CMC 2025 Day 14: Word Circle Cards
Welcome to day fourteen of the 2025 Card Making Countdown, where I’m sharing 14 card making projects in 14 days.
Looking for a fresh and fun way to make your greetings stand out?
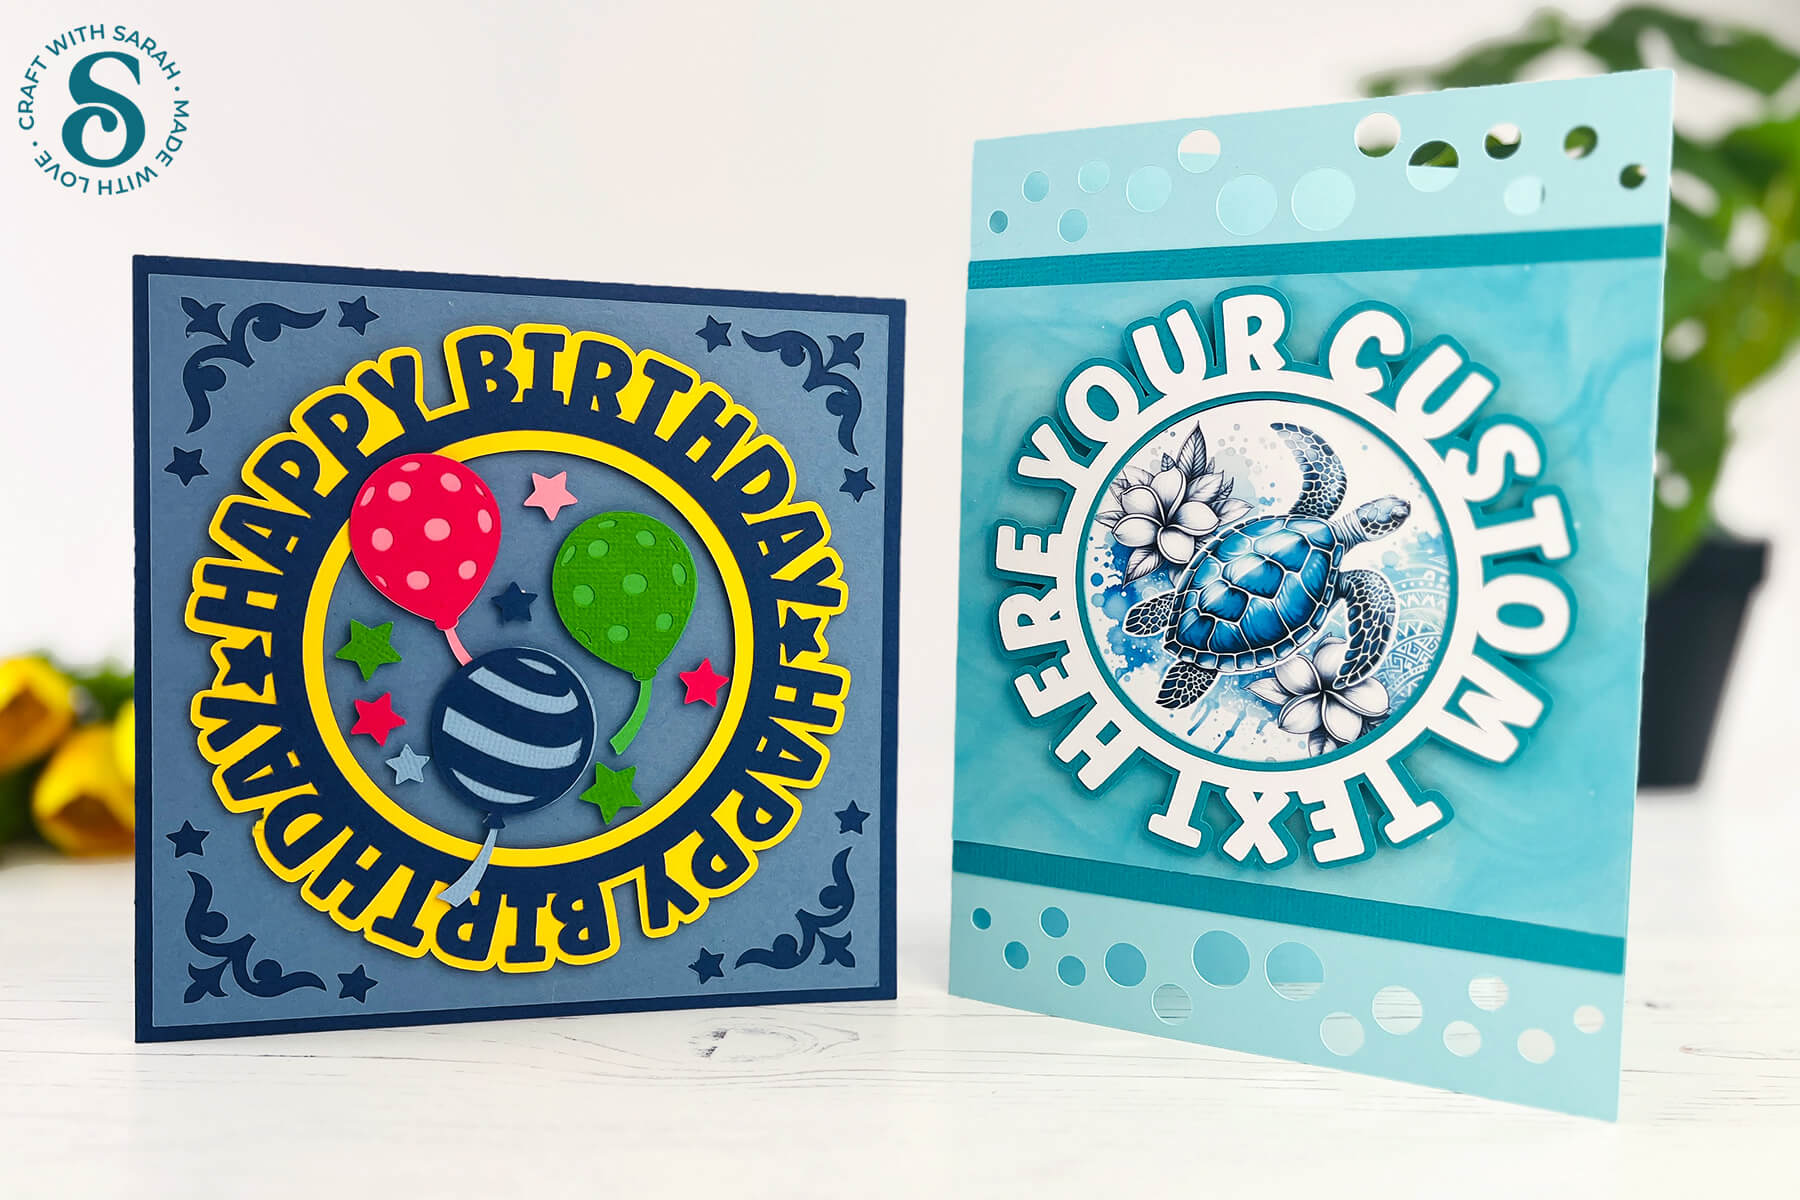
In this tutorial, we’re making word circle cards — eye-catching designs where your message wraps perfectly around a circle, adding a stylish twist to your cardmaking!
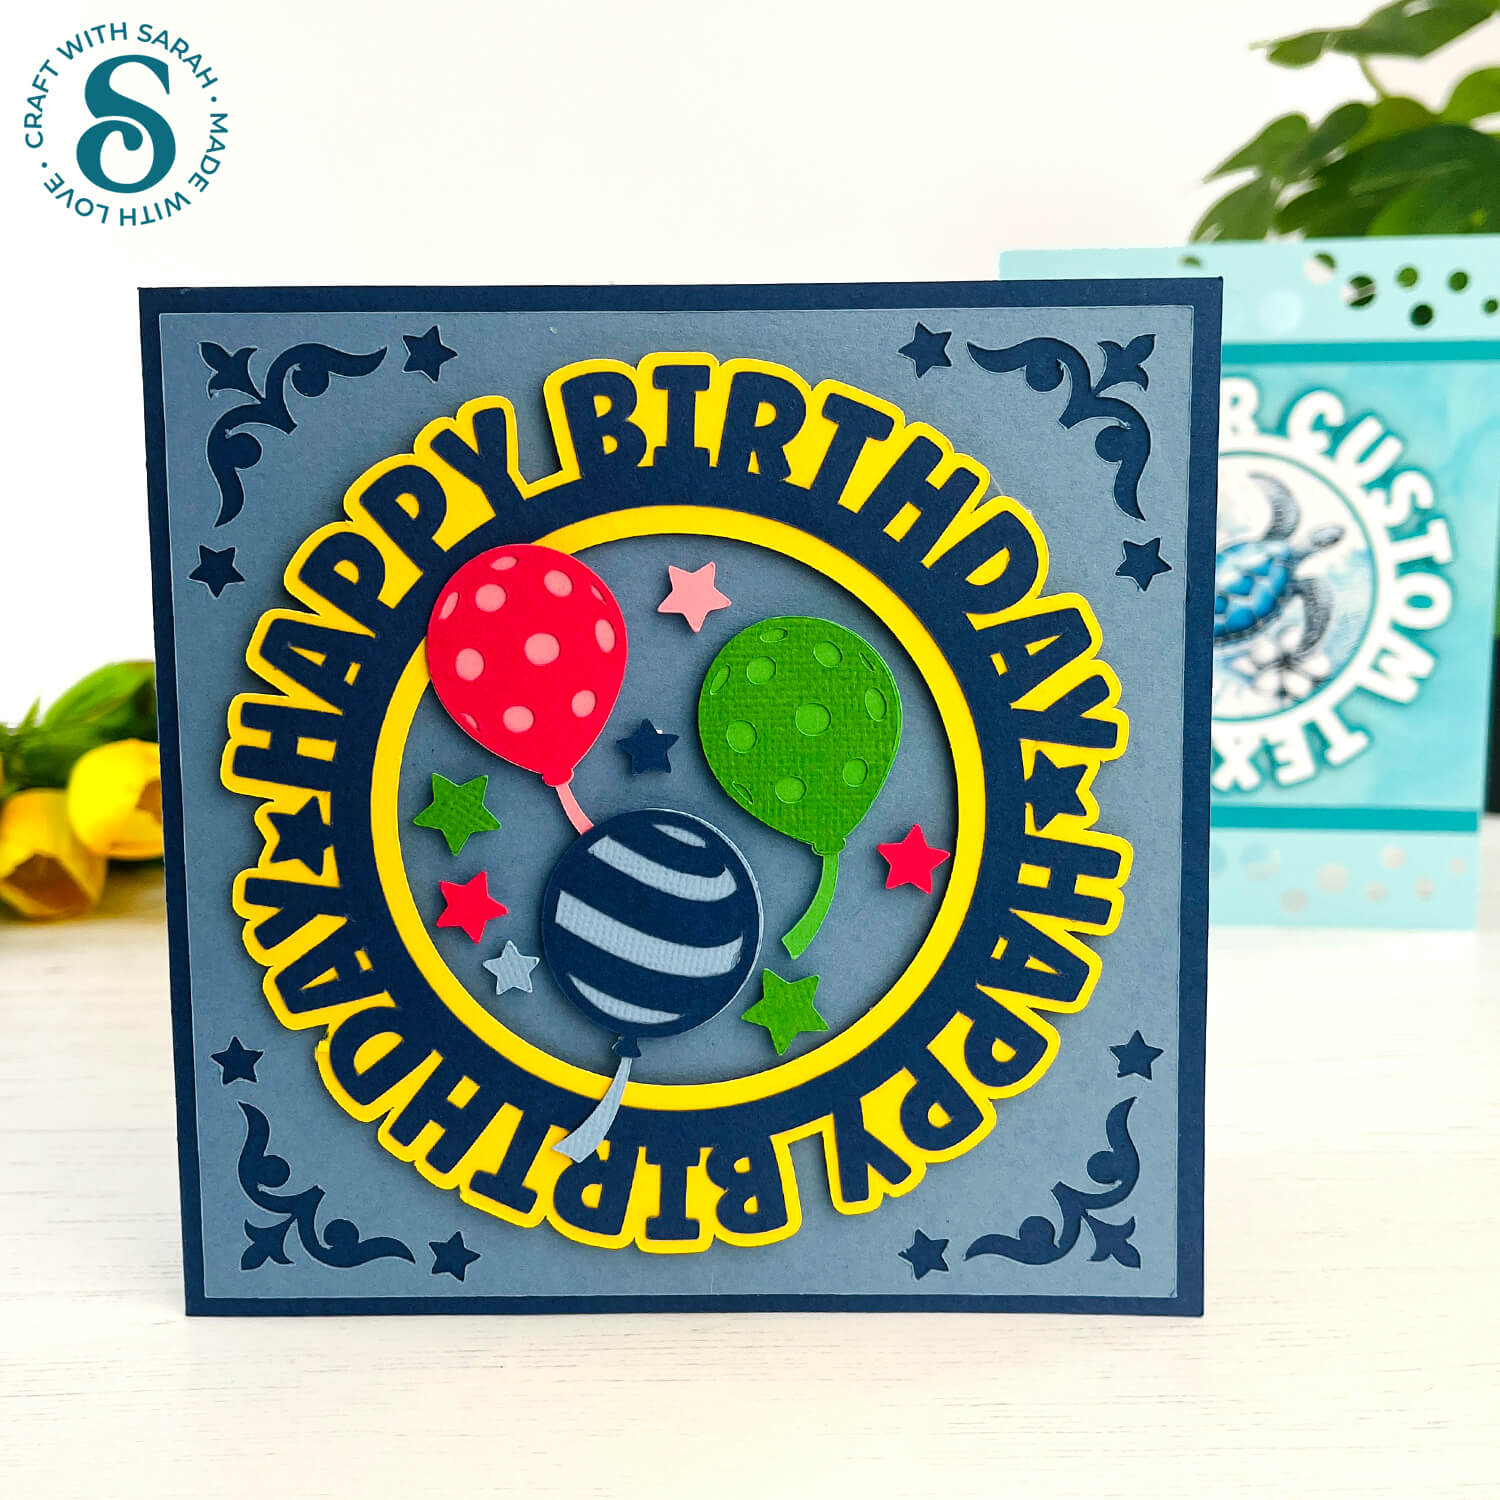
To get you started, Part One of the tutorial walks you through assembling a predesigned Happy Birthday card, complete with playful balloon and star decorations.
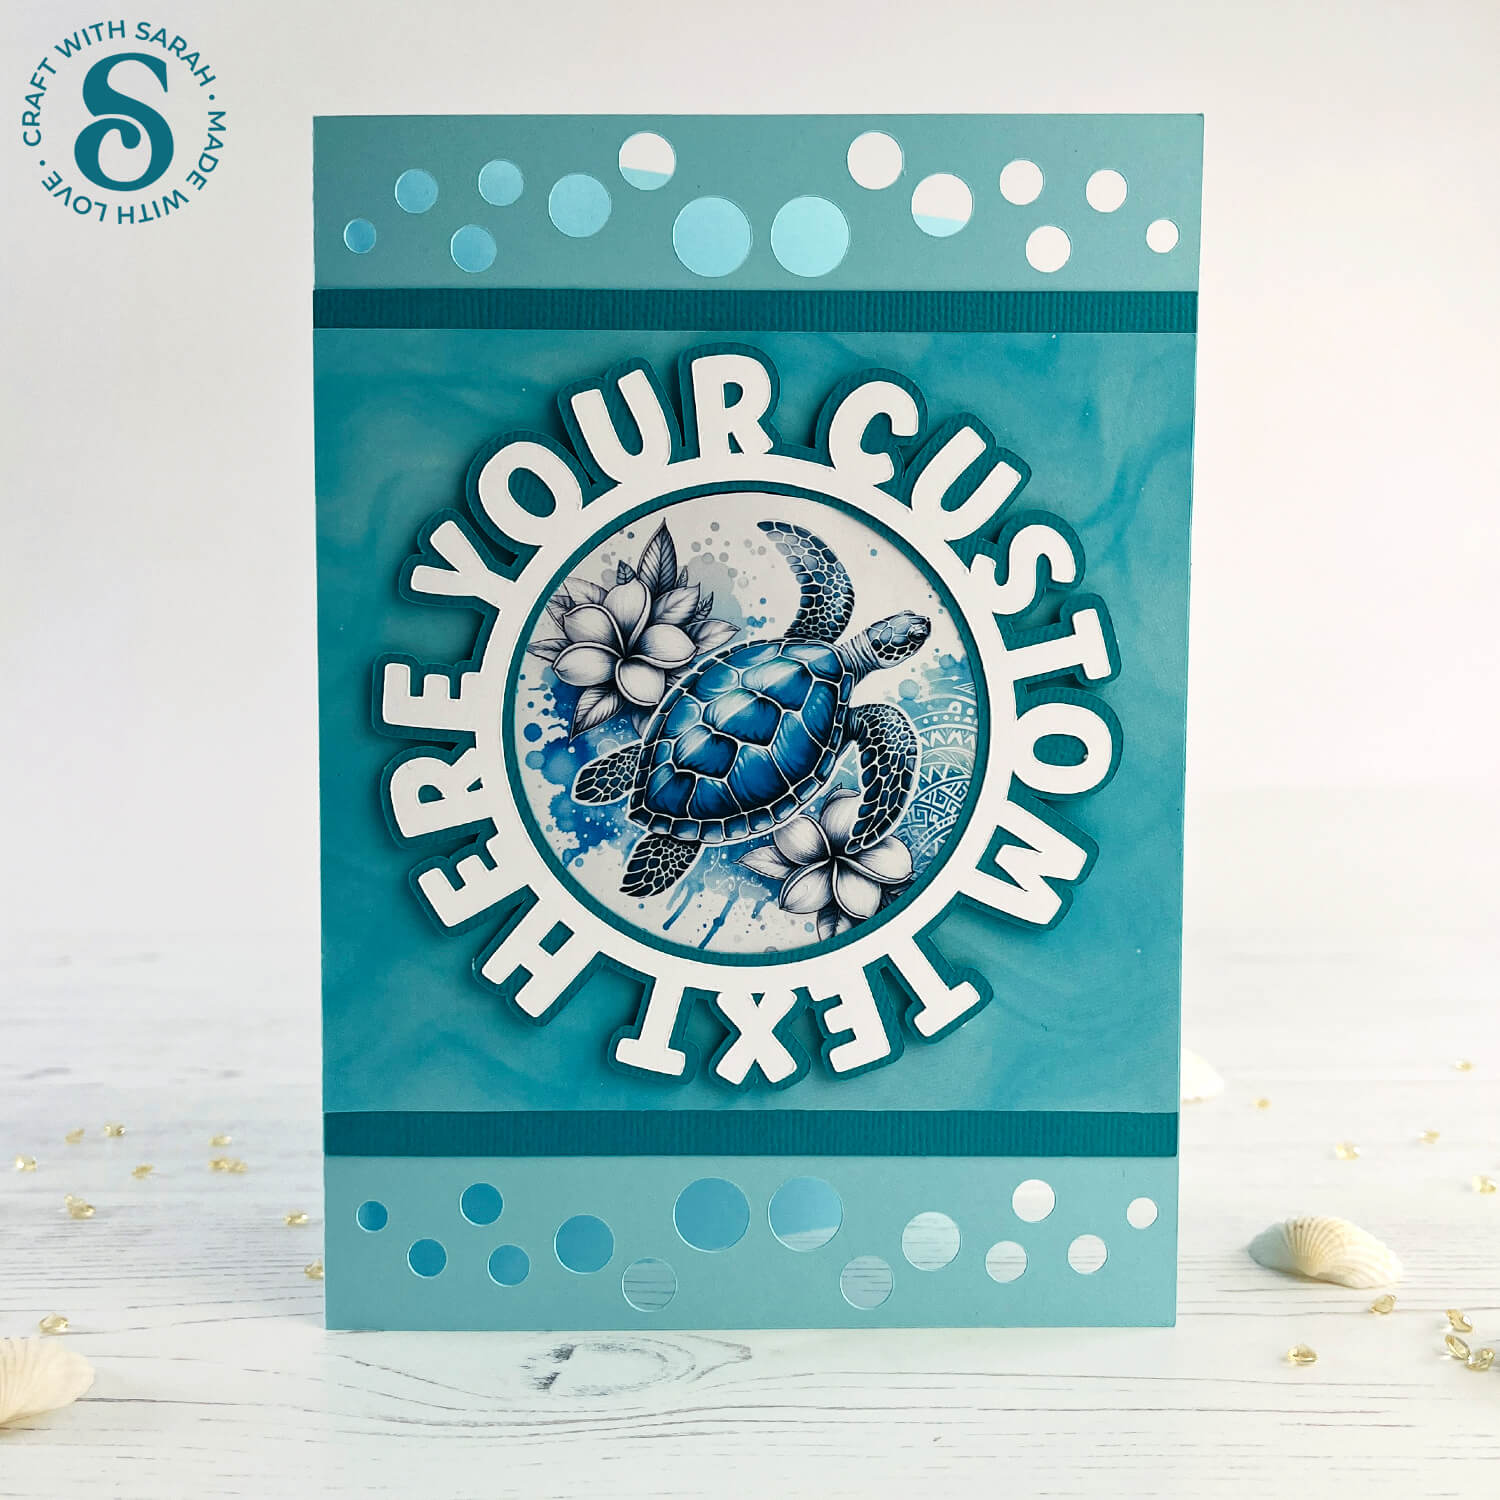
Then in Part Two, we take things up a notch and show you how to create your own custom word circle cards using Cricut Design Space. You’ll learn how to choose your fonts, customize your wording, and add images to craft cards that are completely unique and full of personality.
Whether you’re crafting for a birthday, thank you, or just a hello, these word circle cards are sure to delight. Let’s get started and turn your words into something wonderfully round and meaningful!
The cut files are suitable for a range of cutting machines, such as Cricut, Silhouette and ScanNCut. The file types that are included are: SVG, EPS, DXF and PNG.
Hand-cutting (printable) versions of the templates are also included.
This project is part of the 2025 Card Making Countdown.
Materials supply list
Here is a list of the materials to make this project.
Please note that some of the links included in this article are affiliate links, which means that if you click through and make a purchase I may receive a commission (at no additional cost to you). You can read my full disclosure at the bottom of the page.
- Cricut machine
- Light blue Cricut cutting mat
- Coloured Card
- Foam squares
- Glue (I like Bearly Art Glue and Collall) or double-sided tape
- Colour printer and photo paper (optional for your custom designs)
- Cricut scoring wheel or scoring stylus (optional)
This project is suitable for the following types of Cricut machines: all Explore models, all Maker models, Venture and Joy Xtra. You will need to make the designs smaller to cut them on a Cricut Joy (blue machines).
Foundation learning
If you're new to crafting with your Cricut, you may find the below links helpful.
They teach some of the skills mentioned throughout the Countdown projects.
- How to upload SVG files into Design Space
- How to make 3D layered Cricut projects
- The BEST way to frame papercraft projects
- How to mount multiple designs in the same frame with magic guides
- How to score with a Cricut (even without scoring tools)
- Print then cut tutorial
- Design Space tools (Combine, Attach, Slice, Weld, Flatten, etc.)
- Pattern fill tutorial (for making backgrounds & cutting images to a specific shape/size)
- Free envelope SVGs that can be sized to fit any card
- Presentation boxes for handmade cards
- How to write inside cards with Cricut pens
- How to cut layered designs at a small size
- Design Space tips & tricks
- Cricut pens tutorial
Video tutorial
Watch the video below to see how to make this project. Keep scrolling for a written tutorial.
PART ONE: Premade birthday card
The first part of this tutorial shows how to make the predesigned card from today’s project.
Step 1) Download the cutting files & upload to Design Space
Download the files using the box below.
Purchase the File(s)
This cut file is available as part of the Instant Access Bundle.
Or, purchase this design individually here
Before you upload the SVGs to Design Space, you need to unzip the download folder that they come in.
- How to unzip a folder on Windows computer
- How to unzip a folder on a Mac
- How to unzip a folder on an iPad/iPhone
- How to unzip a folder on an Android device
After unzipping, upload the SVG file(s) into your cutting machine software.
Not sure how to use cut files with your type of machine? The following links lead to videos on how to open cut files in:
- Cricut Design Space
- Silhouette Studio
- CanvasWorkspace (for ScanNCut machines)
The download folder also contains printable PDF versions of the templates for hand cutting.
If you are using Cricut Design Space, start a new project and then click the “Upload” button on the left of the screen.
You can then either click “Browse” to find the file on your computer, or drag-and-drop it.
Find the unzipped download folder, then go into the “01 Cricut Version” subfolder.
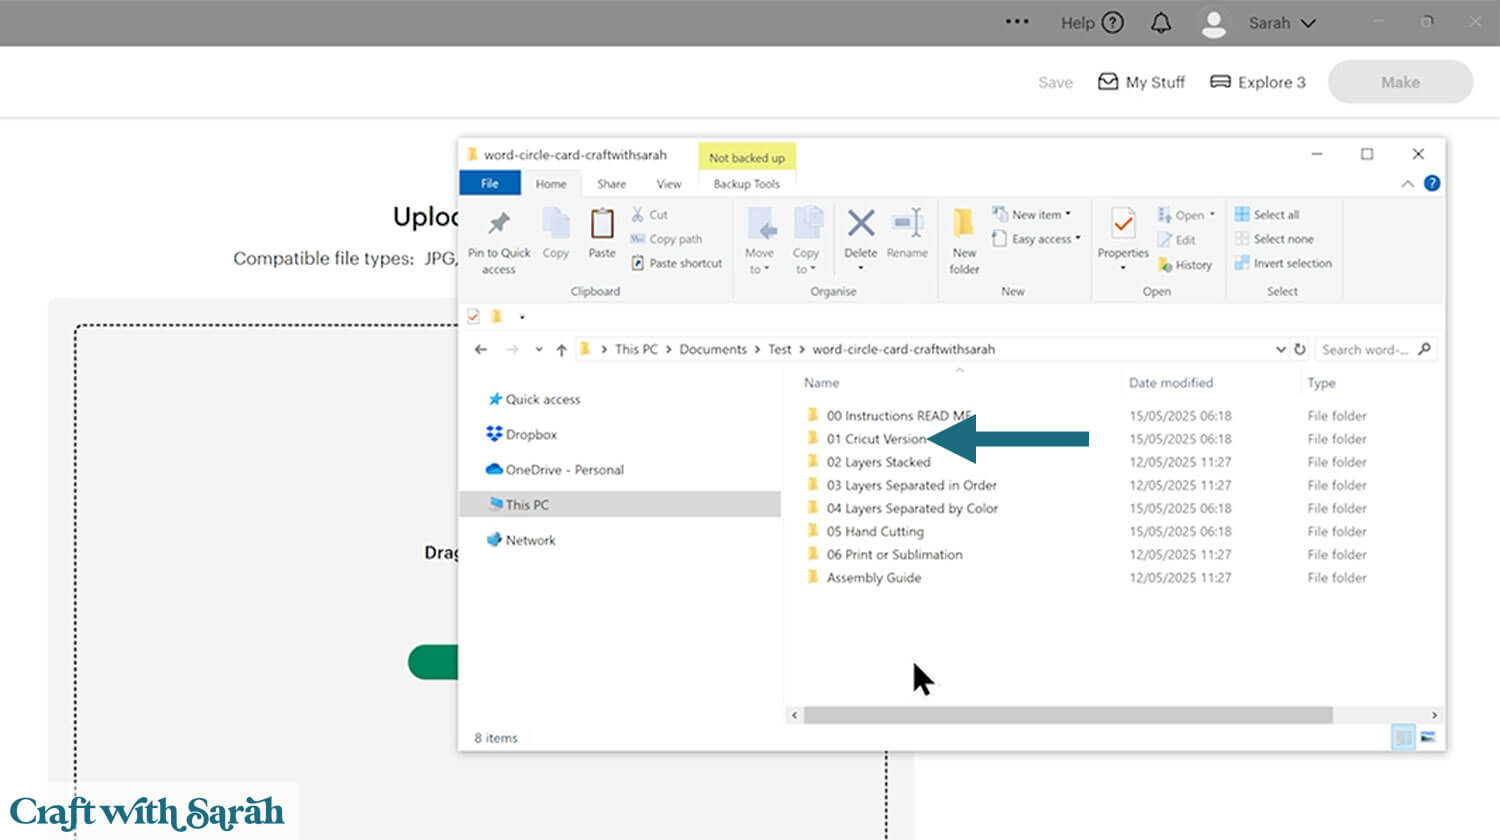
Upload the file called svg-01-word-circle-balloons-craftwithsarah.svg
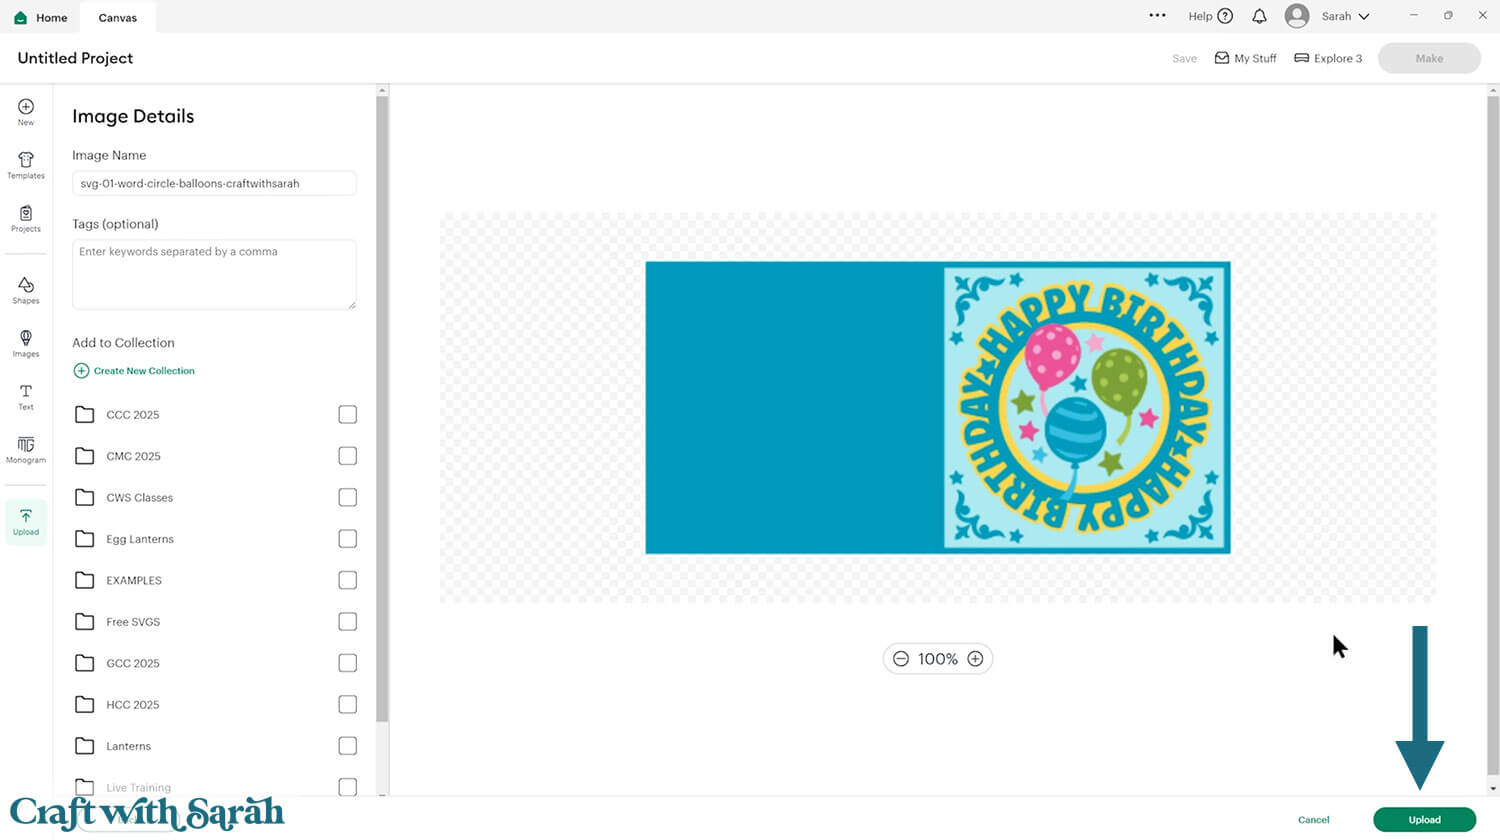
After selecting the SVG file, click “Continue”.
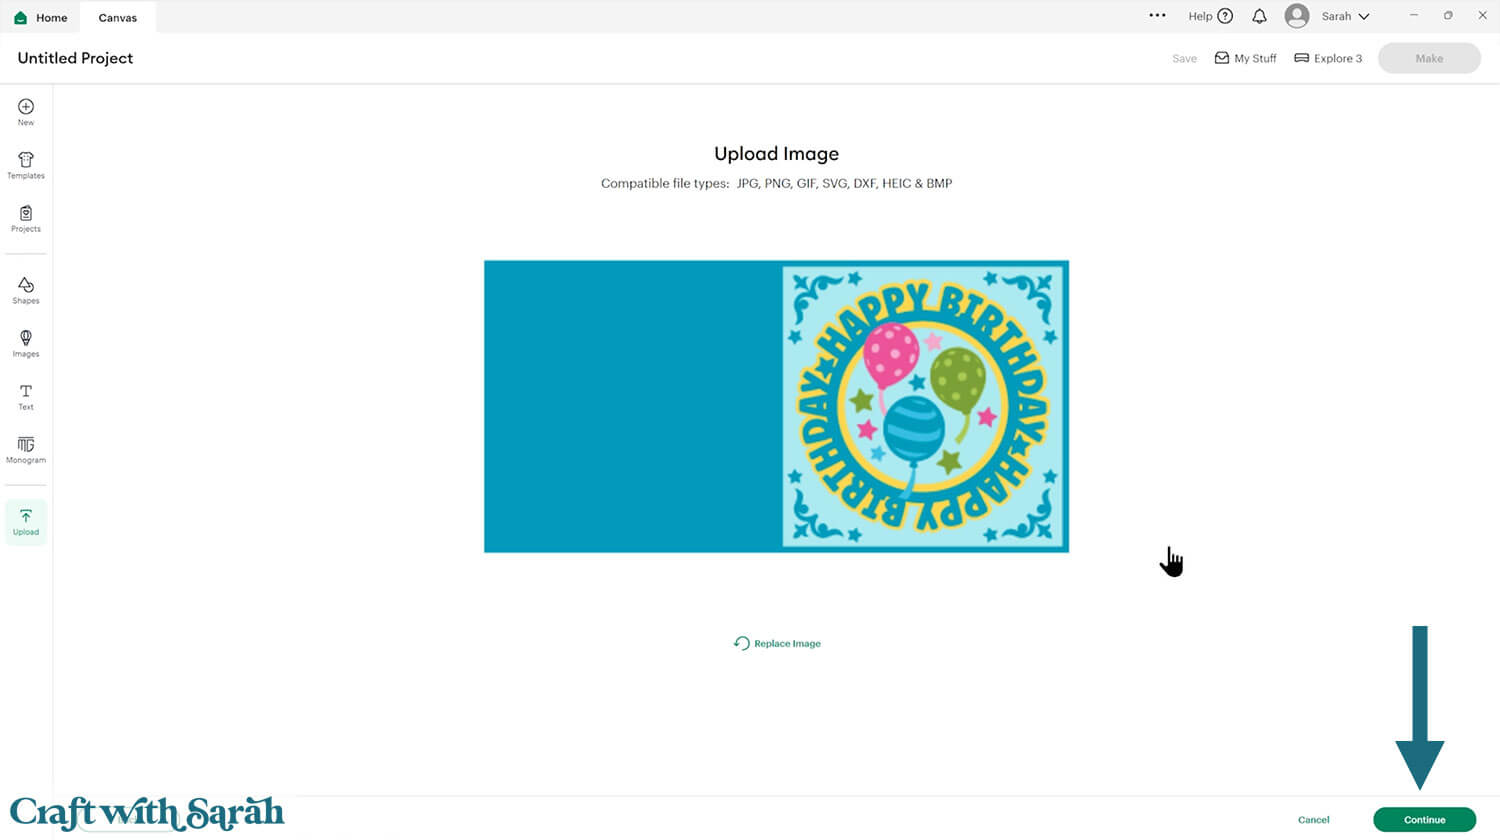
Click “Upload” on the next screen.
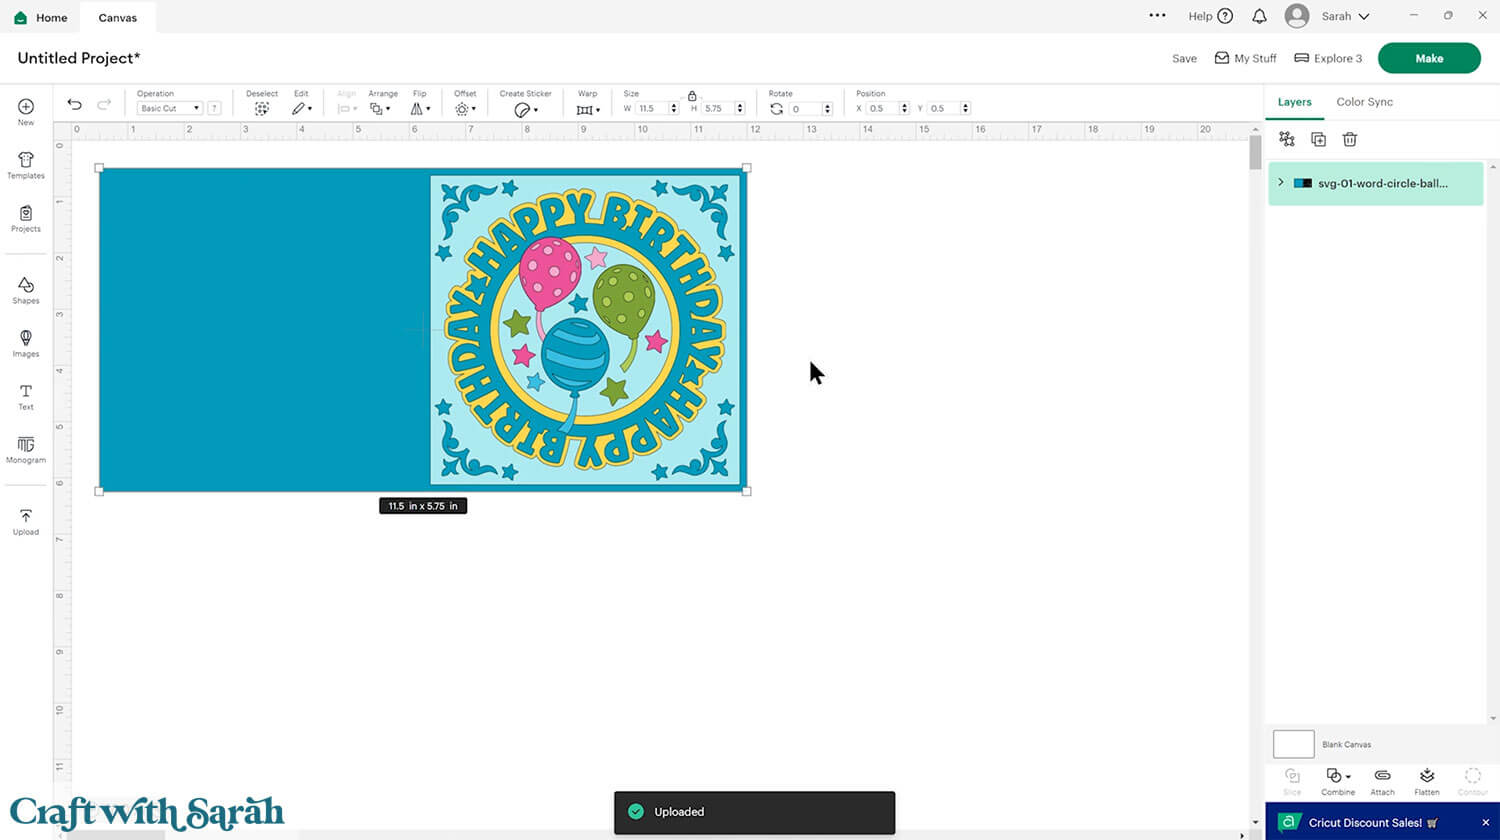
The design will get loaded onto your Canvas.
Step 2) Add a score line
If you have a scoring tool or scoring wheel for your Cricut machine, it’s a good idea to add a score line to the base card and the white insert to make it easier to fold them in the correct places.
If you don’t have a way to score with your Cricut, move on to Step 3.
Click the card and Ungroup the layers to separate them.
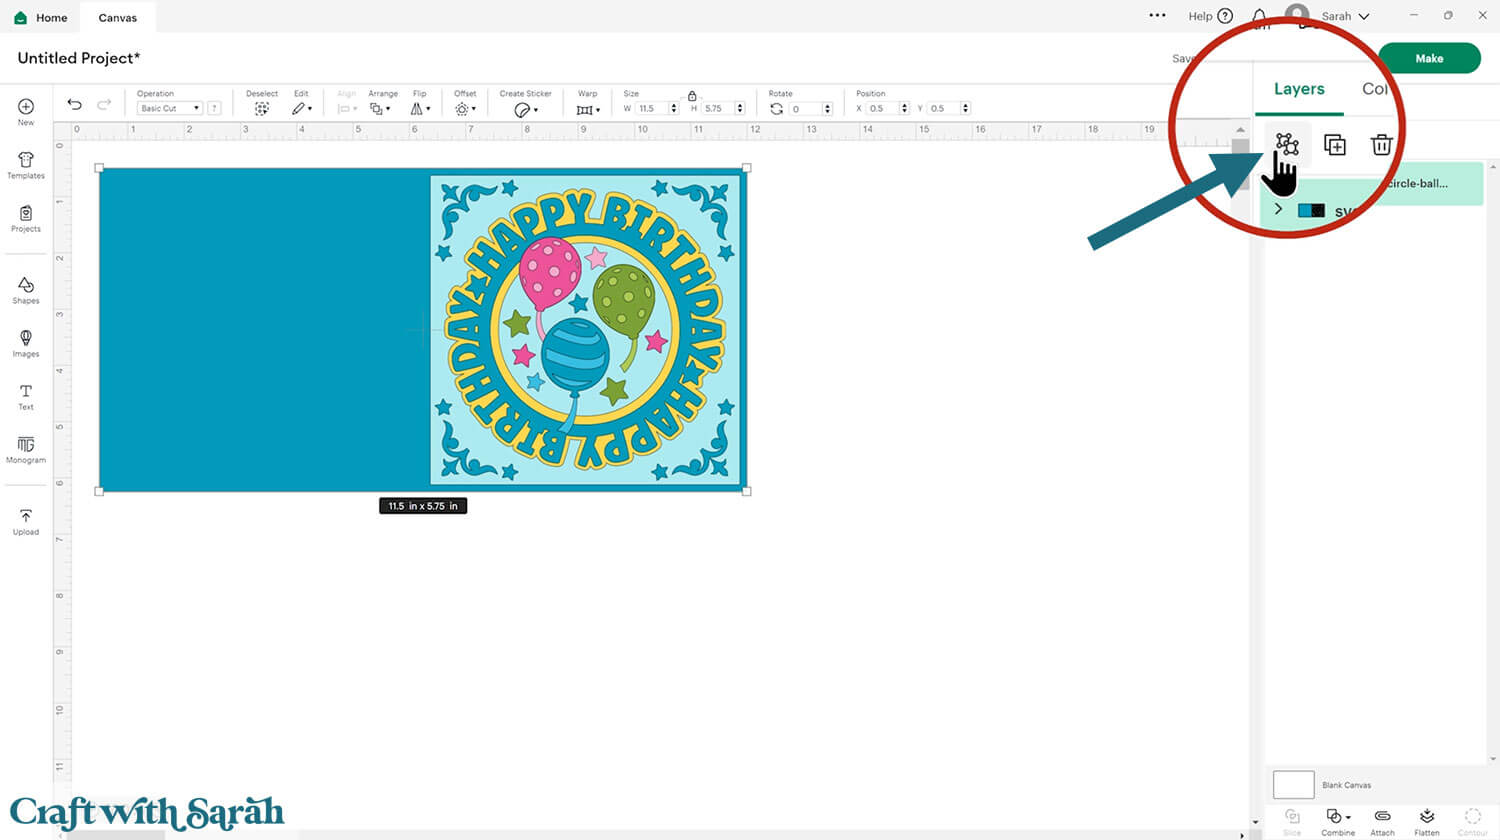
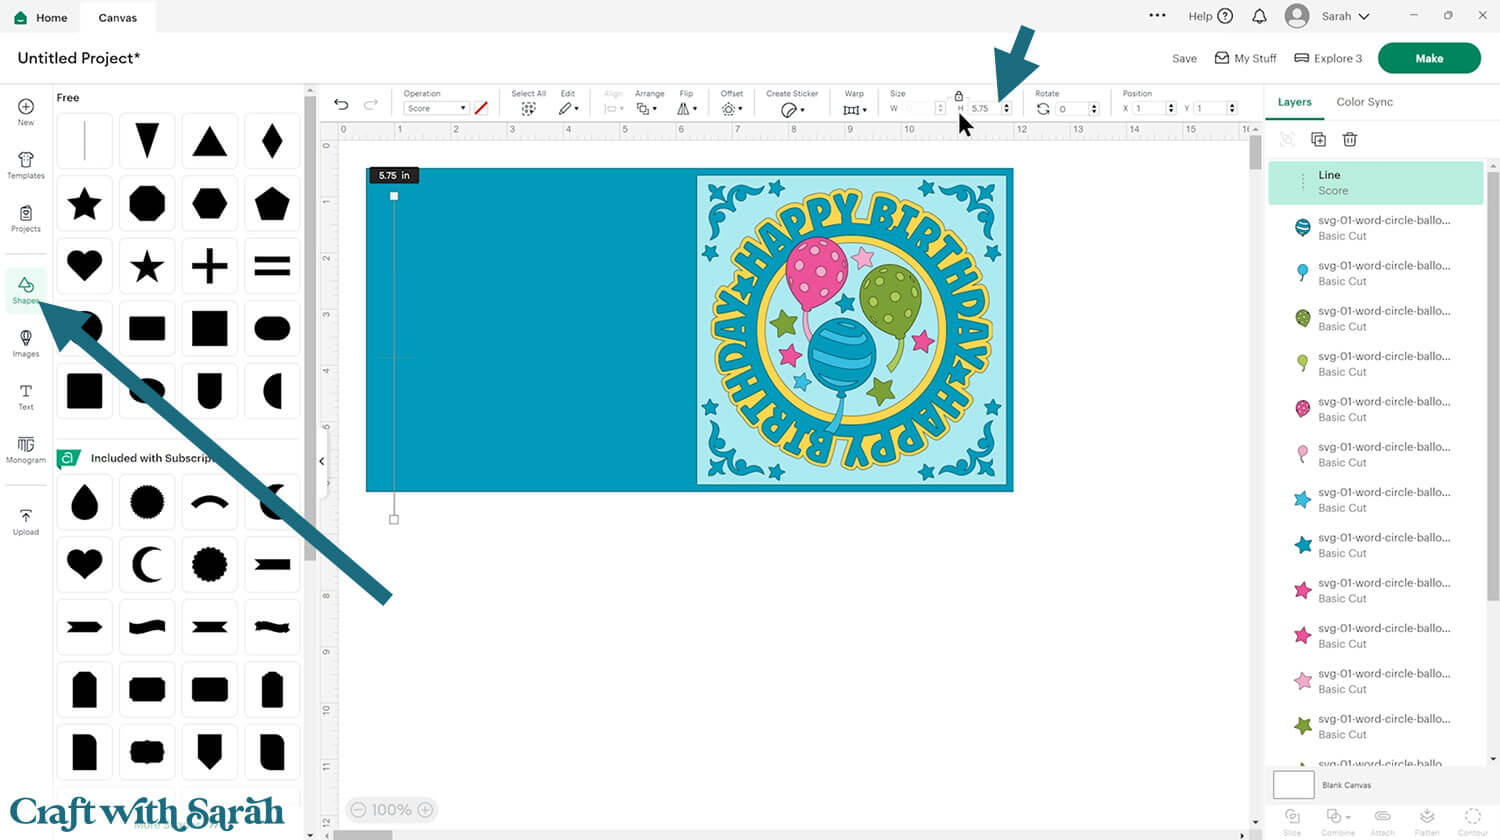
Click “Shapes” and insert a Score Line. Make it 5.75 inches tall.
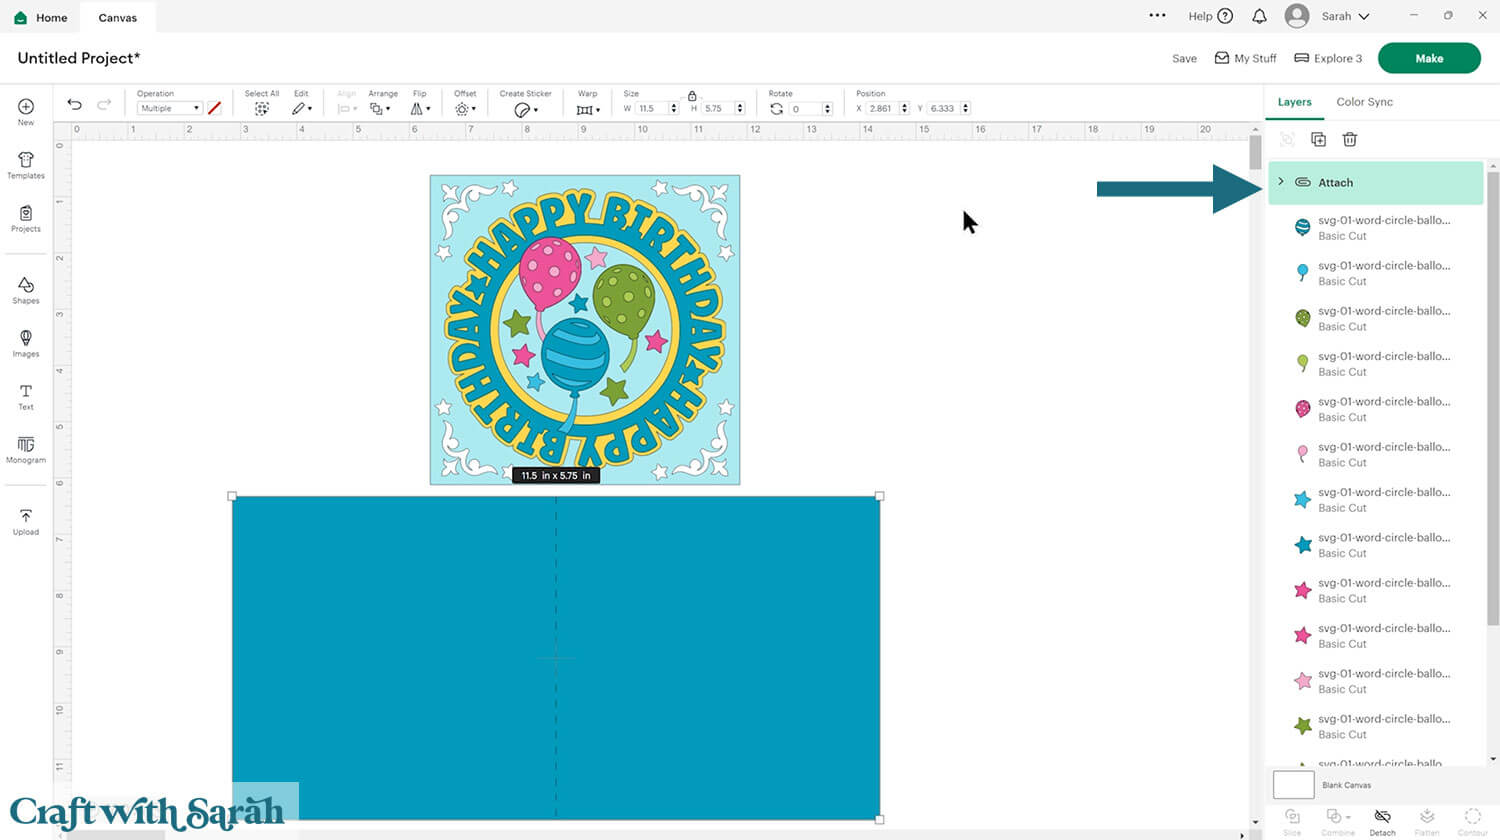
Select the score line and the base card, then click “Align” and “Center” to put the score line exactly in the middle of the card.
Select the score line and the base card, then press “Attach” at the bottom of the layers panel.
Attach is what tells the Cricut that we want it to do the score line down the middle of the base card.
This is a good time to change the colours if you are planning on cutting them differently to what’s on the screen.
Otherwise, it’s time to start cutting!
Step 3) Cut out all the pieces
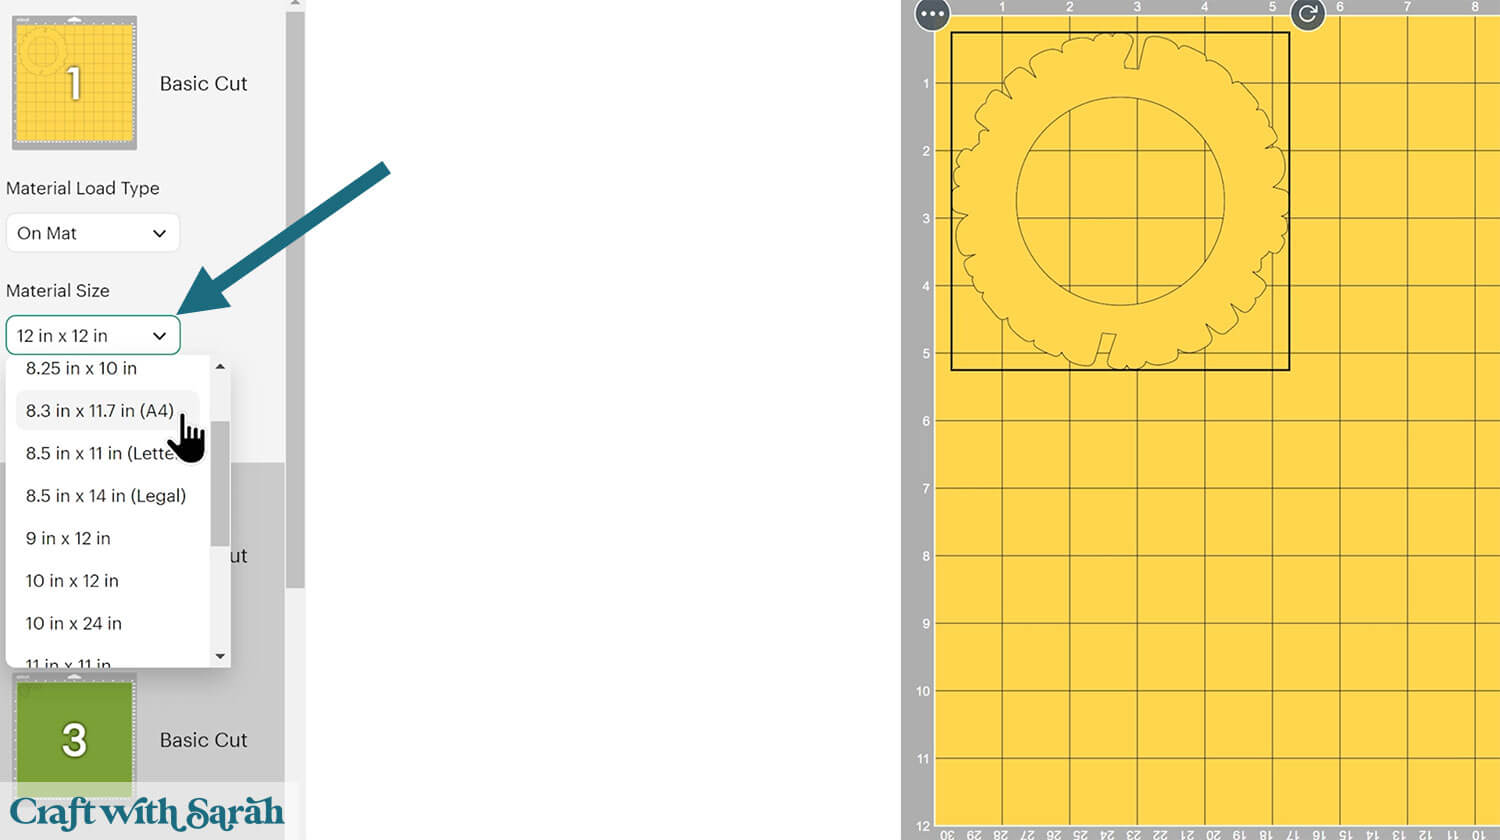
When you’re happy with how the project is looking in Design Space, click “Make” and follow the instructions on-screen to cut out all the pieces.
To change the paper size, go into the dropdowns over on the left side of the screen and choose the paper size that you want to use. You need to change it for every single colour.
To save space on your cardstock, you can move things around by clicking and dragging. Make sure when you’re moving things about that nothing overlaps because otherwise, it won’t cut out properly.
Step 4) Put the card together
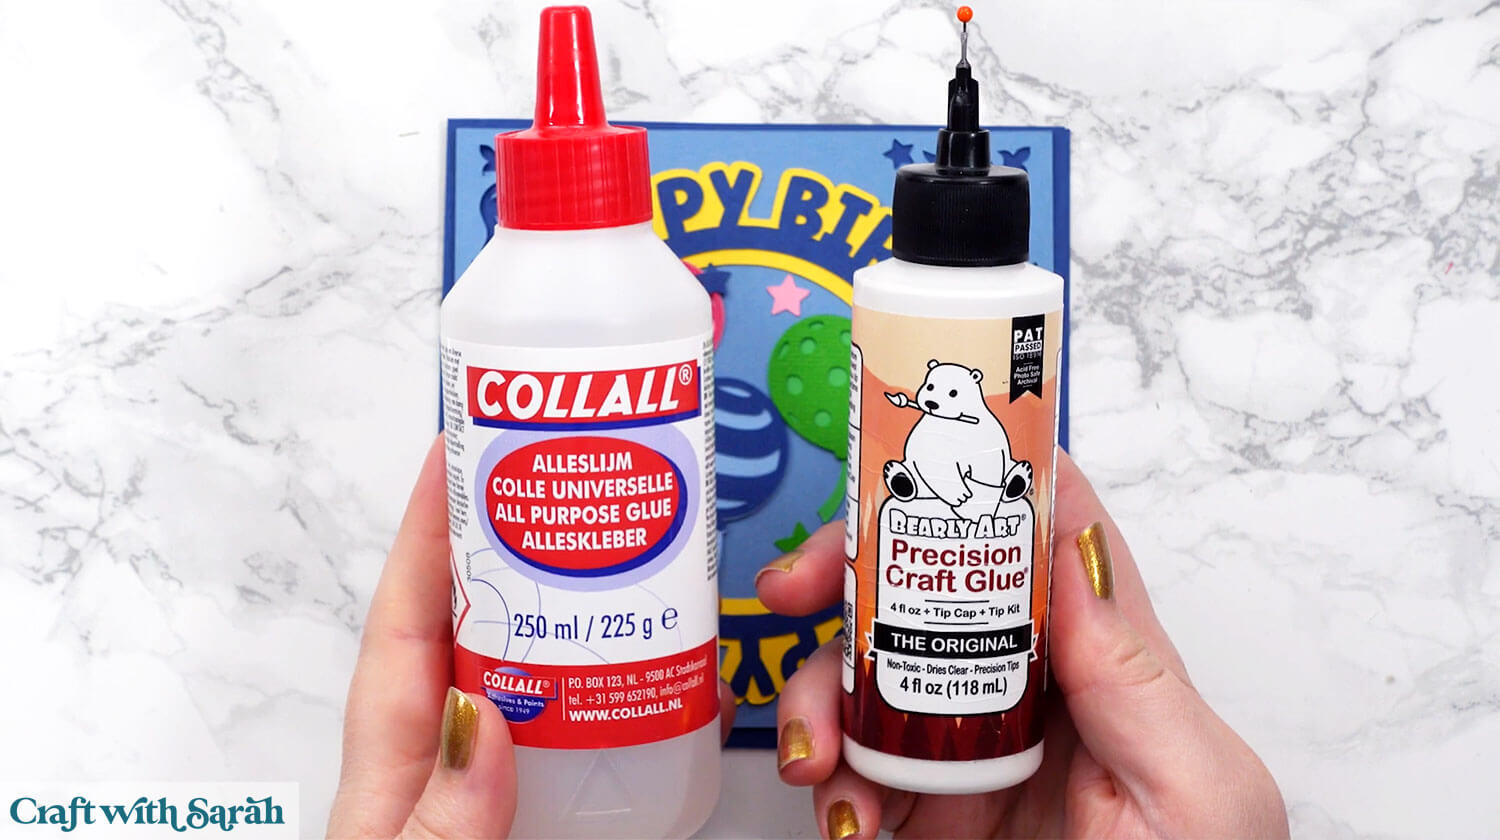
My favourite glues to use on papercraft projects are Bearly Art Glue and Collall All Purpose Glue.
These are great because they don’t “warp” or bend the cardstock like some glues do. You can use as much of it as you want and the card stays perfect – and it dries perfectly clear too!
Bearly Art Glue comes with a tiny nozzle to make it easy to apply glue to small areas of card. The Collall glue doesn’t come with this, so it’s easiest to decant it into needle tip applicator bottles so that you have more control.
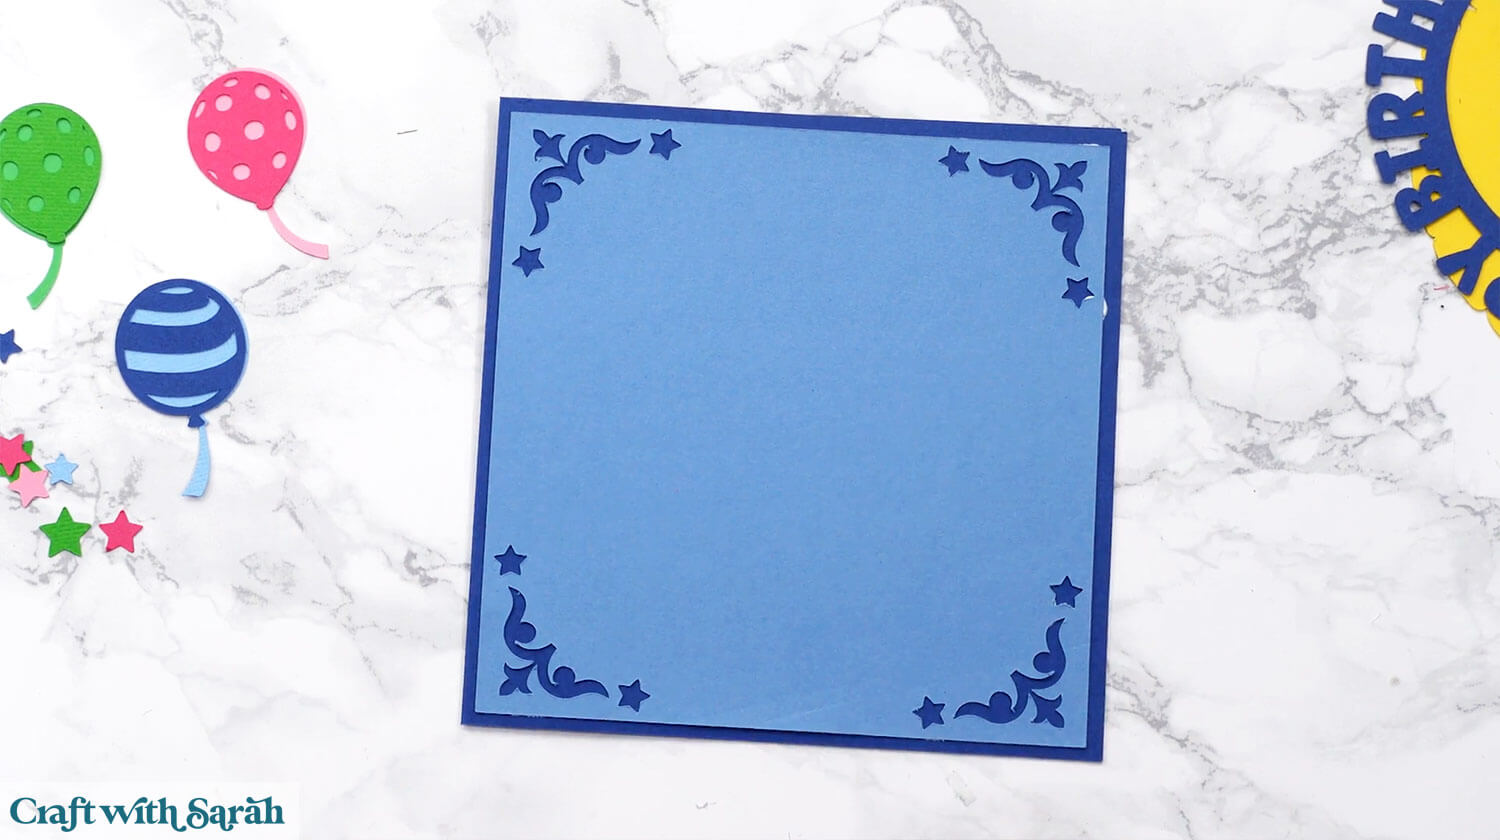
Fold the base card in half down the score line.
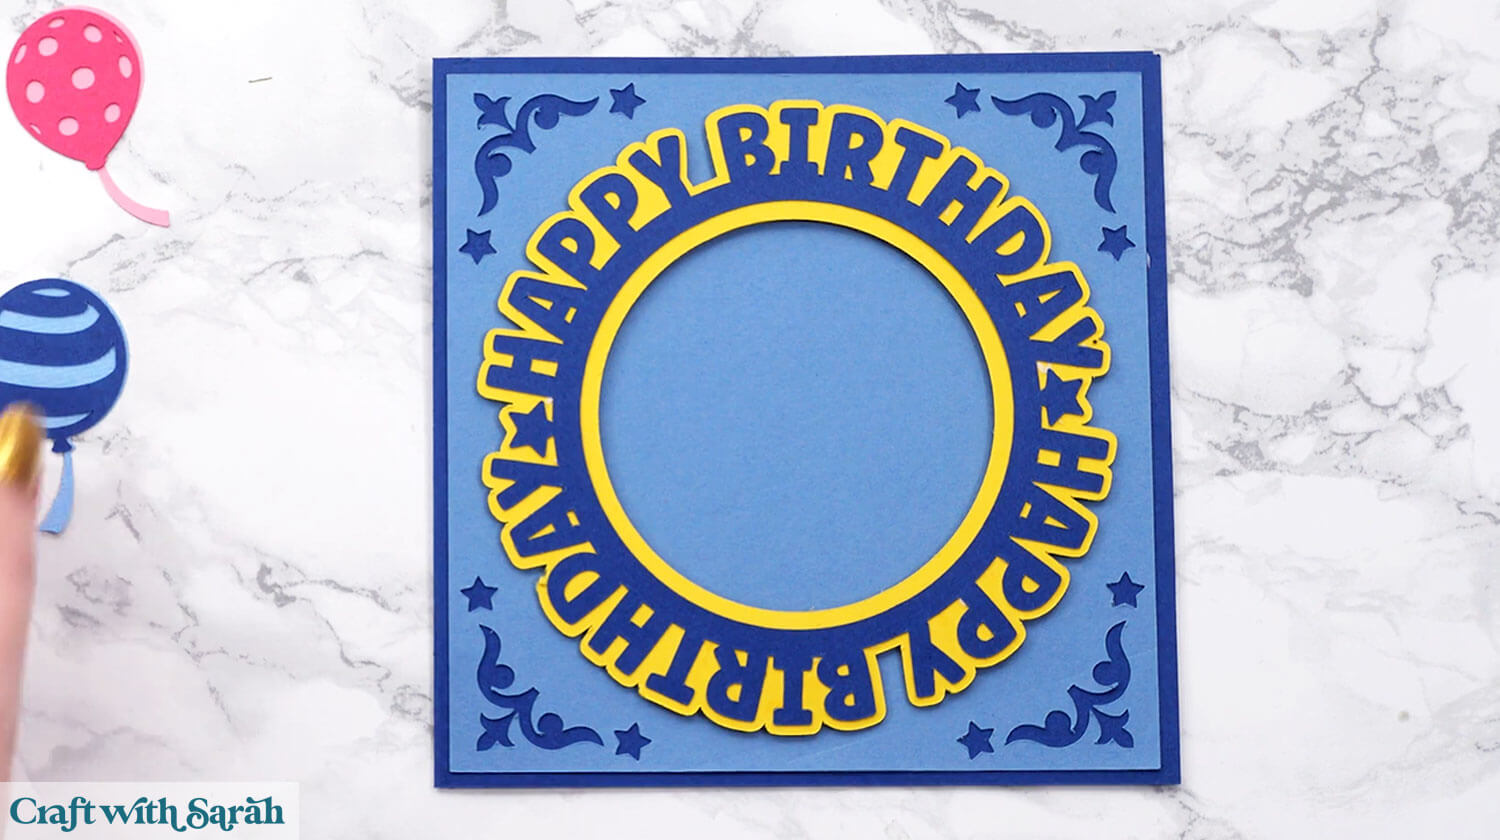
Glue the light blue square onto the base card.
Glue the Happy Birthday topper to the border layer.
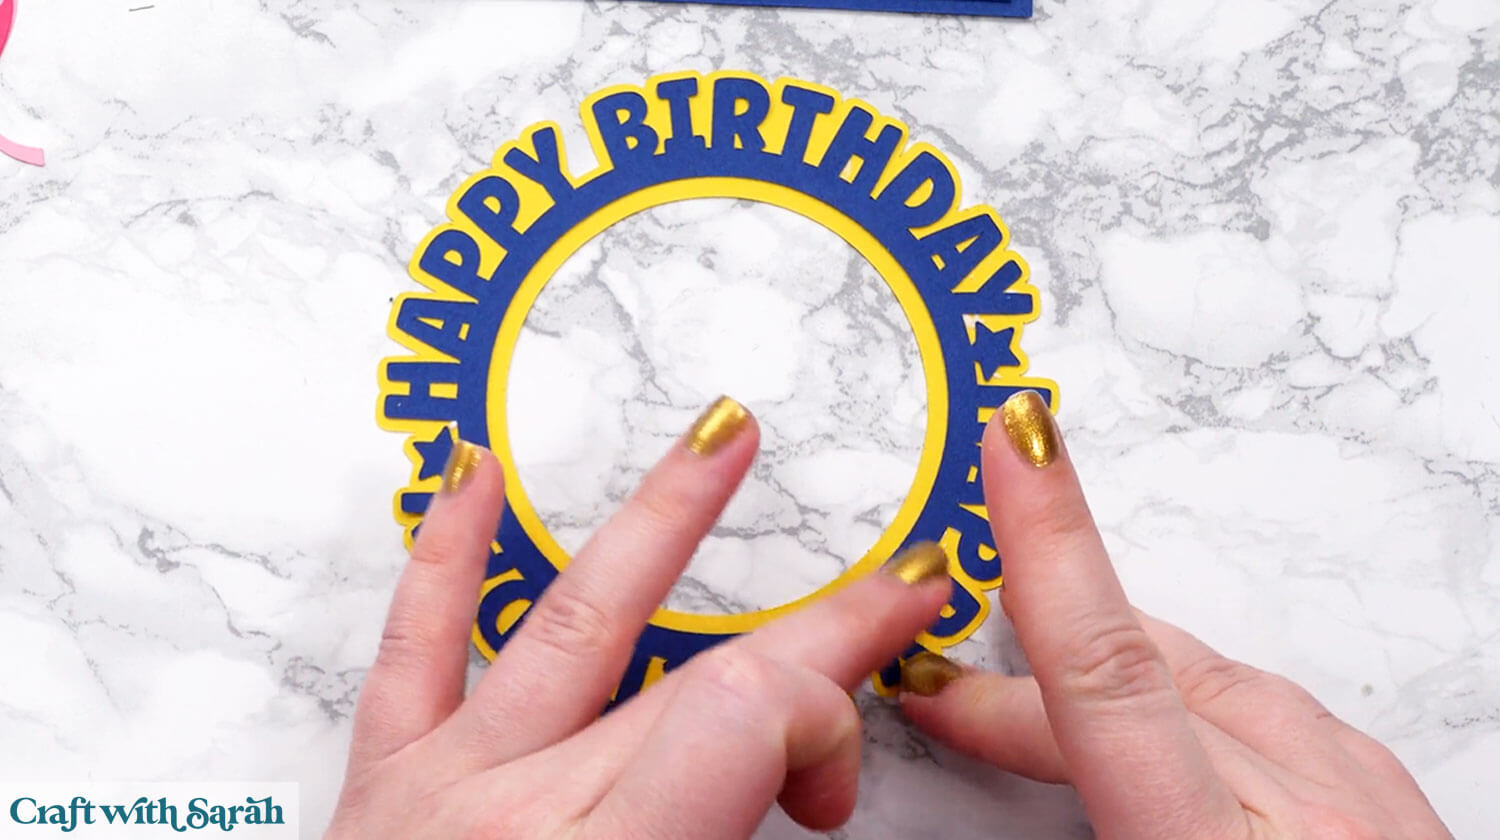
Use foam squares to stick the border layer of the text onto the front of the card.
Attach to the front of the card.
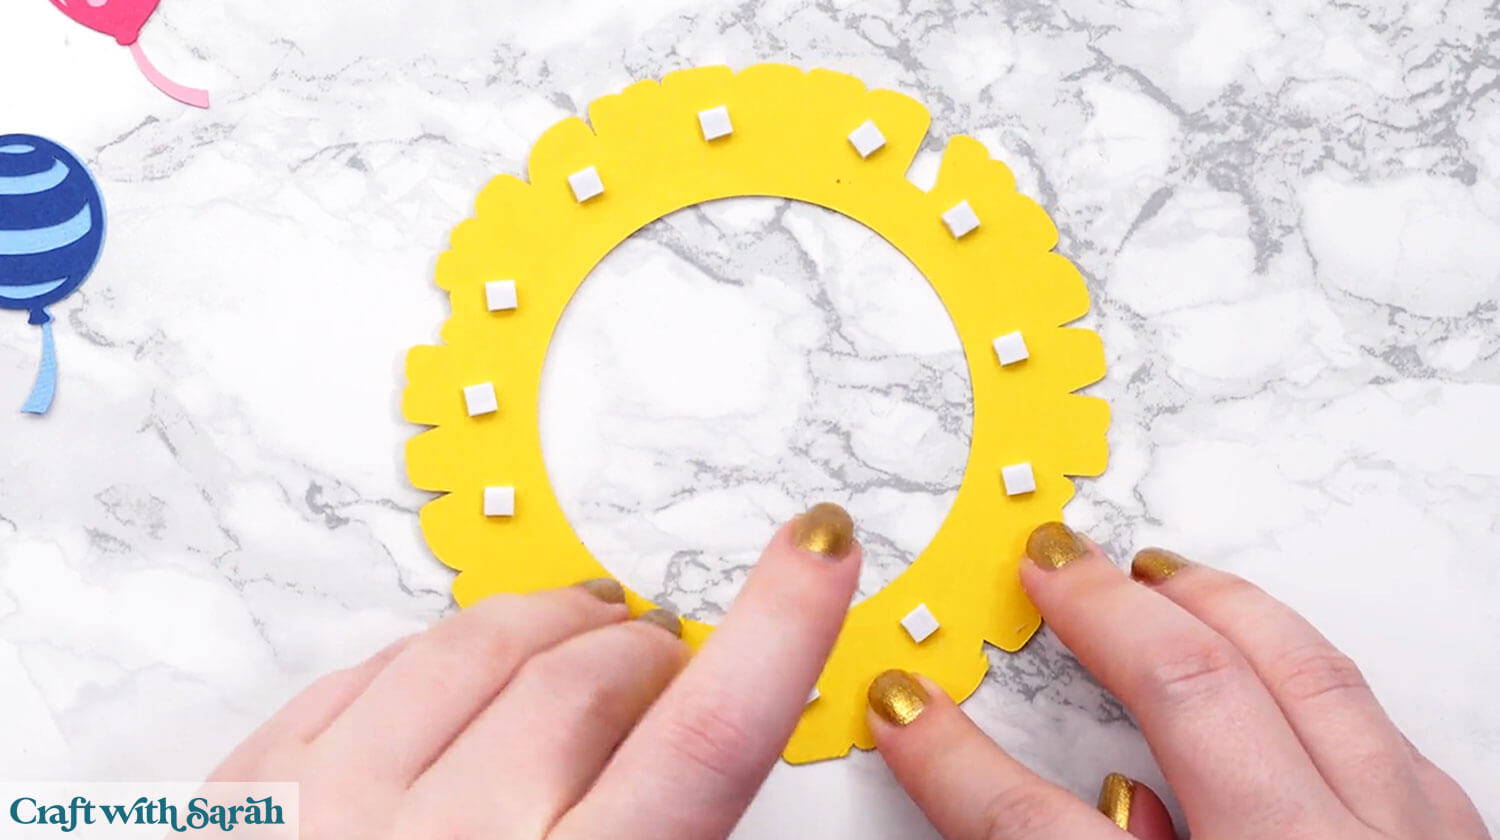
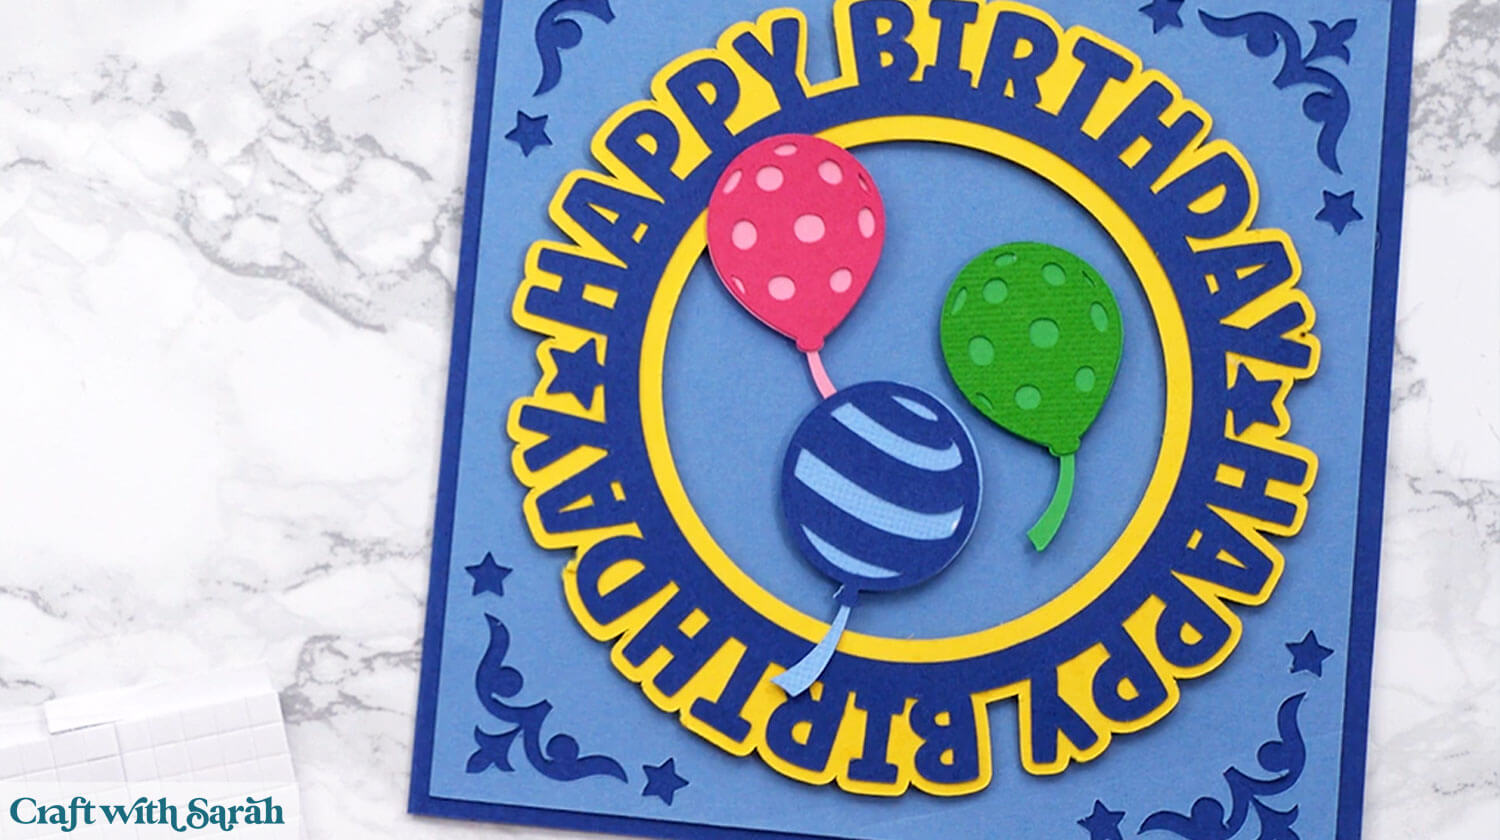
Glue the top pattern layers of each balloon to the piece underneath.
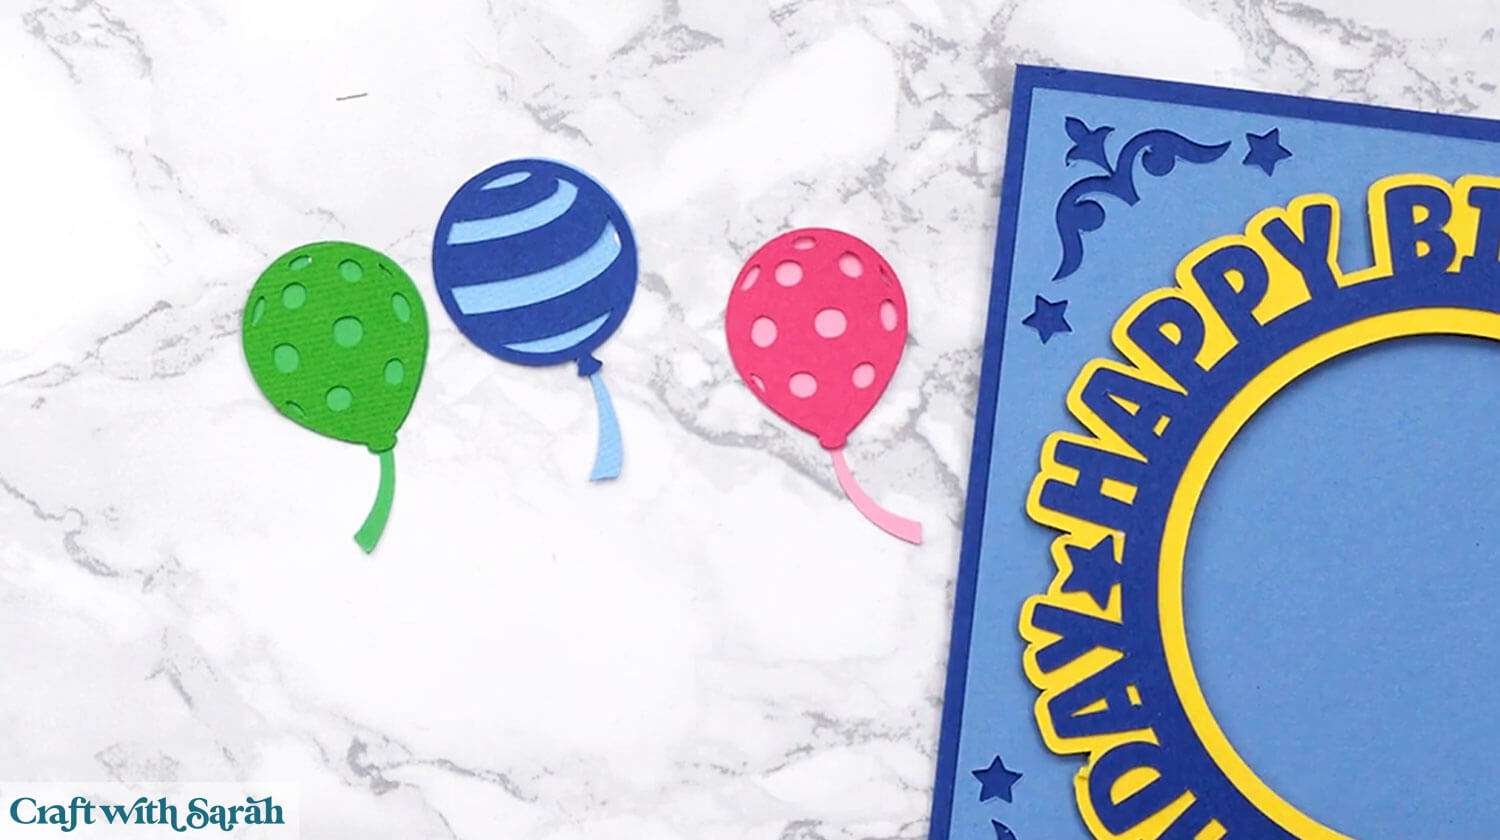
Use foam squares to stick the balloons to the card.
Use glue or foam squares to attach the stars.
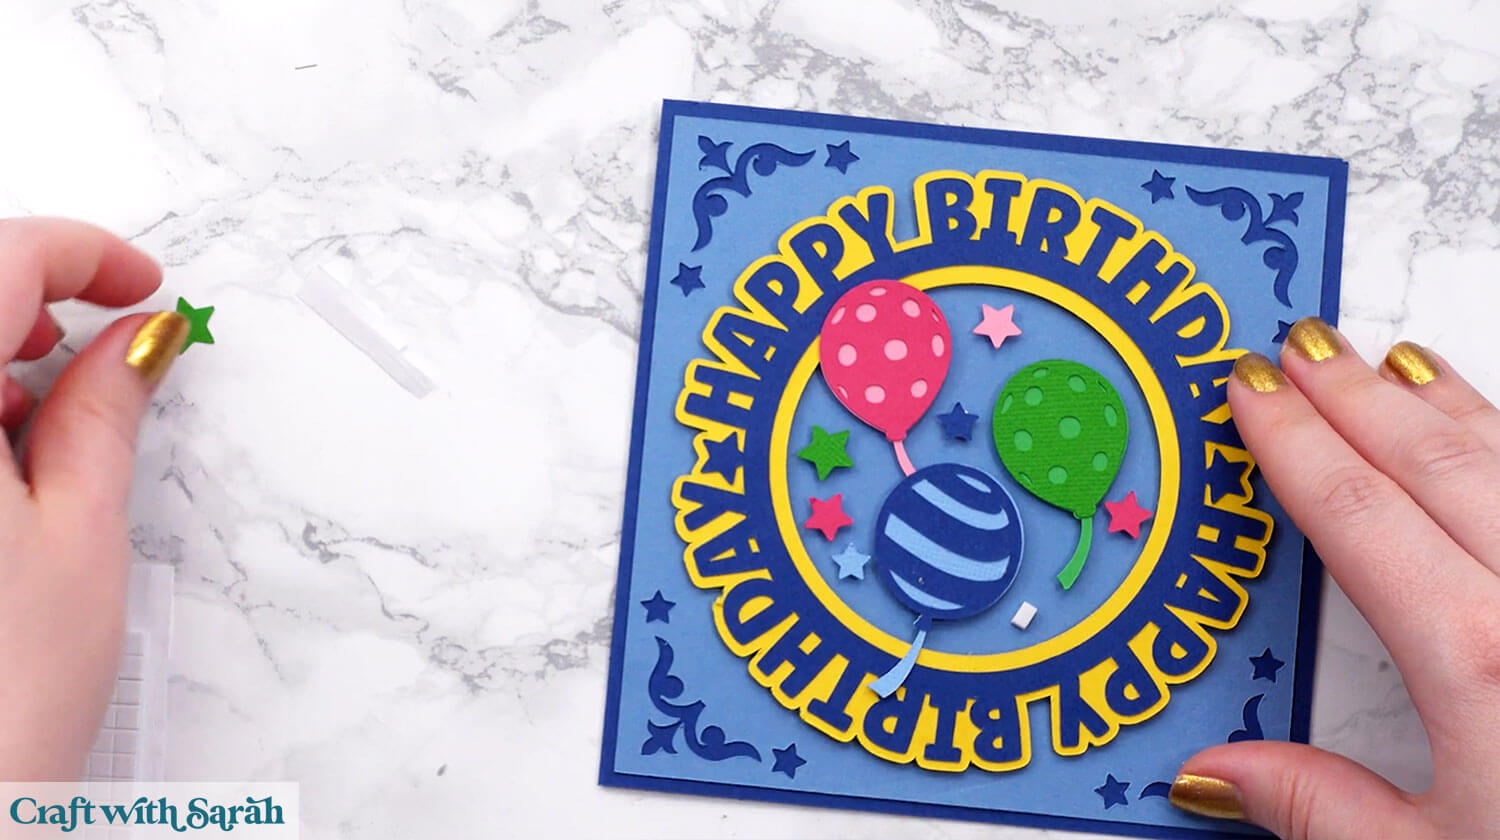
Your birthday card is now finished!
PART TWO: Design your own word circles
Here’s how to make your own custom word circle designs in Cricut Design Space.
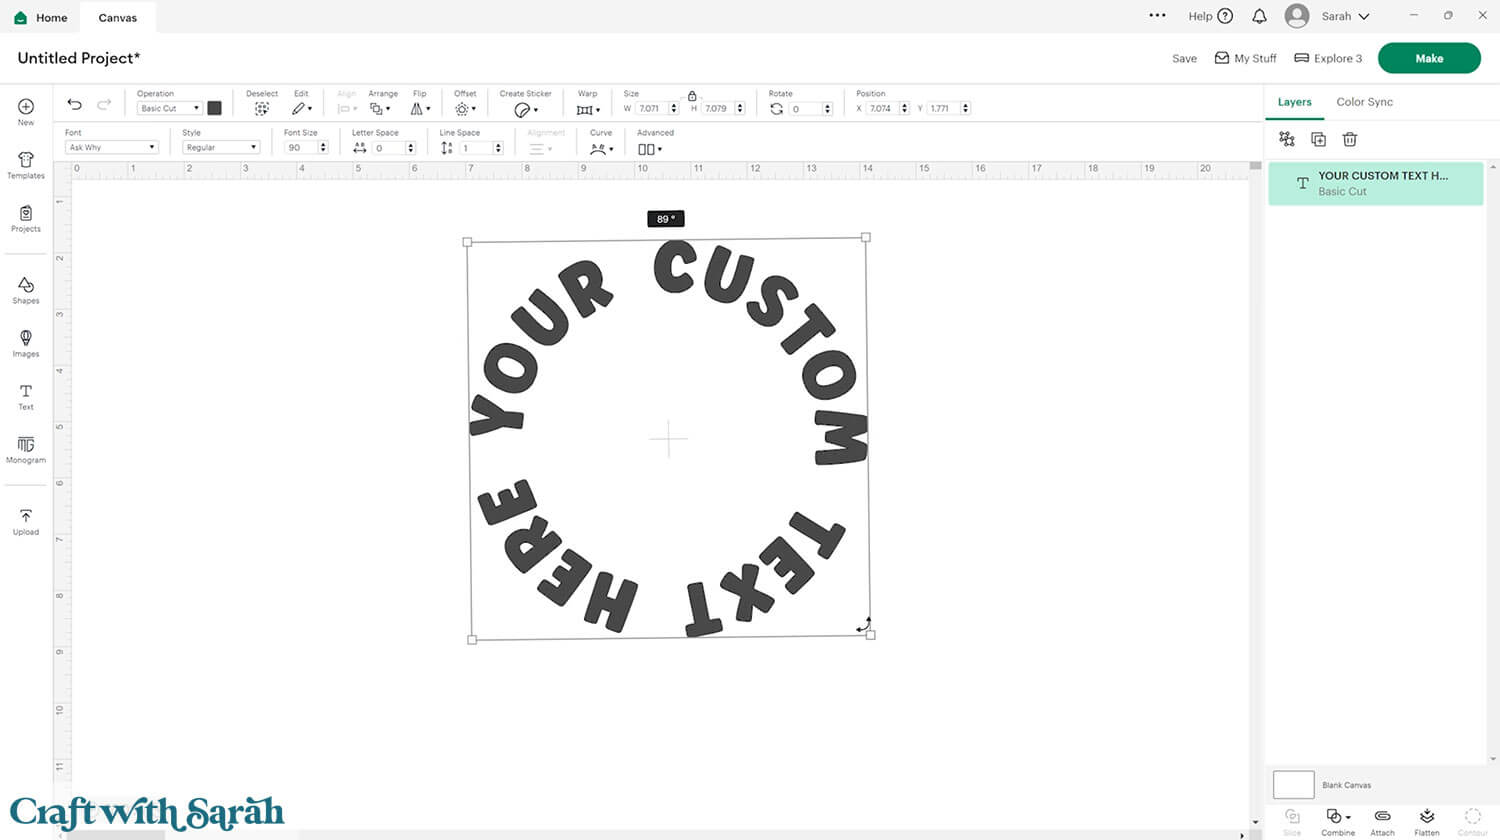
Step 1) Type in a circle
Start a new project in Design Space.
Click “Text”, type out your phrase in capital letters and choose your font.
I like the font called Ask Why from Creative Fabrica as it’s really thick and chunky which makes it easy to cut with the Cricut.
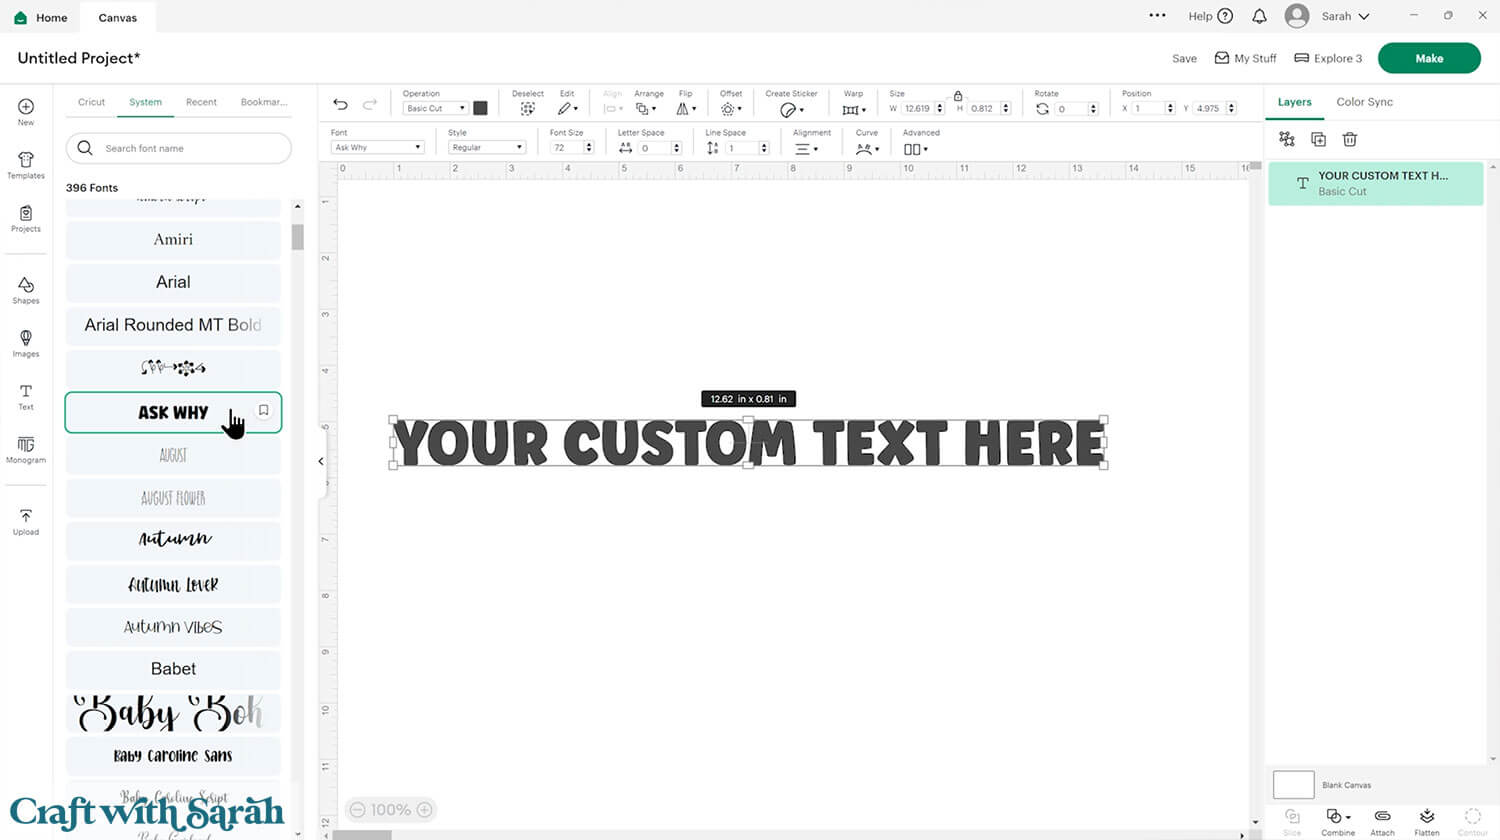
Select the text and press the “Curve” button along the top of the screen.
Drag the slider all the way to the right.
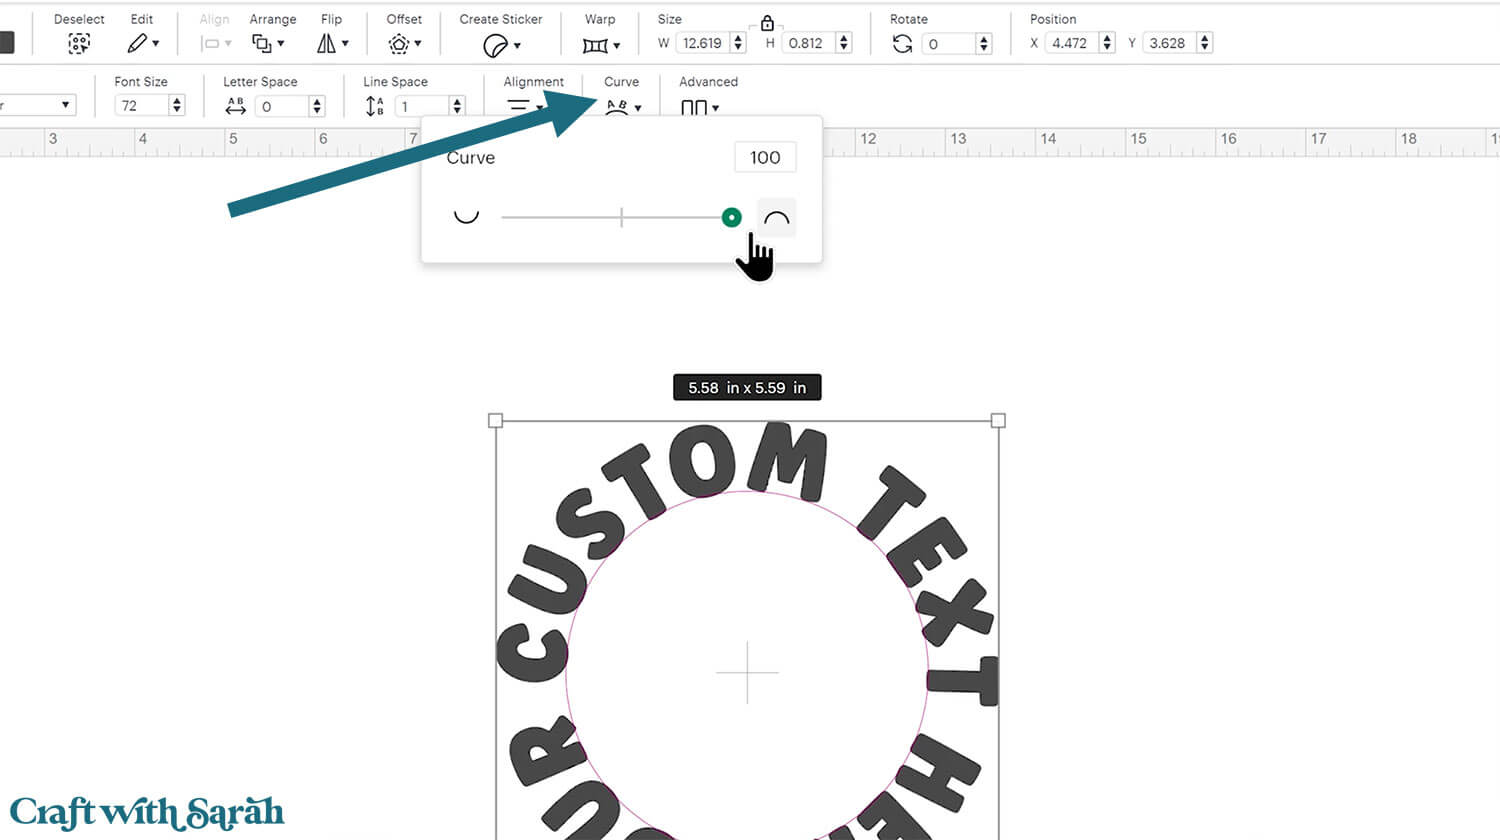
If your words are hard to read, double-click to edit the text and add two spaces between each word instead of one.
You can see in the image above that there is no space between my first and last words.
To correct this, add two spaces to the end of your phrase.
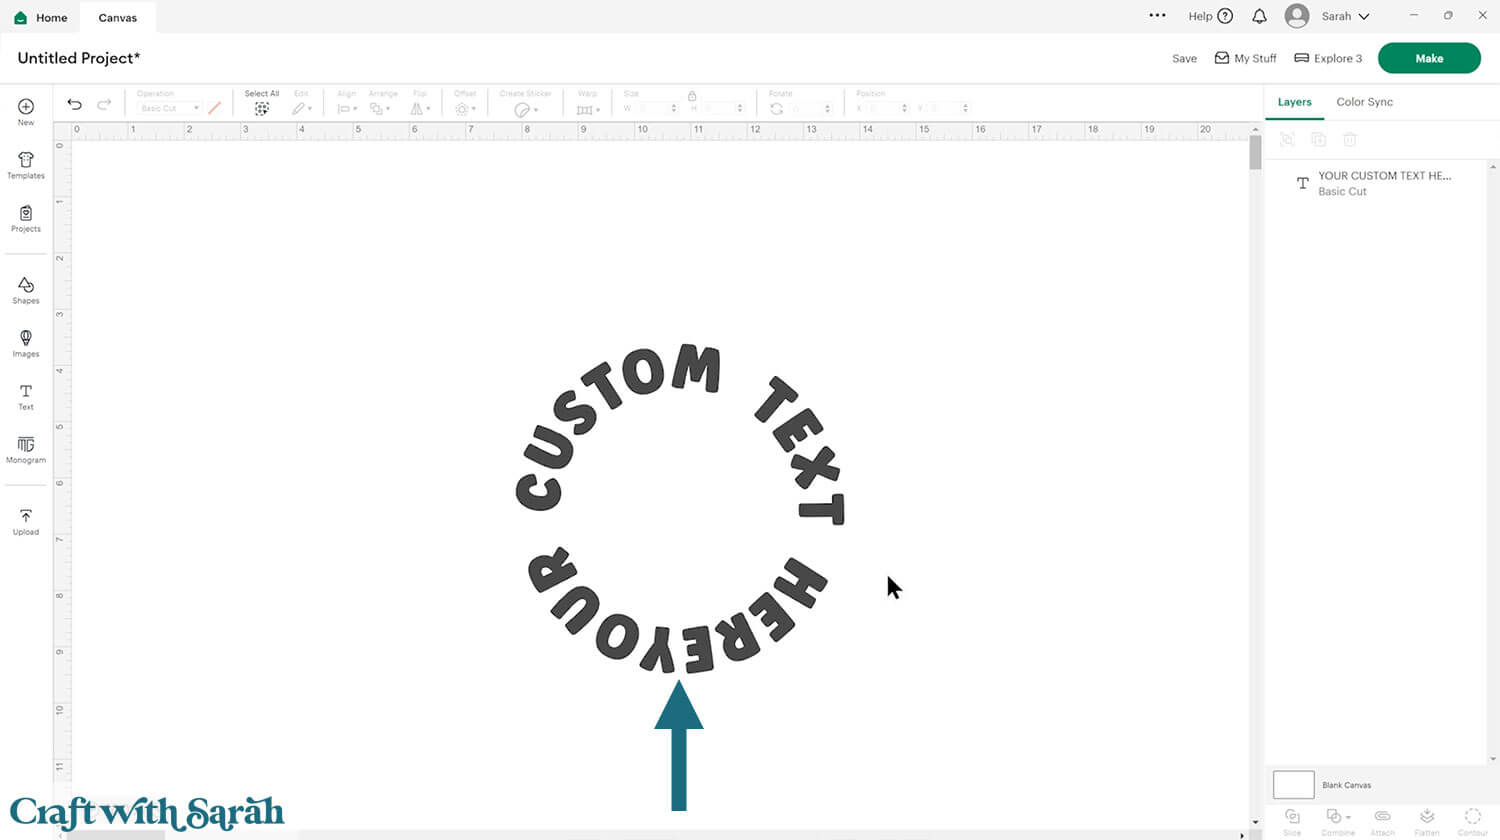
Rotate it around so that the first word in the phrase is on the top-left of the design. That will make it easier to read.
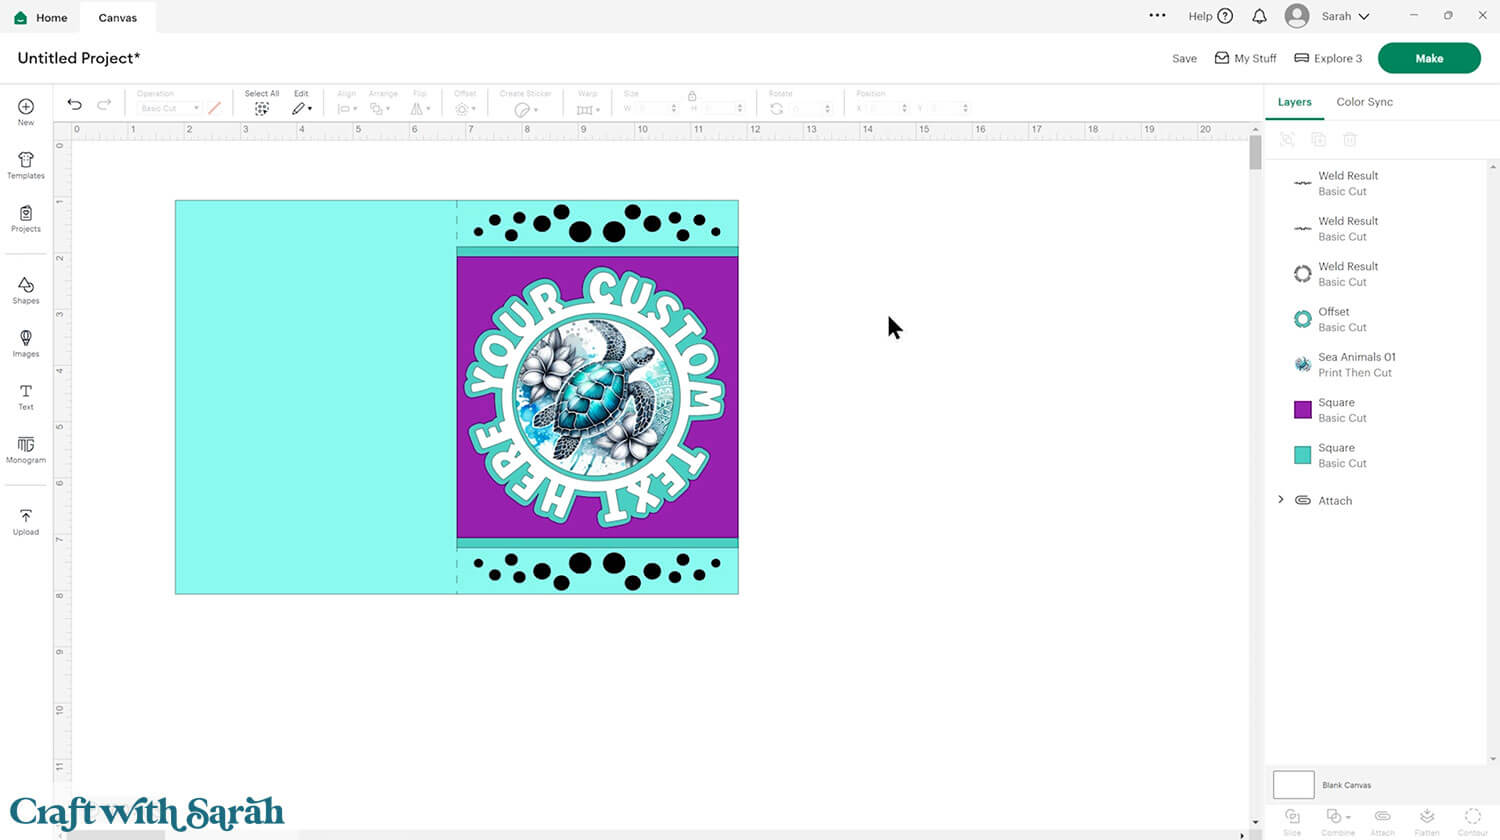
Step 2) Create the word circle topper
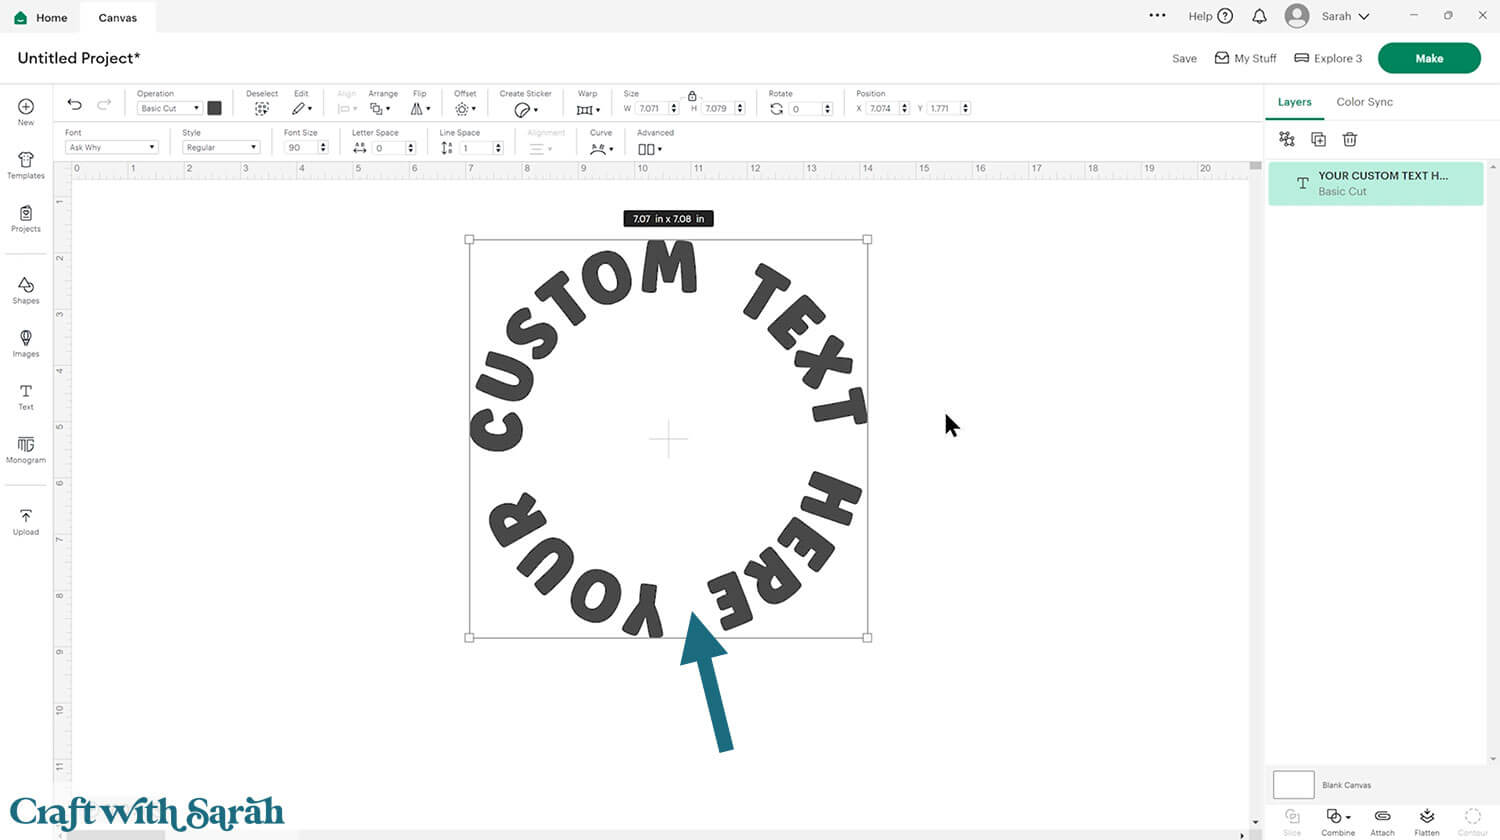
Go to “Shapes” and select a circle.
Resize and position it so that it is just touching the bottom of all the letters.
Create another circle, make it a different colour and put it in the middle of the design. Make this circle slightly smaller than the first one.
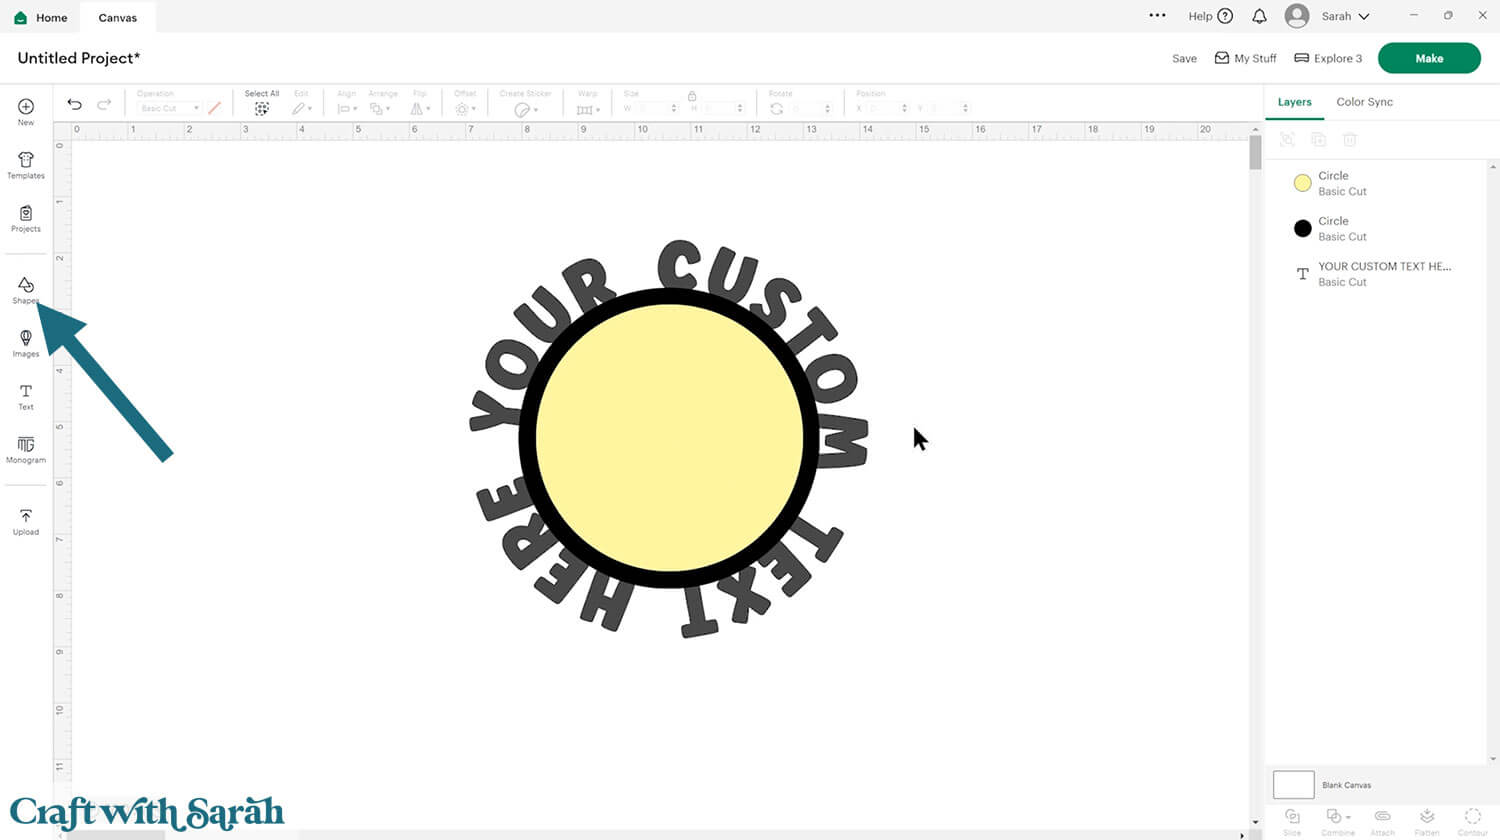
Select all three layers and press Align > Center.
That will position everything exactly in the middle of each other so it looks neat.
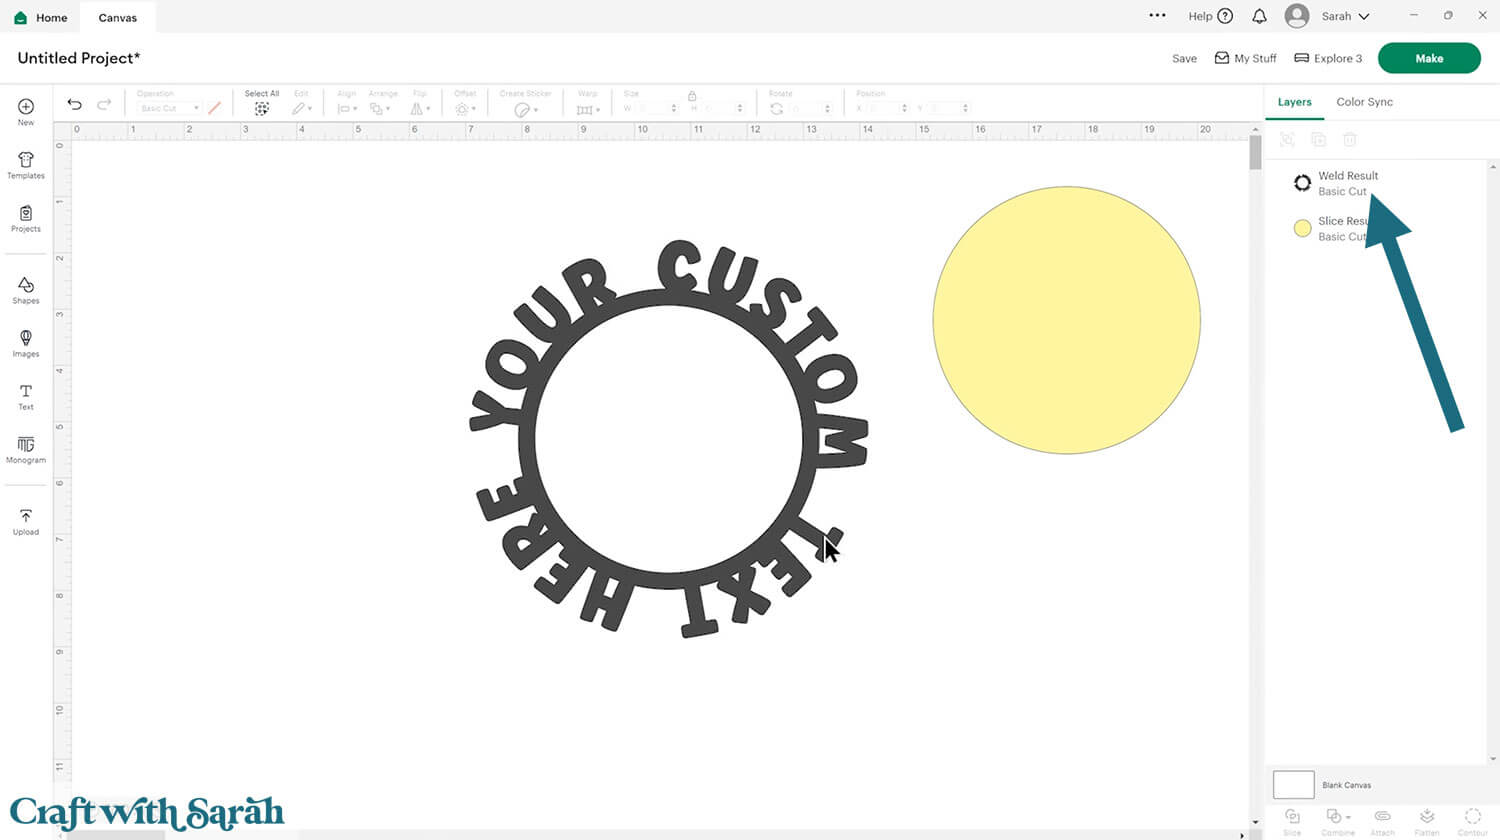
Select both circles and press “Slice”.
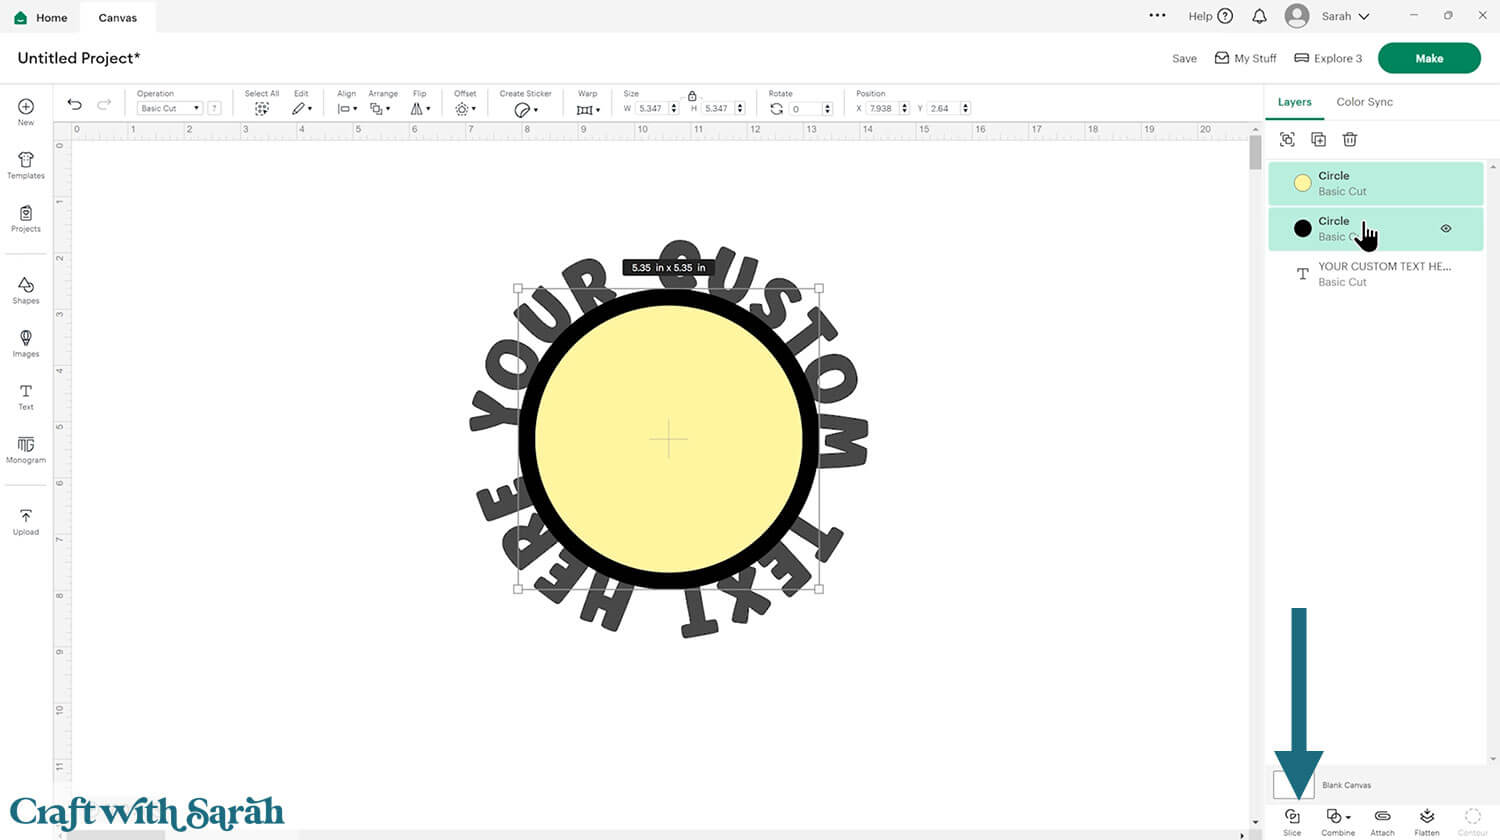
That will cut the smaller circle out of the big one.
Move the small circle over to the side and delete the new circle cutout.
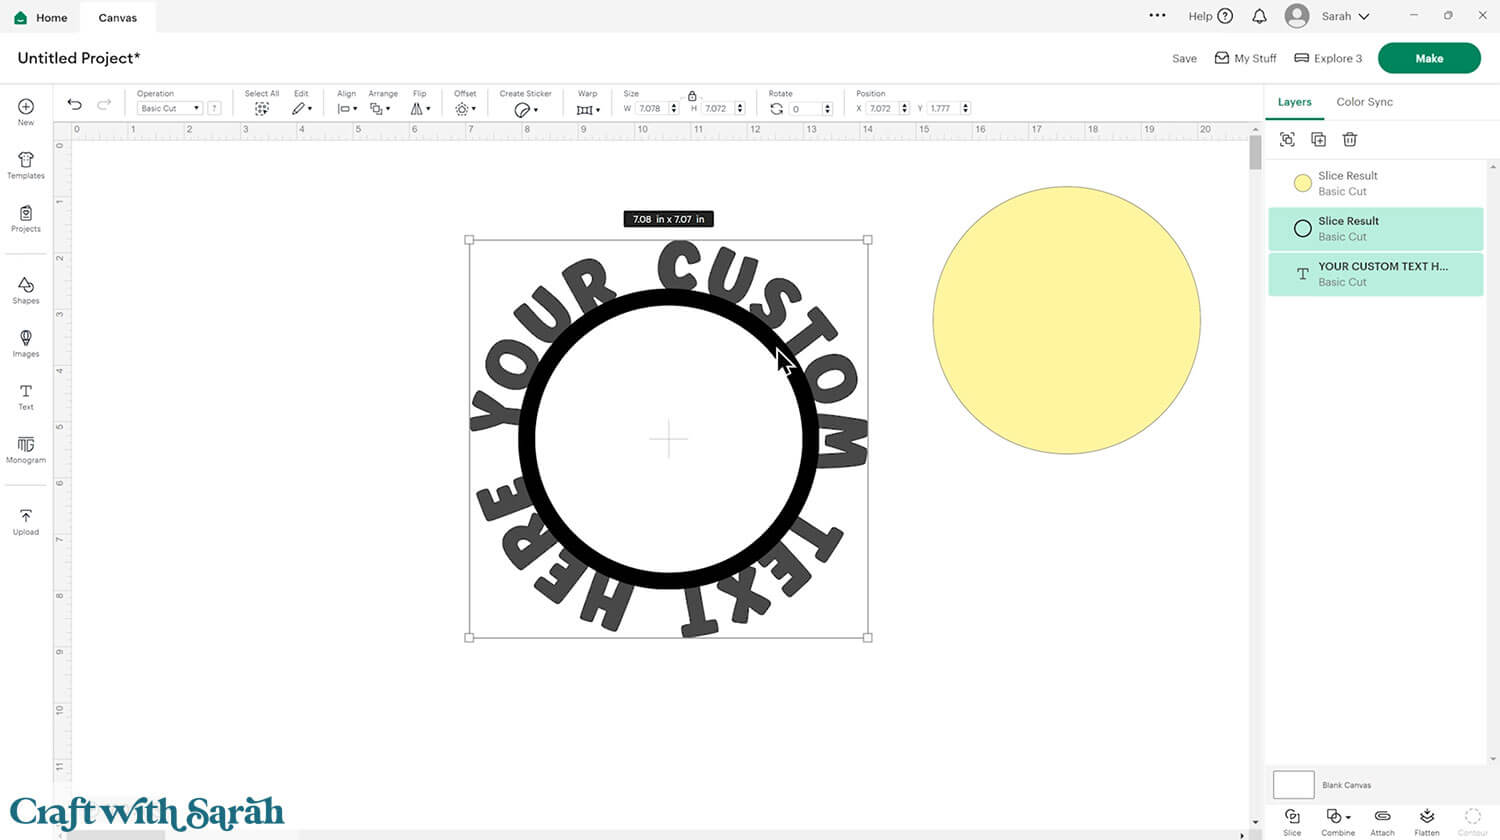
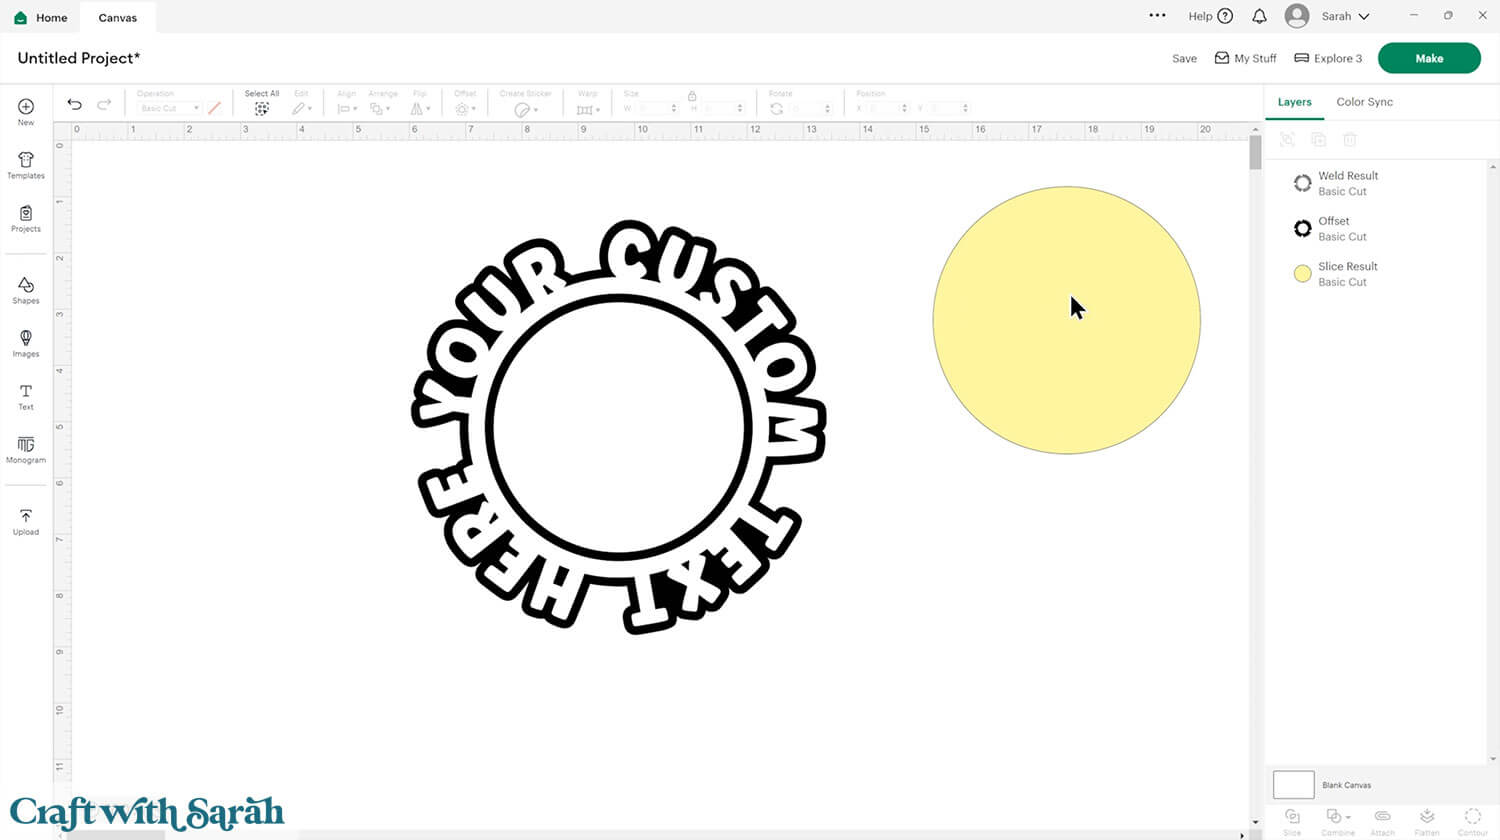
Select the words and the new circle frame (the thin outline) and press Combine > Weld to join them into one layer.
Use “Offest” to make a border around the text. I chose 0.15 as the width for my Offset.
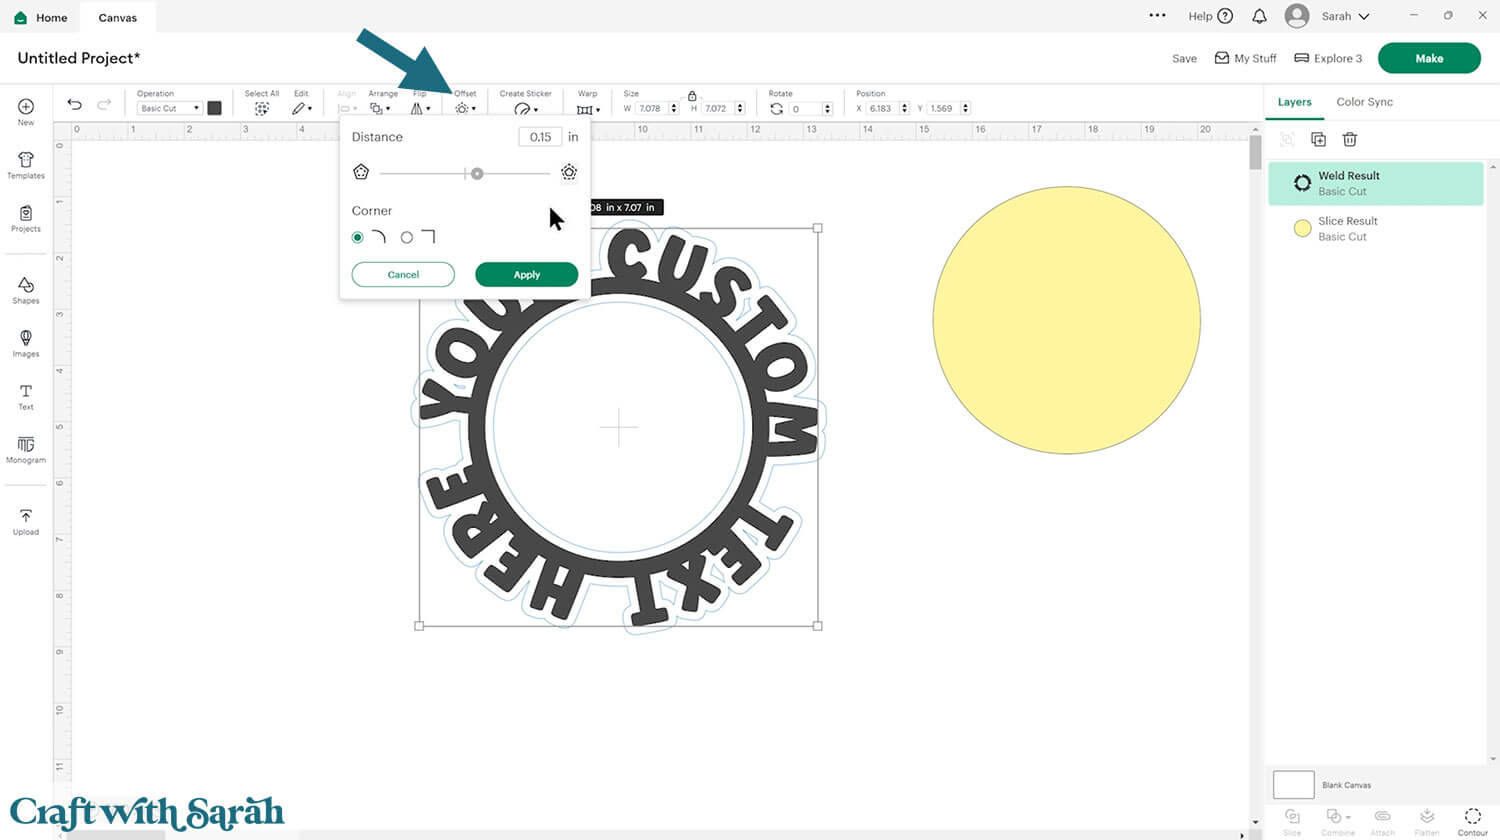
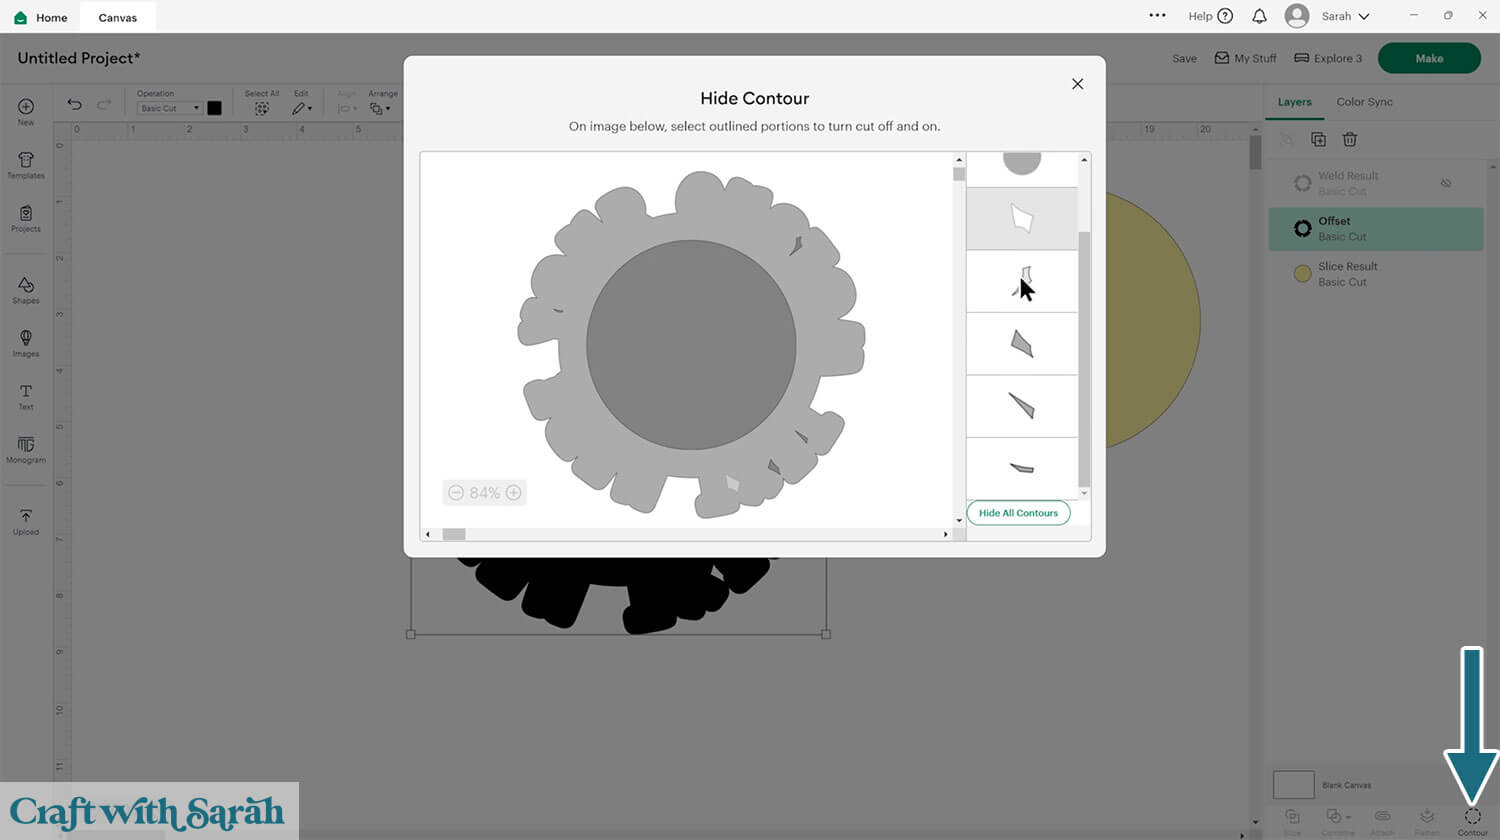
If you have small gaps in the Offset, click the Offset layer then press “Contour”.
Click into the small gaps to remove them.
Change the colours if you want to. I changed my text to white for the image below.
Step 3) Finish your custom card design
Select the word circle layers and Group them, then hide the Group by clicking the eye icon when you hover over it in the layers panel.
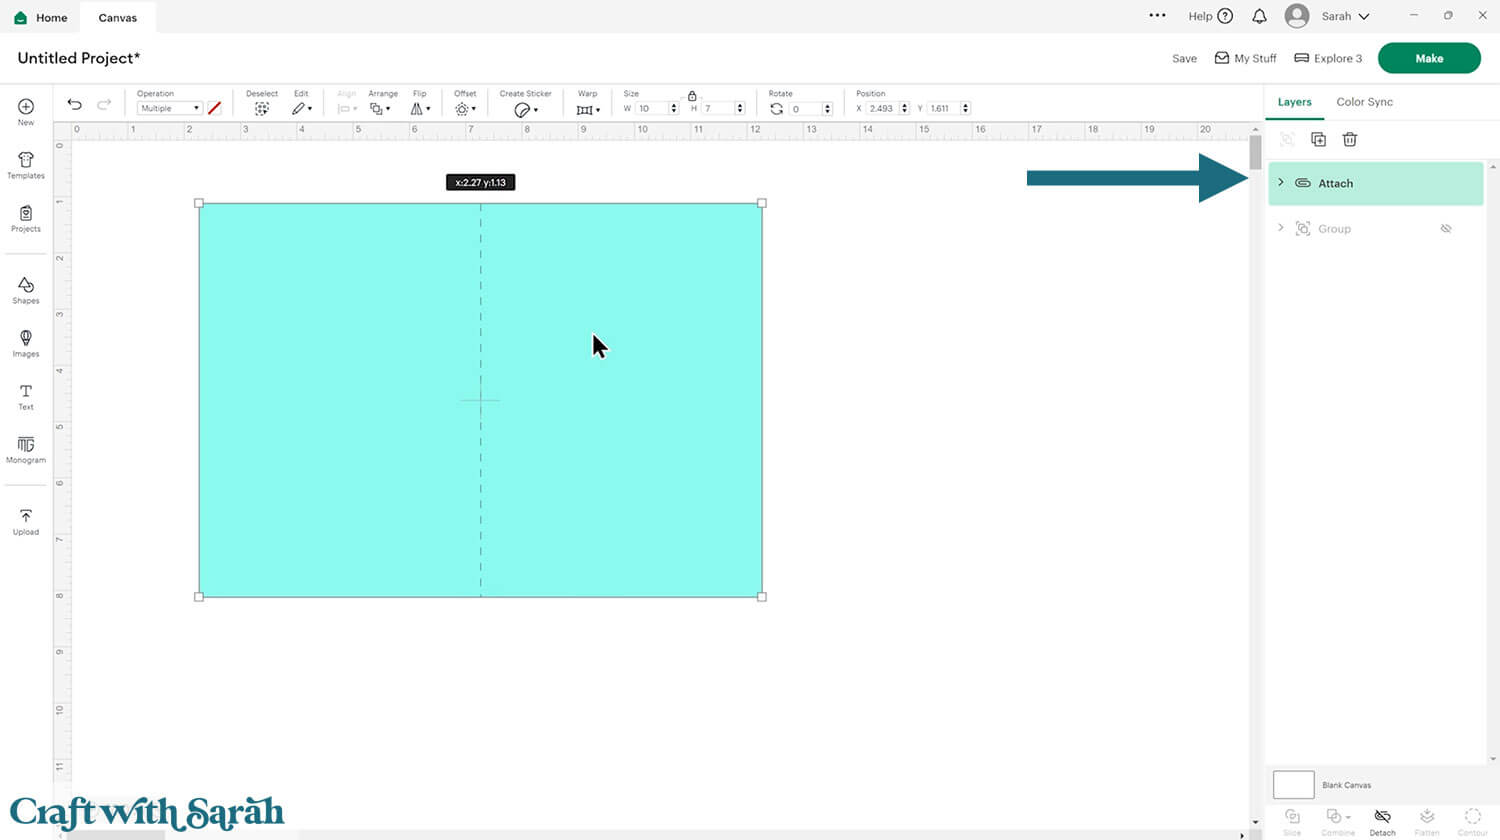
Click “Shapes” and select a square.
Make it the size of your desired greetings card.
I’m making a 5×7 inch card so my rectangle is 10×7.

Insert a score line and make it the height of your card.
Select the score line and the card and press Align > Center to put the score line in the middle.
Click “Attach” to join the two together.
Turn your word circle back on and move the layers to the top of the layers panel.
Roughly size it to fit on the front of the card.
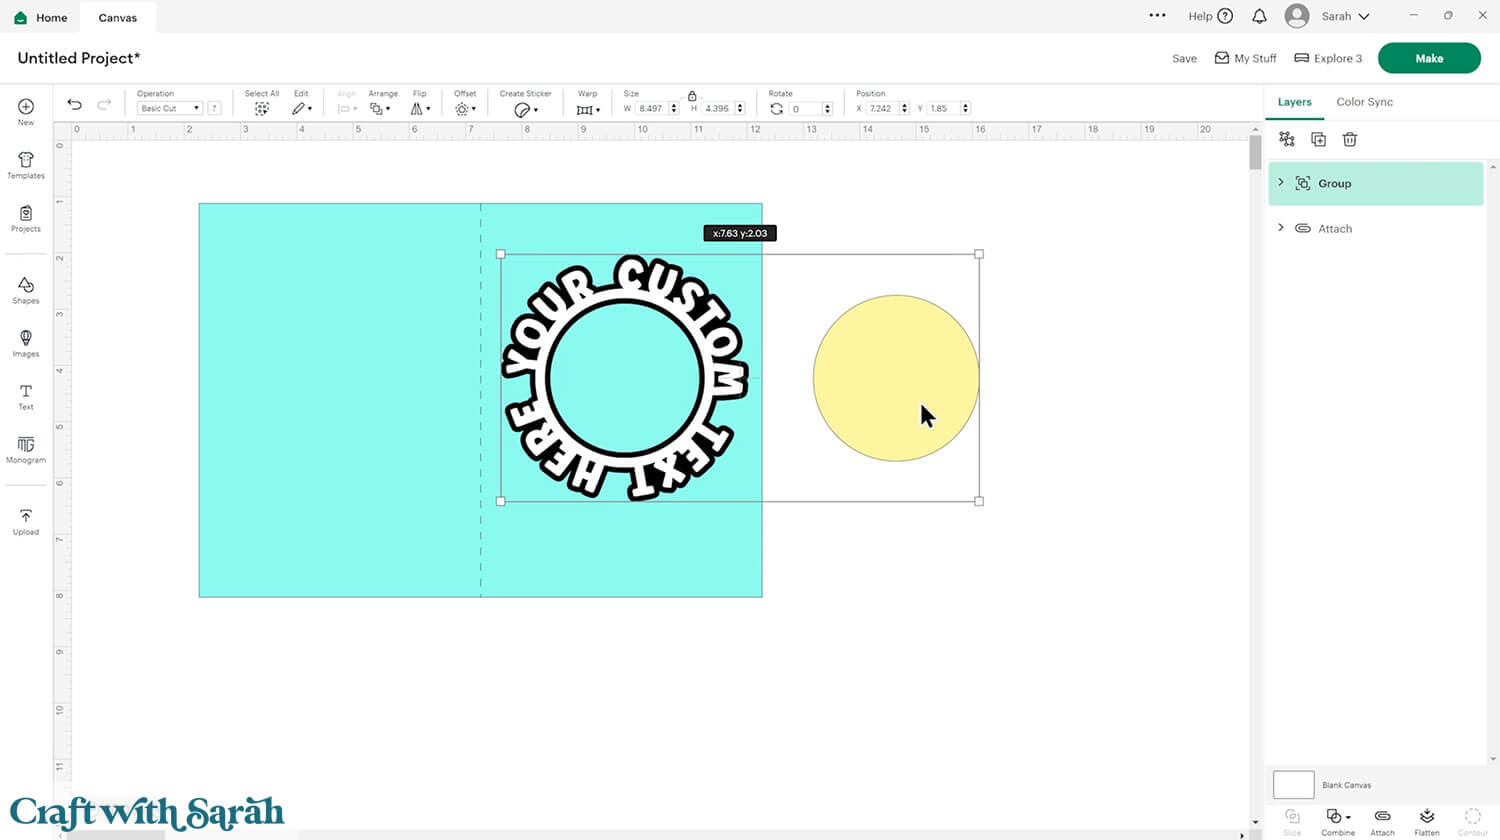
Add some extra squares or rectangles to the front of the card to build up some layers.
I put my top square in purple as I’ll be cutting it from patterned paper.
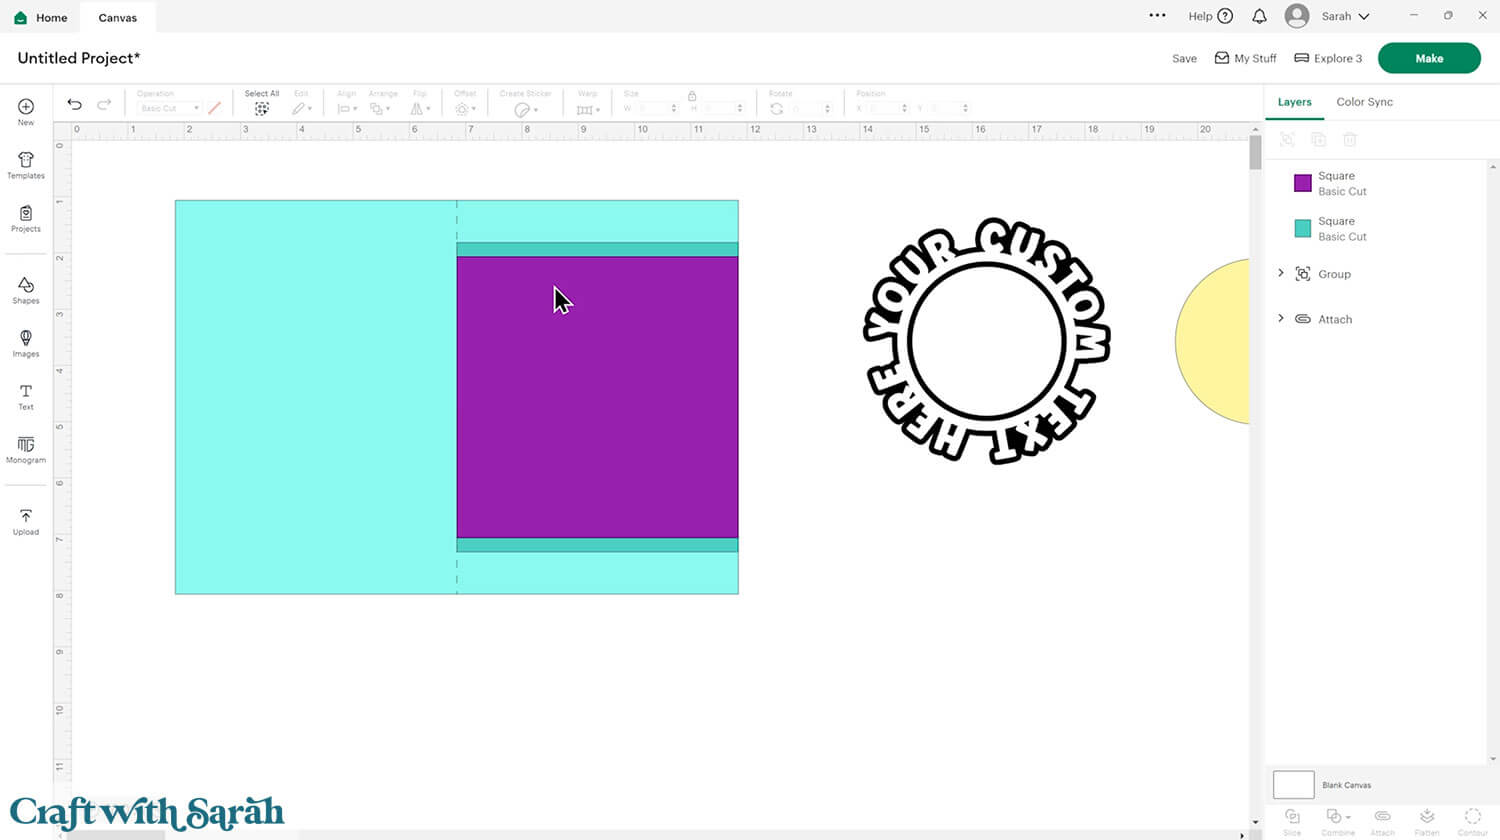
Size, colour and position the word circle onto the card front.
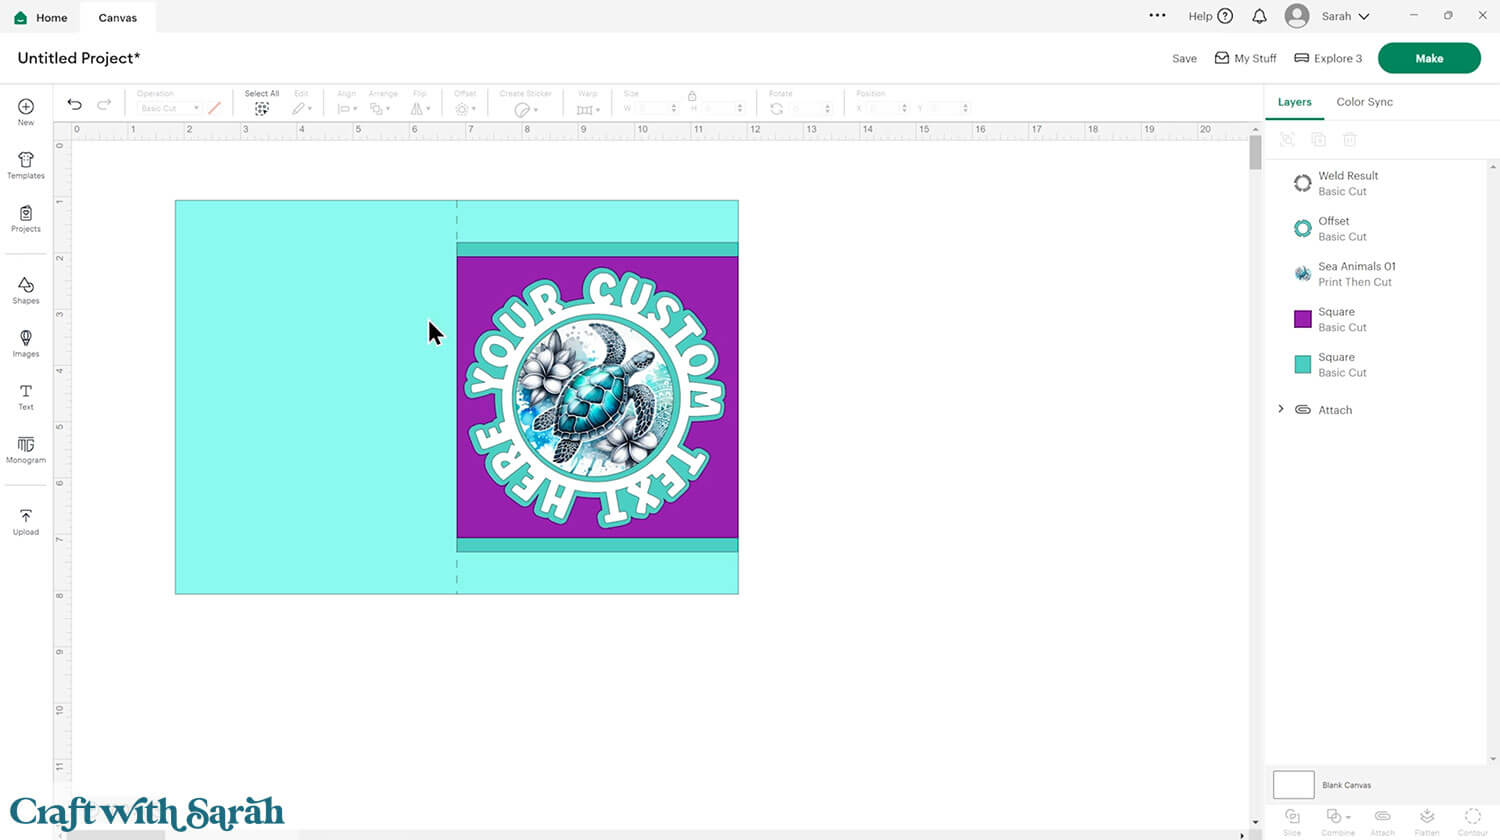
Add your chosen imagery to the card.
I decided to do a print then cut card with a cute turtle image from Creative Fabrica.
I thought the top and bottom of my card was looking a little plain, so I decided to cut out some “bubble” shapes to match the underwater theme.
I found some bubbles in Cricut Access and used Contour to hide the small details.
Then I duplicated and sized the bubbles onto the card.
To cut the bubbles from the card, first Detach the score line from the base card.
Select the base card and all the bubbles and press Combine > Subtract.
Re-attach the score line and move the base card back to the bottom of the layers panel.

Here’s how my custom word circle card looked when cut out and stuck together.
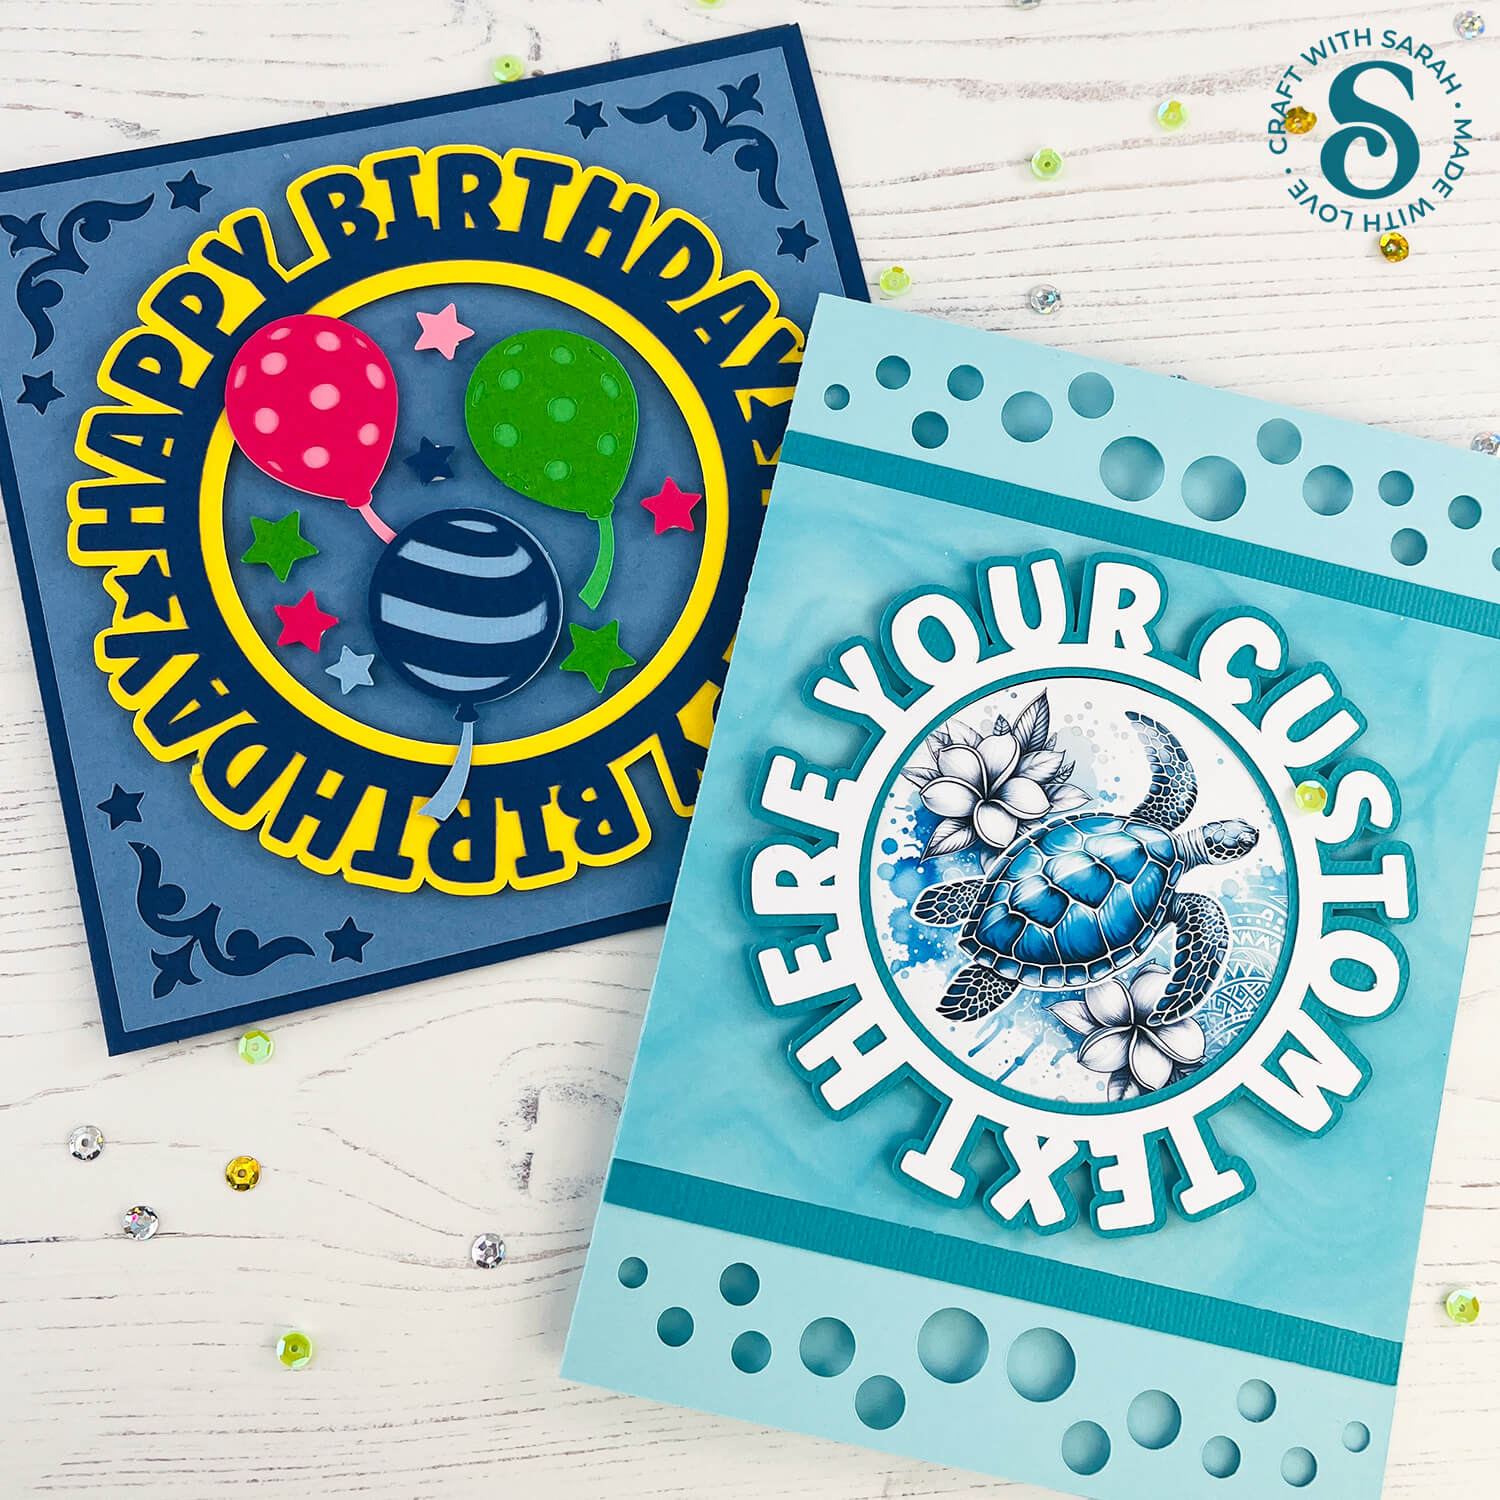
Custom word circle cards
And there you have it — your own beautiful word circle card, ready to brighten someone’s day!
Whether you followed along with the cheerful Happy Birthday design or dove into creating your own custom masterpiece, you’ve now learned how to bring this stylish and creative technique to life.

Word circle cards are such a fun way to play with text and design, turning a simple message into a stunning focal point.
With Cricut Design Space, the possibilities are endless — from heartfelt notes to seasonal greetings, you can let your creativity spin in any direction.
I can’t wait to see your custom word circle cards! Submit your finished projects to our Community to share your photos with us!
Happy crafting,
Sarah x

