How to use Cricut Design Space Tools: Combine, Attach, Slice, Weld & more!

Towards the end of last year, Cricut released an amazing update to Design Space which introduced lots of new features & tools.
These tools are fantastic if you like to design your own projects in Design Space as they allow for more flexibility when making your own creative designs. It’s much easier now to create your own bespoke designs to cut with your Cricut machine.
In this tutorial, I’m going to take a deep dive look at all of the new Combine features including: where to find them, how to use them and when they will be useful.
We’ll also have a look at the old favorites: Slice, Weld, Attach, Contour and Flatten.
Design Space for beginners
I think that the Design Space tools are shown best in the video below, as I’ve “focused in” on all the relevant parts of the screen in Design Space to show where I am clicking.
However, I’ve also written out the steps below for if you prefer to read rather than watch!
Note: This tutorial was created using Design Space version 7.21.131. Later versions may look slightly different.
Design Space overview
Without any further ado, let’s jump straight into Design Space! We’ll start with some of the old favorites.
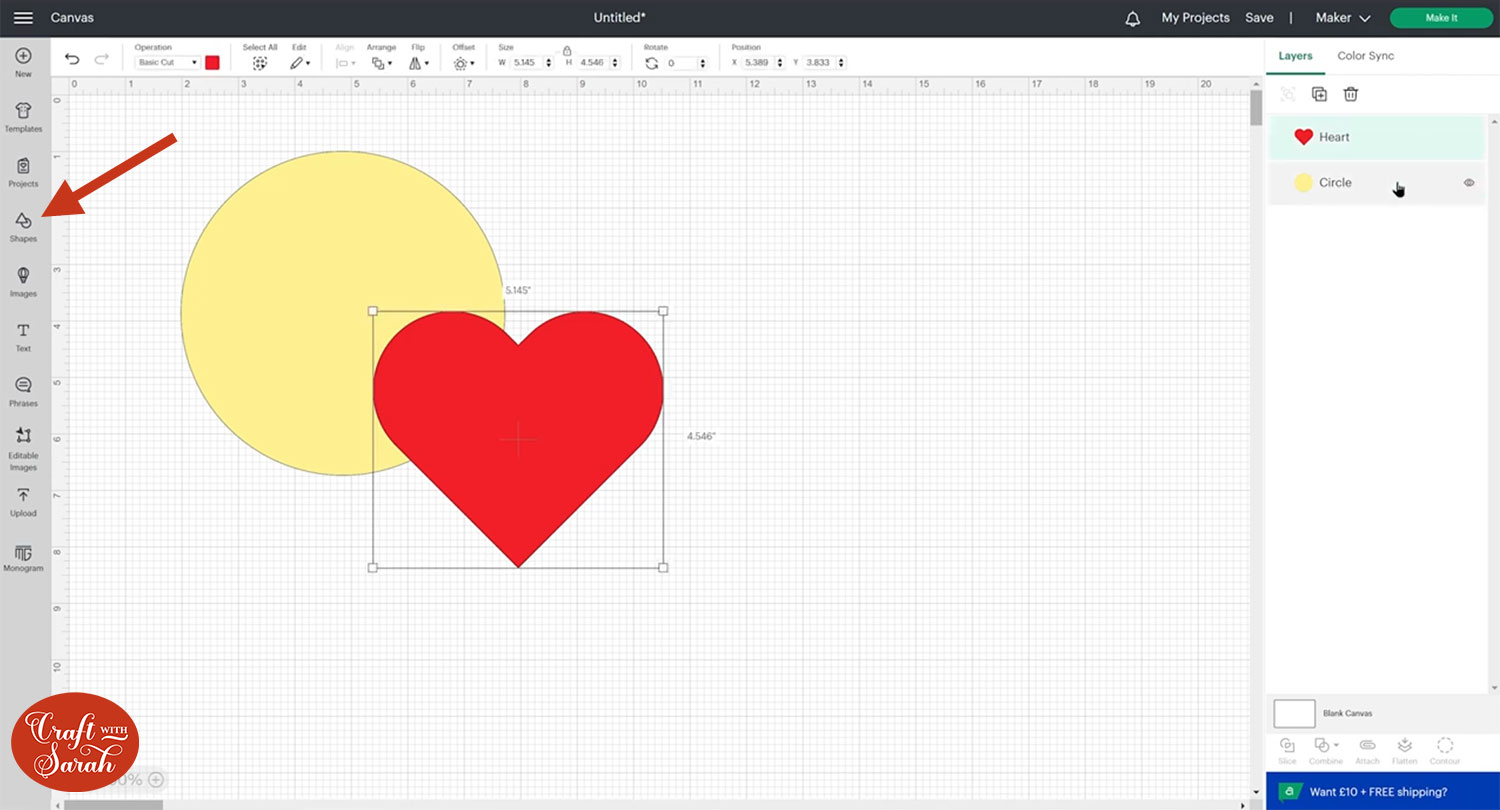
I’ve made a circle and a heart on here using the “Shapes” menu. They’re both separate layers, as you can see in the layers panel.
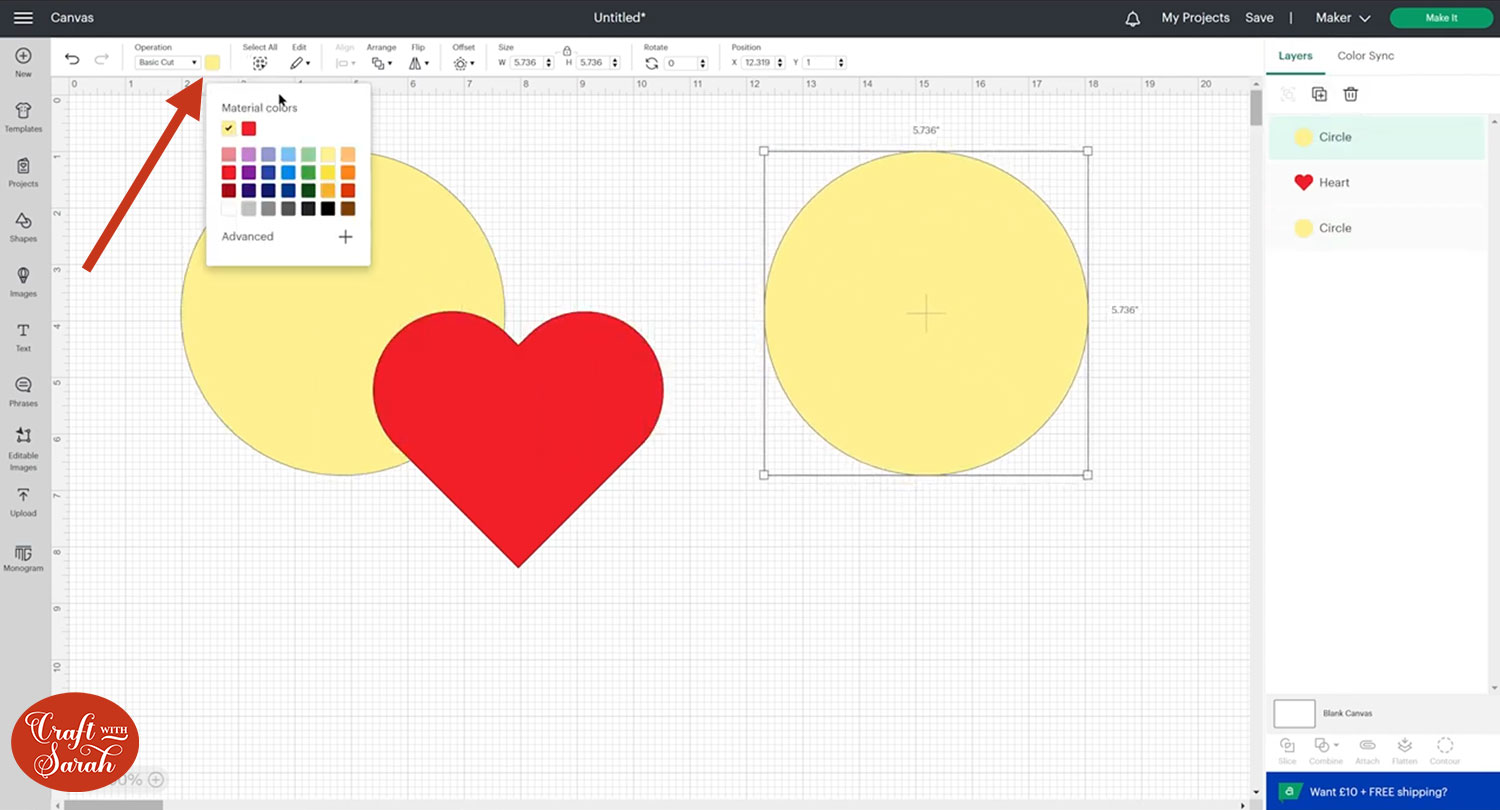
If I want to make an additional copy of this circle, I can click on it and then press Duplicate over on the top and that will make a copy.

Change the colour by clicking into the little coloured rectangle along the top of the screen.
Resize by clicking a layer and then click-and-dragging the little arrows on the edges of the box.
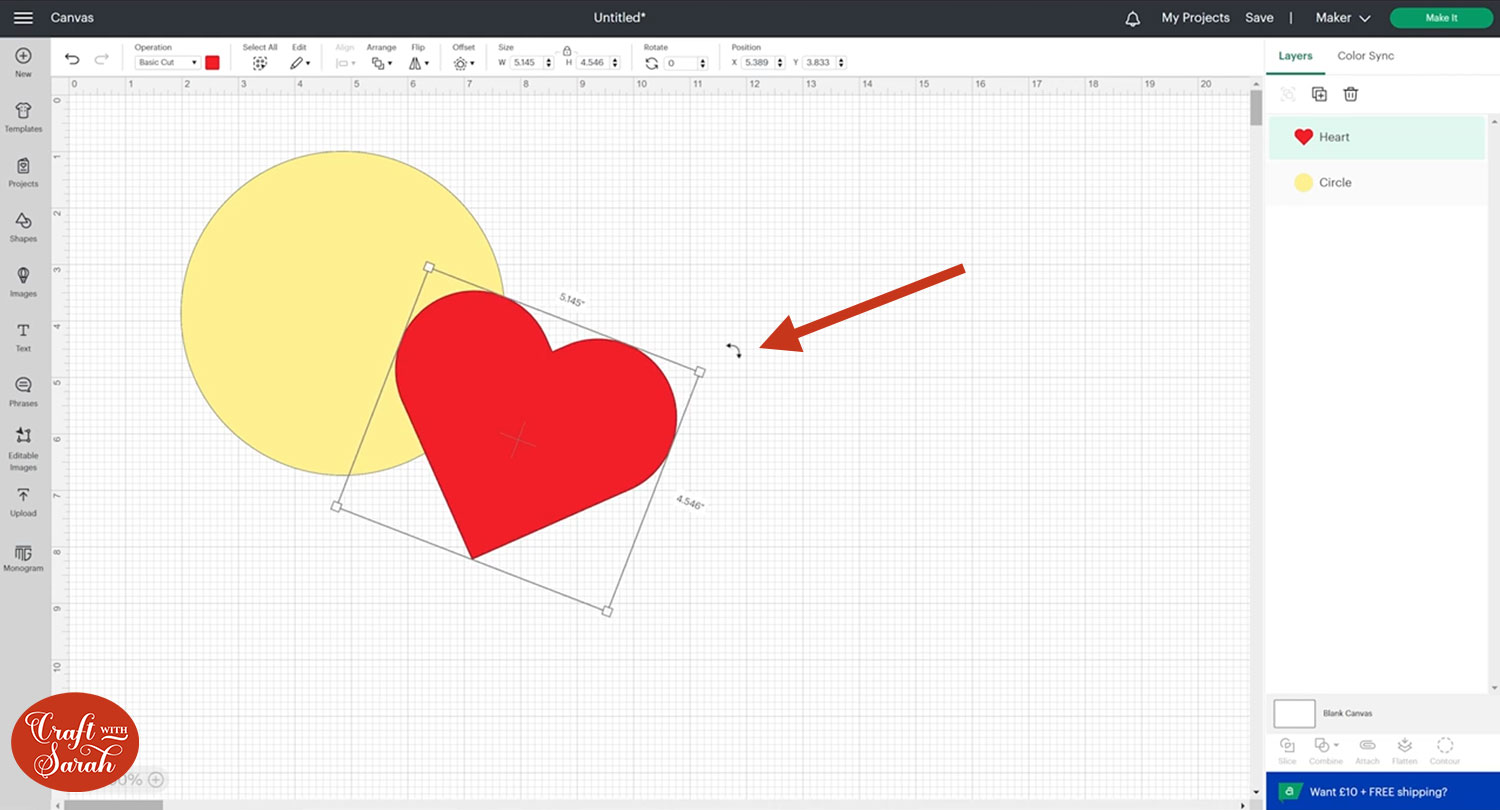
Rotate by moving your mouse a little bit further away from the corners until the arrow changes to a curved shape. Then, you can click-and-drag to rotate.
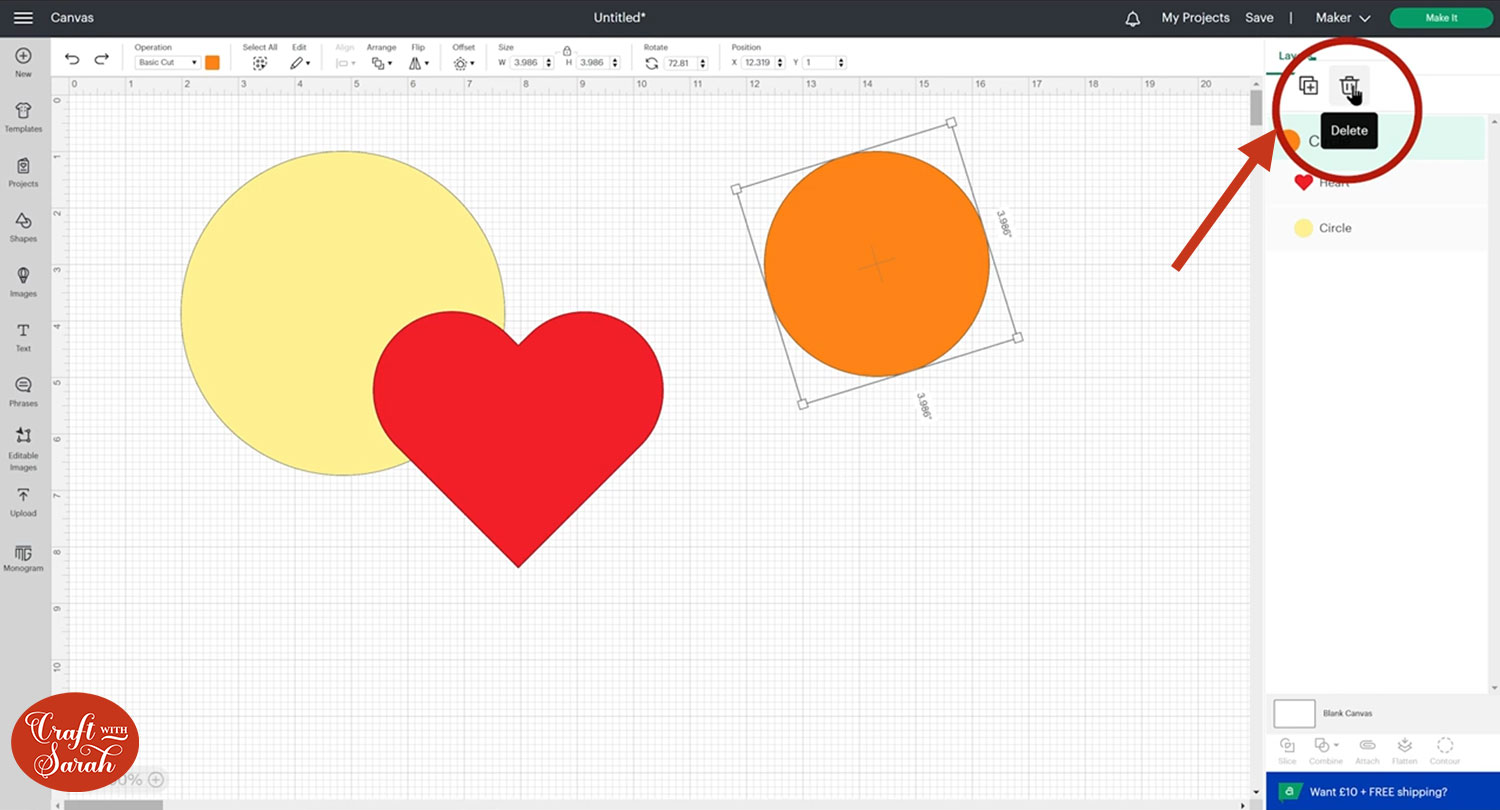
To delete a layer, click it and press the Delete key on your keyboard, or click the trash can icon.
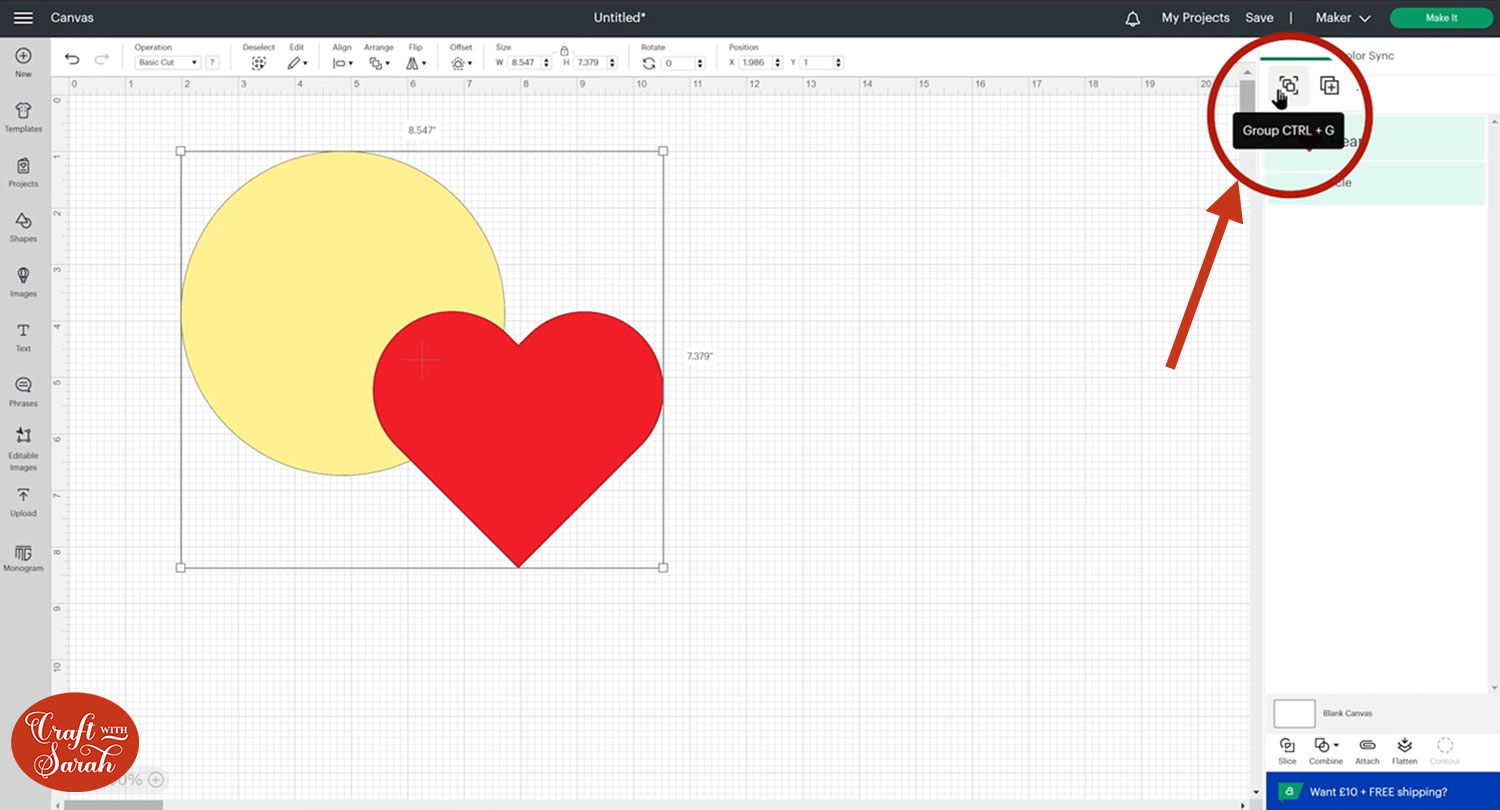
Grouping and Ungrouping layers
Grouping layers is helpful for keeping them all together on the screen.
It allows you to resize all the layers within the group at the same time so that they remain in proportion with each other.
To group layers together, first select them by click-and-dragging a box around them or by clicking all them in the layers panel with your shift key held down on the keyboard (the shift key lets you select multiple layers in the layers panel).
Then, click “Group”.
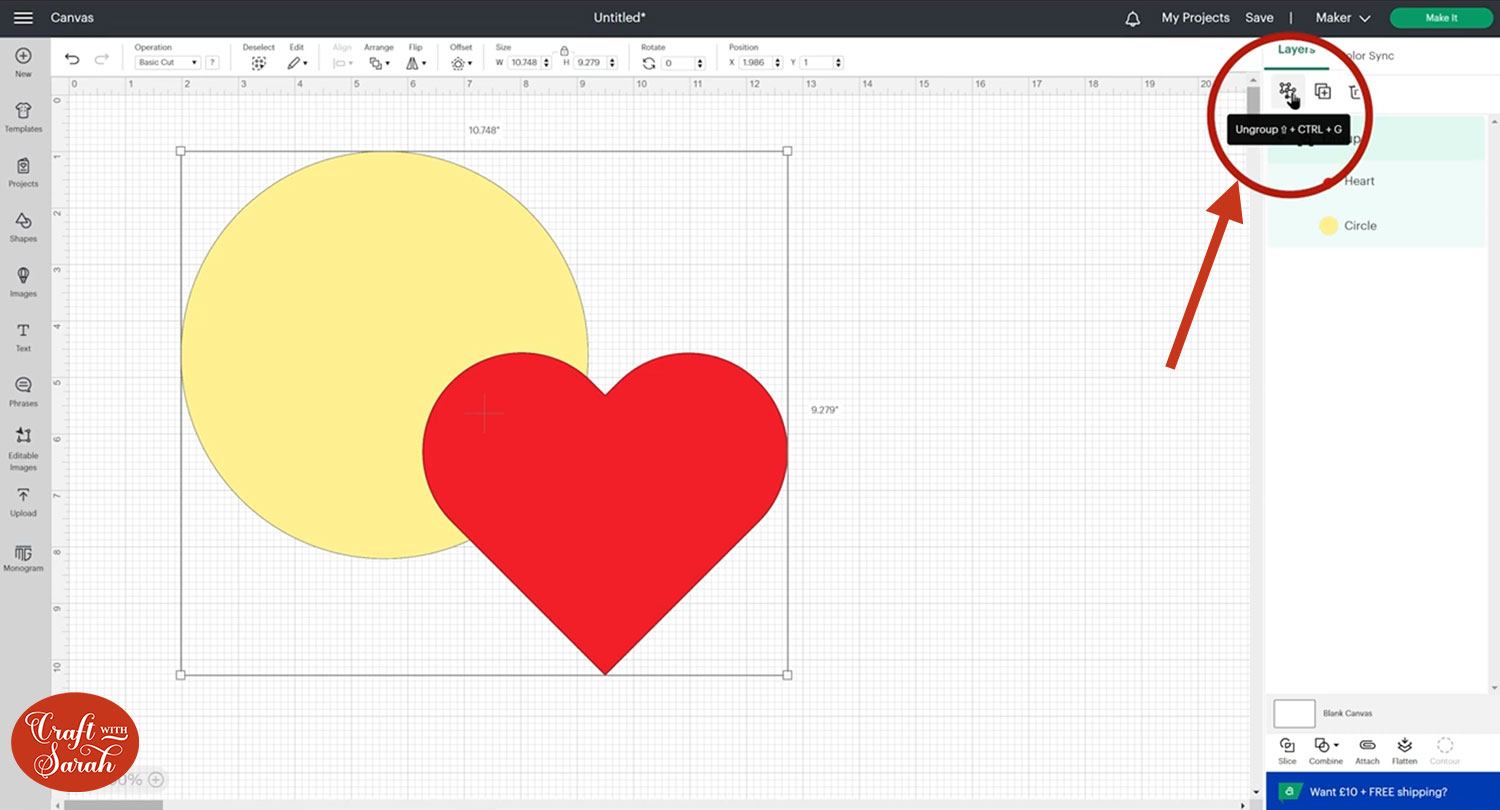
To separate the layers again, click on the Group and then press the same button at the top of the layers panel. It will now say “Ungroup” when you hover your mouse over it.
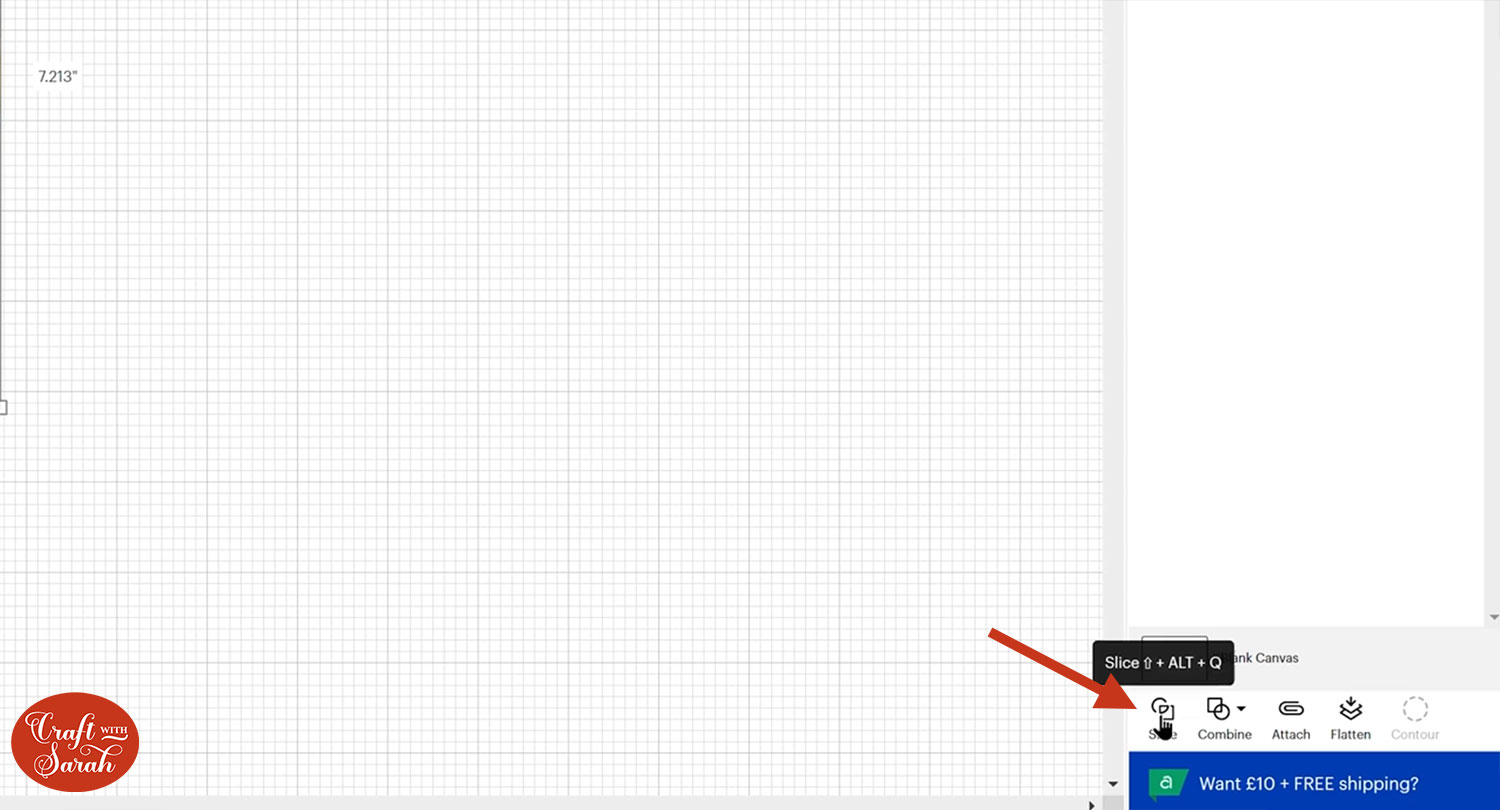
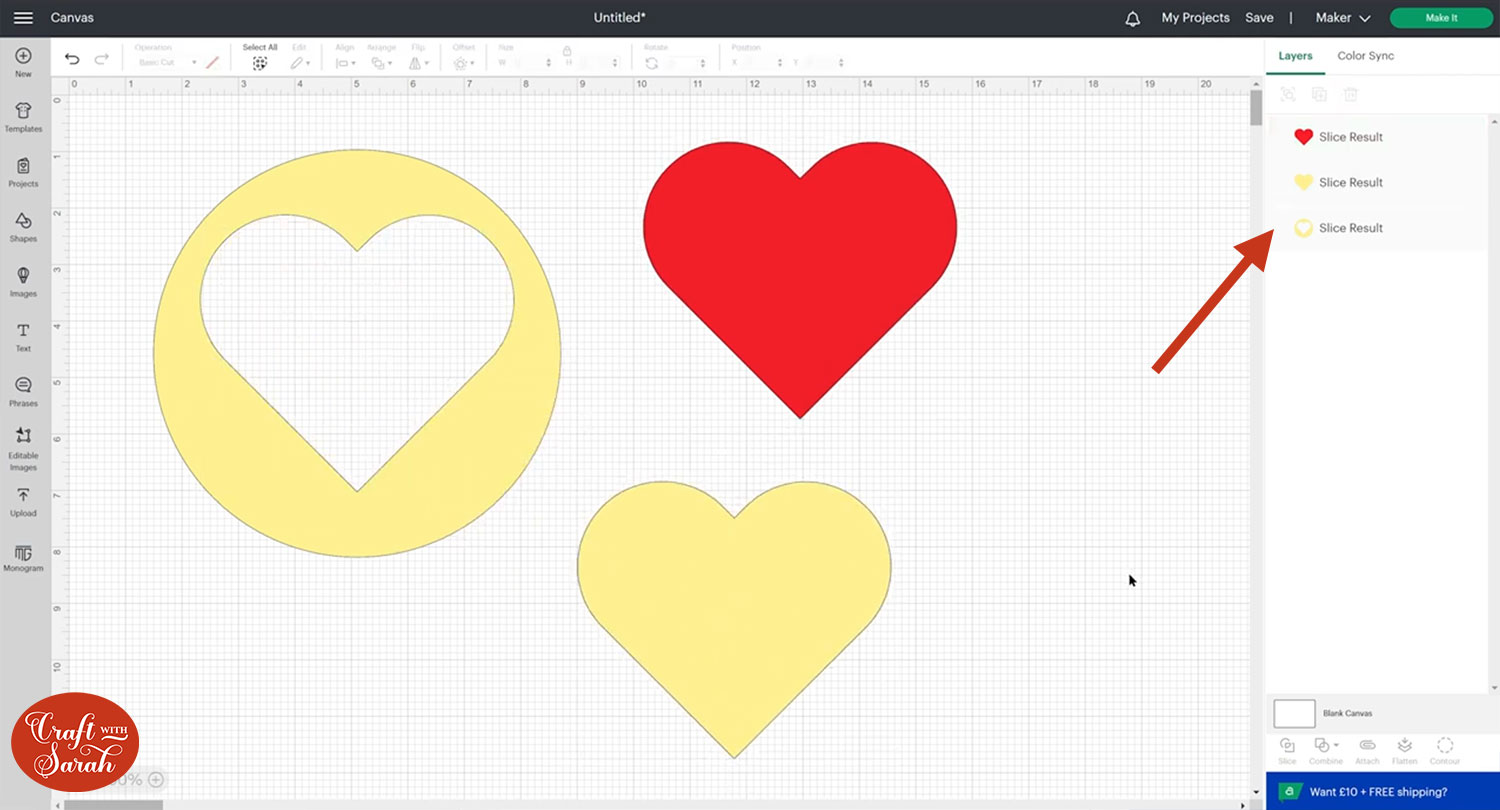
Slice Tool
The Slice tool lets you cut one layer out of another one, a bit like a cookie cutter.
You can ONLY Slice with TWO layers selected.
I put the heart on top of the circle and then Sliced them out.
It gives you these Slice results:
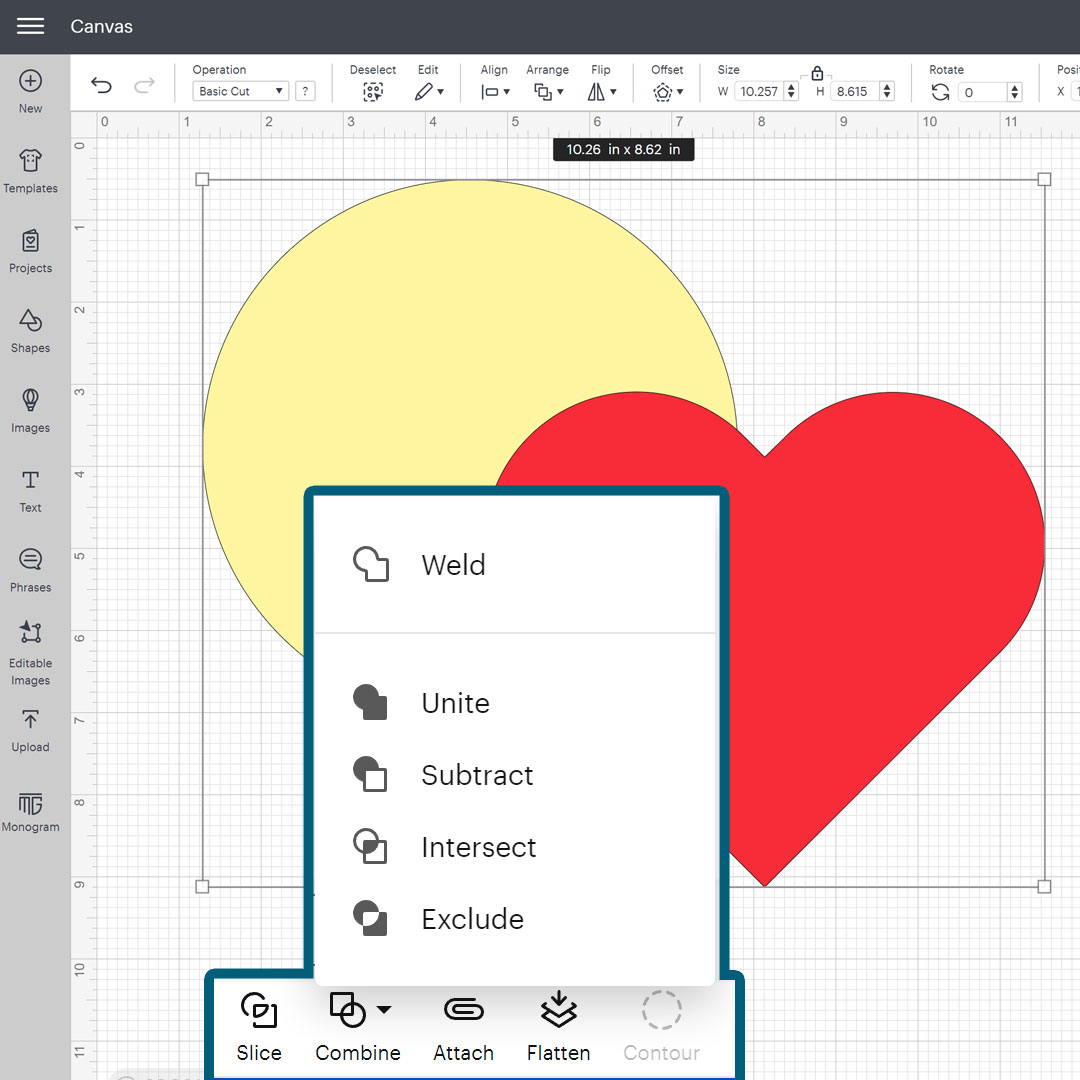
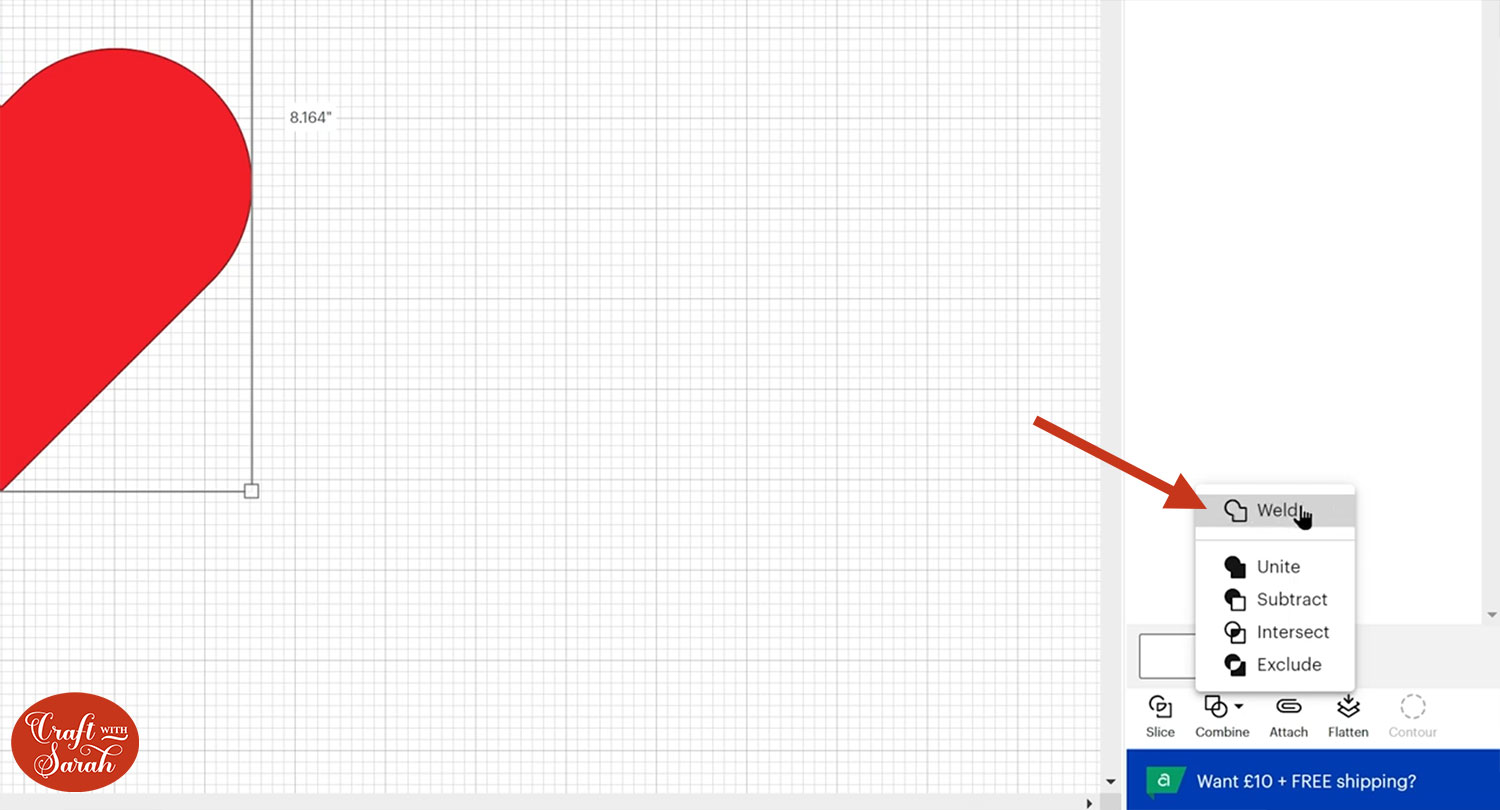
Weld Tool
The Weld tool lets you join multiple layers together into one single layer.
To use it, select the layers you want to join and then click “Combine” and then “Weld”.
Now you can see that my two layers have become one, and they have changed to be the same colour.
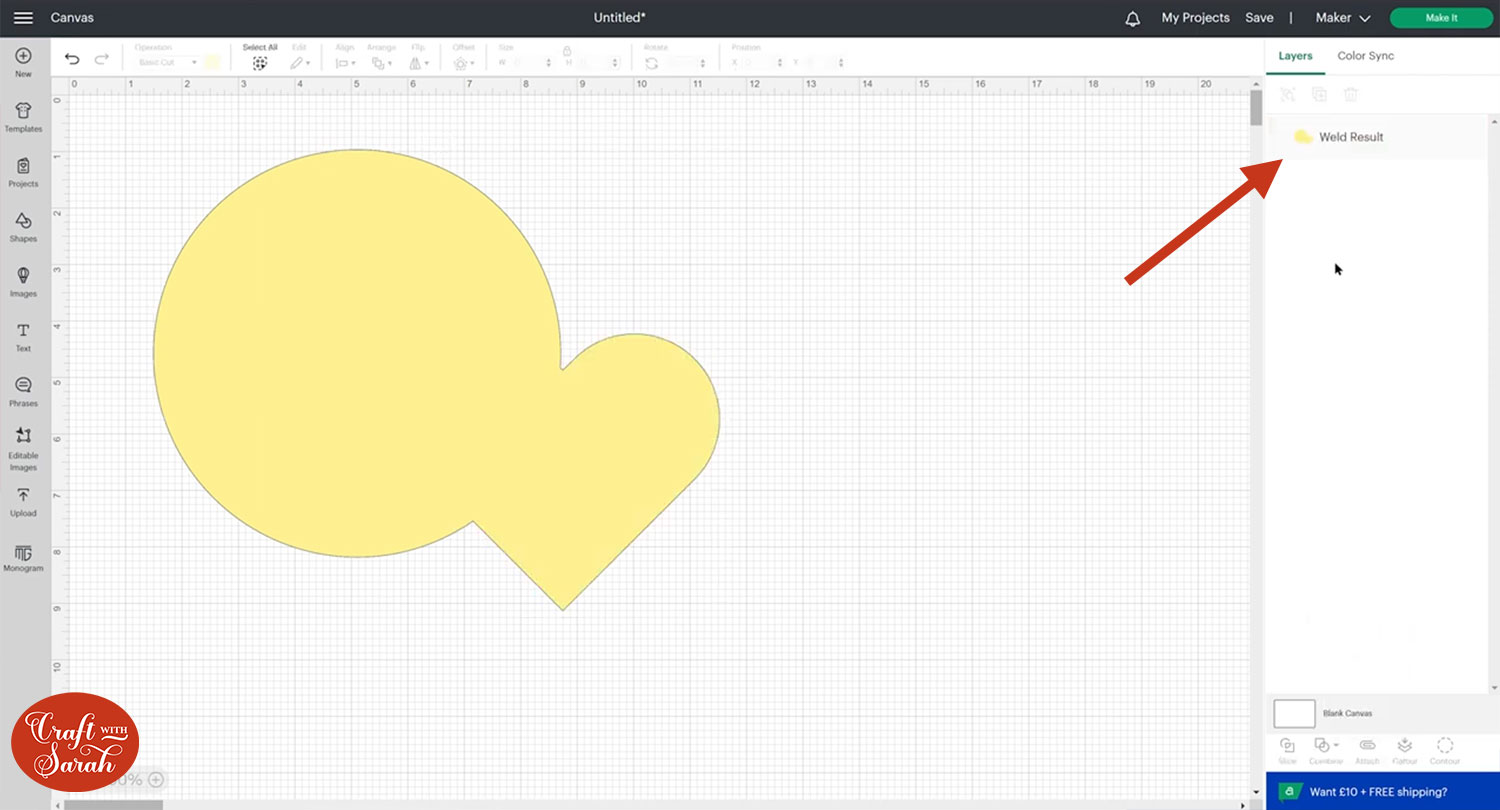
One the drawbacks of Weld is that once you’ve done it, unless you undo it straight away, that change is permanent. So if I Welded my layers, closed Design Space and opened it up again another day and I wanted to separate them out again, I wouldn’t be able to do that.
Design Space have introduced new features so that you CAN make layers go together without it being permanent. These are also contained under the “Combine” button.
New Combine tools
The Combine tools in Cricut Design Space were introduced towards the end of 2022.
There are four new options to choose from:
- Unite
- Subtract
- Intersect
- Exclude
Let’s see how they work…
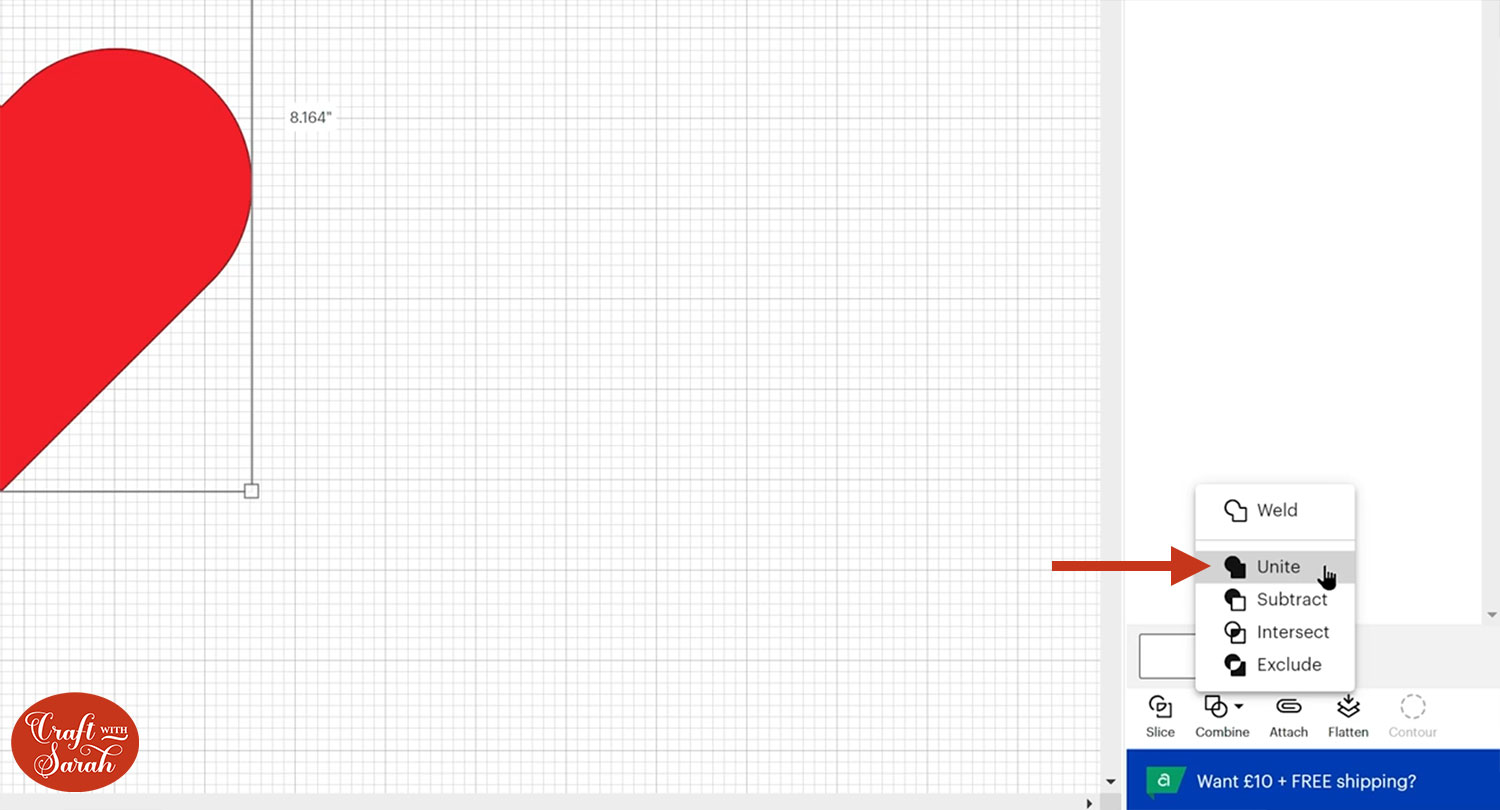
1) Unite
Unite lets you “join” layers together but WITHOUT it becoming permanent.
With my heart and circle selected, I’ll go into Combine and this time I’ll press Unite.
After Uniting, as far as my design on the page looks, it looks like it’s done exactly the same thing.
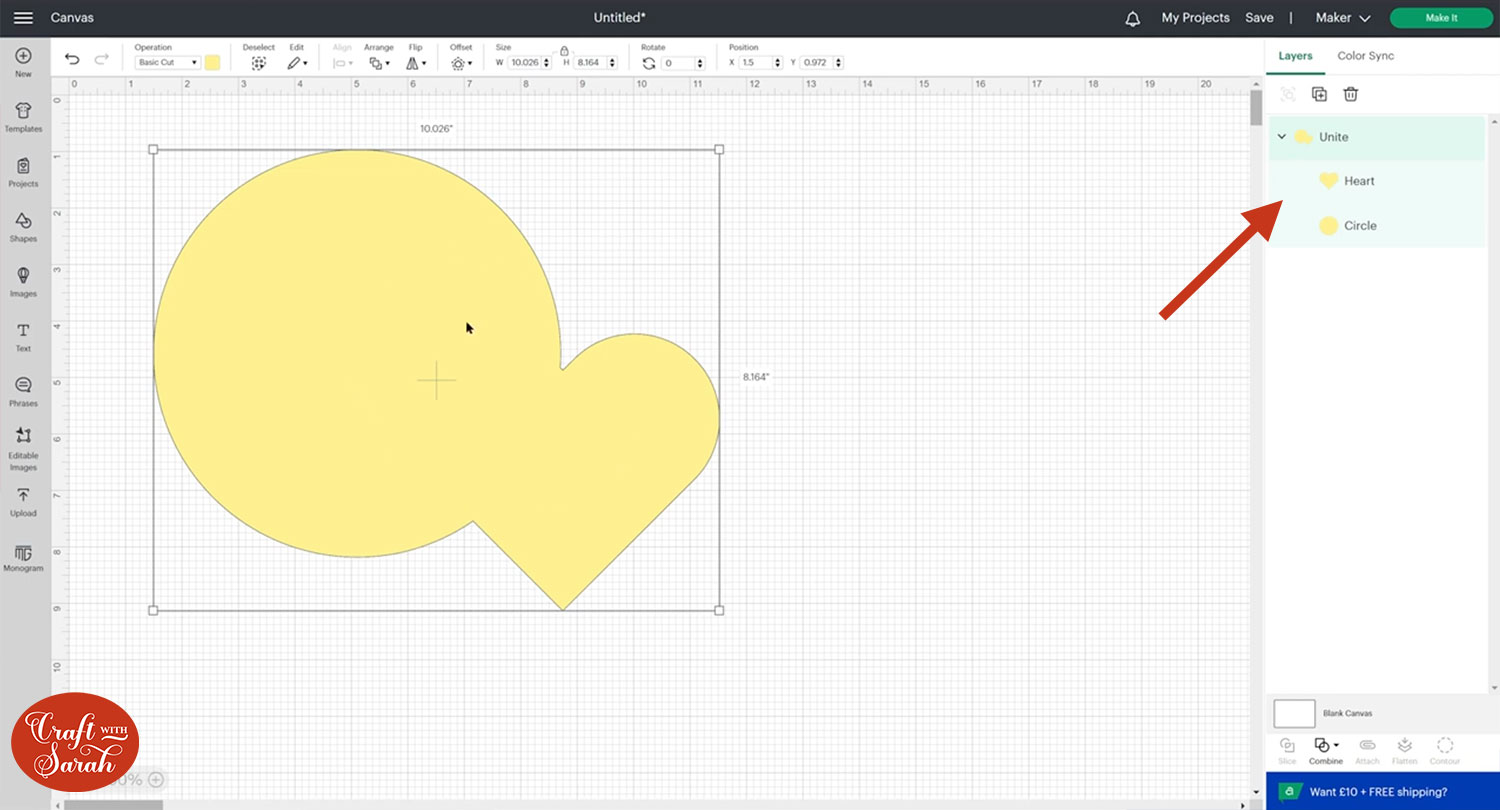
However, when you look in the layers panel this is where you can see that it is actually still two separate layers so even though it looks like it’s joined here I can still select one of the layers in the layers panel and move it about and then when you let go with the mouse it joins them together again.
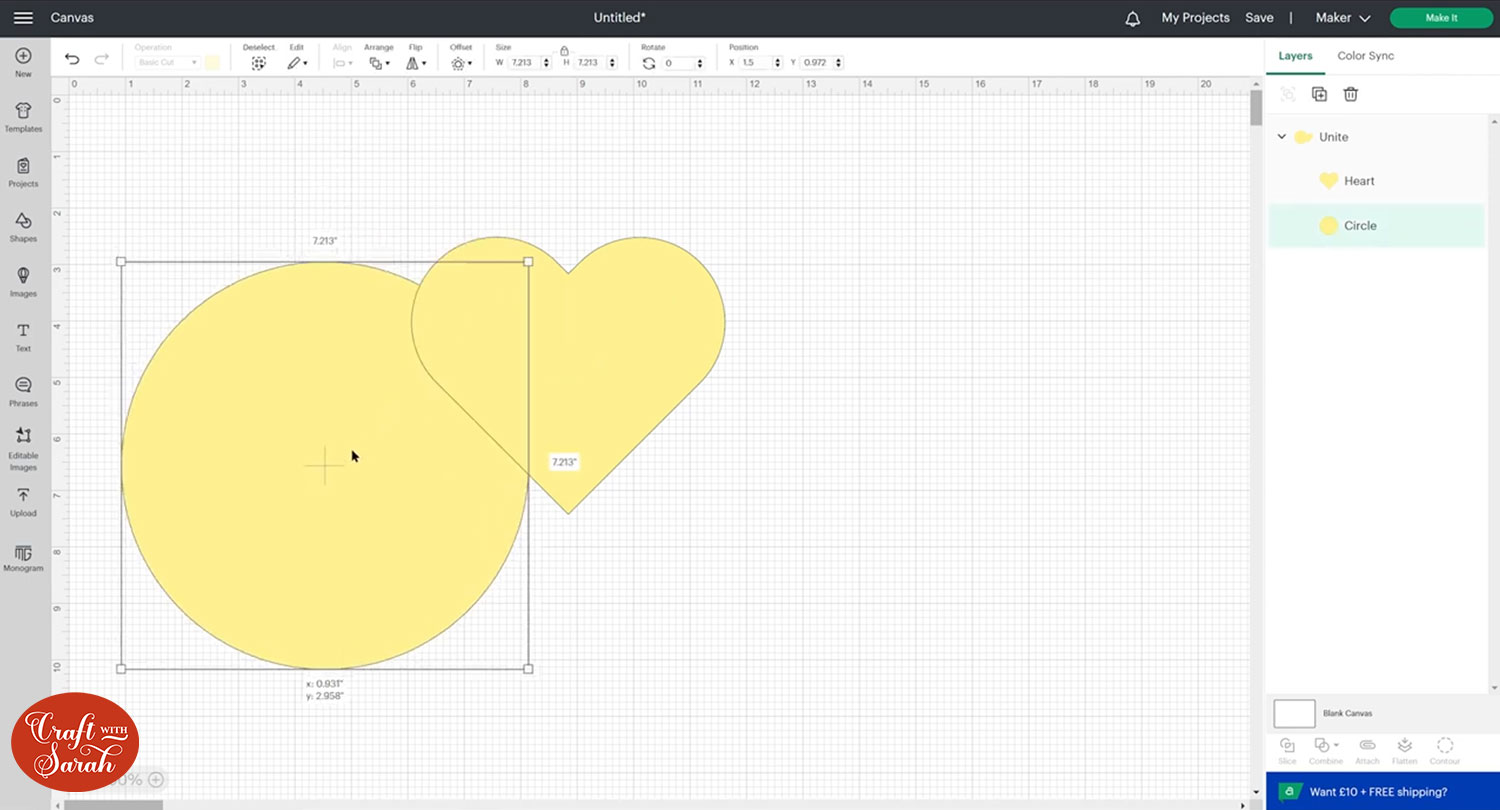
This is really, really great because it means you can move things about if you didn’t quite get it positioned right the first time, whereas previously you would have had to Weld your layers and then if it didn’t look right you would have had to unweld it, move them about, Weld it again and hope that looked right – and if not, then undo, move it about, weld it again.
That’s all gone now with this new Unite button. It gives you lots more flexibility and as soon as you let go with the mouse, it unites them again and when this is cut out with a Cricut it would just cut around the outside of the shape.
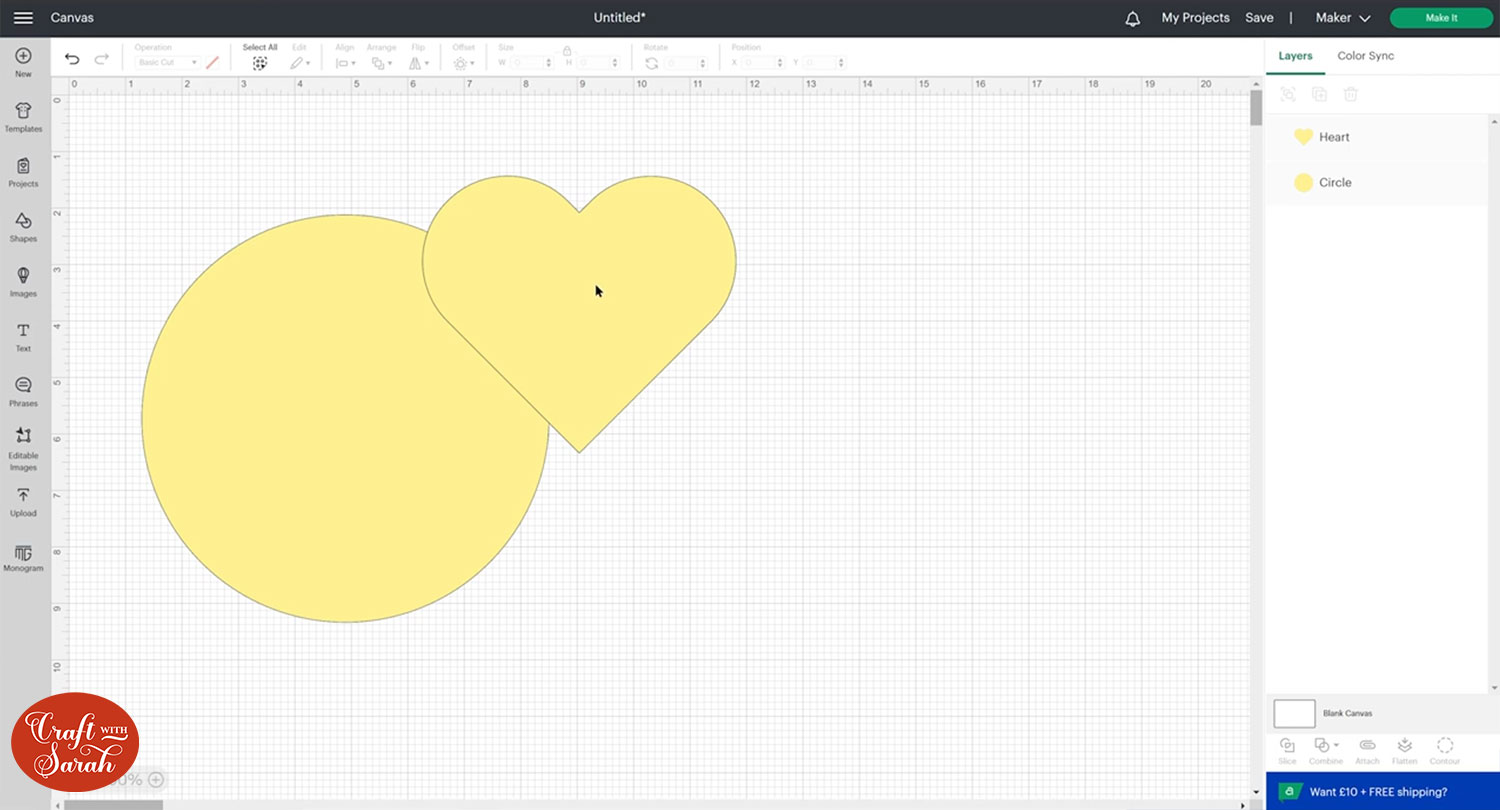
If you want to separate them at any point, click on it, go into Combine and then Undo Unite.
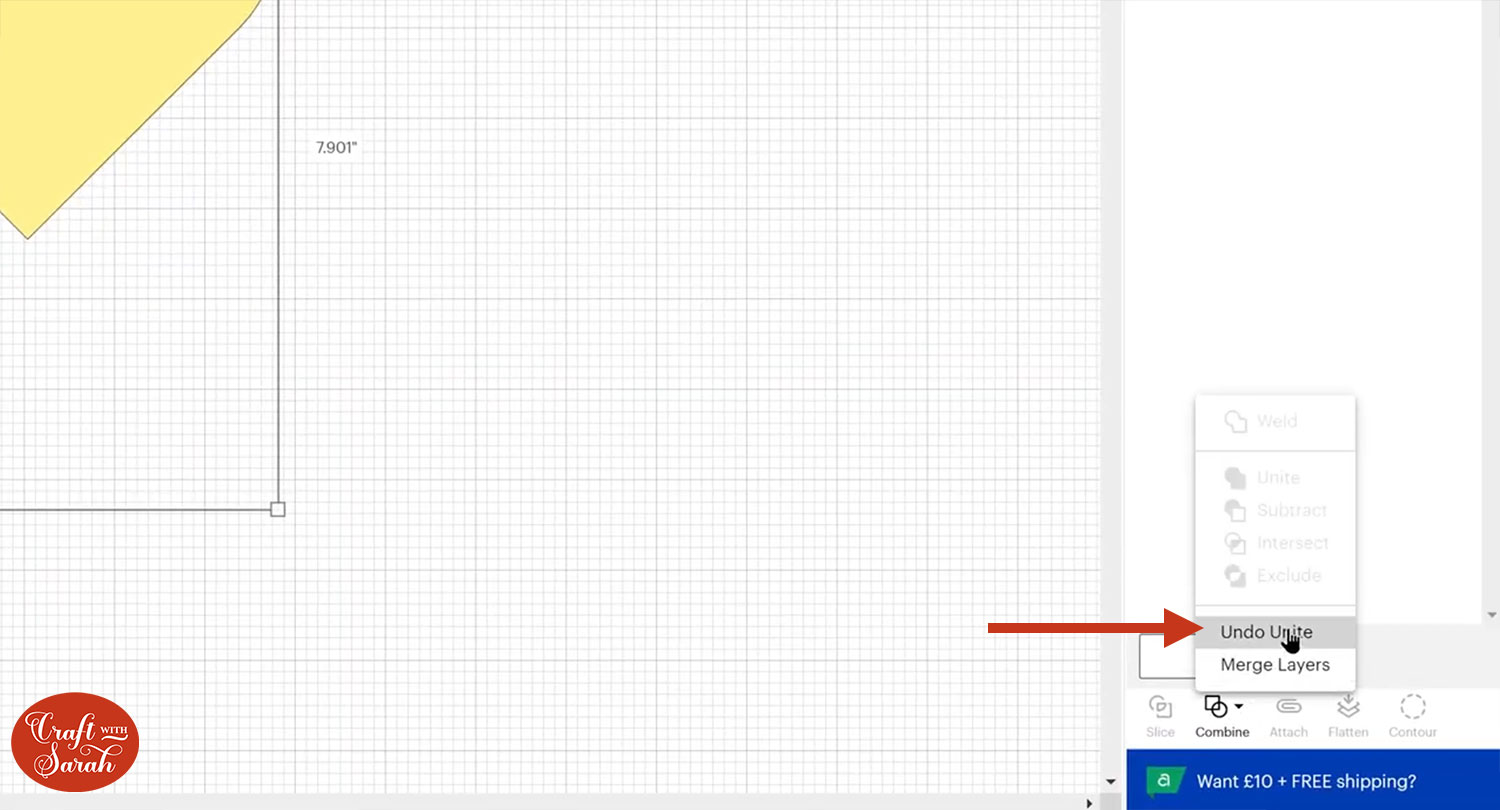
One thing to bear in mind is that if you undo the unite, it does keep everything the same color so you don’t retain your original colors which is why the heart hasn’t gone back to red, but now you can see they’re two completely separate layers again.
2) Subtract
This time, I’ll select my heart and circle and click into Unite and then press Subtract.
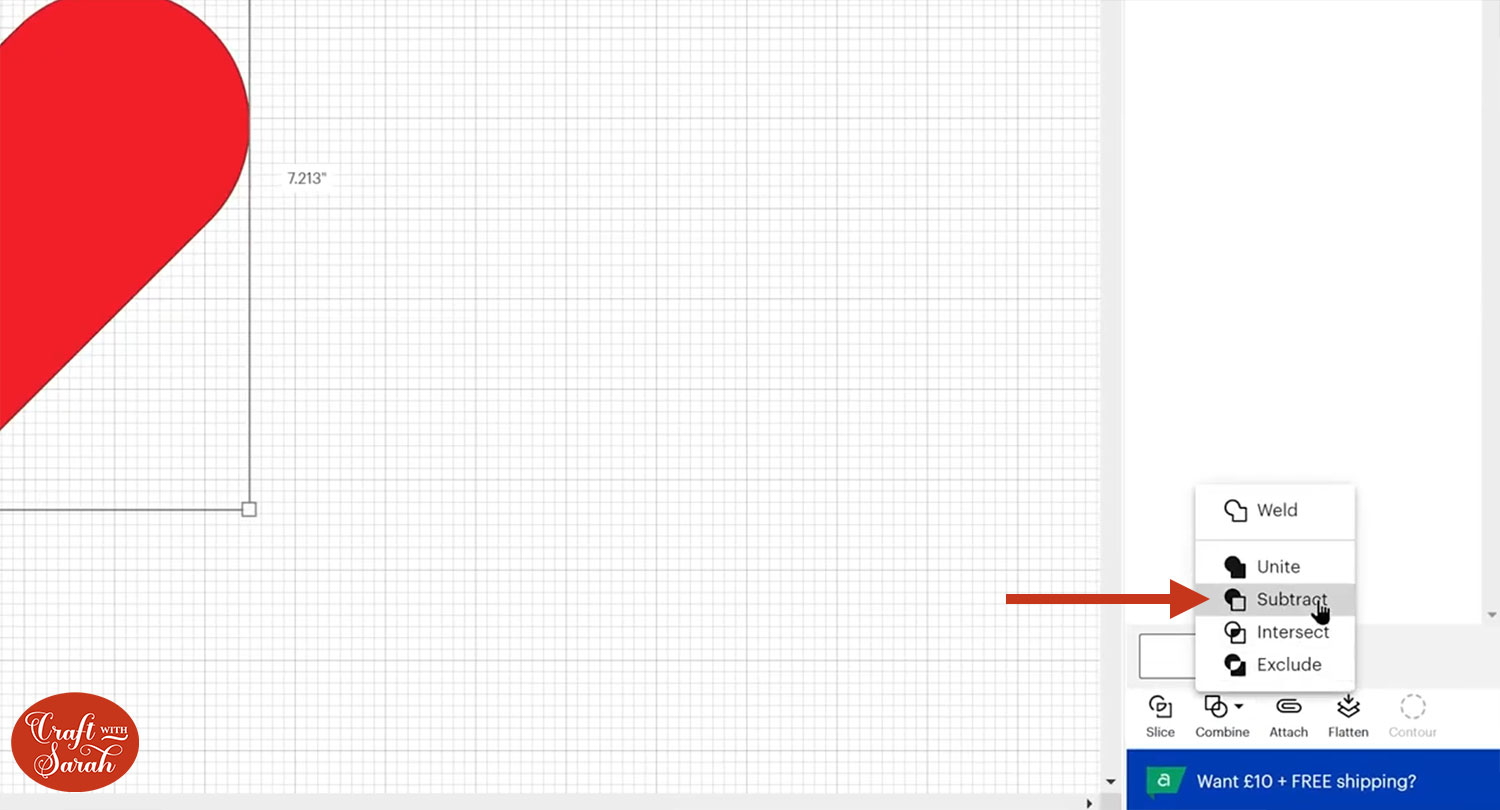
This will take the heart out of the circle.
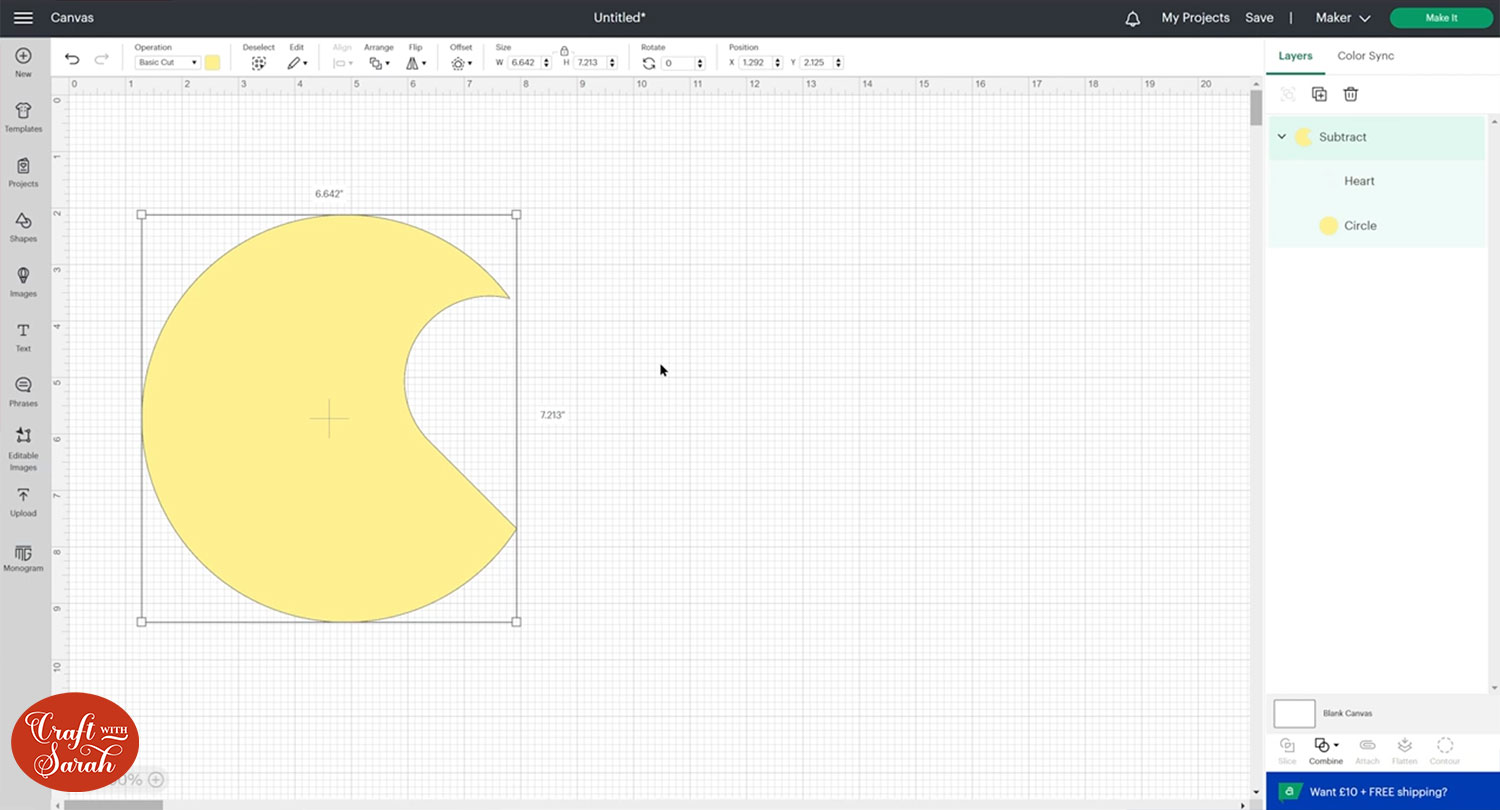
It works similar to the Slice feature that I showed earlier in this post, however with Subtract you don’t get the slice results layers left behind that you then have to delete and also it is less permanent than Slice.
If you Sliced something out and didn’t like how it looked you’d have to undo your slice using the undo button up here and then move your layers about, re-slice it and hope that was what you wanted, whereas with Subtract you can click on the layers in the layers panel, move them about and then when you let go with the mouse it does that Subtract again.
For example, I could click the heart layer and then move it to the middle of the circle.
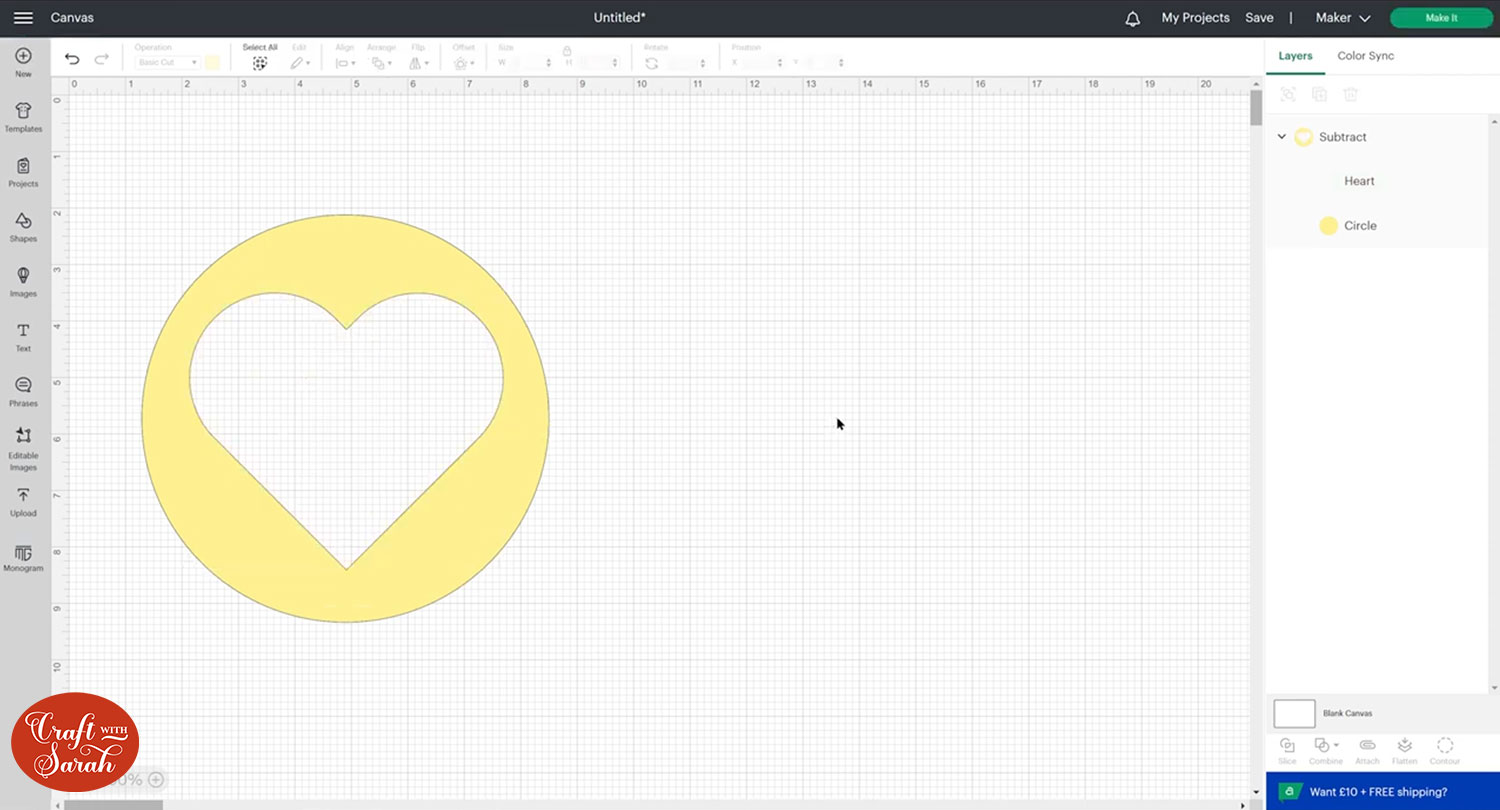
So just like how the Unite option was kind of the improved version of Weld, the Subtract is like the improved version of Slice.
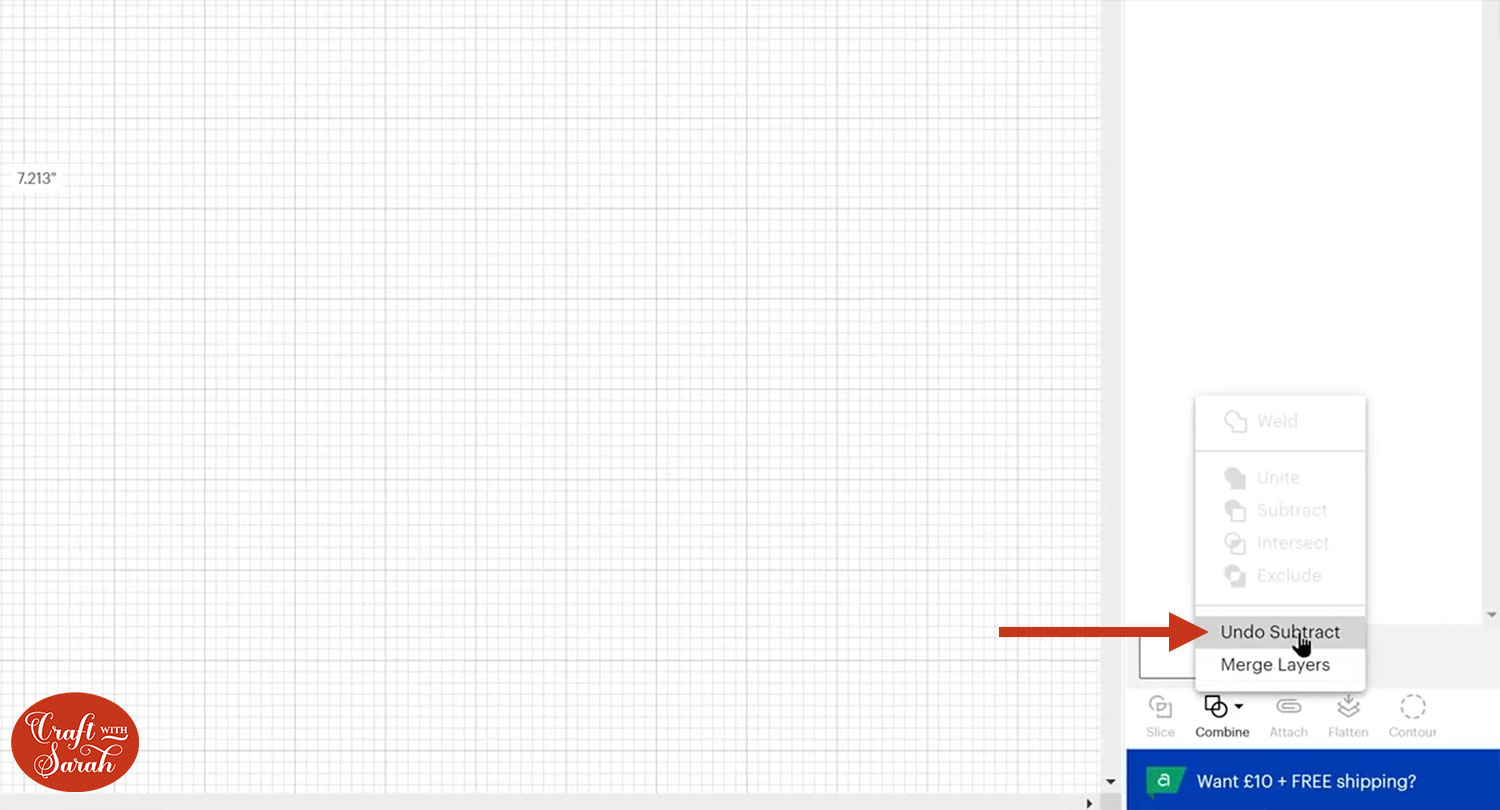
To undo it, just click it go into Combine and Undo Subtract and now our layers are separate again but remember you do lose that original color.
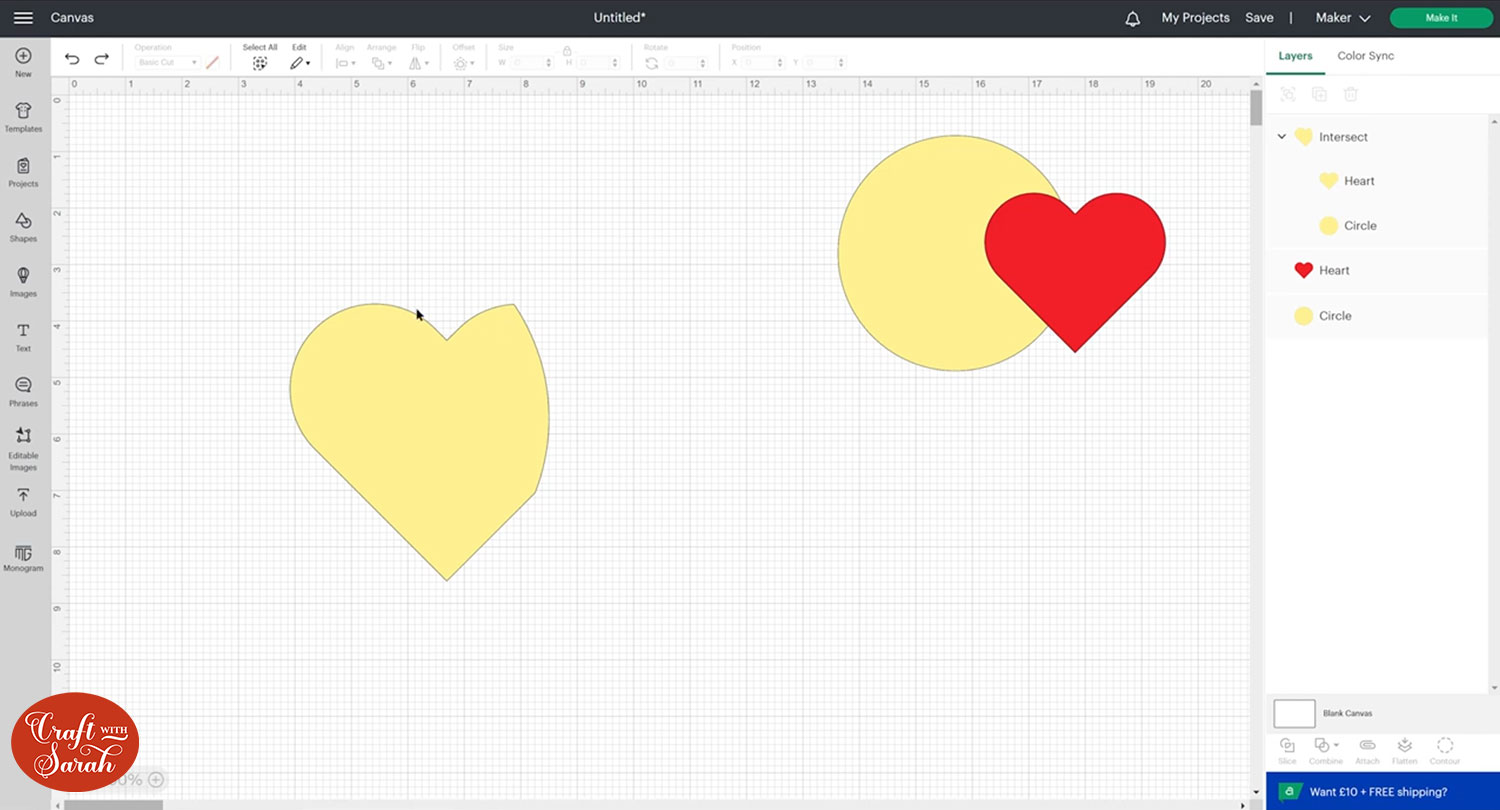
3) Intersect
Intersect lets you keep the shapes where your layers overlap.
Intersecting these two shapes:
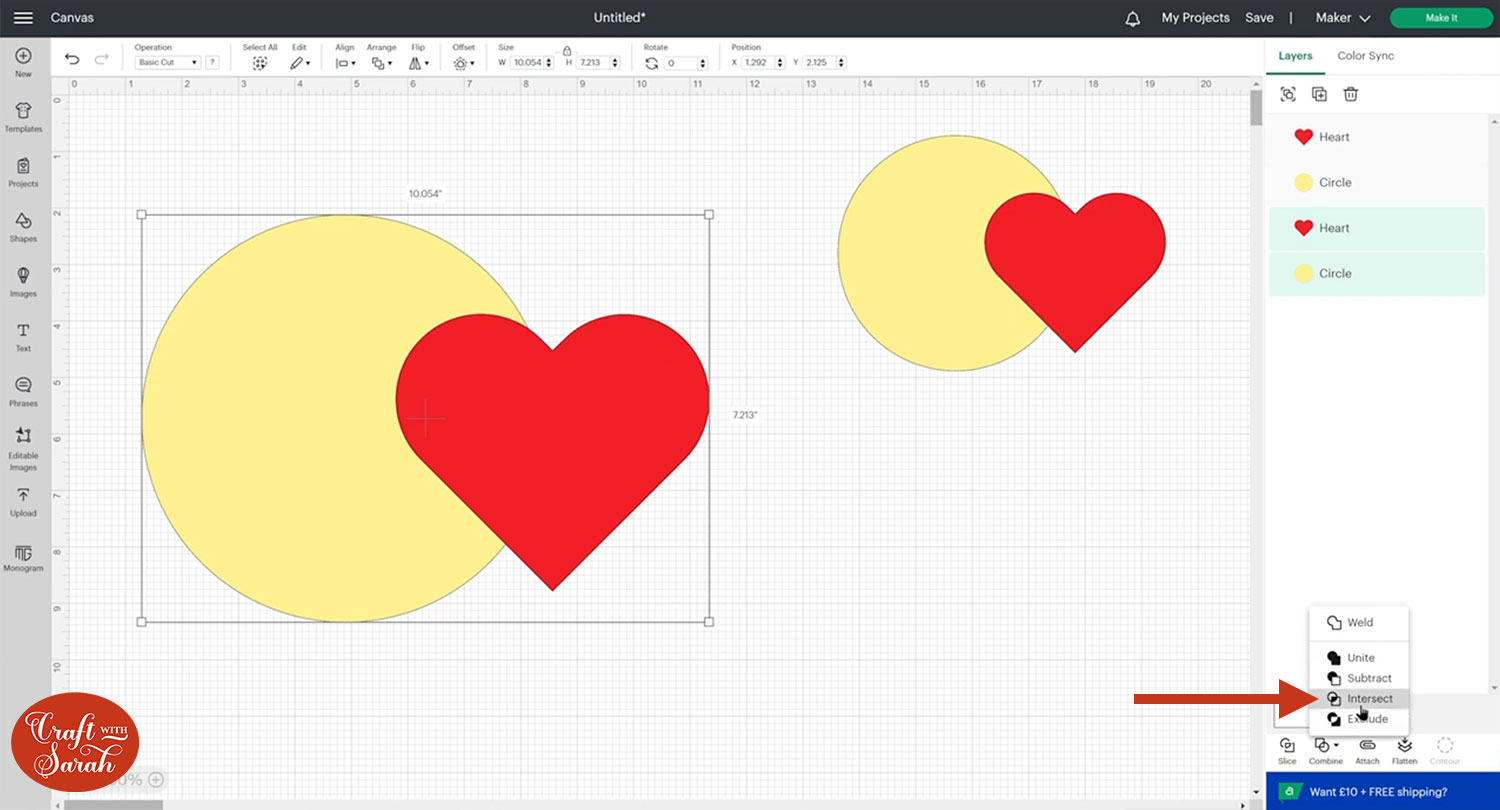
Gives me this:
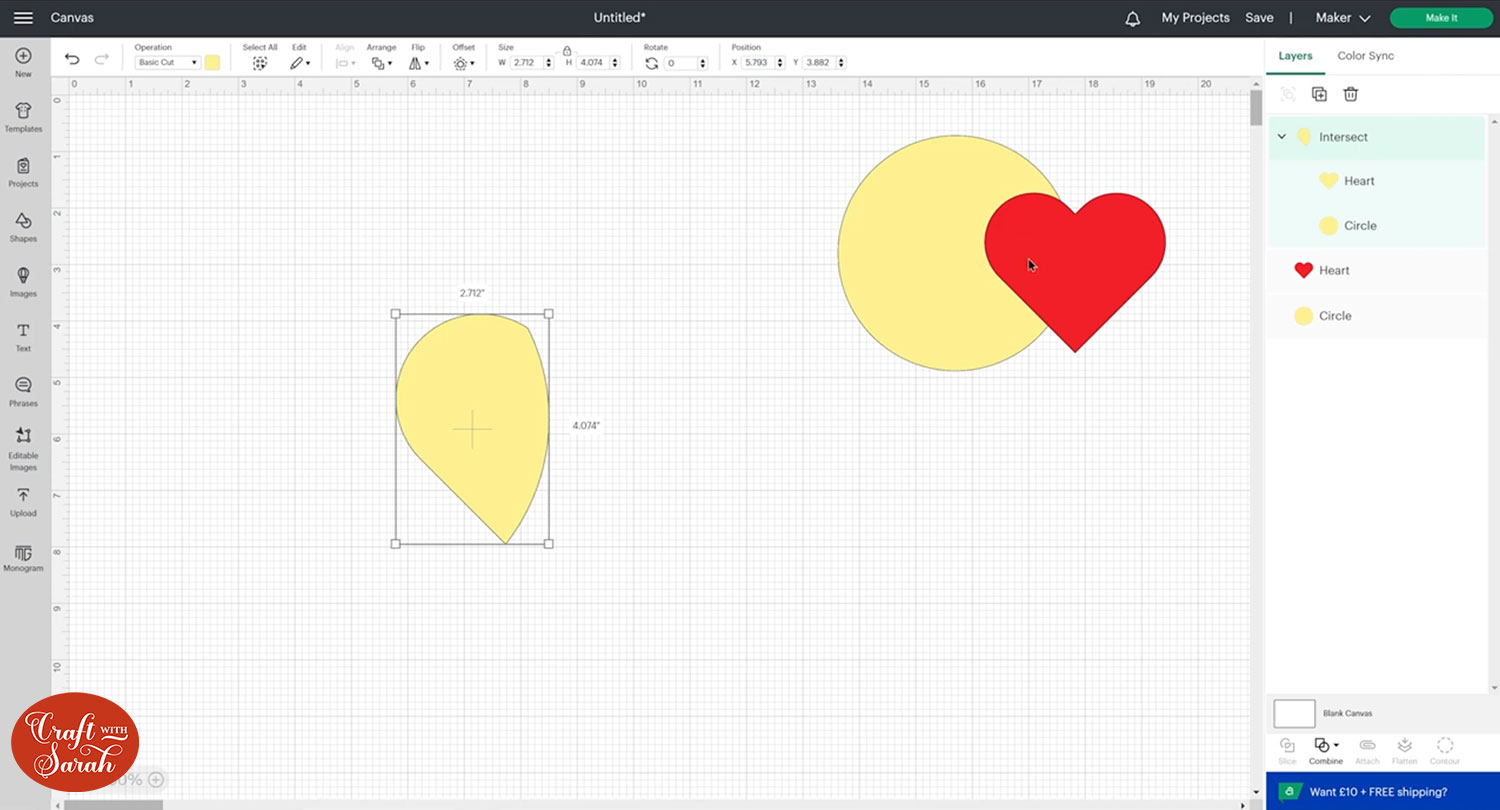
As with the other Unite tools, you can move the layers about to re-position how they look.
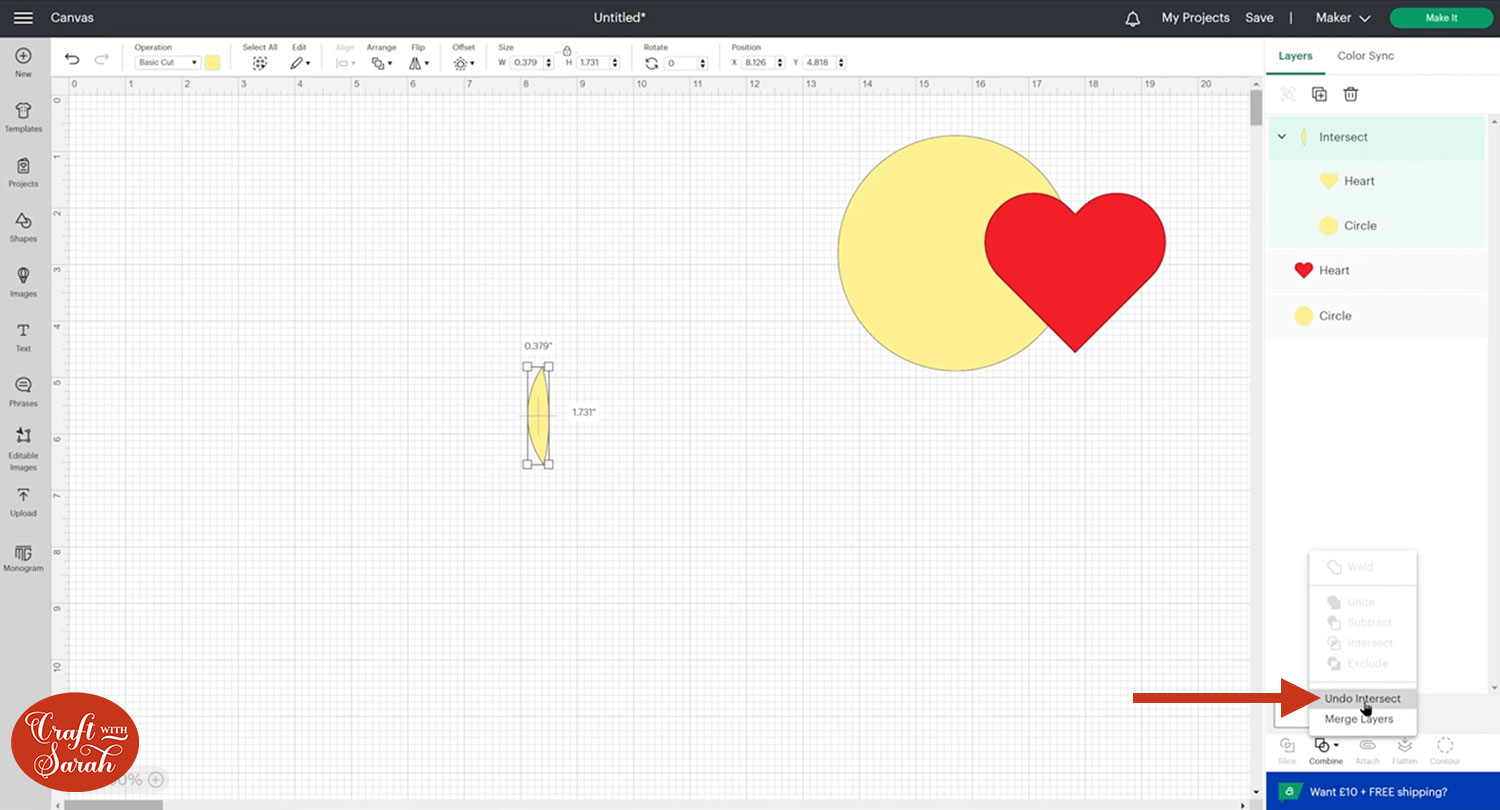
As with Unite and Subtract, you can undo the Intersect by clicking back into Combine and then Undo Intersect.
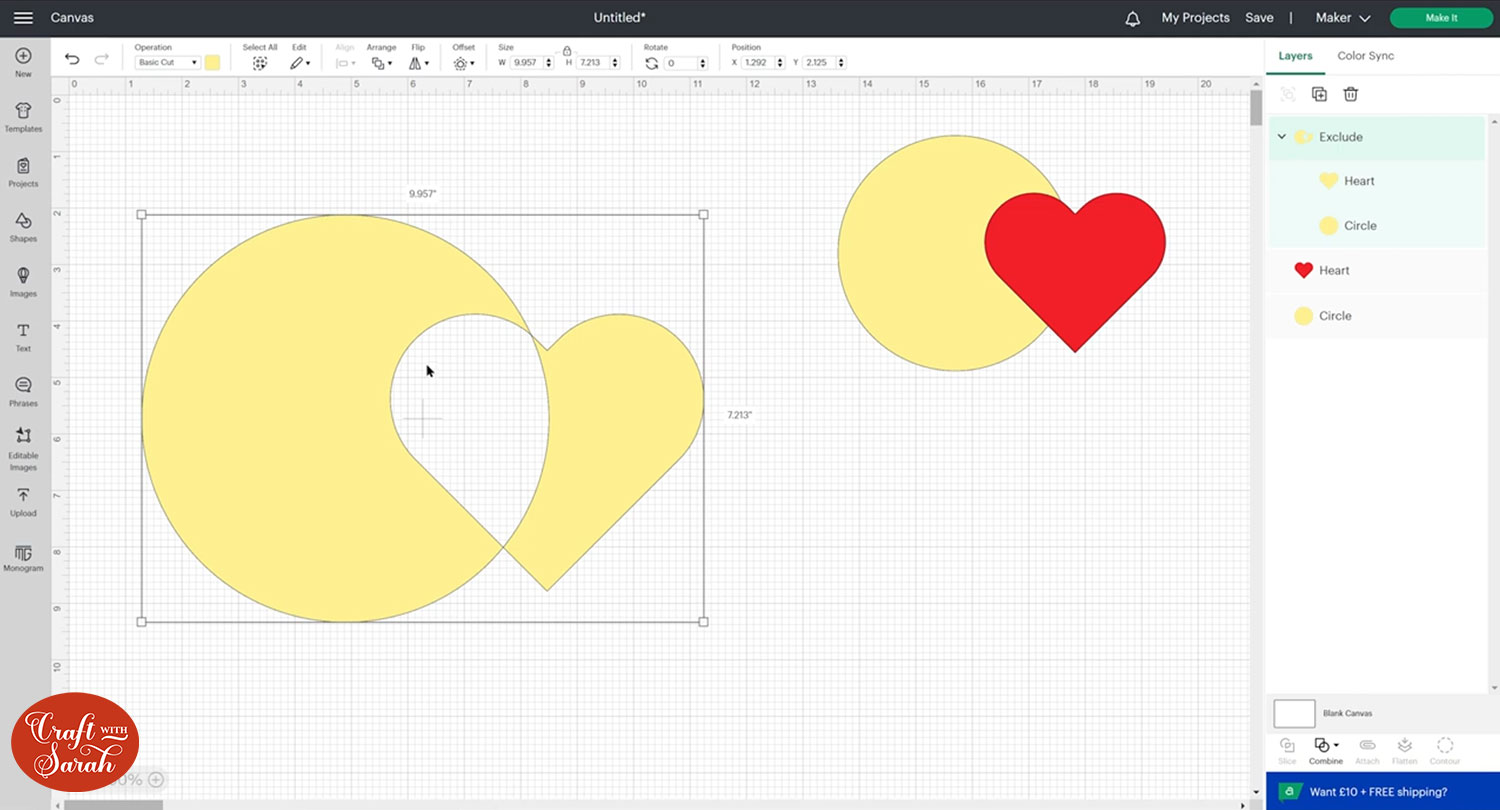
4) Exclude
Exclude is the opposite side of Intersect.
Intersect only keeps where the layers are overlapping, but Exclude REMOVES any overlapping elements.
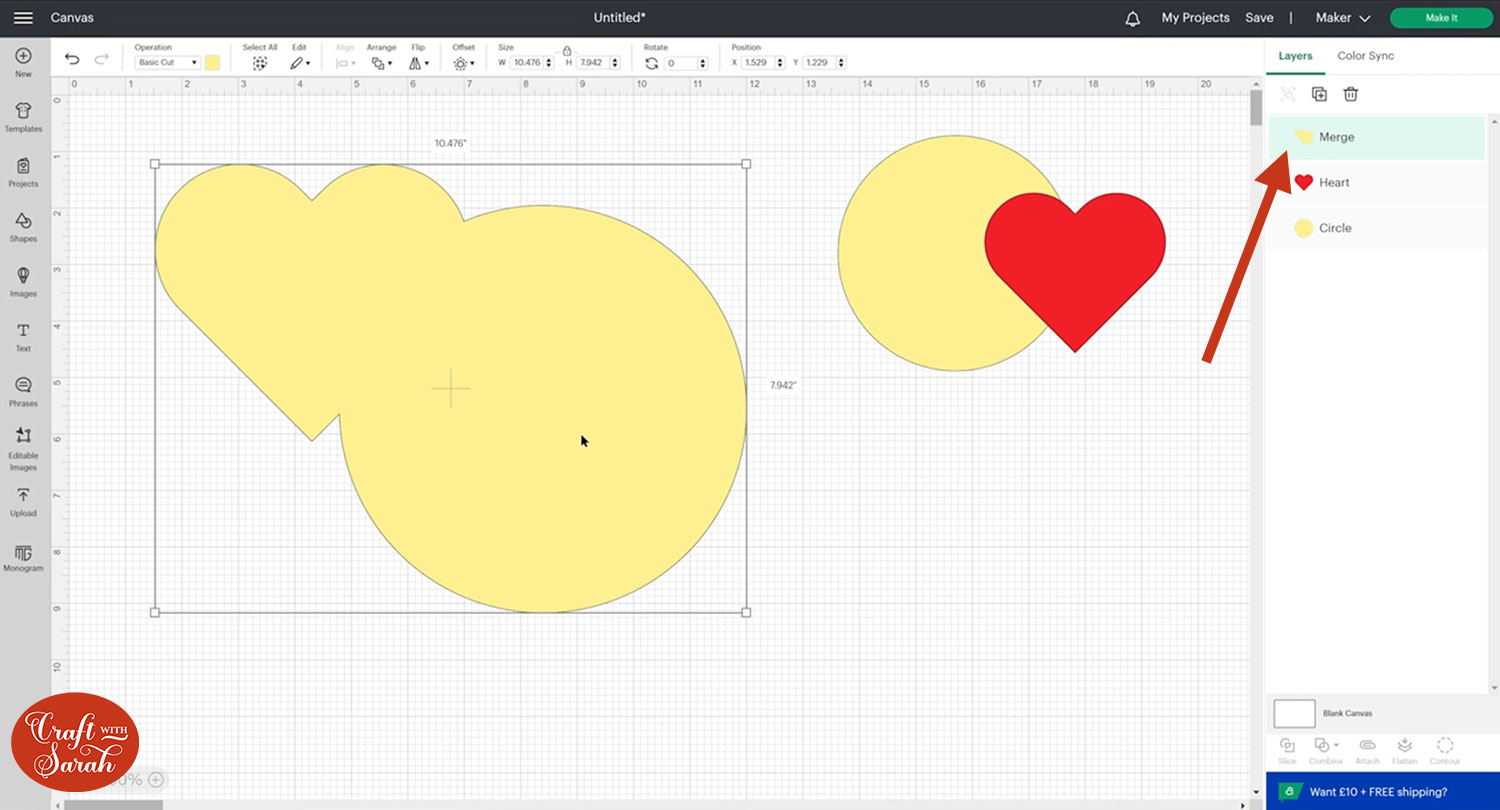
Making Combinations permanent
If you want to make your Combined layers permanently altered, click onto the layers and then go to Combine and Merge Layers.
This permanently changes them to one layer (just like Weld) so you can no longer move the layers about within the Combination.

Merging layers is useful when you want to make additional changes to the design, such as using the Contour tool to remove small gaps/cutouts in the image.
Other Design Space tools: Attach, Flatten and Contour
Attach, Flatten and Contour have always been present in Design Space for at least as long as I’ve been using it, so these are not new and they still work exactly the same way but let’s just have a little quick overview of them just in case you haven’t seen them before.
Attach tool
Attach tells the Cricut that we want to cut layers (or score them, or draw them) in a particular position.
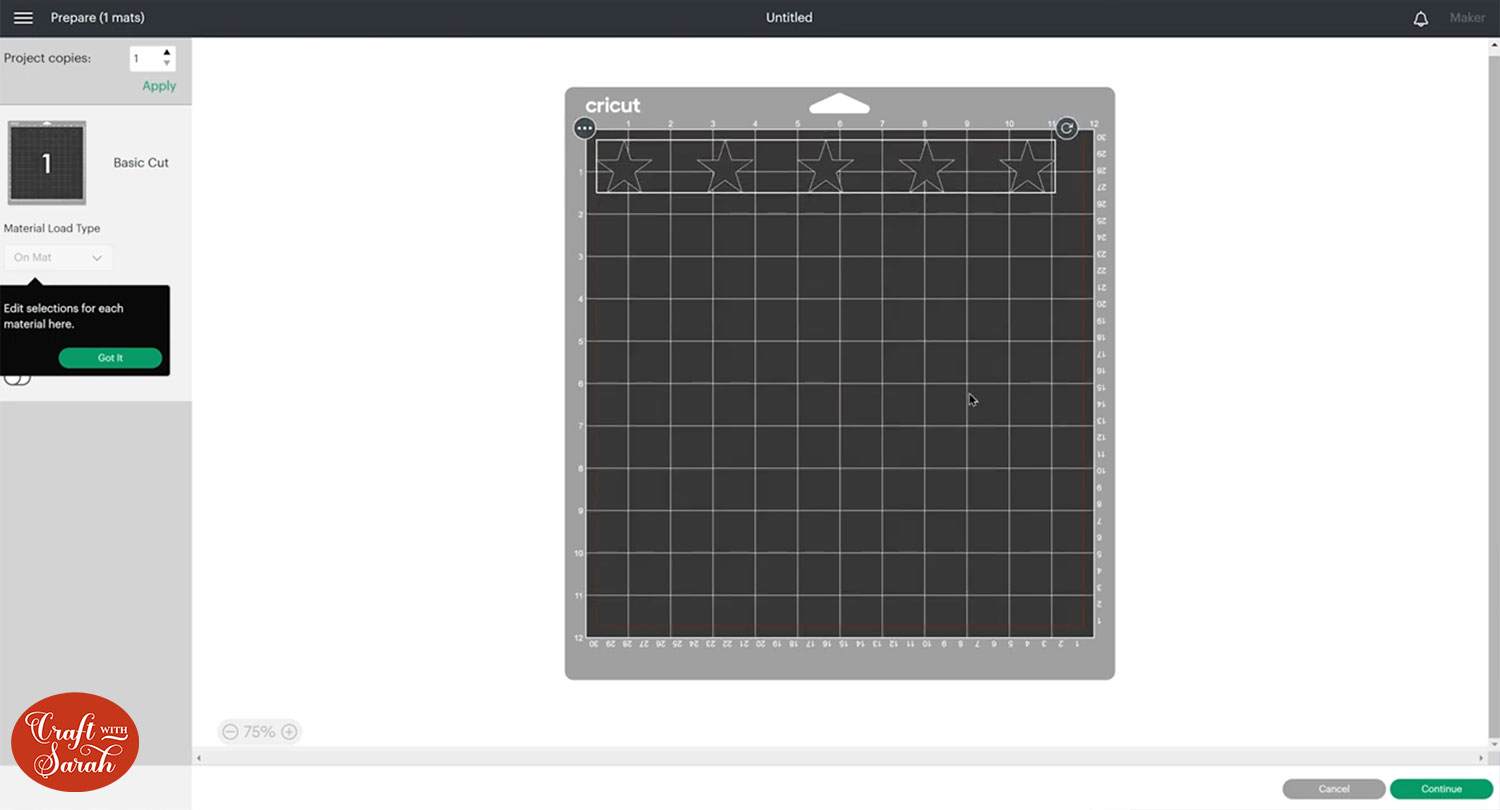
For example, let’s say I have these star shapes which I’ve positioned exactly how I want them cut:
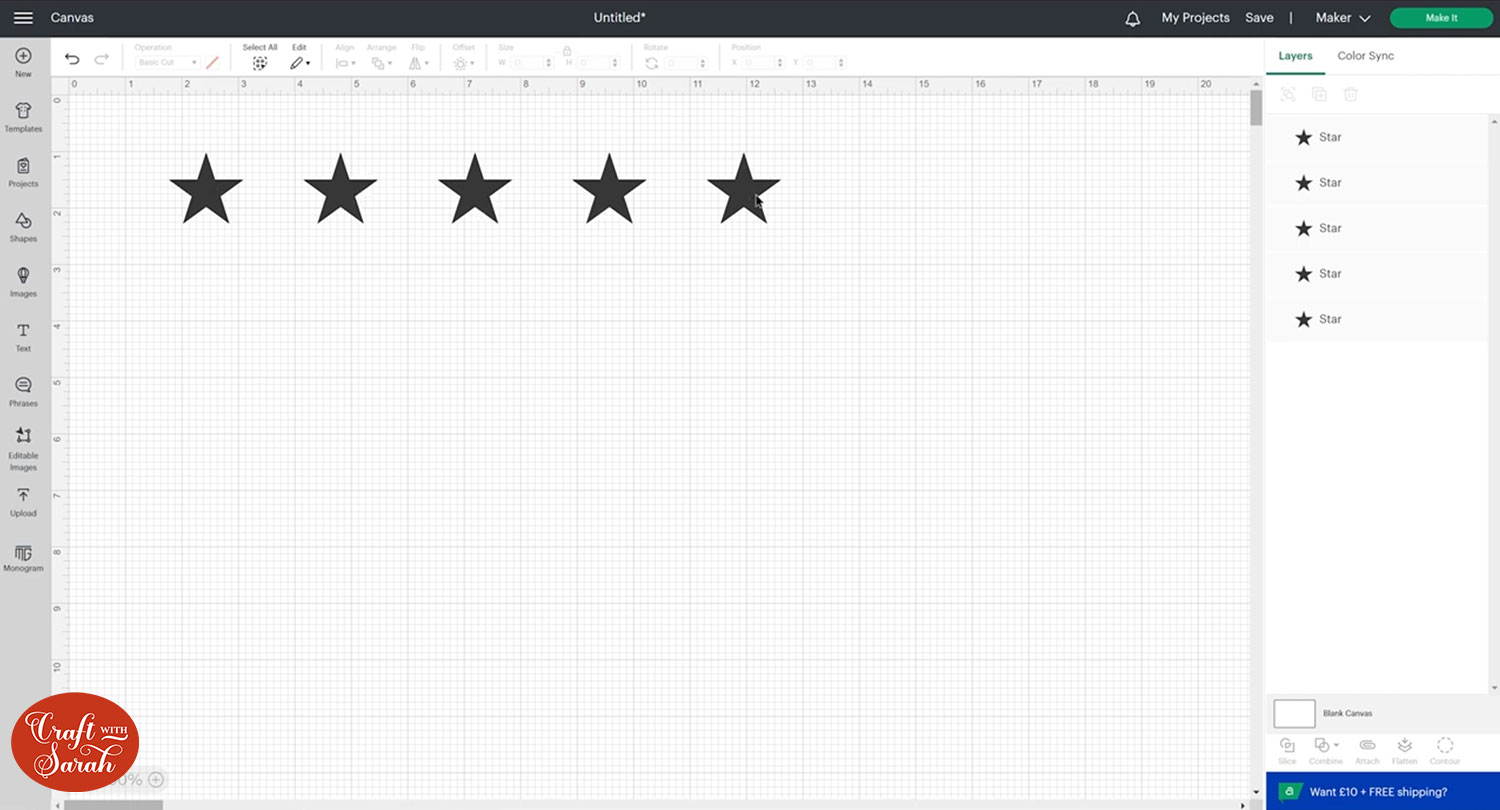
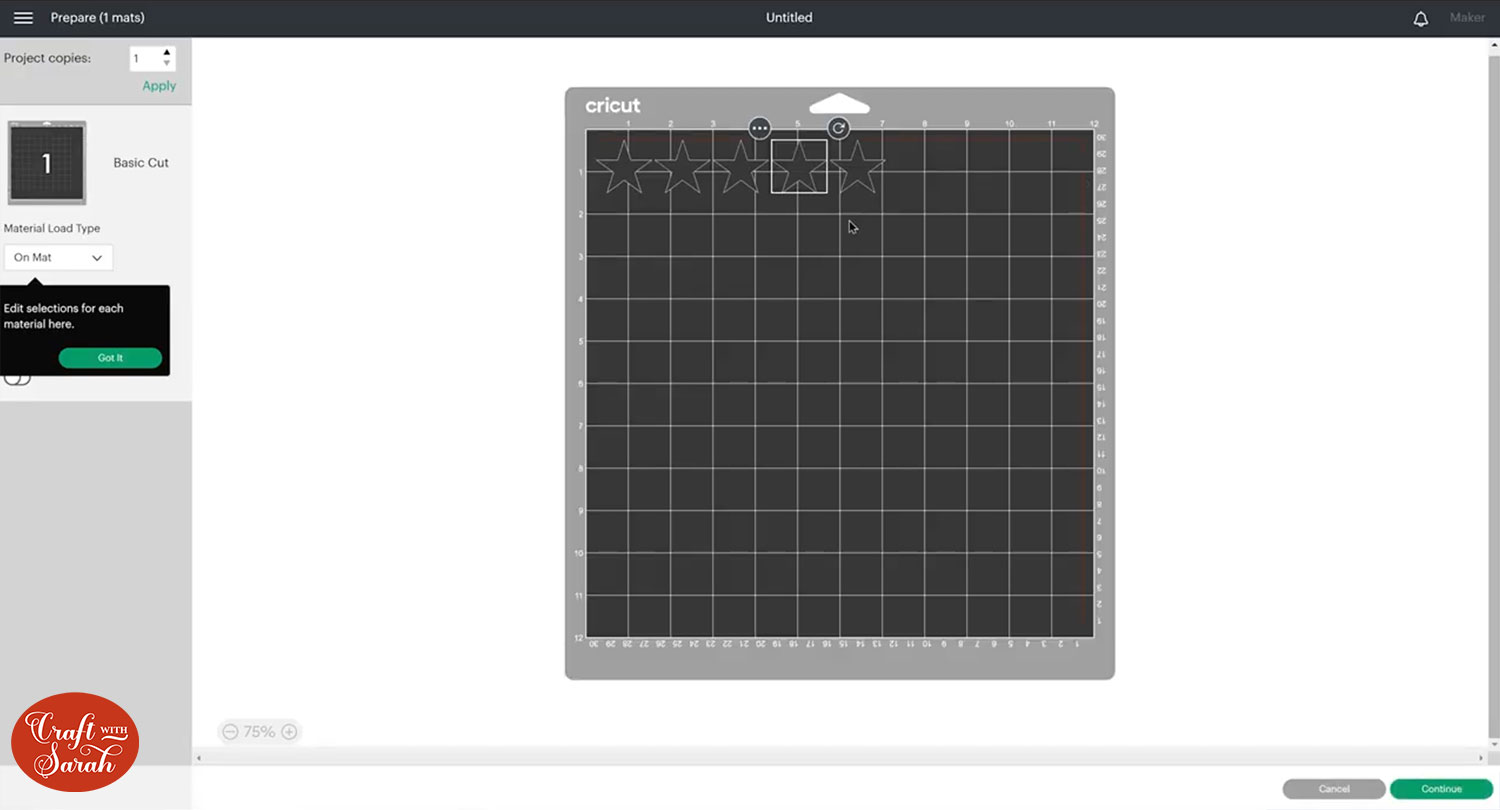
If I was to click “Make It”, Design Space will re-position them so that they are all next to each other.
To retain the desired positioning, select all the layers and then press “Attach”.
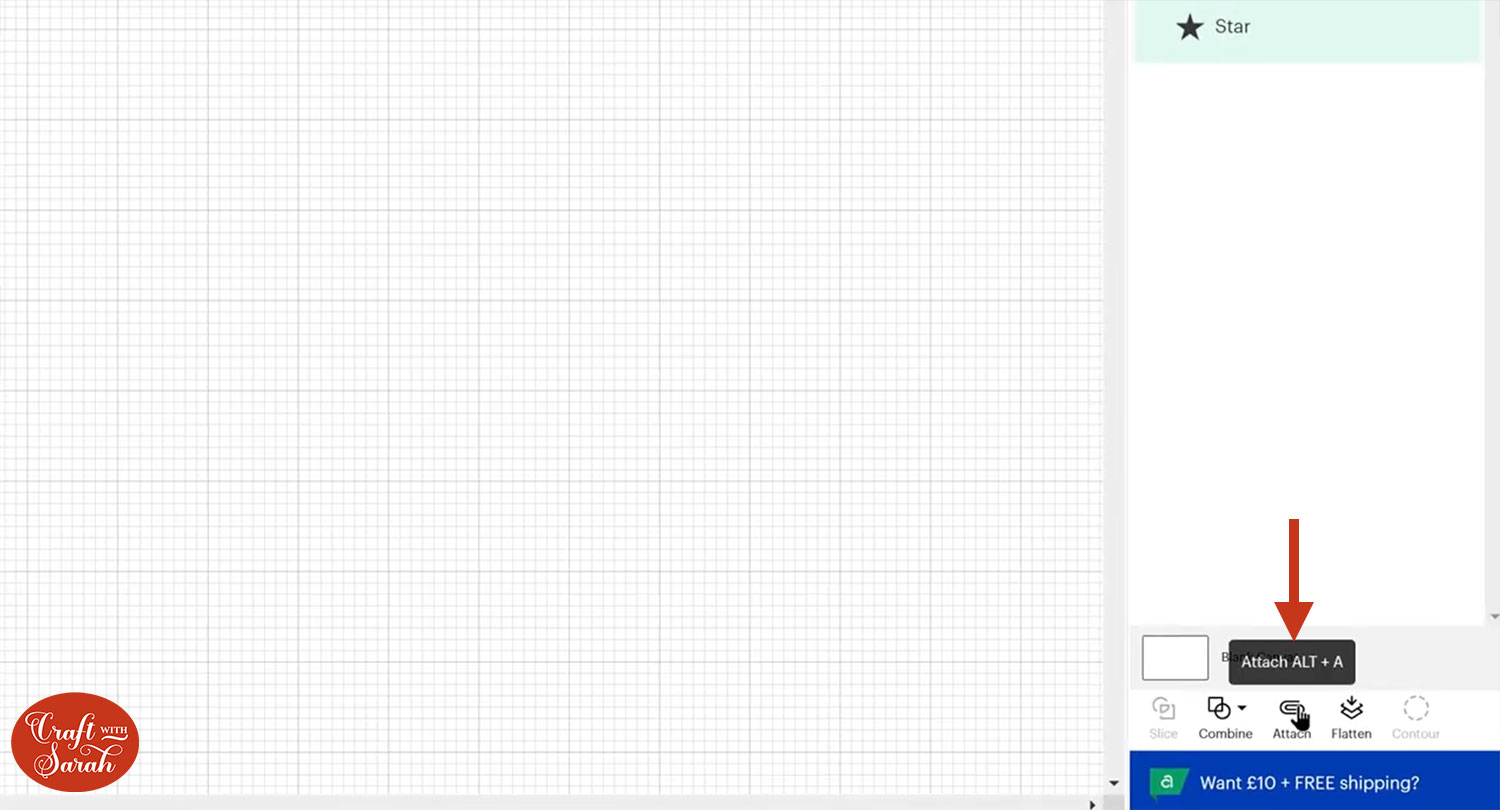
Now when “Make It” is clicked, the spacing is retained.
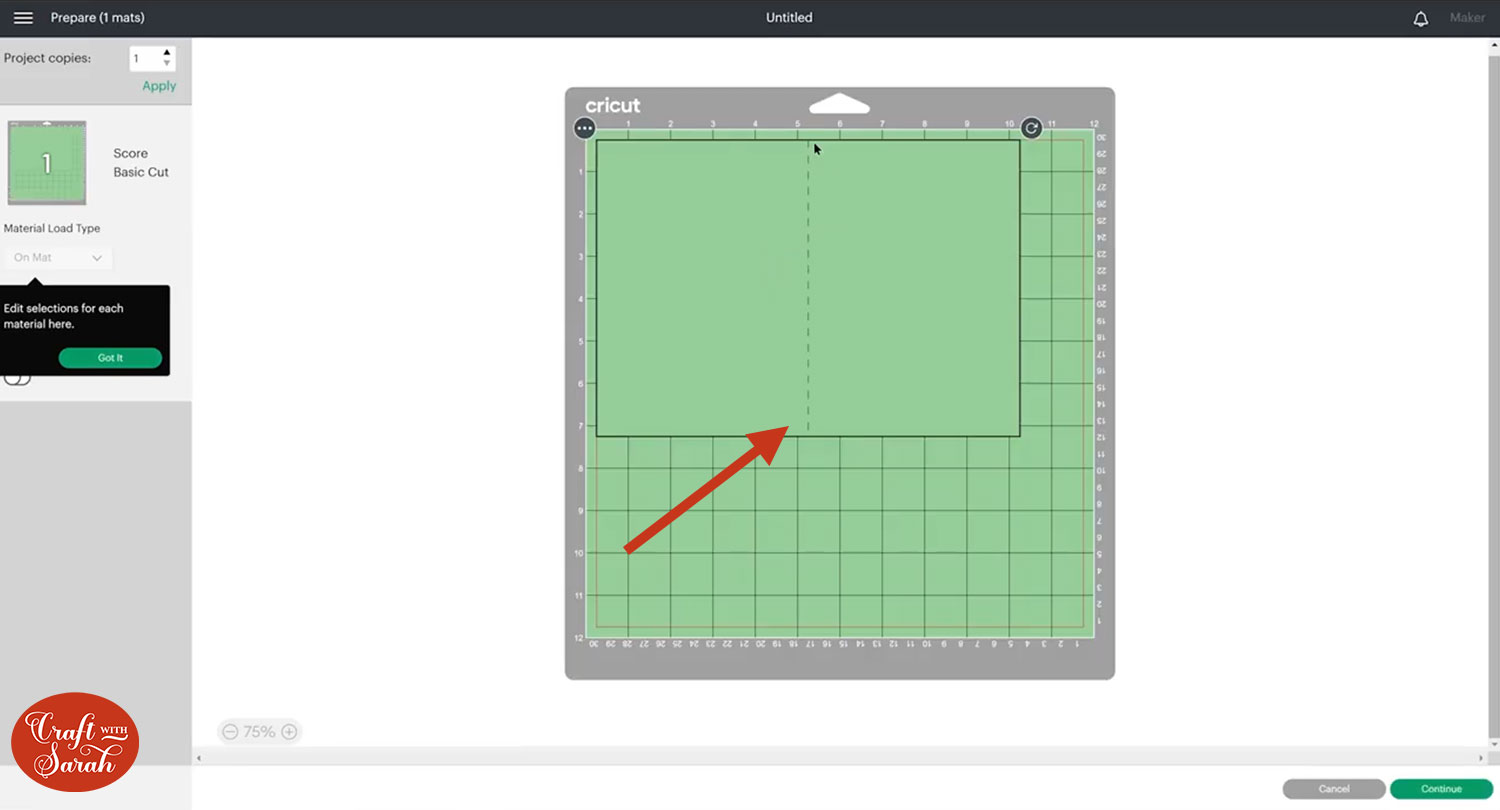
Attach is also what you need to use if you’re doing a score line or drawing with the pen tool.
Here I have a simple greetings card base with a score line down the middle so I know where to fold it:
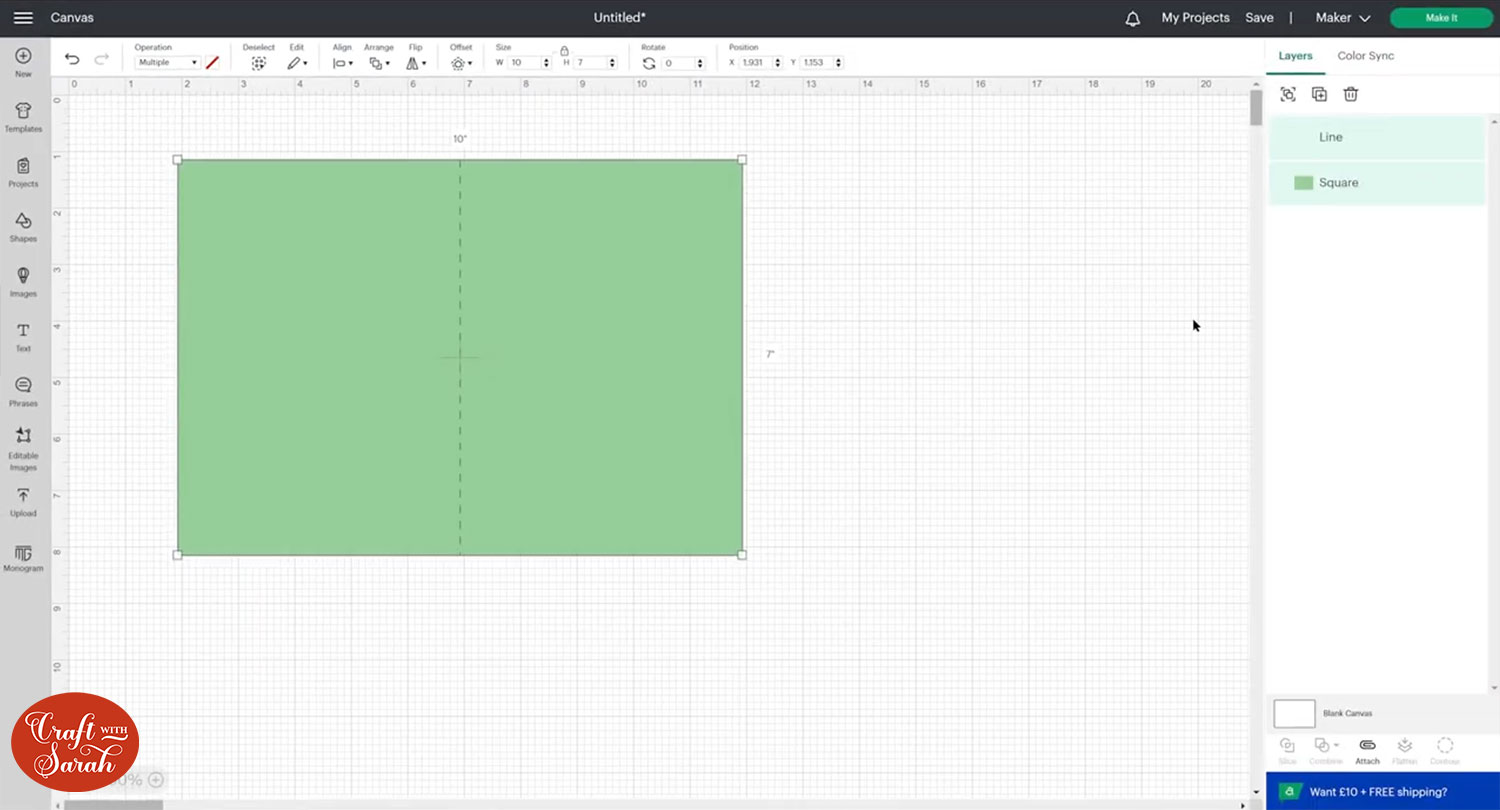
Without the layers being Attached, the score line will appear on a different piece of card after clicking “Make It”.
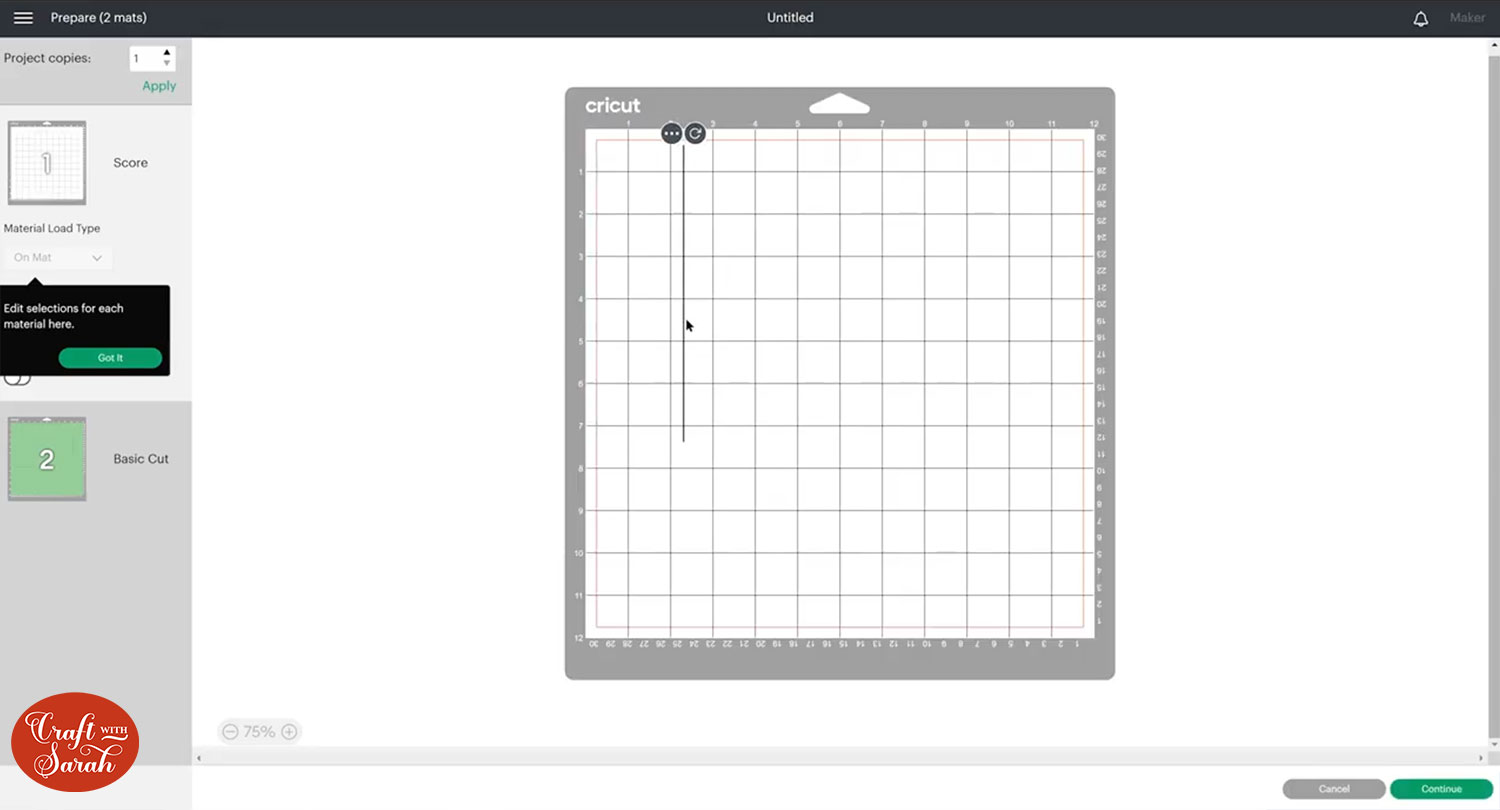
When the layers ARE Attached, the score line appears in the correct place on the rectangle.
Flatten tool
Flatten is only needed if you want to do a print then cut which is where you print a design on your home printer and then the Cricut would cut around the edge.
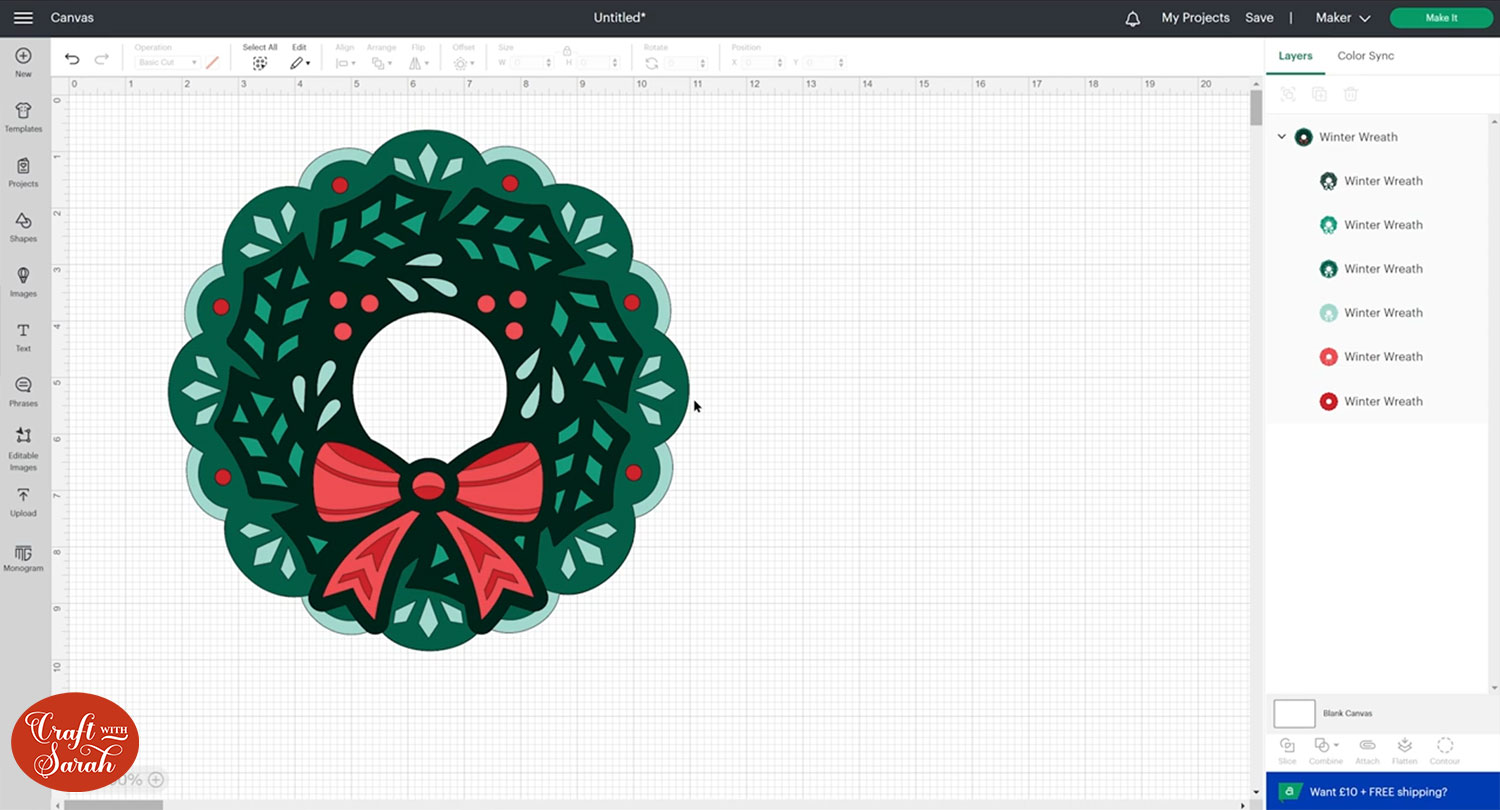
For example, on this wreath design, you can see at the moment it’s lots of different layers because it’s designed to be cut from cardstock or vinyl and then layered up together.
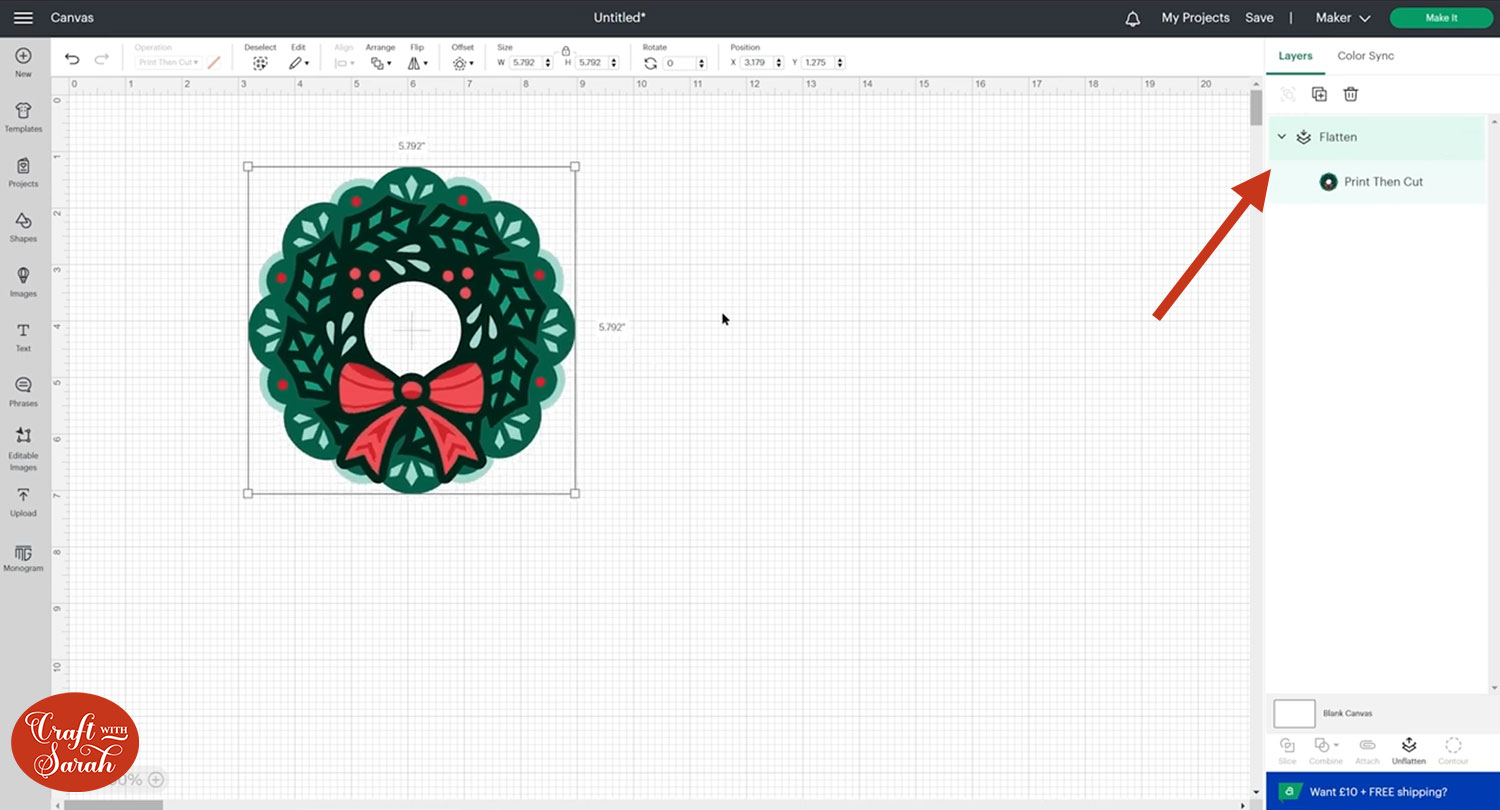
If you wanted to print it on your home printer, click the design and press Flatten.
Flatten merges it all into one layer, you lose all the little black cut lines around the edges and now this is just one piece which you could send to your printer.
If you get a little yellow warning triangle appear next to it in the layers panel, it means the image is too big to print then cut. Resize it to make it smaller until the triangle disappears.
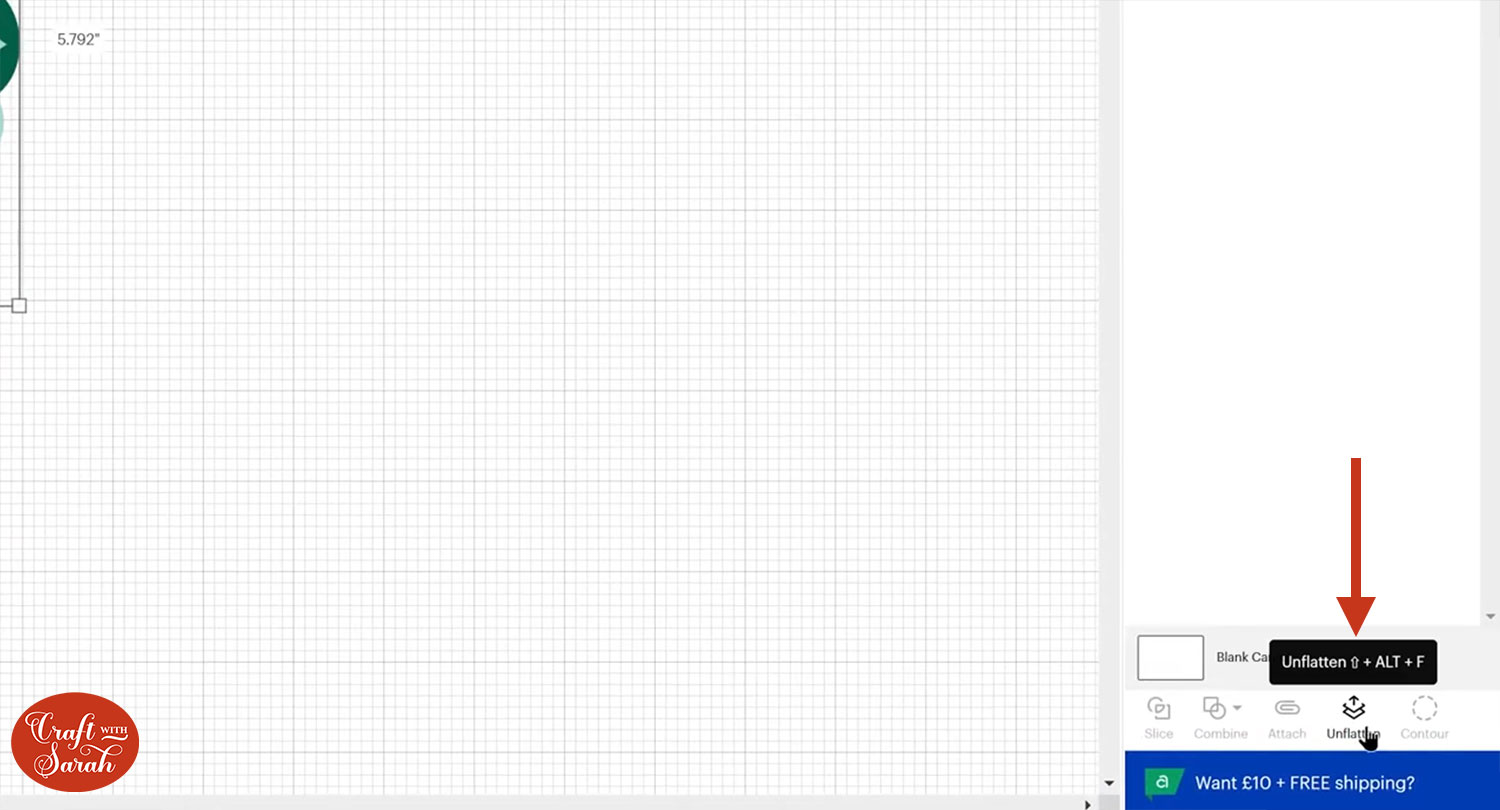
You can Unflatten by clicking the design and then pressing Unflatten and that will bring all your layers back.
Contour tool
Finally, we have the Contour button on the very right hand side. Contour lets you fill in gaps in a design.
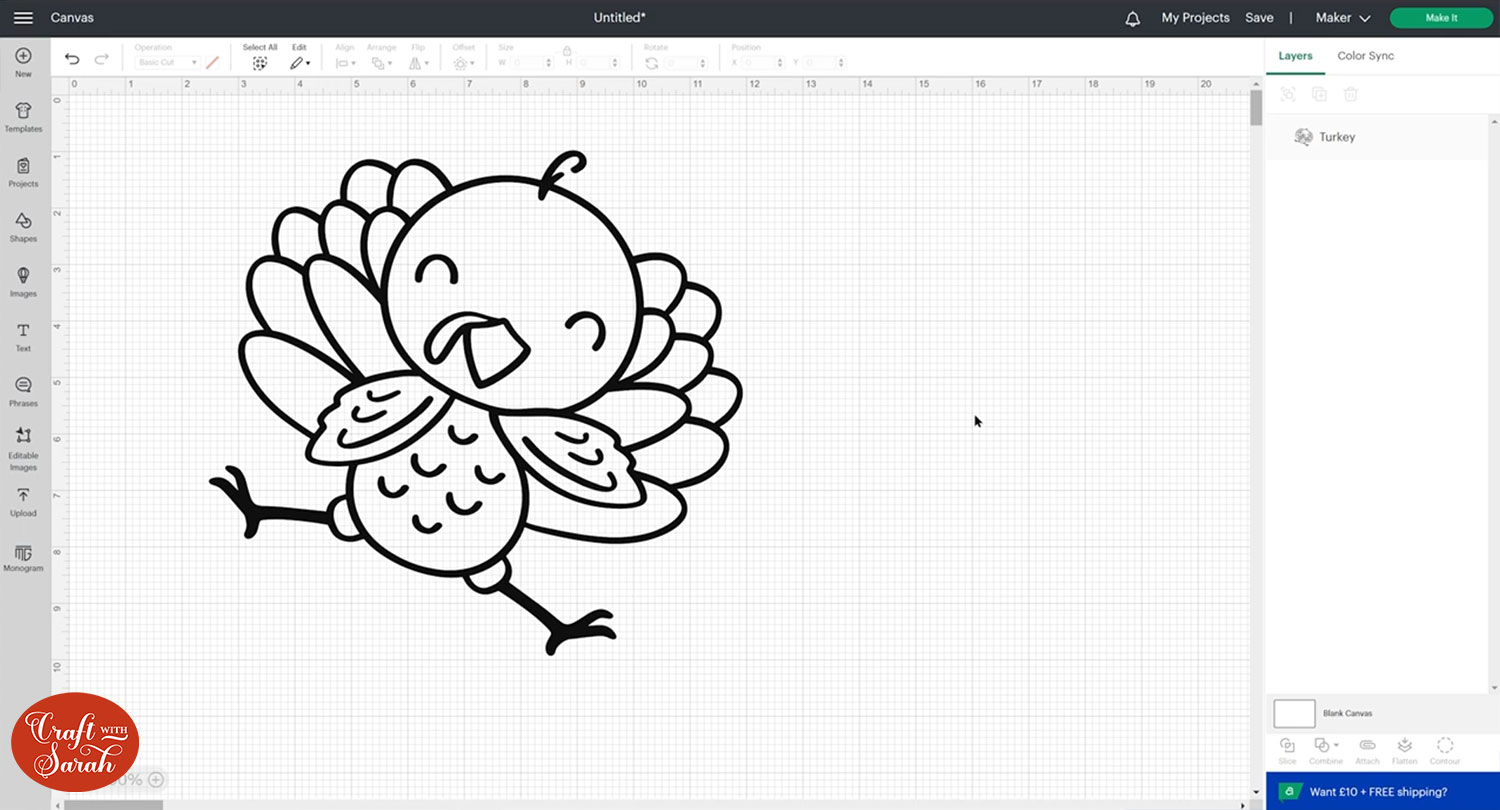
Let’s Contour this little turkey!
Click on the layer and press “Contour” to get a popup box that shows all of the cut lines.
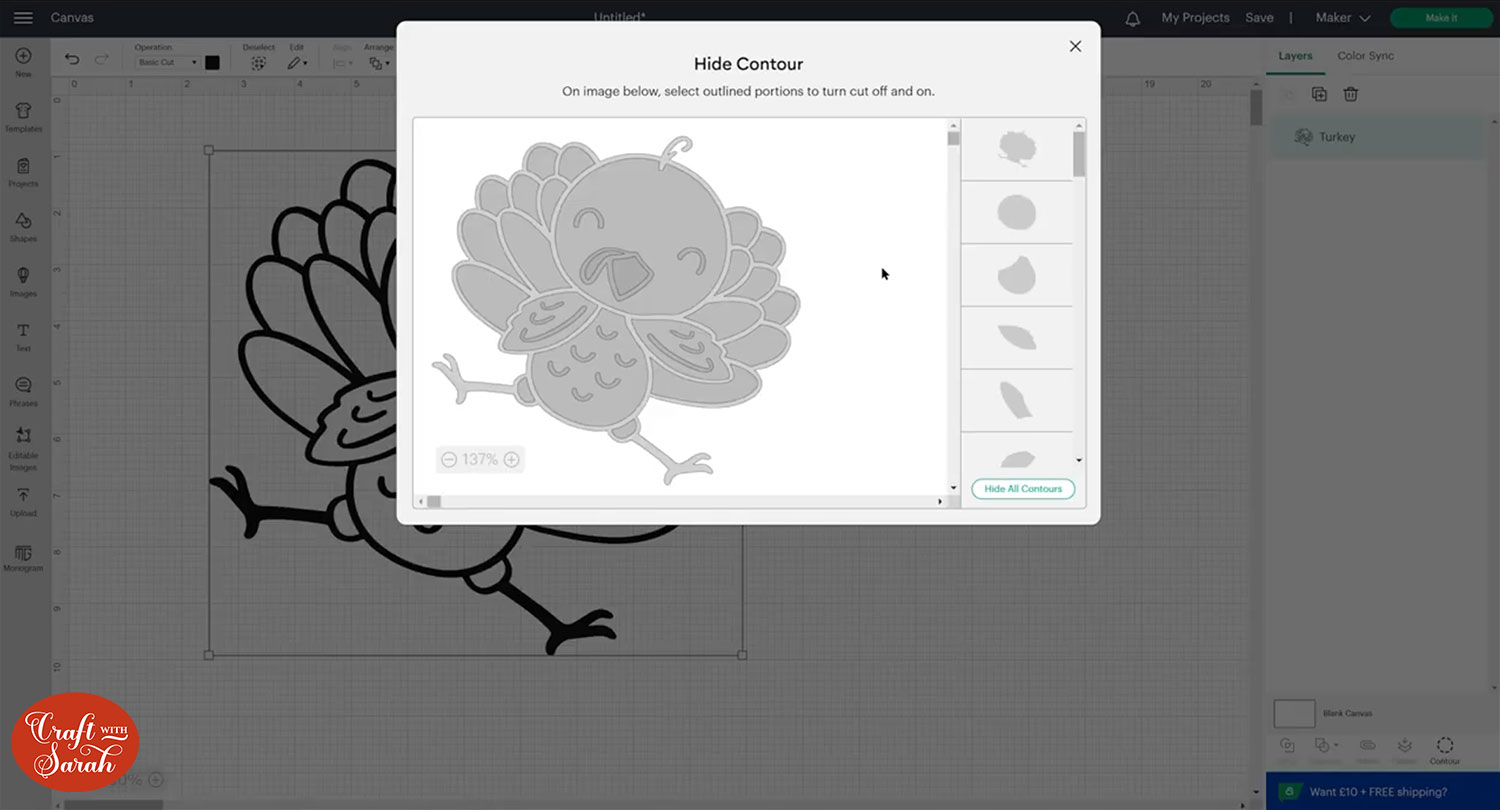
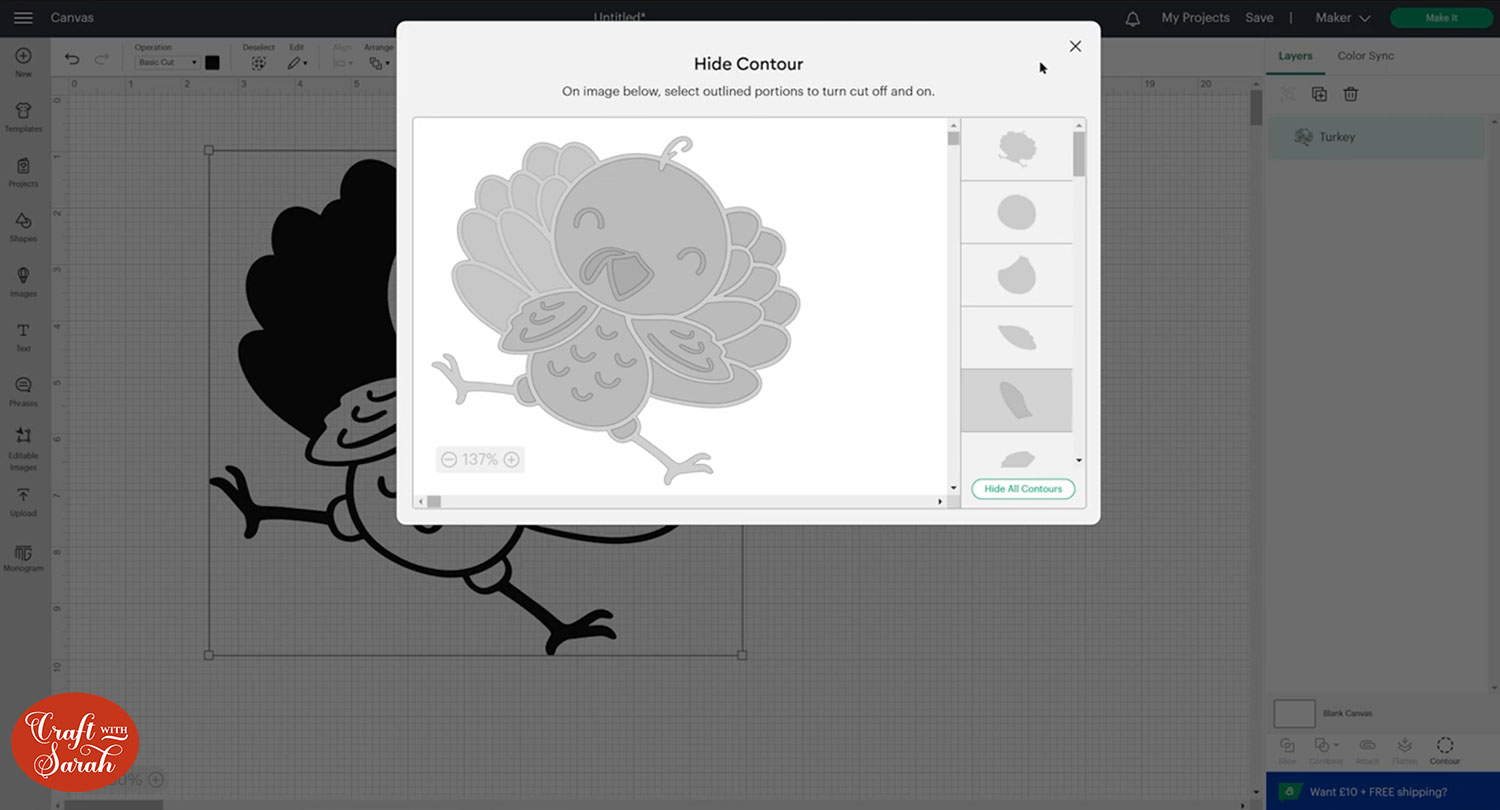
Click the picture of the cut lines to “fill them in” (or open them up if you click one that’s already filled).
Here, you can see I’ve clicked the feathers on the left side to hide the cut lines:
This is really helpful for when you’re creating your own designs in Design Space, particularly paper craft projects because it means if you end up with any teeny tiny gaps in your design that the Cricut might struggle to cut, you can fill them in with Contour.
You can also use Contour to make layered designs. There are so many things you can do with it. I love the Contour feature!
How to use Cricut Design Space Tools
So there we go, that was a quick overview of the key tools in Cricut Design Space and how to use them.
I hope that this tutorial has been helpful!
If you’d like to learn more about using Design Space, check out these other posts:
- The best way to frame papercraft projects
- Using Cricut pens in Design Space
- How to use Score Lines
- Background removal from photos
- Using pattern fill with digital papers
Happy crafting,
Sarah x

