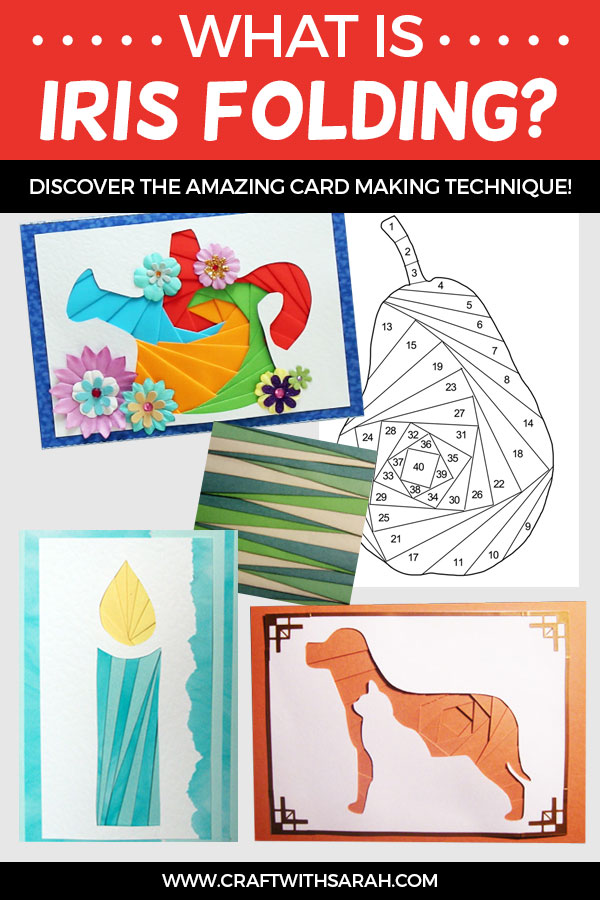
The Complete Guide to Iris Folding (+ Free Patterns!)
Iris Folding Ideas & Patterns
Have you tried making iris folding cards?
Iris folding is the paper folding technique taking the card making world by storm!
This fun paper folding technique produces beautiful handmade cards that look super-complicated and impressive... but only you will know how simple they actually are to make!
I've been crafting iris folding cards for over 15 years. Even today, it's still my favourite card making technique.
Find all you need to know to begin creating your own iris folded greetings cards on this page.
There are tutorials on how to iris folding with a Cricut and how to make iris folding cards by hand.
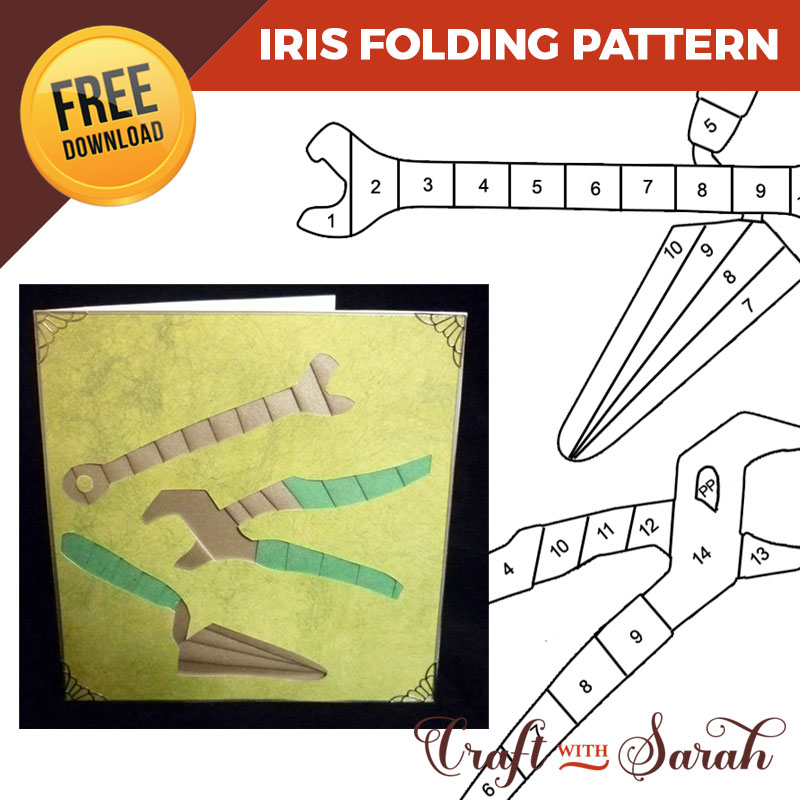
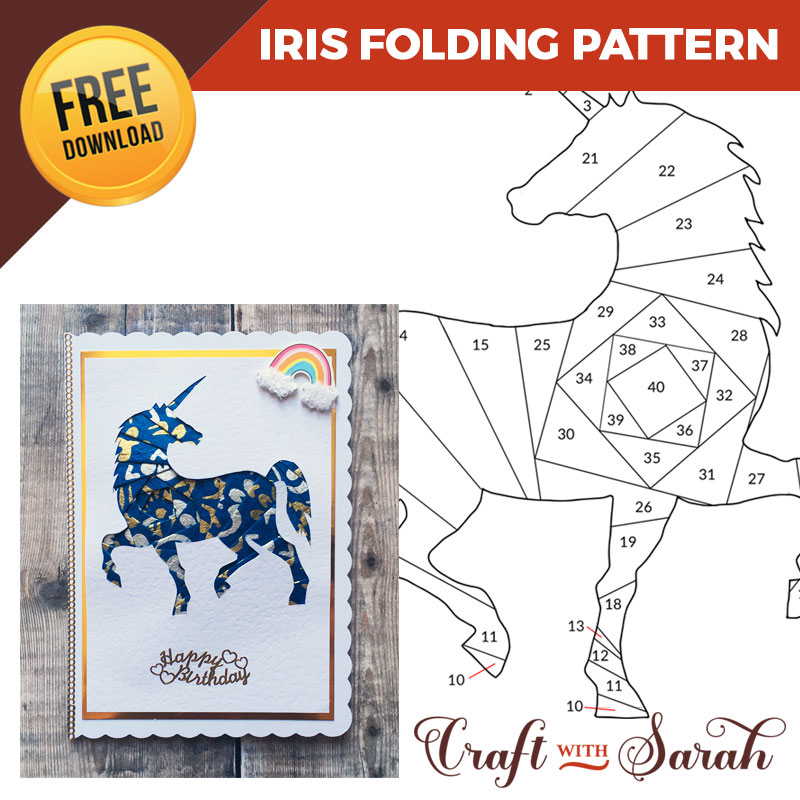
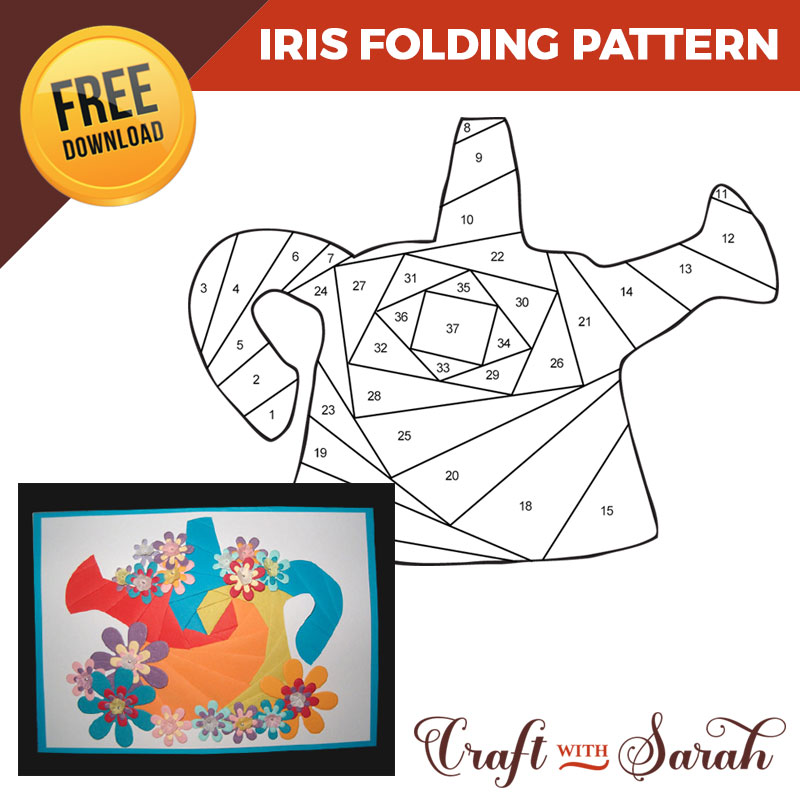
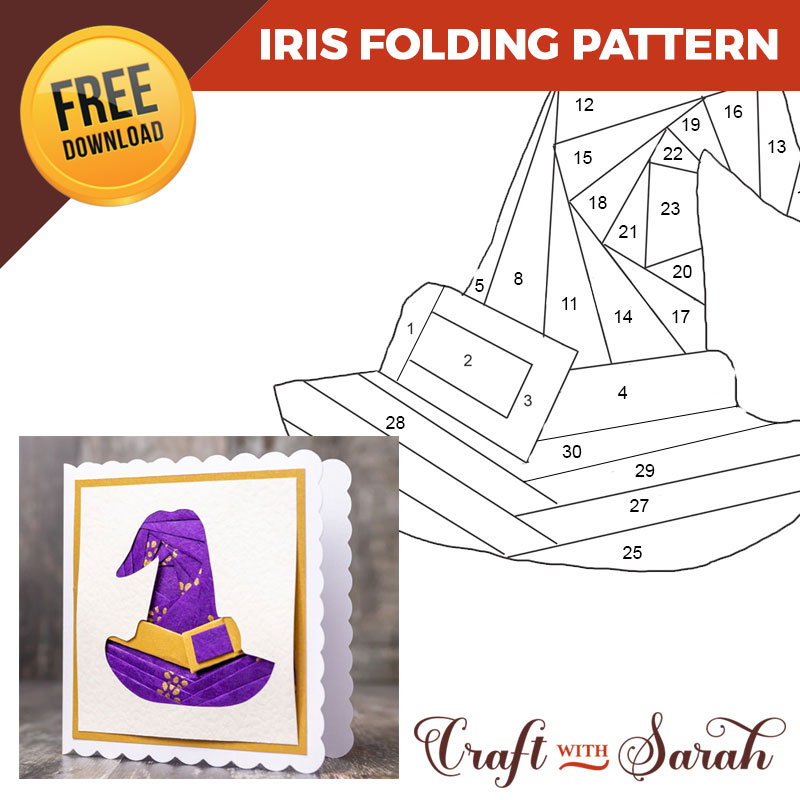
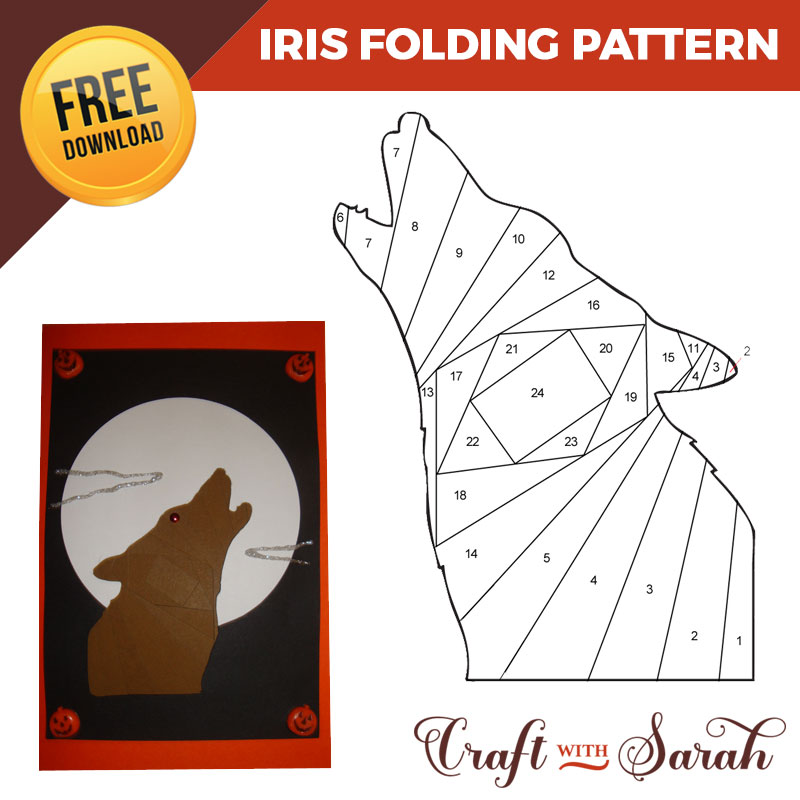
Oh, and of COURSE there's a huge collection of free iris folding patterns to get you started, for all different types of theme, occasion and Holiday.
Happy folding,
Sarah x

What is Iris Folding?
Iris folding is a card making technique that involves layering paper strips across a cutout shape following a printed template.
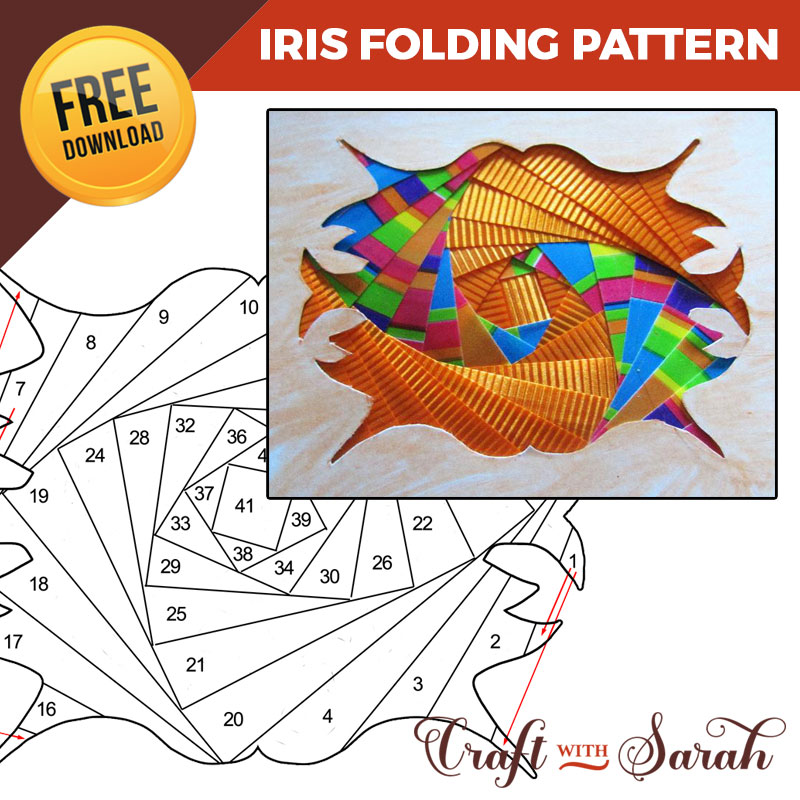
Traditionally the paper strips form a 'swirl' shape similar to the iris of a camera, which is where the technique gets its name.
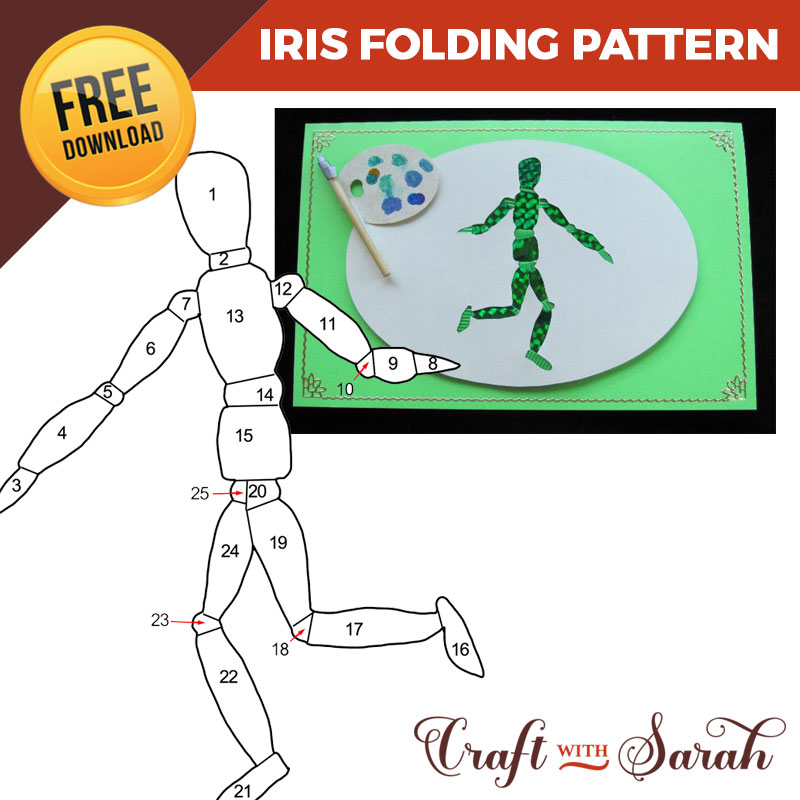
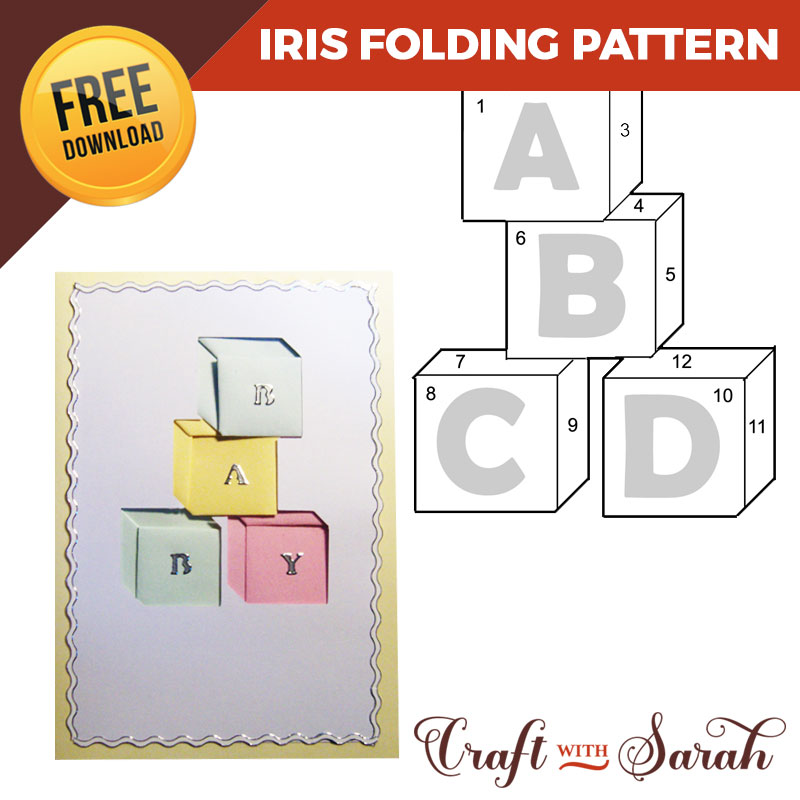
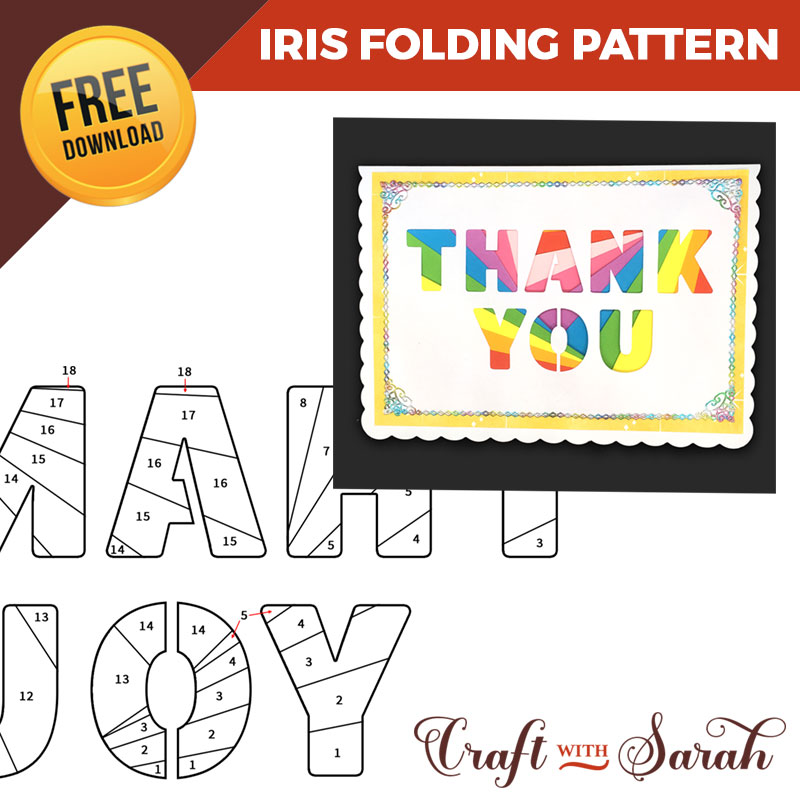
Iris folding has evolved in recent years and there are now different variations including advanced iris folding, fancy folding and paper piecing. These newer patterns may not have the spiral shape, but still feature the traditional paper strips and numbered pattern.
It can look a little bit complicated when you first see an iris folding card, but don't worry - it's actually super simple to make and only needs basic card making supplies that you probably already own!
Iris folding cards can be made with a digital cutting machine such as a Cricut BUT they are also just as easy to make by hand-cutting the shapes using a craft knife or scissors.
How to Iris Fold: Video Tutorial
Easy iris folding tutorial video
Watch the step-by-step video to learn how to iris fold.
Prefer to read rather than watch? Scroll down for step-by-step iris folding instructions, including a photo of each stage of the process.
Two different tutorials are included: one for cutting machines such as a Cricut, and one for hand-cutting the apertures with a craft knife. Both versions are covered in this video.
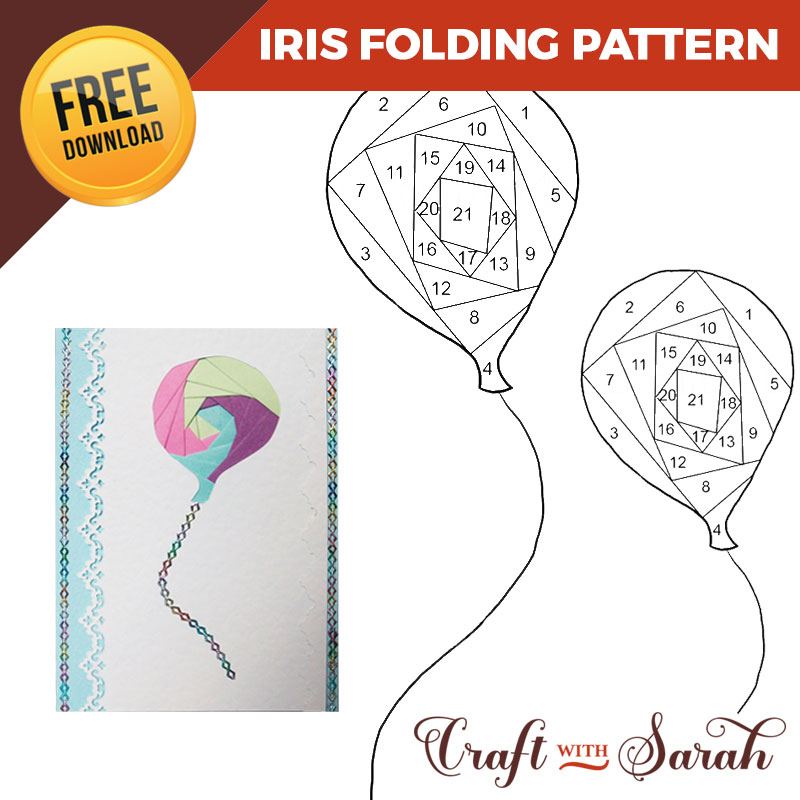
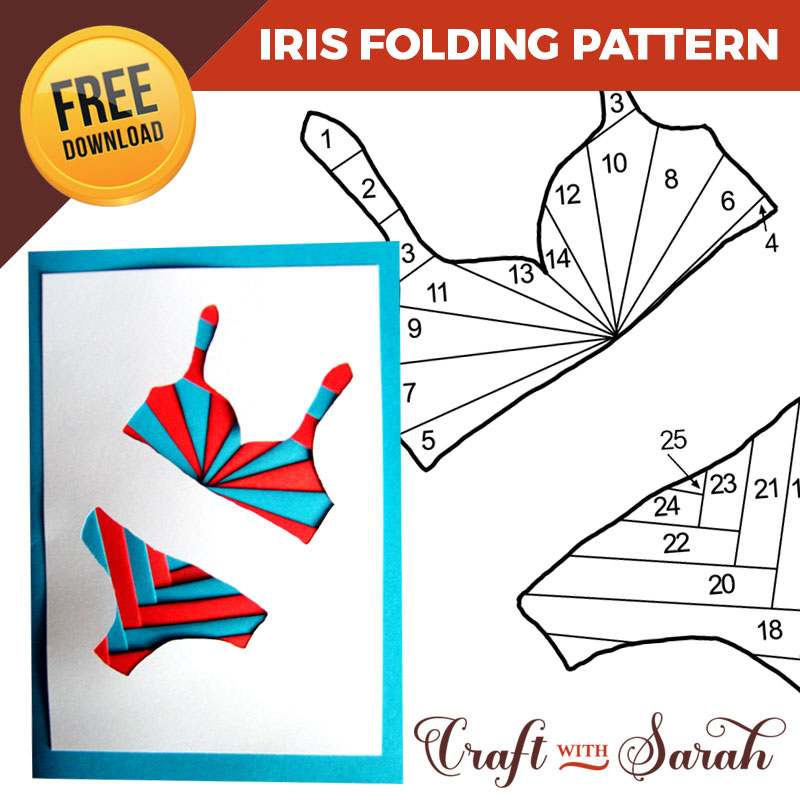
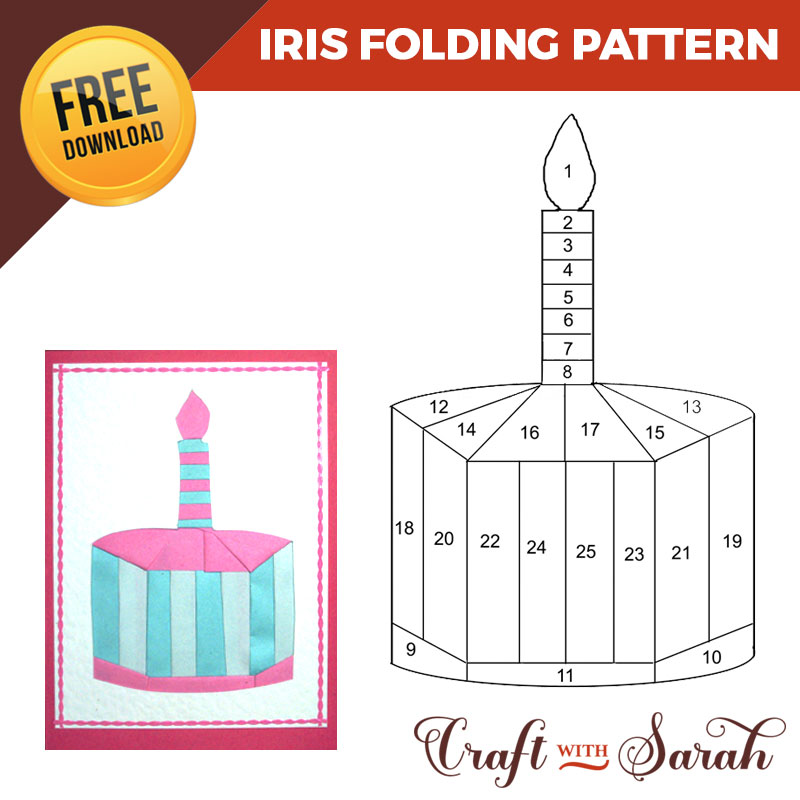
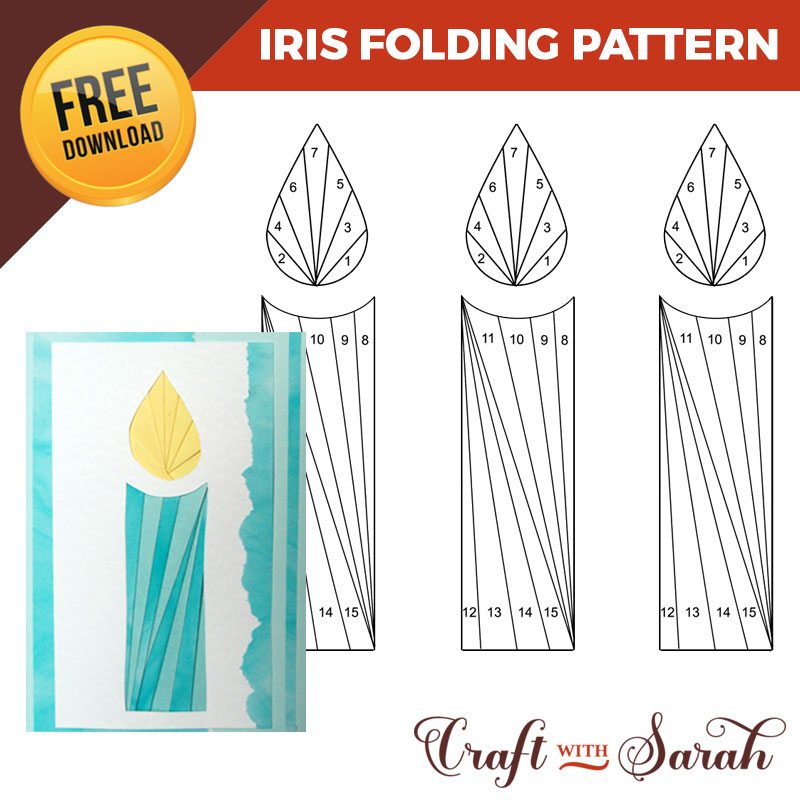
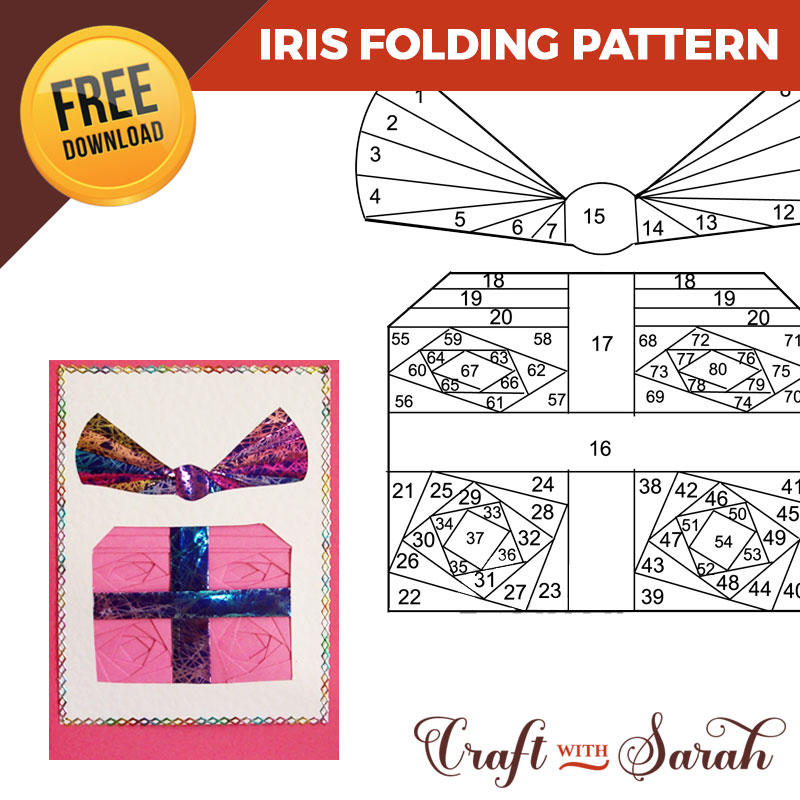
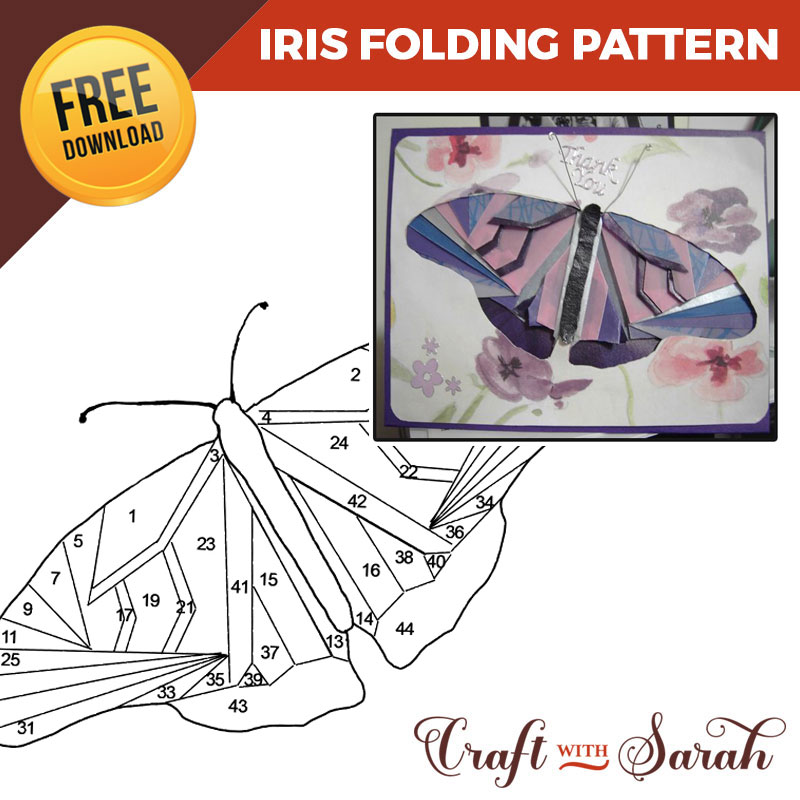
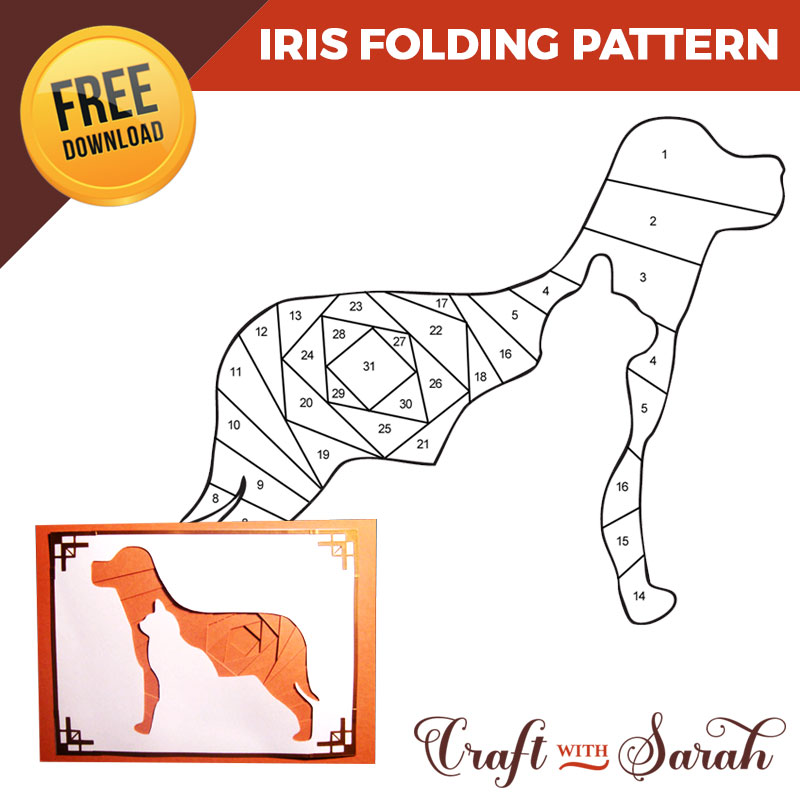
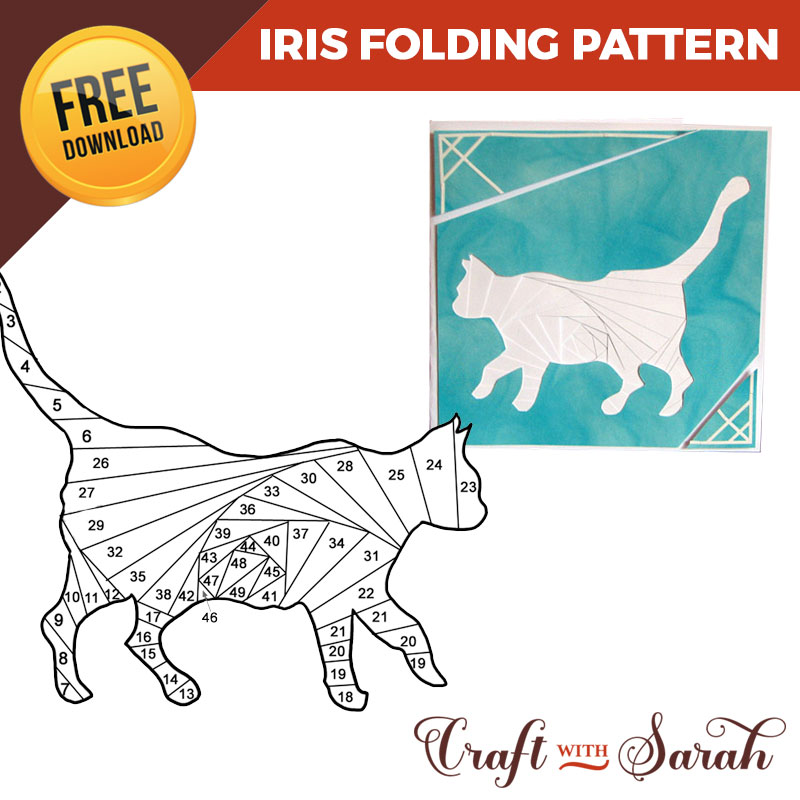
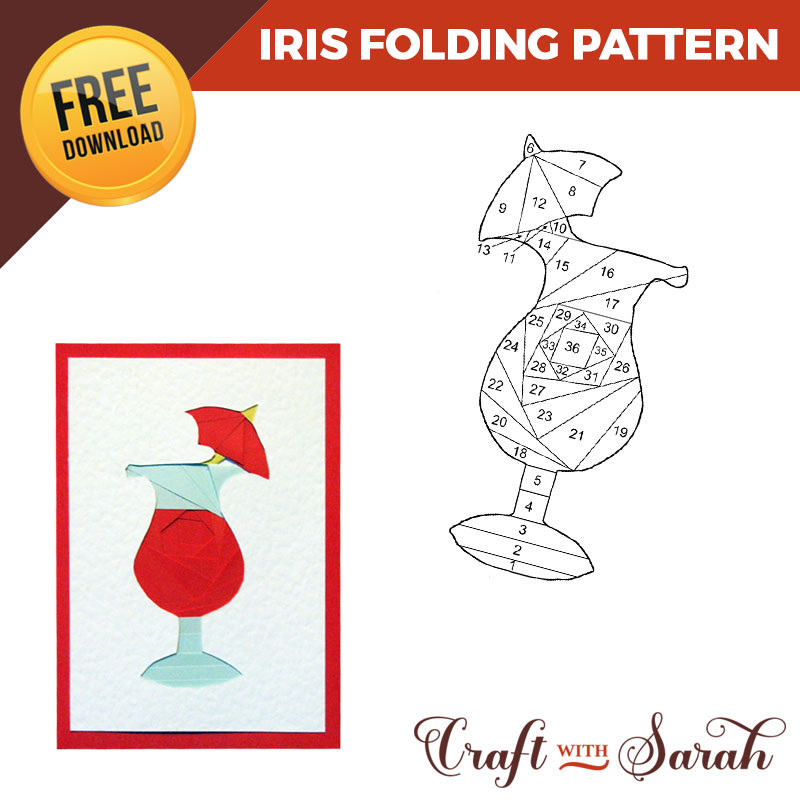
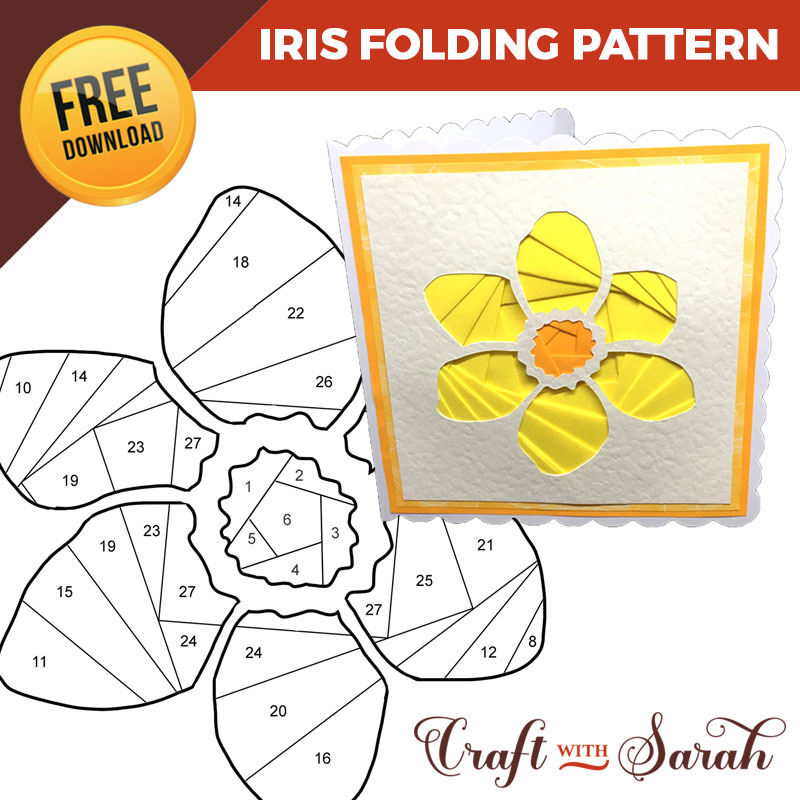
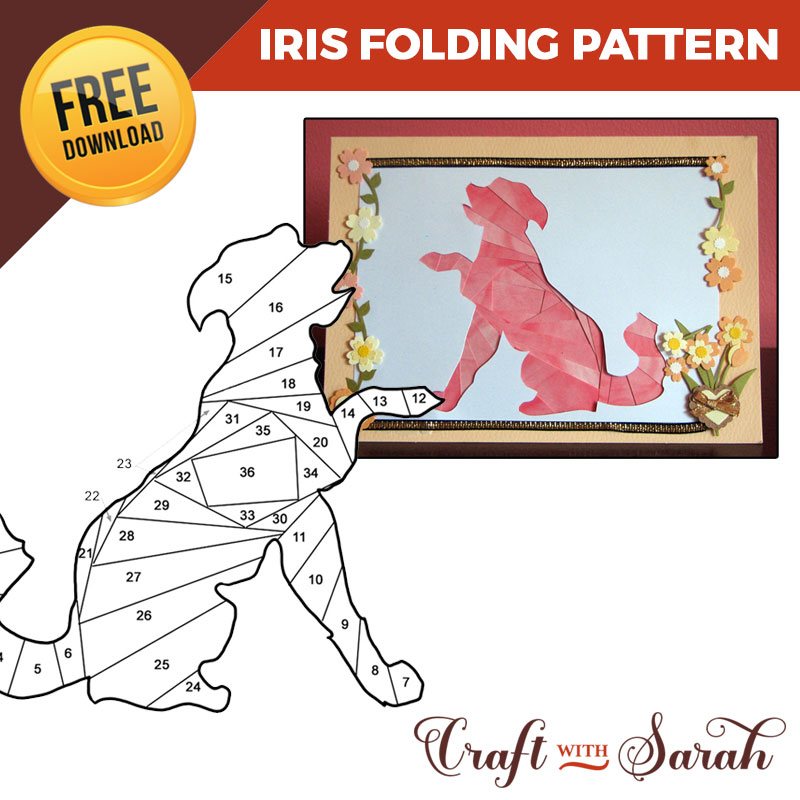
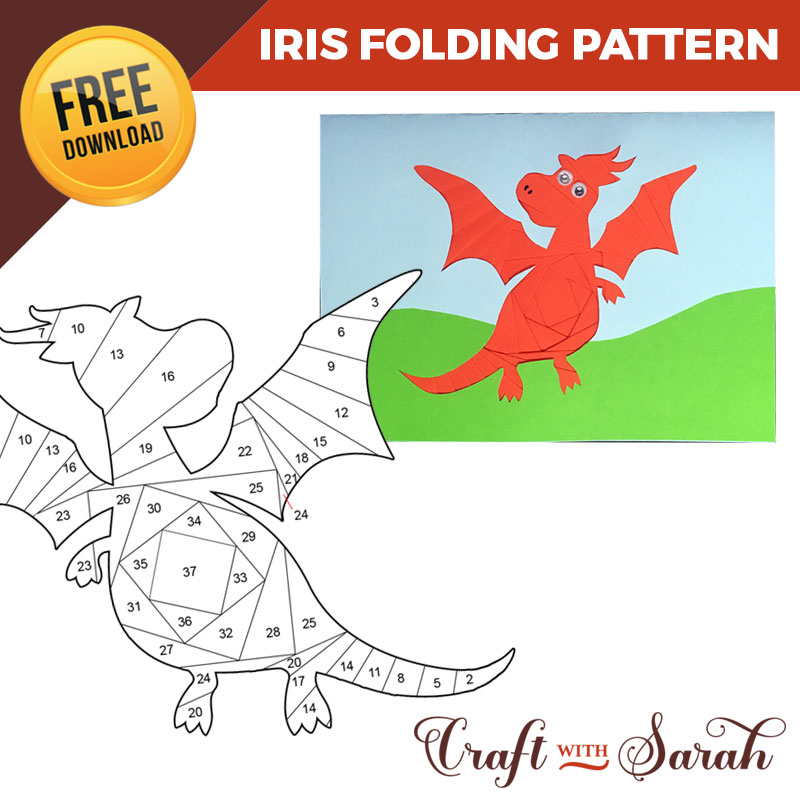
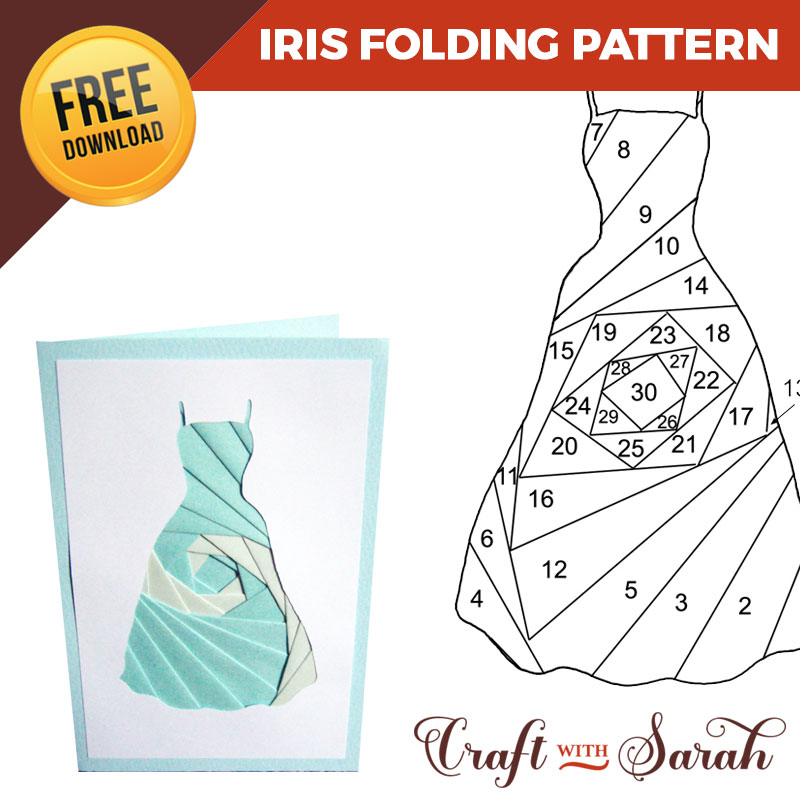
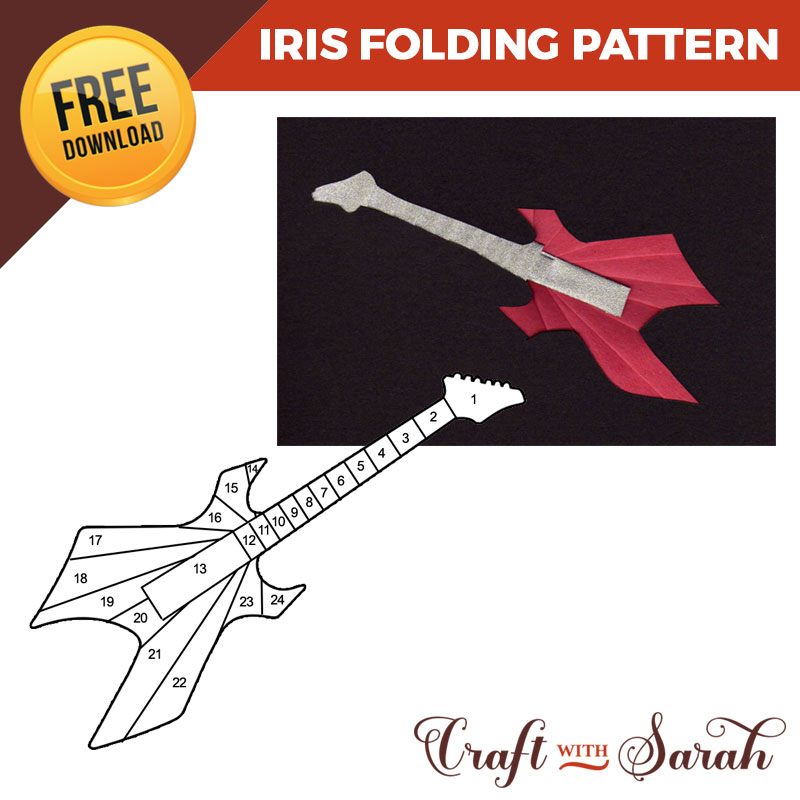
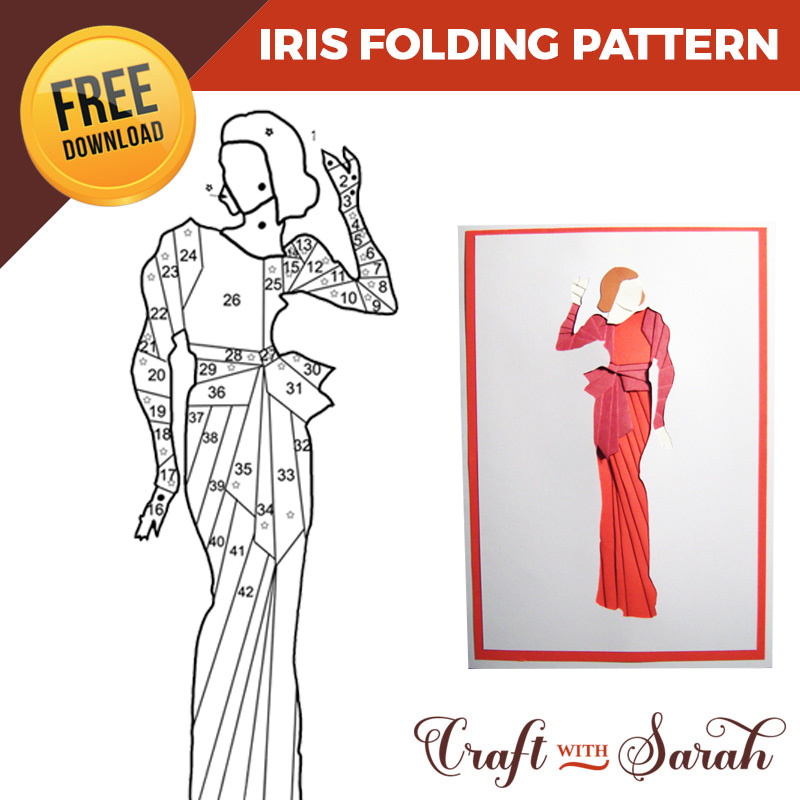
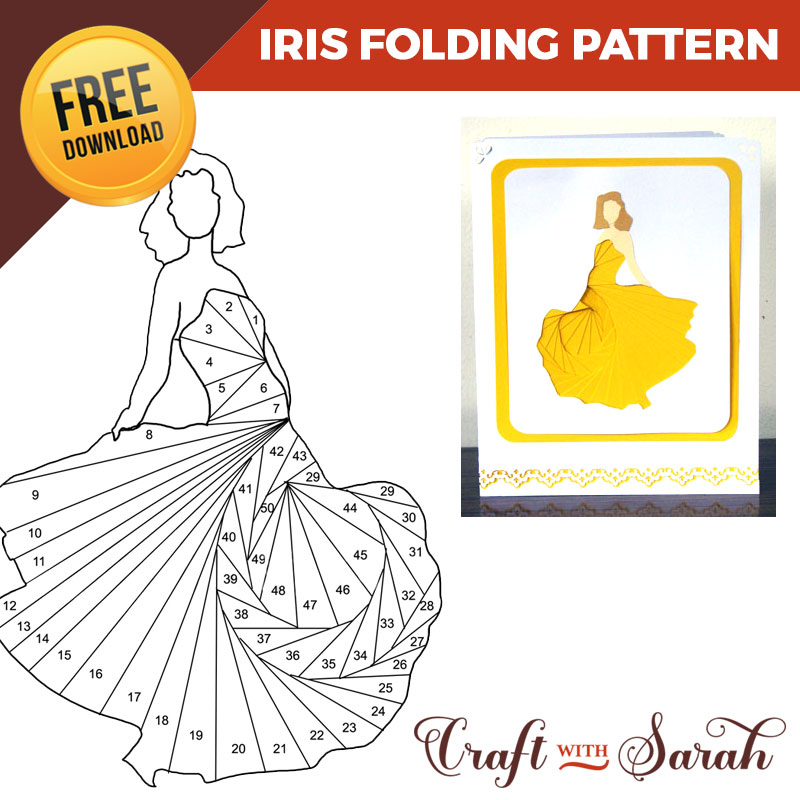
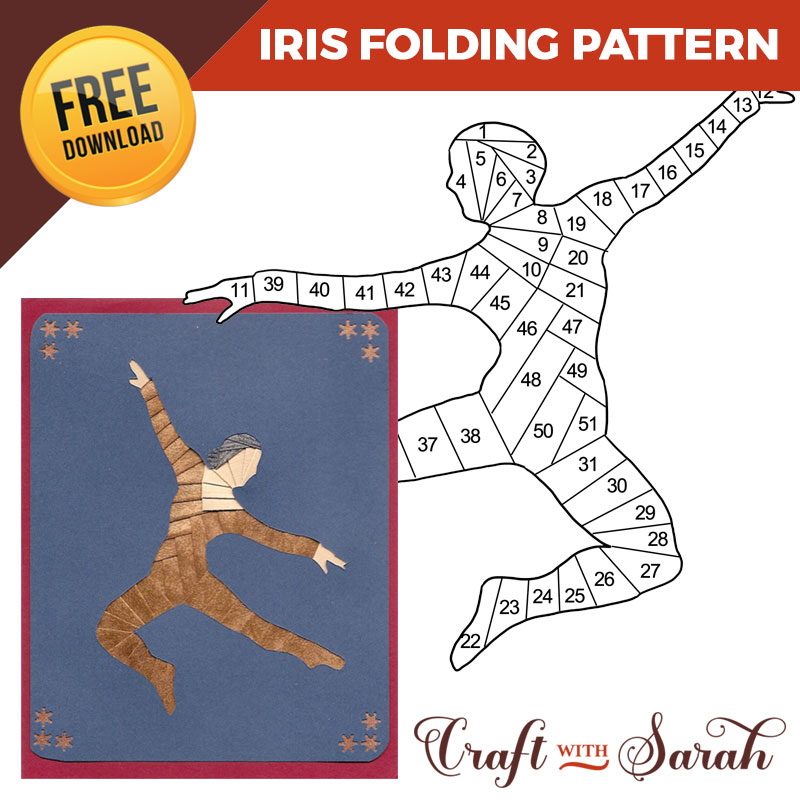
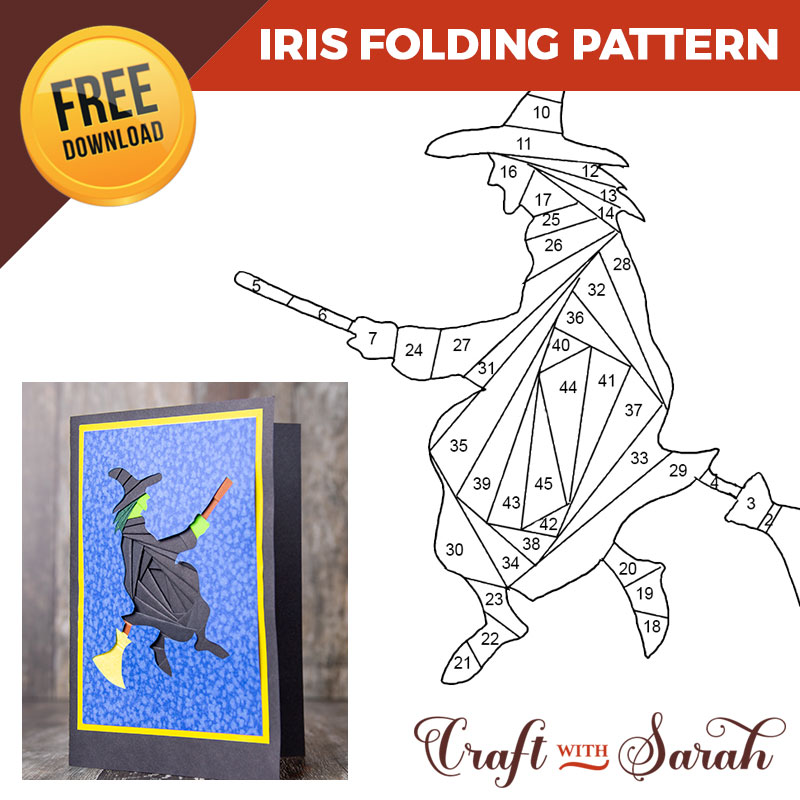
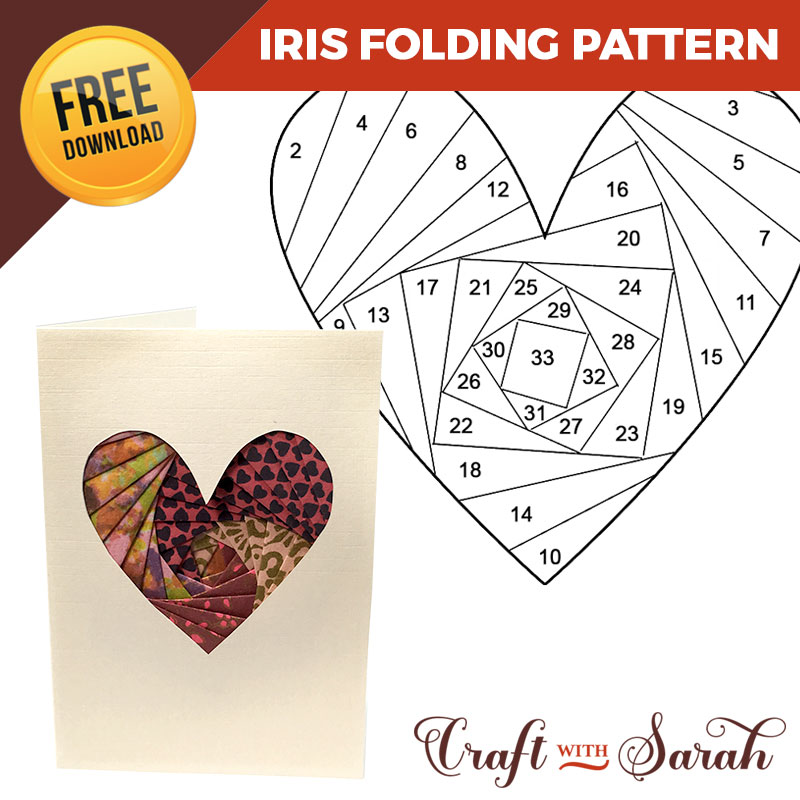
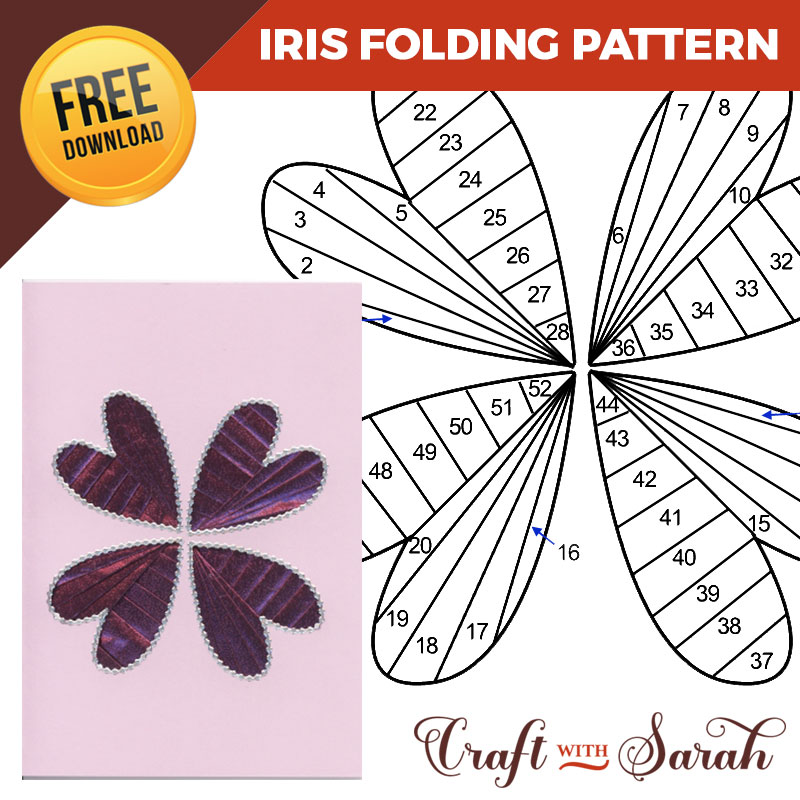
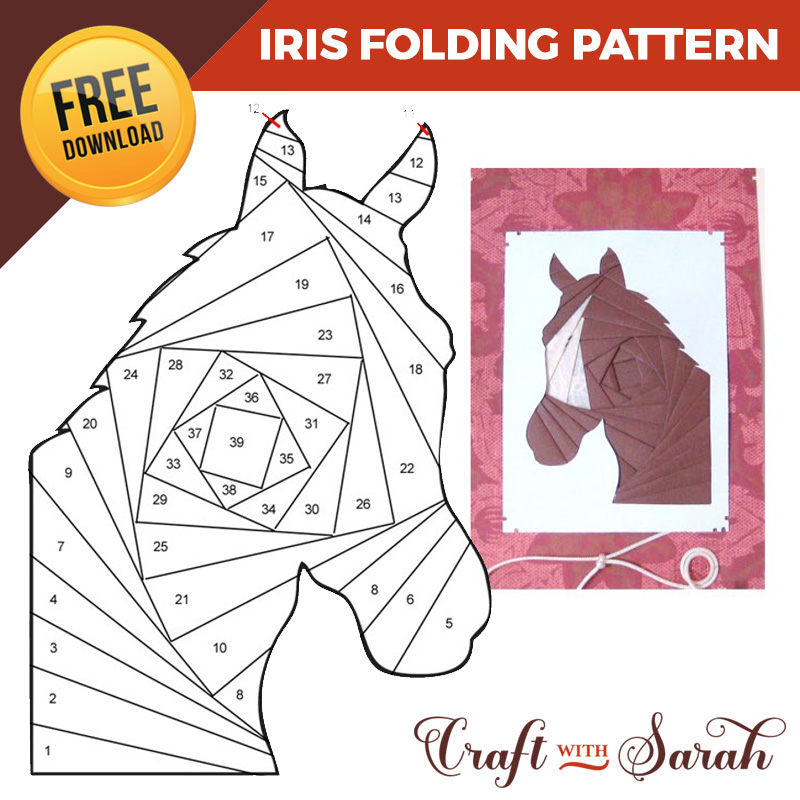
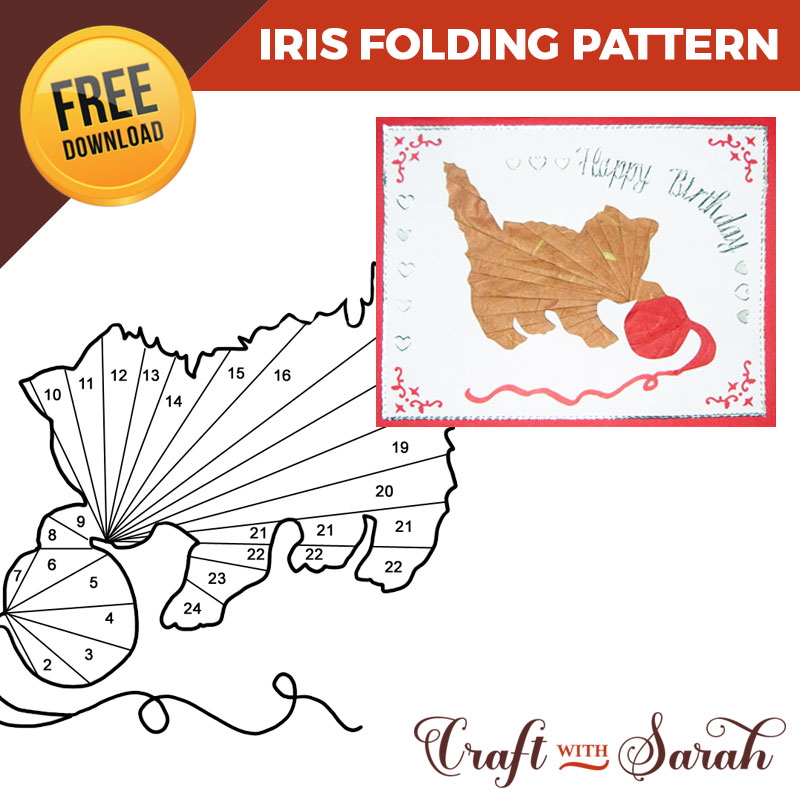
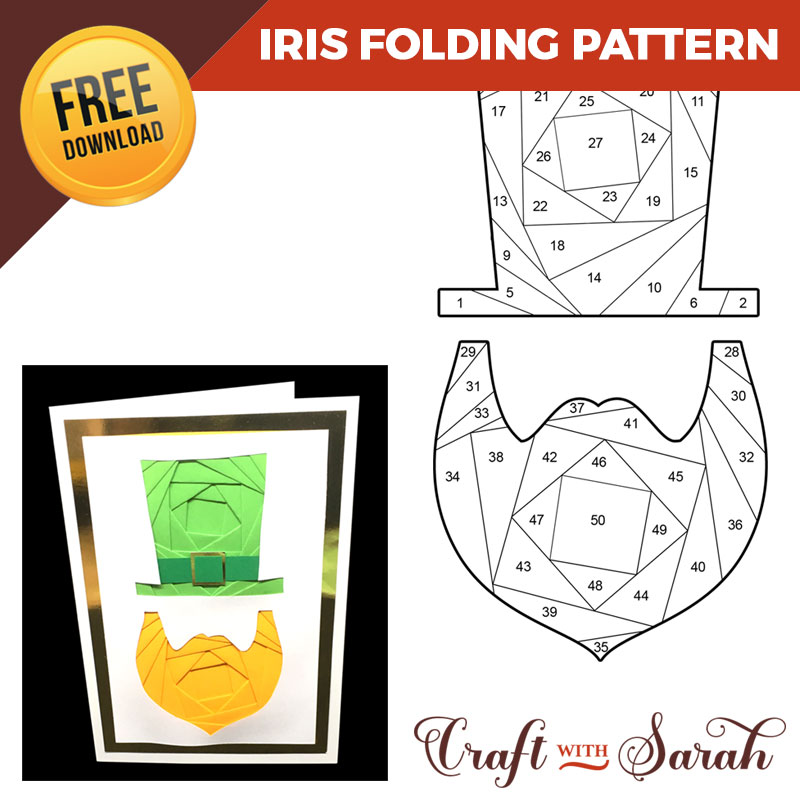
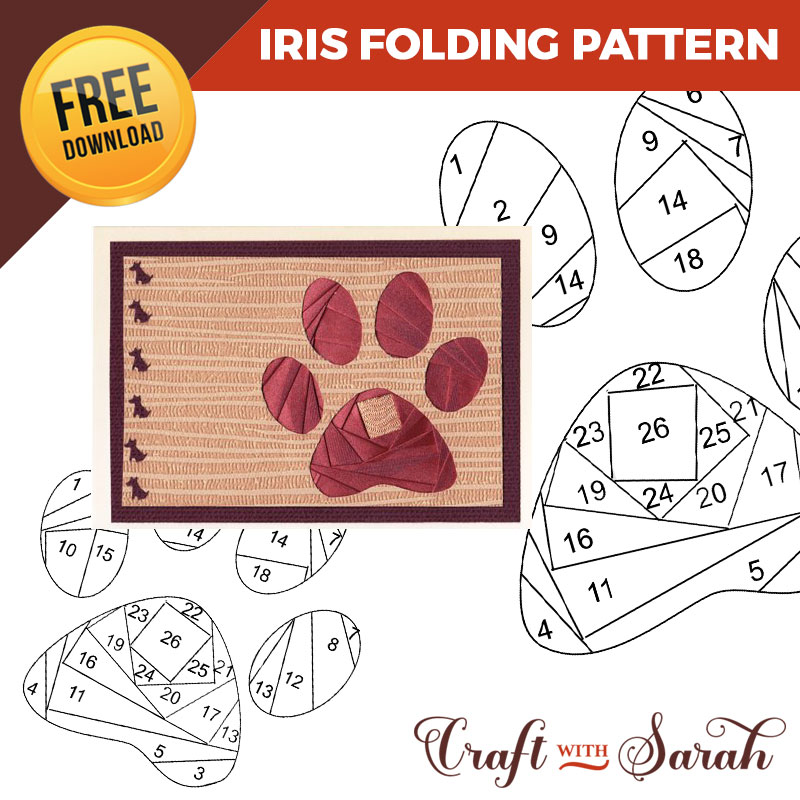
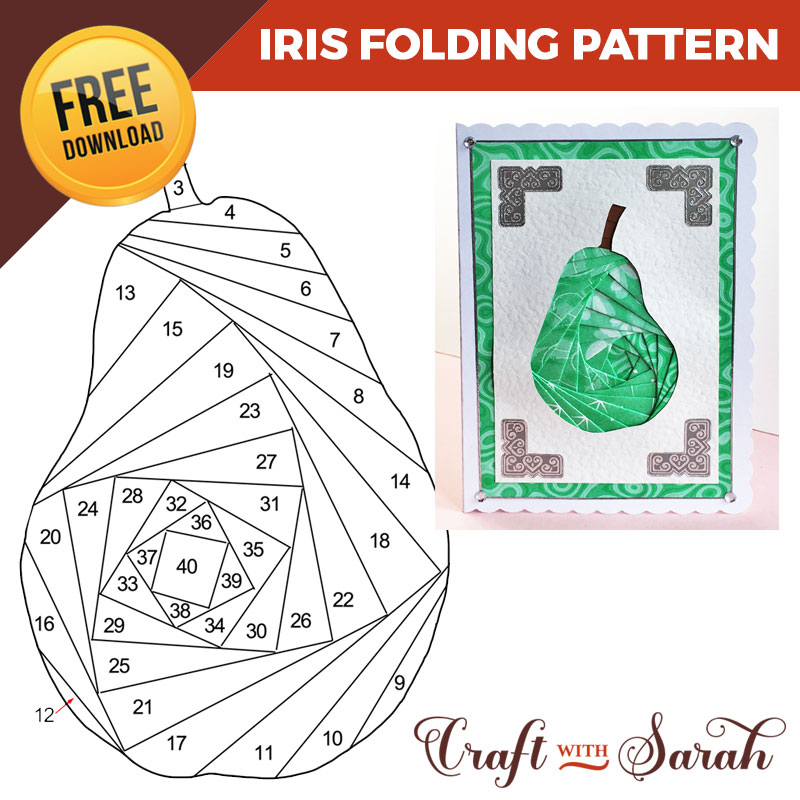
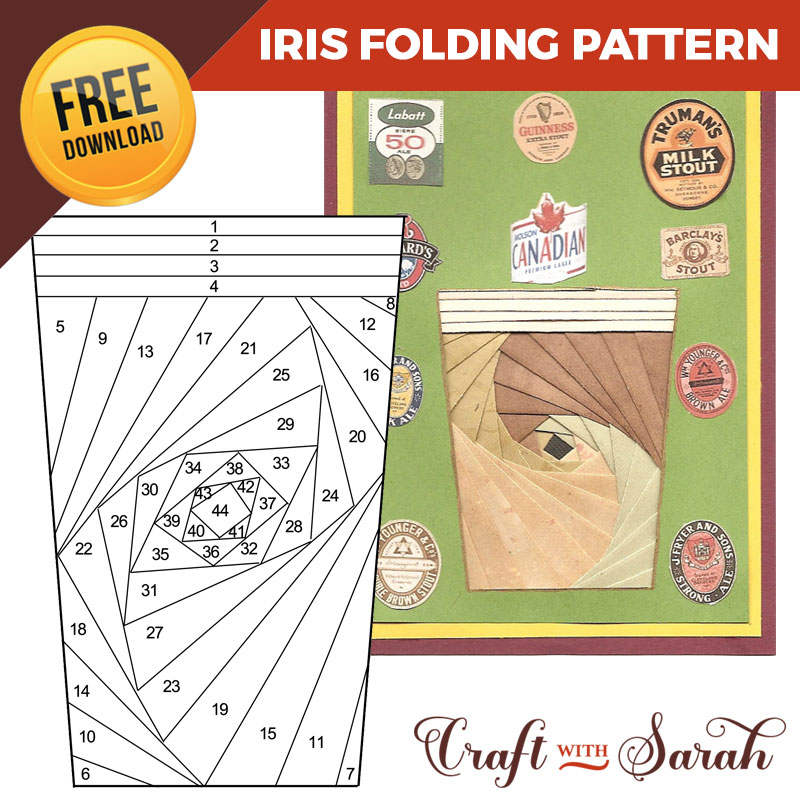
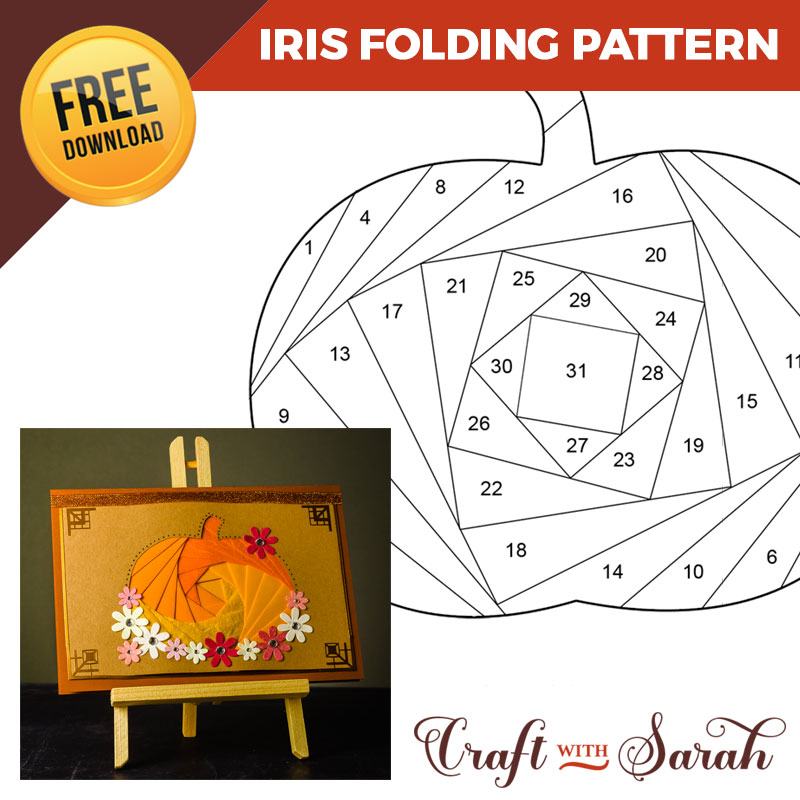
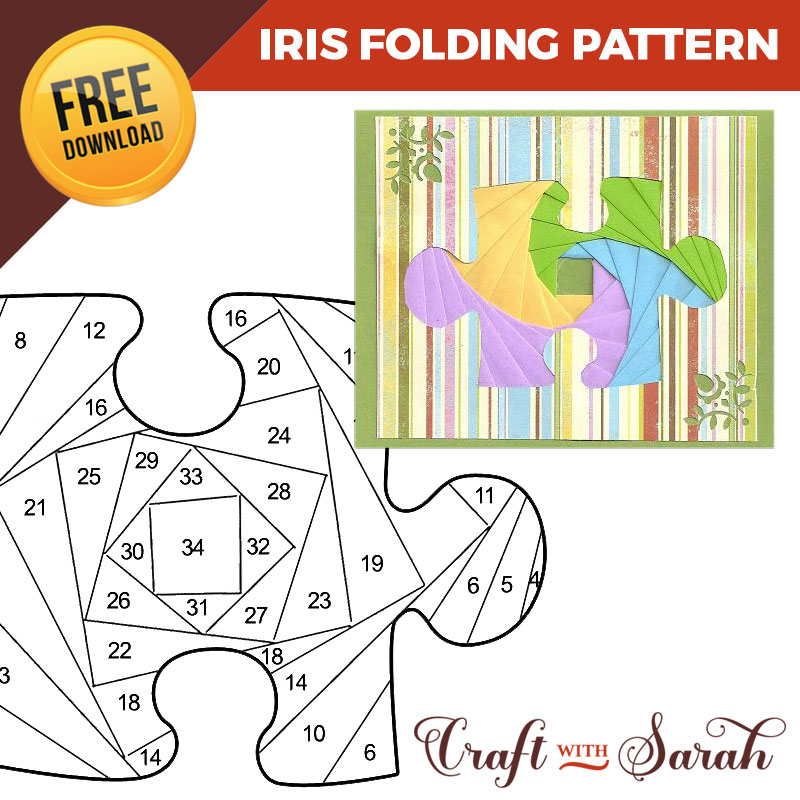
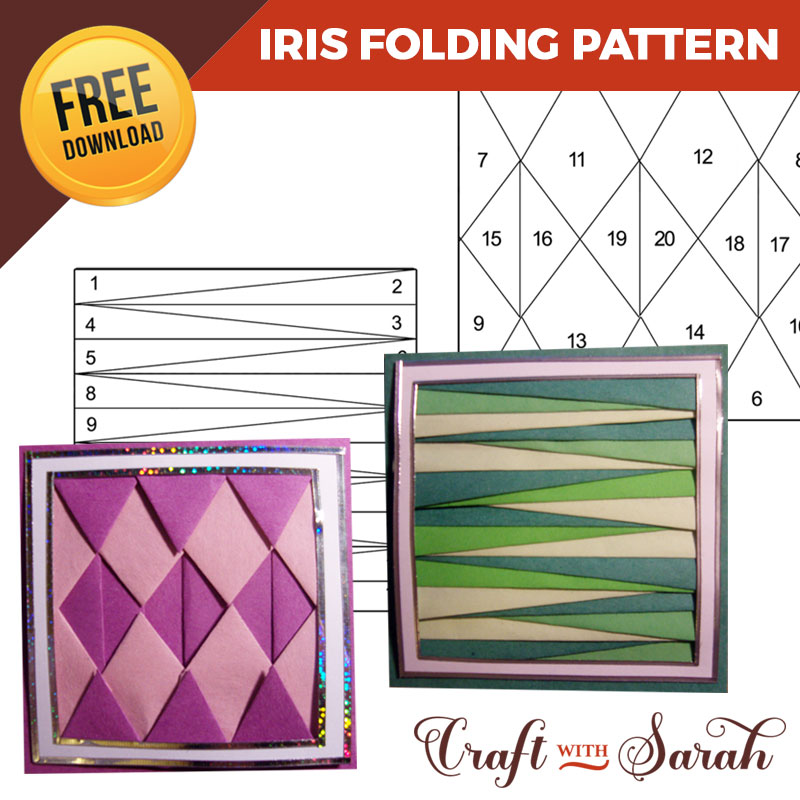
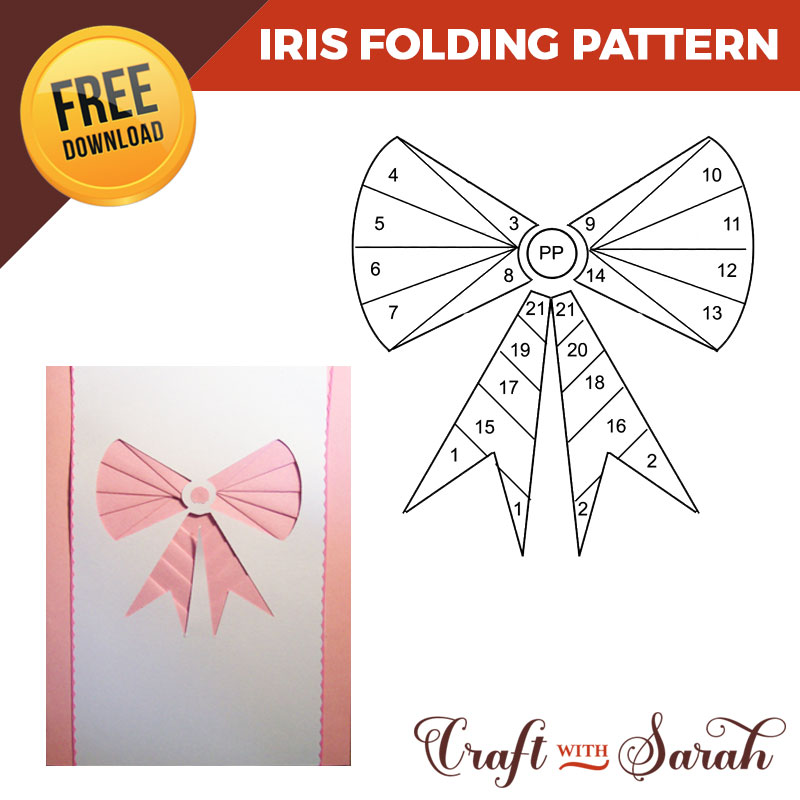
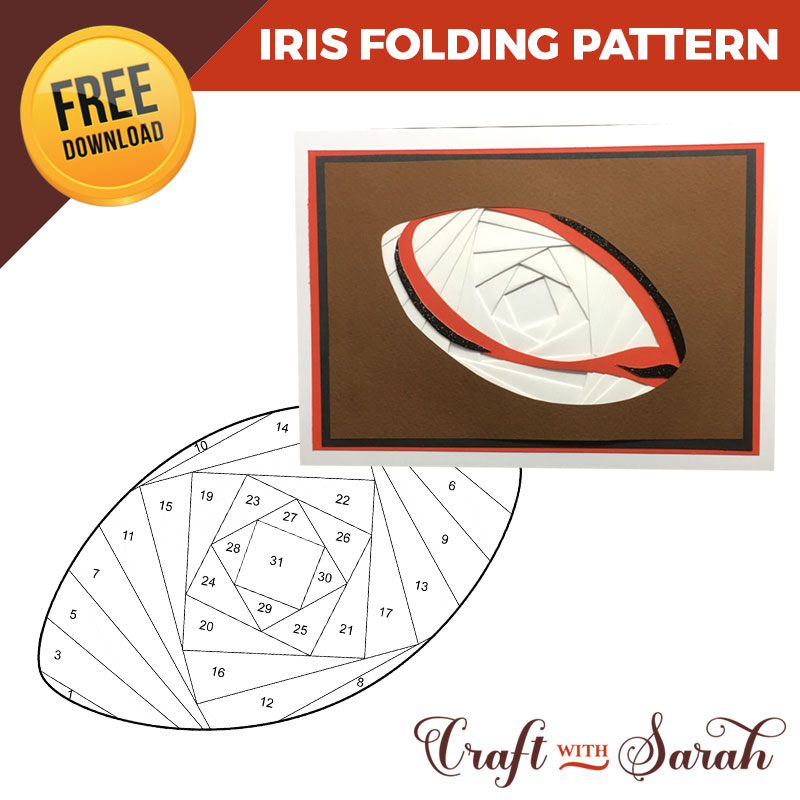
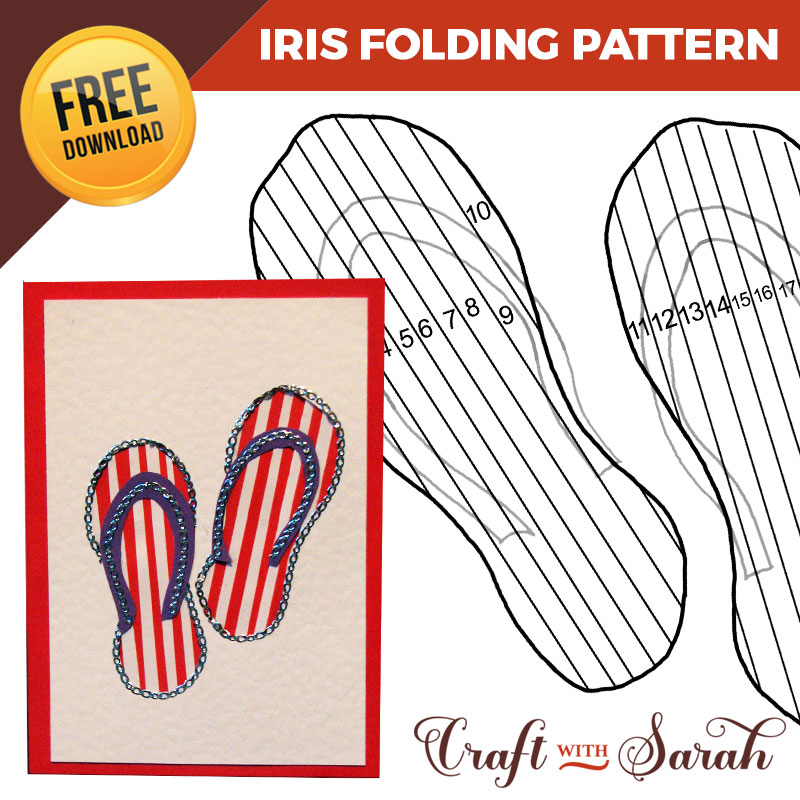
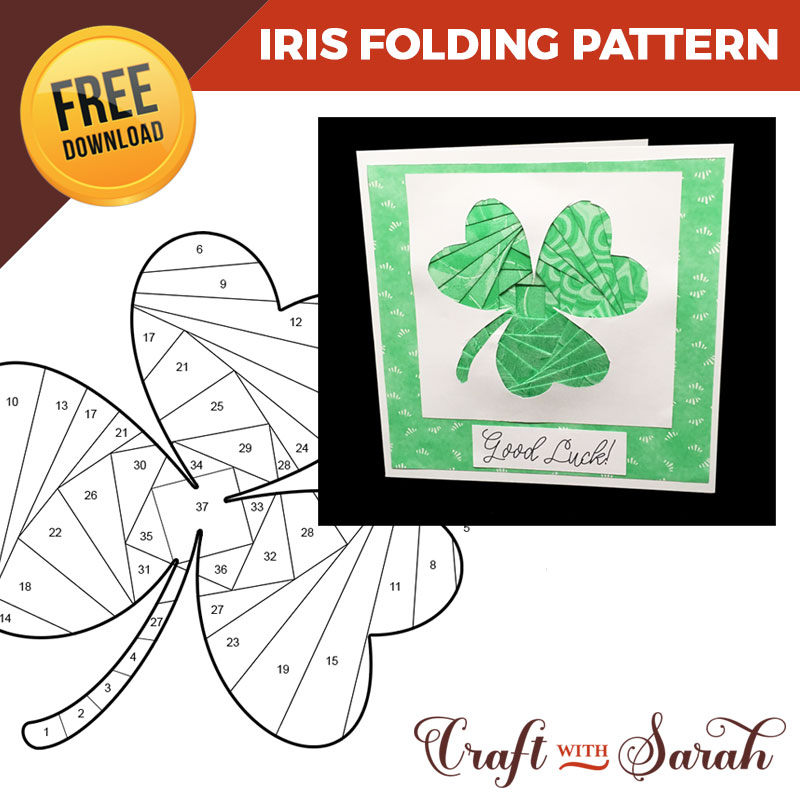
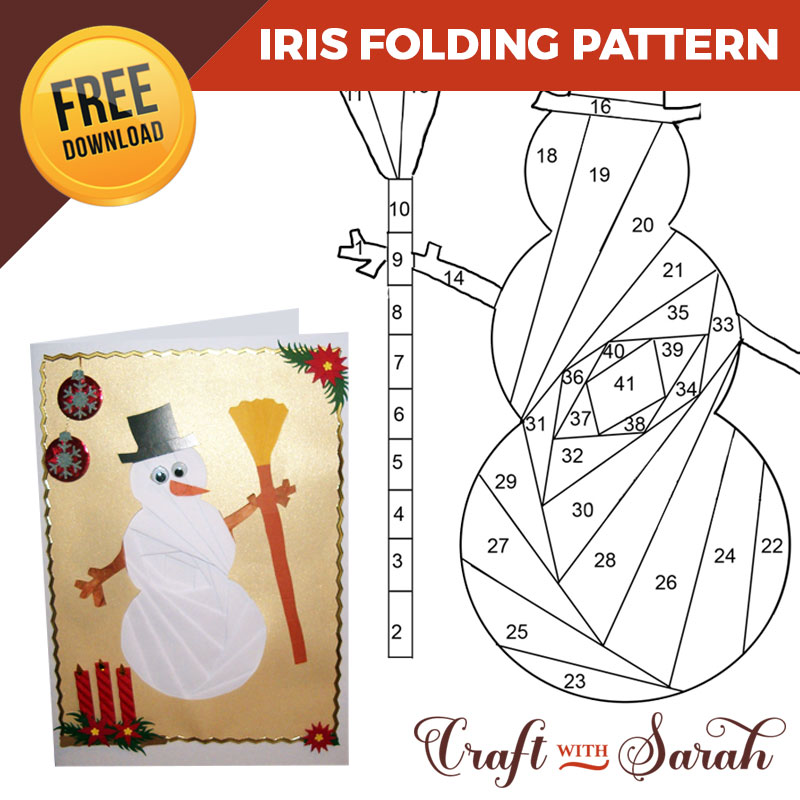
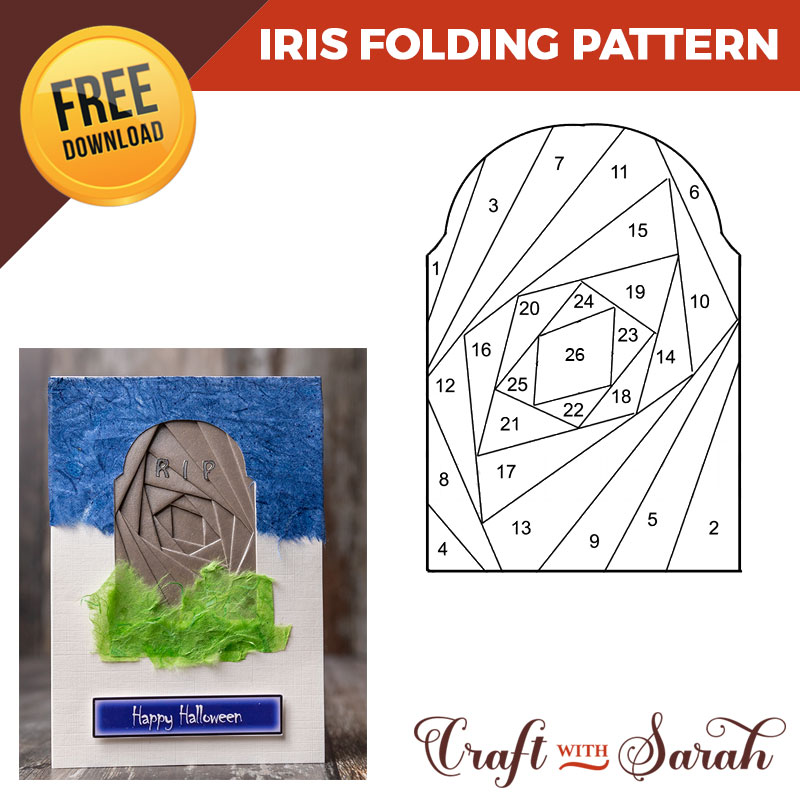
Free Iris Folding Patterns
I LOVE sharing free iris folding patterns with you – and I know you love it too!
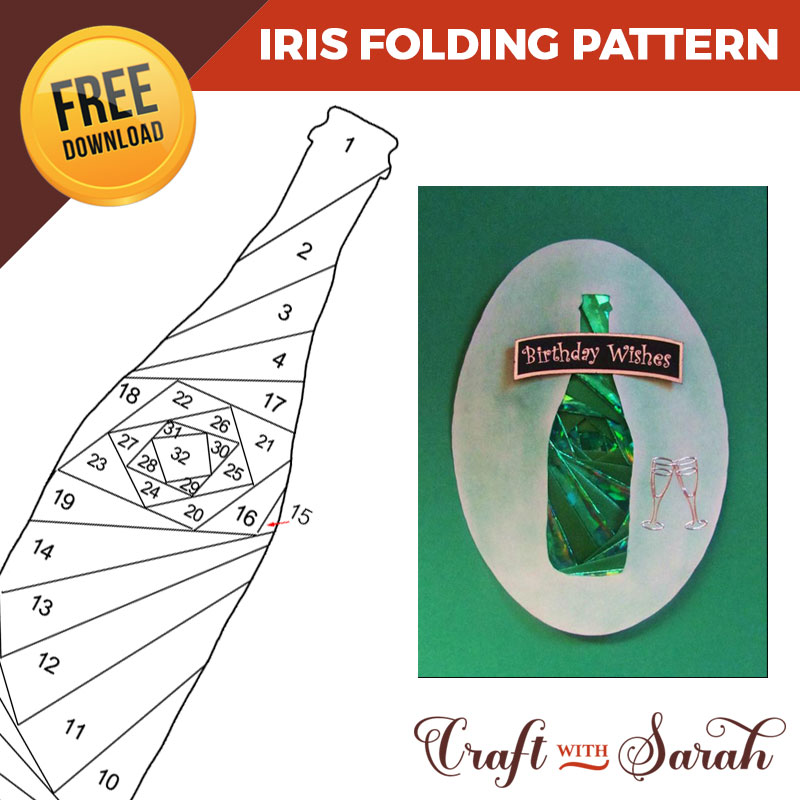
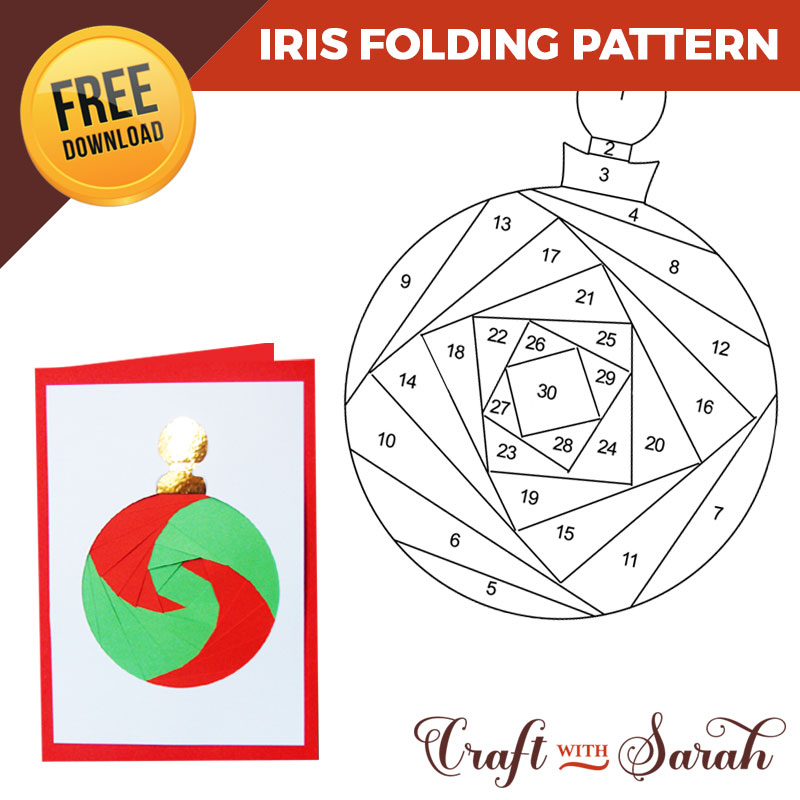
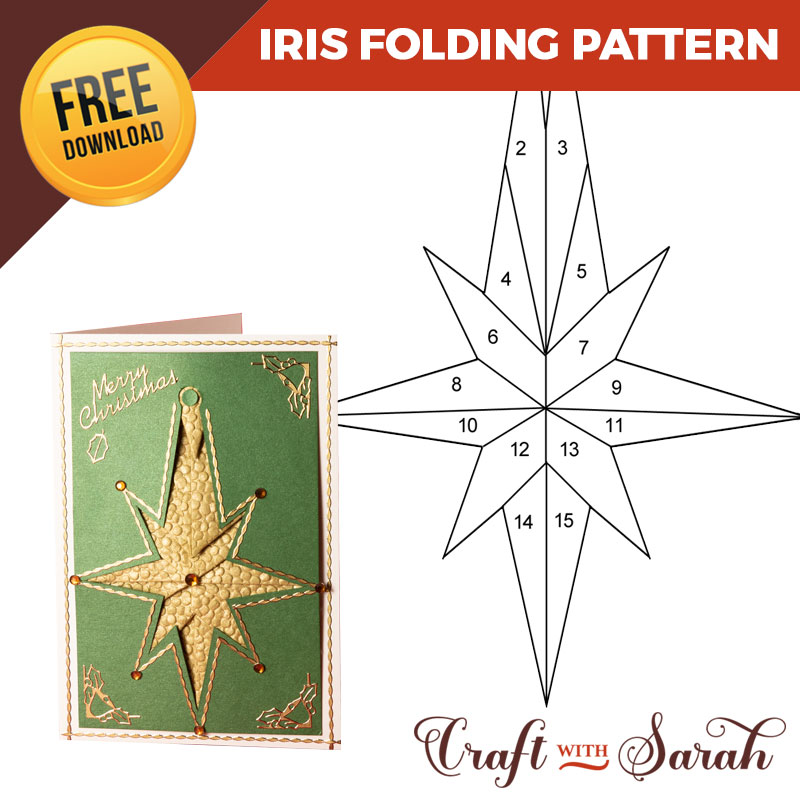
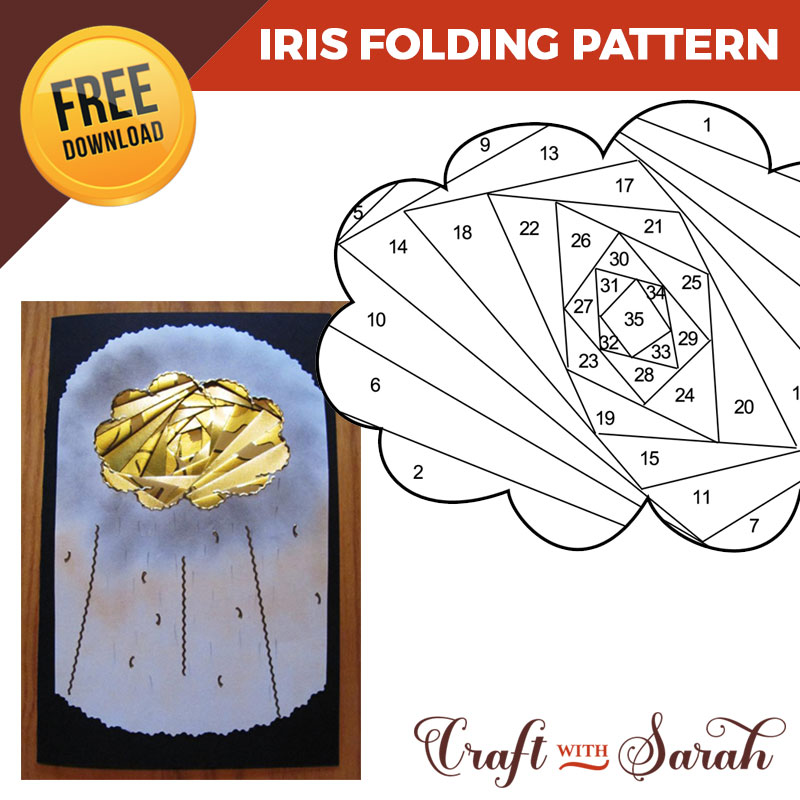
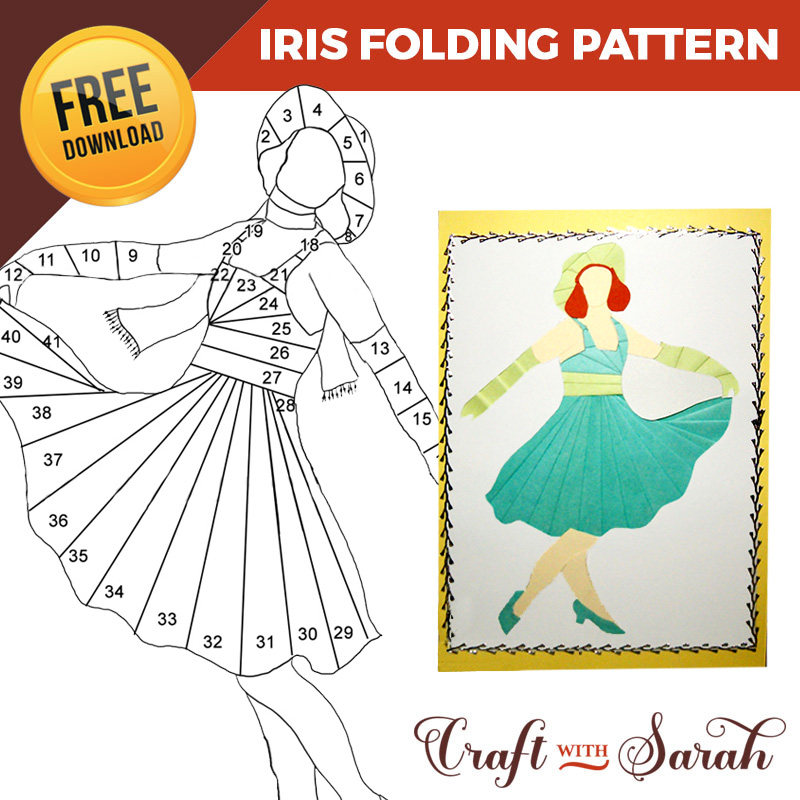
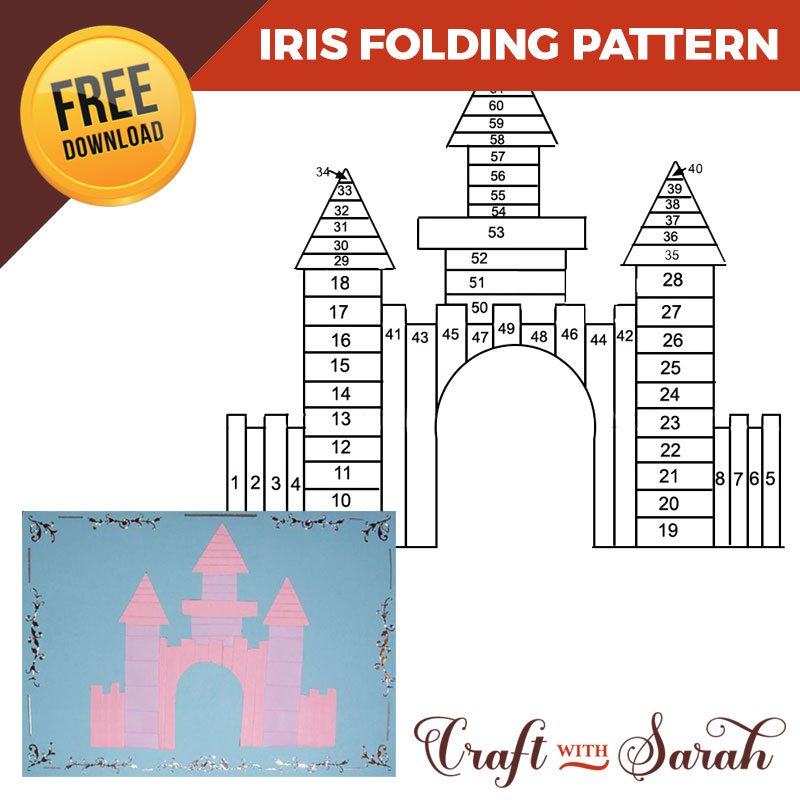
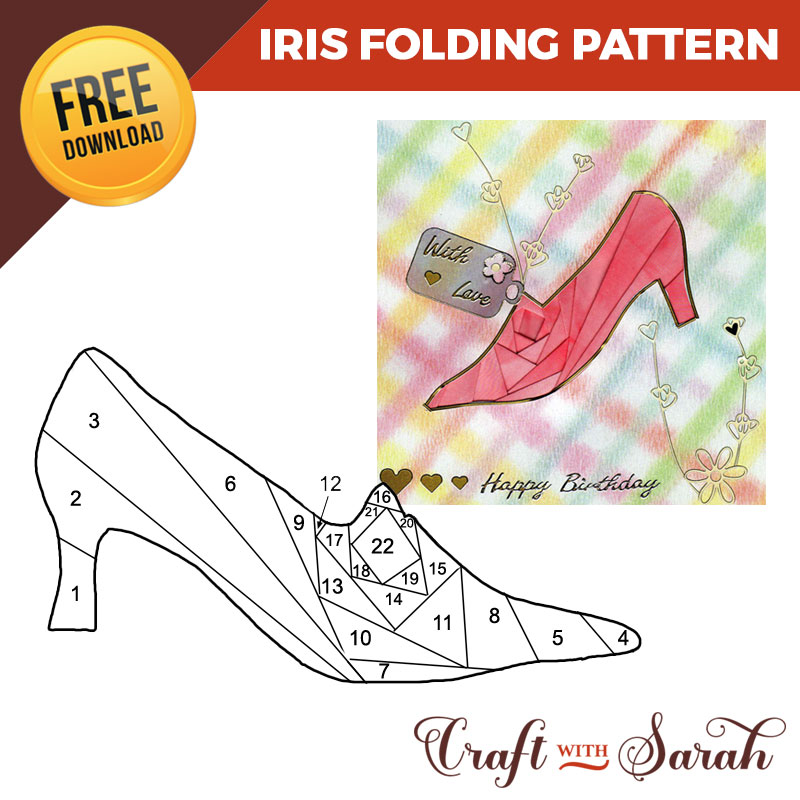
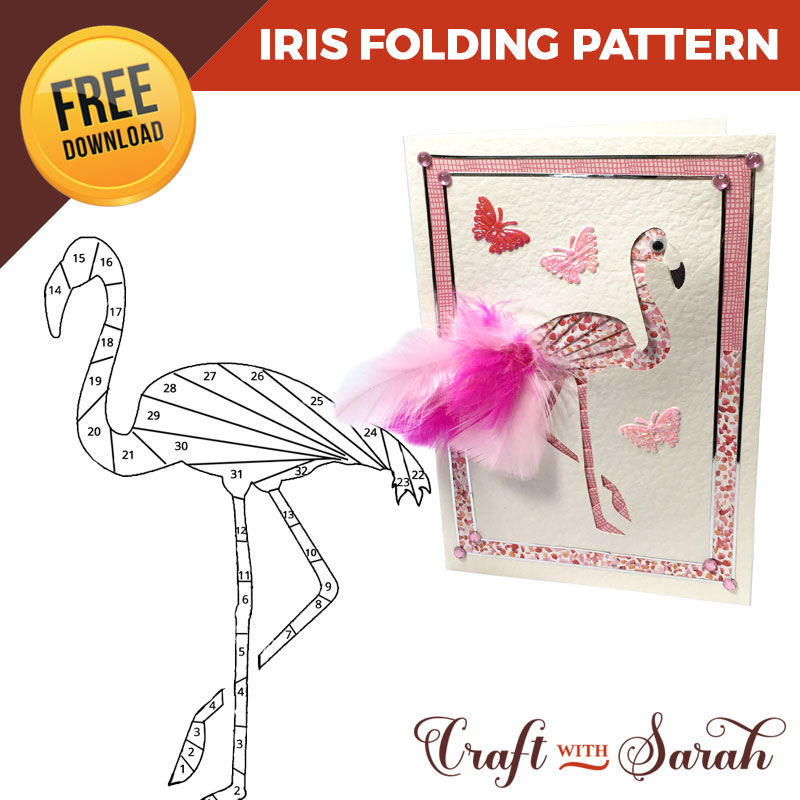
Download 50 free iris folding patterns below, including a great selection of seasonal designs which are great for special occasions such as birthdays, Christmas and Halloween.
Scroll down underneath the patterns to read the tutorial, or use the buttons below.
Cricut Tutorial Video Hand-cutting Tutorial


How to Get Started: Cricut Version
Follow along with these step-by-step iris folding instructions to make your cards using a digital cutting machine such as a Cricut. This makes it easier to cut the aperture shapes, but check out these hand-cutting instructions for if you don't have a cutting machine.
Supplies for iris folding with a Cricut
To make iris folding card with a Cricut, you will need:
- A pattern to follow
- A printer and printer paper
- Scissors
- A Cricut machine or similar
- Some masking tape or washi tape
- Sticky tape
- White card and coloured card
- Double sided sticky tape and/or foam squares
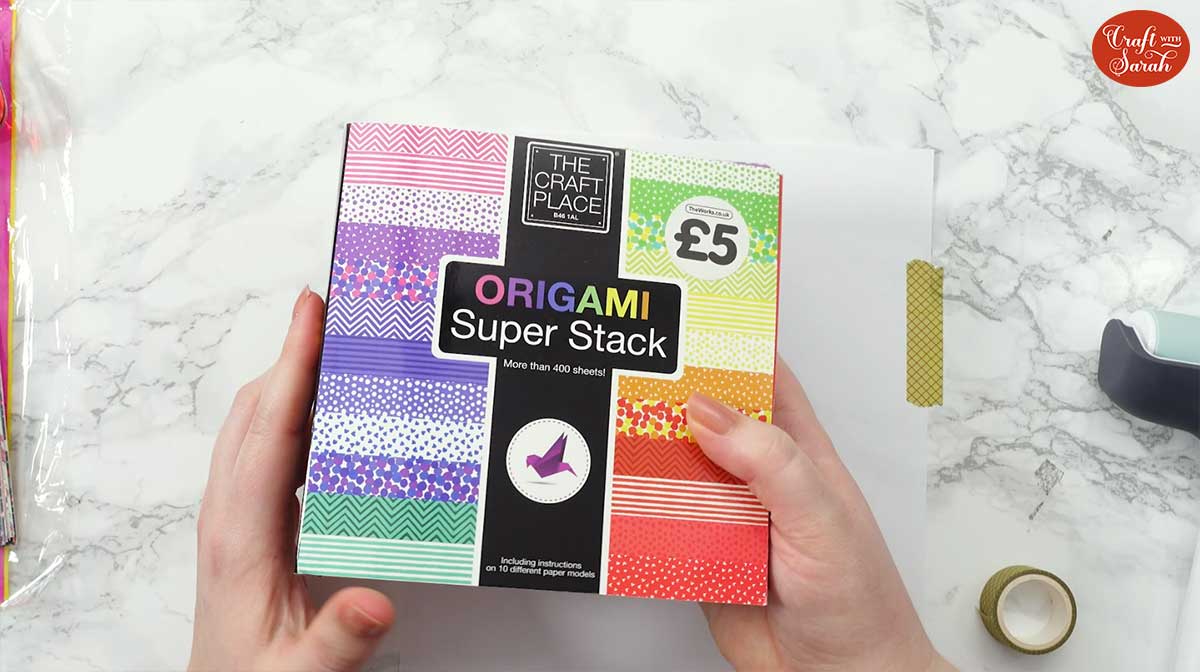
- Strips of folded lightweight coloured paper in various colours. Origami paper works well.
1) Prepare the template
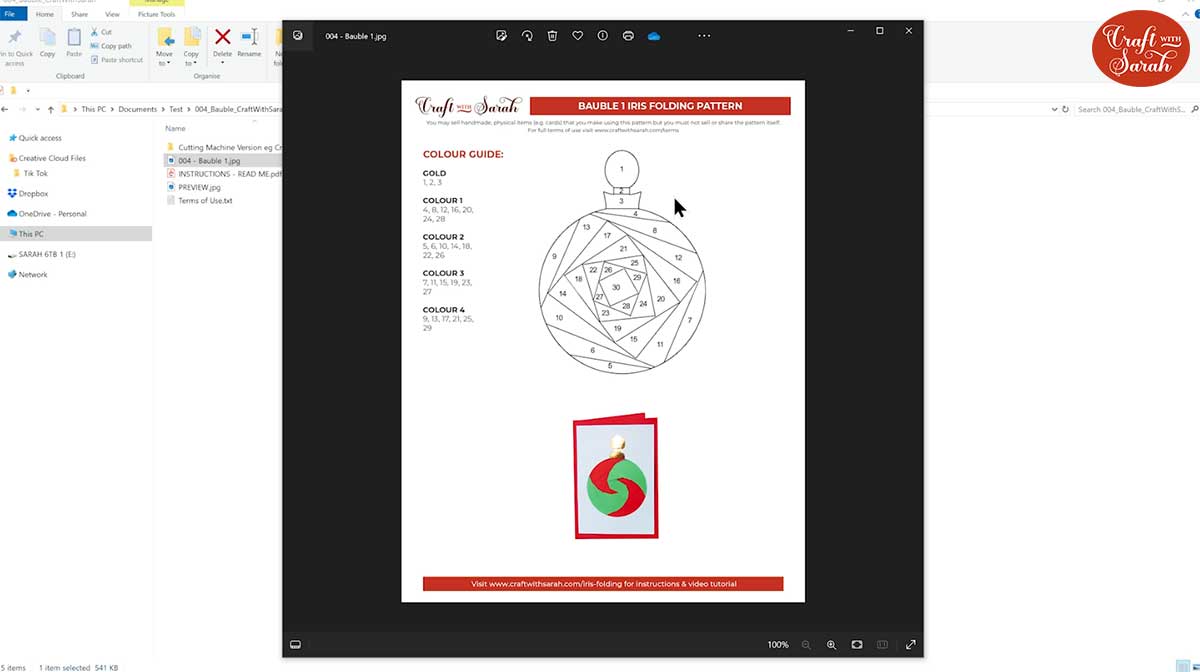
First, download your chosen pattern and unzip the download folder.
Open up Design Space and start a new Project.
Click "Upload" and navigate to the unzipped version of the pattern.
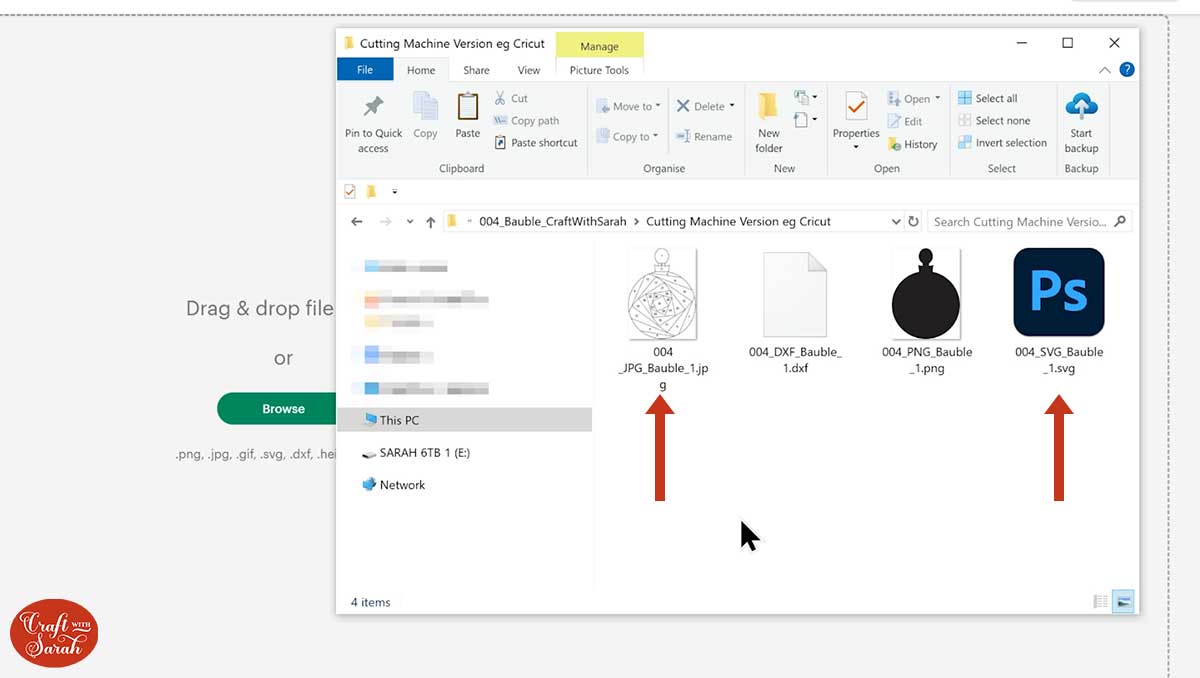
Look inside the folder called "Cutting Machine Version eg Cricut".
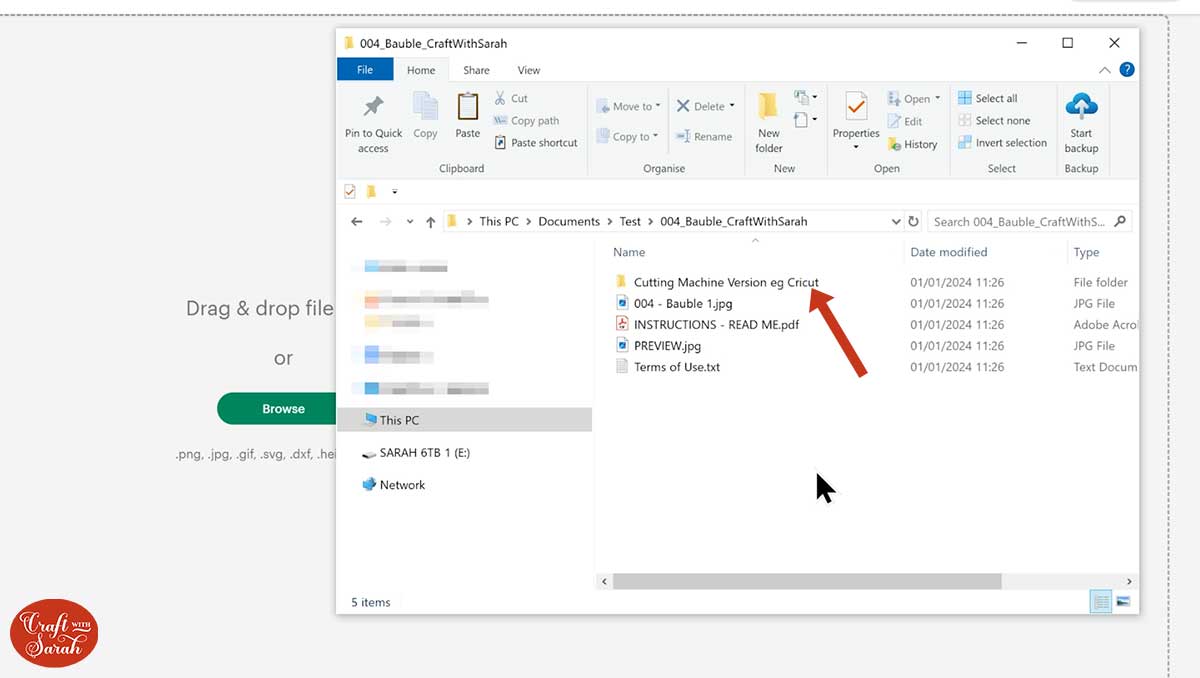
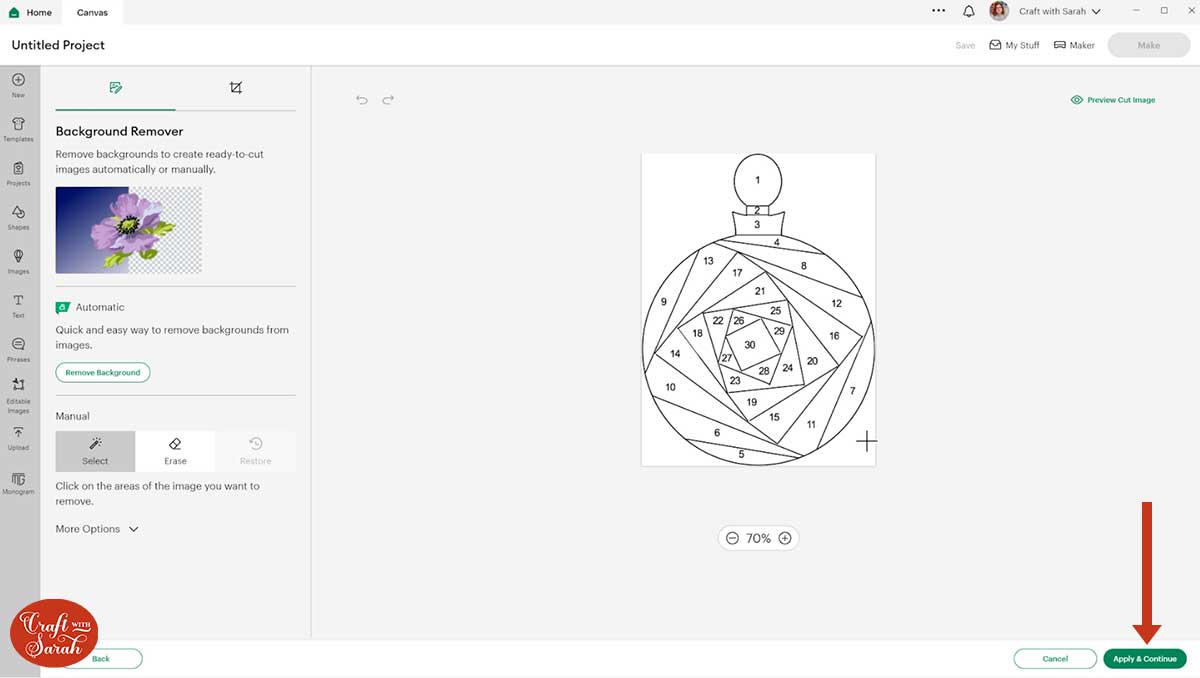
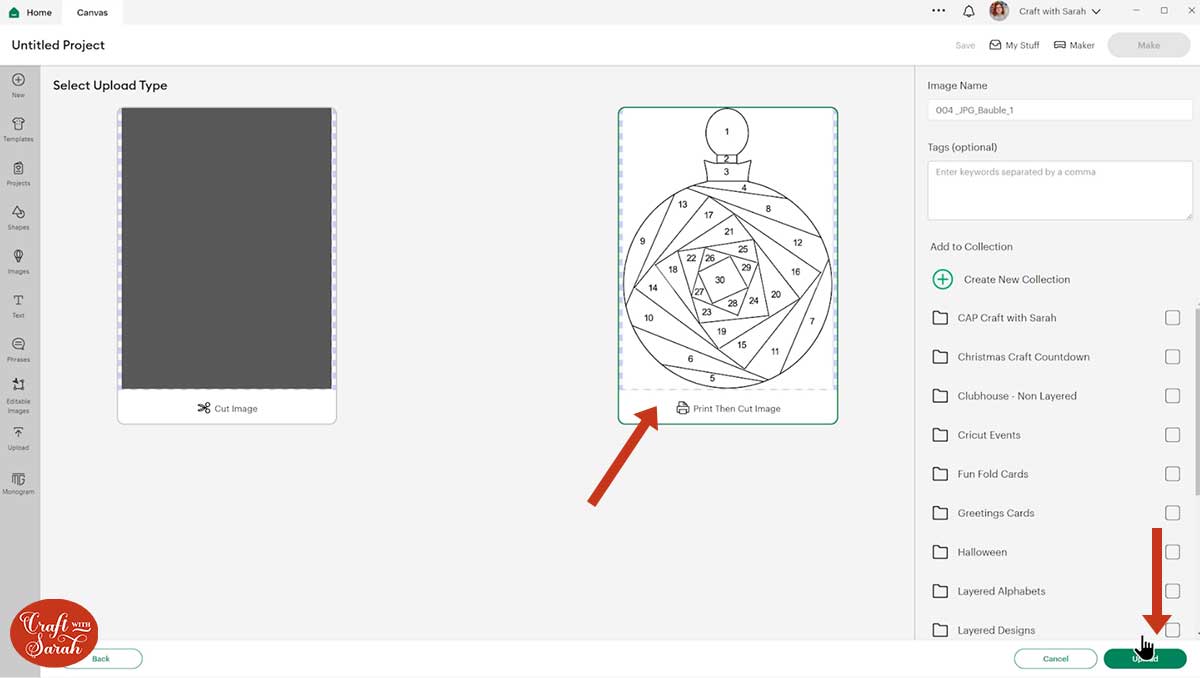
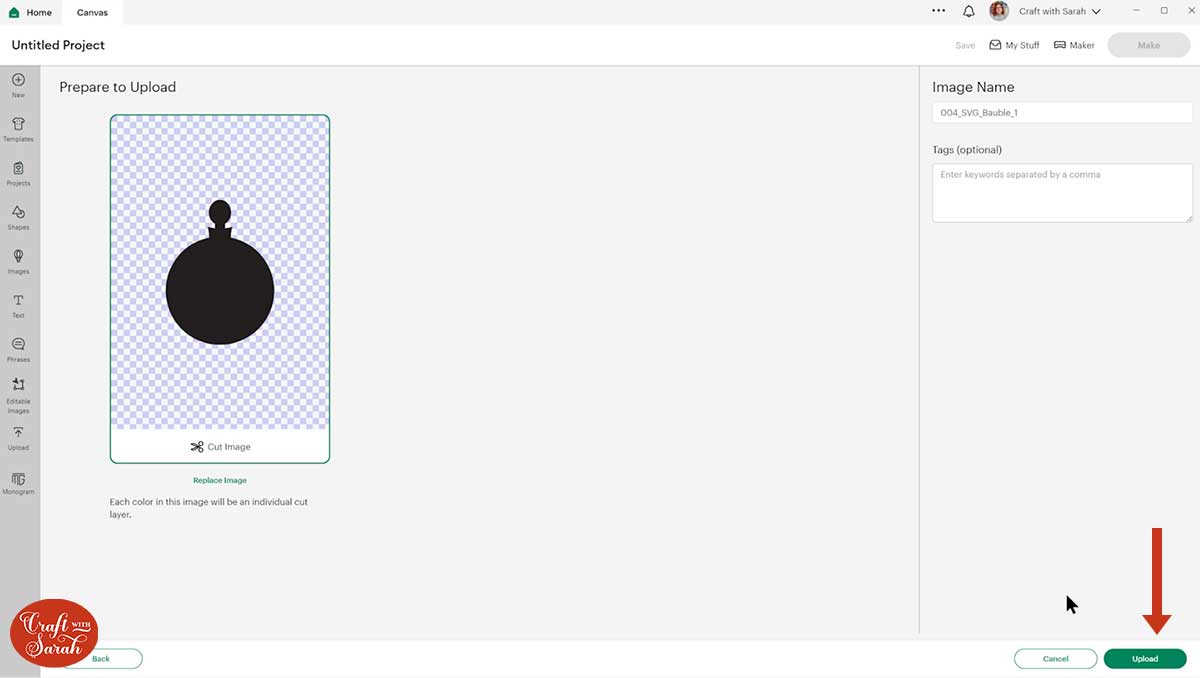
You will need to upload two files. The first is the pattern file which has JPG in the filename. This is a print-then-cut image. The second is the file with SVG in the filename, which is the one that will cut the aperture out.
The JPG pattern is a printable image, so it will load in like the image below. Choose "Complex" as the image type.
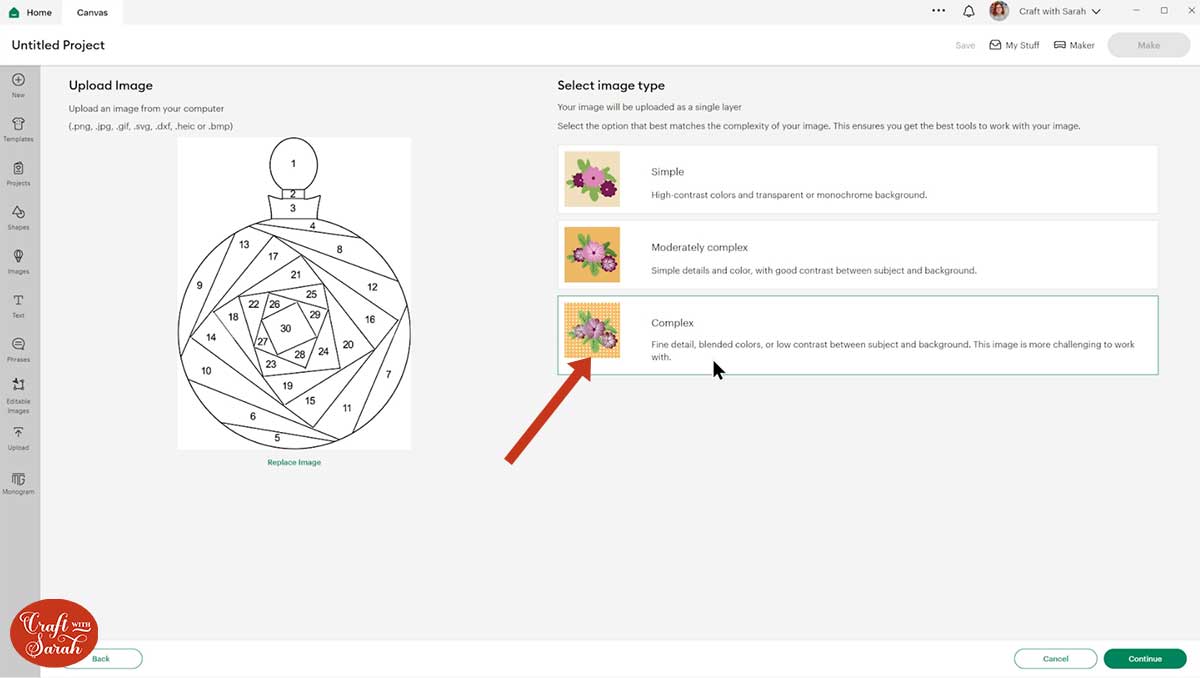
Don't change anything on the next screen - just click Apply &smp; Continue.
Finally, click "Print then cut image" and complete the upload process.
Next, upload the SVG file. This will look like a black silhouette.
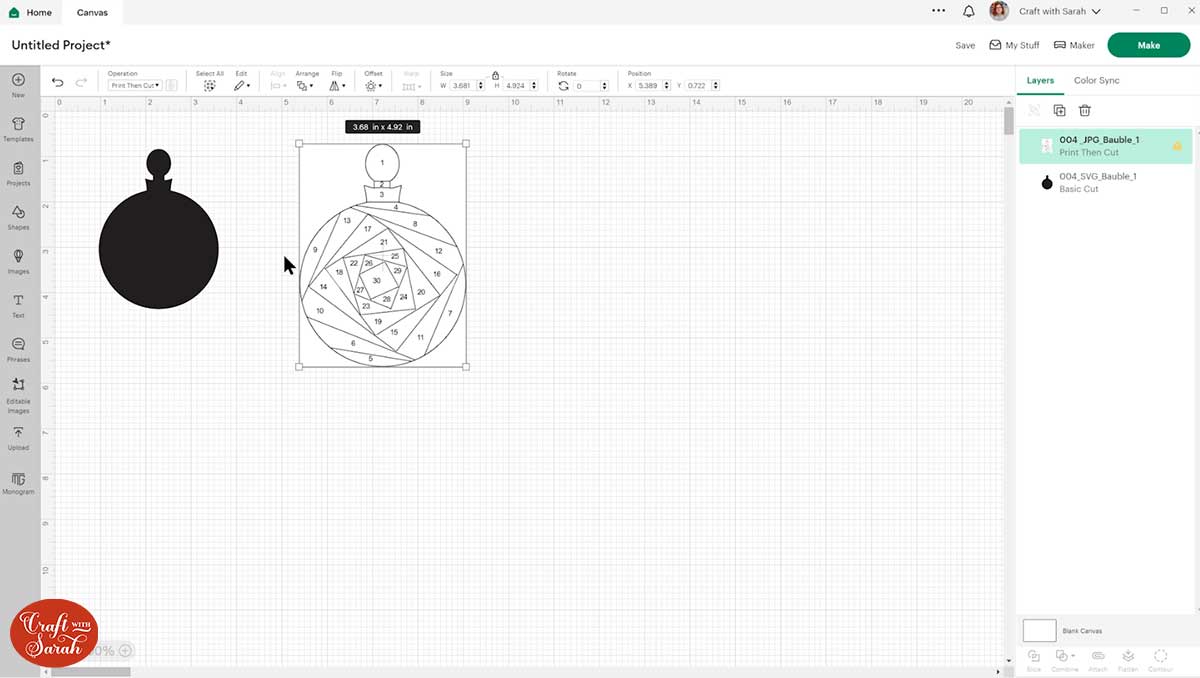
Insert both of the files onto your Canvas.
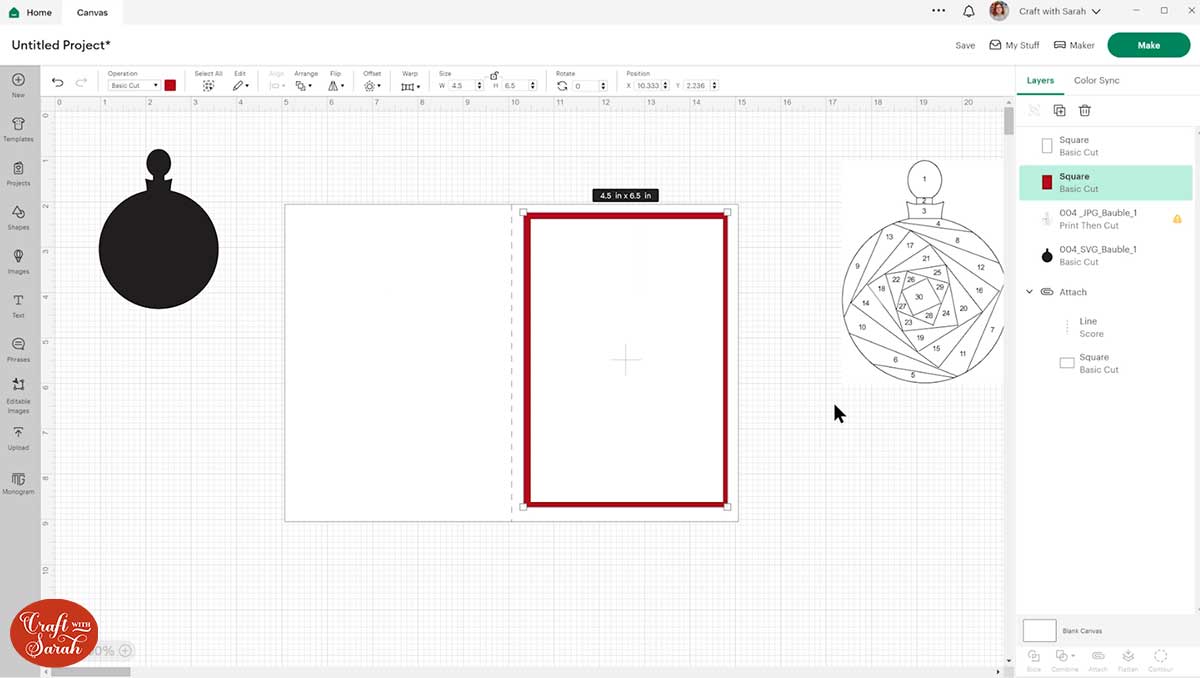
Create a card blank by inserting a rectangle and resizing to 10 inches wide and 7 inches tall. Add a score line and make it 7 inches tall.
Select the rectangle and score line and press Align > Center to put the score line in the middle of the card. Press the "Attach" button at the bottom of the layers panel to join the score line onto the card.

Create another rectangle that's 4.75 inches wide and 6.75 inches tall. Make it a bright colour that matches the colours you are planning on doing the folding in.
Create one more white rectangle that's 4.5 inches wide and 6.5 inches tall. This is that shape that you will do the folding on.
Position the silhouette/black image onto your card and size it as desired.
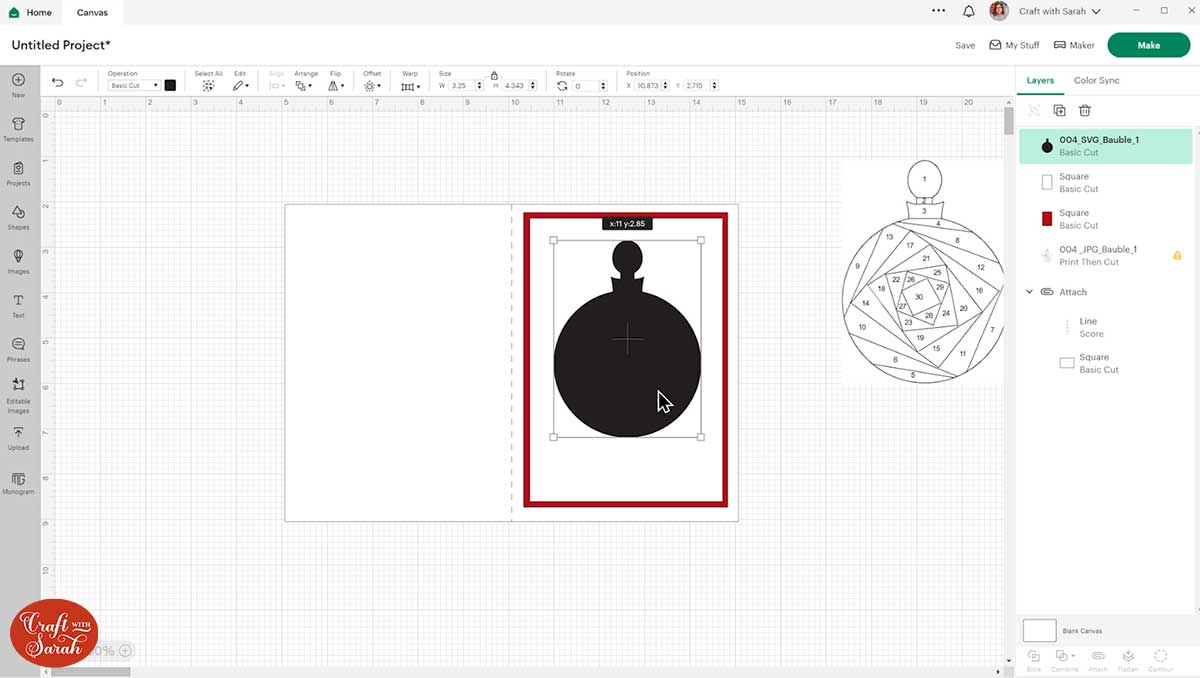
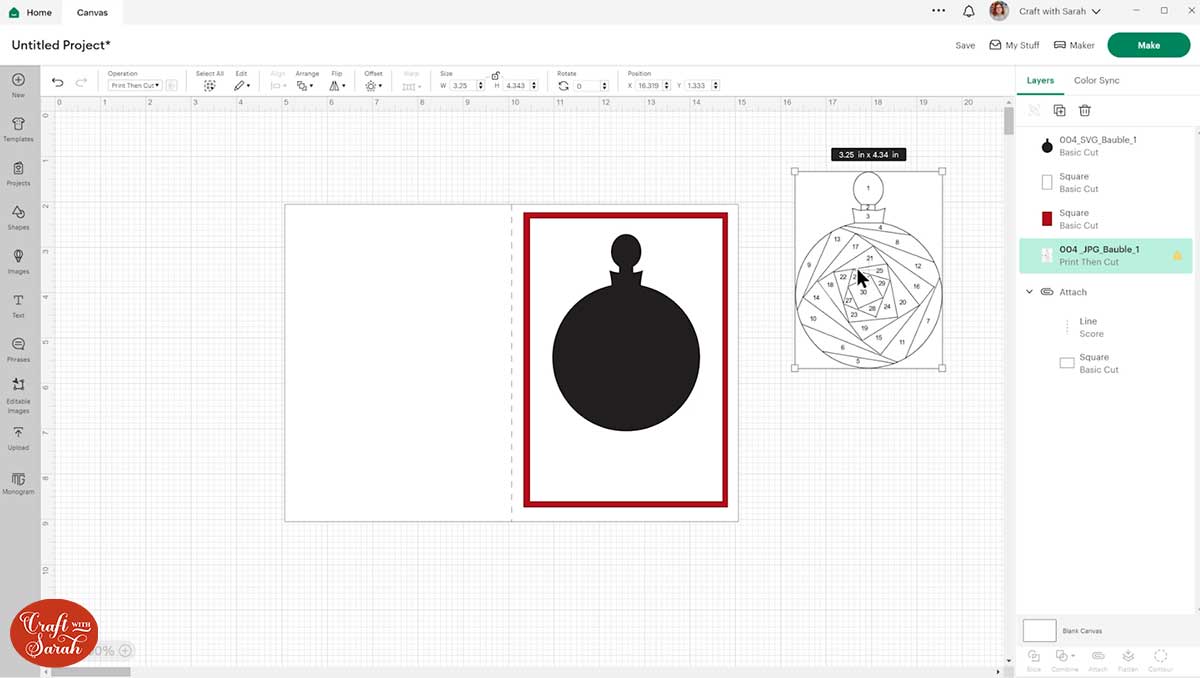
Resize the pattern to the same size as the silhouette. This is REALLY important, as they need to be the same size for the folding to fit.
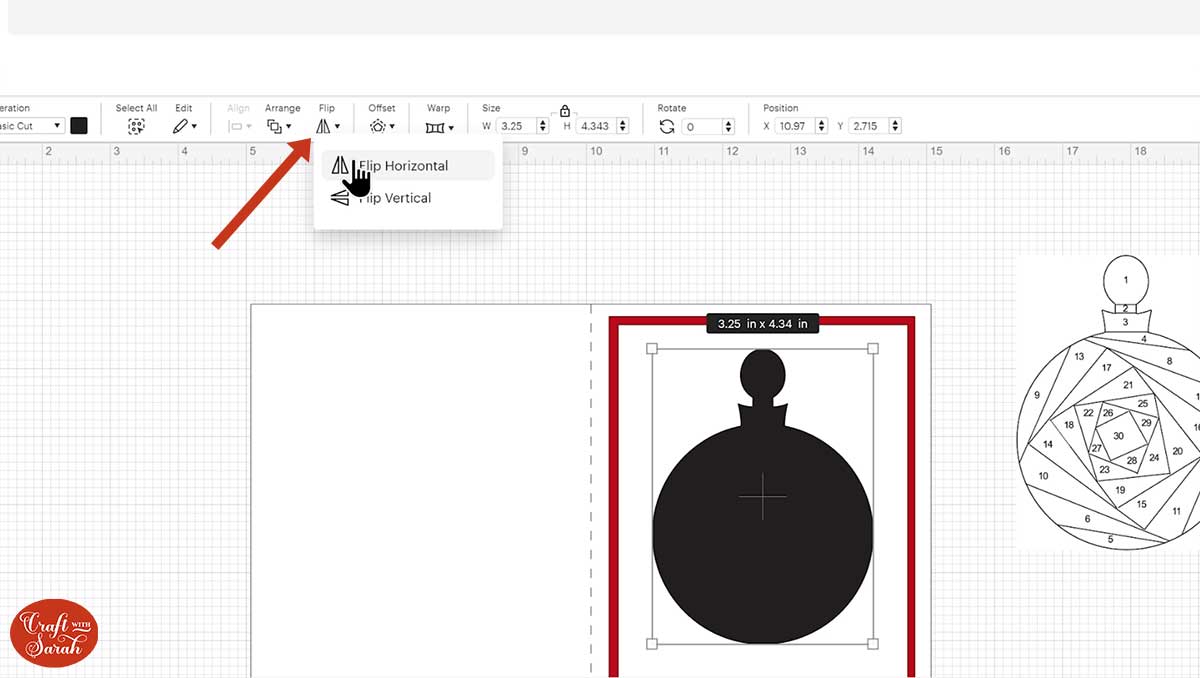
Click the silhouette/black image and press Flip > Flip Horizontal. DO NOT FORGET TO DO THIS!! The image has to be flipped so that it will fit the pattern.
Add any decorations/cutouts you want to the white rectangle. Select the decorations, the black shape and the white rectangle and click Combine > Subtract. This will cut the shapes out of the white rectangle.
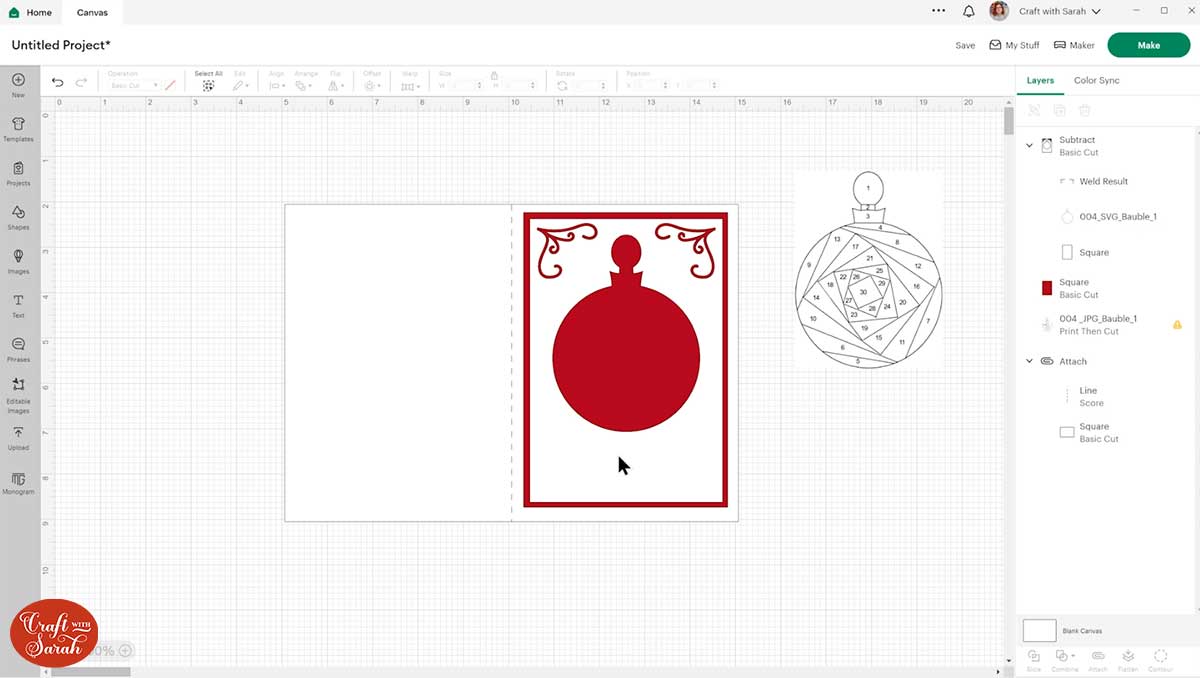
When you're happy with how it's looking, click "Make" and get everything cut out with your Cricut machine.
Congratulations, you are now ready to start iris folding! Click here for instructions.
How to Get Started: Hand-cutting Version
Follow along with these step-by-step iris folding instructions to make your cards by hand, without the need for a cutting machine.
Supplies for hand-cutting iris folding cards
To make iris folding cards, you will need:
- A pattern to follow
- A printer and printer paper
- Scissors
- A pencil
- A craft knife (ideally a rotating blade craft knife)
- Some masking tape or washi tape
- Sticky tape
- A 5x7 inch card blank
- A piece of coloured card slightly smaller than your card blank
- A piece of white card slightly smaller than the coloured one
- Double sided sticky tape and/or foam squares
- Strips of folded lightweight coloured paper in various colours. Origami paper works well.
1) Prepare the template
First, download your chosen pattern and unzip the download folder.
Print two copies of the hand-cutting version of the free iris folding template onto normal printer paper.
The file to print is the one which ends "jpg" in the filename. They look like this:
Cut out one of the patterns using scissors.
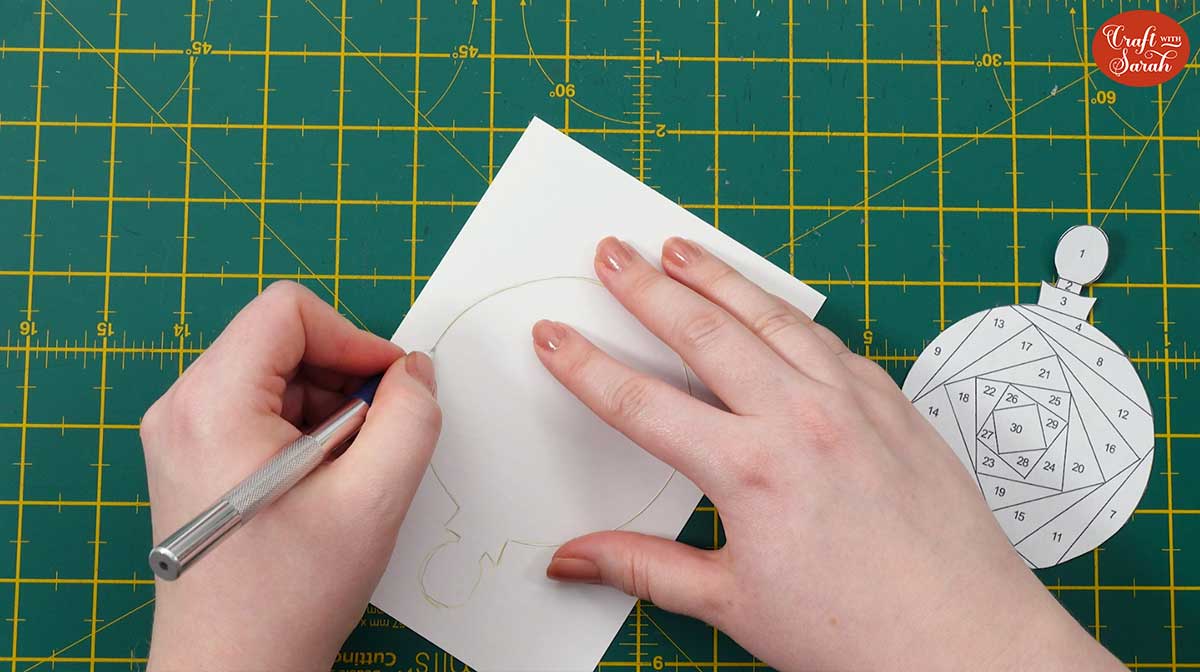
Take your white rectangle of card and turn it over so that the back of the card is facing up. I’m using hammered effect card, so the back of my card is the smooth, unfinished side.
Place the iris folding pattern into the middle of the white card.
Using a pencil, carefully draw around the edge of the pattern.
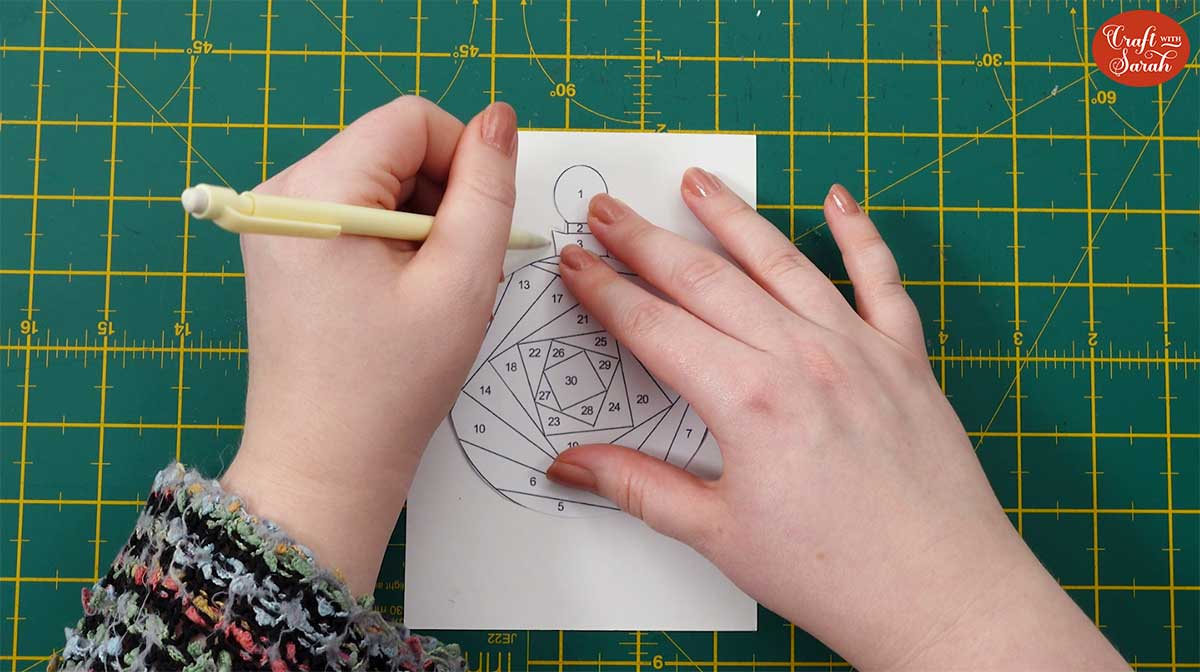
Try not to move the pattern around when you are drawing, as you want to draw a smooth, accurate outline of the iris folding pattern.
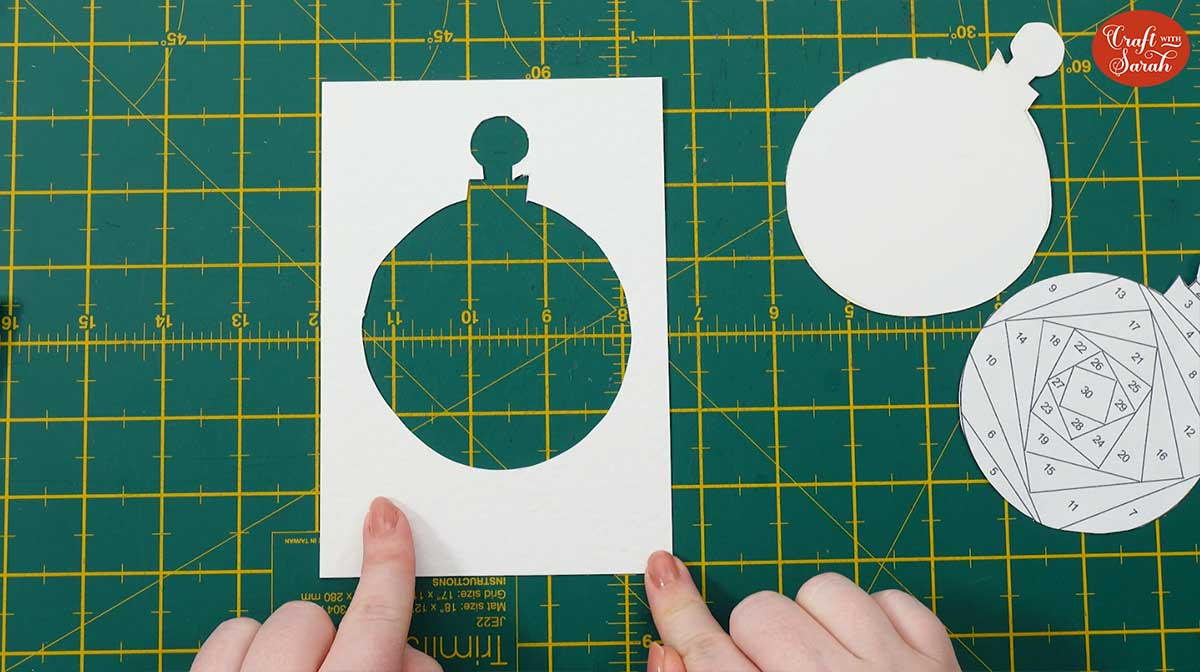
2) Cut out your aperture
Place a cutting mat on your table to protect your work surface.
I like to use a rotating blade craft knife to cut out iris folding shapes. The blade turns as you cut, which makes it really easy to cut smooth shapes and wave the knife around the outline.
Carefully cut around the pencil line you’ve just drawn with your craft knife.
Move the card around so that you're always cutting towards yourself. This puts less stress on the blade of the craft knife, so it’s less likely to snap or tear your card.
When you’re done, pop the shape out of your card and leave to one side, as we won’t be using the shape itself – we need the window cutout.
The next steps for making iris folding cards are exactly the same for both hand-cutting and Cricut versions of the patterns.
How to Iris Fold
1) Secure the pattern
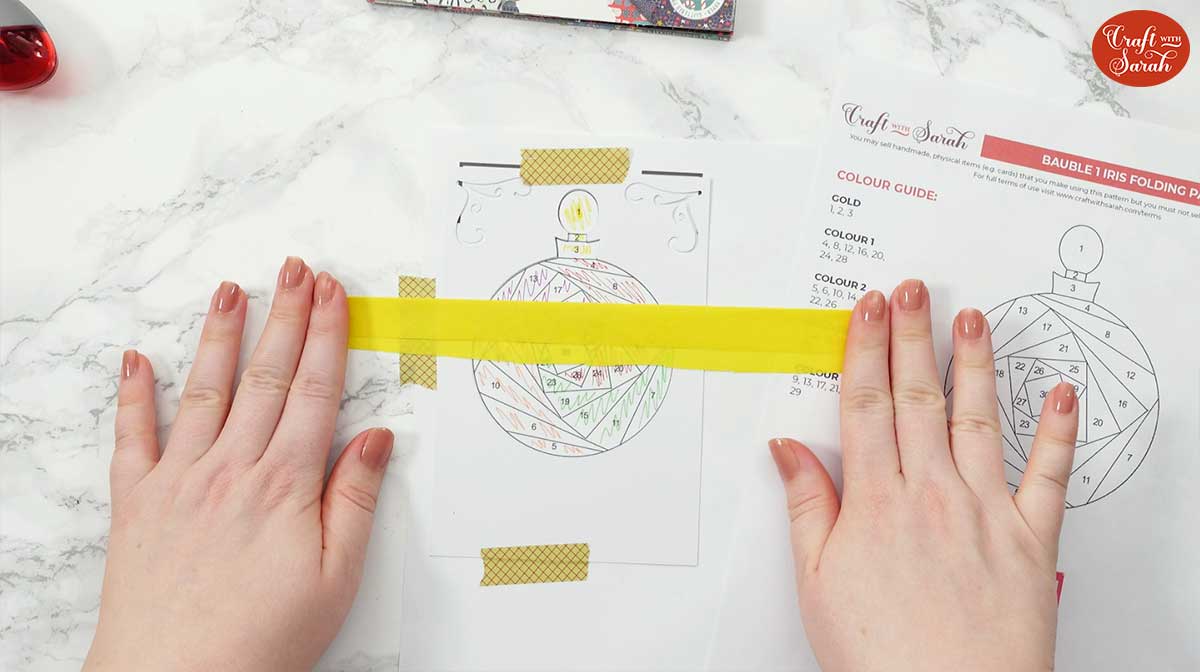
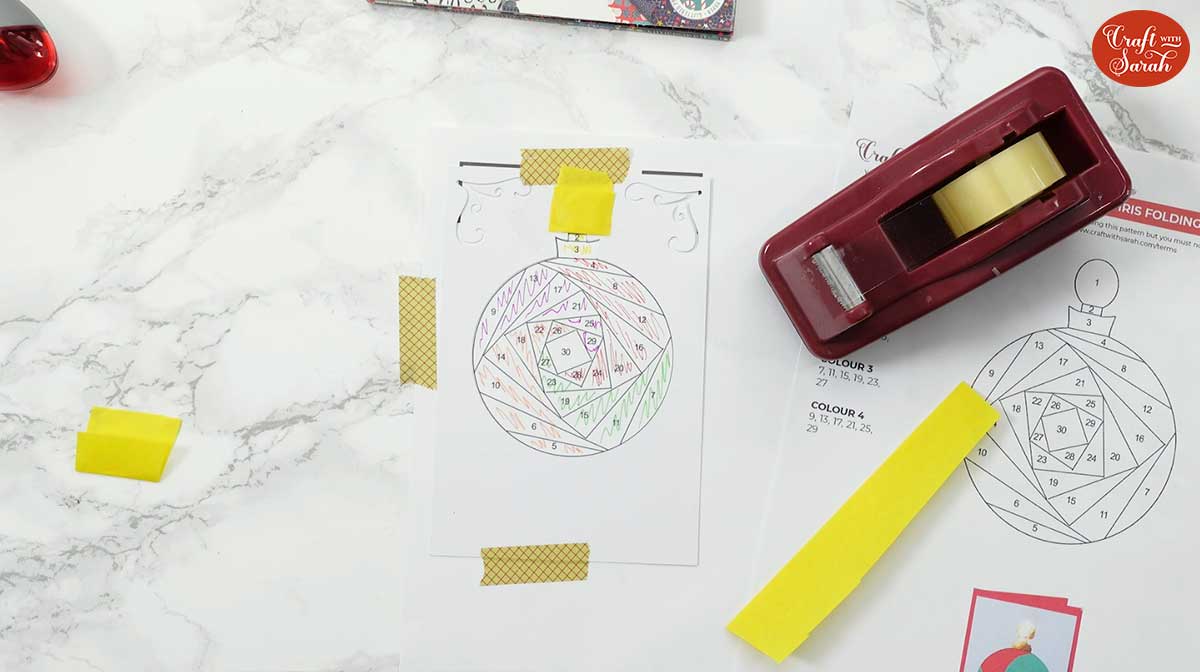
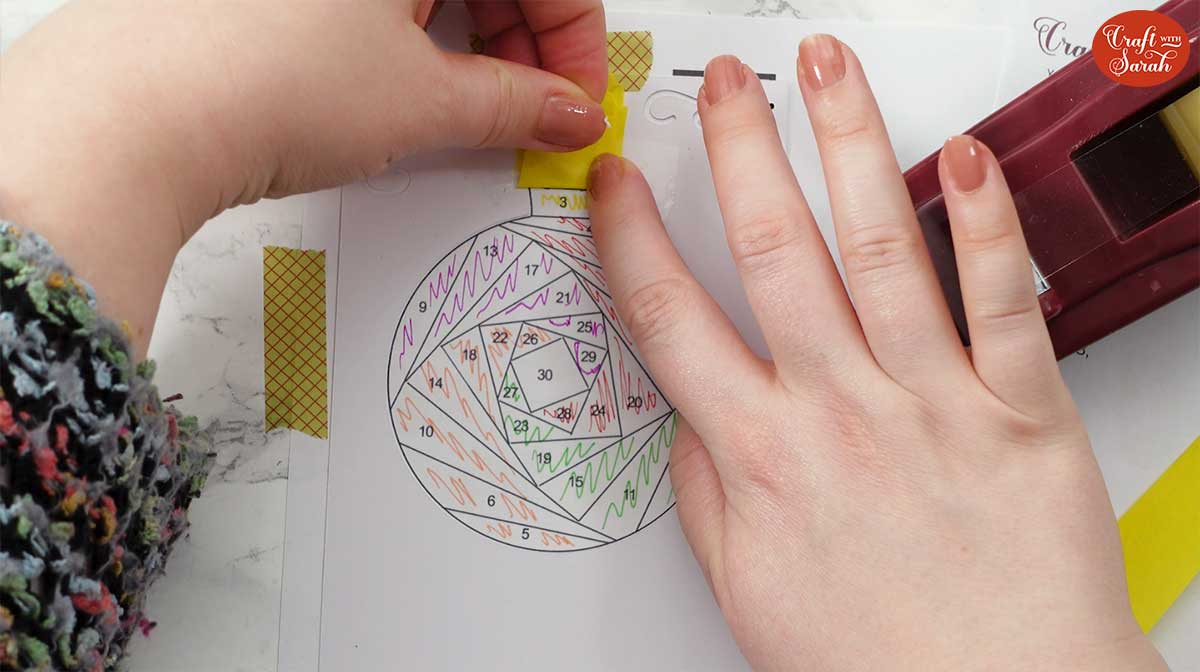
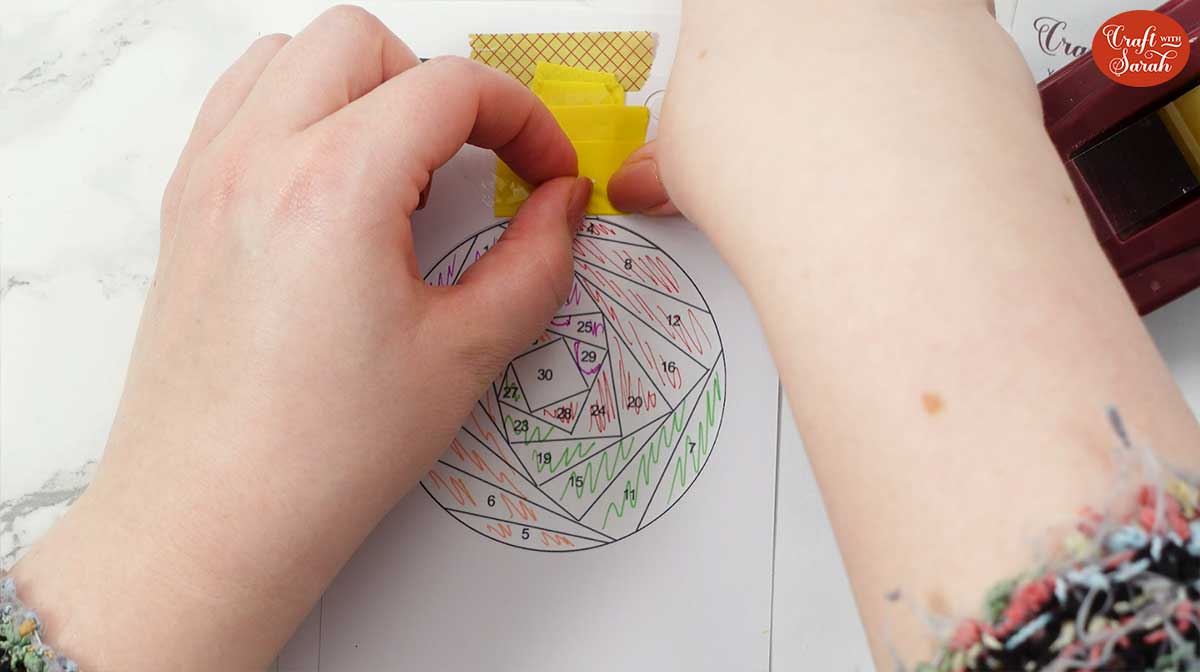
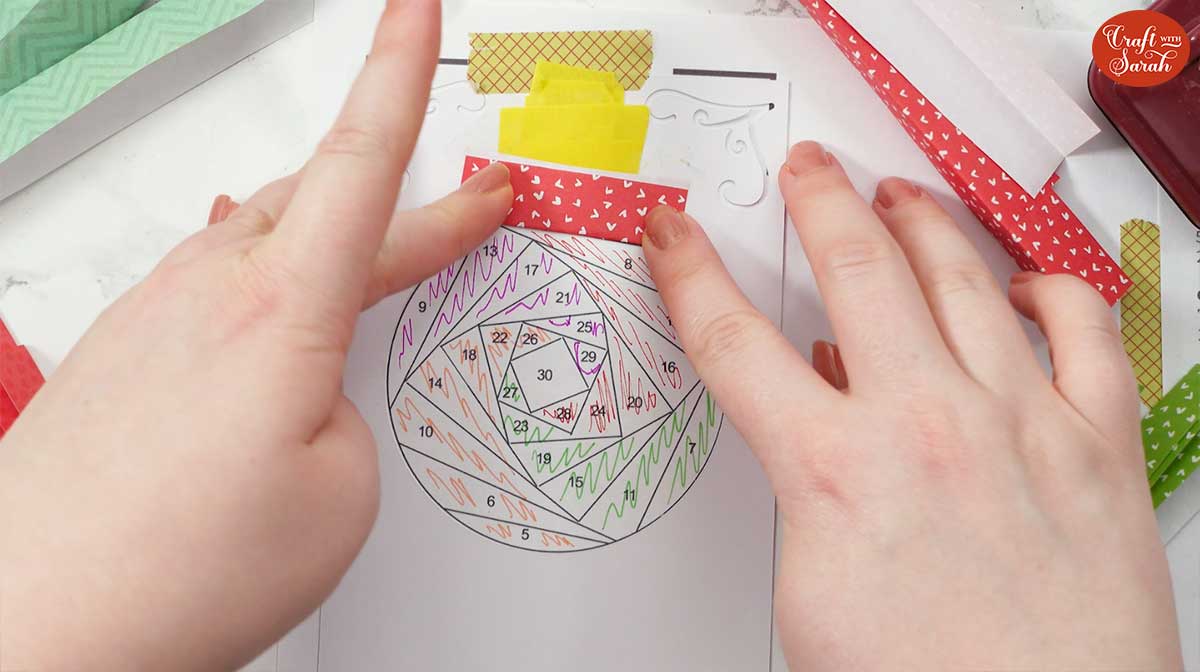
Place the iris folding pattern on your work surface.
Use a couple of small pieces of masking tape or washi tape to secure the pattern to your work surface so that it doesn’t move when you complete the folding.
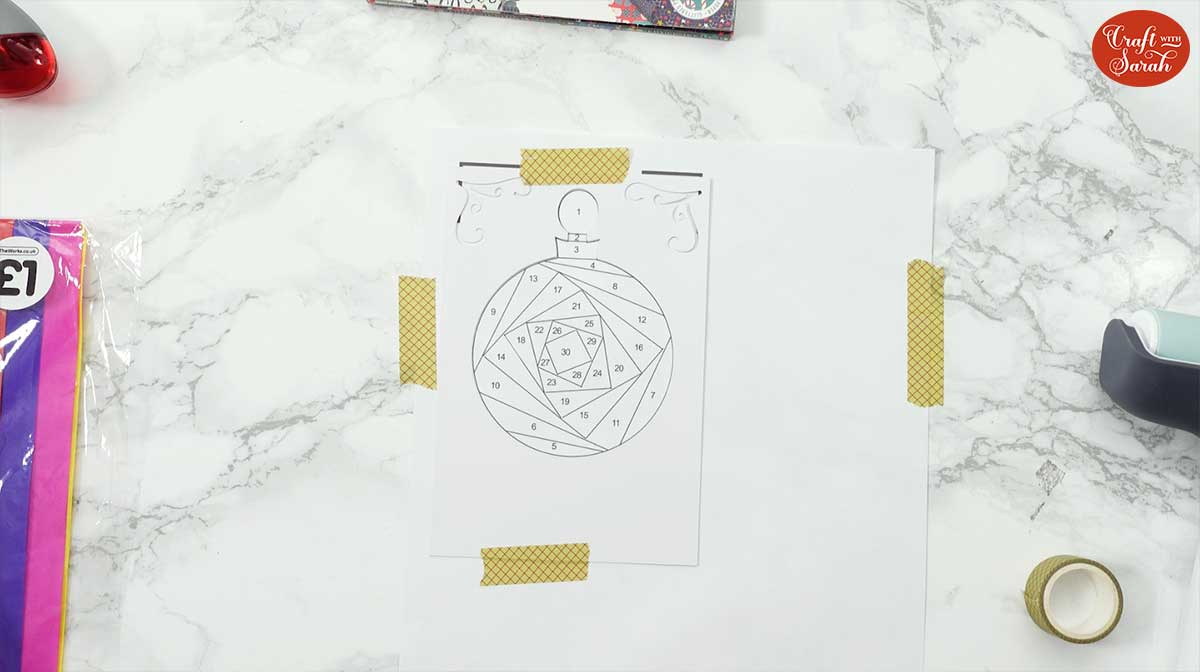
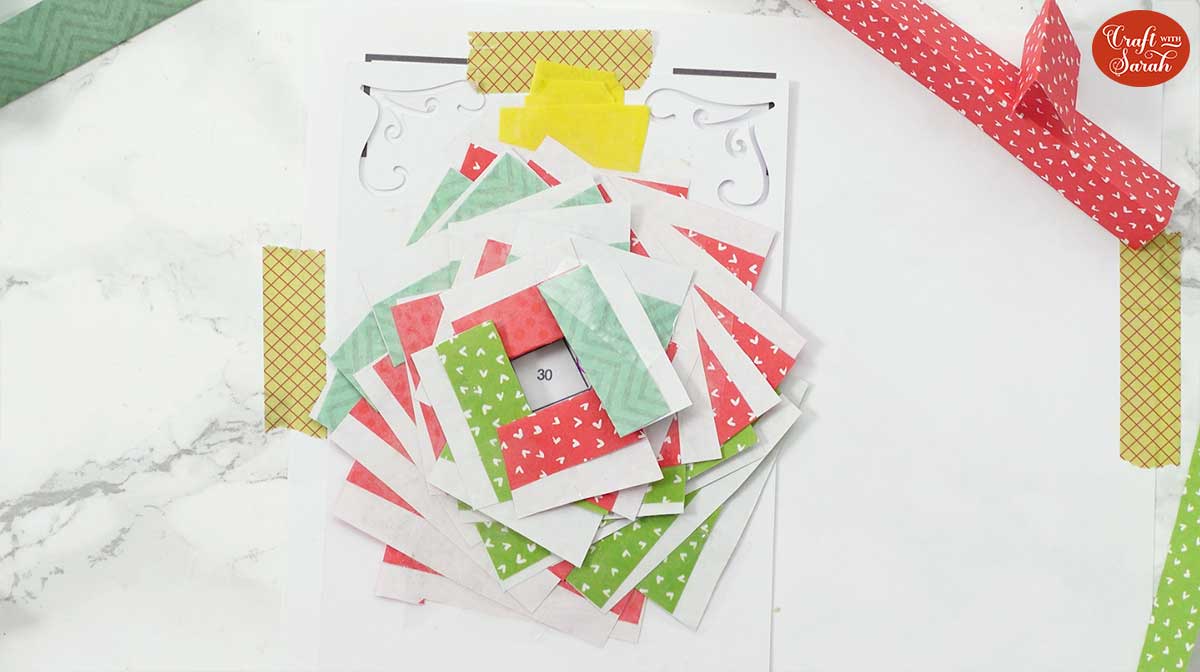
Place your cut-out on top of the pattern and line it up so that the cutout in the card matches the shape of the pattern.
Use some more masking tape to secure the card. Make sure you only put a small amount on the white card, as you will be using most of the space on the back to stick your coloured paper strips to.

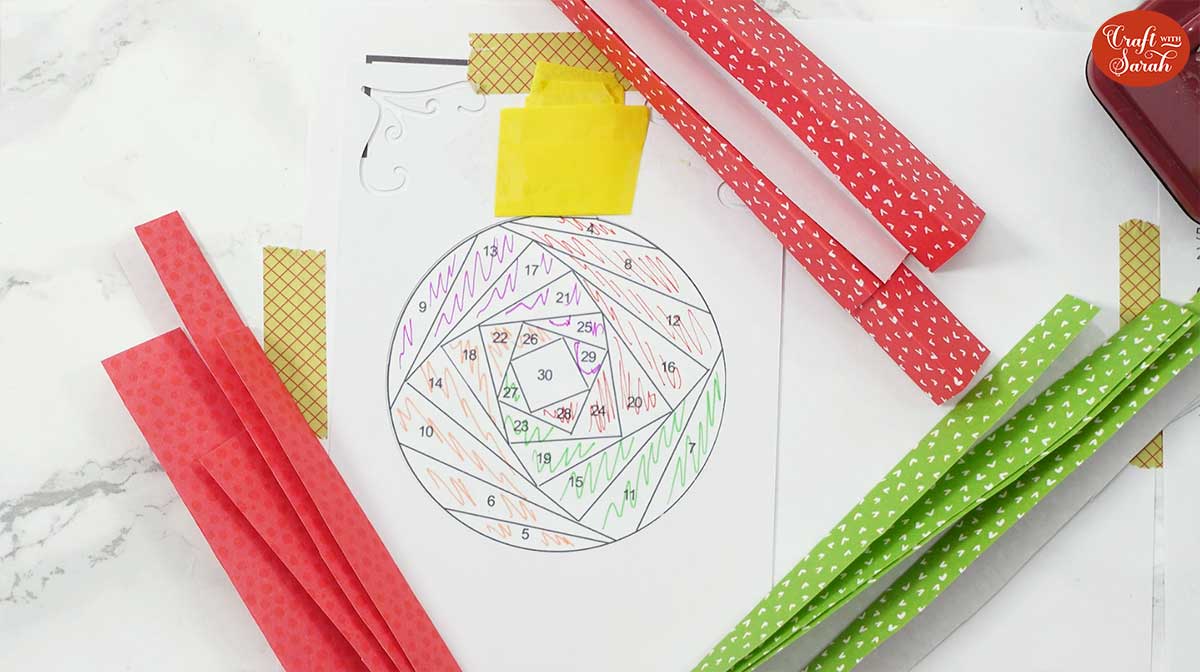
If the pattern has multiple colours, you will be able to see a guide on the pattern printout.
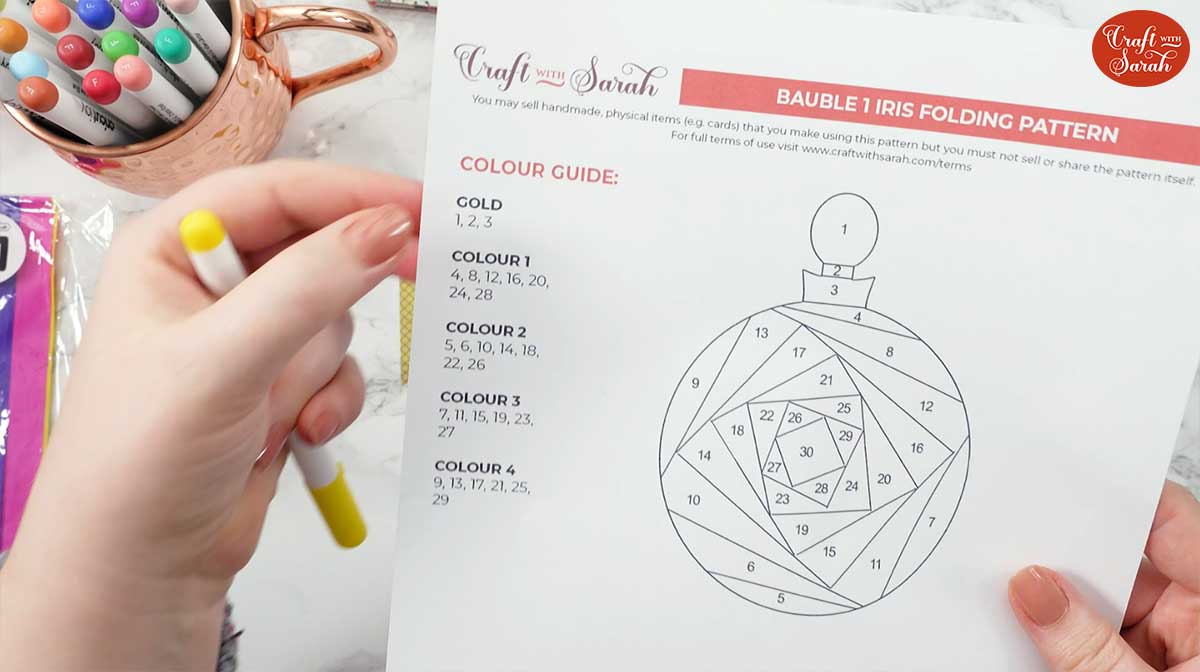
To make it easier whilst you are folding, you can colour the segments of the pattern with pens or pencils to match the guide.

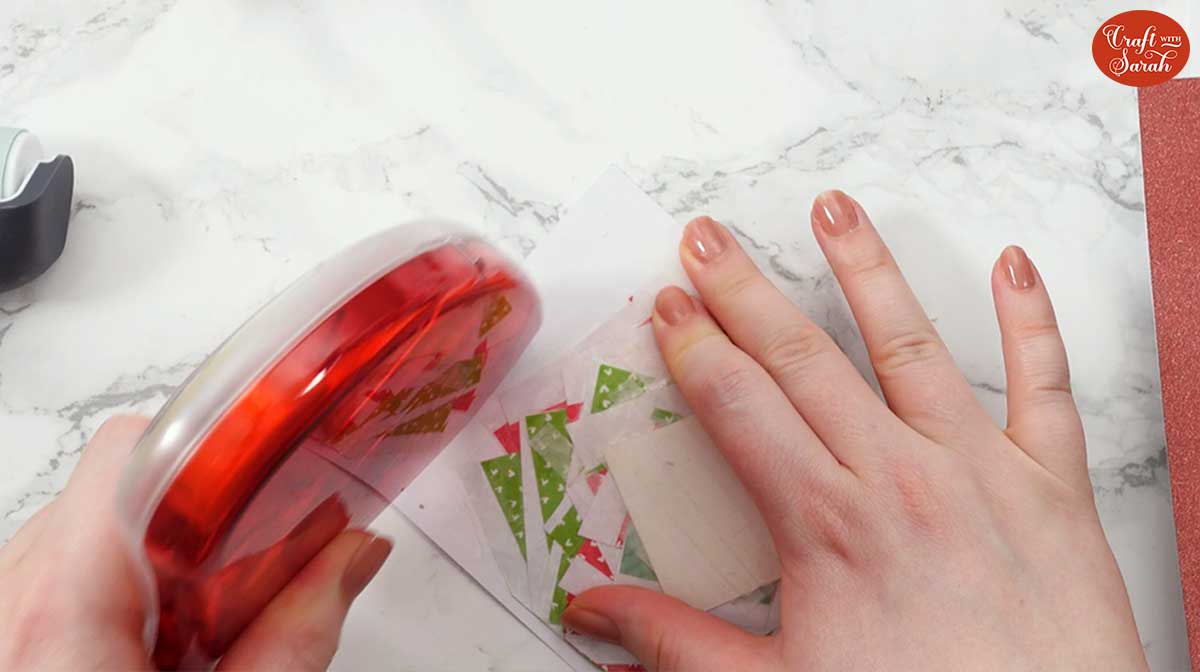
2) Prepare your paper strips
Next, prepare your paper strips.
Thin coloured paper, wrapping paper or even wide florist ribbon are all great choices for iris folding strips. You need paper that’s not too thick, so try to avoid using card or heavy scrapbook paper.
I like using origami paper because it is very thin and has lovely patterns on it.
It doesn’t matter if your strips have jagged edges from where you have cut them out.
Fold the strips in half to get a nice crisp fold. Use a bone folder or brayer to enhance the crease, but if you don’t have either or those then just make sure you run your finger all the way down the crease.
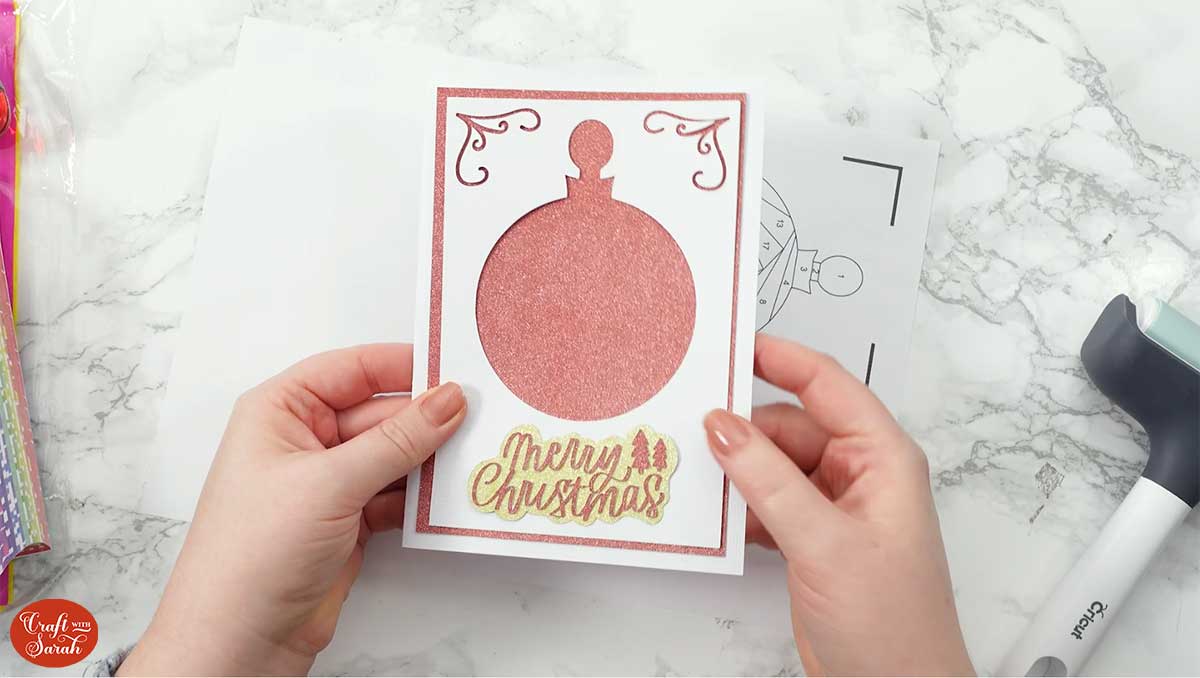
For this pattern, I’m using four different colours of paper – one for each of the spirals in the bauble.
Place the strips around the edge of your card. I like to position the colours on the sides of the pattern that I’ll be using them on, to make it easier to pick the right colour for each fold.
Now you’re ready to start iris folding!
3) Stick your paper strips according to the numbered pattern
Find the fold on the pattern marked with the Number 1.
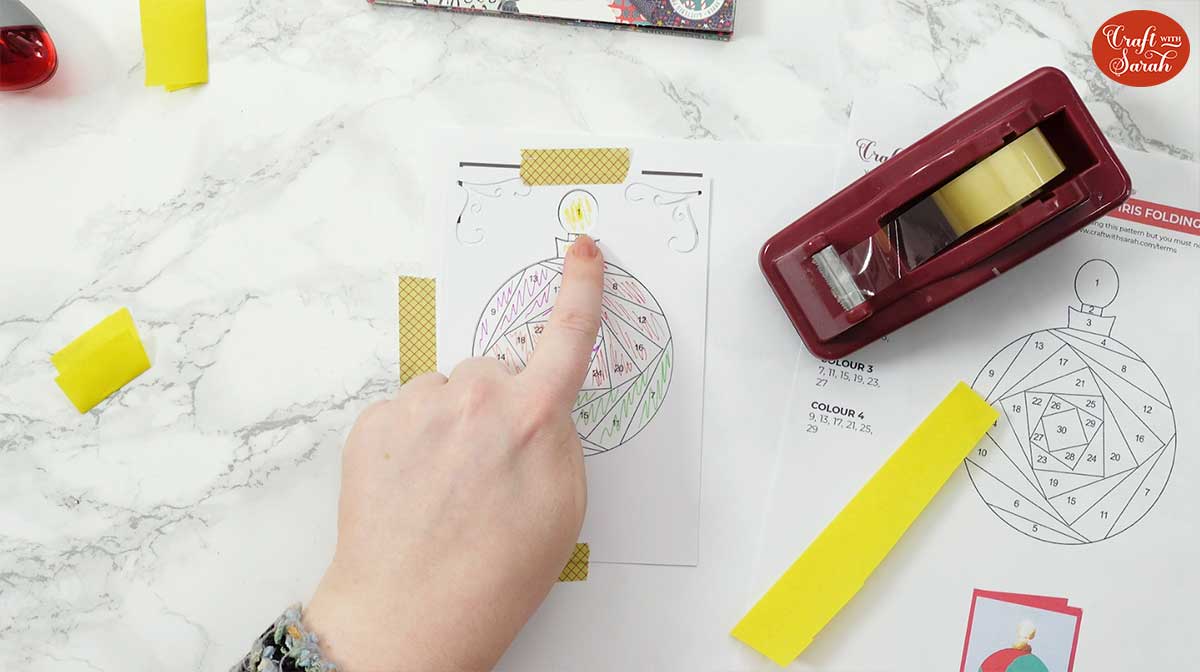
Cut a strip of your paper so that it’s just longer than the fold on the pattern.
Place the strip over the pattern so that the creased line sits along the straight line next to the Number 1.
Use sticky tape to secure the paper strip to the white card.
Don't worry if some of the excess goes outside the edge of the white card as it can be trimmed at the end.
Do the same process for Number 2 on your pattern.
Take your paper strip, cut it to size, place the creased edge along the next fold line on the iris folding pattern and then secure it to the white card with sticky tape.
Keep going along the rest of the pattern, following the folds in numerical order.
You can place your sticky tape on top of paper strips you have already secured, but make sure your sticky tape doesn’t go outside the edge of the white card – you don’t want to end up accidentally sticking your card to your work surface!
4) Complete all the folds on the iris folding template
When you get to a new colour on the pattern, the folding works in exactly the same way as the first colour.
If your card starts to get a little bulky with all the paper strips, use a longer piece of tape to help stick the strips down a little bit flatter.
Don’t be tempted to turn your card over and take a sneaky look at the front before you have finished.
It’s really hard to line everything up exactly if you move it during folding, which is why we used making tape at the beginning to keep the white card in position.
Keep going along all of the folds until you are left with just the square in the middle of the pattern.
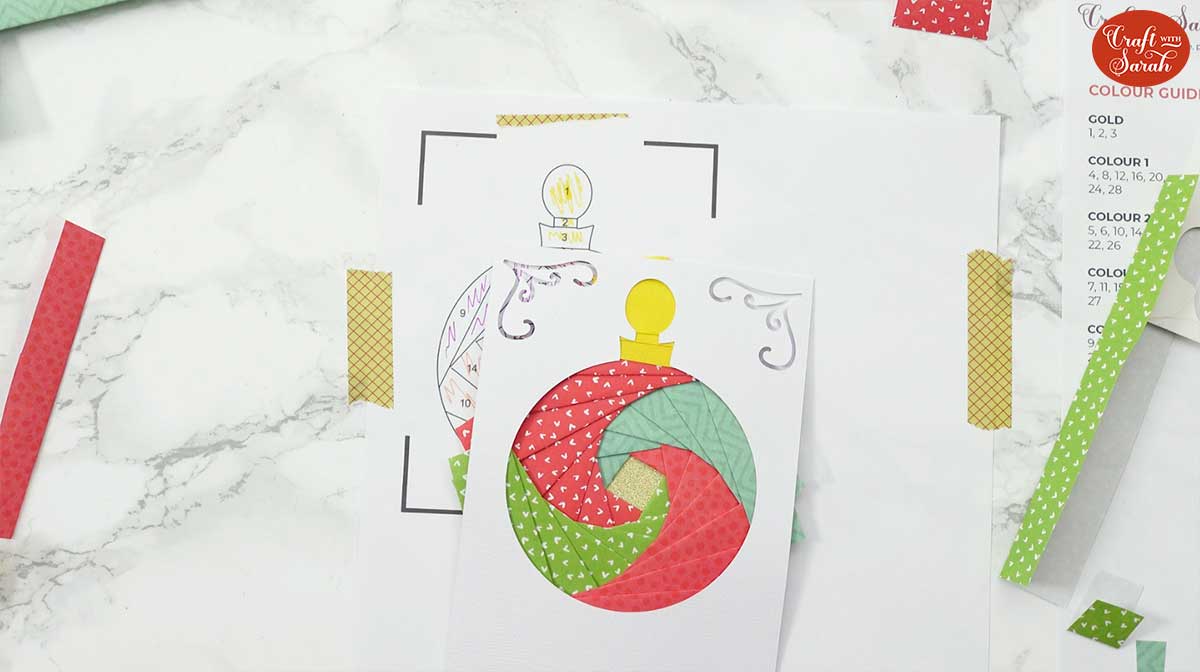
5) Cover the iris folding square
Traditionally, the square of the pattern is covered with holographic or metallic paper so that it looks like the shiny iris in the middle of a camera lens.
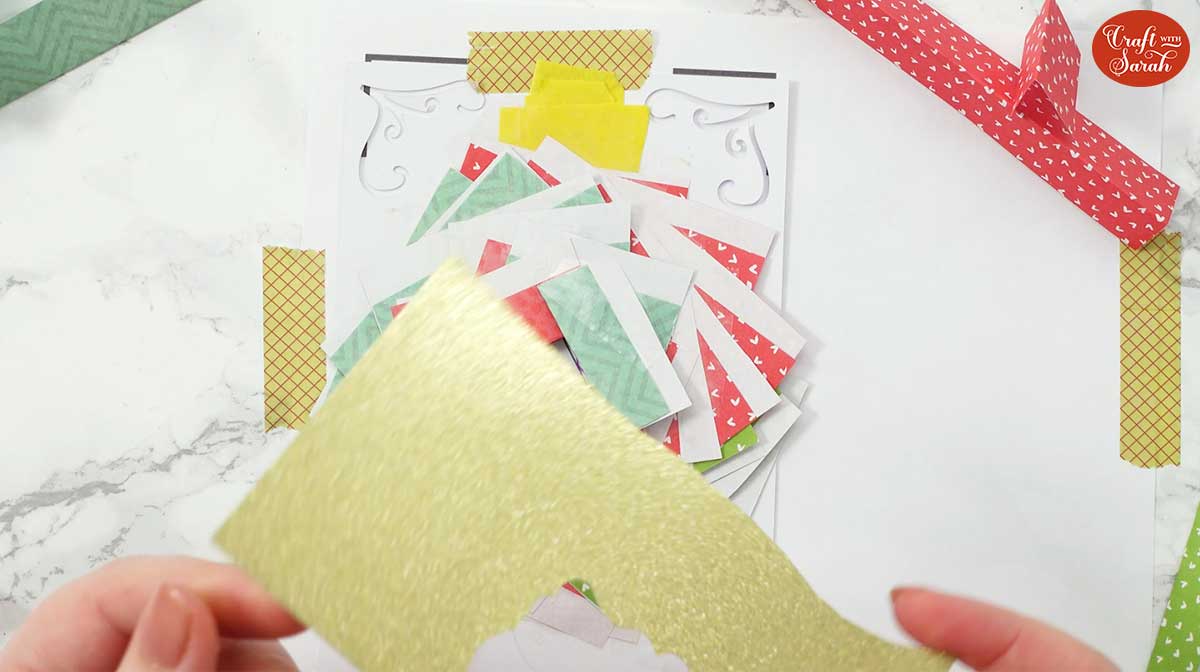
Personally, I don’t really like the metallic effect because then the middle doesn’t match the rest of the design.
Instead, I like to tie in the middle square to match the whole card.
To do this, choose one of your paper strip colours and place it diagonally across the square to leave behind a triangle of empty space.
Choose the colour from the opposite side of the pattern and stick a piece of it over the remaining gap.
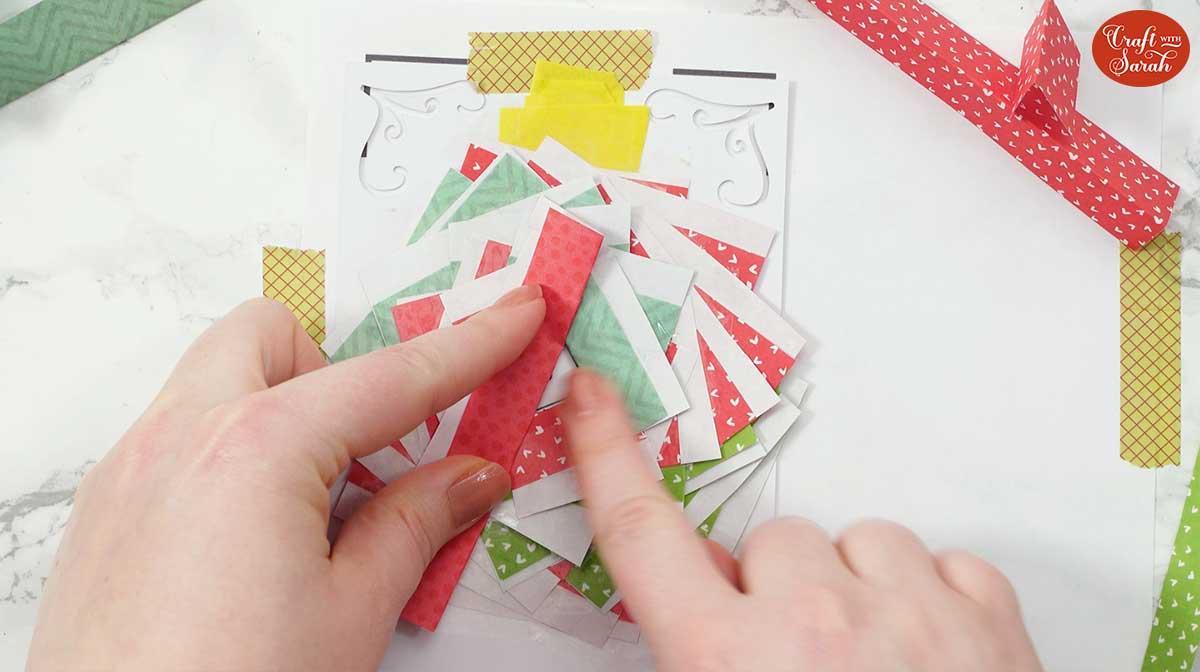
6) Reduce bulk & trim off excess paper strips
Now is the fun part where you can turn the card over and have a look!
If you’ve got paper strips sticking out from the edge of the white card, trim them off with a pair of scissors. You could use a craft knife and metal rule to get straight edges, but scissors works just fine.

Use some long pieces of sticky tape and go down all the edges of the white card. This helps to make sure your paper strips are all secured to the white card, and also reduces bulk.
Turn your card over, and if you have any parts where the paper strips are coming away from the card then stick another long piece of sticky tape down the edge to secure them.
If the pattern is bulky from thick paper strips, press it under a couple of heavy books or similar overnight to help thin it out.
7) Stick your iris folding topper to your card front
Take your double-sided sticky tape and place a strip down each of the edges of the back of your card.
Try to get the double-sided tape as close to the edges as you can.
I like to put a piece down the middle of the card as well, for that extra bit of stickiness.
Firmly stick your iris folding design to the coloured rectangle of card.
Press down all over the card to make sure it’s really stuck down.
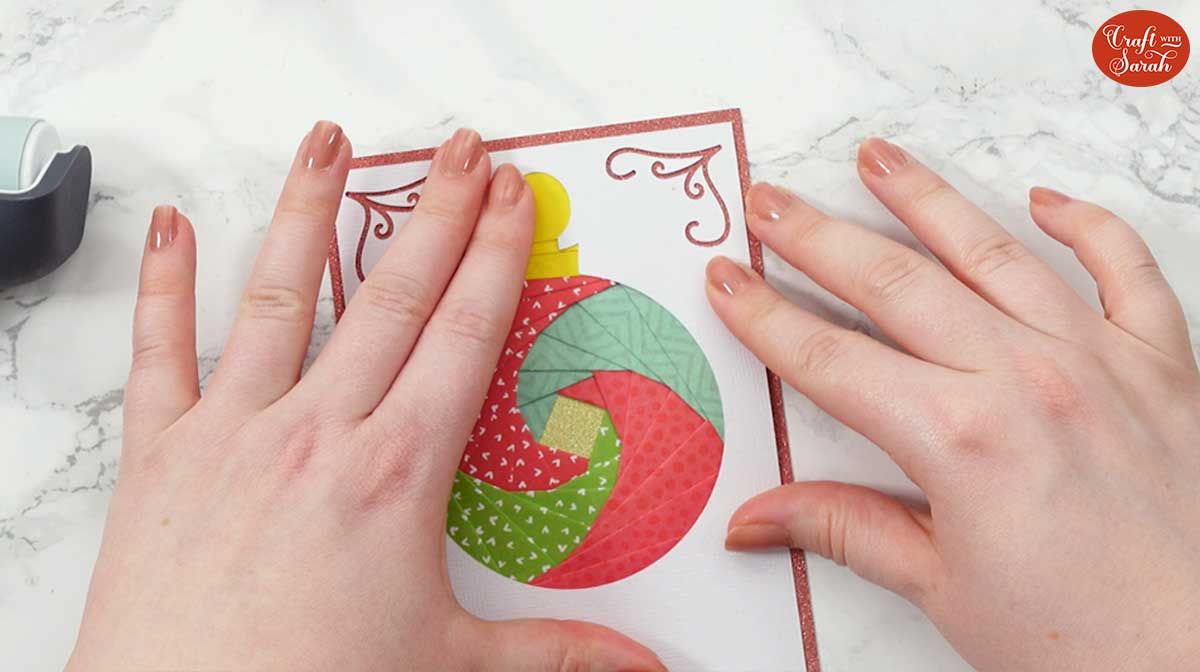
Stick the iris folding design to your card blank using glue or foam squares.
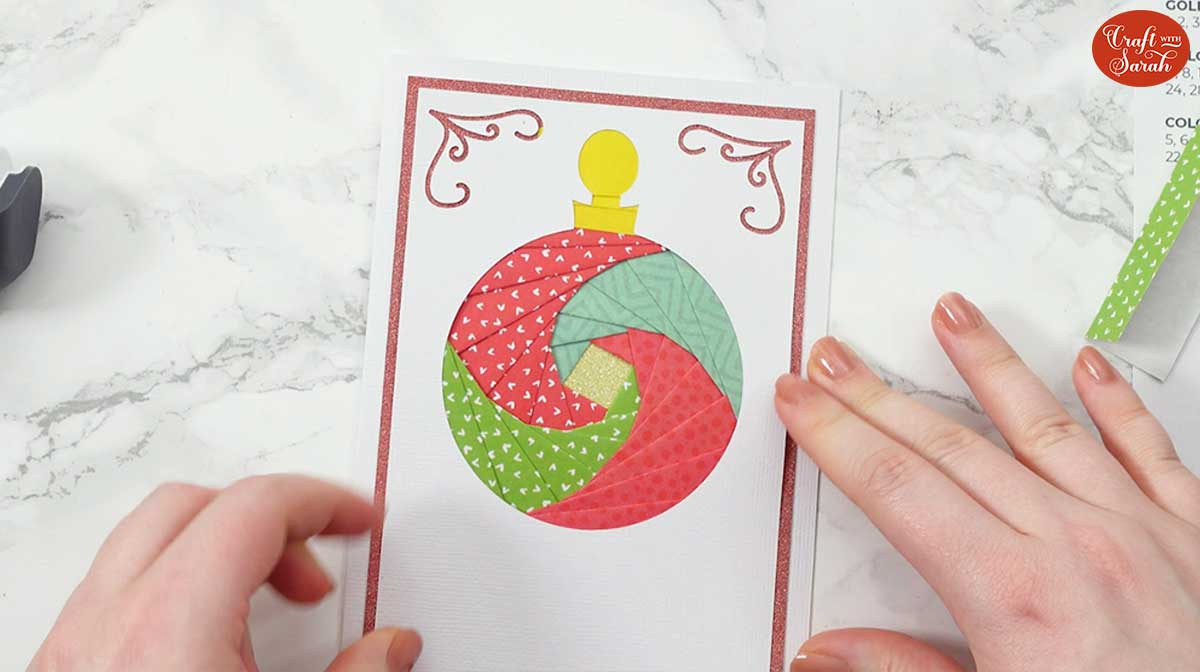
Embellish with toppers, flowers, sentiments or... whatever you like!
Or, leave it plain - it's completely up to you.
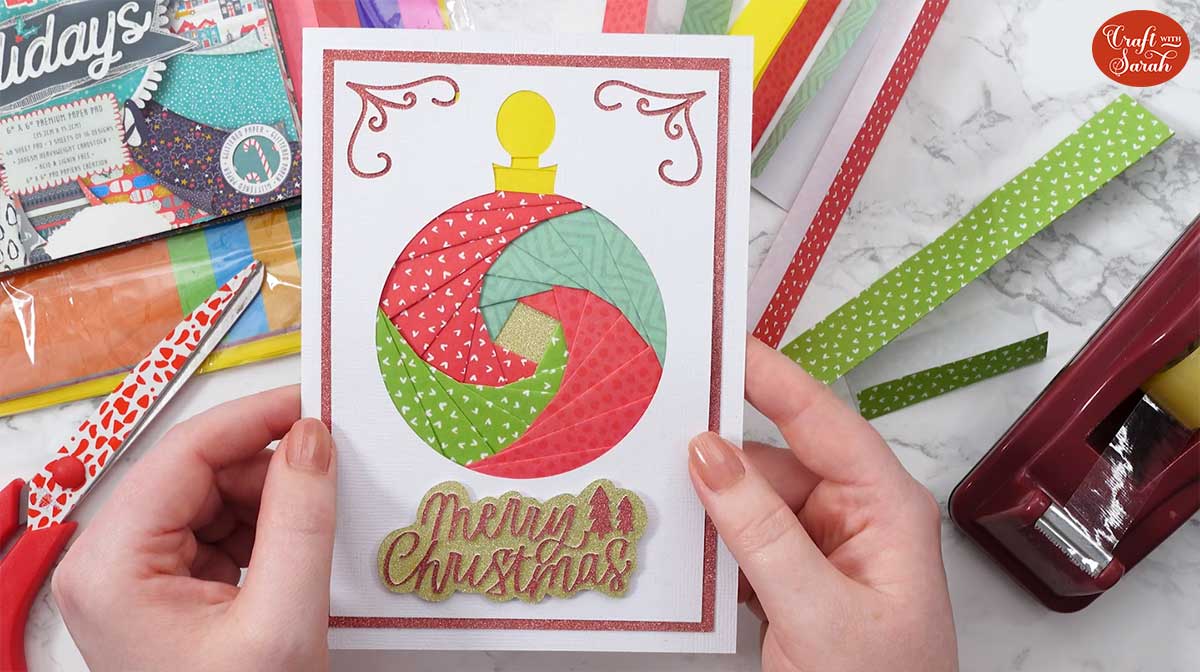
And there you have it - your handmade iris folding card is all finished!