How to Make Envelopes & Write Addresses with a Cricut

Learn how to make an envelope for your Cricut card making projects with these free envelope templates.
Plus, see how to get your Cricut to write the addresses using the pen function.
A rectangular envelope and a square envelope are included in the free envelope templates, so that you can choose the one that’s best suited to the type of card you are making.
Video tutorial: How to make envelopes on a Cricut
Watch the video below to find out how to cut and assemble these useful envelope templates. Or, keep scrolling for a written tutorial.
Materials to make DIY envelopes
Here is a list of the materials that I used to make these handmade envelopes.
Please note that some of the links included in this article are affiliate links, which means that if you click through and make a purchase I may receive a commission (at no additional cost to you). You can read my full disclosure at the bottom of the page.
- Free SVG design (scroll down to find the download box)
- Digital cutting machine such as a Cricut Maker
- Light grip cutting mat
- Cricut scoring wheel or scoring stylus (optional but so helpful!)
- Patterned scrapbook paper
- Double-sided tape and/or glue
- Cricut pen to write the address
How to make an envelope with a Cricut
Here’s how to make envelopes and write the addresses on using your Cricut.
Step 1) Download the free file & unzip the downloaded folder
Download the free envelope SVG files using the box below.
Download the Free Cutting File

Please login to your account to download this file.
TERMS OF USE:
You may sell finished, handmade physical craft items that you have made using this product but must not sell or share the digital files. Read full terms of use
Before you upload the SVG to Design Space, you need to unzip the download folder that it comes in.
- How to unzip a folder on Windows computer
- How to unzip a folder on a Mac
- How to unzip a folder on an iPad/iPhone
- How to unzip a folder on an Android device
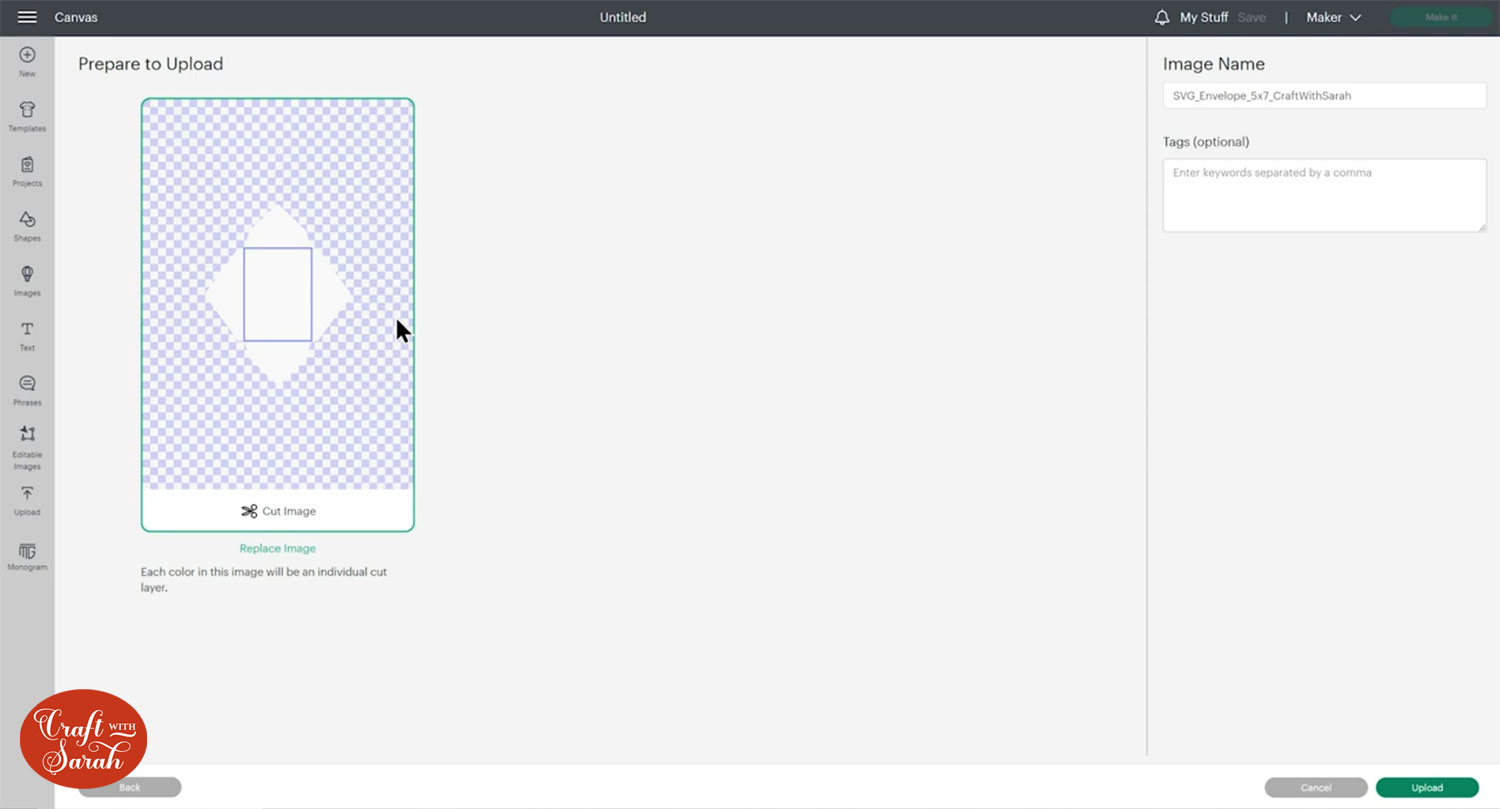
Step 2) Upload the SVG file into Design Space
Open up Cricut Design Space and upload either the rectangular or the square envelope.
The tutorial works the same for whatever shape you choose, but make sure you select the one that best fits the card you are making.
Make sure you upload the file which starts svg- in the filename!!
This is how it should look after you have uploaded the file:
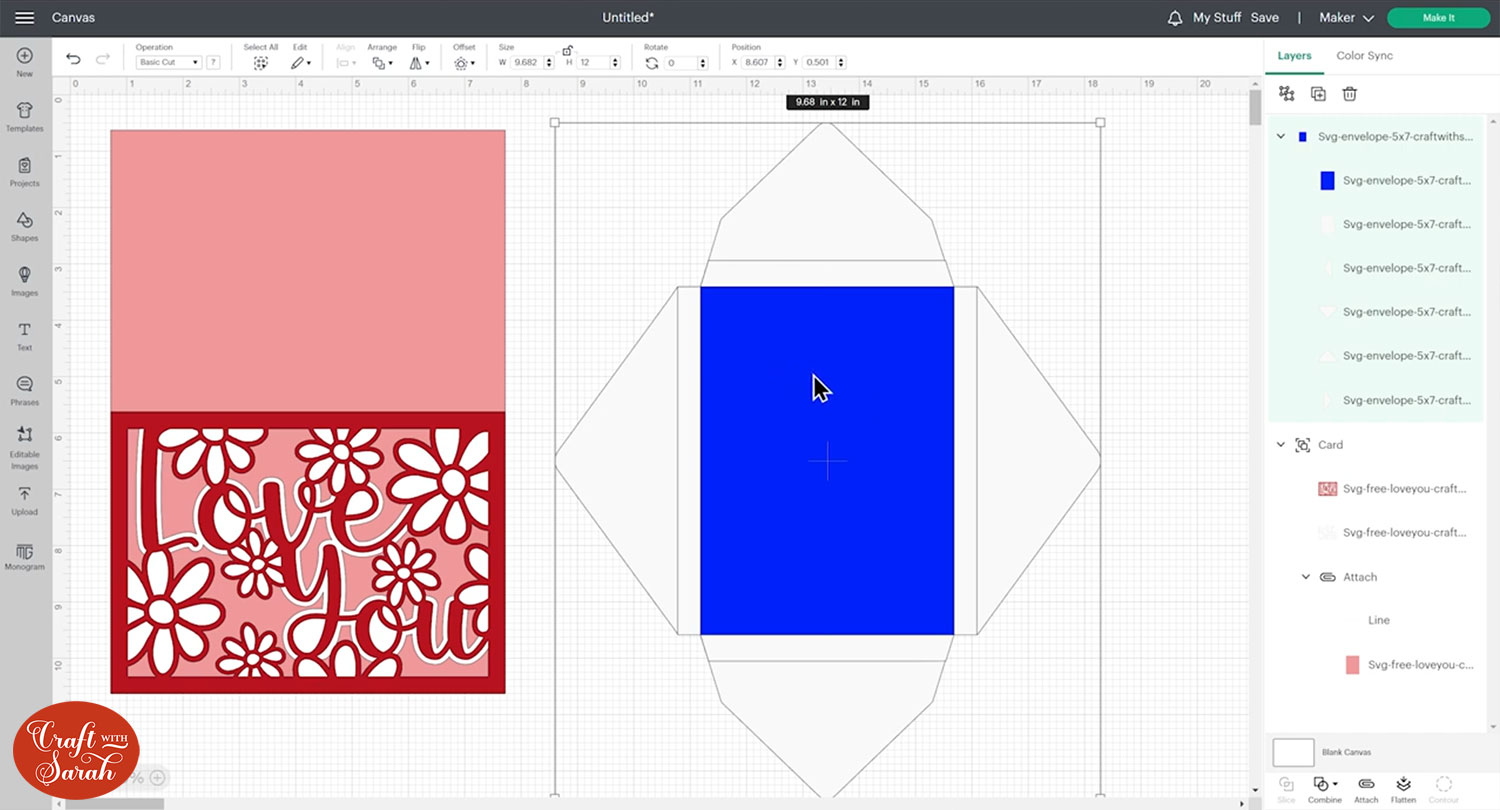
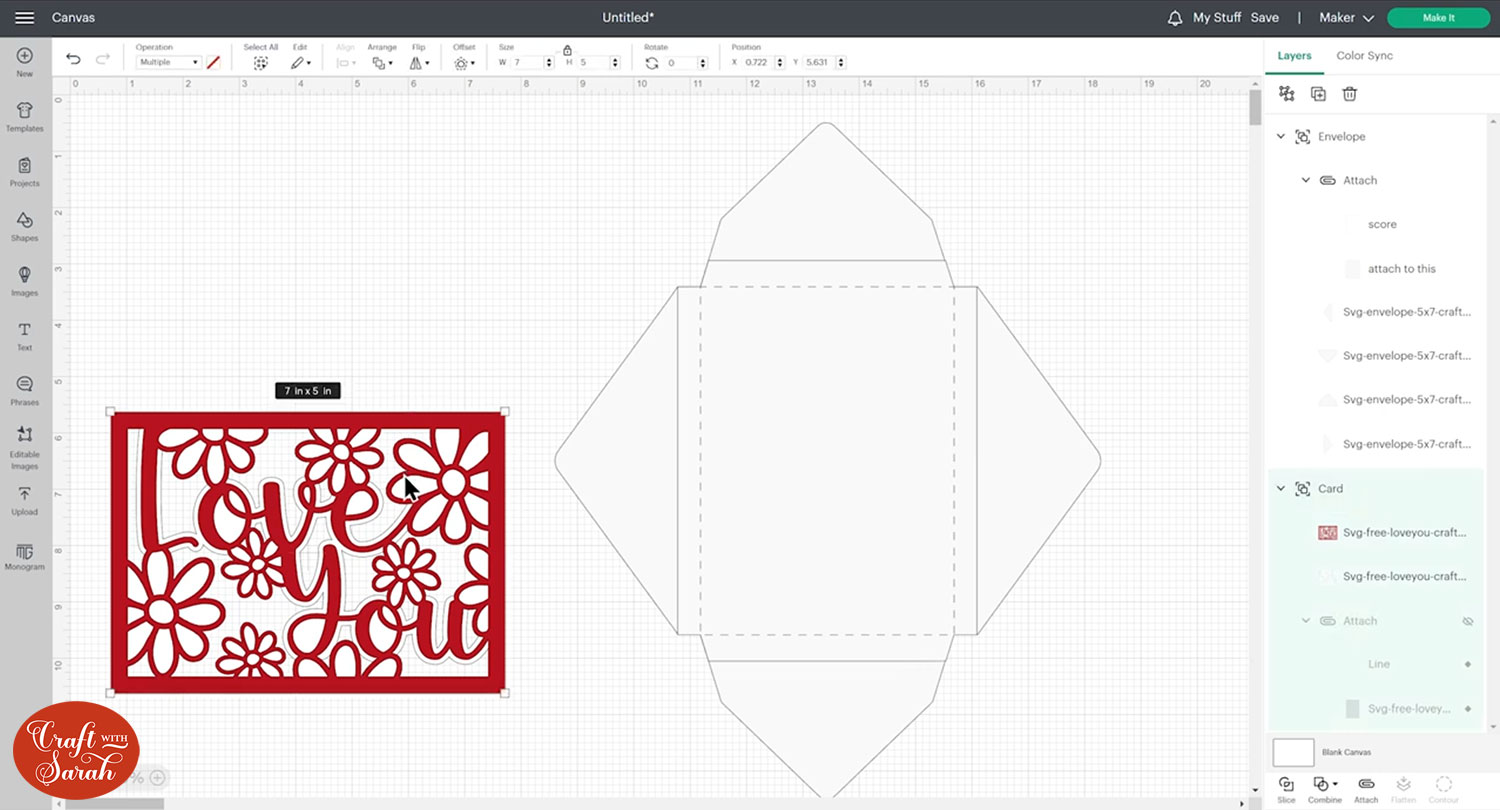
Insert the envelope template onto your project.
I already have my greeting card loaded onto the project too.
It’s a good idea to have this pre-loaded so that you can size the envelope to match the card.
Step 3) Format the score lines
Look down the layers panel until you see the blue rectangle layer.
Click on the blue rectangle layer and change it to a “Score” line in the Operations dropdown.
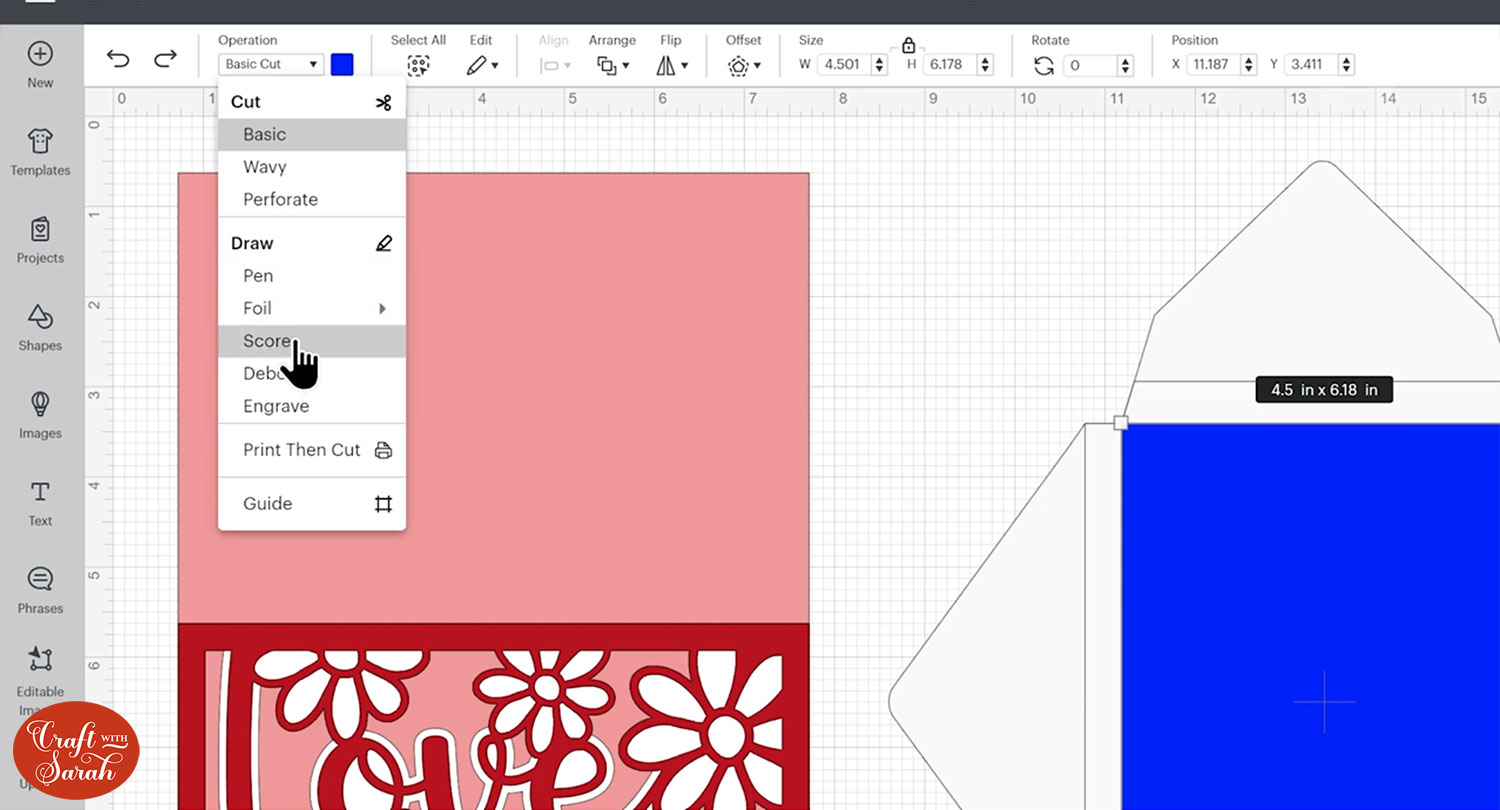
Double-click the name of the score line layer in the layers panel and change it to “Score”.
Rename the layer underneath to “attach to this”.
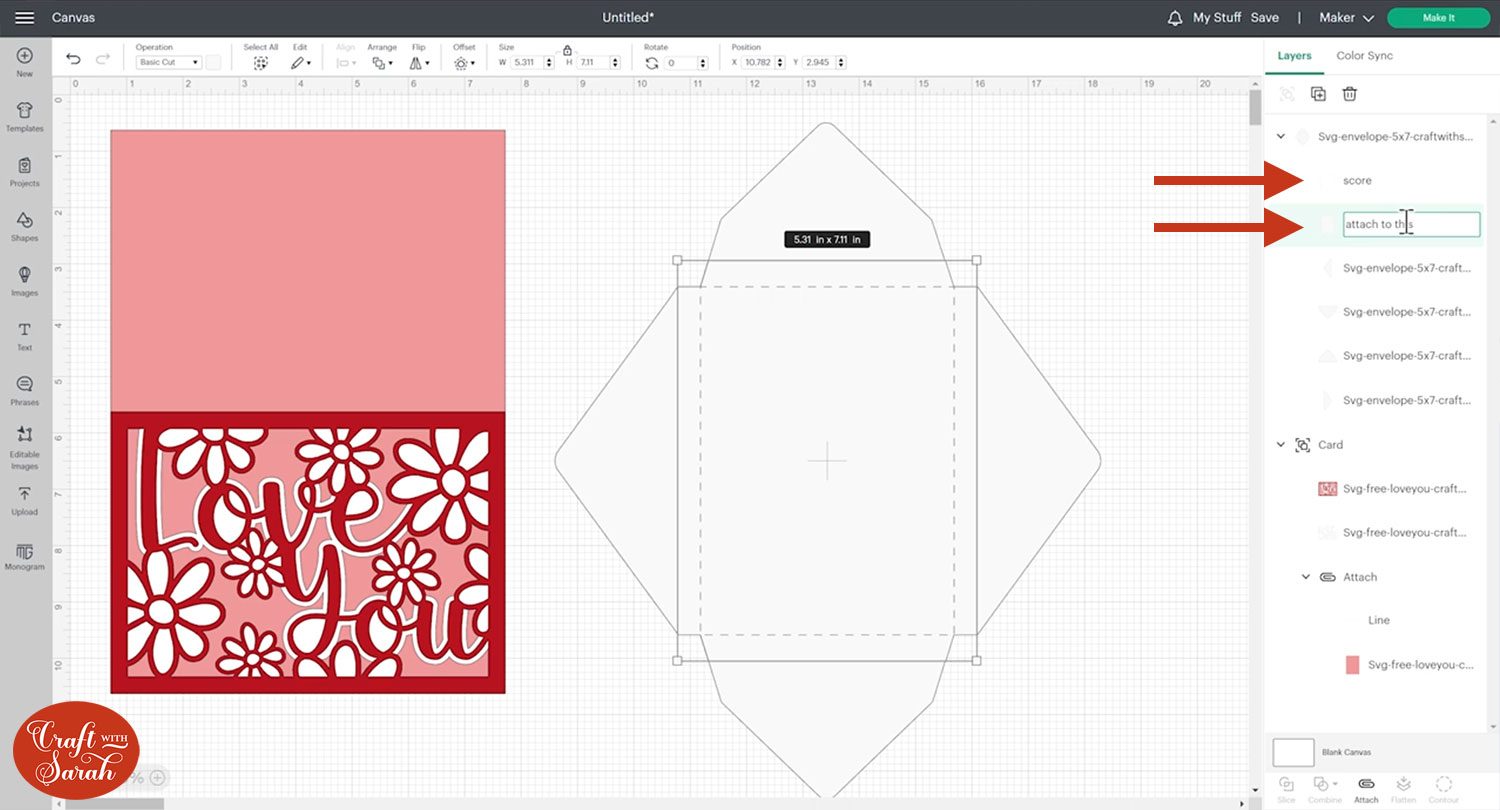
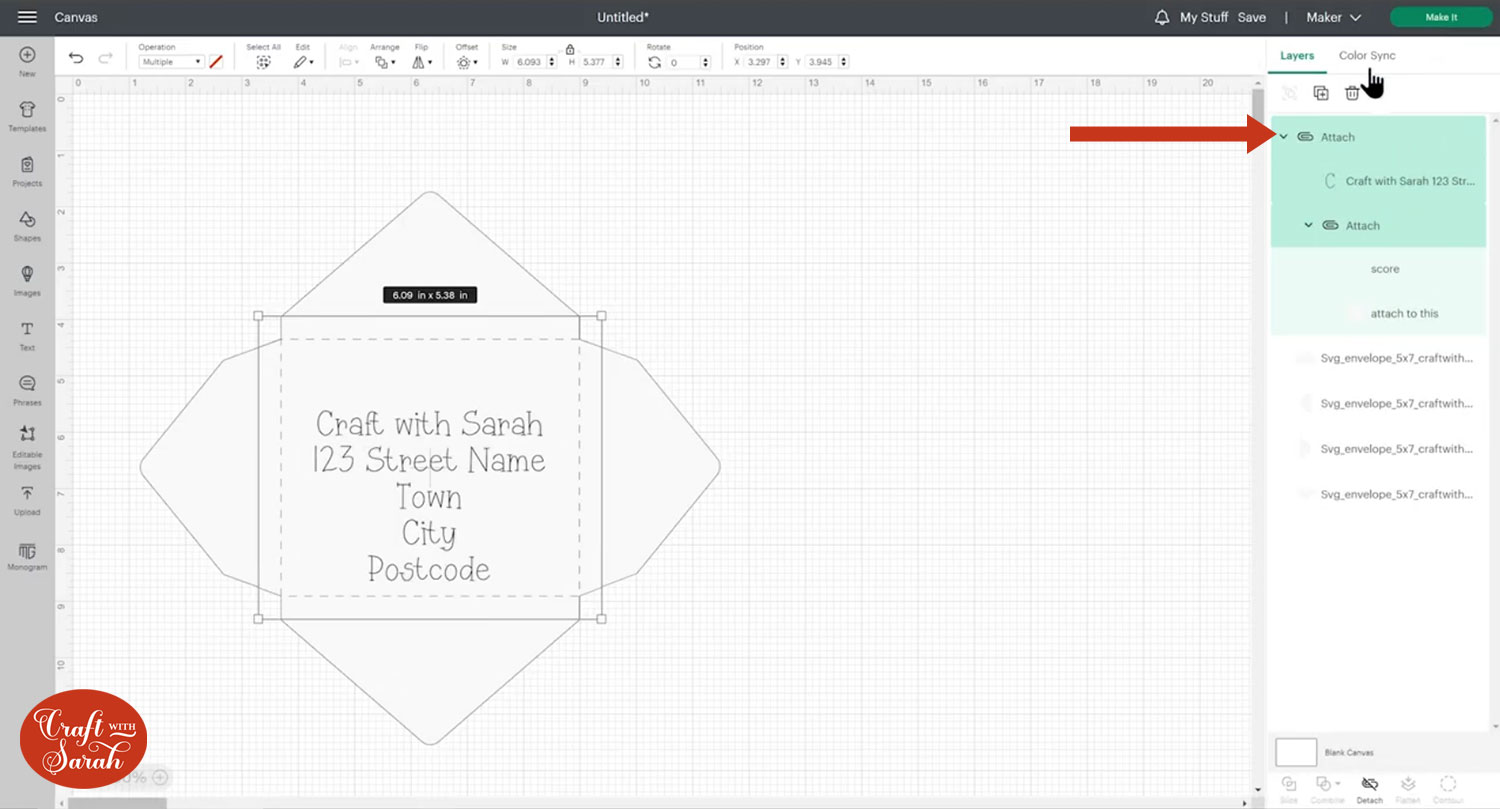
Click the envelope and Ungroup the layers.
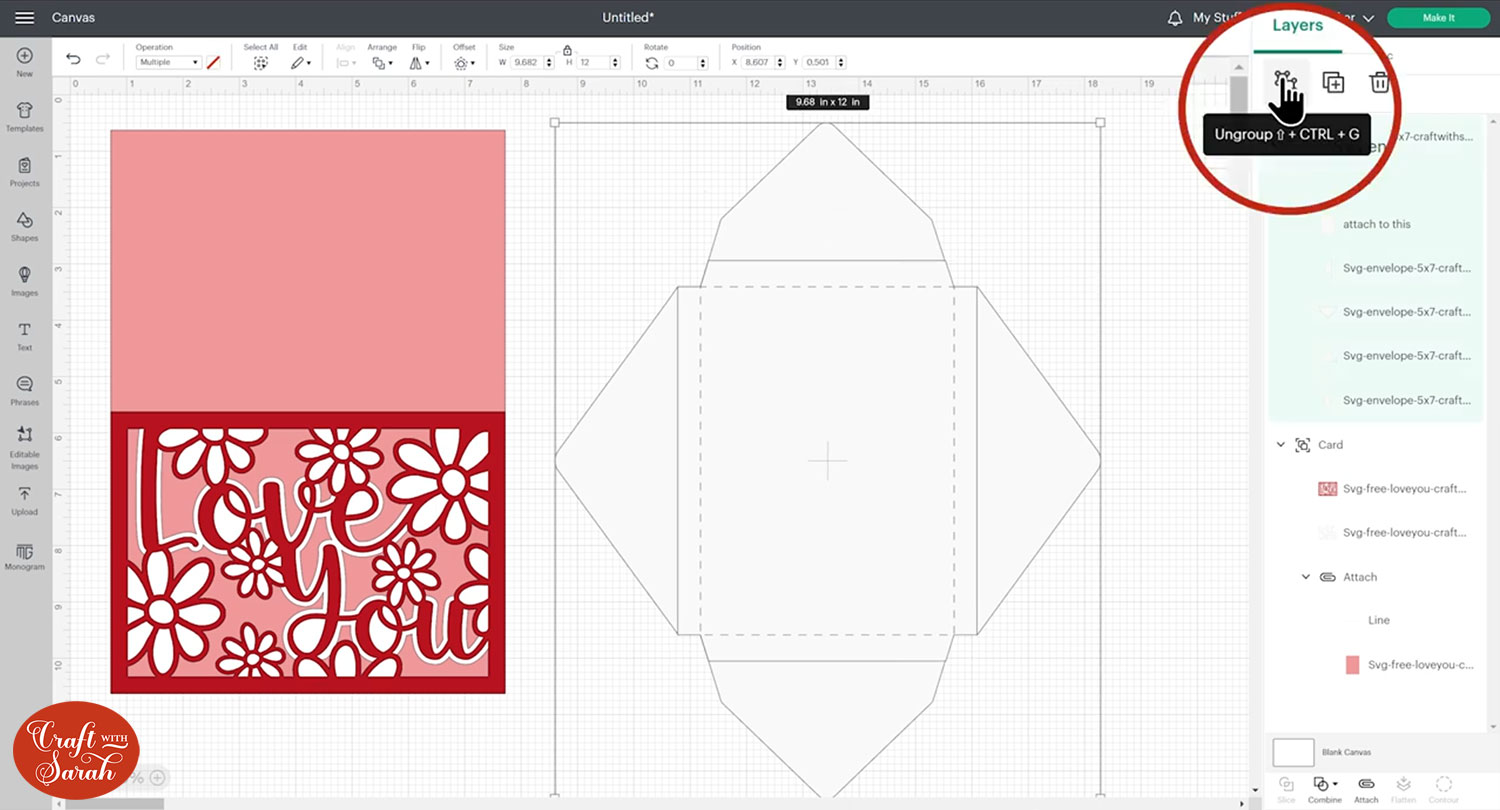
Select that score layer and the one underneath and “Attach” them together.
Attach is what tells the Cricut where we want it to score.
IMPORTANT – make sure you ONLY Attach the score line and the ‘rectangle’ layer of the envelope. DO NOT ATTACH THE FOUR FLAPS!! If you Attach the flaps, the envelope will not fit on your cutting mat!
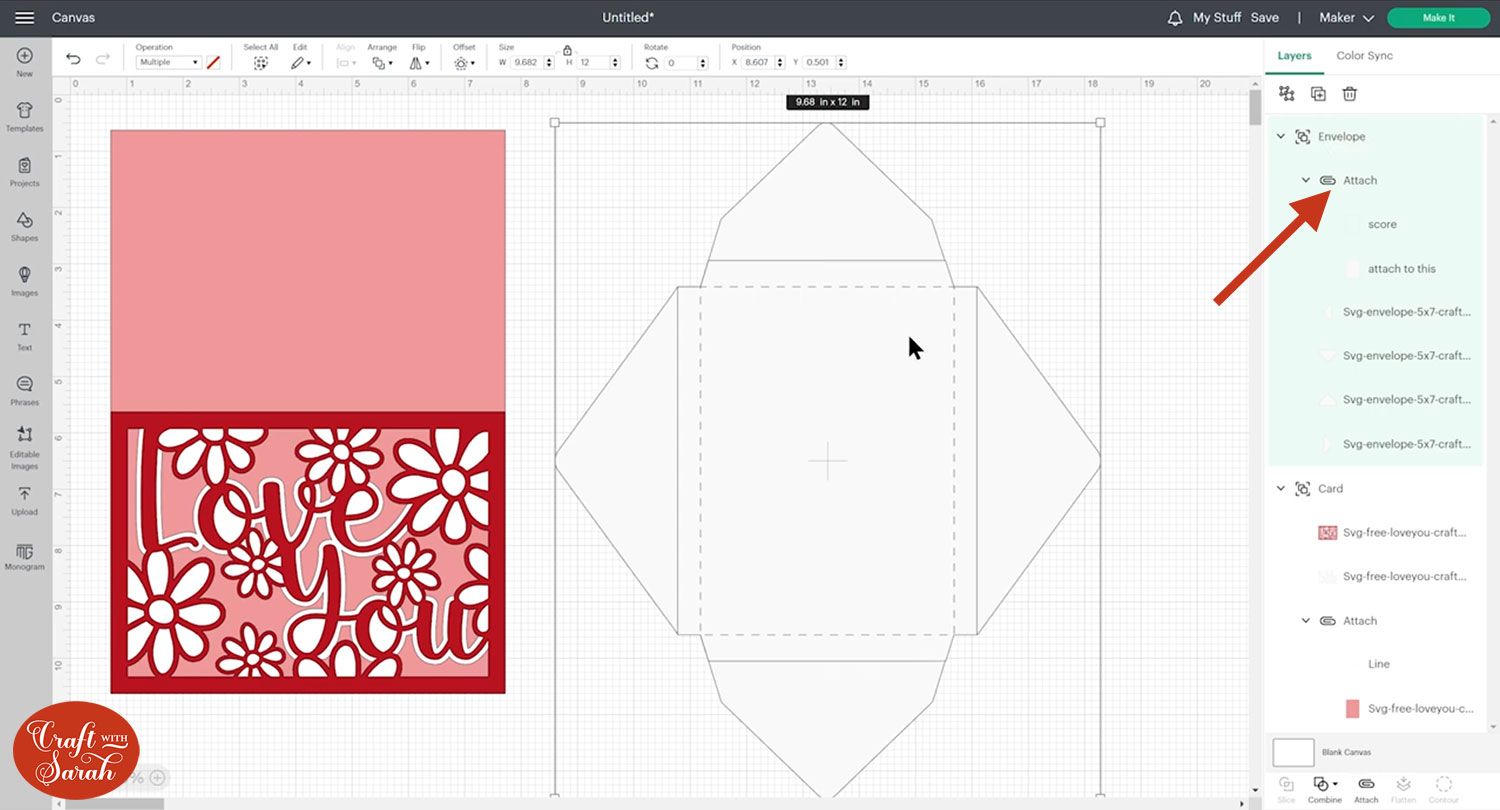
Select all the envelope layers and Group them. The layers should look like this:
Step 4) Size the envelope to fit your card
We need to double-check the size before we cut it, to make sure the card will actually fit!
Hide the base layer of the card by either deleting it, or by hovering your mouse over it in the layers panel and clicking the eye icon.
Rotate the card 90 degrees and position it over the envelope. You may need to click Arrange > Send to Front to bring the card “on top” of the envelope.
We can see from this that the envelope is too small:

DO NOT RESIZE THE GREETINGS CARD!!!
Instead, resize the ENVELOPE until there is a small amount of space all the way around the card, between the card and the score line.

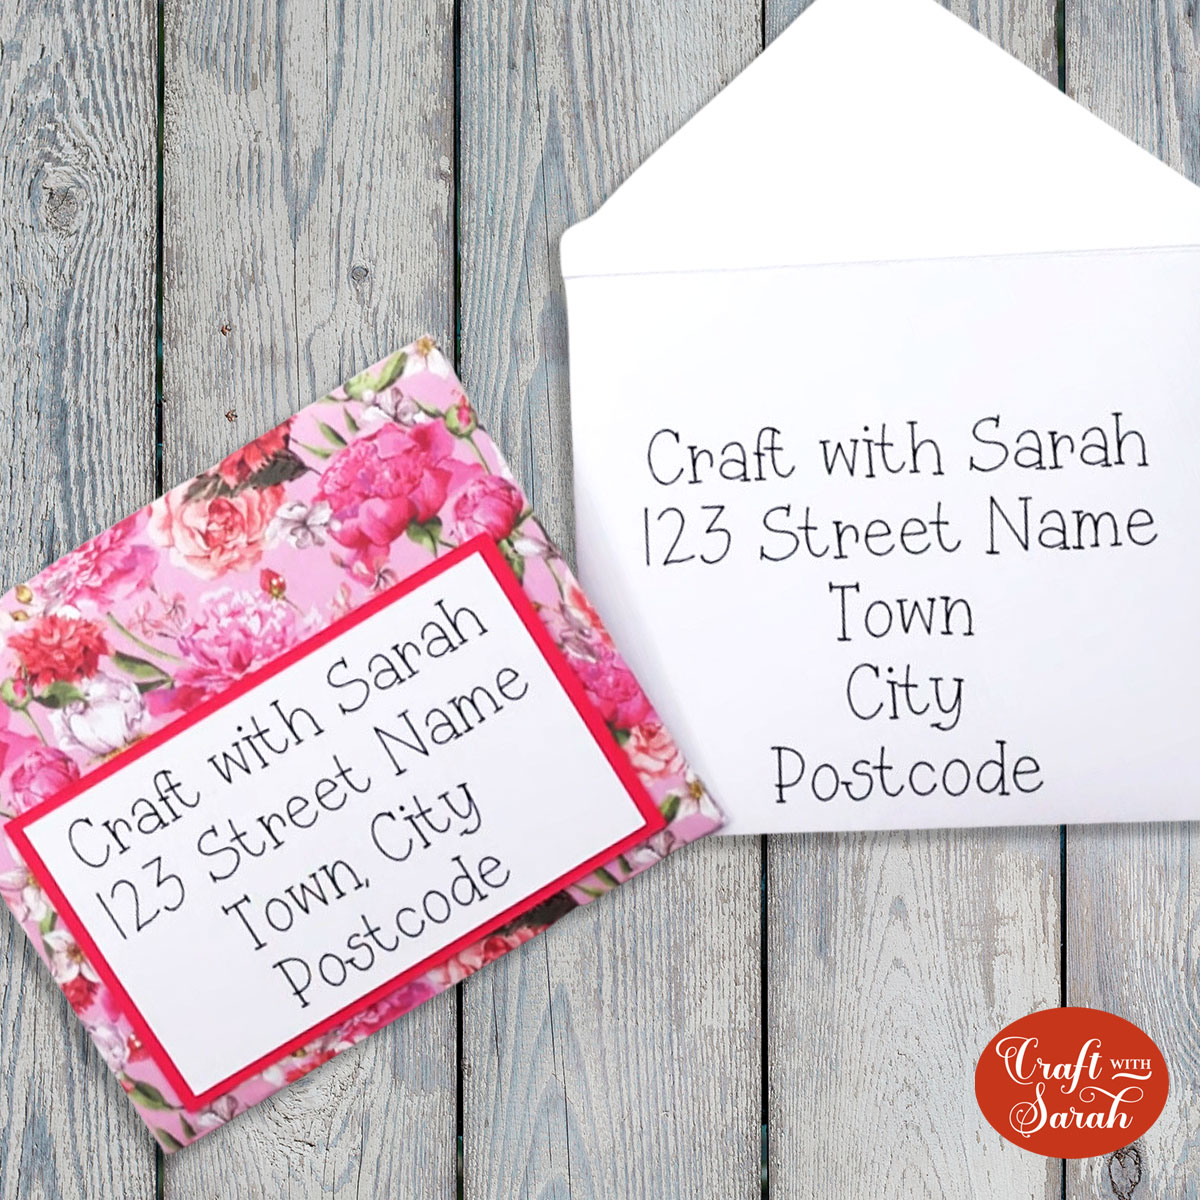
Step 5) Add the address
If you want to address the envelope with your Cricut, now is the time to do that!
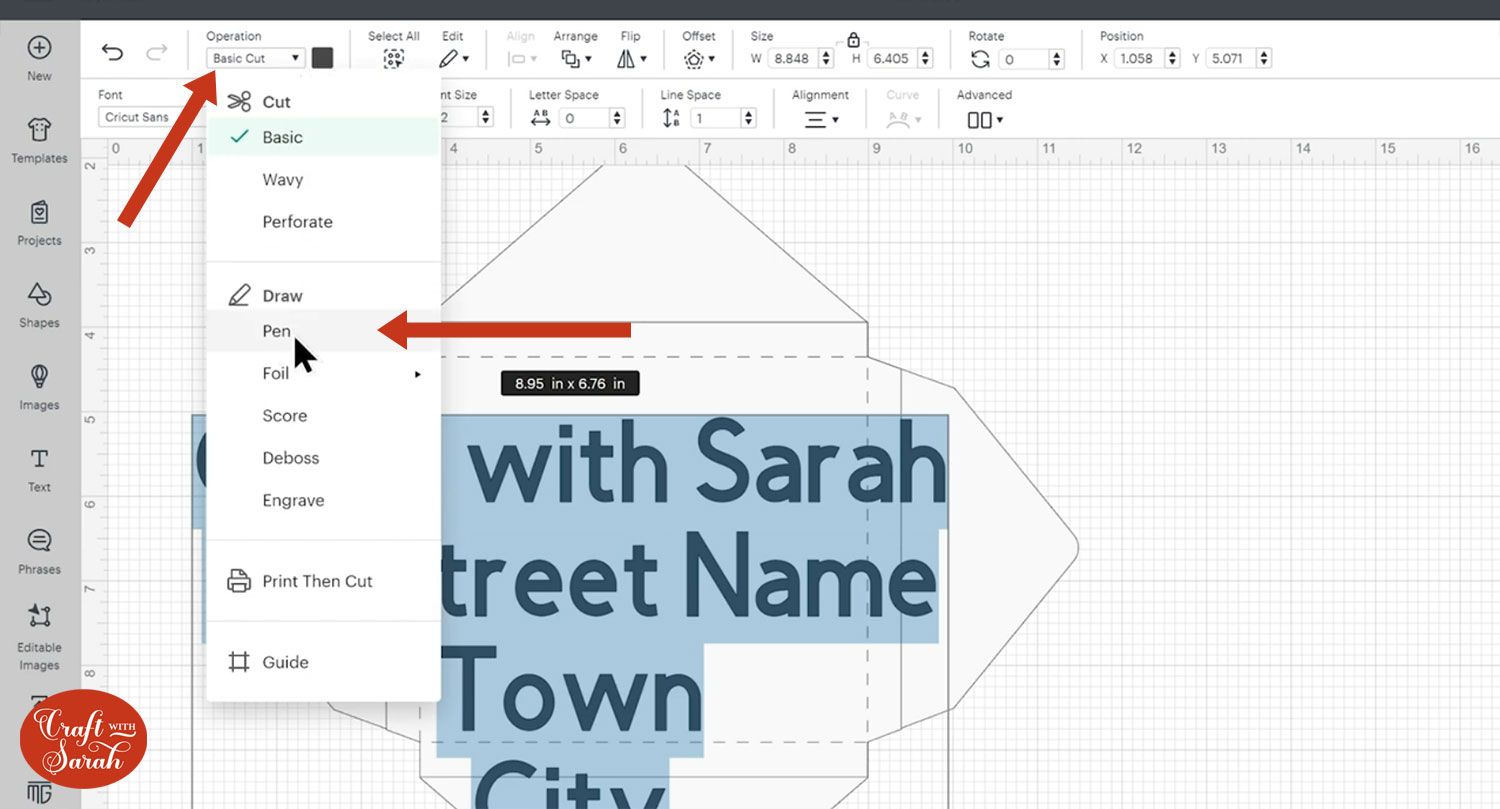
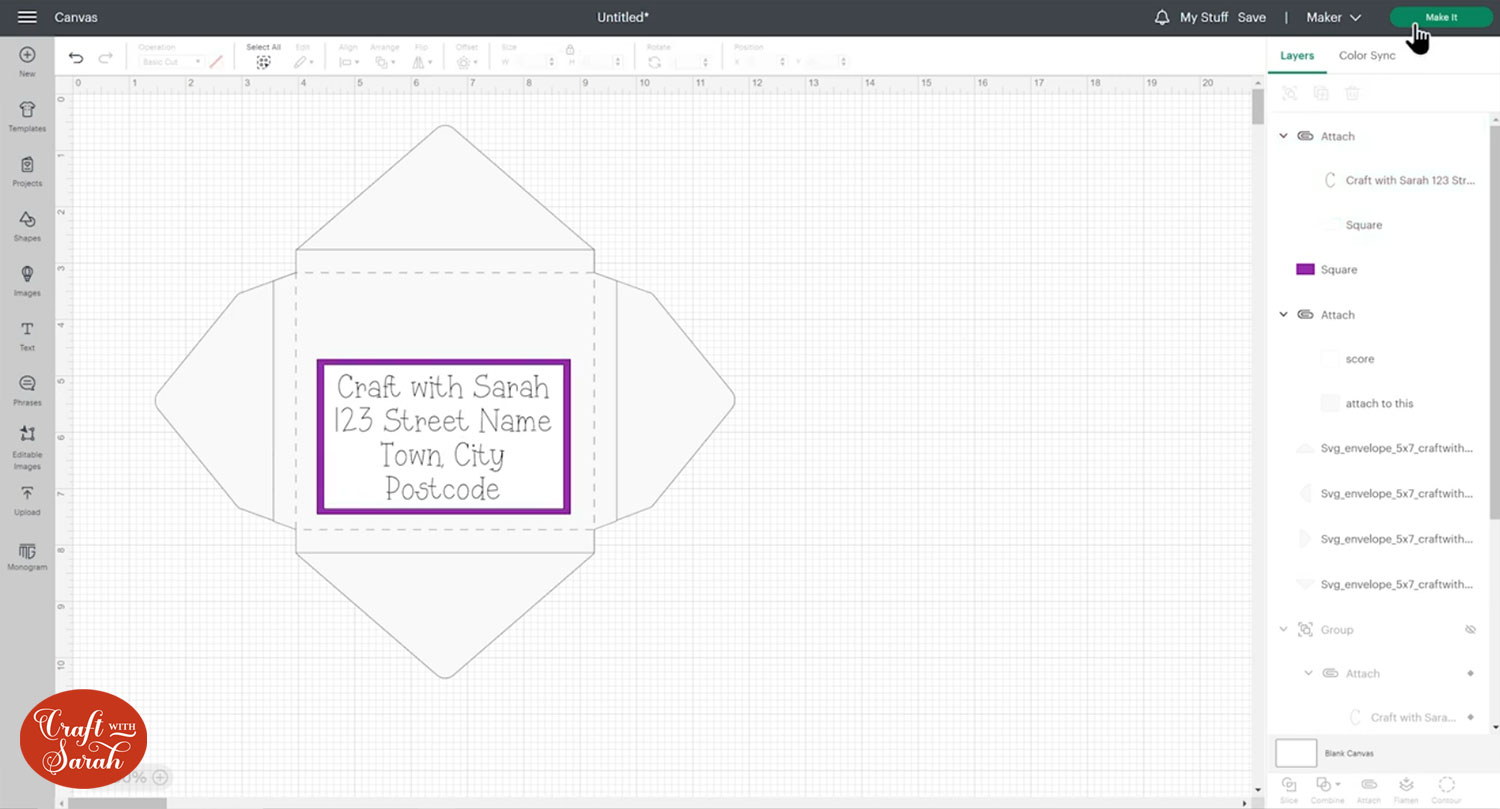
Click “Text” and type out the address.

Click the text layer and go to the Operations dropdown menu. Change the text to a “Pen” layer.
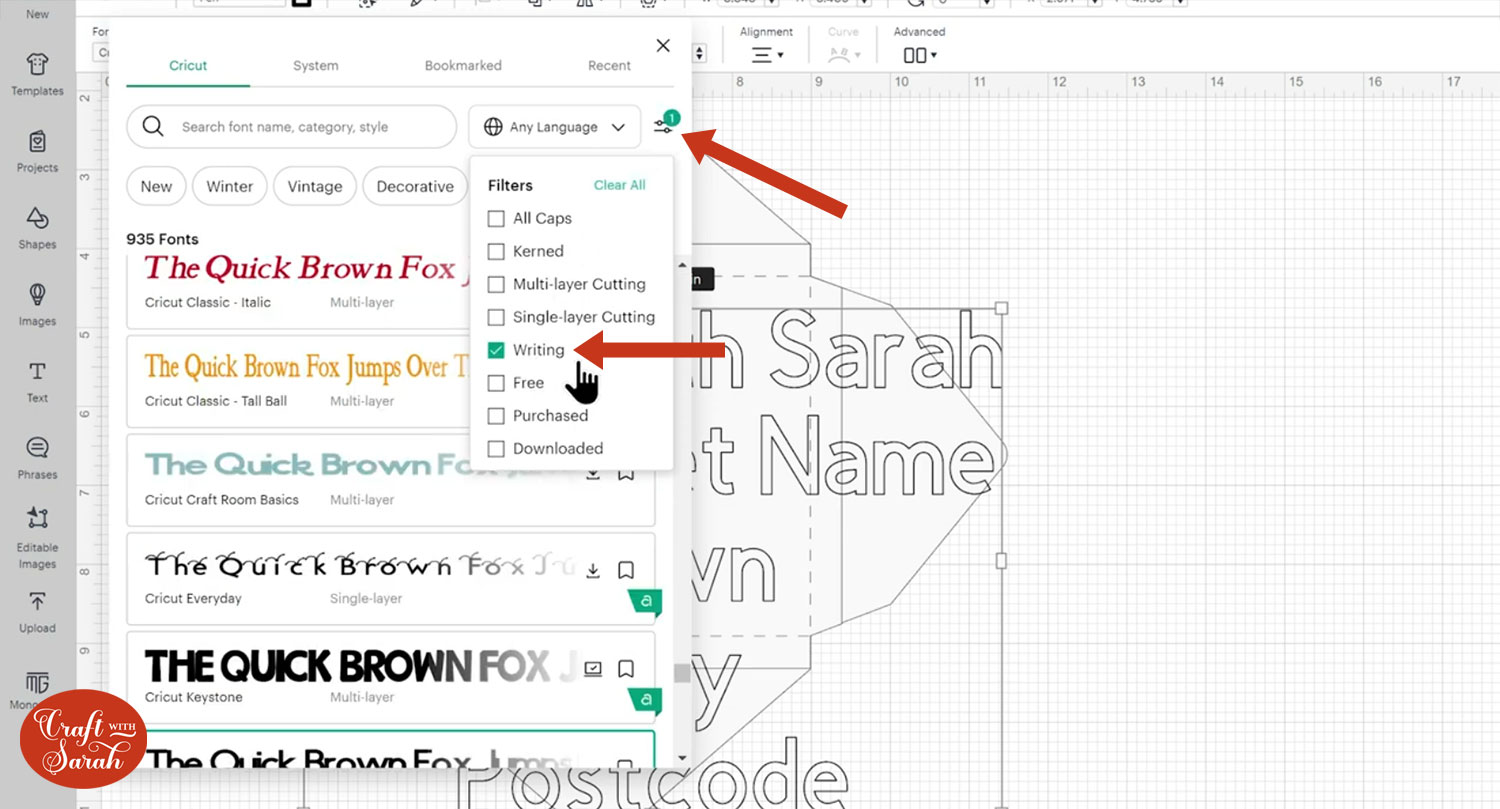
The text will probably look like “outlines” at the moment (also known as “bubble letters”) instead of handwriting style.
To change this, go into the Fonts dropdown and filter by Writing fonts.
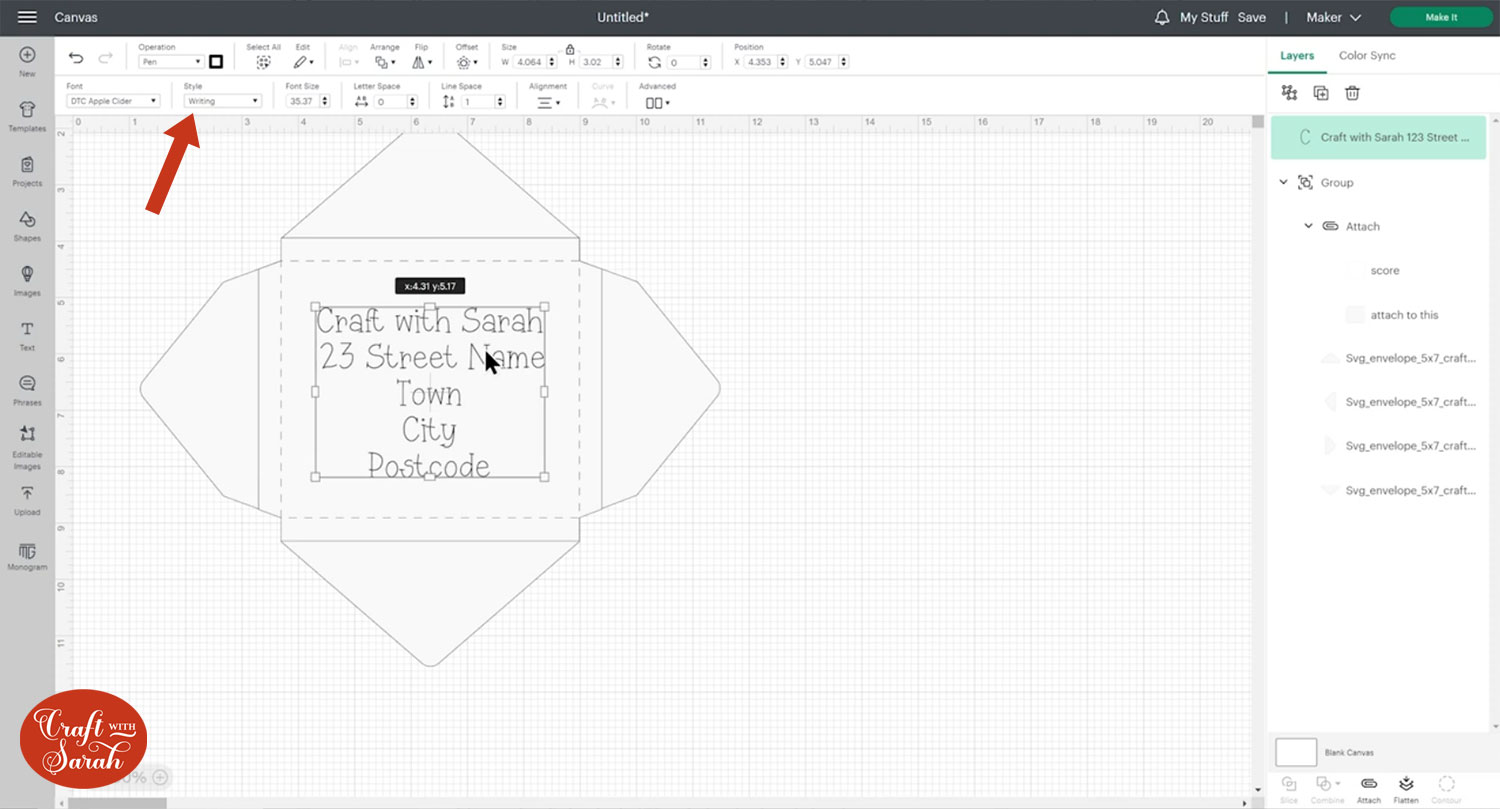
Choose a font and resize the address to fit on the envelope.
Make sure you leave room for the postage stamp on the top!
If your text is still showing a “bubble letters”, make sure the “Style” dropdown is set to Writing.
If all of your envelope layers are Grouped, then Ungroup them to separate the four “flaps” from the main piece of the envelope.
Select the text layer and the main envelope piece and click “Align” and “Center Horizontally” to put the address exactly in the middle.
With the text layer and middle bit of the envelope still selected, click “Attach”.
It doesn’t matter if the score lines are already attached to the main envelope piece, you can Attach it again to join the text.
If you would prefer to have the address written on a separate piece of card rather than directly on the envelope, you can do that too!
Instead of Attaching the text to the envelope piece, create some rectangle shapes and Attach the text to one of those instead.
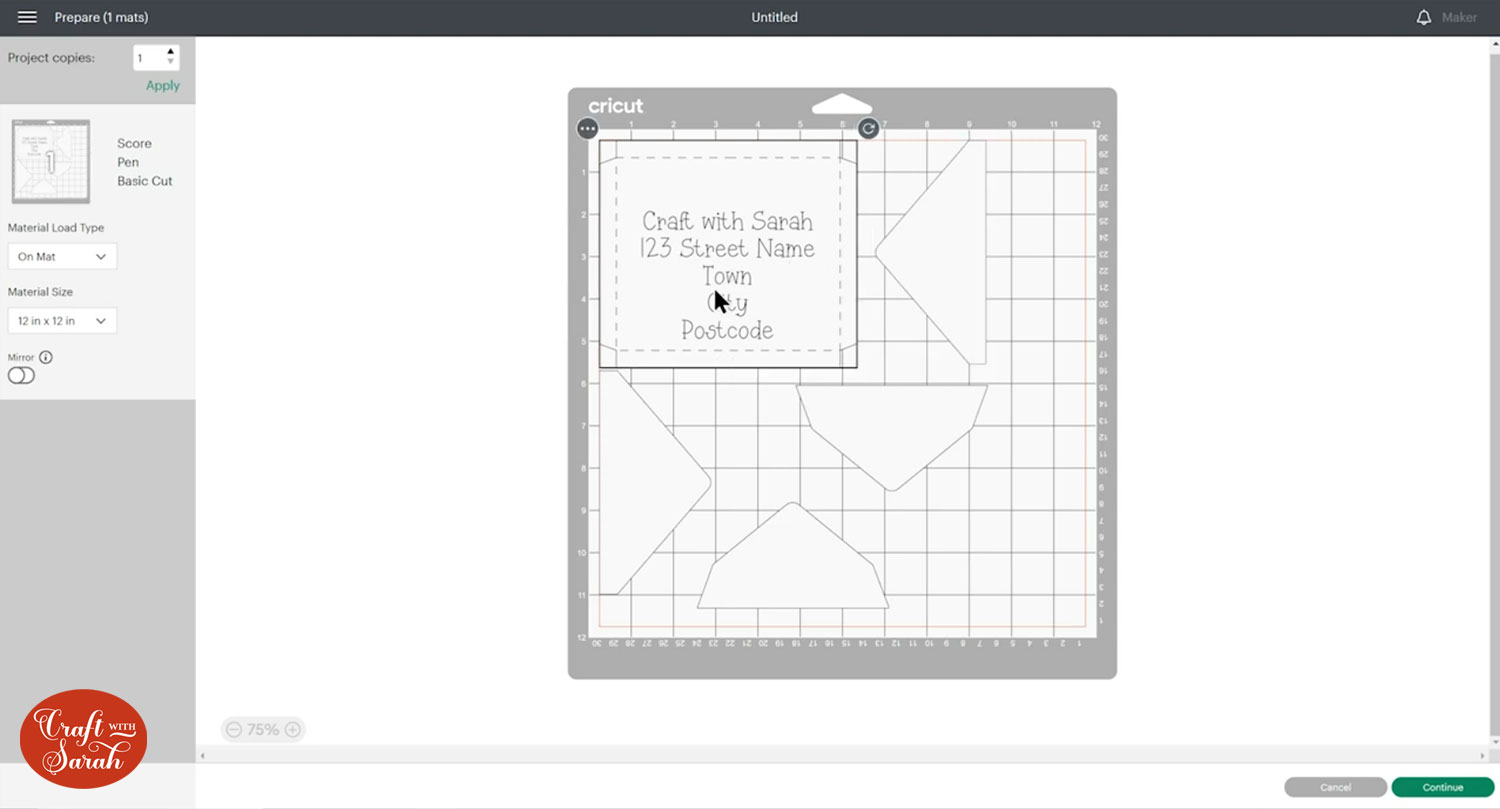
Step 6) Cut the card and envelope
Click “Make It” and follow the steps through to cut the card and envelope.
Your envelope should look like this, with the flaps of the envelope separate to the main piece.
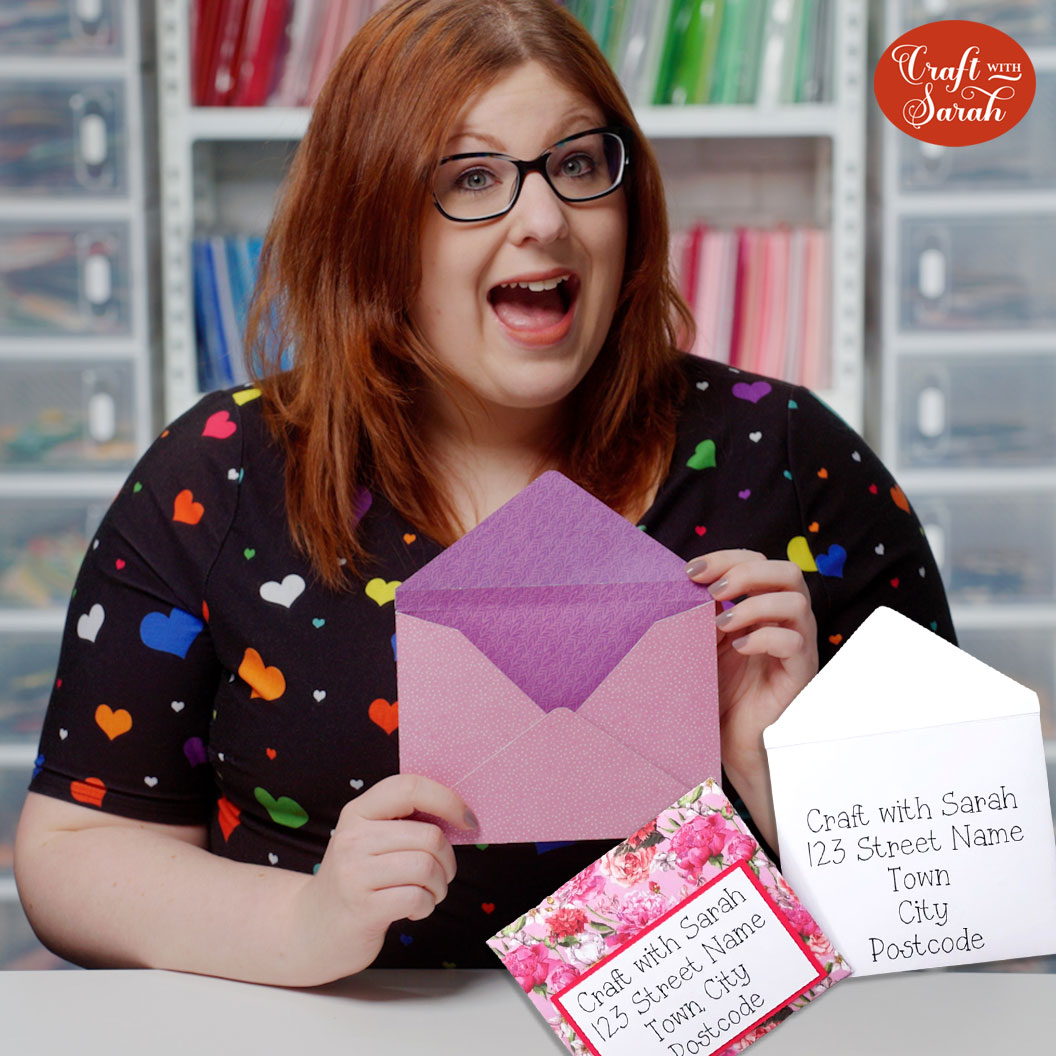
I like to use double-sided scrapbook paper for envelopes so that it’s pretty on both sides. Ideally you want quite a thin paper so that it’s easy to fold.
Step 7) Make the envelope
Fold up the score lines on the main envelope piece.
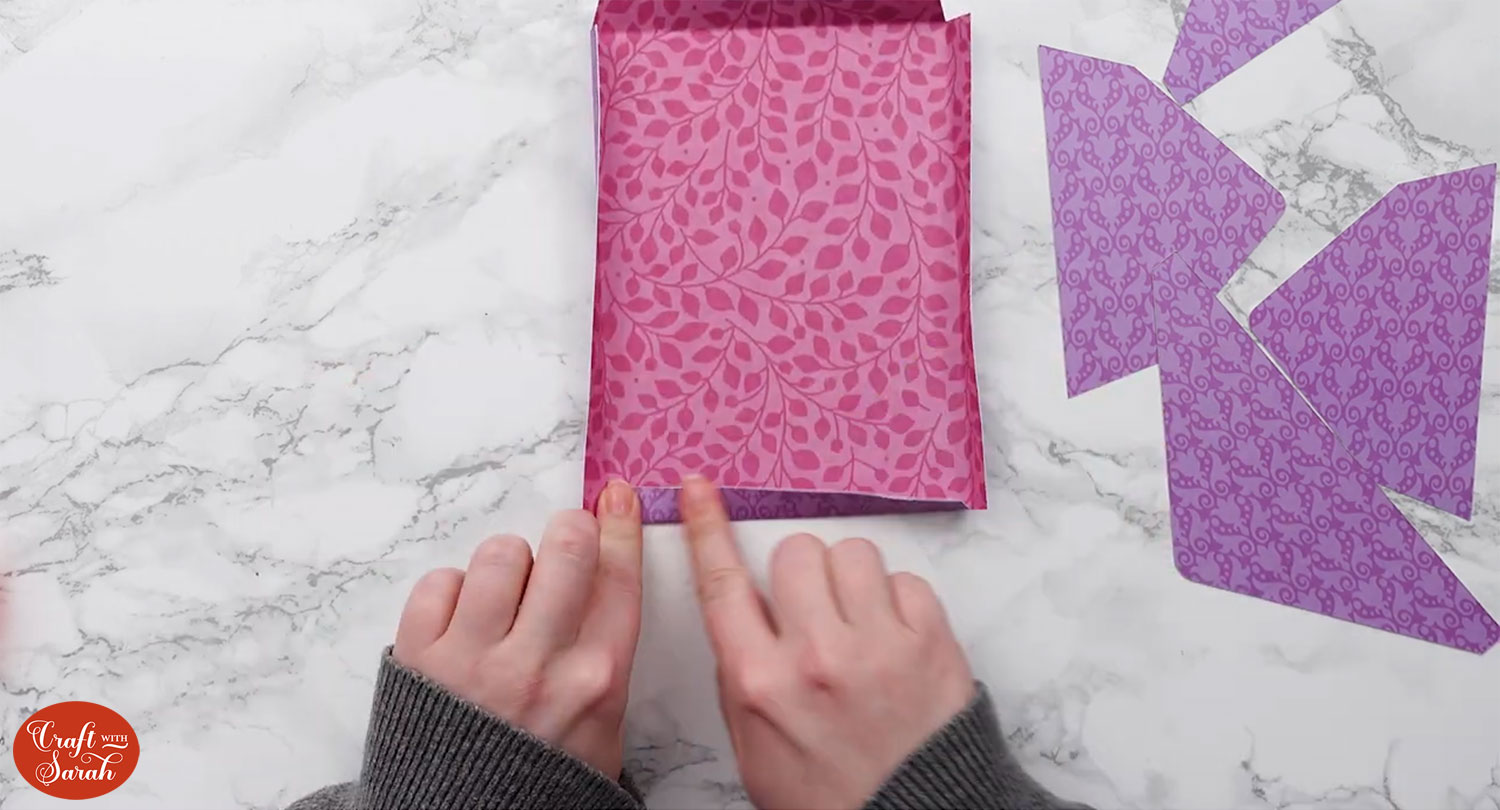
Use double-sided tape or glue to attach all the “flaps” to the main envelope piece.
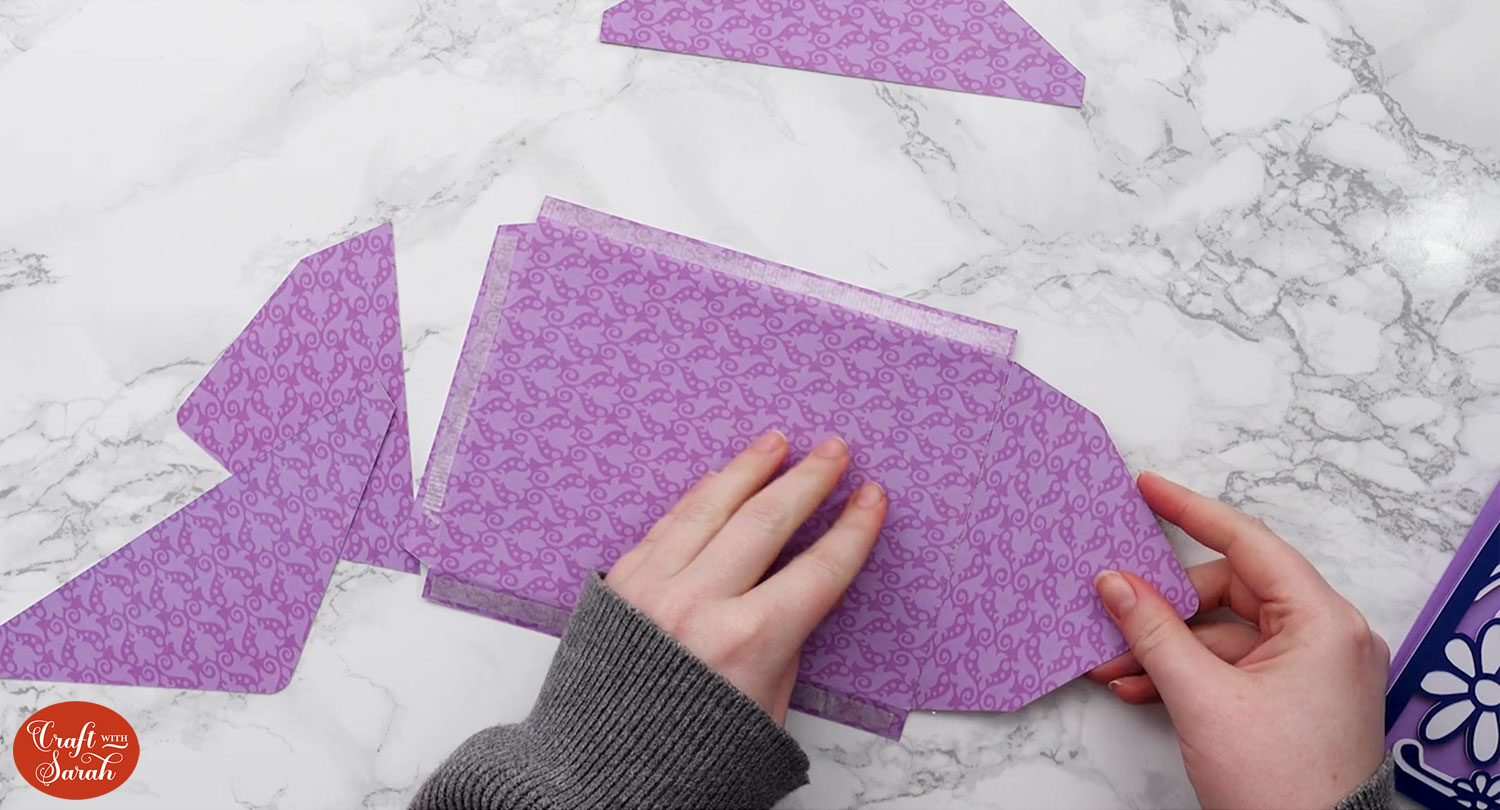
Stick three of the flaps together. Leave the fourth one unstuck so you can put your card inside!
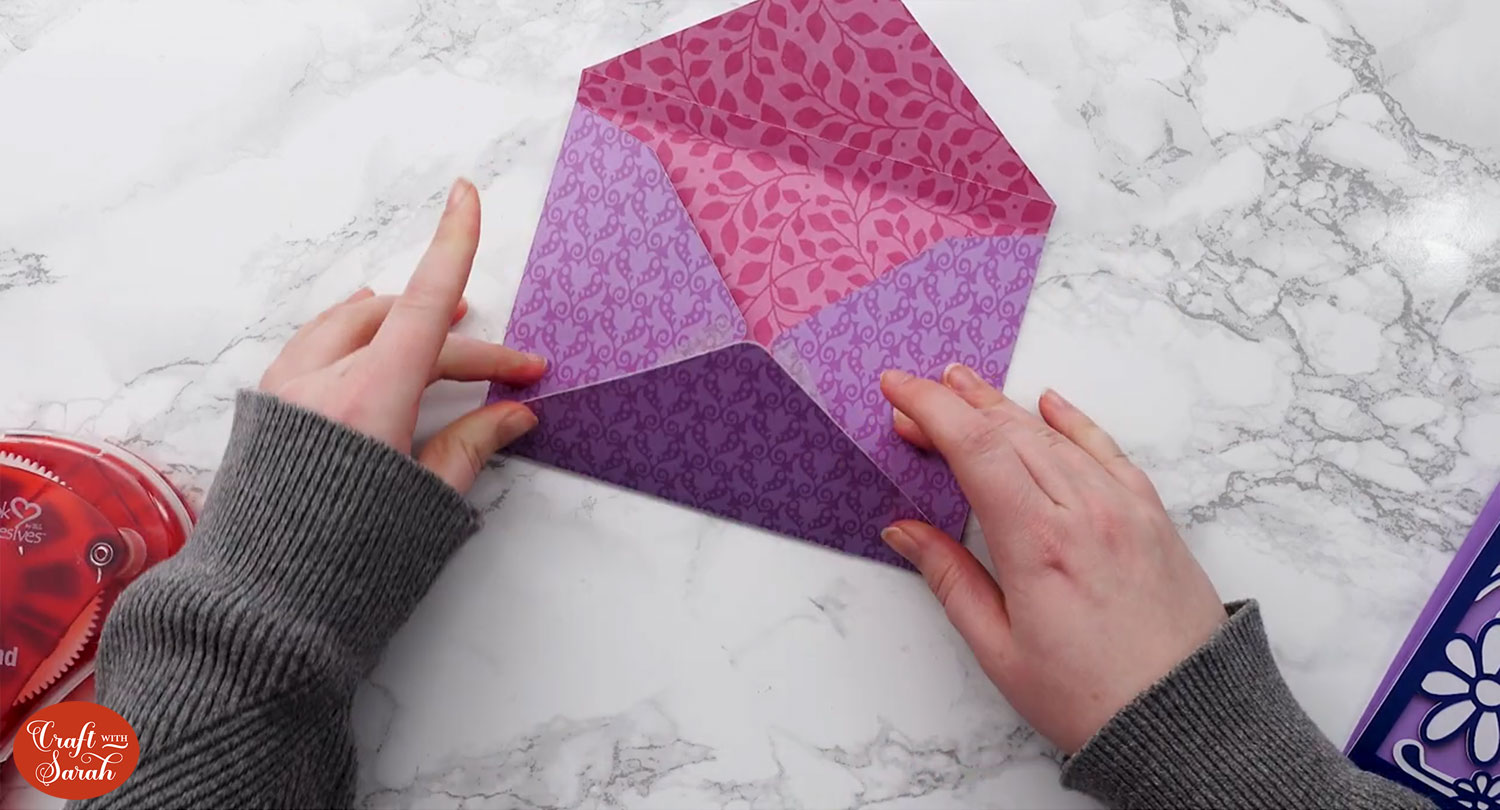
If you wrote the address on separate piece of card then glue them onto the front.
The moment of truth has arrived… does your card fit? 😀

Easy DIY envelope templates
I hope you enjoyed this tutorial on how to make an envelope with your Cricut, and how to write addresses on envelopes with a Cricut.
Now all you need is some cards to put in them!
Here are some free greetings cards SVGs to get you started:
- Layered cards with flowers
- Layered Christmas cards
- Valentine’s Day cards
- Cards for the Cricut Joy
- Cut and Tuck cards
- Christmas side-edge cards
- Popout butterfly cards
- Happy Halloween cards

Happy crafting,
Sarah x

