How to Make Greetings Cards with the Cricut Joy

Learn how to make Cricut Joy cards in Cricut Design Space using the free SVG card templates in my Freebie Library.
I LOVE making handmade cards with my Cricut machines! They let you cut intricate shapes that would have been pretty much impossible to cut by hand and it’s SO quick to do!
You can go from a few sheets of paper to a completed cut-out card that’s all stuck together and ready to be mailed out in just a few minutes.
If you want to make your own greetings cards with a Cricut Joy, Cricut Maker, Cricut Explore or other cutting machine that uses SVG files then you’ve come to the right place!
Check out my free card making SVG files and then read the tutorial below to find out how to use them.
Note: These instructions are for using a computer or laptop, but the process will be similar if you are using the mobile app version of Design Space.
In this tutorial…
Free card making SVGs
I’m making Valentine’s Day cards in this tutorial but the same techniques can be used for any of my upcoming card designs which I’ll be releasing later this year.
Below are the free card SVGs that I have created in this style. New designs are added regularly! I will update this tutorial to include the download links to all free Cricut card SVGs as they are released.
Choose from lots of different insert card designs – including a wide range of free designs.
Before you upload the SVGs to Design Space, you need to unzip the download folder that they come in.
- How to unzip a folder on Windows computer
- How to unzip a folder on a Mac
- How to unzip a folder on an iPad/iPhone
- How to unzip a folder on an Android device
After you’ve unzipped the folder, you’ll see files which look like this:
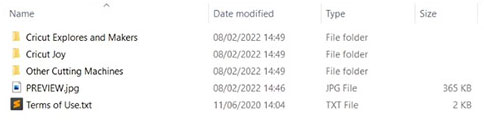
I’ve split out the different variations of each card design into the different types of cutting machines so that it’s easy to see which one you need to choose.
How to make a card with your Cricut
If you have been looking for instructions on how to make a cut out card on Cricut machines then look no further than this video tutorial!
This shows step-by-step how to use my free Cricut card designs and format them so they can be cut on whichever Cricut machine you have.
Prefer to read rather than watch? Keep scrolling for a written tutorial.
Note: this video was recorded before Cricut released their Cutaway Cards so it shows different sized corner cards instead. I have changed how I save my Cricut Joy SVG files since the video was recorded so the files you download will look slightly different to how they look in the video.
This video was recorded using Design Space version 7.1.125. Newer versions of Design Space may look or function slightly differently.
How to Make a Cricut Joy Greeting Card in Cricut Design Space
Note: I am using a Cricut Joy in Design Space for the screenshots.
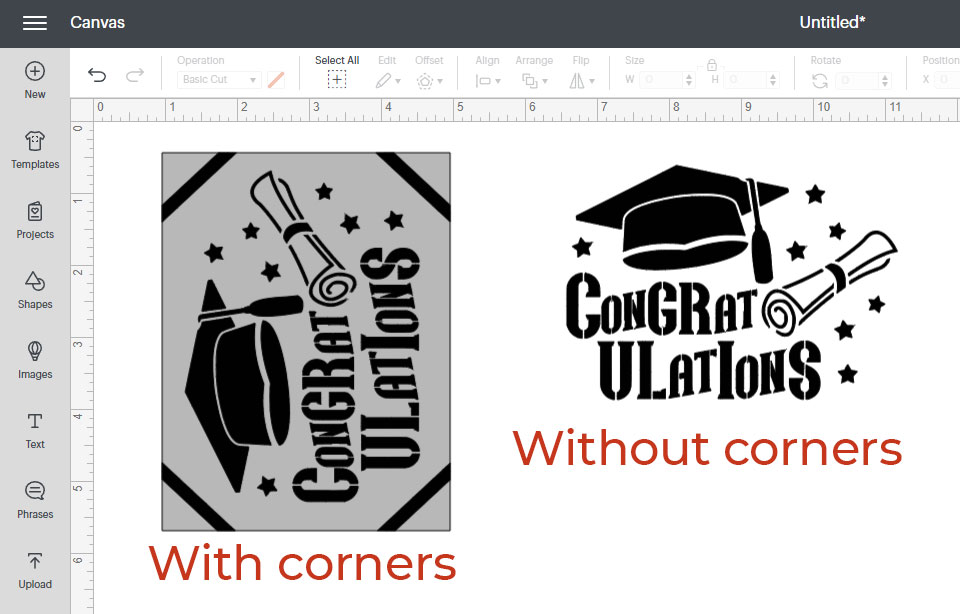
My Cricut Joy card designs come in two different versions: one with corner cutouts for Cricut Joy Insert Cards and one without the corner cutouts for if you are making a Cutaway card.
The designs without corners will work for any of the sizes of the premade cutaway cards that you can buy.
The designs with corners have been created for the “medium” sized premade Cricut Joy Insert Cards (5.25 inches x 4 inches) but you can resize them in Design Space to fit on the other sizes of cards.
Step 1: Upload the SVG file
Open up Design Space and start a new project.
Click “Upload” on the left of the screen and then “Upload Image”.

Click “browse” and then find the “Cricut Joy” folder in your unzipped version of the download from my website and then select either the small, medium or large SVG file.
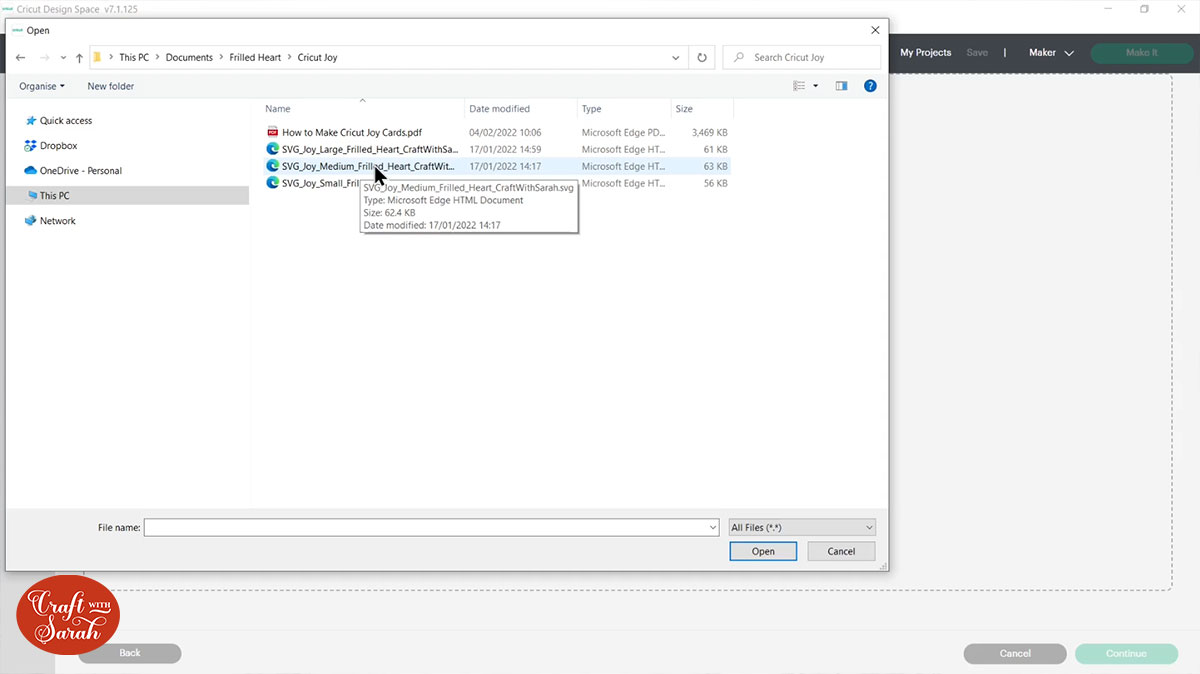
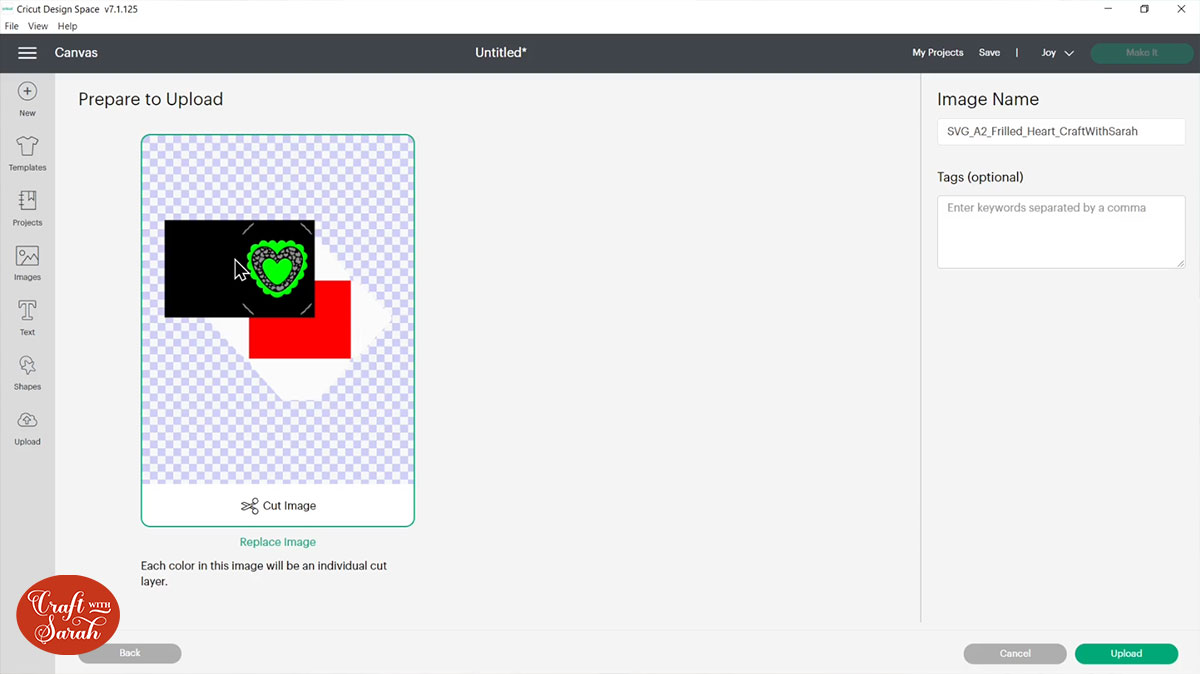
Here is how it should look after you have selected the SVG file:
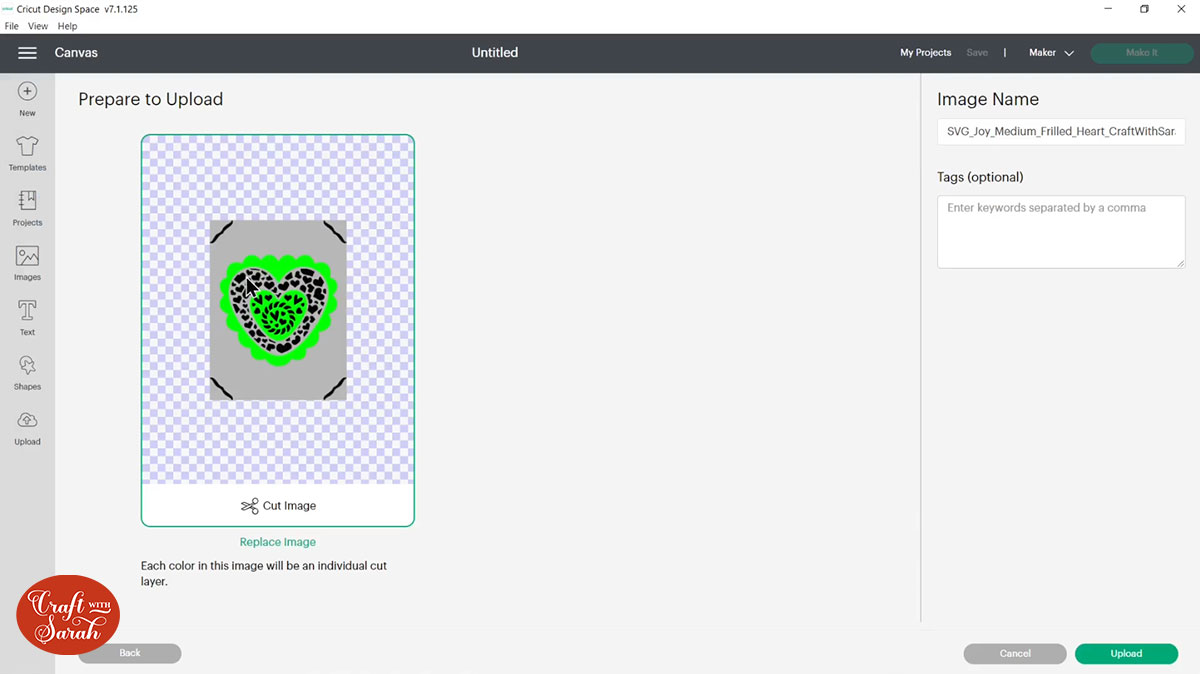
Don’t worry that you’ve got lots of green. I’m going to explain what that all means in a moment.
Go ahead and press ‘Upload’ and then click it in your recent uploads and press ‘Add to Canvas’ to insert it onto your project.
Step 2: Check the sizing
It should load in at the correct size for the medium sized pre-made Cricut insert cards that you can buy, but I recommend double-checking as sometimes Design Space can change the sizes during upload.
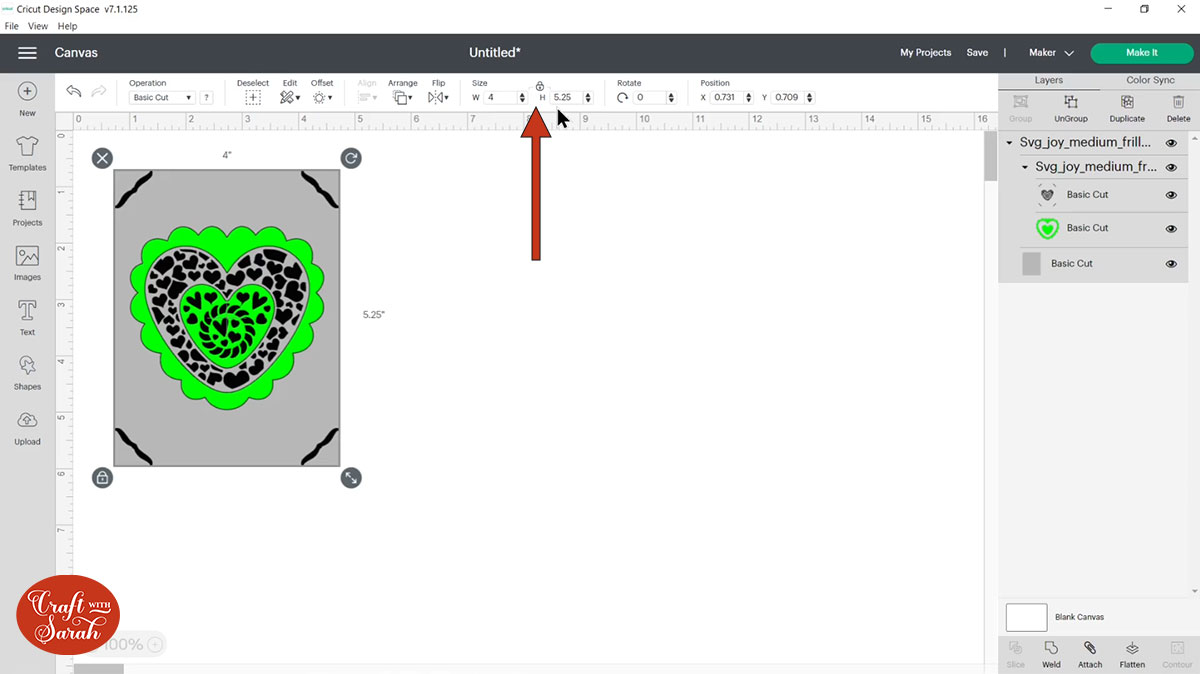
To check what size you need, look at the packaging of the card inserts that you’re going to be using. You want to make sure that the SVG in Design Space is the size of the insert, not the actual card. Here are the measurements you need:
- Small cards: 3.25 inches wide, 4.65 inches tall
- Medium cards: 4 inches wide, 5.25 inches tall
- Large cards: 4.25 inches wide, 6 inches tall
Step 3: Format “Draw” layers
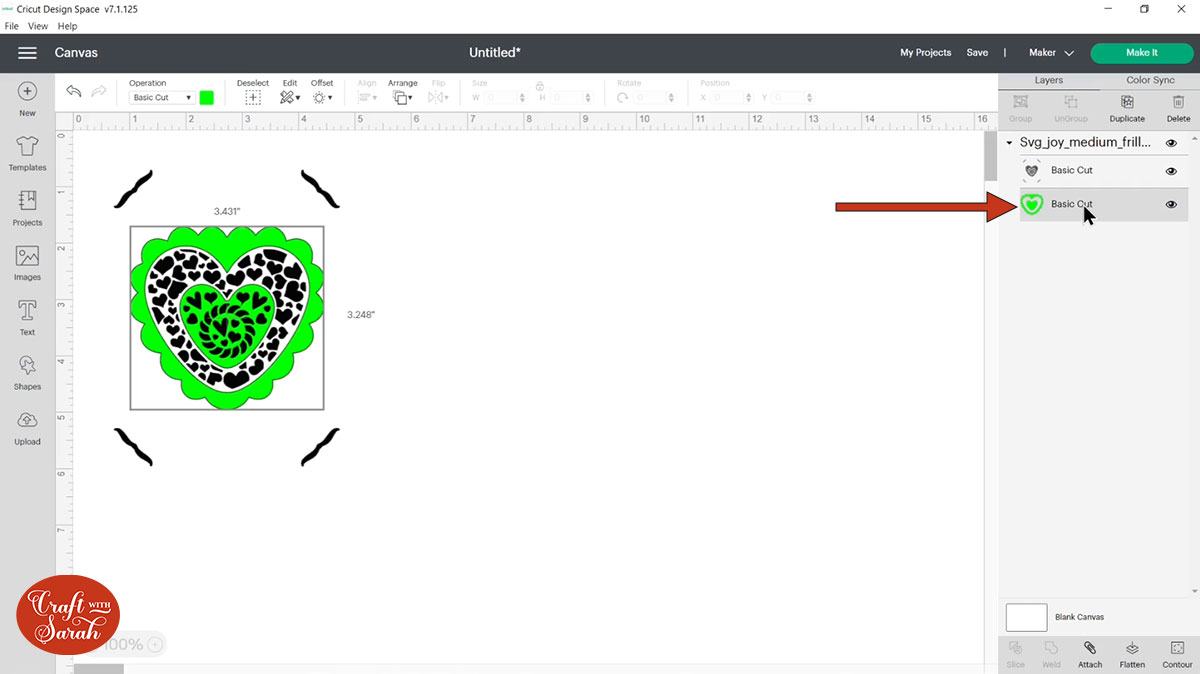
Click on the card design to select it.
Press ‘Ungroup’ to separate out all of the layers.

I’ve included the grey rectangle for in case you want to cut your own insert card. If you’re not using one of the pre-cut Cricut inserts then you might want to use your Joy to cut the little rectangle which will go inside of your card to show through all of the gaps.
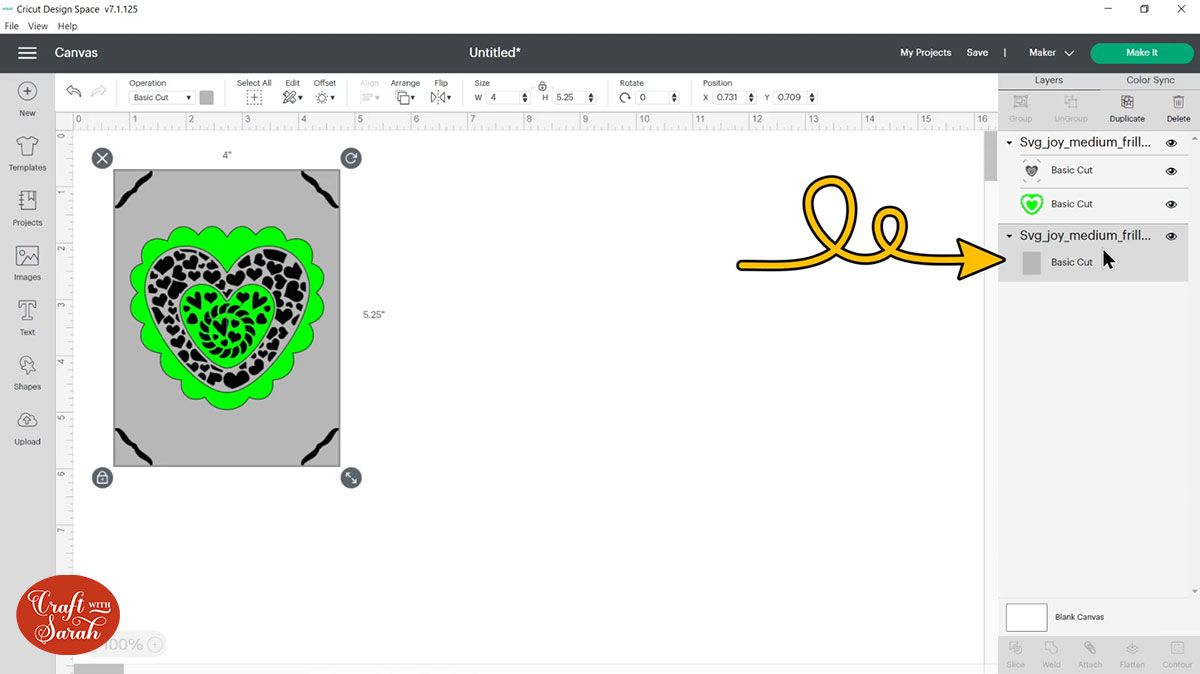
However, I am using the pre-made ones so I don’t need this layer. To delete it, click it in the layers panel press delete on your keyboard.
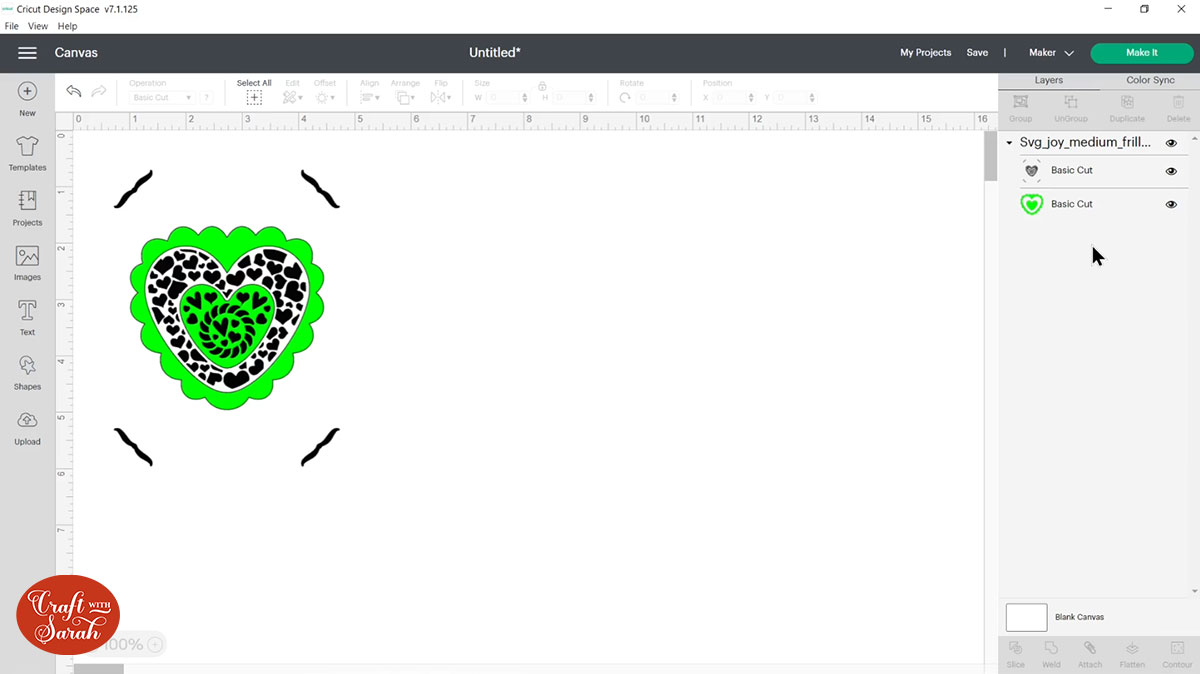
Next we need to change the green layer to a draw layer.
For all of my card templates, if you see a lime green layer, it needs to be changed to the ‘Draw’ operation type. Not all card designs have a ‘Draw’ layer.
To do that, simply click the layer over in the layers panel and then under the ‘Operation’ drop down change it to ‘Pen’.
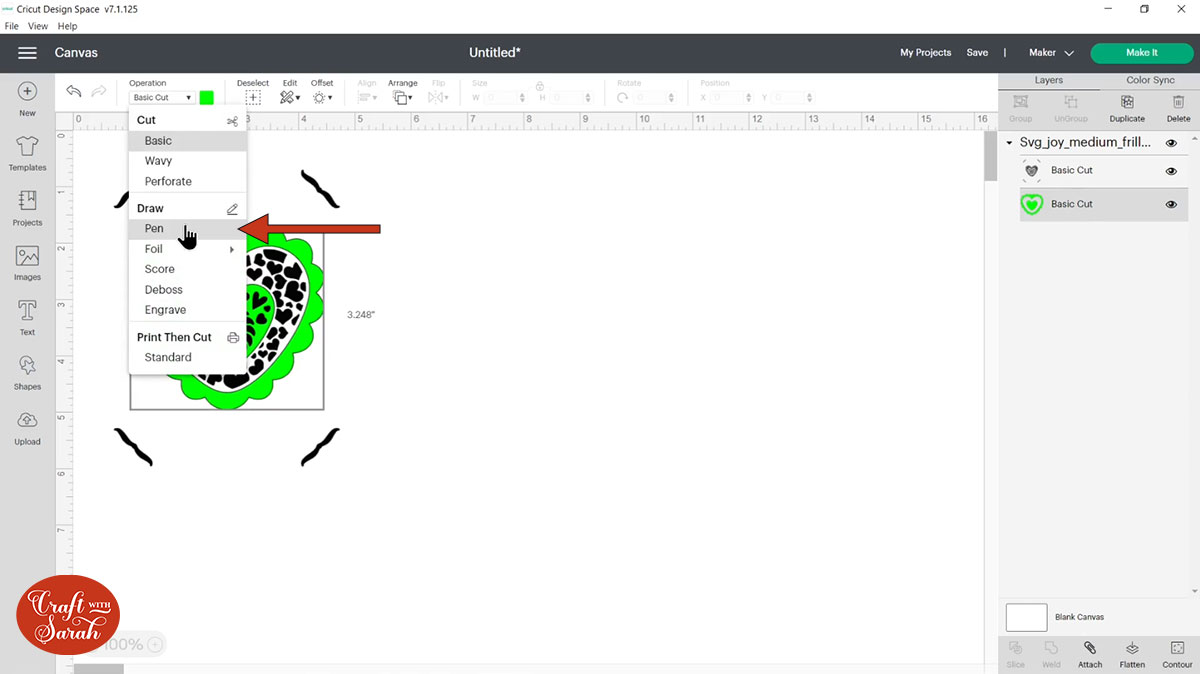
You can change the color by clicking into the little square box next to the ‘Operation’ dropdown.
When you’re changing the pen type and colour, it’s really important to have the Cricut Joy set as the machine you’re going to be using. To this in the dropdown on the top-right of the screen.
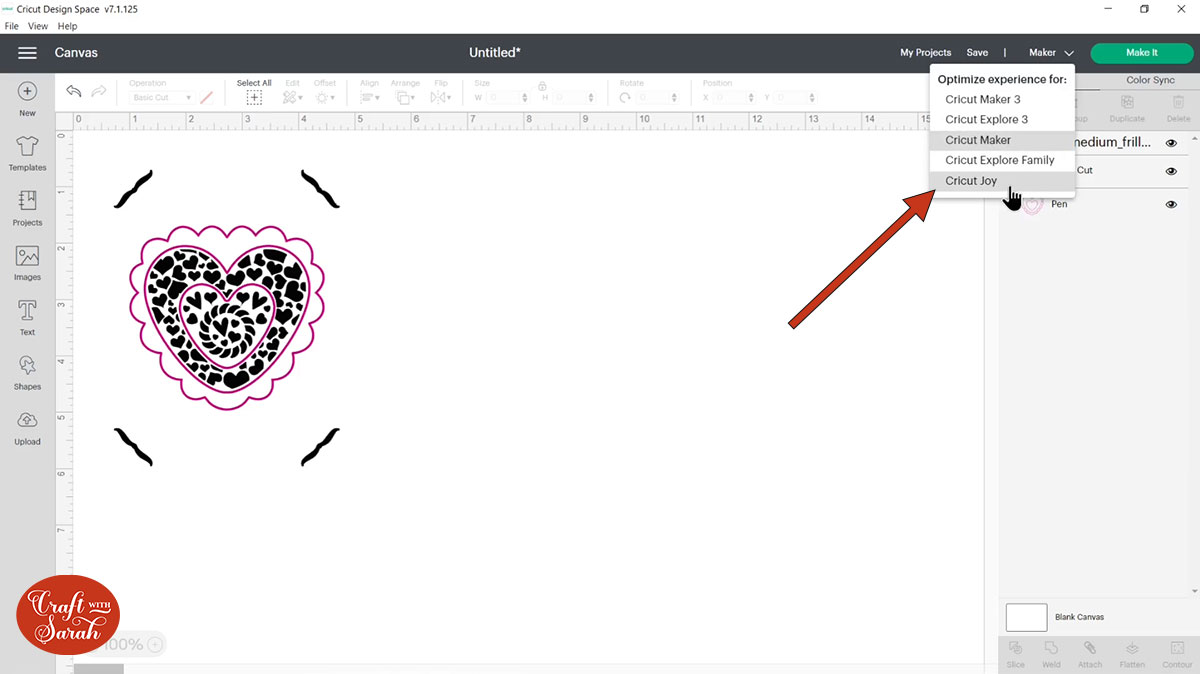
After changing your machine selection to the Cricut Joy, you might find that you get a little warning triangle appear in the layers panel which says your chosen pen is not compatible. That’s because there are a lot more pens available for the Cricut Maker and other larger machines. If you’ve accidentally chosen one of those and then changed the machine selection to the Joy, you might find that the pen you chose isn’t compatible. If that’s the case, go into the pen selection menu and now this list will have updated to only show the Cricut Joy pens. Change it to one that will work and then that warning triangle will go away.
Step 4: Attach the cut and draw layers
If we were to click ‘Make it’ now, the Cricut Joy would try and do the cutting on one piece of card and the drawing on another, which isn’t what we want.
We need to tell the Cricut that we wanted to draw these heart bits on the same card that it’s going to be cutting.
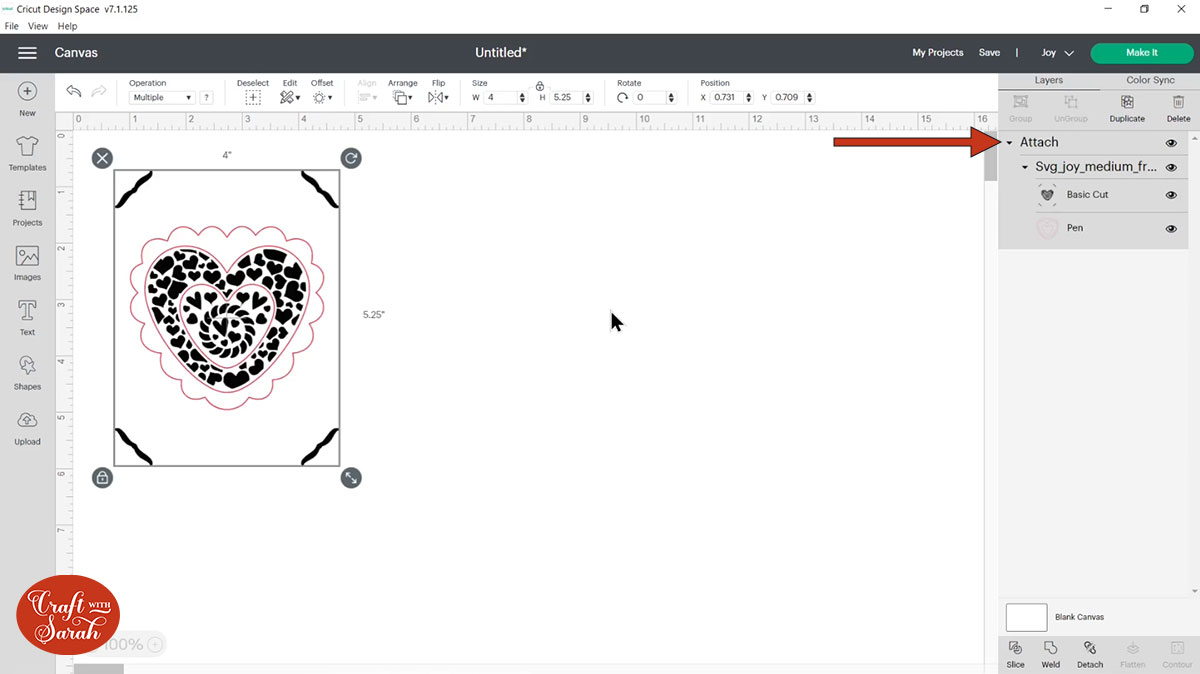
Press ‘Select All’ along the top.

Down the bottom-right of the screen, press ‘Attach’. That’s what tells the Cricut to do everything on the same piece of card.

Here’s how your layers panel should be looking:
Step 5) Cut the Cricut joy card template
Click ‘Make it’.
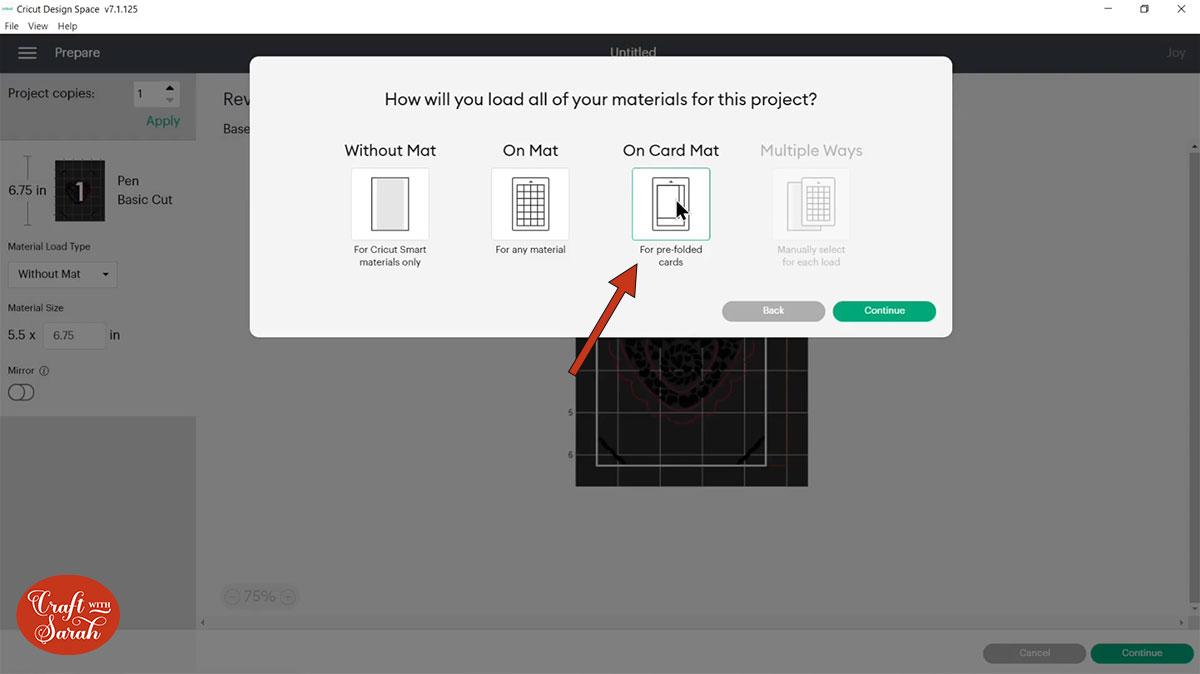
Choose ‘On Card Mat’ – you will need the Cricut Joy card mat for these cards – and then press ‘Continue’.
Make sure you’ve got the correct size in here for the one that you’re going to be cutting, then click ‘Continue’ to connect to your Cricut Joy.

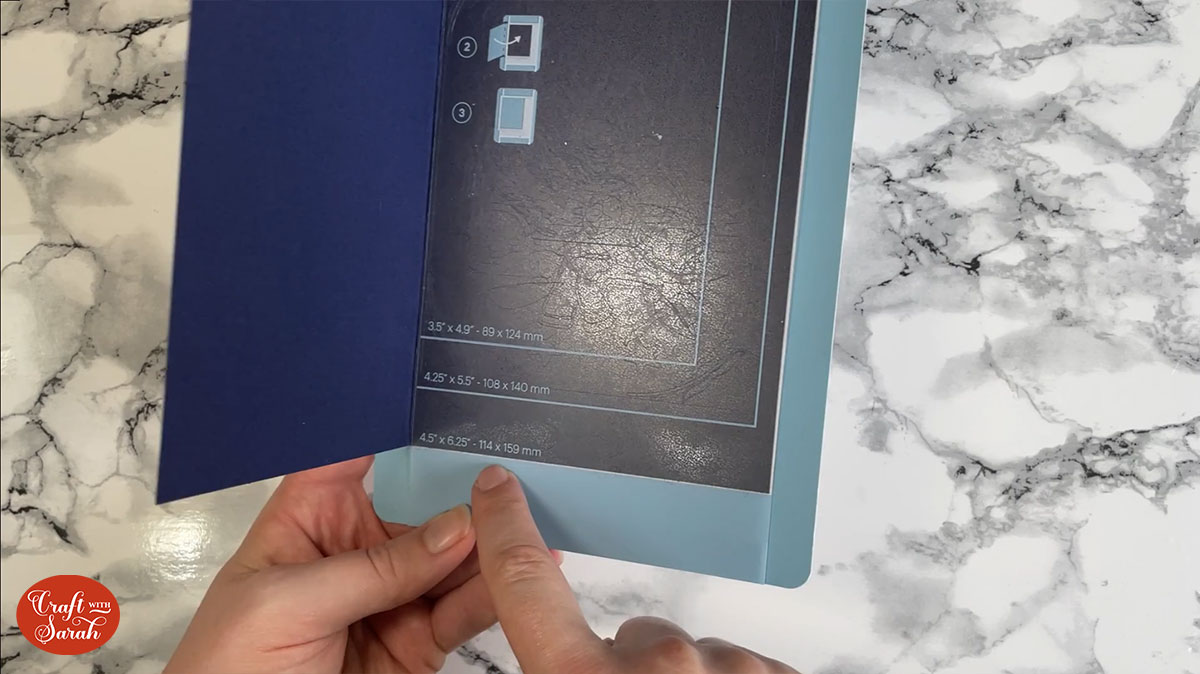
We’re going to be using the Cricut Joy card mat. The front of it has a little cellophane wrapper which needs to be taken off to reveal the sticky surface underneath.

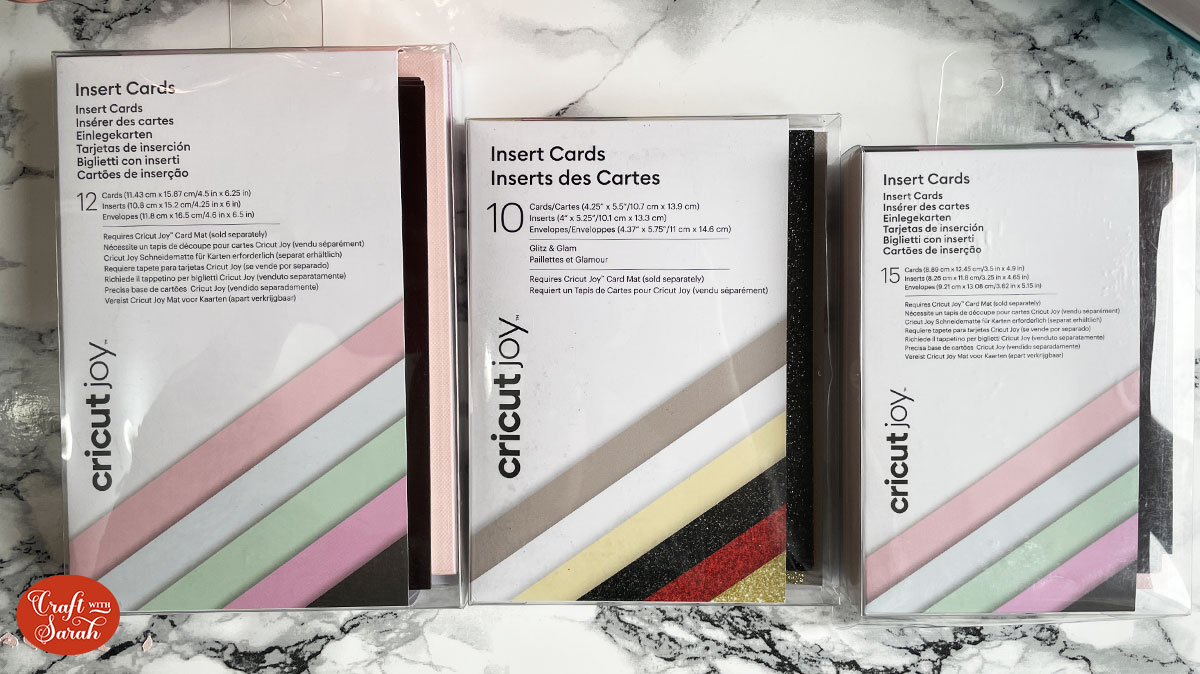
These are the three different sizes of Cricut Joy insert cards that I was talking about at the start of the video. Choose the one that corresponds to what you’ve got in Design Space. These packs contain envelopes, cards and then the insert pieces. You’ll need an insert piece and a card for these projects.
Take the card and open it up and then slide the back piece underneath the little-gap-foldy-thing in the Cricut Joy mat and then push it in. The lines on the mat correspond to the size of the insert card that you’re using.
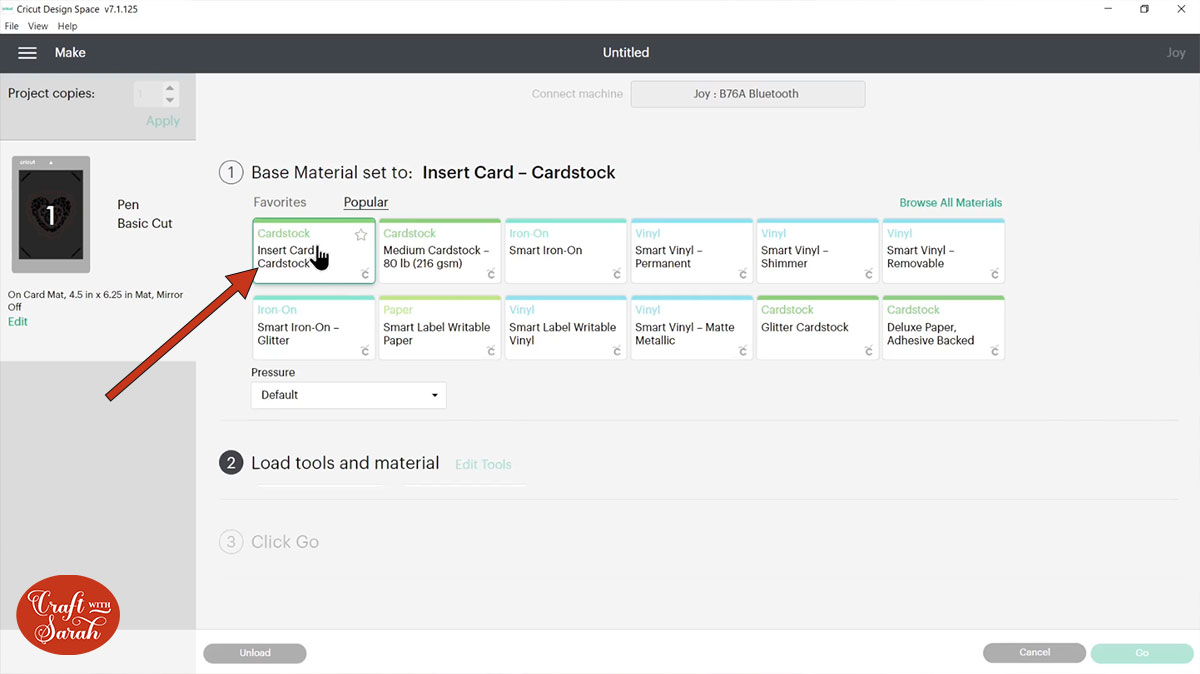
In Design Space, click ‘Continue’ and it will connect to your Joy. Choose ‘Insert Card’ as the material that we’re going to use.
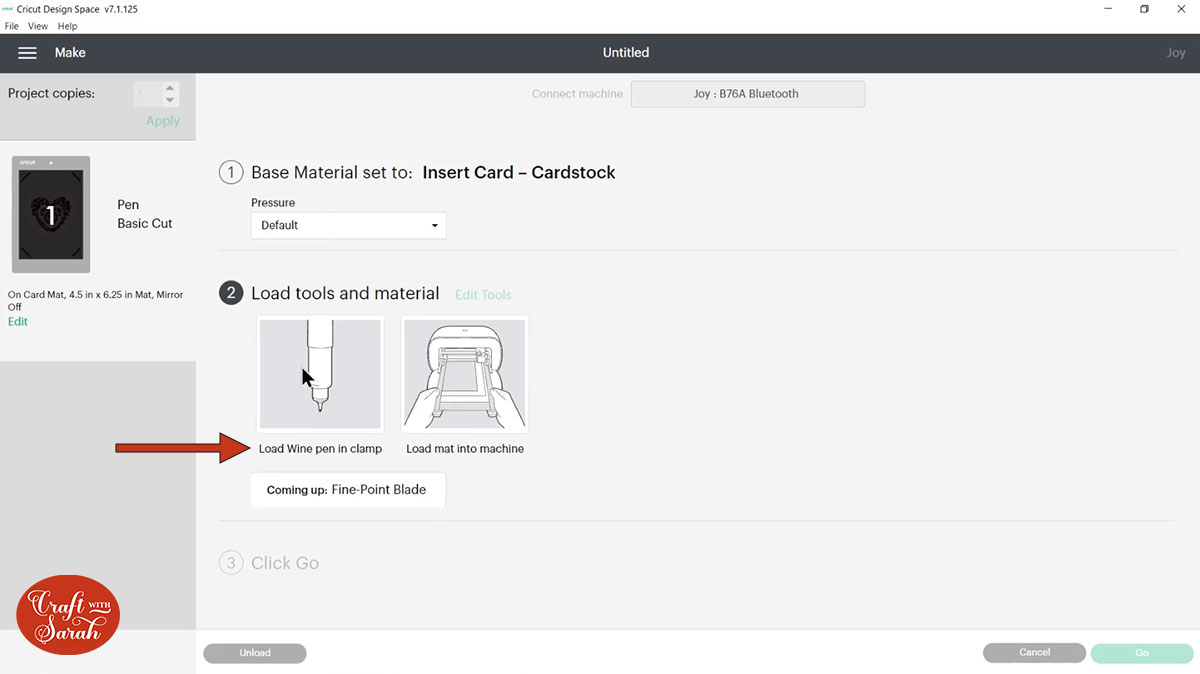
If the card design you are making has a pen layer, it will tell you to load the pen first.
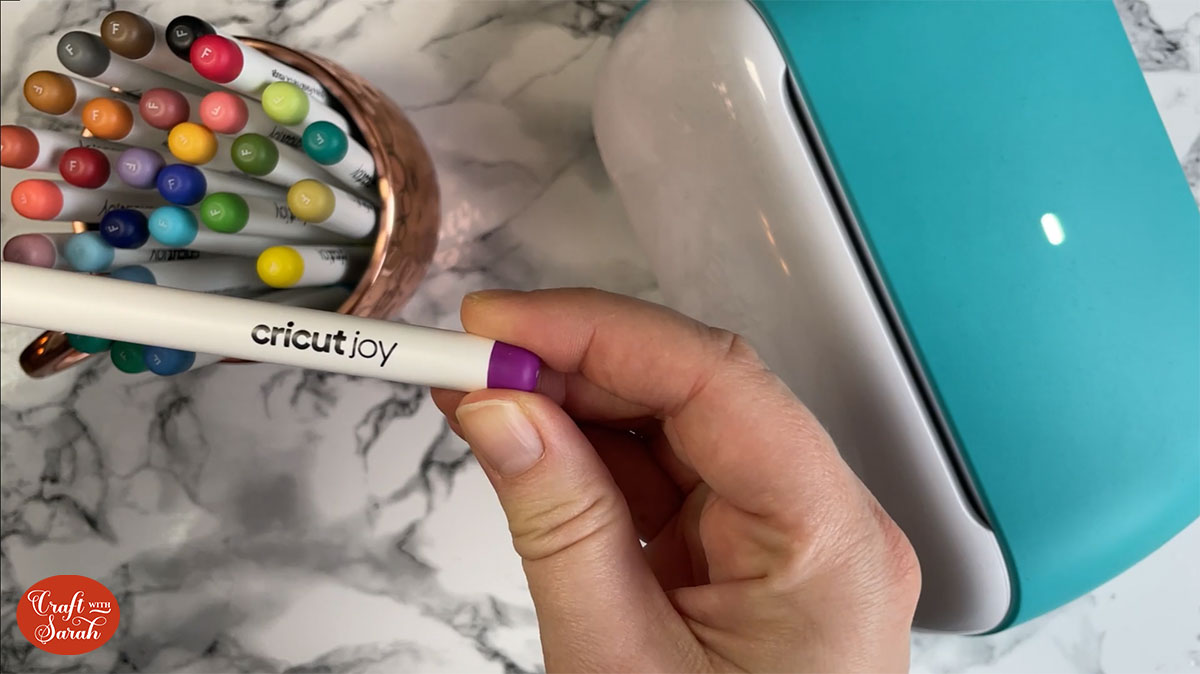
You need to make sure you’re using specific pens for the Cricut Joy because the bigger ones won’t work. You’ll know because they say Cricut Joy on the side.
These work best if you store them with the nibs pointing downwards. It just helps the ink last a little bit longer
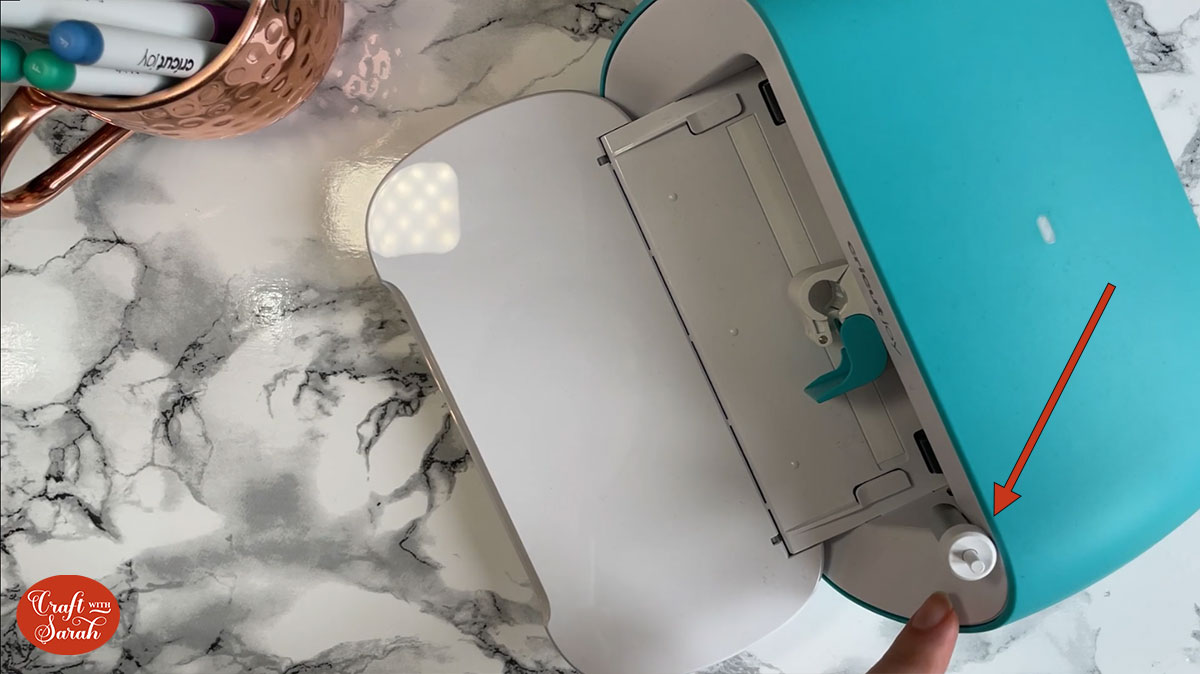
Open up the clasp inside your Joy and remove the blade. The Joy machine has a little magnet on the side to keep your blade safe.
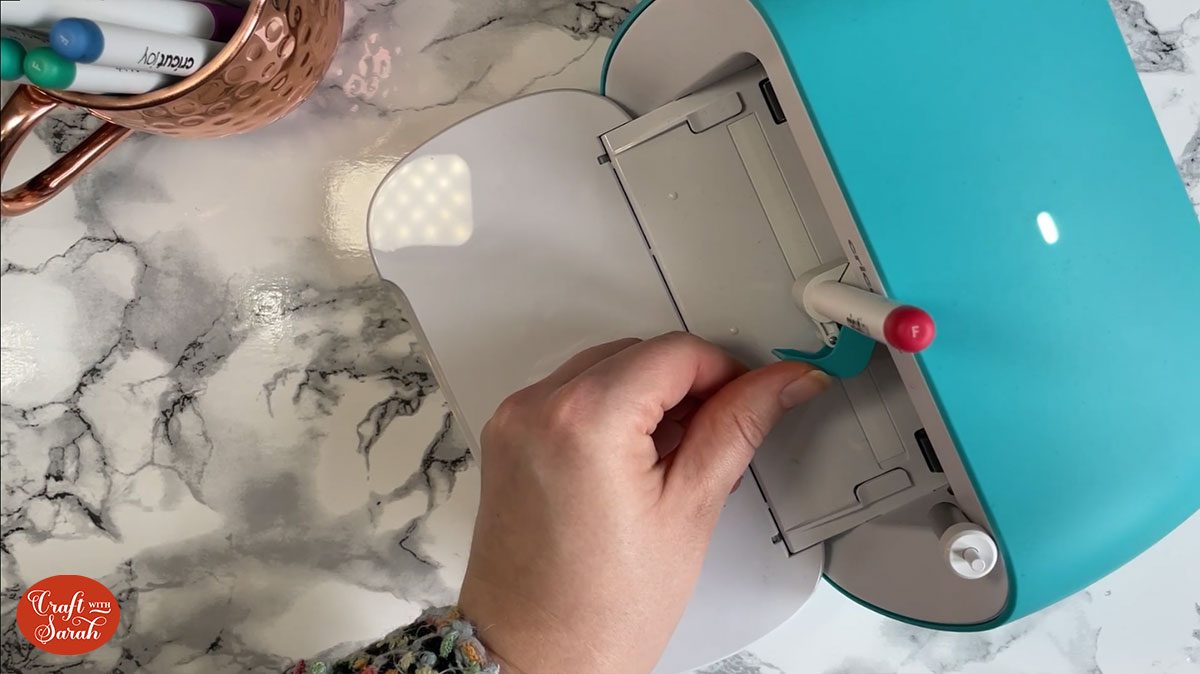
Take the lid off your chosen pen colour and insert it into the blade holder. Close up the clasp.
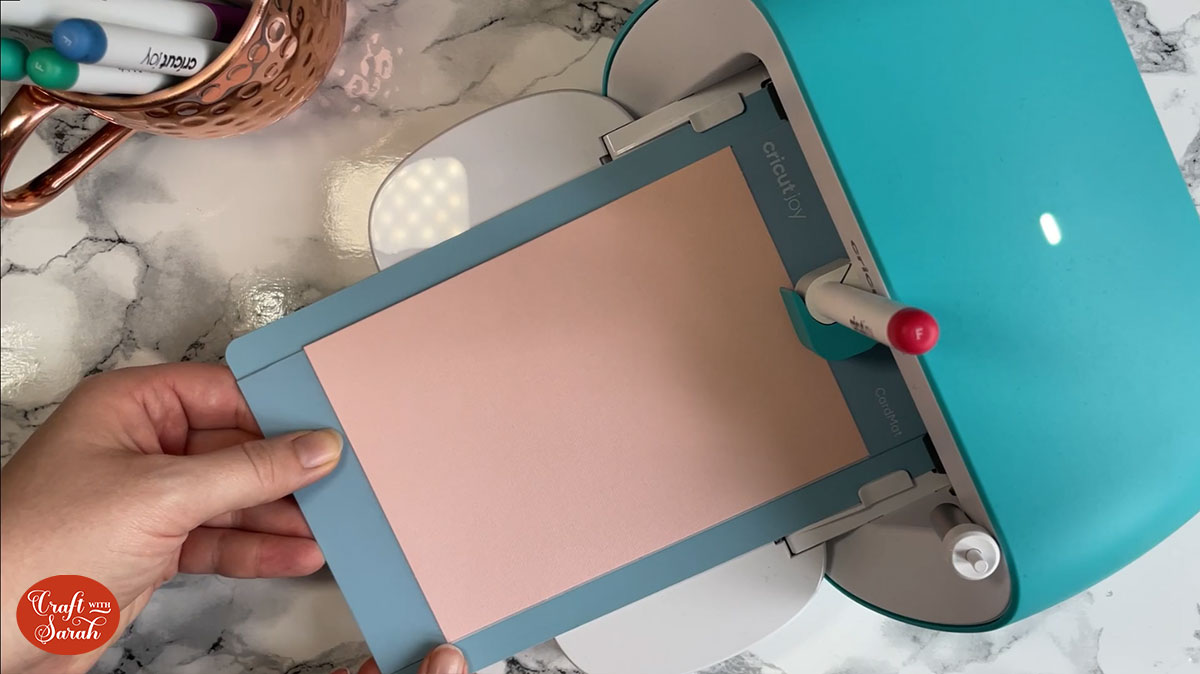
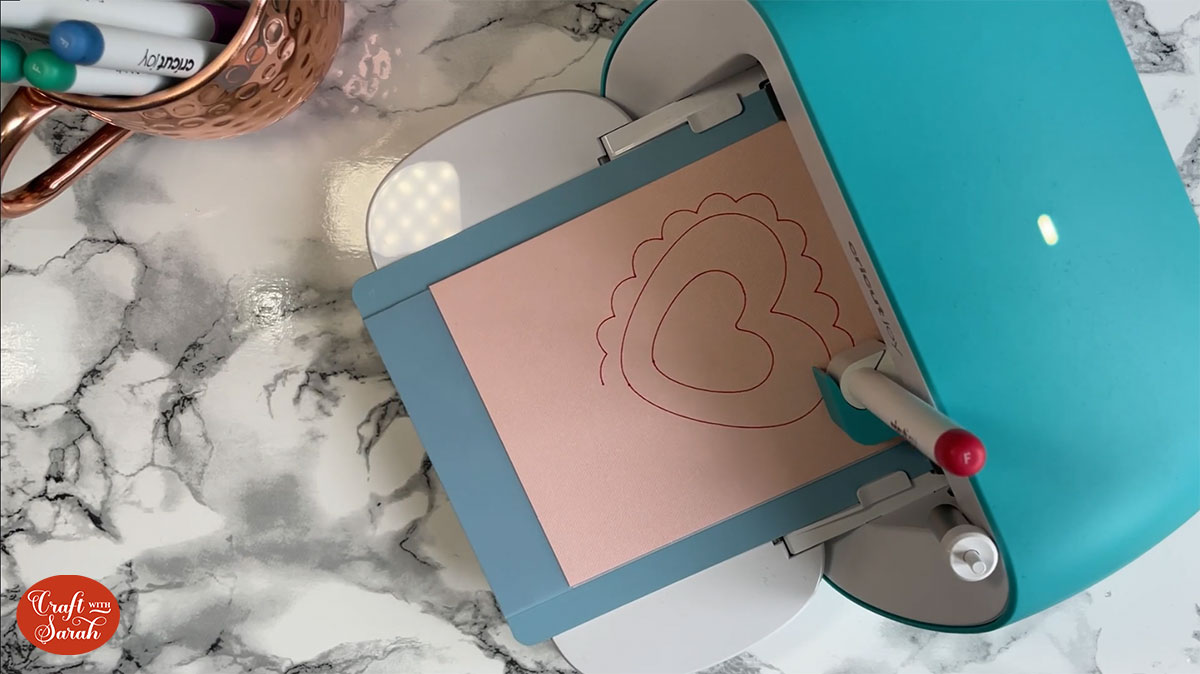
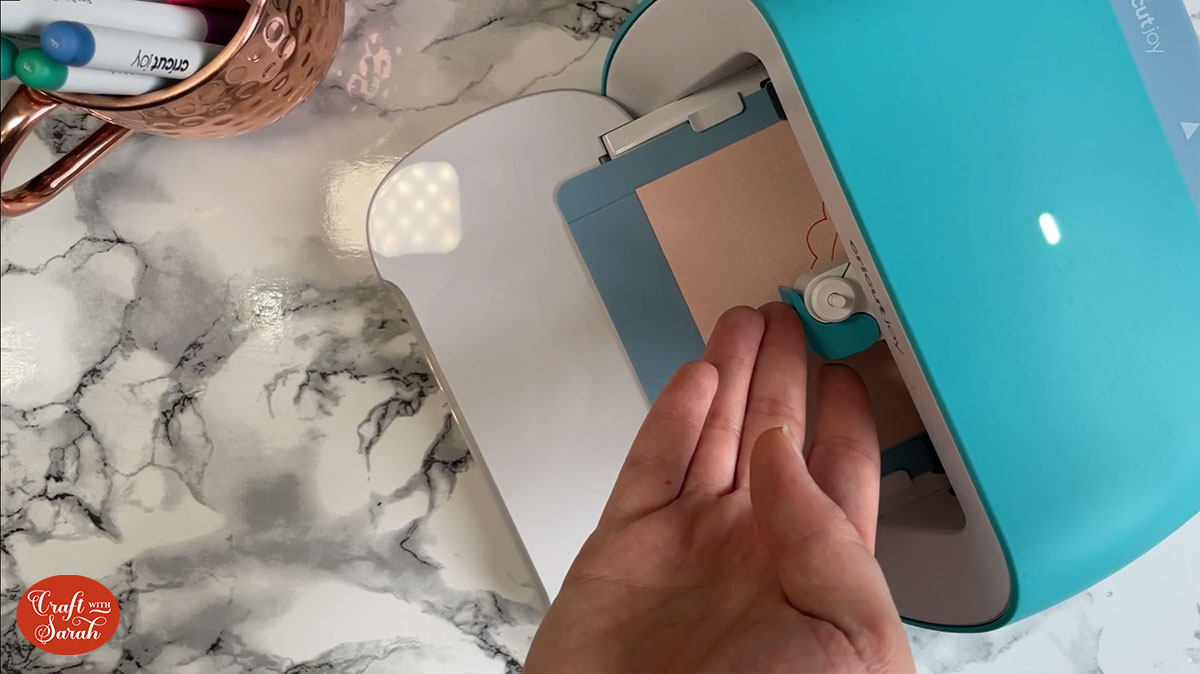
Load the card mat into the machine. Make sure the arrow is facing in towards the machine and load it in one smooth motion with both sides touching the rollers at the same time.
Slide it under the little plastic guides and then it will feed it into the machine and it will just pull the mat through a couple of times to check that it’s happy with everything.
Click ‘Go’ on your Design Space screen and it will go ahead and do the draw portion of the card.
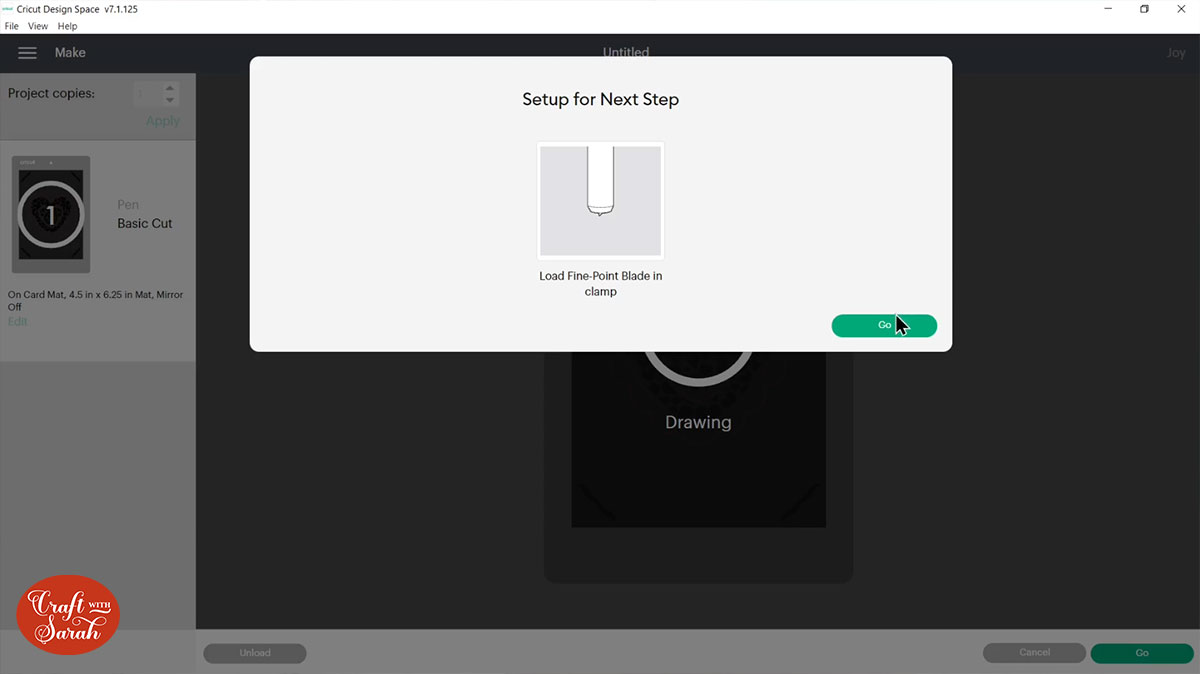
When it’s finished, go back to Design Space and read the instructions on-screen. If you have different pen colours, it will tell you to load the next colour. If not, it will tell you to put the blade in. We need to do that before we press the ‘Go’ button again.
Undo the clamp and take out the pen. Don’t forget to put the lid back on and then store it with the nib facing down.
Take your blade put it in the blade holder and again close up that clamp.
Head back to Design Space and click ‘Go’. It will feed the mat through and do the cutting part of the card.
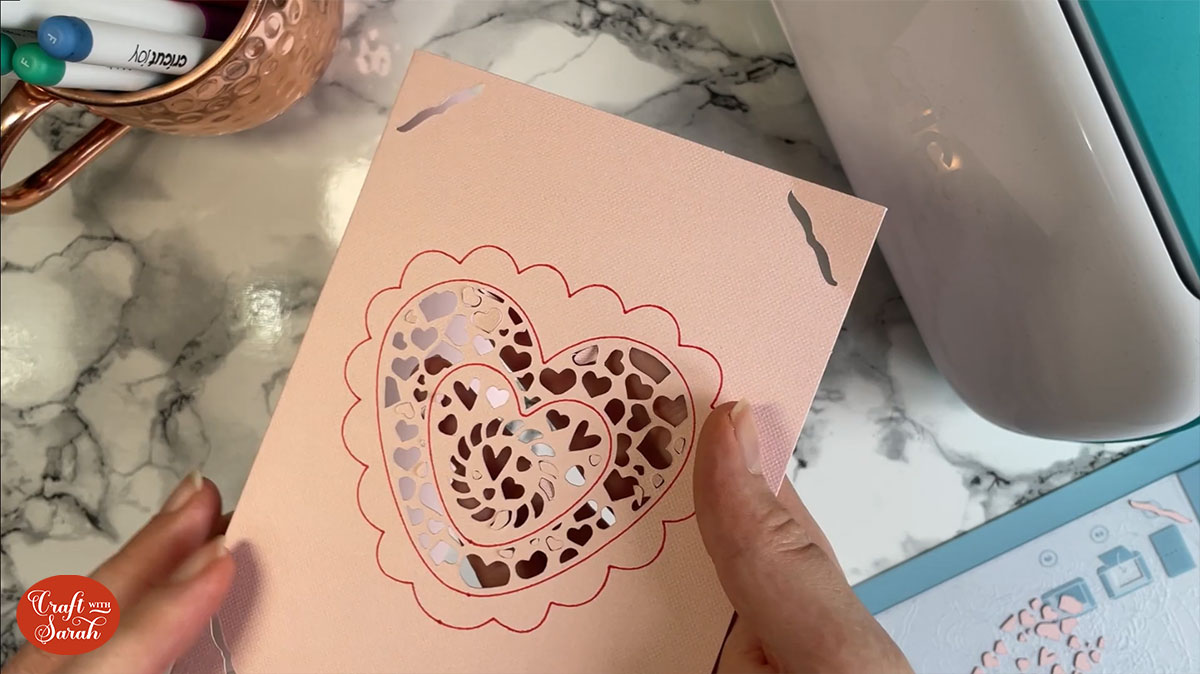
I was really impressed at how well the Joy cuts, even on these teeny tiny hearts. It does them perfectly. Everything’s aligned within those draw lines so you know it’s going to look beautiful when it’s finished. As well as cutting out all the hearts in the middle, it’s going to do the corners of my card which are going to be really important for the next step.
When it’s finished, head back to Design Space and a little box will come up with an ‘unload’ button. Click on that and it will eject the mat out of the machine.
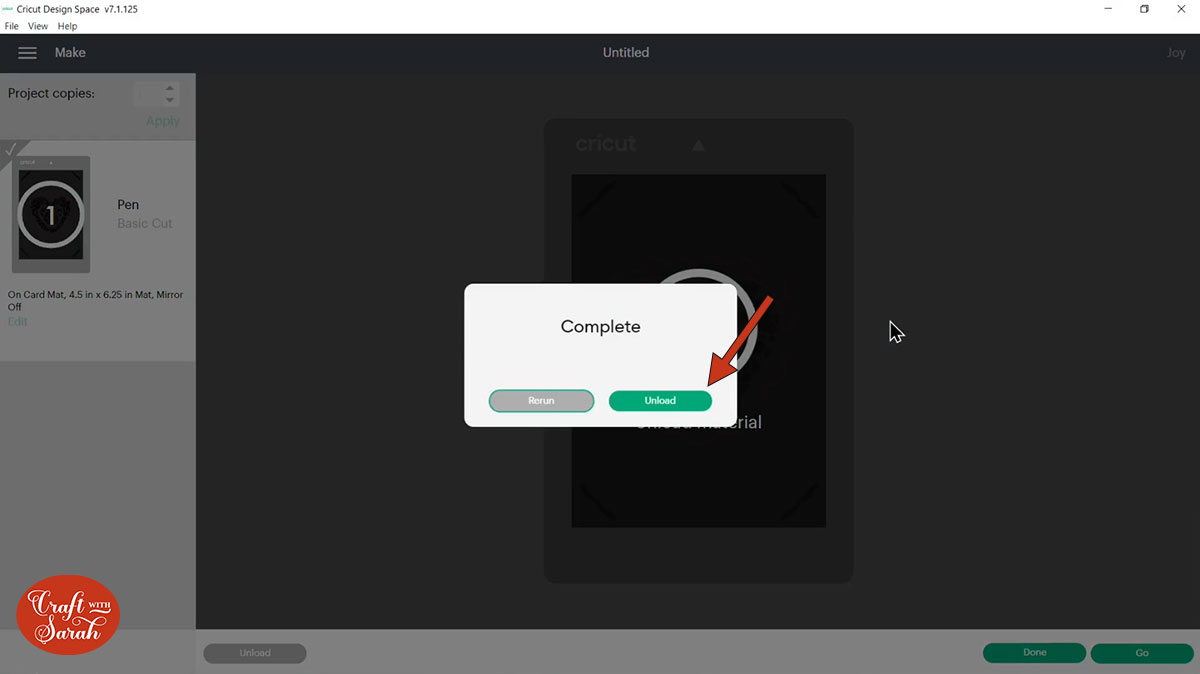
We’re done with Design Space now, so click ‘done’ and it will take you back to the project screen.
Carefully peel up the front of your card off of the stickiness of the mat, being careful not to bend or tear and then slide the back piece out from your mat. You might have some little cardstock pieces still connected so just poke them out with your fingers or you could use a weeding tool or something else small and pointy.
Then use your scraper tool to get all the little bits that’s stuck on the front of your mat off.
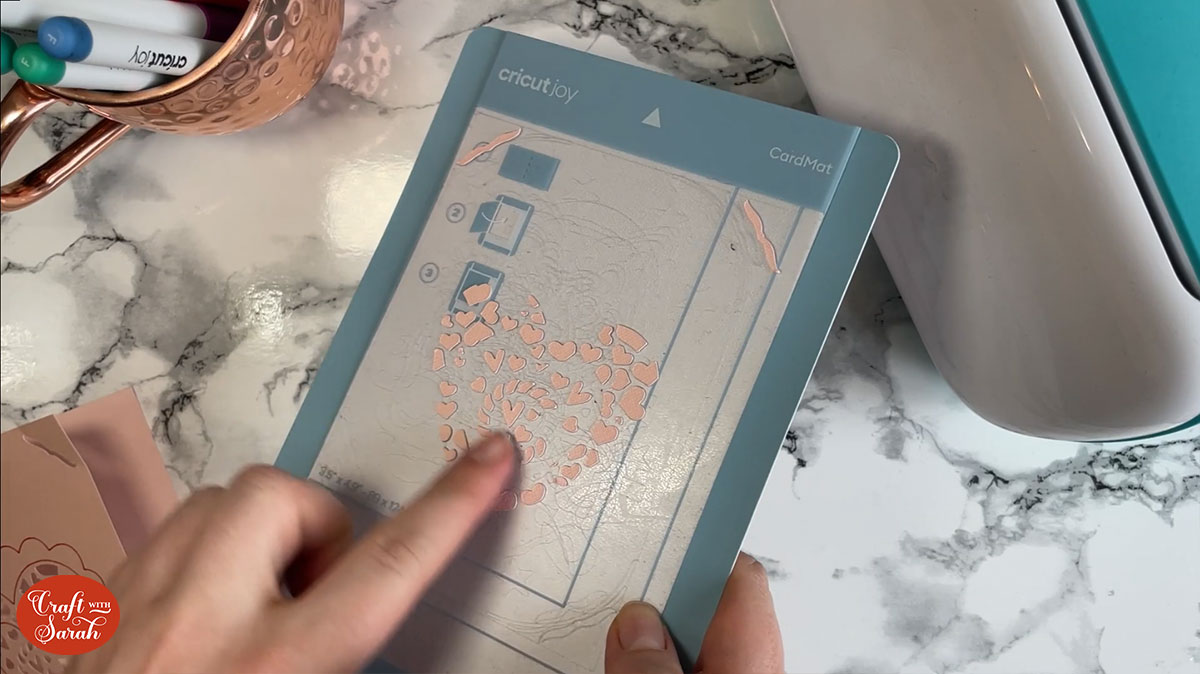
Don’t forget to put that cellophane protector sheet back on when you’re done so that you can protect your mat.
Step 6) Add the insert piece
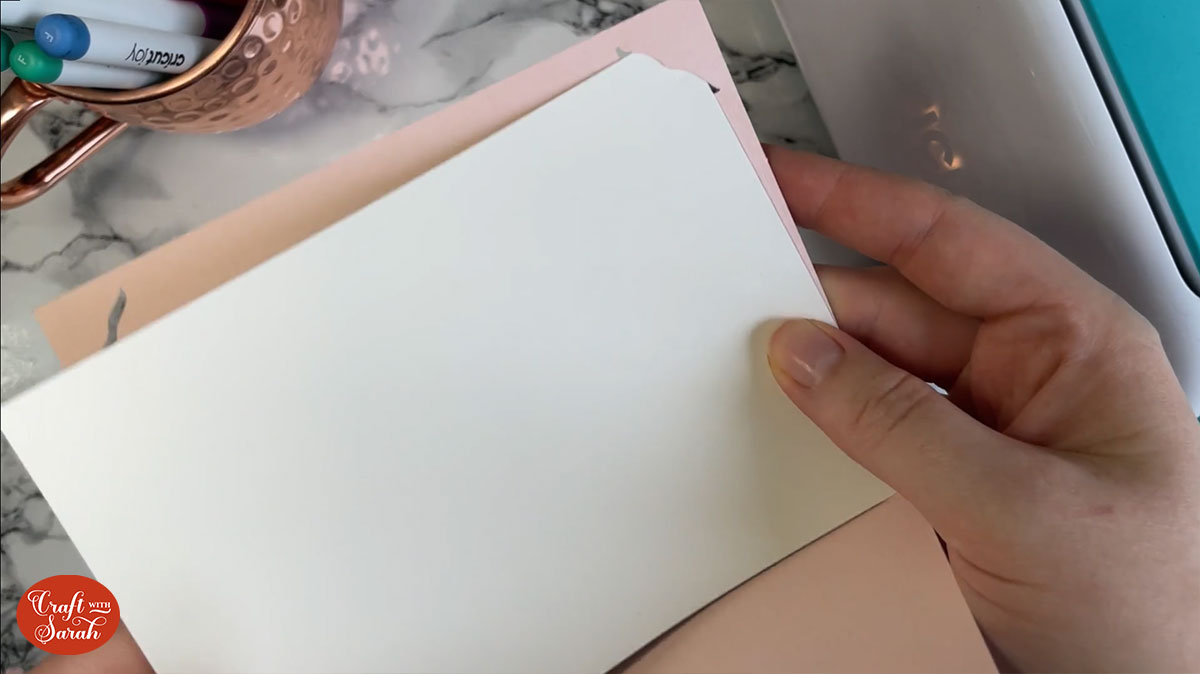
When you’ve finished taking out all the little parts, it’s time to put in the insert.
Open up the card and position the insert so that the pretty side is facing outwards and then slide it under one of the corners, getting it right up into those edges.
Then, slide it into the corner on the other side of the card. You can bend it a little bit but make sure you don’t actually add any creases or fold lines into that insert card.
Tuck it into the bottom two corners too. You might need to wiggle it about a bit to get it to go flat but it should sit completely flat to show that it’s in the correct position.
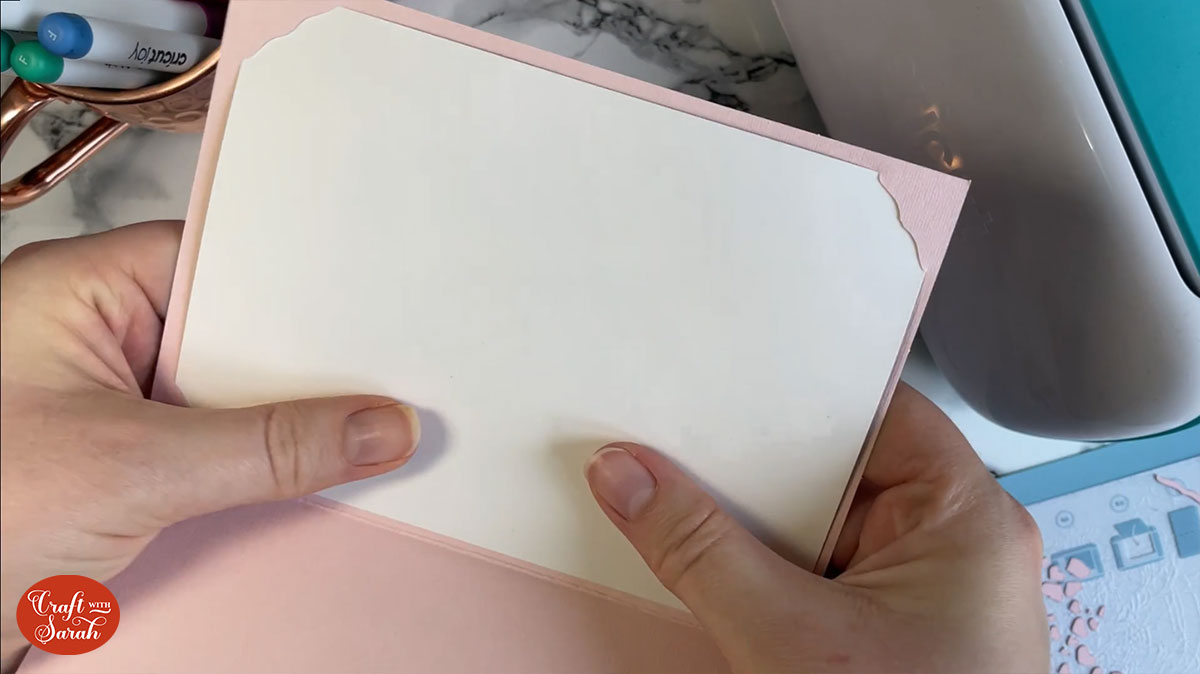
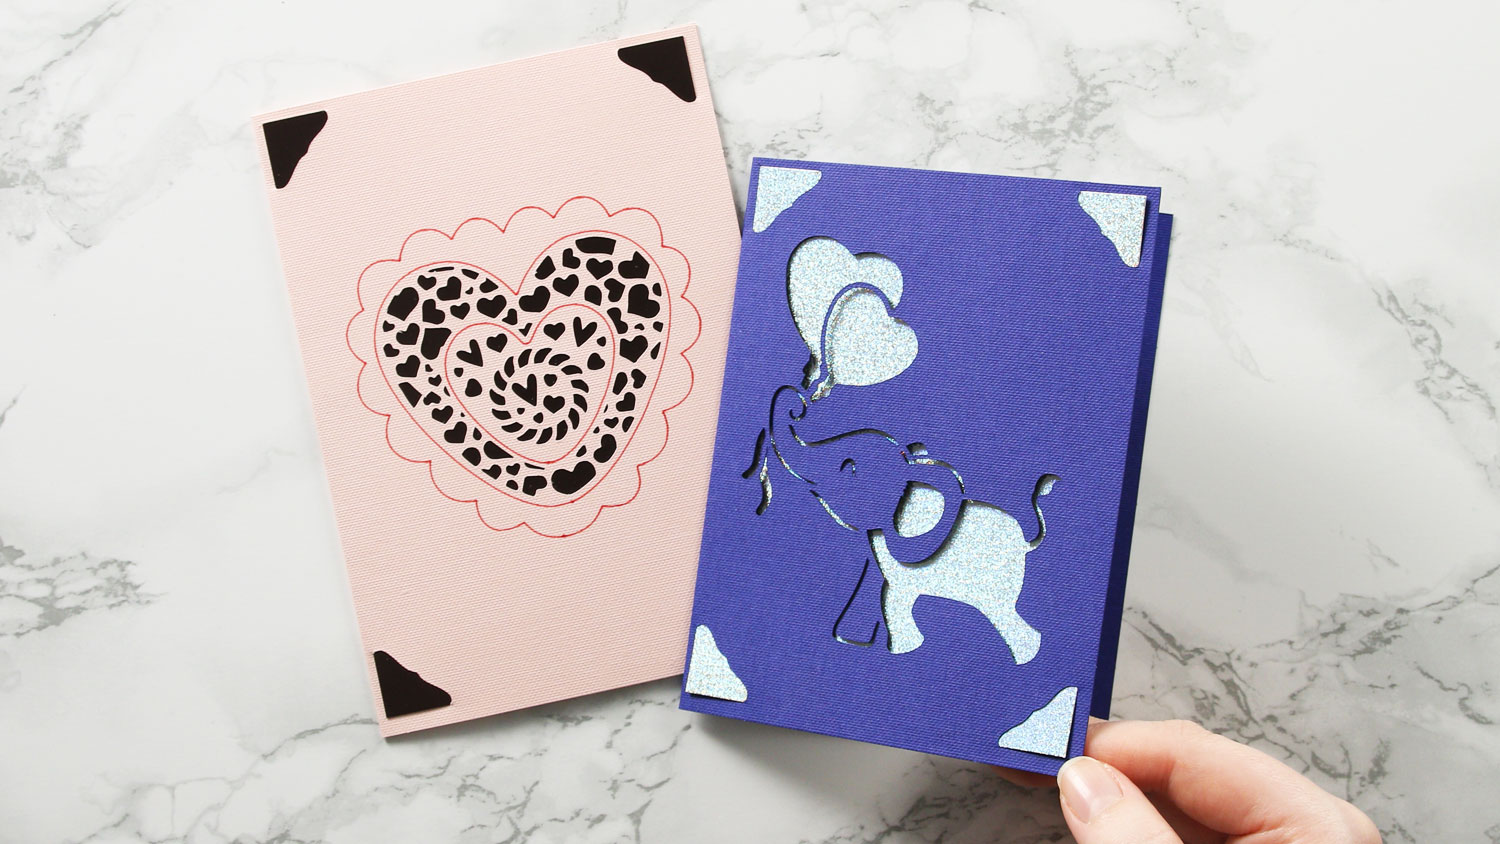
When it’s all closed up, here you go – this is what it looks like. Isn’t it pretty?
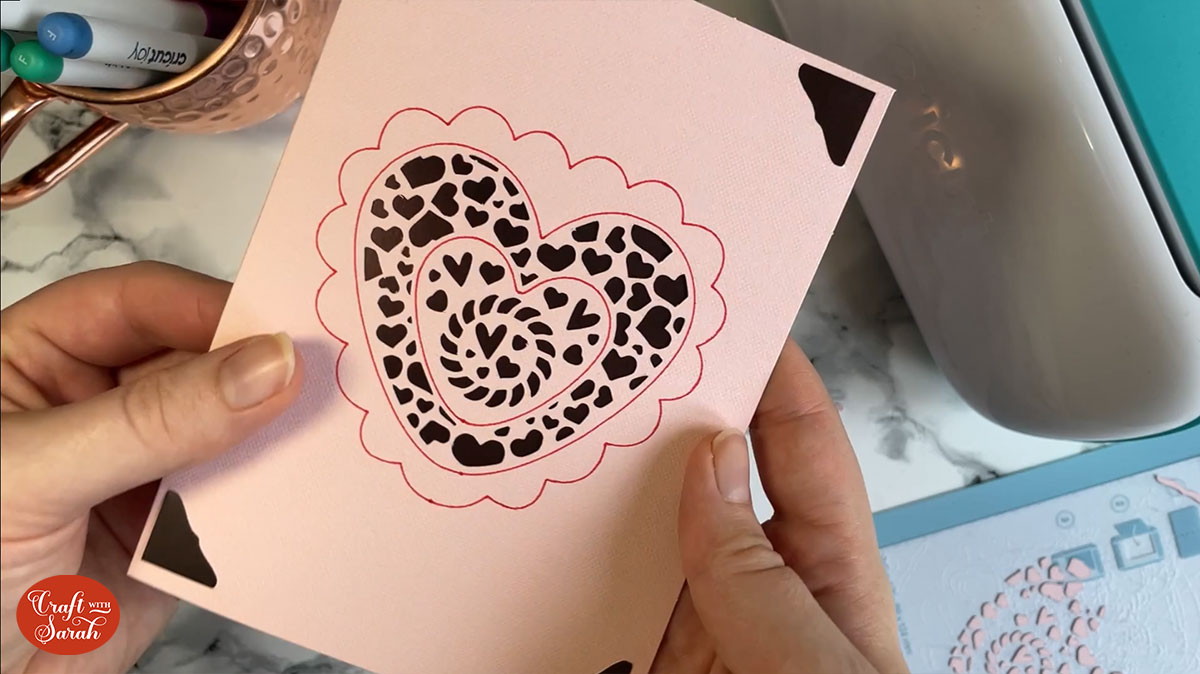
Your Cricut Joy card is now all finished and ready for you to add your message inside!
Card making with the Cricut Explore Air 2/3 and Cricut Maker/3
If you’re cutting this card on the larger Cricut machines, so the Cricut Explore Air 2 or 3 or the Maker or Maker 3, then you’ll need to do a little bit of extra formatting and it looks a little bit different to how we did it with the Joy.
Step 1) Upload the card SVG
After unzipping the download folder, go into ‘Upload’ and then ‘Upload image’.
This time we’re going to go into the folder that says ‘Cricut Explores and Makers’ and then select the SVG file in there.
This one’s a bit different because we’re going to be cutting the card base as well as the design on the card front. If you’re making one of my newer card designs then it will come with an envelope as well.
The reason my Cricut Joy cards don’t come with envelopes and don’t come with the full card base that you fold is because that would make it too big to be able to cut on the Joy. The bigger machines can handle it just fine though.
Press ‘Upload’ and then click the design and press ‘Add to Canvas’.
Now at the moment, you see I’ve got lots of warning triangles over here and that’s because I’ve still got my machine set to my Joy which means it’s telling me that everything on my screen is too big to be able to cut.
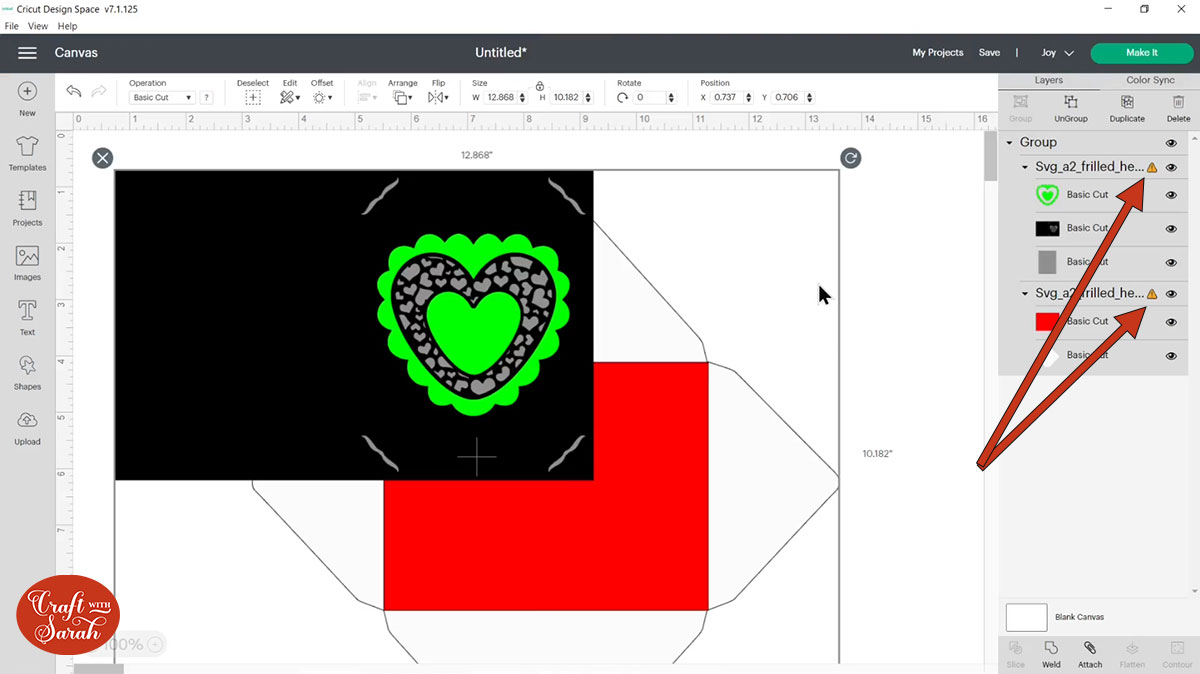
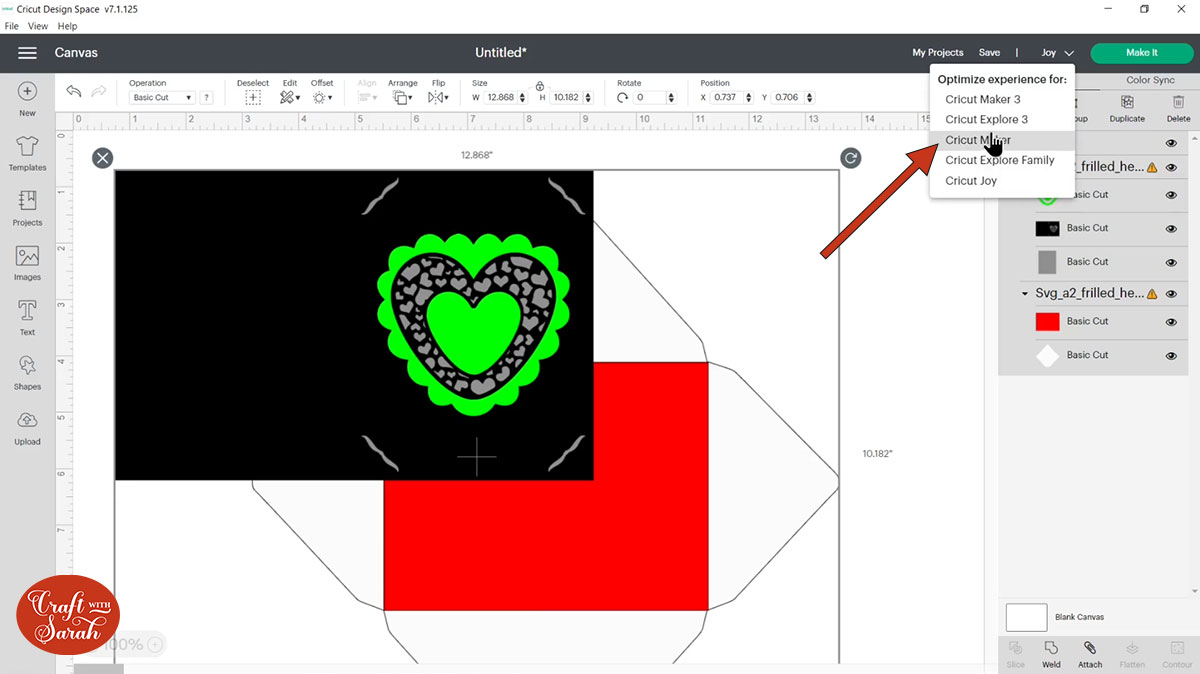
To fix that, simply click into the drop-down and change it to the machine you’re going to be using, so I’ve put mine to my ‘Maker’.
Step 2) Format the envelope template
The design is showing up as the wrong colors and there are a few things we need to change.
First, click on the main group over in the layers panel, so your very top line, and press ‘Ungroup’.
That will separate out the envelope from the card.
If you don’t want to make an envelope, simply click on it and press delete on your keyboard to remove it from the screen.
I am going to be making one though so I’ll show you how to format it.
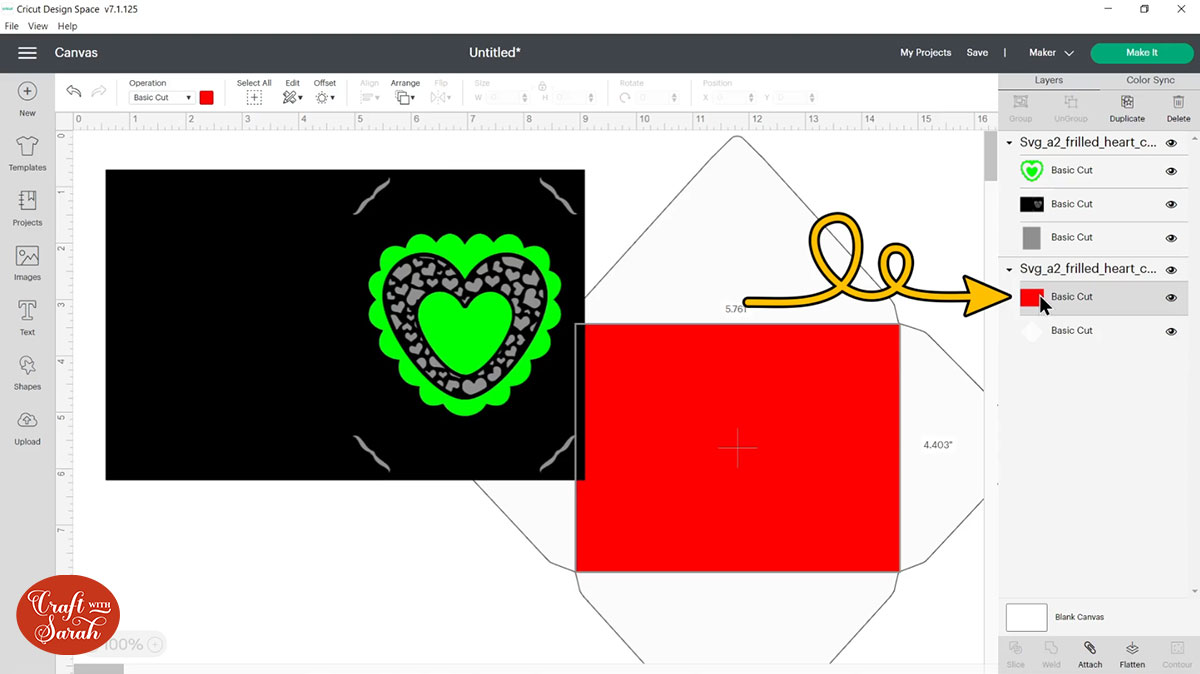
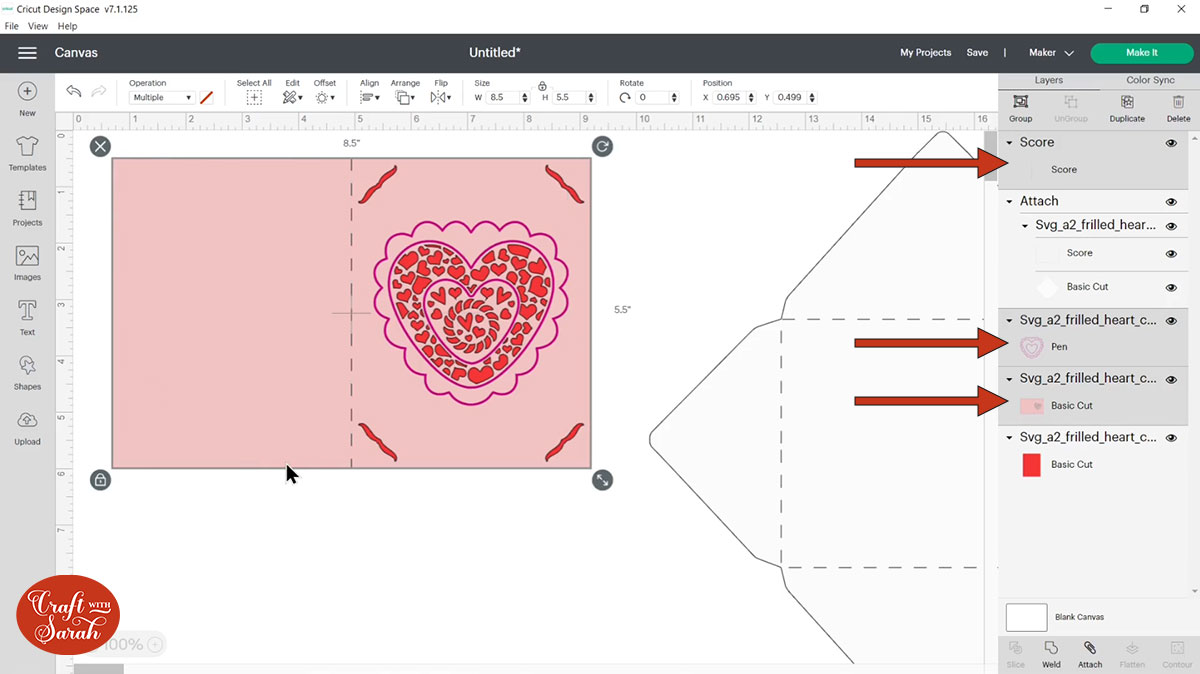
When you see a red shape on my card designs that means that that layer needs to be set to a score line.
Click the red rectangle in the layers panel.
Make sure you’ve just got that rectangle layer selected (not the whole envelope group) and then under ‘operation’ change it to ‘score’.
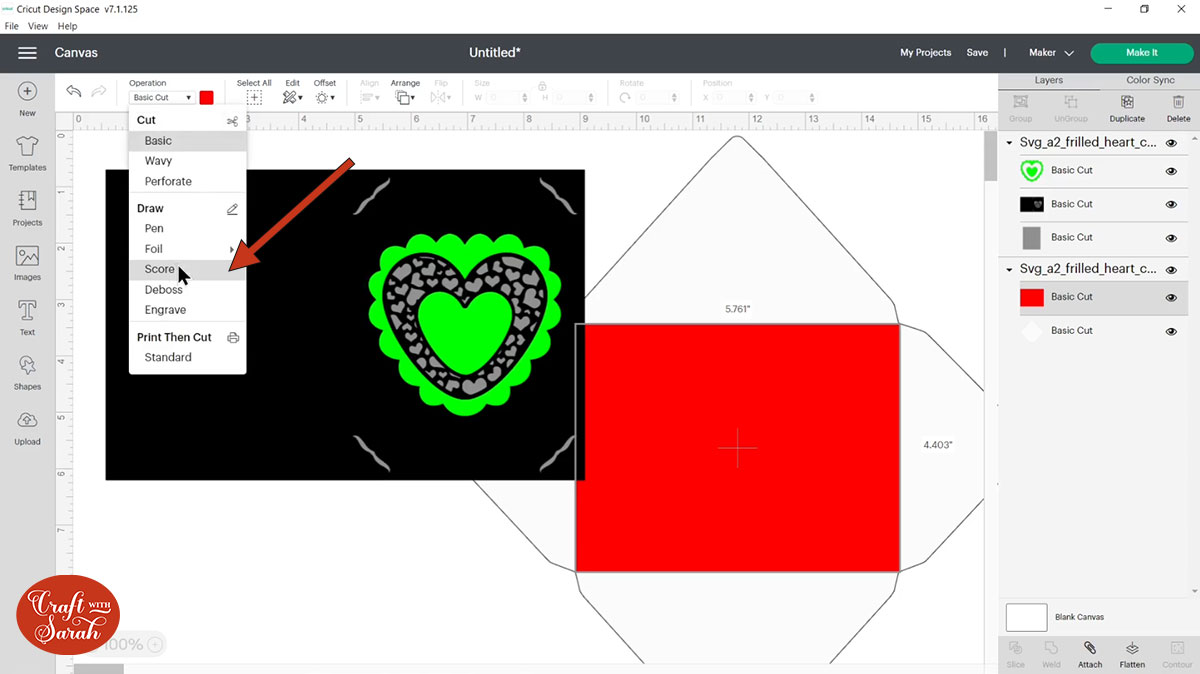
Now you can see the red has gone and it’s changed to a dashed line which is telling me that it’s going to score, however at the moment if I was to click ‘Make It’, it would do the cutting out of the outside of the envelope on one piece of paper and then it would score on a second piece and that’s not what we want.
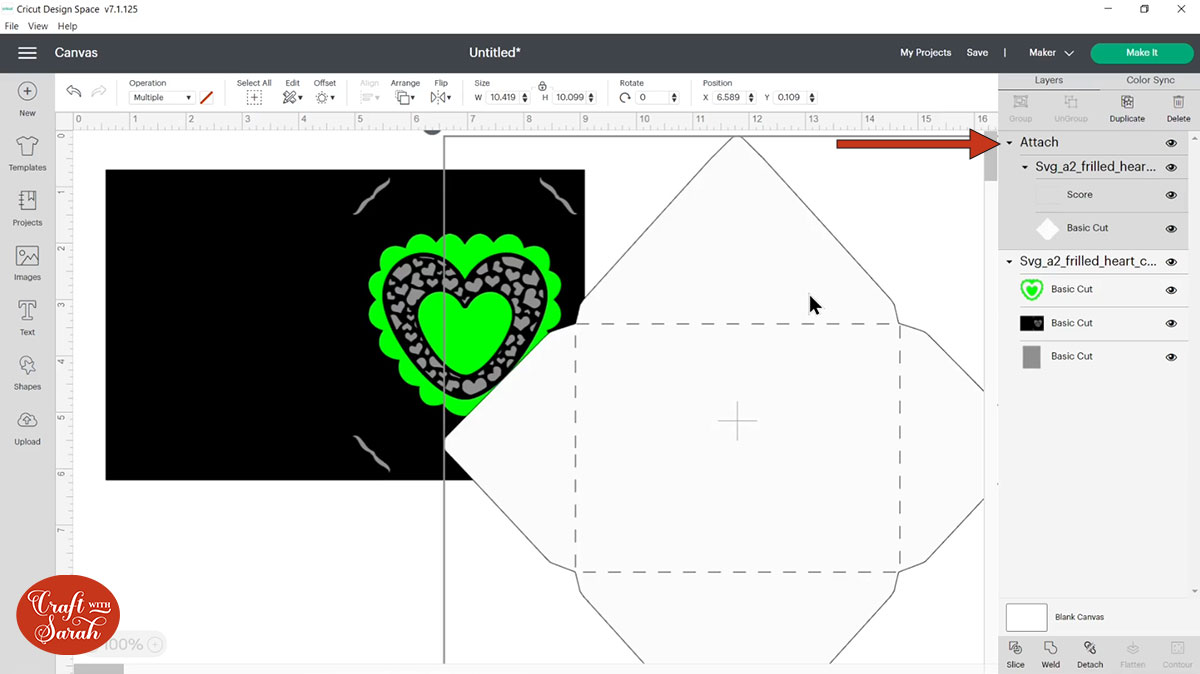
We want it to do them both on the same piece. Click on the envelope group to select it.
At the bottom of the layers panel press ‘Attach’.
That joins that score line to the outside of the envelope. Now that will all happen on the correct piece of card or paper.
That’s the envelope done. That was really nice and simple and now we can move on to the card.
Step 3) Change the card base colour
Let’s change the colour of the base card to the colour of card that we’ll be cutting it from.
It doesn’t really matter what you choose in Design Space because your Cricut doesn’t actually know what color card you’re going to be putting in there but I like to roughly get an idea of how it’s going to look before I cut it out which is why I’m changing these colors in Design Space.
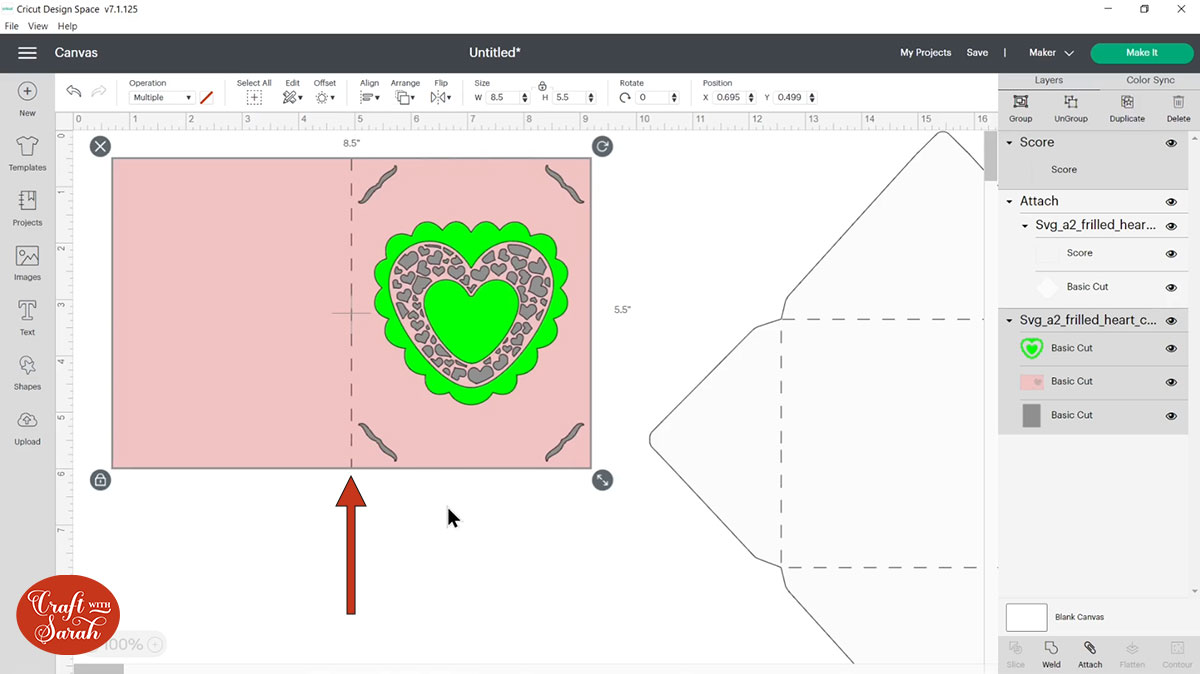
Step 4) Add a score line
By default, I haven’t added score lines down the middle of these cards. If you want to add a score line to make it easier to fold, it is really easy to do.
Go into ‘Shapes’ and then choose a score line.
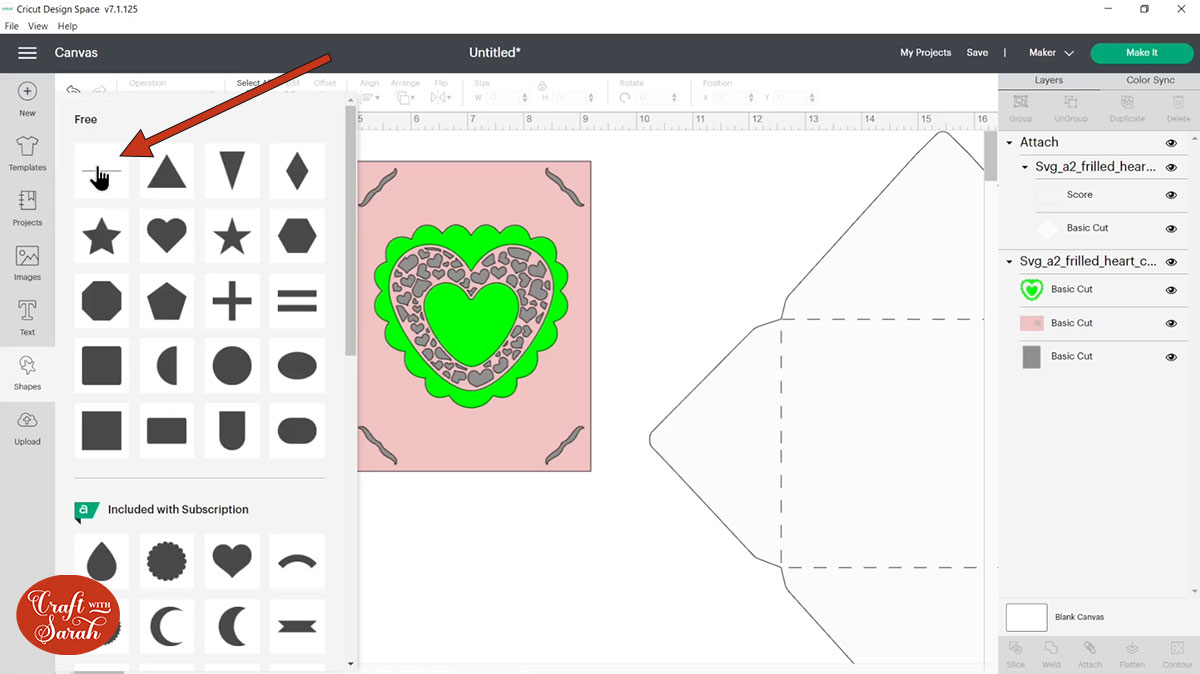
We need it to be the same height as the card. To find that out, click on the card layer to check the height. Mine is 5.5 inches so I can click back to that score line and type 5.5 in the height and press enter.
Next we need to center the score line on the card. Drag a box that touches both of them and now we’ve got the card and the score line selected. You can see this in the layers panel because those bits have gone gray.
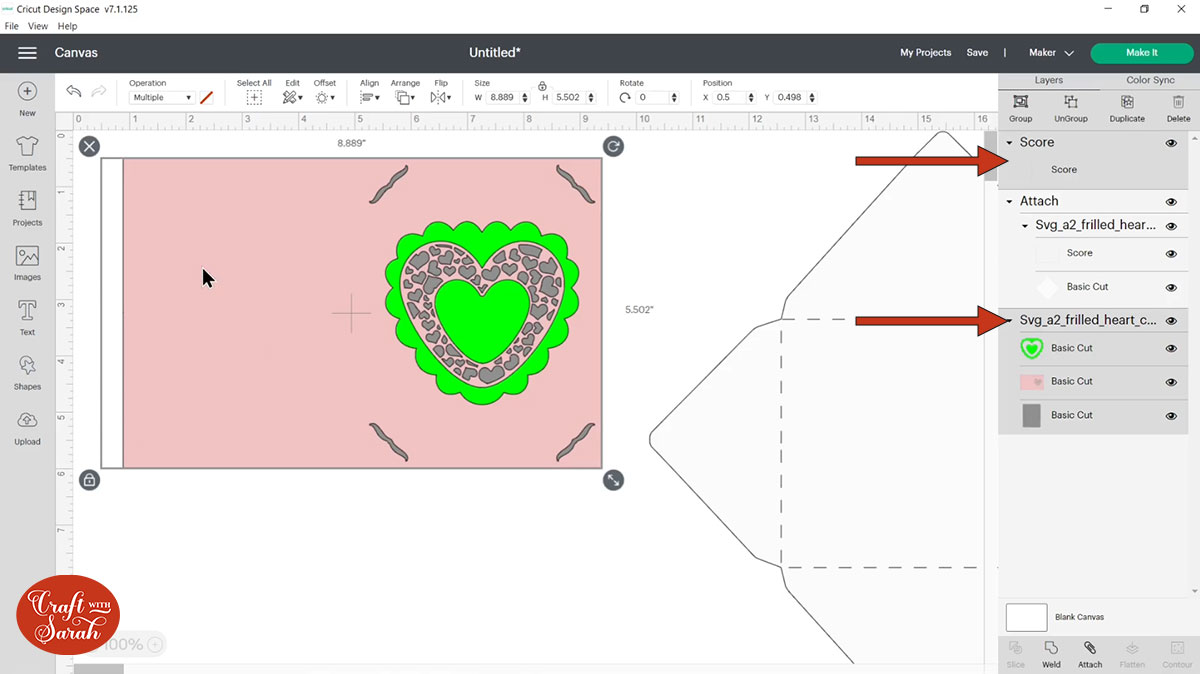
Then go into ‘Align’ and then ‘Center’.
Now the score line is exactly in the middle of the card.
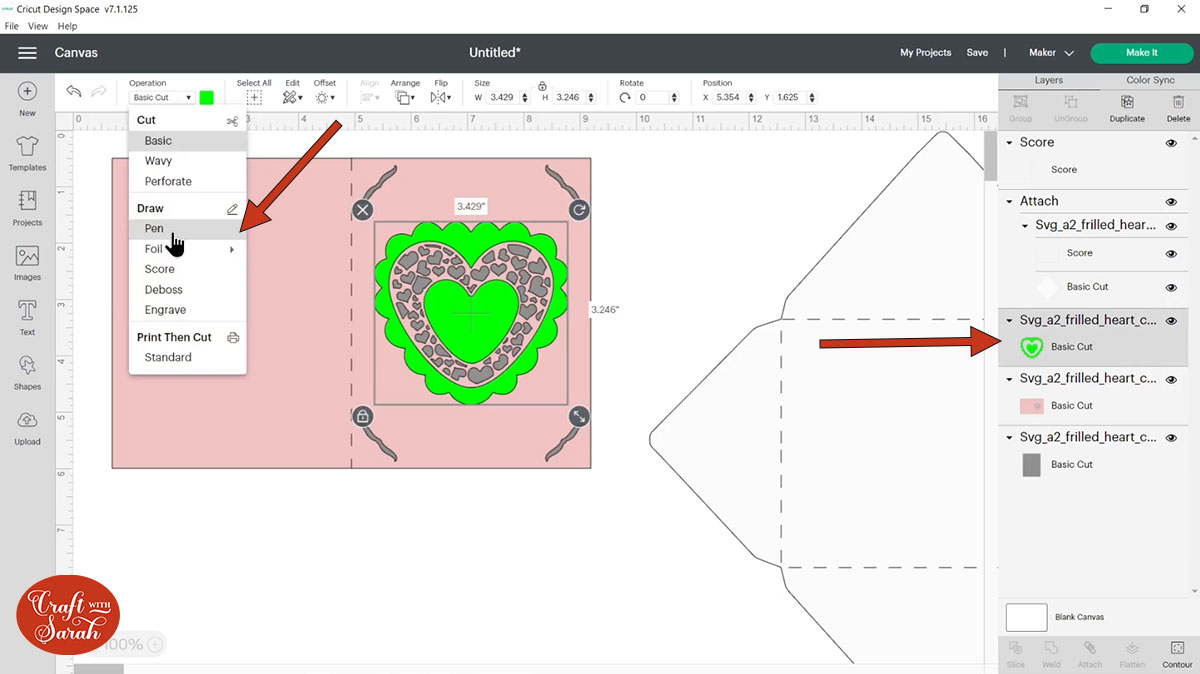
We will need to Attach it just like we did with the score line on the envelope but first we need to change the green layer to a Draw.
For all of my card templates, if you see a lime green layer, it needs to be changed to the ‘Draw’ operation type. Not all card designs have a ‘Draw’ layer.
Click on the card Group over in the layers panel and press ‘Ungroup’ to separate out all the layers.
Choose the green layer and then under the ‘Operation’ dropdown, change it to ‘Pen’.
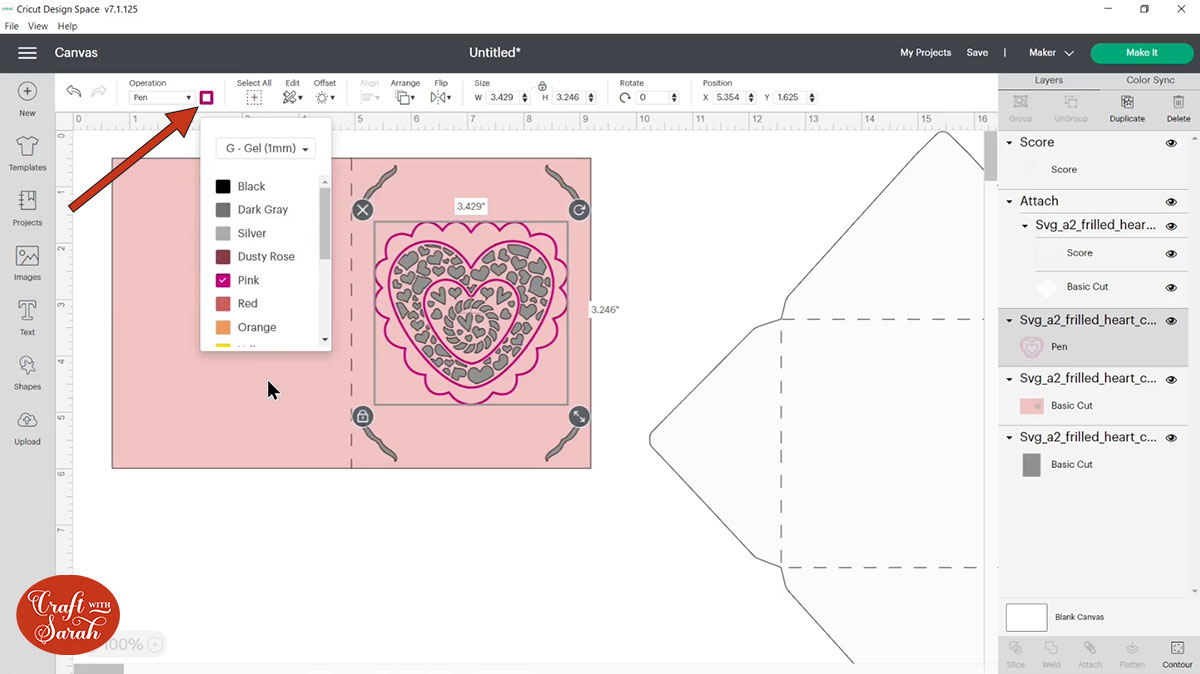
You can change the color by clicking the little box next to the dropdown and also change the type of pen that you’re using.
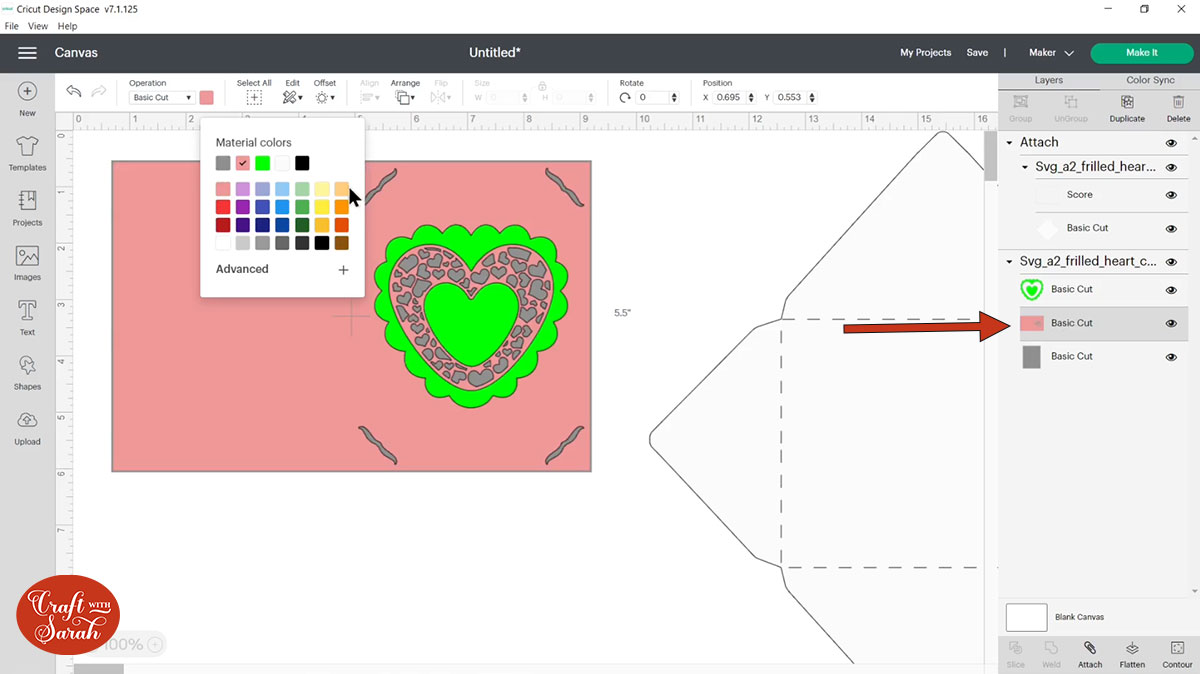
Step 5) Change the colour of the card insert
The gray rectangle you can see peeking through these holes is going to be cut from a rectangle of card and that will show through the holes so that you can see that color inside.
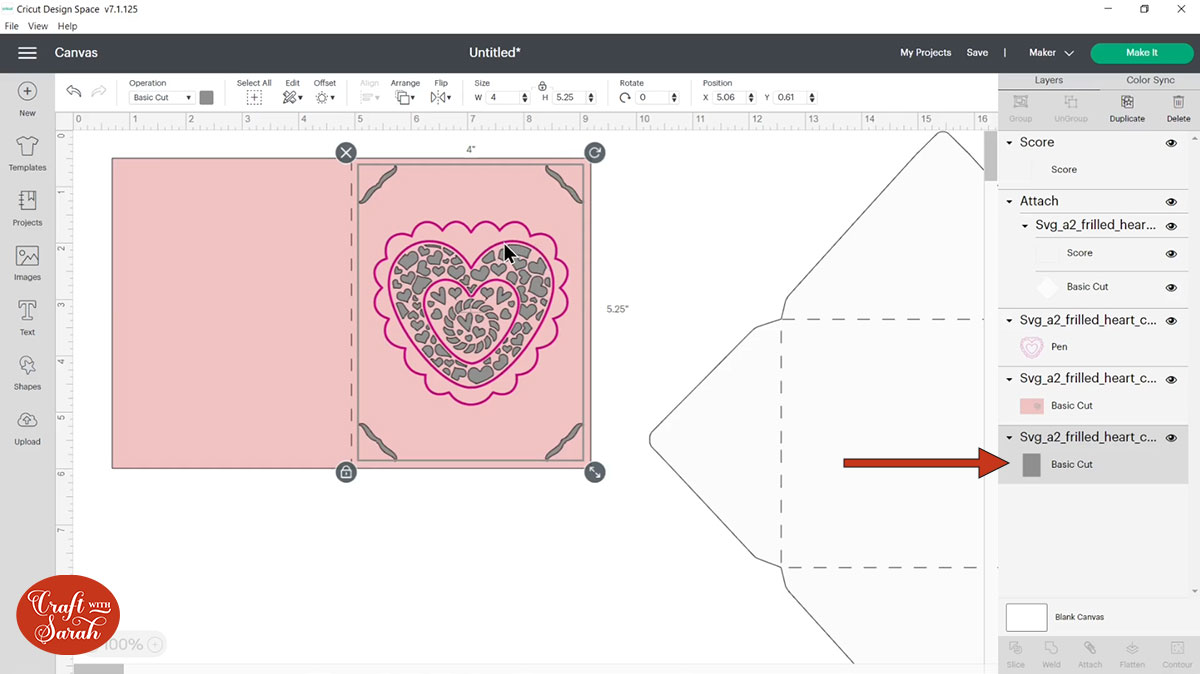
Let’s make it a nice bright red.
Step 6) Attach the score/draw and cut lines
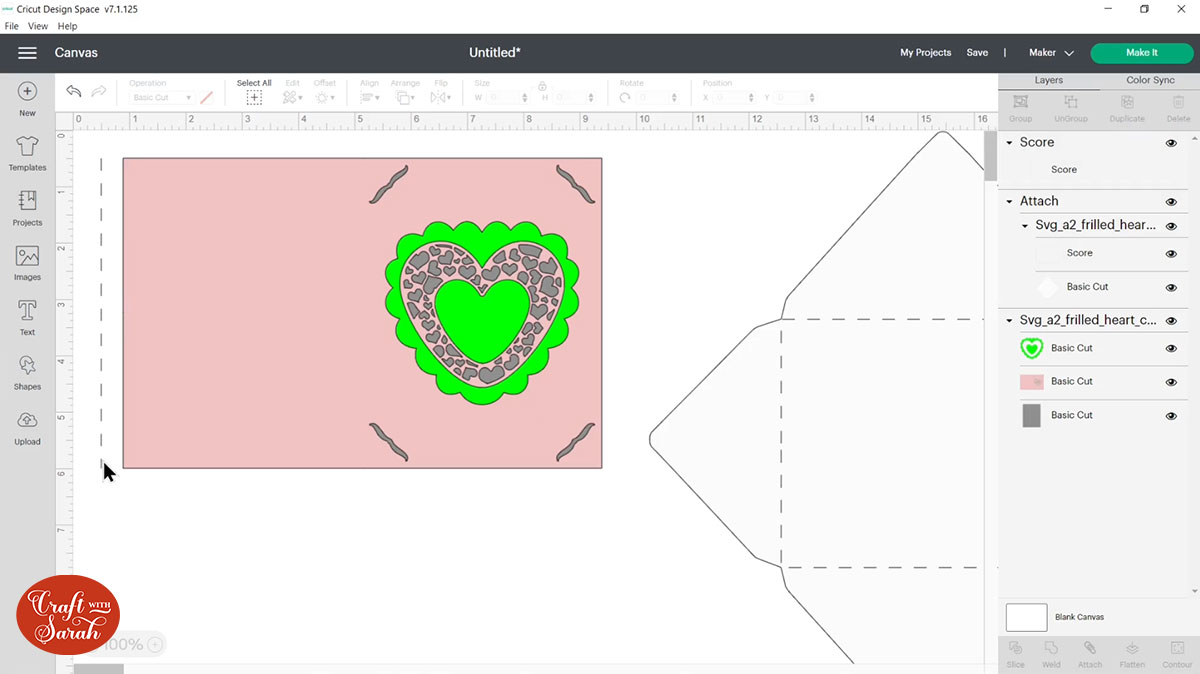
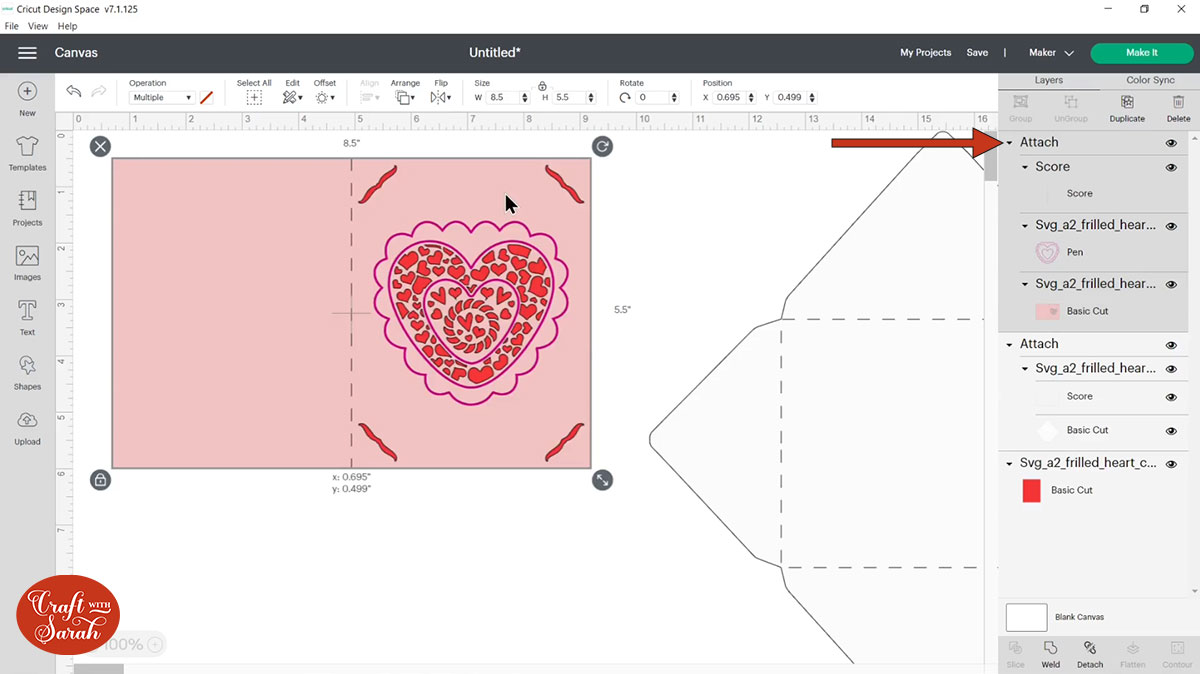
Finally we need to do our attaching on the card. To do that, I find it easiest to go over to the layers panel, click the score line if you added one (if you didn’t that’s fine you don’t need it).
Click the score line if there is one, press shift on your keyboard and choose the draw layer and then press shift again and choose the base card (the big rectangle).
Do not choose the rectangle which sits underneath the front (our red rectangle). We don’t want to attach that because that is going to be cut from a separate piece of card.
Click “Attach” to join these three layers together.
Here’s how it should look in the layers panel:
Step 7) Cut the Cricut greetings card
This is now all ready to cut, so click ‘Make it’ and it will separate out everything for you.
If you want to change your paper size you can do it in the little drop downs on the left side of the screen.
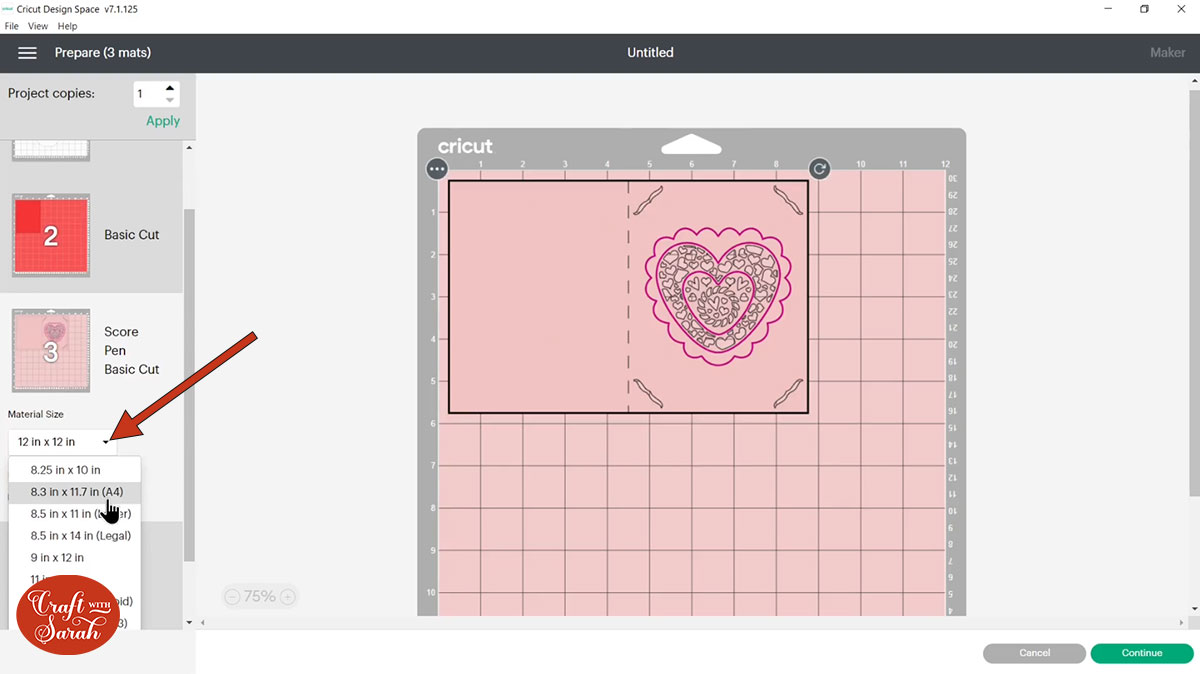
When you’re happy with how it’s all looking, go ahead and press ‘Continue’. It will connect to your Cricut machine and then you can follow the on-screen instructions to get everything cut out.
I hope you’ve enjoyed this tutorial on how to make greetings cards using the Cricut Joy or the larger Cricut machines.
I’ll be releasing more greetings cards designs like these very, very soon and the best thing is you’ll be able to follow the steps in this tutorial for all of my future card designs.
Happy crafting,
Sarah x

