Cricut Scoring Tutorial ✂️ How to Score – even on the JOY!!
Learn to use all the different scoring tools with your Cricut machine AND how to score even if you don’t have a scoring tool… including how to score with the Cricut Joy and Joy Xtra!
If you’re wondering how scoring works on a Cricut, this is the tutorial for you!
We’re taking a deep-dive into all the different ways you can make score lines with a Cricut, including how to use scoring tools with your Cricut machine and how to score even if you don’t have a scoring tool.
This is especially helpful if you have a Cricut Joy or Joy Xtra, as those machines don’t have dedicated scoring tools… but I’ve found THREE different ways you can make score lines without scoring tools. 😁
Please note that some of the links included in this article are affiliate links, which means that if you click through and make a purchase I may receive a commission (at no additional cost to you). You can read my full disclosure at the bottom of the page.
How does scoring work on Cricut?
Cricut have three different types of scoring tool available for purchase:
- Scoring stylus (for Maker, Maker 3, Explore Air 2 & Explore Air 3)
- Single scoring wheel (Maker & Maker 3 only)
- Double scoring wheel (Maker & Maker 3 only)
There are also three different ways you can score on a Cricut without a scoring tool:
- Using the lightest possible cut setting
- Drawing the lines and then manually scoring them
- Using the Cricut Foil Tool to score <-- best method!
How do I change my Cricut from cut to score?
The difference between cut and score on a Cricut is that the “cut” lines will be cut by the regular blade inside the machine, whereas “score” lines require a separate scoring tool to create a pressed-in (almost dented) line in your material. This allows you to fold it along that line to get get a crisp, accurate fold.
Scoring is often used with cardstock projects, including greetings cards, envelopes, gift boxes, 3D crafts, gift card holders and more.
To add a score line in Cricut Design Space, go into “Shapes” and choose the first option which looks like a single vertical line. This is a score line.

Note that if you are using the Cricut Joy or Joy Xtra then this will not appear as a score line, since those machines do not come with a native scoring tool. Instead, it will show as a “cut” line. Keep reading to find out how to score with the Joy machines!
Score lines appear as dashed lines on the screen in Design Space. This is to give a visual cue that it is a score line when you’re working on the project, but it won’t actually score in “dashes”. Instead, it will score as a single line.
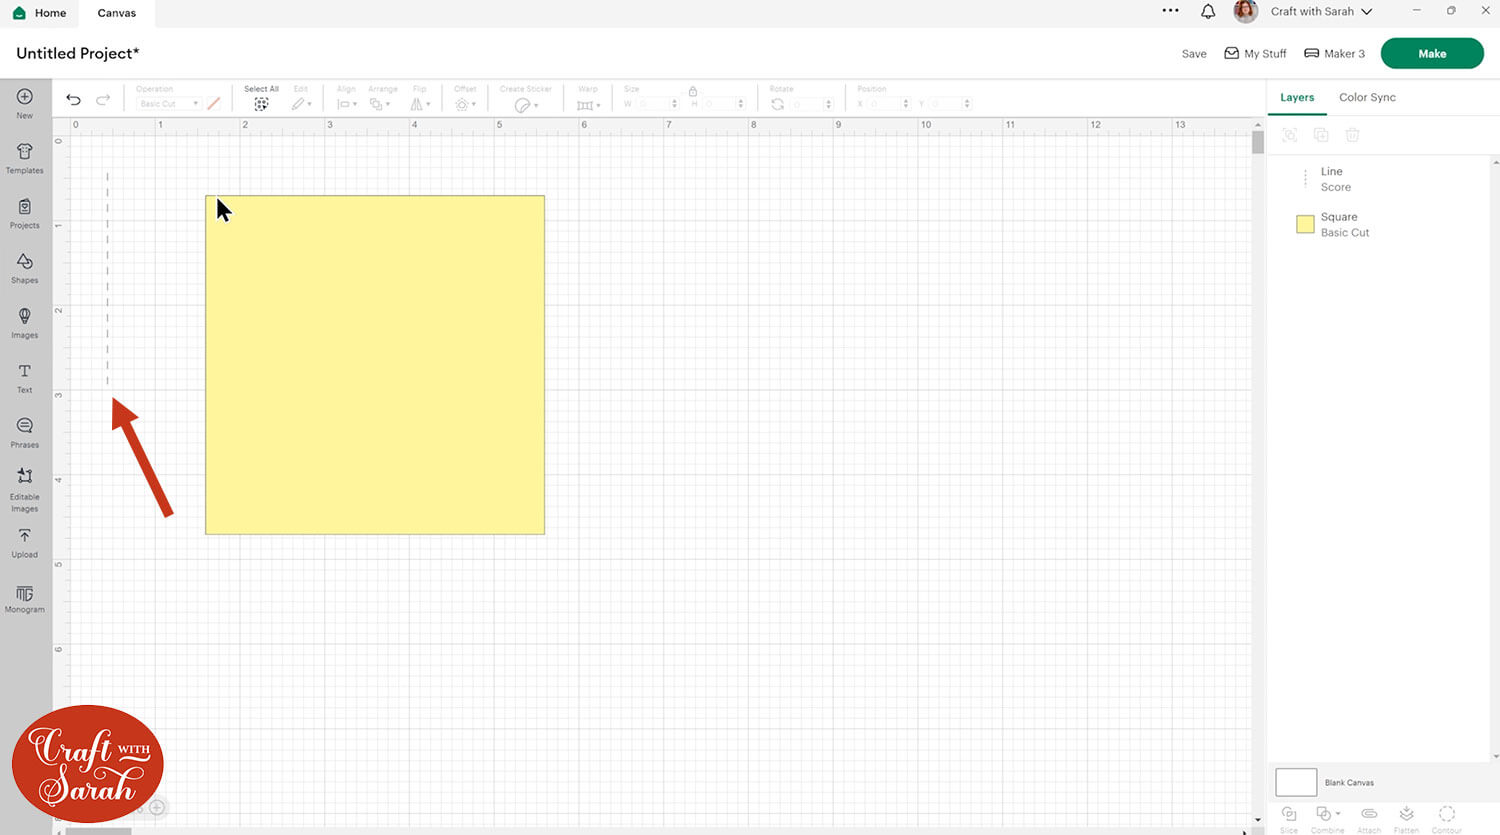
To add a score line onto another shape, size it to the same width or height as the shape. You can rotate it using the box along the top of the screen if needed.
To put the score line exactly in the middle, select the score line and the shape and press Align > Center.
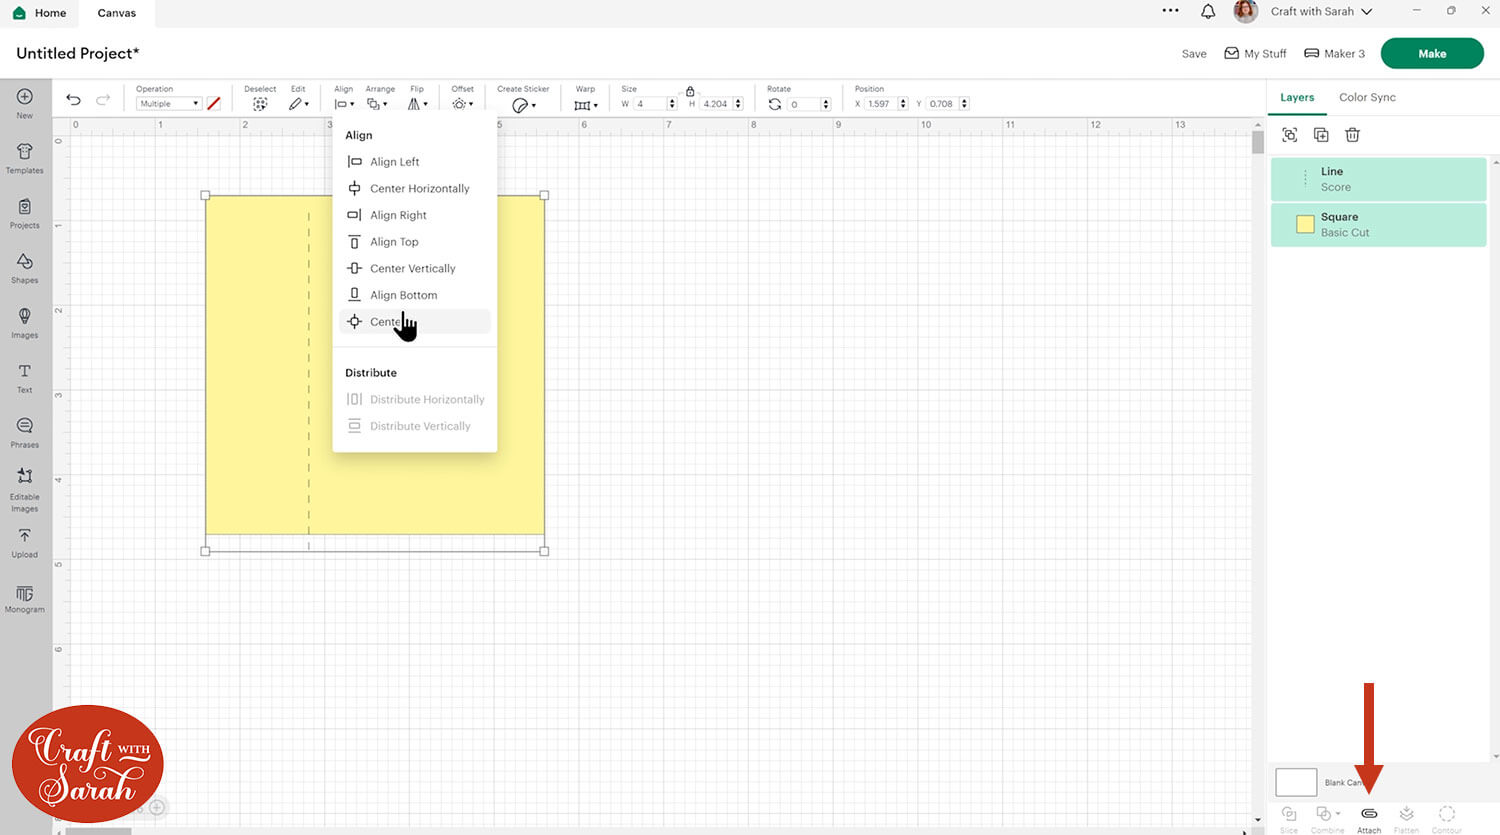
You need to manually tell the Cricut to do the score line on your shape, using the Attach tool.
If you do not attach the score line to the shape then the Cricut will score on a separate piece of card.
To attach, select both layers and click the Attach button at the bottom of the layers panel.
Your layers panel will update to visually show that these layers are now attached.
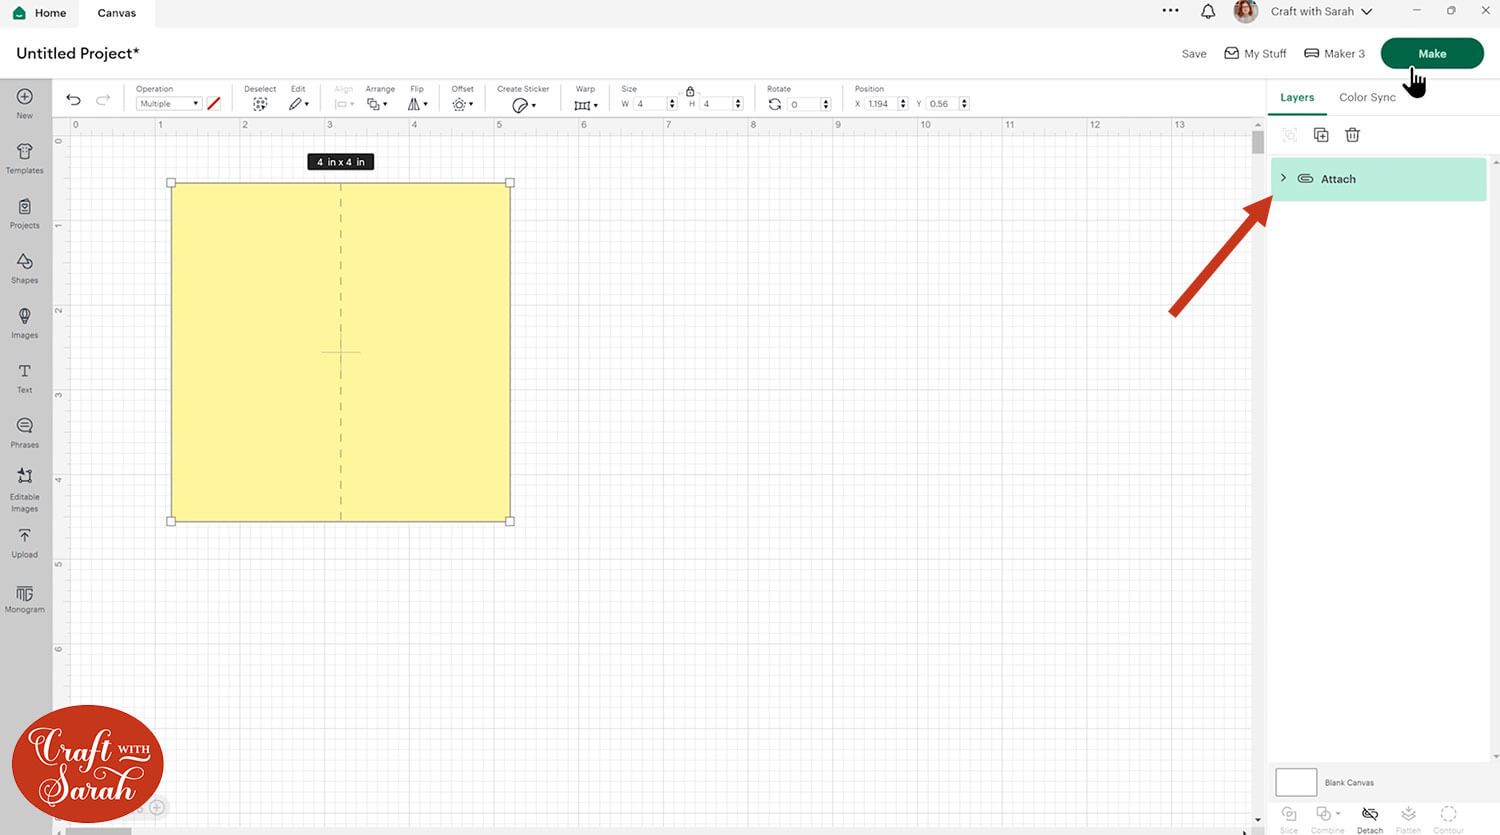
Click the arrow that appears in the layers panel to see the different pieces that you have attached.
You can separate the layers at any time by clicking on them and pressing “Detach” at the bottom of the layers panel.
You can also change any image, shape or text to be scored instead of cut.
It works the same way for all these types of cut file.
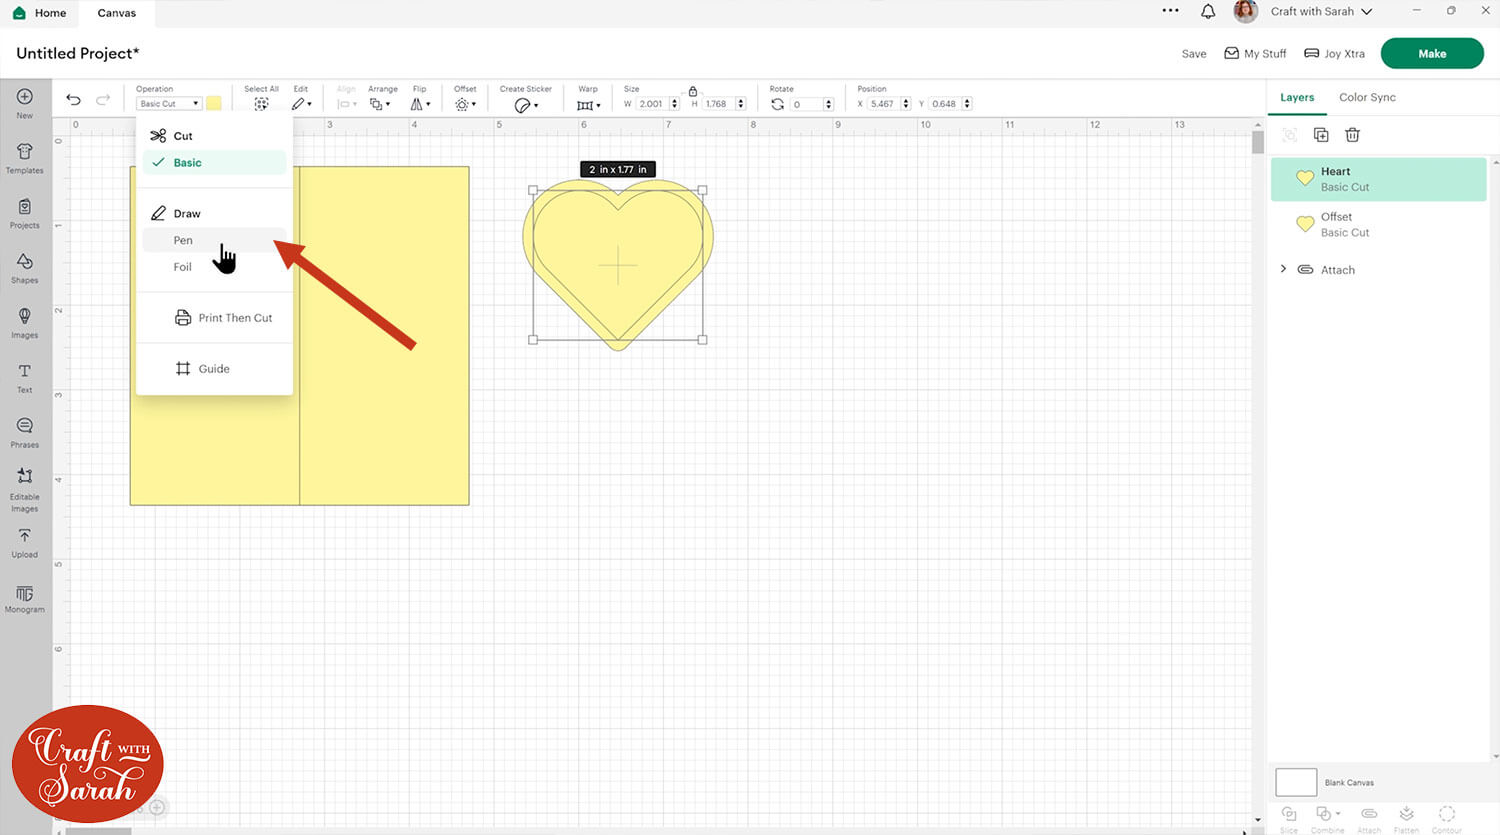
To do this, click on the layer you want to change to score, then click into the Operations dropdown and select “Score”.
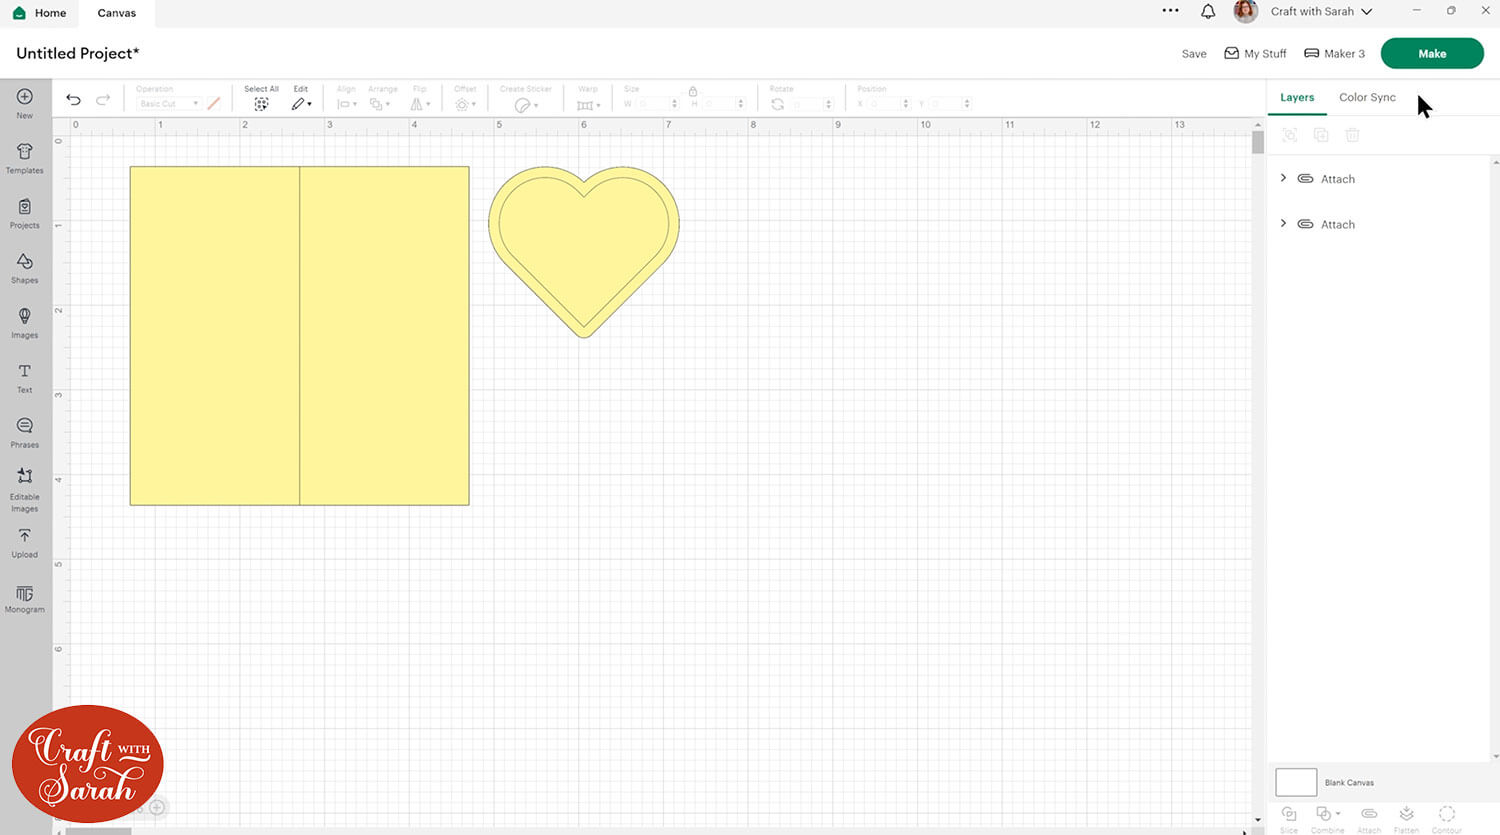
For example, here is how a heart shape looks when changed from Cut to Score.
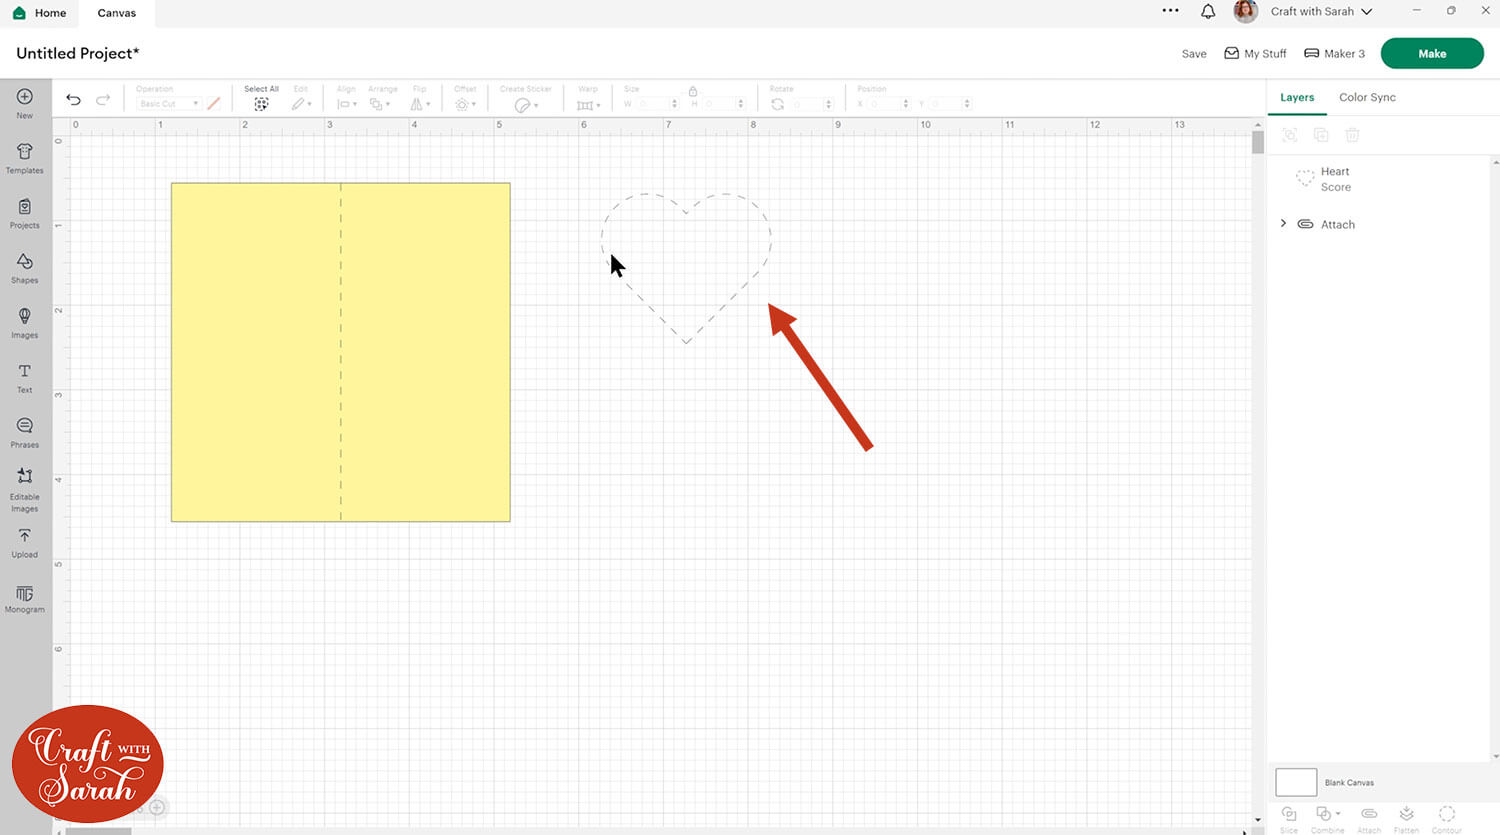
To test out all the different ways to score with a Cricut, I’m going to use the single vertical score line down the square shape, and the curved edge of the heart shape which I have attached to a slightly larger heart shape to give it a border.

How to score with Cricut’s scoring wheel
The scoring wheel is part of the “quick swap housing” range of tools and is only compatible with the Maker and Maker 3.
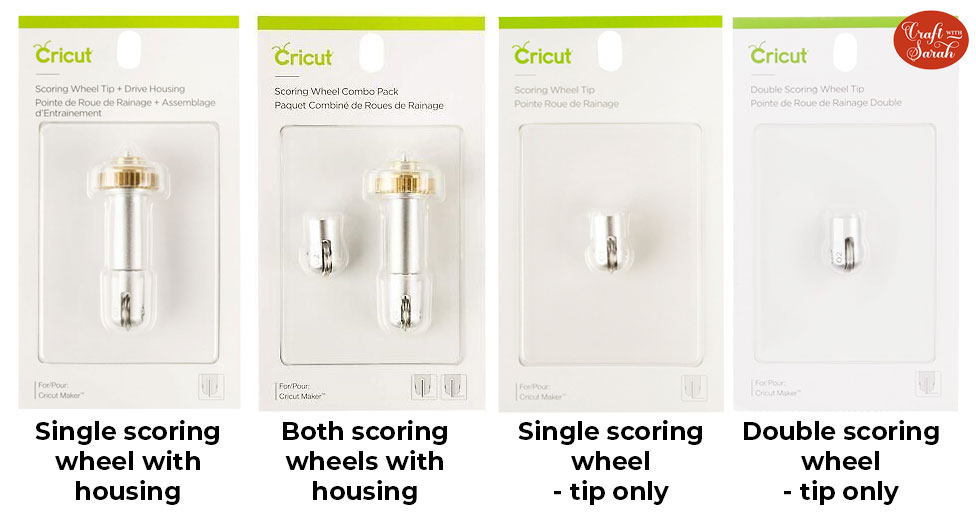
You can purchase it as a single scoring wheel, with the quick swap housing included, or just as the scoring wheel tip if you already have the housing.
Note: Do not get the quick swap housing confused with the rotary blade which comes in the box with the original Maker machines – they are different.
There is also a “double” scoring wheel, designed for thicker materials. Despite owning it for over four years, I have never used the double scoring wheel as the single wheel or scoring stylus have always performed well enough for my needs.
While you can buy cheaper off-brand versions of the scoring wheel online, I would be wary of purchasing them as they may void your machine’s warranty. The scoring wheel interacts with the mechanics of the Cricut machine for it to recognise the wheel and direct it along the score lines, therefore I personally stick to the Cricut brand scoring wheel.
The type of scoring tool that Design Space recommends will change based on your material selection.
For example, when I select the “Heavy Cardstock” option on my Maker 3, it suggests that I use the double scoring wheel.
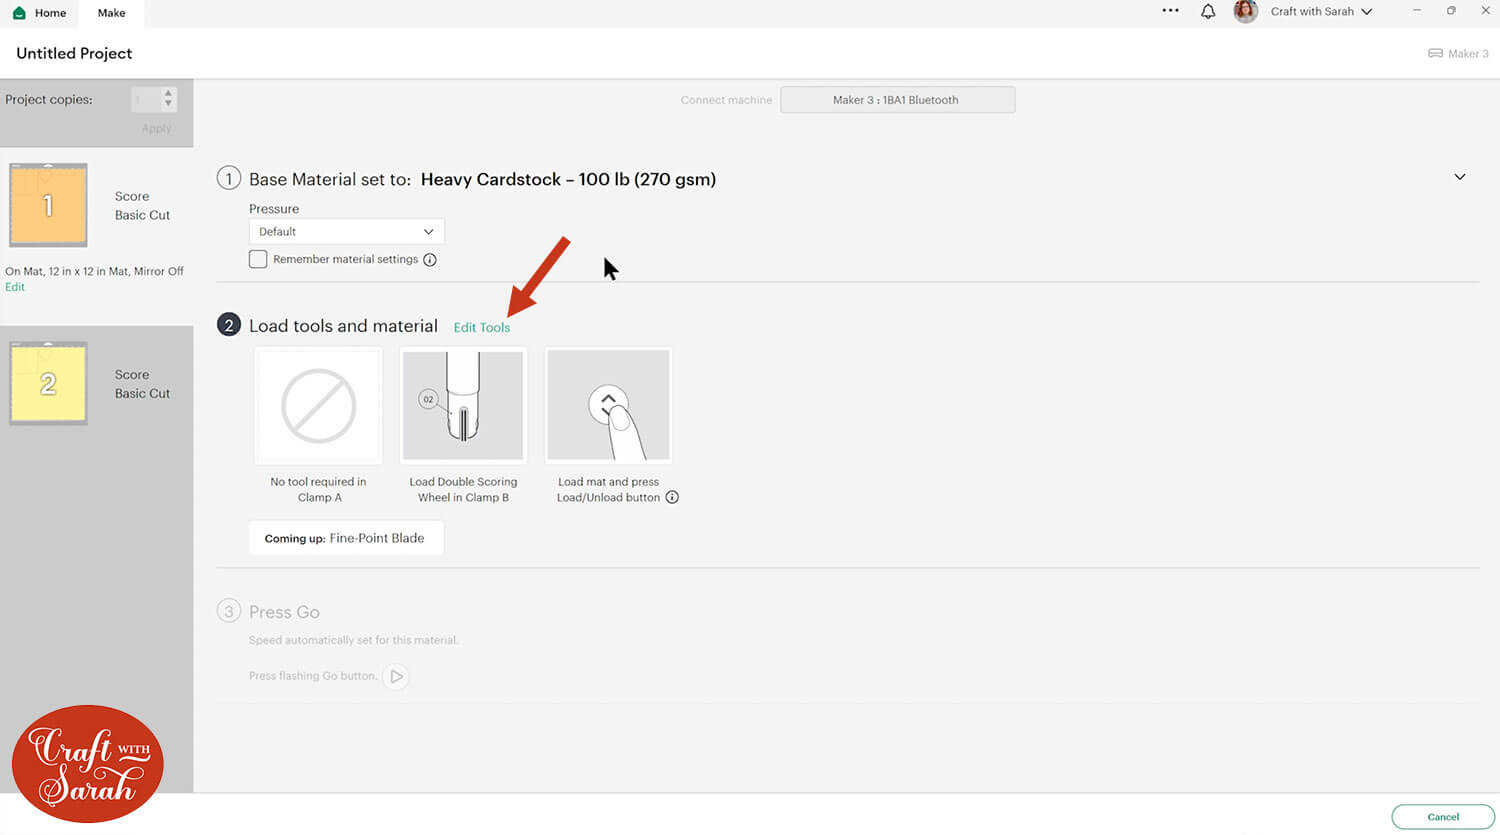
Change this to a different tool by clicking the “Edit Tools” link.
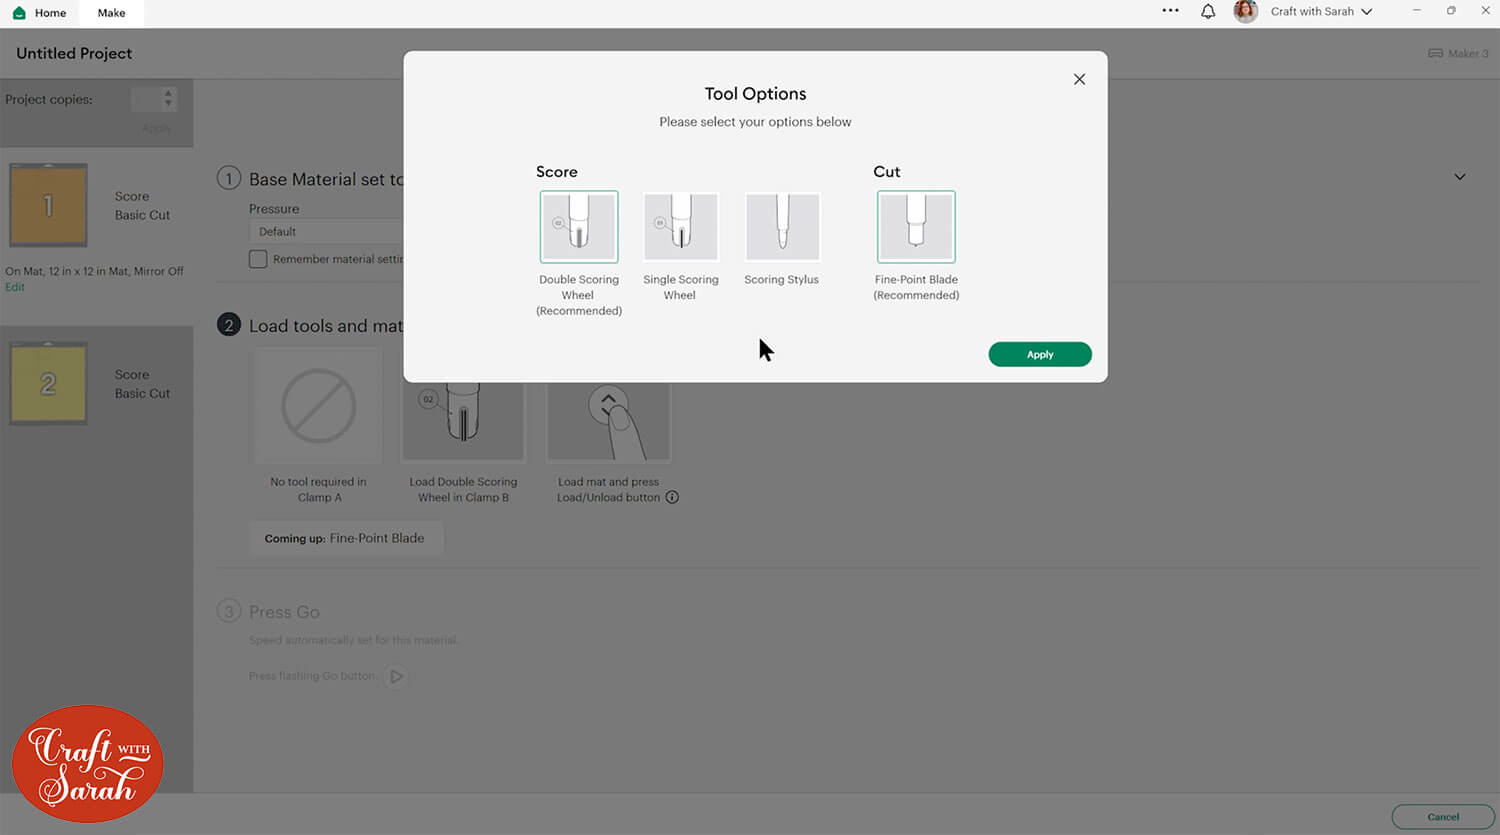
Choose your preferred scoring tool, then press “Apply”.
Remember to change this for all sheets that require scoring.
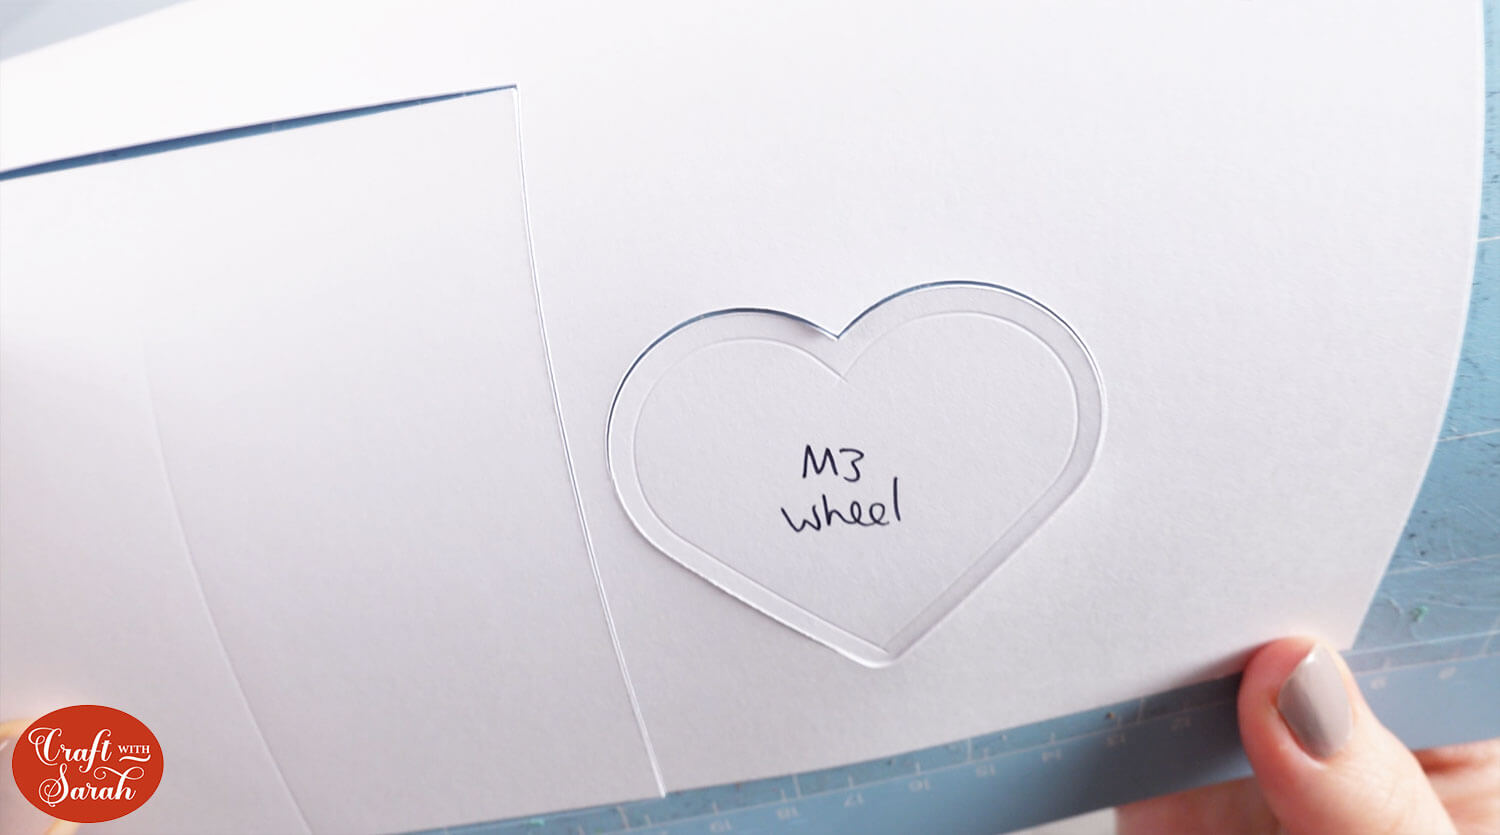
The scoring wheel works great for straight lines, but it can struggle a bit with shapes with corners, for example the heart.
Take a look at where the two points intersect at the top and bottom of the heart:
To make it clearer, I have “coloured in” the score lines with a black pen to show where they are starting and ending:
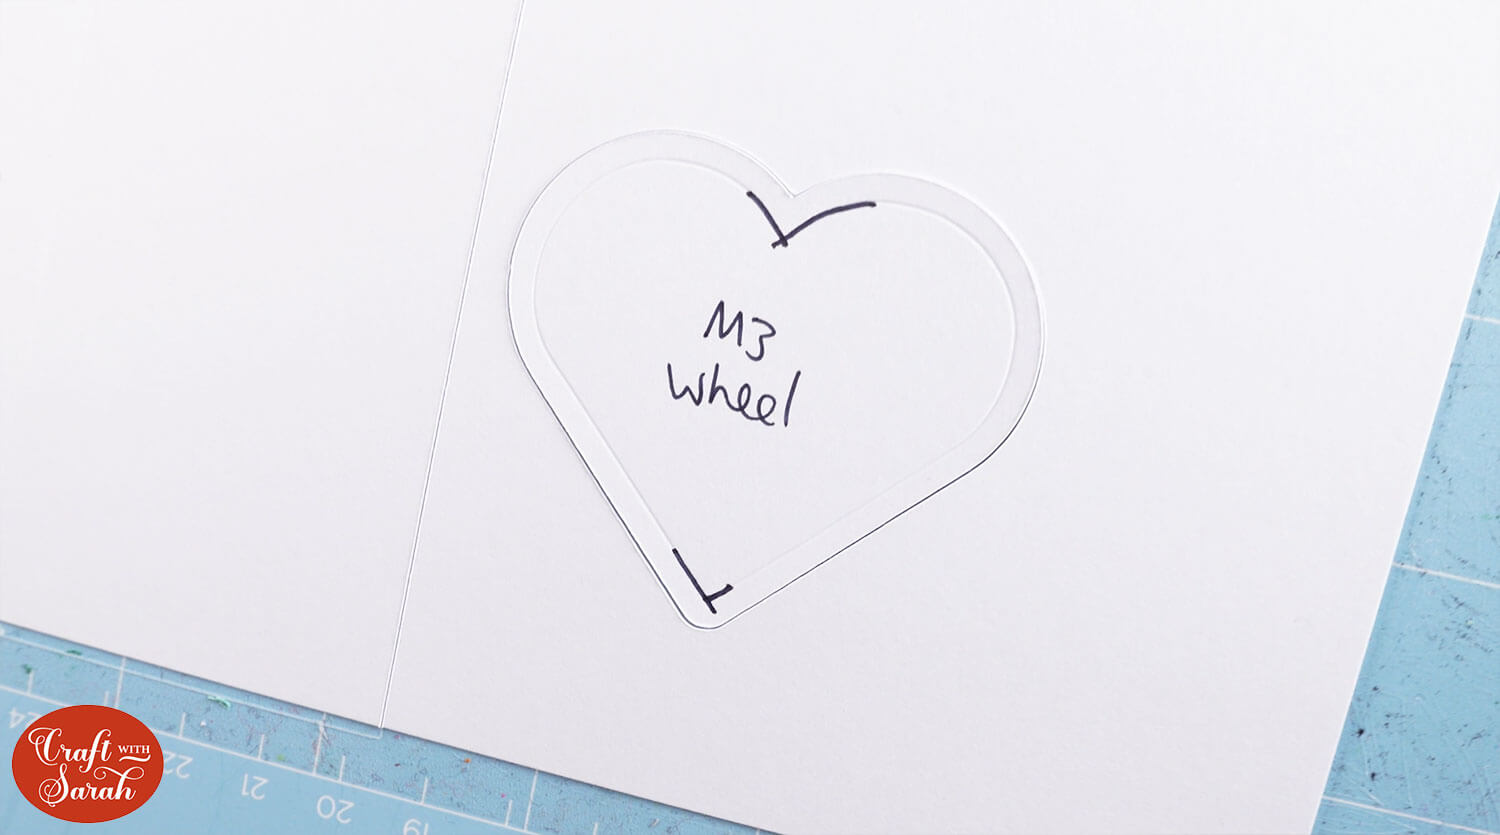
As you can see, there is some overlap where the wheel has scored slightly more than it was supposed to.
For score lines where points intersect, the Cricut scoring stylus is the better option to choose as it does not overlap the lines in this way.
How to score with Cricut’s scoring stylus
The Cricut stylus (sometimes referred to as a “score pen”) is a more affordable alternative to the scoring wheel.
It is compatible with the Cricut Maker, Maker 3, Explore Air 2 and Explore Air 3.
I have both a Cricut brand scoring stylus and an off-brand one, and they both seem to work just as well as each other. As this tool doesn’t interact with the mechanics of the Cricut machine, I am confident with using an off-brand version.
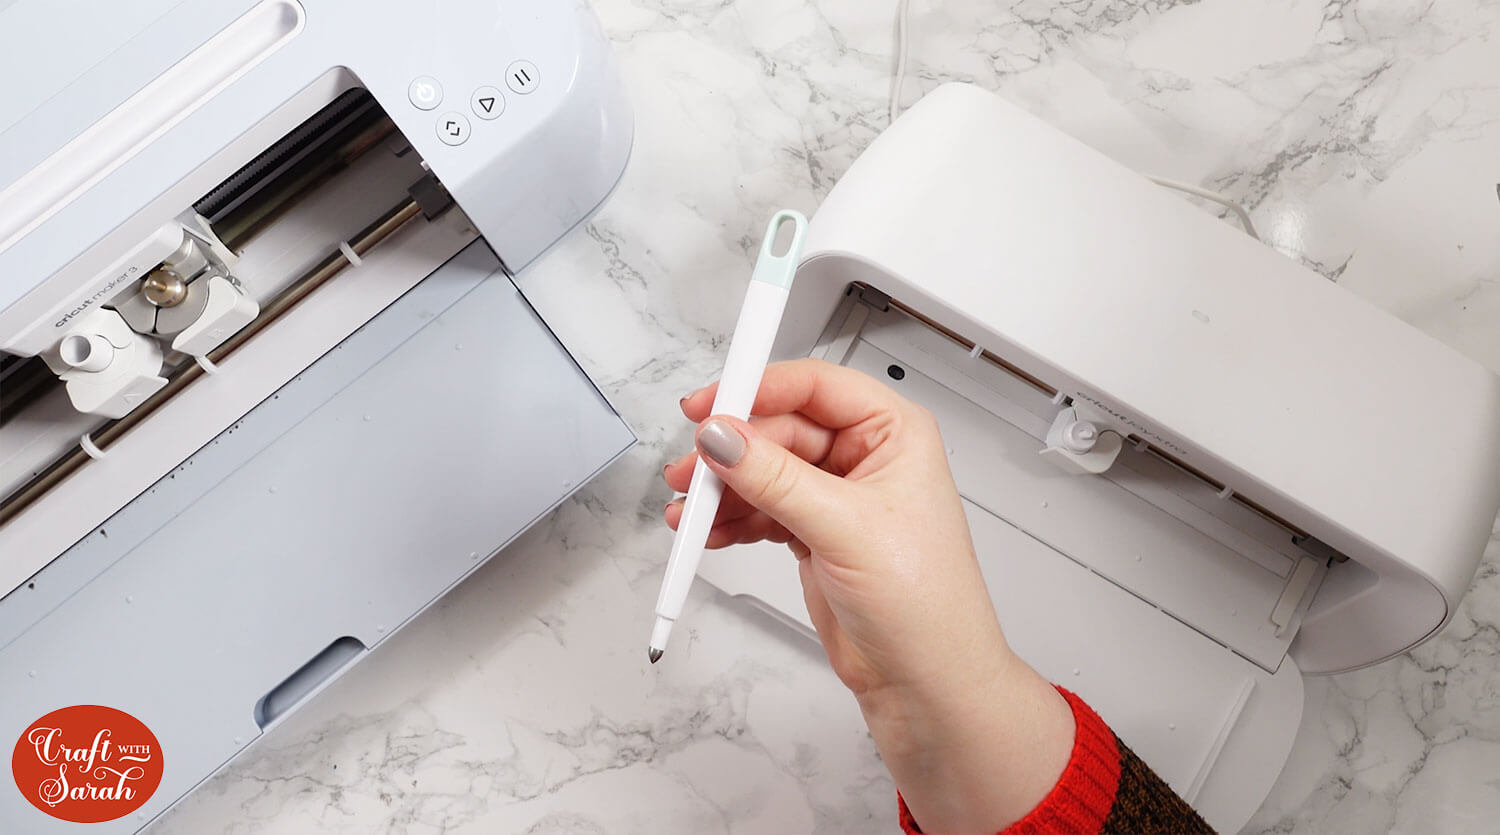
I have both the wheel and the stylus for my Maker and Maker 3 machines, and I much prefer using the stylus.
It fits into the “A” clamp of the machine (where you would usually put Cricut pens), which means it can do the scoring and the cutting all in one go, without having to pause half-way through to remove the scoring wheel and replace the blade.
This makes it quicker to use than the wheel, especially for larger projects with lots of score lines.
Here’s how the scoring stylus performed on that same heart shape:
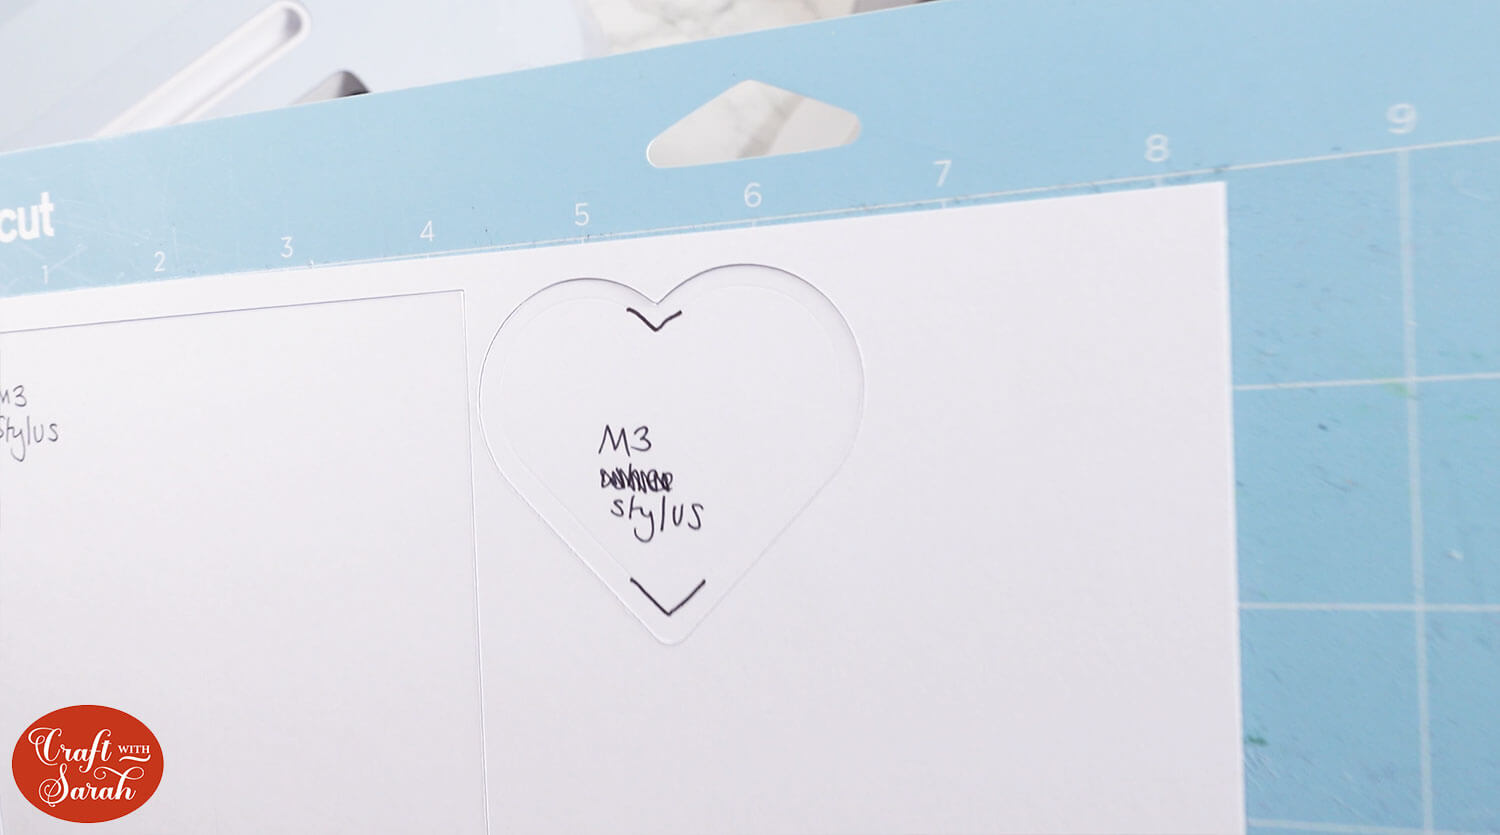
There are no overlapping corners on this one, so it looks much neater.
What can I use if I don’t have a scoring tool?
If you don’t have a scoring tool to use with your Cricut, it’s not a problem.
There are several ways that you can score without a dedicated scoring tool. These are:
- Using the lightest possible cut setting
- Drawing the lines and then manually scoring them
- Using the Cricut Foil Tool to score <-- best method!
You can also create “dashed” lines for the machine to cut by adding lots of small single cut lines (about half a cm wide), putting them all in a line and Attaching them to the shape that you want scored. However, that is quite time consuming to do, and only works for straight lines, which is why I have left it out of this tutorial.
These are all explained in detail in the section below. They work with all types of Cricut machine, with the possible exception of the Cricut Venture. I don’t own that machine, so am unable to test if these methods work with it.
However, if you have an Explore Air 2, Explore Air 3, Maker or Maker 3 then I highly recommend purchasing a scoring stylus. This is one of the more affordable scoring options at around $10 and it makes scoring so easy!
How to score with the Cricut Joy
One of the questions I get asked fairly often is “How do I do score lines on a Cricut Joy?”.
The Cricut Joy is the smallest available Cricut machine. It was joined in 2023 by the Cricut Joy Xtra which is a slightly larger machine, capable of cutting A4 and US Letter sized materials.
However, neither of these machines currently come with a scoring tool that will work with them (as of May 2024).
The blade holder is smaller in these machines than on the Explore and Maker models, meaning that the scoring wheel and scoring stylus will not fit.
Let’s have a look at three different ways to do scoring without a scoring tool!
Method 1: Use your machine’s lightest cut setting
This method only works if you are using quite thick materials, for example heavy cardstock or Kraft board.
By setting the machine to cut the score lines on its lightest possible cut setting, it means that the cut doesn’t go all the way through the card, so you end up with a line that looks “scored” instead.
To do this method, first change the existing score line to a “Basic Cut” under the Operations dropdown.
Because the material will all be cut on the same mat, the base layer that the score line is Attached to needs to be duplicated several times, otherwise the light cut setting won’t cut through the edge of the shape (it will look “scored”, just like the line).
I had five copies of the outer shape in total:
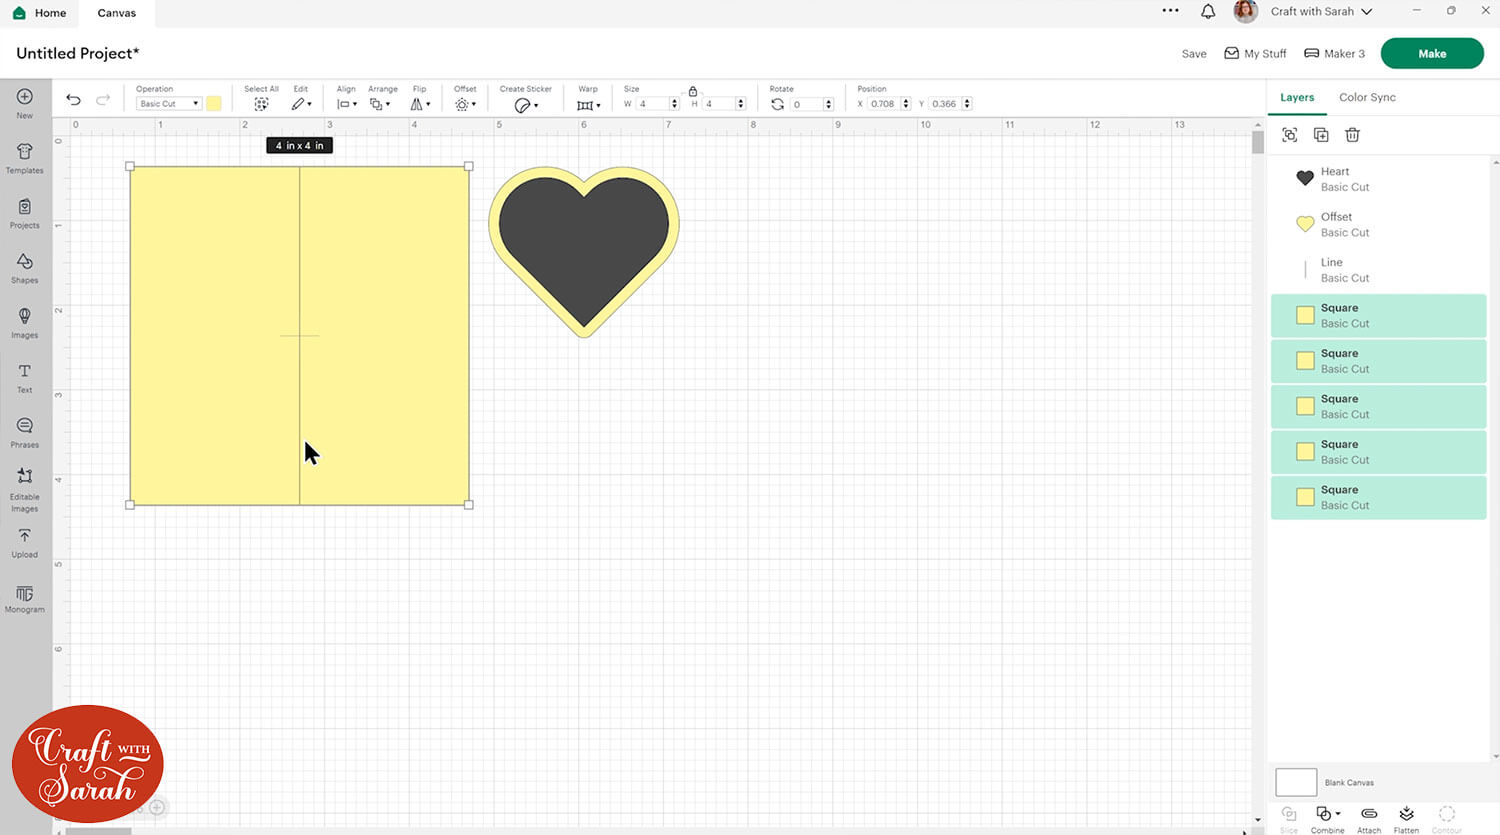
Select them all and “Attach” together with the cut line that we want to look scored.
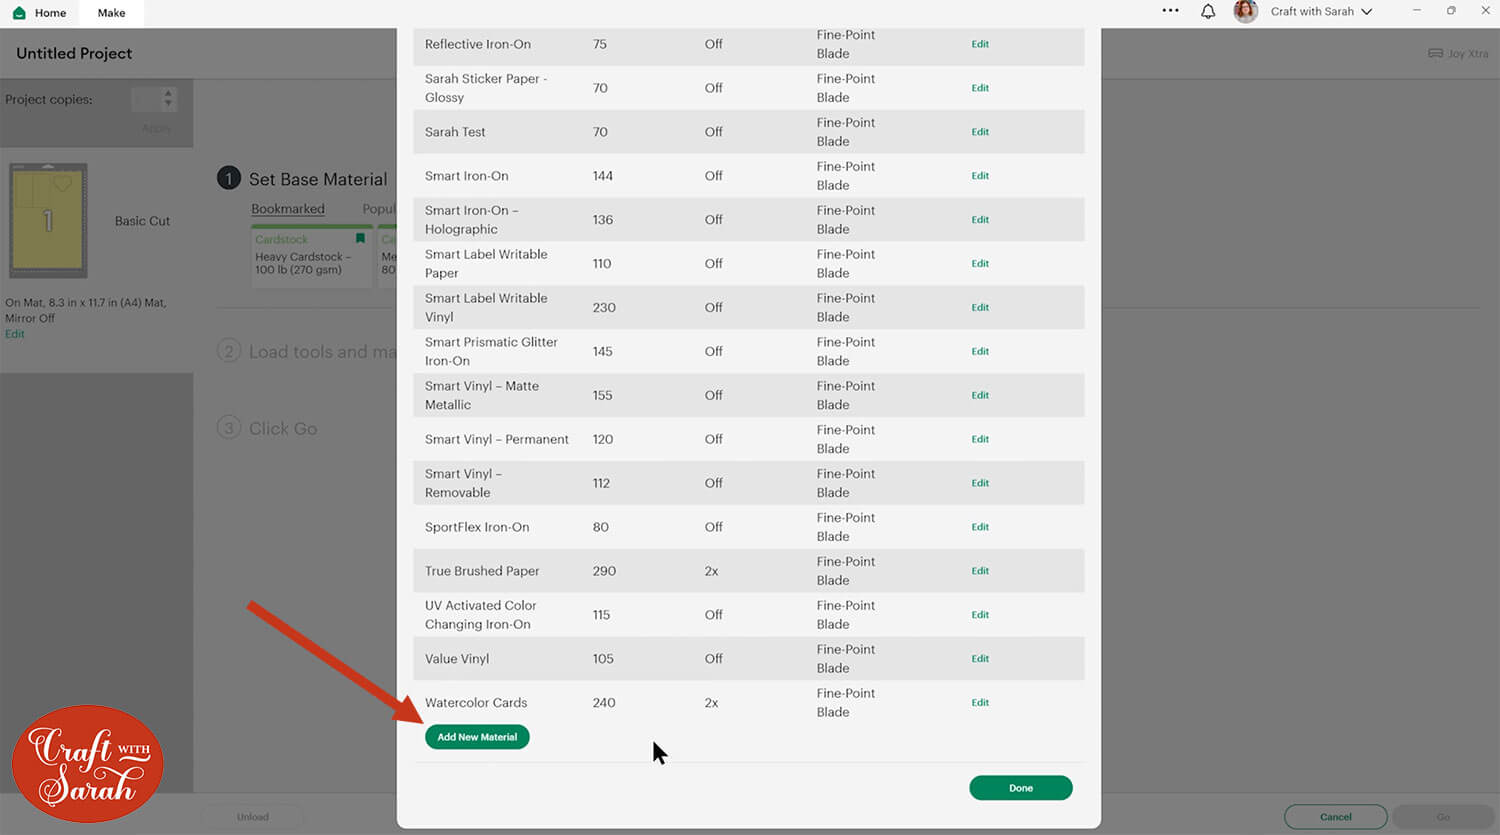
To set the Cricut to its lightest setting, click the “Browse All Materials” link on the cut screen.
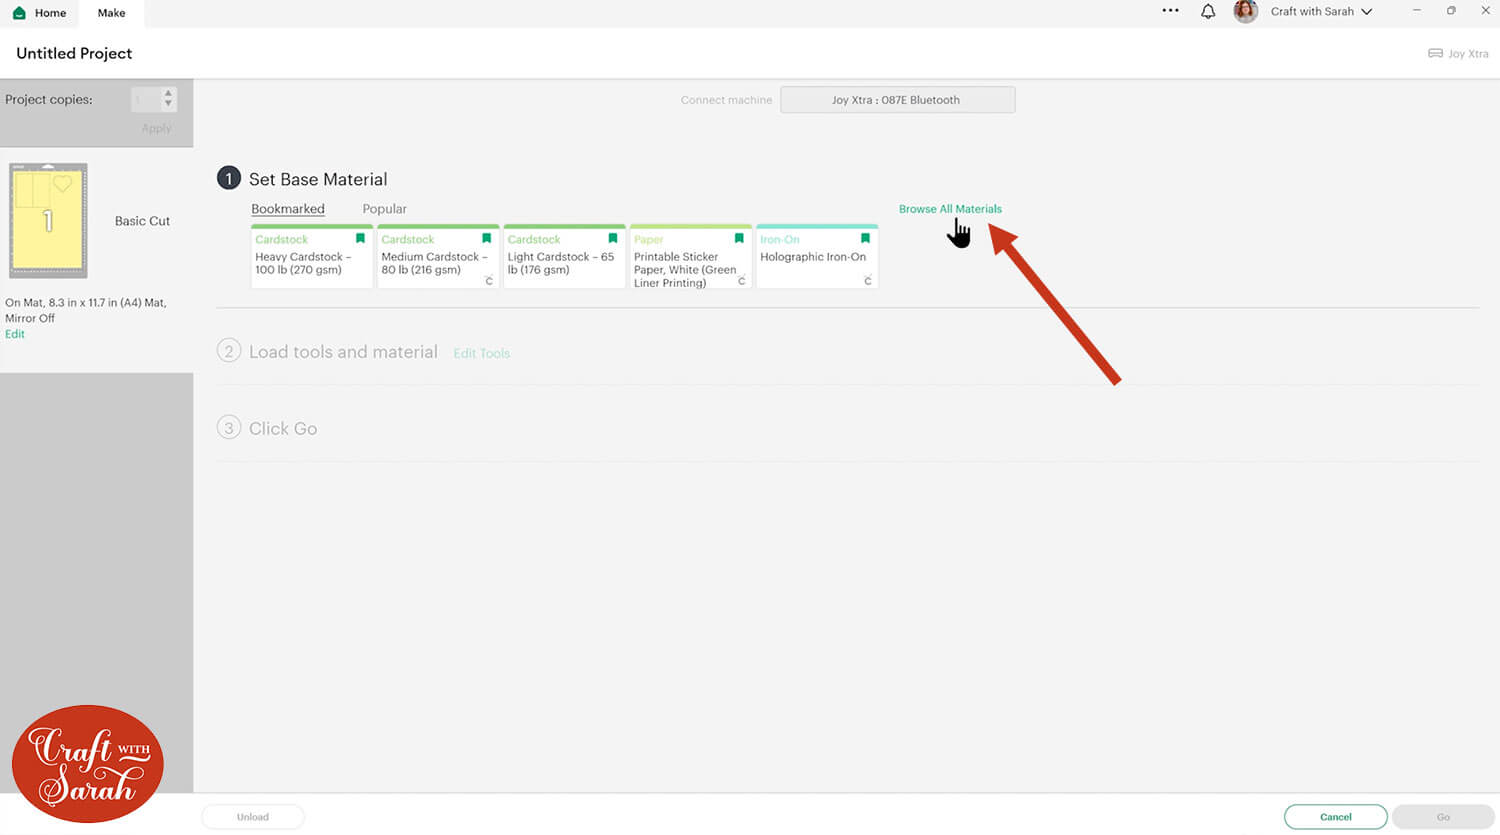
Look down the bottom of the list and click the “Add New Material” button.
Give it a name (I used “Sarah – JOY Lightest Setting”) and drag the blade depth right down to the bottom (70).
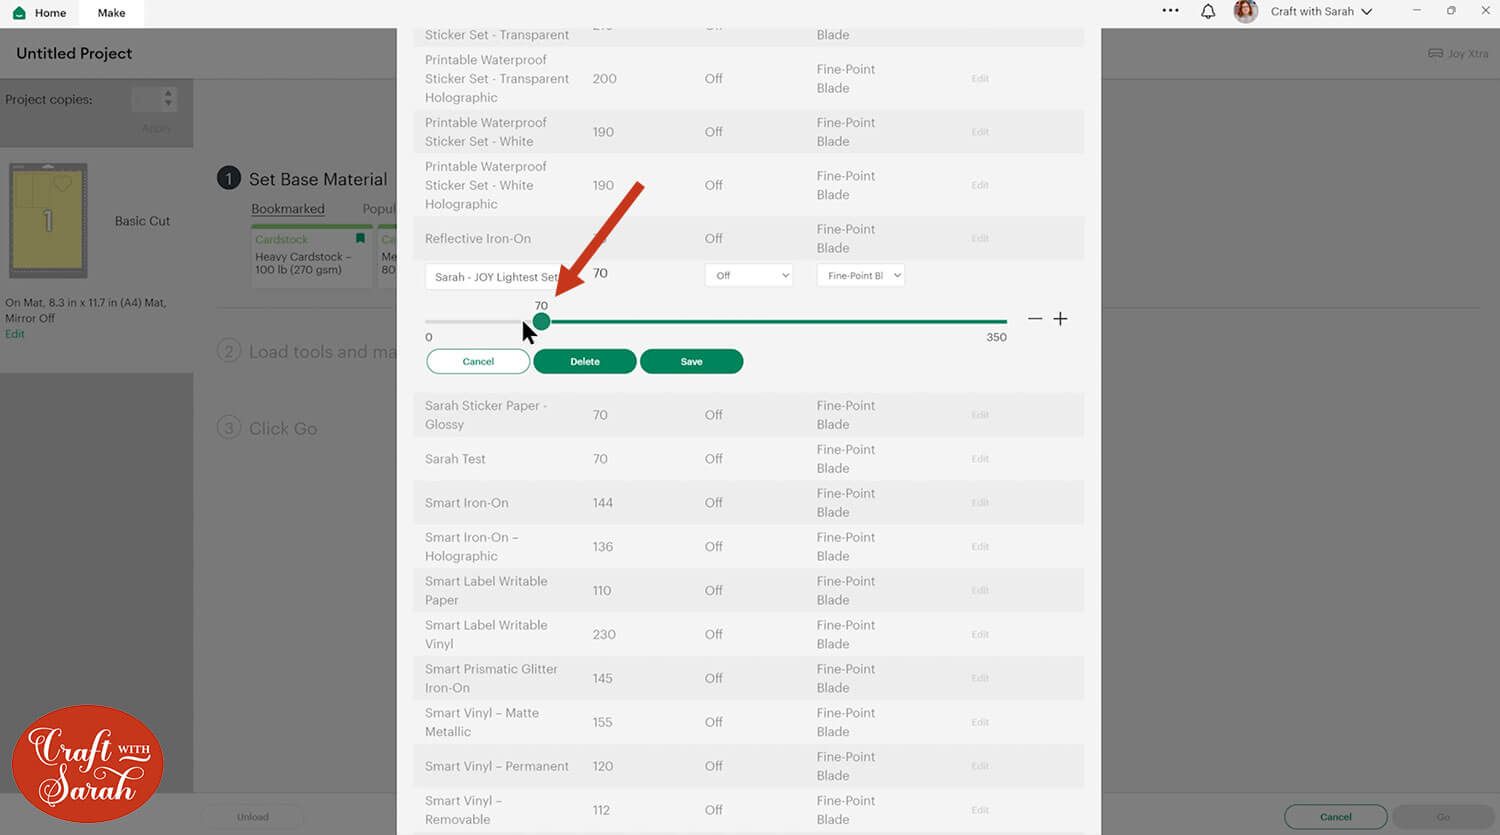
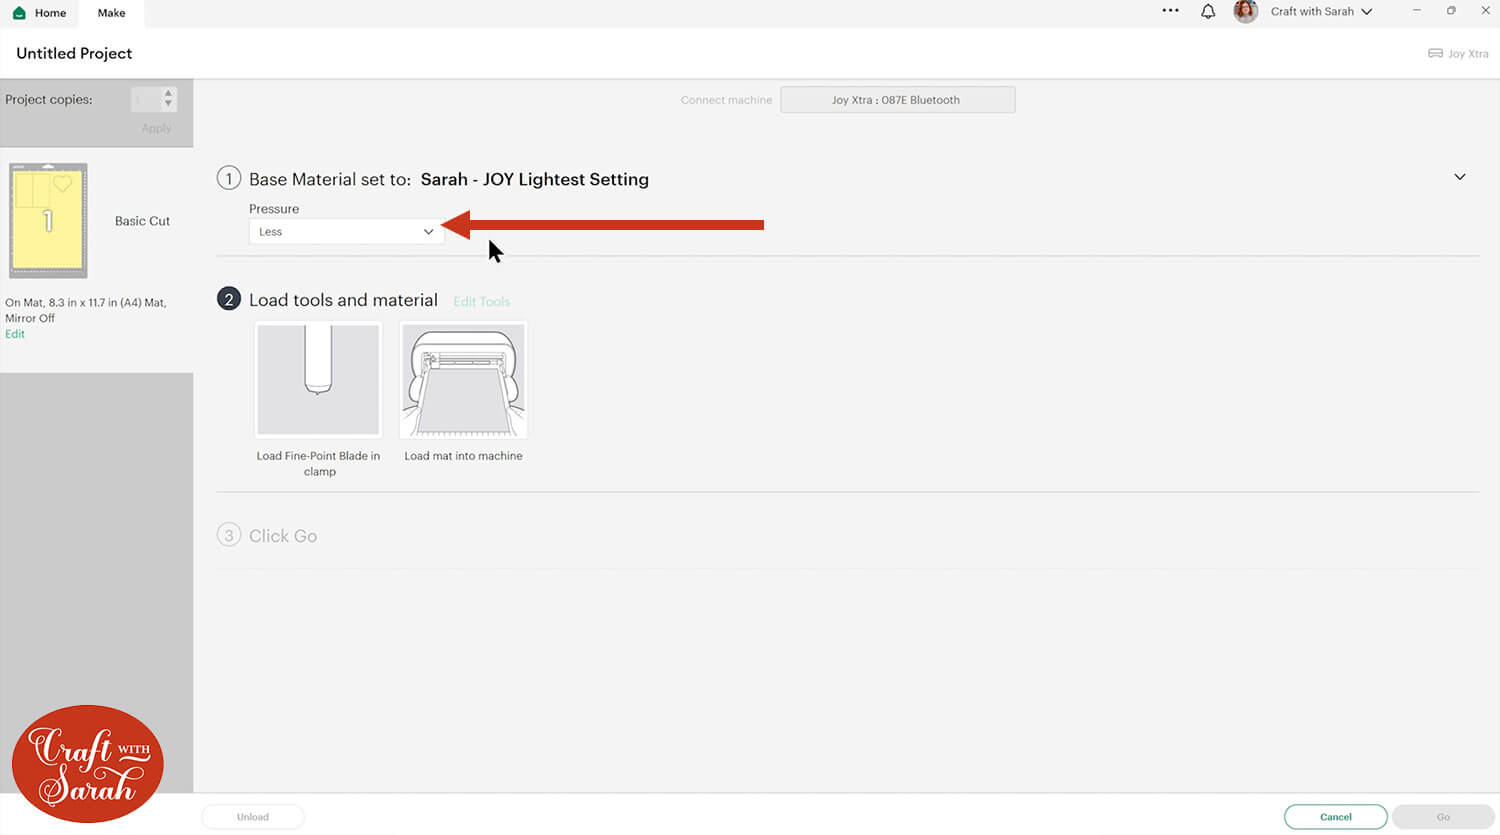
Save the setting and then select it. Change the pressure to “Less” for an even lighter cut setting.
Note: Custom cut settings are not visible if you change to a different machine type – e.g. if you change from a Joy to a Maker. You will need to make a custom cut setting for each machine that you own, which is why I added the word “JOY” into my custom setting’s name.
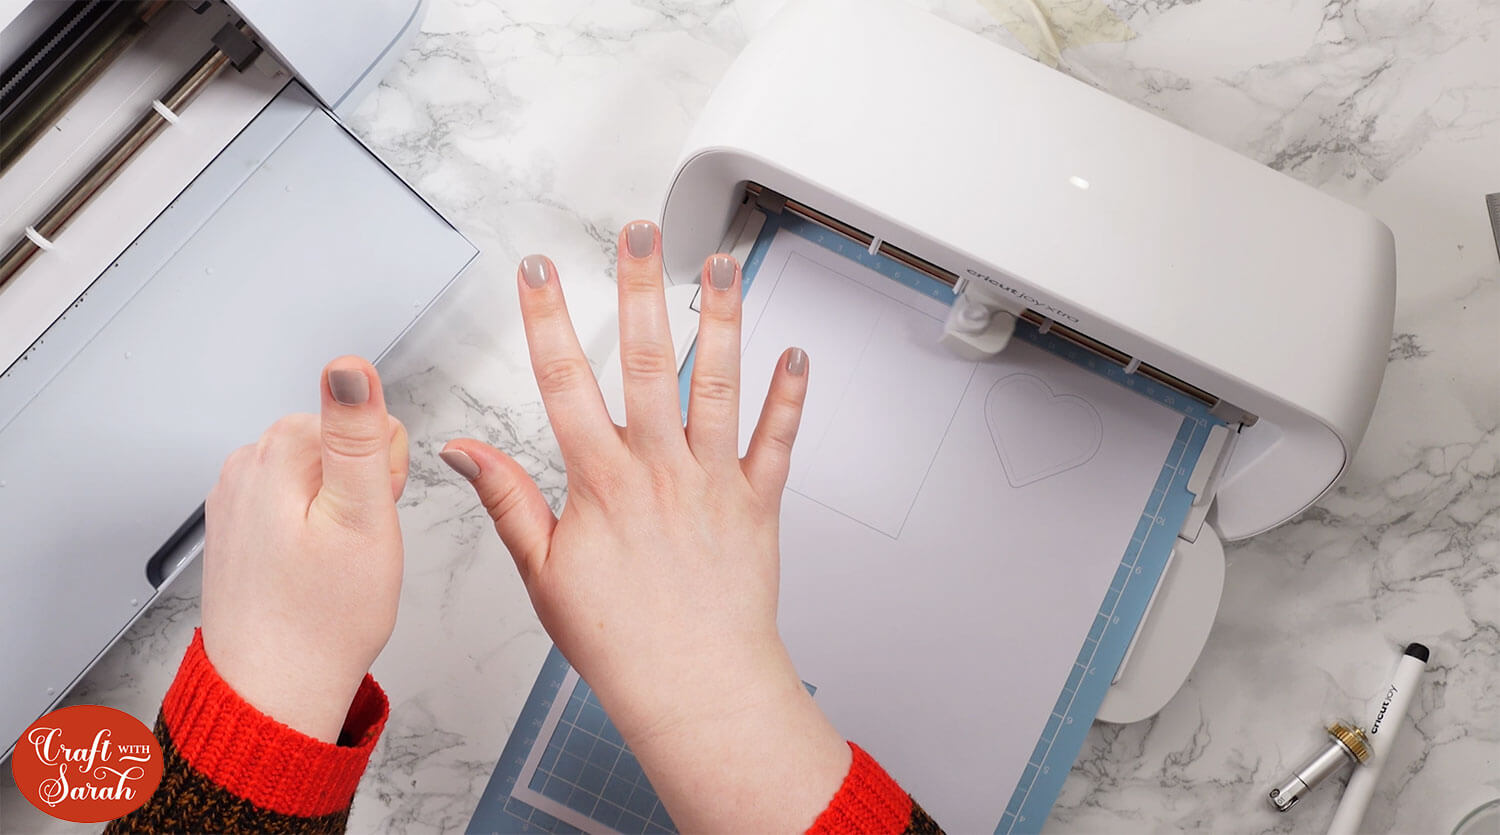
When the machine cuts, it will do 6 passes in total.
The first is for our “score” line and then it will cut the outside shapes 5 times. This is to ensure that it cuts through the material on such a light cut setting.
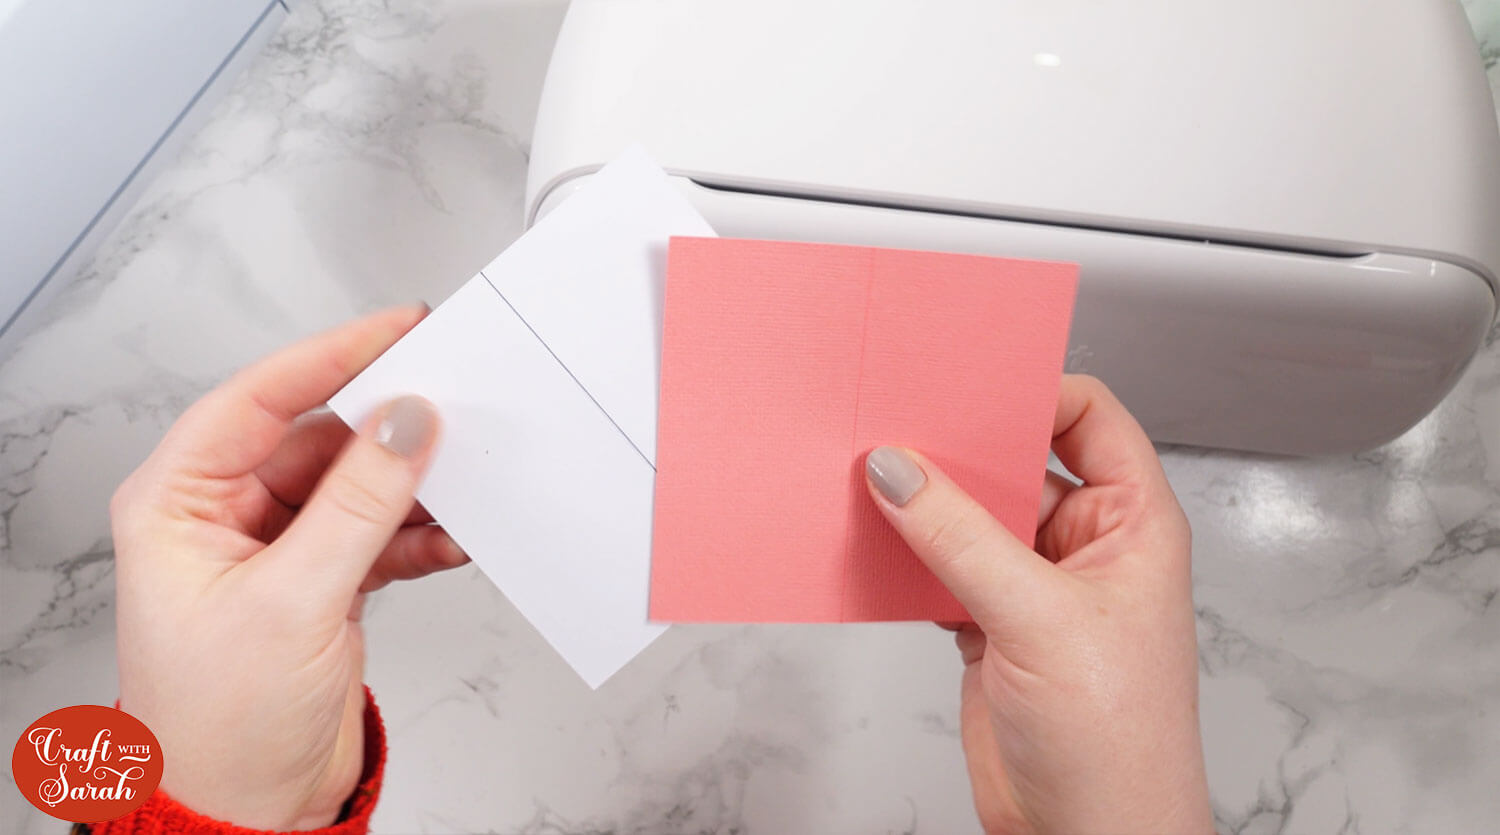
Here’s how it ended up looking. The line down the middle folded really well.
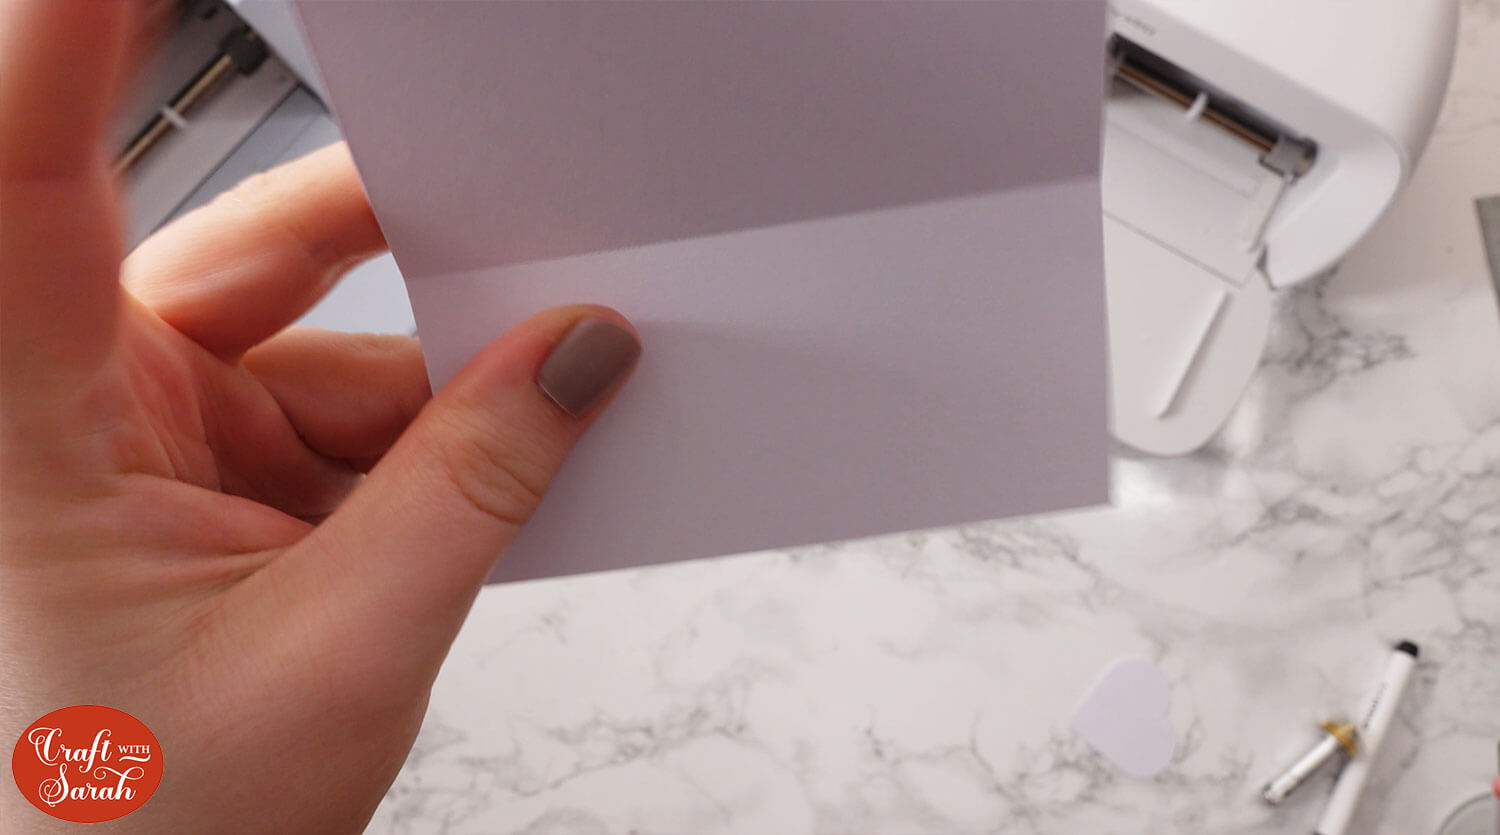
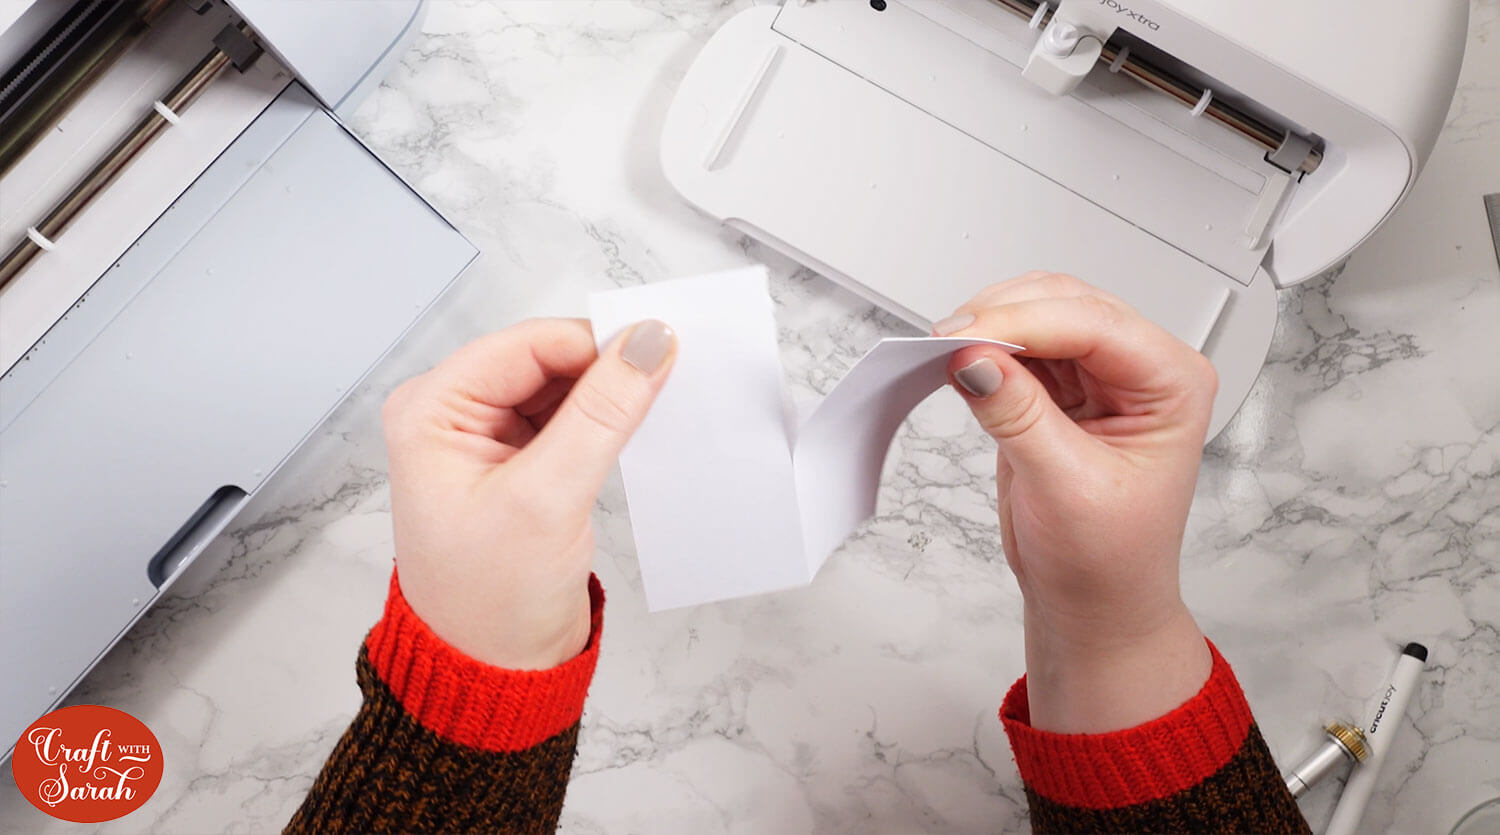
One drawback was that it cut quite deeper than a scoring tool would mark the card, which made the card quite weak along that line.
I was easily able to tear it by pulling the two sides:
Positives of this method:
- You don’t need to purchase any extra tools
- Works well on straight and curved lines
Negatives of this method:
- Only works on thick materials
- Takes a while to set up the projects in Design Space
- The cardstock can become weak and prone to tearing if the lines are cut too deep
- Can damage your Cricut mat if the outside edges get cut too many times
Method 2: Using pens and manually scoring
This method is using the Cricut to draw the score lines with a pen, then scoring them by hand afterwards with a manual scoring tool or a pair of scissors.
Most Cricut machines come with a black pen in the box, so you may already have one in your craft stash that you can use without having to buy anything extra.
To set this up in Design Space, change the line you want scored to be a “Pen” line under the Operations menu. Don’t forget to Attach the draw line to your base piece!
Note that the Joy models of machine use smaller, rounder pens than the Maker/Explore machines, so make sure you use the correct type of pen.

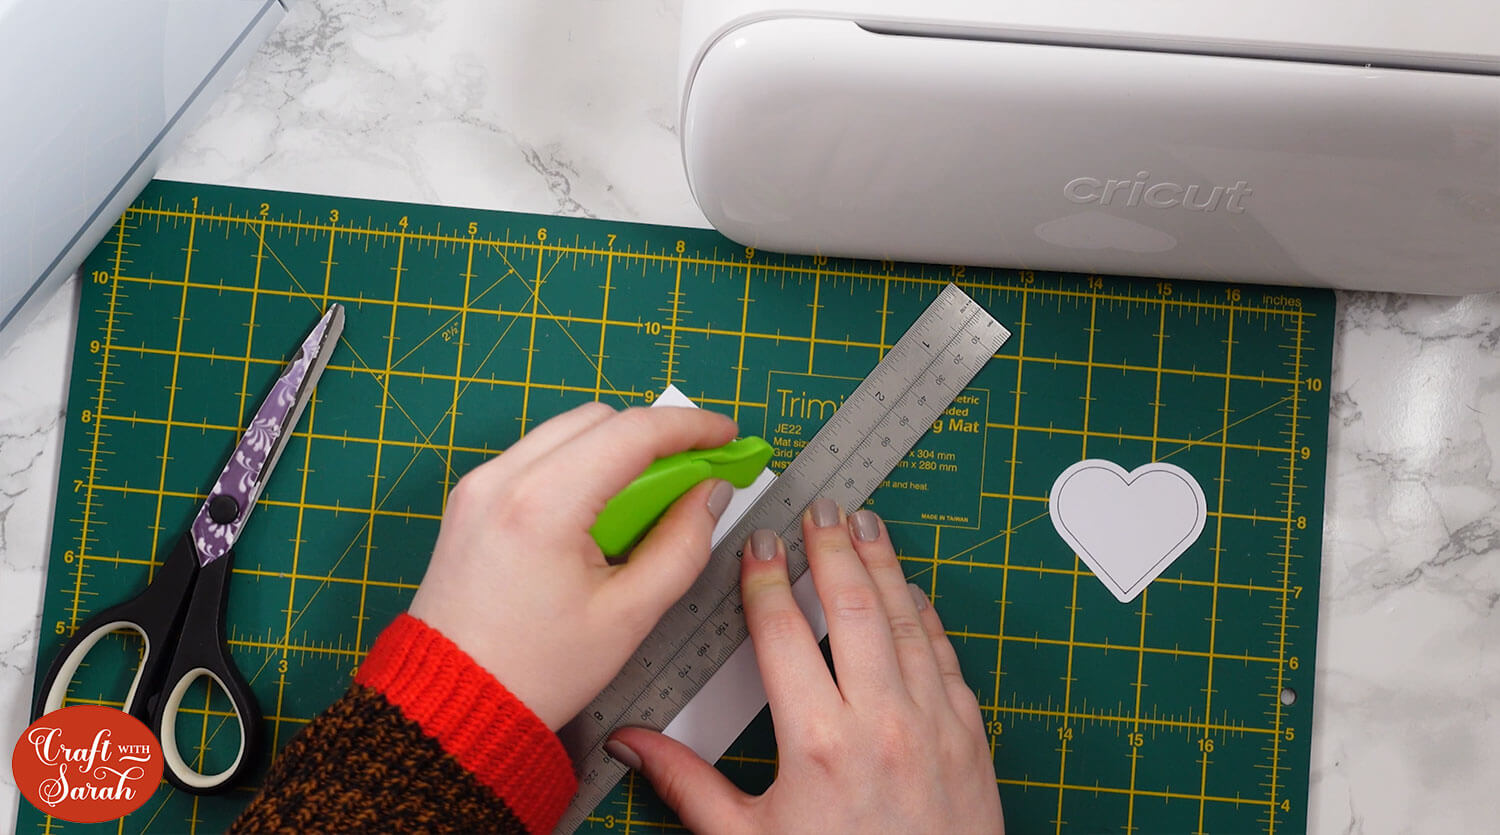
After the machine has drawn the line and cut the outside, you can do down the line manually with a scoring tool or an open pair of scissors (be CAREFUL if using scissors!!).
To make the lines less obvious on your project, try matching the pen colour to the colour of the material you are using, to help the lines blend in.
Positives of this method:
- Quick to set up in Design Space
- Can blend the score lines into the color of card you’re using
Negatives of this method:
- Difficult to manually score curved lines
- Can be expensive to purchase the pens
- Time consuming to manually score the lines
Method 3: Cricut Foil Transfer Kit
Our third and final method of scoring without an “official” scoring tool is to use the Cricut Foil tool instead.
These are designed to be used with pressure-activated foil, to transfer metallic foil onto a project.
But… we can be sneaky, and use it WITHOUT the foil to make beautiful score lines instead!
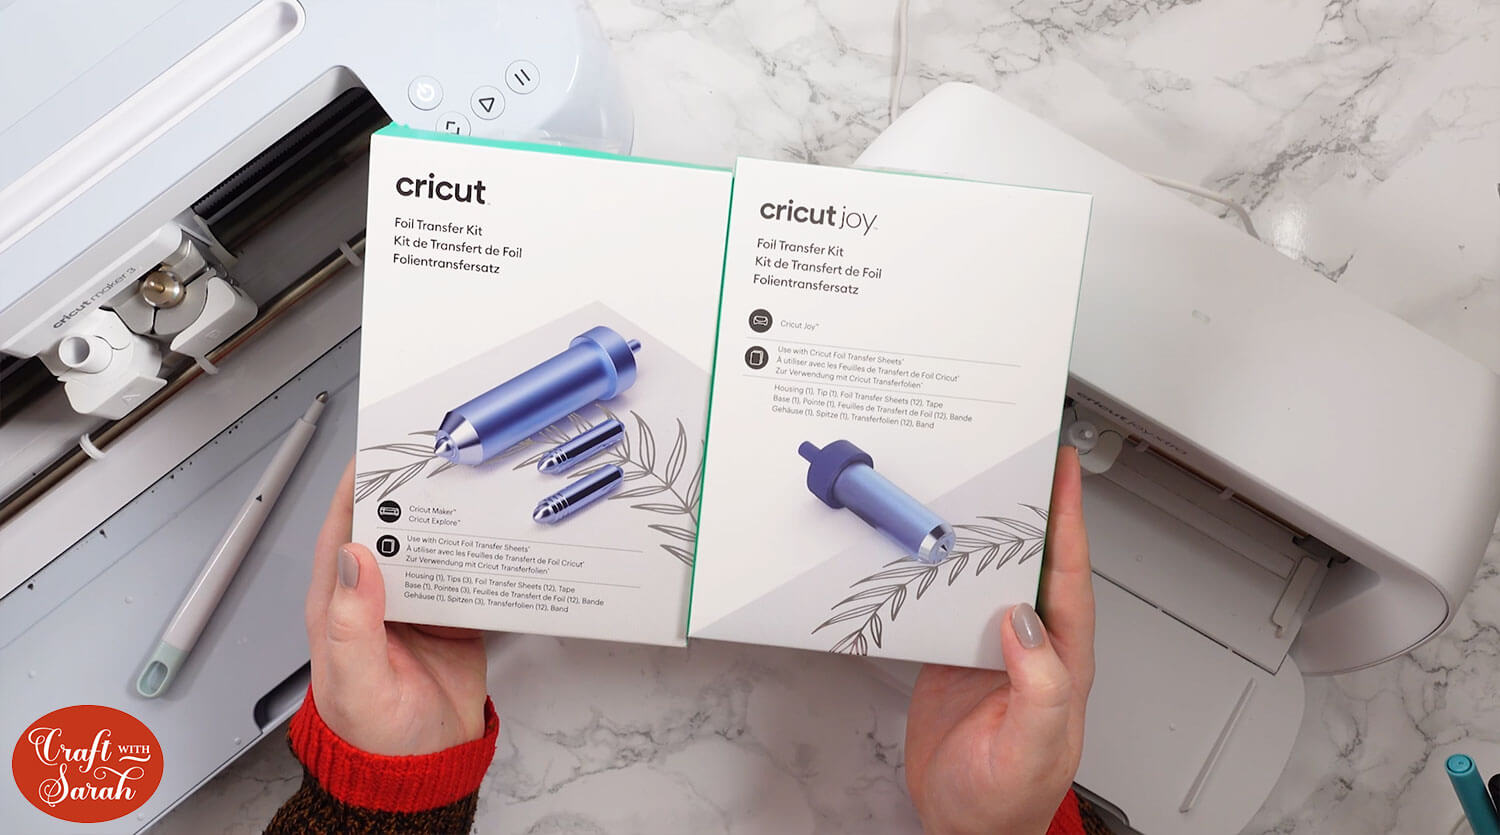
Note that the foil transfer kit comes in two versions: One for Explore/Maker machine and one for the Joy/Joy Xtra, so make sure you purchase the correct one.
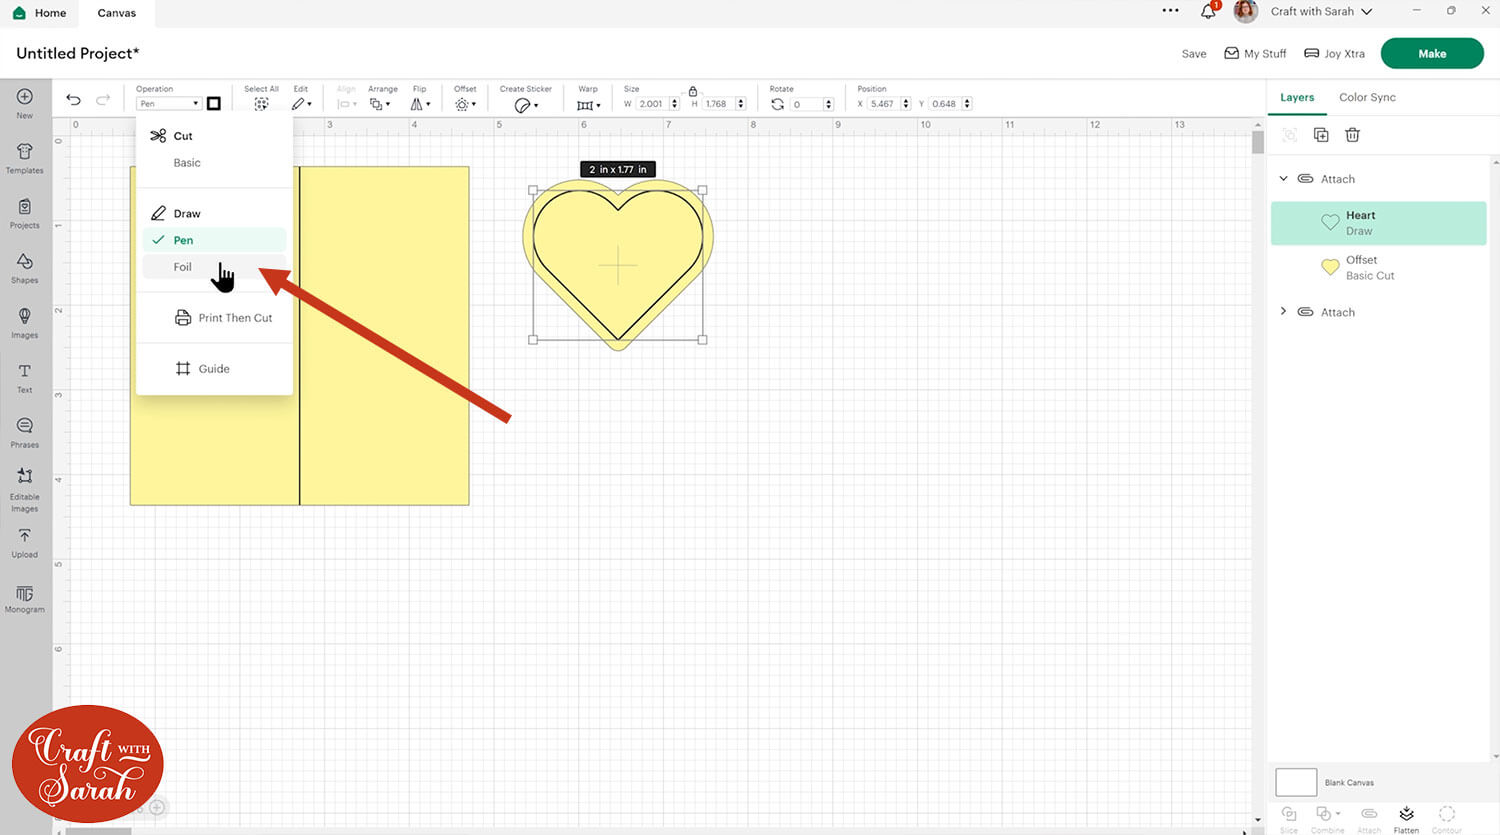
Change the lines to want score to be “Foil” under the Operations dropdown.
For best results, duplicate the score lines by hovering your mouse over them and pressing the “alt” key on your board, then move the mouse slightly until your cursor changes to have a plus (+) symbol next to it. Click the mouse and it will duplicate the score line in exactly the same place.
Don’t forget to Attach them to the base shapes!
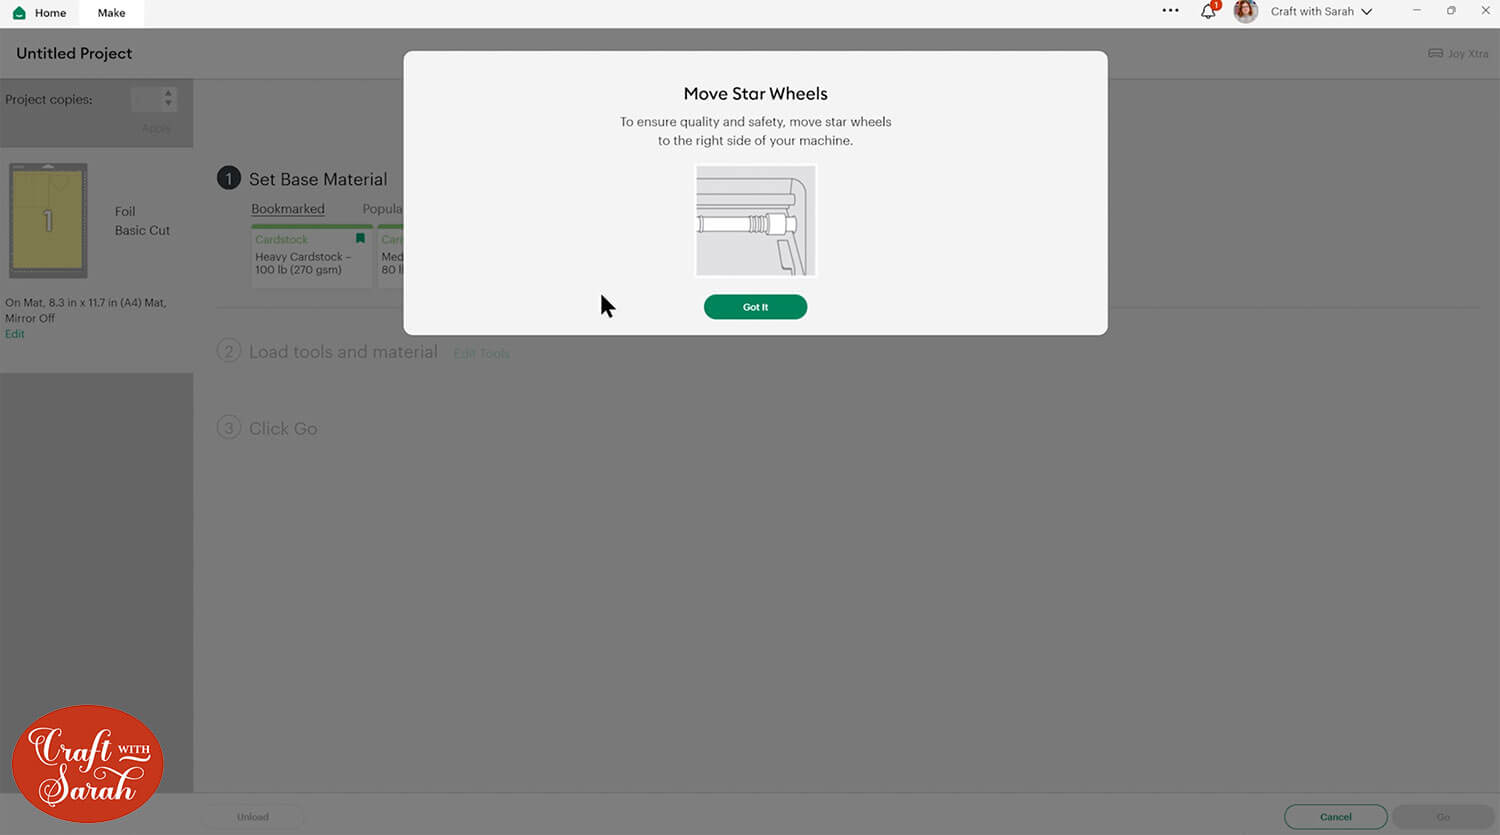
When you go to cut the material, Design Space will suggest that you move your star wheels to the edge of the machine. This is to stop it marking the foil – but we aren’t actually using the foil, so you can ignore this and leave them where they are.
Load the foil tool when directed, but don’t add the foil. The Cricut won’t know that you haven’t put it on there.
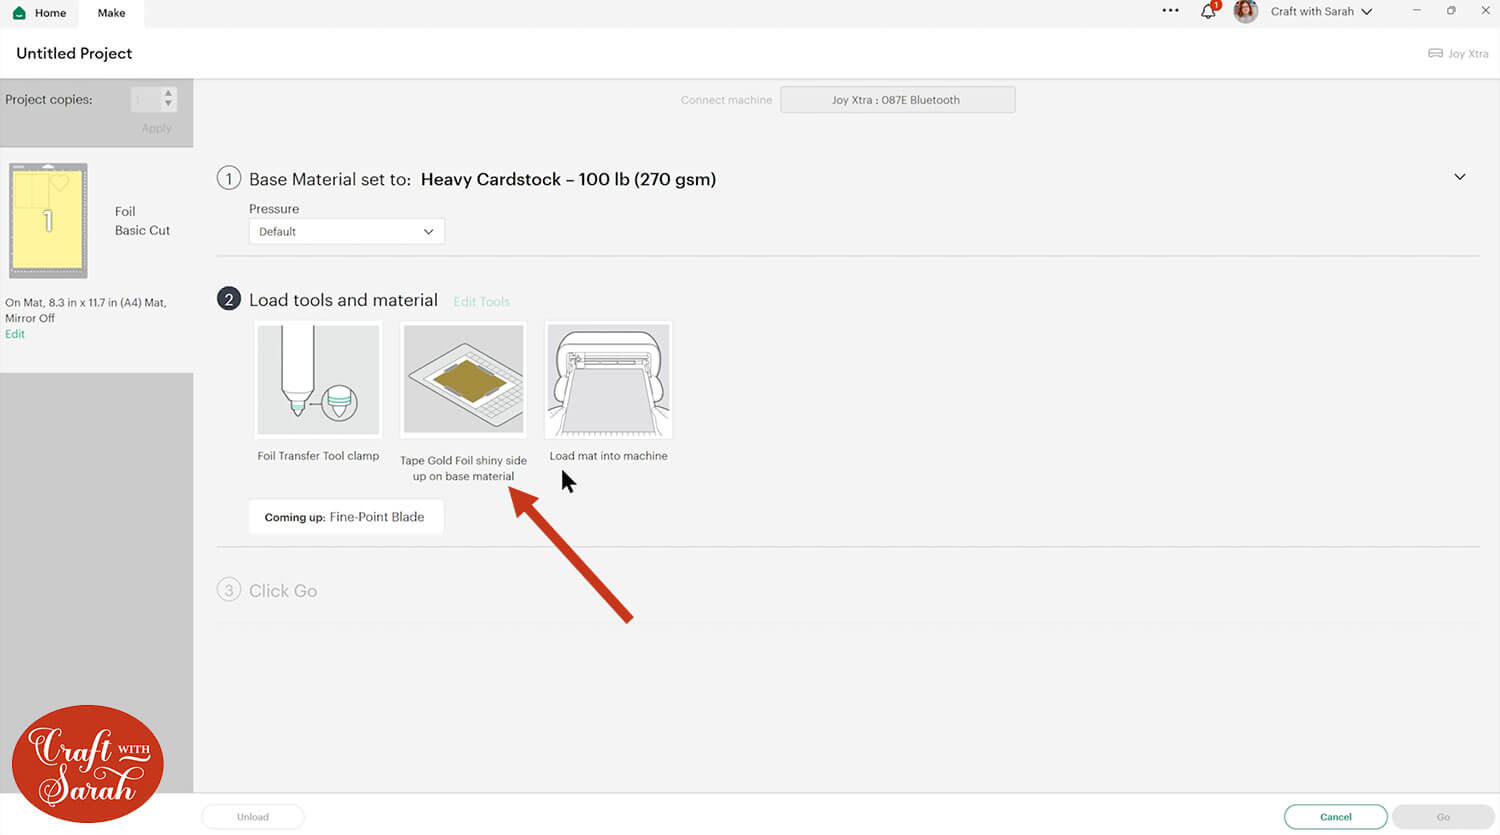
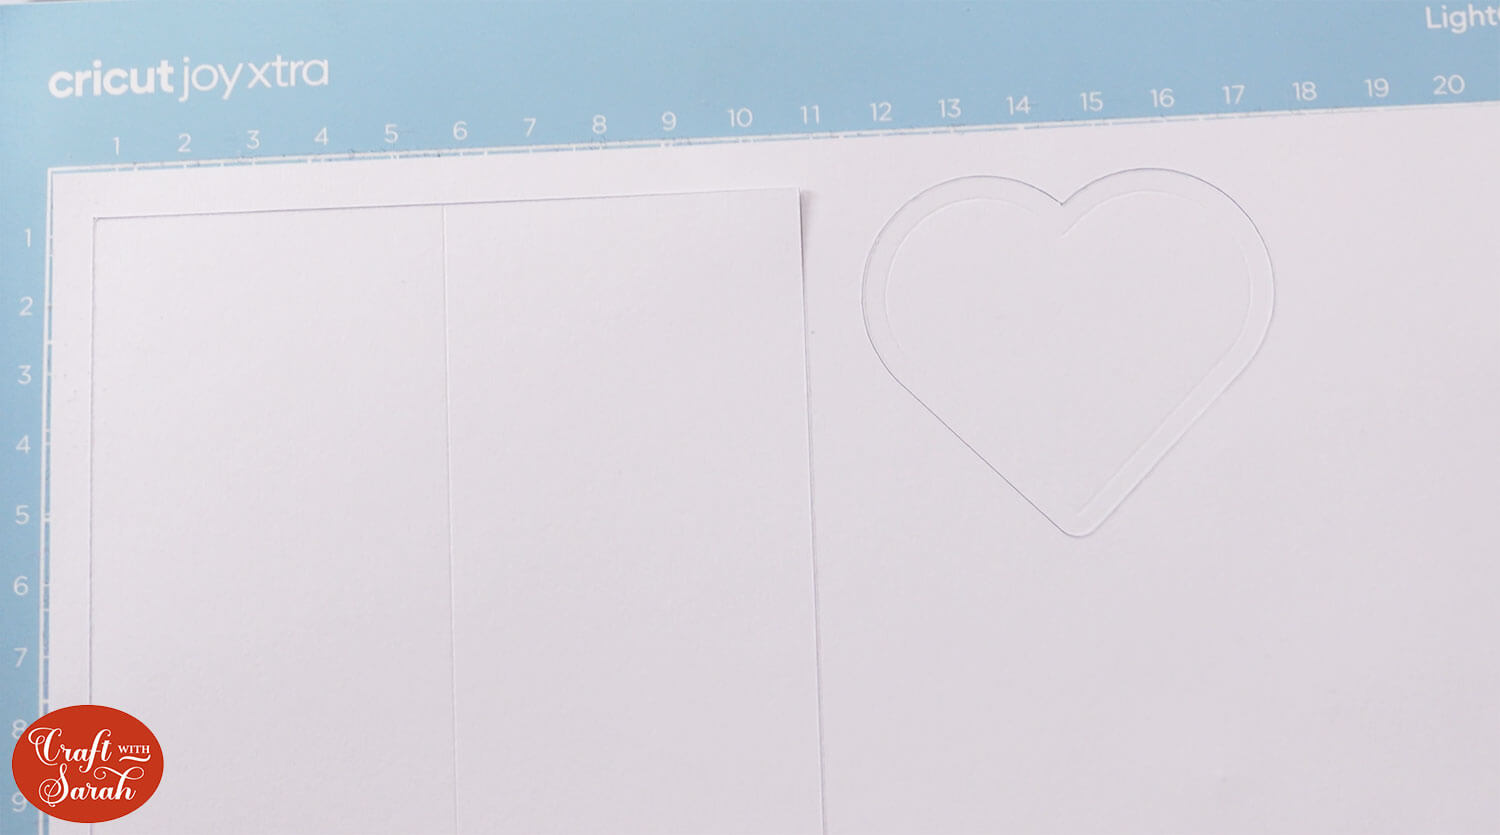
Here are the results! Beautiful, accurate score lines at just the right depth, using the Cricut Foil Transfer Kit! Hurrah!
Positives of this method:
- Quick to set up in Design Space
- Works well on all types of material
- Works well on straight and curved score lines
- Gives the best “score line” appearance out of the three methods
Negatives of this method:
- Foil tool is a little pricey
Frequently asked questions about scoring with a Cricut
Not sure how to score on a Cricut machine? Check out answers to common Cricut scoring questions below.
Do you need a special tool to score on a Cricut?
There are two different Cricut tools that have been made specifically for scoring: a scoring wheel and a stylus. The scoring wheel works with the Cricut Maker or Maker 3. The scoring stylus works with the Cricut Maker, Maker 3, Explore Air 2 and Explore Air 3.
Don’t have either of those? No problem! Read the tutorial above to see how to score without either of those tools, or how to score on a Cricut Joy/Joy Xtra.
Can you write on a card with a Cricut?
Yes, you can use Cricut pens in the A clamp which allow your Cricut to do all the hard work for you! I have a whole tutorial on how to write on cards with your Cricut that you might want to check out, as well as another tutorial on how to write envelope addresses with a Cricut.
Can you score with a regular Cricut blade?
Surprisingly, yes! You will need to make a custom material type to set your machine to the lightest cut setting possible (I go through in more detail in the tutorial above). There are other (more effective!) ways to score without a scoring tools which I go through in the tutorial above as well.
What if I don’t have a scoring wheel for Cricut?
A brilliant (and cheaper!) alternative to the Cricut scoring wheel is the scoring stylus which you can use for all your scoring needs. If you don’t have one of those either then read the tutorial above to see the other methods you can use to score.
How do I change cut line to score?
Click the line you would like to change and go into the Operations drop down in the top left of the Design Space screen and change it to “Score”. Don’t forget to Attach the score line to the piece underneath so that the Cricut knows where to score!
Scoring with a Cricut made easy!
I hope you enjoyed this tutorial on how to score with a Cricut machine, even if you don’t own a scoring tool!
Now that you know how to do scoring, here are some projects to try out:
- DIY envelopes to fit any size of card
- Layered greetings cards
- Spring gnome popout card
- Easter bunny popout card
- Presentation Boxes for Handmade Cards
- Gift card holders
- 3D snowman papercraft
Happy crafting,
Sarah x

