Easter Popout Card! 🐰 Easter Bunny Cricut Card
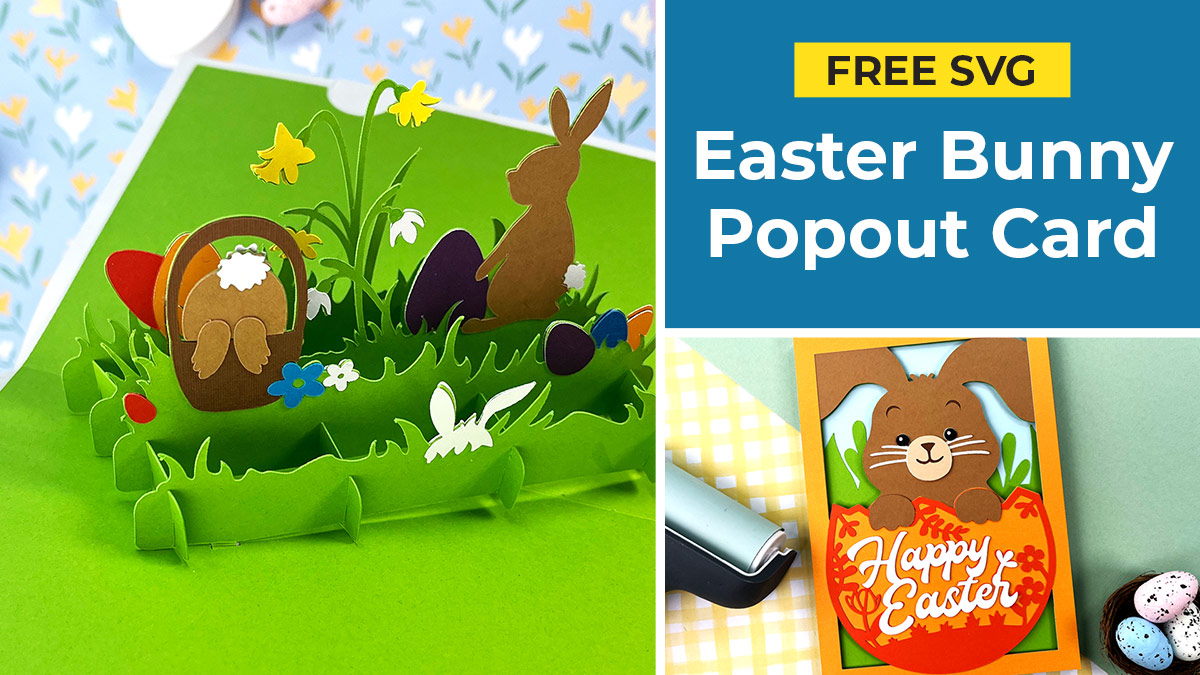
Make this impressive Easter popout card with your Cricut machine. It’s easier than it looks!
If you’re after a special Easter card then you’re going to love this.
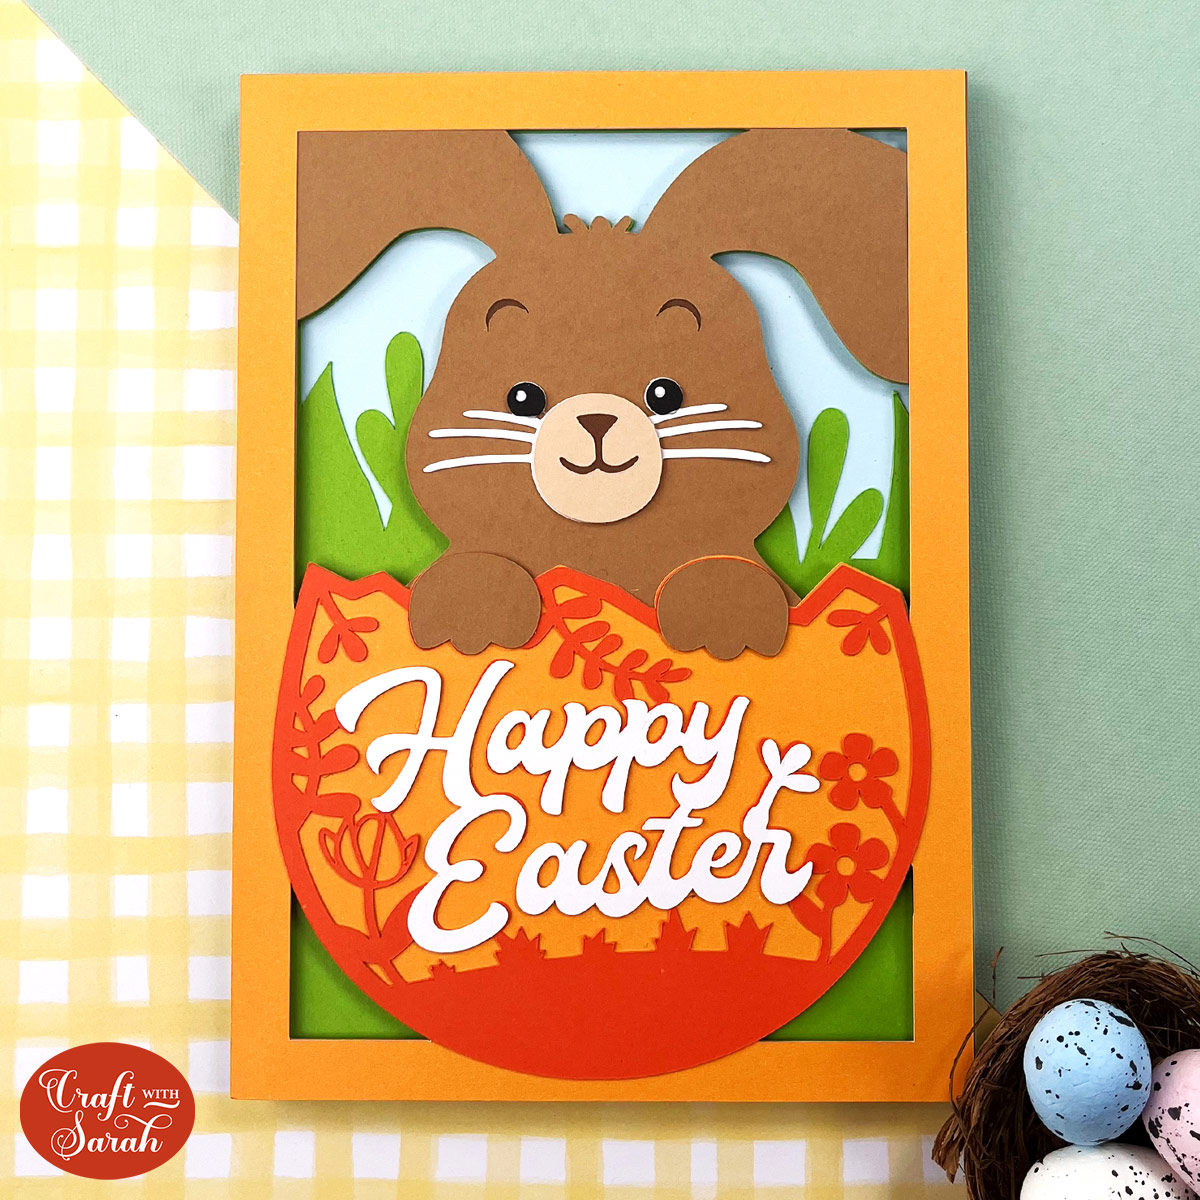
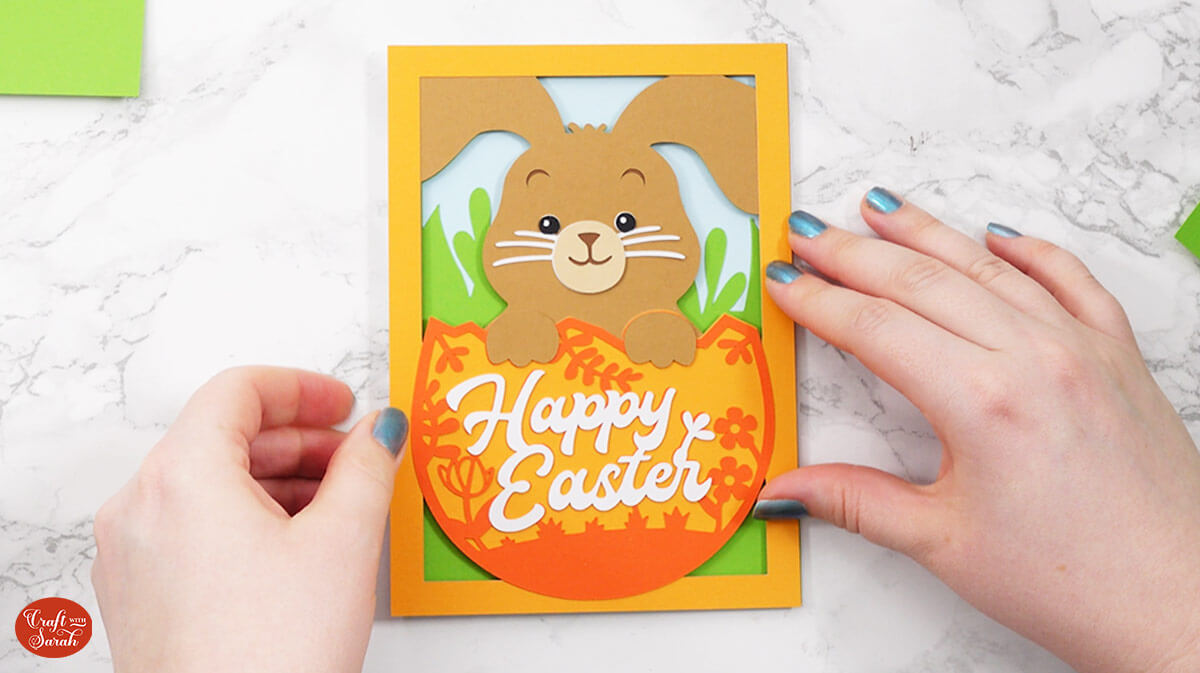
At first glance it looks like a cute bunny layered card… which of course, it is!
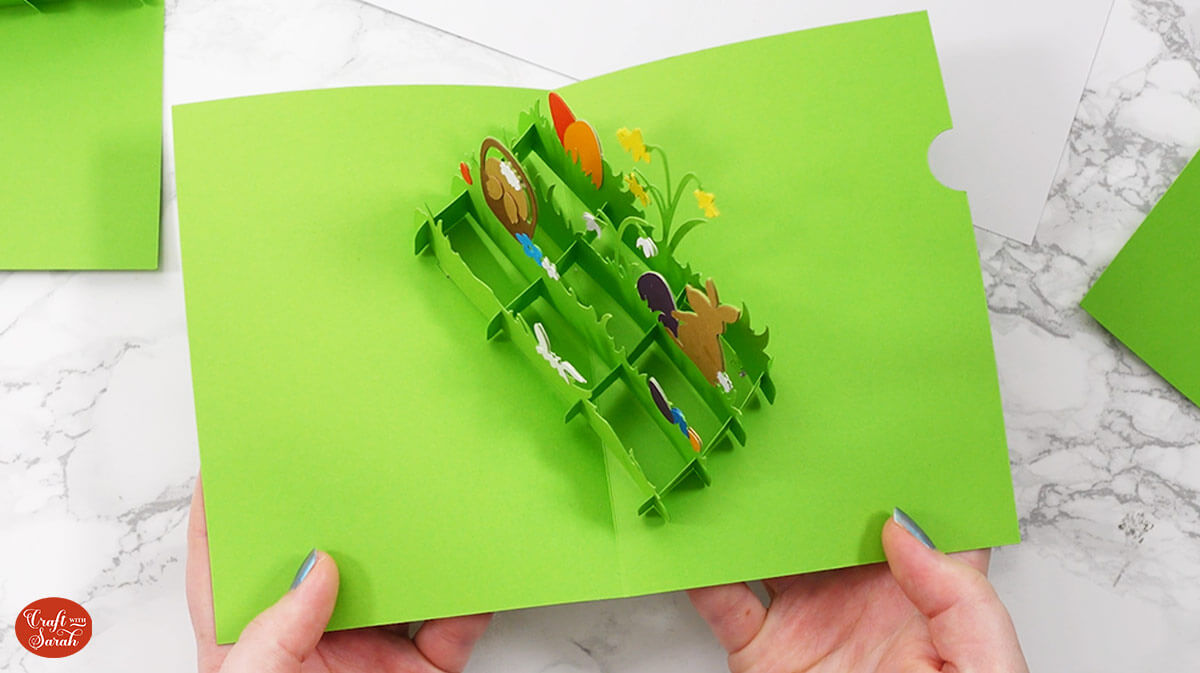
But when you open it, there’s a beautiful and detailed Easter scene waiting inside.
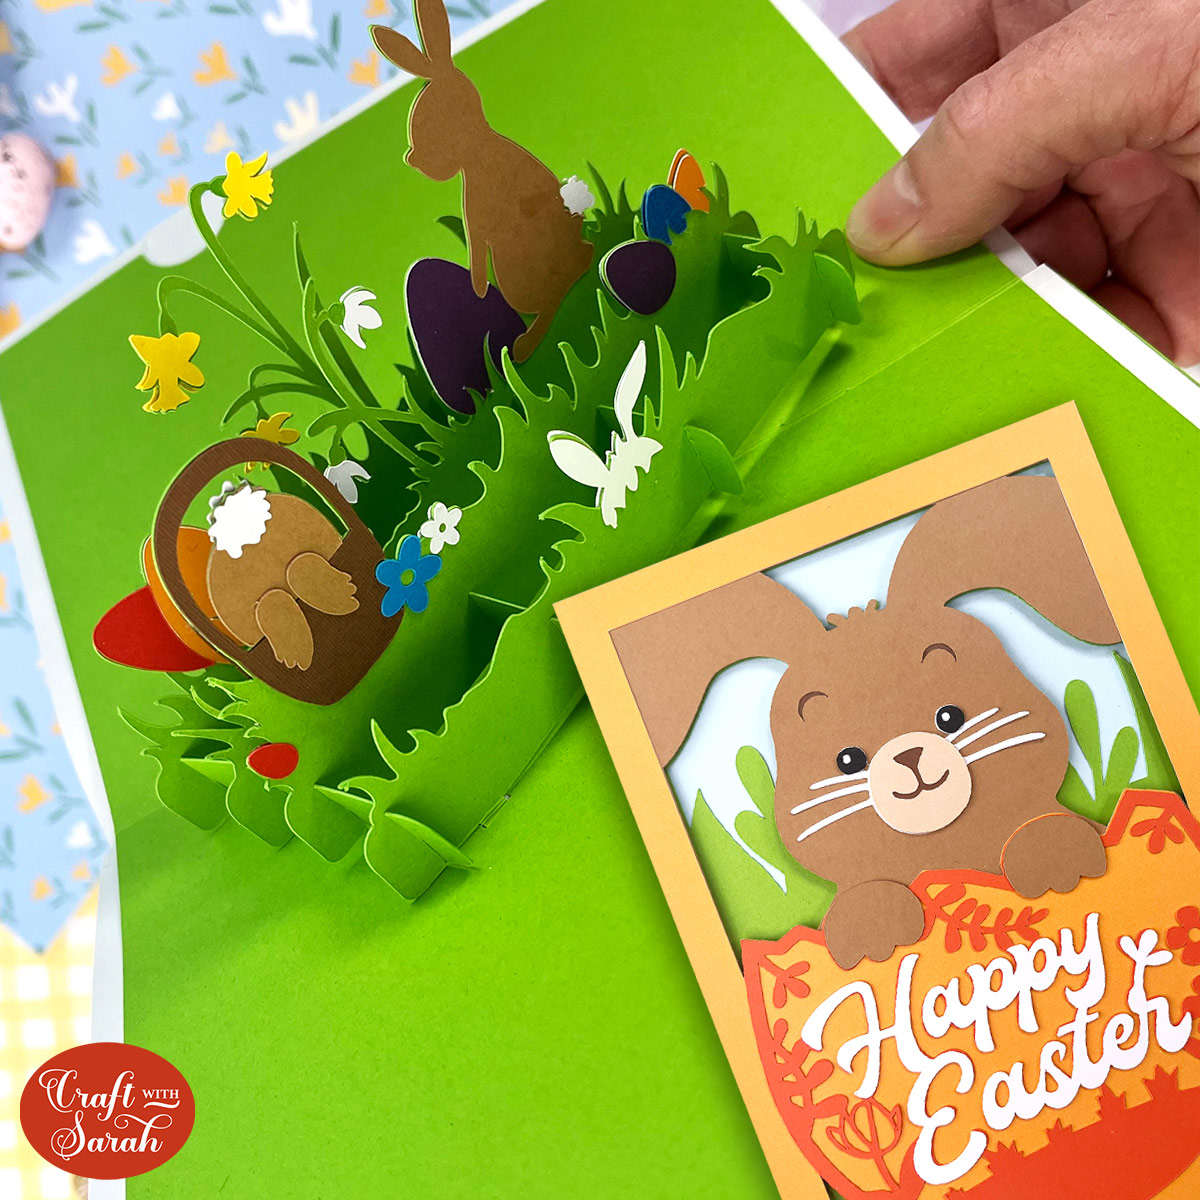
There’s even a hidden message panel so that you have space to write your Easter message.
This design will make a 5×7 inch card so you can use any 5×7 inch envelope or you can make your own with this envelope tutorial.
Materials supply list
Here is a list of the materials that I used to make this project.
Please note that some of the links included in this article are affiliate links, which means that if you click through and make a purchase I may receive a commission (at no additional cost to you). You can read my full disclosure at the bottom of the page.
- Cricut machine
- Light blue Cricut cutting mat
- Cricut scoring wheel or Cricut scoring stylus
- Coloured card
- Collall All Purpose glue or similar
- Needle tip applicator bottle (optional)
- Foam squares/foam pads
- Sticky tape
This project is suitable for the following types of Cricut machine: Explore Air 2, Explore Air 3, Maker, Maker 3, Venture and Joy Xtra.
Video tutorial
Watch the video below to see how to make this project. Keep scrolling for a written tutorial.
Written tutorial (with photos!)
Here’s how to make your very own Easter popout card using a Cricut machine!
Step 1) Download the cutting file(s) & unzip the downloaded folder
Download the Free Cutting File

Please login to your account to download this file.
TERMS OF USE:
You may sell finished, handmade physical craft items that you have made using this product but must not sell or share the digital files. Read full terms of use
Before you upload the SVG to Design Space, you need to unzip the download folder that it comes in.
- How to unzip a folder on Windows computer
- How to unzip a folder on a Mac
- How to unzip a folder on an iPad/iPhone
- How to unzip a folder on an Android device
Step 2) Upload the SVG file into Design Space
Open up Cricut Design Space and start a new Project.
Click “Upload” and then find your unzipped version of the downloaded files for this project.
Select the file called svg-easter-popout-card-craftwithsarah.svg
This is how it should look after you have uploaded the file:
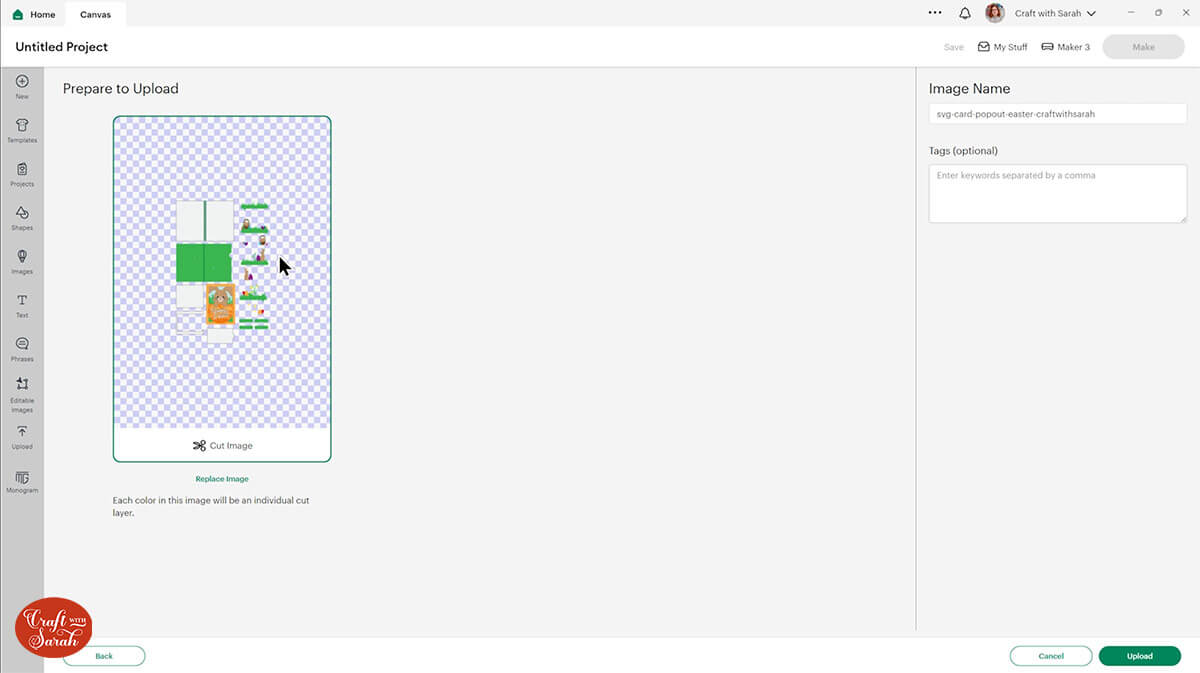
Make sure you upload the file which starts svg- in the filename!!
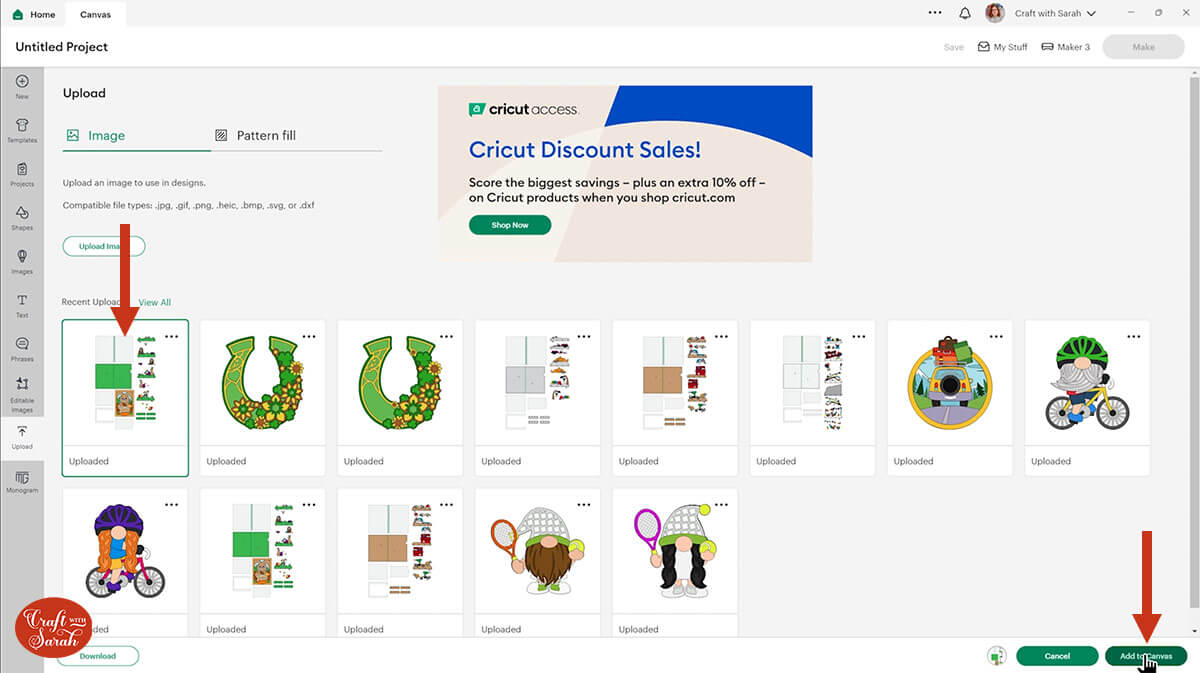
After uploading, the design will show in your “Recently Uploaded Images”.
Click on it and then press “Add to Canvas” to put it onto your Project.
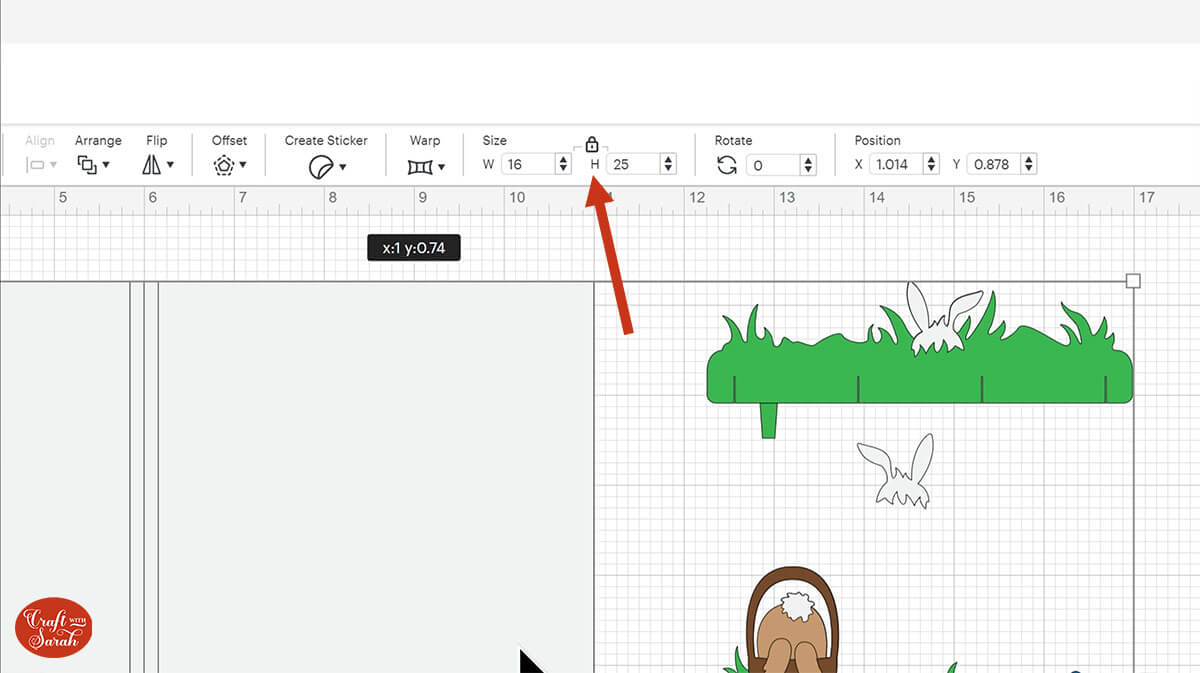
The design should load in at 16 inches wide and 25 inches tall which will make a 5×7 inch card when everything is finished.
Change the design to that size if yours doesn’t match.
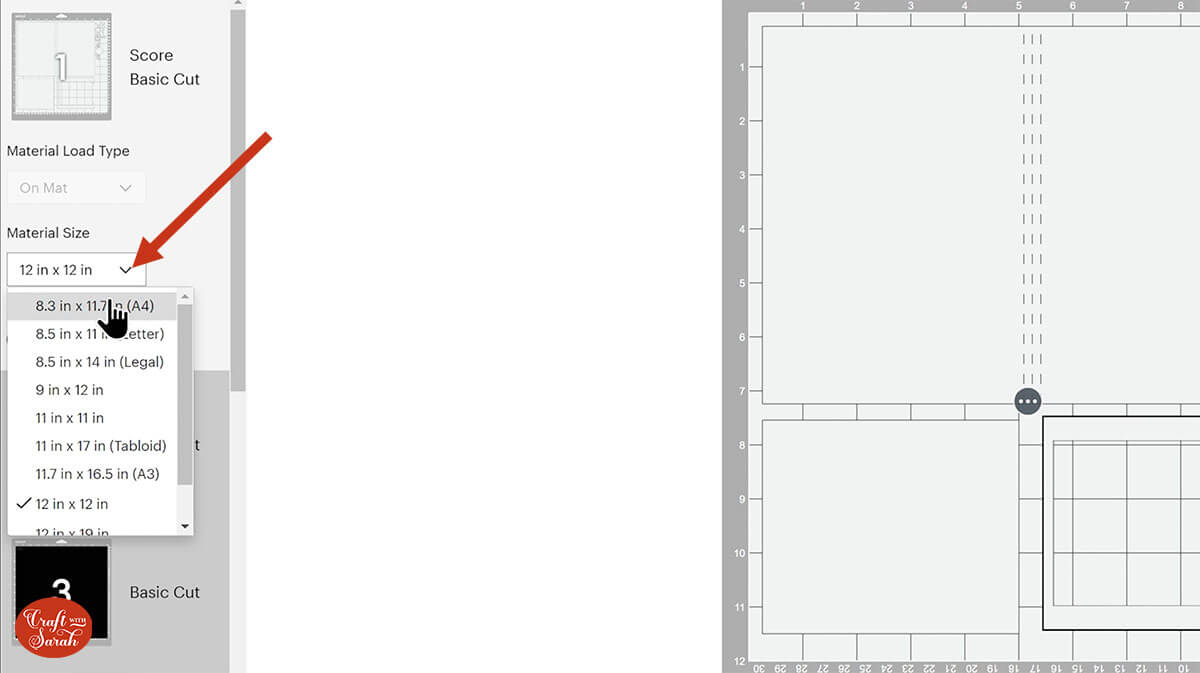
Step 3) Format the score lines
Some of the pieces of the card have score lines to make it easier to put together.
If you don’t have a scoring stylus or scoring wheel for your Cricut machine (or if you are using the Cricut Joy Xtra), you can delete the score lines.
However, if you do have one, here’s how to format them so that your Cricut knows to score them.
First, click the whole design and then press the Ungroup button at the top of the layers panel to separate out all those layers.
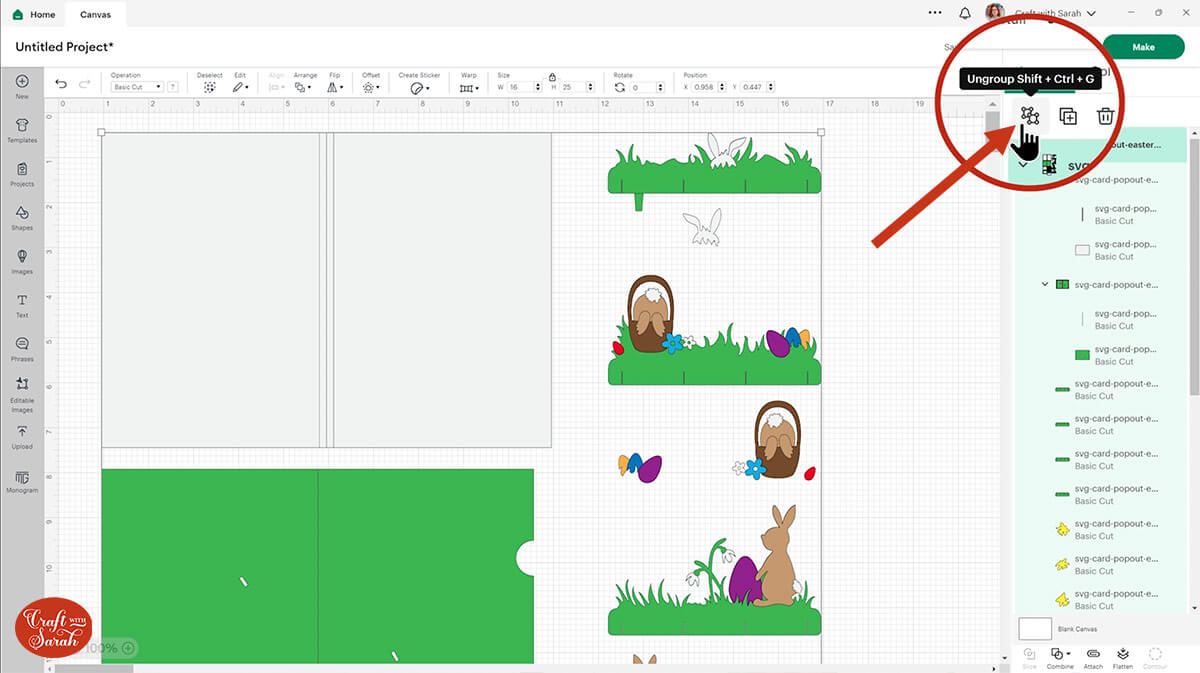
Click away to deselect everything and look down the layers panel until you find the main greetings card layer.
If the group is appearing closed, click the little arrow on the left-side to open it up to see the different layers.
Click the vertical line layer.
Change the layer to “Score” using the Operations dropdown.
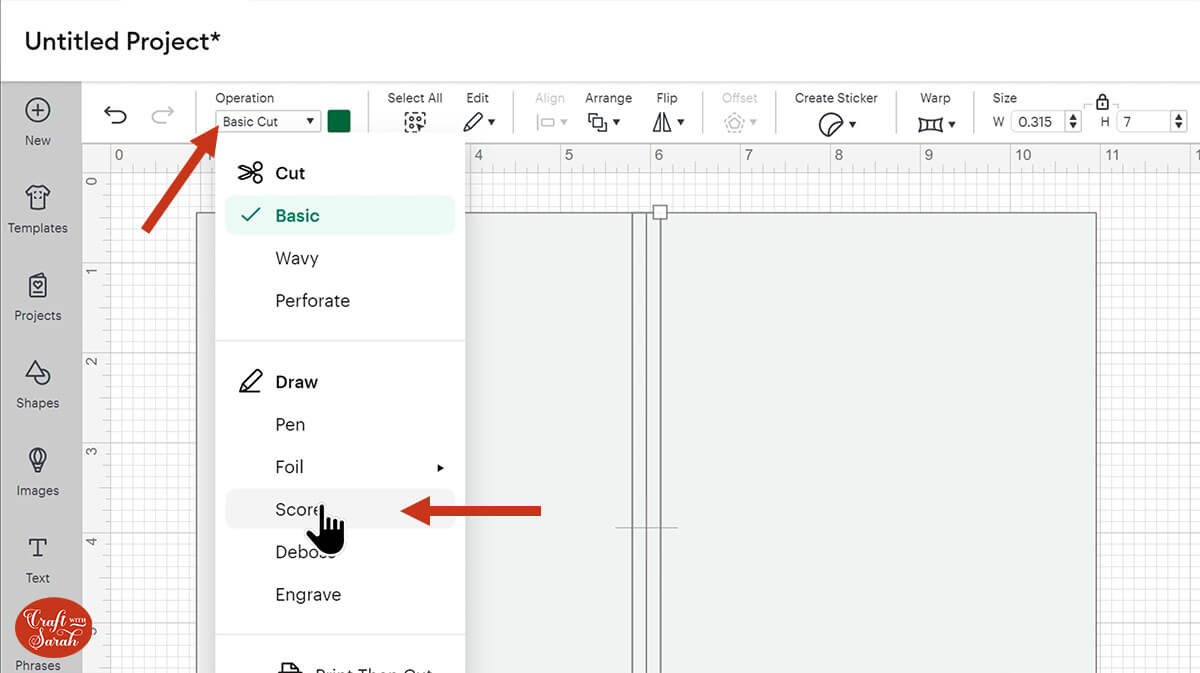
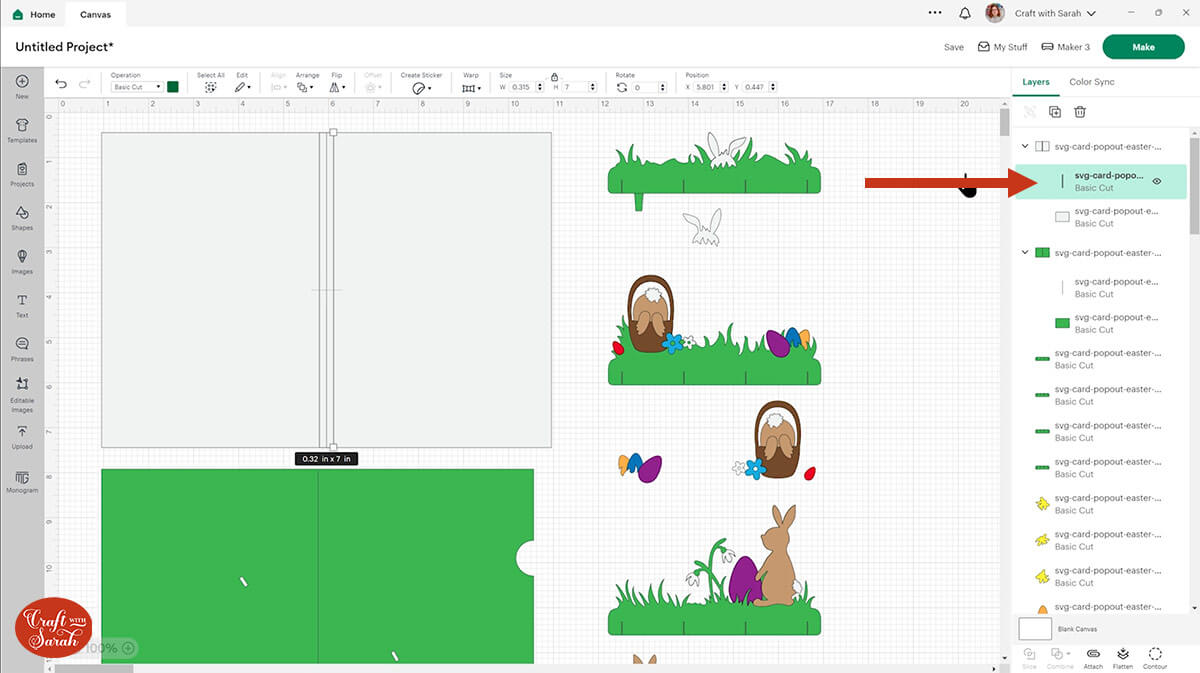
We need to do one more thing to it which is to tell the Cricut we actually want it to do those score lines on that rectangle.
Click to select the whole group that contains the score line and the base card pieces. Down the bottom of the layers panel, press Attach.
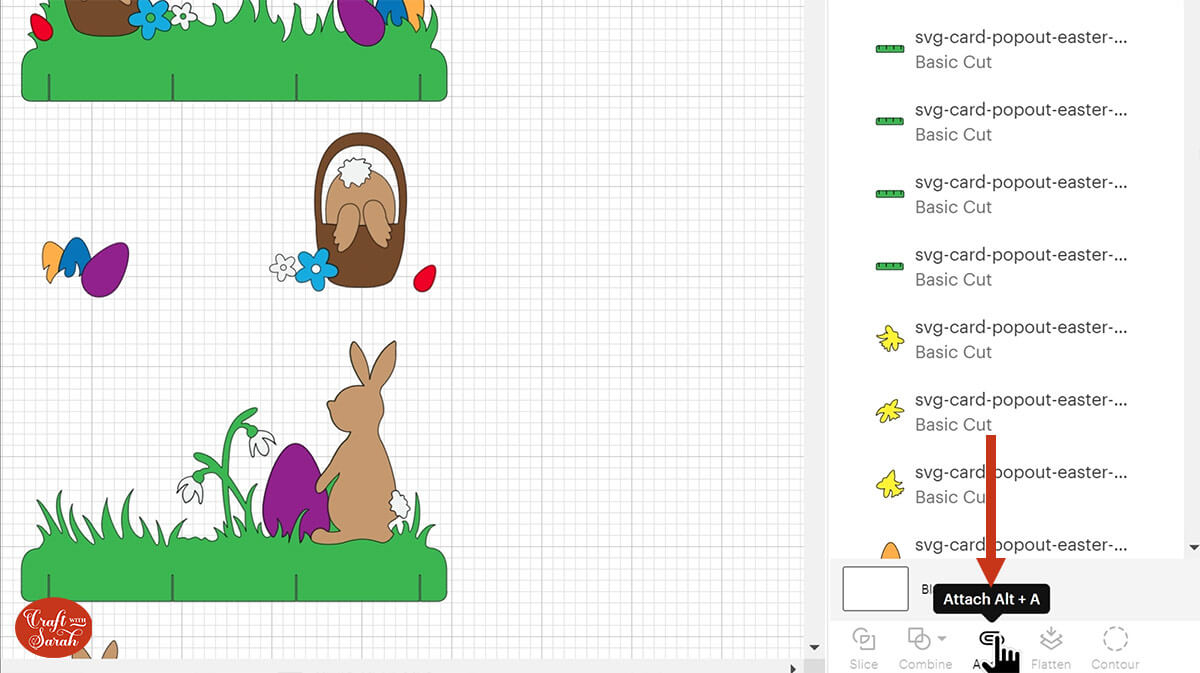
Your layers panel should now look like this:
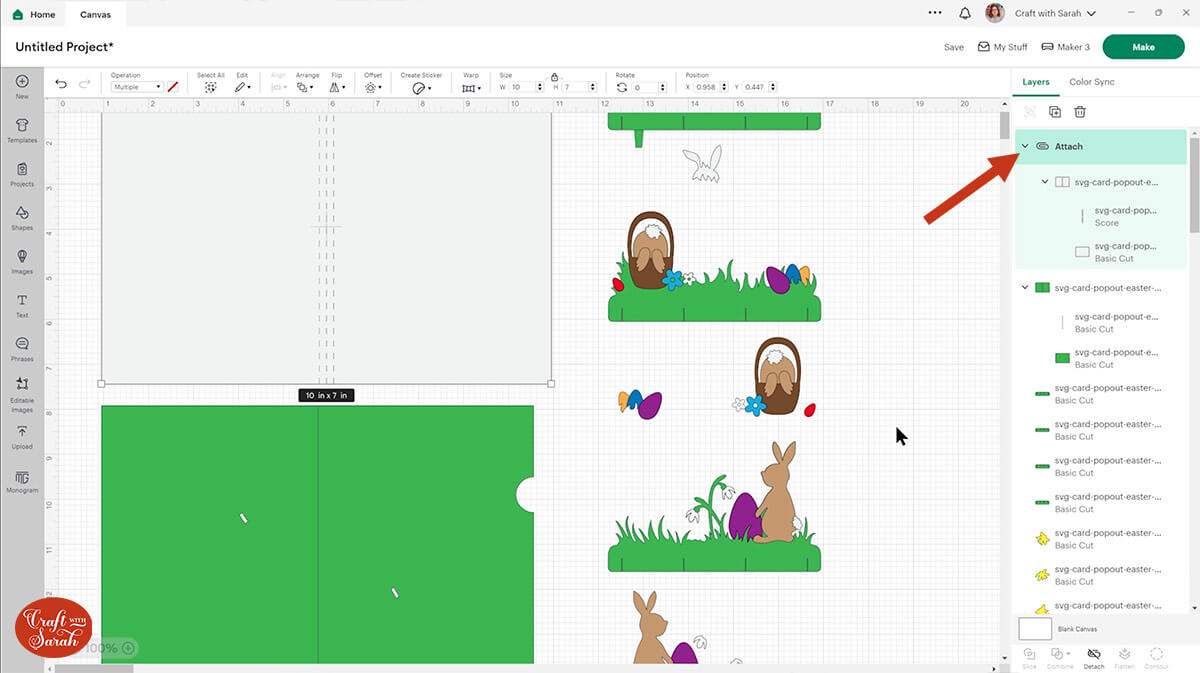
Complete the same steps for the remaining score layers.
There are three more score lines to change: a vertical line on the green greetings card base and horizontal lines on two of the decorative pieces.
When you attach something, it moves it to the top of the layers panel which does mean that you then can’t see the pretty pictures on top.
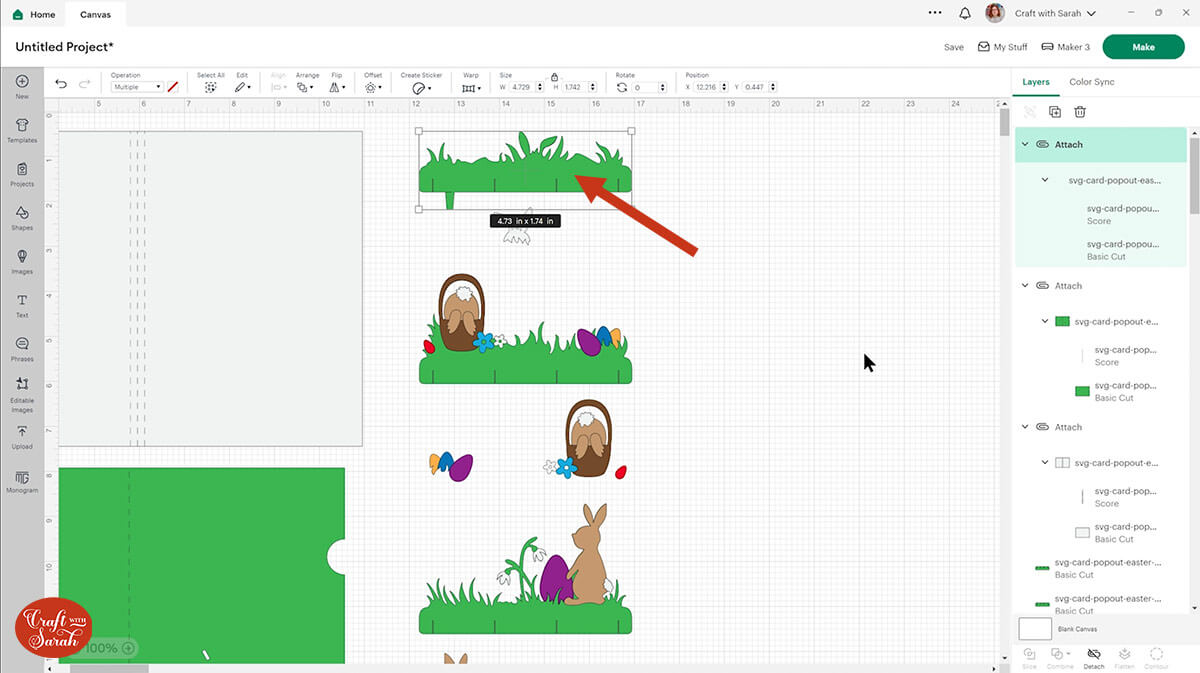
If you want to put it back again go Arrange, Send to Back and then you can see all the colours again.
TIP: If you don’t have a scoring wheel or stylus for your Cricut then click the single-line layers and hit the trash can to delete them instead. It will be a little bit trickier to put together without score lines because you will have to fold it manually in the correct places.
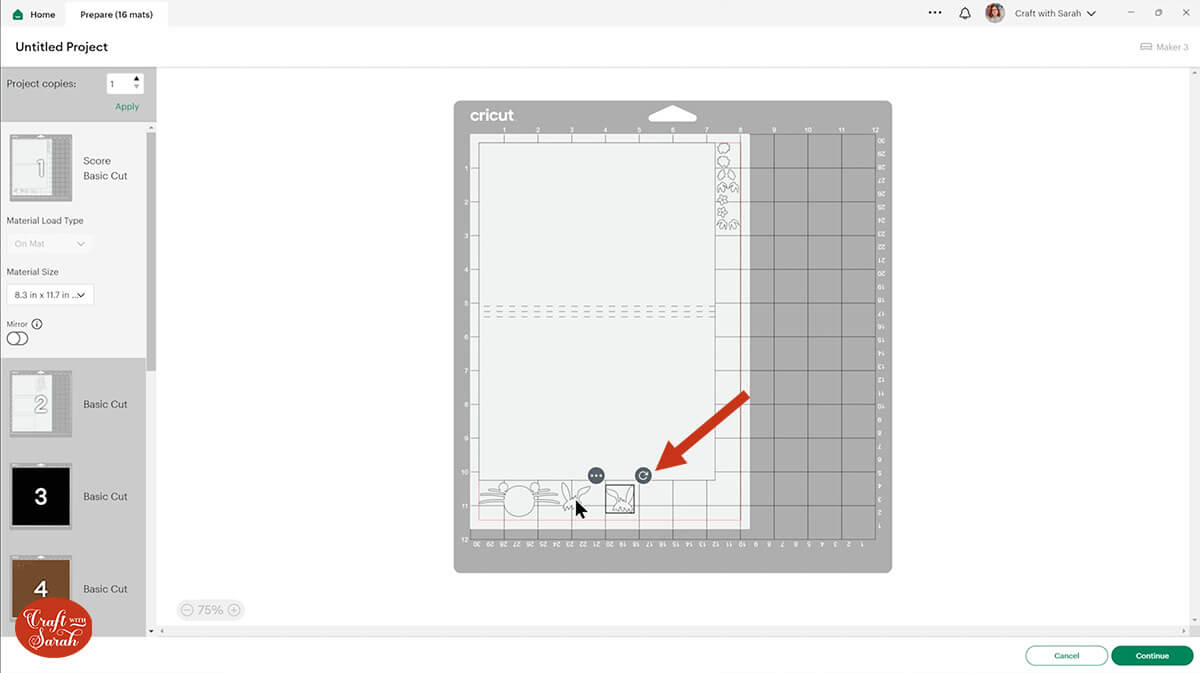
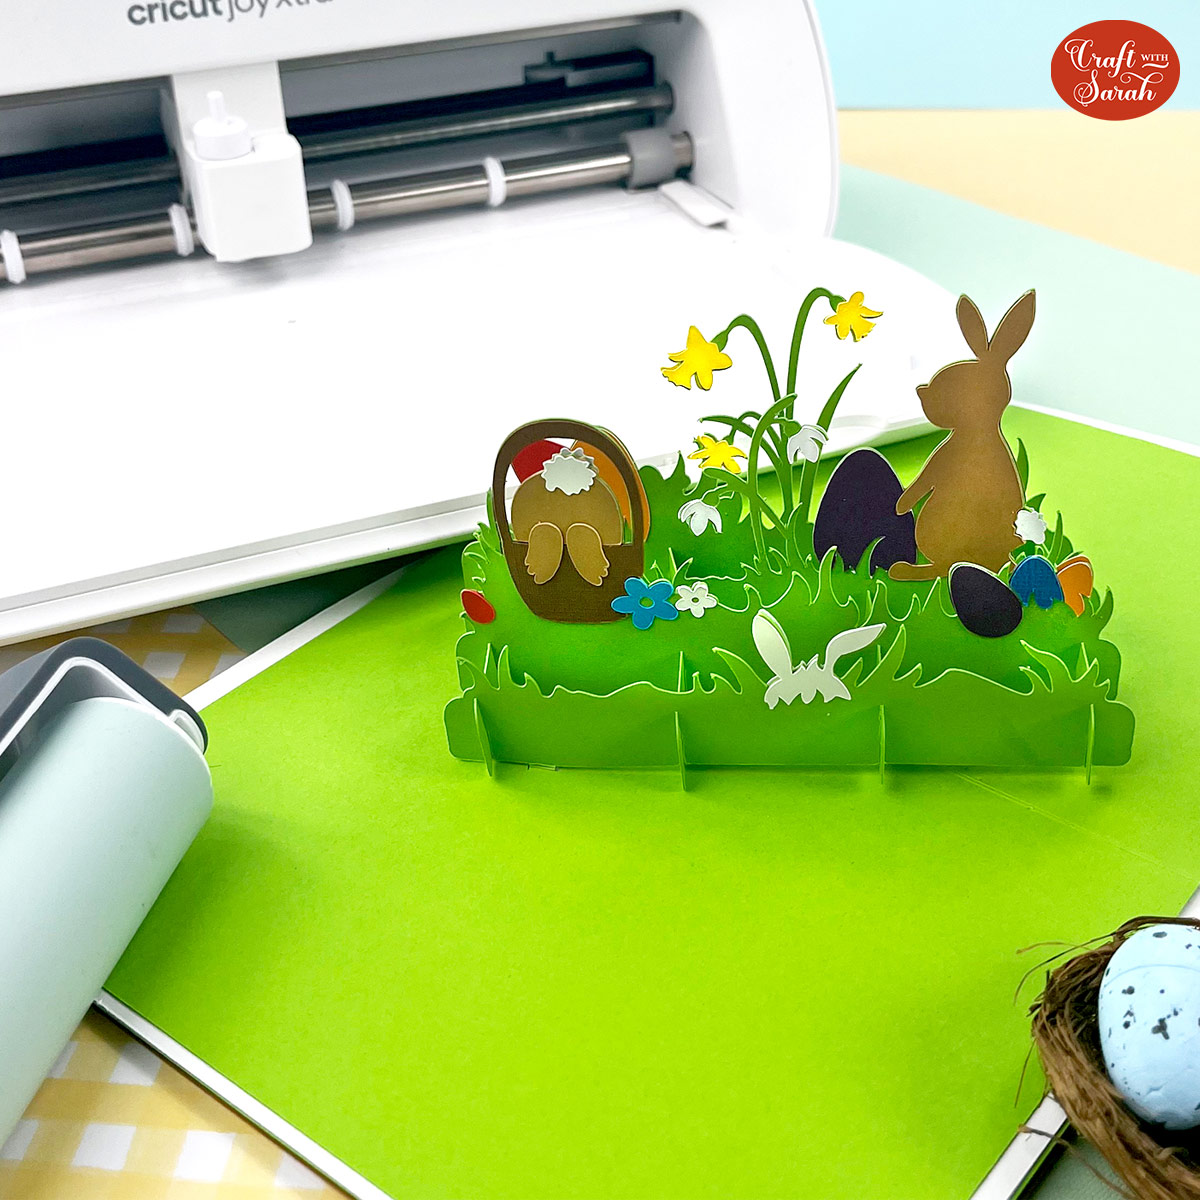
Step 4) Cut the project from cardstock
Now is a good time to save your project so that you don’t have to do the formatting all over again.
When you’re happy with how everything is looking, click “Make” and follow the on-screen instructions to get everything cut out from your cardstock.
TIP: If you’re worried about sticking on all the tiny bunnies and eggs, you can make this easier by cutting the small pieces from adhesive vinyl instead of cardstock.
To change the paper size, go into the dropdowns over on the left side of the screen and choose the paper size that you want to use. You need to change it for every single colour.
To save space on your cardstock, you can move things around by clicking and dragging. Make sure when you’re moving things about that nothing overlaps because otherwise, it won’t cut out properly.
TIP: New to cutting cardstock with a Cricut? Check out this in-depth tutorial which goes through every step of the process, including tips for getting the best quality cuts from your Cricut.
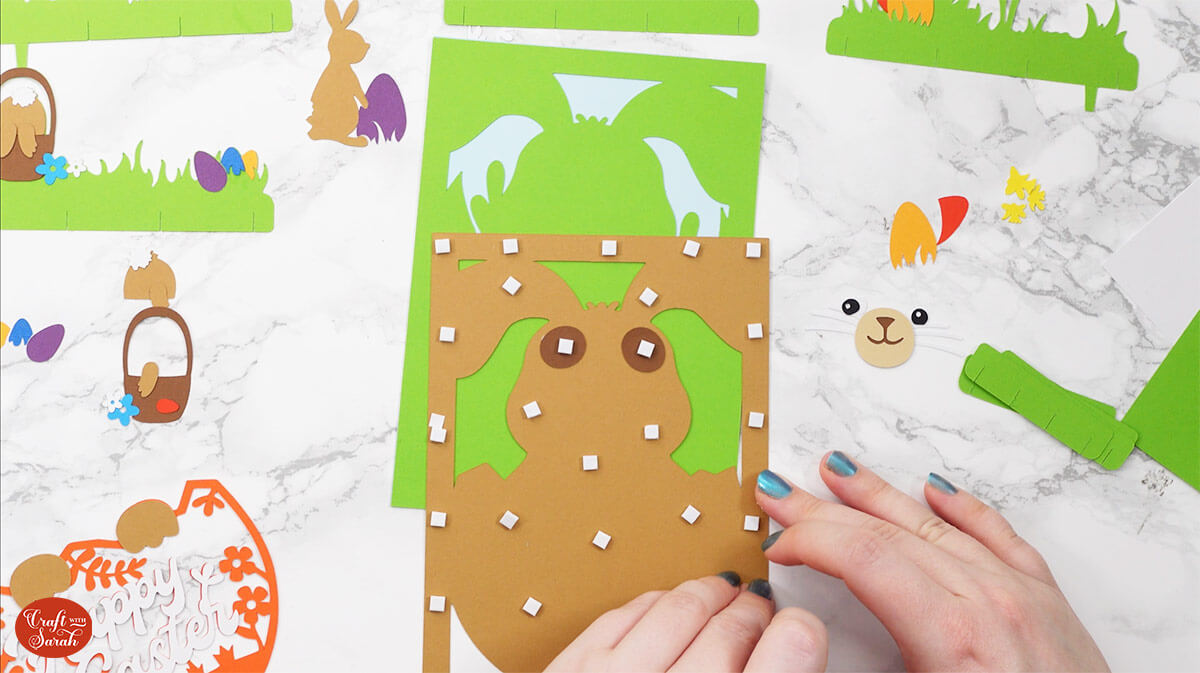
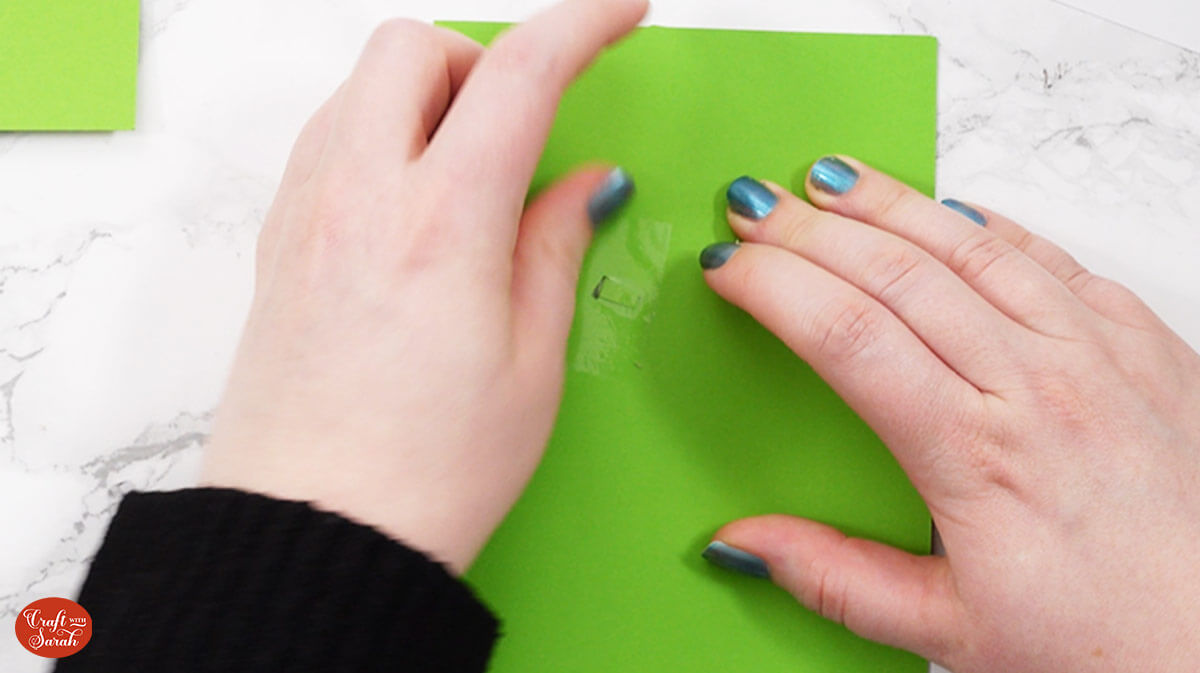
Step 5) Stick the card front together
Stick together the pieces that make up the front of the card with a mixture of foam squares and glue, as shown on the assembly guide below.

When you’re adding foam squares to the back of the brown bunny piece, make sure you put some in the middle of the card as well as around the edge. If you don’t put any in the middle, there is nothing to hold the card flat so it might bow downwards without them.
Step 6) Glue the popout detailing on
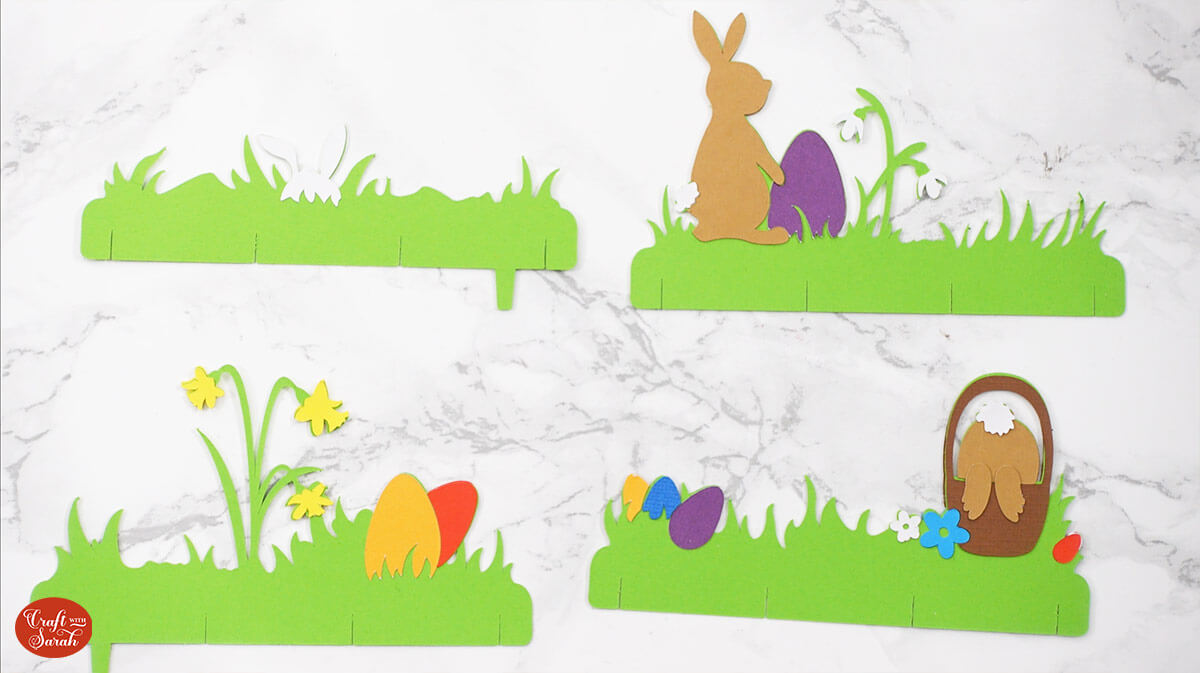
Take your popout base pieces and glue the eggs, bunnies and flowers on in the correct positions which are shown in the assembly guide below.
The pieces are double sided so you will need to glue them the same on both sides.
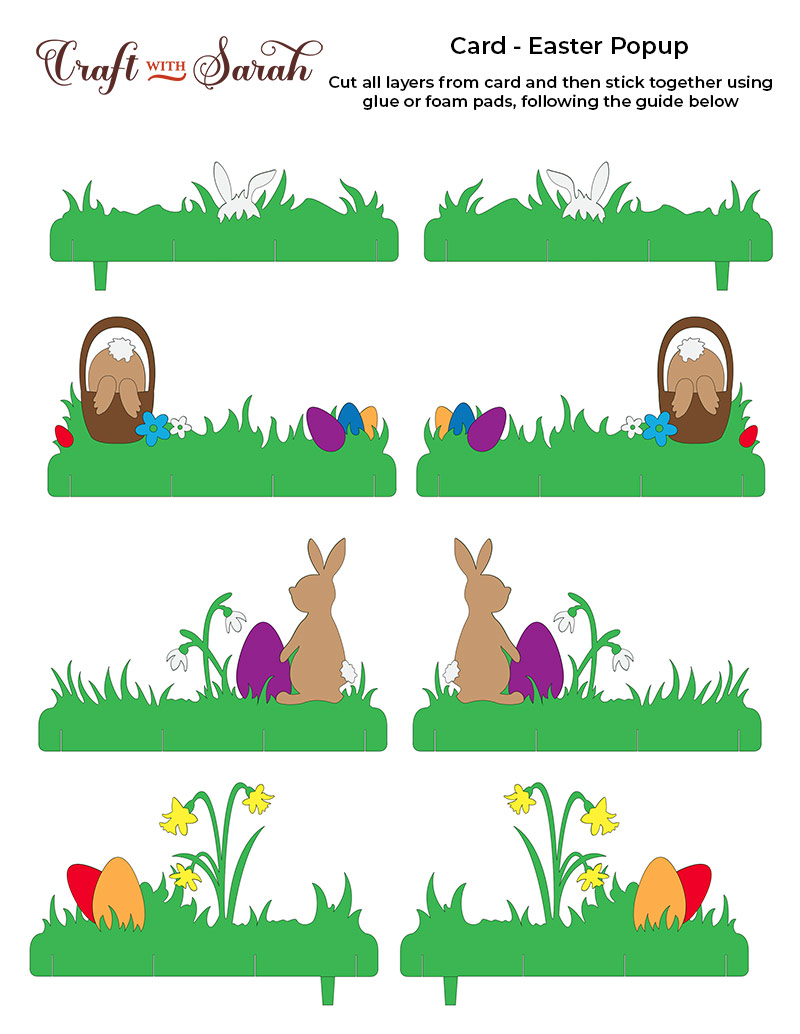
Now all of the 4 popout pieces are ready.
Step 7) Glue the hidden message panel together
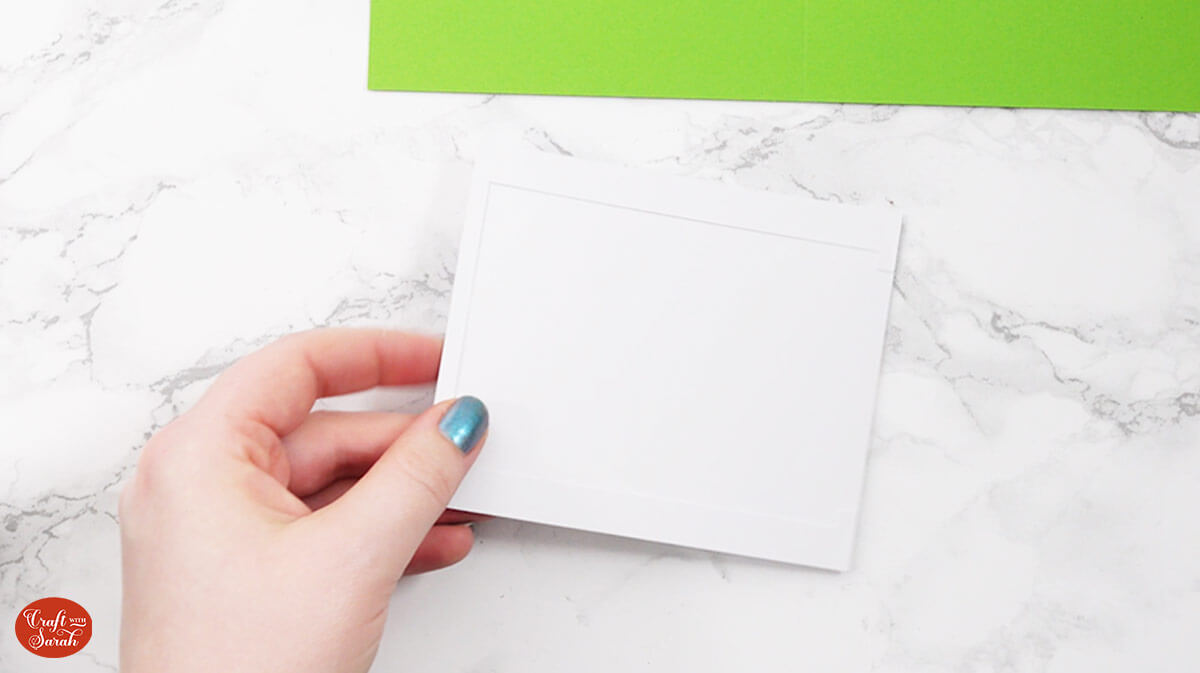
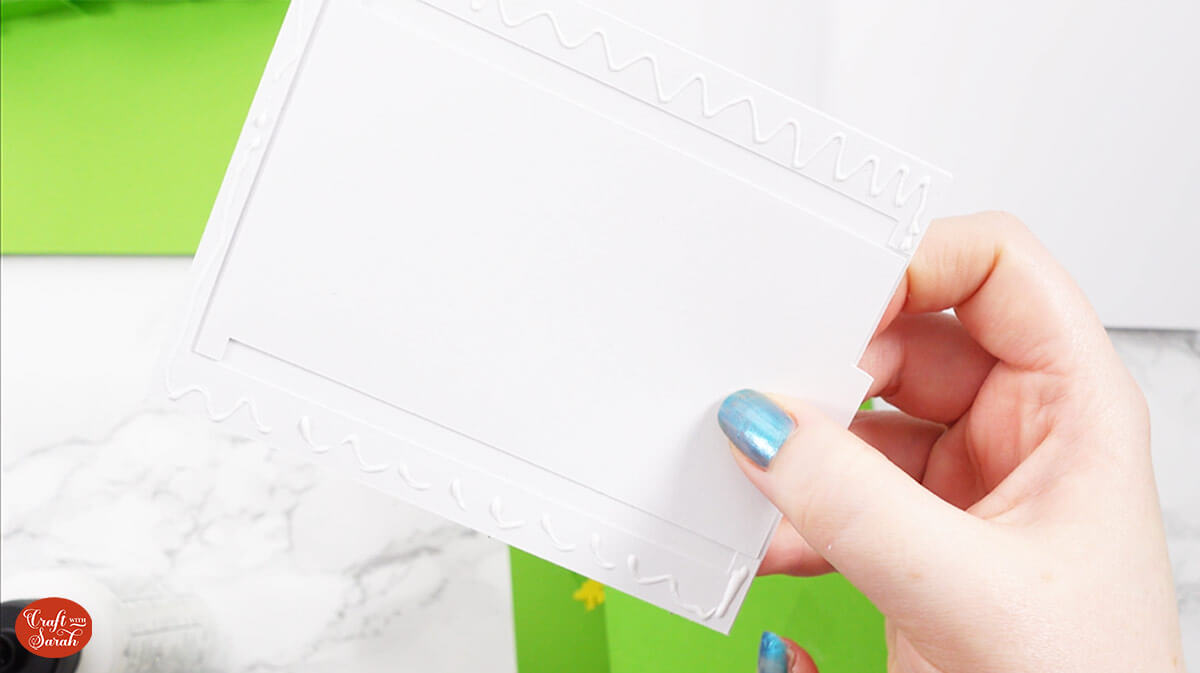
Gather the three hidden message panel pieces.
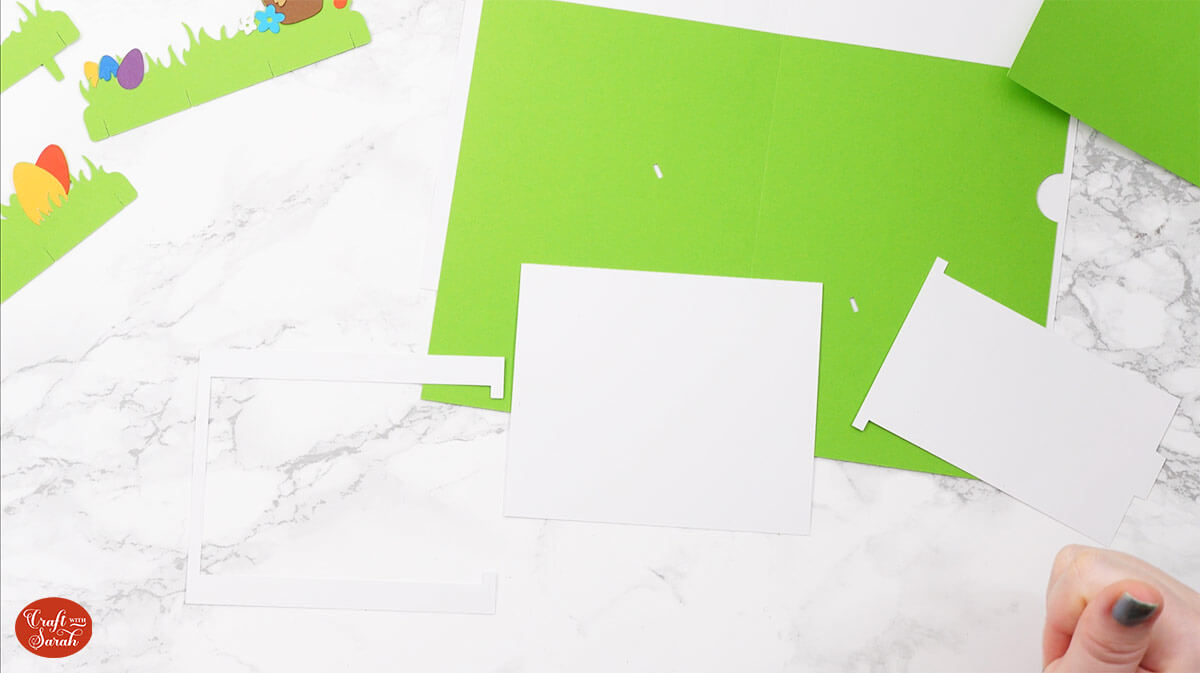
Take the plain rectangular piece and add glue to the back of the edge piece which has the rectangle cut out.
Line it up and stick it down onto the rectangle. This will keep the hidden message panel secure.
Put the panel pieces aside. We will stick it to the card later on.
Step 8) Assemble the popout mechanism
Next we will put the popout mechanism together.
The photo below shows a blank template of the mechanism to show what we are going to create.
It’s a simple “grid” which will be made by slotting the green pieces together.

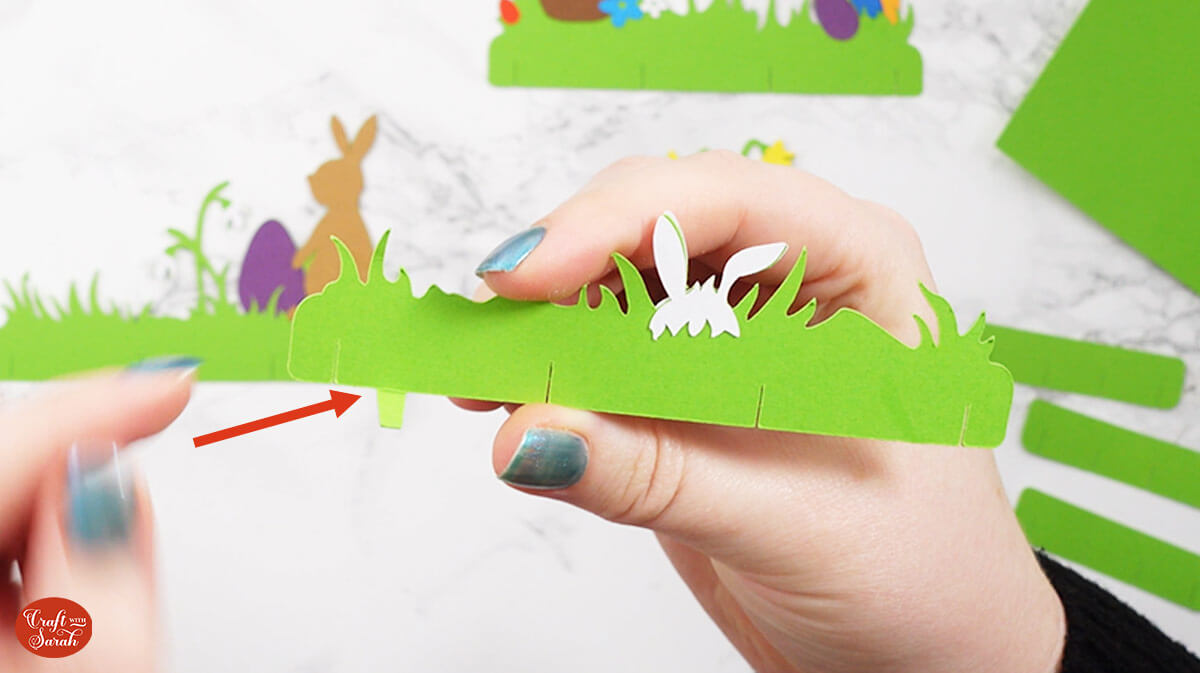
Take the four small green pieces which have four small slits along each one and the larger green pieces which you added the detailing to earlier.
Put pieces in the order shown below. They need to go together in a certain way, otherwise the popout won’t work. This layout will help you put the pieces together in the correct order.
IMPORTANT – Make sure the pieces all match the directions shown below. This is ESSENTIAL for the two green pieces with the bottom tabs on them.
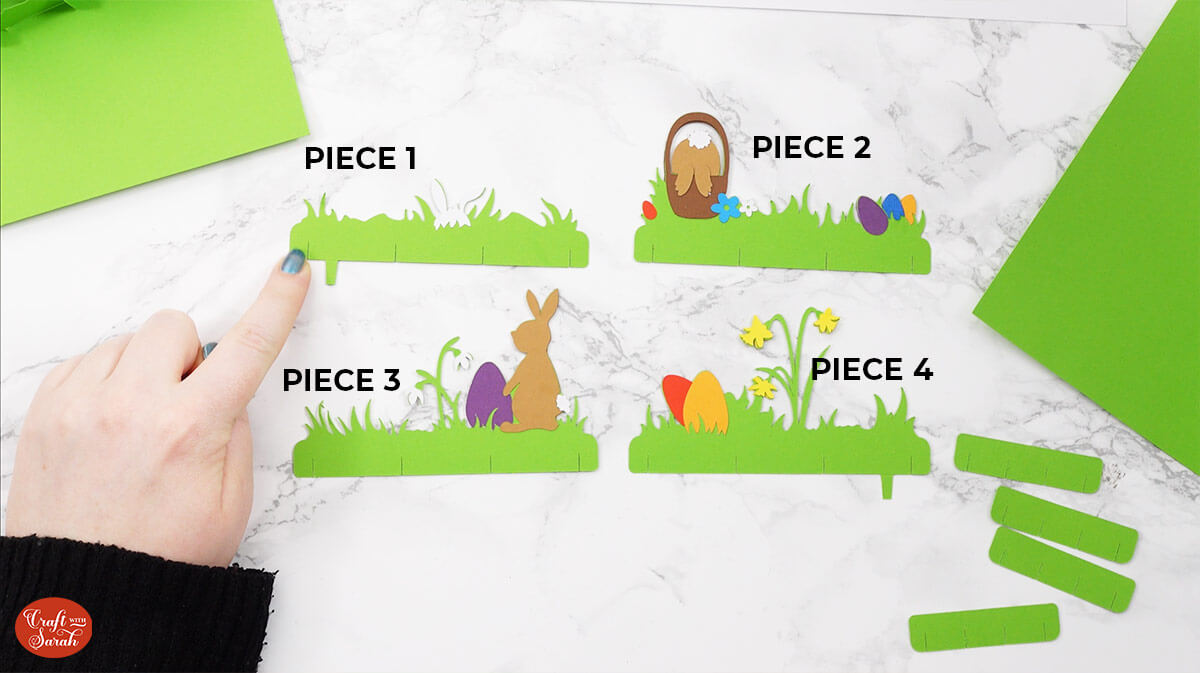
Take Piece 1. Make sure the bunny is on the RIGHT and the tab is on the LEFT. Fold the tab along the score line upwards, towards you.
The four slits correspond to the slits in the smaller pieces.
Slot each of the smaller pieces into the longer piece using the first slits on each of the smaller tabs.
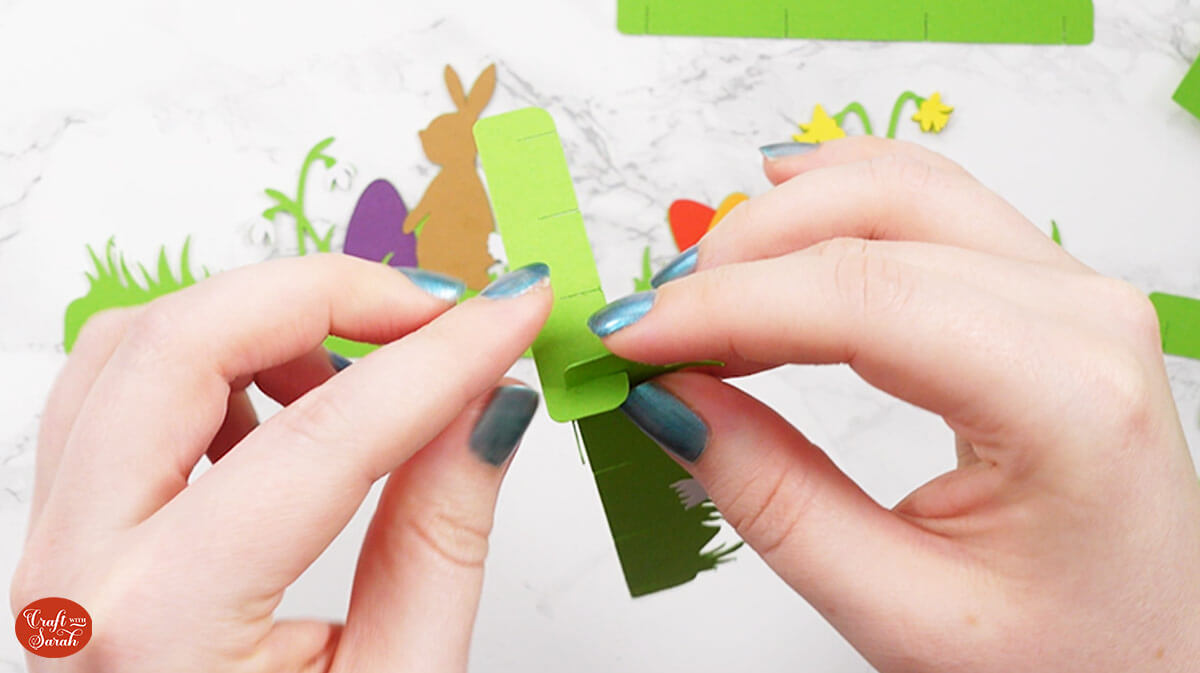

Take Piece 2 which has the bunny in the basket and slot it into the second row of slits. Make sure the bunny is on the LEFT.
Make sure everything sits flush along the bottom.
Take Piece 3 which has the bunny standing up and slot it into row 3, with the rabbit on the RIGHT.
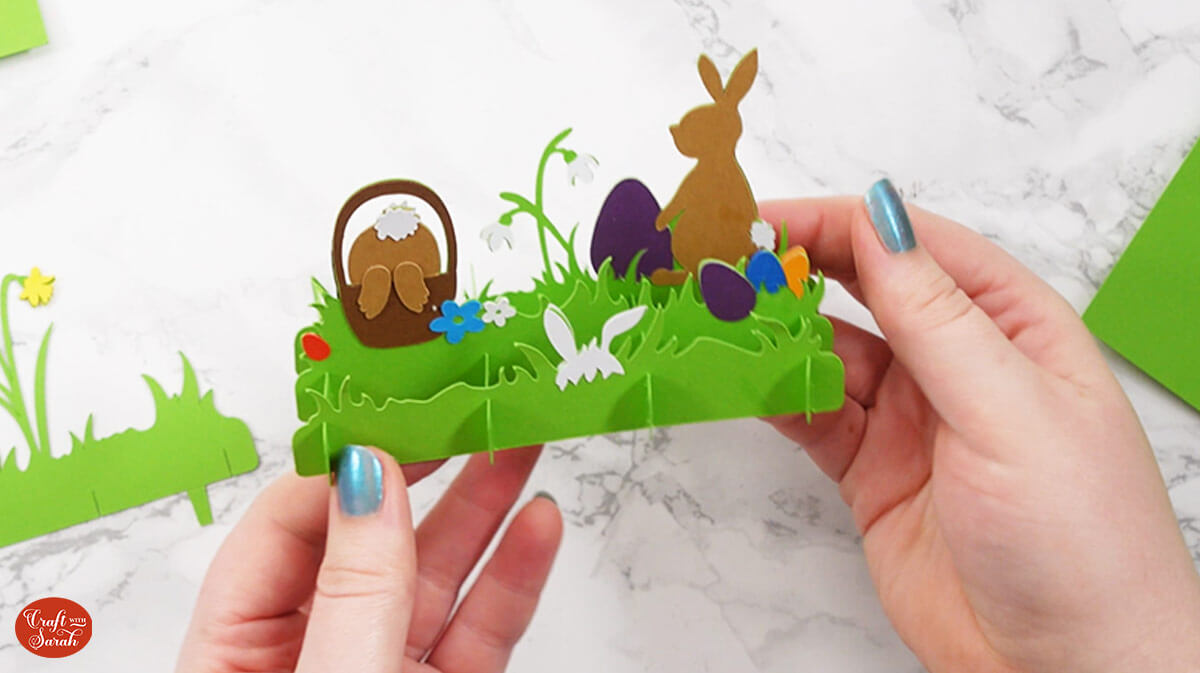
Finally, select Piece 4 and make sure the tab is on the RIGHT. Fold the score line back behind itself.

Then you can slot it into the last row.
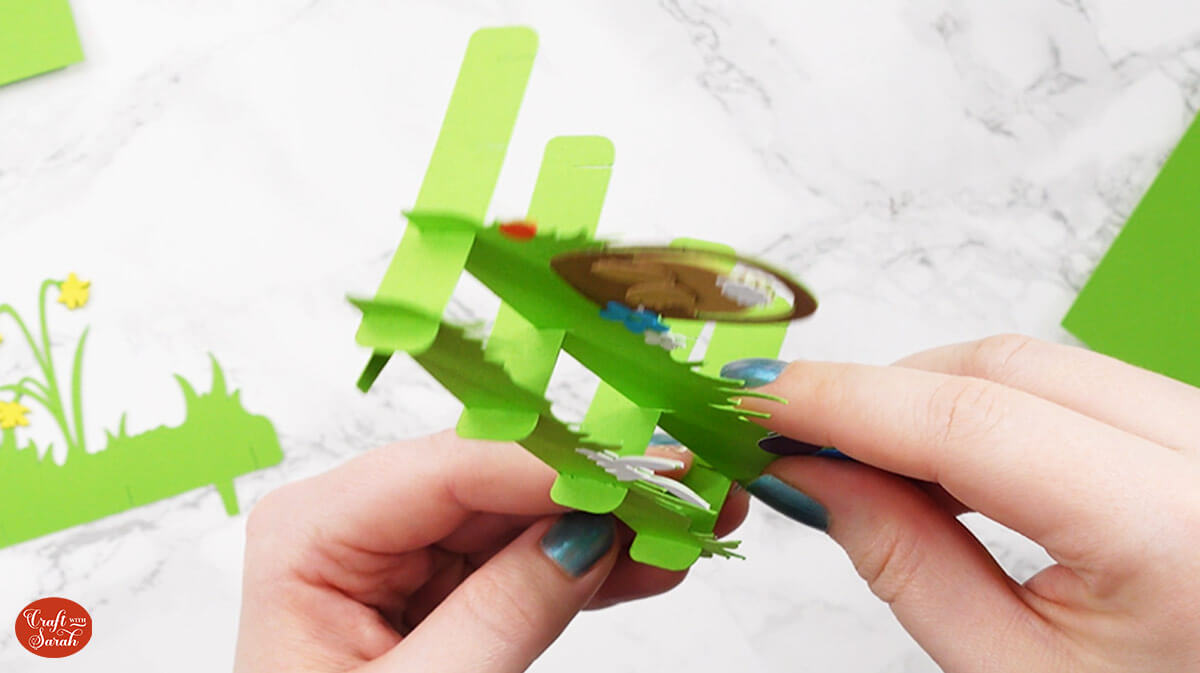
This is how it should look from above:
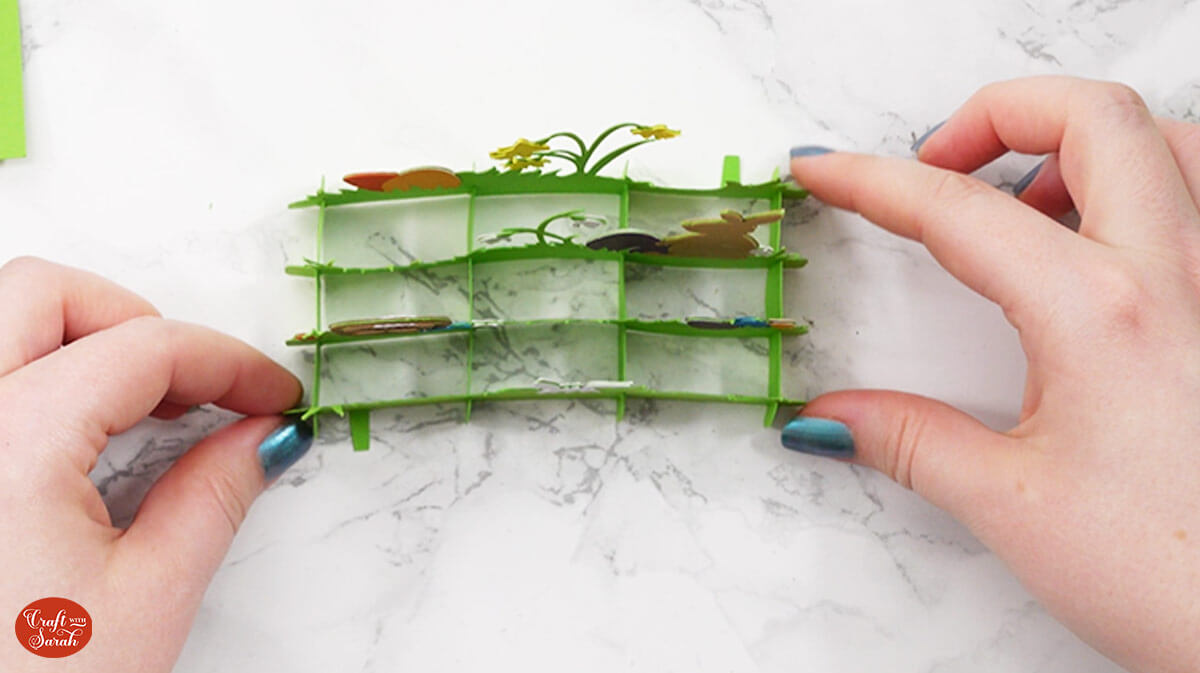
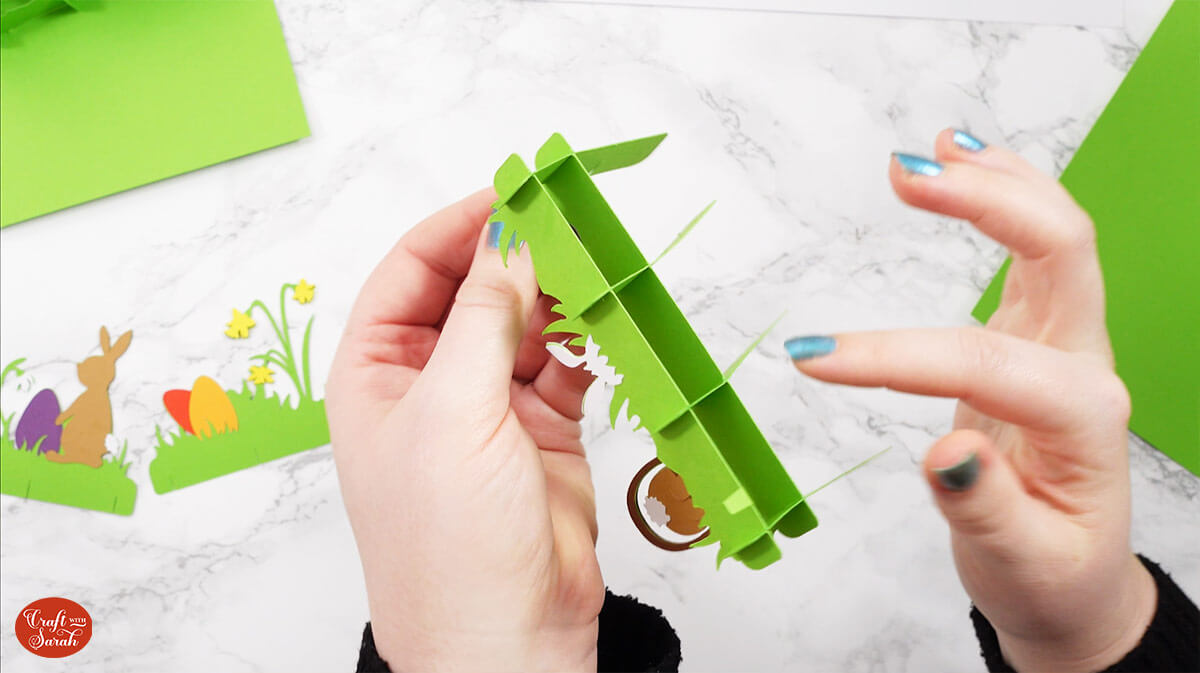
Give the popout effect a try by gently closing up the grid. It should fold in on itself to become flat.
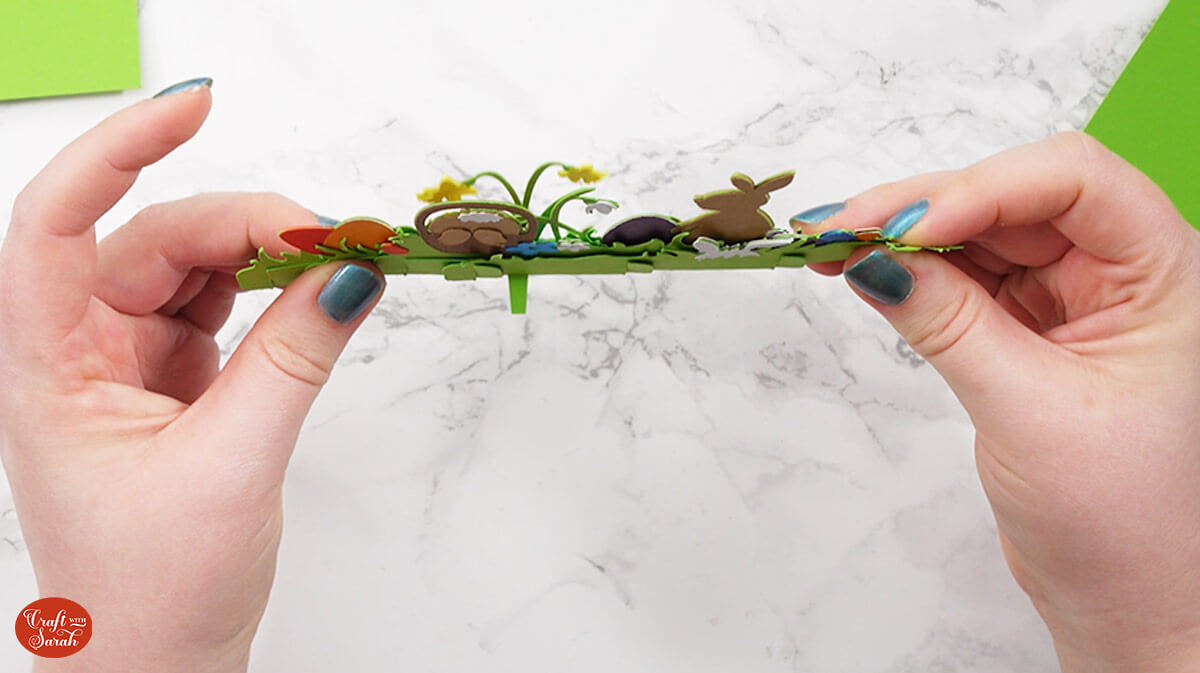
Step 9) Attach the pieces together
Take the green card and fold it down the middle. Place it on your work surface so that the cut out for the hidden message panel is on the right.
You will see the two cut outs which are where the tabs on the popout mechanism will go through.
Take the popout mechanism and position it so that the top cut out on the left side is where the tab on the piece with the white bunny will go through.
The other cut out which is lower down on the right side will be for the one at the back which is the daffodil piece.
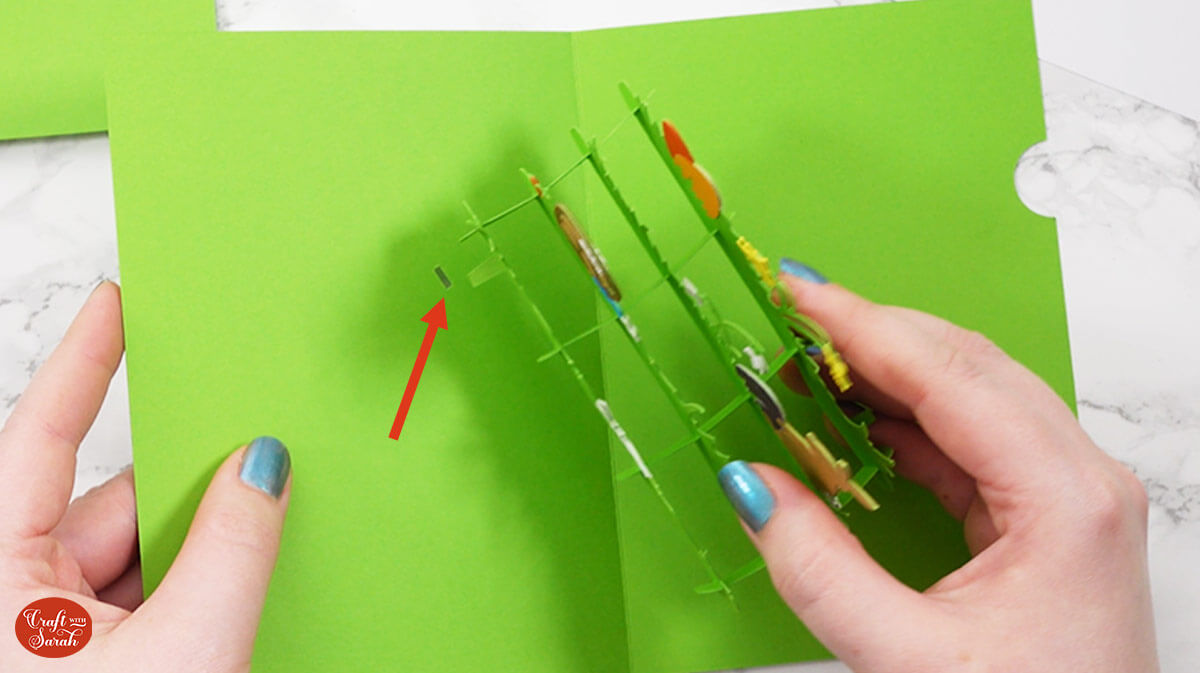
It is important to get these the right way around so that the popout mechanism works.
Carefully slide the front tab in the corresponding hole and secure it on the other side using tape. The tab should be pointing in a bottom-right direction.
Do the same for the other tab and secure it using sticky tape. Make sure this tab is pointing in a top-left direction (I stuck mine wrong in the video – whoops!)
Now your popout should be secure!
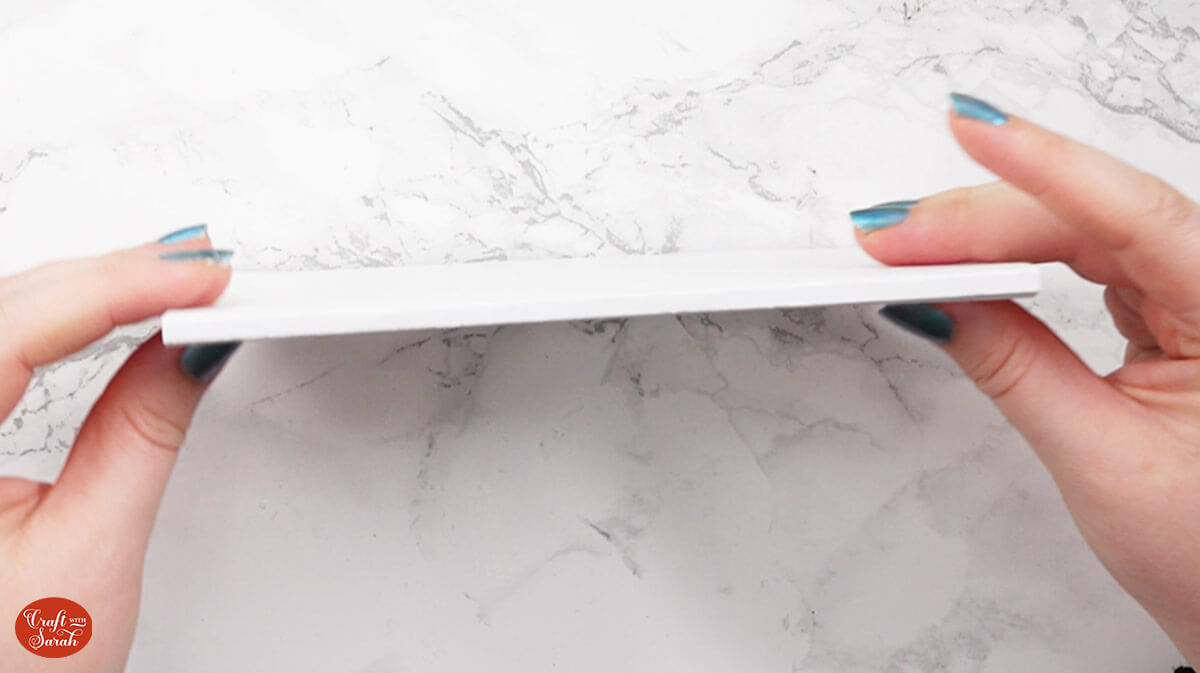
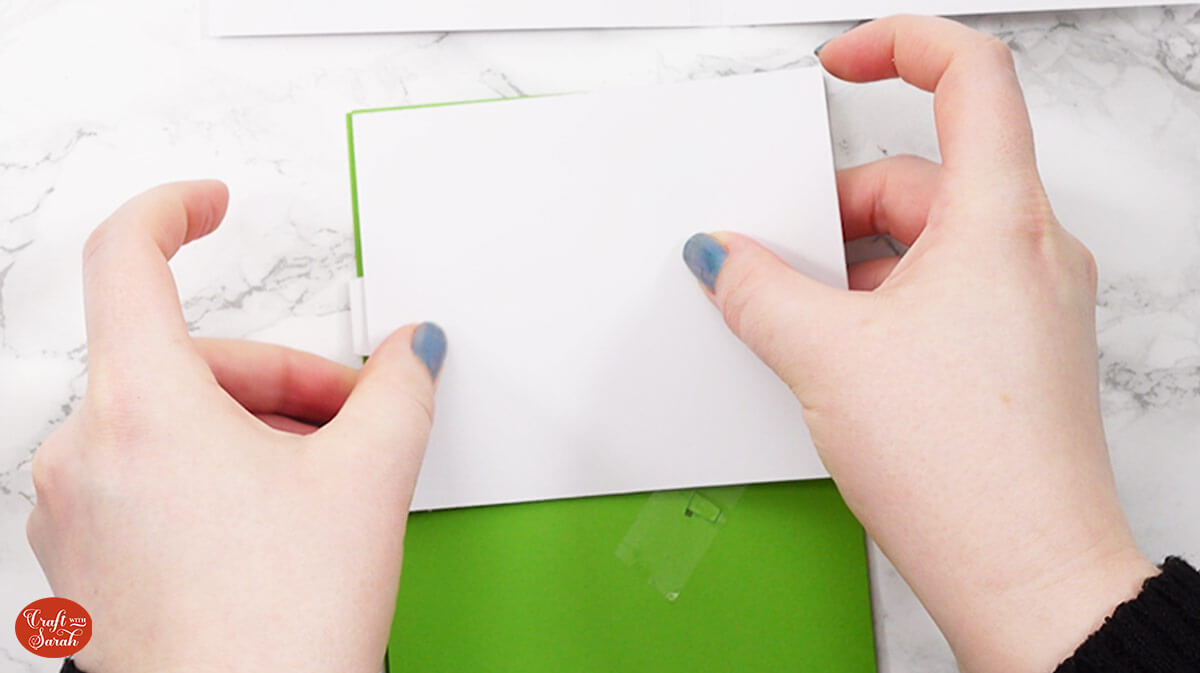
Take the white outer card piece which has three score lines in the middle. Fold the middle scoreline and then the other two so that it looks like this.
Next, select the message panel and place the pull out section inside. Glue around the edge piece but do not glue the message tab itself.
Stick it to the back of the green card section.
Allow it to dry and then check that the message panel pulls out.

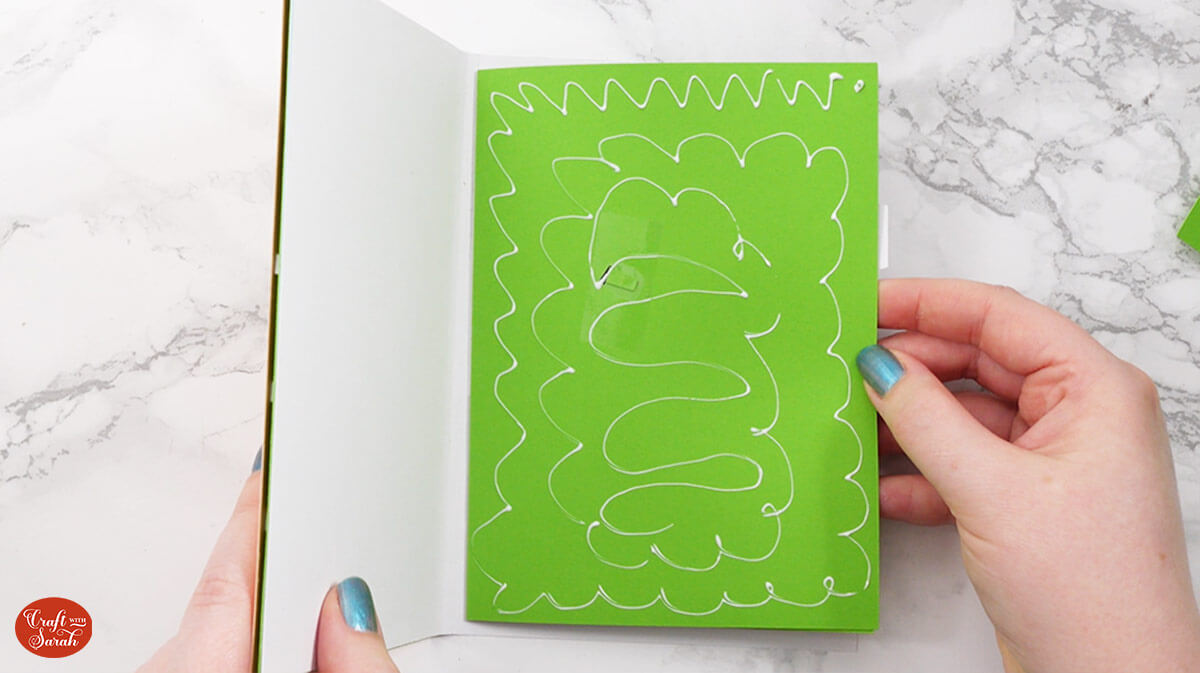
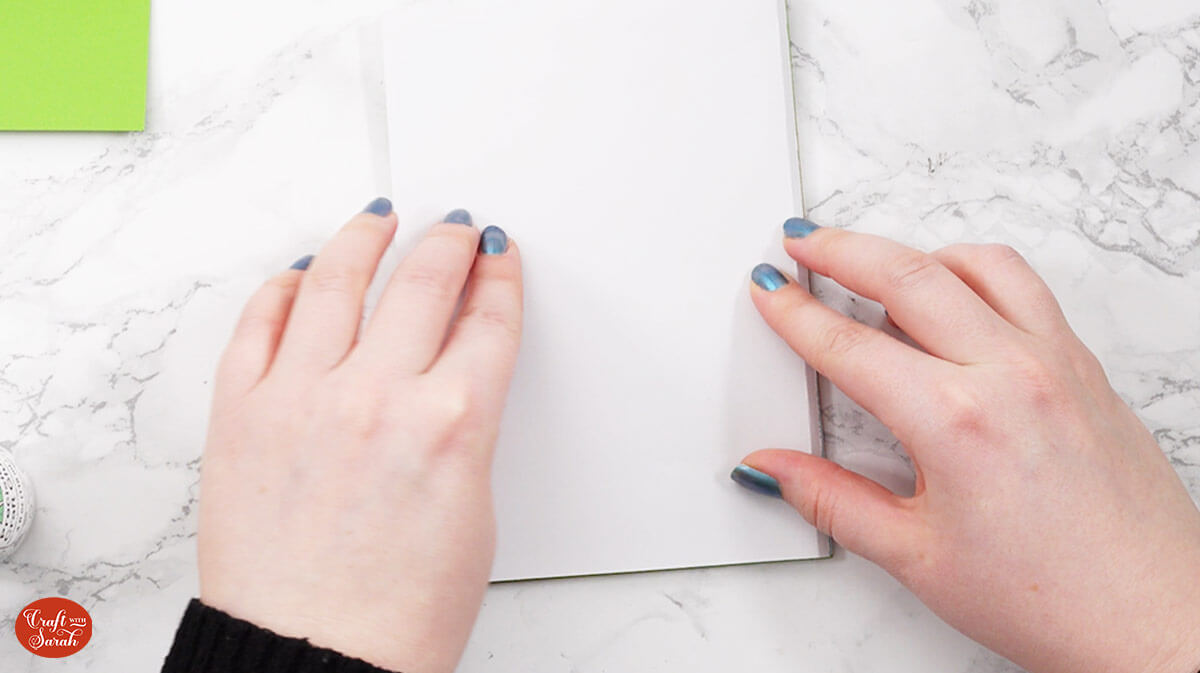
Add a generous amount of glue the back of the 5×7 inch card front (with the bunny in the egg) and stick it to the front of your card.
Add glue to the back of the green piece of card, but only on one side.
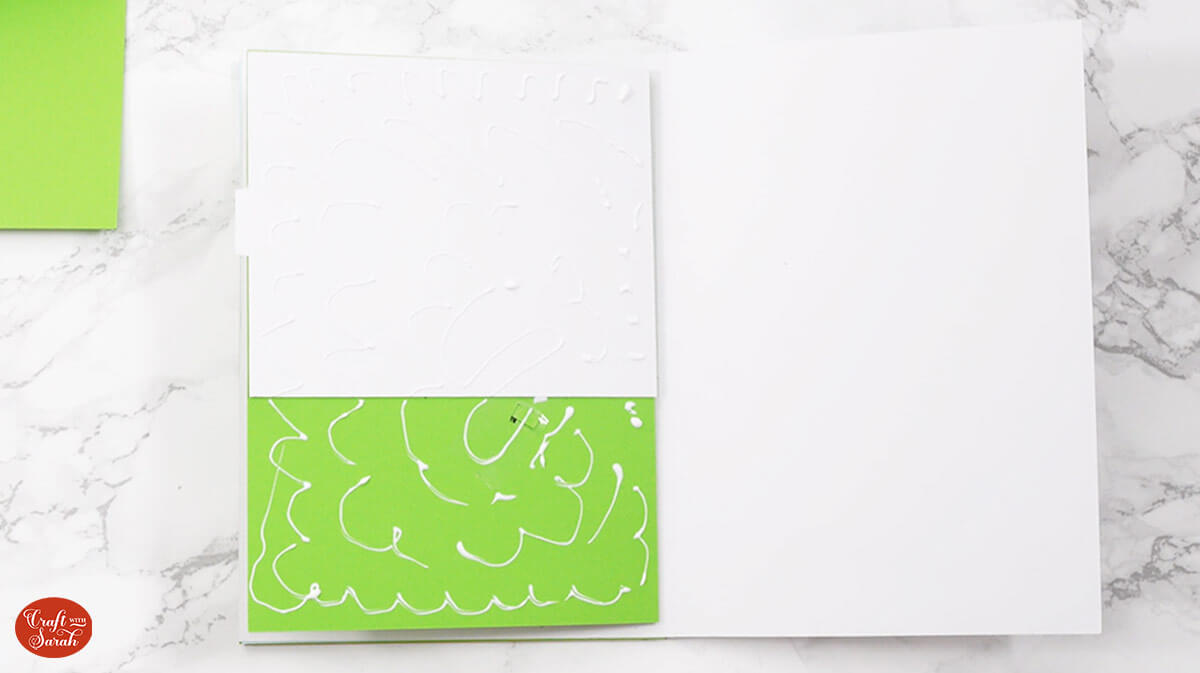
Place it inside the white card and line it up along the score lines.
Make sure it is central.
Close the card up and press it together so that the glue sticks.
Open the card up and add glue to the other side of the green card piece.
Close the card and press it all over to get the glue to stick.
You should have an even amount of white showing all the way around the edge.
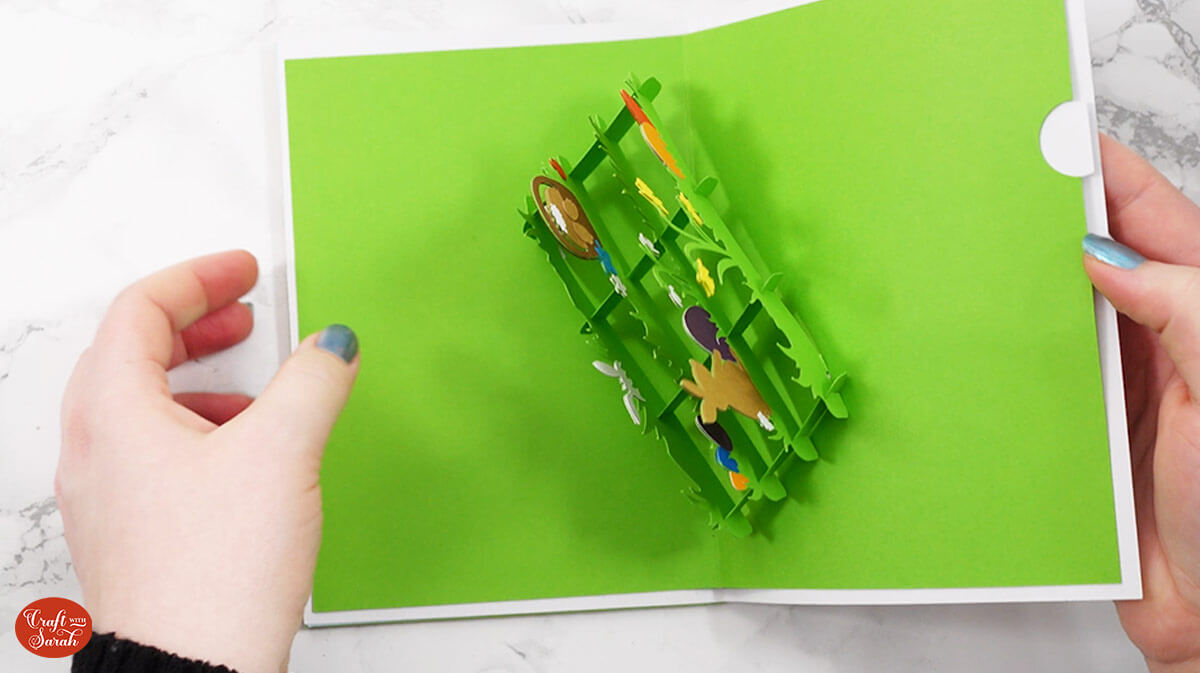
And there we have it! Your Easter popout card is finished!
Need an envelope? Here’s how to make a 5×7 inch envelope.
Got questions about Cricut popout cards?
I’m here to answer your frequently asked questions about how to make popout cards with a Cricut.
How do you make things pop out of cards?
I use a special grid design which opens up as you open the card. All the details are in the tutorial above. The grid is the same for all my Cricut popout cards and I personalise them with all sorts of themes and designs.
Can you make pop up cards with the Cricut Joy?
Yes, you can! You will just need to resize the design so that your machine will be able to cut it. Simply select the SVG, group it and make it smaller until it’s a size that the Joy can cut.
Or, you could cut the largest cardstock rectangles by hand or using a paper trimmer/guillotine rather than using the Cricut. Then, you can make the rest of the card at its original intended sizes, ending up with a 5×7 inch card.
What kind of paper do you use for pop up cards?
I use all different kinds of cardstock for my pop out cards, it doesn’t really matter as long as it’s strong enough to hold the pop out mechanism. I tend to find card around 180-240gsm cuts best (we measure in gsm in the UK, not lb).
“Solid core” card cuts better than “white core”. It means that the colour runs all the way through the card, whereas white core cardstock just has the colour on the top and bottom and the “middle” of the card is white, so it doesn’t look as good when you cut it as you see the white edges.
What materials do I need to make Cricut cards?
You will need: A Cricut machine, light blue Cricut mat, scoring wheel or stylus, coloured card, glue, foam squares and sticky tape. You can see how we will use all of these in the tutorial above.
Is it easy to make cards with a Cricut?
Yes! They are especially easy if you follow along with the tutorial or assembly guide. If you’d rather watch a video, you can find lots of card making tutorials on my Youtube channel.
Assembly guides are always included with my SVGs to help you put the project together. You can find lots of different card designs in my SVG shop.
Easy DIY popout card for Easter
I hope you enjoy making this popout card. It’s so clever and the front is beautiful too.
I love how spectacular this card is once it’s finished. It will be such a lovely surprise for whoever opens it up!
I’m working on some different themed popout cards at the moment which will be made free for Craft Clubhouse members on 1st April 2024. They will all go together in the same way as this Easter card, so once you’ve made one… you’ll know how to make them all!
Happy crafting,
Sarah x

