CMC 2025 Day 13: Castle Cards
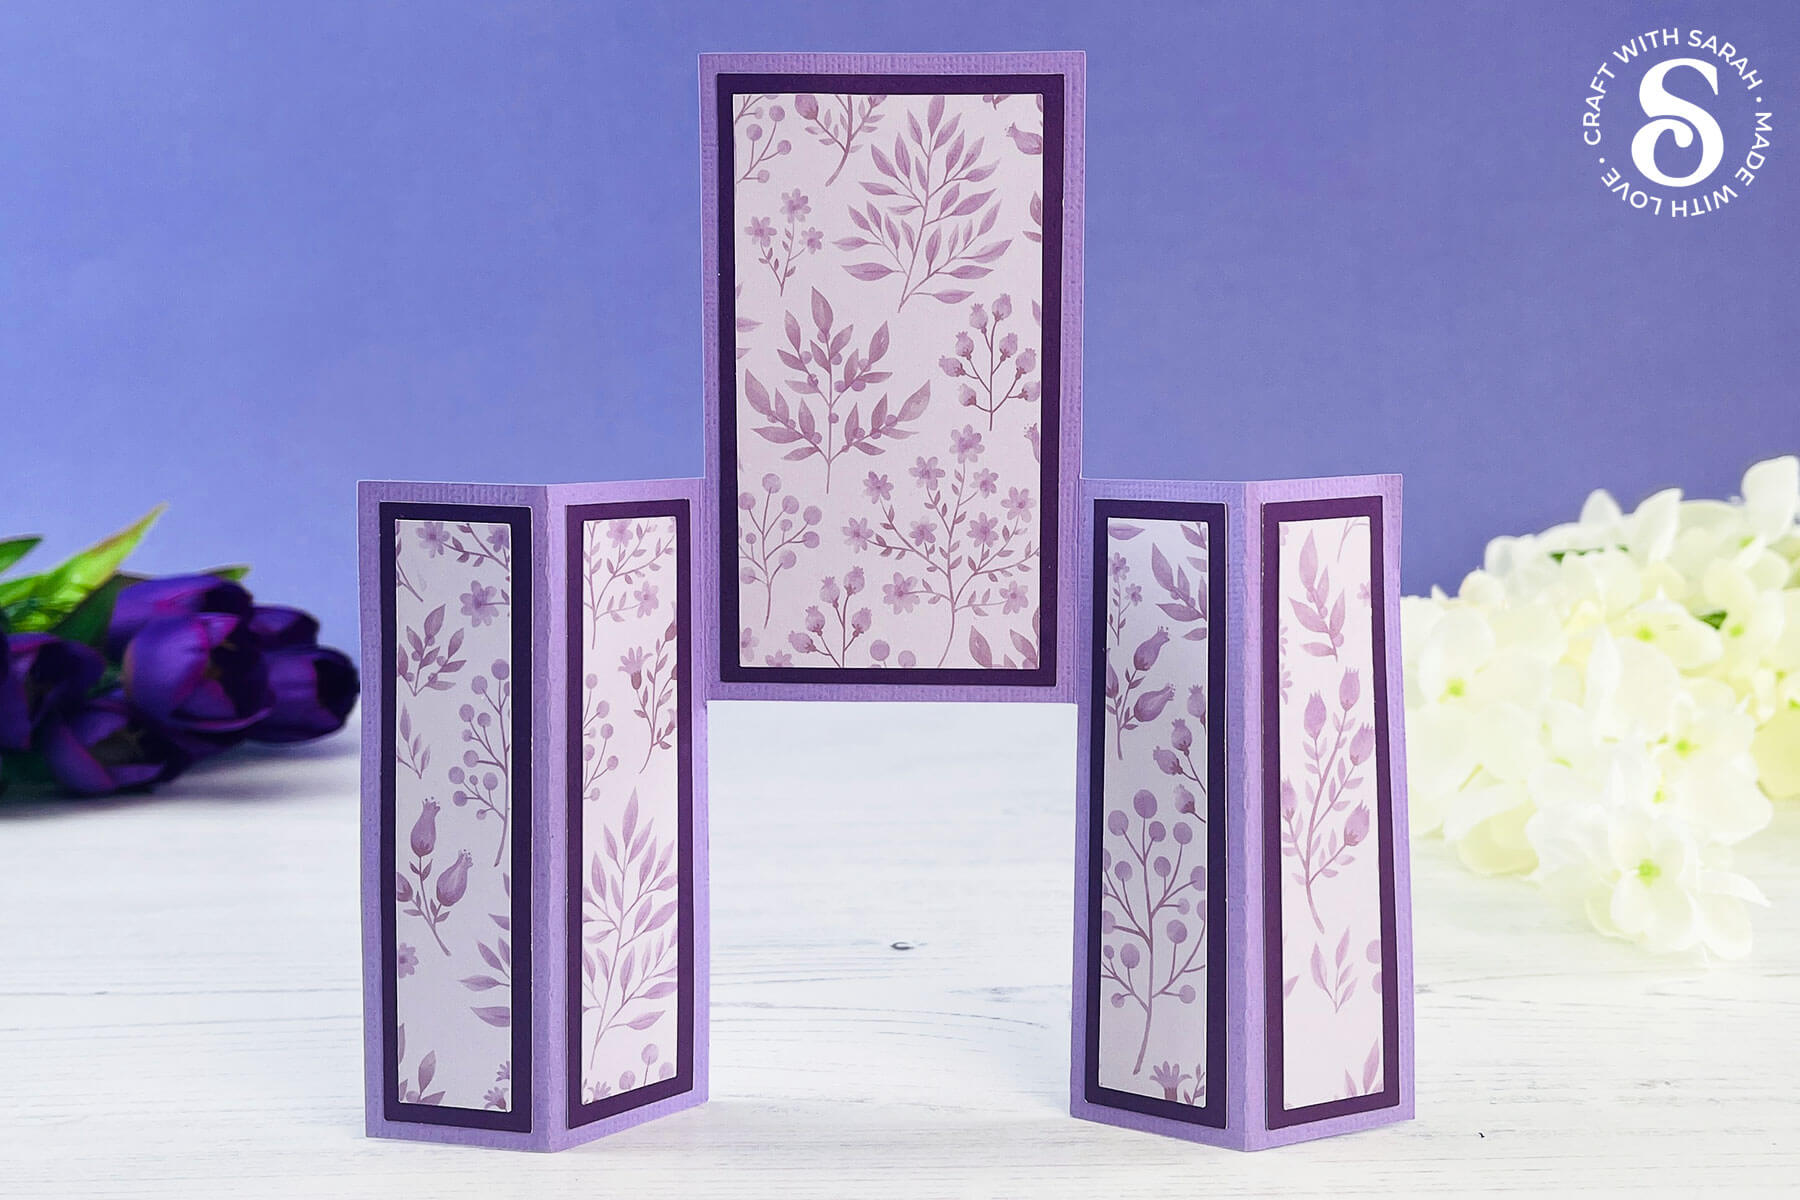
Welcome to day thirteen of the 2025 Card Making Countdown, where I’m sharing 14 card making projects in 14 days.
Today we are going waaaaay back, all the way to 2009 and the start of my digital design journey.
One of my first introductions to creating digital files for crafting was when I was accepted as a designer for a website called Craftsuprint.com back in around 2008 (ish – it was a long time ago 😅). This was years before I’d ever heard of a Cricut machine (did they even exist back then?).
I started creating card making printables that were designed to be printed onto photo paper or thin card and cut with scissors.
This inspired me to start playing around with cardstock to try and create “fun fold” cards that would be a bit different to a “standard” rectangular or square card.
And that’s how Castle Cards came about!
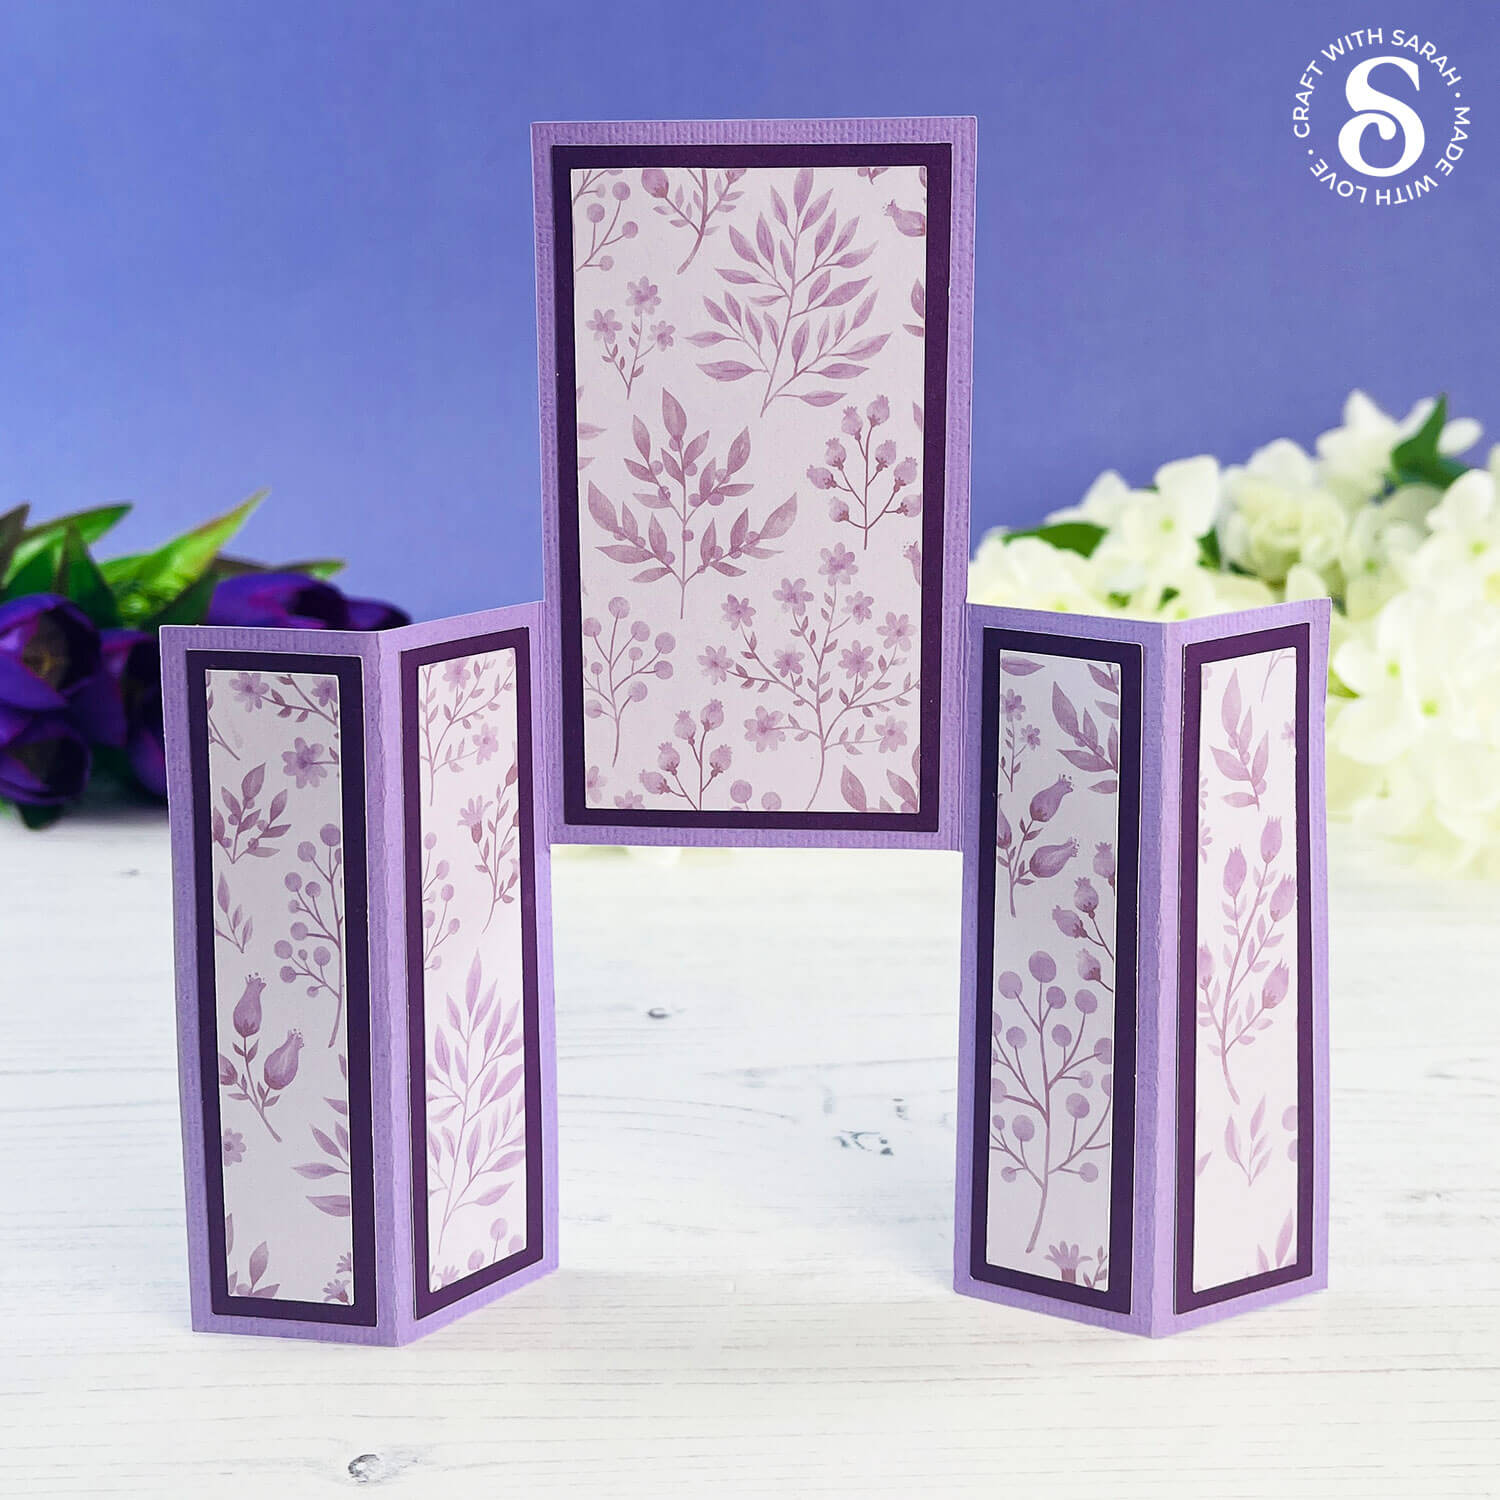
I chose the name because the shape of the cards when they are stood up reminded me of the gate going across the drawbridge of a castle to seal it off in times of siege.
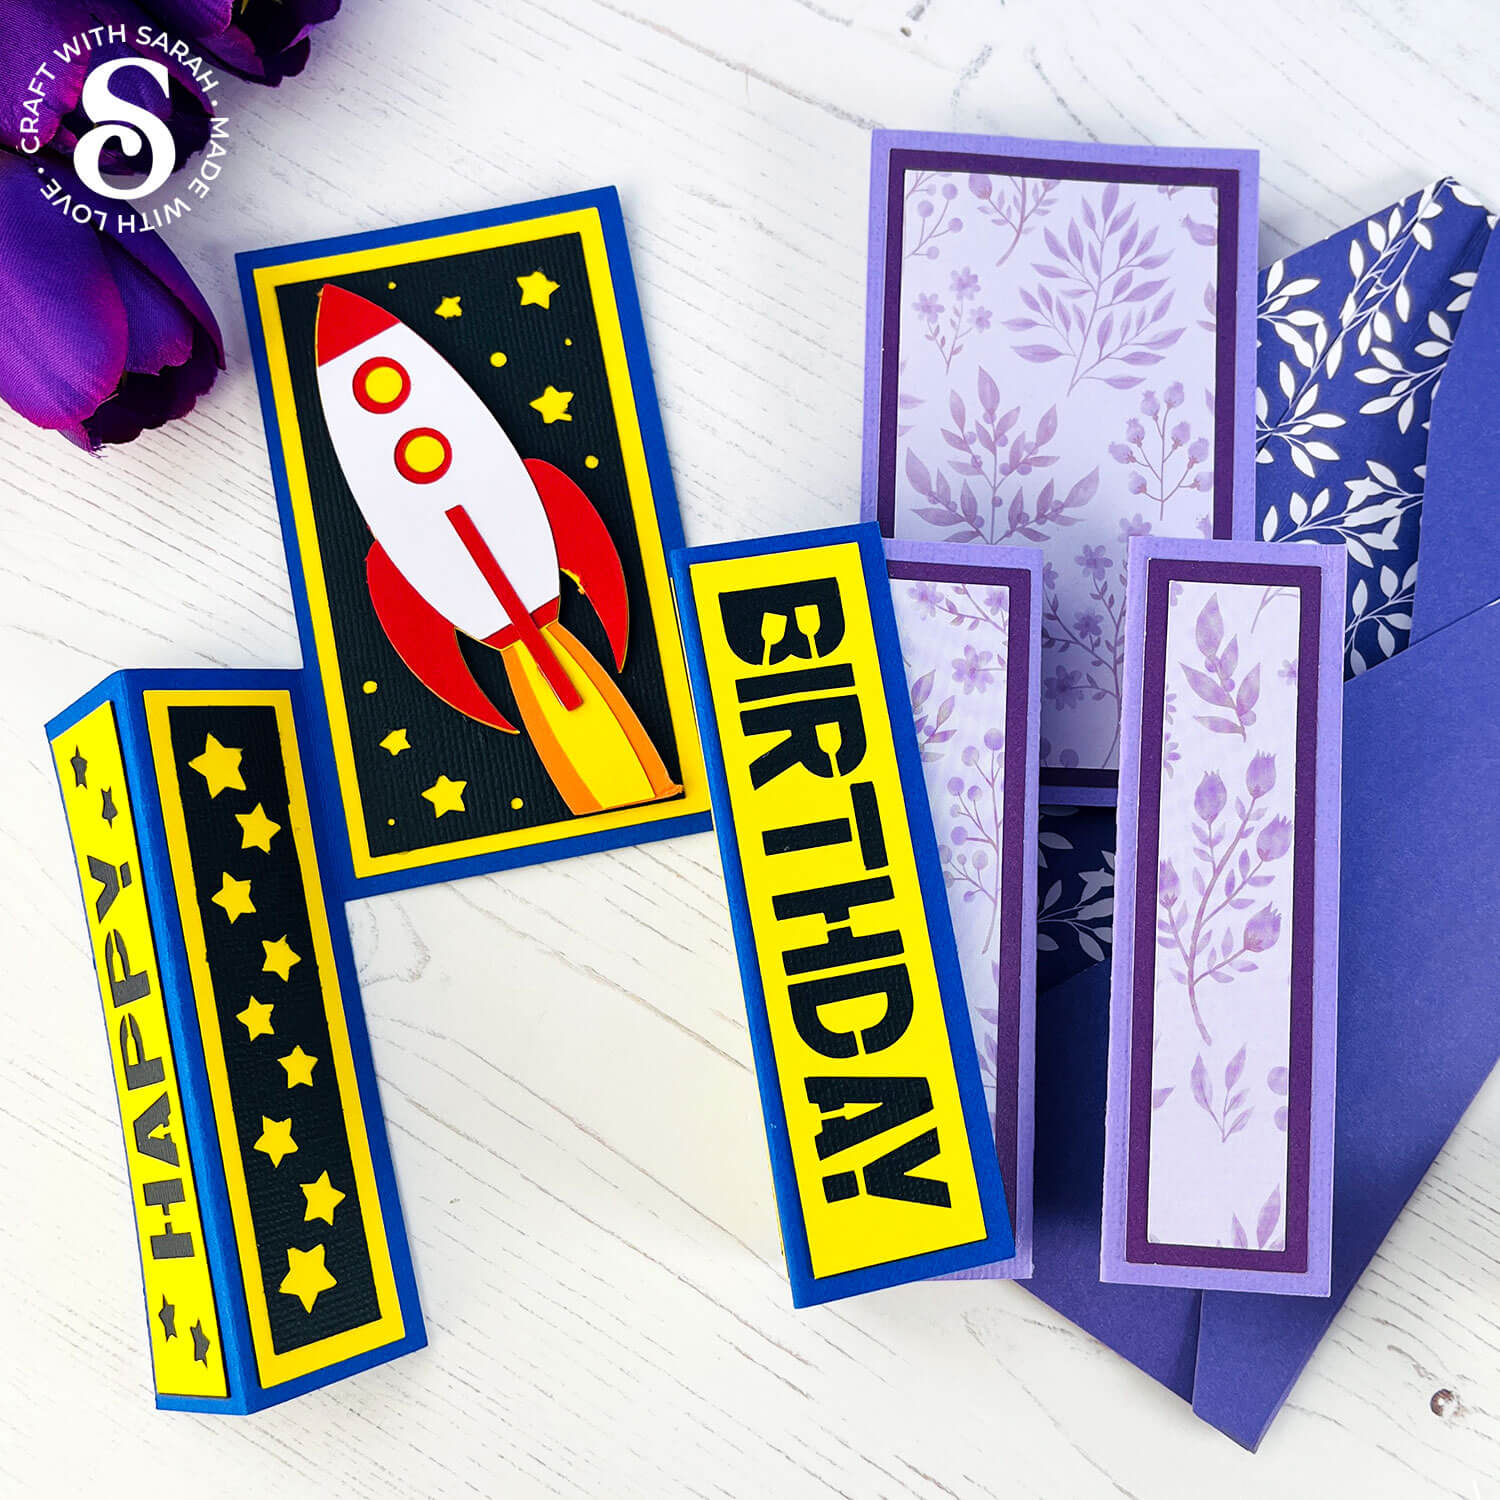
Castle Cards fold inwards to make a slimline card that’s ideal for sending “short but sweet” greetings to your loved ones.
To display them, simply open up the sides to make a freestanding card.
Castle cards are quick and simple to make and can be customized to suit any theme or occasion.
In this tutorial, I’ll first show how to make the castle card pattern into a finished card. Then, all the decorating is down to you!
I’ve included a custom envelope with the Castle Card download, as they fold in very small so would get a bit lost in a standard sized envelope!
To give an idea for how the Castle Cards could be decorated, I’ve also included a pre-designed version which is a space and rocket ship theme.
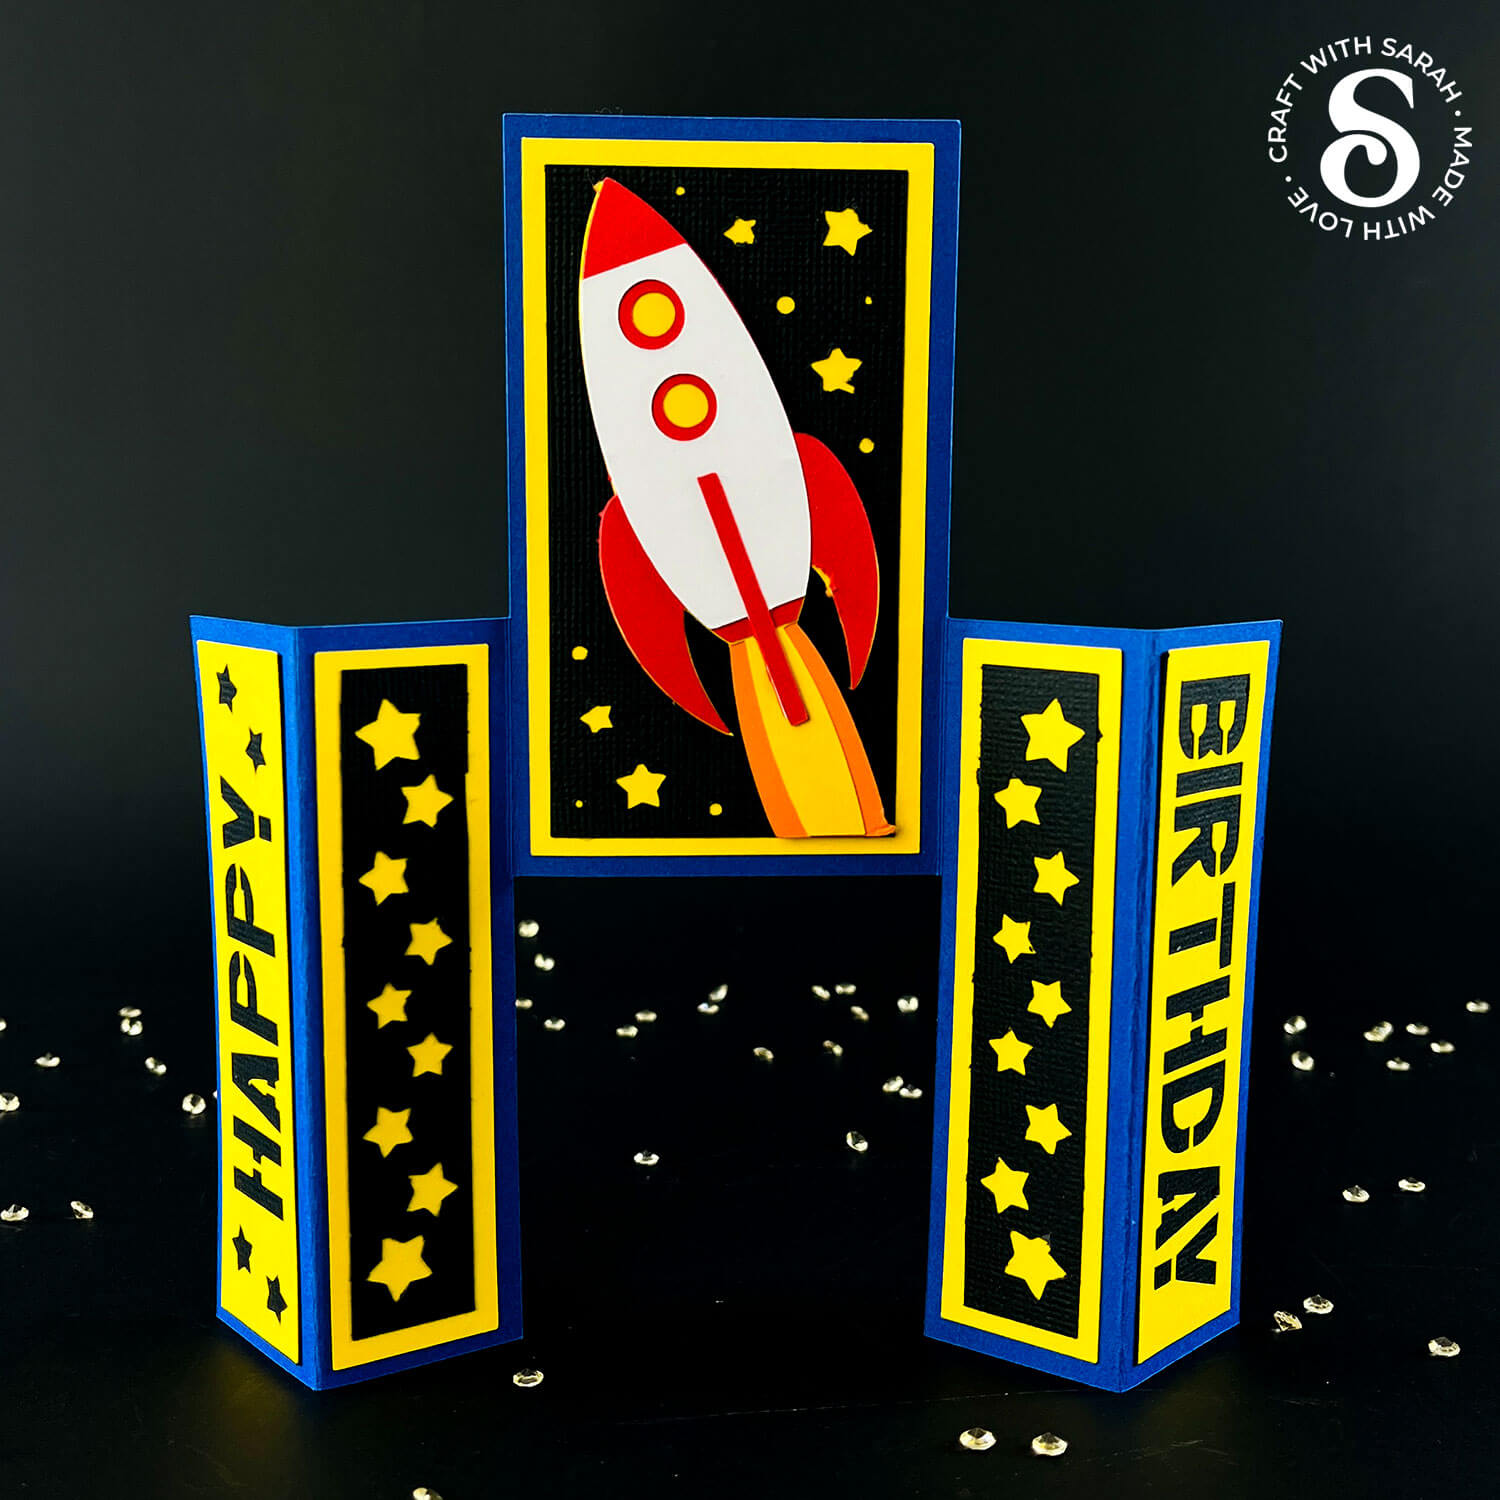
The cut files are suitable for a range of cutting machines, such as Cricut, Silhouette and ScanNCut. The file types that are included are: SVG, EPS, DXF and PNG.
Hand-cutting (printable) versions of the templates are also included.
This project is part of the 2025 Card Making Countdown.
Materials supply list
Here is a list of the materials that you’ll need for this Castle Card tutorial.
Please note that some of the links included in this article are affiliate links, which means that if you click through and make a purchase I may receive a commission (at no additional cost to you). You can read my full disclosure at the bottom of the page.
- Cricut machine
- Light blue Cricut cutting mat
- Coloured Card
- Patterned paper and/or embellishments
- Glue (I like Bearly Art Glue and Collall) or double-sided tape
- Cricut scoring wheel or scoring stylus
- Foam squares (optional)
This project is suitable for the following types of Cricut machines: all Explore models, all Maker models, Venture and Joy Xtra. It can be cut on the original Joy (blue machines) if you resize the template smaller.
Foundation learning
If you're new to crafting with your Cricut, you may find the below links helpful.
They teach some of the skills mentioned throughout the Countdown projects.
- How to upload SVG files into Design Space
- How to make 3D layered Cricut projects
- The BEST way to frame papercraft projects
- How to mount multiple designs in the same frame with magic guides
- How to score with a Cricut (even without scoring tools)
- Print then cut tutorial
- Design Space tools (Combine, Attach, Slice, Weld, Flatten, etc.)
- Pattern fill tutorial (for making backgrounds & cutting images to a specific shape/size)
- Free envelope SVGs that can be sized to fit any card
- Presentation boxes for handmade cards
- How to write inside cards with Cricut pens
- How to cut layered designs at a small size
- Design Space tips & tricks
- Cricut pens tutorial
Video tutorial
Watch the video below to see how to make this project. Keep scrolling for a written tutorial.
Written tutorial (with photos!)
Here’s how to turn the Castle Card template into a finished greetings card.
Step 1) Download the cutting files & upload to Design Space
Download the files using the box below.
Purchase the File(s)
This cut file is available as part of the Instant Access Bundle.
Or, purchase the designs individually:
Before you upload the SVGs to Design Space, you need to unzip the download folder that they come in.
- How to unzip a folder on Windows computer
- How to unzip a folder on a Mac
- How to unzip a folder on an iPad/iPhone
- How to unzip a folder on an Android device
After unzipping, upload the SVG file(s) into your cutting machine software.
Not sure how to use cut files with your type of machine? The following links lead to videos on how to open cut files in:
- Cricut Design Space
- Silhouette Studio
- CanvasWorkspace (for ScanNCut machines)
The download folder also contains printable PDF versions of the templates for hand cutting.
If you are using Cricut Design Space, start a new project and then click the “Upload” button on the left of the screen.
You can then either click “Browse” to find the file on your computer, or drag-and-drop it.
Find the unzipped download folder, then choose either the “Blank Template” or “Space Card” design.
The steps to make both versions are the same.
You will also see a folder for the envelope (it’s missing from the image below as I hadn’t created the envelope yet at the time of filming).
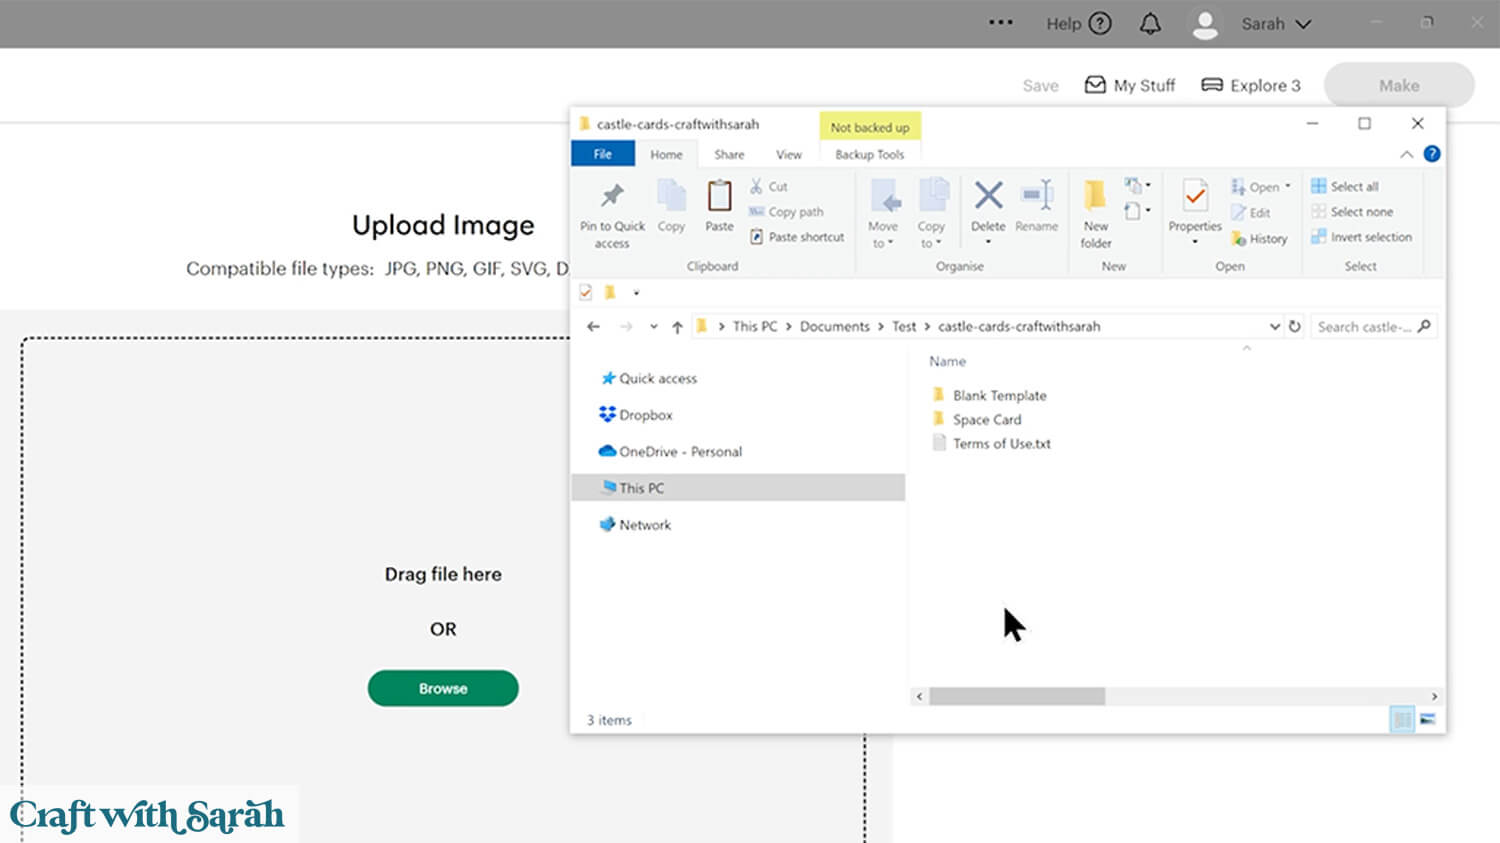
If you are using a Cricut machine, use the file in the “01 Cricut Version” subfolder.
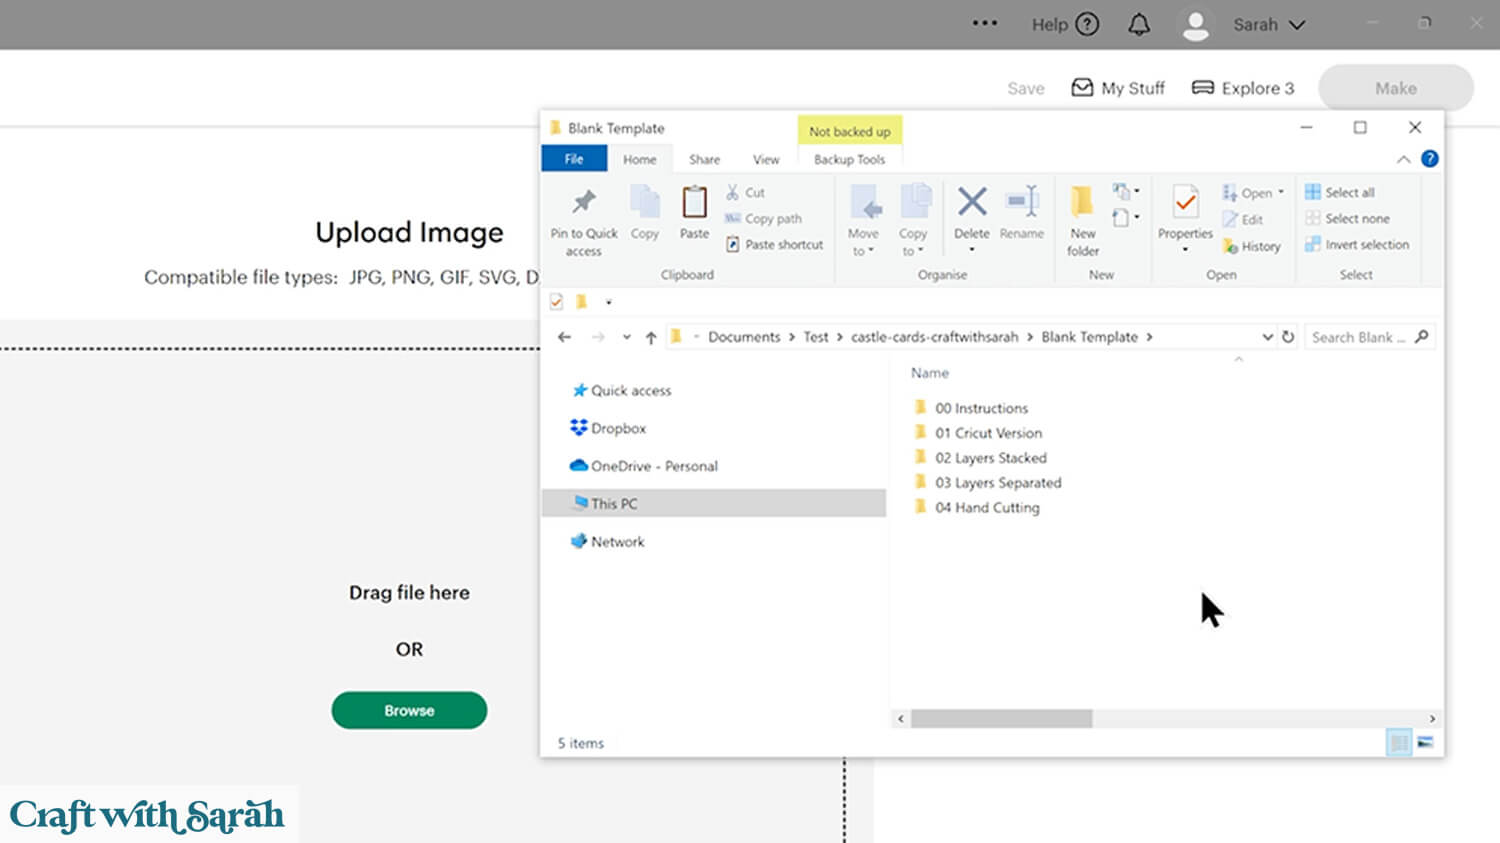
Select the file then click “Continue”.
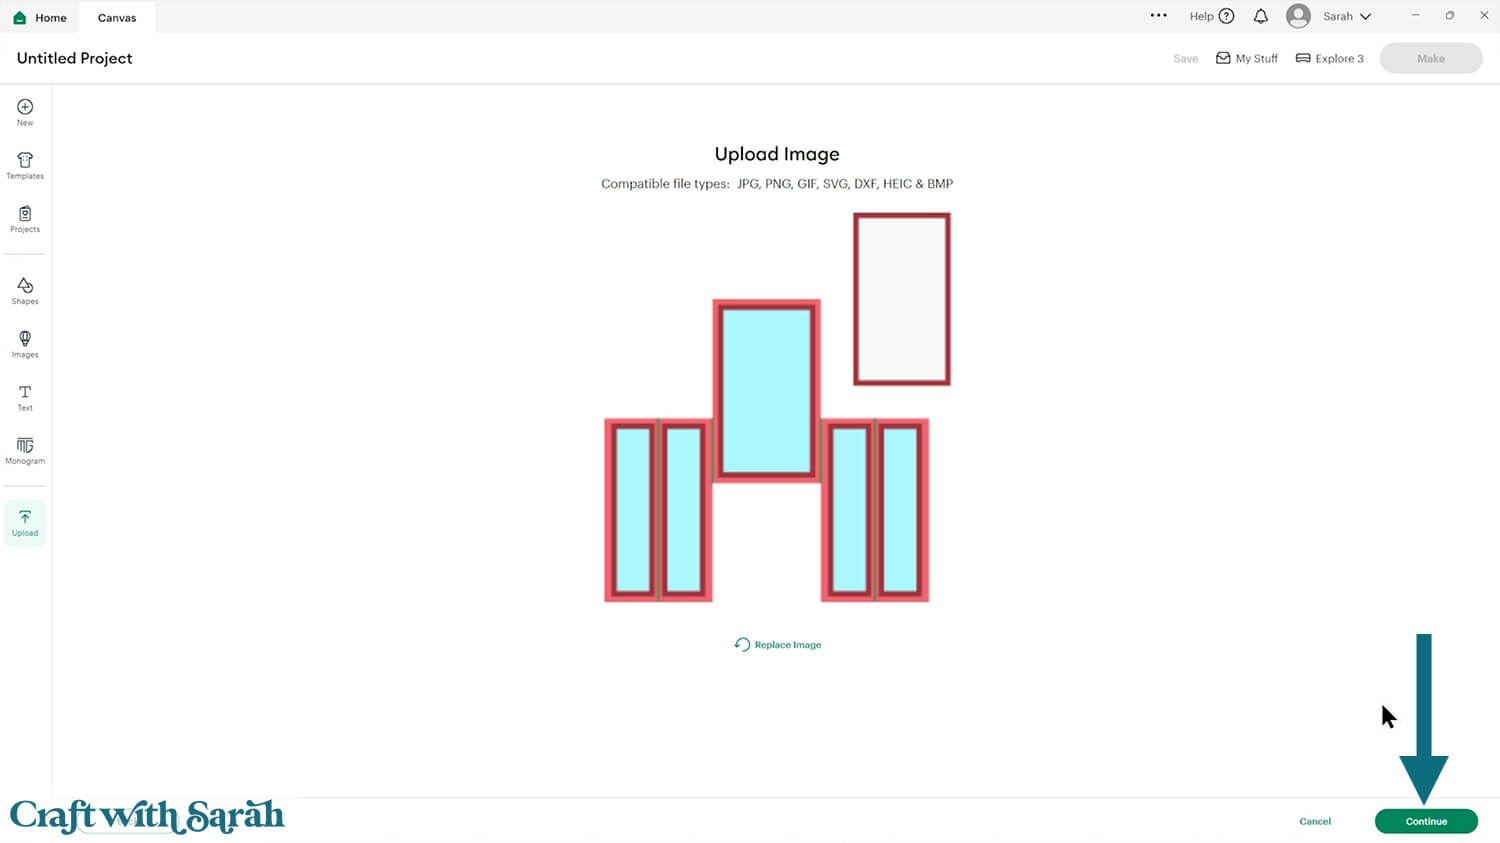
There’s no need to change anything on the next page – just click “Continue”.
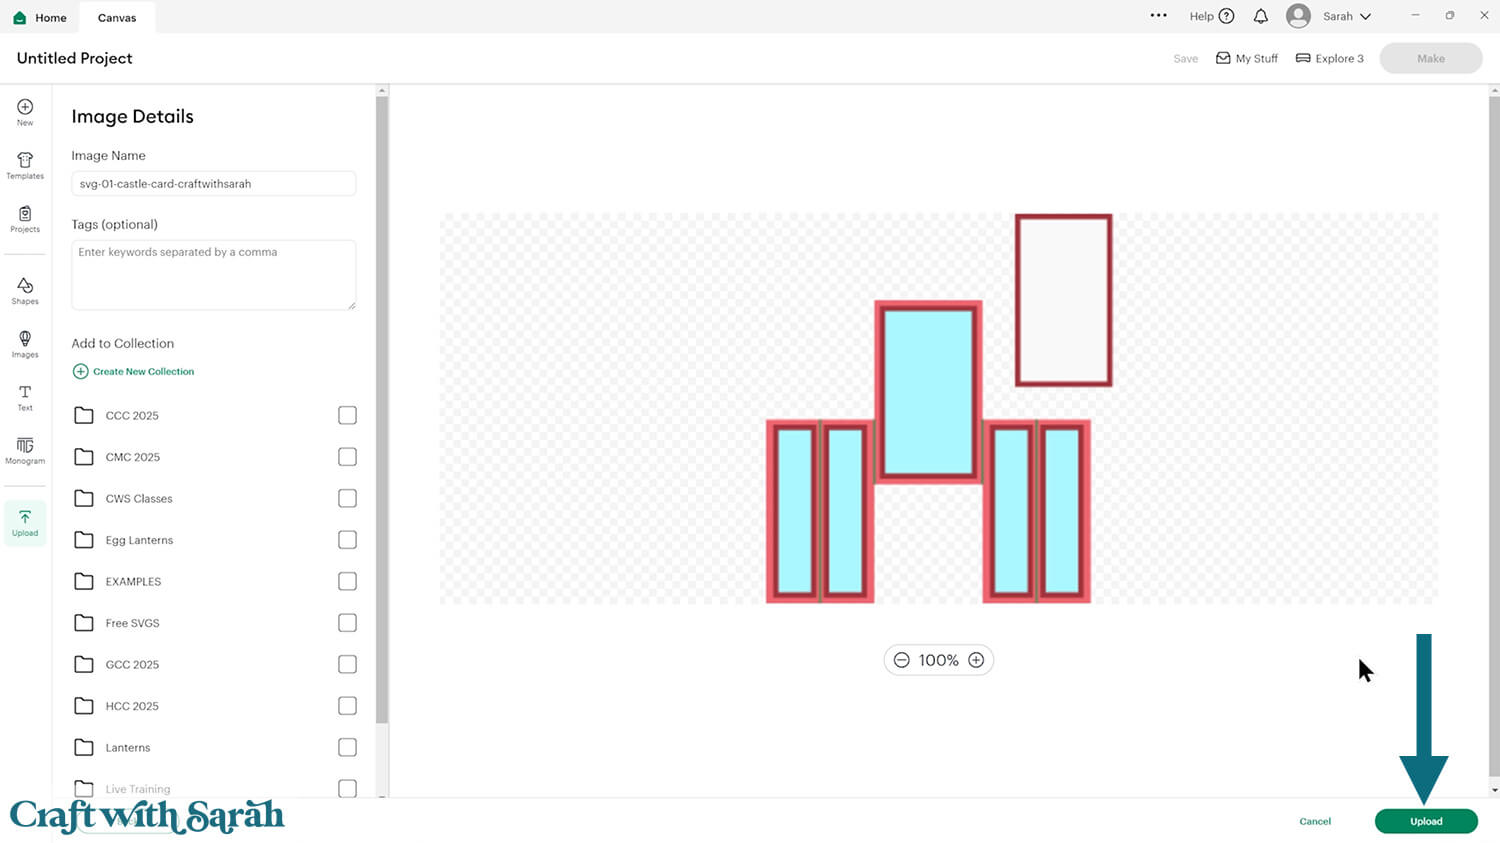
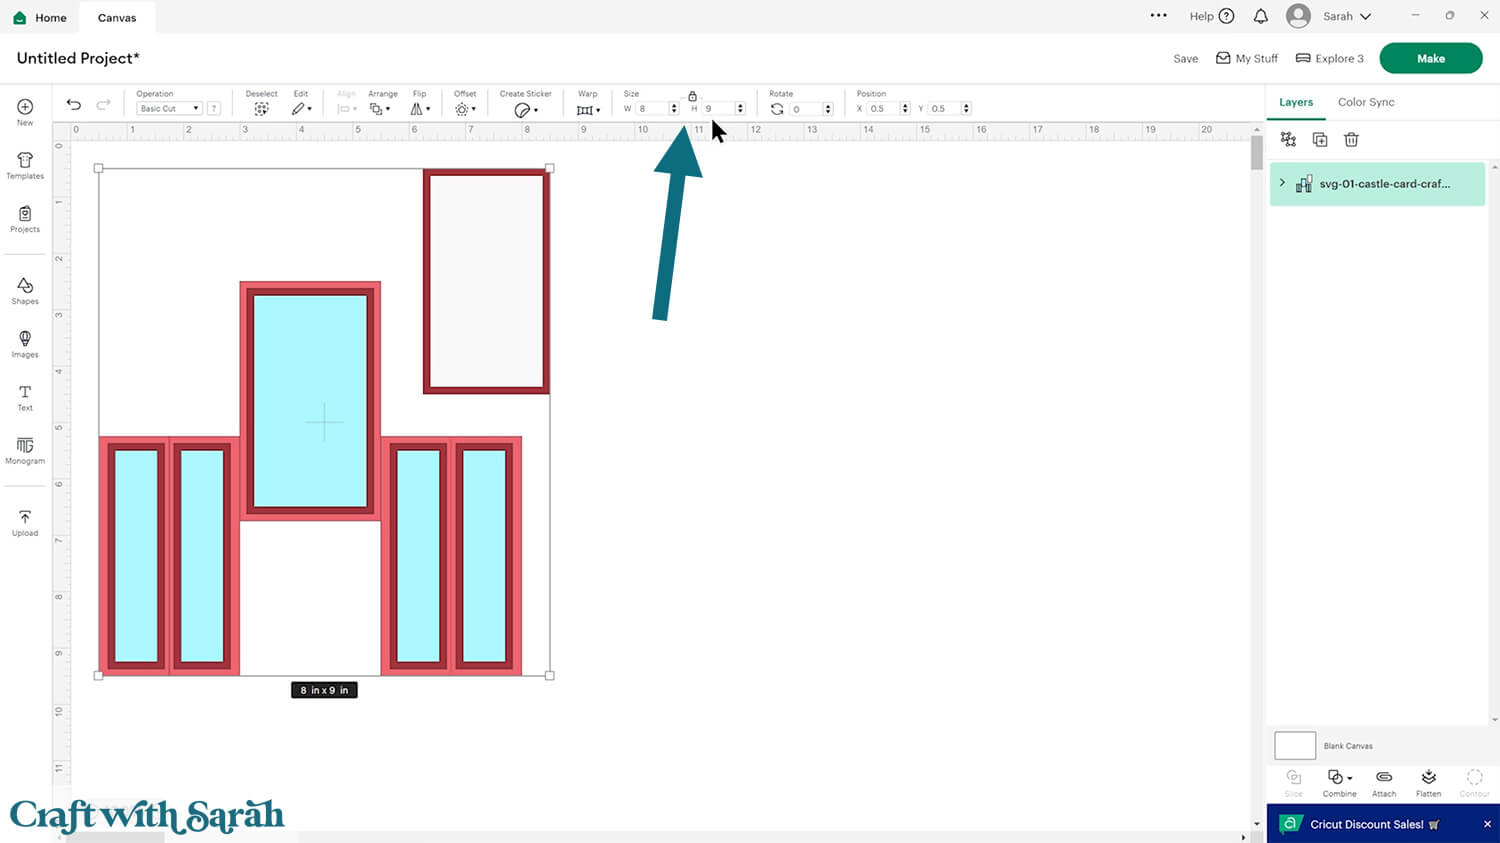
The Castle Card template will then be added to your Canvas.
Check the size in the width and height boxes along the top of the screen. It should load in at 8 inches wide and 9 inches tall.
If yours comes in differently, resize it to 8 x 9.
Step 2) Format the score lines
This card making project requires a scoring wheel or stylus for your machine.
Don’t have a scoring tool? Check out these Cricut scoring hacks for alternatives.
Click the card and Ungroup the layers to separate them.
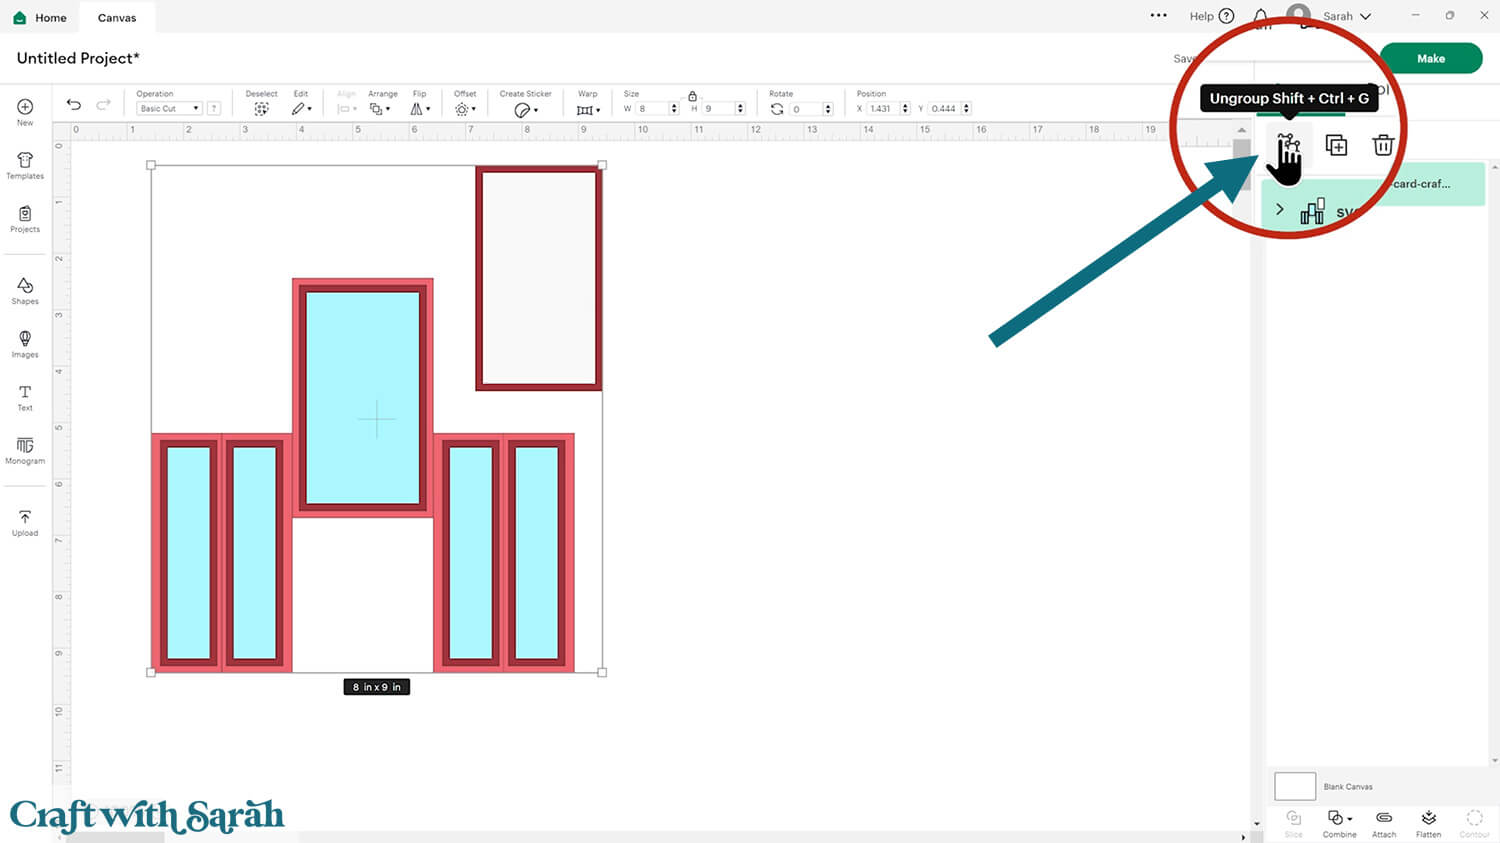
Scroll down to the bottom of the layers panel. You’ll see the base card with a little chevron arrow next to it.
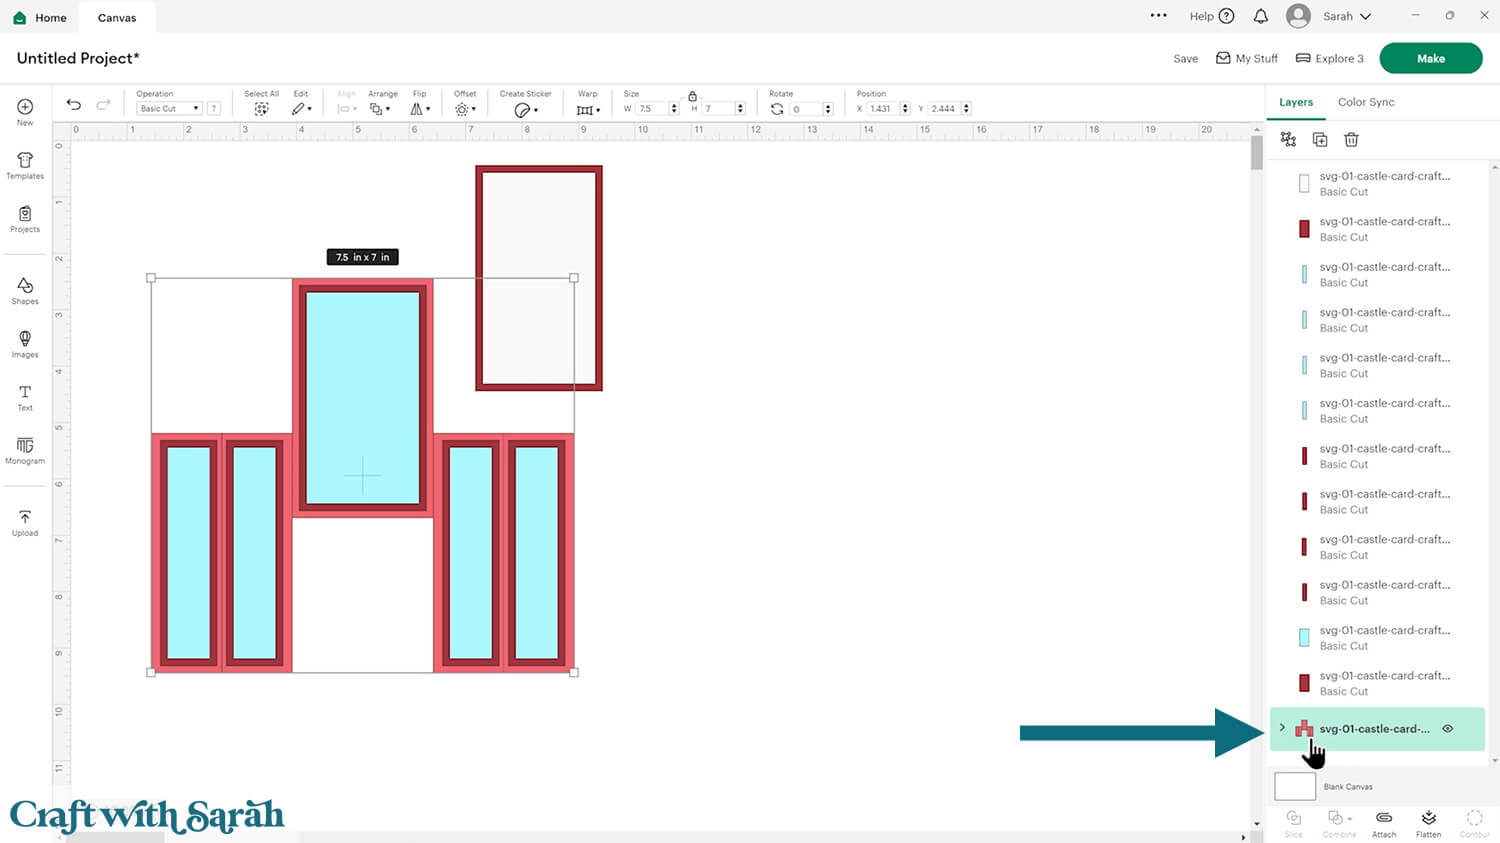
Click the arrow to open up the layers.
Click the layer that looks like several vertical lines.
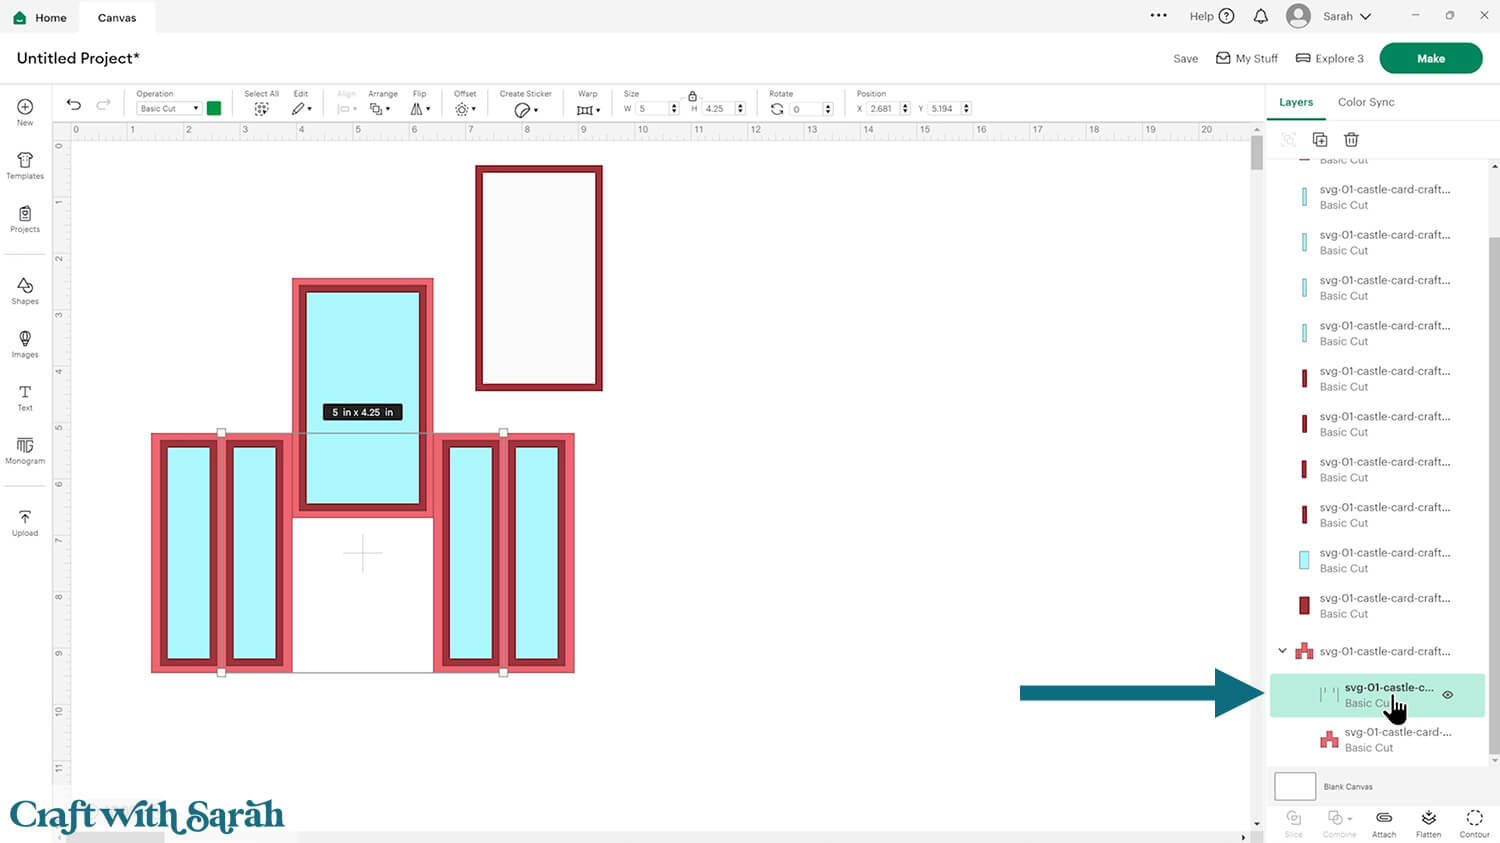
Change this layer to “Score” in the Operations dropdown menu along the top of the screen.
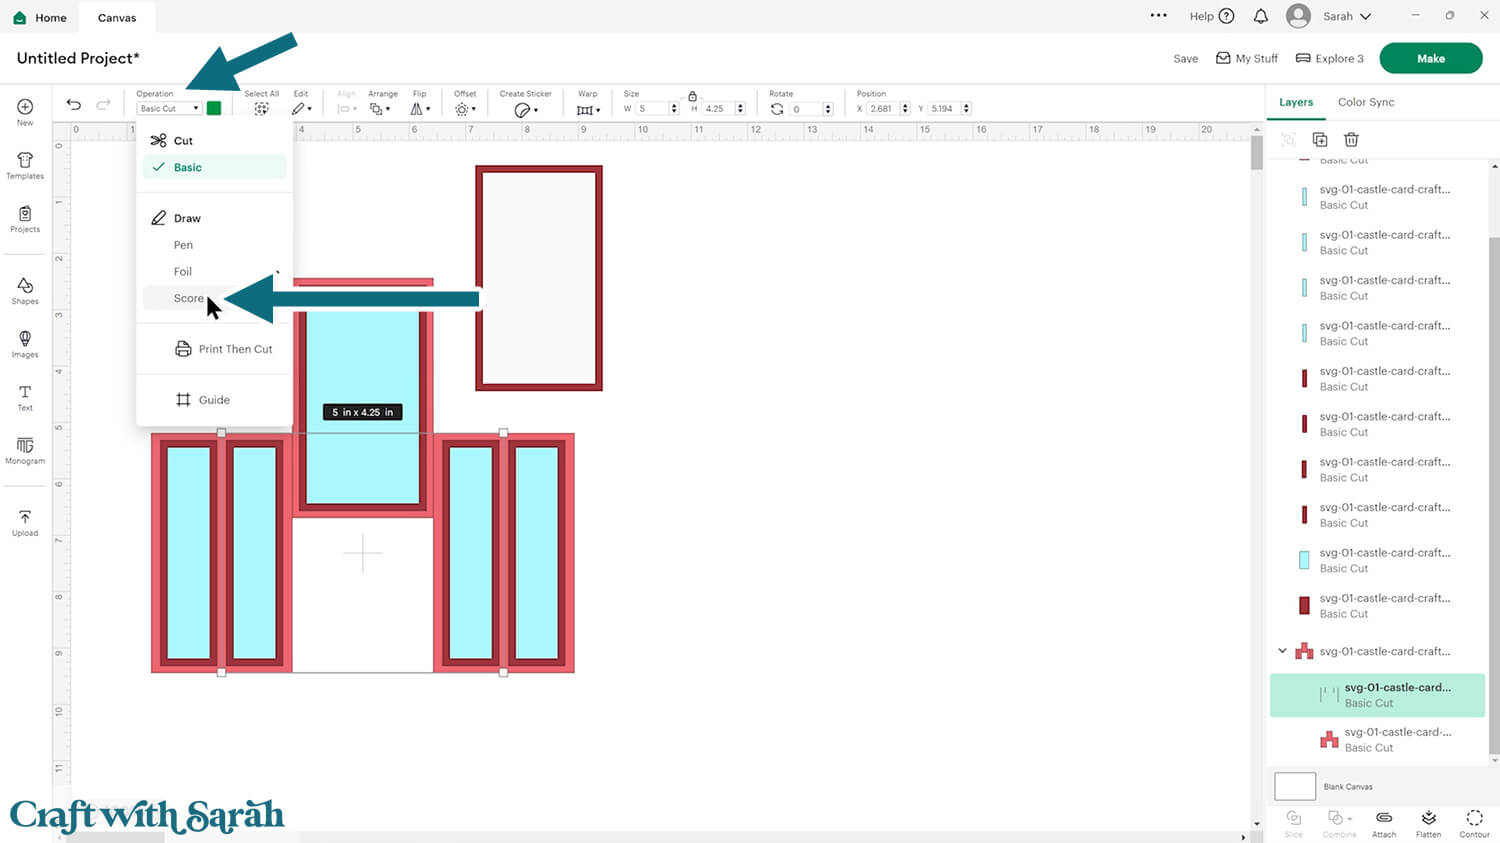
Select the score line layer and the base card, then press “Attach” at the bottom of the layers panel.
Attach is what tells the Cricut where to do the scoring.
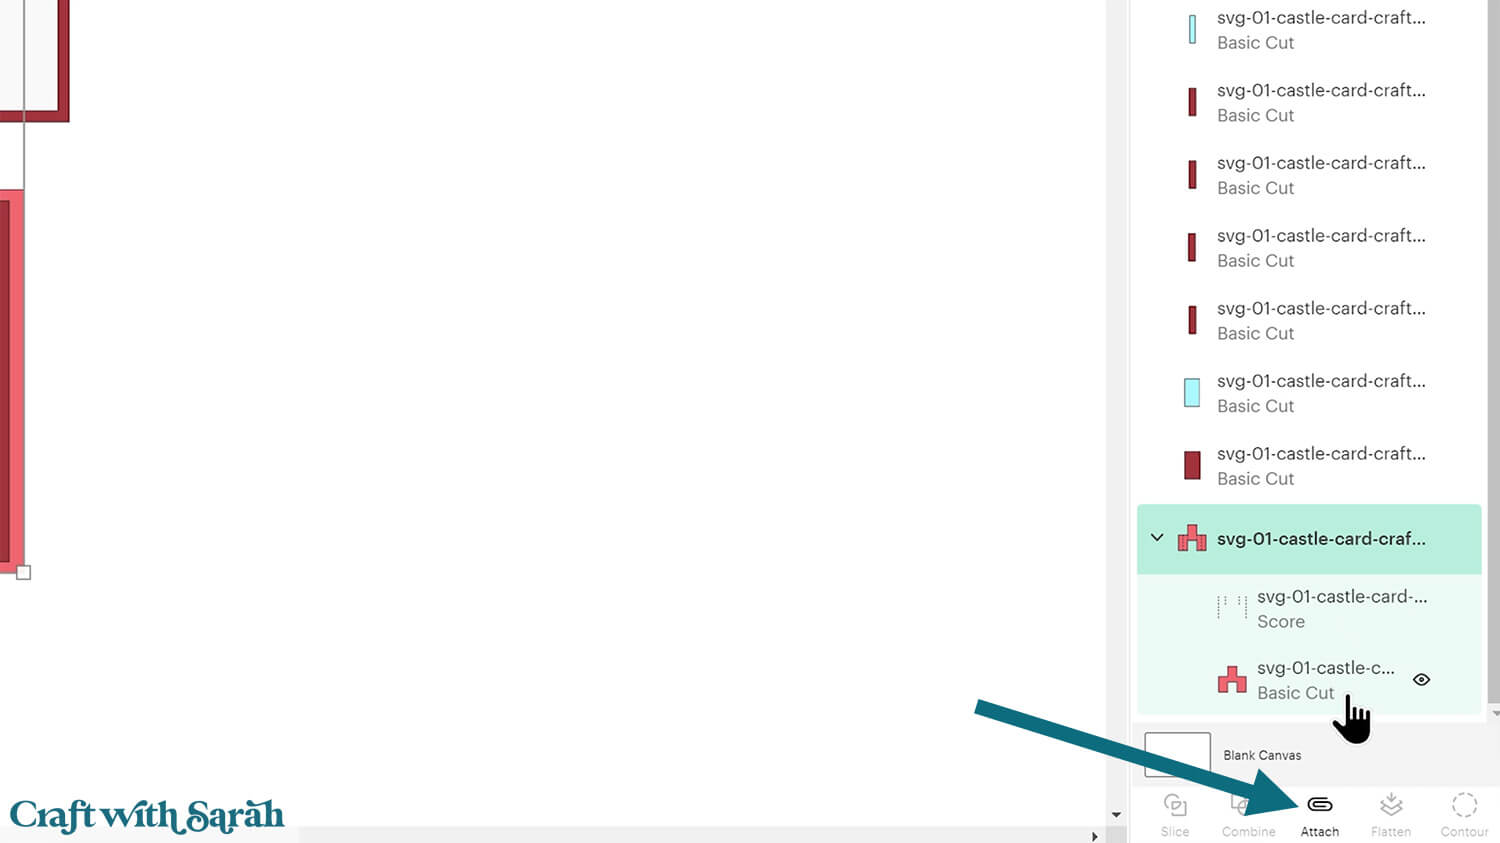
After Attaching, the base card will move to the top of the layers panel.
It should now have a paperclip icon next to it, and the word “Attach”.
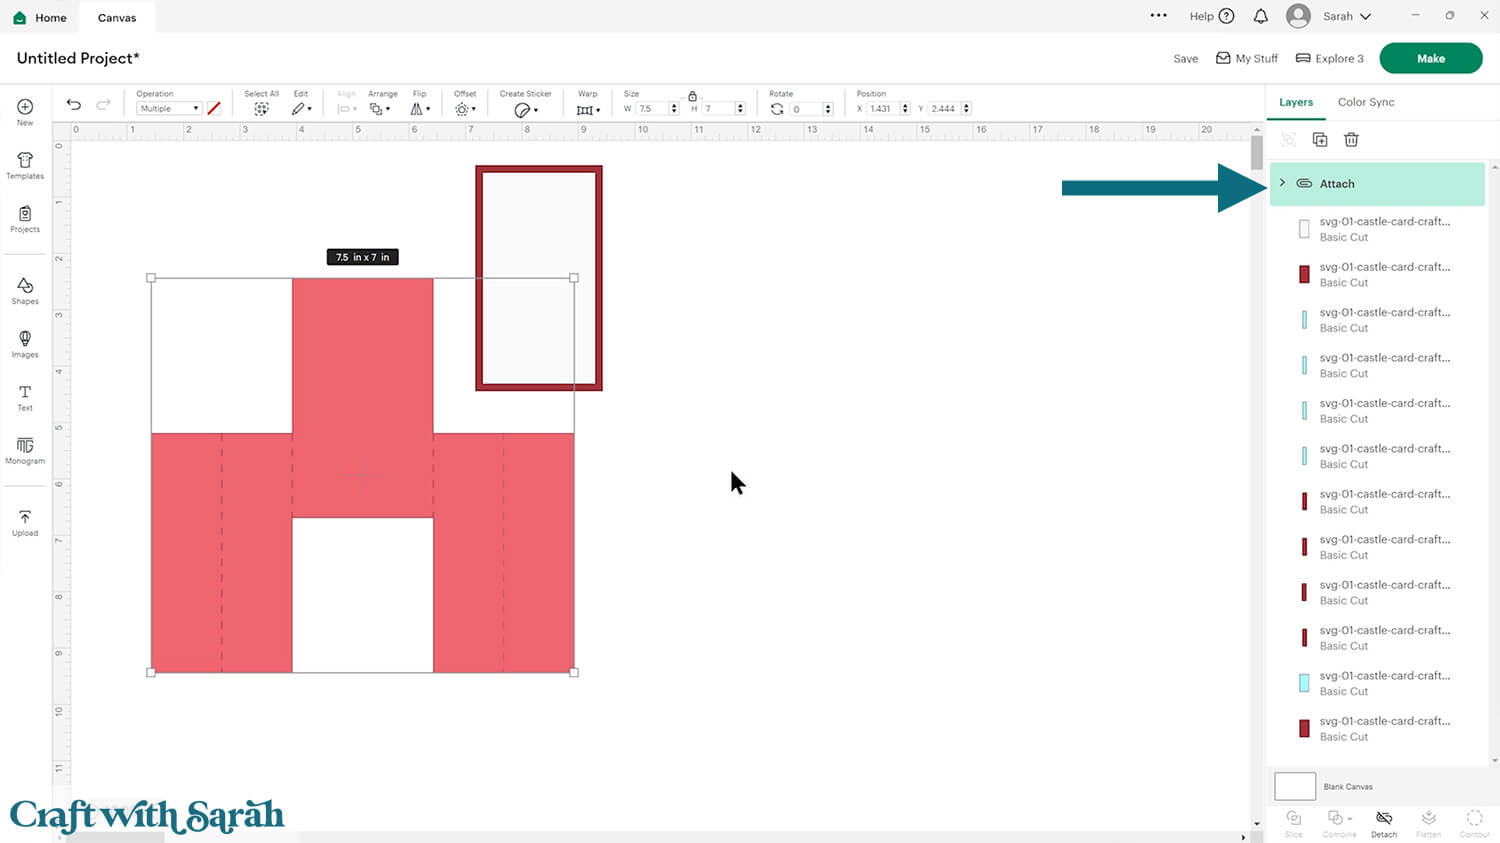
Move it back down to the bottom of the layers panel by clicking Arrange > Send to Back.
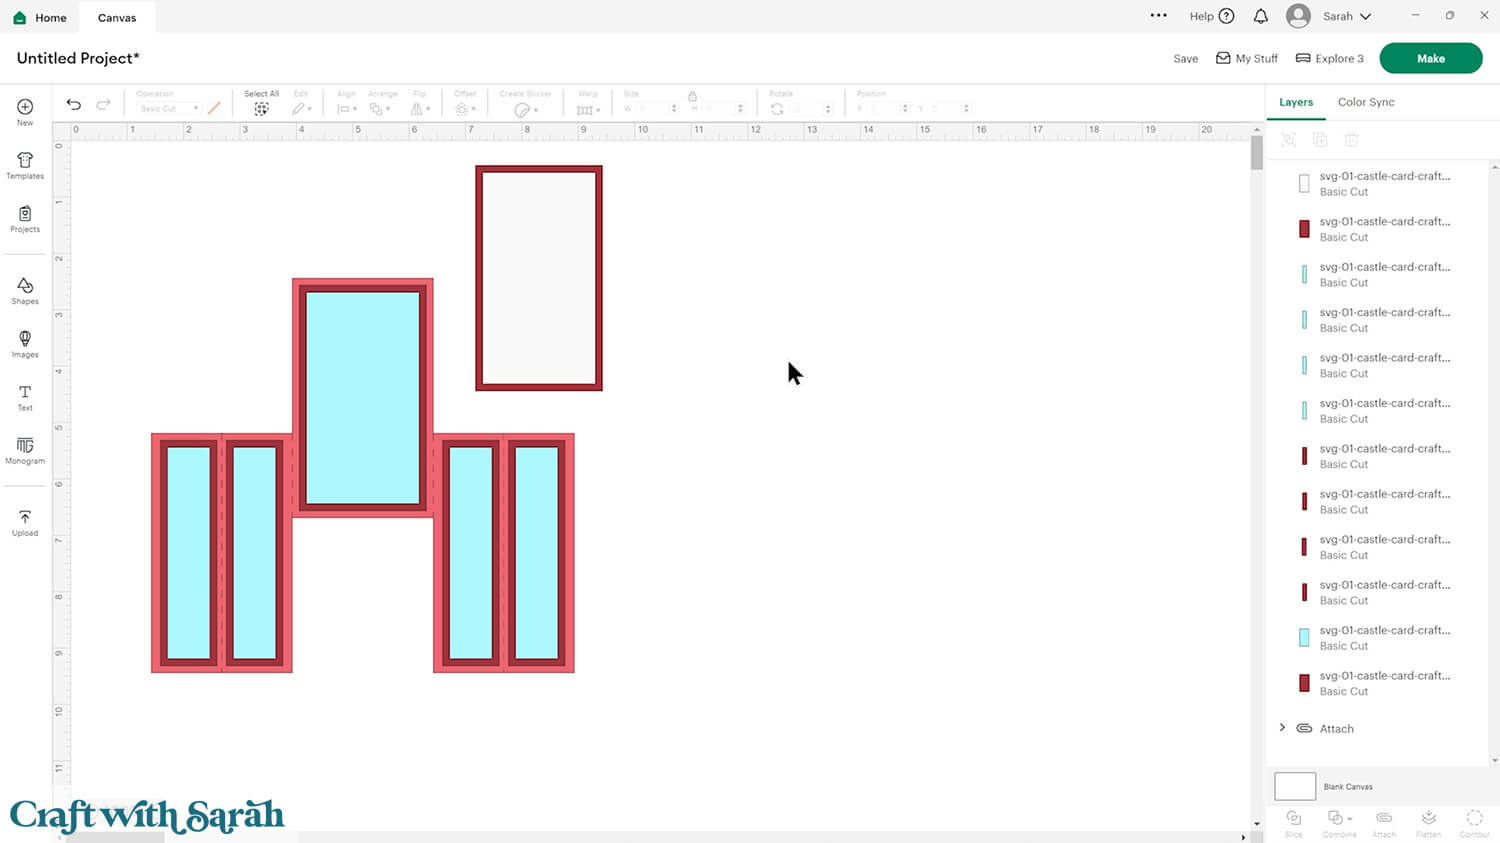
Step 3) Change the colours (optional)
This is a good time to change the colours if you are planning on cutting them differently to what’s on the screen.
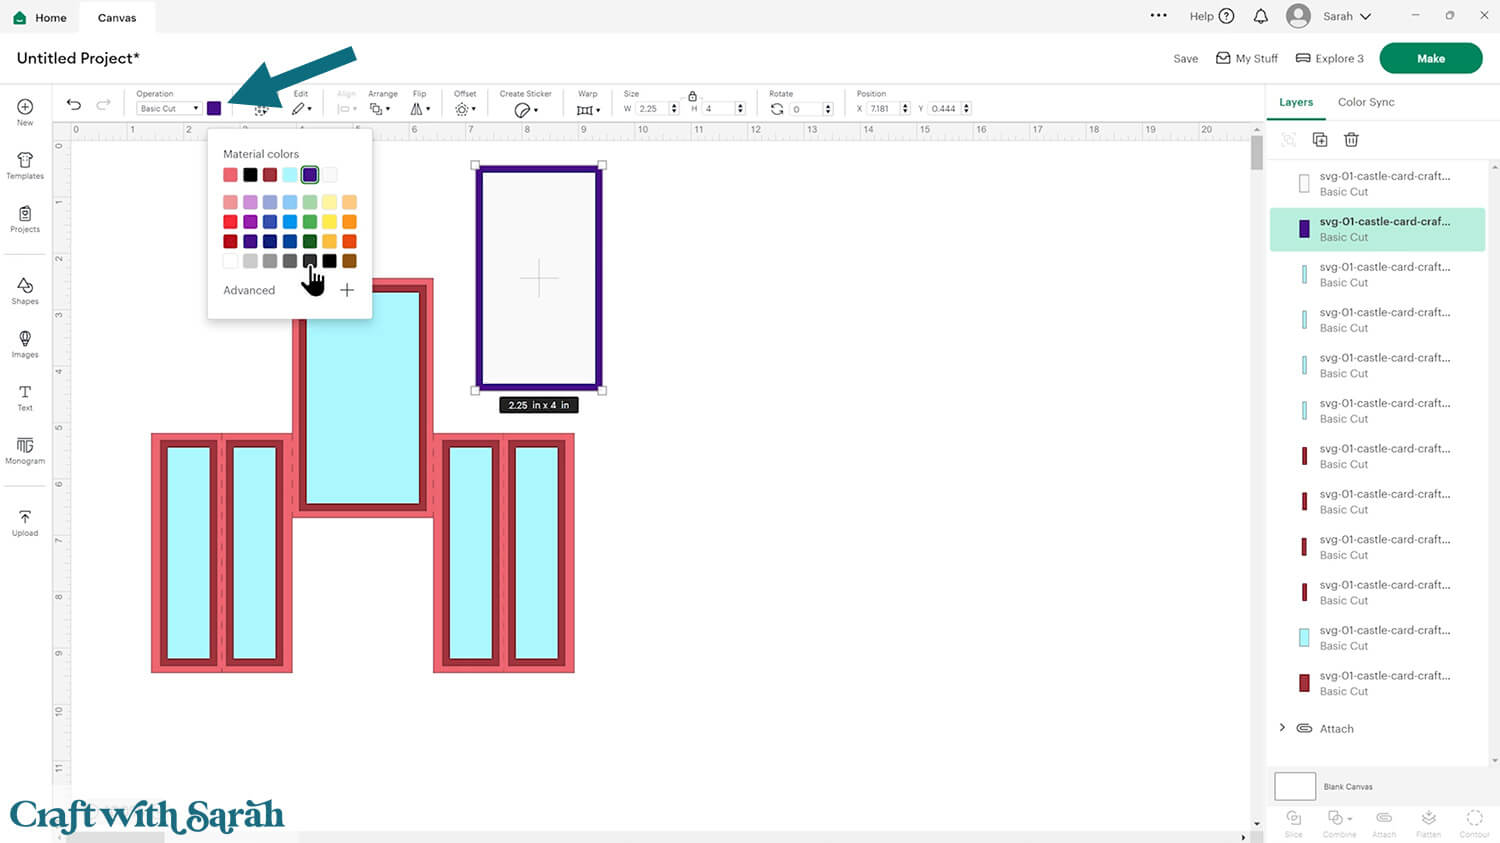
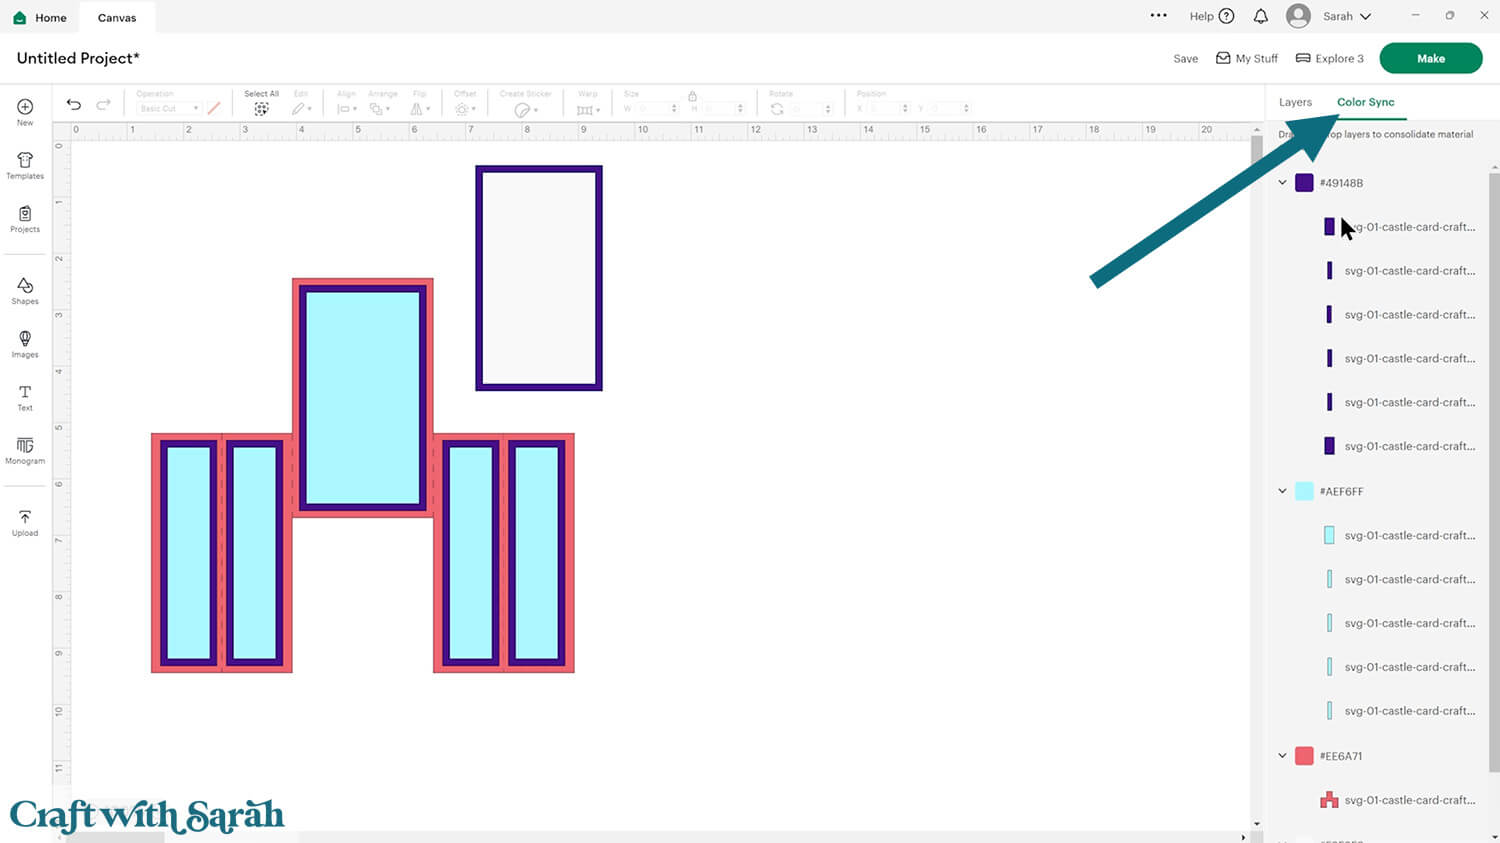
Once you’ve changed one piece, you can easily change all other pieces in the original colour to the new one by clicking “Color Sync” at the top of the layers panel and dragging-and-dropping the old colour into the new one.
The white rectangle is the message panel to go on the back of the card. I recommend leaving this white (or a light colour) so that your writing will show up.
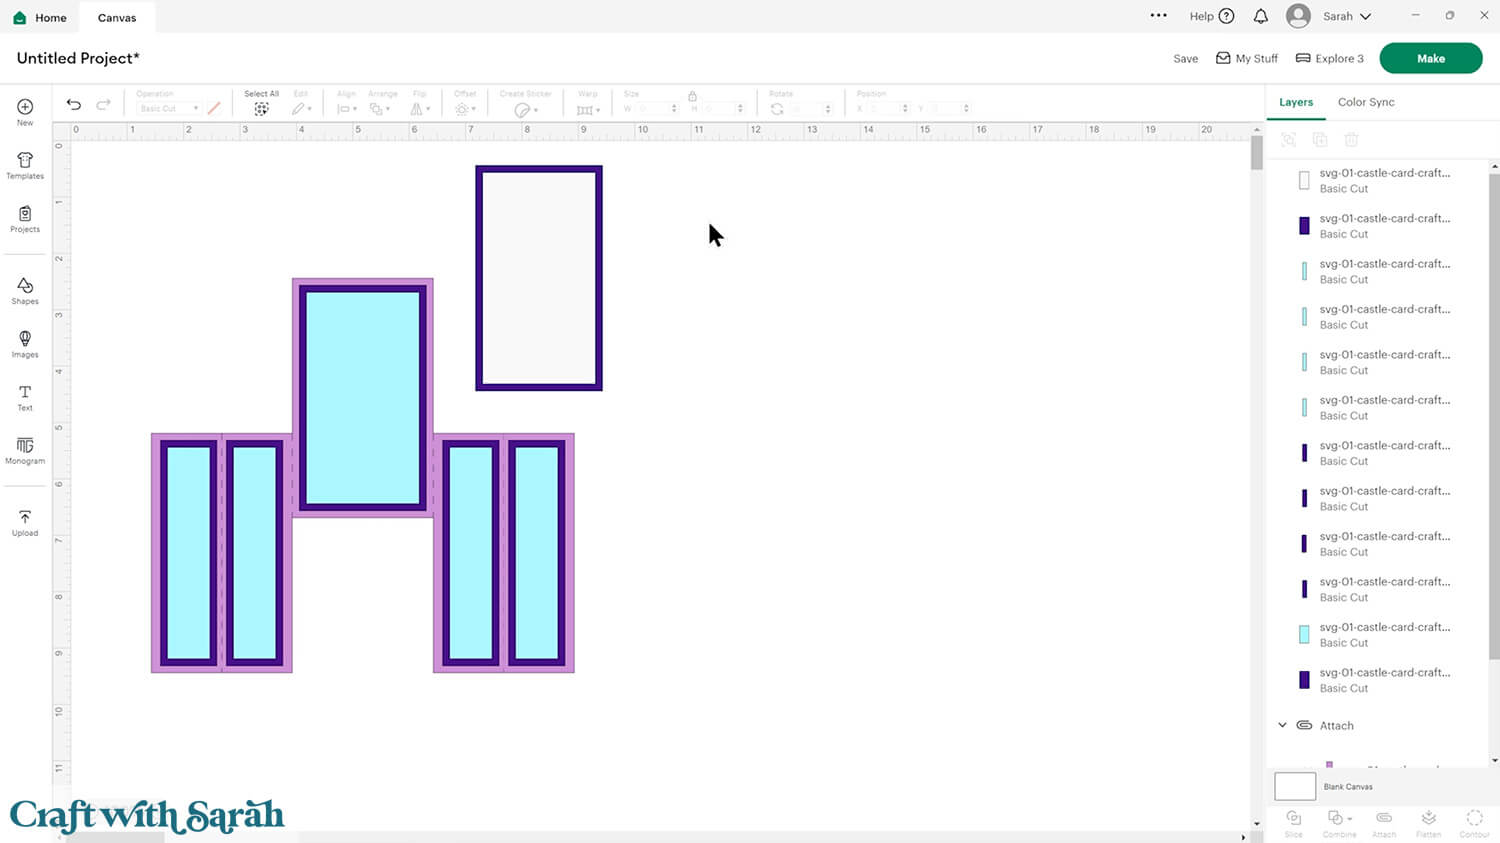
If you would like to add any extra embellishments or decorations in Design Space, now is the time to do it.
Otherwise, it’s time to start cutting!
Step 4) Cut out all the pieces
When you’re happy with how the project is looking in Design Space, save the project then click “Make” and follow the instructions on-screen to cut out all the pieces.
To change the paper size, go into the dropdowns over on the left side of the screen and choose the paper size that you want to use. You need to change it for every single colour.
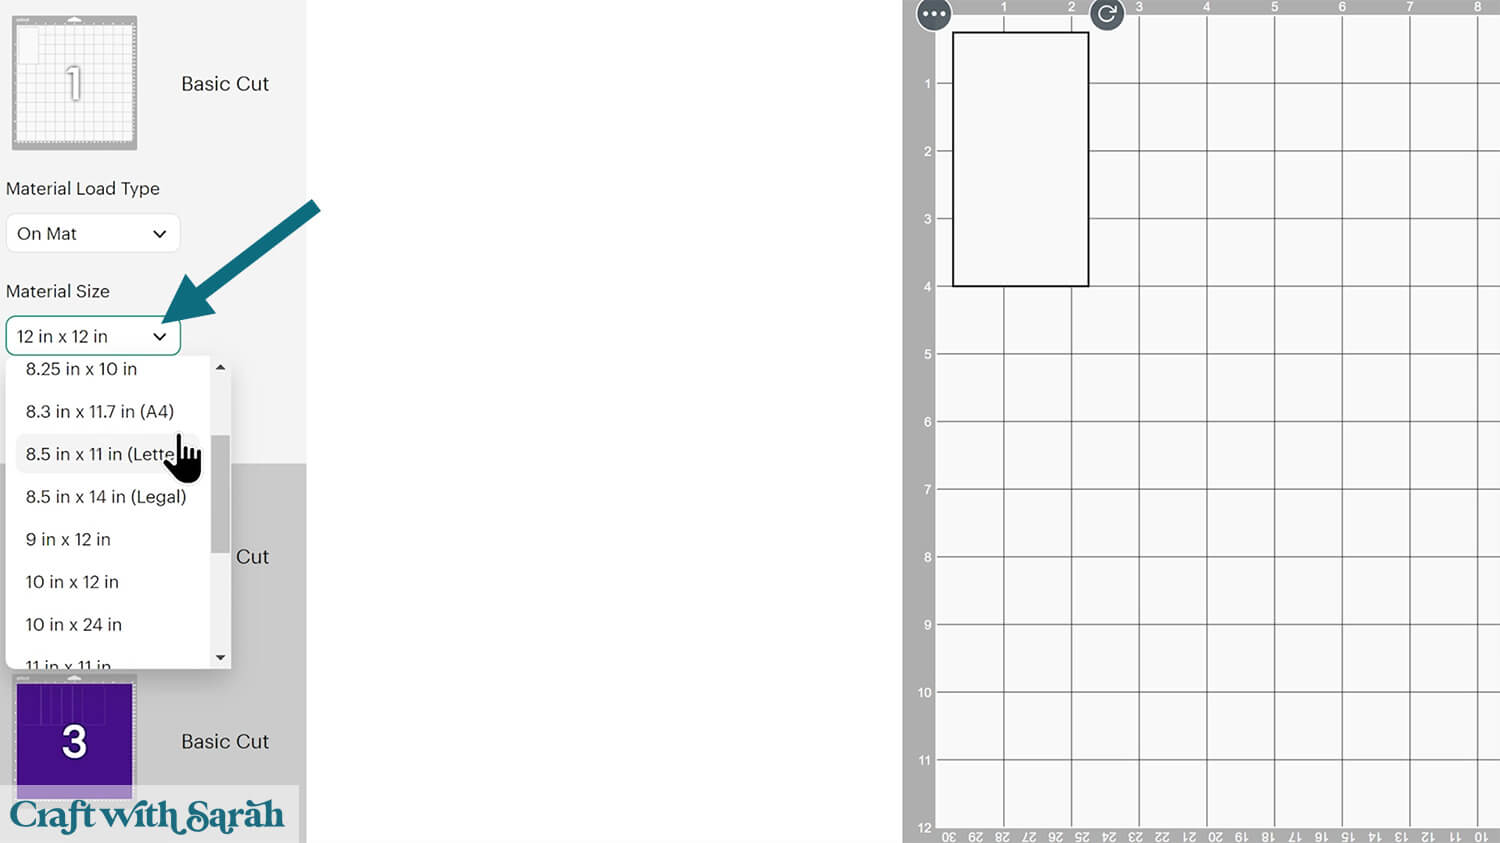
To save space on your cardstock, you can move things around by clicking and dragging. Make sure when you’re moving things about that nothing overlaps because otherwise, it won’t cut out properly.
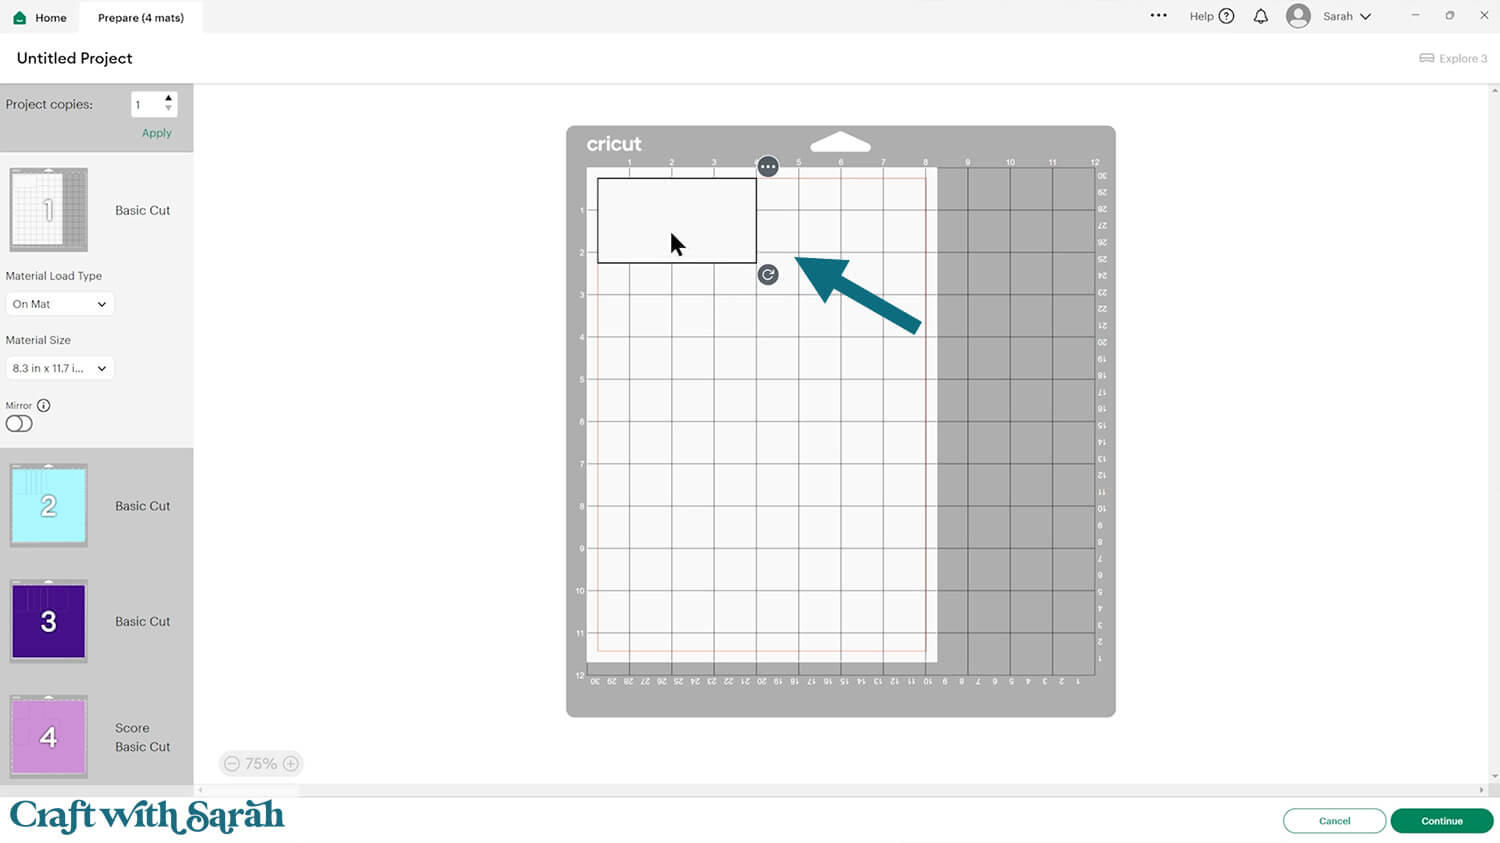
IMPORTANT! If you’re planning to use patterned paper that has a “right way up” on the pattern, don’t rotate any of the rectangles otherwise your pattern will be facing the wrong direction when you put the card together. Keep all the rectangles vertical to ensure correct pattern placement.
Step 5) Put the card together
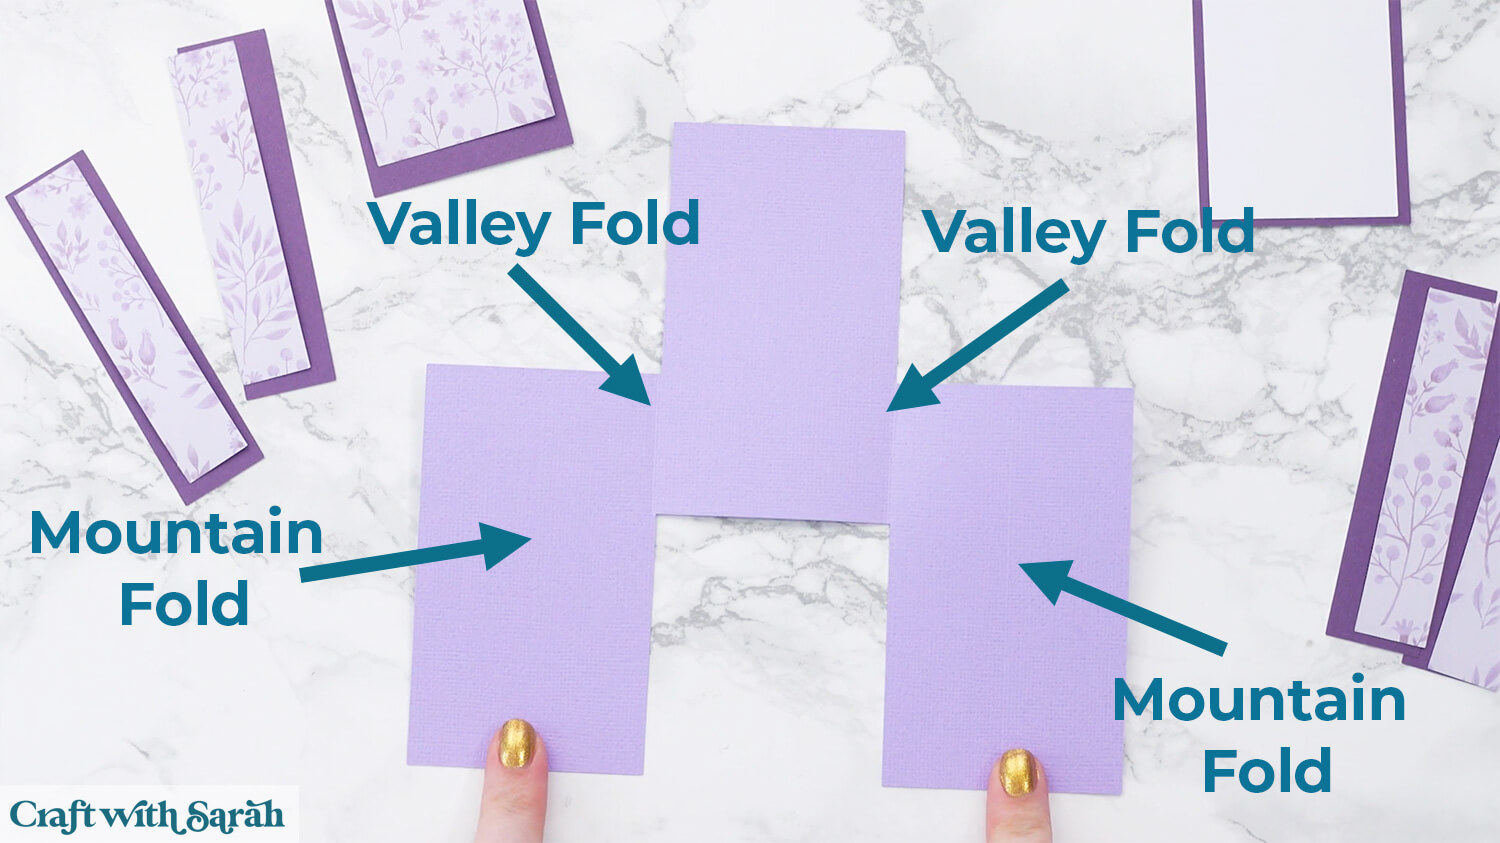
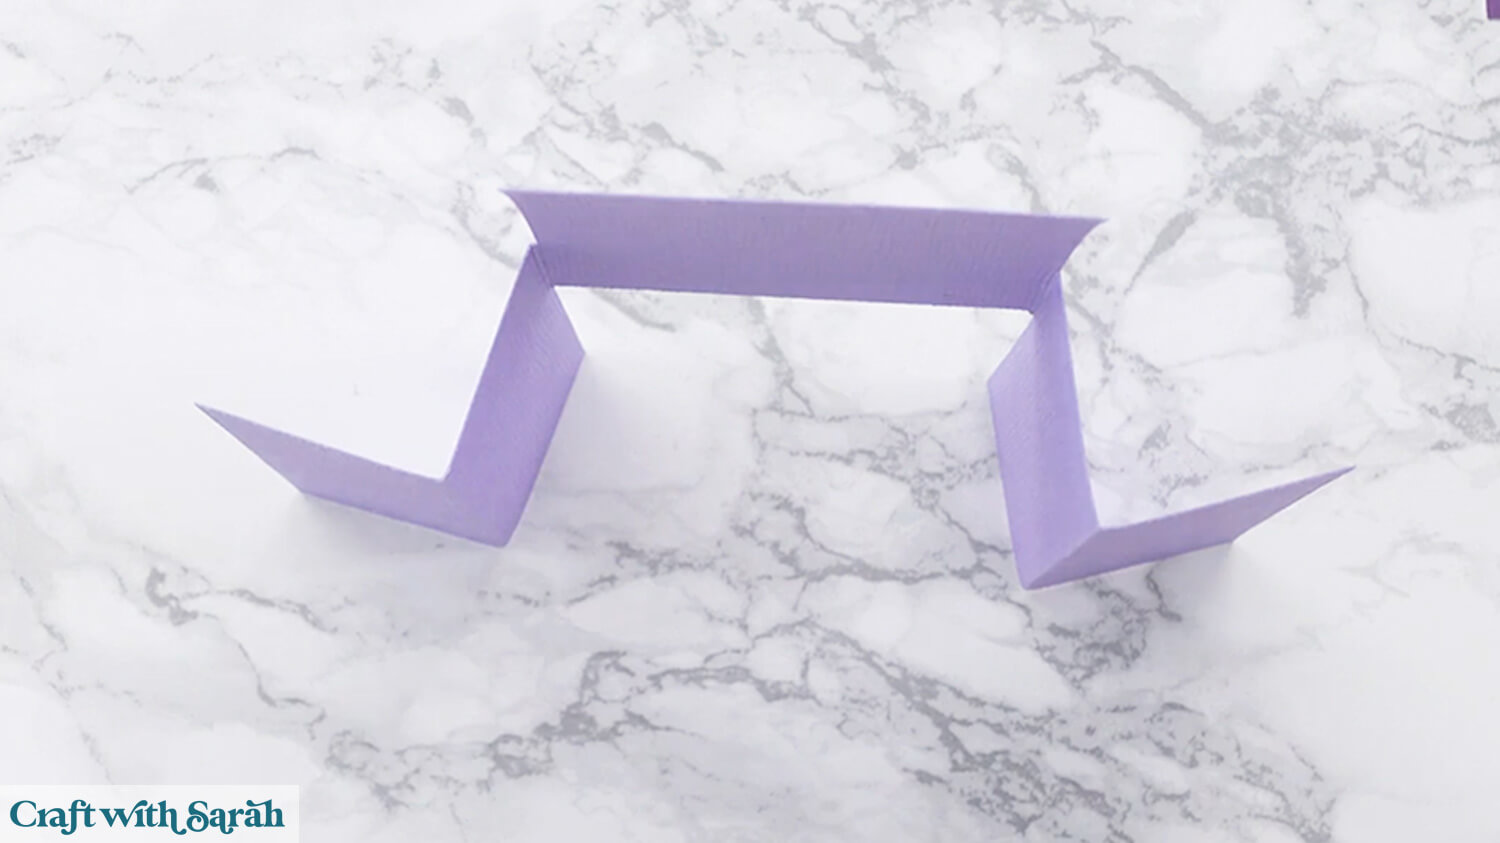
Valley fold the two score lines close to the middle of the card. This means that the “point” of the fold is at the bottom.
Mountain fold the two score lines along the edges. The “point” for these folds will be at the top.
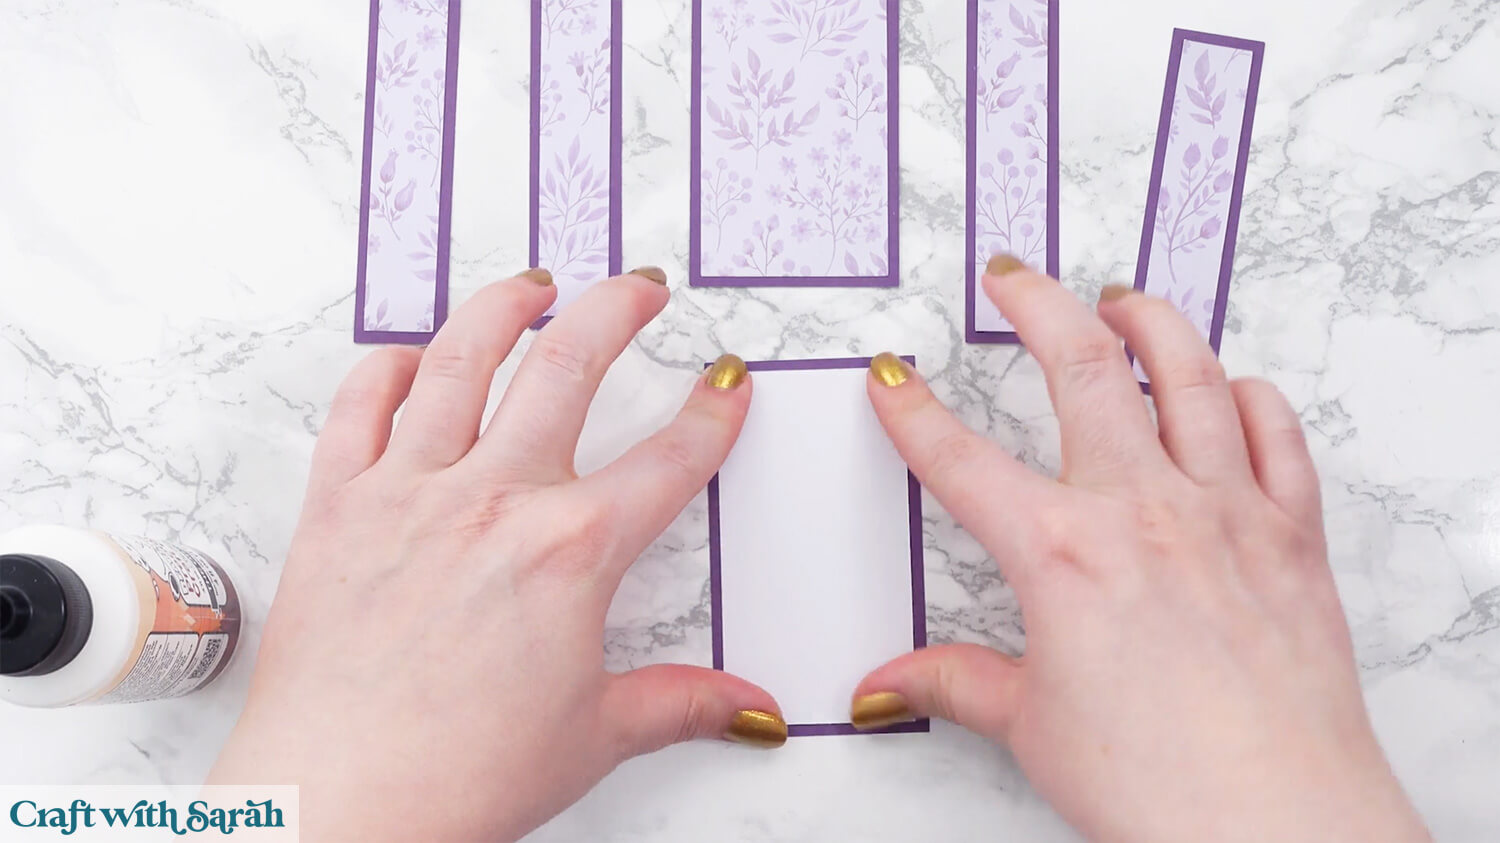
Glue all of the inner rectangles to their matching border piece that goes underneath.
My favourite glues to use on papercraft projects are Bearly Art Glue and Collall All Purpose Glue.
These are great because they don’t “warp” or bend the cardstock like some glues do. You can use as much of it as you want and the card stays perfect – and it dries perfectly clear too!
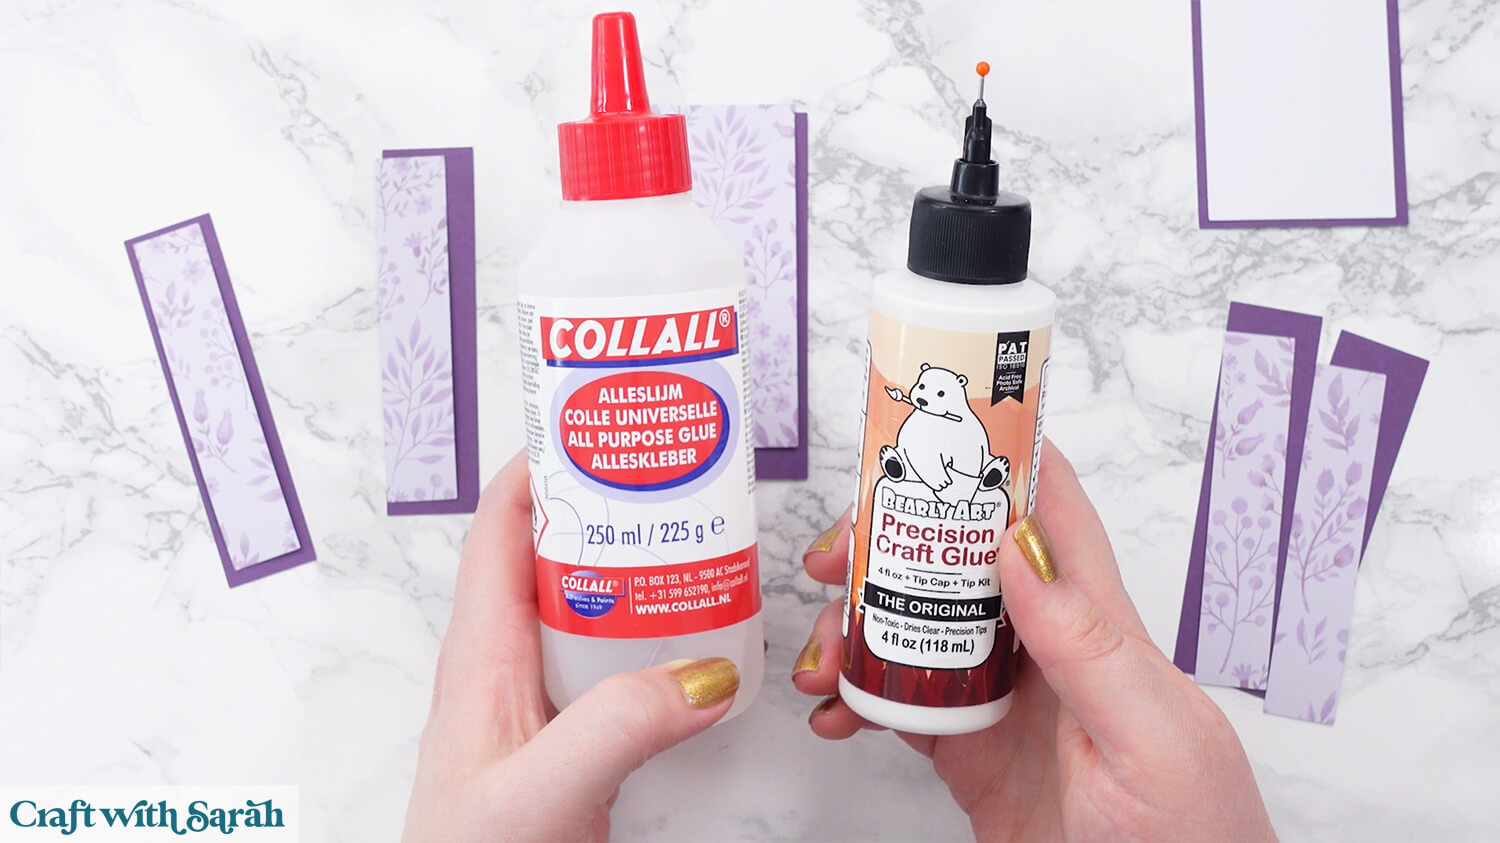
Bearly Art Glue comes with a tiny nozzle to make it easy to apply glue to small areas of card. The Collall glue doesn’t come with this, so it’s easiest to decant it into needle tip applicator bottles so that you have more control.
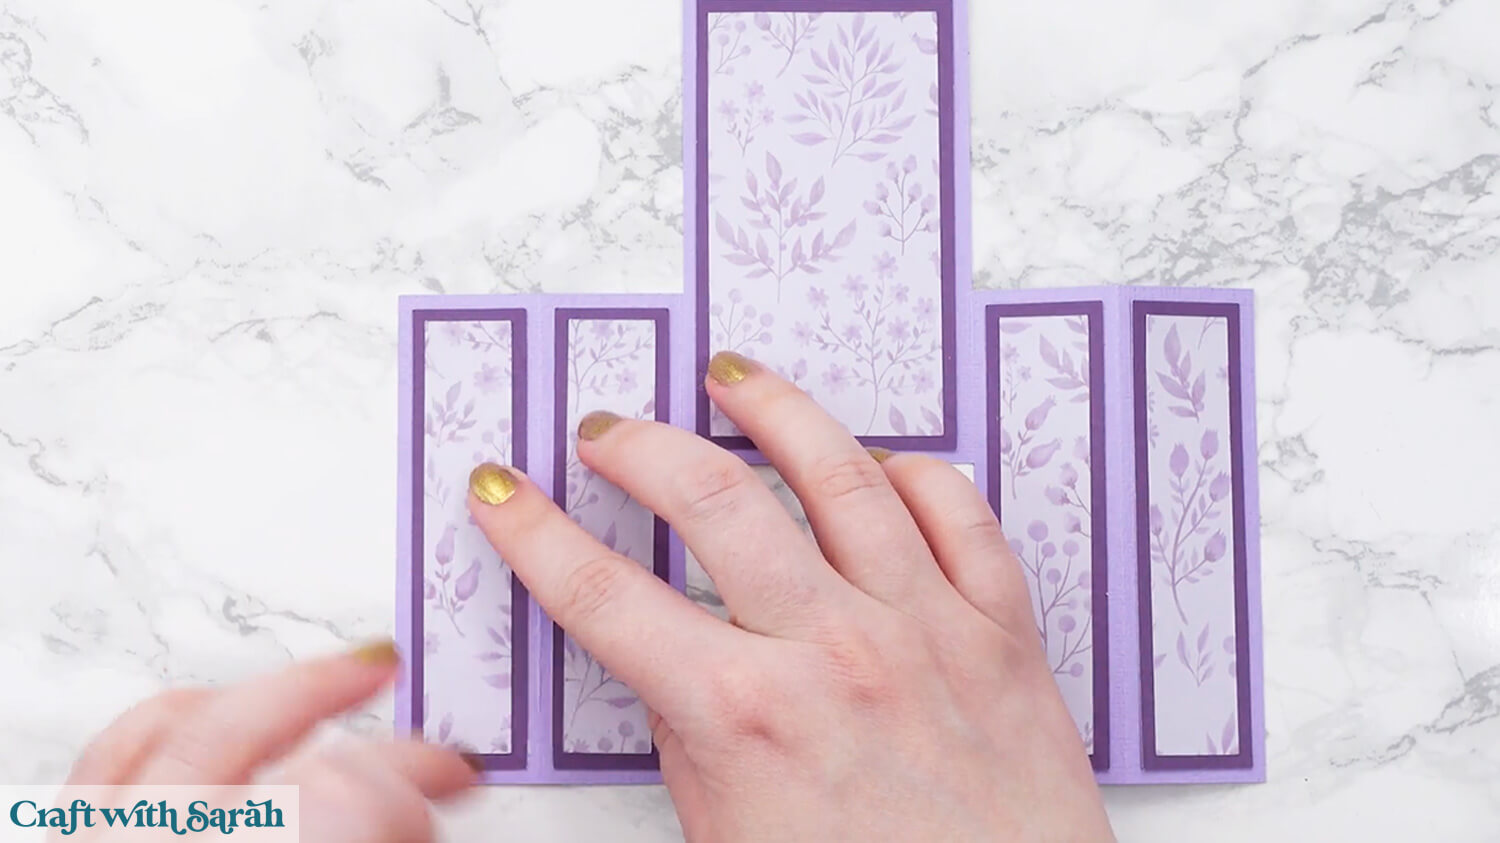
Glue the rectangles to the front of the card.
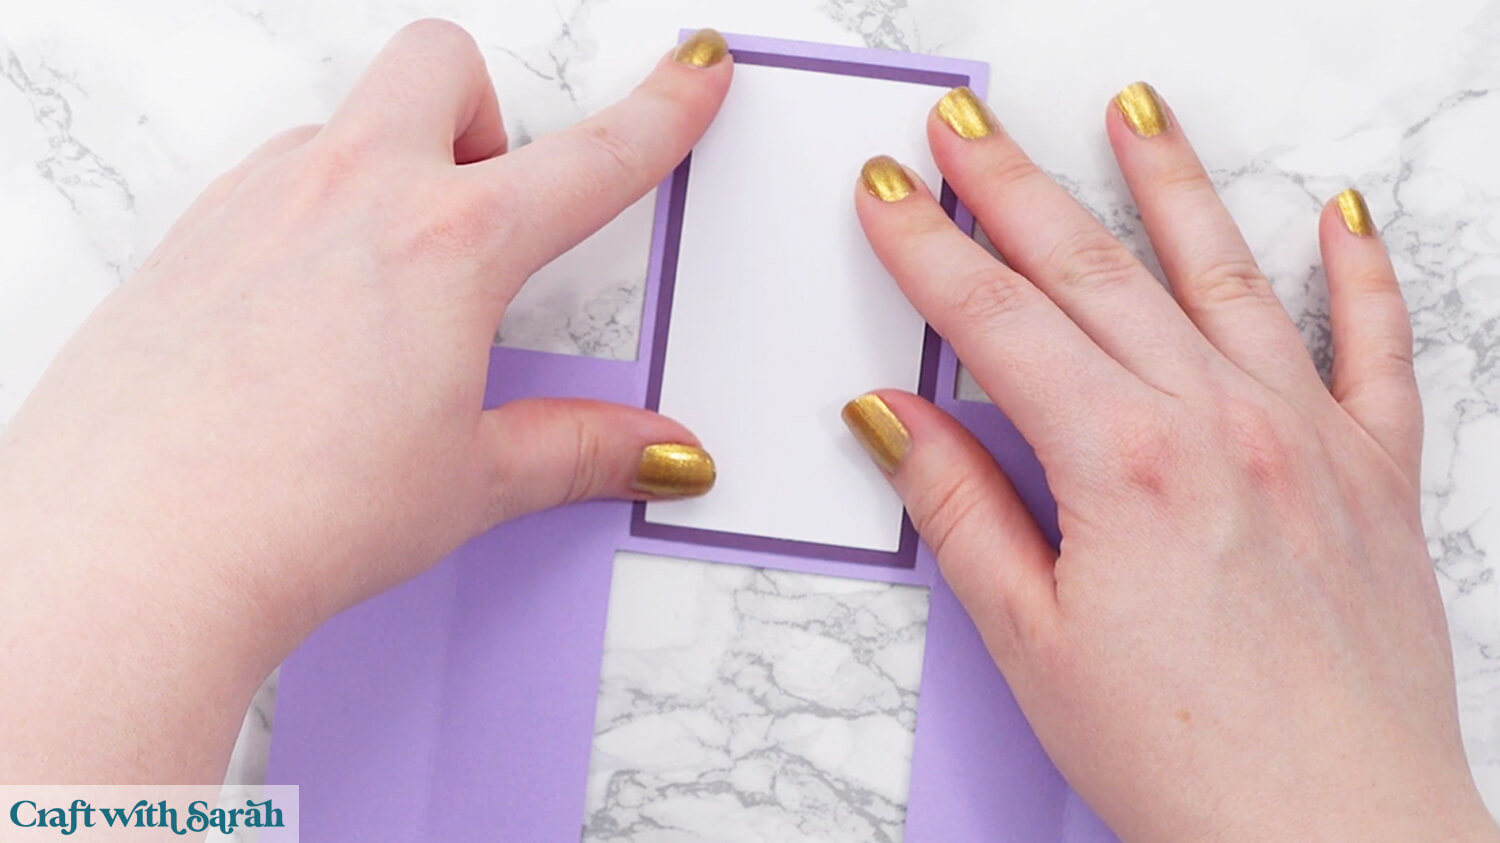
Glue the message panel to the middle section of the back of the card.
Check that the sides fold inwards to make a neat, slimline card.
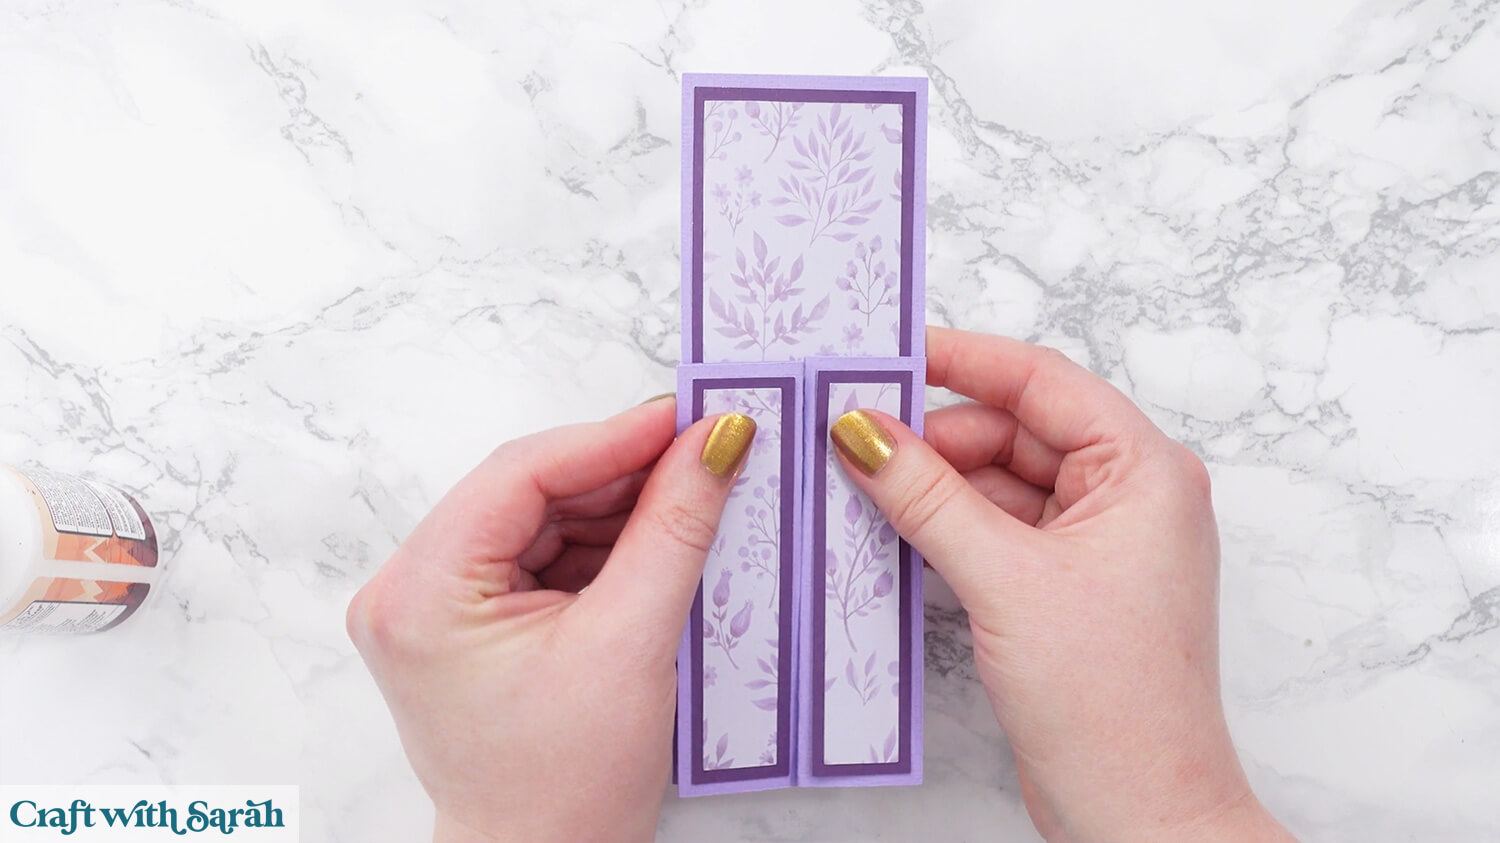
Your Castle Card is now all ready for finishing or decorating in whatever way you wish.
If you are making the space version of the card, it mostly goes together in the same way.
The only difference is that you have some extra pieces of cardstock to build up the rocket scene.
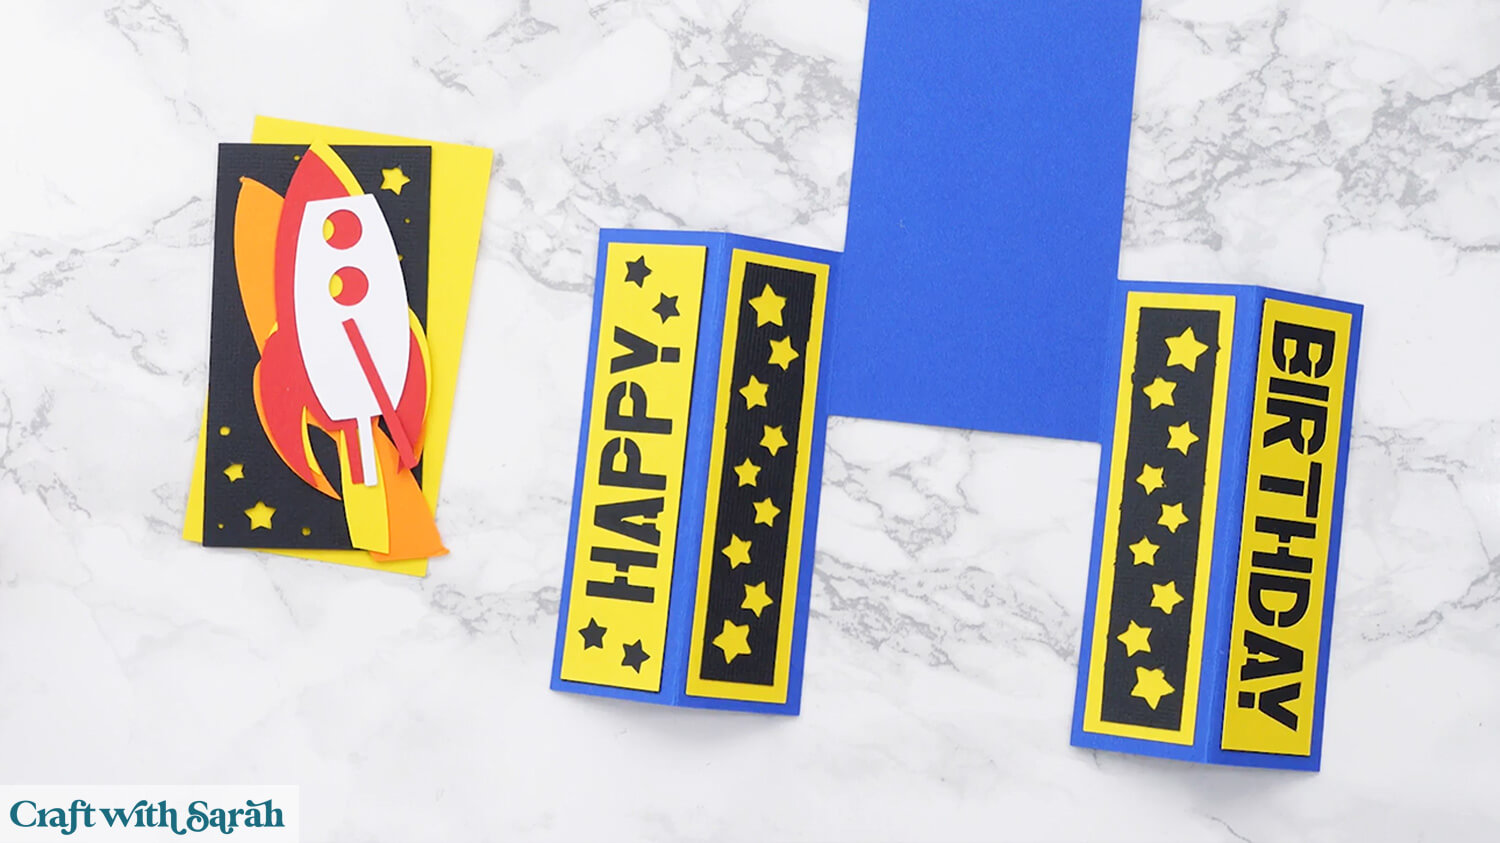
Glue the black sky rectangle onto the yellow rectangle.
You can either glue all the pieces of the rocket, or make it “pop” out a little by using foam squares to attach the orange cardstock piece.
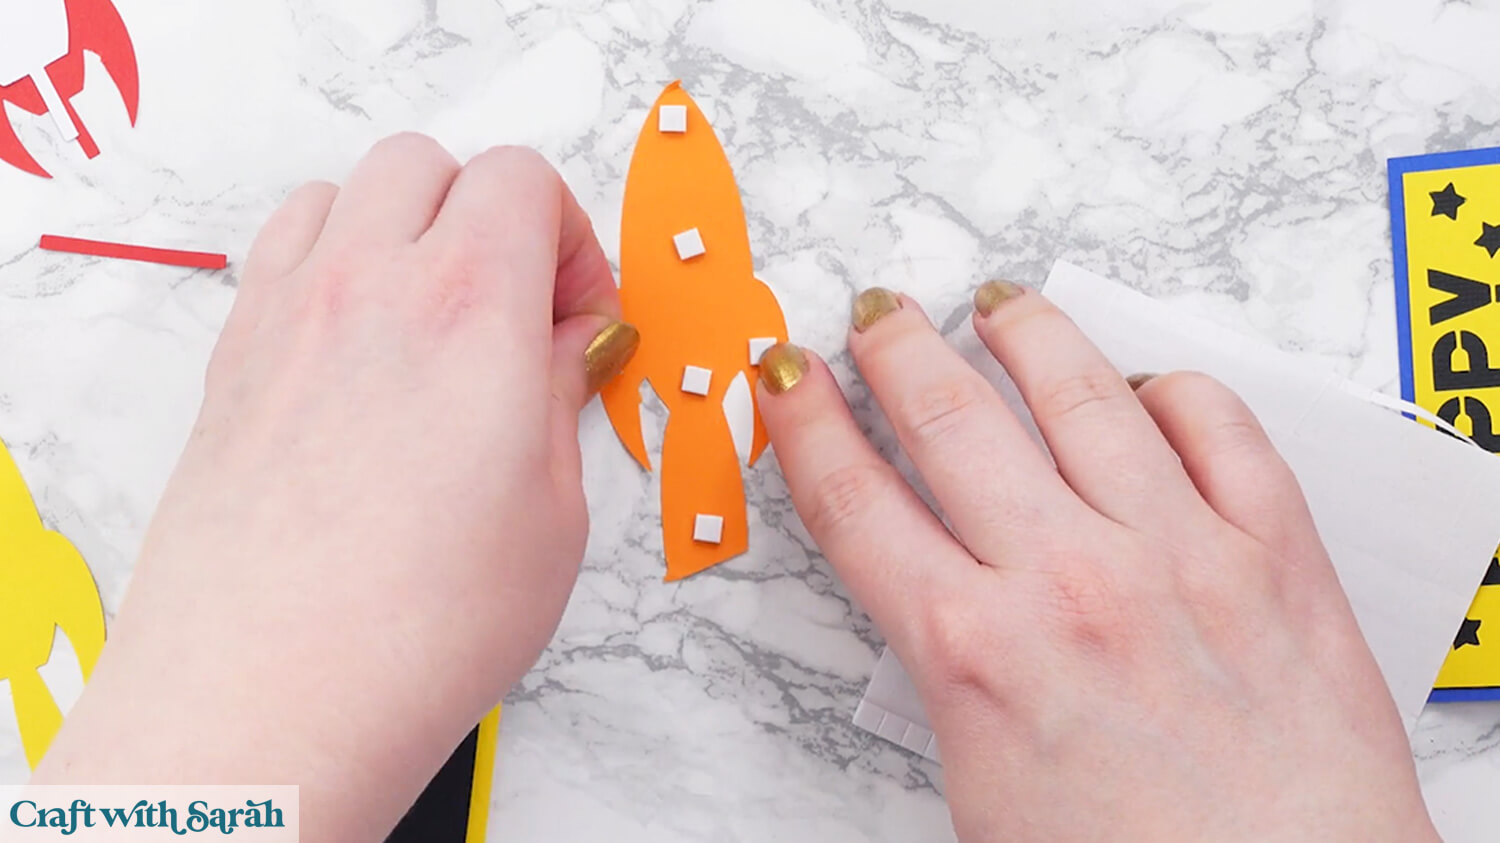
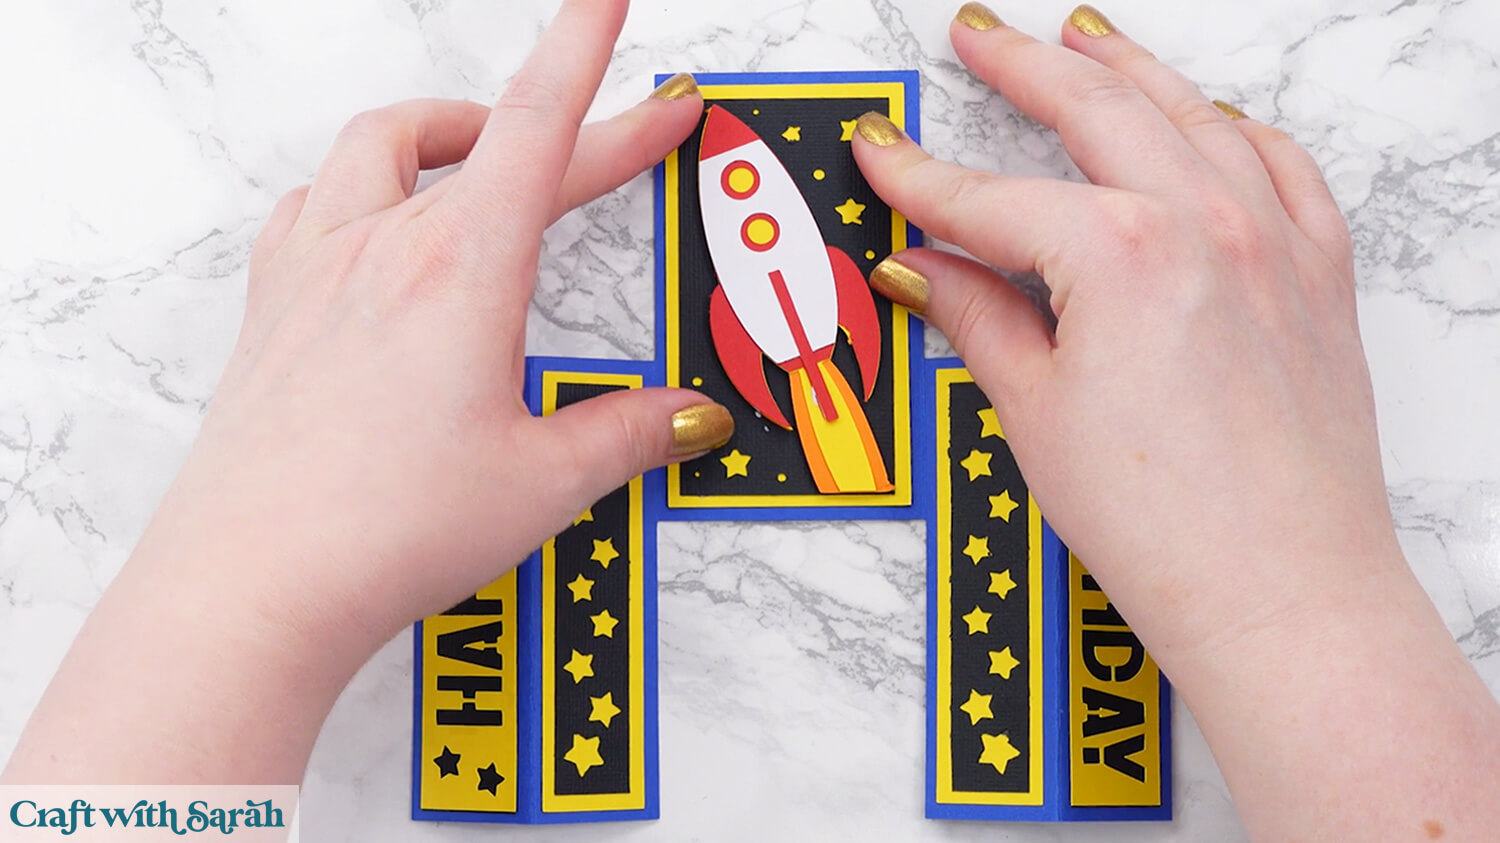
Glue all the other pieces of the spaceship in order, then glue the rectangle to the middle of the Castle Card.
Step 6) Make a matching envelope
The Castle Card template is thin when folded up, and will not fit in a standard size envelope as it’s too small. Therefore, I have included a custom envelope template in your download folder.
Load the SVG file for the envelope into Design Space.
Check that the envelope template loads in at 7.5 inches wide and 14.5 inches tall.
If yours is a different size, change it to 7.5 x 14.5.
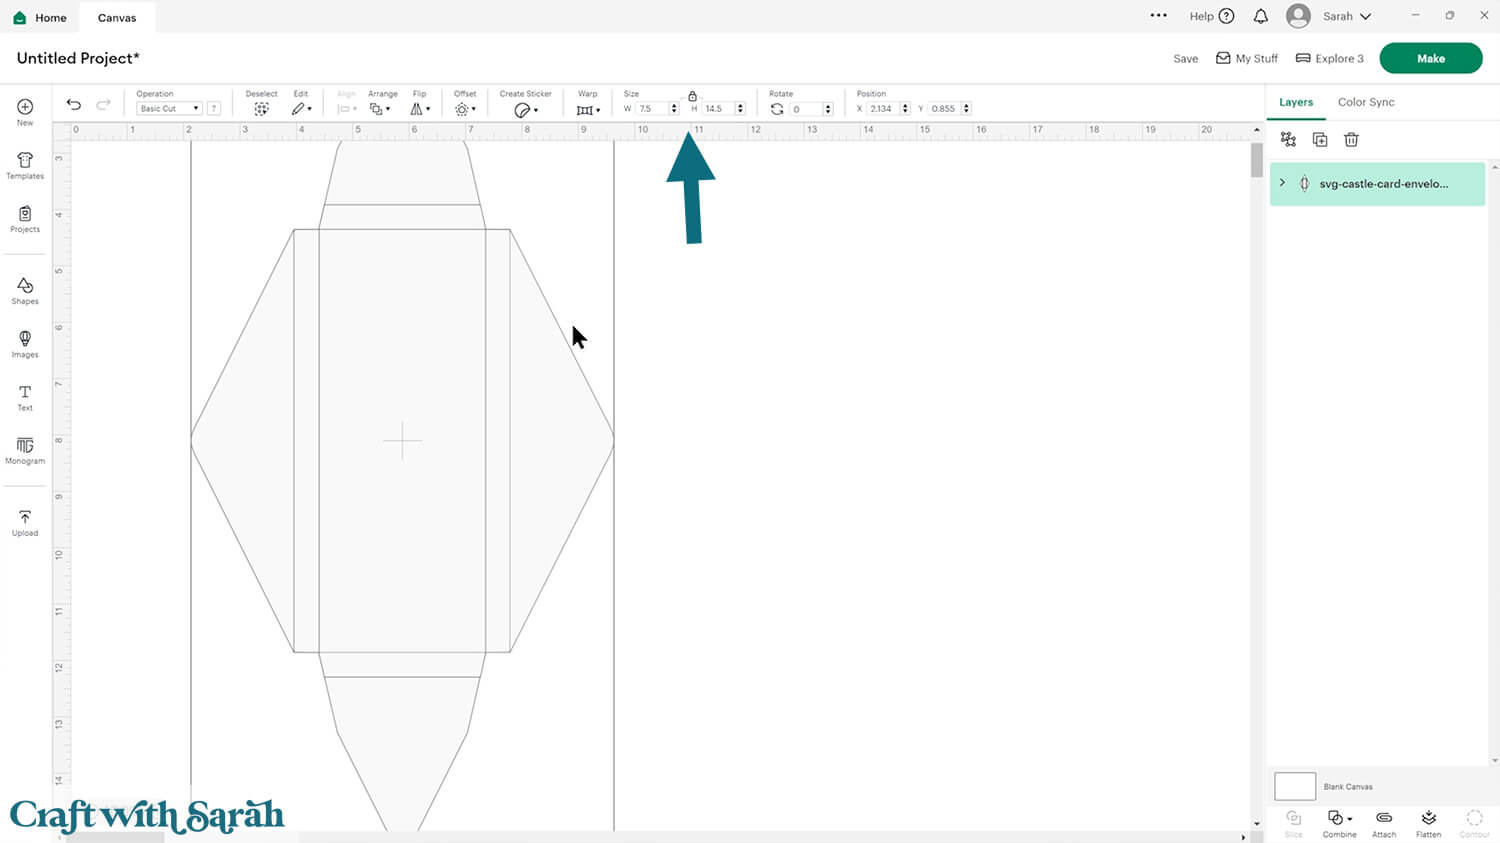
Ungroup the layers, then click the chevron icon next to the main “rectangular” piece of the envelope.
Select the top layer in that subgroup and change it to “Score”.
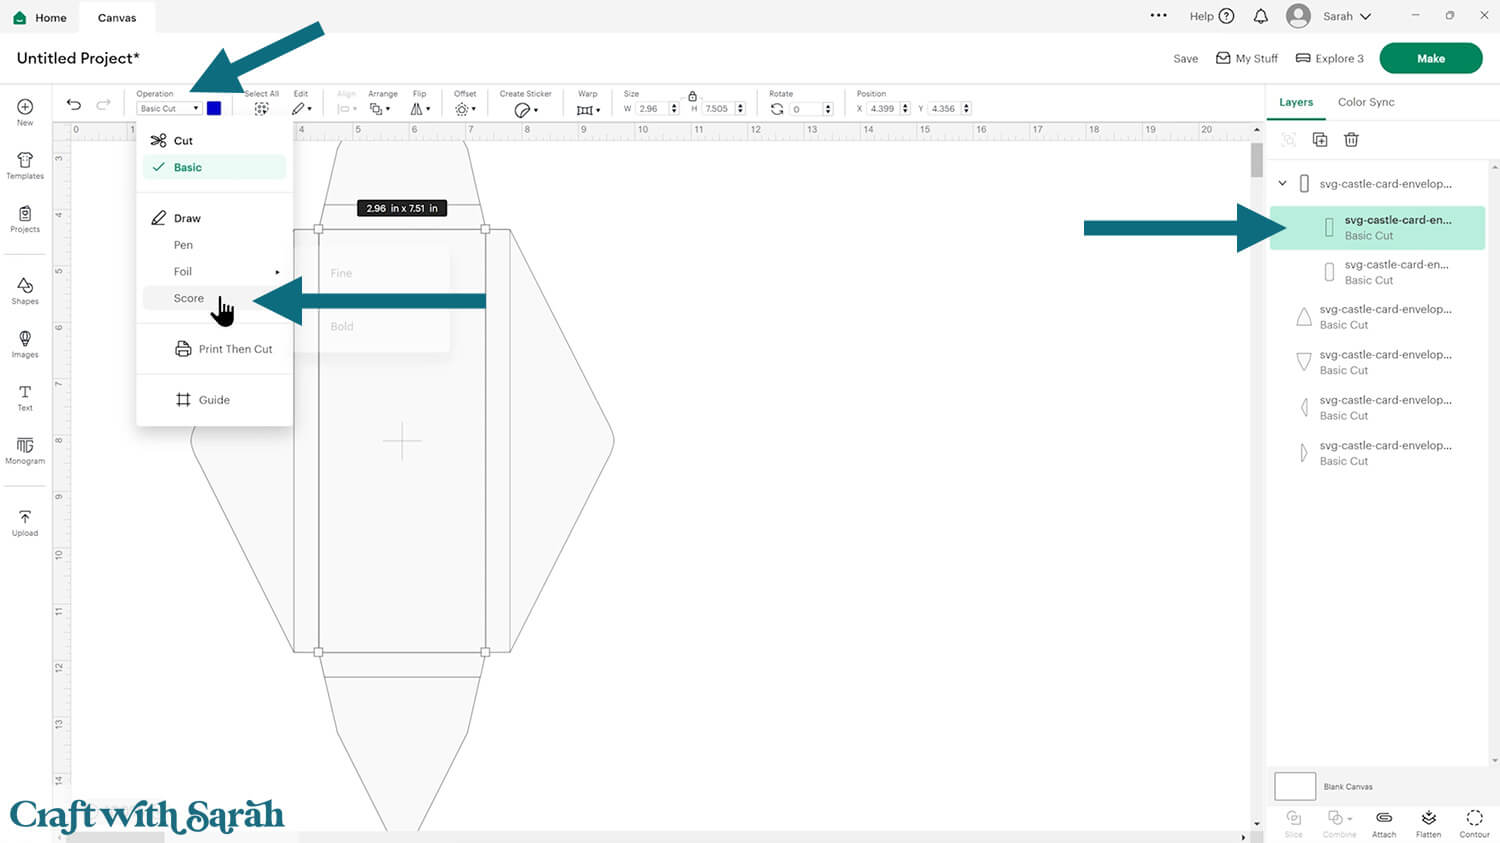
Attach the score line to the rectangular piece.
Make sure that the four “triangle” pieces are still separate.
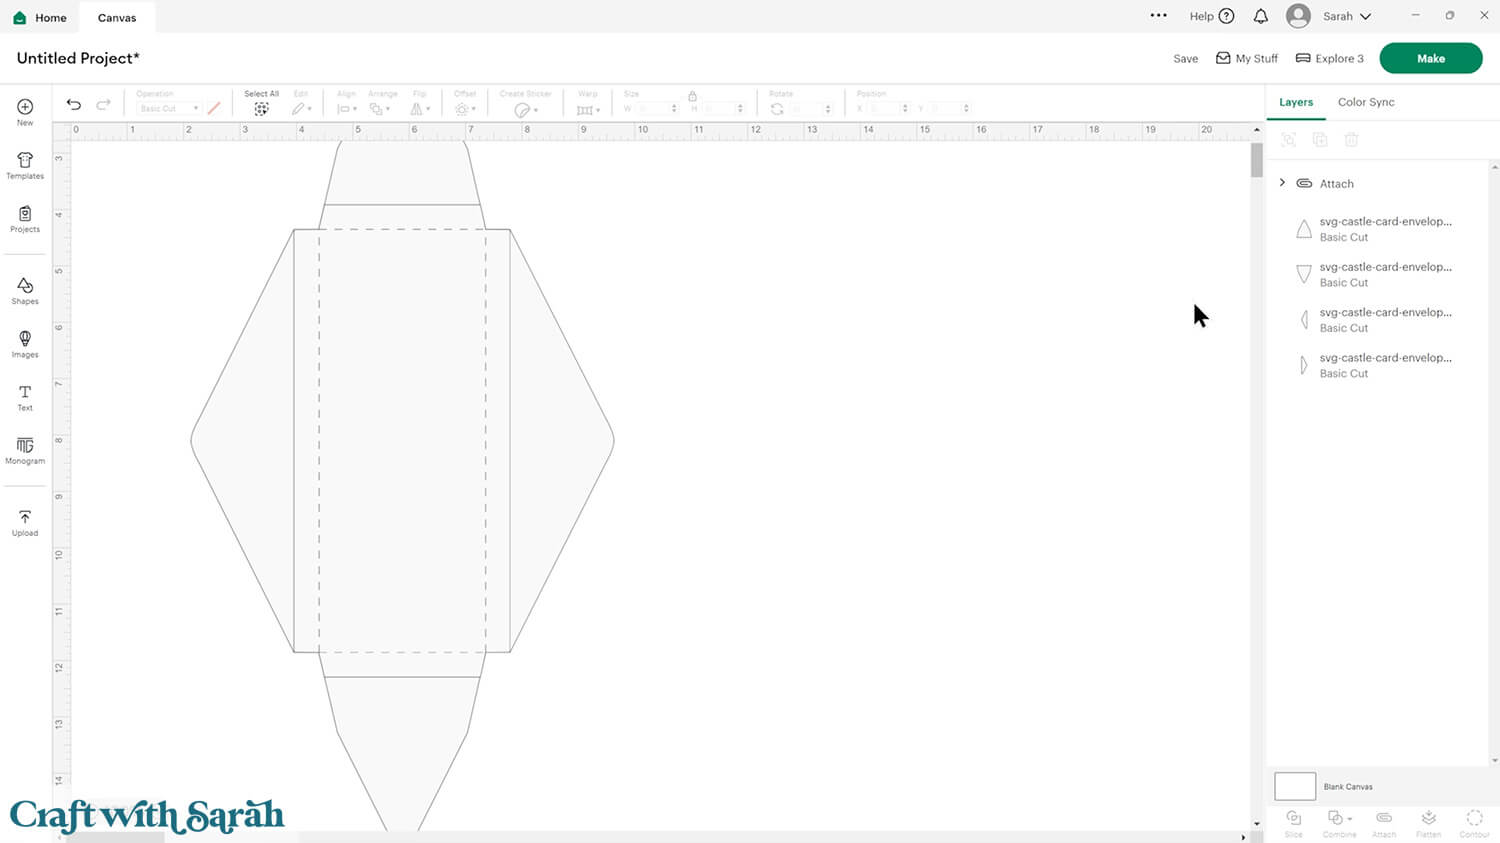
Cut the envelope. I like to use scrapbook paper that’s patterned on both sides, so that the envelope looks pretty on the inside too. You could also use lightweight / thin cardstock.
Turn the main rectangle shape upside down, so that the side of the card you want to appear on the inside of the envelope is facing upwards.
Fold all the score lines upwards towards yourself.
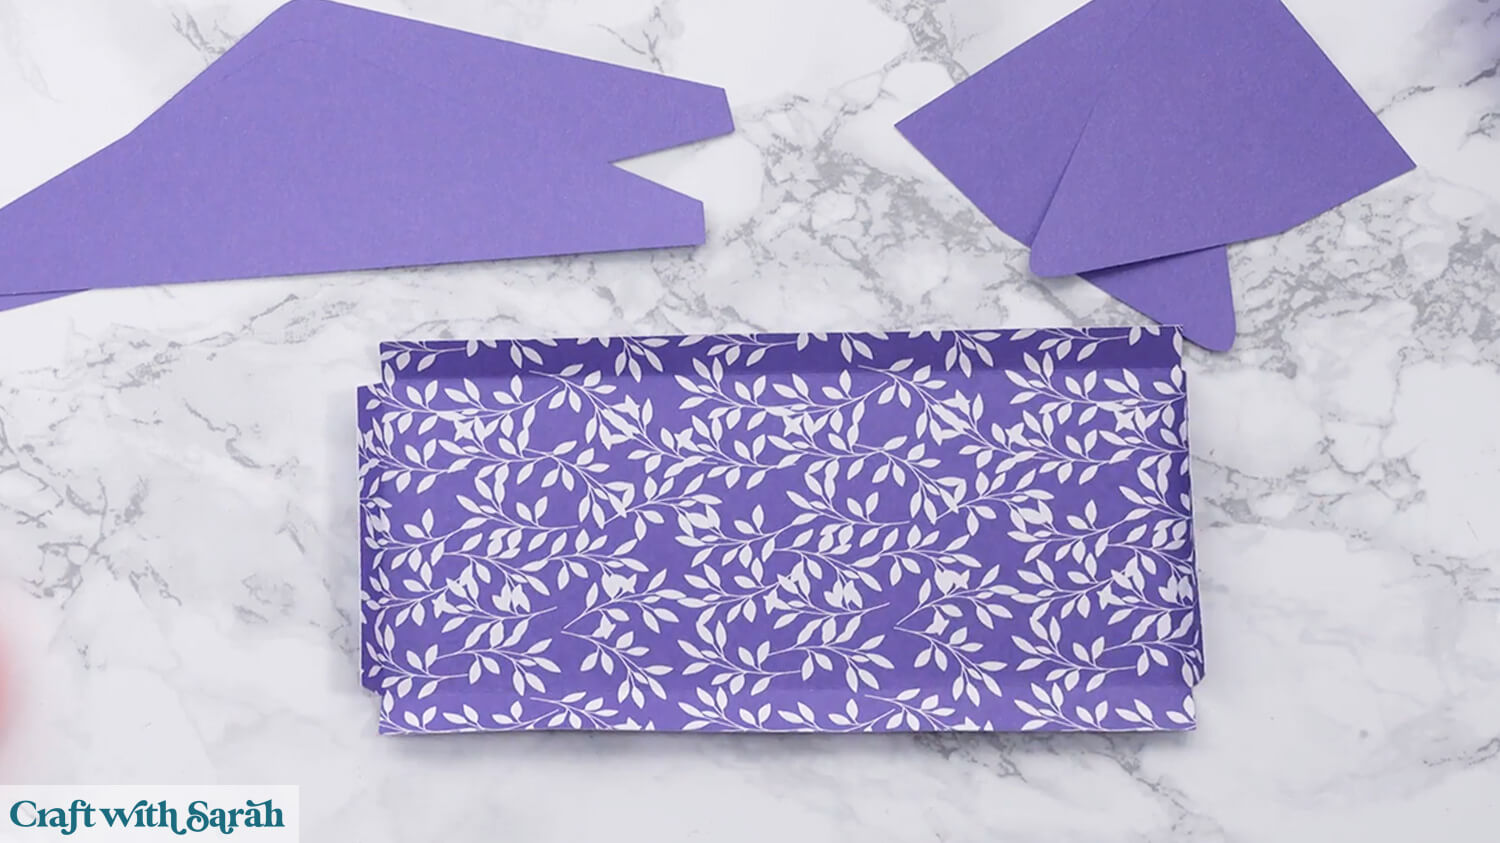
Turn the piece the other way up and add double sided tape or glue down all the tabs, up to the score lines.
I find double sided tape easier as it sticks straight away without having to wait for the adhesive to dry.
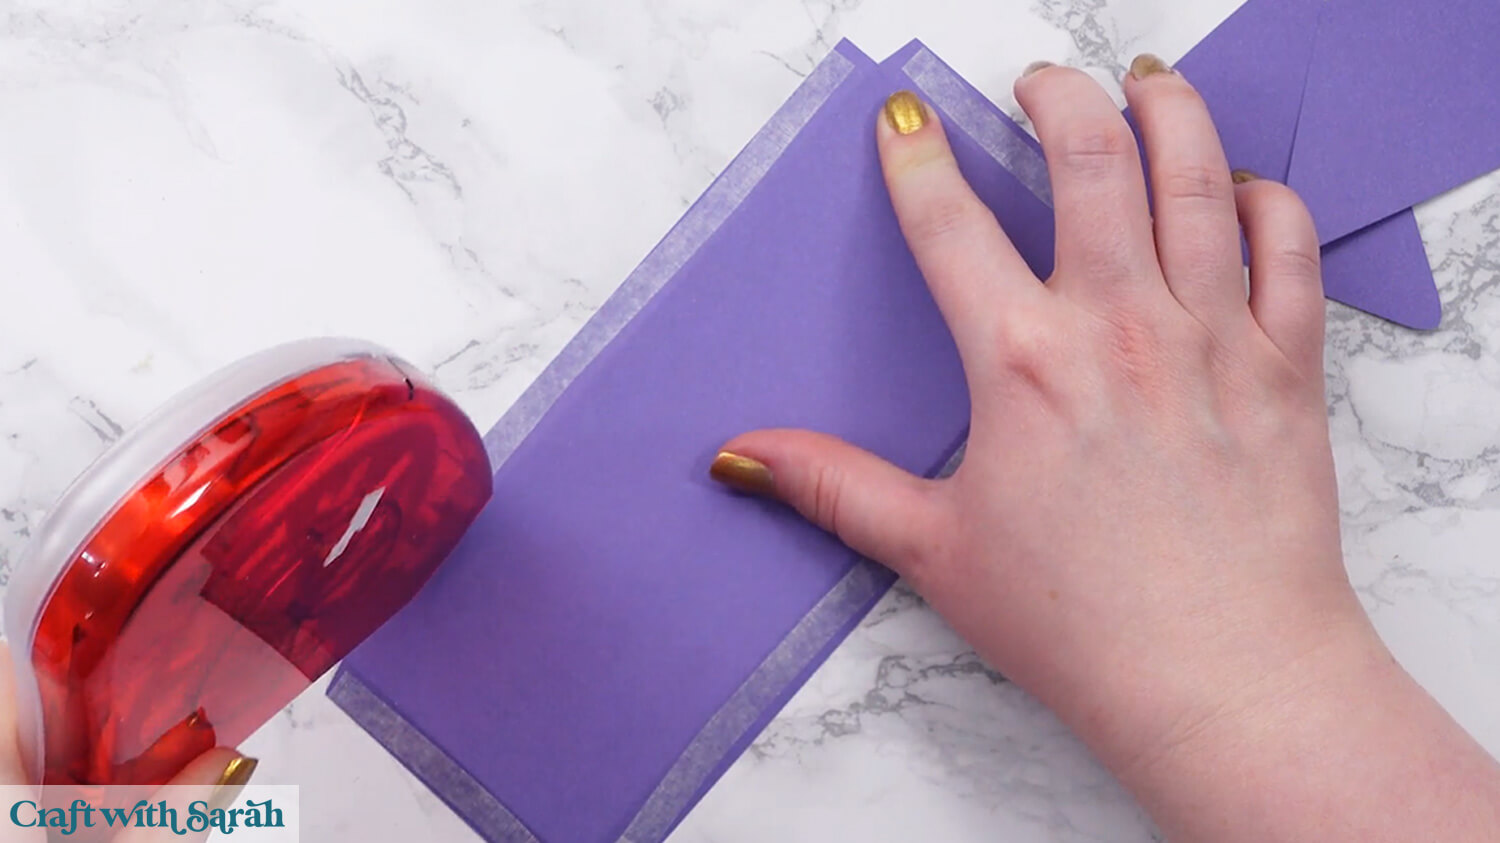
Attached the four triangle pieces, lining each one up with the score lines on the rectangular piece.
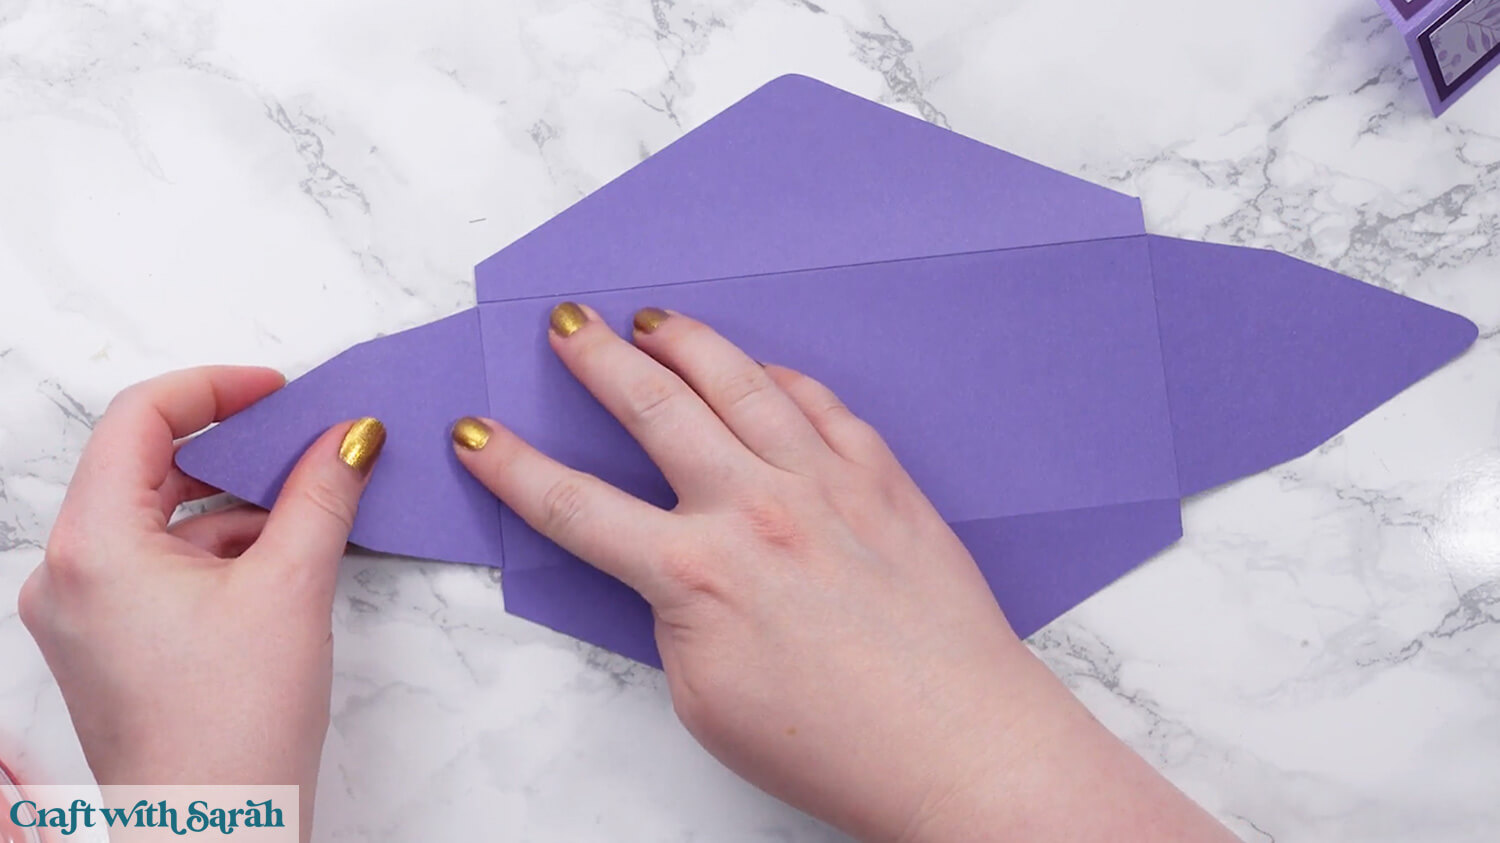
Turn the envelope over.
Fold in the two smaller sides, then stick one of the larger sides over the top.
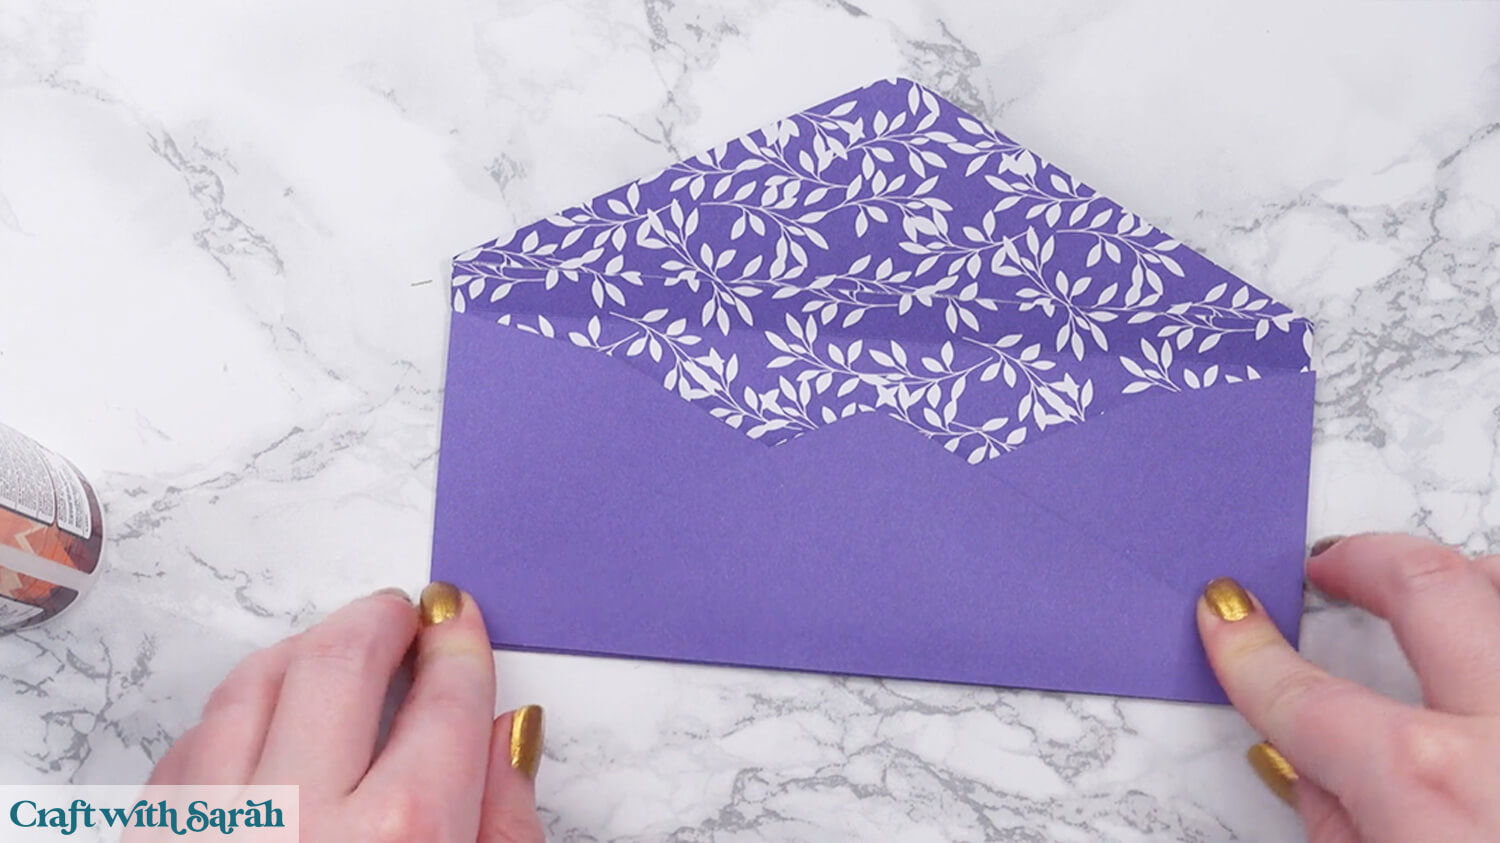
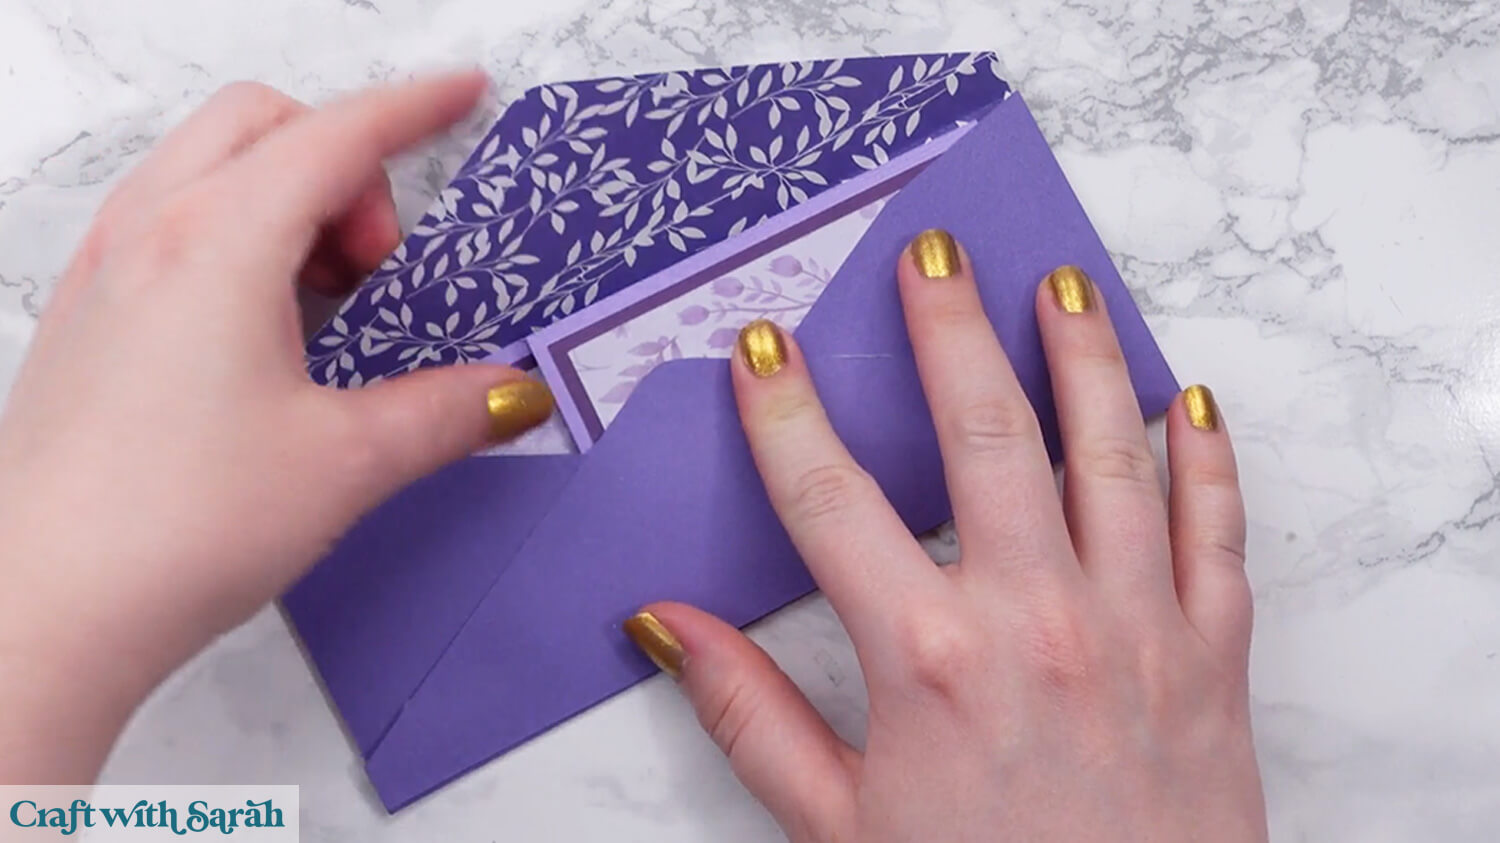
The envelope is now ready to receive your Castle Card!
Seal it with double-sided tape, glue, or go fancy with a wax seal!
Quick & easy Castle Cards
If you’re looking for a fun fold pattern that’s quick to make, but gives an unusual card shape that’s a little bit “different” to a standard square or rectangle card, Castle Cards are a great choice.
Decorate them however you want, to suit any occasion or theme.

I can’t wait to see what you create for your Castle Cards. Submit your finished projects to our Community to share your photos with us!
Happy crafting,
Sarah x

