CMC 2025 Day 09: Cascade Cards
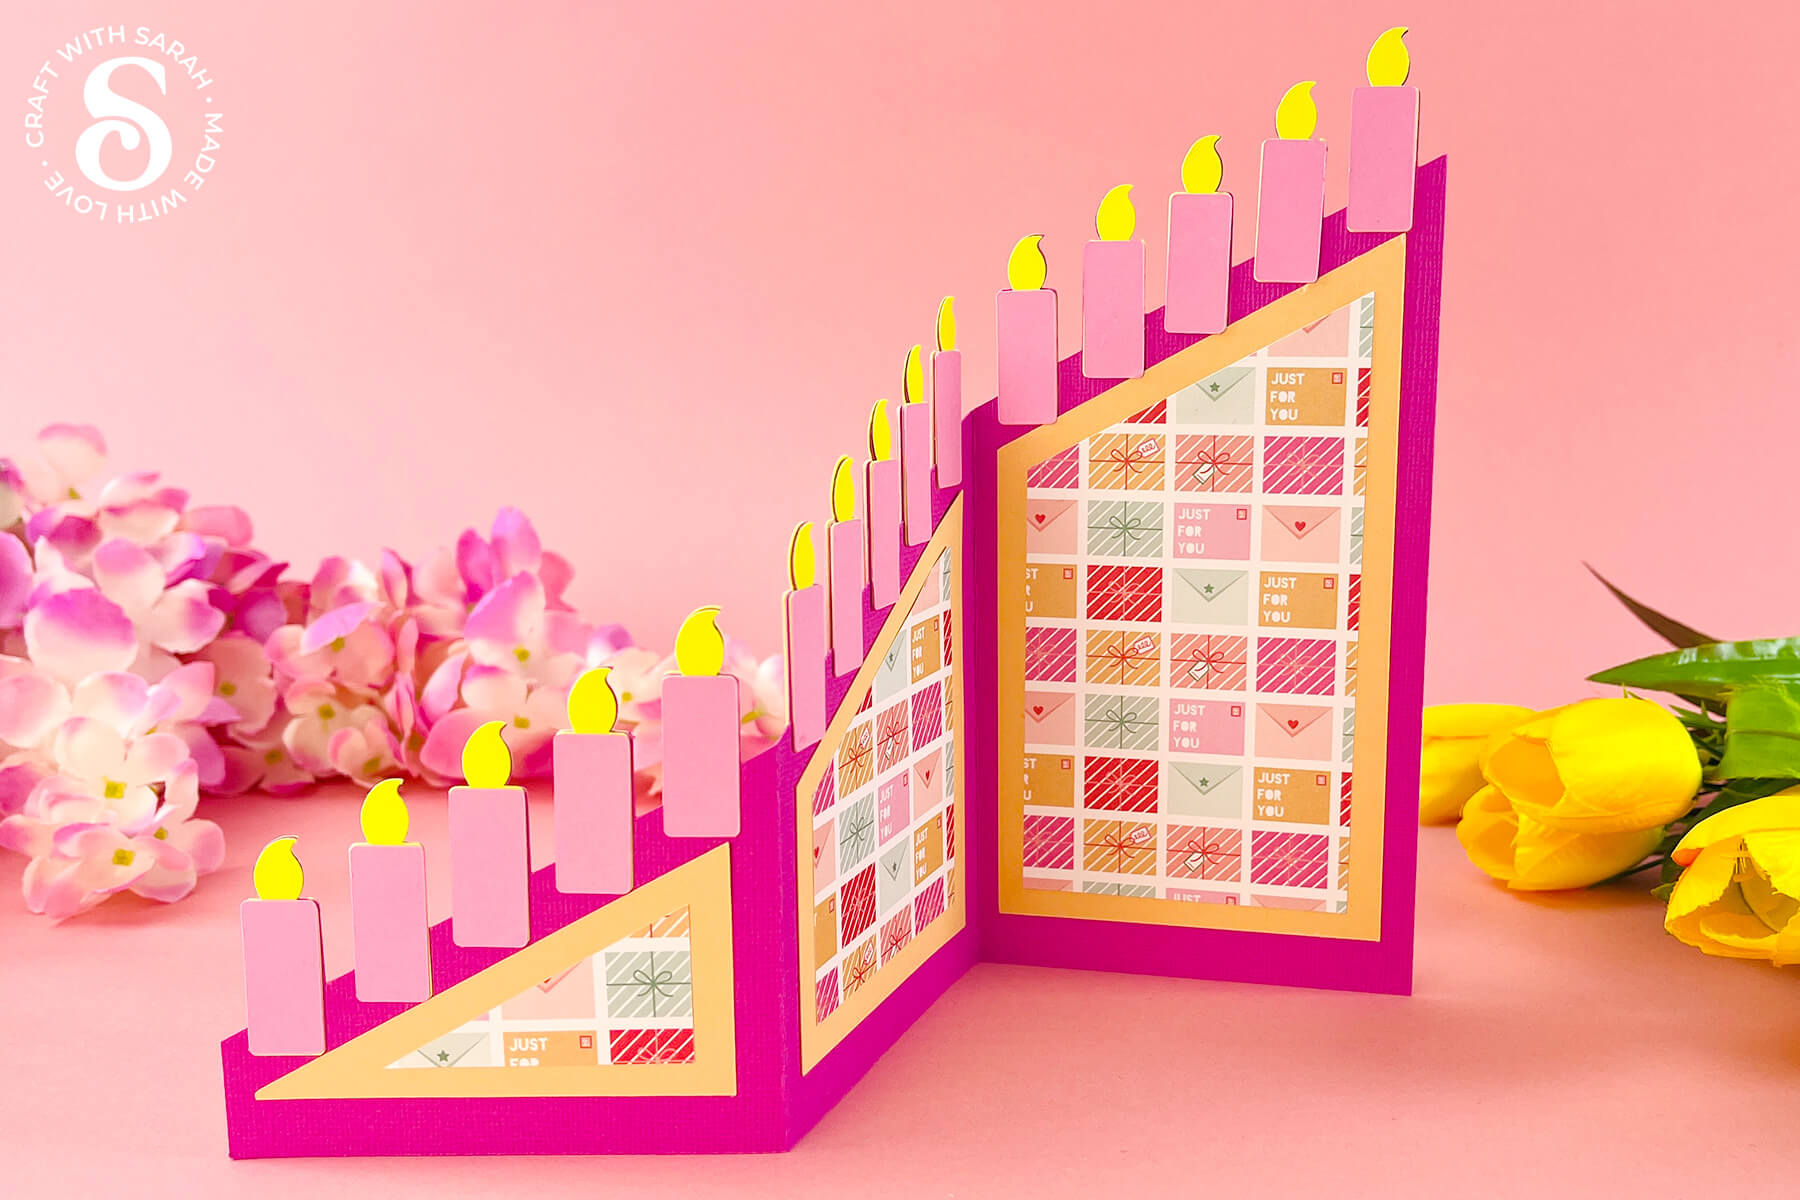
Welcome to day nine of the 2025 Card Making Countdown, where I’m sharing 14 card making projects in 14 days.
Ready to take your cardmaking to the next level? 🎉
In this fun and easy tutorial, I’m showing how to make cascade cards. These eye-catching, freestanding “fun fold” cards pop with personality and stand proud on display!
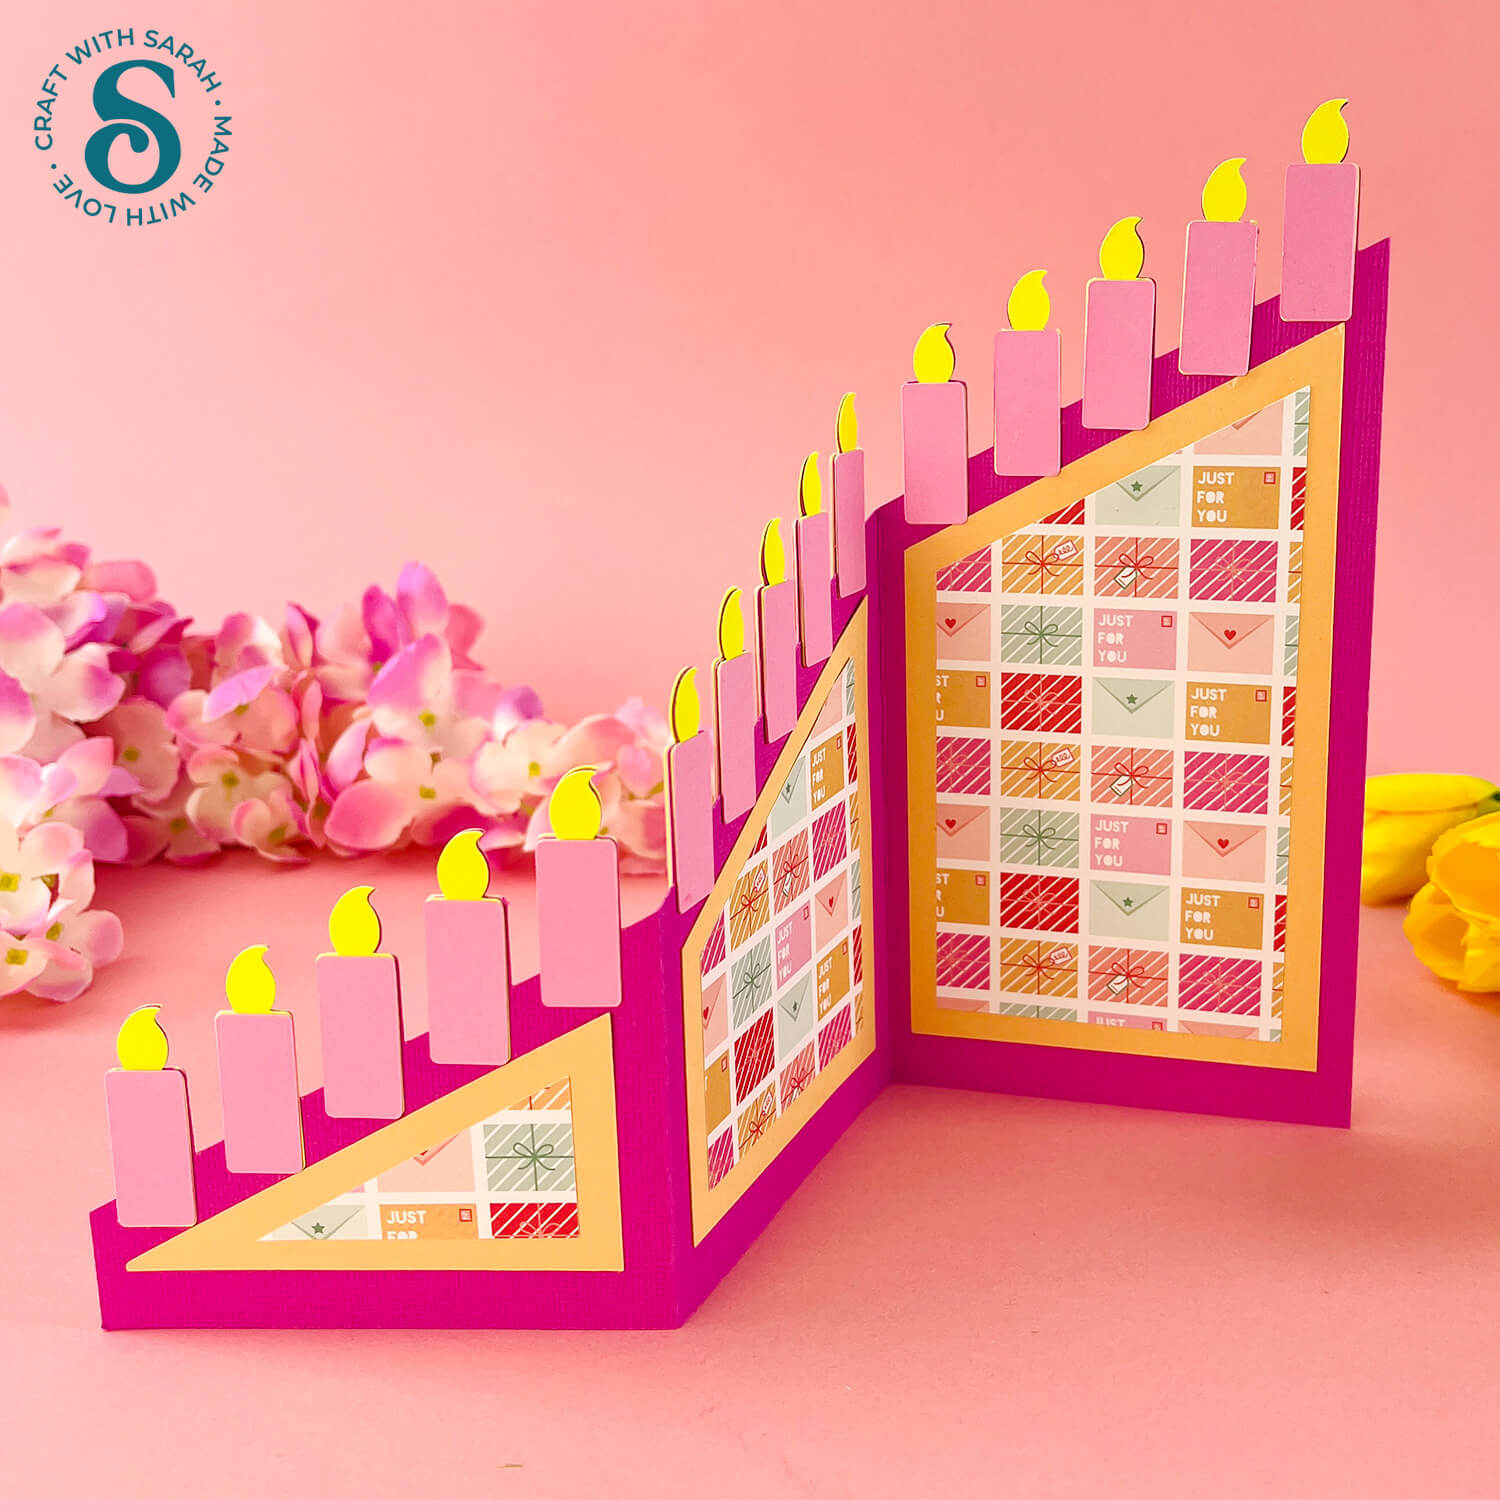
You’ll learn how to fold cardstock into three cascading panels and bring your card to life with one of our three exclusive templates: a classic straight-edge design, a sweet scalloped circle edge, and a playful birthday candle version that’s perfect for celebrations!
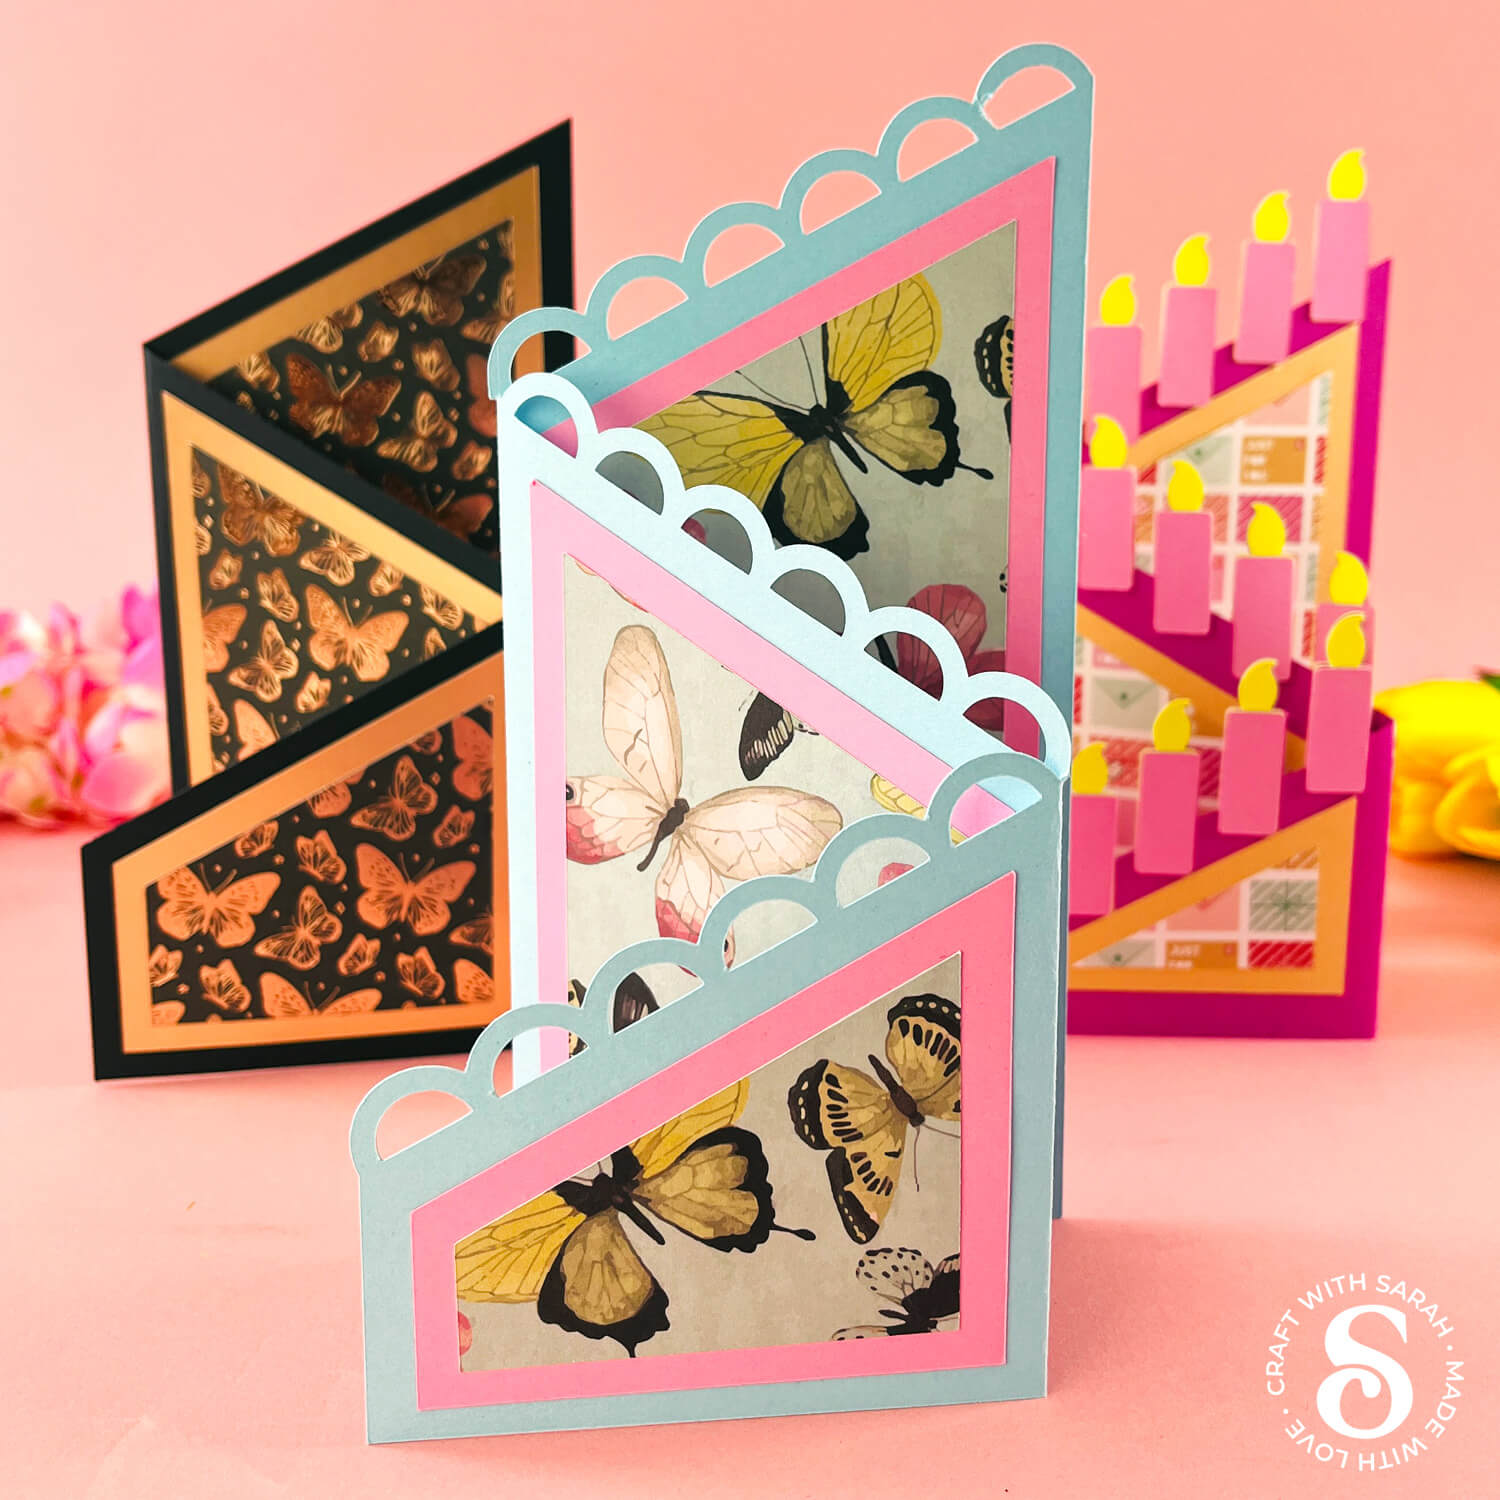
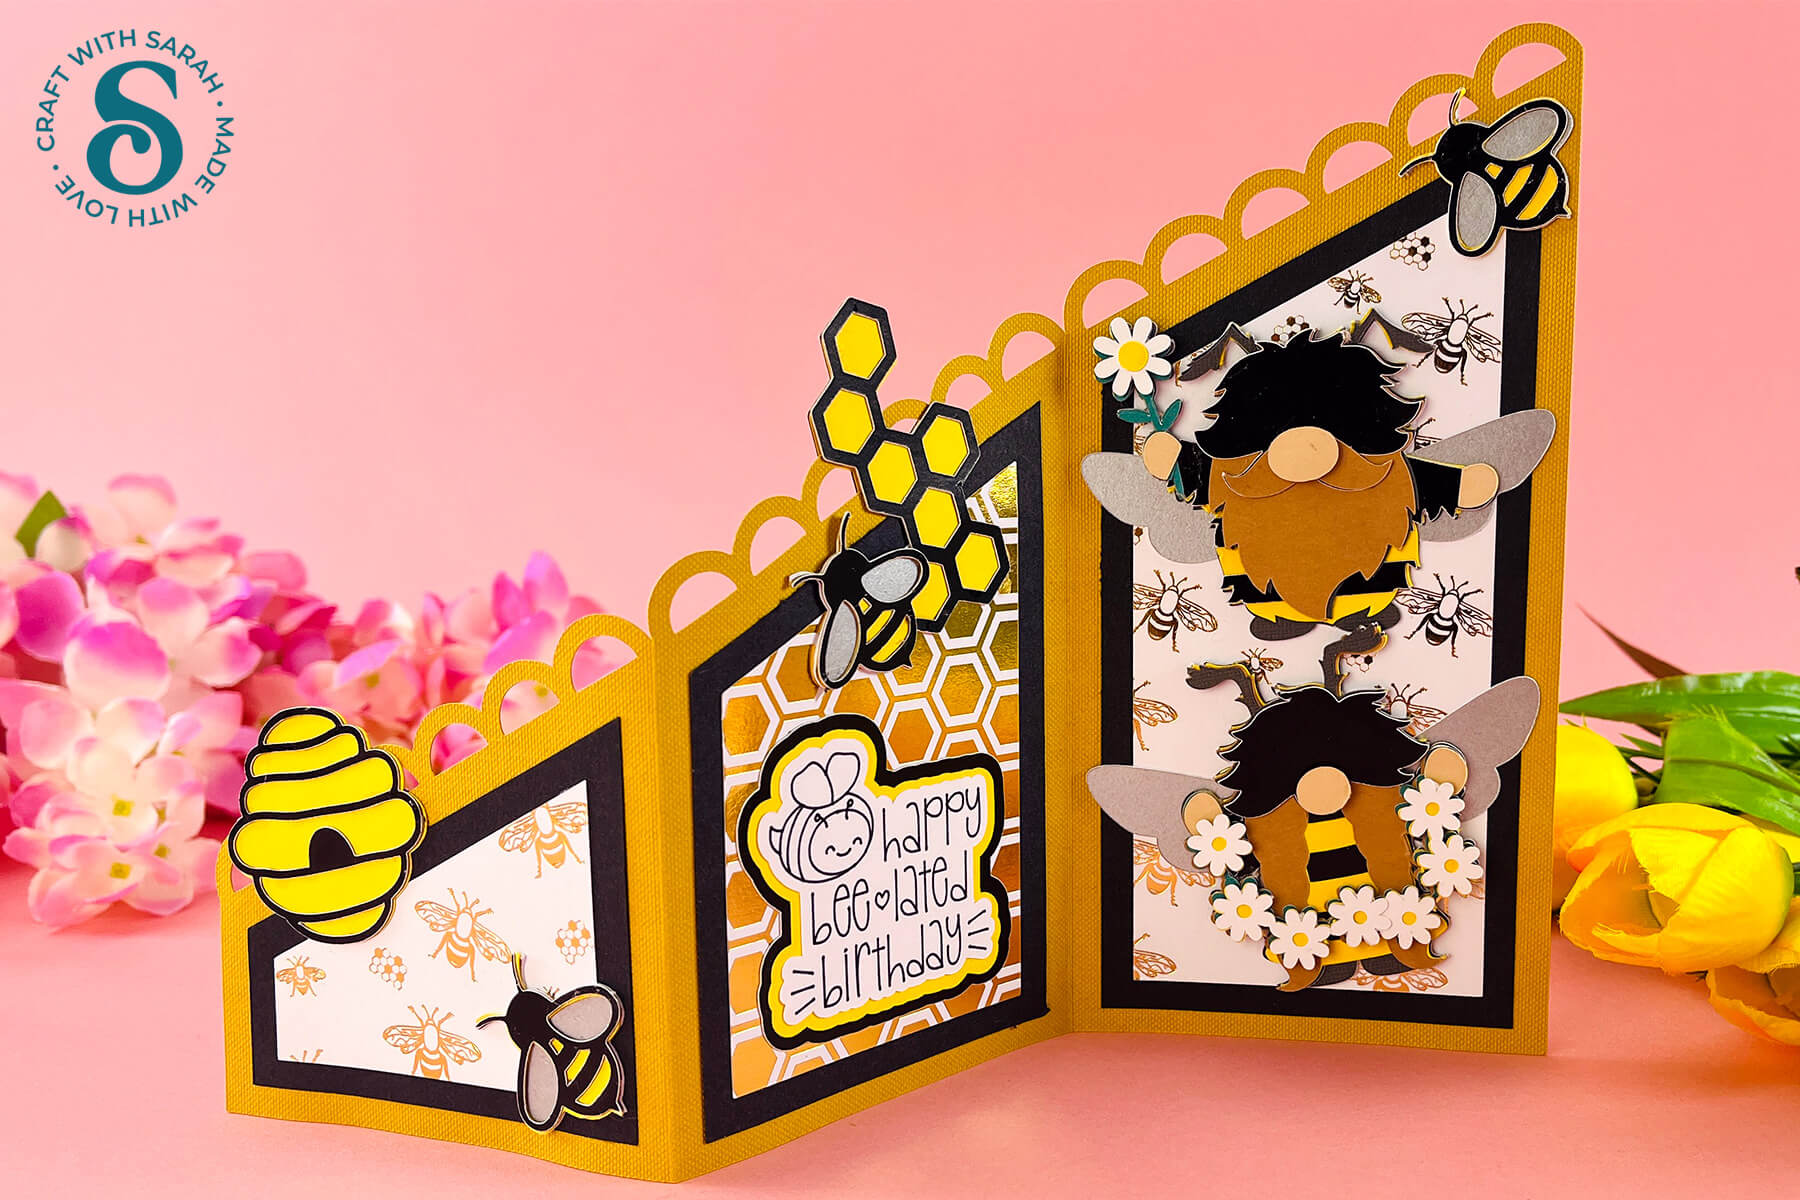
But the creativity doesn’t stop there — I’ll also show you how to customize your cascade cards for any occasion using layered SVGs, text, images, and patterned paper.
And yes… there will be gnomes!!
Whether you’re crafting for a birthday, holiday, or just because, these cards are sure to wow and delight.
An envelope template is included too that will perfectly fit the cascade cards.
So grab your paper, fire up your cutting machine (or scissors!), and let’s start folding our way to something beautiful and unique. Let your imagination soar — the possibilities are endless!
The cut files are suitable for a range of cutting machines, such as Cricut, Silhouette and ScanNCut. The file types that are included are: SVG, EPS, DXF and PNG.
Hand-cutting (printable) versions of the templates are also included.
This project is part of the 2025 Card Making Countdown.
Materials supply list
Here is a list of the materials that you’ll need for this cascade card tutorial.
Please note that some of the links included in this article are affiliate links, which means that if you click through and make a purchase I may receive a commission (at no additional cost to you). You can read my full disclosure at the bottom of the page.
- Cricut machine
- Light blue Cricut cutting mat
- Coloured Card
- Patterned paper and/or embellishments
- Glue (I like Bearly Art Glue and Collall) or double-sided tape
- Cricut scoring wheel or scoring stylus
- Foam squares (optional)
This project is suitable for the following types of Cricut machines: all Explore models, all Maker models, and Venture. You will need to make the designs smaller to cut on the Joy Xtra. These templates are too large to cut on a Cricut Joy.
Foundation learning
If you're new to crafting with your Cricut, you may find the below links helpful.
They teach some of the skills mentioned throughout the Countdown projects.
- How to upload SVG files into Design Space
- How to make 3D layered Cricut projects
- The BEST way to frame papercraft projects
- How to mount multiple designs in the same frame with magic guides
- How to score with a Cricut (even without scoring tools)
- Print then cut tutorial
- Design Space tools (Combine, Attach, Slice, Weld, Flatten, etc.)
- Pattern fill tutorial (for making backgrounds & cutting images to a specific shape/size)
- Free envelope SVGs that can be sized to fit any card
- Presentation boxes for handmade cards
- How to write inside cards with Cricut pens
- How to cut layered designs at a small size
- Design Space tips & tricks
- Cricut pens tutorial
Video tutorial
Watch the video below to see how to make this project. Keep scrolling for a written tutorial.
Written tutorial (with photos!)
Here’s how to turn the cascade card templates into finished greetings cards.
Step 1) Download the cutting files & upload to Design Space
Download the files using the box below.
Purchase the File(s)
This cut file is available as part of the Instant Access Bundle.
Or, purchase the designs individually:
Cascade Card (Birthday Candles)
Before you upload the SVGs to Design Space, you need to unzip the download folder that they come in.
- How to unzip a folder on Windows computer
- How to unzip a folder on a Mac
- How to unzip a folder on an iPad/iPhone
- How to unzip a folder on an Android device
After unzipping, upload the SVG file(s) into your cutting machine software.
Not sure how to use cut files with your type of machine? The following links lead to videos on how to open cut files in:
- Cricut Design Space
- Silhouette Studio
- CanvasWorkspace (for ScanNCut machines)
The download folder also contains printable PDF versions of the templates for hand cutting.
If you are using Cricut Design Space, start a new project and then click the “Upload” button on the left of the screen.
You can then either click “Browse” to find the file on your computer, or drag-and-drop it.
Find the unzipped download folder, then choose the “01 Cricut Version” subfolder.
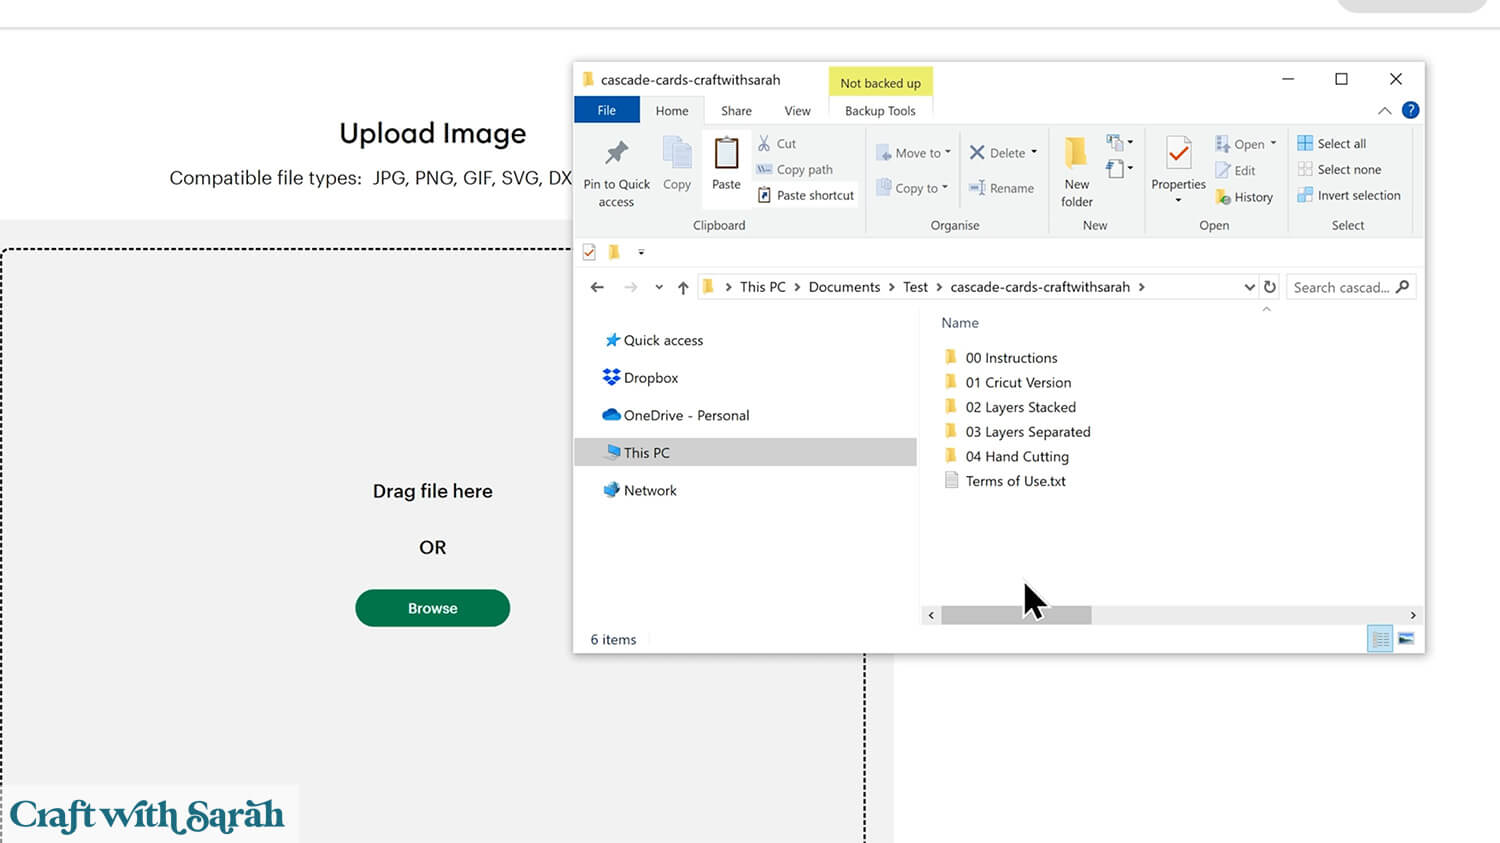
Choose one of the cascade card patterns to upload.
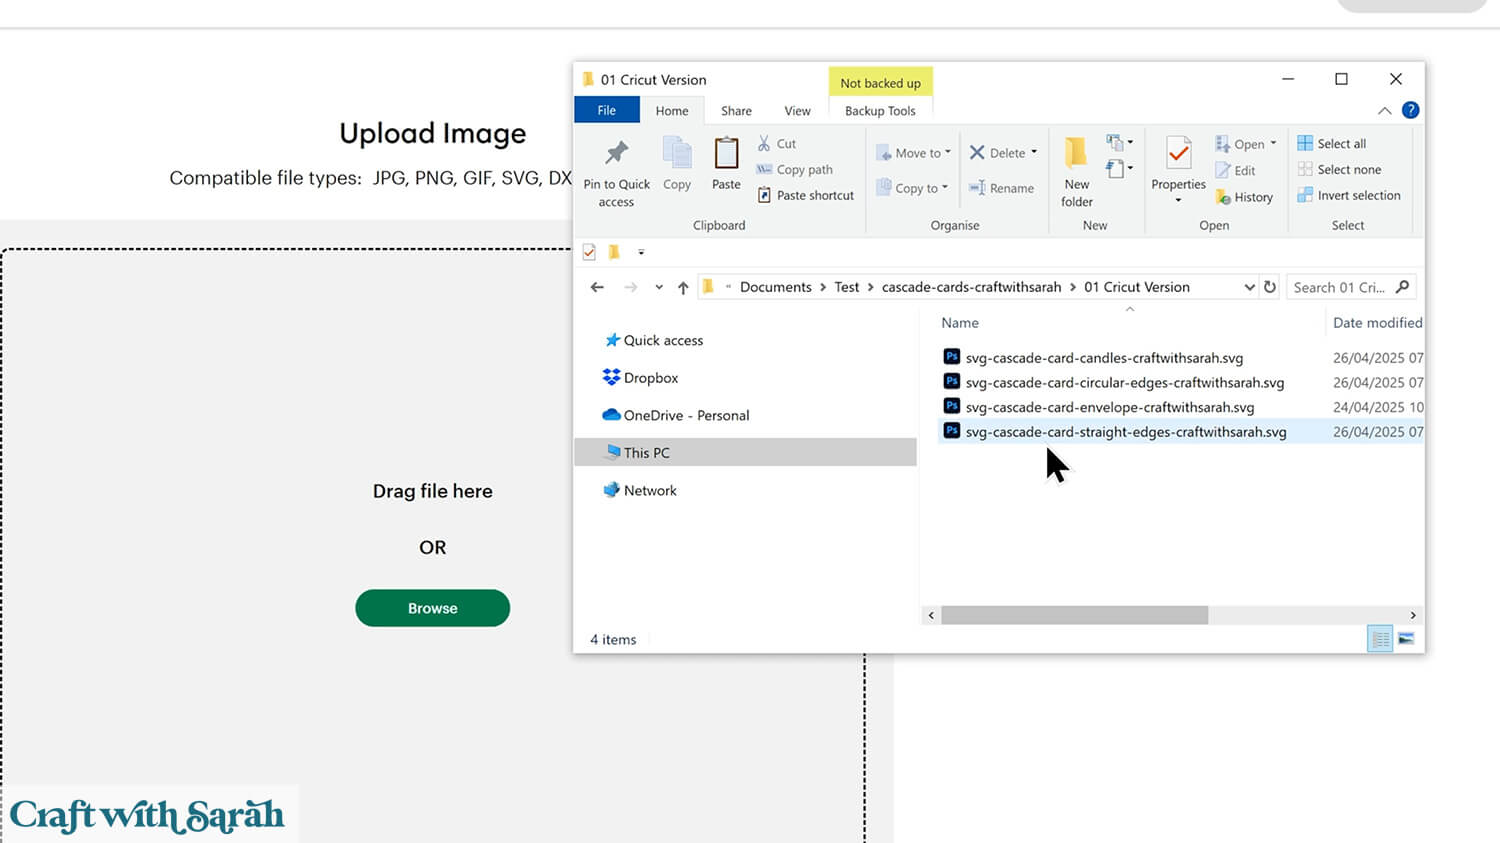
I am using the straight edge design for this tutorial, but the steps are the same for all three designs.
Select the file then click “Continue”.
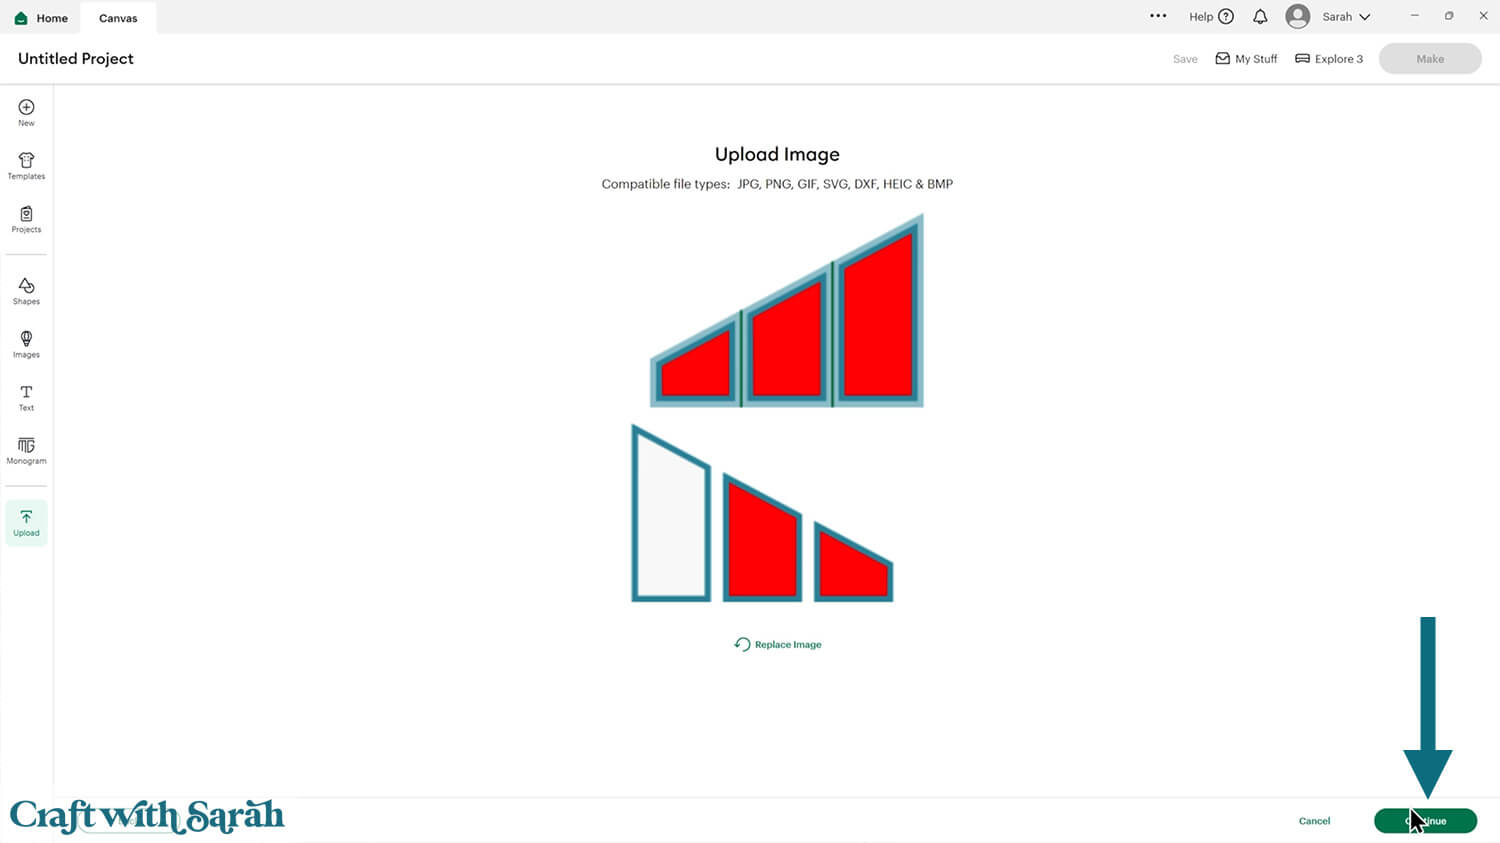
There’s no need to change anything on the next page – just click “Upload”.
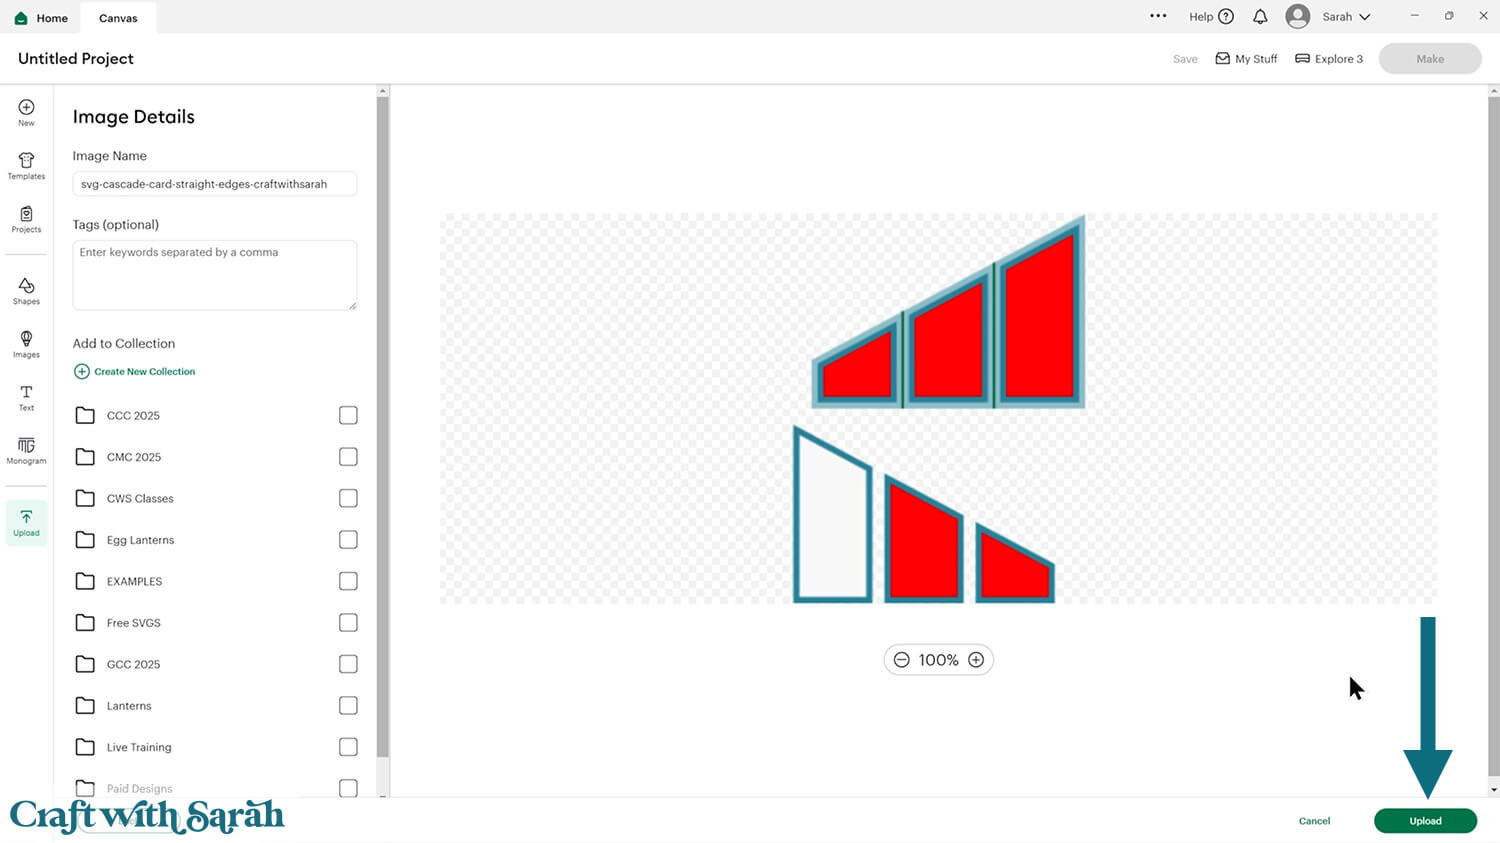
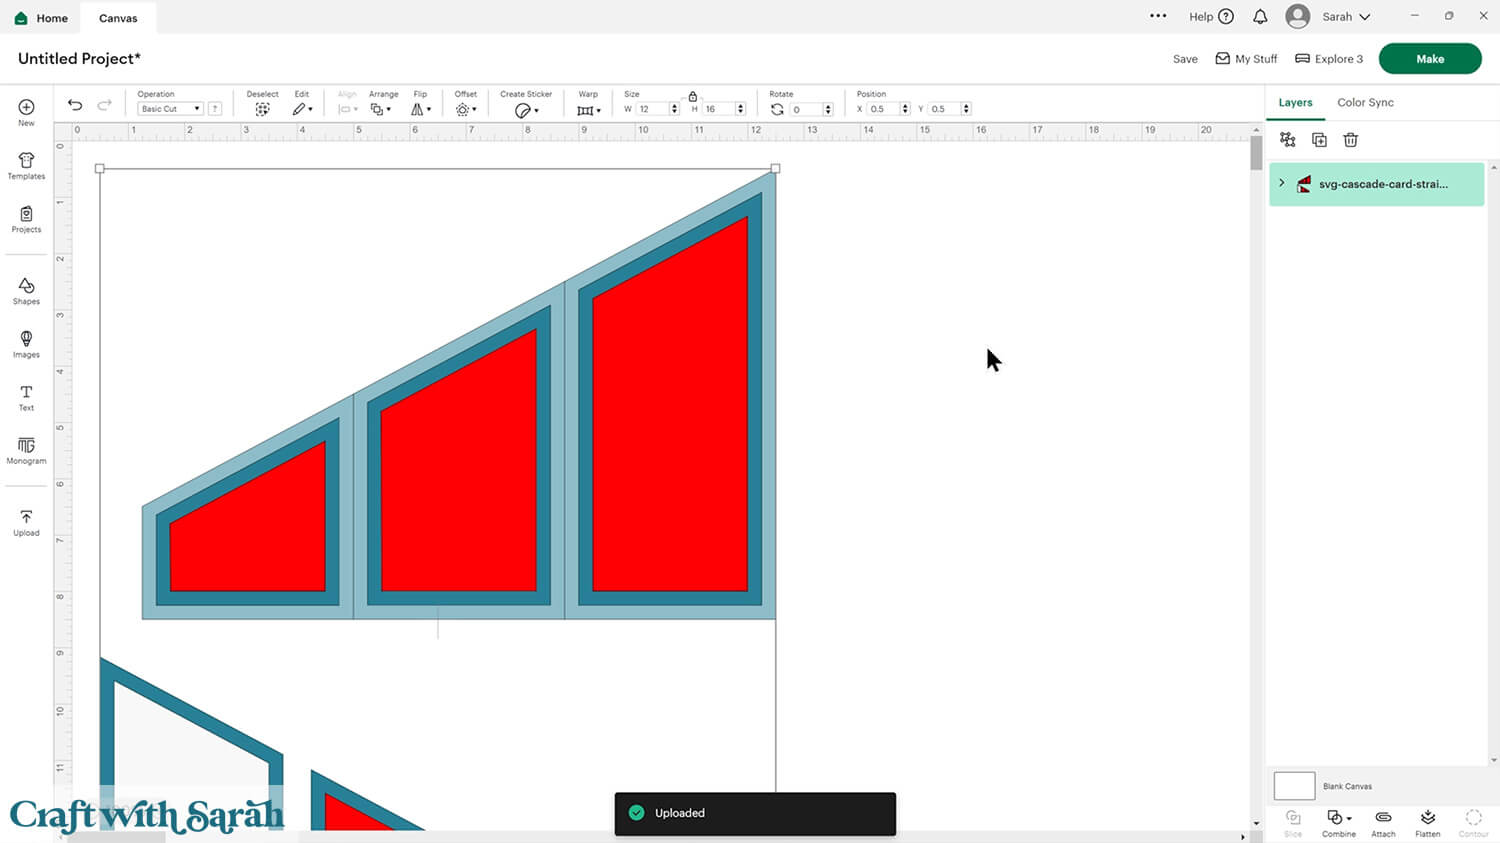
The cascade card template will then be added to your Canvas.
Step 2) Format the score lines
This card making project requires a scoring wheel or stylus for your machine.
Don’t have a scoring tool? Check out these Cricut scoring hacks for alternatives.
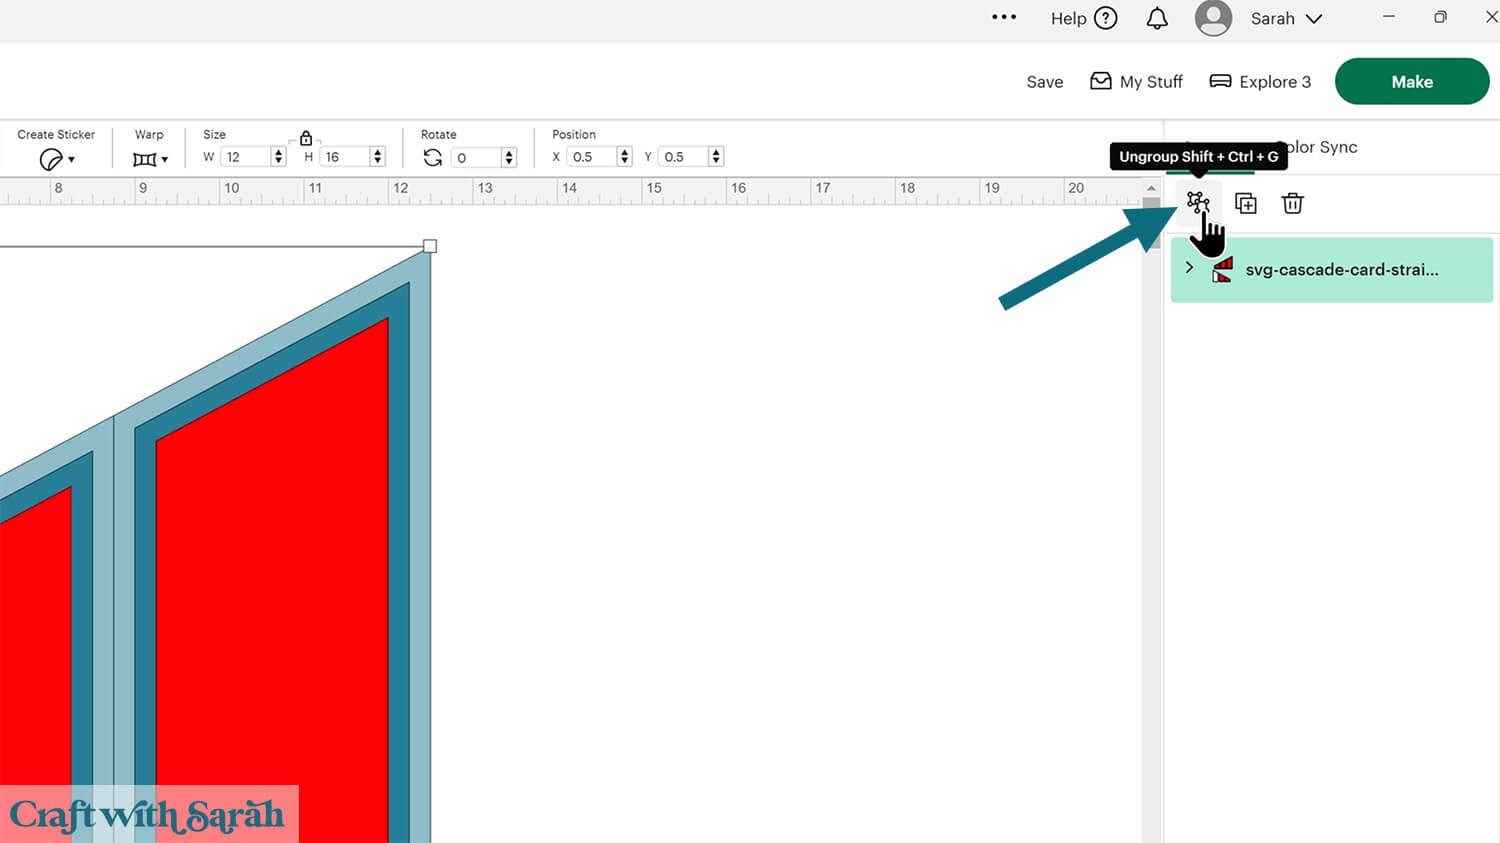
Click the card and Ungroup the layers to separate them.
Scroll down to the bottom of the layers panel. You’ll see the base card with a little chevron arrow next to it.
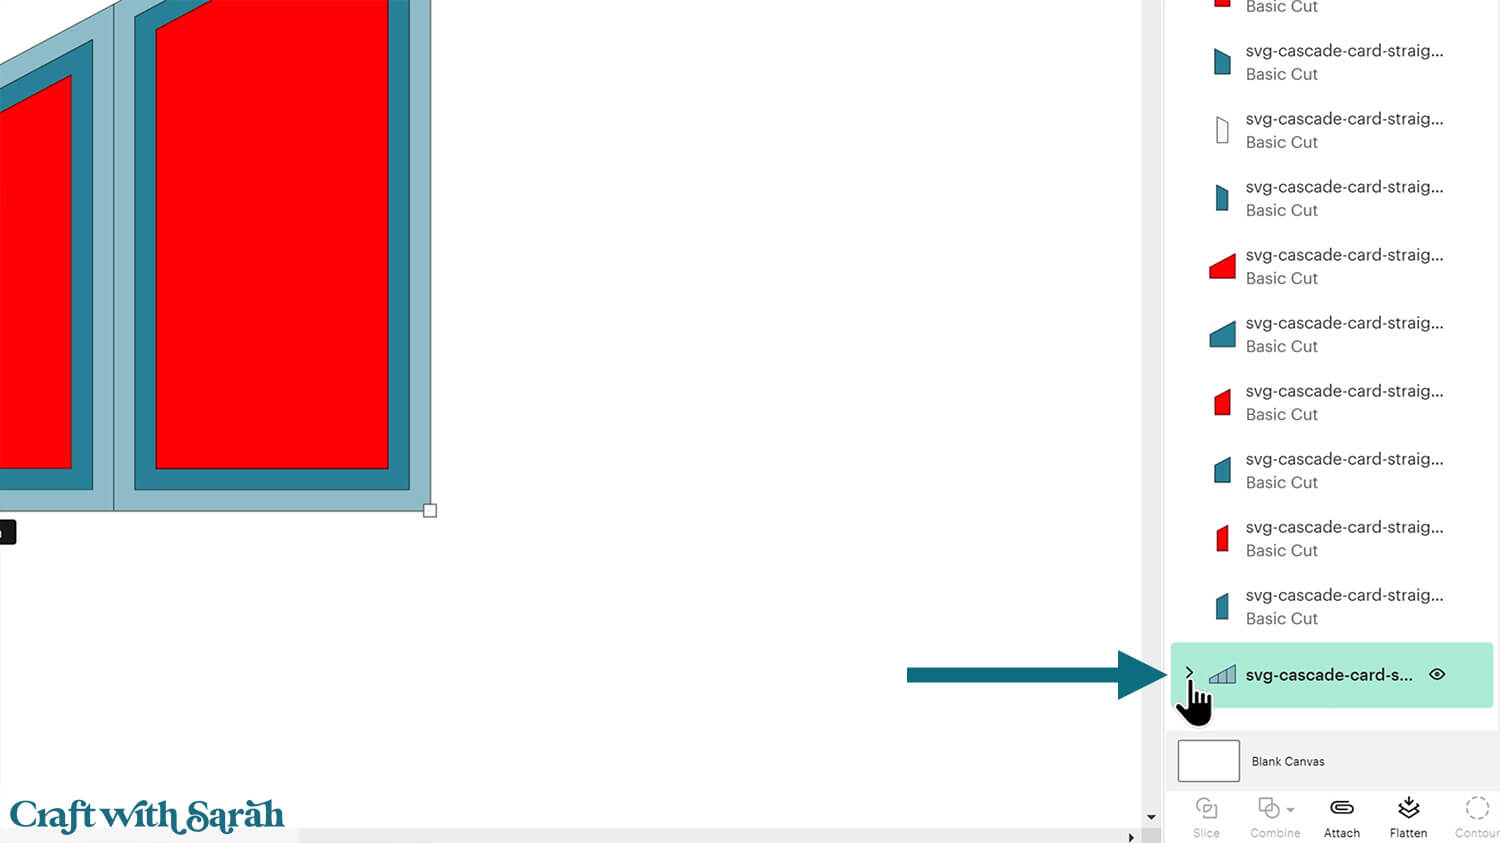
Click the arrow to open up the layers.
Click the layer that looks like several vertical lines.
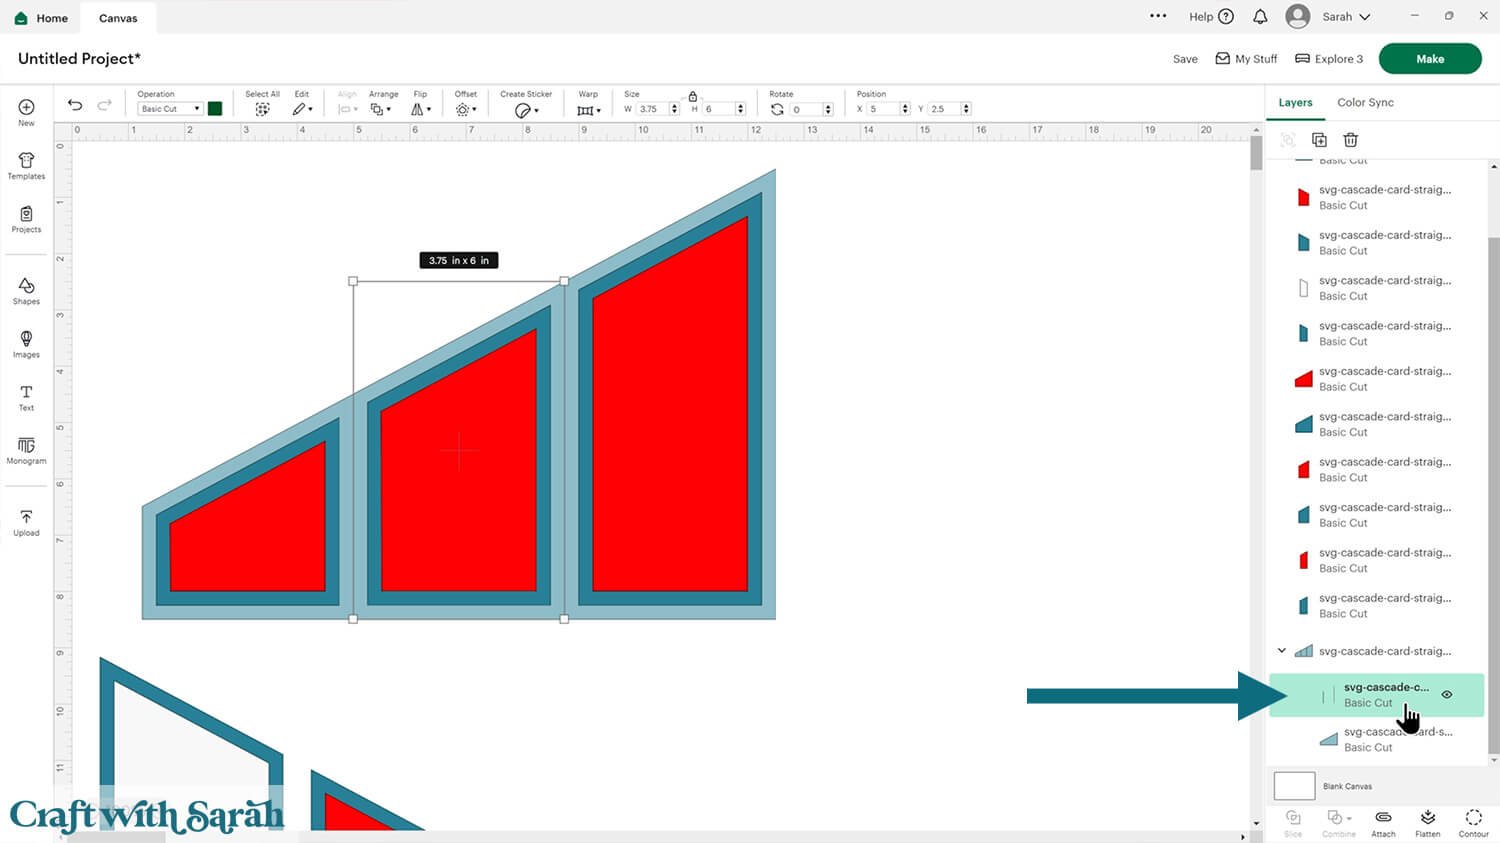
Change this layer to “Score” in the Operations dropdown menu along the top of the screen.
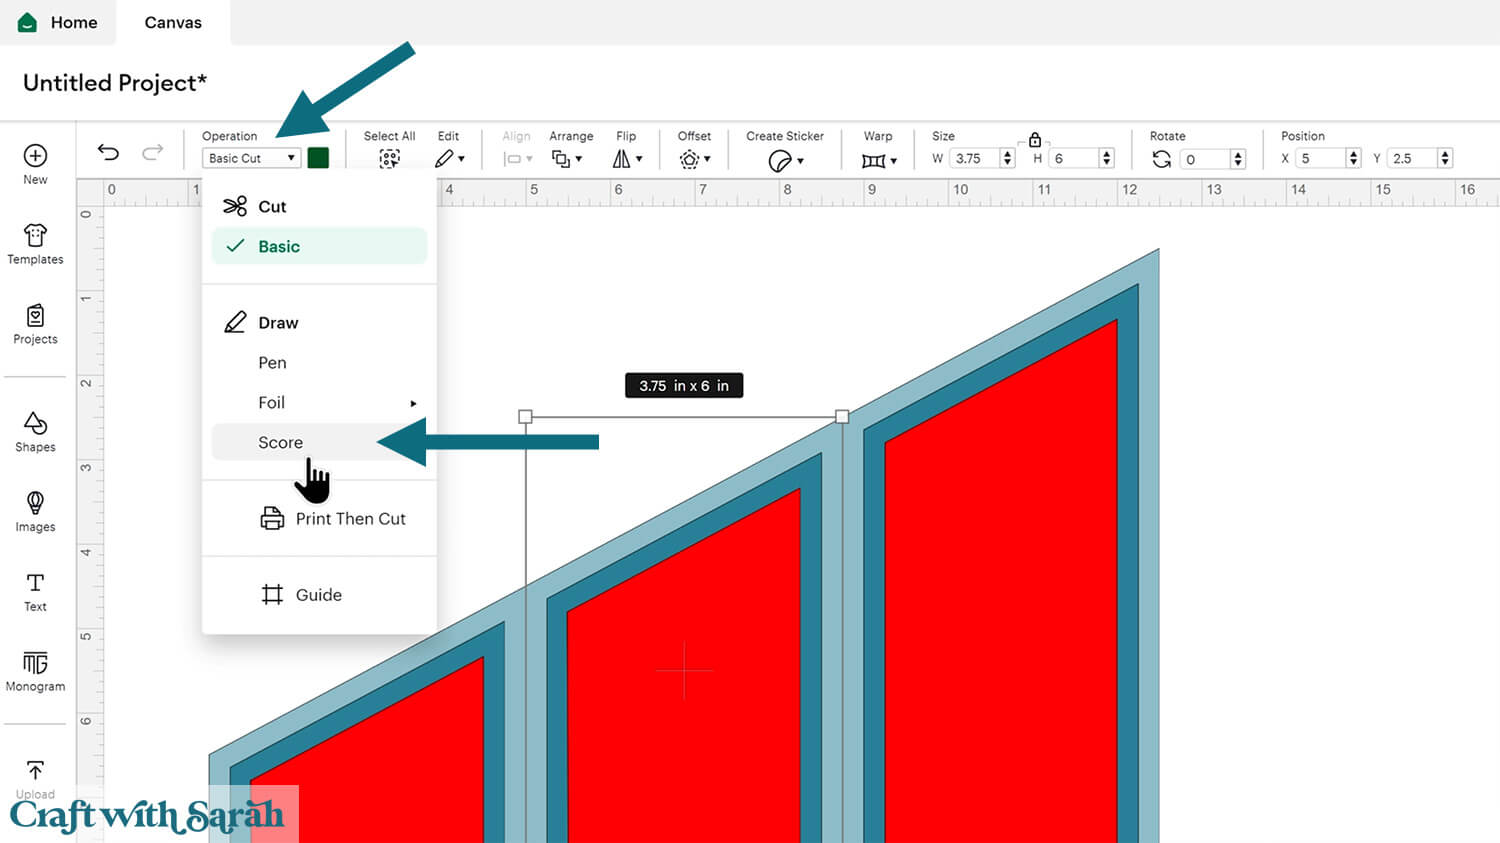
Select the score line layer and the base card, then press “Attach” at the bottom of the layers panel.
Attach is what tells the Cricut where to do the scoring.
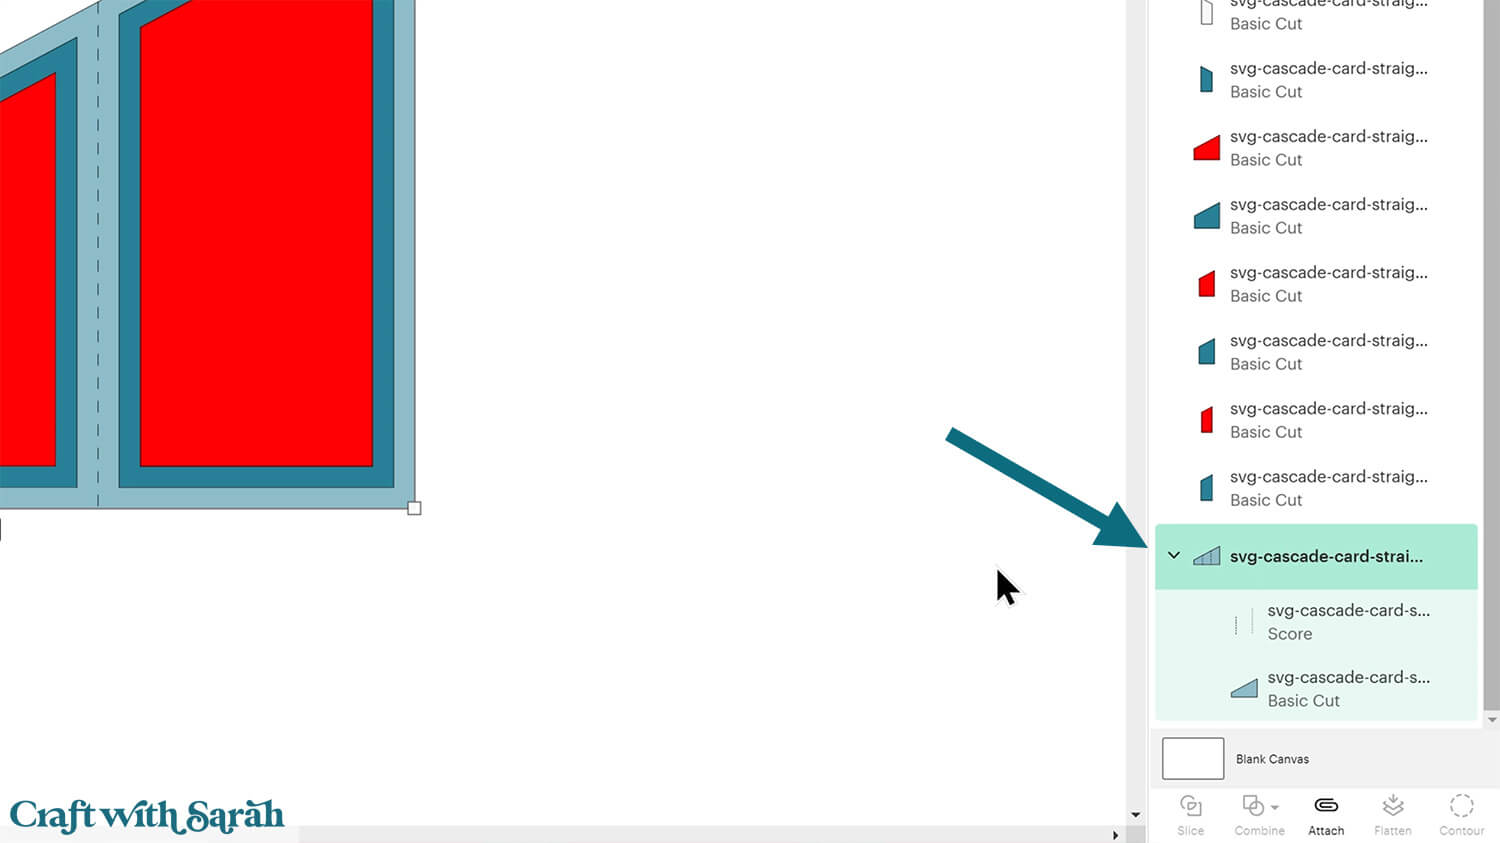
After Attaching, the base card will move to the top of the layers panel.
It should now have a paperclip icon next to it, and the word “Attach”.
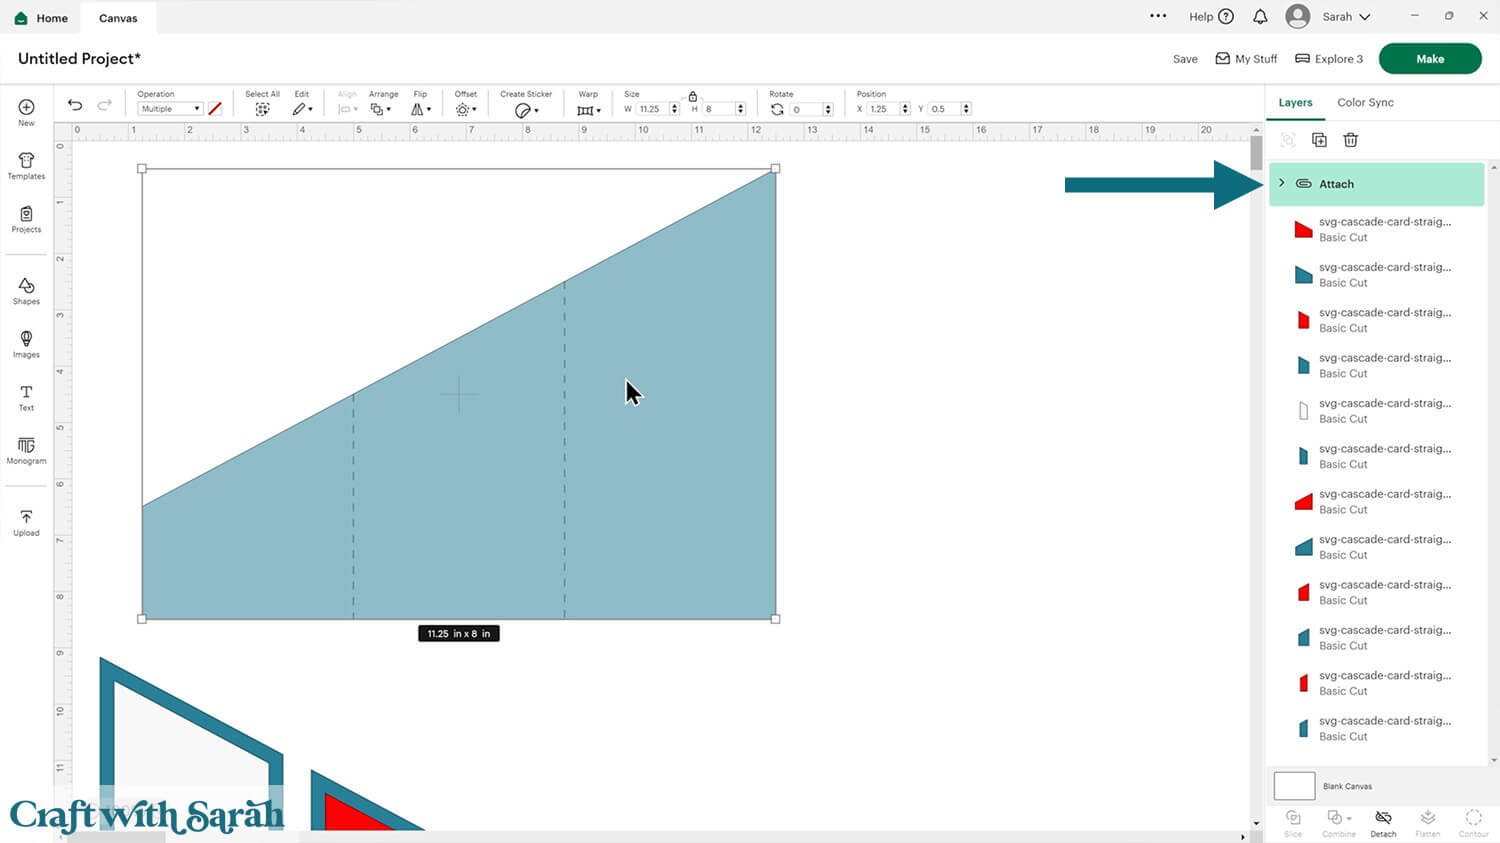
Move it back down to the bottom of the layers panel by clicking Arrange > Send to Back.
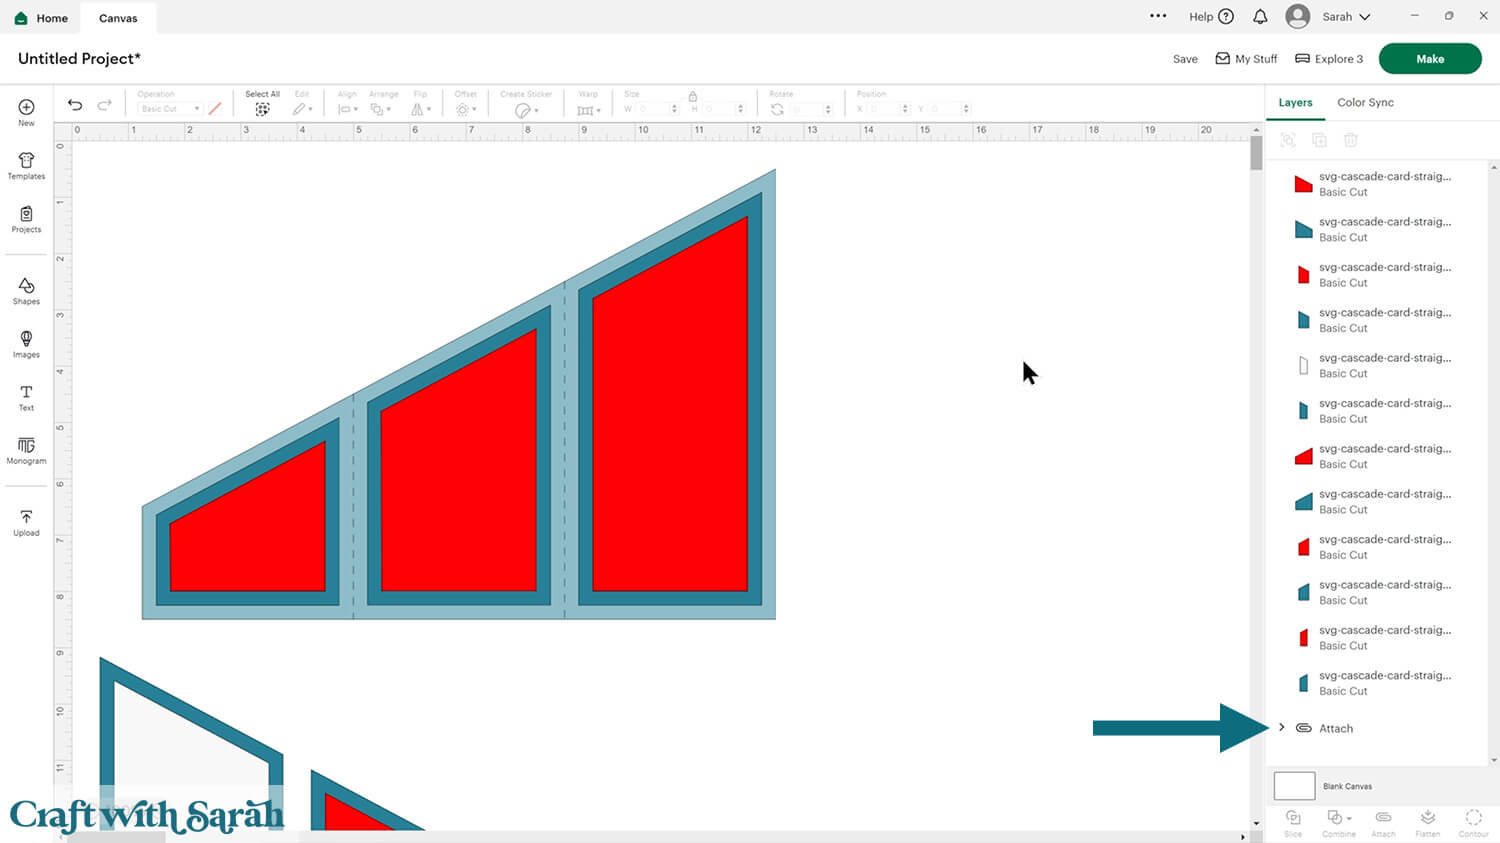
Step 3) Change the colours (optional)
This is a good time to change the colours if you are planning on cutting them differently to what’s on the screen.
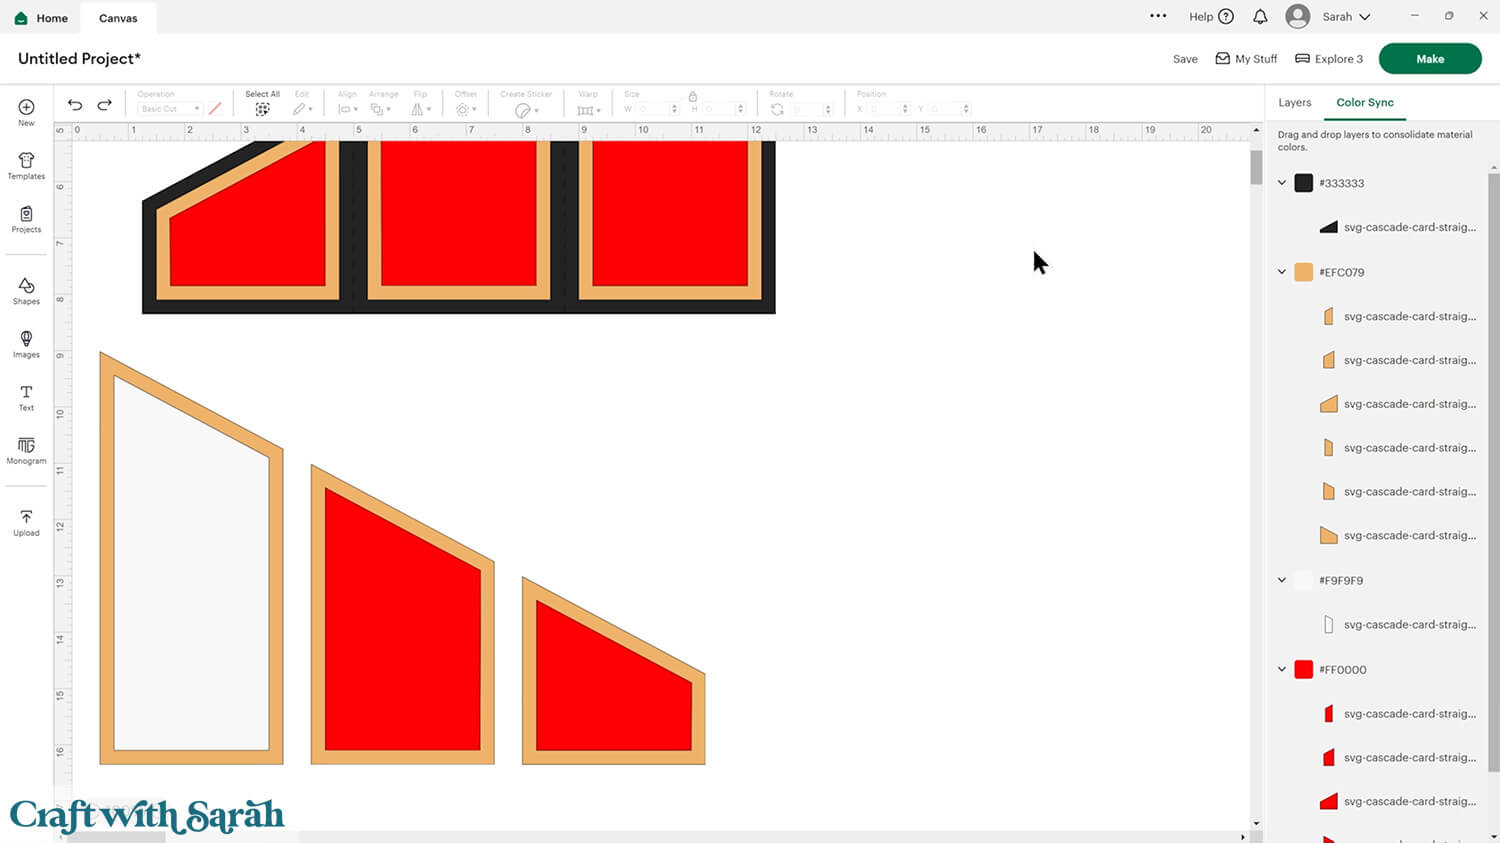
Once you’ve changed one piece, you can easily change all other pieces in the original colour to the new one by clicking “Color Sync” at the top of the layers panel and dragging-and-dropping the old colour into the new one.
If you want to use different papers for the various panels then colour them differently.
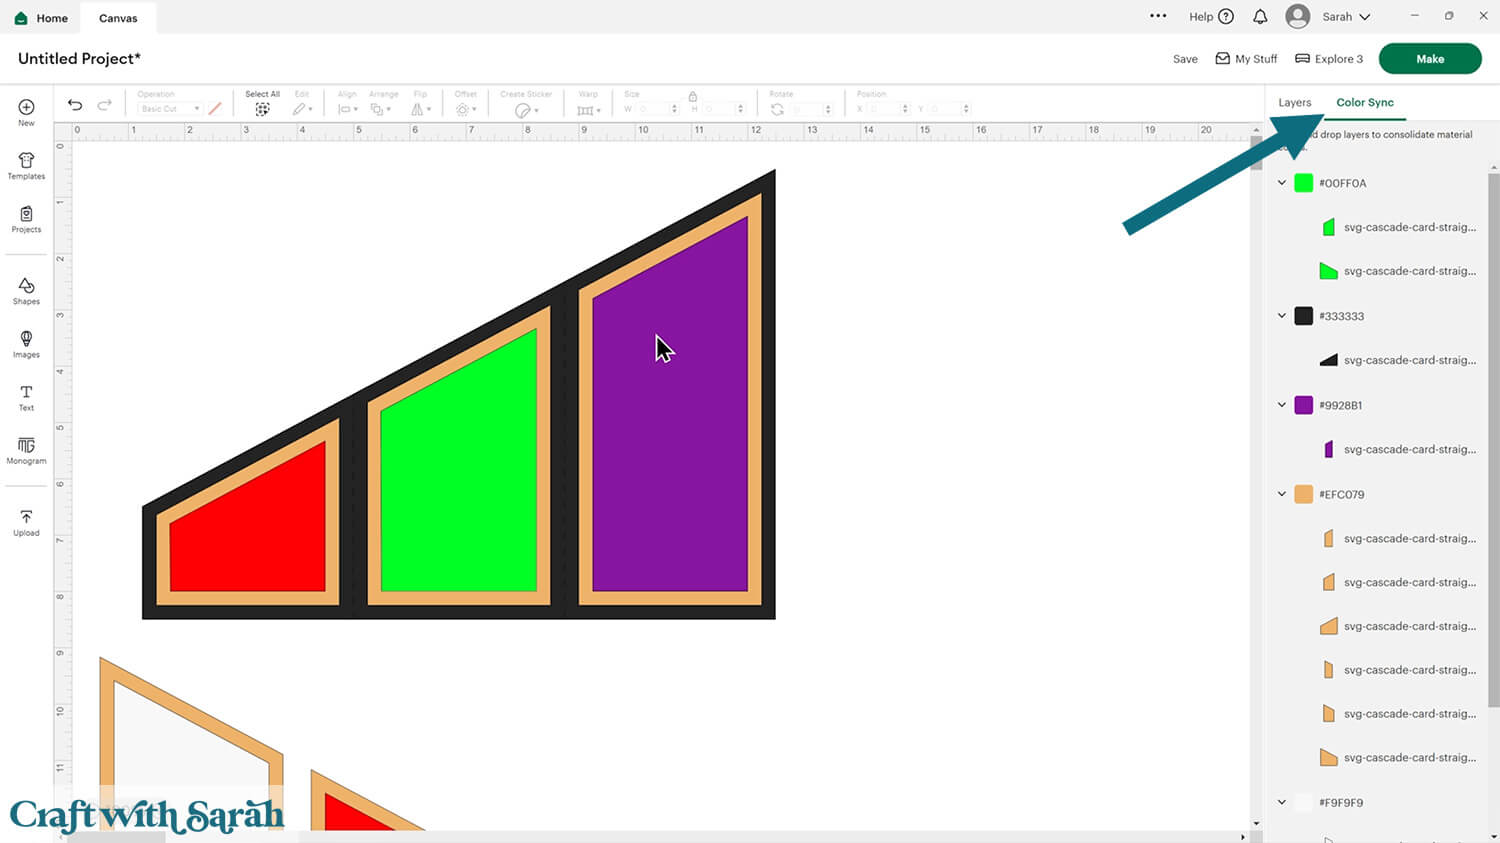
The white rectangle is the message panel to go on the back of the card. I recommend leaving this white (or a light colour) so that your writing will show up.
Step 4) Decorate your card
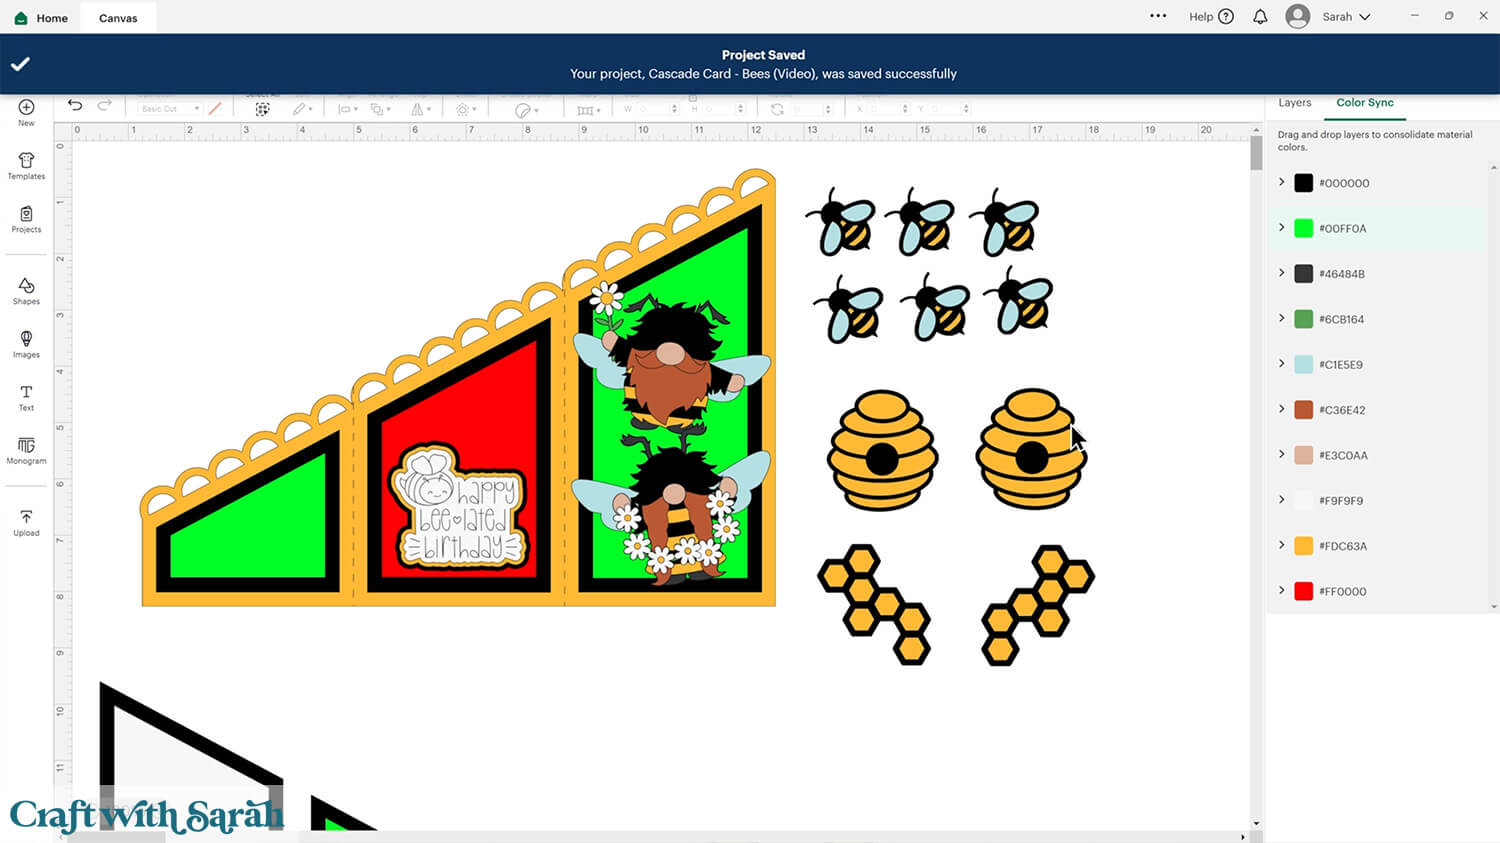
If you would like to add any extra embellishments or decorations in Design Space, now is the time to do it.
These cards are perfect for adding miniature layered designs too, for example some of my layered gnome SVGs.
You may wish to hide/delete some of the layers to make them a little easier to cut at a small size.
- How to simplify layered SVGs in Cricut Design Space
- How to simplify layered SVGs in Silhouette Studio
- How to simplify layered SVGs in CanvasWorkspace for ScanNCut
When resizing the layered designs, make sure they will fit on the card without overlapping any of the score lines.
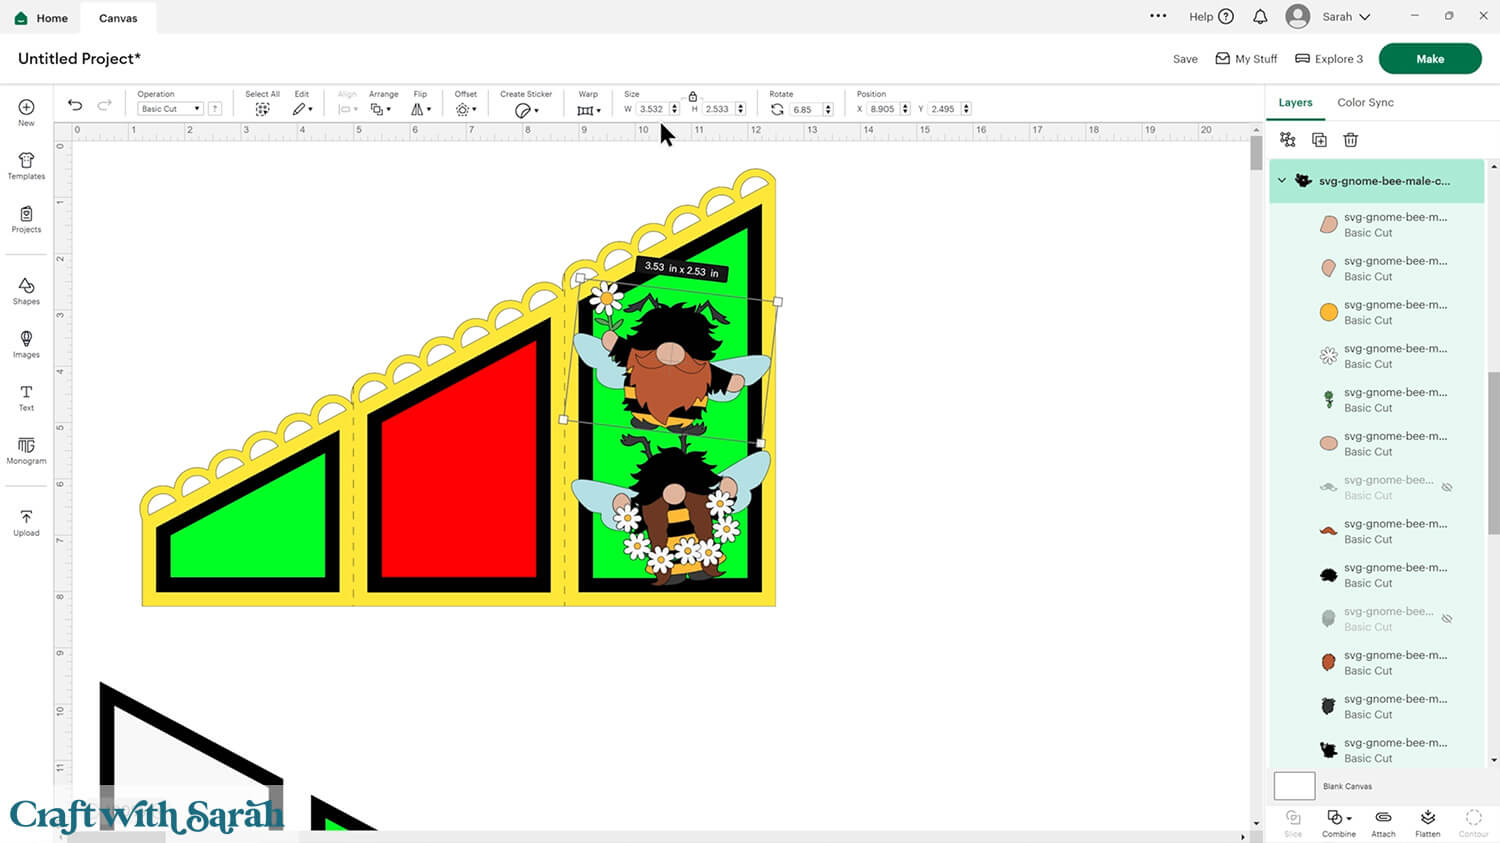
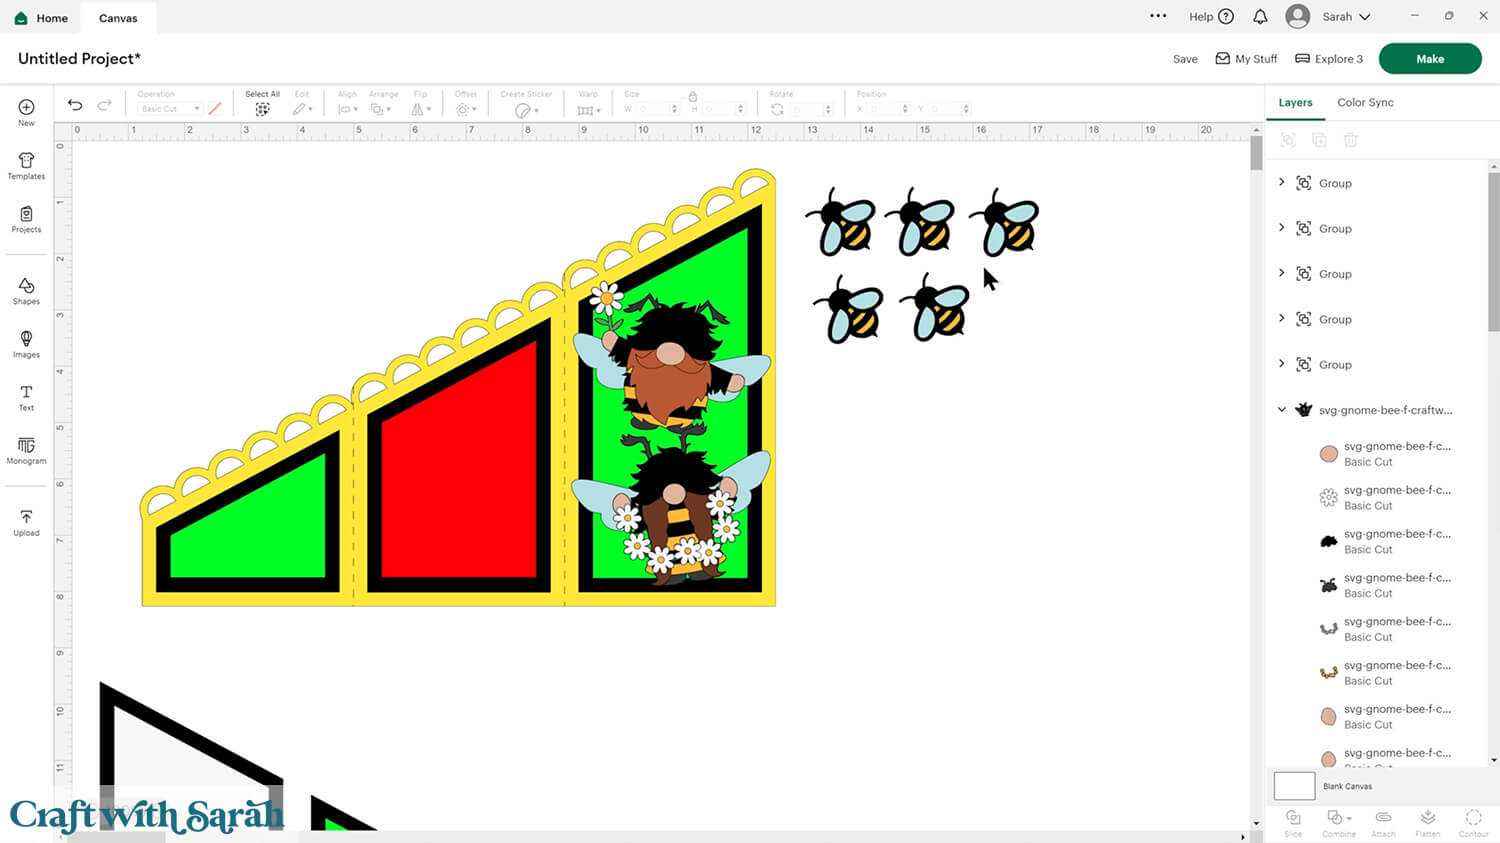
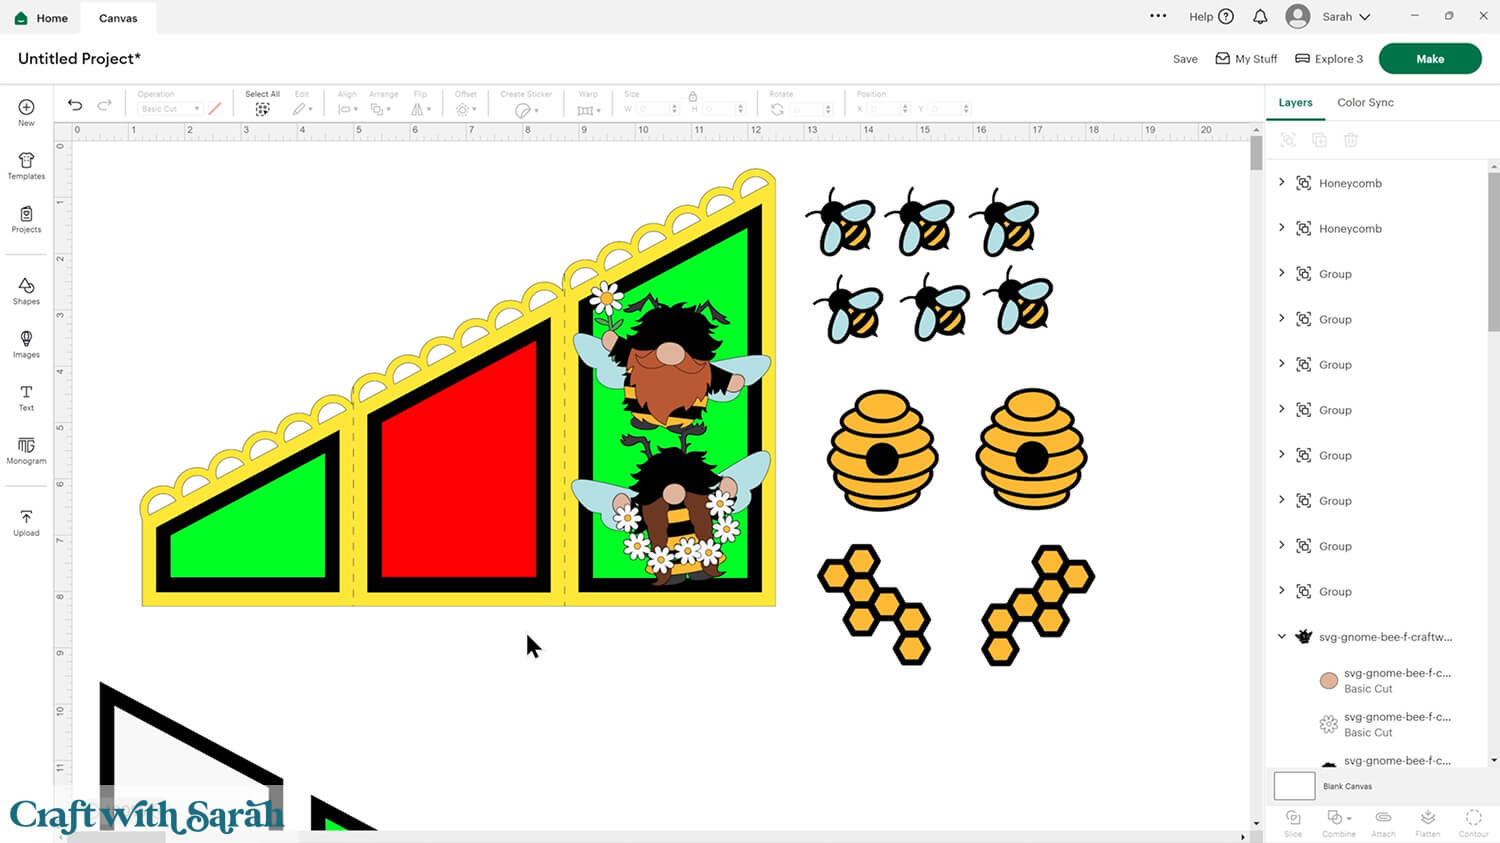
If you aren’t sure exactly where to play images then you can keep them separate to the template in Design Space.
For example, my little bees are going to be used to fill in any gaps/spaces on the card, so where they are positioned will depend on the final look of my card once I’ve got the patterned papers in place.
I like to add overlapping elements that go over the “top” of the front and middle sections of the card.
To make it pretty on both sides, Duplicate the image and then press Flip > Flip Horizontal on the copy to make a mirror image.
That means that you can stick them back-to-back so the card looks great no matter which side you are looking at it from.
I’ve done that for the beehive and honeycomb images shown below.
These images are from Cricut Access.
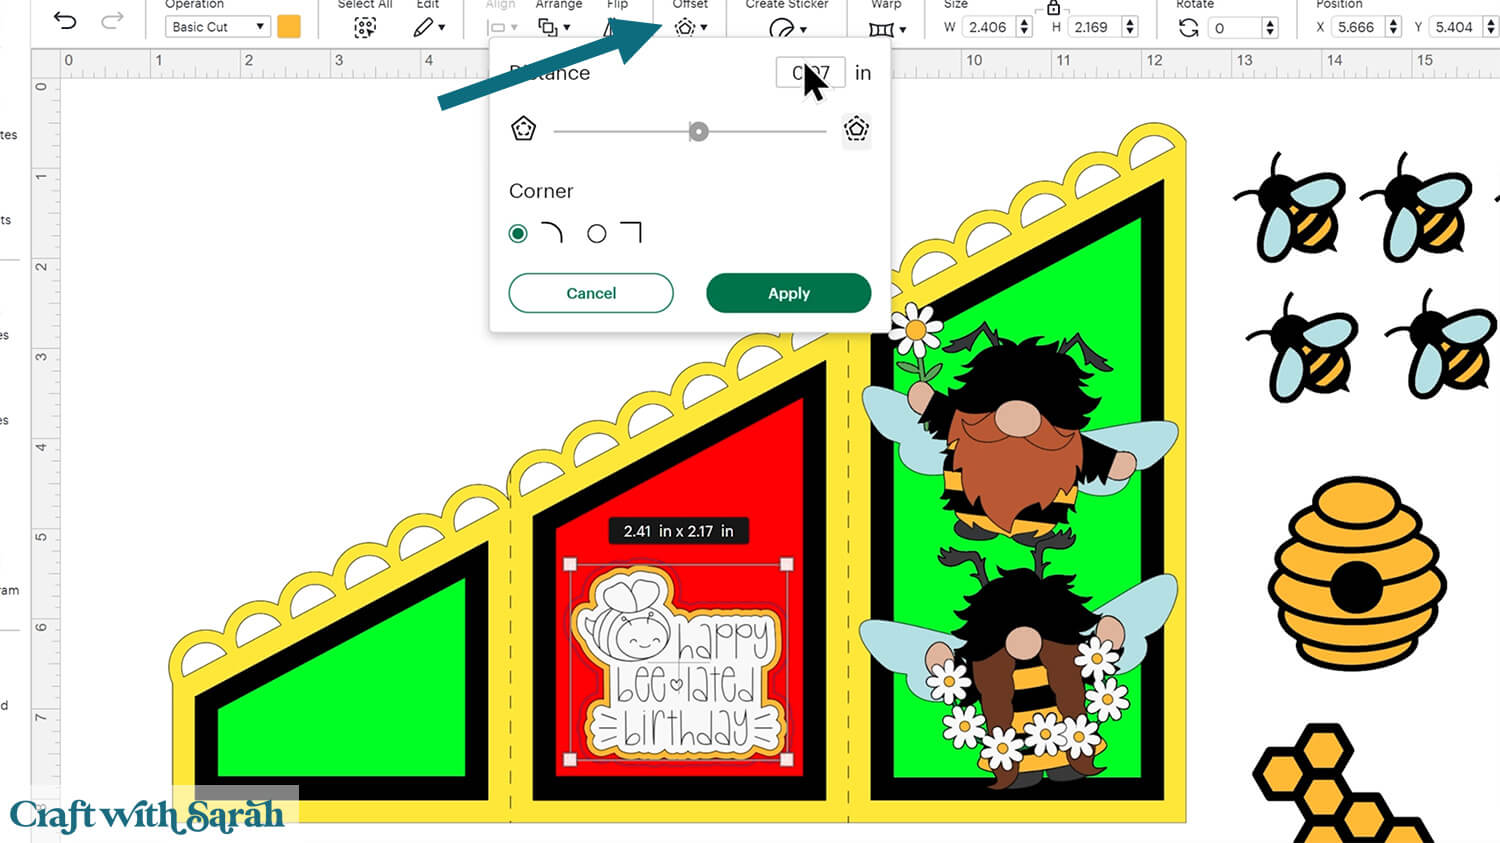
The “Offset” tool in Design Space is helpful for adding borders around sentiments to help them stand out against your patterned papers.
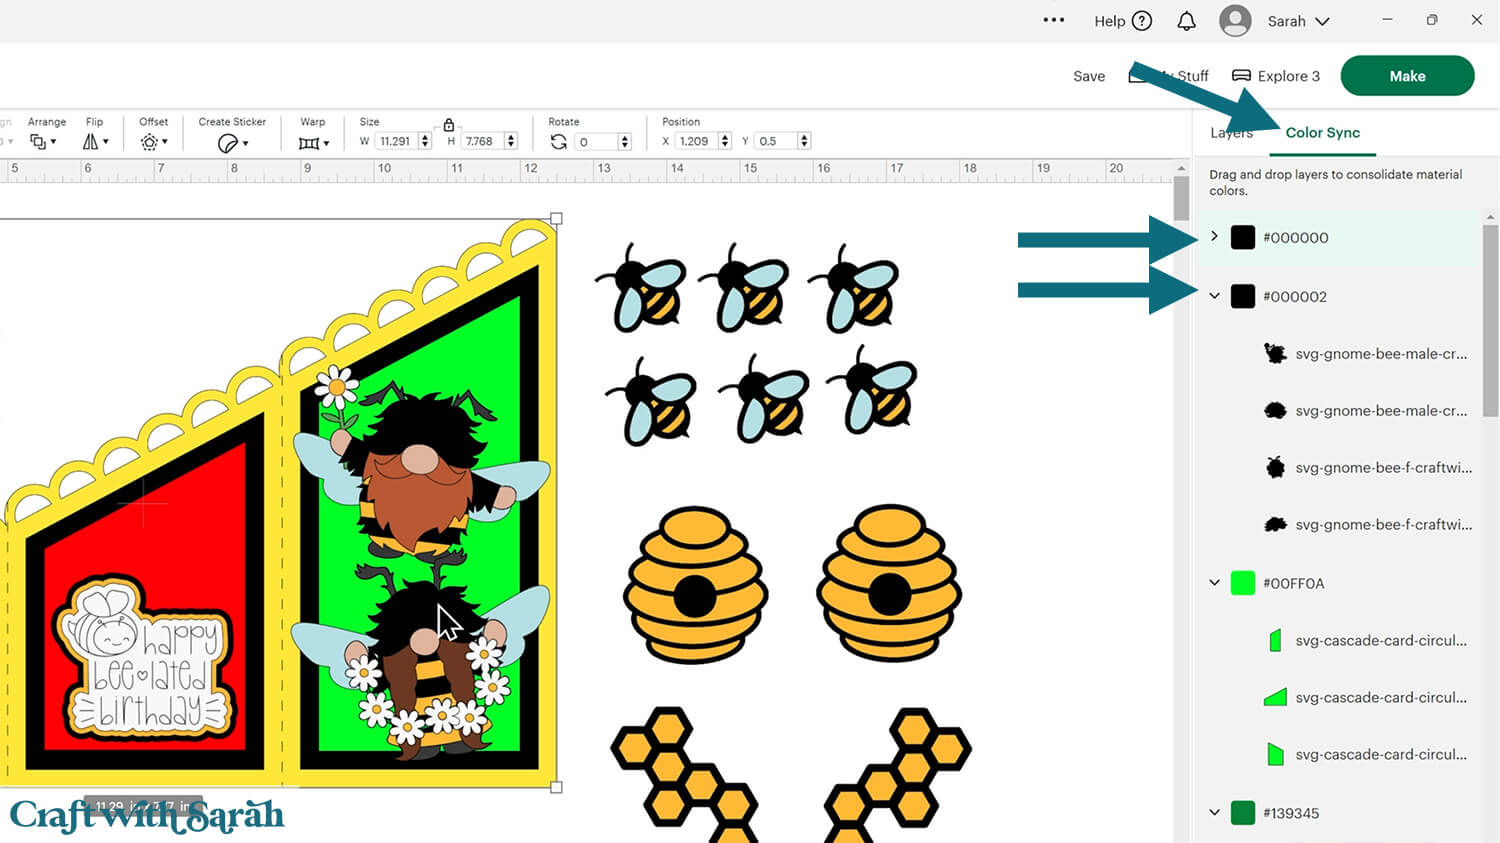
When you’re done adding images, click “Color Sync” at the top of the layers panel.
This changes the layers panel to separate everything out by colour.
Check to see if there are any very similar colours that could be combined into one to make it easier to cut.
For example, the #000000 layers and the #000002 layers could both be cut from the same shade of black card.
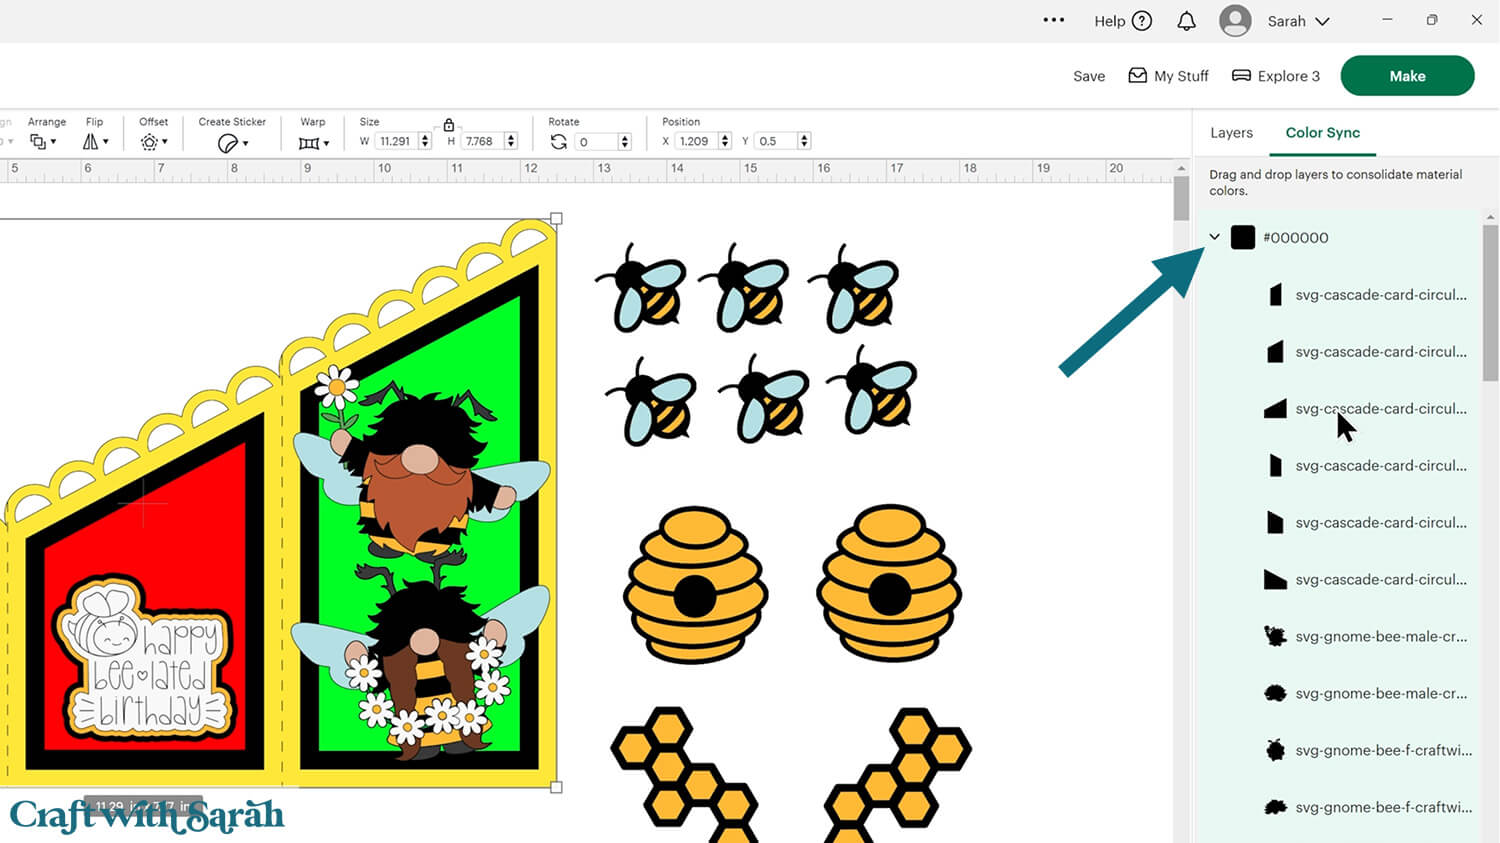
To resolve this, click-and-drag one of the colours onto the other to combine them into one.
Don’t forget to save your project!!
Step 5) Cut out all the pieces
When you’re happy with how the project is looking in Design Space, save the project then click “Make” and follow the instructions on-screen to cut out all the pieces.
To change the paper size, go into the dropdowns over on the left side of the screen and choose the paper size that you want to use. You need to change it for every single colour.
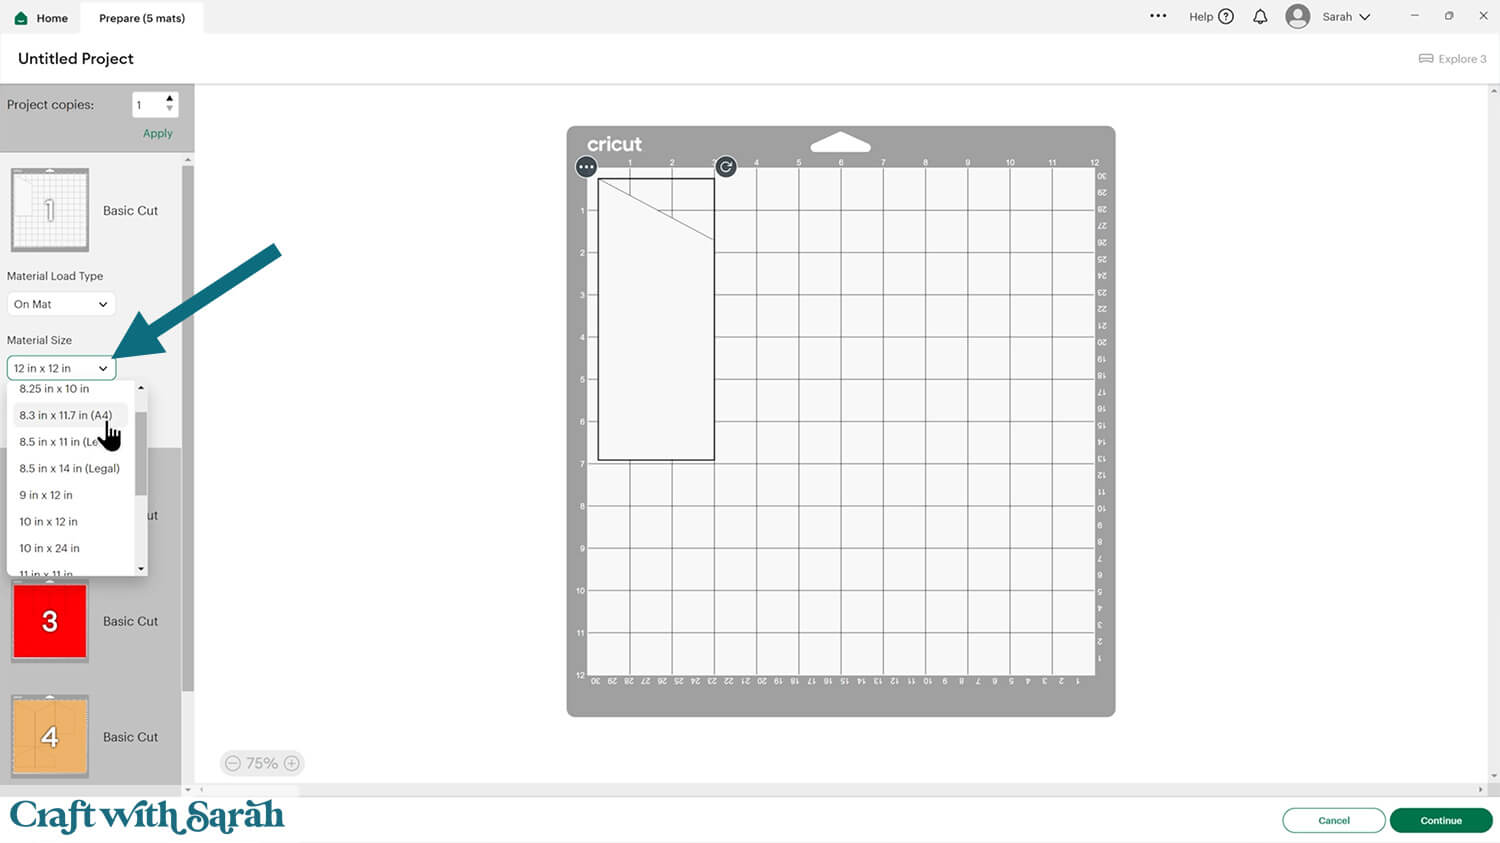
To save space on your cardstock, you can move things around by clicking and dragging. Make sure when you’re moving things about that nothing overlaps because otherwise, it won’t cut out properly.
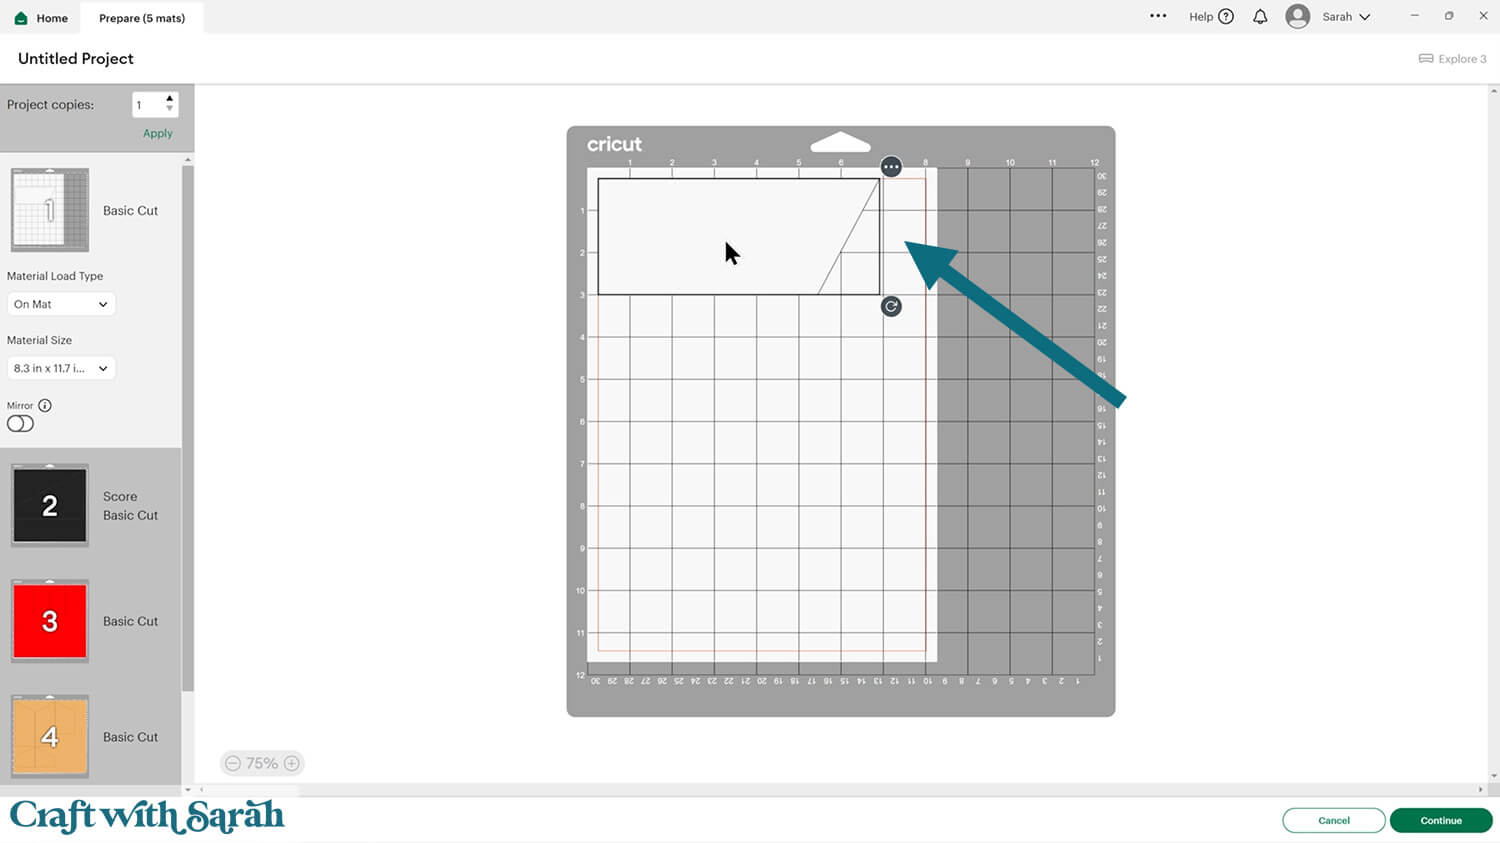
IMPORTANT! If you’re planning to use patterned paper that has a “right way up” on the pattern, don’t rotate any of the rectangles otherwise your pattern will be facing the wrong direction when you put the card together. Keep all the rectangles vertical to ensure correct pattern placement.
Step 6) Put the card together
The images below show the blank template, not the one that I decorated with the gnomes. I’ll add some extra information about the gnome card further down the page.
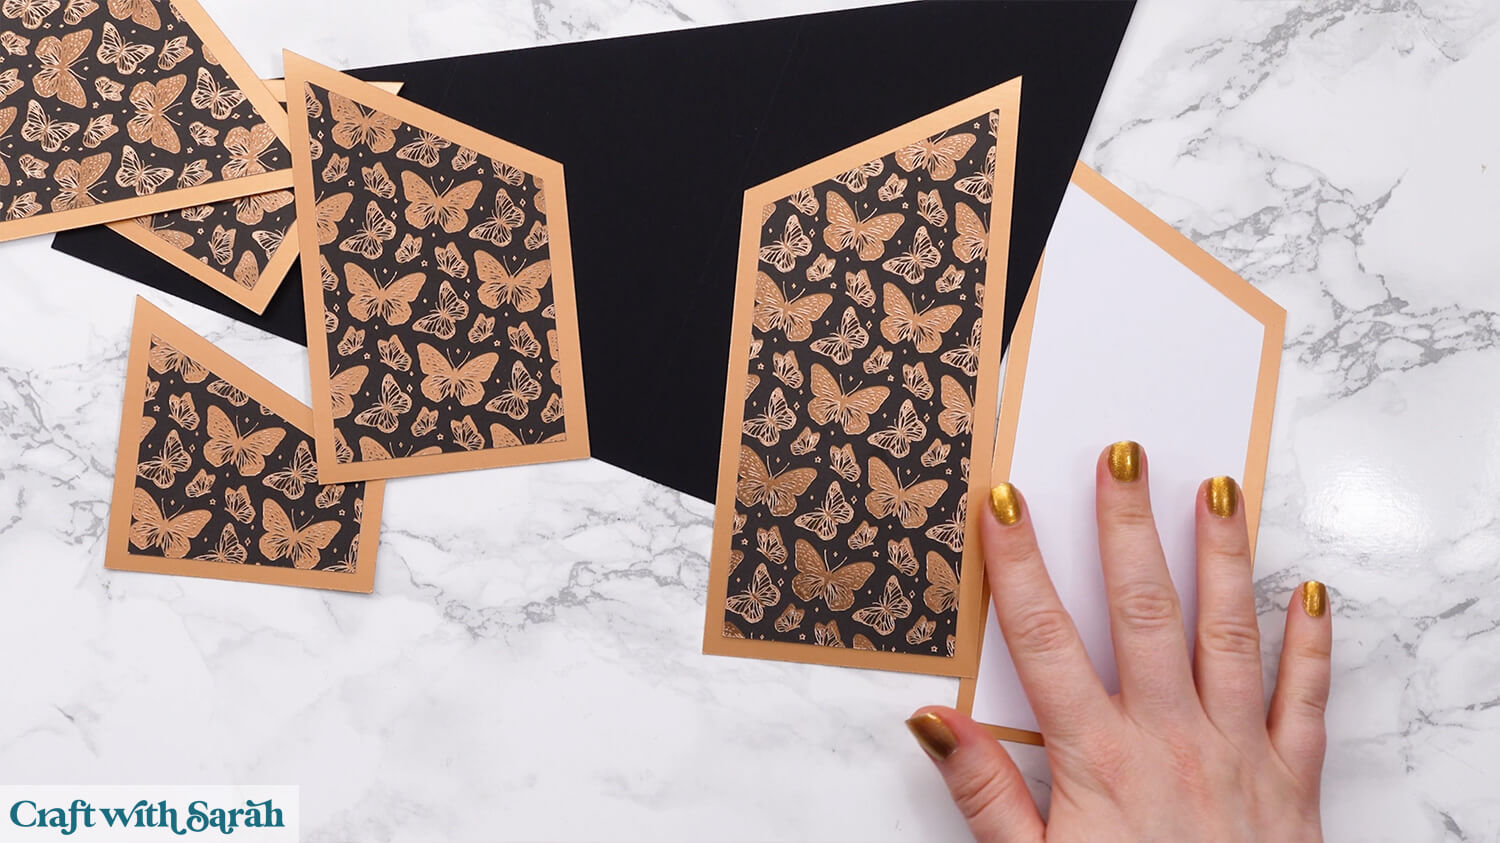
I’ve used rose gold patterned paper from The Range called “Foiled Design Pad – Multicolour“. It’s a bit odd, as it’s a “lucky dip” which colour you will be sent, but I definitely got lucky with rose gold as it is beautiful!
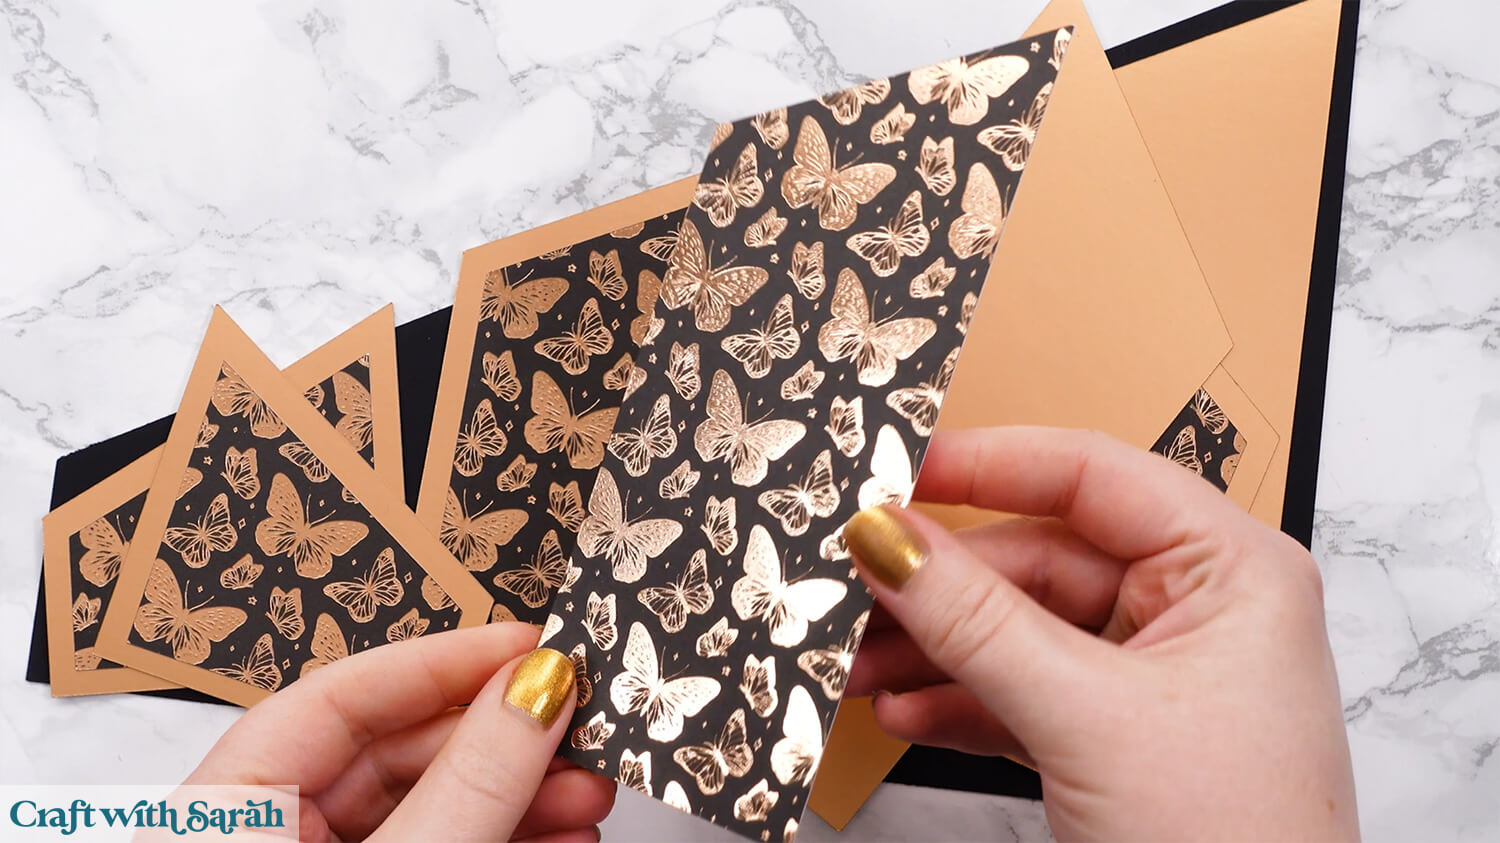
Glue all the patterned papers onto their matching blanks.
It’s a good idea to place everything in order before you start gluing, to make sure that everything is in the correct position.
My favourite glues to use on papercraft projects are Bearly Art Glue and Collall All Purpose Glue.
These are great because they don’t “warp” or bend the cardstock like some glues do. You can use as much of it as you want and the card stays perfect – and it dries perfectly clear too!
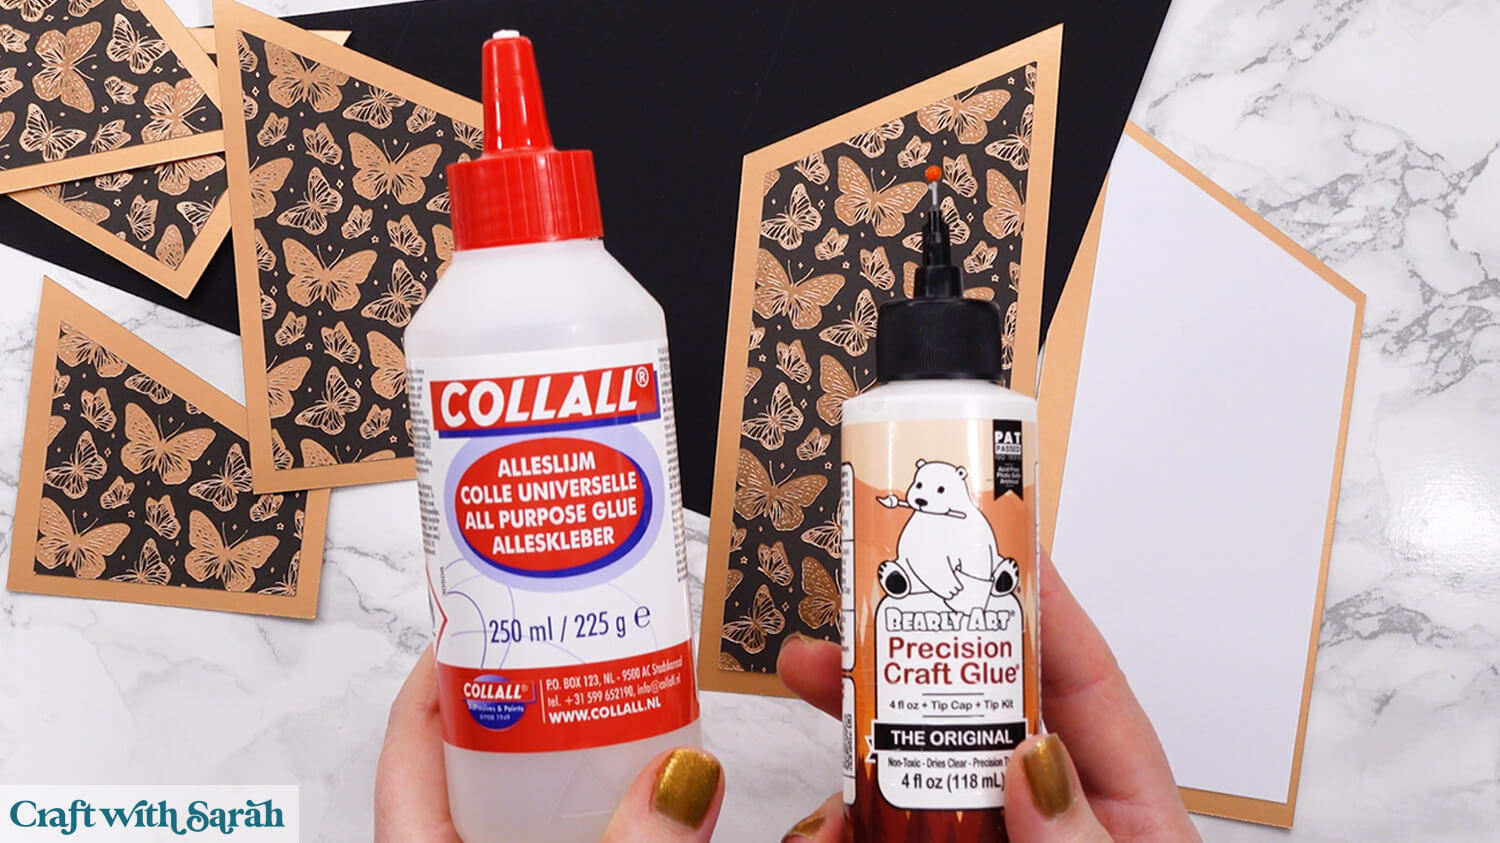
Bearly Art Glue comes with a tiny nozzle to make it easy to apply glue to small areas of card. The Collall glue doesn’t come with this, so it’s easiest to decant it into needle tip applicator bottles so that you have more control.
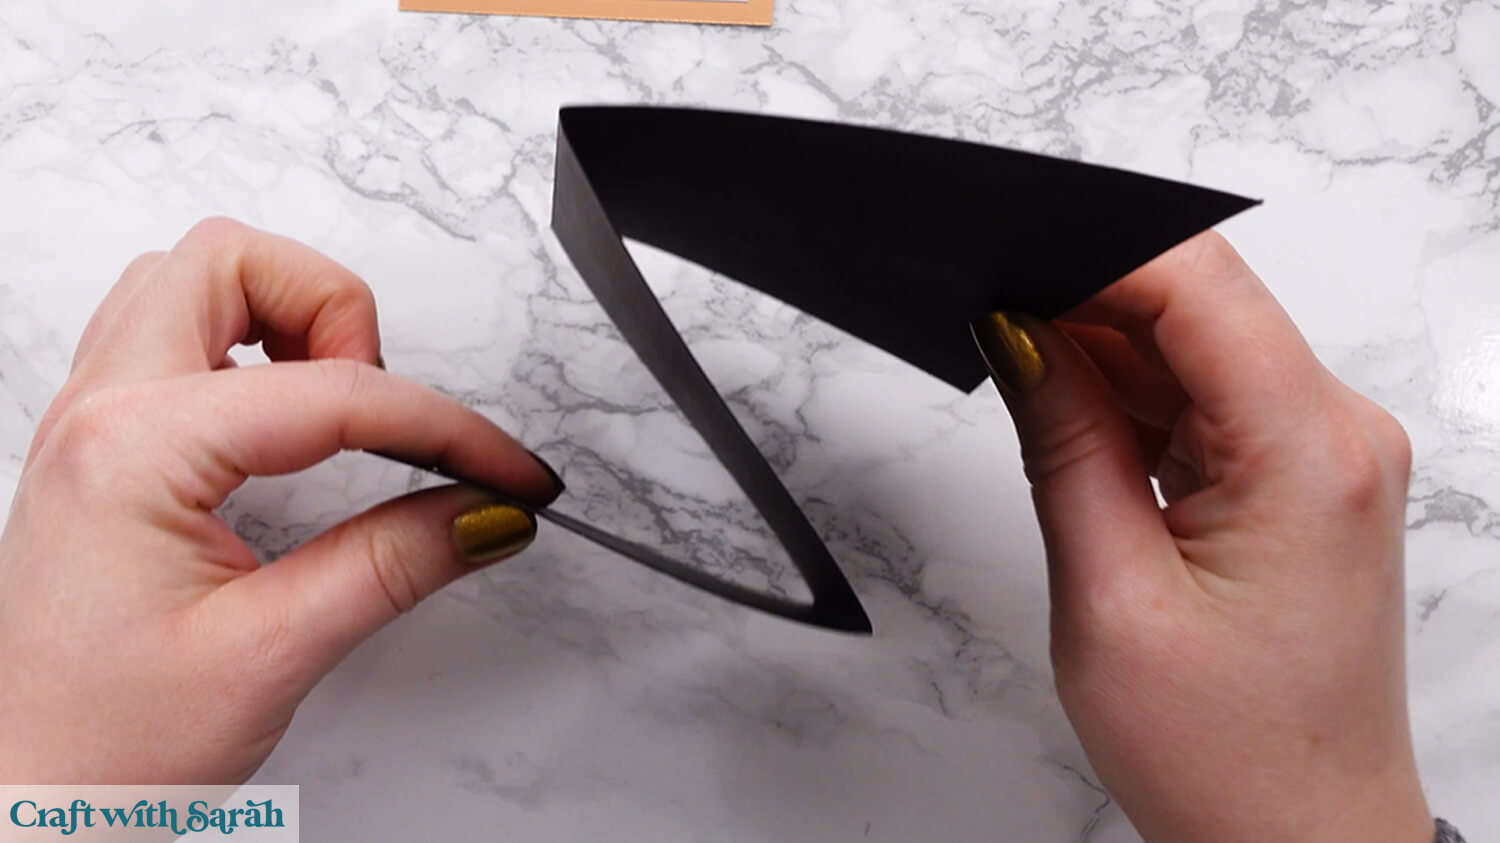
Fold down the score lines on the base card to make a concertina effect.
Glue all the patterned paper panels to their coordinating spaces on the base card.
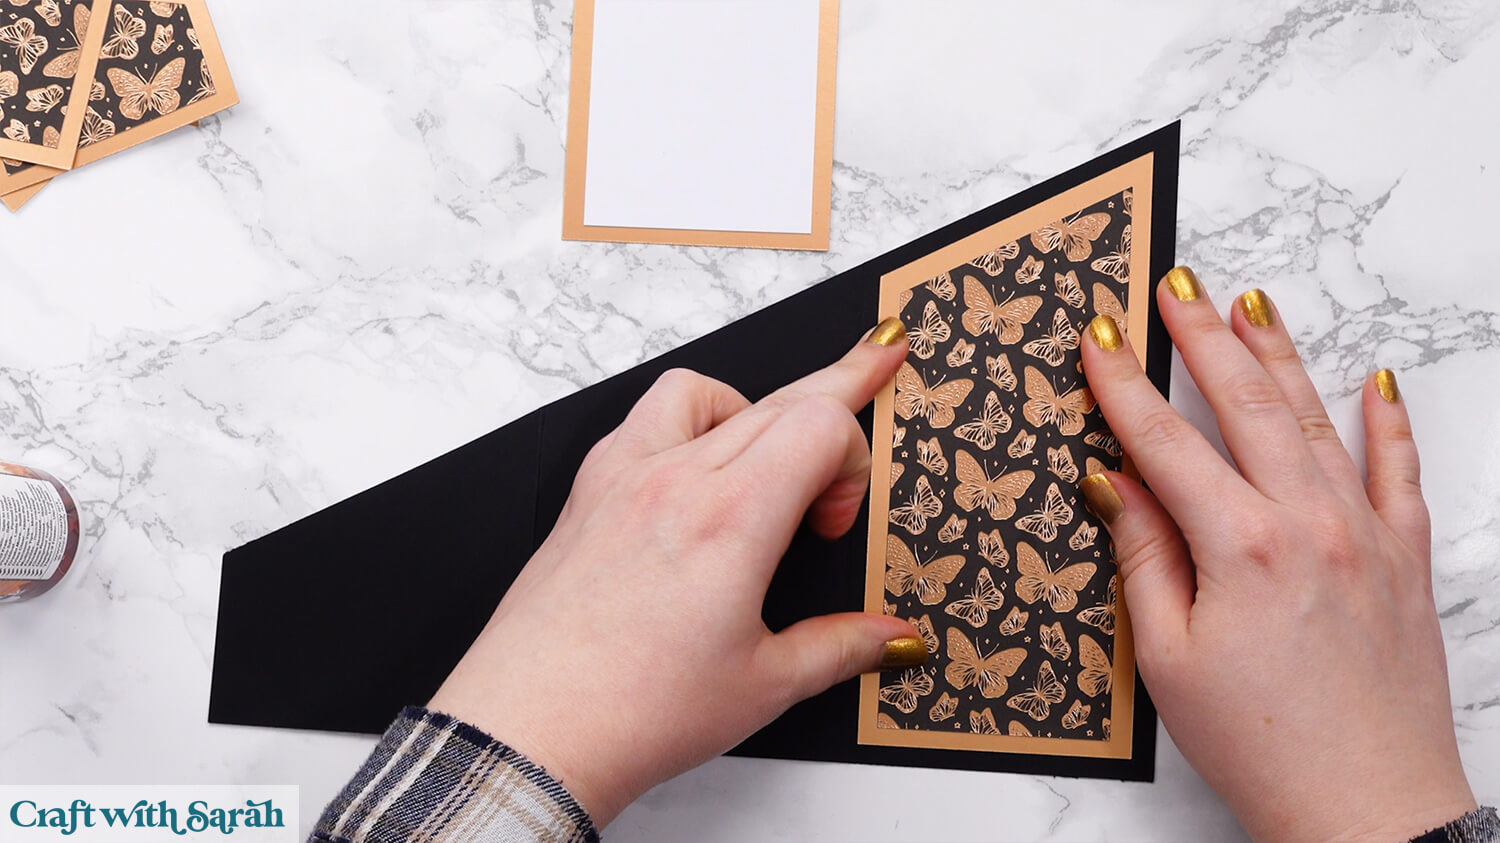
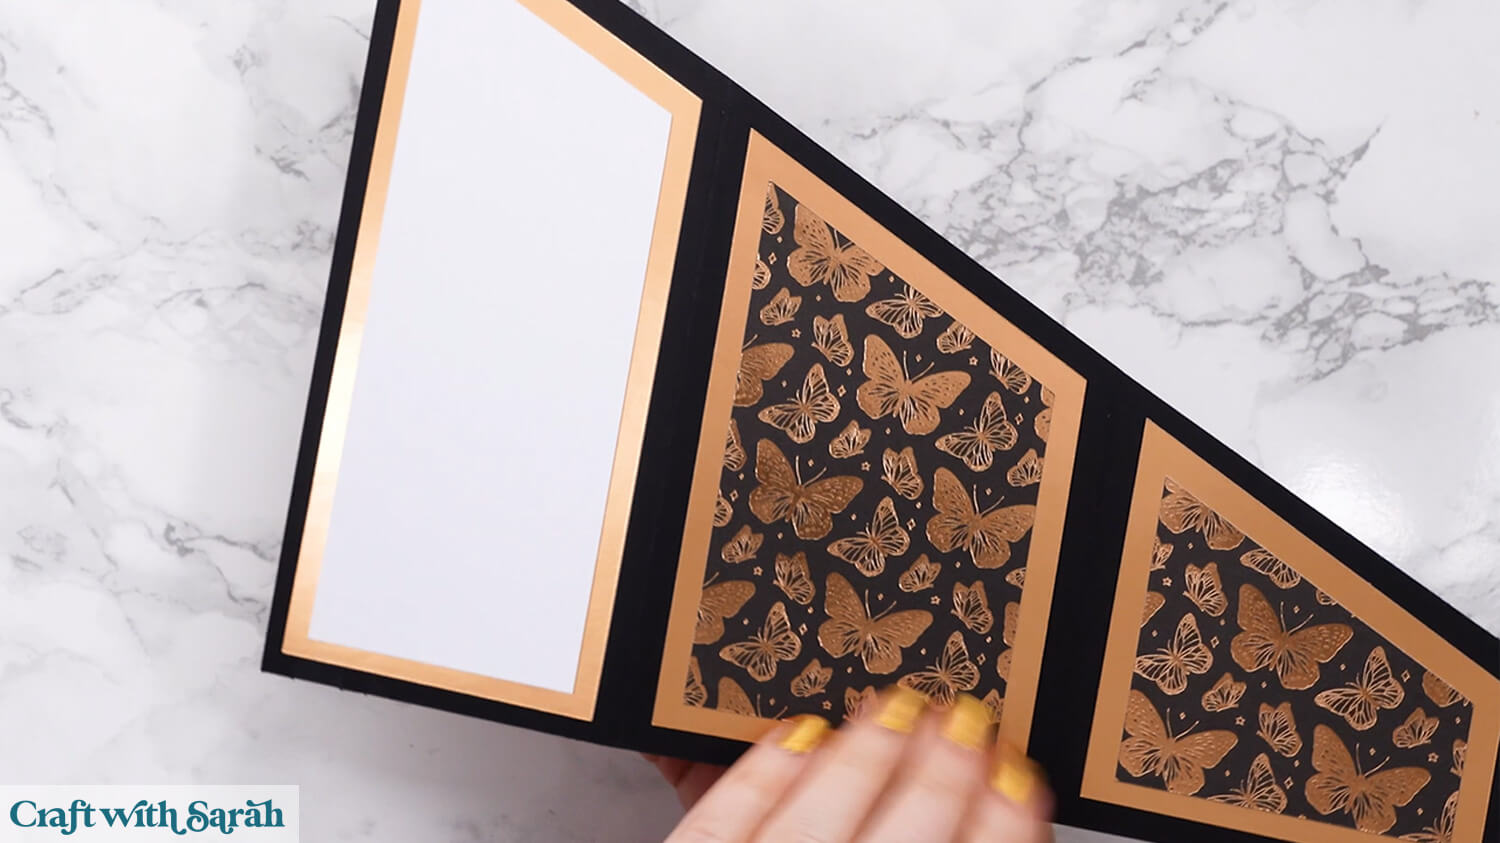
Your cascade card is now all ready for finishing or decorating in whatever way you wish.
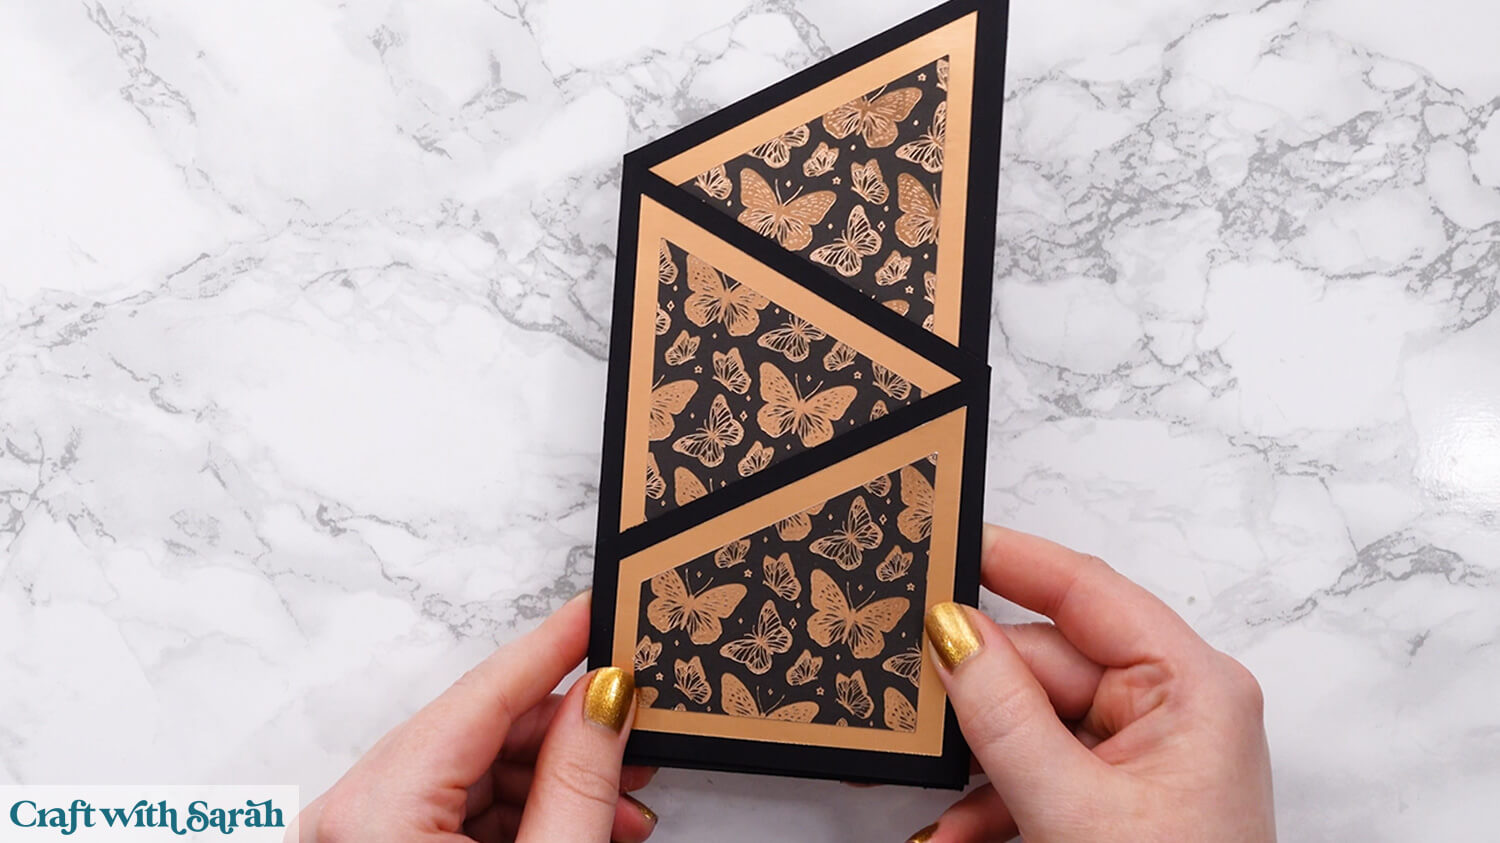
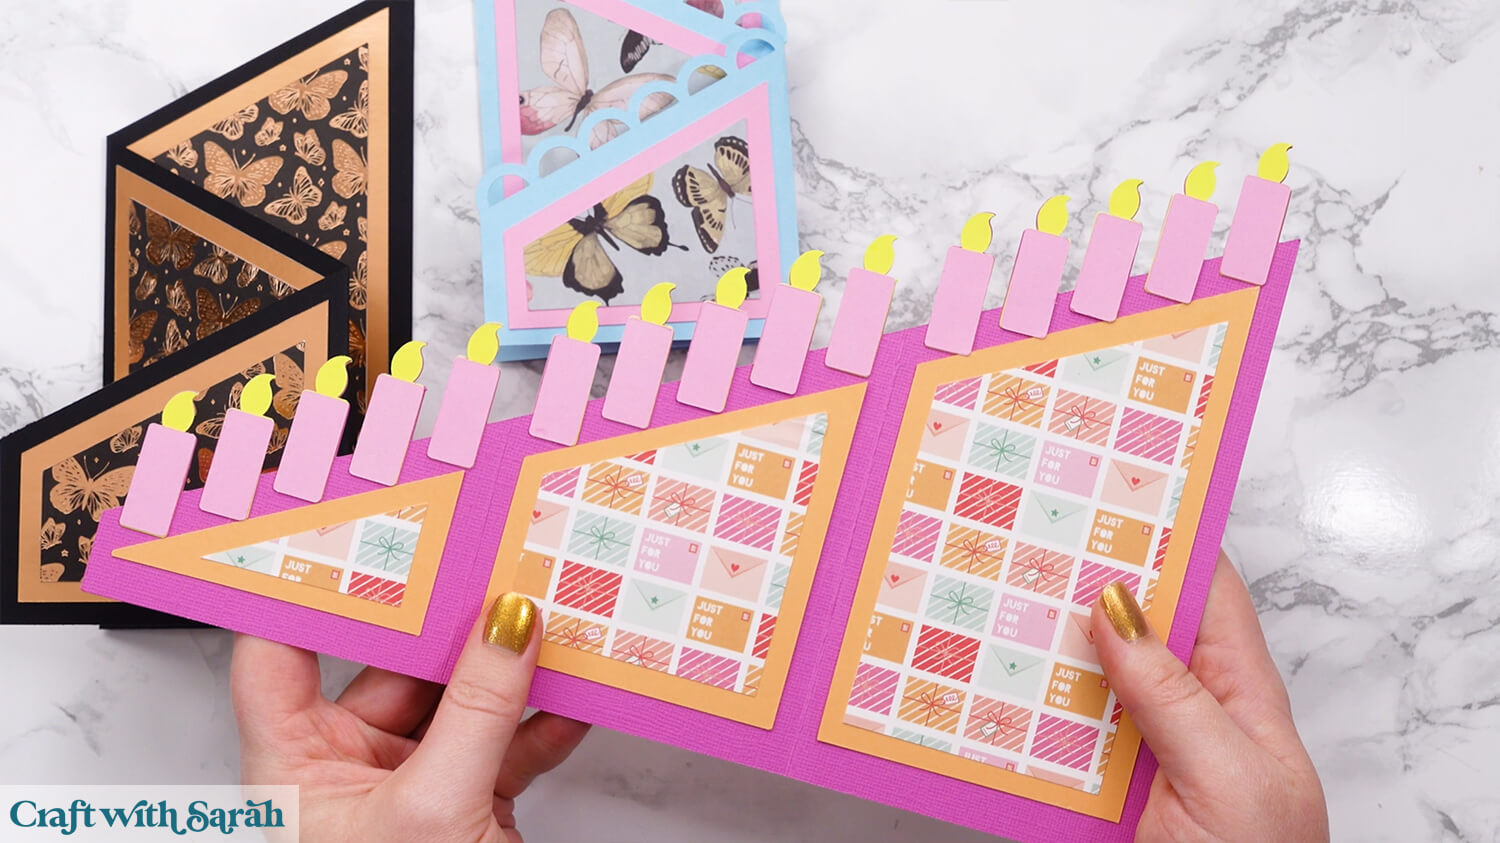
If you are making the candle version of the card then it’s time to glue on all the candles!! They go on both sides of the card.
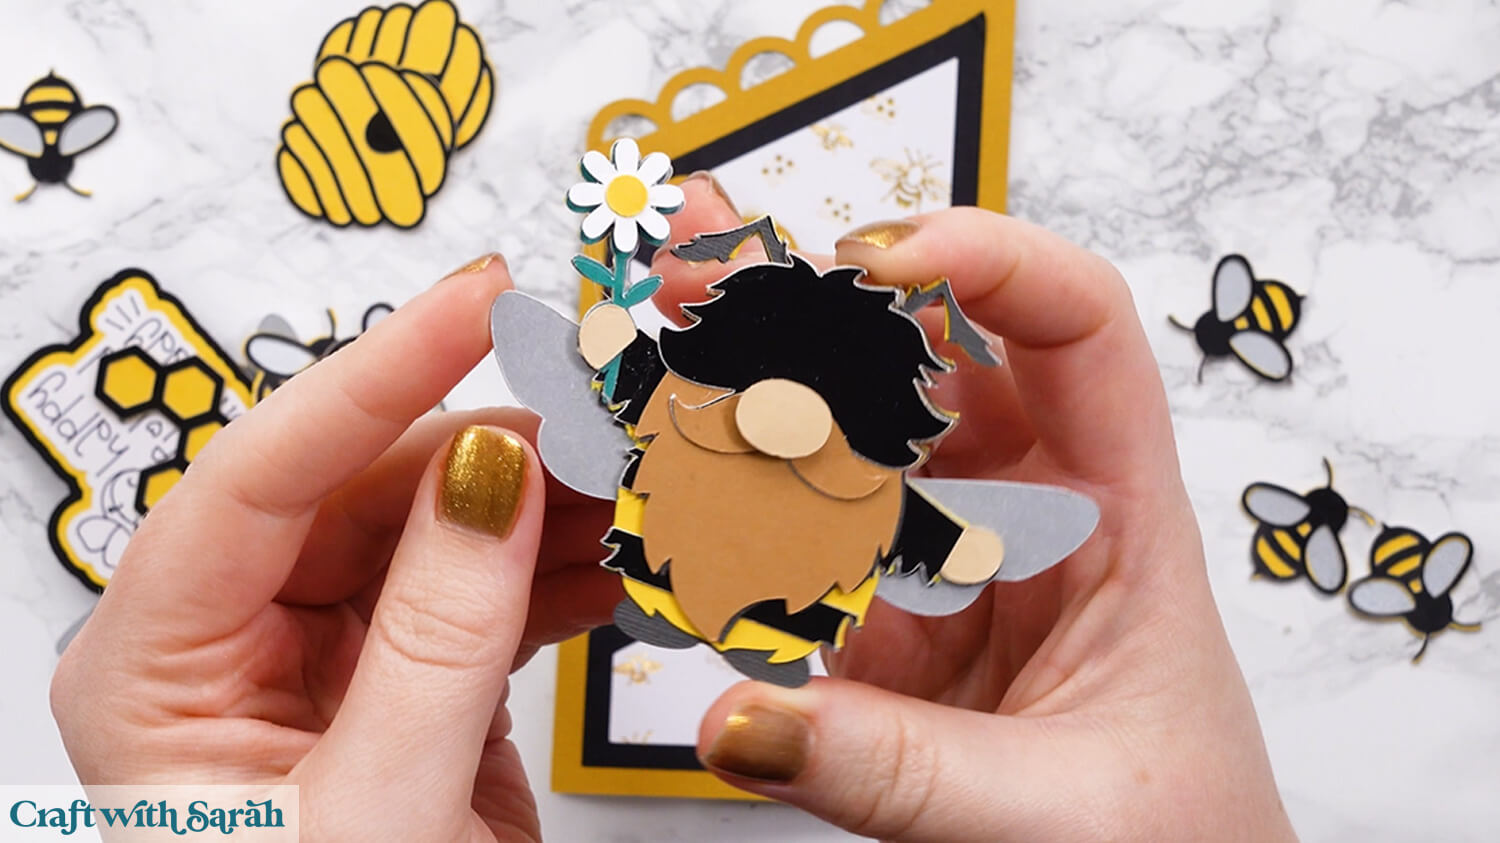
If you’ve cut out extra embellishments then stick all the pieces together.
Look how cute my little gnome is!!!
The patterned paper panels go together in the same way as shown above.
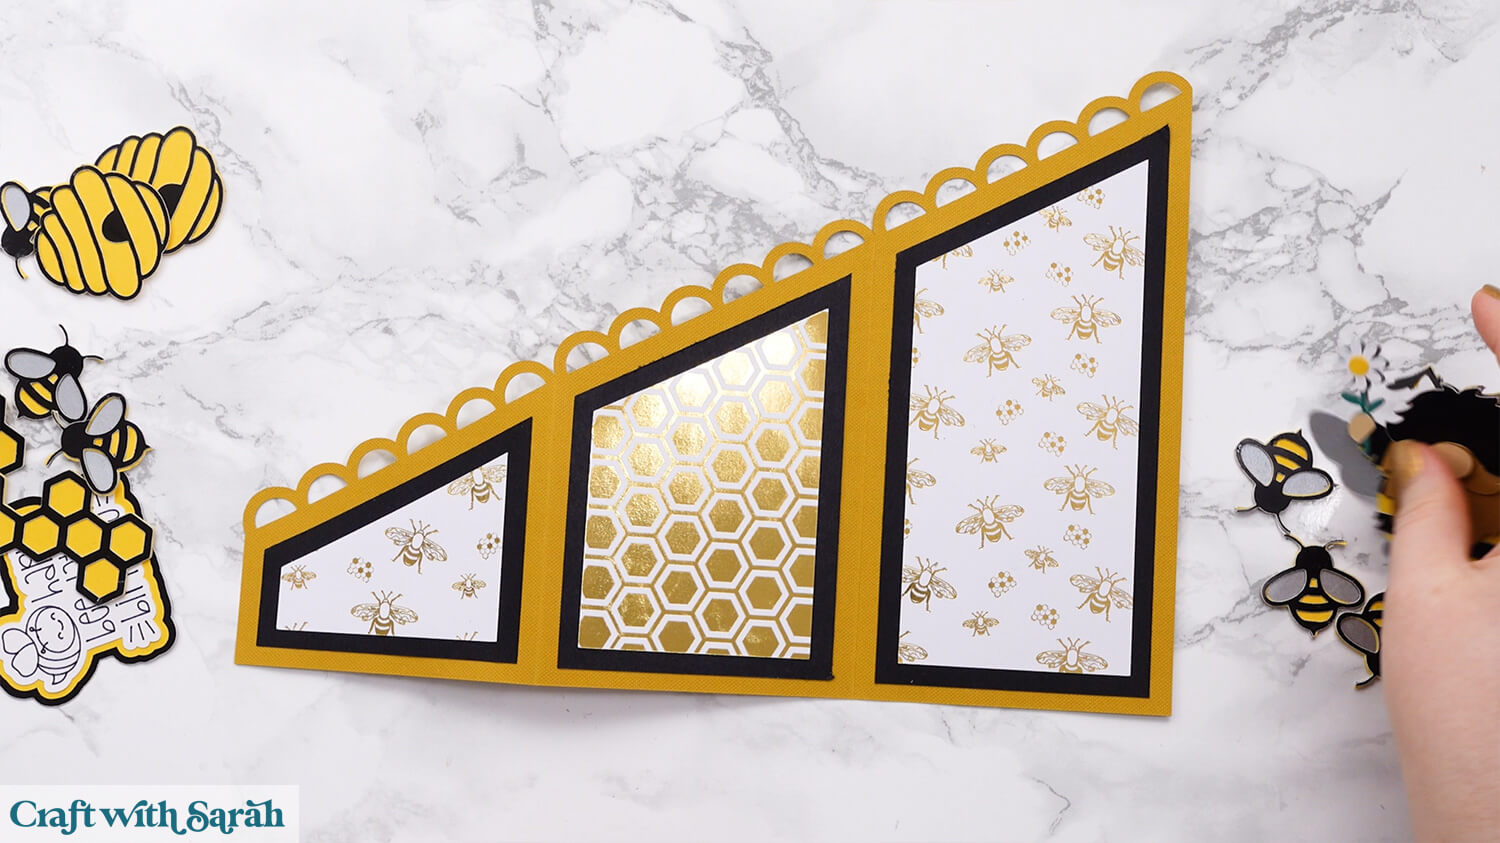
The bee and honeycomb paper I’ve used is from this “Bee Paper Pad” set from The Range.
I find it easier to position everything onto the card before sticking anything, to check that I’m happy with how it’s all looking.
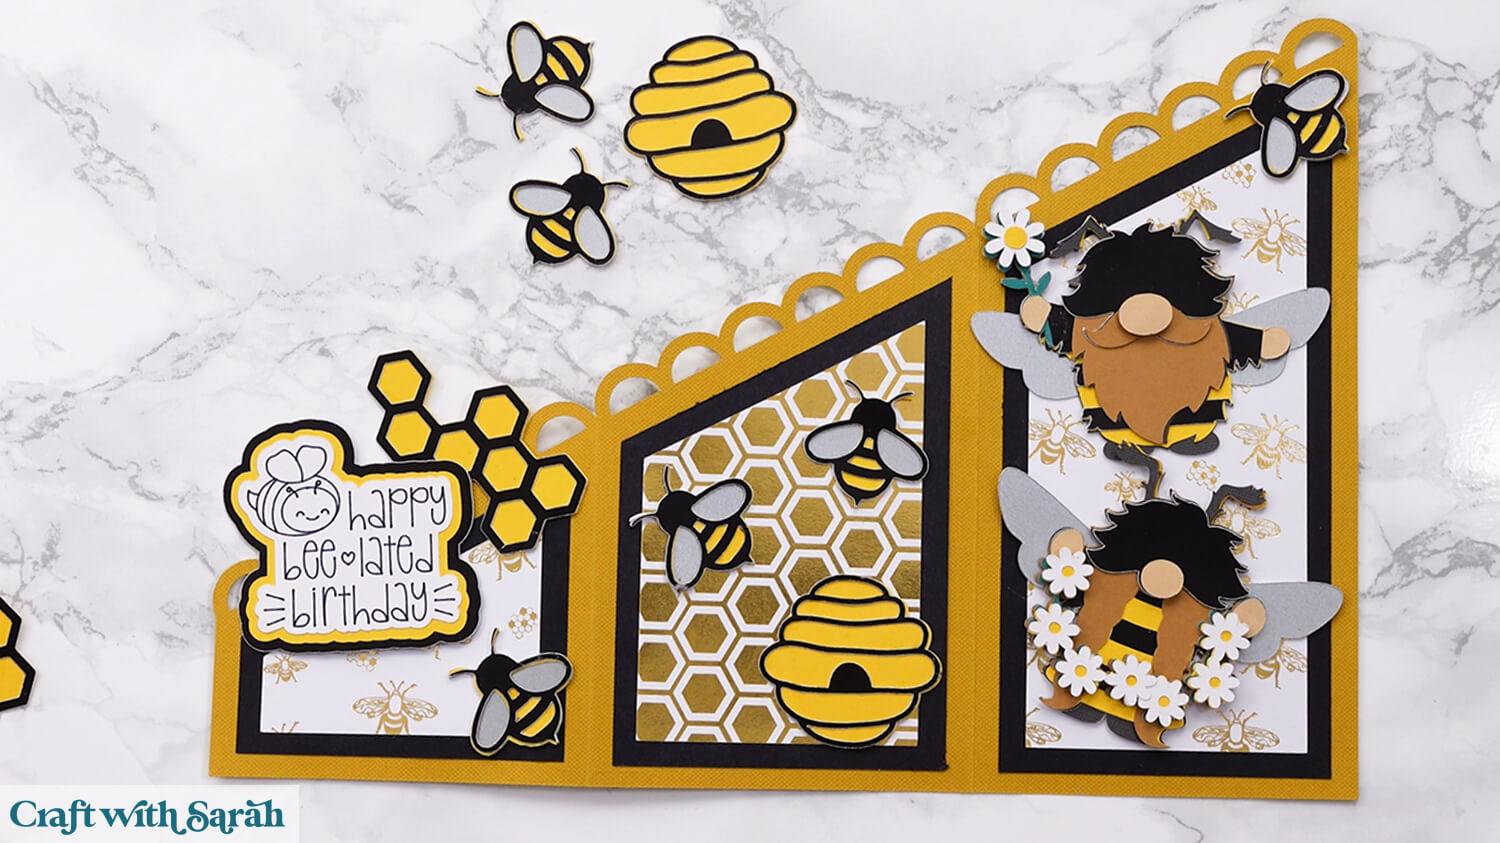
As you can see, I am quite indecisive!!
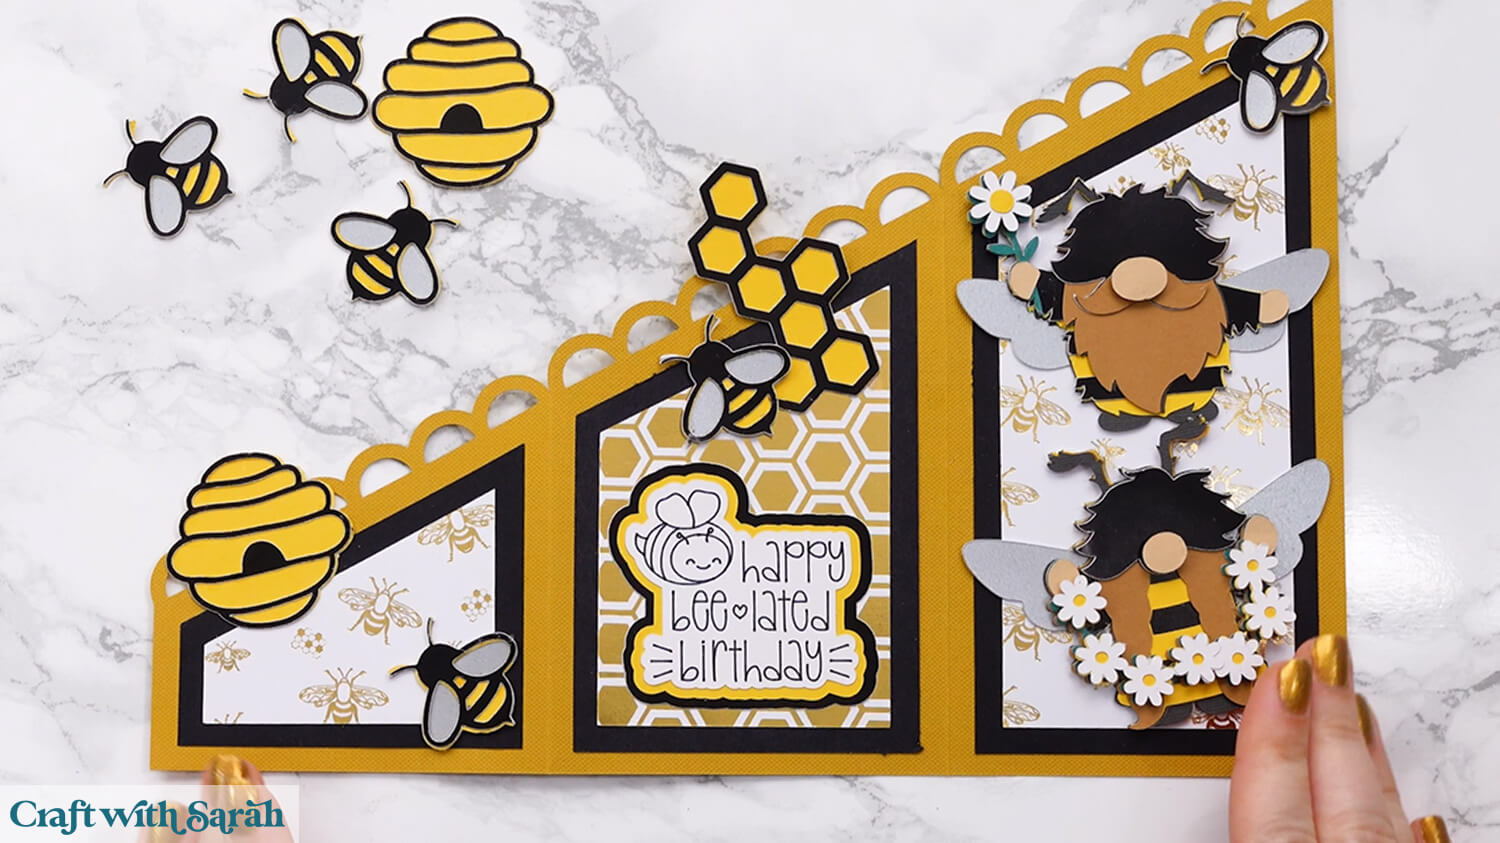
Stick everything together, and then your card is finished.
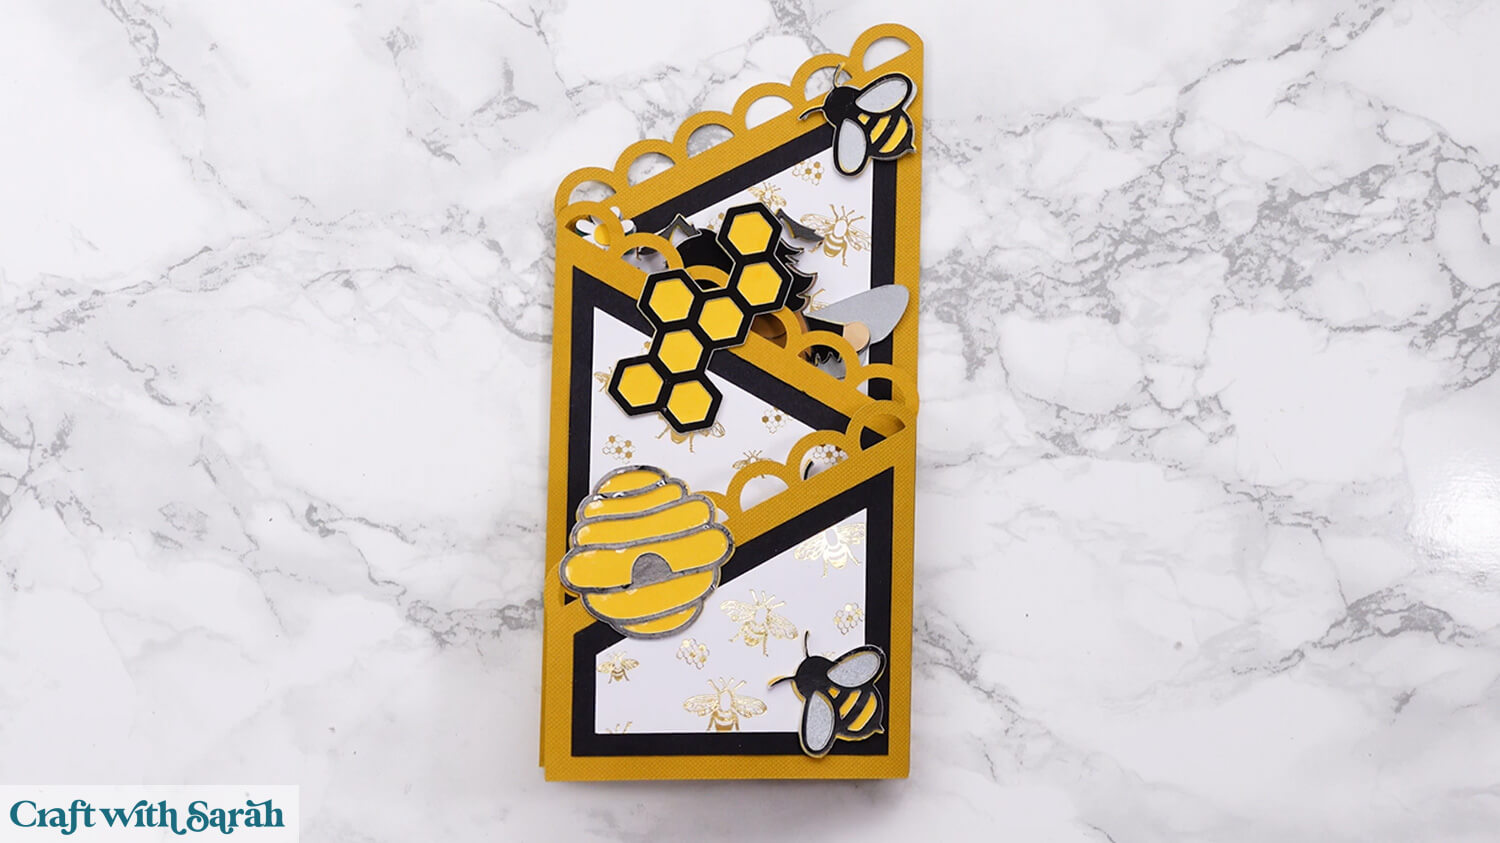
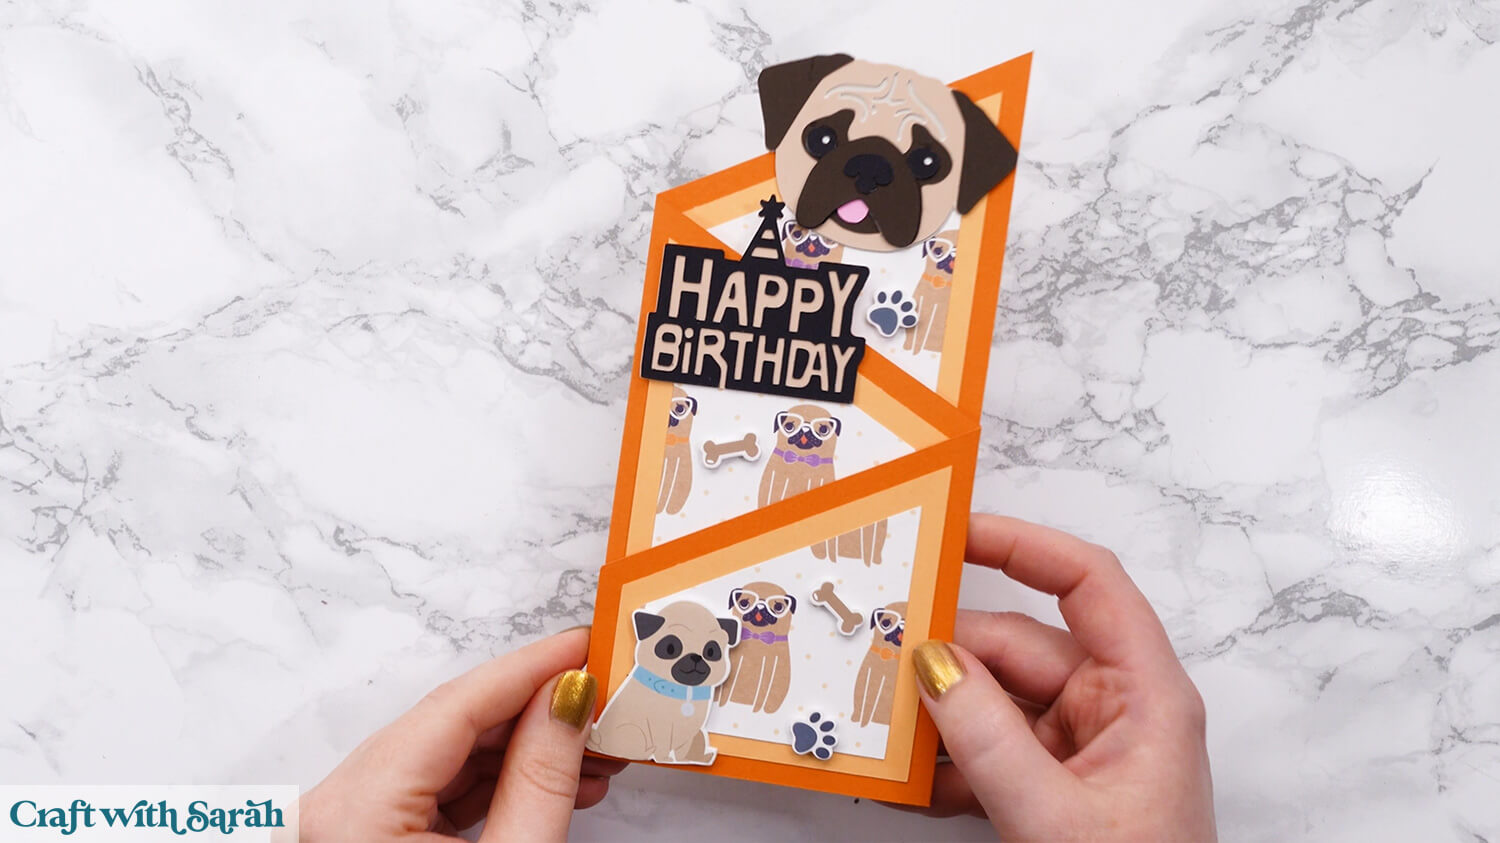
Here’s another example of a finished card. This time it has a pug theme.
Step 6) Make a matching envelope
The cascade cards are slimline when folded up, so they won’t fit in a standard size envelope. Therefore, I have included a custom envelope template in your download folder.
Load the SVG file for the envelope into Design Space.
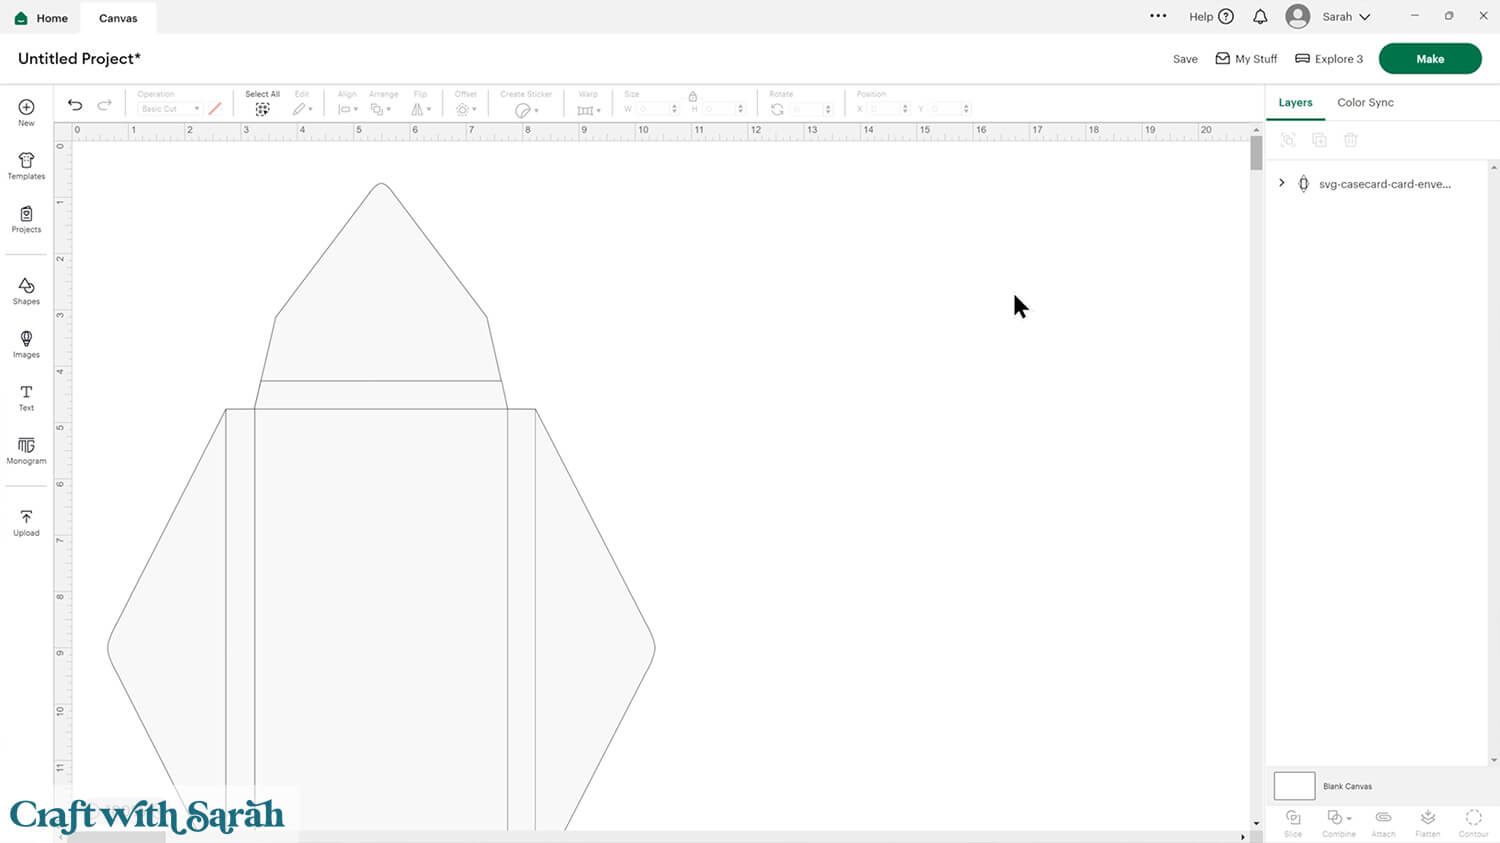
Ungroup the layers, then click the chevron icon next to the main “rectangular” piece of the envelope.
Select the top layer in that subgroup.
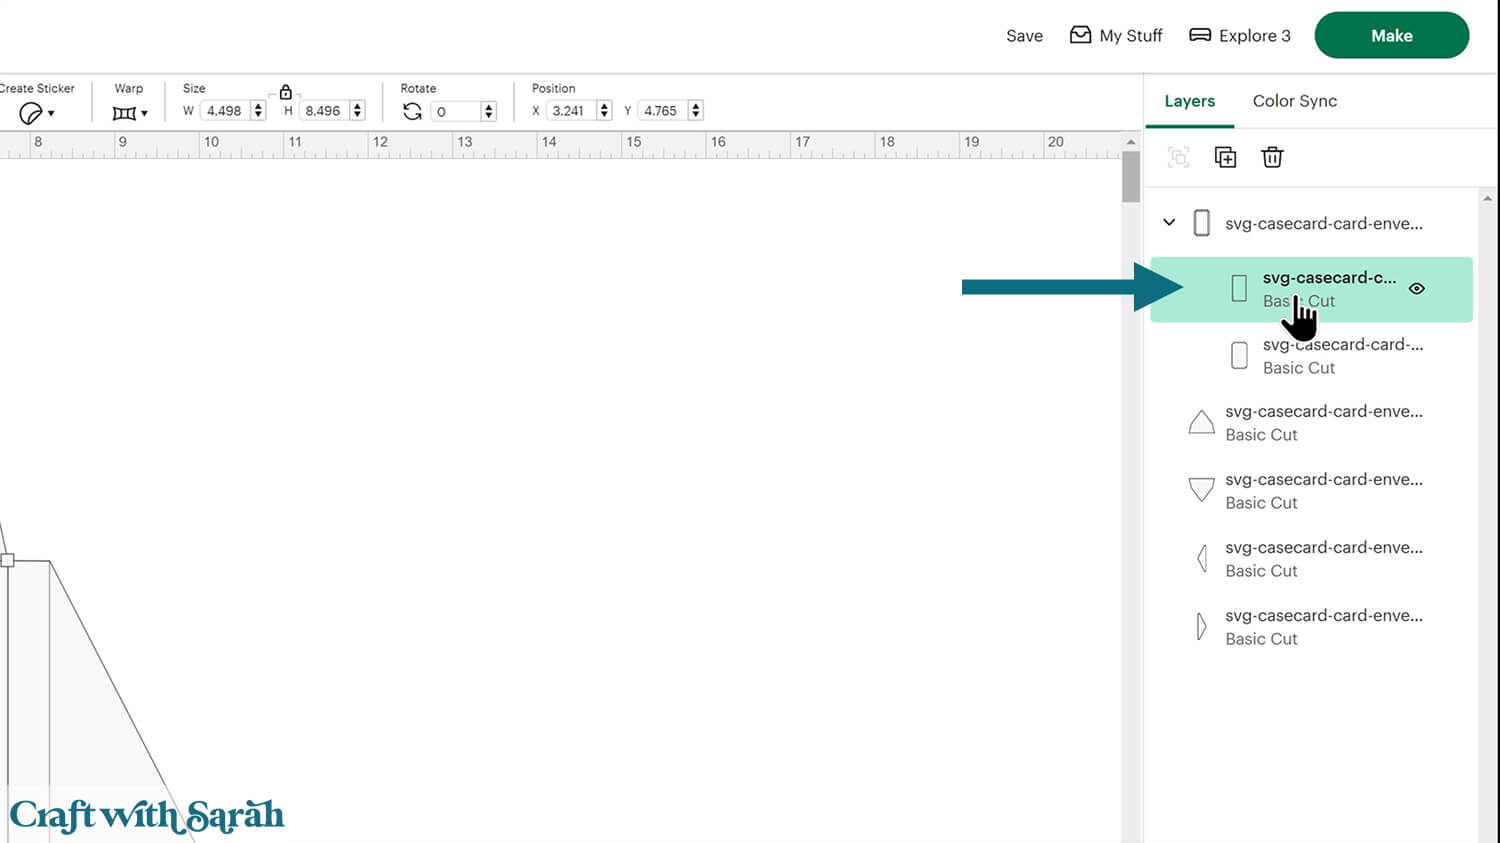
Change it to “Score” in the Operations dropdown.
Attach the score line to the rectangular piece.
Make sure that the four “triangle” pieces are still separate.
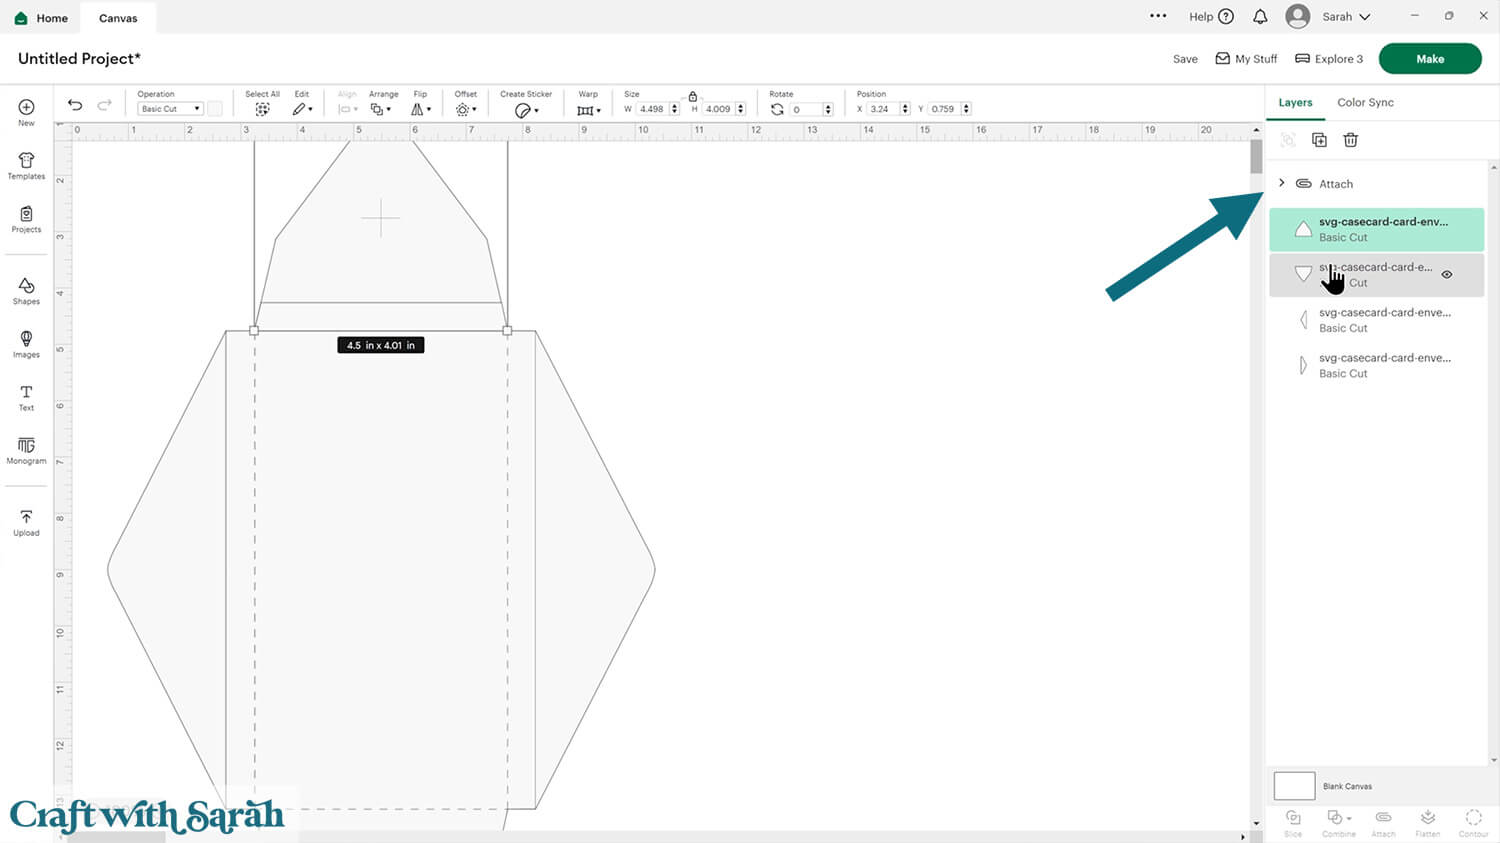
Cut the envelope. You can move the layers around in Design Space to fit them all onto one 12×12 sheet of card.
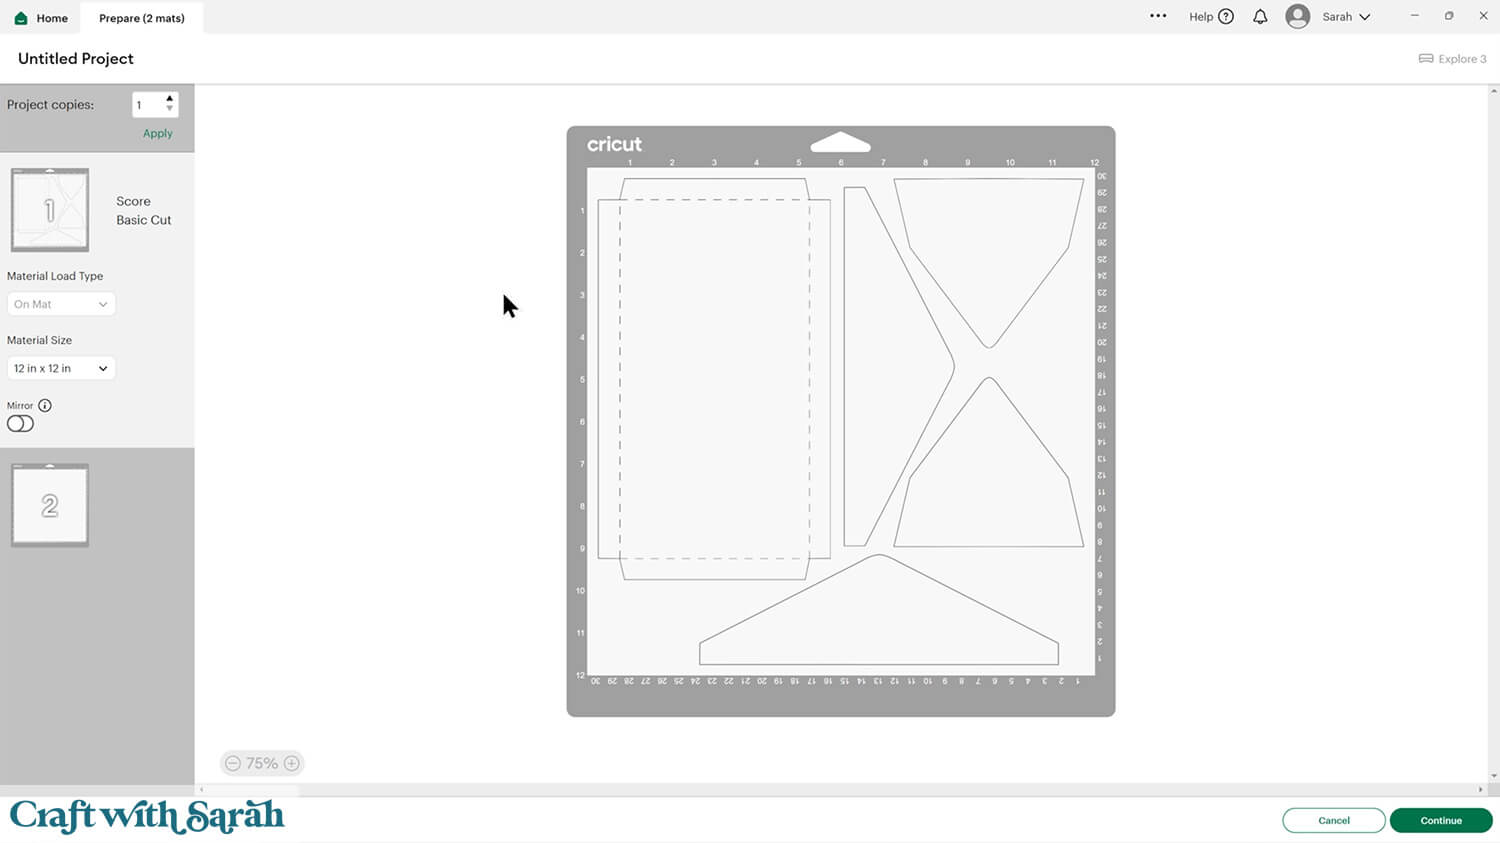
I like to use scrapbook paper that’s patterned on both sides, so that the envelope looks pretty on the inside too. You could also use lightweight / thin cardstock.
I used white card for this tutorial.
Turn the main rectangle shape upside down, so that the side of the card you want to appear on the inside of the envelope is facing upwards.
Fold all the score lines upwards towards yourself.
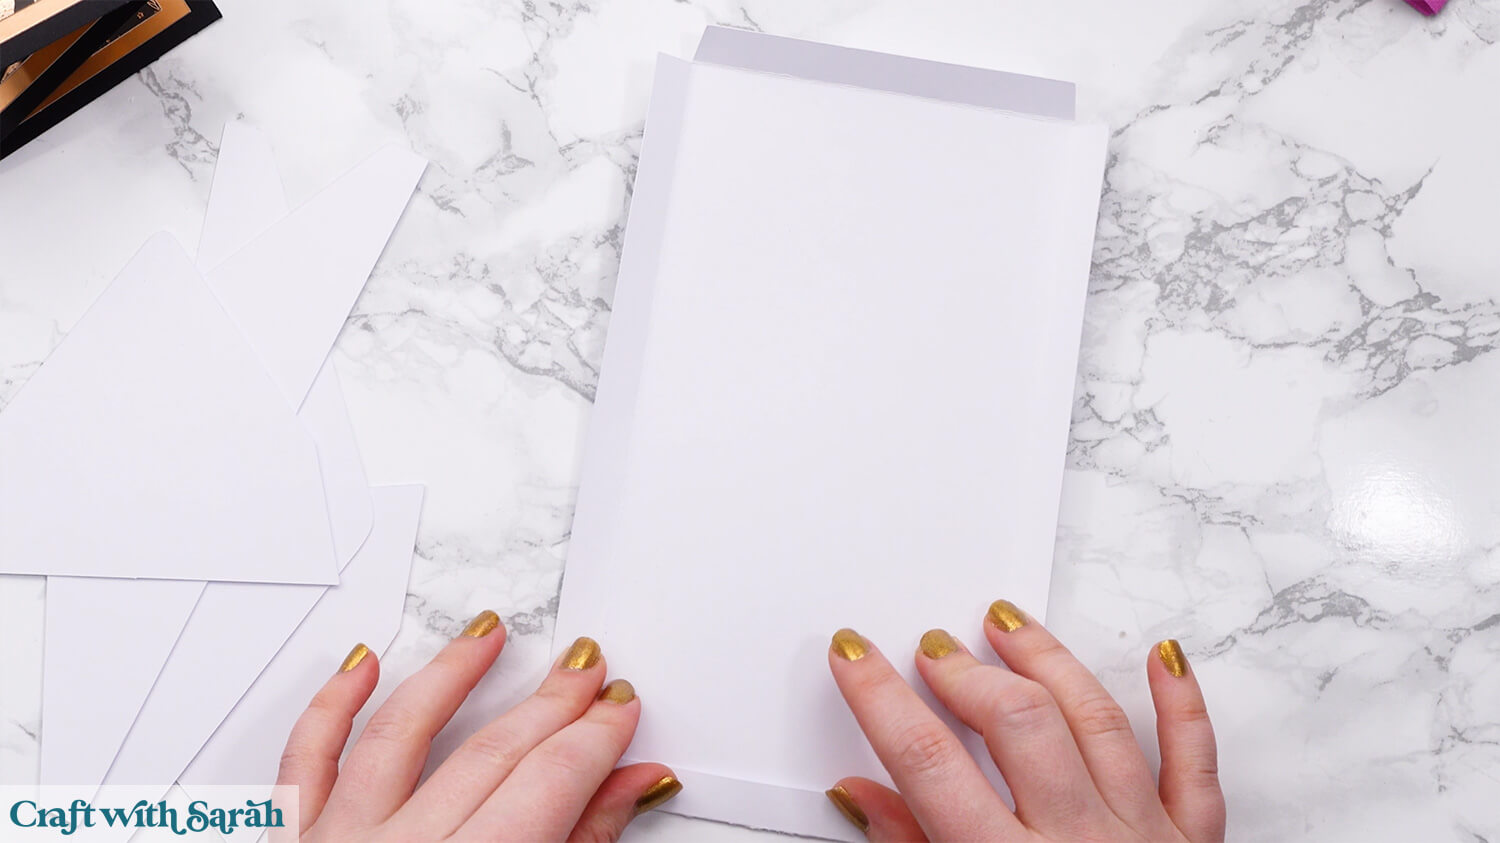
Turn the piece the other way up and add double sided tape or glue down all the tabs, up to the score lines.
I find double sided tape easier as it sticks straight away without having to wait for the adhesive to dry.
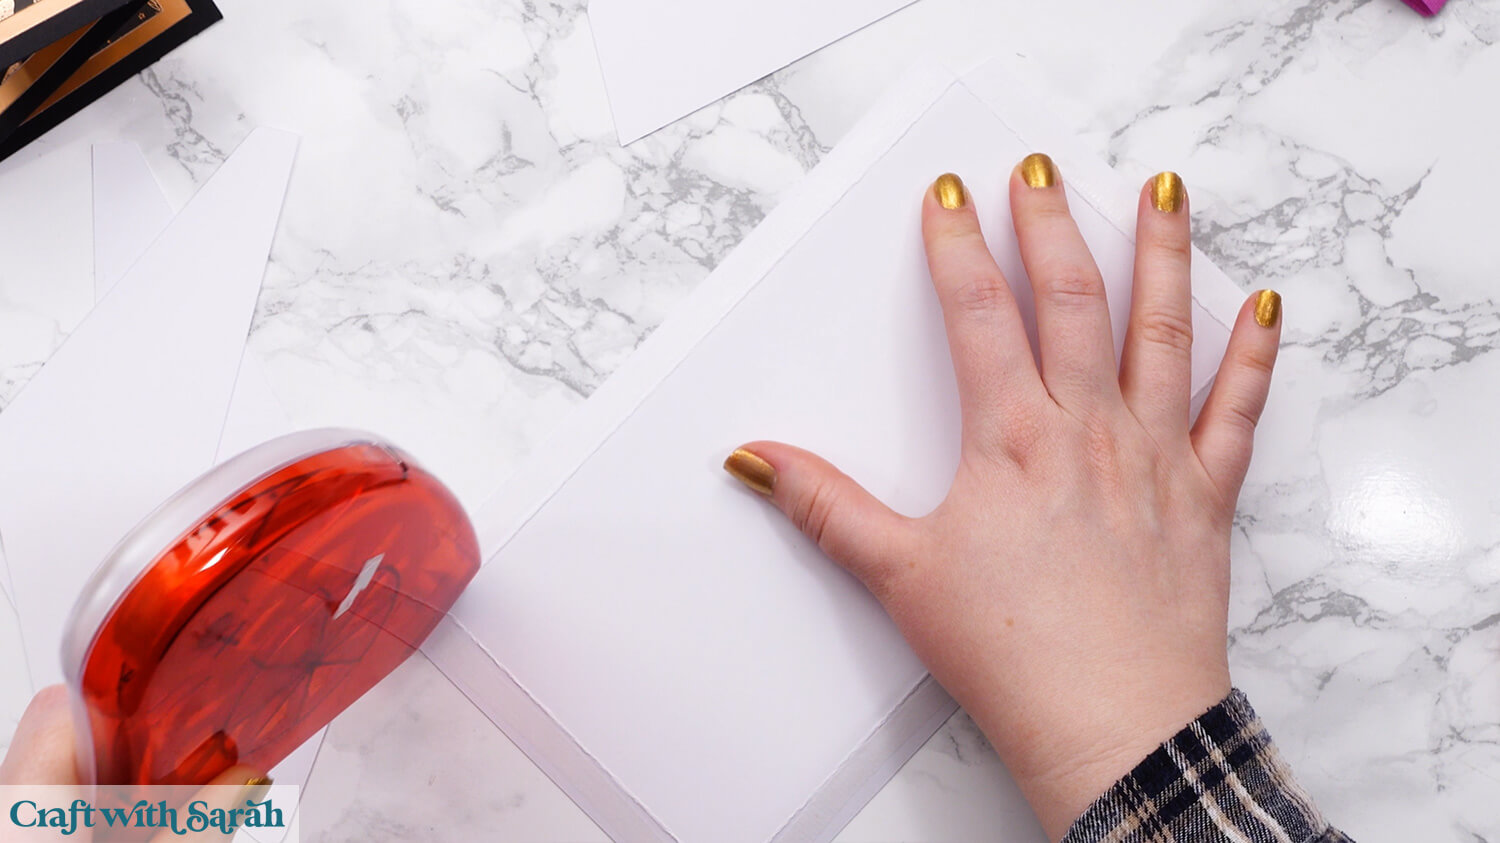
Attached the four triangle pieces, lining each one up with the score lines on the rectangular piece.
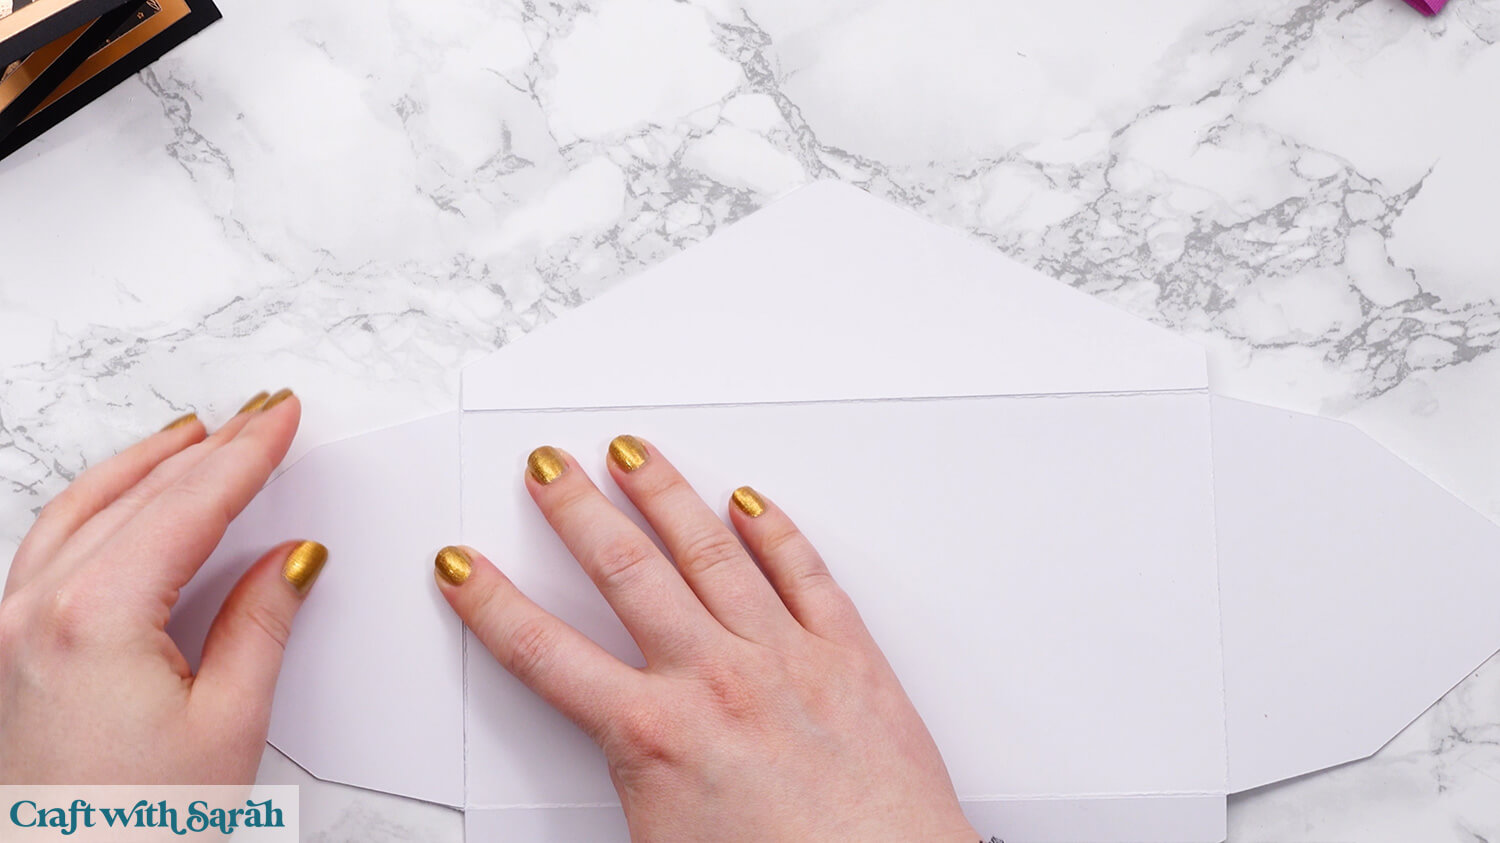
Turn the envelope over.
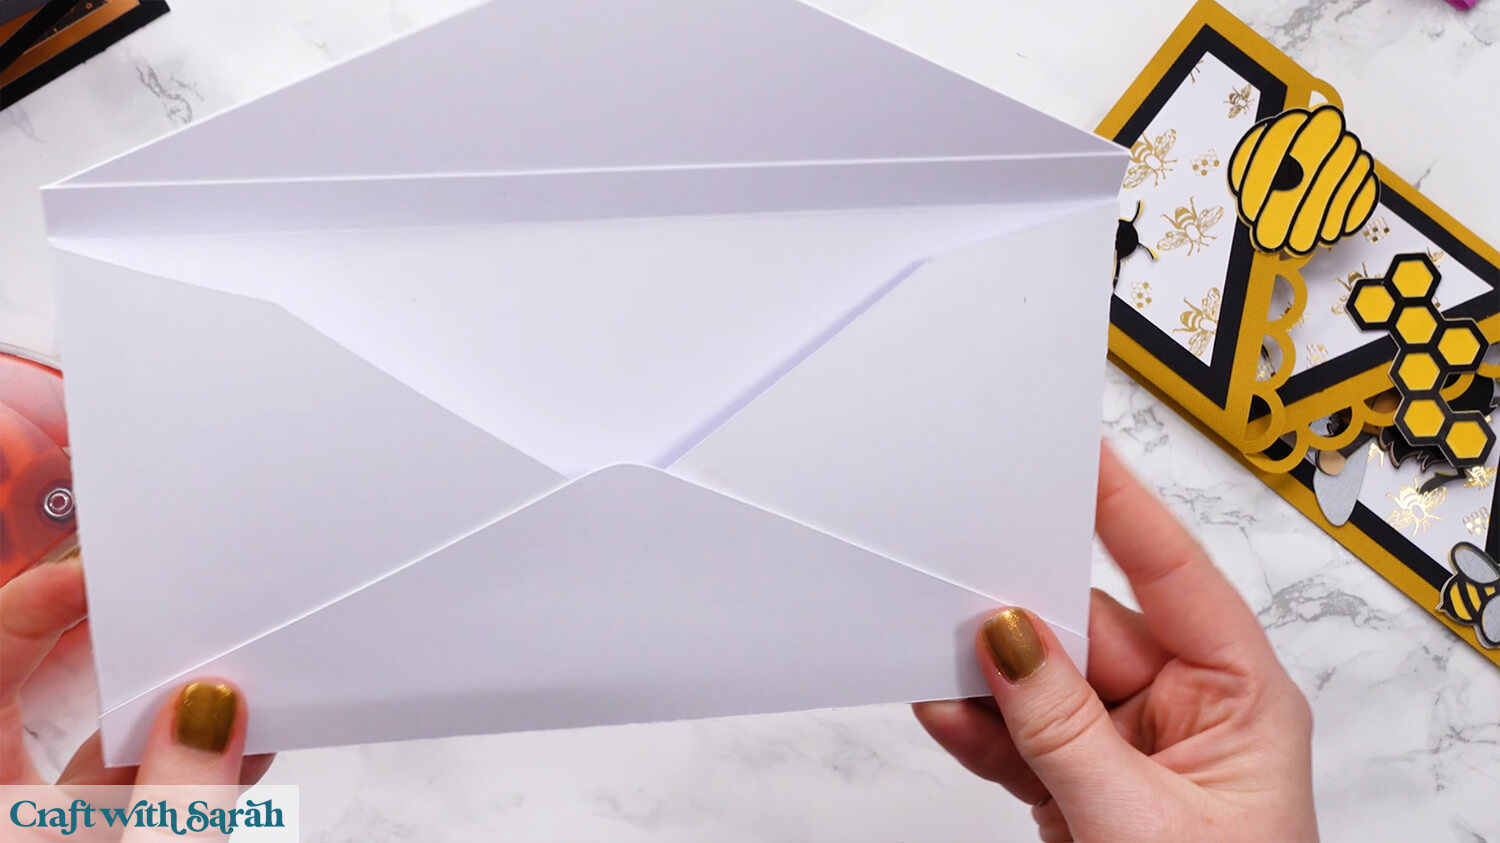
Fold in the two smaller sides, then stick one of the larger sides over the top.
If your card is thick then put the card inside before folding up the sides to make sure the card will fit.
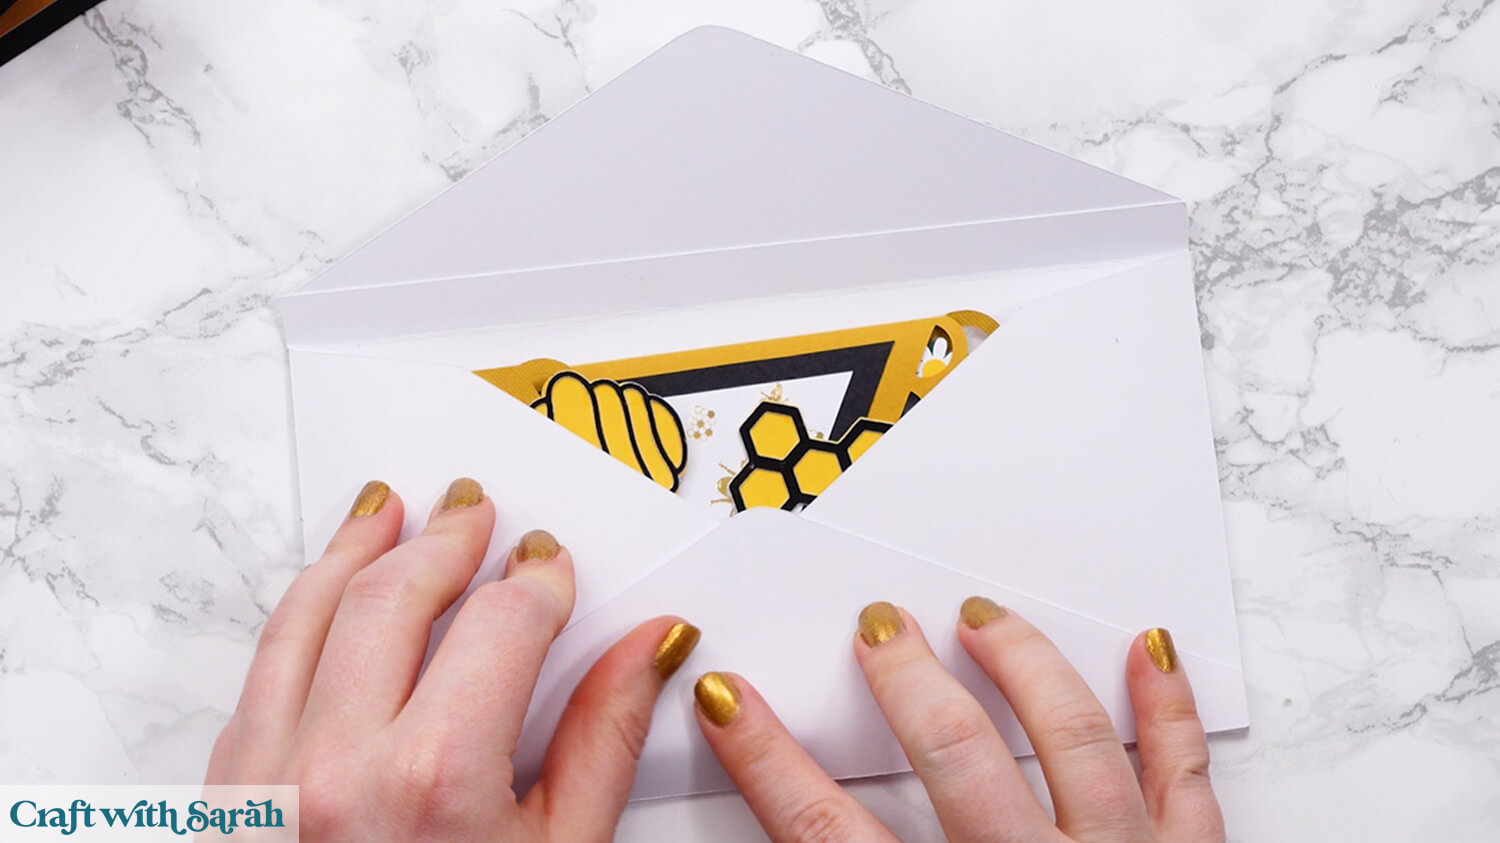
The envelope is now ready to receive your cascade card.
Seal it with double-sided tape, glue, or go fancy with a wax seal!
Quick & easy cascade cards
And just like that, you’ve created your very own cascade card – a freestanding masterpiece full of charm, dimension, and personality!
Whether you went for the classic look, added some flair with the circular edges, or celebrated with birthday candles, each card is a joyful expression of your creativity.
With endless ways to decorate using layered SVGs, patterned paper, images, and text, these cards can be customized for any occasion — birthdays, holidays, weddings, or just to say hello. The best part? They’re as fun to make as they are to give!
We hope this tutorial inspired you to fold, layer, and decorate to your heart’s content. Keep crafting, keep experimenting, and most of all — keep sharing your beautiful creations with the world.
Happy crafting,
Sarah x

