Slot-Together Woodland Animals 🍂 FCC 03
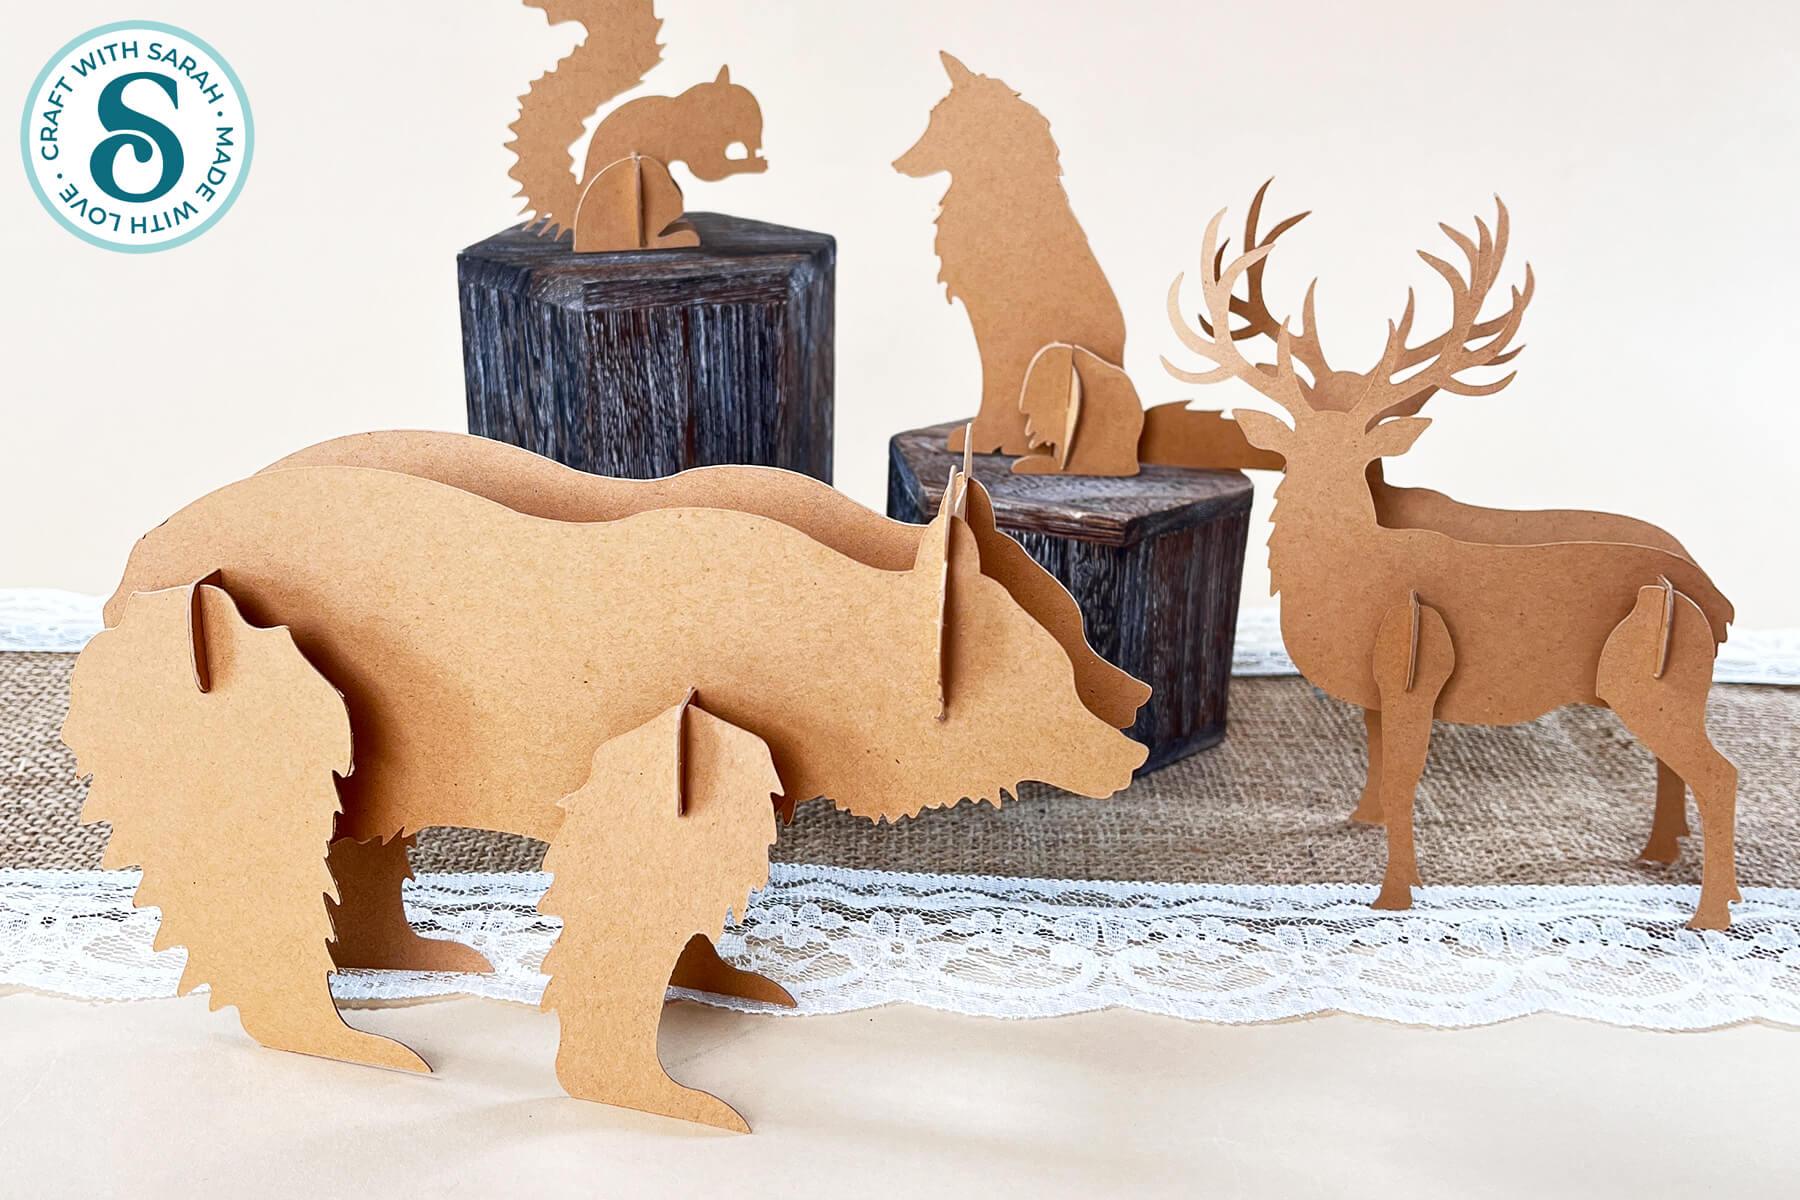
Make a collection of 3D forest animals with these slot-together cardstock designs.
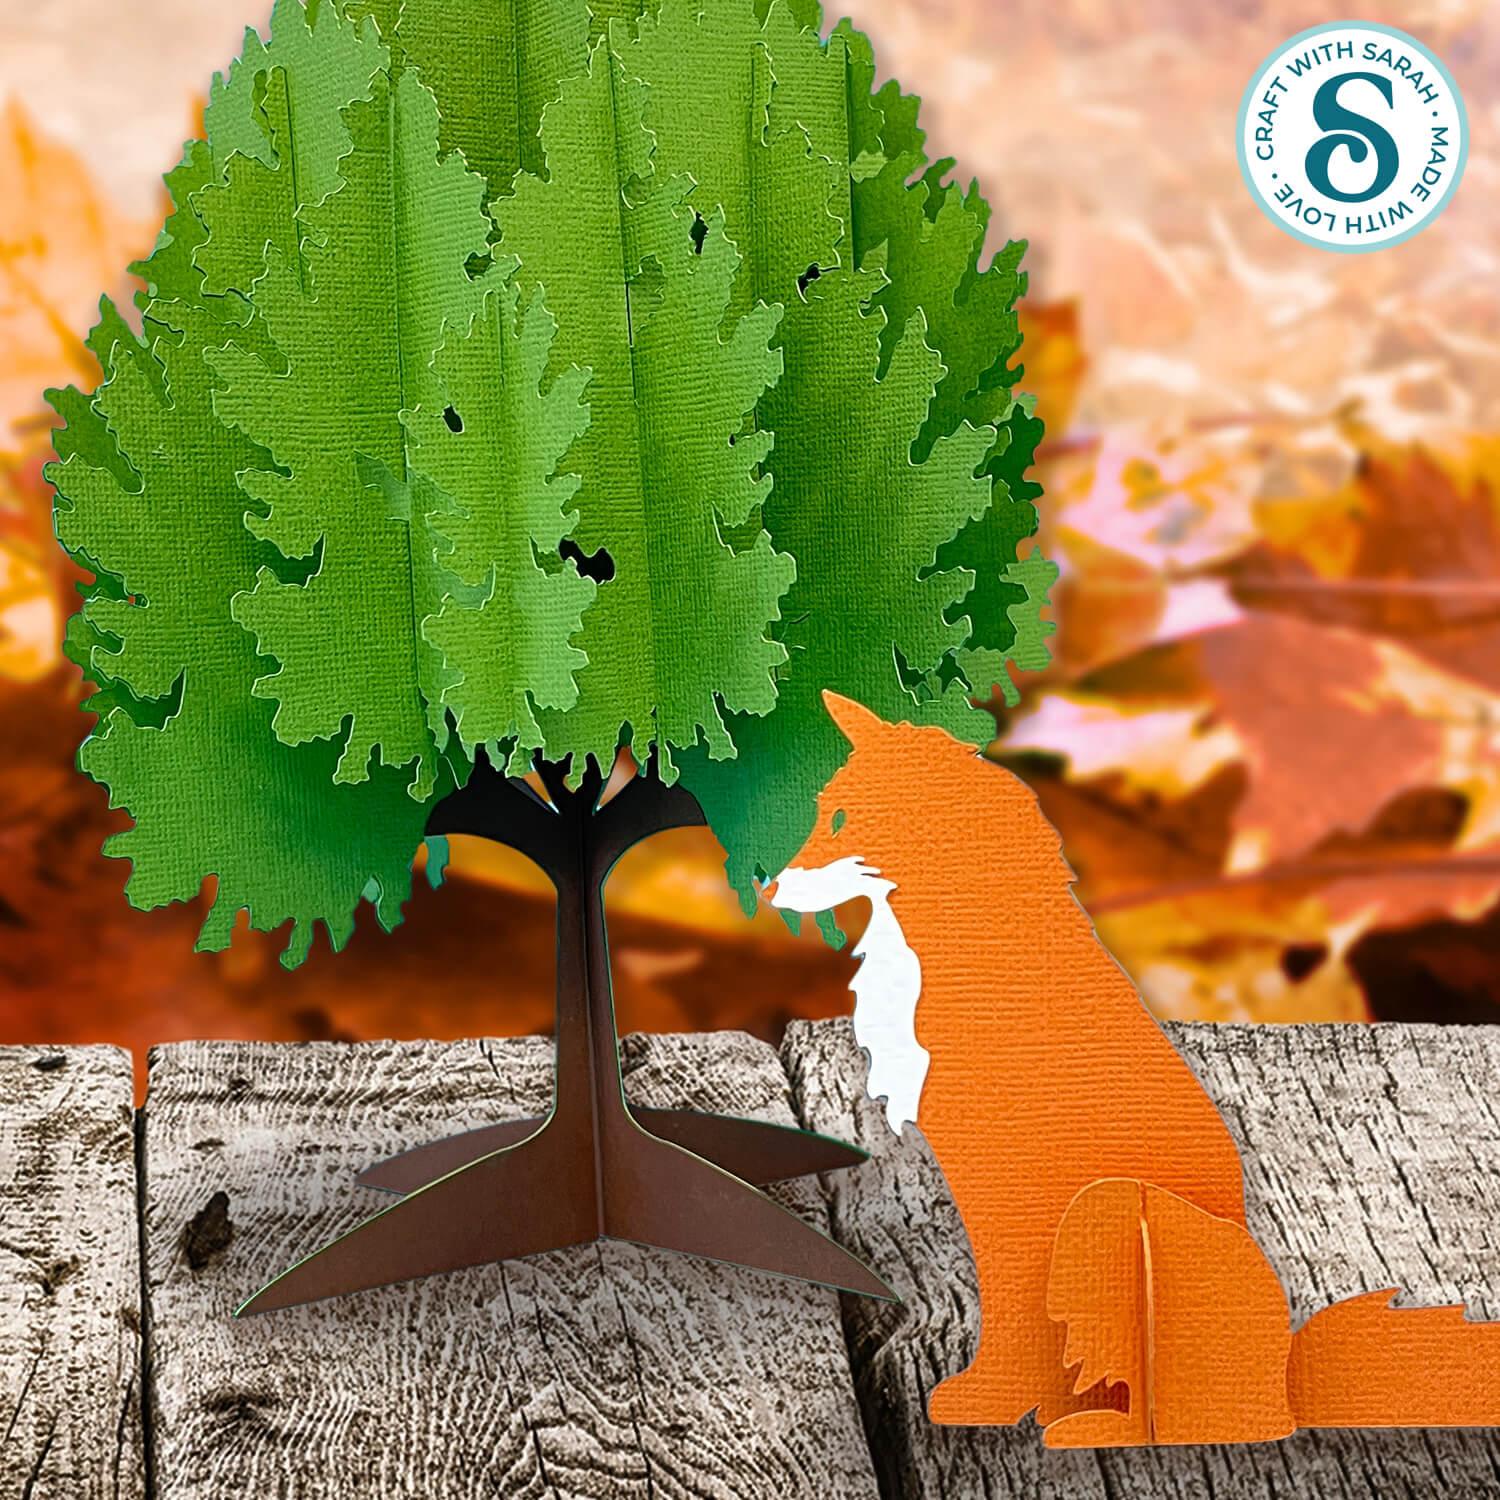
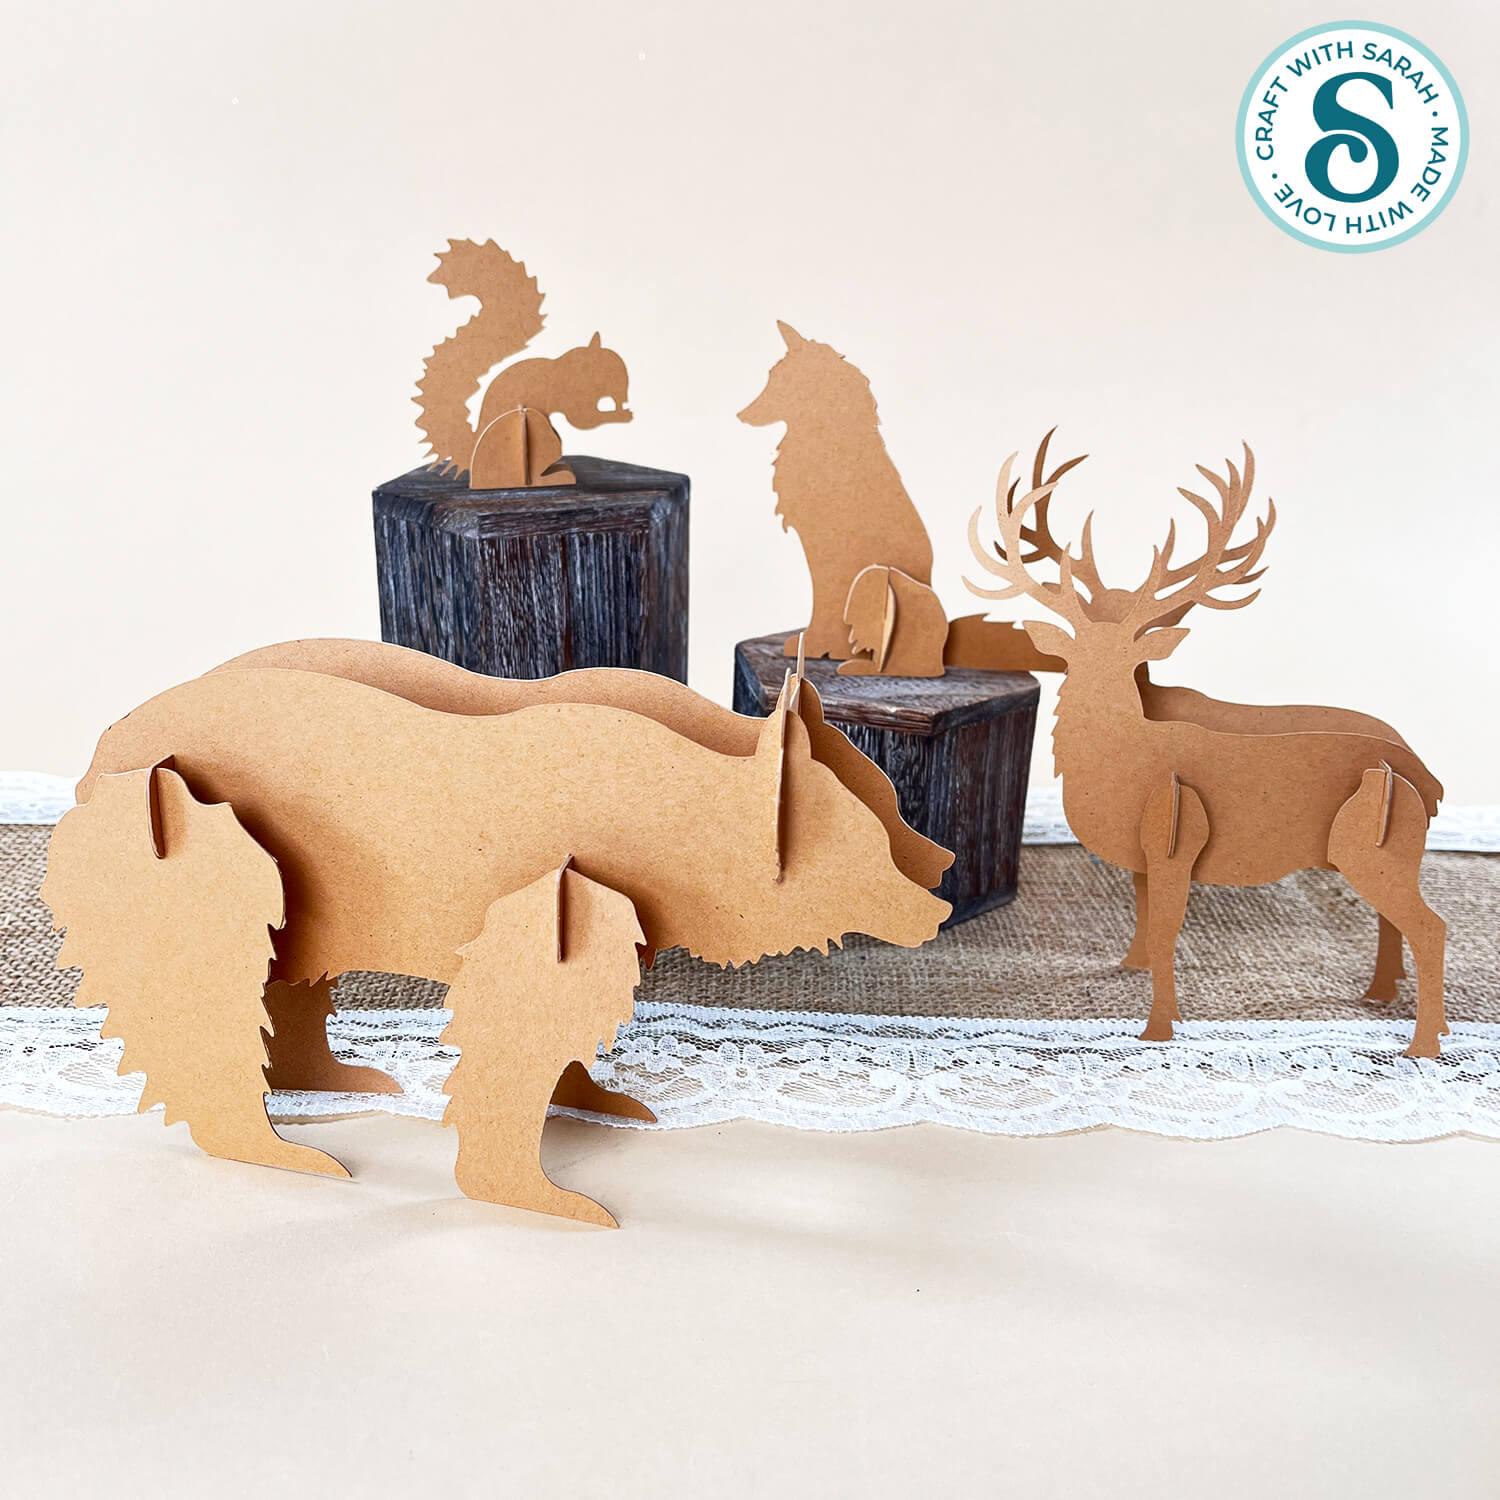
Create a beautiful woodland display for autumn with this collection of 3D slot-together animals and an impressive layered tree.
The collection includes a fox, squirrel, stag, bear and a decorative tree, all designed to stand up without needing any glue for the finished assembly (apart from one small support inside the stag).
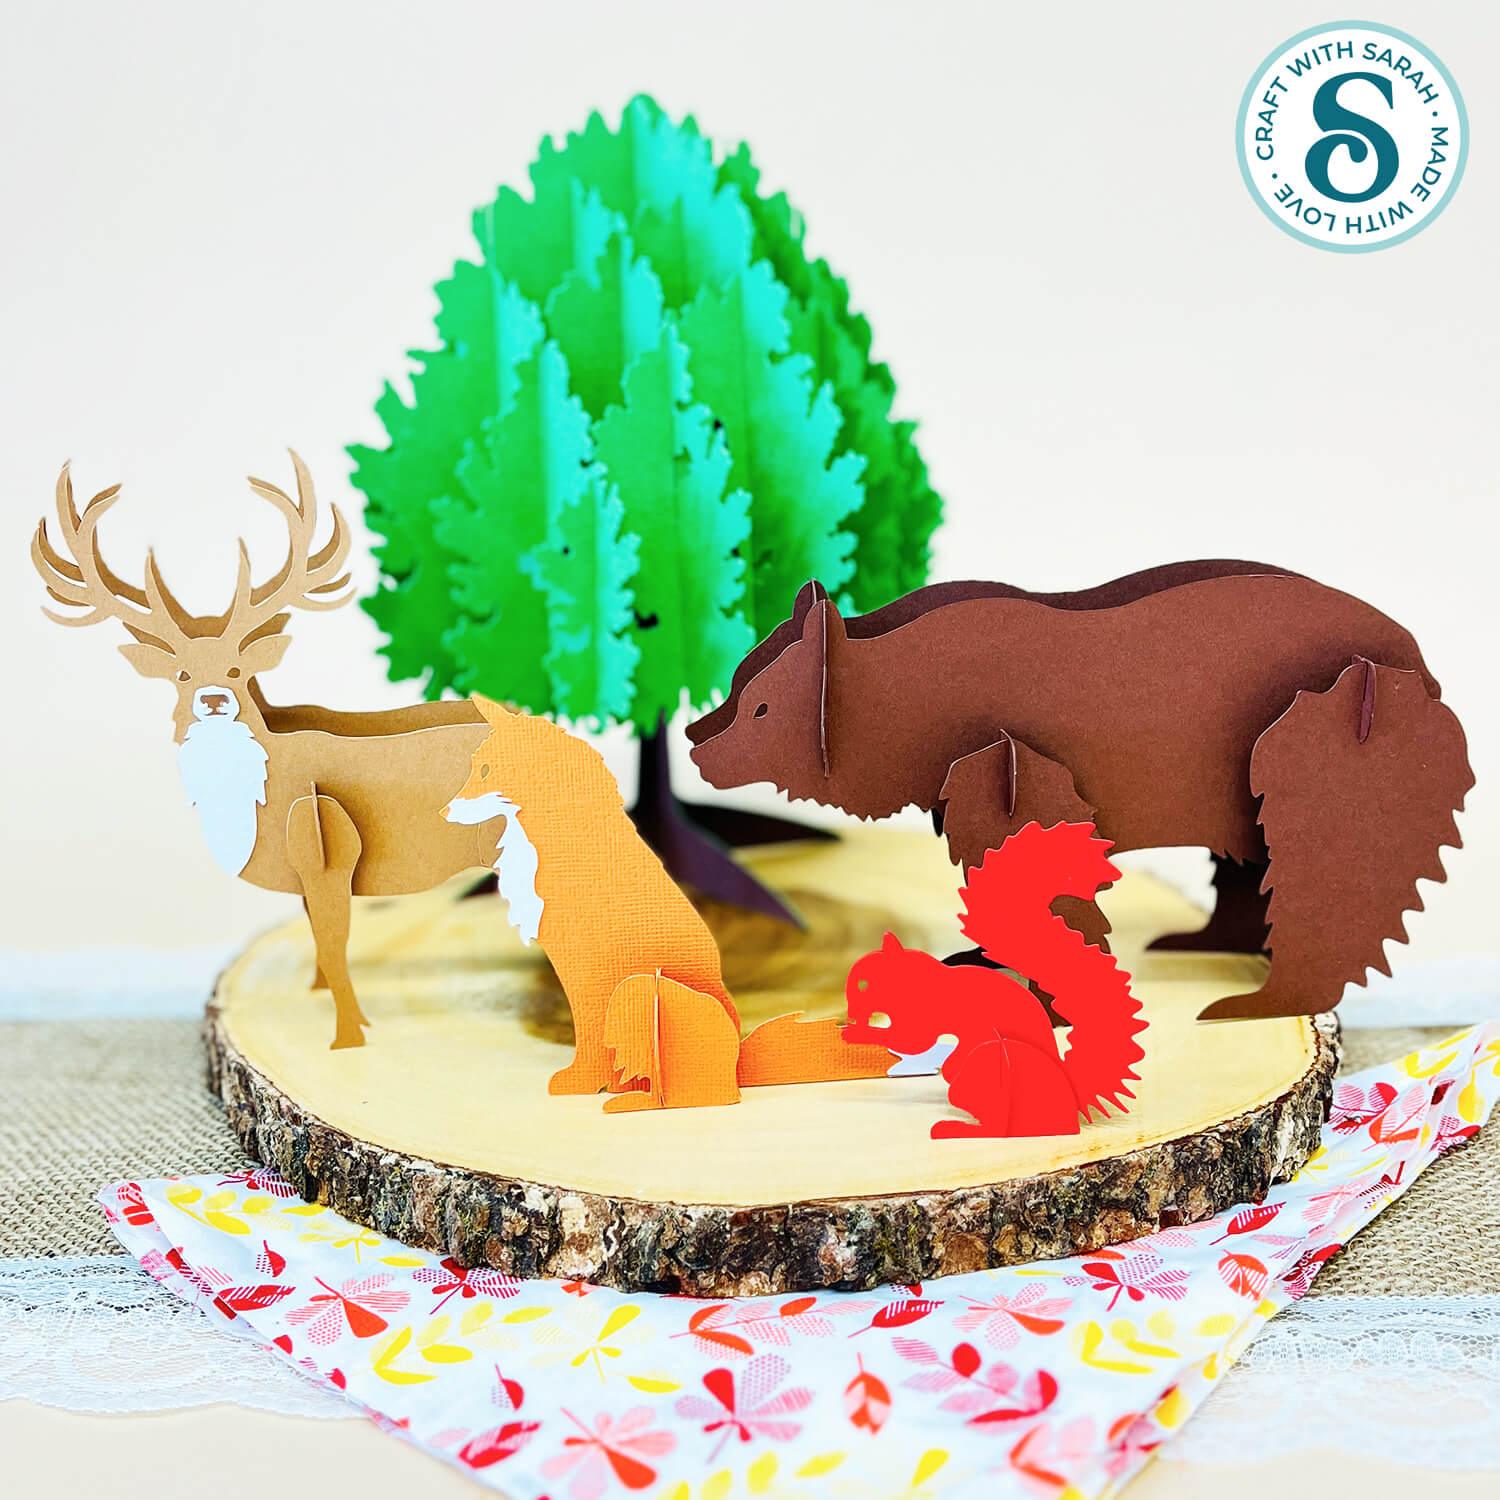
You can make the designs in multiple colours for a detailed woodland scene, or simplify them by cutting everything from one colour of cardstock or Kraft Board for a more rustic, Scandi-inspired look.
The pieces slot together and can be easily taken apart for storage. The tree folds flat, so you don’t need to take the pieces apart for that design.
This tutorial walks you through preparing the SVG files in Cricut Design Space, choosing the best cardstock thickness, cutting the pieces and assembling each woodland animal and the tree.
This project is part of the 2026 Falloween Craft Countdown
Woodland animals materials supply list
Here is a list of the materials that I used to make this project.
Please note that some of the links included in this article are affiliate links, which means that if you click through and make a purchase I may receive a commission (at no additional cost to you). You can read my full disclosure at the bottom of the page.
- Cricut machine
- Light blue Cricut cutting mat
- Coloured Card (thicker card words best, e.g. 300gsm / 110lb)
- Glue (I like Bearly Art Glue and Collall)
- Cricut scoring wheel or stylus (only used for one piece)
This project is suitable for the following types of Cricut machines: Explore series, Maker series and Joy Xtra. The tree is not suitable for cutting with the Joy or Joy 2, but all the animal designs are compatible with those machines.
Foundation learning
If you're new to making papercrafts with your cutting machine, check out these links to get you started.
They include videos on topics such as: which file to use with your type of cutting machine, how to load the files into your cutting machine's software, how to cut cardstock with your type of cutting machine, how to recolor and modify/customize the cut files and tips for displaying your projects.
- How to use zip folder downloads
- Help guides for Cricut machines
- Help guides for Silhouette machines
- Help guides for ScanNCut machines
The following tutorials are Cricut-specific, but many of the ideas will work similarly with a Silhouette or ScanNCut machine and any cut files that are shared in them are compatible with all types of cutting machine.
- How to score with a Cricut (even without scoring tools)
- Print then cut tutorial
- Design Space tools (Combine, Attach, Slice, Weld, Flatten, etc.)
- Pattern fill tutorial (for making backgrounds & cutting images to a specific shape/size)
- Free envelope SVGs that can be sized to fit any card
- Presentation boxes for handmade cards
- How to write inside cards with Cricut pens
- How to cut layered designs at a small size
- Design Space tips & tricks
- Cricut pens tutorial
- How to mount multiple designs in the same frame with magic guides
3D animal craft video tutorial
Watch the video below to see how to make this project. Keep scrolling for a written tutorial.
A note before you start
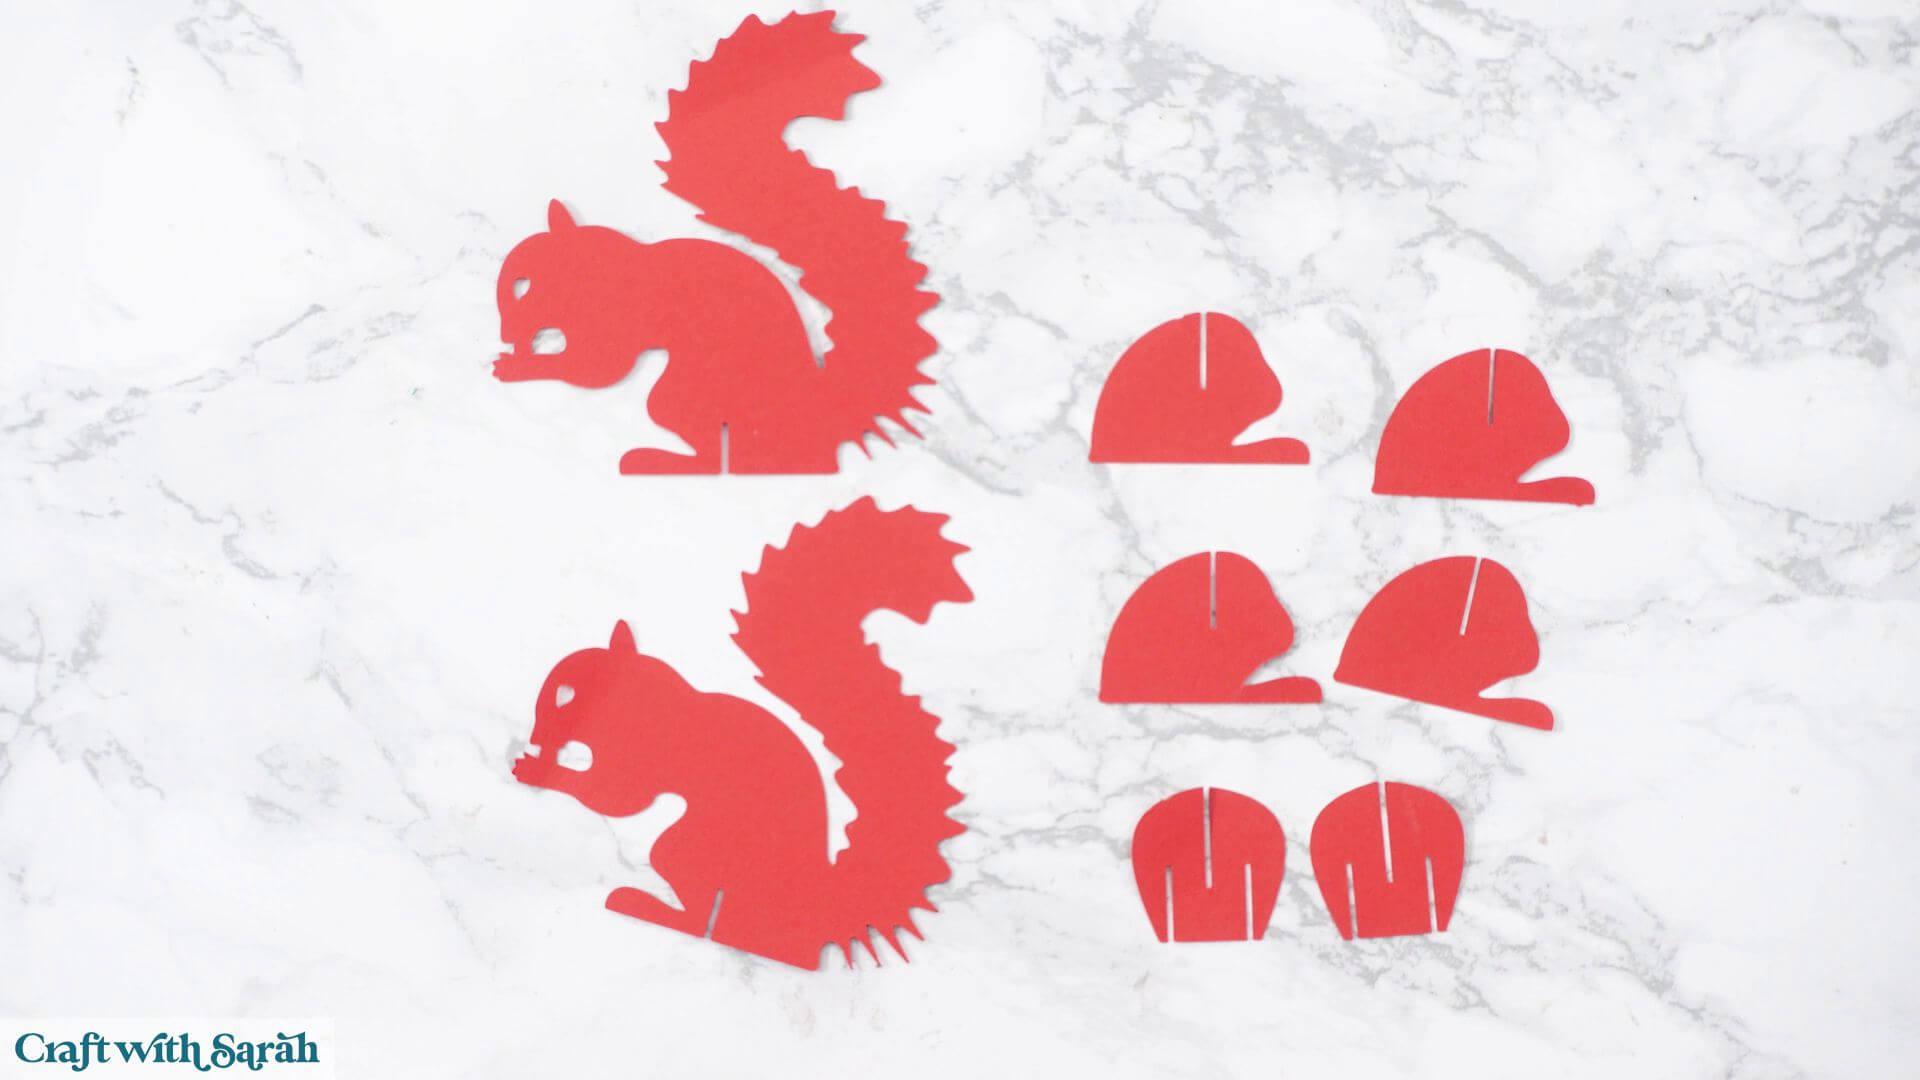
The SVG file contains two copies of every structural piece of the animals.
This allows you to glue matching pieces back to back if you’re using thinner cardstock. Doubling the layers makes the slots tighter and gives the finished animals much better stability.
Whether you need both copies depends entirely on the thickness of your cardstock.
Using regular cardstock
For cardstock around 210–250 gsm (approximately 65–80 lb), you’ll usually want to glue every matching piece together before assembly.
Using thicker cardstock or Kraft Board
If you’re using Cricut Kraft Board or similar thick cardstock around 300 gsm (110 lb), you may only need to double up some of the structural pieces.
I ma not sure if Cricut still make Kraft Board as it is getting harder to purchase it online. It is a thicker type of cardstock, around 300 gsm / 110 lb.
Don’t get it confused with Chipboard which is more like wood. Chipboard is not suitable for this project.
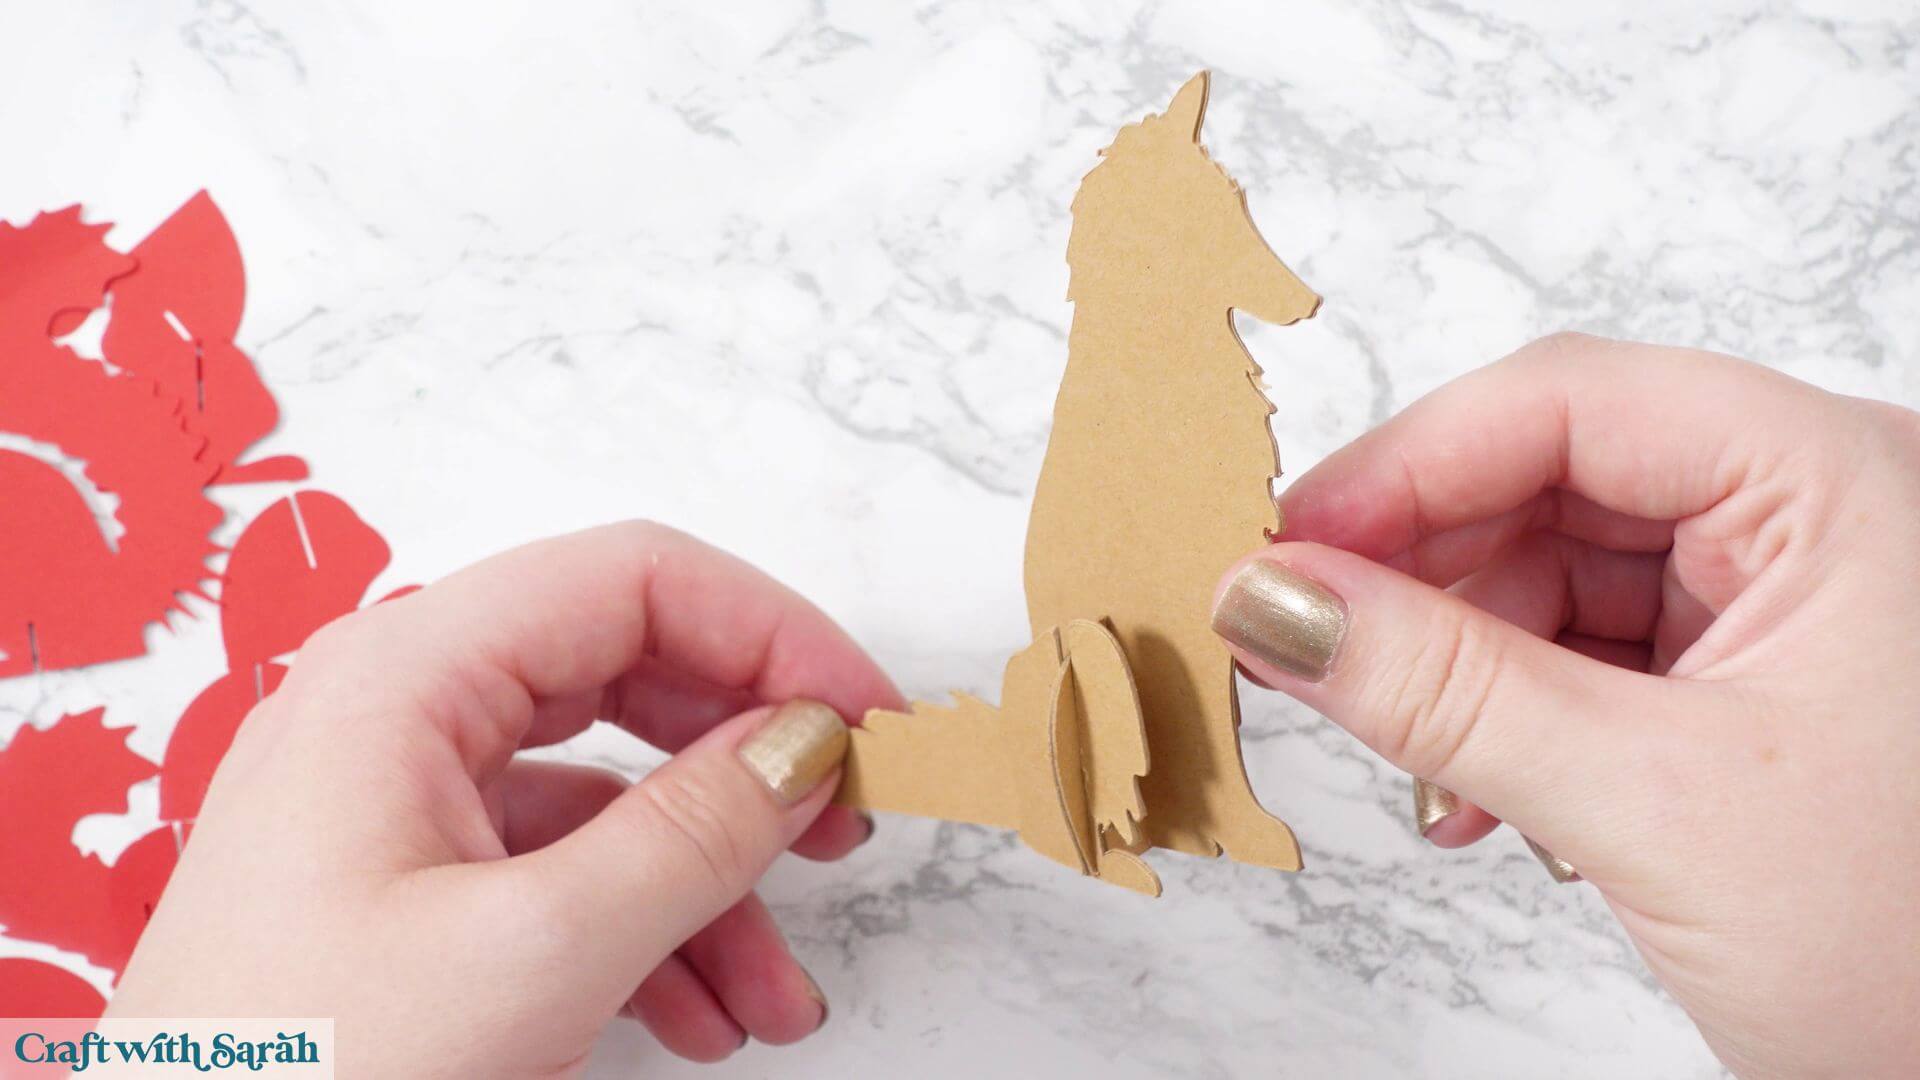
A good way to test your thickness of card and whether you will need both copies of the animal shapes or not is to cut just the squirrel first as that is the smallest animal so it will take up the least amount of your cardstock.
Assemble it and see how securely it fits together before deciding whether the remaining animals need all the duplicate pieces.
The only exception is the tree. Even when using thick cardstock, all of the tree pieces are required exactly as supplied. Removing duplicate structural pieces will make the tree unstable.
Written tutorial (with photos!)
Here’s how to make this series of slot together animals using a Cricut machine.
Step 1) Download the cutting file & upload to Design Space
Download the files using the file download box that appears further up this page (above the video tutorial).
Get the files using the box below.
Purchase the File(s)
This cut file is available as part of the Instant Access Bundle.
Or, purchase this design individually here
Before you upload the SVGs to Design Space, you need to unzip the download folder that they come in.
Not sure how to do this? Click here for a tutorial that covers all the following types of computer and device:
- How to unzip a folder on a Windows computer
- How to unzip a folder on a Mac
- How to unzip a folder on an iPad
- How to unzip a folder on an iPhone
- How to unzip a folder on an Android device
After unzipping, upload the SVG file(s) into your cutting machine software.
Not sure how to use cut files with your type of machine? The following links lead to tutorials on how to use cut files in:
- Cricut Design Space
- Silhouette Studio
- CanvasWorkspace (for ScanNCut machines)
If you are using Cricut Design Space, start a new project and then click the “Upload” button on the left of the screen.
You can then either click “Browse” to find the files on your computer, or drag-and-drop them in.
Select the SVG file called svg-slot-together-animals-craftwithsarah.svg
Press “Upload” on the next screen.
After uploading, the design should be automatically inserted onto your Canvas.
To hide the left sidebar (to give you more space for designing!), click the arrow that’s about half way down the page.
If the design doesn’t get inserted onto your Canvas, it will show under “Uploads” in your “Recently Uploaded Images”. Click on it and then press “Add to Canvas” to put it onto your Project.
Need help uploading SVGs? Get step-by-step instructions here in our detailed help guides for Cricut, Silhouette and ScanNCut.
Check that the overall design measures 32 inches wide and 44 inches high.
If it doesn’t, resize it to those measurements before making any changes.
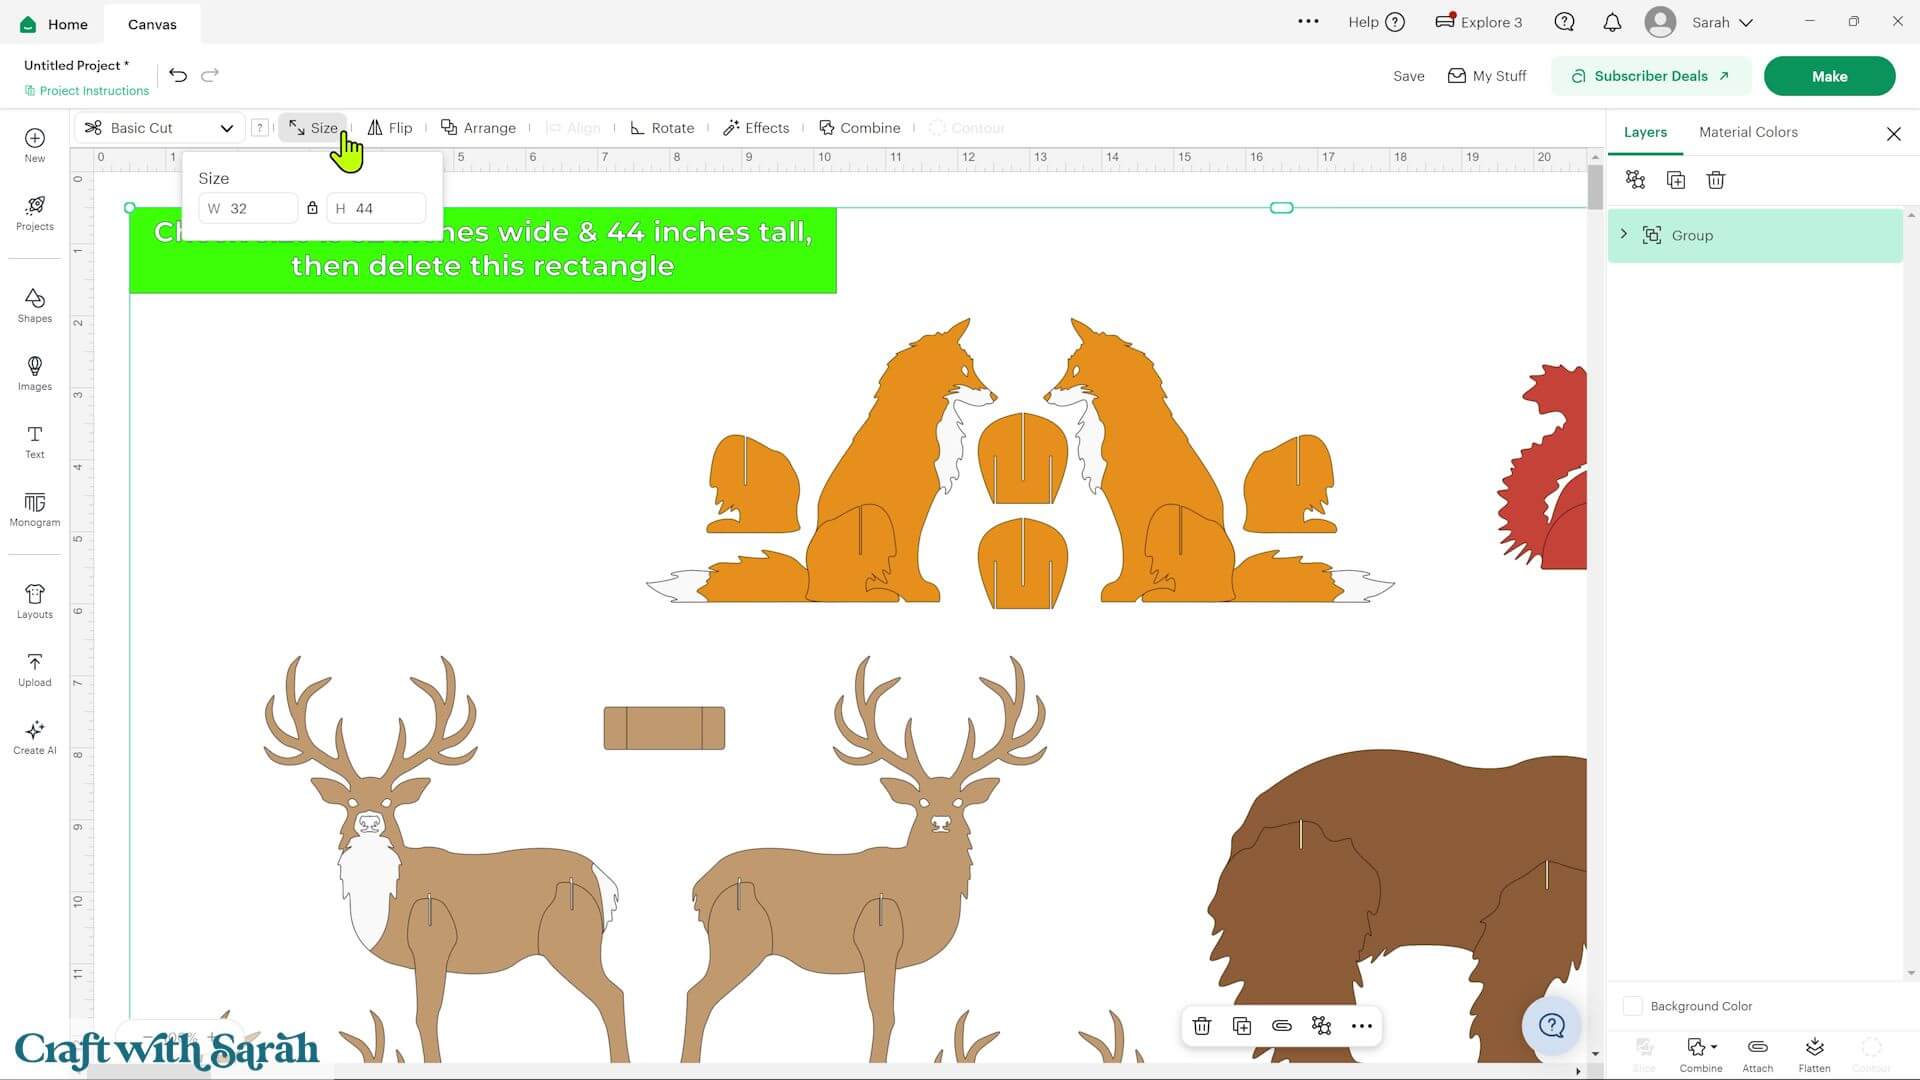
Ungroup the design and delete the sizing rectangle.
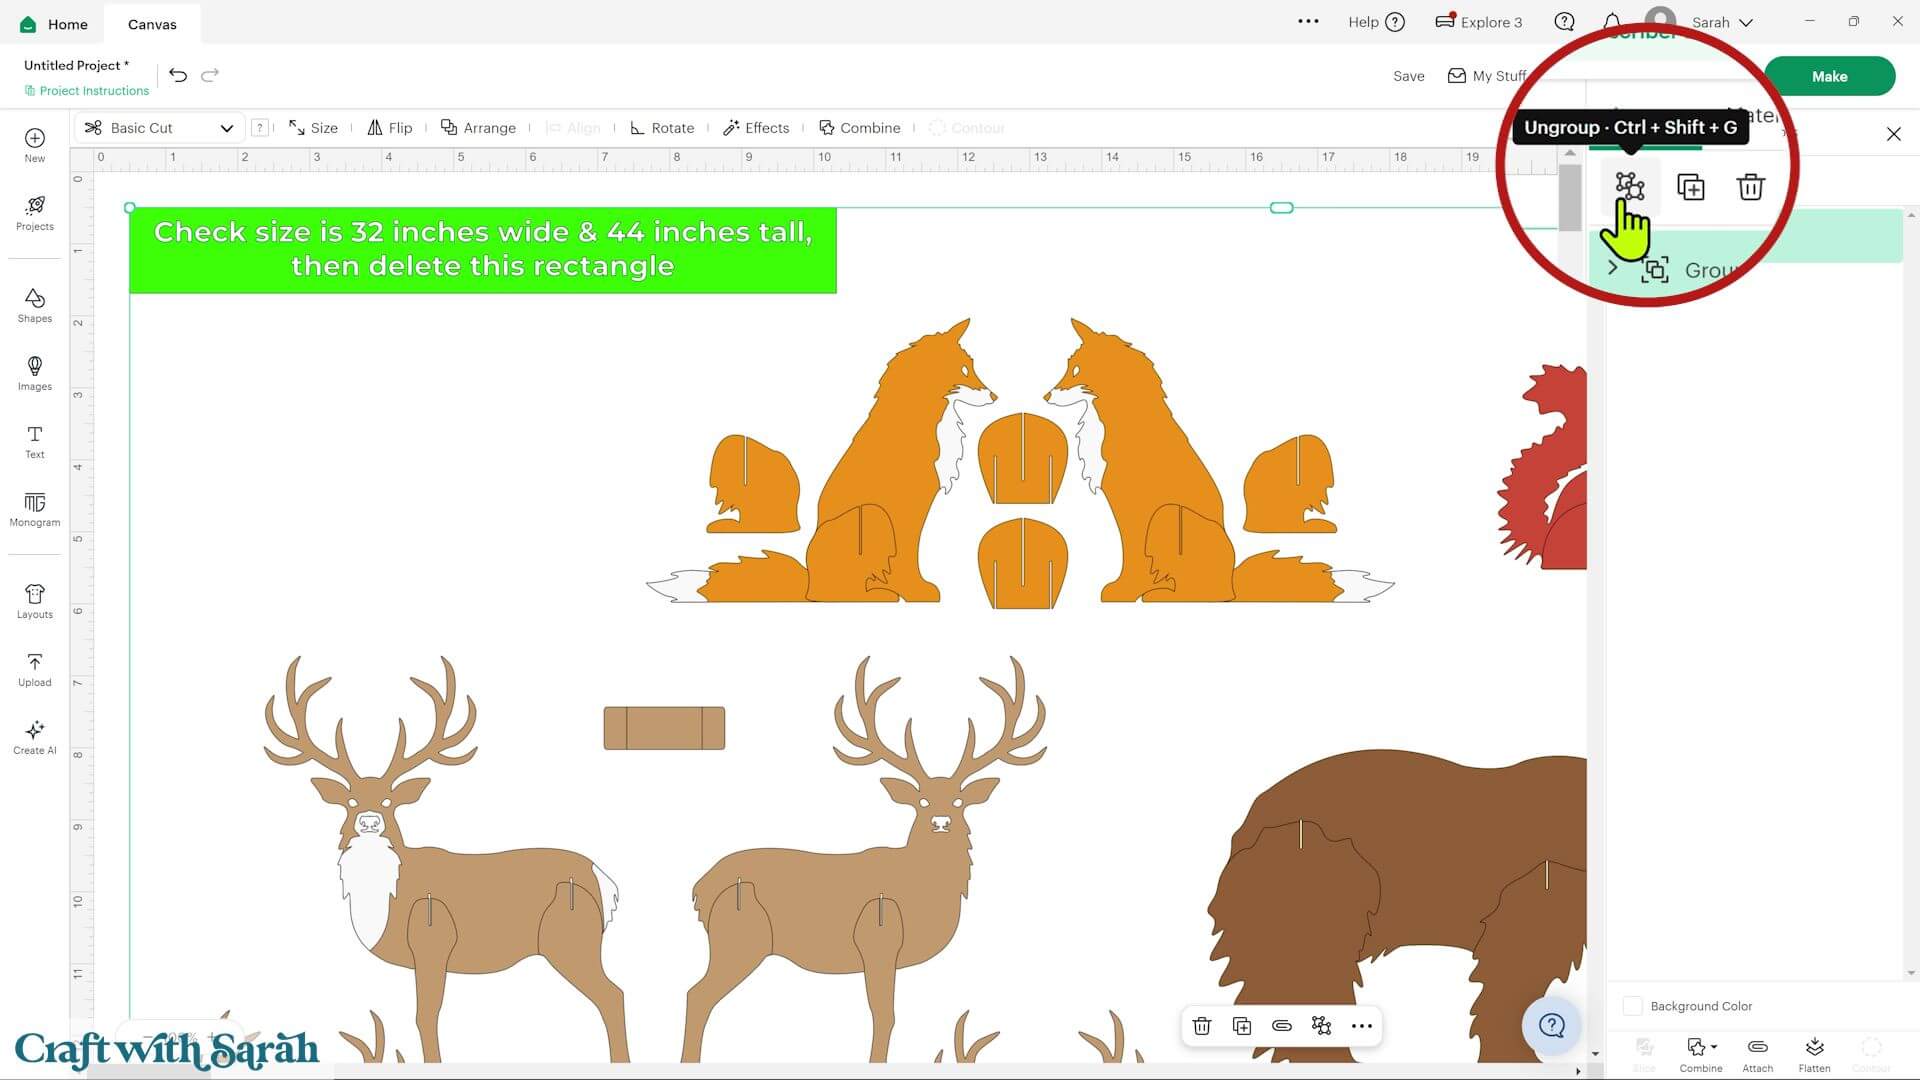
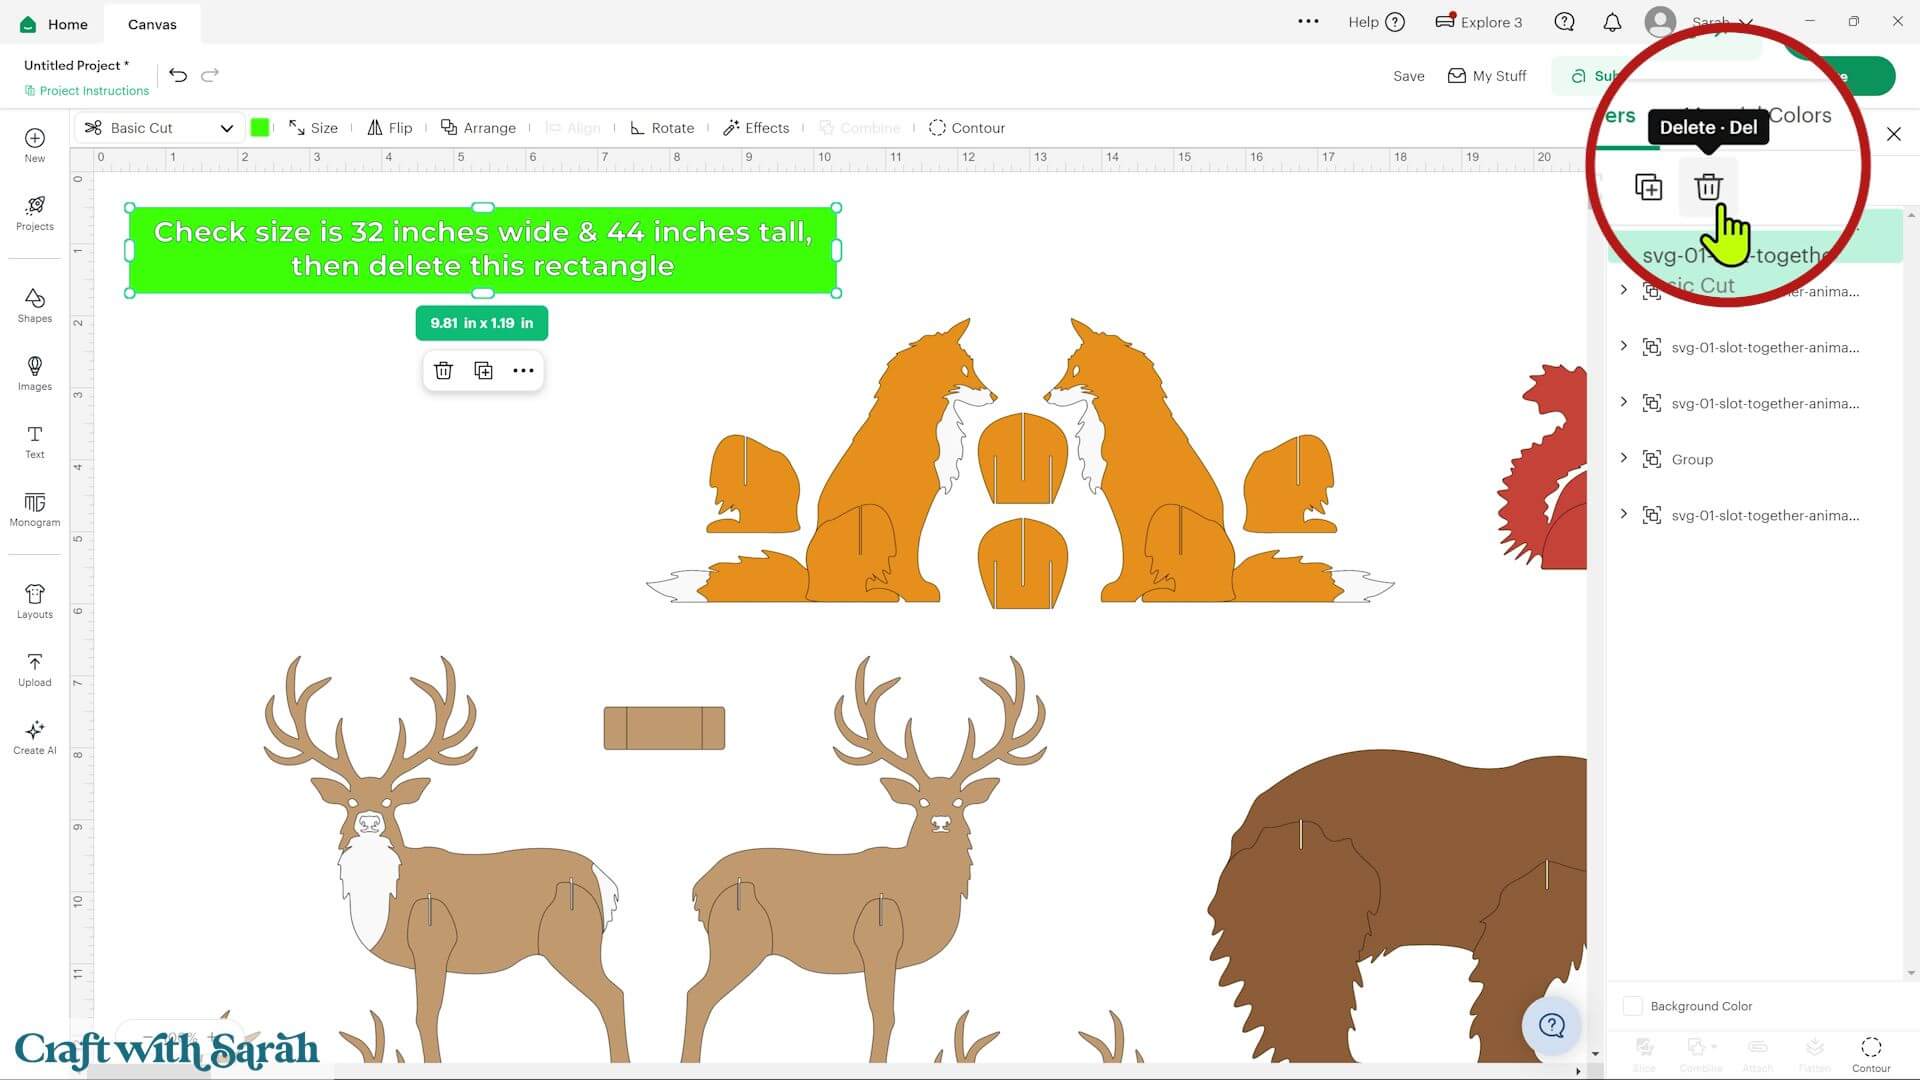
The design is organised into separate groups for each woodland animal plus one group for the tree.
Step 2) (Optional) Recolour the designs
For a more Scandinavian-inspired woodland display, change every layer to the same colour.
Before changing the colours, temporarily move the attached stag support out of the selection. The attached lines on this piece make it a bit trickier to change the colours, so it’s easiest to move it out of the way.
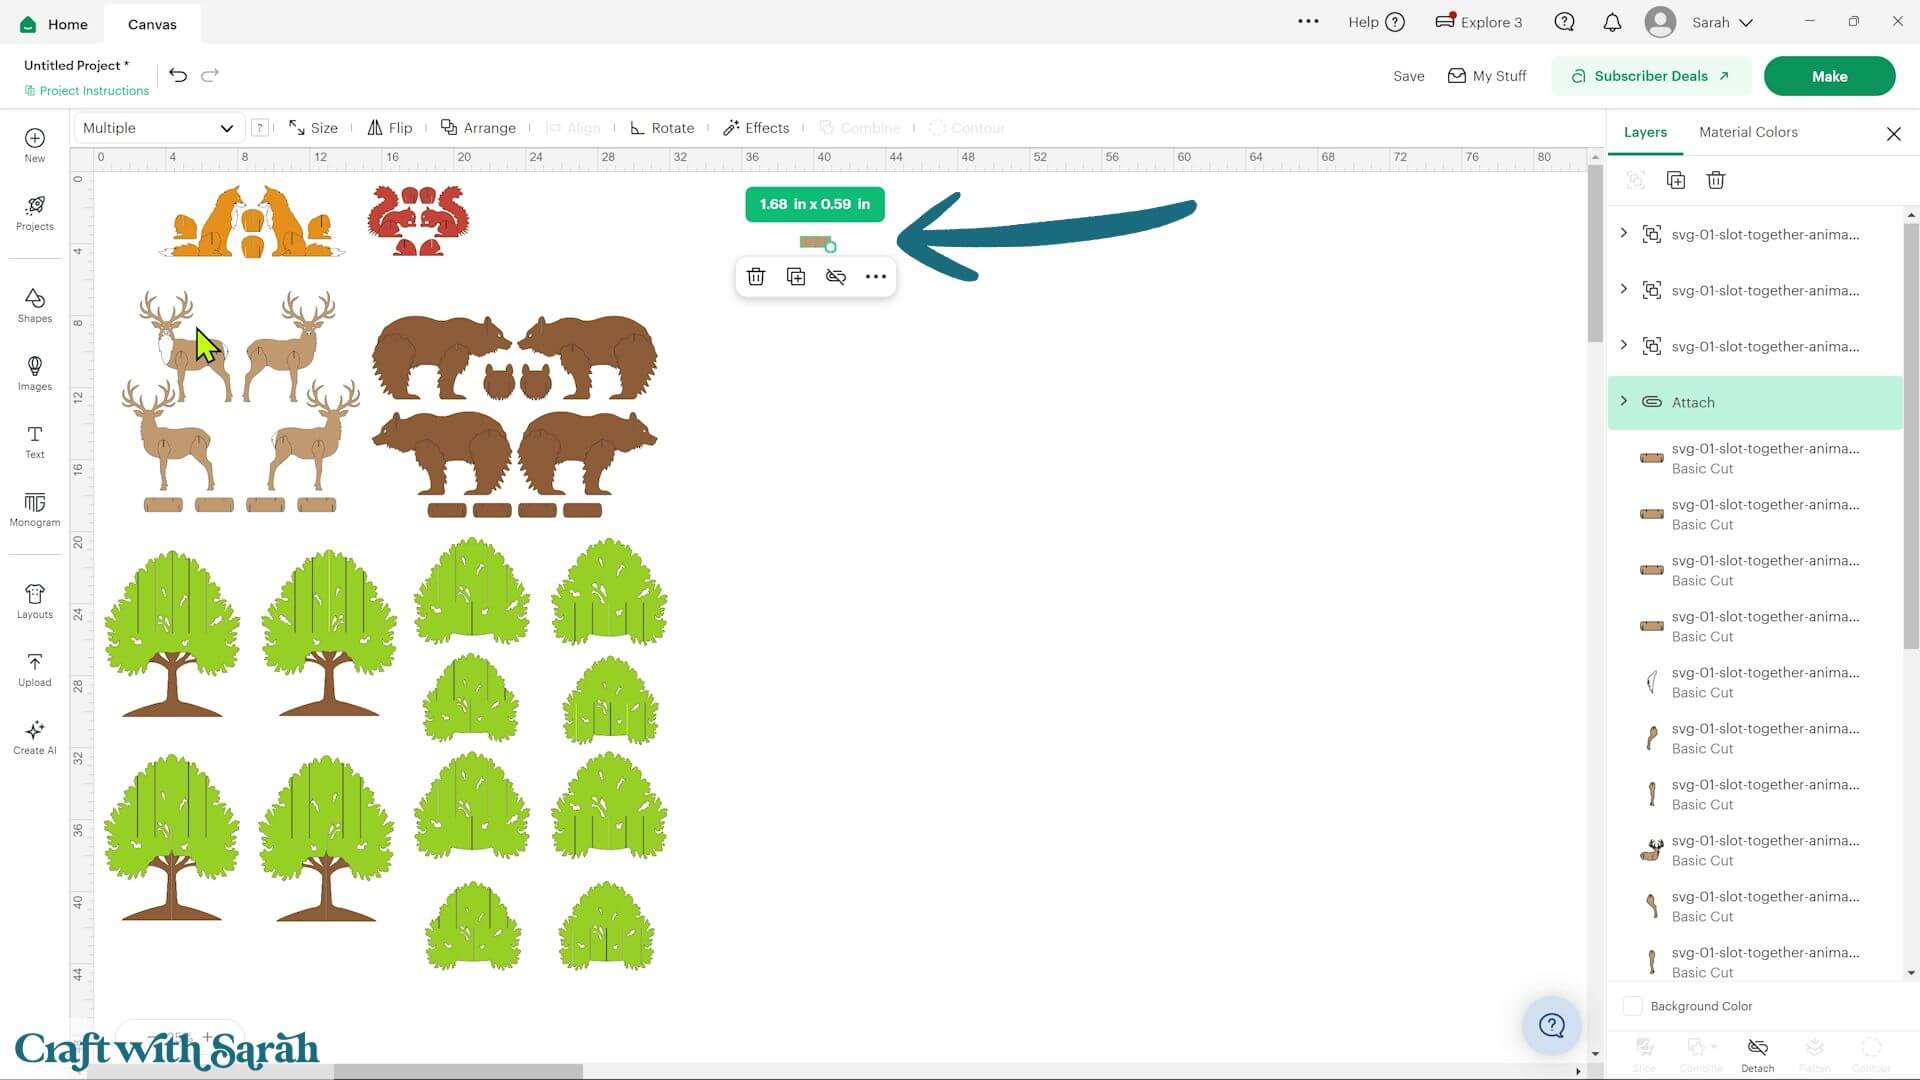
Select all other pieces in the design.
Change the colour of everything else to match the light brown colour of the piece in the stag that you just moved.
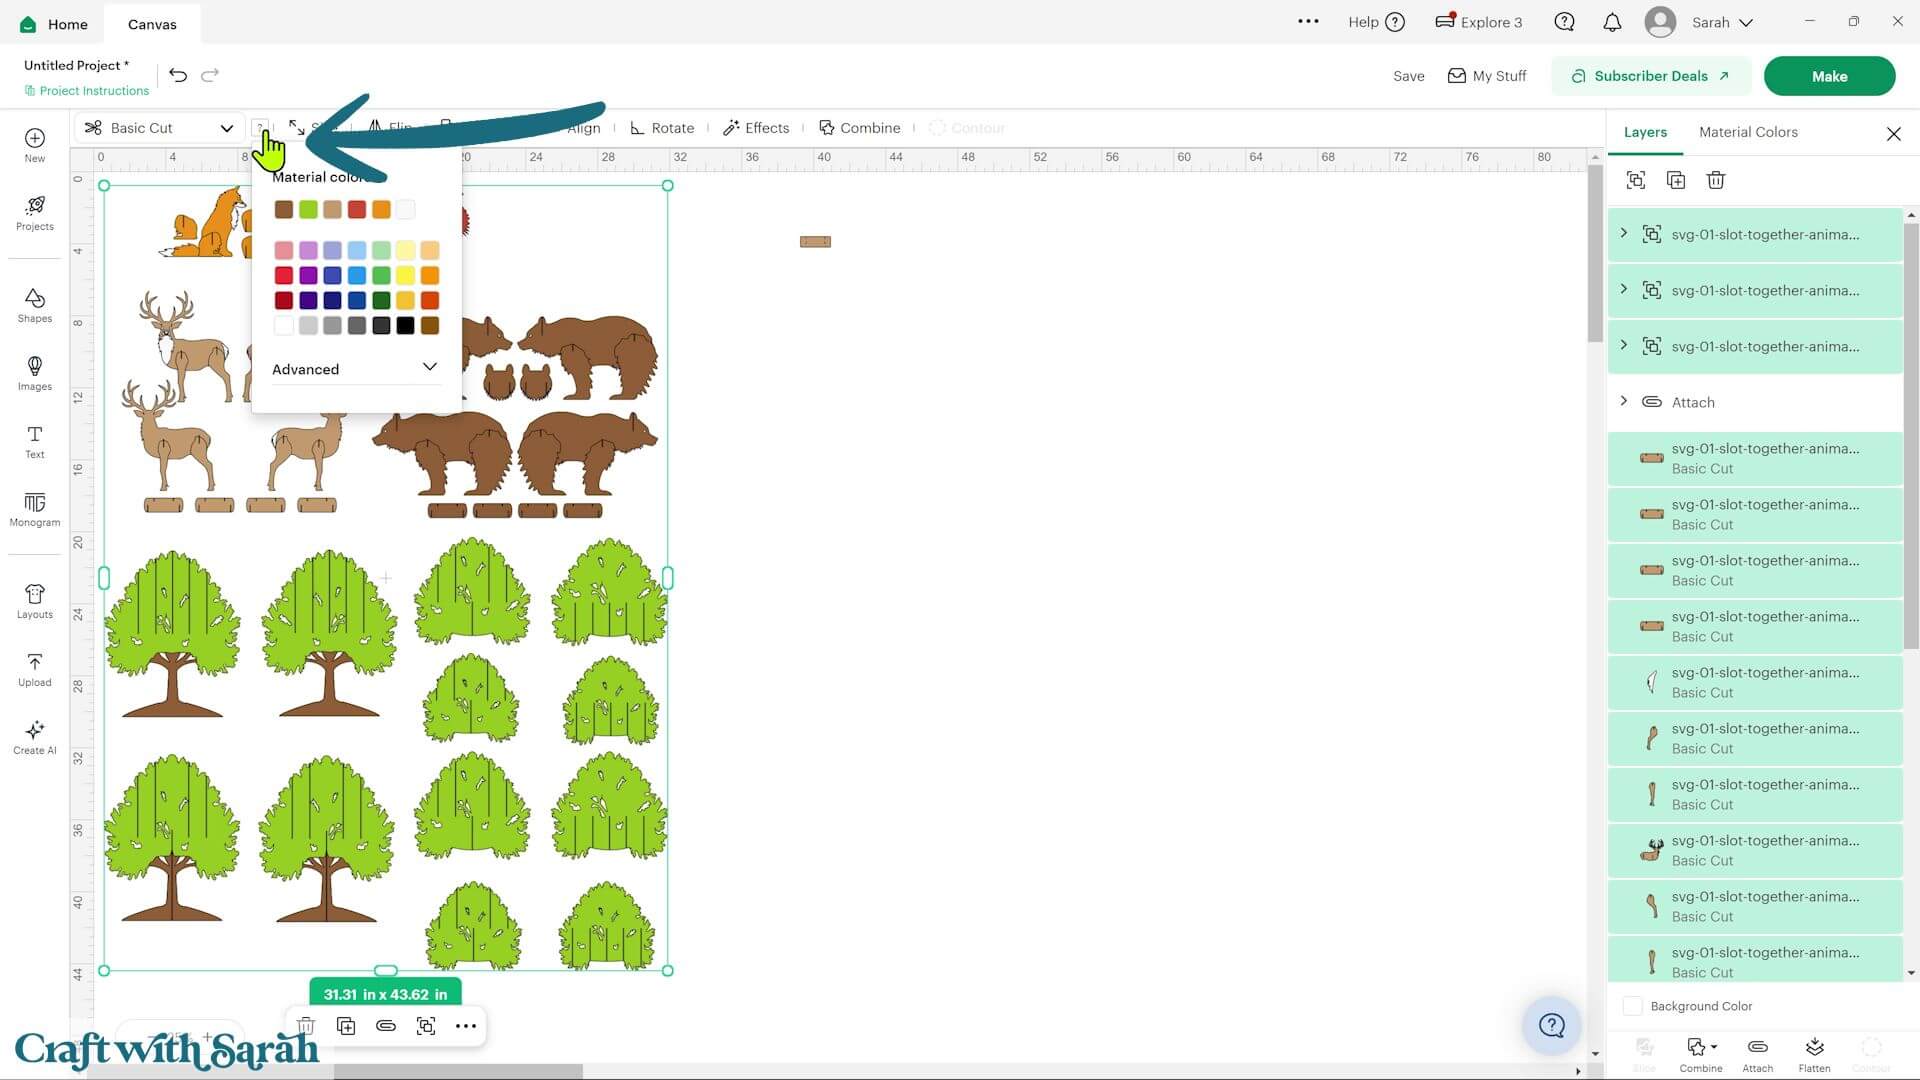
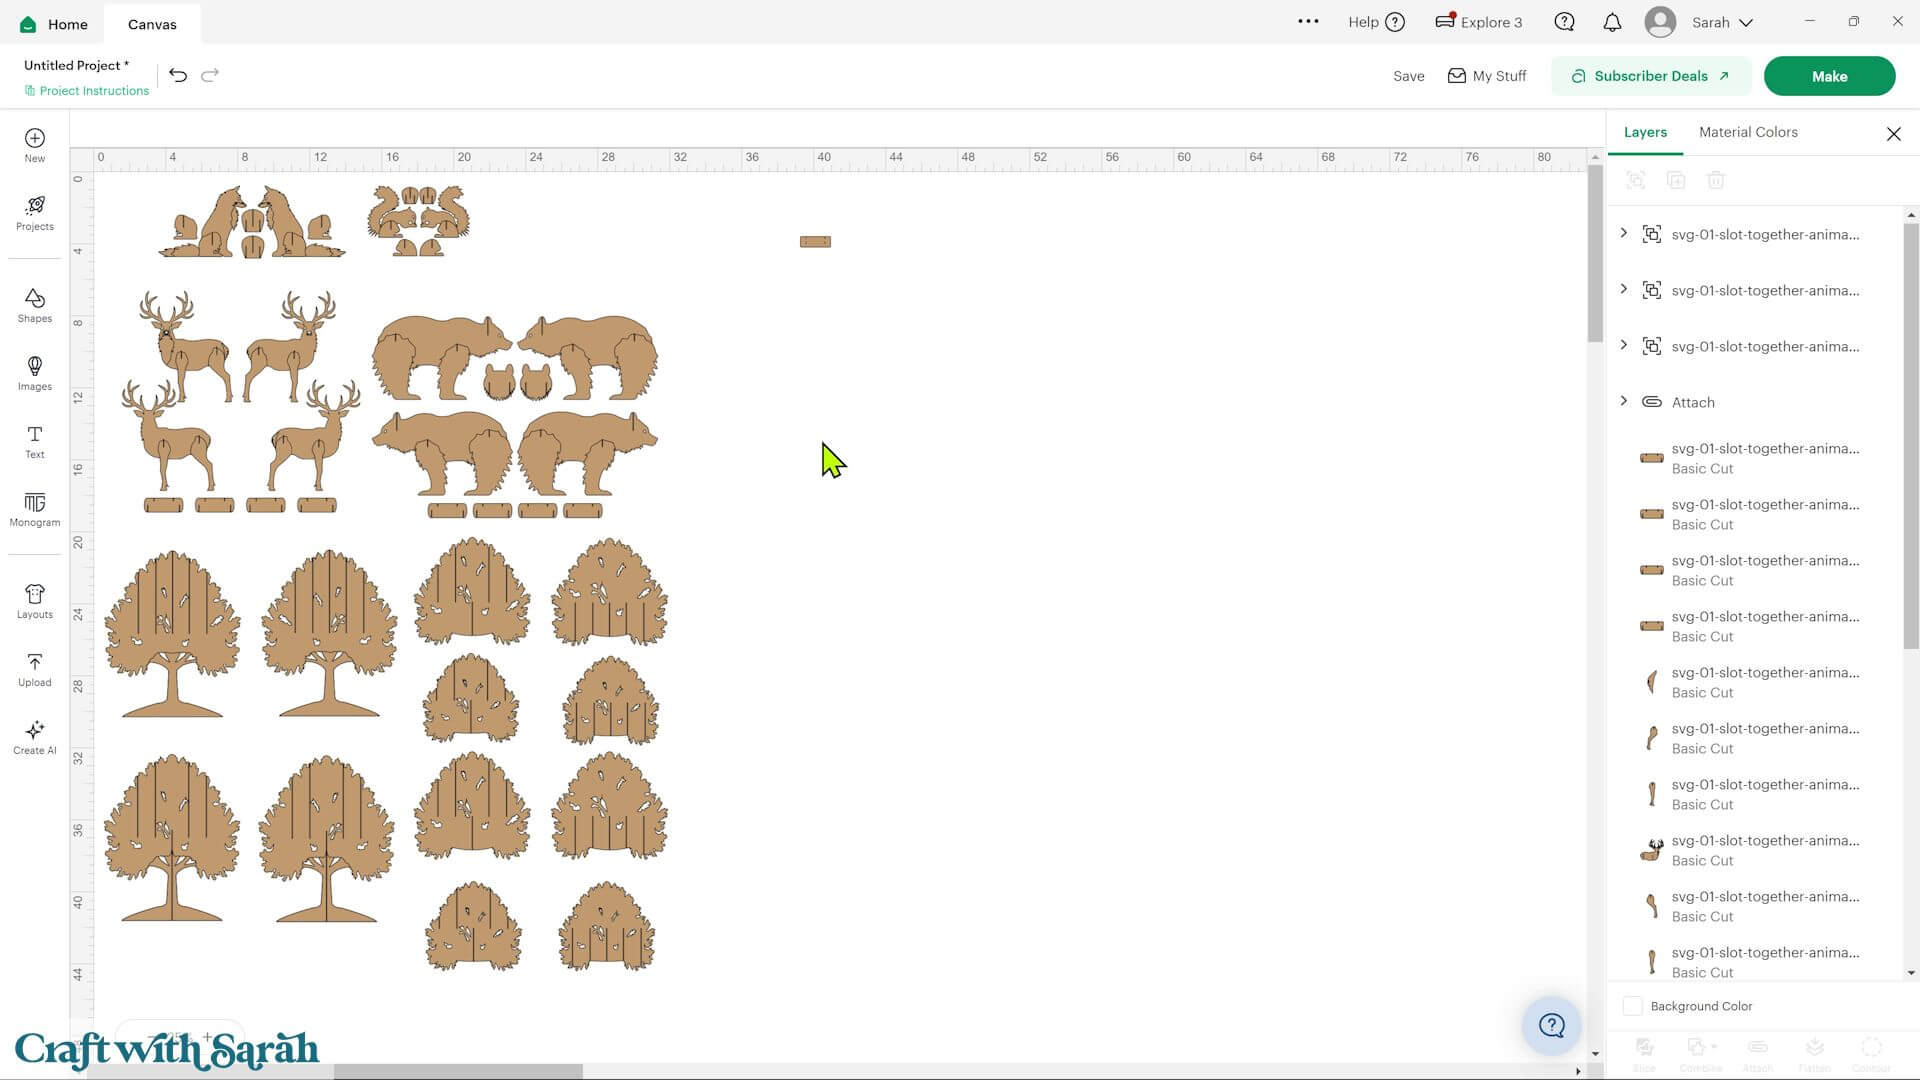
For an even simpler look, you can hide the eye holes using the “Contour” tool.
Click a layer with an eye hole, then press Contour.
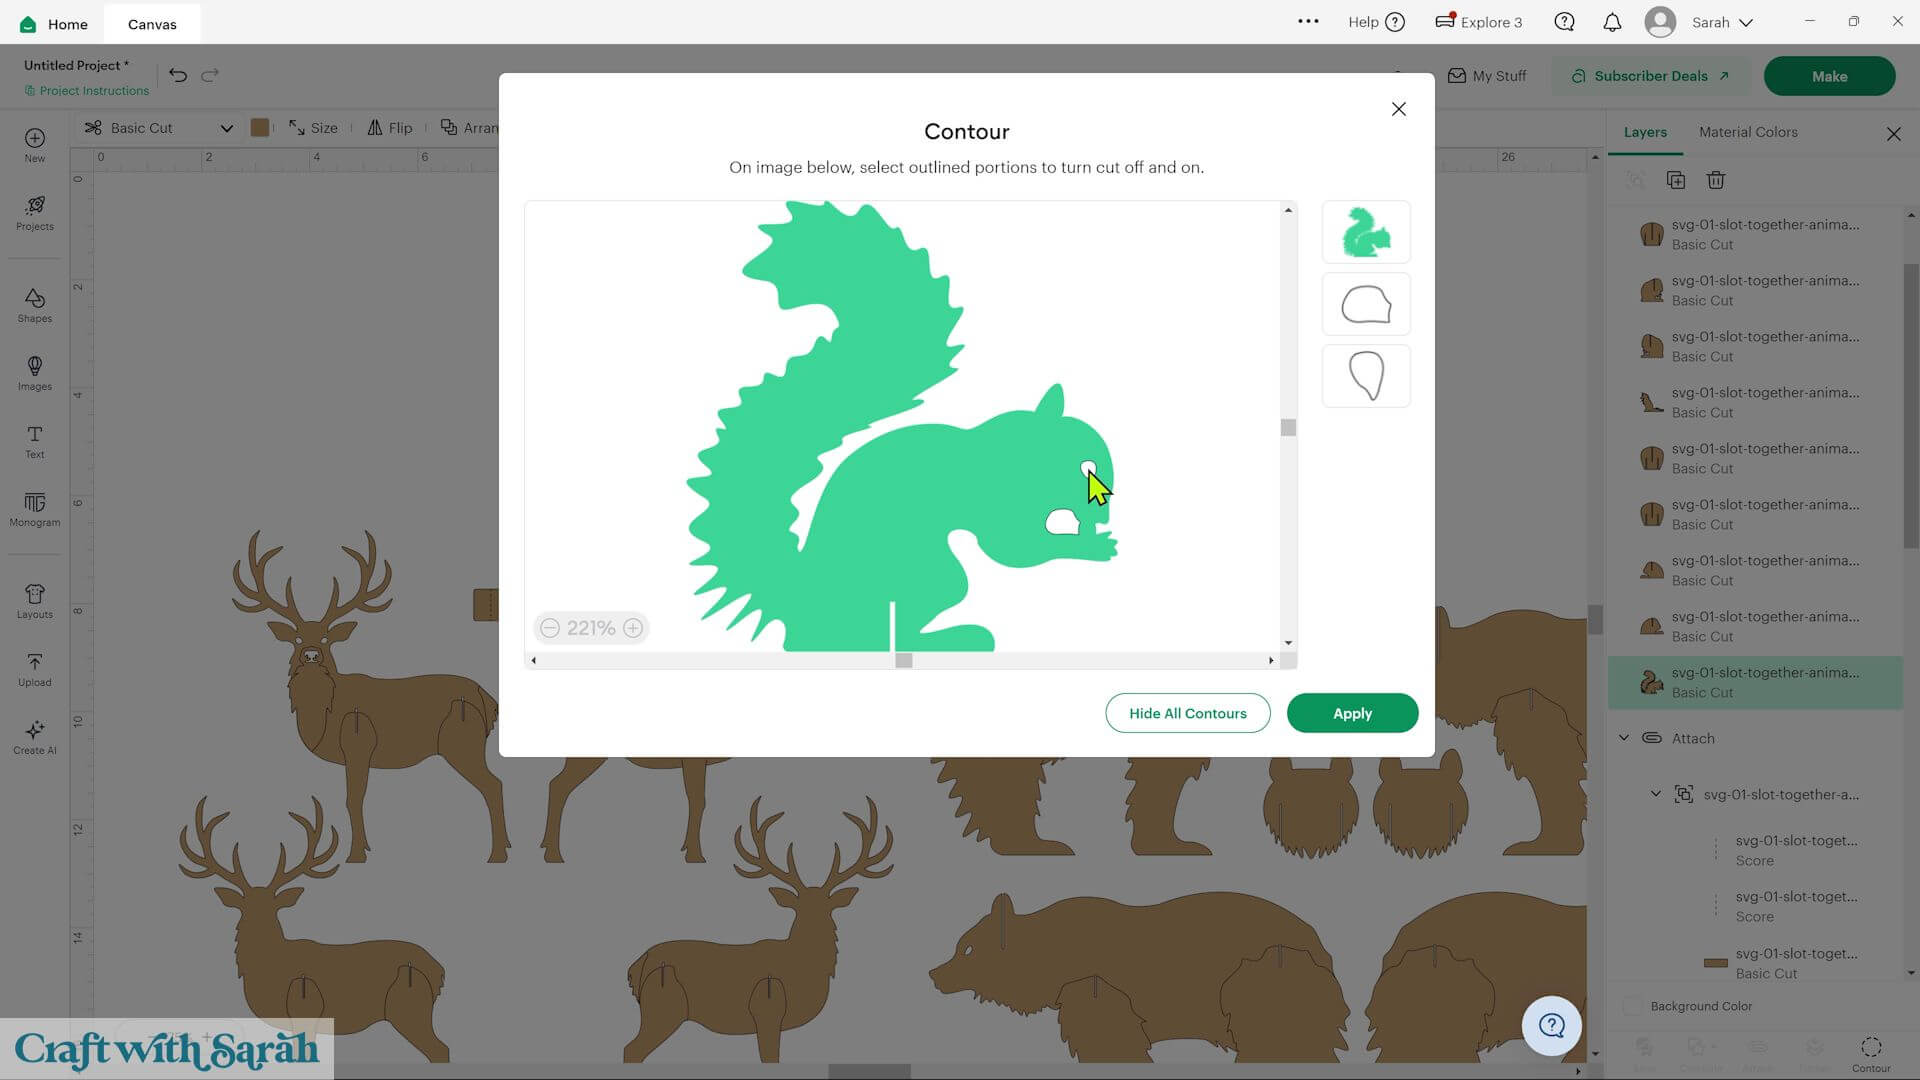
Click the eye holes to remove them, then press “Apply”.
Repeat for other layers.
You can also delete the extra “detail” layers such as the tail on the deer and fox, as these aren’t needed once the designs are all one colour.
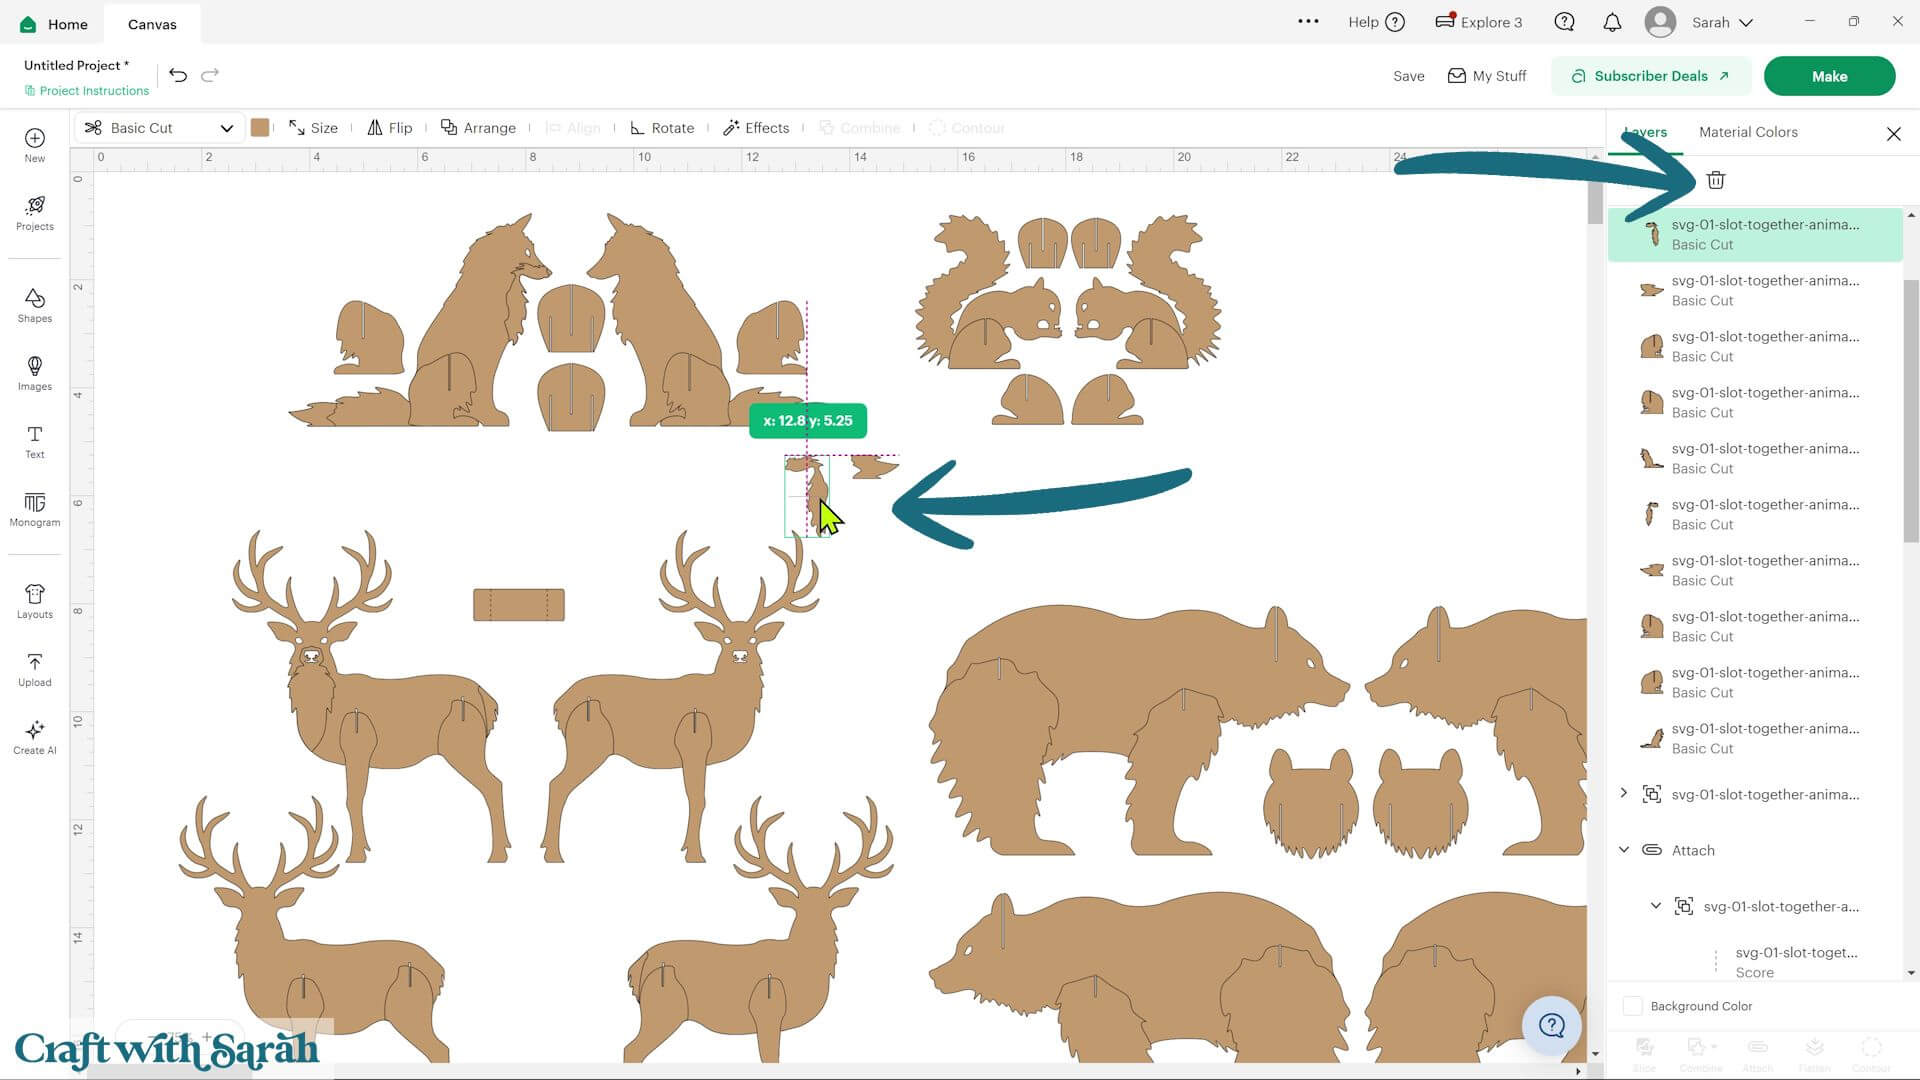
Leave all of the tree pieces exactly as designed.
Step 3) Add the score line
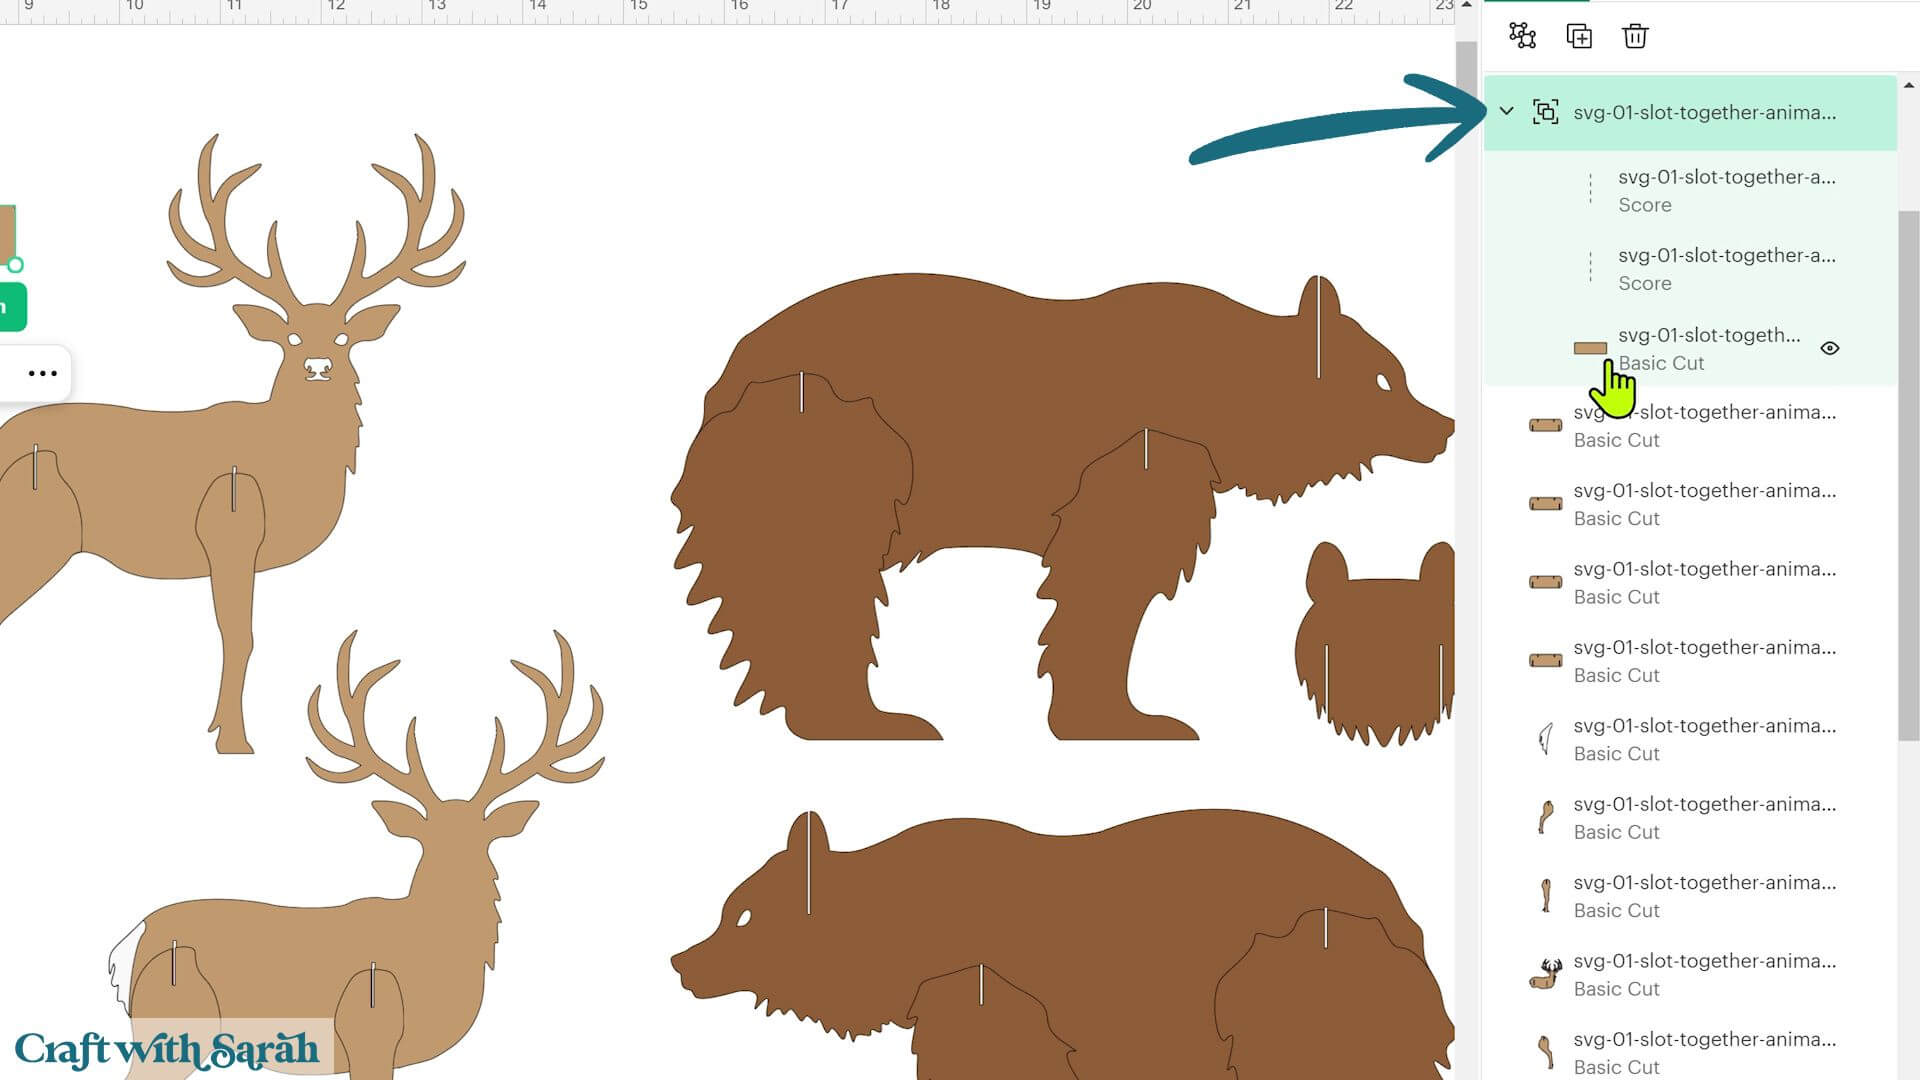
The only piece in the entire project that requires scoring is the small support inside the stag.
Ungroup the stag layers.
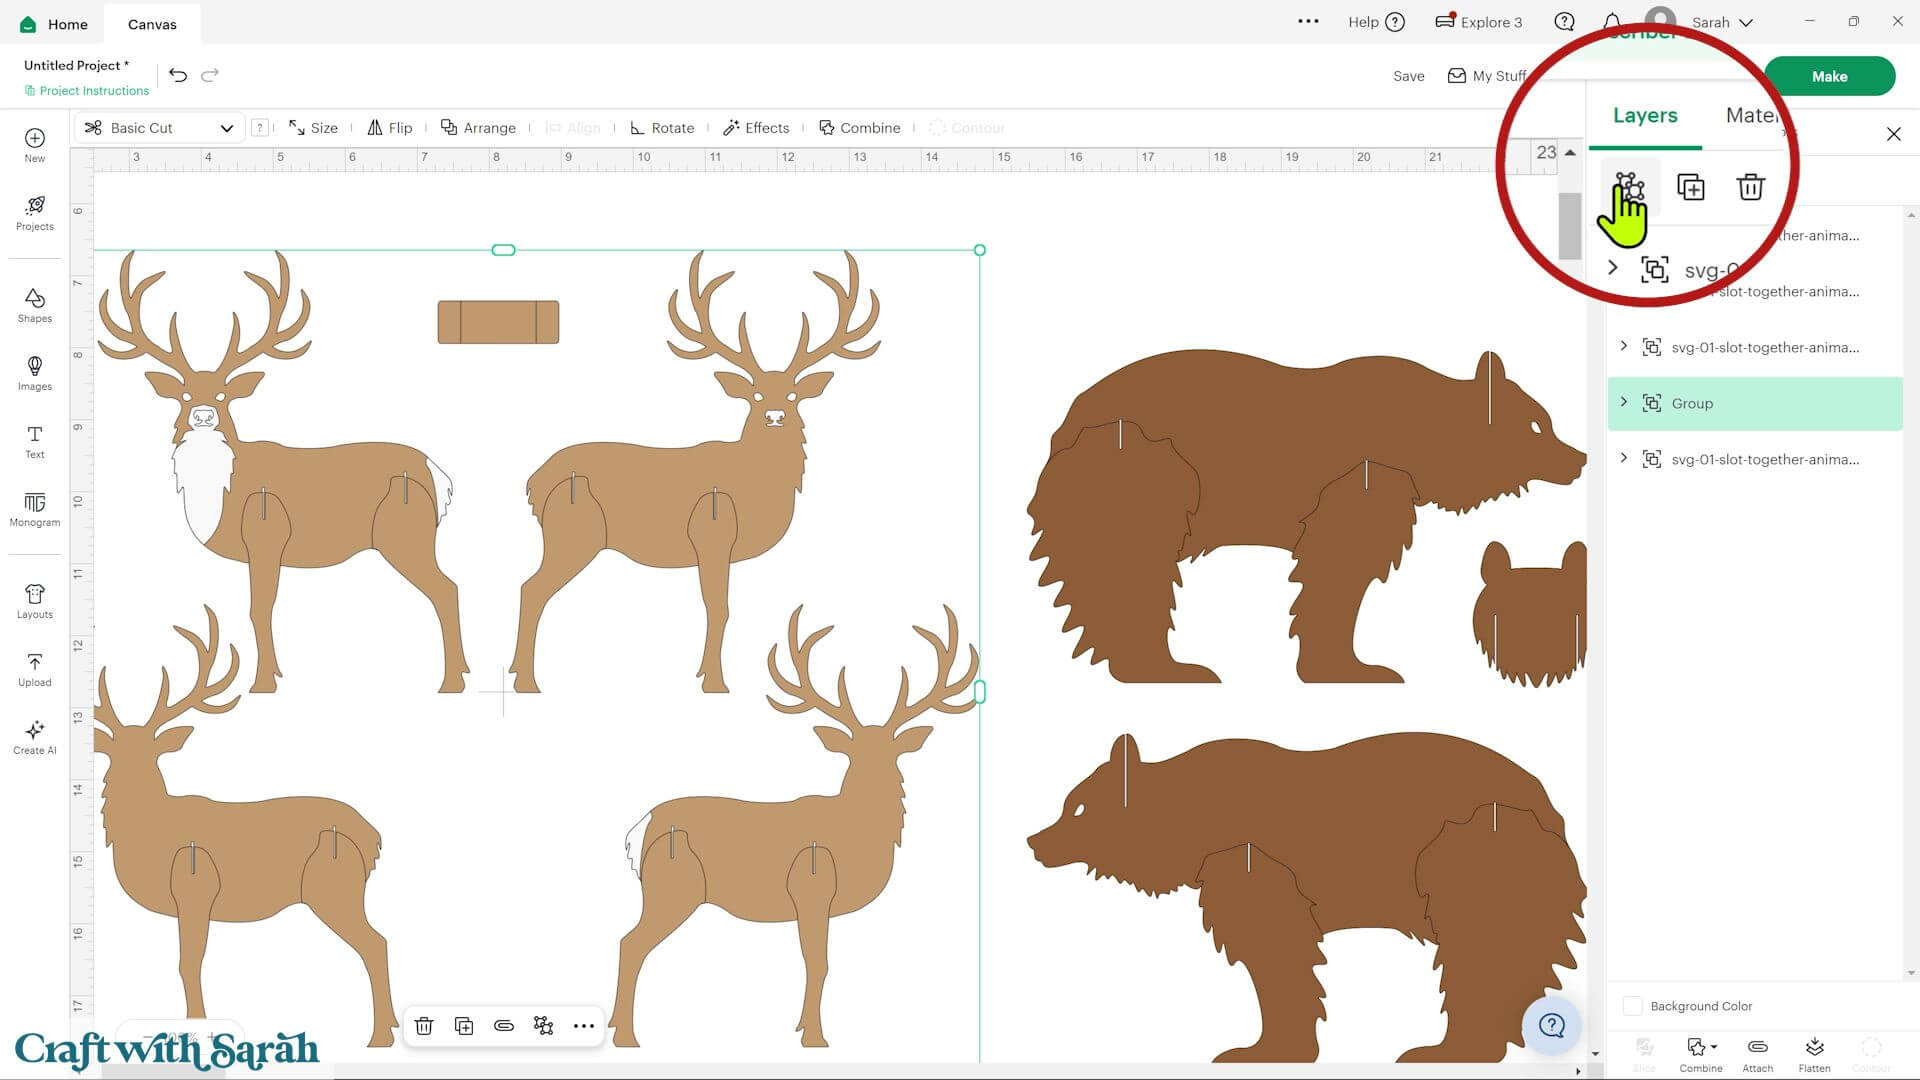
Locate the small support piece and expand its group in the Layers panel.
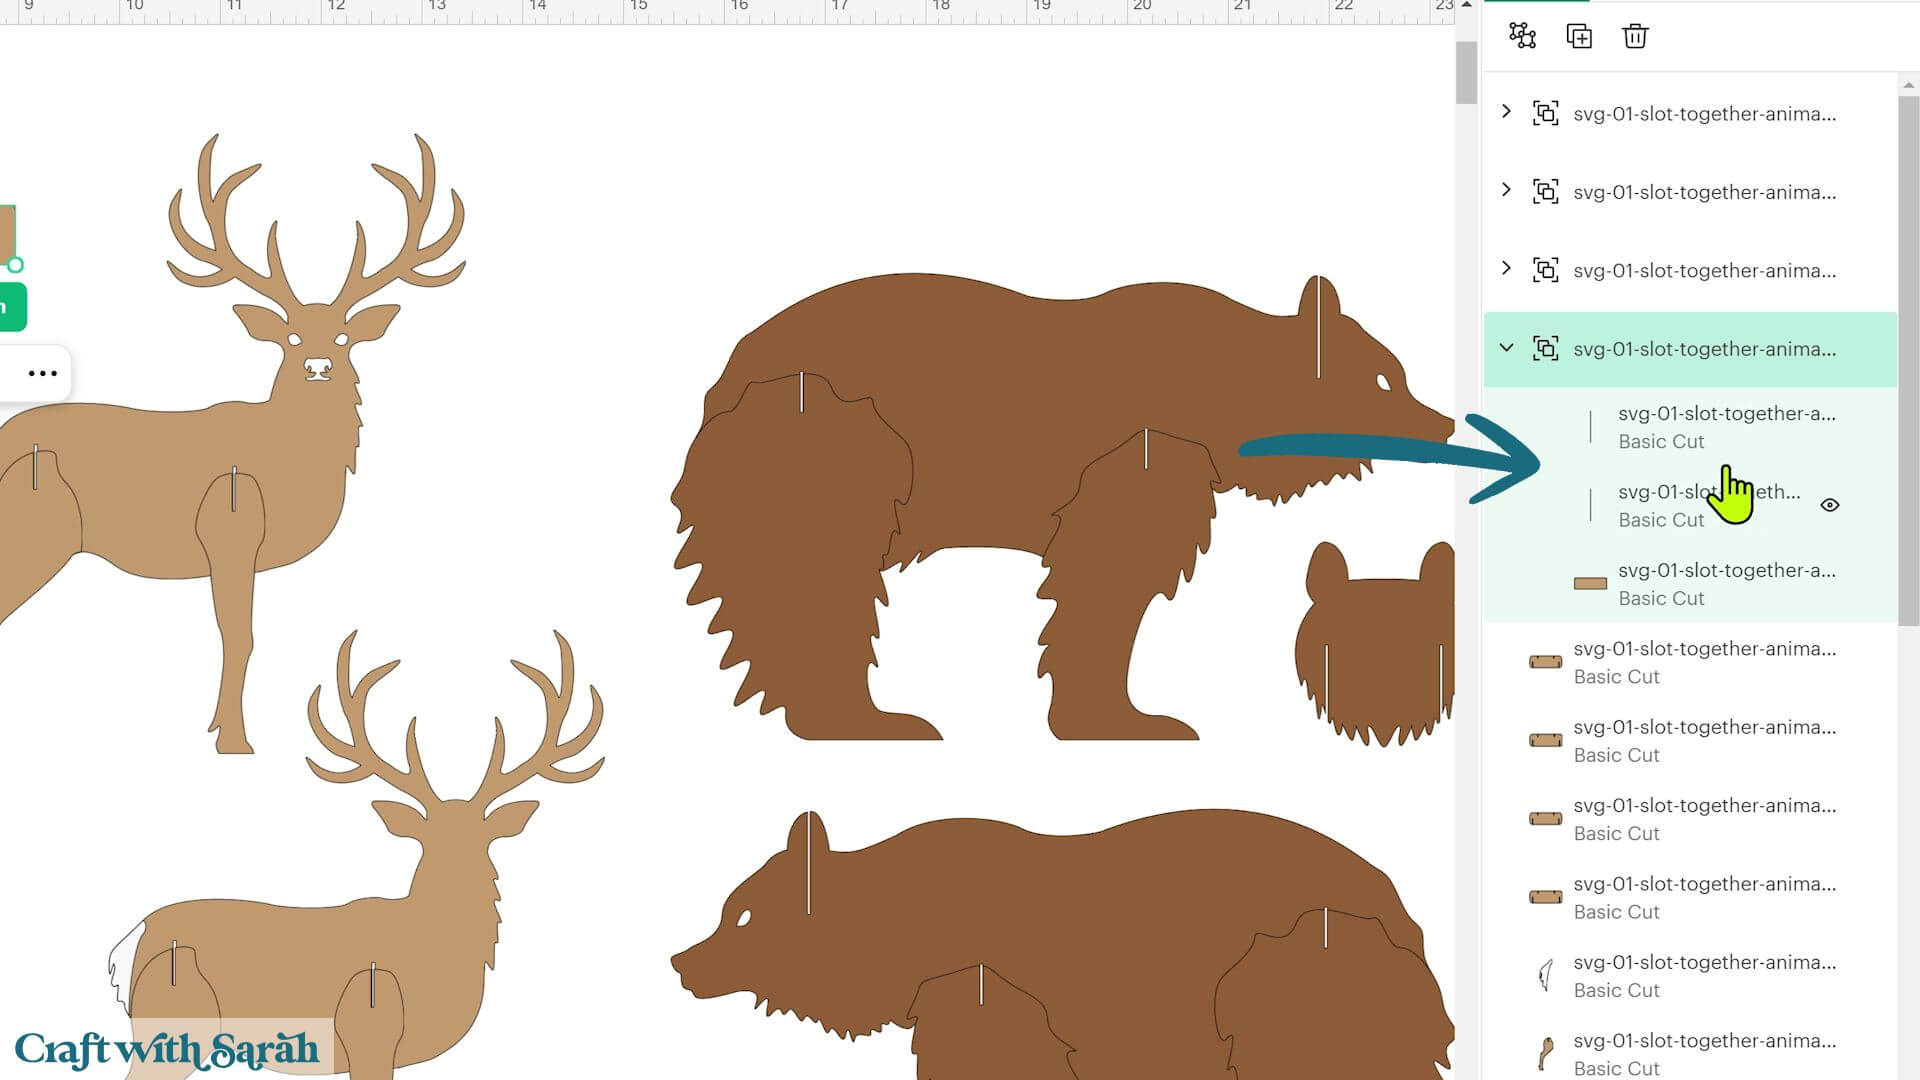
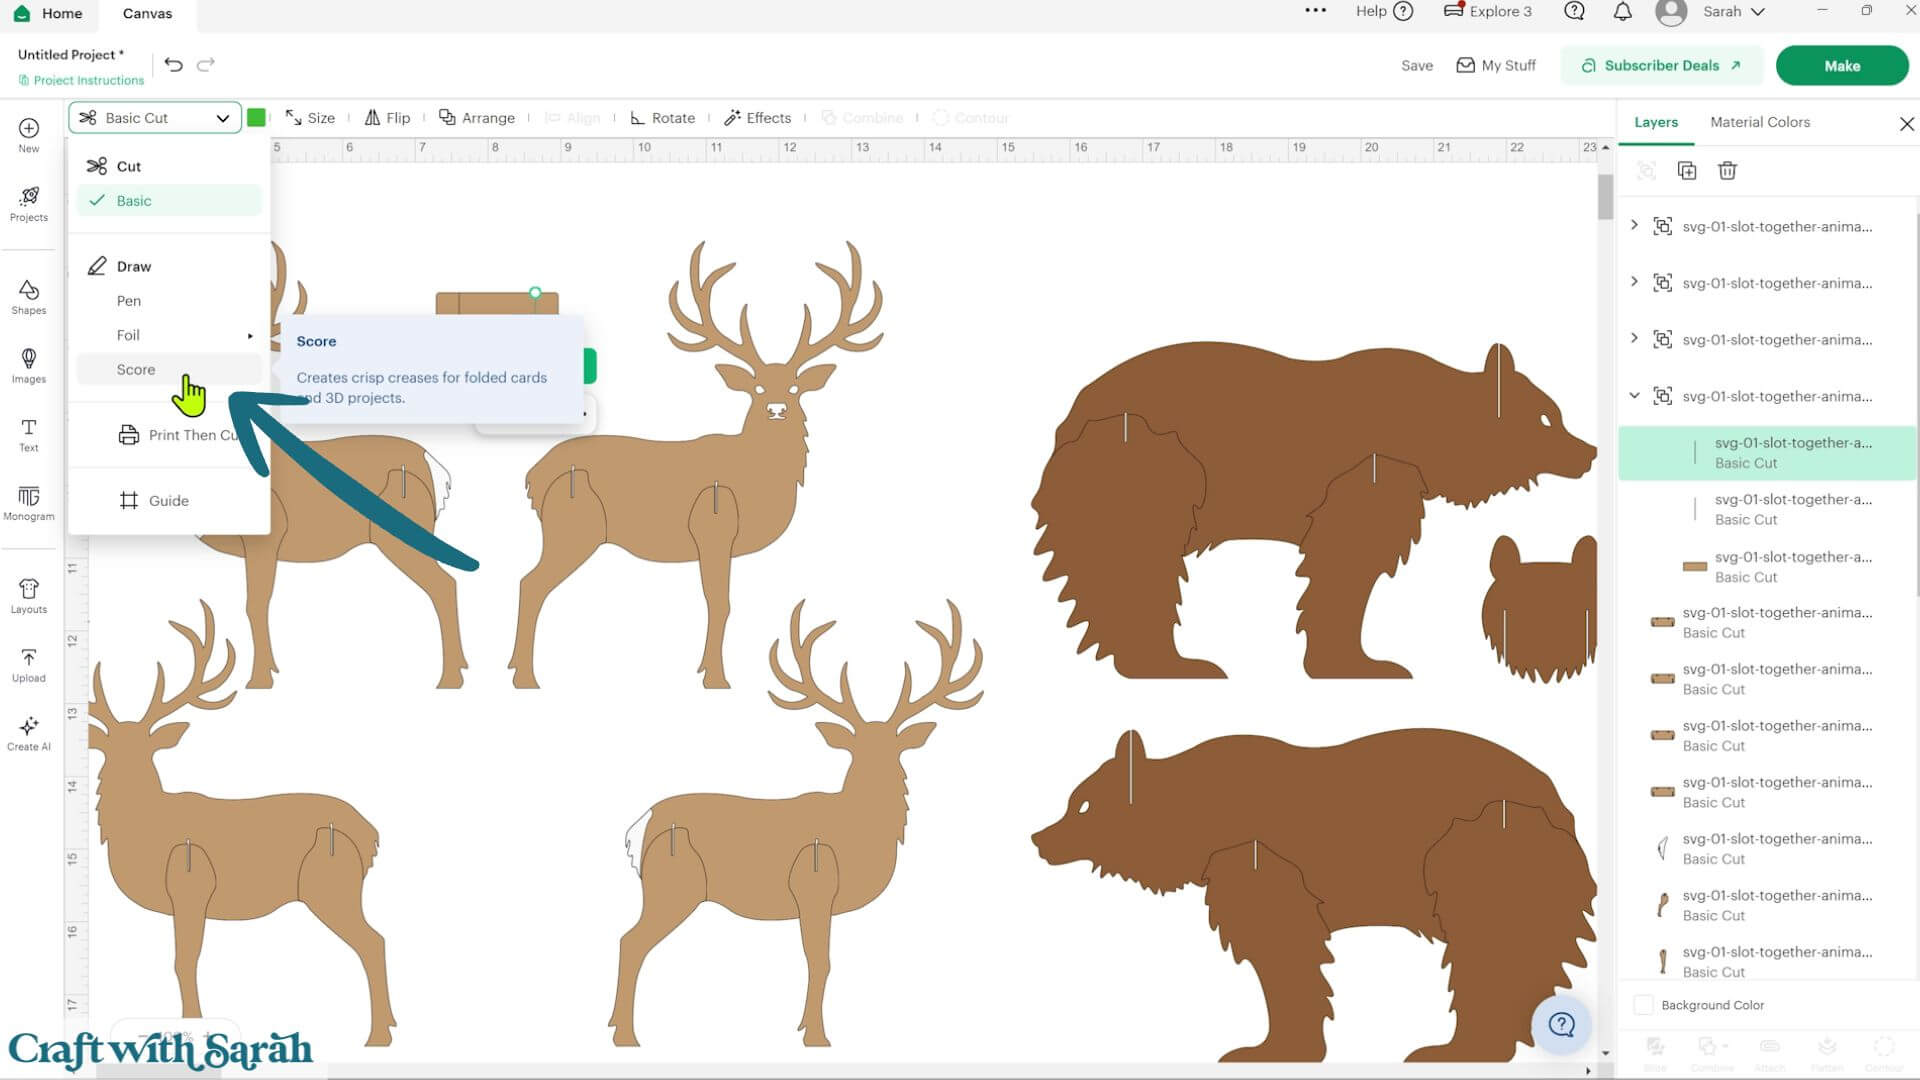
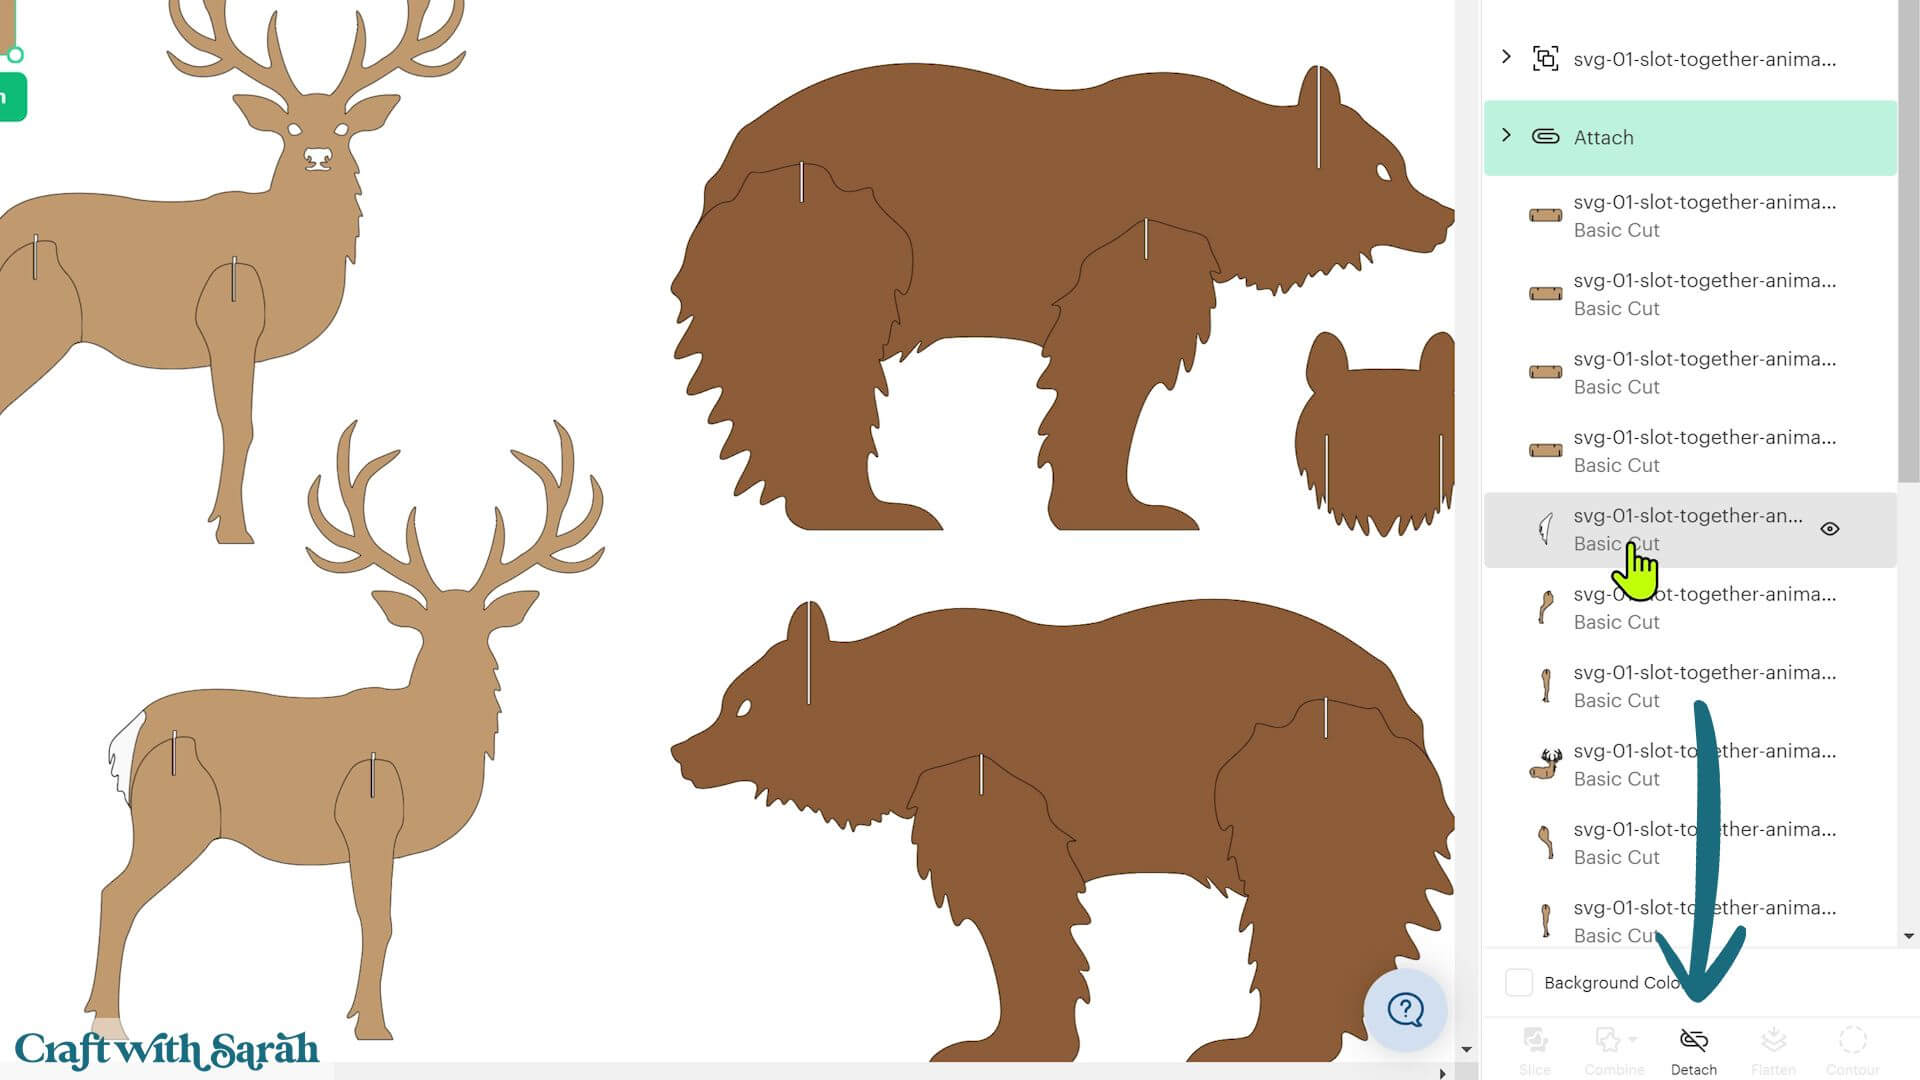
Change the two line layers to ‘Score’ using the Operations dropdown menu.
Then select the support and its score lines and click ‘Attach’.
Attach is what tells the Cricut where to do the scoring.
This ensures the score lines are placed correctly when the design is cut.
Step 4) Check your cardstock thickness
If you’re testing your cardstock thickness, duplicate the squirrel pieces and temporarily hide the rest of the design.
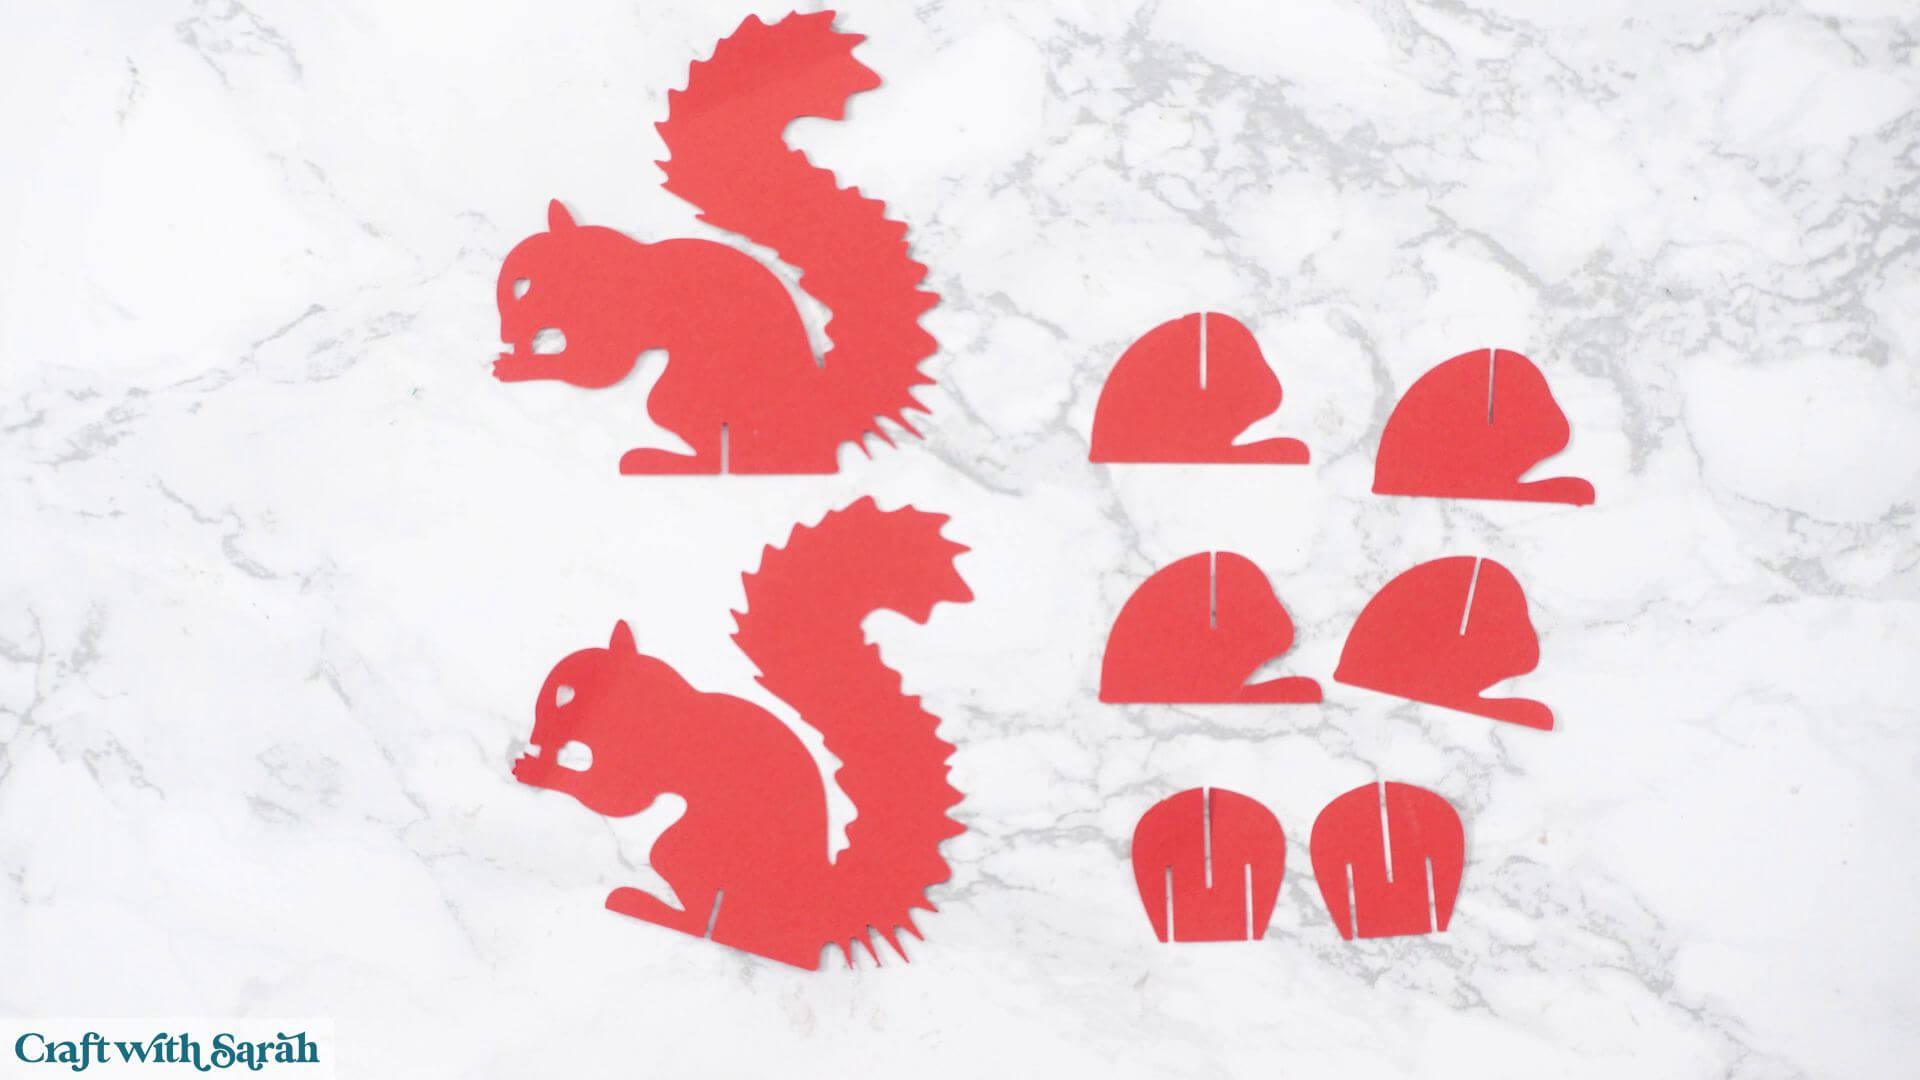
After cutting the squirrel, assemble it to see how snugly everything fits.
If your cardstock is thick enough, you can delete duplicate decorative pieces from the remaining animals and only keep duplicate structural parts where they’re needed.
If you’re using thinner cardstock, simply leave everything as supplied and glue matching pieces together before assembly.
Step 5) Cut out the project
After clicking ‘Make’, Cricut Design Space separates the pieces onto cutting mats.
You may be able to reduce the number of sheets needed by moving pieces between mats using ‘Move Object’.
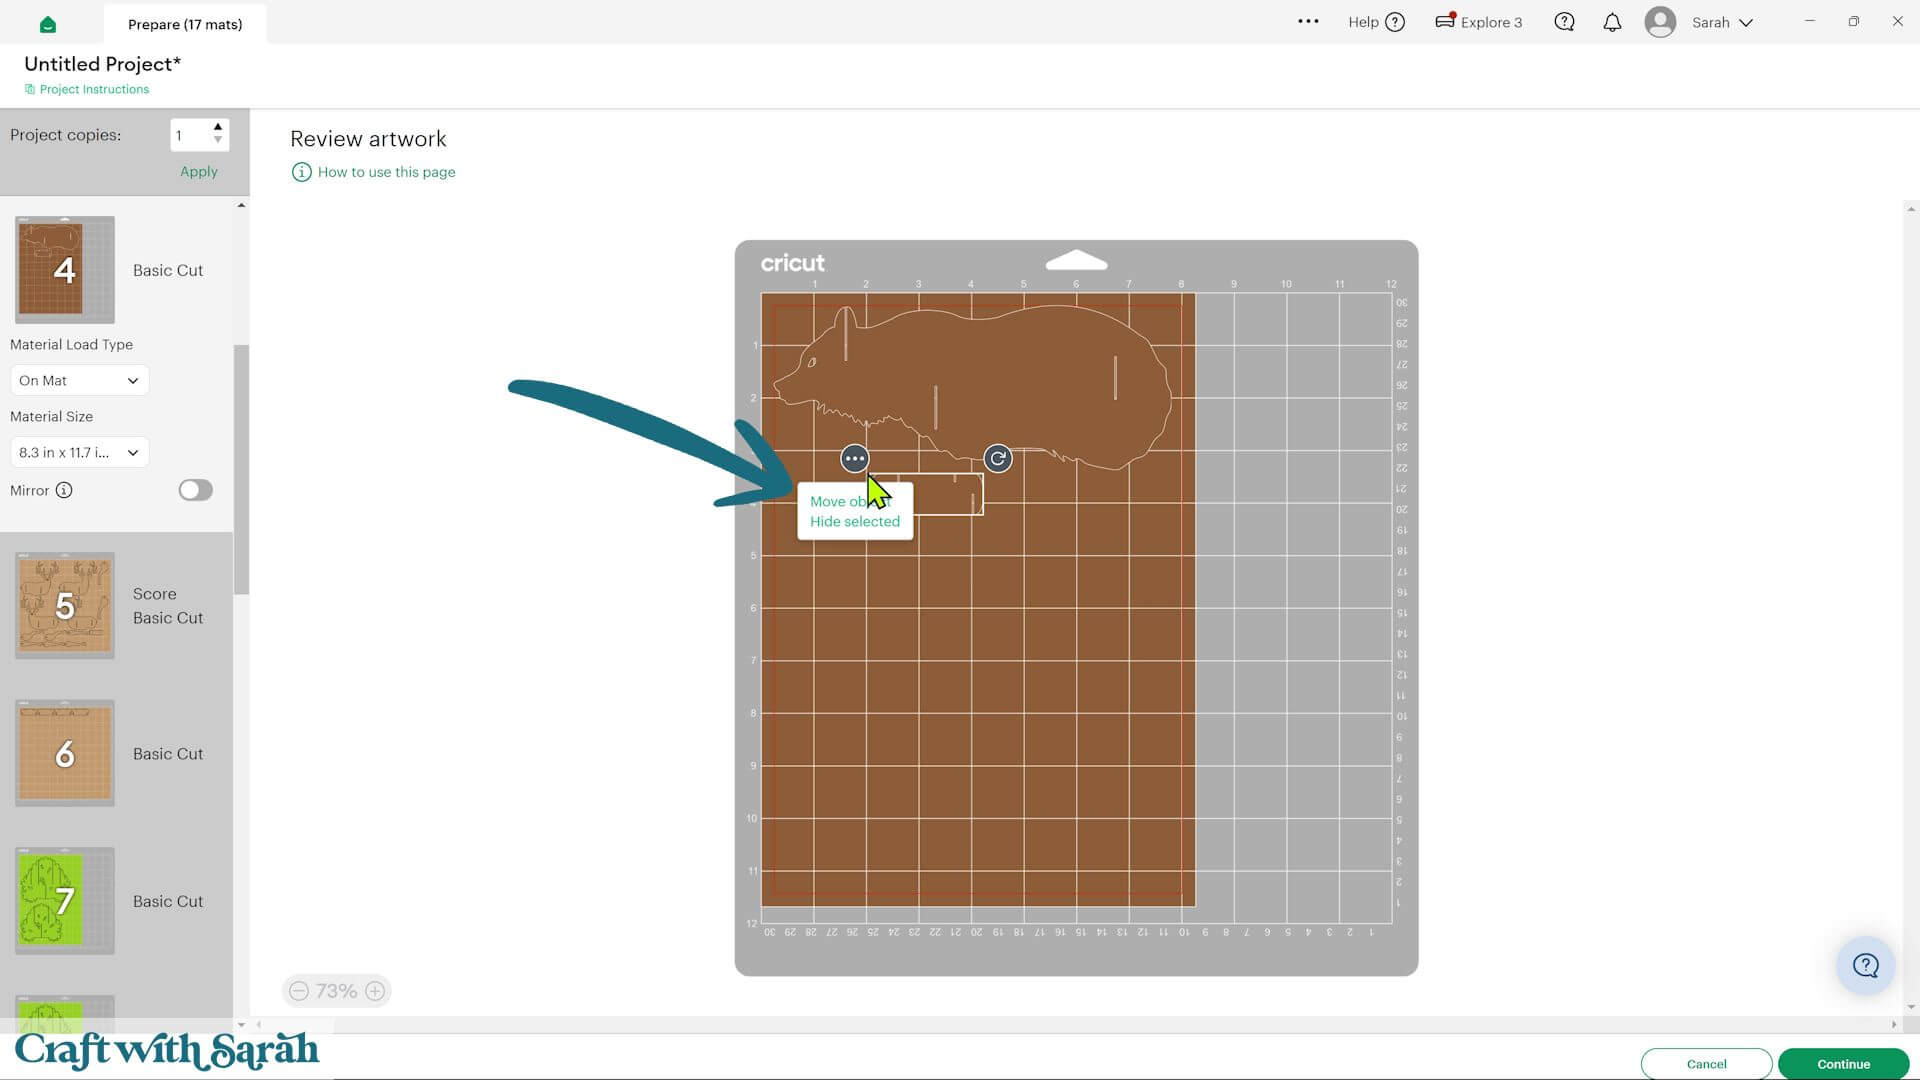
Taking a few minutes to rearrange the layouts can often save an entire sheet of cardstock.
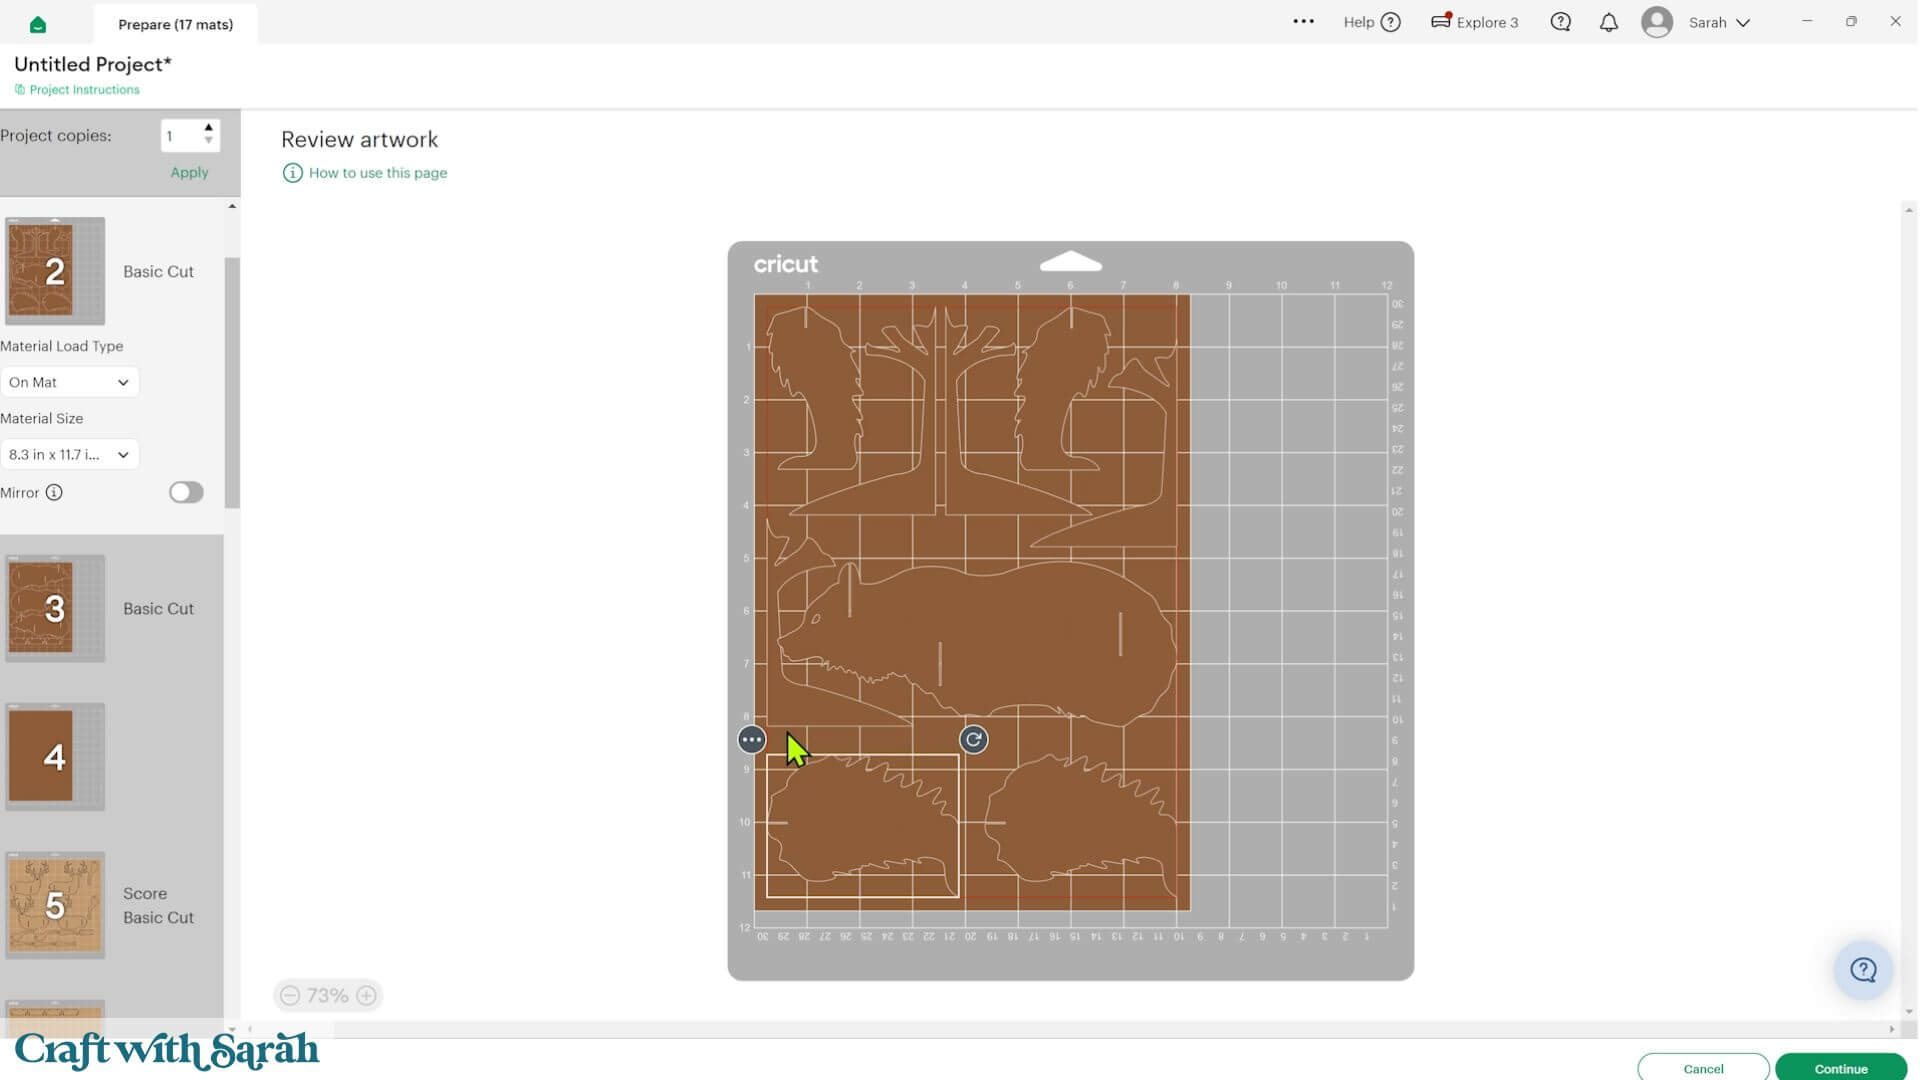
Empty mats will disappear automatically before cutting.
For Kraft board or thick cardstock, I use the “Kraft Board” setting. Although this performs a double cut, it gives much cleaner results on heavier materials.
For other cardstock, the “Heavy Cardstock” setting with Regular Pressure works well for most brands.
If you’re unsure which setting to use, test the squirrel pieces first before cutting the entire collection.
TIP: New to using cardstock with your cutting machine? Check out these machine help guides for Cricut, Silhouette and ScanNCut that go through every step of the process, including tips for getting the best quality cuts from your machine.
Step 6) Assemble the squirrel
If you’re using thinner cardstock, glue each matching piece back to back.
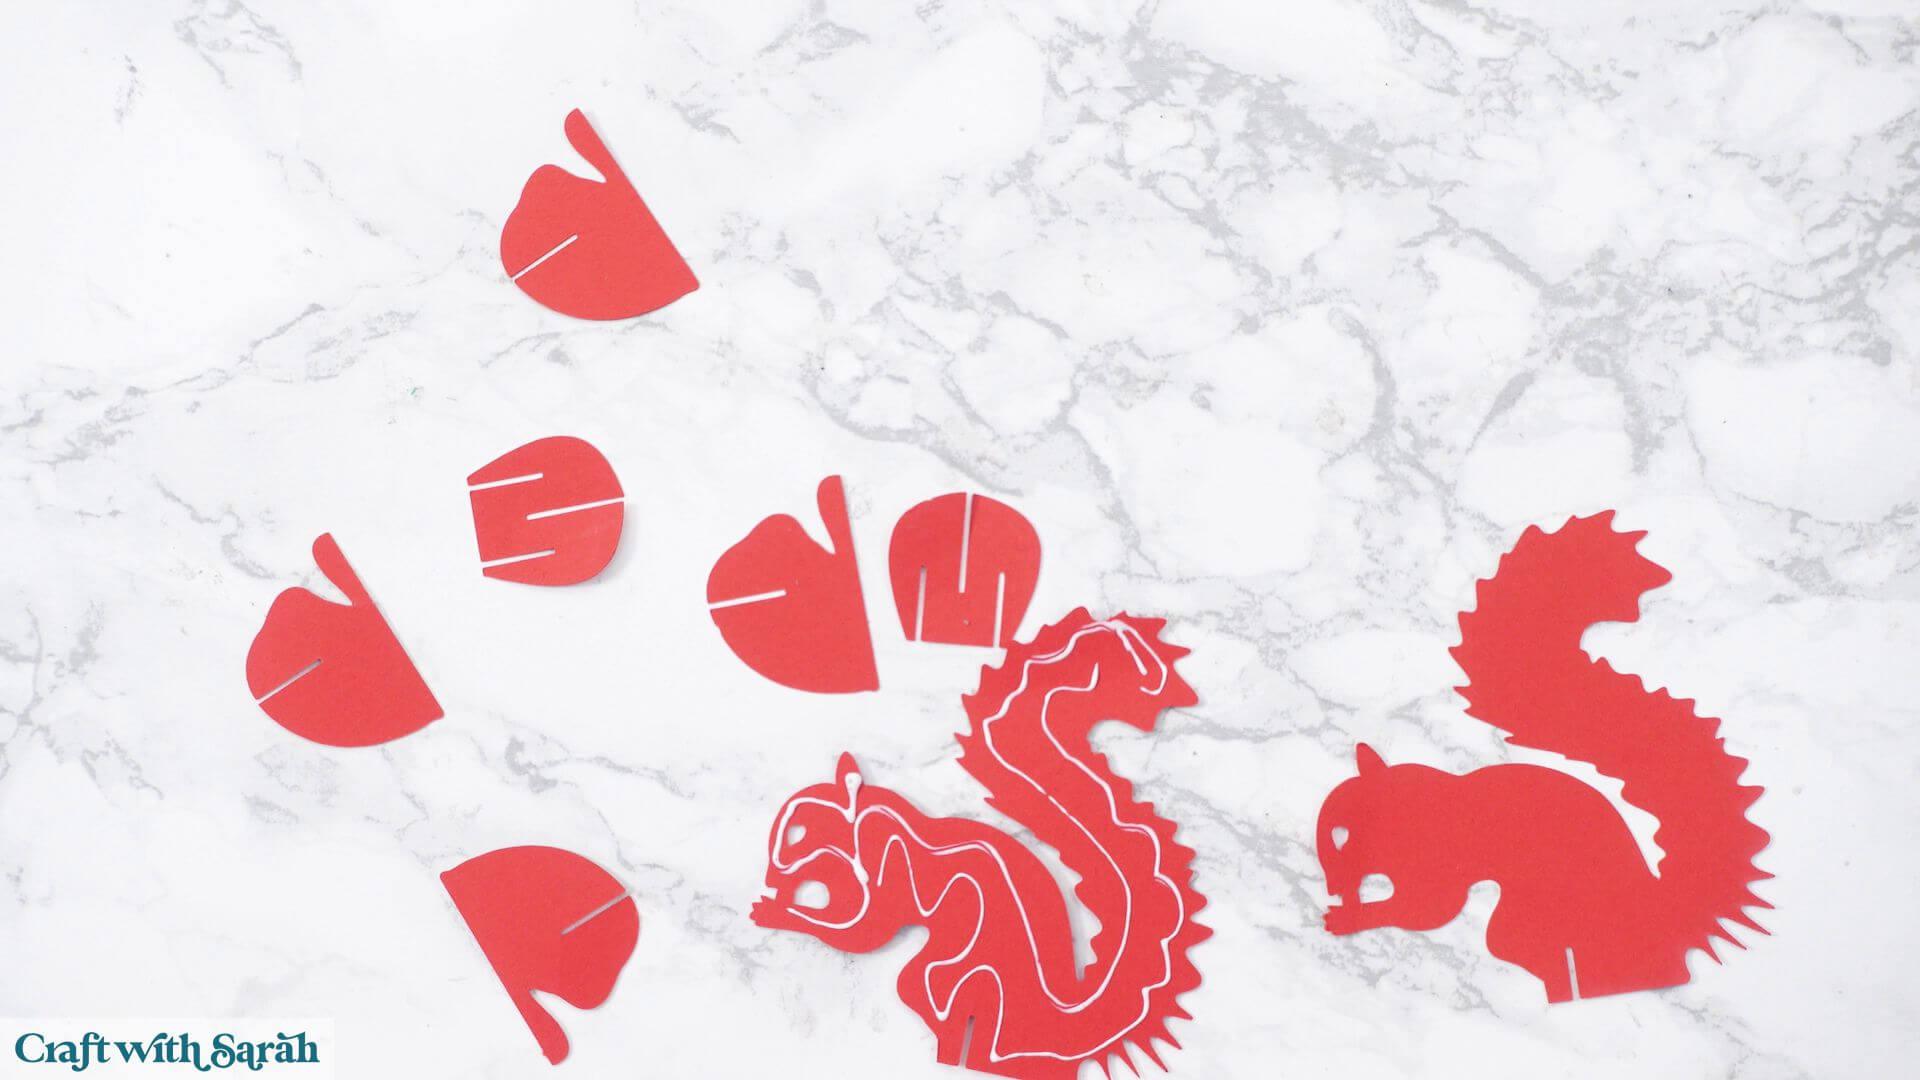
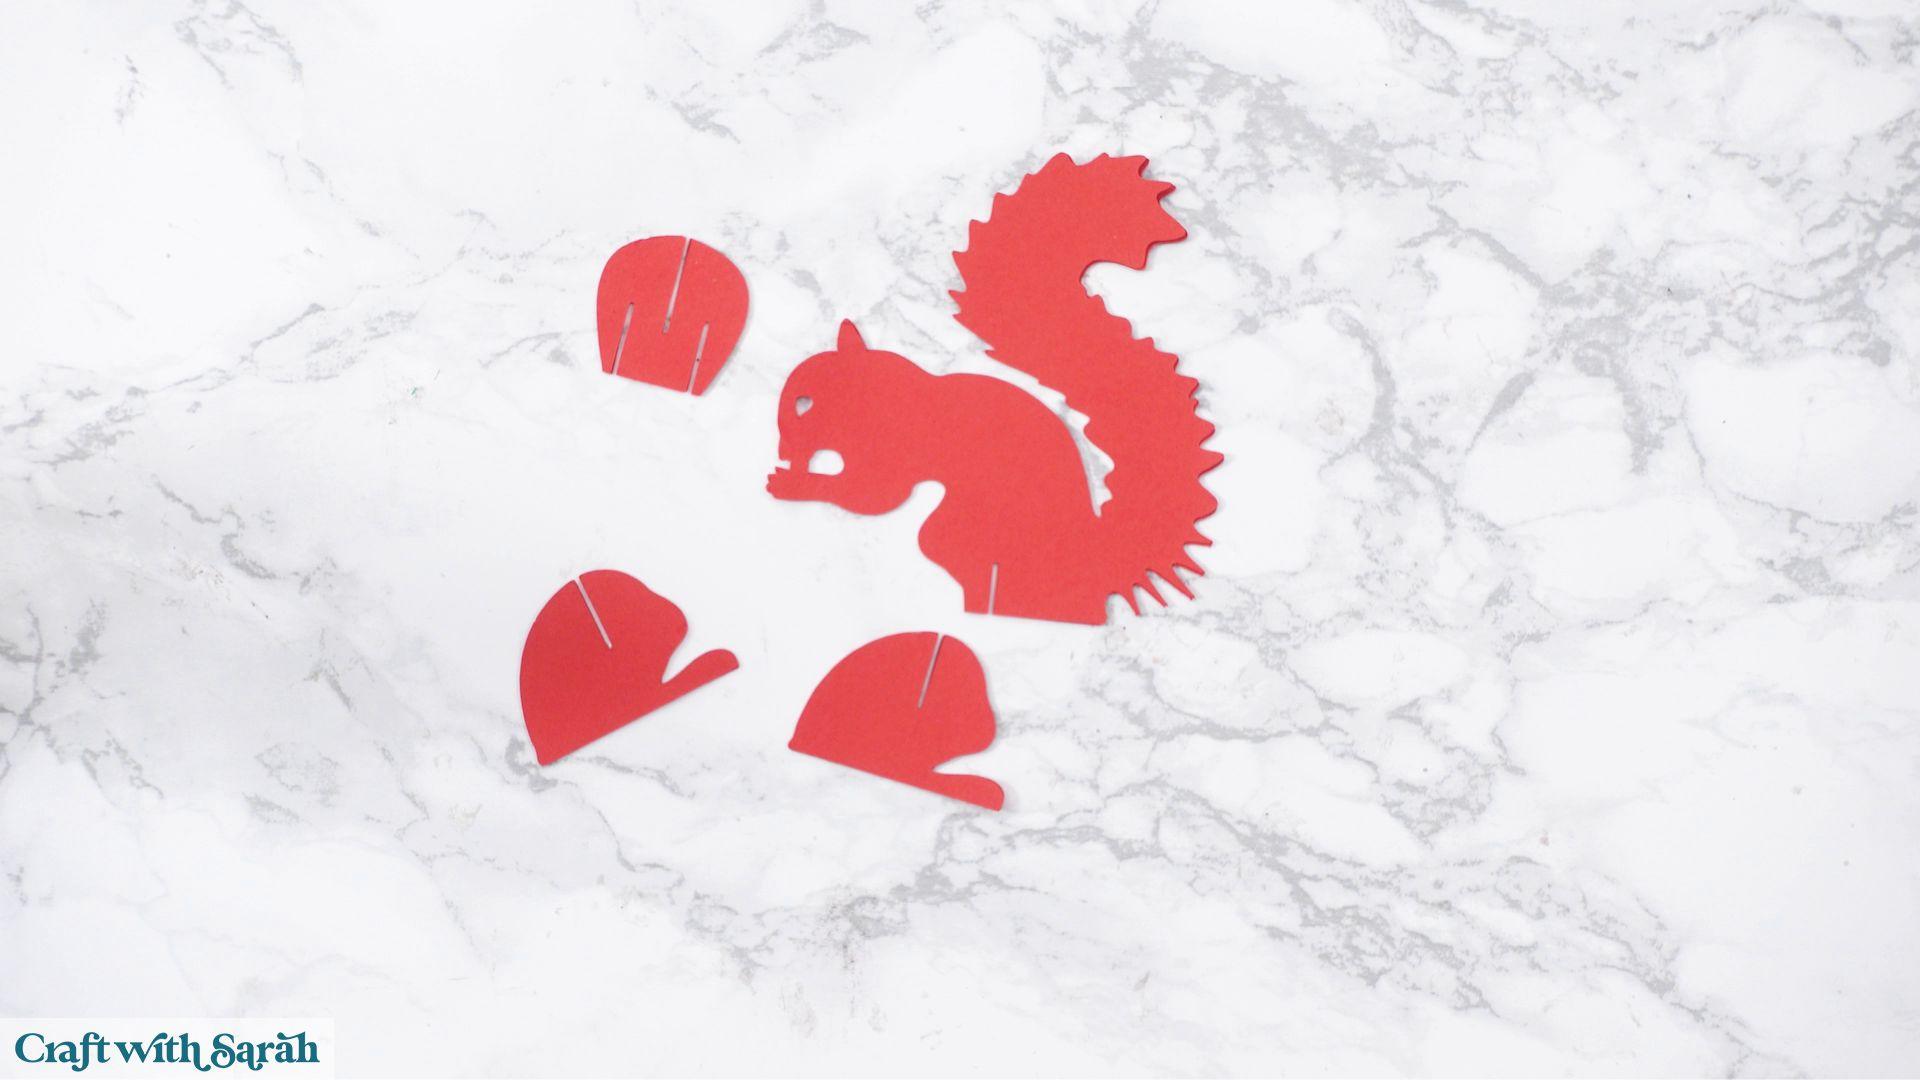
Take care to line up every slot perfectly before the glue dries.
Once the glue has dried, slot the centre support into the squirrel.
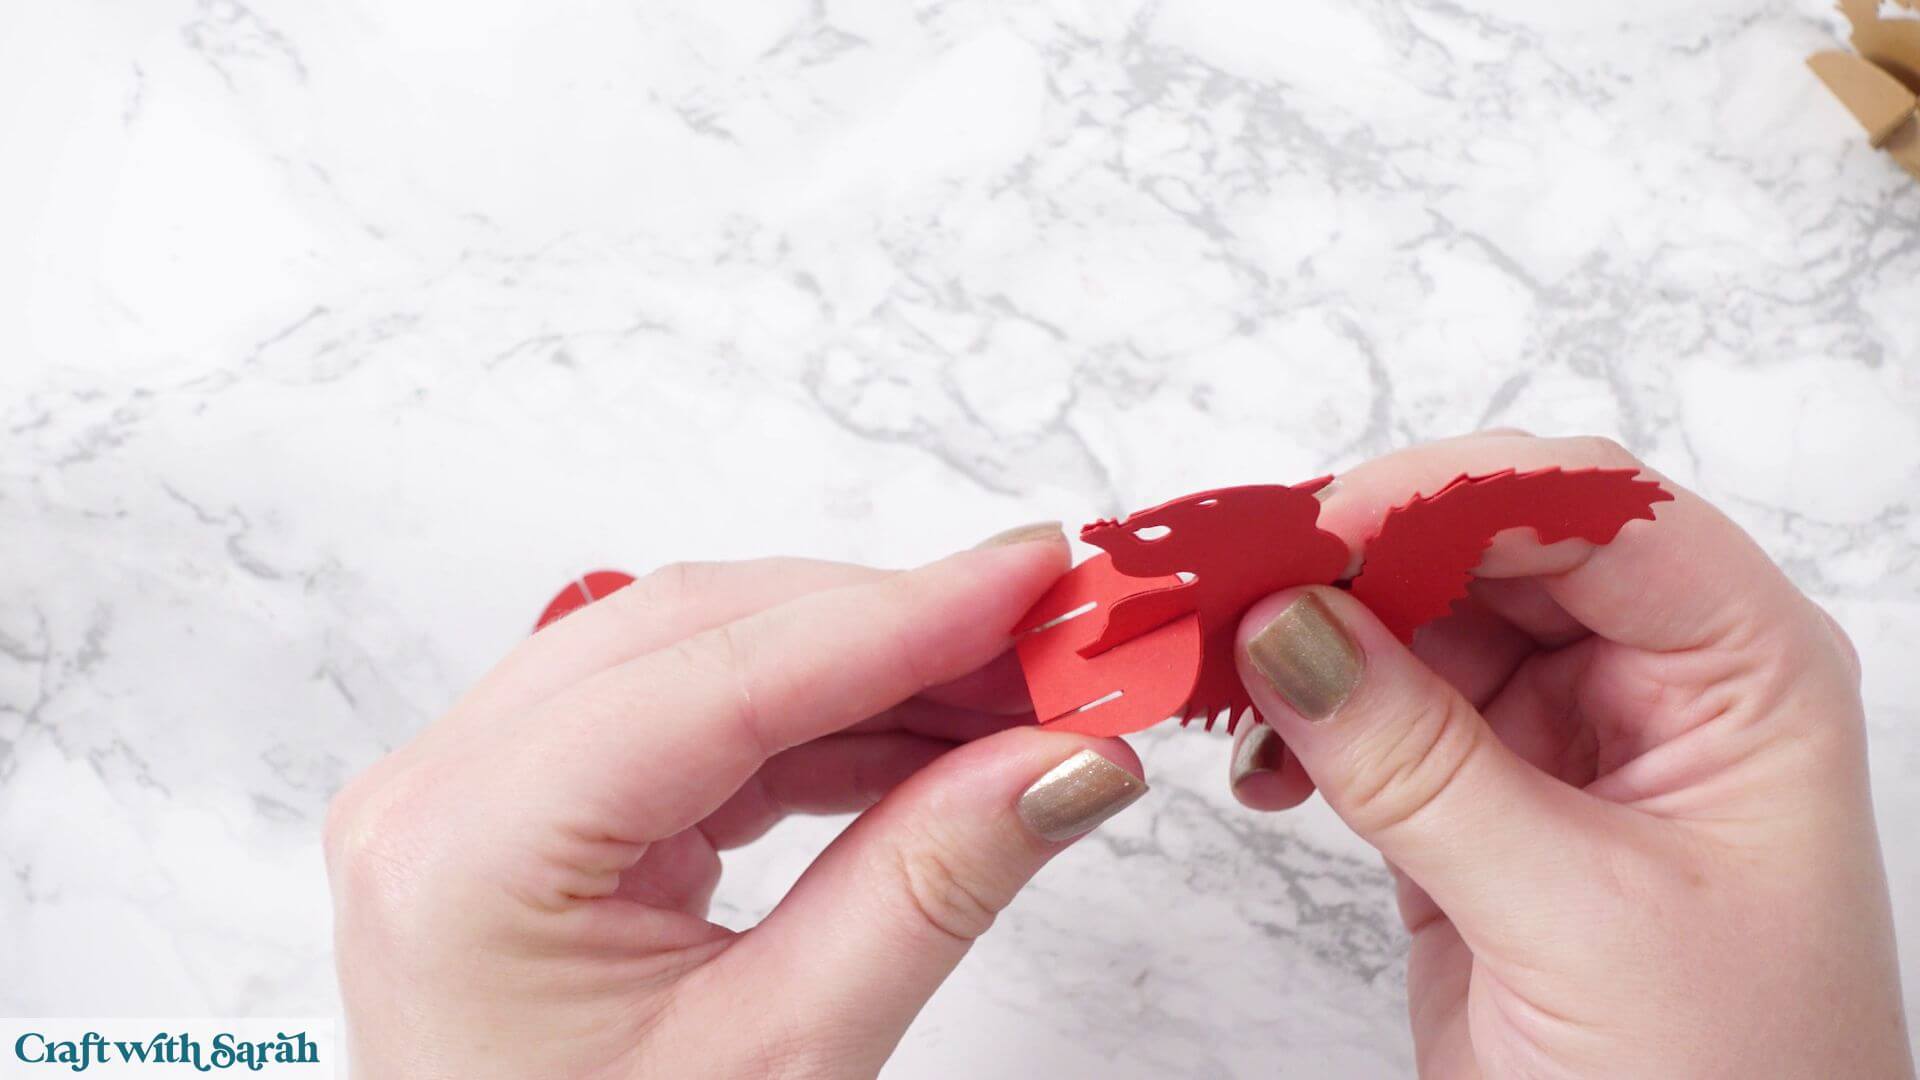
Add the two feet, making sure they point towards the head.
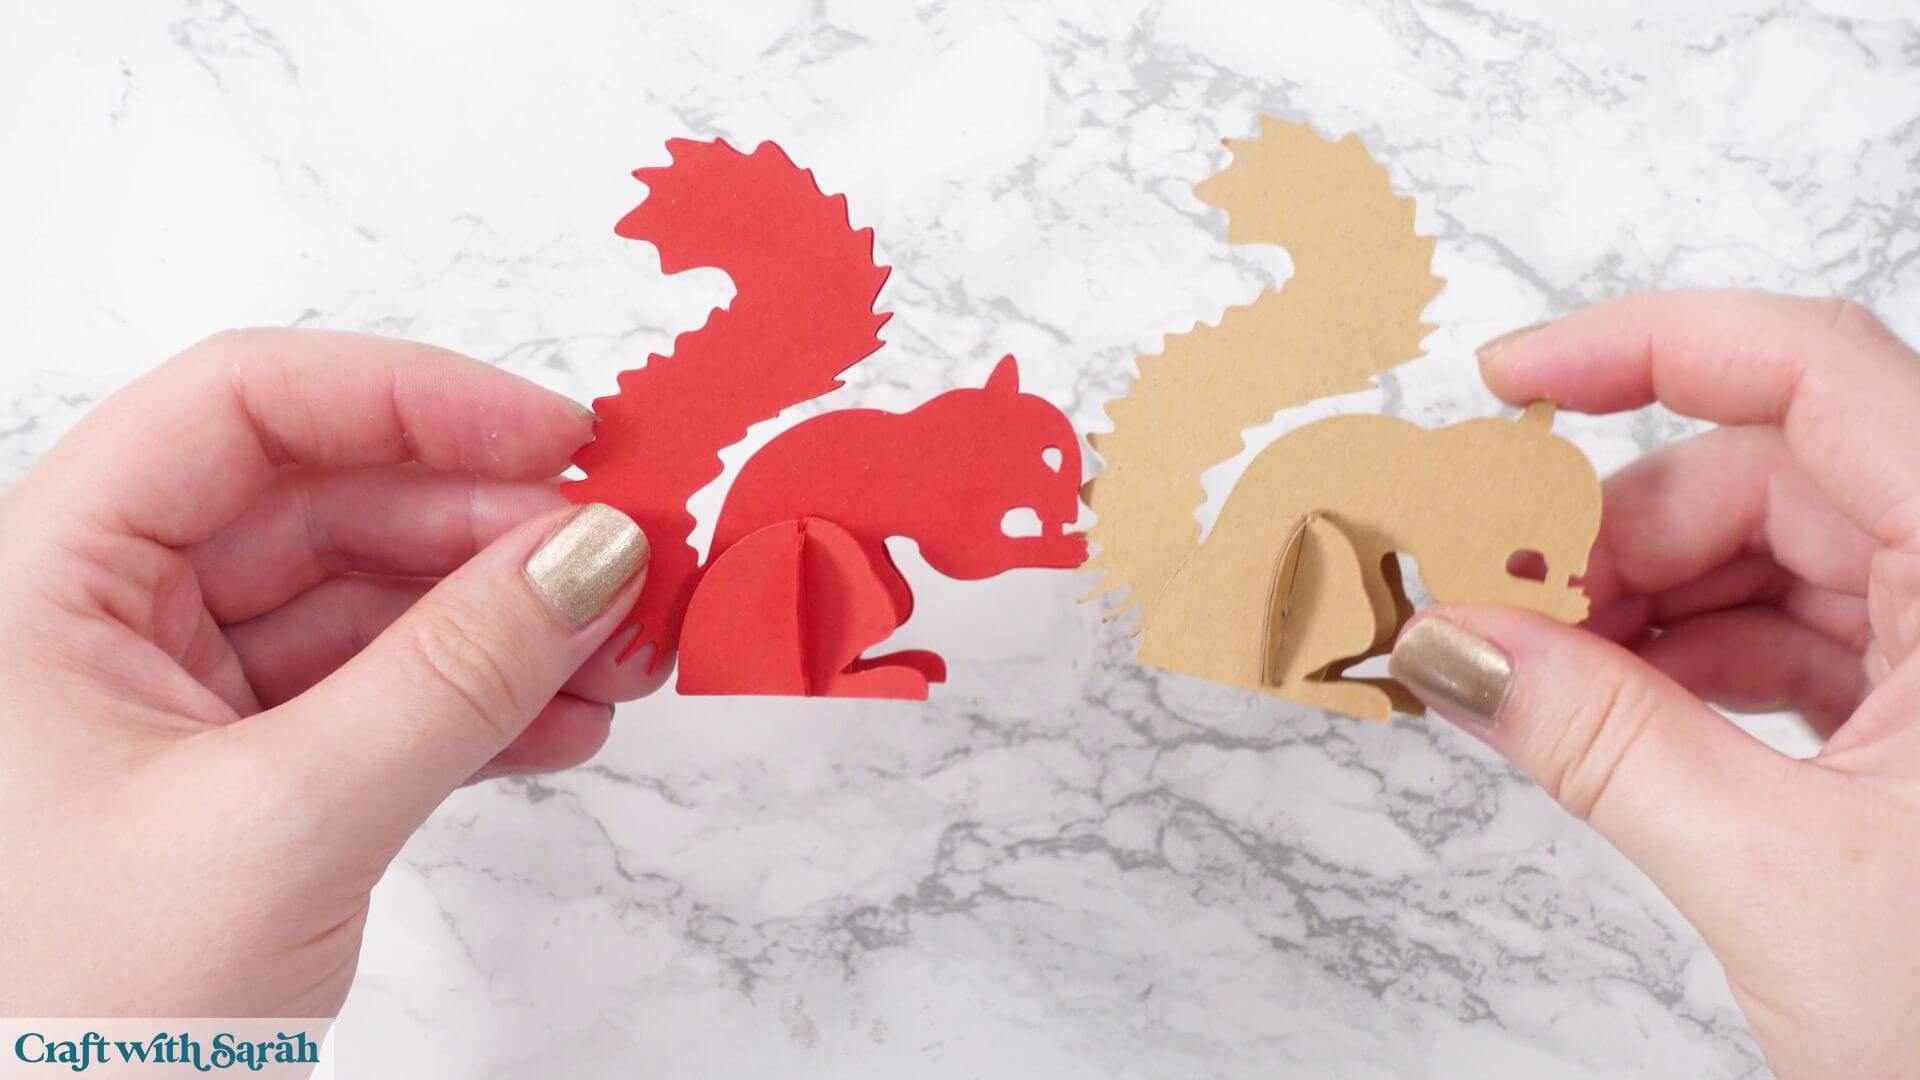
Check everything sits flush.
If the squirrel still feels loose, cut another copy of the centre support and glue it to the existing one before adding extra body pieces.
Step 7) Assemble the fox
Glue the matching pieces together, paying particular attention if you’re using textured cardstock.
By gluing mirror-image pieces back to back, the texture will appear on both sides of the finished fox.
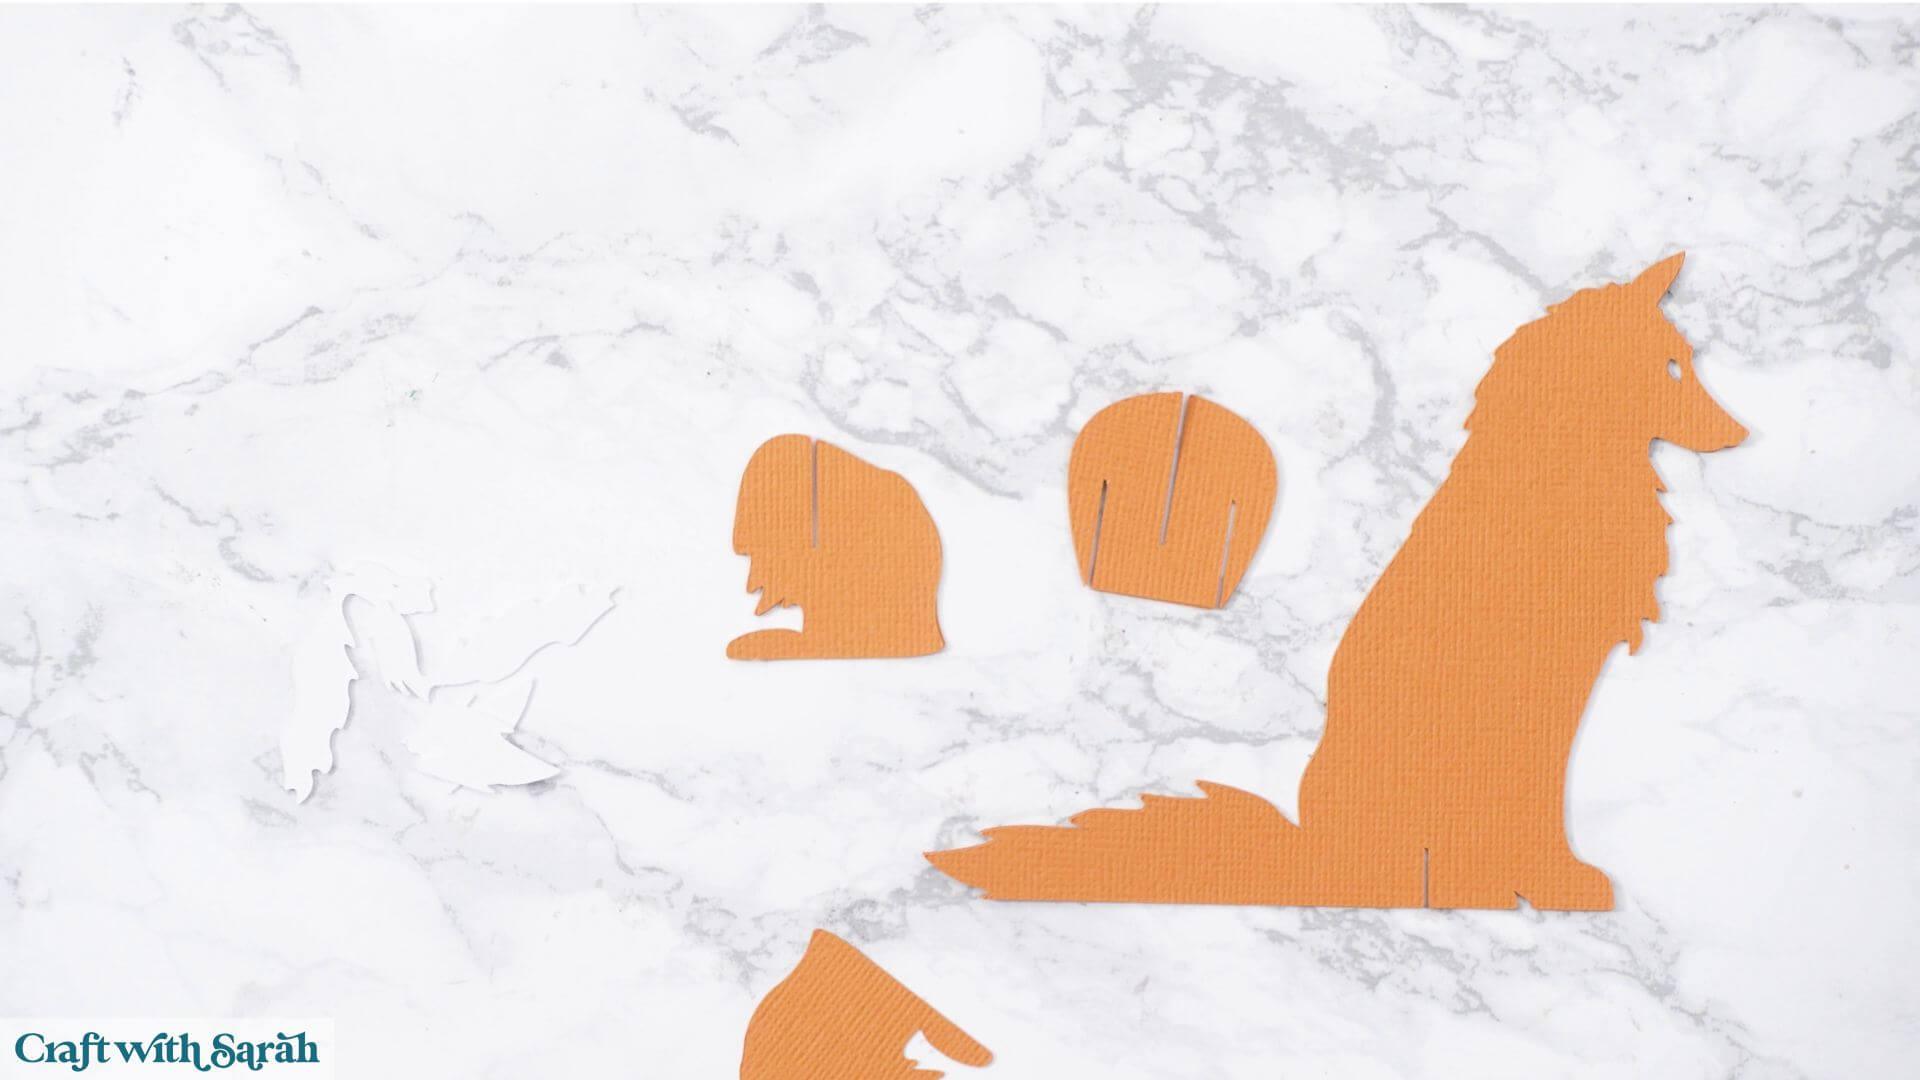
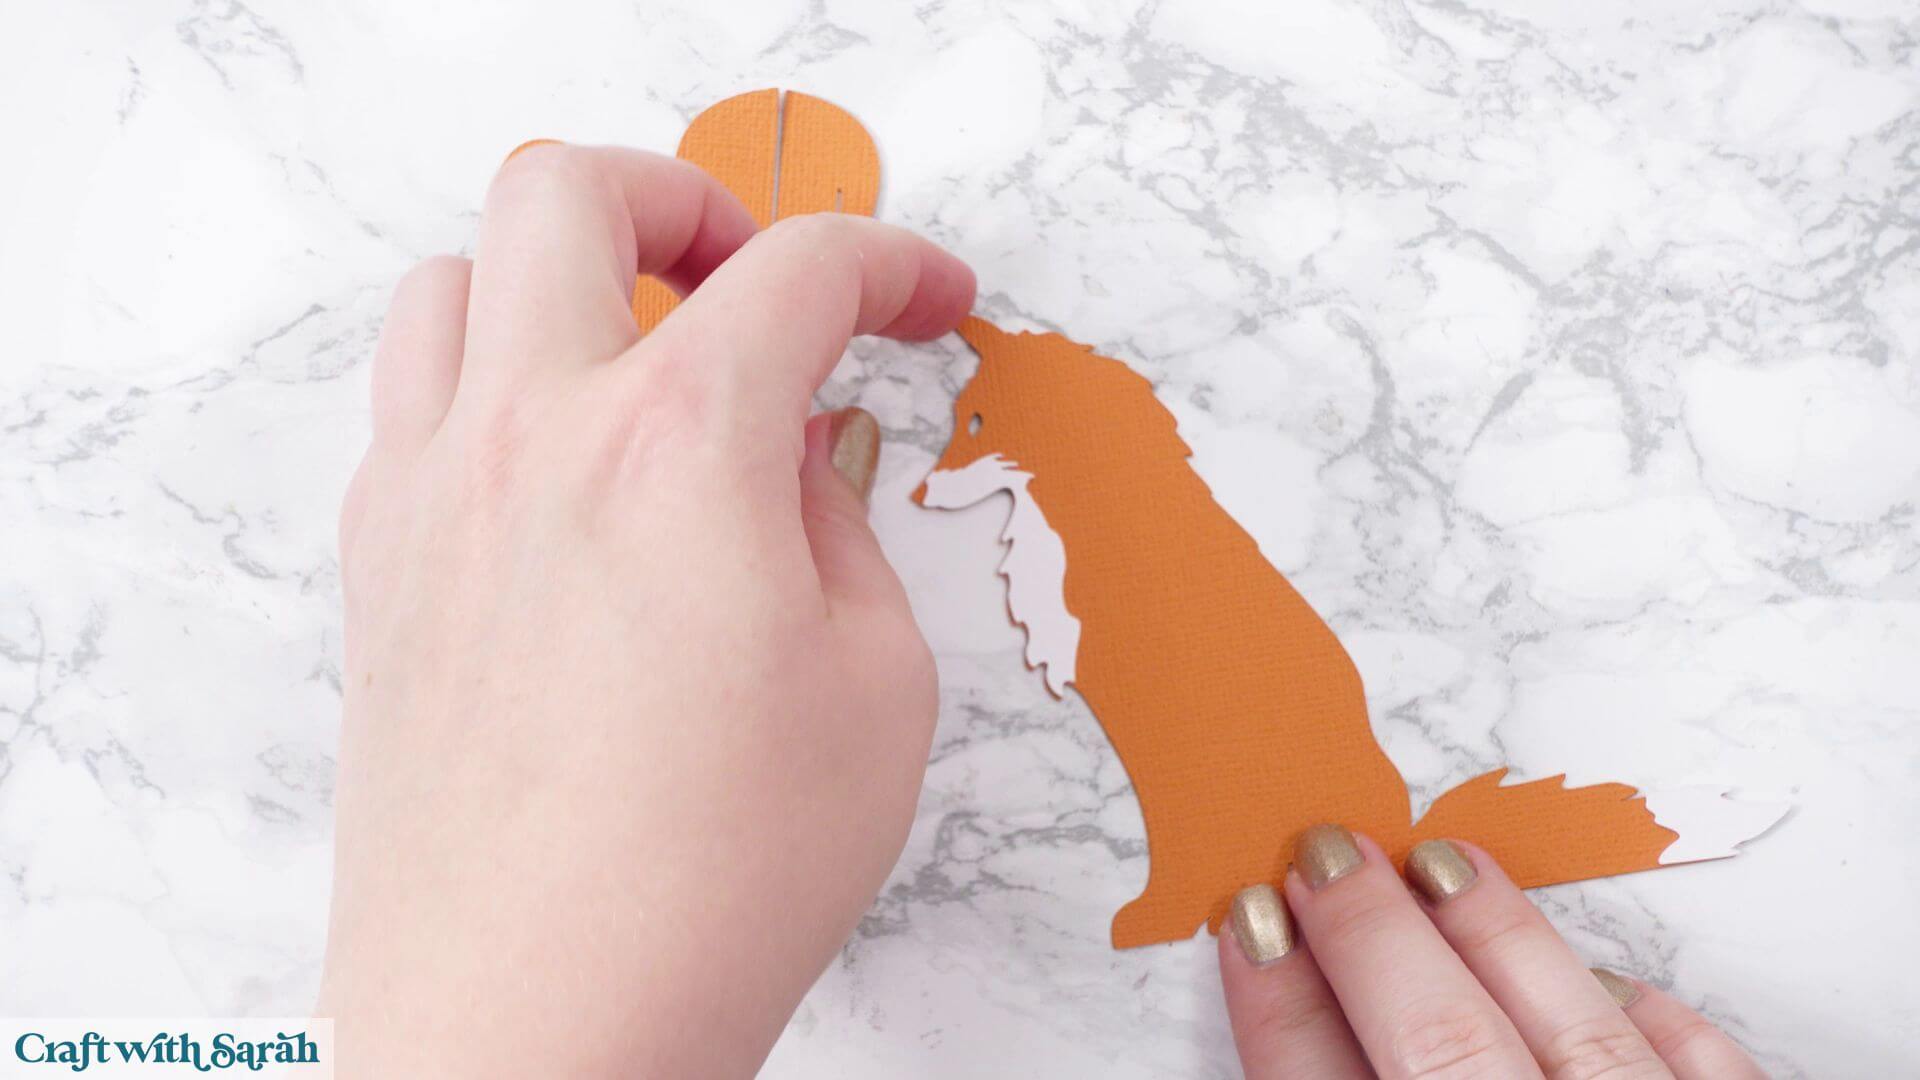
Glue the white face detail onto the fox as well as the chest piece and the tail tip before assembling the body.
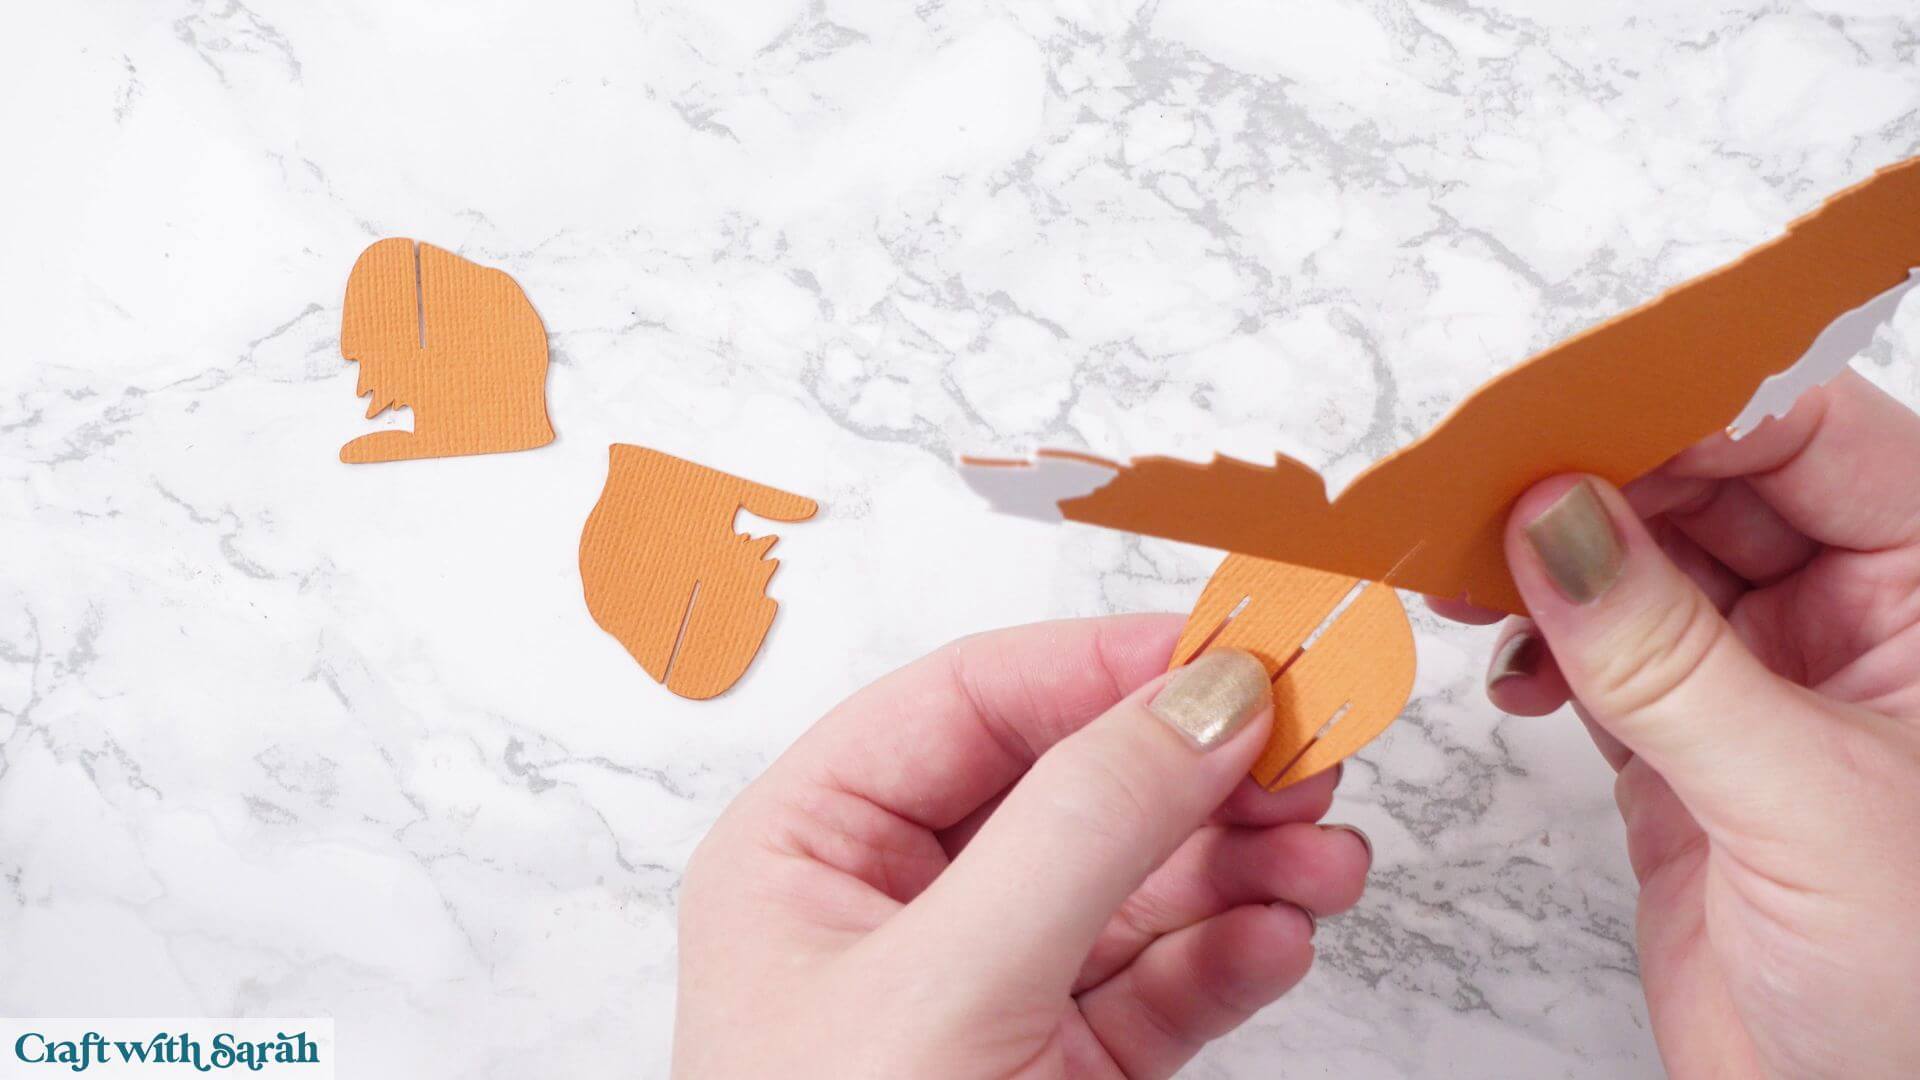
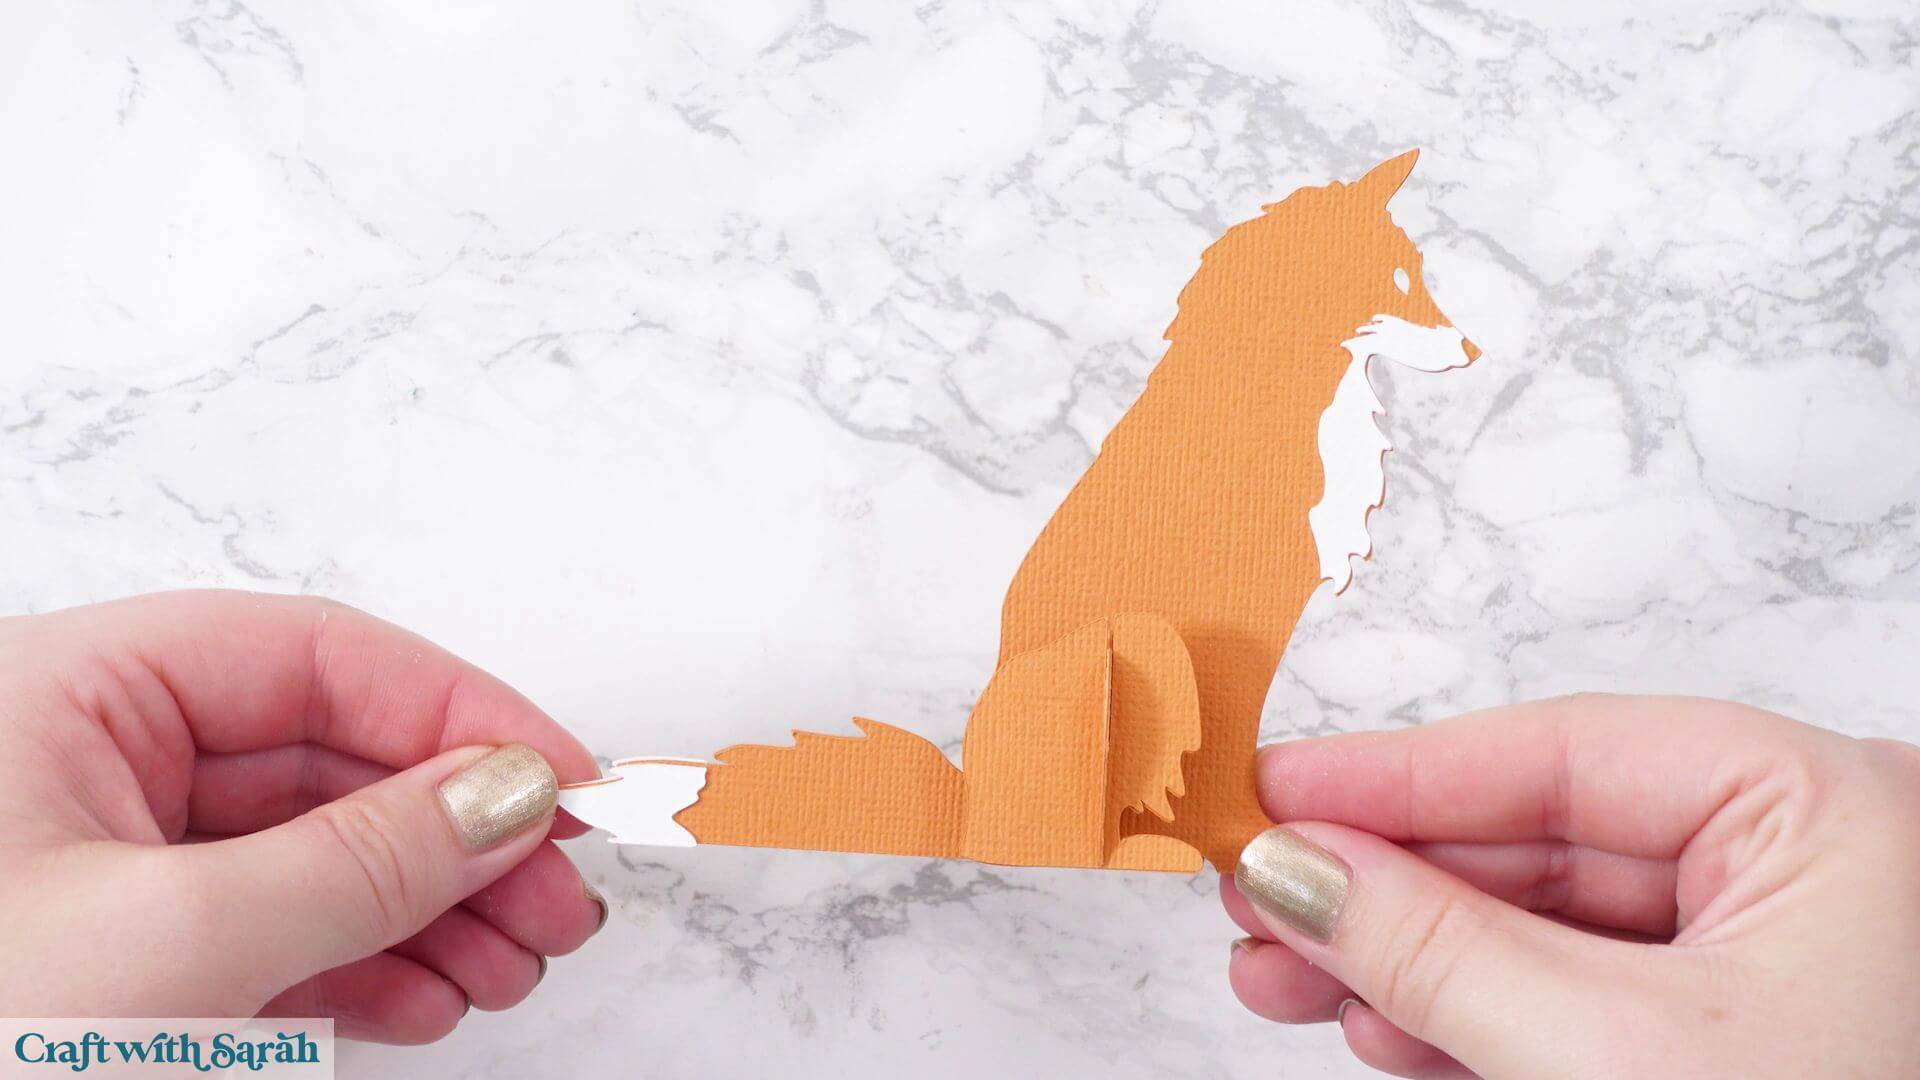
Slot the middle support into the fox and add the feet in exactly the same way as the squirrel.
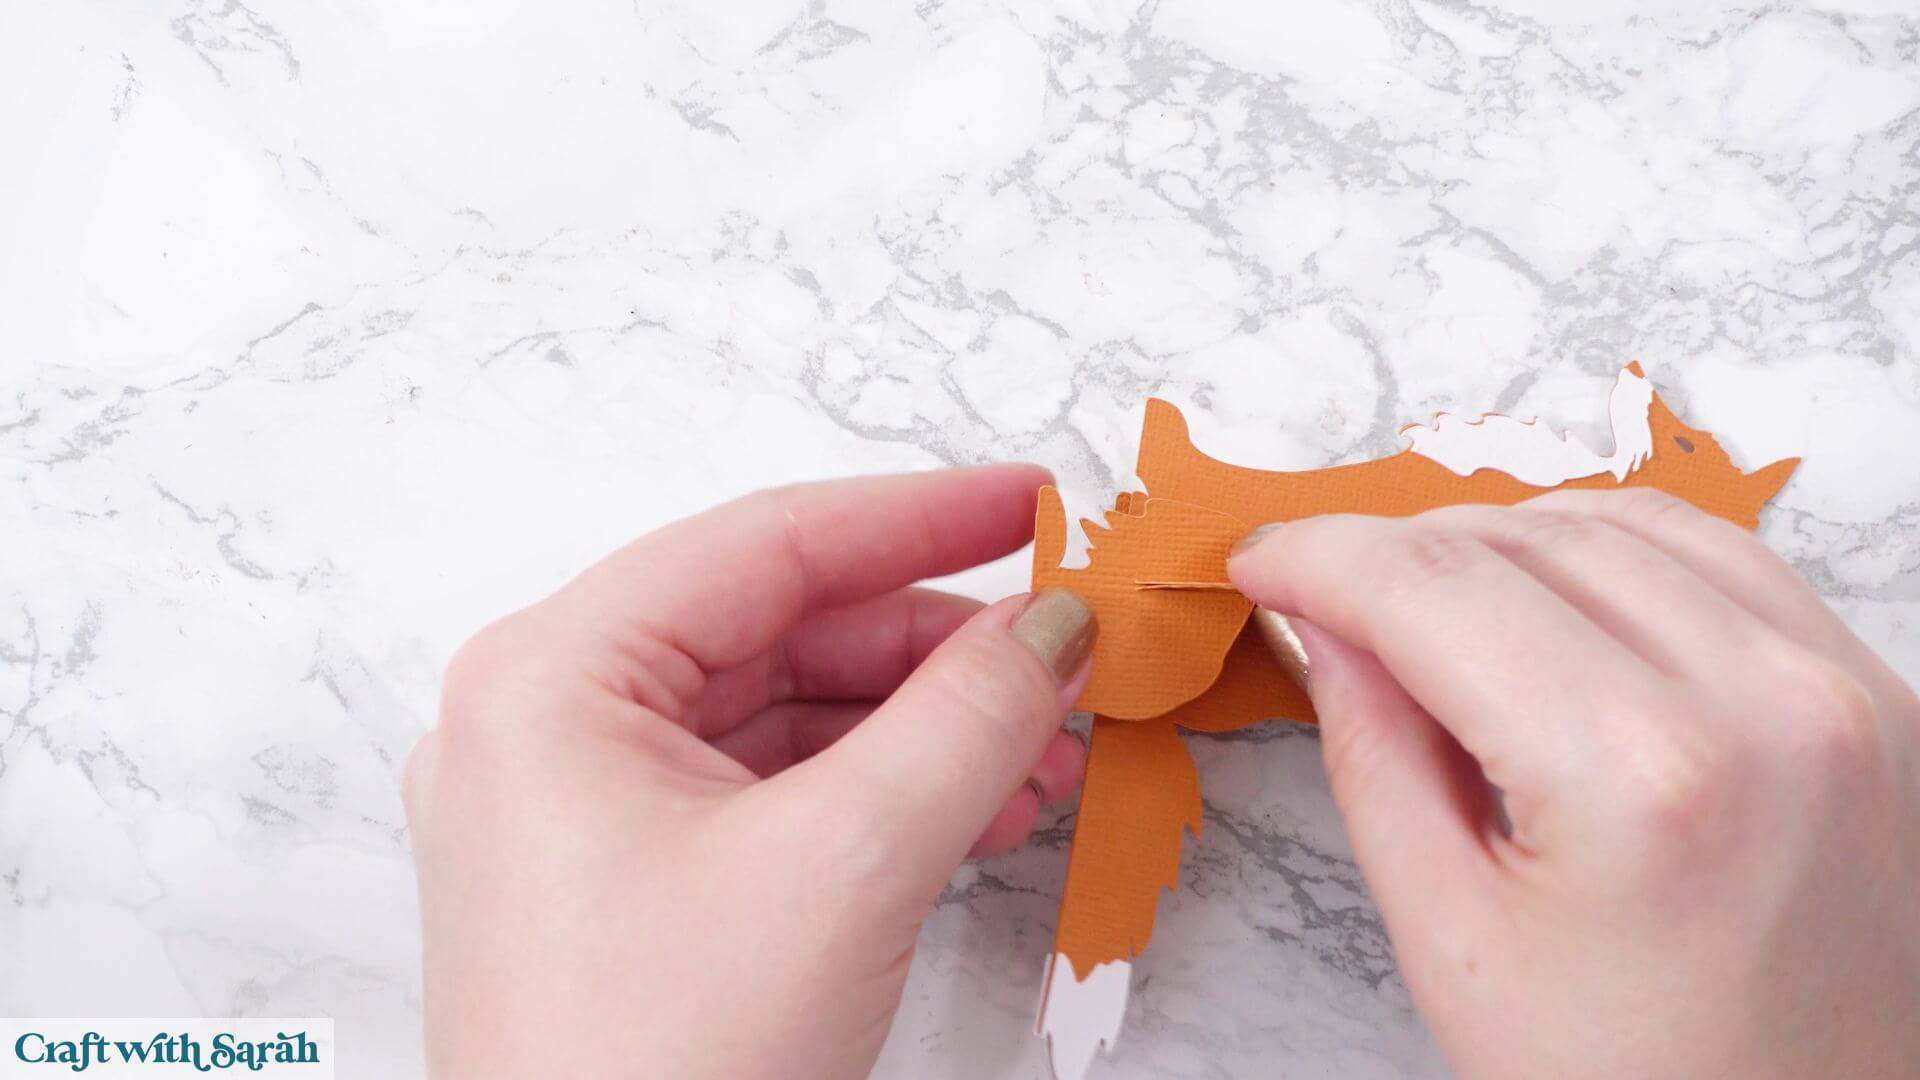
Your fox should look like this.
Step 8) Assemble the stag
The stag is assembled slightly differently because it has separate front and back body pieces.
Begin by attaching the white nose detail and tail pieces.
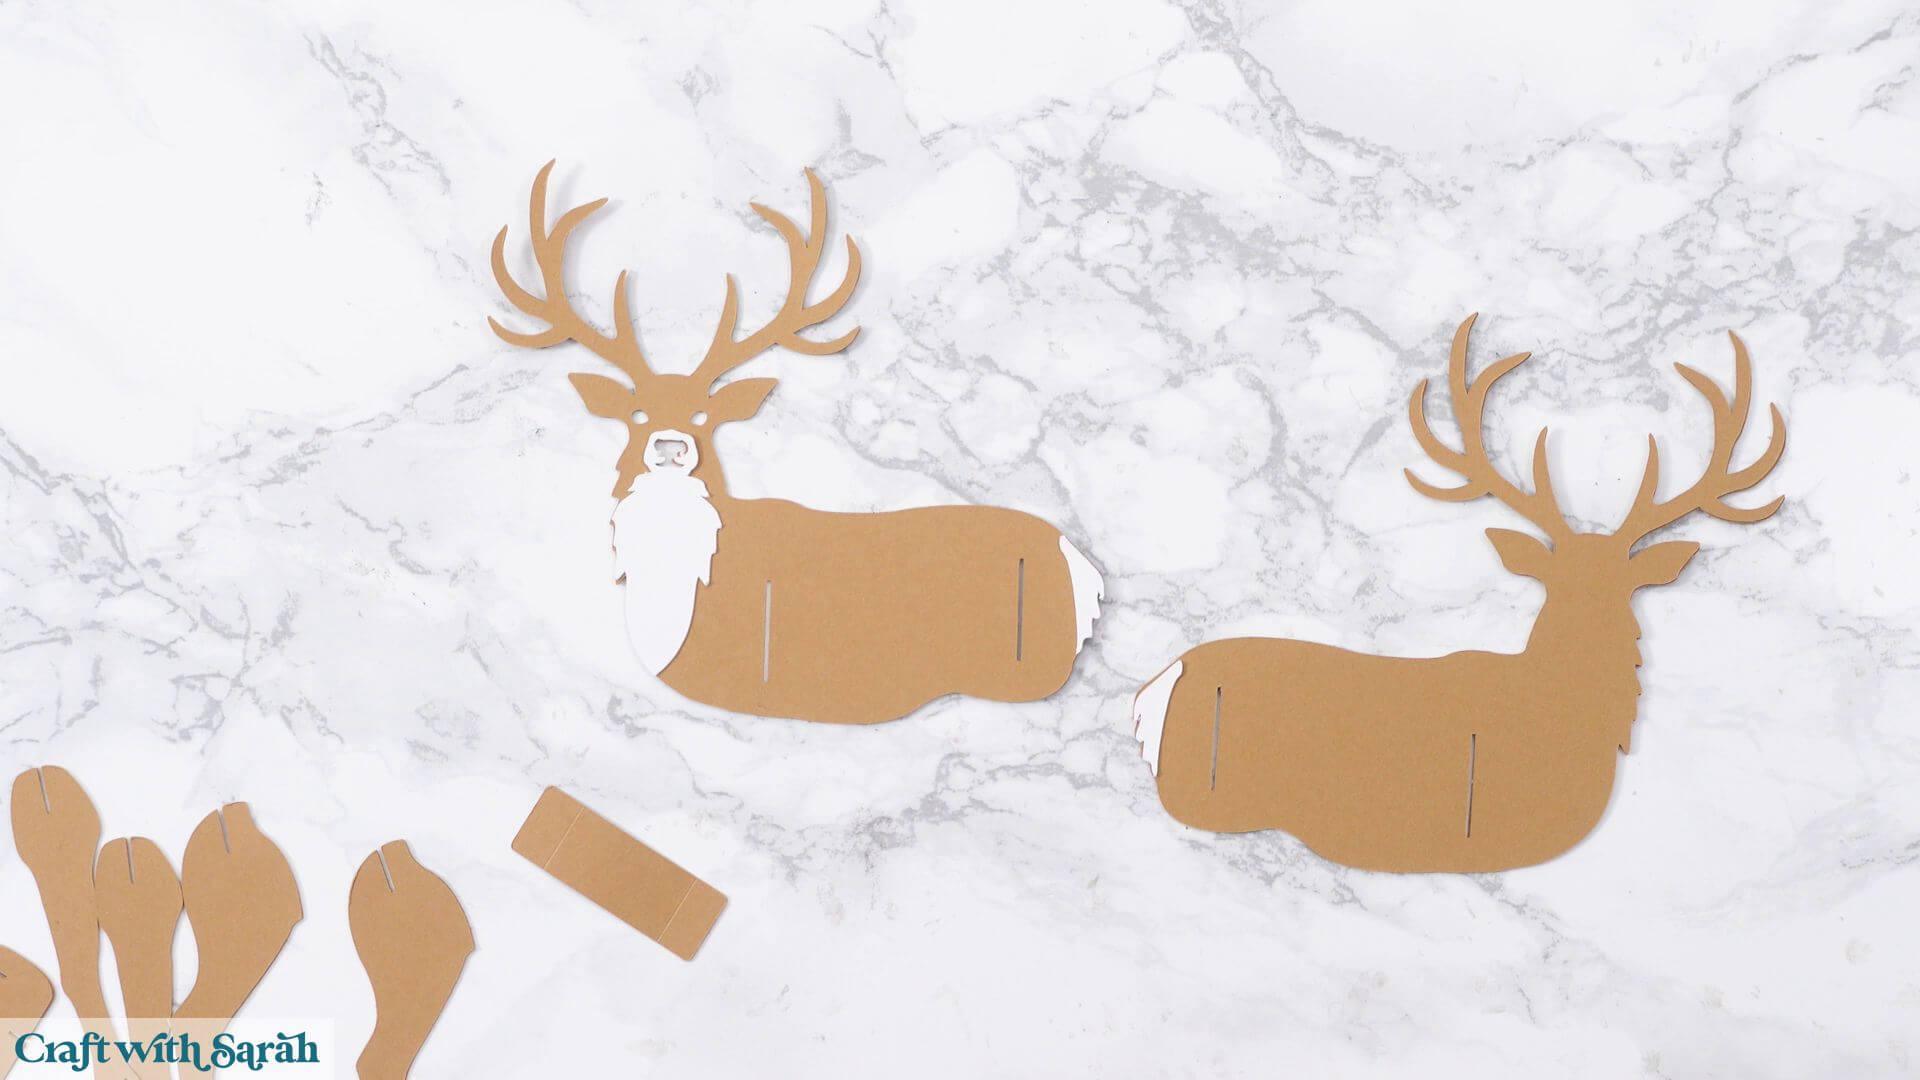
Next, insert both internal supports using the slits in the body and the two oval pieces with slits. This will hold the two main body pieces.
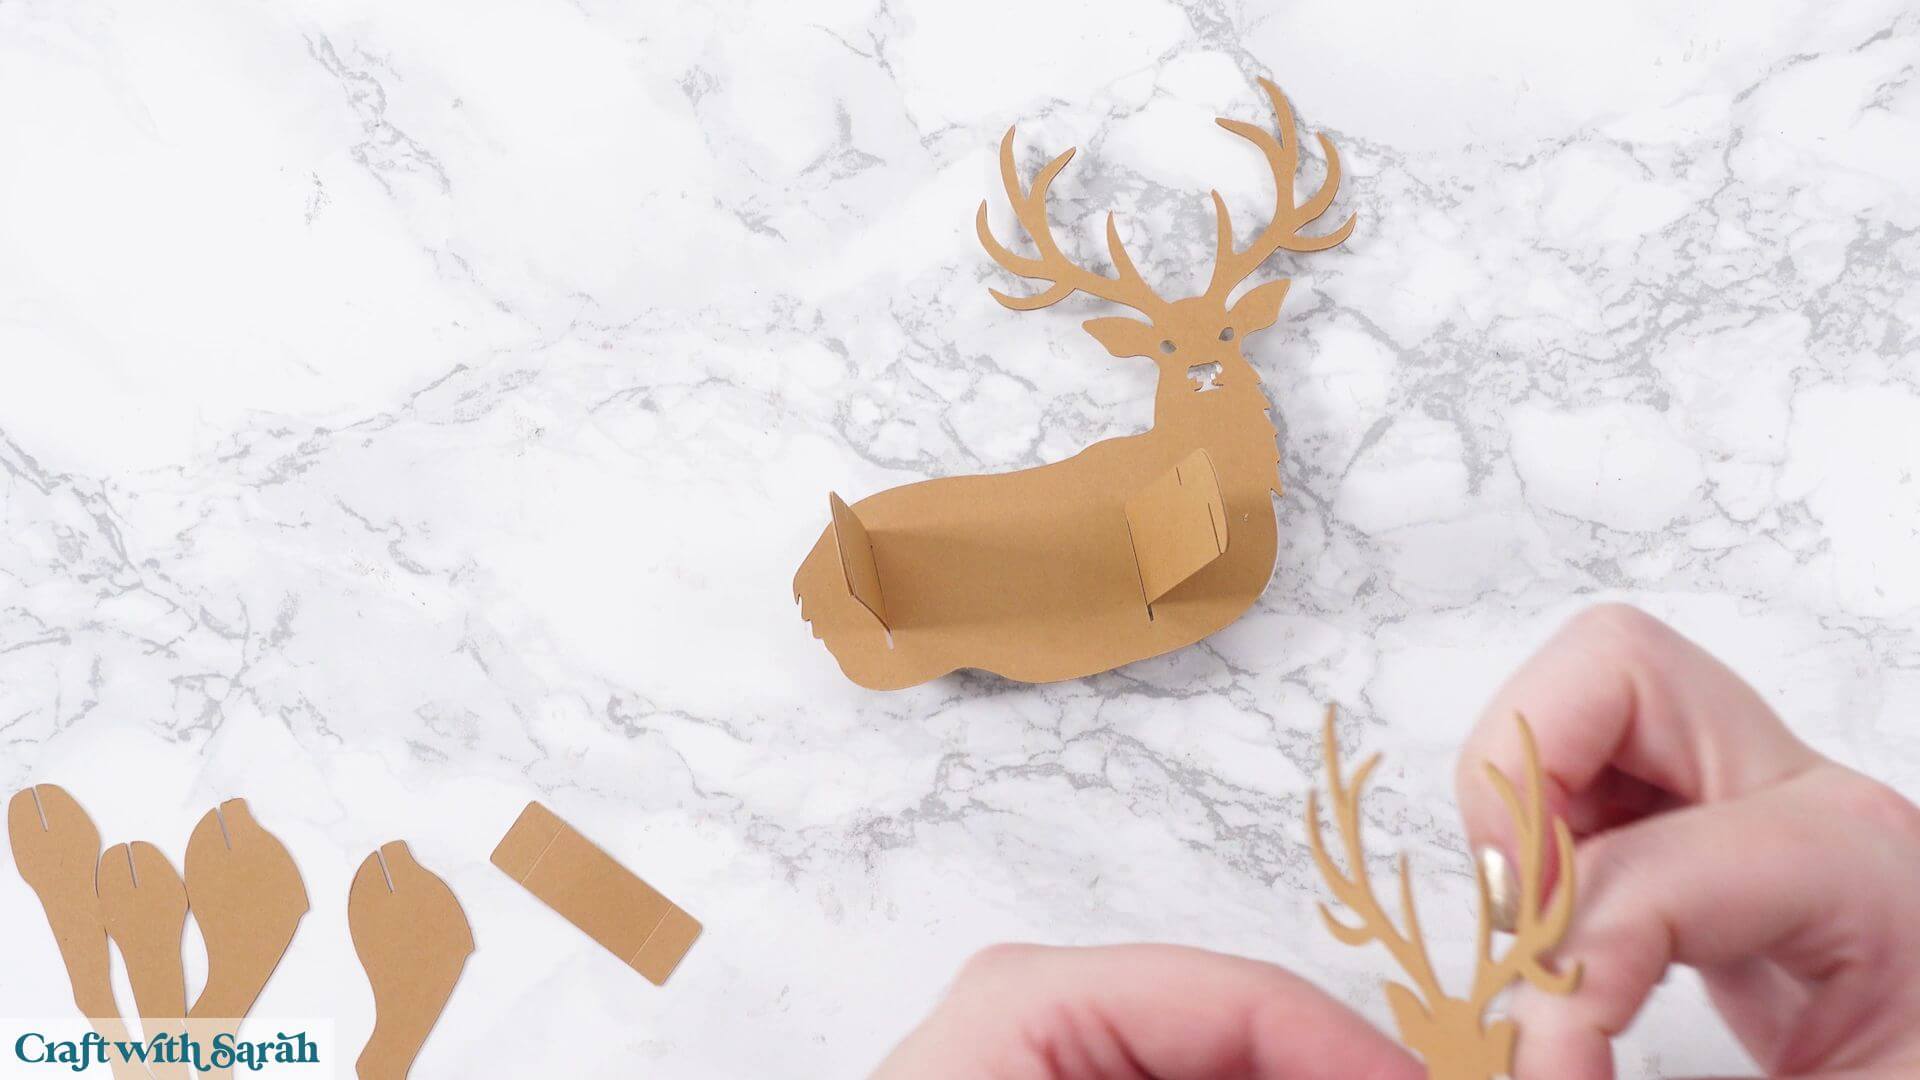
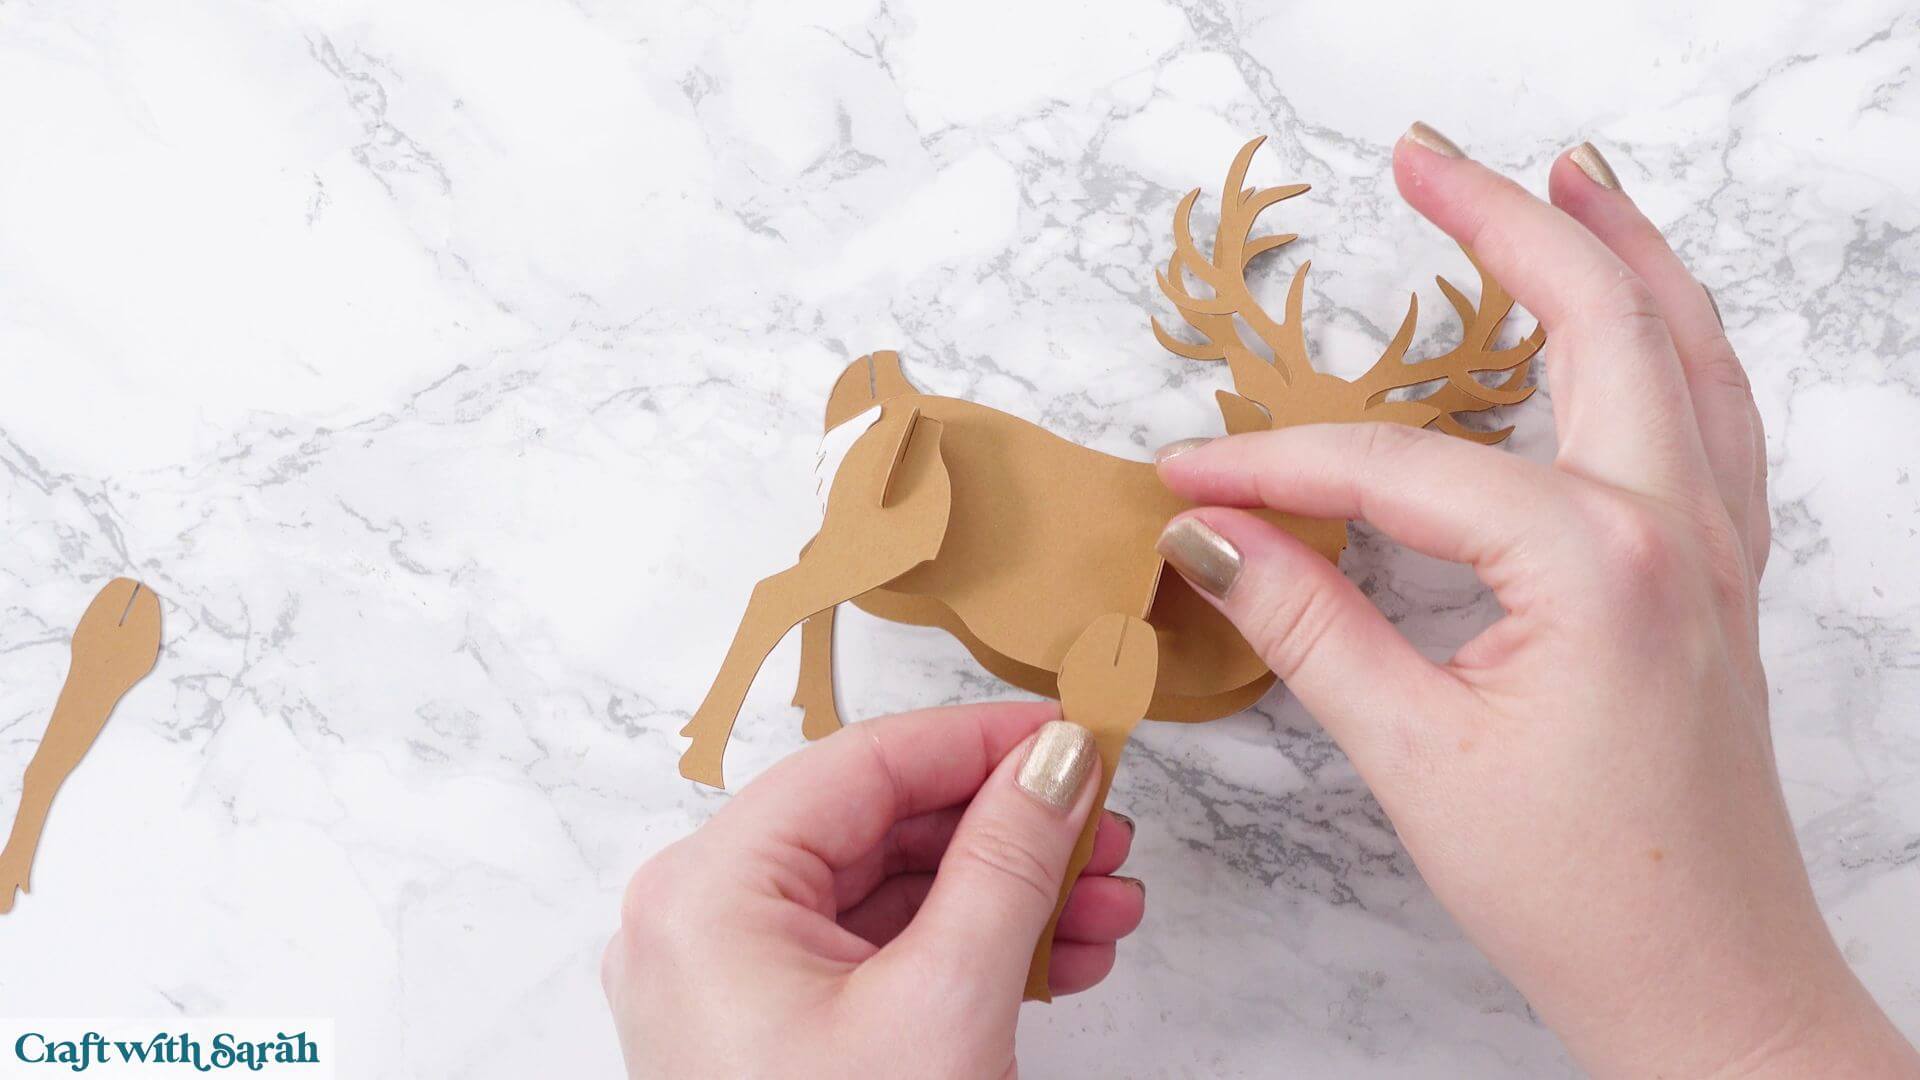
Add the front and back body.
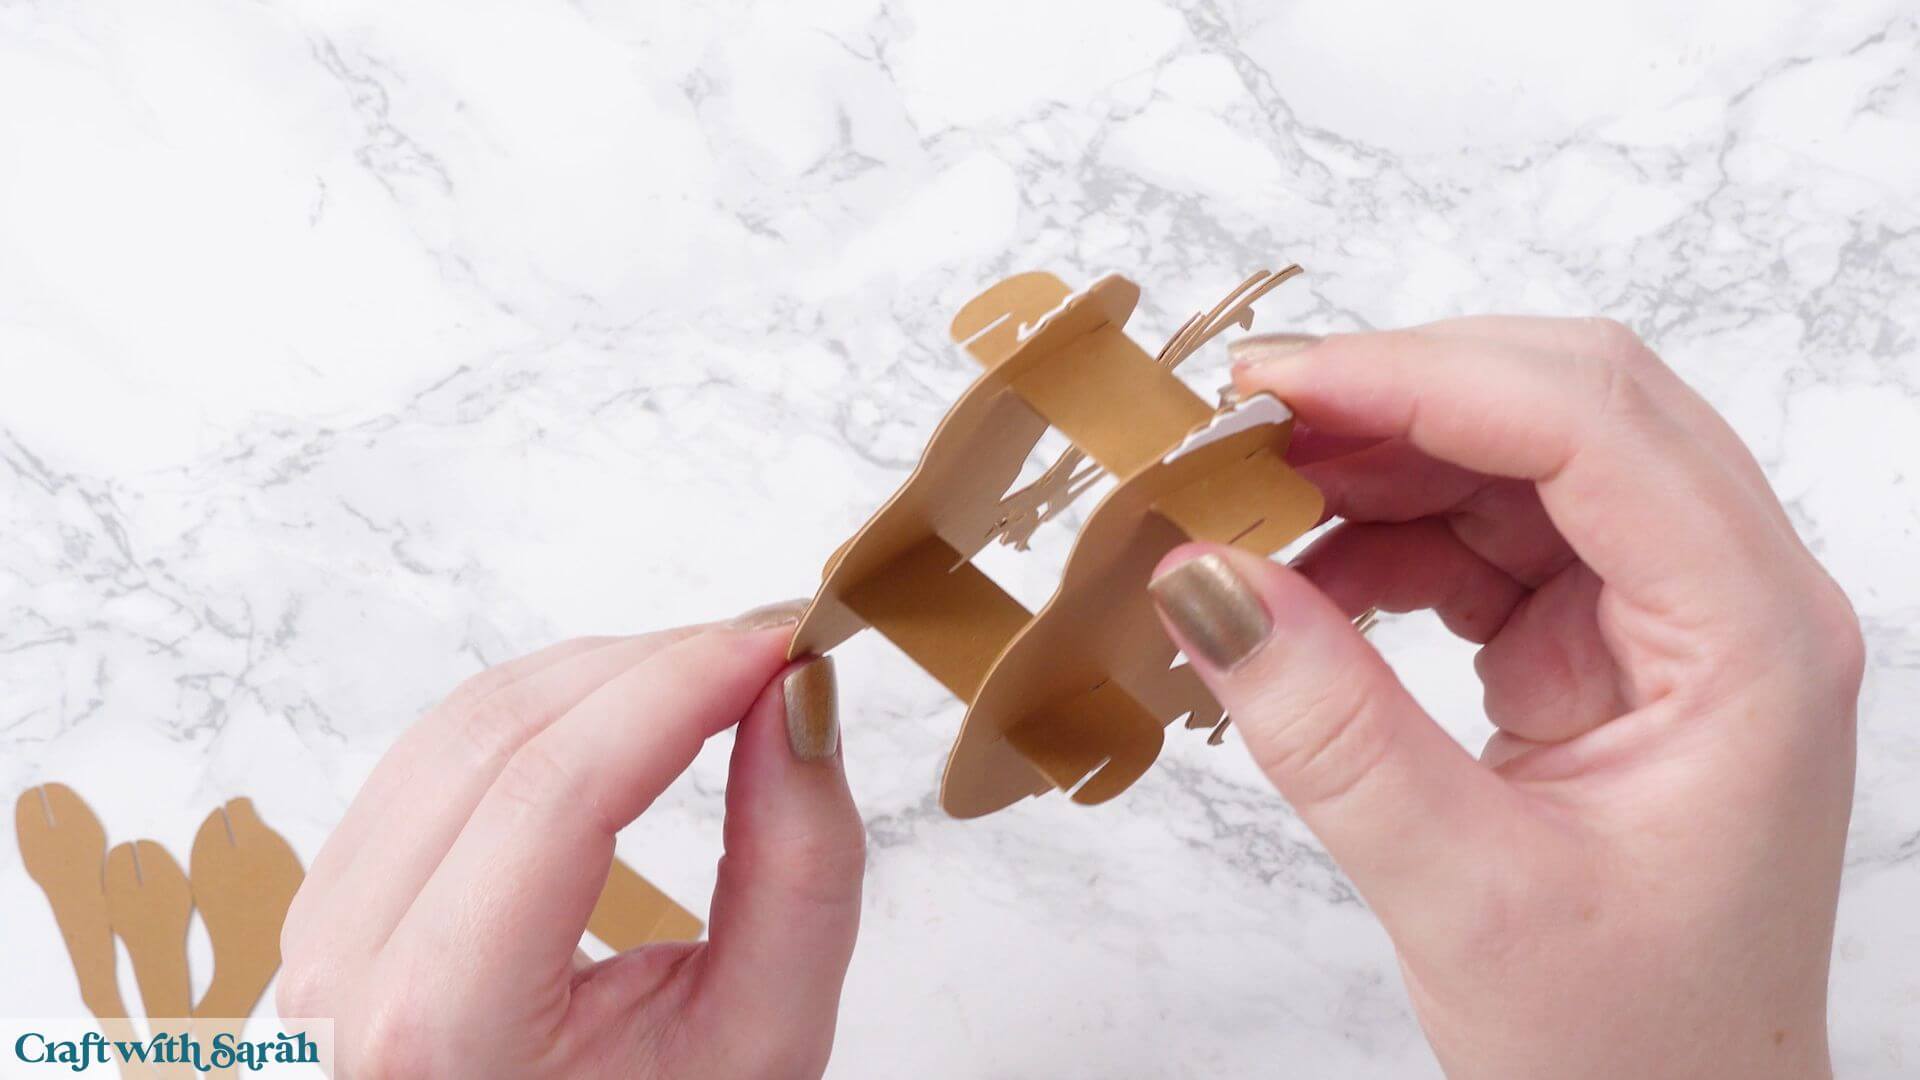
Slot in the front and rear legs.
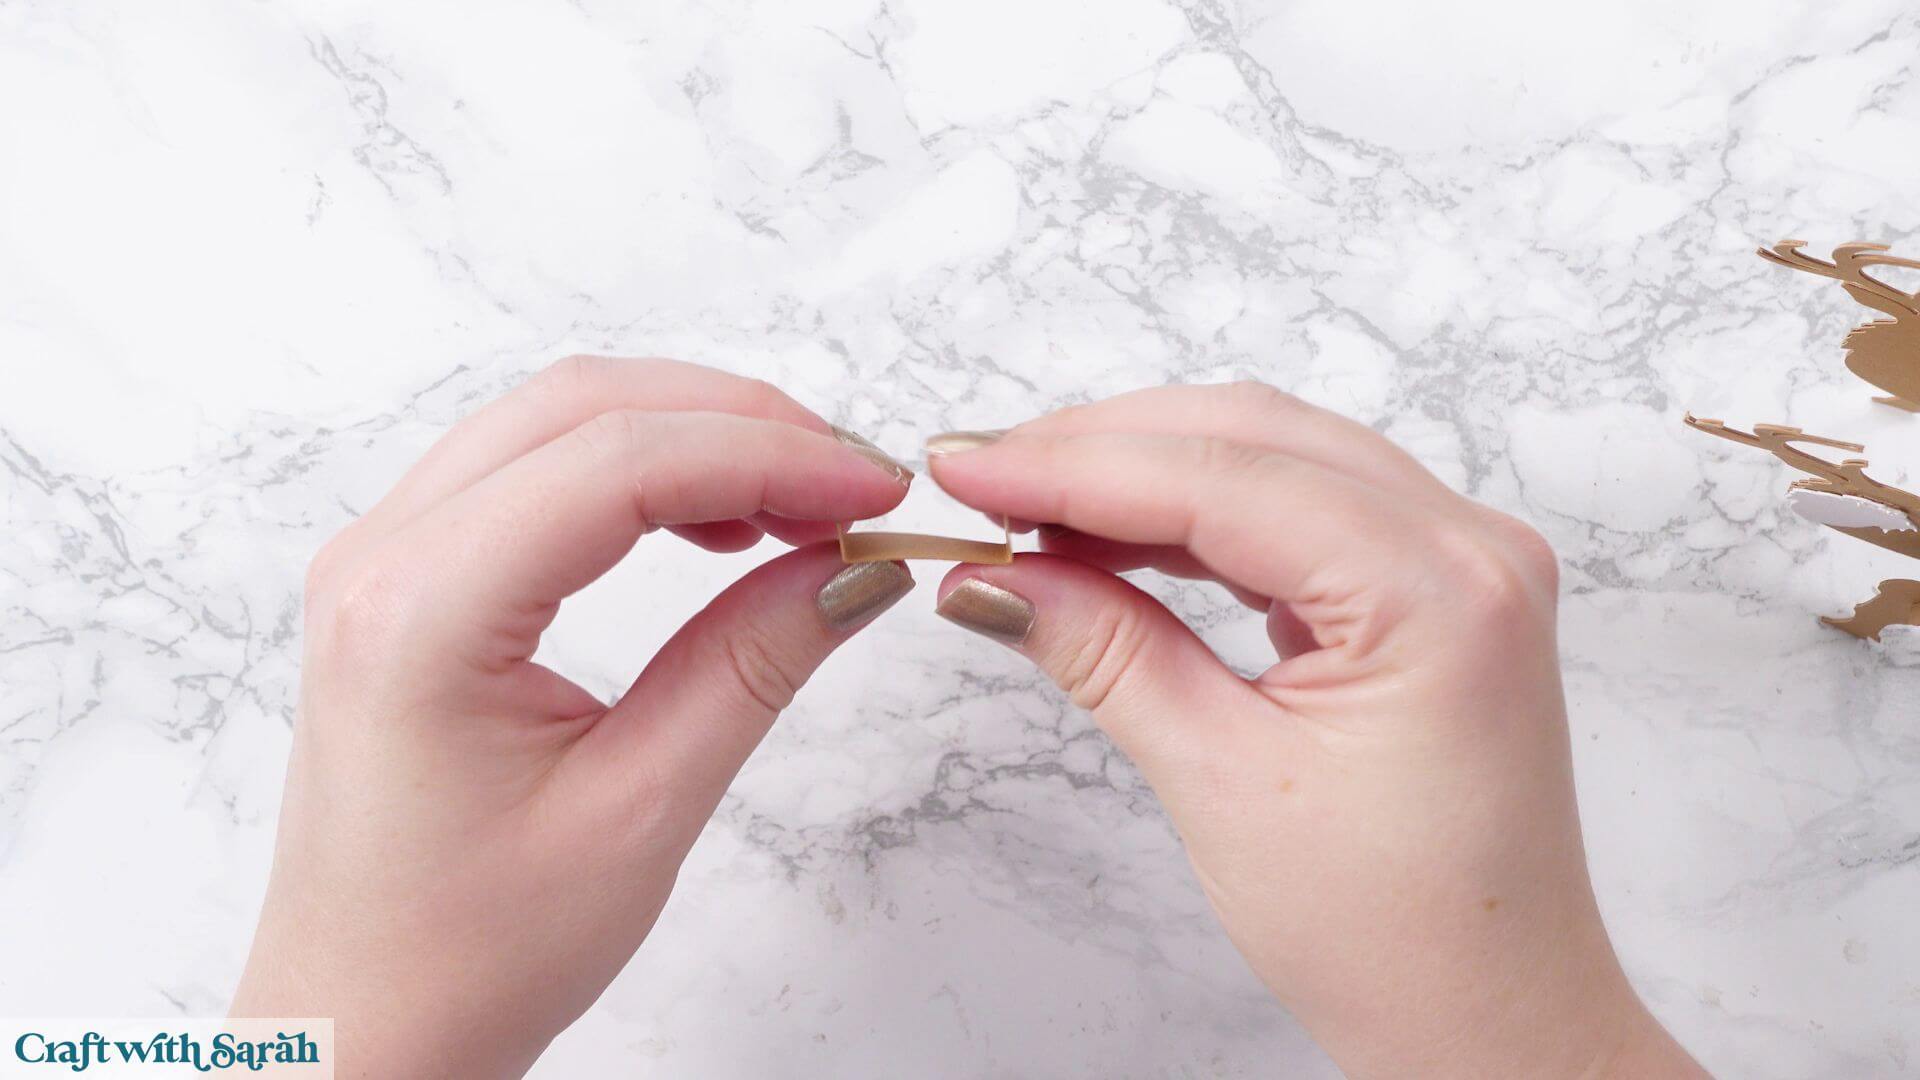
Fold the scored support along the score lines.
Glue it inside the neck.
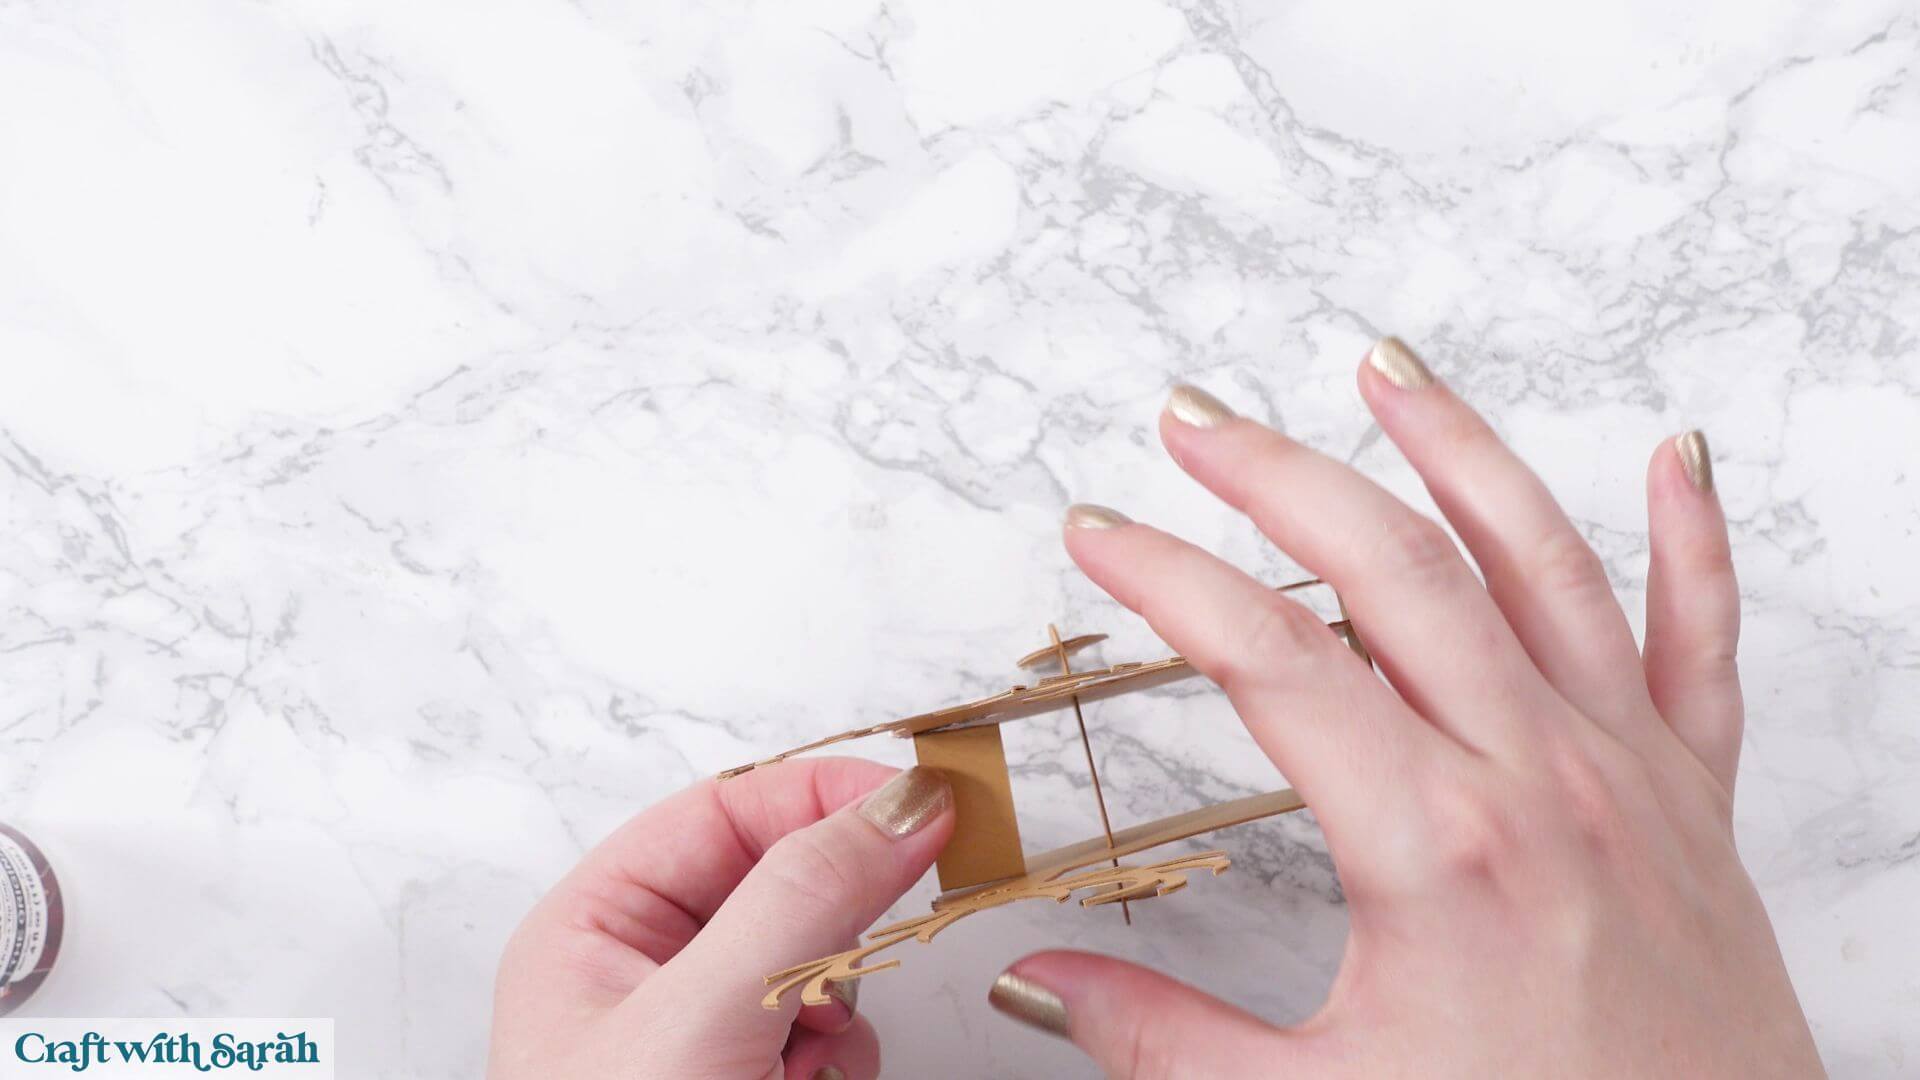
This final support keeps the stag upright and prevents the neck from separating.
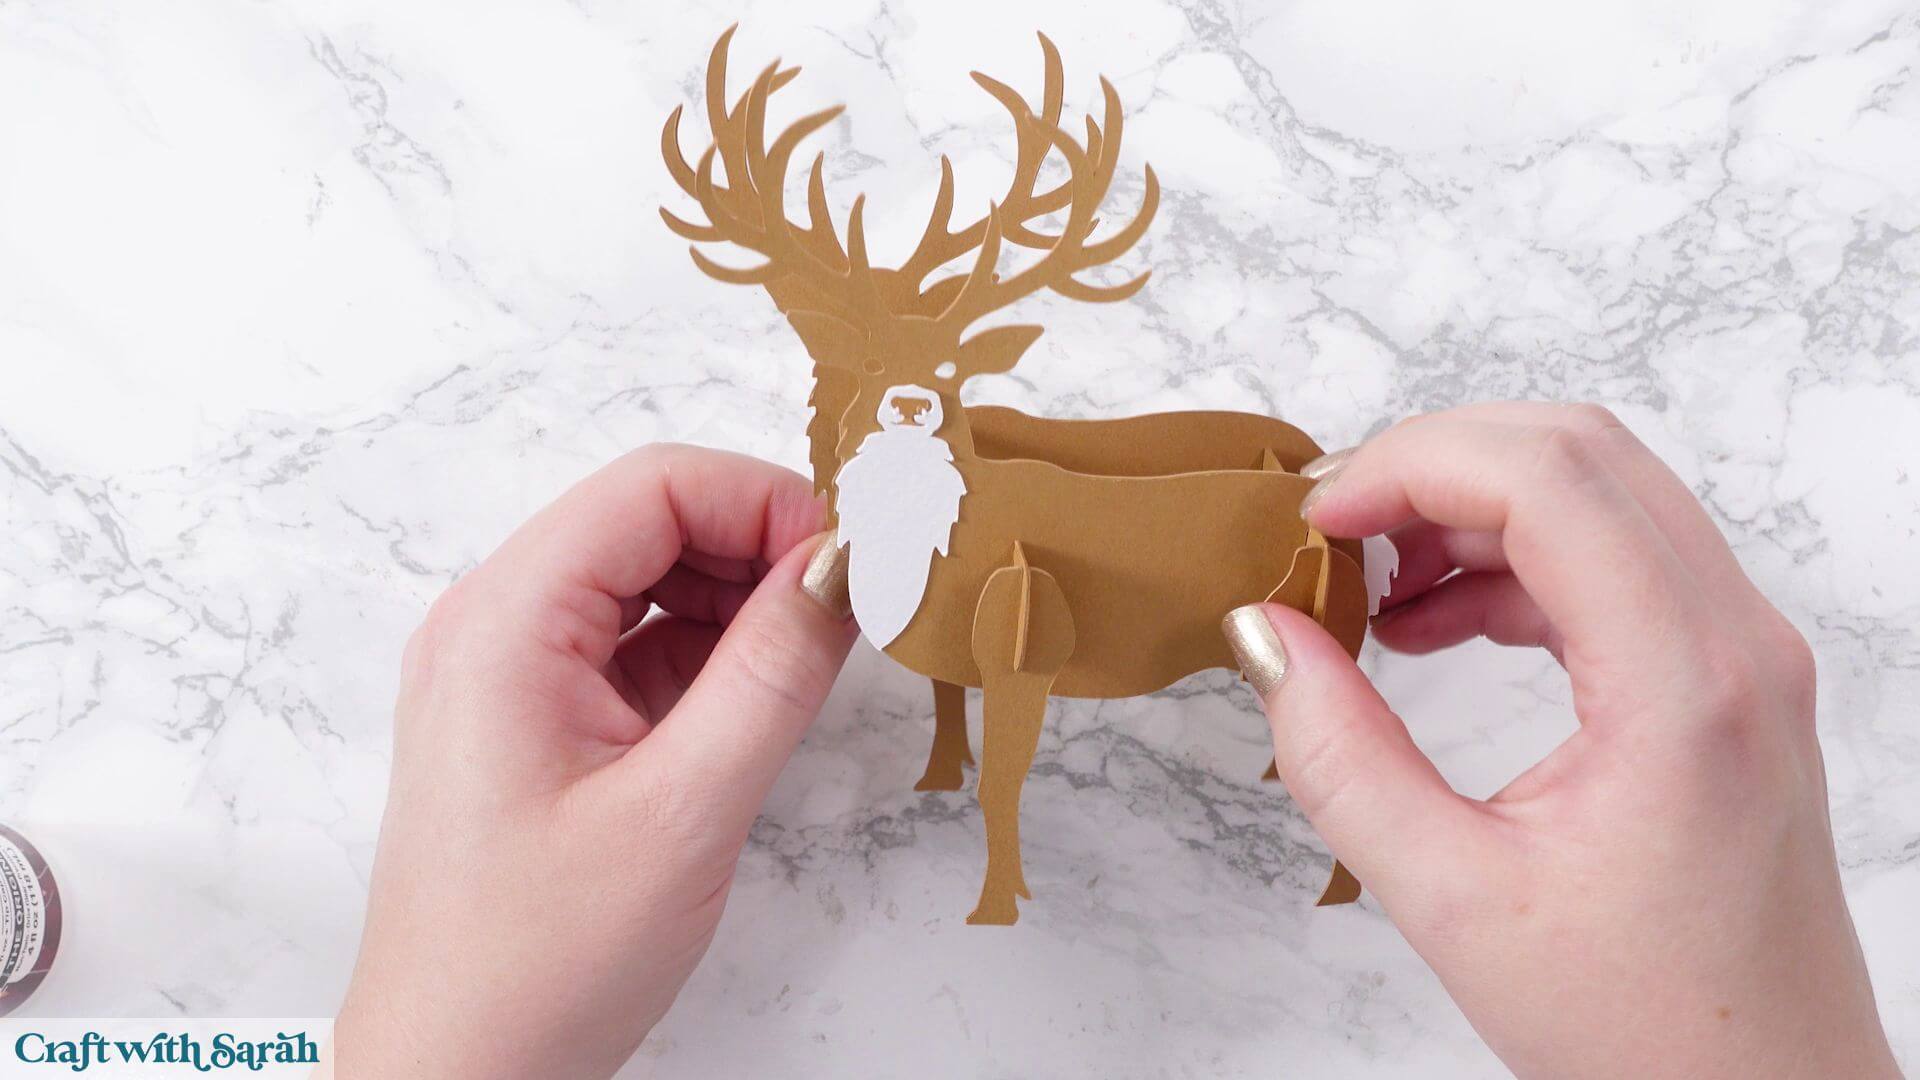
If you’d rather store the stag flat after autumn, you can leave this support out, although the finished model won’t be quite as sturdy.
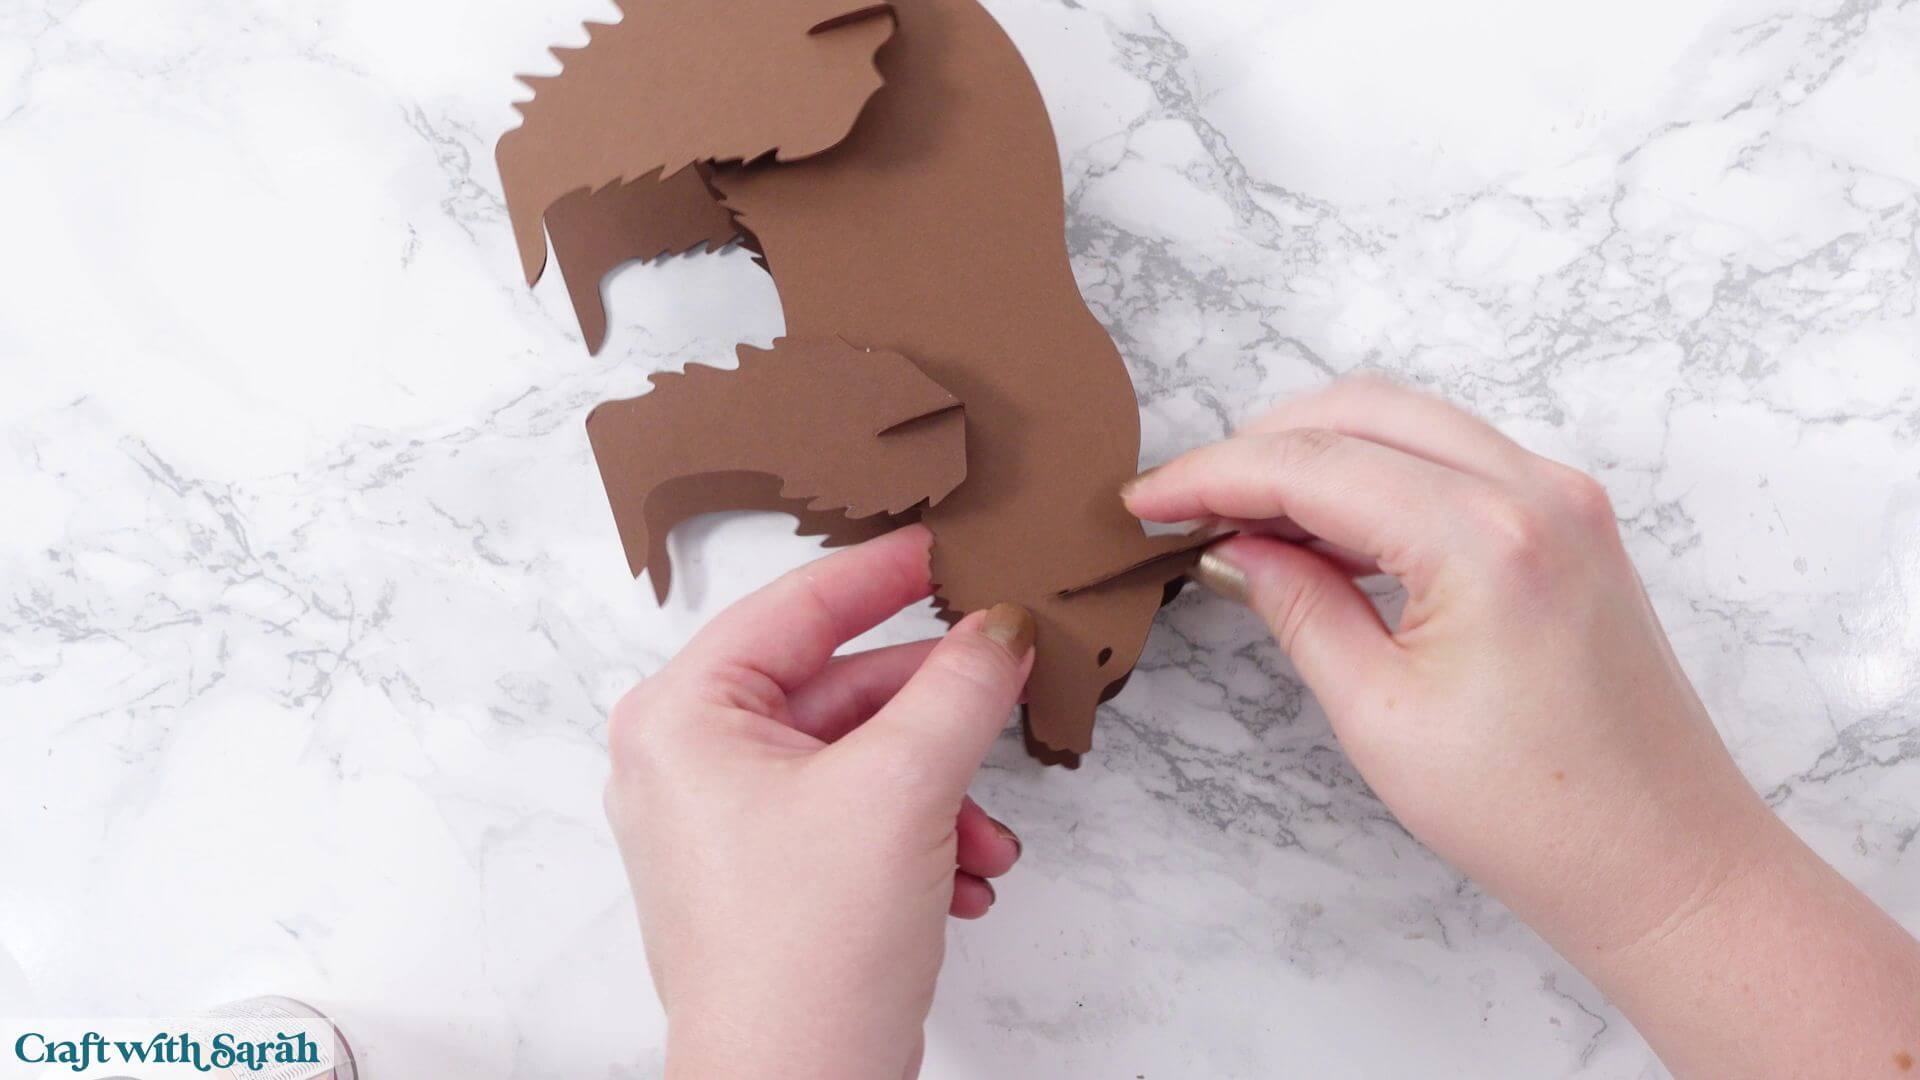
Step 9) Assemble the bear
The bear goes together very similarly to the stag.
Insert the internal supports first.
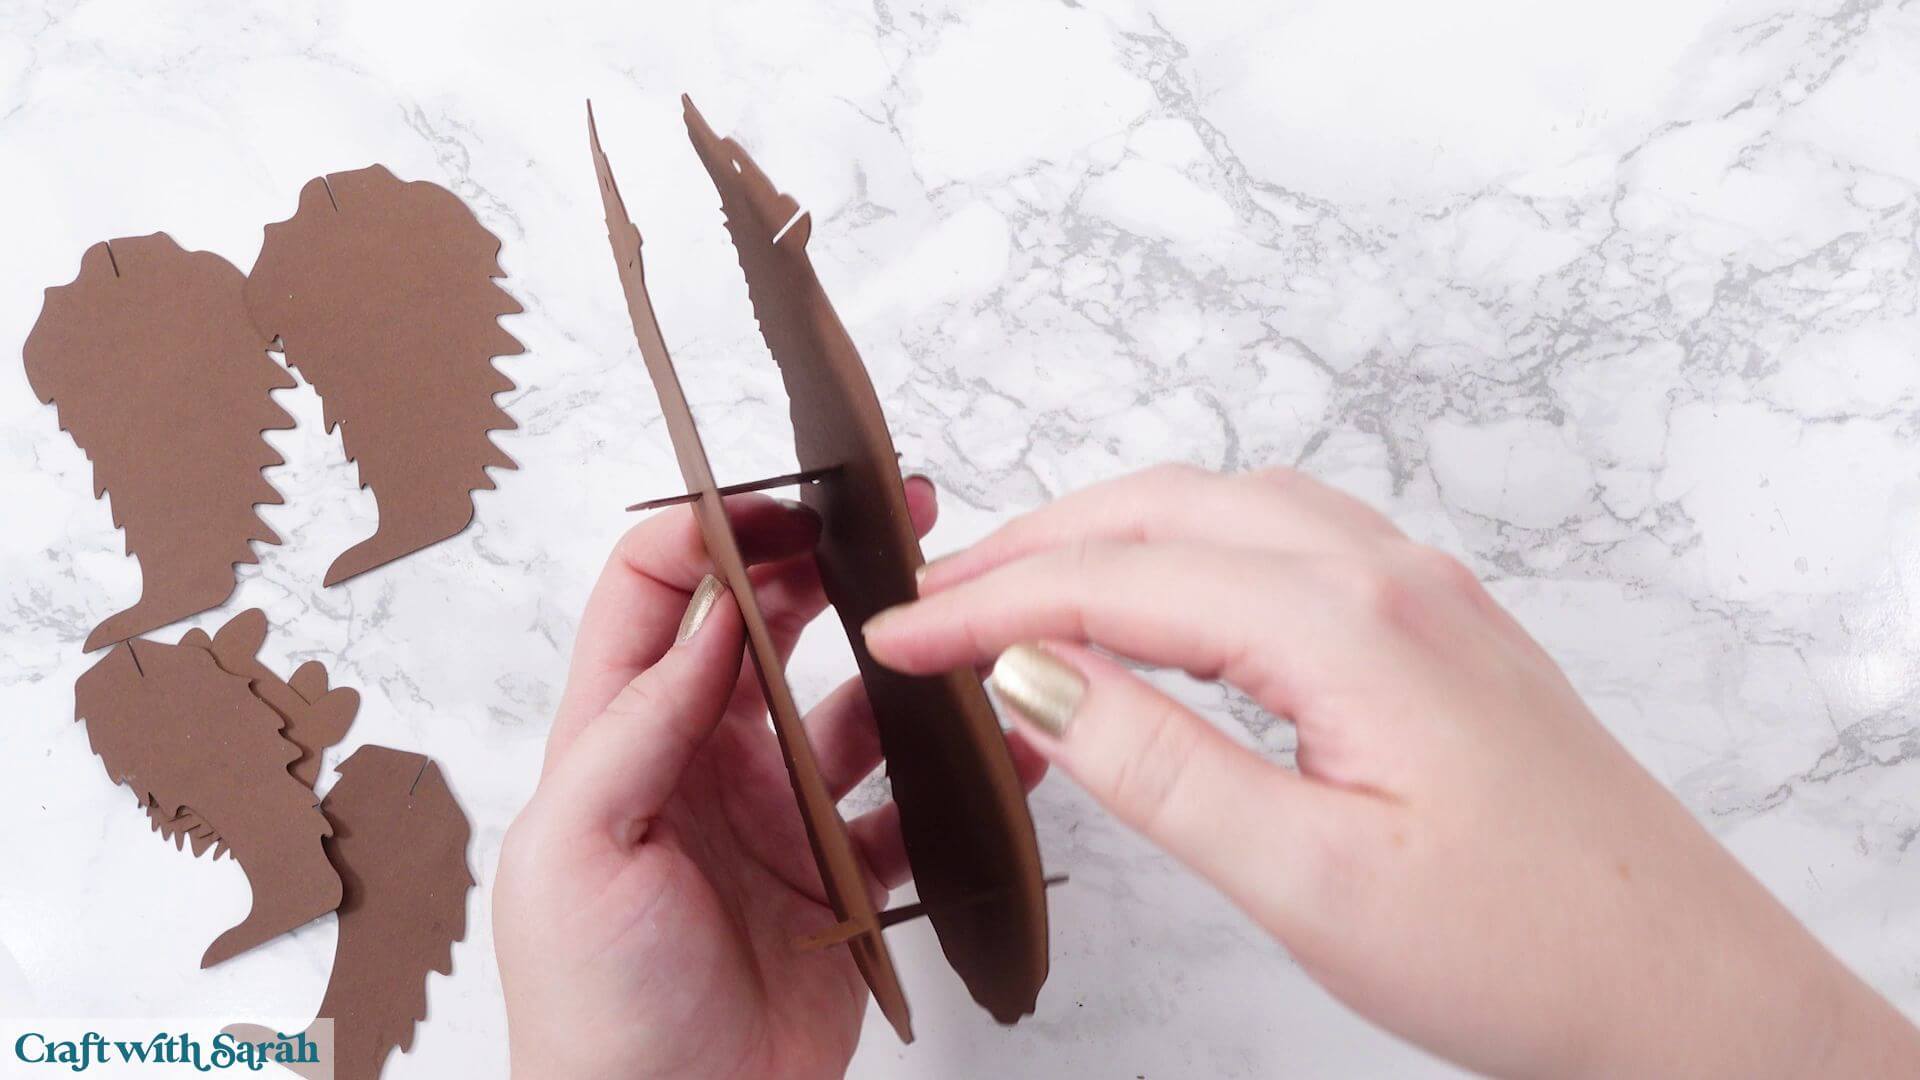
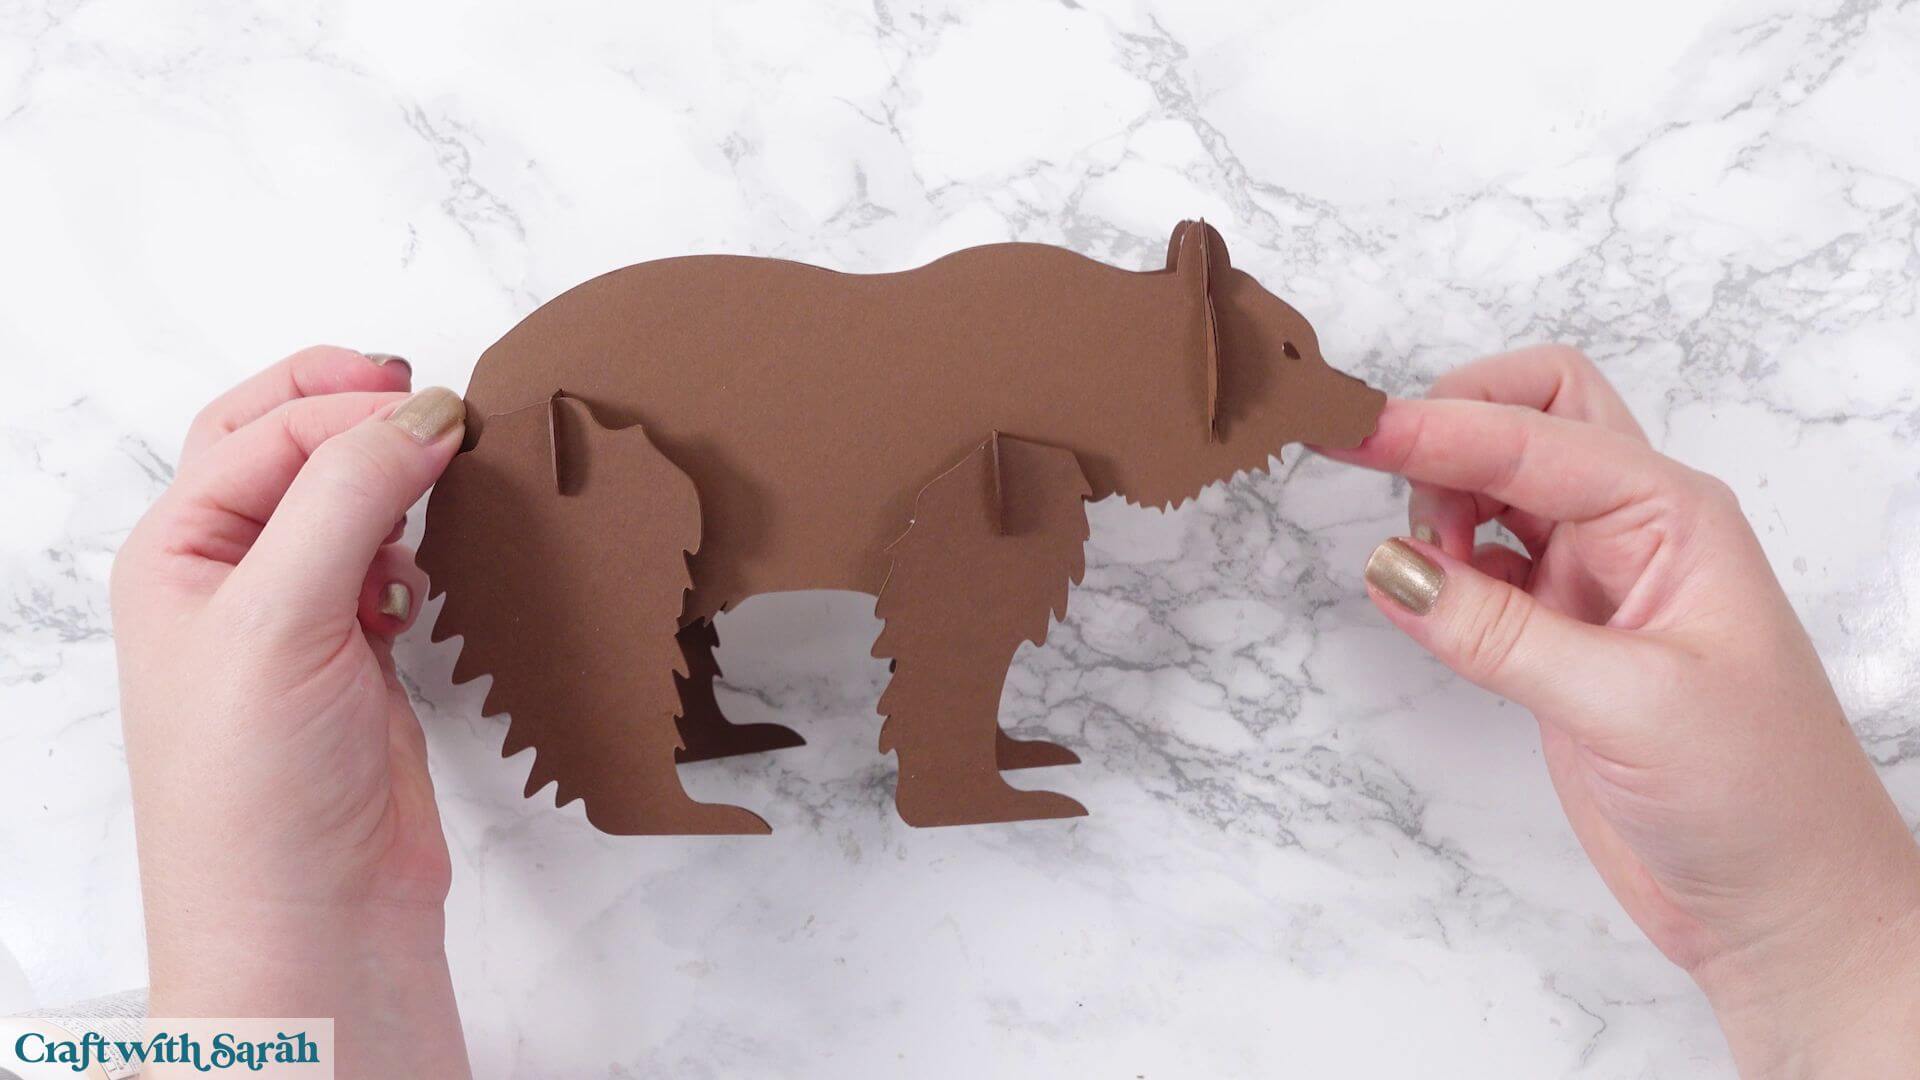
Next, add the other body piece followed by the legs.
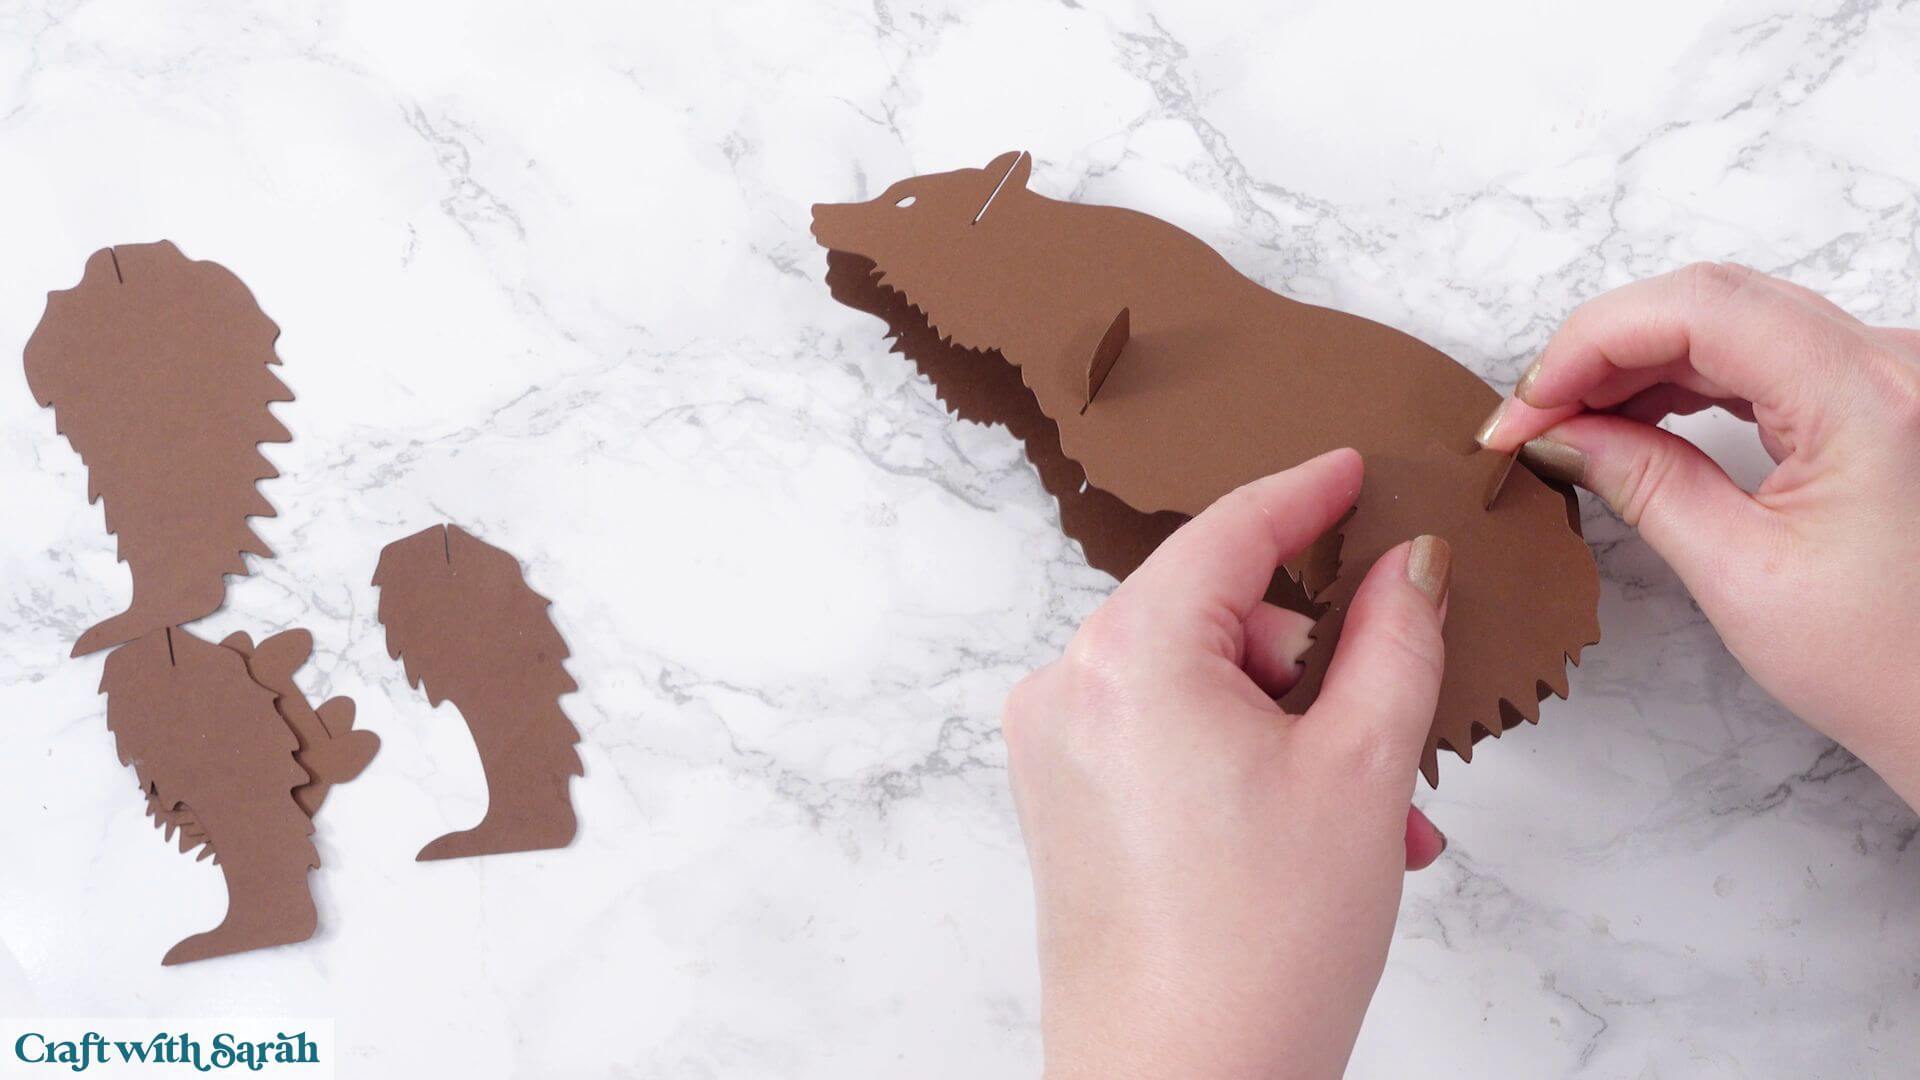
Finally, insert the head support through the ears.
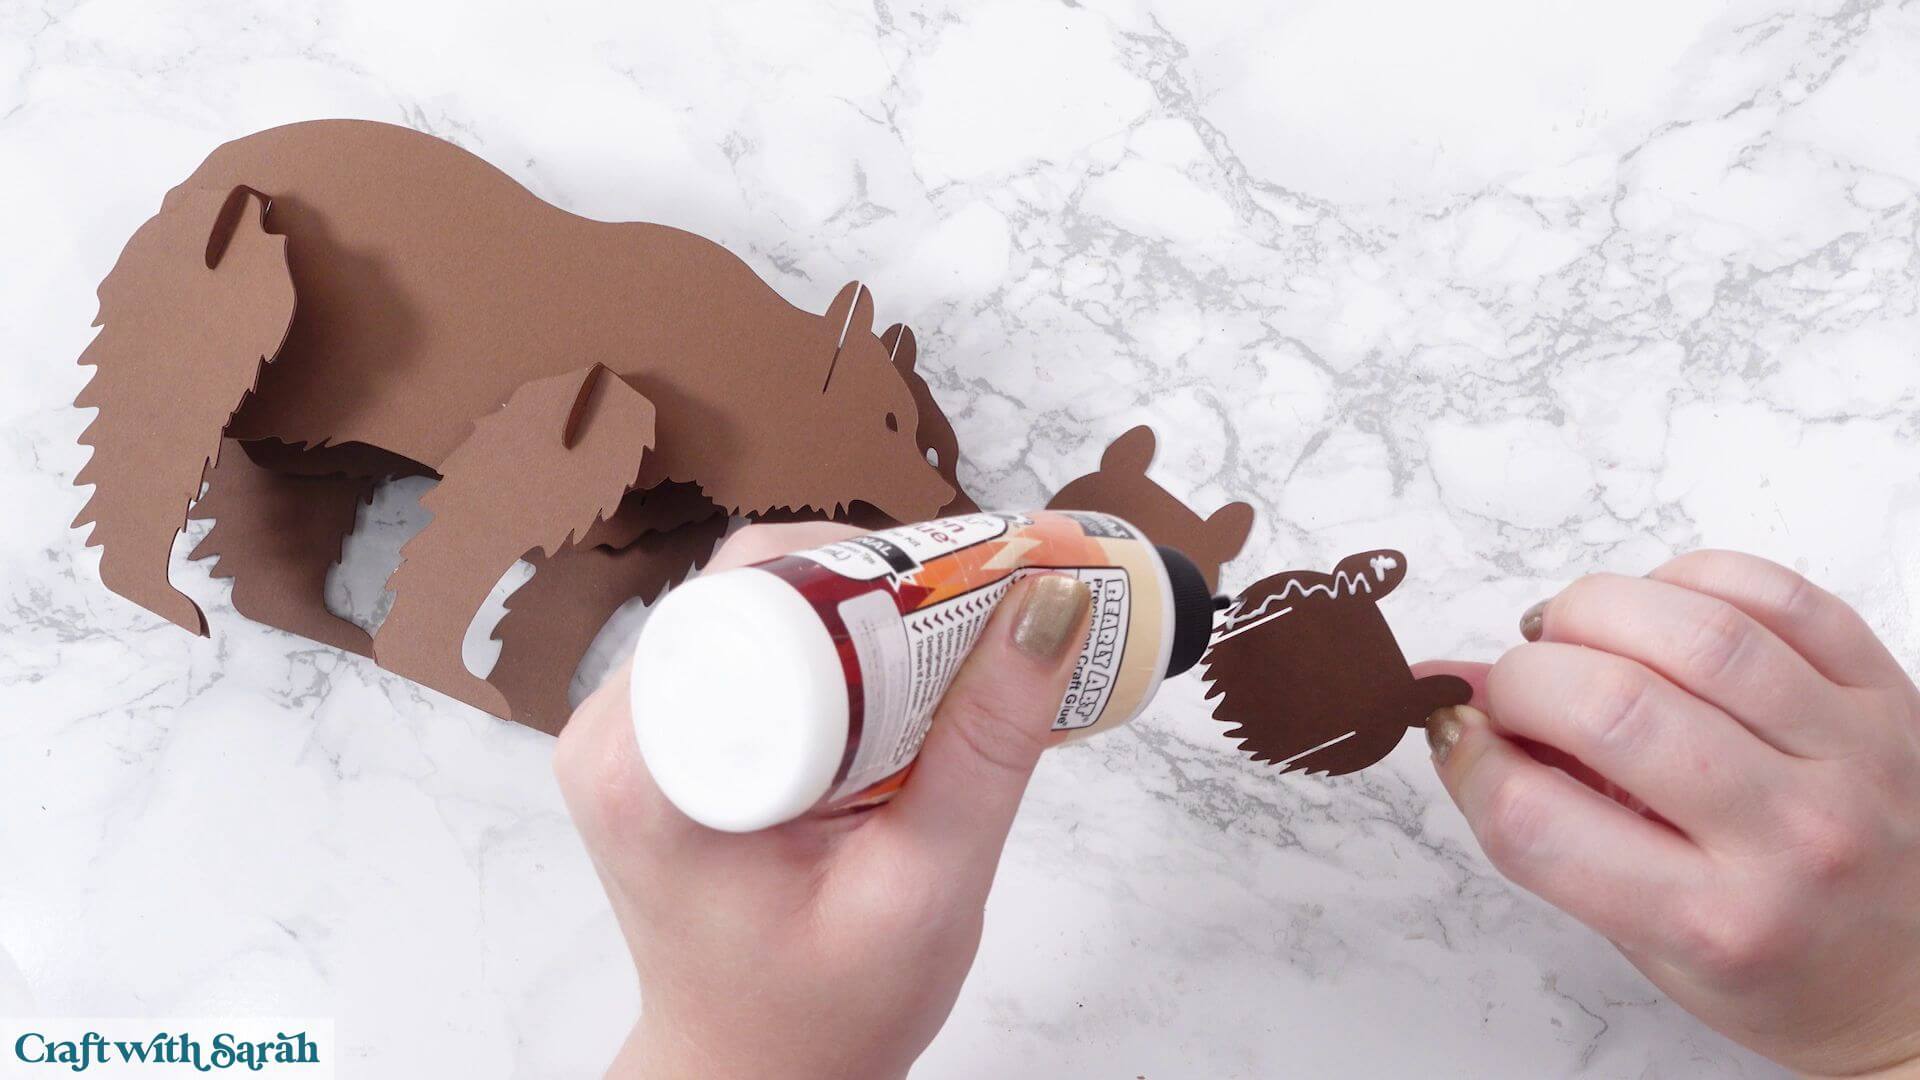
If any legs seem uneven after assembly, push each slot fully into place until the bear stands flat.
Step 10) Assemble the tree
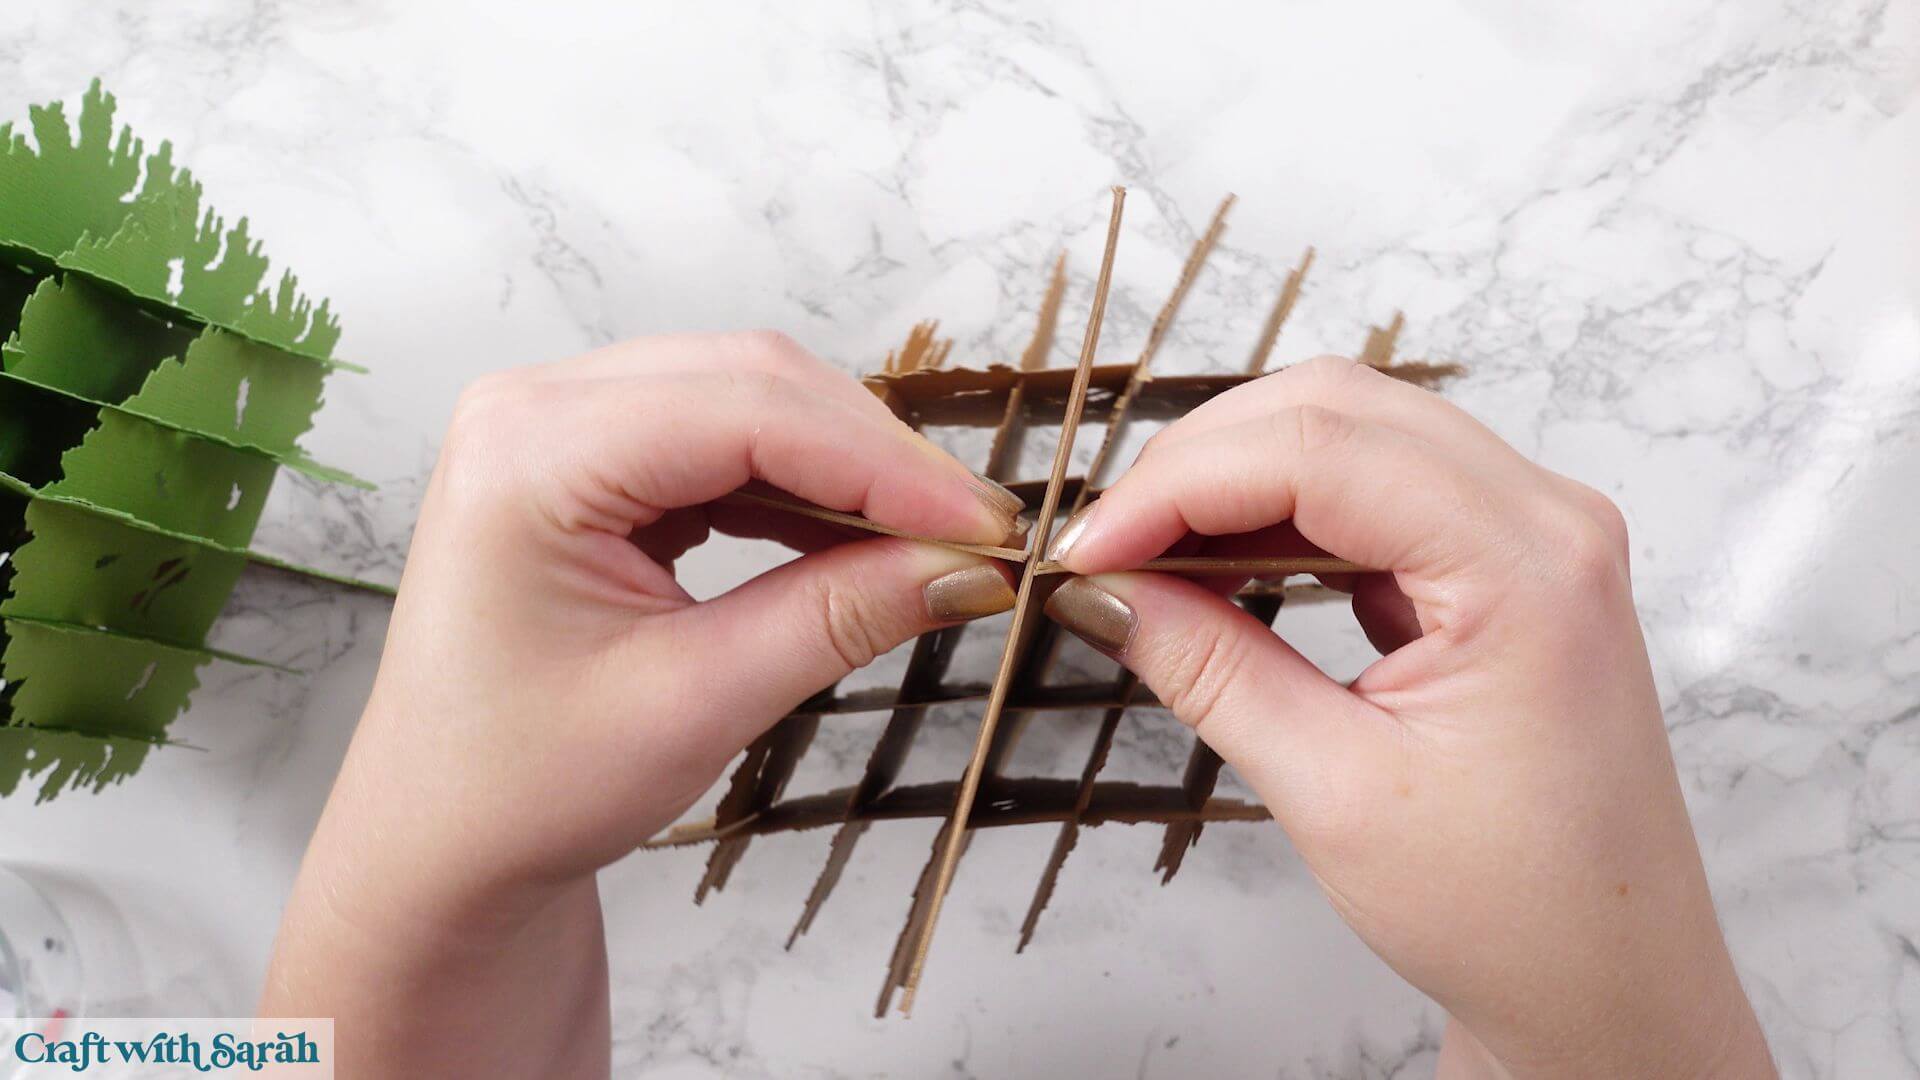
Begin by gluing the matching trunk pieces onto both of the main tree supports. Take care not to glue across the slot in the centre support, otherwise the two sections won’t slot together later.
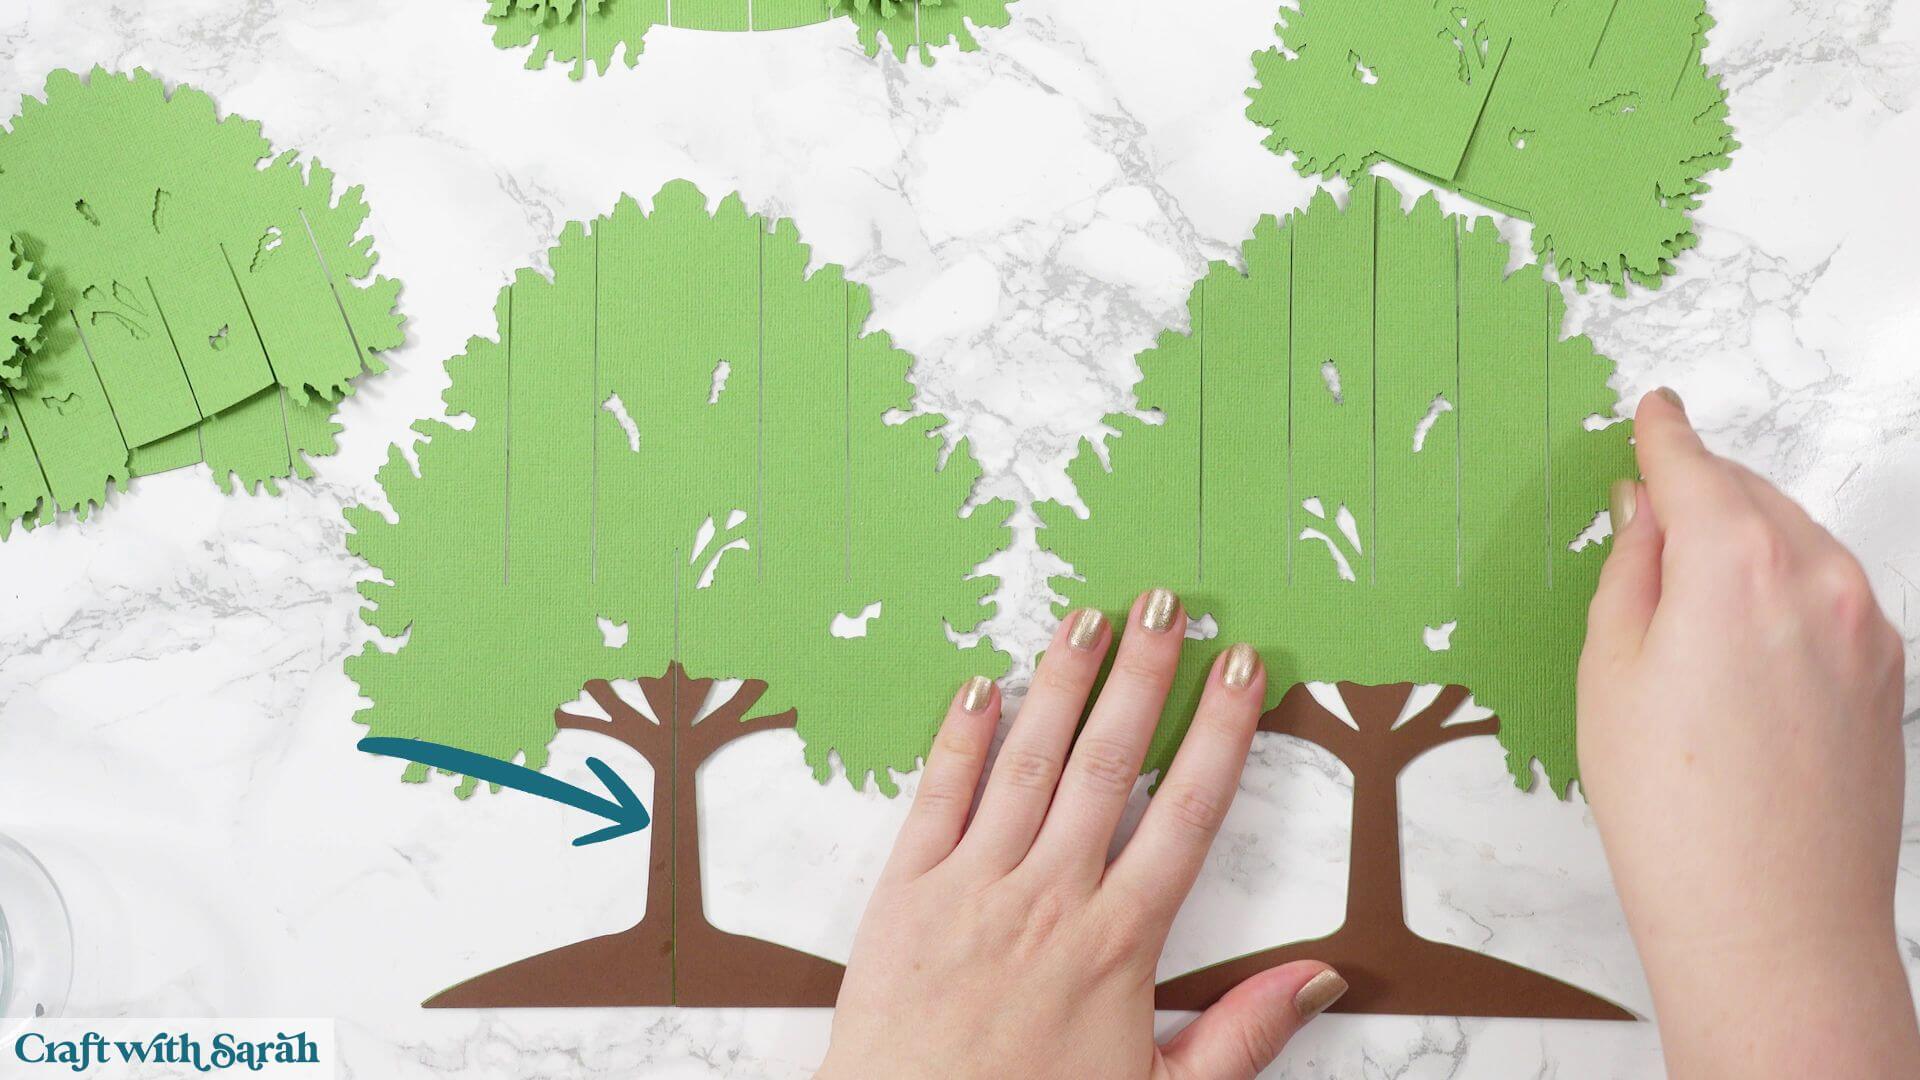
Once the glue has dried, slot the two large centre supports together to create a sturdy cross-shaped base.
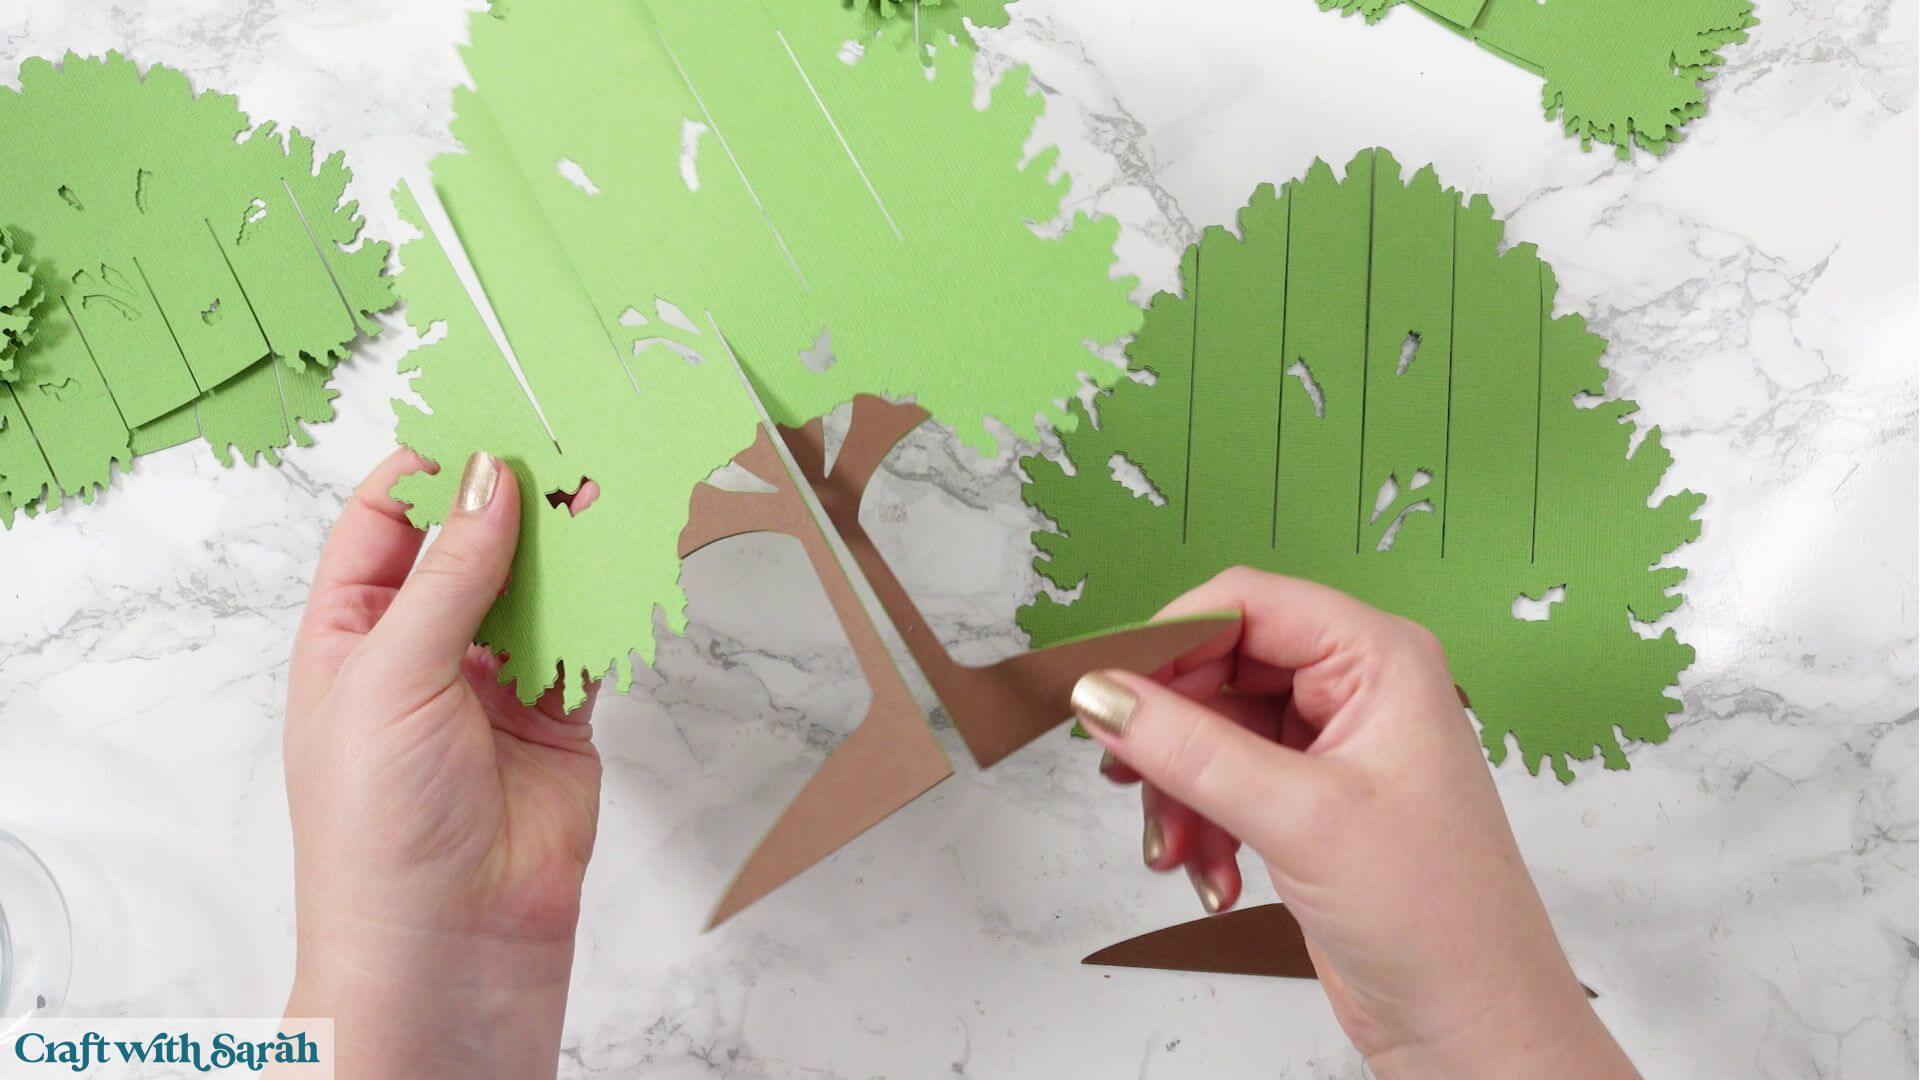
If your cardstock is fairly thin and the base feels a little flexible, this is a good opportunity to strengthen it by gluing extra brown support pieces over the base before continuing.
Next, insert the two large branch sections with the slots in the top.
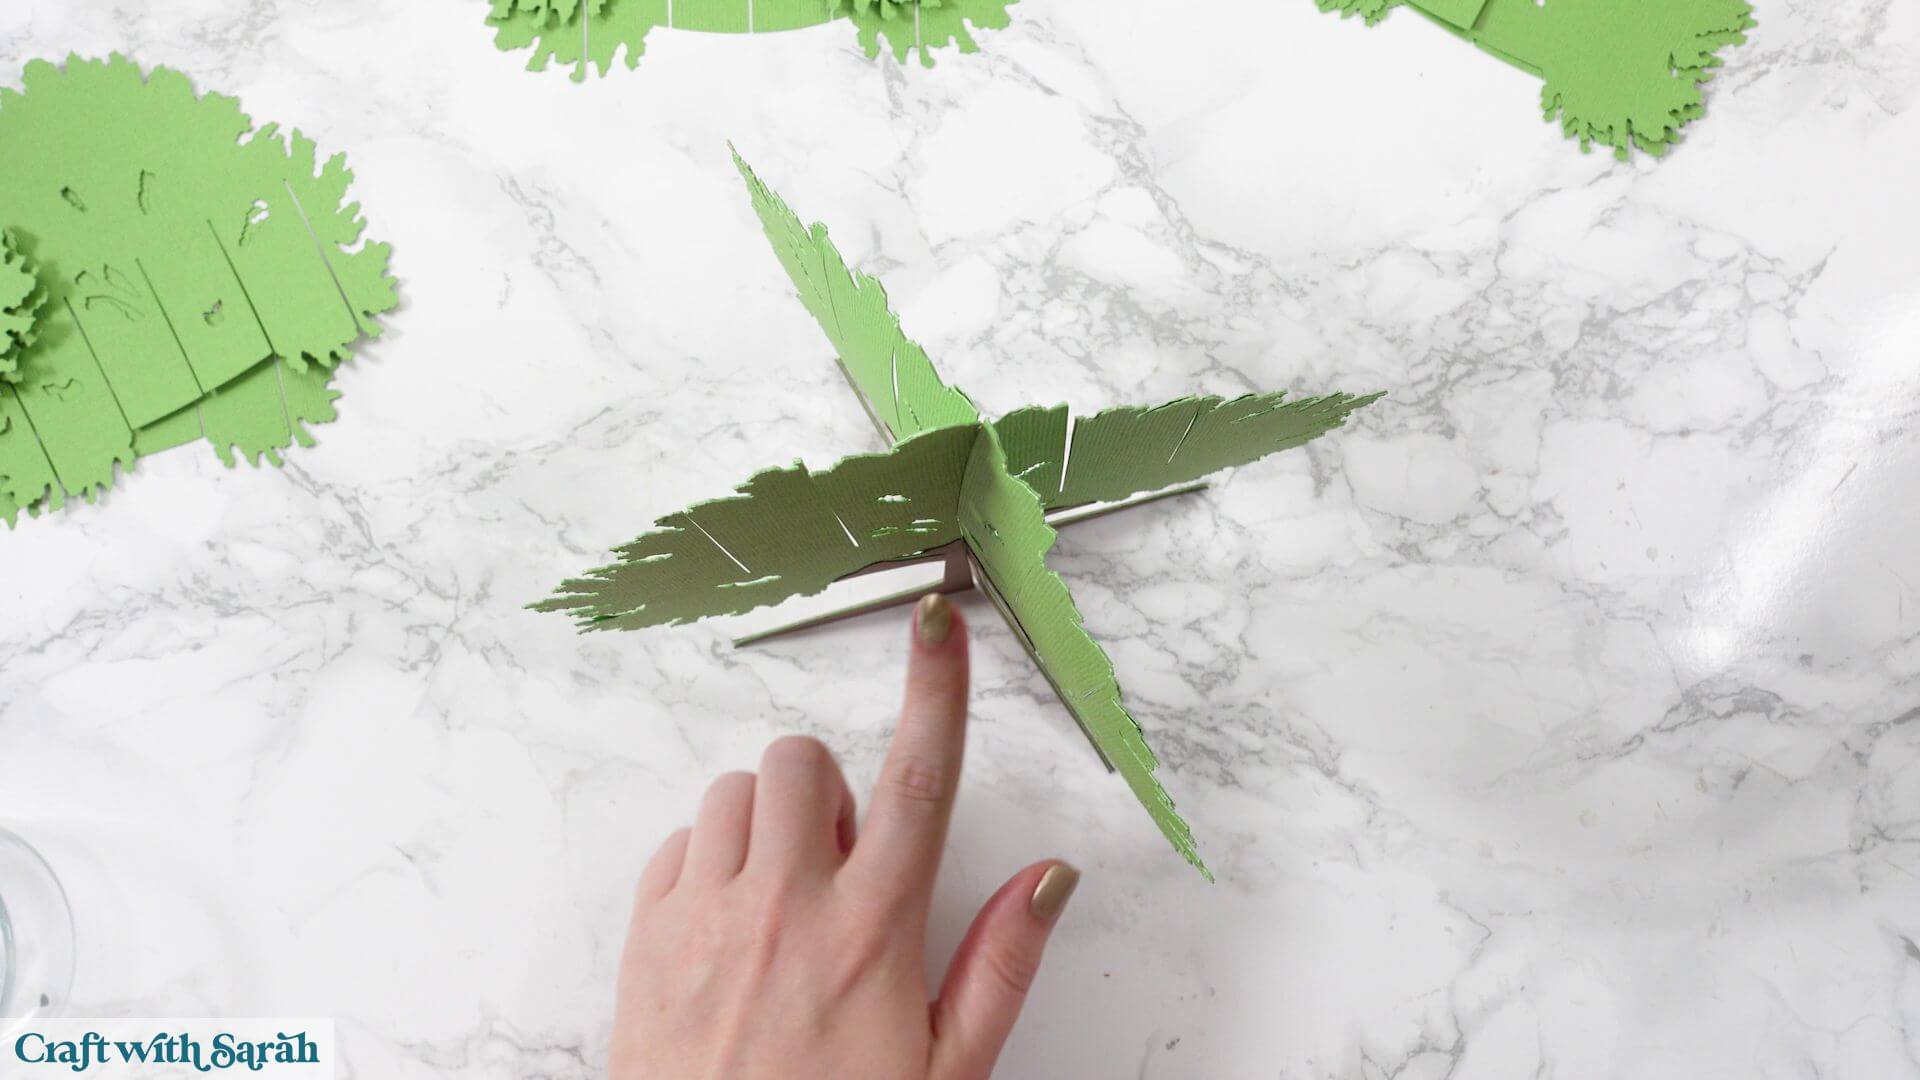
Follow this technique with the two smaller matching pieces which will slot in either side.
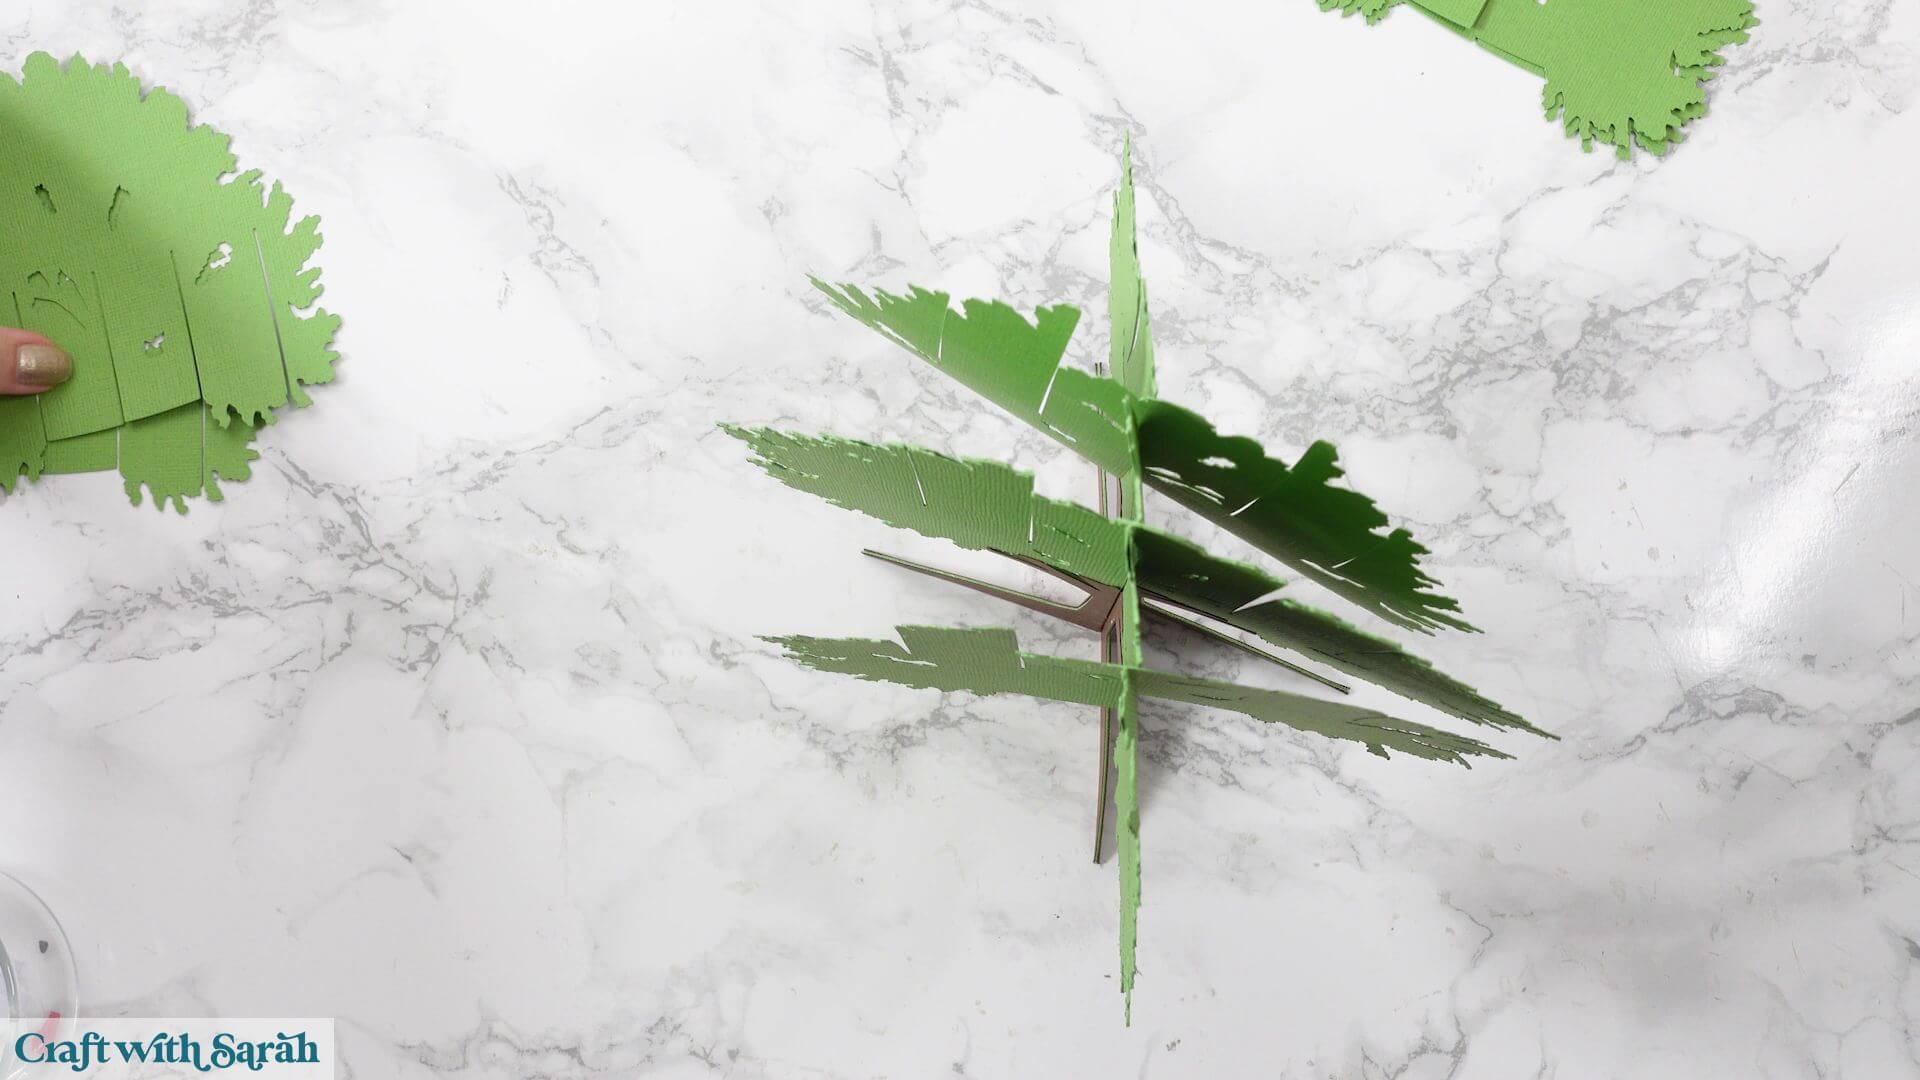
Once those are in place, add the remaining two large branch sections and finish by inserting the final two smaller pieces.
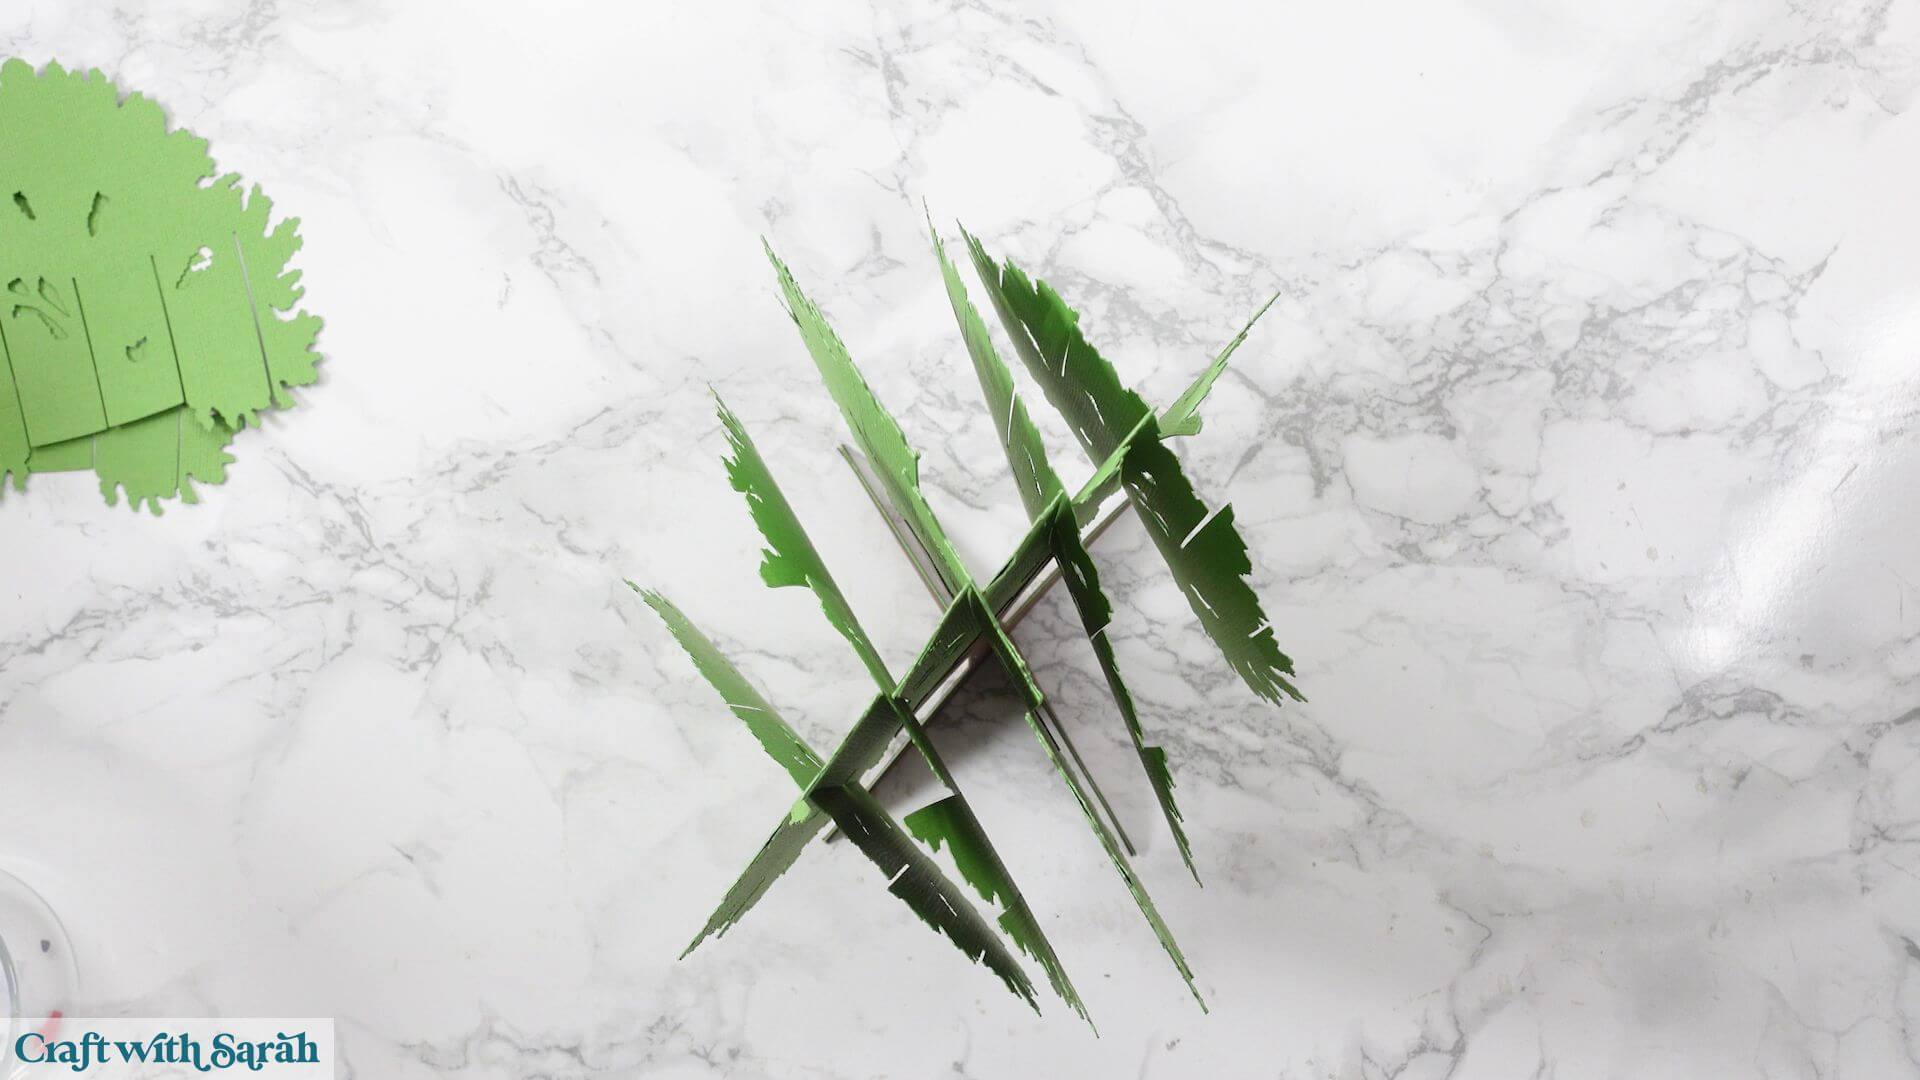
Now, use the same technique to slot in the other pieces going the other way. The larger pieces will sit either side of the central piece.
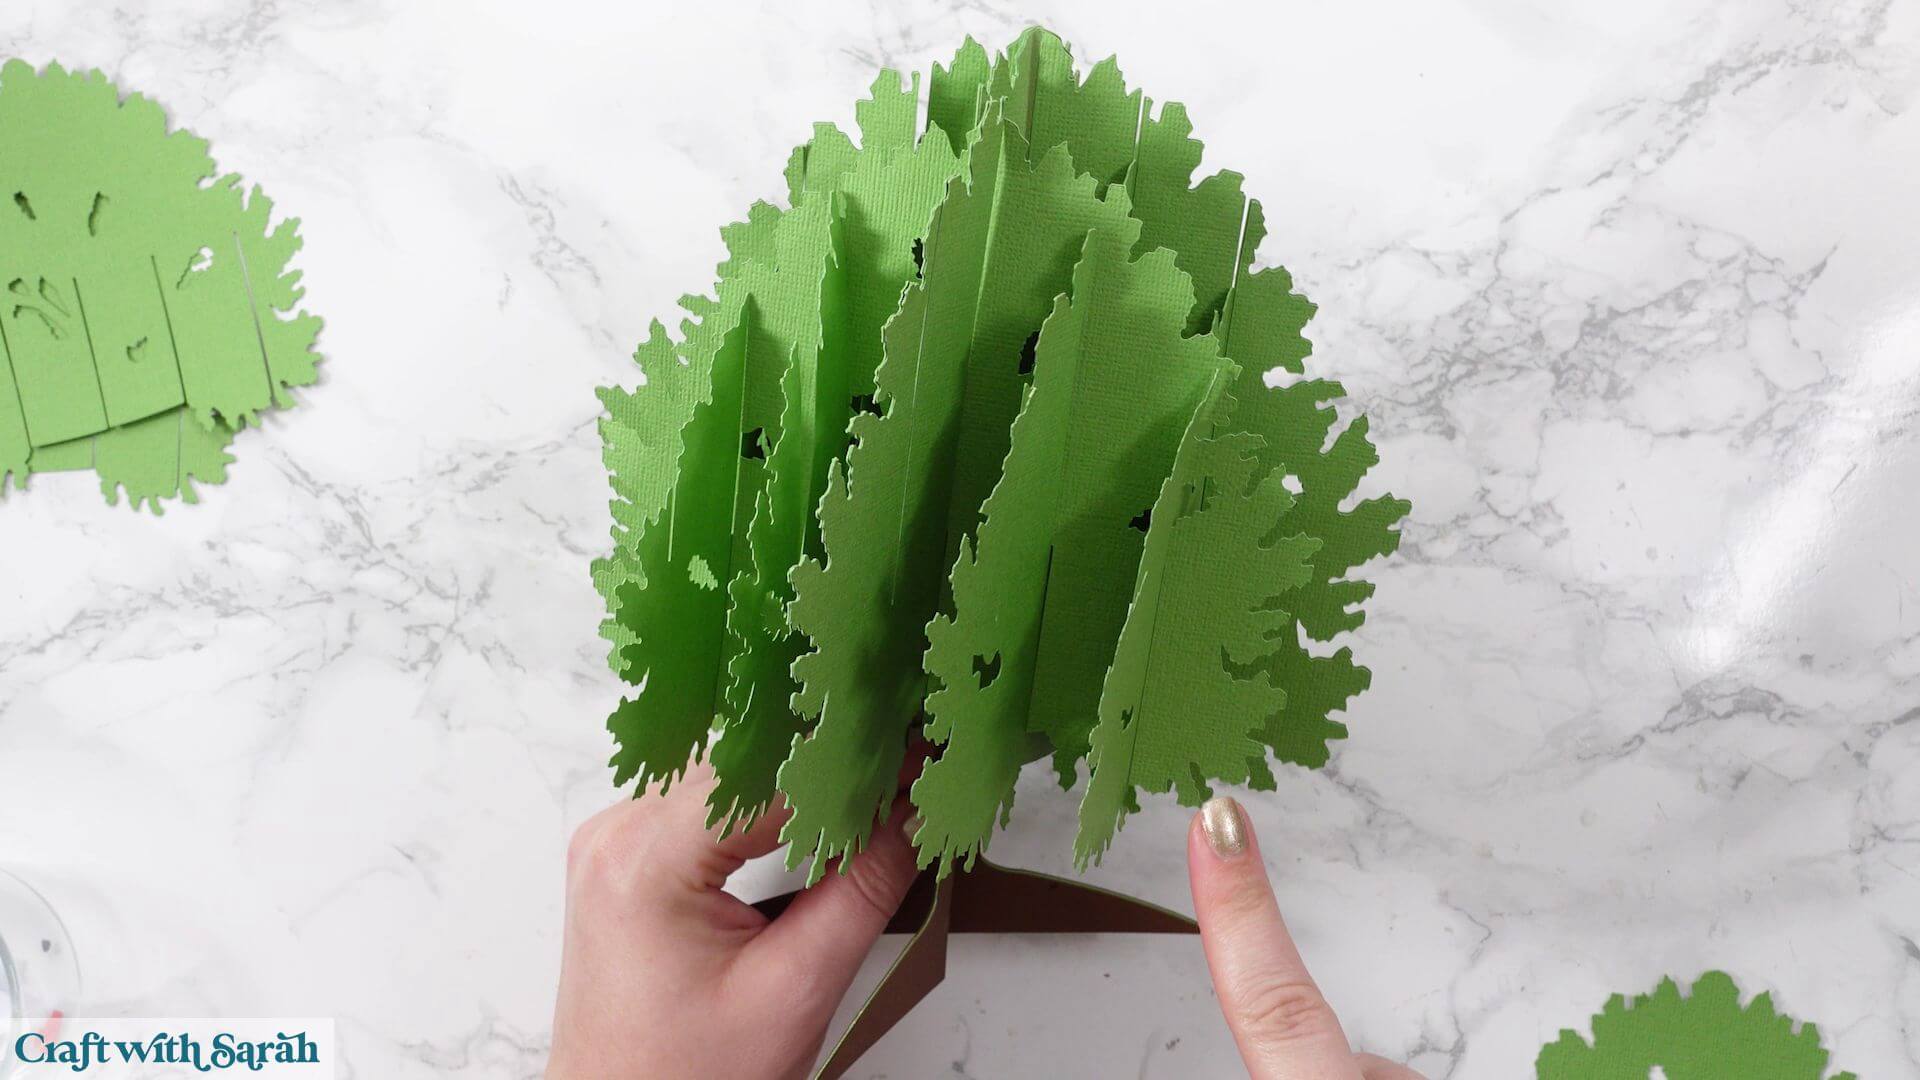
As each layer is added, the tree becomes much more stable and gradually takes shape as a beautiful 3D display.
One of the nicest features of this design is that the completed tree folds flat for storage. Simply collapse the branches carefully when putting it away, then gently pull them back out when you’re ready to display it again.
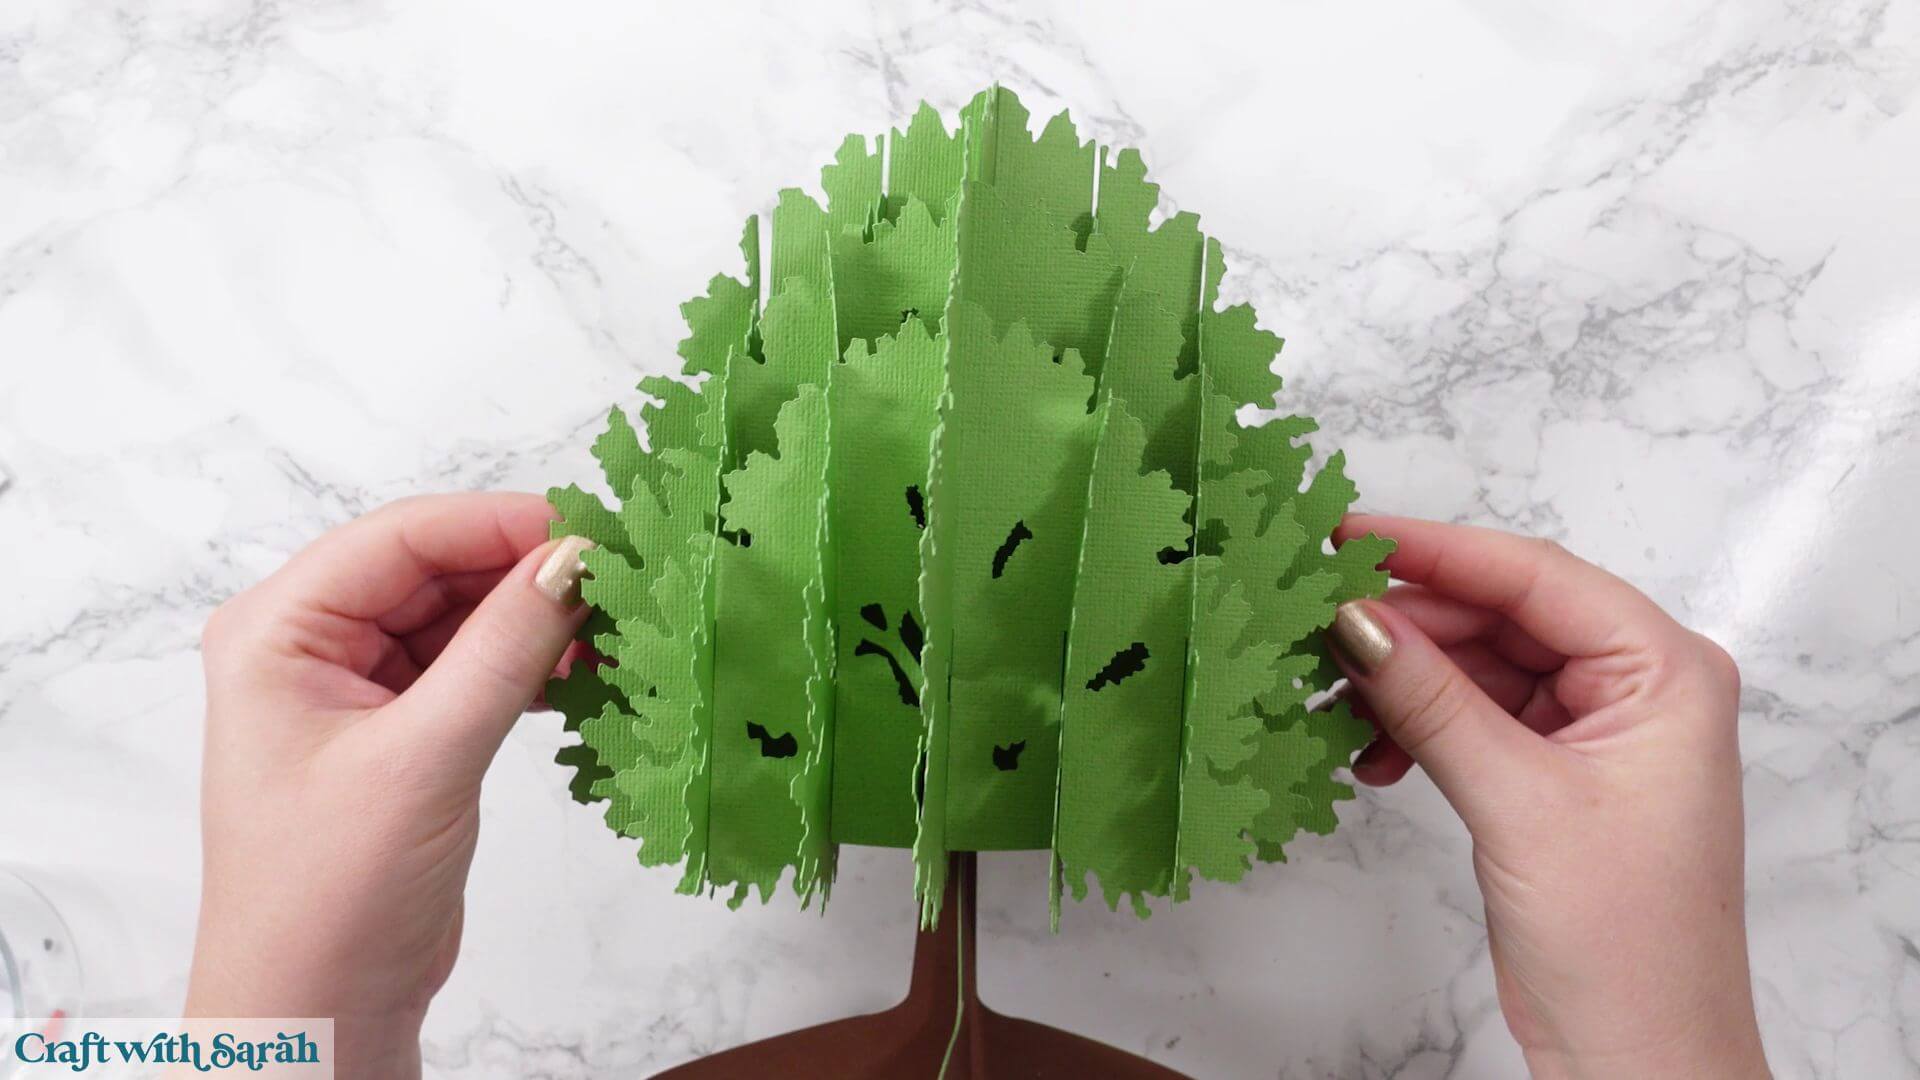
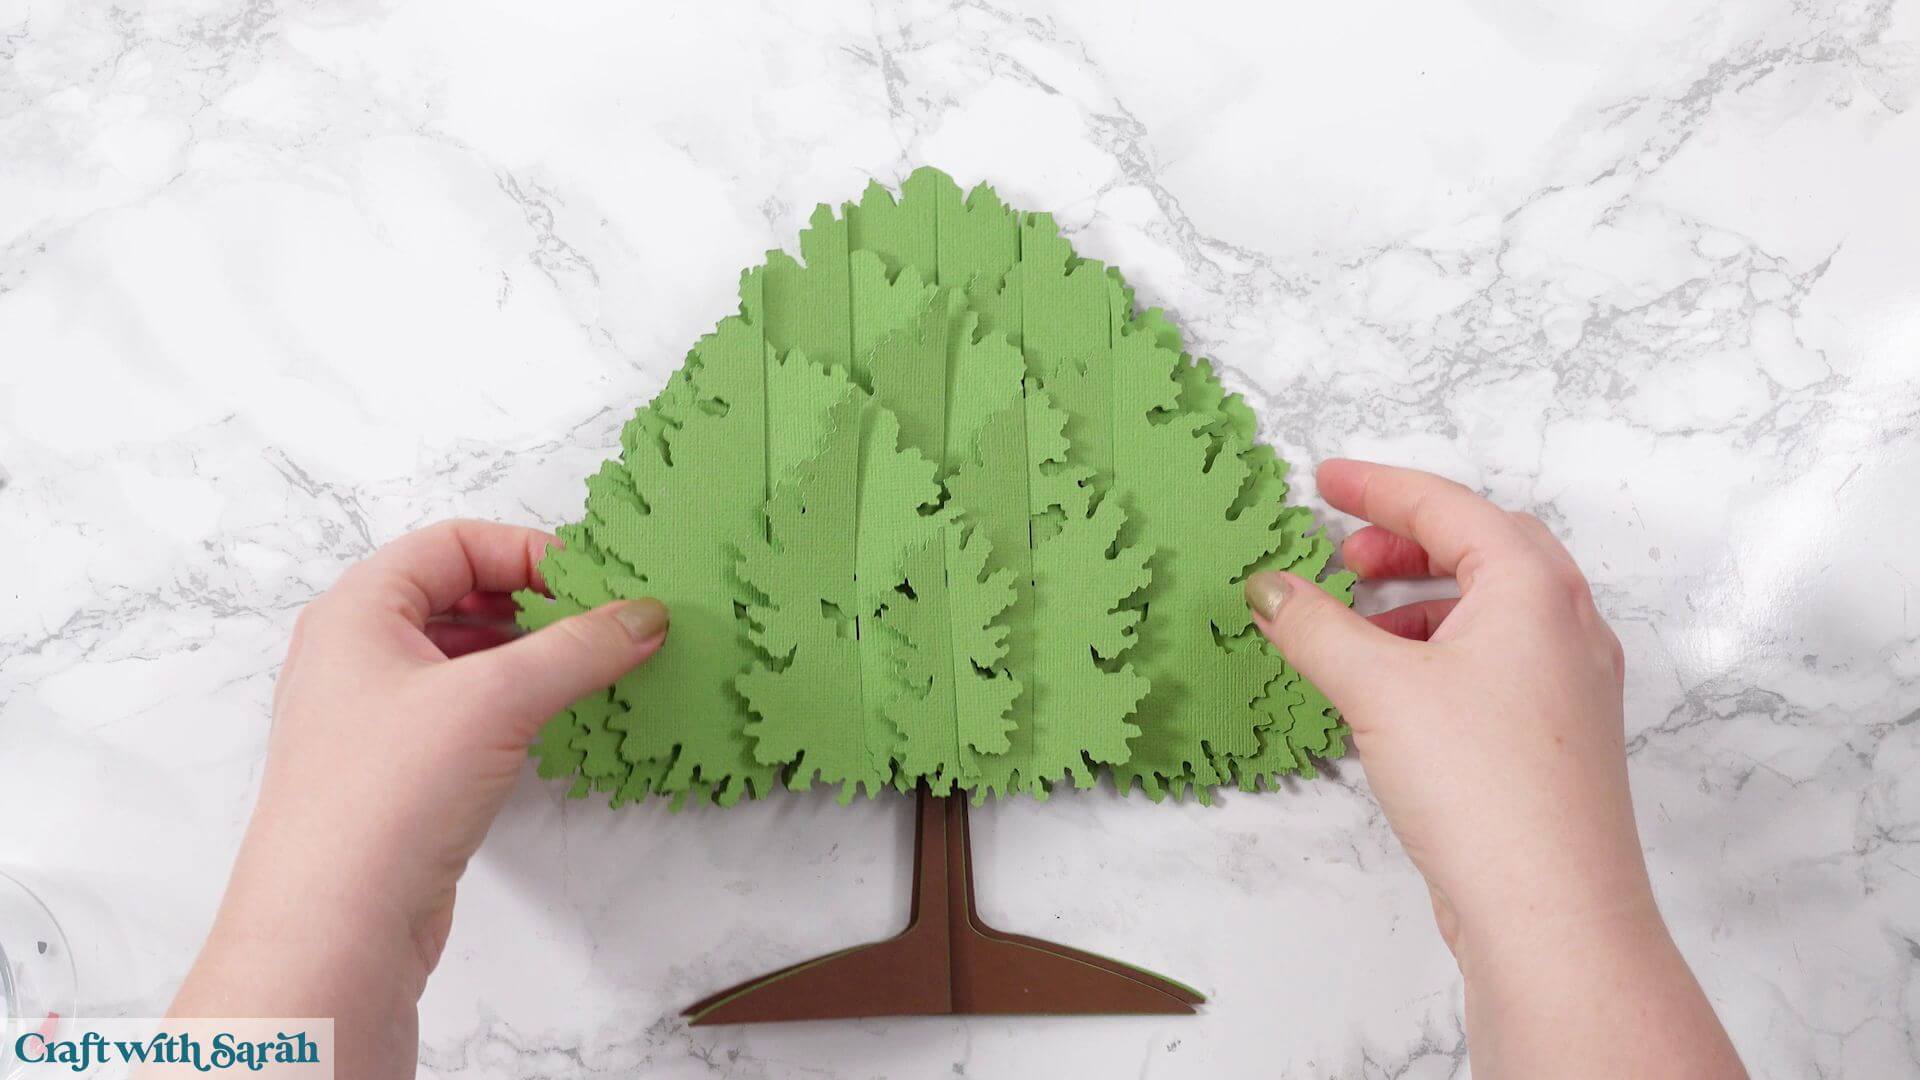
If you’d prefer maximum stability, you can add glue where the two centre supports cross over each other. This creates a much sturdier base, although it does mean the tree will no longer fold flat for storage.
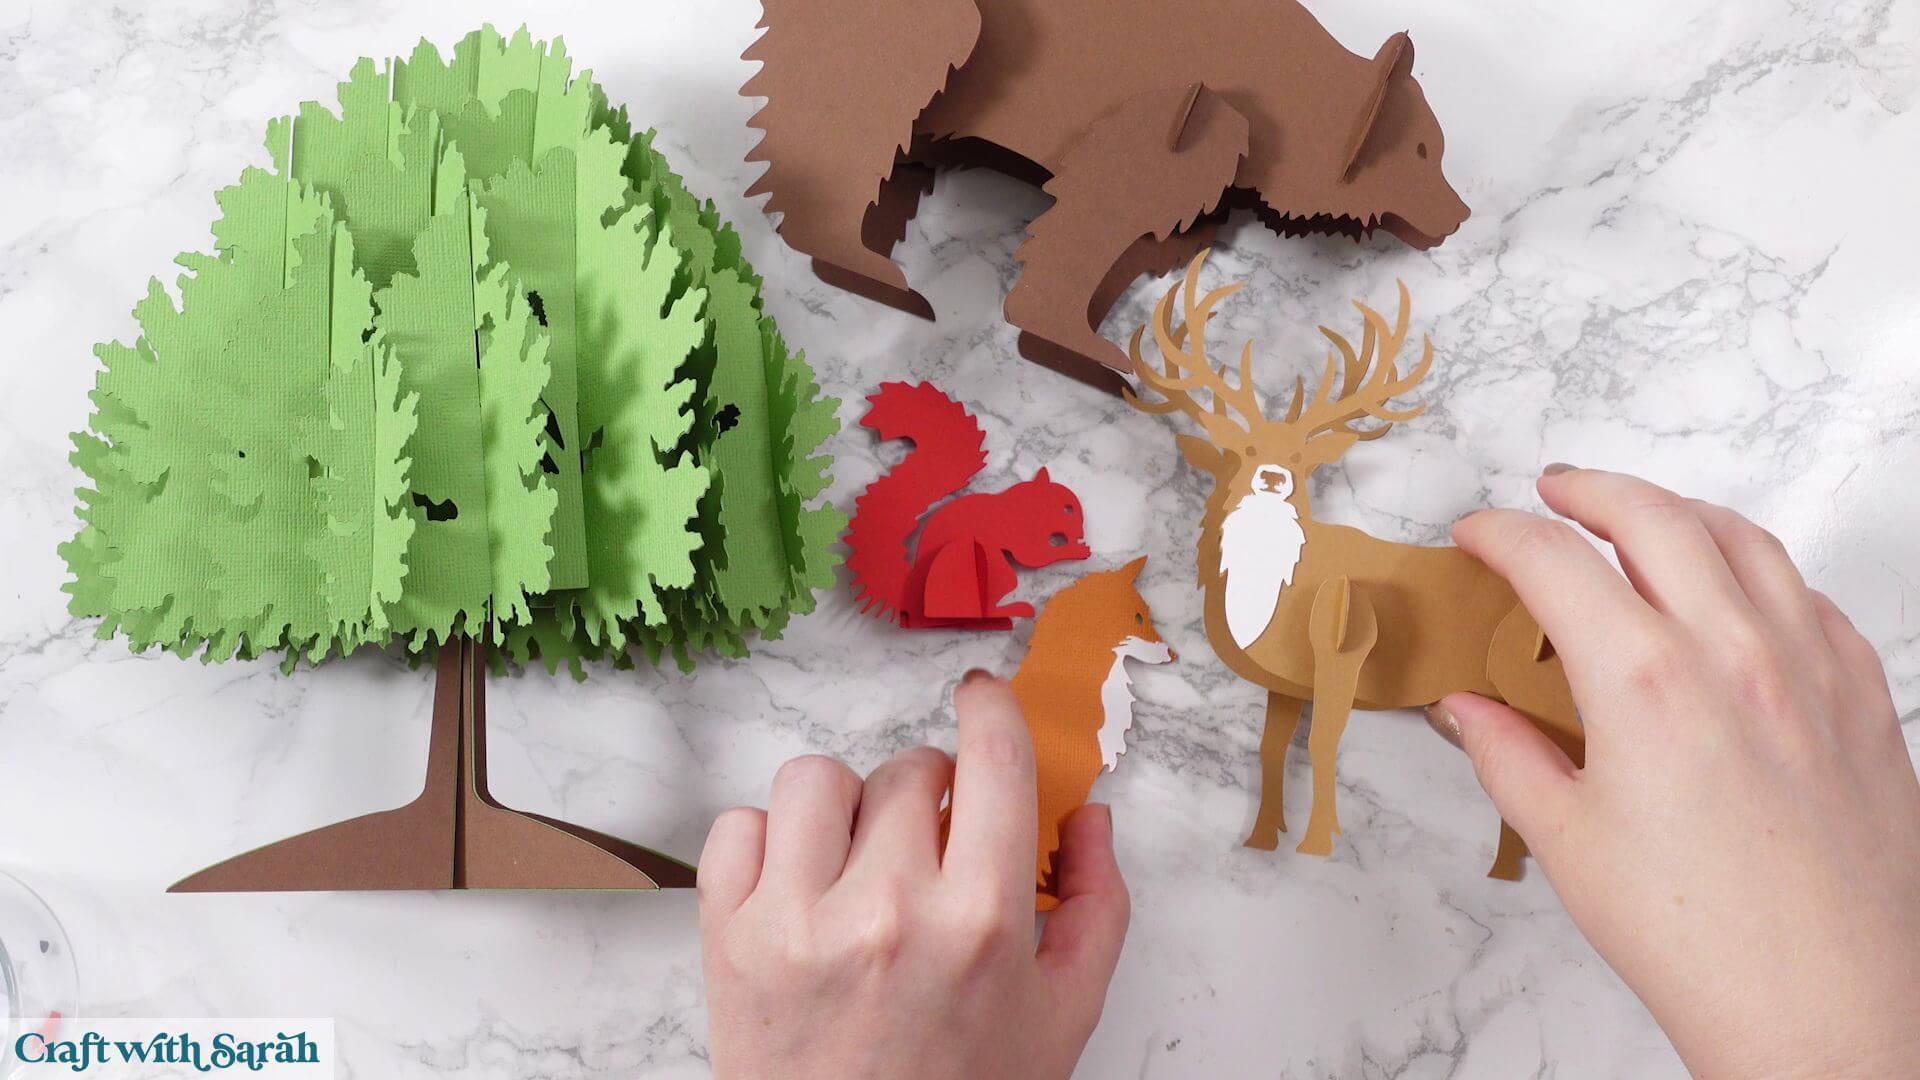
3D woodland scene made from cardstock
Your woodland scene is now complete!
Arrange the fox, squirrel, stag and bear around the finished 3D tree to create a lovely autumn display for your home.
Whether you choose the detailed multi-coloured version or the simpler Kraft Board design, these slot-together woodland animals make a lovely seasonal decoration that’s easy to display year after year.
Best of all, most of the pieces can be taken apart for compact storage, ready to bring out again next autumn.
Happy crafting,
Sarah x