Teddy Bear Giant Sign 🍂 FCC 10
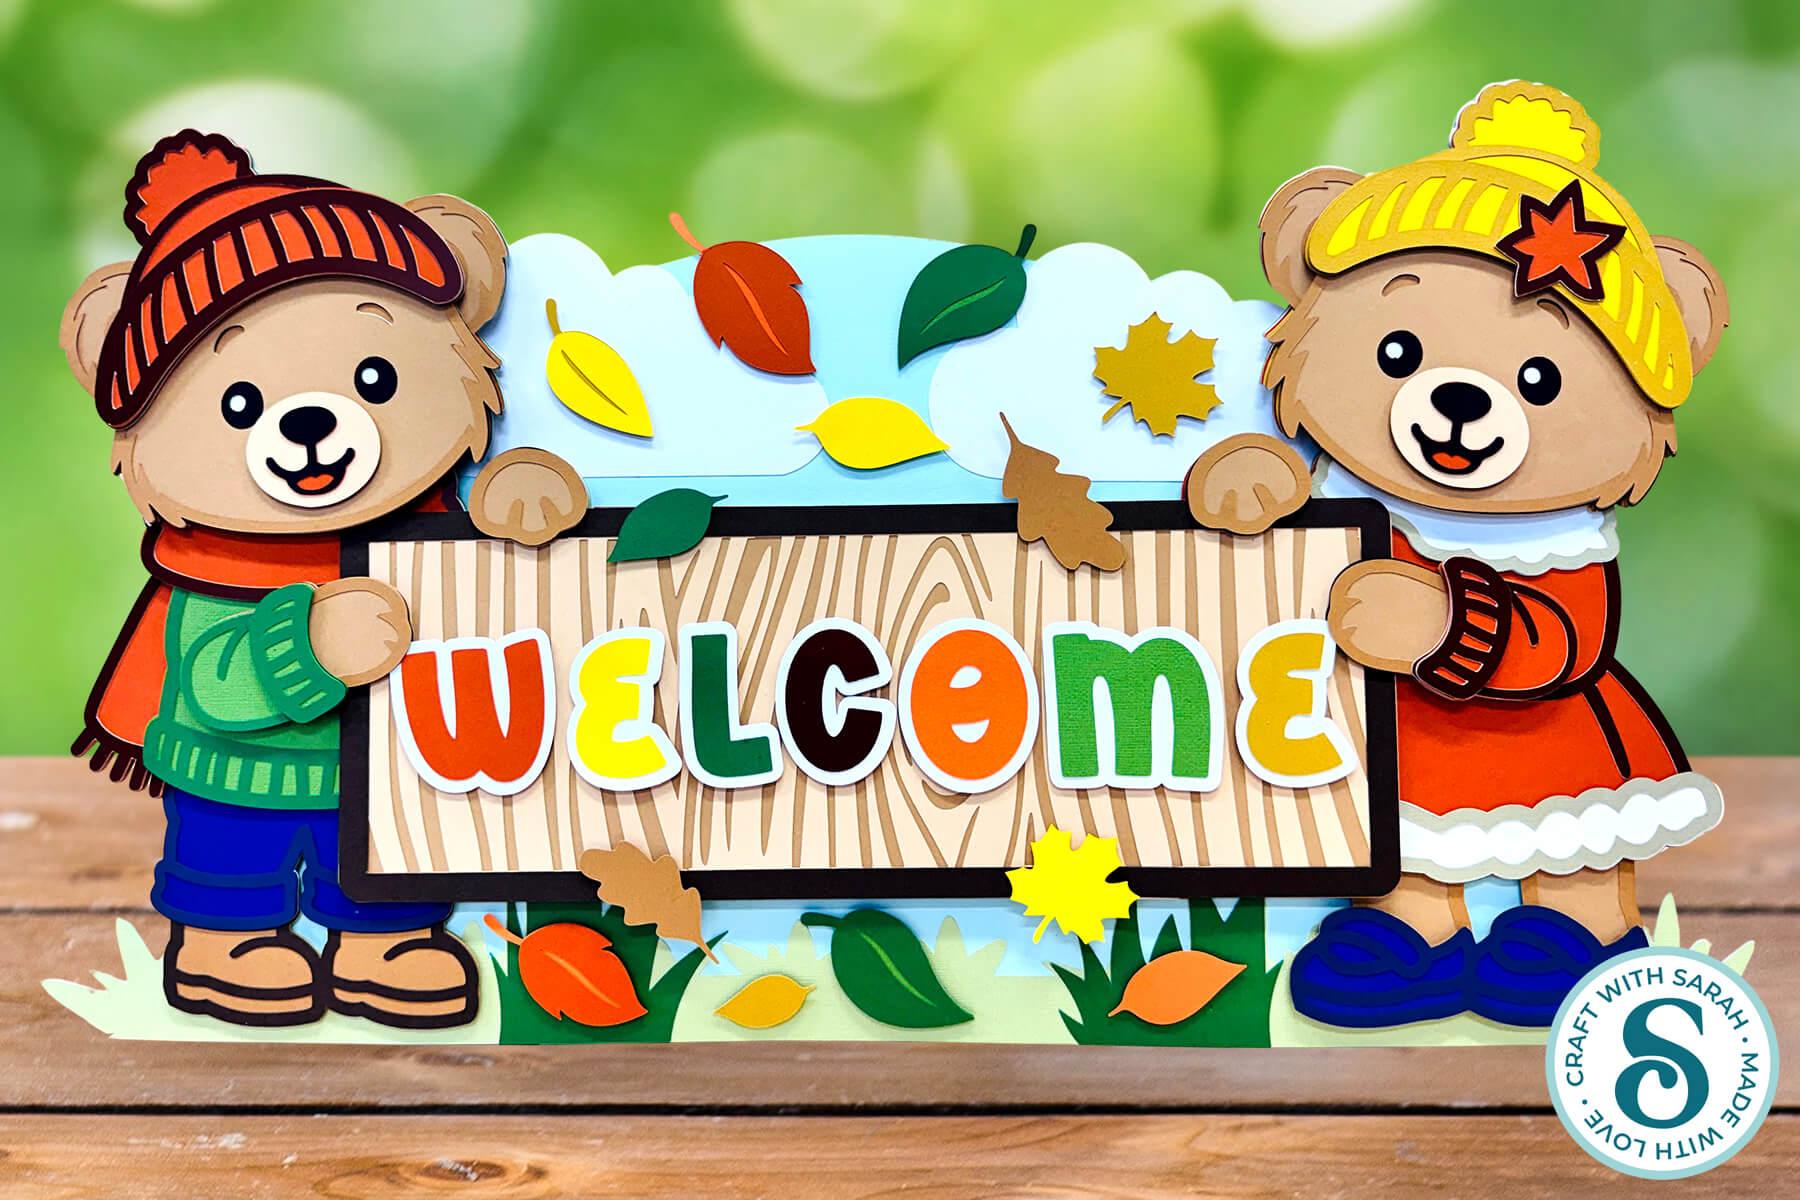
Make a showstopper off-the-mat craft project to welcome guest to your home this autumn.
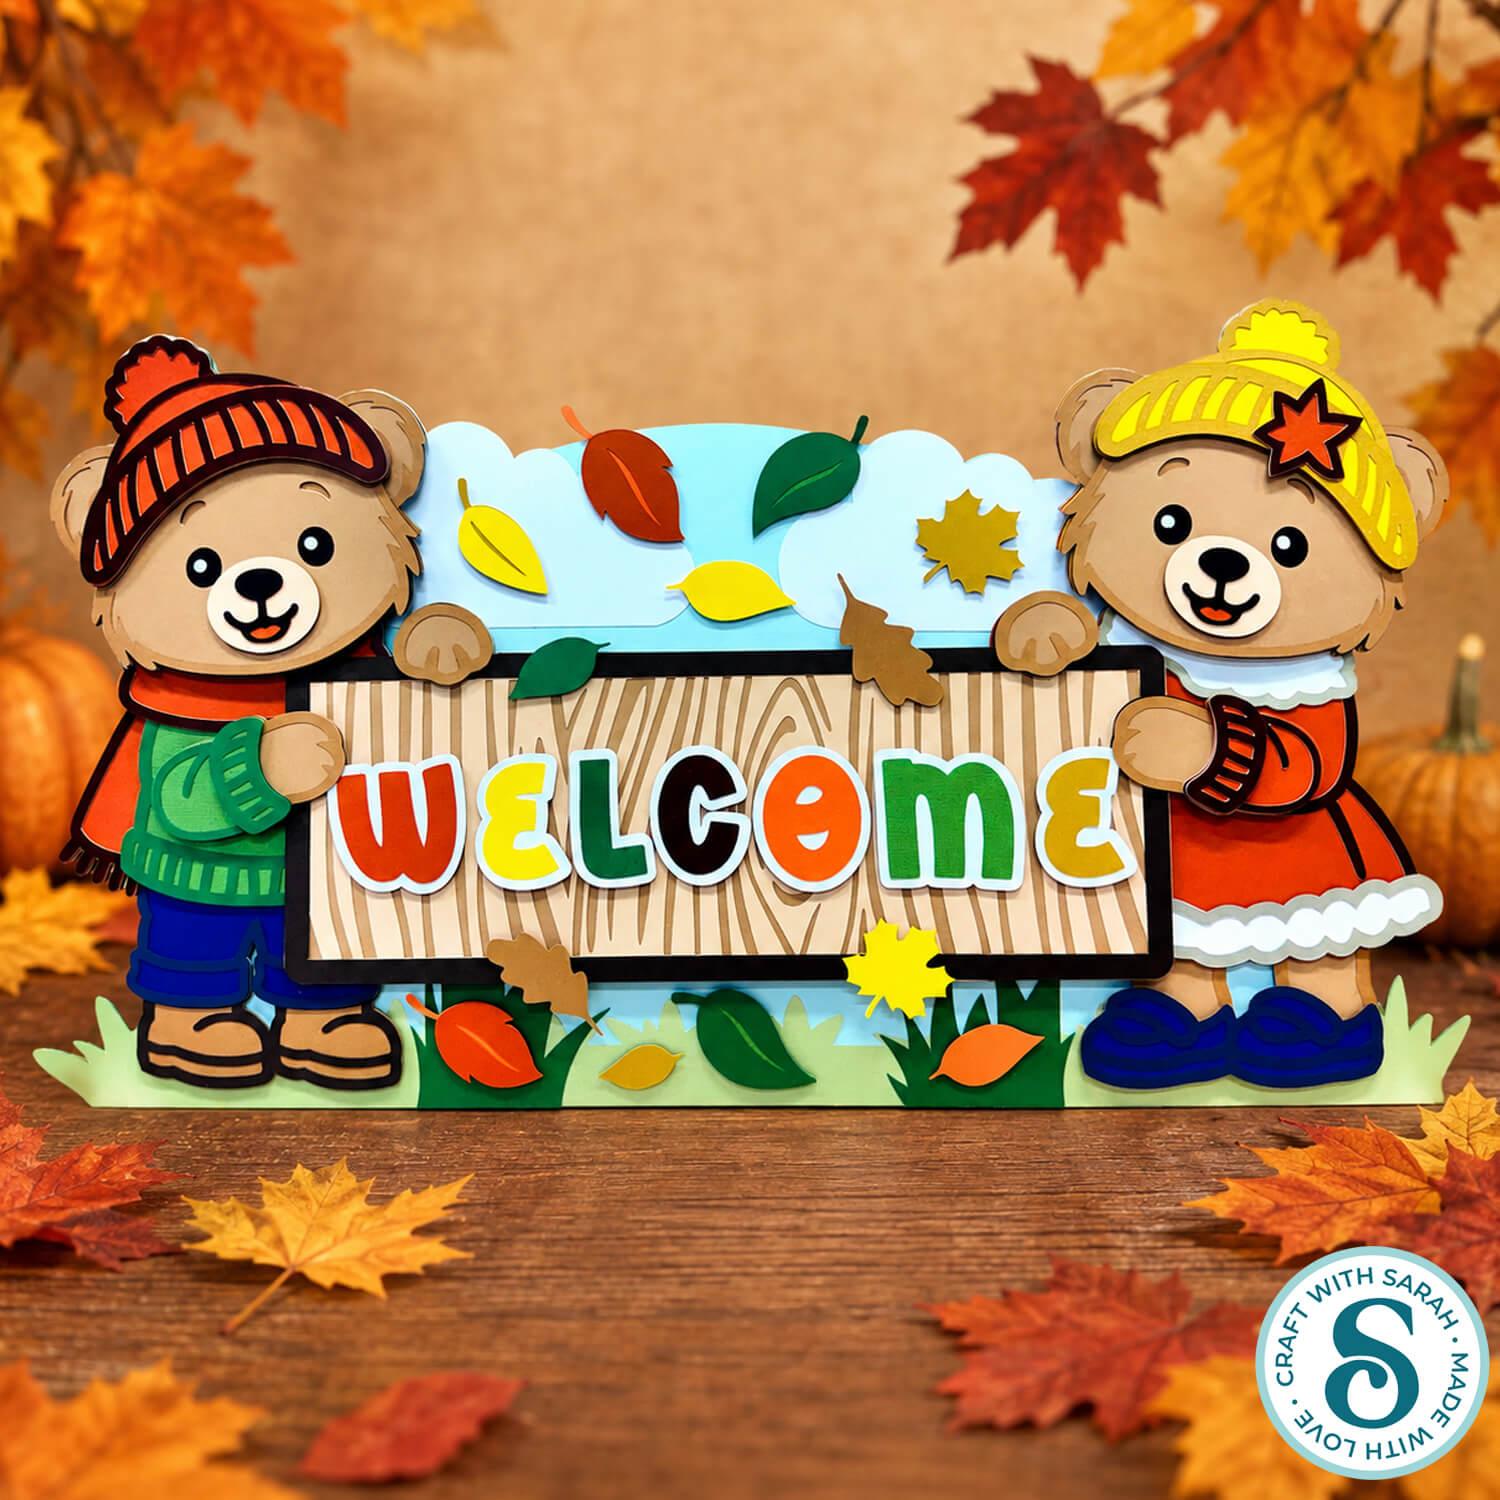
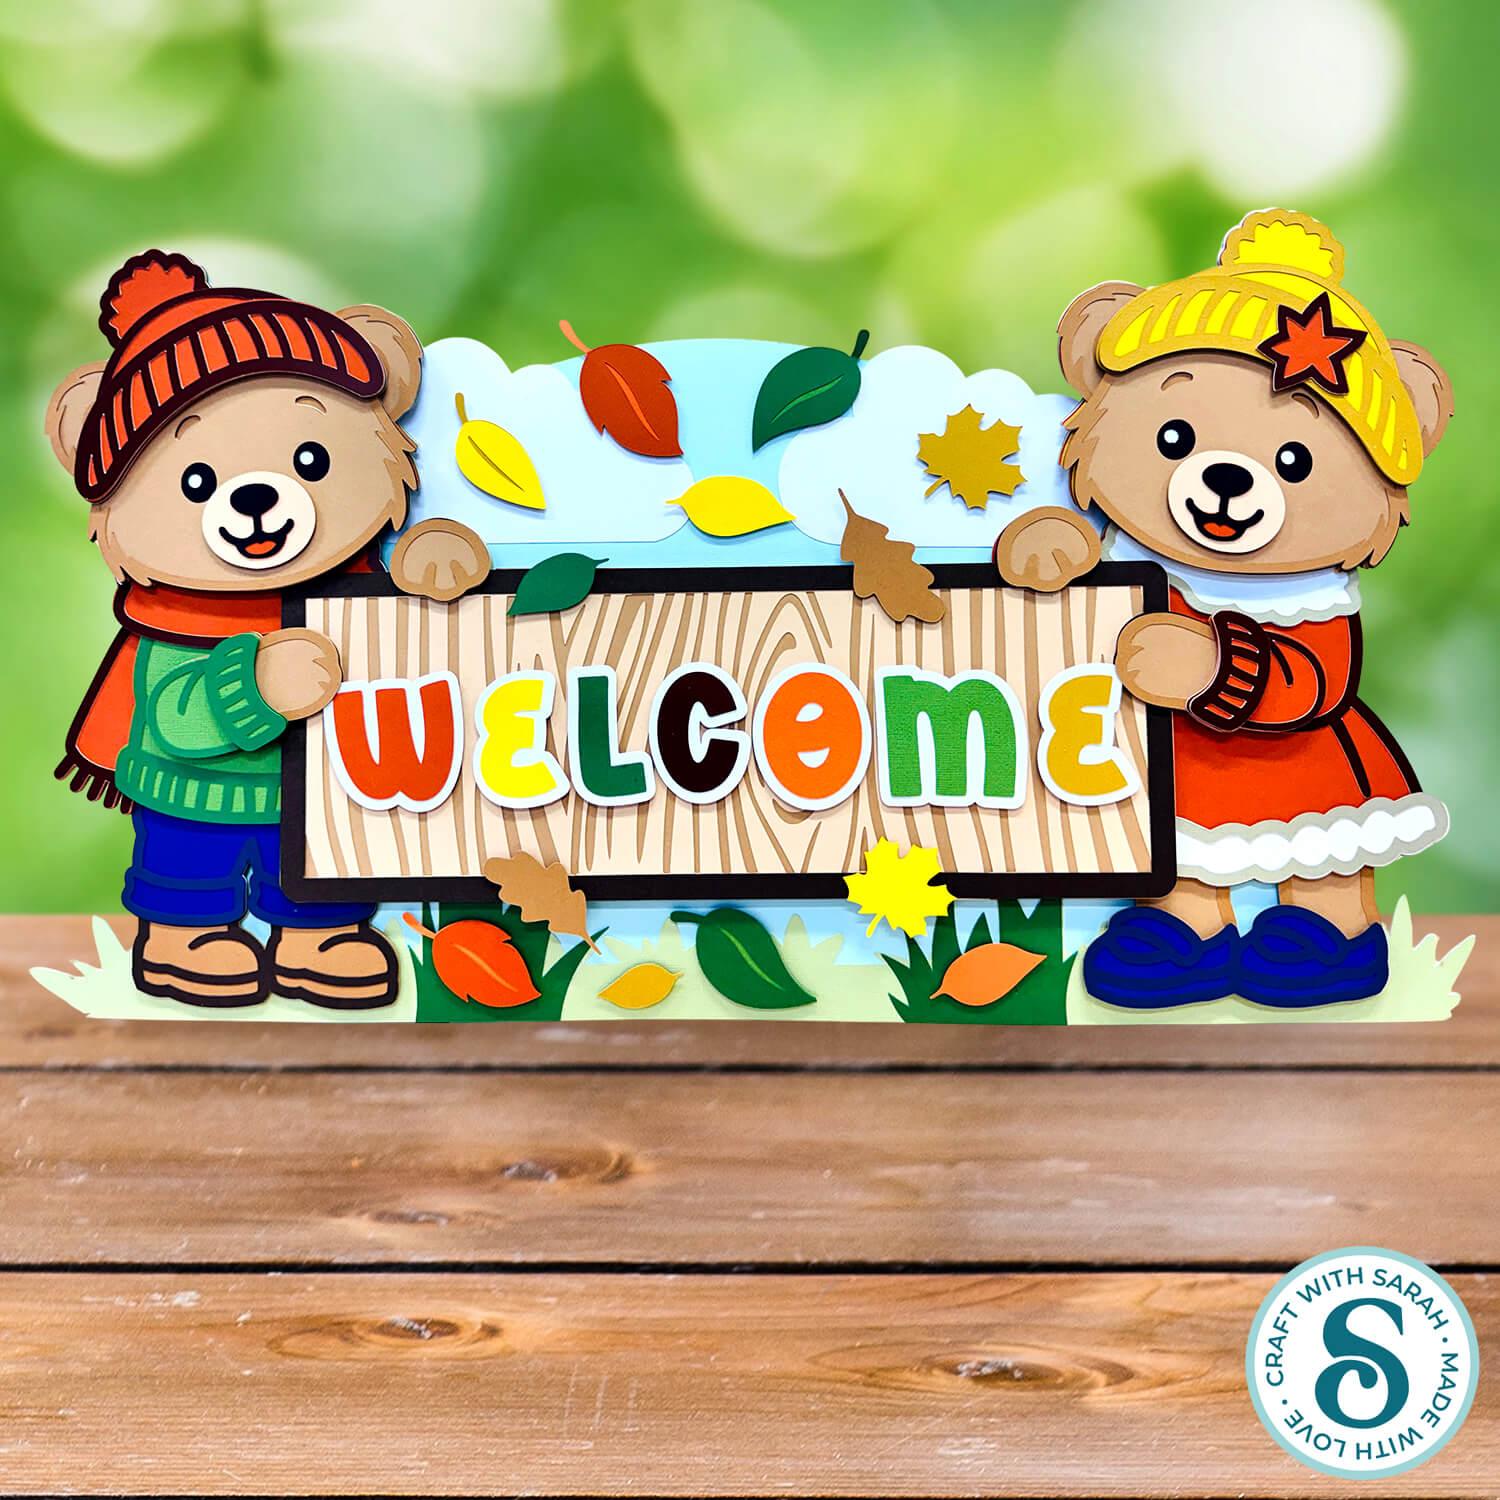
This adorable larger-than-mat Cricut project features two teddy bears holding a large wooden-style sign, surrounded by colourful autumn leaves.
The middle of the sign has been left blank so that you can personalise it with your own message.
I chose ‘WELCOME’ for mine, but you could add any autumn or fall-themed wording you like.
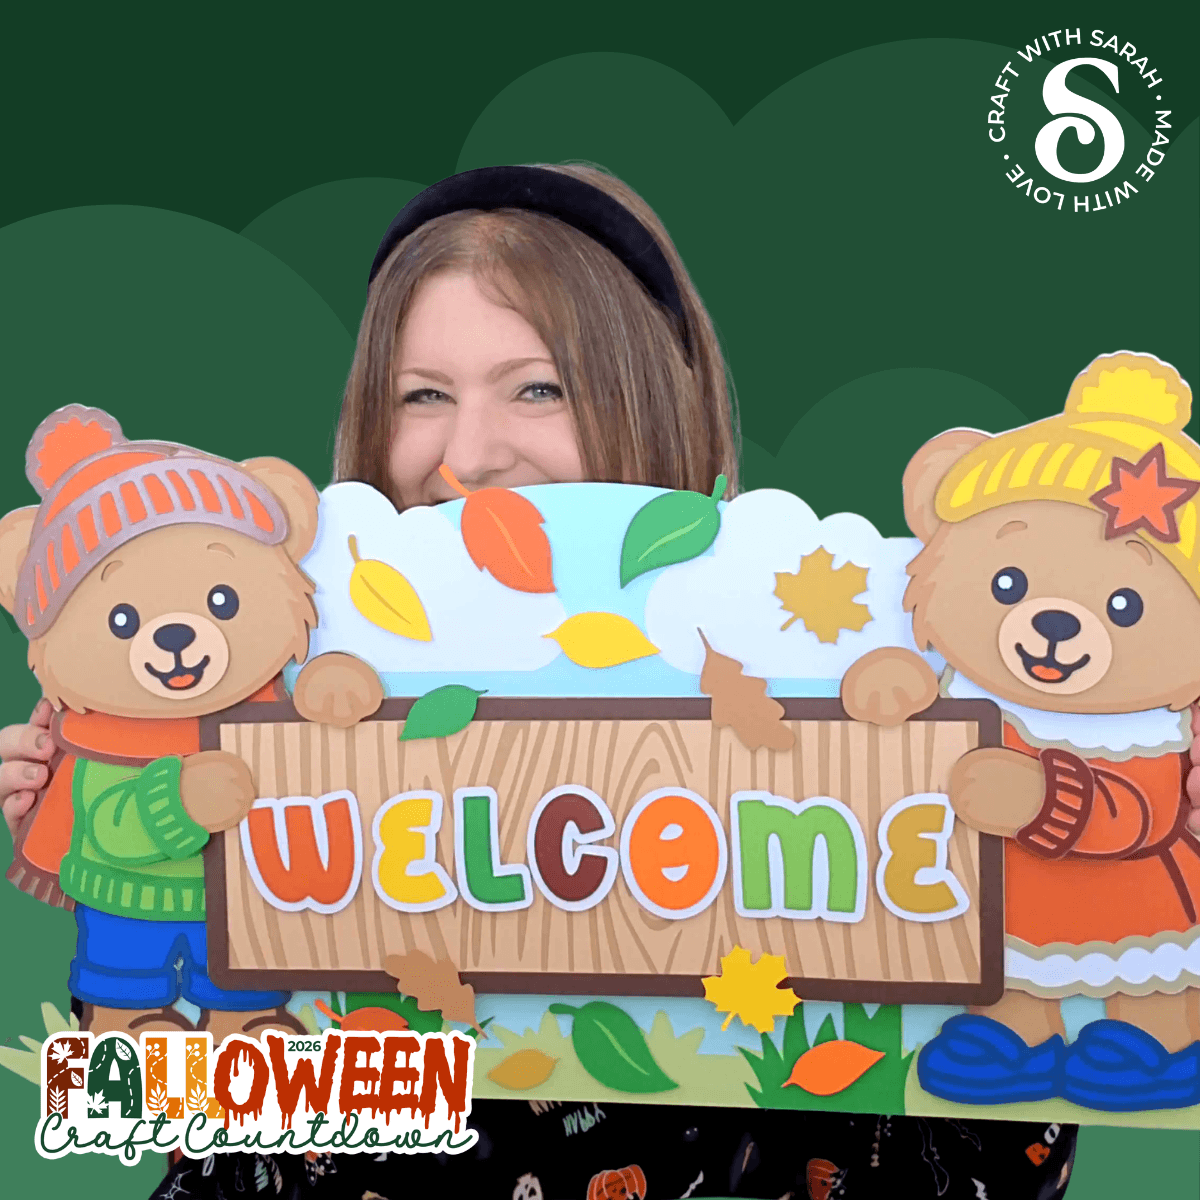
At the default size, the finished design is 25 inches wide and 14 inches tall.
The bottom pieces are cut in sections, so it will cut from regular 12 inch, A4 or US Letter cardstock on a standard 12×12 inch Cricut cutting mat.
You can hang your giant sign on the wall using twine or ribbon, or prop it up along the edge of a shelf.
It’s a fairly big project with lots of pieces, so it does take a little while to cut and assemble, but the finished result is absolutely worth it!
Please note that this project does not include a hand-cutting version.
This project is part of the 2026 Falloween Craft Countdown
Autumn welcome sign craft materials supply list
Here is a list of the materials that I used to make this project.
Please note that some of the links included in this article are affiliate links, which means that if you click through and make a purchase I may receive a commission (at no additional cost to you). You can read my full disclosure at the bottom of the page.
- Cricut machine
- Light blue Cricut cutting mat
- Coloured Card (any thickness)
- Glue (I like Bearly Art Glue and Collall)
- 3D foam pads
- Twine or ribbon, if you choose to hang the sign up
- Sticky tape, if you choose to hang the sign up
This project is suitable for the following types of Cricut machines: Explore series, Maker series and Joy Xtra. It is too large to cut on the Joy or Joy 2.
Foundation learning
If you're new to making papercrafts with your cutting machine, check out these links to get you started.
They include videos on topics such as: which file to use with your type of cutting machine, how to load the files into your cutting machine's software, how to cut cardstock with your type of cutting machine, how to recolor and modify/customize the cut files and tips for displaying your projects.
- How to use zip folder downloads
- Help guides for Cricut machines
- Help guides for Silhouette machines
- Help guides for ScanNCut machines
The following tutorials are Cricut-specific, but many of the ideas will work similarly with a Silhouette or ScanNCut machine and any cut files that are shared in them are compatible with all types of cutting machine.
- How to score with a Cricut (even without scoring tools)
- Print then cut tutorial
- Design Space tools (Combine, Attach, Slice, Weld, Flatten, etc.)
- Pattern fill tutorial (for making backgrounds & cutting images to a specific shape/size)
- Free envelope SVGs that can be sized to fit any card
- Presentation boxes for handmade cards
- How to write inside cards with Cricut pens
- How to cut layered designs at a small size
- Design Space tips & tricks
- Cricut pens tutorial
- How to mount multiple designs in the same frame with magic guides
Autumn welcome sign craft video tutorial
Watch the video below to see how to make this project. Keep scrolling for a written tutorial.
Written tutorial (with photos!)
Here’s how to make this welcoming autumn craft project using a Cricut machine.
Step 1) Download the cutting file & upload to Design Space
Get the files using the box below.
Purchase the File(s)
This cut file is available as part of the Instant Access Bundle.
Or, purchase this design individually here
Before you upload the SVGs to Design Space, you need to unzip the download folder that they come in.
Not sure how to do this? Click here for a tutorial that covers all the following types of computer and device:
- How to unzip a folder on a Windows computer
- How to unzip a folder on a Mac
- How to unzip a folder on an iPad
- How to unzip a folder on an iPhone
- How to unzip a folder on an Android device
After unzipping, upload the SVG file(s) into your cutting machine software.
Not sure how to use cut files with your type of machine? The following links lead to tutorials on how to use cut files in:
- Cricut Design Space
- Silhouette Studio
- CanvasWorkspace (for ScanNCut machines)
Open Cricut Design Space, start a new project and then click the “Upload” button on the left of the screen.
You can then either click “Browse” to find the file on your computer, or drag-and-drop it.
Select the file in the “01 Cricut Version” subfolder called svg-01-giant-teddies-craftwithsarah.svg
Press “Upload” on the next screen.
After uploading, the design should be automatically inserted onto your Canvas.
To hide the left sidebar (to give you more space for designing!), click the arrow that’s about half way down the page.
If the design doesn’t get inserted onto your Canvas, it will show under “Uploads” in your “Recently Uploaded Images”. Click on it and then press “Add to Canvas” to put it onto your Project.
Need help uploading SVGs? Get step-by-step instructions here in our detailed help guides for Cricut, Silhouette and ScanNCut.
The design should load in at 25 inches wide and 14 inches tall.
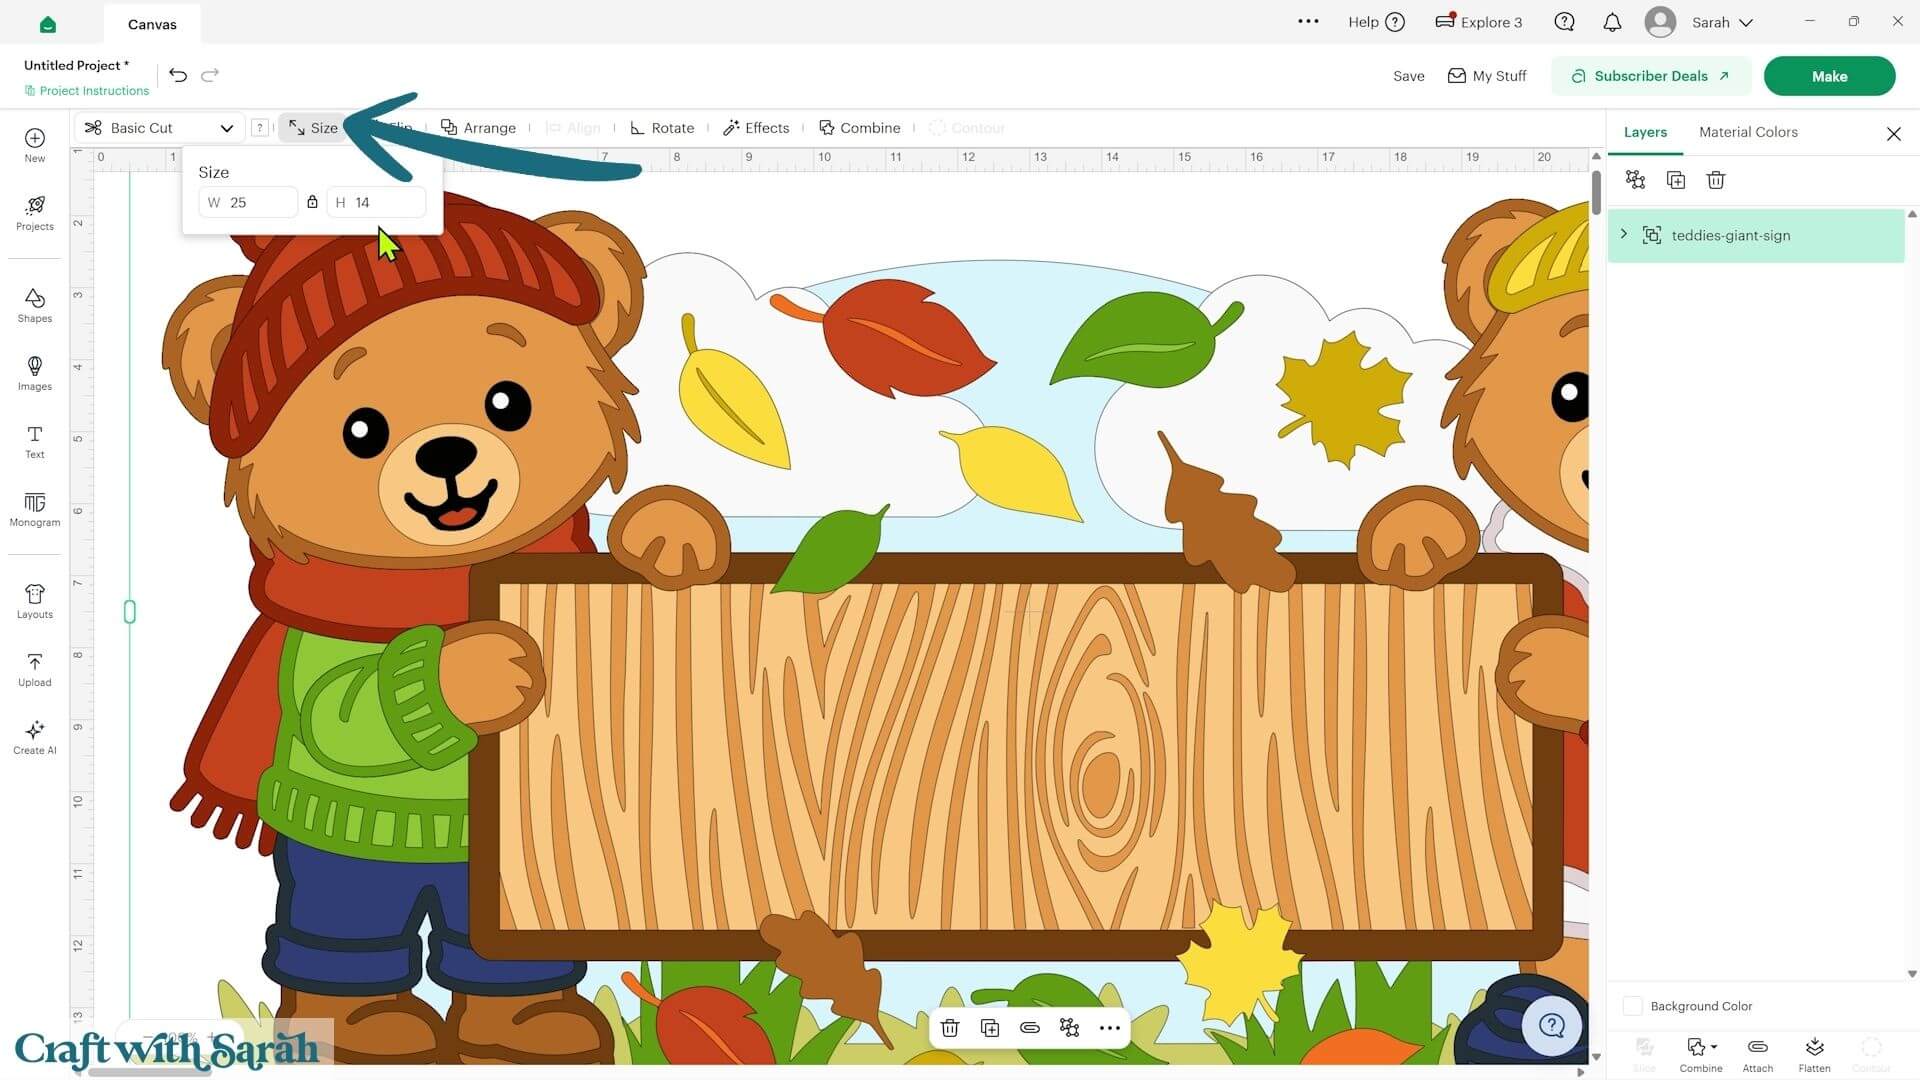
You can make the design smaller if you wish. You can also make it bigger, although if you increase it beyond the default size then you will need 12×12 inch cardstock.
The default size has been specifically designed so that all of the pieces can be cut from either US Letter or A4-sized cardstock.
Open the group in the Layers panel using the chevron arrow to see all of the individual pieces.
There are lots of layers in this project, but don’t let that put you off! A large number of them are the individual autumn leaves.
The larger sections towards the bottom of the Layers panel have been split into several pieces. For example, the sky and the bottom section of the sign are made from six separate pieces.
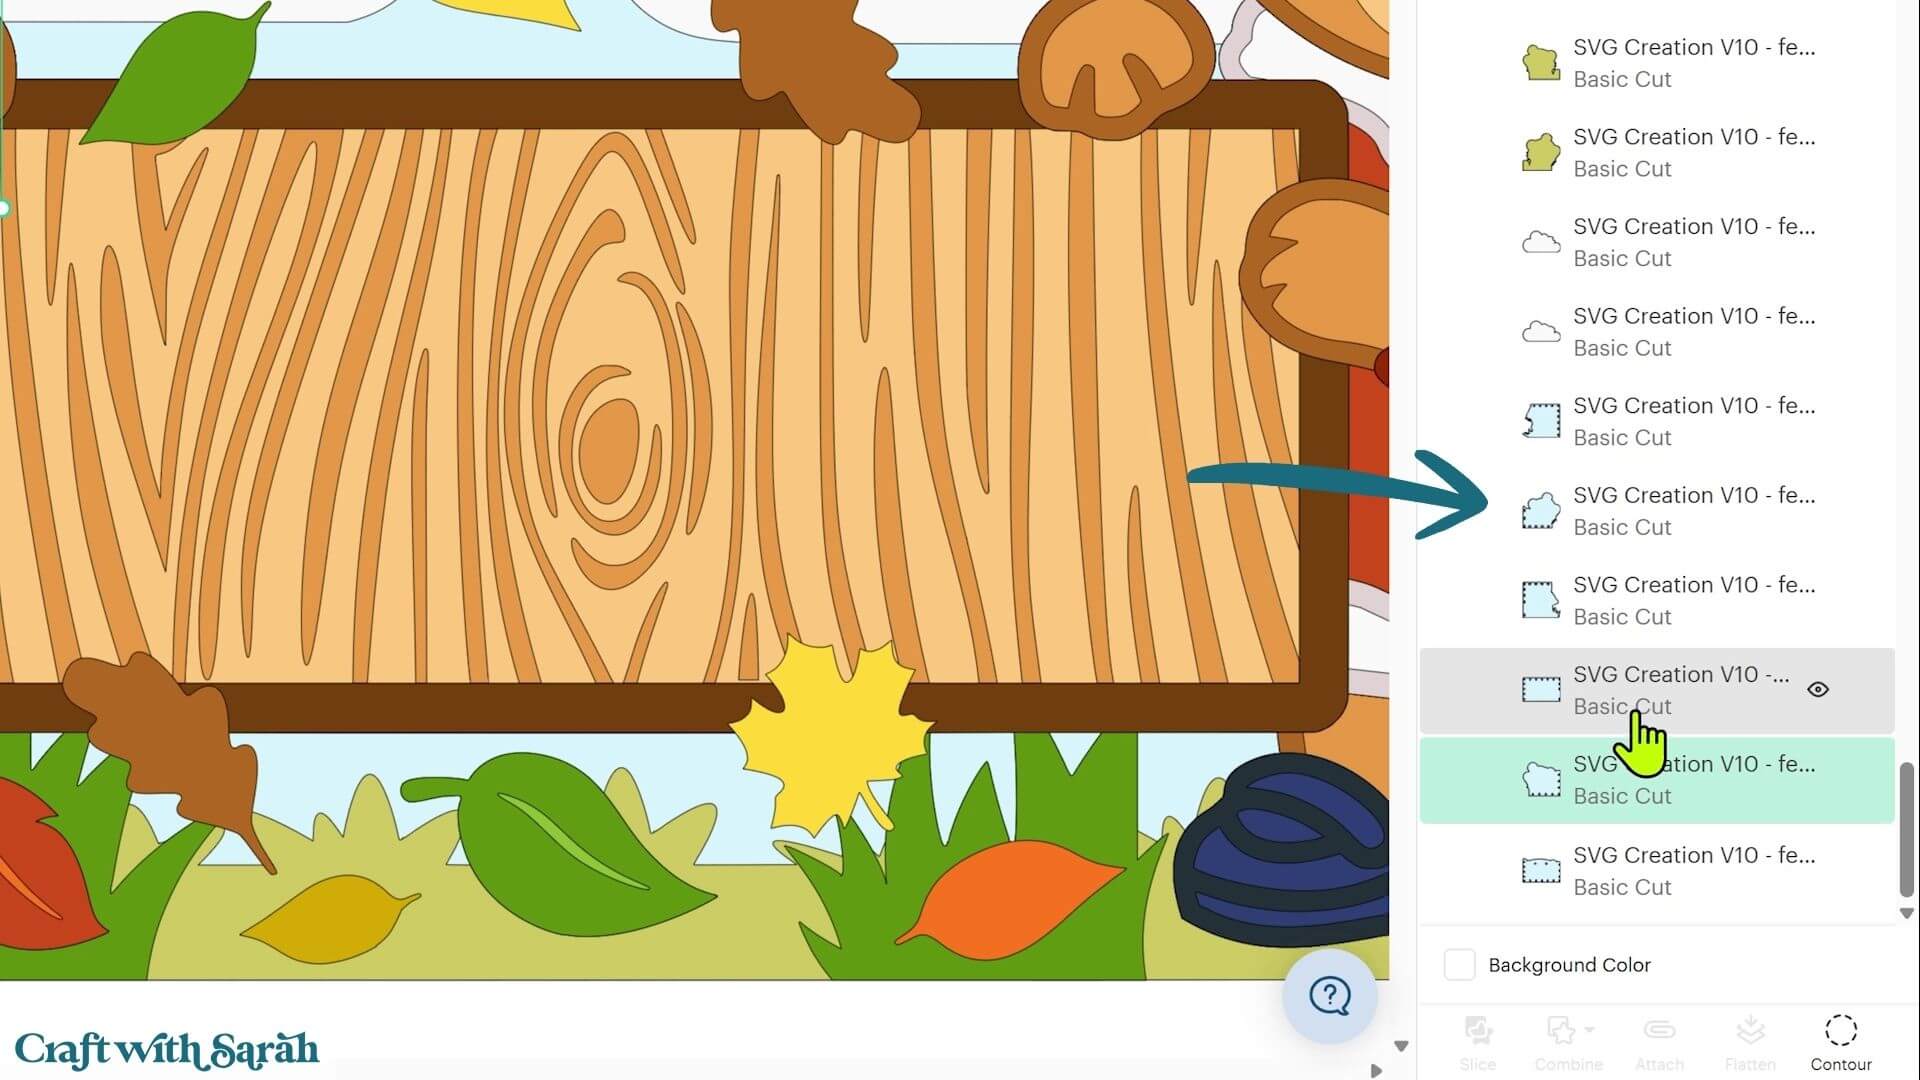
Splitting these large sections into smaller pieces allows us to create a finished project that is much larger than a Cricut mat.
We’ll join all of those pieces back together during the assembly process.
Step 2) Add a personalised message to the sign
The wooden sign is intentionally left blank so that you can add your own message.
Click ‘Text’ and type the wording you would like to use. I chose ‘WELCOME’ in capital letters.
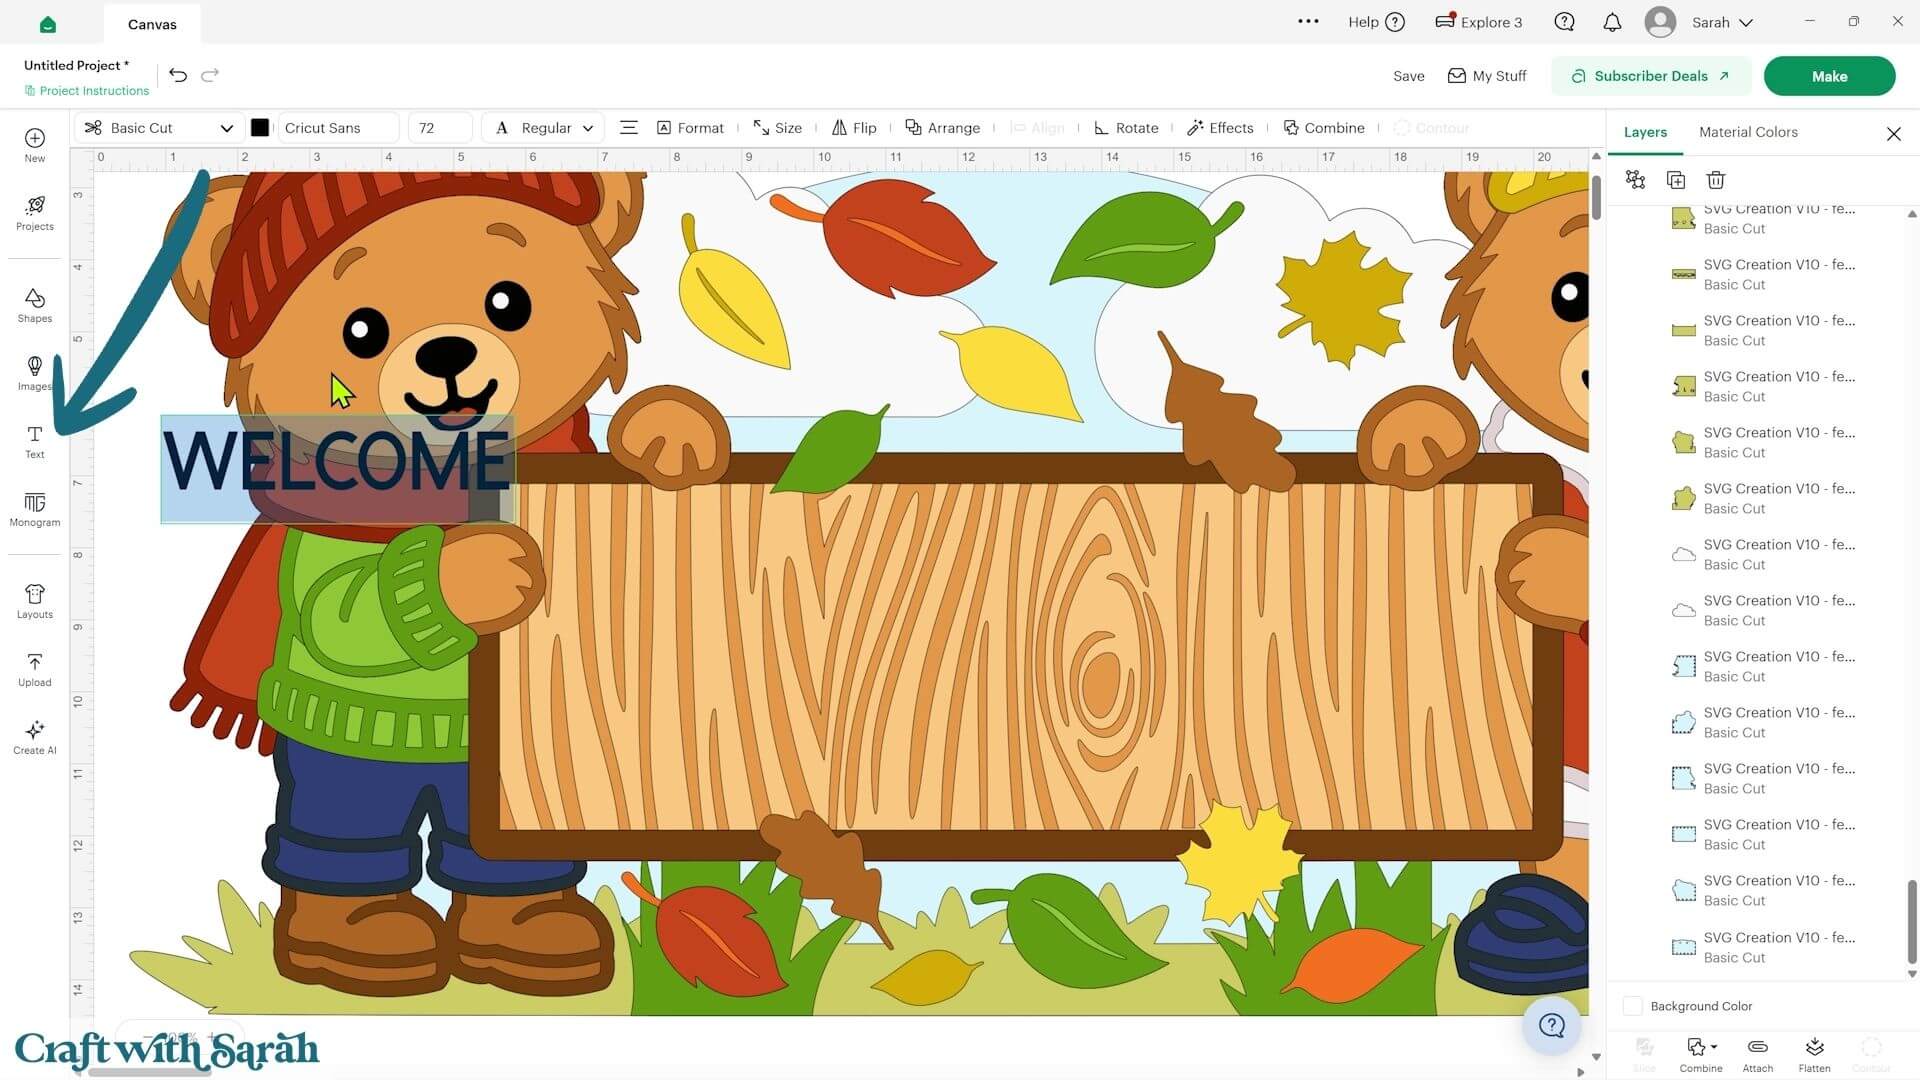
Choose a font for your message.
I used a Cricut Access font called BFC Foxy because the thick, chunky and playful letters work really well with the style of the teddy bears.
For a project this large, I recommend choosing a font where the individual letters are separate rather than a script font where all of the letters touch.
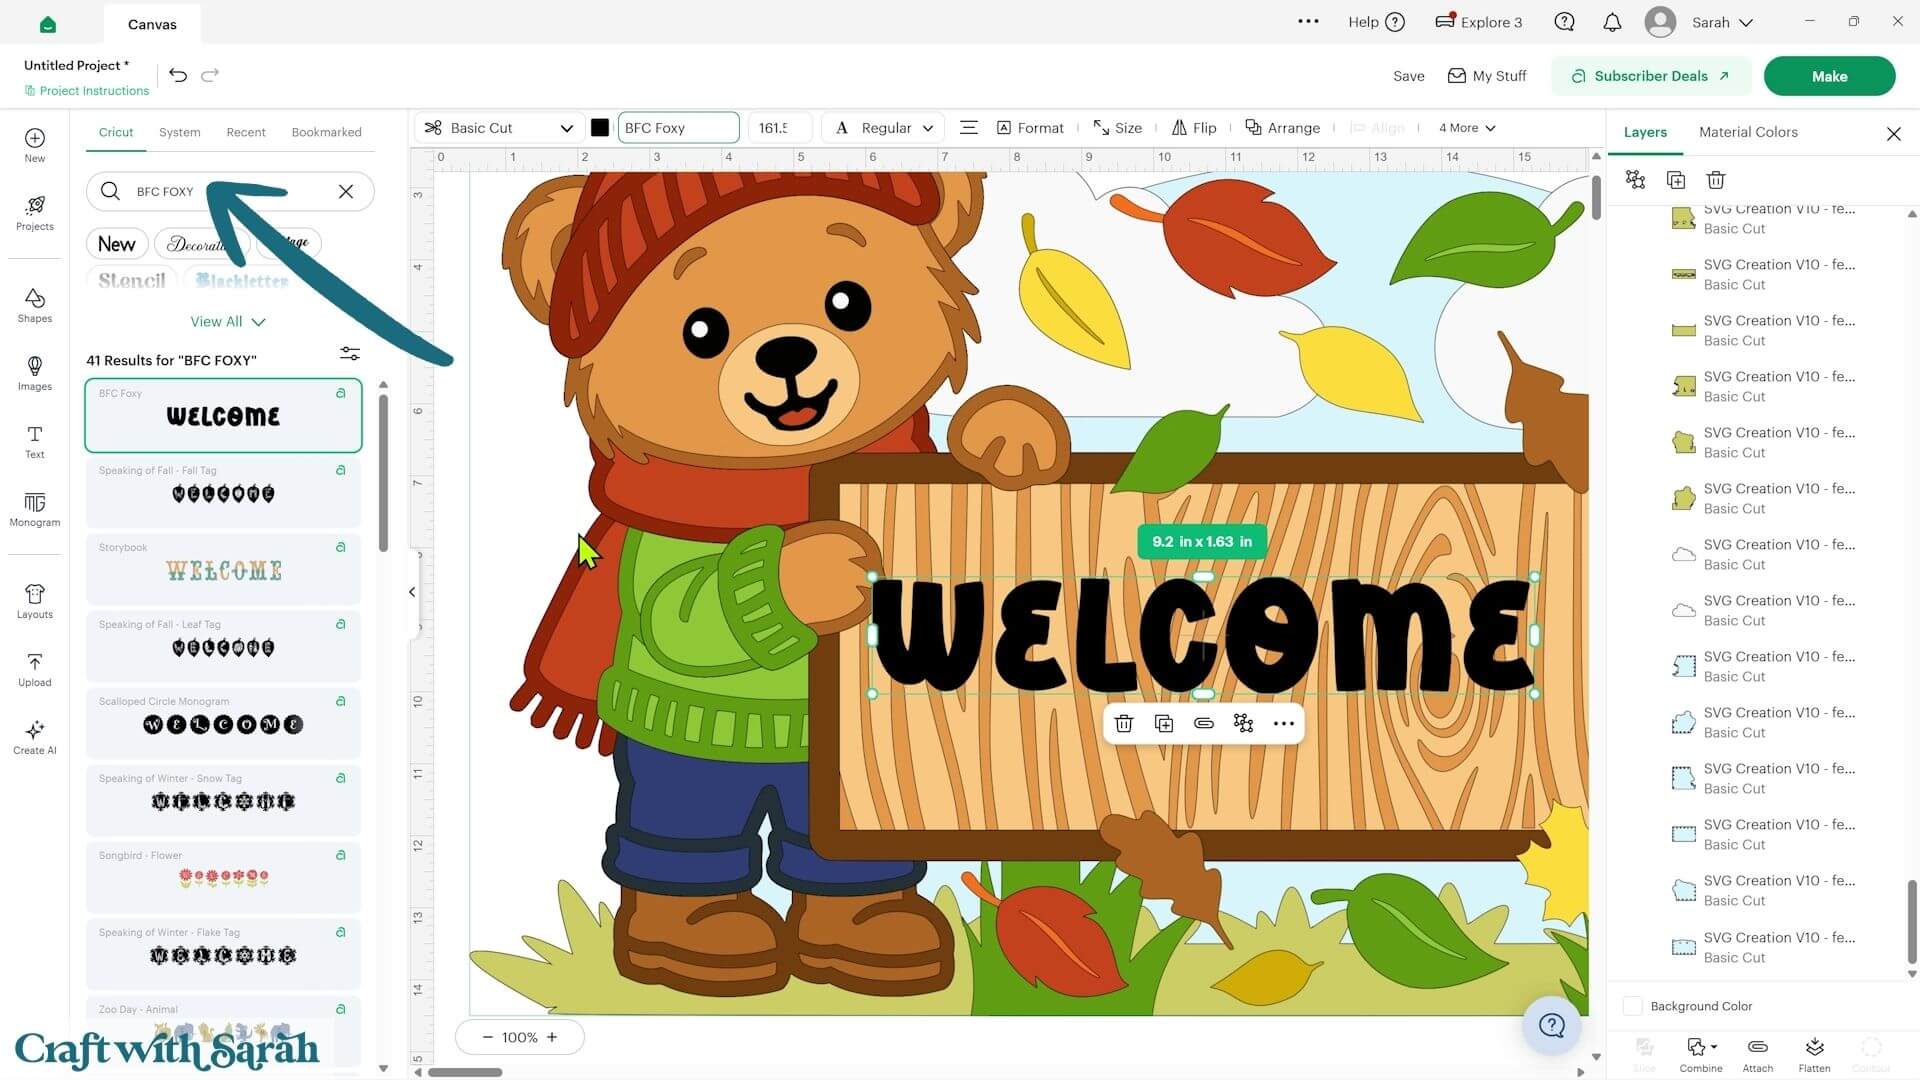
My ‘WELCOME’ text was over 11.5 inches wide, which meant it would be too large to cut as one piece without using a very long Cricut mat and matching cardstock.
Instead, we can separate the letters so that Cricut cuts each one individually.
Select the text and press ‘Ungroup’ at the top of the Layers panel. Each letter will now appear on its own layer and can be moved independently.
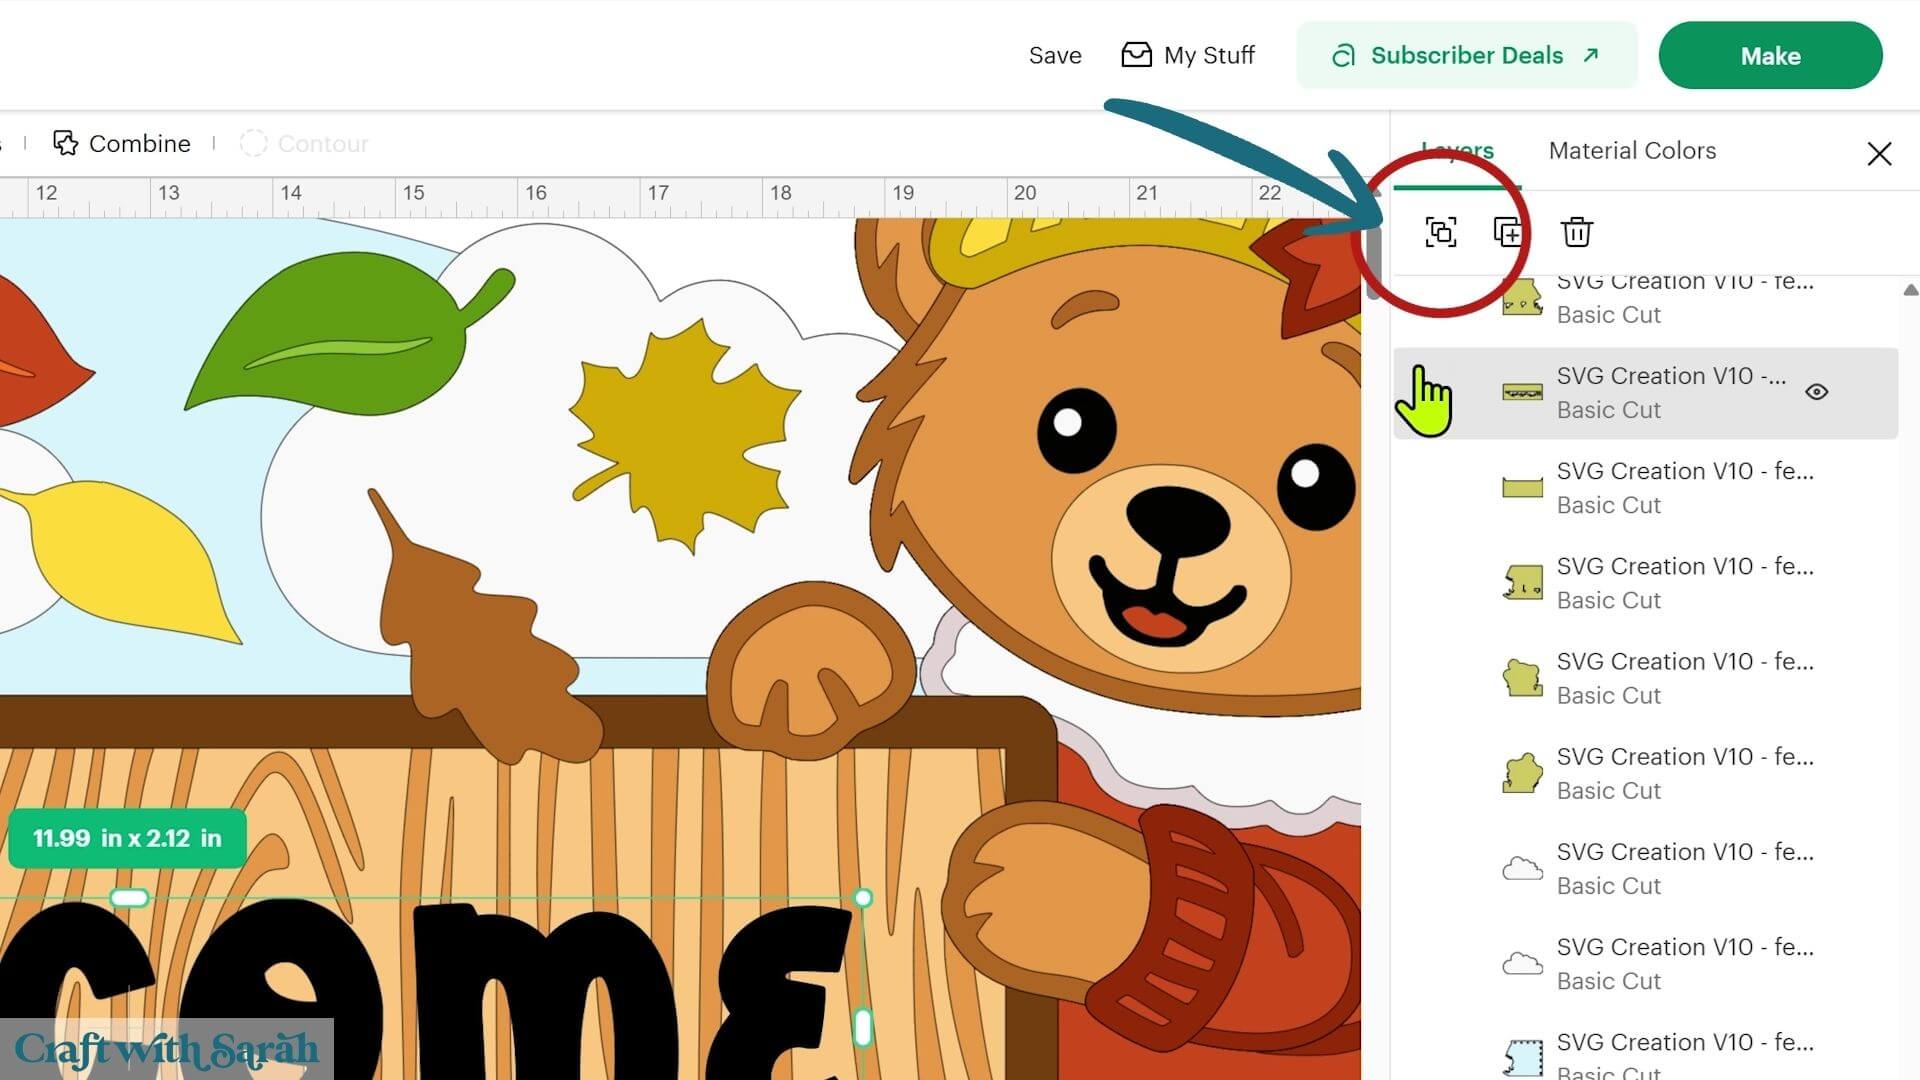
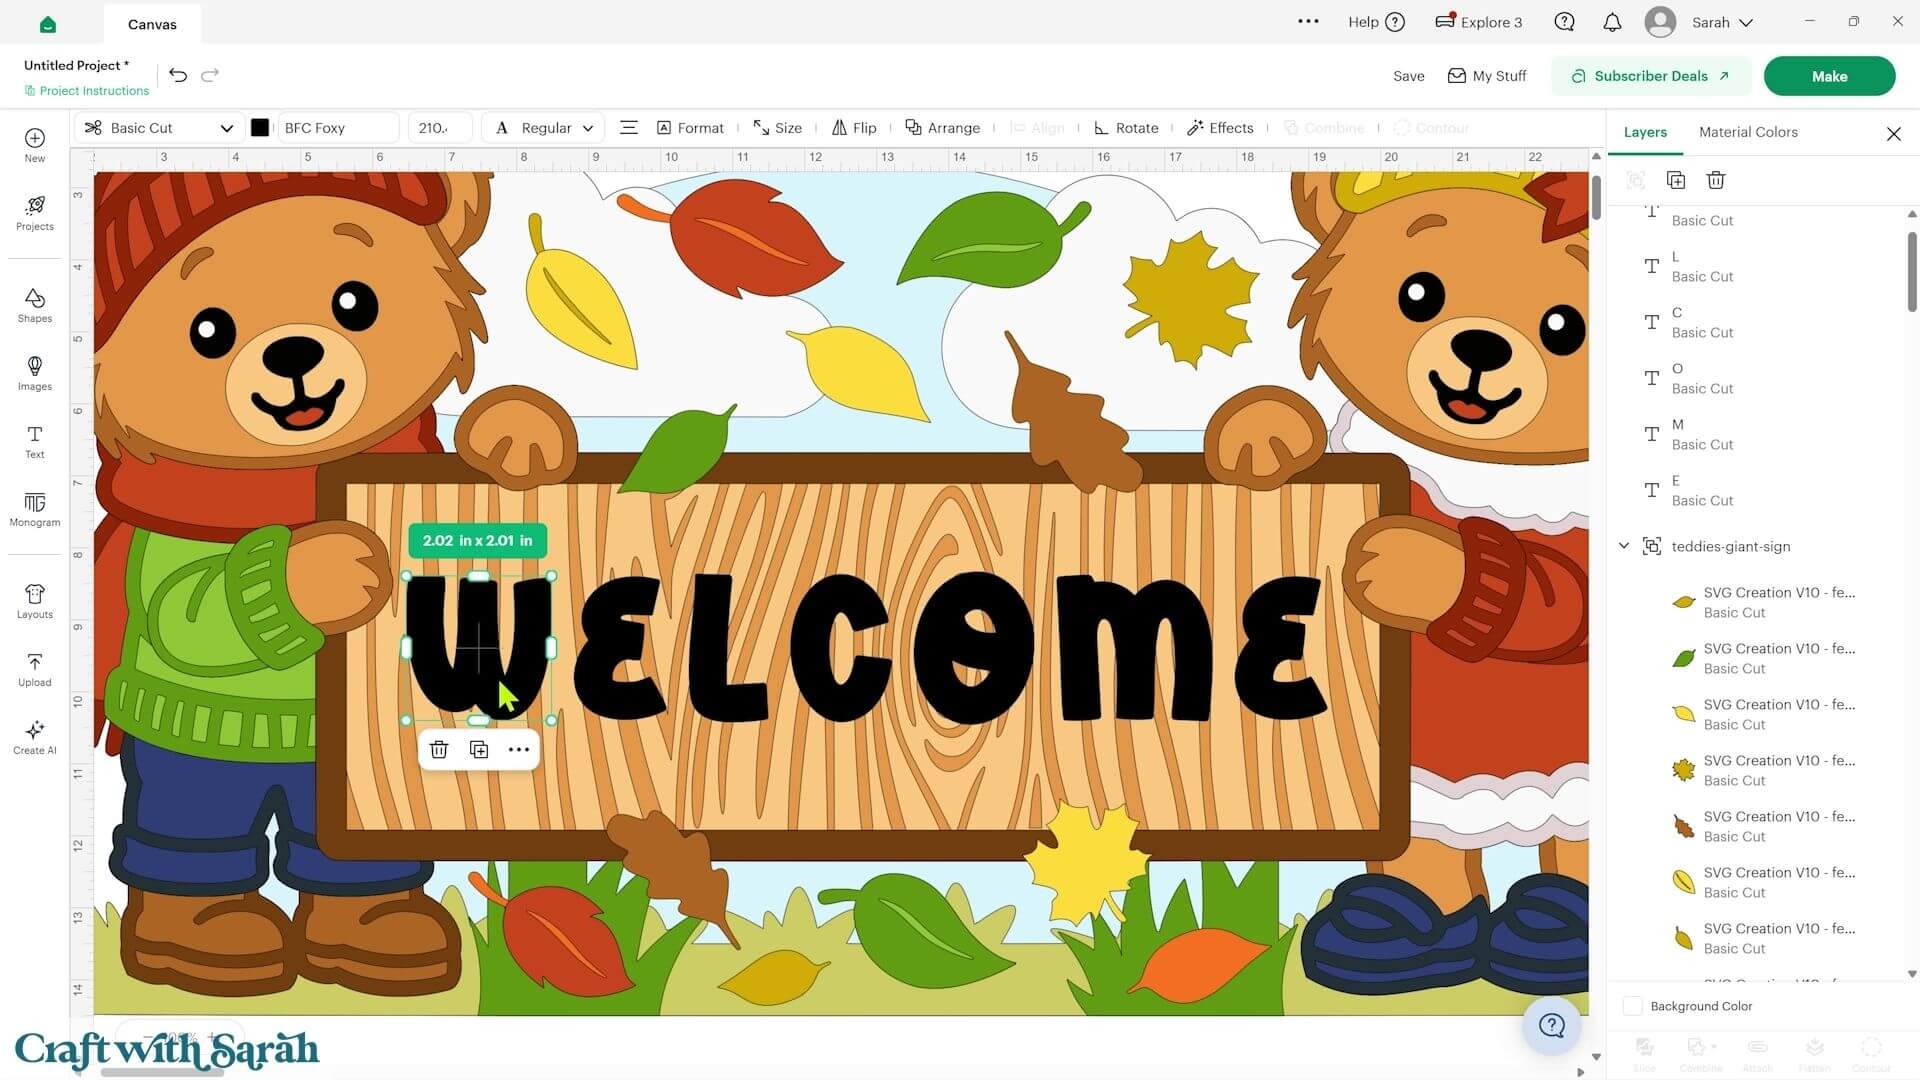
Move the first and last letters further apart to give yourself some space to work with.
Hold the Shift key on your keyboard and select all of the letters. Go to ‘Align’ and choose ‘Distribute Horizontally’.
This adds an equal amount of space between each letter.
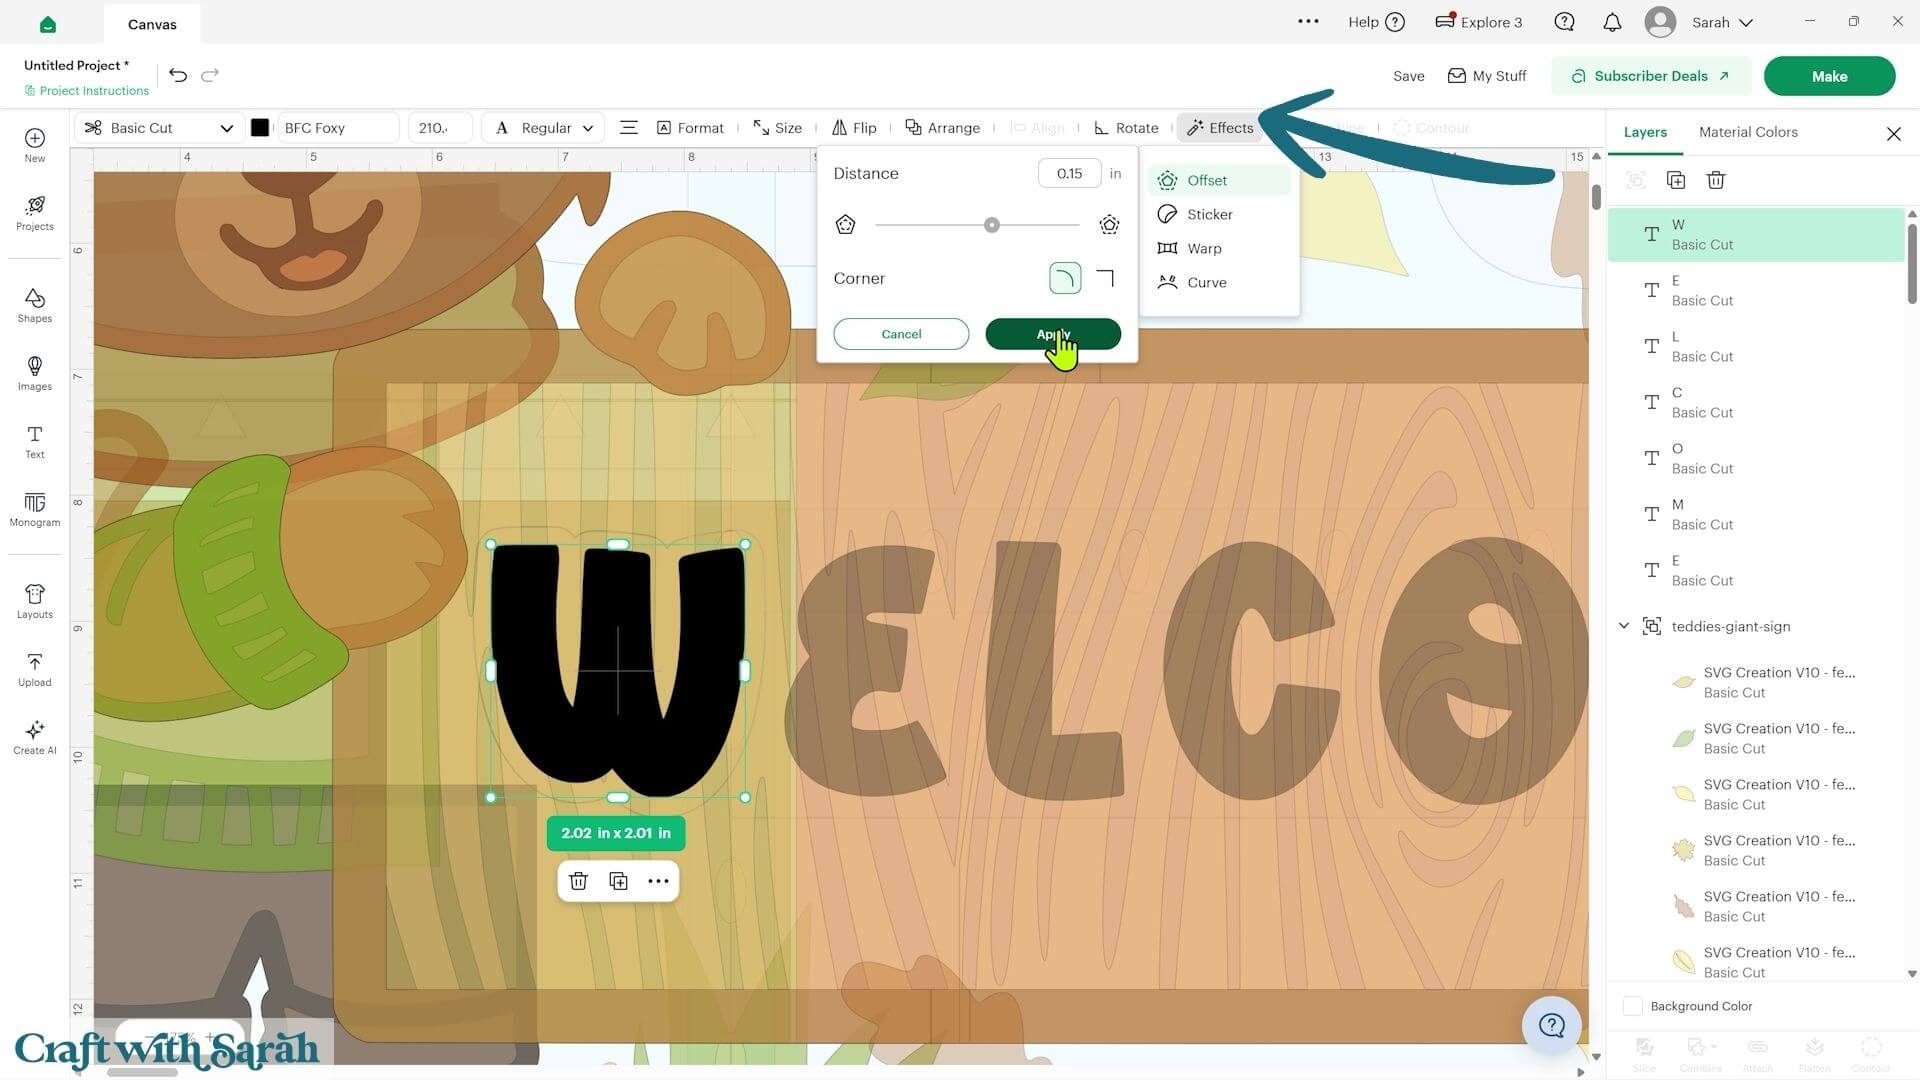
Adding an offset around each letter creates a border that helps the wording stand out against the wood-effect sign.
Select the first letter, go into ‘Effects’ and choose ‘Offset’.
Adjust the size of the offset until you are happy with the border. I used an offset of 0.15 inches.
Press ‘Apply’.
I changed my offset layer to white to match the clouds in the rest of the design.
Repeat the process for each letter, using the same offset amount each time.
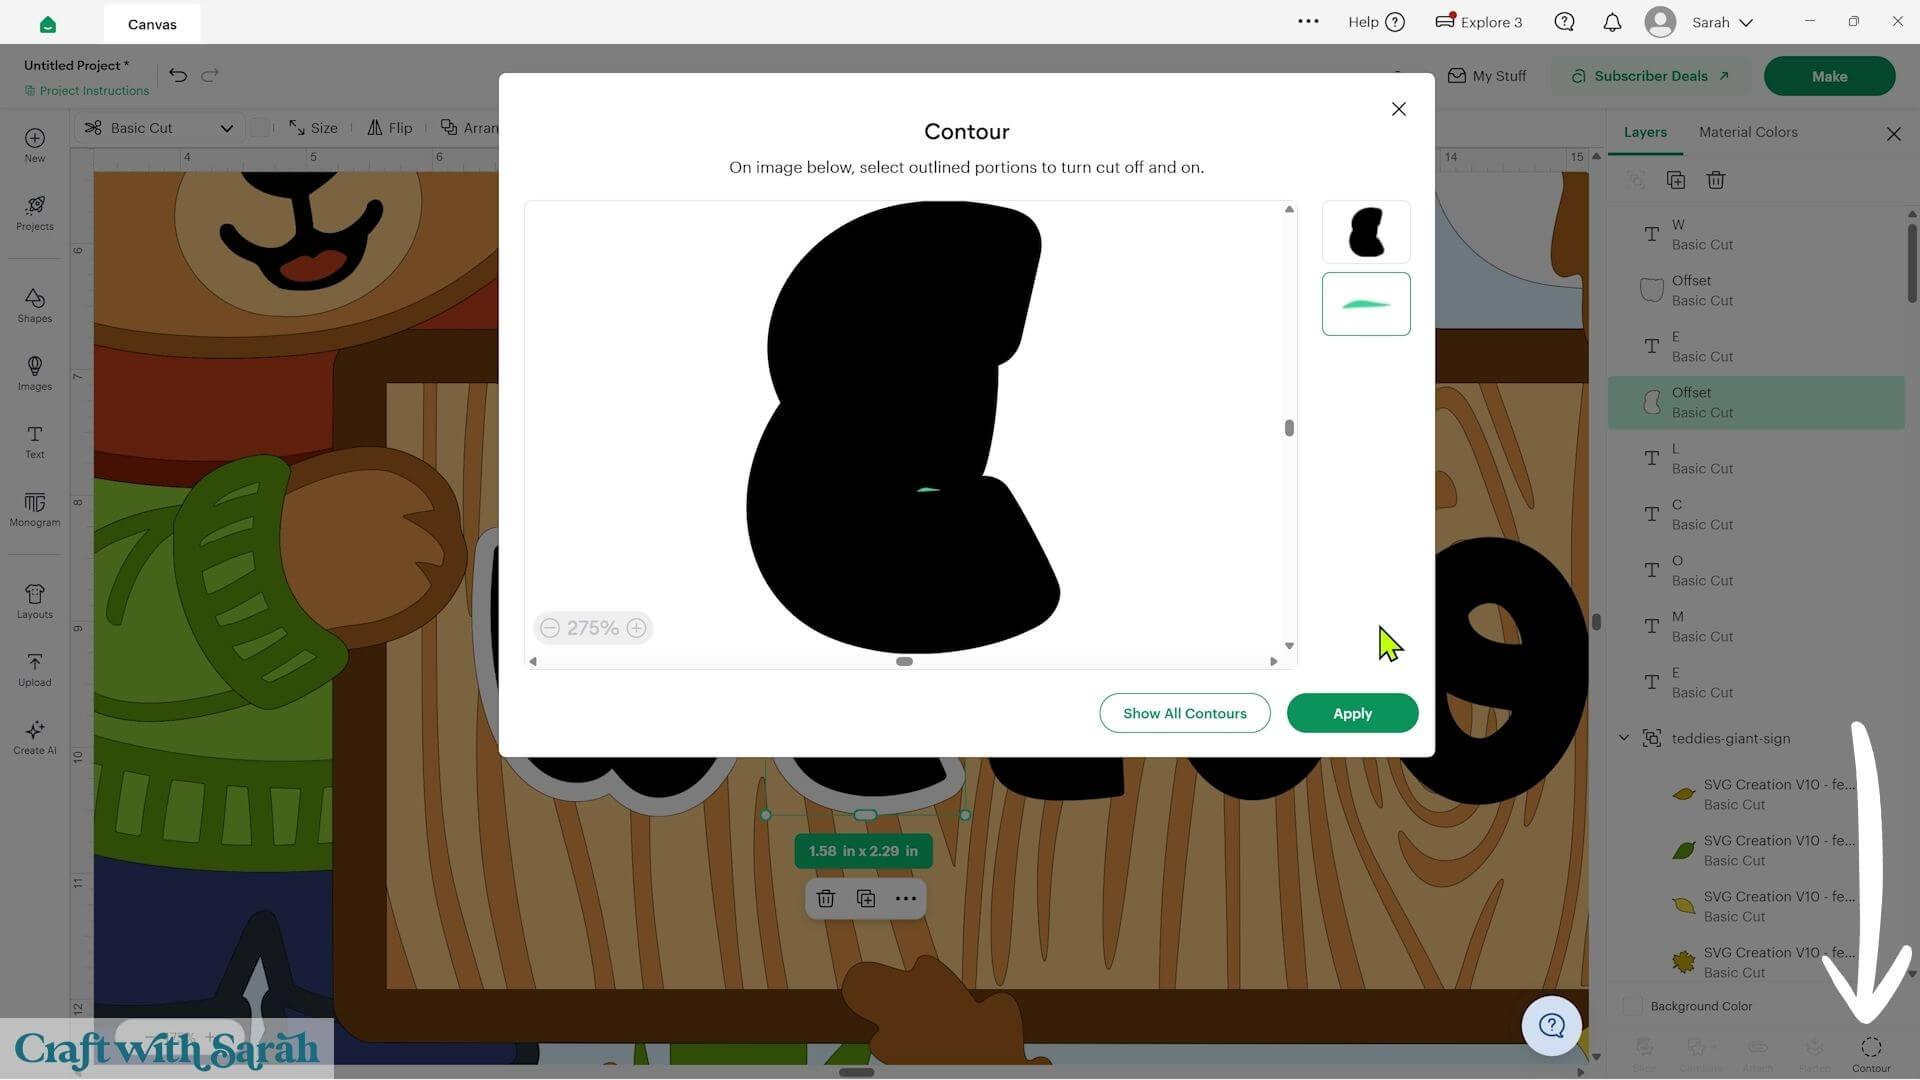
You may find that some letters develop tiny gaps or holes inside the offset.
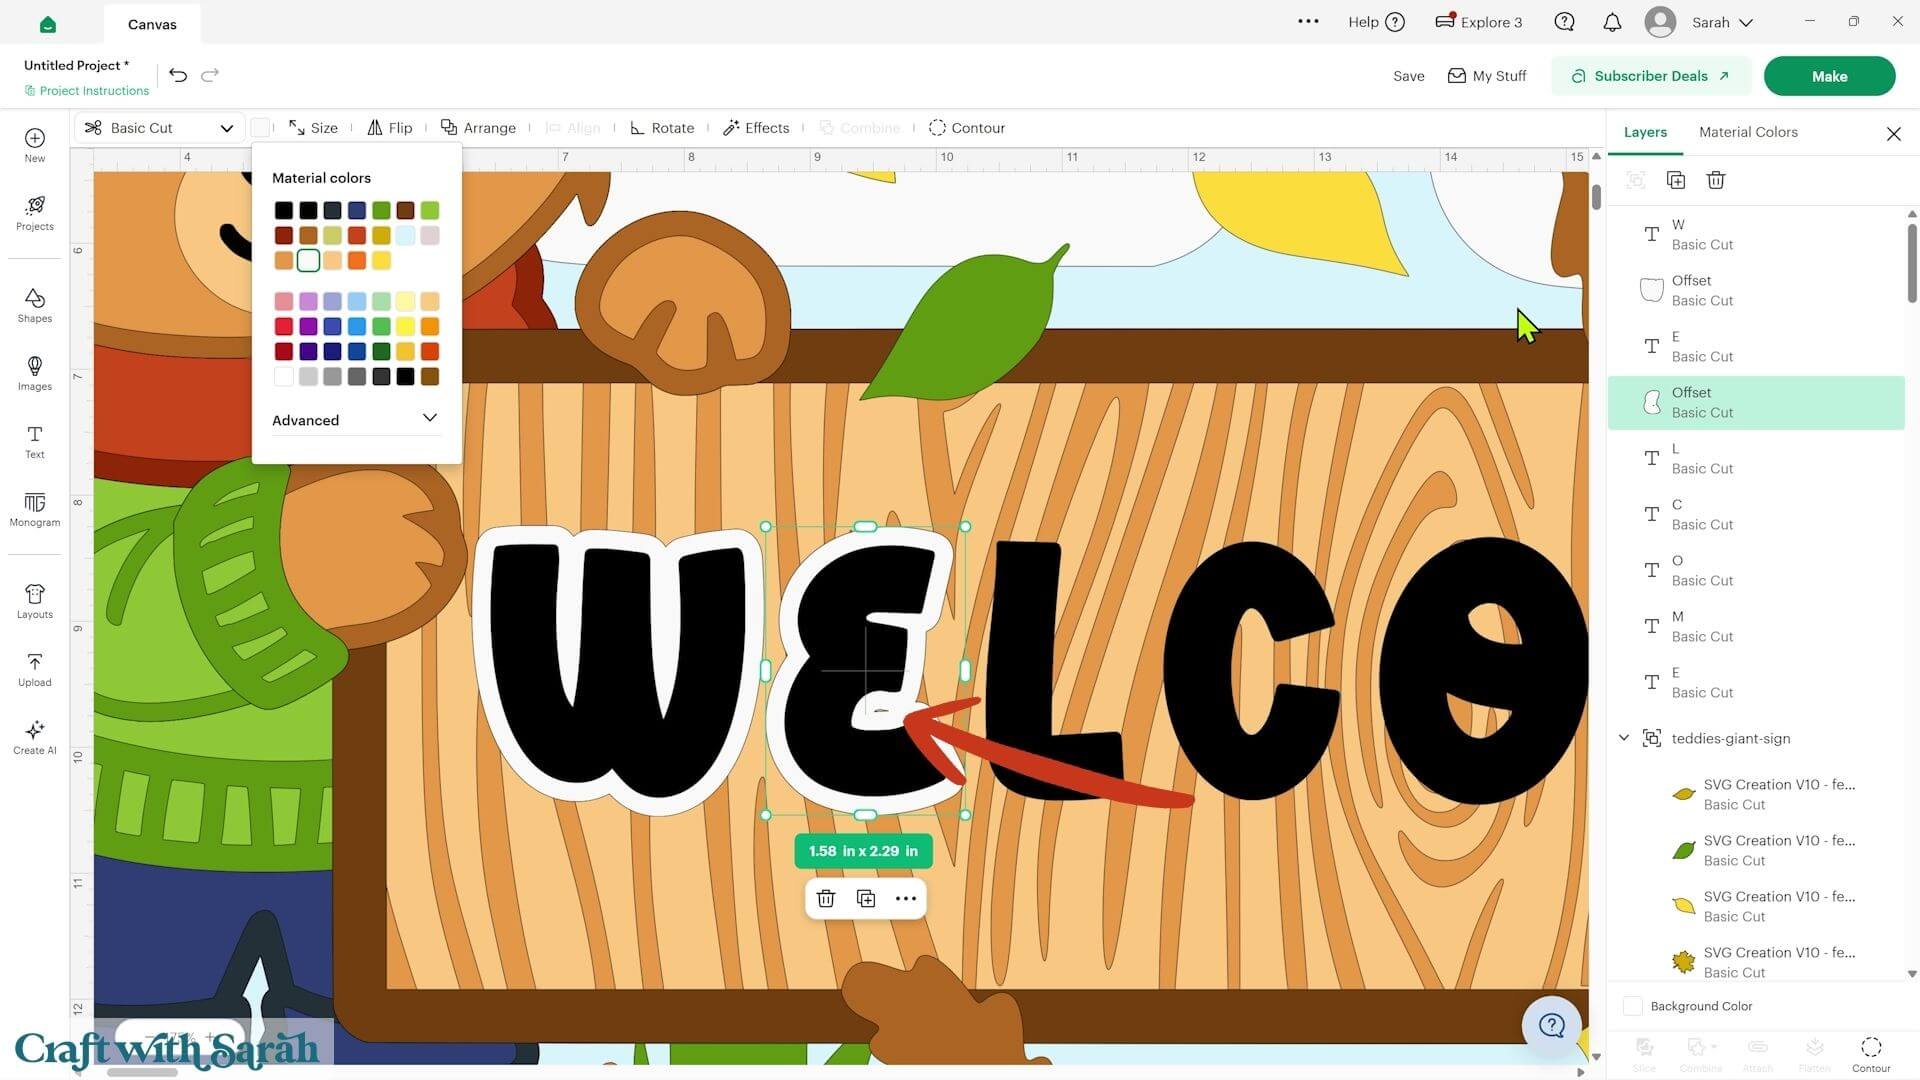
If that happens, select the offset layer and go into ‘Contour’.
Click the little gaps that you don’t want to cut and press ‘Apply’ to fill them in.
Once all of the letters have their offsets, select all of the letters and their corresponding offset layers and group them together.
You can now resize the complete message whilst keeping all of the letters and offsets in proportion.
I sized mine so that the ‘W’ and final ‘E’ will tuck slightly underneath the teddy bears’ hands when the project is assembled. This makes the message appear to stretch right across the sign.
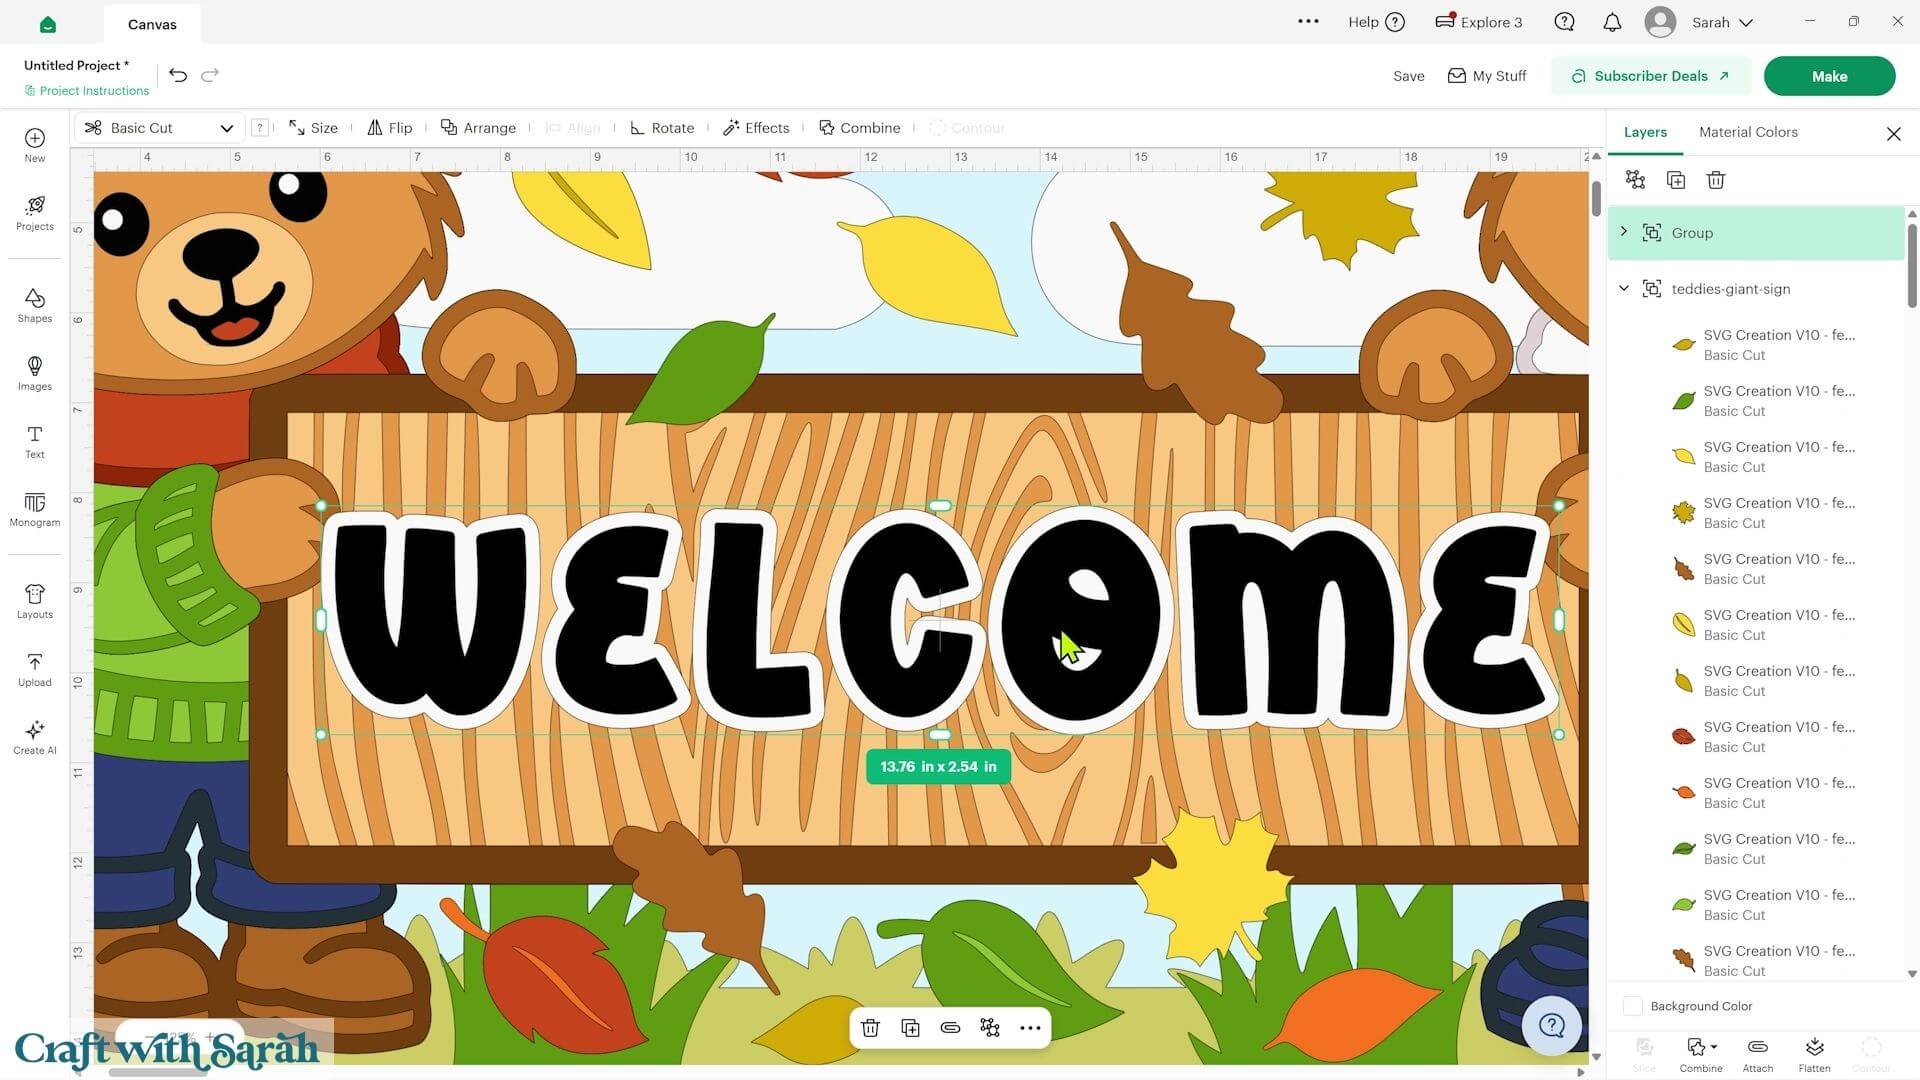
When you are happy with the size, ungroup the letters again.
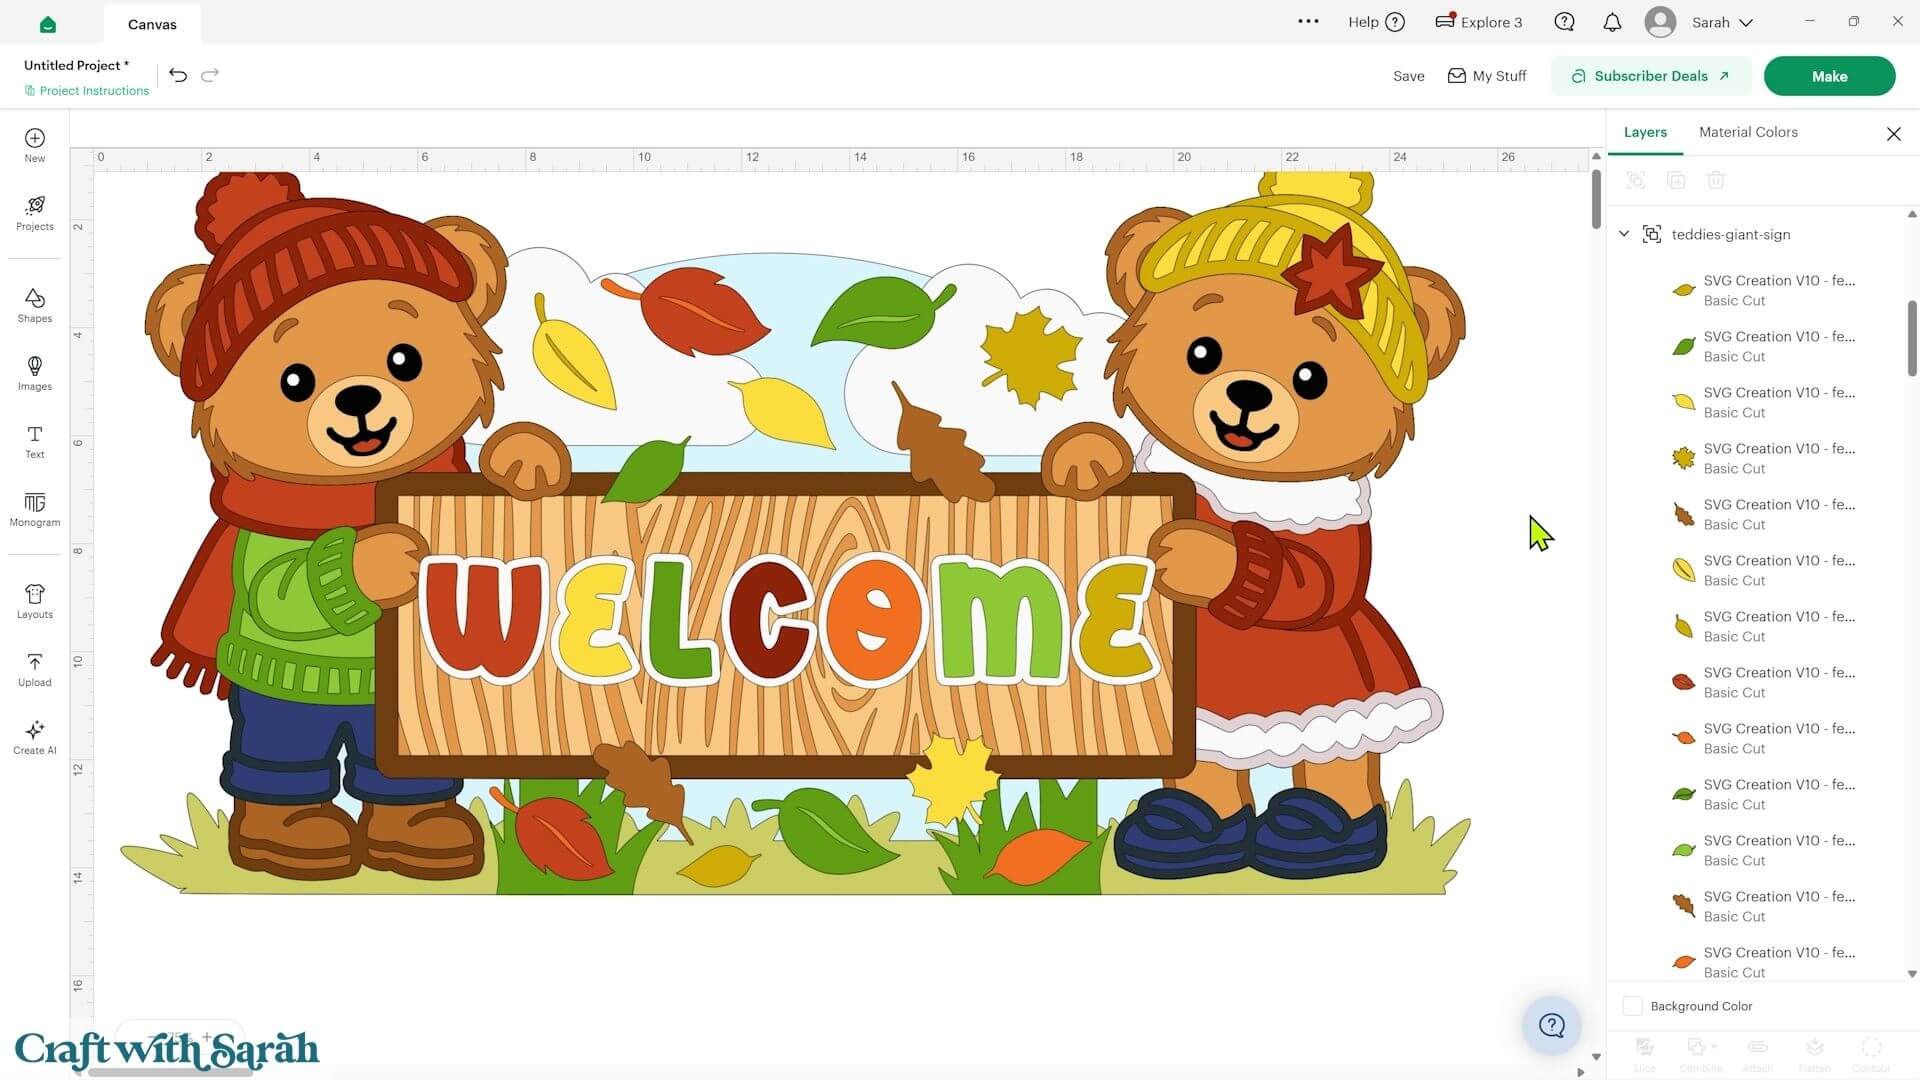
You can now change the colours of the top letters. I chose a selection of colours already used elsewhere in the teddy bear design so that the wording coordinates with the autumn leaves.
You could make every letter a different colour, alternate between two colours or keep all of the letters the same.
Zoom out using the controls at the bottom left of Design Space to check how the complete project looks.
Step 3) Cut the project
When you’re happy with your design, save the project and connect to your Cricut machine.
Press ‘Make’ to separate everything onto the cutting mats.
This is a large project and it does require quite a lot of cardstock.
At the default size, there are lots of mats to work through, particularly if you are using A4 cardstock rather than 12×12 inch sheets.
You can change the paper size in the dropdowns on the left of the screen.
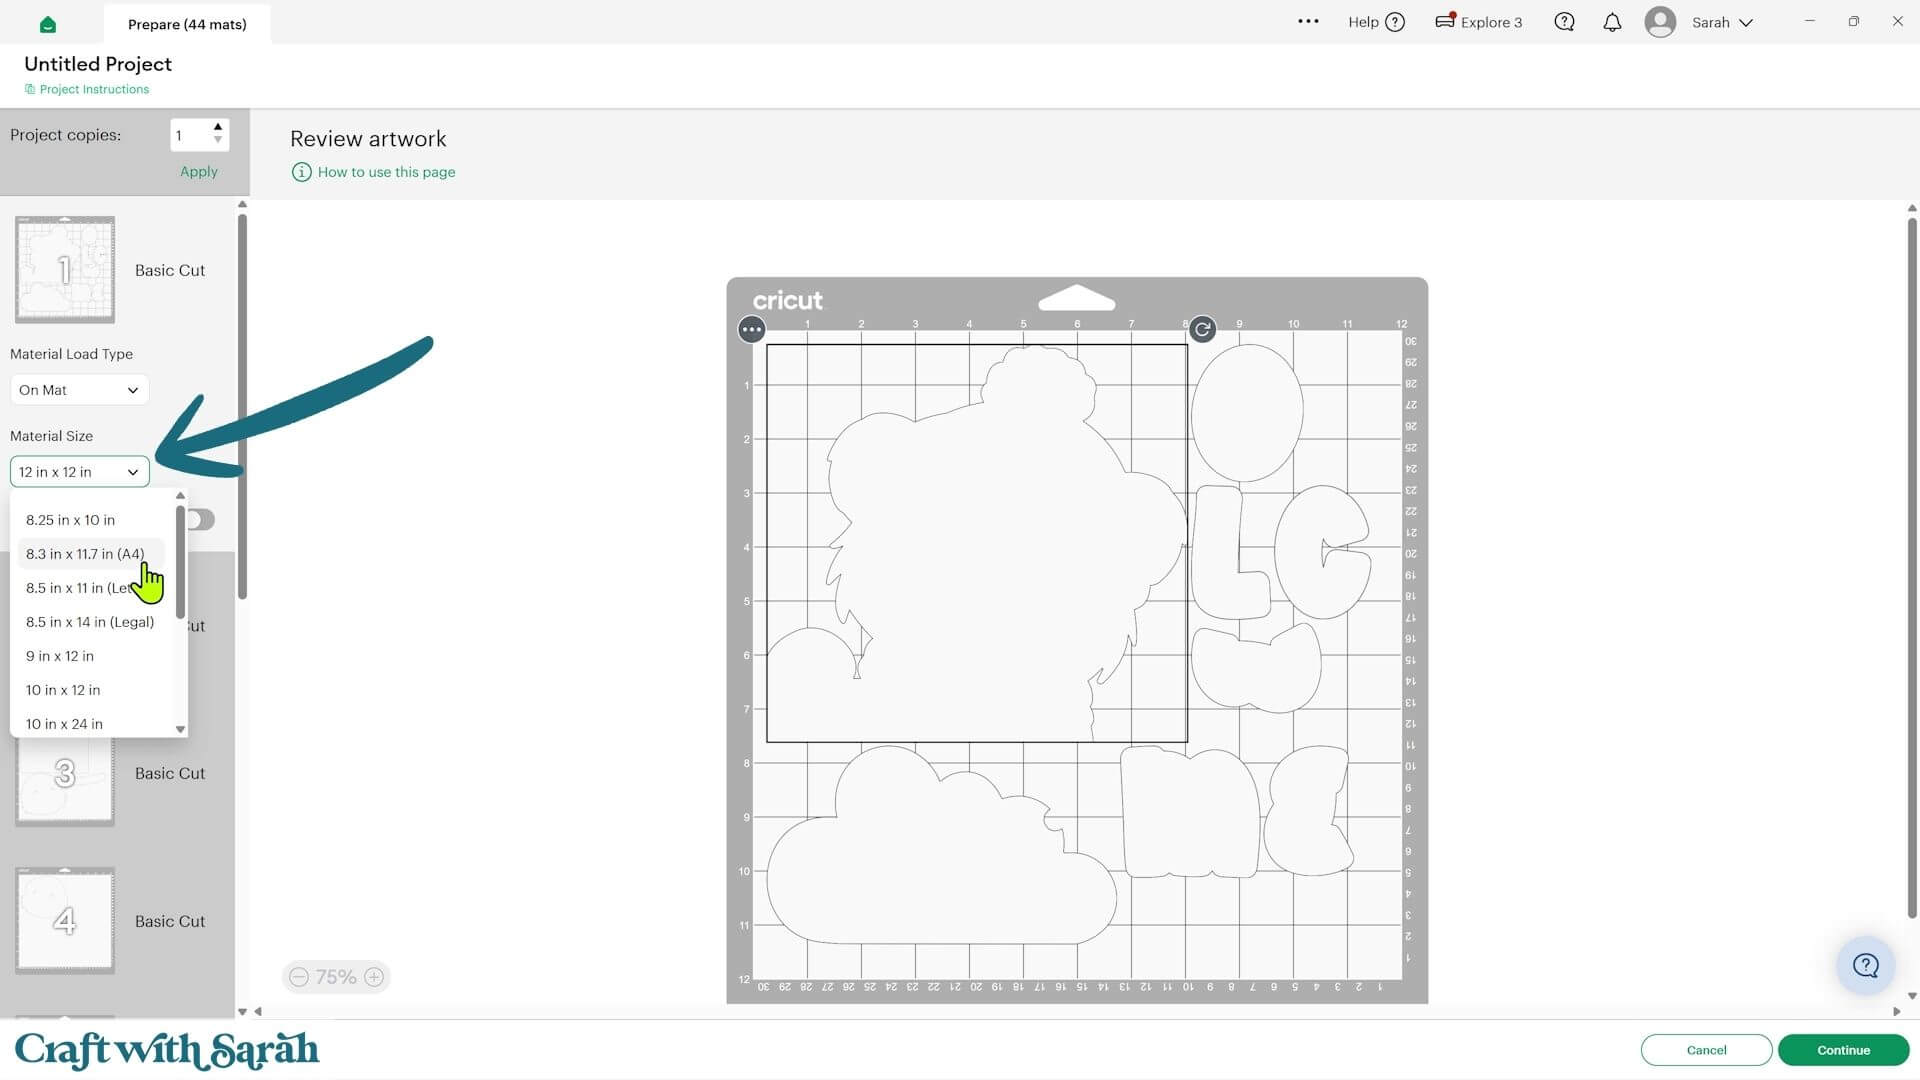
Some of the colours only require small amounts of cardstock, so this is a good opportunity to use up scraps from previous projects.
My project took approximately two and a half hours to cut from start to finish.
Although that sounds like a long time, most of the shapes are straightforward for the Cricut to cut.
Check all of the mats, change the paper sizes where required and follow the on-screen instructions to get everything cut from cardstock.
TIP: New to using cardstock with your cutting machine? Check out these machine help guides for Cricut, Silhouette and ScanNCut that go through every step of the process, including tips for getting the best quality cuts from your machine.
Step 4) Prepare the pieces
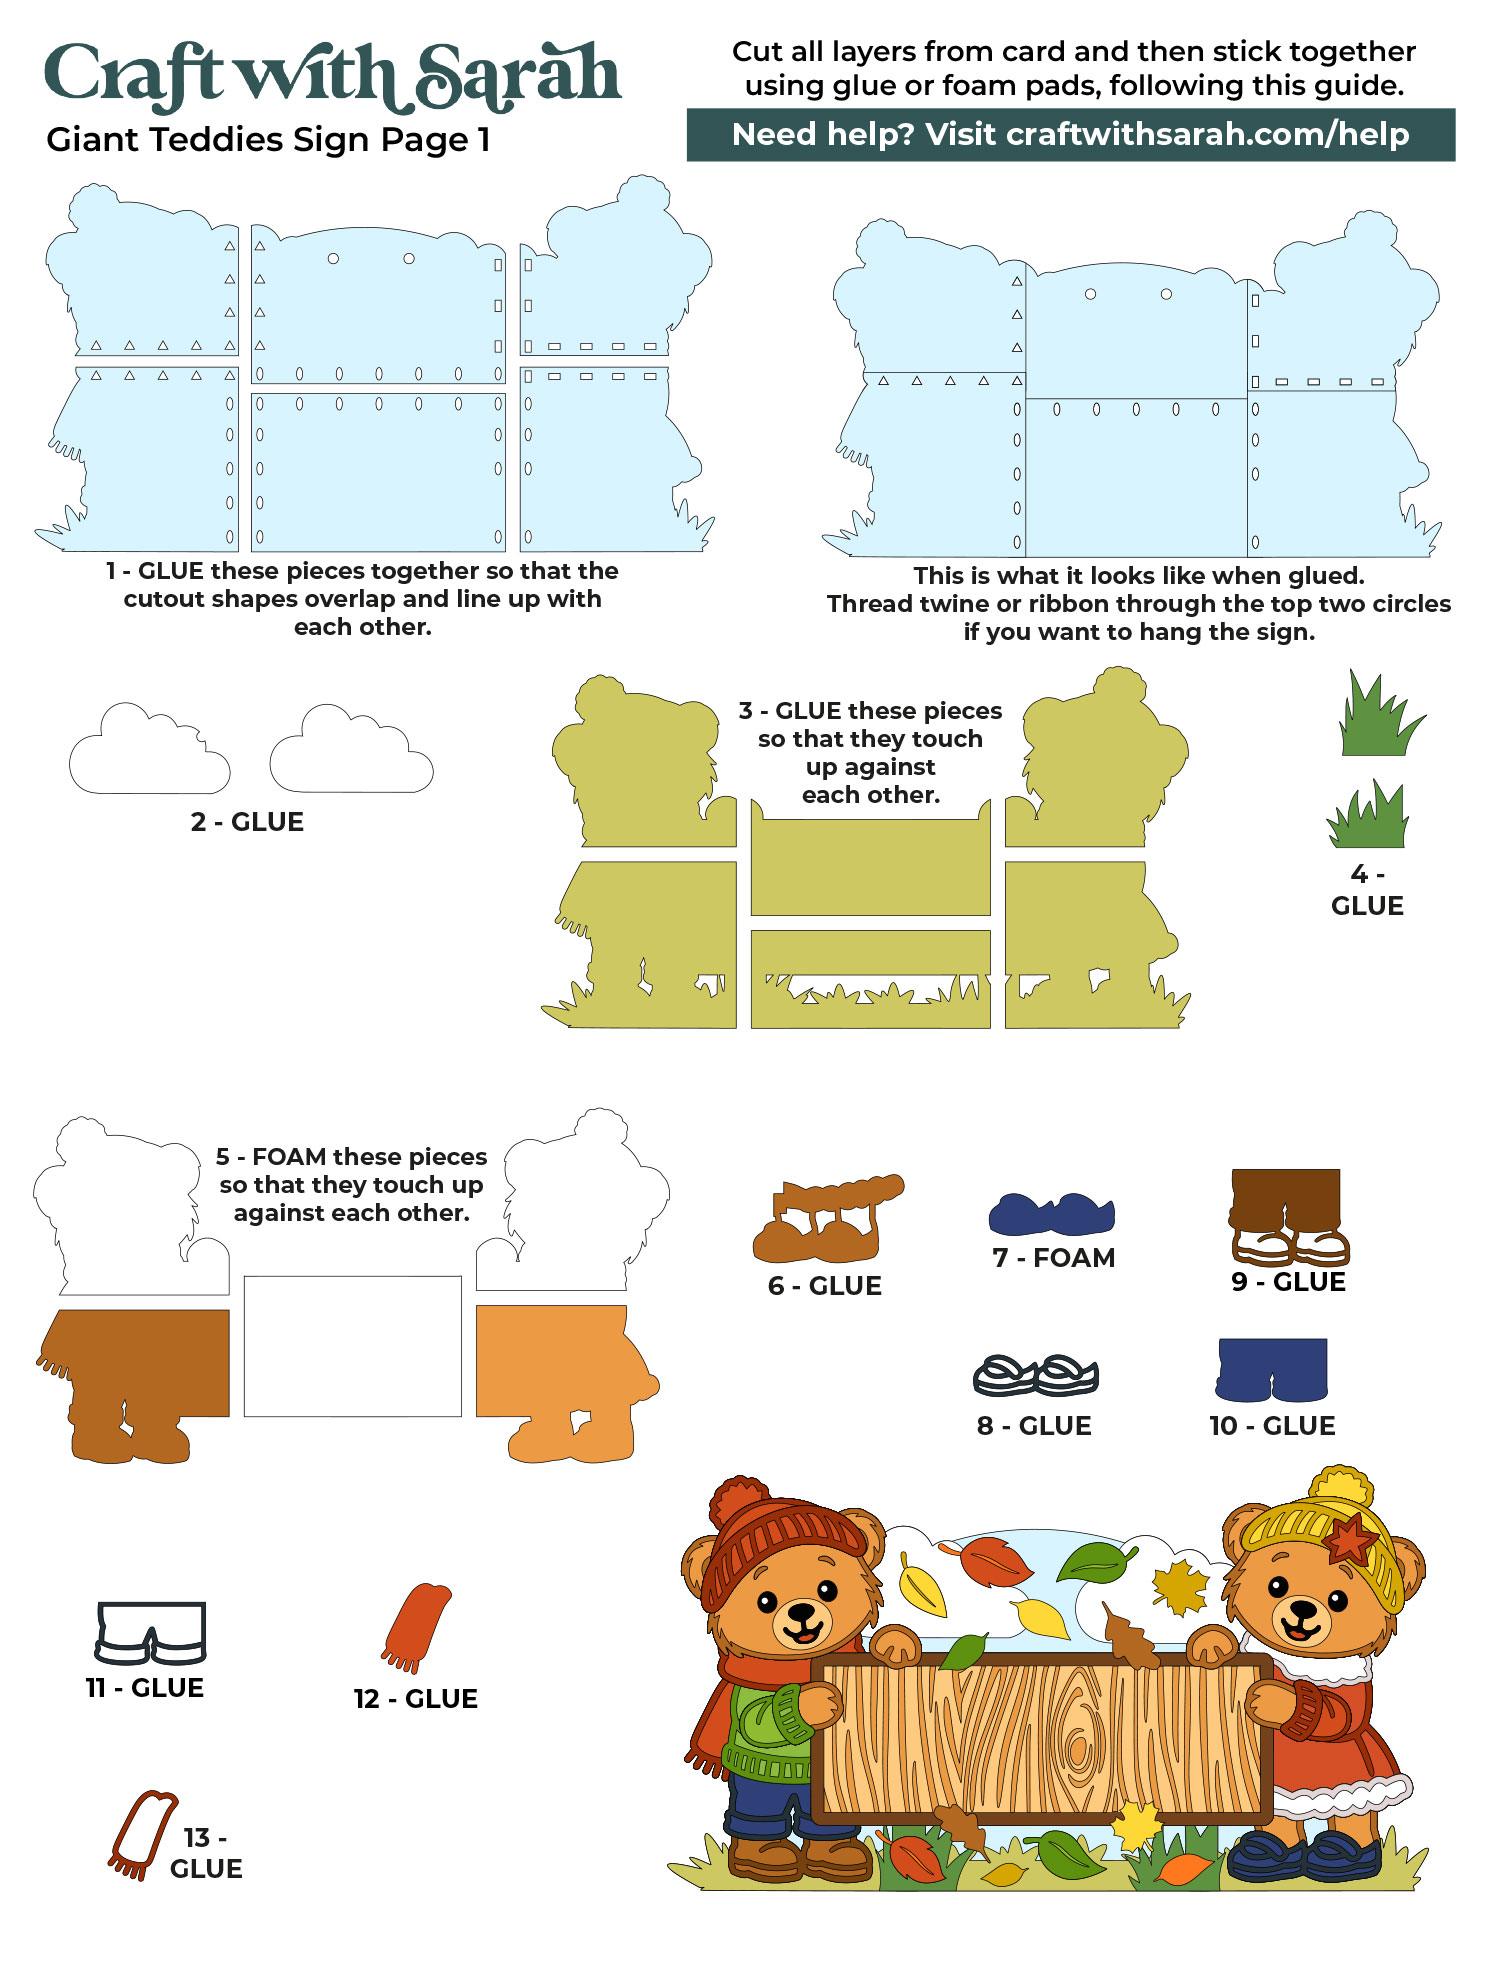
I recommend making this project with the assembly guide that’s included in the download folder printed out or on your computer screen so that you can refer to it.
I separated my cutout pieces into rough groups according to the assembly guide steps.
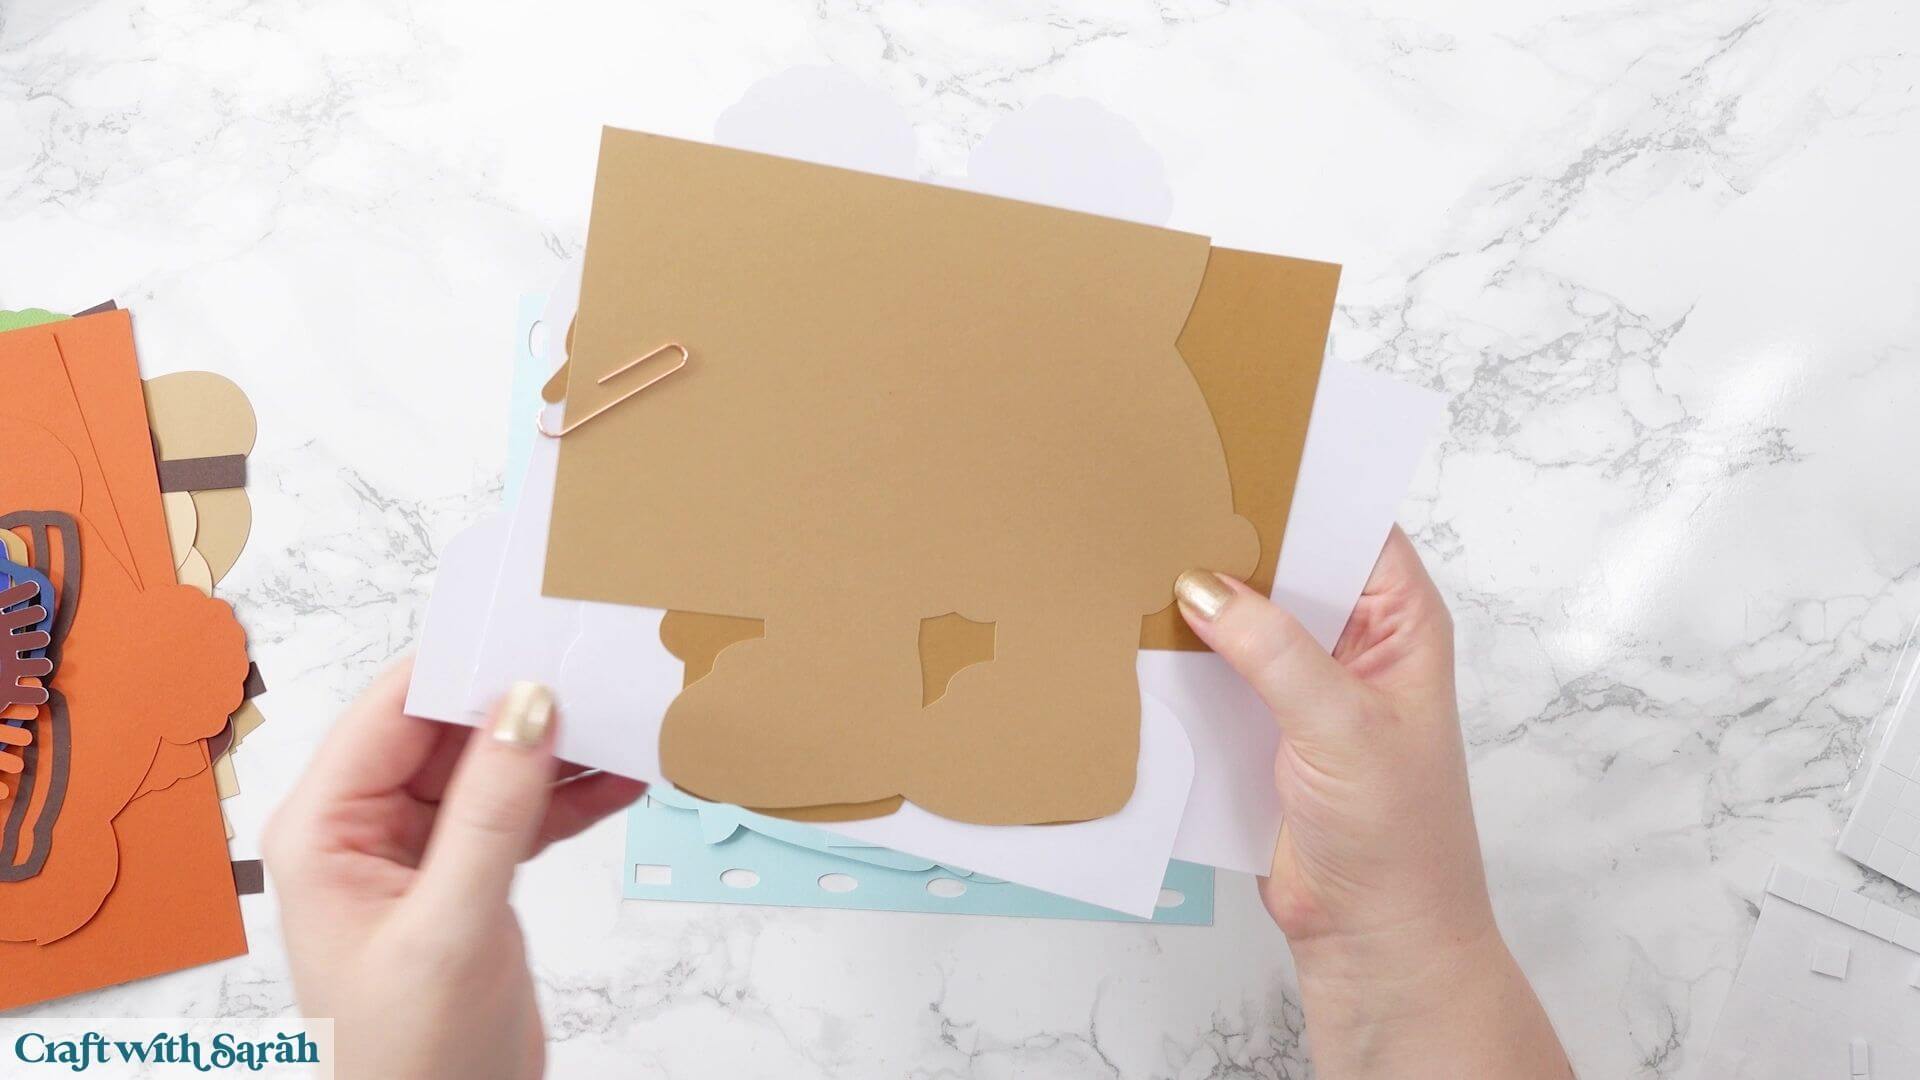
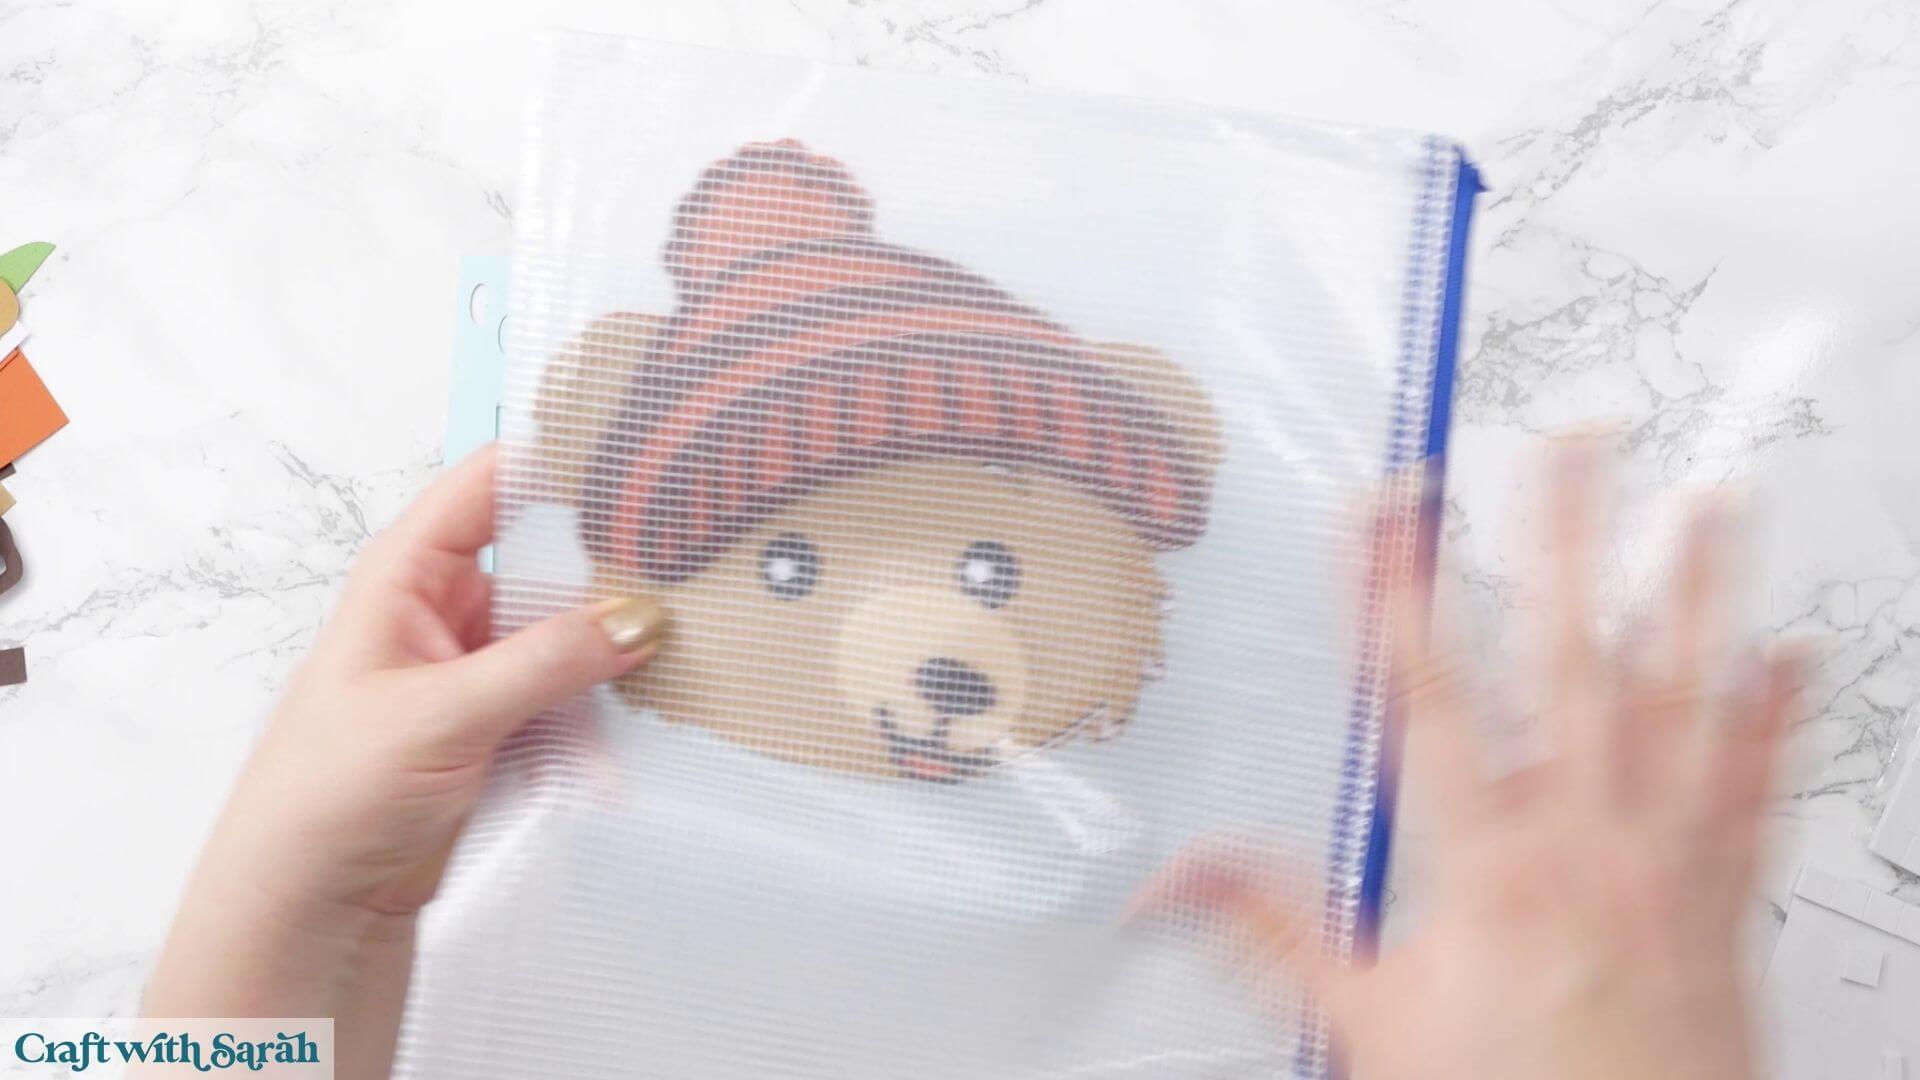
This is especially helpful for a project with so many pieces as it allows you to check that everything has cut correctly and that you have all of the layers before you begin sticking them together.
The project uses a combination of glue and foam squares.
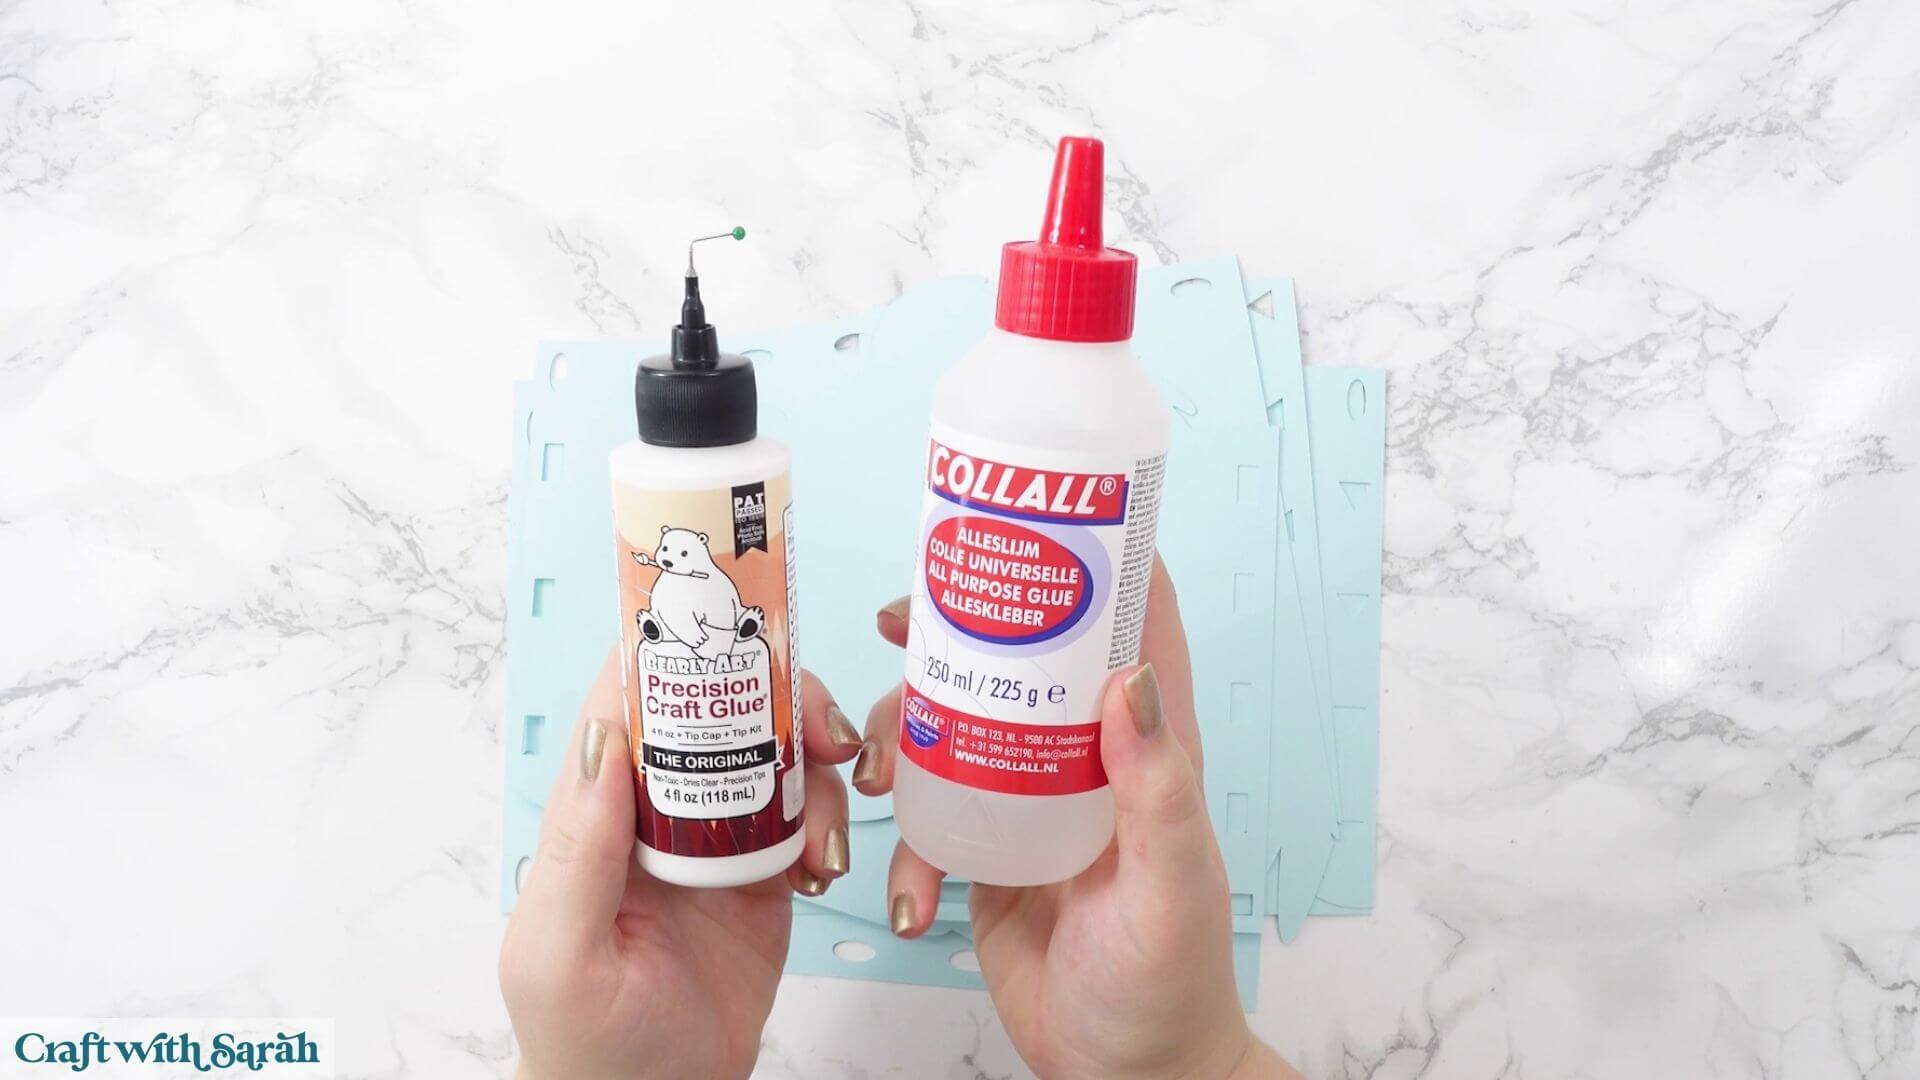
My favourite glues to use on papercraft projects are Bearly Art Glue and Collall All Purpose Glue.
These are great because they don’t “warp” or bend the cardstock like some glues do. You can use as much of it as you want and the card stays perfect – and it dries perfectly clear too!
Bearly Art Glue comes with a tiny nozzle to make it easy to apply glue to small areas of card. The Collall glue doesn’t come with this, so it’s easiest to decant it into needle tip applicator bottles so that you have more control.
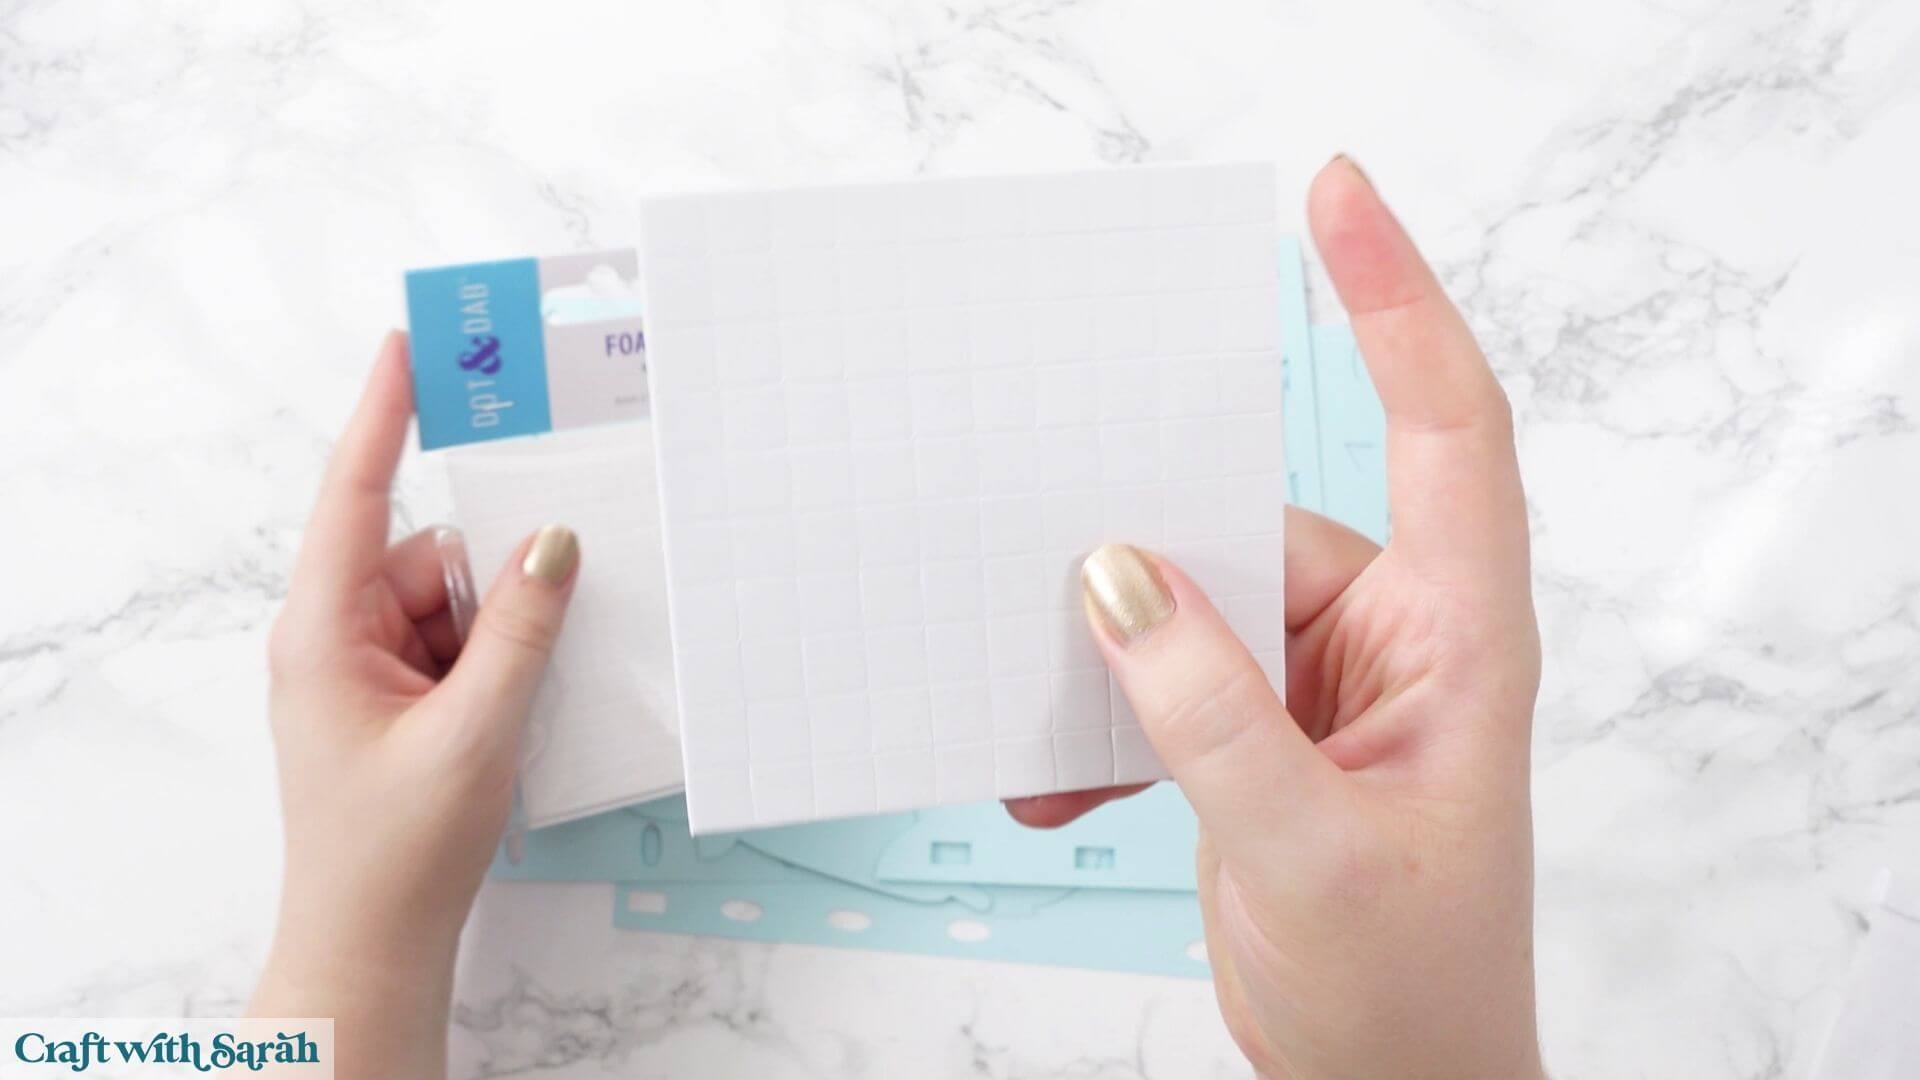
The foam pads that I use are from “Dot & Dab”, but any foam squares will work.
As this is a large project, I’ve got 5x5mm squares and 10x10mm squares.
Step 5) Build the base
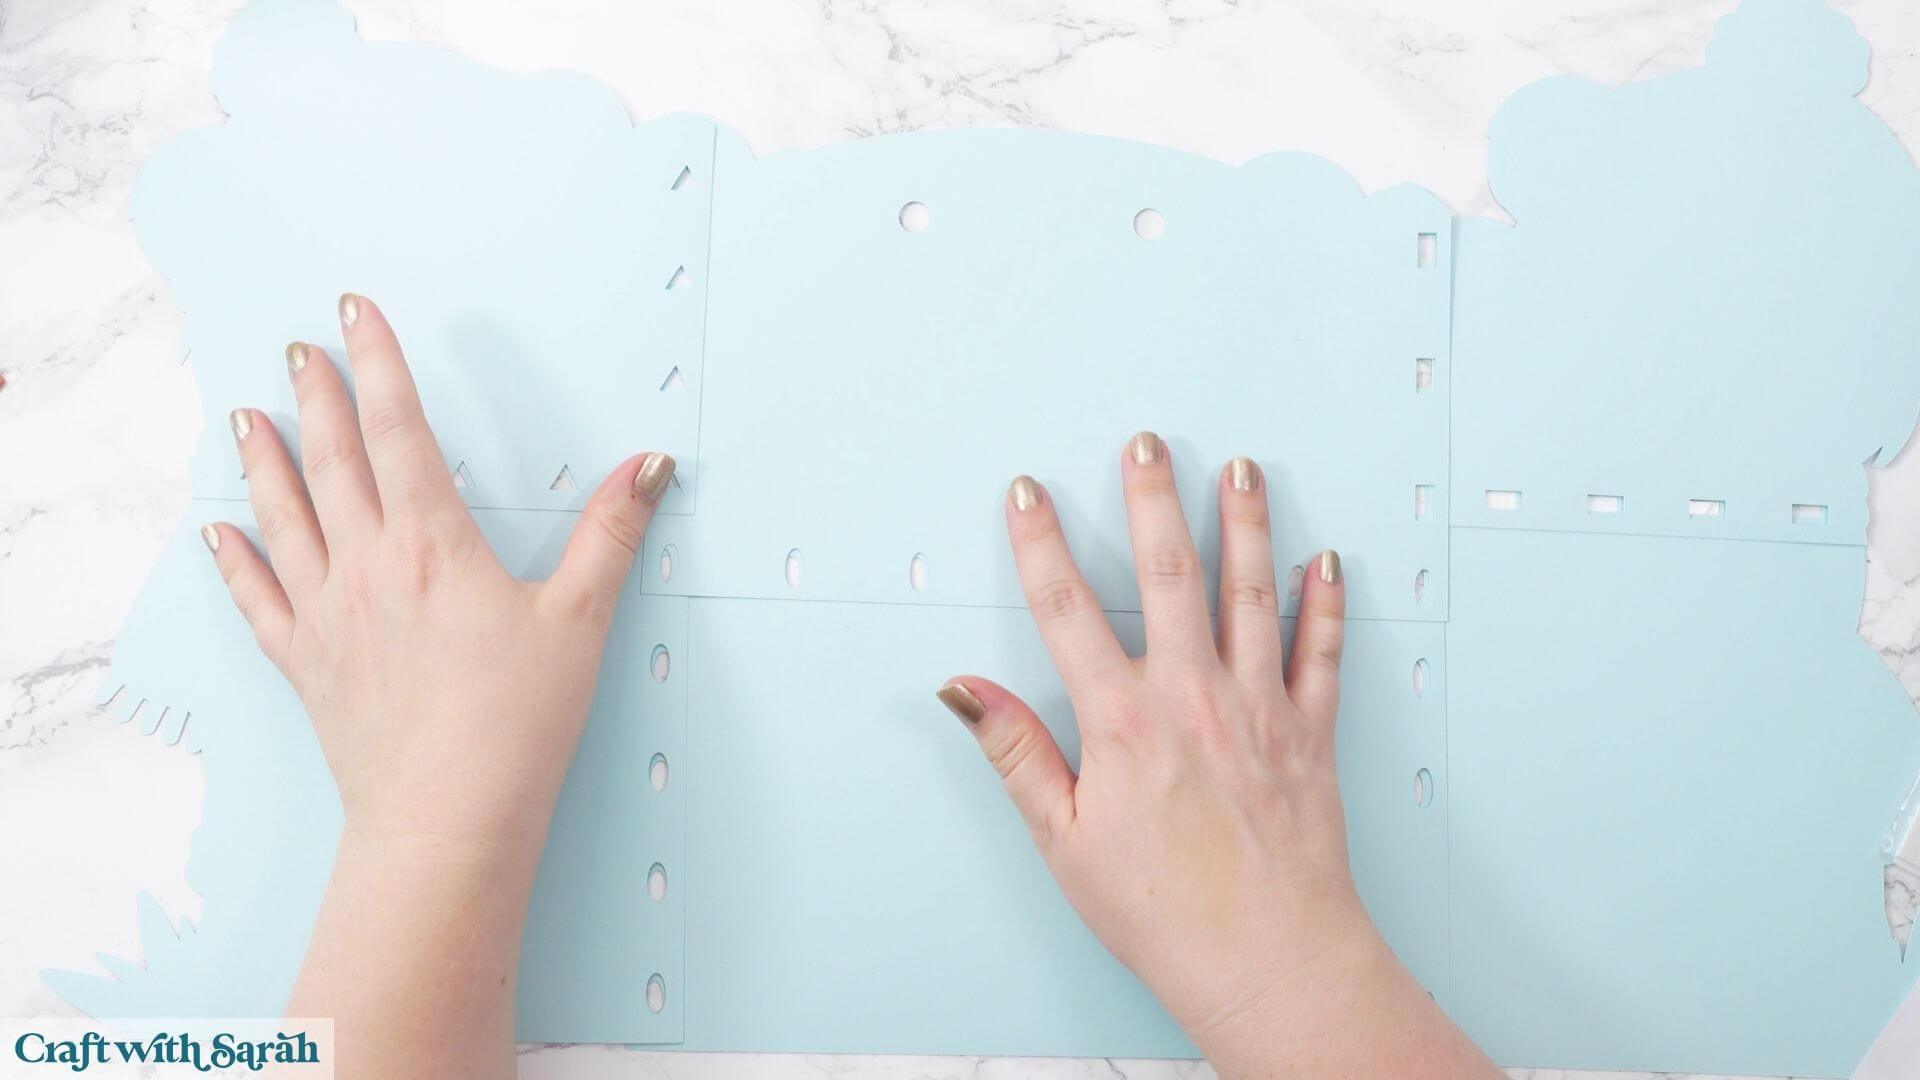
Select the six sky blue pieces that make up the base of the sign.
Glue them together so that the cutout shapes perfectly align with each other.
It doesn’t matter which order you stick the pieces together in.
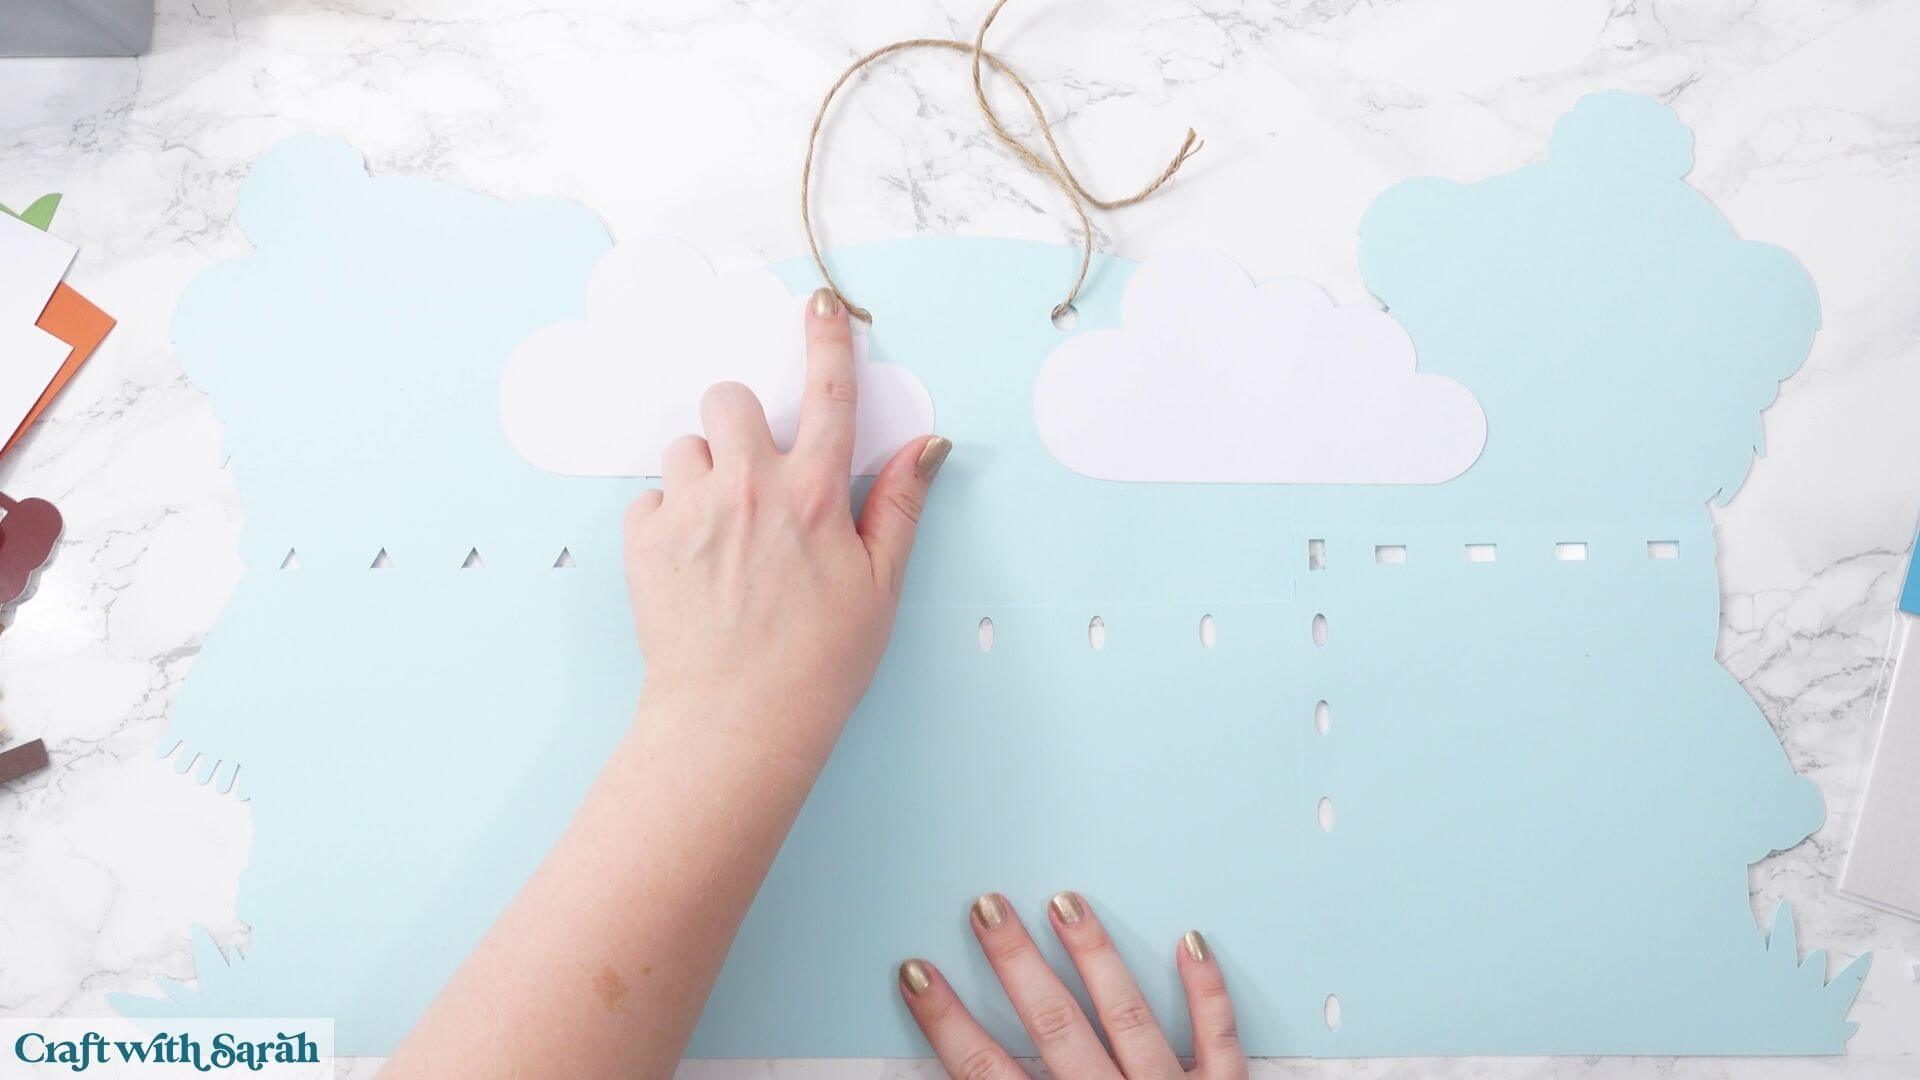
Glue on the clouds, then thread twine through the holes in the top if you will be hanging the sign up.
Step 6) Assemble the sign
Follow the assembly guide to build the rest of the sign.
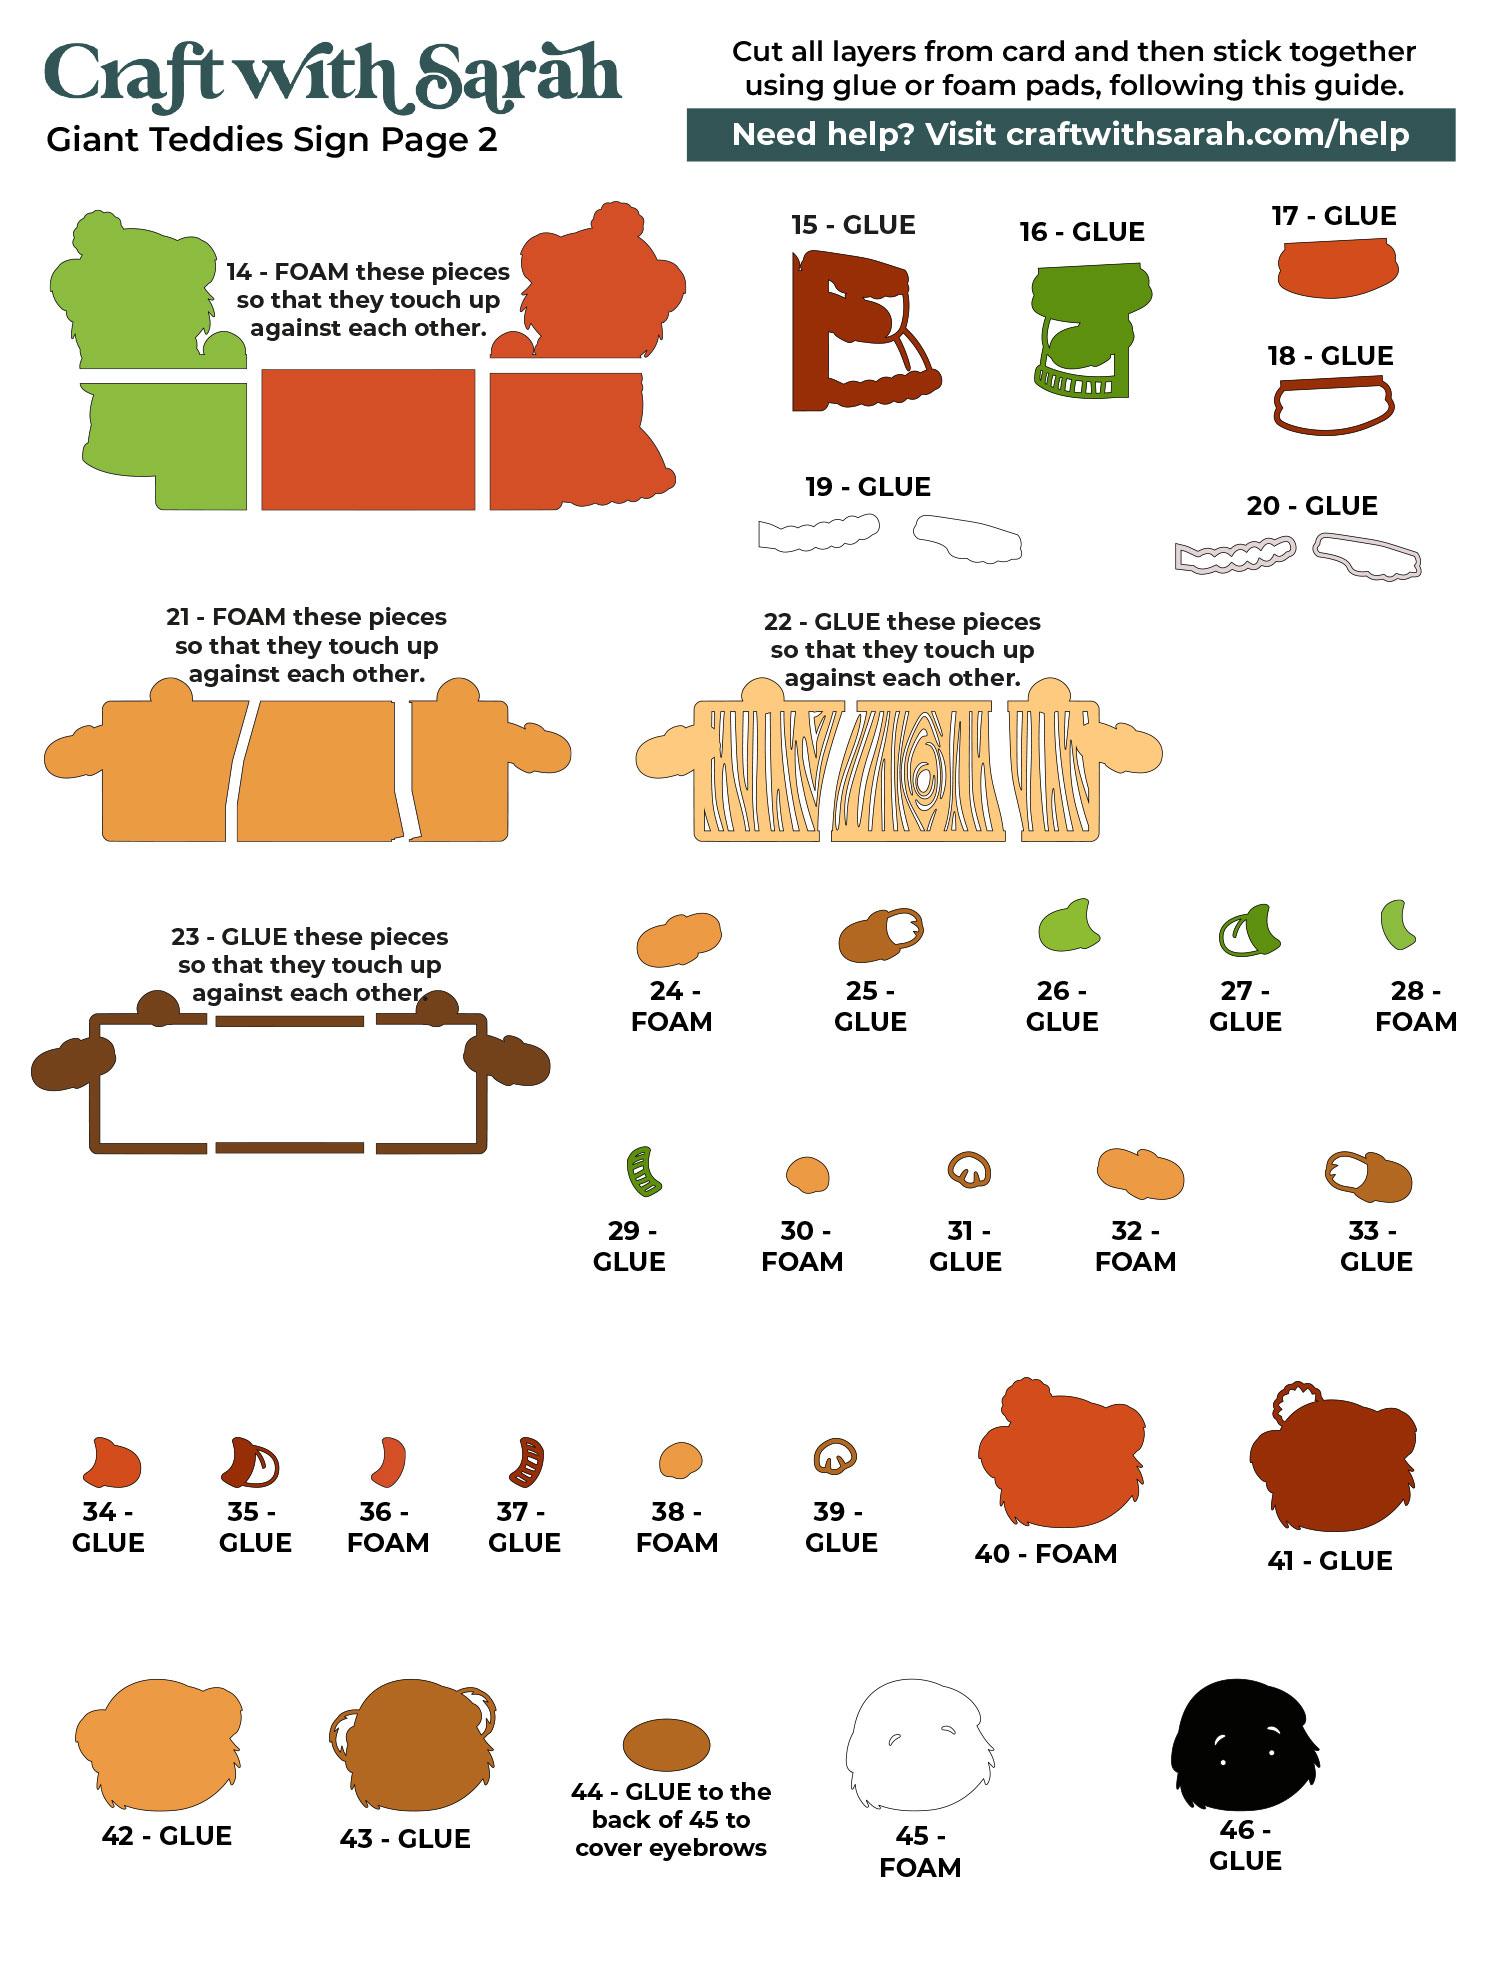
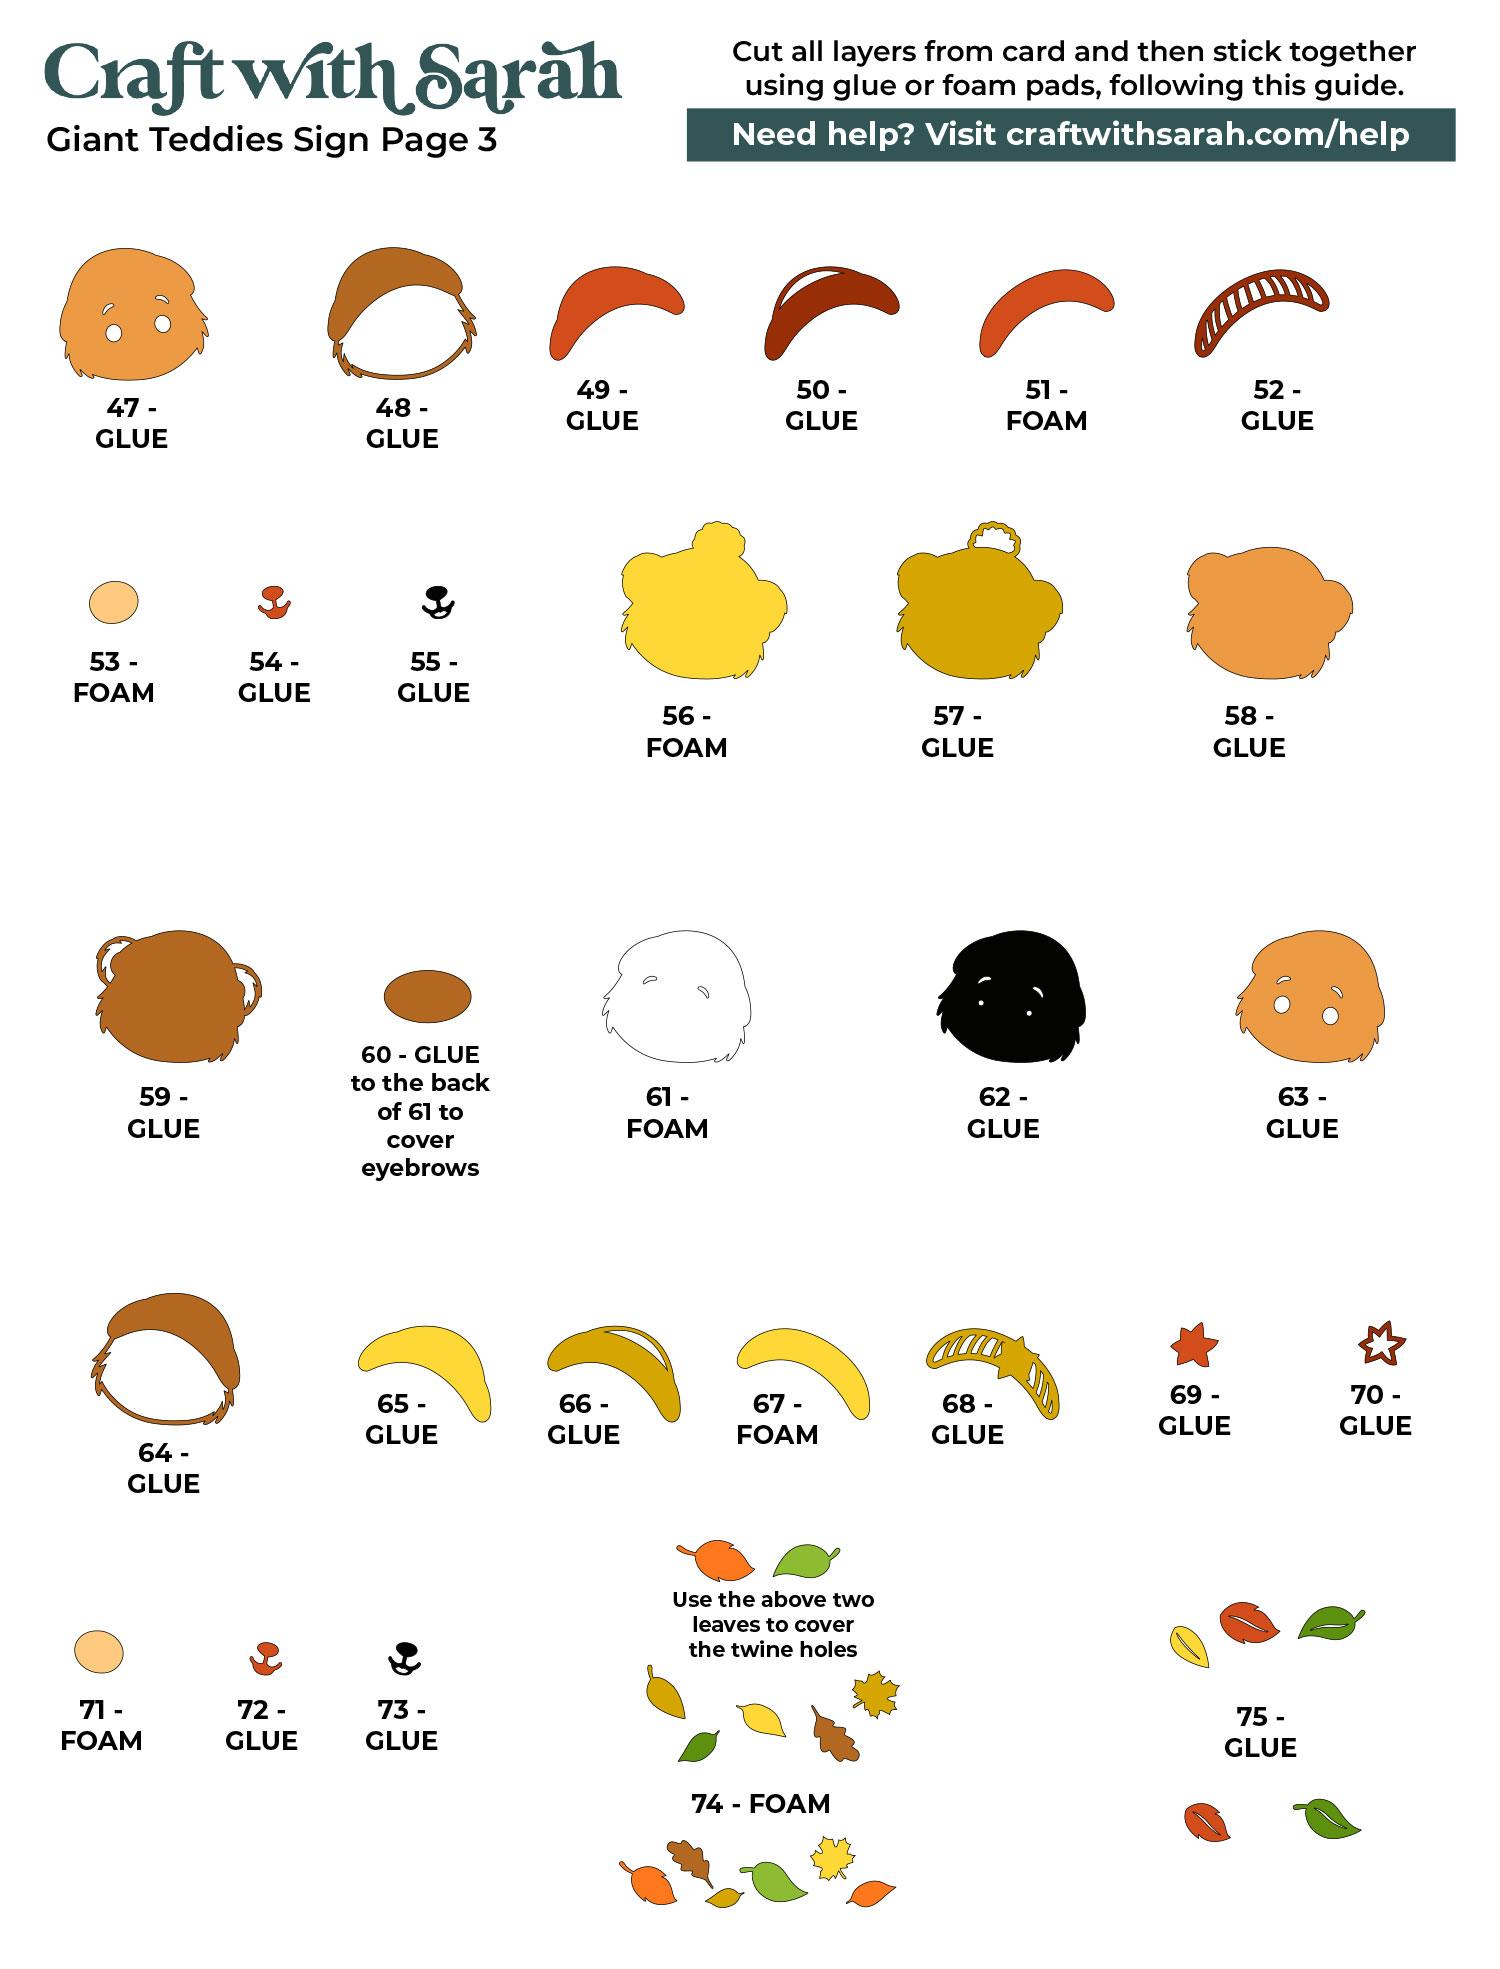
When it comes to adding the leaves near the end of the project, use the two largest leaves to hide the hanging holes near the top of the design.
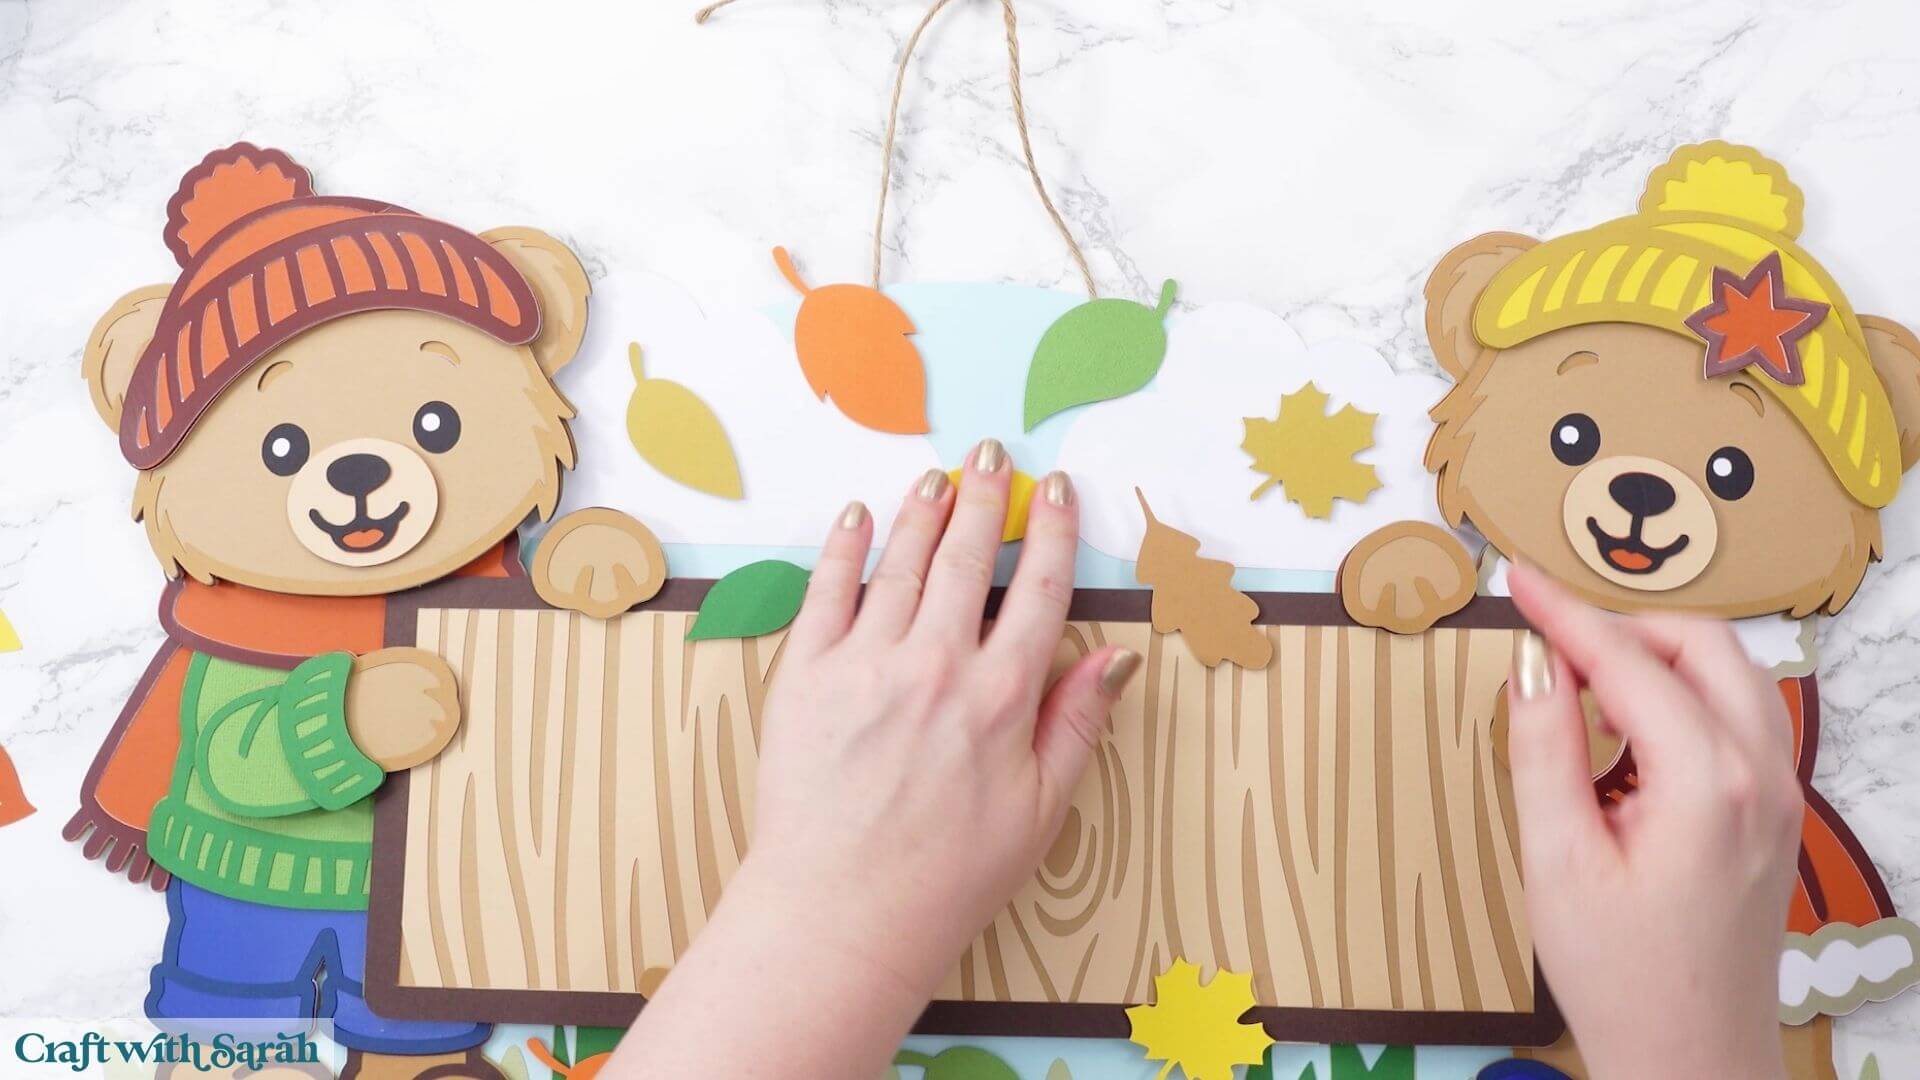
Step 7) Add your message
The final step is to add your message to the middle of the wooden sign.
First, glue each coloured letter onto its corresponding white offset layer.
Before sticking the letters onto the sign, lay the whole word out in position.
This is important because you want to check that all of the letters will fit and that the spacing looks right before committing to their final positions. If you start sticking them down individually without checking first, you could reach the end and discover there isn’t enough room for the final letter.
Once you’re happy with the layout, add foam squares to the backs of the white offset layers.
Stick the letters onto the sign one at a time, keeping the spacing as even as you can.
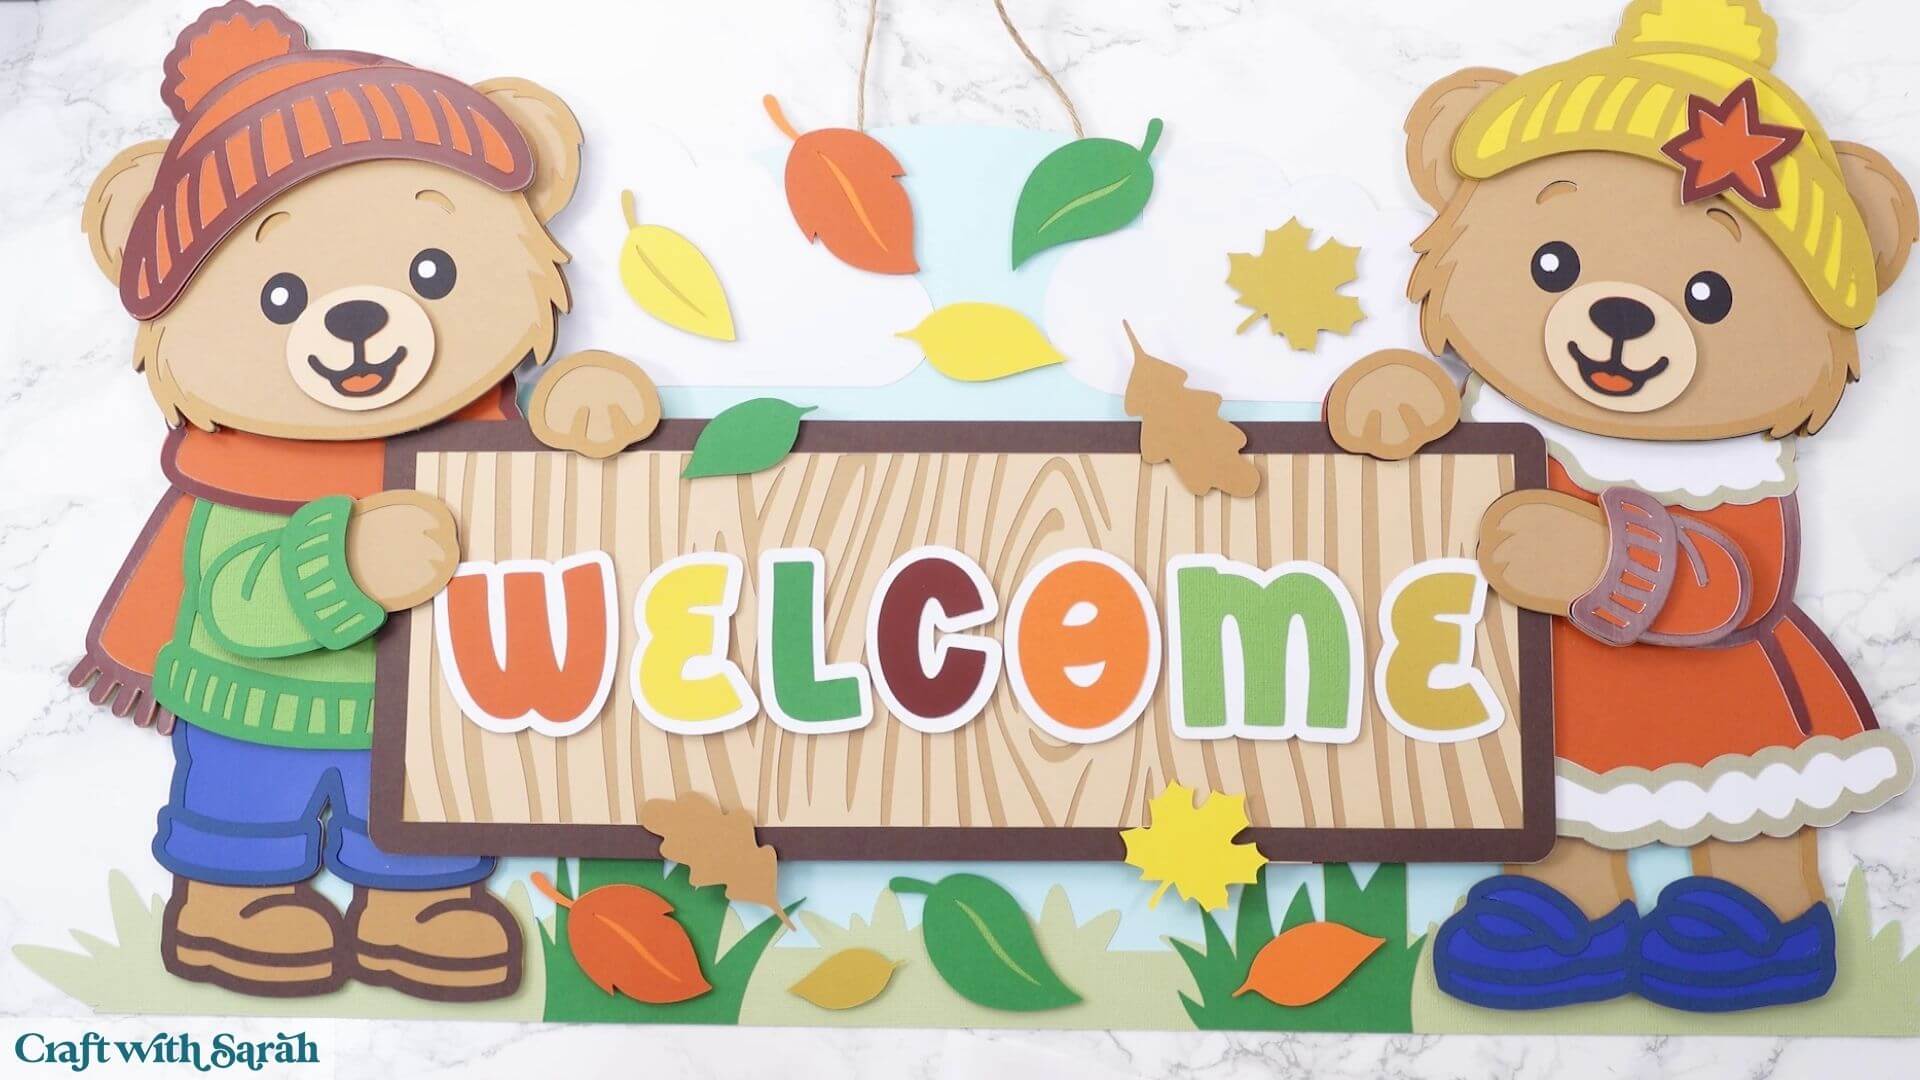
For my ‘WELCOME’ sign, the ‘W’ and final ‘E’ tuck very slightly underneath the teddy bears’ paws. This helps make the wording look like it stretches naturally across the full width of the wooden sign.
Don’t worry if your letters aren’t absolutely perfectly straight. With a chunky, playful font like this, a slightly wibbly-wobbly arrangement works really nicely with the cute style of the design.
There’s that last letter on, and now the giant teddy bear welcome sign for fall is all finished!
Your giant teddy bear sign is finished!
I love how this project turns out at such a large size.
The teddy bears are so cute, and all of the layered details, autumn leaves and personalised lettering make this a really special piece of autumn decor.
You can hang your finished sign on the wall using the twine or ribbon, or prop it up along the edge of a shelf.
Happy crafting,
Sarah x