Honeycomb Pumpkins 🍂 FCC 09
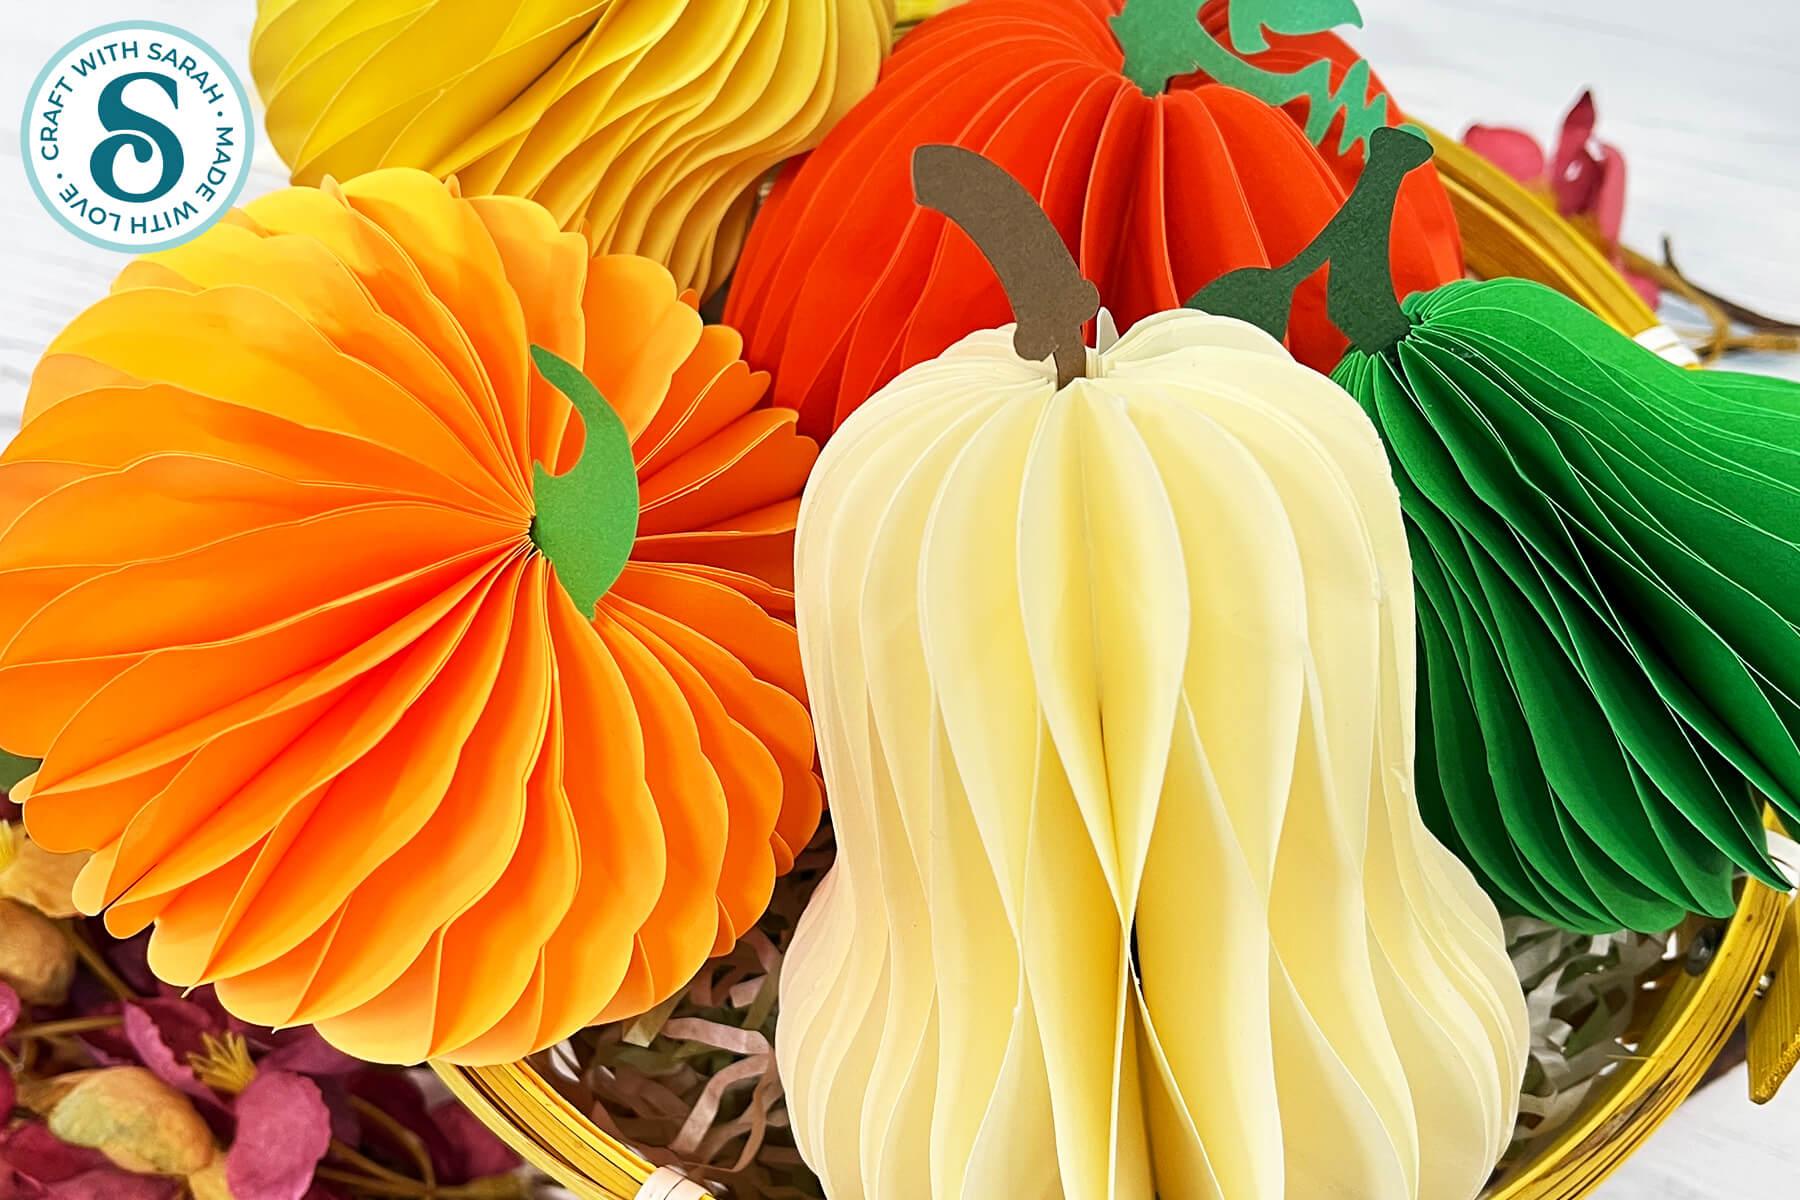
Make pretty honeycomb decorations for Fall with this collection of pumpkins, squash and fruit.
Create a beautiful autumn display with these 3D honeycomb pumpkins, fruit and vegetables.
These lightweight paper decorations are perfect for decorating your home, creating a Thanksgiving centrepiece or displaying on a mantelpiece throughout the autumn season.
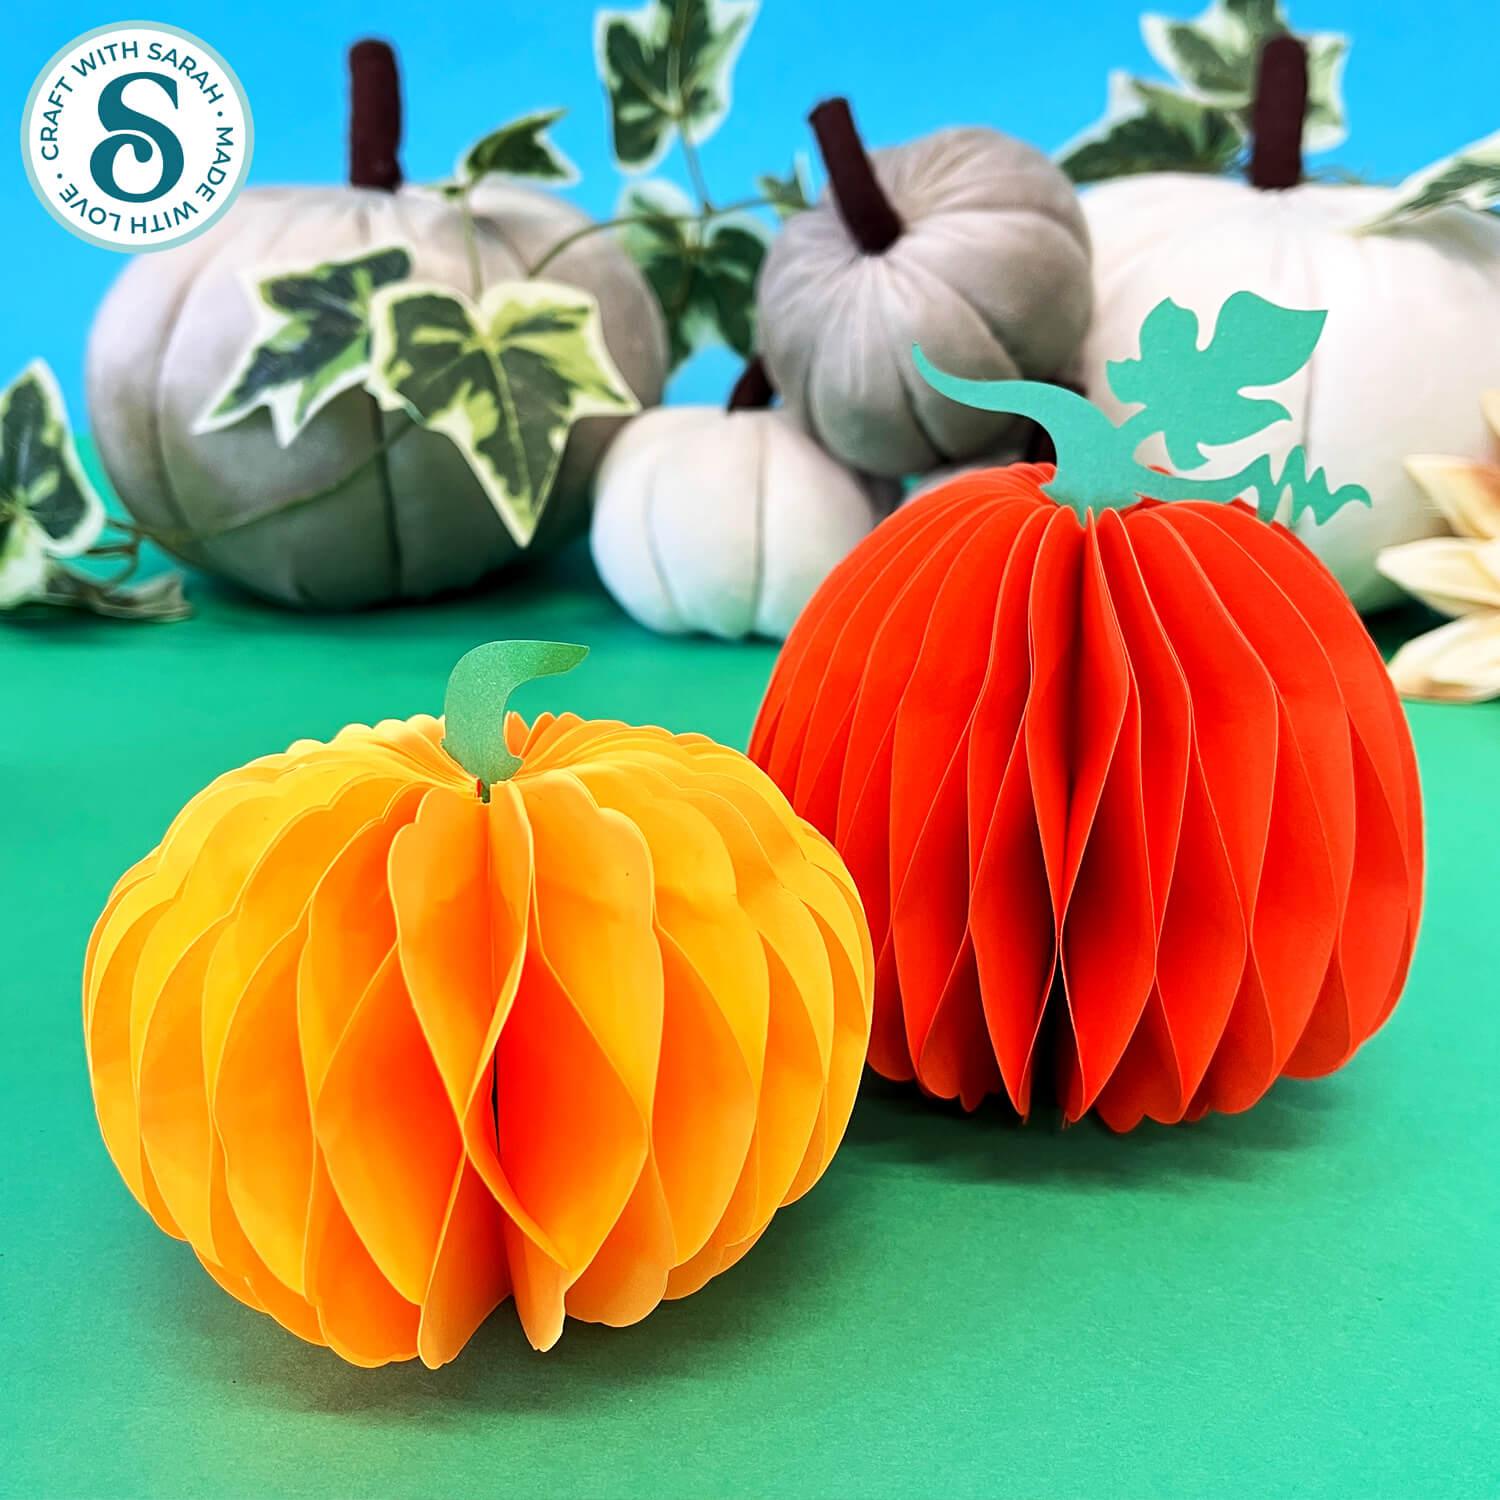
Each decoration is made by layering multiple folded paper shapes together in a special pattern.
When the final two sides are glued together, the decoration opens into a beautiful honeycomb shape that looks impressive from every angle.
This tutorial shows you how to prepare the SVG files in Cricut Design Space, choose the right materials and assemble each honeycomb decoration.
This project is part of the 2026 Falloween Craft Countdown
Honeycomb pumpkins materials supply list
Here is a list of the materials that I used to make this project.
Please note that some of the links included in this article are affiliate links, which means that if you click through and make a purchase I may receive a commission (at no additional cost to you). You can read my full disclosure at the bottom of the page.
- Cricut machine
- Light blue Cricut cutting mat
- Coloured copy paper or construction paper (not cardstock!)
- Coloured cardstock for the stalks
- Glue (I like Bearly Art Glue and Collall)
- Bulldog clips or large paperclips
- Scissors (optional)
This project is suitable for the following types of Cricut machines: Explore series, Maker series, Joy Xtra, Joy and Joy 2.
Foundation learning
If you're new to making papercrafts with your cutting machine, check out these links to get you started.
They include videos on topics such as: which file to use with your type of cutting machine, how to load the files into your cutting machine's software, how to cut cardstock with your type of cutting machine, how to recolor and modify/customize the cut files and tips for displaying your projects.
- How to use zip folder downloads
- Help guides for Cricut machines
- Help guides for Silhouette machines
- Help guides for ScanNCut machines
The following tutorials are Cricut-specific, but many of the ideas will work similarly with a Silhouette or ScanNCut machine and any cut files that are shared in them are compatible with all types of cutting machine.
- How to score with a Cricut (even without scoring tools)
- Print then cut tutorial
- Design Space tools (Combine, Attach, Slice, Weld, Flatten, etc.)
- Pattern fill tutorial (for making backgrounds & cutting images to a specific shape/size)
- Free envelope SVGs that can be sized to fit any card
- Presentation boxes for handmade cards
- How to write inside cards with Cricut pens
- How to cut layered designs at a small size
- Design Space tips & tricks
- Cricut pens tutorial
- How to mount multiple designs in the same frame with magic guides
Honeycomb decorations video tutorial
Watch the video below to see how to make this project. Keep scrolling for a written tutorial.
Before you start…
Although many papercraft projects work best with cardstock, these honeycomb decorations are different.
The main body pieces should be cut from lightweight coloured paper such as copy paper or construction paper.
Using cardstock makes the finished decorations too bulky and prevents the honeycomb sections from opening properly.
The stalks can be cut from cardstock if you prefer, although a lighter weight cardstock will give the nicest results.
Each design includes 25 copies of the main shape.
For the default sizes, this gives a full, rounded honeycomb effect.
If you decide to make the decorations larger, you may need to cut a few extra copies.
If you make them much smaller, you’ll probably find that you don’t need all 25 layers.
Written tutorial (with photos!)
Here’s how to make honeycomb pumpkins, squash, apples and pears.
Step 1) Download the cutting file & upload to Design Space
Get the files using the box below.
Purchase the File(s)
This cut file is available as part of the Instant Access Bundle.
Or, purchase this design individually here
Before you upload the SVGs to Design Space, you need to unzip the download folder that they come in.
Not sure how to do this? Click here for a tutorial that covers all the following types of computer and device:
- How to unzip a folder on a Windows computer
- How to unzip a folder on a Mac
- How to unzip a folder on an iPad
- How to unzip a folder on an iPhone
- How to unzip a folder on an Android device
After unzipping, upload the SVG file(s) into your cutting machine software.
Not sure how to use cut files with your type of machine? The following links lead to tutorials on how to use cut files in:
- Cricut Design Space
- Silhouette Studio
- CanvasWorkspace (for ScanNCut machines)
If you are using Cricut Design Space, start a new project and then click the “Upload” button on the left of the screen.
You can then either click “Browse” to find the files on your computer, or drag-and-drop them in.
Select the SVG file called svg-honeycomb-pumpkins-craftwithsarah.svg
Press “Upload” on the next screen.
After uploading, the design should be automatically inserted onto your Canvas.
To hide the left sidebar (to give you more space for designing!), click the arrow that’s about half way down the page.
If the design doesn’t get inserted onto your Canvas, it will show under “Uploads” in your “Recently Uploaded Images”. Click on it and then press “Add to Canvas” to put it onto your Project.
Need help uploading SVGs? Get step-by-step instructions here in our detailed help guides for Cricut, Silhouette and ScanNCut.
Check that the overall design measures 18 inches wide and 20 inches tall.
If it doesn’t, resize it to those measurements before making any changes.
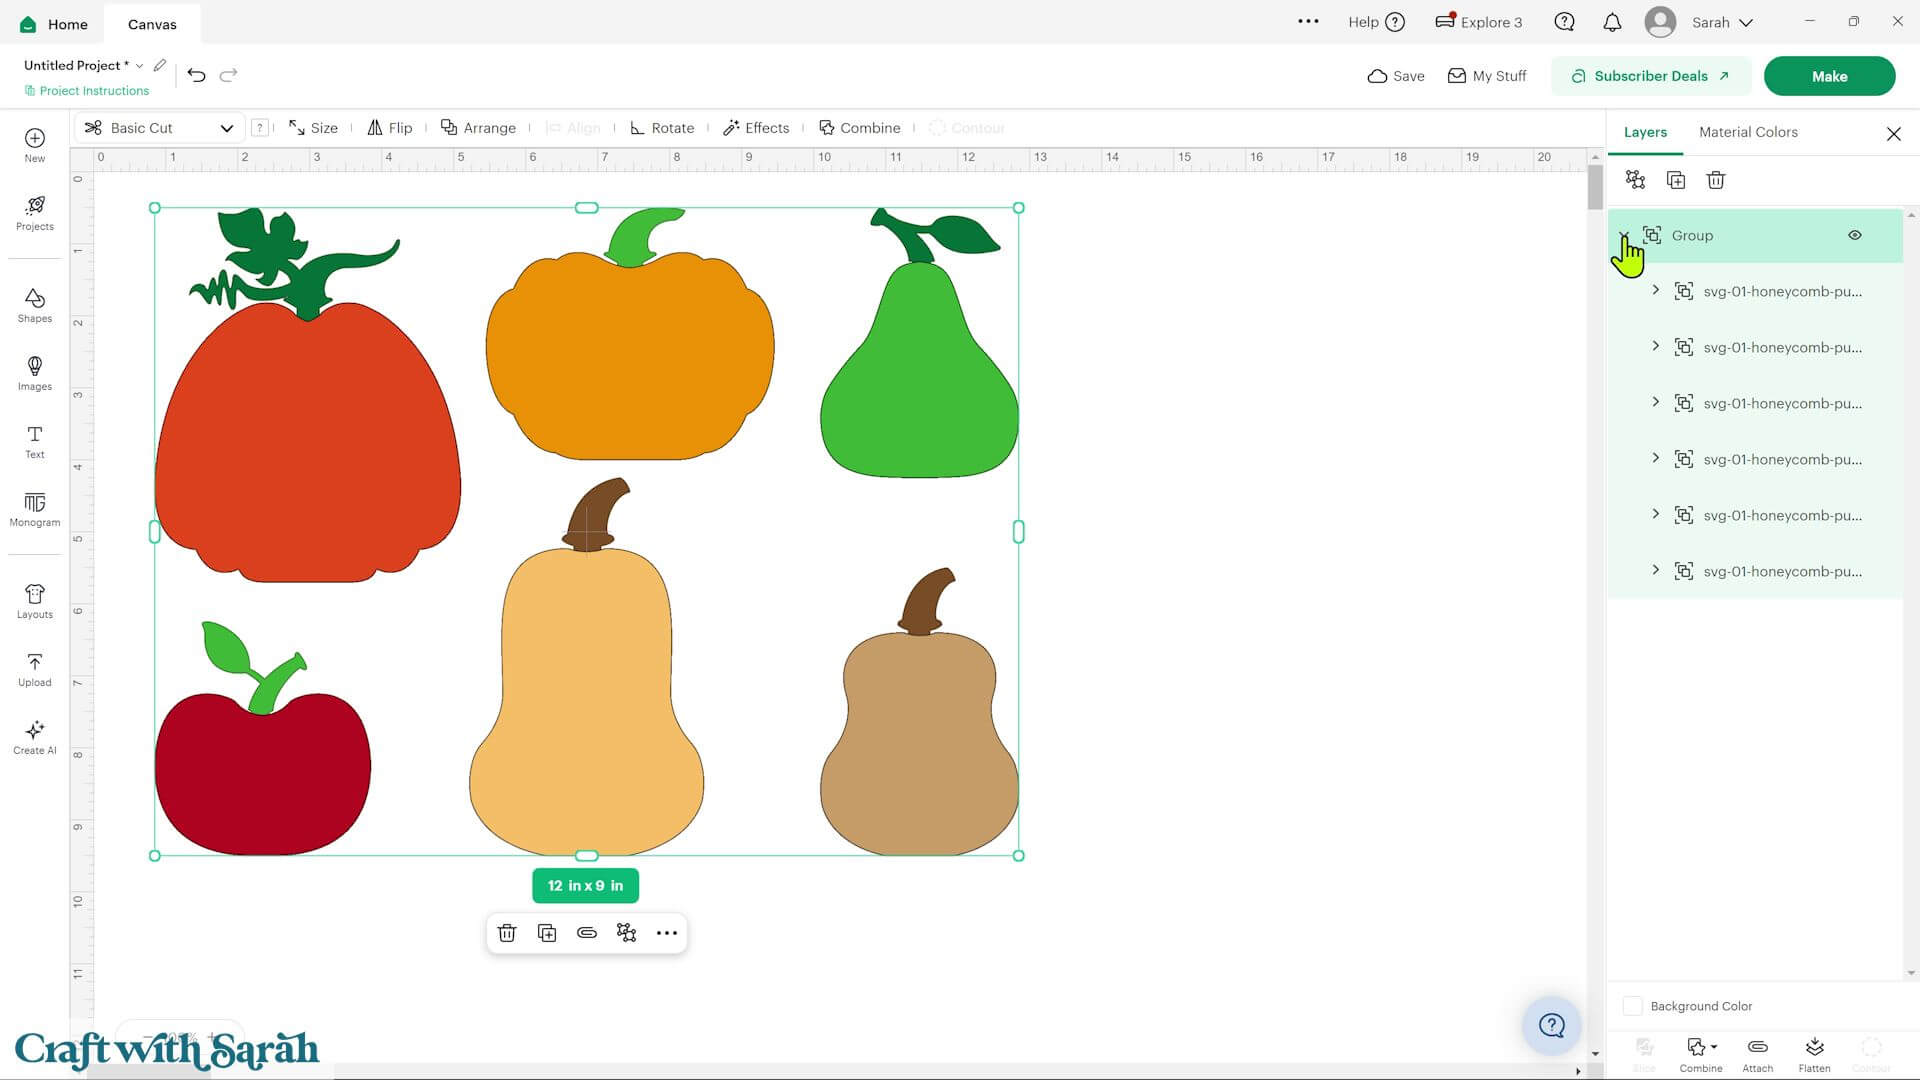
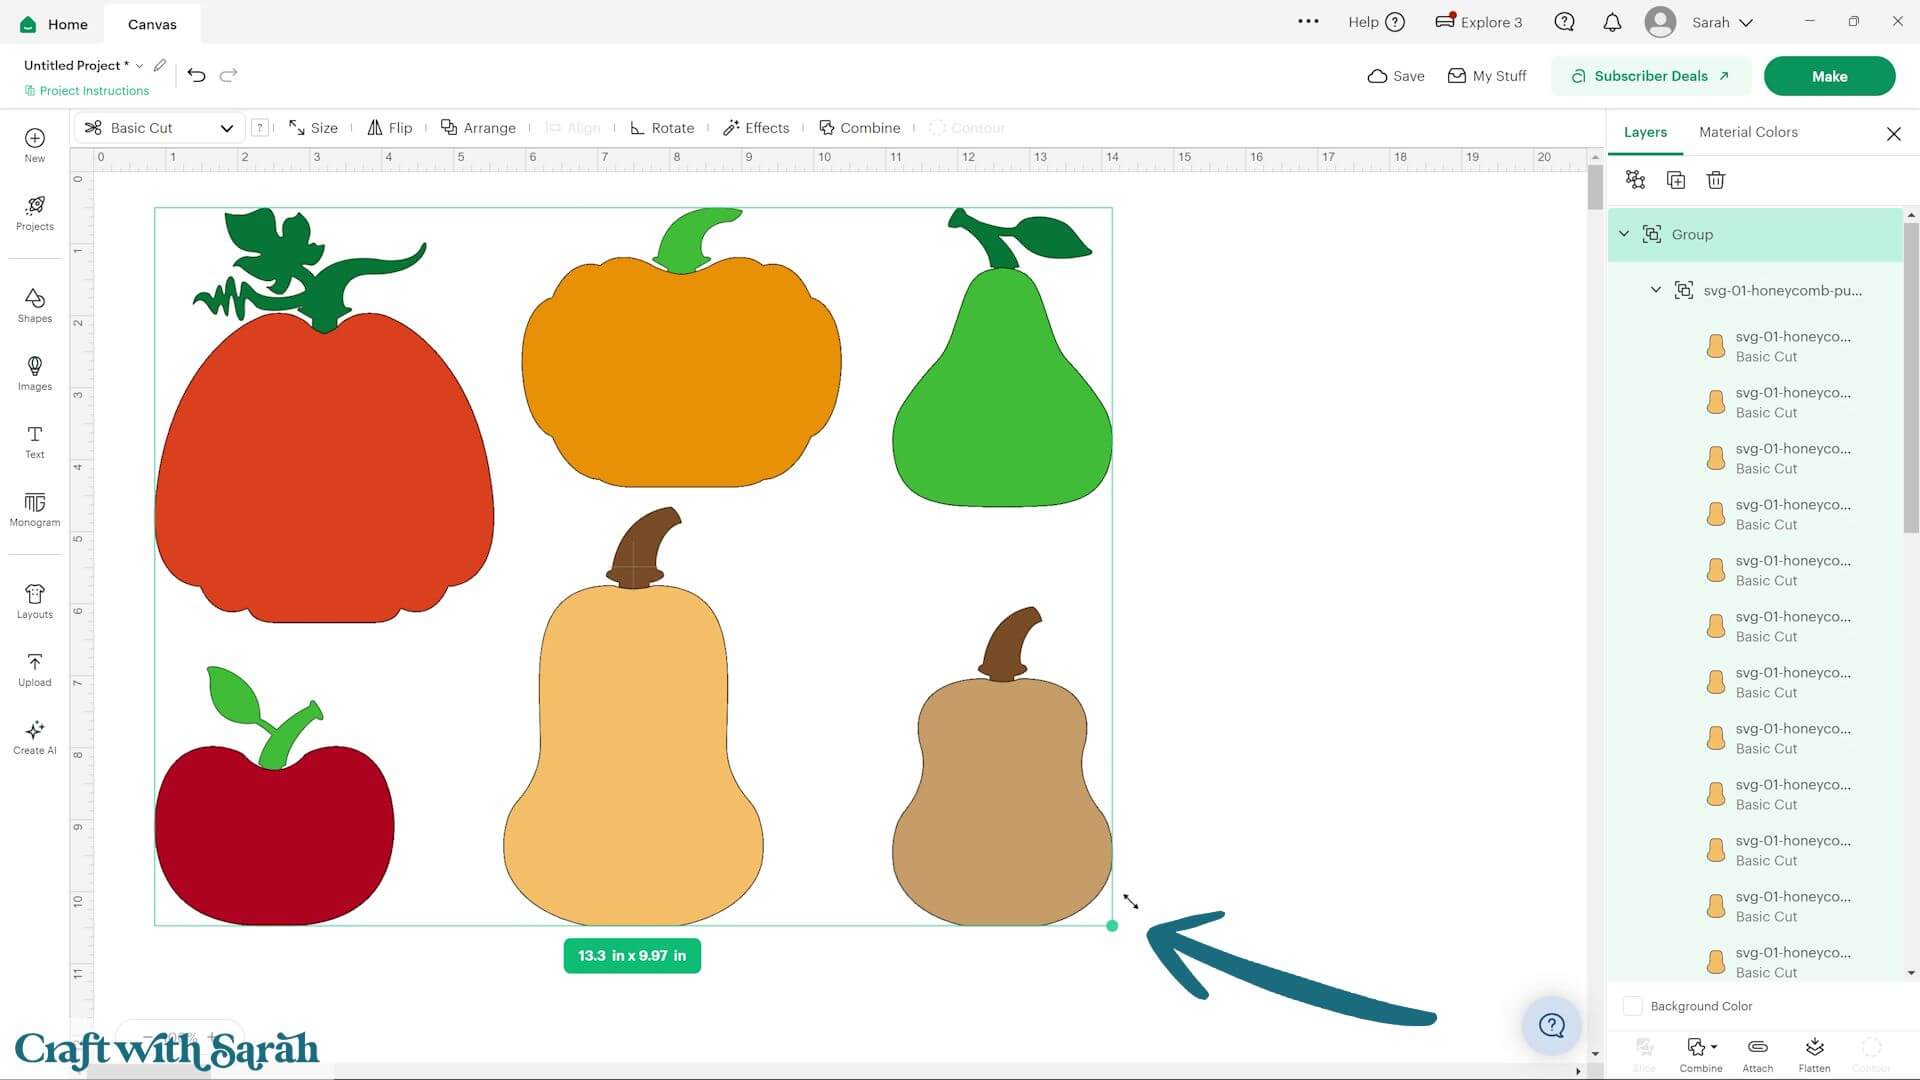
If you’d like to resize the decorations, simply select the entire design and drag one of the corner handles to make everything larger or smaller.
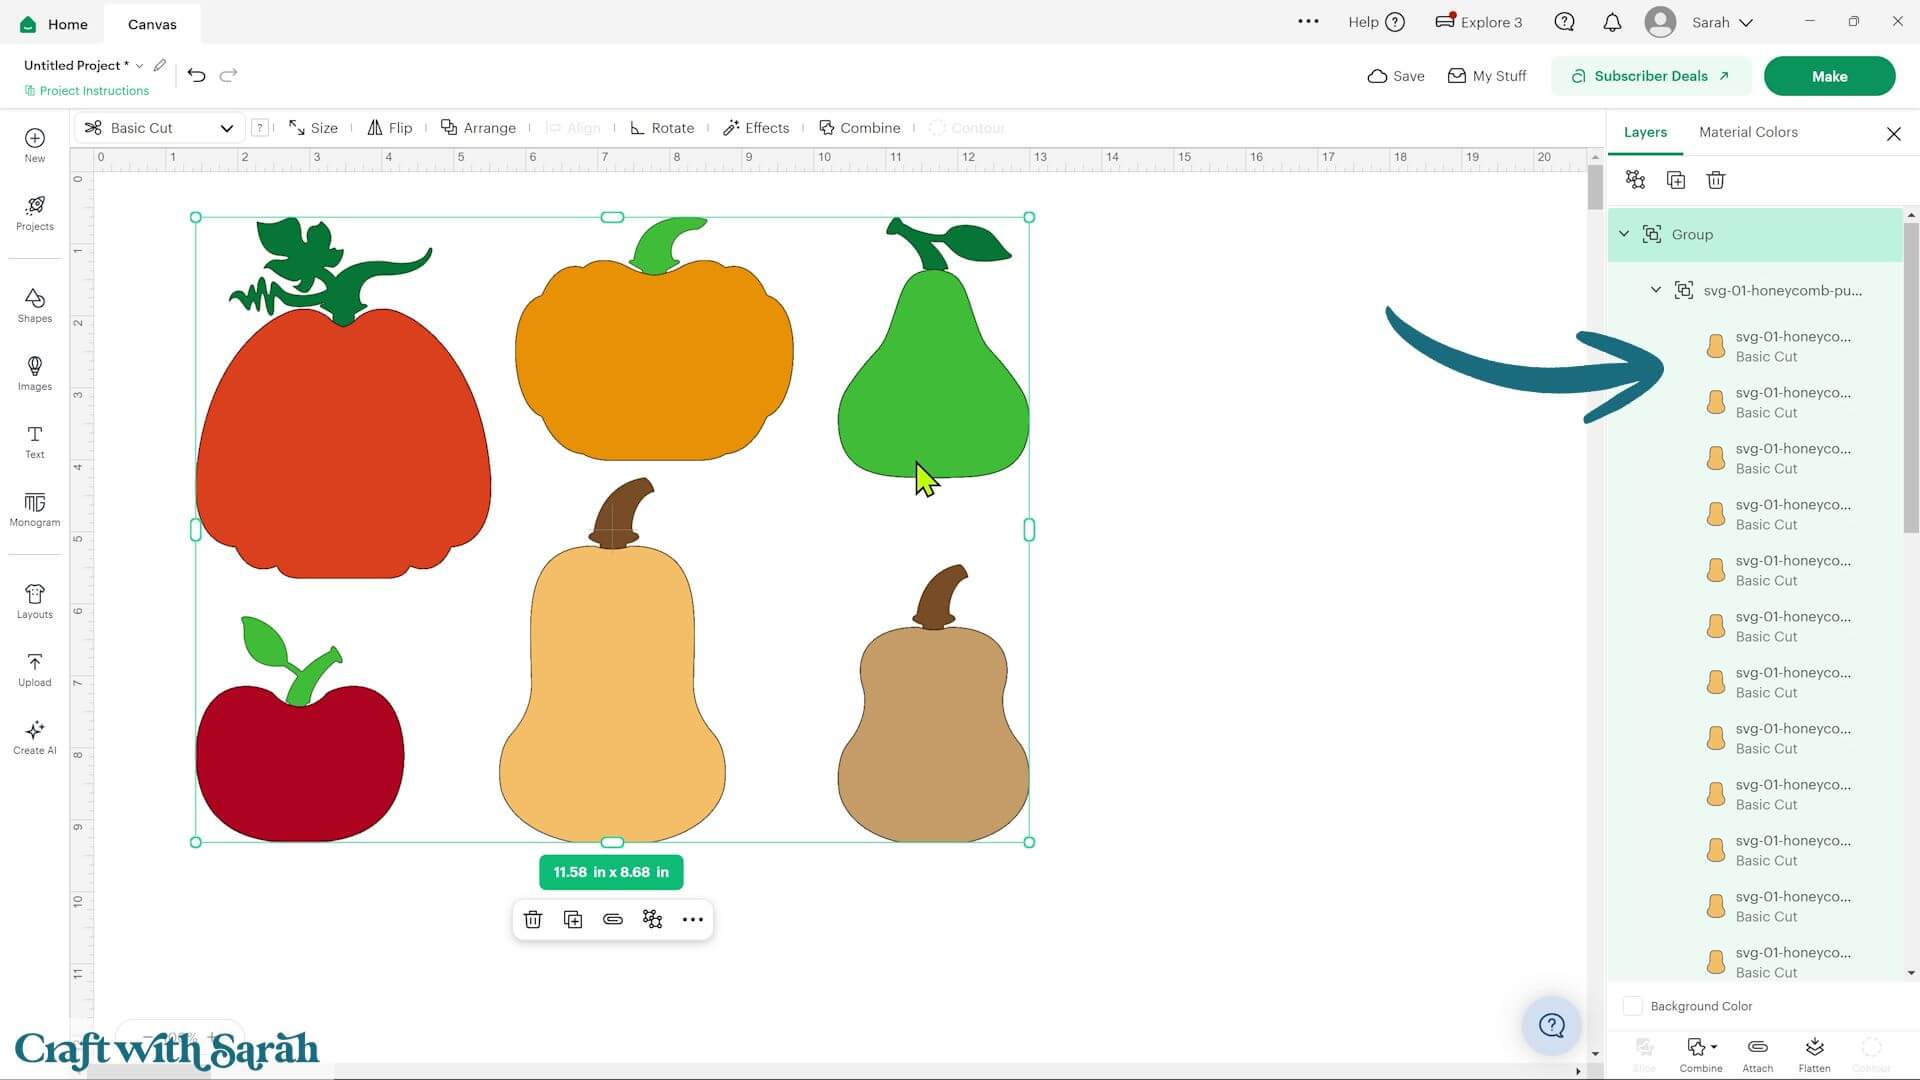
You can also customise which decorations you’d like to make. Ungroup the design and delete any shapes you don’t want, or duplicate individual designs if you’d like to make several of the same fruit or vegetable.
To recolour a decoration, ungroup its layers, move the stalk out of the way and select all 25 copies of the main shape together. You can then change them all to a new colour in one step.
Step 2) Cut the project
Cut the main fruit and vegetable shapes from coloured copy paper or construction paper.
For the stalks, you can use lightweight cardstock or the same coloured paper if you prefer.
You can rearrange pieces on the mats to make better use of your cardstock, provided none of the pieces overlap.
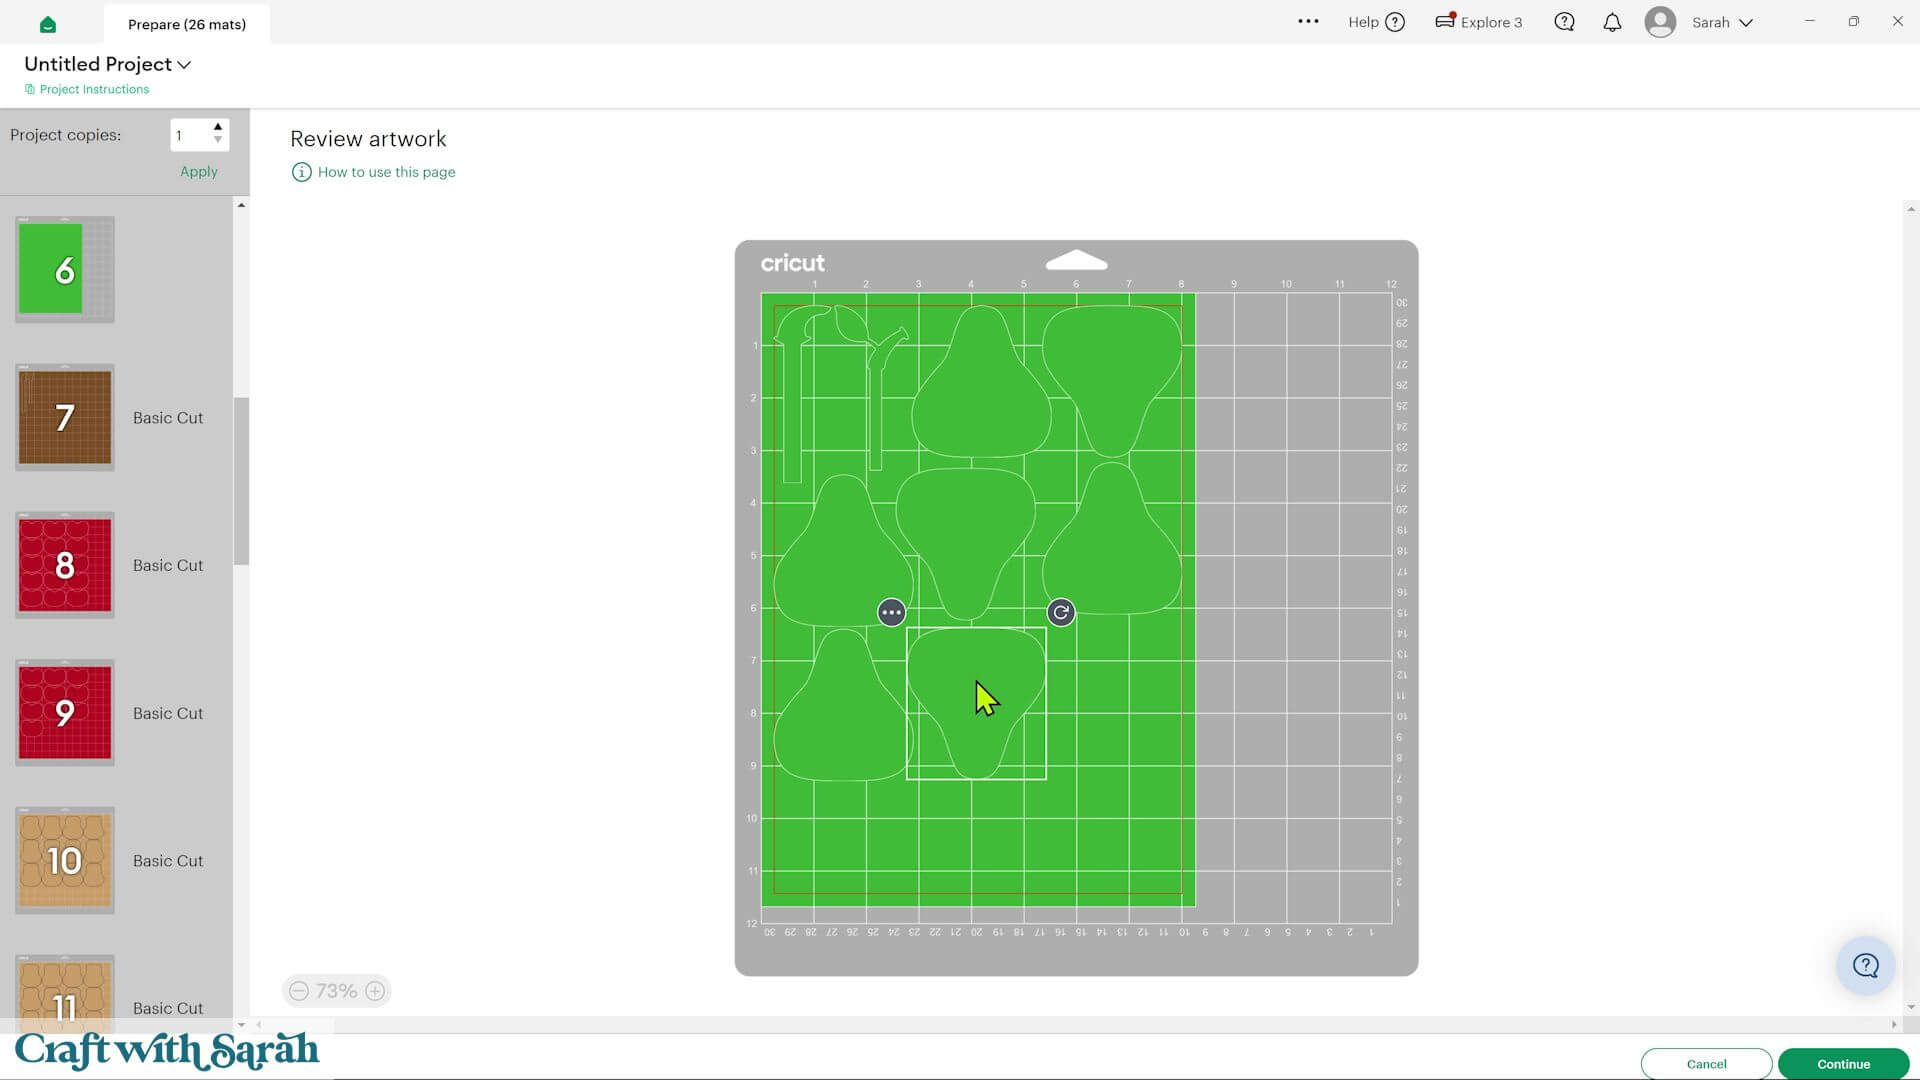
Follow the on-screen instructions to get everything cut from cardstock.
The “Copy Paper” material setting works well for most lightweight papers.
If you notice the paper tearing, try using Copy Paper with Less Pressure.
For especially delicate papers, the Vellum setting can also work well, although you may need to send the mat through the machine twice to cut all the way through.
TIP: New to using cardstock with your cutting machine? Check out these machine help guides for Cricut, Silhouette and ScanNCut that go through every step of the process, including tips for getting the best quality cuts from your machine.
Step 3) Fold all the pieces in half
Once everything has been cut, fold every fruit or vegetable shape in half vertically.
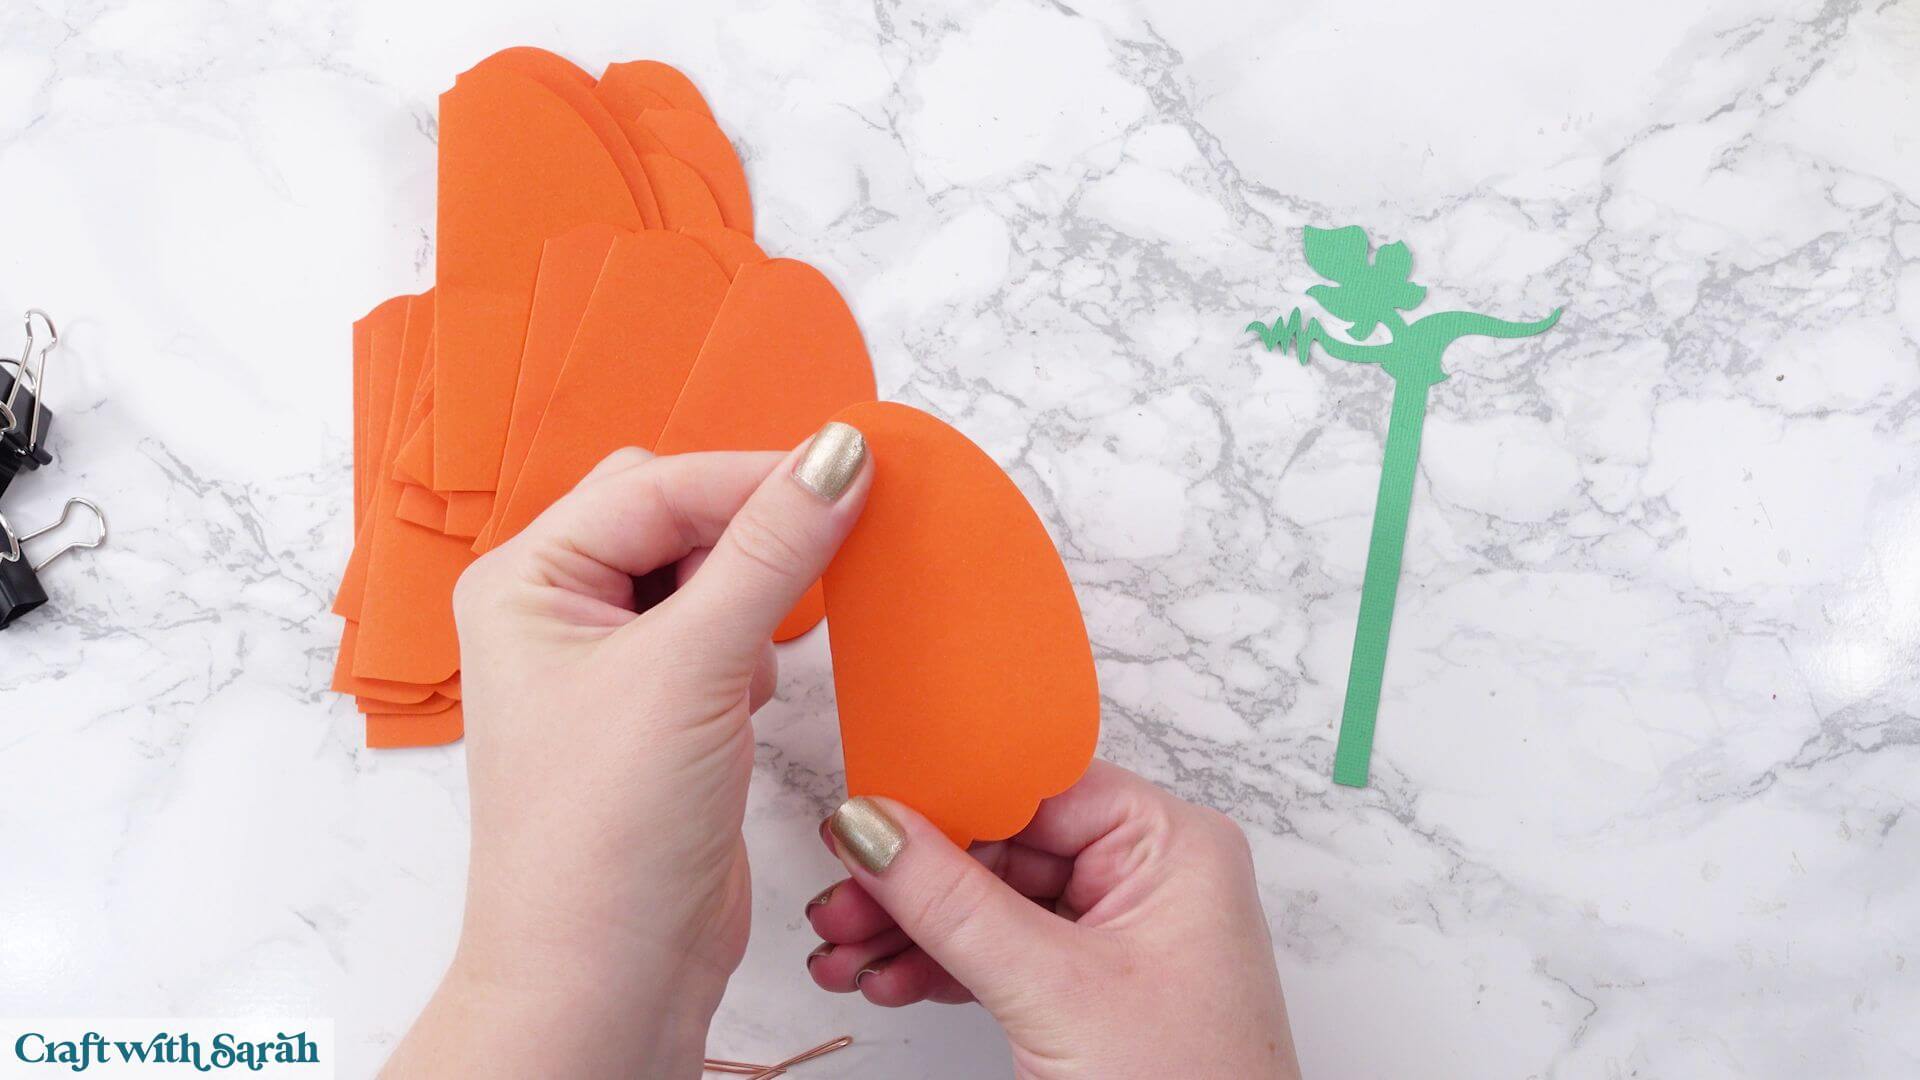
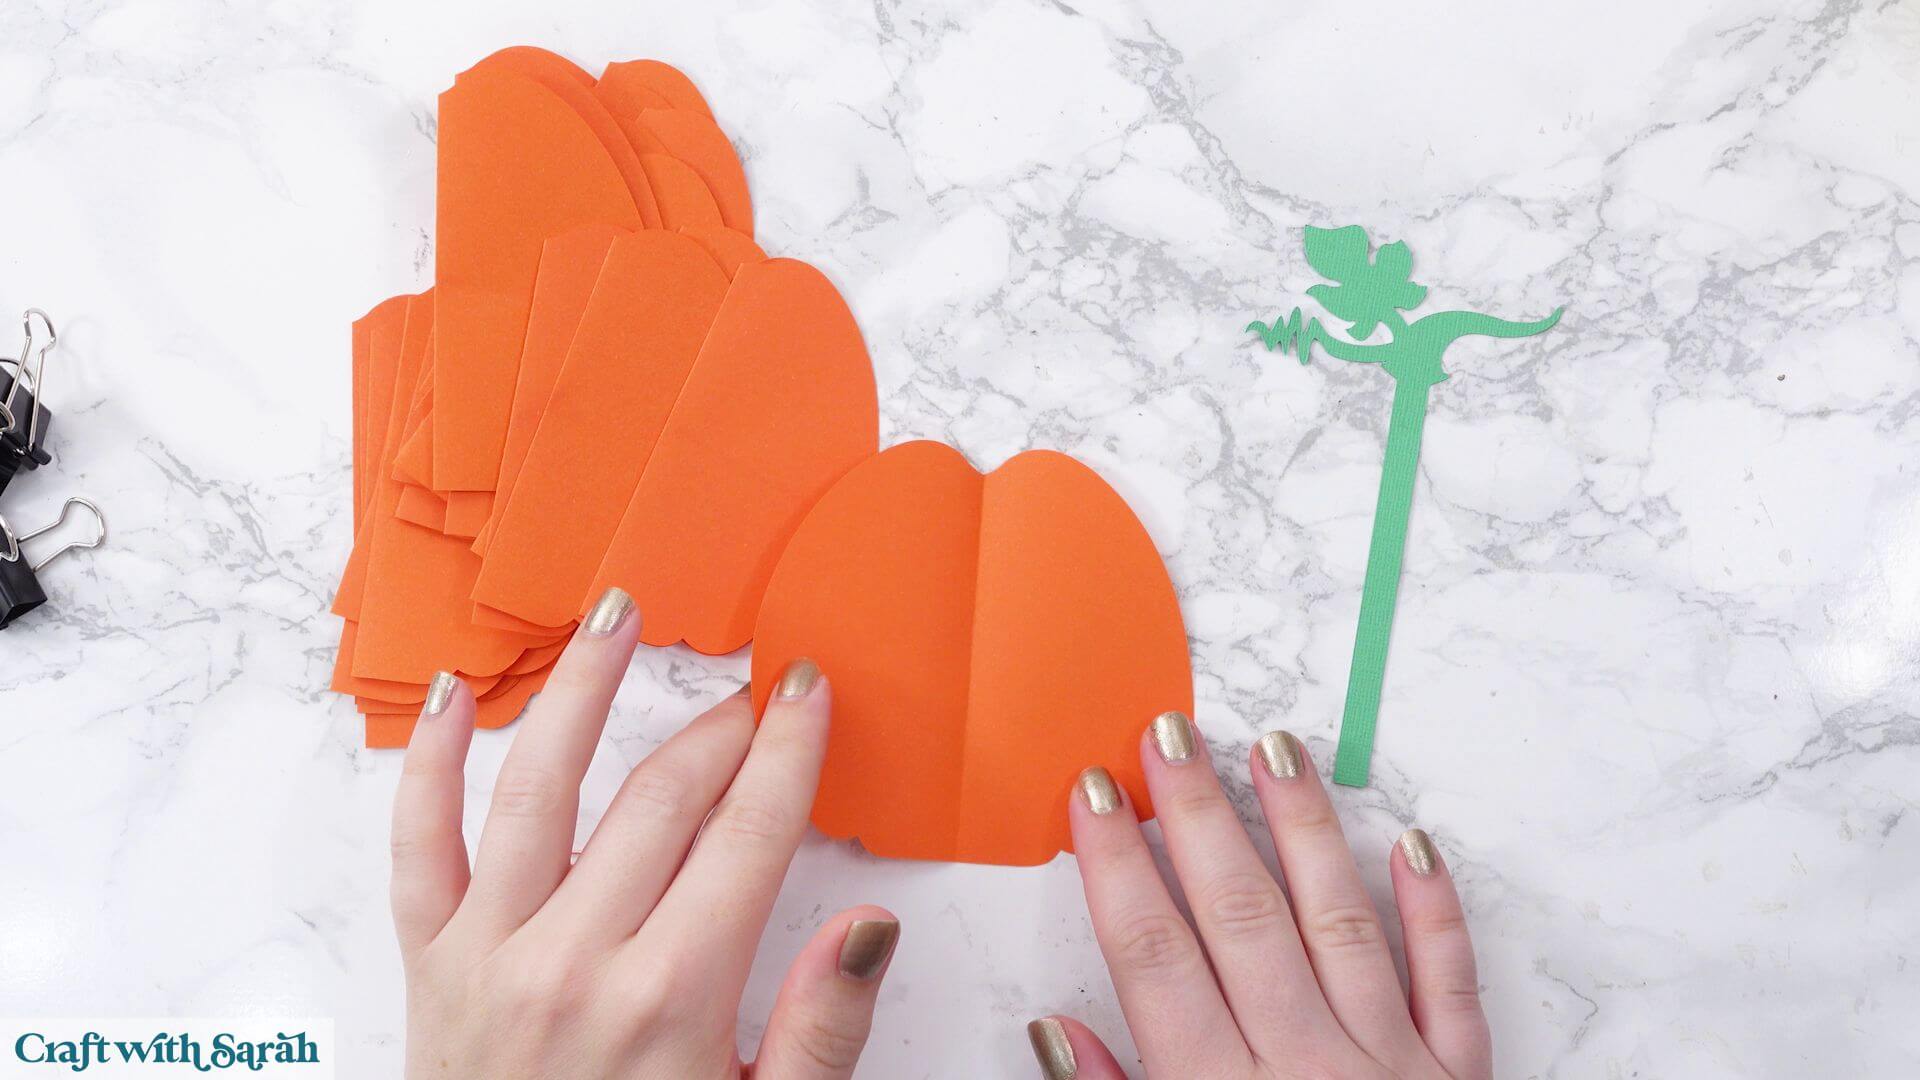
Try to make each fold as accurately as possible, as neat folds will produce a more even finished decoration.
My favourite glues to use on papercraft projects are Bearly Art Glue and Collall All Purpose Glue.
These are great because they don’t “warp” or bend the cardstock like some glues do. You can use as much of it as you want and the card stays perfect – and it dries perfectly clear too!
Bearly Art Glue comes with a tiny nozzle to make it easy to apply glue to small areas of card. The Collall glue doesn’t come with this, so it’s easiest to decant it into needle tip applicator bottles so that you have more control.
Step 4) Glue the middles together
Open one folded shape and apply a very thin line of glue just like the image below.
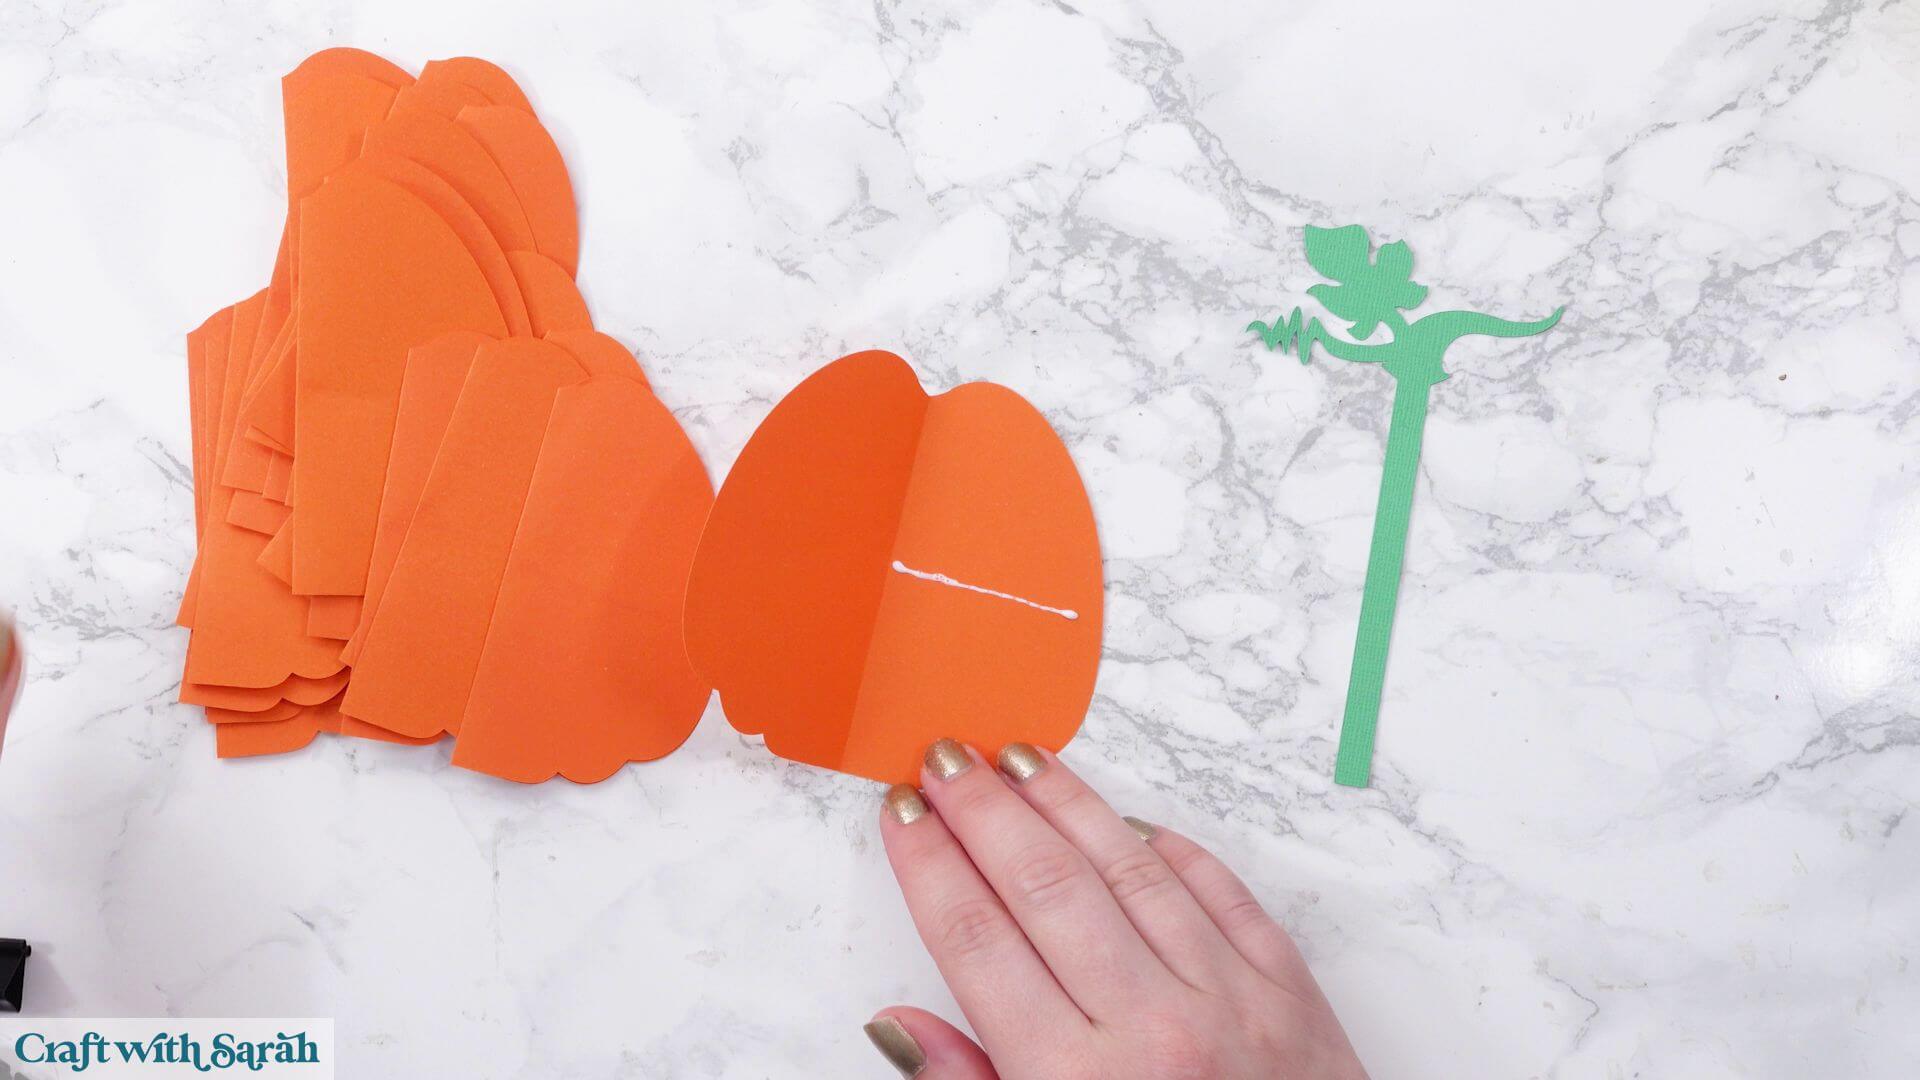
Keeping the glue away from the very ends helps prevent it squeezing out during assembly, which could accidentally glue the honeycomb sections together.
Fold the shape closed again and press gently along the fold. It should look like this:
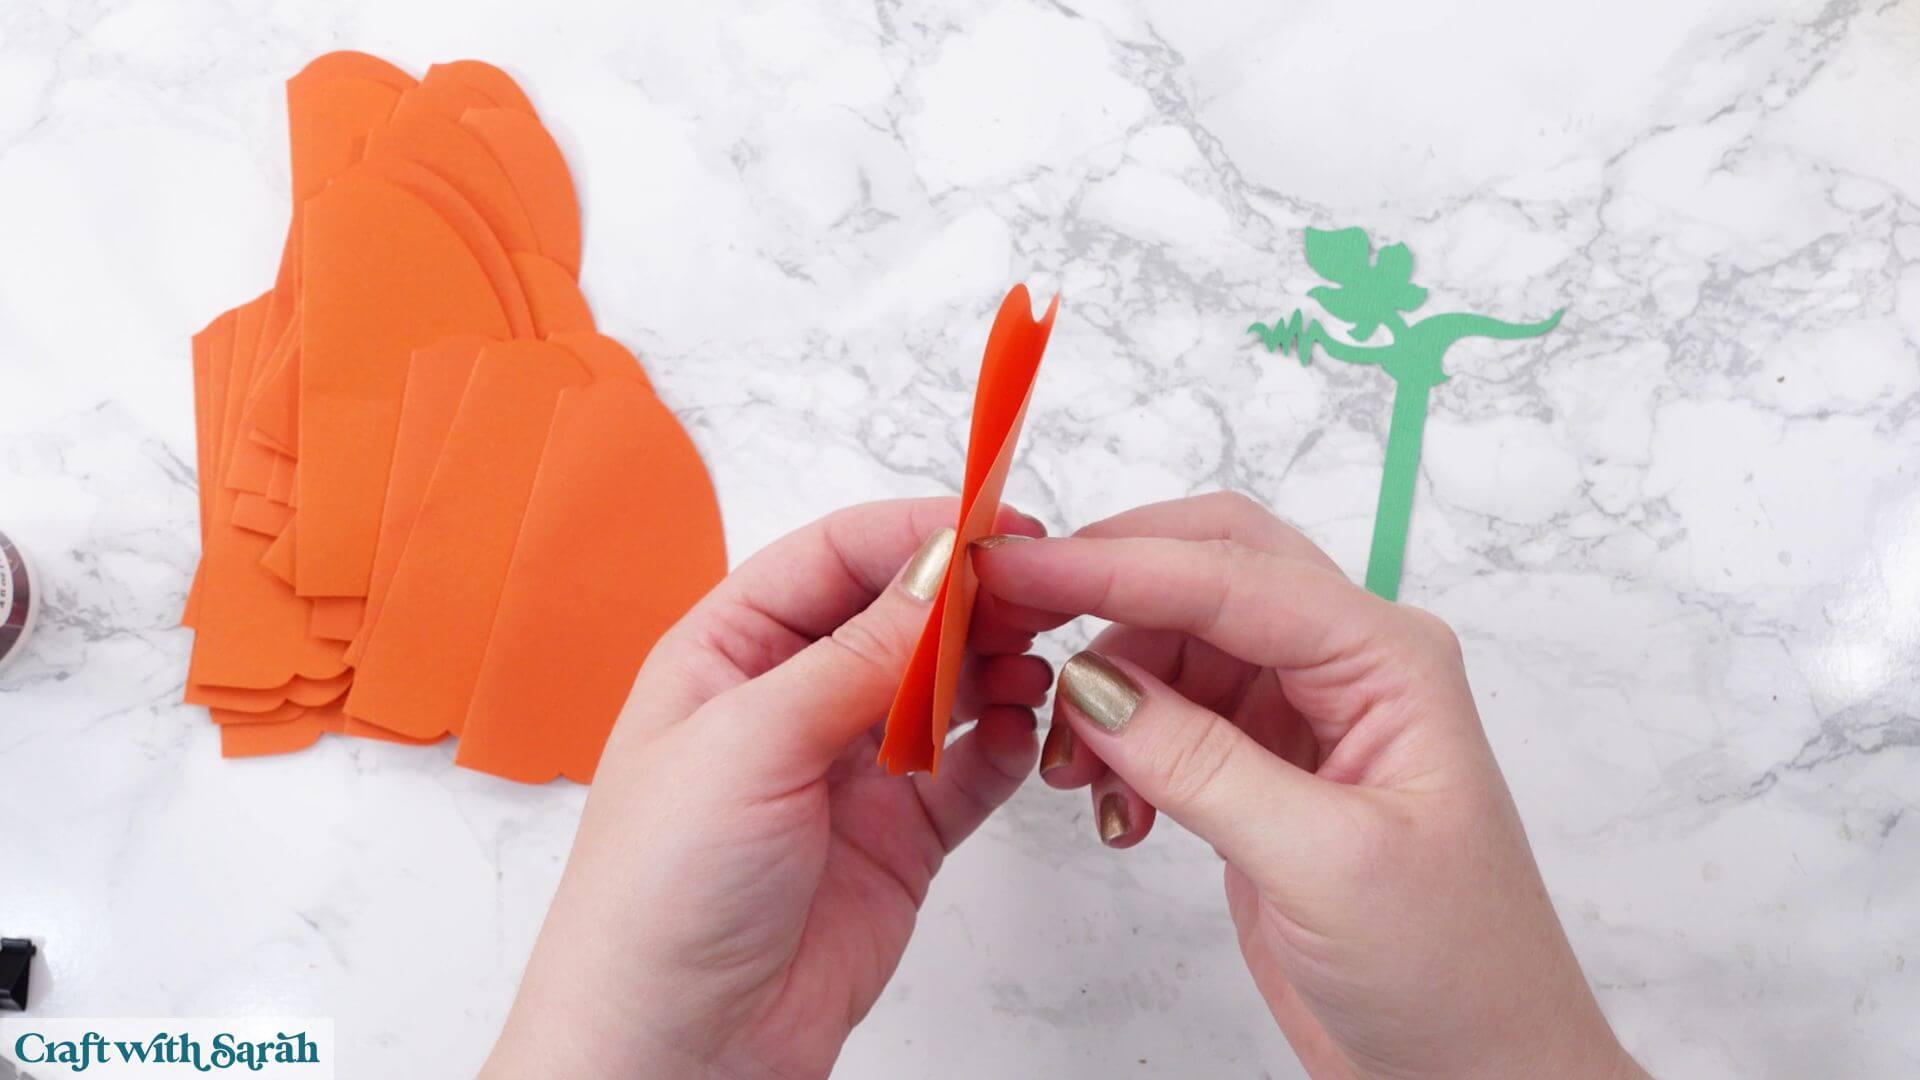
Avoid pressing too firmly, as squeezing the glue can create a thick ridge inside the decoration.
Repeat this for every copy of the shape.
Once all of the folded pieces have their middle glue line, allow them to dry before moving on.
Step 5) Build the honeycomb stack
The remaining pieces are attached one at a time.
Instead of gluing down the centre, apply two very thin glue lines to one side of the folded shape.
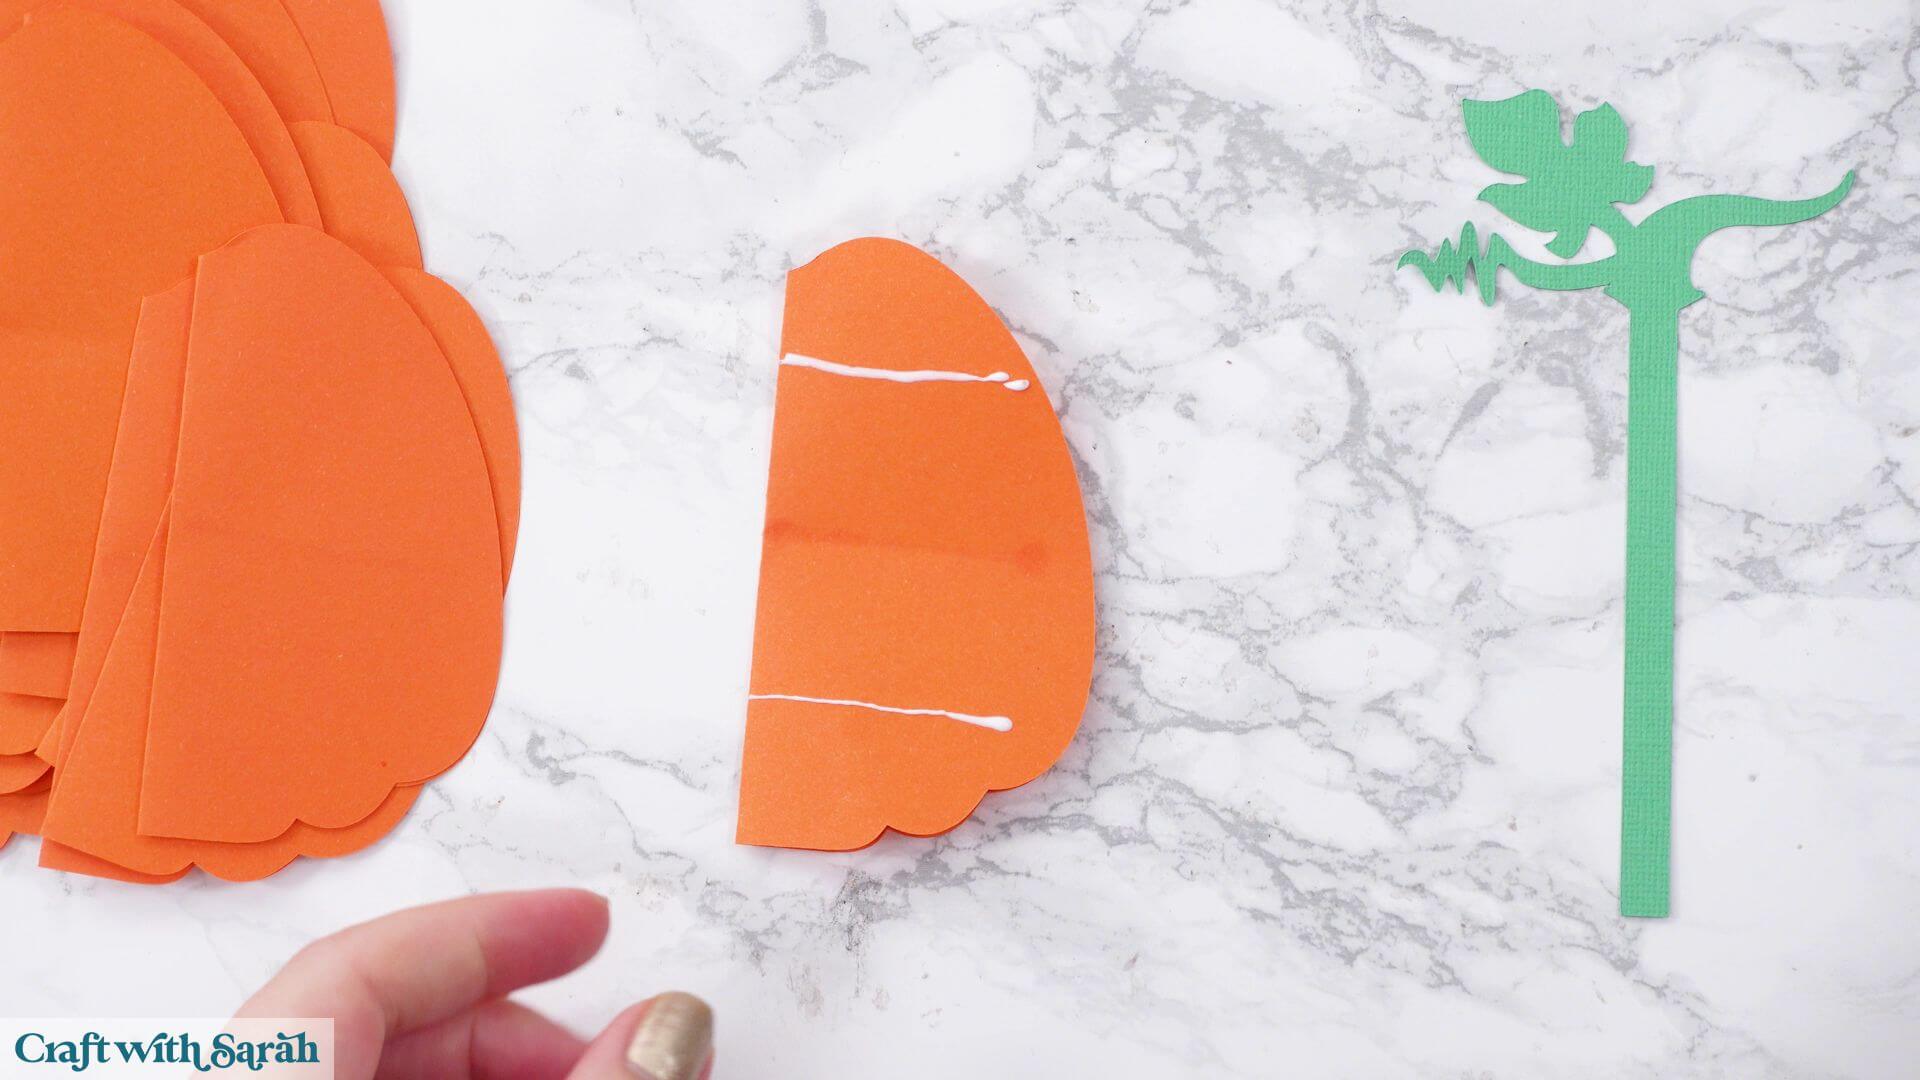
Position one glue line roughly halfway between the top edge and the centre fold, and the second halfway between the centre fold and the bottom edge.
The exact spacing doesn’t have to be perfect, but keeping the glue lines reasonably consistent throughout the project helps create an even honeycomb pattern.
Place the next folded shape directly on top, carefully matching both folded edges together as accurately as possible.
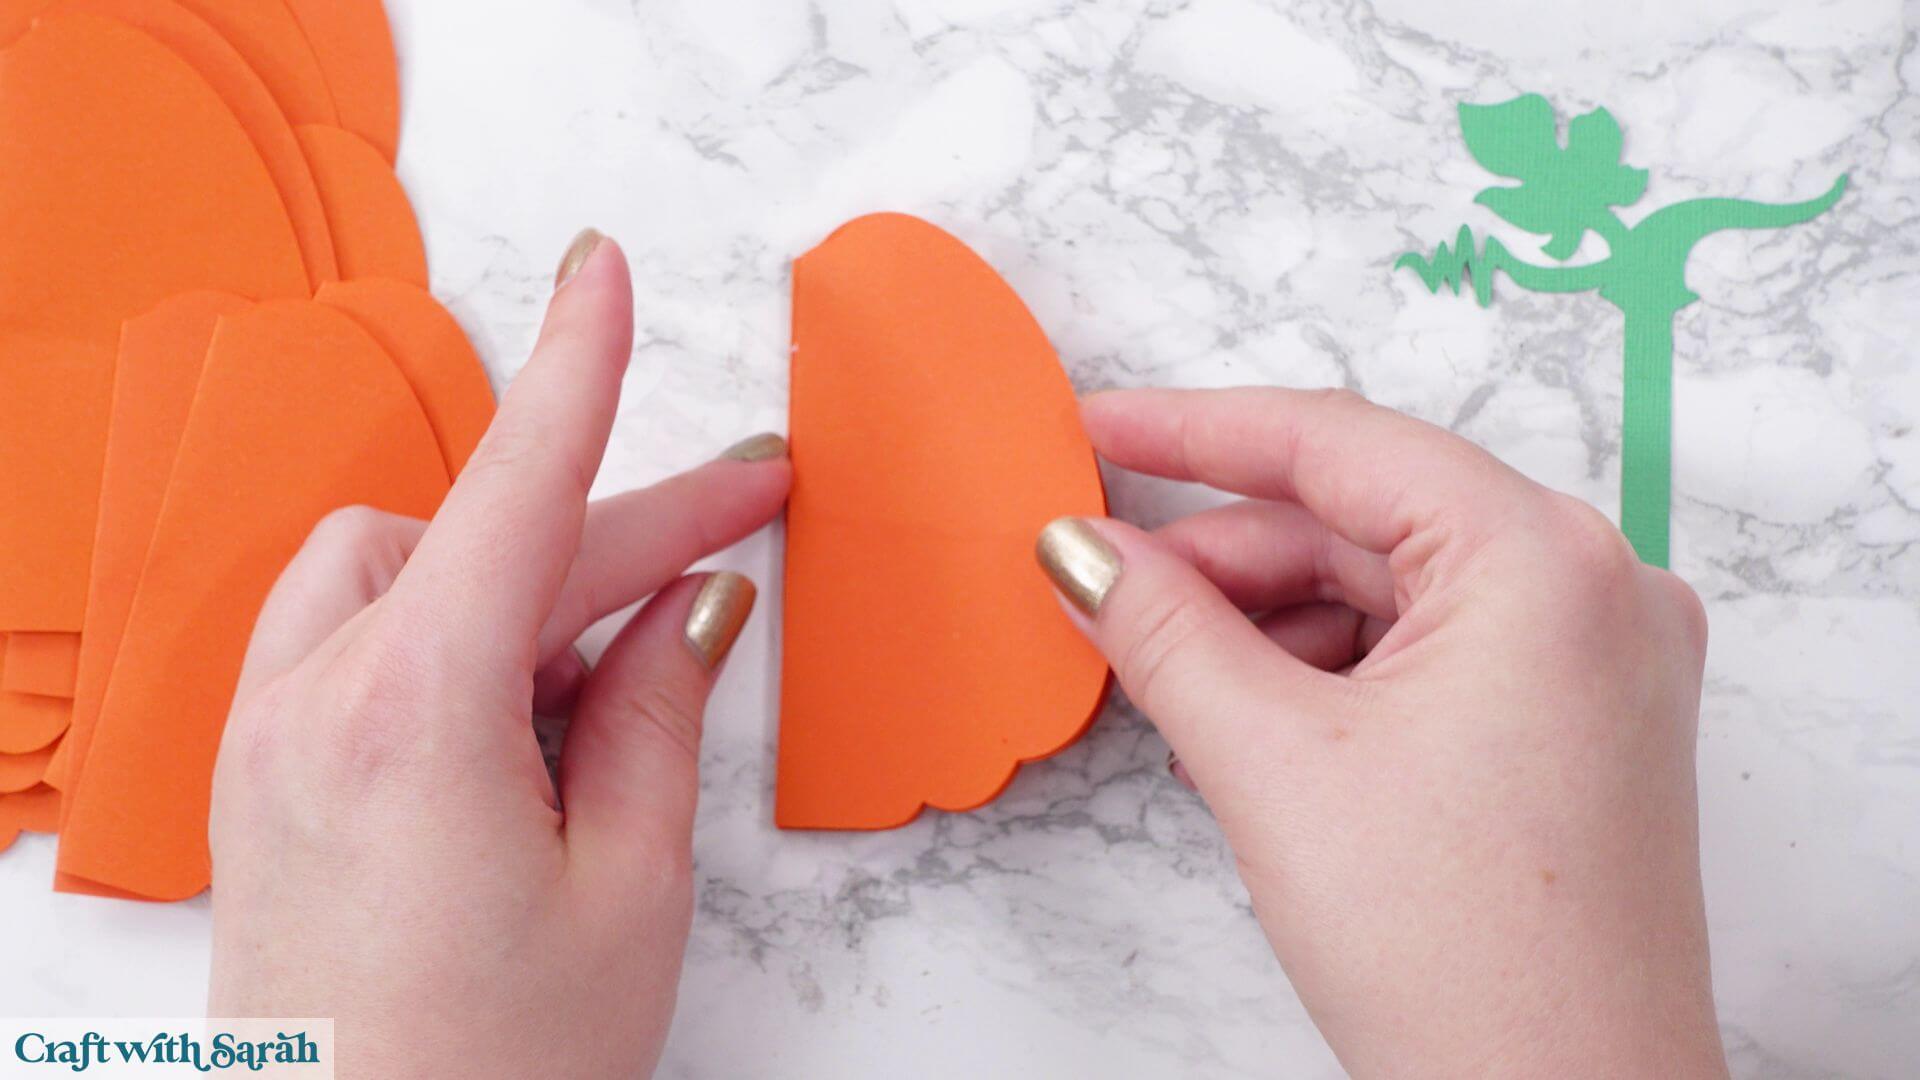
Lightly press the pieces together without flattening them so much that the glue squidges out of position.
Continue repeating this process until all 25 layers have been glued together into one thick stack.
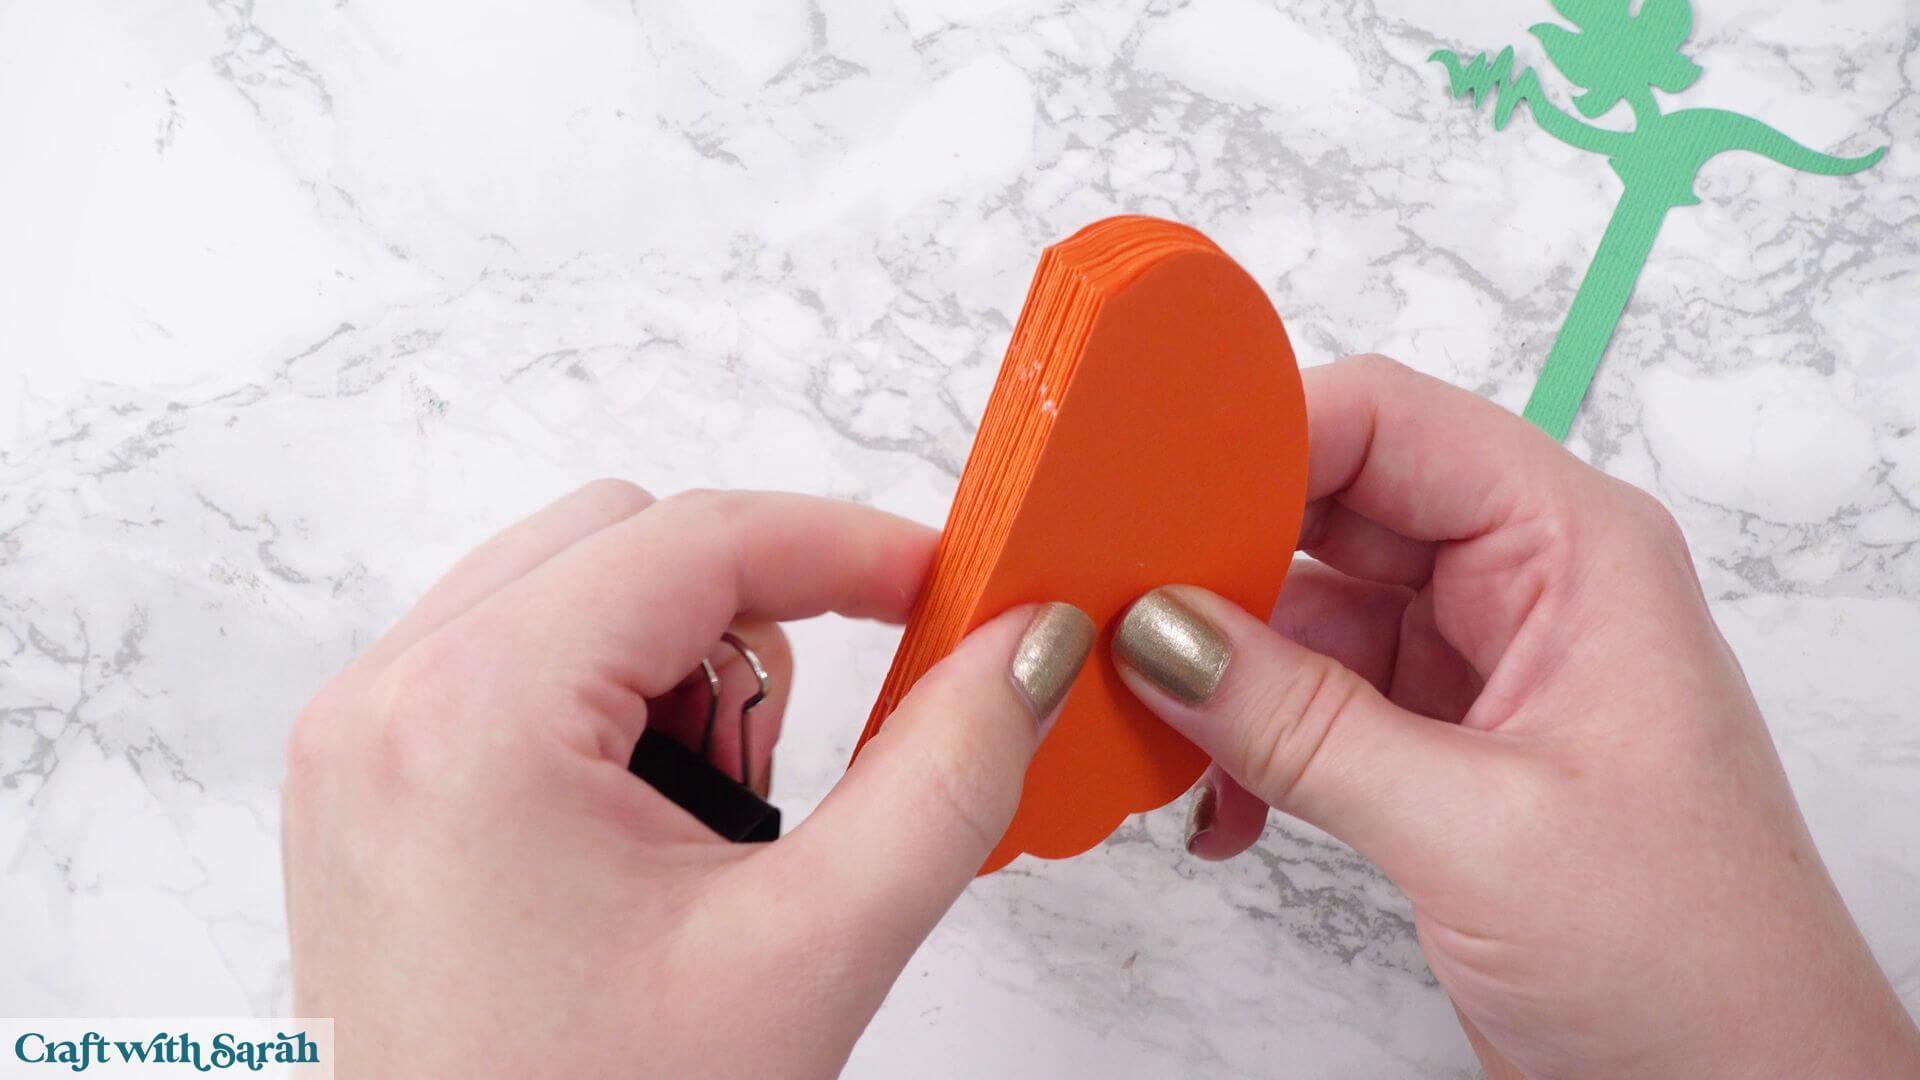
Take care not to run the glue right to the edges, as this is one of the most common causes of the honeycomb sections sticking together later.
Once all of the layers have been glued together, the stack needs time to dry completely.
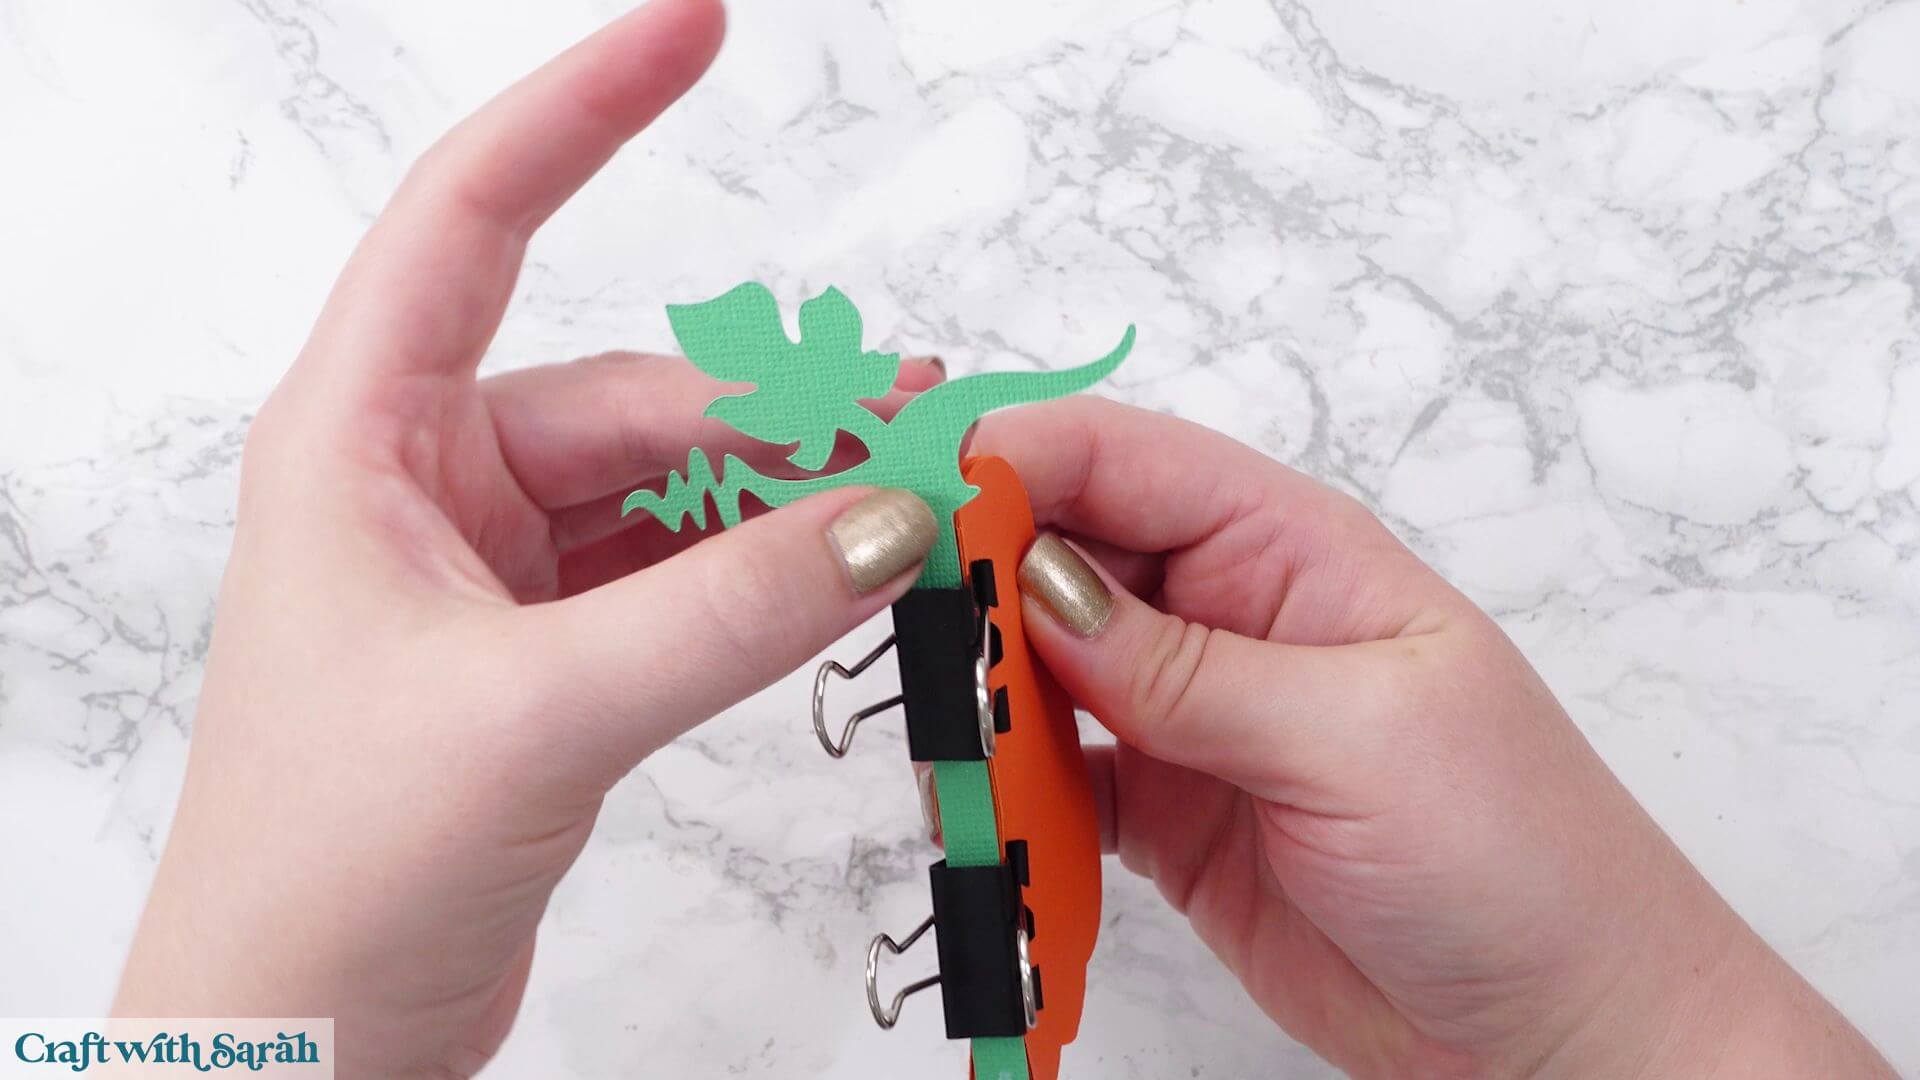
Place bulldog clips around the outside edges to compress the stack tightly while the glue dries.
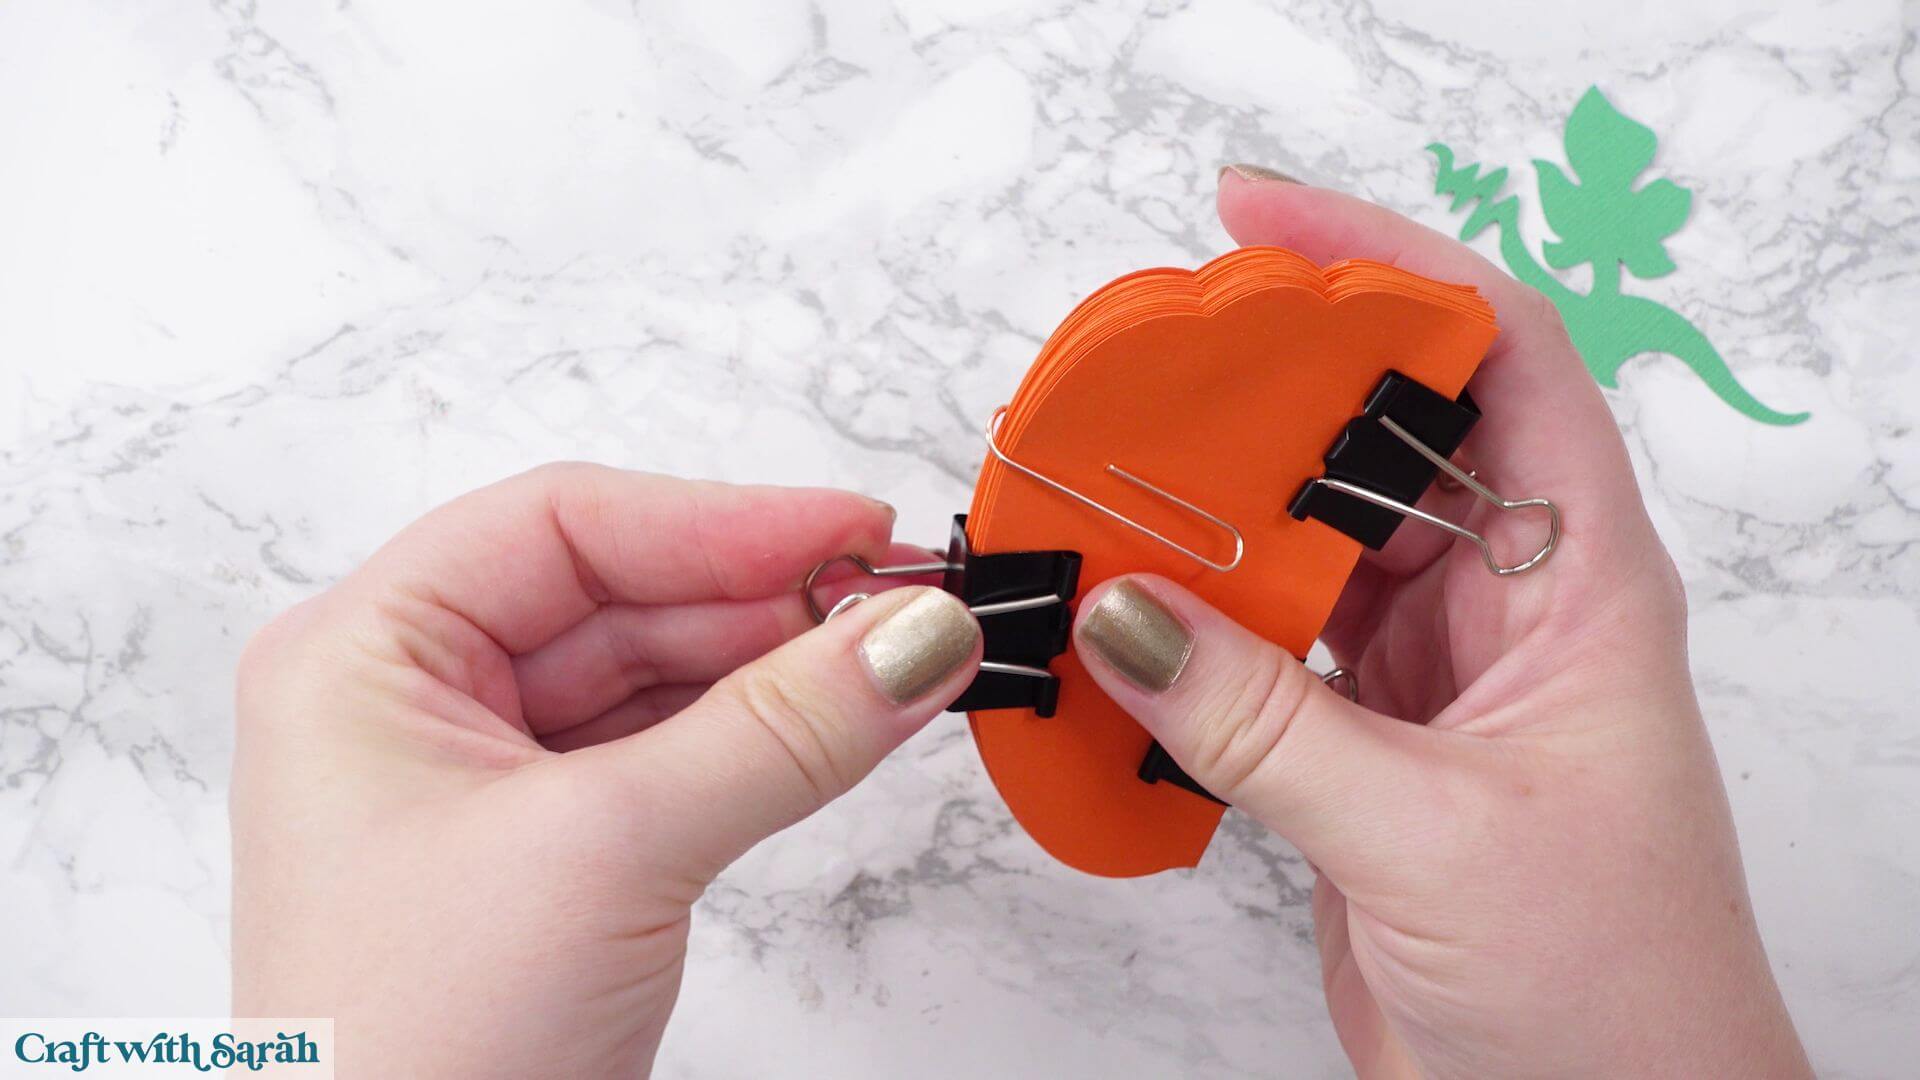
If you don’t have bulldog clips, large paper clips also work, although they don’t hold quite as firmly and may bend slightly because of the thickness of the paper stack.
Leave the stack clamped for around 10 to 15 minutes, even if you’re using a fast-drying glue. Allowing the glue to dry thoroughly at this stage helps the decoration keep its shape when opened.
Don’t worry if the clips leave small marks around the outer edge, as these won’t be noticeable once the decoration has been assembled.
Step 6) Check the honeycomb effect
Before adding the stalk, open the decoration into a circle without gluing the ends together.
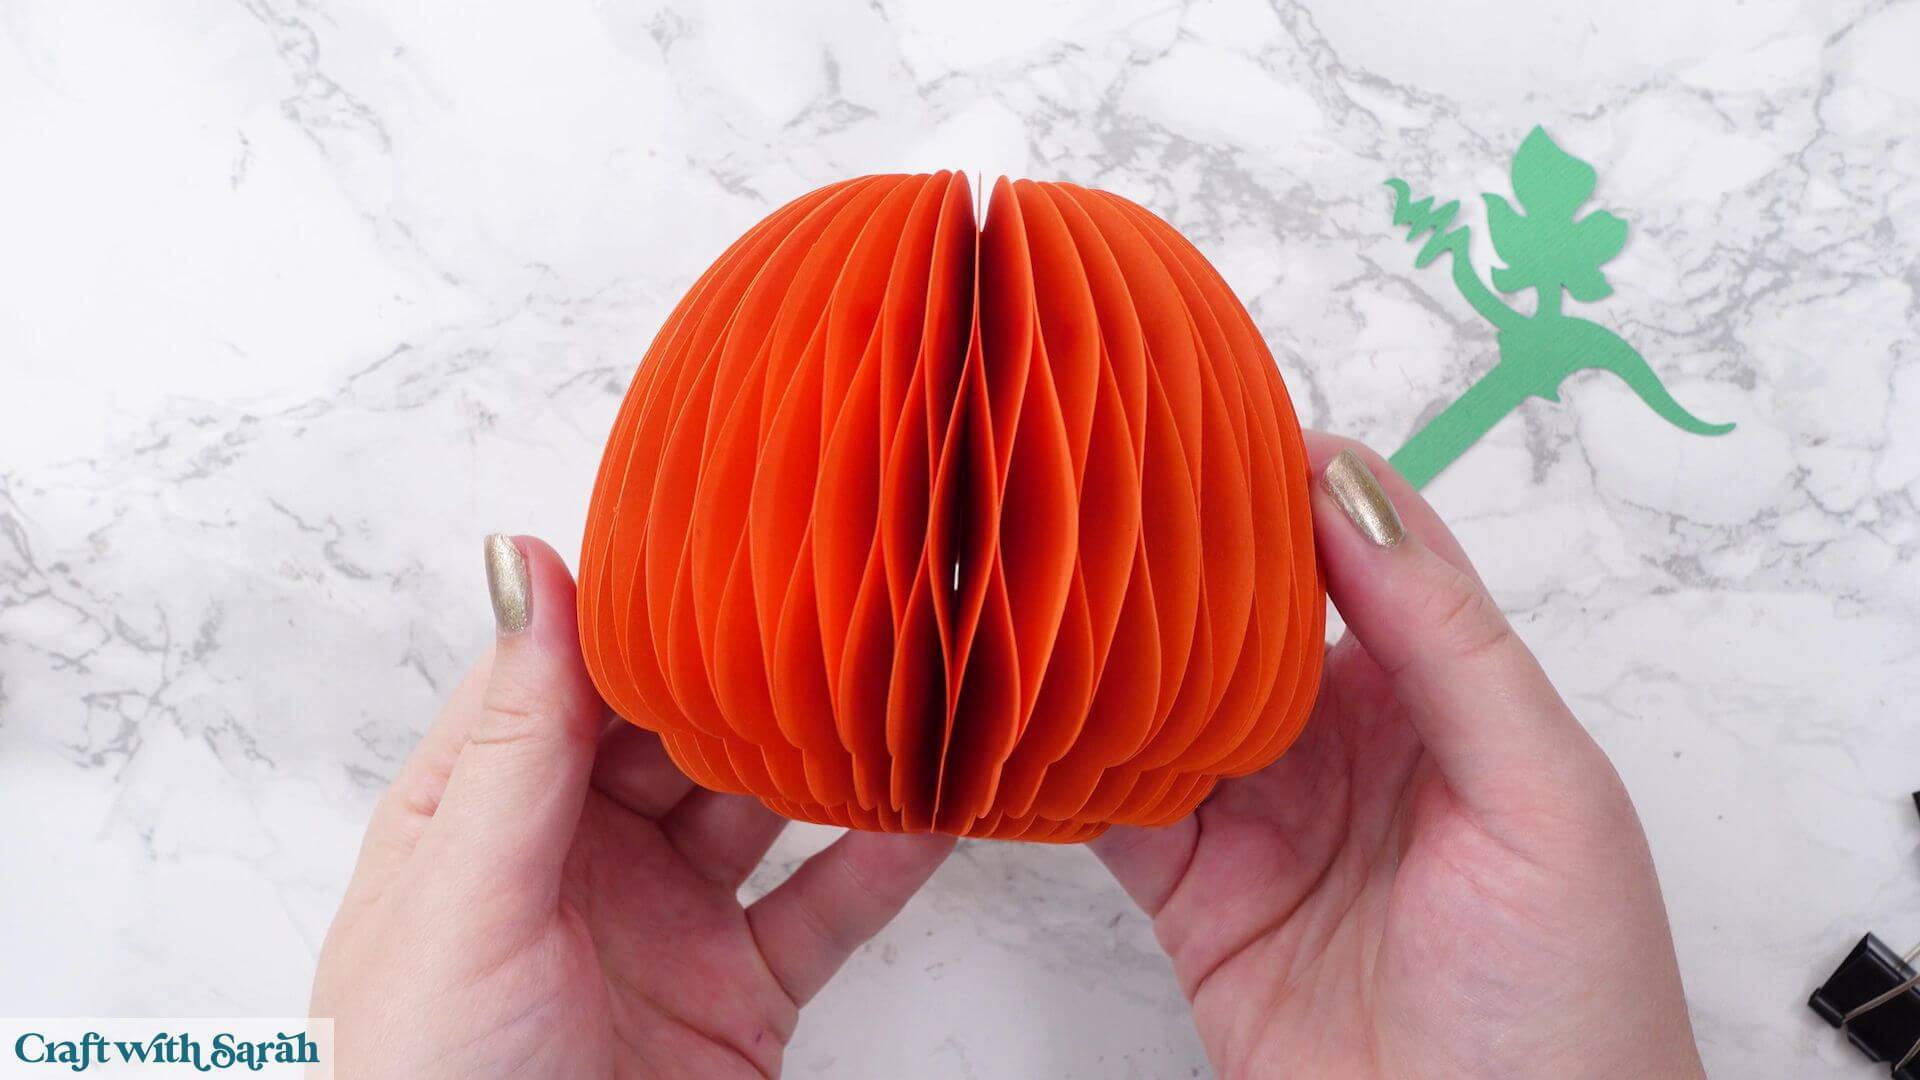
The two outer pieces should come together fairly easily with very little resistance.
The honeycomb sections should look evenly spaced all the way around without appearing stretched.
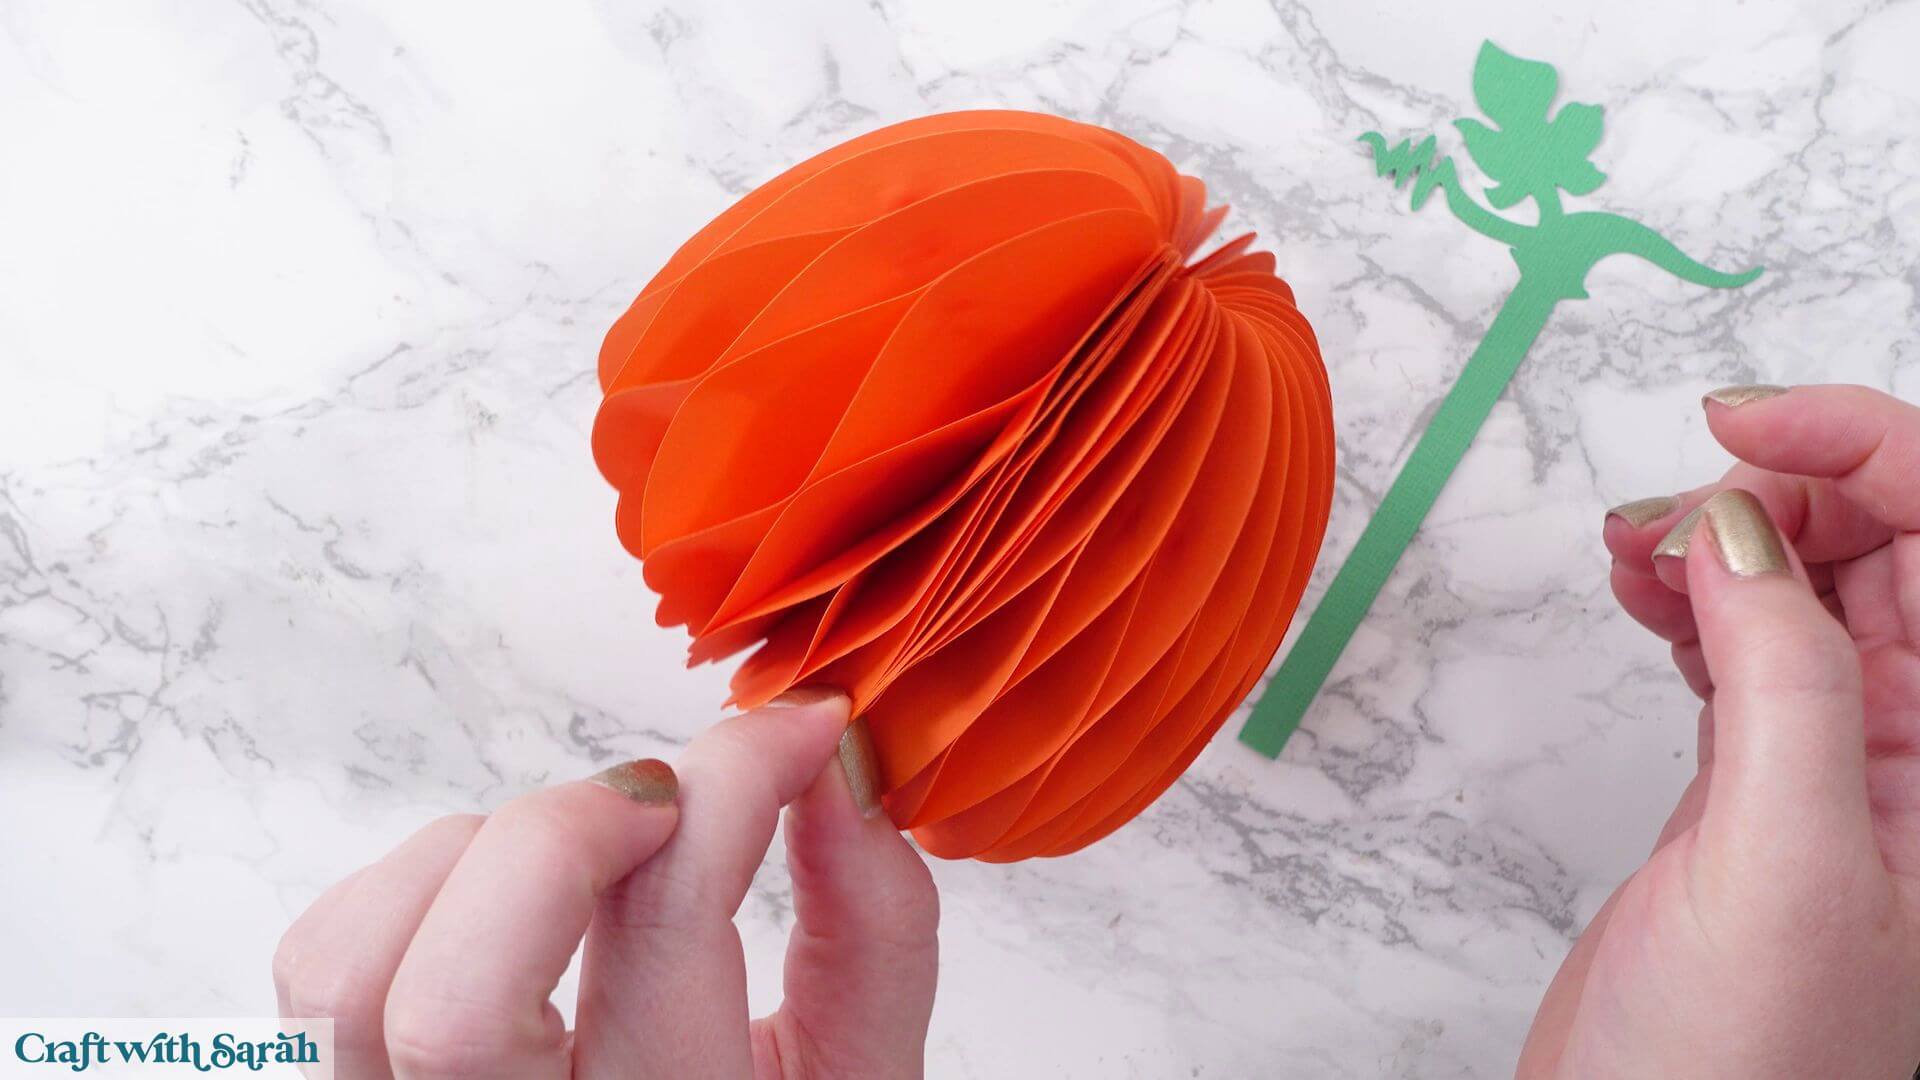
If the decoration opens comfortably and the paper isn’t under tension, you have enough layers.
However, if it feels difficult to pull into shape or the honeycomb openings become long and stretched rather than neat diamond shapes, you’ll need to add a few more folded pieces before continuing.
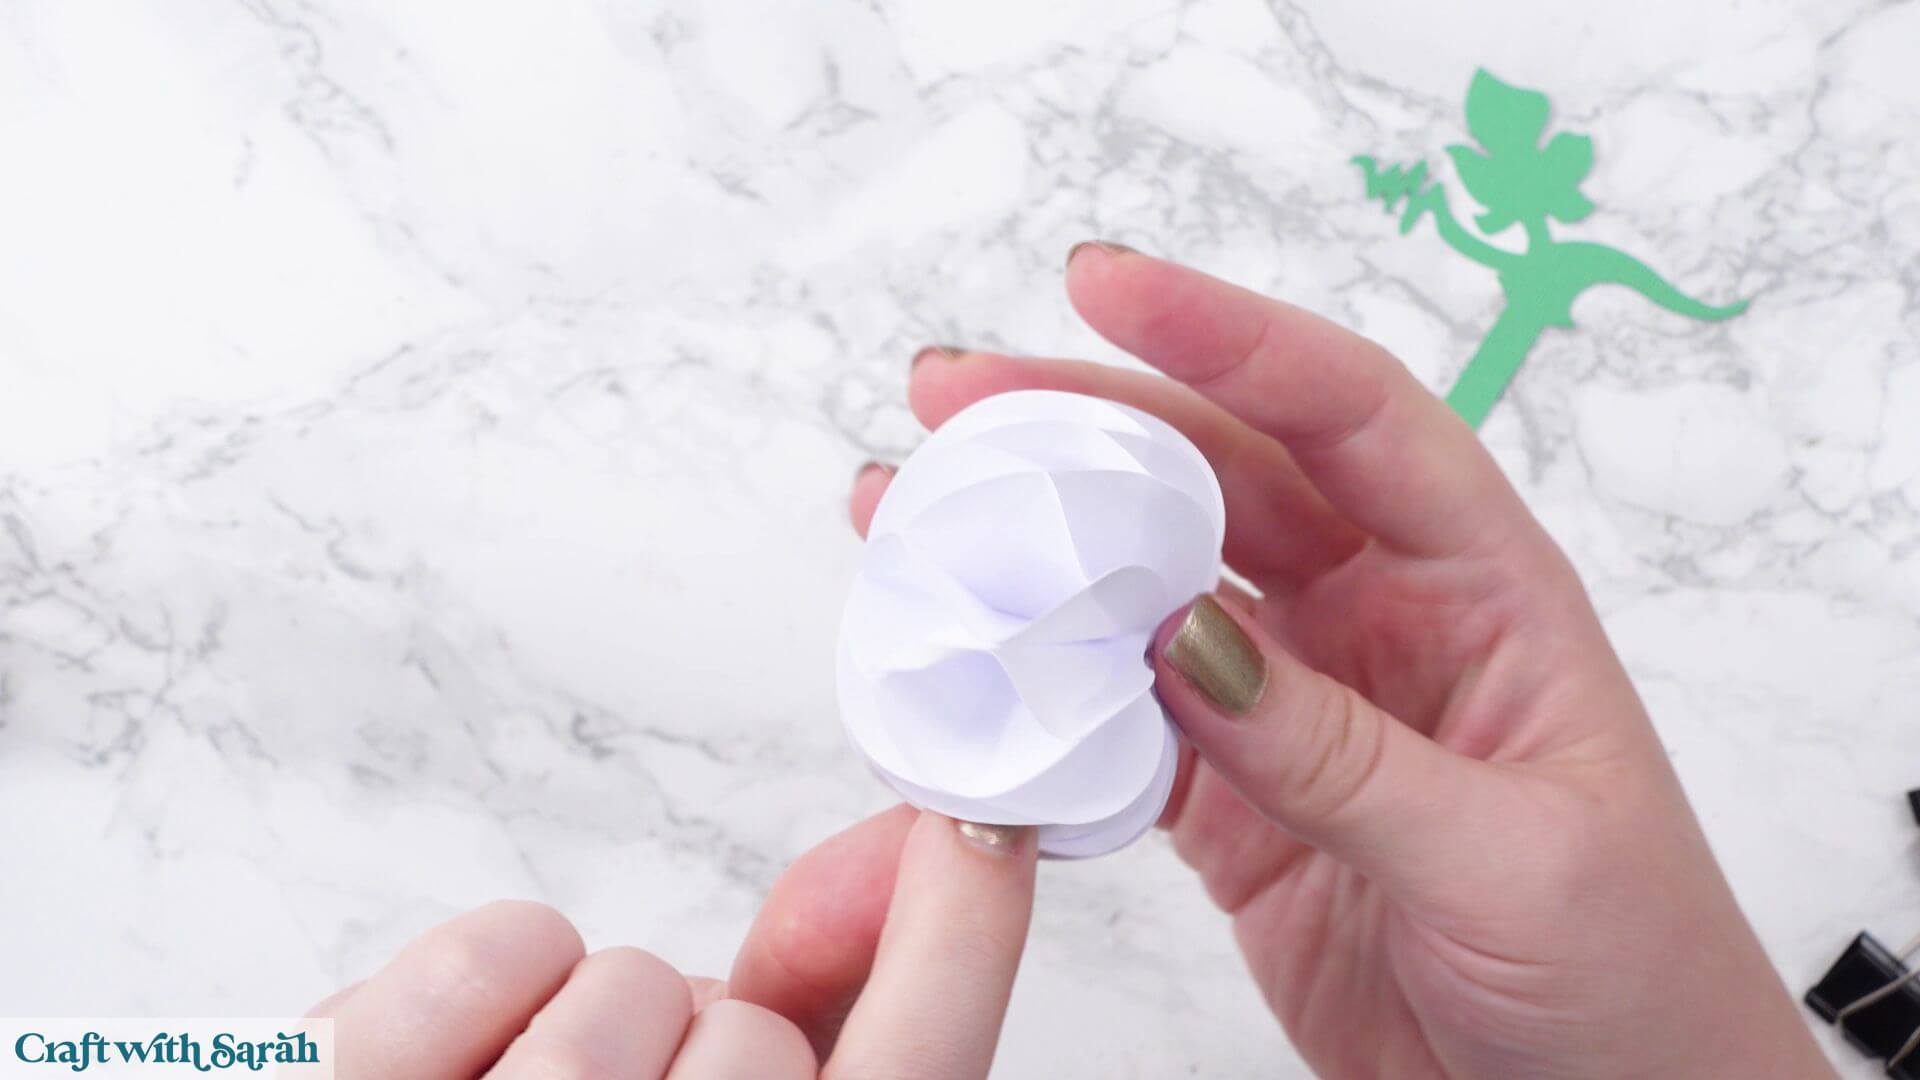
Usually another three layers is a good place to start.
Glue the additional layers onto the stack, allow them to dry completely, then test the shape again.
For very small versions of the decorations, you may actually need fewer than the supplied 25 layers.
The easiest way to judge is simply by how naturally the decoration opens into its final shape.
Step 7) Attach the stalk
Once you’re happy with the honeycomb shape, it’s time to attach the stalk.
Position it in the centre of the stack so that the wider part begins just above the top of the pumpkin or fruit.
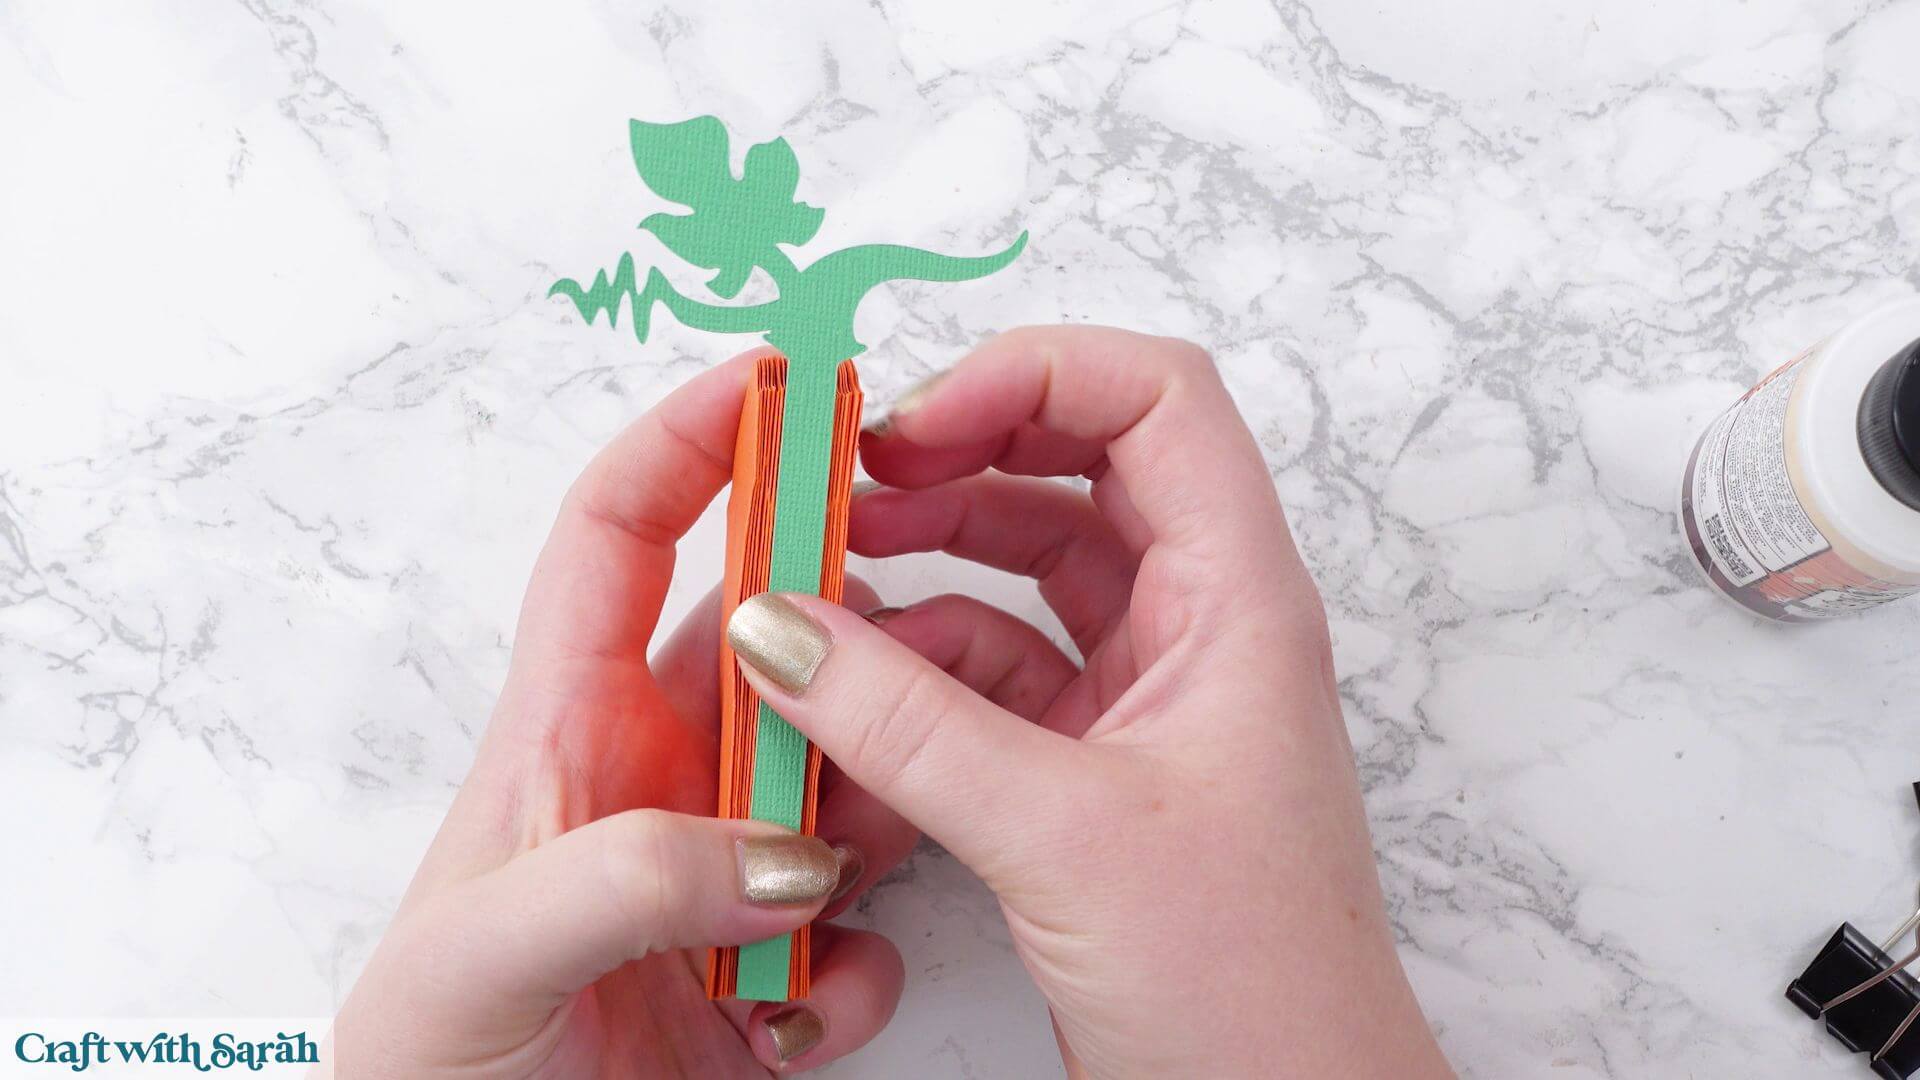
The stalk must extend high enough that the wider section clears the top edge of the decoration when it opens.
If you’d prefer the wider part of the stalk to sit closer to the fruit, you can trim a tiny amount from the bottom before gluing it into place.
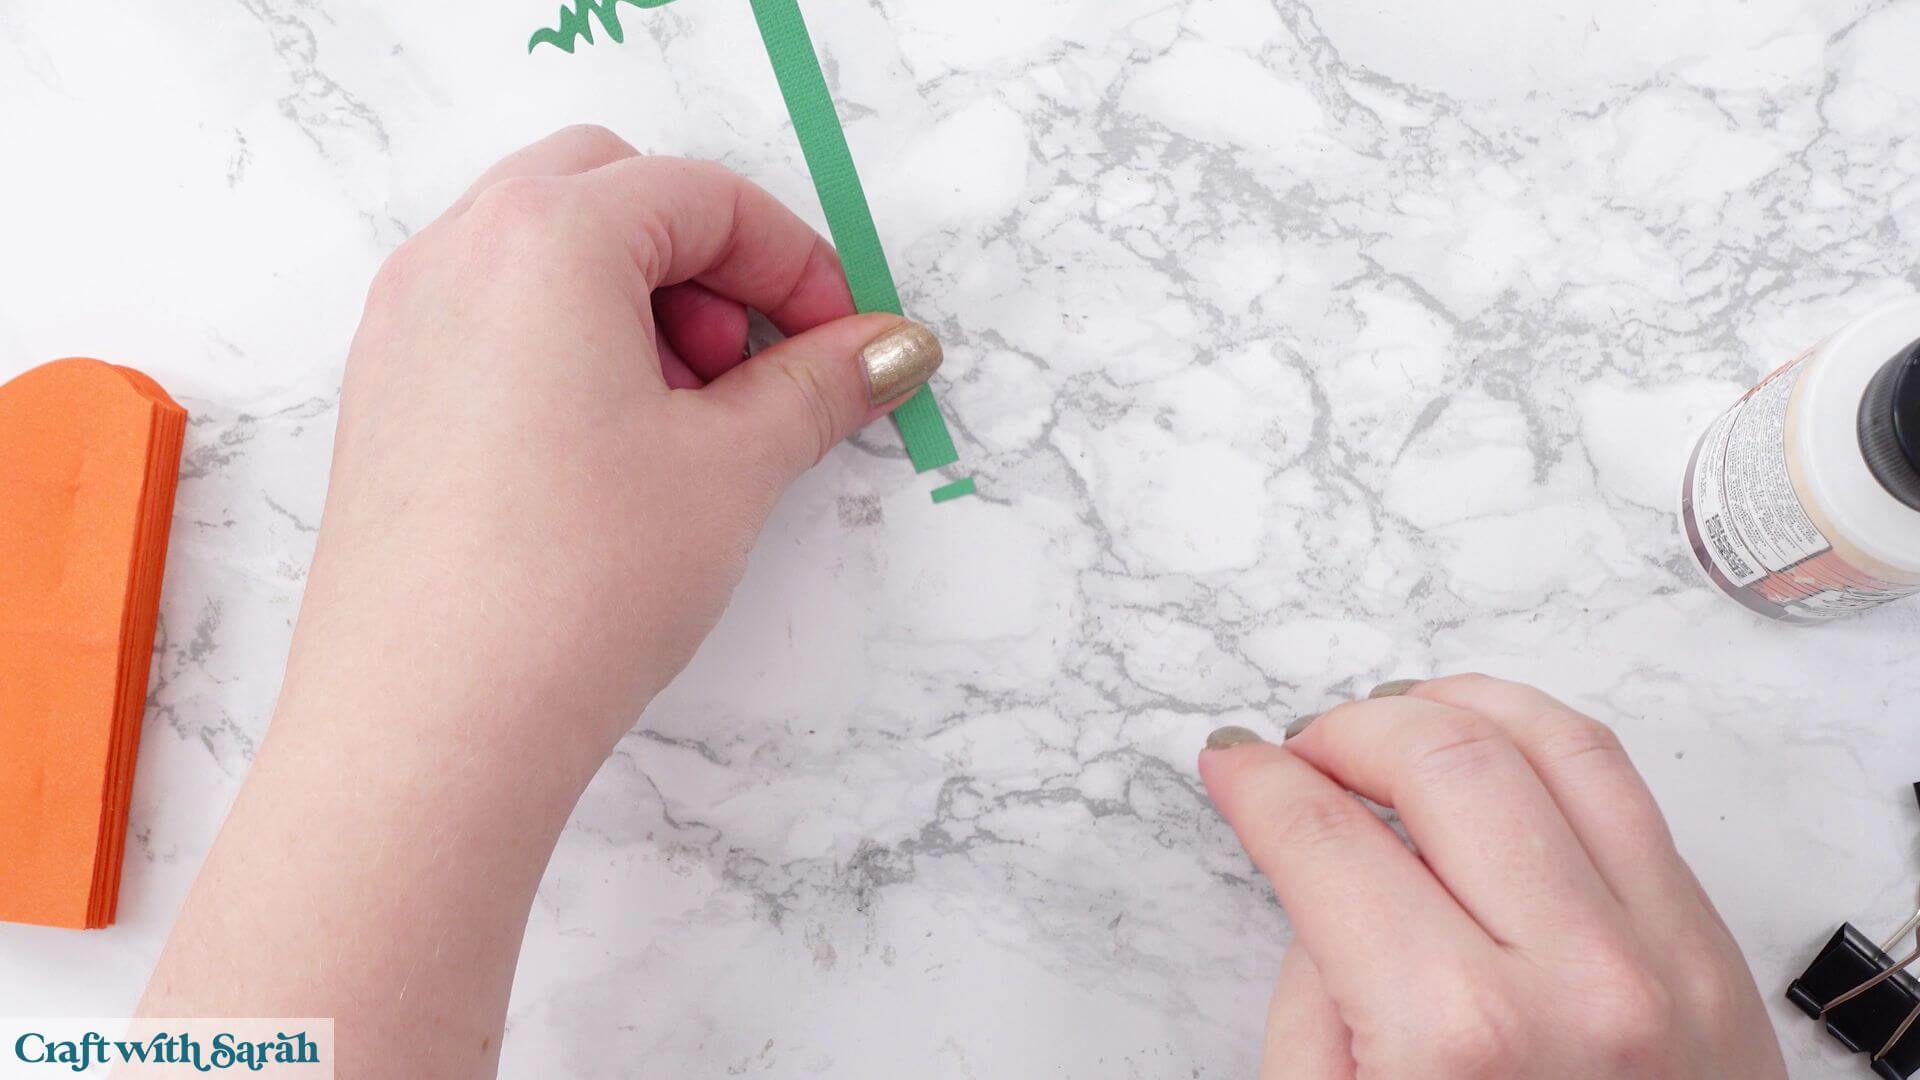
Only remove a very small amount at a time and keep checking that the stalk still clears the top edge when the decoration opens.
Apply glue to the lower section of the stalk and press it into the centre of the folded stack, lining it up as centrally as possible.
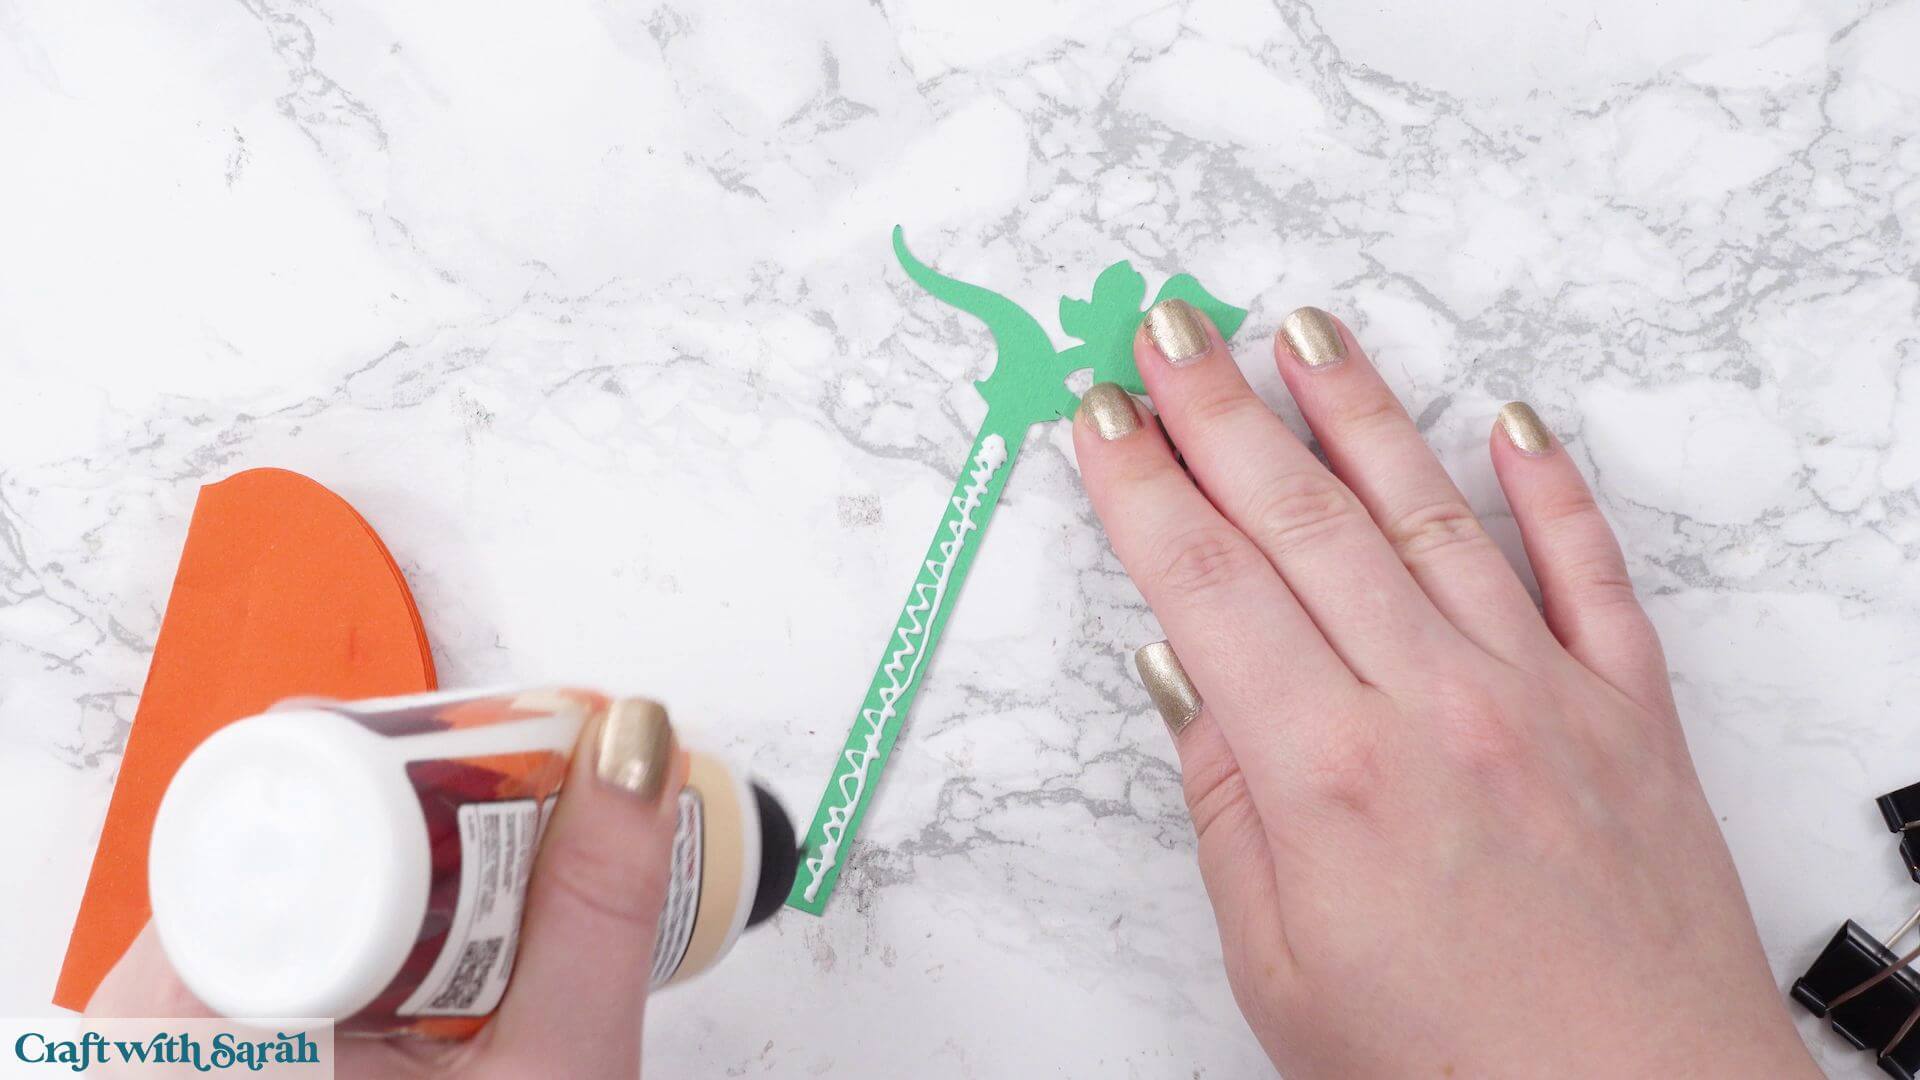
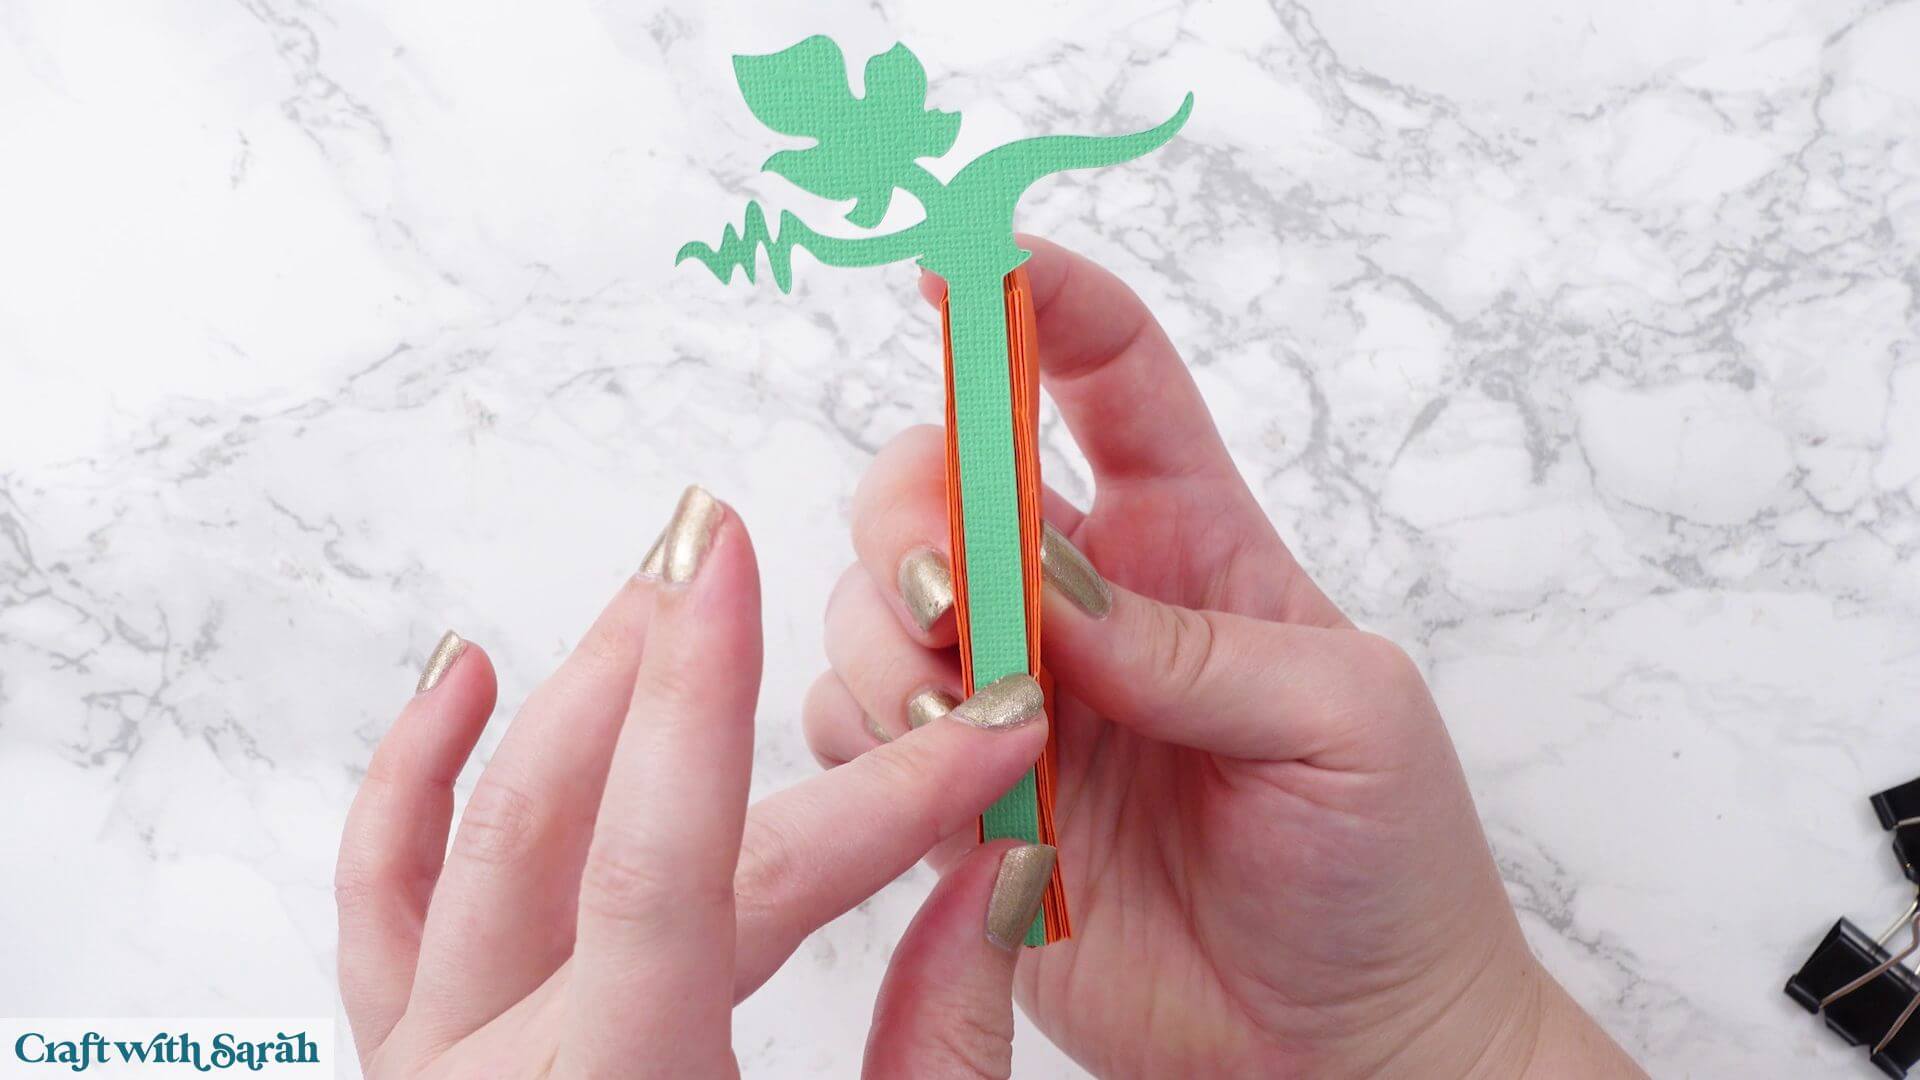
Clamp it with bulldog clips again and allow the glue to dry completely before continuing.
Step 8) Glue the decoration into shape
Open the decoration back into its circular shape.
Apply the same two glue lines to the final loose side that you used throughout the rest of the assembly.
Adding a little glue to the reverse side of the stalk at the same time also helps strengthen the finished decoration.
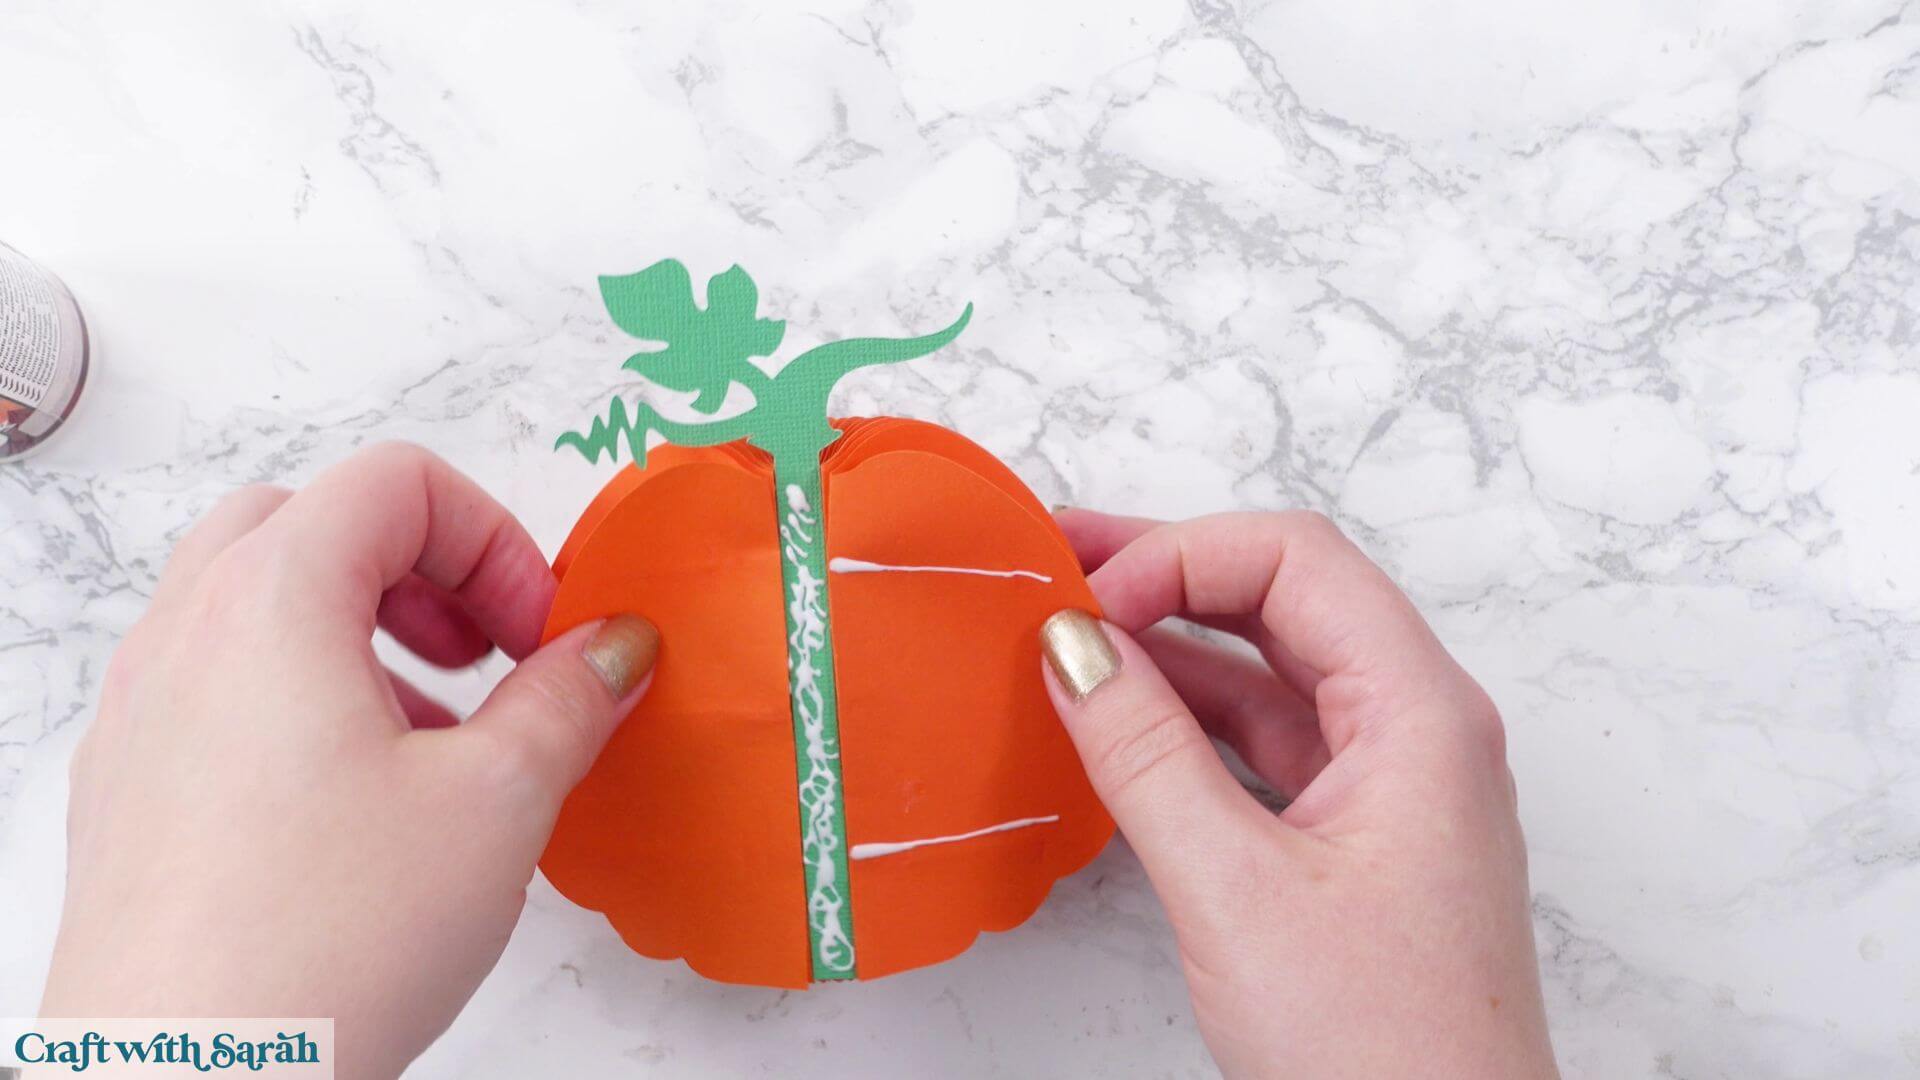
Carefully bring the two end pieces together and line up their folded edges as accurately as possible.
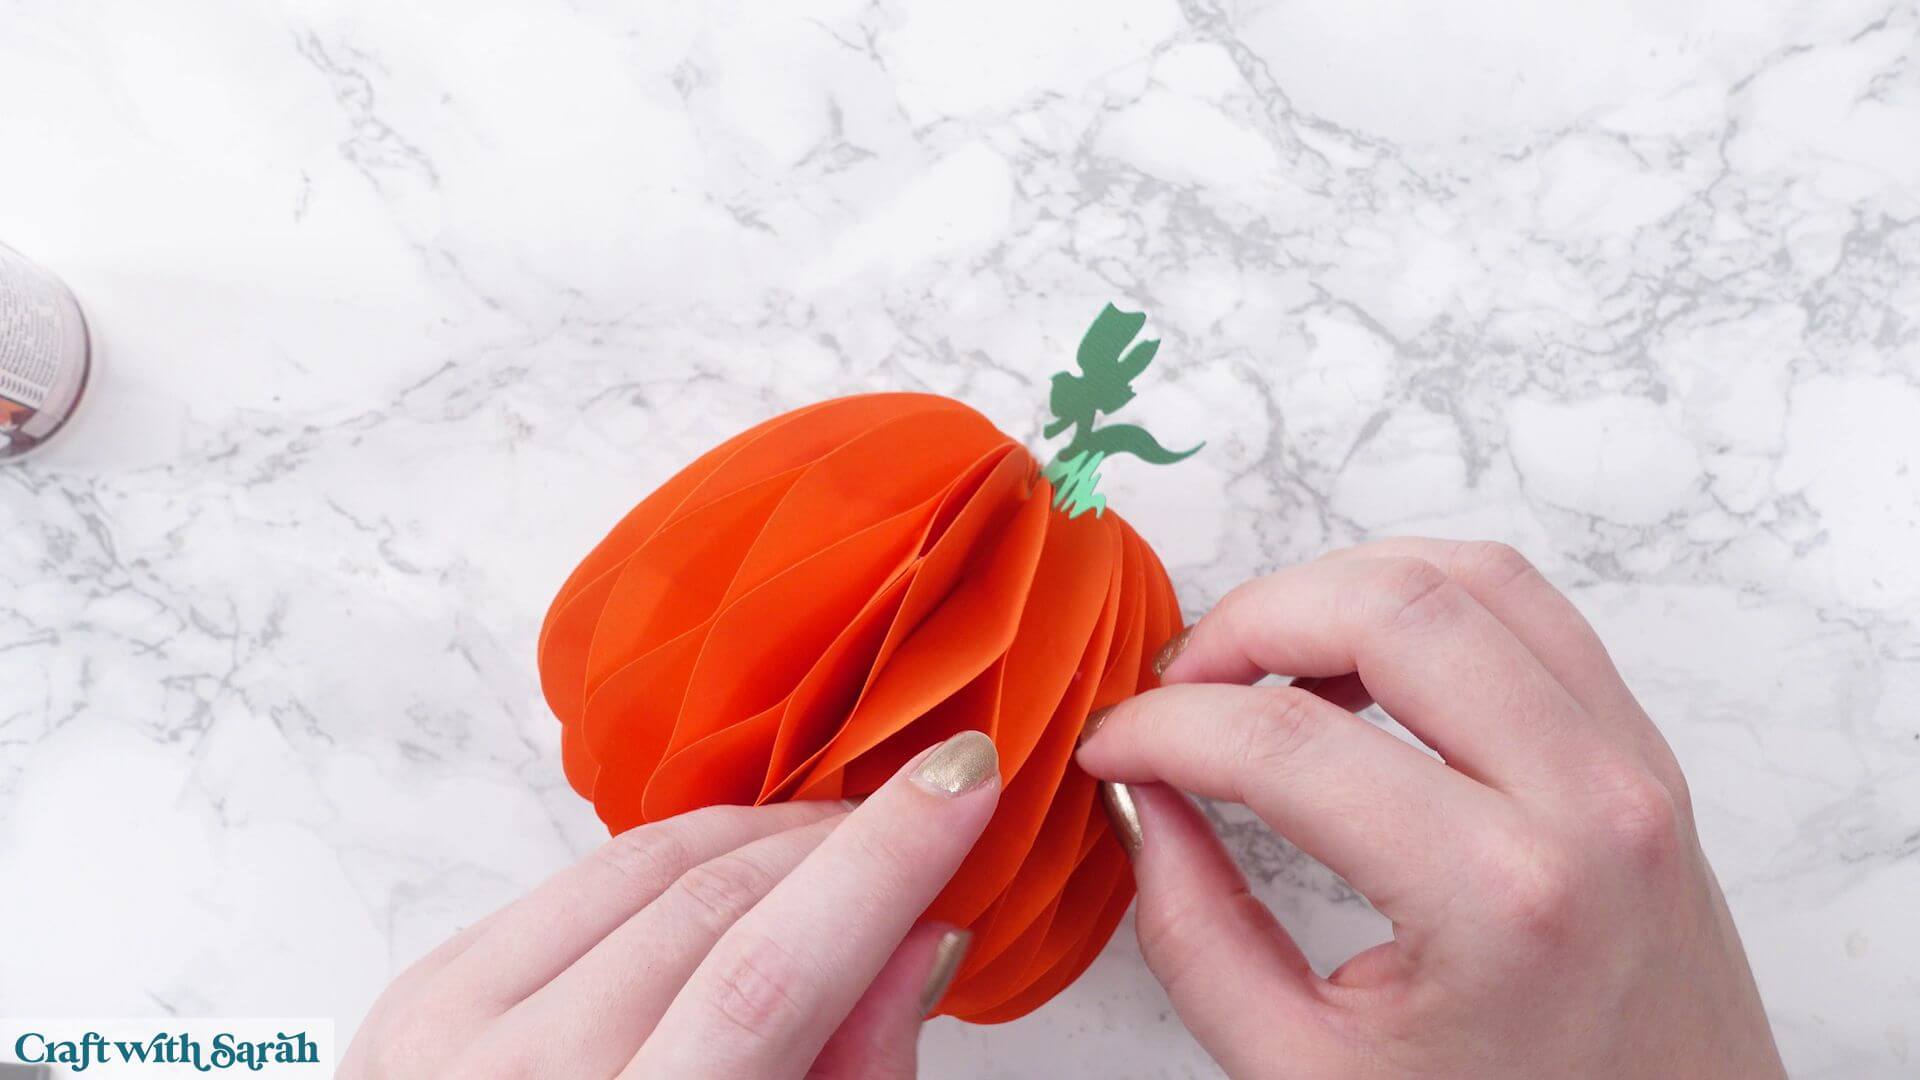
This is often the trickiest step because the decoration naturally wants to spring open, so using a couple of paper clips or bulldog clips to hold the final join while it dries makes the process much easier.
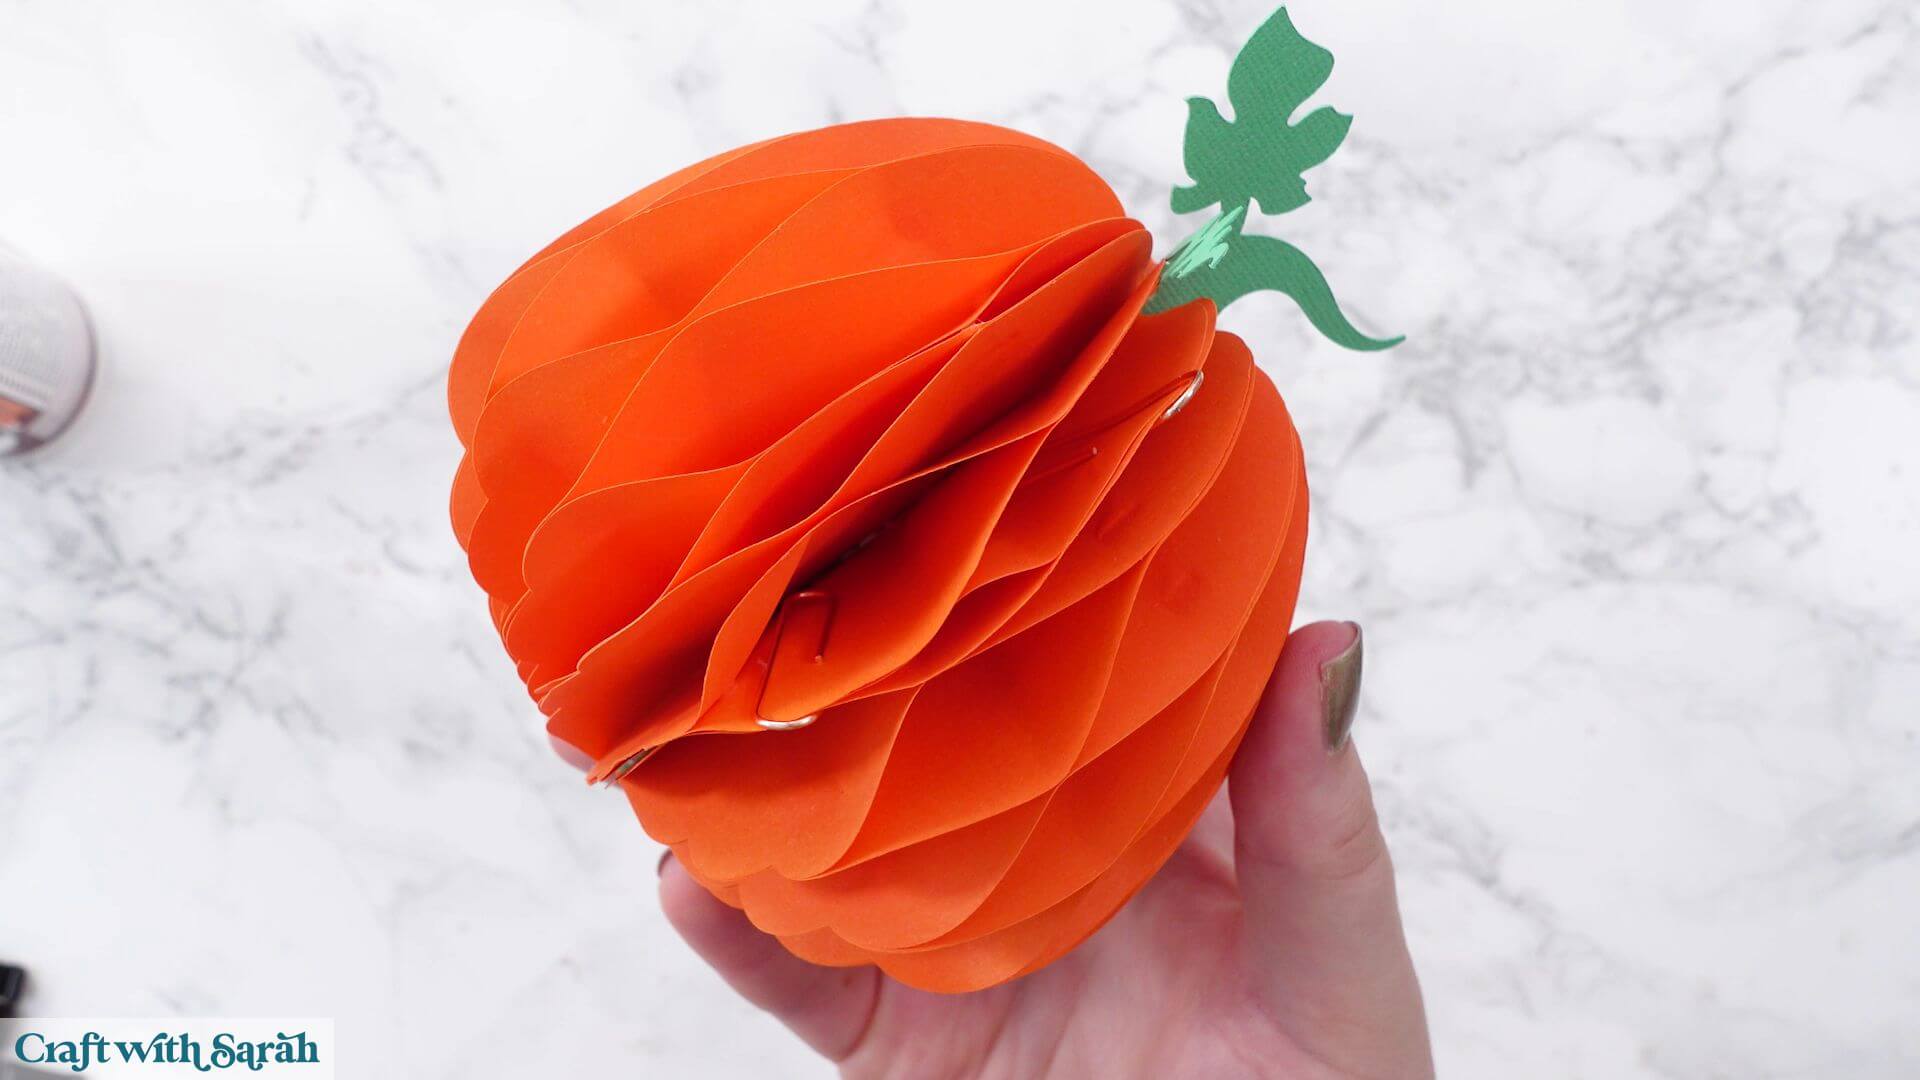
Allow this final glue joint to dry completely before removing the clips.
Step 9) Shape the sides of the honeycomb decoration
Once the final join has dried, remove the clips and gently open the decoration fully.
If some honeycomb sections appear wider than others, simply work your fingers around the decoration, gently moving the folds until they’re distributed more evenly.
If you notice any sections that haven’t opened properly, it’s likely that a little glue squeezed too close to the edge during assembly.
Carefully separate only the paper that has accidentally stuck together. Take care not to pull apart the glue joints that are meant to hold the decoration together.
After a few gentle adjustments, the honeycomb should open evenly all the way around.
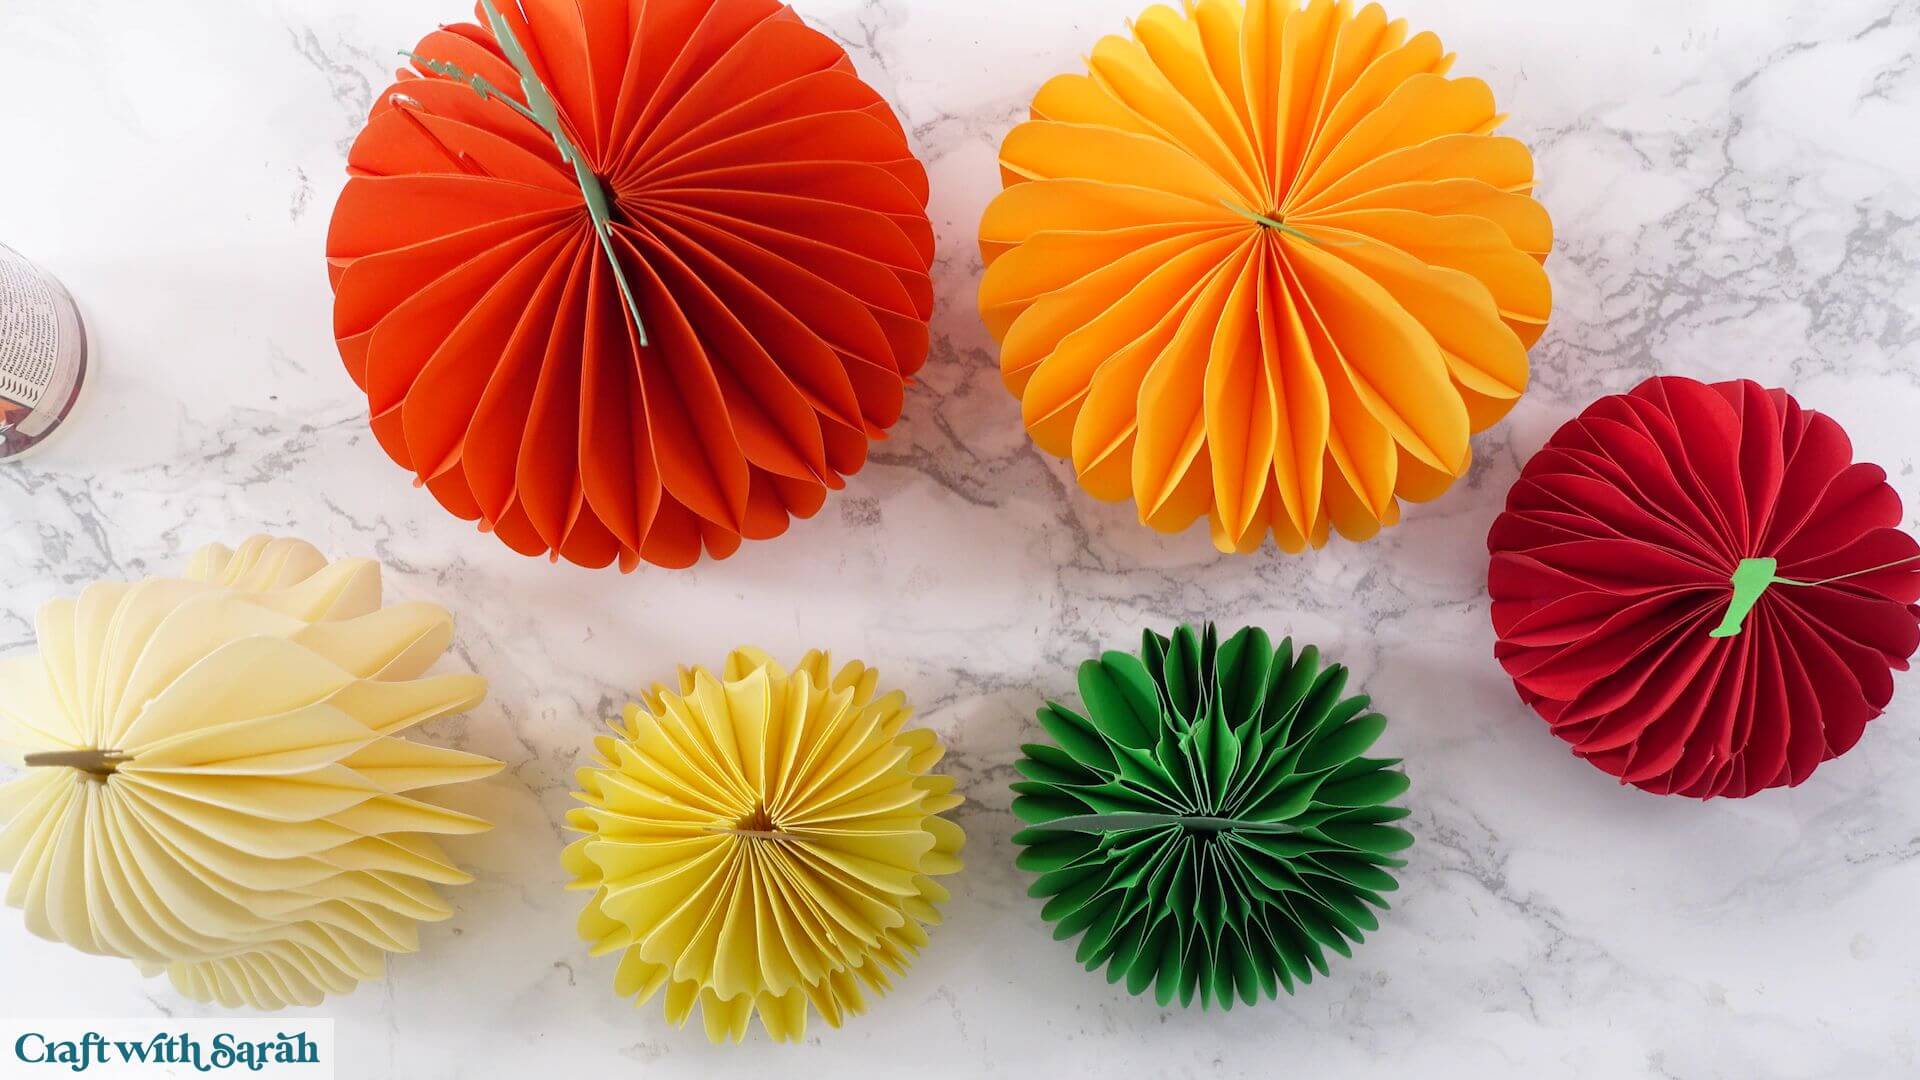
Easy DIY paper pumpkins for autumn
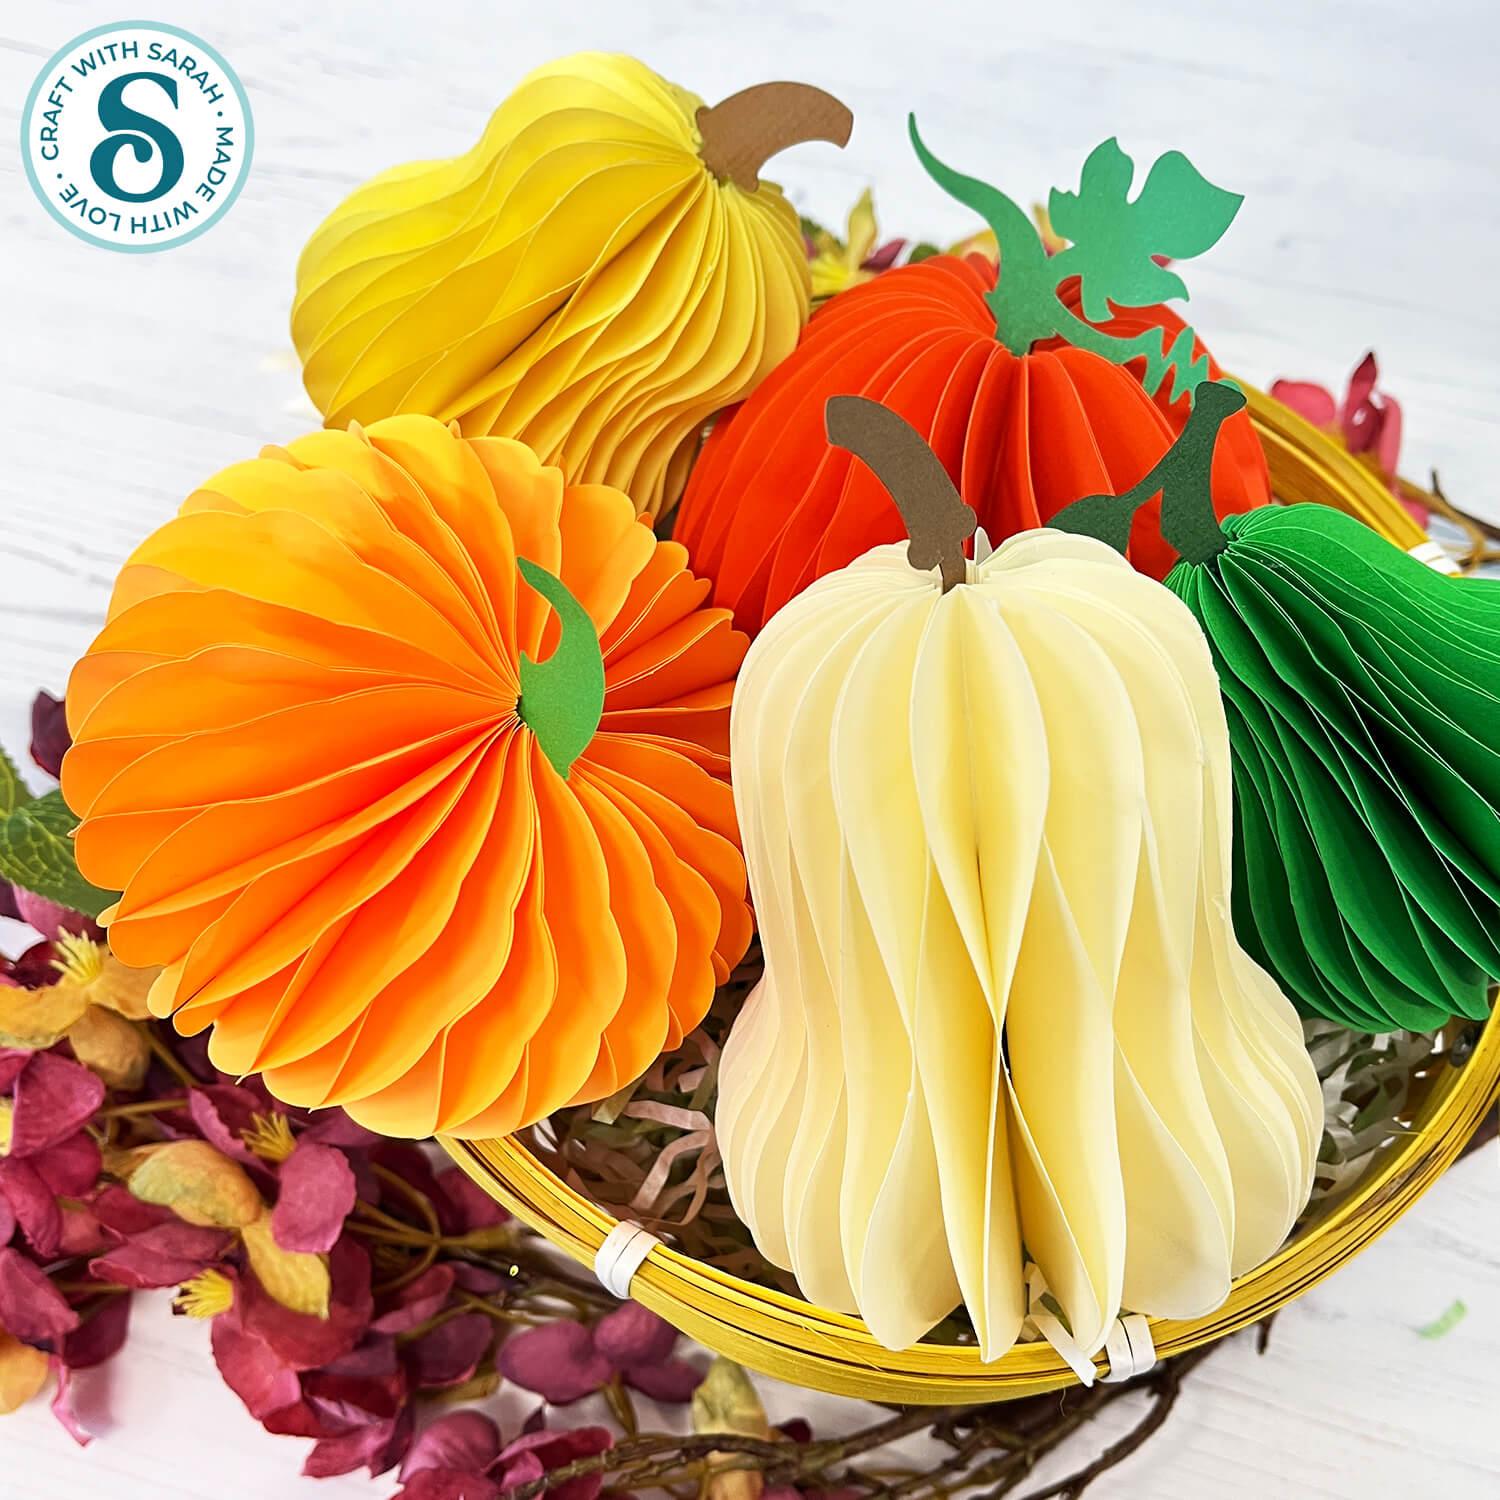
Your autumn honeycomb decorations are now ready to display!
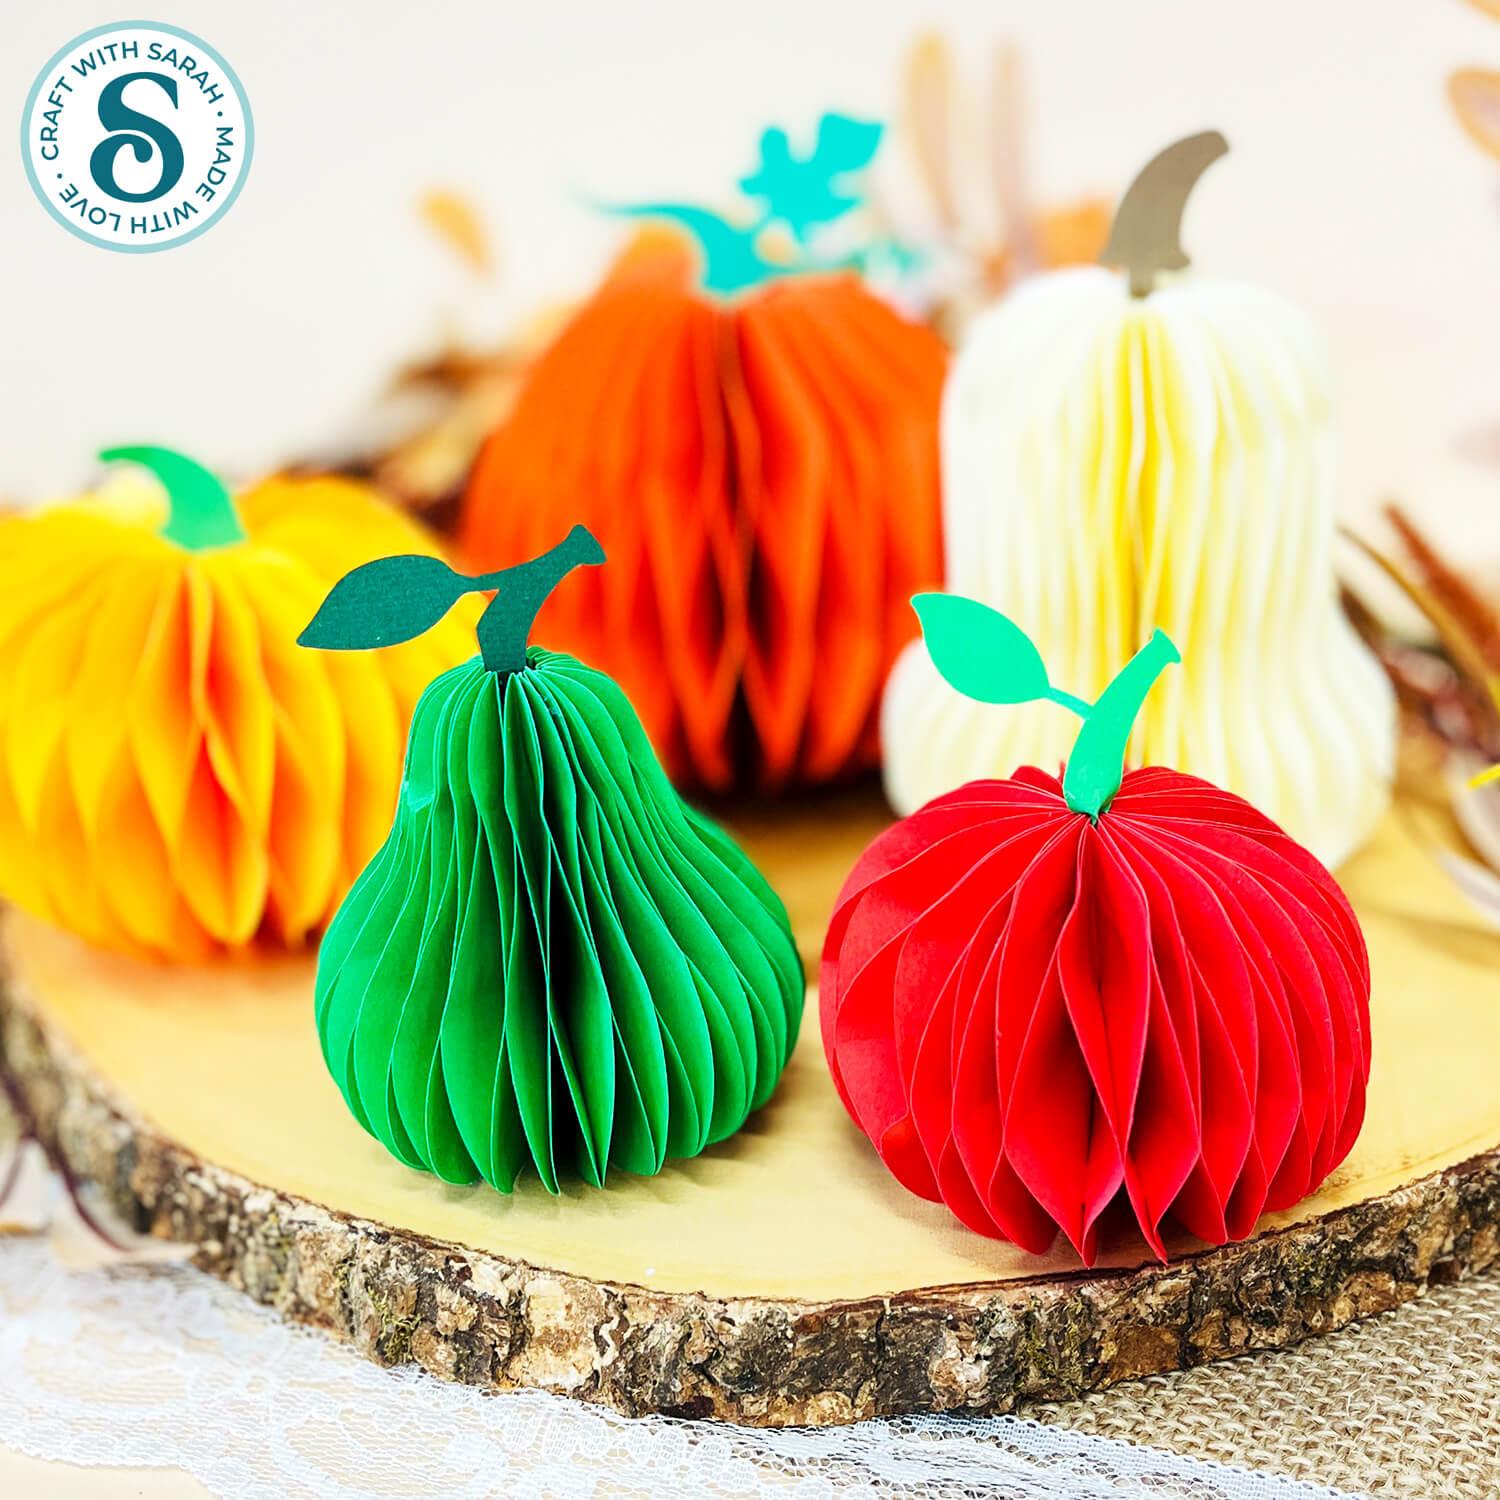
The collection includes pumpkins, a butternut squash, a gourd, an apple and a pear.
You you can resize them, recolour them and make as many copies as you’d like to create your own seasonal display.
Arrange them together as a Thanksgiving centrepiece, display them on a shelf or mantelpiece, or scatter them around your autumn decorations for a lightweight, eye-catching 3D effect.
Happy crafting,
Sarah x