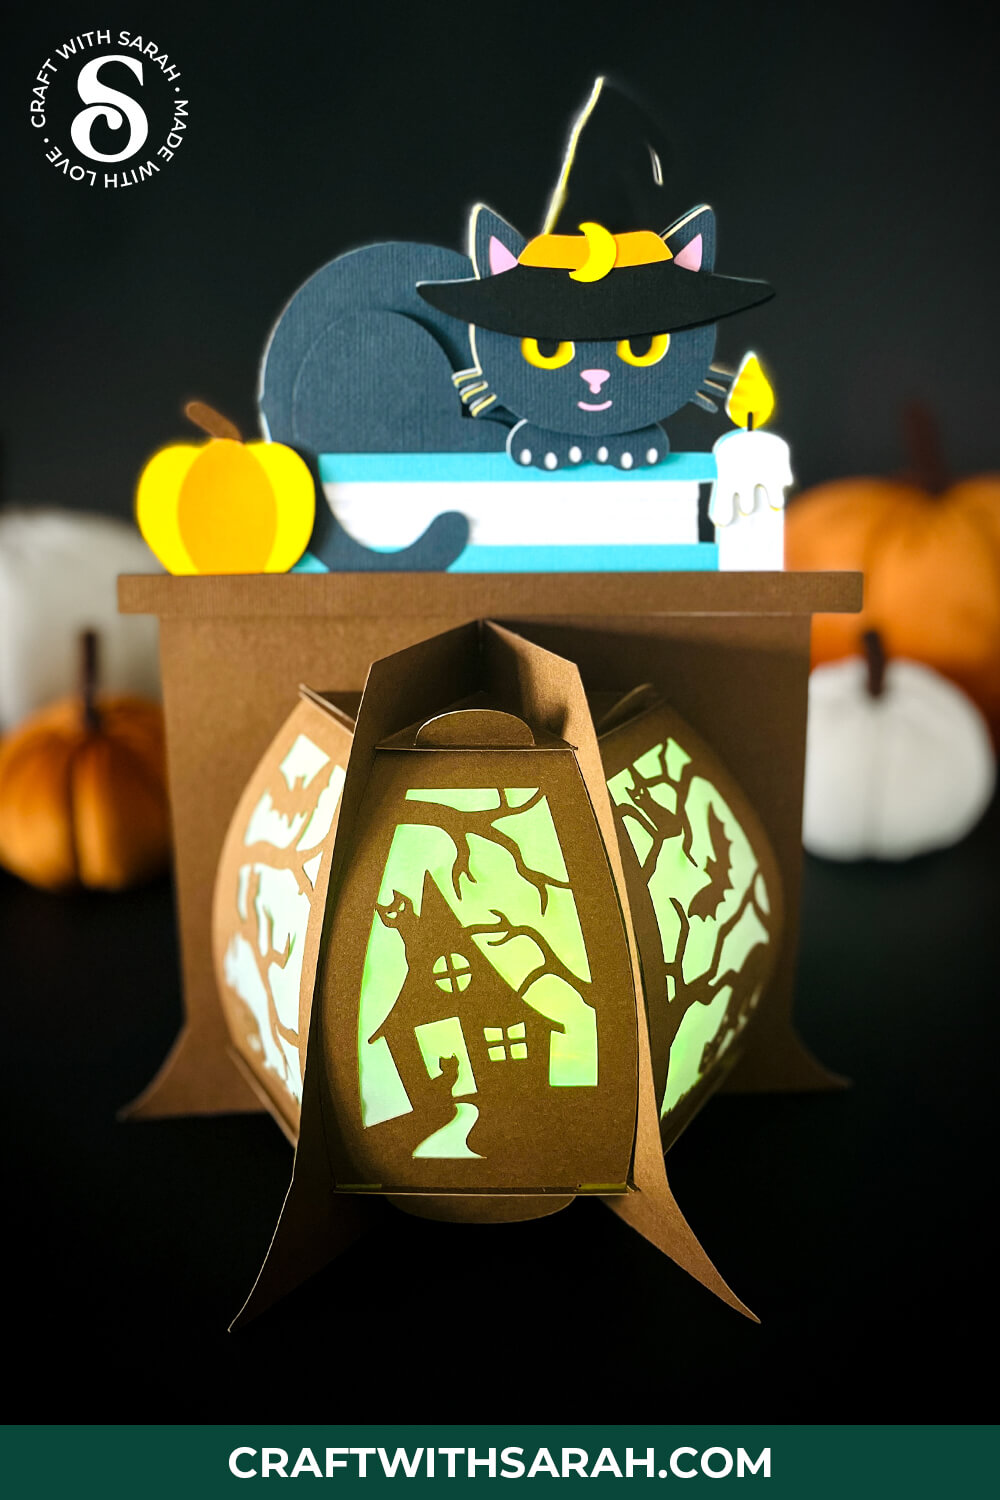
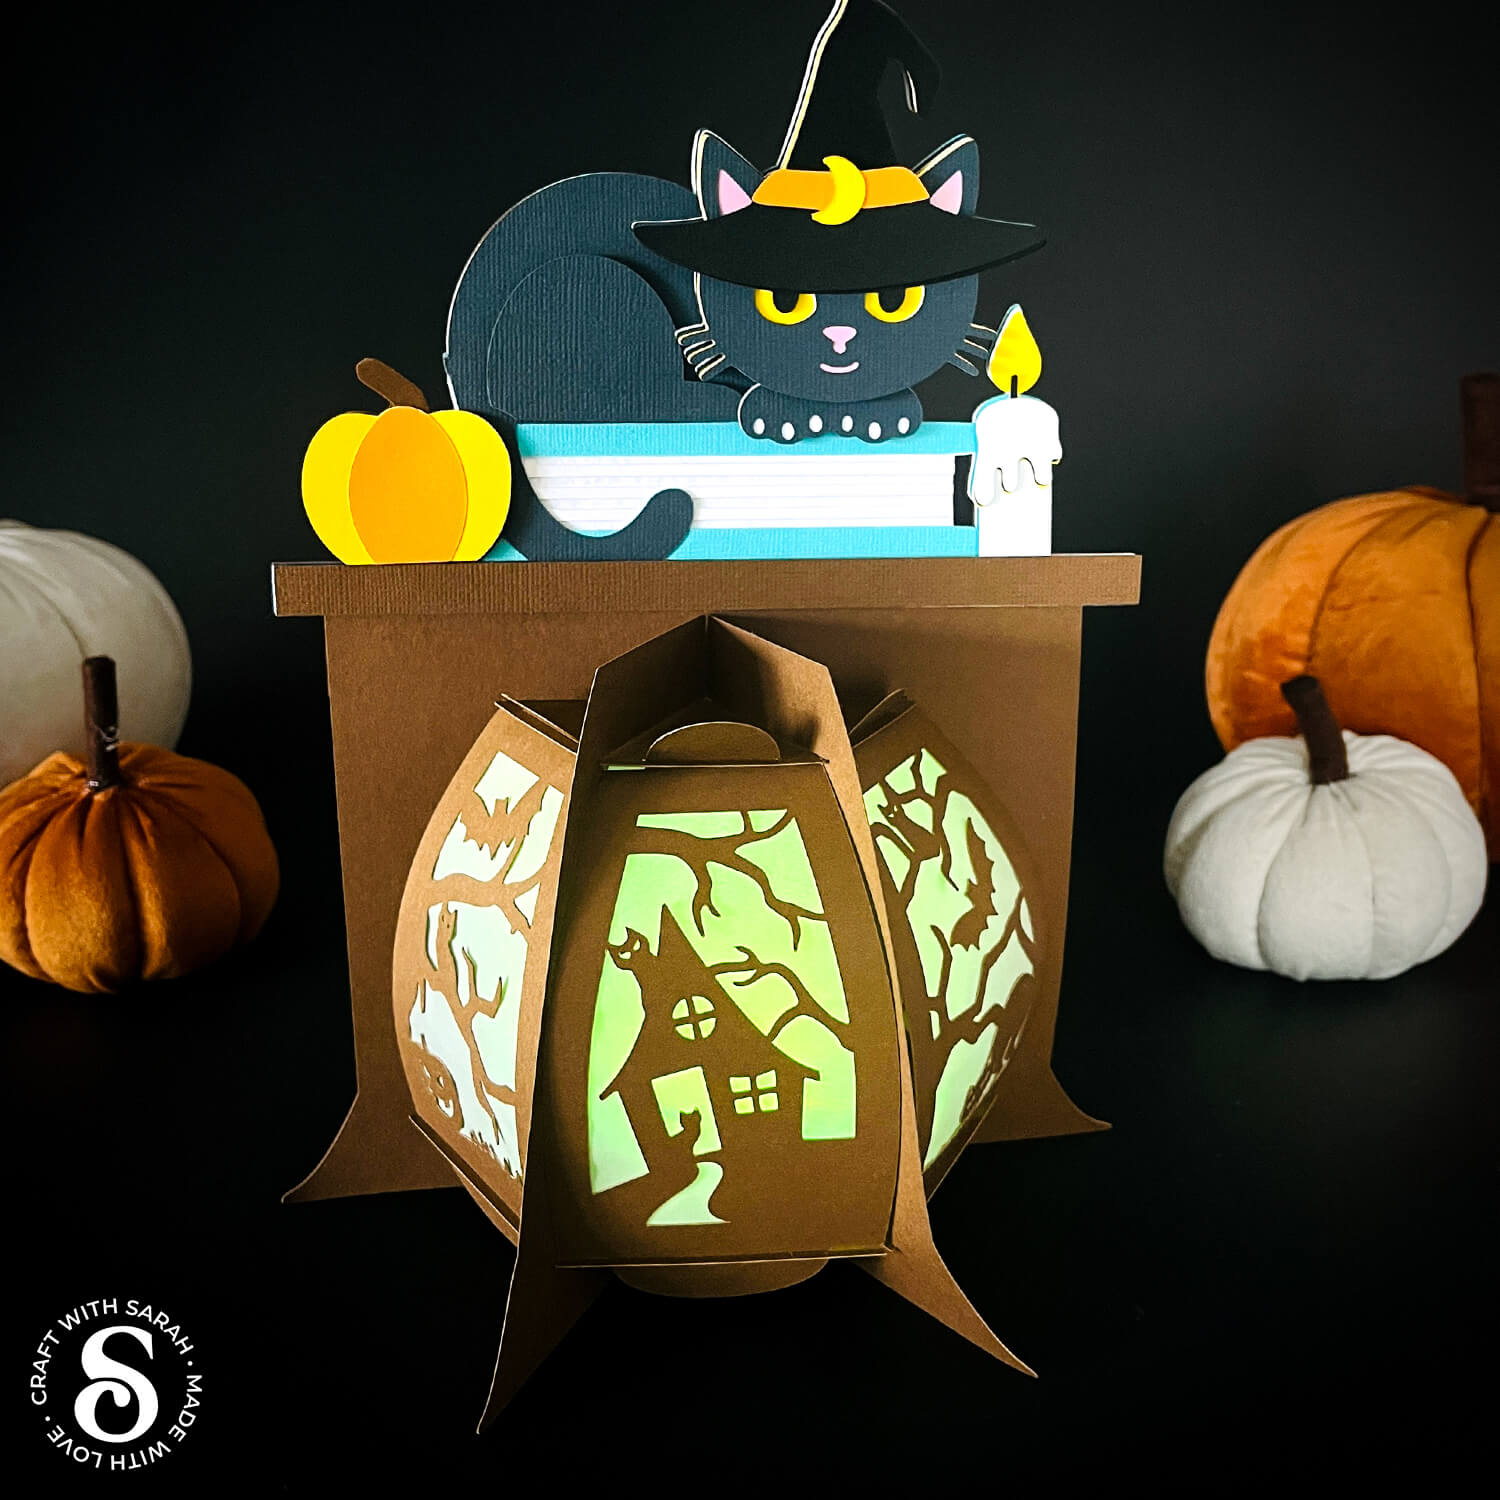
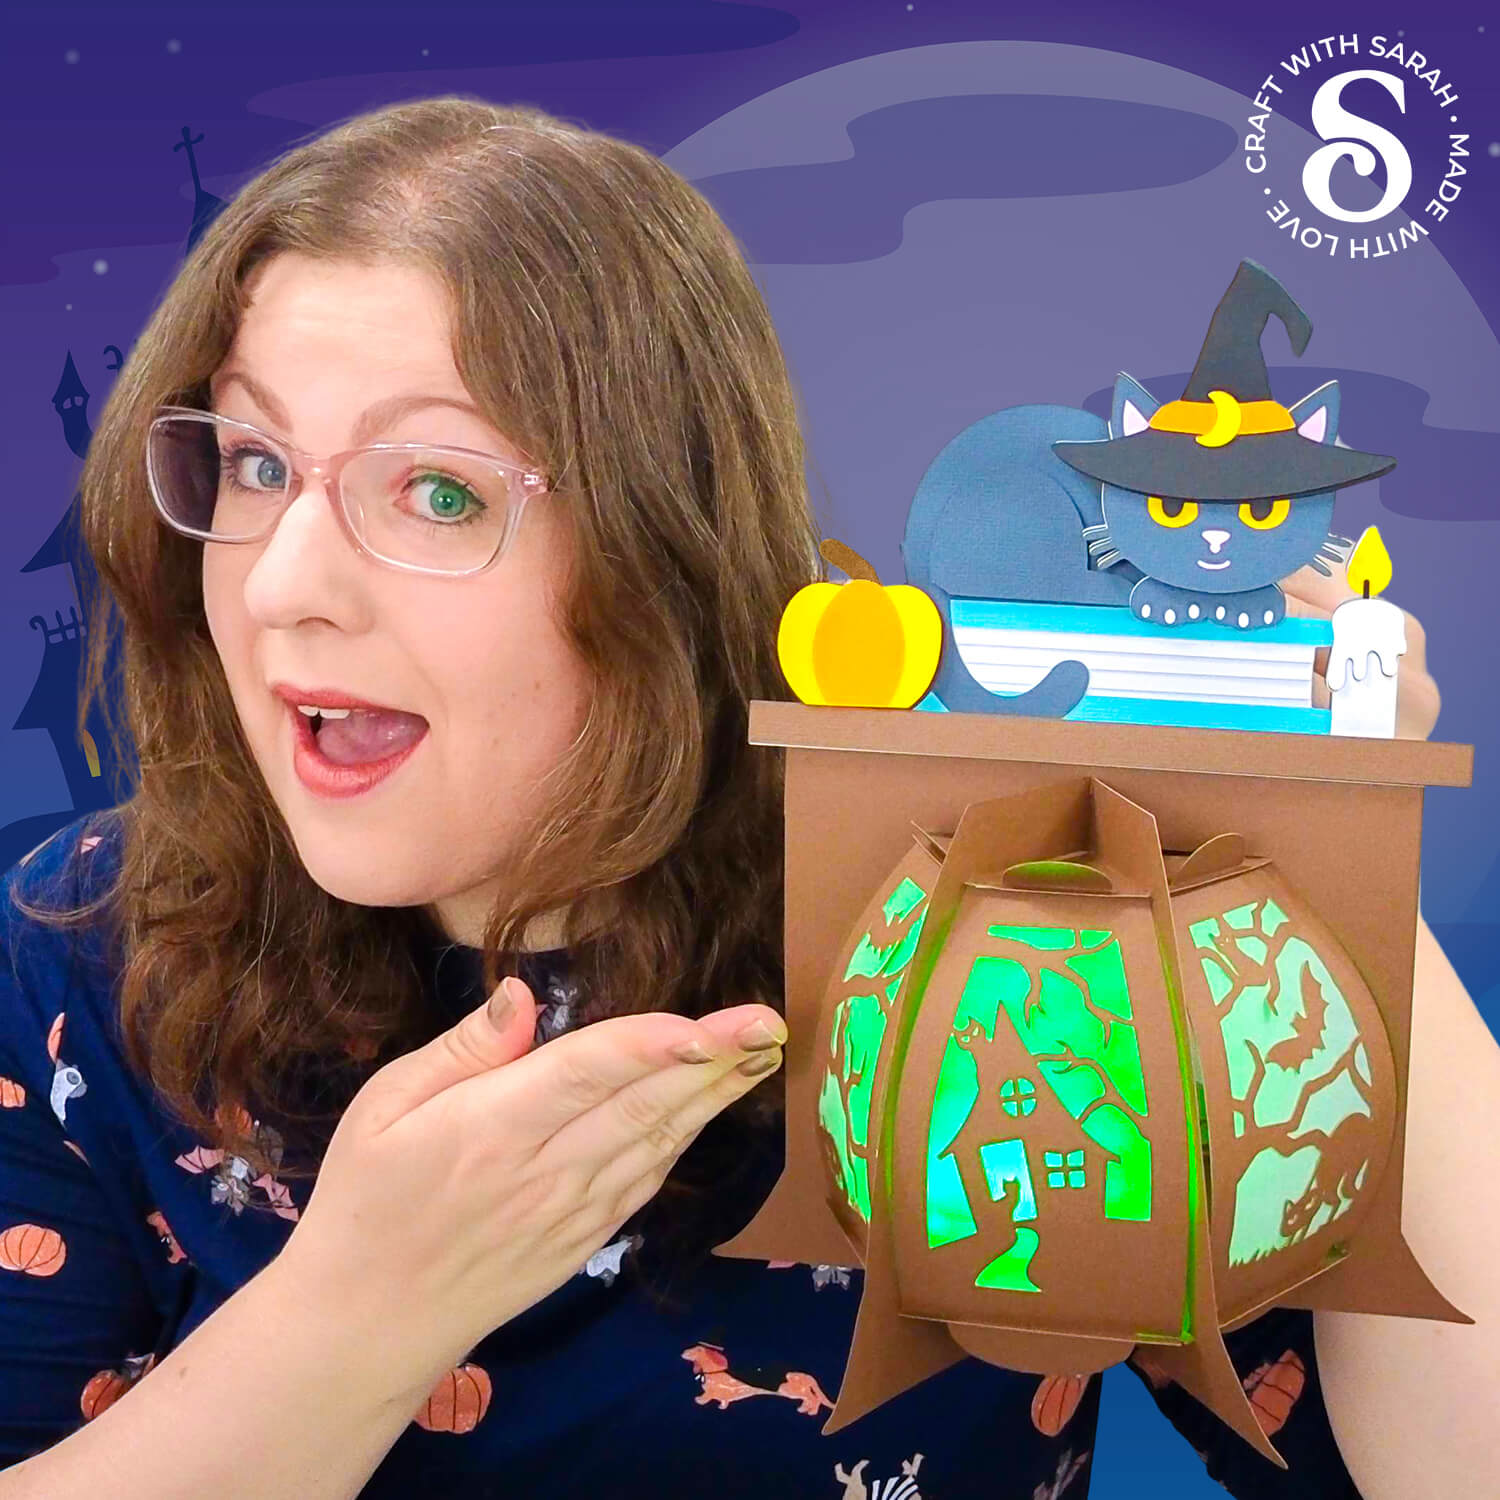
Cat with Spellbooks Base Lantern 👻 HCC 2025
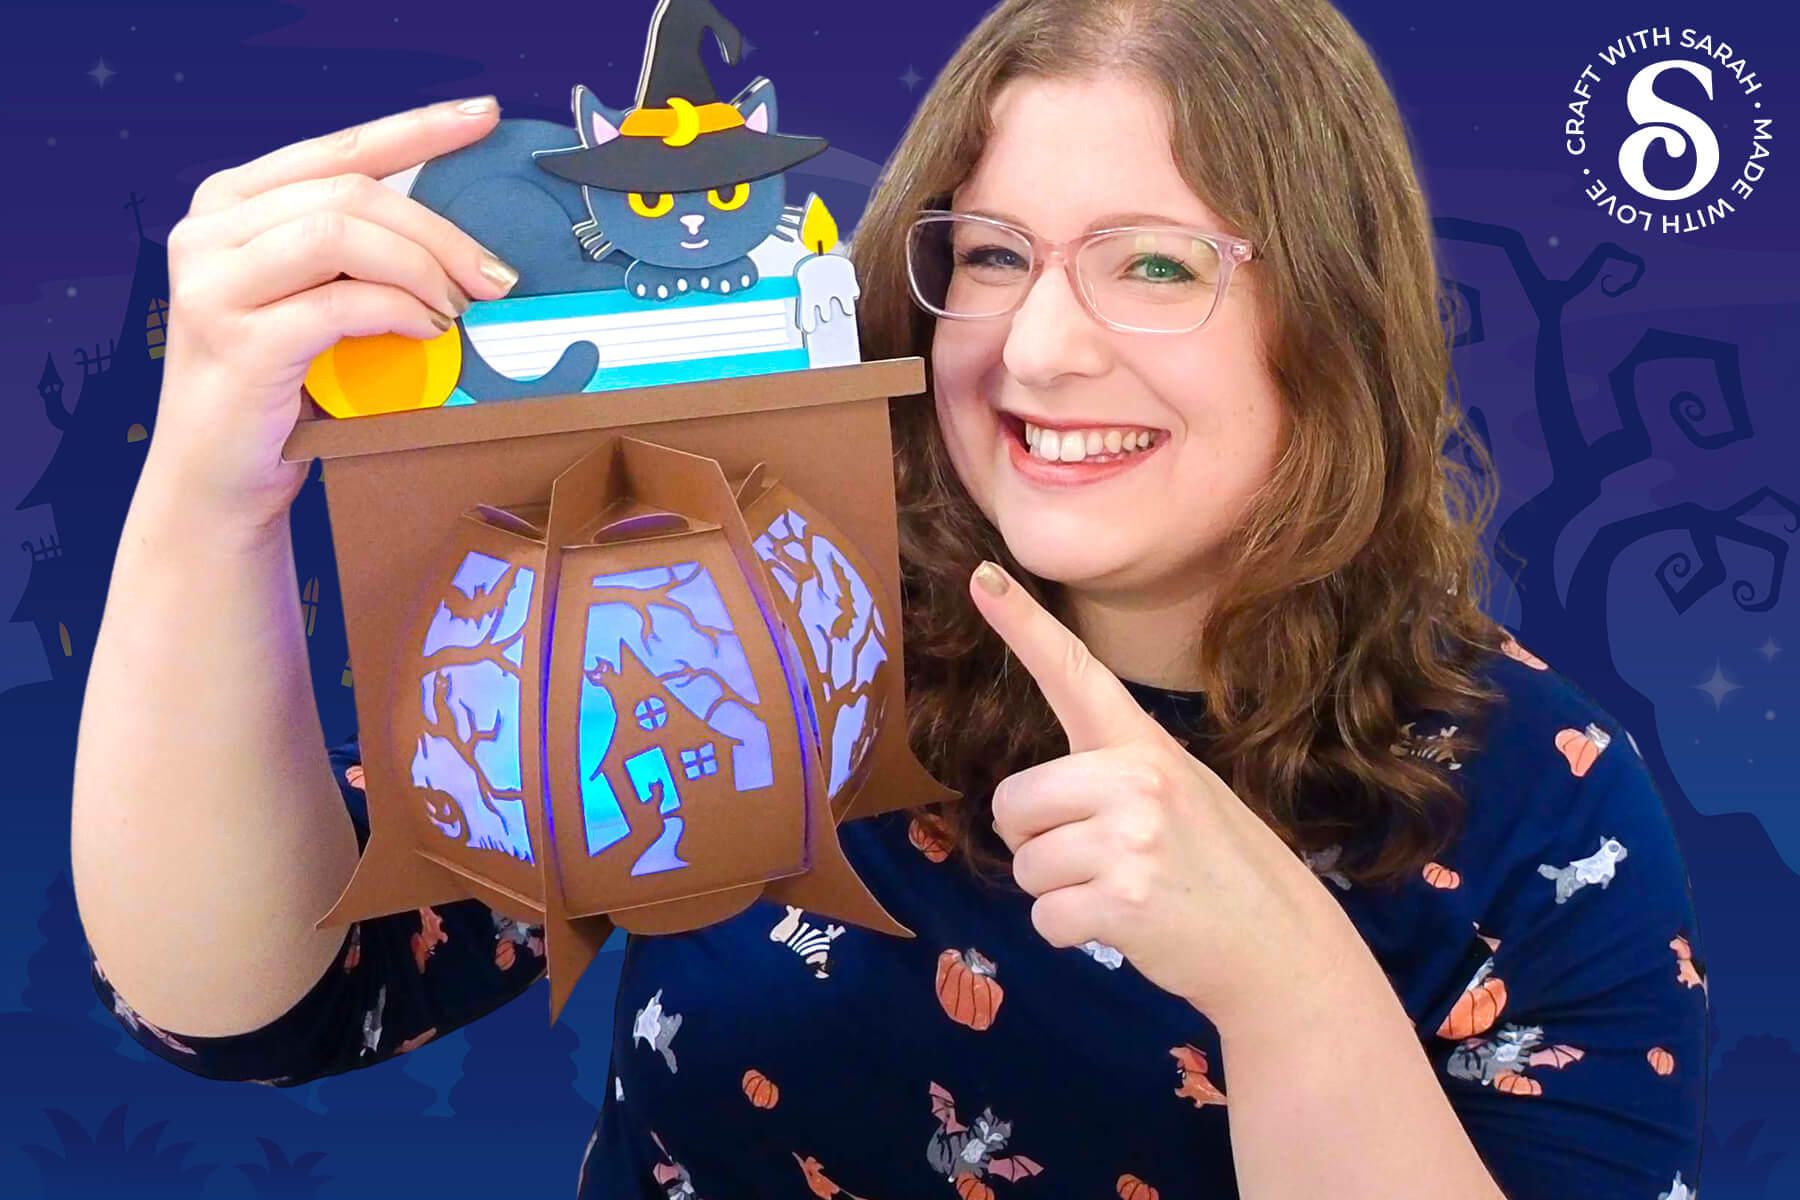
If you’re ready to make a bold statement with your Halloween crafting this year, this dramatic Cricut lantern craft is the perfect project to try.
Designed in the “base lantern” style, it’s a large 3D papercraft that’s ideal for display — whether on a table, shelf, or as a striking centerpiece.
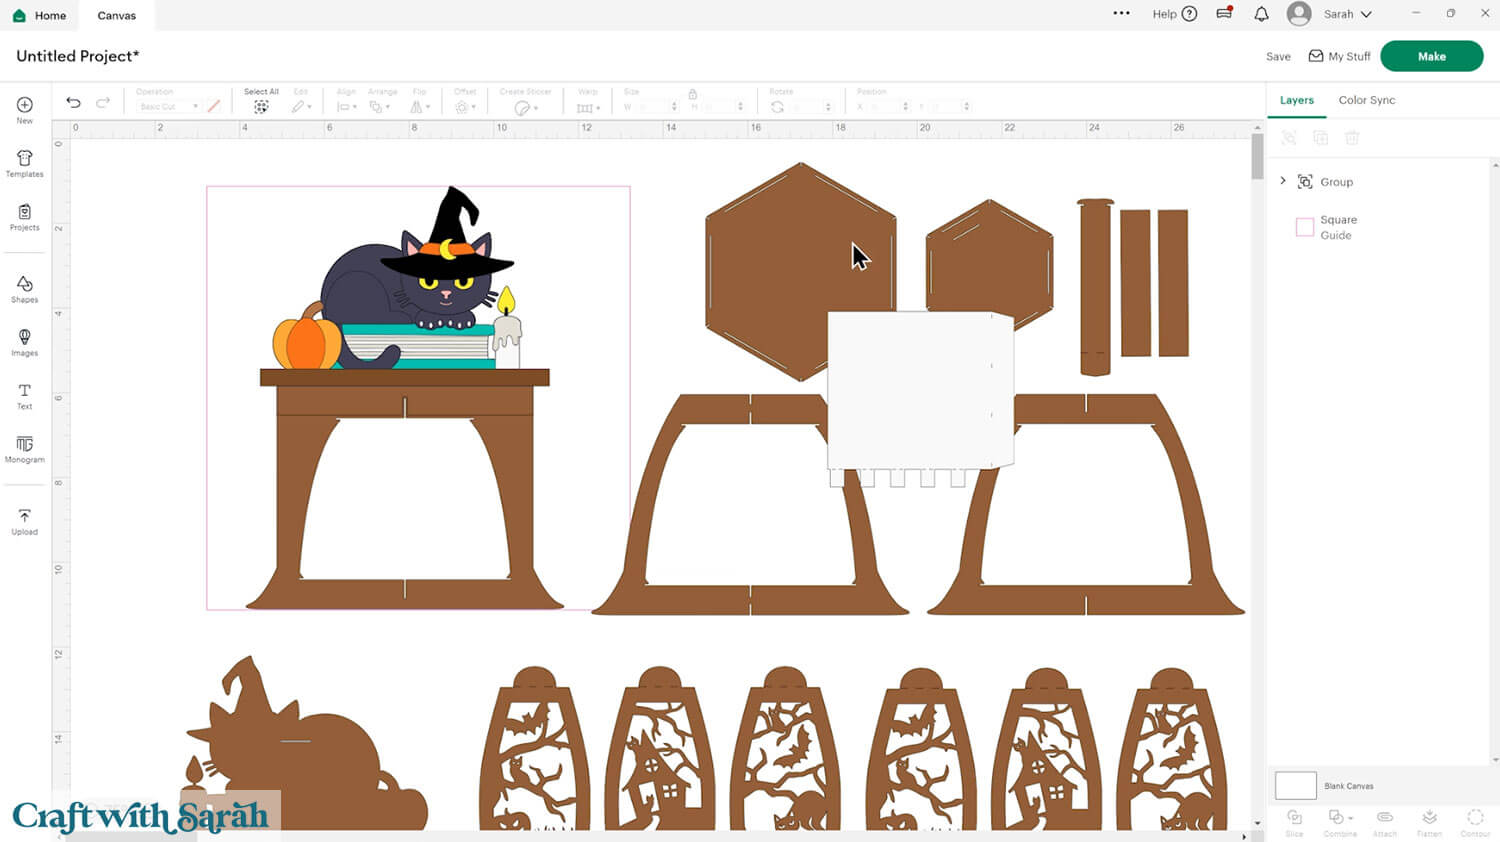
At the heart of the design is a black cat resting on top of a spellbook with a witch hat perched on its head. A flickering candle and pumpkin complete the scene, all set on what looks like an old wooden desk.
The layered elements create depth, shadow, and interest from every angle, giving this Halloween lantern a polished and atmospheric look.
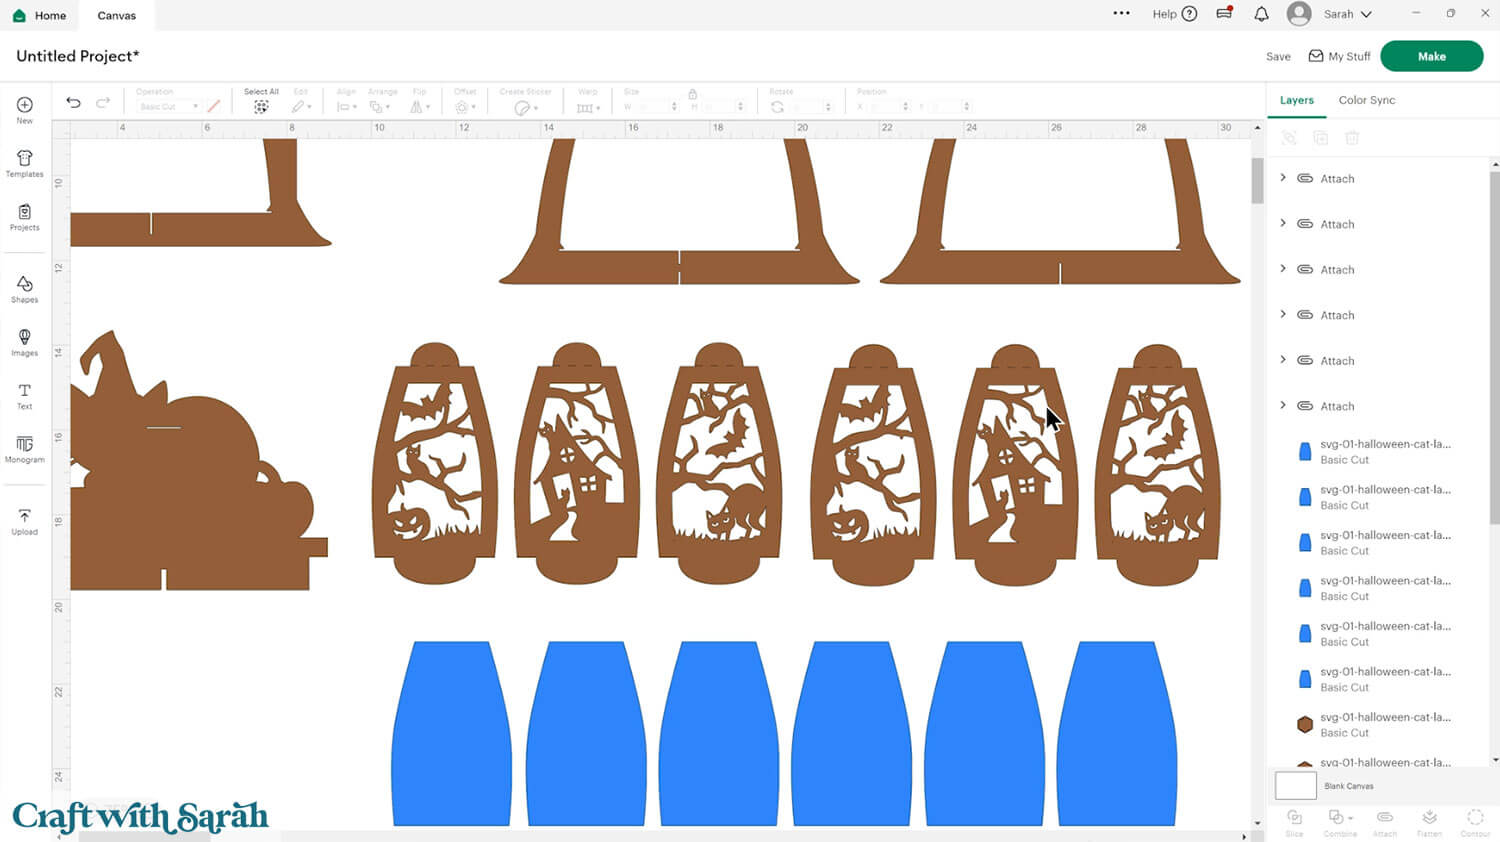
The lantern’s side panels add even more detail, featuring haunted houses, crooked trees, spooky cats, and bats flying through the night sky.
Add submersible lights, fairy lights or battery tea lights inside for an eerie glow and you’ve got a real showstopper for Halloween night.
The lantern can be disassembled and stored flat once Halloween is over, making it a great long-term addition to your Halloween decorations.
A slightly “delicate” note about this tutorial… it was pointed out to me after I filmed the video for this project that the original pumpkin stalk that you’ll see in the video and step-by-step images in this page was in a… shall we say, rather “unfortunate” position. I have modified the version of the file that you will download so that the stalk faces the other direction. 😂
This project was part of the 2025 Halloween Craft Countdown.
Materials supply list
Here is a list of the materials that are required to make this project.
Please note that some of the links included in this article are affiliate links, which means that if you click through and make a purchase I may receive a commission (at no additional cost to you). You can read my full disclosure at the bottom of the page.
- Cricut machine
- Light blue Cricut cutting mat
- Coloured Card
- Glue (I like Bearly Art Glue and Collall)
- 3D foam pads
- Translucent vellum, tracing paper or similar
- Lights to go inside the lantern such as submersible lights, battery powered tea lights or fairy lights with small battery packs
- Cricut scoring wheel or scoring stylus (optional)
This project is suitable for the following types of Cricut machines: Explore series, Maker series and Joy Xtra. It is too large to cut with a Cricut Joy.

Foundation learning
If you're new to making papercrafts with your cutting machine, check out these links to get you started.
They include videos on topics such as: which file to use with your type of cutting machine, how to load the files into your cutting machine's software, how to cut cardstock with your type of cutting machine, how to recolor and modify/customize the cut files and tips for displaying your projects.
- Help guides for Cricut machines
- Help guides for Silhouette machines
- Help guides for ScanNCut machines
The following tutorials are Cricut-specific, but many of the ideas will work similarly with a Silhouette or ScanNCut machine and any cut files that are shared in them are compatible with all types of cutting machine.
- How to score with a Cricut (even without scoring tools)
- Print then cut tutorial
- Design Space tools (Combine, Attach, Slice, Weld, Flatten, etc.)
- Pattern fill tutorial (for making backgrounds & cutting images to a specific shape/size)
- Free envelope SVGs that can be sized to fit any card
- Presentation boxes for handmade cards
- How to write inside cards with Cricut pens
- How to cut layered designs at a small size
- Design Space tips & tricks
- Cricut pens tutorial
- How to mount multiple designs in the same frame with magic guides
DIY Lantern Video Tutorial
Watch the video below to see how to make this project. Keep scrolling for a written tutorial.
A big Design Space update is currently rolling out that changes how the screen looks, including the position of some of the buttons and tools. I had already recorded all the Countdown videos before the update was released, so unfortunately there will be areas of the videos that look different to your screen.
To help with this, I've recorded a walkthrough video that explains all of the Design Space changes so that you can see how to do everything in the new version.
What lights work best inside the lanterns?
Never use a real flame/candle as your lantern will catch fire!!
Instead, choose battery powered lights.
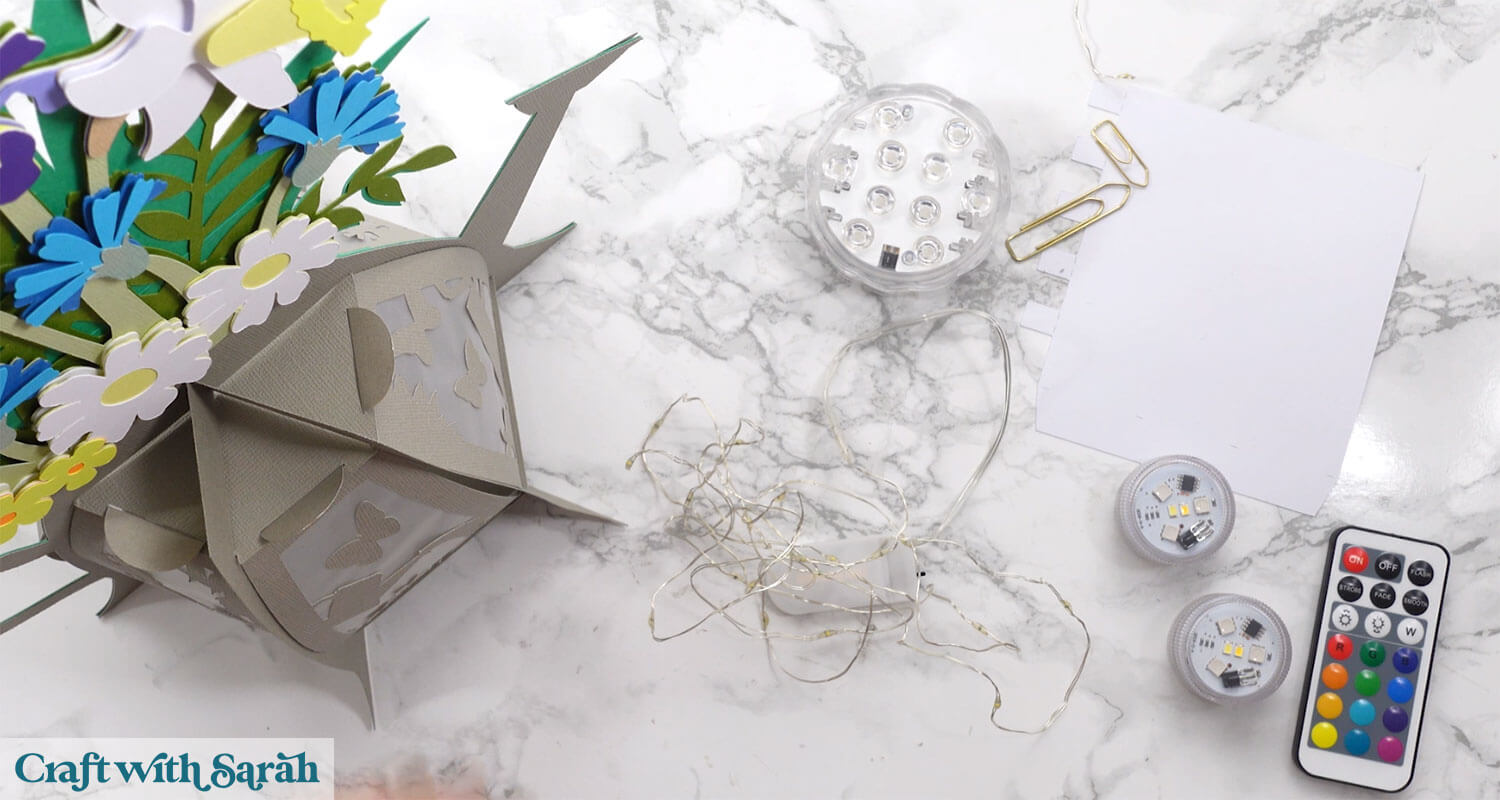
As you are putting the light in an enclosed space with the walls made from cardstock, it is essential that you choose lights that do NOT get warm during use.
Option 1: Battery powered tea lights
This is a quick and simple light option and you may already have some of these lights in your home, however they are not the most effective for this particular type of lantern.
Base lanterns are quite large, so tea lights probably won’t be strong enough to make much of an impact.
Find battery powered tea lights on Amazon
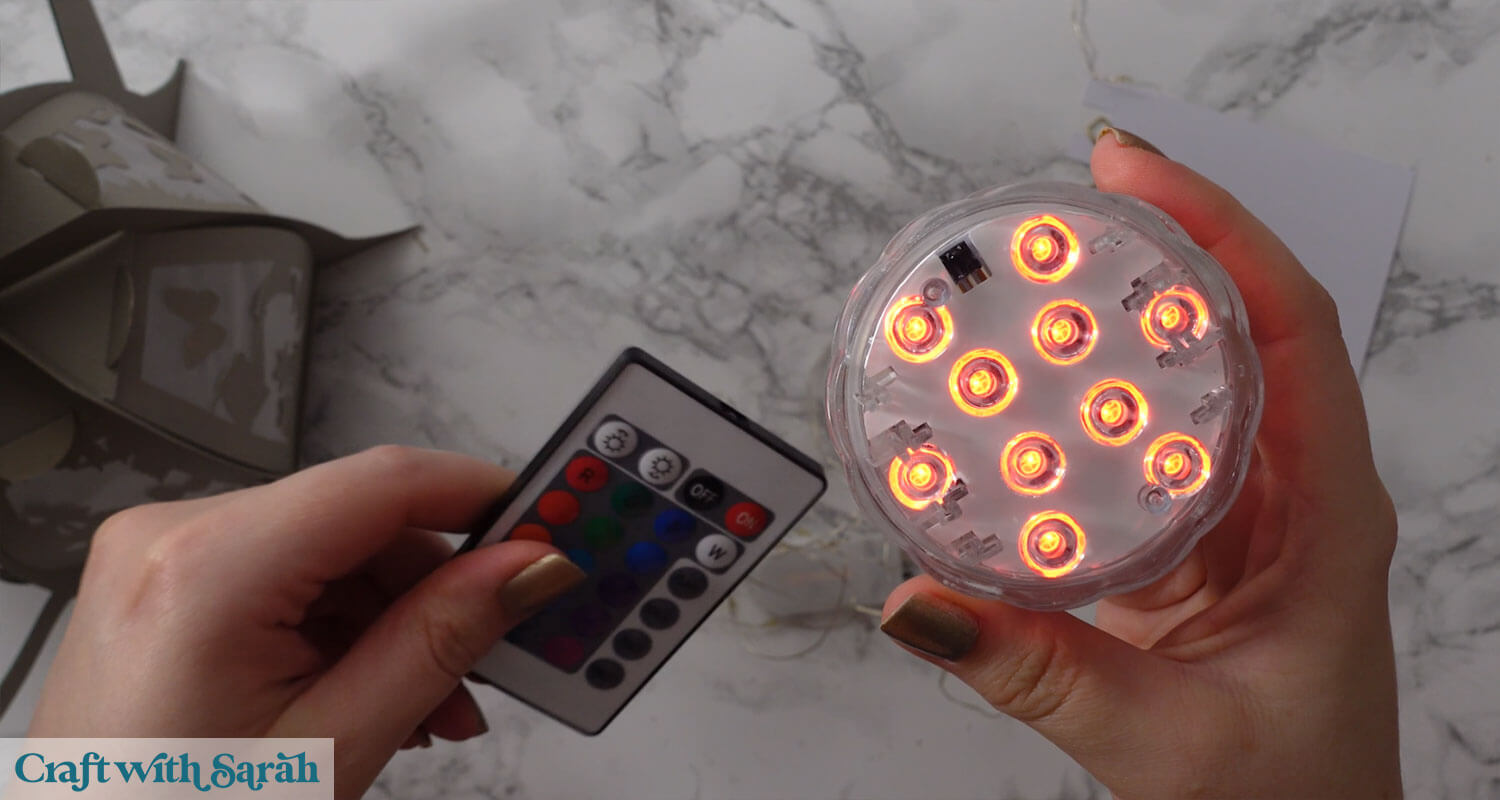
Option 2: Submersible LED lights
This is my favourite lighting option. These tiny little lights come with a remote control to change the colour. You can even make your own disco light show by having them flash or fade through all the different colours!
If you use a smaller light like these, you will need 2-3 inside to light the lantern adequately.
Find small submersible lights on Amazon
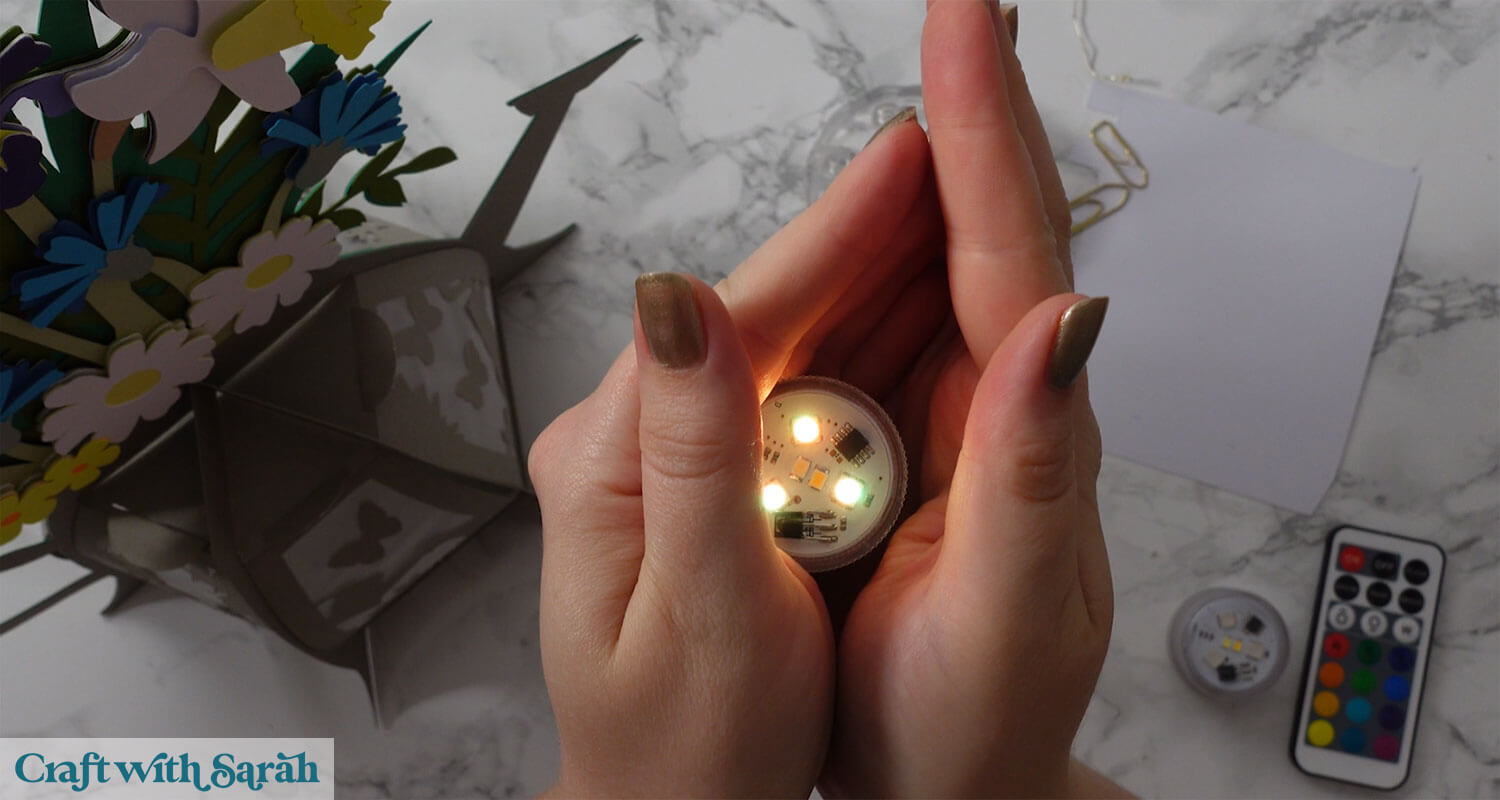
These larger lights work best for the base lanterns. They require 3 x AAA batteries.
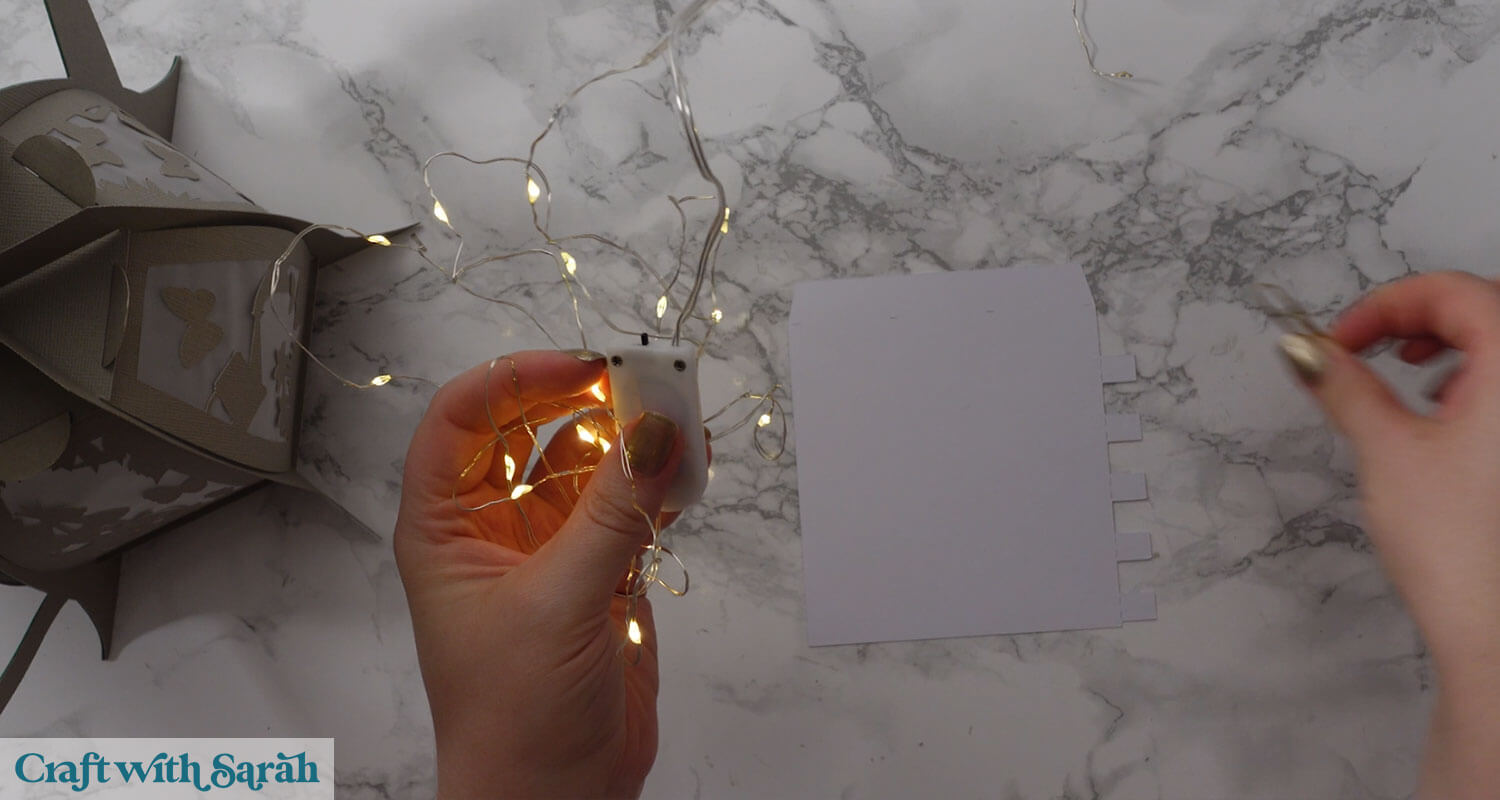
Option 3: Fairy lights
Putting a string of fairy lights inside the lanterns gives the brightest overall effect.
Choose lights with small battery packs and make sure you unravel/unwrap the lights from the battery pack before using them, for safety reasons.
The design comes with an optional light tower to wrap the lights around, so that the light will reach all the way to the top of the lantern.
Written Tutorial for Halloween Cat SVG
Here’s how to make a spooky Halloween cat lantern using your Cricut.
Step 1) Download the cutting file & upload to Design Space
Get the files using the box below.
Purchase the File(s)
This cut file is available as part of the Instant Access Bundle.
Or, purchase this design individually here
Before you upload the SVGs to Design Space, you need to unzip the download folder that they come in.
- How to unzip a folder on Windows computer
- How to unzip a folder on a Mac
- How to unzip a folder on an iPad/iPhone
- How to unzip a folder on an Android device
After unzipping, upload the SVG file(s) into your cutting machine software.
Not sure how to use cut files with your type of machine? The following links lead to videos on how to open cut files in:
- Cricut Design Space
- Silhouette Studio
- CanvasWorkspace (for ScanNCut machines)
If you are using Cricut Design Space, start a new project and then click the “Upload” button on the left of the screen.
You can then either click “Browse” to find the file on your computer, or drag-and-drop it.
Upload the file in the “01 Cricut Version” subfolder called svg-01-halloween-cat-lantern-craftwithsarah.svg
This is how it should look after you have selected the file:
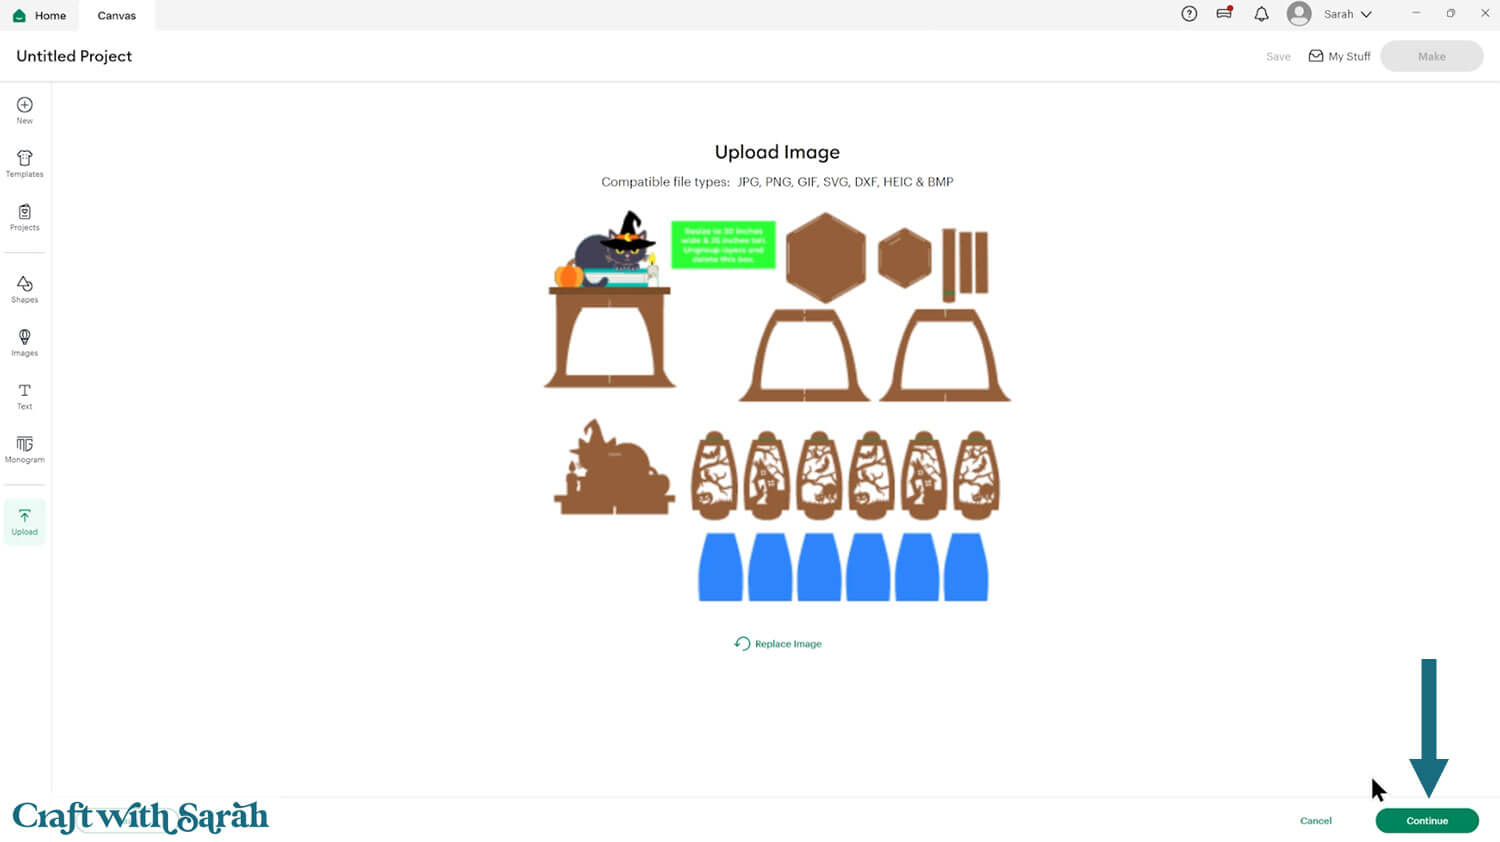
Don’t worry if the image preview appears blurry – it will show in full quality once it’s inserted onto your project.
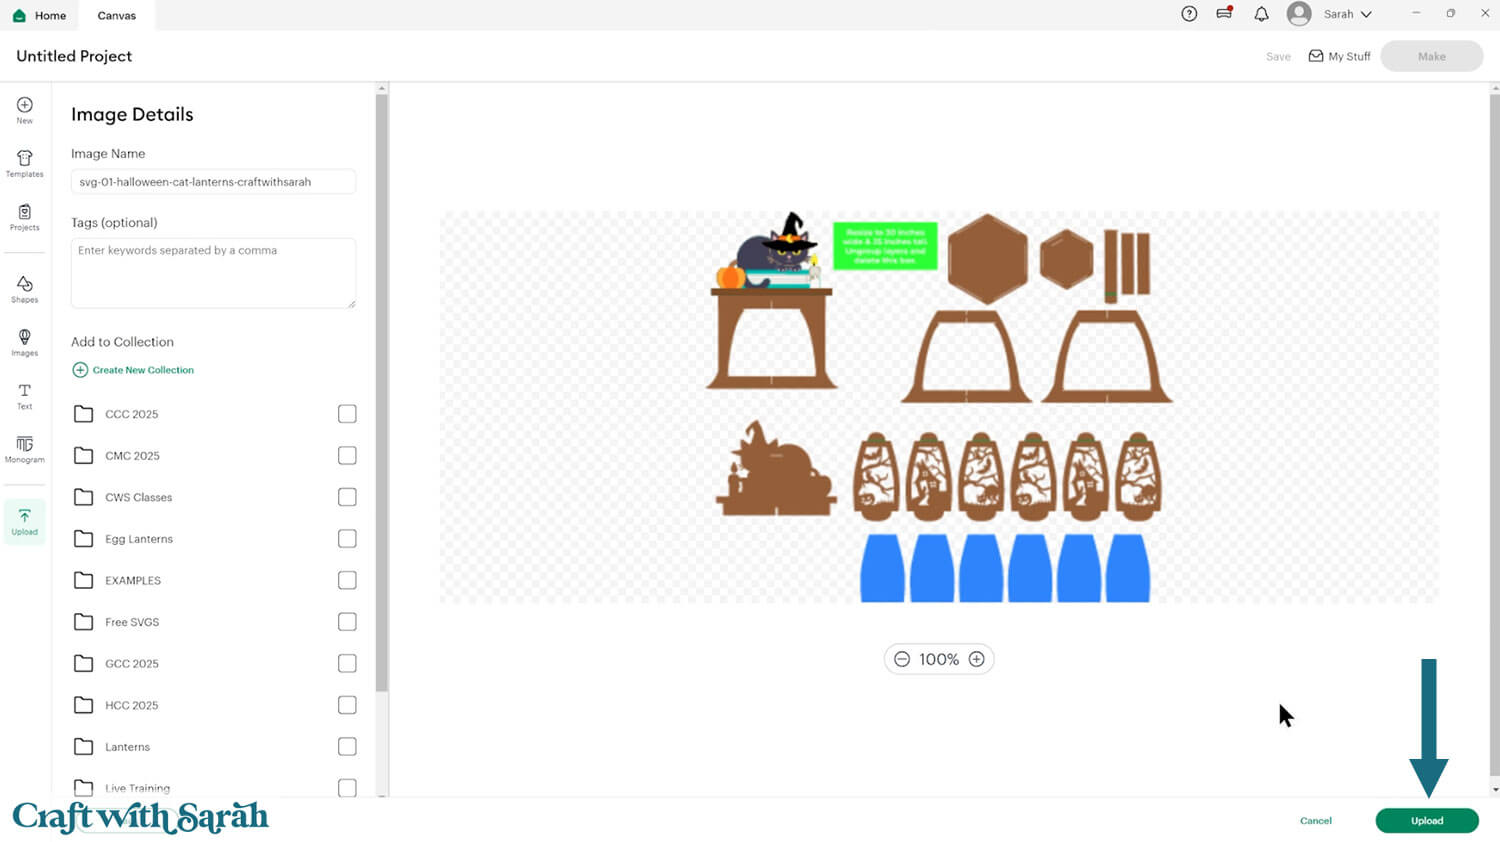
Press “Upload” on the next screen.
After uploading, the design should be automatically inserted onto your Canvas.
Cricut have recently (as of June 2025) introduced a feature where you get a “pop out” bar of similar images when you Upload a design. To hide this bar (to give you more space for designing!), click the arrow that’s about half way down the page.
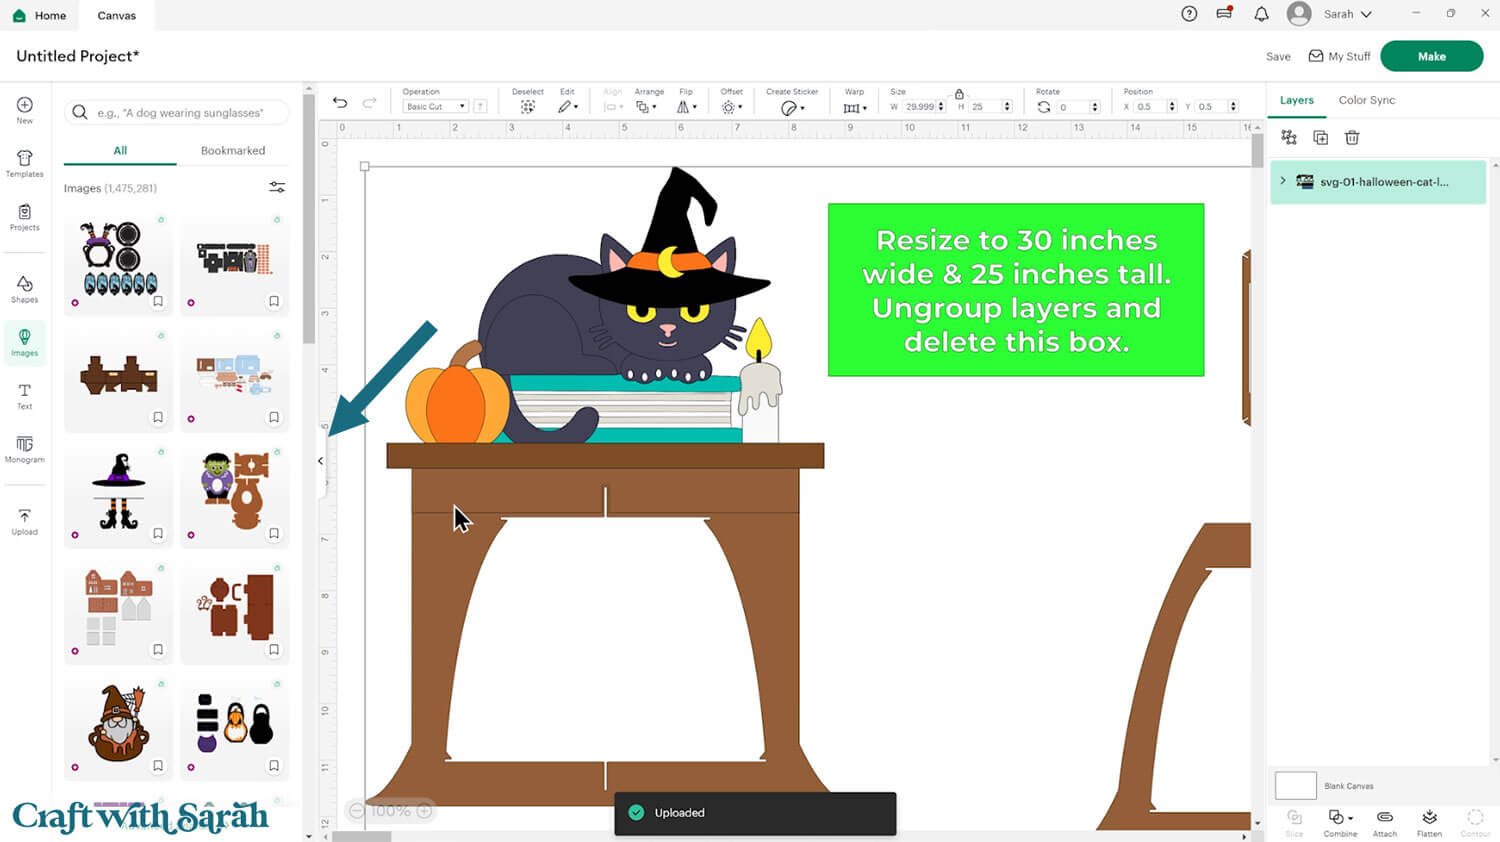
If the design doesn’t get inserted onto your Canvas, it will show under “Uploads” in your “Recently Uploaded Images”. Click on it and then press “Add to Canvas” to put it onto your Project.
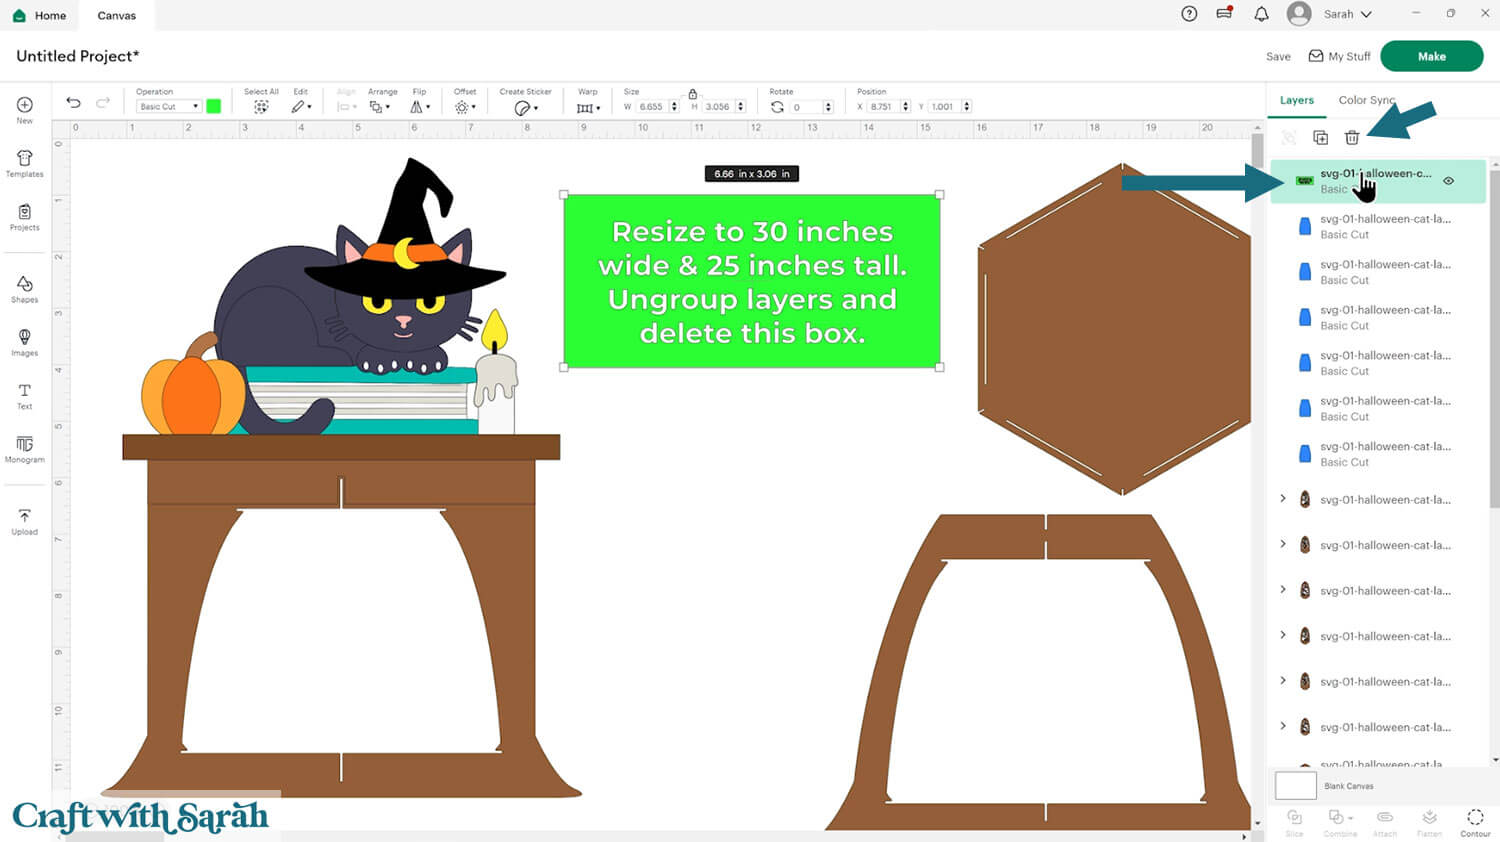
Step 2) Format the DIY lantern design
The design should load in at 30 inches wide and 25 inches tall. If not, adjust the size to match those measurements.
Then, delete the green rectangle with the size information.
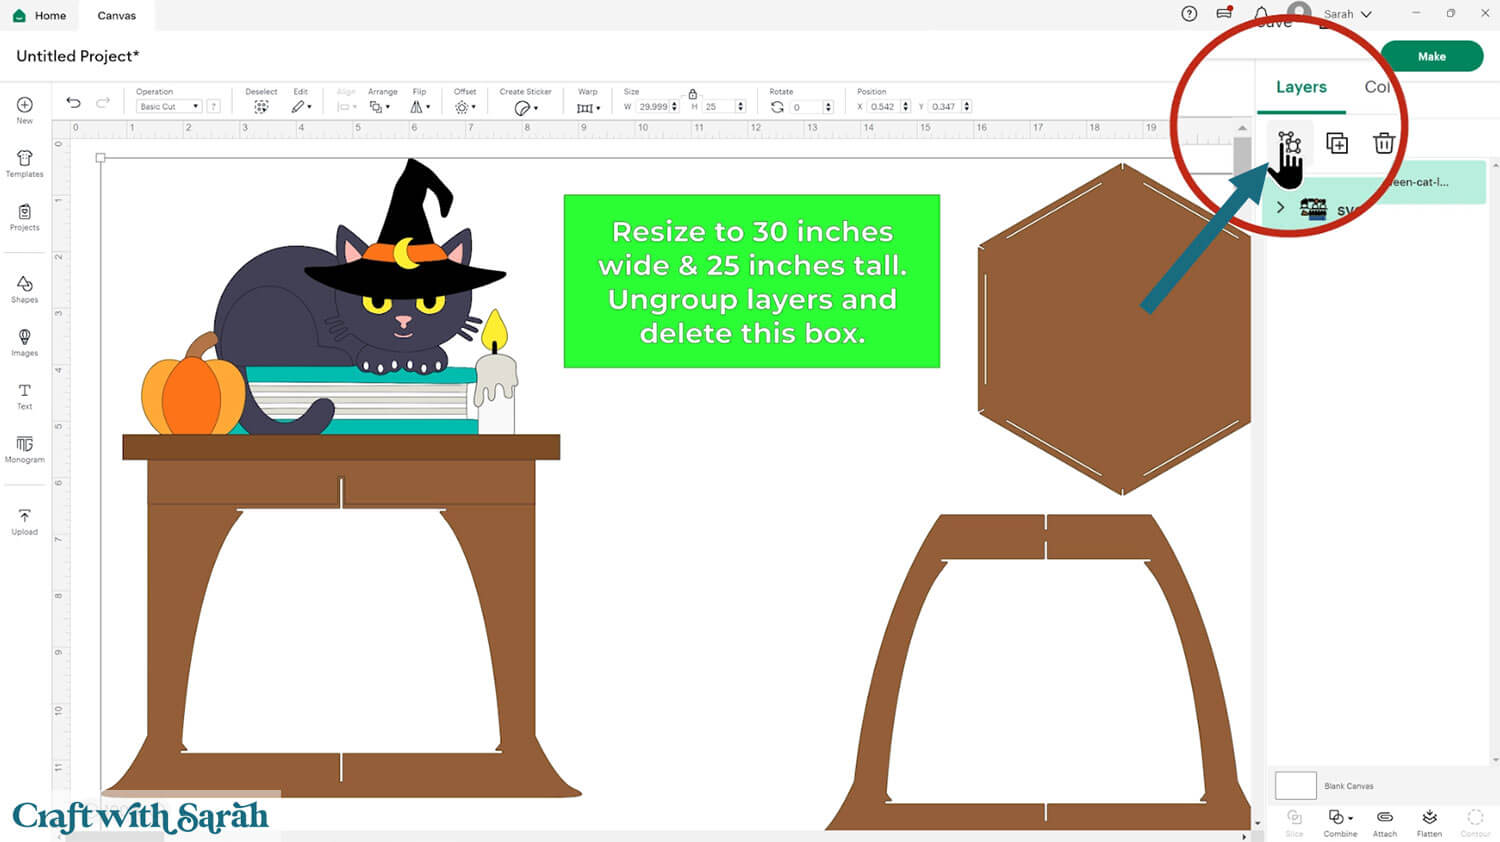
Click the design, press “Ungroup”, then select the green rectangle layer and delete it.
Next, we’ll format the score lines. If you don’t have a scoring stylus or wheel, don’t worry — you can delete those lines and fold by hand.
If you do want to score, locate the six decorative sides of the lantern. As each is repeated, you can make this step faster by deleting the three on the right. We’ll add them back in once the score lines have been formatted.
Look down the Layers panel for a mini group (as shown by a chevron icon). Click the chevron to see the layers. Click on the single line layer.
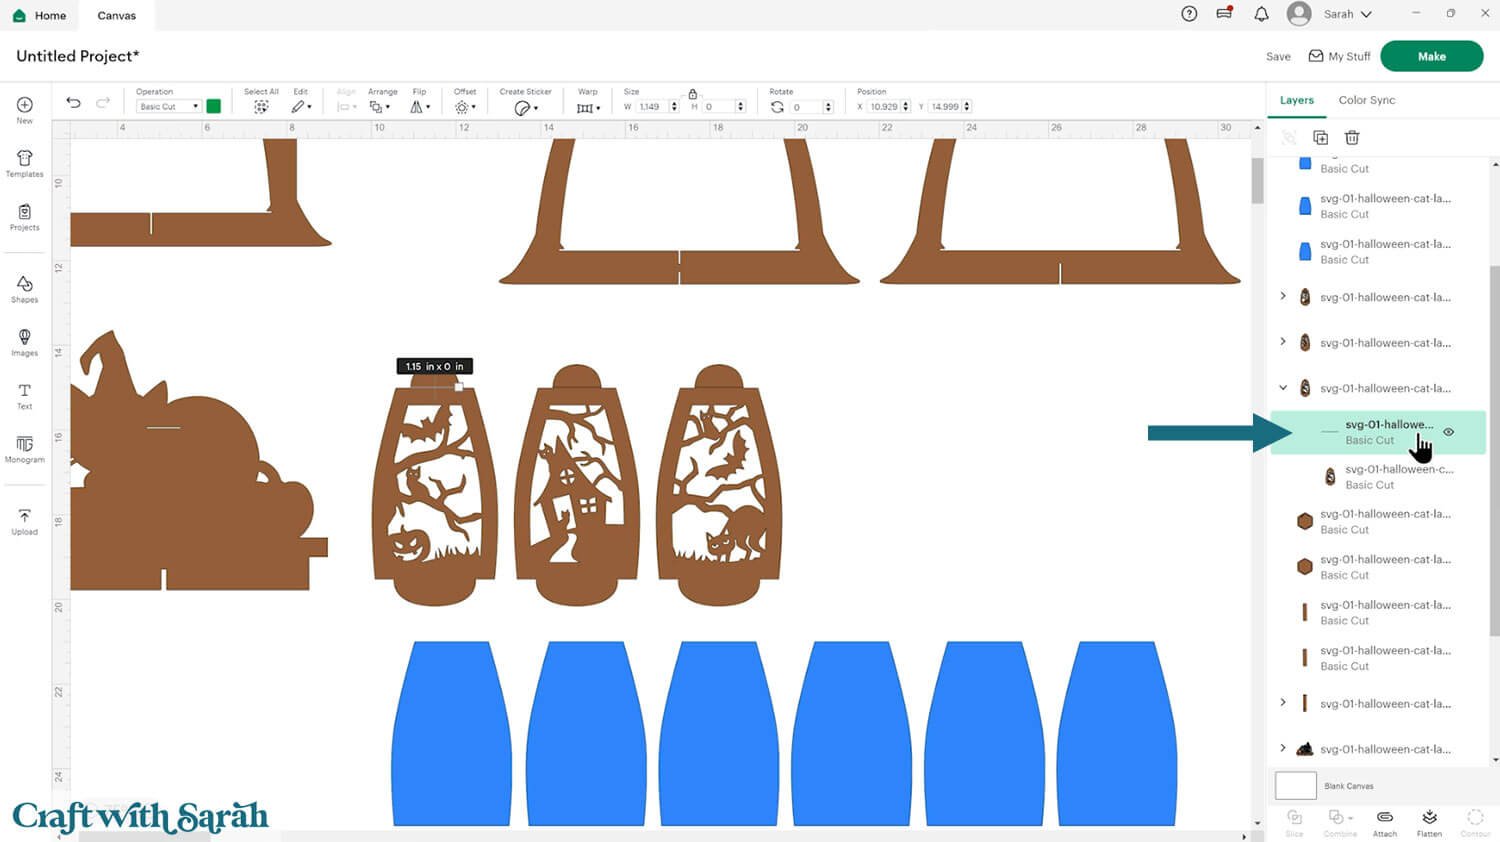
Change it from “Cut” to “Score” in the Operations dropdown menu (or delete it if you aren’t going to score with the Cricut).
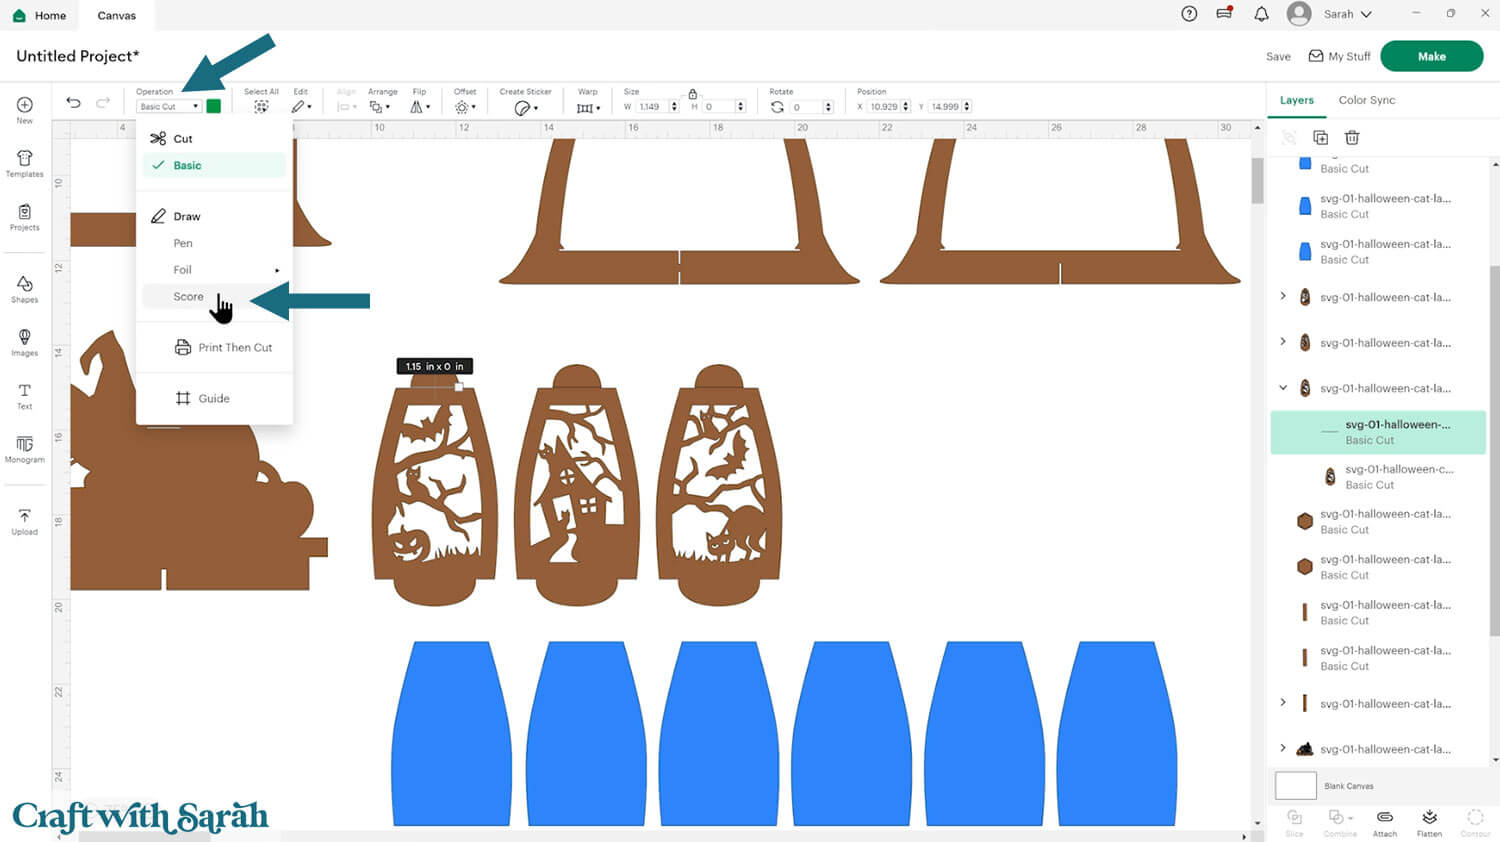
Click to select both of the layers in the mini group. Press “Attach” to tell the Cricut where to do the scoring.
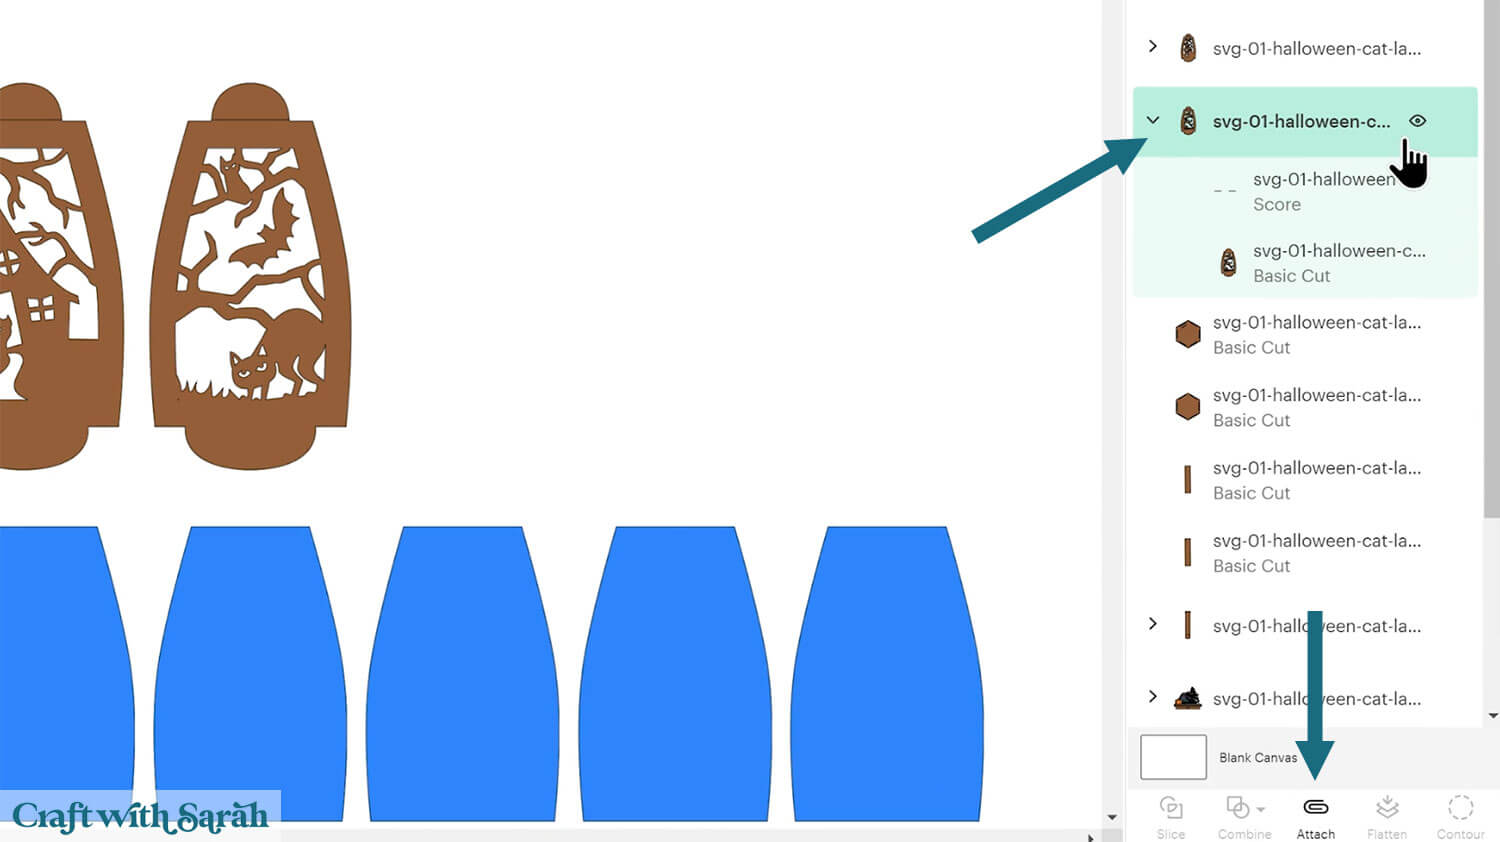
Repeat these steps until you have formatted all the score lines.
Duplicate the three lantern sides after formatting so that you have 6 in total again.
There is also a score line on the long thin rectangle piece.
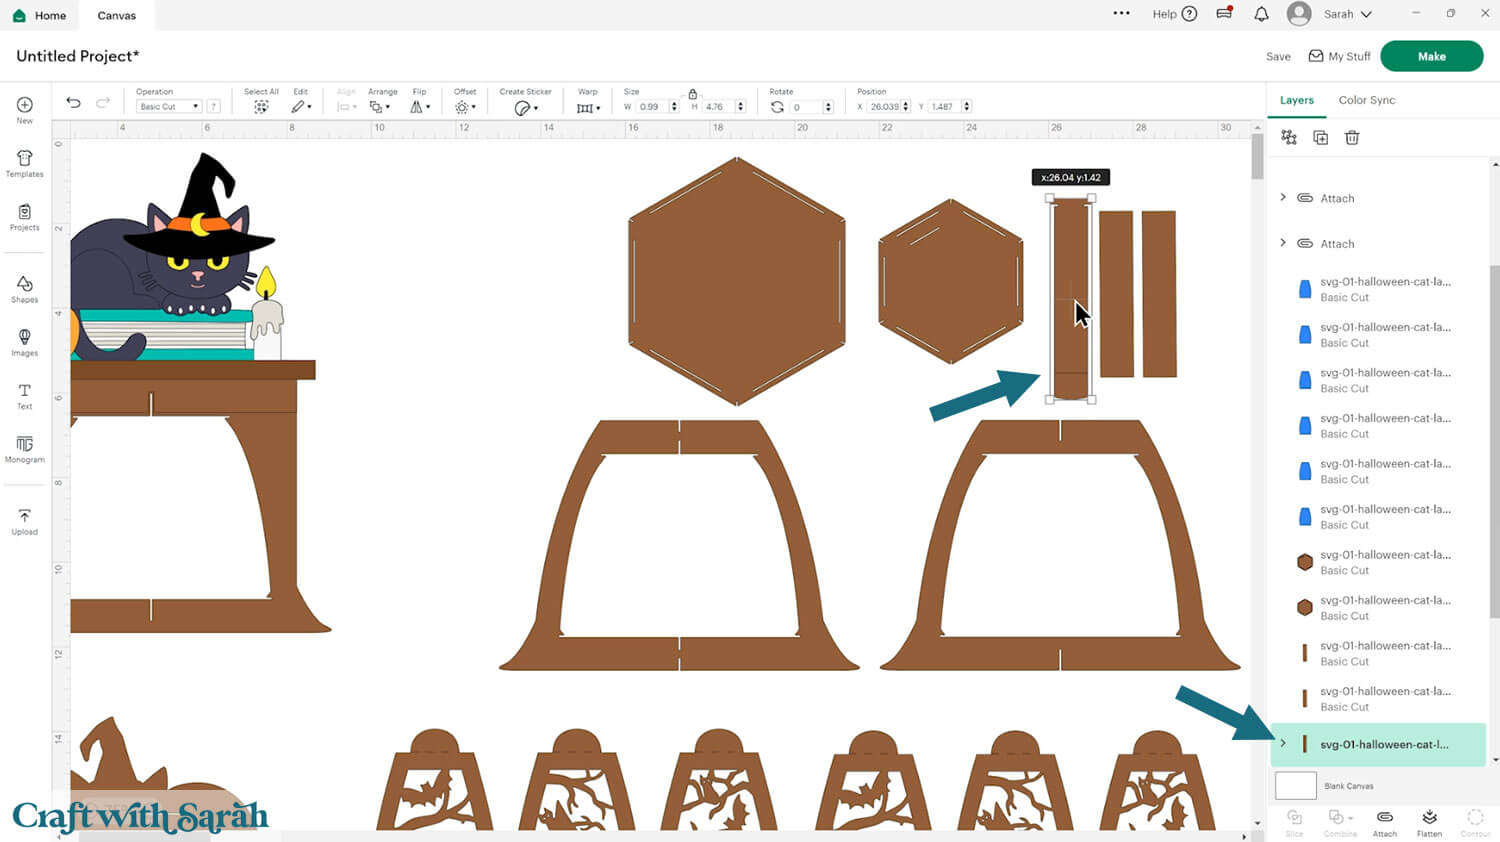
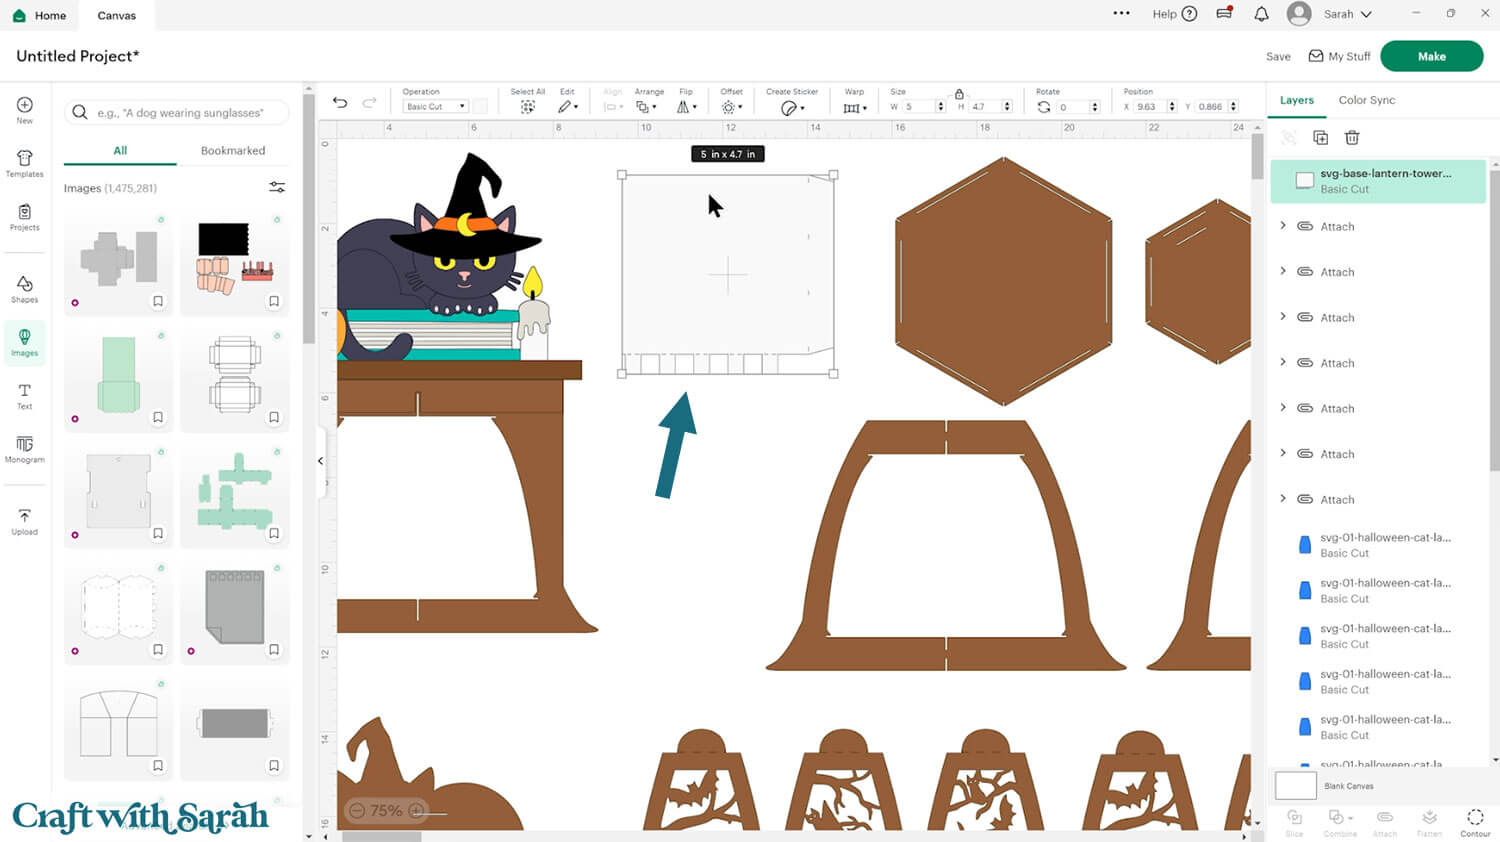
Step 3) Add the light tower (optional)
If you’re planning to use fairy lights, there’s an optional light tower you can include. It helps spread the light evenly throughout the lantern. Upload this file just like the others and make sure it’s included if you resize the whole design.
It loads in at 5 inches wide and 4.7 inches tall.
You don’t have to change anything with this SVG – it loads in exactly ready to cut.
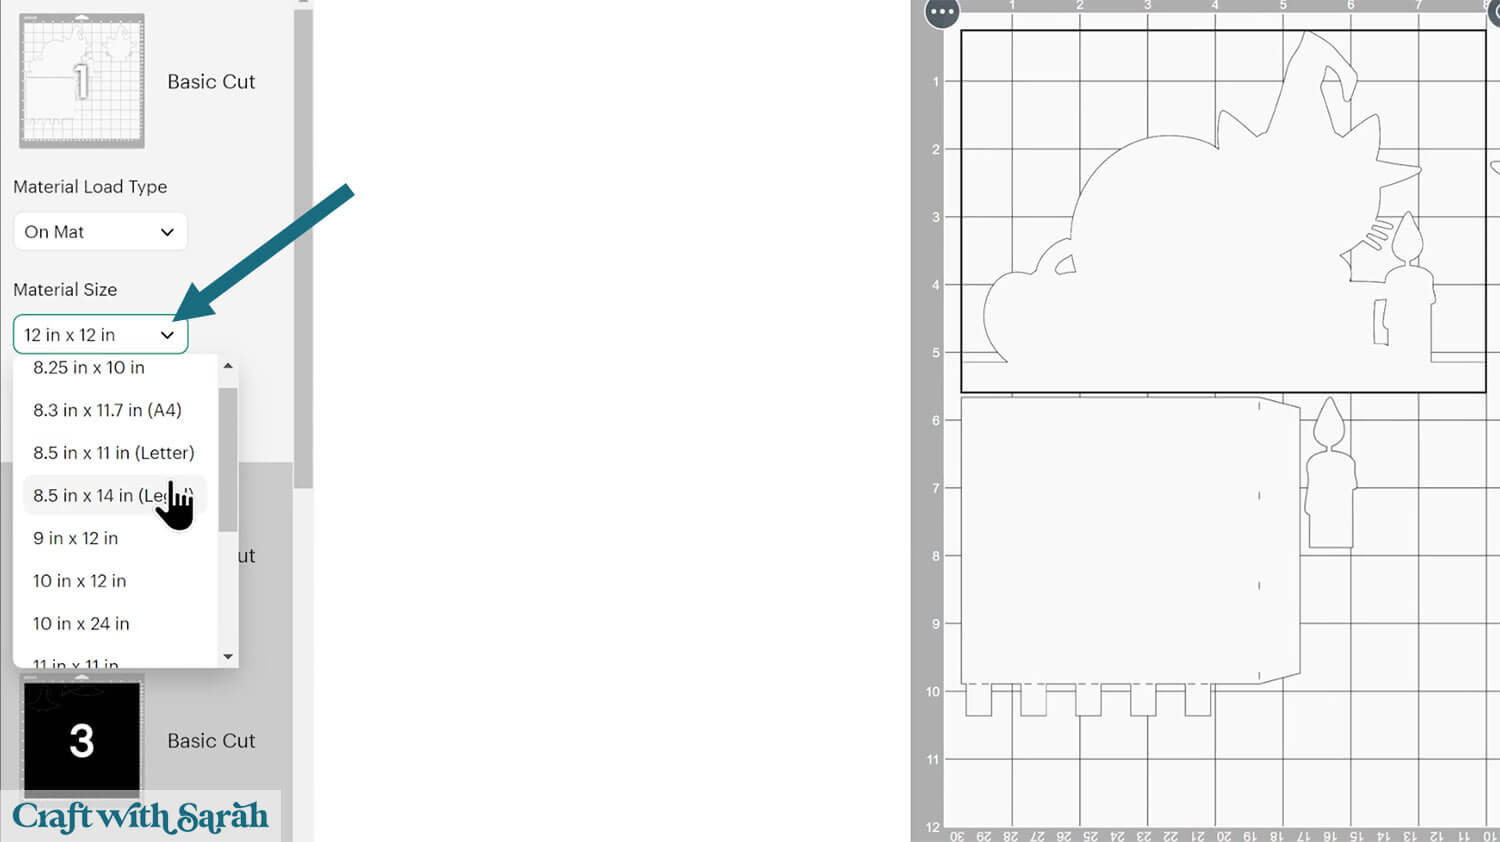
Step 4) Resize the design (optional)
Base lanterns are designed to be fairly large when cut and they require 12×12 cardstock for some of the layers.
However, you can make it smaller if you wish.
To do this, first select all of the layers and click Group.
If you’re using the optional light tower, make sure it’s inserted onto your Canvas before you start resizing, and that it gets included in your Group.
Add a square shape to your canvas and resize it to your desired width (e.g., 7 inches).
Change it to a “Guide” layer in the Operations dropdown menu.
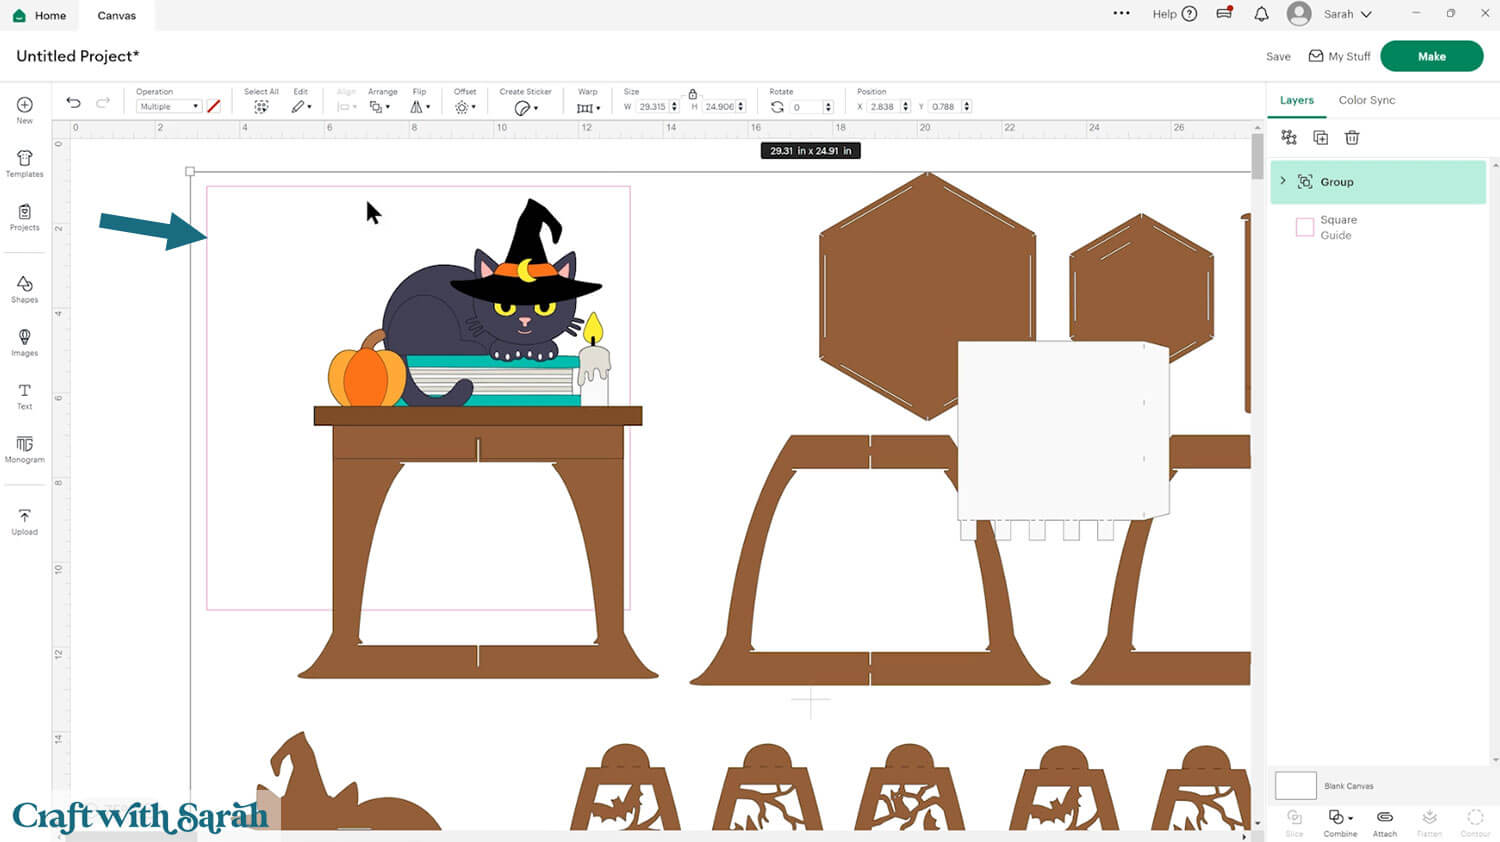
Shrink the lantern layers so that the front of the lantern fits inside your square.
Make sure the padlock icon is closed so everything resizes in proportion.
Delete the guide rectangle when you are done resizing.
TIP: Smaller versions are harder to put together. I recommend staying above 7 inches wide for easier assembly, as the slots on the sides of the shapes get VERY small and a little hard to use if the designs get too little.
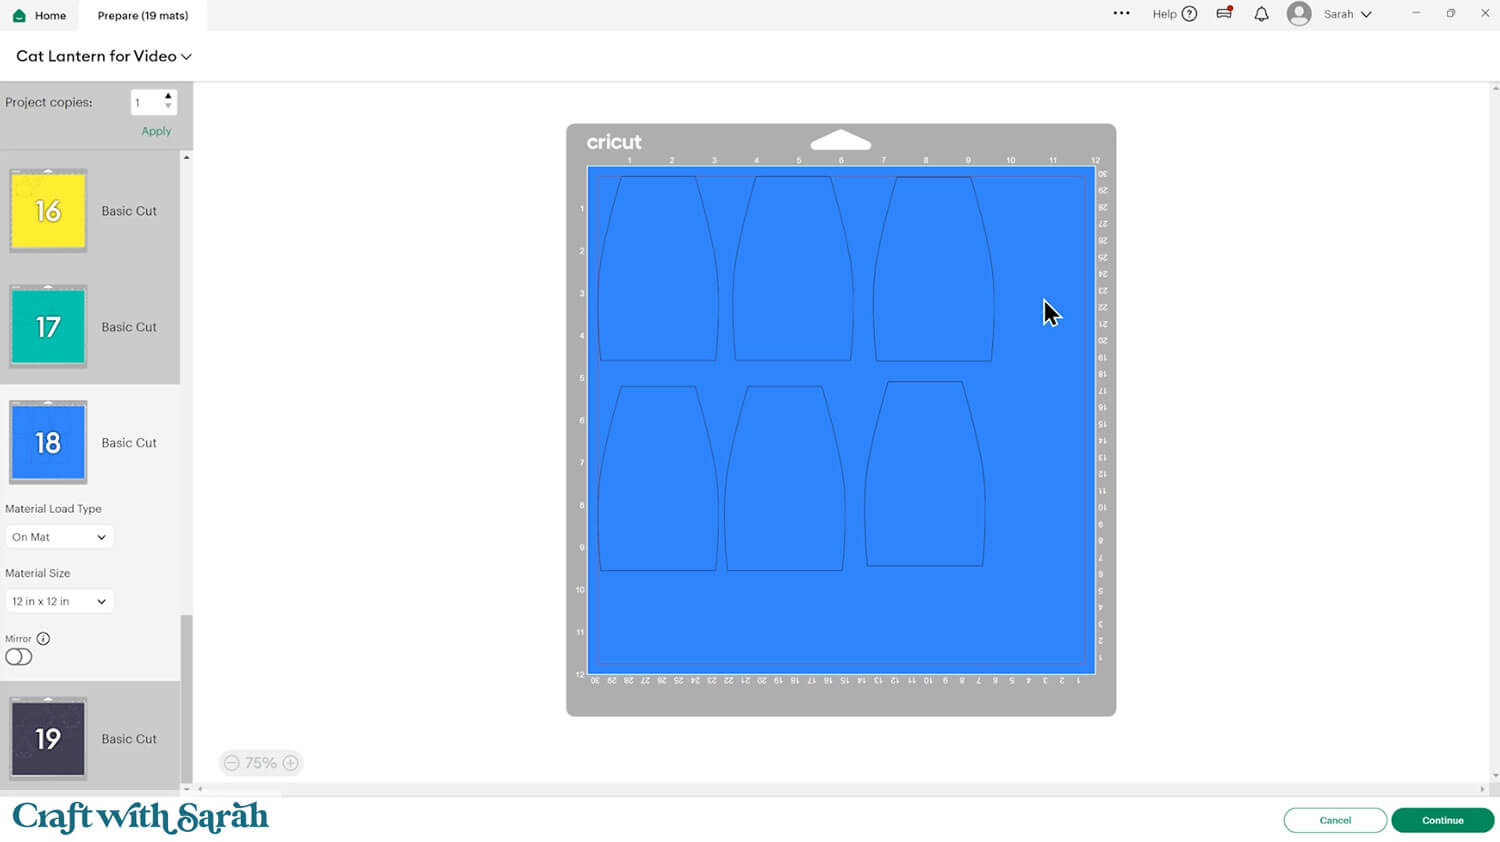
Step 5) Cut the lantern project
Once everything’s formatted and sized the way you want, click “Make” in the top-right corner to begin the cut process.
You can change the paper size with the dropdowns on the left of the screen. You need to change it for every colour.
Larger pieces will not allow you to change the size, as they require 12×12 inch card.
You can drag-and-drop the pieces on the screen to move them about to take up less space on your cardstock.
Make sure that no pieces overlap, otherwise they won’t cut out correctly.
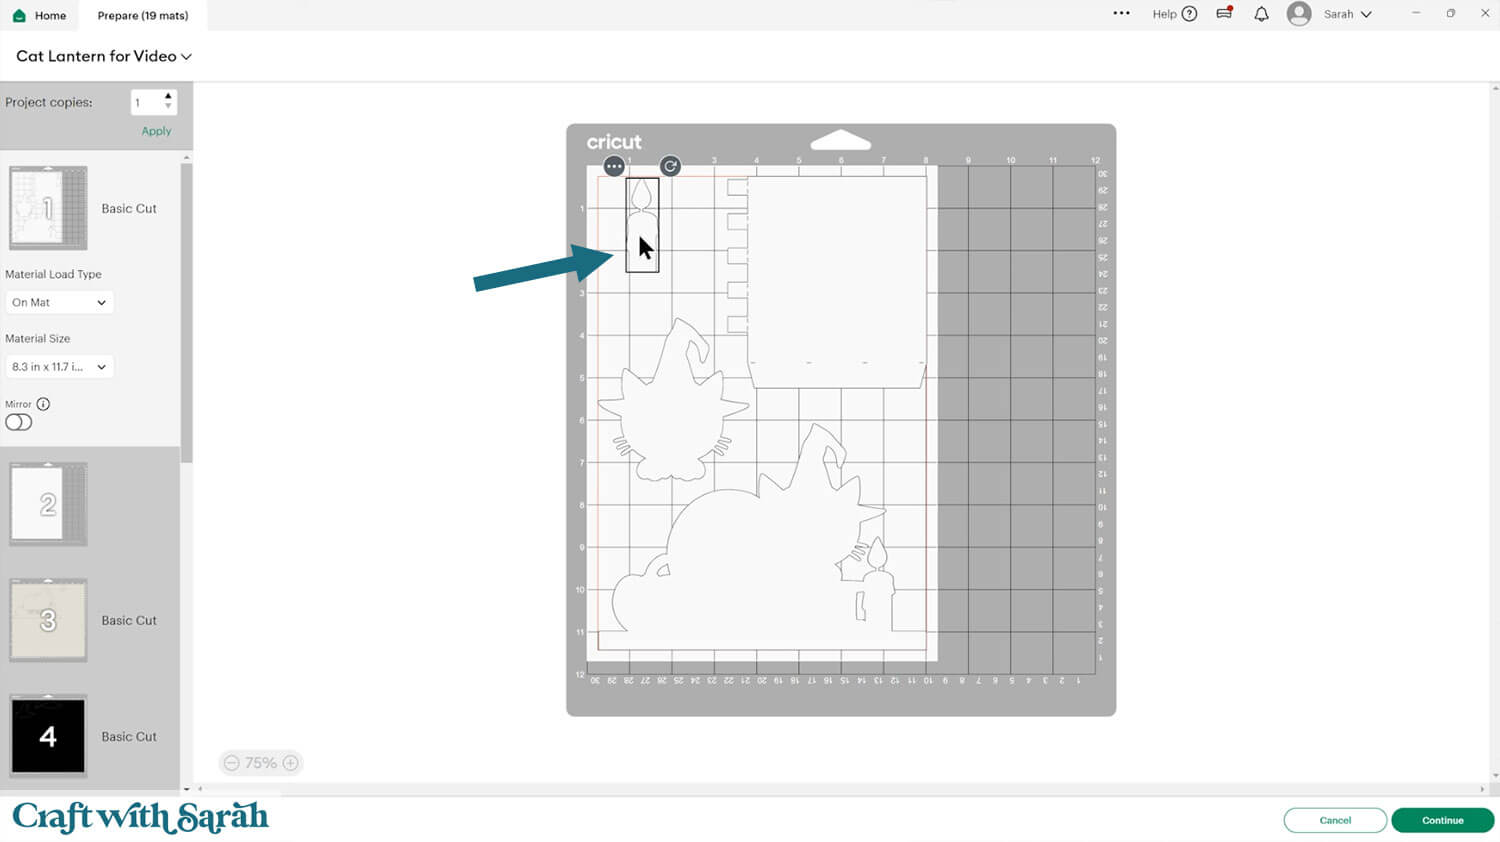
Most of the design will be cut from cardstock, but there are some exceptions.
The bright blue shapes that appear at the bottom of the file should be cut from a translucent material such as vellum, tracing paper or butcher paper.
If you don’t have anything semi-transparent then a full transparent material such as acetate or the cover of an old Cricut mat would work too, but it won’t be quite as effective as you will see the light mechanisms inside the lantern.
I use the “Vellum” setting to cut my tracing paper.
TIP: New to using cardstock with your cutting machine? Check out these machine help guides for Cricut, Silhouette and ScanNCut that go through every step of the process, including tips for getting the best quality cuts from your machine.
Step 6) Stick the window panels and back-stand together
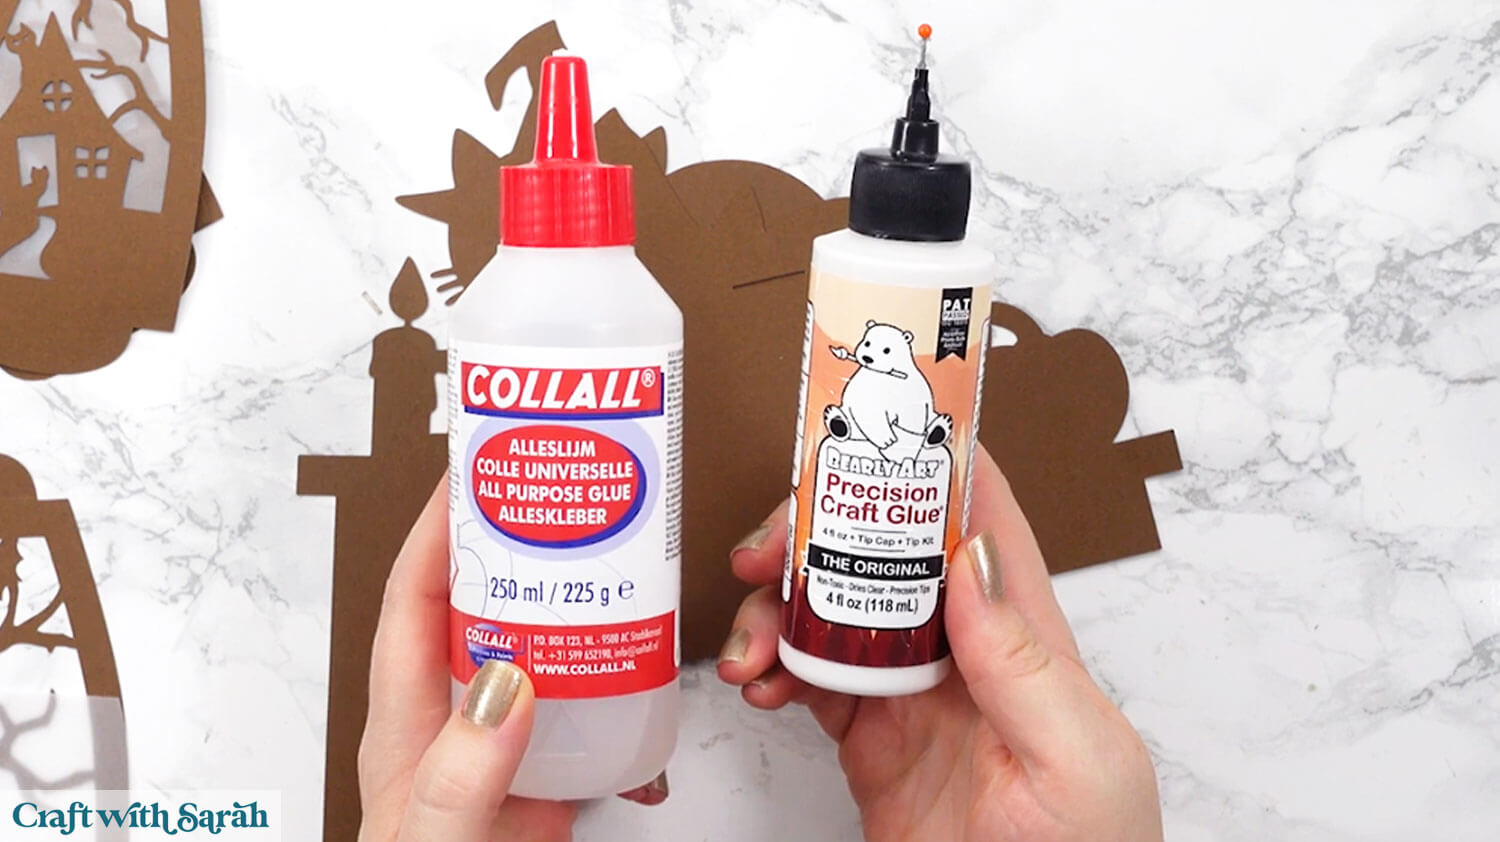
I used Bearly Art Glue to stick the project together.
It’s SO good because it doesn’t “warp” or bend the cardstock like some glues do. You can use as much of it as you want and the card stays perfect – and it dries perfectly clear too!
Collall All-Purpose Glue is another great one to use for cardstock, although it’s a solvent glue so it has a bit of a smell to it.
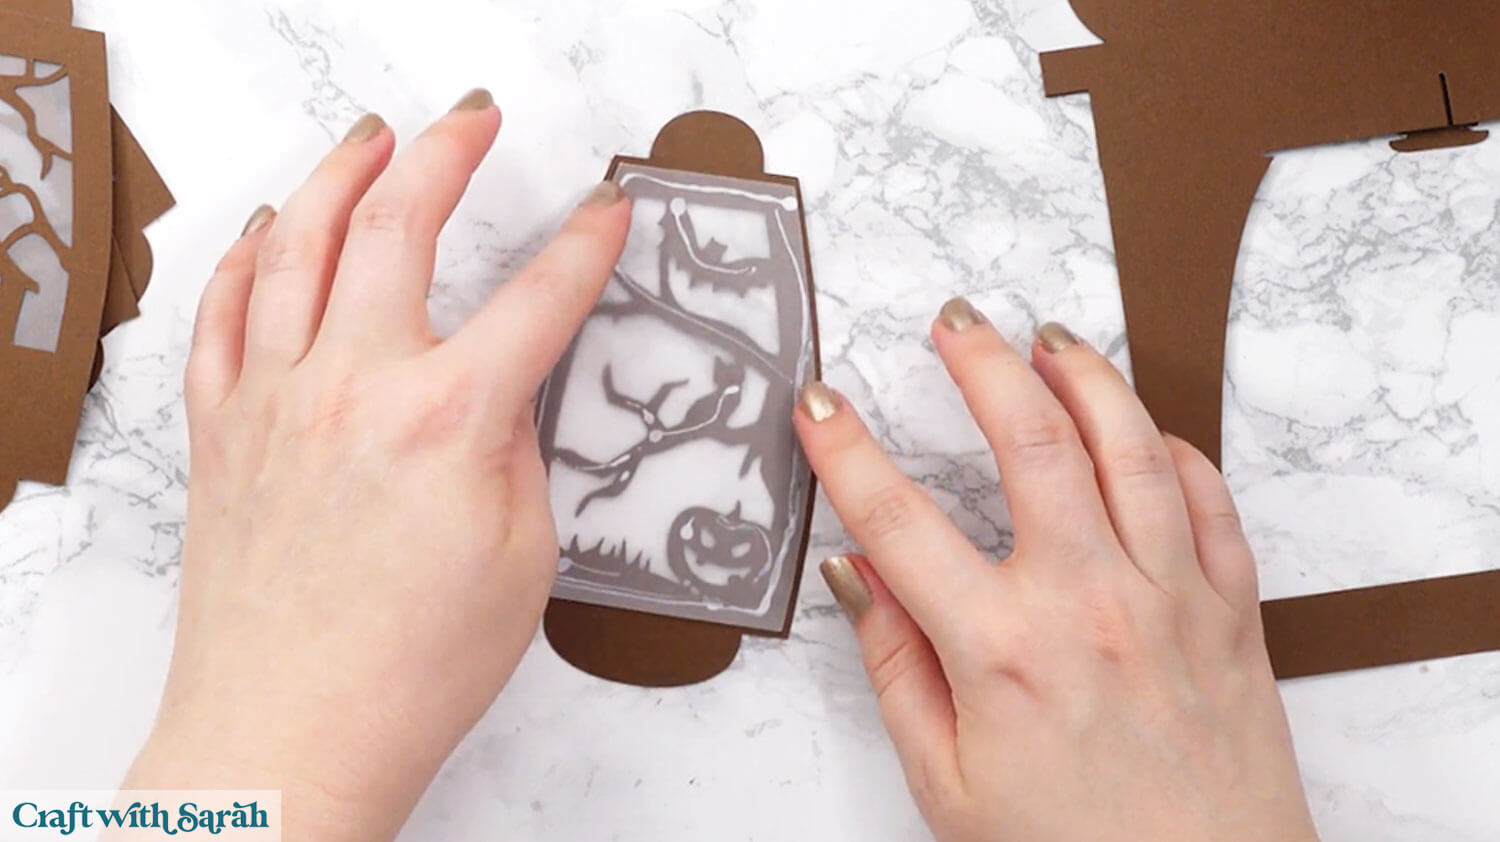
Turn the window panels upside down so you are looking at the bottom side.
Carefully add a small amount of glue around the edges and glue the vellum pieces to the backs. The wider side of the vellum goes at the bottom of the window panels.
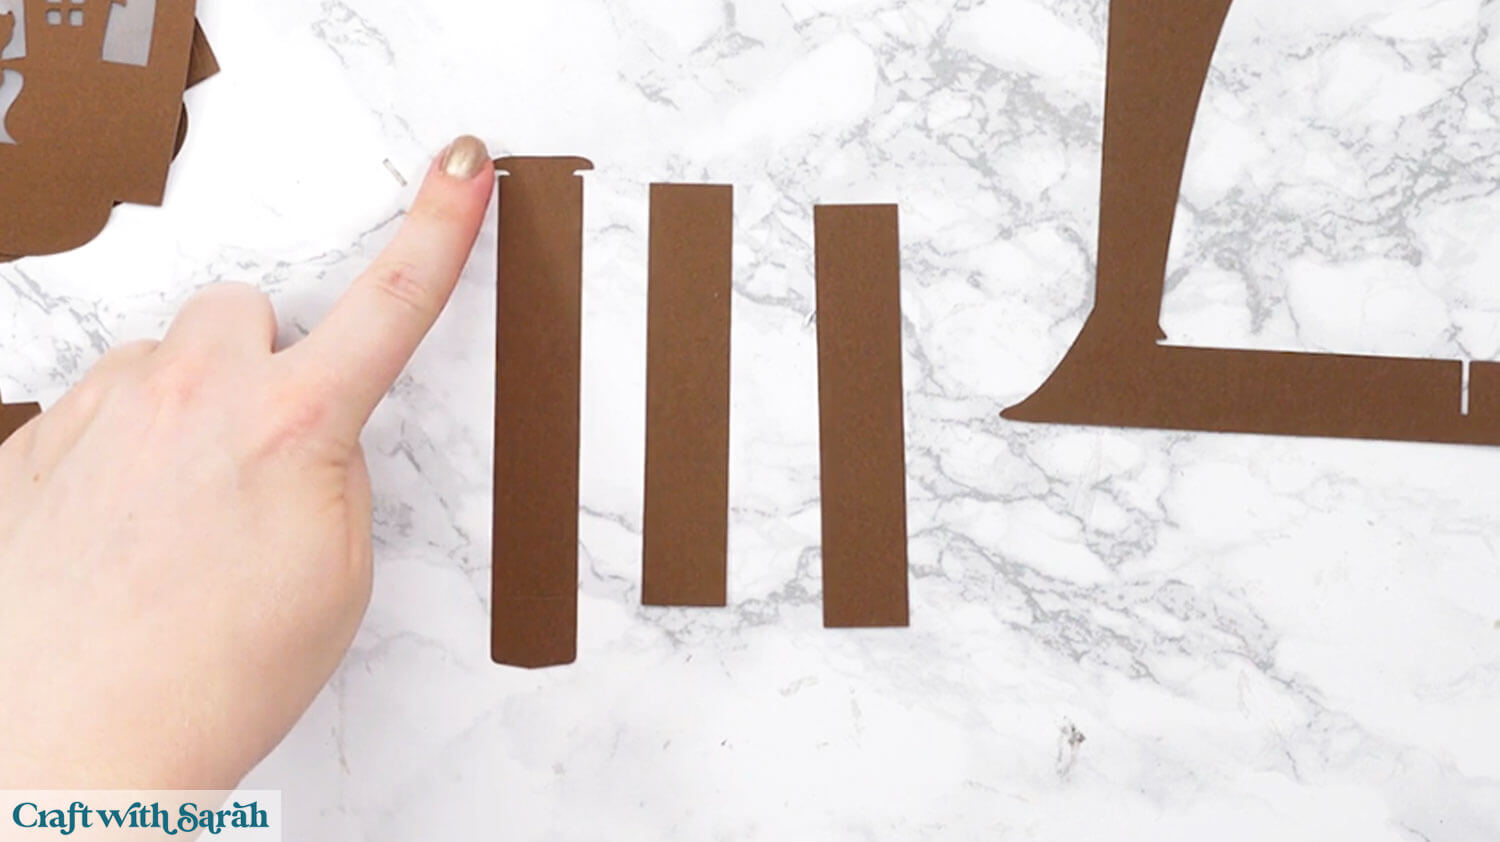
Take the three rectangular pieces. Two look like plain rectangles, one has a hook on one end and a score line the other end.
These will help to “pull” the weight of the cat image backwards so that it stands up straight.
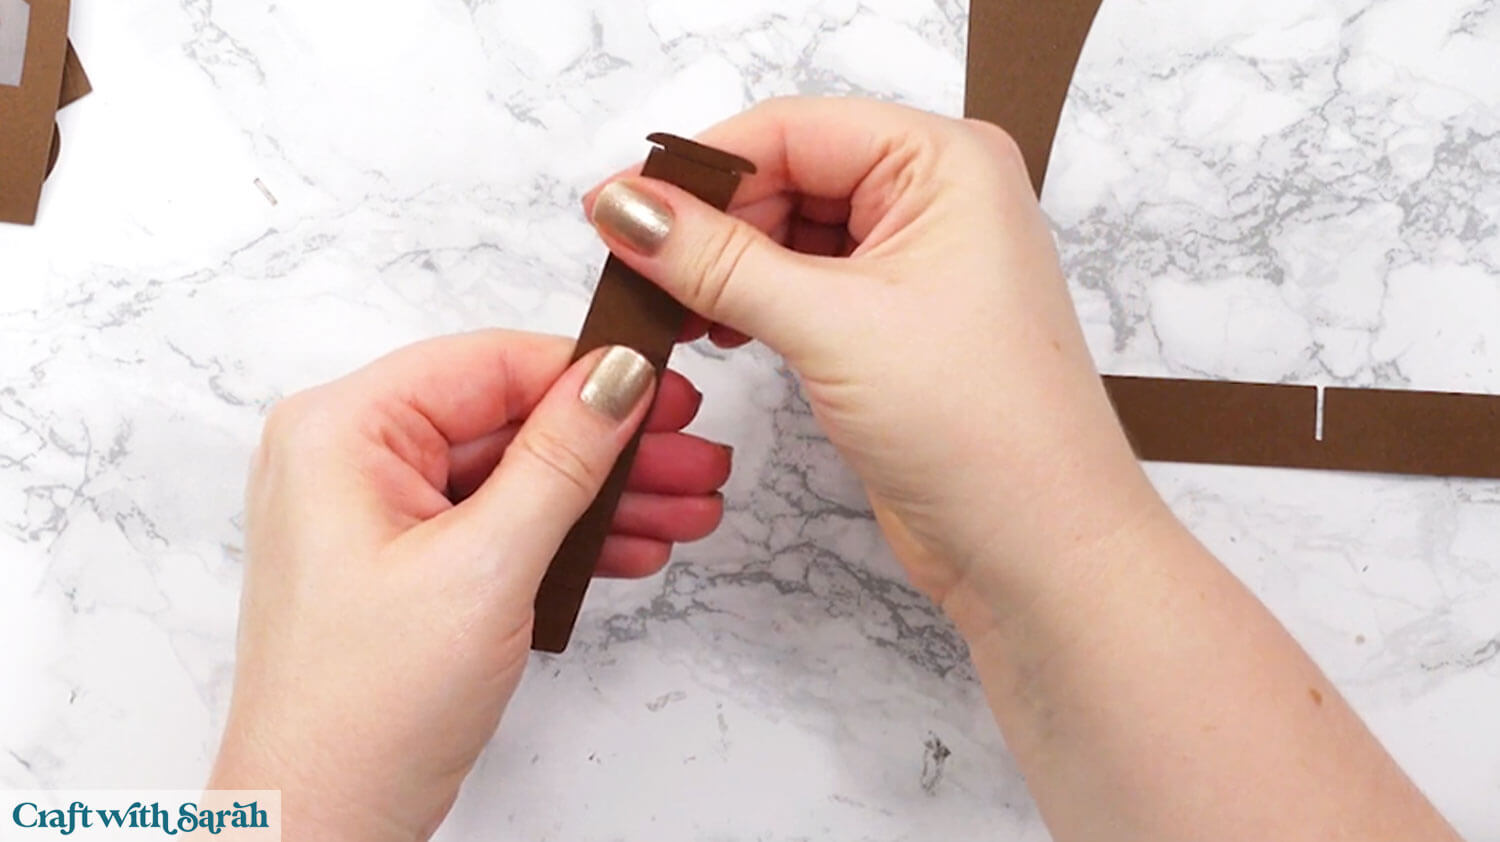
Add glue to the rectangle (with a hook) from the score line to just before the hook.
Stick one of the rectangles on top.
Add glue to the bottom in the same way and glue the other rectangle to it. This will help to give it stability so that it can hold the imagery.
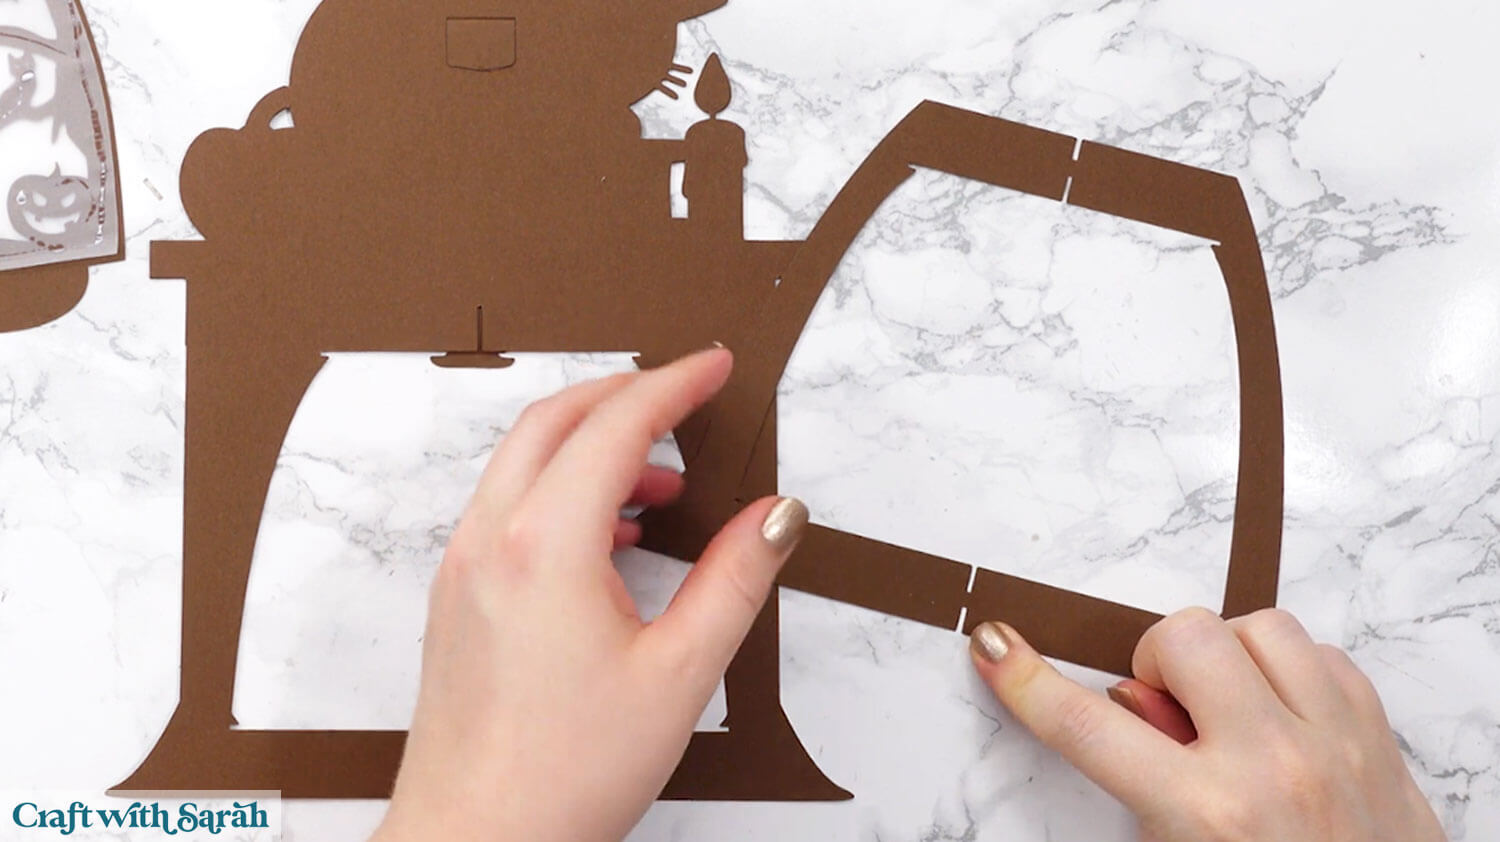
Step 7) Prepare the main structure piece
Note: this tutorial can be used for all “base lantern” designs, however the lantern structure process will vary depending on which base lantern design you are making.
The pictures below show the steps for the Halloween cat lantern.
To check the specific instructions for the exact lantern design you are making, look at the Assembly Guide that’s included in your download folder.
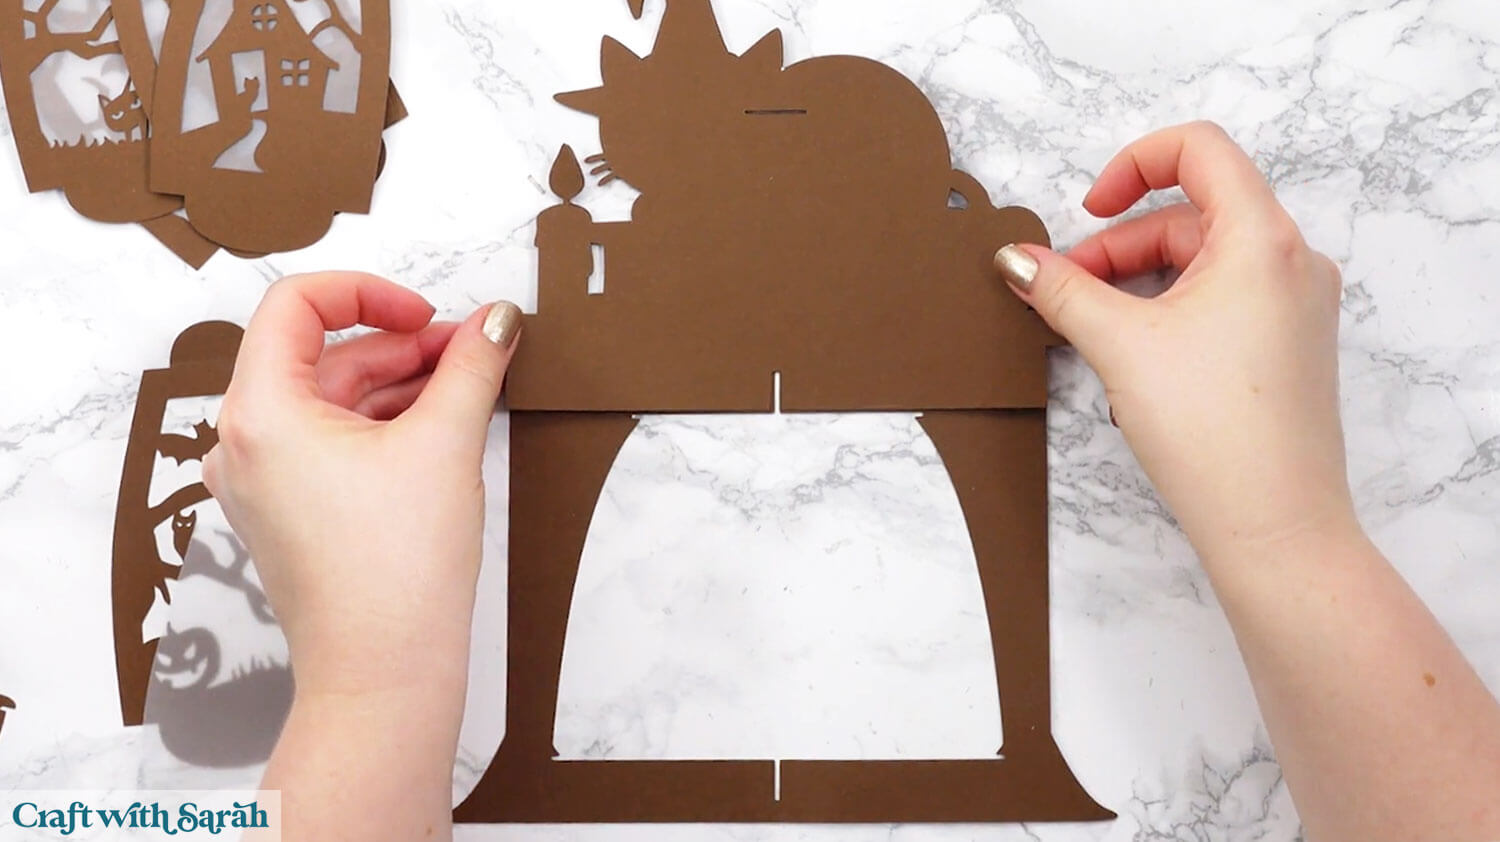
Select the main structure piece of the lantern and turn it upside down so that the cat is facing to the left.
Glue on the other brown piece of the cat in the same colour. This gives stability to the back of the lantern.
With the back of the design still facing up towards you, take the rectangle (back-stand) we glued together earlier and fold along the score line.
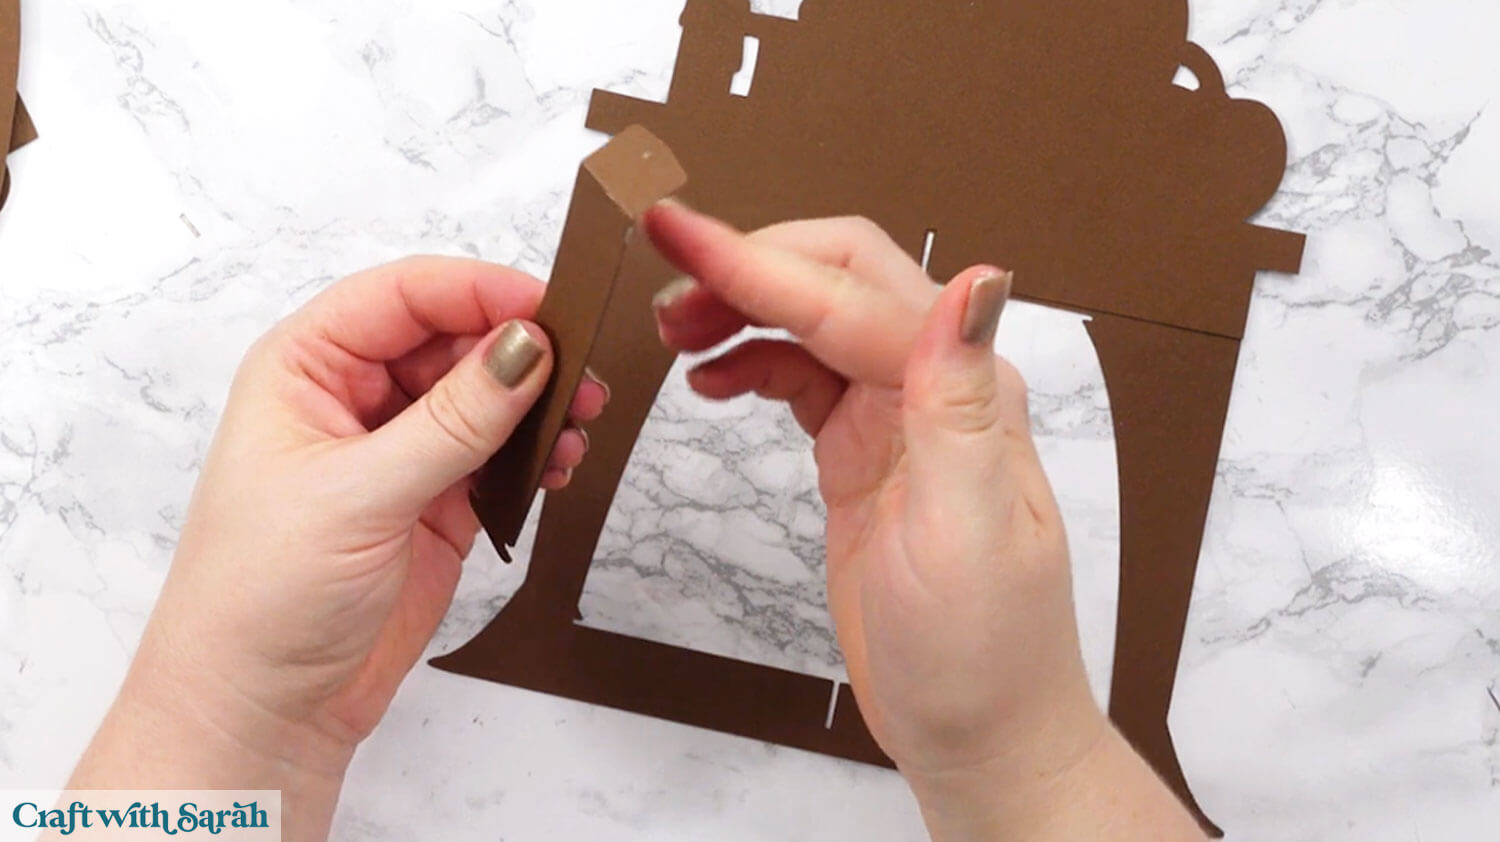
Thread it through the slit in the back of the cat shape and glue the tab downwards on the front of the lantern.
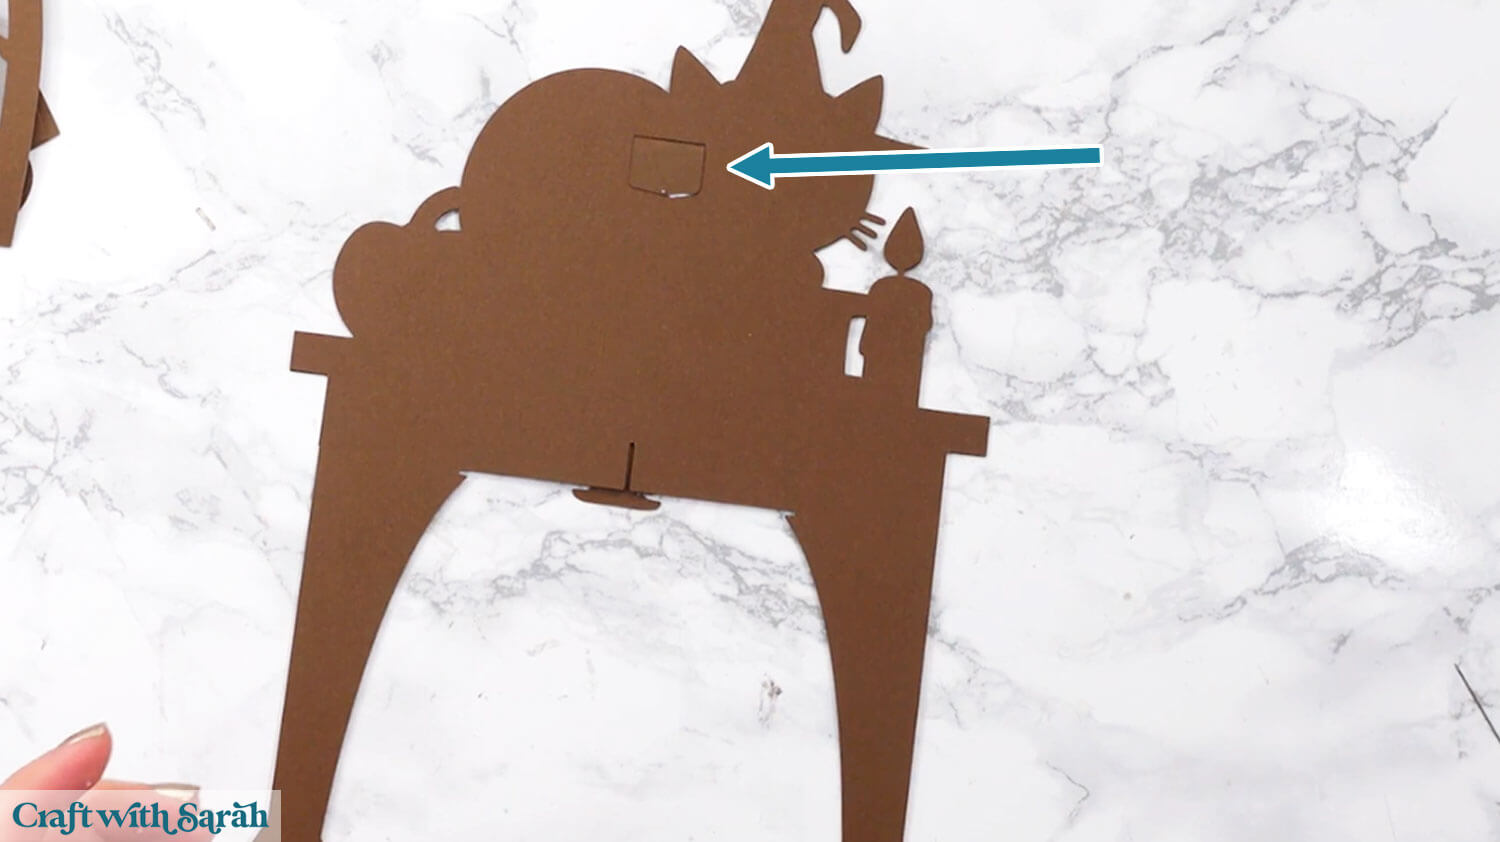
The image below shows how it looks from the FRONT once the tab is glued.
Step 8) Stick the cat together
Now we will move on to building up the cat.
It is very important that you do NOT build the cat directly onto the structure piece from the previous step. If you do, it will be incredibly difficult to build the lantern.
Instead, build the cat separately and glue it to the lantern at the very end.
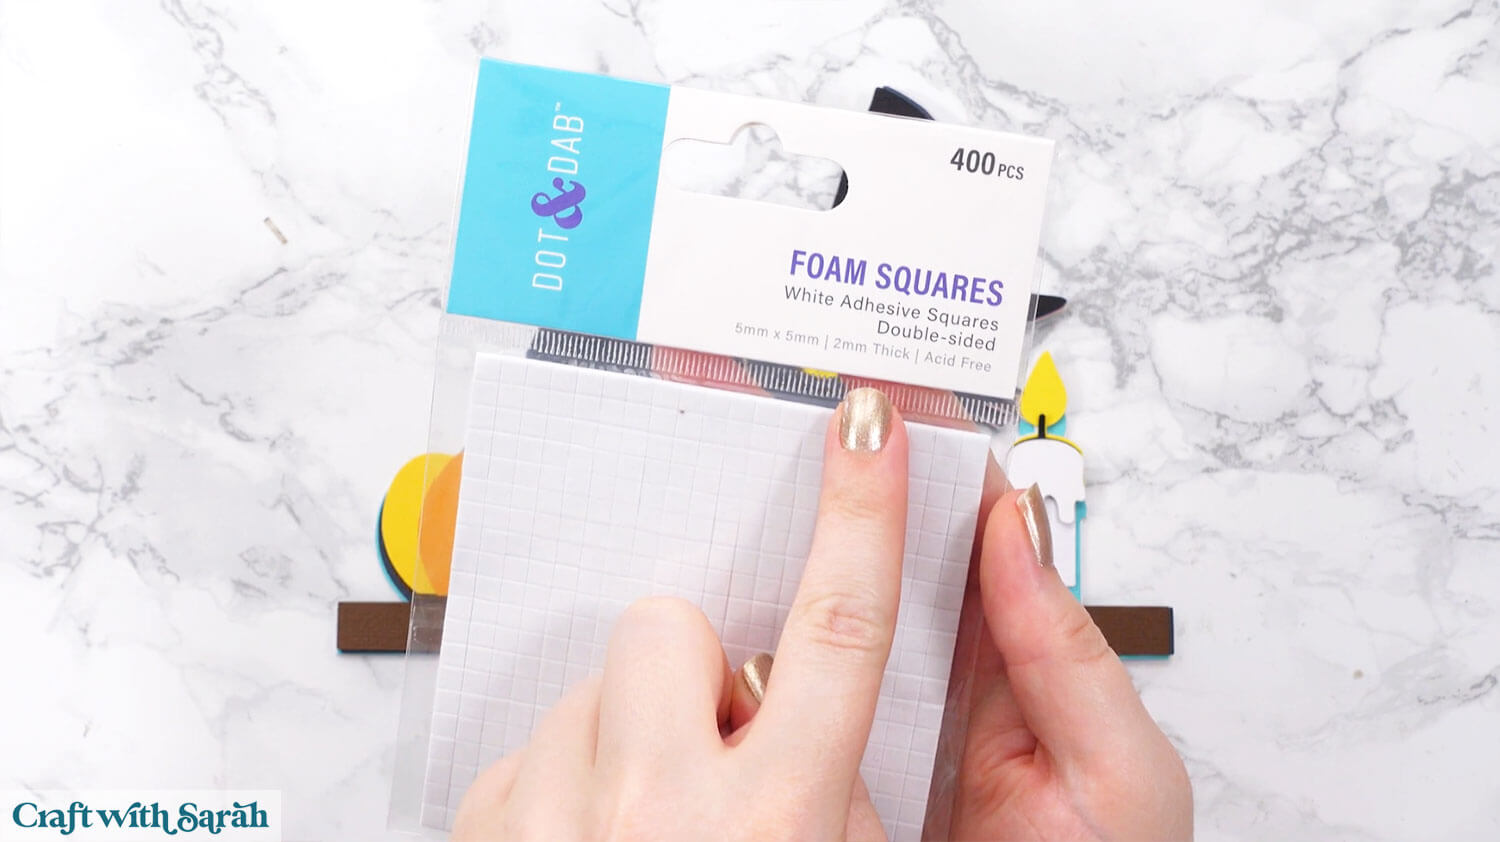
The cat will be stuck together with a combination of glue and foam squares.
I like these foam pads from “Dot & Dab”, but any will do. If yours are large then you might need to cut them smaller with a pair of scissors.
Follow this assembly guide to see the order to put the cat together in:
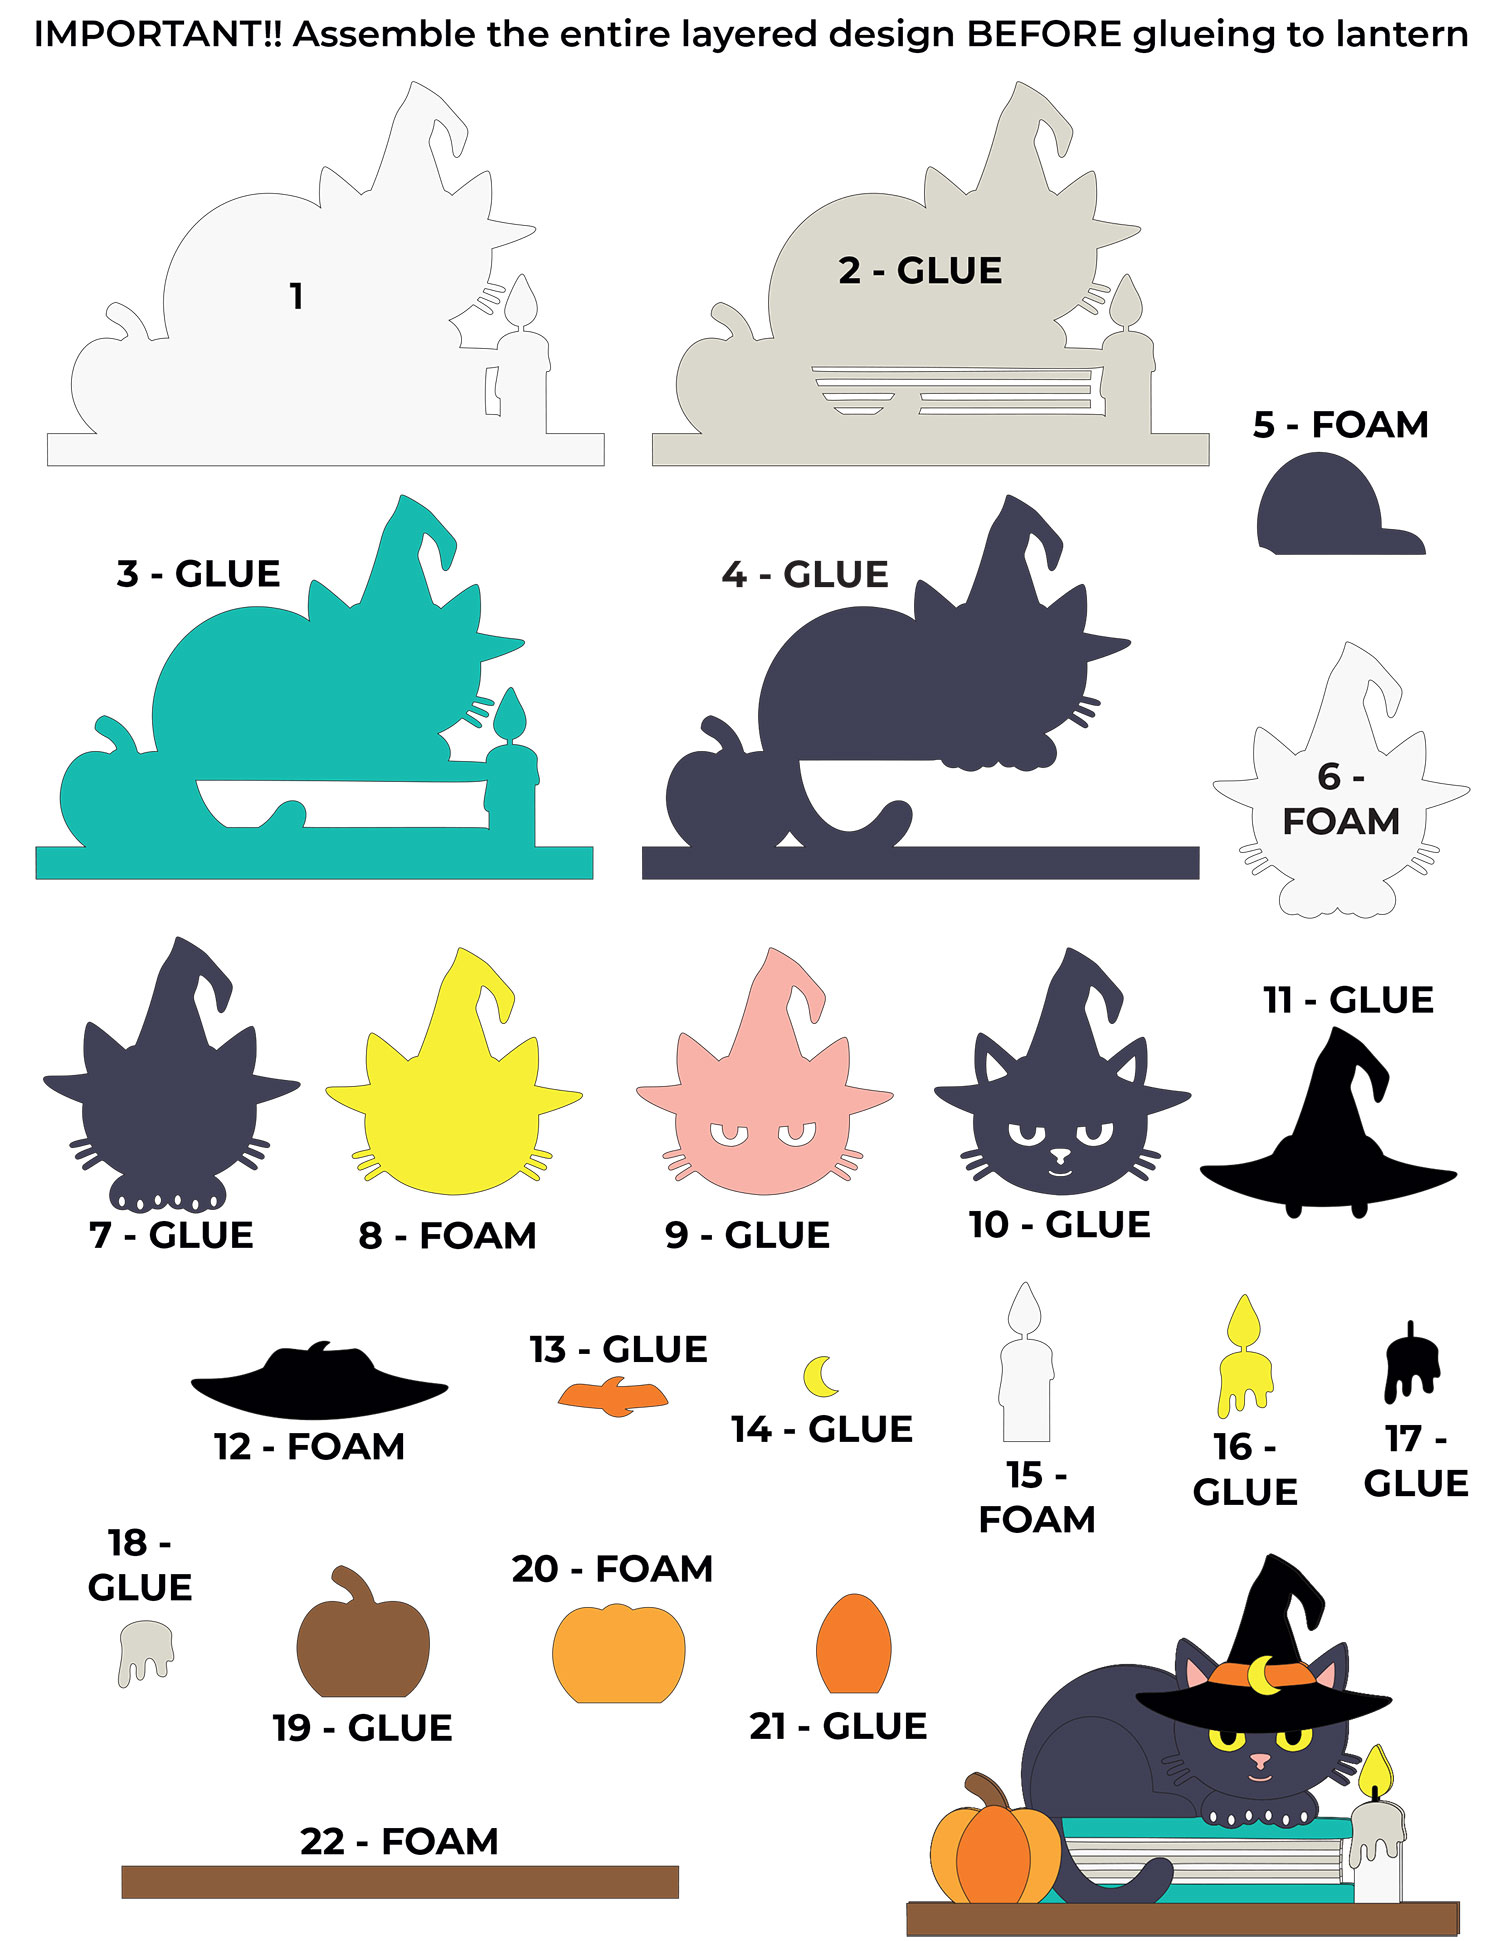
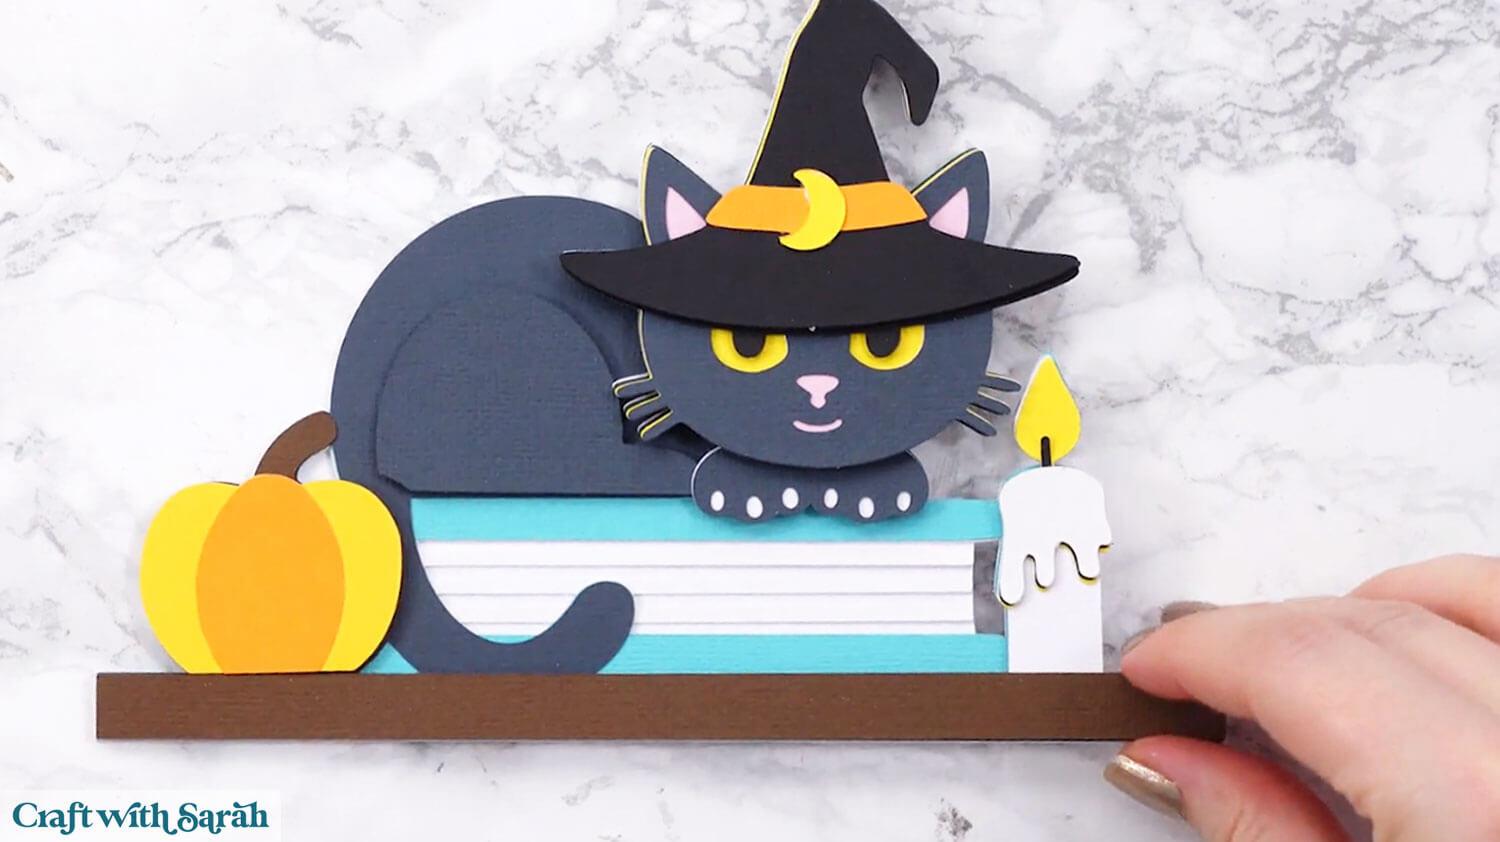
Here’s how the cat looks once finished:
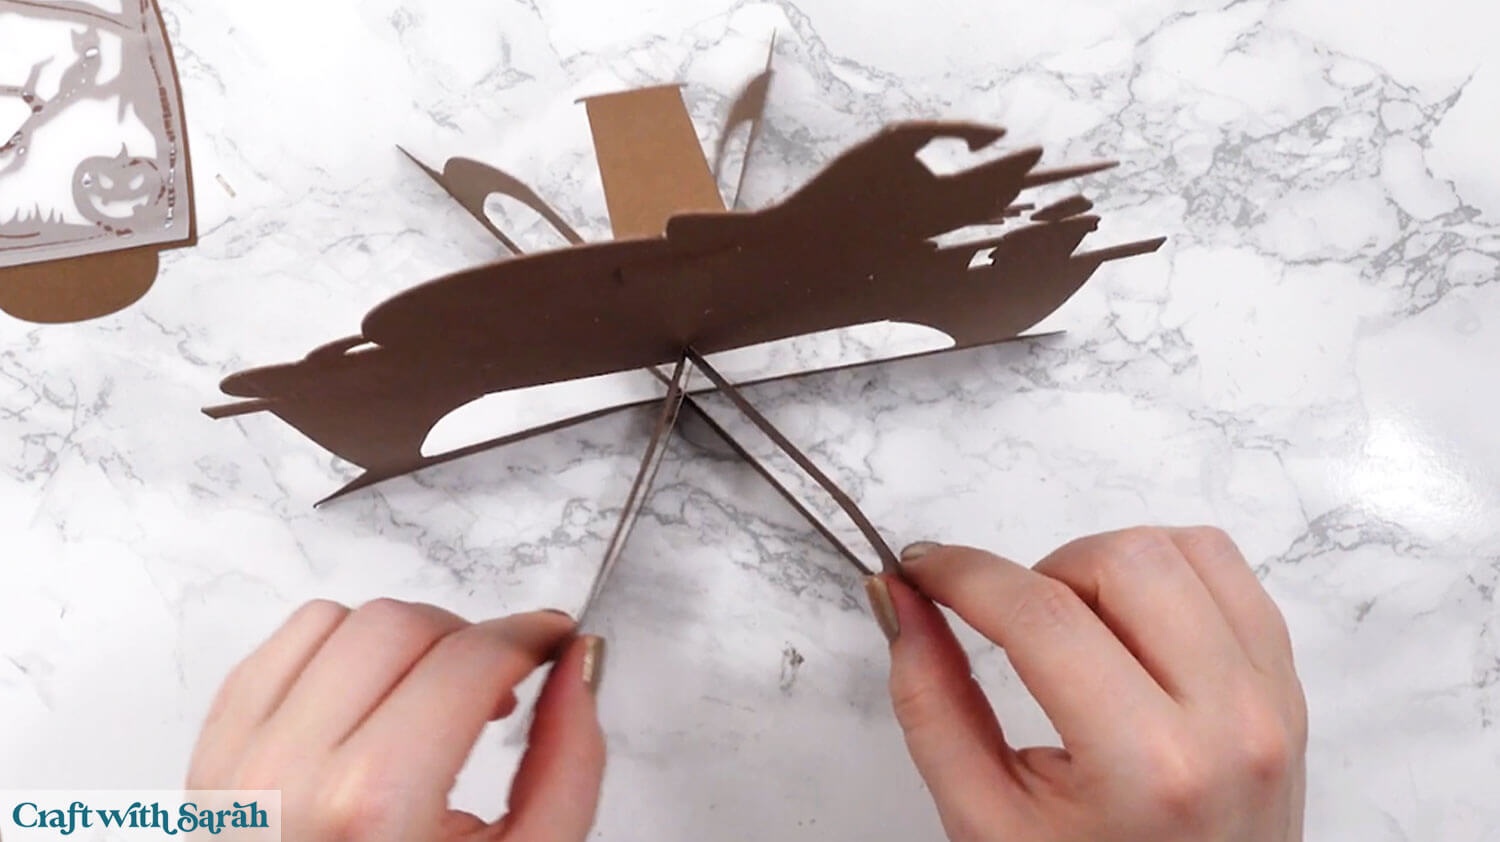
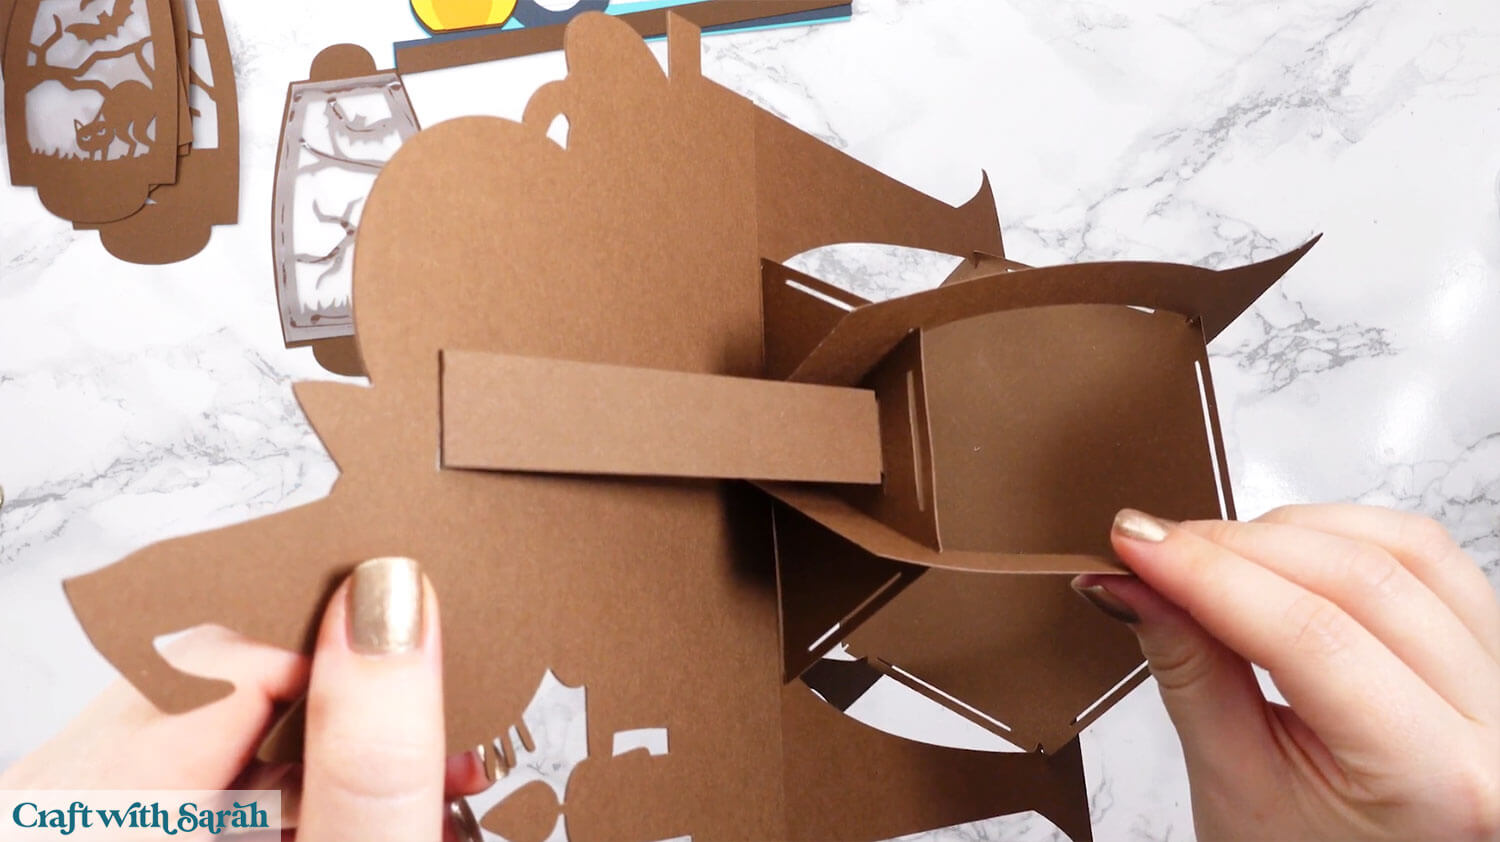
Step 9) Assemble the lantern structure
Take the structure piece which matches the image below.
Place it into the slits on the top and bottom of the base piece.
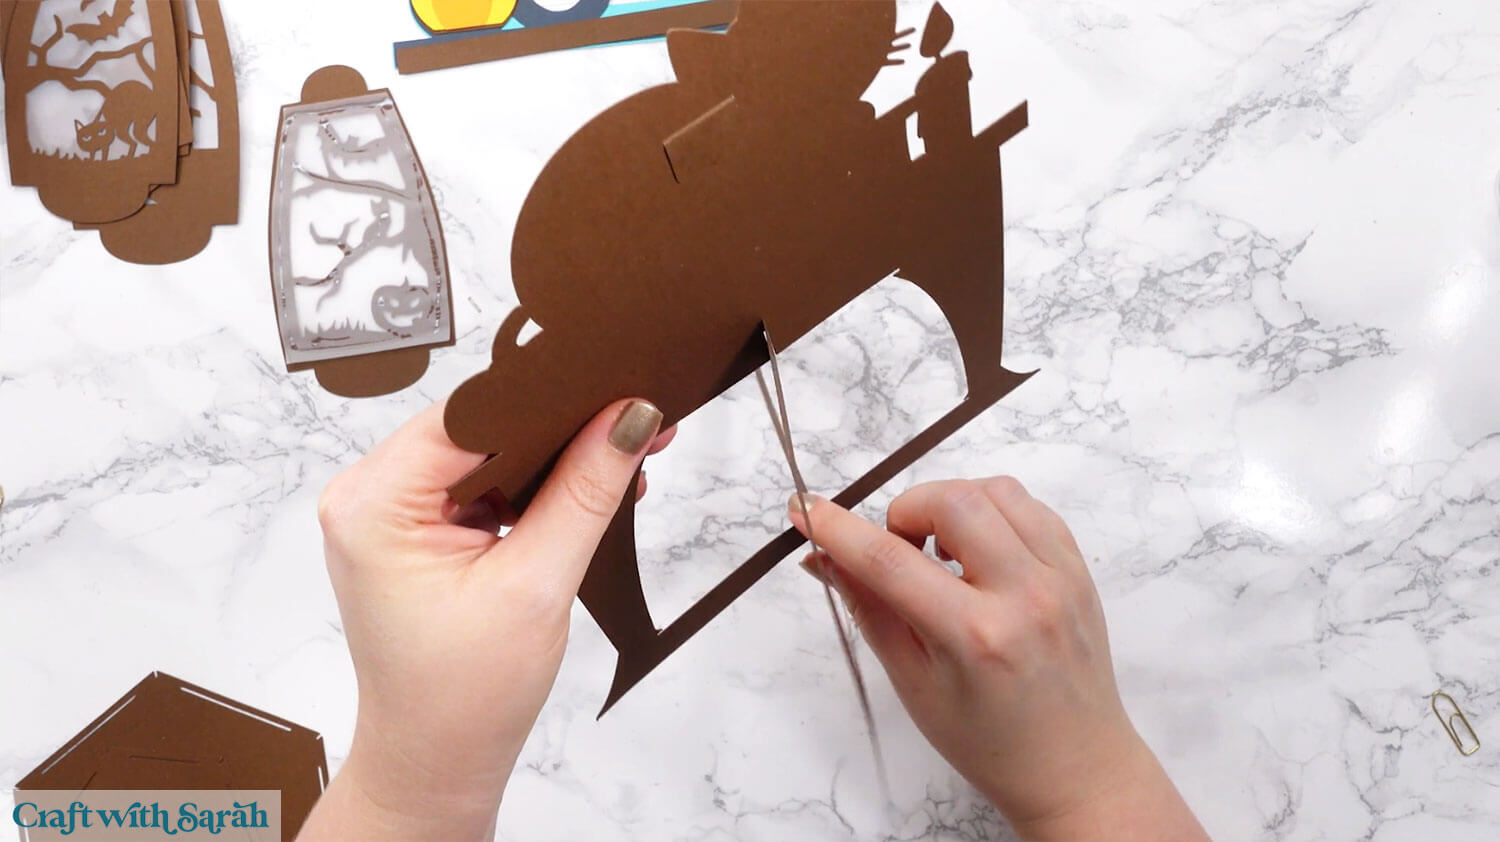
Then hold the two pieces flat against each and slot the final structure piece in.
Now you will have a 6 sided structure that stands up by itself.
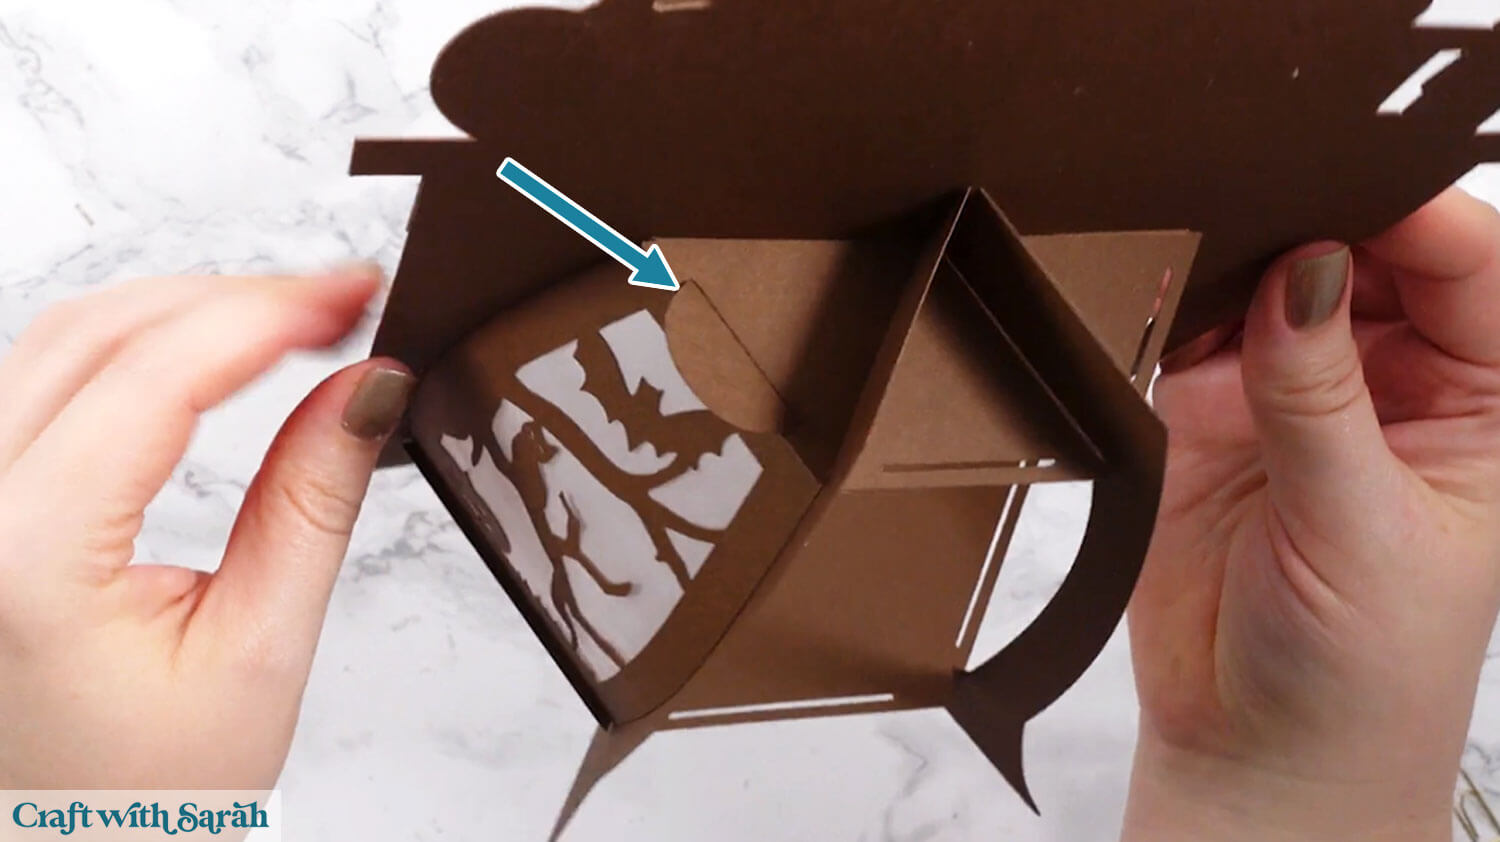
Take the largest hexagon and place it inside the bottom of the base lantern.
The small slits in the side of the hexagon will go into the slits in the bottom of the lantern.
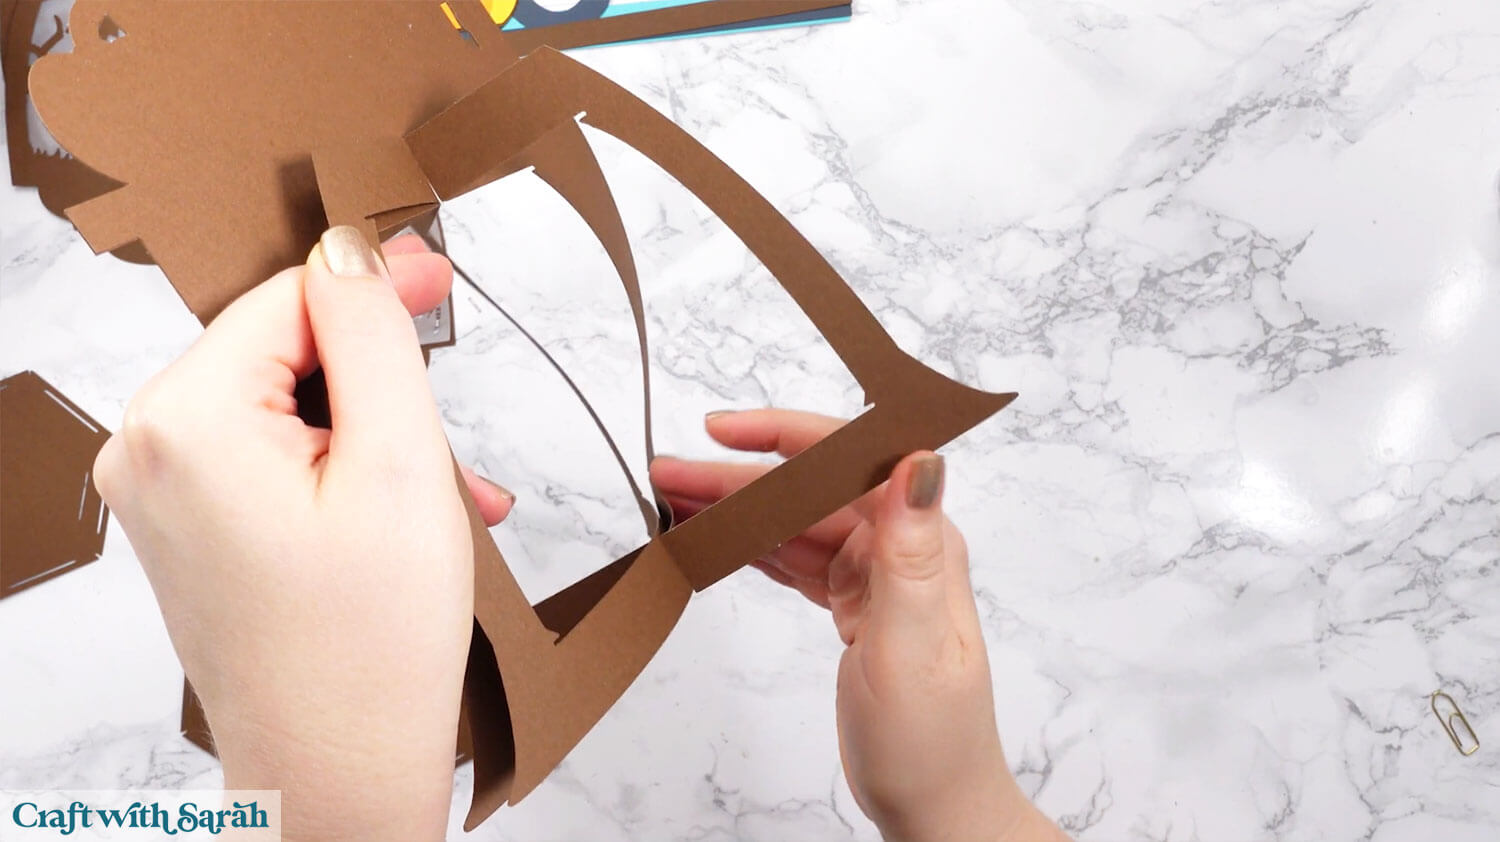
This part can be a bit fiddly, so go slowly and be careful not to tear the cardstock.
Do the same for the smaller hexagon in the top of the base lantern. With this one, make sure the extra rectangular hole in the hexagon lines up with the hook on the back of the lantern.
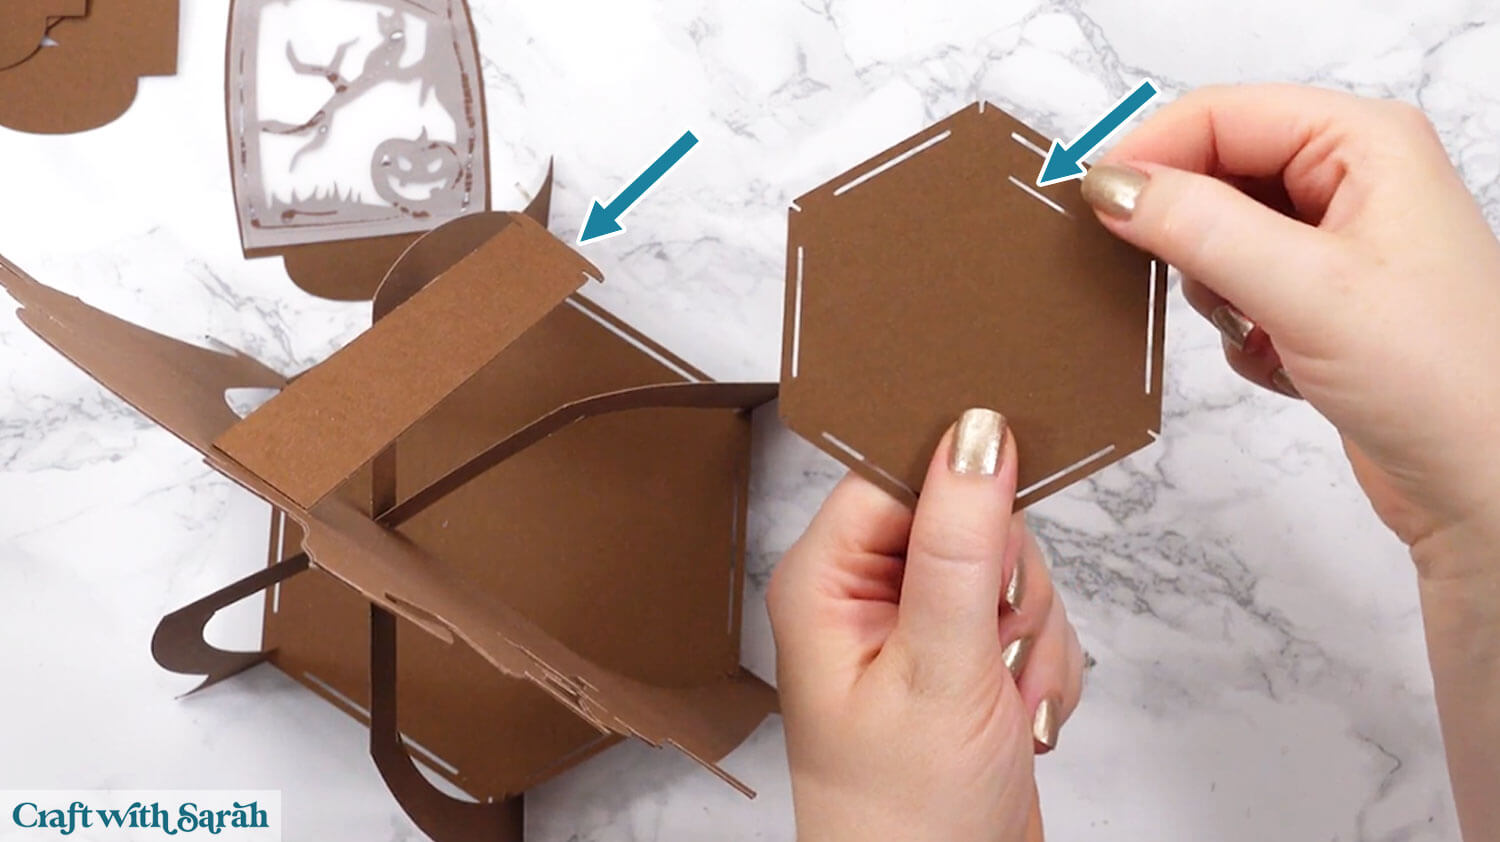
Slot the hook through the slit to secure it.
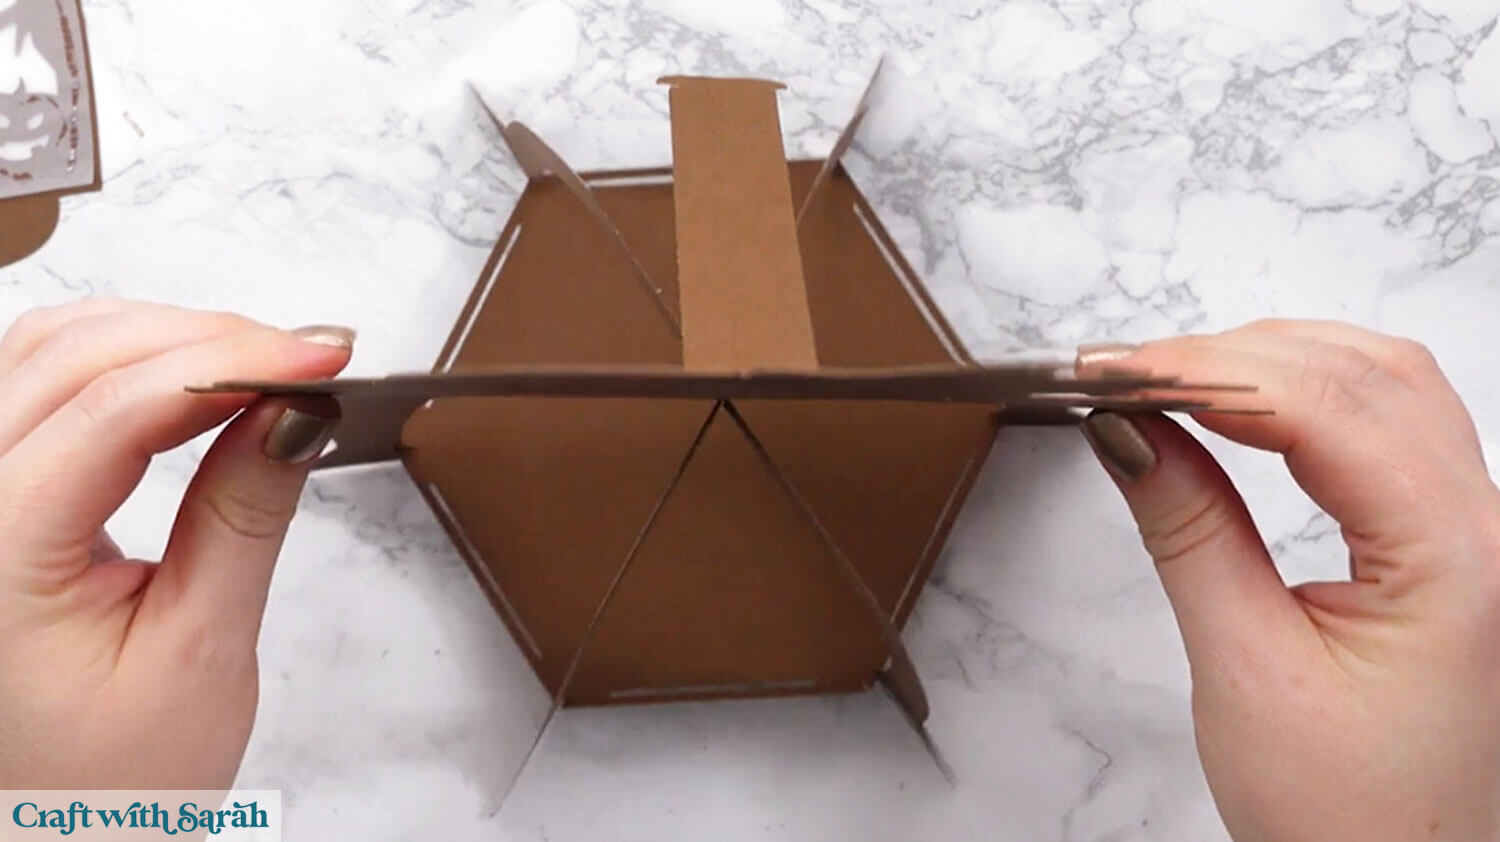
Step 10) Finish the lantern
Slot five of the six side panels into the lantern.
Bend the tabs towards you along the score line to hold them in place. Press firmly when you fold them to make the tabs run flat against the hexagon.
Add glue to the back of the cat and stick it to the lantern.
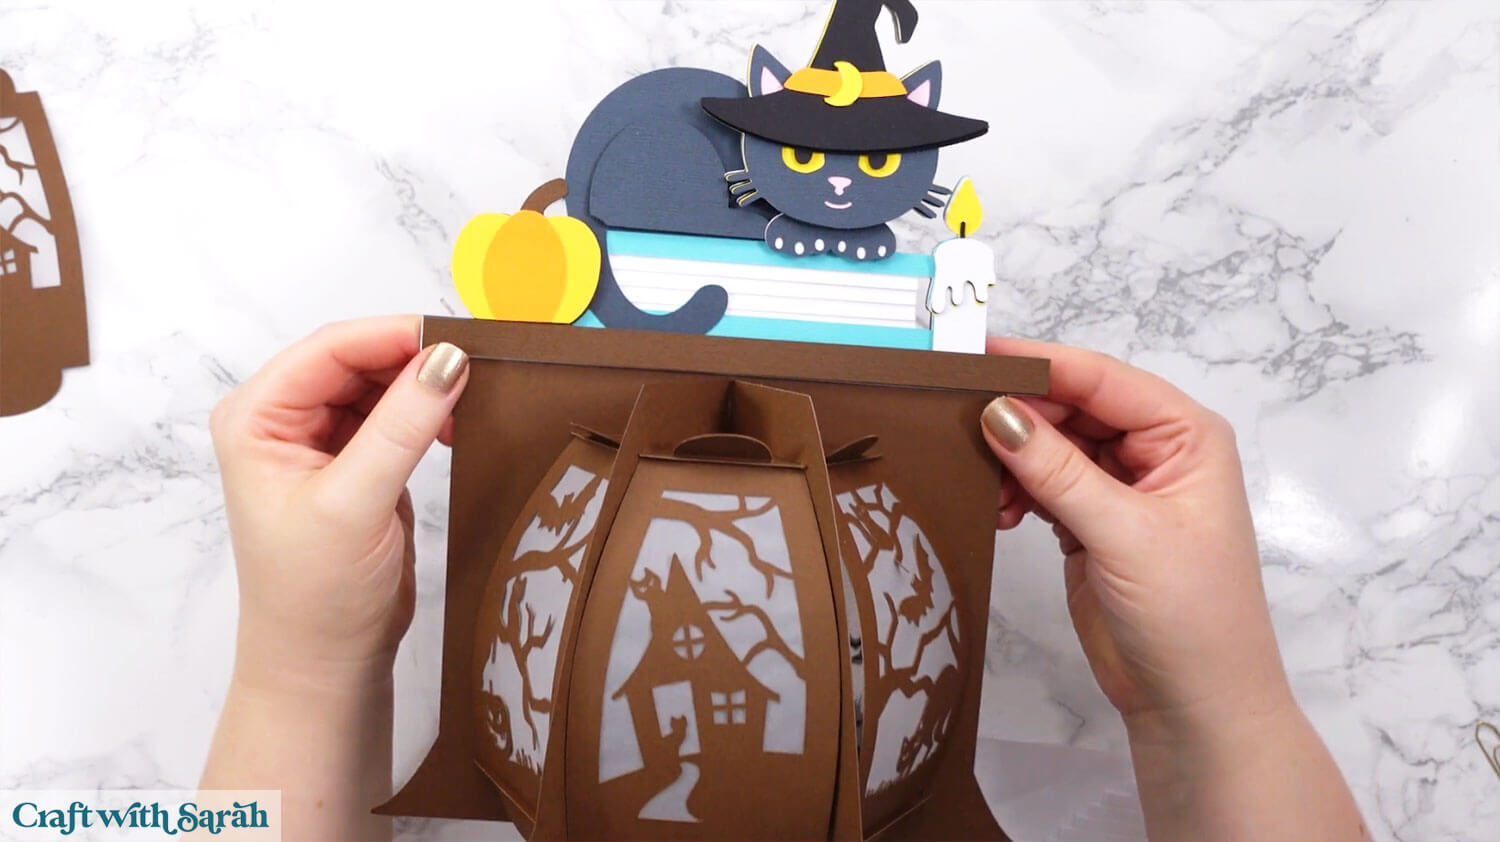
If you’re using submersible LED lights or other standalone lights, put your light inside and then put the final side panel on.
If you’re using fairy lights, check out the optional extra step below.
Step 11) Build the light tower (optional)
This step is only needed if you are using fairy lights and opting for the optional light tower to distribute the glow more evenly.
Take the light tower piece and locate the dashed lines.
Fold it inwards and roll it round to train the paper so that it will roll up.
Add glue to the edge of the cardstock piece, up to where the dashed lines are.
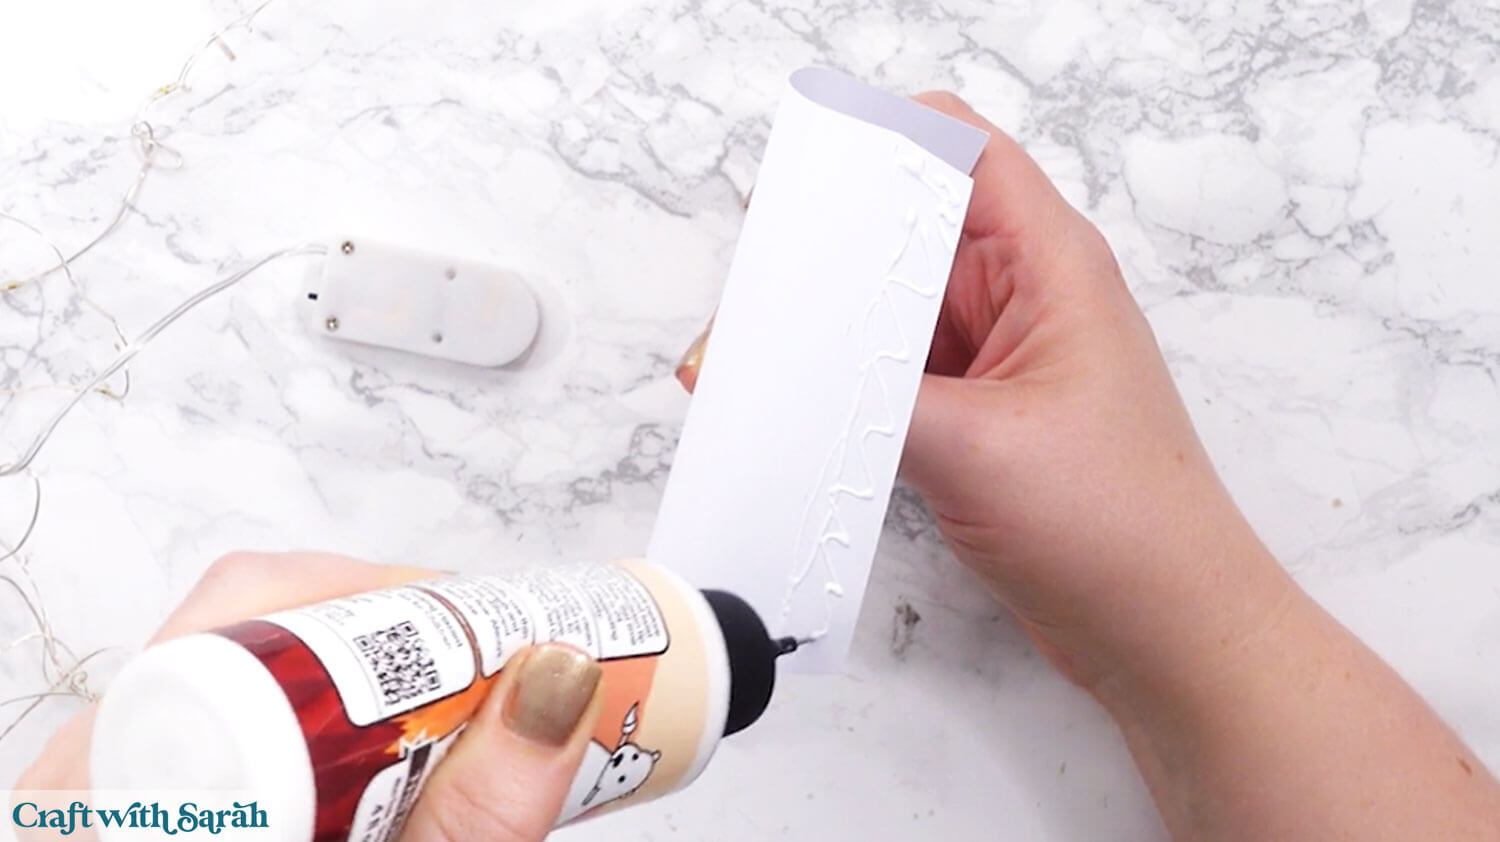
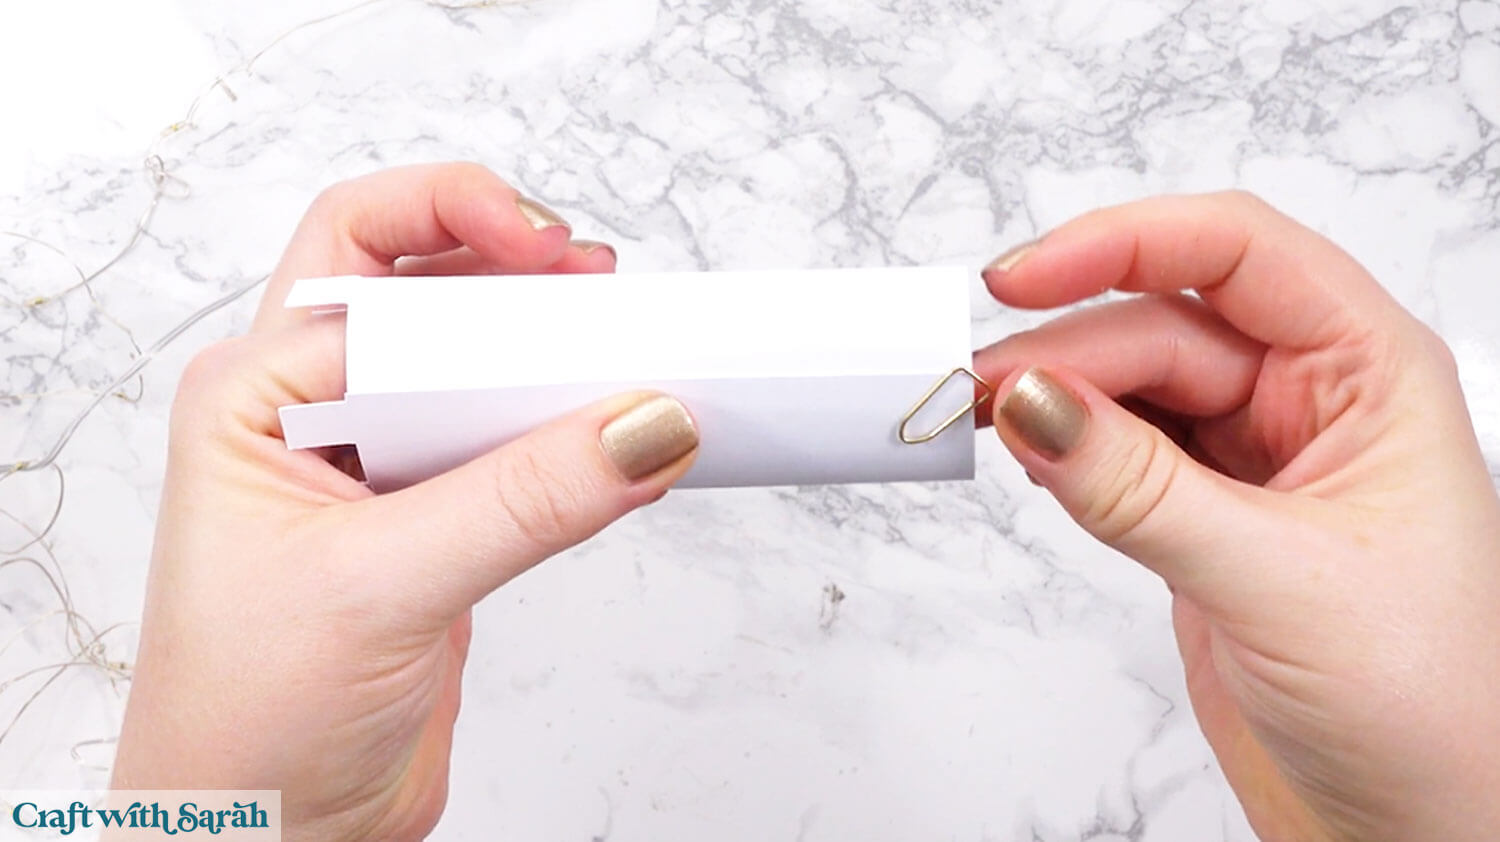
Roll into a tube and hold until the glue sticks, or use paperclips/bulldog clips to hold in place.
Once the glue is completely dry, fold out the four tabs along the bottom so that the tube can stand up.
Take your fairy lights and wrap them around the cylinder, using sticky tape to secure them.
You can use two sets of fairy lights to give a better effect.
Don’t wrap the lights too tightly, in case they get warm. They should be a little bit loose around the tube.
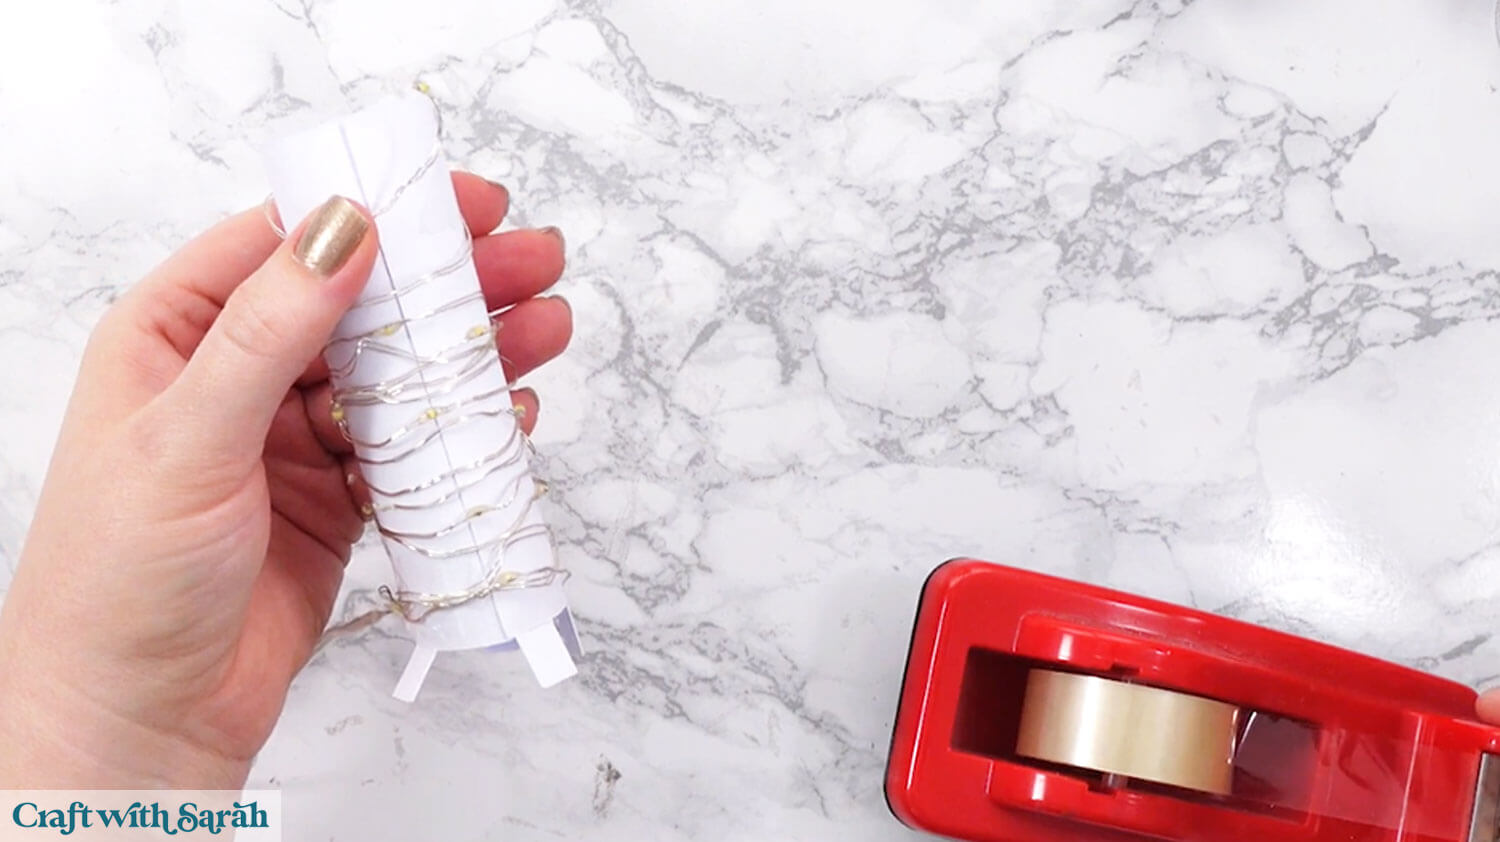
Slide the tube into the lantern so that the tabs sit along the bottom of the lantern.
It will hold itself in place – there’s no need to stick/glue it inside.

Slot the final side panel into the lantern, and you’re all finished!
Easy Halloween lantern to use year-after-year
And that’s it! Your Halloween lantern is complete!
I hope you had as much fun making this witch’s assistant craft as I did.
For more lantern making ideas, check out these additional tutorials:
- Snowy owl lantern
- Spring flowers watering can lantern
- Easter story egg lantern
- Cat and dog lanterns
- Winter wonderland lantern
Happy crafting,
Sarah x

