3D Lantern Papercraft 🕯️ A Beautiful Winter Scene That GLOWS
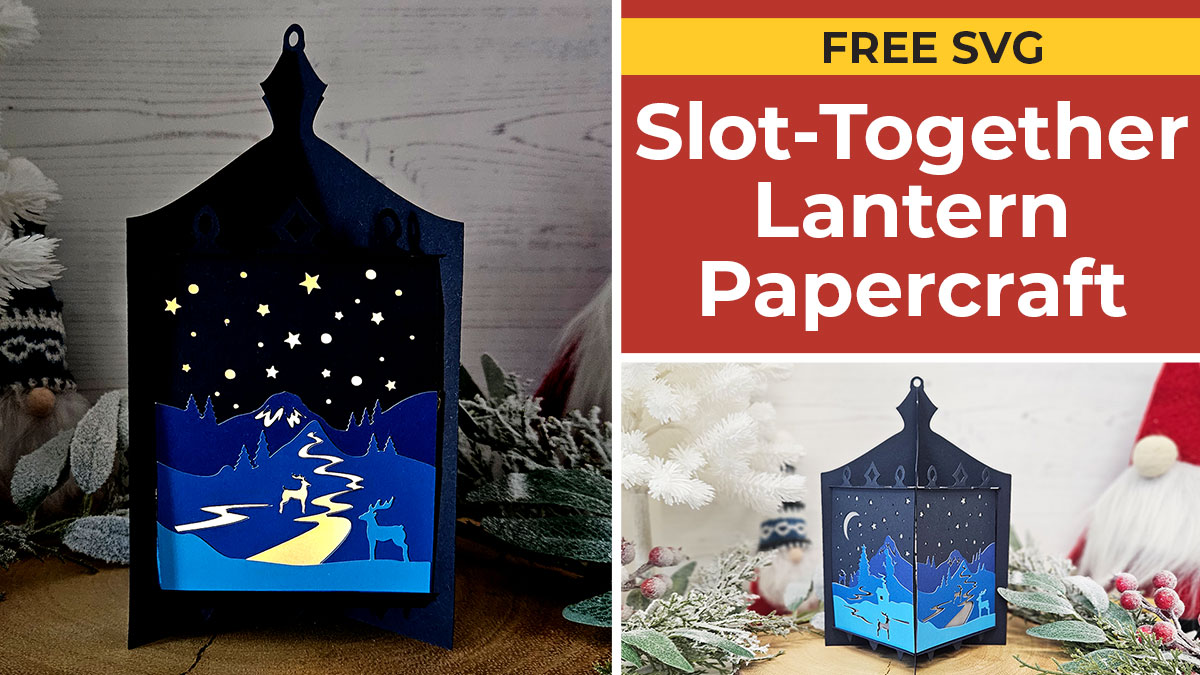
Make a 3D lantern papercraft for Christmas with this cardstock design.
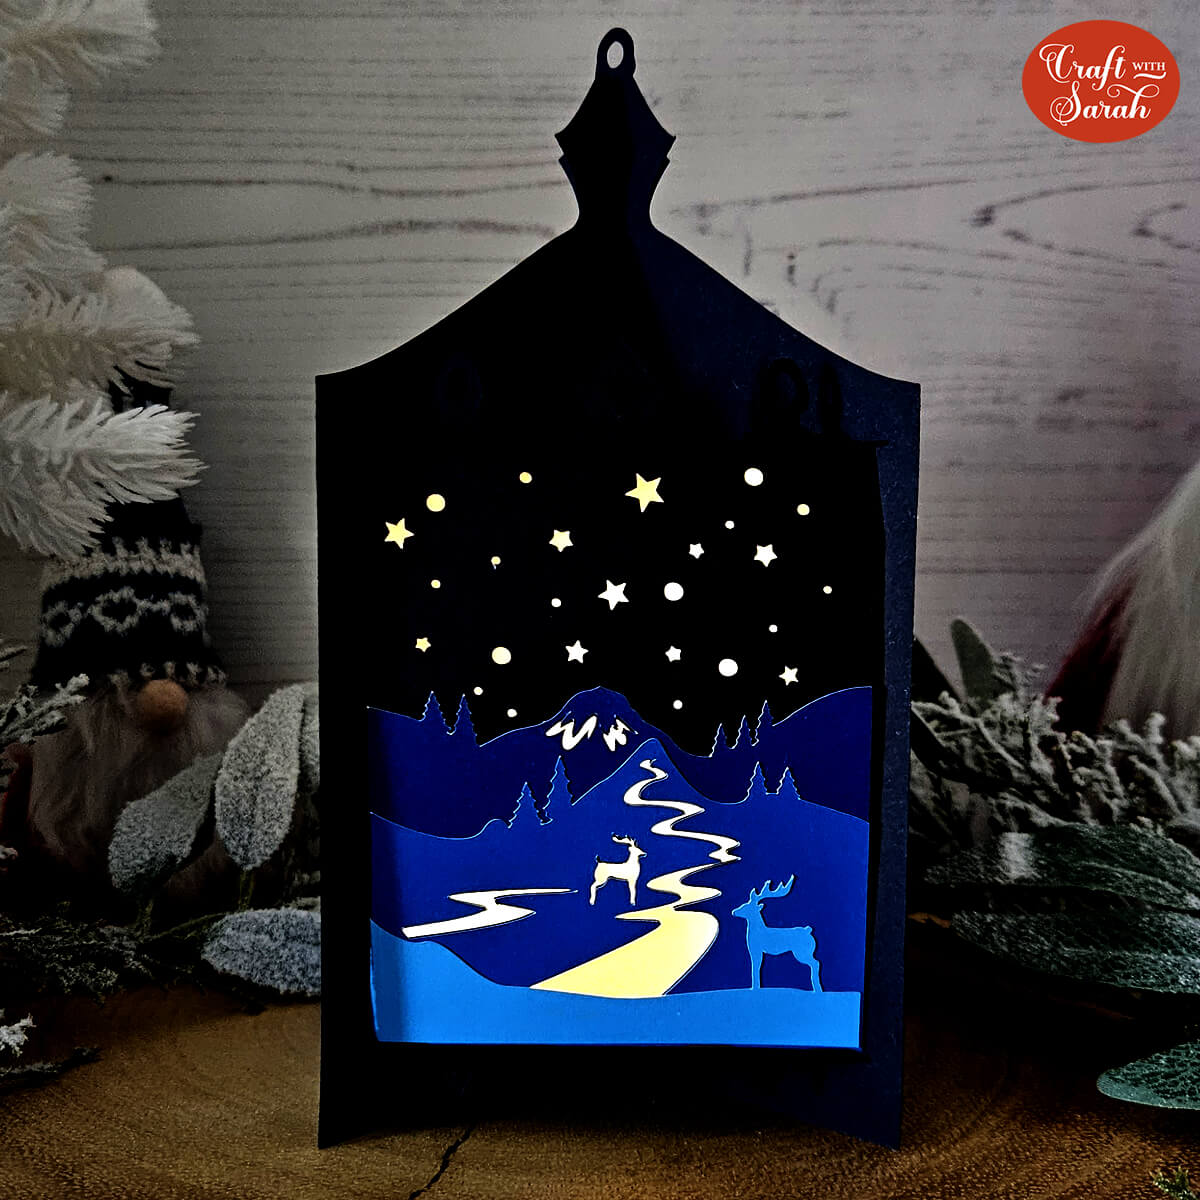
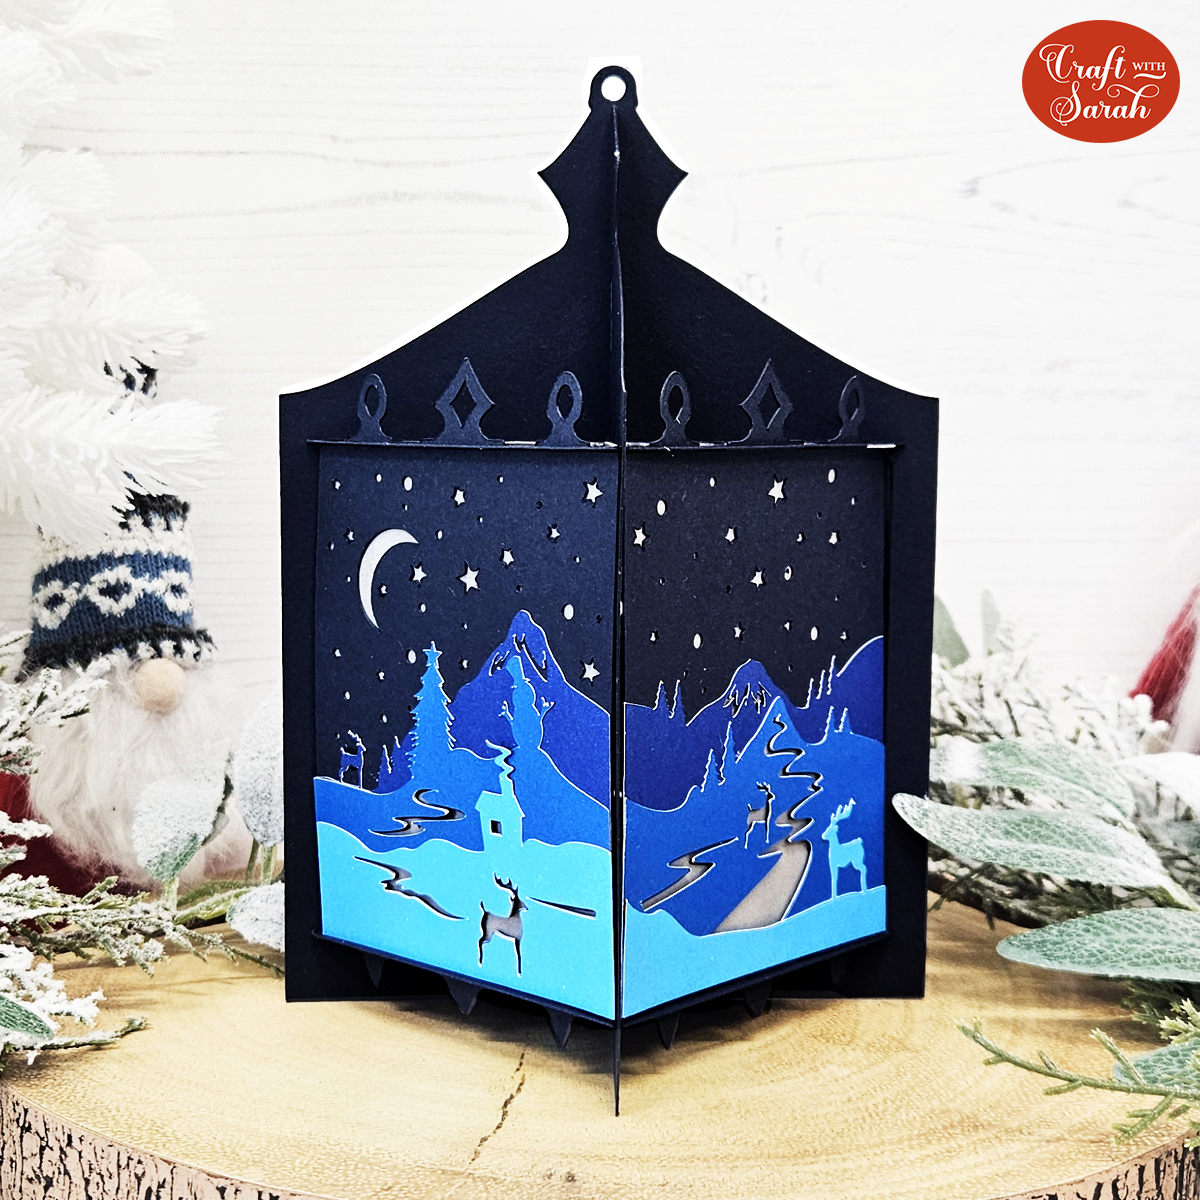
Craft this beautiful 3D papercraft lantern with a pretty snow scene on the edges which is built up with different shades of blue to add all the details.
The luminary SVG file comes in two versions: one has the winter scene shown in the photograph below and the other has the sides left blank/empty so you can add your own decorations.
That means you can design custom lanterns for any occasion!
Add a battery-powered candle or fairy lights to make your papercraft lantern glow from the inside.

Materials supply list
Here is a list of the materials that I used to make this project.
Please note that some of the links included in this article are affiliate links, which means that if you click through and make a purchase I may receive a commission (at no additional cost to you). You can read my full disclosure at the bottom of the page.
- Cricut machine
- Light blue Cricut cutting mat
- Coloured card
- Vellum, tracing paper or similar
- Collall All Purpose glue or similar
- Needle tip applicator bottle
- Battery powered candle or fairy lights (optional)
This project is suitable for the following types of Cricut machine: Explore Air 2, Explore Air 3, Maker, Maker 3, Venture and Joy Xtra. If you make the design smaller then you can cut it on the Cricut Joy.
Video tutorial
Watch the video below to see how to make this project. Keep scrolling for a written tutorial.
Written tutorial (with photos!)
Here’s how to make your very own 3D luminary lantern papercraft project using a Cricut machine!
Step 1) Download the cutting file(s) & unzip the downloaded folder
Download the Free Cutting File
Please login to your account to download this file.
TERMS OF USE:
You may sell finished, handmade physical craft items that you have made using this product but must not sell or share the digital files. Read full terms of use
Before you upload the SVG to Design Space, you need to unzip the download folder that it comes in.
Step 2) Upload the SVG file into Design Space
Open up Cricut Design Space and start a new Project.
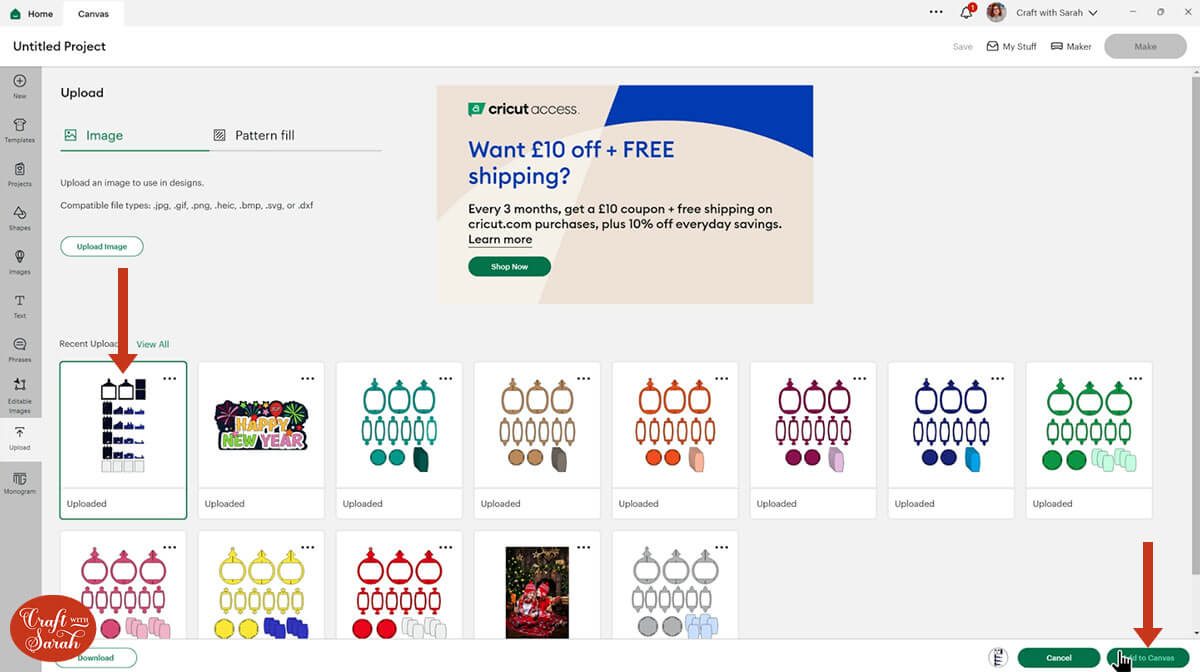
Click “Upload” and then find your unzipped version of the downloaded files for this project.
Go into the “Cut Files” subfolder and then select the file called svg-lantern-snow-scene-craftwithsarah.svg
This is how it should look after you have uploaded the file:

Make sure you upload the file which starts svg- in the filename!!
After uploading, the design will show in your “Recently Uploaded Images”.
Click on it and then press “Add to Canvas” to put it onto your Project.
The lantern will load in at the correct size to make a finished design that’s approximately 7.8 inches tall and 5.5 inches wide.
The design loads in at 16.158 inches wide and 34.374 inches tall.
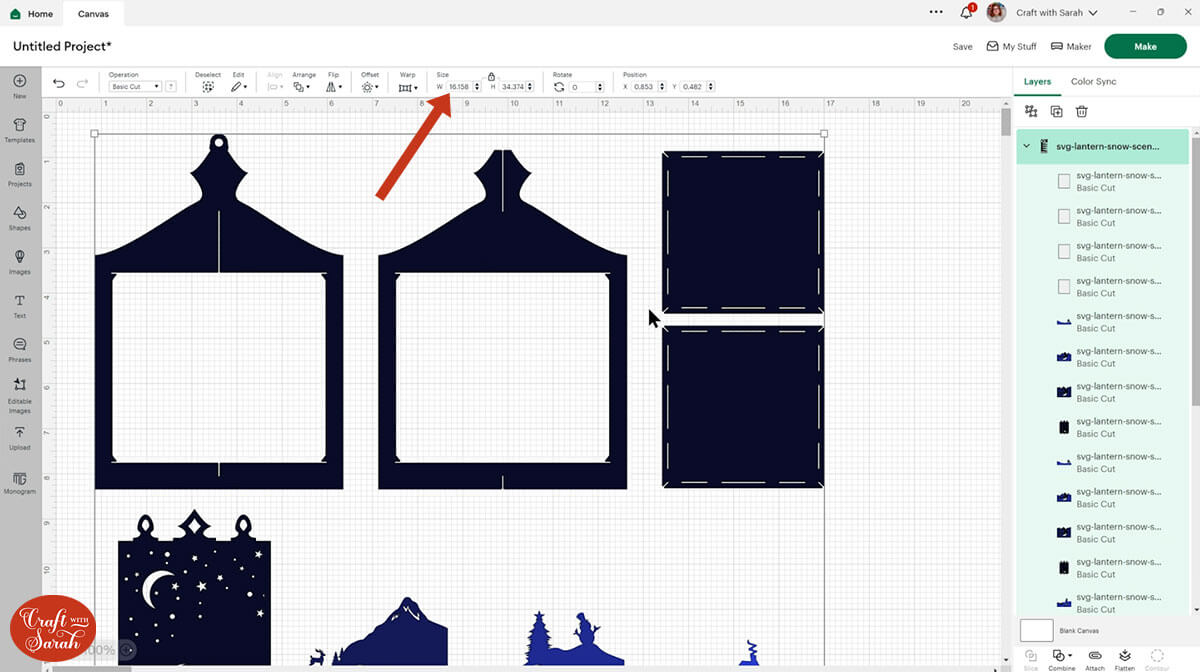
You can resize it to make it larger or smaller lanterns.
TIP: If you resize the lantern, make sure the padlock icon above the width/height boxes is CLOSED before you resize. If it appears “open”, click it with your mouse to close it.
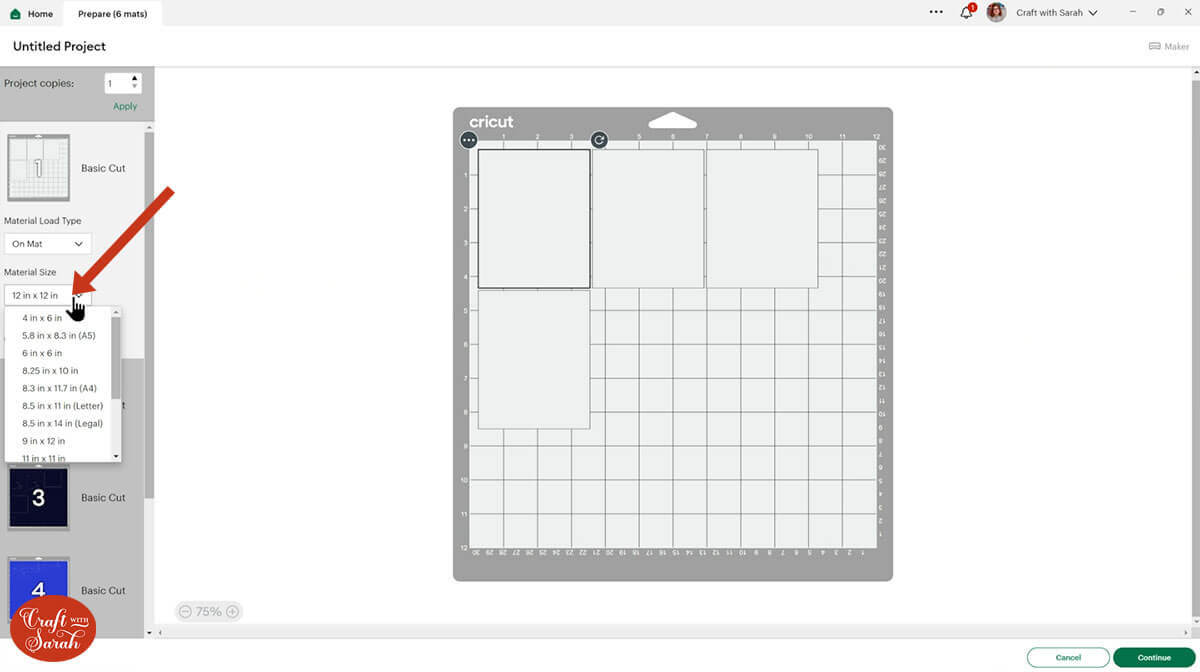
Step 3) Cut out the project from cardstock
The project is ready to cut, so you don’t need to do any extra steps in Design Space.
Click “Make” and follow the instructions on-screen to cut out all the layers.
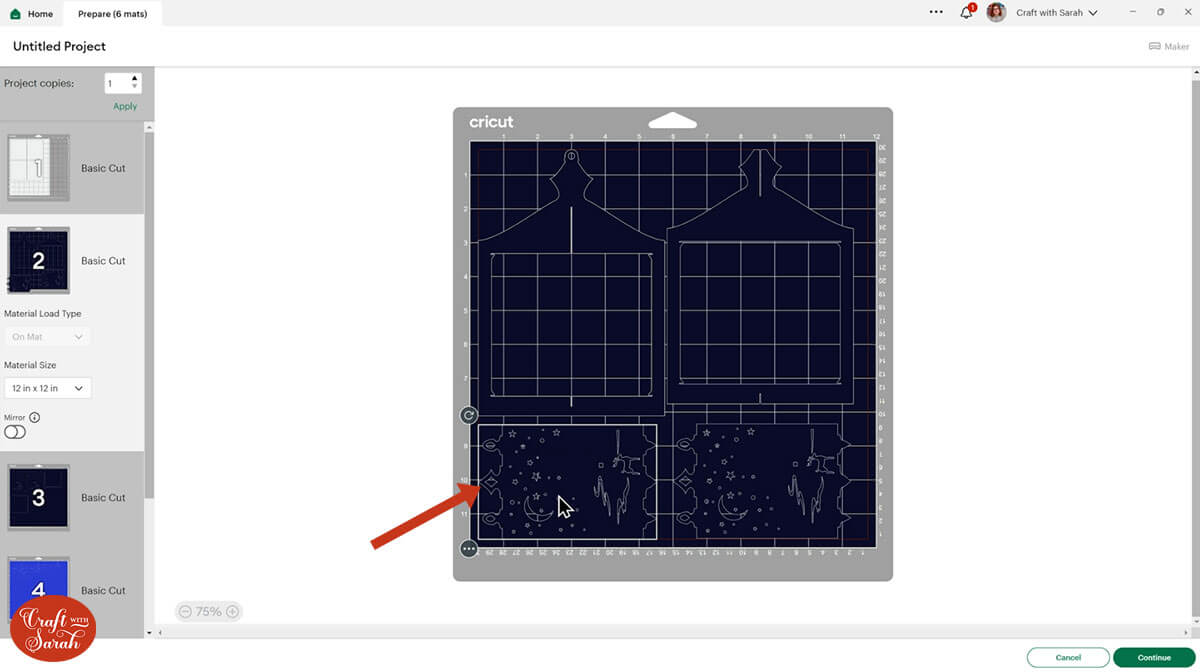
To change the paper size, go into the dropdowns over on the left side of the screen and choose the paper size that you want to use. You need to change it for every single colour.
IMPORTANT: Cut the white rectangles shown on the image below from vellum, tracing paper or some other kind of translucent material.
To save space on your cardstock, you can move things around by clicking and dragging. Make sure when you’re moving things about that nothing overlaps because otherwise, it won’t cut out properly.
TIP: New to cutting cardstock with a Cricut? Check out this in-depth tutorial which goes through every step of the process, including tips for getting the best quality cuts from your Cricut.
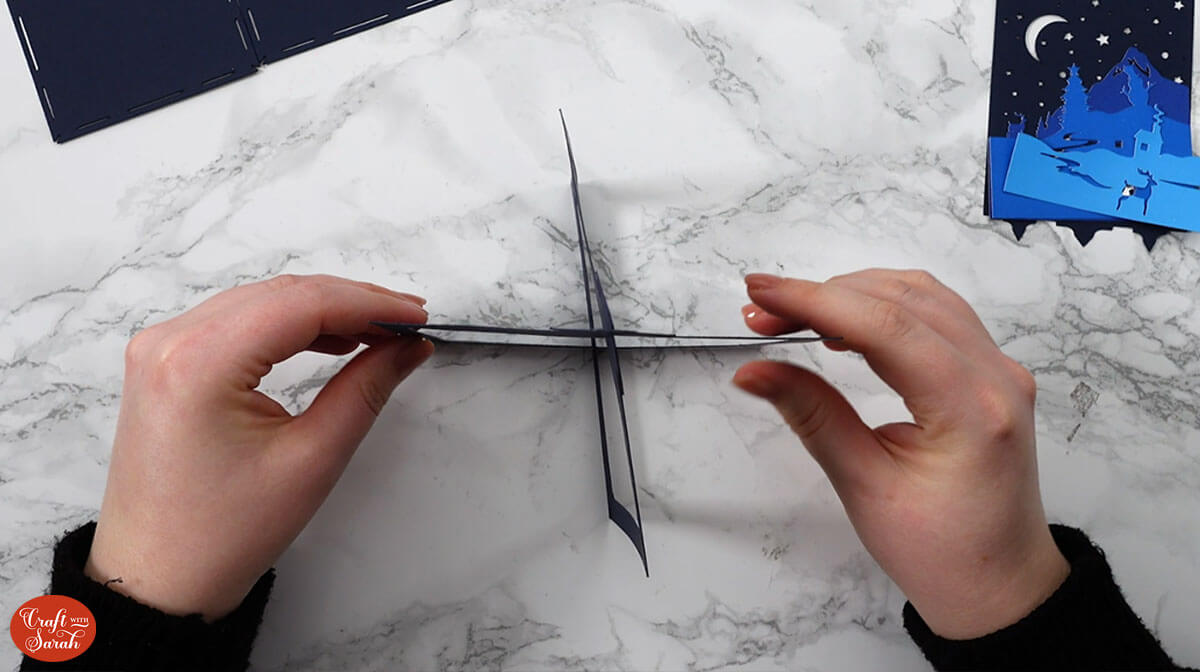
Step 4) Build the structure of the lantern
The structure of the lantern is “slotted” together without the need for any adhesive.
Take the two outer pieces. Slot the piece without the hanging circle at the top into the one that does have the hanging circle.
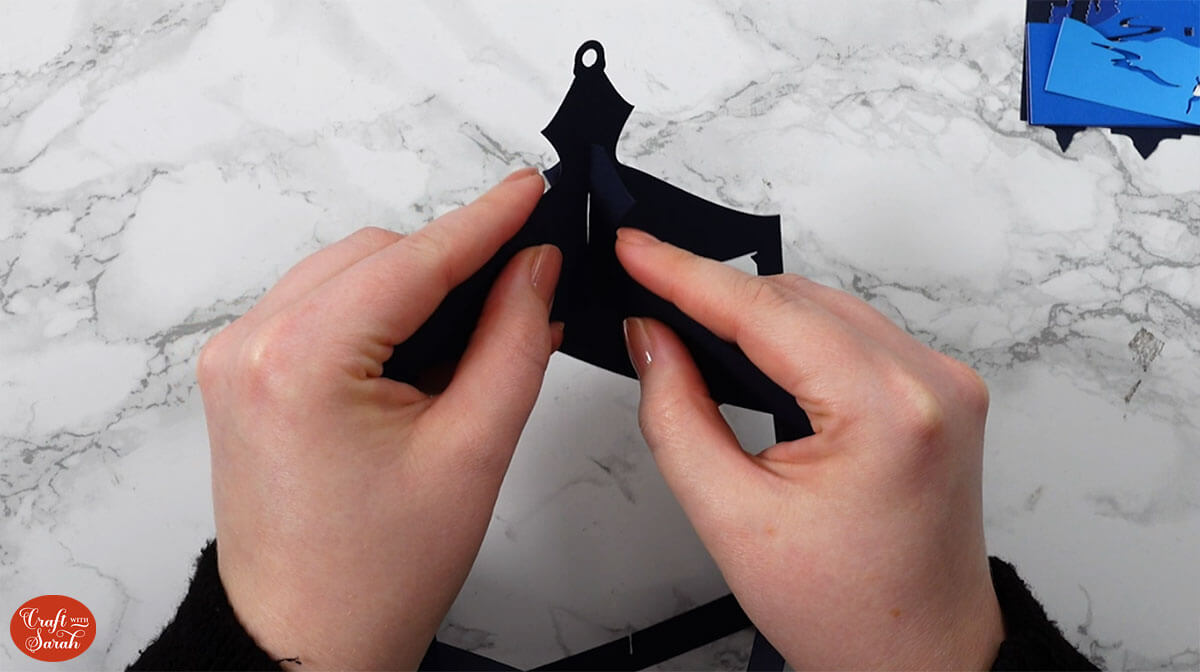
You will end up with four sides that stand up unassisted.
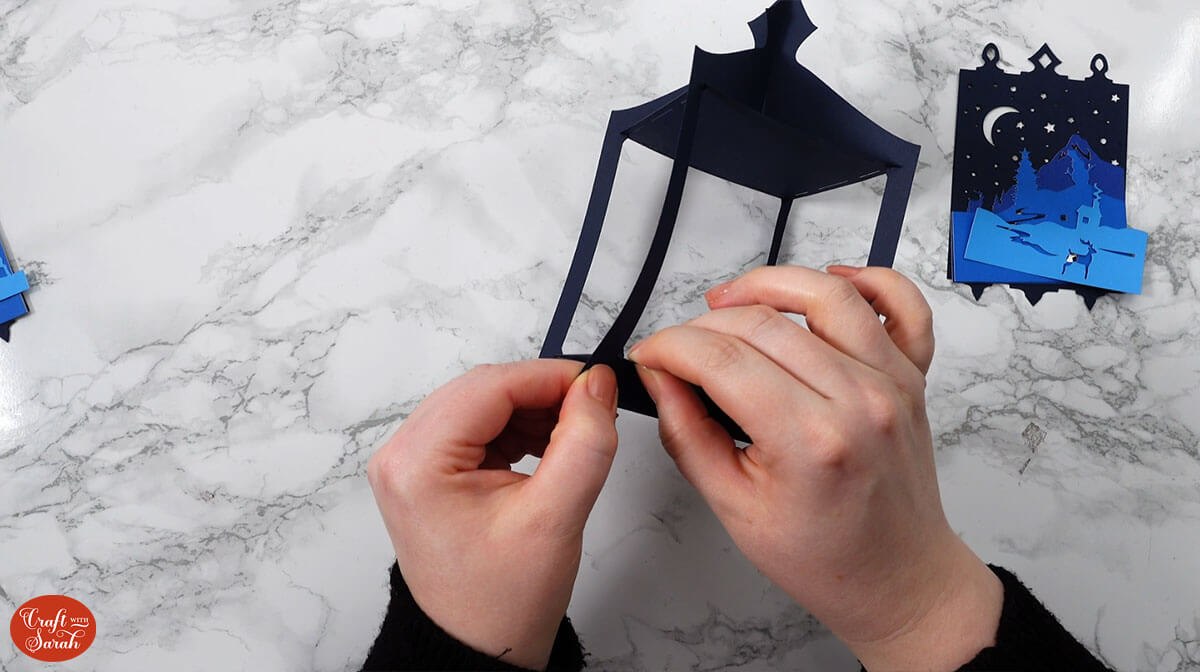
Take one of the square shapes, slide it into the middle of the lantern and manoeuvre it so that the slits in the edge of the square are pushed into the slits in the structure pieces.
This is quite fiddly and the cardstock is delicate, so be very careful to not tear anything.

Slide the other square into the bottom of the lantern and ensure all the slits are in place.
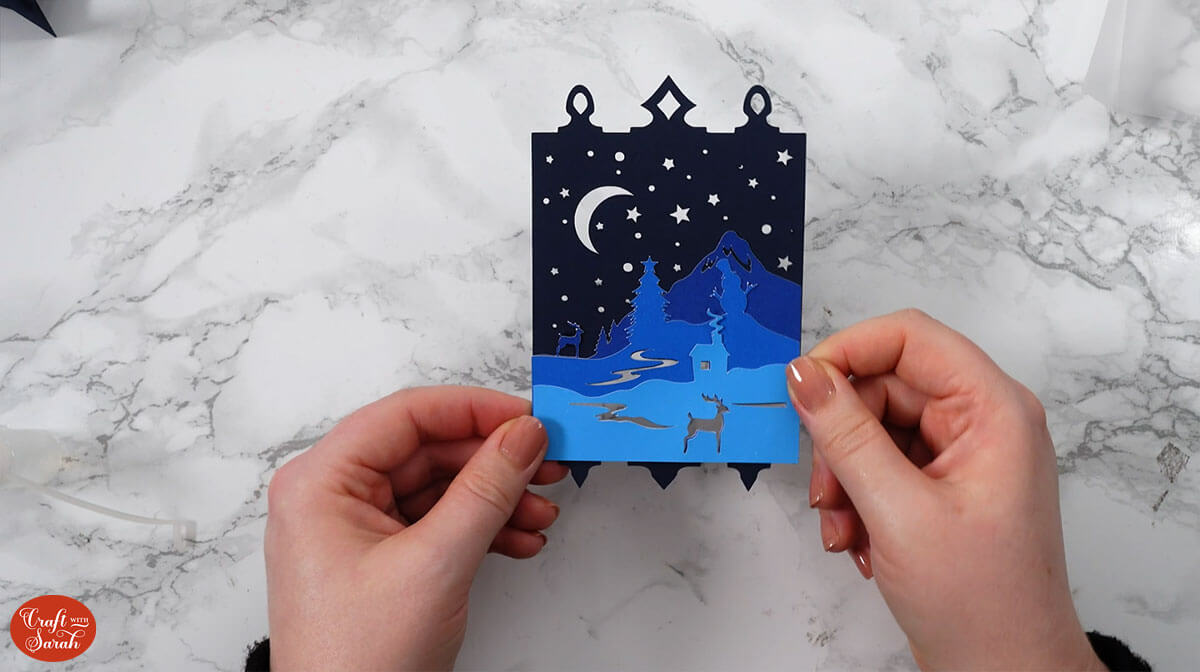
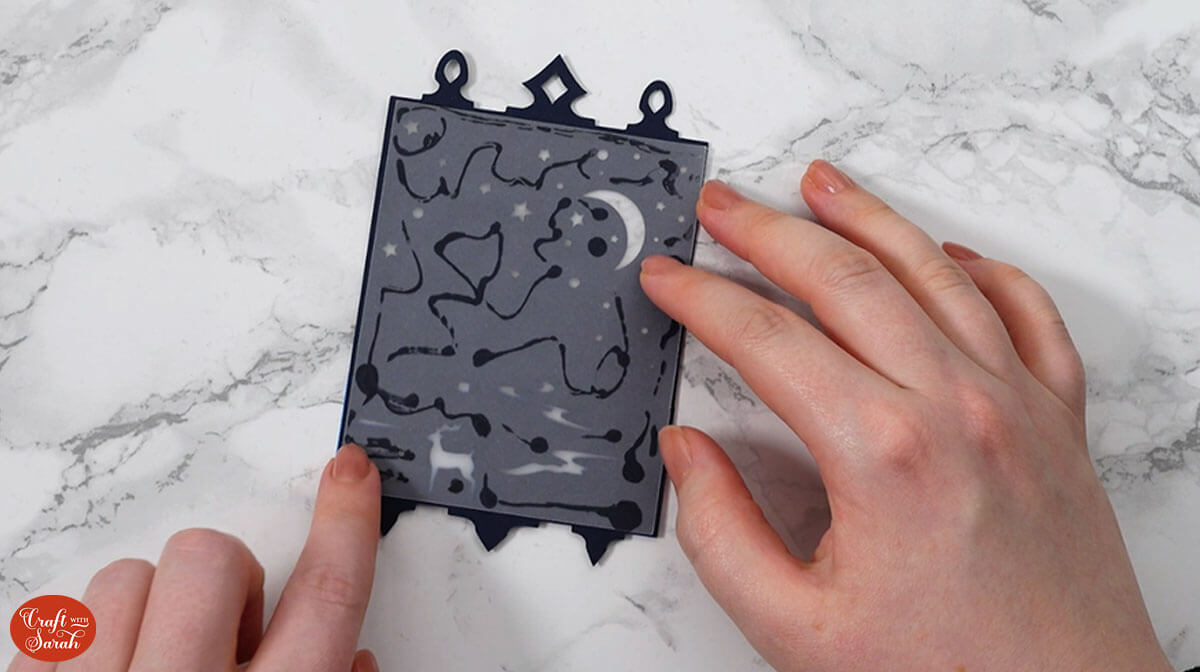
Step 5) Glue the layers of the sides together
Lay out the pieces of each of the four sides of the lantern so that you know which order to glue them in.
They go in size order, with the larger pieces of the winter scene at the bottom and the smallest pieces on top.
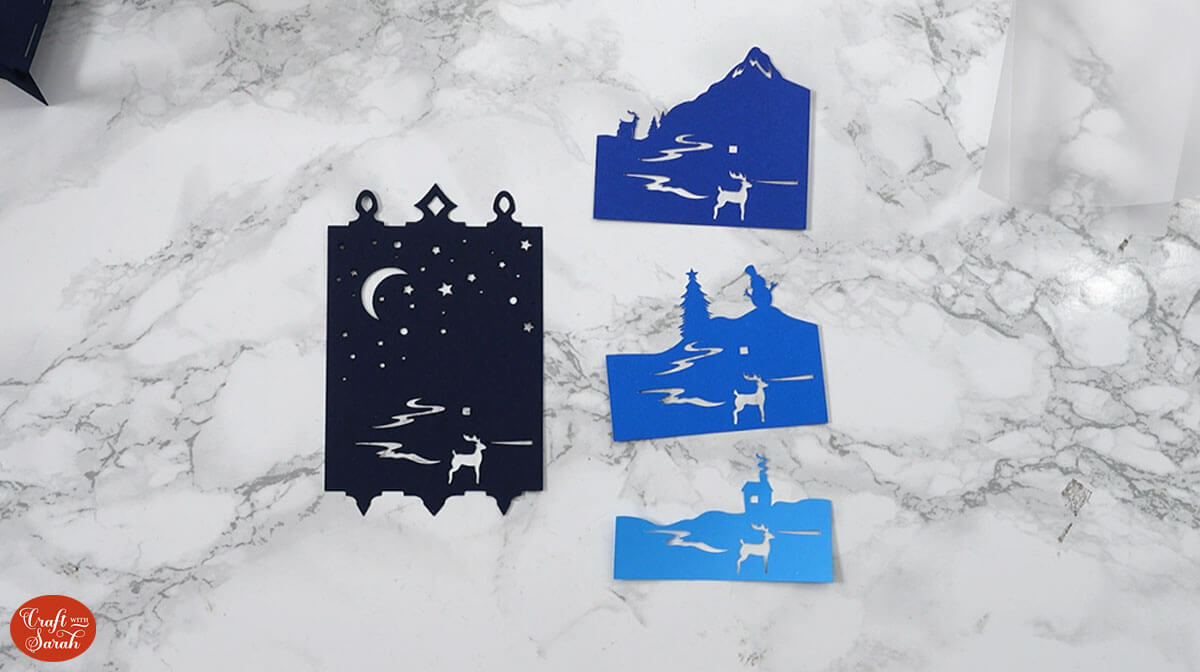
Glue the pieces onto all of the sides.
Turn the sides upside down and glue the vellum/tracing paper to the underside.
This will create a “diffusion” effect for the battery-powered candle or fairy lights which gives a better “glow” to the lantern.
Step 6) Add the sides onto the lantern
Once the glue is fully dry, take one of the sides and slot it into the lantern structure by threading the pointed shapes at the top through the slits in the lantern structure and the bottom pointed shapes through the bottom slits.

Repeat this for two more sides.
Alternate the two different side panel designs so that the “same” designs are on opposite sides to each other.
Before you add the final side, add some fairy lights or a battery powered candle inside the lantern.

Add the final side.
As the side are only threaded in, you can easily remove one to turn the lights on and off.
3D lantern craft for winter
I hope you enjoy making this luminary craft with my free lantern SVG.
I love how it looks all lit up with fairy lights inside!
But it looks just as beautiful when the lights are off.
If you would like to try designing your own lanterns, use the blank template included in the download folder.
Use the same techniques shown in this DIY ornament tutorial to add your decorations to the sides of the lantern.
Happy crafting,
Sarah x

