Fall Flowers & Leaves 🍂 FCC 07
Make a collection of matching autumn craft projects with these flower SVGs.
This tutorial is a little different because instead of making one specific finished design, we’re getting creative with a collection of autumn flowers, leaves, greenery and embellishments.
The flowers and leaves in the SVG come as individual elements rather than a completed project, which means you can mix and match them to create all sorts of different crafts.
In this tutorial, I’ll show you three ways to use them: greetings cards, a layered shadow box and a giant floral wall display.
These techniques are designed to give you ideas for how the individual elements can be combined, but you certainly don’t need to copy my designs exactly.
Experiment with different flowers, colours, sizes and layouts to create something completely unique.
This project is suitable for the following types of Cricut machines: Explore series, Maker series, Joy Xtra, Joy and Joy 2. You will need to make the design smaller to cut on the Joy or Joy 2.
Please note that this project does not include hand-cutting versions.
This project is part of the 2026 Falloween Craft Countdown
Foundation learning
If you're new to making papercrafts with your cutting machine, check out these links to get you started.
They include videos on topics such as: which file to use with your type of cutting machine, how to load the files into your cutting machine's software, how to cut cardstock with your type of cutting machine, how to recolor and modify/customize the cut files and tips for displaying your projects.
- How to use zip folder downloads
- Help guides for Cricut machines
- Help guides for Silhouette machines
- Help guides for ScanNCut machines
The following tutorials are Cricut-specific, but many of the ideas will work similarly with a Silhouette or ScanNCut machine and any cut files that are shared in them are compatible with all types of cutting machine.
- How to score with a Cricut (even without scoring tools)
- Print then cut tutorial
- Design Space tools (Combine, Attach, Slice, Weld, Flatten, etc.)
- Pattern fill tutorial (for making backgrounds & cutting images to a specific shape/size)
- Free envelope SVGs that can be sized to fit any card
- Presentation boxes for handmade cards
- How to write inside cards with Cricut pens
- How to cut layered designs at a small size
- Design Space tips & tricks
- Cricut pens tutorial
- How to mount multiple designs in the same frame with magic guides
How to use flowers & leaves in Cricut projects
Watch the video below to see how to make this project. Keep scrolling for a written tutorial.
For all project: SVG preparation
Get the files using the box below.
Purchase the File(s)
This cut file is available as part of the Instant Access Bundle.
Or, purchase this design individually here
Before you upload the SVGs to Design Space, you need to unzip the download folder that they come in.
Not sure how to do this? Click here for a tutorial that covers all the following types of computer and device:
- How to unzip a folder on a Windows computer
- How to unzip a folder on a Mac
- How to unzip a folder on an iPad
- How to unzip a folder on an iPhone
- How to unzip a folder on an Android device
After unzipping, upload the SVG file(s) into your cutting machine software.
Not sure how to use cut files with your type of machine? The following links lead to tutorials on how to use cut files in:
- Cricut Design Space
- Silhouette Studio
- CanvasWorkspace (for ScanNCut machines)
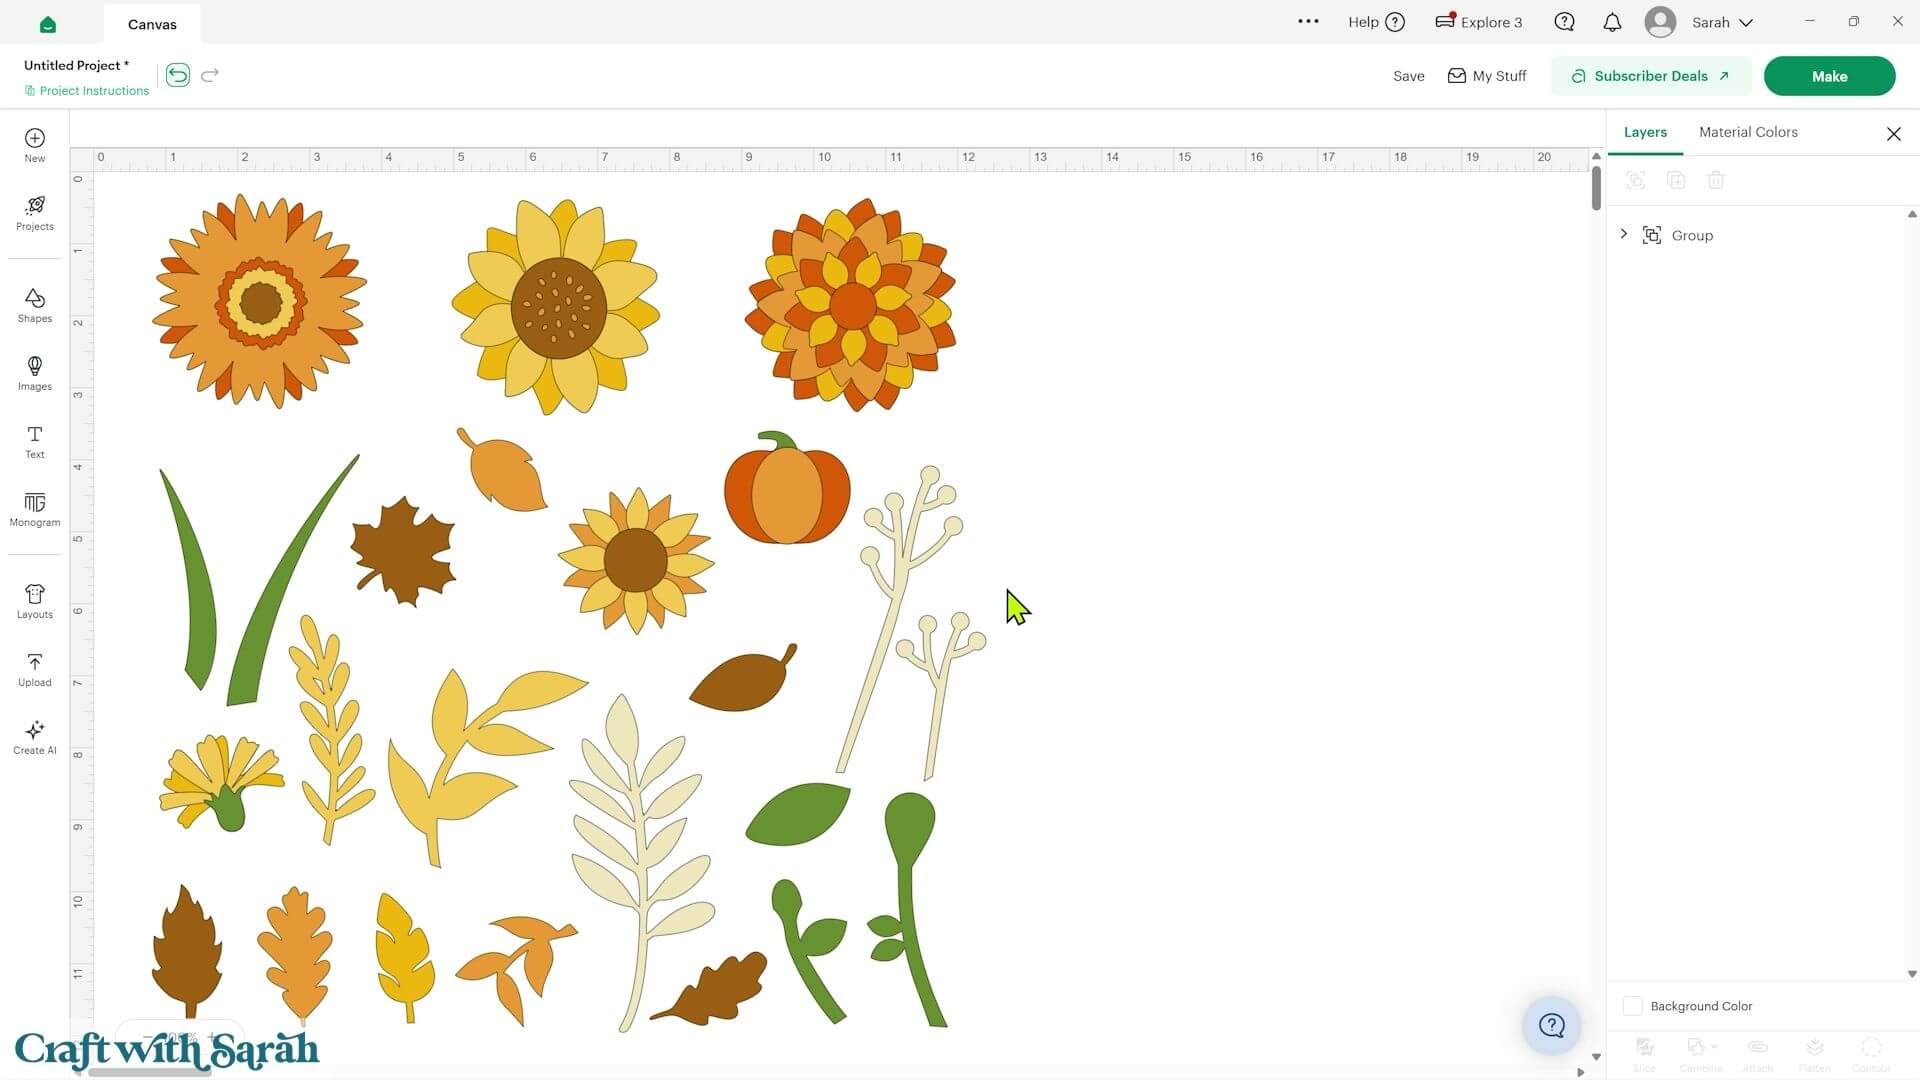
Upload the SVG into Cricut Design Space and press ‘Ungroup’ at the top of the Layers panel to separate all of the different images.
Some of the images are made from a single layer, whereas others contain several layers.
If you click an image and a Group is selected in the Layers panel, click the little chevron arrow next to it to see all of the individual pieces.
Project 1) Autumn greetings cards
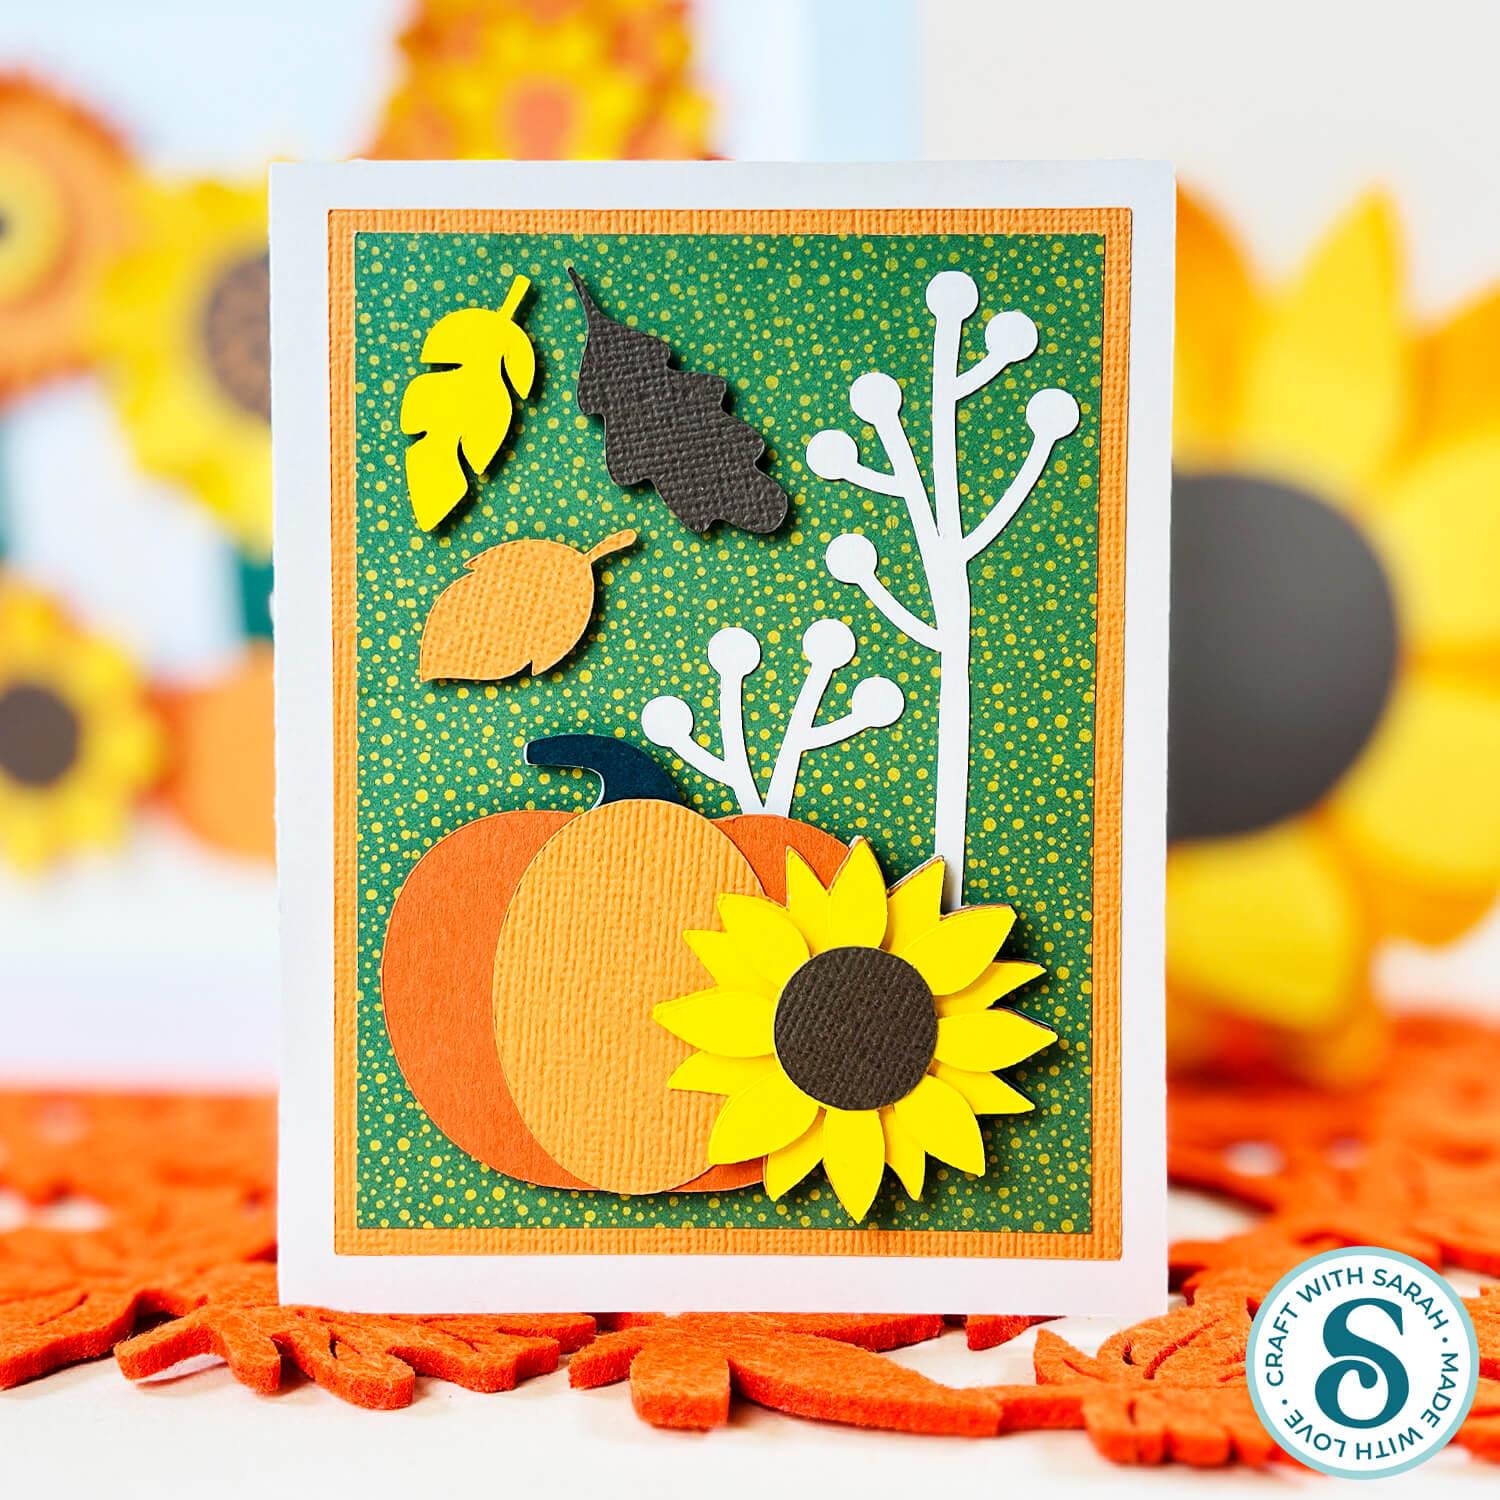
We’ll start small by using the flowers and leaves to make greetings cards.
I’m making A2 size cards, which measure 4.25 x 5.5 inches when folded, but you can use the same techniques for any card size.
Step 1) Create the base card
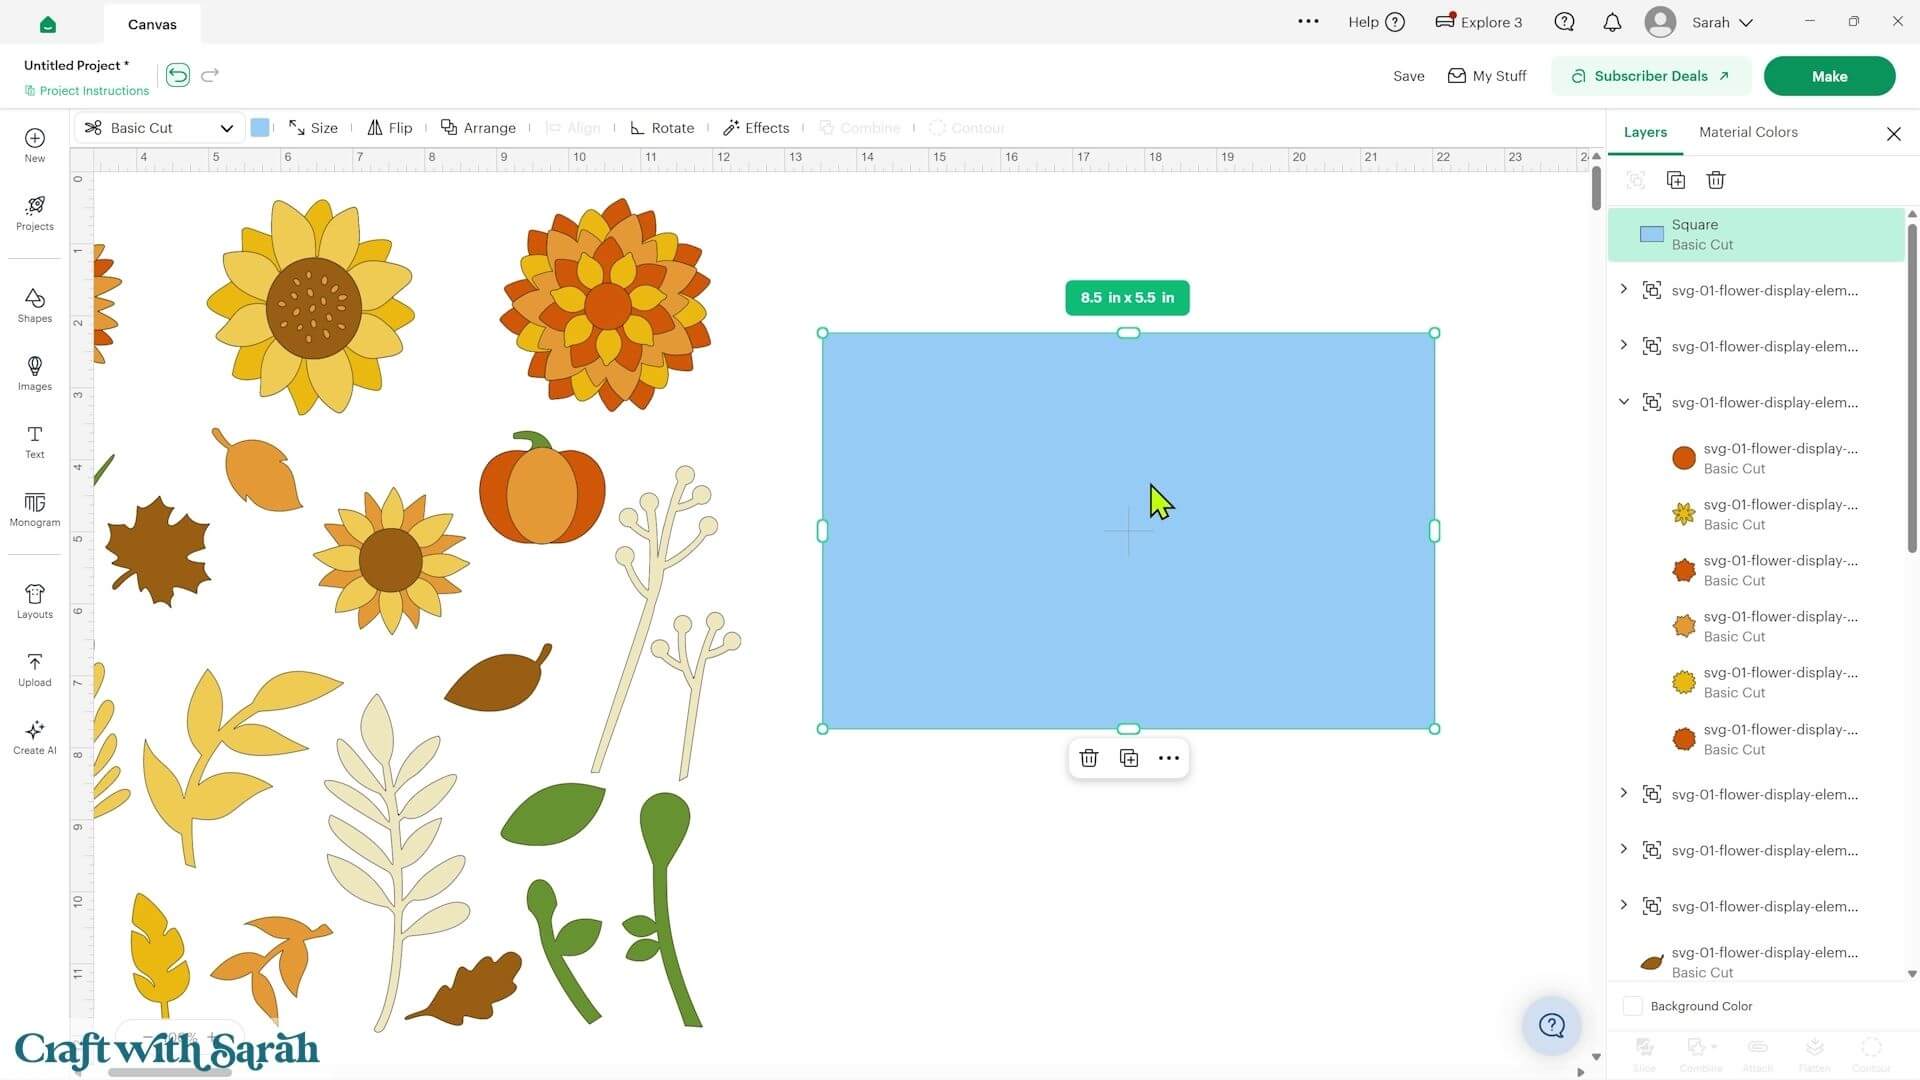
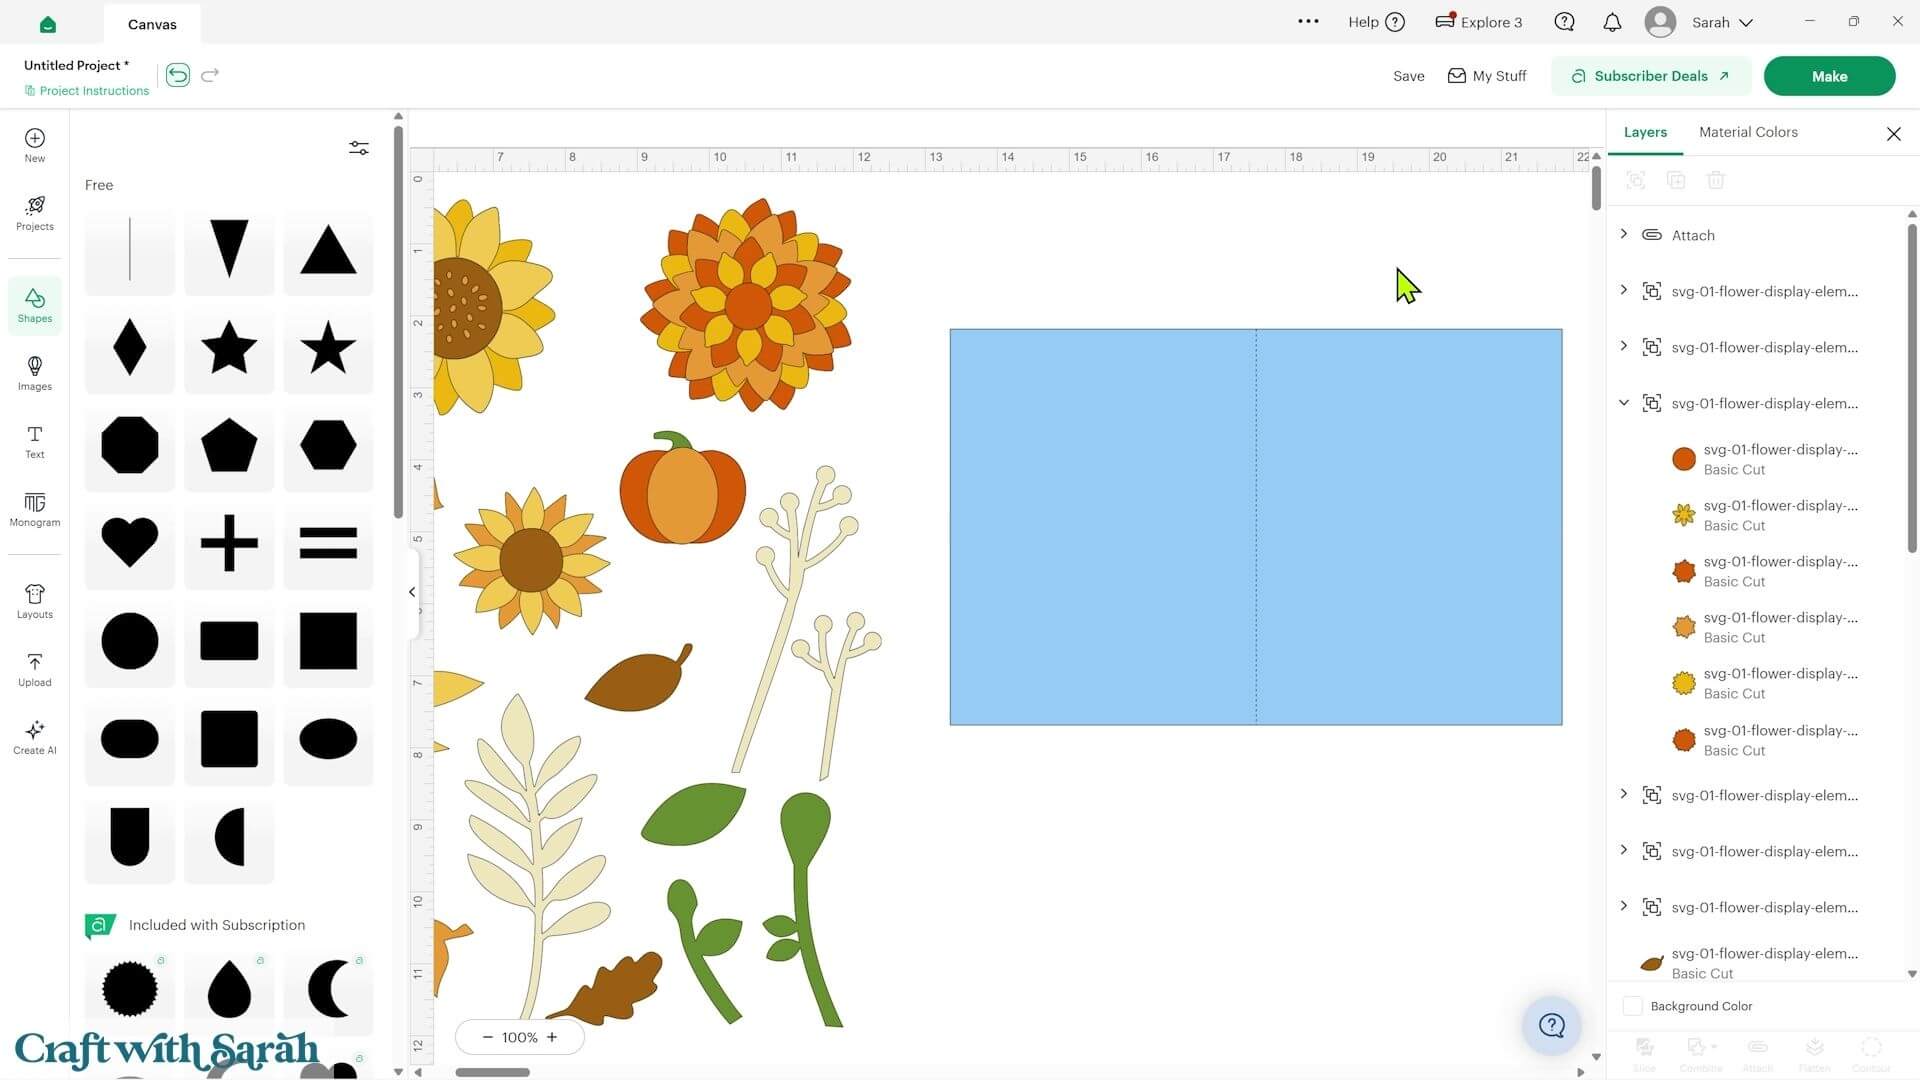
Go into ‘Shapes’ and add a square.
Click the padlock icon to unlock the proportions, then change the size to 8.5 inches wide and 5.5 inches tall.
This will create an A2 card when folded in half.
If you have a scoring stylus or scoring wheel, you can add a score line to make the card easier to fold.
Go into ‘Shapes’ and choose a score line. Change the height to 5.5 inches.
Select the score line and base card together, then go into ‘Align’ and ‘Center’ to position the score line perfectly in the middle.
With both layers still selected, press ‘Attach’. This tells the Cricut to score the line in that exact position on the card.
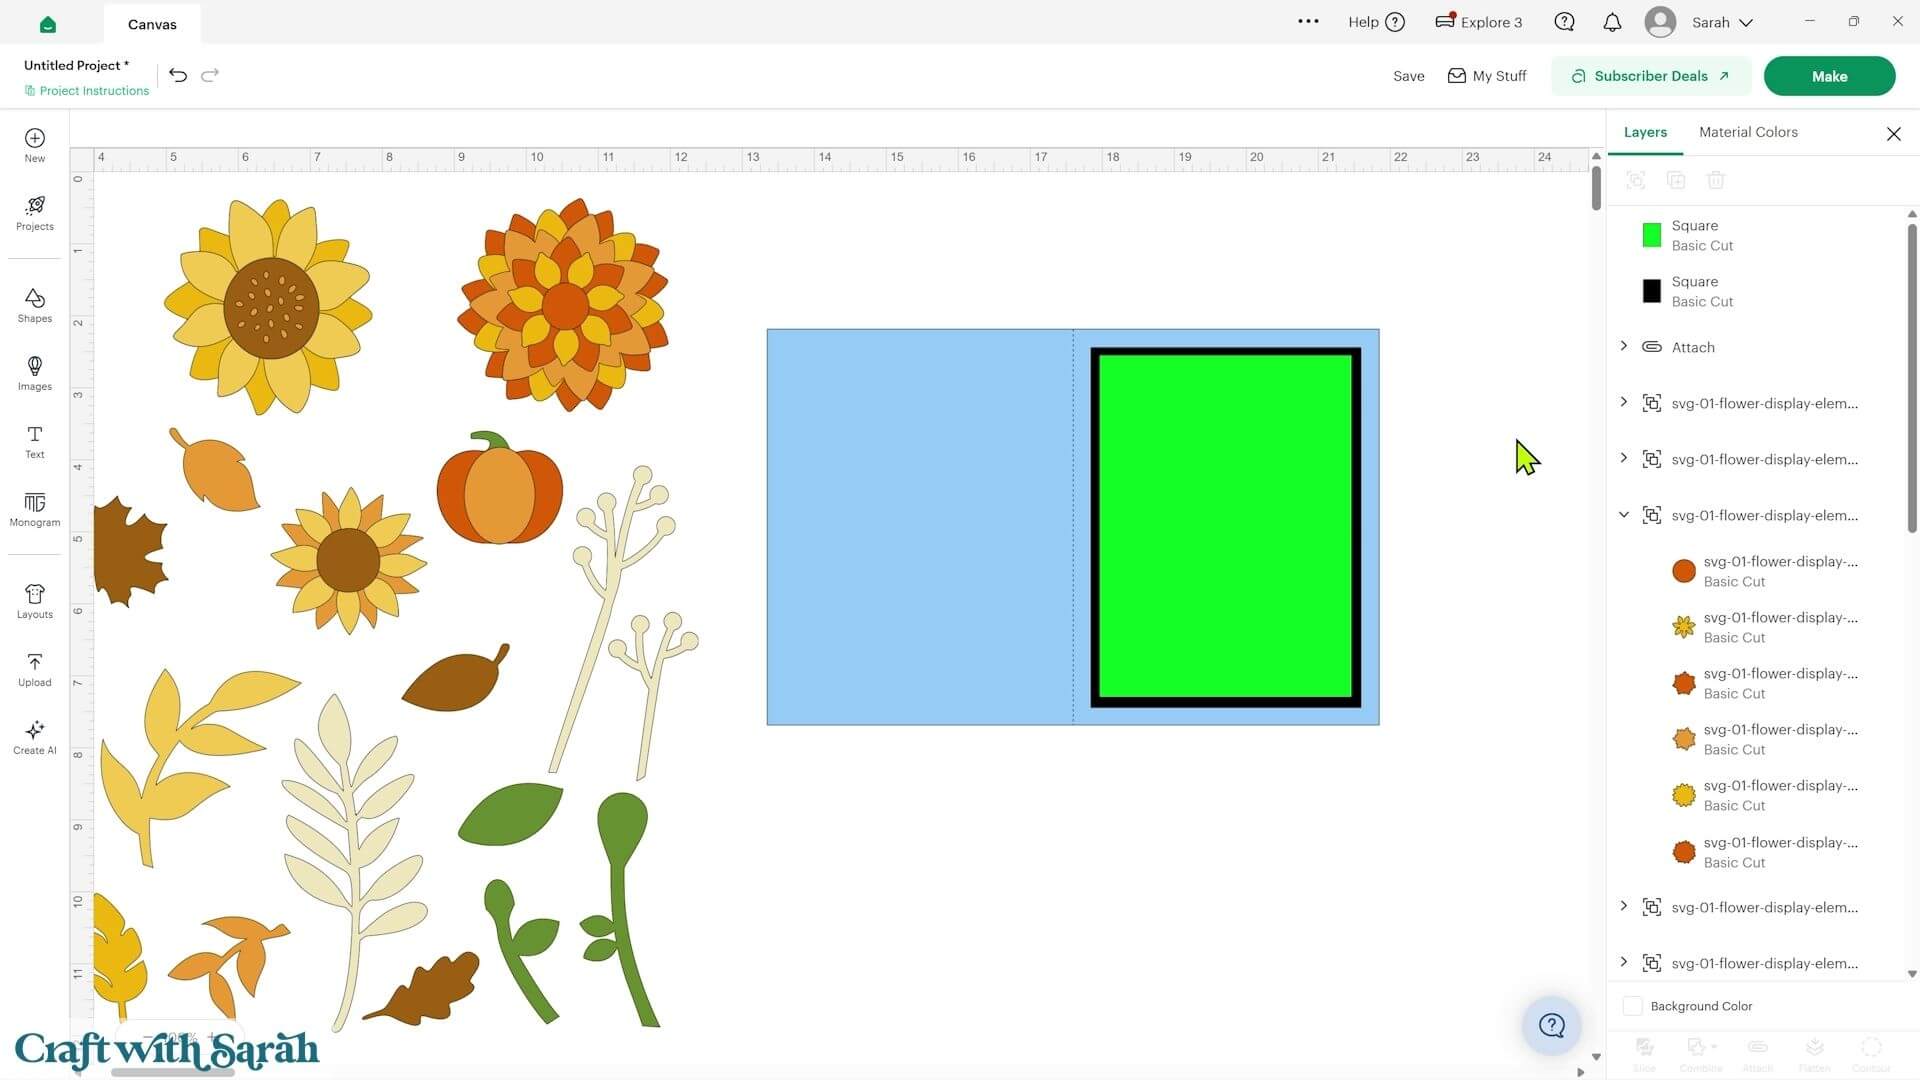
I like to add a couple of decorative layers to the front of my cards.
For my first card, I added a rectangle measuring 3.75 x 5 inches and then another one measuring 3.5 x 4.75 inches.
The smaller rectangle will be cut from patterned paper.
When I’m designing with patterned paper in Cricut Design Space, I like to make those layers a really obvious colour such as lime green or bright pink.
That makes it easy to remember which mat needs to be cut from patterned paper when I get to the cutting stage.
Step 2) Build your card design
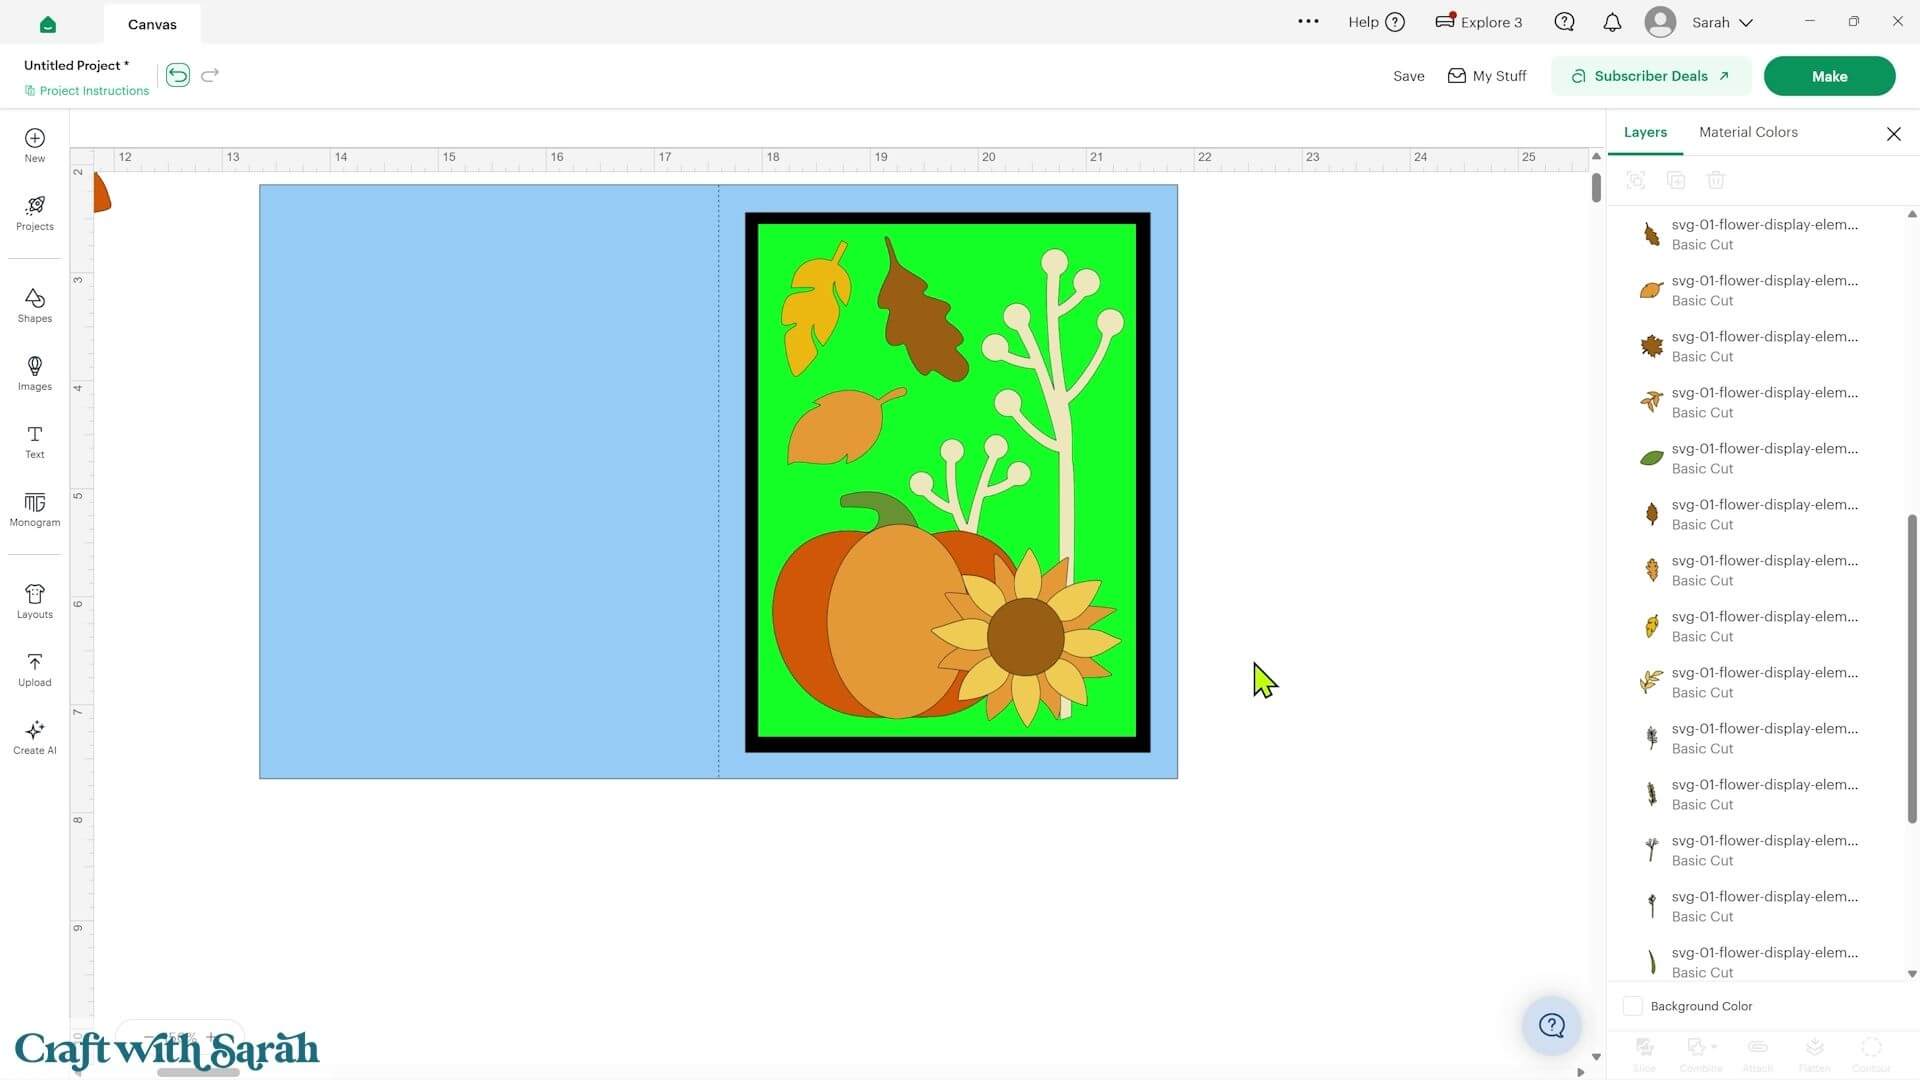
Drag the flowers, leaves and embellishments that you want to use onto the front of the card.
If the images disappear behind your card layers, select all the card pieces and go to ‘Arrange’ and ‘Send to Back’.
You can resize, rotate and reposition the different elements until you’re happy with your arrangement.
You can also move layers up and down in the Layers panel to change which pieces appear in front of or behind the others.
For my first card, I used a pumpkin, sunflower and some foliage, then added a couple of loose leaves to make it look like they were fluttering around in the breeze.
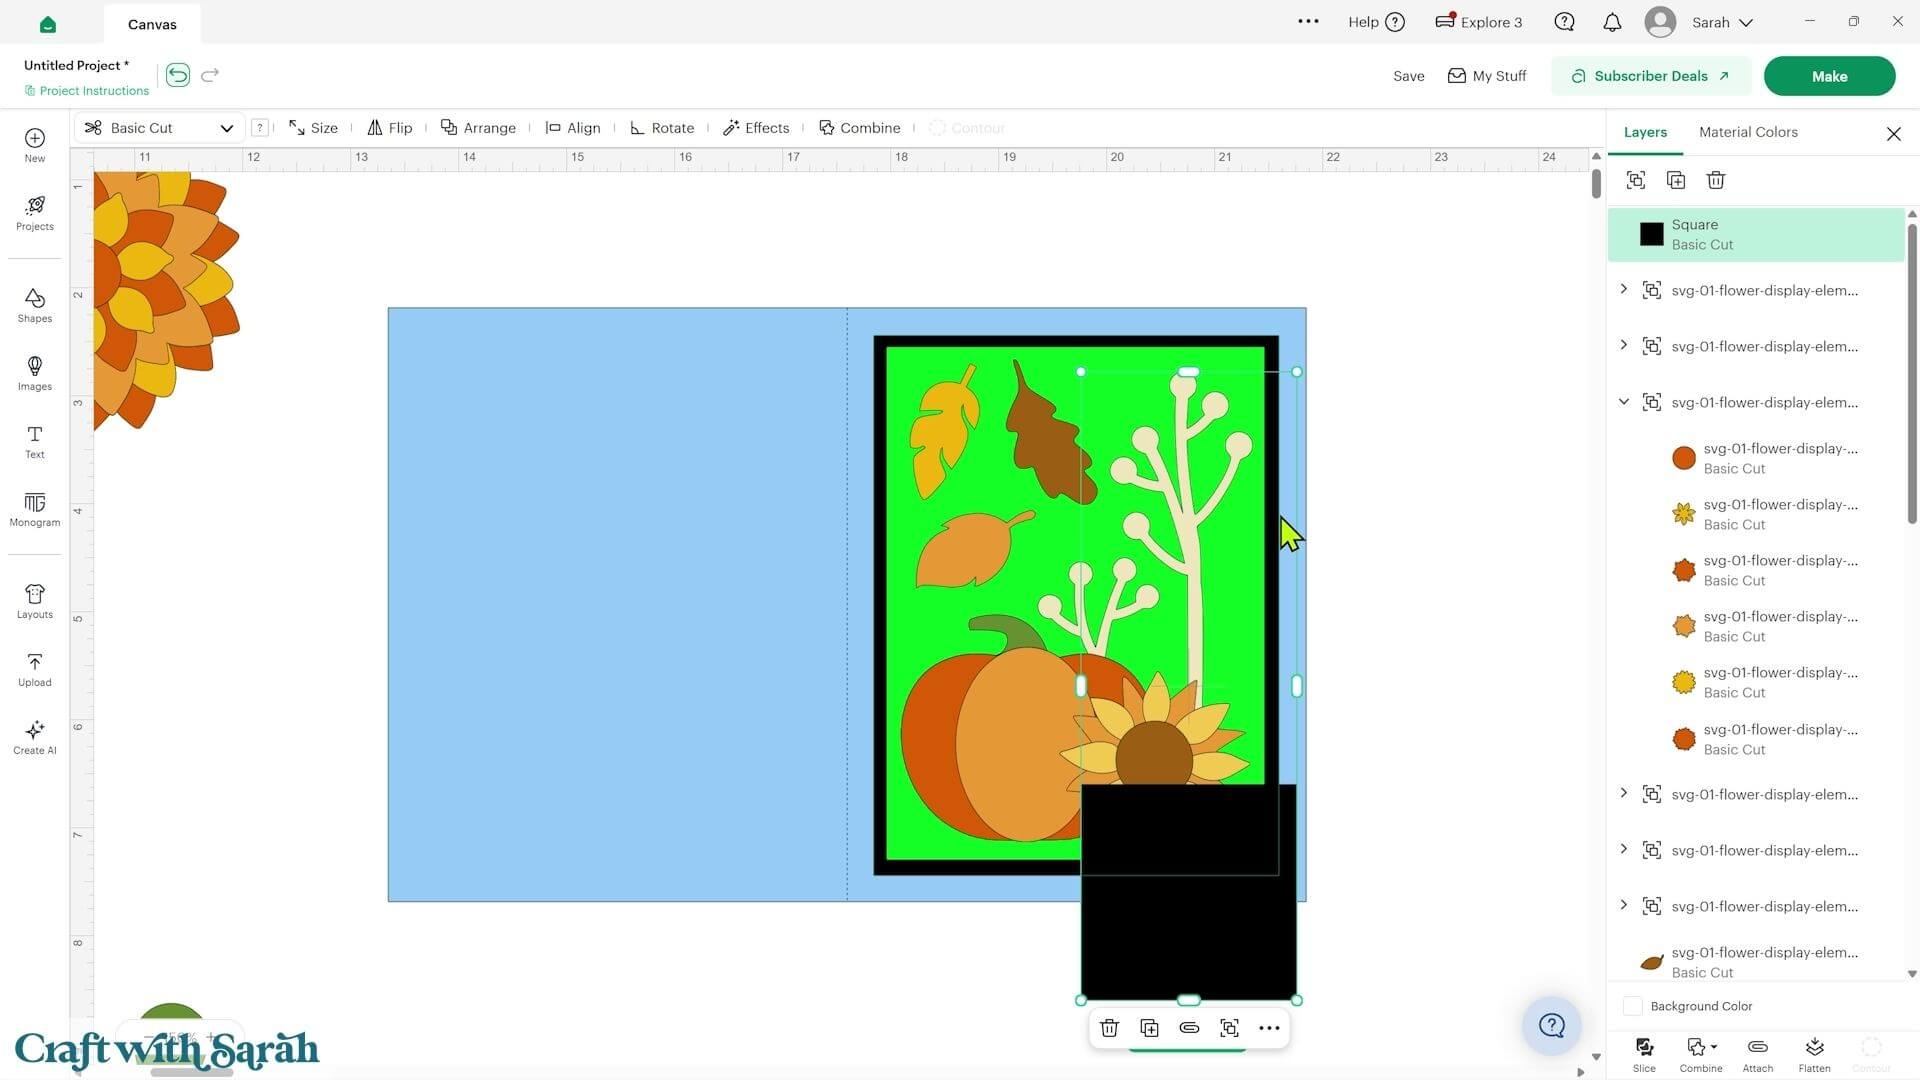
If part of an image is sticking out somewhere you don’t want it, like the bottom of the cream-coloured stick in the image above, you can use the Slice tool to remove it.
Add a shape over the section you want to remove.
Select the shape and the layer you want to cut, then press ‘Slice’.
Remember that Slice only works when exactly two layers are selected.
Delete the unwanted pieces that are created by the Slice operation.
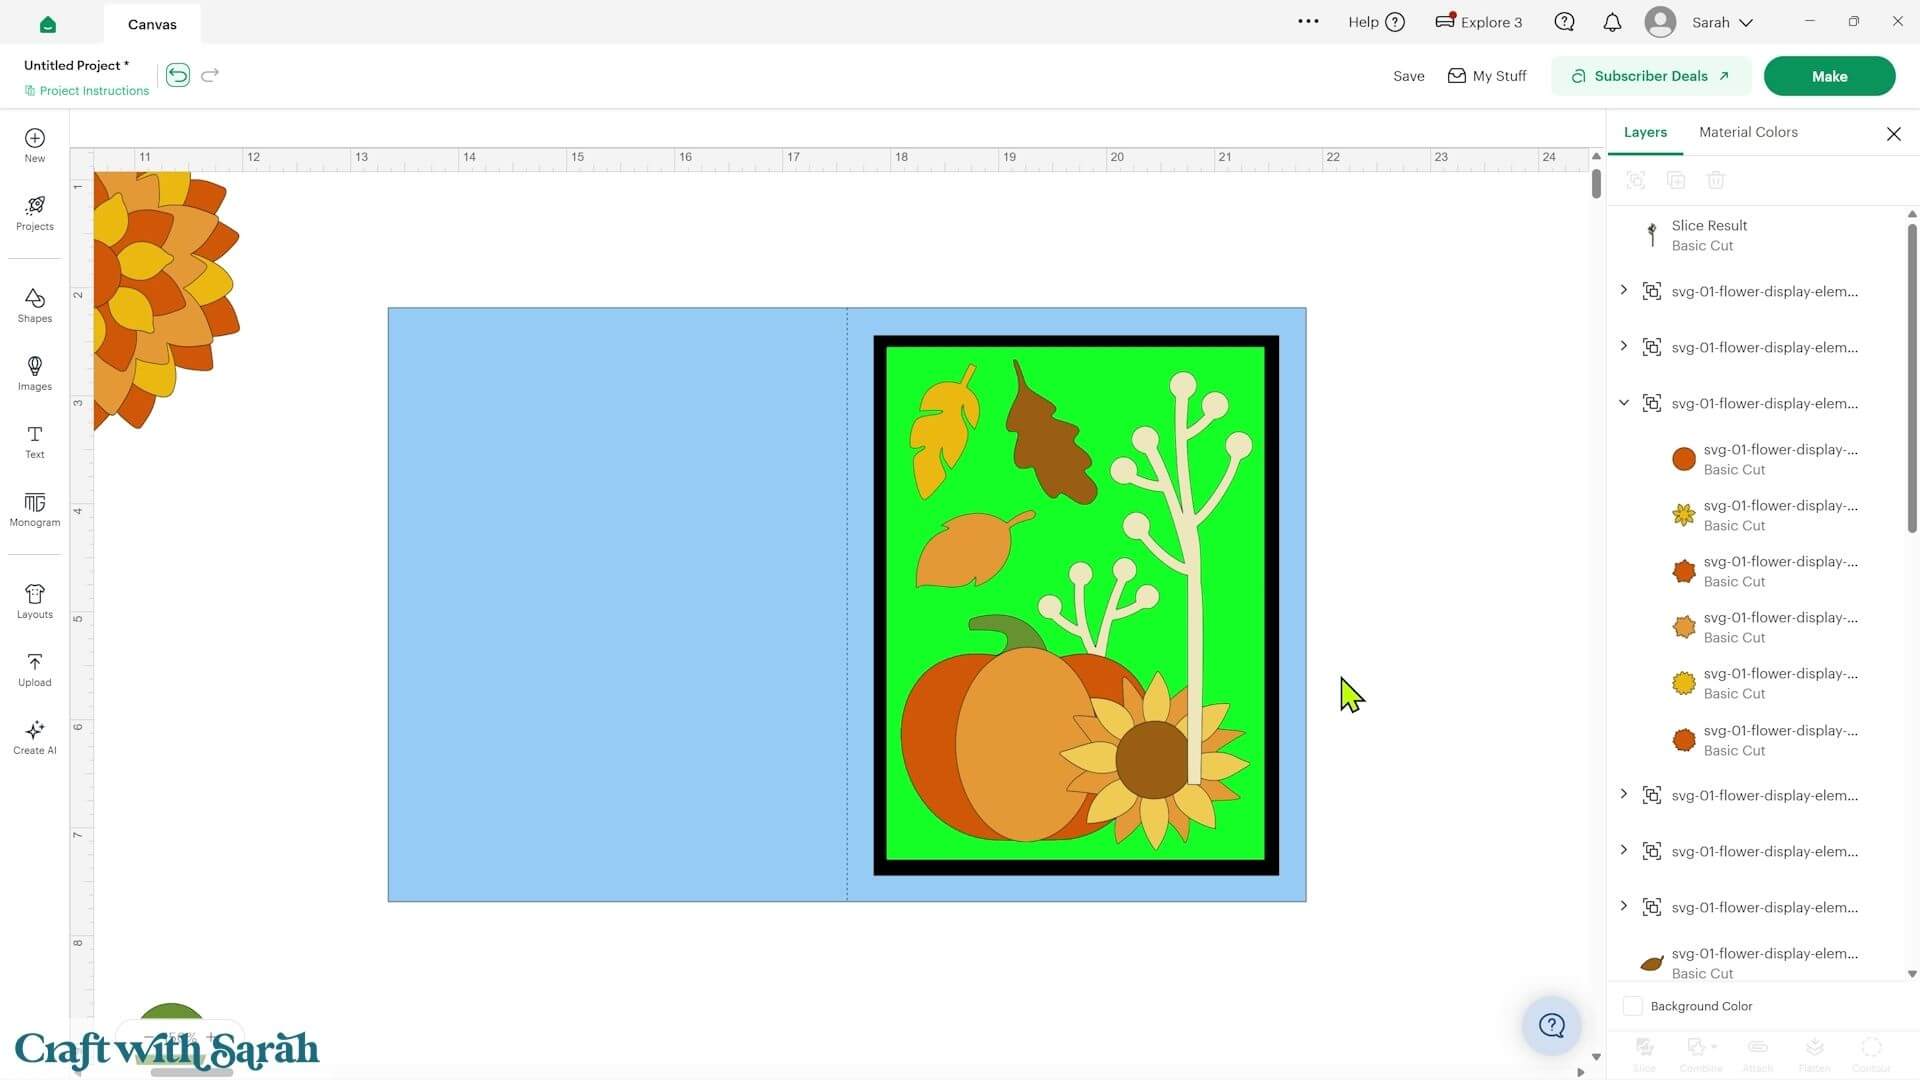
You may then need to move the remaining part of the image back into position in the layers panel.
Finish designing your card, including changing the colours if desired.
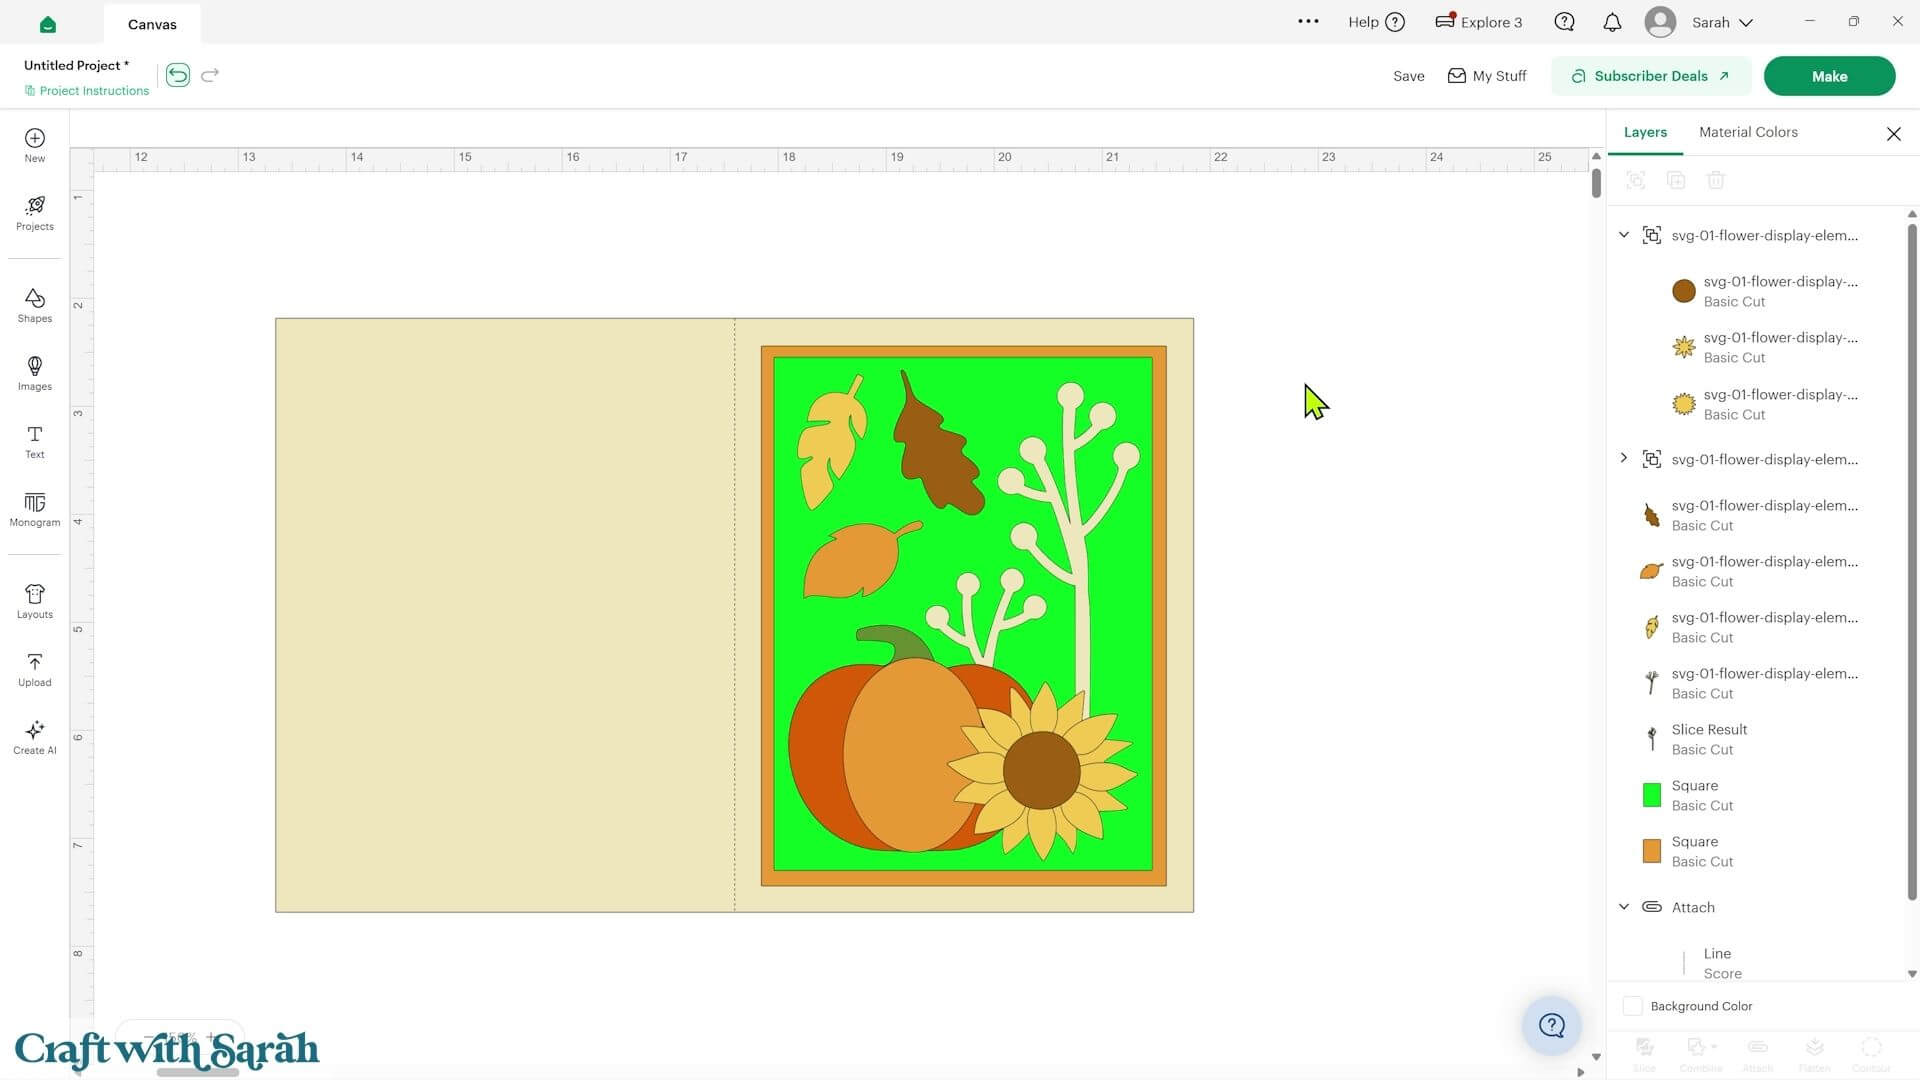
Step 3) Make the layers easier to assemble
You can leave all of the elements separate and put them together like a jigsaw puzzle after cutting, but I prefer to do a little extra work in Design Space to make the assembly easier.
For example, I joined the bottom layers of my pumpkin, sunflower and foliage together so that they would cut as one large piece of cardstock.
This makes it much easier to recreate the exact positioning that you designed on the screen.
To make a copy of a layer without moving the original, hover your mouse over the layer and hold ‘Alt’ on Windows or ‘Option’ on Mac, then click it.
Drag the copied layer out of its original group and change it to the colour of the layer you want to join it to.
Repeat this for any other shapes that you need.
Select all of the pieces that you want to turn into one layer, then go into ‘Combine’ and choose ‘Weld’.
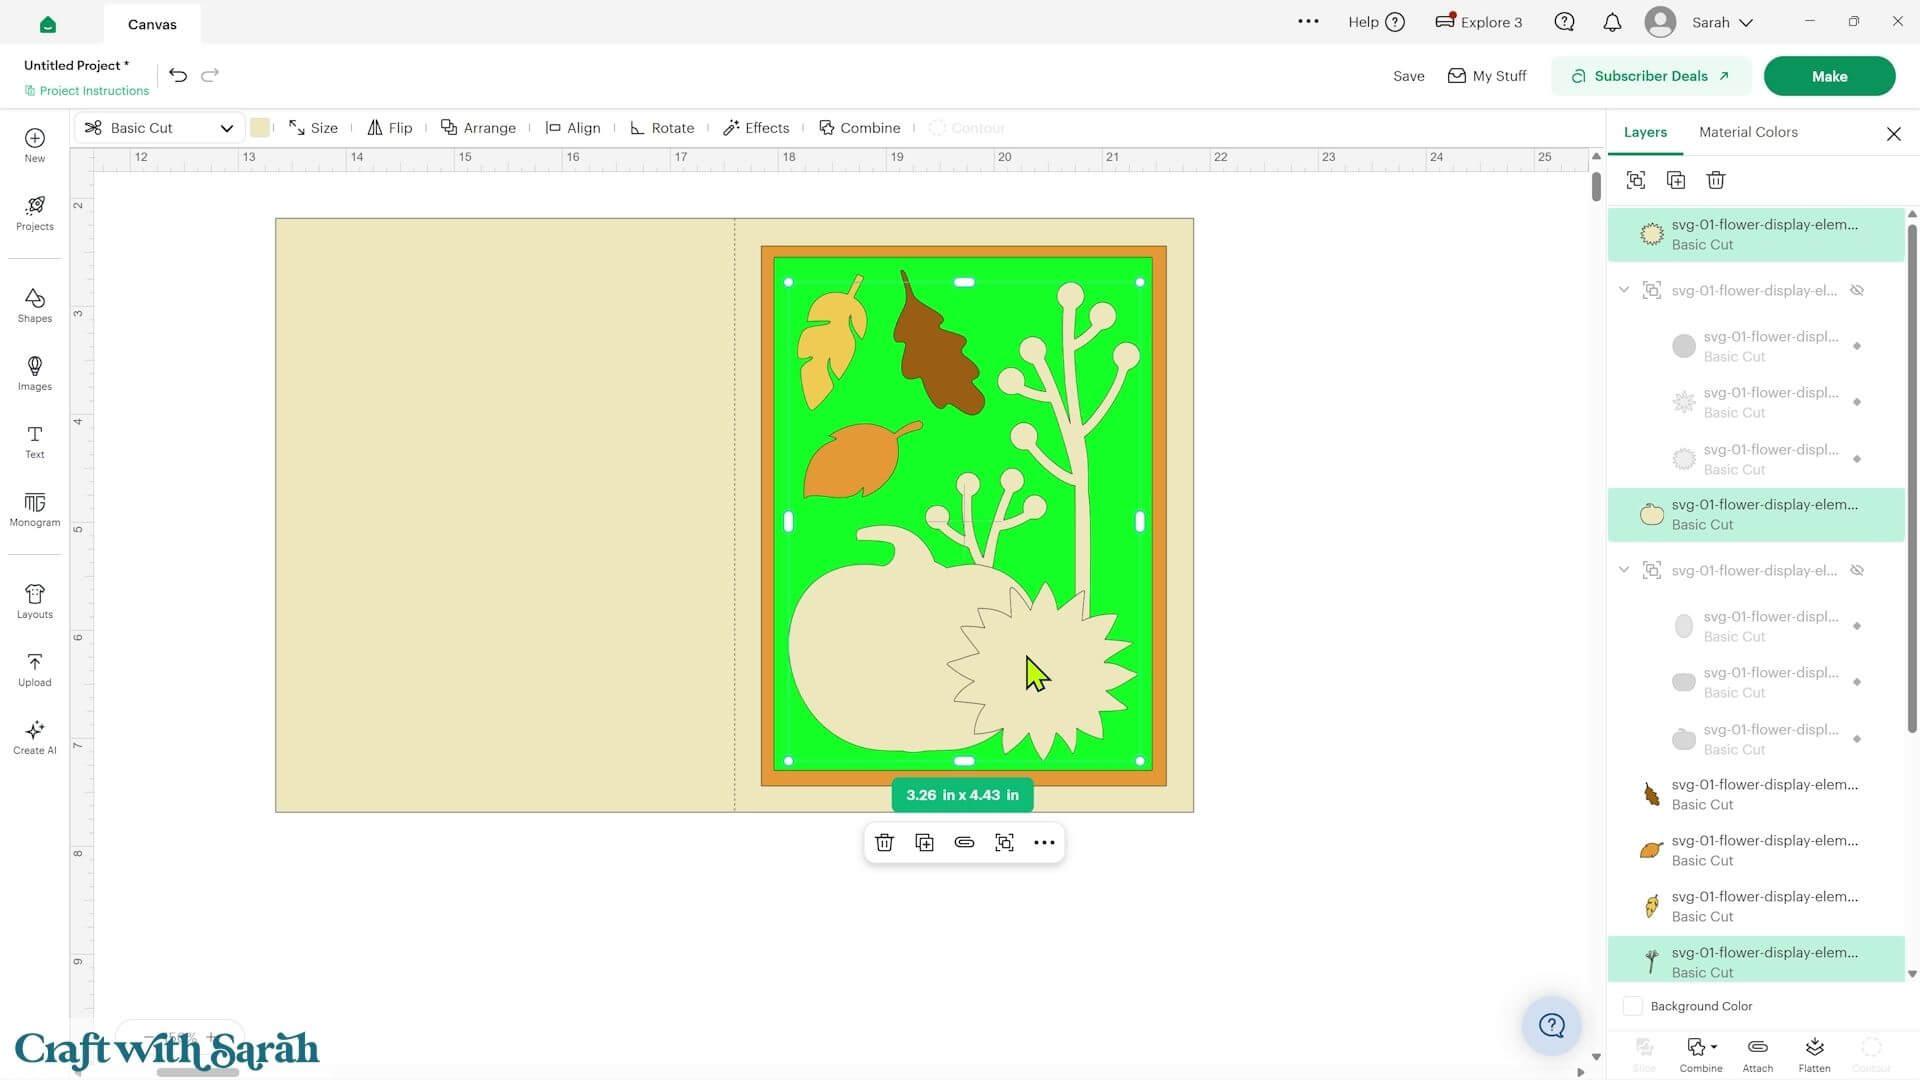
Weld joins those pieces together into one shape.
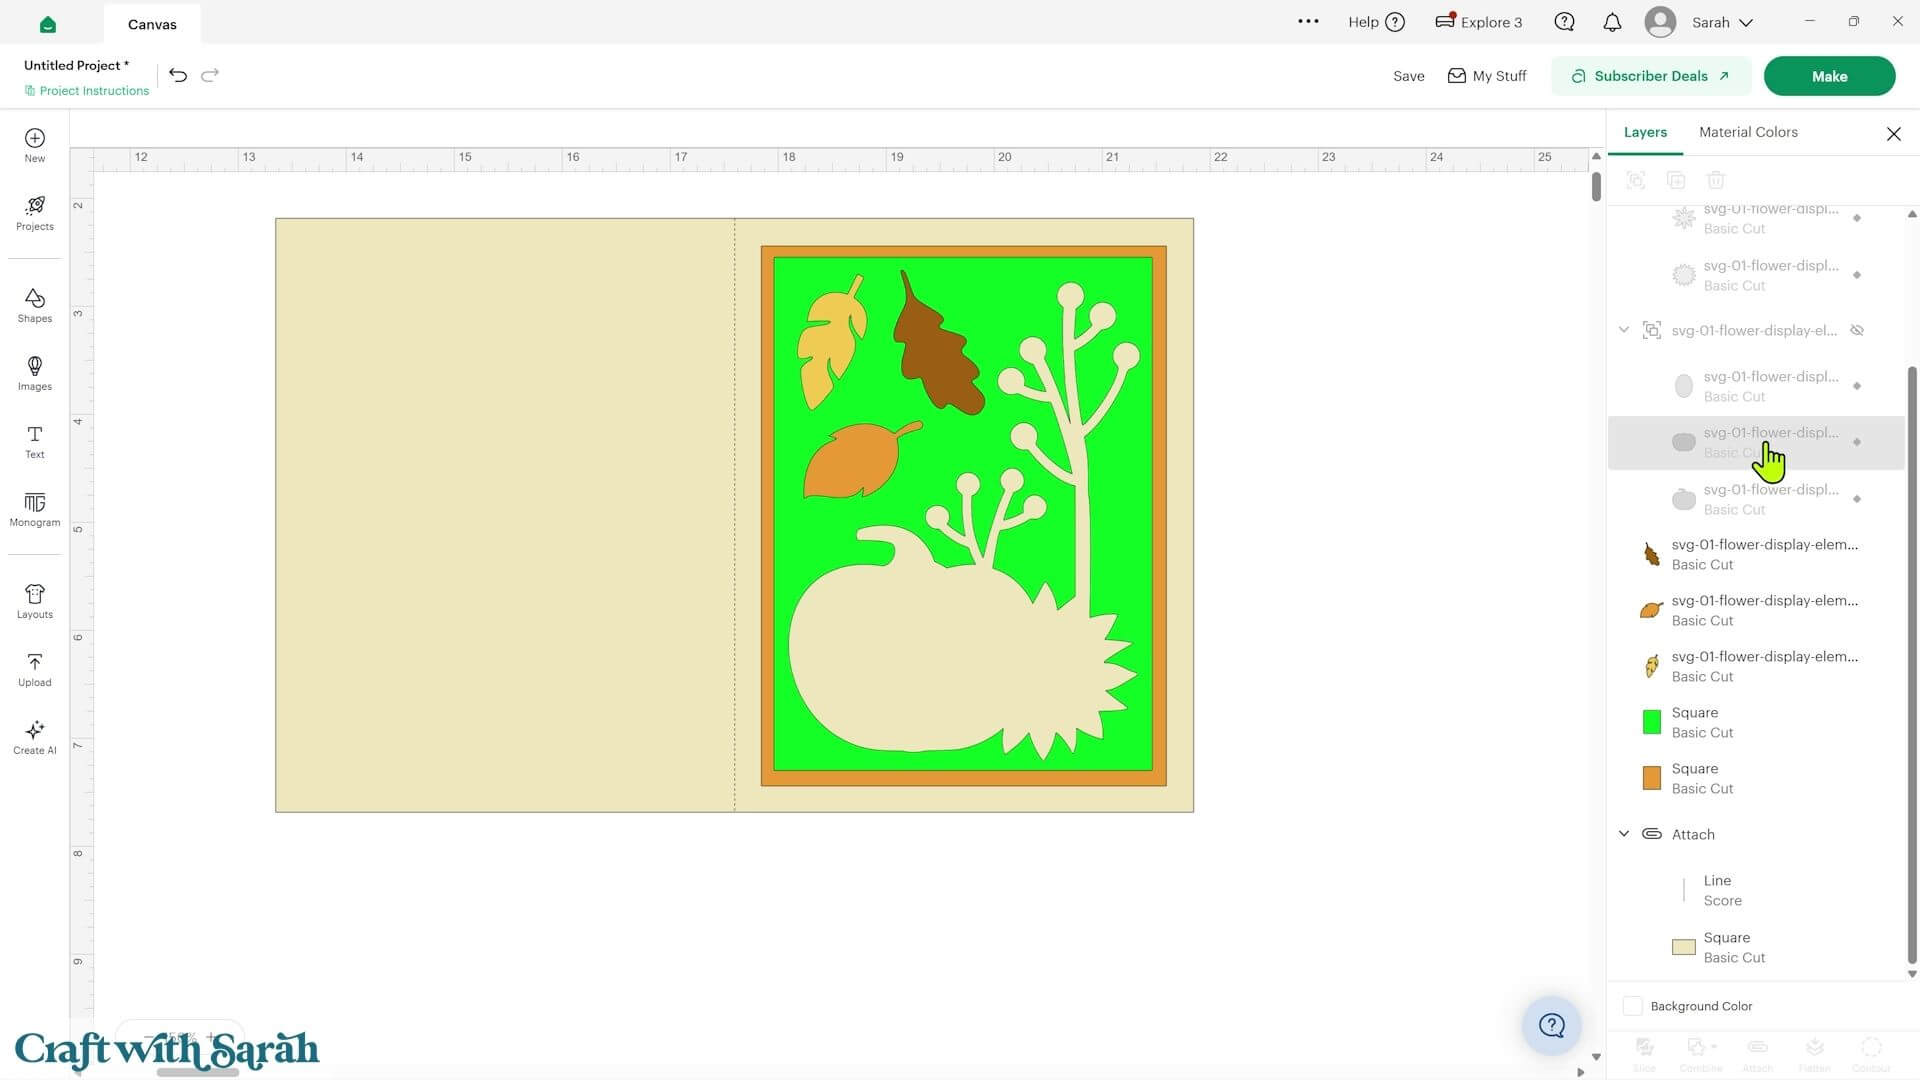
You can repeat this technique for the other colours in your design.
If welding shapes together creates a tiny cut line or gap that will be difficult for your Cricut to cut, try using Contour to remove them.
If that doesn’t work, add a small shape such as a circle over the problem area.
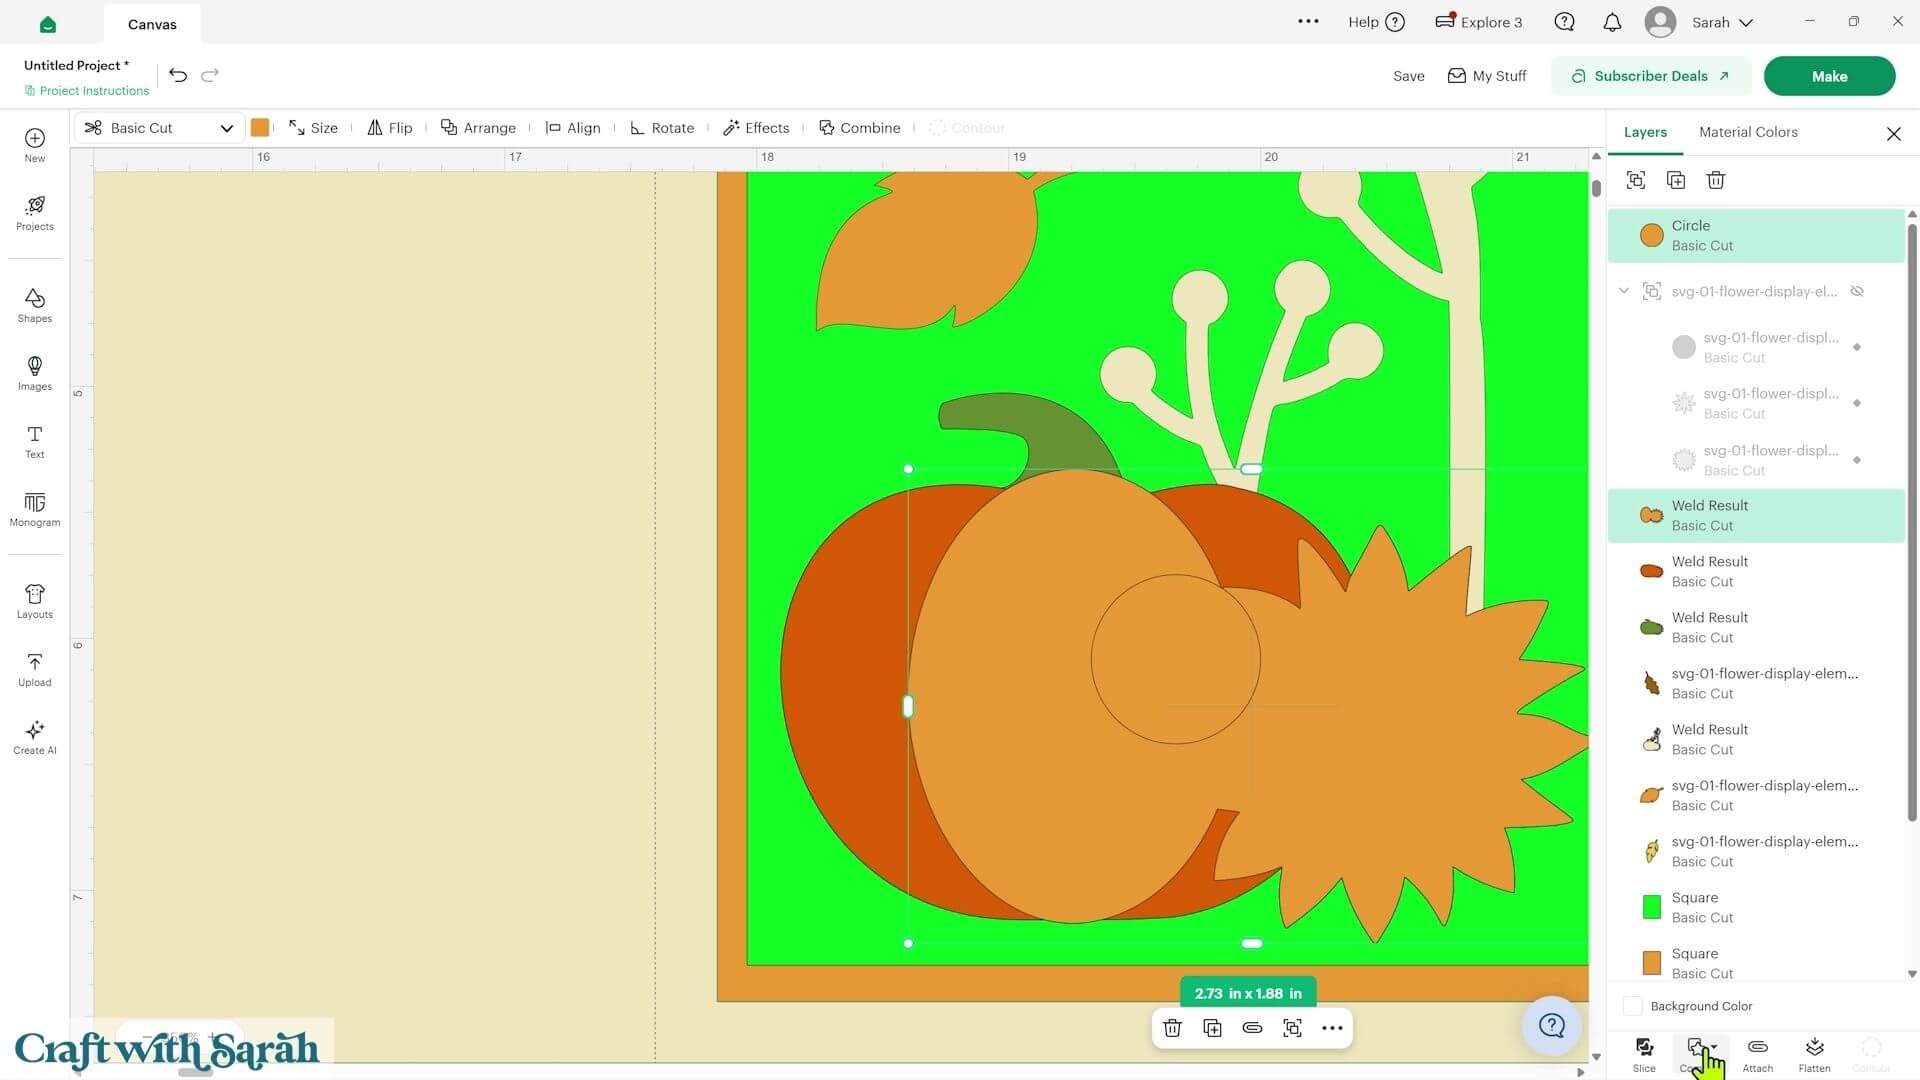
Select the circle and the layer underneath, then use ‘Combine’ and ‘Weld’ to fill in the gap.
Once you’re happy with the card, save the project and get everything cut out.
Step 4) Add a sentiment (optional)
For my second card, I created another A2 card with a large flower in the middle and left some space underneath for a birthday message.
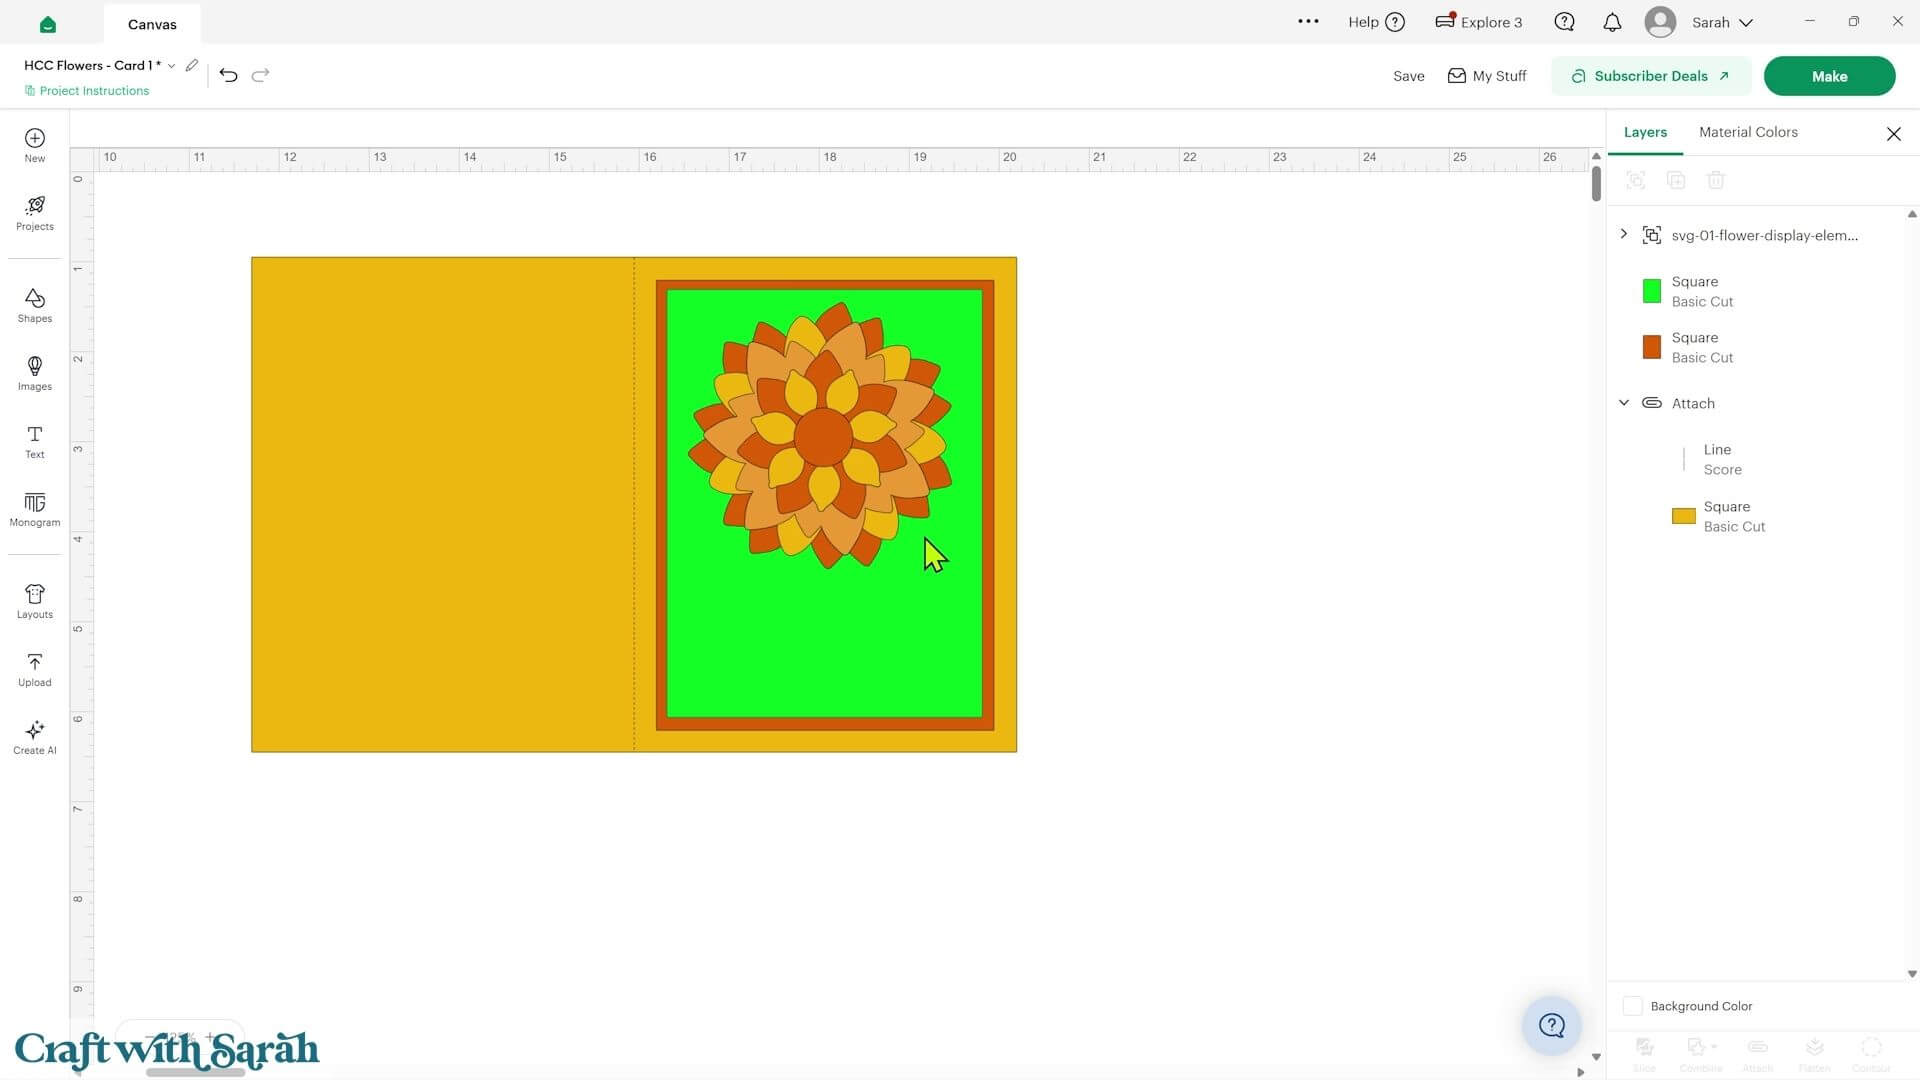
There are a couple of different ways to add wording.
Sentiment Option A) Use a Cricut Access image
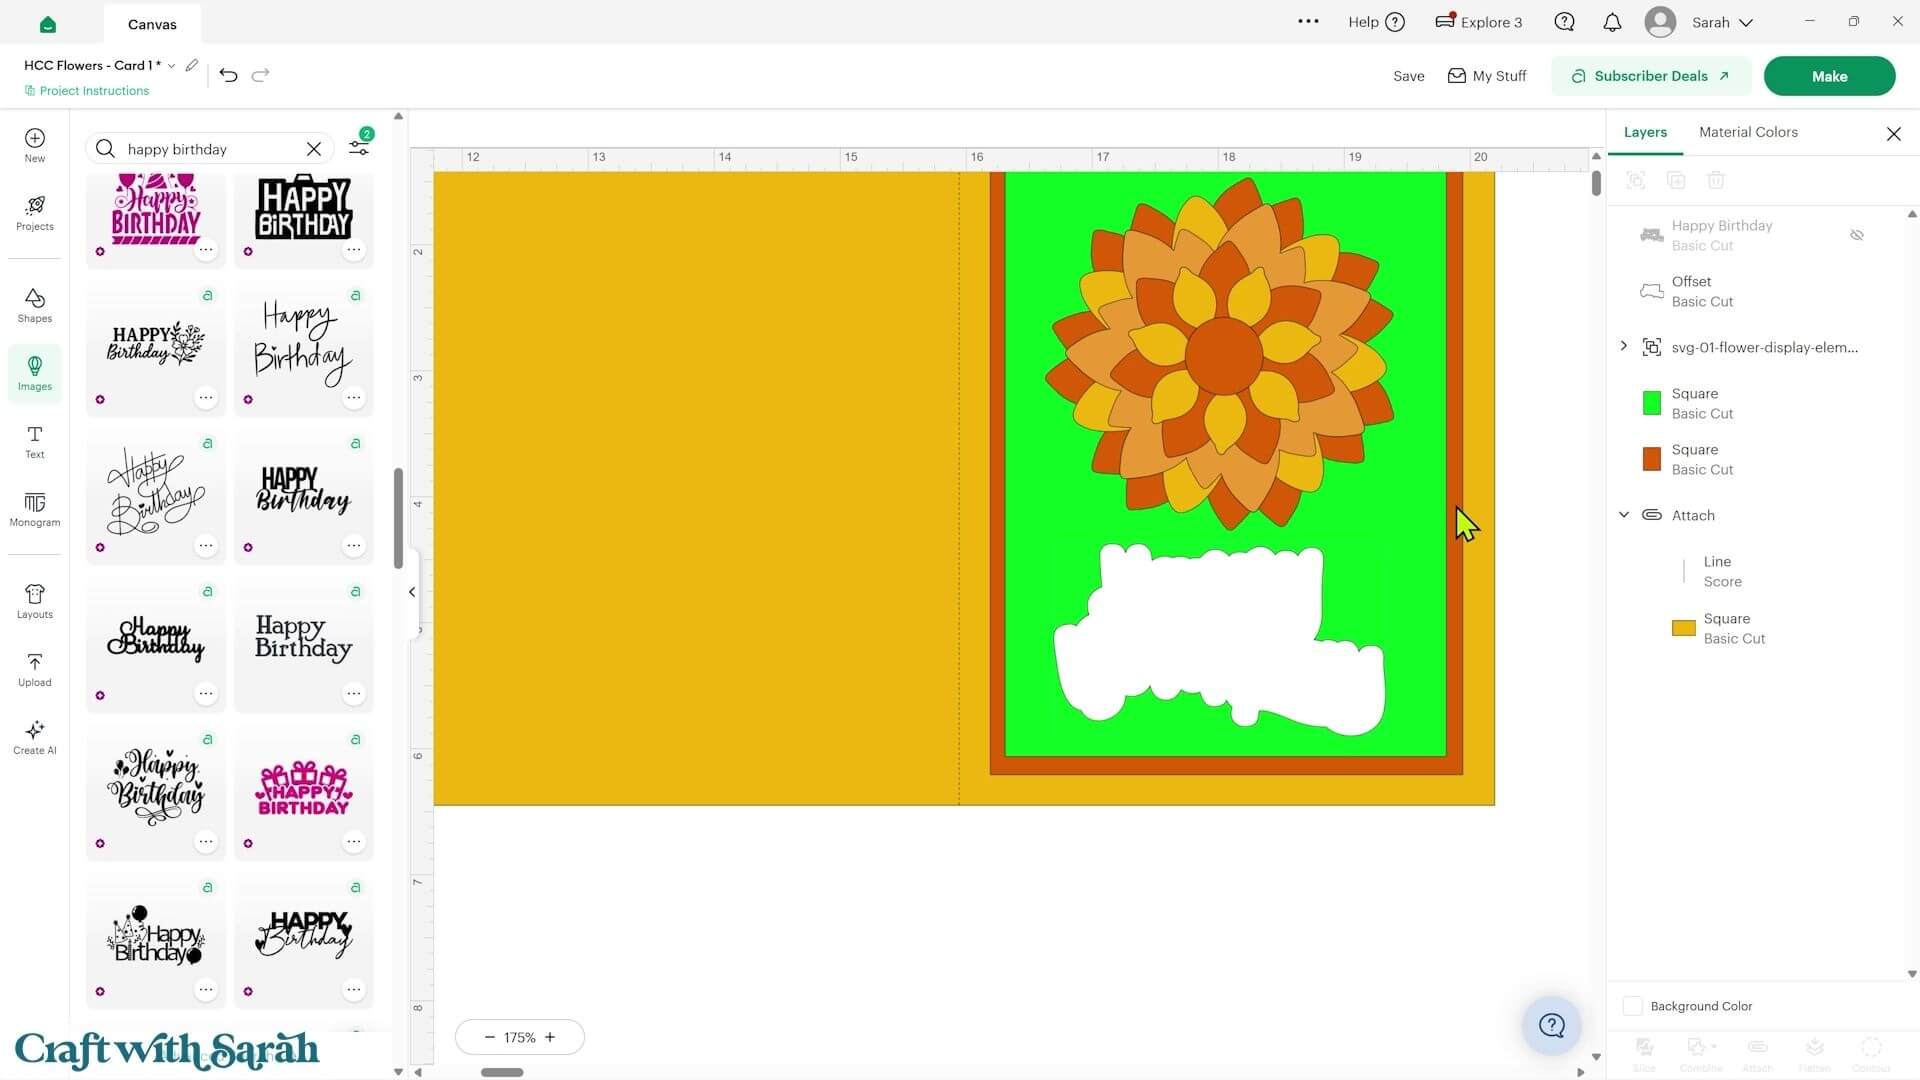
Go into ‘Images’ and search for the sentiment you want to use. For example, I searched for ‘Happy Birthday’.
You can use the filters to select ‘Cut Only’ and ‘Single Layer’ to narrow down the results.
If you’re cutting the sentiment from cardstock, look for a design where the letters are fairly thick and everything is joined together.
Avoid designs with lots of individual letters or extremely thin sections. They will be more difficult to cut and much more fiddly to glue onto the card.
Once you’ve found a suitable sentiment, resize it to fit your design.
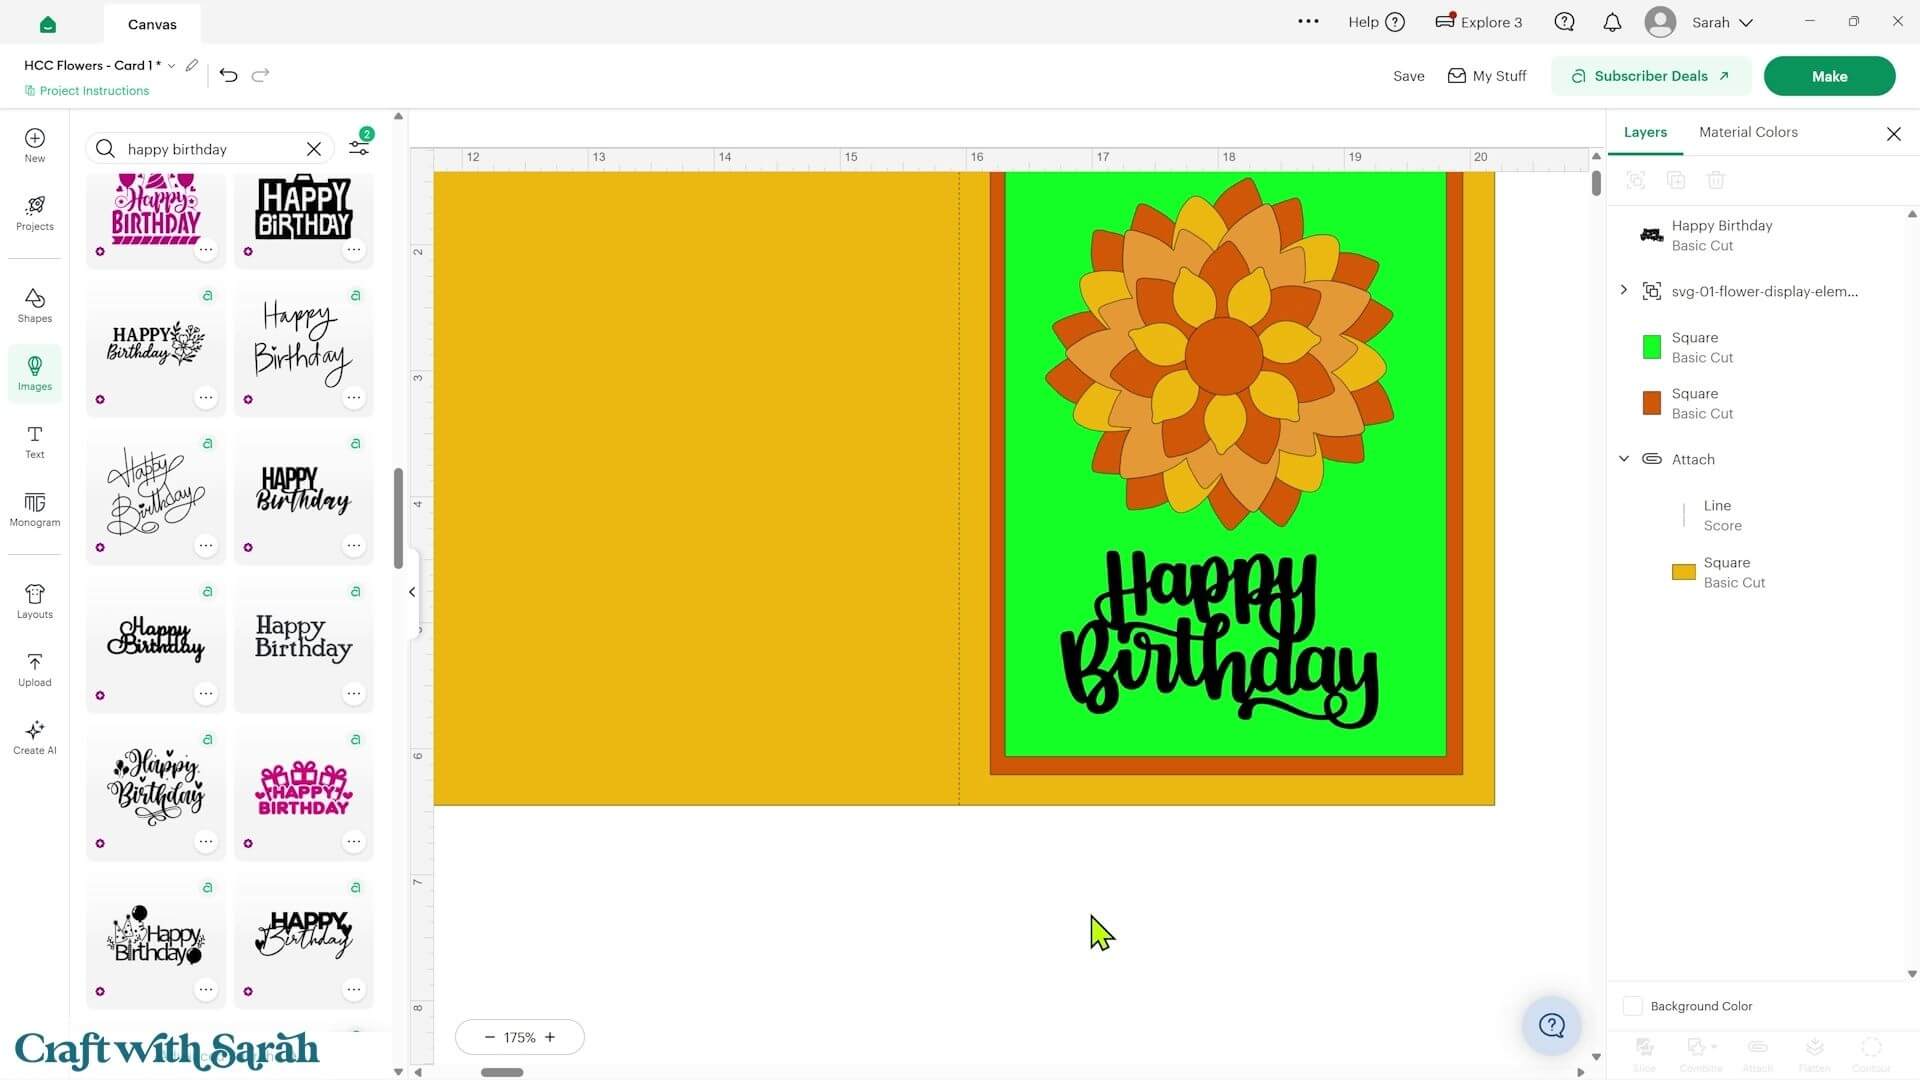
If the words might get lost against your patterned paper, you can add a contrasting border.
Select the sentiment, go into ‘Effects’ and choose ‘Offset’.
Adjust the slider until you’re happy with the thickness of the offset, then press ‘Apply’.
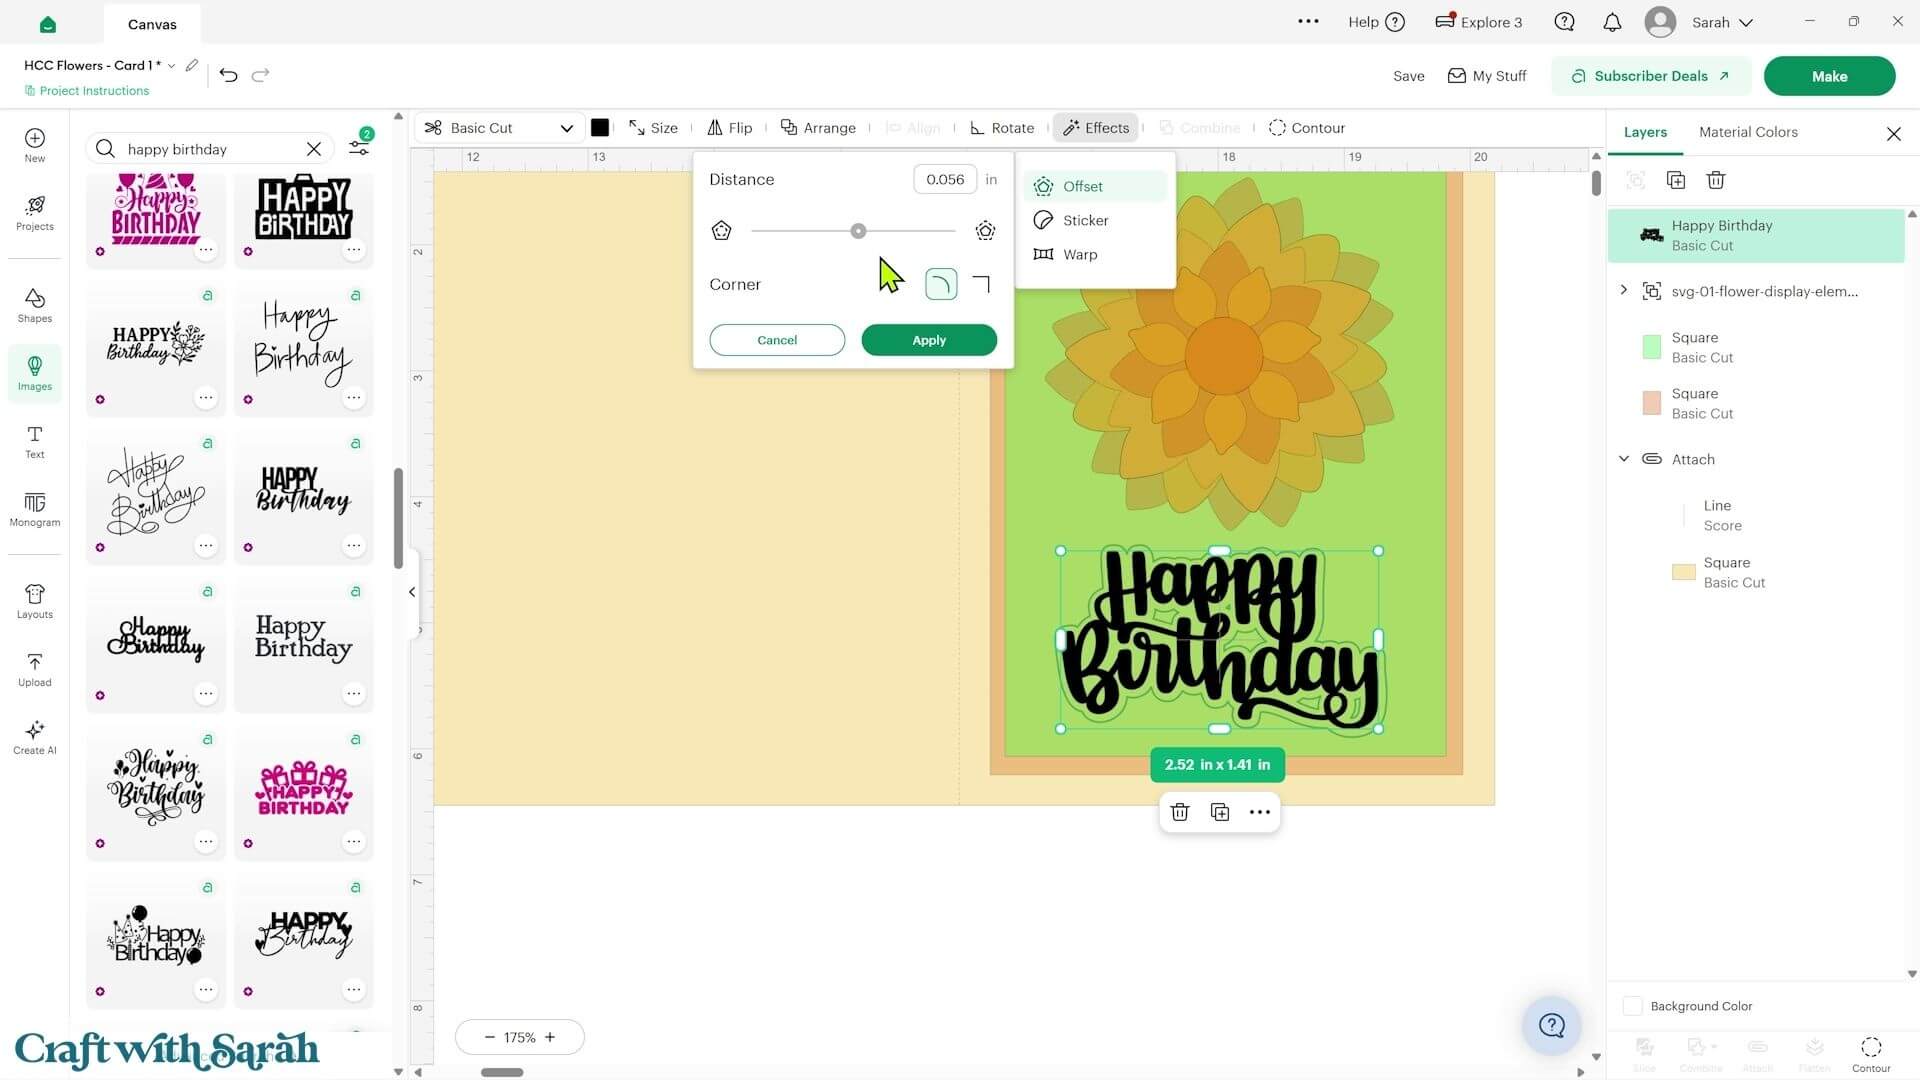
I made my offset white to help the wording stand out.
If the offset contains lots of tiny gaps, select the offset layer and press ‘Contour’. Choose ‘Hide All Contours’ and press ‘Apply’.
This turns the offset into one solid shape, which is much easier to cut.
Sentiment Option B) Type your own sentiment
Alternatively, you can type the wording yourself.
This is useful if you don’t have a Cricut Access subscription, can’t find a suitable pre-designed image or want to add a custom message.
Go into ‘Text’ and type your wording.
For cardstock, choose a font that is fairly thick and where the letters connect together.
For my example, I used “BFC Allie Bee Connected”.
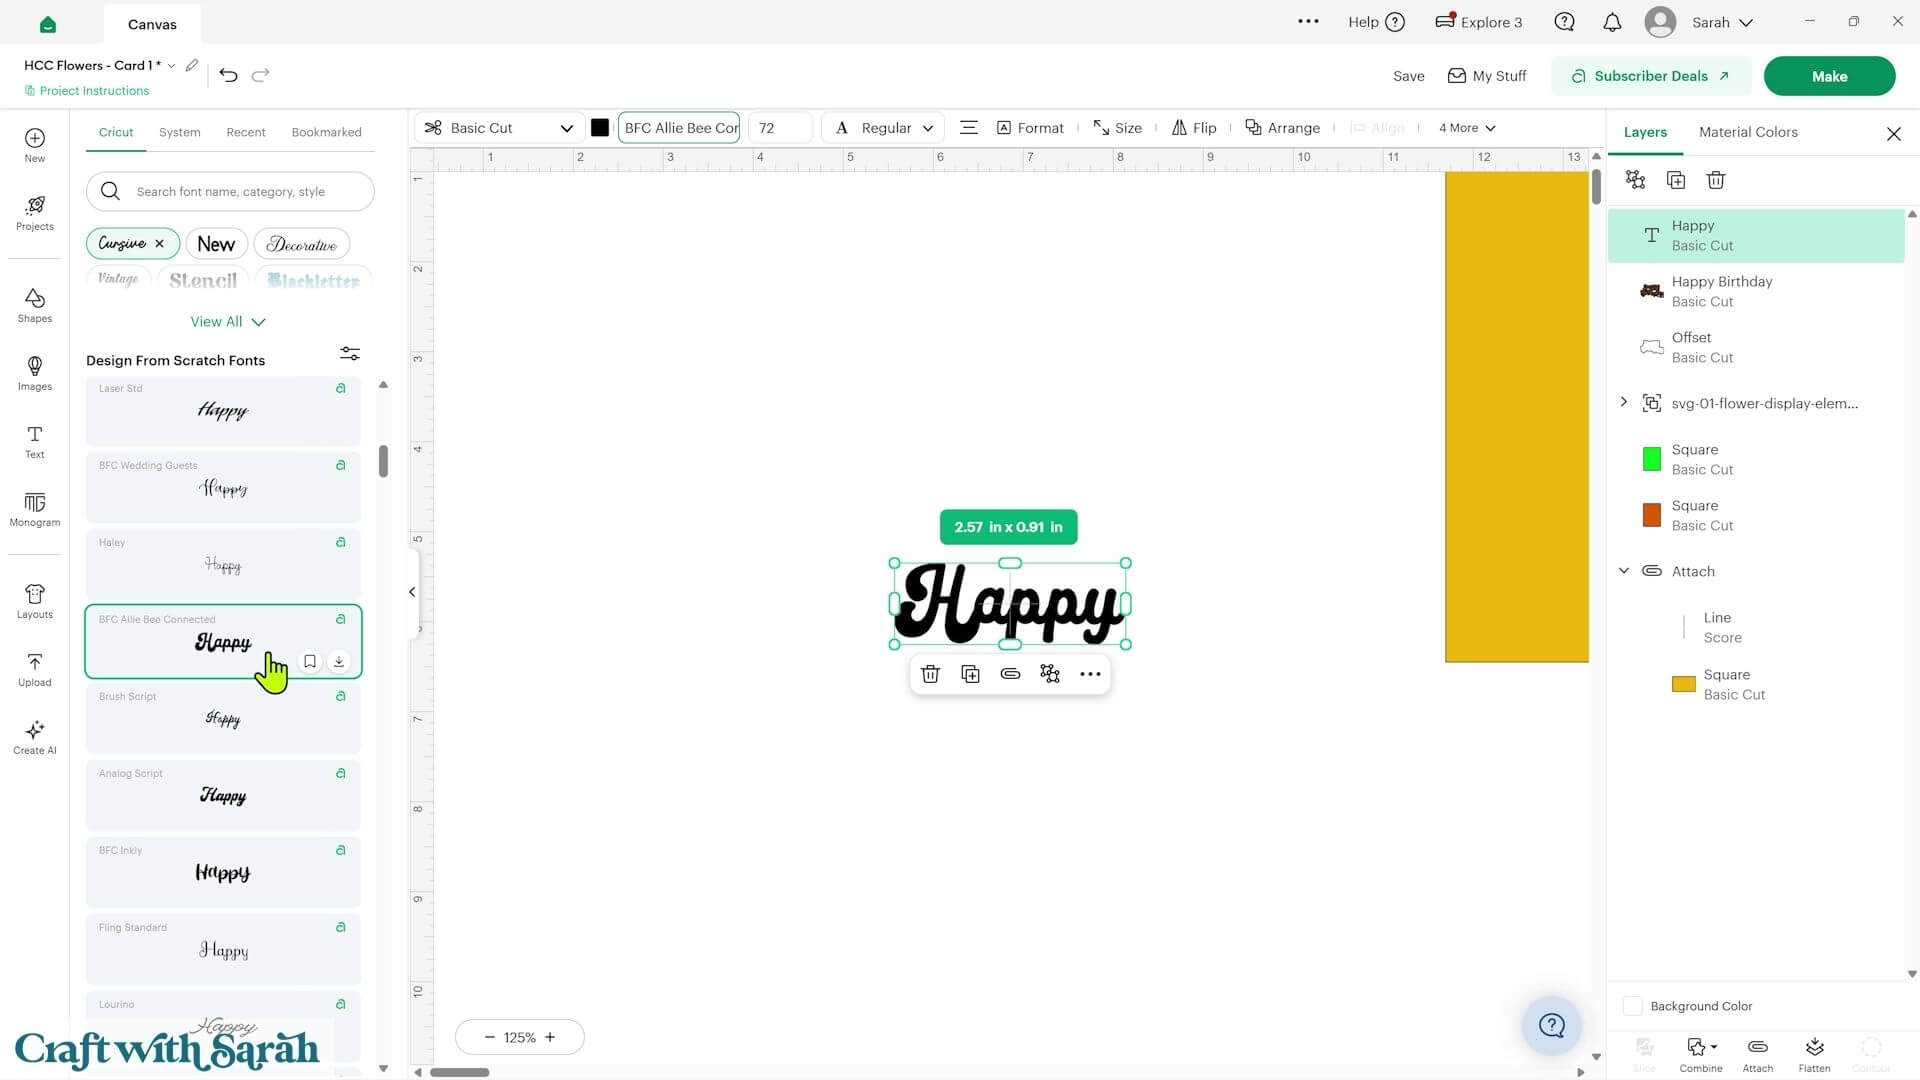
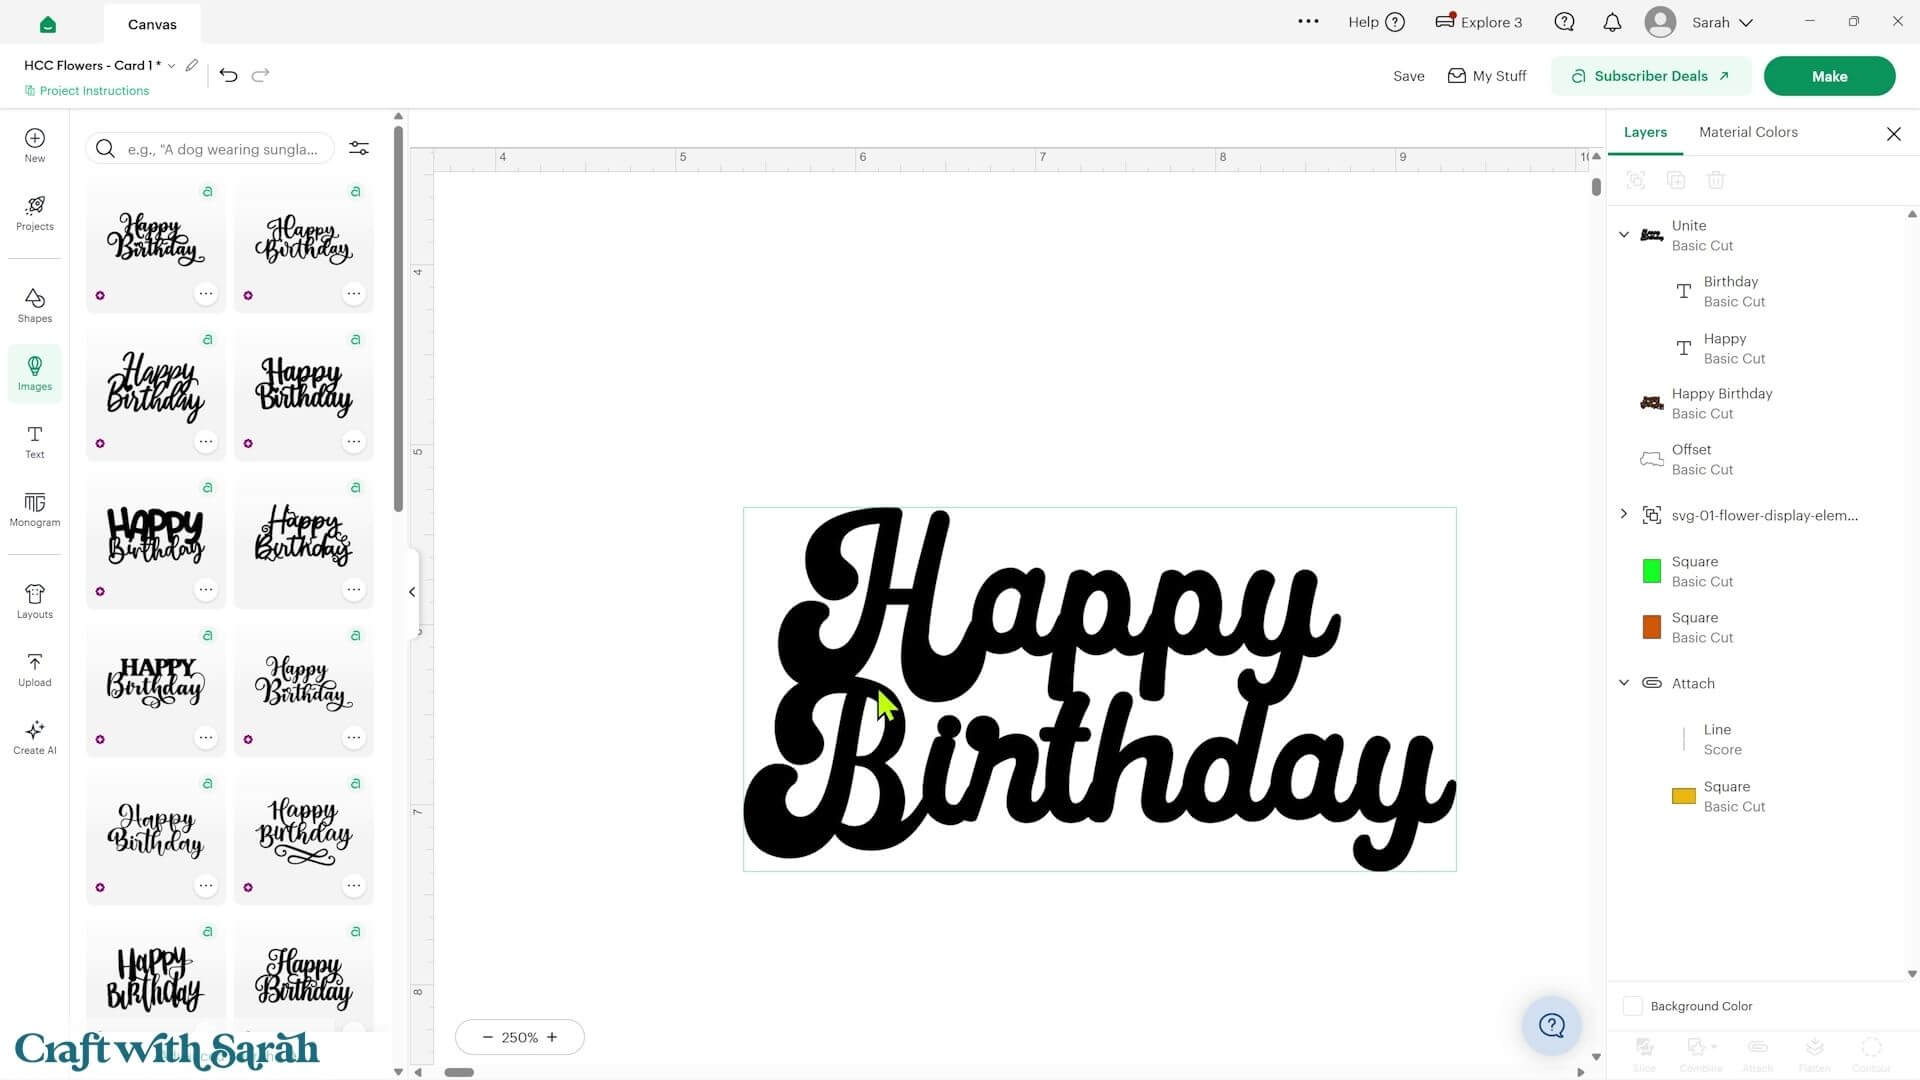
I created ‘Happy’ and ‘Birthday’ separately so that I could position them exactly how I wanted.
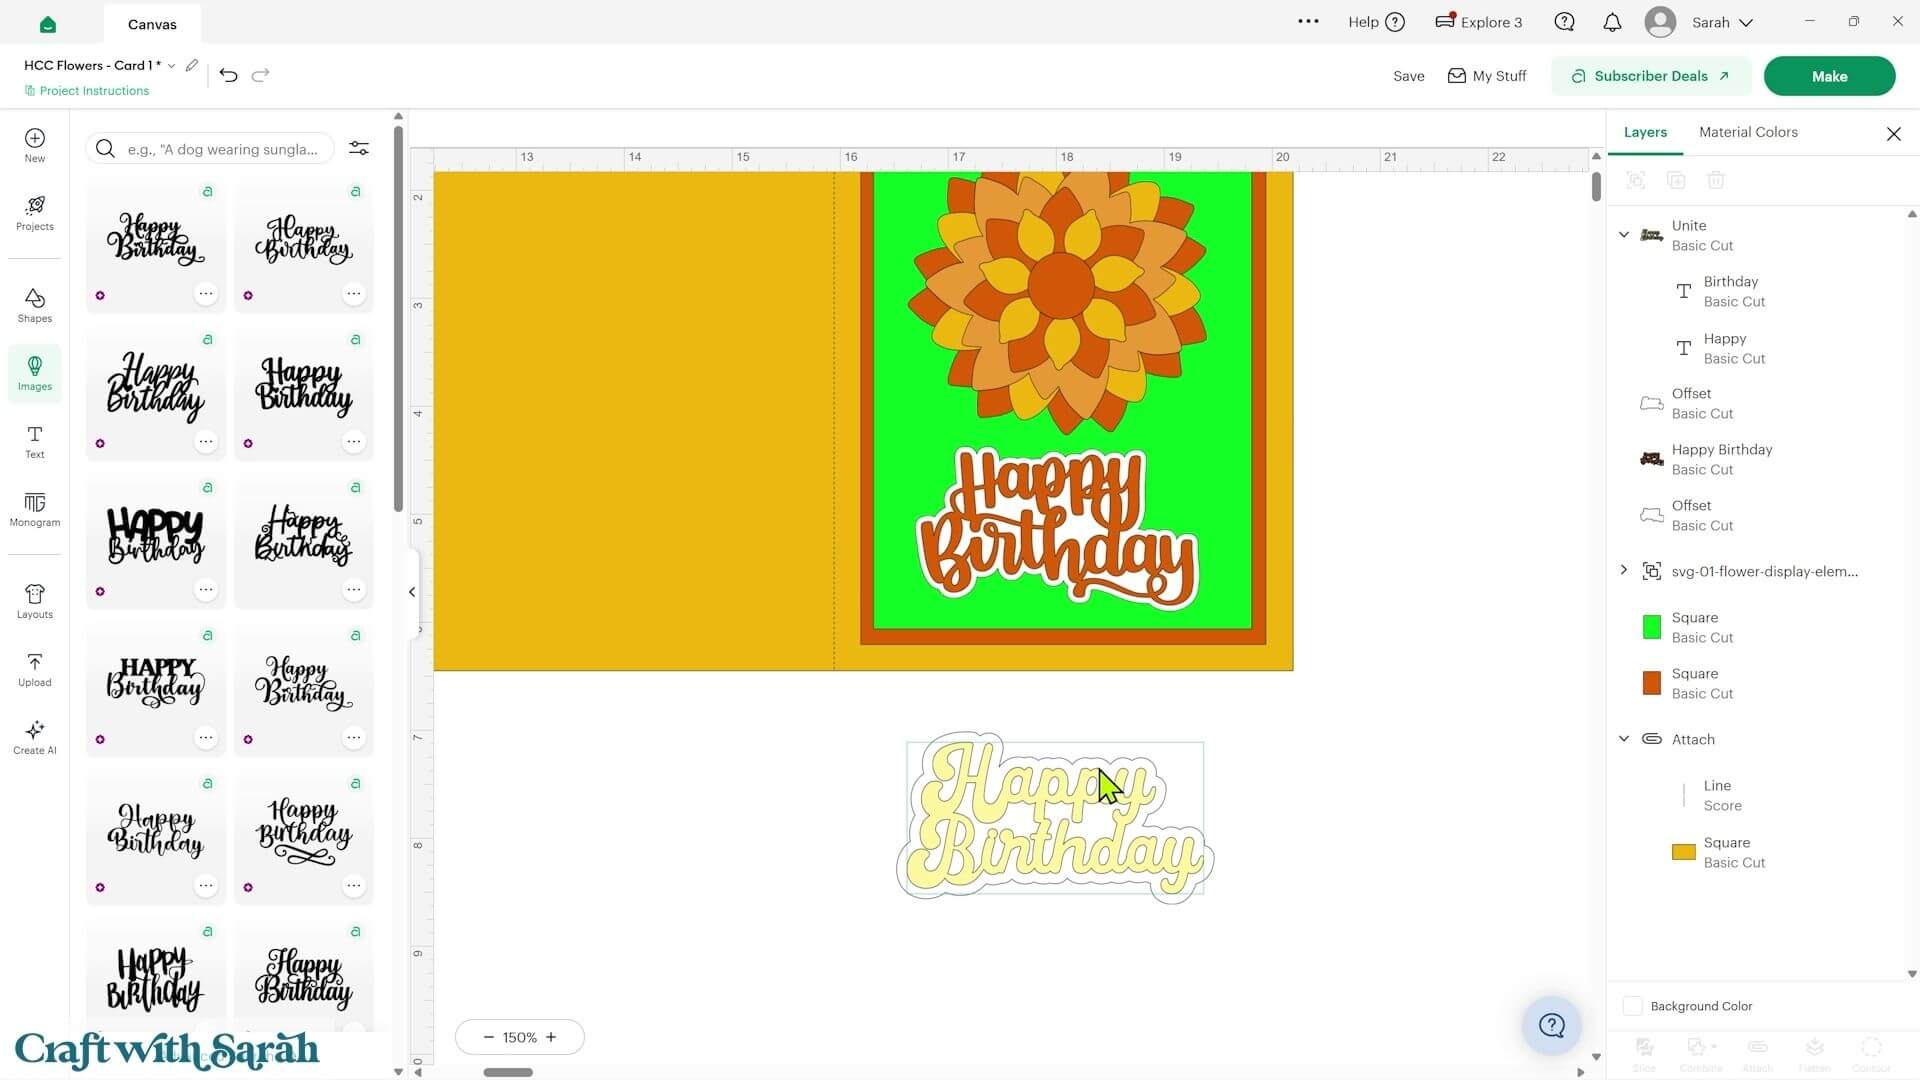
Move the two words until they touch, then select them both and go into ‘Combine’ and ‘Unite’.
I like using Unite rather than Weld at this stage because you can still open the combined layer and reposition the individual words if you change your mind.
You can then add an Offset and remove the internal details with Contour in exactly the same way as the first version.
Step 5) Cut the cards out
Save your project, connect to your Cricut machine and get all of the pieces cut out.
Step 6) Assemble the greetings cards
I assembled my cards using a combination of glue and foam squares.
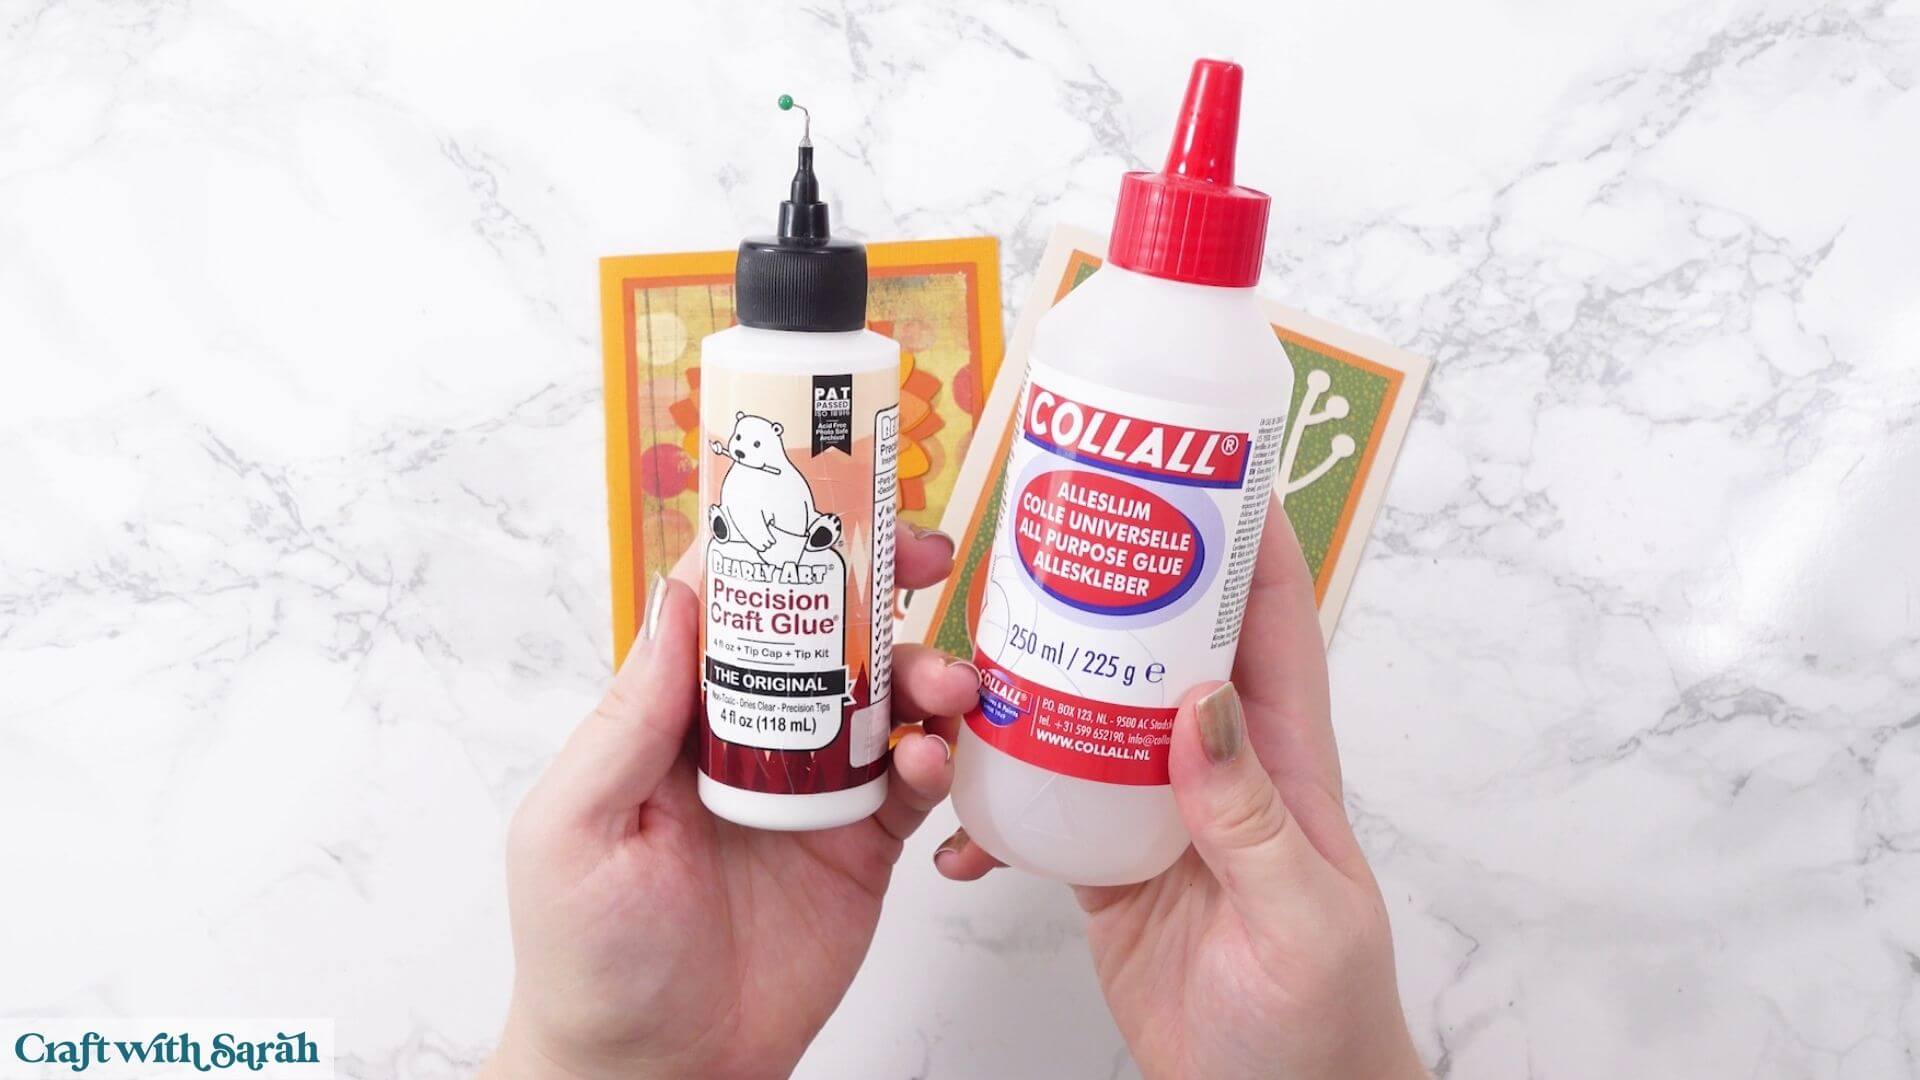
The glue I use is Bearly Art Glue, but I also like Collall because neither of these glues bend or wrinkle the cardstock like some other glues can.
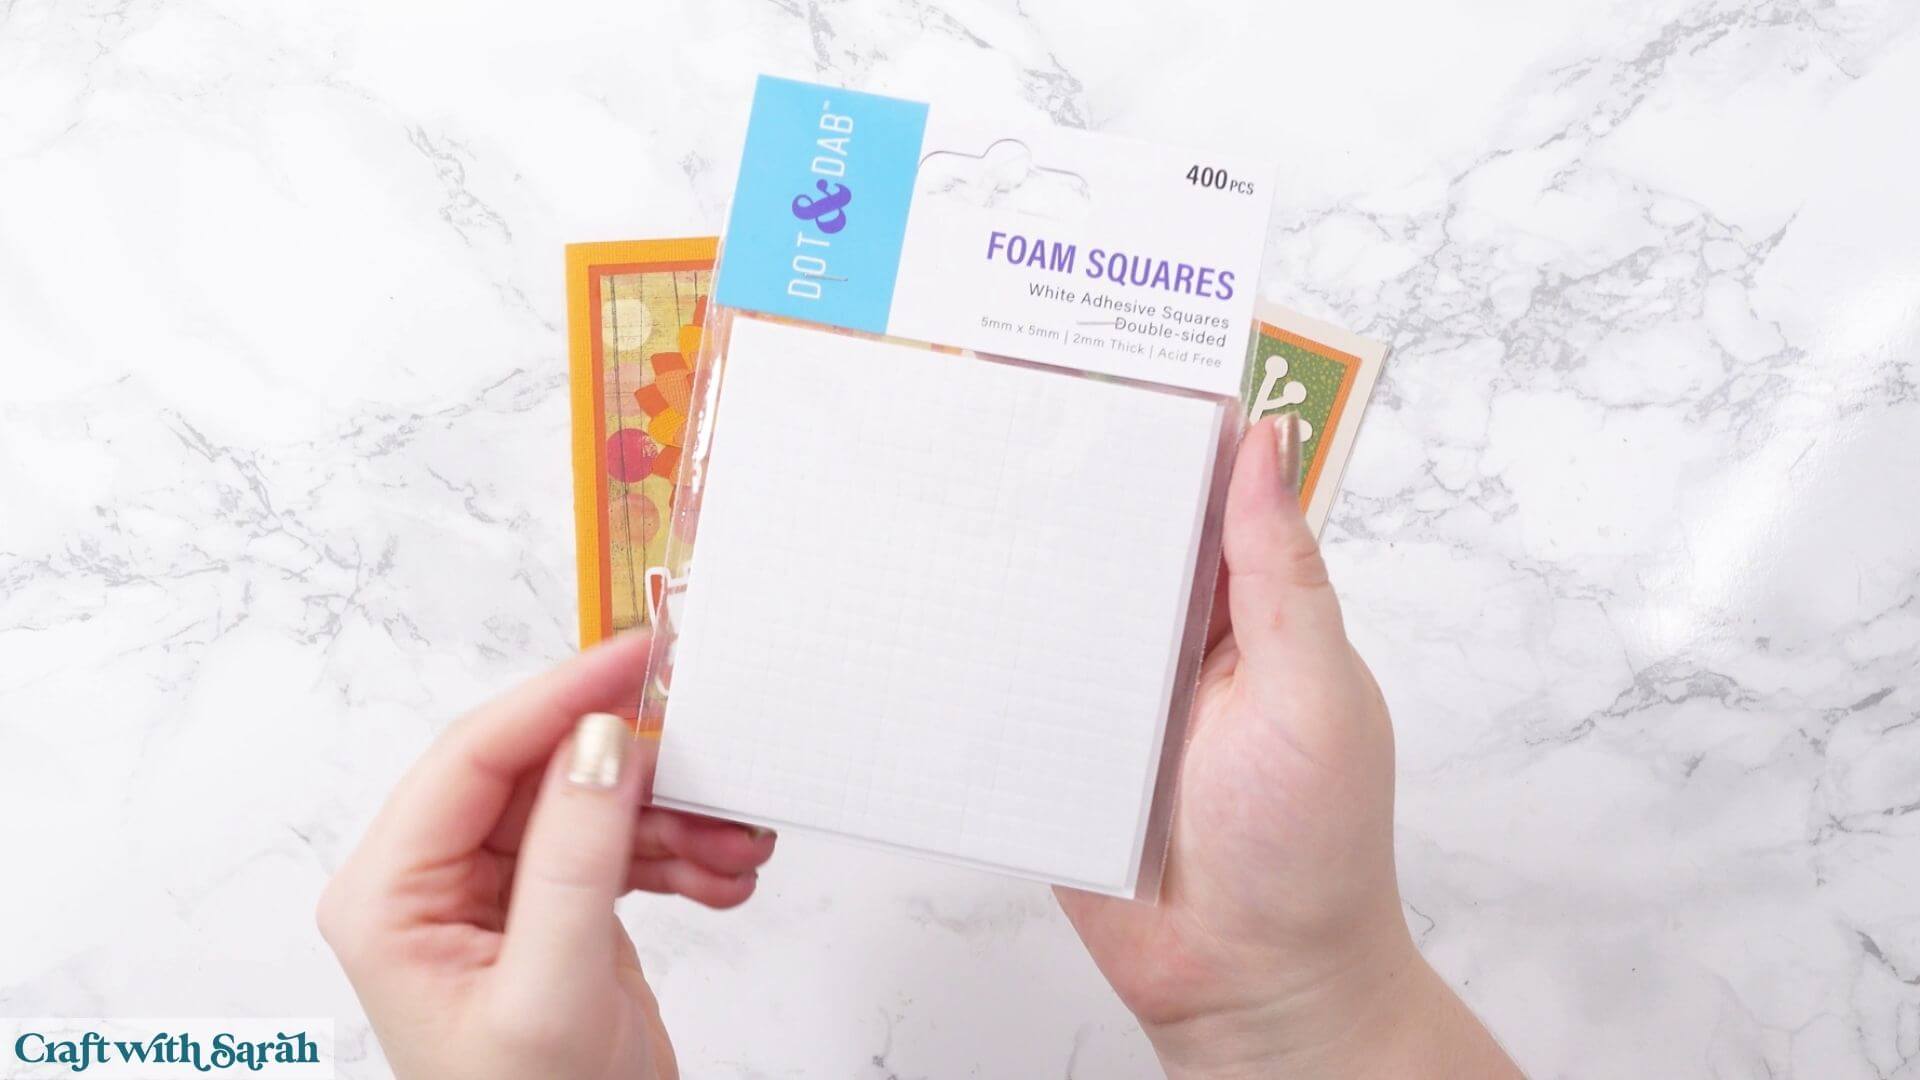
My foam squares are from Dot & Dab and measure 5 x 5 mm and 2 mm thick. If your foam squares are too large for some of the pieces, cut them smaller with scissors.
You don’t need to use foam squares between every single layer.
Keeping some of the layers glued flat means you can still create dimension without making the finished card unnecessarily thick, which is particularly useful if you’re going to post it.
Fold the base card in half along the score line.
Glue the background layer and patterned paper onto the front.
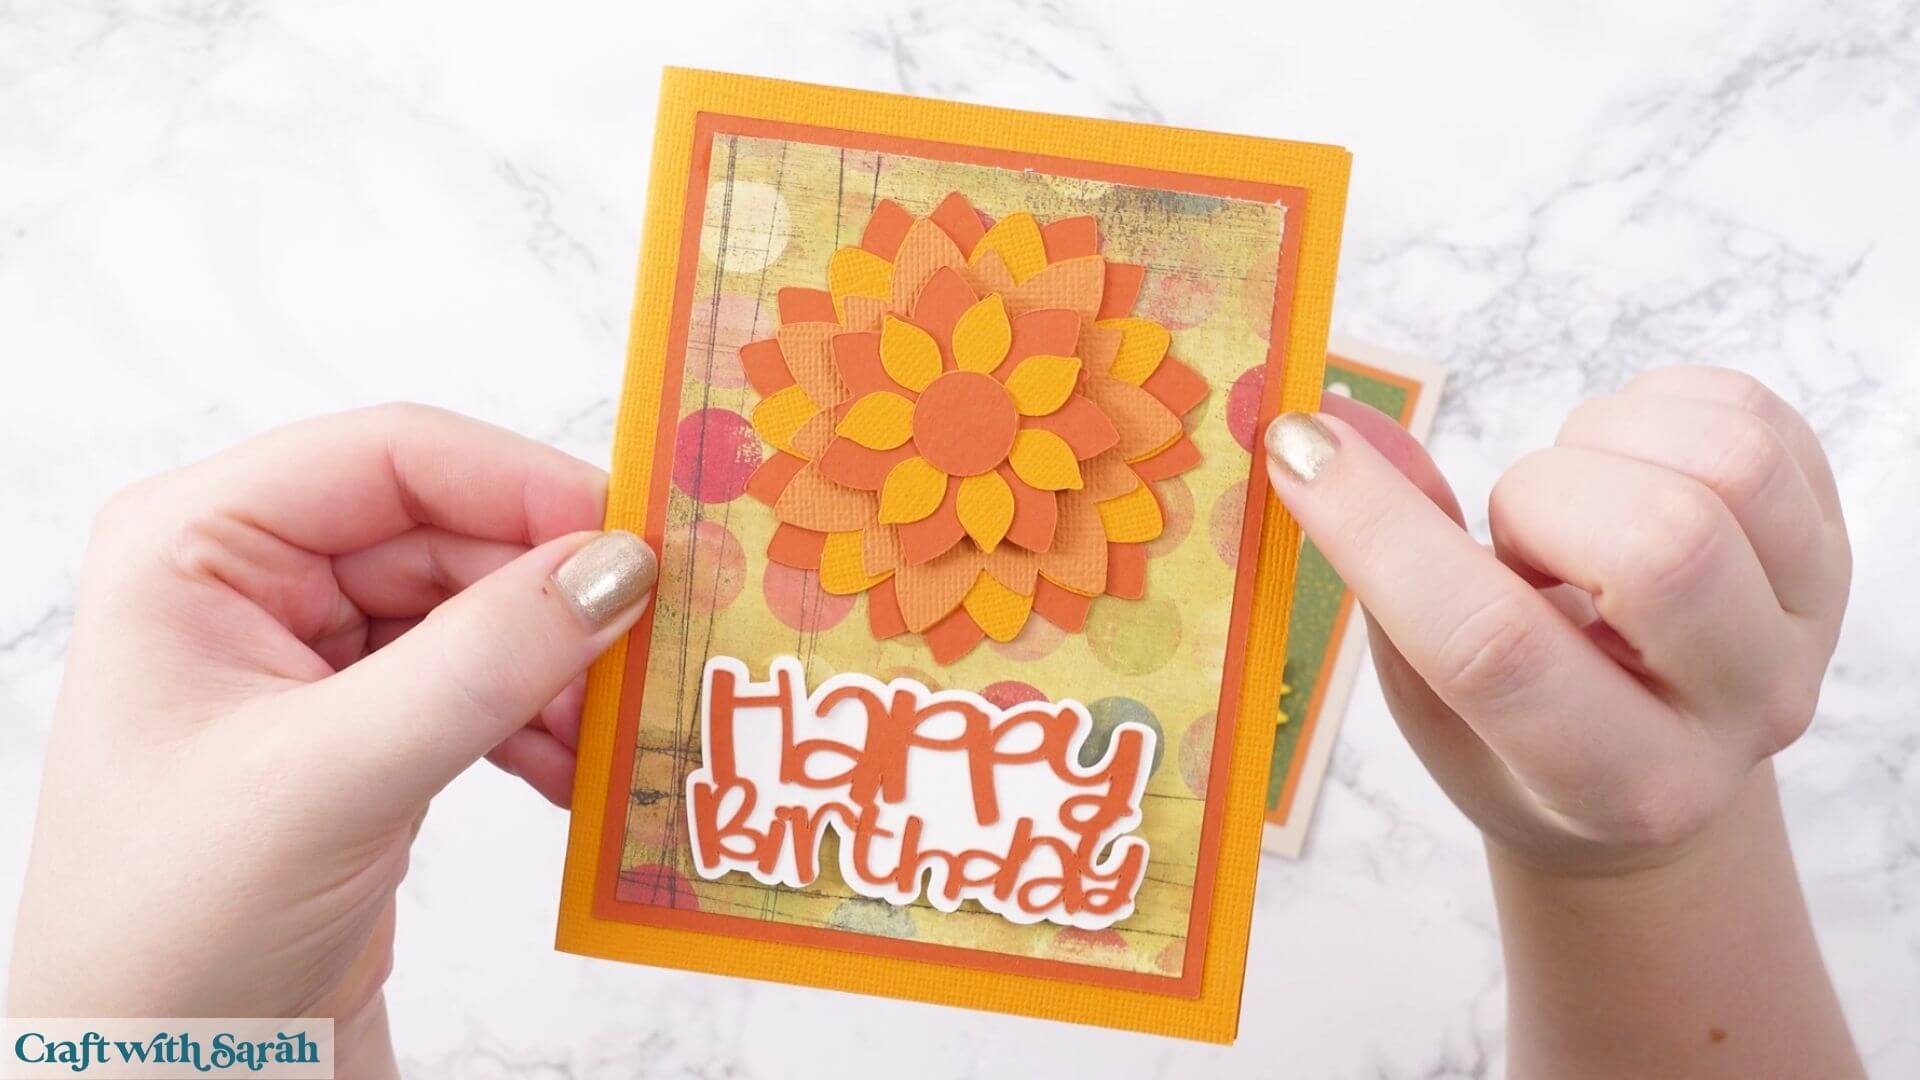
For my birthday card, I glued the first three layers of the flower, added foam squares underneath the next orange layer and then glued the remaining layers.
I glued the orange ‘Happy Birthday’ onto its white backer and added foam squares underneath the white layer.
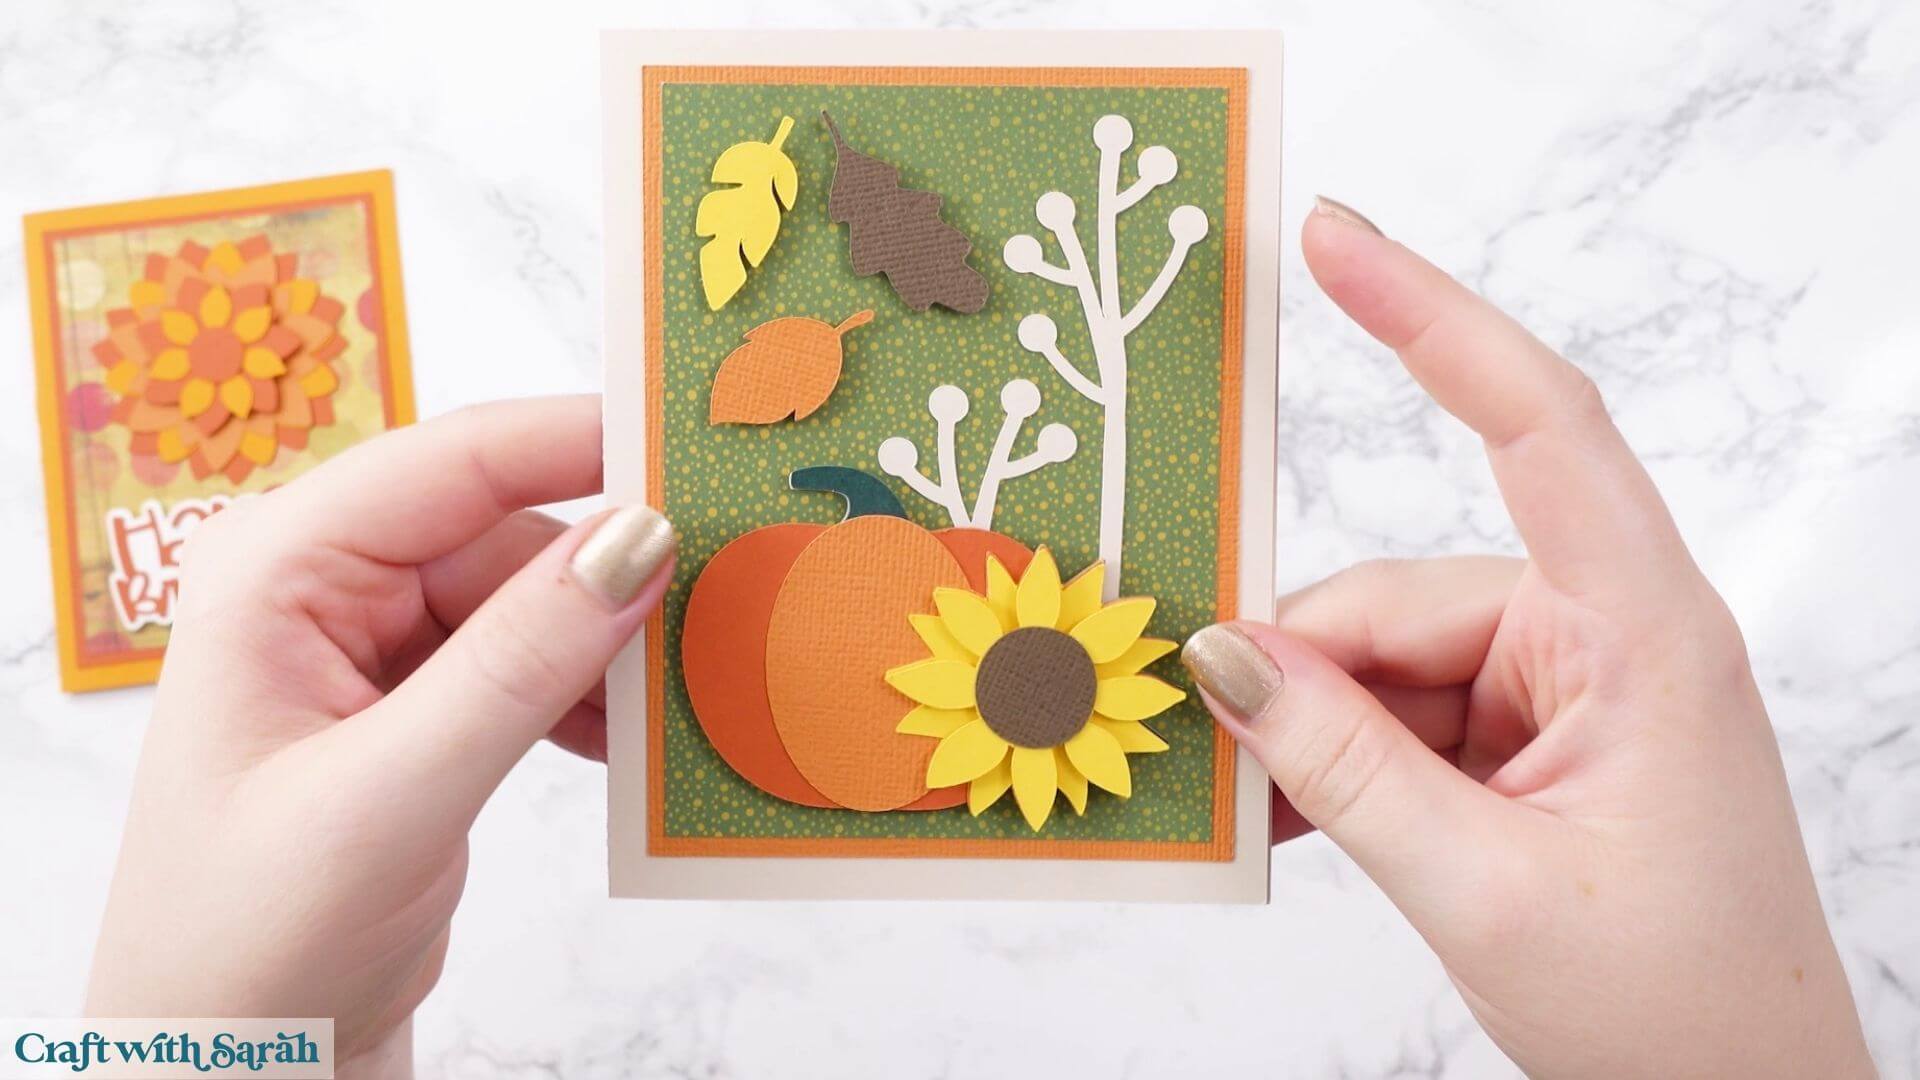
For my pumpkin card, I glued the bottom layer of the pumpkin design, added foam squares underneath the green pumpkin stalk and then glued the orange layers on top.
The bottom sunflower layer was glued down, with foam squares underneath the next layer of petals and the centre glued on top.
I also used one layer of foam squares underneath each of the loose leaves.
This gives the cards some lovely dimension while keeping them thin enough to post.
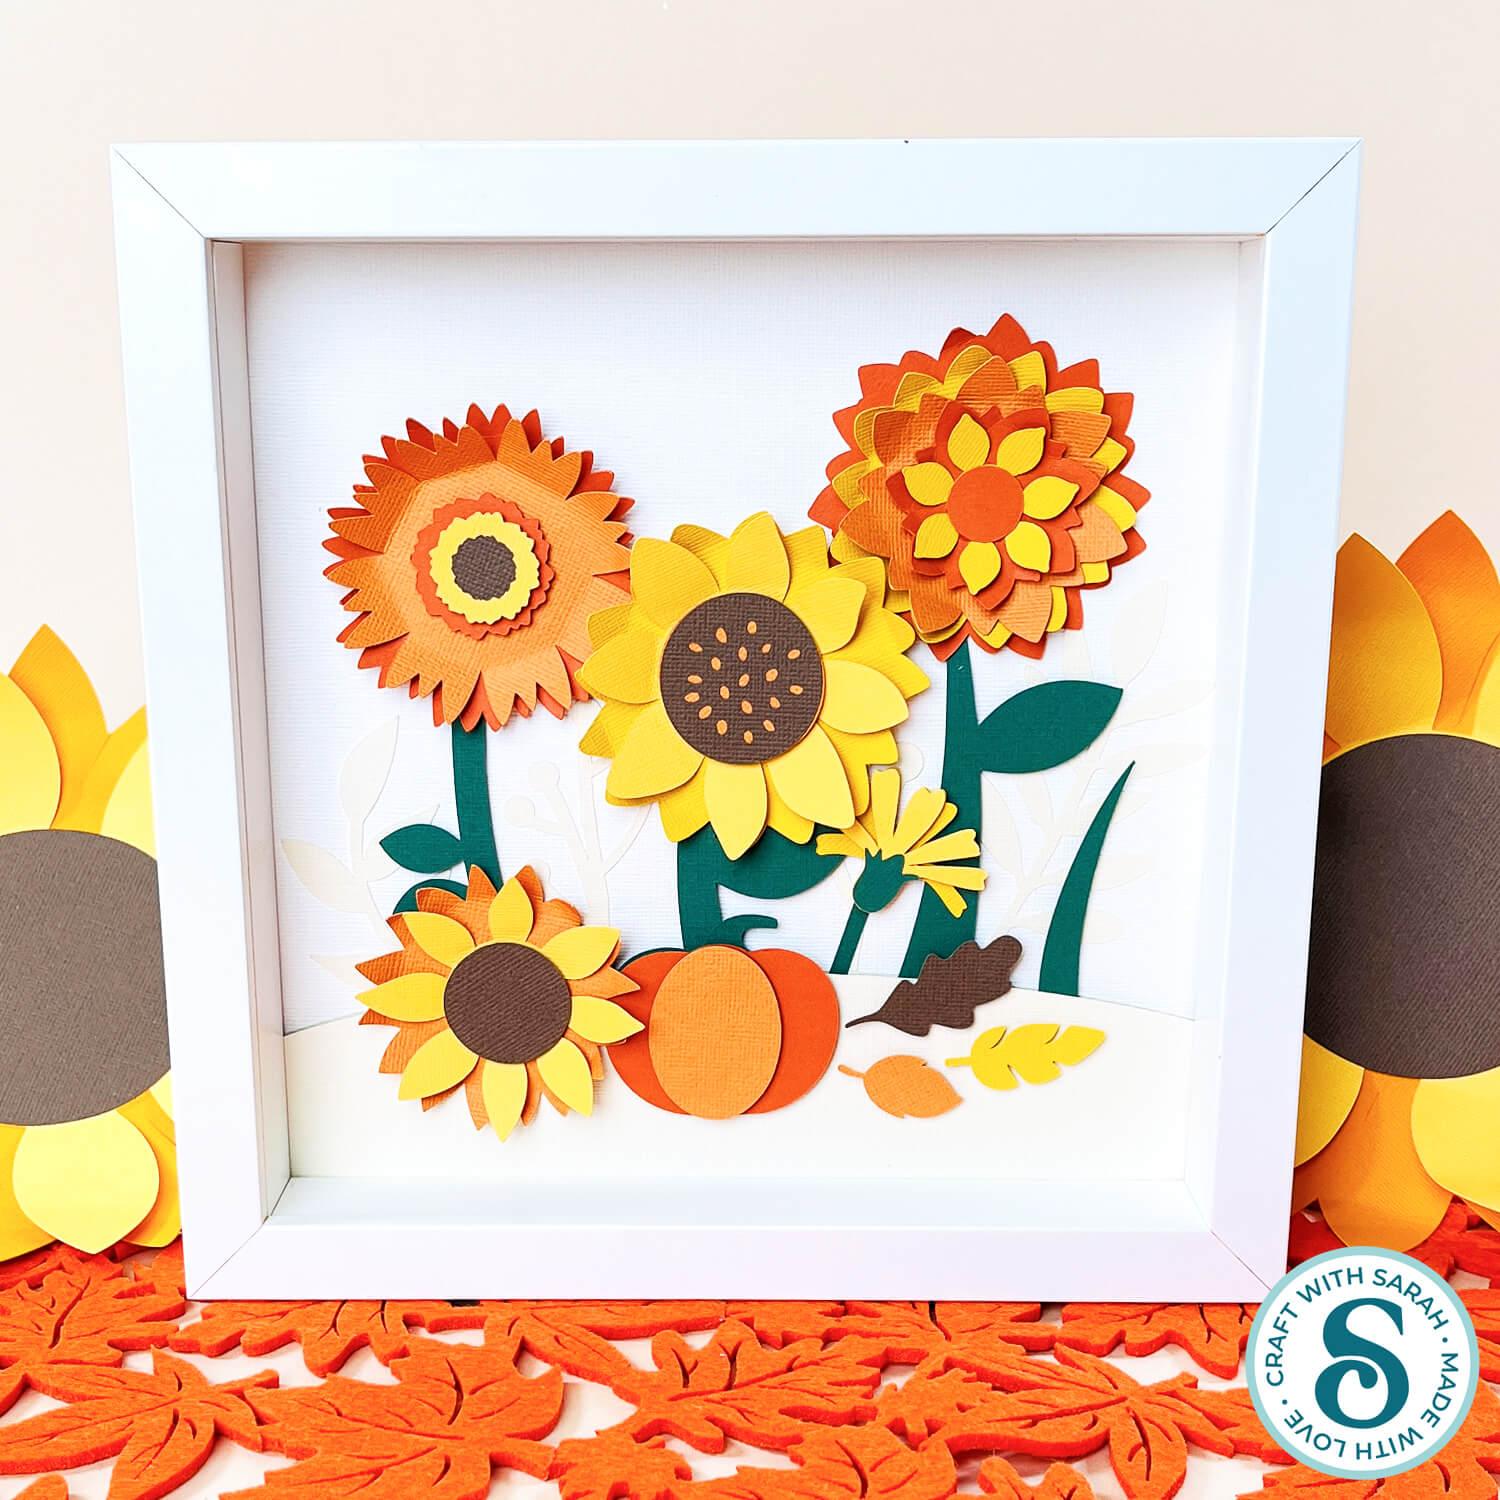
Project 2) Autumn shadow box
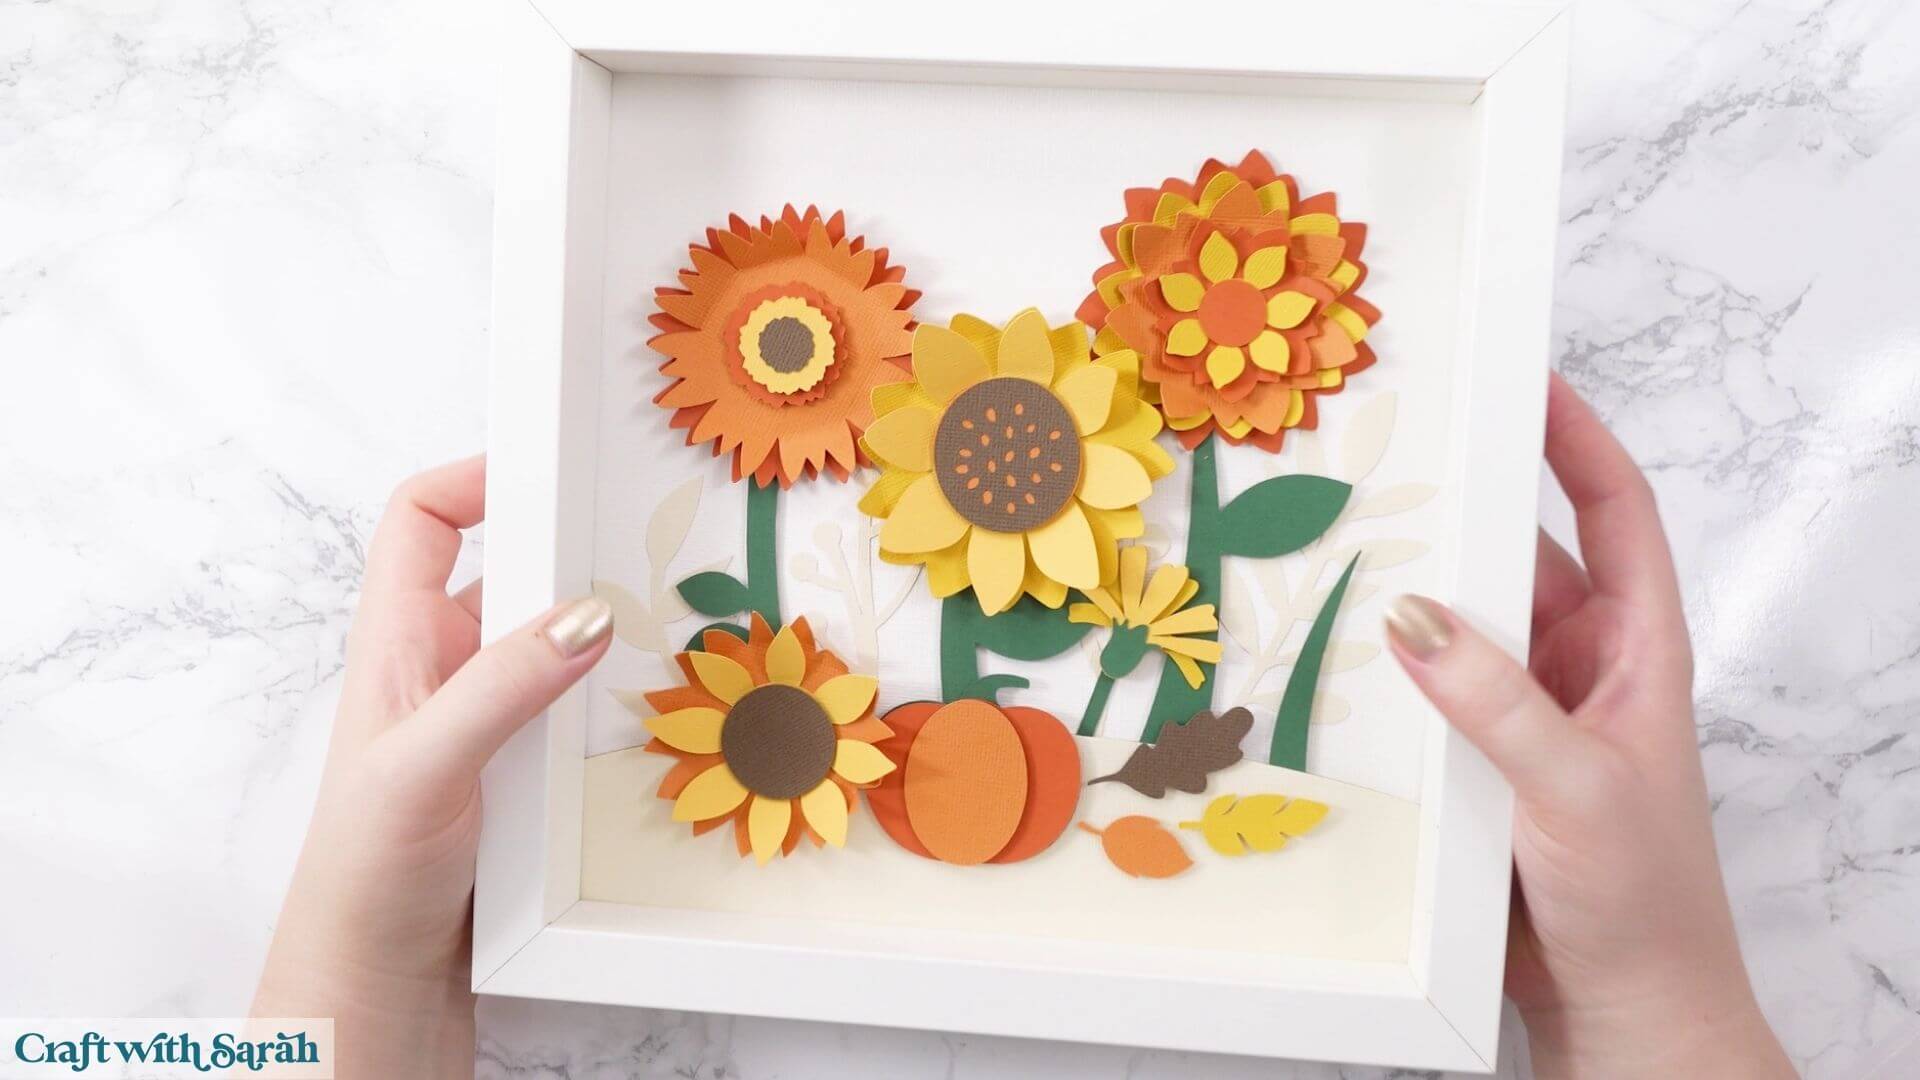
Next, let’s make the flowers bigger and use them to create a shadow box.
Step 1) Measure your frame
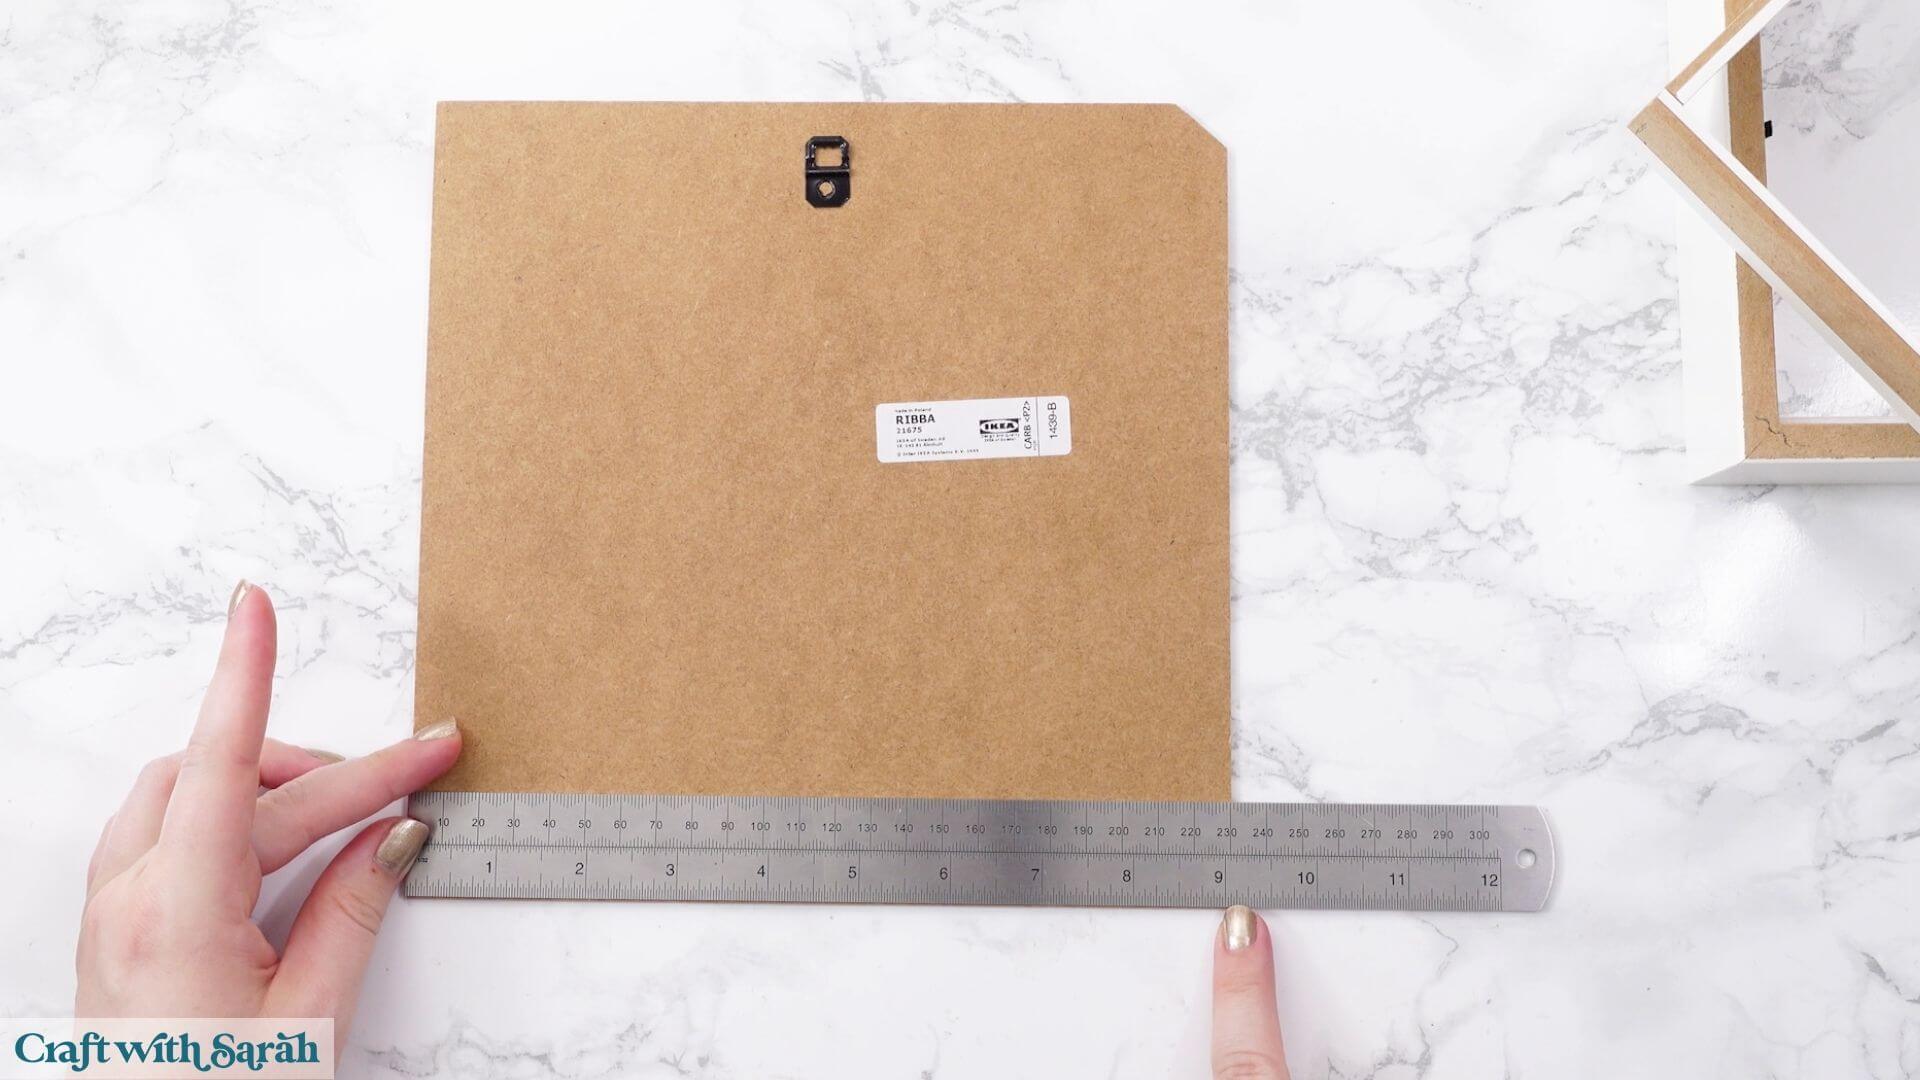
Start by measuring the inside of your frame.
Remove the back and spacer from the frame and measure either the entire backing piece or from one outside edge of the spacer to the other.
My frame measured 9 inches.
Step 2) Build a template in Design Space
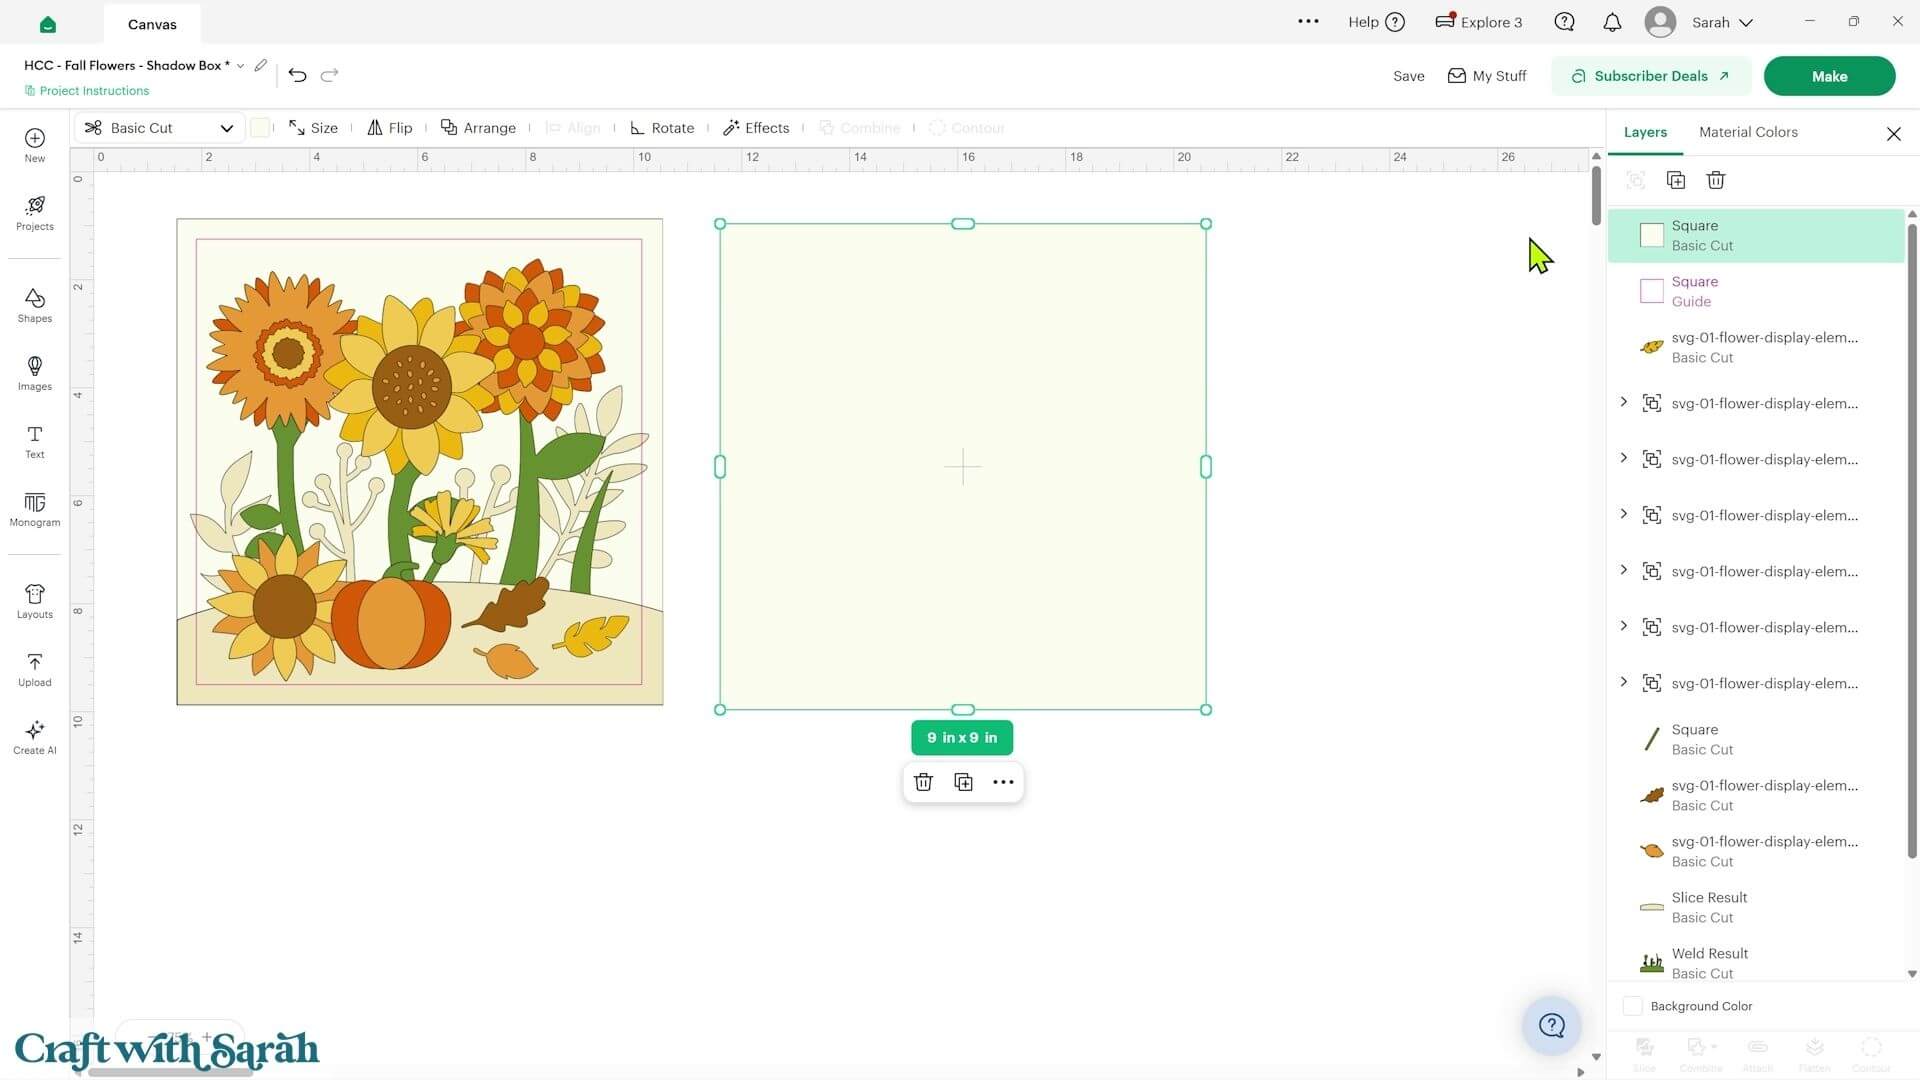
Go into ‘Shapes’ in Cricut Design Space, add a square and resize it to match your measurement.
This gives you the base for your shadow box.
However, the very edges of your design won’t necessarily be visible once it is inside the frame.
The spacer will cover some of the design from behind and the front of the frame can cover some of the edges too.
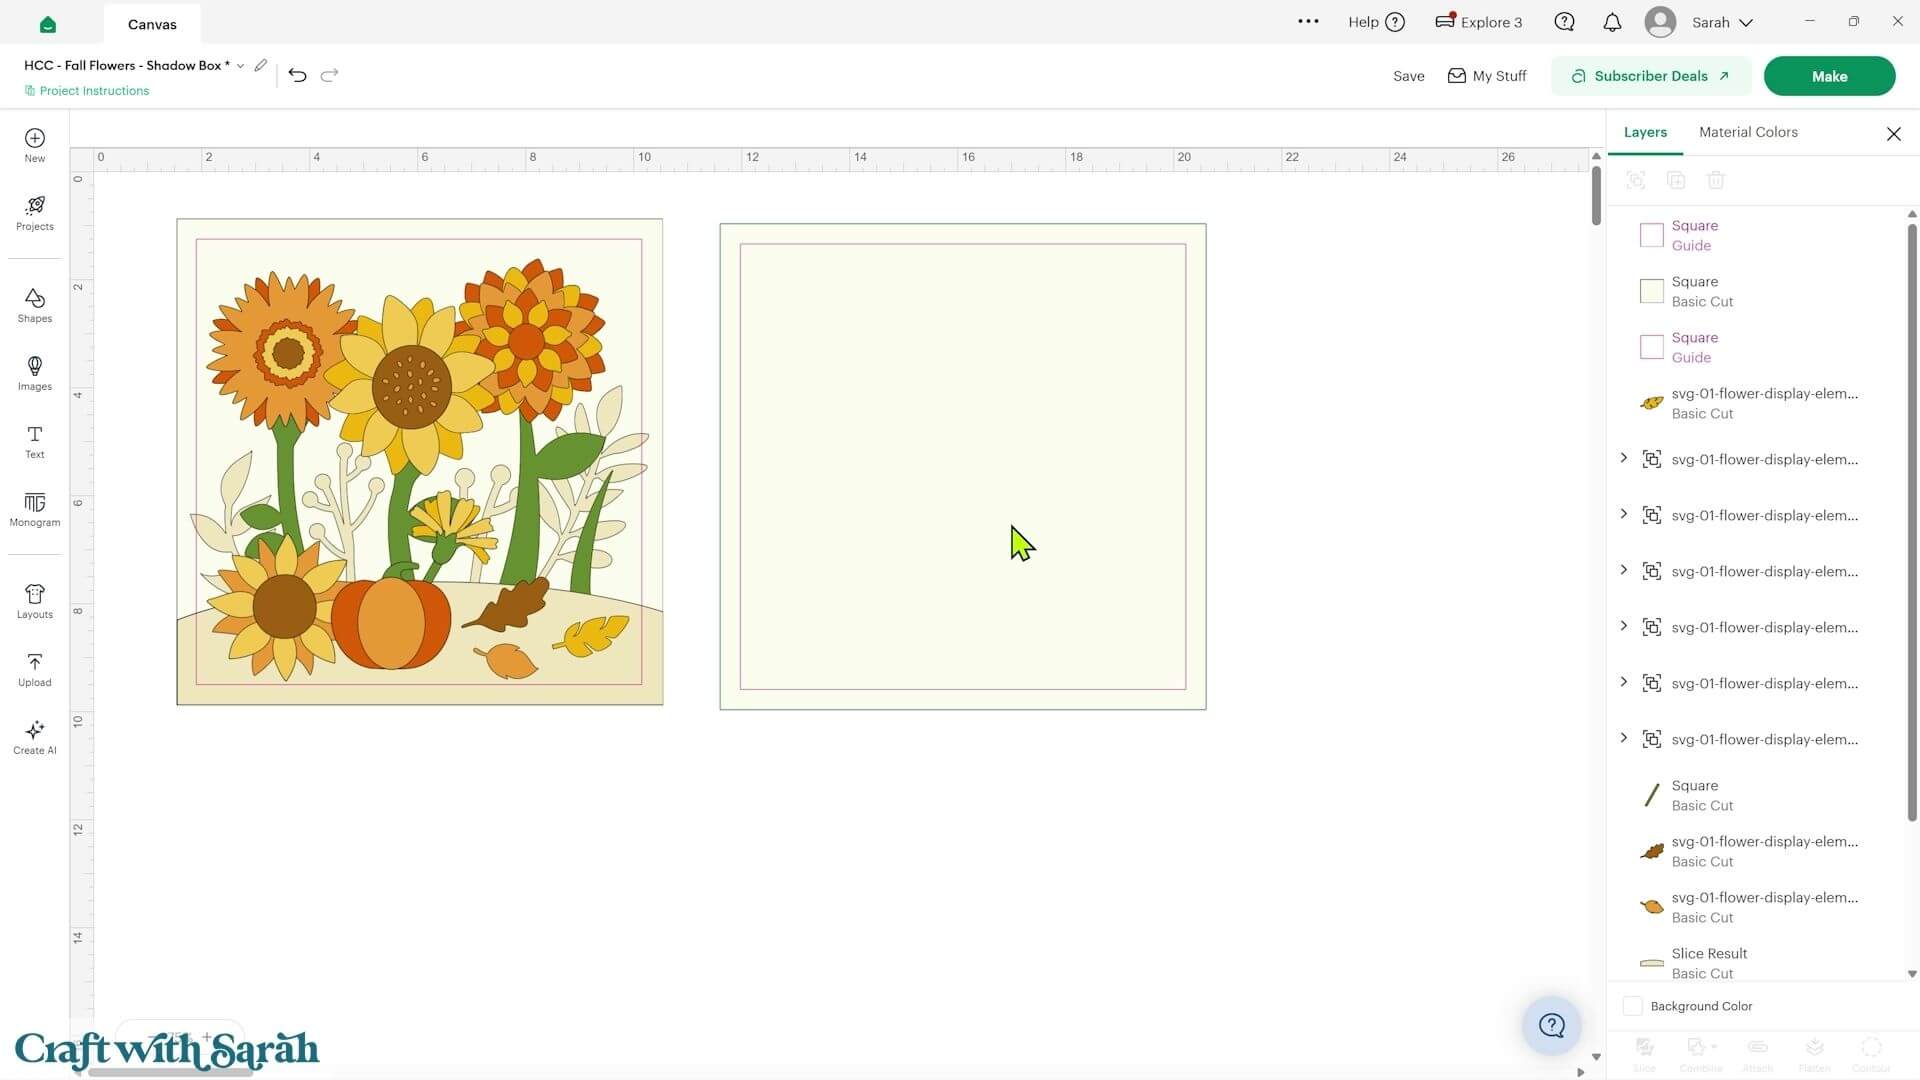
To help with this, duplicate your base square and make the copy slightly smaller.
For my 9-inch frame, I made the second square 8.25 inches.
Change the Operation of this smaller square to ‘Guide’, then select both squares and use ‘Align’ and ‘Center’.
The pink Guide line gives you a safe area to work within.
Try to keep all of the important parts of your design inside this line. You should also avoid putting very thick layers right at the edge because they could get trapped between the spacer and the back of the frame.
Step 3) Design the shadow box
Drag the flowers, foliage and embellishments into the square and arrange them into your chosen layout.
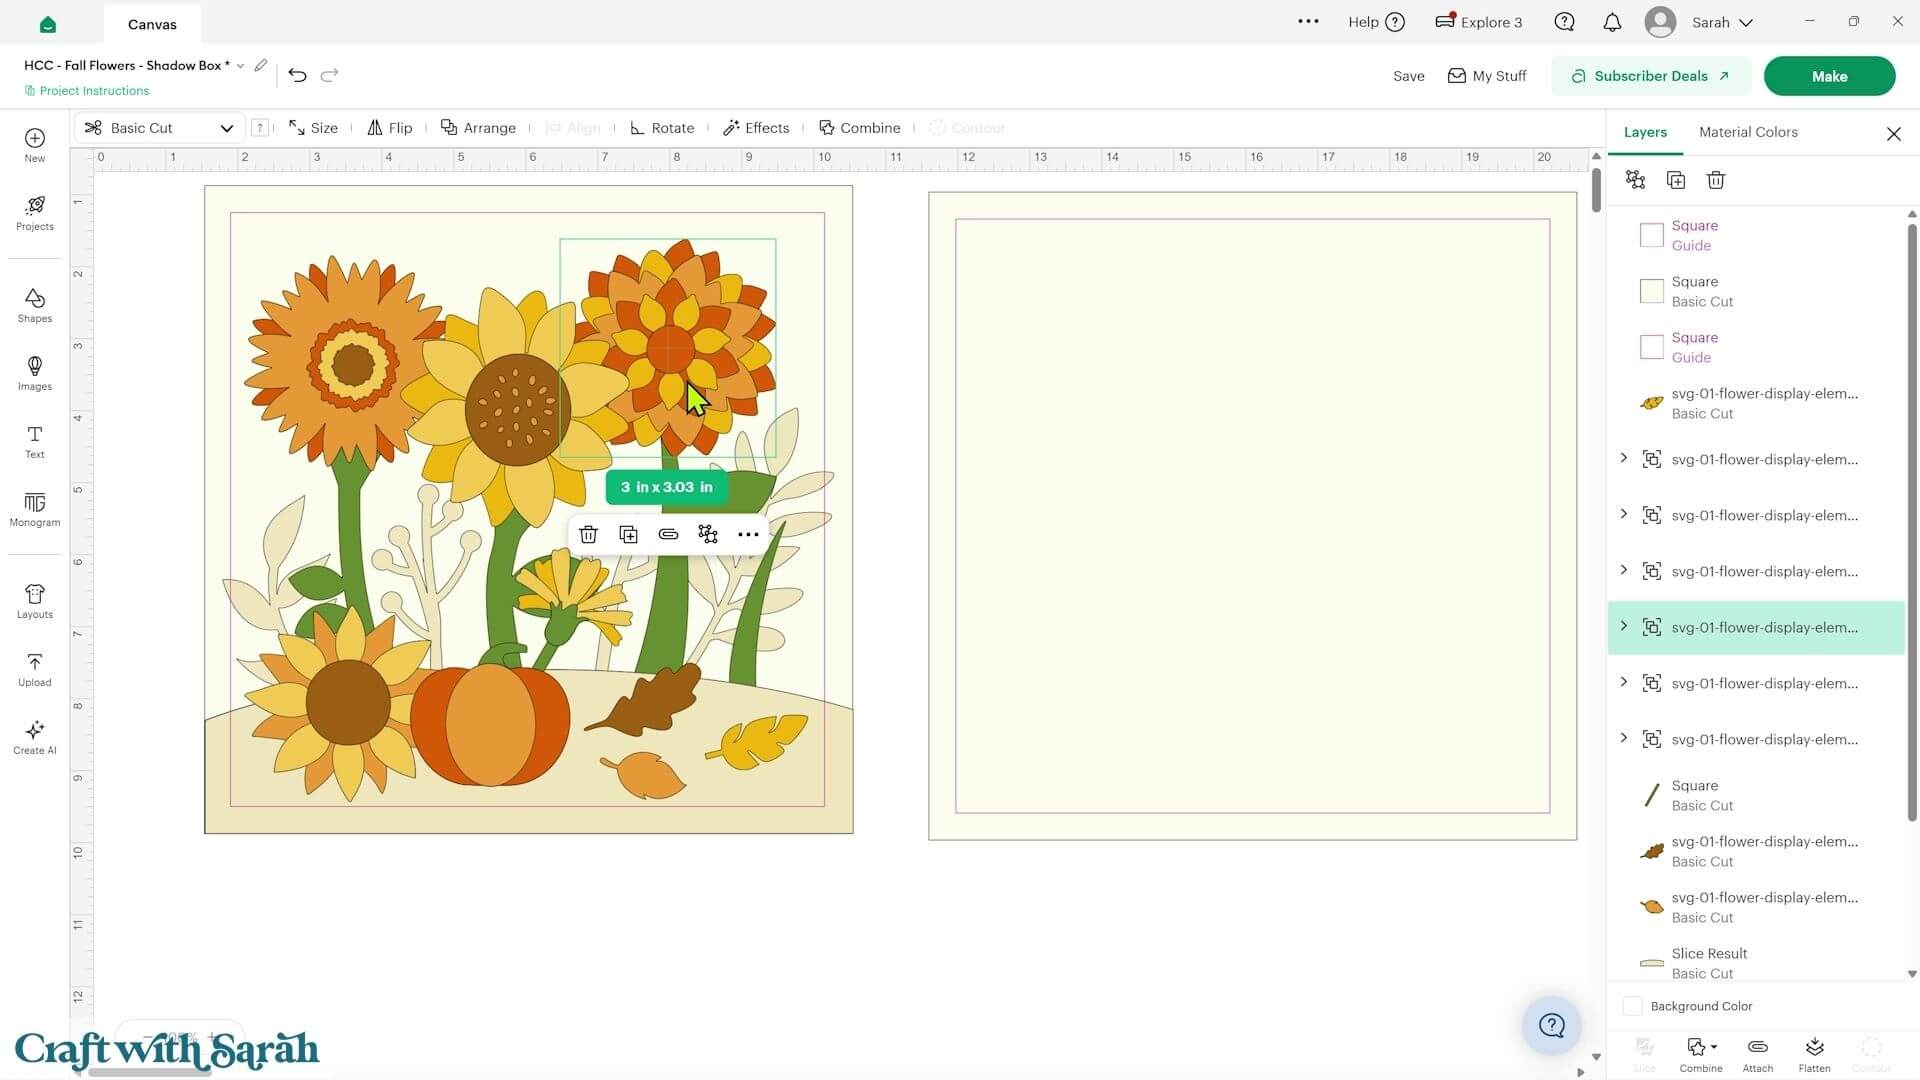
I used the same techniques from the greetings cards to join some of the bottom layers together.
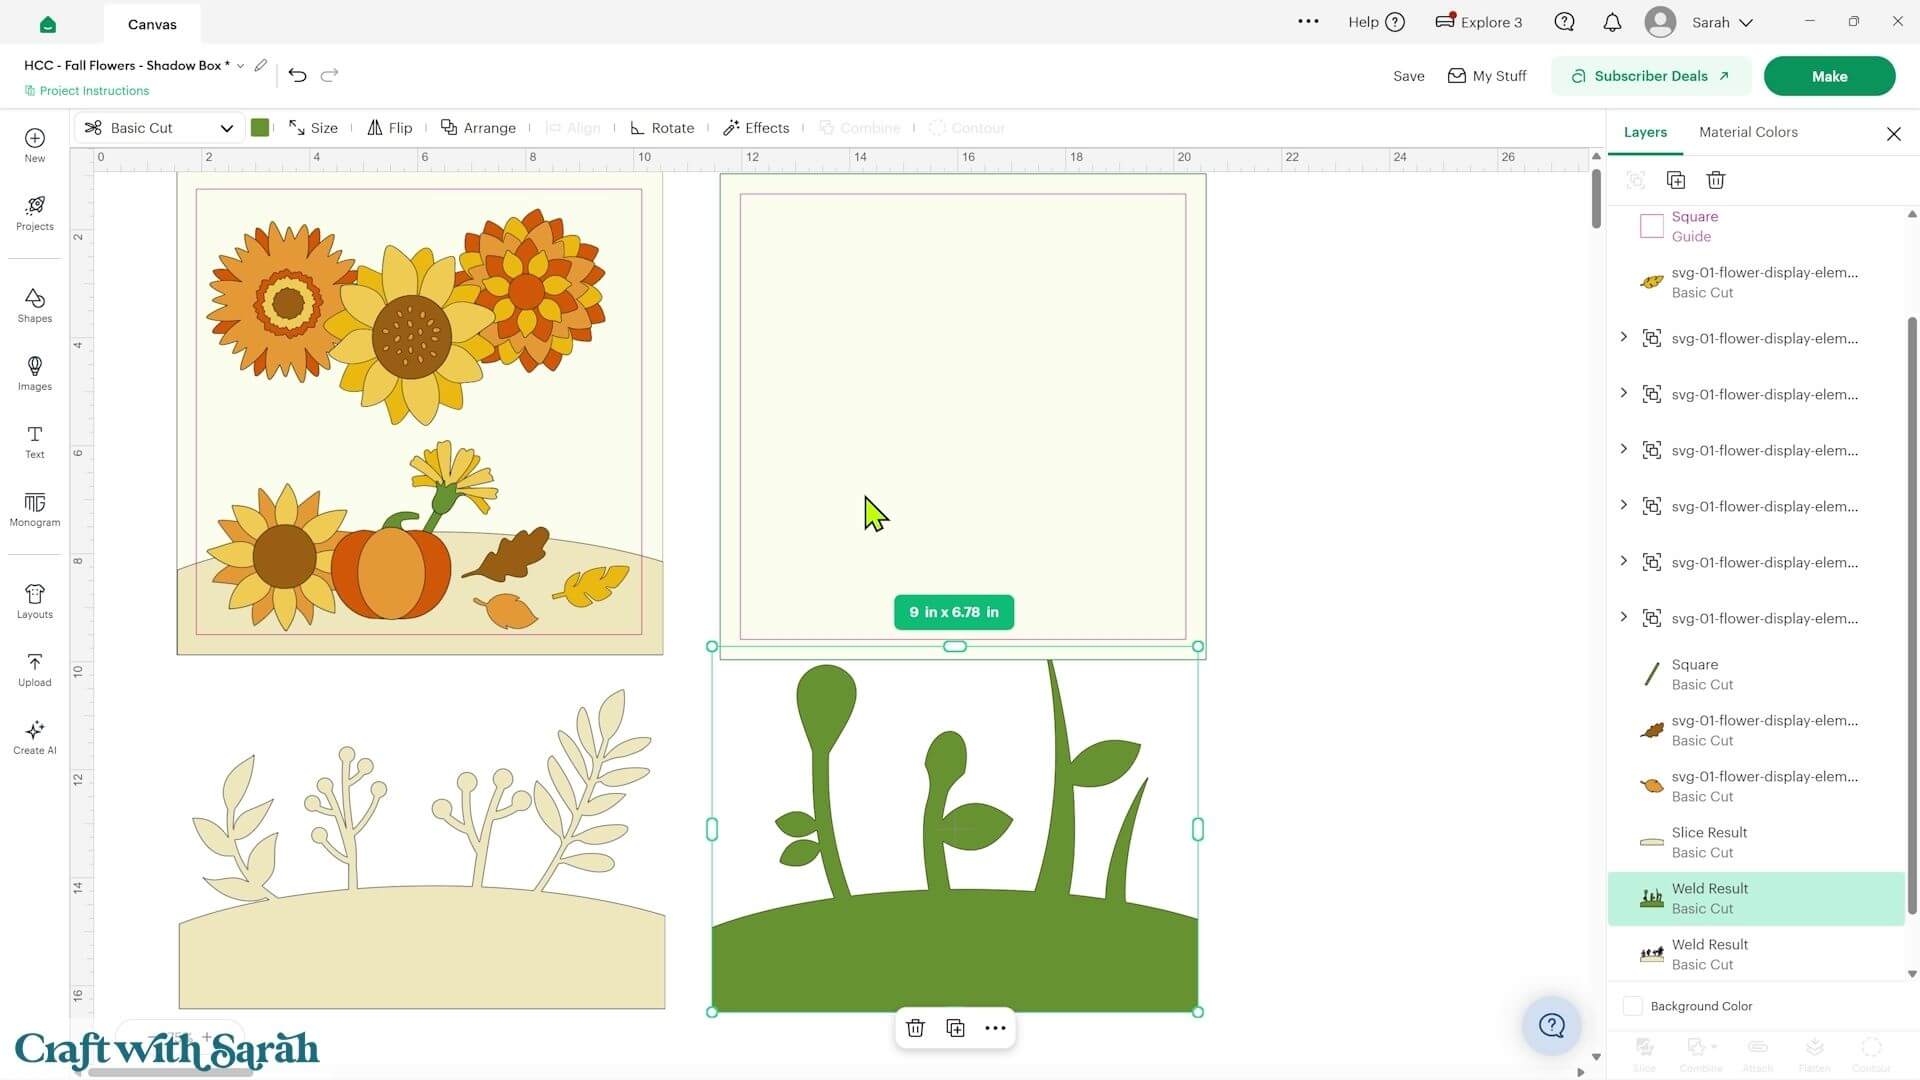
I deliberately made my flowers look slightly oversized in Design Space because I planned to bend the petals upwards when assembling them. This makes them appear smaller in the finished shadow box.
I also added a curved hill along the bottom to ground the design.
To create something similar, add a circle and resize it into a large oval that overlaps the bottom of the base square.
Duplicate the base square using ‘Alt’ or ‘Option’ and click.
Select the copied square and oval, then go into ‘Combine’ and choose ‘Intersect’.
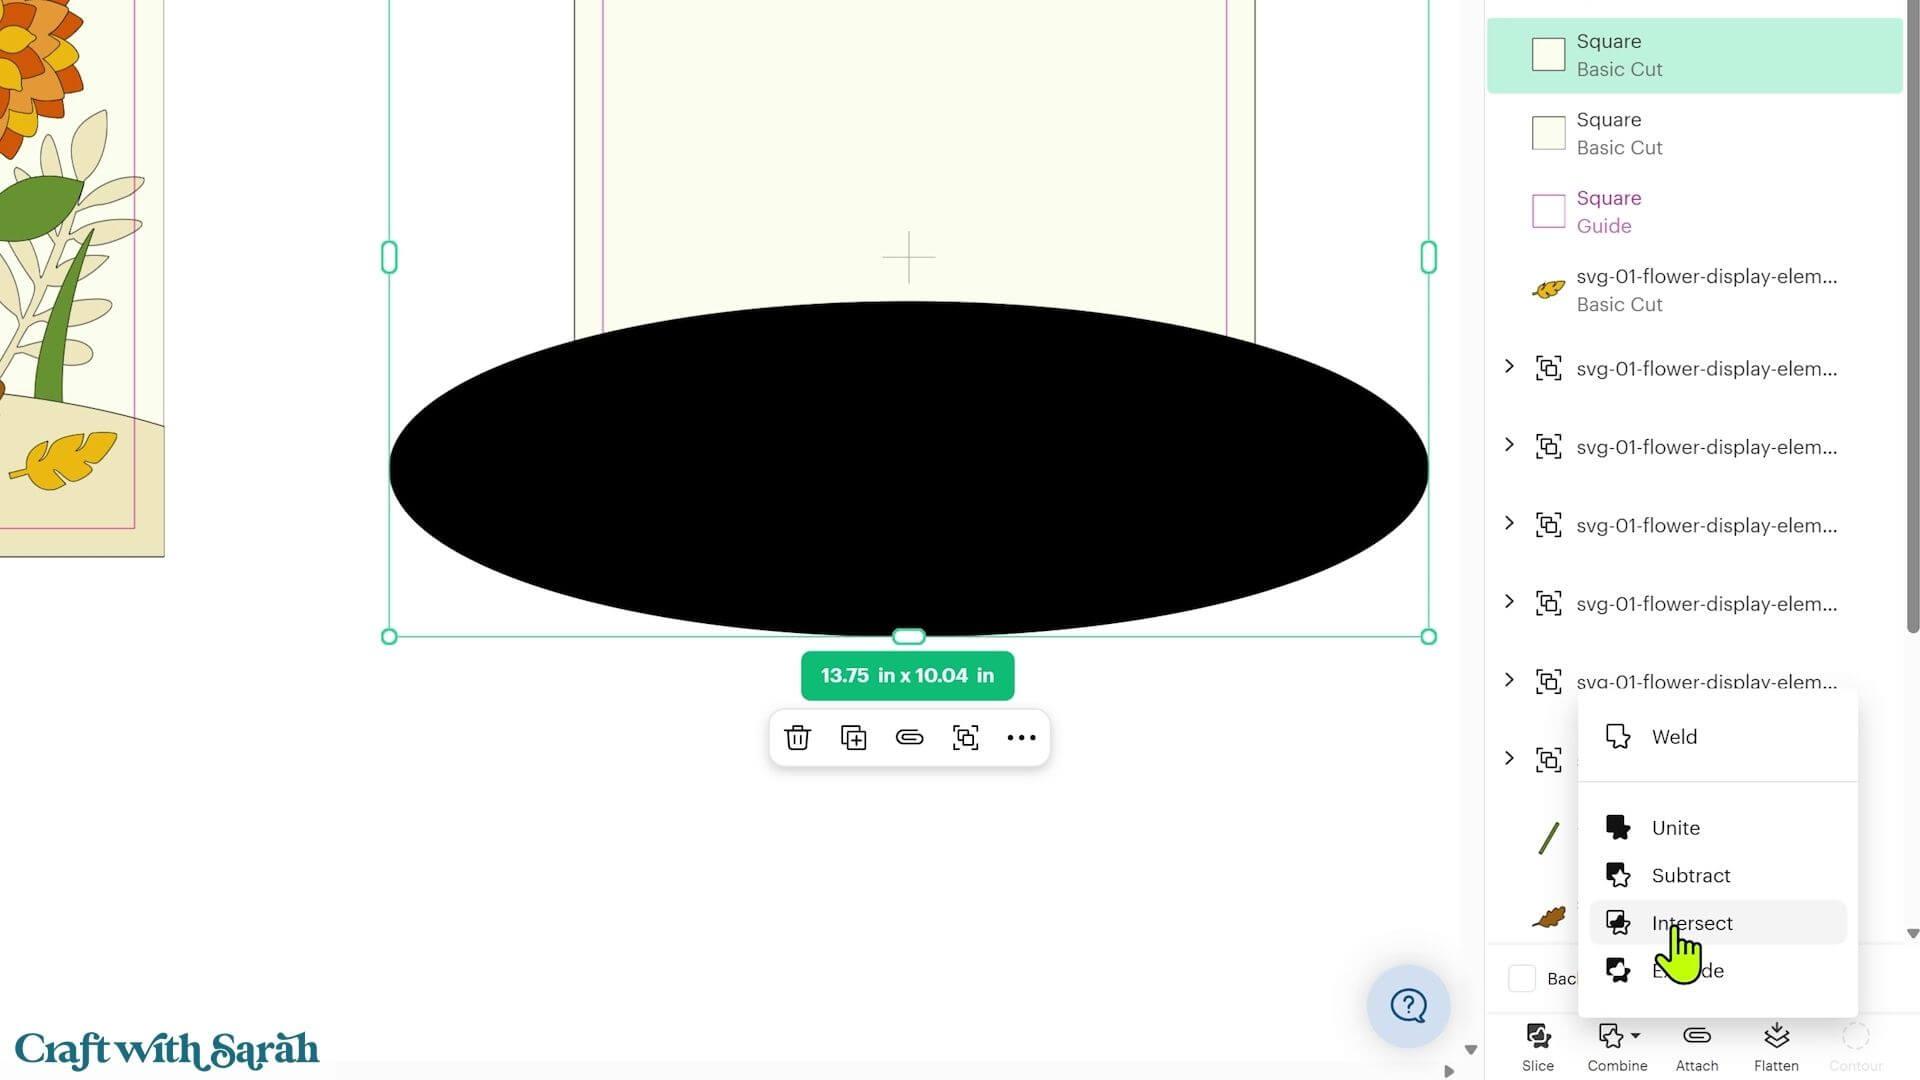
This keeps only the area where the two shapes overlap, creating a perfectly shaped section for the bottom of the shadow box.
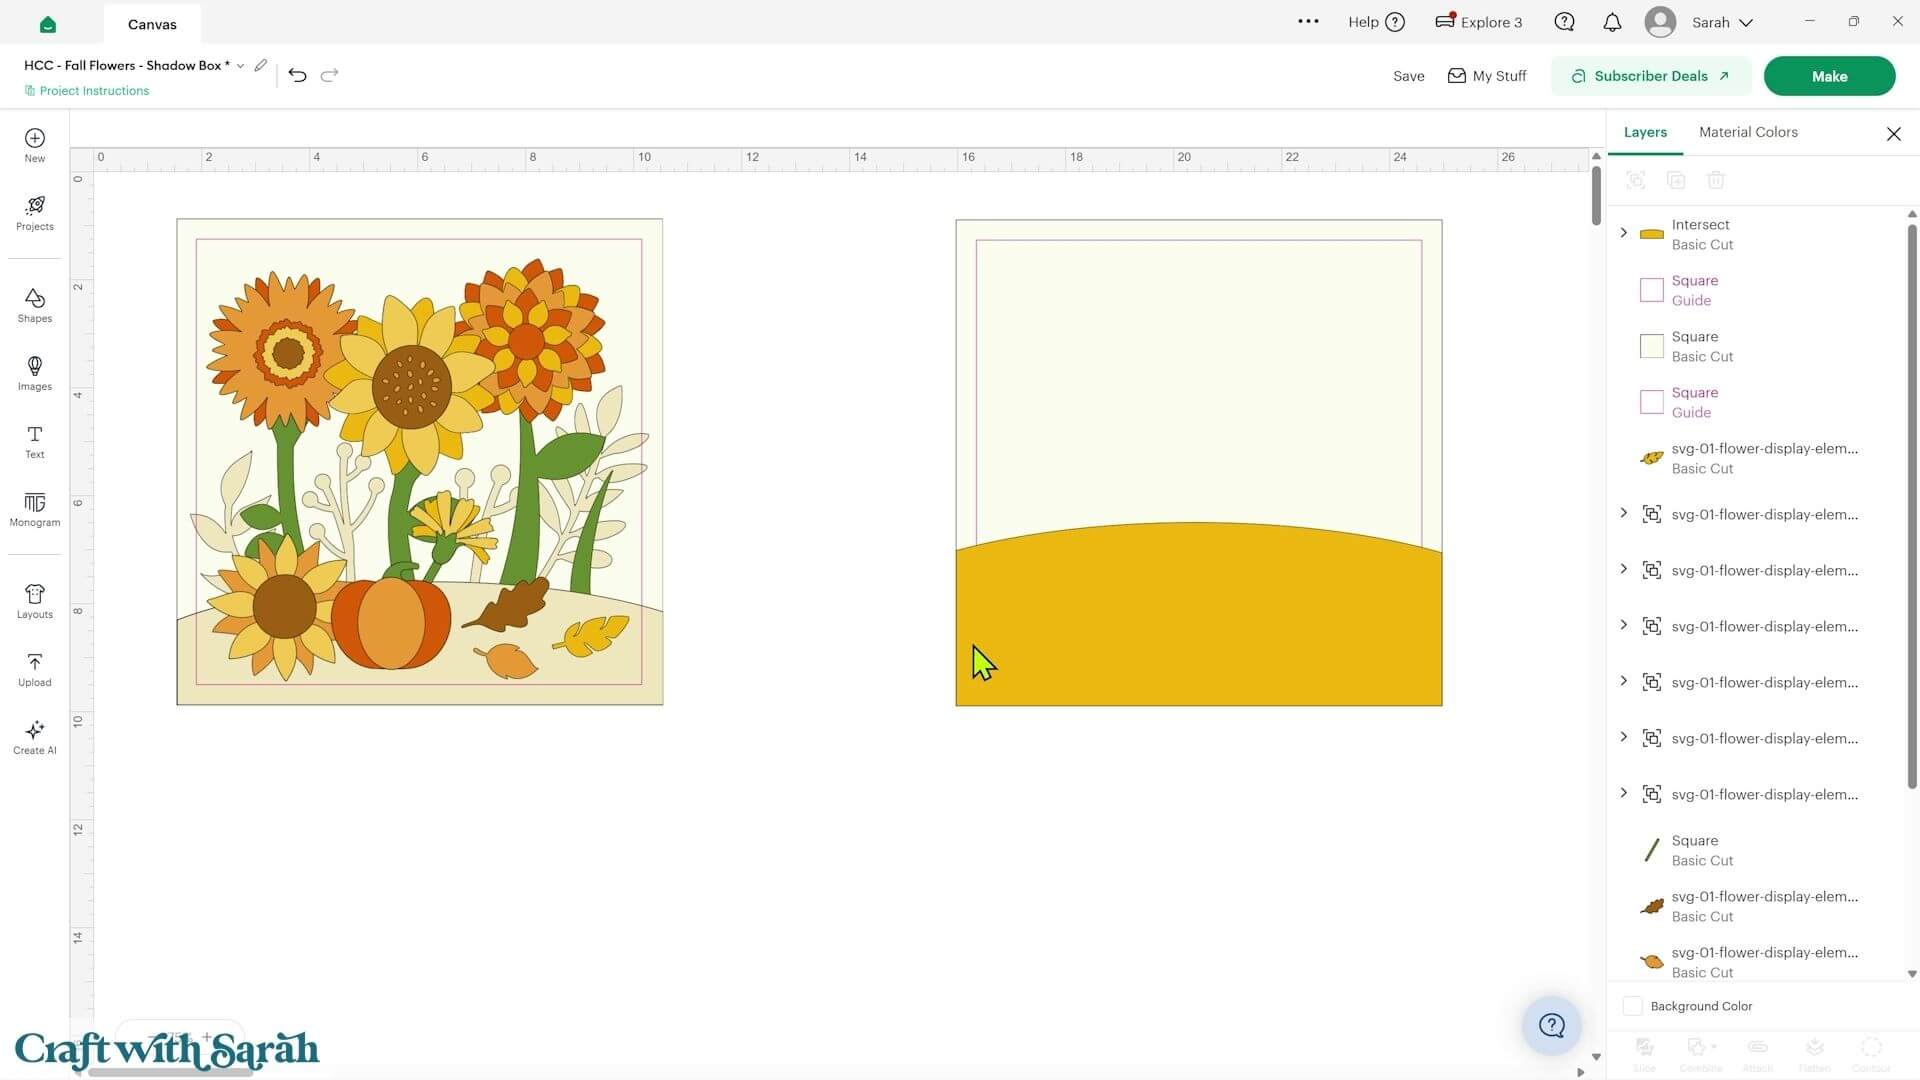
Step 4) Cut the shadow box design
Save your project, connect to your Cricut machine and get all of the pieces cut out.
Step 5) Assemble the shadow box
Start with the base layer and build up your design.
For mine, I glued the leaves onto the base, added the stems with foam squares and then glued the curved section along the bottom.
The smaller embellishments can be assembled separately before adding them to the main design.
To give the flowers a more realistic 3D appearance, gently bend or roll the petals upwards.
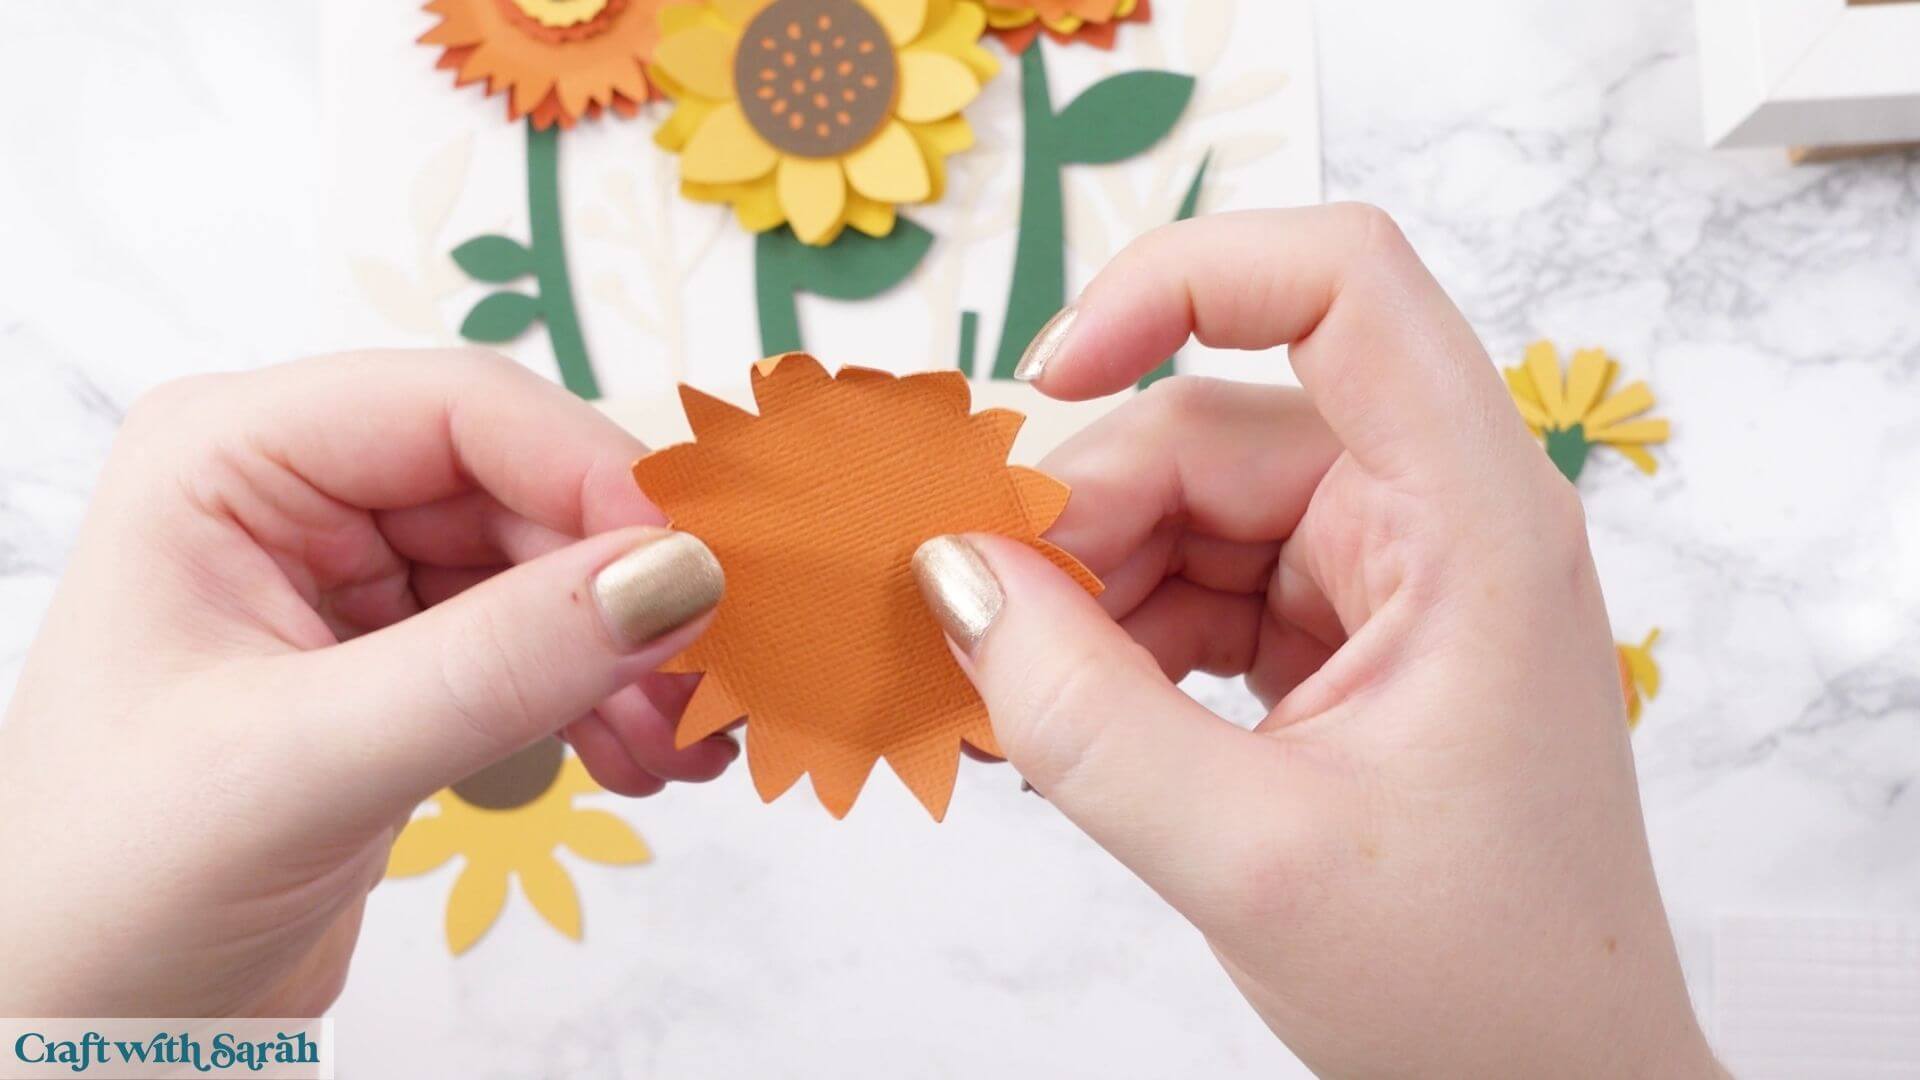
Try not to make hard fold lines. You’re aiming for a gentle curve instead.
The petals don’t need to be perfectly even. Real flowers aren’t completely uniform either, so slightly different bends can help them look more natural.
Build up the flower layers using glue, foam squares or a combination of both.
Once everything is stuck together, place the glass into the frame if you’re using it, followed by the spacer.
Put your finished design behind the spacer and replace the back of the frame.
The spacer keeps the dimensional cardstock away from the glass and gives all those curved petals plenty of room.
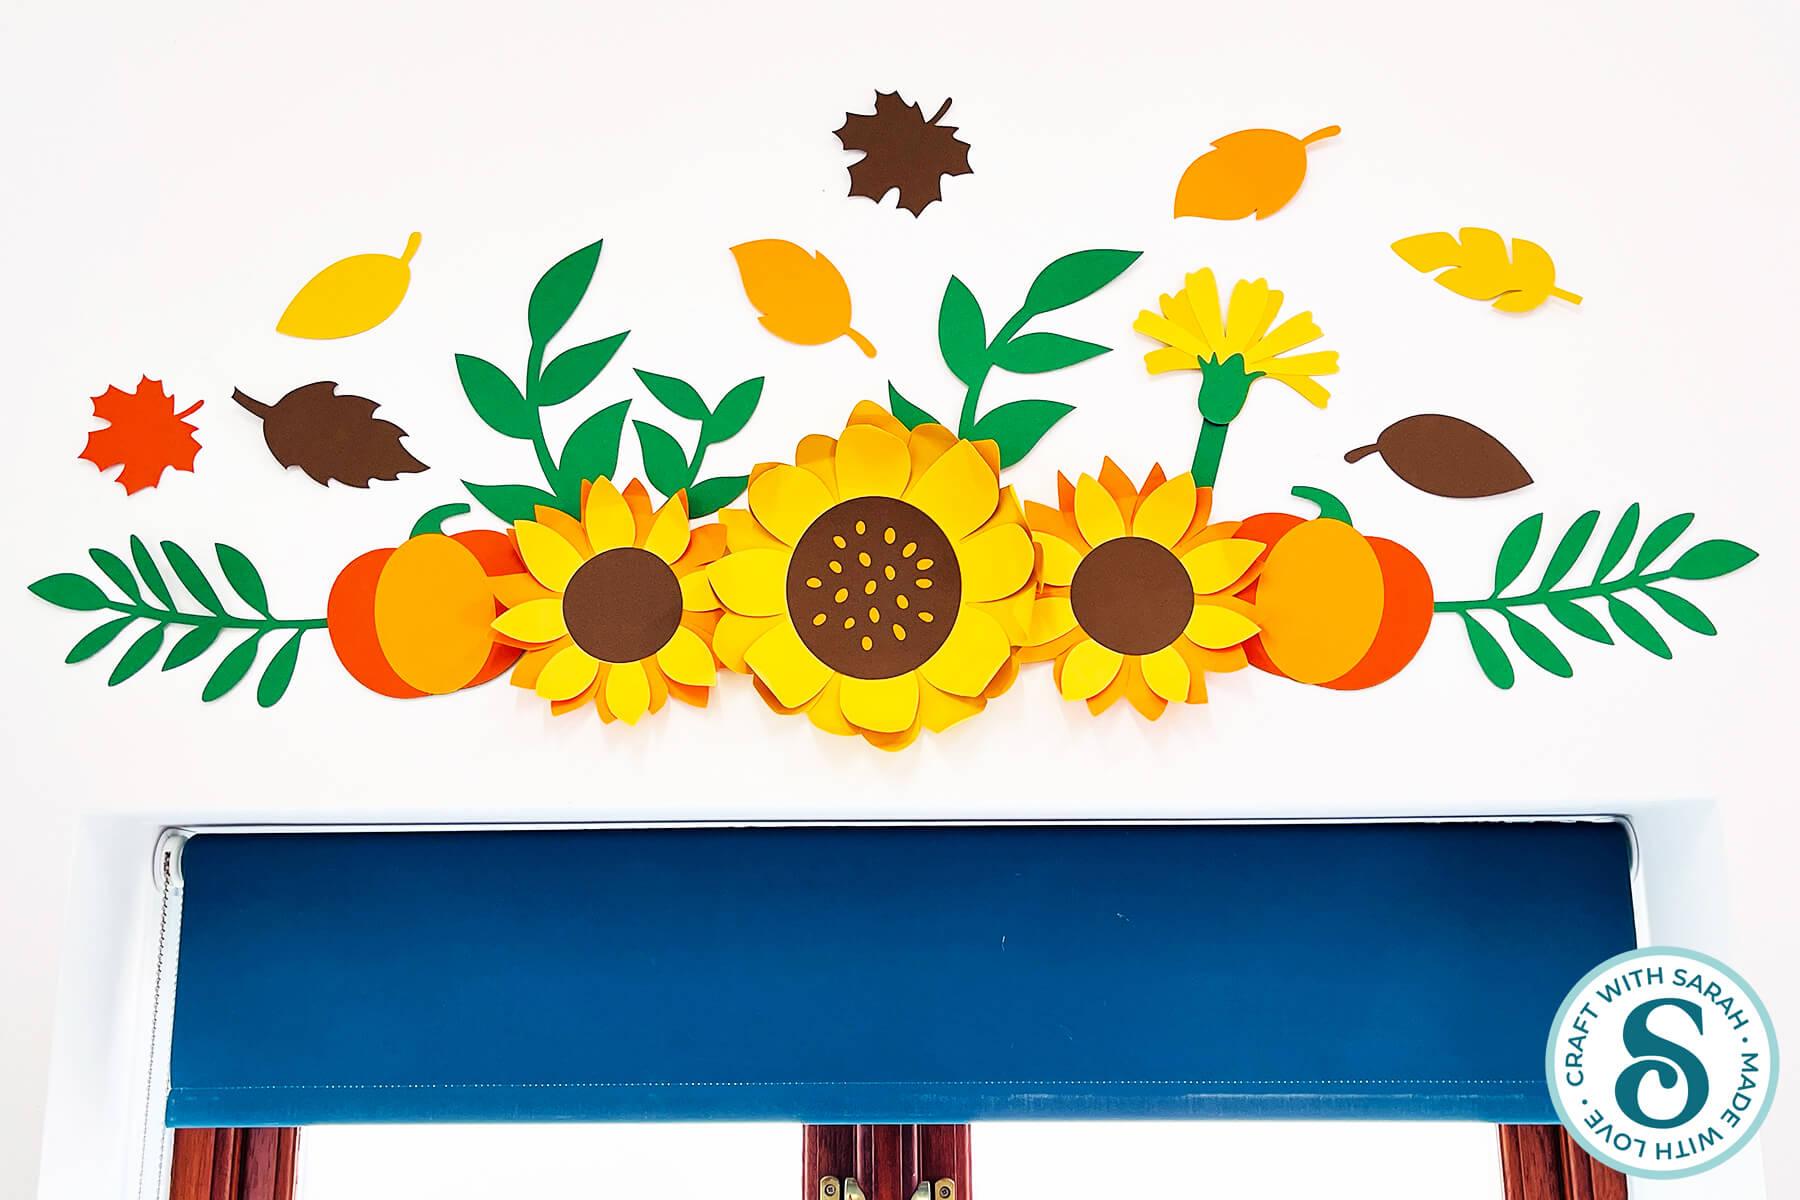
Project 3) Giant autumn wall display
For the final project, we’re going much bigger!
You can use the same flowers and leaves to create a giant display for a wall, above a window or anywhere else that needs some autumn decoration.
Step 1) Measure your space
Start by measuring the space you want to fill.
I had approximately 50 inches of width above my office window and decided to make my design around 22 inches tall.
Step 2) Create a template in Design Space
In Design Space, create a rectangle that matches your available space.
It will show an exclamation mark because a 50 x 22-inch rectangle is far too big to cut on a Cricut, but that doesn’t matter.
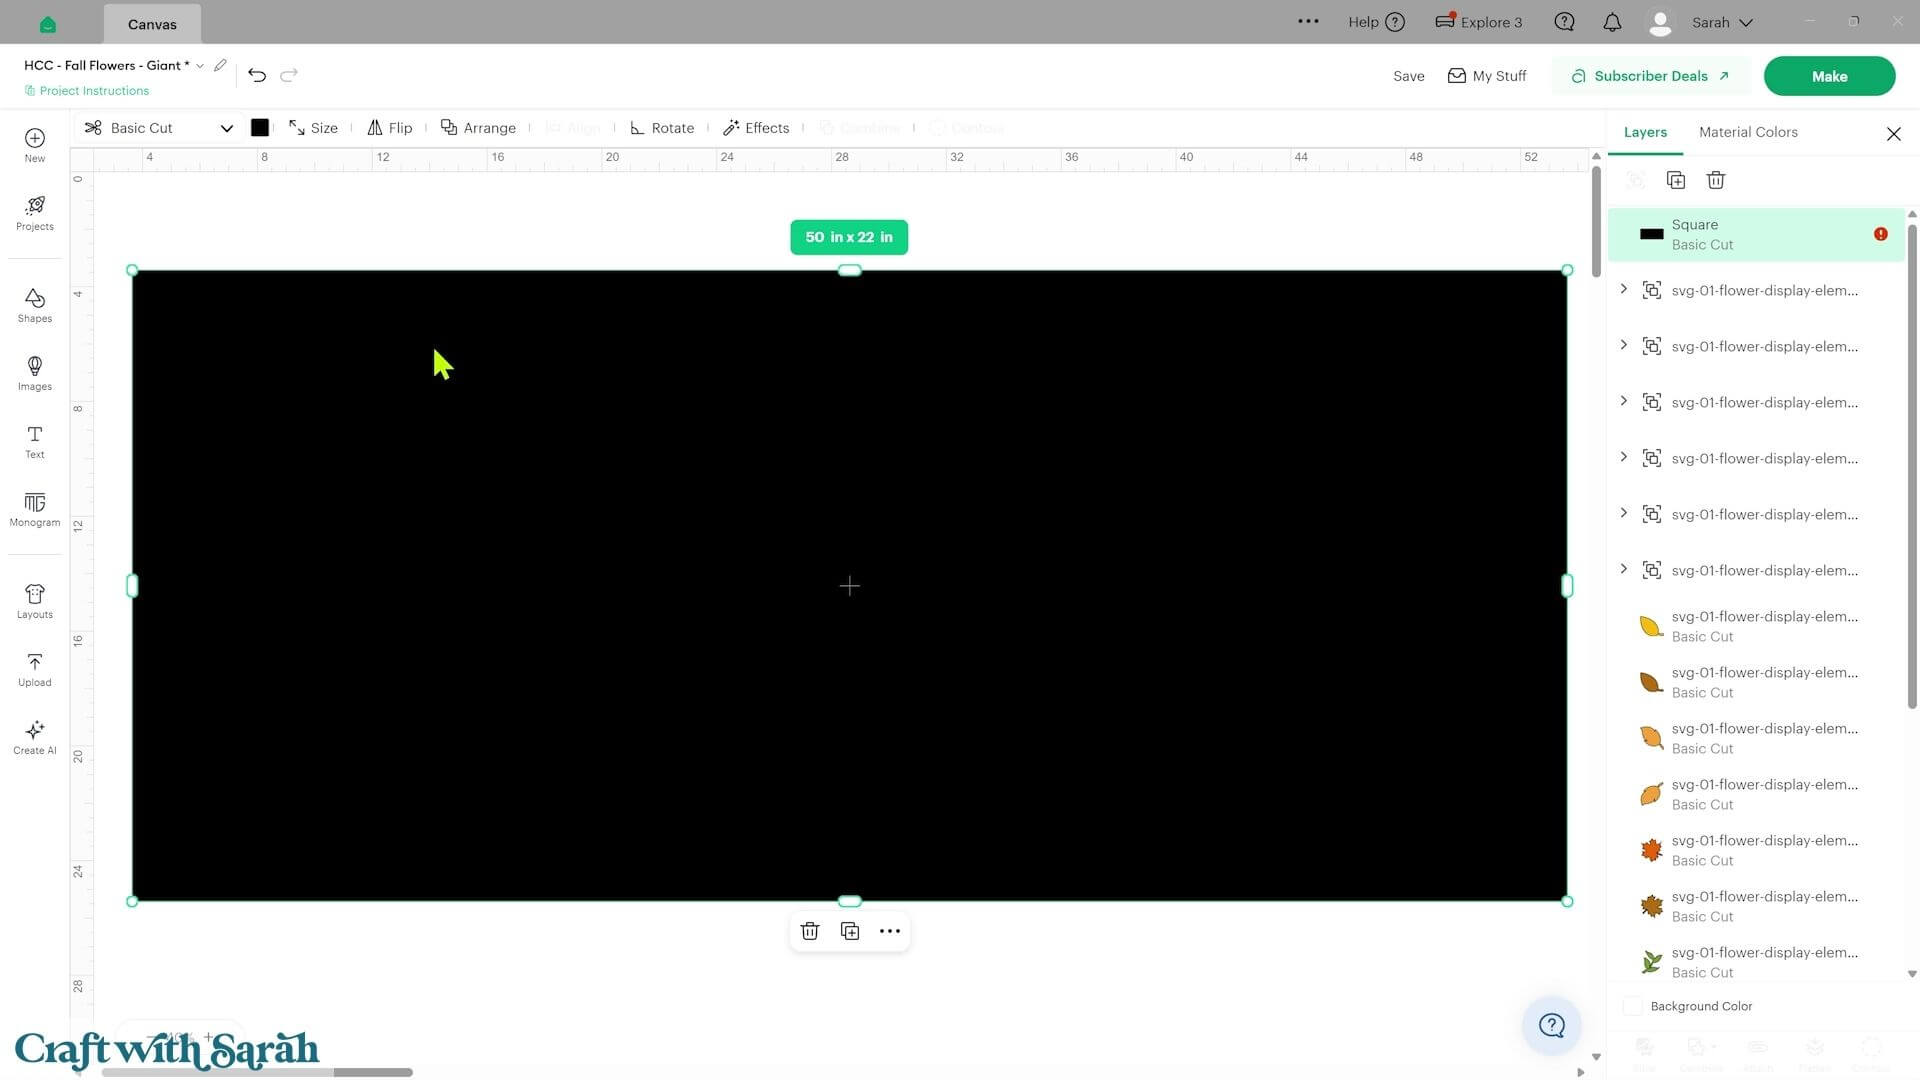
Change the Operation to ‘Guide’ to turn it into a outline instead of a filled in shape.
We’re only using the rectangle to show the available space. The individual flowers and leaves will all be cut separately.
Arrange your flowers and leaves inside the Guide until you’re happy with the layout.
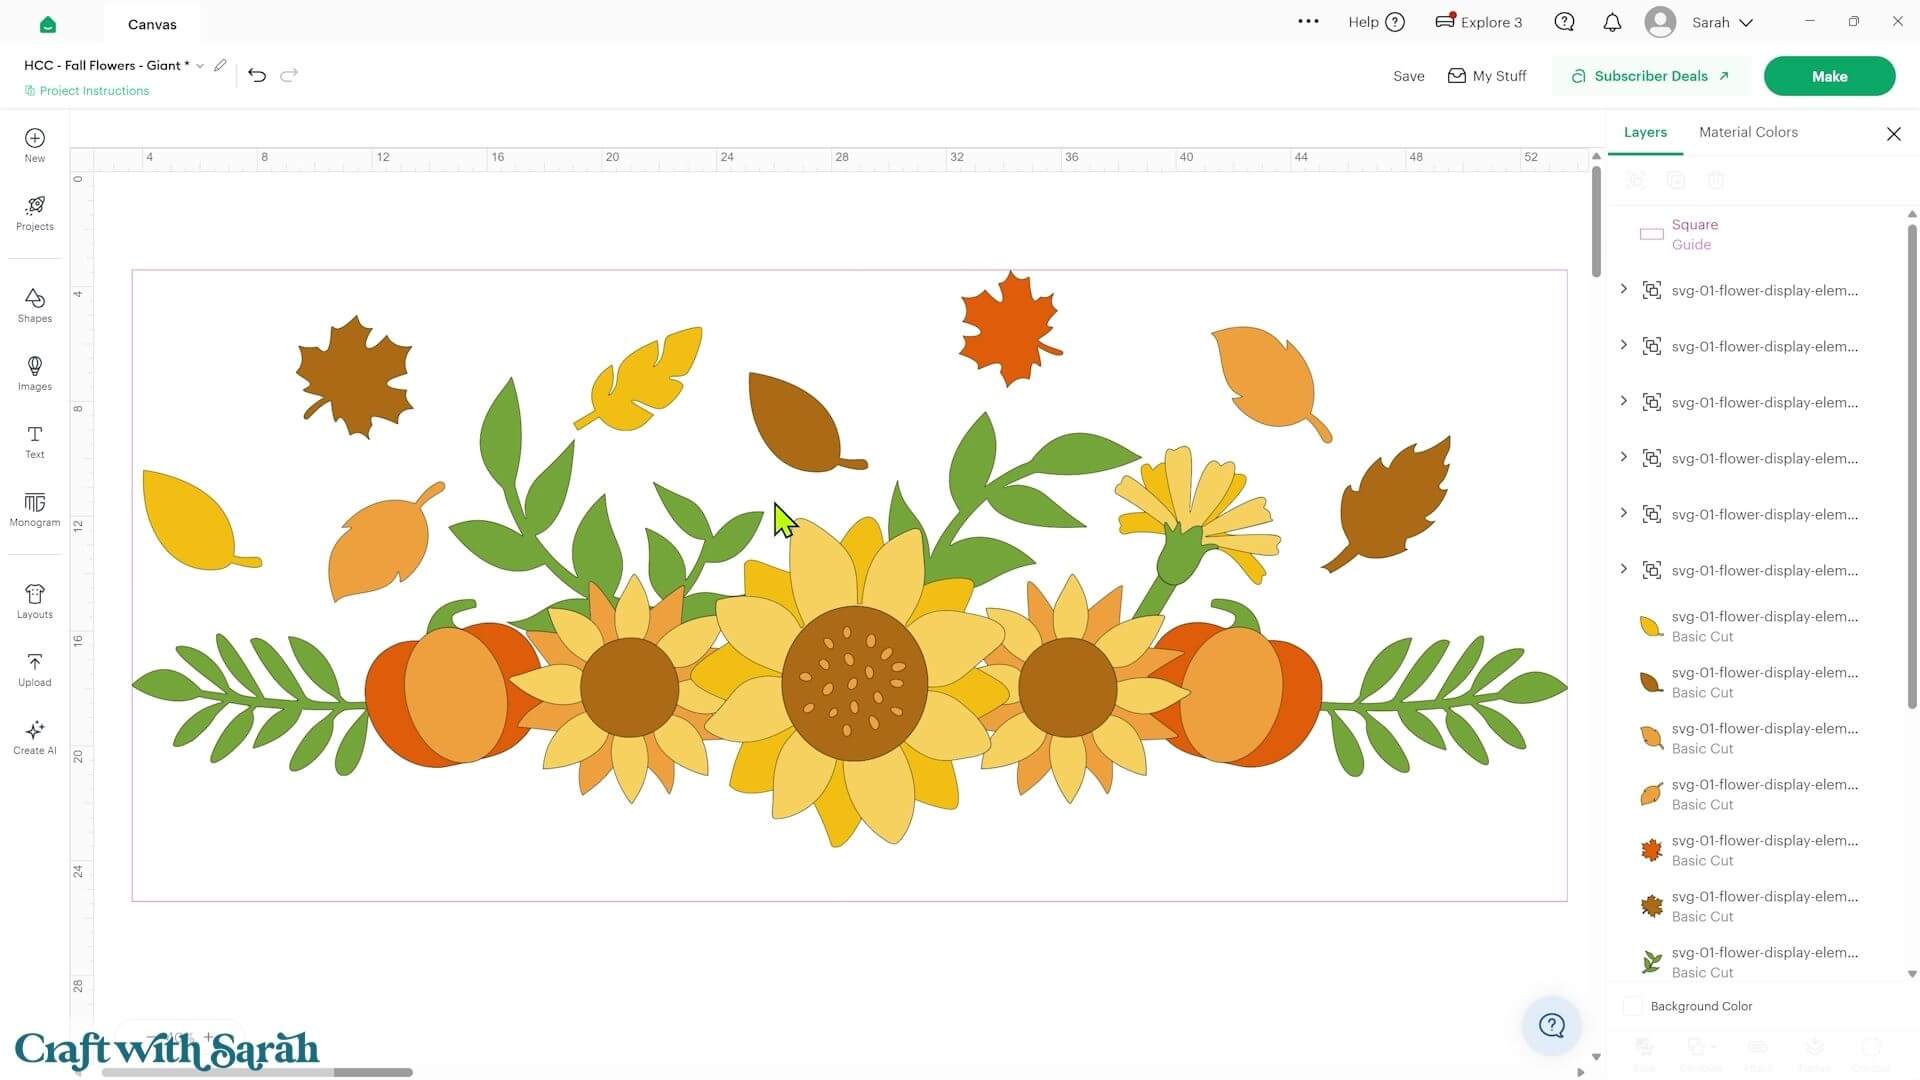
Remember to check that none of the individual pieces are too large for your cutting mat.
The maximum width you can cut from 12 x 12-inch cardstock is 11.5 inches, so I made my largest sunflower 11.5 inches across at its widest point.
If you see the red exclamation mark appear on one of your individual pieces, resize it until it is small enough to cut.
Unlike the greetings cards and shadow box, I kept all of the pieces separate for this project rather than welding the layers together. Joining them would have made the individual pieces too large to cut.
Step 3) Cut your paper flowers
Save your project, connect to your Cricut machine and get all of the pieces cut out.
Step 4) Build the pieces separately
I decided to glue the layers together rather than use foam squares because the flowers themselves would already have lots of dimension.
It also saves using an enormous number of foam squares!
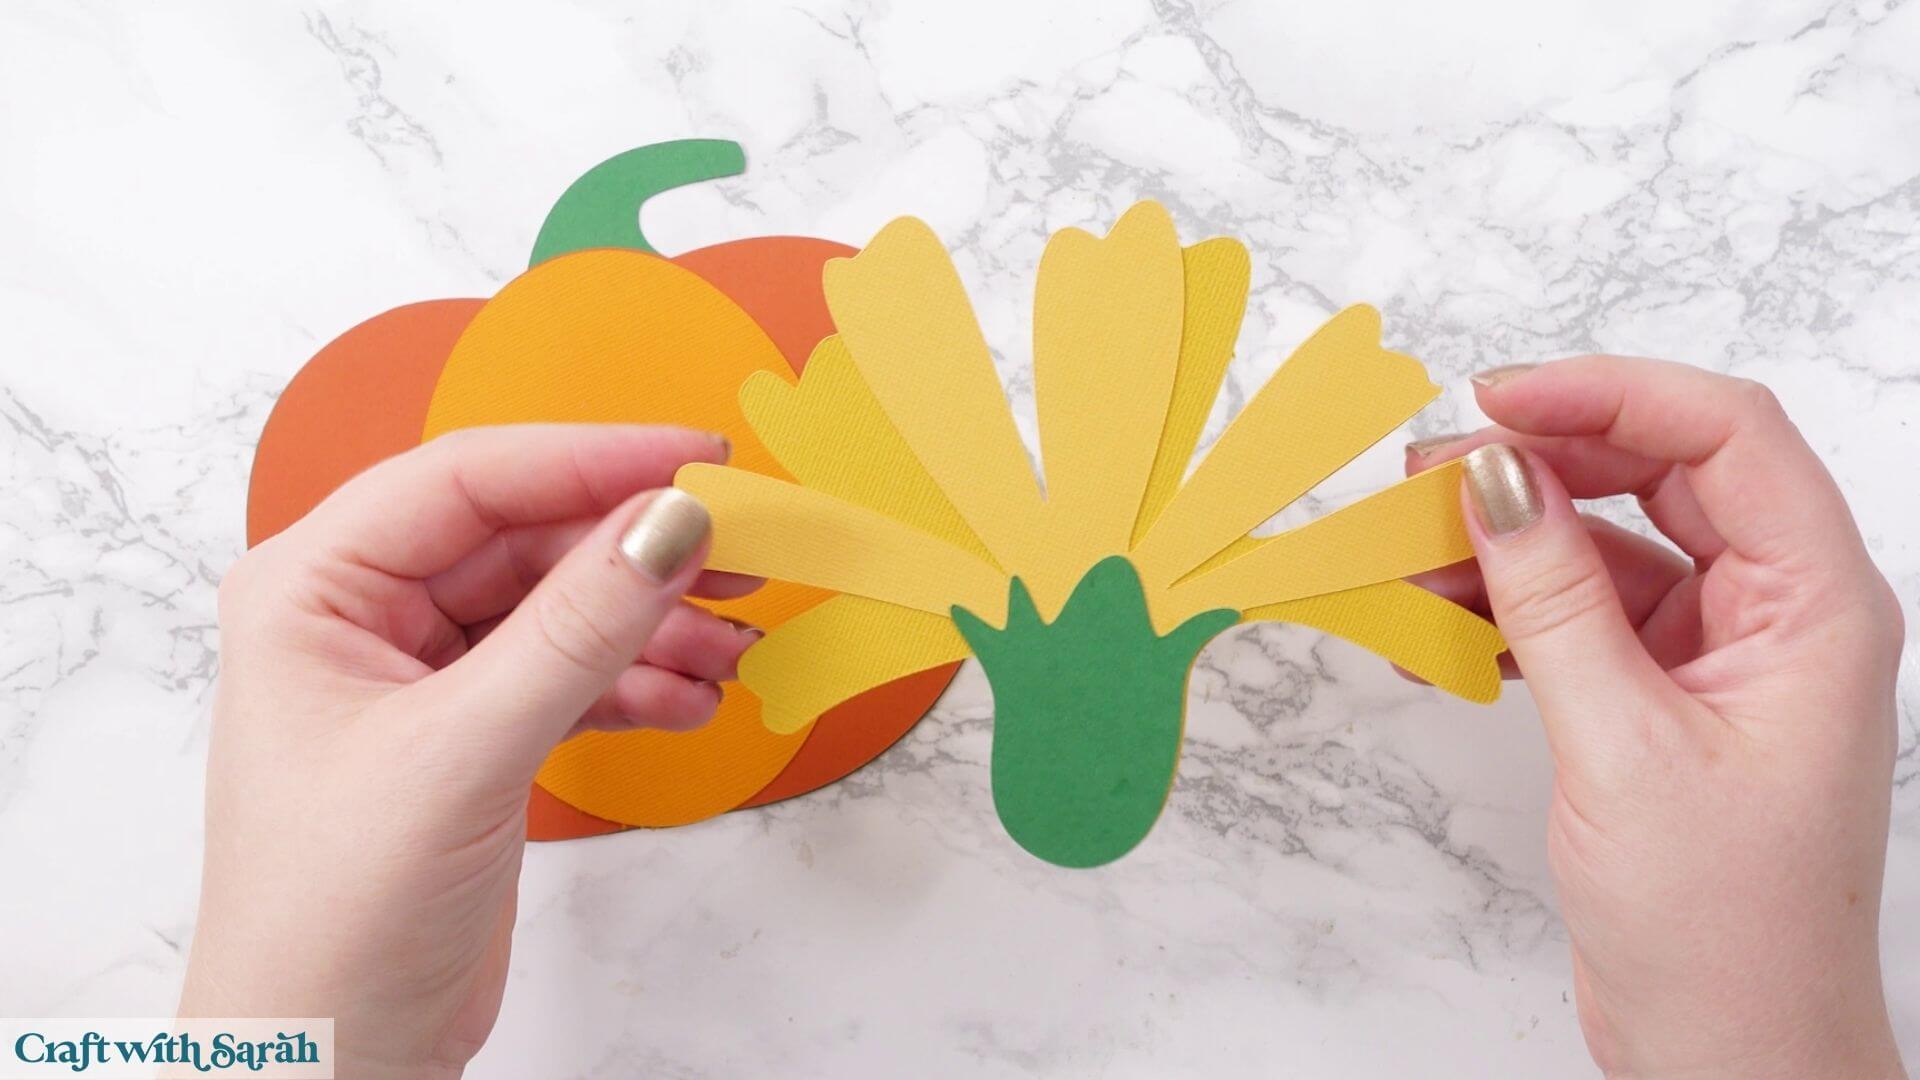
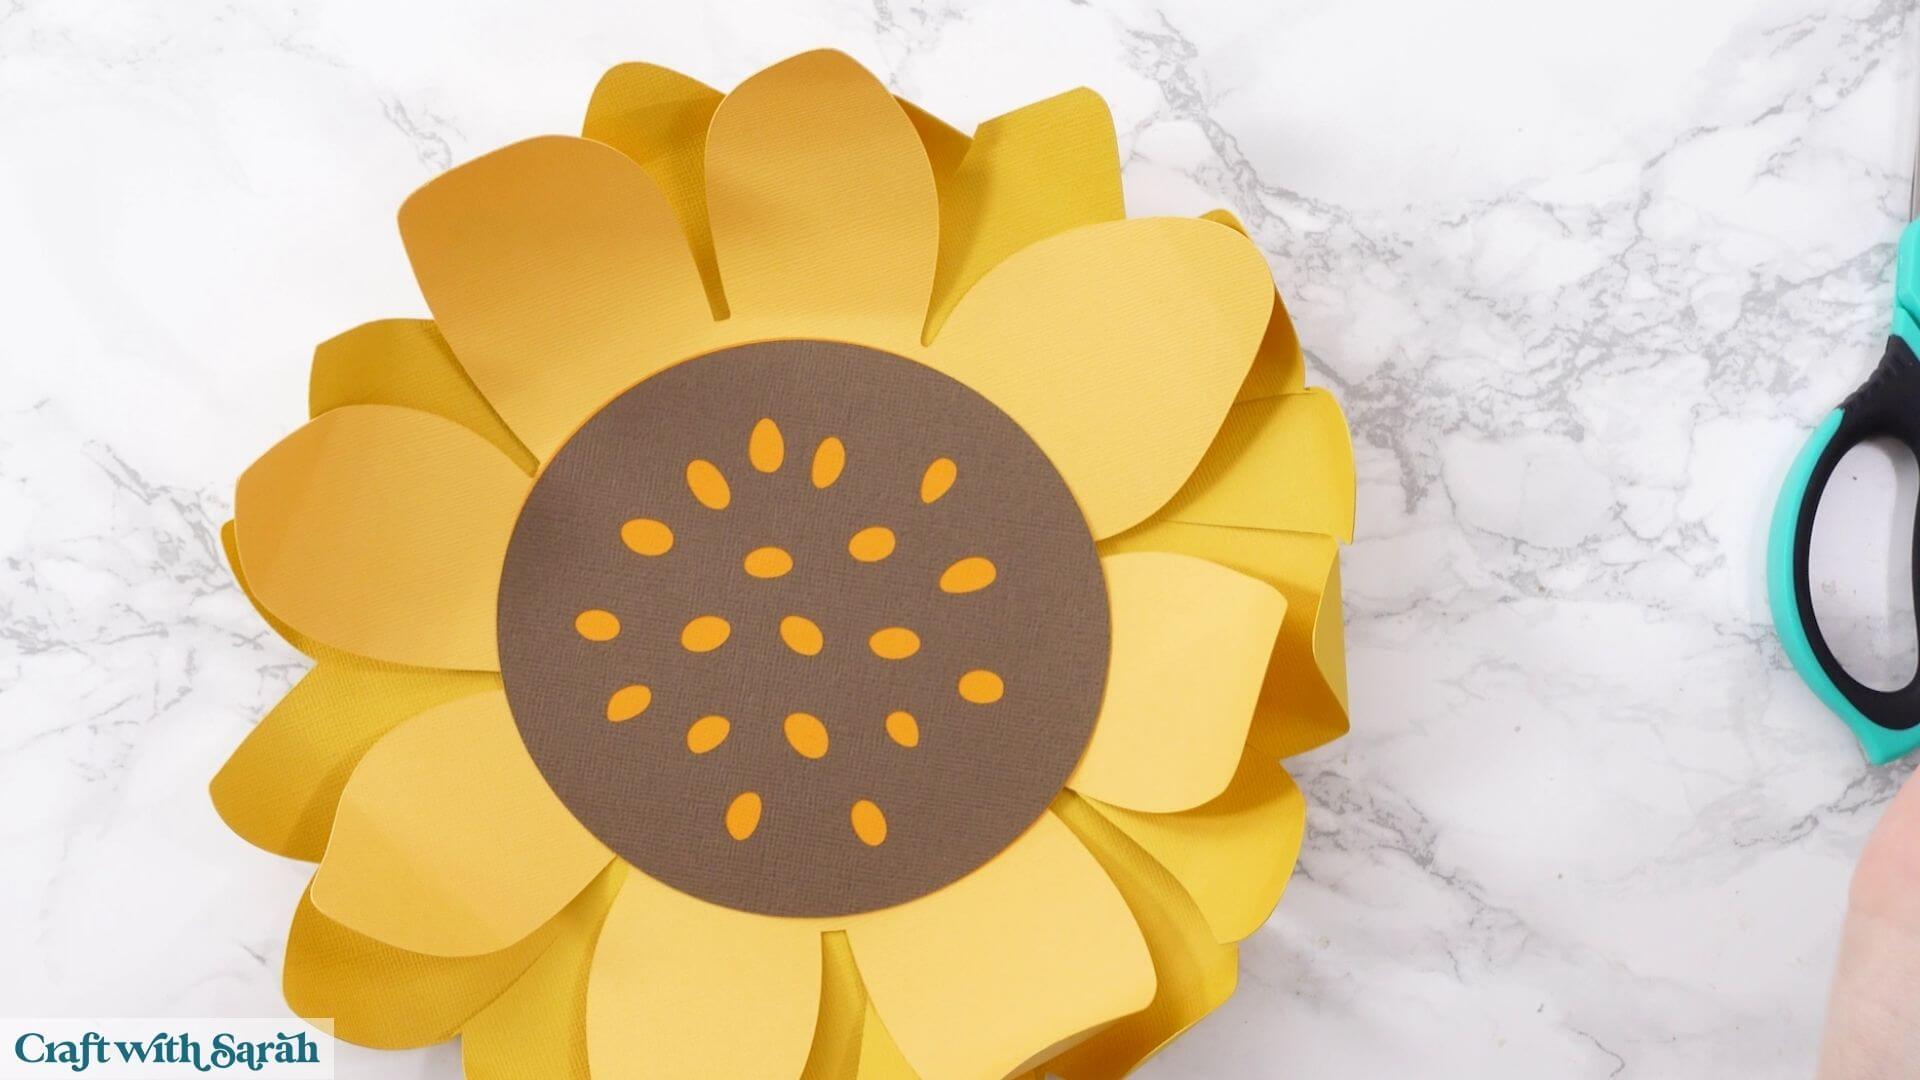
For the smaller sunflowers, gently roll the petals upwards in the same way as the shadow box flowers.
For the largest sunflower, I wanted even more movement in the petals.
To achieve this, use scissors to cut further down some of the gaps between the petals on the bottom layer.
You don’t need to be particularly precise. I like to follow the curve of the petals, but straight cuts would work too.
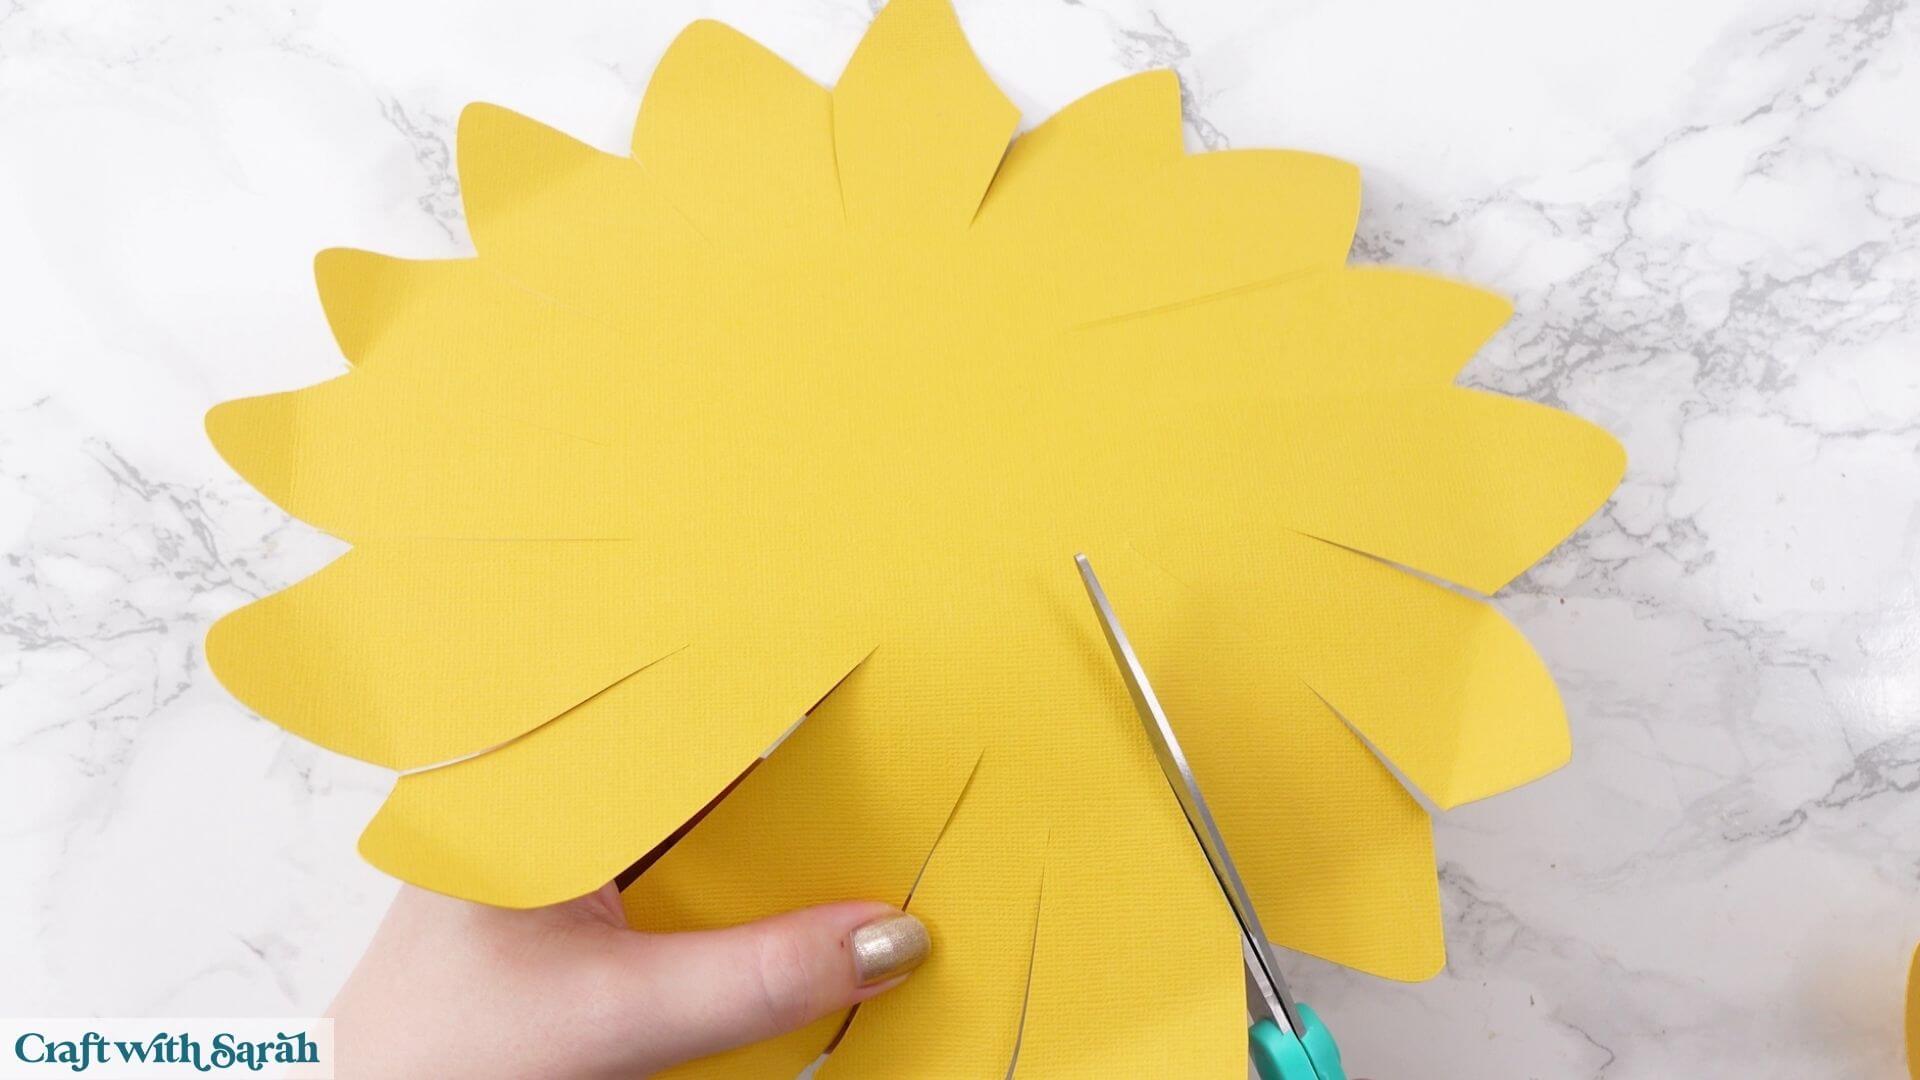
Opening up those gaps gives each petal more freedom to move so that you can curl them much further.
You can bend them with your fingers or wrap the cardstock around something cylindrical.
I used a Cricut brayer, but a marker pen, Cricut pen or another rounded object would work too.
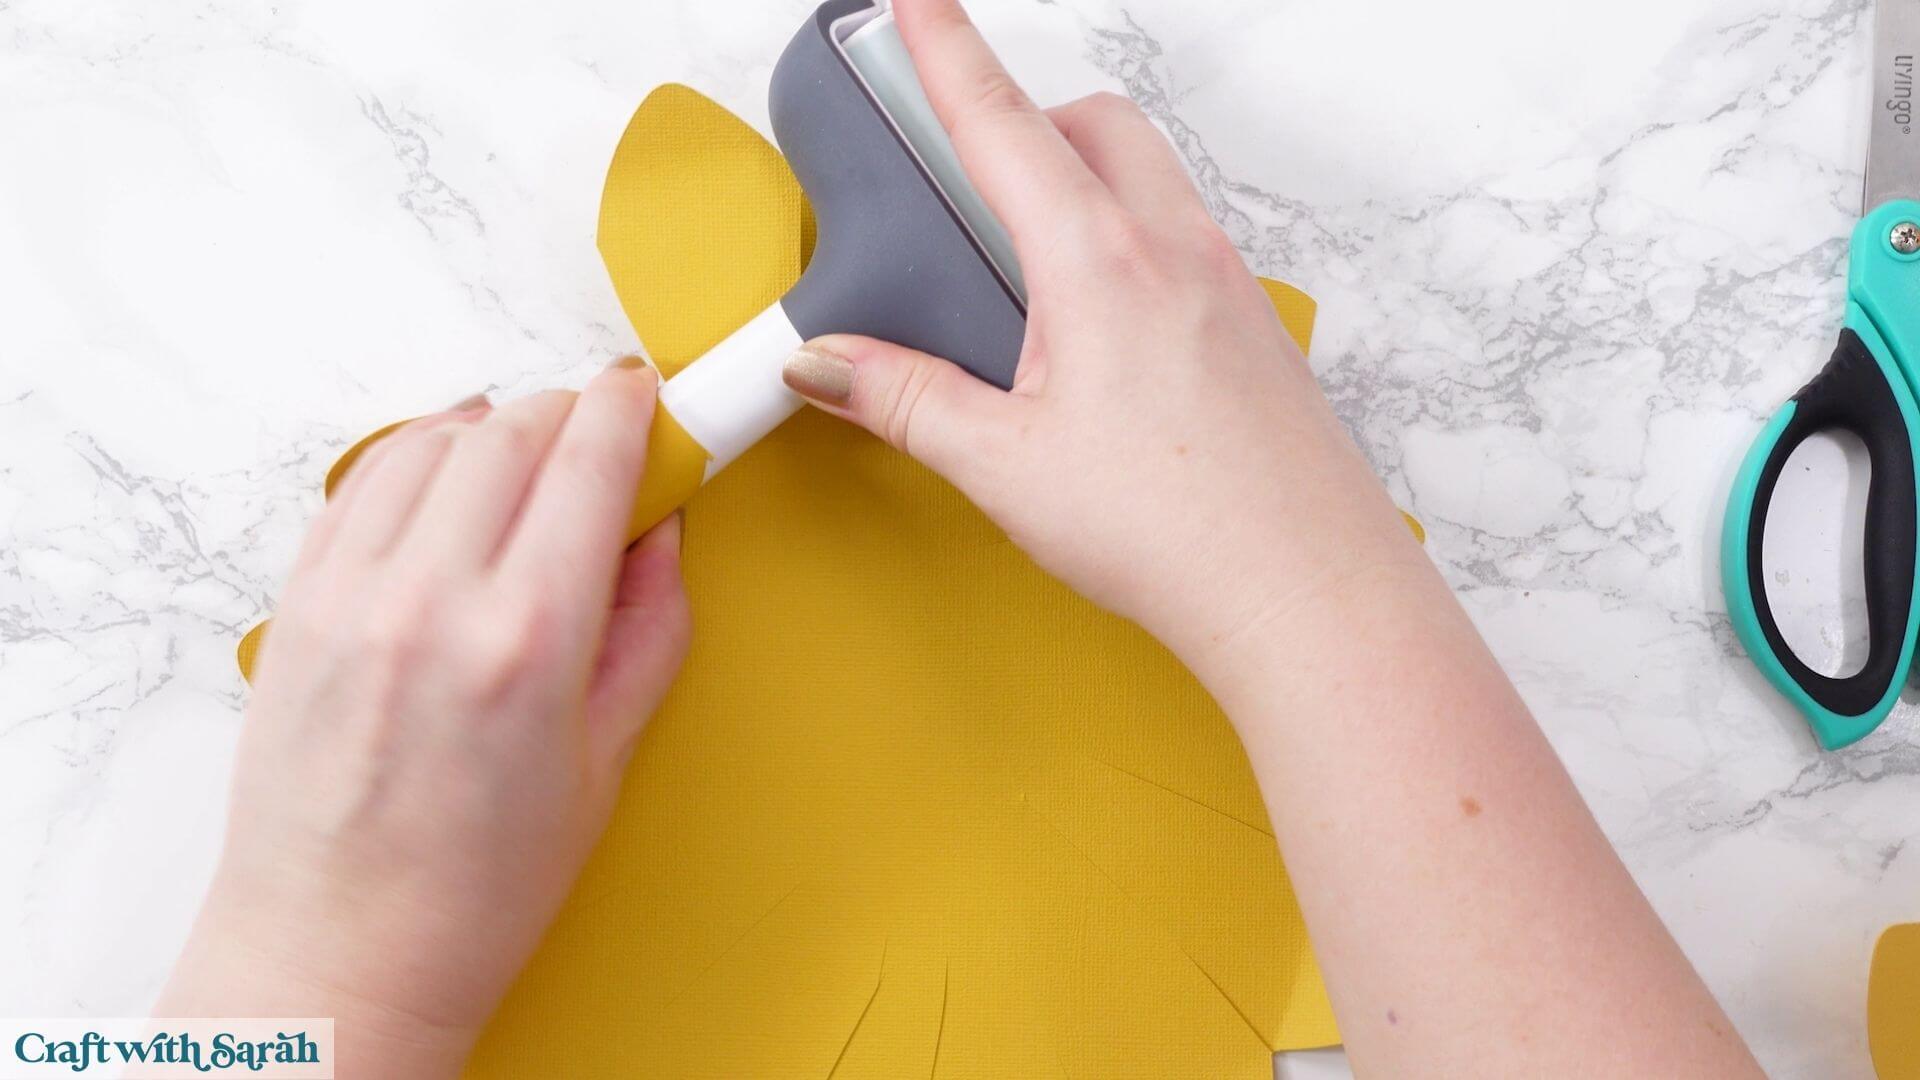
Alternatively, curl the petals into a loose cone shape with your fingers and then release them.
Experiment until you get the amount of curl that you like.
Glue the flower layers together, then adjust the petals again if needed.
Step 5) Mount to the wall
I used Blu Tack to temporarily attach my cardstock pieces to the wall.
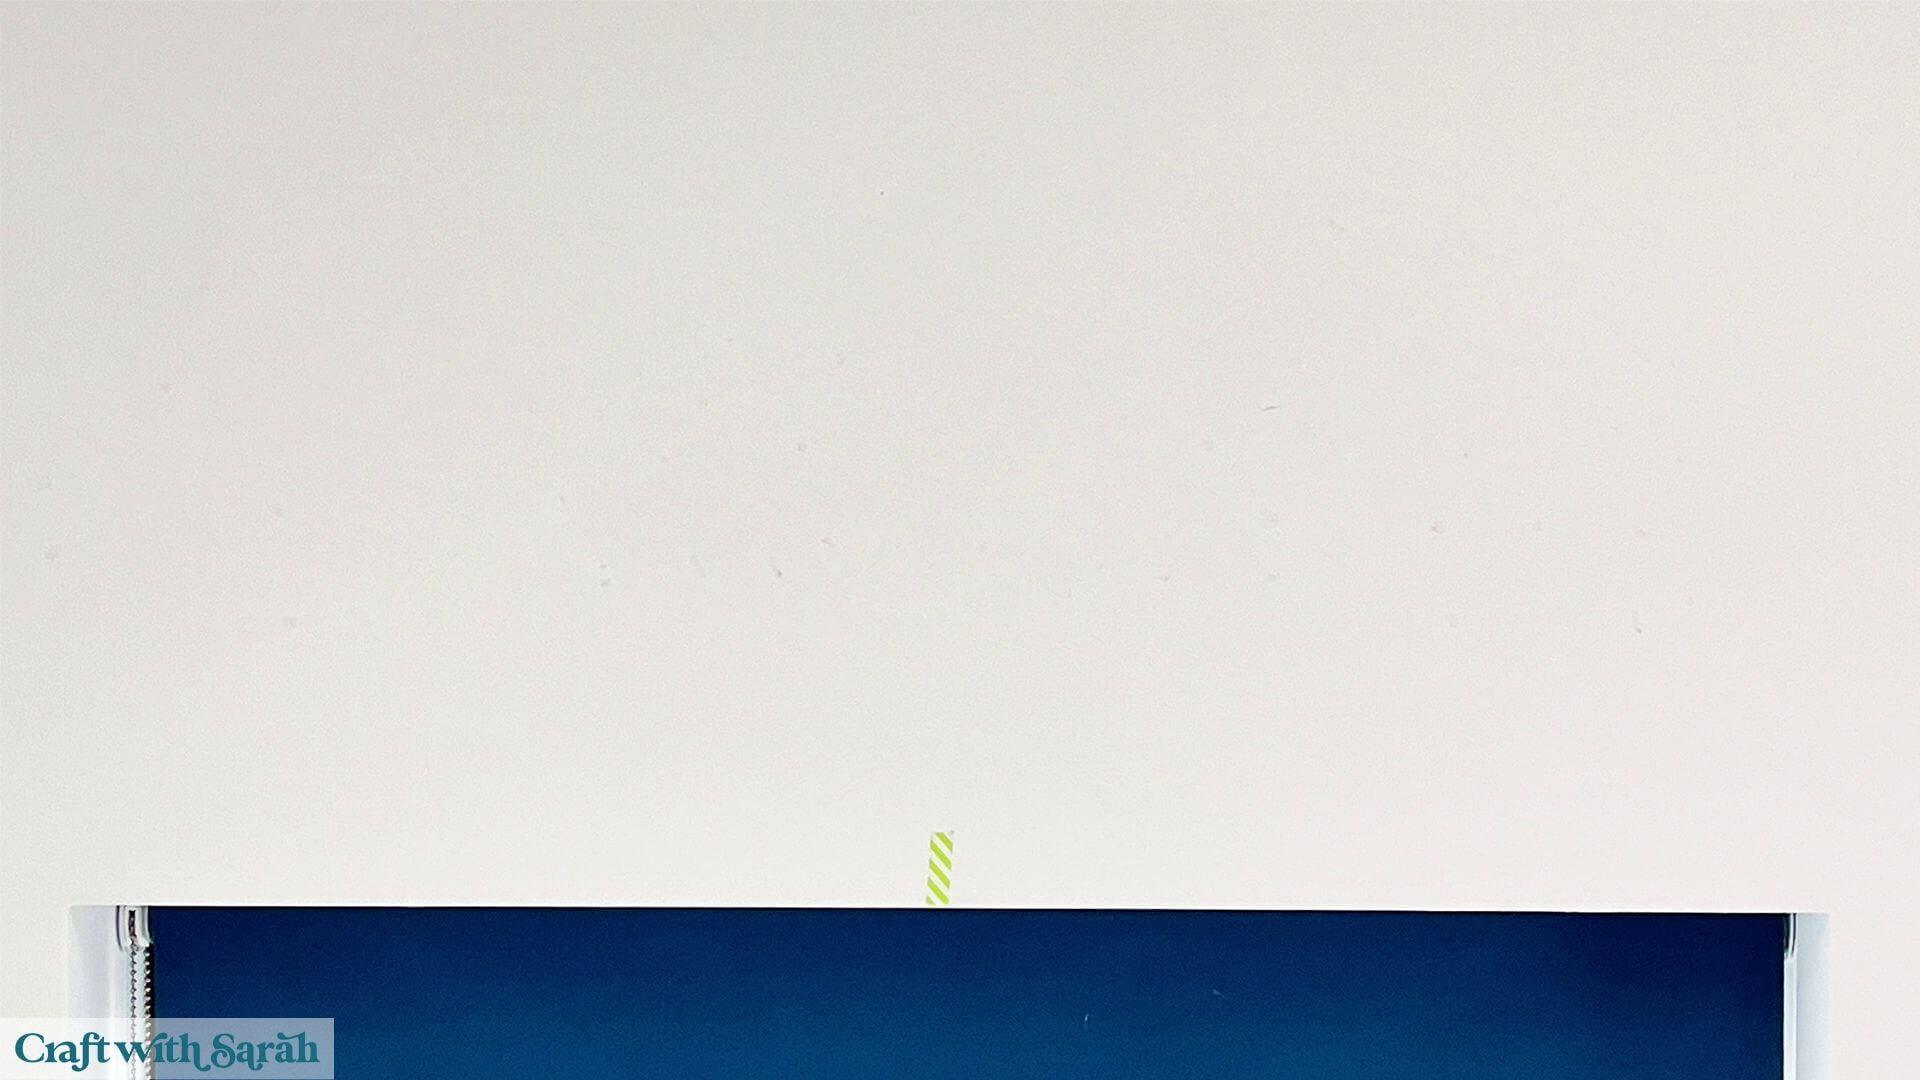
Before starting, measure the area where your display will go and mark the centre point with a small piece of washi tape, masking tape or similar.
This makes it much easier to keep the finished arrangement centred instead of putting everything up and discovering that the whole design is skew-whiff!
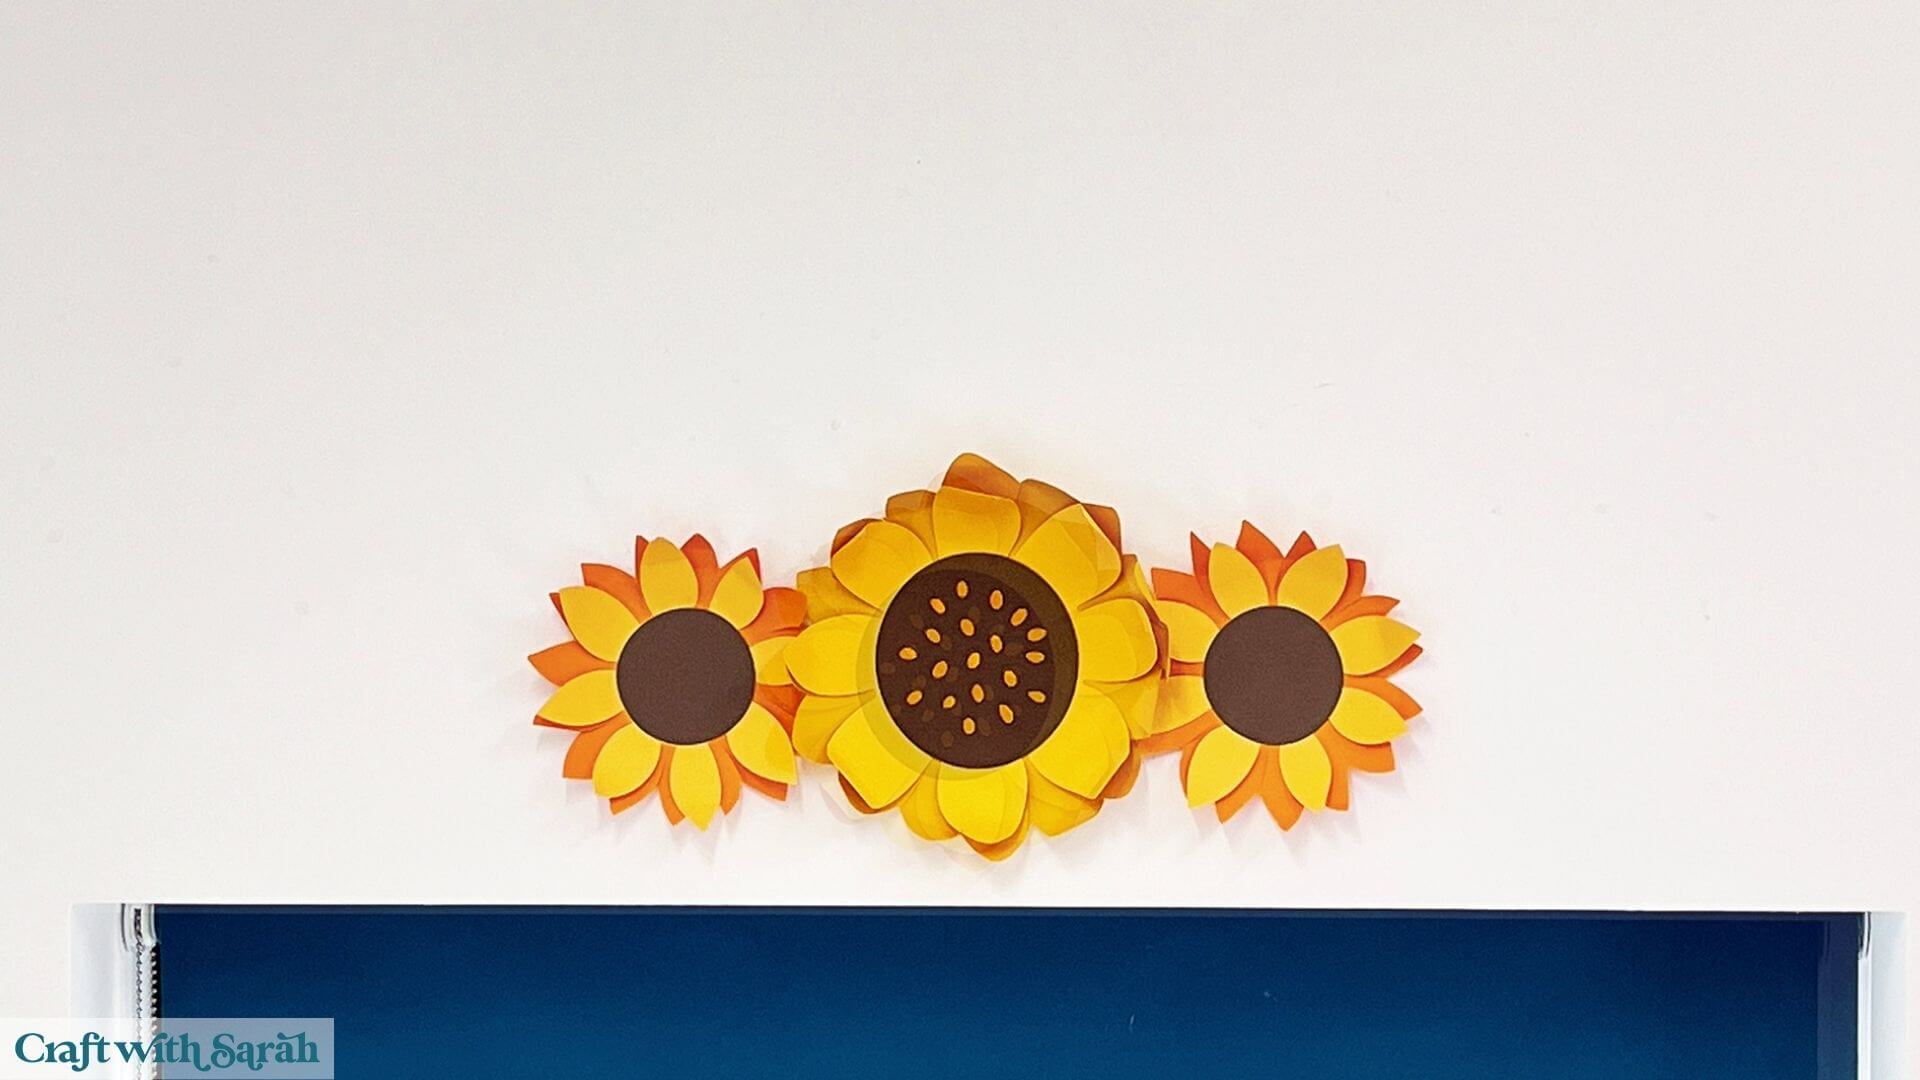
Start with the large central sunflower.
Next, add the other flowers as these are the biggest elements in the design.
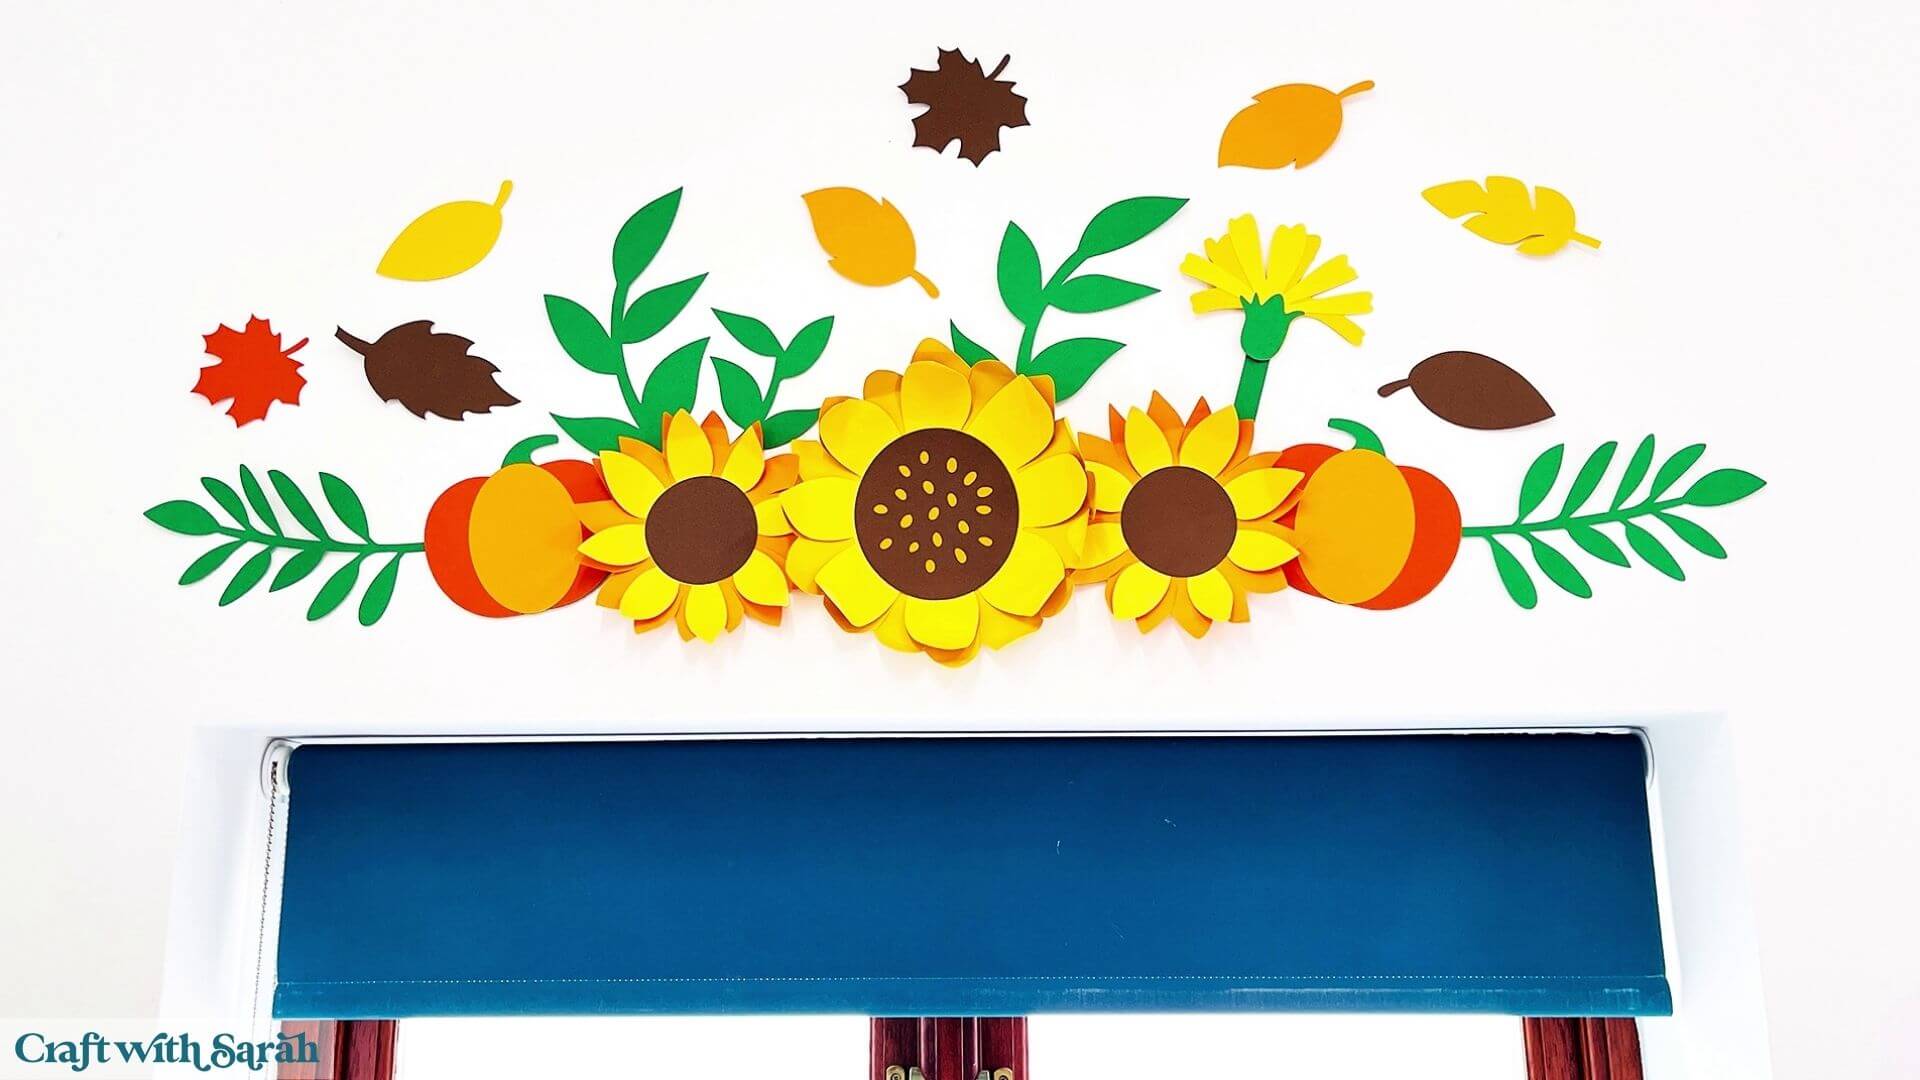
Add the flourishes coming out from the sides to establish the overall width, then start filling in the spaces with the smaller leaves, blossom and other greenery.
Finally, add the loose leaves above the main arrangement so that they look like they’re blowing around in the breeze.
You don’t have to follow your Design Space layout exactly. Use it as a guide, then adjust the positioning as you put everything on the wall.
Once everything is in place, you can curl or bend the flower petals again if they have flattened slightly while you were working.
Design your own autumn Cricut projects
I hope that you enjoy designing your own custom projects with these flowers and leaves.
Whether you’re cutting the flowers tiny for a greetings card, creating a dimensional shadow box or going enormous with a statement wall display, there are so many different ways to use this collection of autumn flowers, leaves and greenery.
Have fun experimenting with the individual elements to create your own custom fall, autumn and Thanksgiving craft projects.
Happy crafting,
Sarah x