3D Owl Centrepiece 🍂 FCC 06
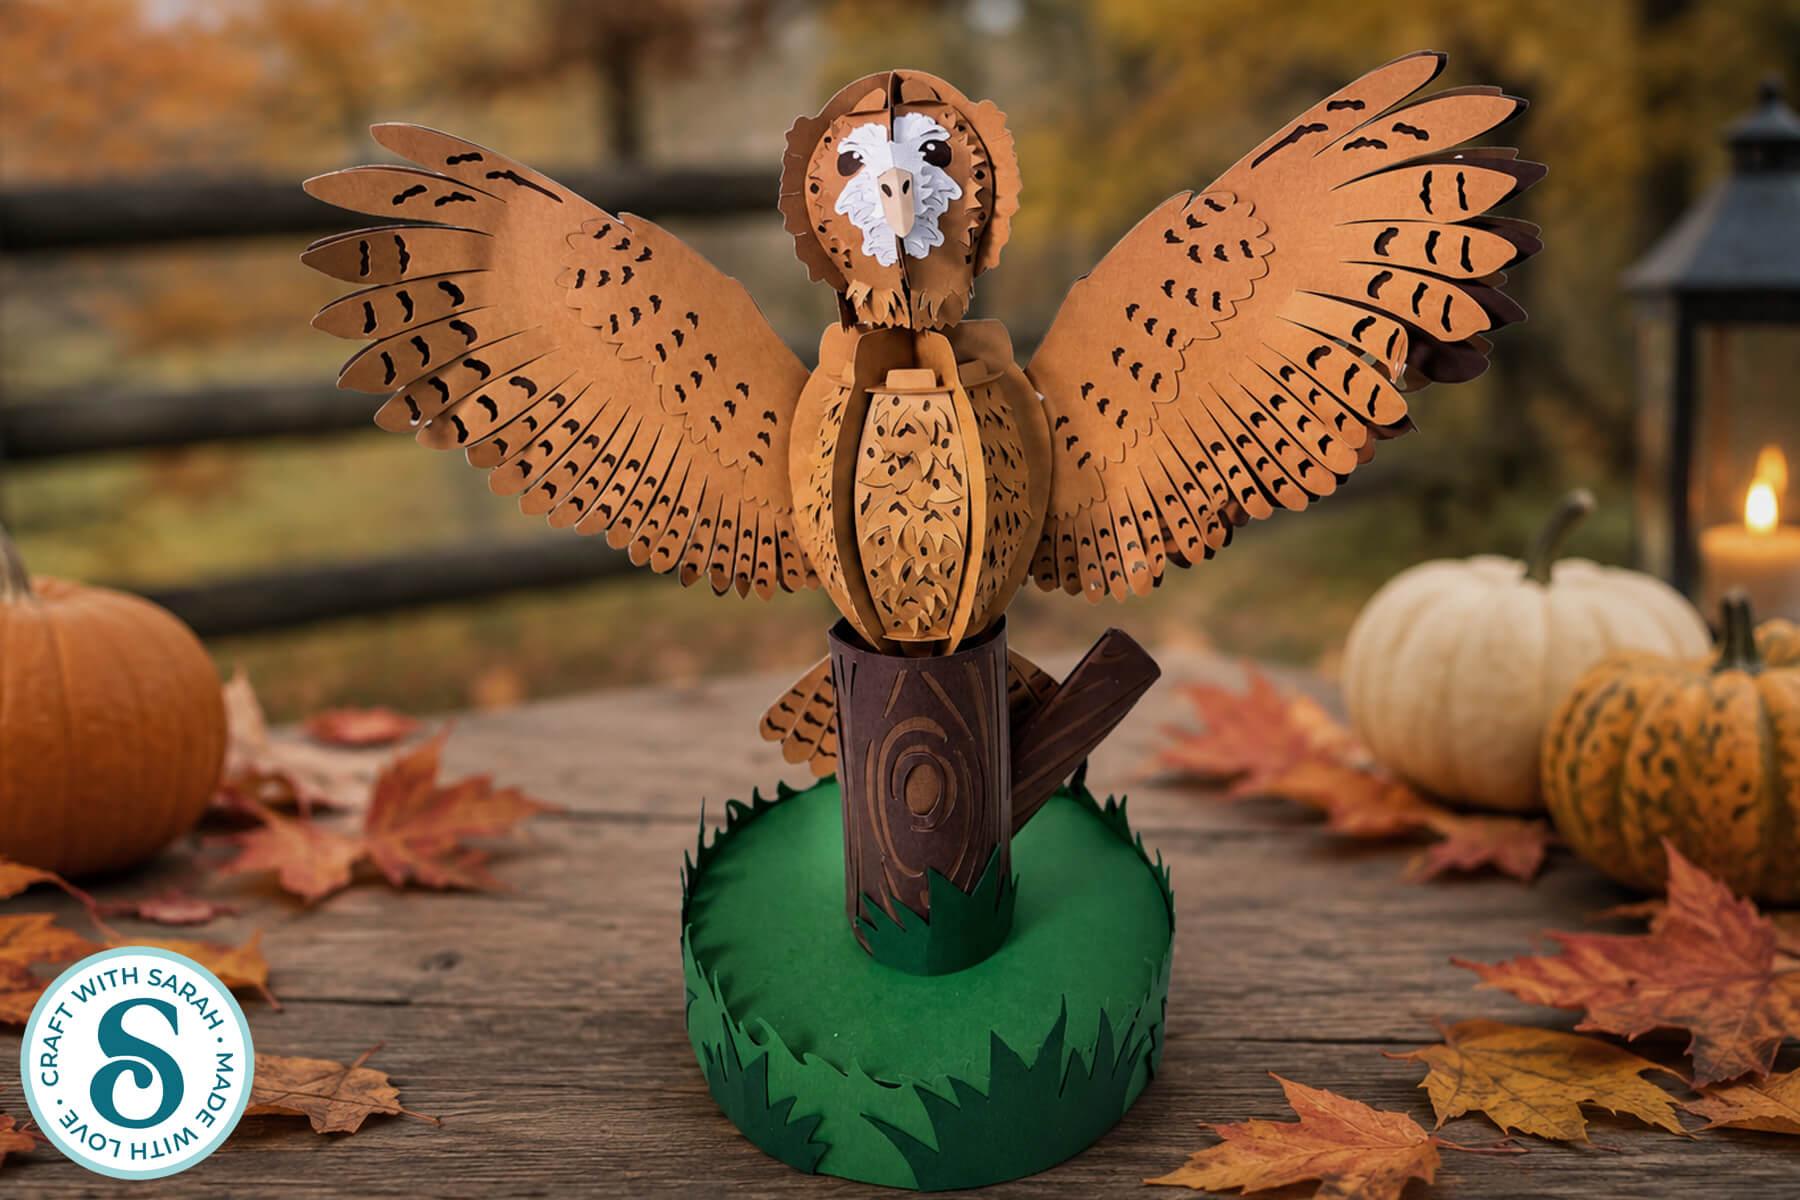
Make an impressive 3D owl from cardstock with your Cricut machine.
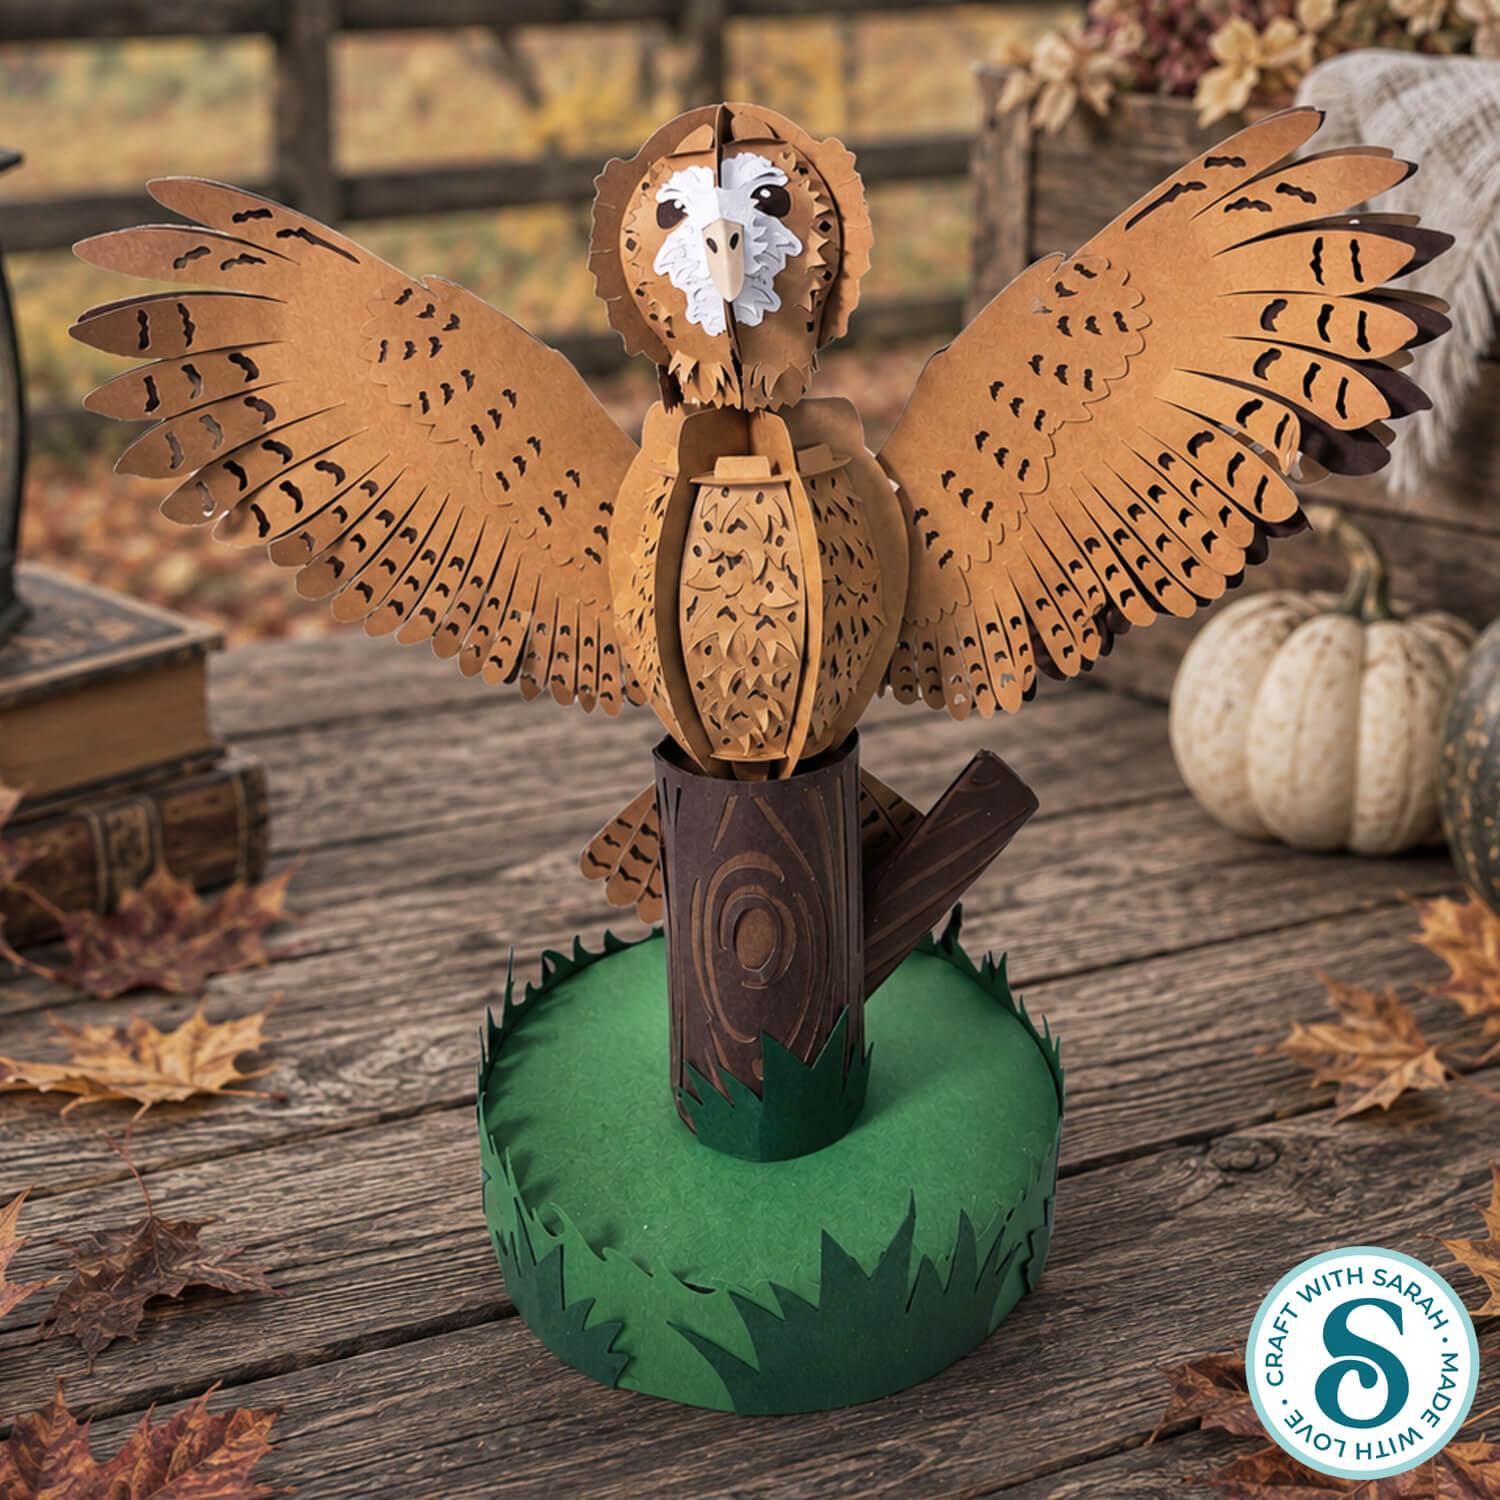
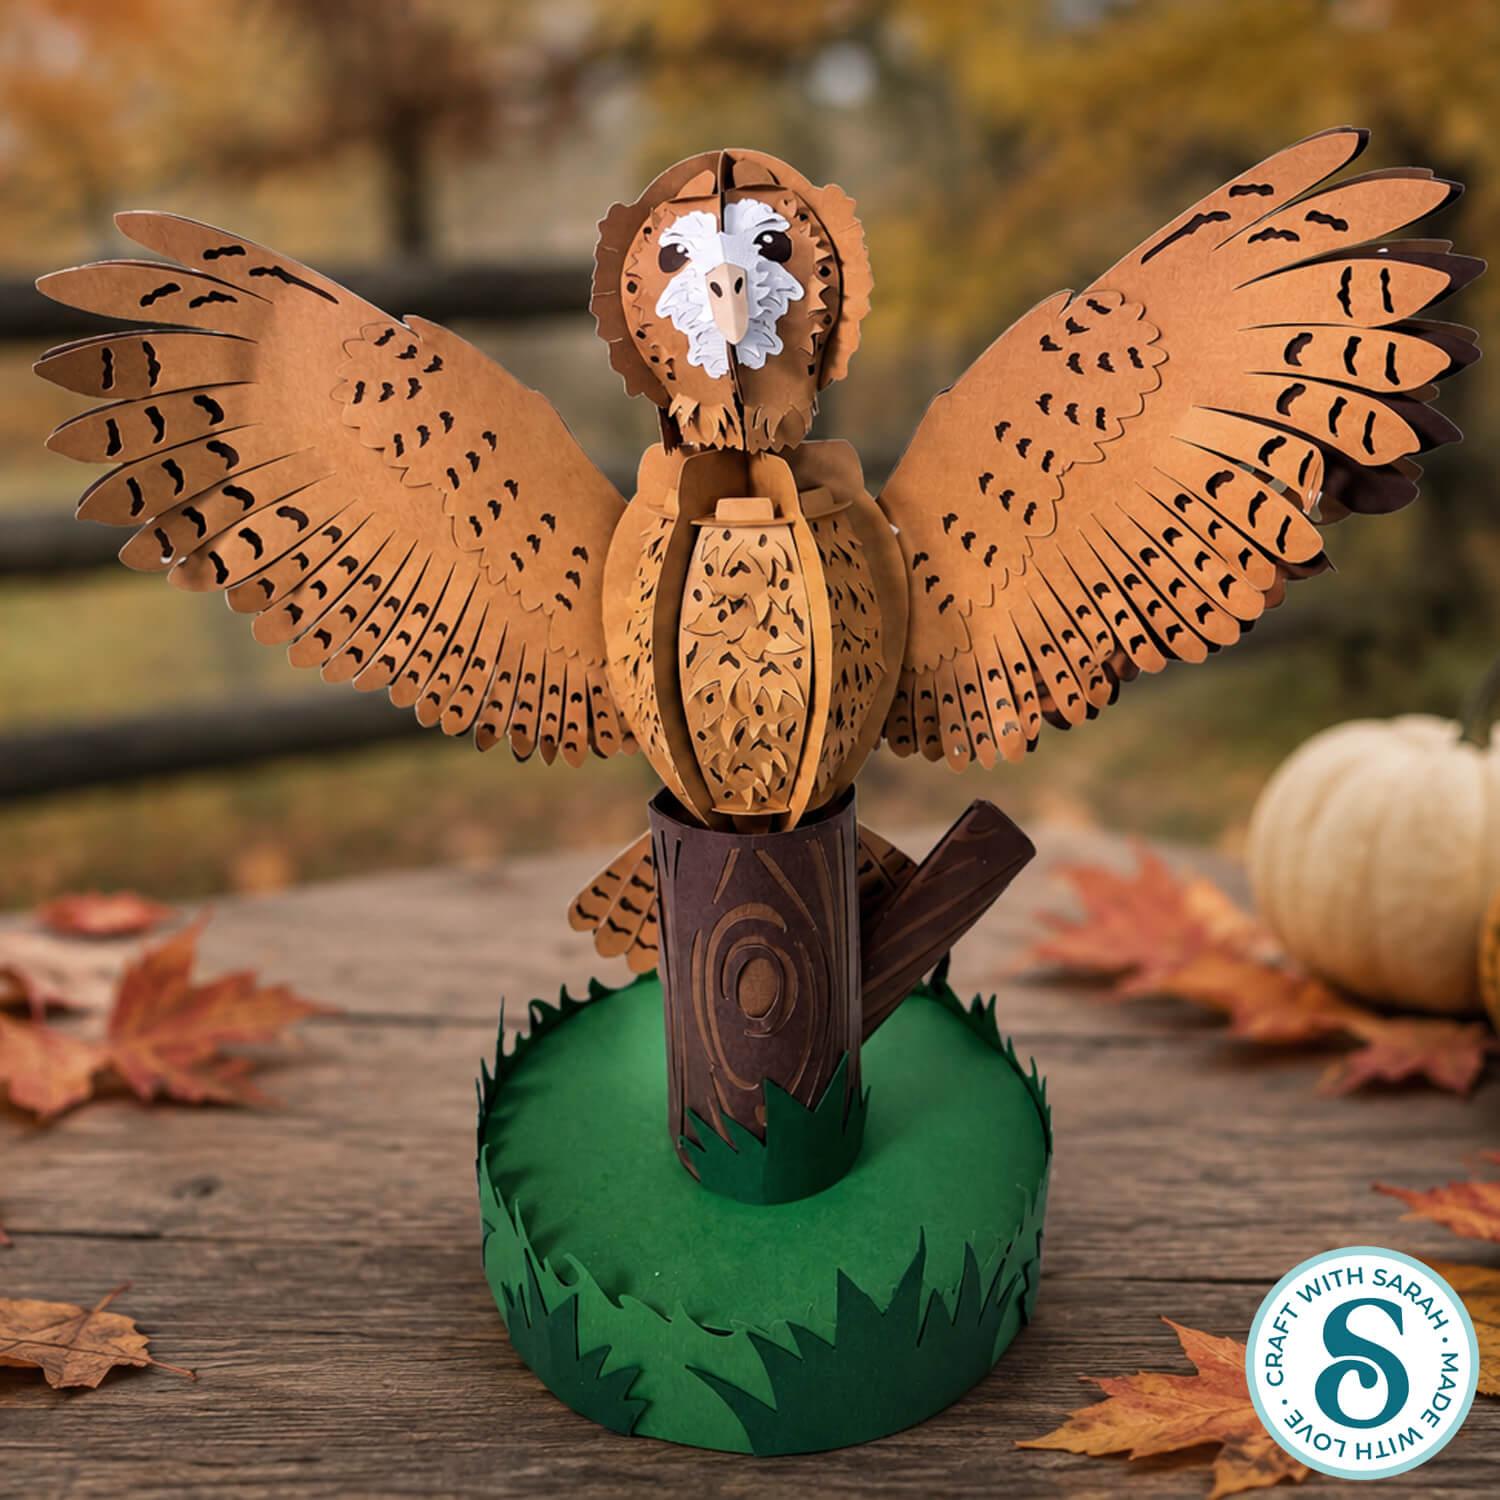
This three-dimensional owl centrepiece is made entirely from cardstock, with a woodland tree stump, grassy base and a wonderfully detailed owl with his wings outstretched.
There are quite a few pieces to put together, so this is one of those projects where you’ll want to set aside a little bit of time and work through each section carefully.
It’s absolutely worth the effort though, as the finished owl is really sturdy and makes a beautiful autumn decoration for a table, shelf or mantelpiece.
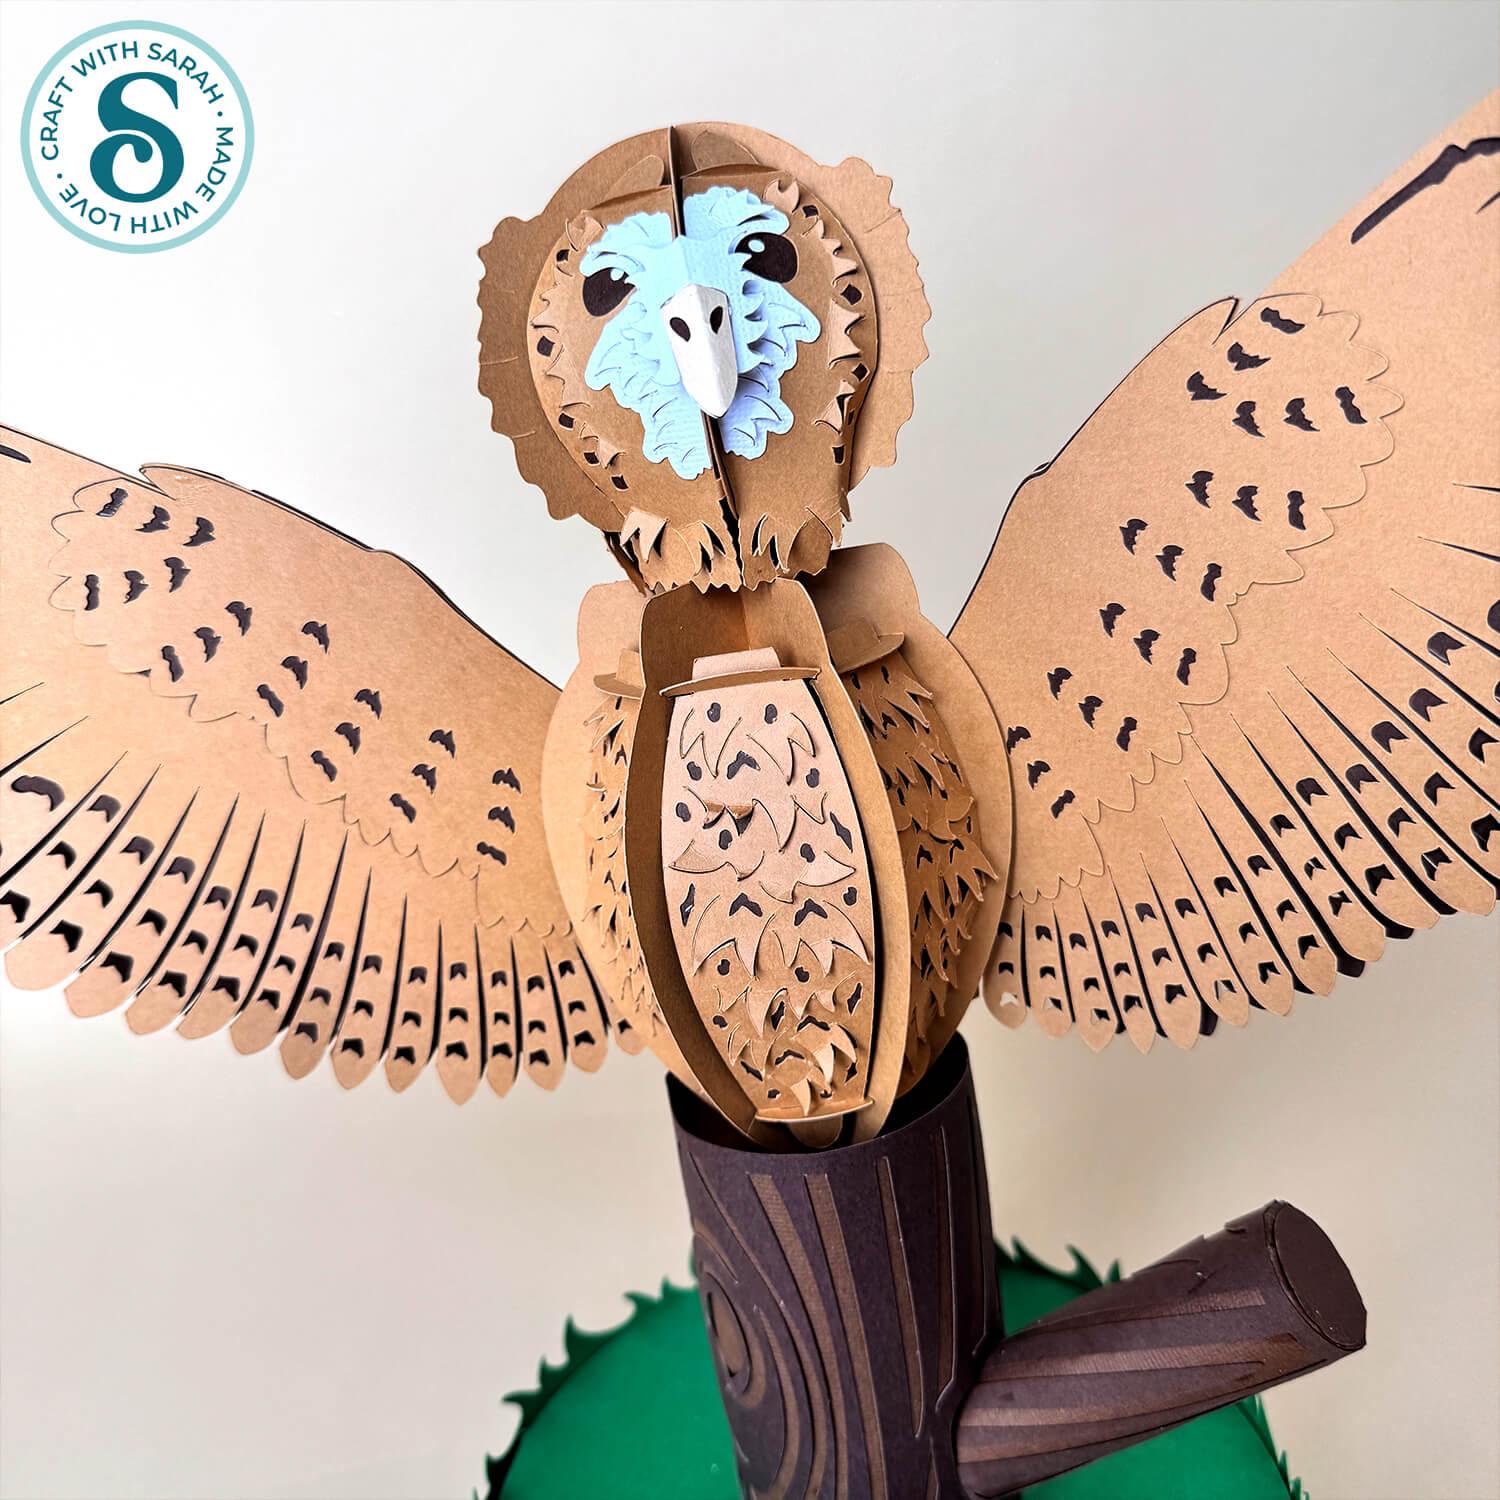
The design has been created so that most of the main sections can be pulled apart again, which makes it much easier to store your owl and bring him back out again next autumn.
Please note that this project does not include a hand-cutting version.
This project is part of the 2026 Falloween Craft Countdown
3D owl materials supply list
Here is a list of the materials that are used to make this project.
Please note that some of the links included in this article are affiliate links, which means that if you click through and make a purchase I may receive a commission (at no additional cost to you). You can read my full disclosure at the bottom of the page.
- Cricut machine
- Light blue Cricut cutting mat
- Cricut scoring wheel or stylus
- Coloured Card (any thickness)
- Glue (I like Bearly Art Glue and Collall)
- 3D foam pads
- Paperclips (optional, useful for holding pieces together while the glue dries)
This project is suitable for the following types of Cricut machines: Explore series, Maker series and Joy Xtra. It is too large to cut on the Joy or Joy 2.
Foundation learning
If you're new to making papercrafts with your cutting machine, check out these links to get you started.
They include videos on topics such as: which file to use with your type of cutting machine, how to load the files into your cutting machine's software, how to cut cardstock with your type of cutting machine, how to recolor and modify/customize the cut files and tips for displaying your projects.
- How to use zip folder downloads
- Help guides for Cricut machines
- Help guides for Silhouette machines
- Help guides for ScanNCut machines
The following tutorials are Cricut-specific, but many of the ideas will work similarly with a Silhouette or ScanNCut machine and any cut files that are shared in them are compatible with all types of cutting machine.
- How to score with a Cricut (even without scoring tools)
- Print then cut tutorial
- Design Space tools (Combine, Attach, Slice, Weld, Flatten, etc.)
- Pattern fill tutorial (for making backgrounds & cutting images to a specific shape/size)
- Free envelope SVGs that can be sized to fit any card
- Presentation boxes for handmade cards
- How to write inside cards with Cricut pens
- How to cut layered designs at a small size
- Design Space tips & tricks
- Cricut pens tutorial
- How to mount multiple designs in the same frame with magic guides
Cricut owl craft video tutorial
Watch the video below to see how to make this project. Keep scrolling for a written tutorial.
Written tutorial (with photos!)
Here’s how to make this 3D autumn owl centerpiece using a Cricut machine.
Step 1) Download the cutting file & upload to Design Space
Get the files using the box below.
Purchase the File(s)
This cut file is available as part of the Instant Access Bundle.
Or, purchase this design individually here
Before you upload the SVGs to Design Space, you need to unzip the download folder that they come in.
Not sure how to do this? Click here for a tutorial that covers all the following types of computer and device:
- How to unzip a folder on a Windows computer
- How to unzip a folder on a Mac
- How to unzip a folder on an iPad
- How to unzip a folder on an iPhone
- How to unzip a folder on an Android device
After unzipping, upload the SVG file(s) into your cutting machine software.
Not sure how to use cut files with your type of machine? The following links lead to tutorials on how to use cut files in:
- Cricut Design Space
- Silhouette Studio
- CanvasWorkspace (for ScanNCut machines)
Open Cricut Design Space, start a new project and then click the “Upload” button on the left of the screen.
You can then either click “Browse” to find the files on your computer, or drag-and-drop them in.
Select the file in the “01 Cricut Version” subfolder called svg-3d-owl-craftwithsarah.svg
Press “Upload” on the next screen.
After uploading, the design should be automatically inserted onto your Canvas.
To hide the left sidebar to give you more space, click the arrow that’s about half way down the page.
If the design doesn’t get inserted onto your Canvas, it will show under “Uploads” in your “Recently Uploaded Images”. Click on it and then press “Add to Canvas” to put it onto your Project.
Need help uploading SVGs? Get step-by-step instructions here in our detailed help guides for Cricut, Silhouette and ScanNCut.
The whole design should load in at 35 inches wide and 48 inches tall.
Click the design and check the measurements in the size boxes at the top of the screen. If yours are different, change them to 35 inches wide and 48 inches tall.
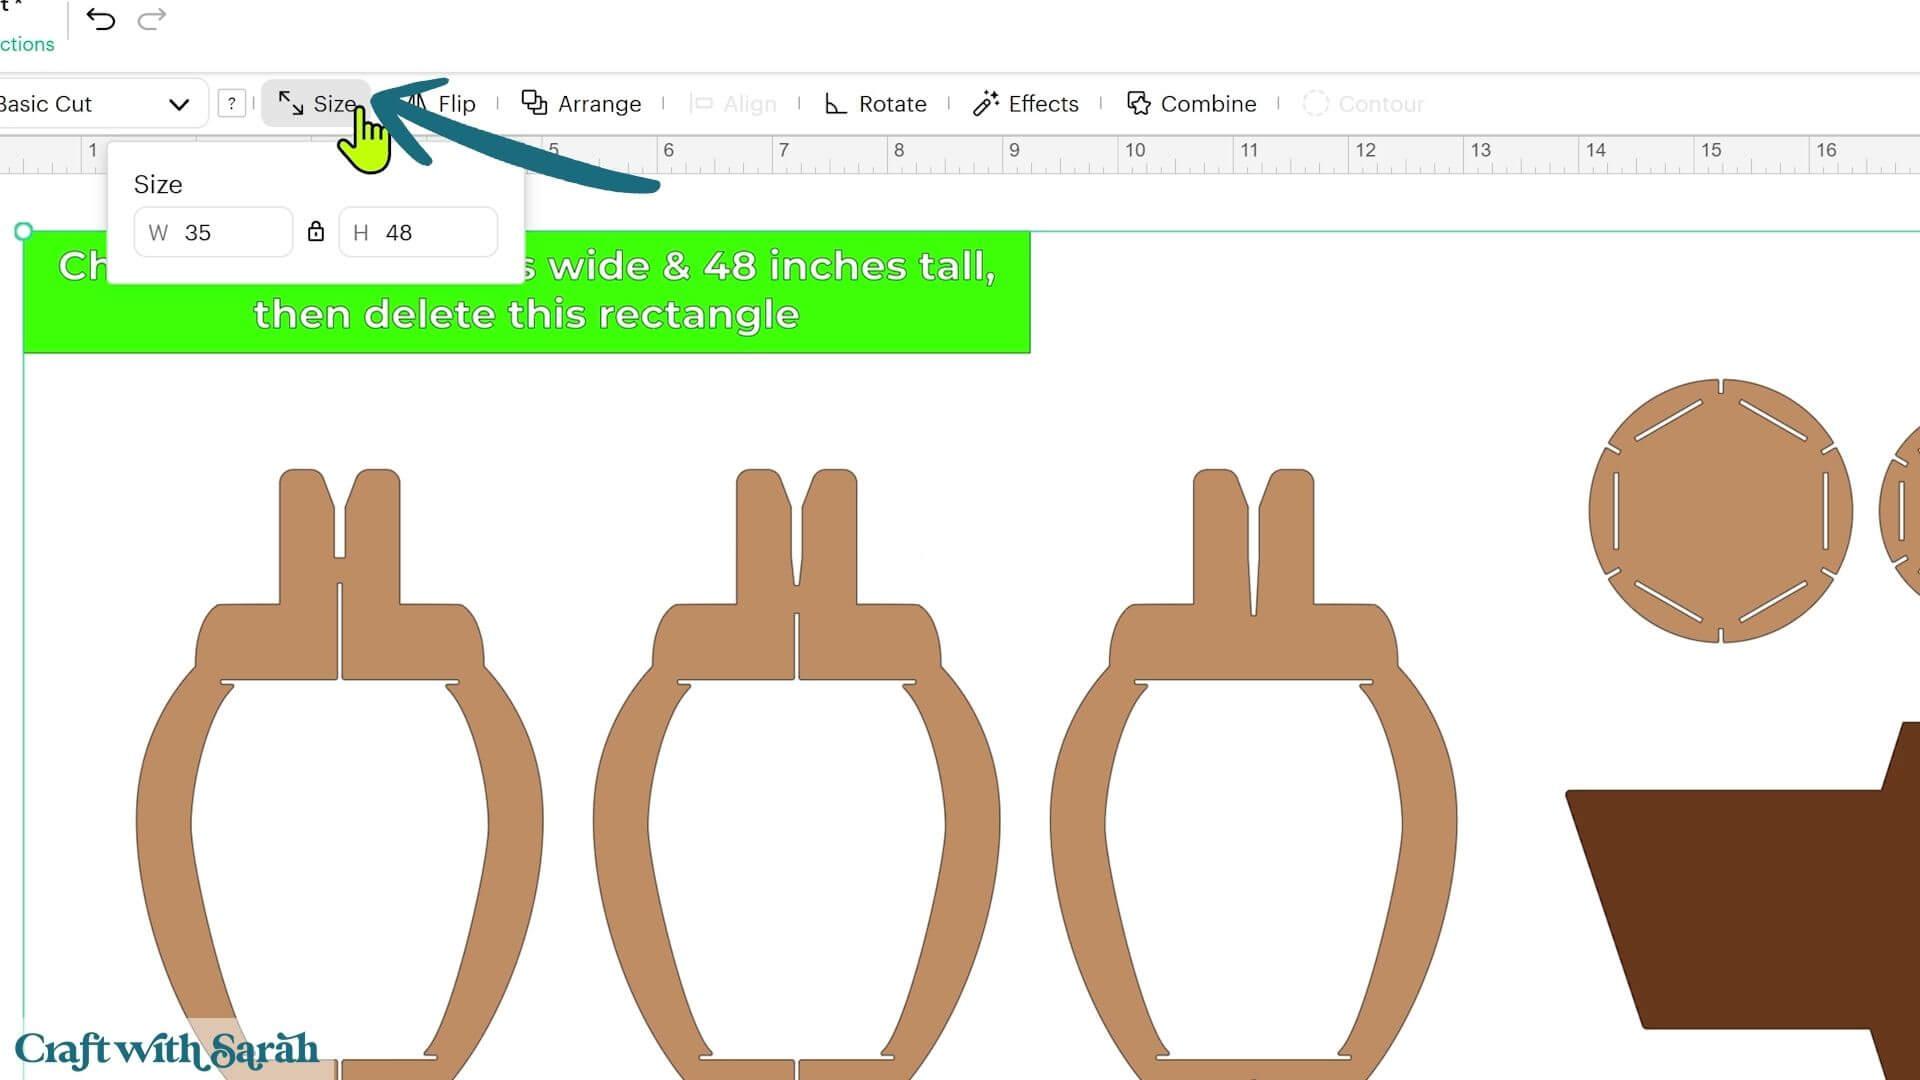
The design can be cut from 12 x 12 inch cardstock, US Letter or A4. This means that it’s suitable for the Cricut Explore and Maker machines and the Cricut Joy Xtra, but it’s too large to make on the original Cricut Joy or Joy 2.
Click the design and press ‘Ungroup’ at the top of the Layers panel.
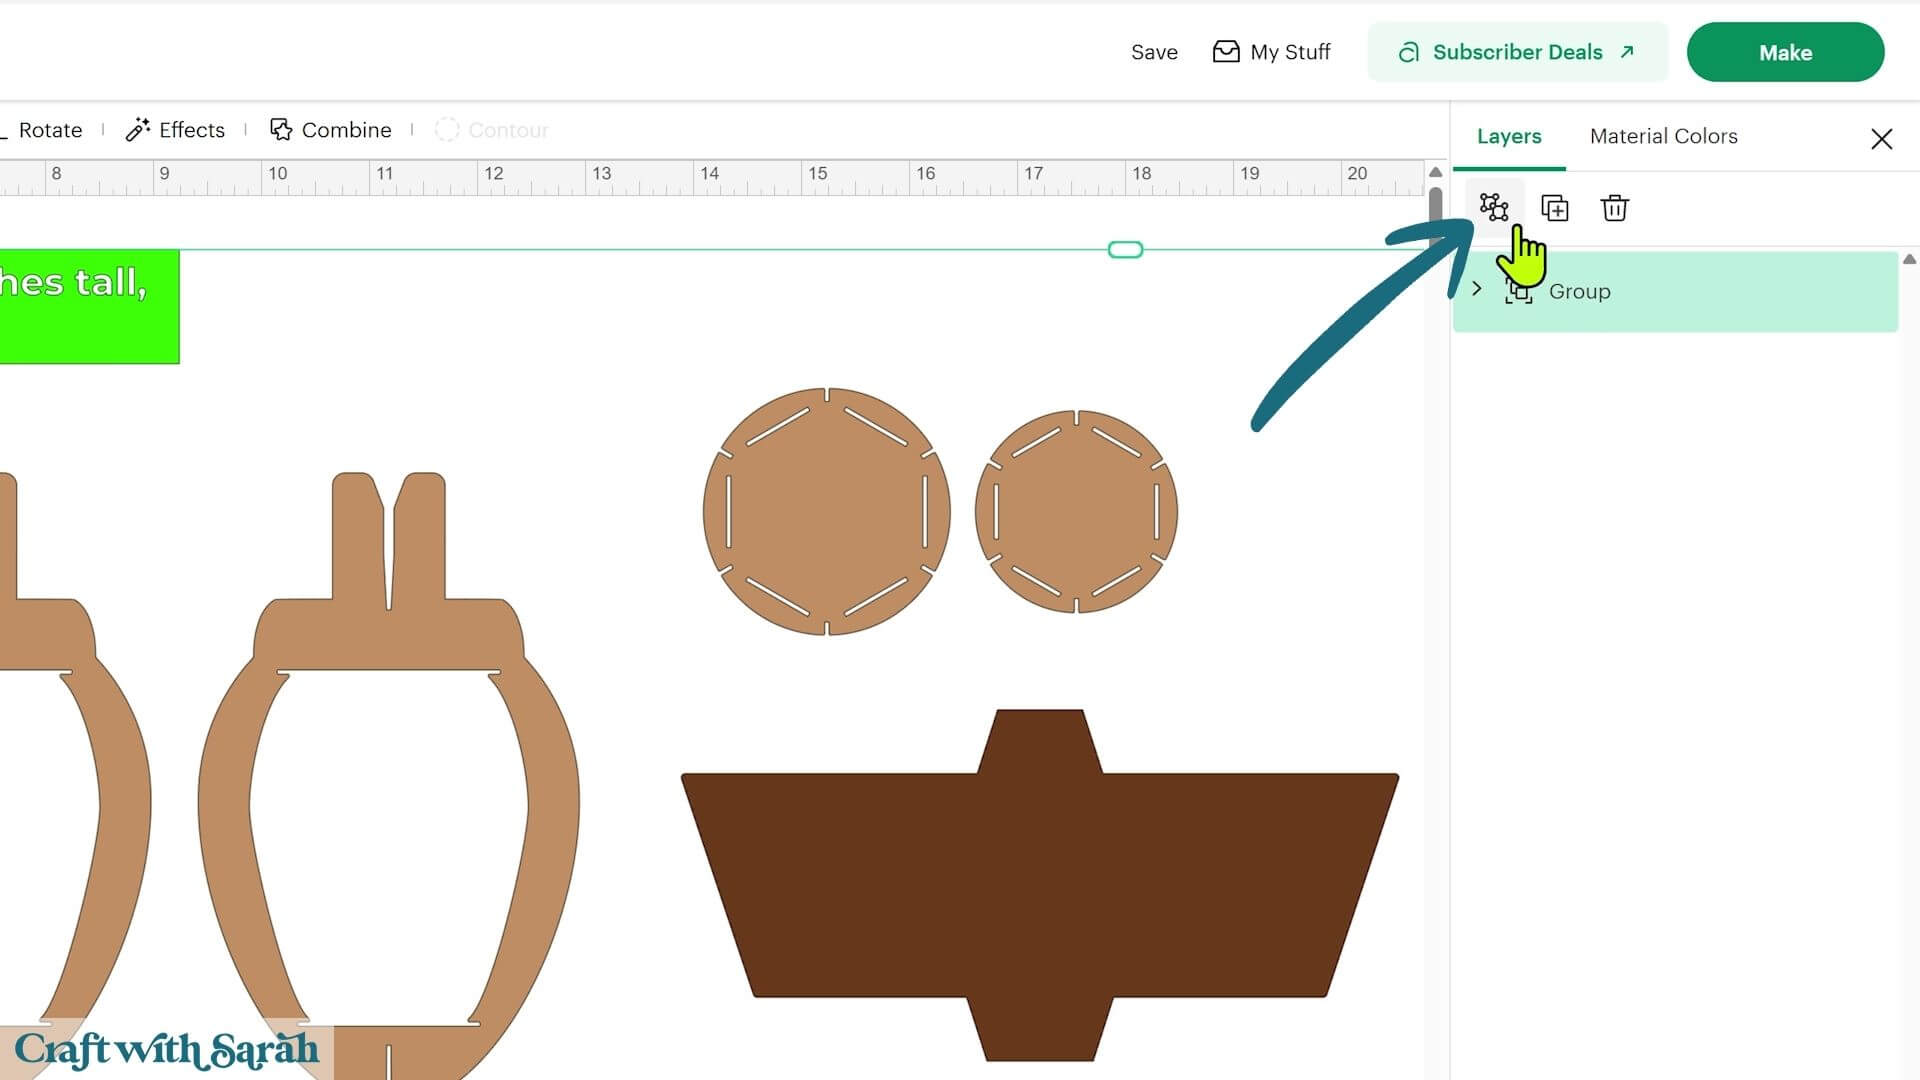
The top layer is a size box which was included to help the SVG load at the correct dimensions. Click that layer and delete it.
Step 3) Format the score lines
There are several score lines to format before cutting.
The easiest way to find them is to look down the Layers panel for the different groups.
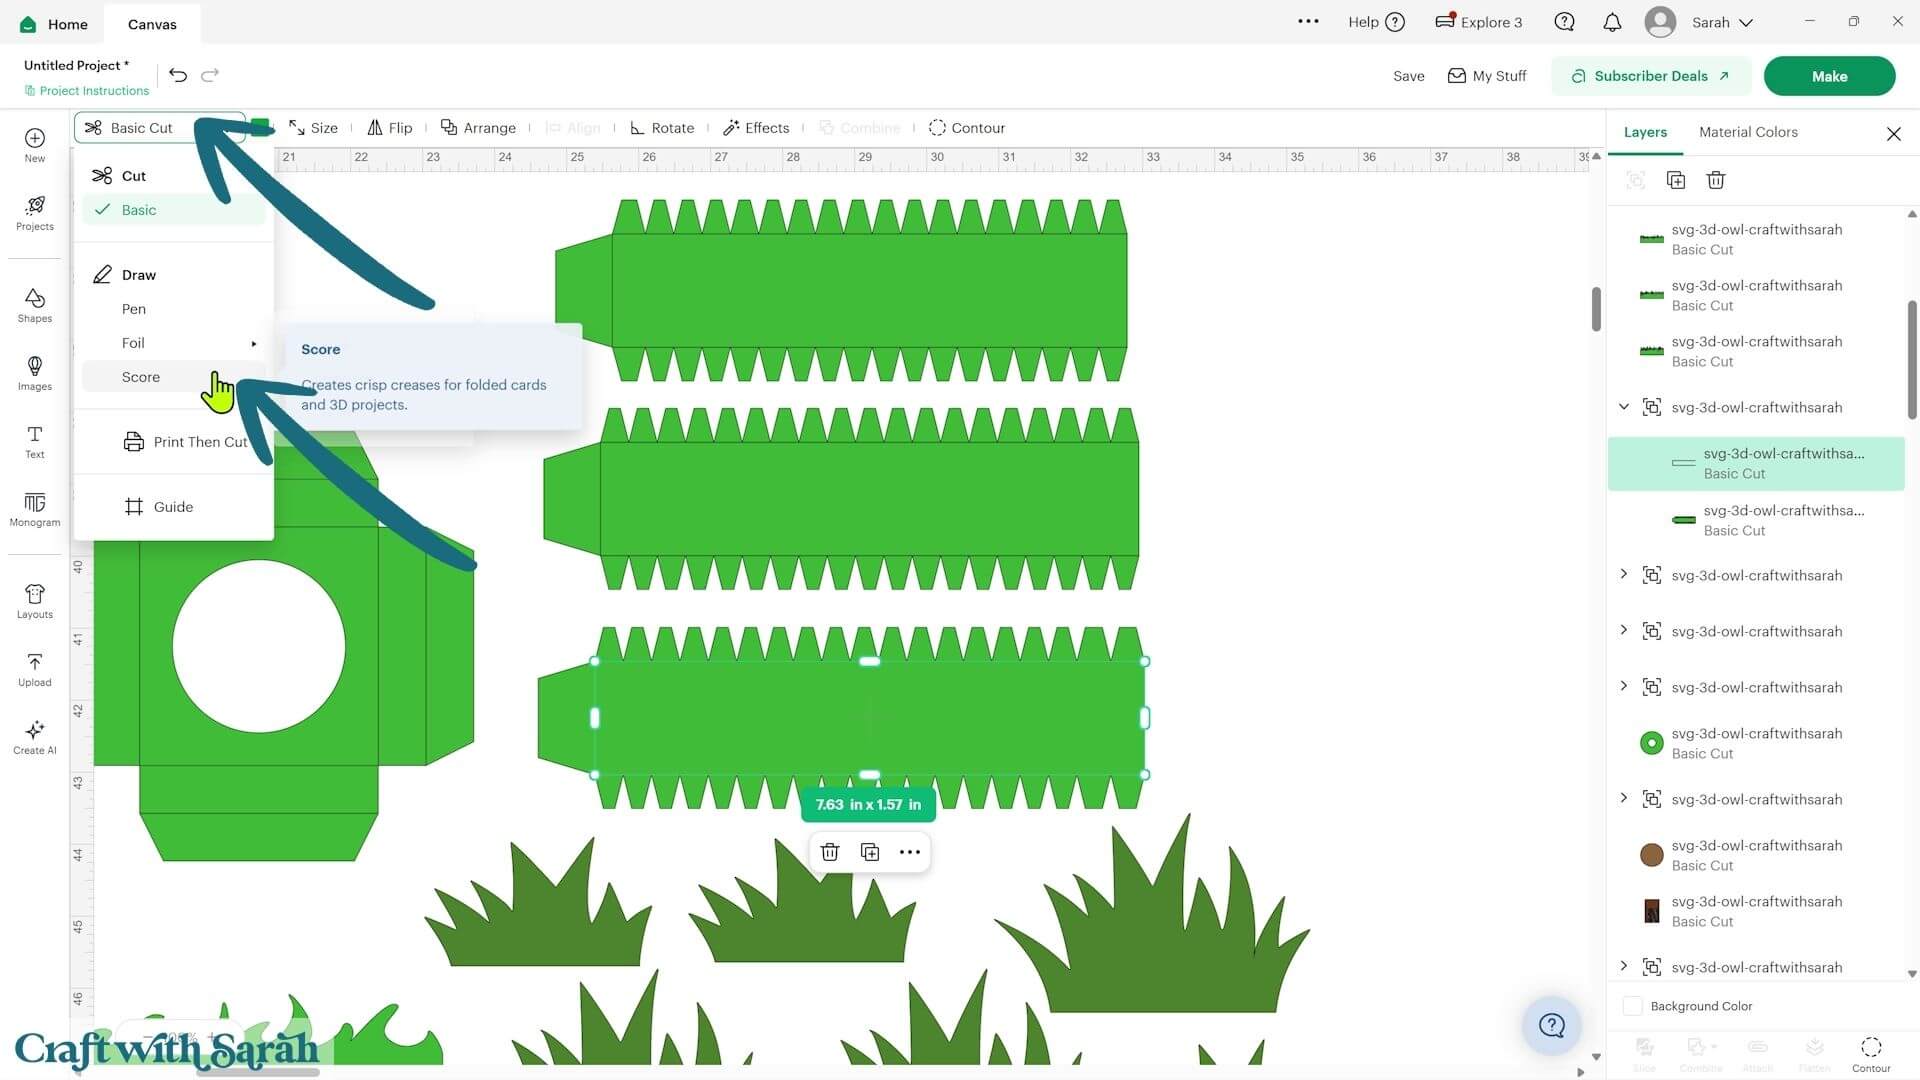
Working through each group one-at-a-time, open them using the little chevron icon and select the top layer within. This is the line to change to be scored.
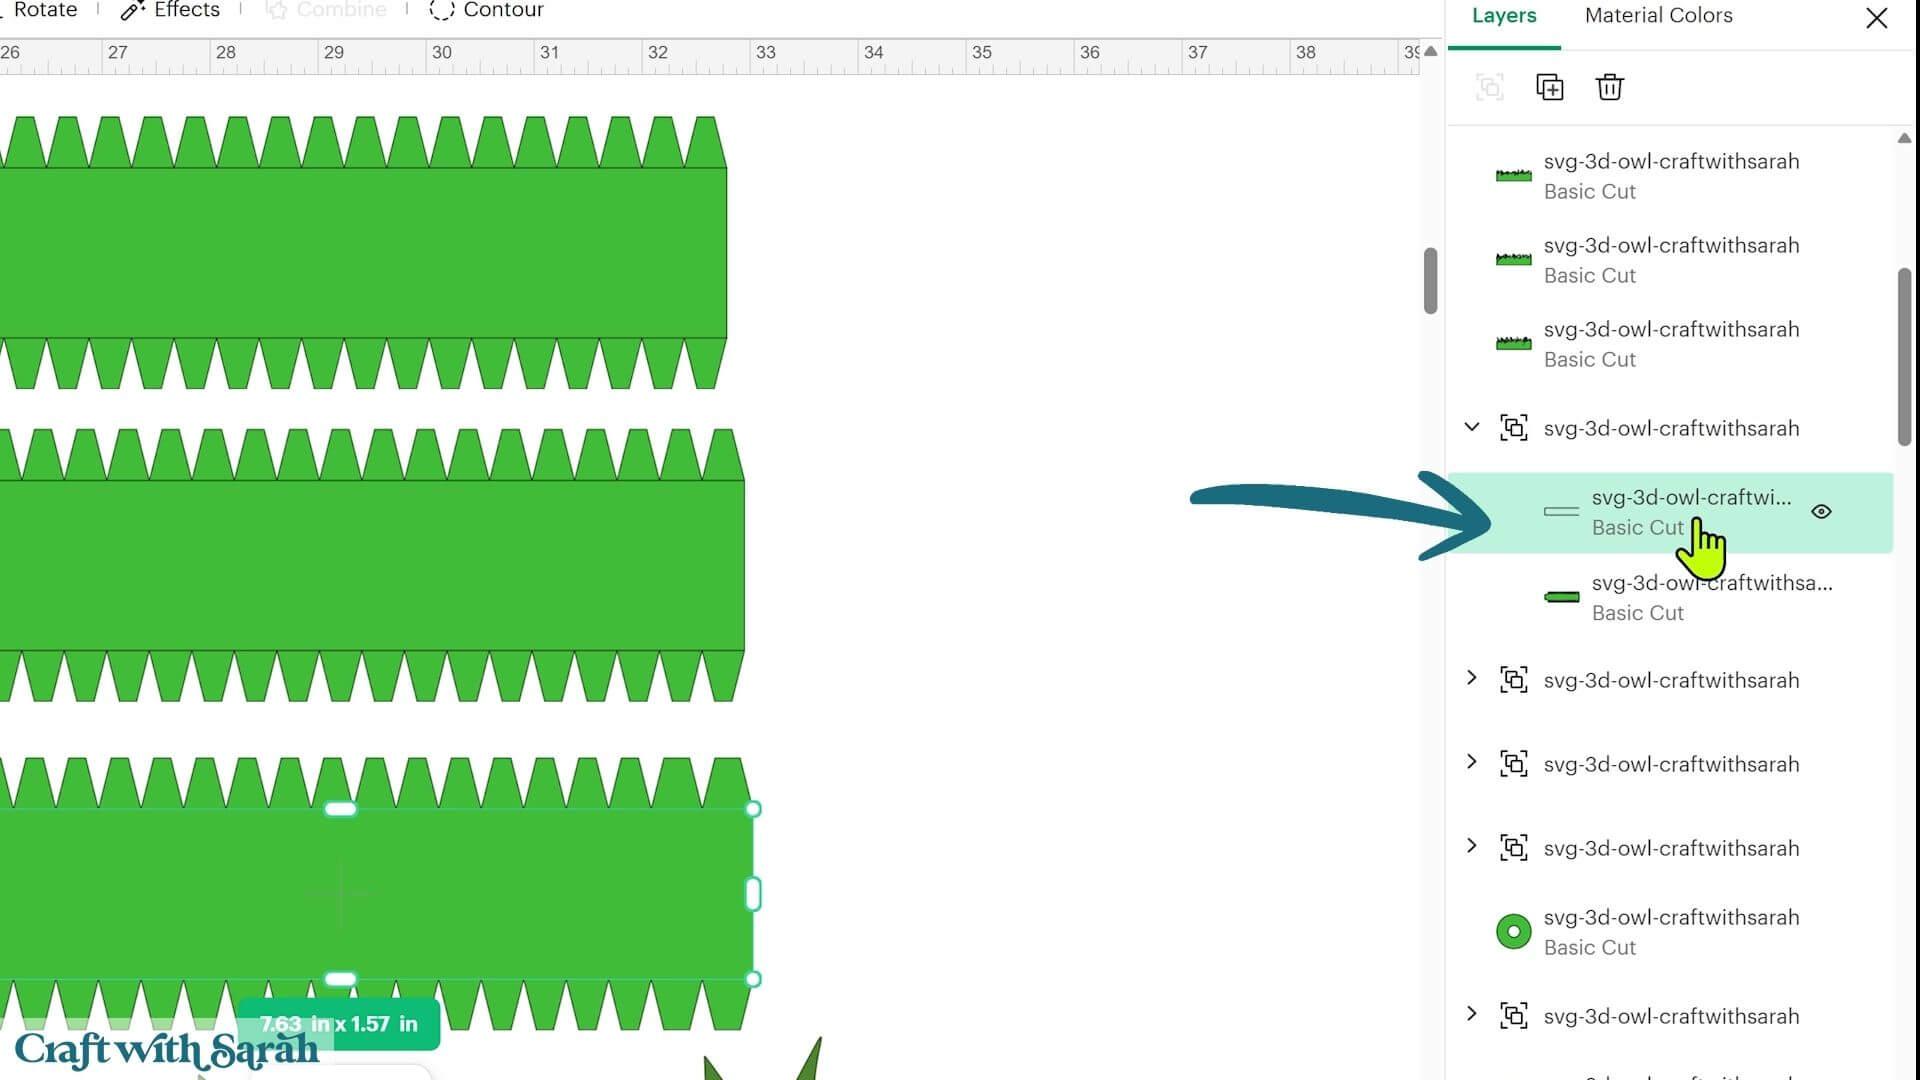
Change it to ‘Score’ using the Operations menu.
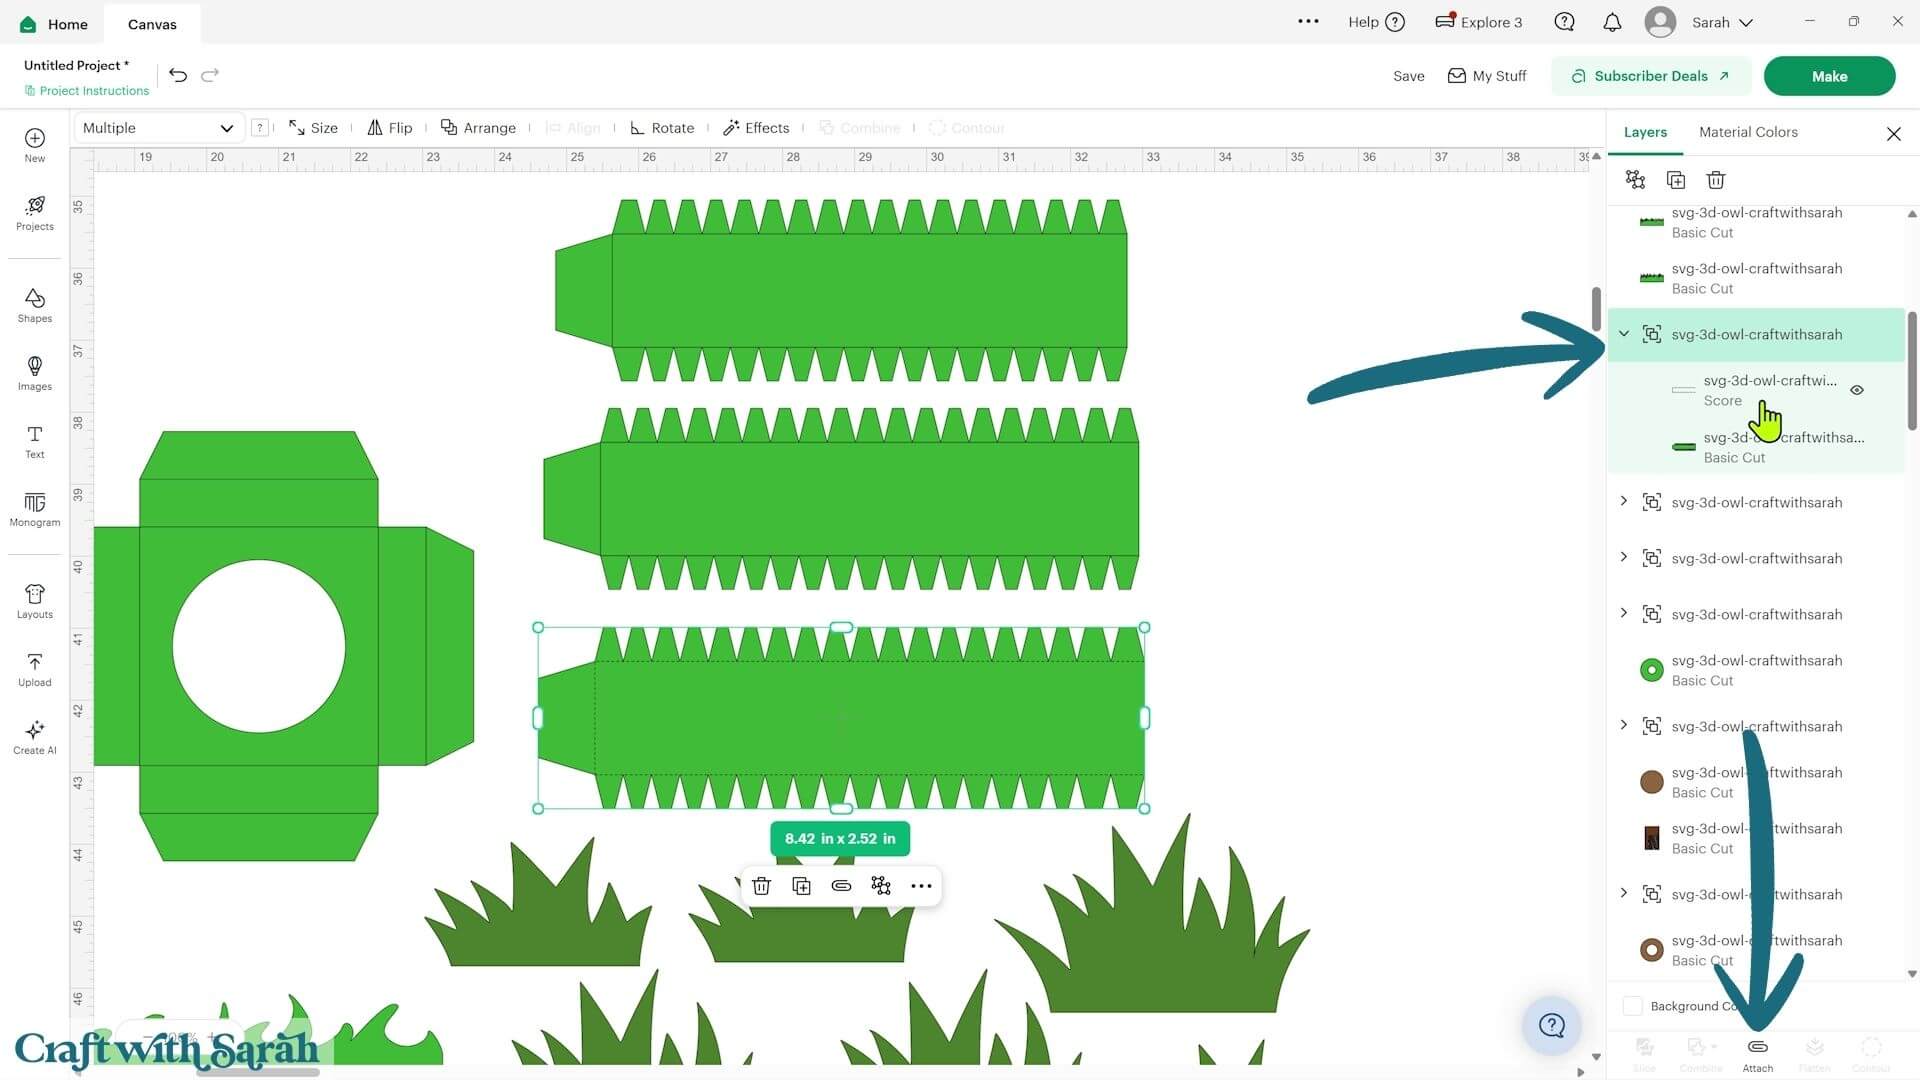
Select the group that contains the score line and the corresponding cut layer underneath, then press ‘Attach’ at the bottom of the Layers panel.
Attach is what tells the Cricut where to do the scoring.
Work through all of the groups in this way. Some of the score lines are in slightly different positions, and you’ll also find them on pieces such as the wood and the owl’s beak.
Step 3) Cut the project
When you’ve finished formatting all the score lines, save your project and connect your Cricut machine.
Click ‘Make’ to separate the pieces onto the different cutting mats.
You can change the material size using the dropdown menu and move the pieces around on the mats to make better use of your cardstock.
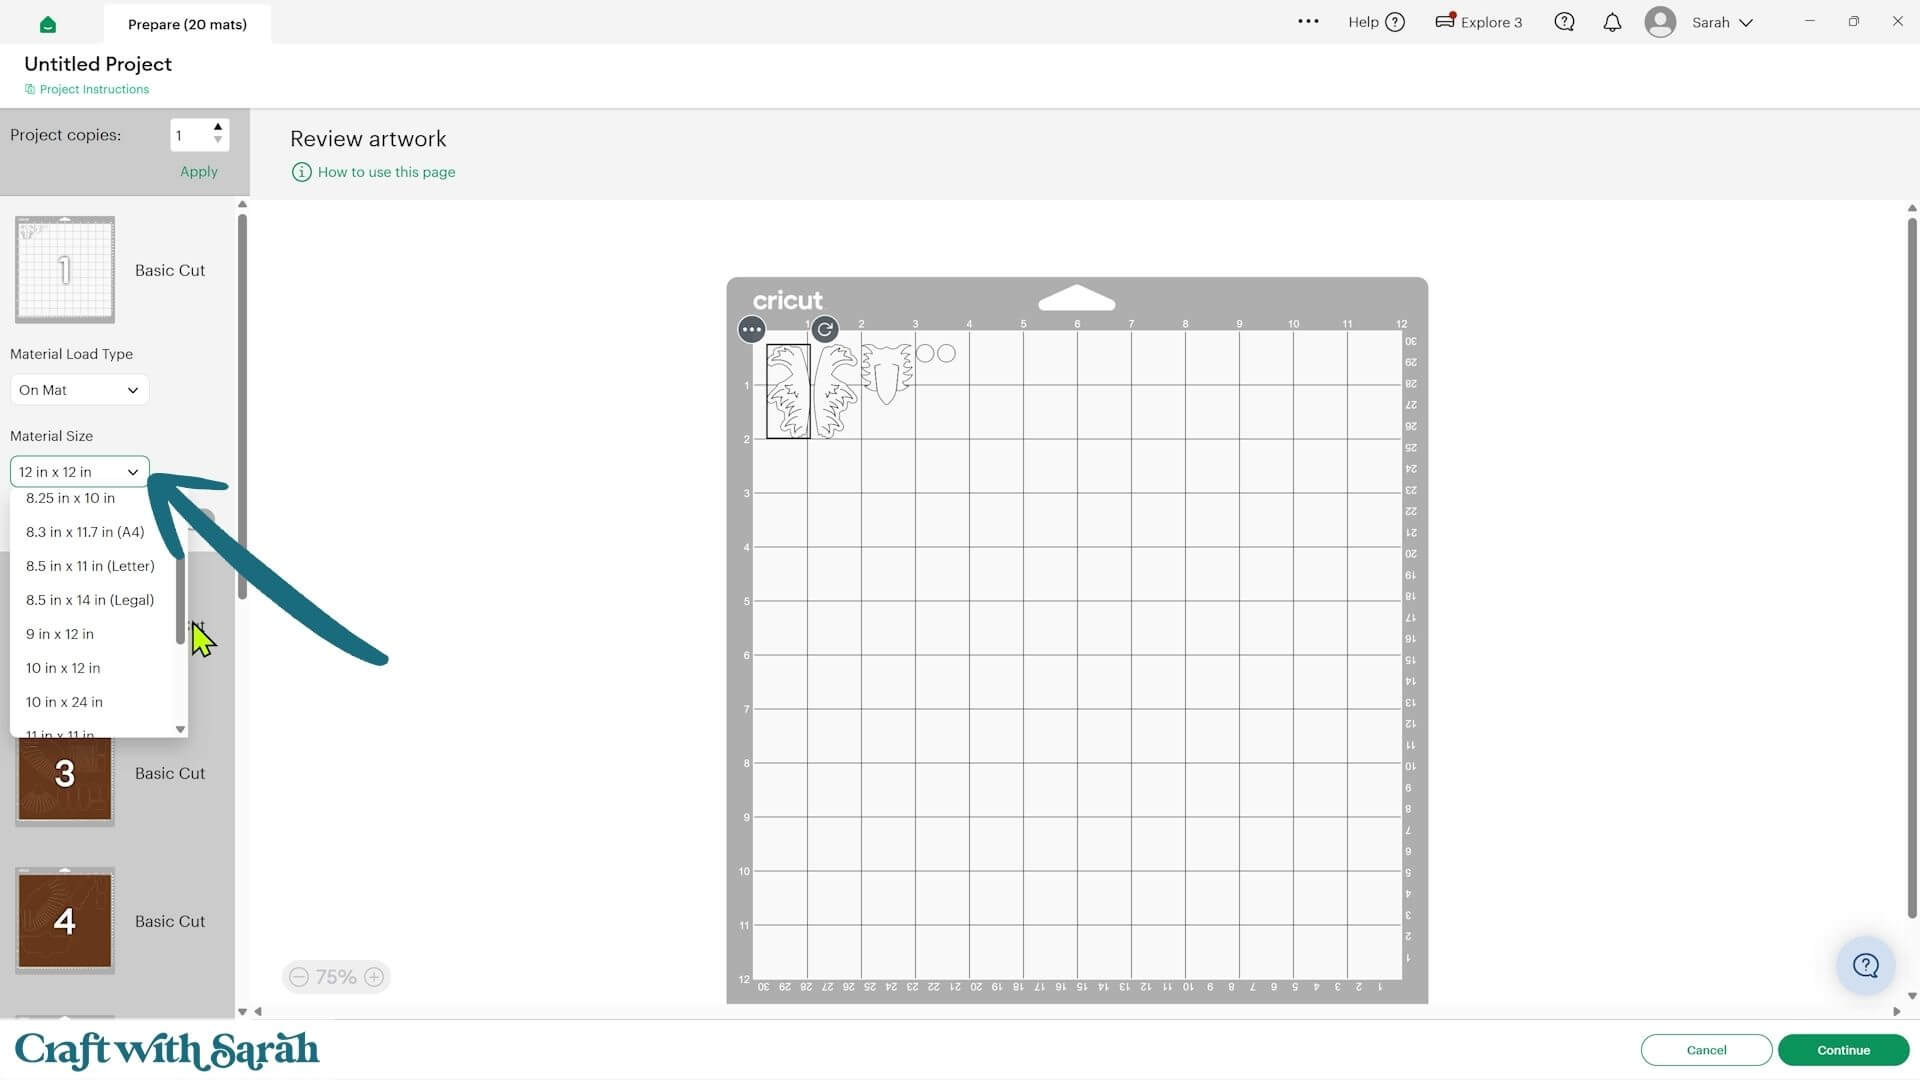
Some colours only require small pieces, so this project is a great opportunity to use up some of your cardstock scraps.
When you’re happy with the mats, click ‘Continue’ and follow the onscreen instructions to get everything cut from cardstock.
Step 4) Make the green base
We’ll start by making the grassy base that the whole owl design will sit on.
Find the three green pieces with lots of little ‘crocodile teeth’ tabs along the edges.
Fold all of the tabs along their score lines. There are quite a few to do, so take your time and try to keep the folds nice and straight. You can place a ruler along the score lines to help if needed.
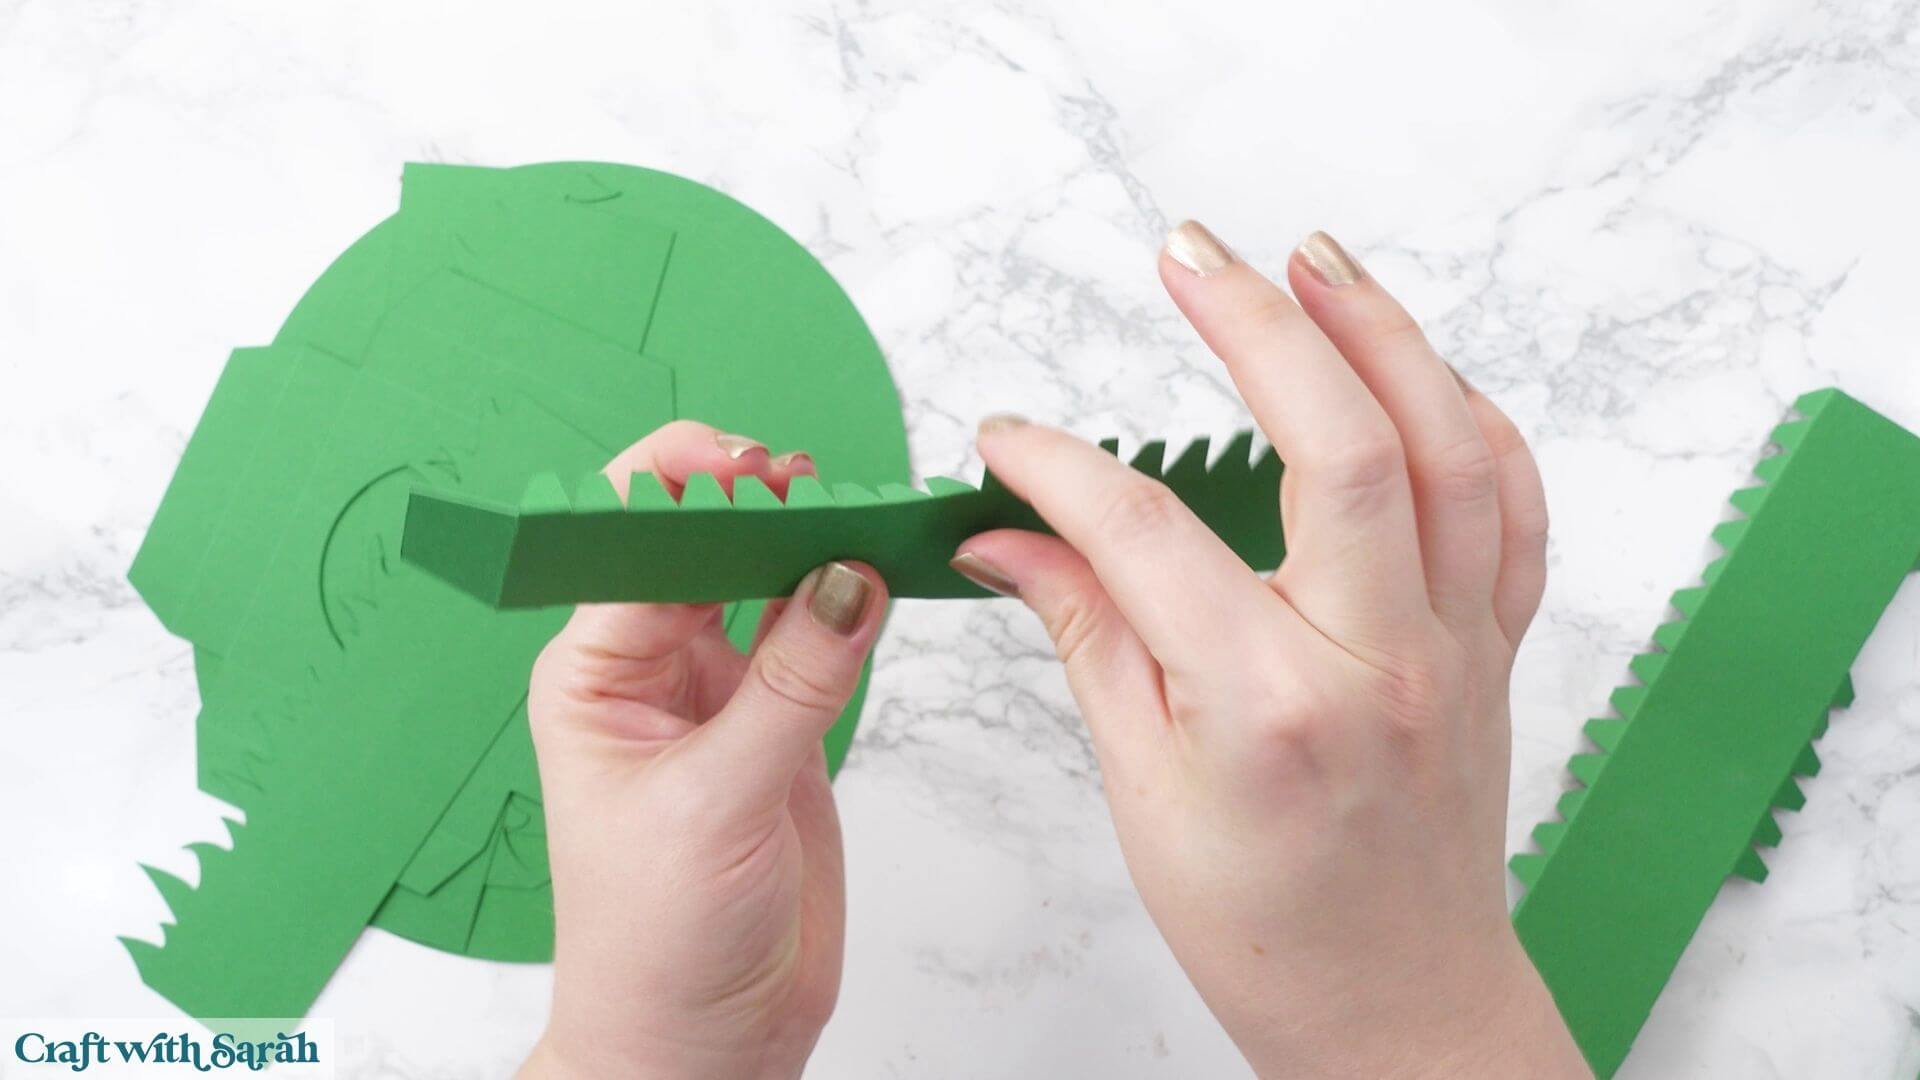
Don’t forget to fold the larger tab at the end of each piece too.
Put those three pieces to one side for the moment.
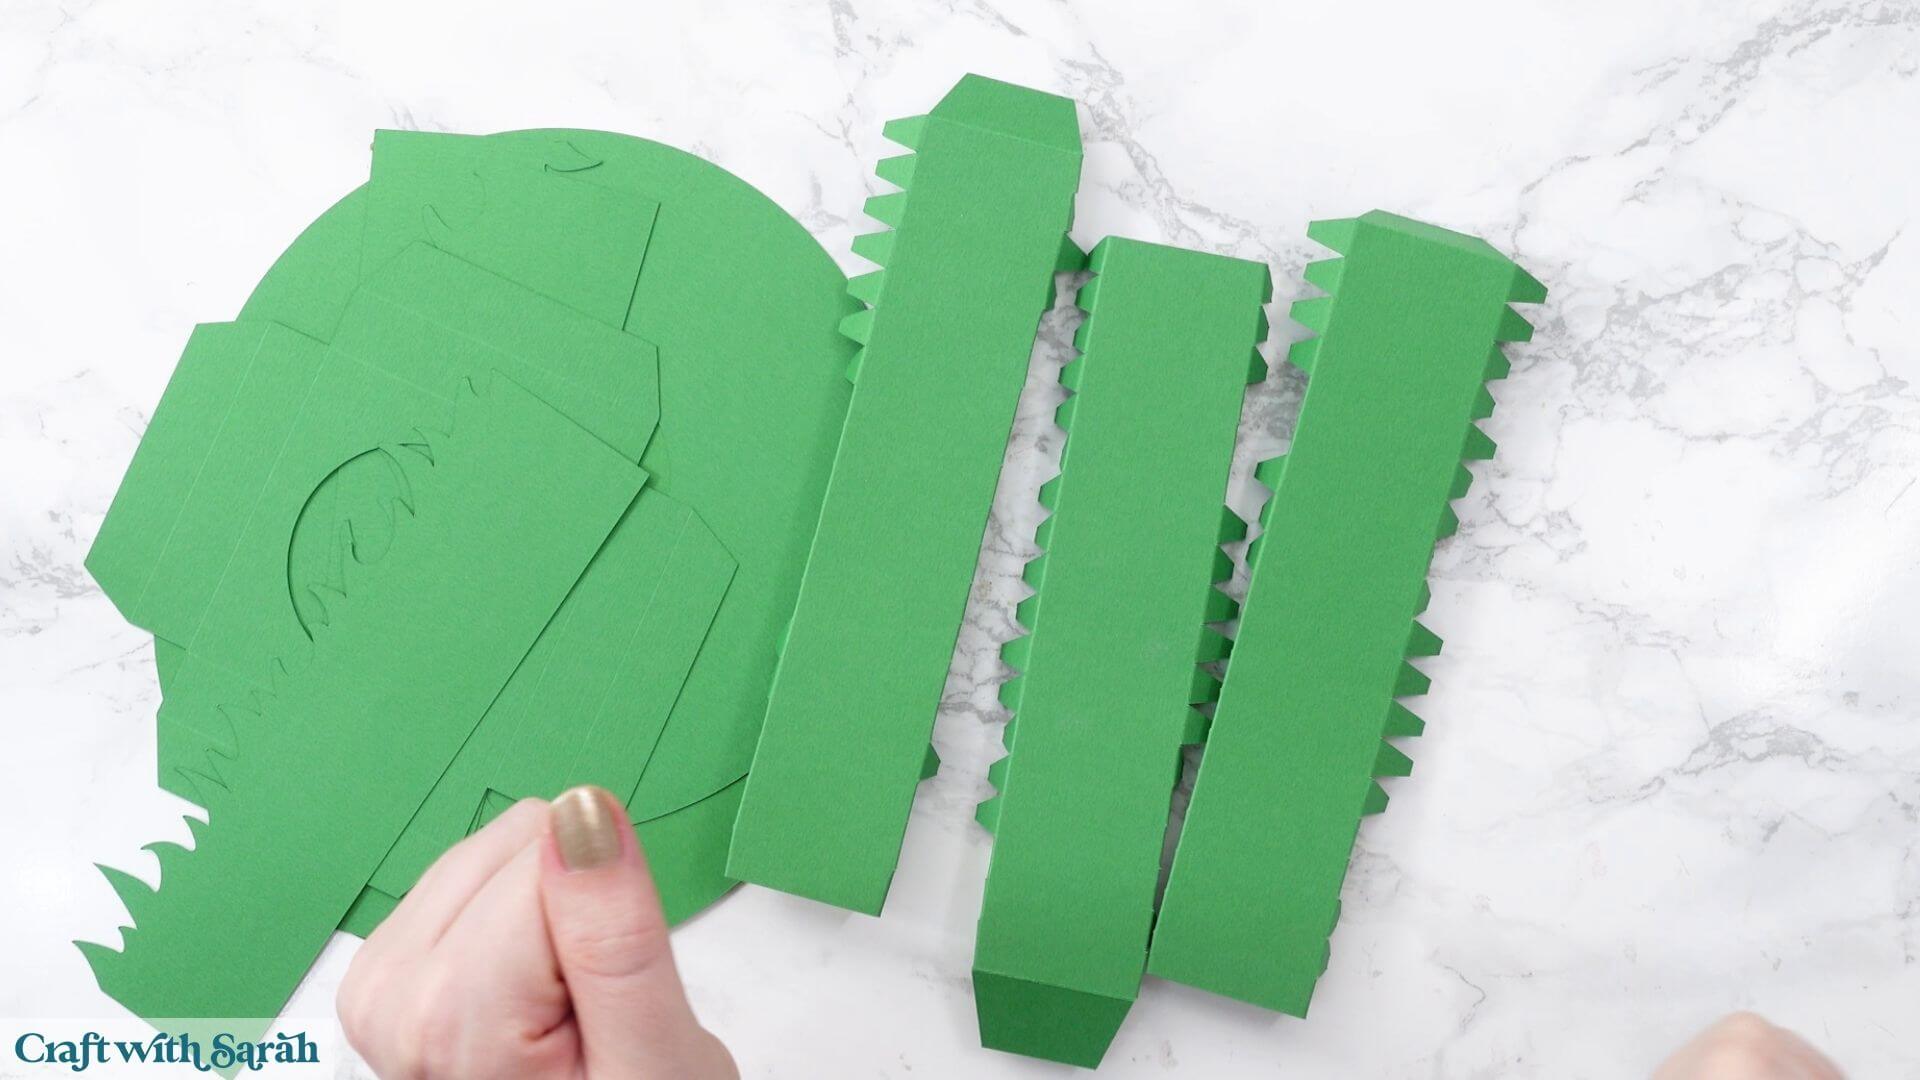
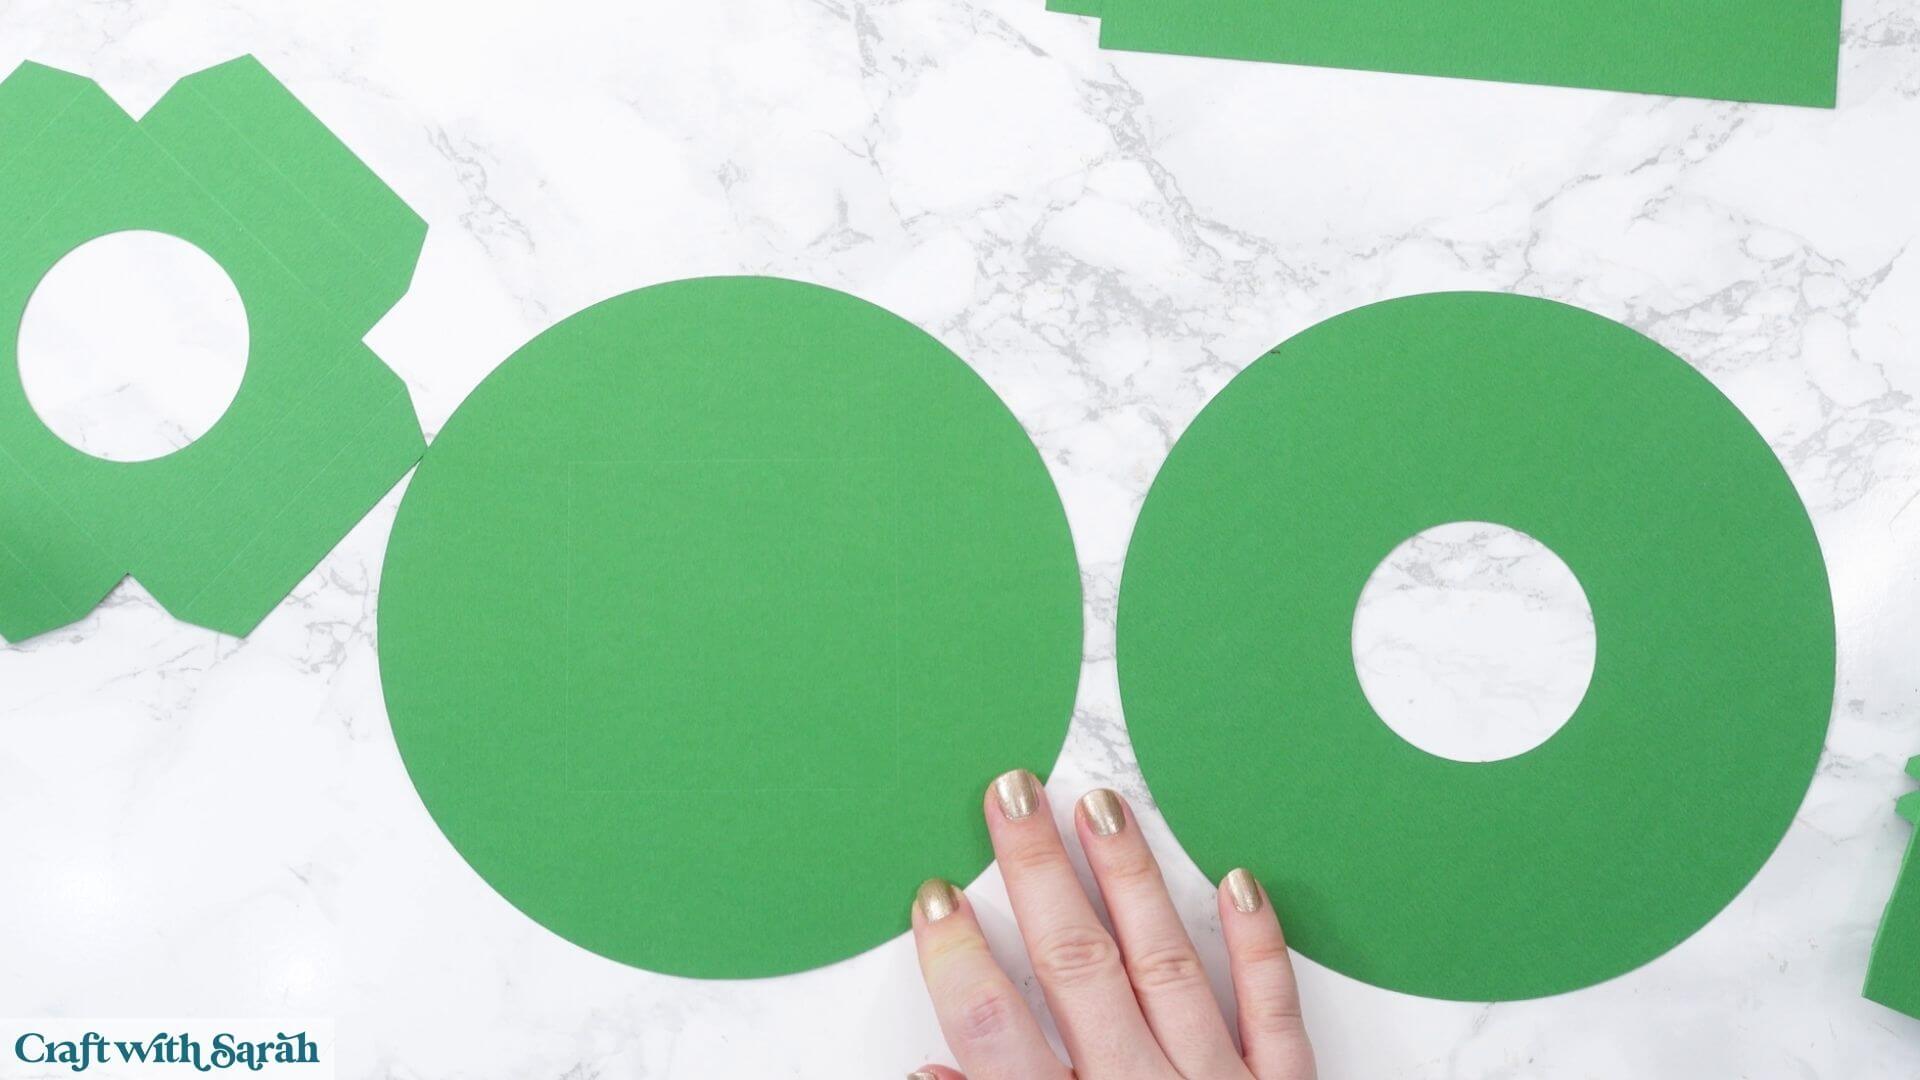
Next, find the two large green base pieces. One has a scored square in the middle and the other has a circular hole.
There is also a smaller structure piece which will sit inside the base and help to hold the tree stump in position.
Fold along all the score lines on this smaller piece, including the tabs around the sides and the four pieces on the back.
It ends up looking similar to a box.
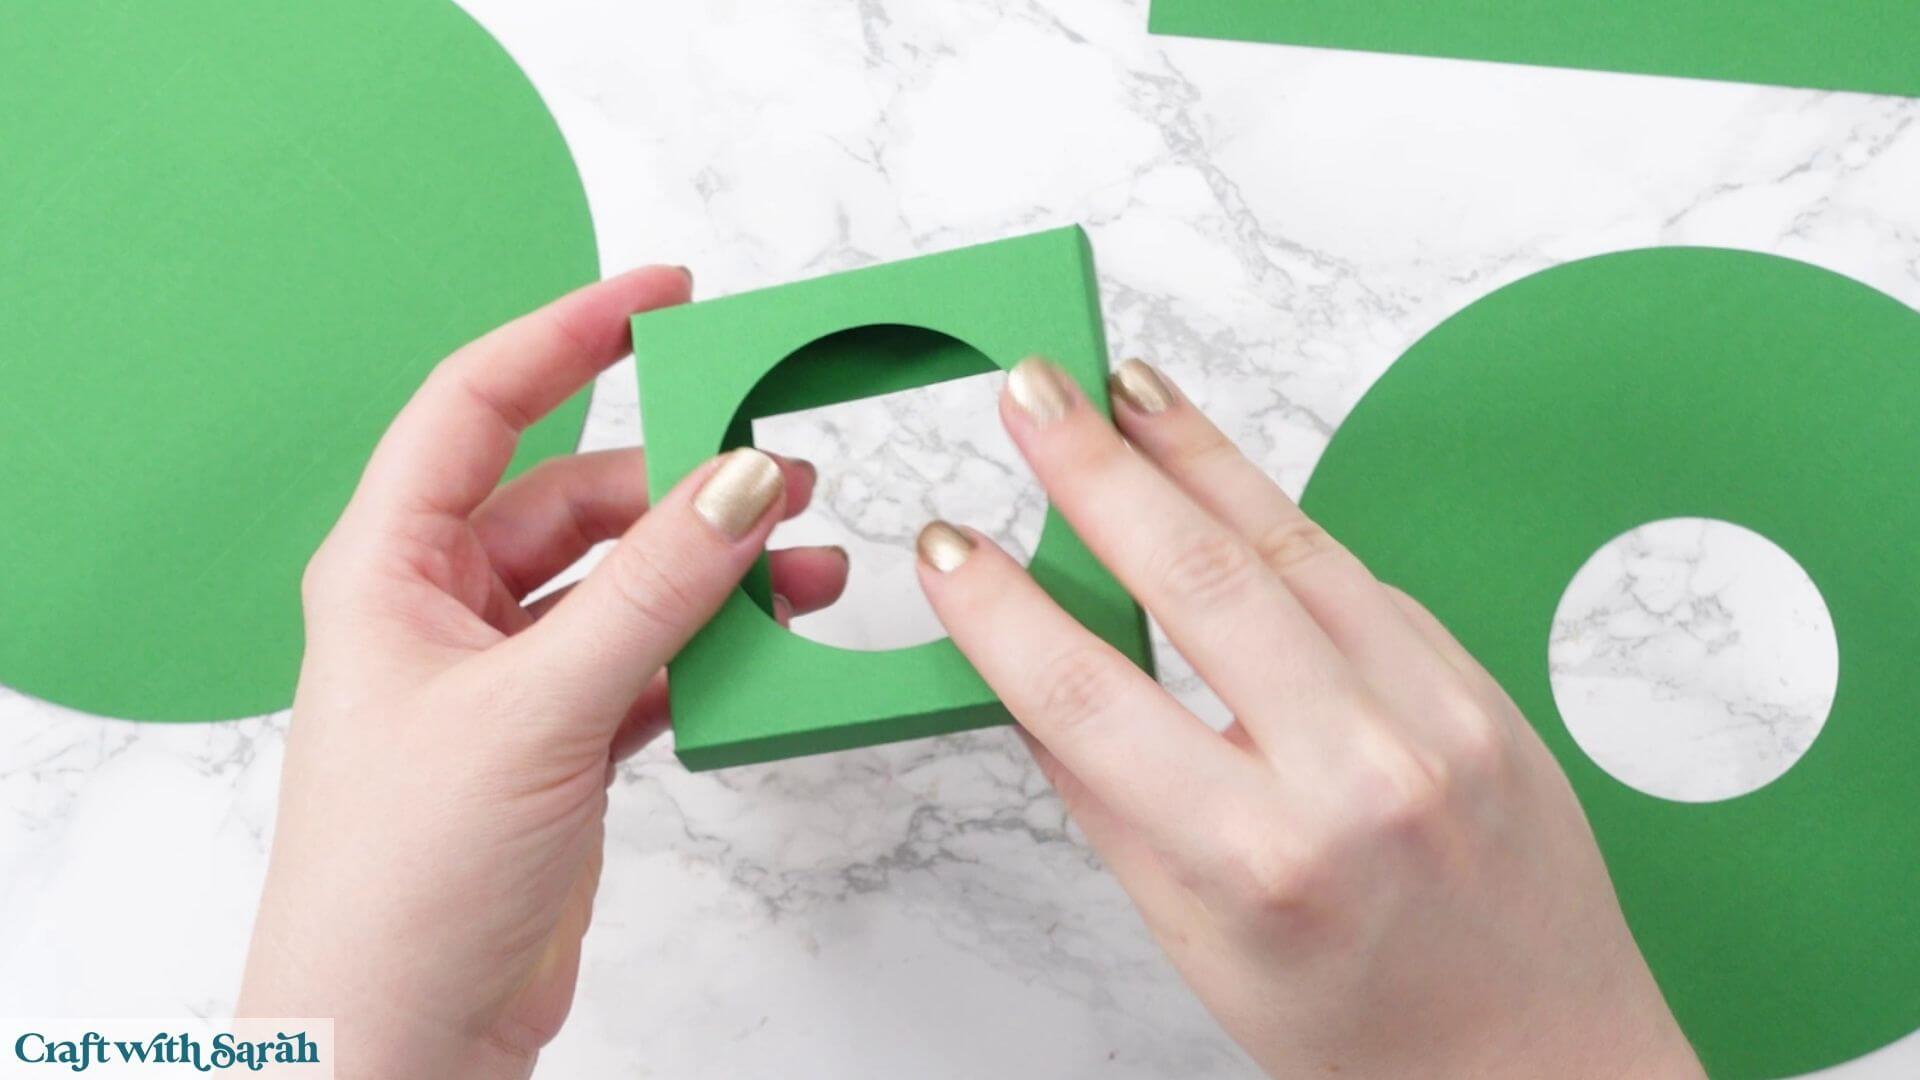
Add glue inside the scored square on the corresponding base piece.
It’s important to position this accurately because the circular hole in the structure piece needs to line up with the circular hole in the other part of the base later.
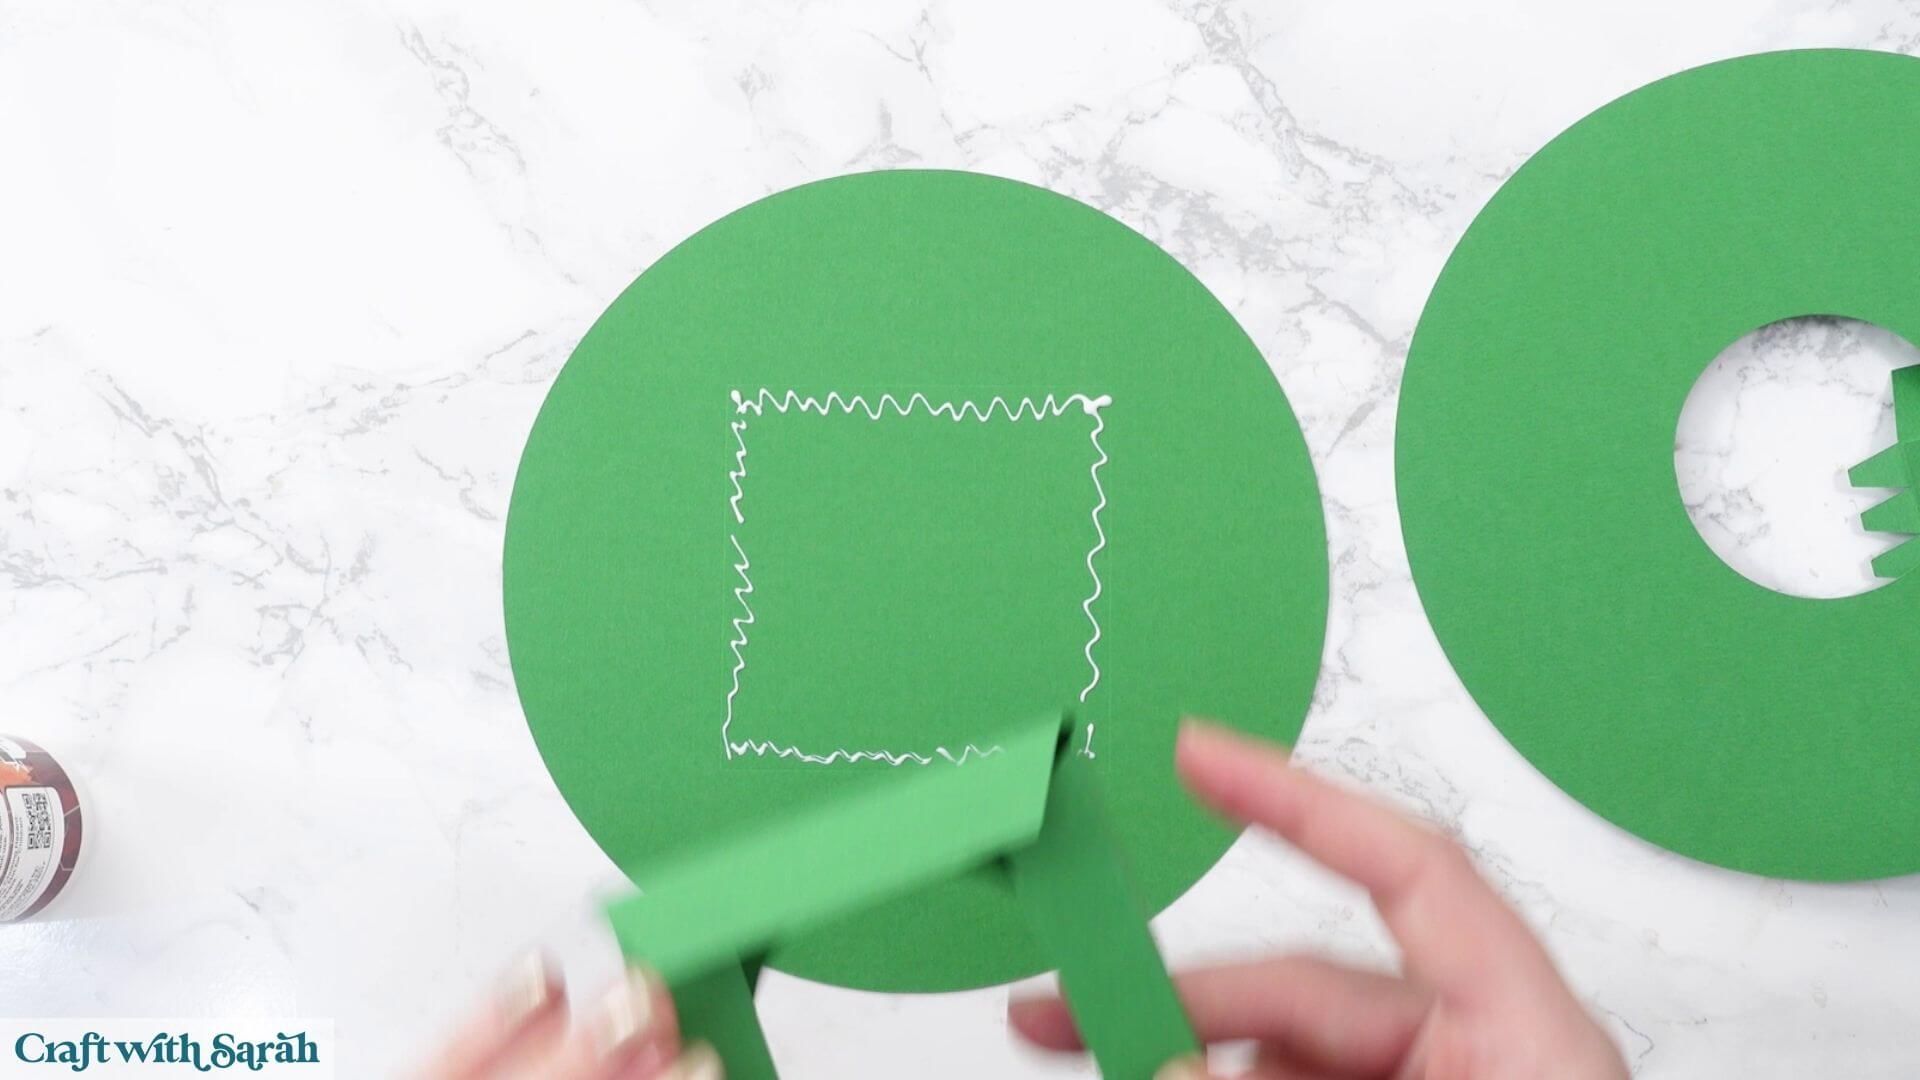
You can also add a little glue to the edges of two of the tabs so that the overlapping pieces will stick together and make the structure slightly firmer.
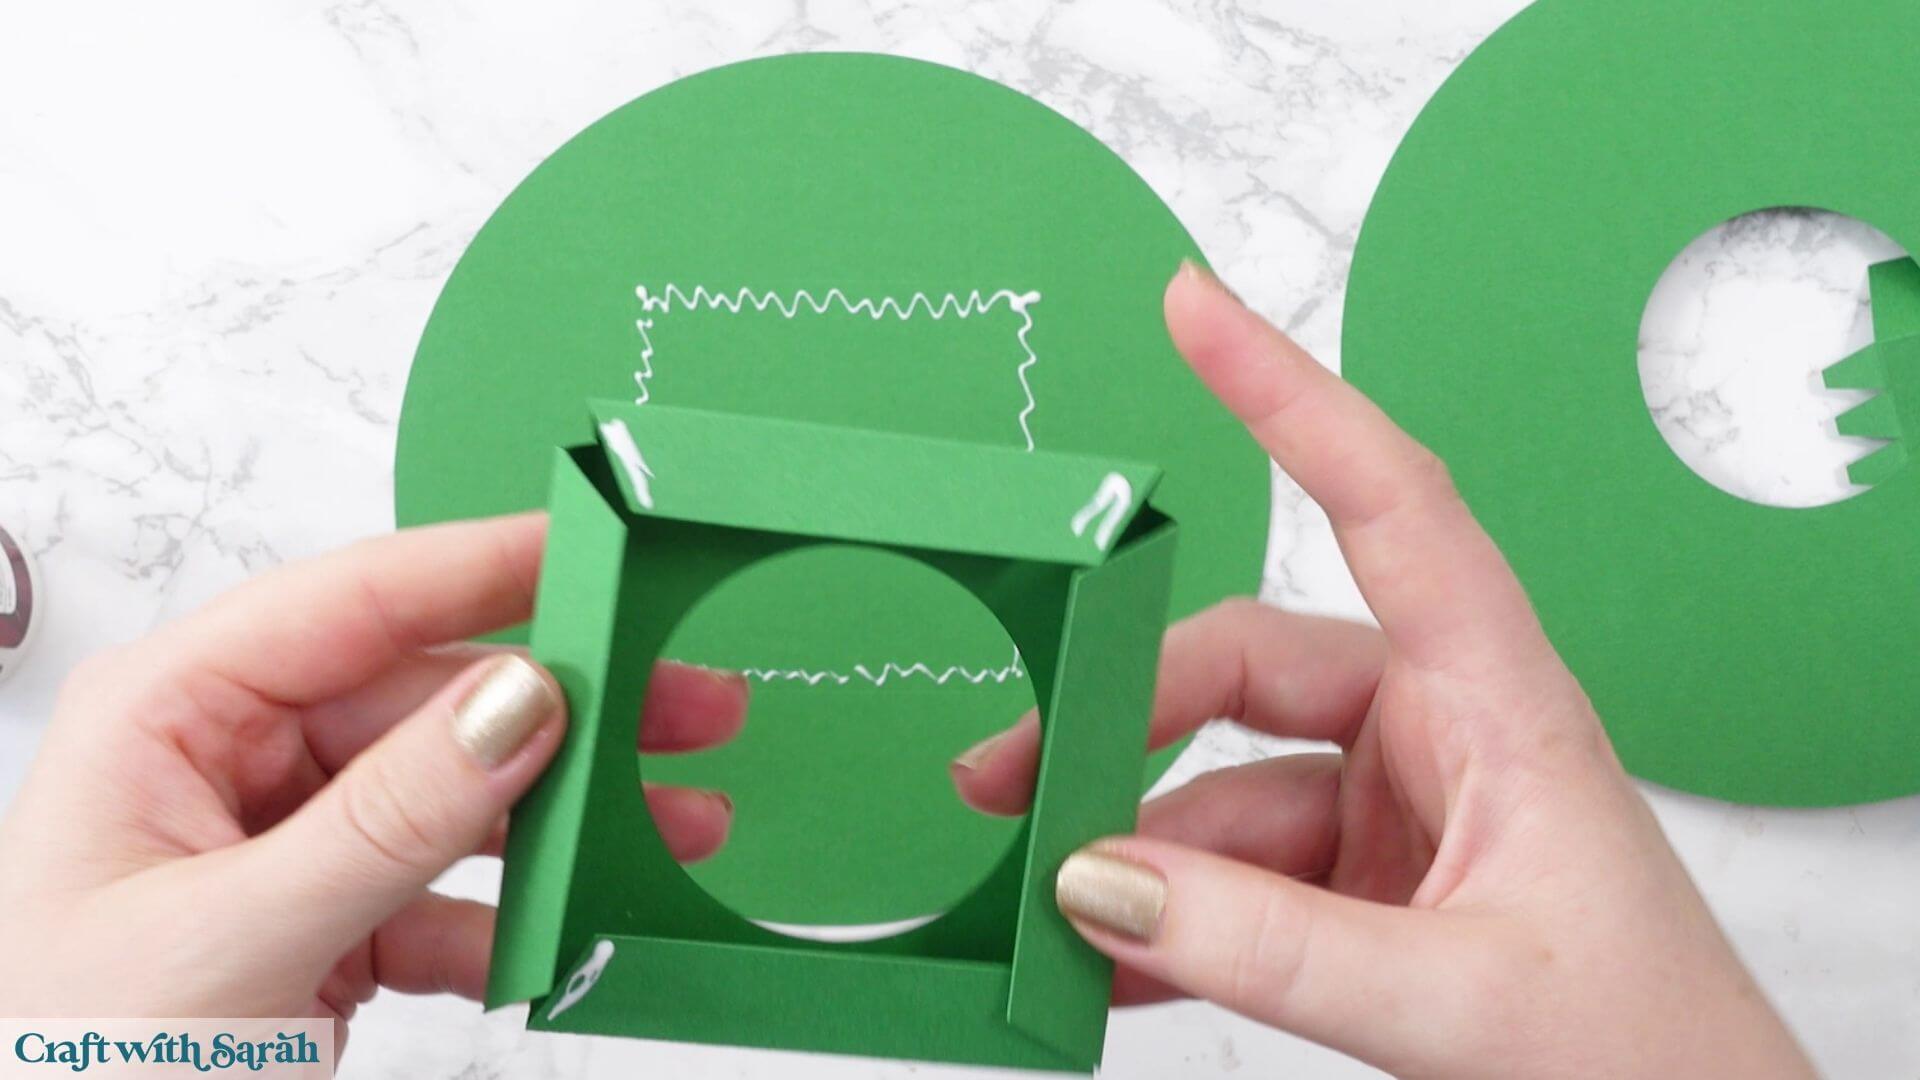
Turn the structure over and carefully line it up within the scored square. Put your finger through the middle to press the tabs down into the glue.
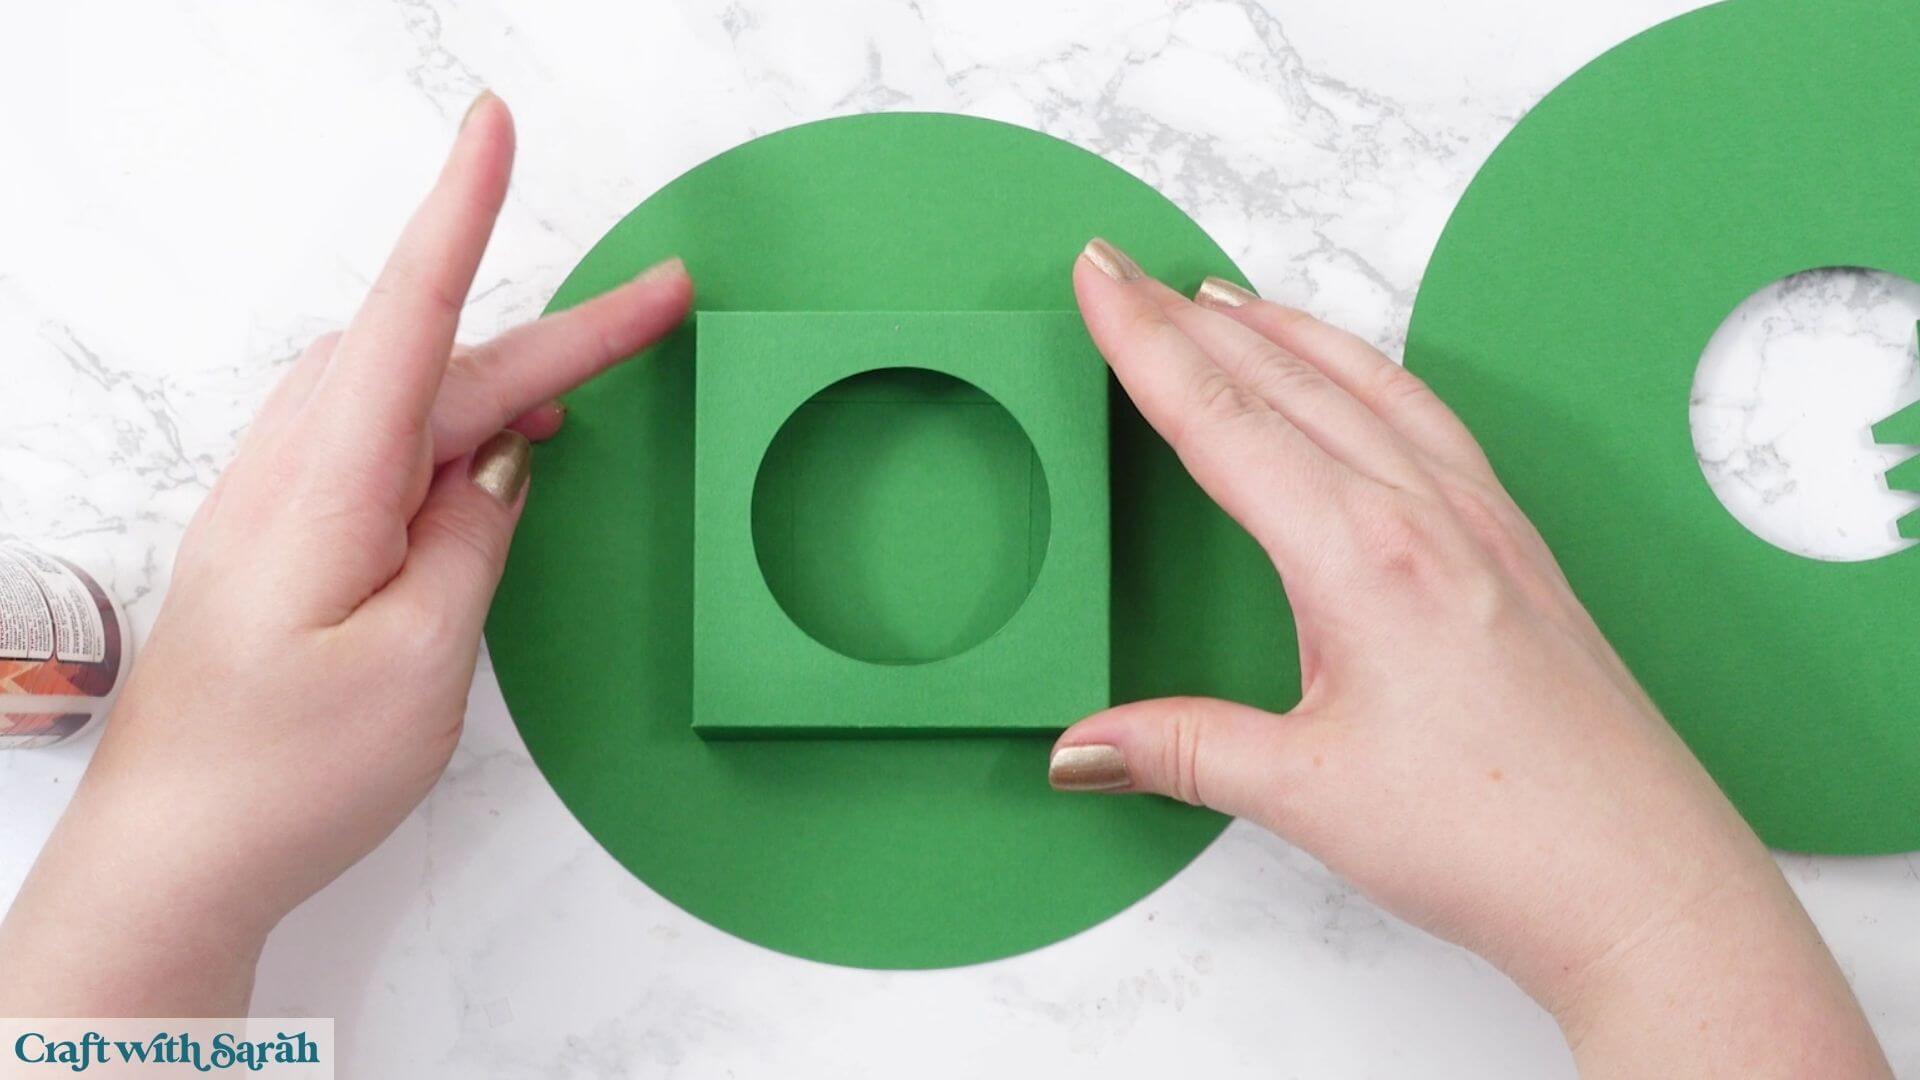
Take the first of the three long green pieces with the crocodile teeth tabs.
Flatten one side of the little tabs so that they’re at a right angle to the rest of the piece.
These pieces are going to form the curved edge around the base.
You could glue all three long pieces together before attaching them to the base, but I find it easier to work with them individually. Otherwise, you’re trying to control one very long piece of cardstock while the glue is drying.
You can either add glue individually to all of the tabs or add the glue directly around the edge of the base. Adding it to the base is a little messier, but I found it much easier!
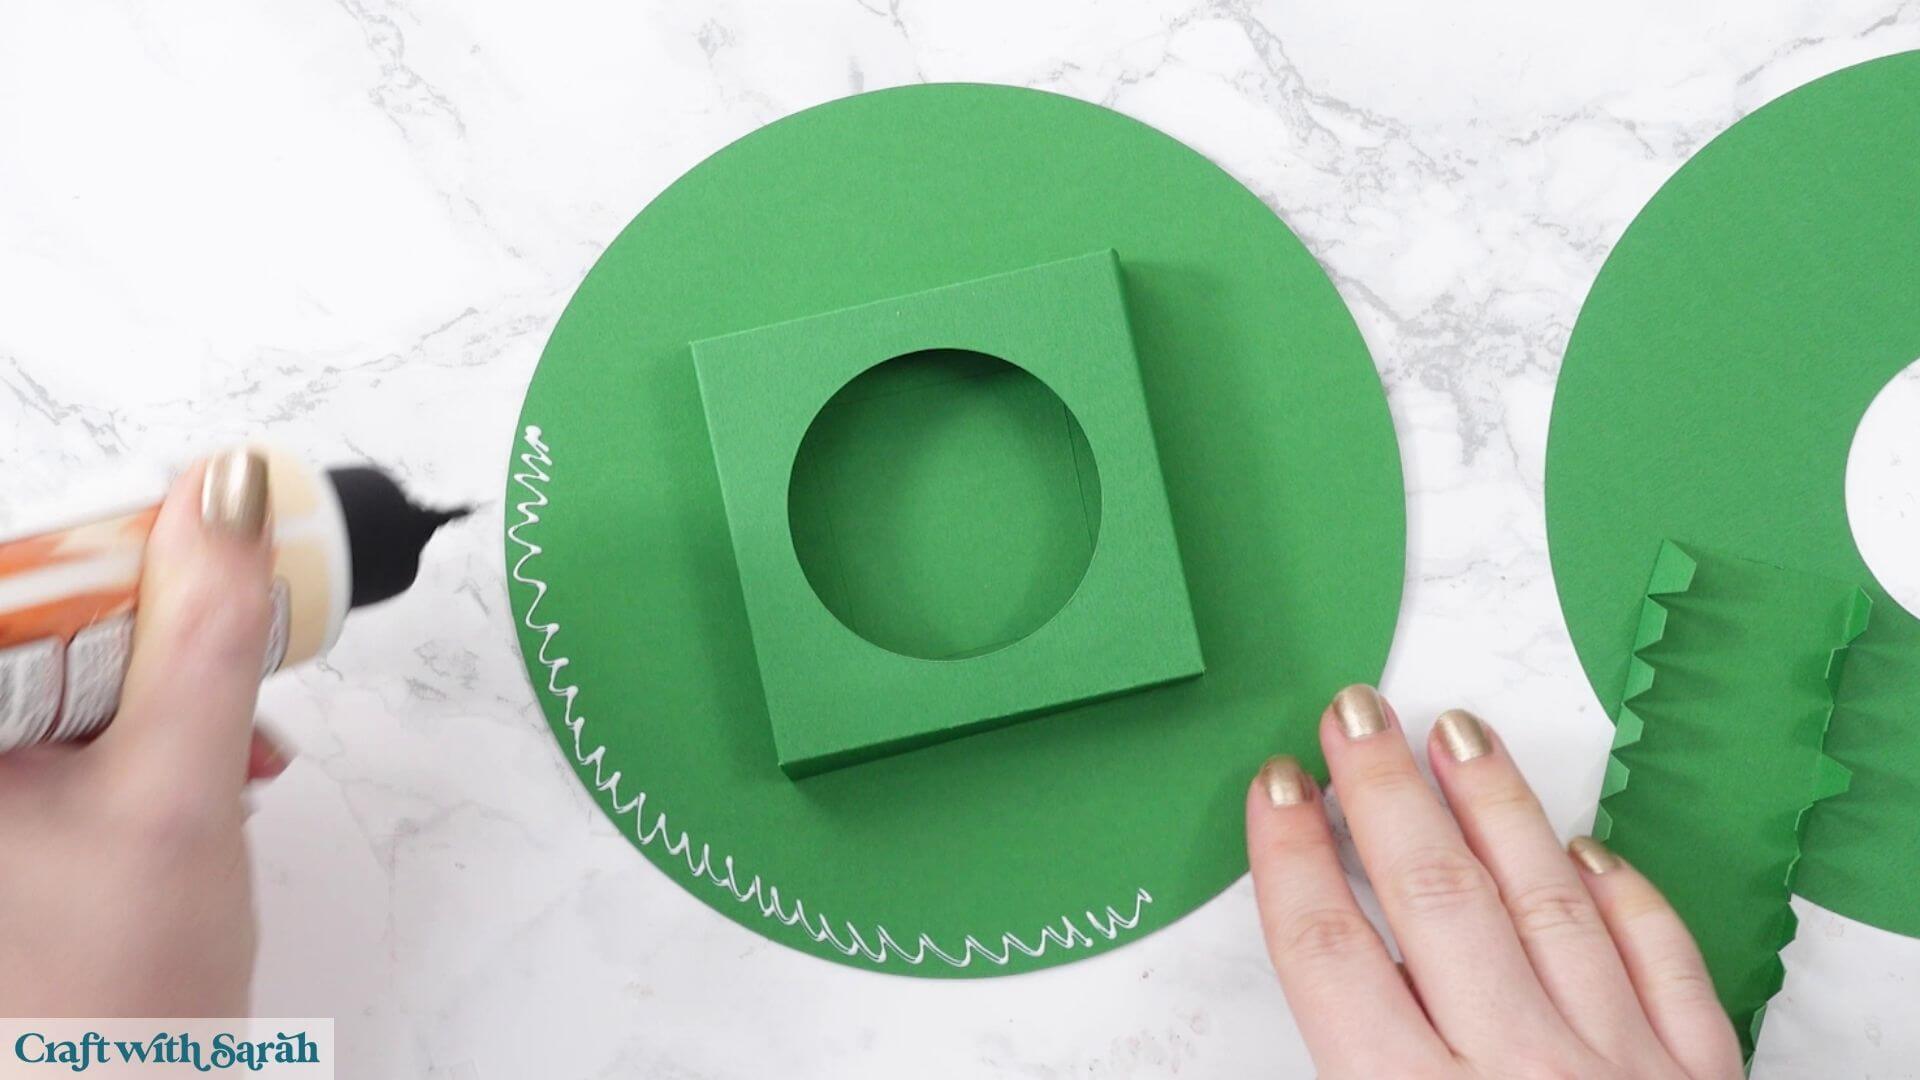
Position the tabs around the edge of the circle.
Before the glue dries, gently pull or push each tab so that the side of the cardstock follows the circular edge of the base as closely as possible.
The two ends can sometimes try to pop out of position, so keep an eye on them while the glue is drying and add a little more glue if necessary.
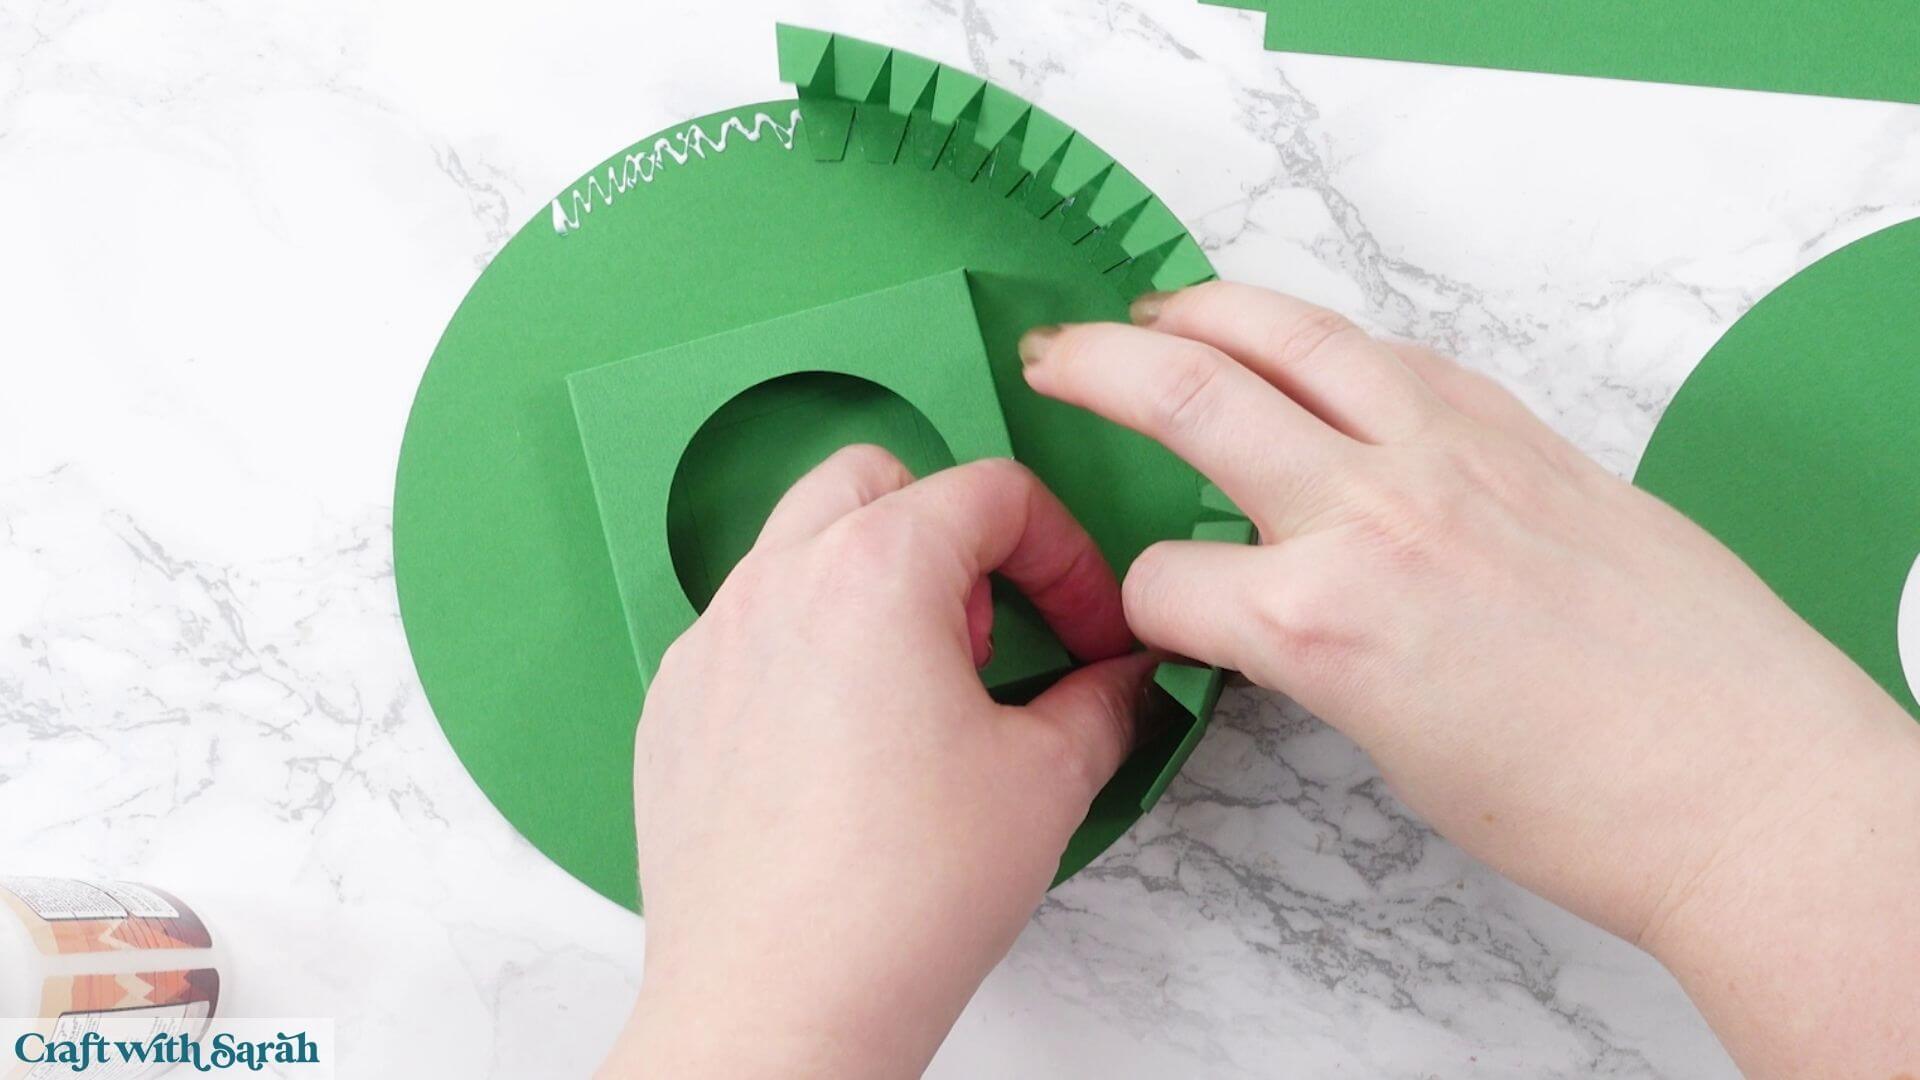
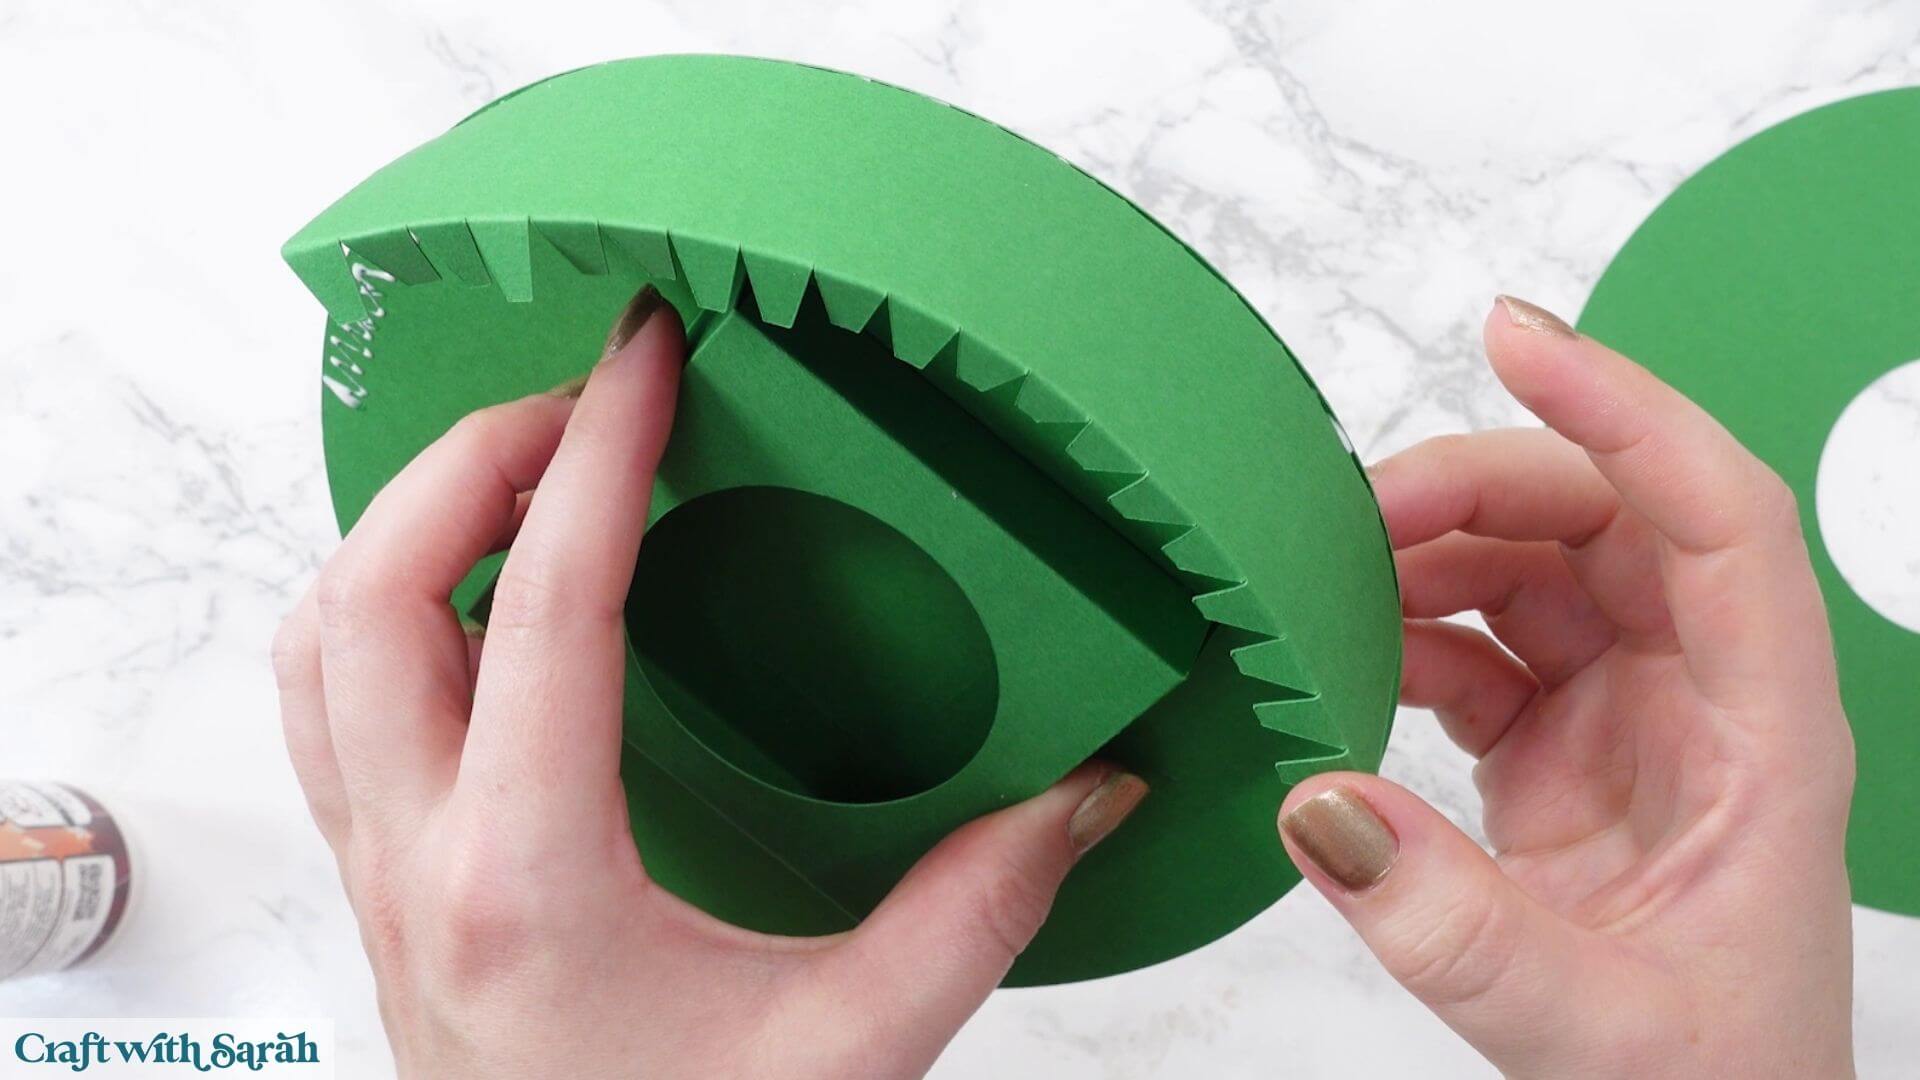
For the second section, add glue around the next part of the base and also to the large joining tab on the piece you’ve just attached.
Stick the second piece to that tab and continue positioning its crocodile teeth around the edge.
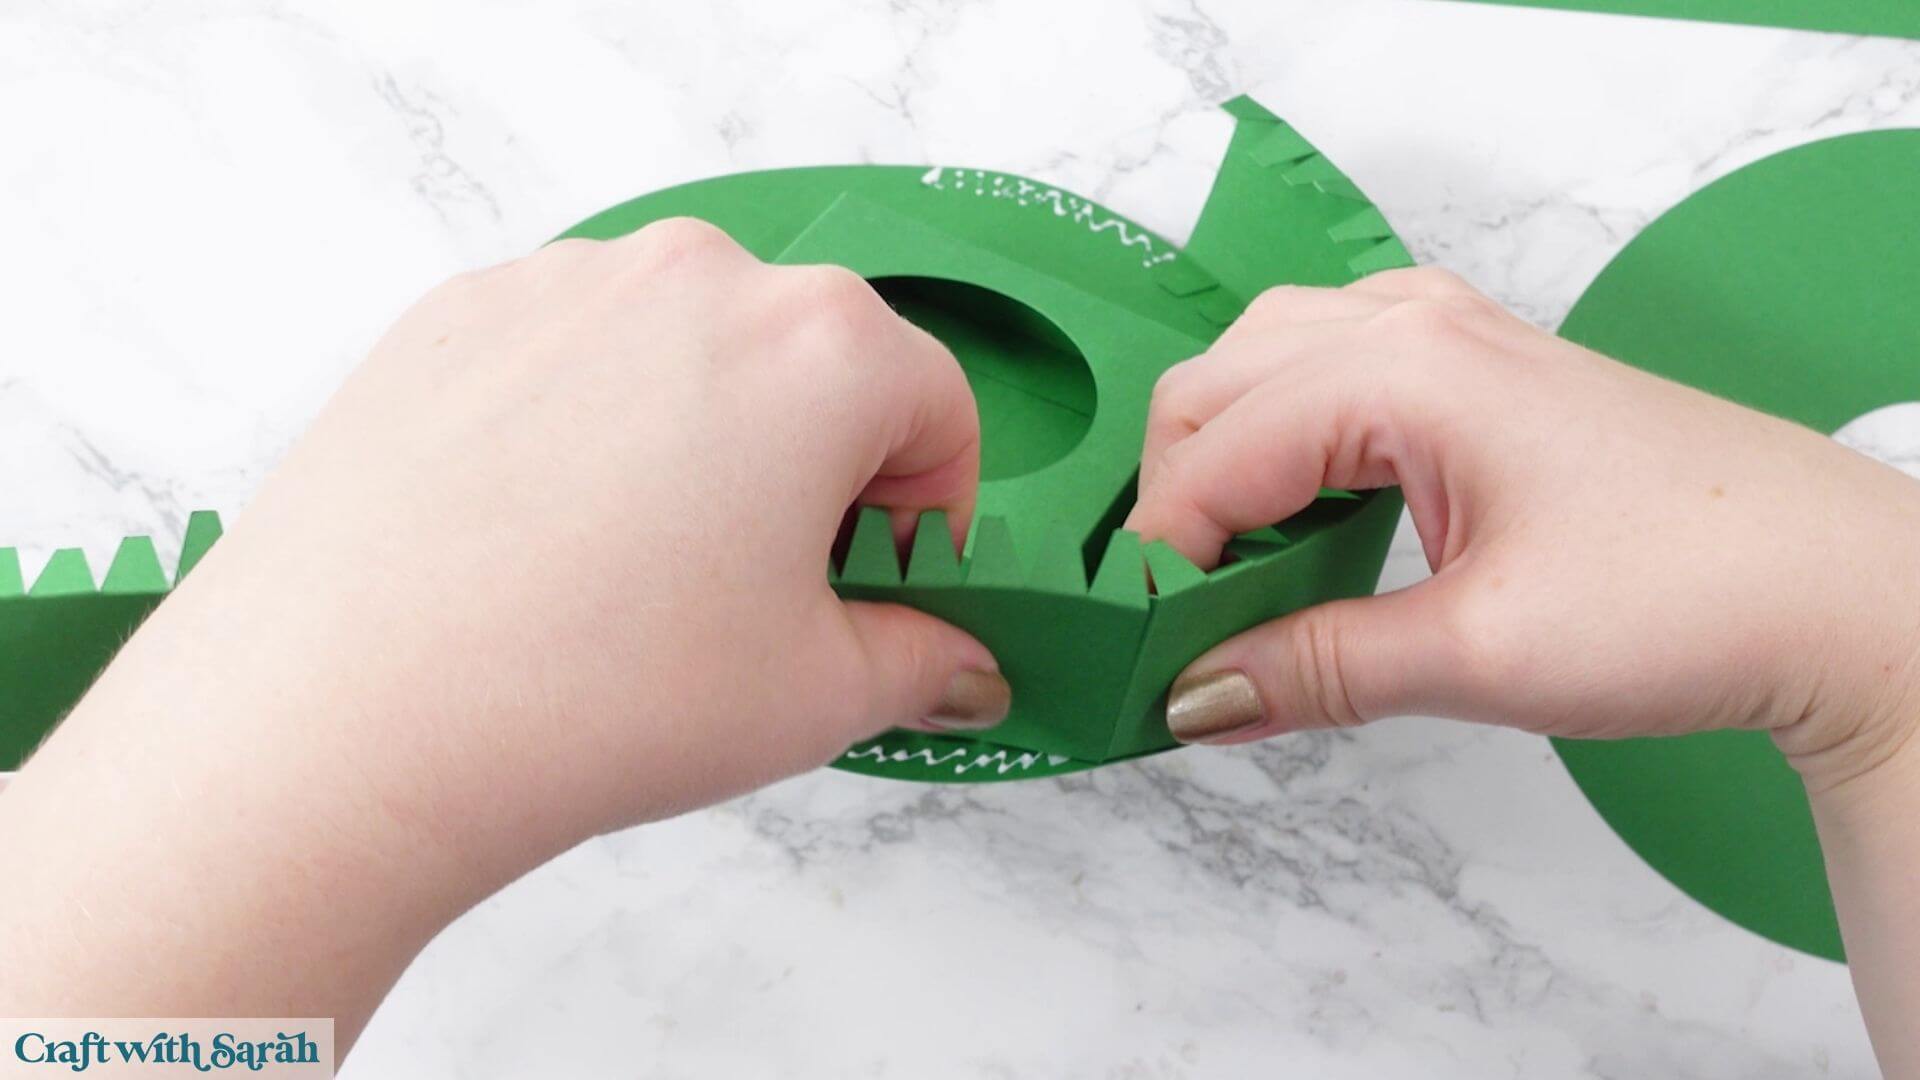
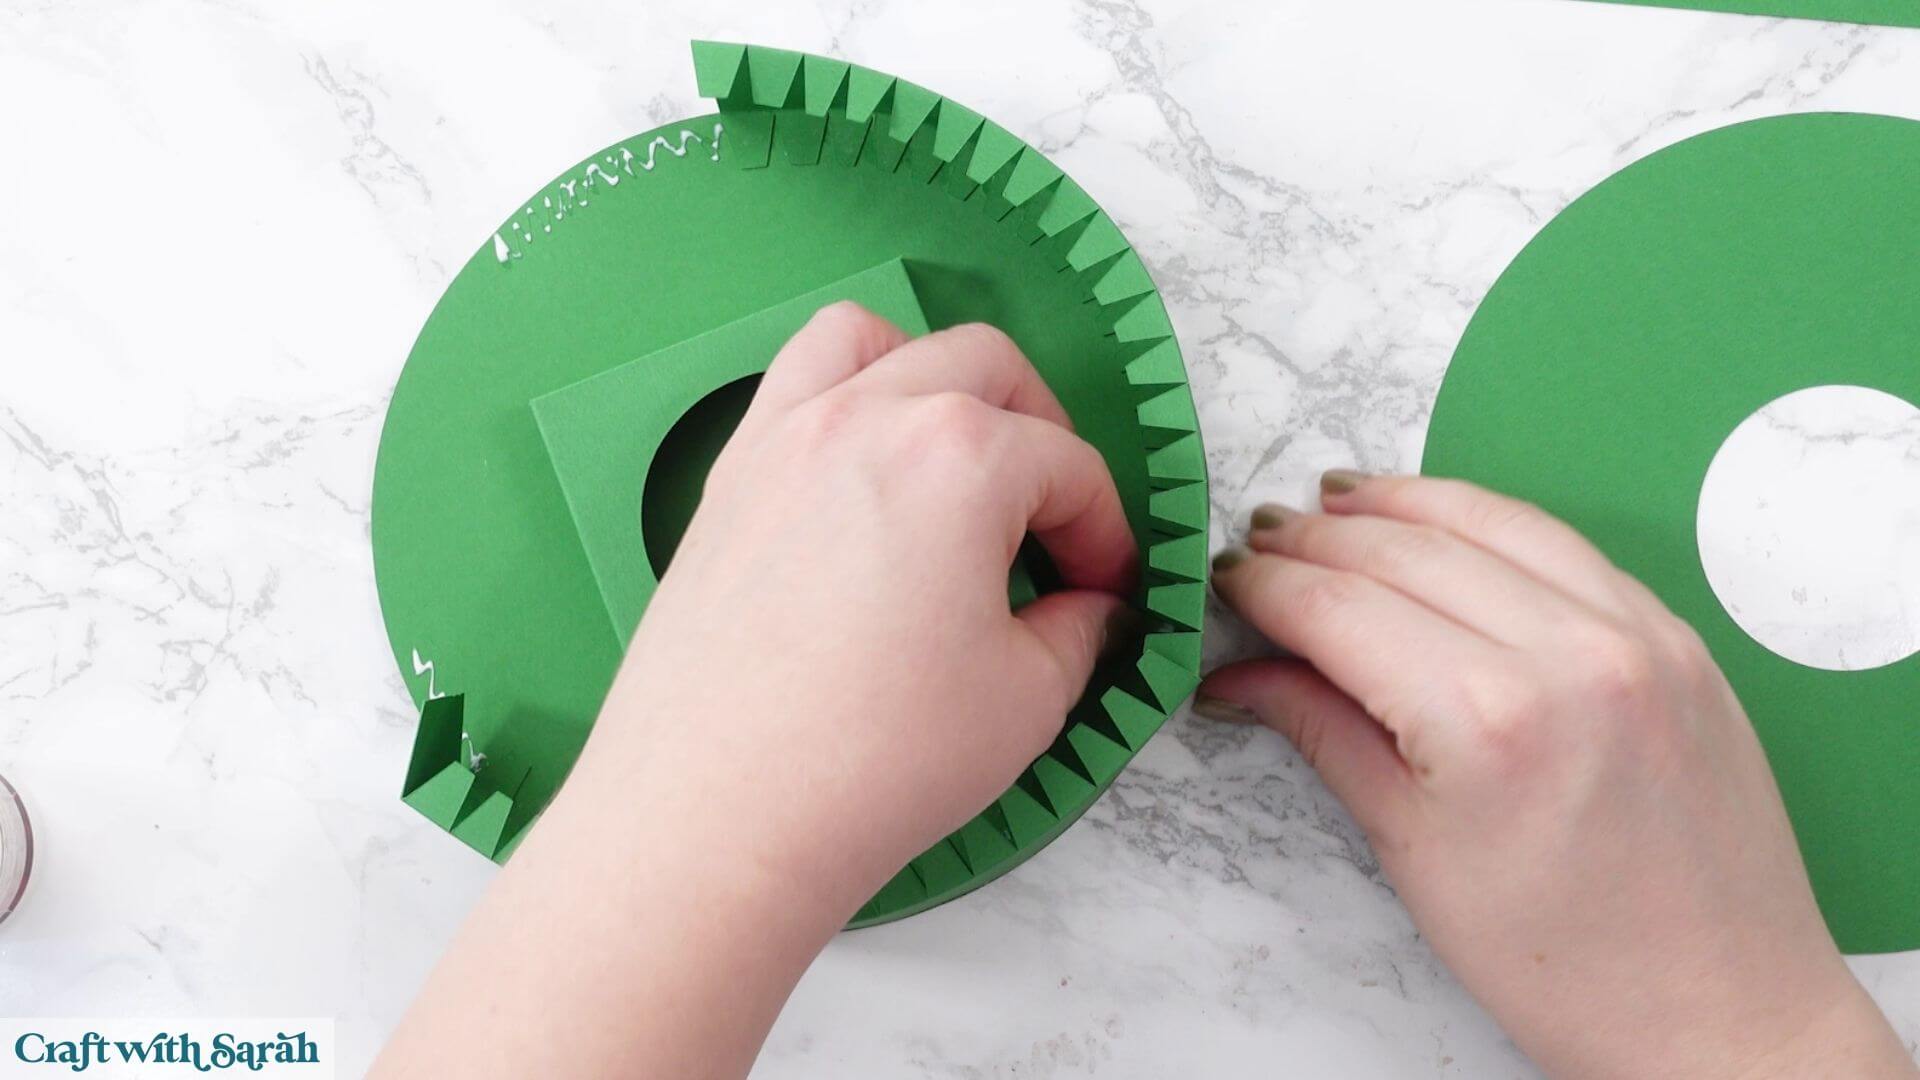
Repeat the process with the final section.
If the final piece seems slightly too long when you reach the other end, carefully loosen the last join before the glue has completely dried and pull it in slightly. The important thing is to get the cardstock fitting tightly around the circular base.
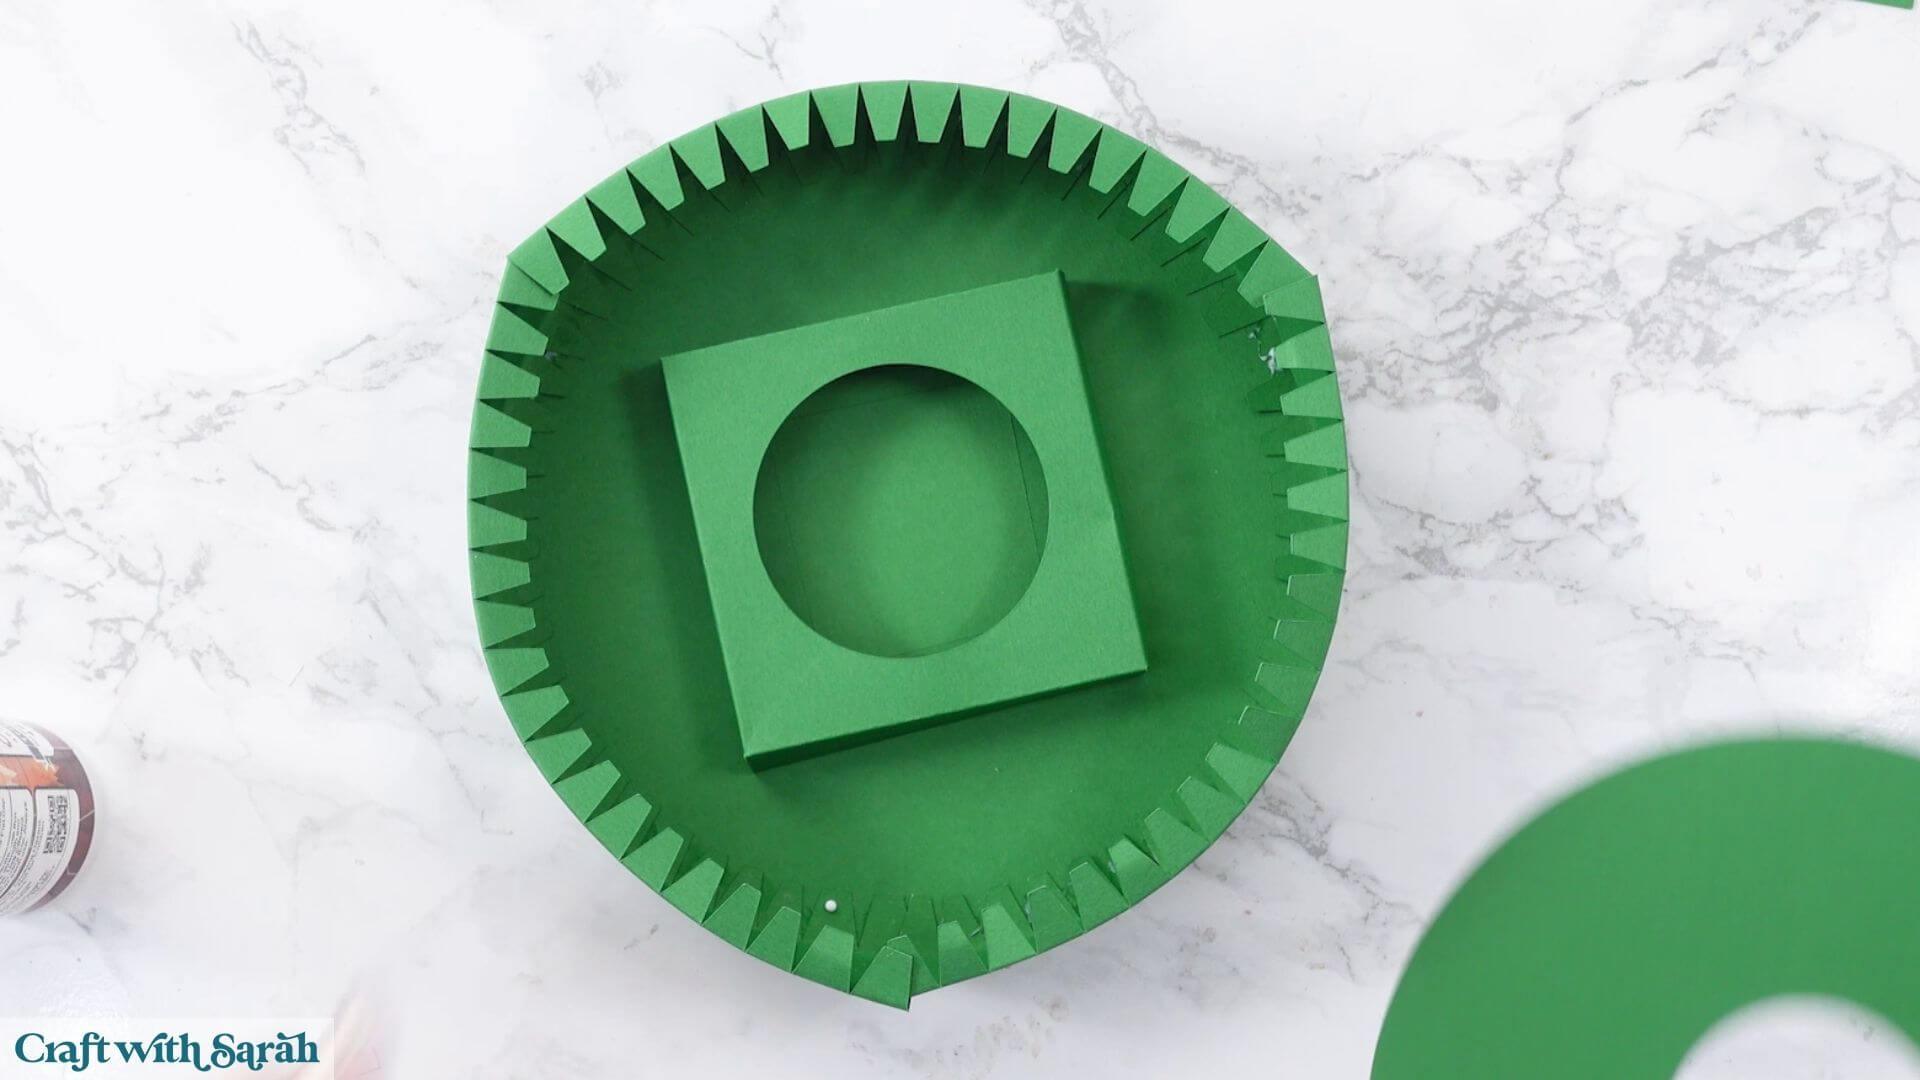
Once all three sections are attached, fold the remaining crocodile teeth across the top so that they all appear horizontal.
Add glue to them.
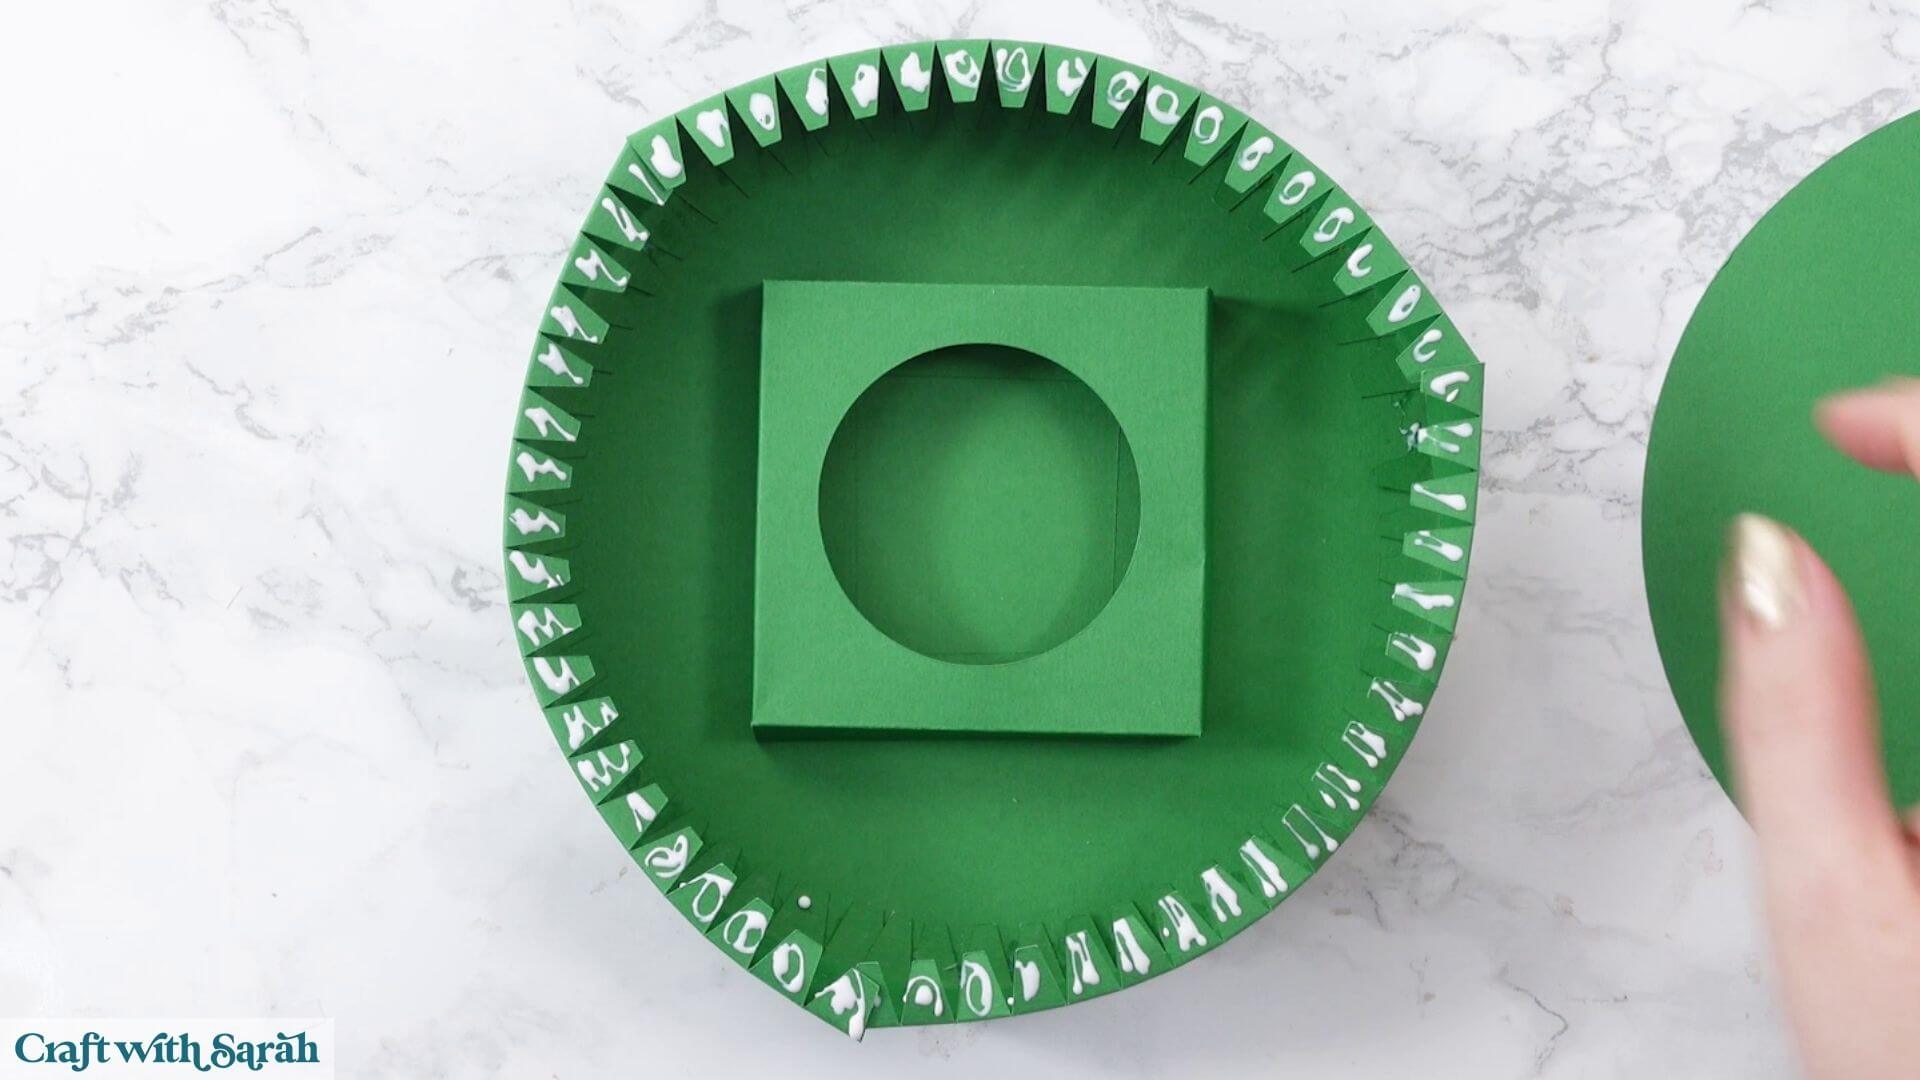
Place the second circular base piece on top.
Squeeze and pull the sides where needed to get them aligned as closely as possible with the circular edge. The non-pointy end of a weeding tool can be useful for gently pushing out any tabs that have slipped too far inwards.
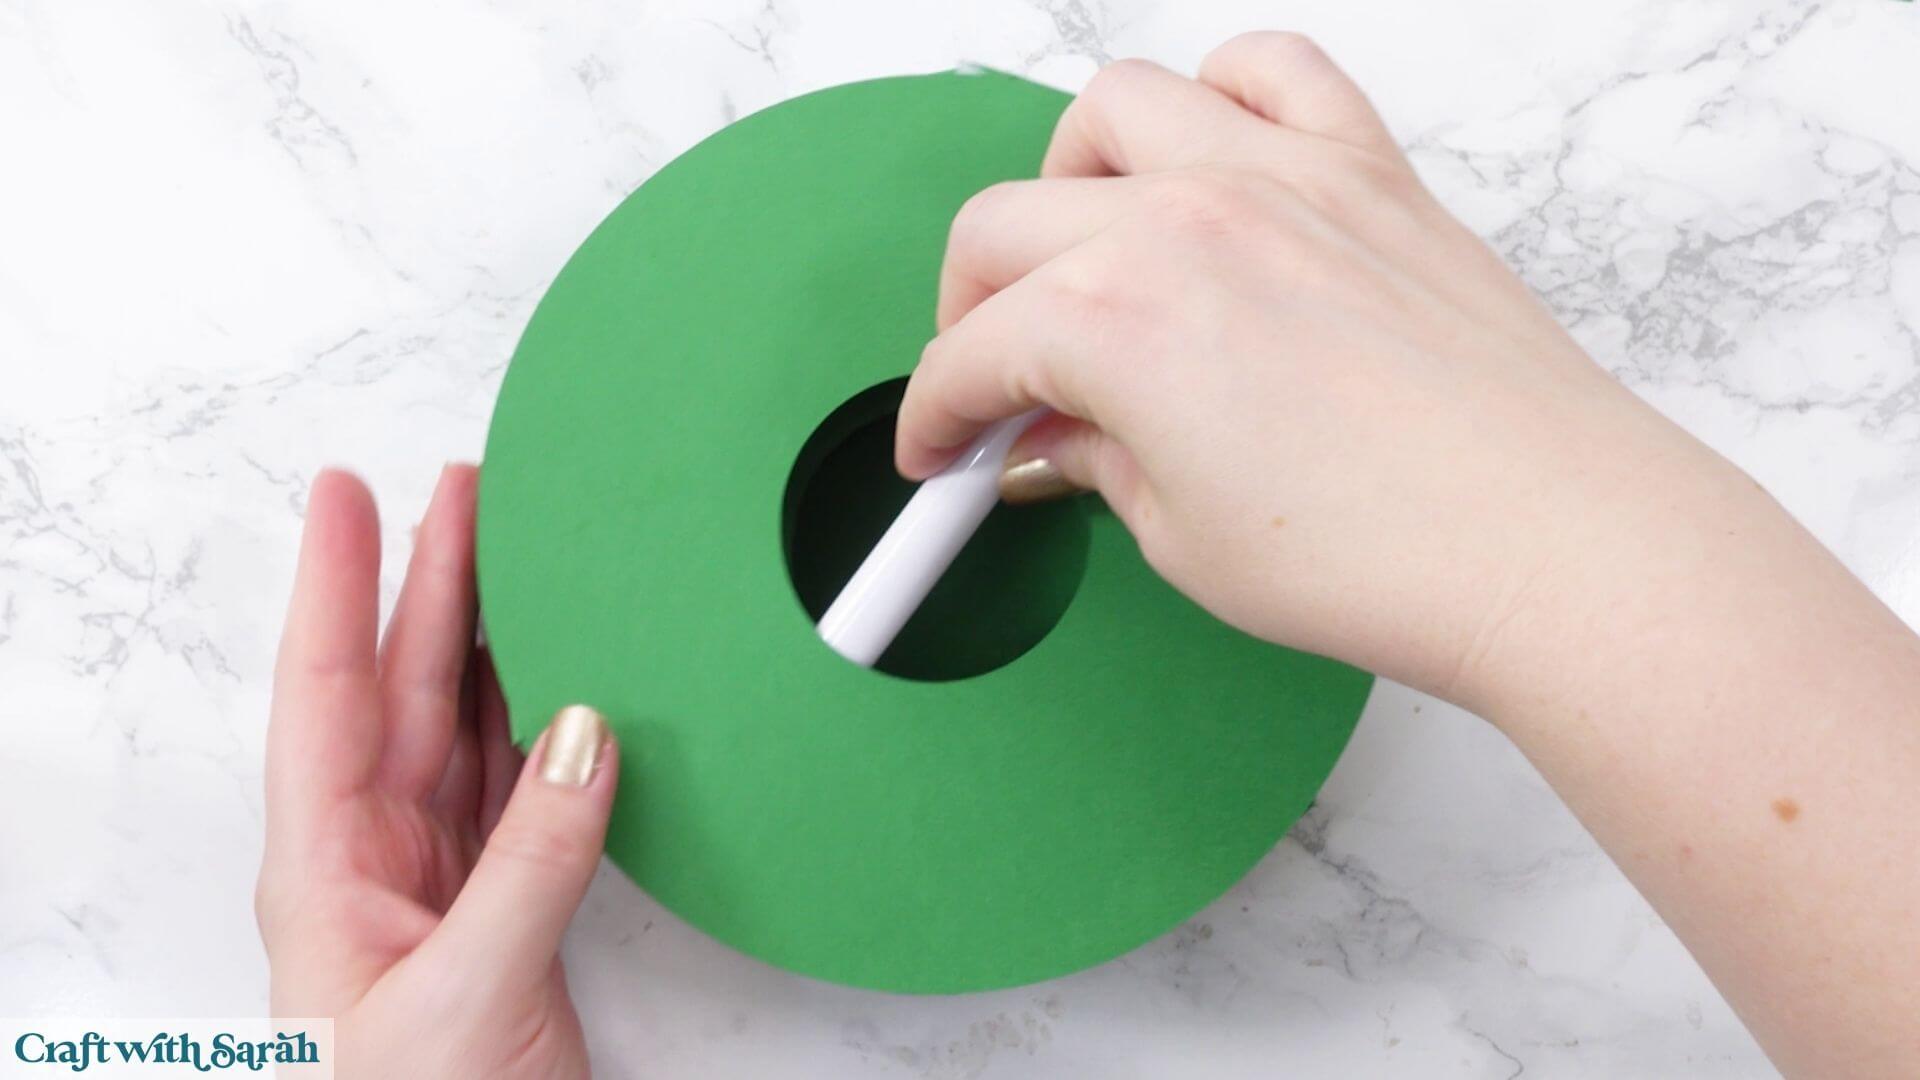
Turn the base upside down while it dries so that you can apply a little pressure to the glued sections.
Next, add the three green outer pieces around the edge of the base.
Gently roll each piece between your hands first to encourage the cardstock into a curved shape. Don’t add any actual fold lines or creases; you’re just training the cardstock to curve.
Glue the three pieces around the outside of the base. They don’t overlap, so simply position each one up against the next.
It’s a good idea to let the previous layers dry properly before doing this. Otherwise, you may find that they start popping apart as you handle the base.
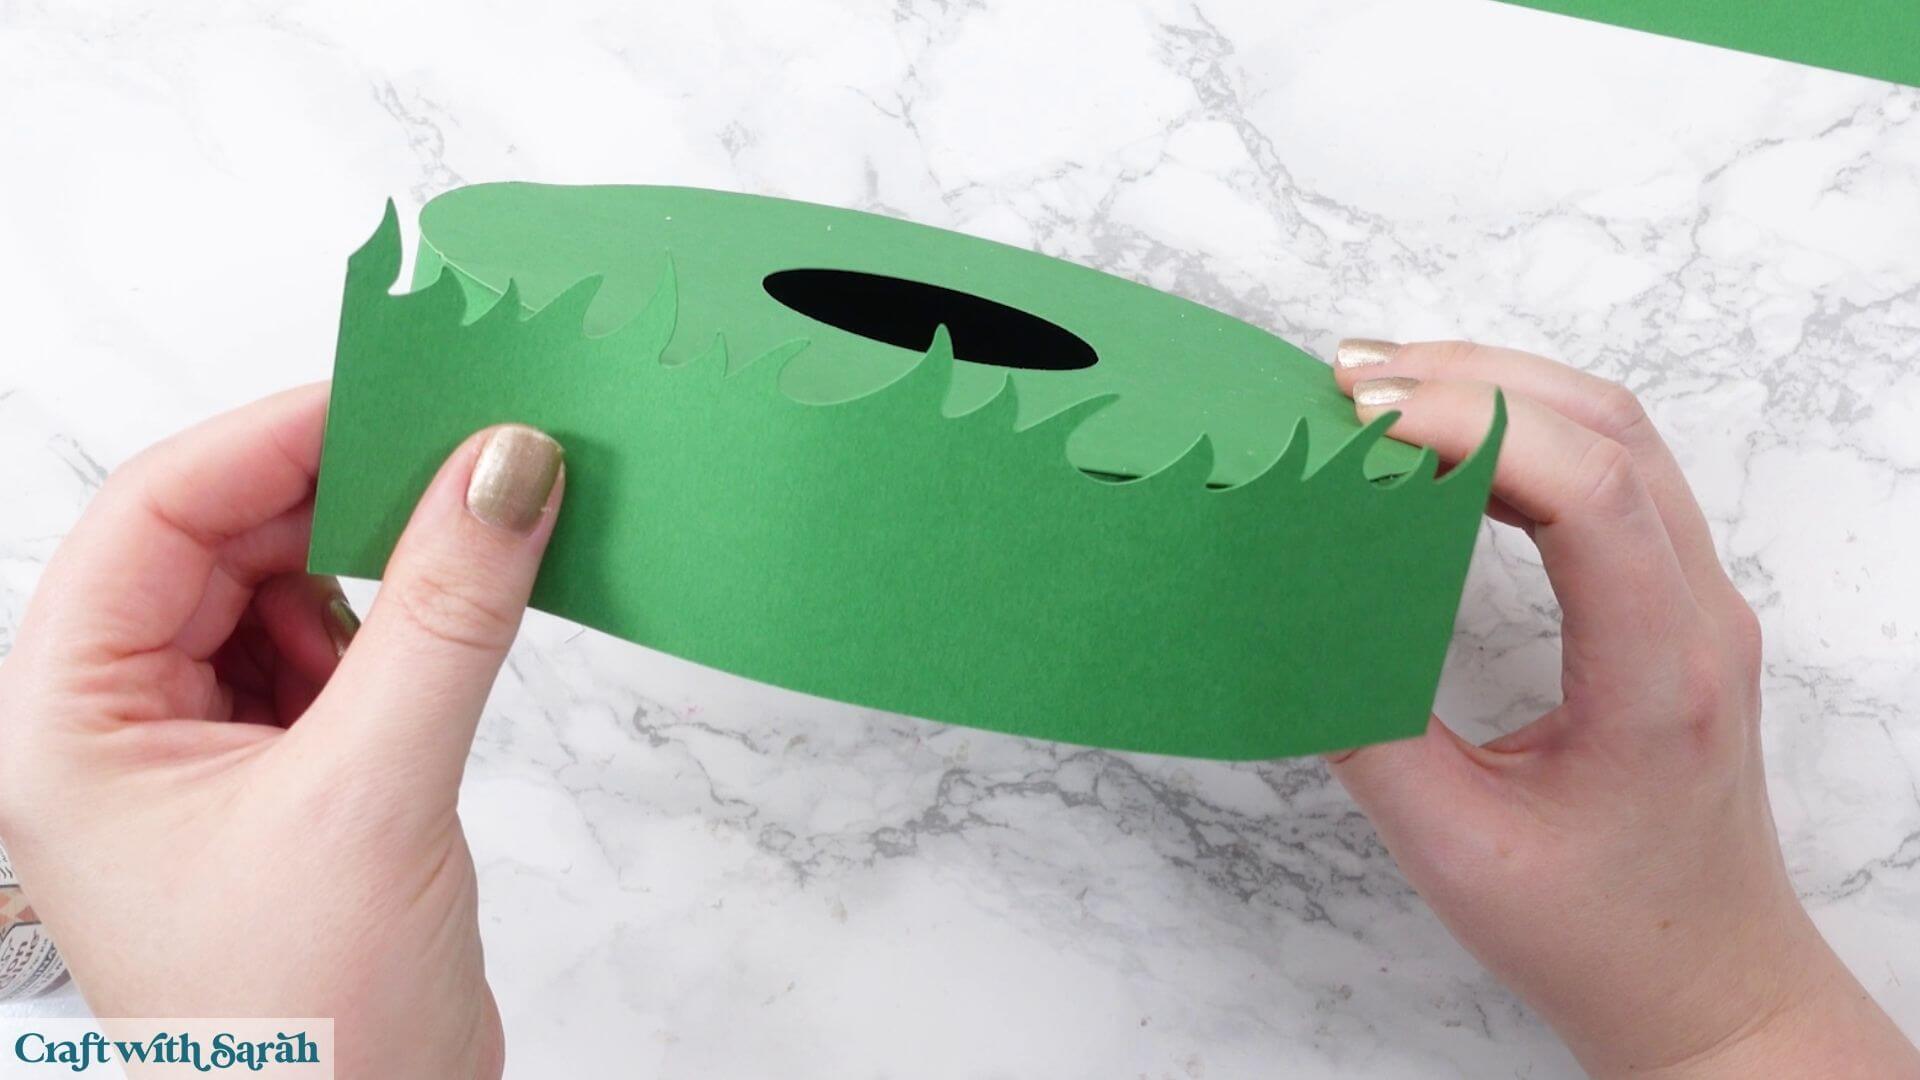
You will have cut several darker green grass pieces.
The three largest pieces are all the same and are designed to cover the join lines around the outside of the base.
Gently curve each one and glue it over a join so that the taller parts of the grass disguise where the outer pieces meet.
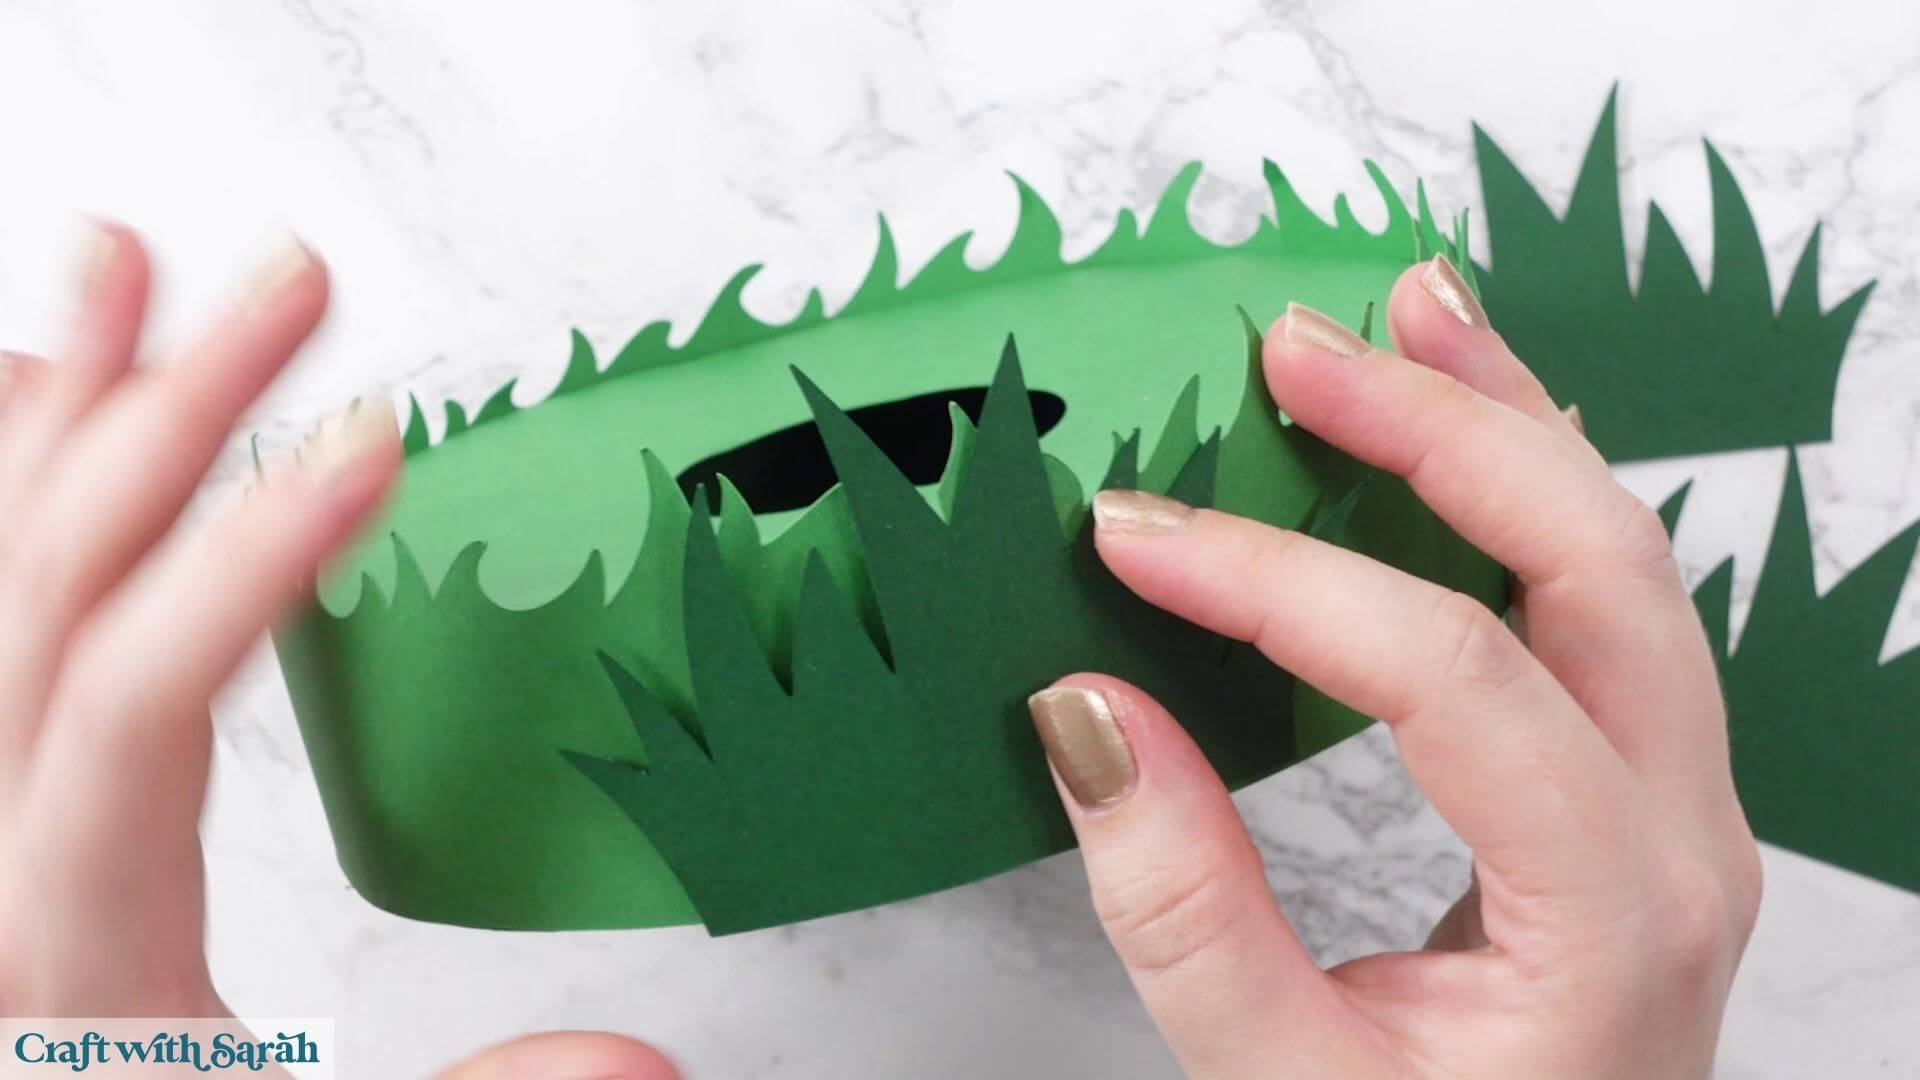
The smaller grass pieces will be used later around the tree stump. These are optional, but they’re useful for hiding some of the joins when the whole design is assembled.
Your green base is now finished.
Step 5) Make the tree stump
The main tree stump is made from three large brown pieces.
Two have crocodile teeth tabs on the end and one doesn’t.
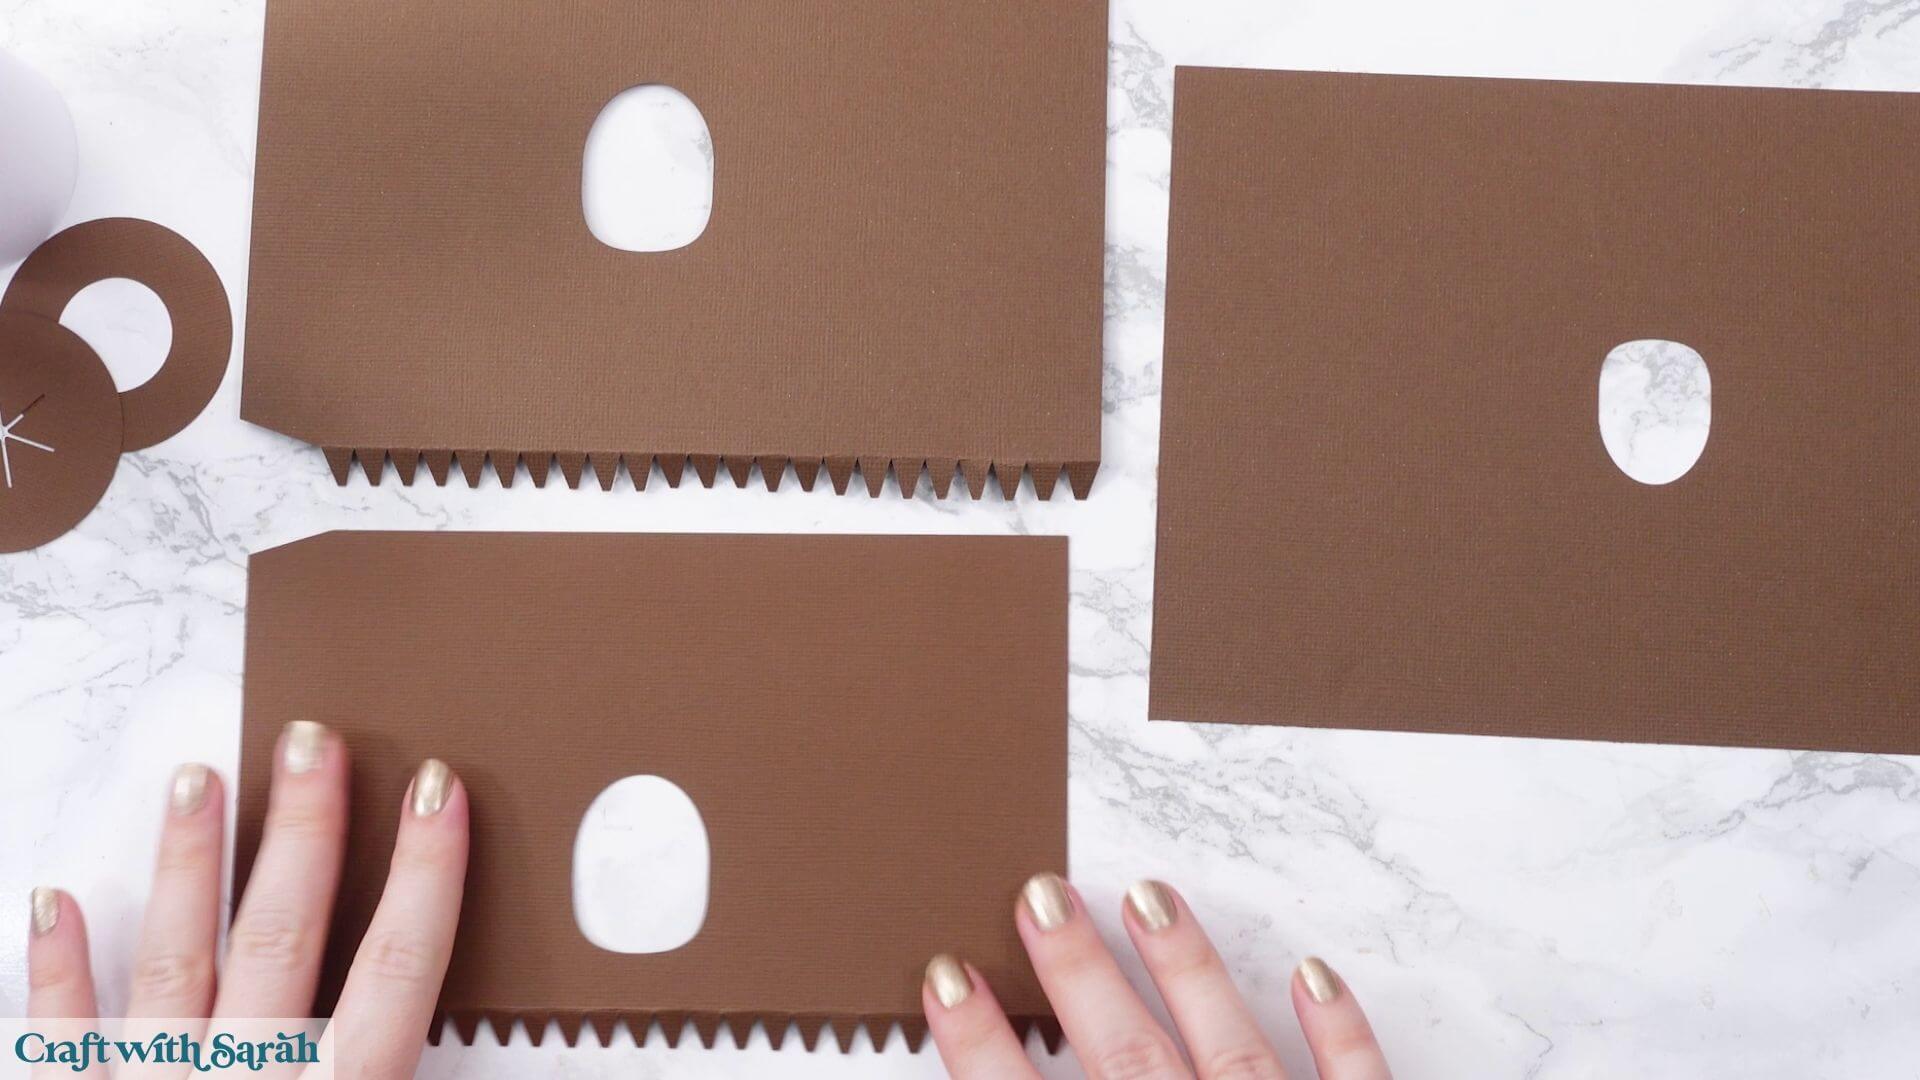
Take the two pieces with crocodile teeth tabs and place them over each other so that the holes line up. Start with the smaller of the two.
Fold down all of the tabs.
Next, gently train the cardstock into a cylindrical shape. This will be easier with thinner cardstock and a little trickier if you’re using something thick.
You’re aiming for an almost toilet-roll-shaped tube. Getting the cardstock used to the curve before gluing makes it much easier to assemble.
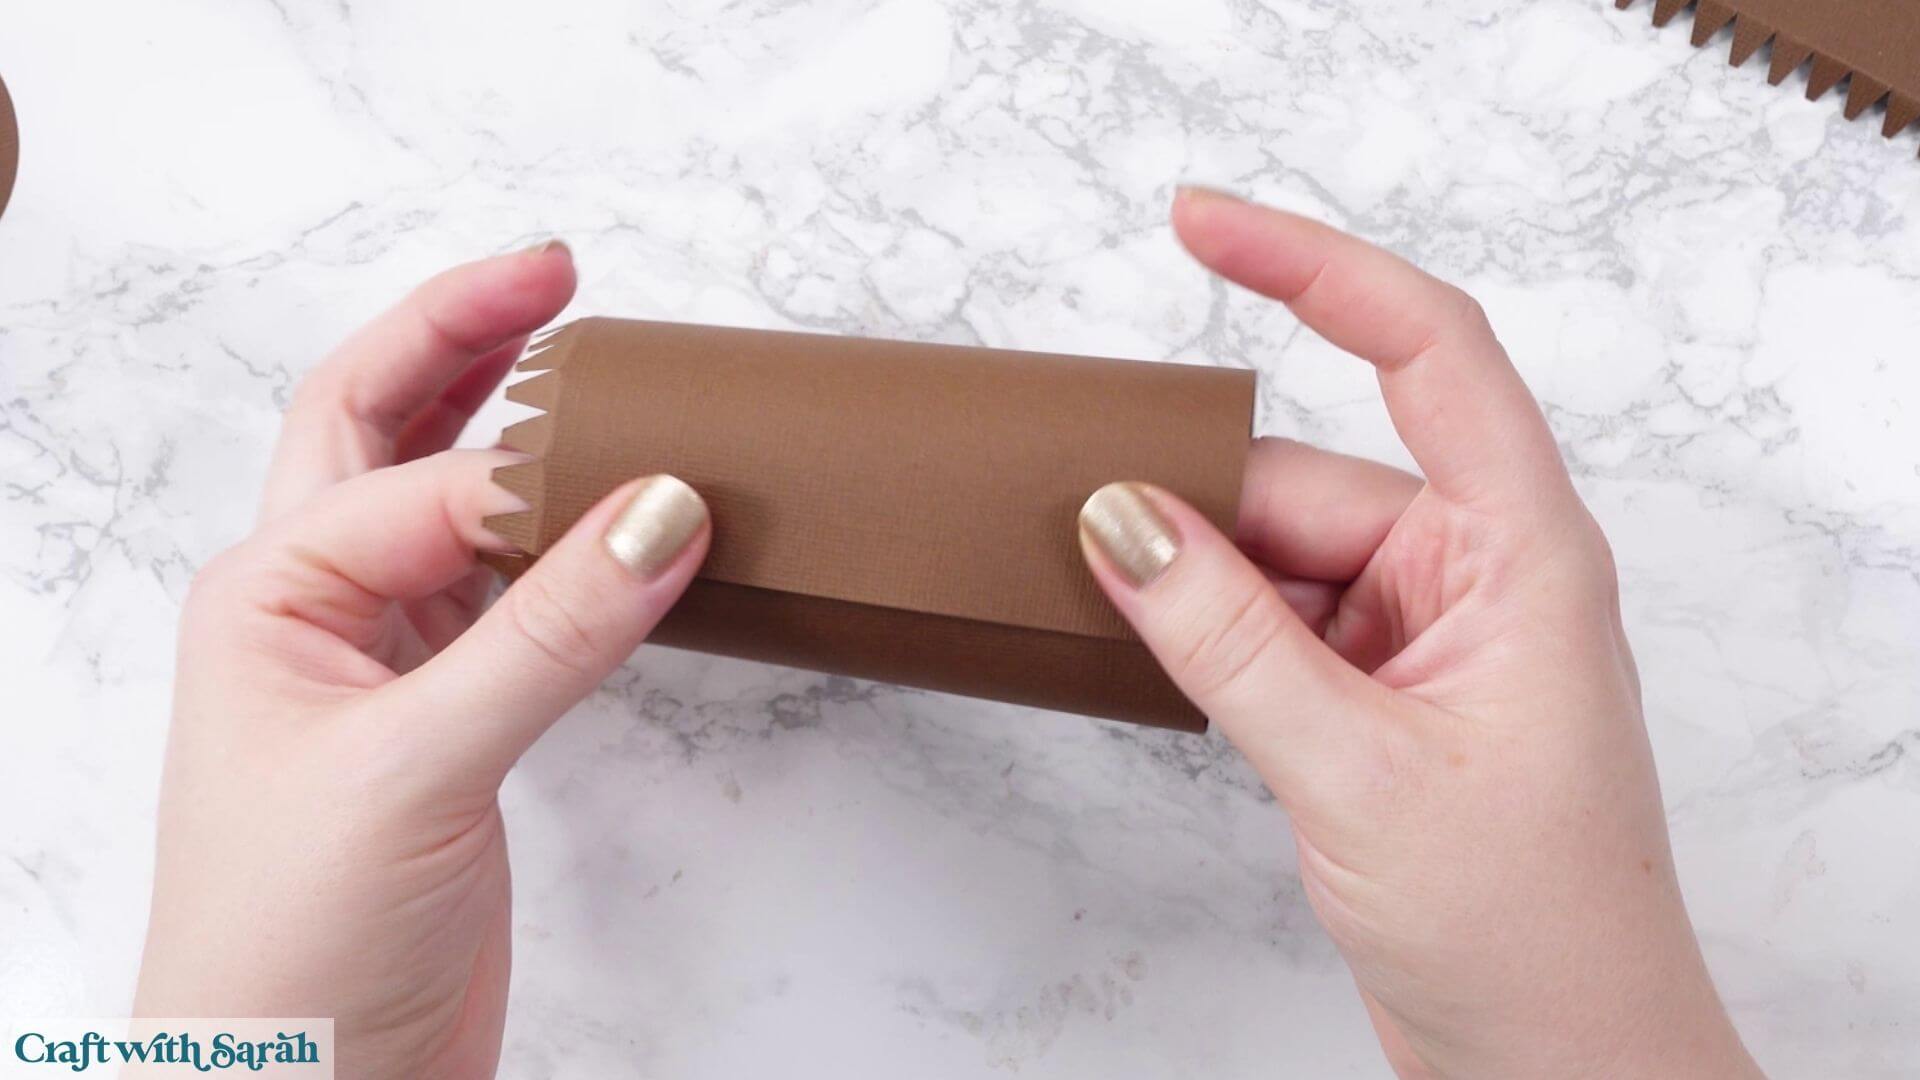
Add glue along the edge with the diagonal ends. There isn’t a score line here, so take the glue down to just before the diagonal sections end.
Use a fairly generous amount of glue so that the tube will hold securely.
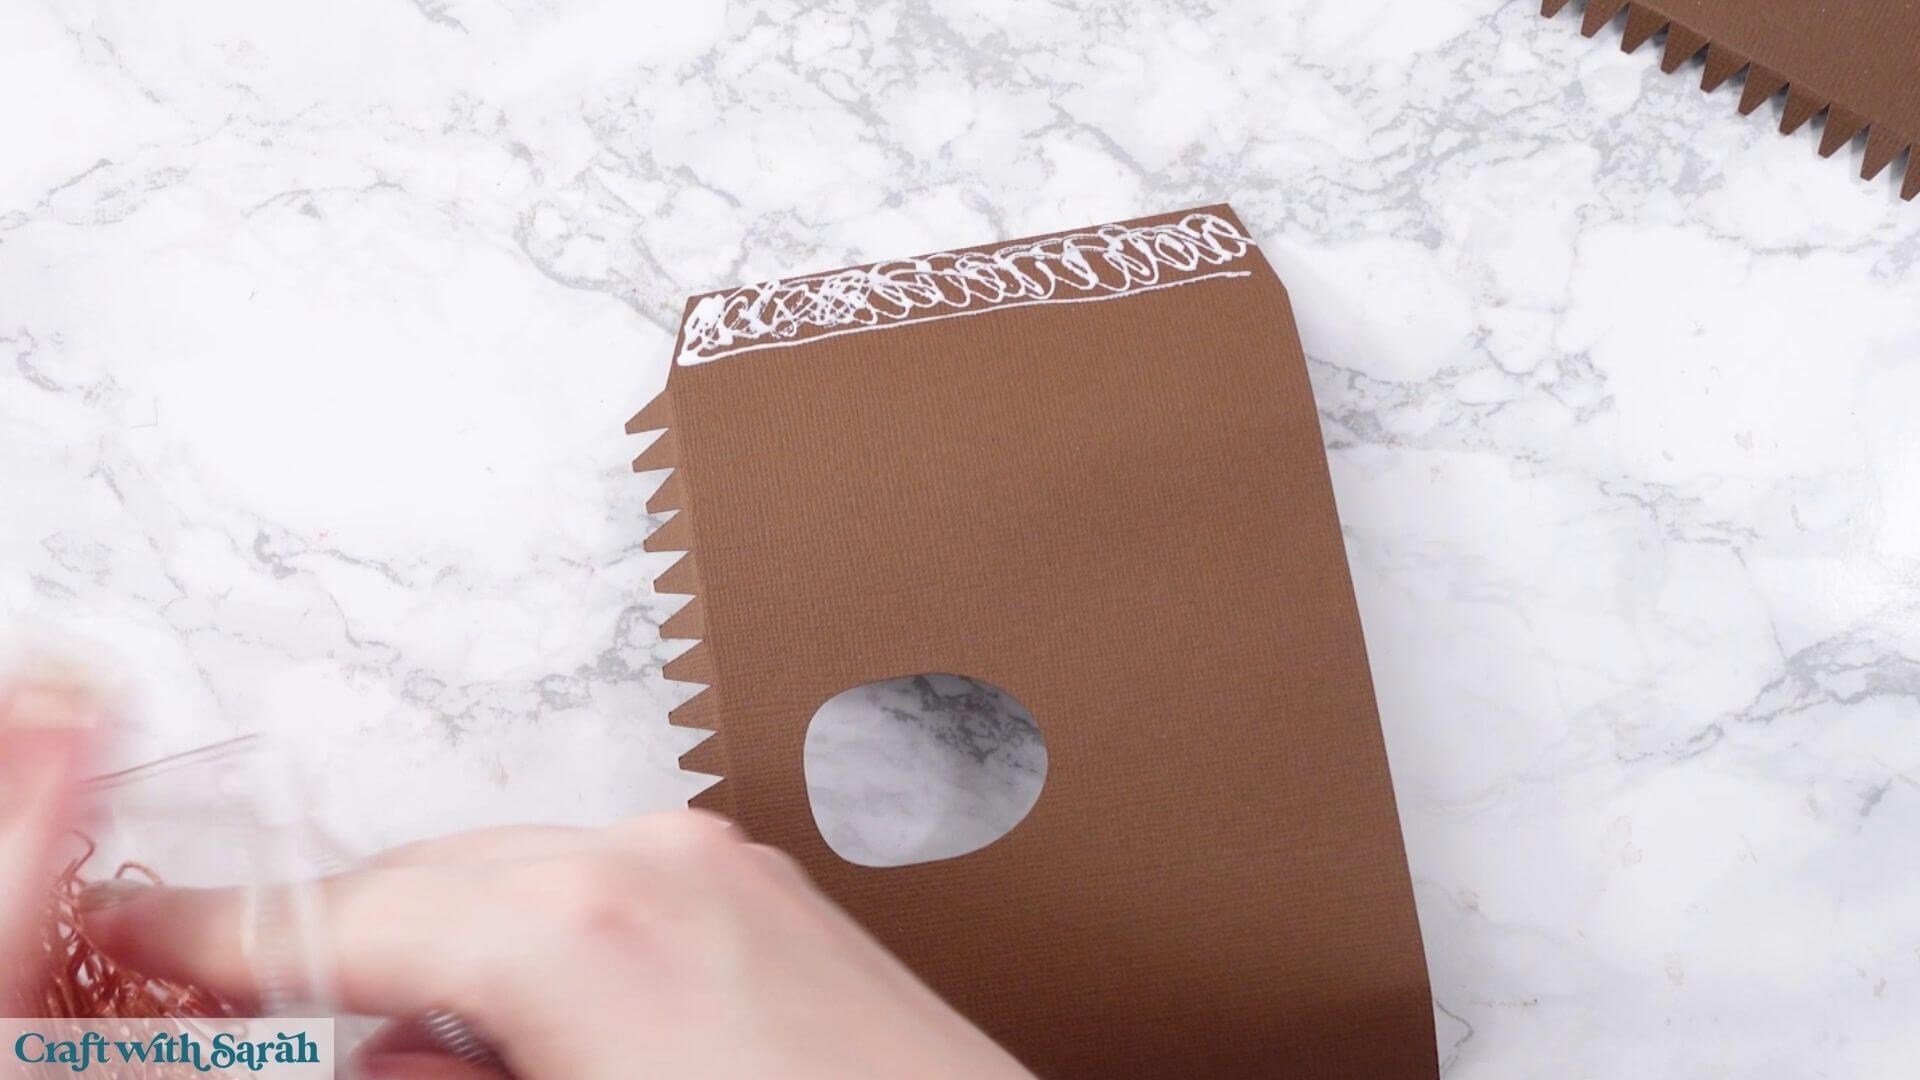
Curl the opposite edge around and stick it over the glue, lining it up with the point where the diagonal sections finish.
Try to make the tube as circular as possible because it will eventually need to fit inside the opening in the green base.
Paper clips are very useful for holding everything together while the glue dries. If you don’t have any, you’ll need to hold the join in place for a little longer.
You can also use a little washi tape or masking tape to temporarily hold the join, although be careful when removing it so that it doesn’t damage the cardstock.
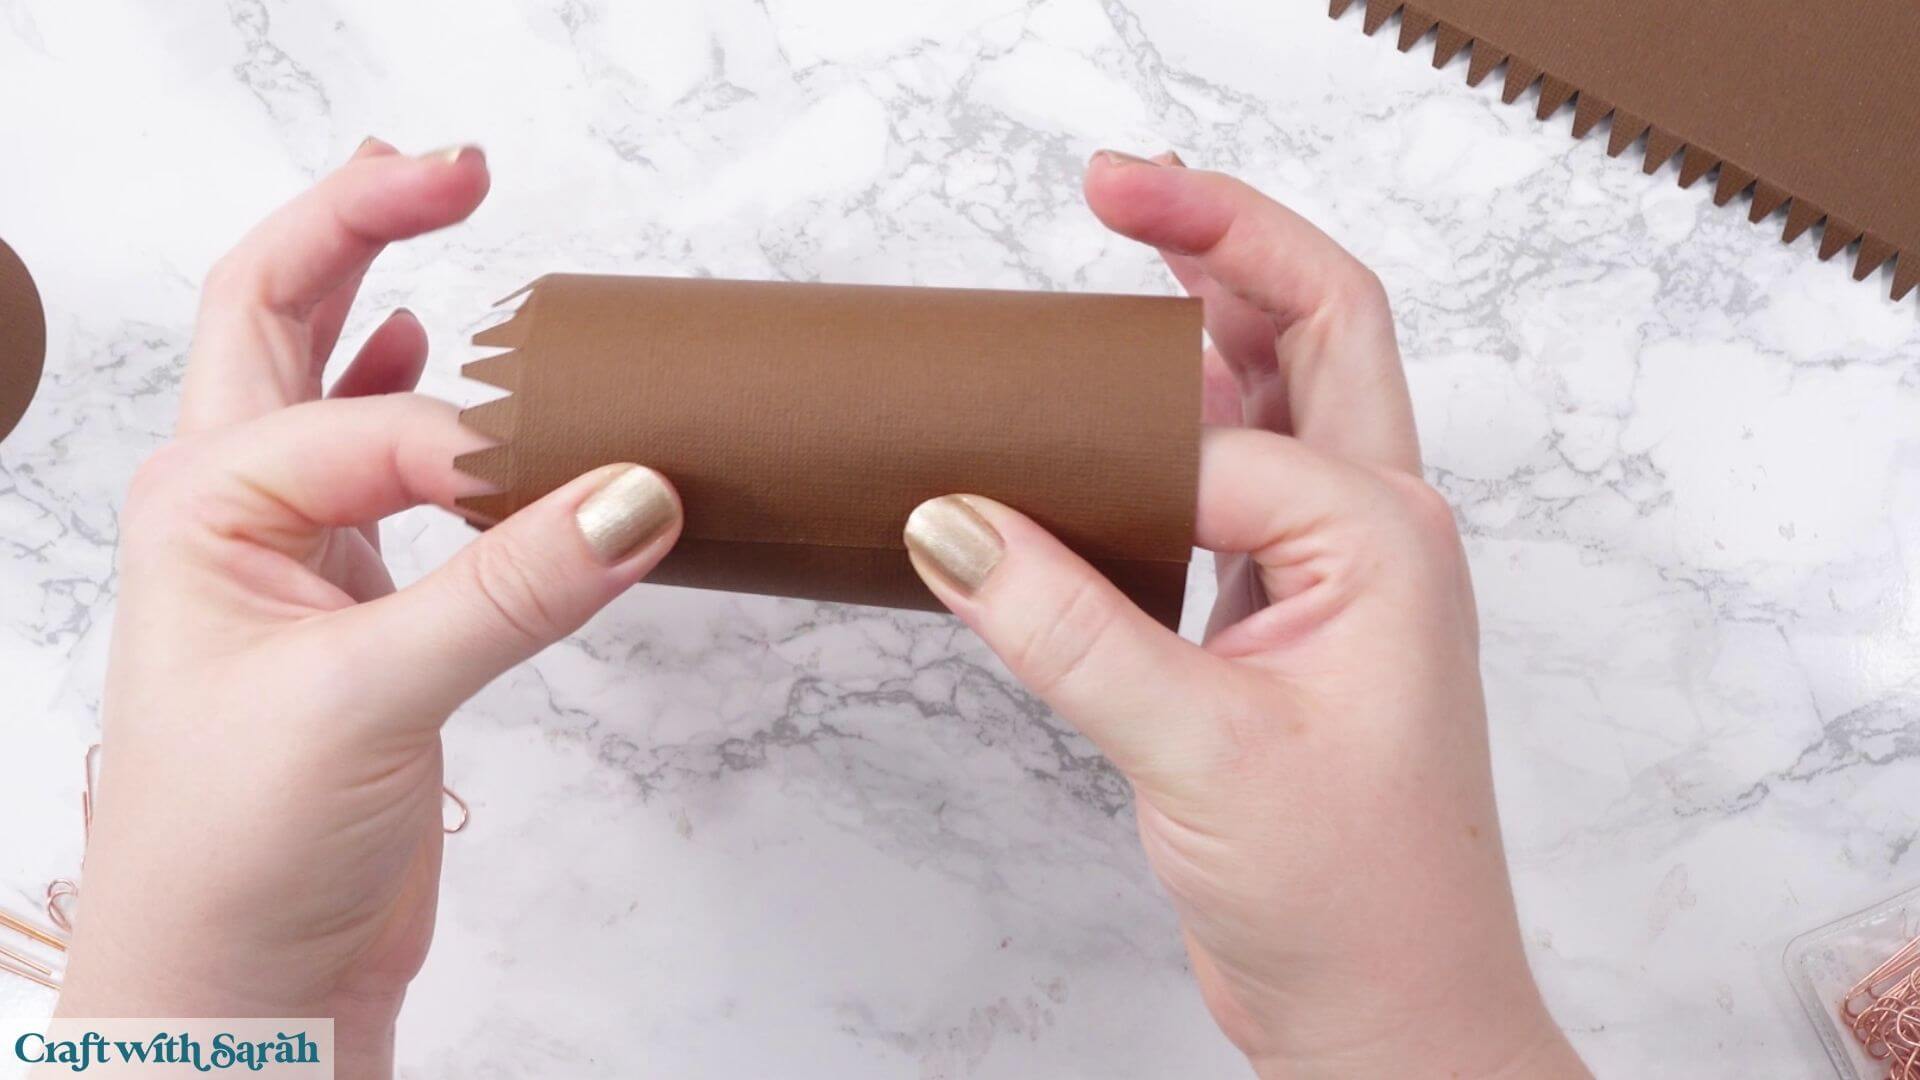
Repeat the same process with the medium-sized piece.
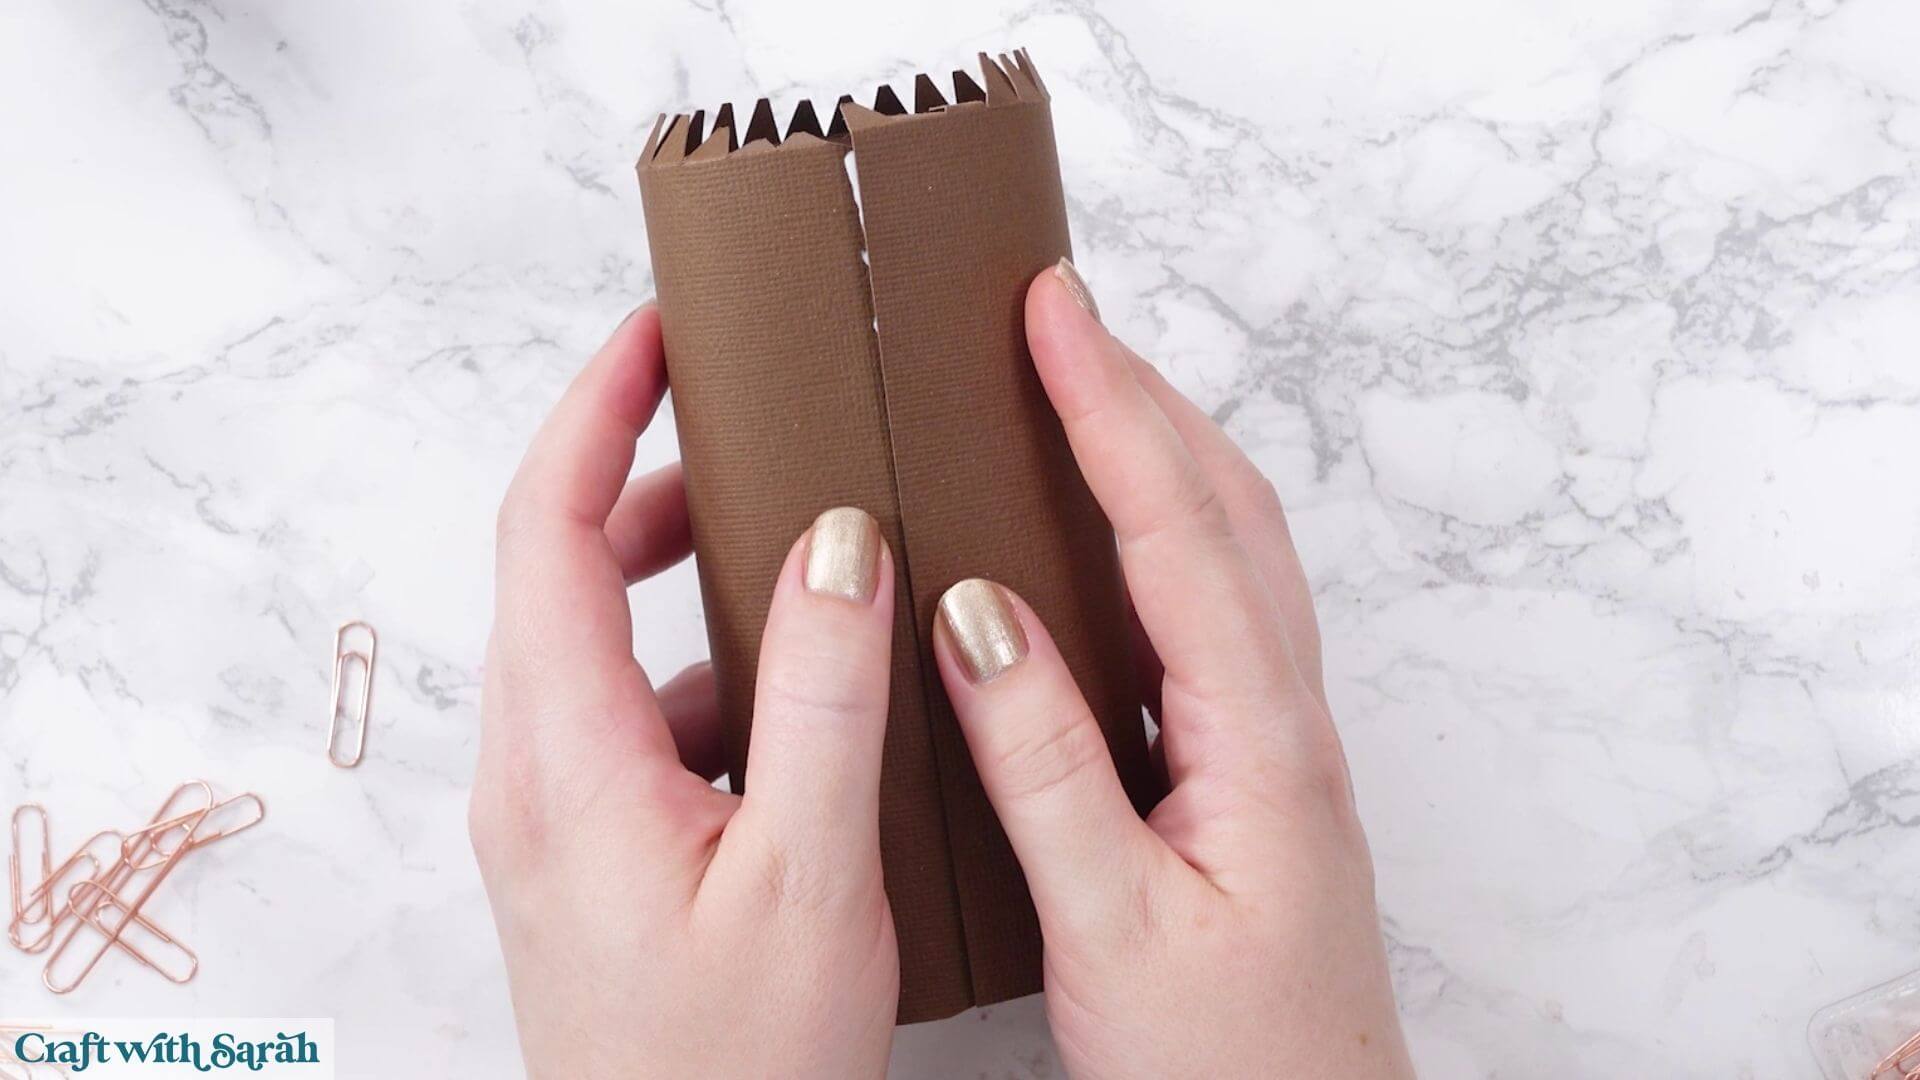
Finally, make the largest tube in the same way. This one doesn’t have crocodile teeth tabs, but you still need to gently train it into a curved shape before gluing it together.
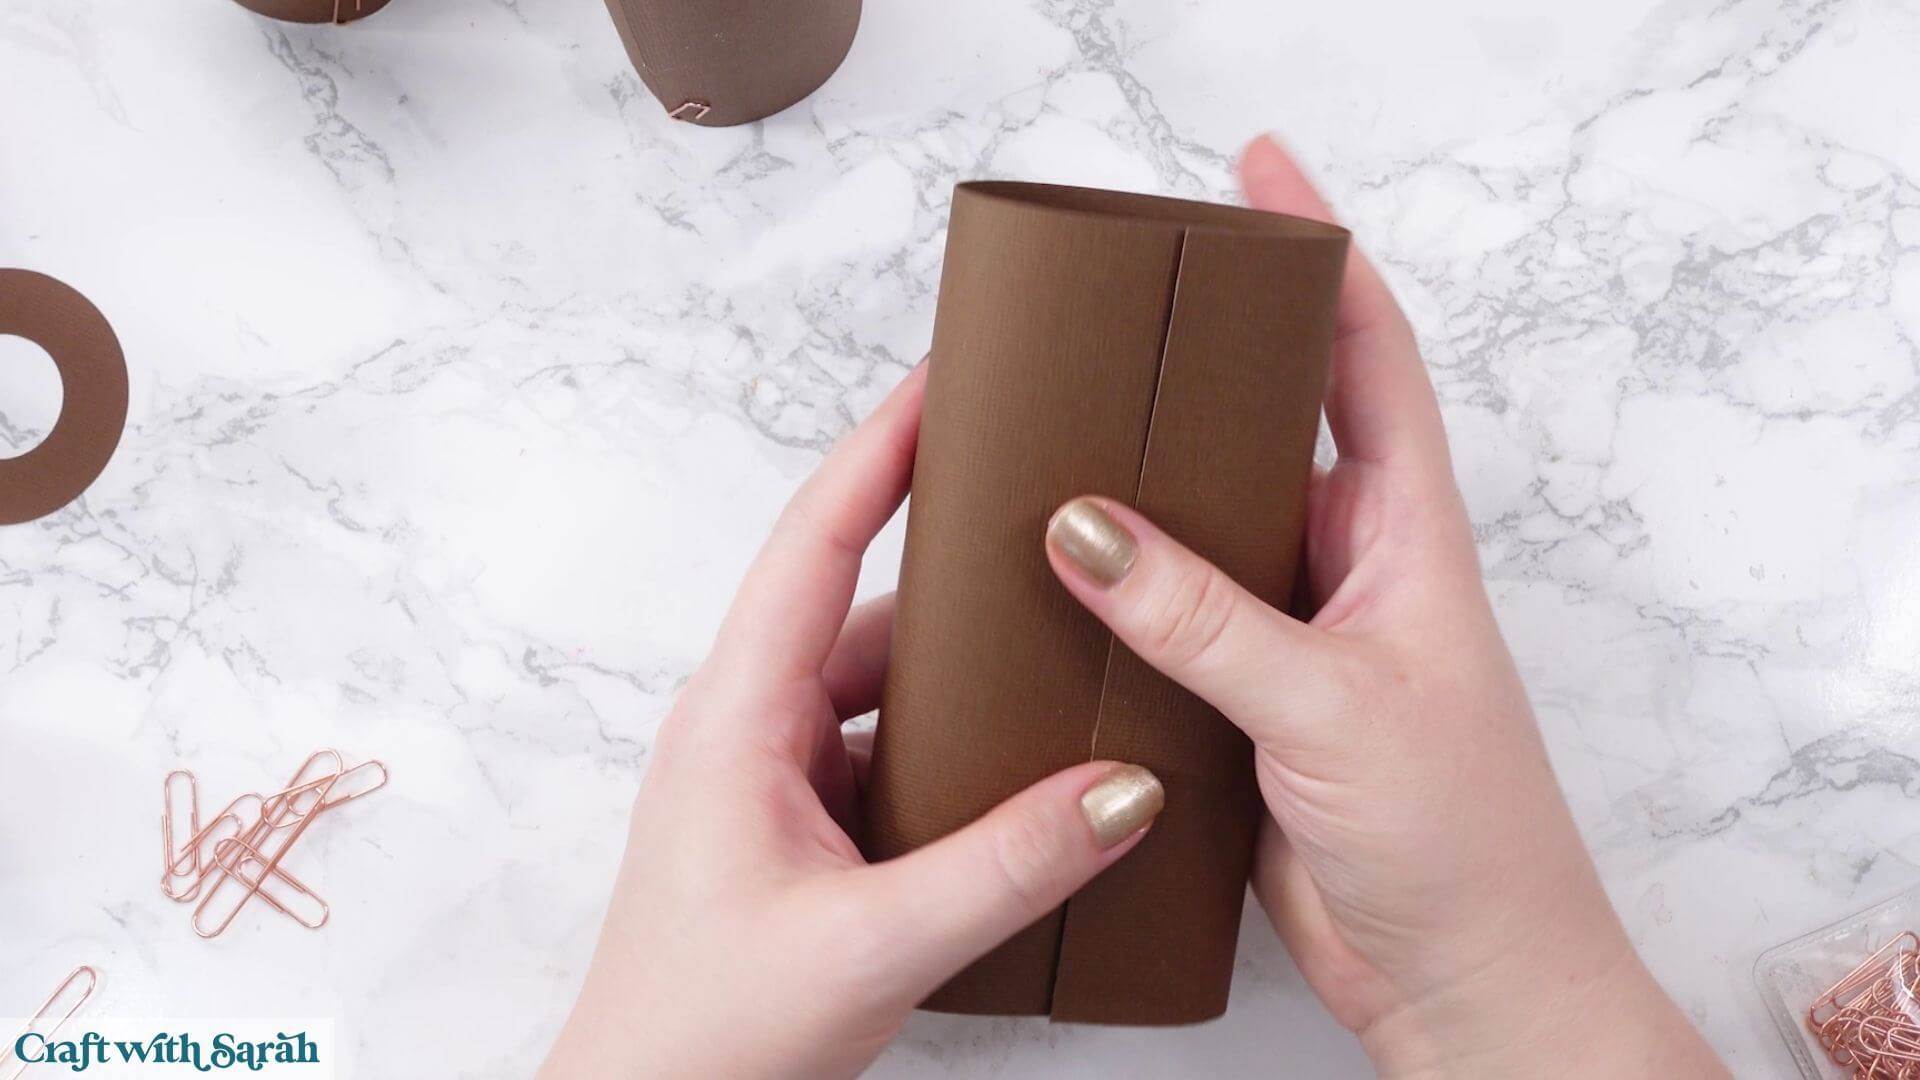
Take the smallest tube and remove the paper clips once the glue is dry enough.
Fold all the crocodile teeth tabs down.
Find the doughnut-shaped circular piece and glue it on top.
Just as we did with the green base, gently manipulate the sides so that the tube follows the circular shape as closely as possible. You can put your finger through the hole to help pull the little tabs outwards where needed.
It’s worth taking a little extra time here because the different tree stump pieces need to slot inside each other later.
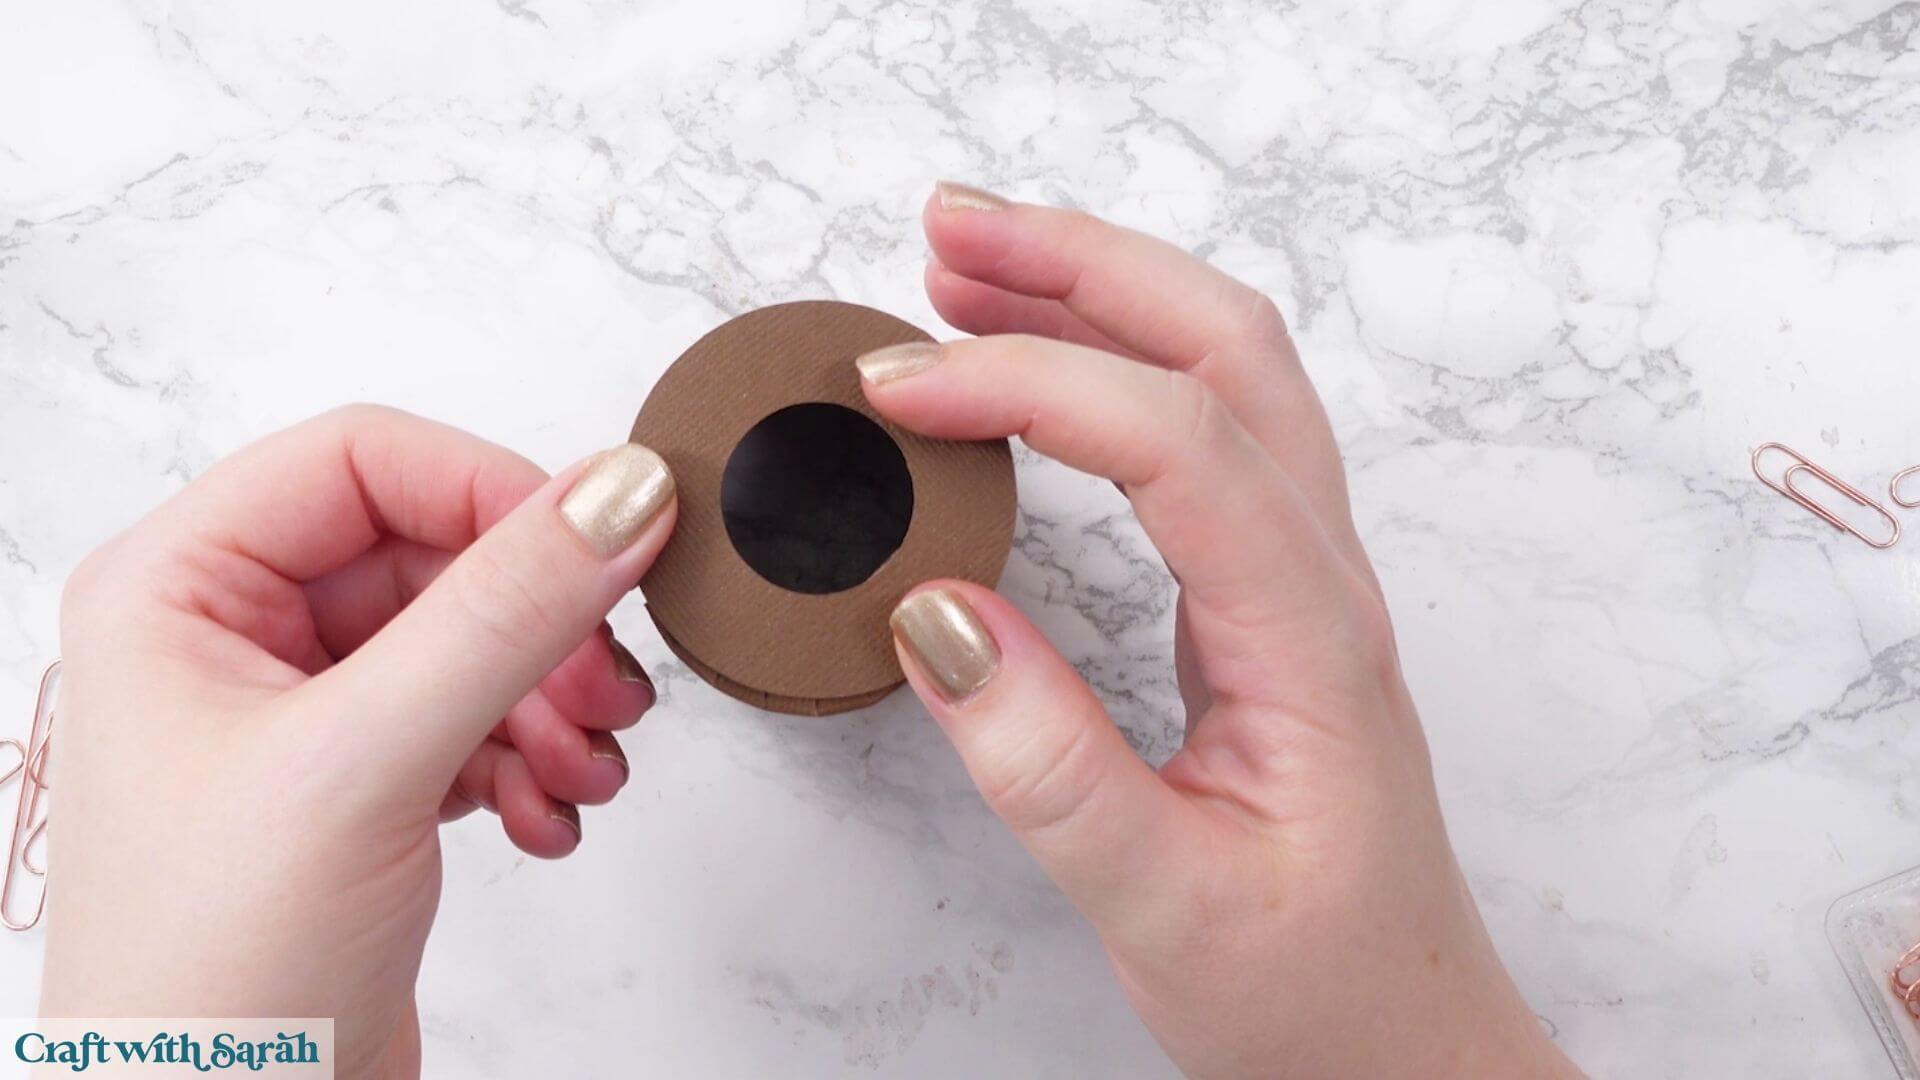
For the medium-sized tube, find the circular piece with the star-shaped opening in the middle.
Glue this onto the crocodile teeth tabs and again adjust the tube so that it fits neatly around the circular shape.
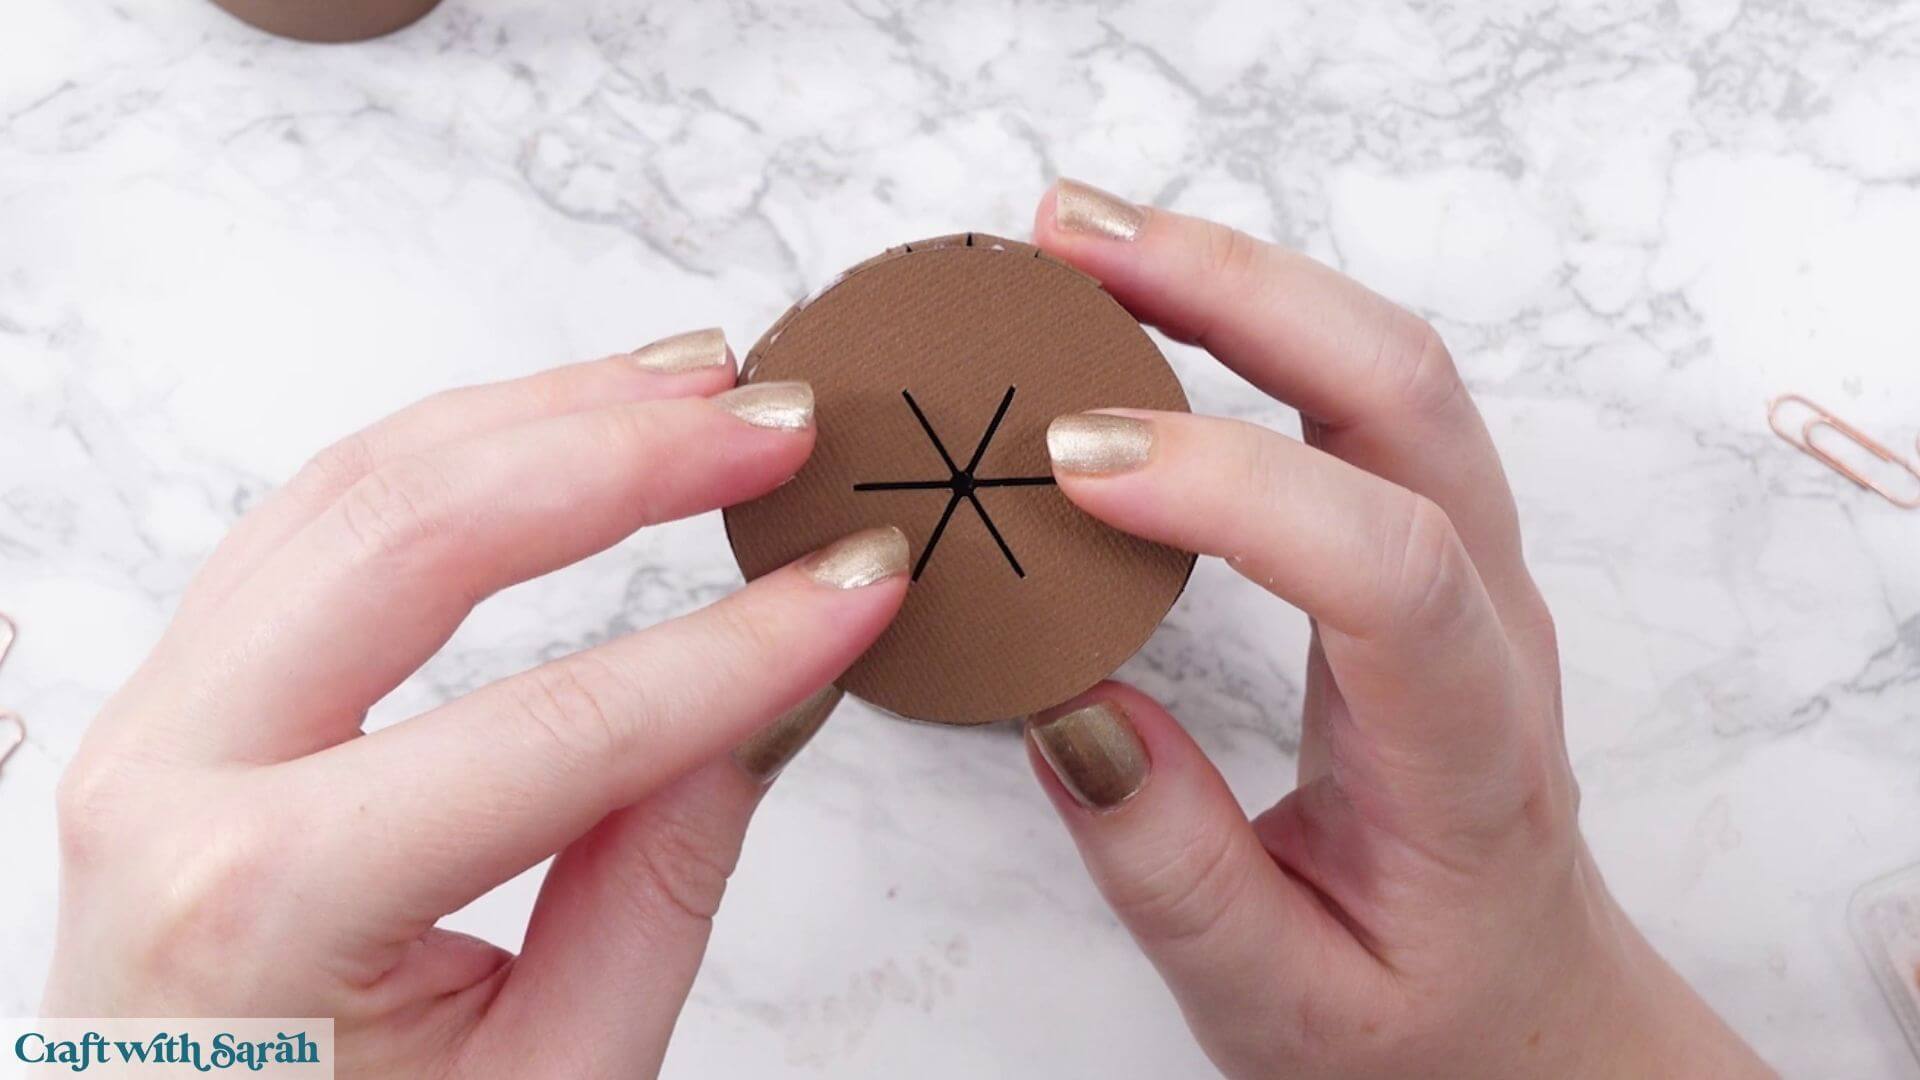
Leave both pieces to dry before slotting them together.
The smaller branch that sticks out of the side is made in a similar way.
Fold all of the crocodile teeth tabs.
This piece needs to form a much narrower tube, so it can help to train the cardstock around something that’s roughly the correct size. The end of a brayer works well, or you can roll the cardstock against the edge of your table.
Keep working the cardstock until it starts holding that tighter cylindrical shape.
Glue the edges together and use paper clips if needed while it dries.
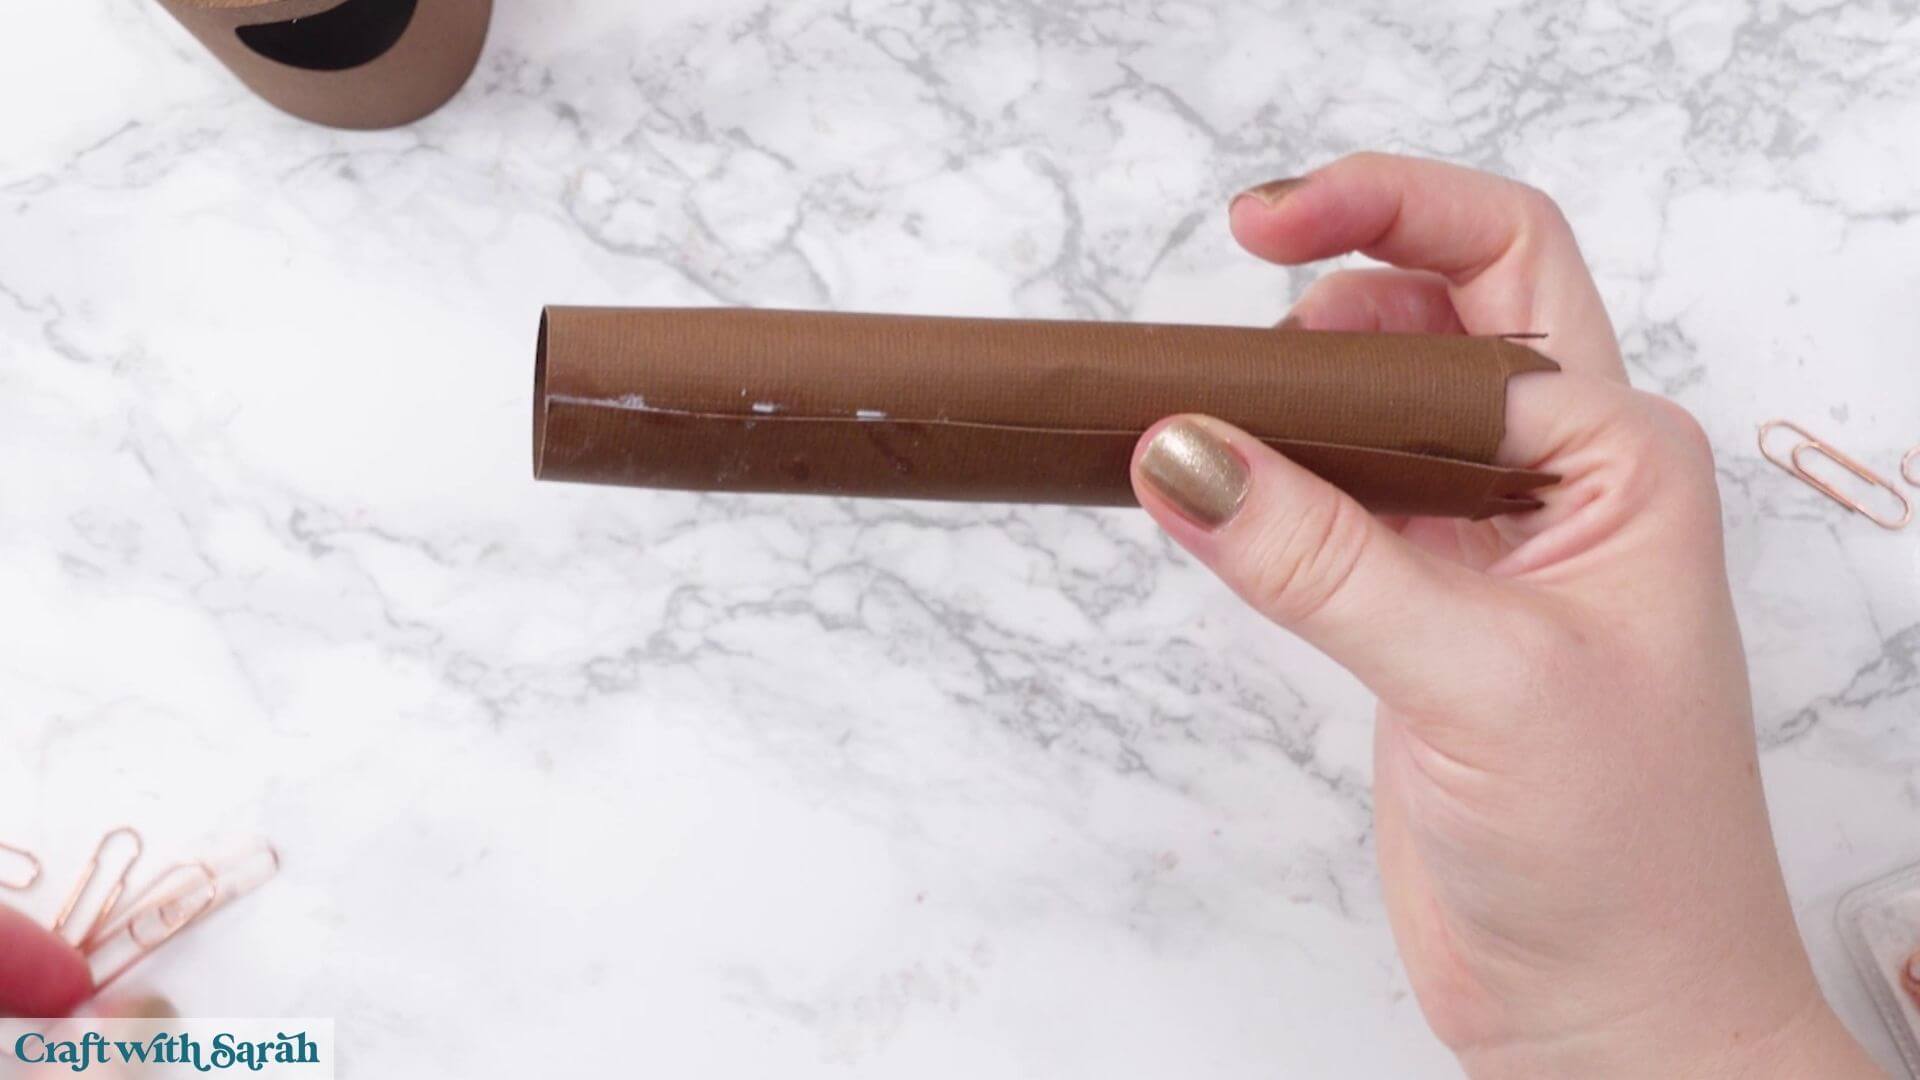
Fold the crocodile teeth tabs in so that they’re horizontal, add glue and attach the small circular piece on top.
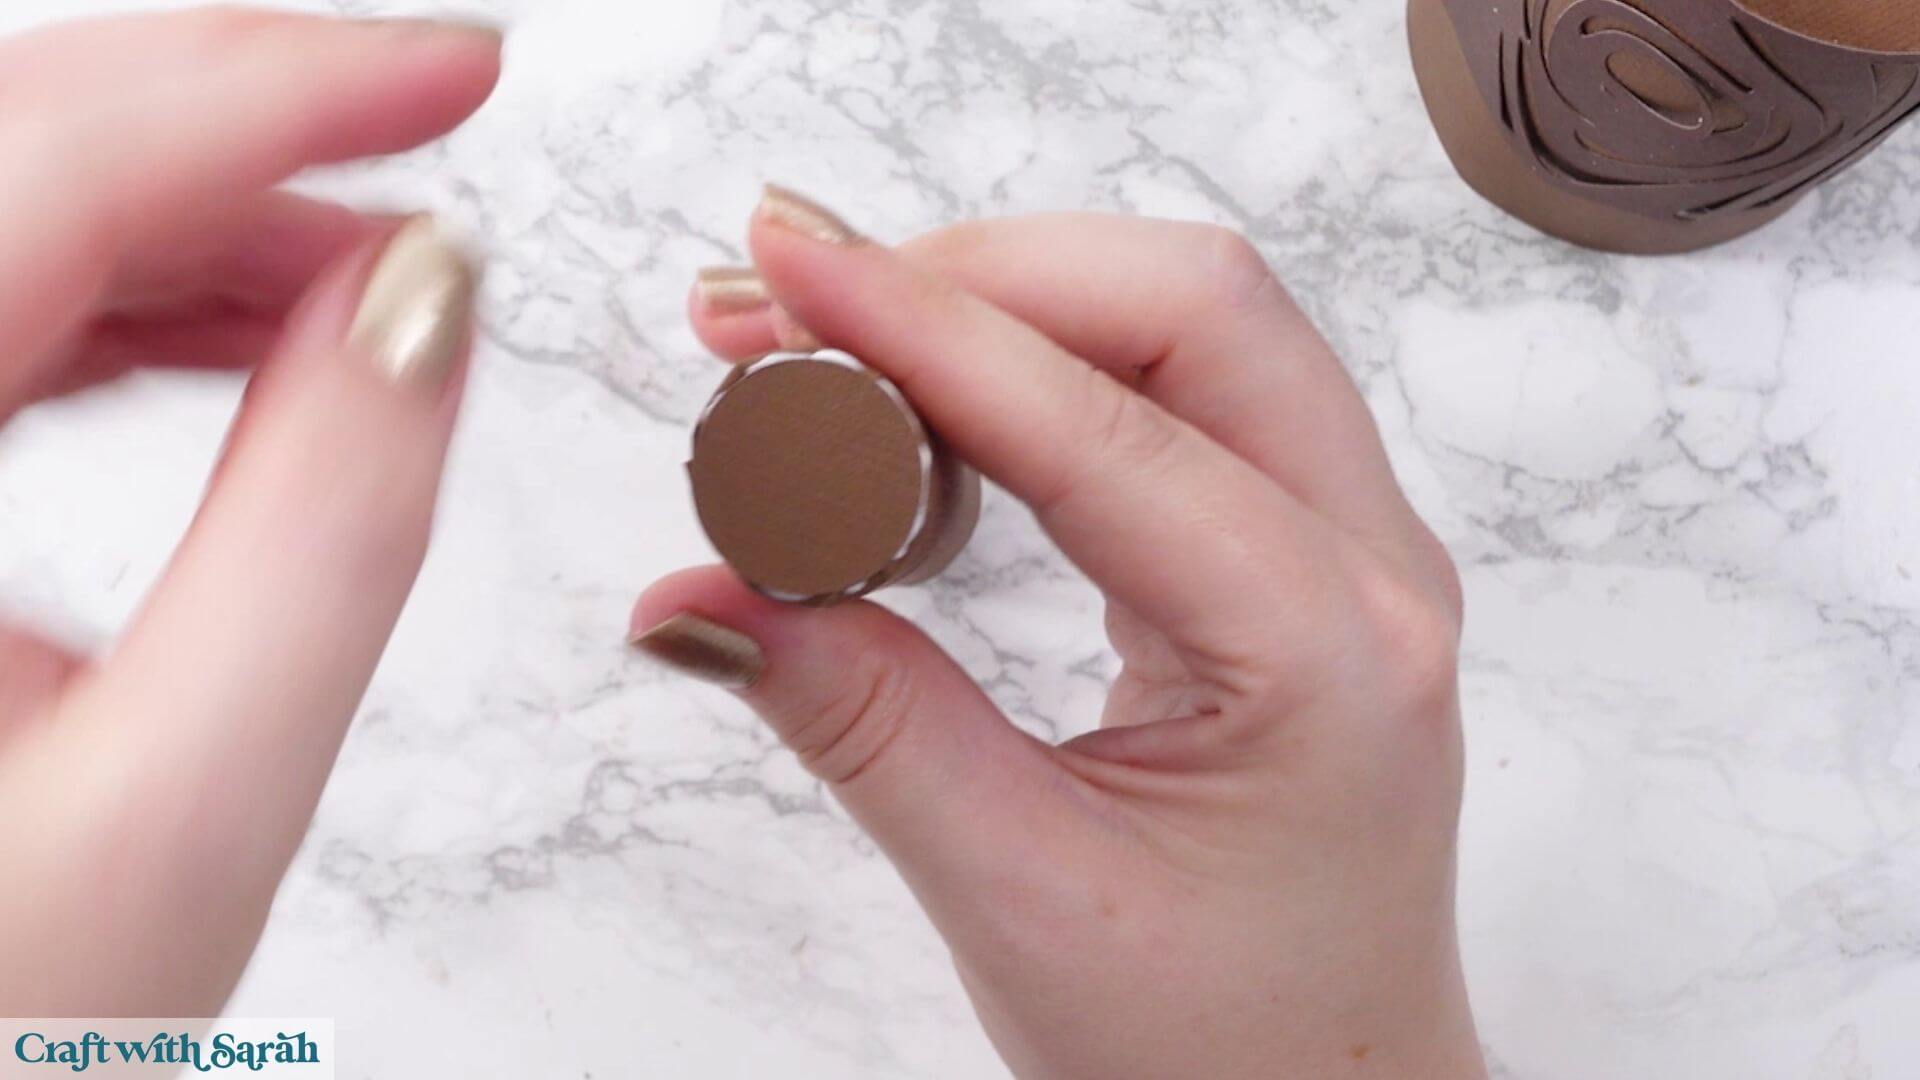
Once the glue on the main sections are dry, they can be slotted together.
The piece with the star-shaped opening goes over the smallest tube. Both of the top pieces that you’ve glued on should be facing upwards.
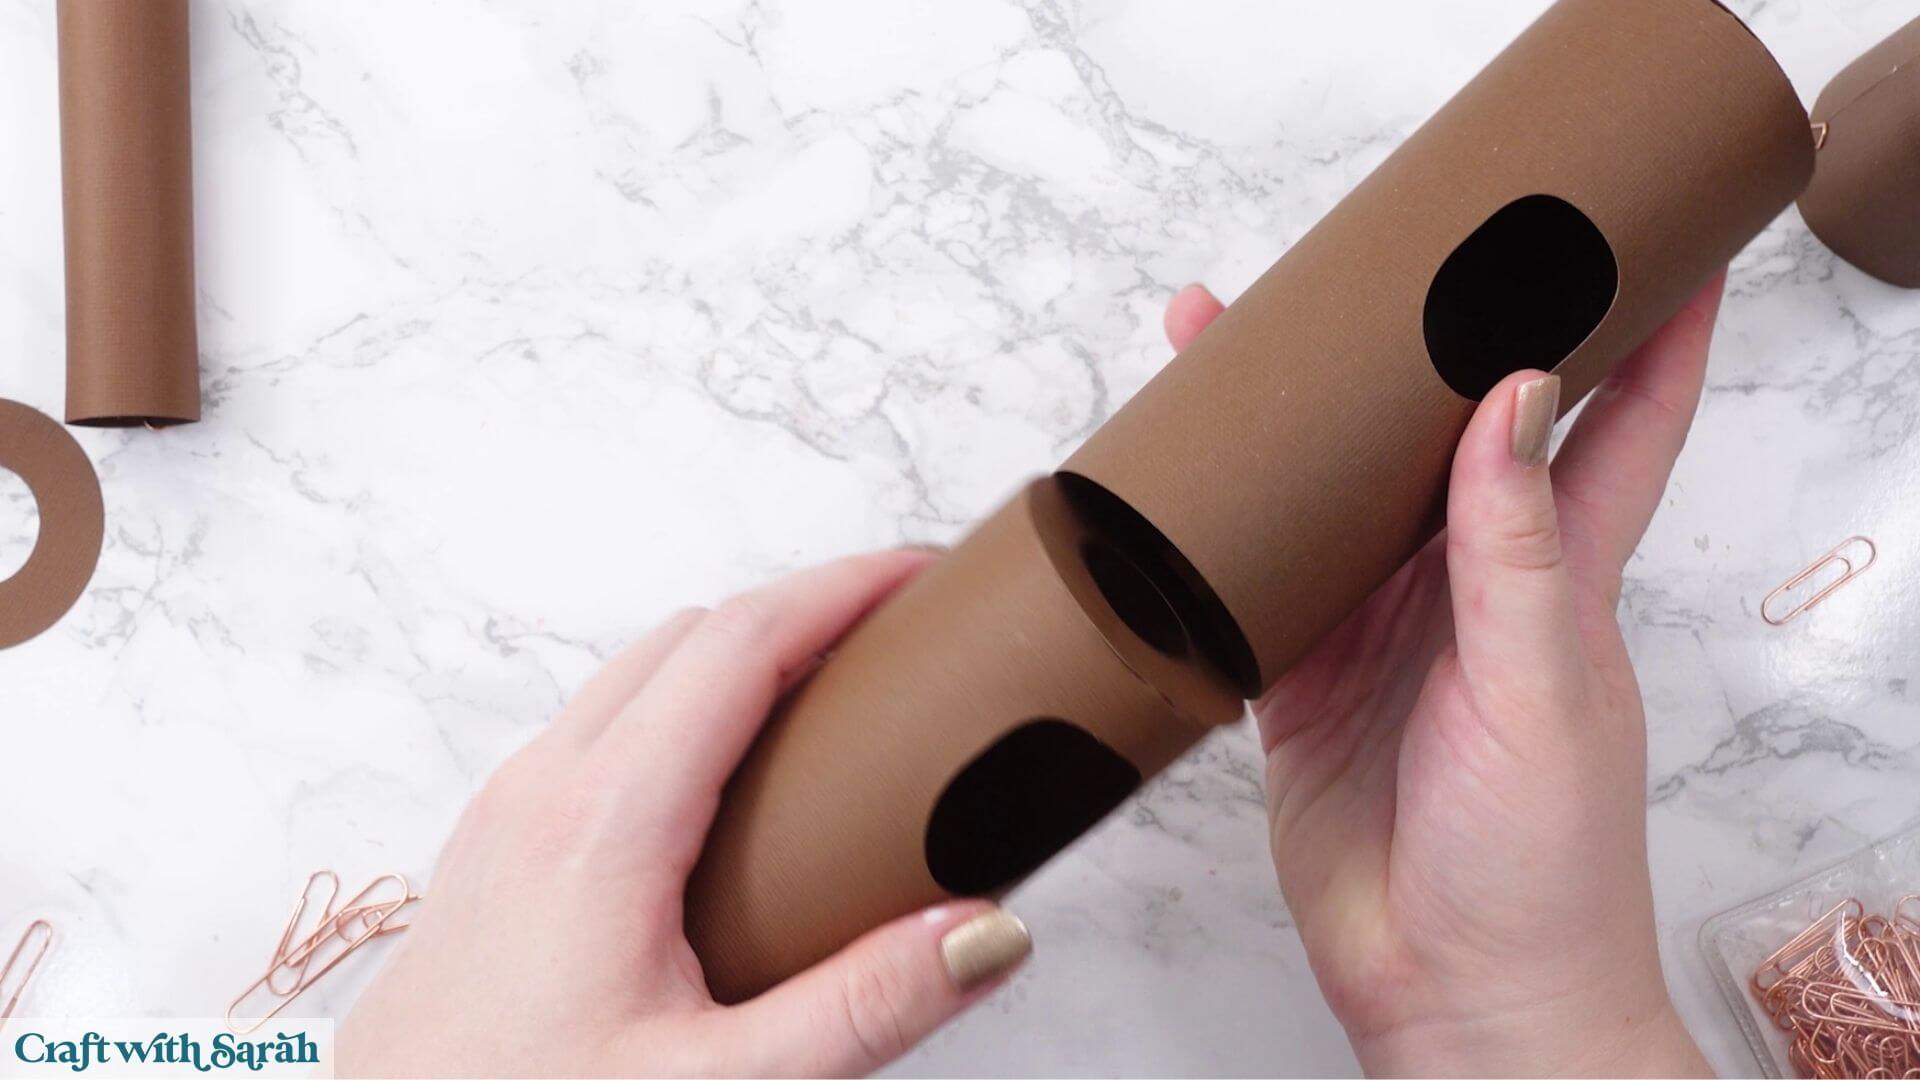
Push the sections together until the holes in their sides line up.
The largest tube then slides over the other two.
If it’s a tight fit, gently squish and adjust the tubes as you slide them together. Make sure that all of the holes line up, as this is where the smaller branch will eventually be inserted.
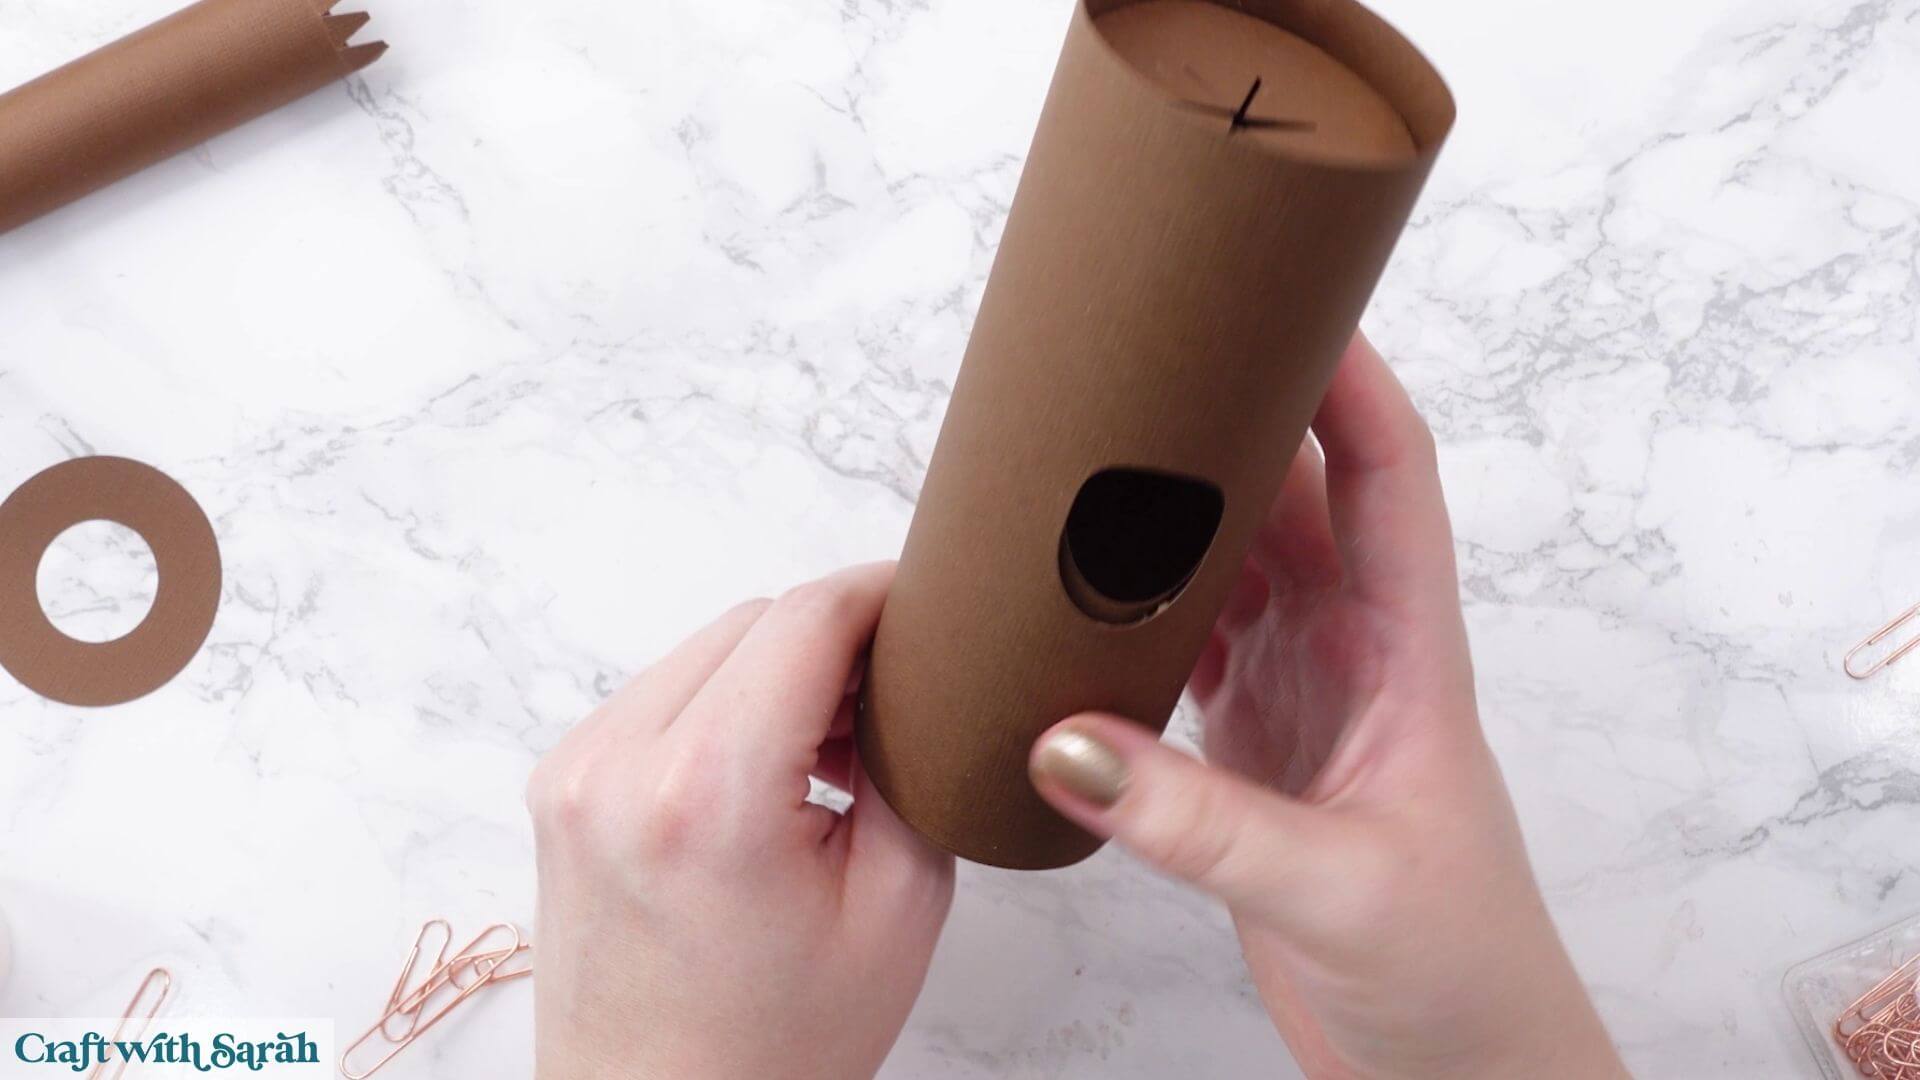
Glue the decorative brown layer around the outside, positioning the detailed parts closest to the top.
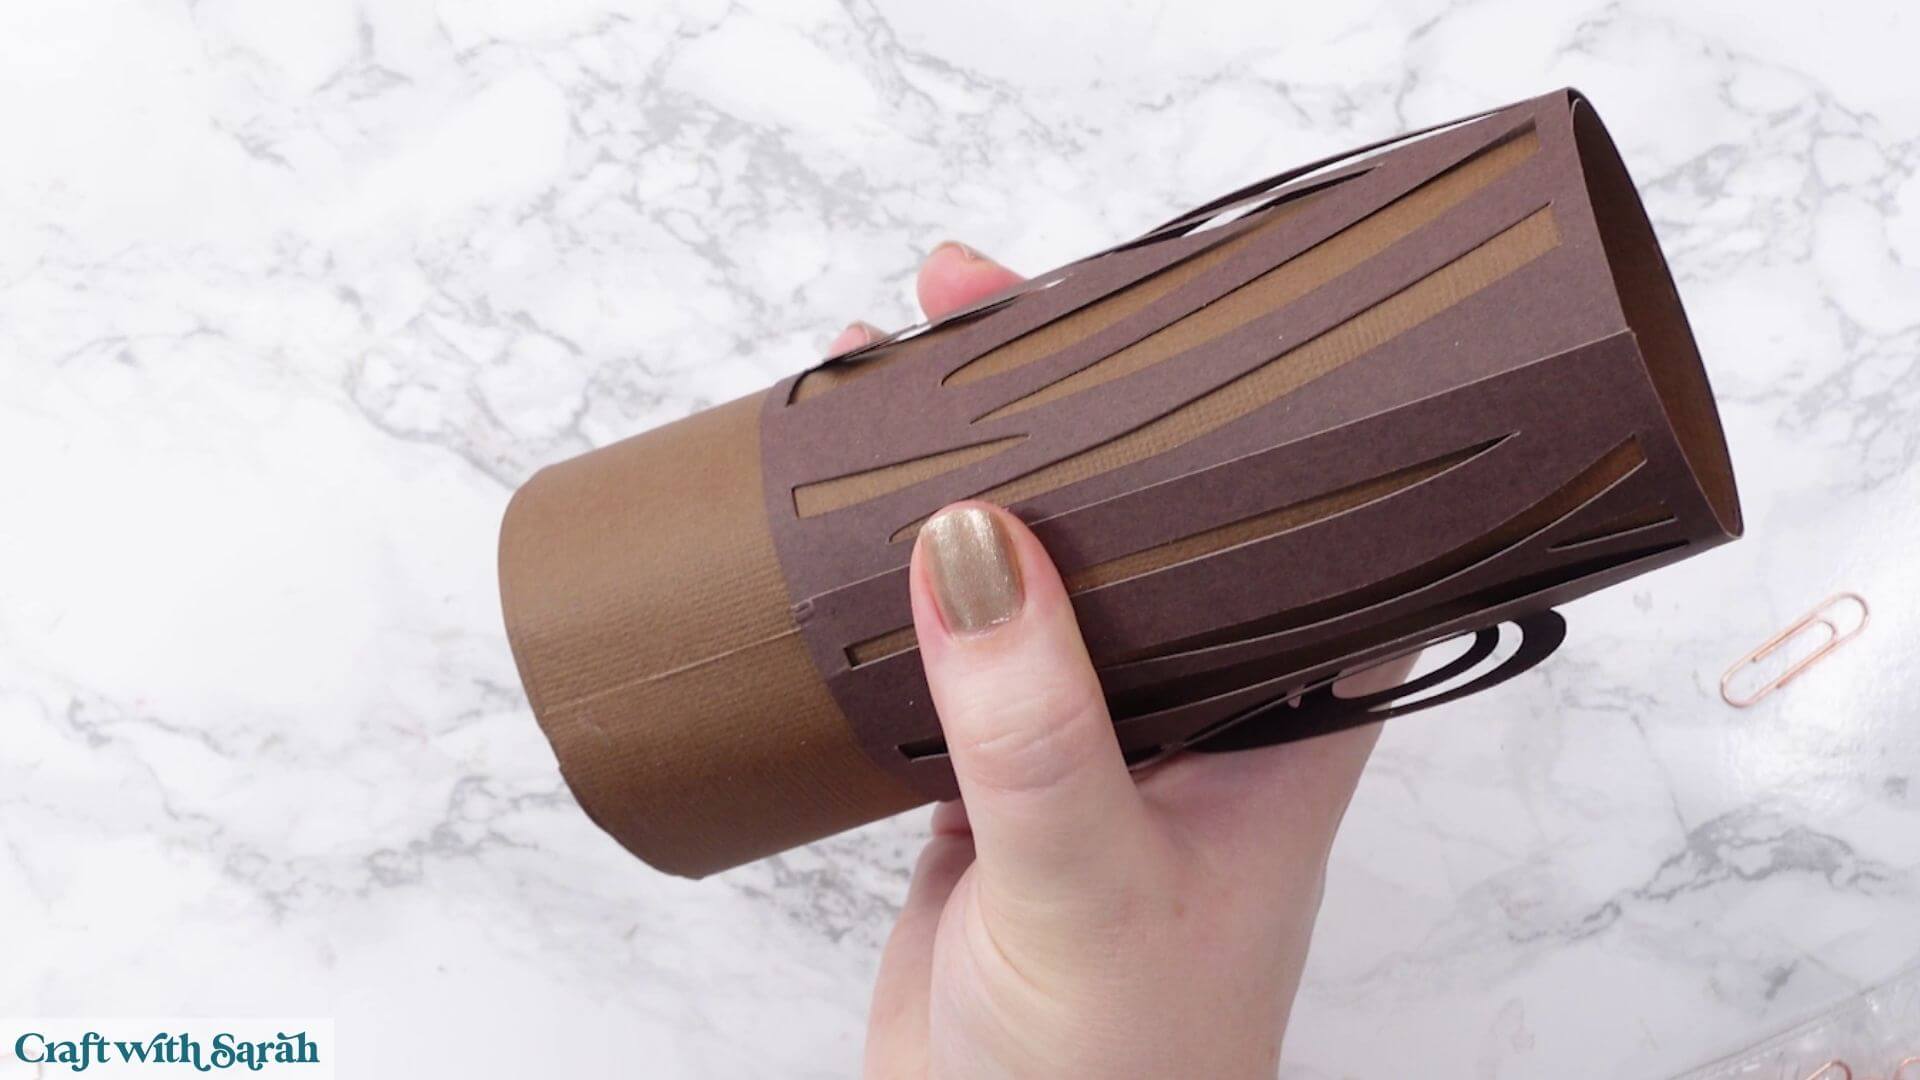
Do the same for the thinner tube for the smaller branch. The detail part should be placed against the top of the tube, i.e. the side that you glued the small circle to.
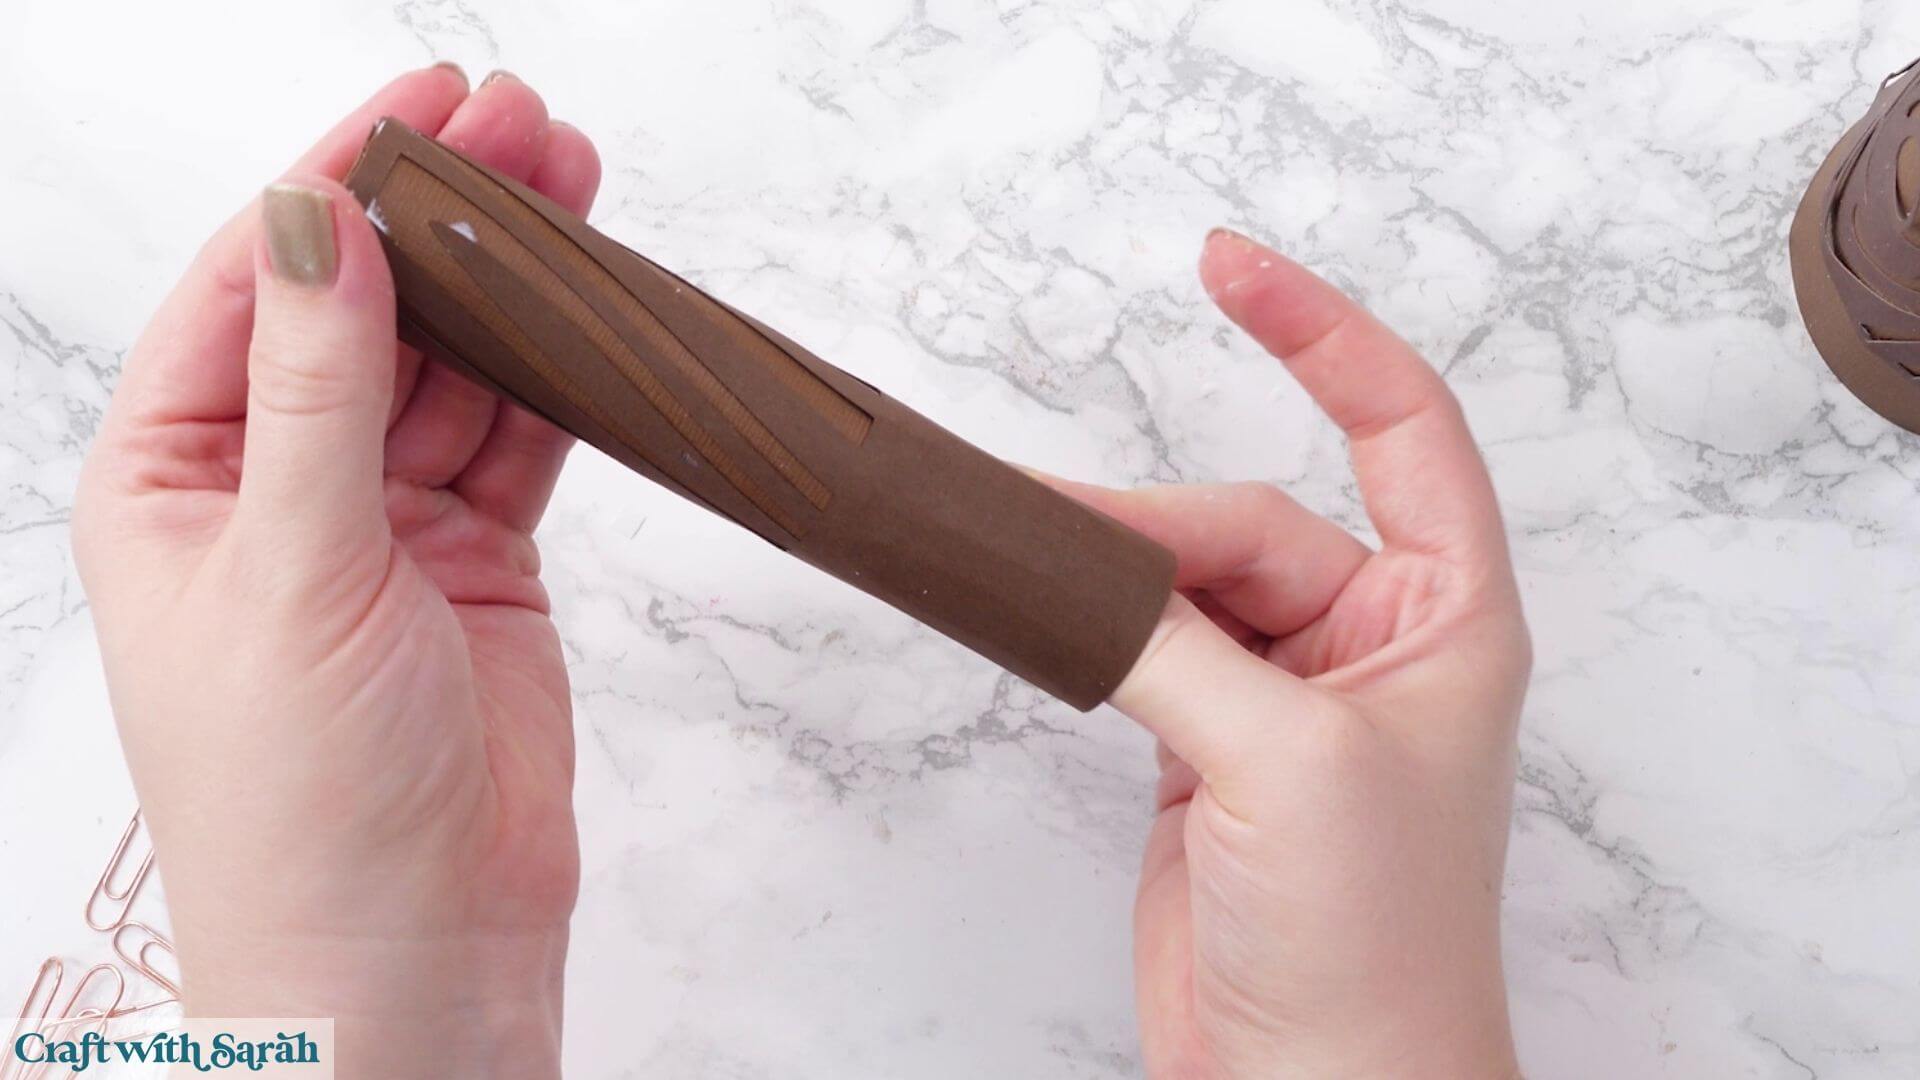
It’s fine if the decorative layer overlaps slightly where the ends meet.
Finally, slide the smaller branch into the hole in the side.
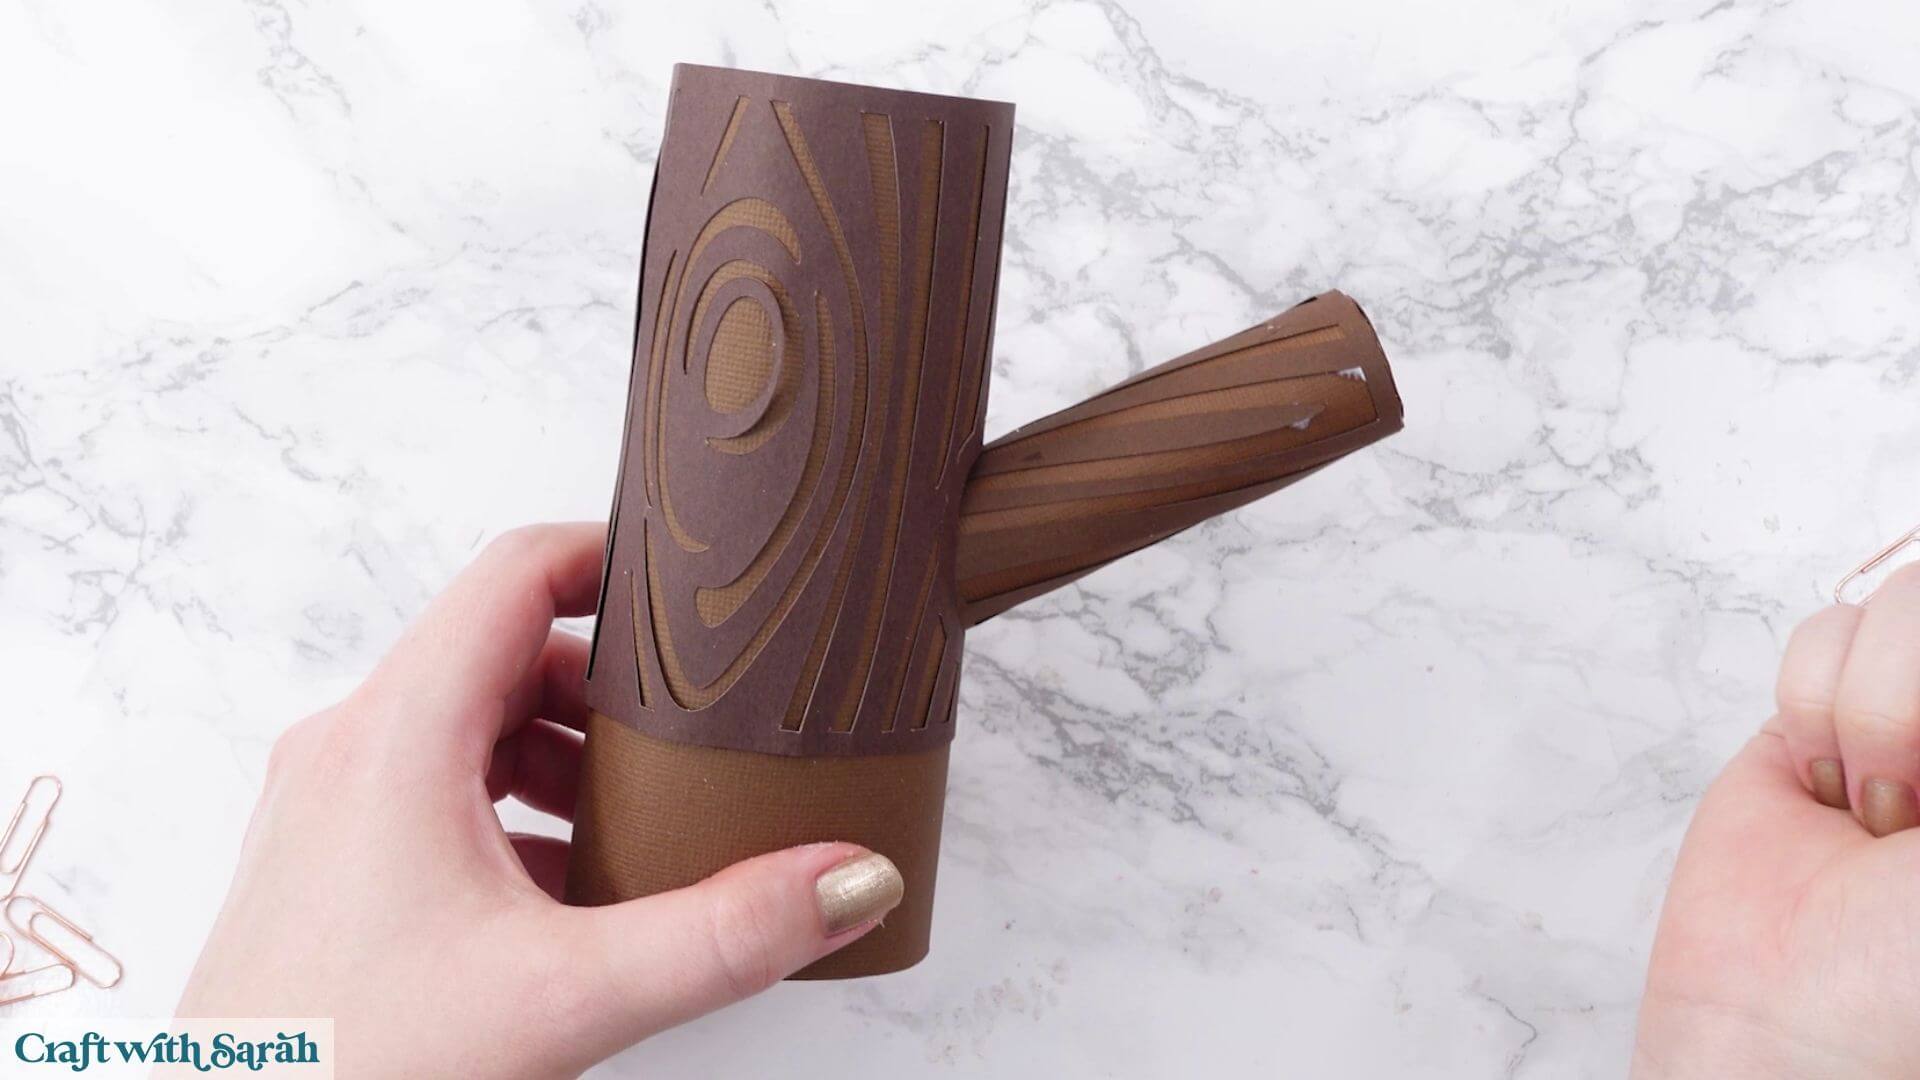
Step 6) Make the owl’s body
Now we can start making the owl.
There are three main structure pieces for the body, four feathery side pieces, four matching solid brown pieces and two circular structure pieces.
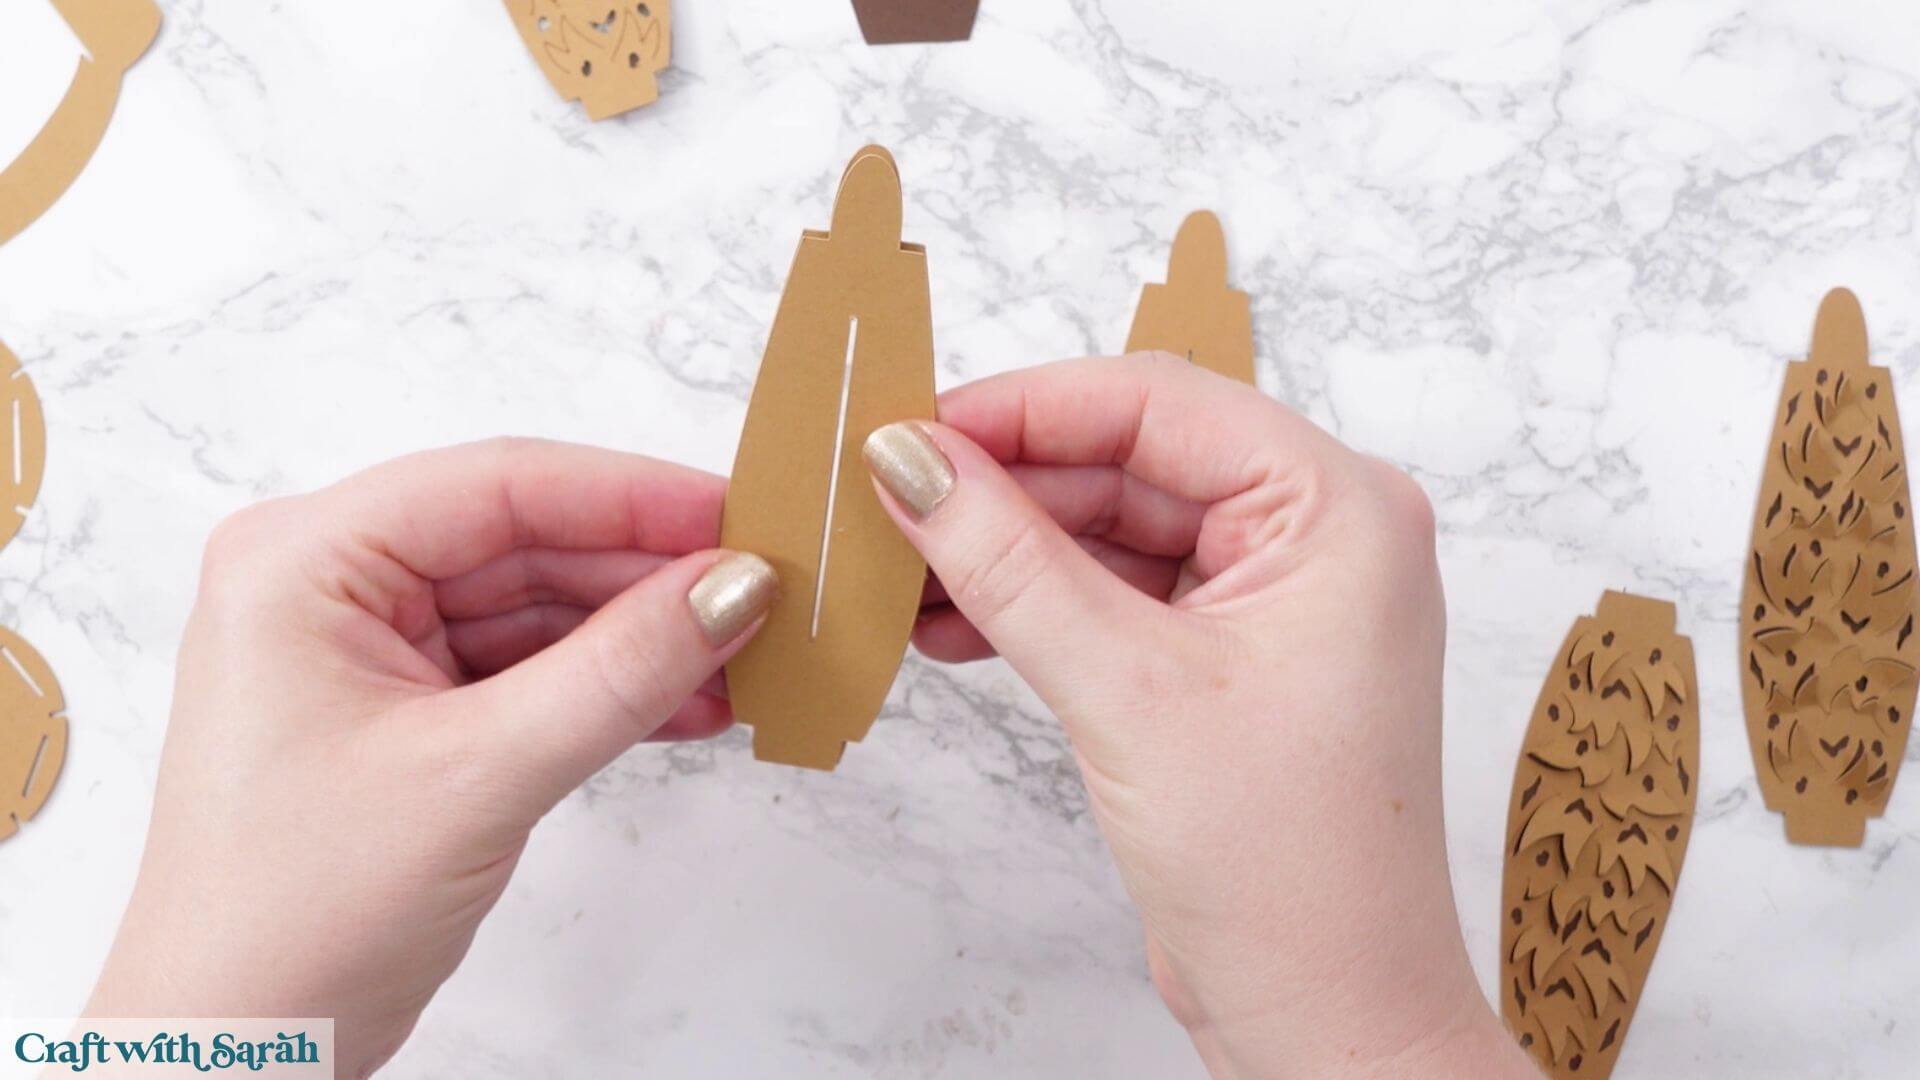
You’ll also have four pieces with a slit in the middle. These help to support the owl’s large wings.
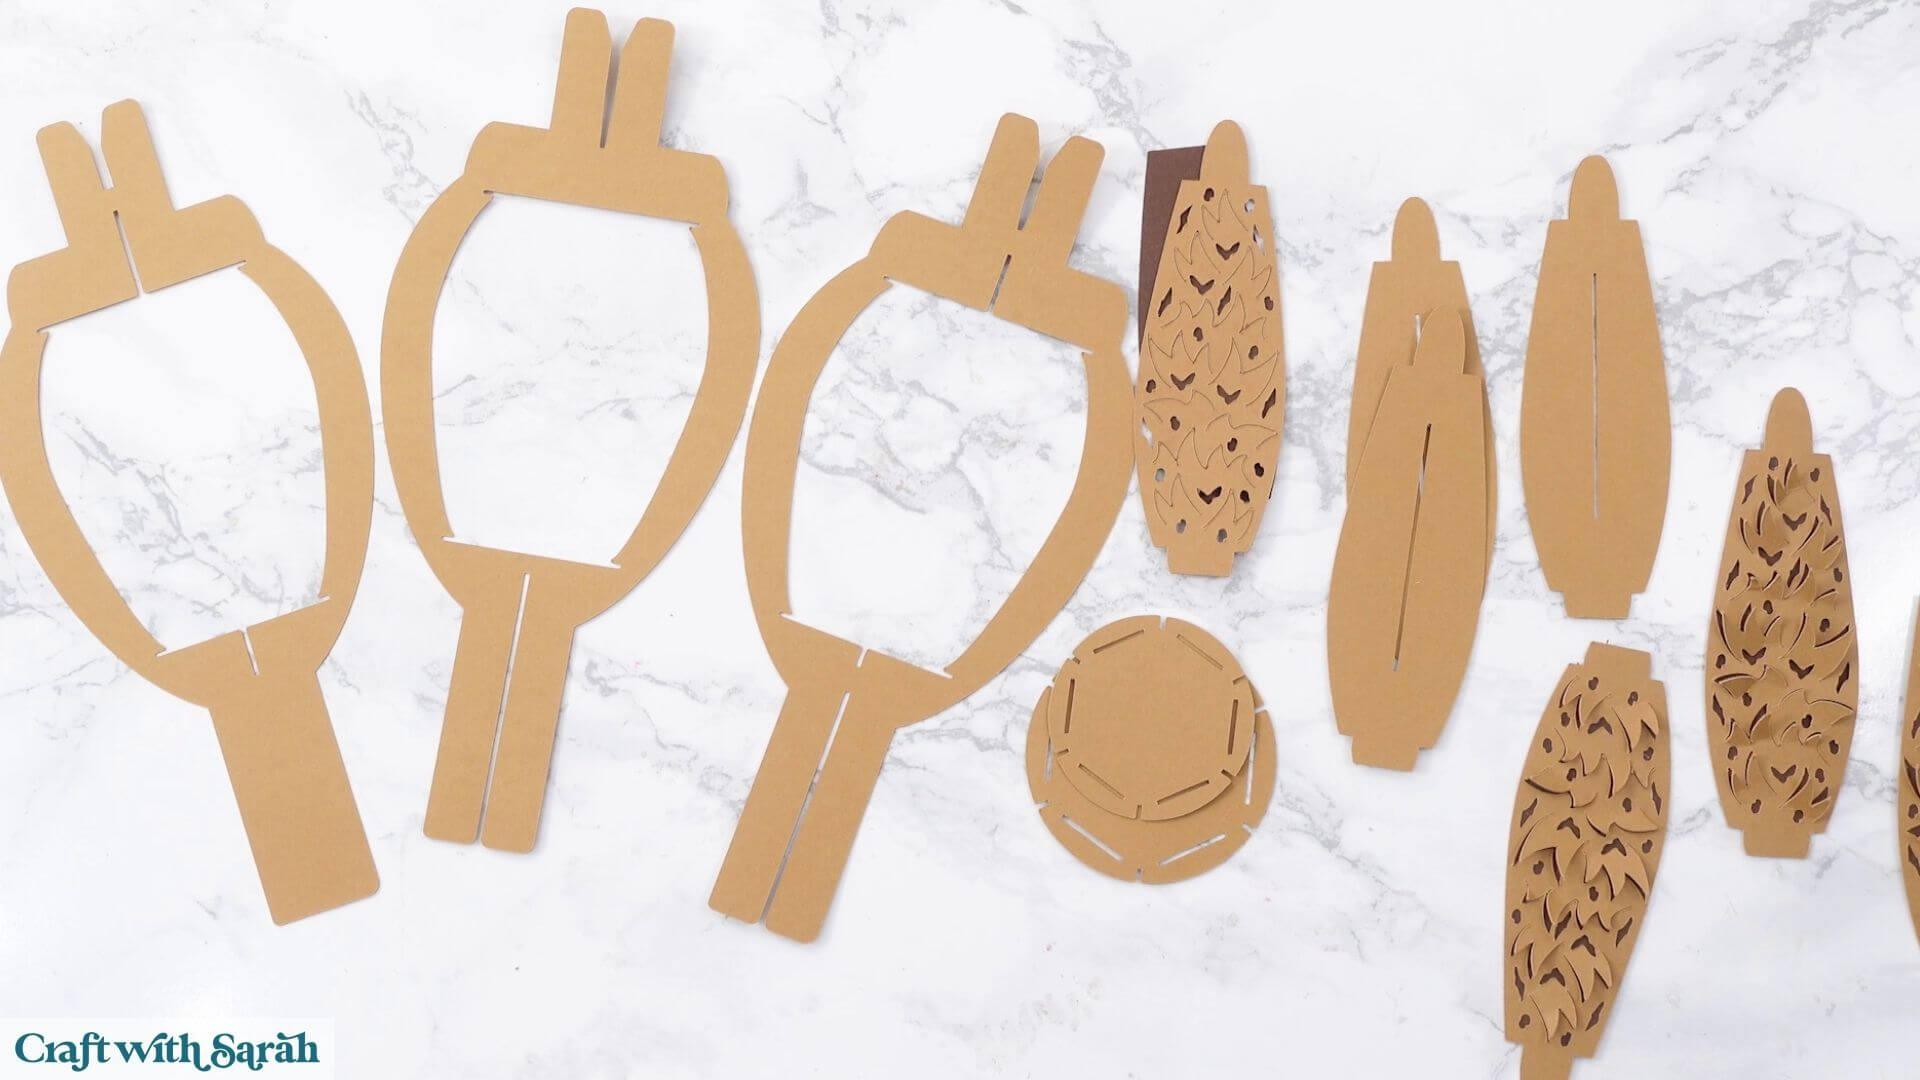
Glue these together in pairs so that you end up with two double-thickness pieces. This gives the structure more stability and helps it support the weight of the wings.
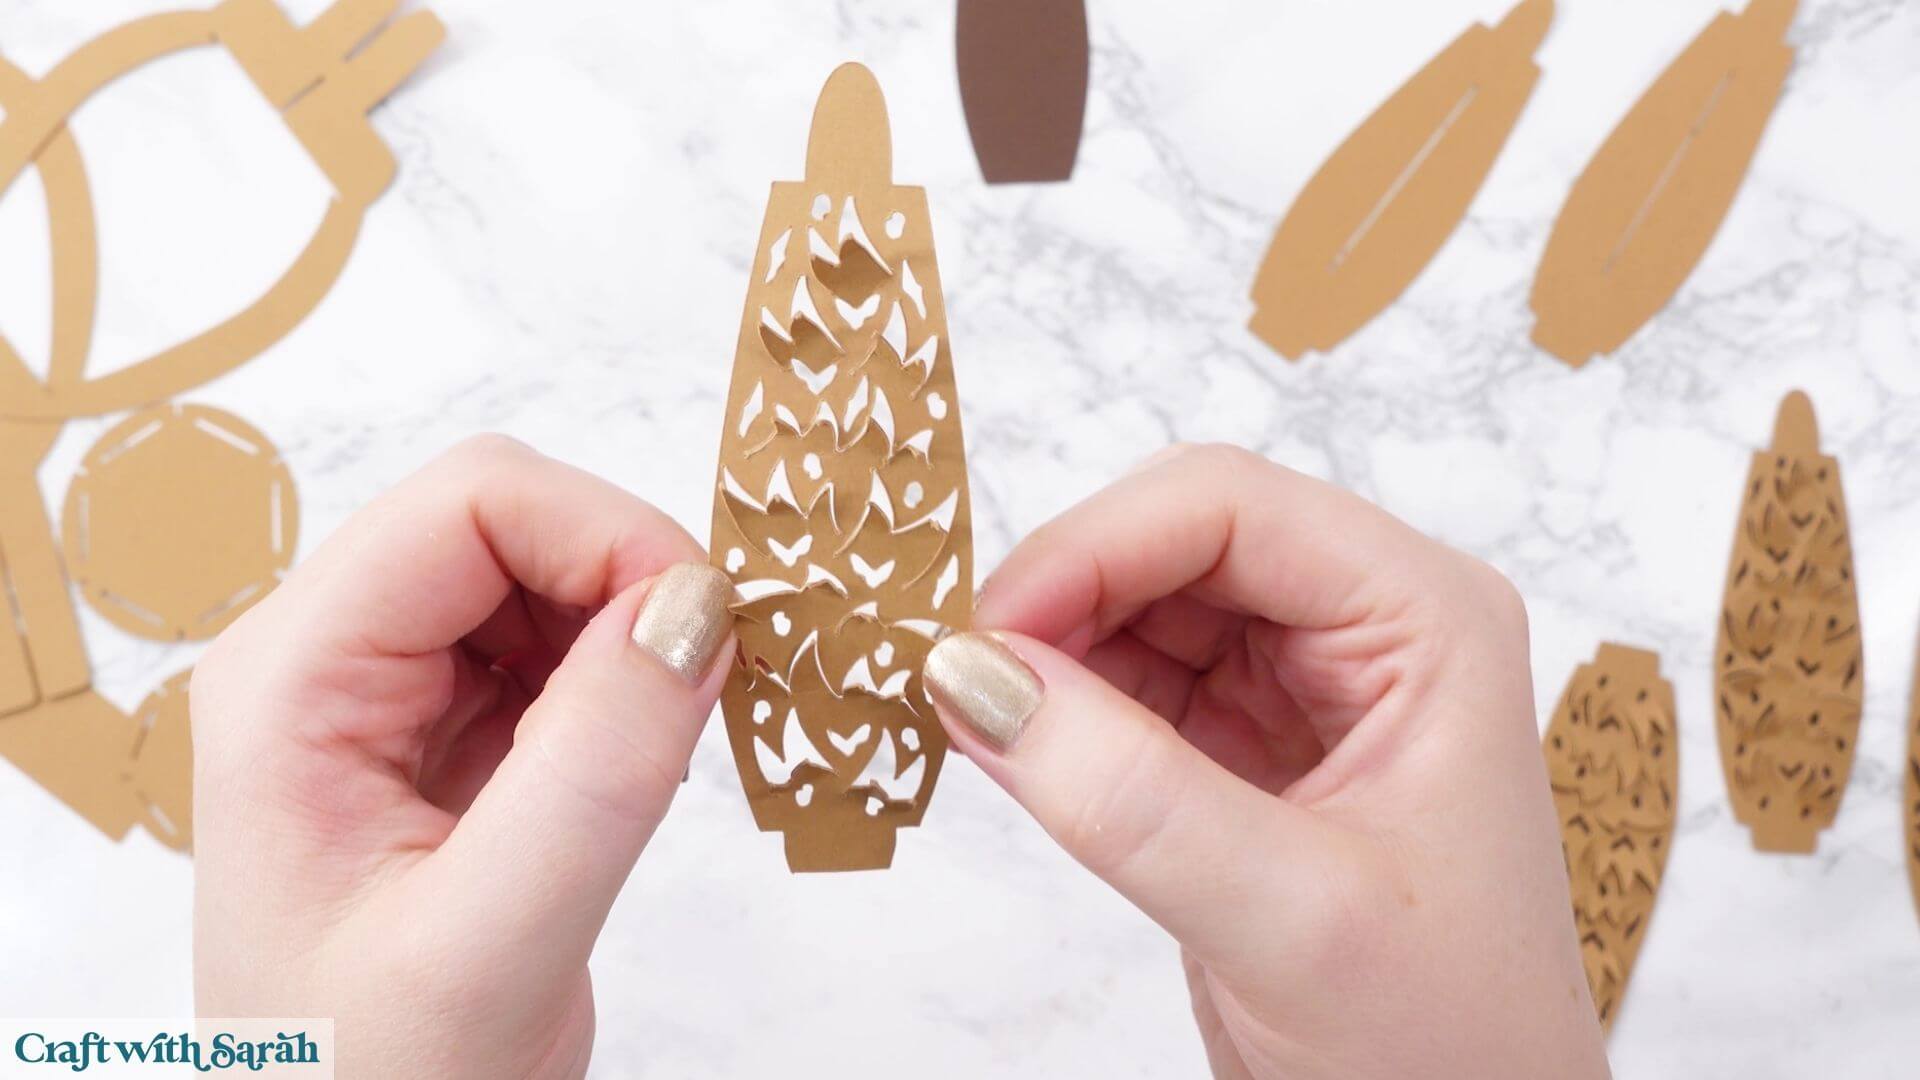
Next, take the four feathery side pieces.
Very gently bend the individual feather sections outwards. They’re quite close together, so be careful not to tear them.
You’re only adding a slight bend rather than a crease. This gives the owl a more dimensional, fluffy appearance.
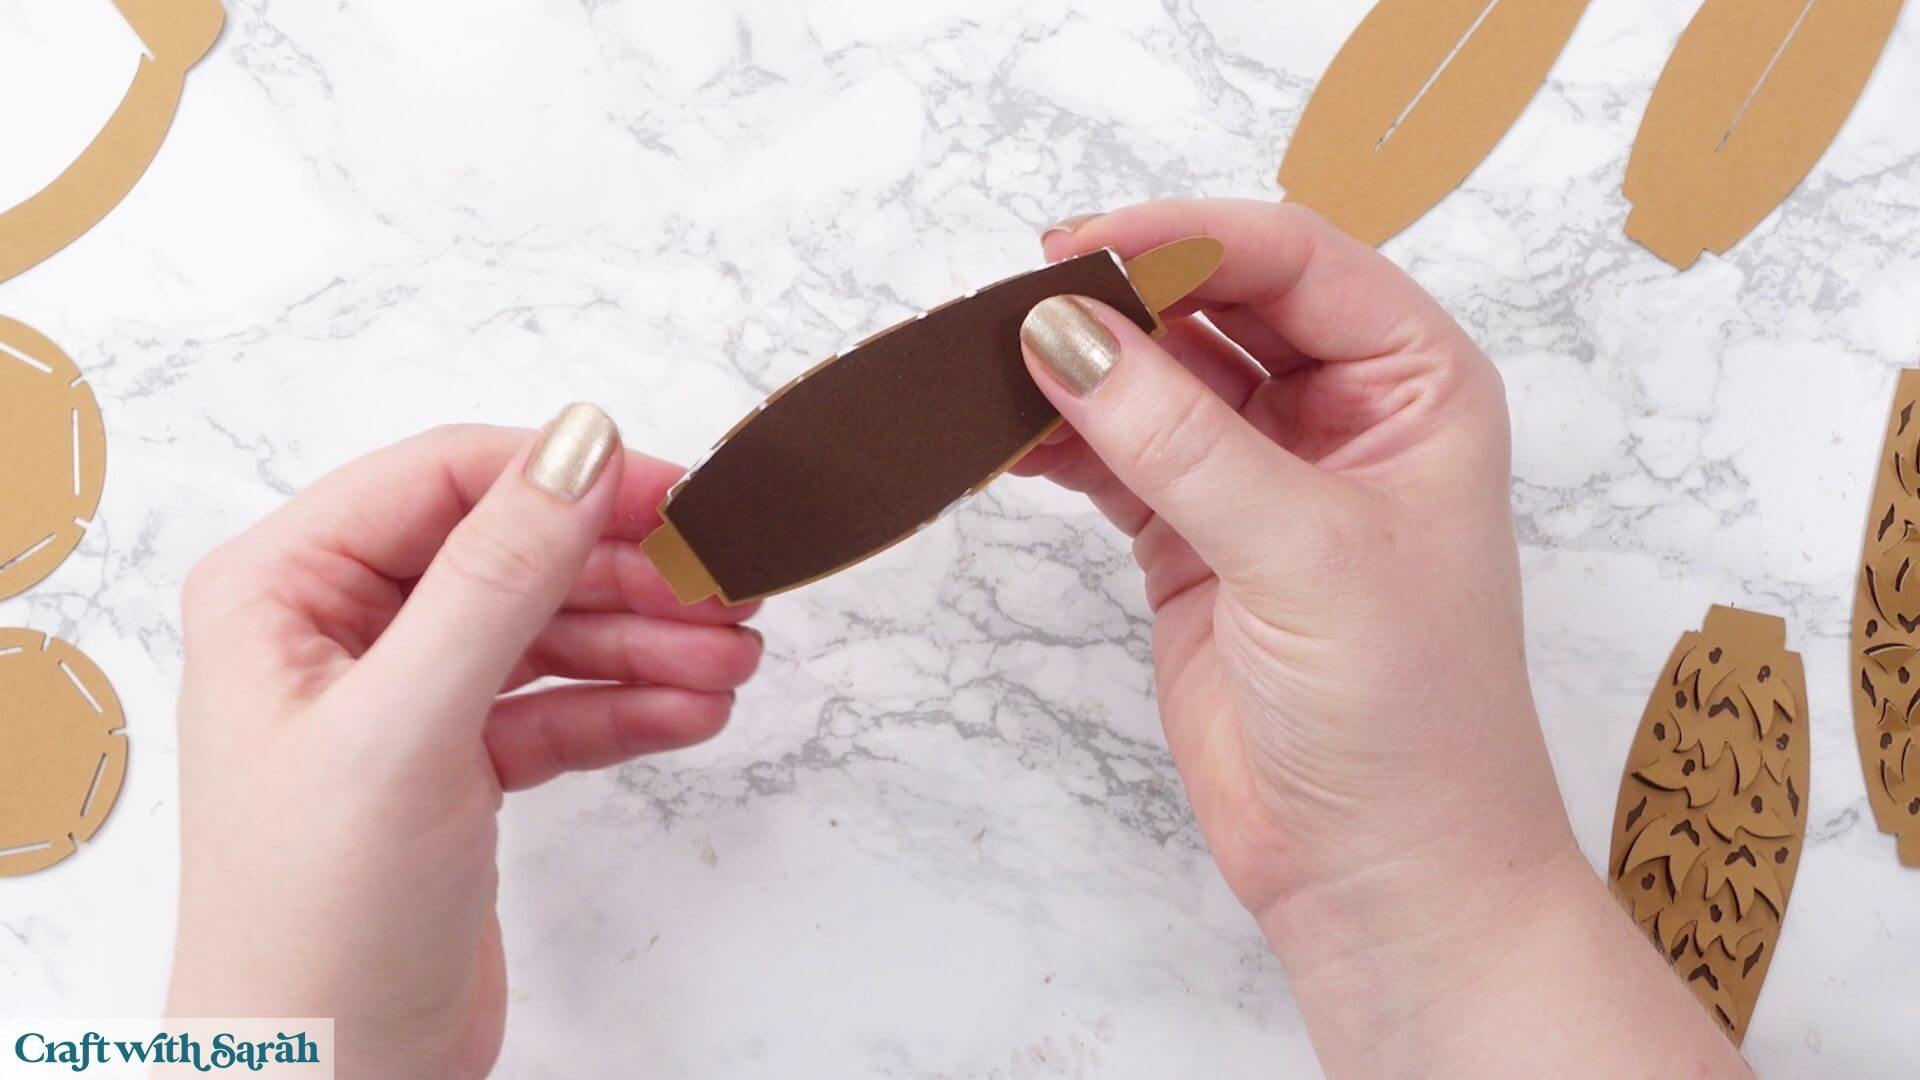
Turn each piece over and add glue to the back, avoiding the sections that you’ve bent outwards. Don’t put glue on the top or bottom tabs either.
Glue a solid brown piece behind each feathery layer.
The slightly thinner end goes at the top, which is the end with the large oval-shaped tabs.
The pieces don’t fit completely flush around every edge, so you’ll have a little wiggle room when positioning them.
Leave them face down while they dry so that any glue which has escaped around the edges doesn’t accidentally stick the dimensional feathers to your work surface.
Find the three large internal structure pieces.
Start with the one which doesn’t have a slit in the large bottom tail section.
The second piece has a slit in the tail section and two separate slits running down from the top.
The third piece has just one slit coming down from the top.
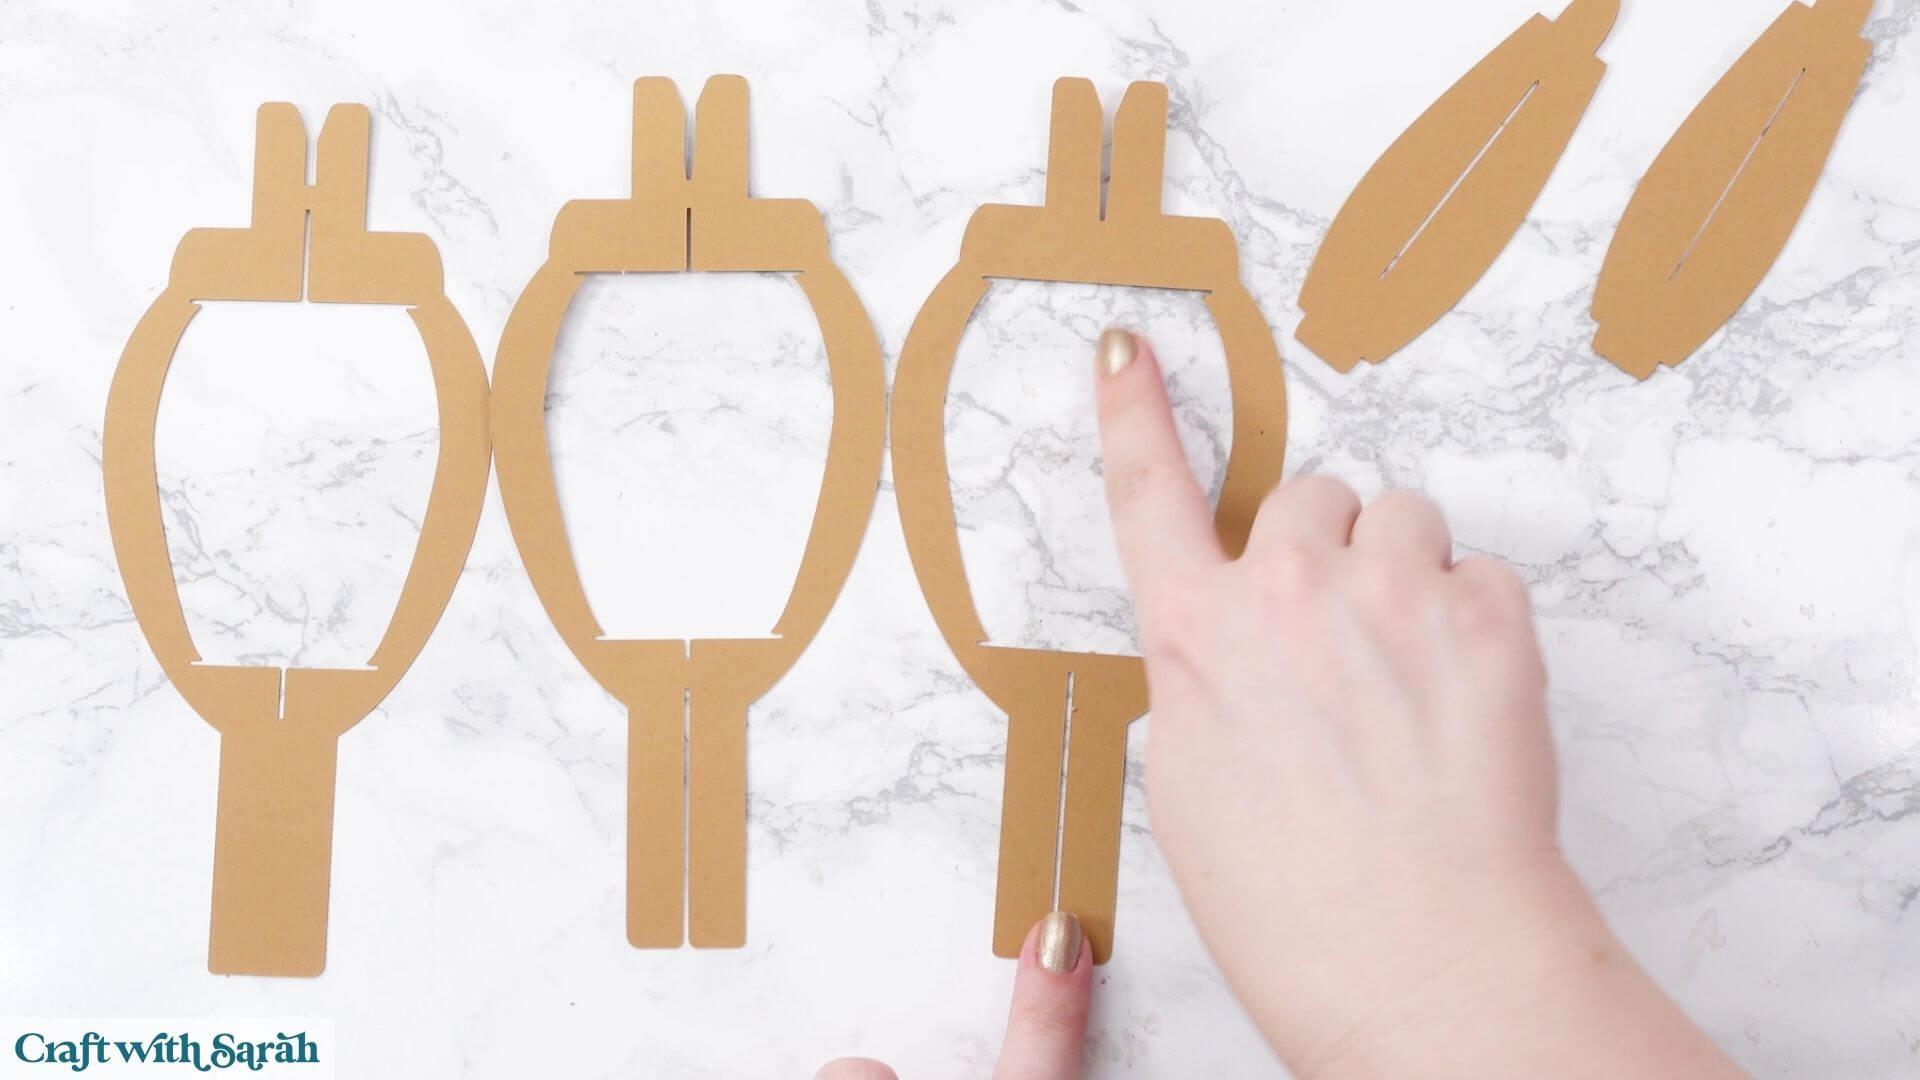
Take the first two pieces.
Pull the small tail sections on the second piece apart and slide them down over the first piece. Carefully bend the cardstock without creasing it and slot the top through the corresponding opening.
You should now have a four-sided structure.
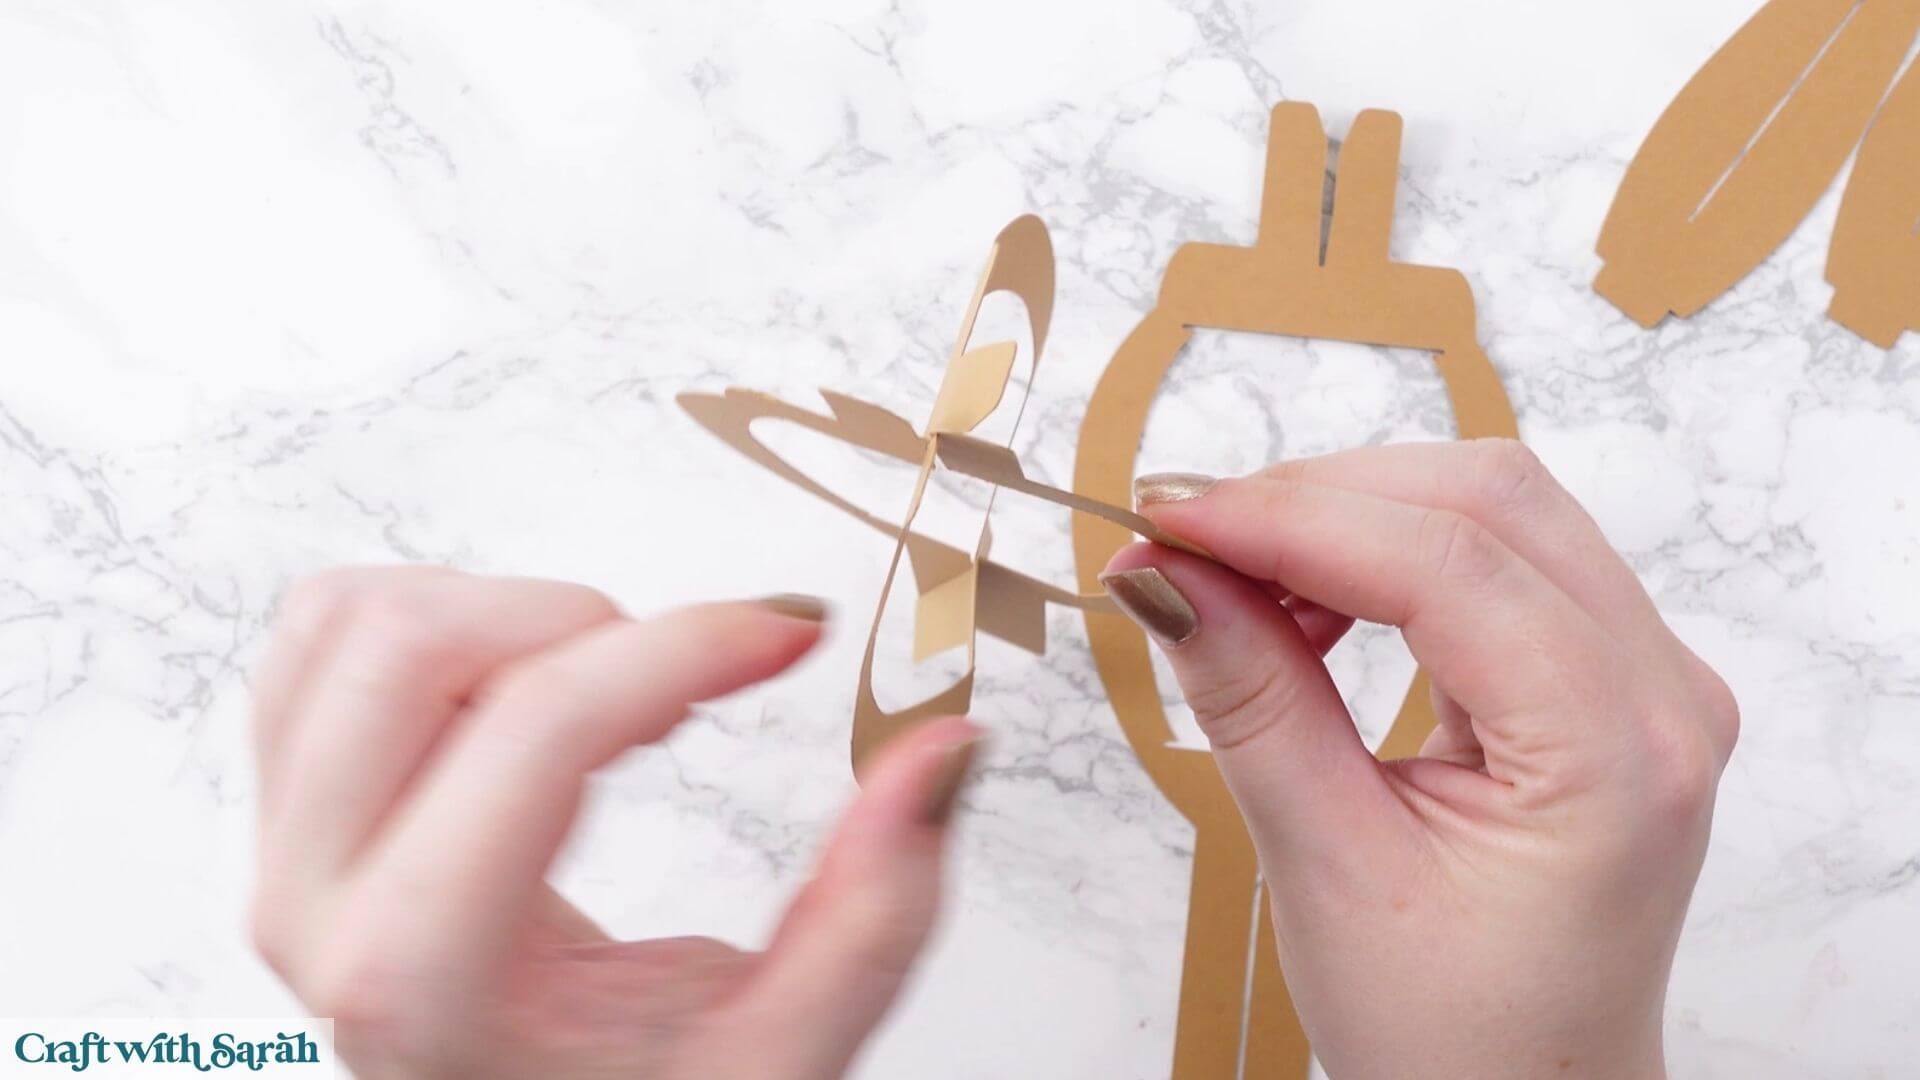
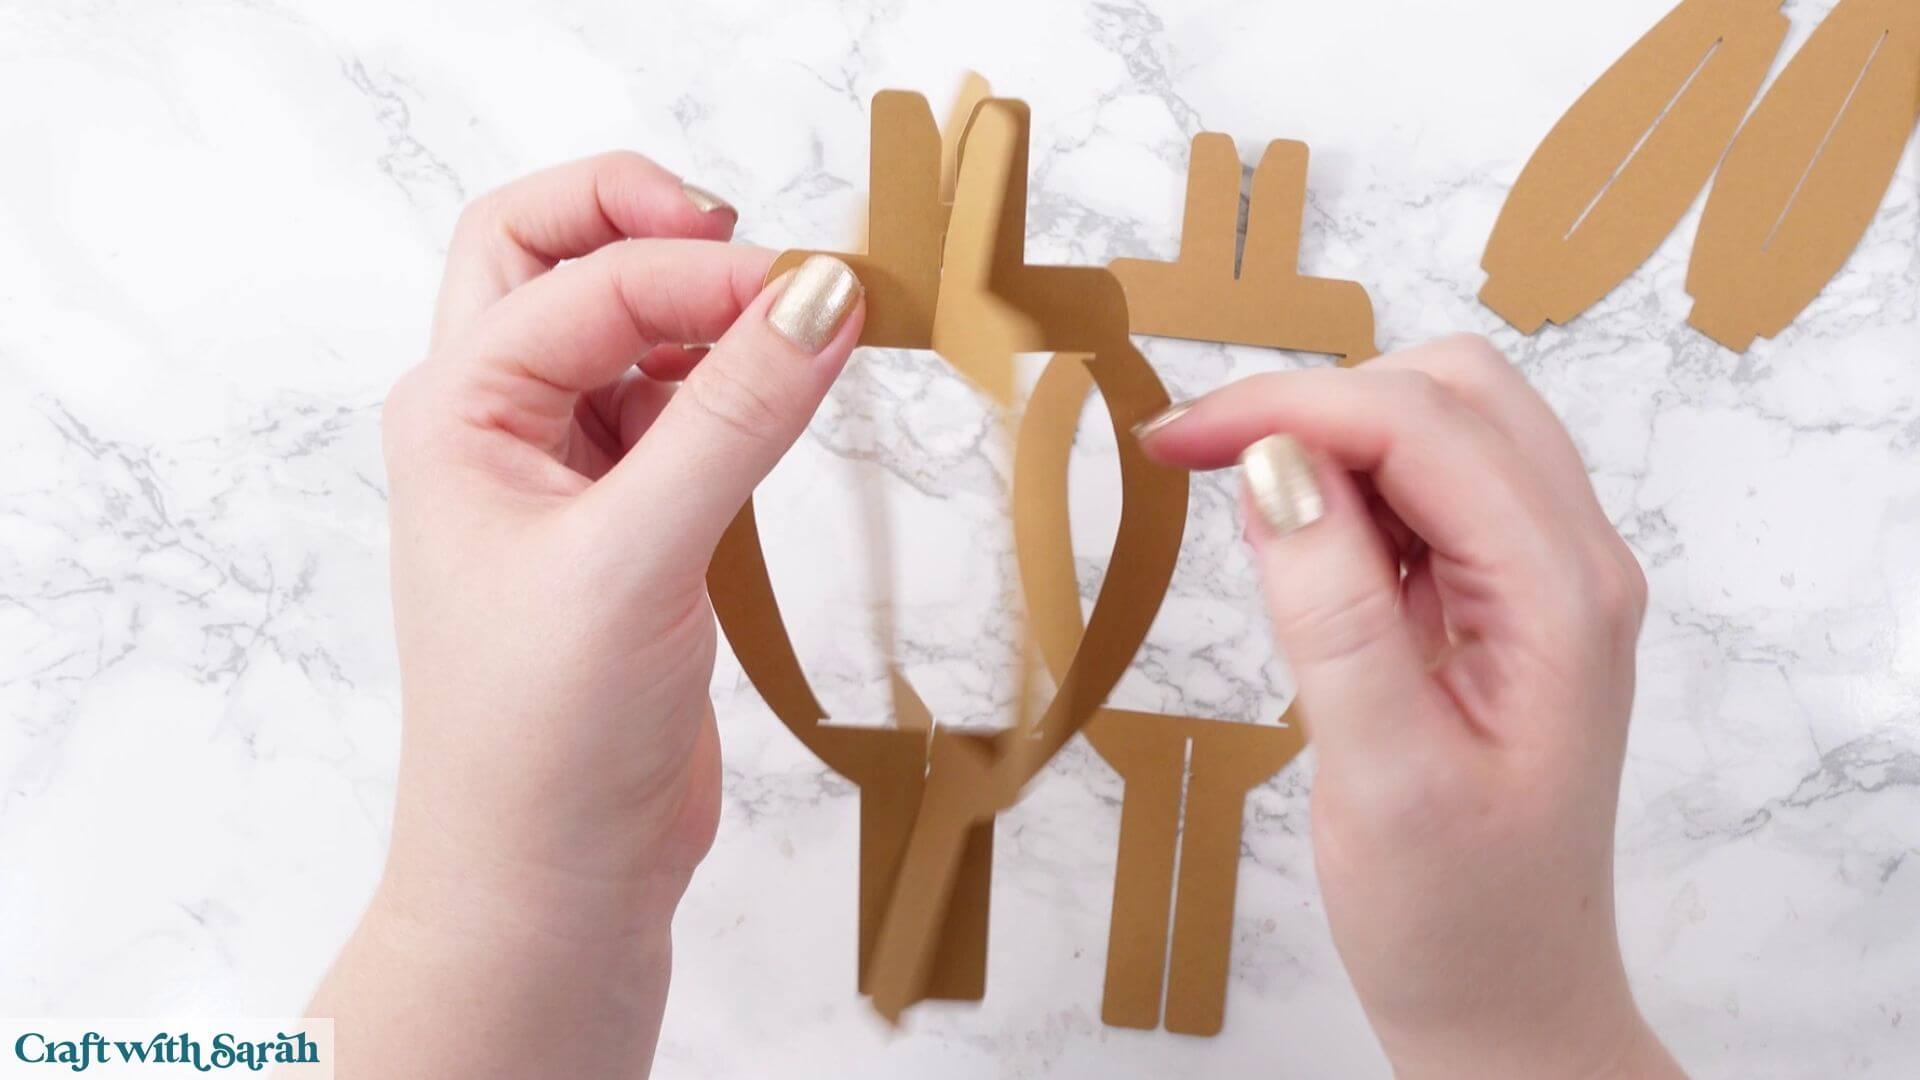
Hold those pieces flat against each other and add the third section in the same way.
This creates a six-sided structure.
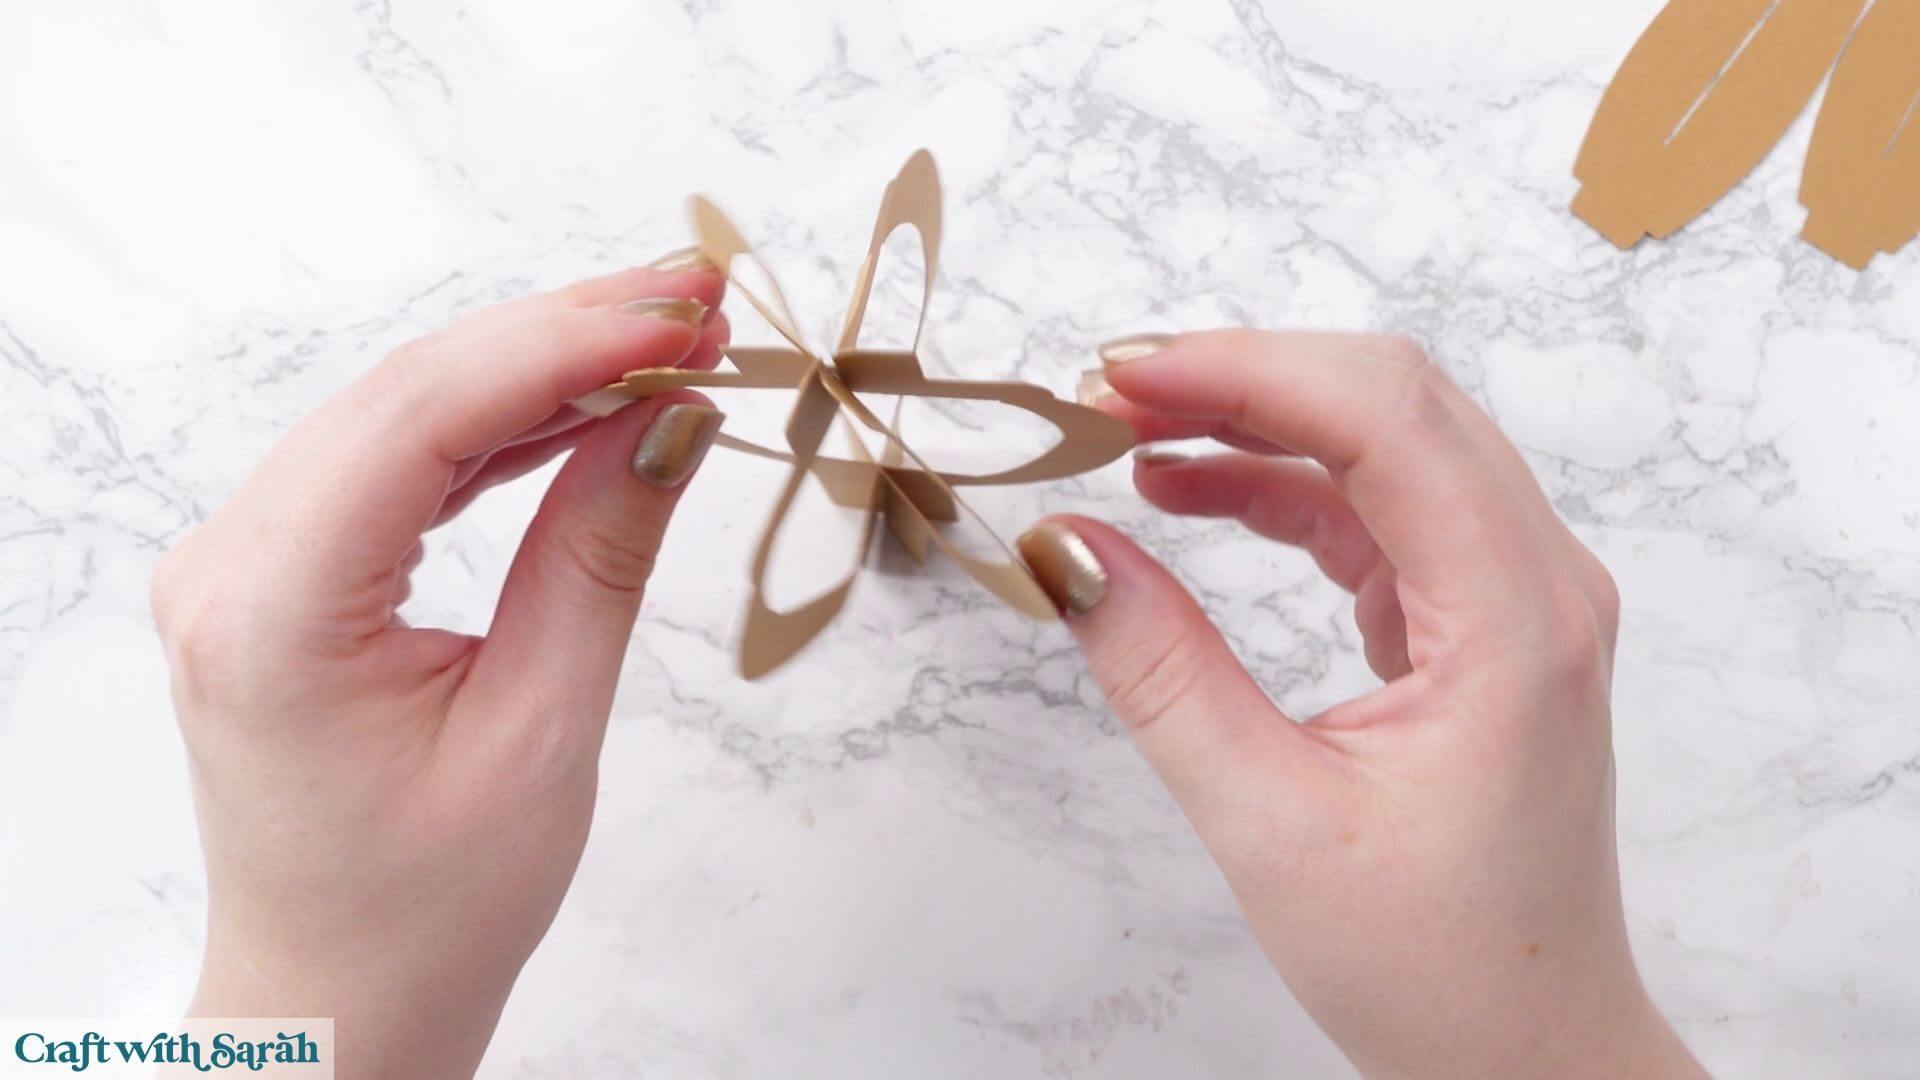
To make it more stable, we’ll add the two circles.
The larger circle goes into the top and the smaller one goes into the bottom.
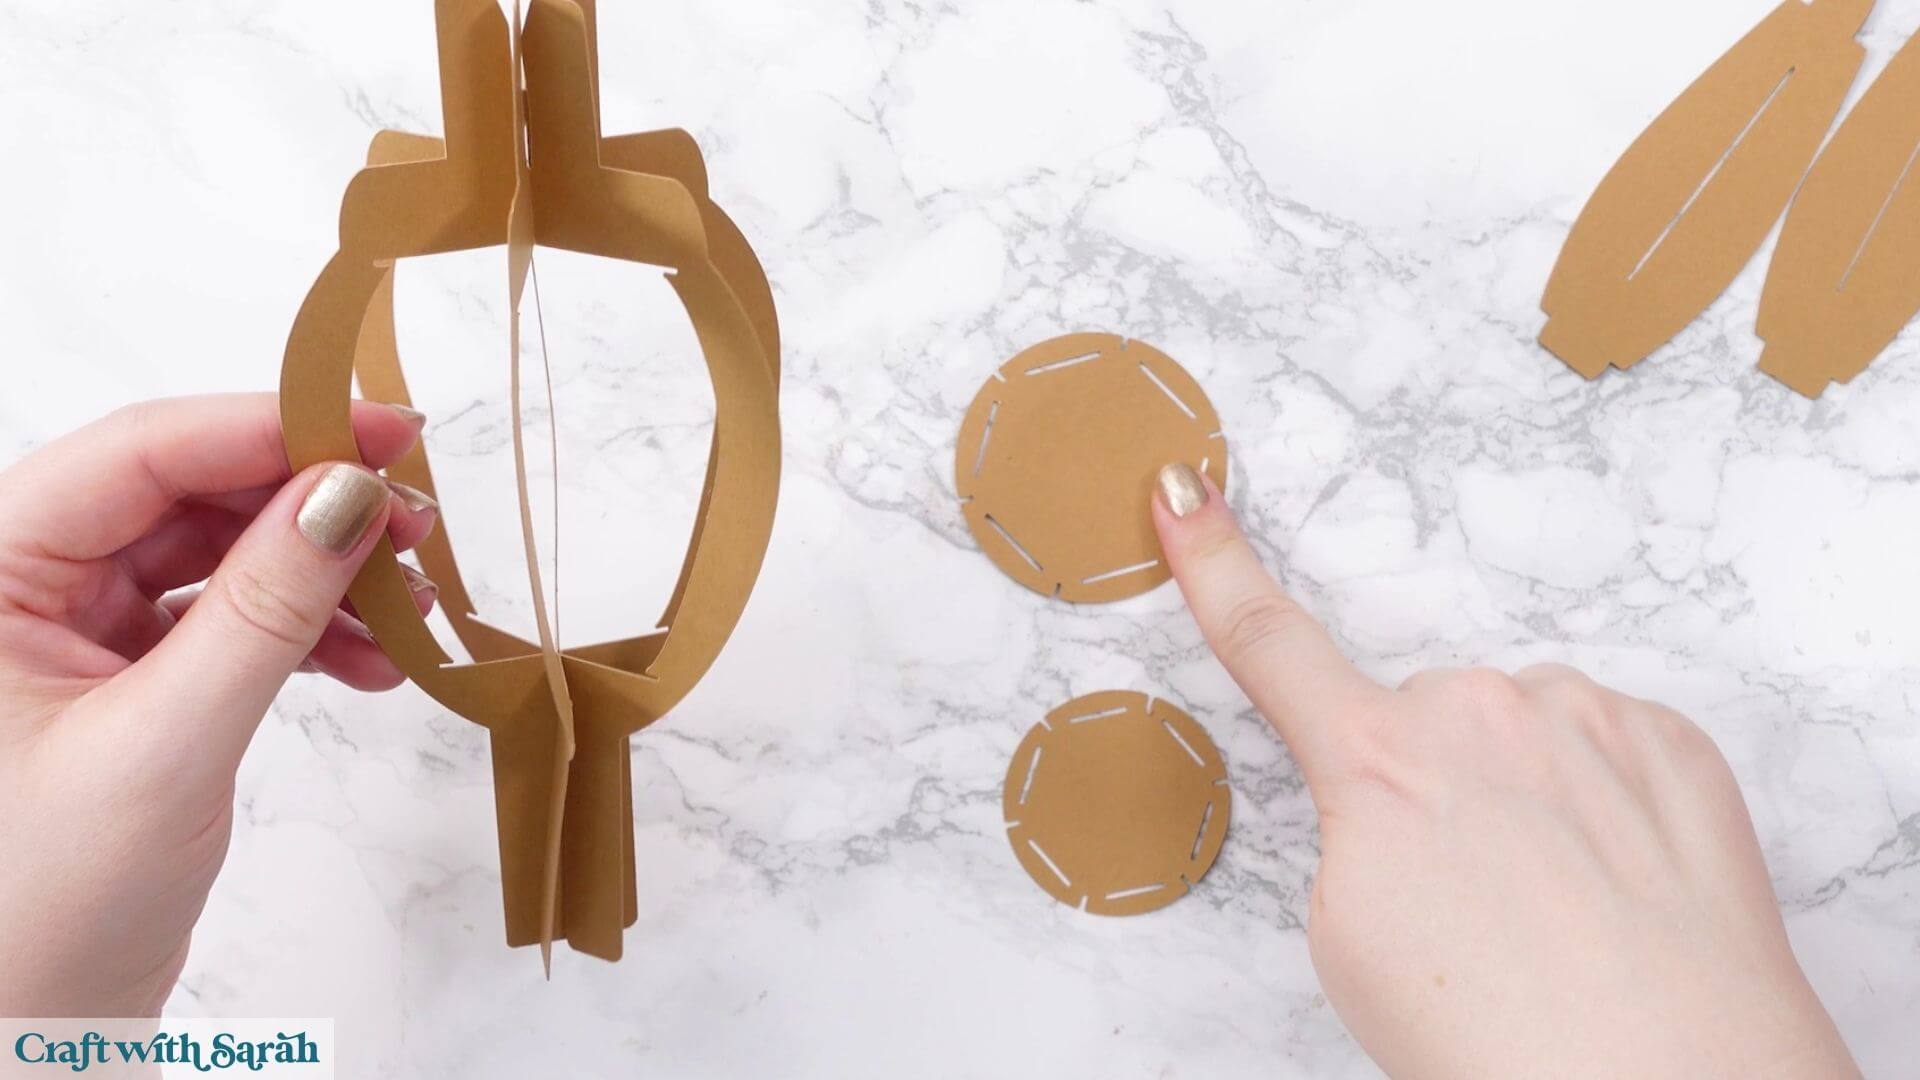
Each circle has small slits around its edge which correspond with the slits in the body structure.
Work slowly around the circle, slotting each section into position. Don’t try to push one section completely in before moving to the next. It’s easier to gradually work around the whole shape until everything is lined up.
Be careful not to tear the cardstock as you go.
When it’s correctly positioned, the circle should sit nice and flat.
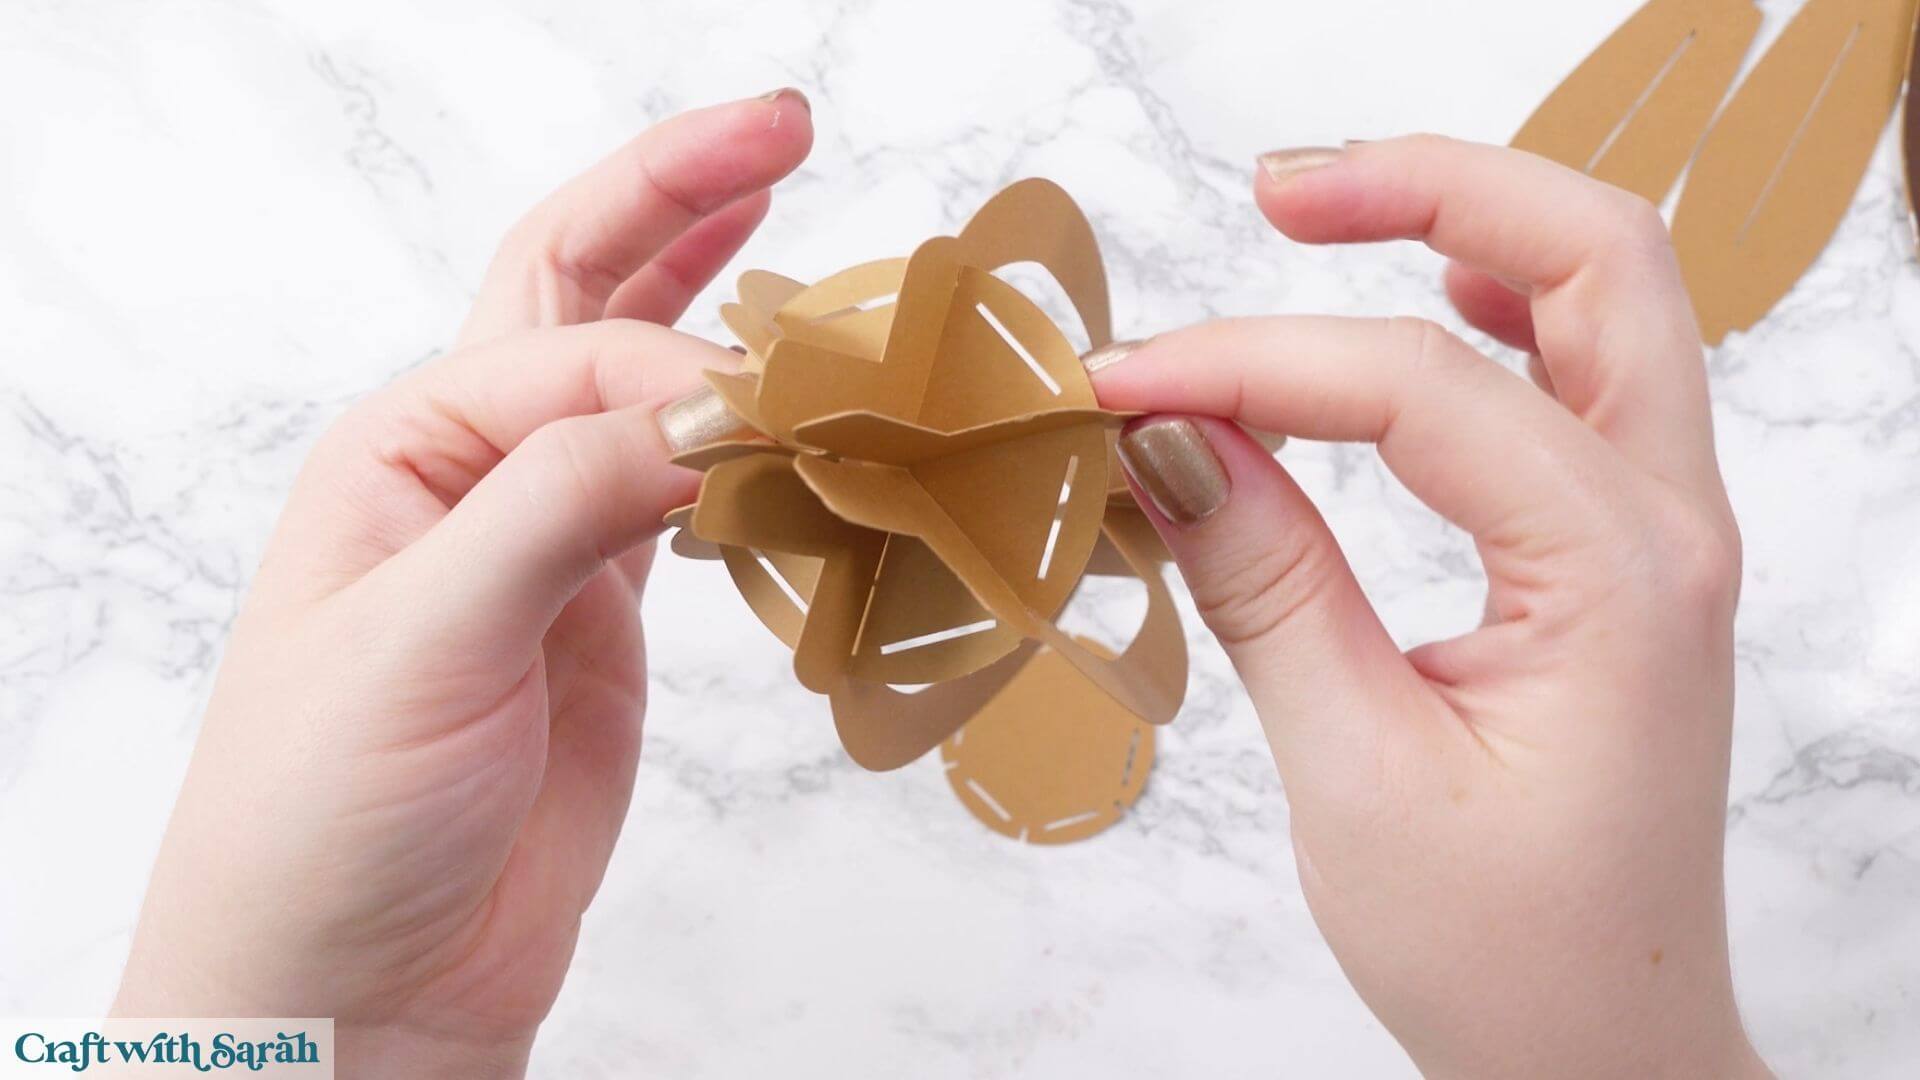
Repeat the process with the smaller circle at the bottom.
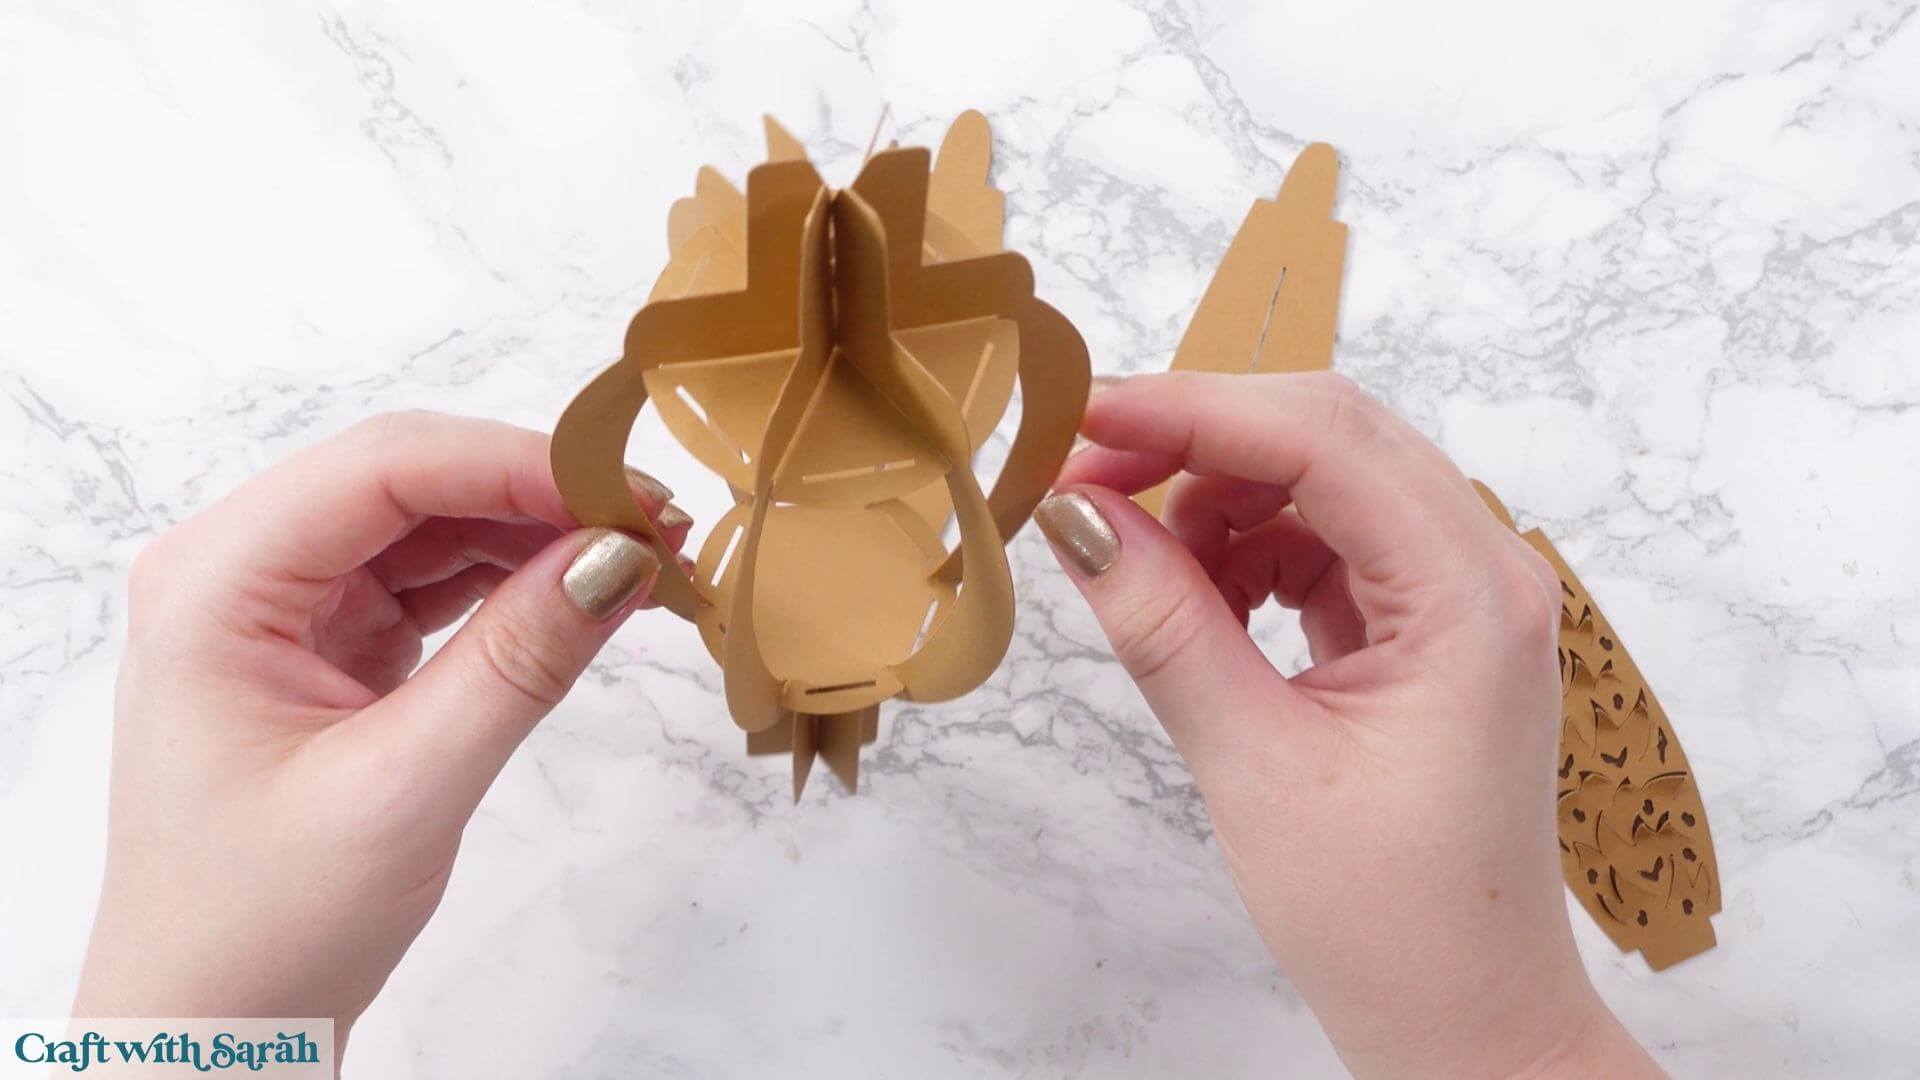
We can now start adding the feathery sides.
The two double-thickness sections that will support the wings need to be positioned directly opposite each other.
Start with one of the regular feathery pieces at the front.
The flatter end goes at the top and the more curved end goes at the bottom.
Slot the top into the body structure, gently bend the piece around and tuck the bottom tab into place.
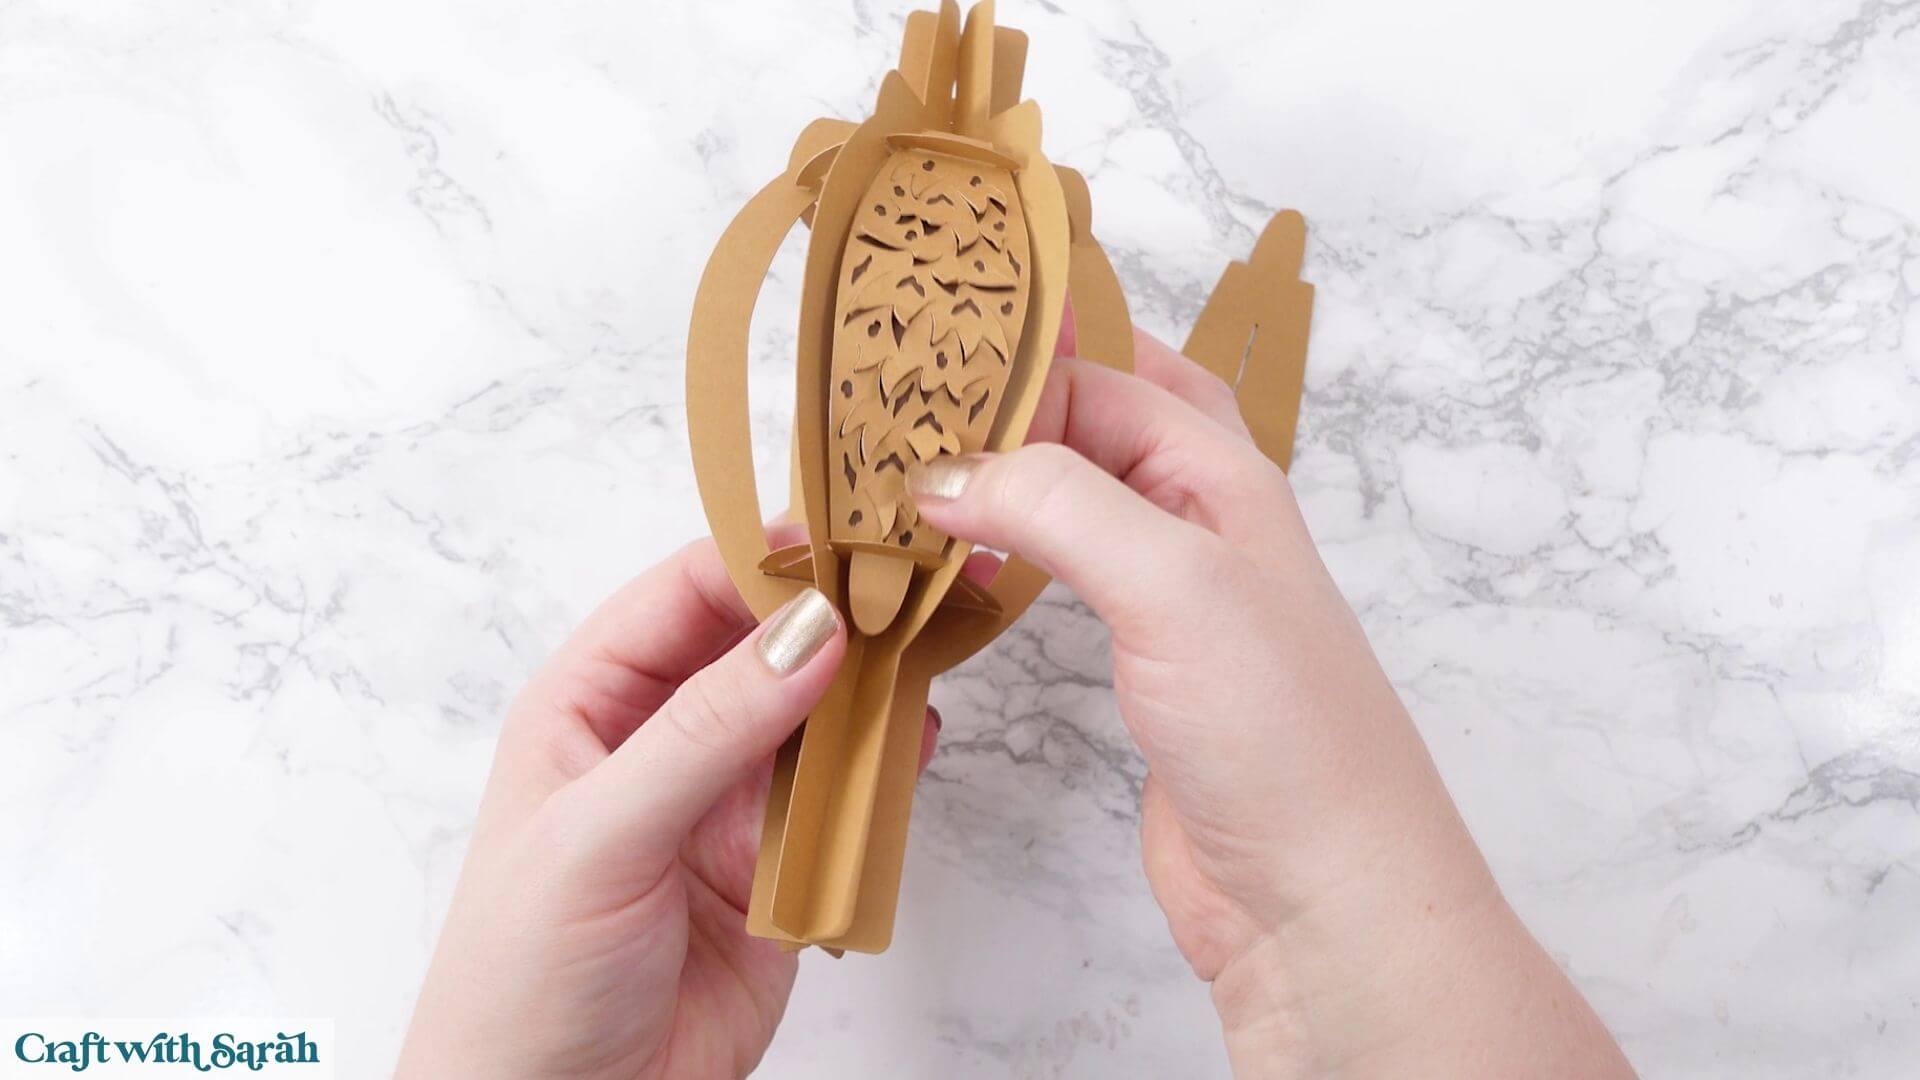
Repeat with the remaining sides, leaving the wing sections until later.
Step 7) Make the owl’s wings
Before making the wings, there’s one important extra step.
The SVG contains three copies of the central wing-support piece.
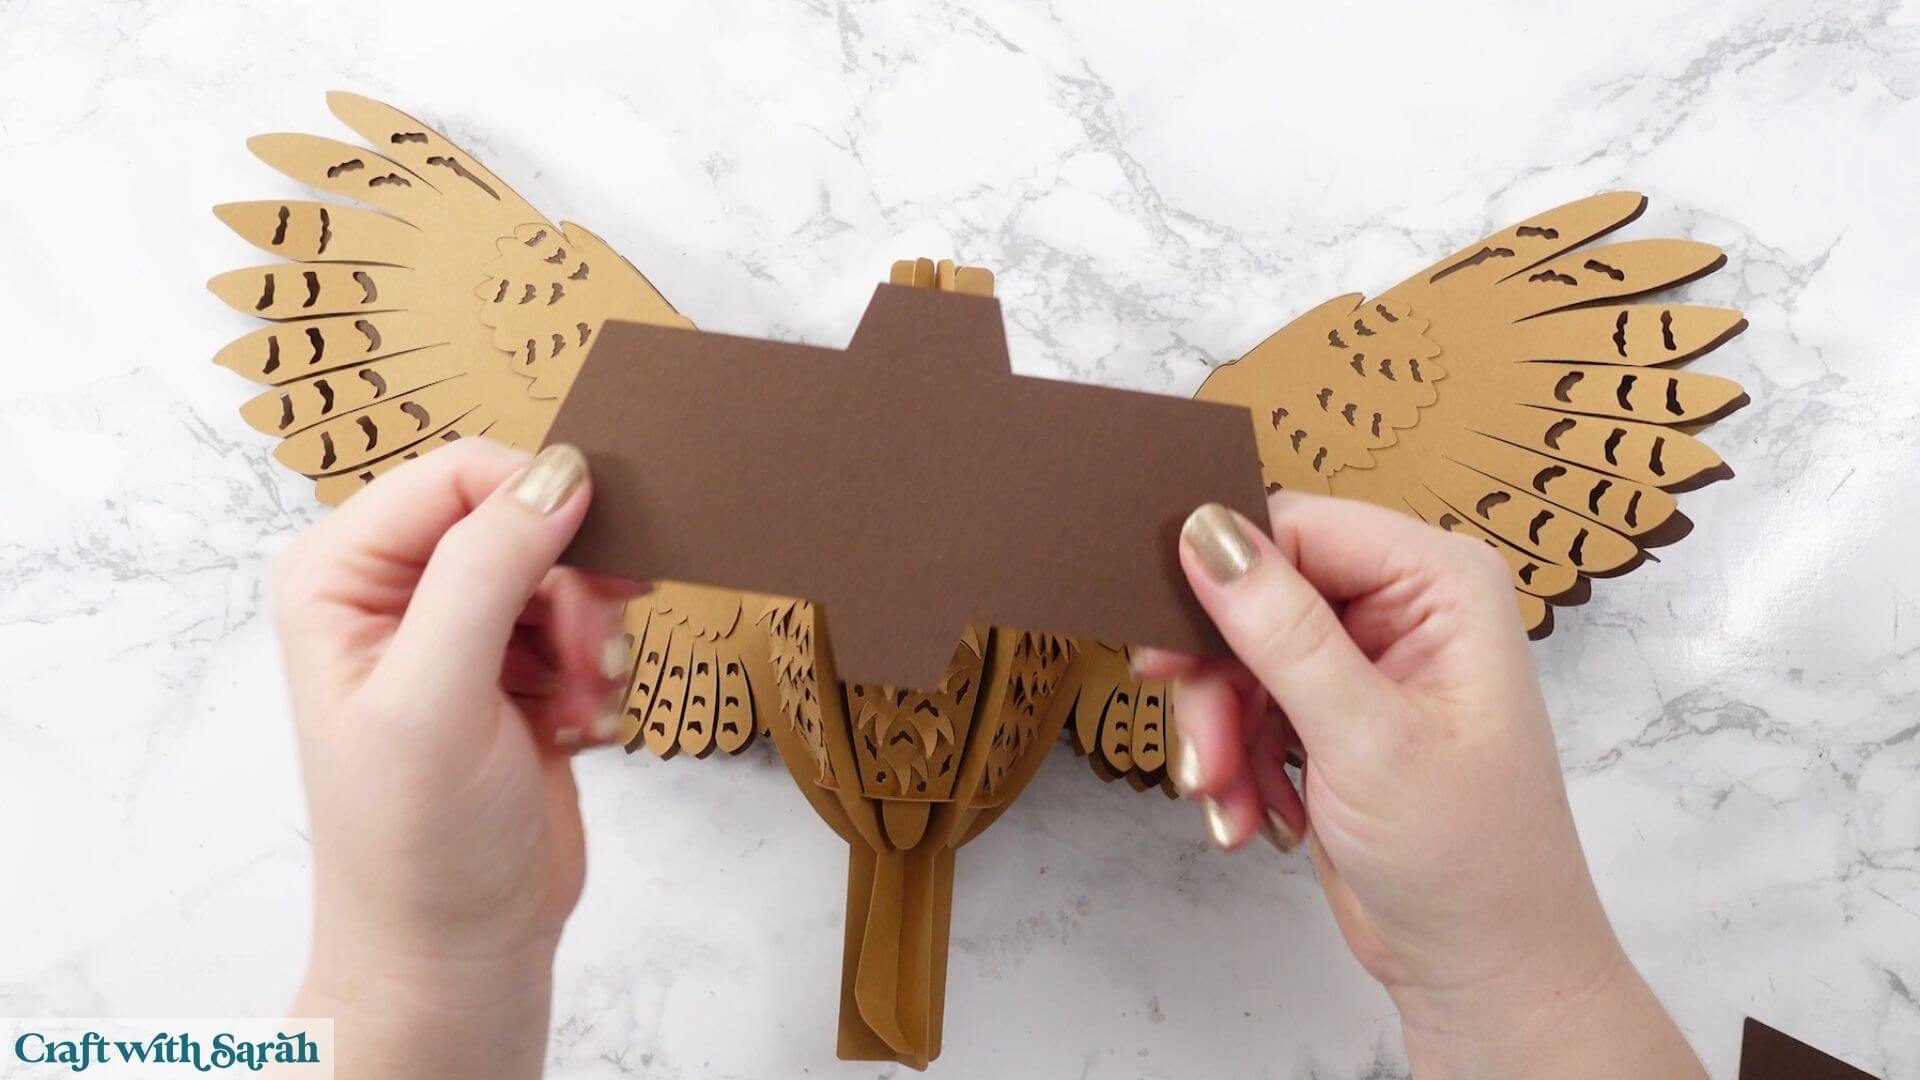
Glue all three copies directly on top of each other, taking care to line them up accurately and make sure they’re all facing the same way, as the tabs are slightly different sizes.
This additional strength helps to keep the owl’s wings outstretched.
When I originally filmed the project, I’d only used one copy of this piece. My owl looked beautiful when I’d finished him, but I came downstairs the following morning to discover that his wings had fallen backwards, as shown in the image below.
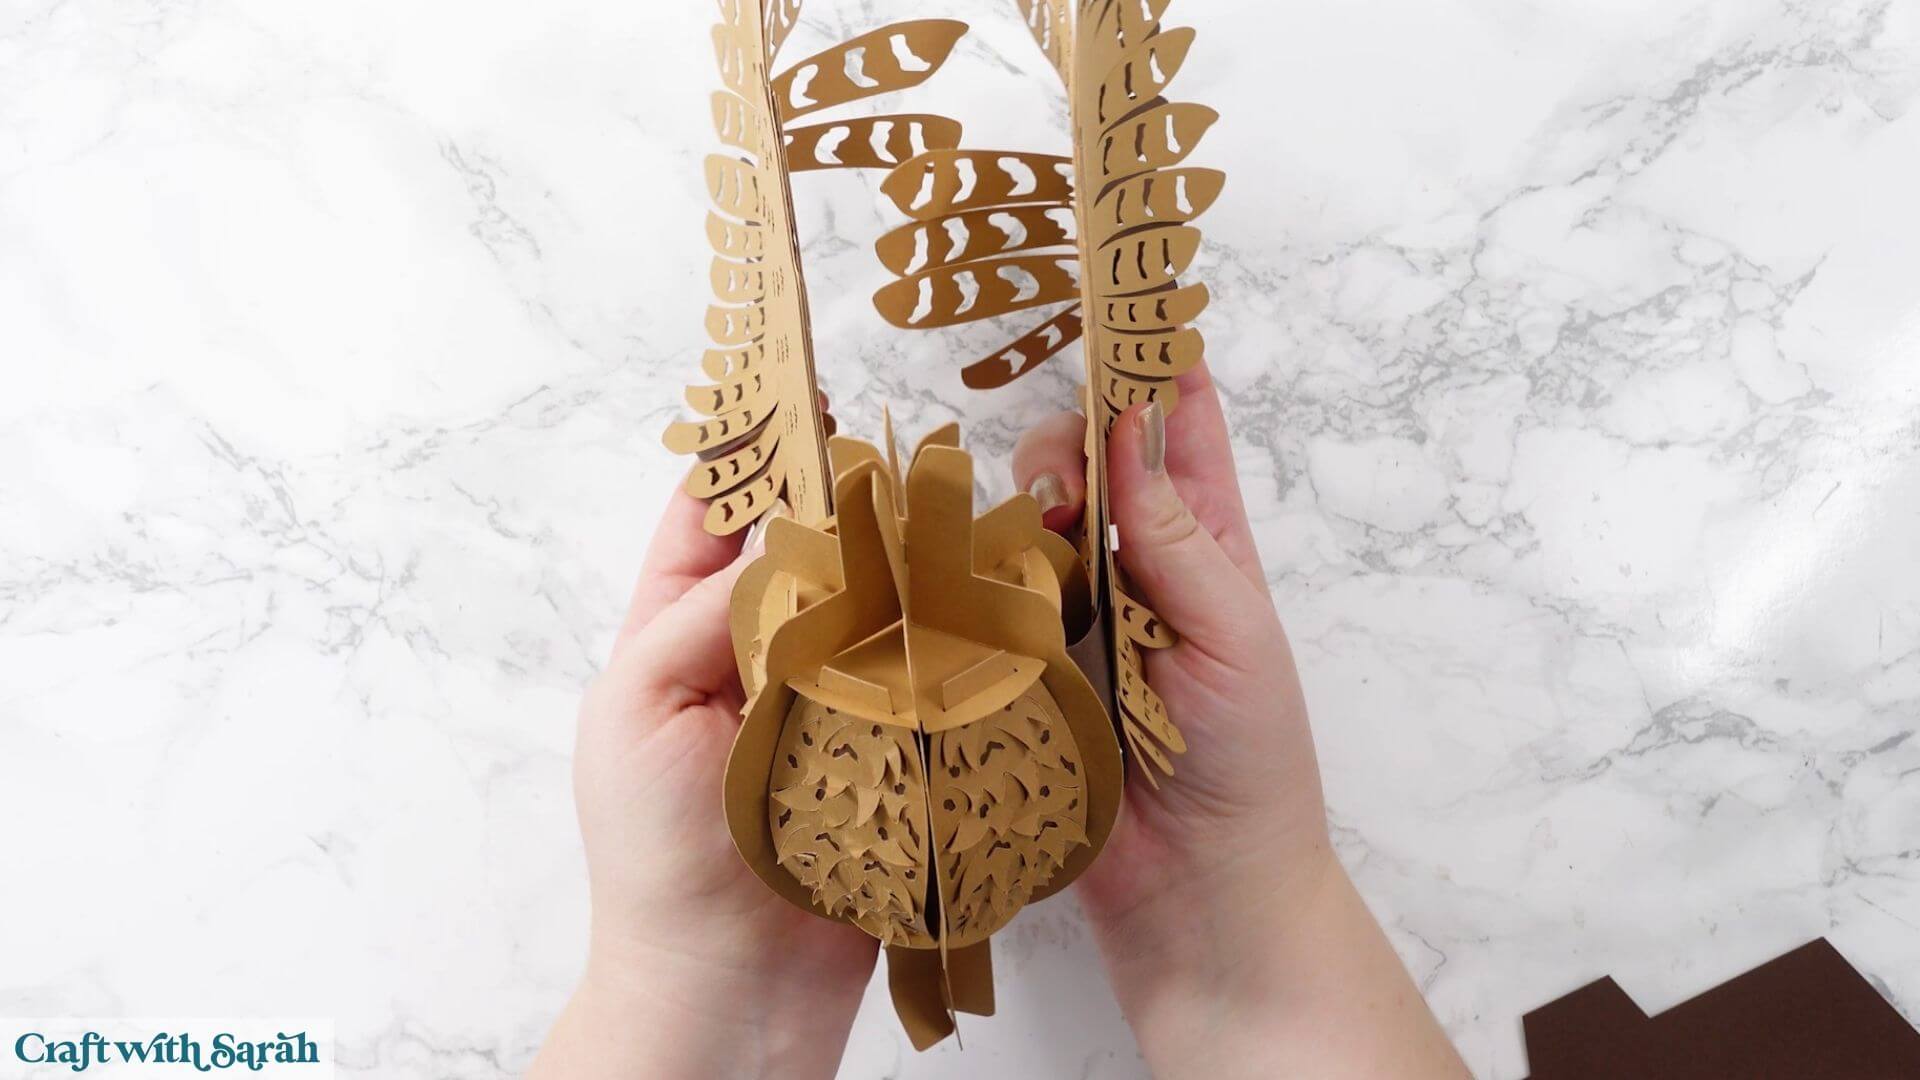
The cardstock I’d used was particularly lightweight and wasn’t strong enough to support the weight of the wings over time.
I’d had another test owl sitting happily on a shelf for about a month without any problems, so of course it had to be the one I filmed that decided not to cooperate!
Adding the extra two copies to strengthen the structure fixed the problem.
If your cardstock is particularly lightweight and you still find that the wings start moving backwards, there’s another optional fix using foam squares which we’ll look at once the owl has been assembled.
There are quite a few pieces for the wings, so it’s important to make sure you’ve got everything the right way round before gluing.
Each wing has a dark brown central piece with two large slits at the bottom, plus separate decorative sections for the front and back.
The front and back designs are slightly different.
Look at the upper section of each decorative piece. The one with two holes is for the front and the one with three holes is for the back.
Before gluing the layers together, gently fluff up the edges of the feathers.
Don’t crease them or add fold lines. Simply give them a slight bend so that the feathers begin to curve outwards and give the owl’s wings more dimension.
For the front, glue the darker detail layer onto the lighter brown base, followed by the lighter detailed layer with the cutouts.
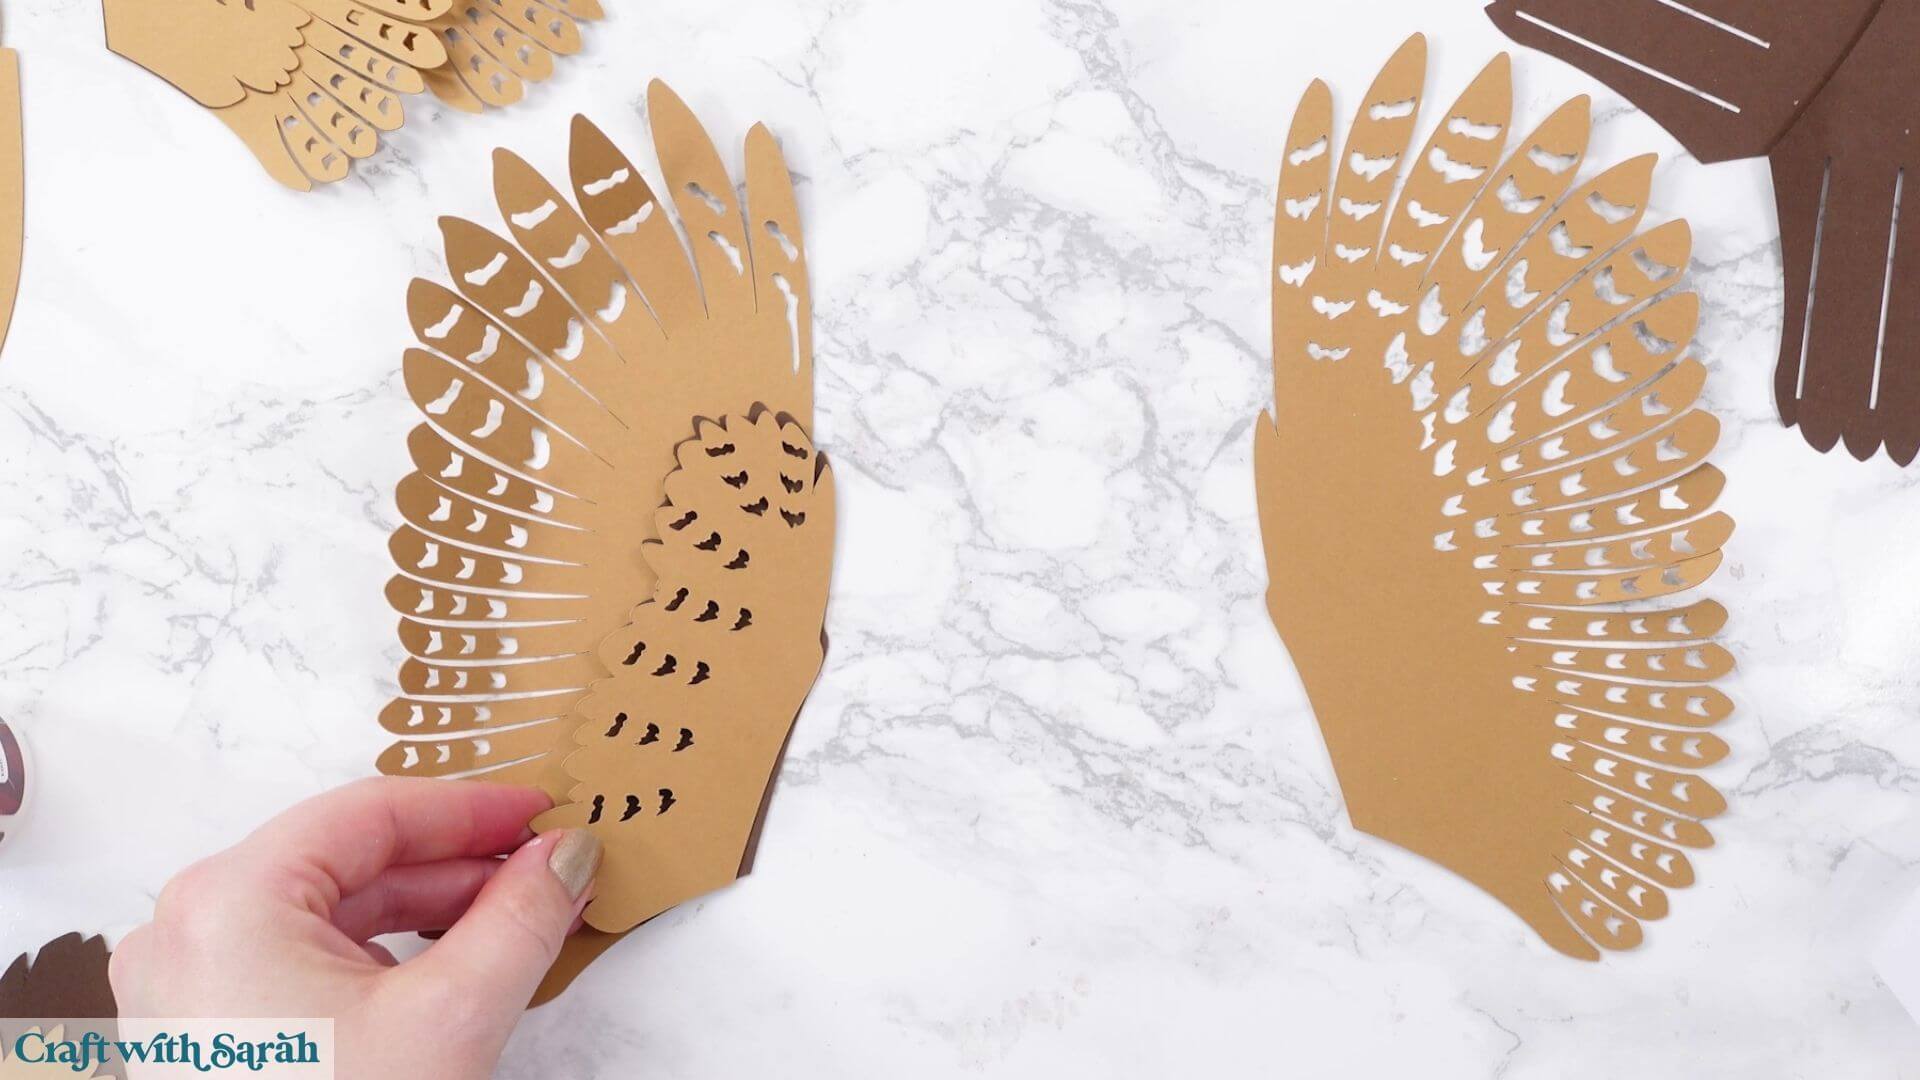
For the back, turn the corresponding piece over and glue on the solid brown layer followed by the solid lighter layer.
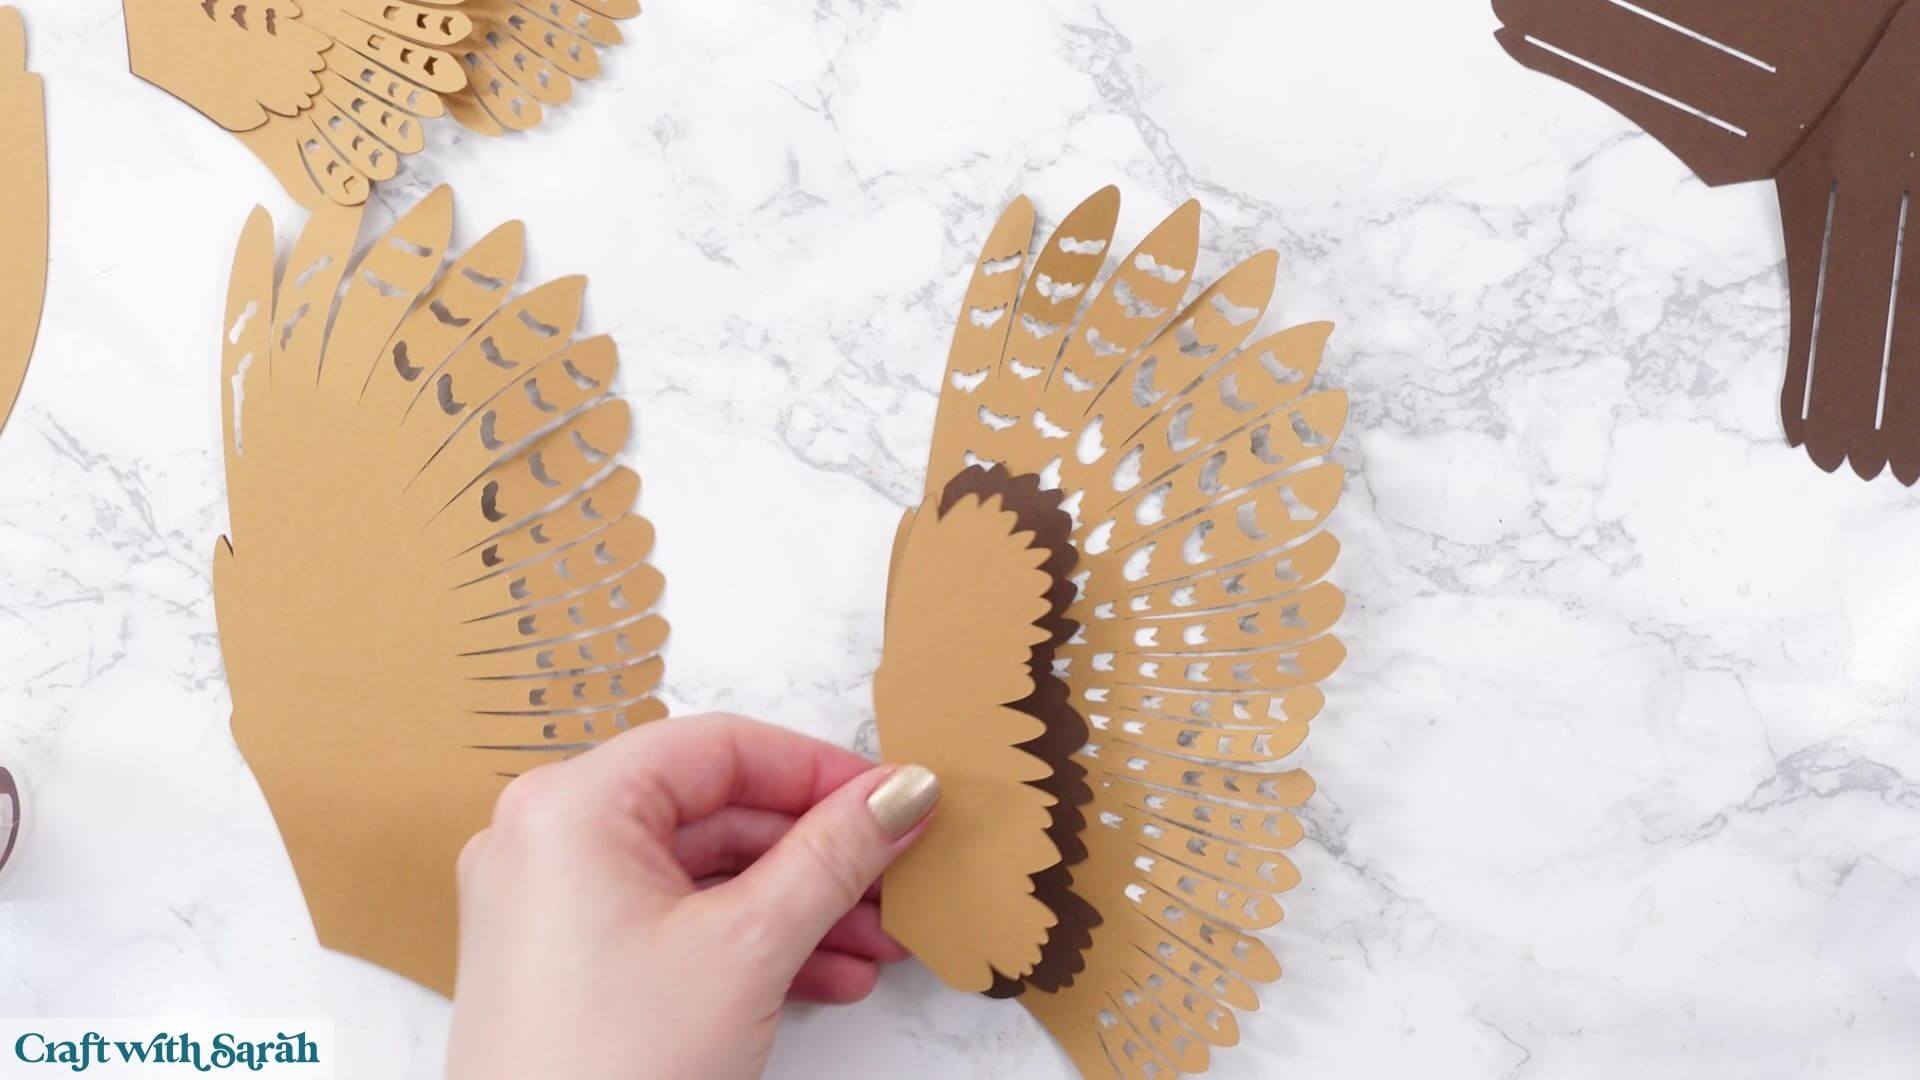
Repeat for the second wing and put them aside.
Bring the owl’s body back in.
Take the strengthened central support piece. It has one tab that’s slightly wider than the other. The wider tab goes at the bottom.
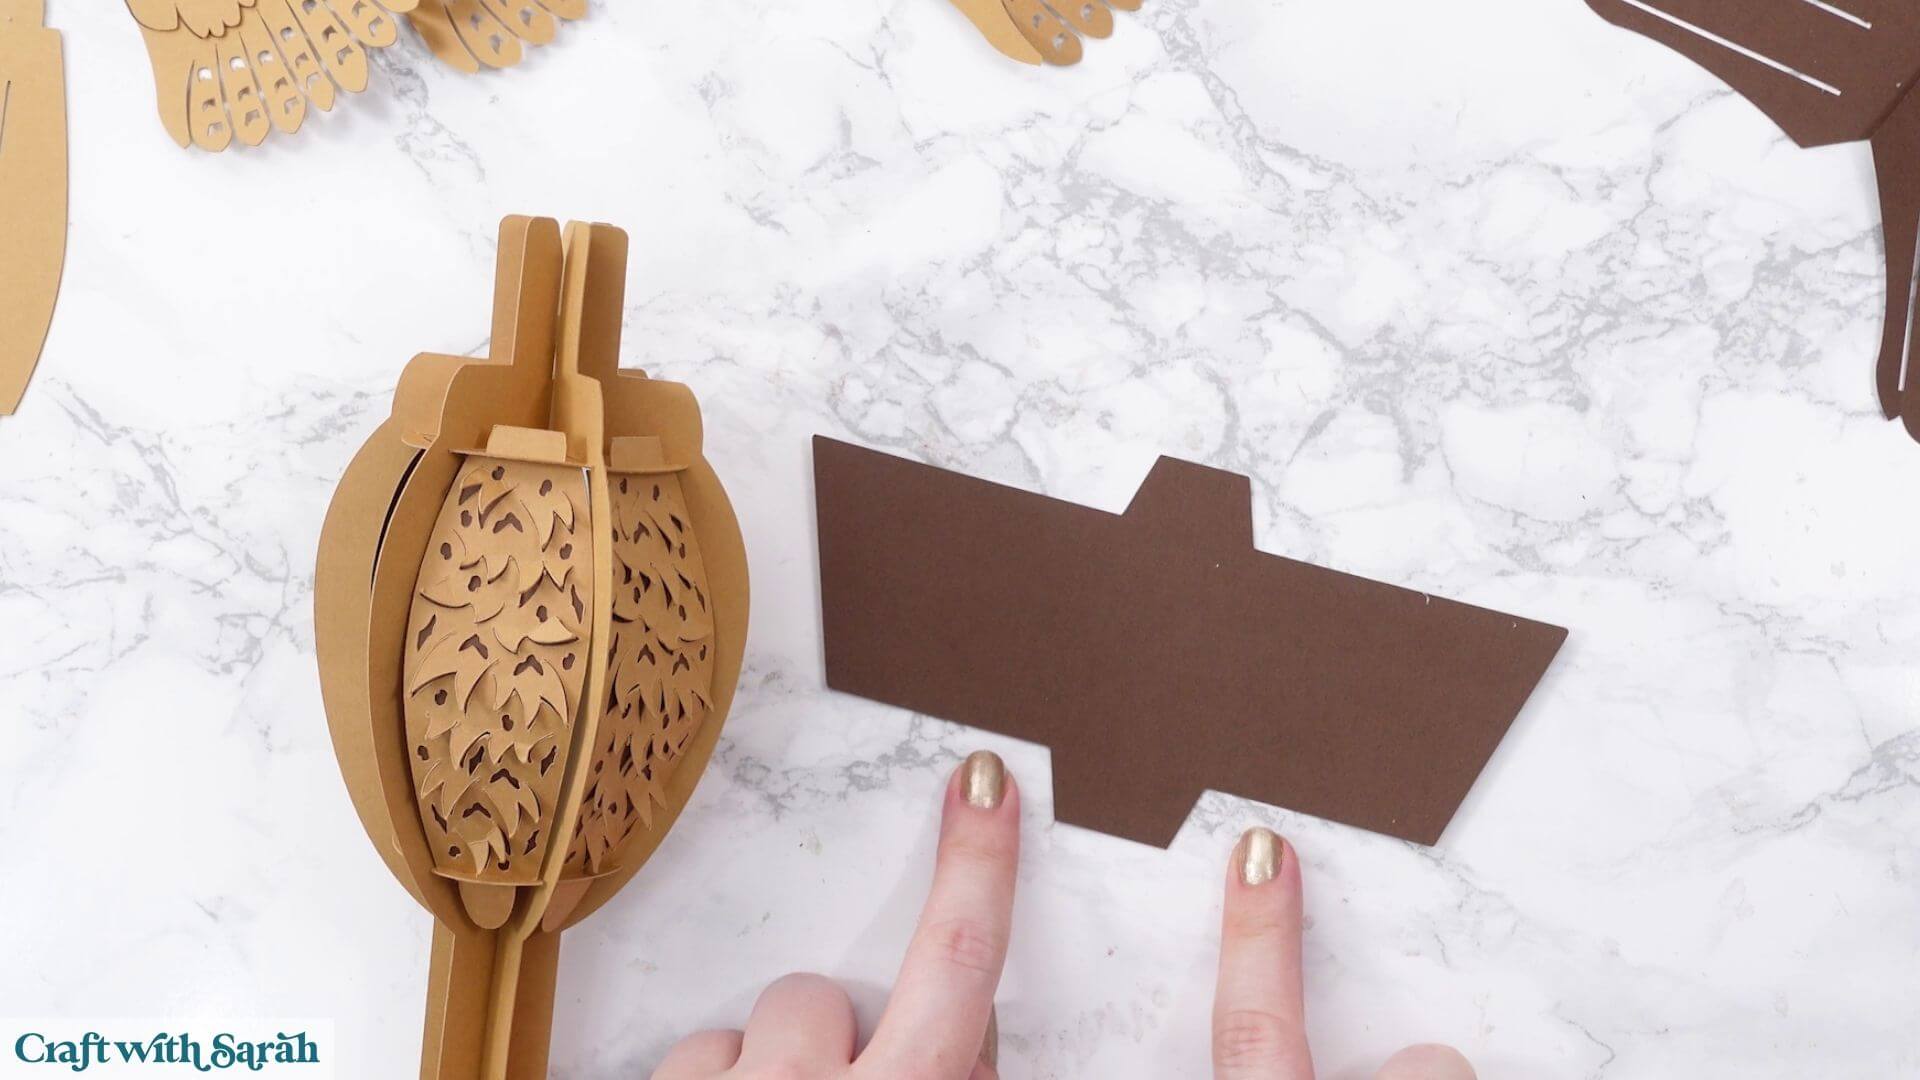
Push it through the two holes in the body so that it runs all the way through the middle. The tabs should sit against the top and bottom circles inside the body structure.
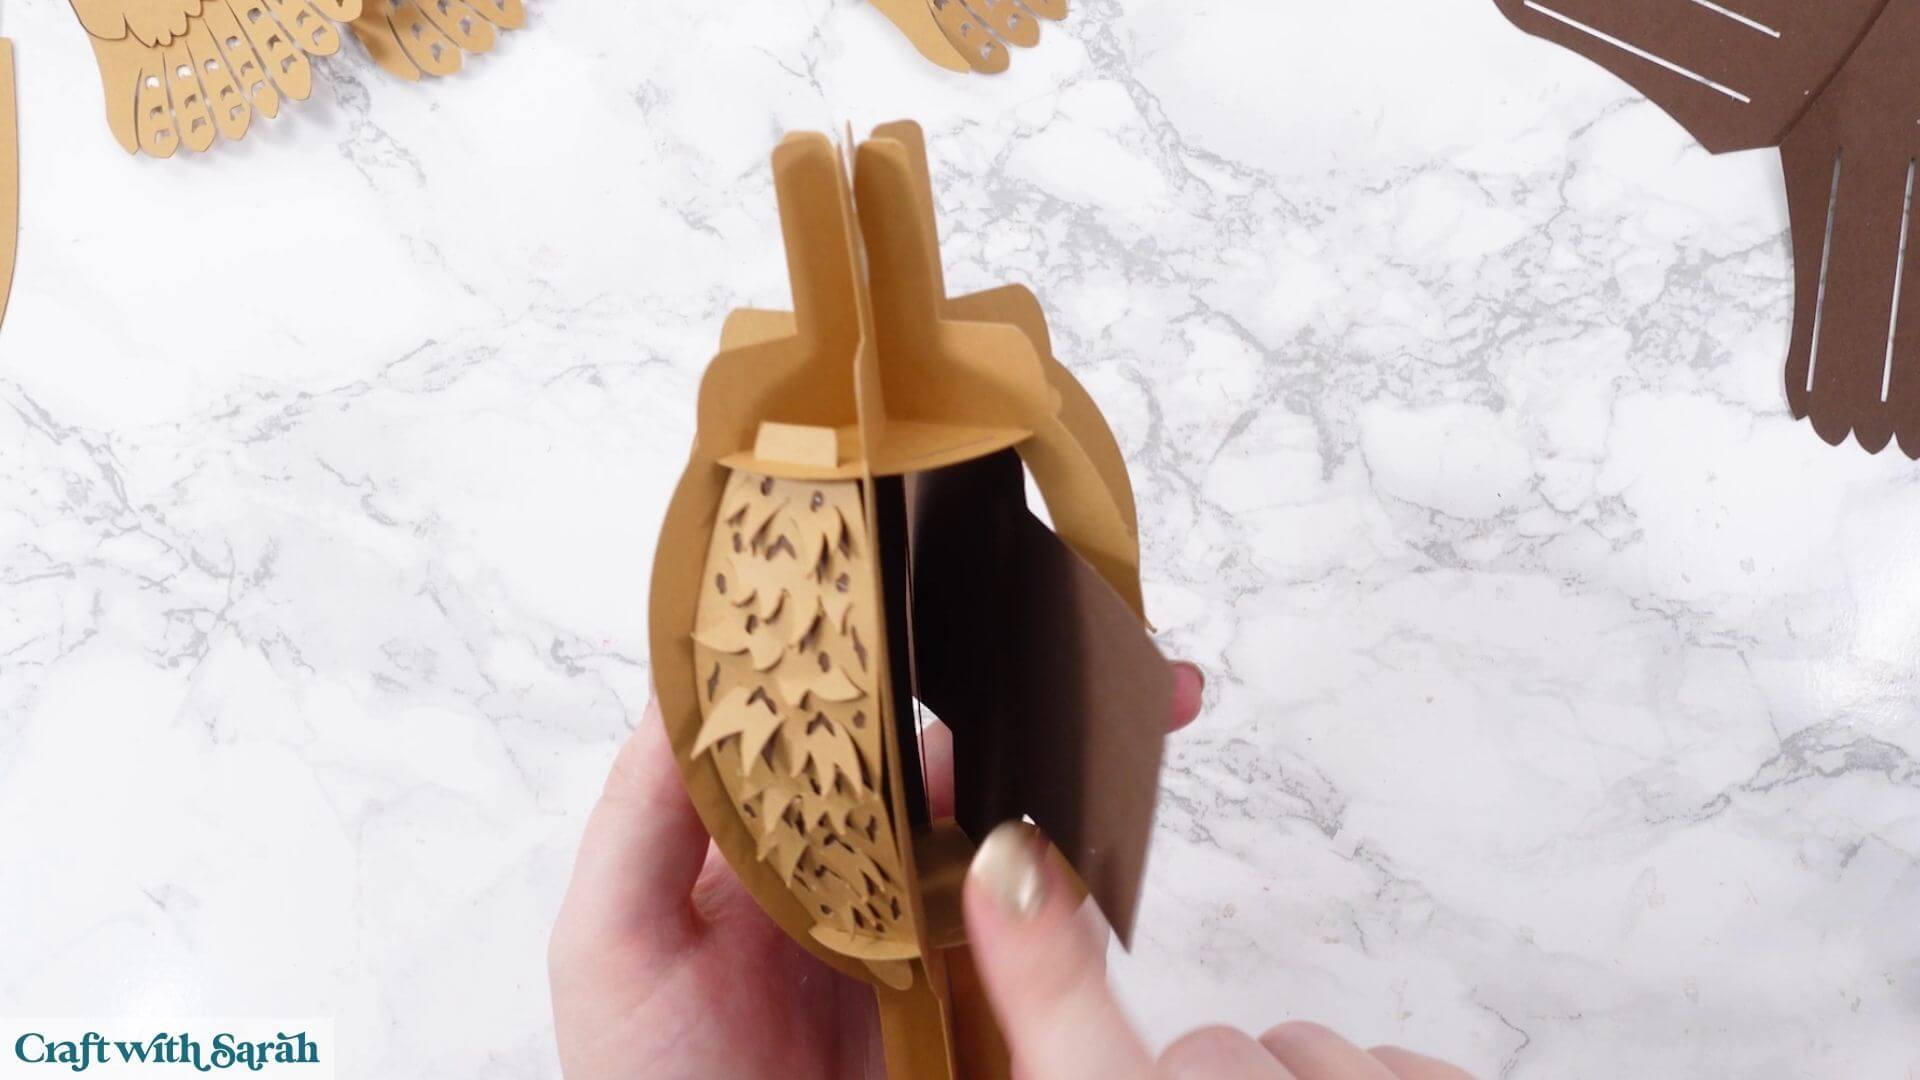
Next, add the double-thickness side pieces that you glued together earlier.
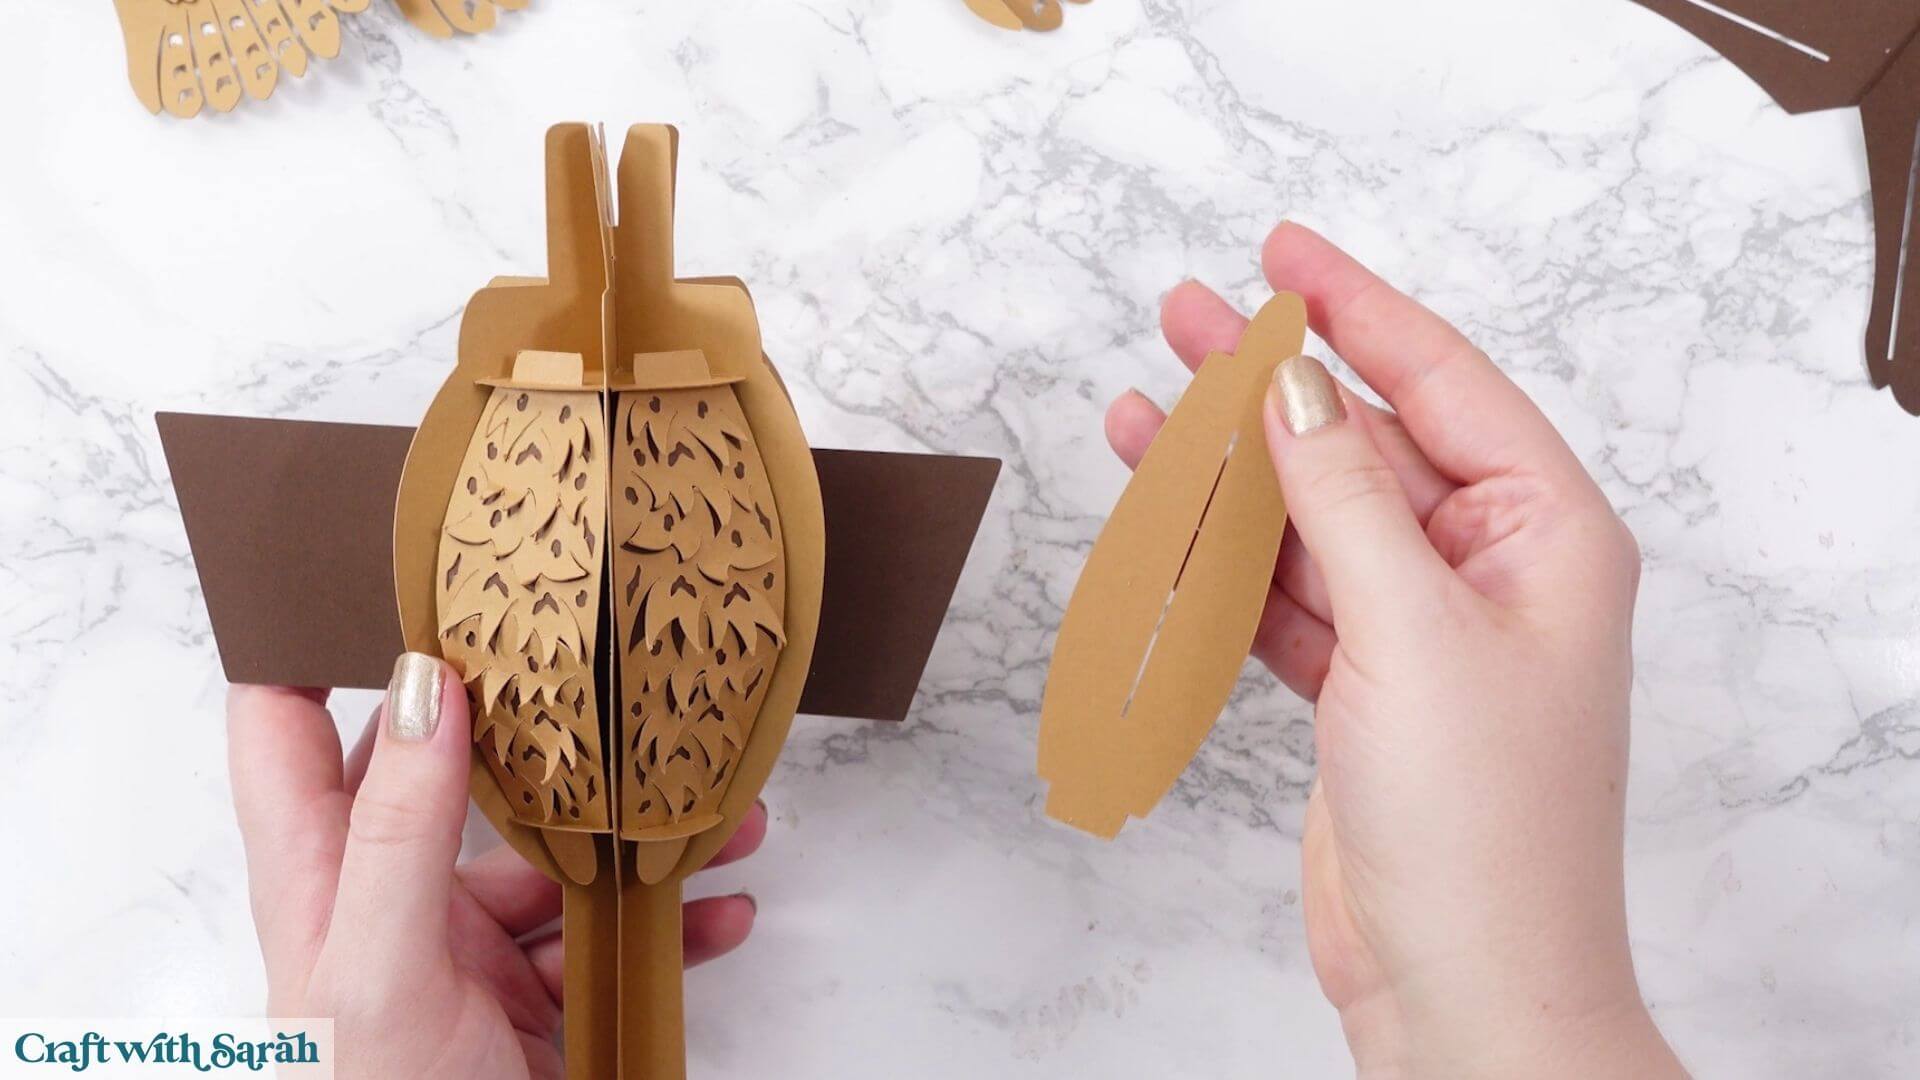
These can be a little trickier to insert because they’re thicker and they need to fit around the central support.
If anything pops out while you’re working, simply thread it back through and try again.
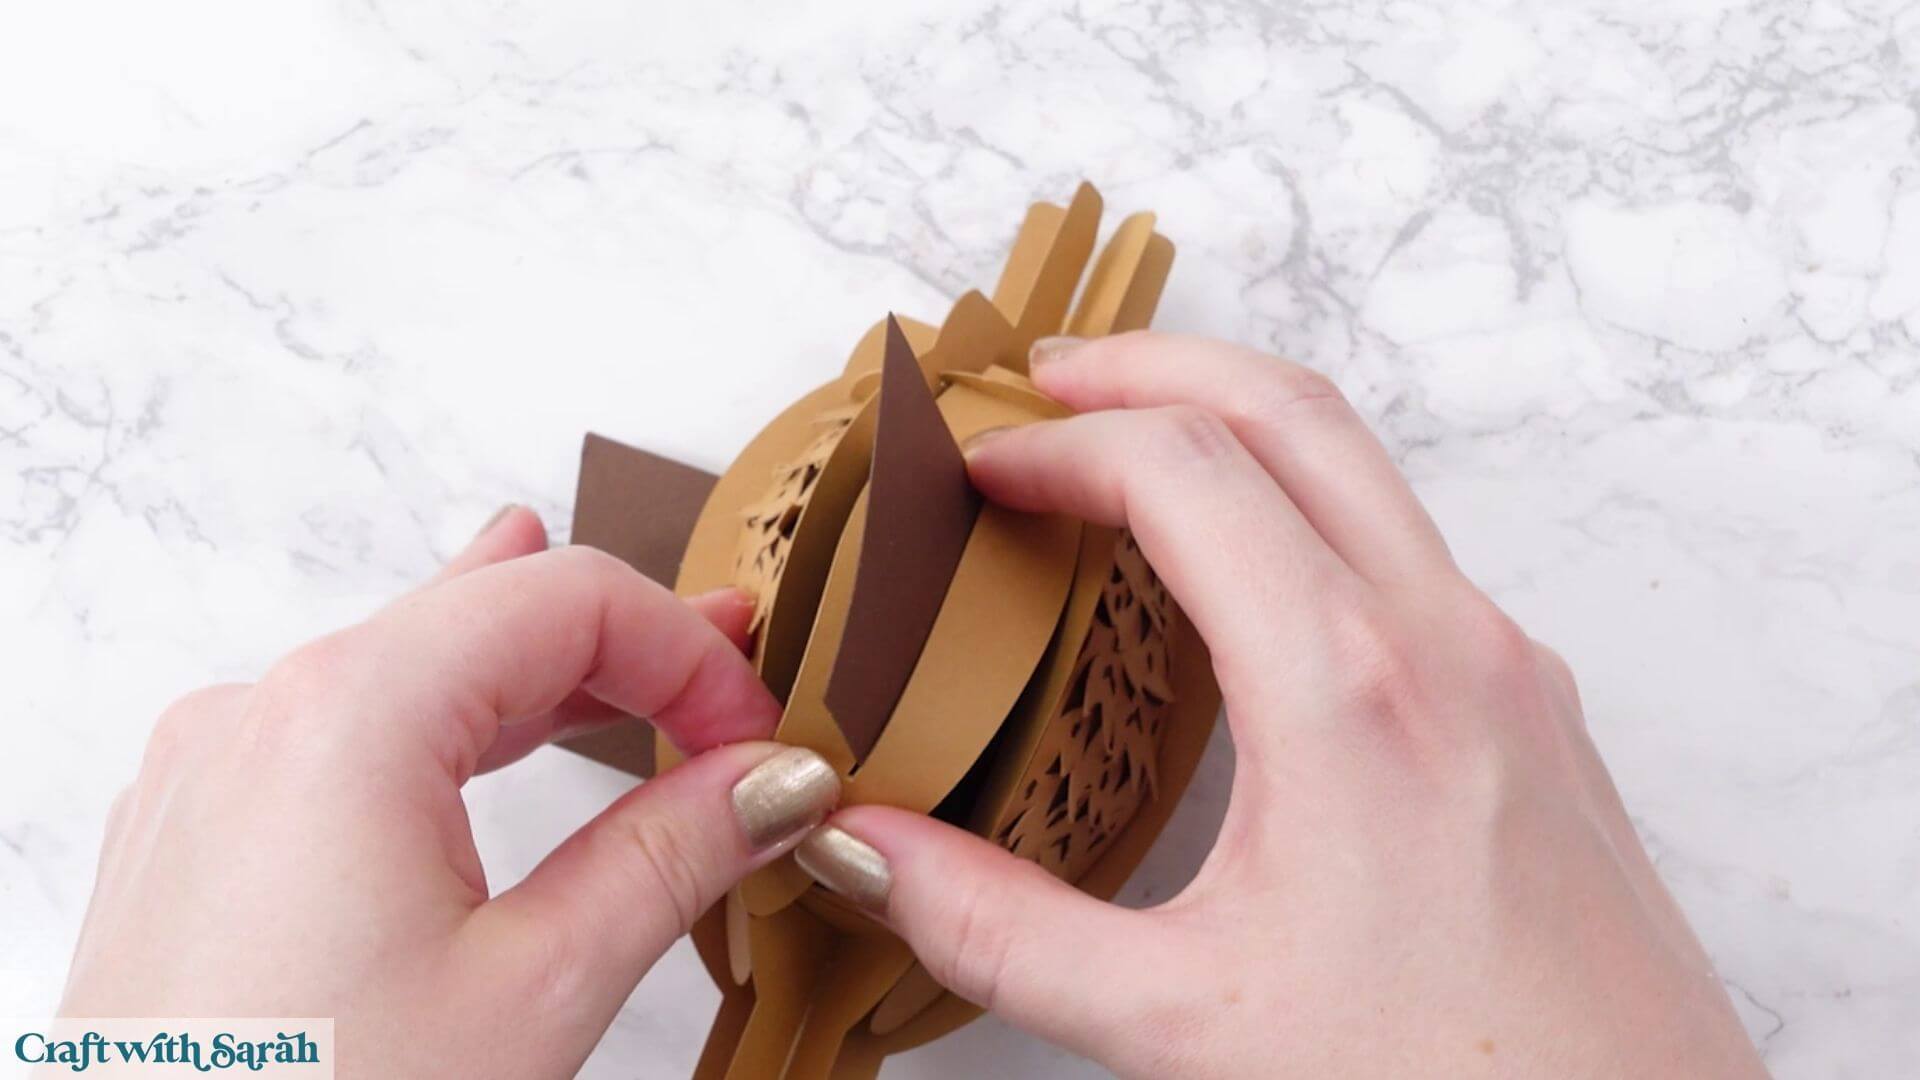
When both sides are in place, you’ll have the structure that the wings attach to.
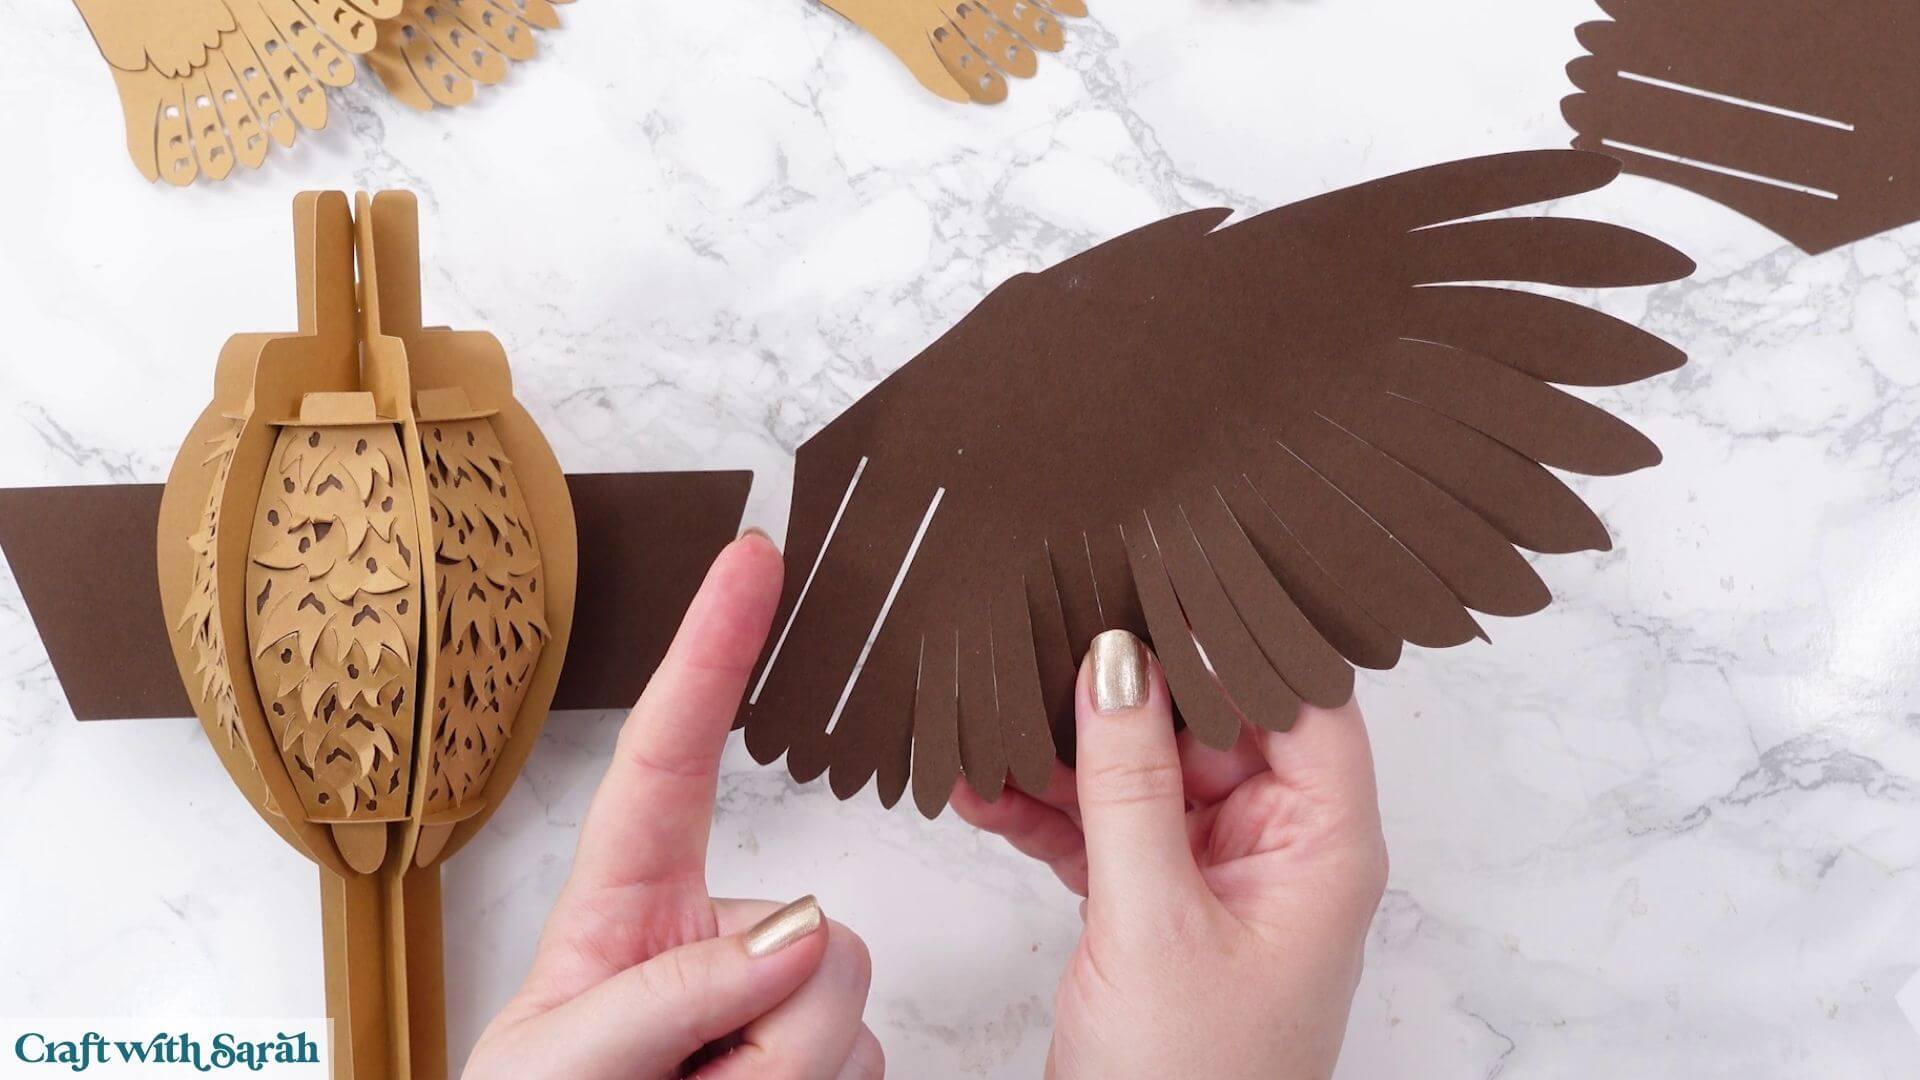
Take one of the dark brown wing pieces.
Attaching it is a little bit like buckling a belt.
Thread the tab through the first opening from the back, bend it around and bring it back out through the second opening.
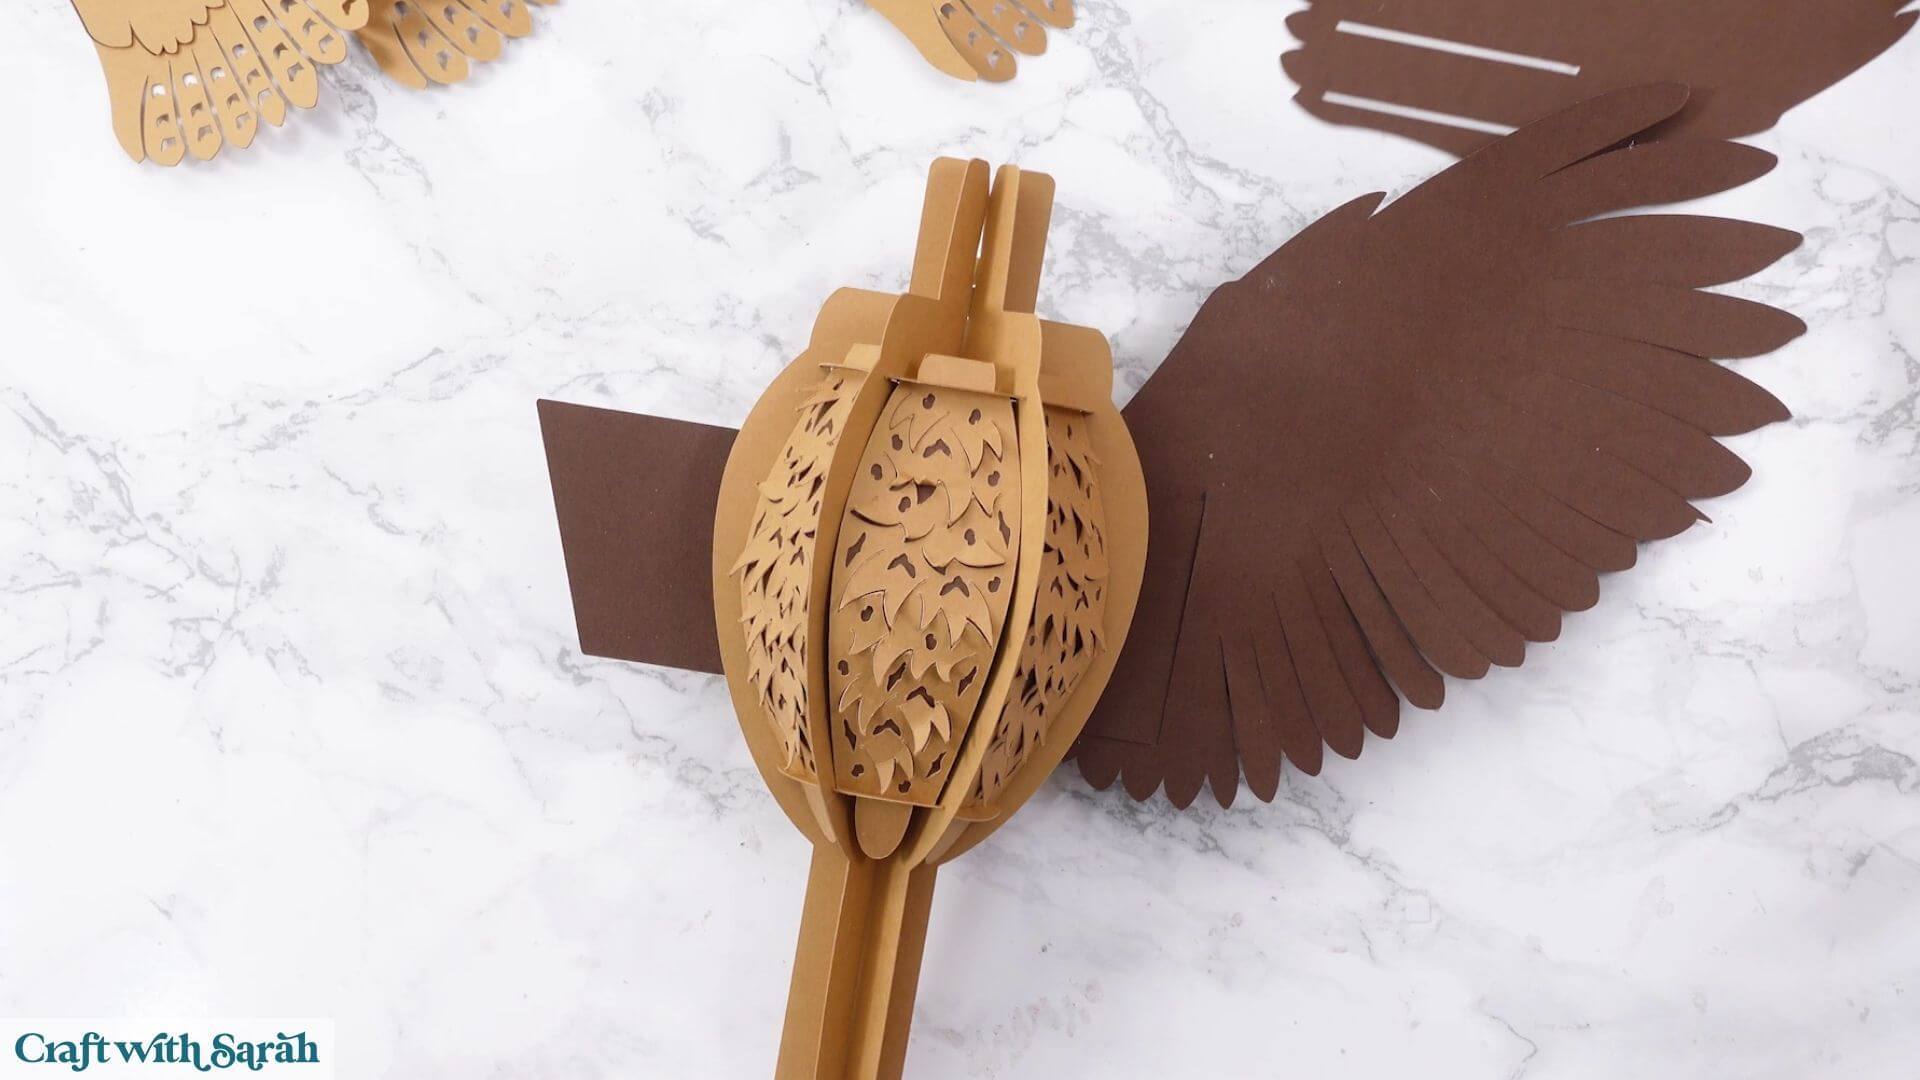
Repeat with the other wing.
Adjust them until roughly the same amount of cardstock is coming through on each side.
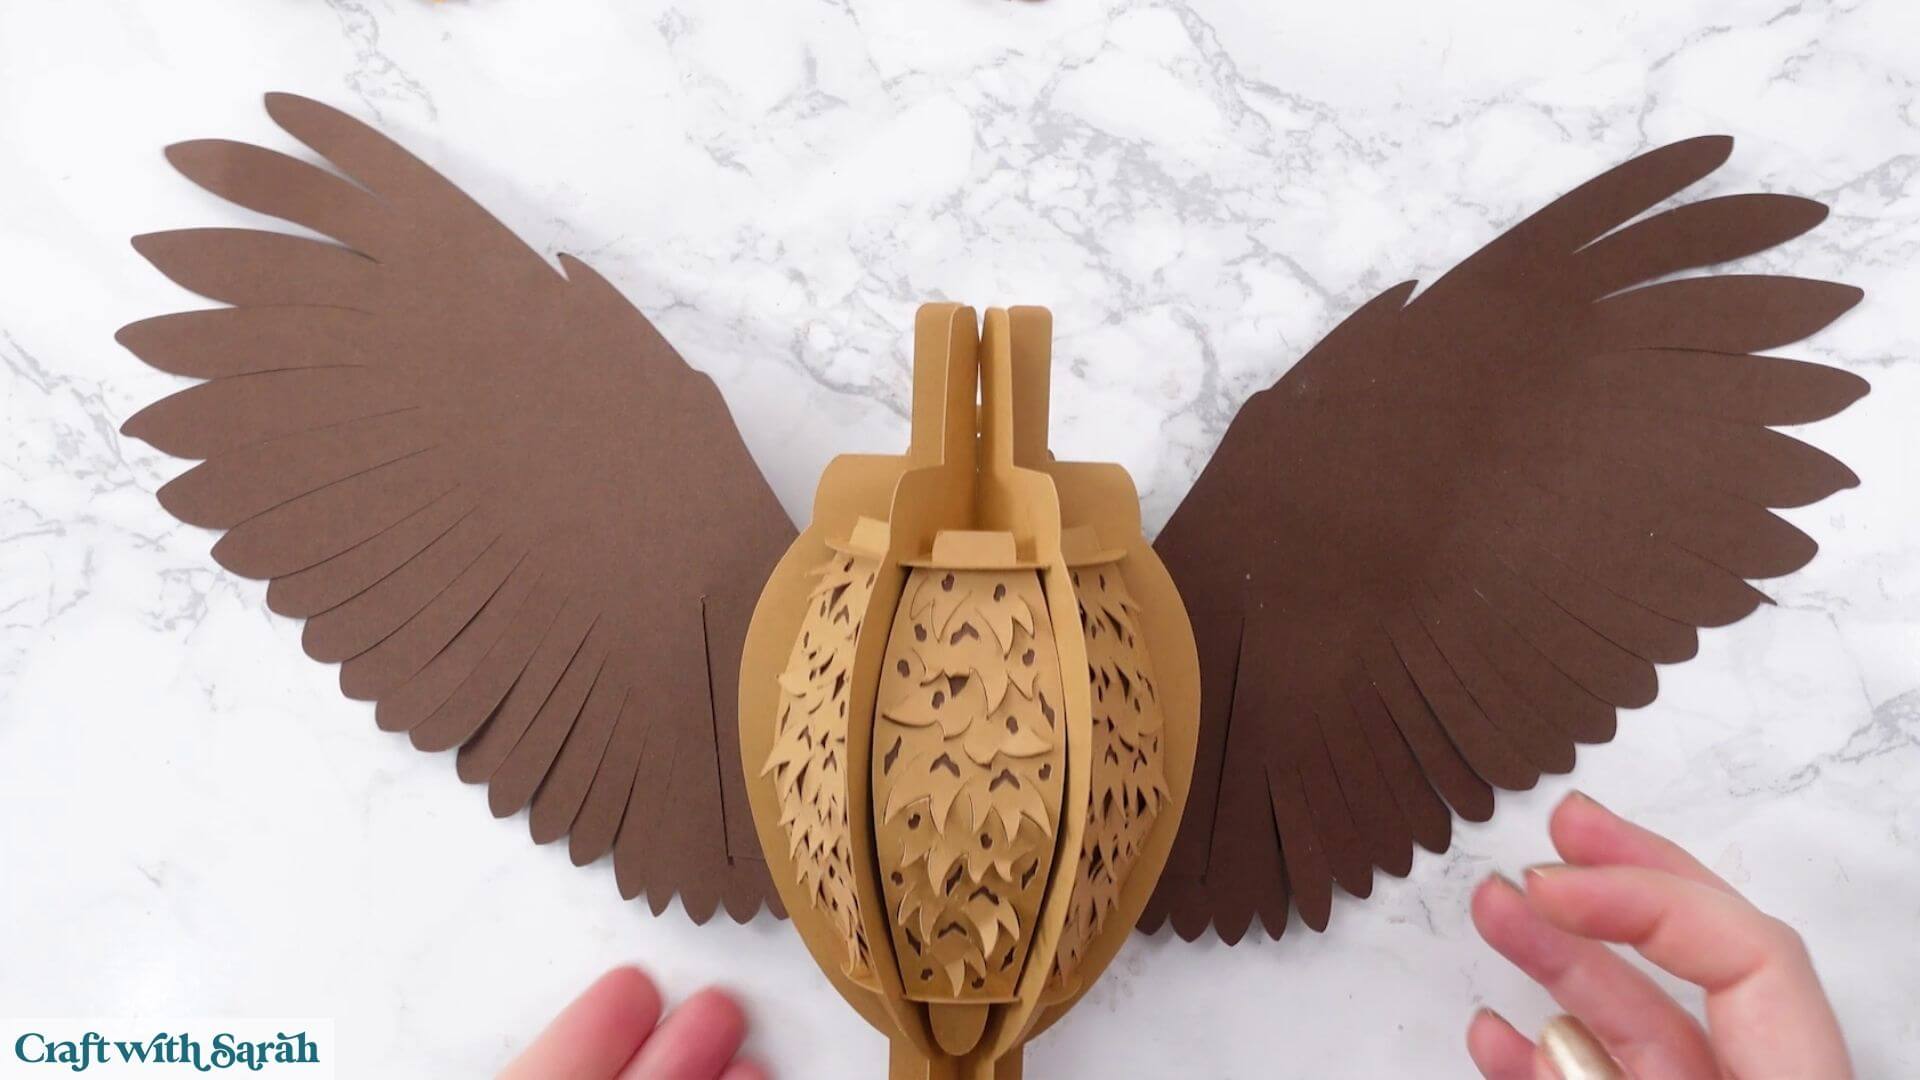
You can now glue the decorative front layers onto the dark brown wings.
Avoid putting glue on the feathered sections because we want those to remain slightly raised.
Also avoid putting glue directly over the removable tab. Leaving this section unglued means you can still slide the wings off again if you want to dismantle the owl for storage.
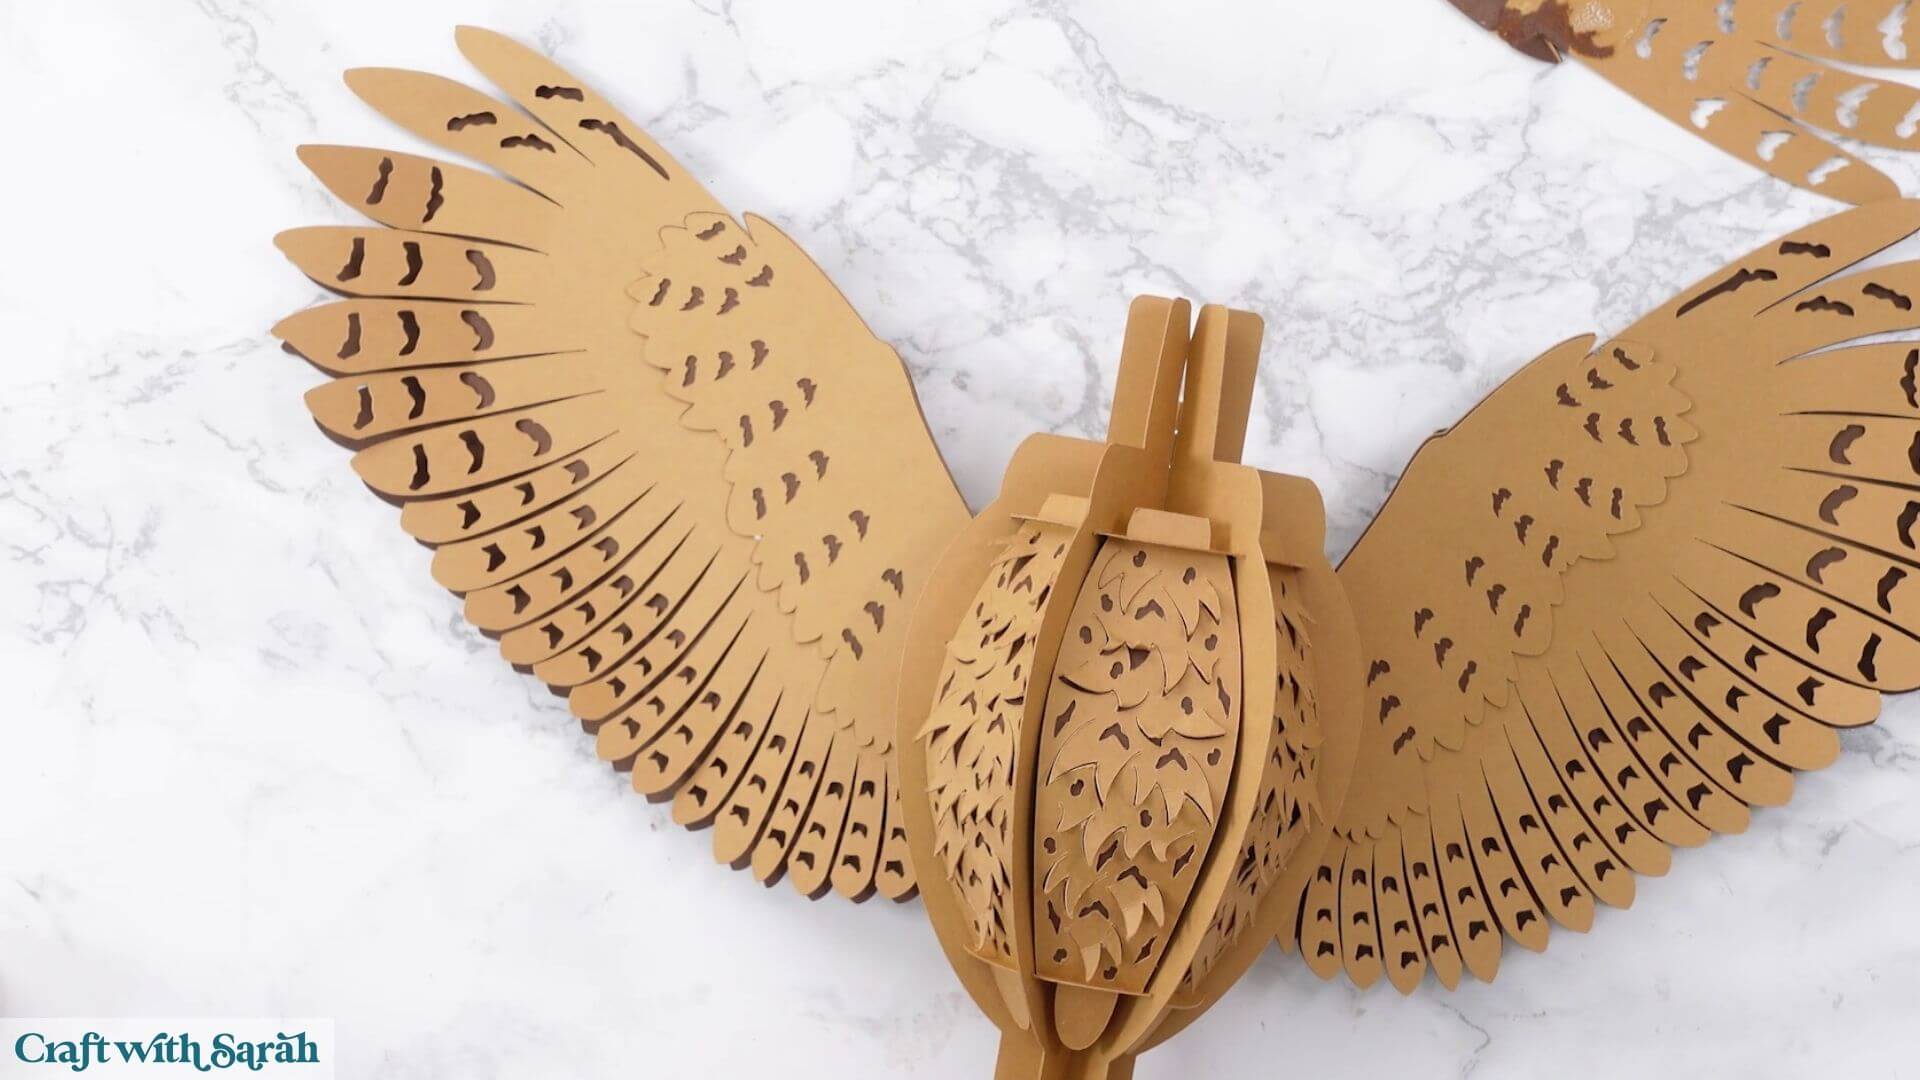
Glue the back decorative layers in place too.
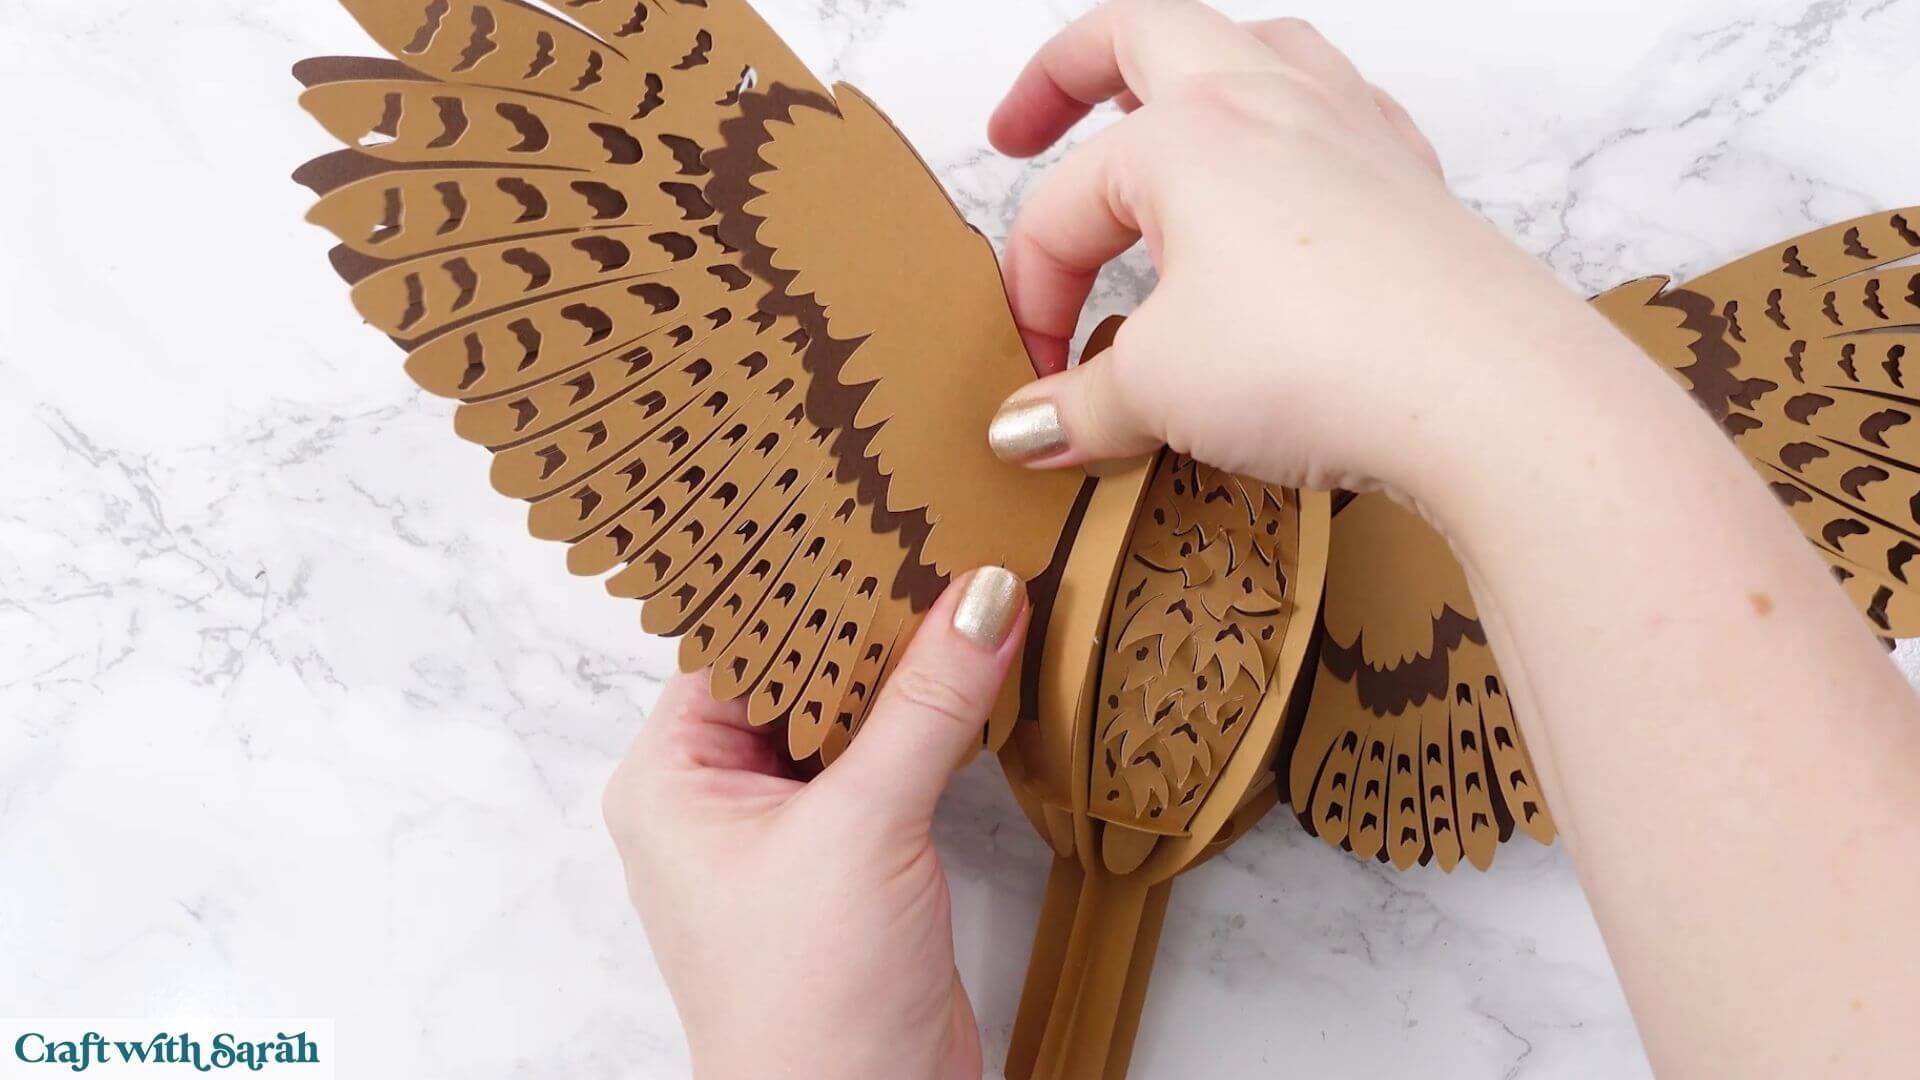
If you find that the wings don’t stay securely attached, you can glue the decorative pieces over the tabs. This will make the wings more stable, although it means that particular section will no longer come apart.
You’ll still be able to remove the body from the tree stump, remove the tree stump from the base and take off the owl’s head, so the project can still be dismantled quite a bit.
Step 8) Make the owl’s head
For the owl’s head, you’ll have four side pieces and matching brown backing pieces.
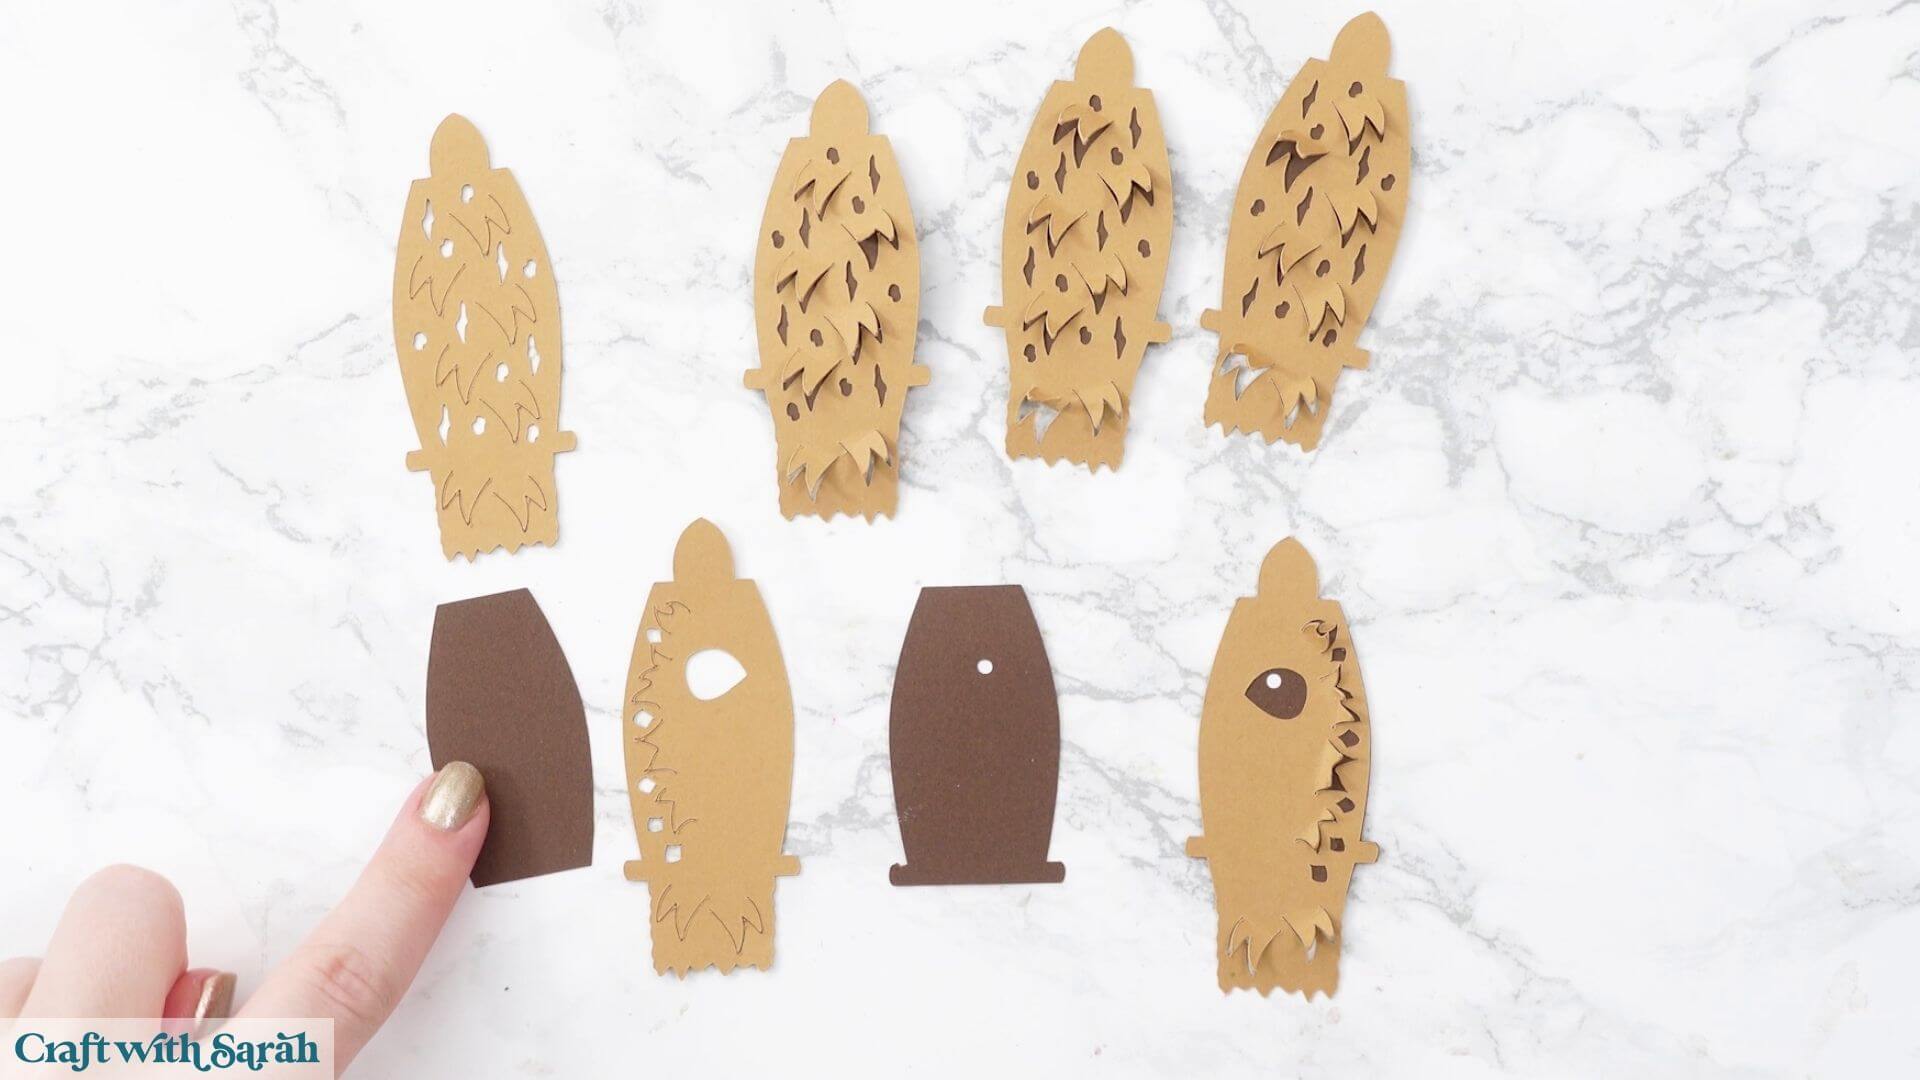
Just like the body, gently bend out all the little feather sections before adding glue to the back and attaching the solid brown pieces.
There are also two brown eye pieces, one with the small eye opening towards the right and one towards the left, plus two tiny white circles.
Glue the white circles behind the small openings.
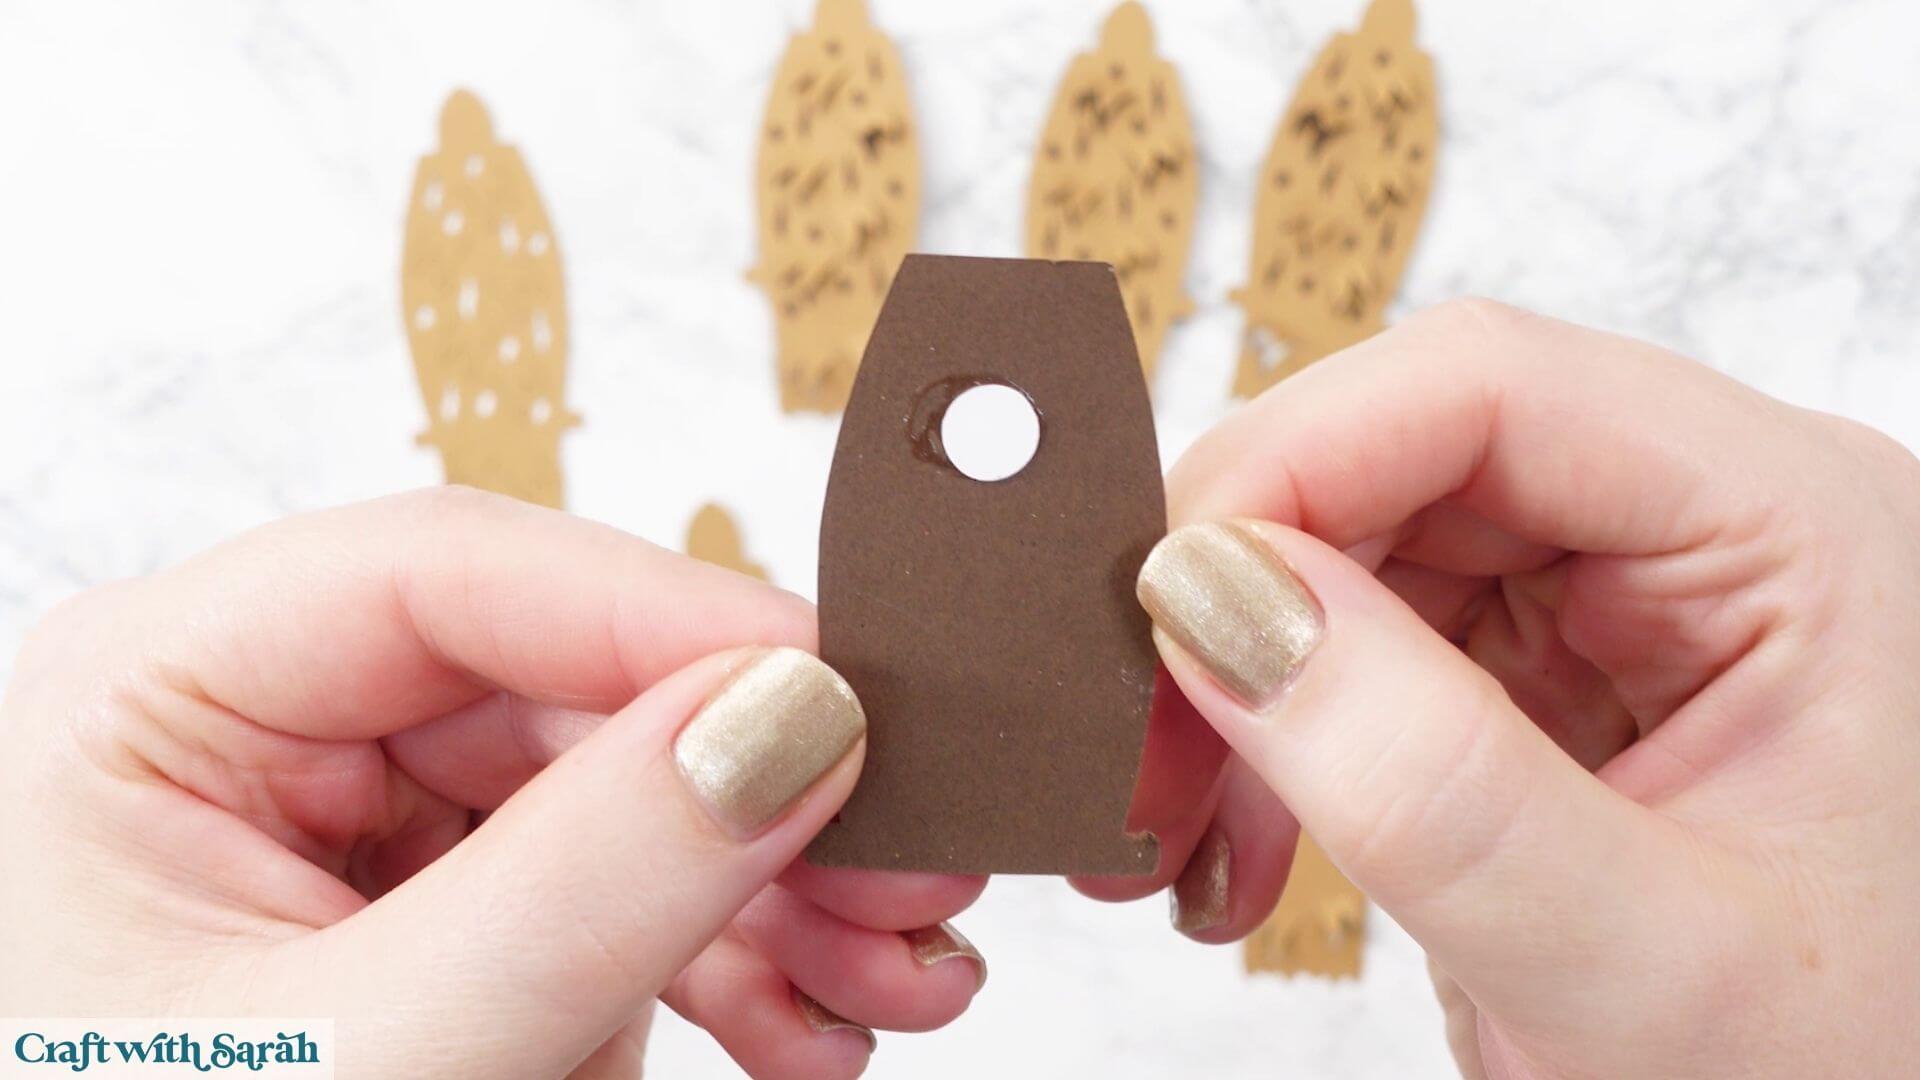
Position the eye pieces so that the white highlights point inwards towards each other. This helps to make the owl look as though he’s facing forwards.
There are also little feather sections around the sides of the eyes.
Carefully lift these outwards with your fingernail. You can also use a weeding tool or small spatula if that’s easier.
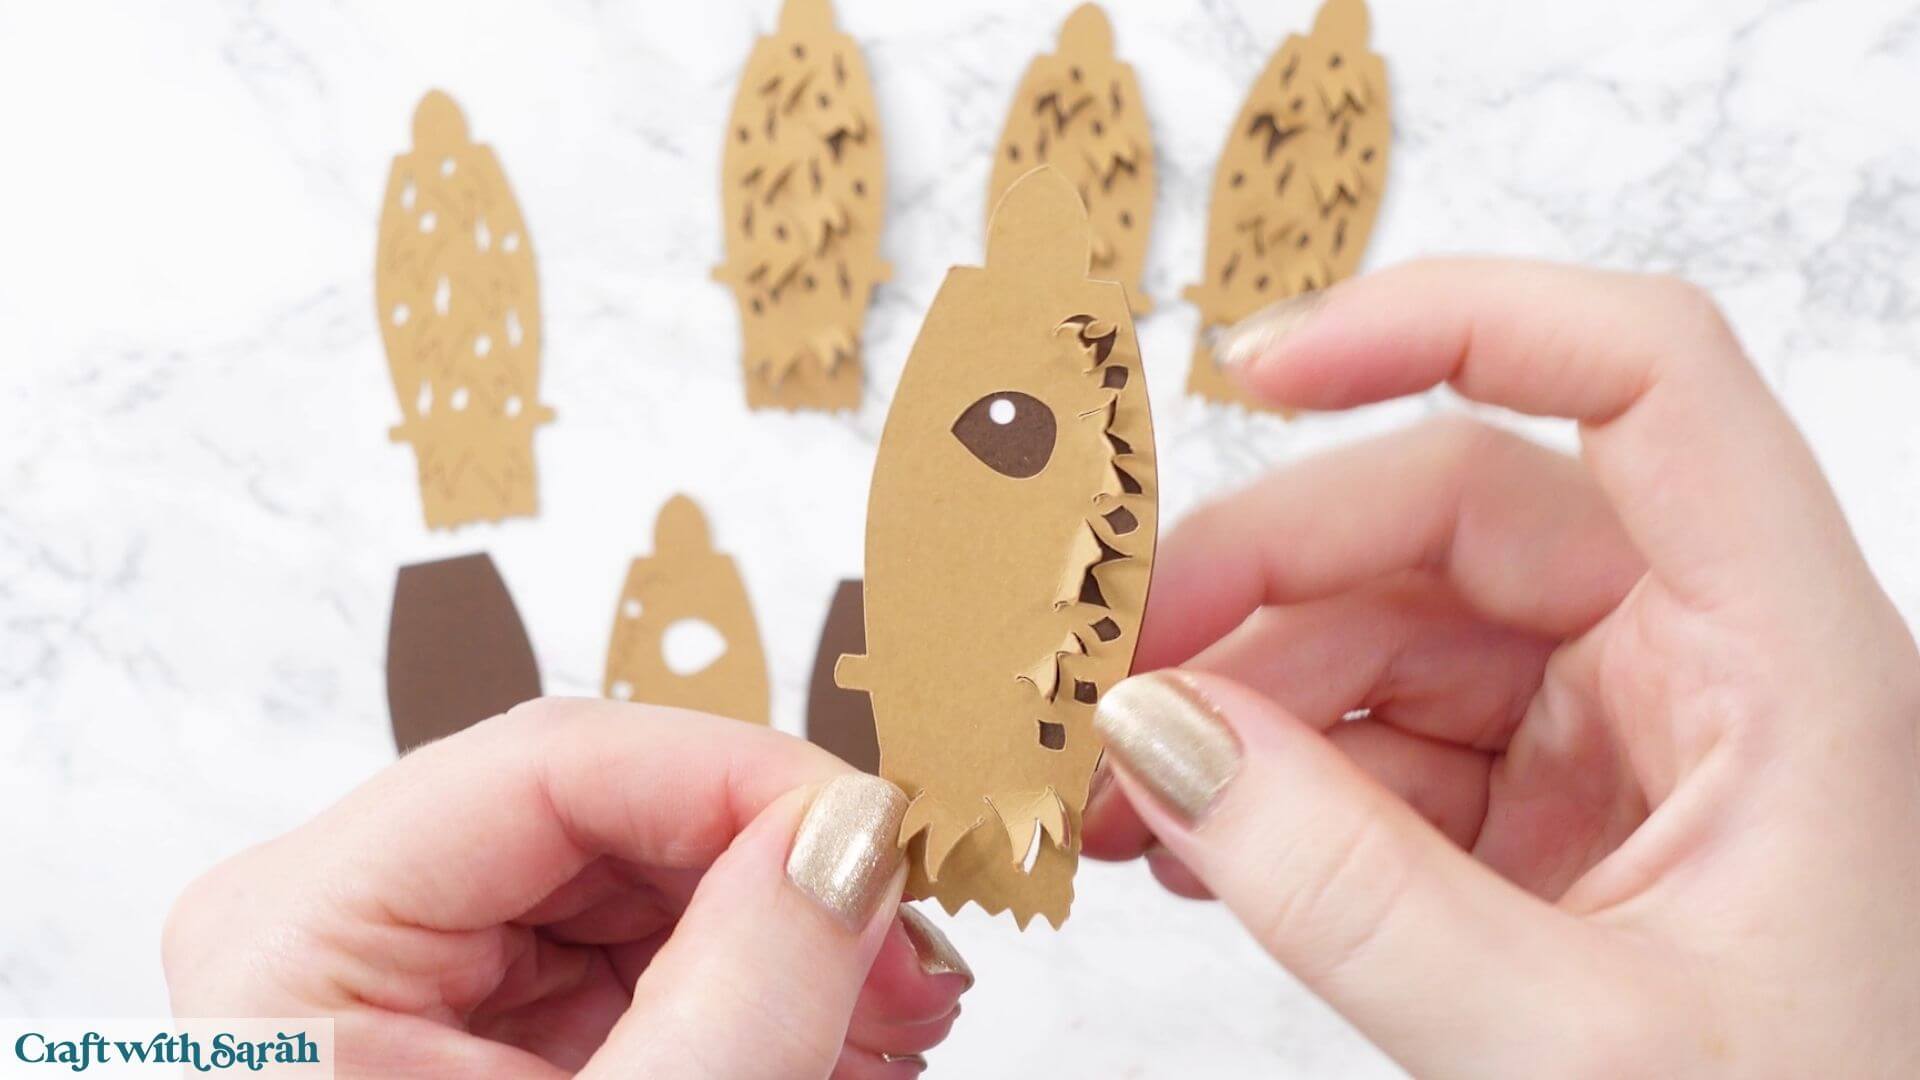
There are three internal structure pieces for the head.
The first doesn’t have feathers around the edge.
The second has feathers around the edge and two small slits at the top.
The third has feathers around the edge and one slit at the top.
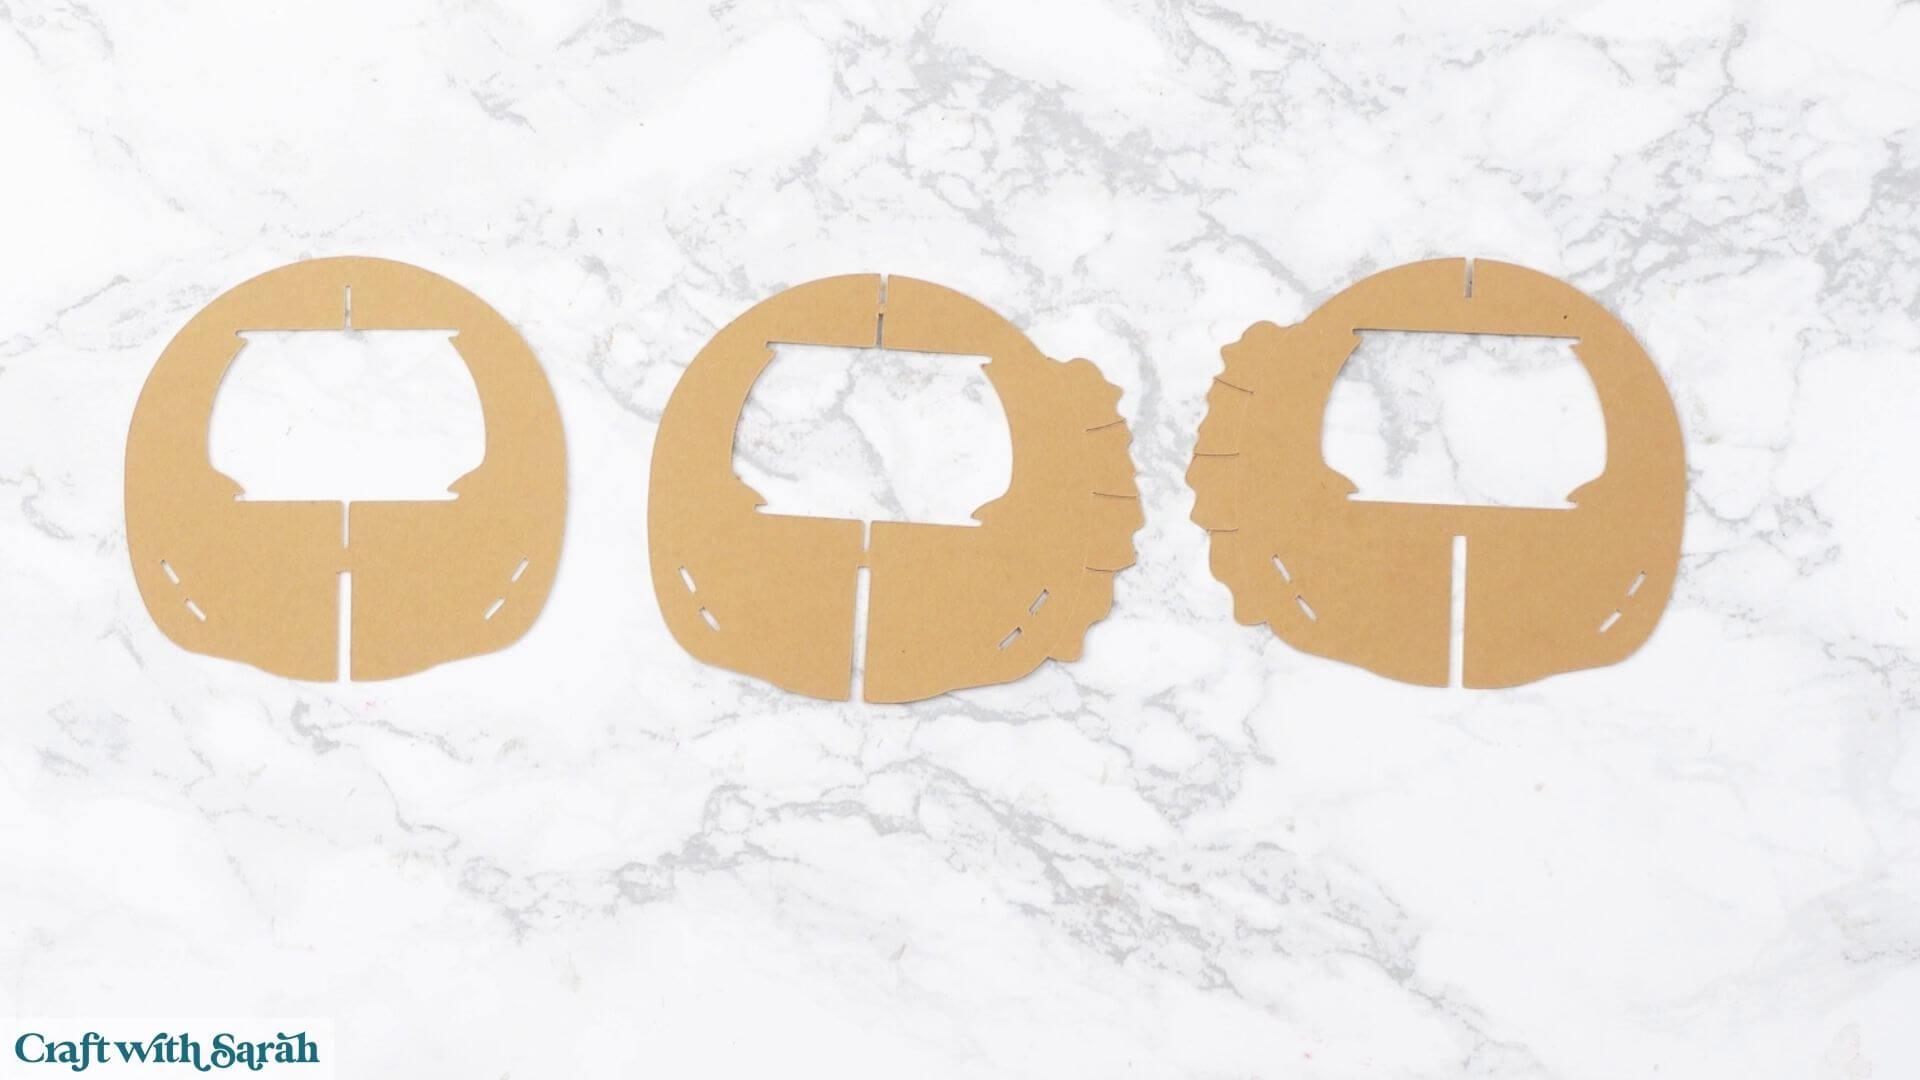
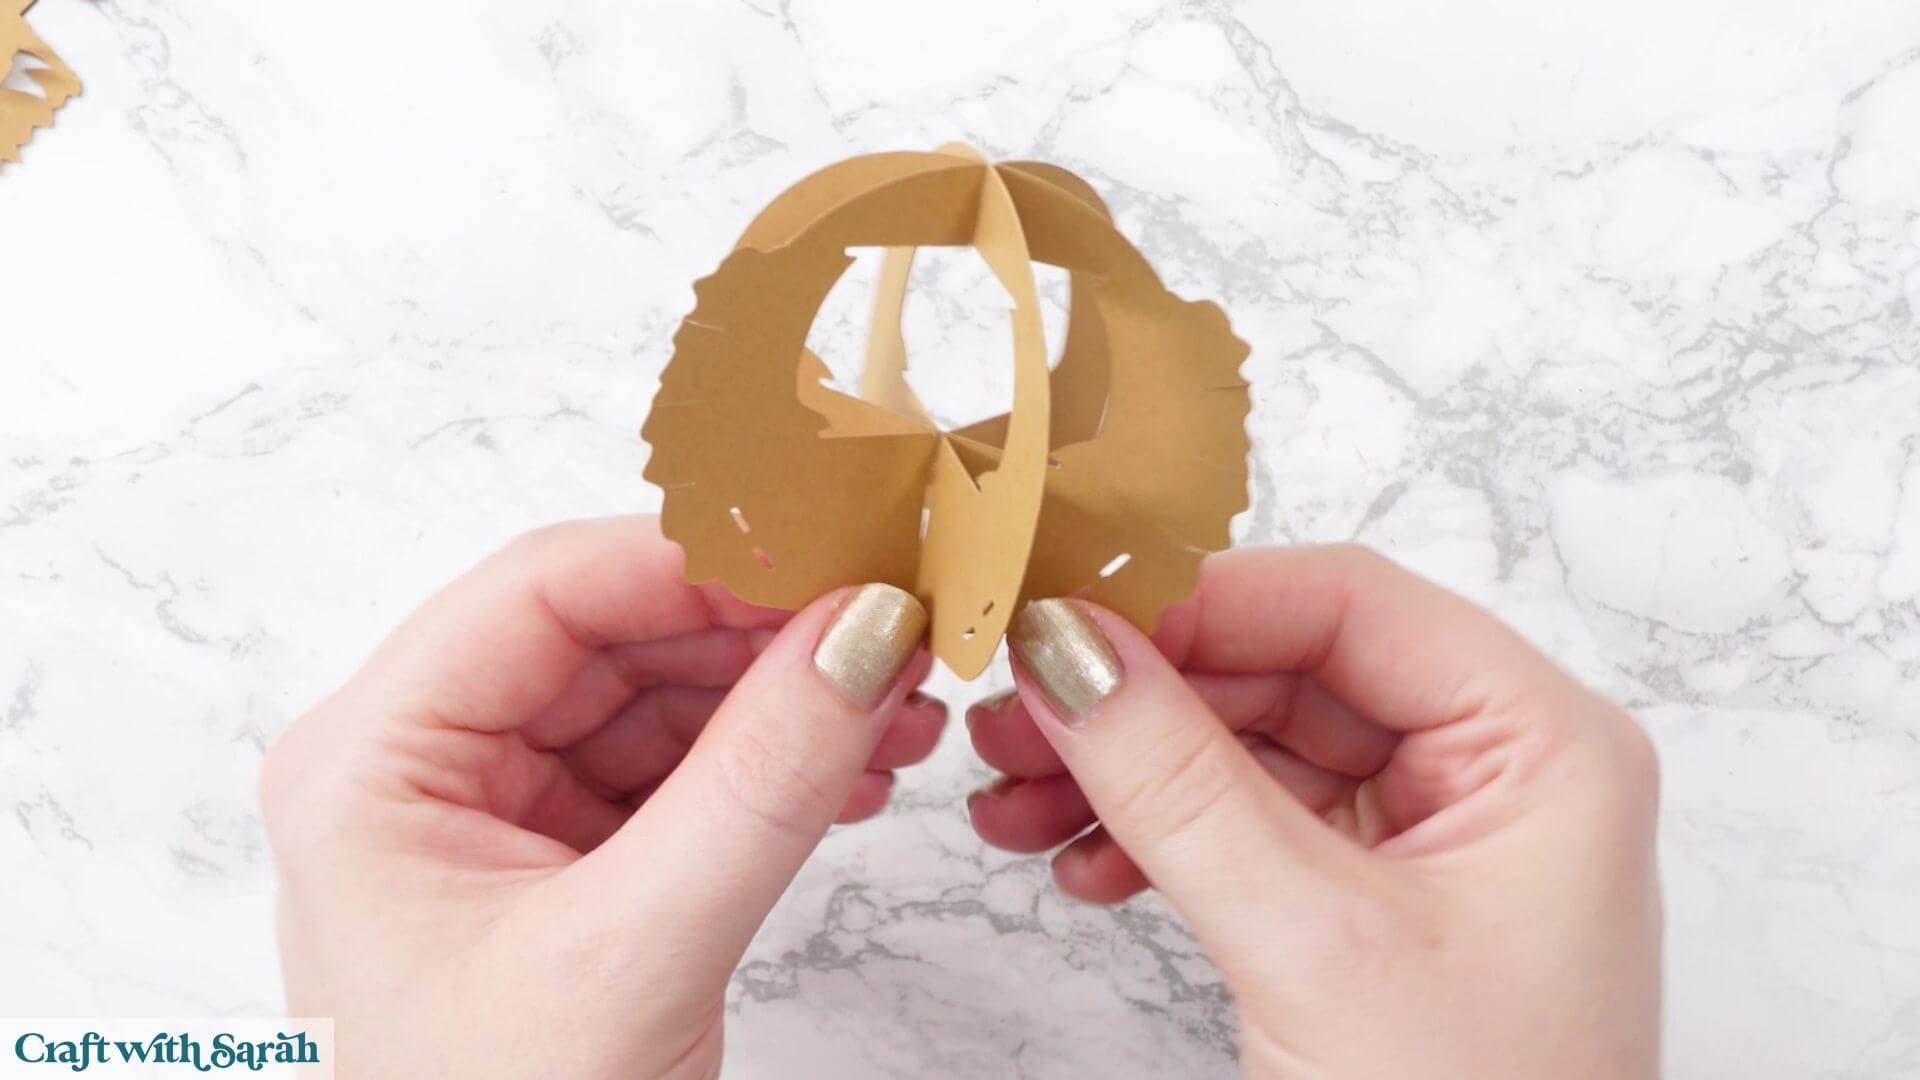
Slot them together in the same way as the body pieces.
They’re a little fiddly because of the shape, so take your time and be careful not to tear anything.
When adding the third piece, check the order carefully.
You should have a feathered section on the left, followed by a smooth section, and then another feathered section on the right.
If you accidentally put them together in the wrong order, they can be taken apart and repositioned.
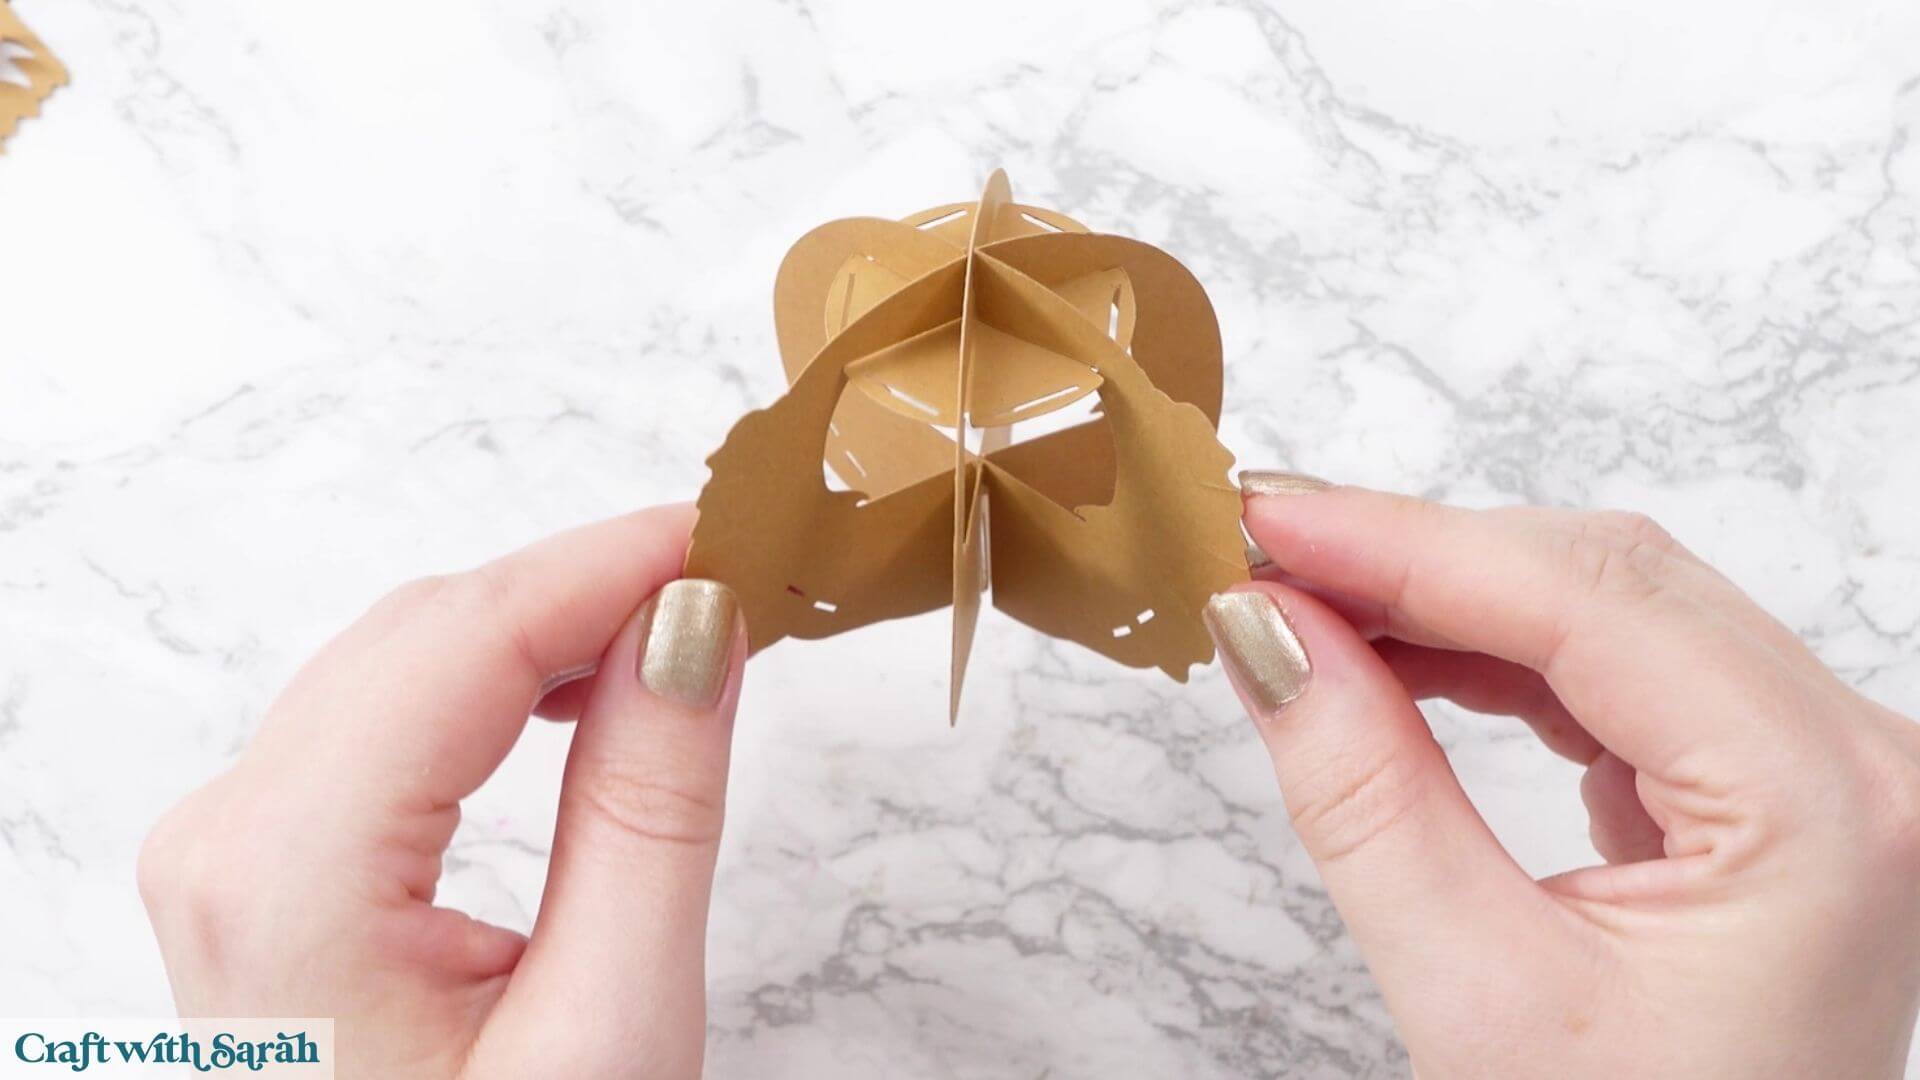
Add the circular support piece into the top of the head to stabilise the structure.
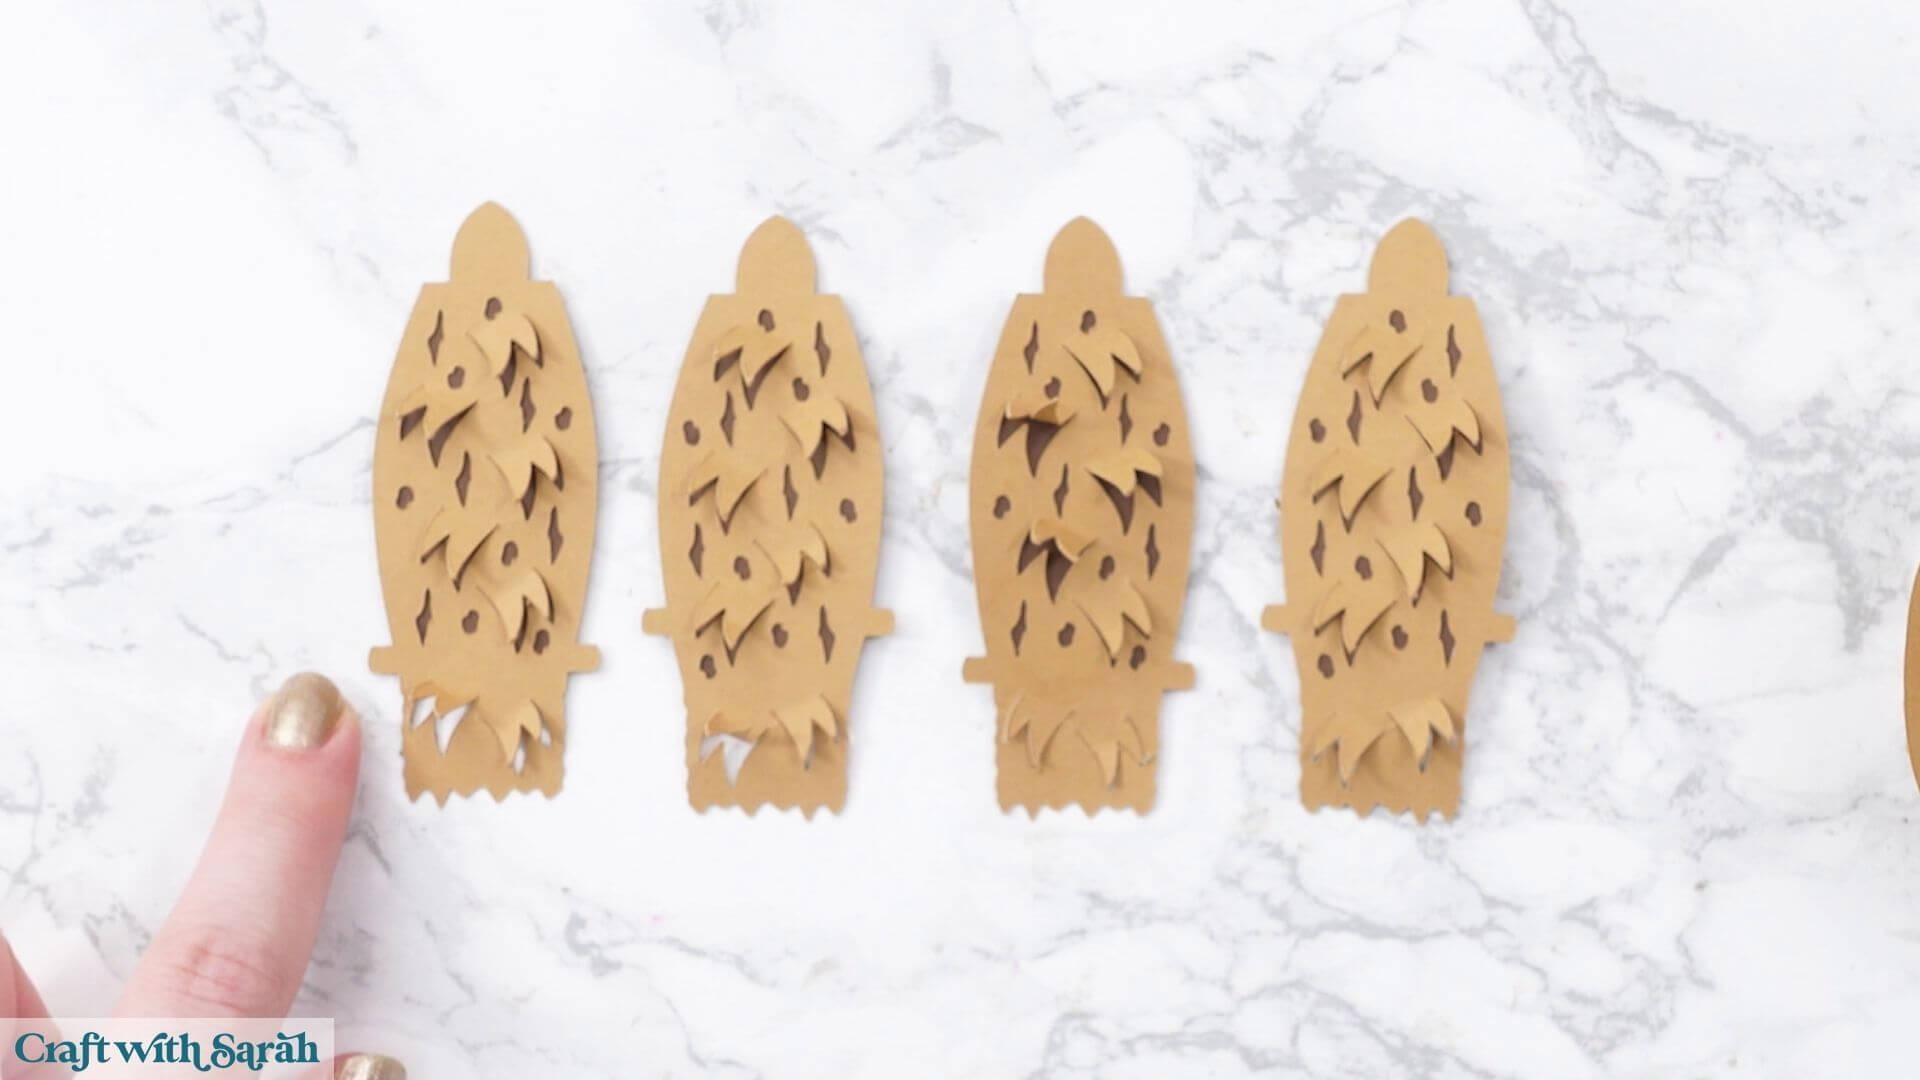
Line up the four side pieces.
Two have their small sticky-out tabs positioned slightly lower than the other two.
Arrange them so that you alternate between low, high, low and high.
Look at the head structure and find the sections with the sticky-out feather pieces. These will be where the eyes go.
Start with one of the side pieces with the lower tabs and slot those into the lower holes on the structure.
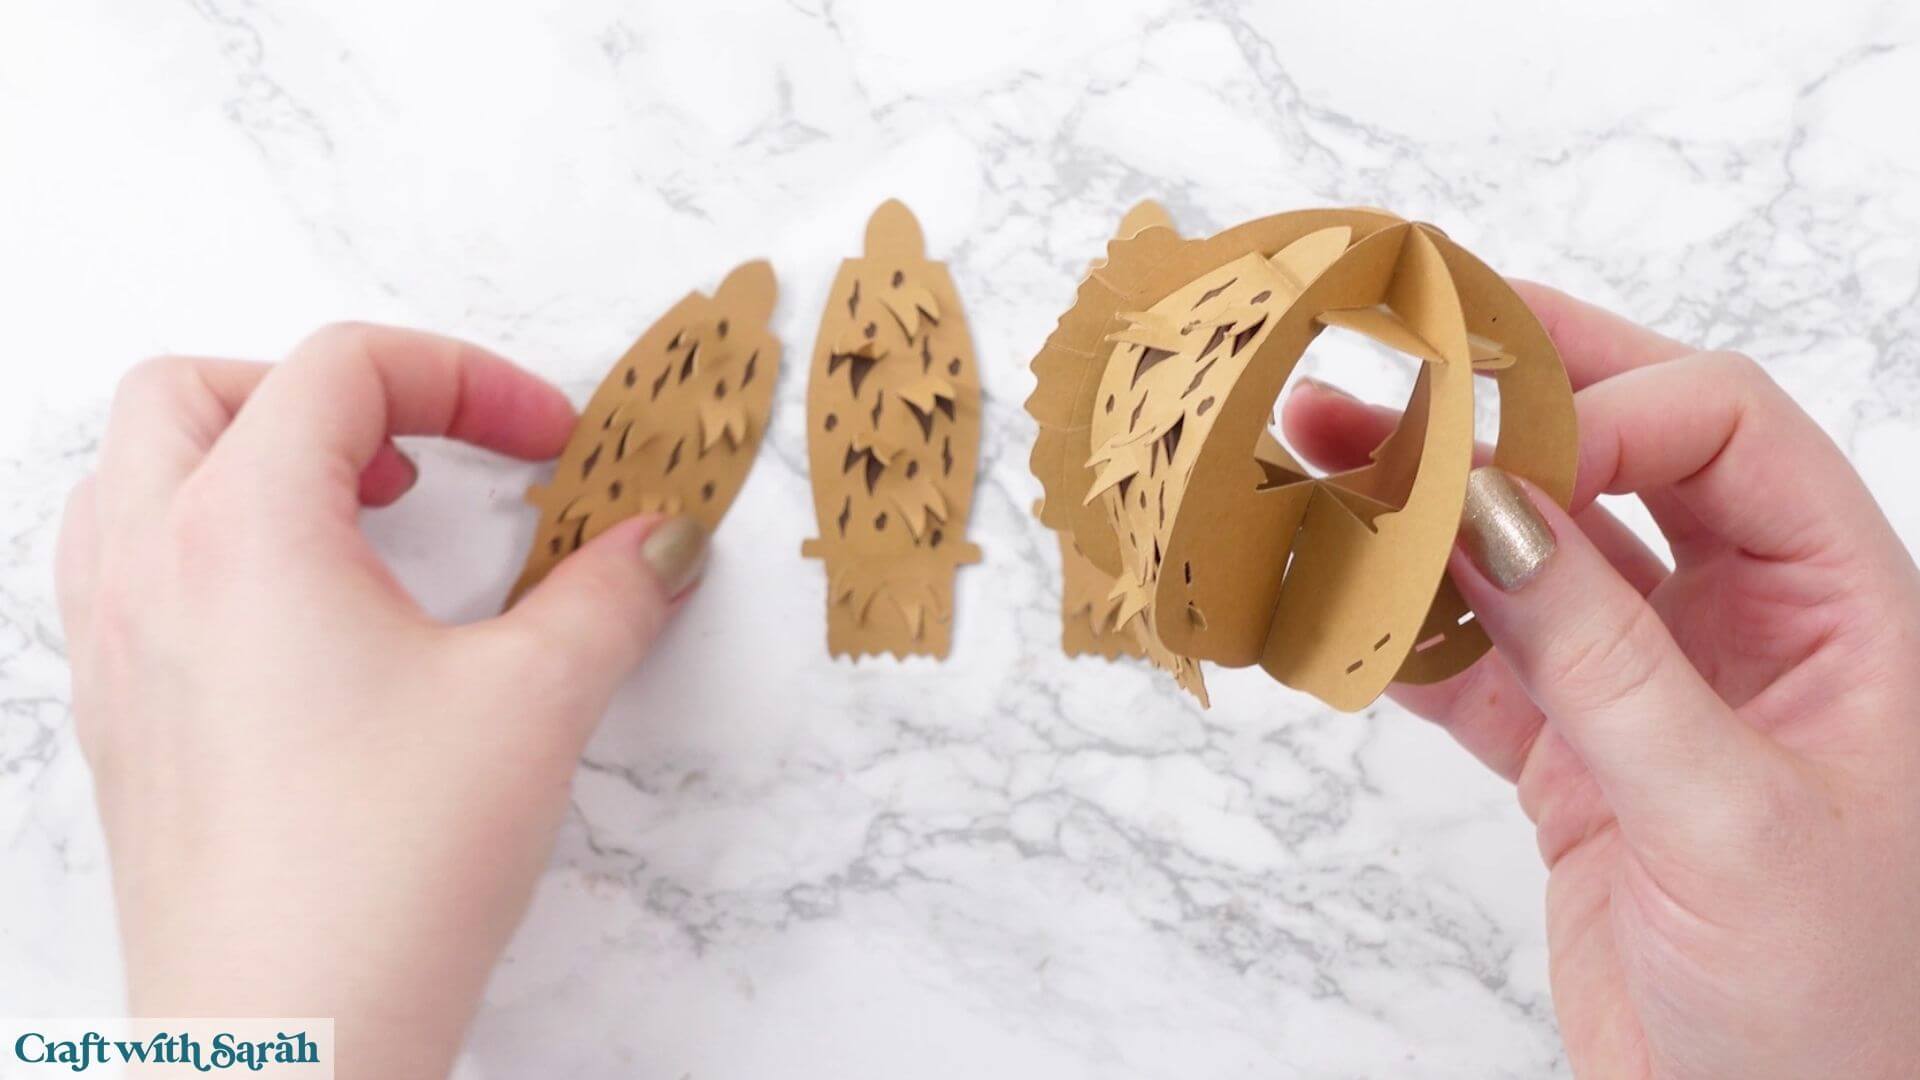
The next piece has the higher tabs, so these go into the upper holes.
Continue alternating around the head.
If a piece is difficult to insert, gently bend it into shape before trying to slot it in.
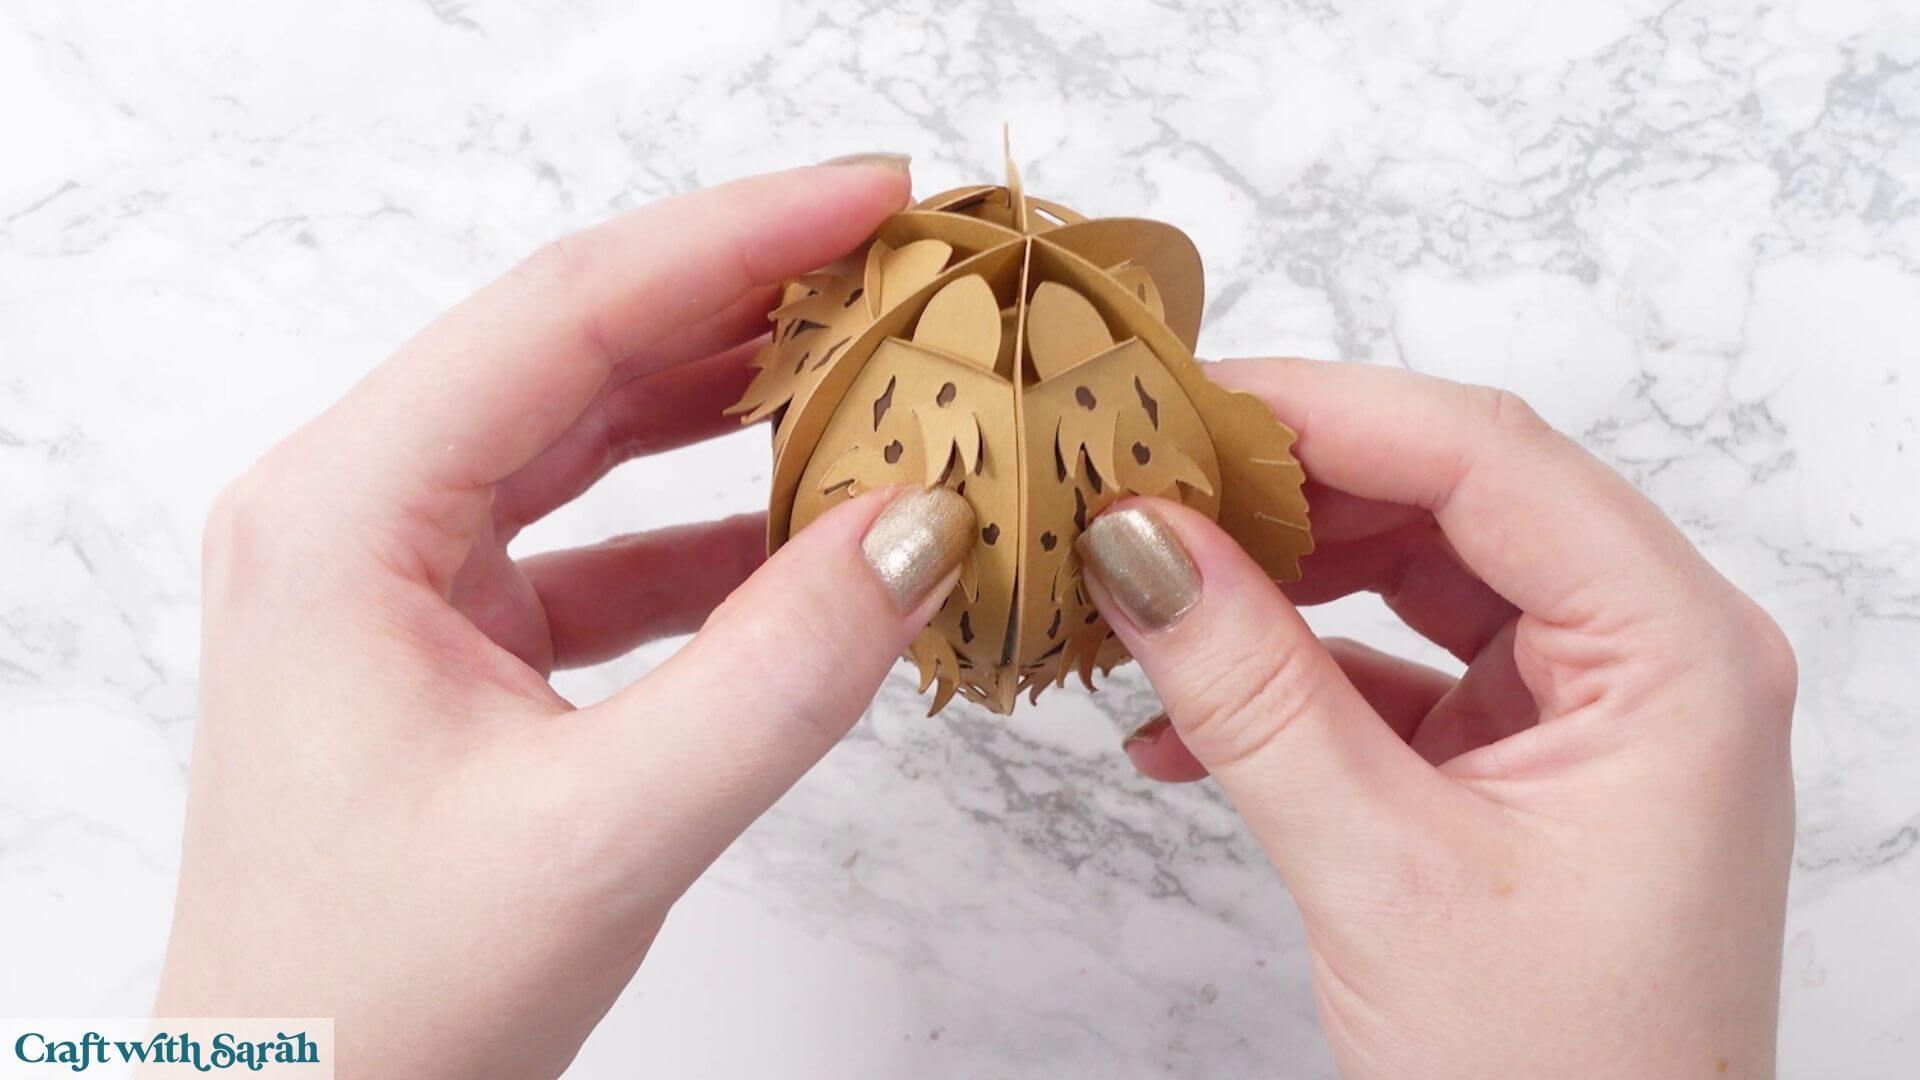
Before adding the eyes, find the two additional white decorative pieces.
These also have little feather cutouts that can be carefully bent upwards.
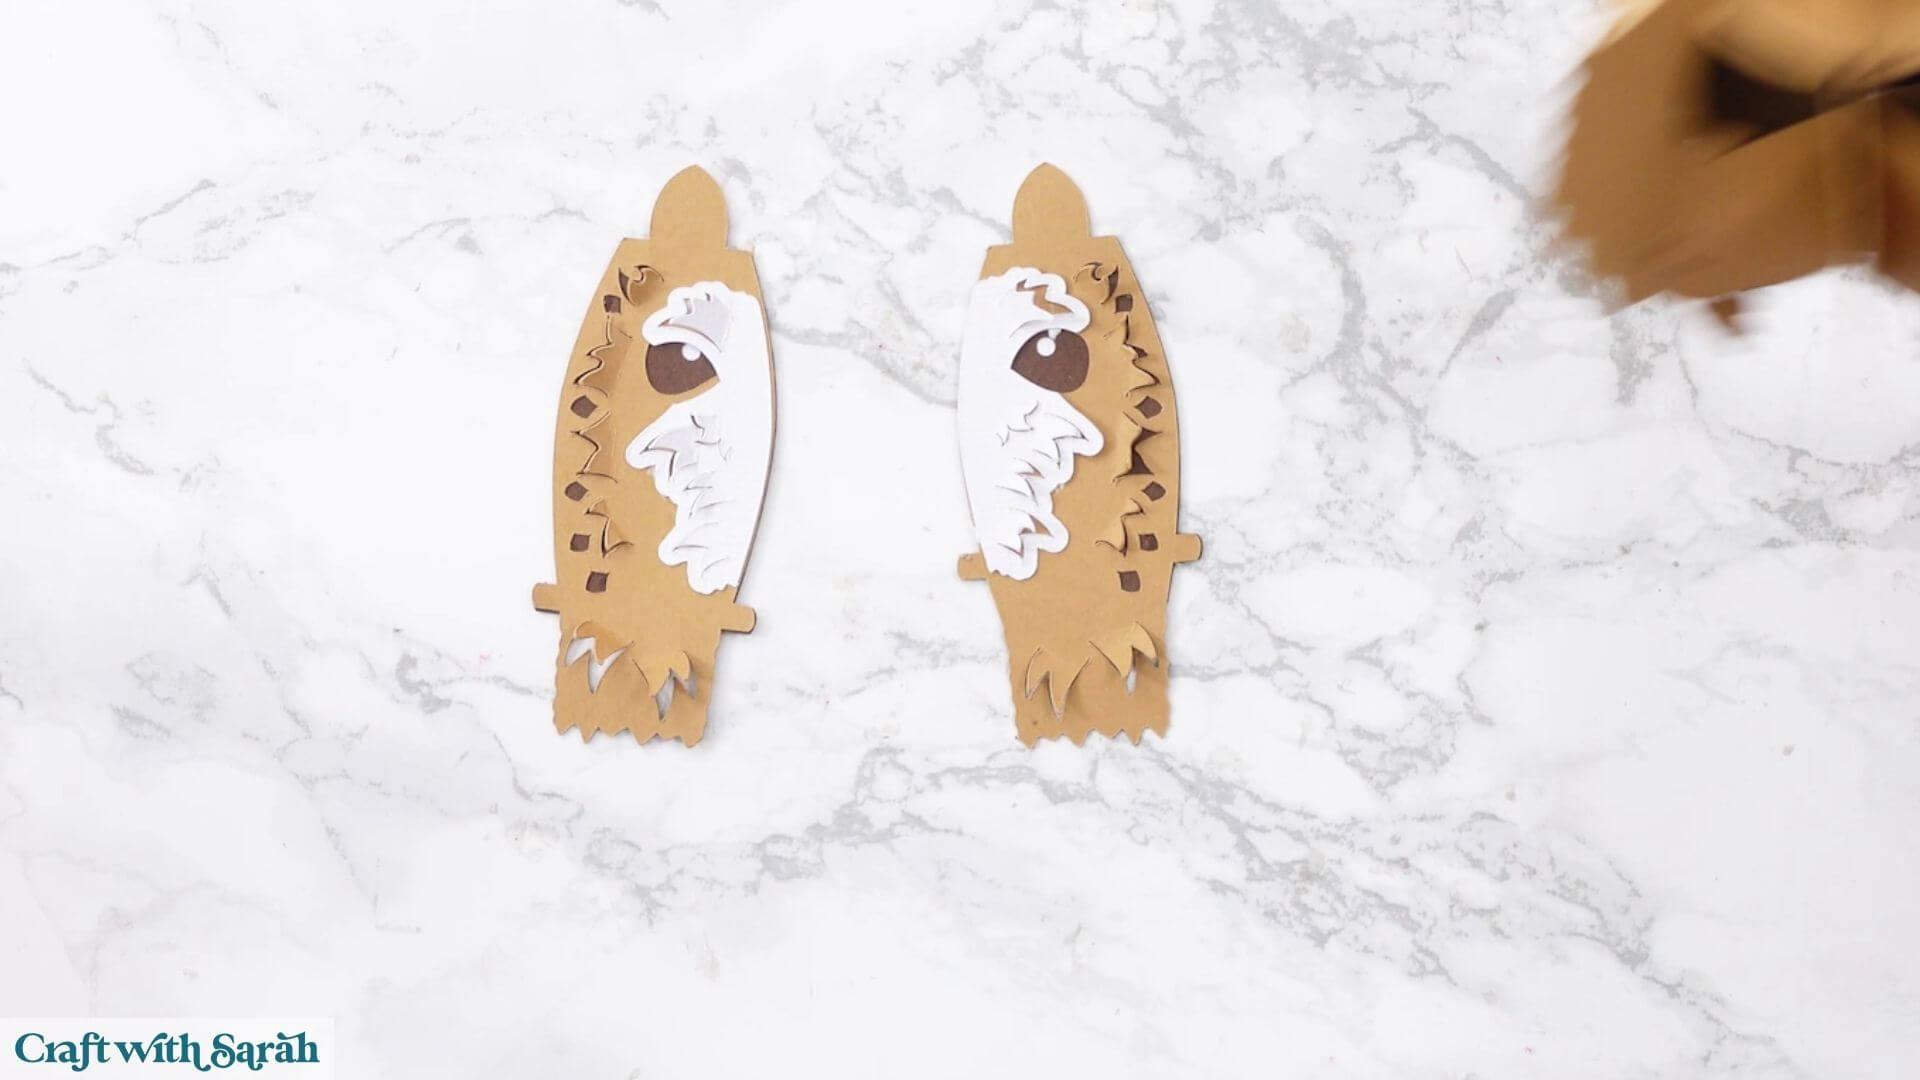
Glue them around the eye sections and then slot the completed eye pieces into the main structure.
The final piece may feel a little tight.
Once everything is in, check around the head for any tabs that have popped out. Carefully lift the neighbouring section and tuck those tabs underneath so that they’re hidden.
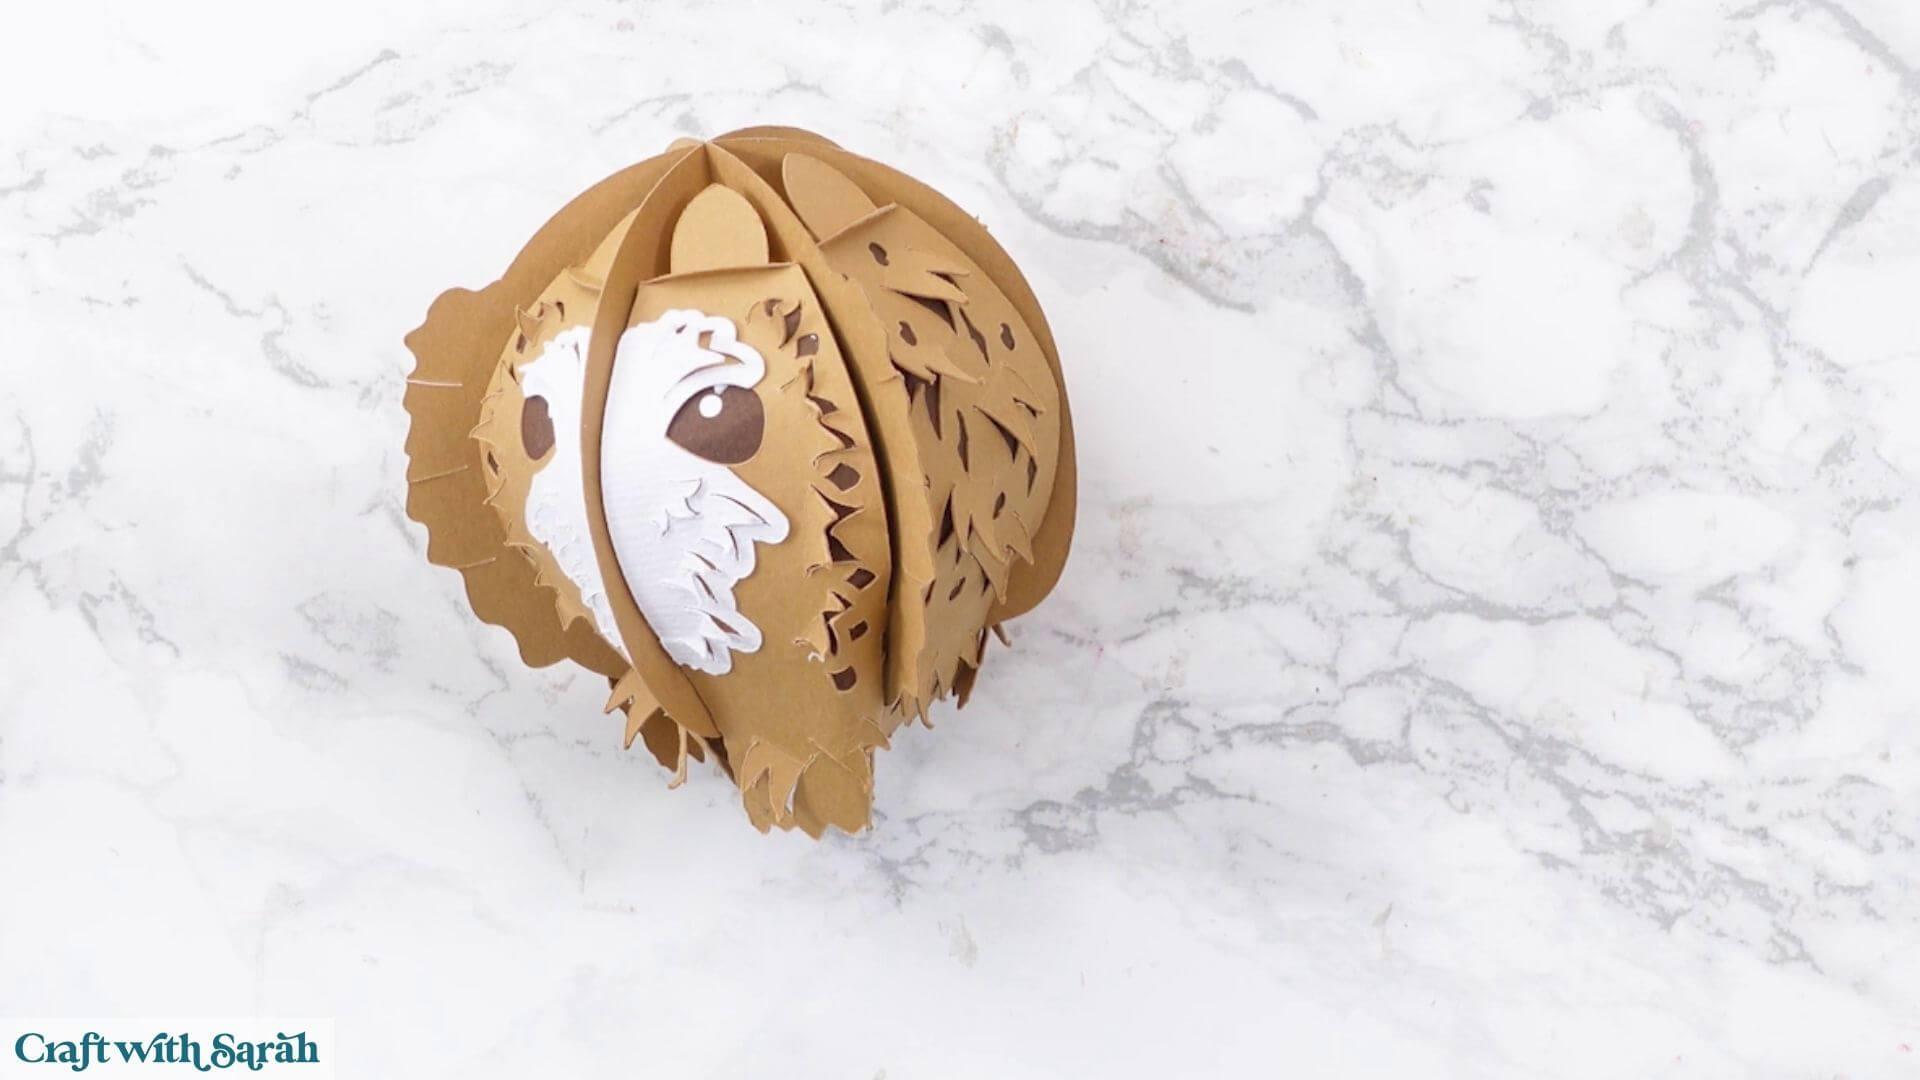
For the beak, you’ll need some small foam squares.
I used Dot & Dab 5 x 5 mm foam squares which are 2 mm thick. If yours are larger, you may need to cut them smaller with scissors.
Add two foam squares on top of each other to one side of the beak area, then another two stacked foam squares on the other side.
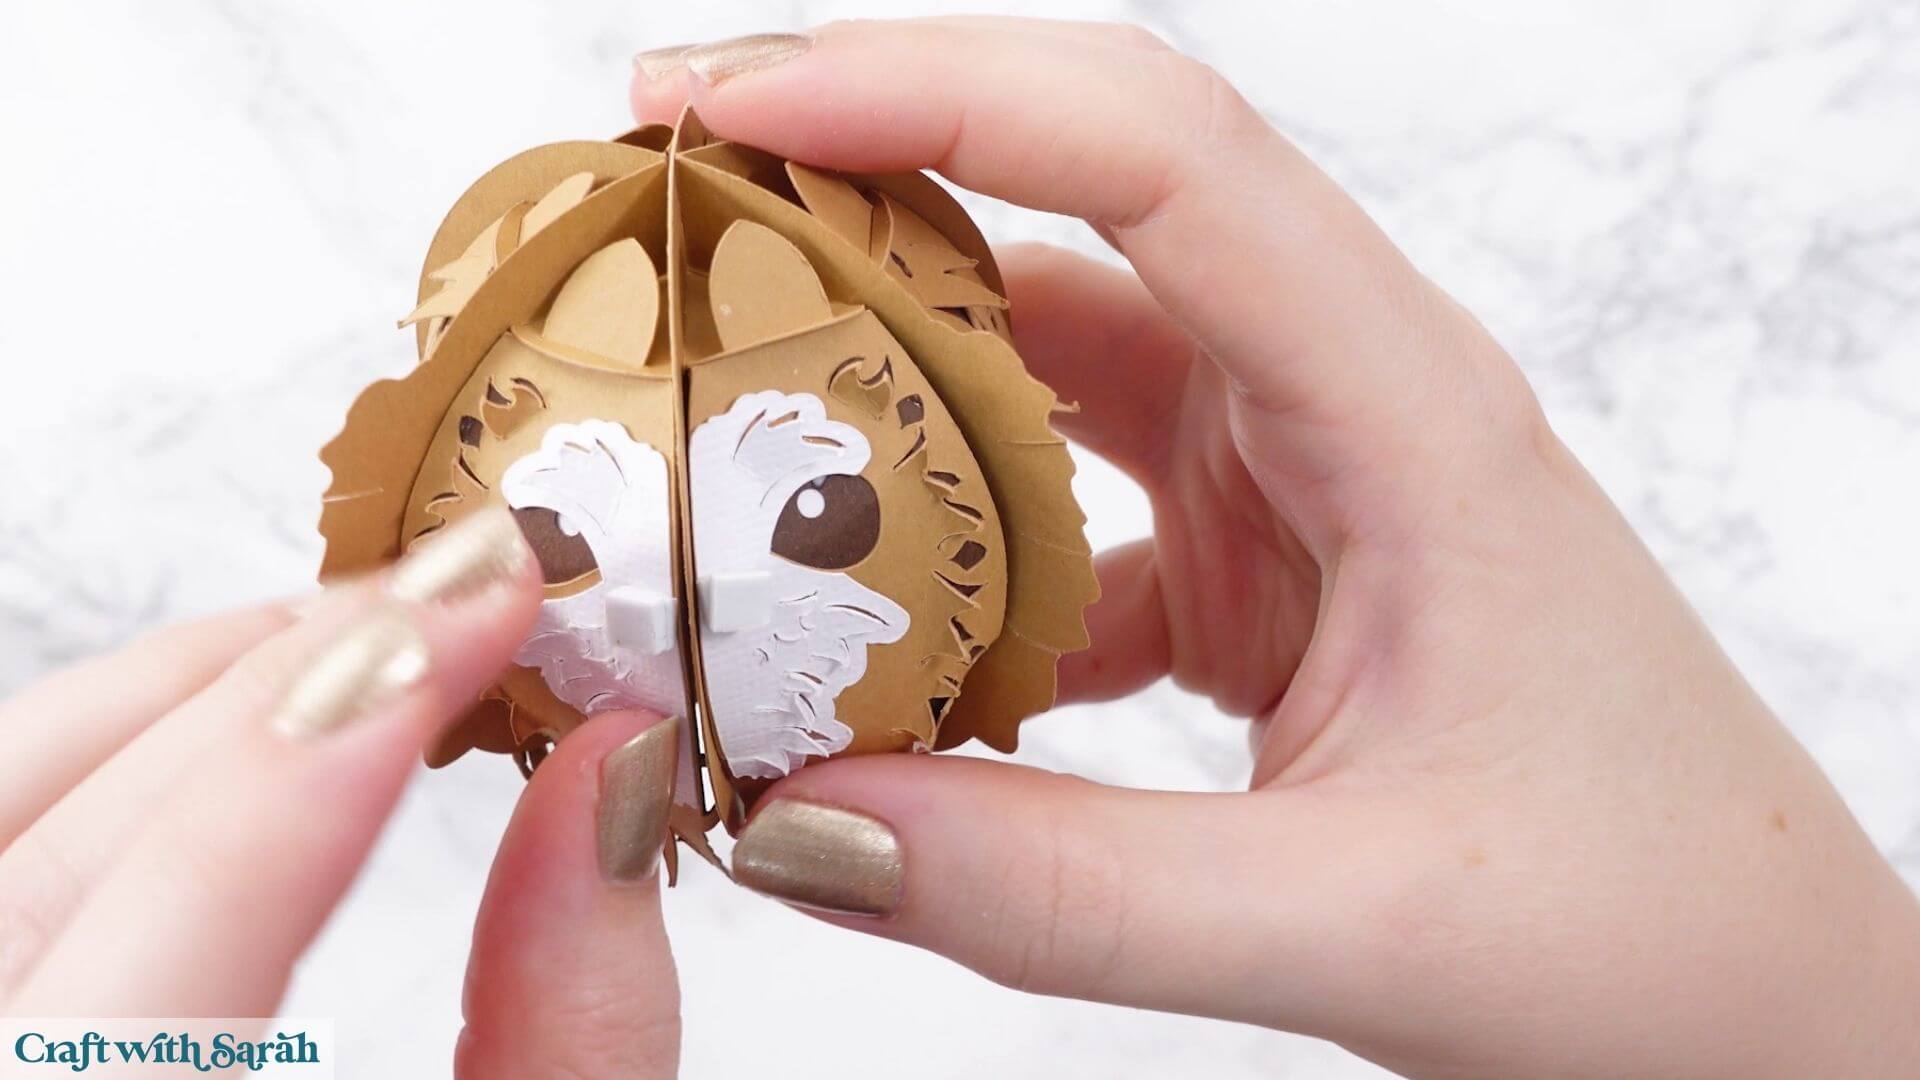
The aim is to bring them to roughly the same height as the structure piece running down the middle of the owl’s face.
Take the tiny white beak structure piece and fold the top away from you along the score line to create a mountain fold.
Fold the main beak section along its score line too.
Stick the white beak piece on top.
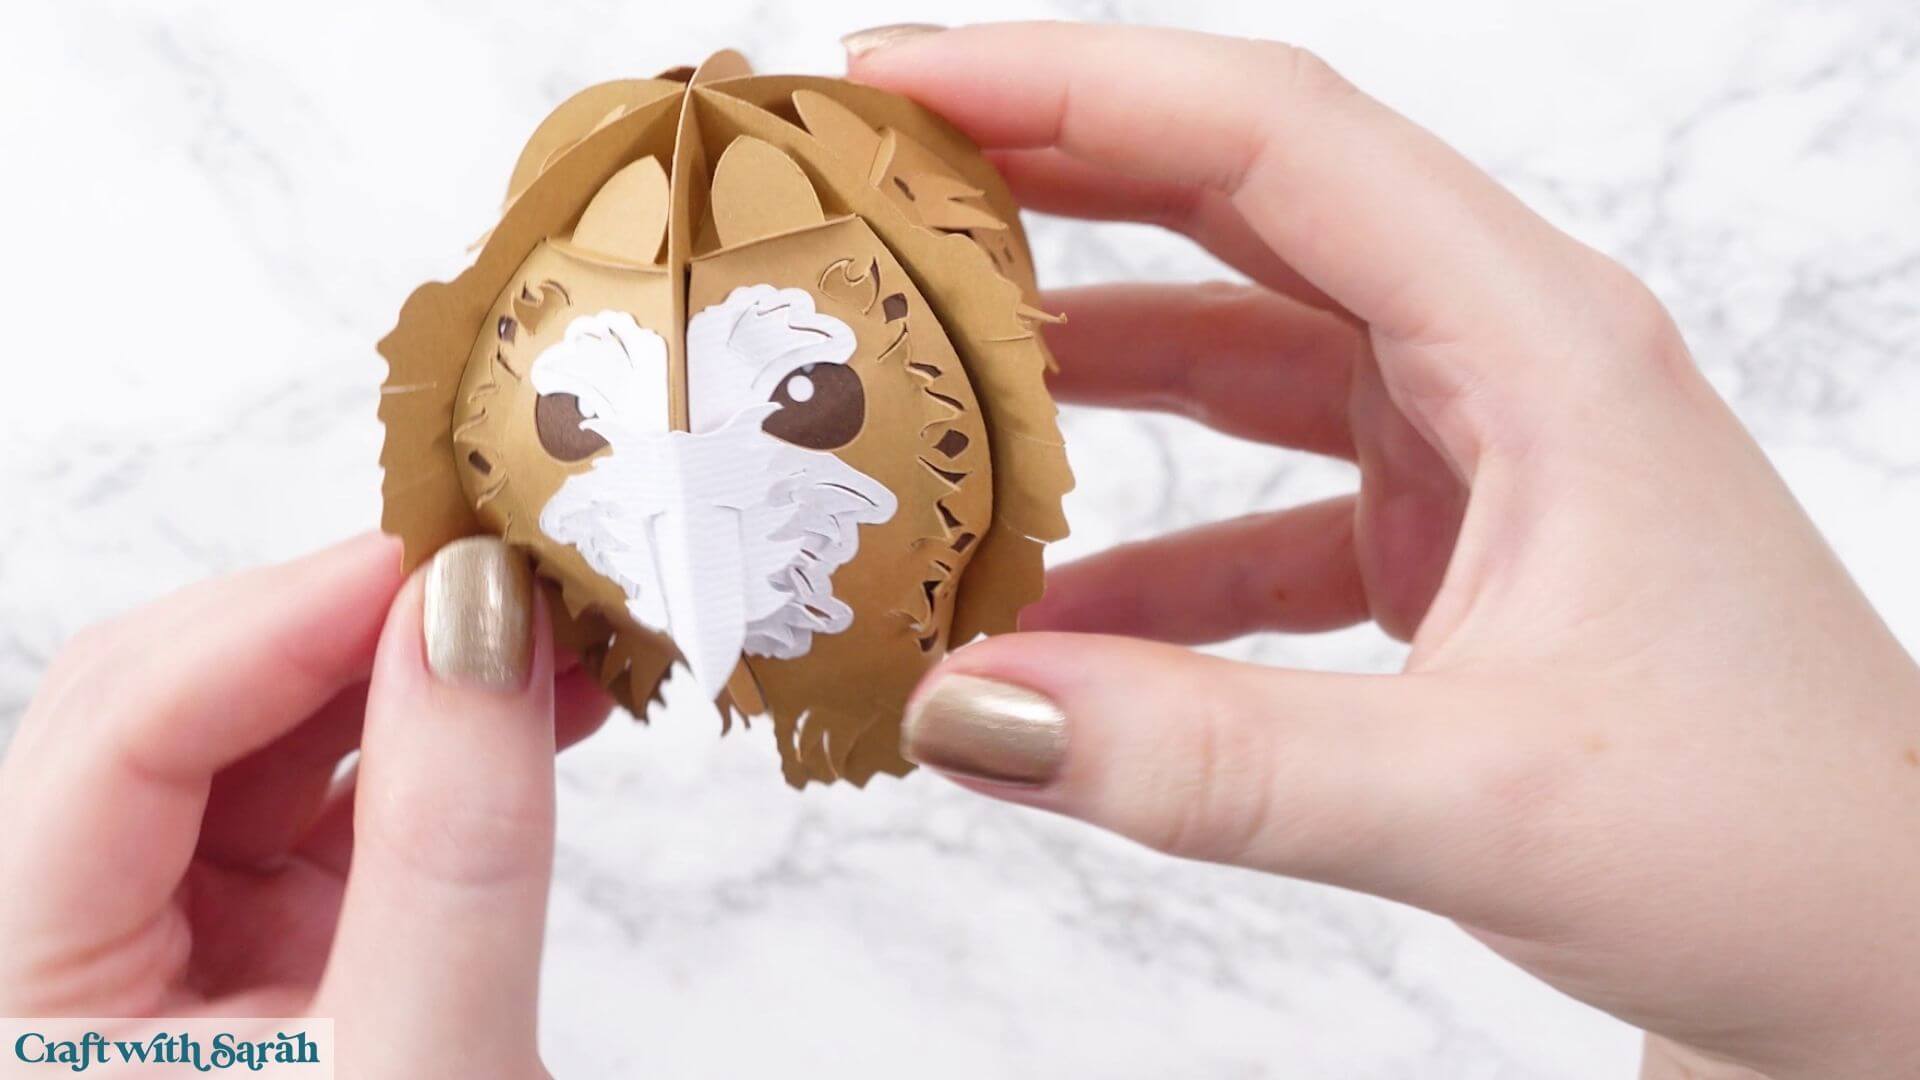
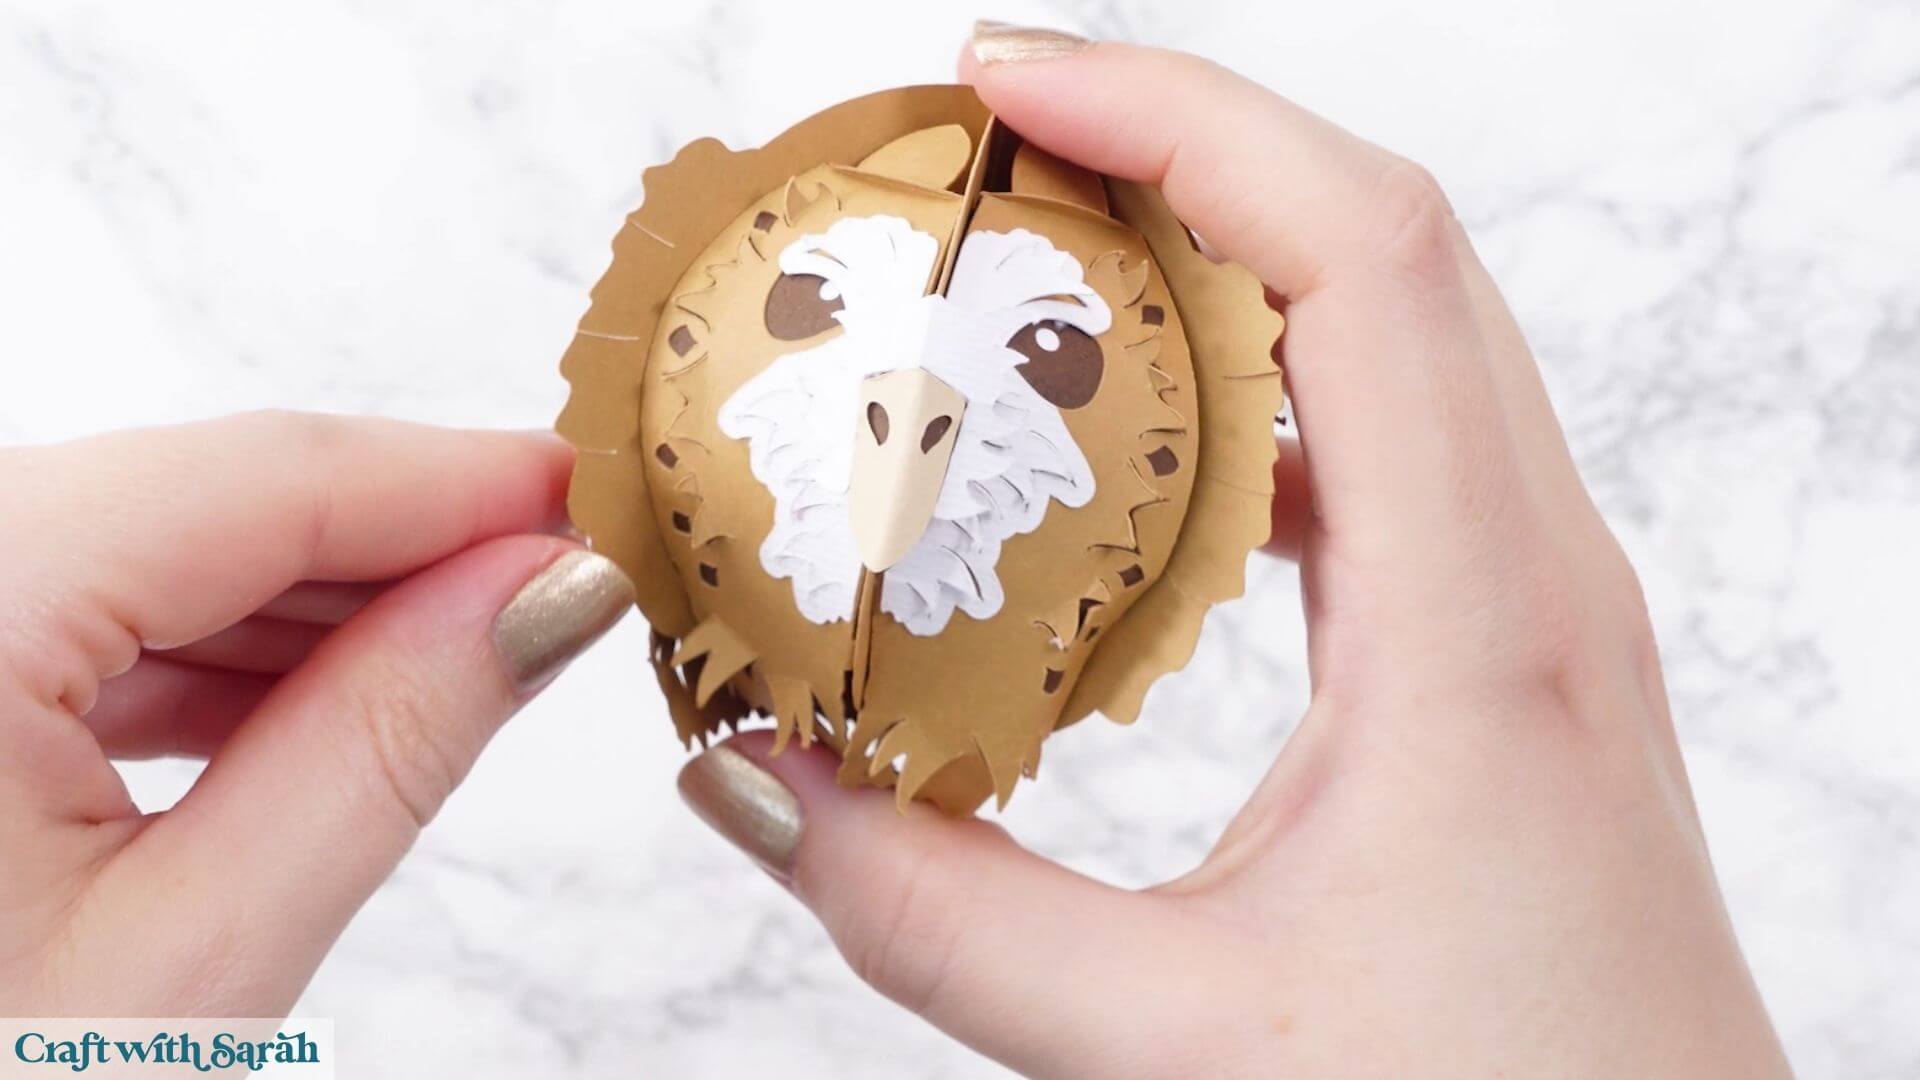
There are then two decorative beak pieces: a darker brown and a lighter colour.
Fold the darker piece in half along its score line and glue it over the beak structure.
Repeat with the lighter piece.
Your owl’s face is now complete.
Step 9) Make the owl’s tail
The tail consists of a dark brown base and two lighter brown decorative pieces.
There are two score lines near the top of the dark brown piece.
The first score line, closest to the feathers, needs a mountain fold. Fold it so that the point rises upwards like the top of a mountain.
The second score line is a valley fold. Fold this in the opposite direction so that it forms a V.
Together, these folds create a small concertina section which helps the tail hook onto the tree stump.
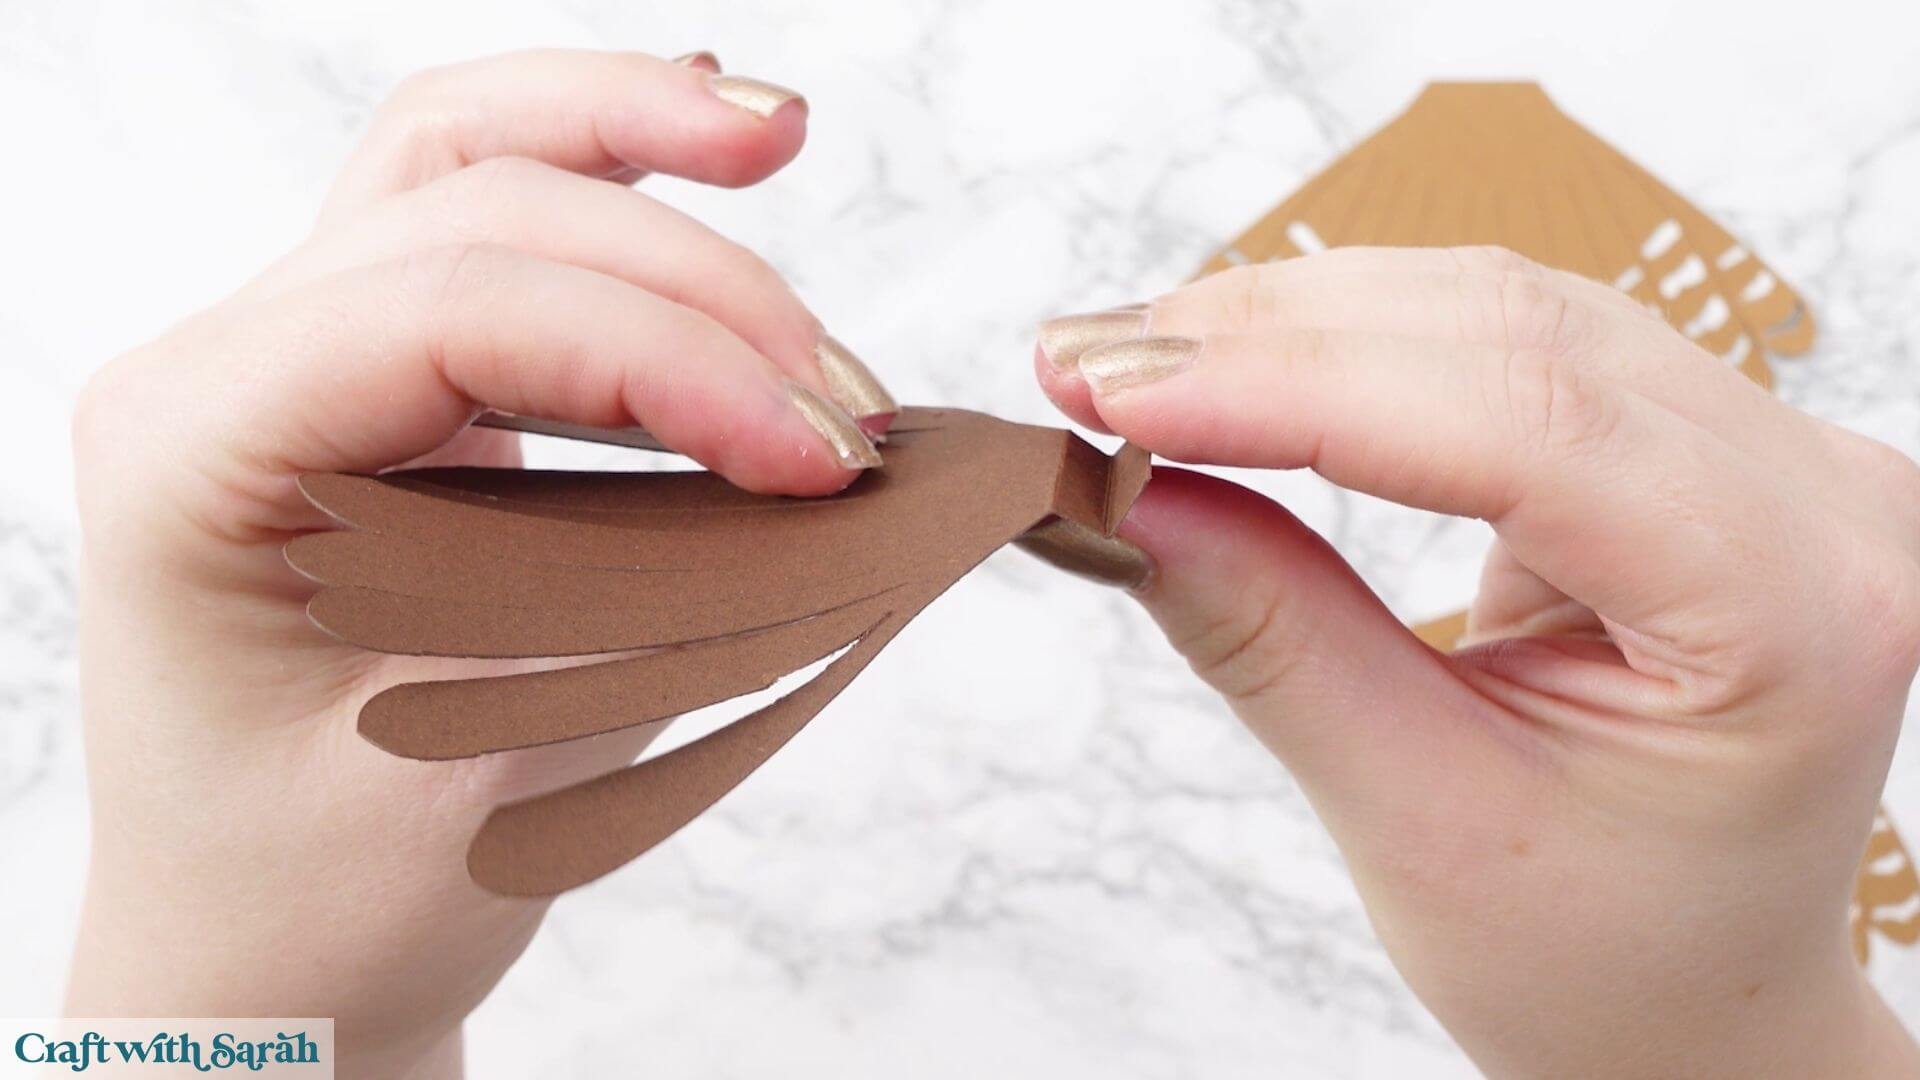
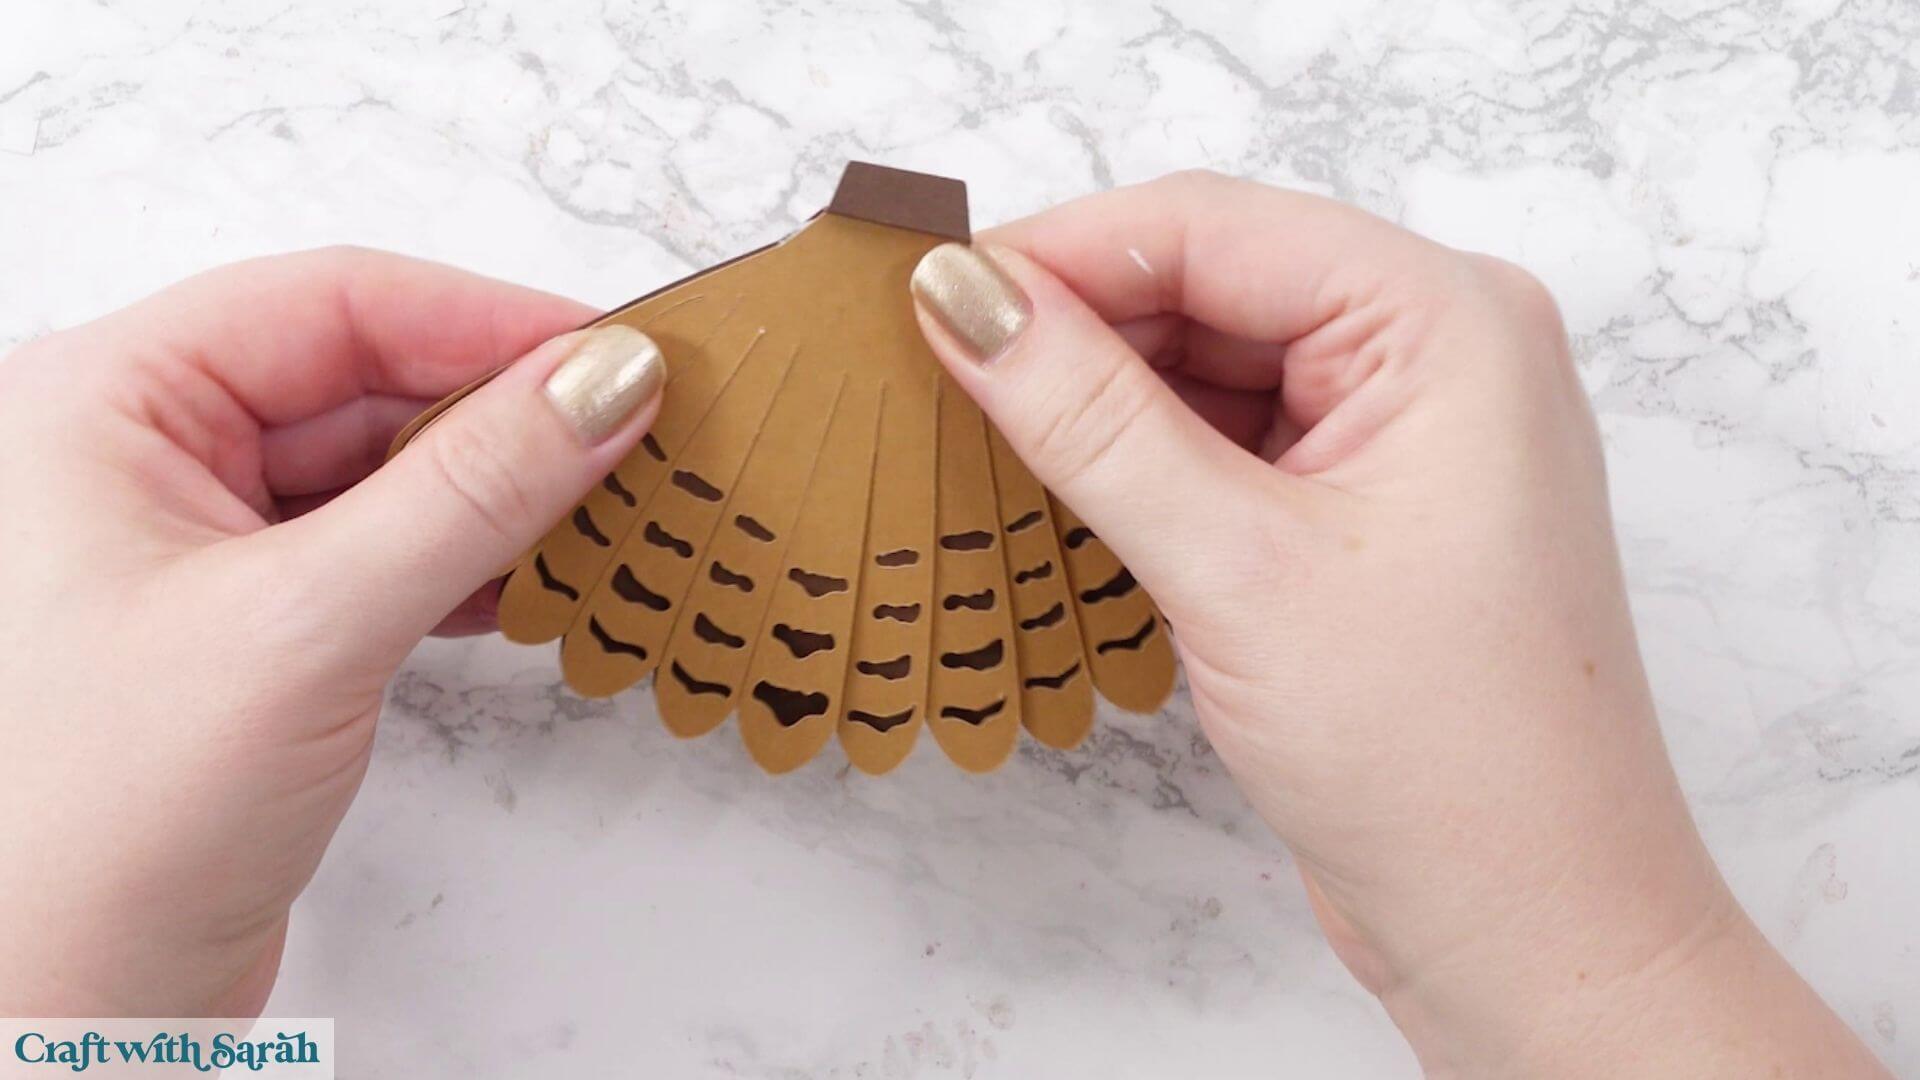
Glue one of the lighter brown decorative pieces to the front and the other to the back.
Don’t glue all the way down the feathers if you’d like to gently bend them outwards later for a little extra dimension.
Step 10) Put the pieces together
Now all the individual sections are complete, it’s time to put everything together!
Take the green base and the main tree stump.
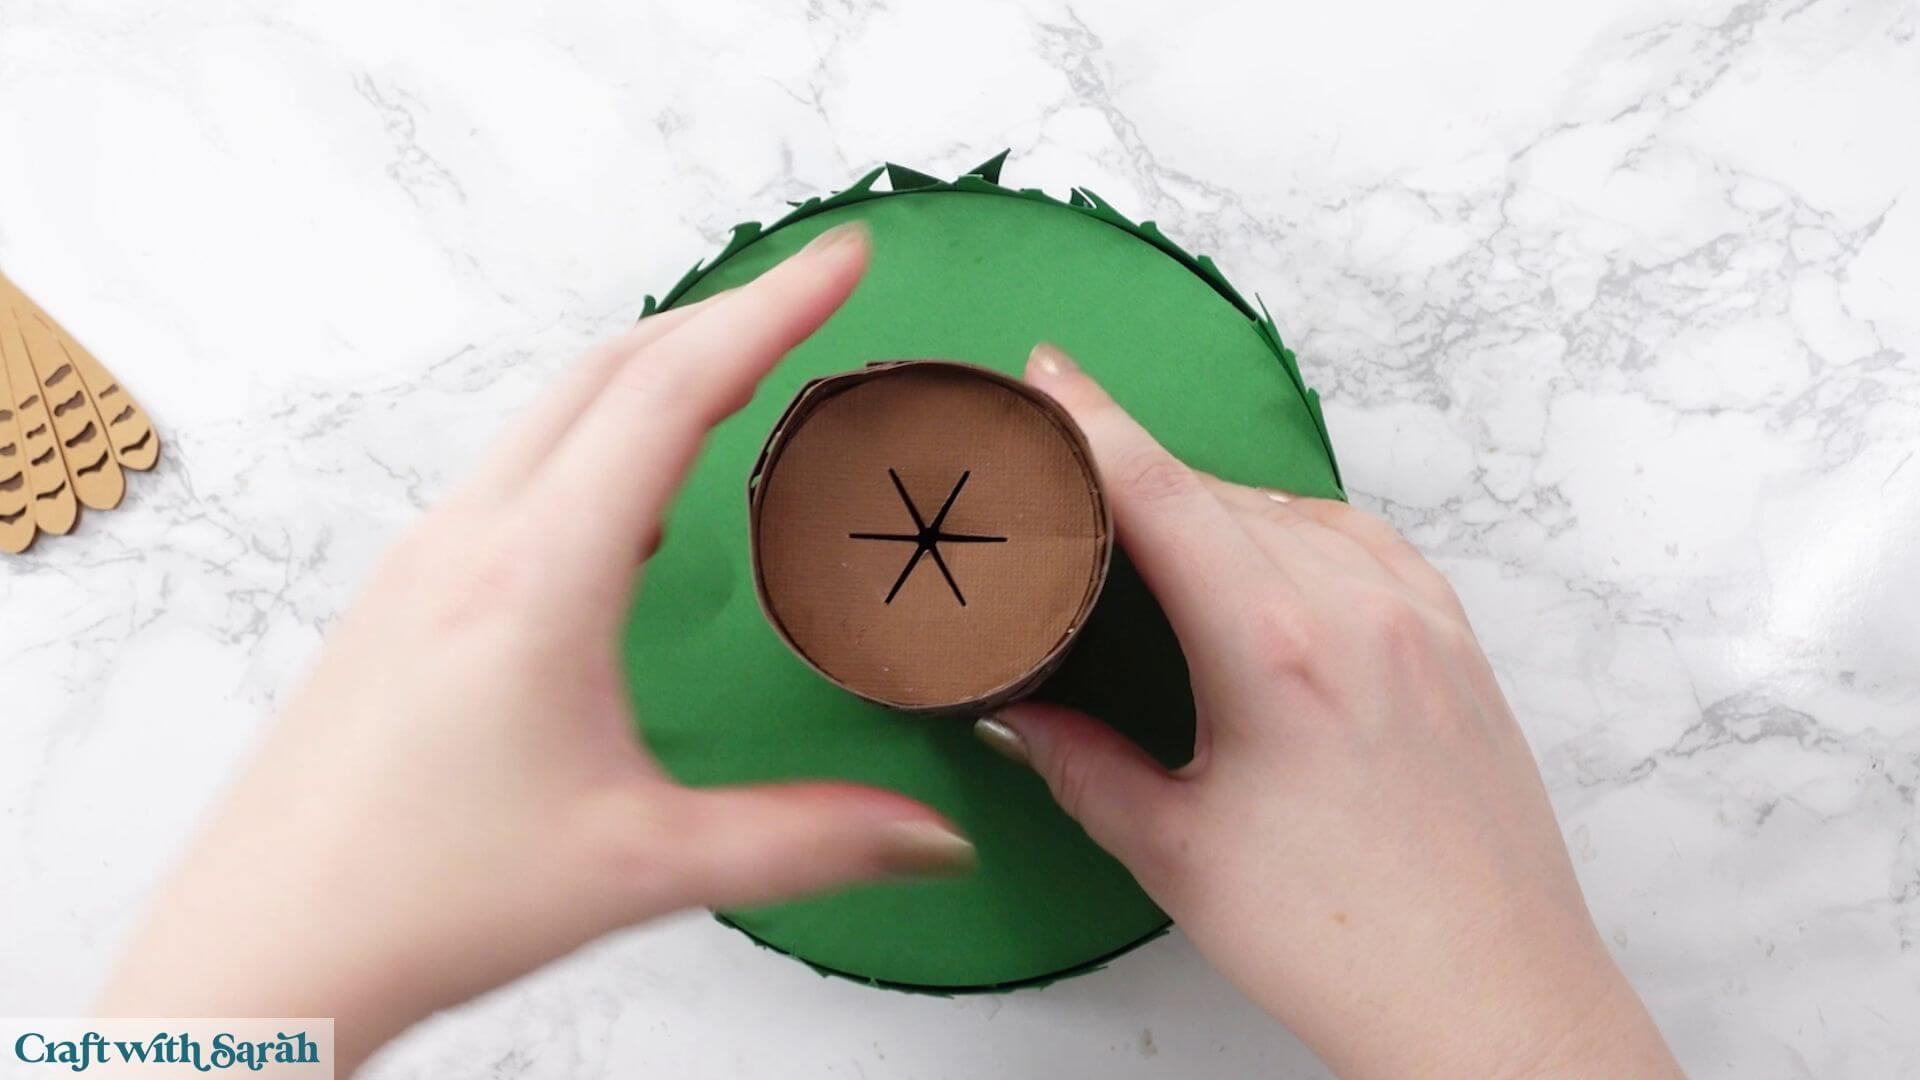
Push the tree stump through the circular opening in the top of the base.
It may be quite a tight fit, so squeeze and wiggle it gently until it passes through both of the circular supports inside.
Twisting the tree stump as you push can help.
Keep going until it reaches the bottom. The top of the green base should line up roughly with the point where the darker decorative layer begins on the tree stump.
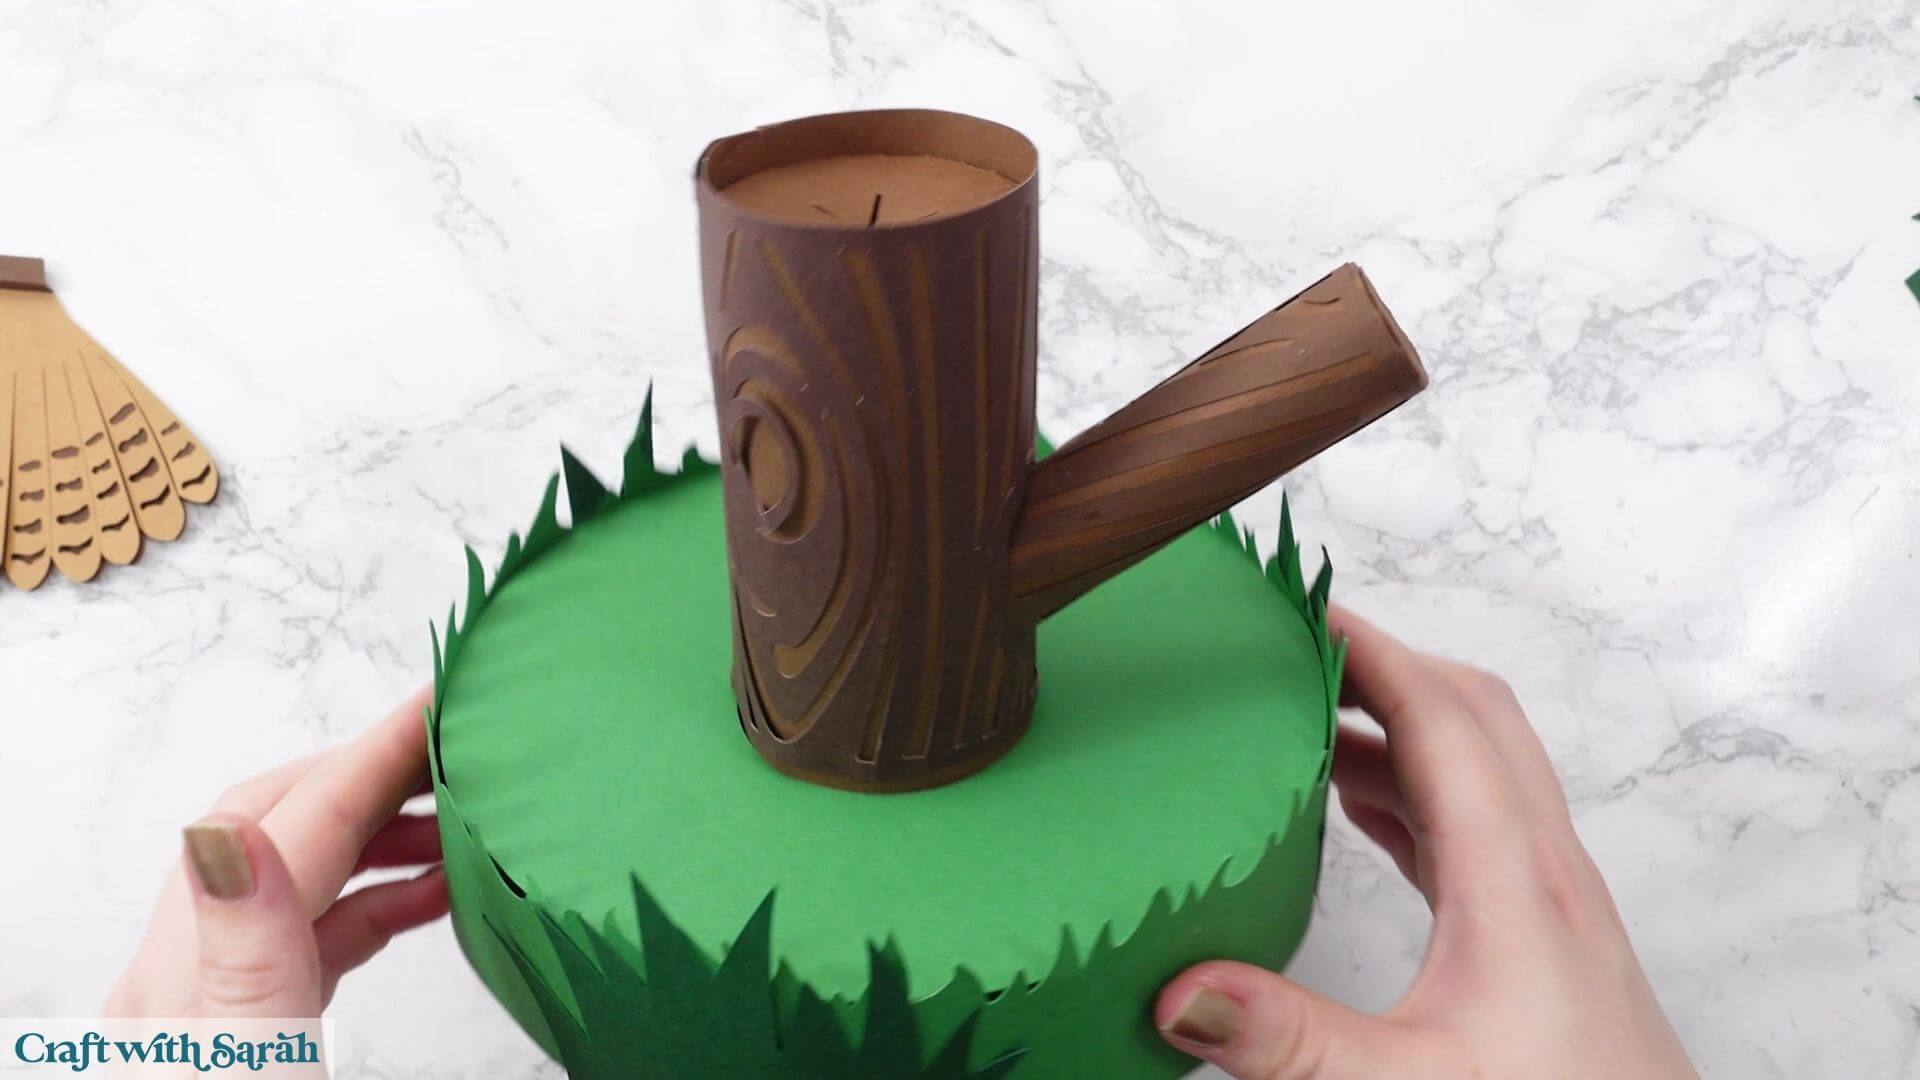
Next, slide the smaller tree branch into the hole and push it all the way down.
Decide which direction you want to be the front of the finished centrepiece before moving on.
Take the owl’s body and position it so that the front is facing in your chosen direction.
The star-shaped tabs on the bottom of the owl slot into the star-shaped opening in the top of the tree stump.
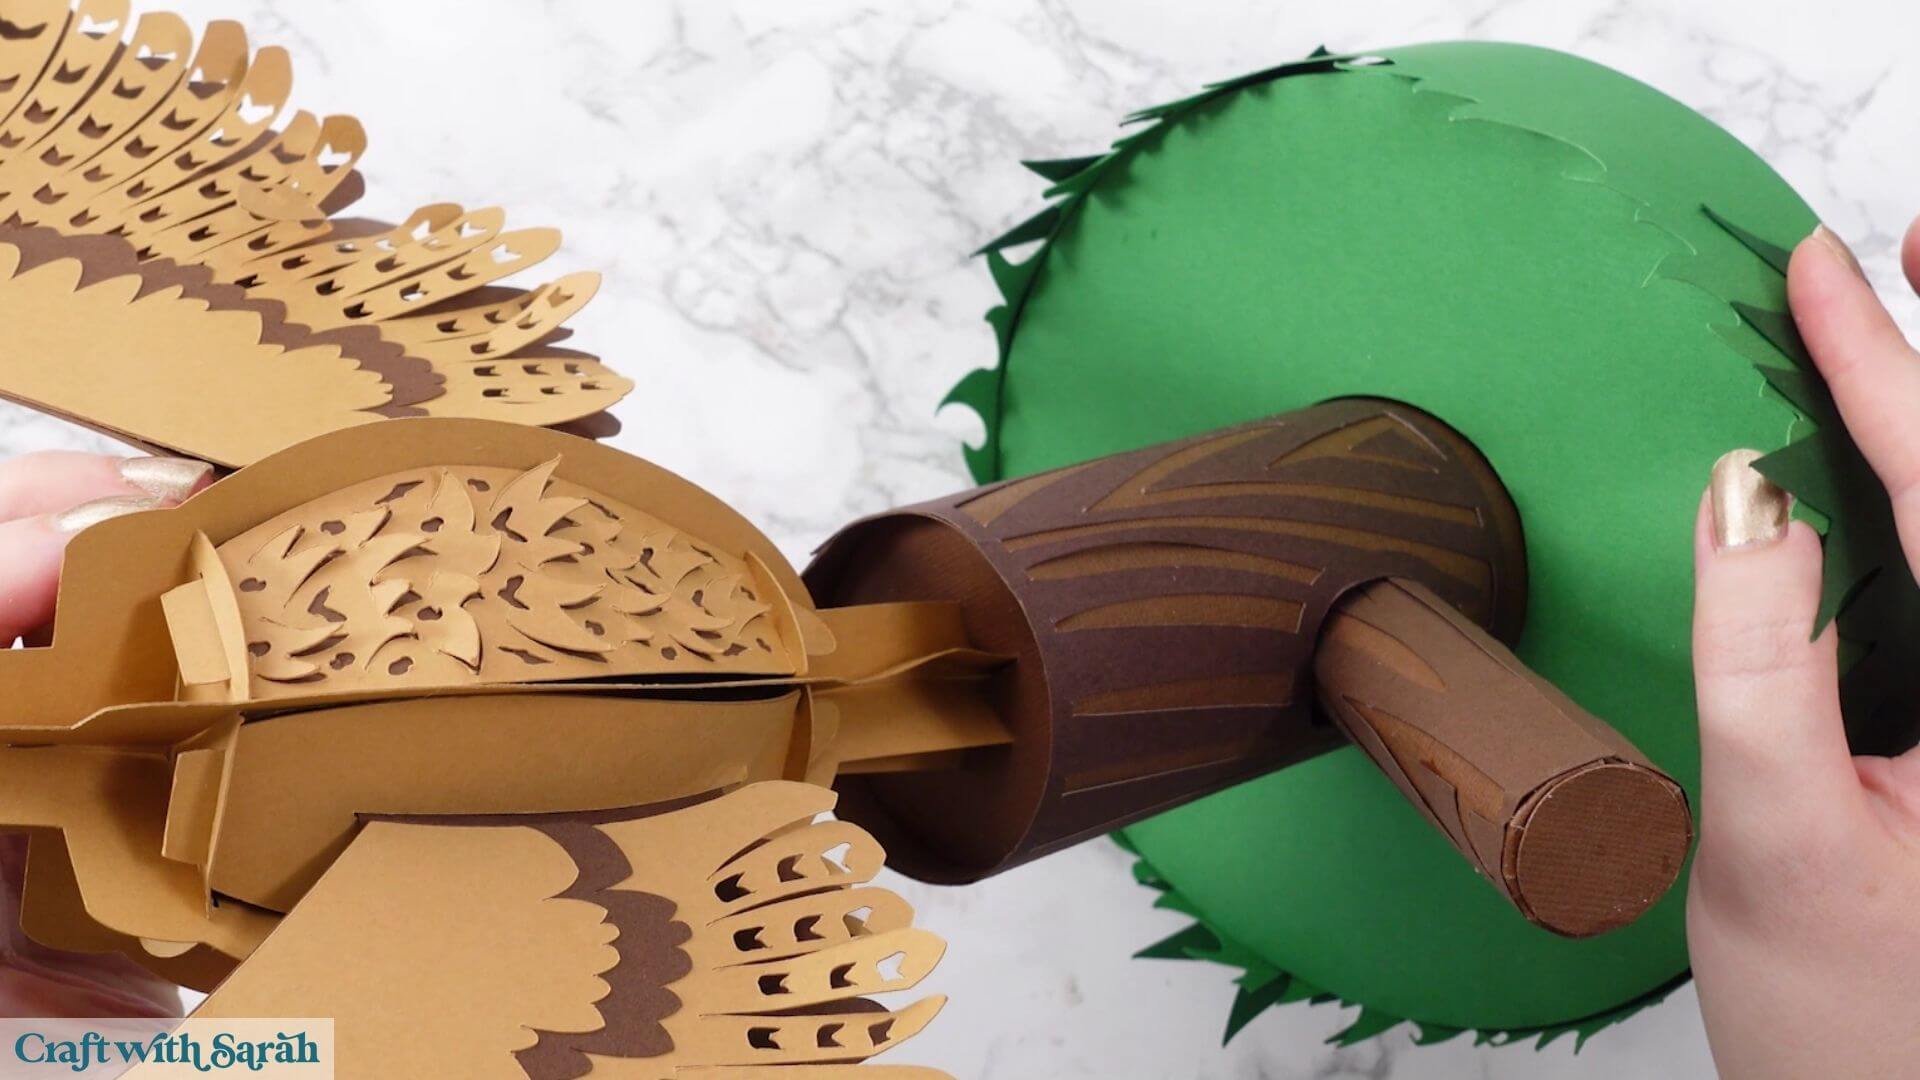
Carefully feed each section through the opening and push the owl down until it sits completely flush with the top of the tree.
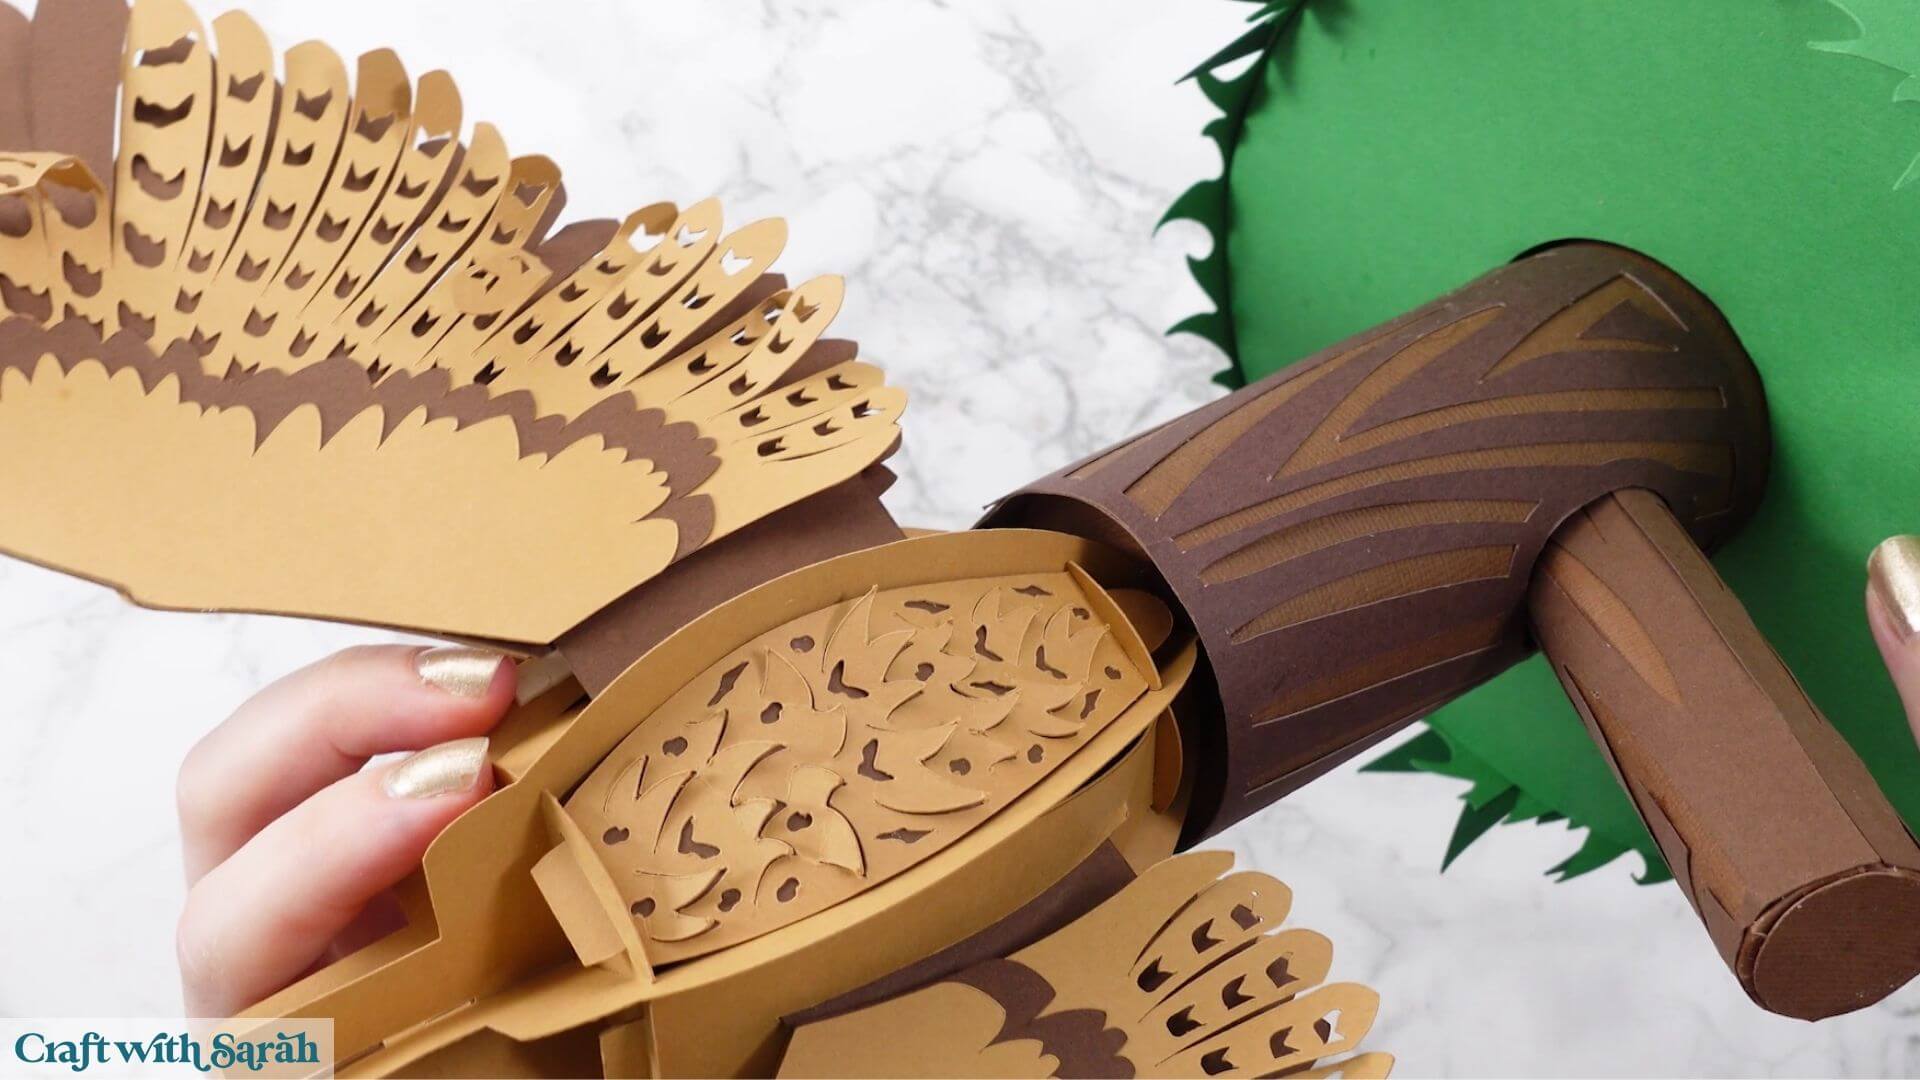
Before attaching the head, check the little tabs underneath and push them out slightly if needed so that they don’t get in the way.
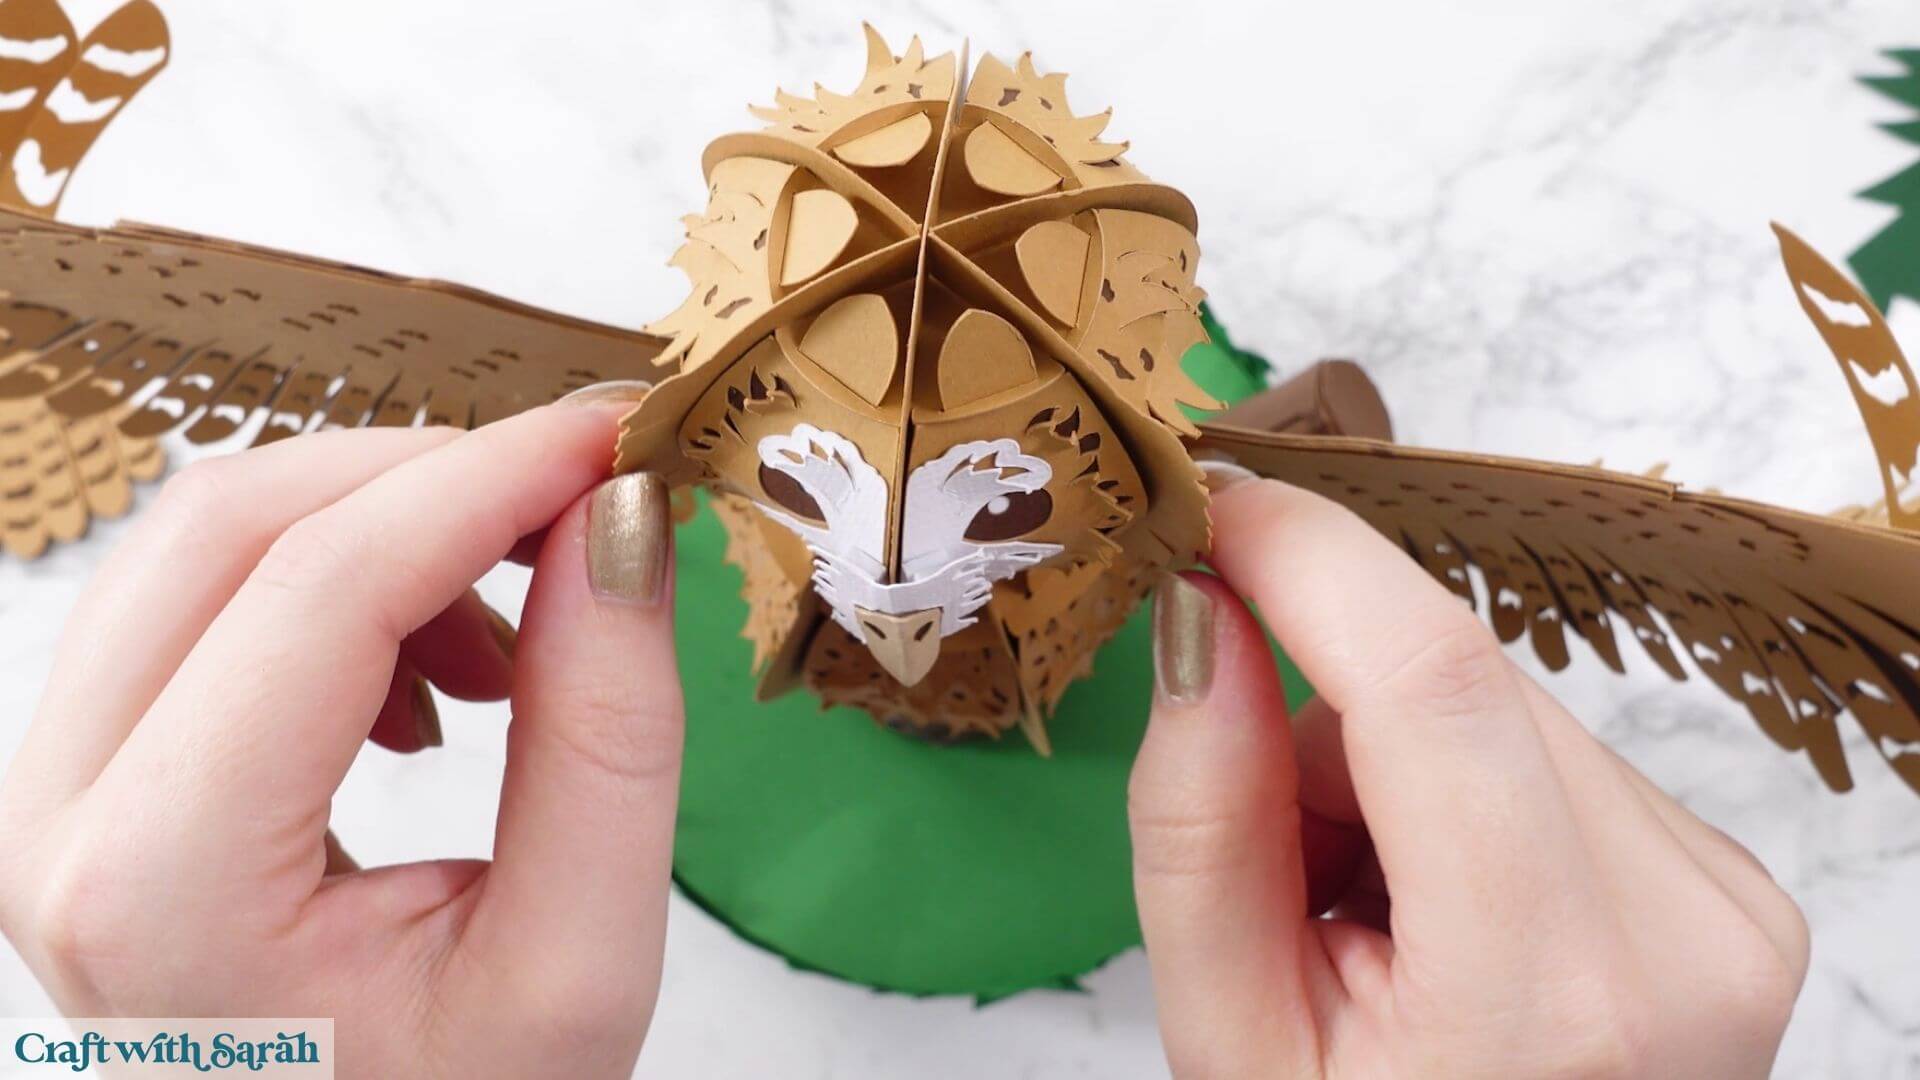
Line the head up in the correct direction and slide it straight onto the top of the body.
You may need to wiggle it gently, but it should sit neatly in place fairly easily.
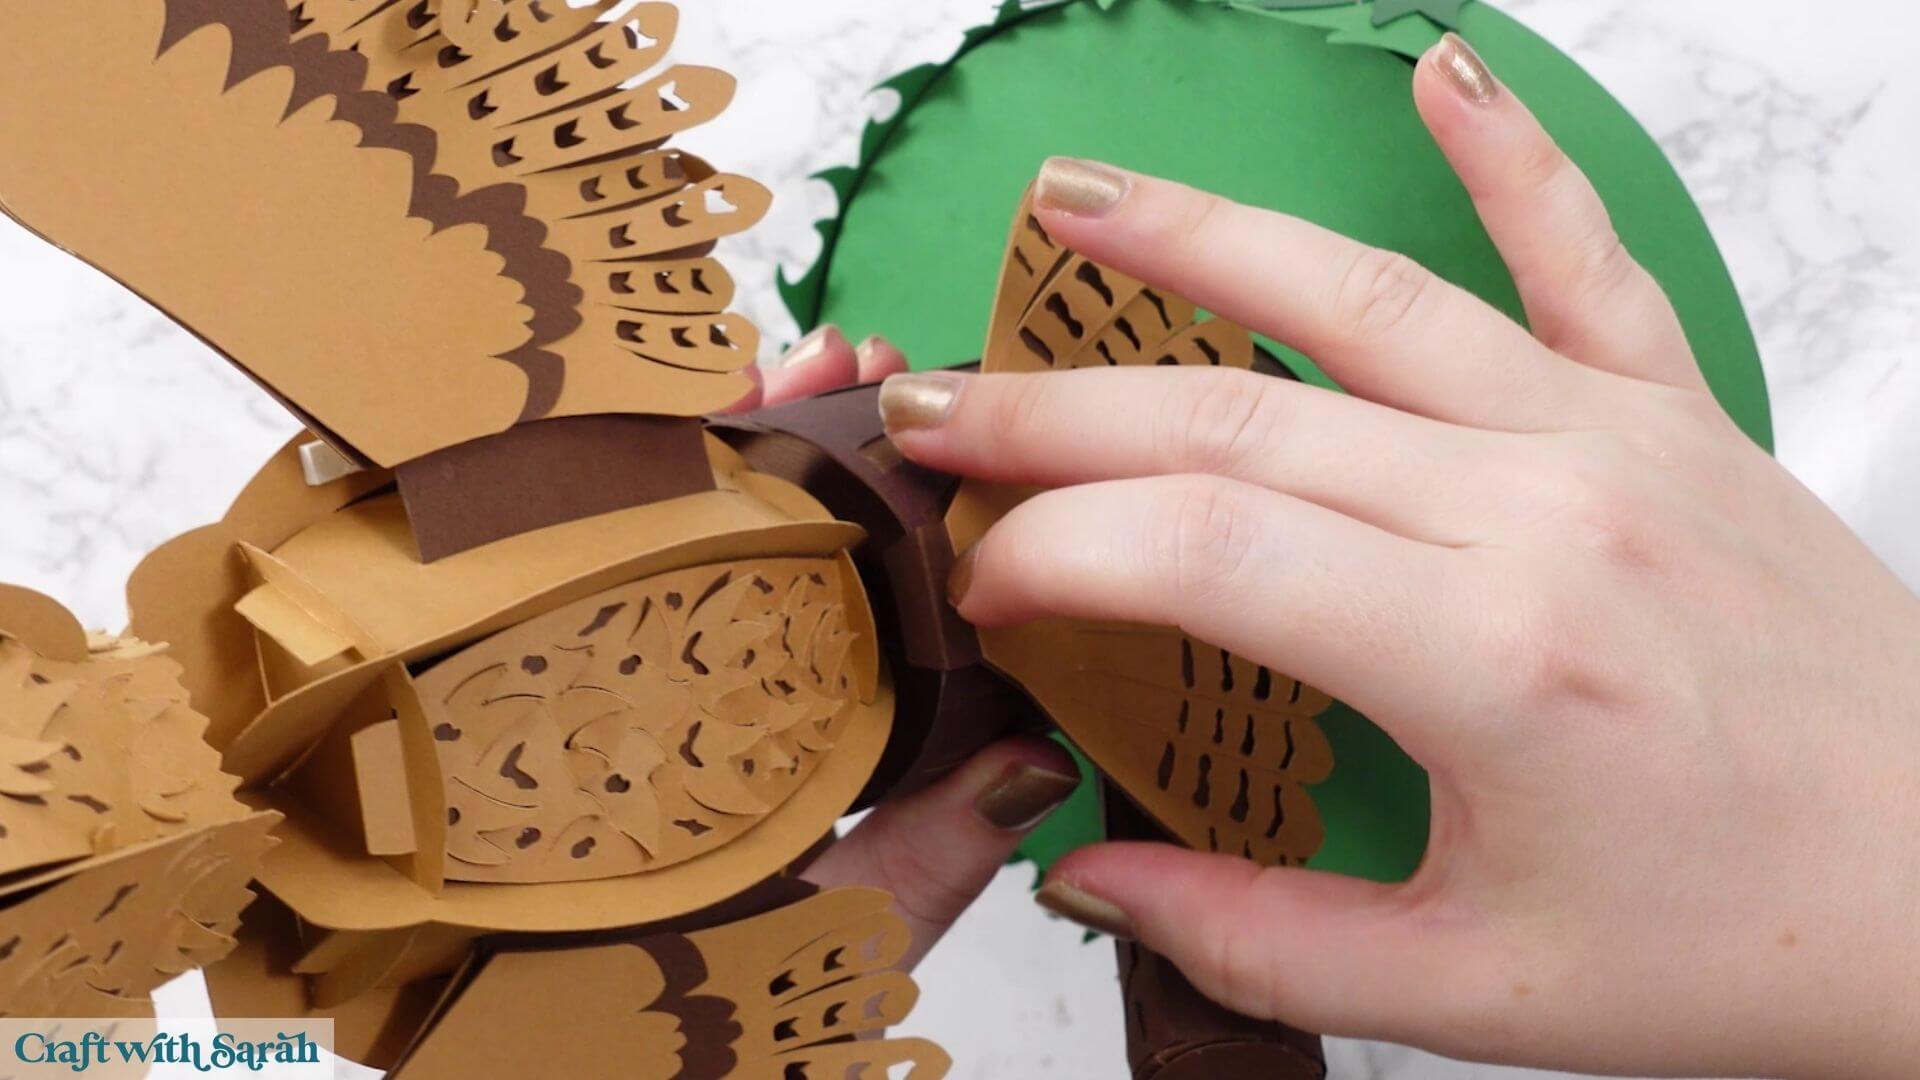
The tail hooks over the bottom of the tree stump using the folded section that we made earlier.
If you’ve used particularly lightweight cardstock, you may find that the tail doesn’t hold itself securely enough. If that happens, add a little glue to the tab to secure it over the edge of the tree stump.
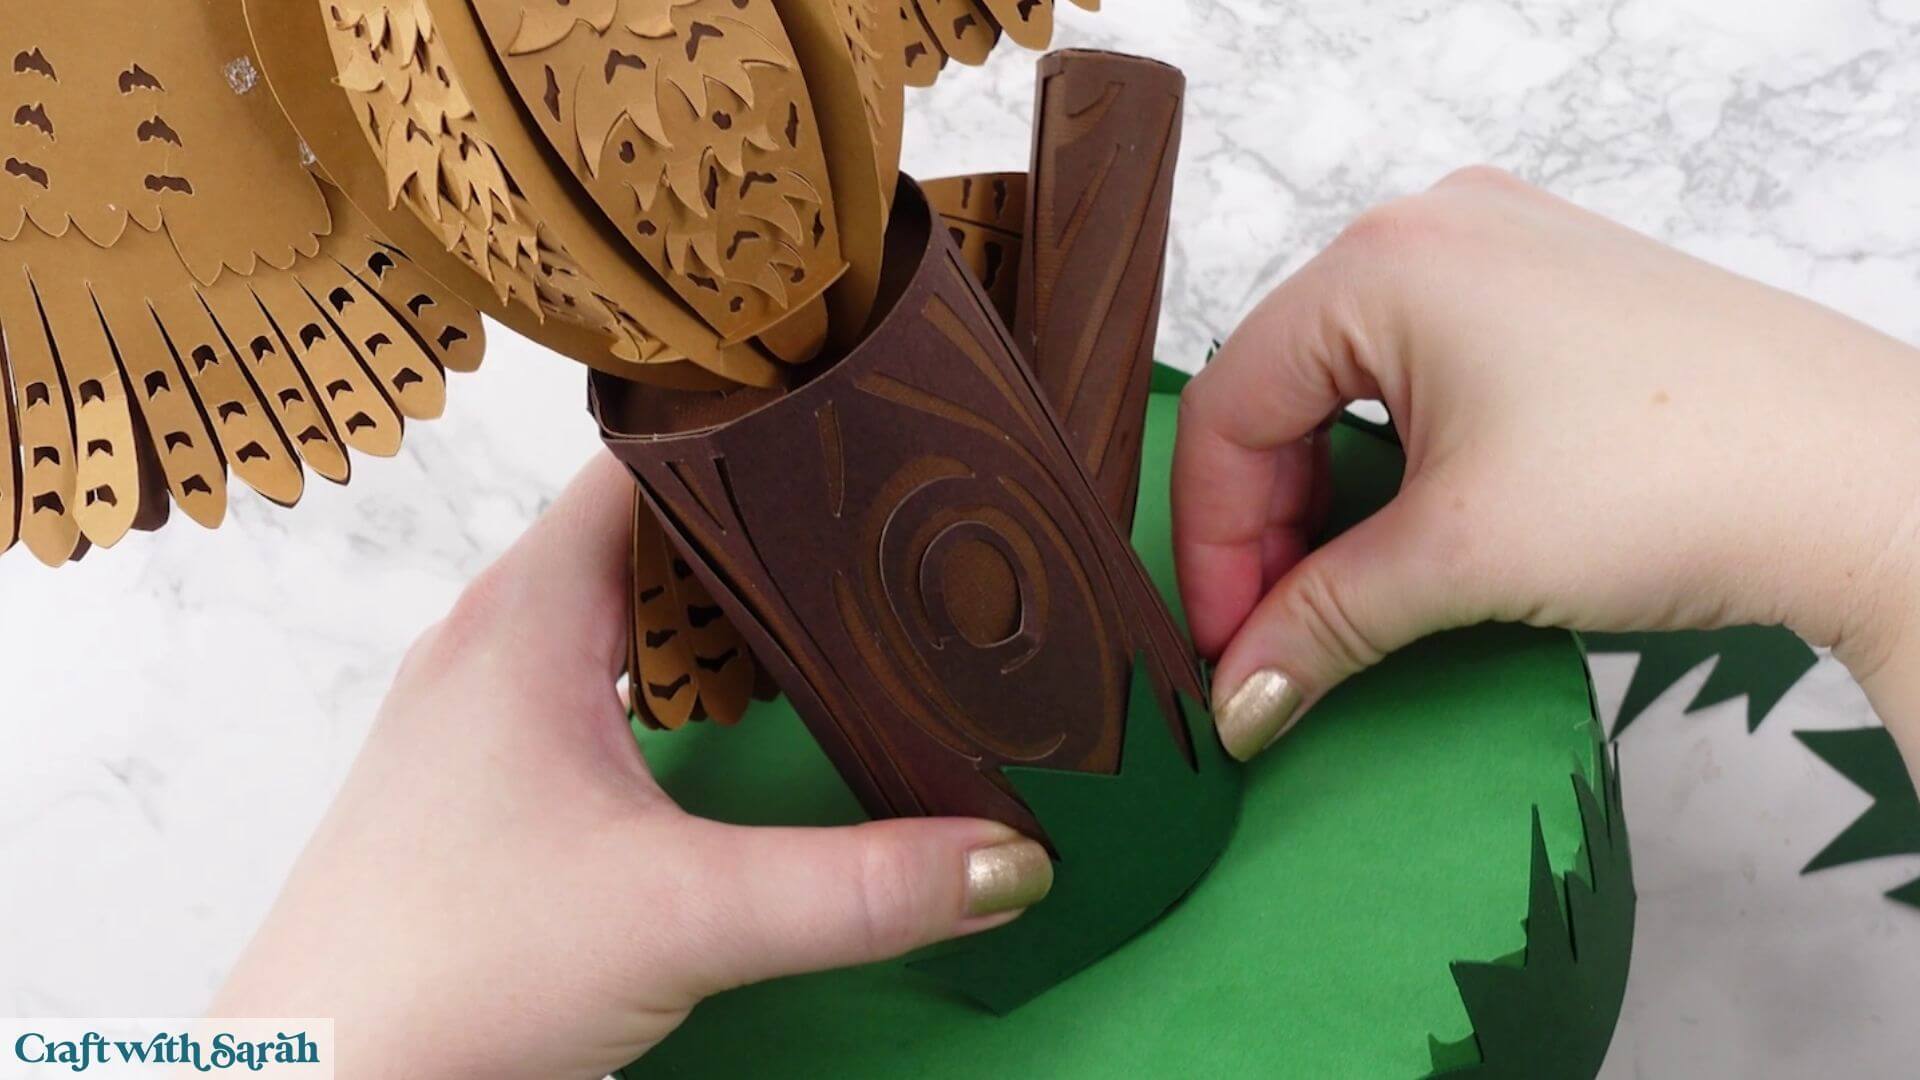
You can also add the remaining small green grass pieces around the bottom of the tree stump to disguise any visible joins.
These are completely optional, so arrange them wherever you think they look best.
Step 11) Add extra support to the wings if needed
Your 3D owl centrepiece should now be standing proudly with his wings outstretched.
The additional layers that we added to the middle wing support should be enough to keep the wings in position.
However, if you’re using very lightweight cardstock or find that the wings gradually start moving backwards, you can give them a little extra support with foam squares.
Add a thin line of foam squares around the body structure behind the wing.
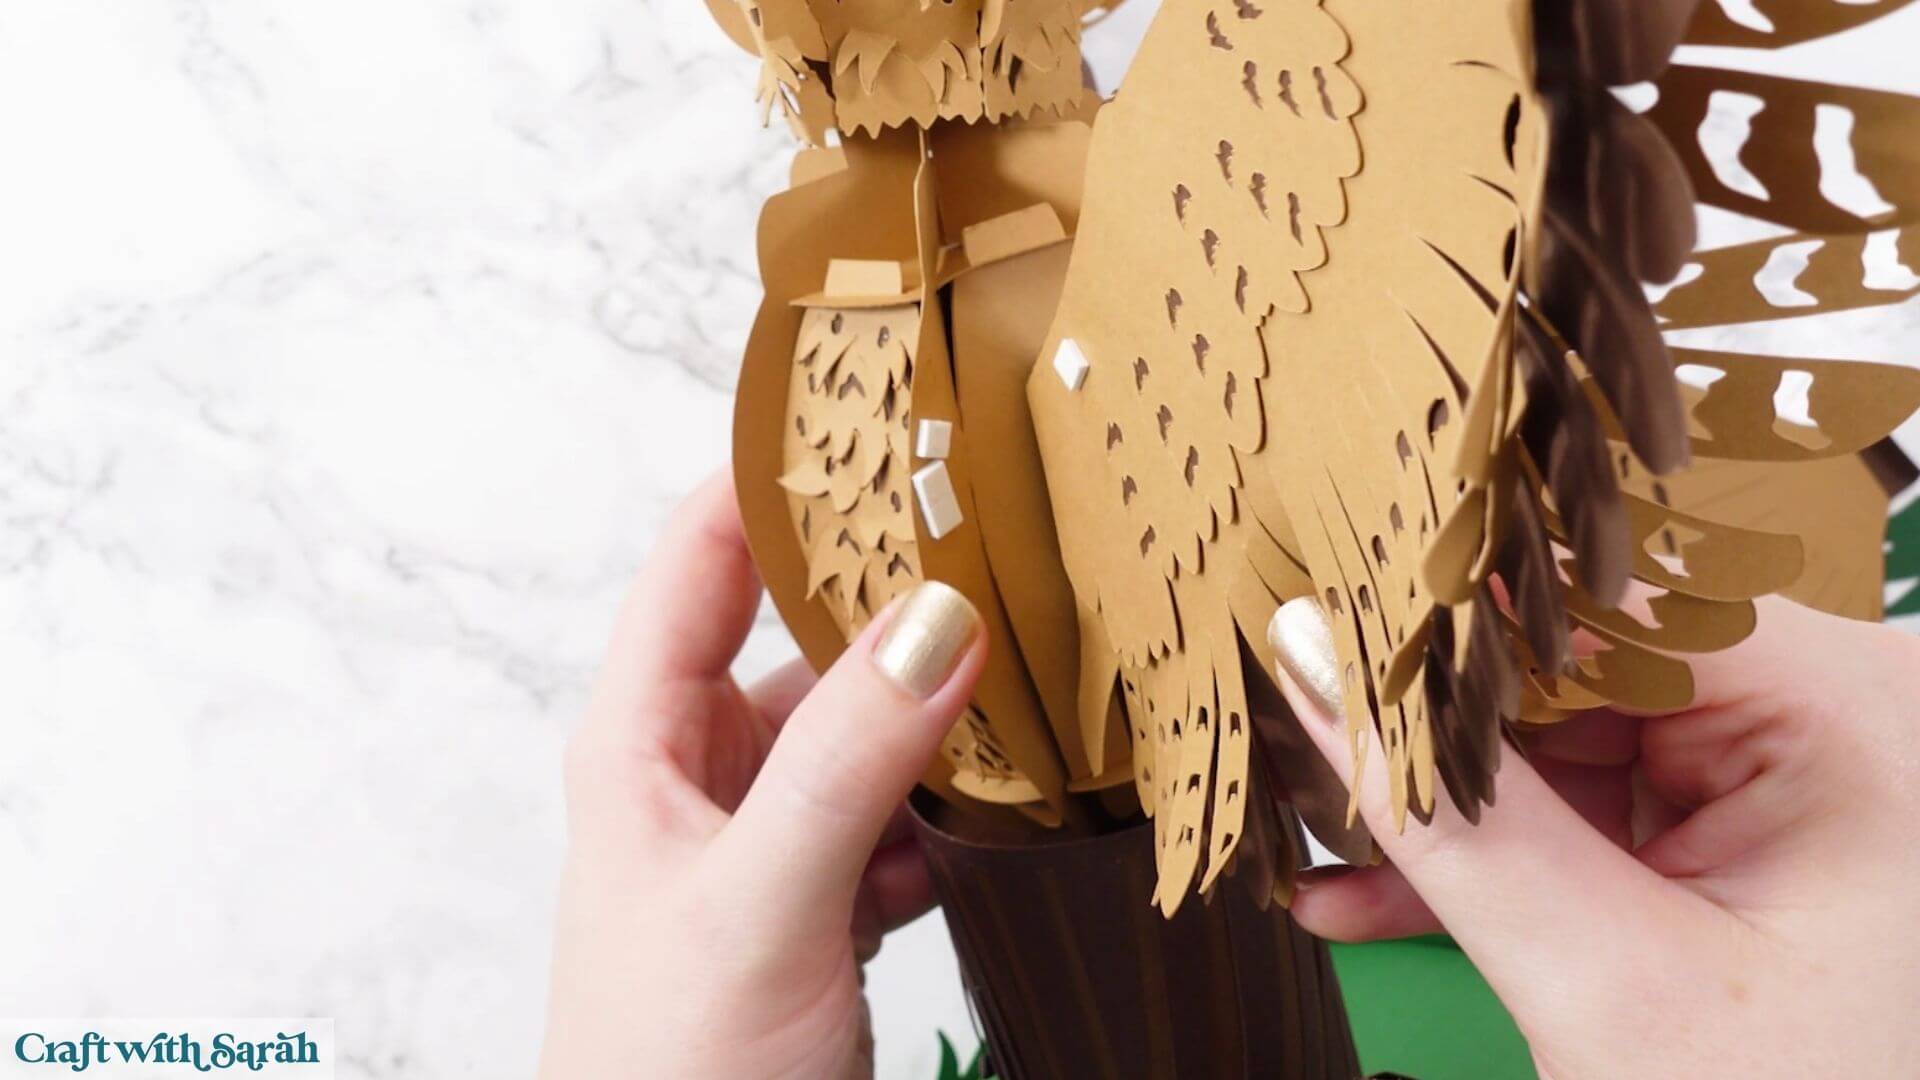
Gently pull the wing forwards and press it against the foam squares so that they’re holding it in the correct position.
If the foam squares aren’t sticking securely enough, add a small dab of glue on top before pressing the wing into place.
This makes the wings very secure, but bear in mind that it will make it harder to remove them from the body later.
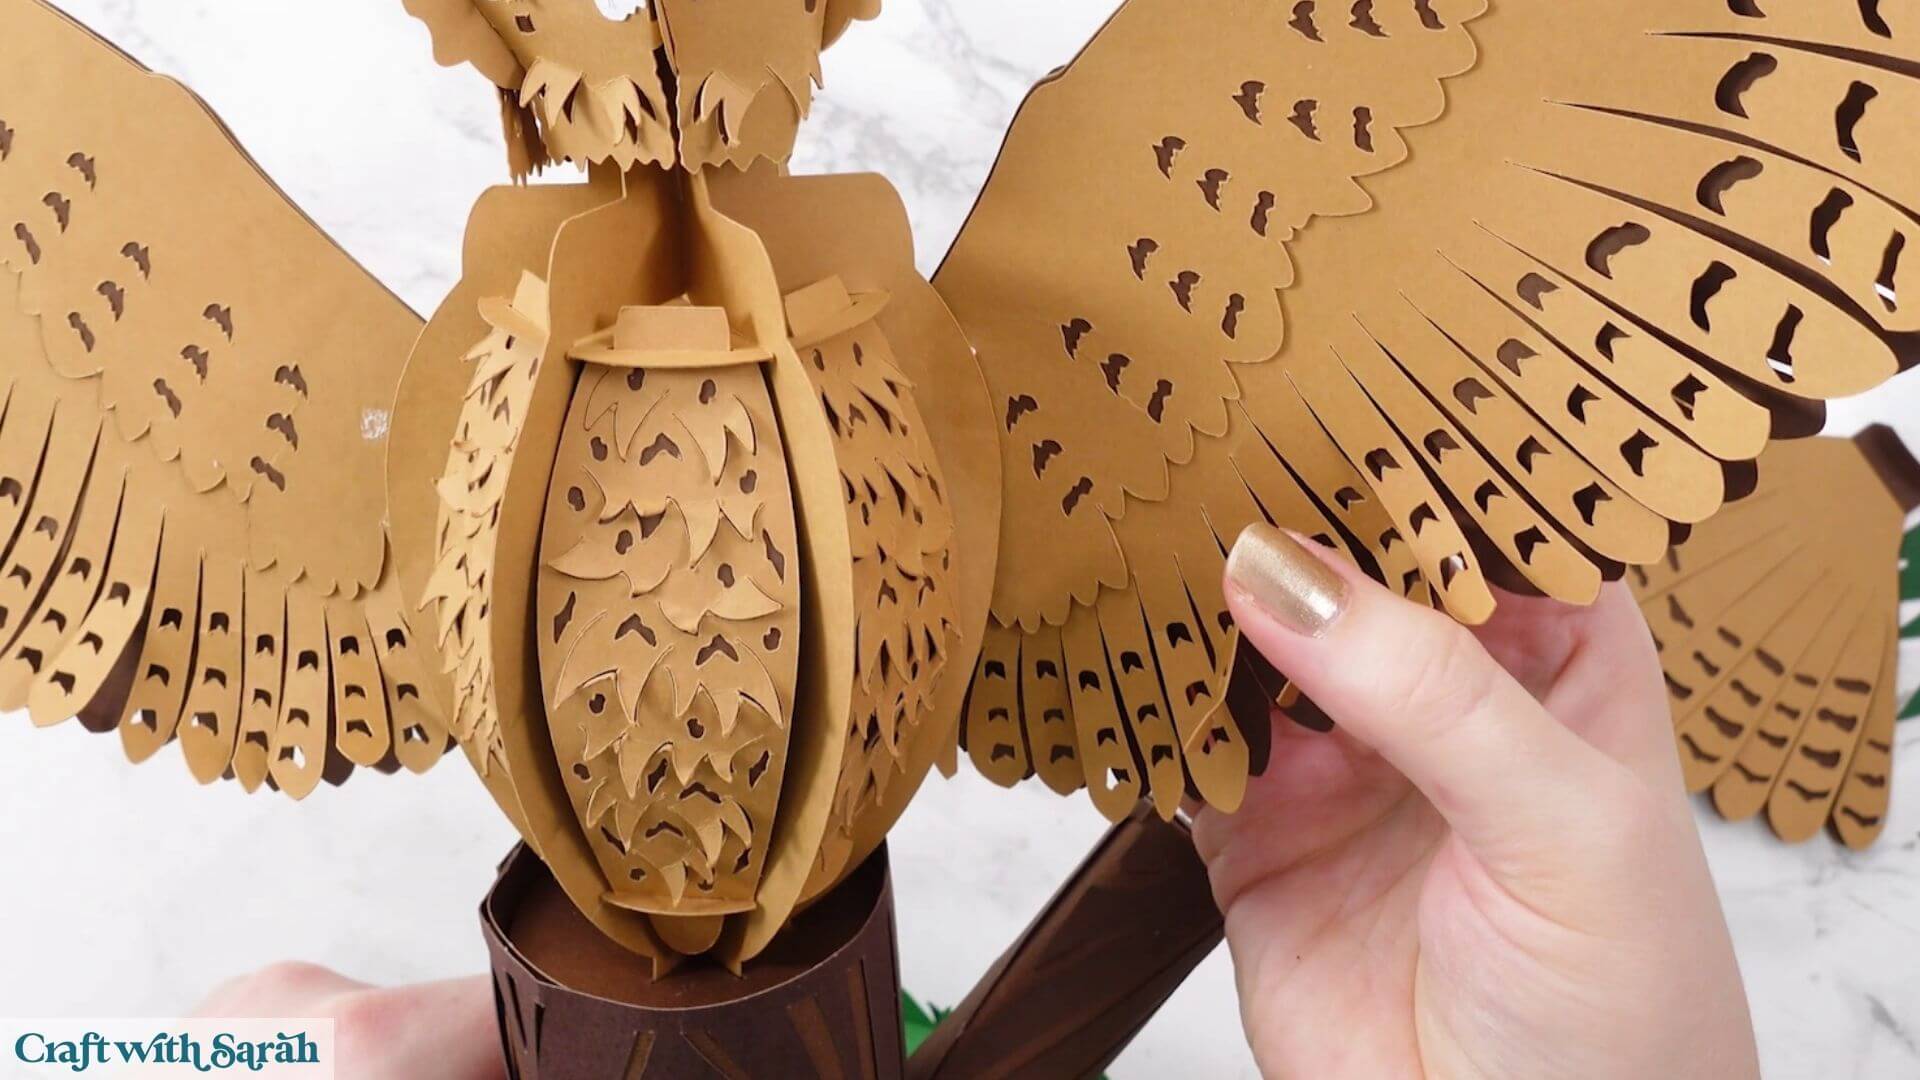
Impressive 3D owl centrepiece made with a Cricut
Your autumn owl centrepiece is finished!
Gently adjust any of the feather details that have become flattened during assembly. You can bend them out slightly to give the owl even more dimension.
One of my favourite things about this design is that, if you haven’t permanently glued the optional sections, much of it can be taken apart again.
The head slides off the body, the owl comes out of the tree stump and the tree stump comes out of the grassy base. That makes this large 3D project much easier to pack away and store until next autumn.
Your finished owl is ready to take pride of place on a shelf, table or as part of an autumn display.
With all those dimensional feather details, outstretched wings and the woodland tree stump underneath, he’s certainly one of the showstopper projects of this year’s Falloween Craft Countdown!
Happy crafting,
Sarah x