3D Bat Tower 🦇 FCC 13
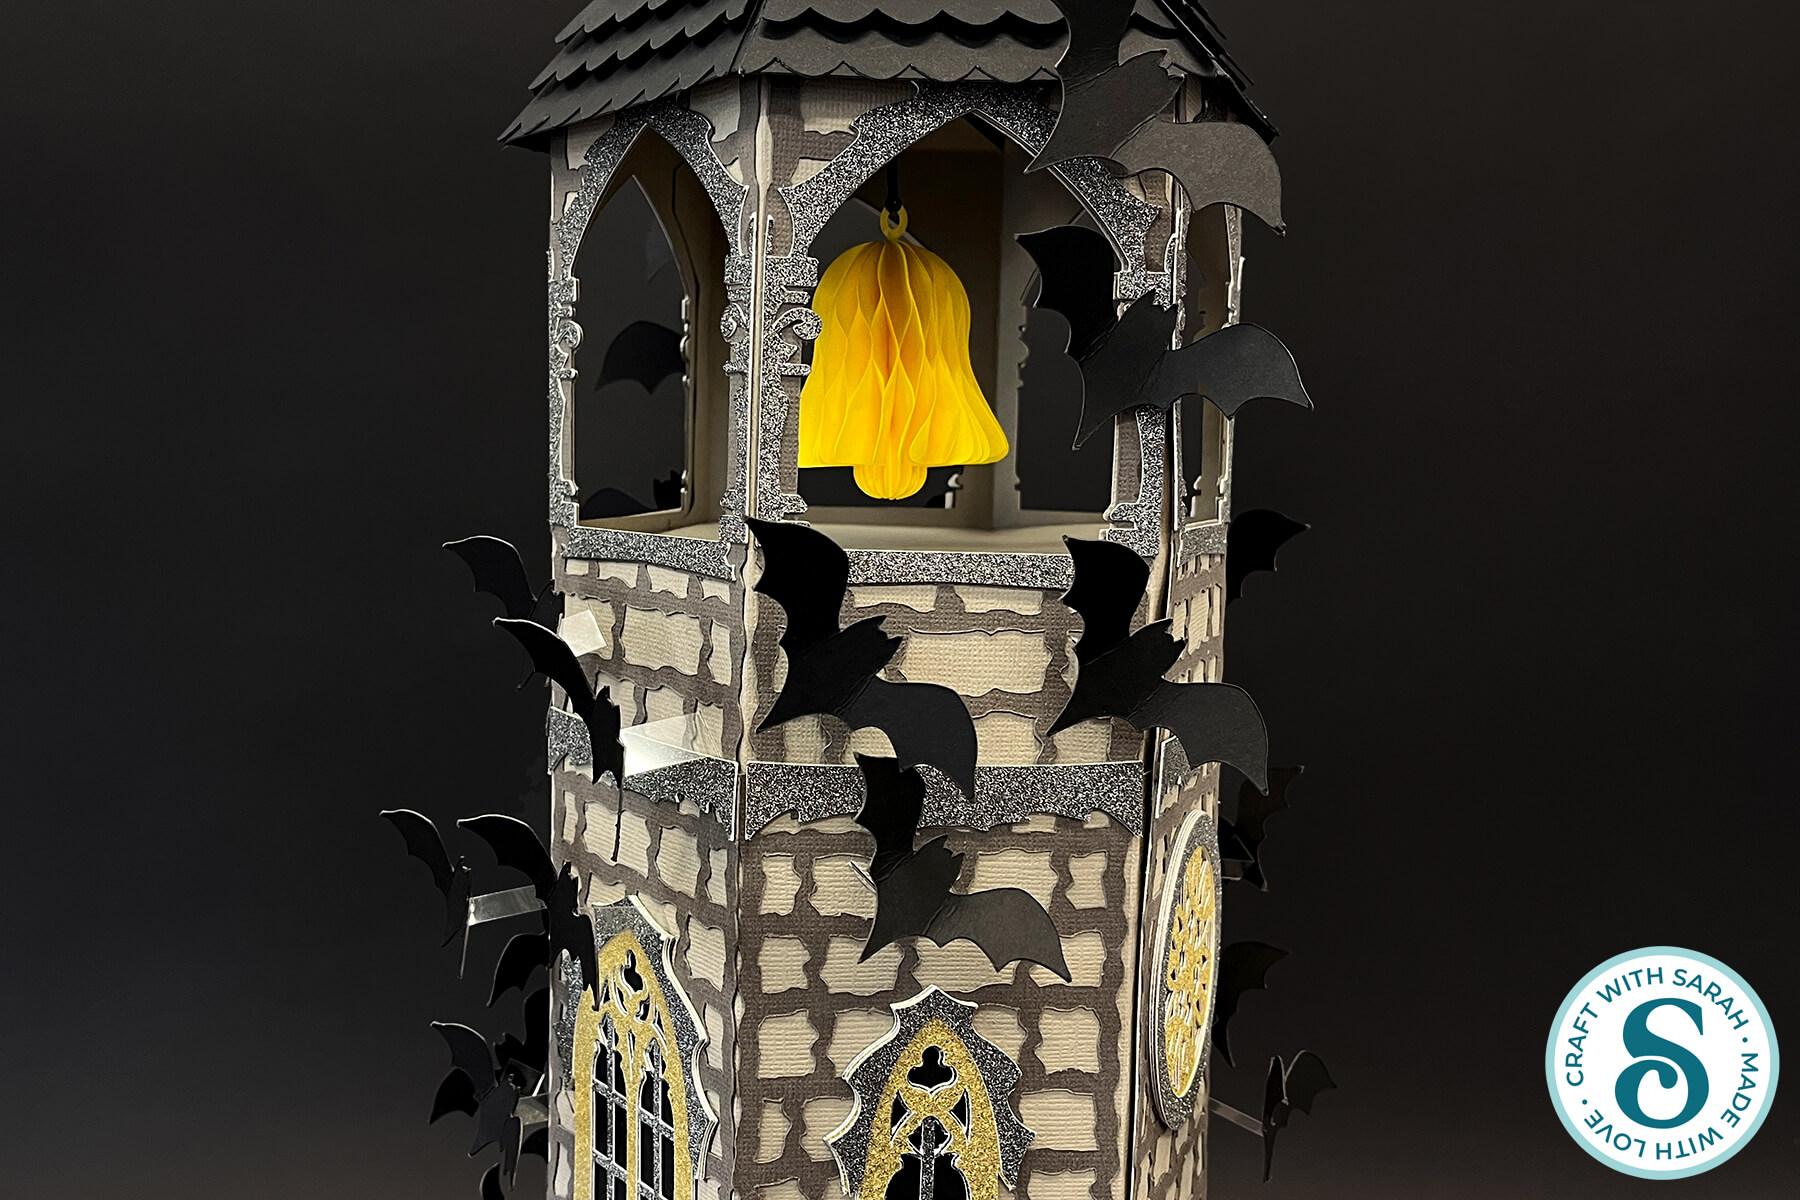
Make a showstopping Halloween decoration with this 3D bat tower SVG!
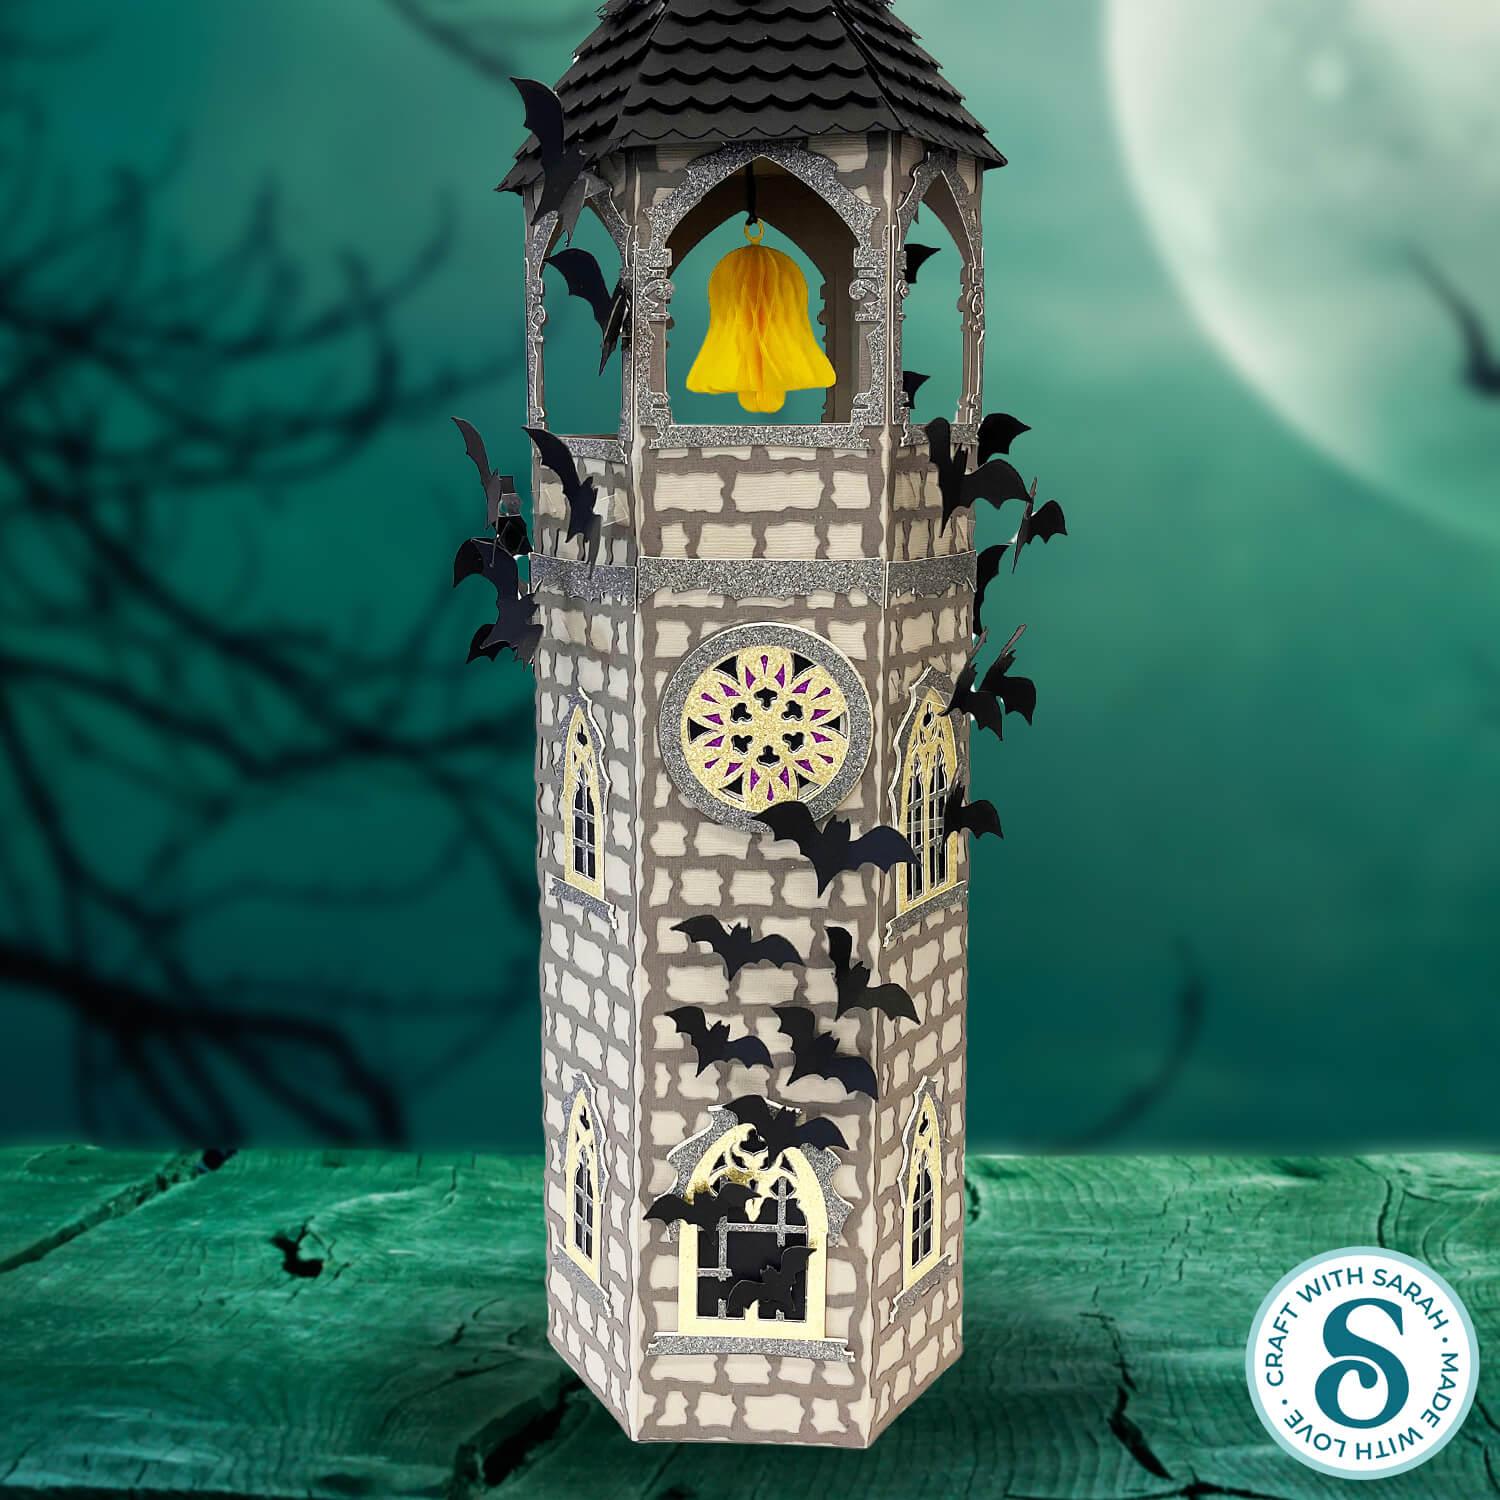
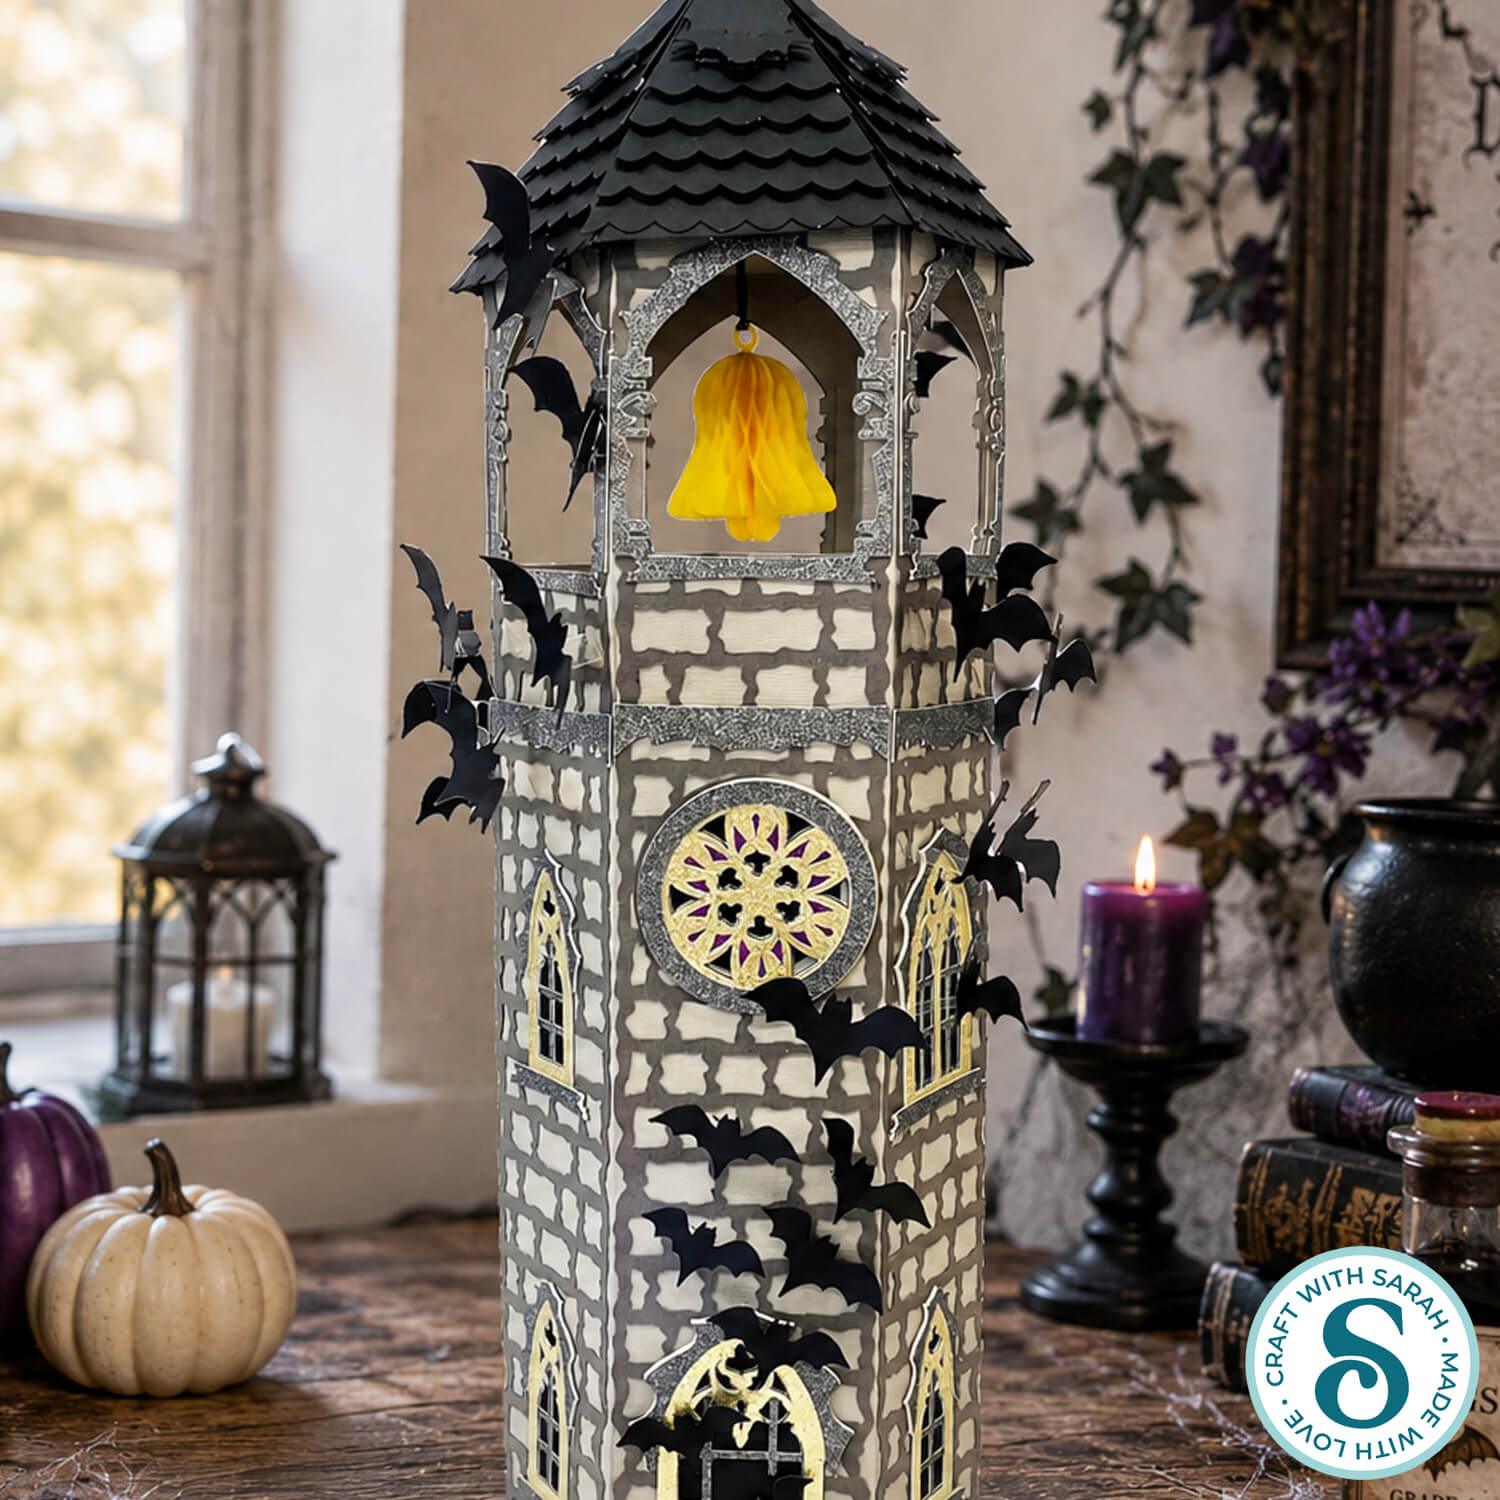
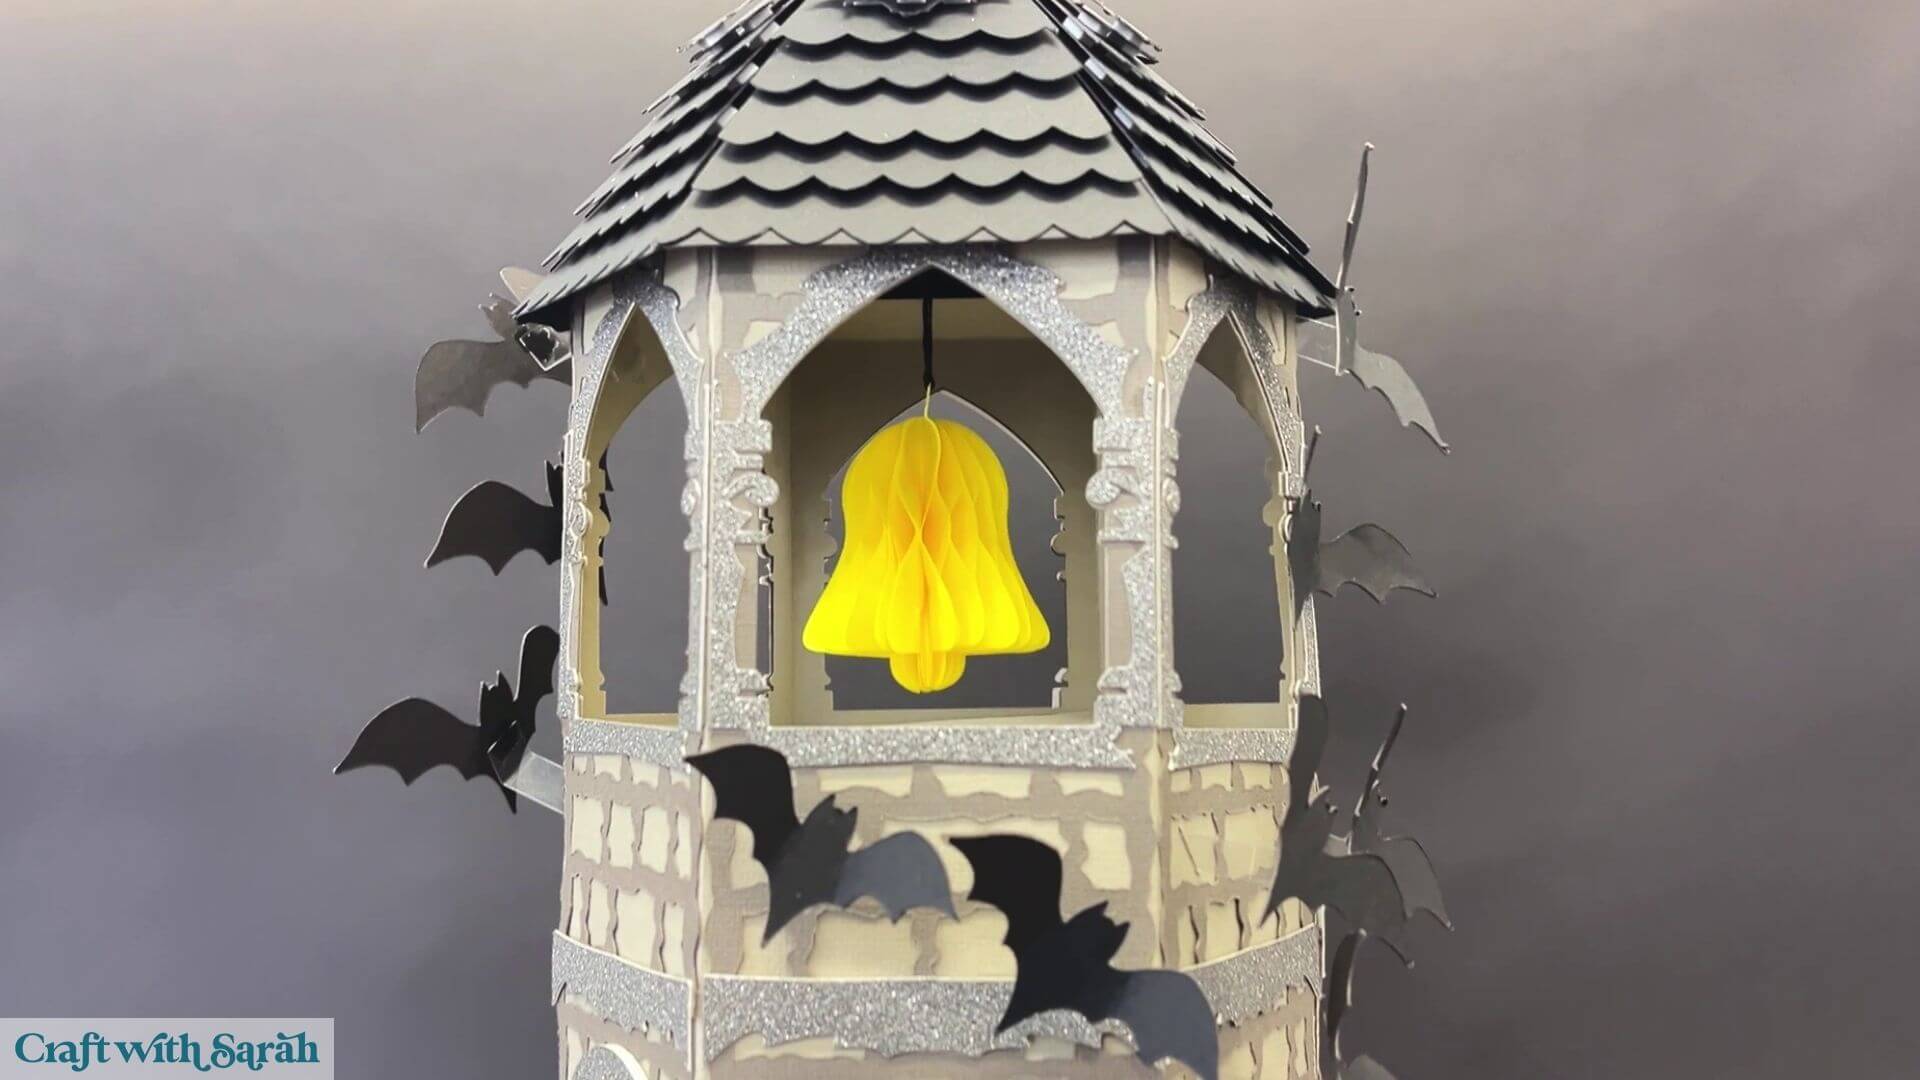
This impressive papercraft project features the top of a spooky castle tower, complete with gothic windows, a tiled roof and a tiny honeycomb bell hanging inside.
The real stars of the design are the bats. They appear to be bursting out of the broken windows and flying around the tower, with pieces of clear acetate used to make some of them stand away from the walls for an extra 3D effect.
This is one of the more detailed projects in the Falloween Craft Countdown, so there are quite a few pieces to cut and assemble. Take your time with it and follow the steps below carefully, particularly when building the tower walls.
Once everything comes together, you’ll have a spectacular Halloween decoration that can be brought out year after year.
Please note that this project does not include a hand-cutting version.
This project is part of the 2026 Falloween Craft Countdown
Materials and supplies
Here is a list of the materials that I used to make this project.
Please note that some of the links included in this article are affiliate links, which means that if you click through and make a purchase I may receive a commission (at no additional cost to you). You can read my full disclosure at the bottom of the page.
- Cricut machine
- Light blue Cricut cutting mat
- Cricut scoring wheel or stylus
- Coloured Card (any thickness)
- Glue (I like Bearly Art Glue and Collall)
- Foam squares
- Paperclips and bulldog clips (to hold pieces in place while the glue dries)
- Sticky tape
- Thin yellow paper for the optional bell
- Clear acetate
- String, twine or embroidery thread
- Brayer, scraper tool or ruler for helping with the folds
This project is suitable for the following types of Cricut machines: Explore series, Maker series and Joy Xtra. It will need to be made smaller for the Joy Xtra. It is too large to cut on the Joy or Joy 2.
The yellow material for the bell should be paper rather than cardstock. Something around the thickness of regular printer paper or children’s construction paper works well.
The acetate needs to be sturdy enough to support the weight of the cardstock bats without bending over. The clear protective cover from an old Cricut mat is not strong enough for this project.
If you don’t want to make the bell, you can leave it out.
Similarly, you can leave out the acetate pieces and stick all of the bats directly to the tower instead.
Foundation learning
If you're new to making papercrafts with your cutting machine, check out these links to get you started.
They include videos on topics such as: which file to use with your type of cutting machine, how to load the files into your cutting machine's software, how to cut cardstock with your type of cutting machine, how to recolor and modify/customize the cut files and tips for displaying your projects.
- How to use zip folder downloads
- Help guides for Cricut machines
- Help guides for Silhouette machines
- Help guides for ScanNCut machines
The following tutorials are Cricut-specific, but many of the ideas will work similarly with a Silhouette or ScanNCut machine and any cut files that are shared in them are compatible with all types of cutting machine.
- How to score with a Cricut (even without scoring tools)
- Print then cut tutorial
- Design Space tools (Combine, Attach, Slice, Weld, Flatten, etc.)
- Pattern fill tutorial (for making backgrounds & cutting images to a specific shape/size)
- Free envelope SVGs that can be sized to fit any card
- Presentation boxes for handmade cards
- How to write inside cards with Cricut pens
- How to cut layered designs at a small size
- Design Space tips & tricks
- Cricut pens tutorial
- How to mount multiple designs in the same frame with magic guides
Halloween haunted tower craft video tutorial
Watch the video below to see how to make this project. Keep scrolling for a written tutorial.
Written tutorial (with photos!)
Here’s how to make this 3D bat tower using a Cricut machine.
Step 1) Download the cutting file & upload to Design Space
Get the files using the box below.
Purchase the File(s)
This cut file is available as part of the Instant Access Bundle.
Or, purchase this design individually here
Before you upload the SVGs to Design Space, you need to unzip the download folder that they come in.
Not sure how to do this? Click here for a tutorial that covers all the following types of computer and device:
- How to unzip a folder on a Windows computer
- How to unzip a folder on a Mac
- How to unzip a folder on an iPad
- How to unzip a folder on an iPhone
- How to unzip a folder on an Android device
After unzipping, upload the SVG file(s) into your cutting machine software.
Not sure how to use cut files with your type of machine? The following links lead to tutorials on how to use cut files in:
- Cricut Design Space
- Silhouette Studio
- CanvasWorkspace (for ScanNCut machines)
Open Cricut Design Space, start a new project and then click the “Upload” button on the left of the screen.
You can then either click “Browse” to find the file on your computer, or drag-and-drop it.
Select the file in the “01 Cricut Version” subfolder called svg-bat-tower-craftwithsarah.svg.
Press “Upload” on the next screen.
After uploading, the design should be automatically inserted onto your Canvas.
To hide the left sidebar (to give you more space for designing!), click the arrow that’s about half way down the page.
Need help uploading SVGs? Get step-by-step instructions here in our detailed help guides for Cricut, Silhouette and ScanNCut.
The complete design should load in at 40 inches wide and 48 inches tall.
If the SVG doesn’t load at 40 x 48 inches, select the whole design and change the size to match.
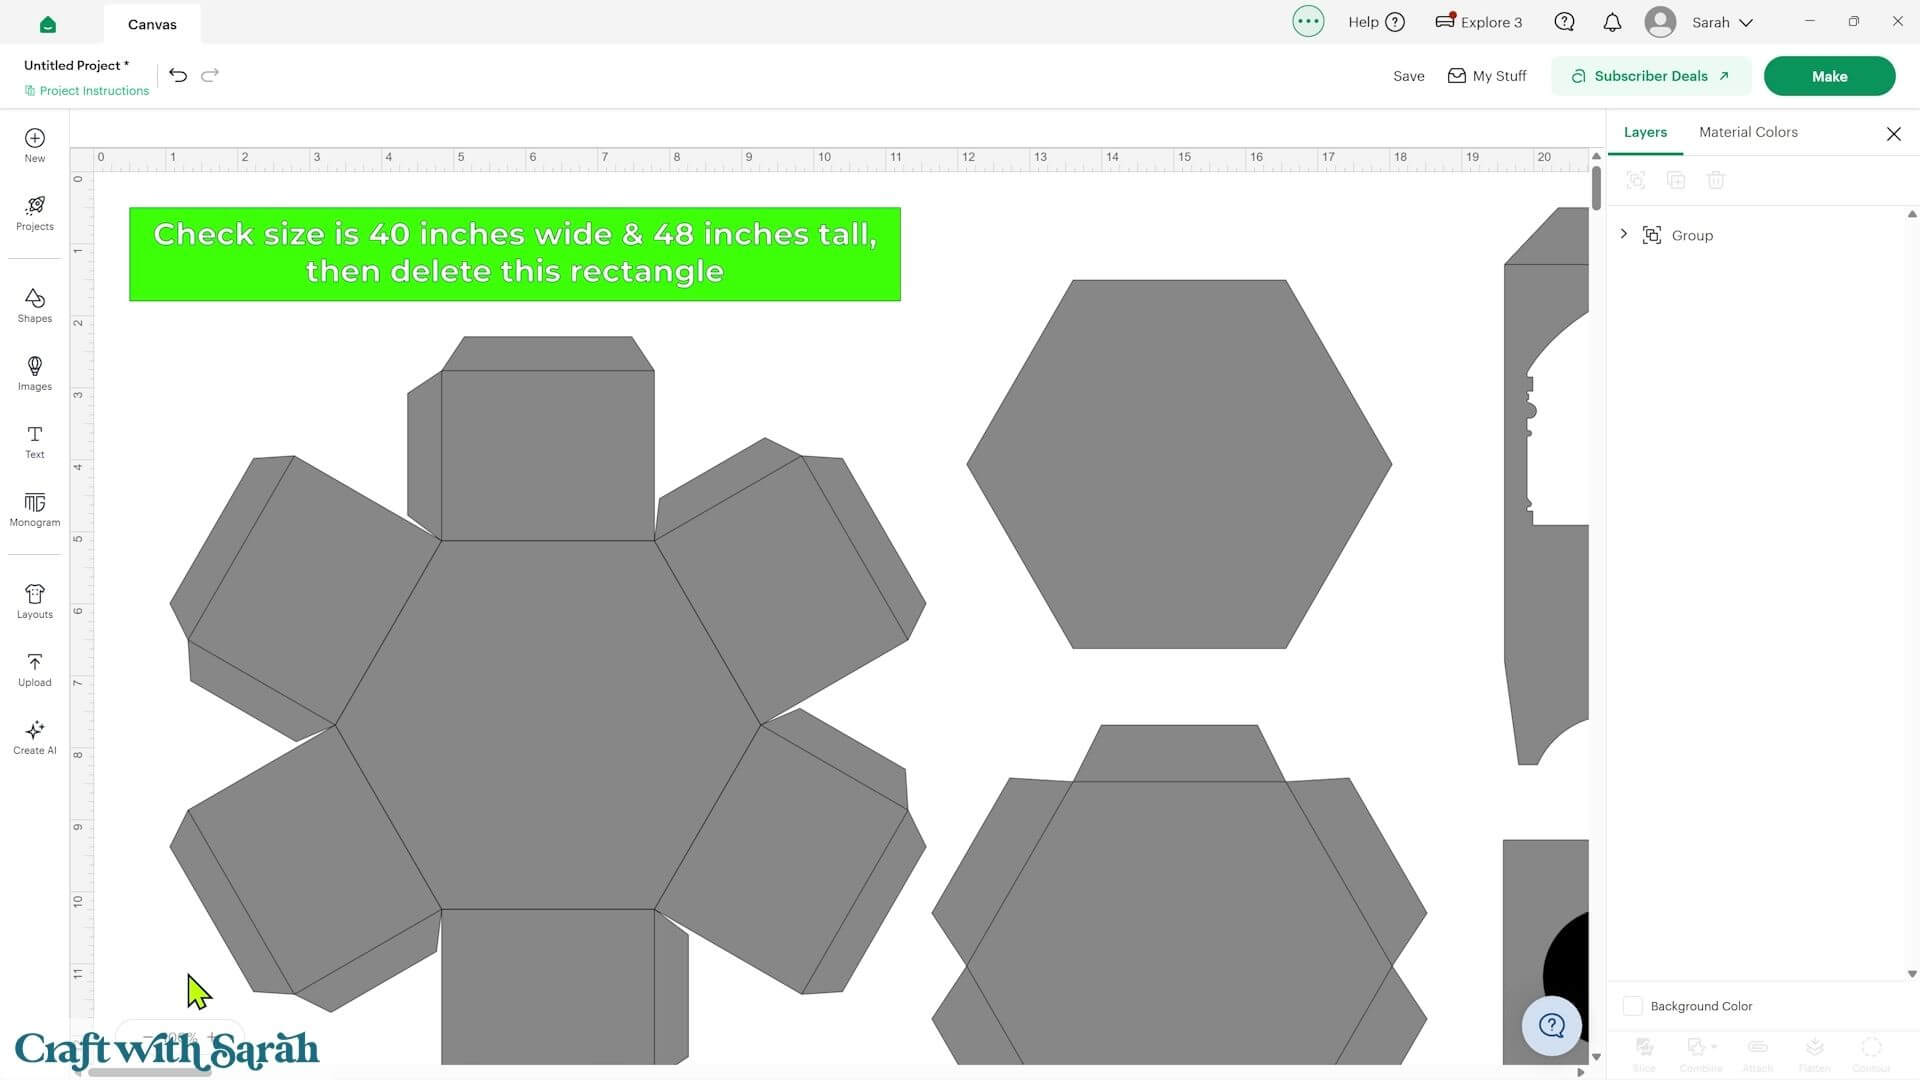
Ungroup the design.
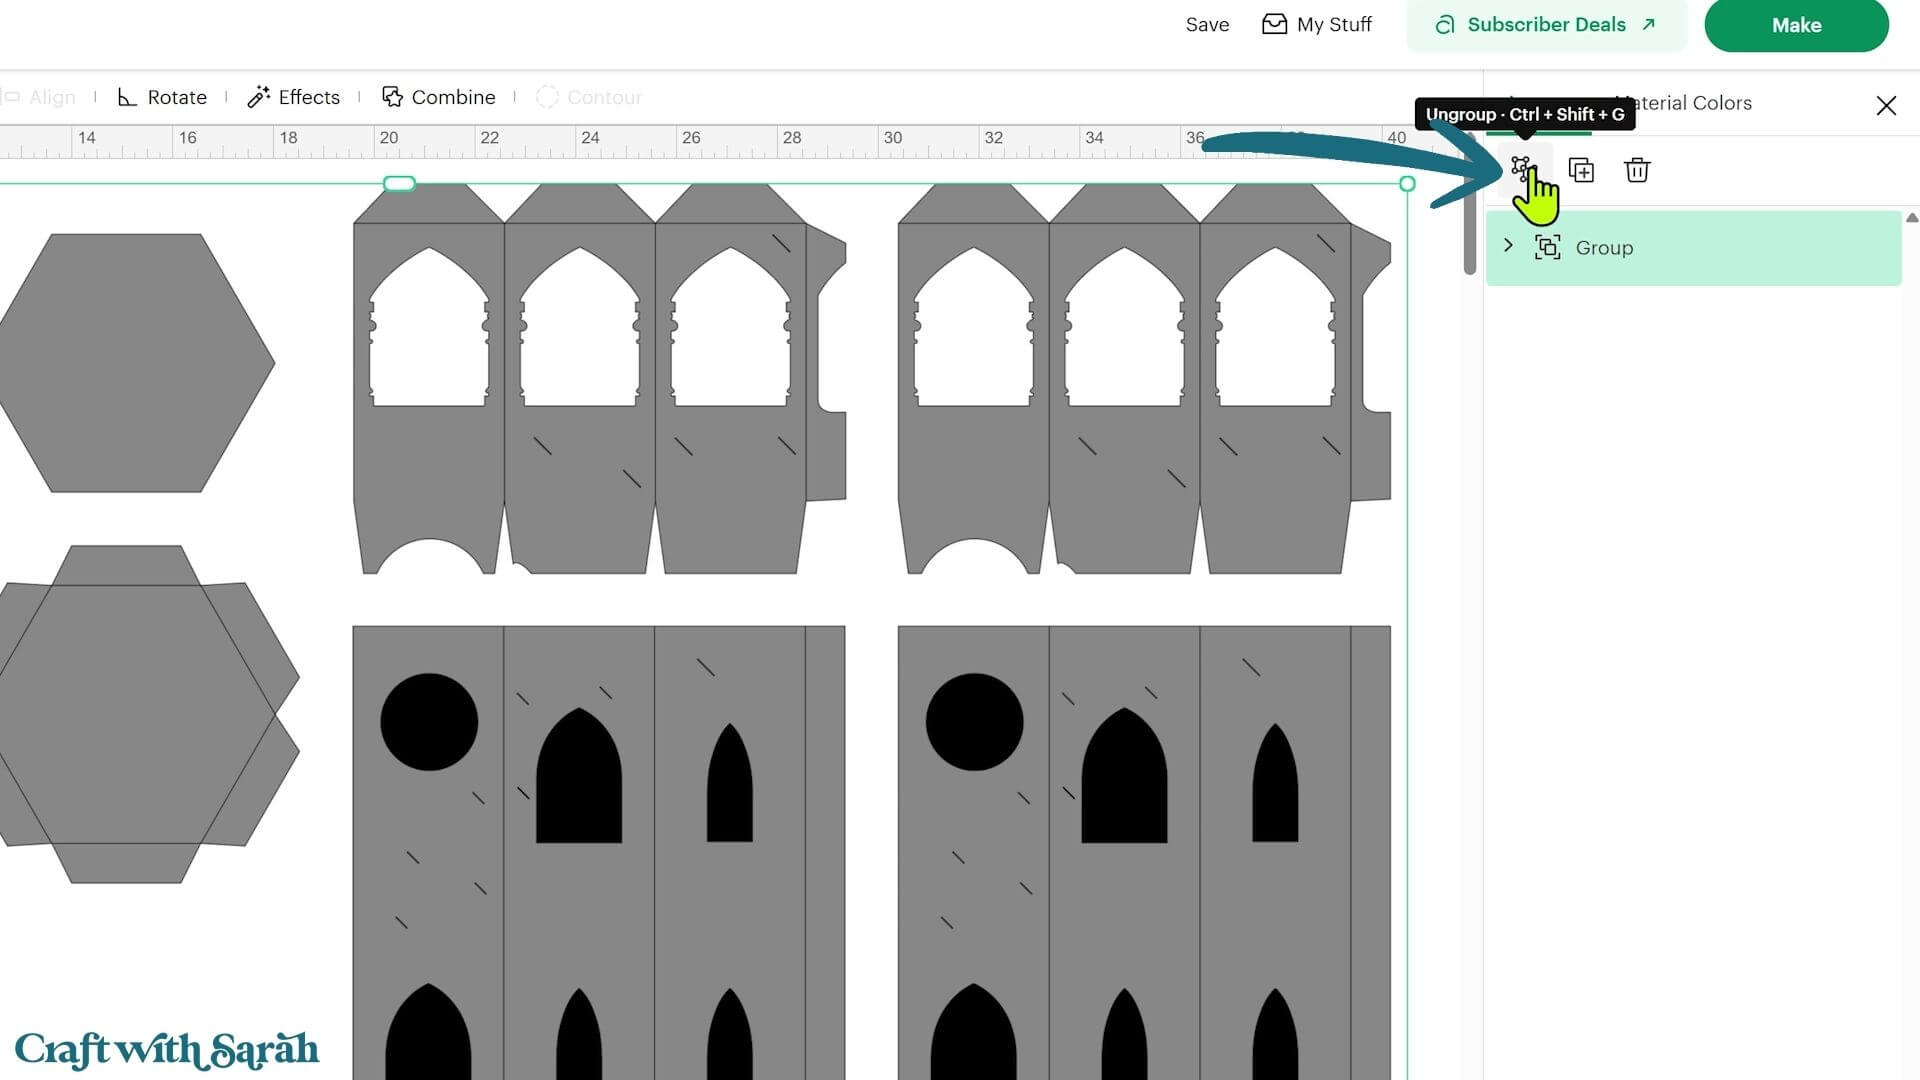
Delete the size guide from the top of the Layers panel.
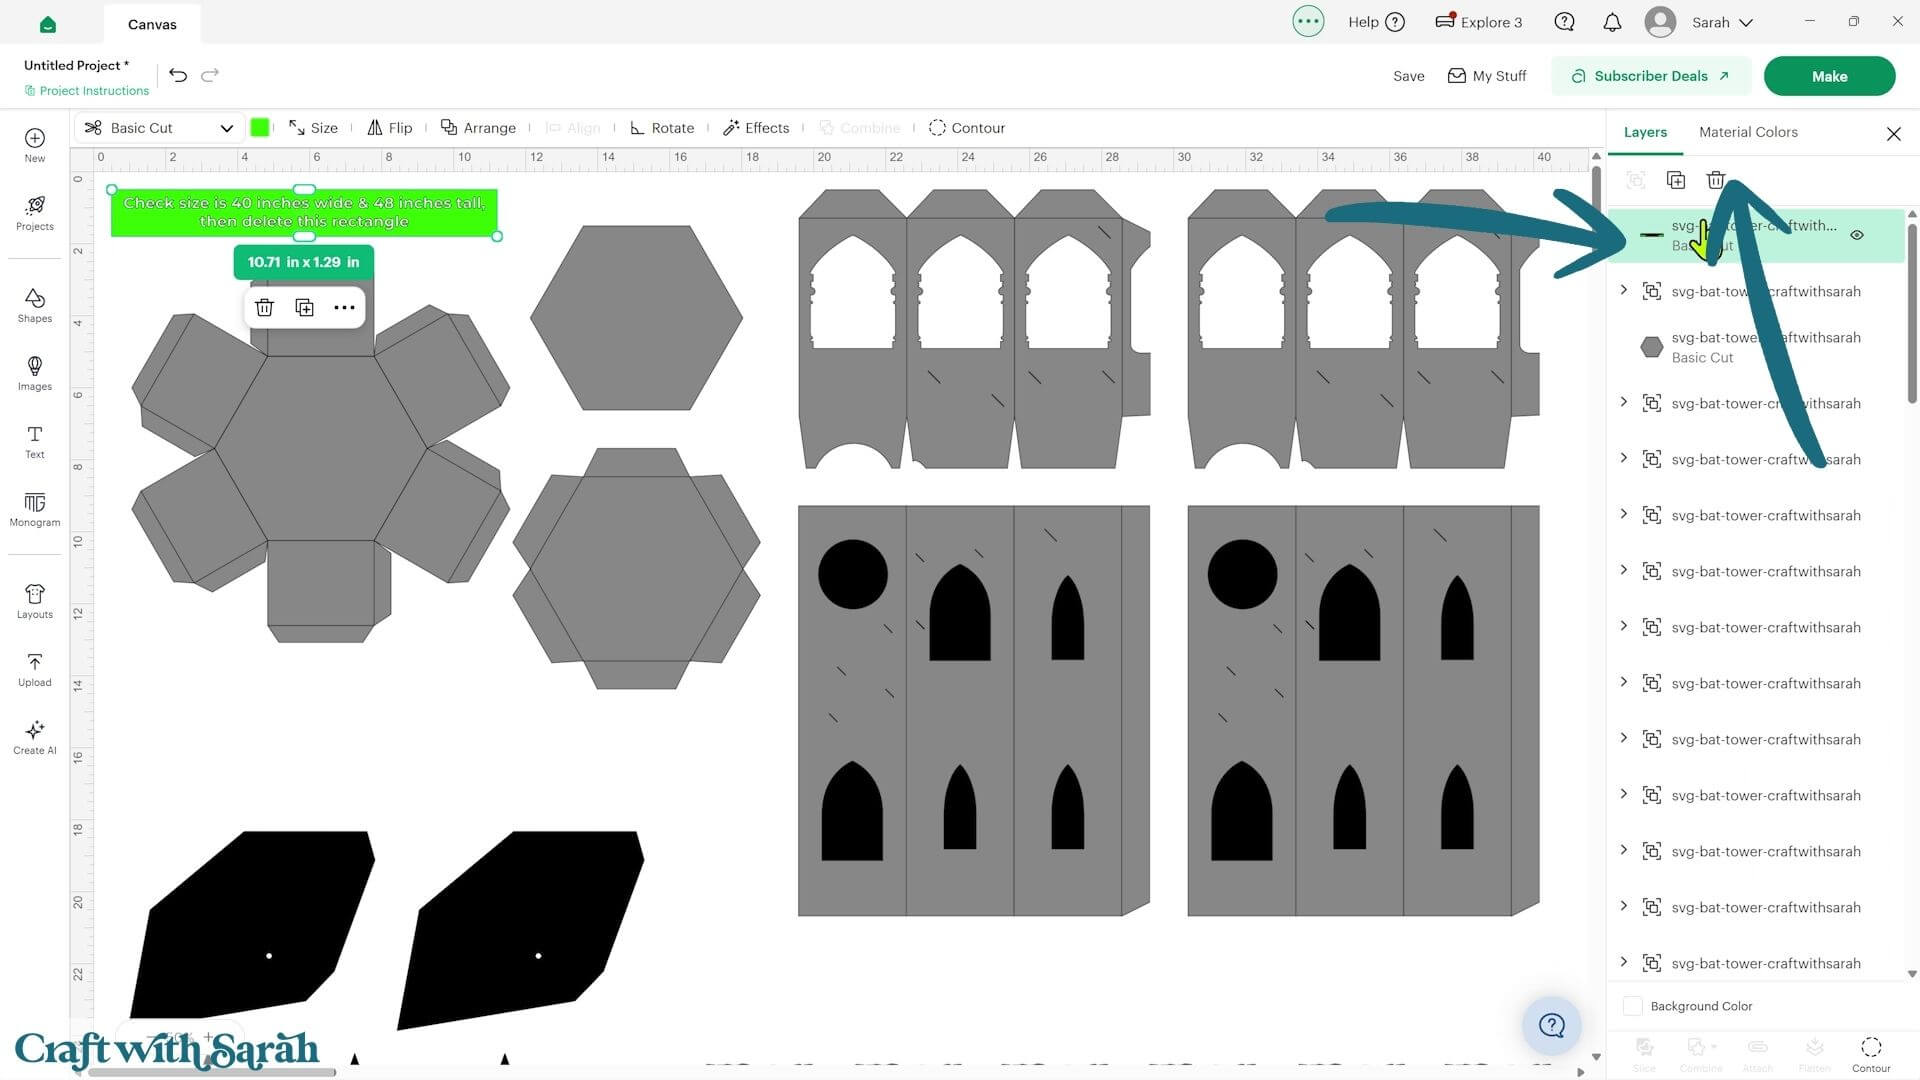
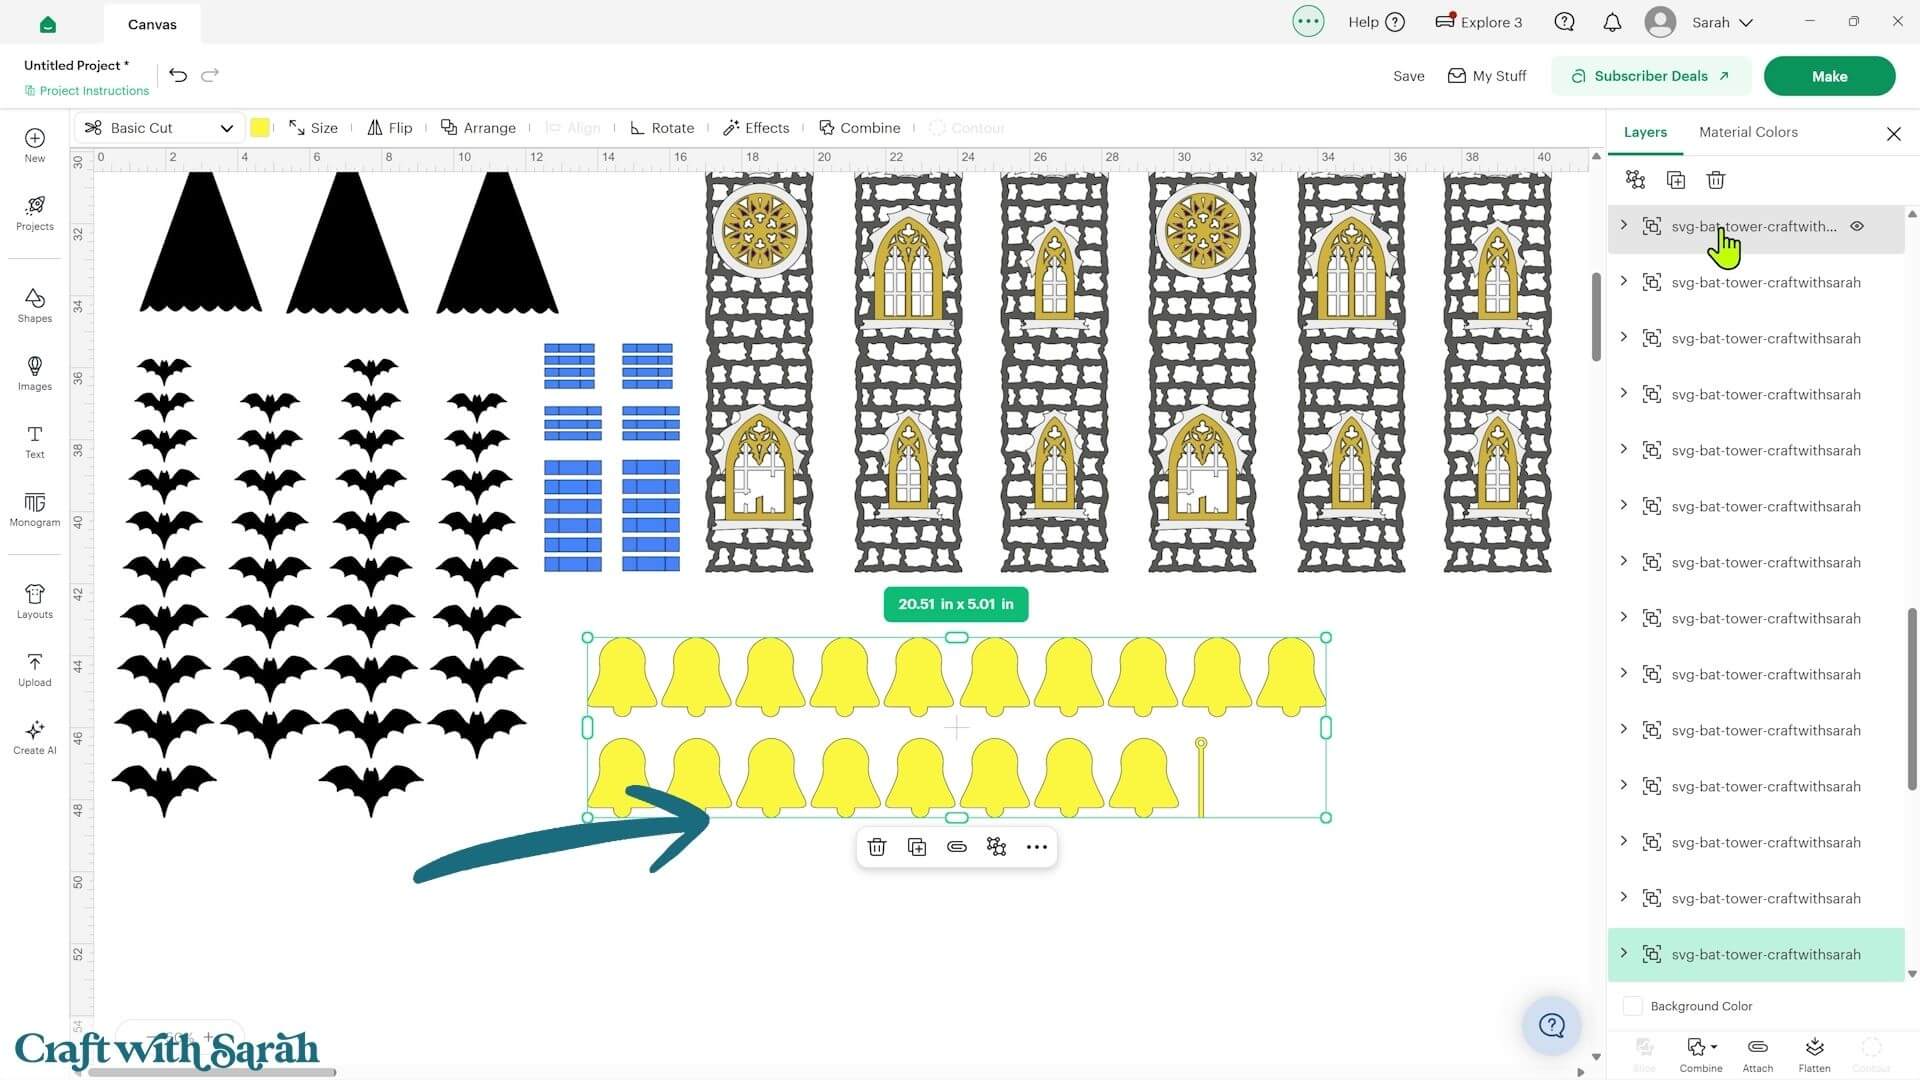
If you don’t want to make the honeycomb bell, scroll down to the bell group in the Layers panel and delete it.
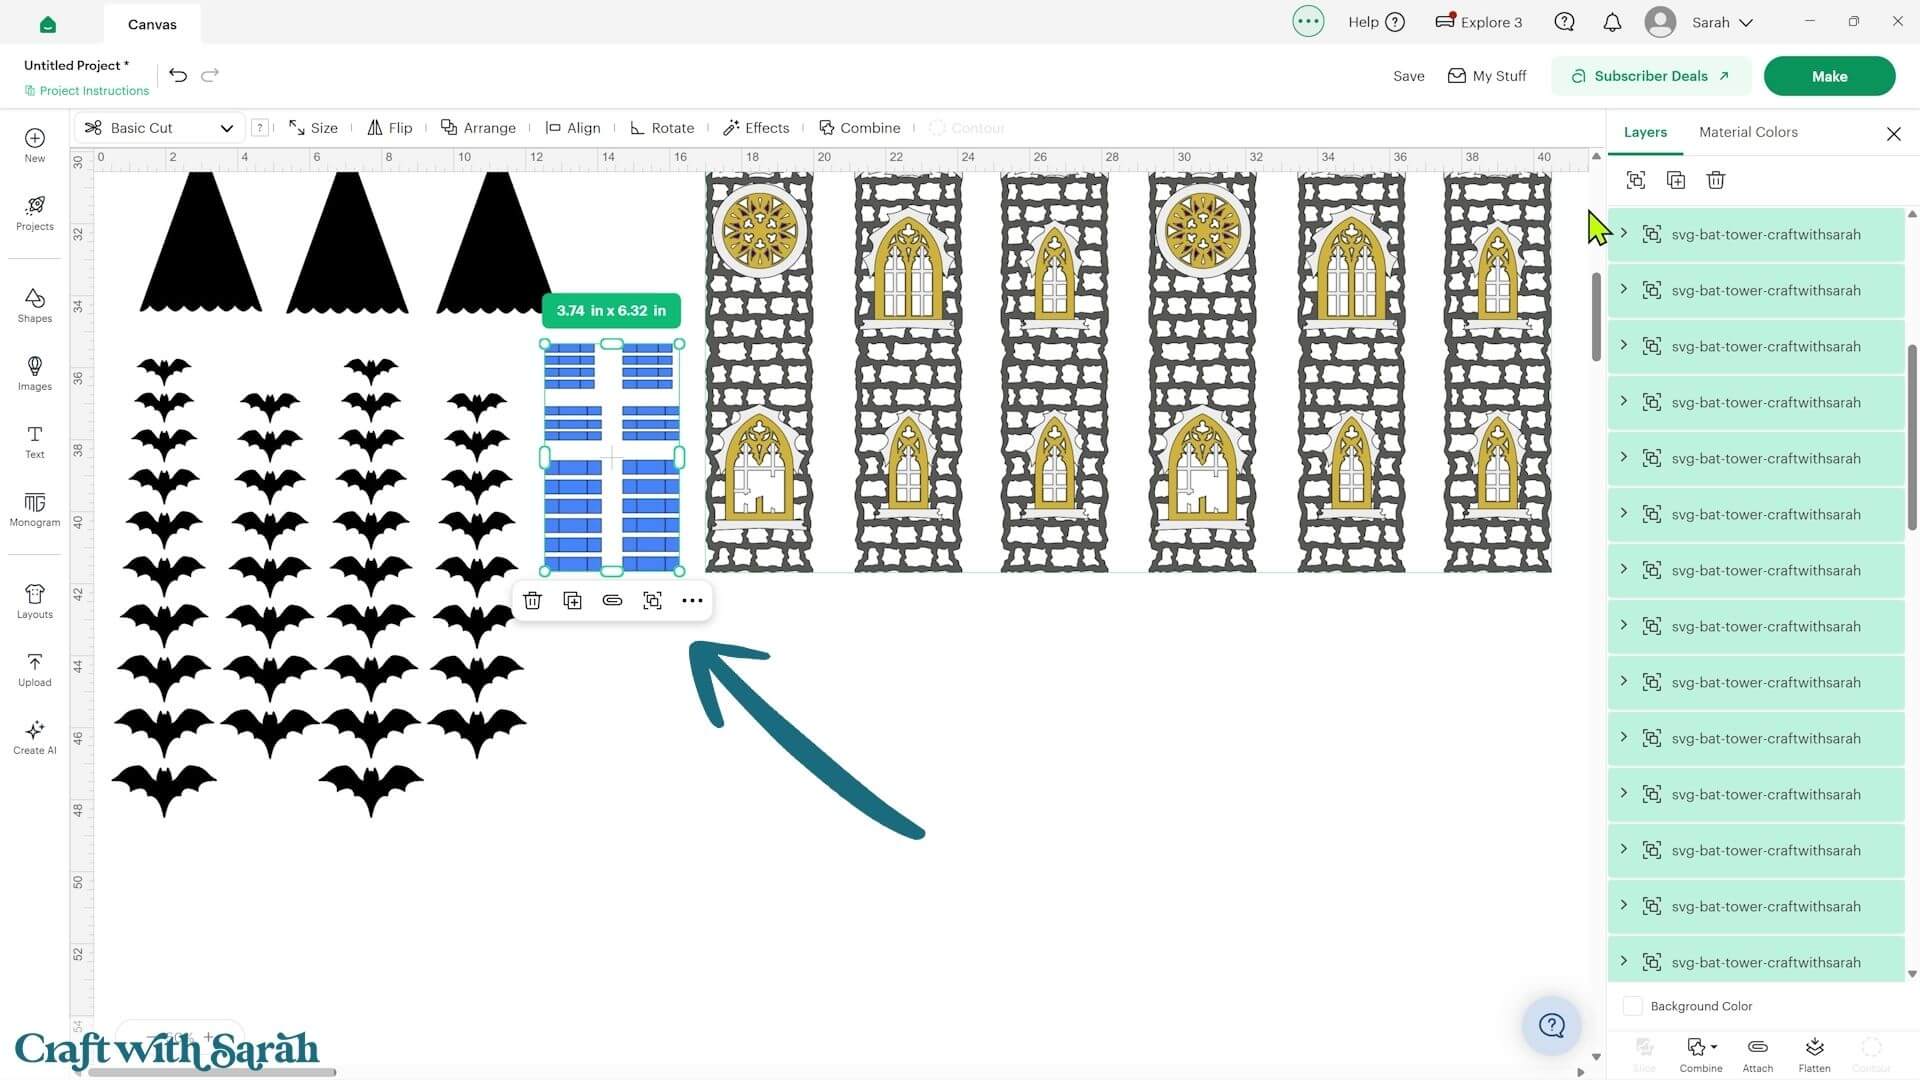
If you aren’t using acetate, you can delete the blue acetate pieces.
The little slits in the tower walls can either be left in place to show you where to position the bats, or removed using the Contour tool.
Step 2) Format the score lines
There are several pieces in the SVG which contain score lines that need to be formatted before cutting.
Start with the tower pieces.
Click one and open up the Group by clicking the chevron arrow next to it in the layers panel.
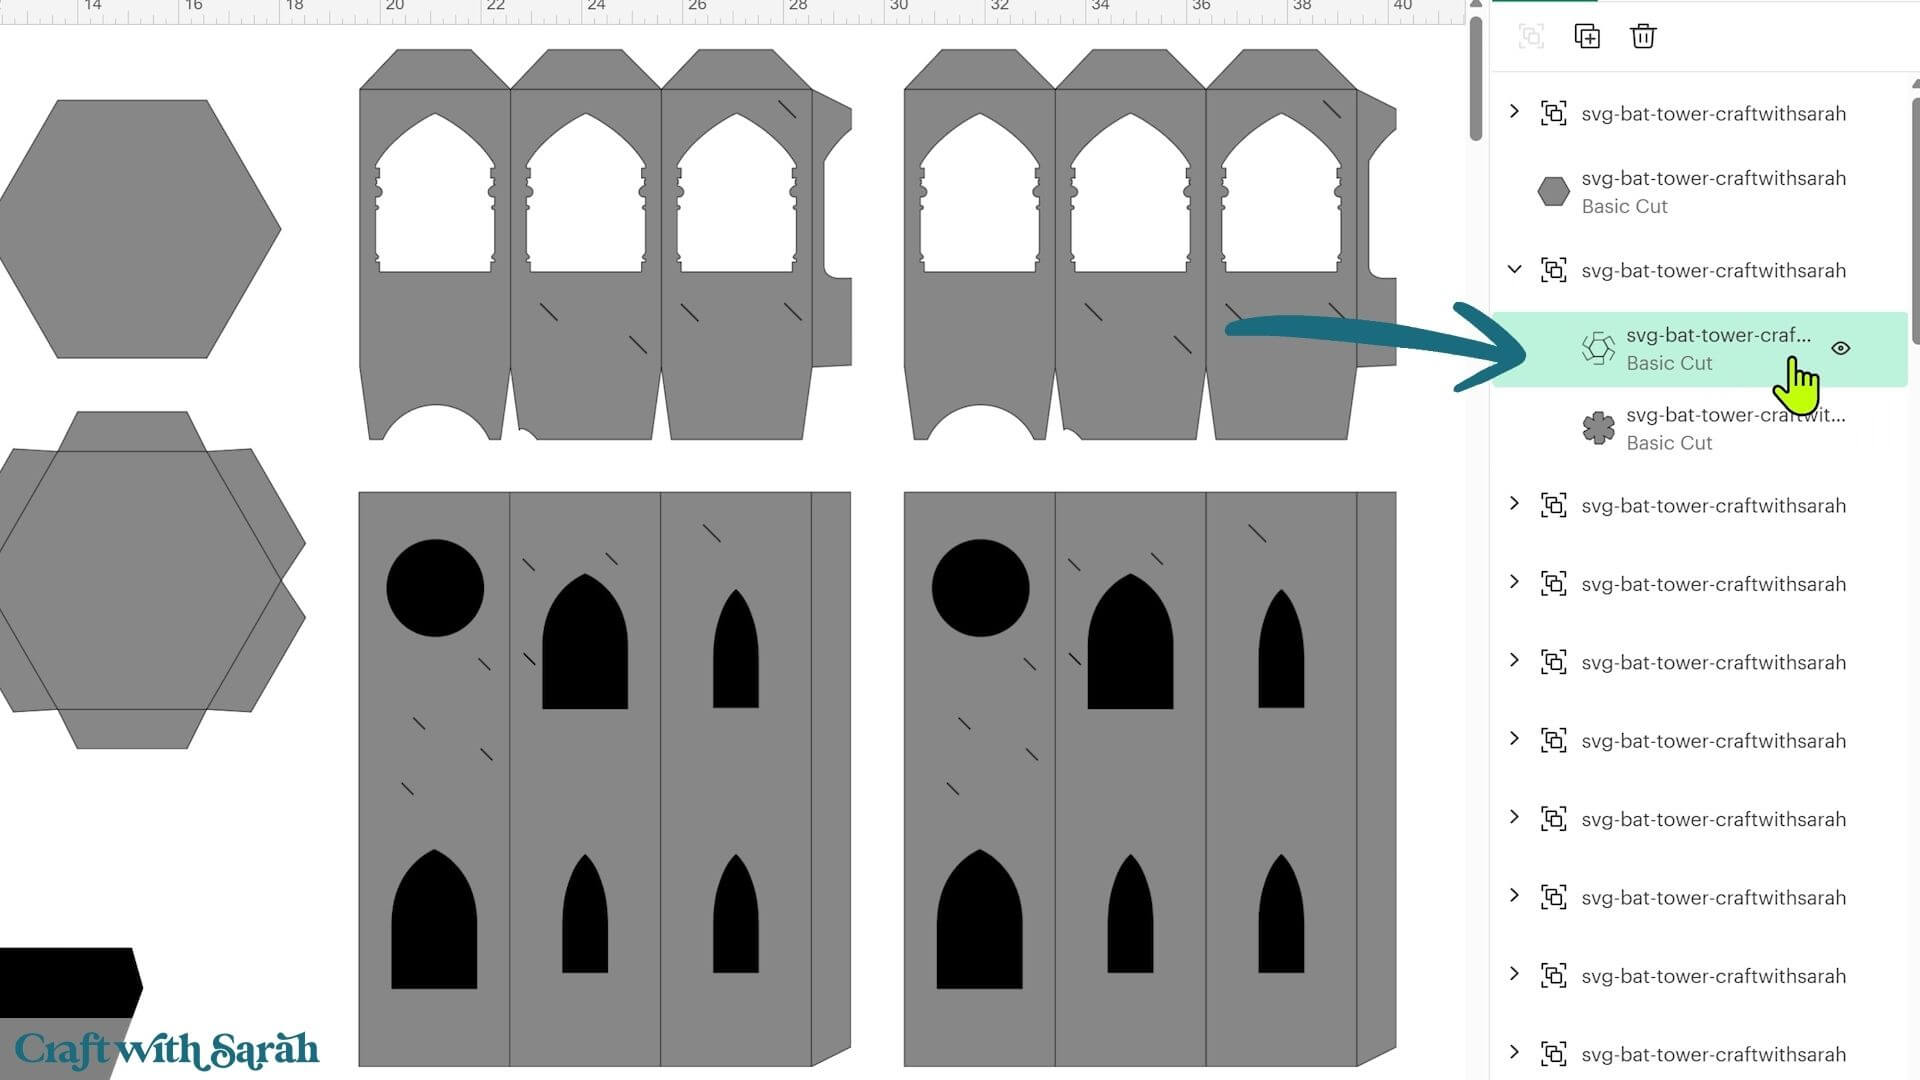
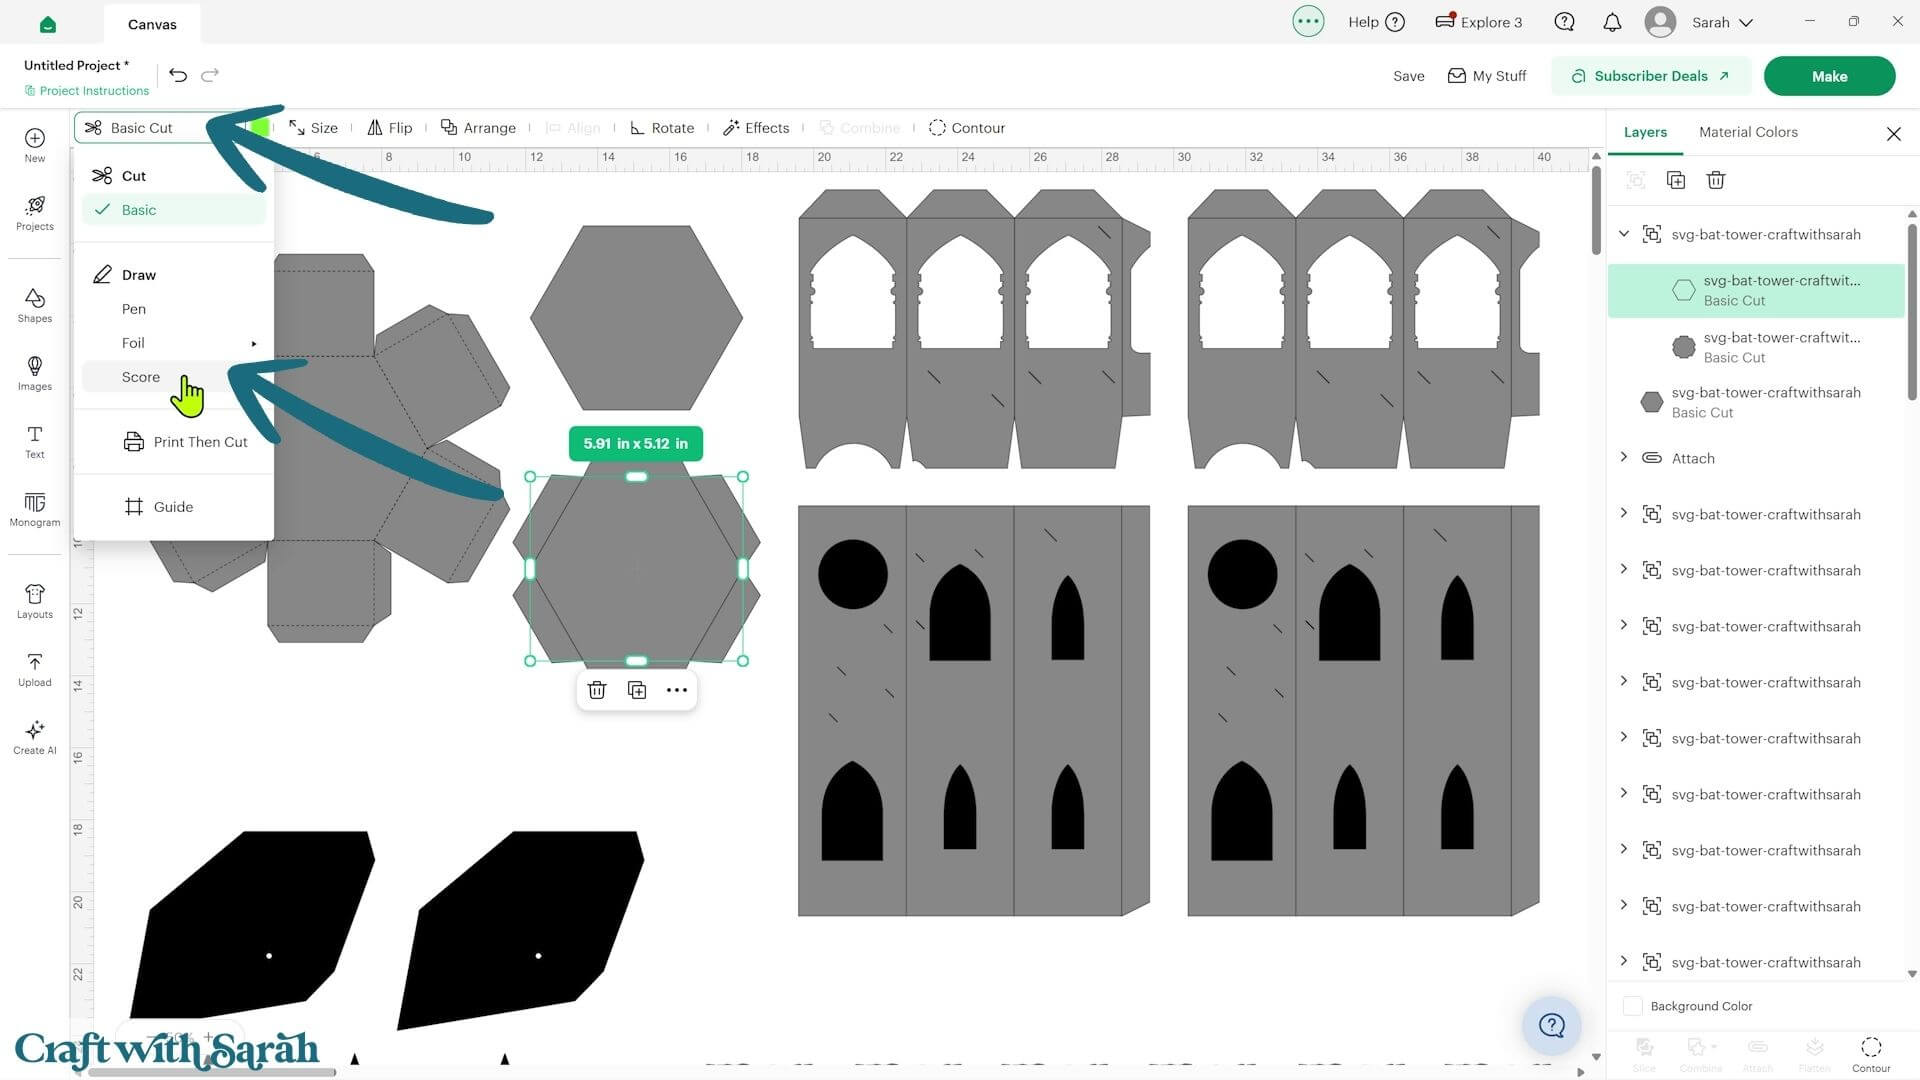
Select the layer containing the score lines and change it from ‘Basic Cut’ to ‘Score’ under the Operations dropdown.
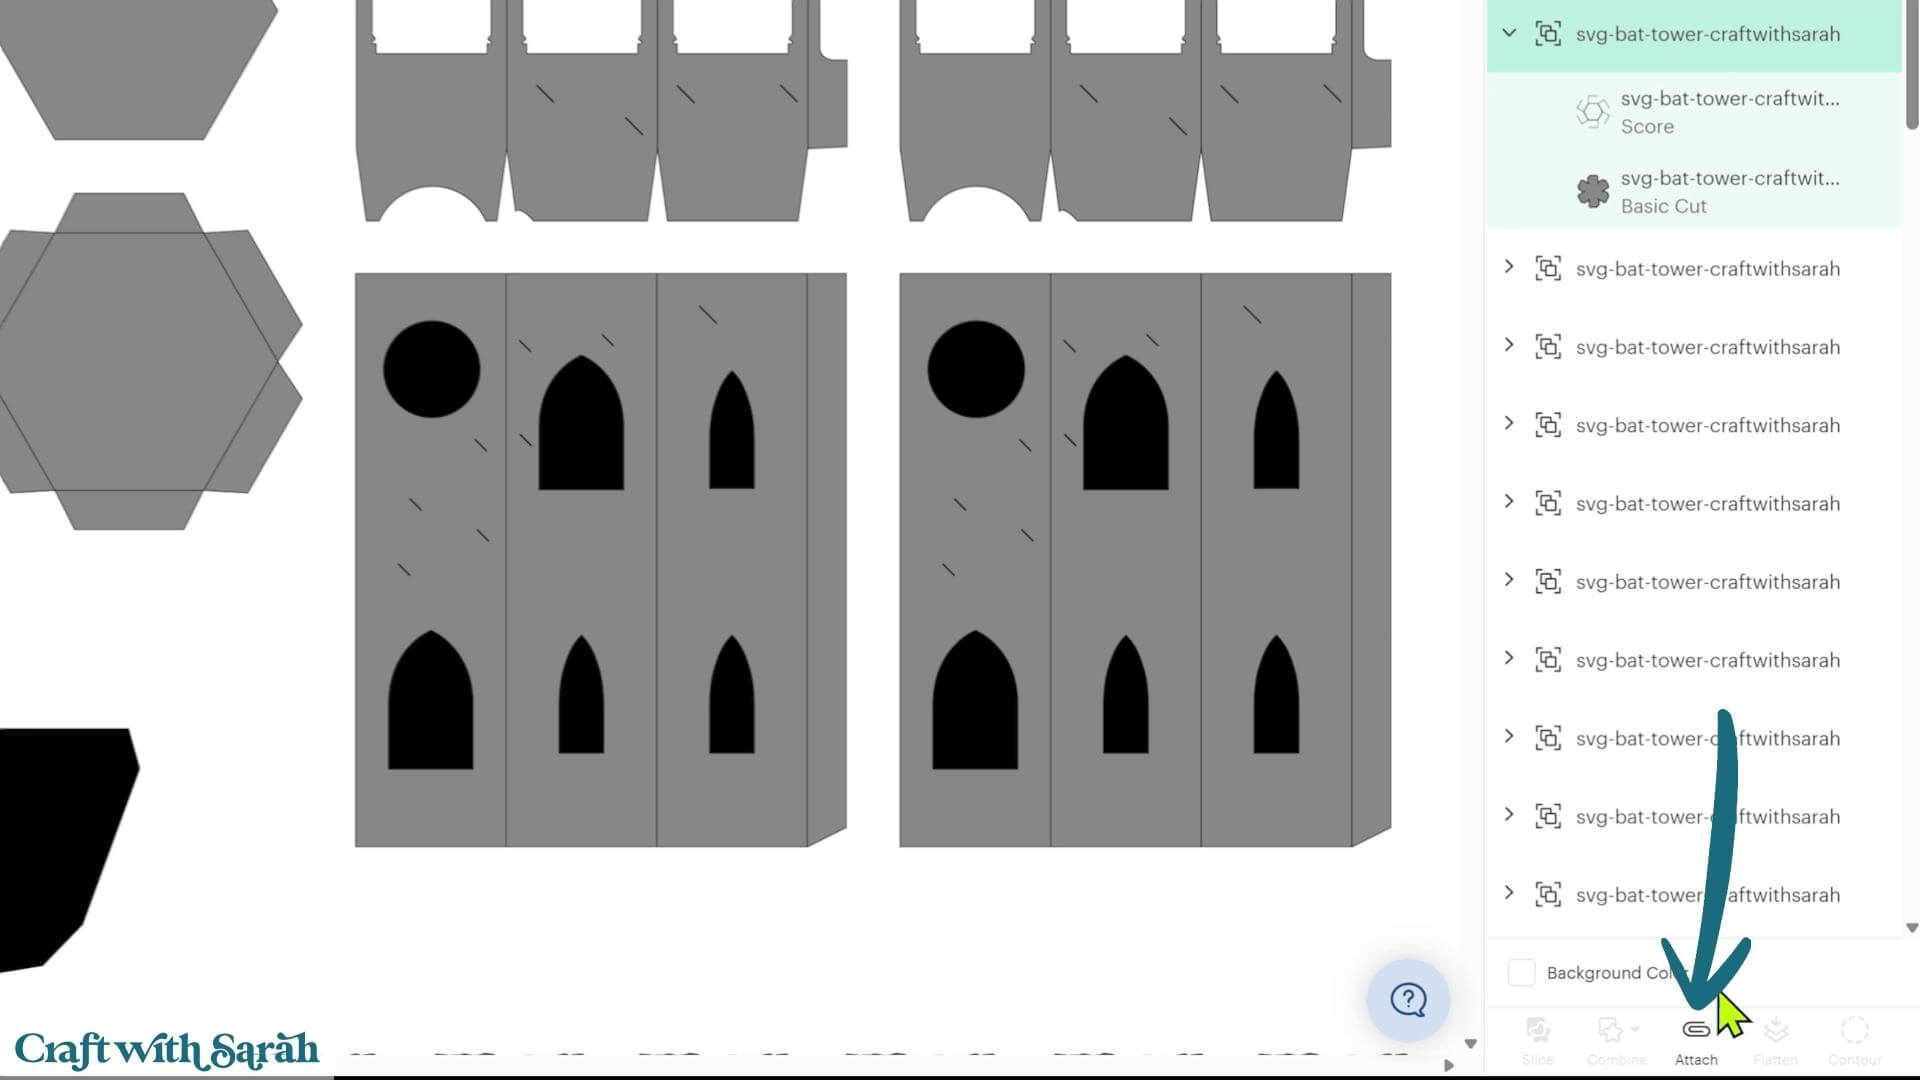
Select the whole group and press ‘Attach’.
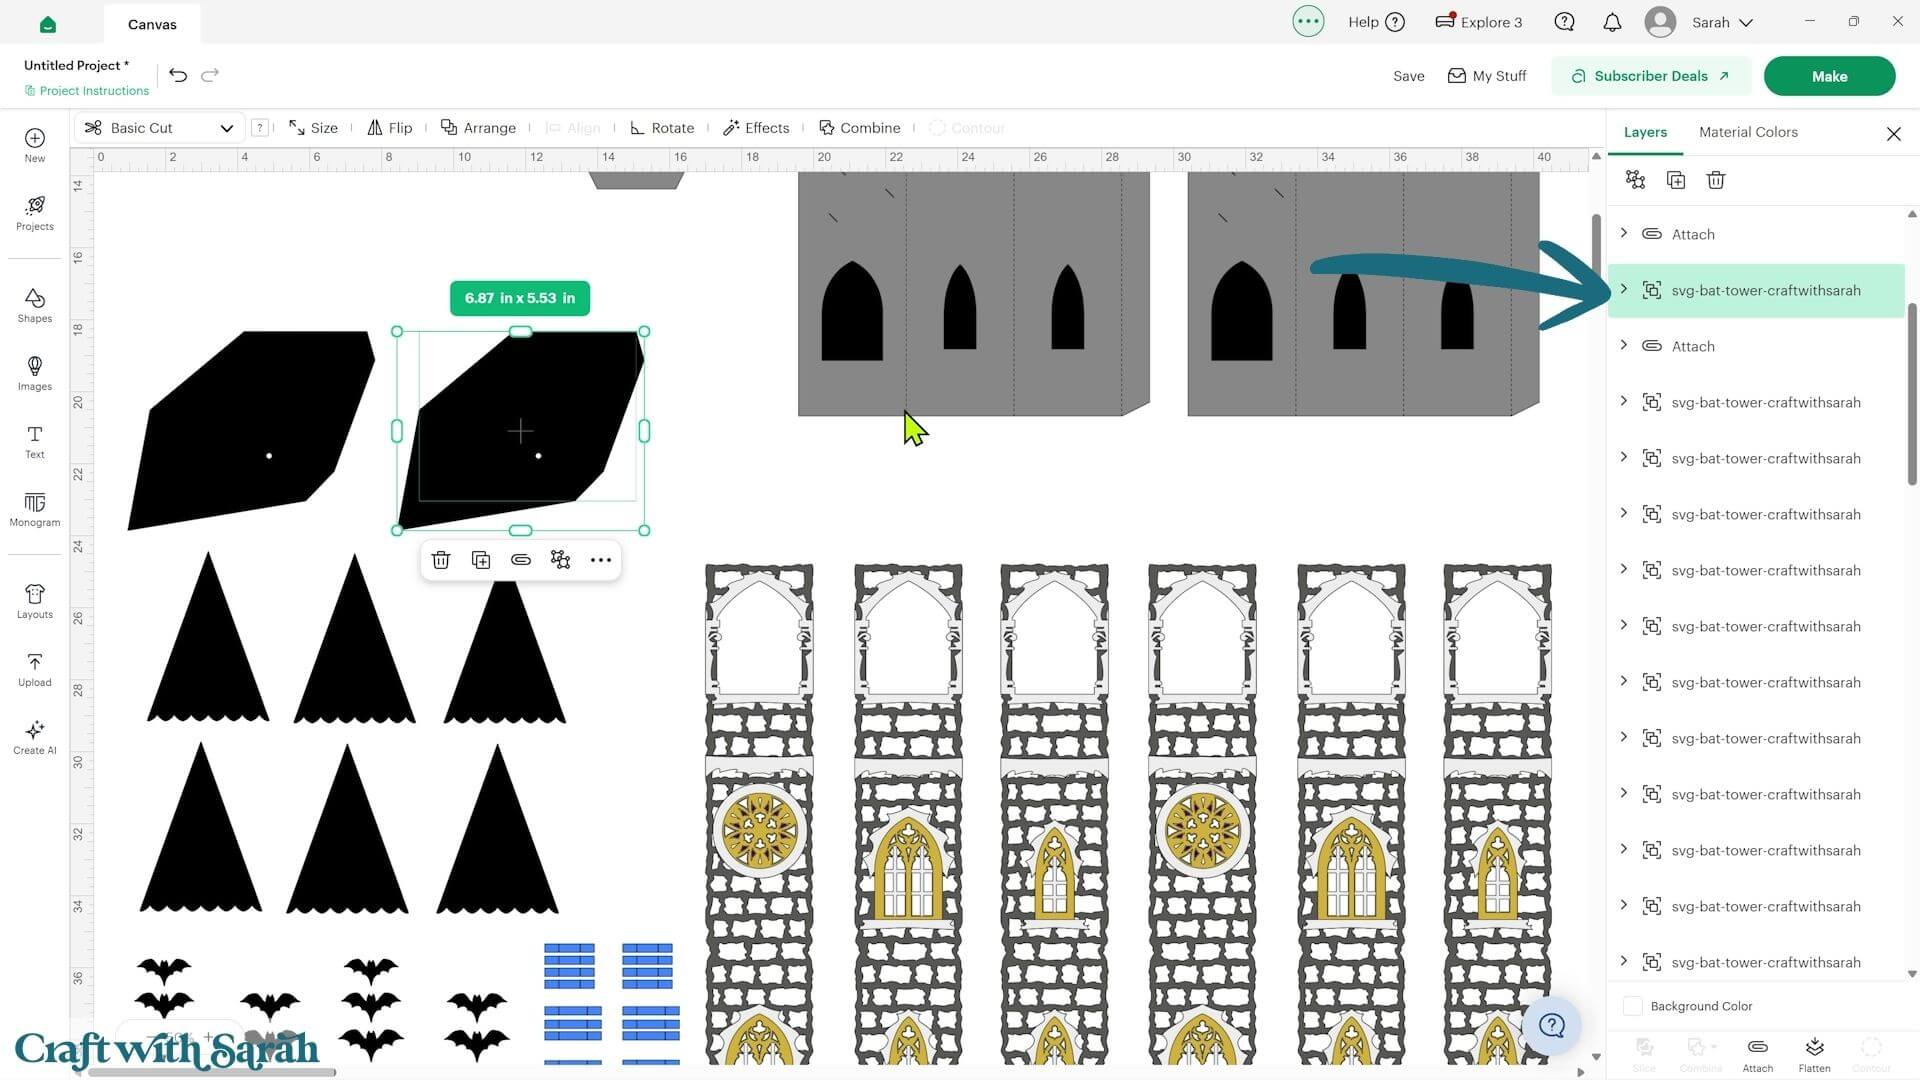
Repeat this process for all of the base and wall sections.
The black roof structure pieces also have score lines. You won’t be able to see them as the score lines appear black too, but don’t forget to format them.
The small blue rectangles are the pieces which will be cut from acetate.
Each one contains two sets of score lines. This is because it’s a bit harder to score on acetate, so doubling up the lines gives a better result.
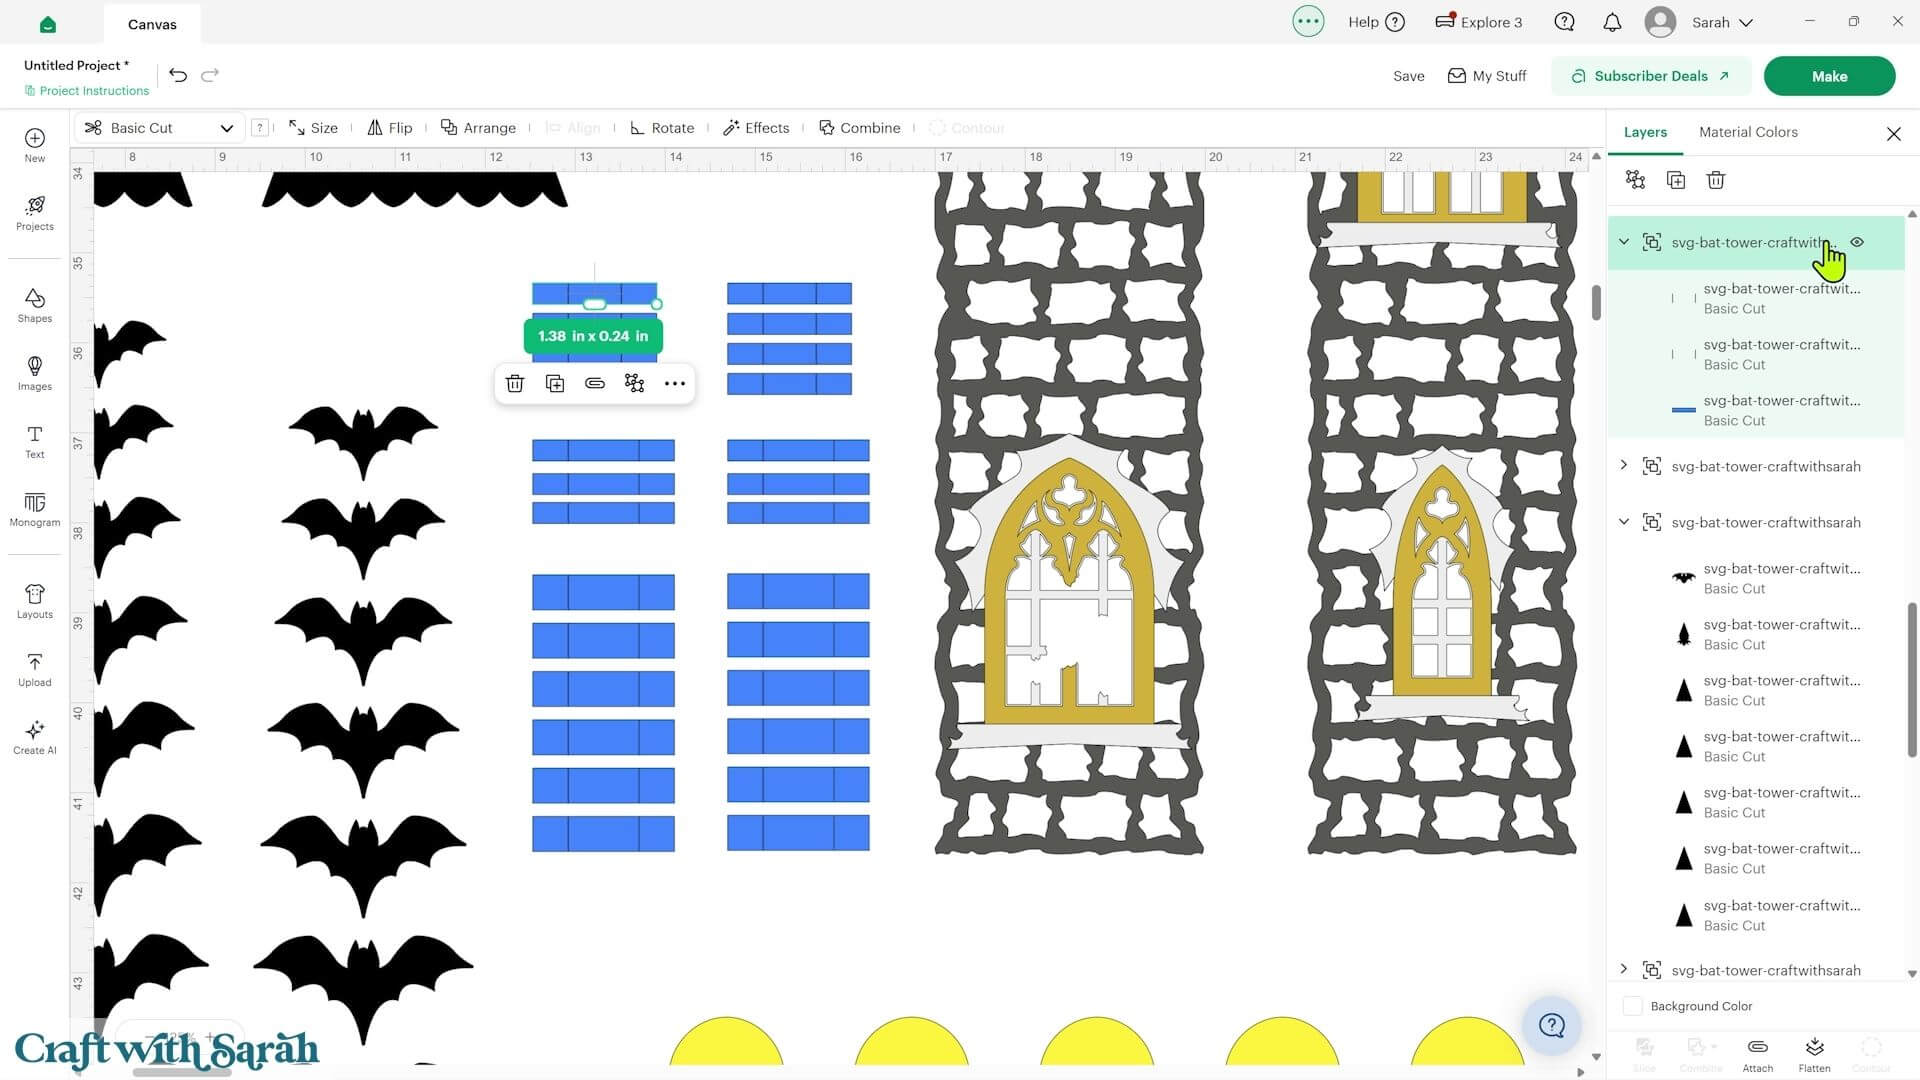
Open the group, change both line layers to ‘Score’, select the whole group and press ‘Attach’.
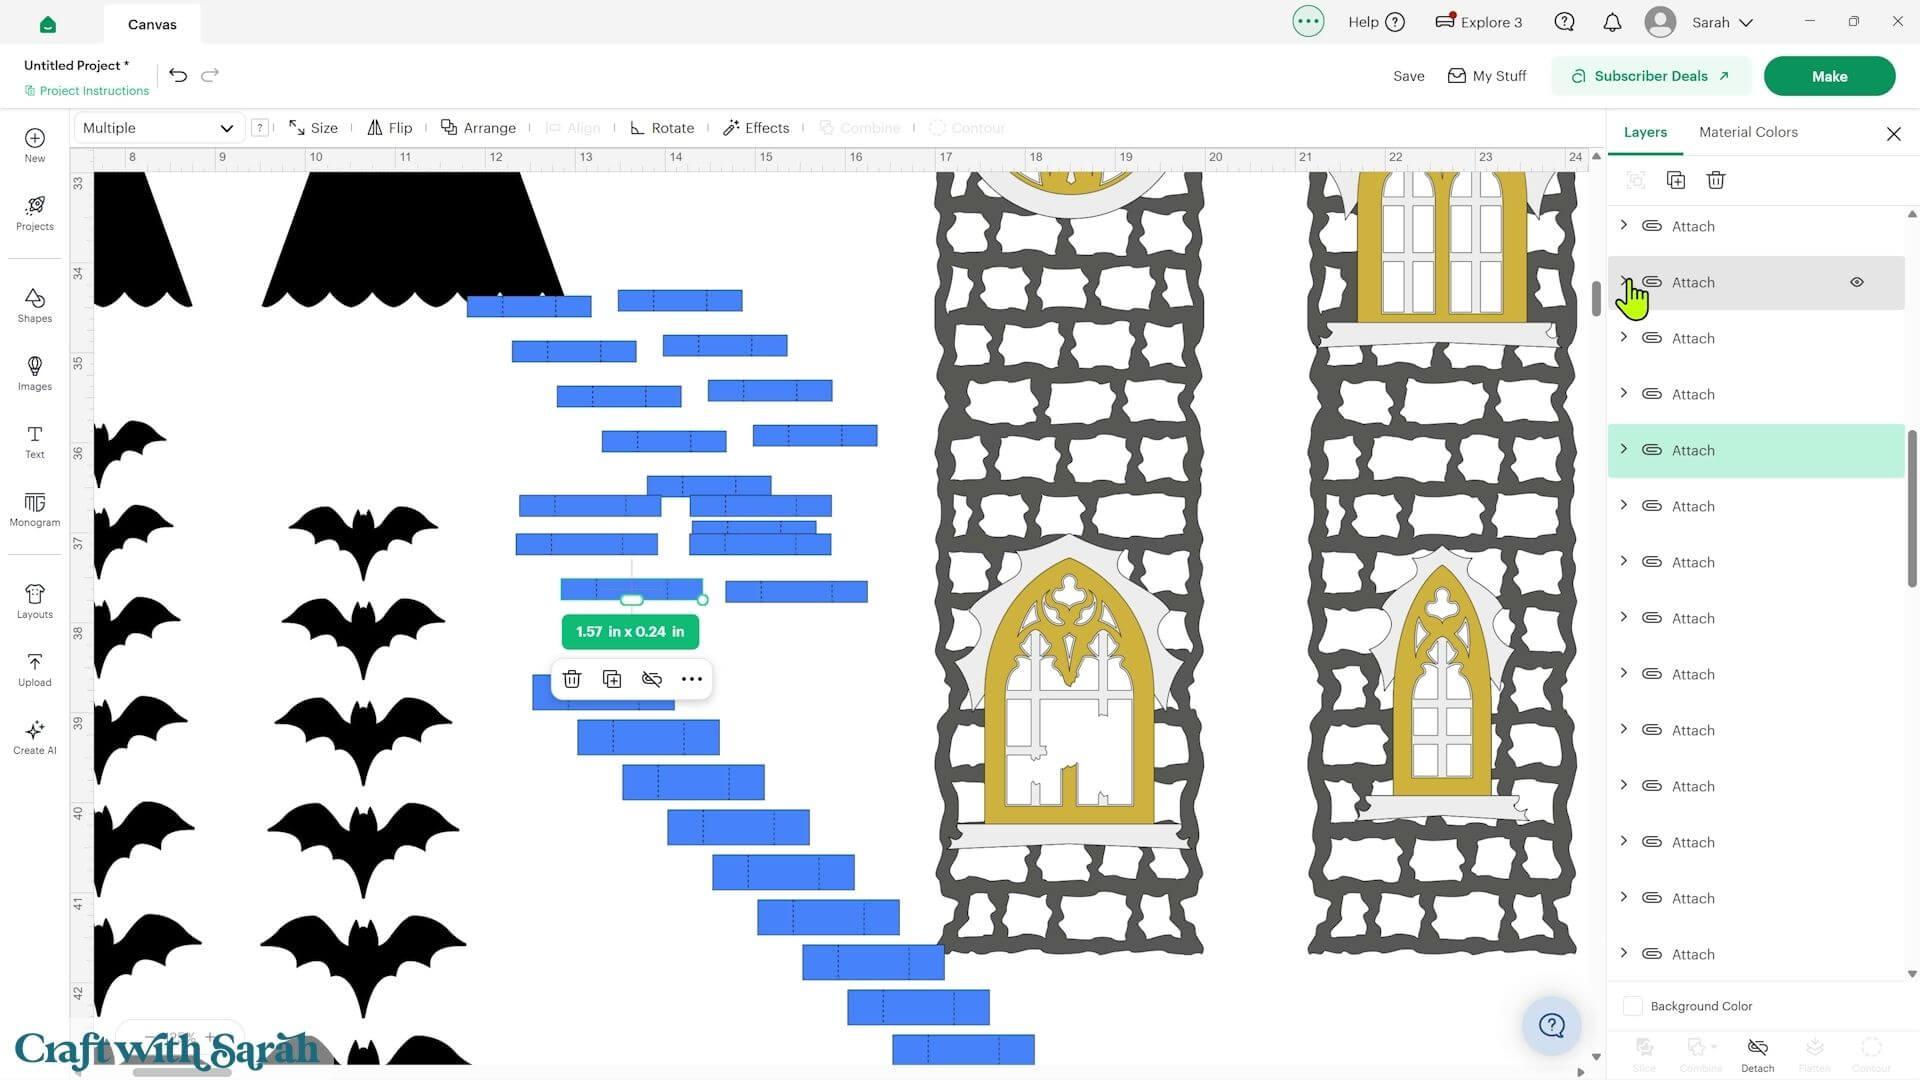
There are several different sizes of acetate strip. Rather than formatting every single one individually, you can format one of each size, delete the remaining copies and duplicate the correctly formatted version until you have the required number.
I also recommend cutting a couple of extra acetate pieces in each size. They’re small, transparent and extremely easy to lose!
Step 3) Cut the project
Save the project when you’ve finished so that Cricut Design Space remembers all of your formatting changes.
Connect to your machine and then click ‘Make’ to separate everything onto the cutting mats.
At the original SVG size, some pieces require 12×12 inch cardstock. If you only have A4 or US Letter cardstock, resize the entire design smaller before cutting.
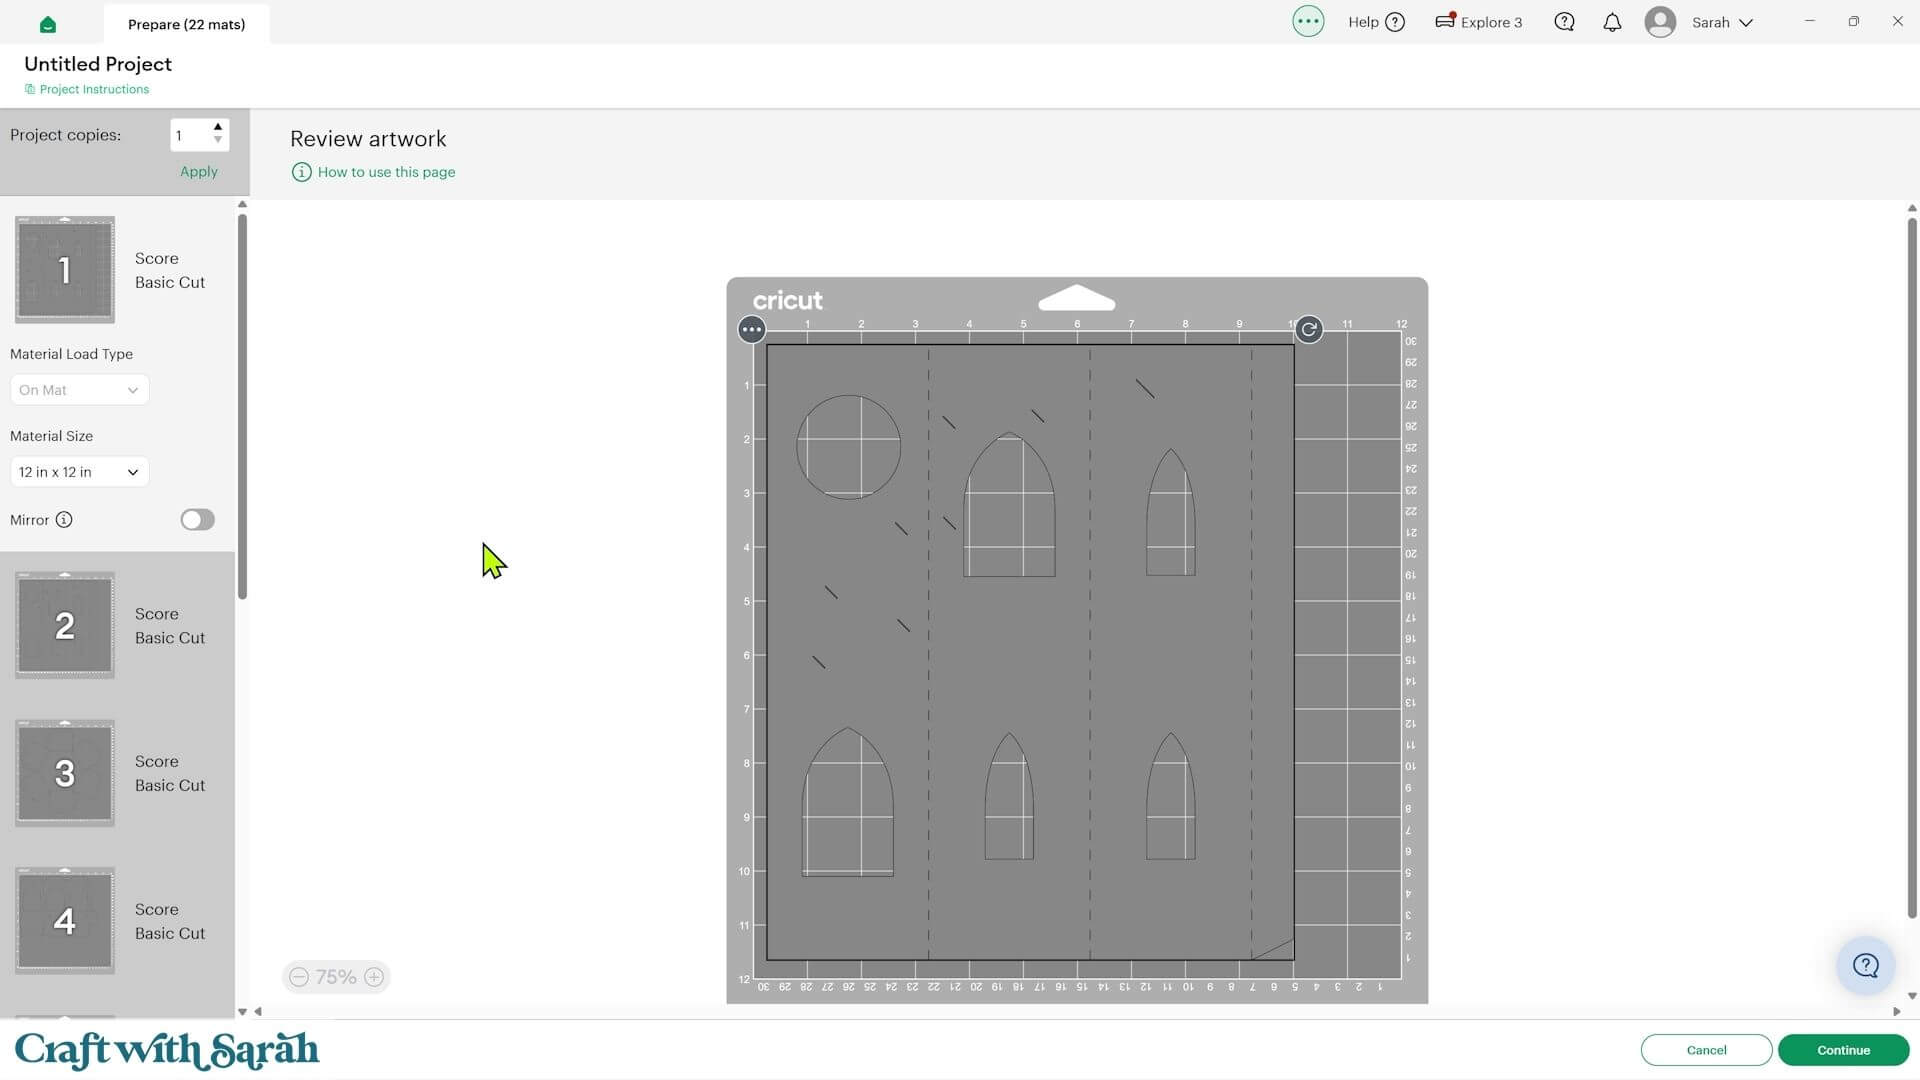
You can change the material size for the smaller pieces and move them around on the mat previews to reduce cardstock waste.
Just make sure none of the pieces overlap.
Cut the yellow bell pieces from thin paper rather than cardstock.
For the acetate, I use the ‘Kraft Board’ material setting. Despite Cricut Design Space having a dedicated acetate setting, I find that it doesn’t cut deeply enough for the acetate I use.
I also use the Kraft Board setting for my glitter cardstock and the Copy Paper setting for the yellow paper.
Follow the on-screen instructions to get everything cut.
Step 4) Fold the tower pieces
There are quite a few steps involved in constructing the tower walls, and the order is important.
It’s easiest to complete one full set of wall pieces and then repeat the process for the matching set.
Here’s what it will look like when we’re done:
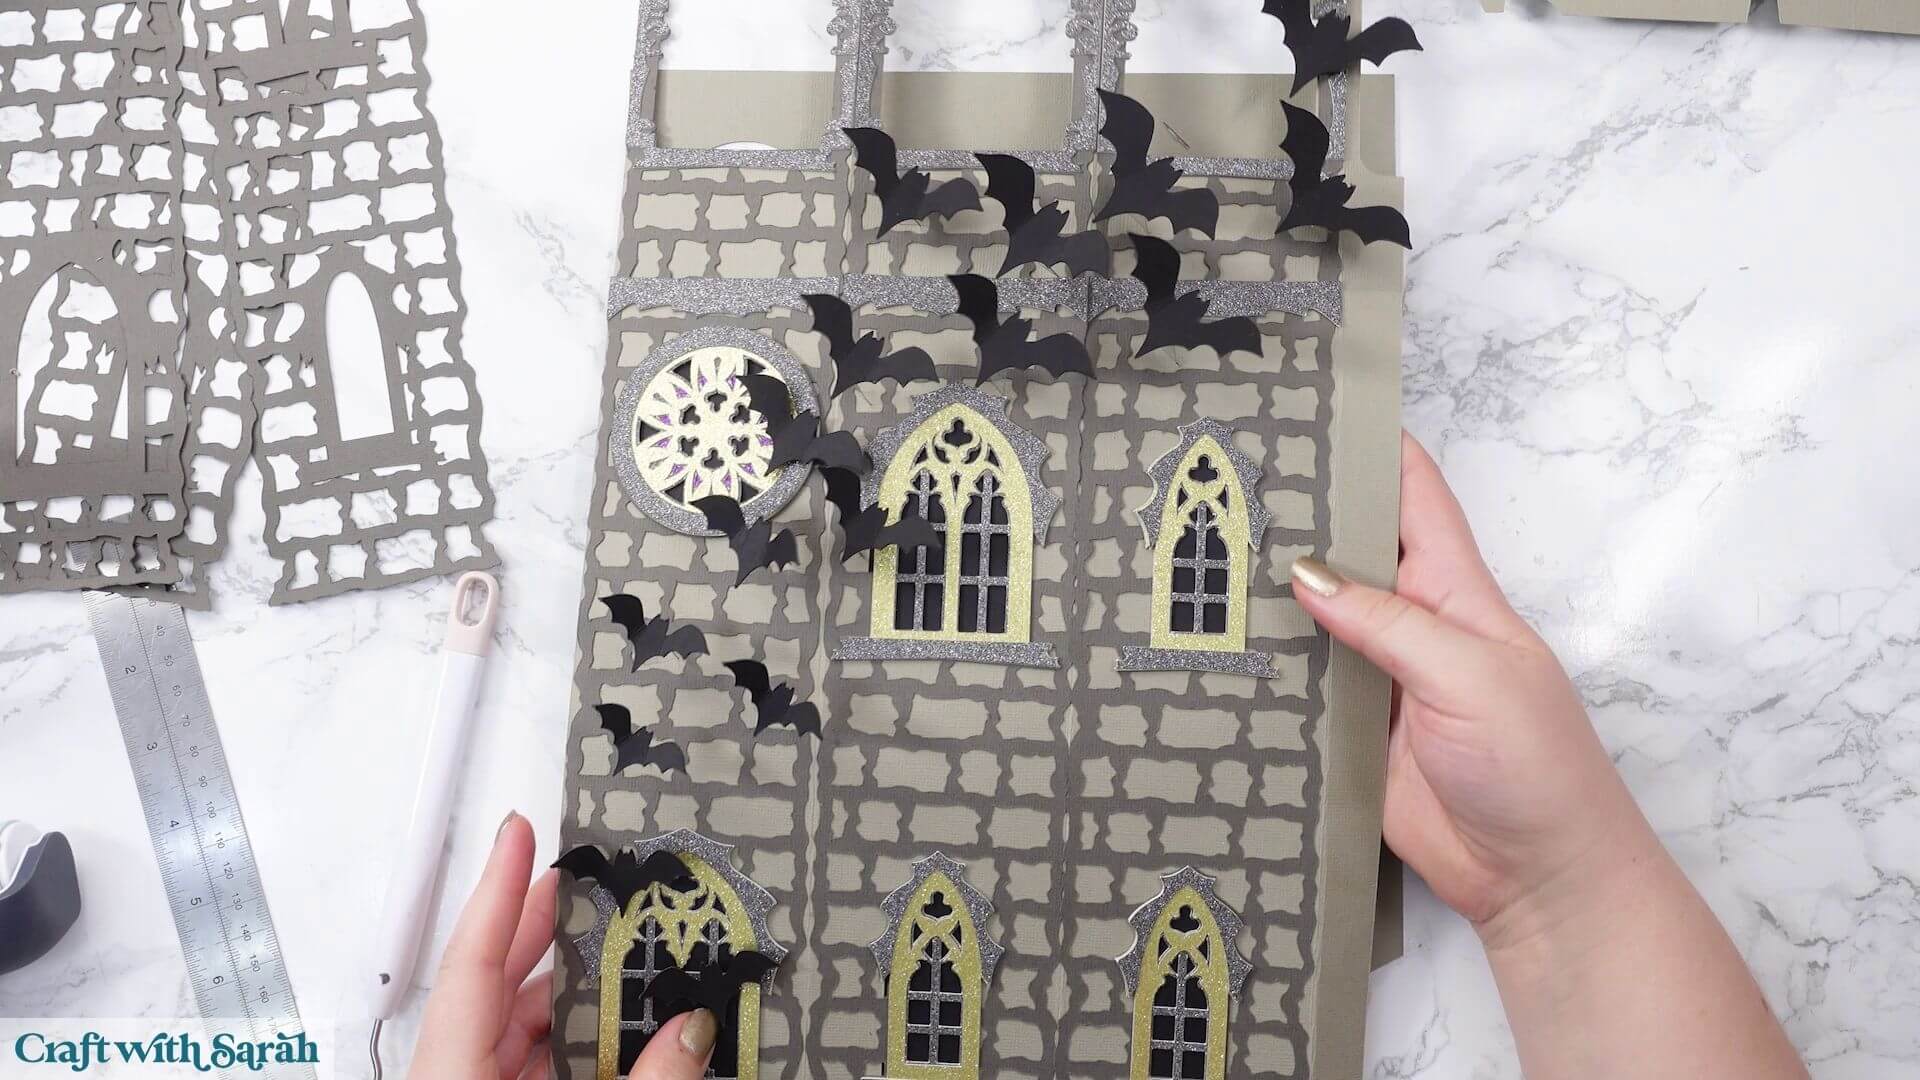
Start by folding all of the score lines before adding any of the decorative layers.
The tower pieces are quite large, and Cricut score lines can sometimes be difficult to see.
I find it helpful to place a ruler against the score line and gently start the fold in the opposite direction first. This makes the score line more visible and easier to work with.
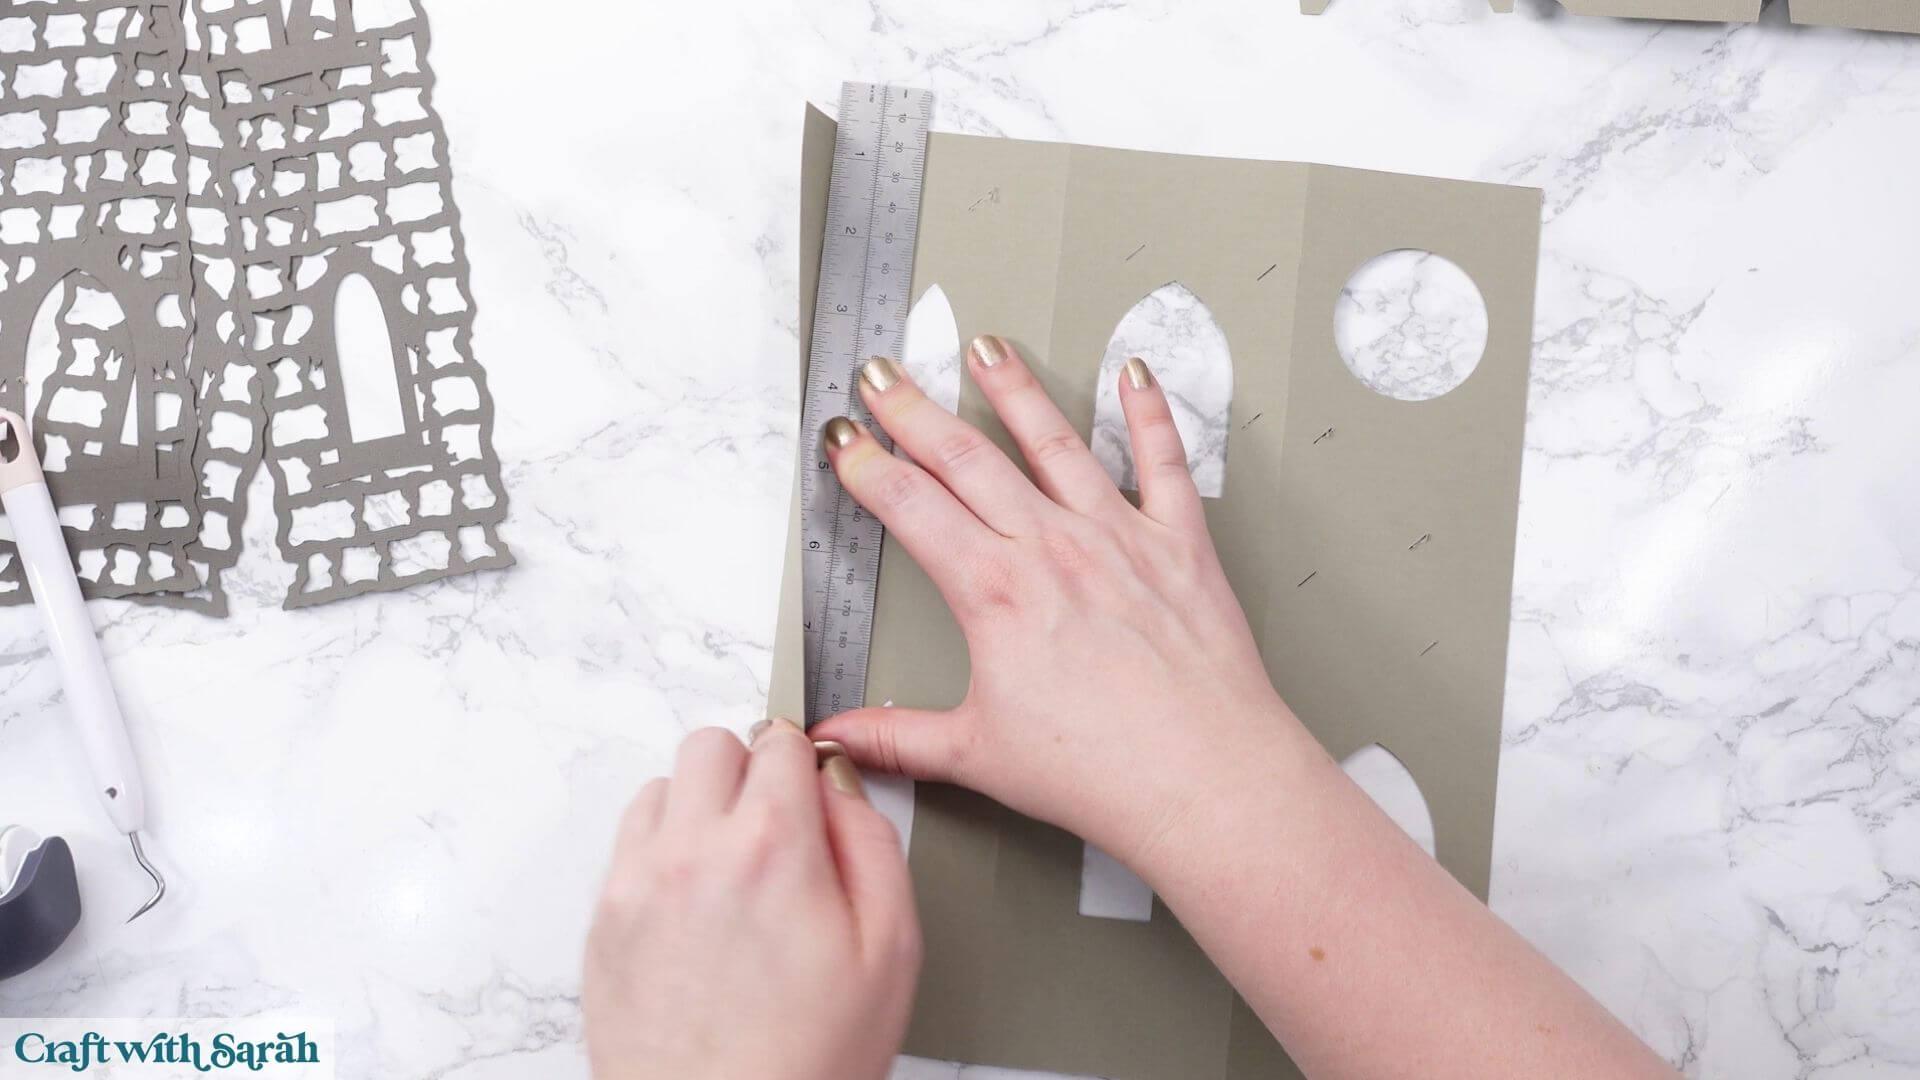
Turn the cardstock over and fold it back in the correct direction.
Use a brayer, scraper tool or similar tool to make the folds crisp.
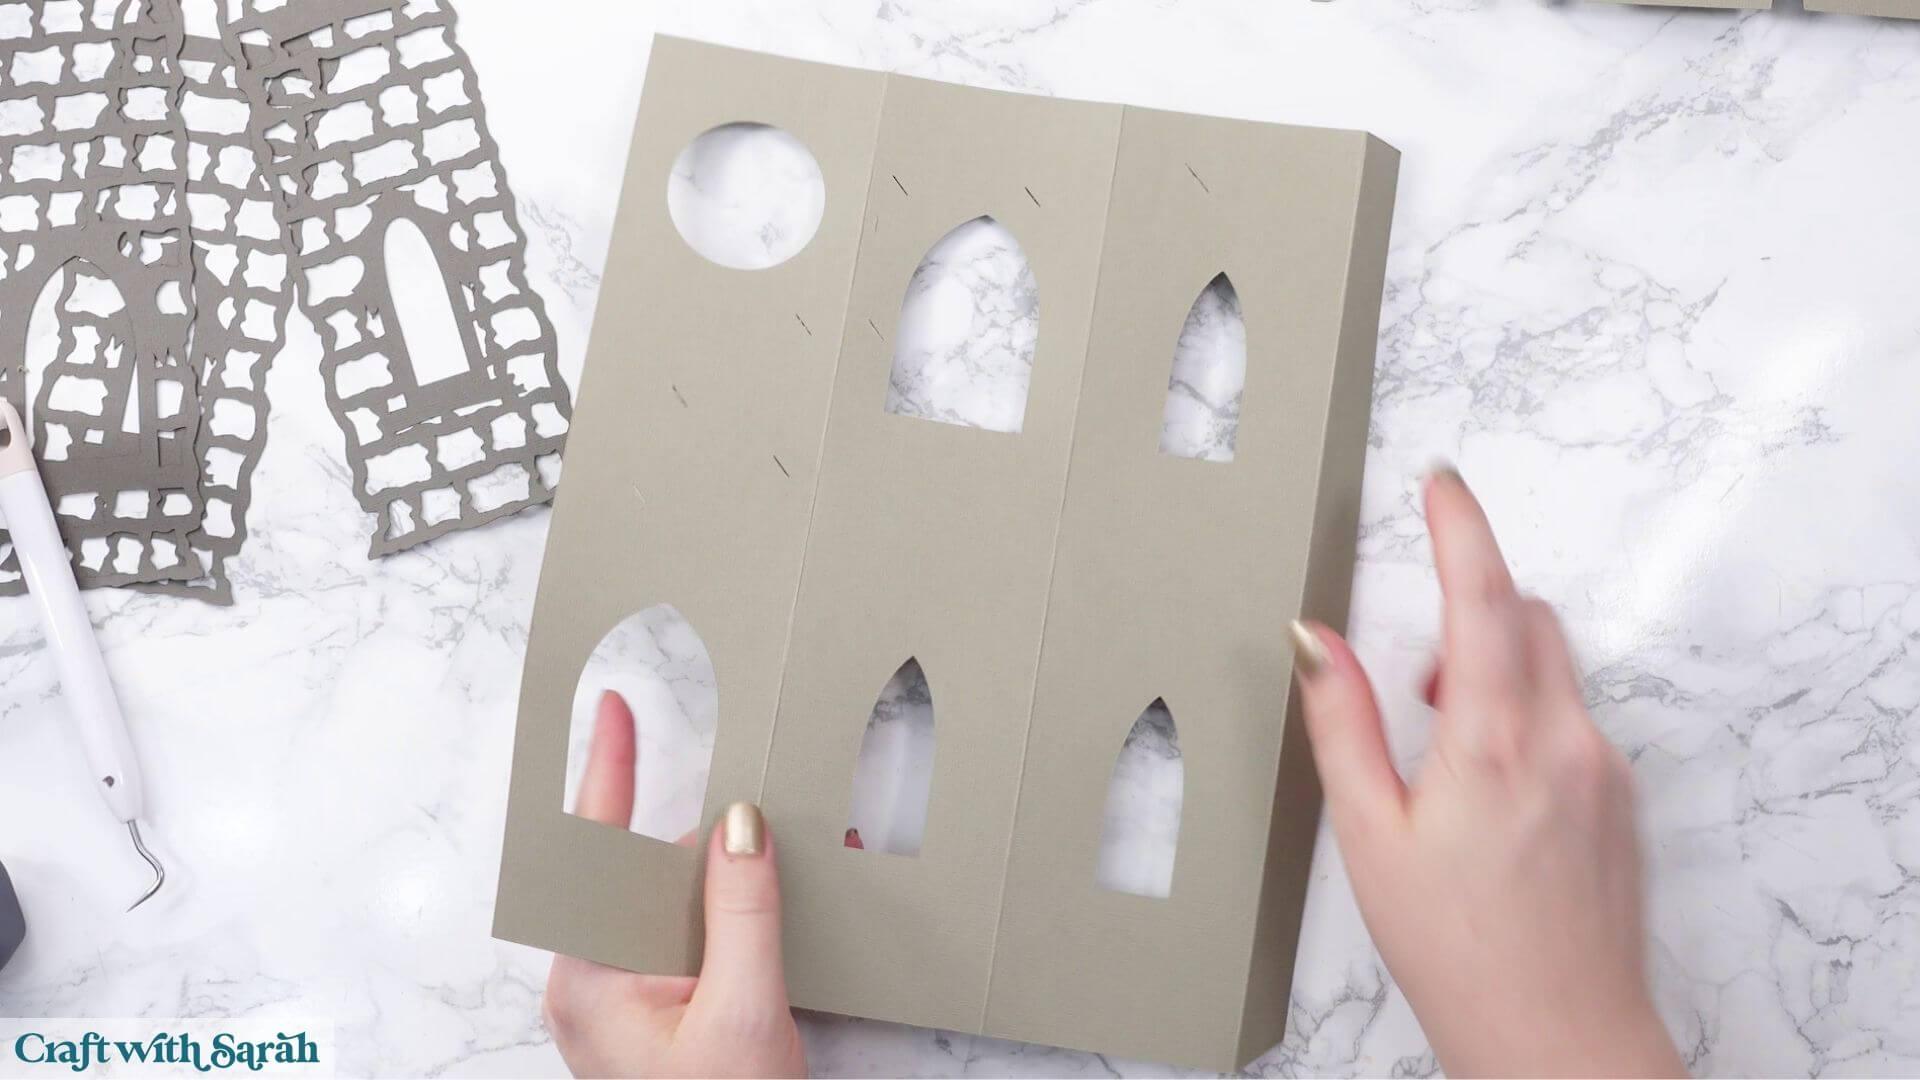
Also fold the structure pieces for the top of the tower.
Be particularly careful around the narrow areas beside the windows and on the thin joining tabs. Support those areas with your fingers as you fold so that the cardstock doesn’t tear.
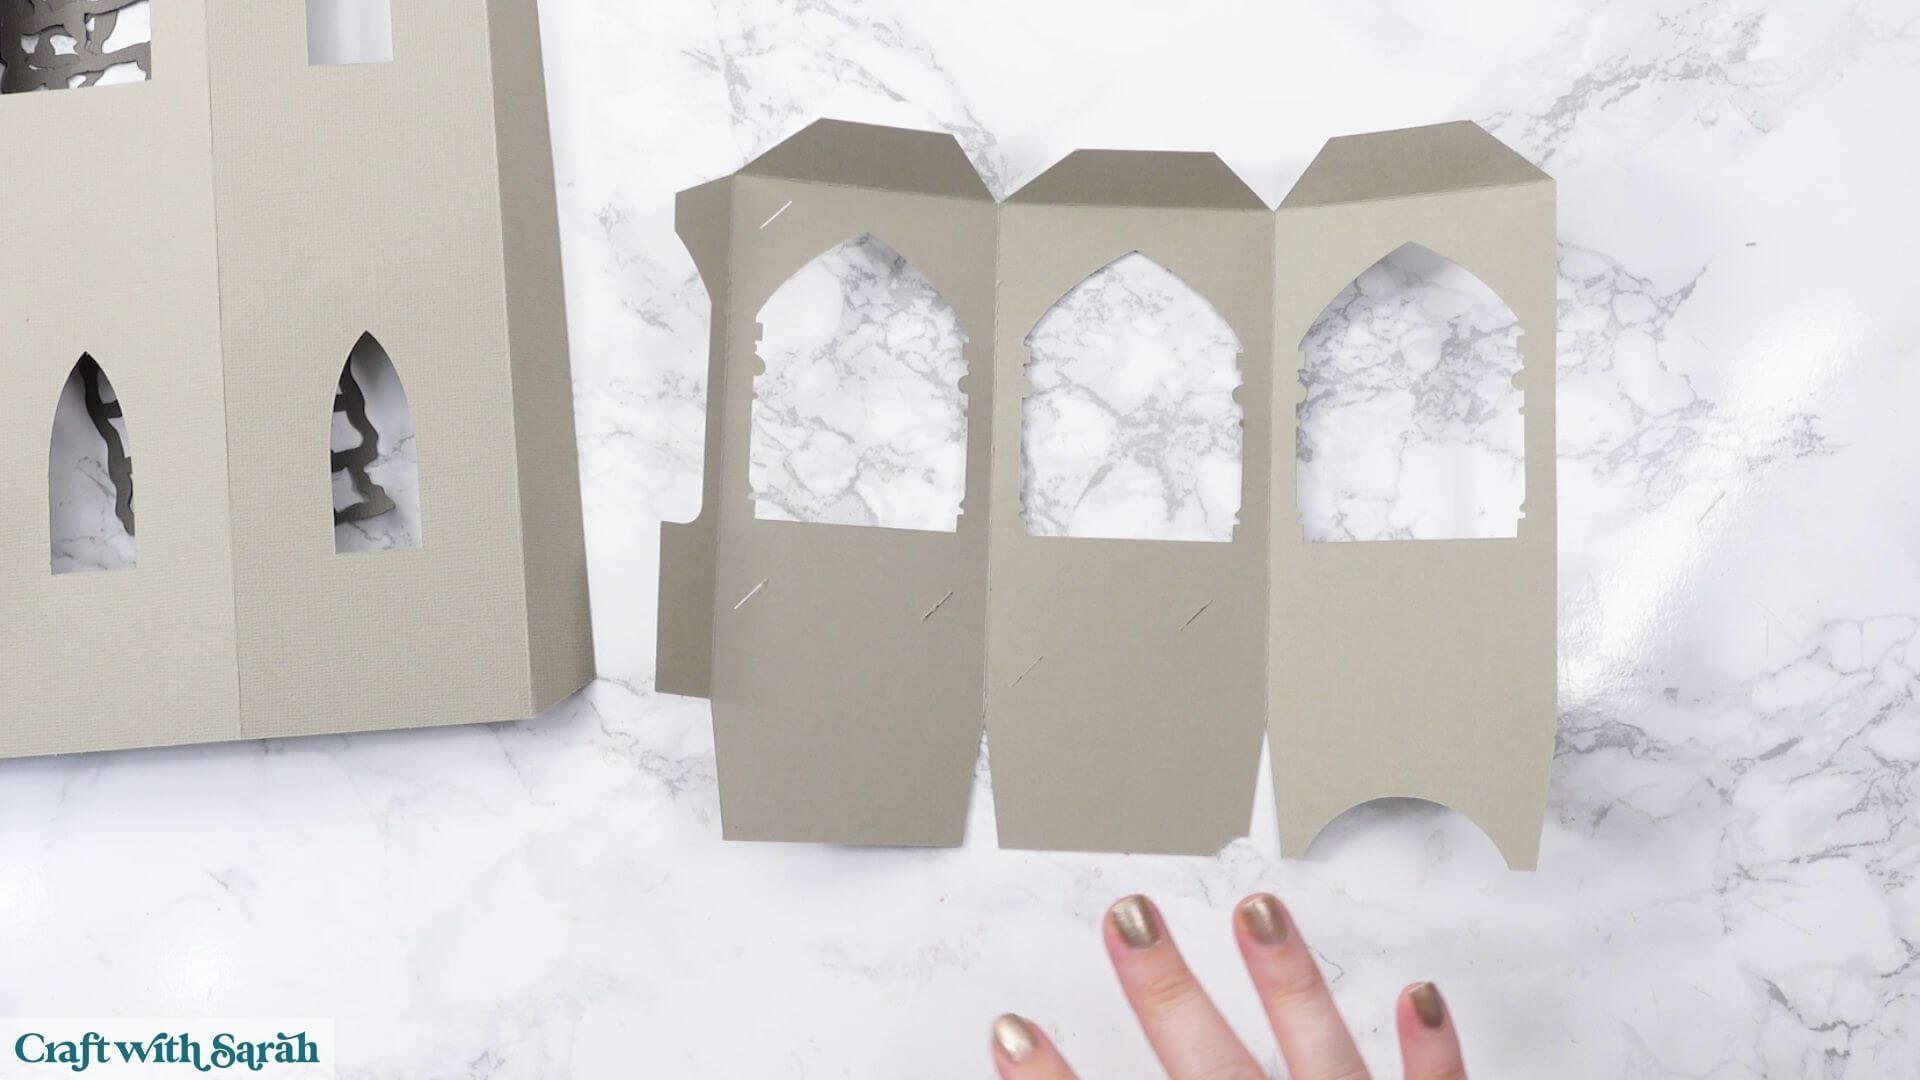
Step 5) Add the brickwork
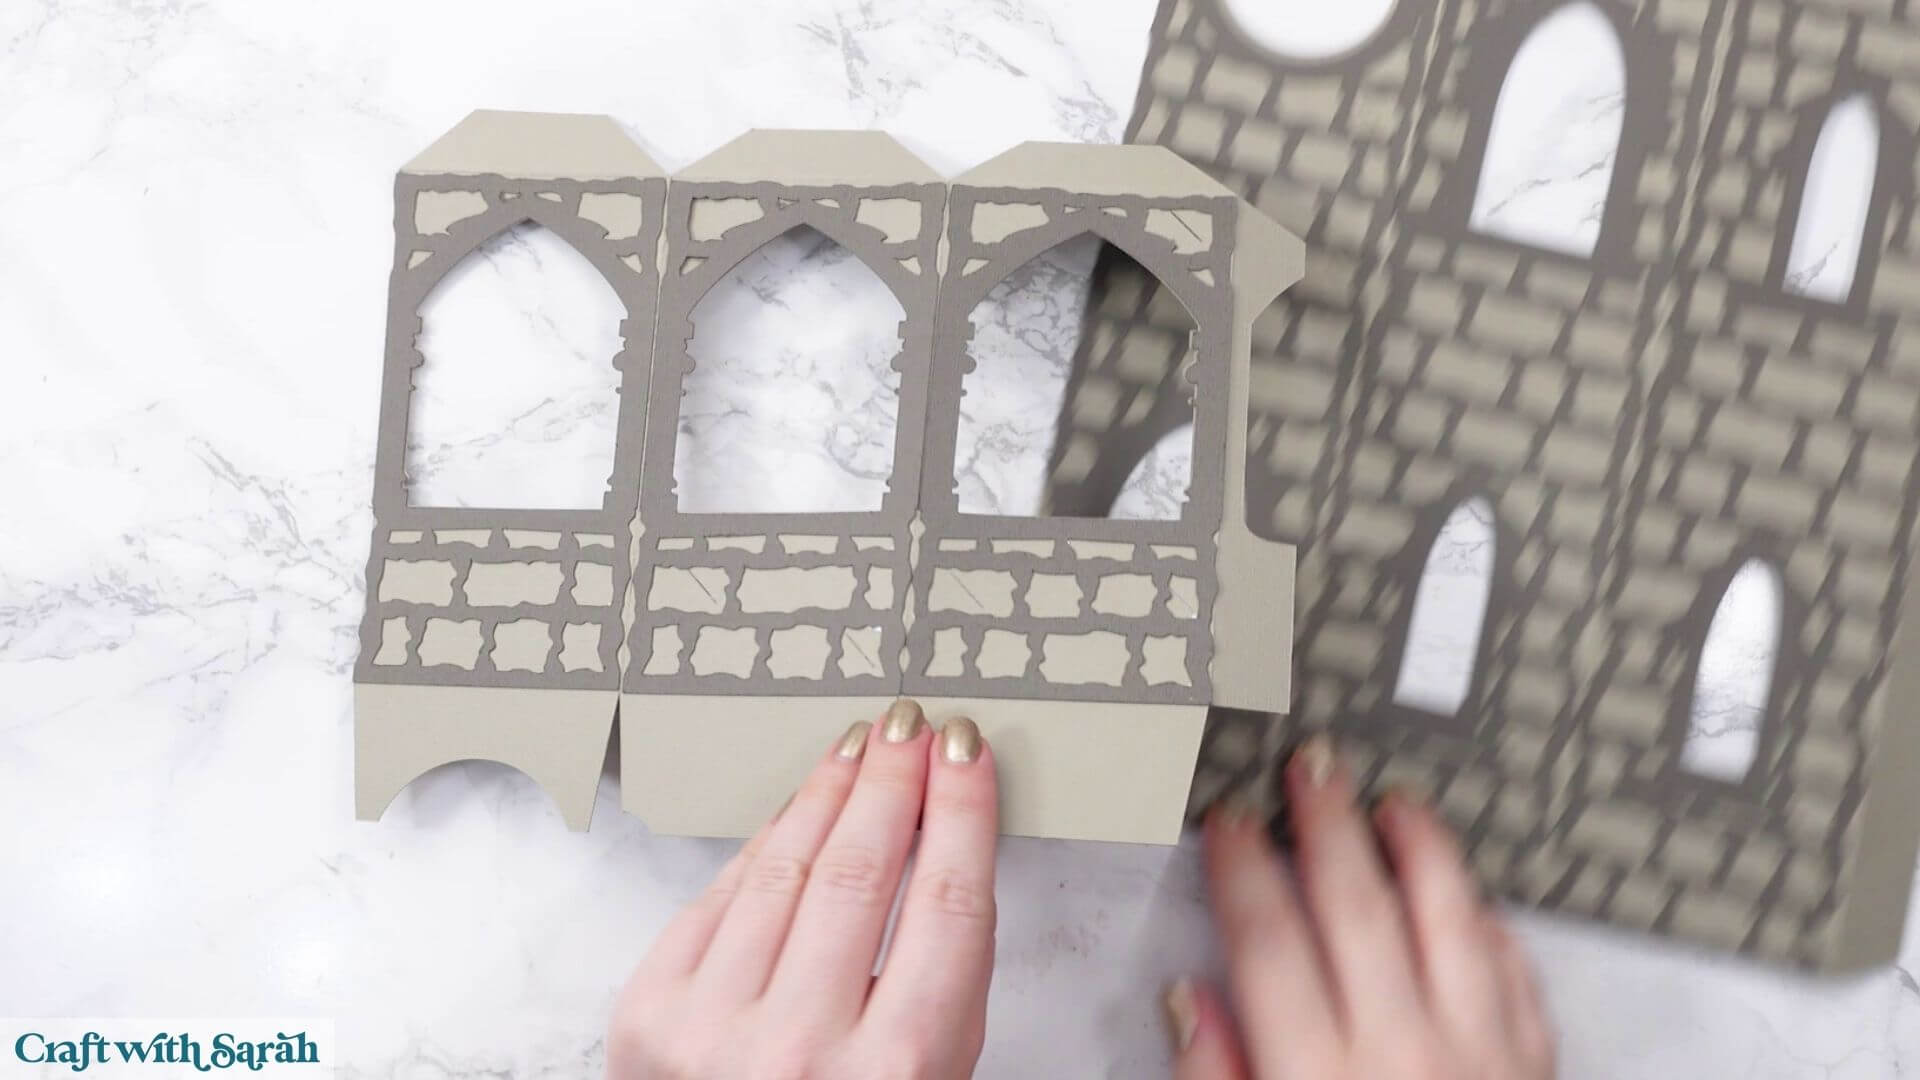
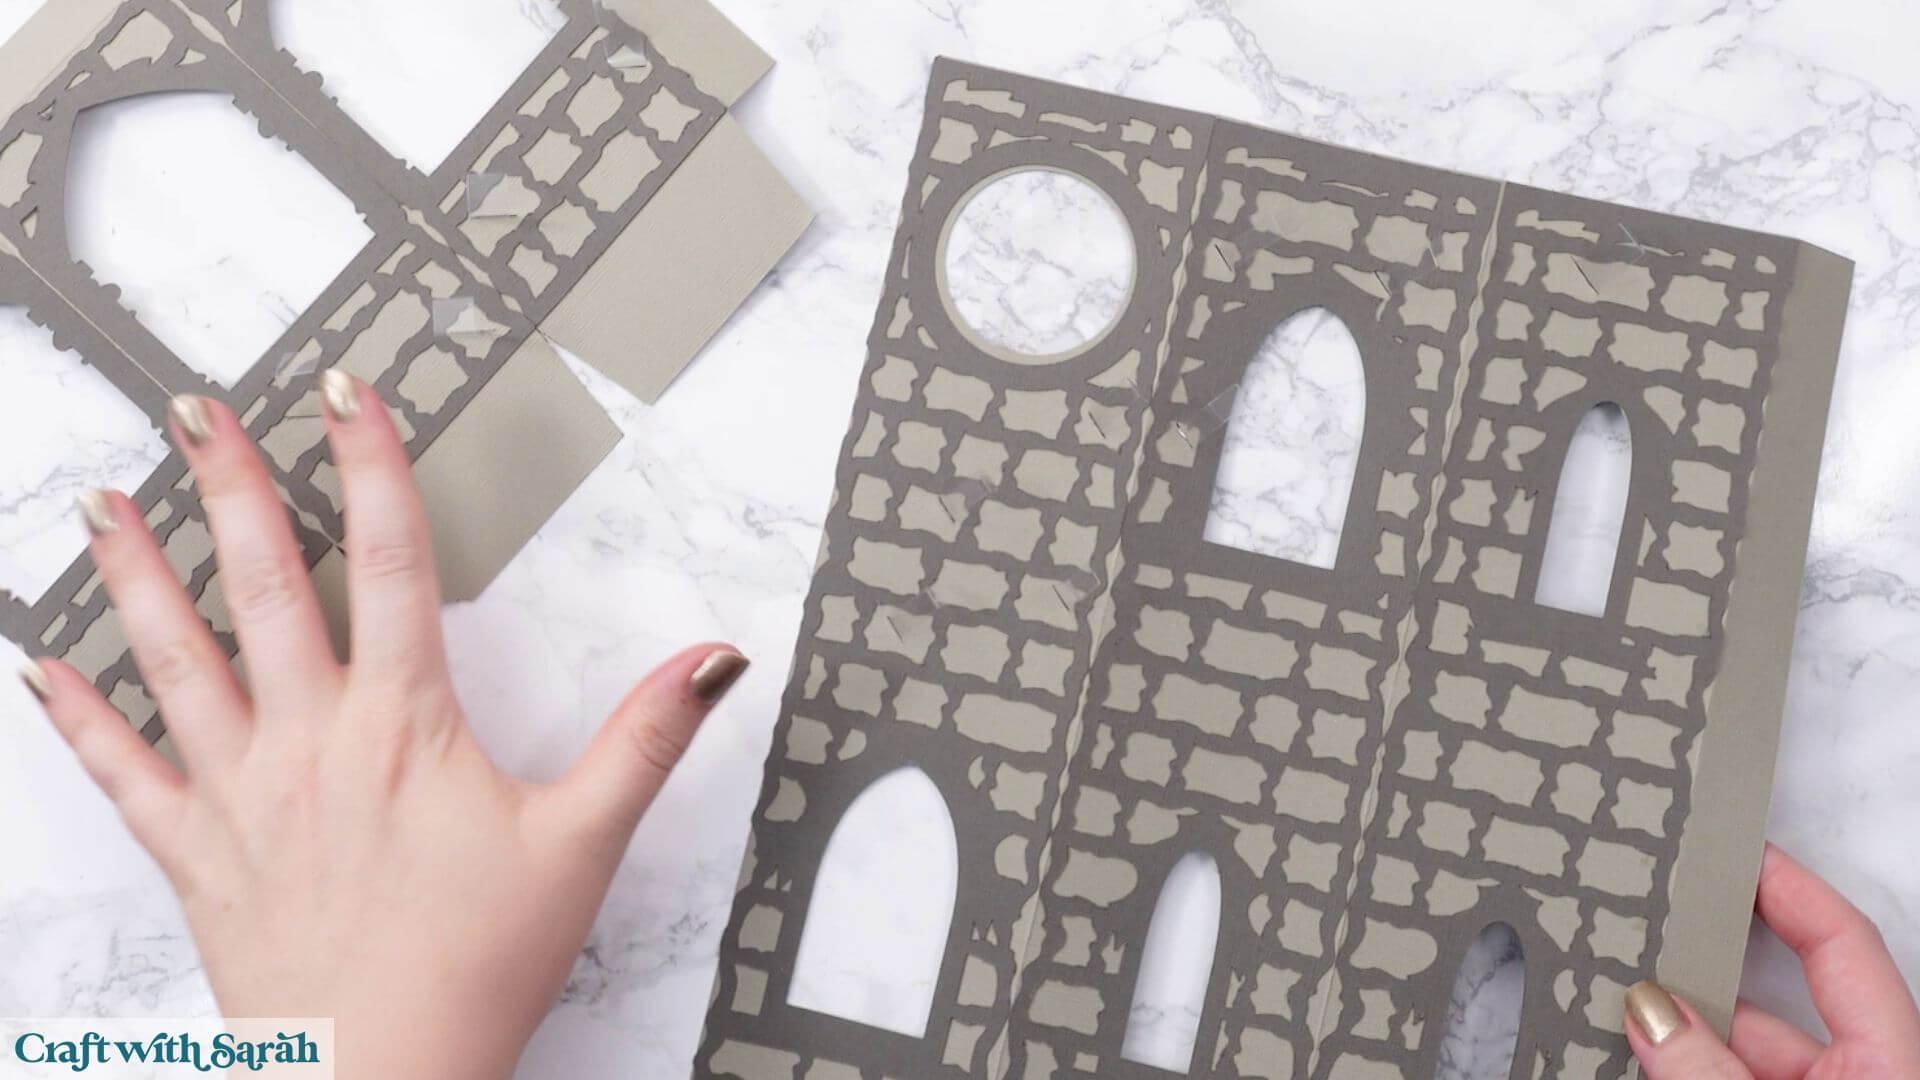
Glue the dark grey brickwork pieces onto the lighter grey tower walls.
The different wall pieces can be identified by the windows. One has two smaller windows, another has the circular opening and the middle section has two differently sized windows.
Avoid getting glue across the fold lines as this could make it more difficult to construct the tower later.
Bearly Art Glue works particularly well here because the fine nozzle makes it easier to apply glue to the narrow sections of brickwork.
Line up the window openings and gently press the brickwork into place.
Don’t press too firmly or you may squeeze glue out through the narrow gaps.
Make sure the cardstock doesn’t extend beyond the bottom edge of the tower wall as this could stop the finished tower from standing flat.
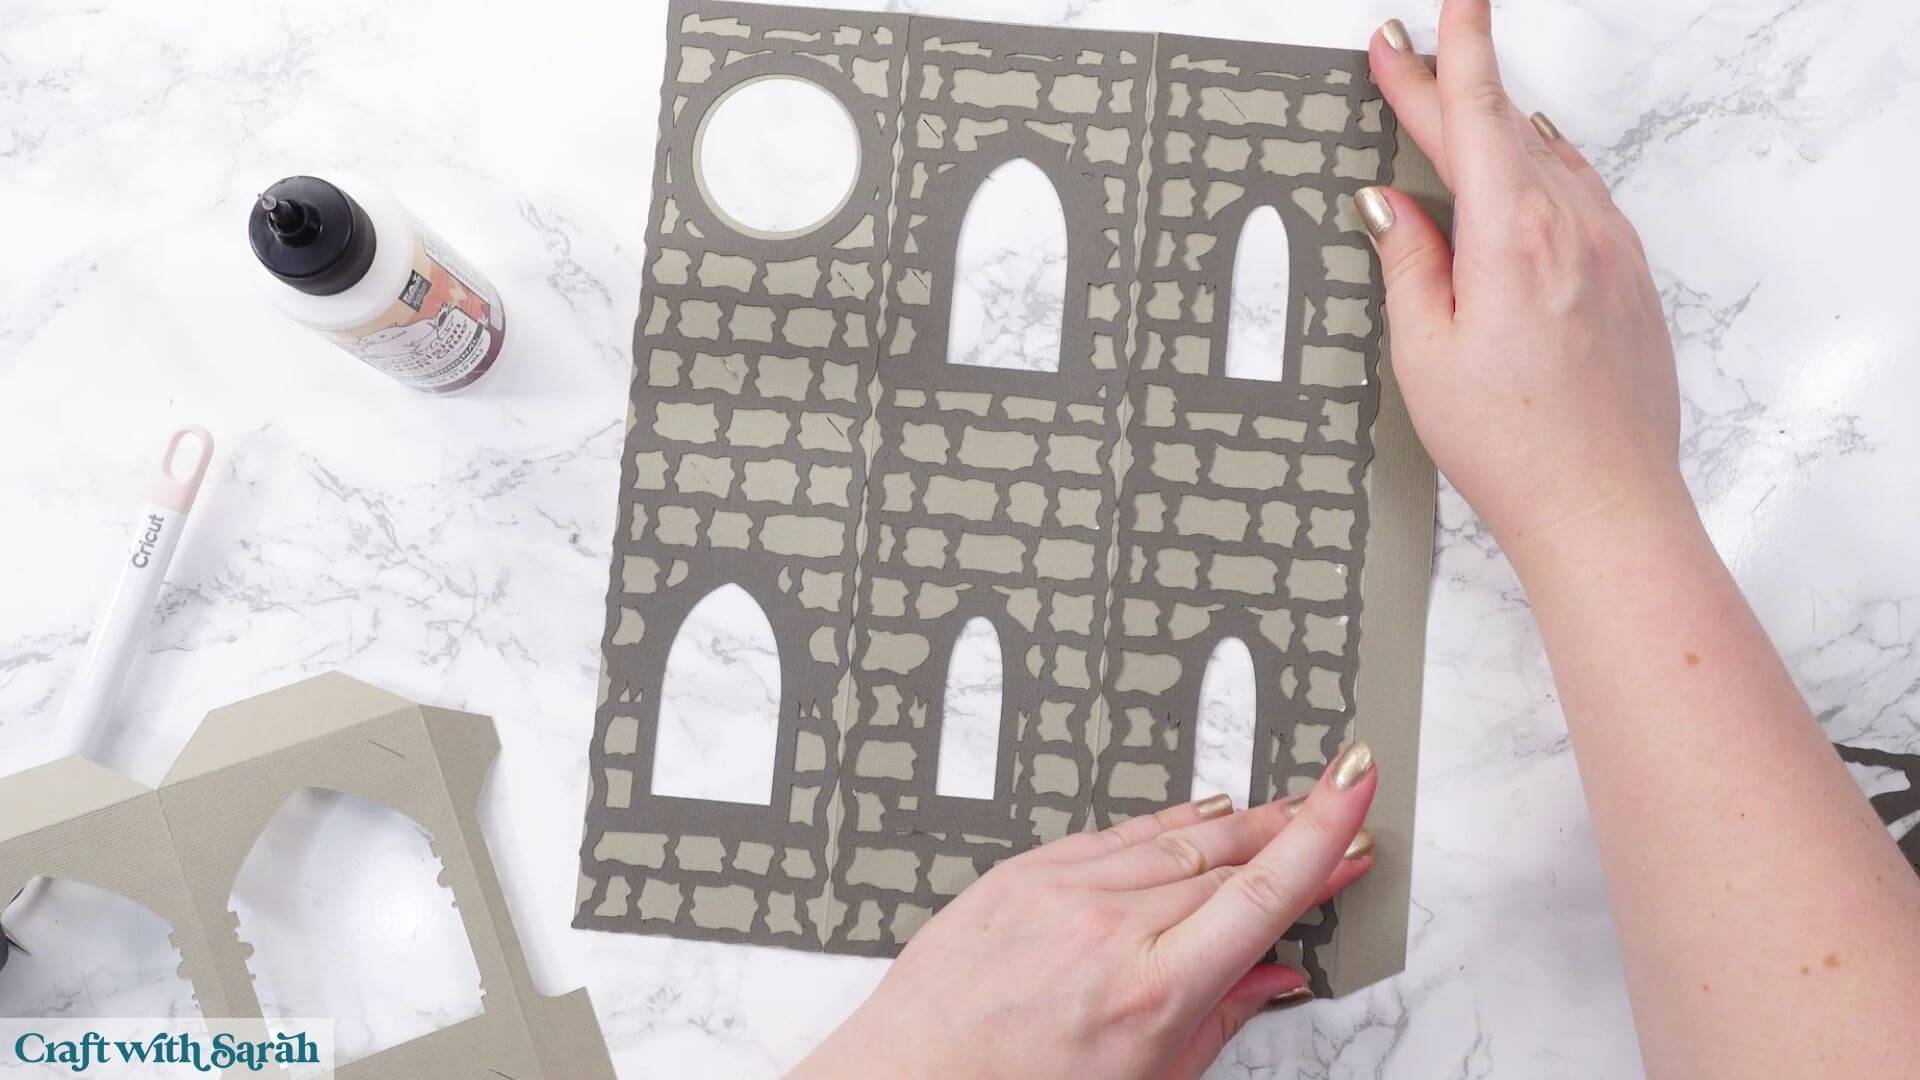
Repeat for the top section of the tower.
Step 6) Add the acetate strips
Fold each acetate strip along its score lines to create a small staple-like shape.
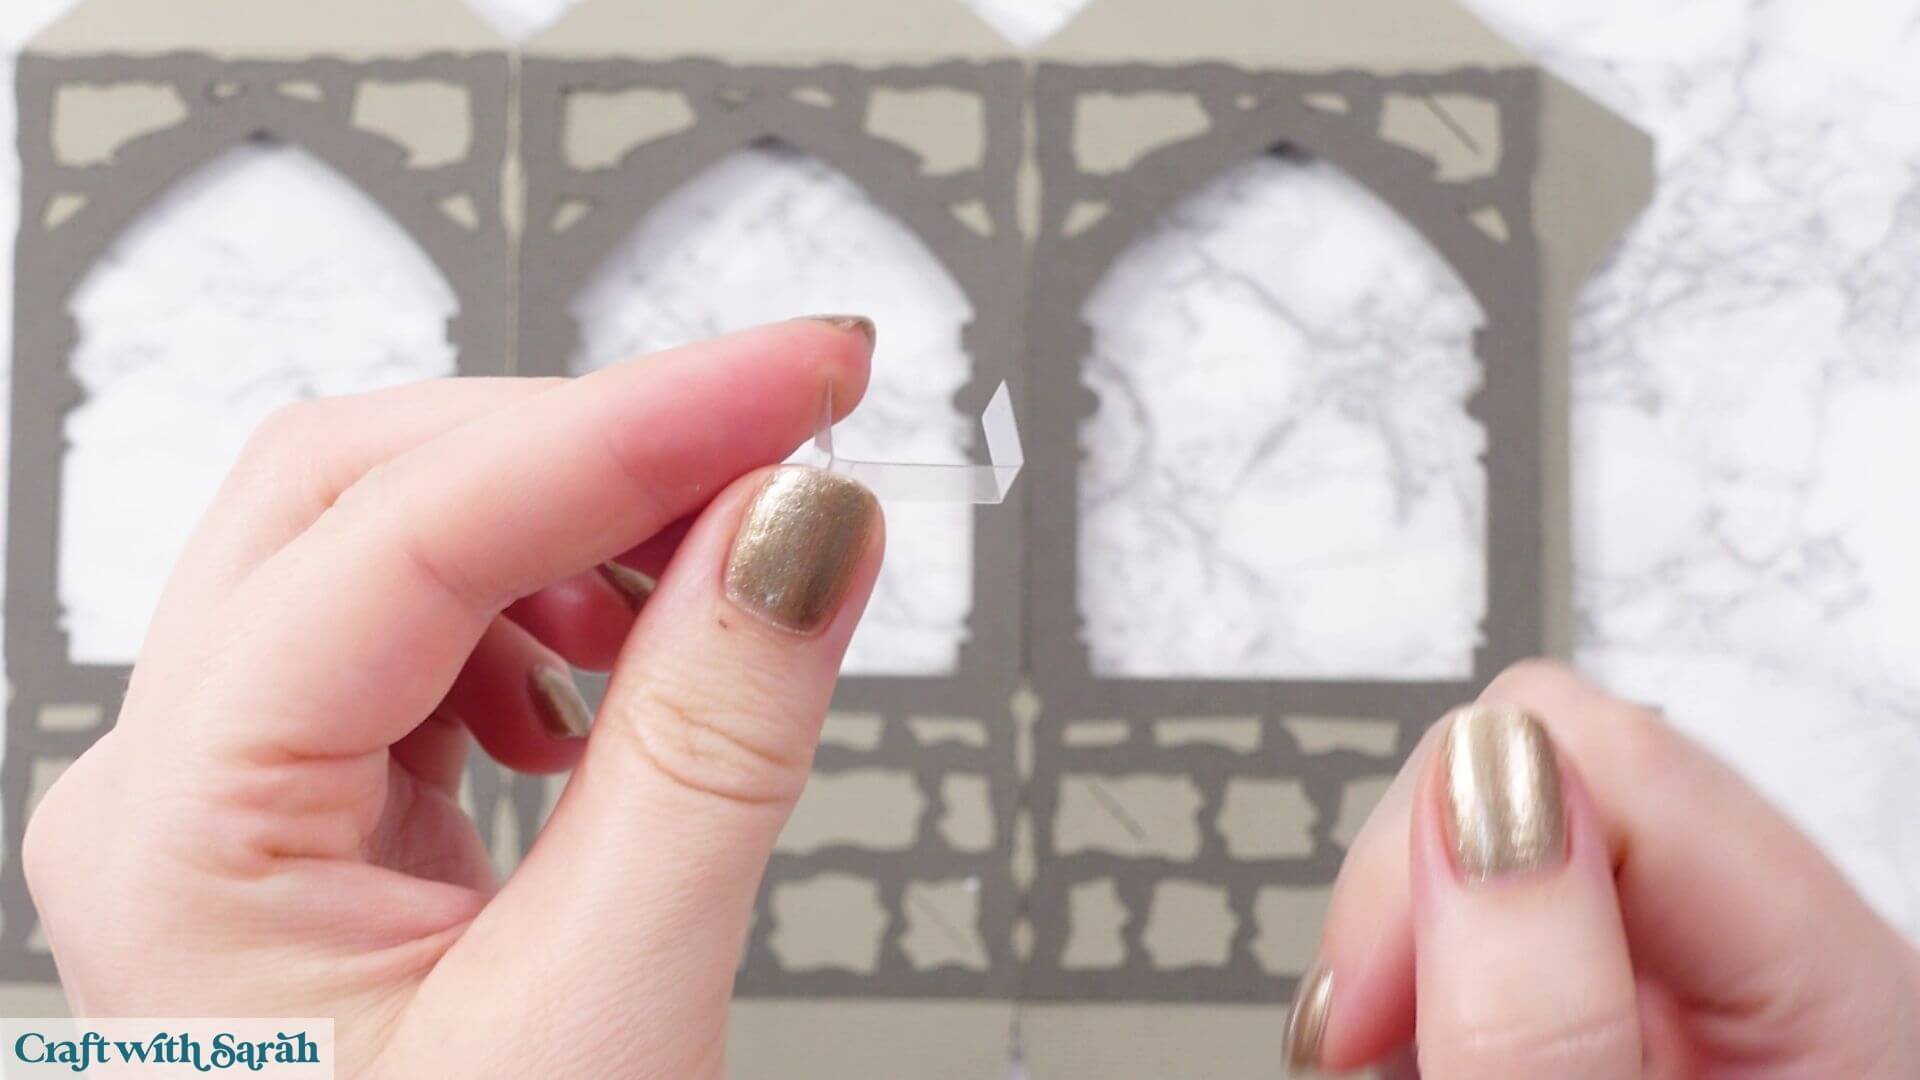
One end will be threaded through a slit in the tower wall and taped to the back. The other end will eventually hold a bat.
Thread one end of an acetate strip through a slit from the front of the tower.
Turn the cardstock over, fold the acetate against the back and secure it with a small piece of sticky tape.
Try not to put the tape over any fold lines or window openings.
In most places, the acetate can be folded upwards on the back. However, some slits are close to score lines, so you may need to fold the acetate downwards instead.
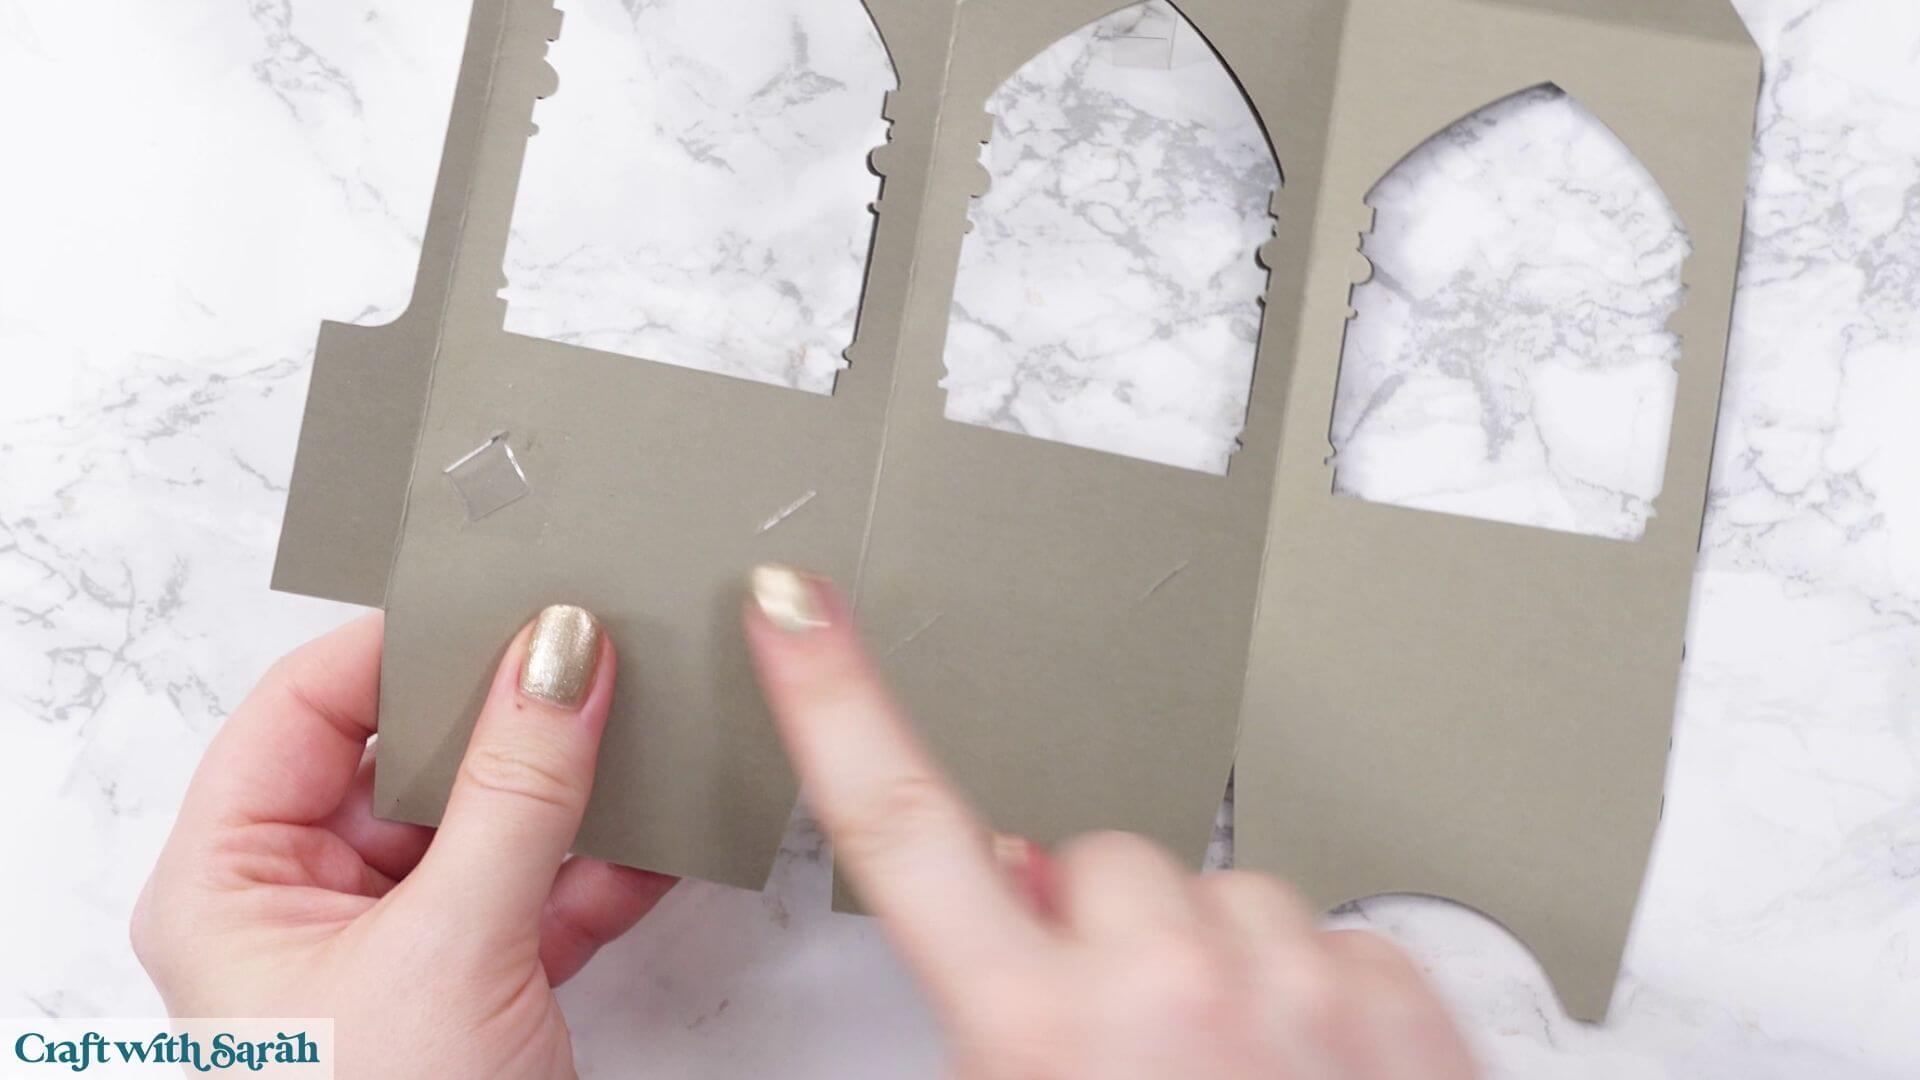
The exact size of acetate strip used in each position isn’t hugely important, although the larger pieces are intended for the bats further away from the windows, helping to create the appearance of them flying further out from the tower.
Continue until every slit that you want to use has an acetate strip secured through it.
Step 7) Join the wall sections
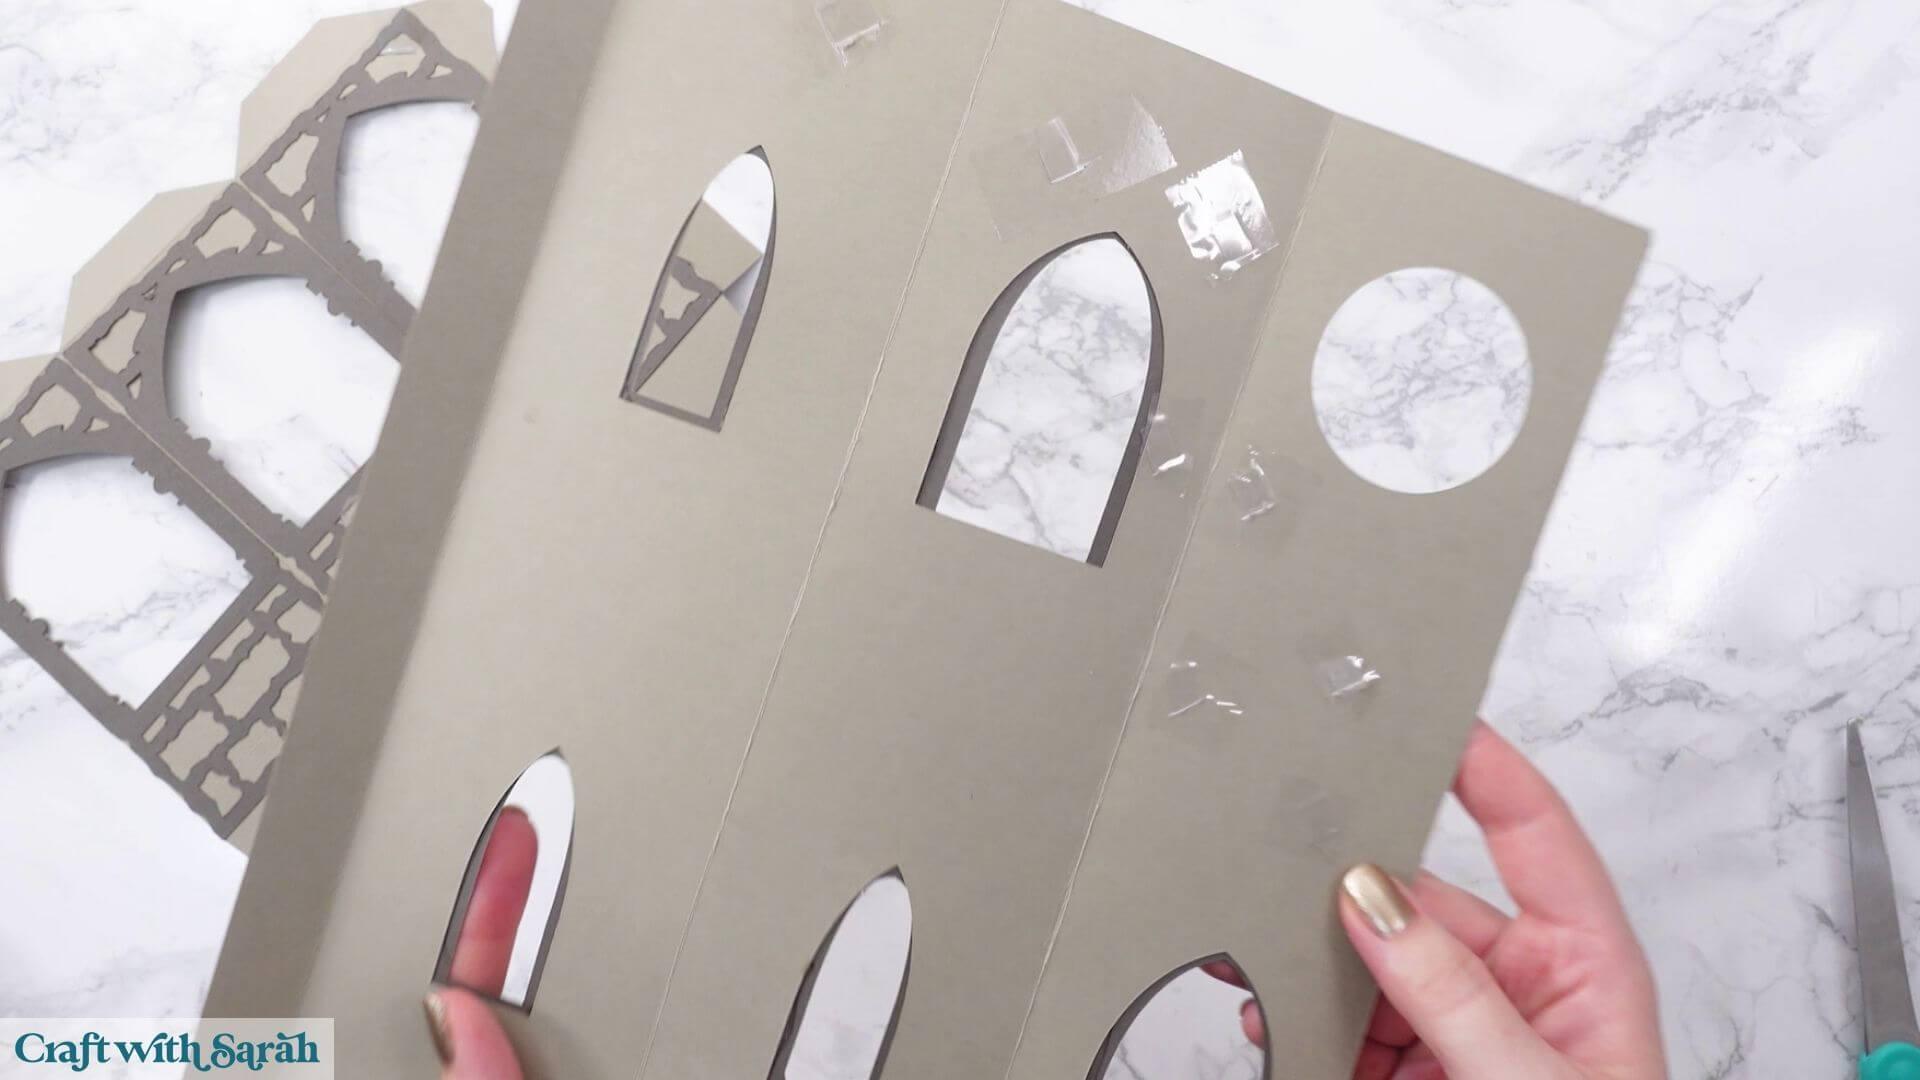
Place the corresponding upper and lower wall pieces together.
The circle and outer edges will help you work out the correct positioning.
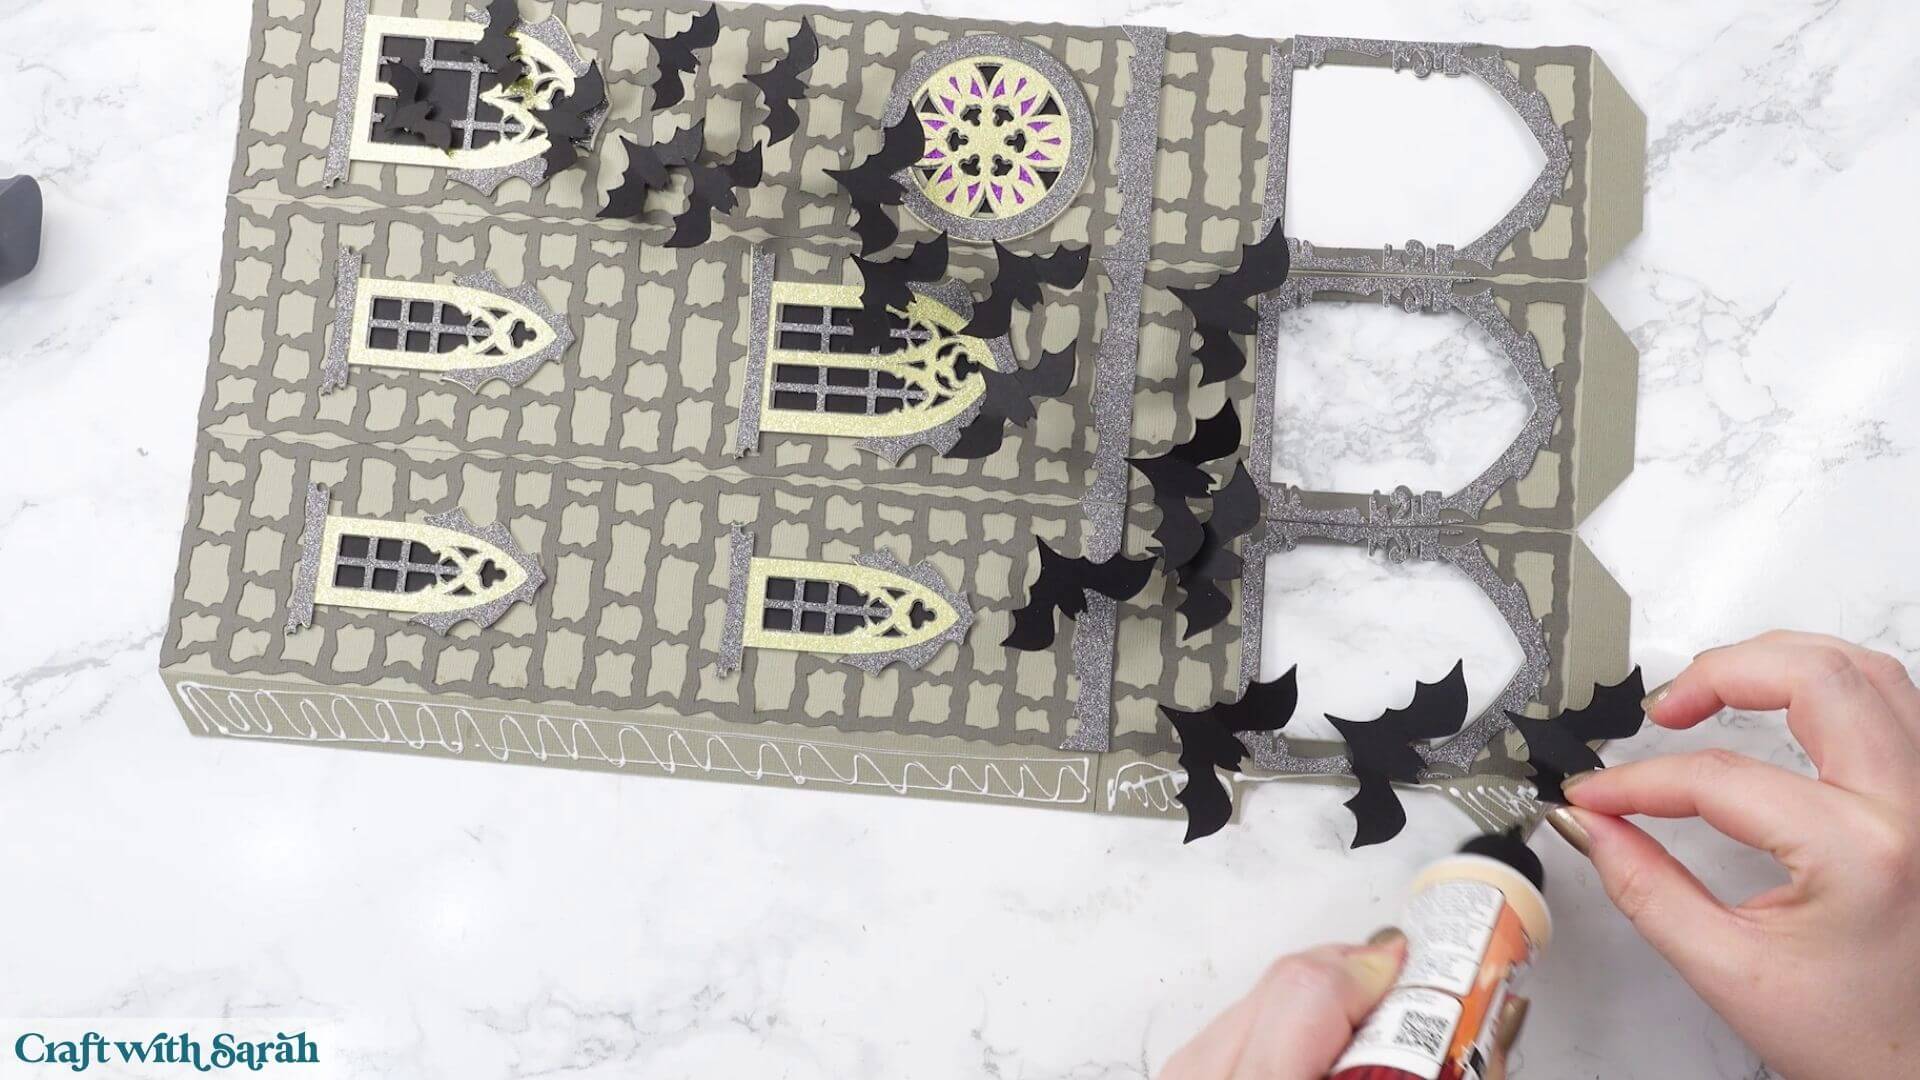
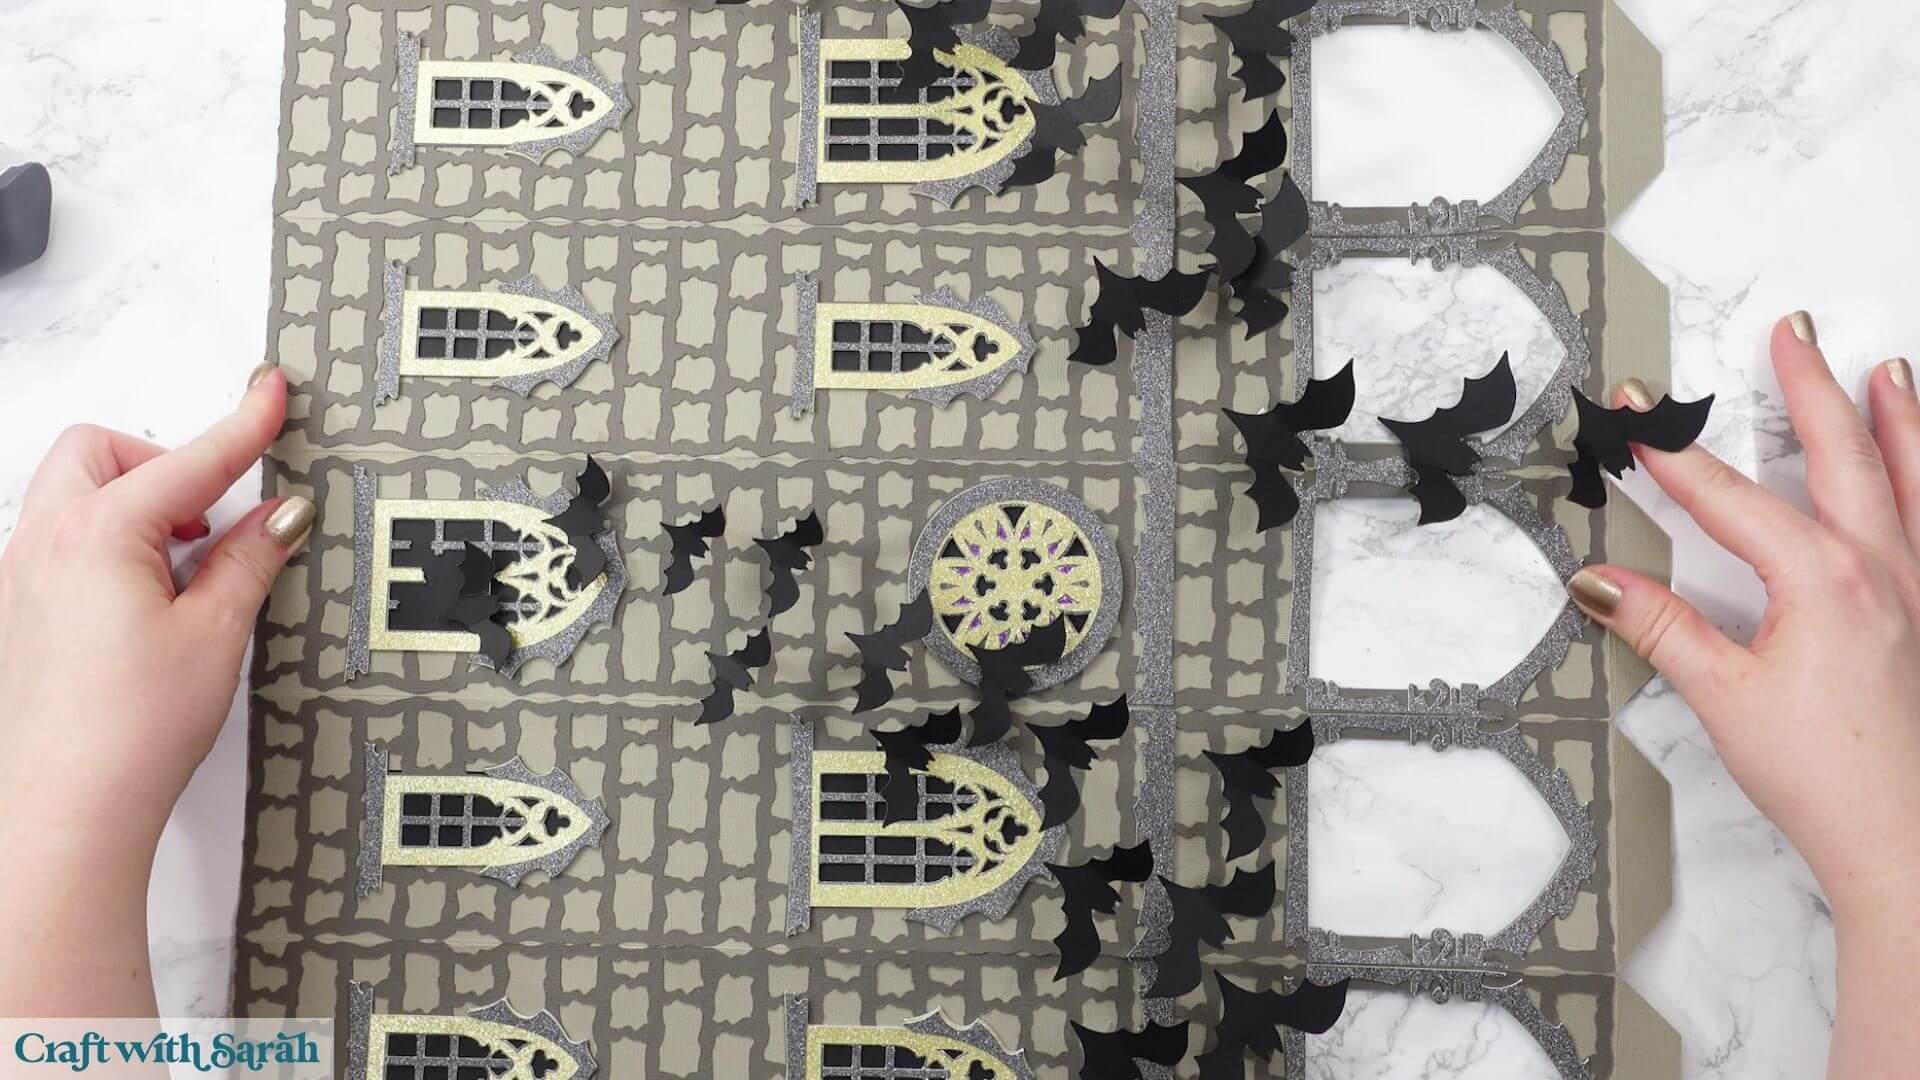
Add glue to the joining areas and carefully position the pieces together, making sure none of the acetate strips become trapped between them.
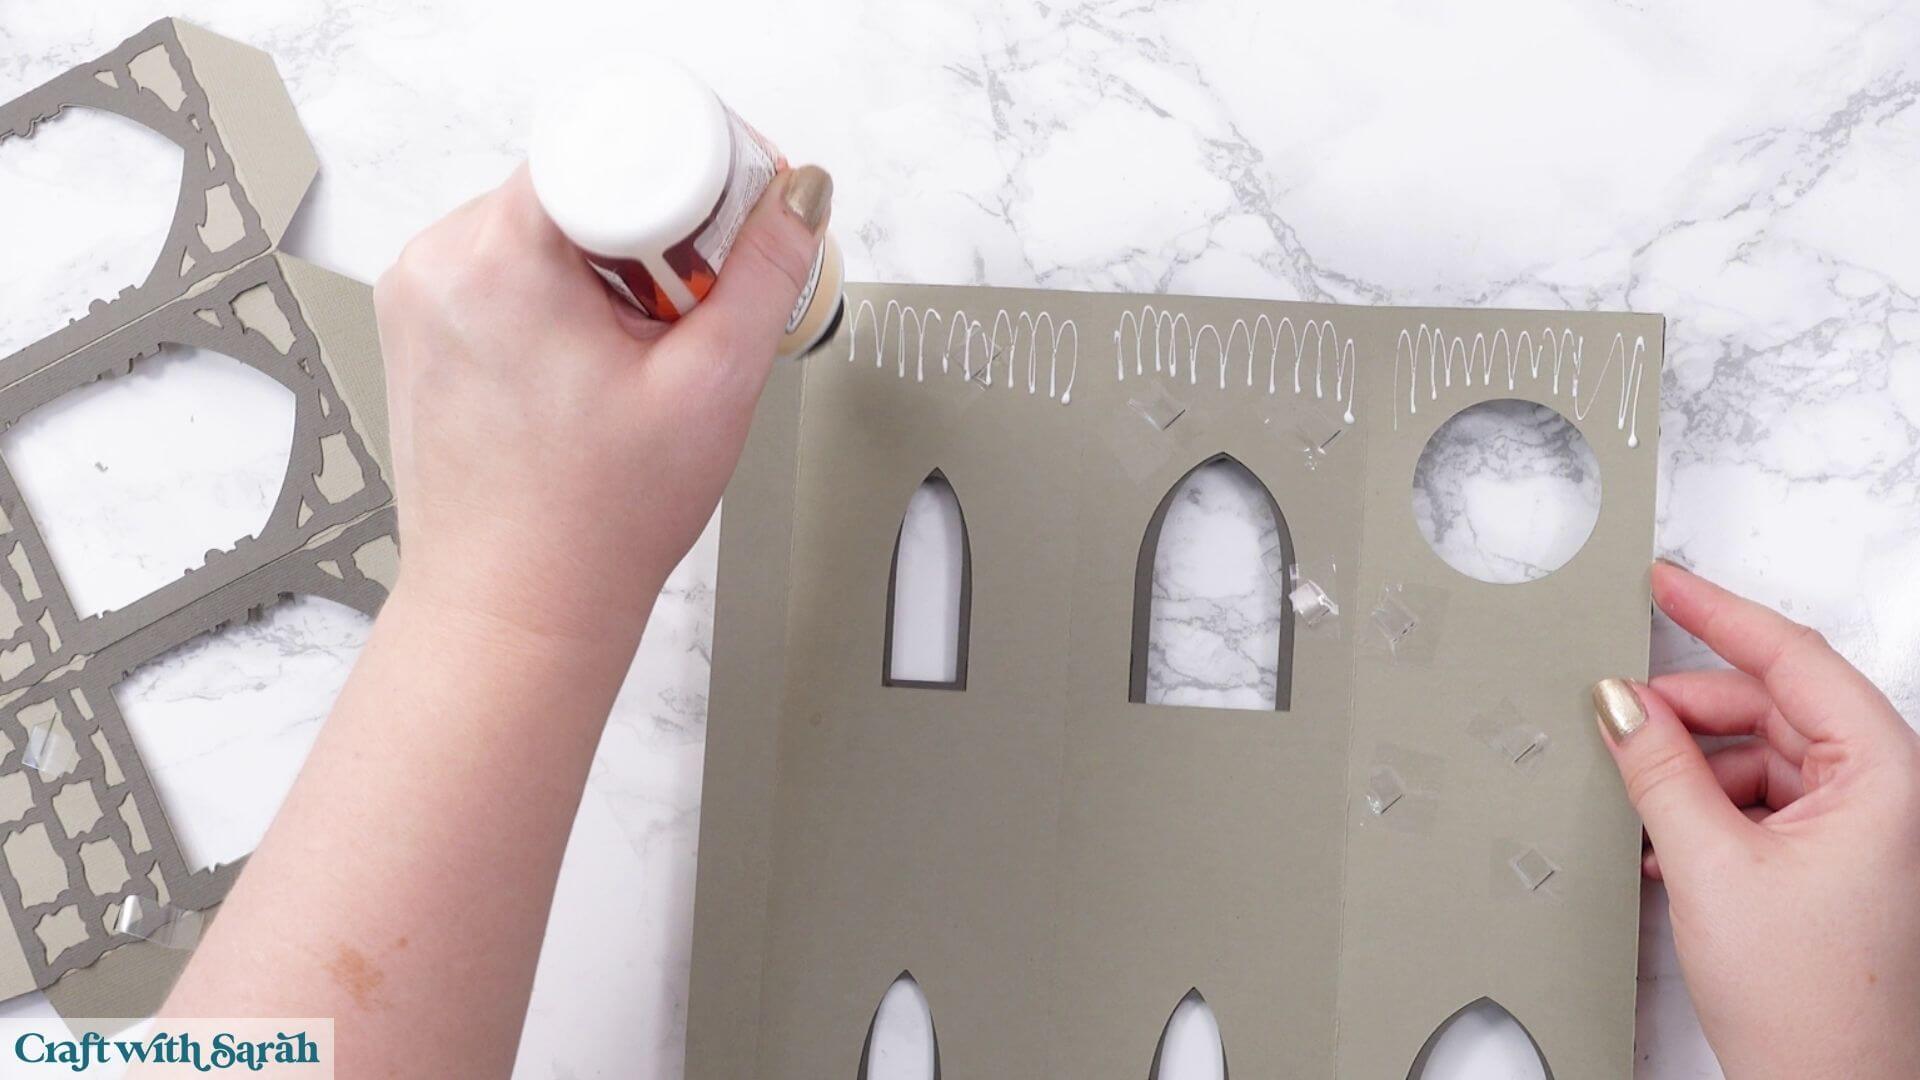
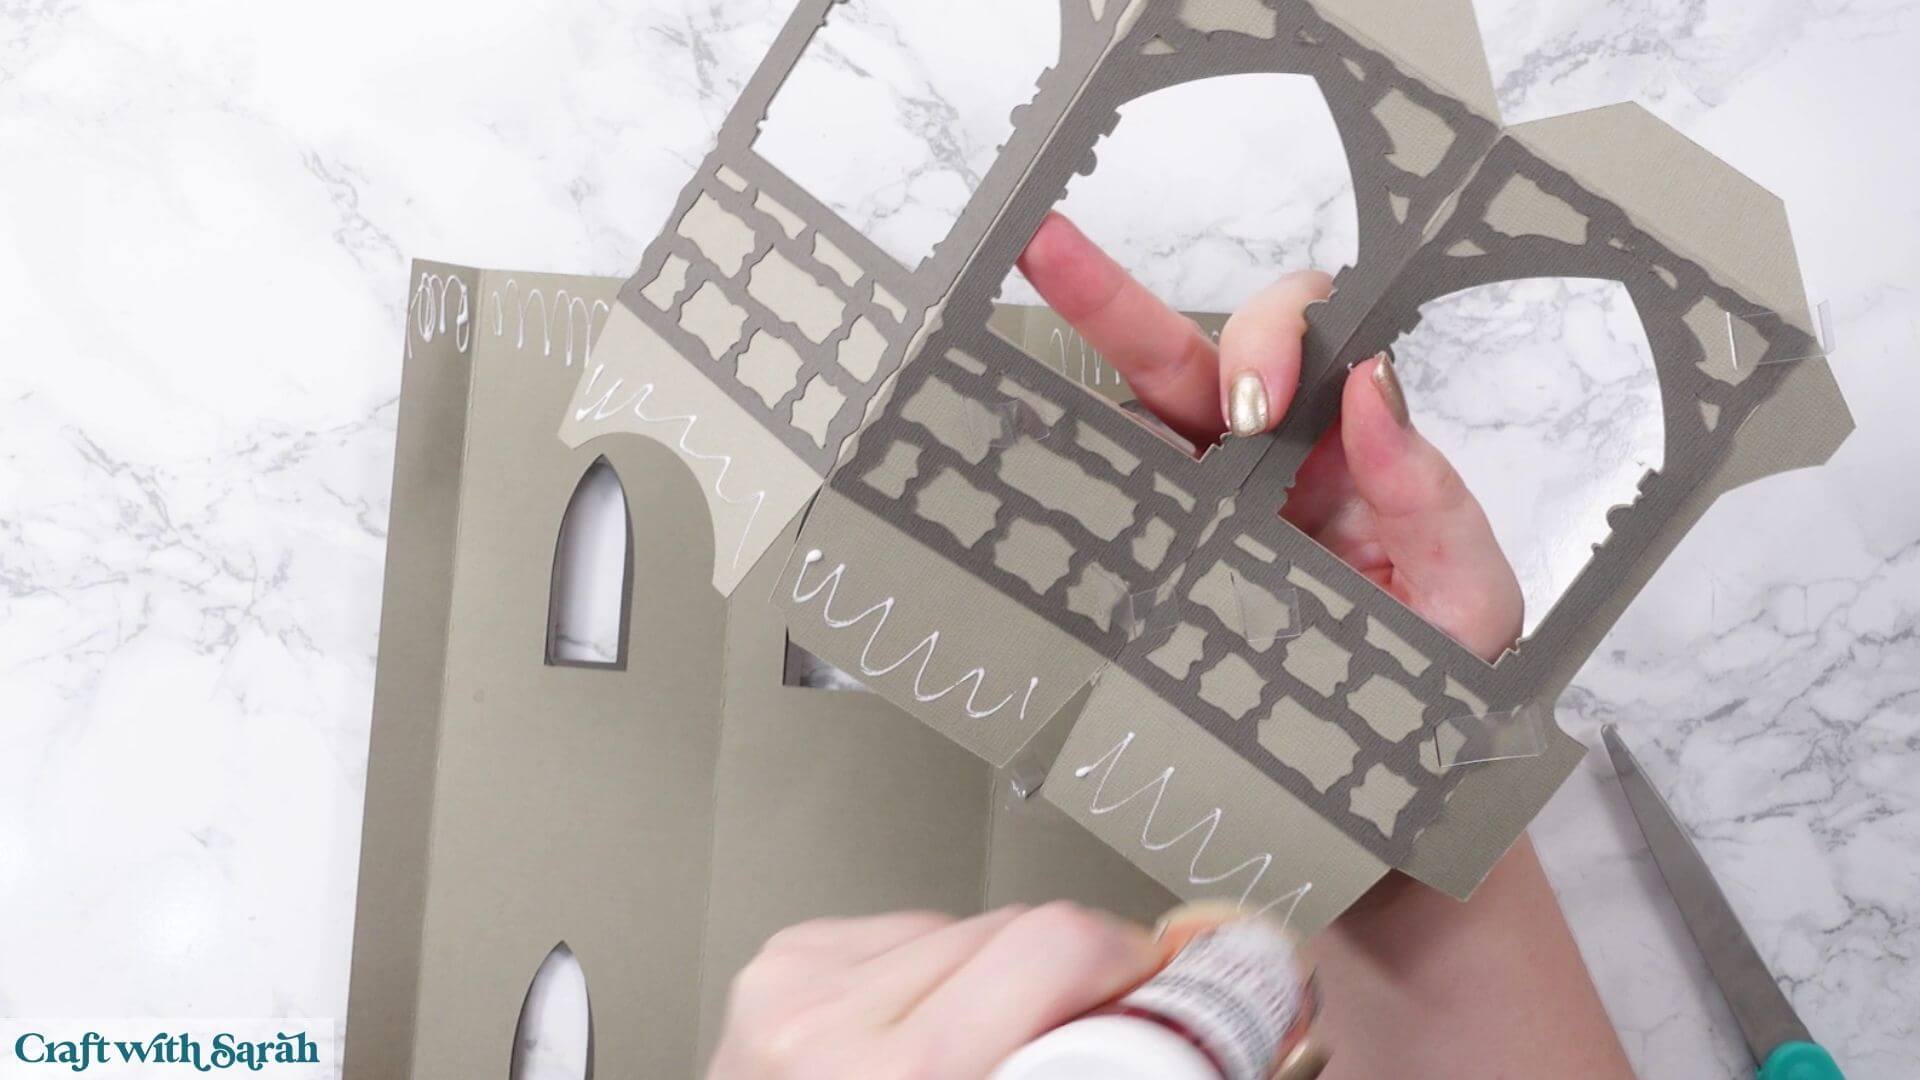
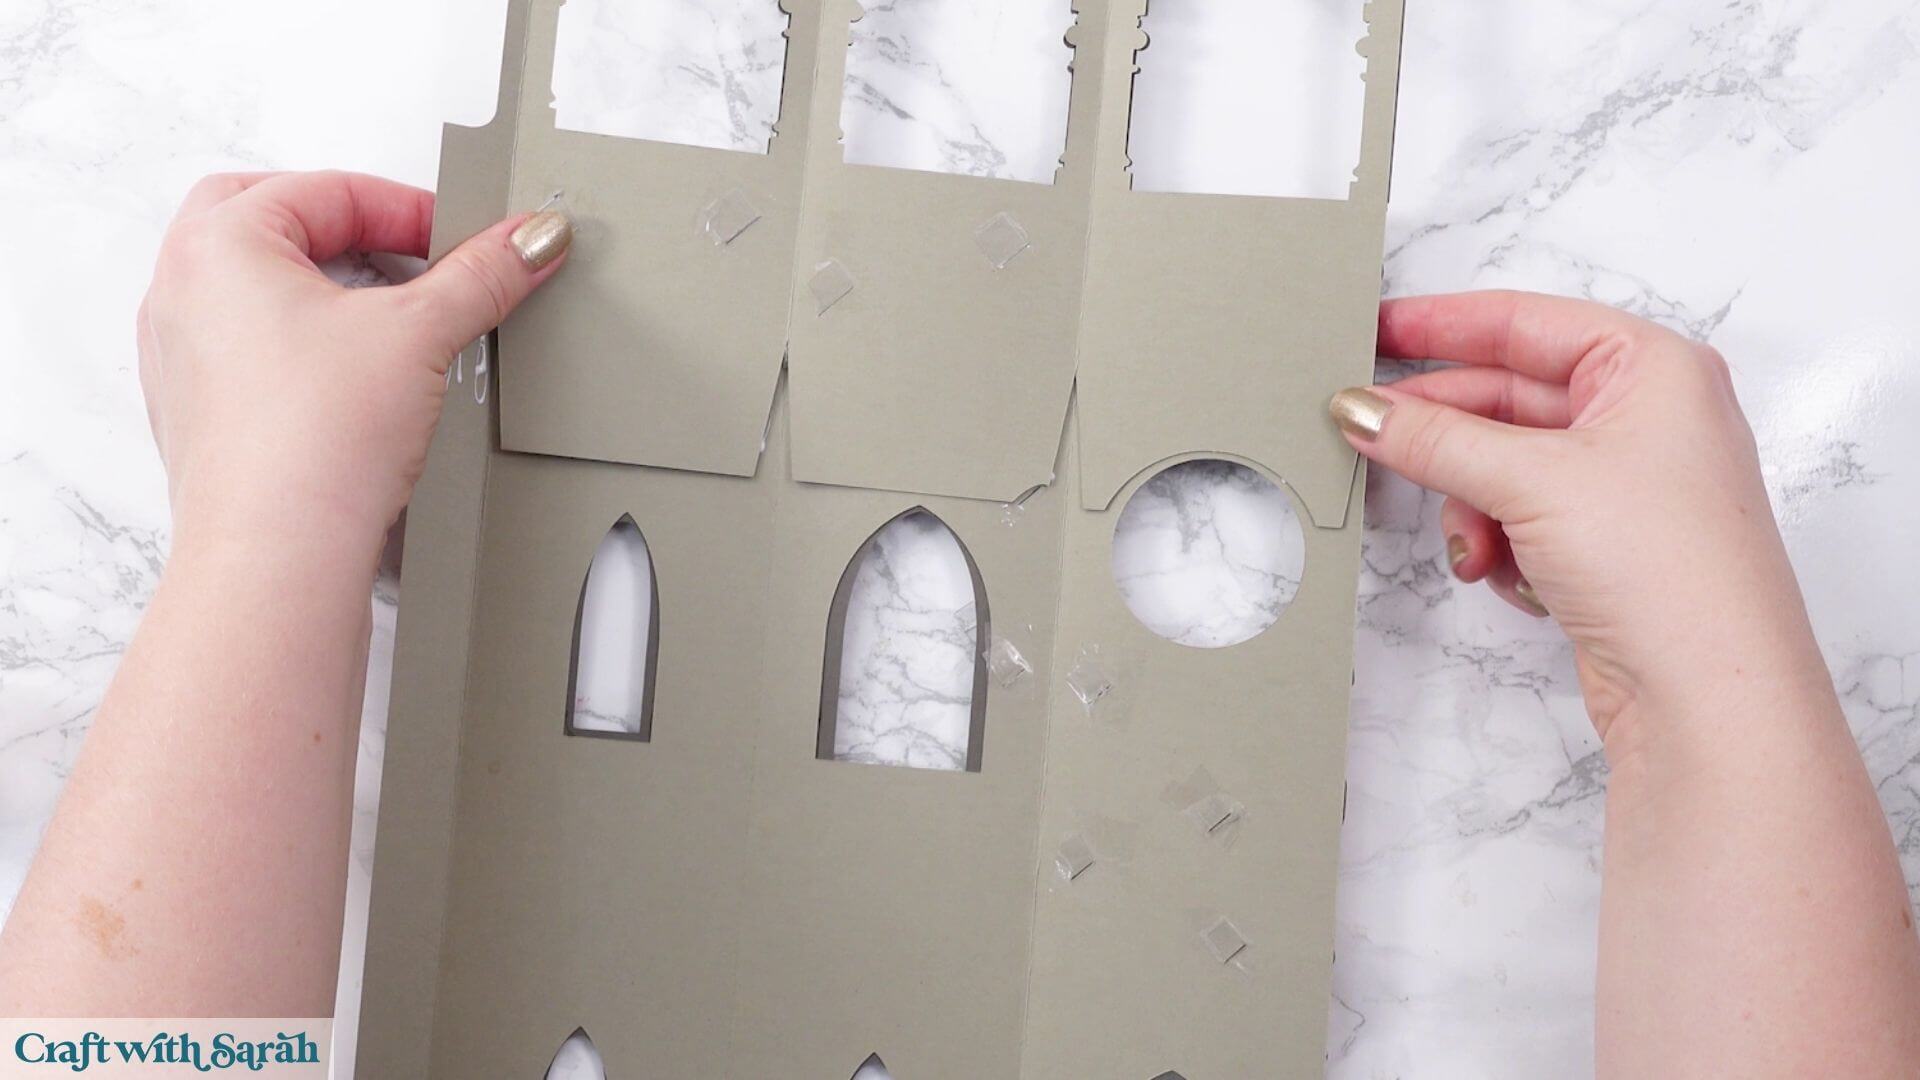
The joins between the sections will be covered with decorative cardstock pieces, so once they’re attached you shouldn’t be able to see where the larger tower sections were originally split.
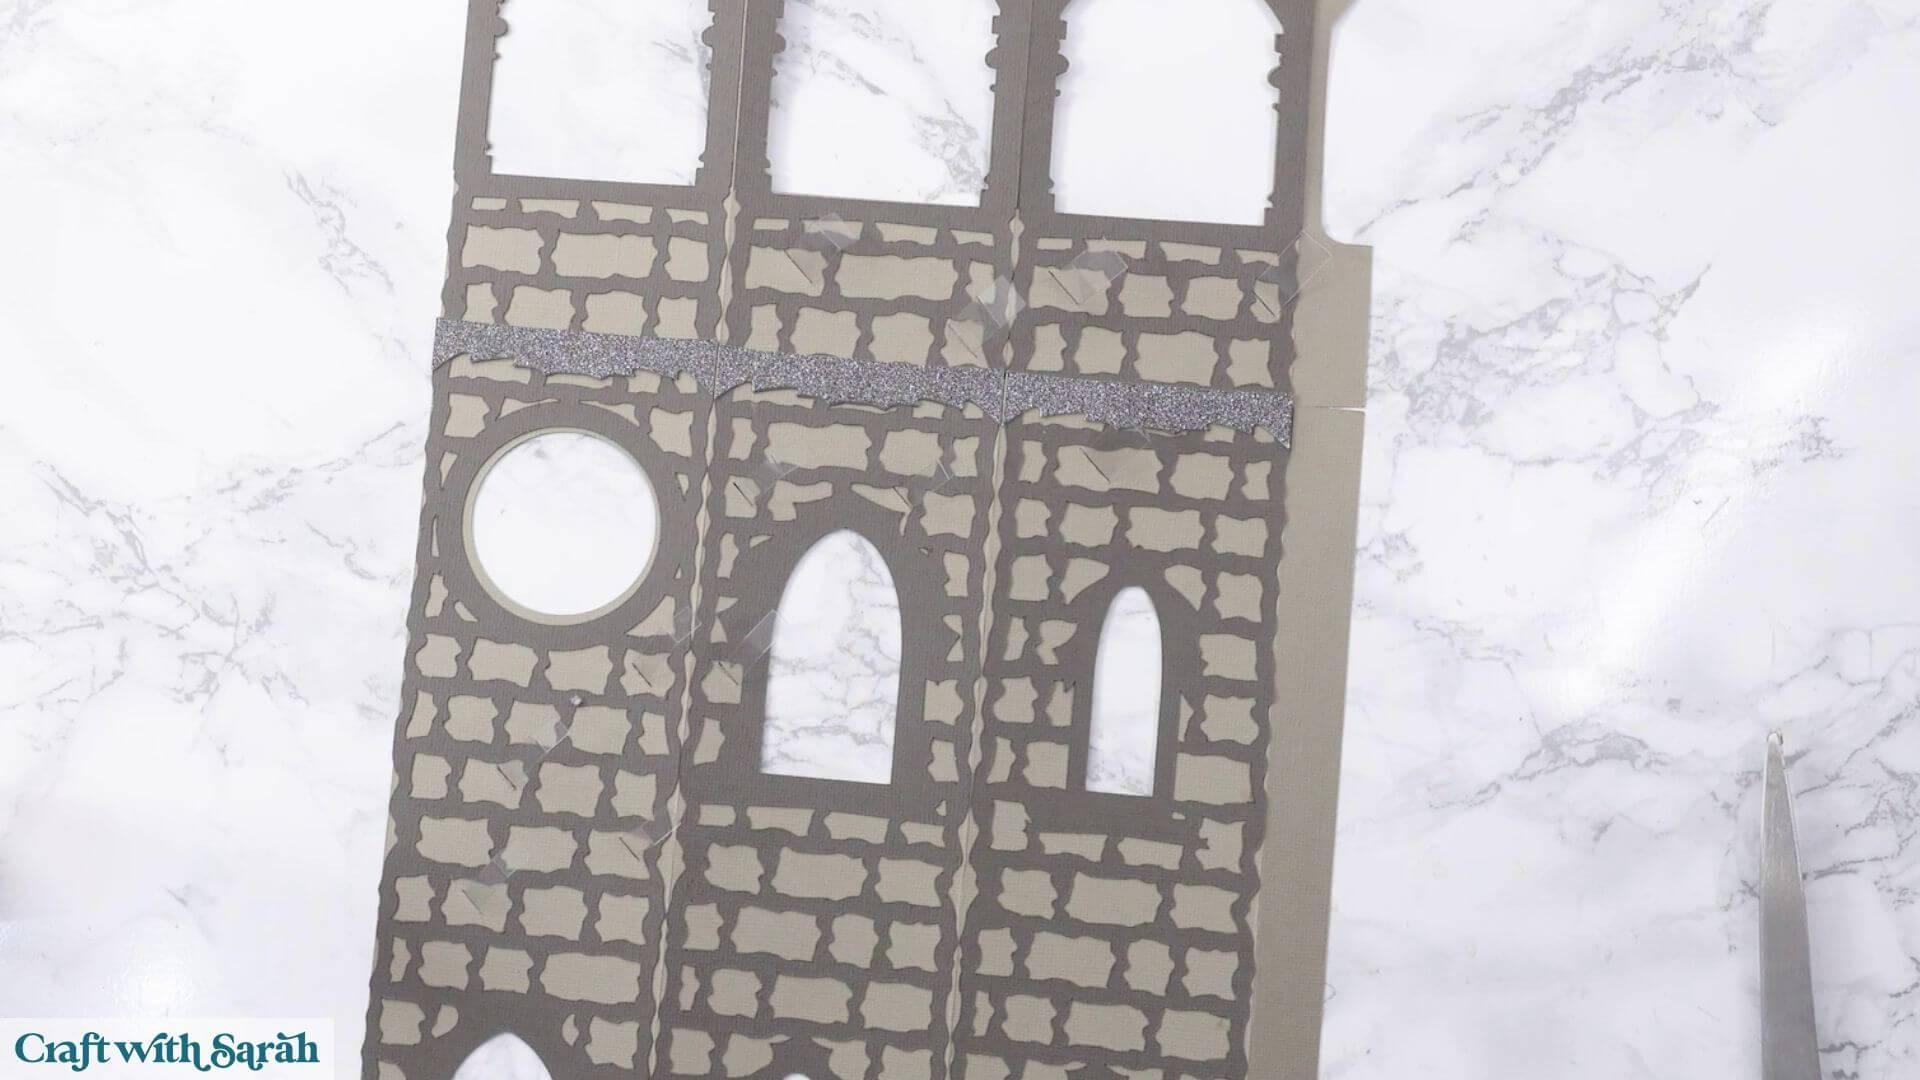
Glue the silver decorative strips over the joins.
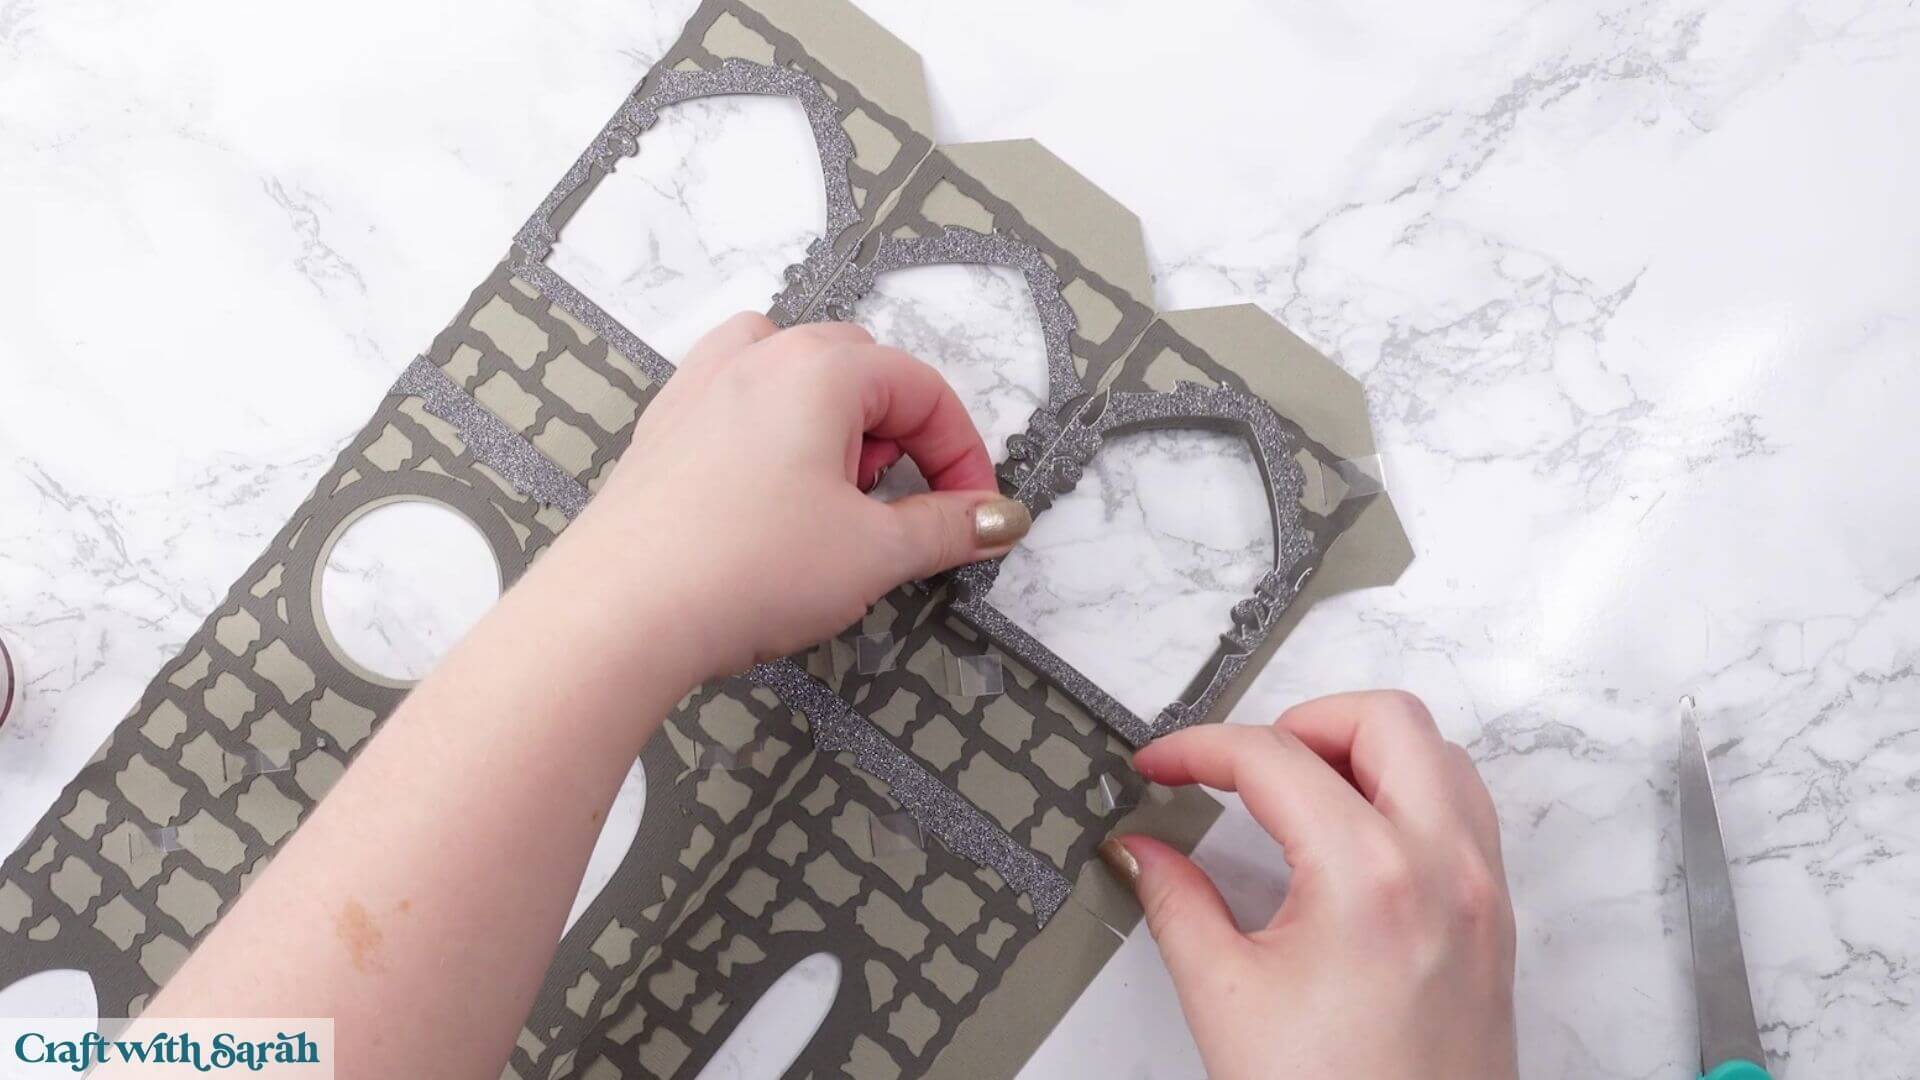
Add the matching decorative surrounds to the openings at the top of the tower.
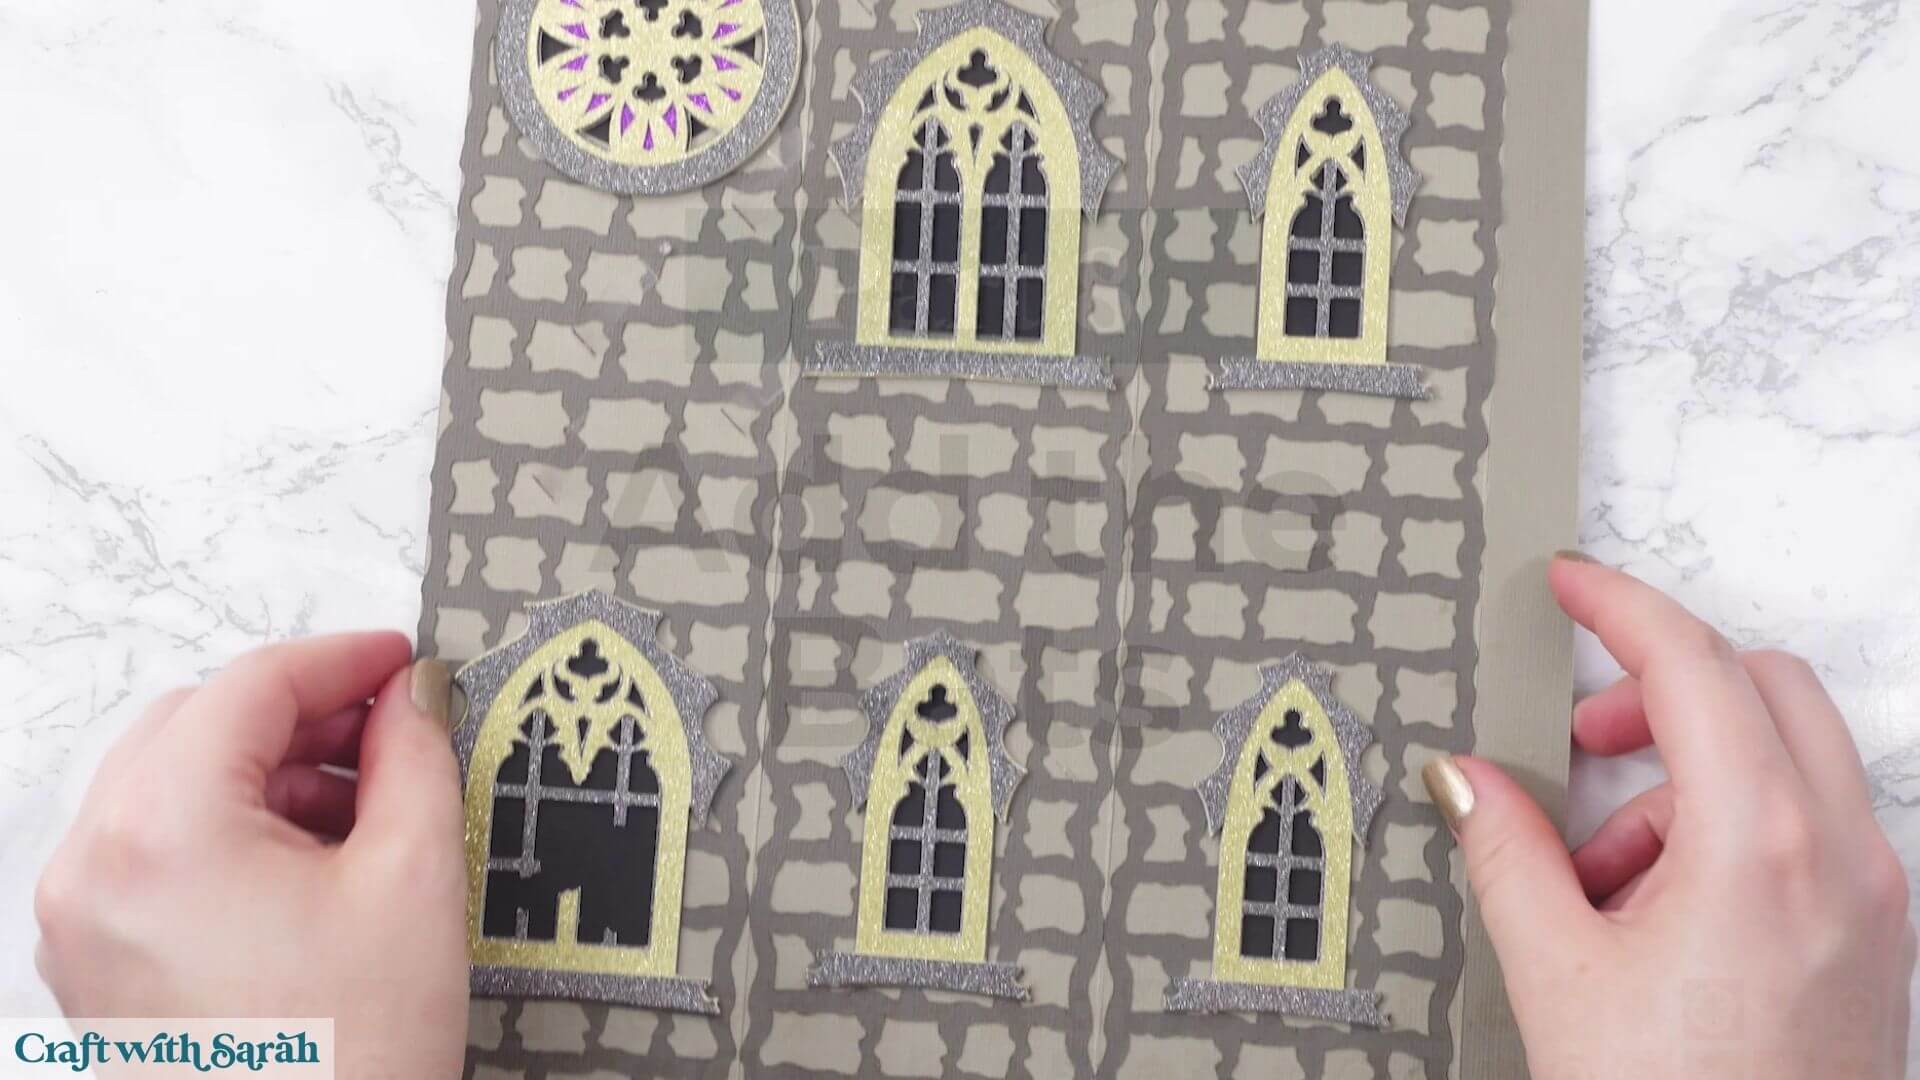
Step 8) Make the windows
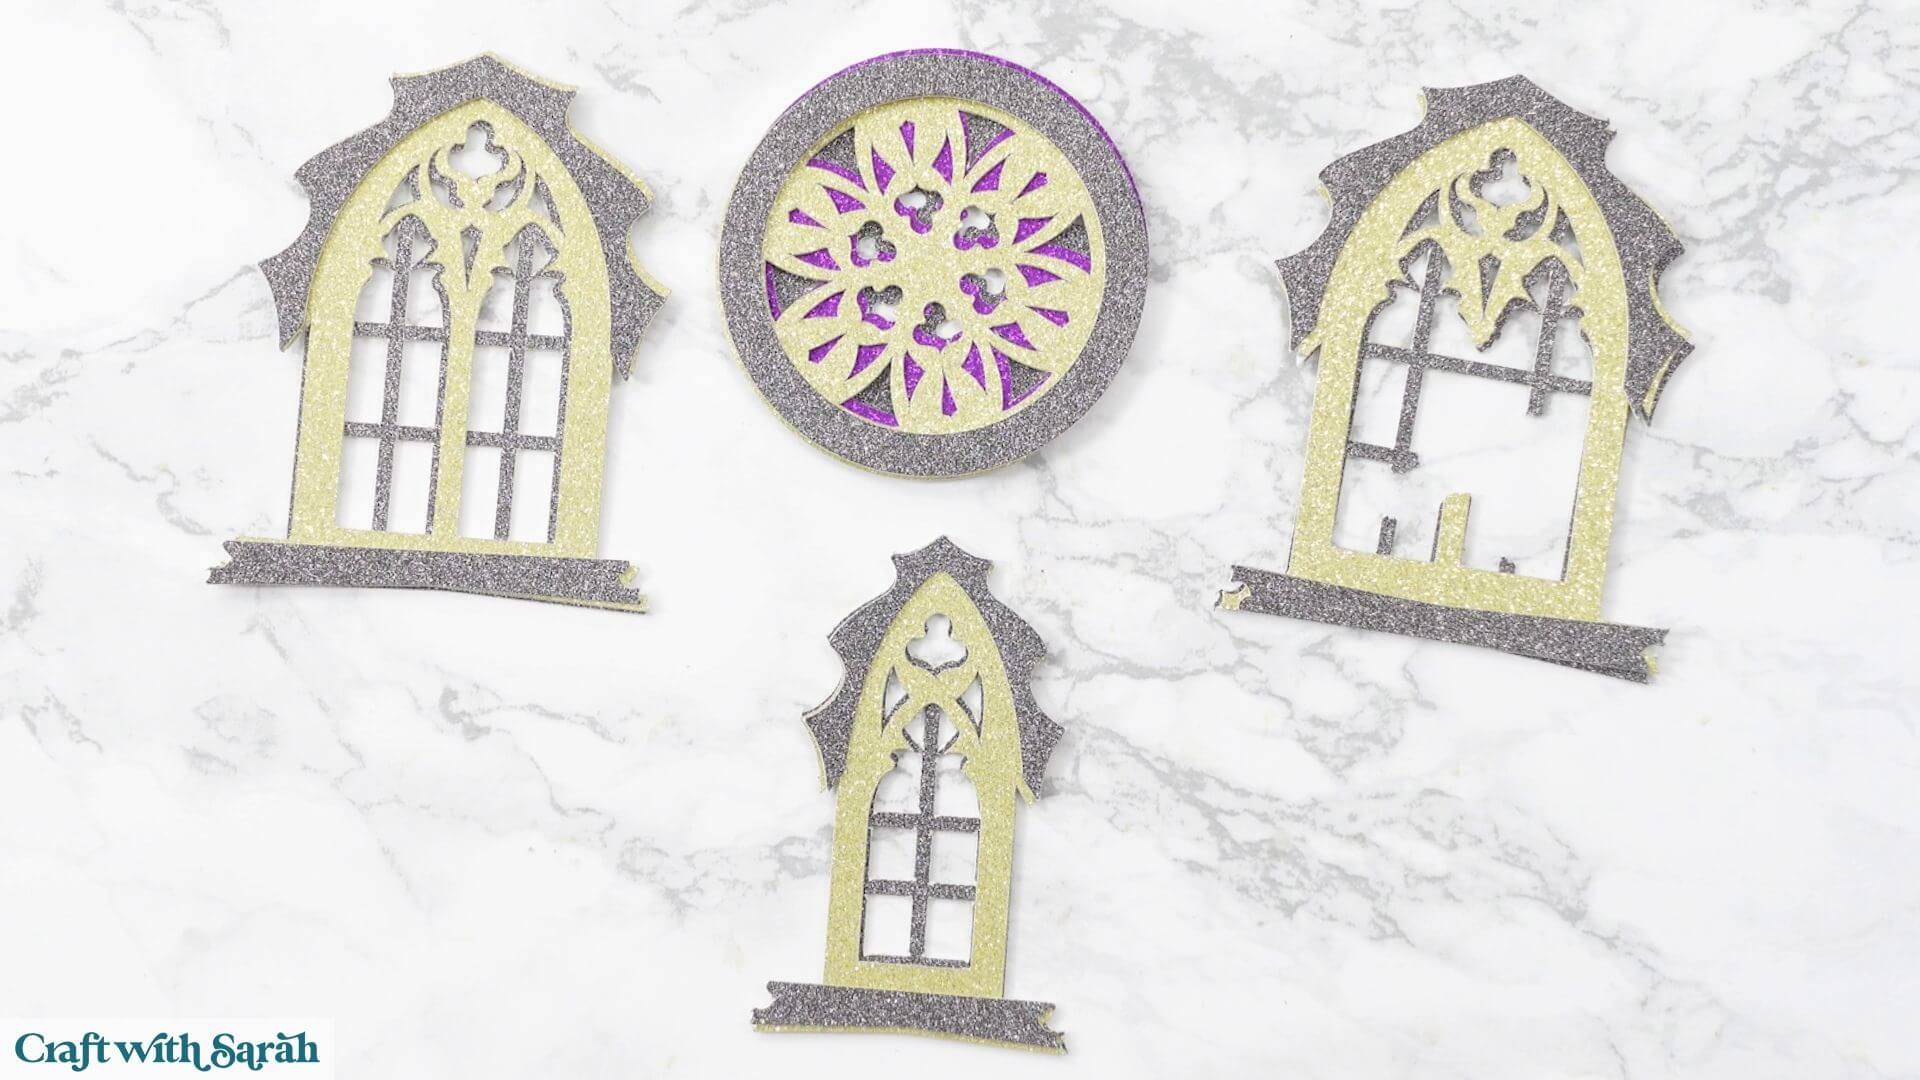
There are four different window styles in the project:
- A circular stained-glass-style window
- A larger complete window
- A larger broken window
- A smaller window
It is helpful to lay all the pieces for the windows out before you start gluing.
Stack the corresponding pieces together so that you can check you have everything in the correct order.
Pay particular attention to the two larger windows.
One is a complete window with all of its bars intact. The other is deliberately broken to make it look as though the bats have burst through it.
Glue the layers together, carefully lining up the openings.
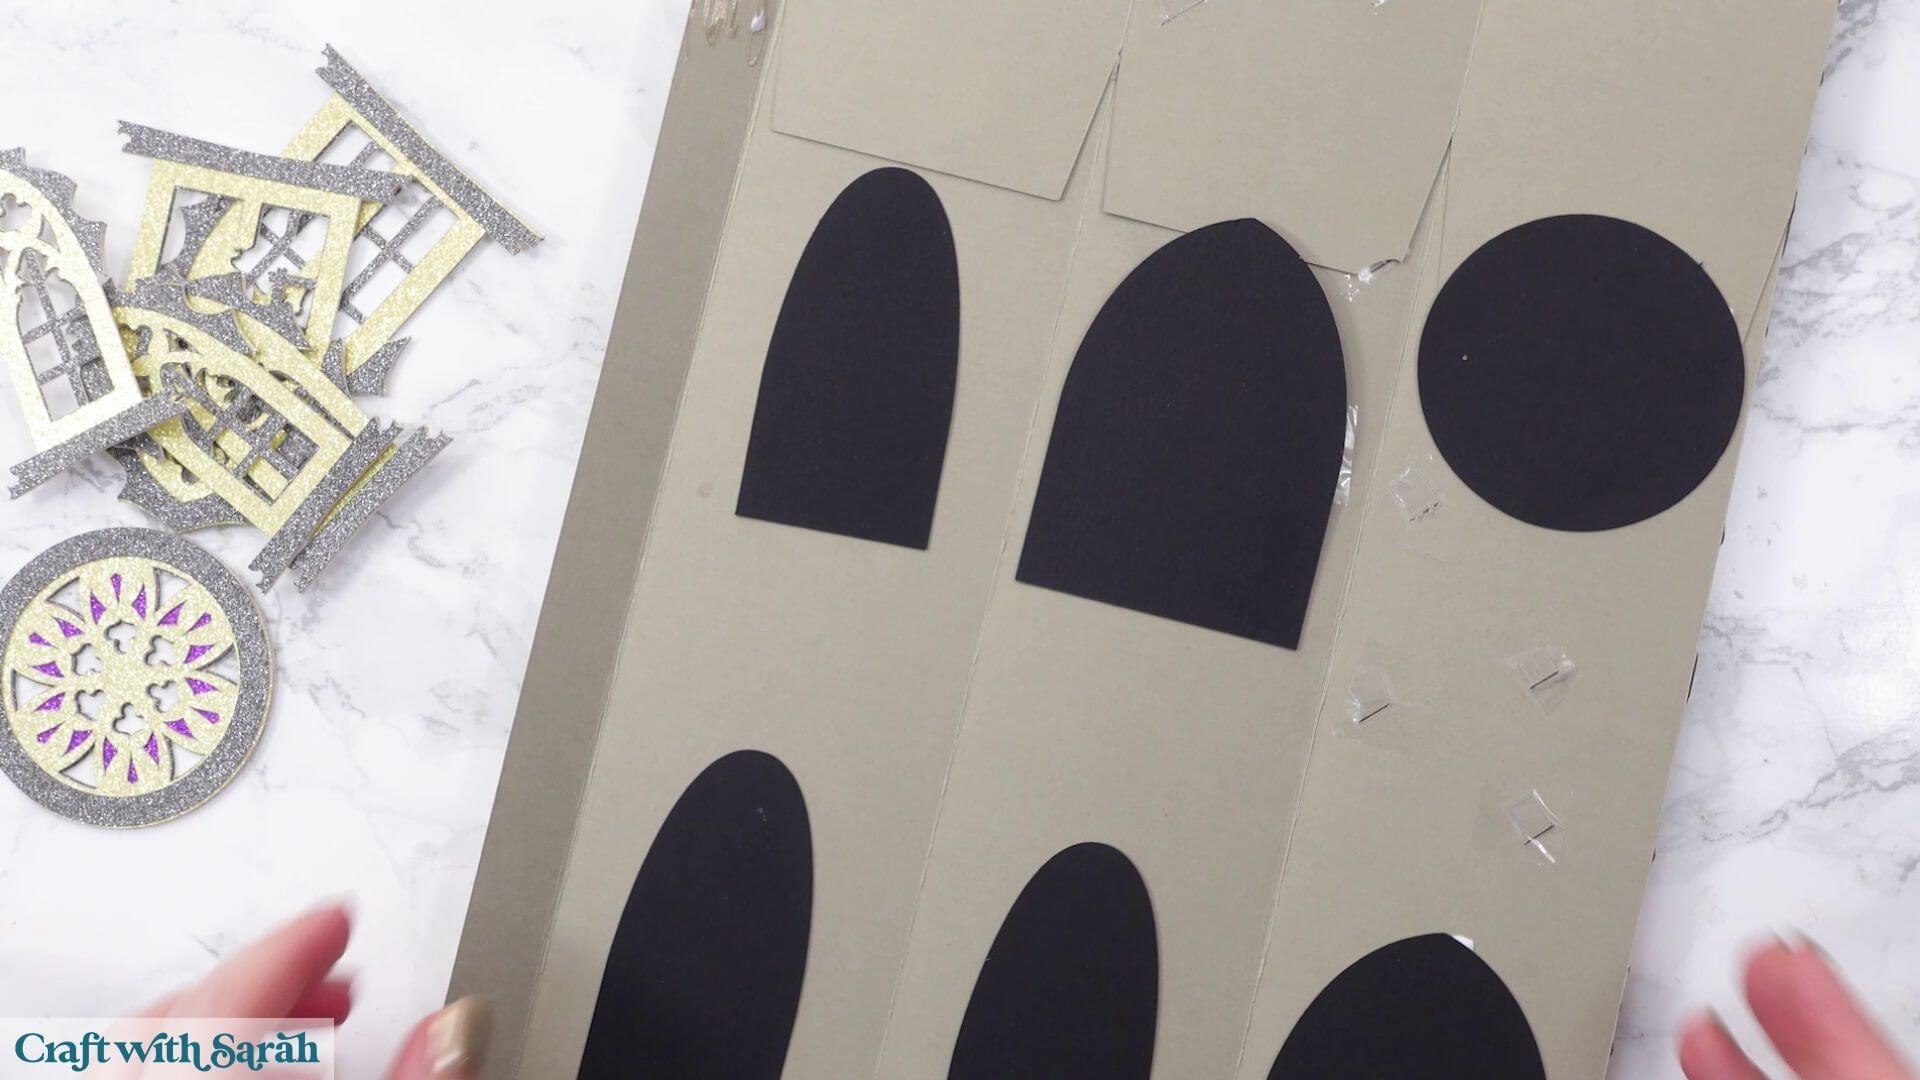
Once all of the windows have been assembled, turn the tower wall pieces over and glue the black backing pieces behind the appropriate window openings.
The three openings at the very top don’t need black backing pieces as these will remain open so that you can see the bell.
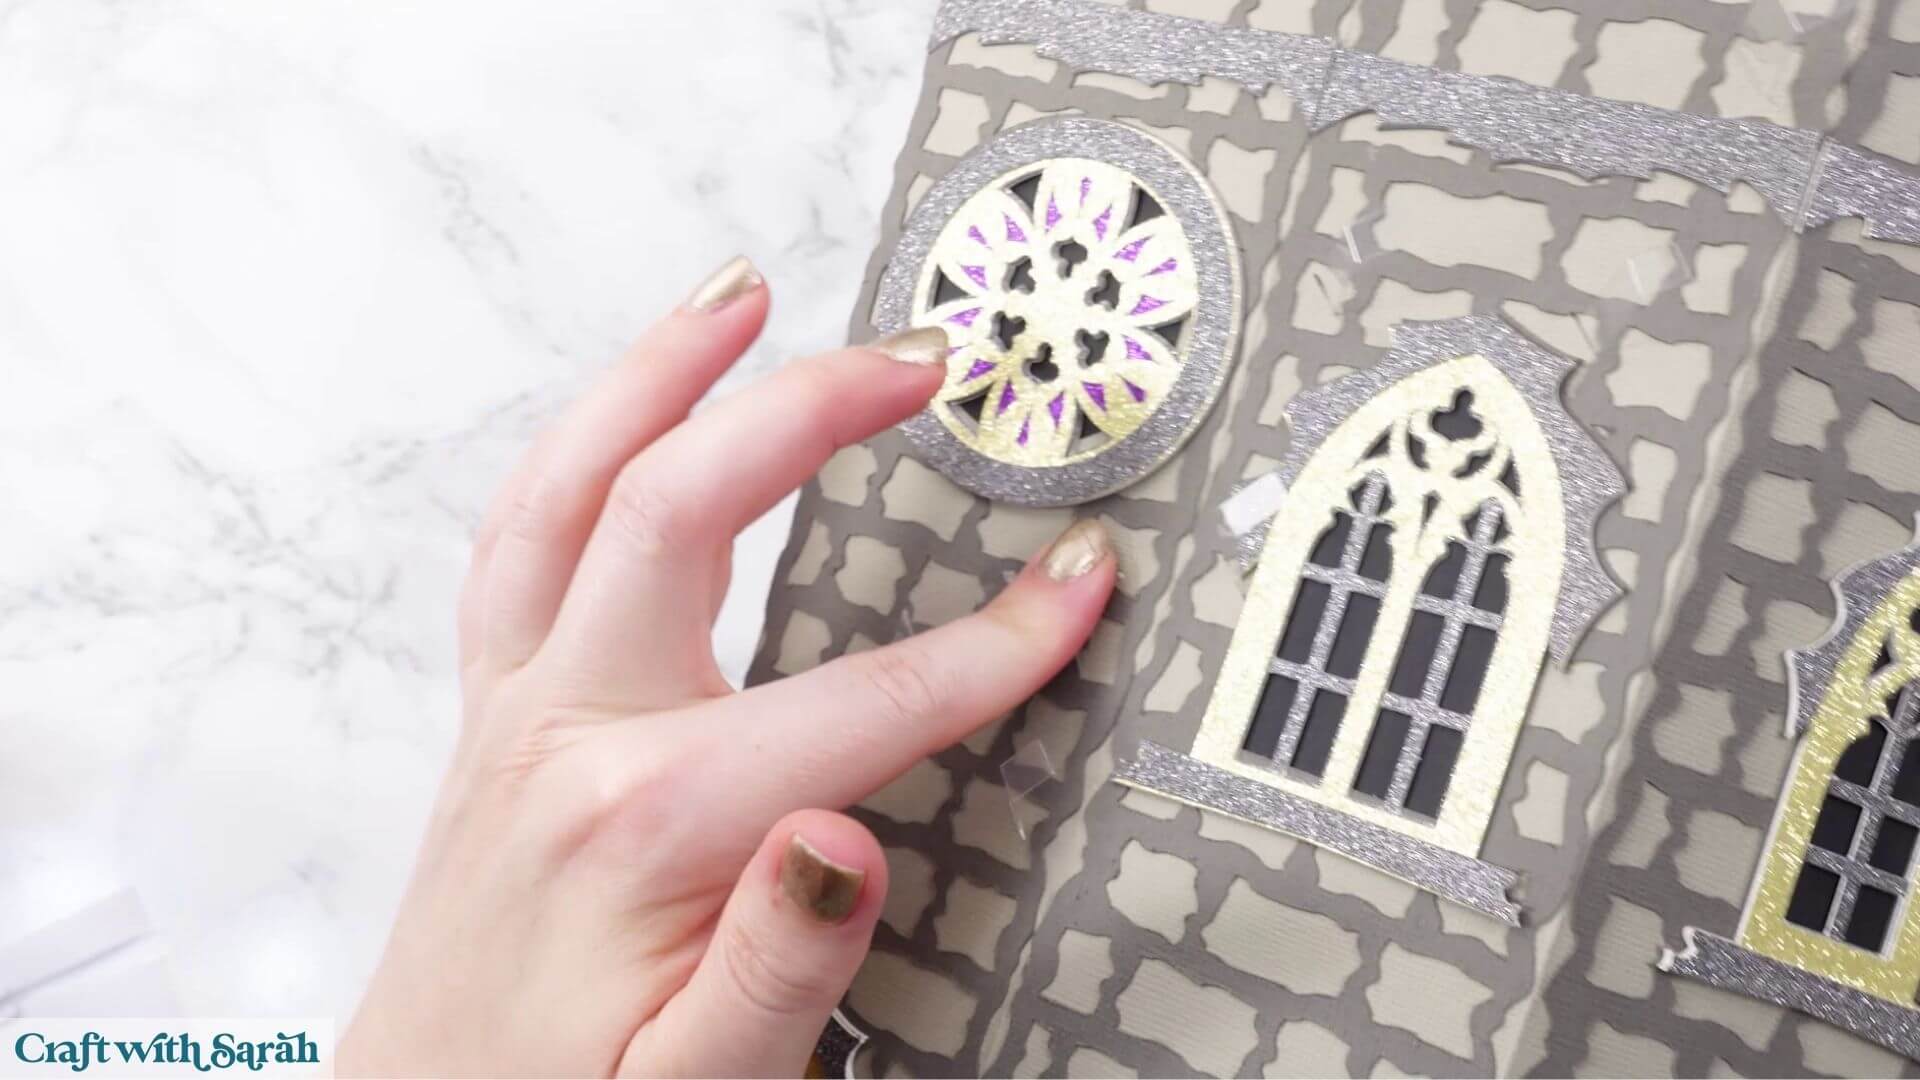
Turn the walls back over and glue the completed windows into position.
Take care when positioning them around the acetate strips.
The broken window goes towards the bottom of the section where the bats are flying out.
Step 9) Add the bats
Before adding the bats, bend each acetate strip so that the small tab at the end is parallel with the tower wall.
This gives you a flat surface for gluing the bats.
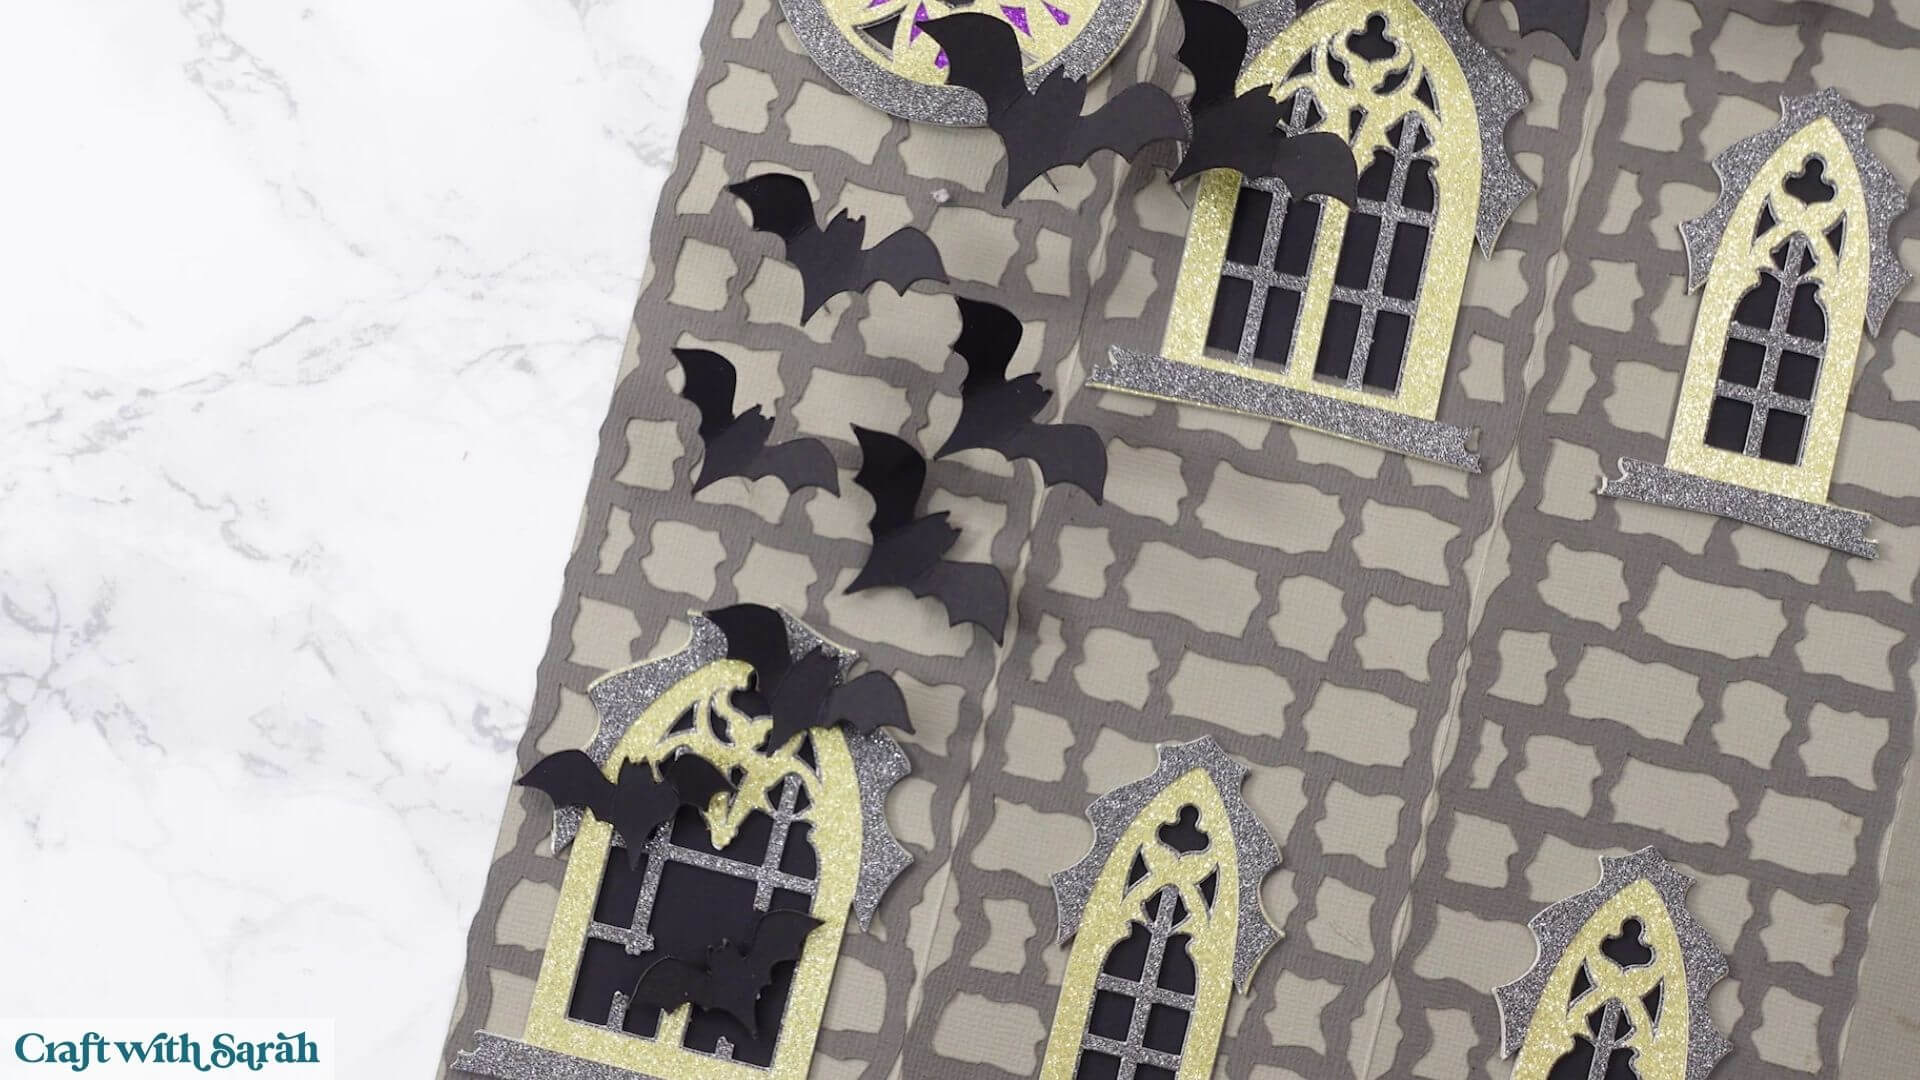
Arrange your bats roughly in size order. The smaller bats should be closest to the broken window, gradually getting larger as they fly further up and away from the tower.
Before gluing them in place, gently bend the wings forward to give each bat a more dimensional appearance.
Add glue to the flat end of each acetate strip and rest a bat on top.
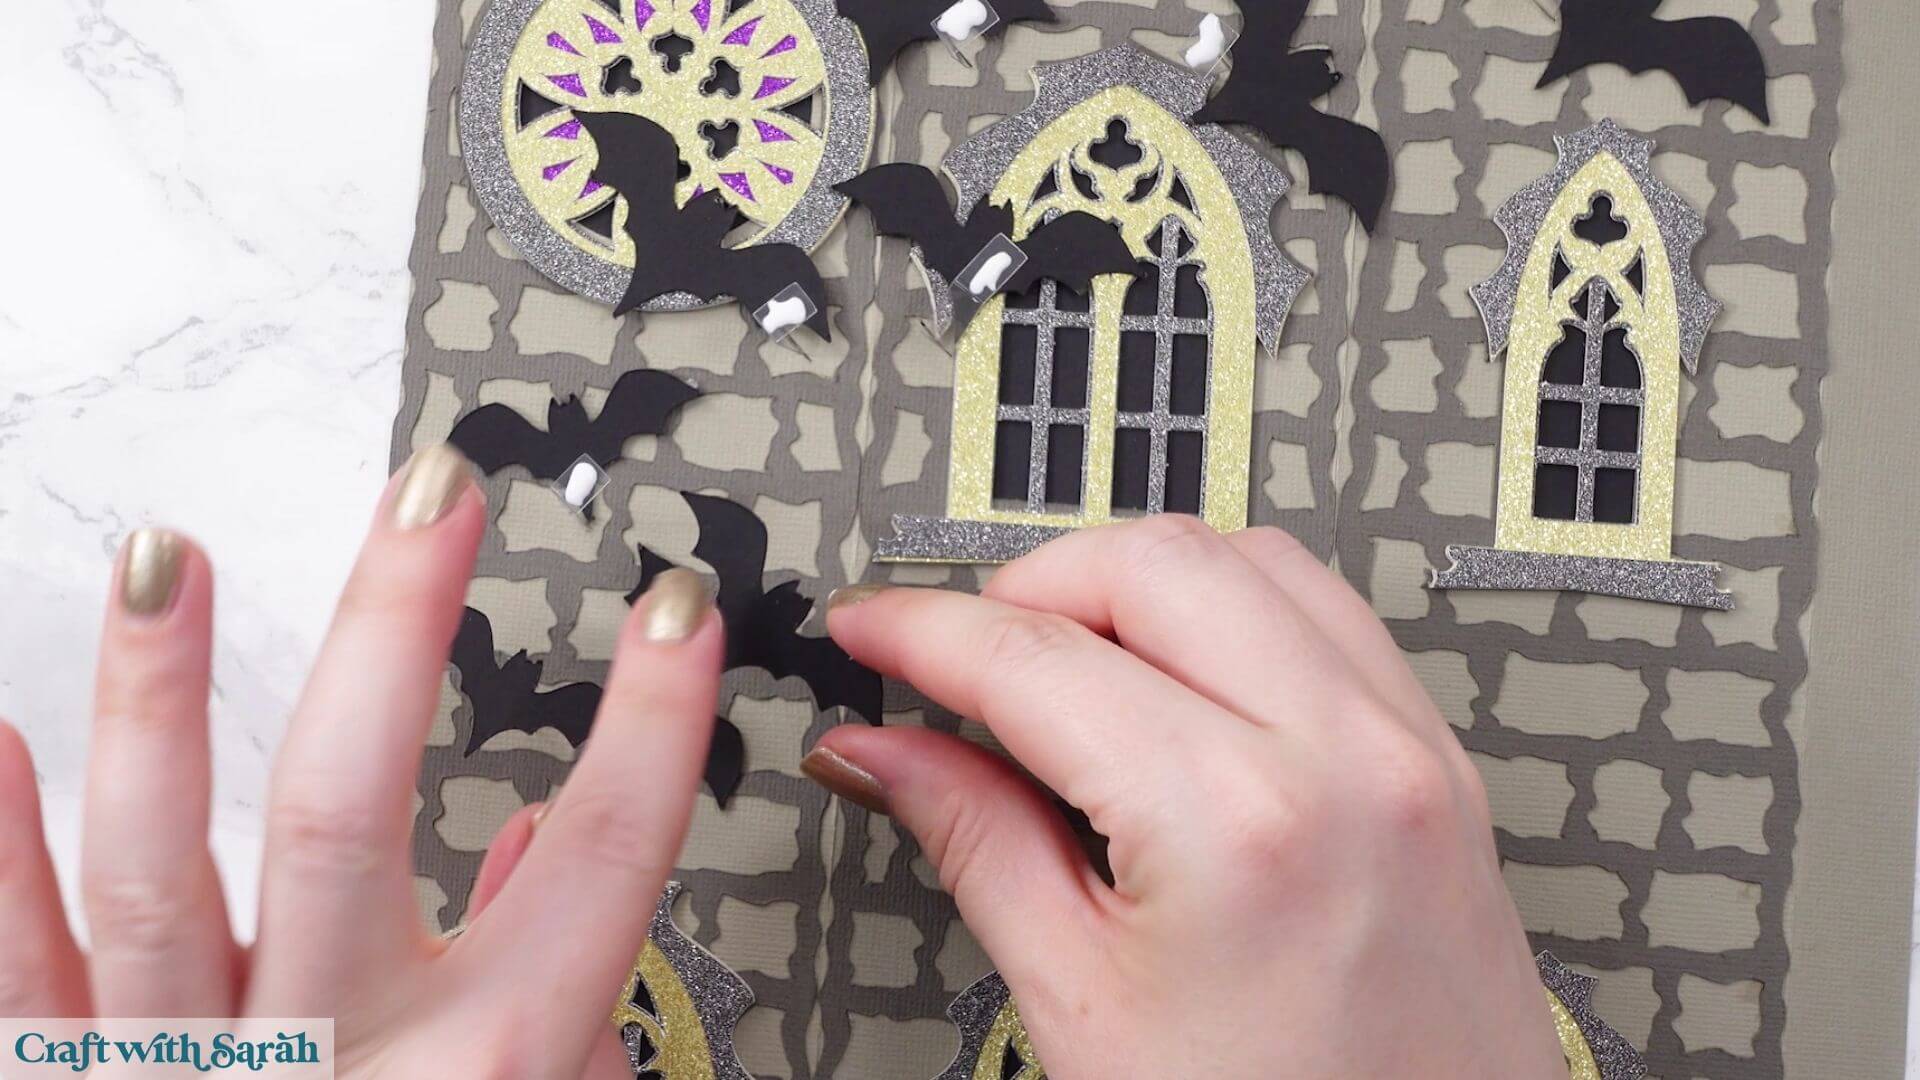
Try to position the bats so that they’re generally flying in the same direction. This helps the finished arrangement look like one big swarm coming out of the tower.
The glue will take much longer than usual to dry against the acetate.
Don’t move on to constructing the tower until the bats are completely secure. Depending on your glue, this could take several hours or even overnight.
If you have spare bats, you can add those directly to the tower with foam squares.
Step 10) Build the tiled roof panels
There are six sides to the roof.
Each side contains several triangular pieces which gradually get smaller. These stack together to create a raised, tiled appearance.
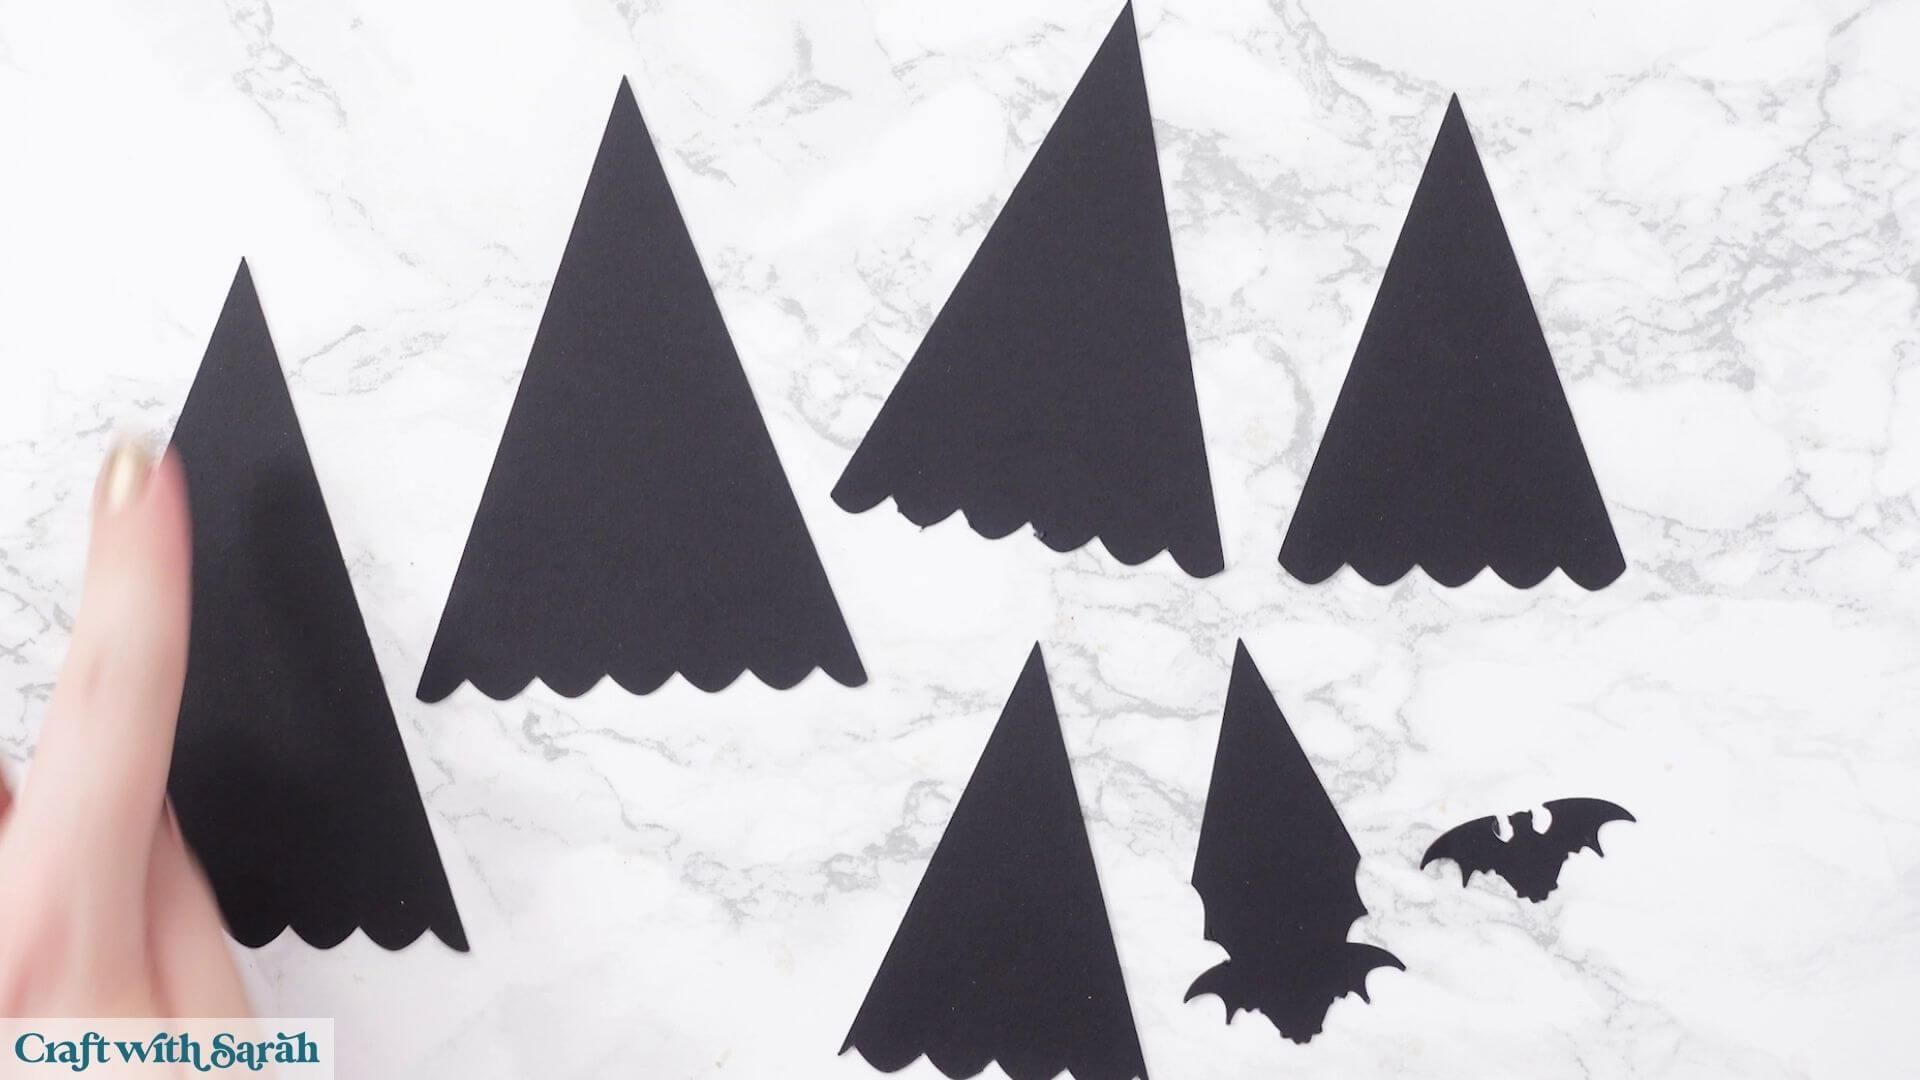
Before gluing, separate the pieces into six piles so that you know you have all the correct sizes for every roof panel.
Start with the largest triangle.
Add foam squares along the scalloped bottom edge, then add glue towards the pointed top of the triangle.
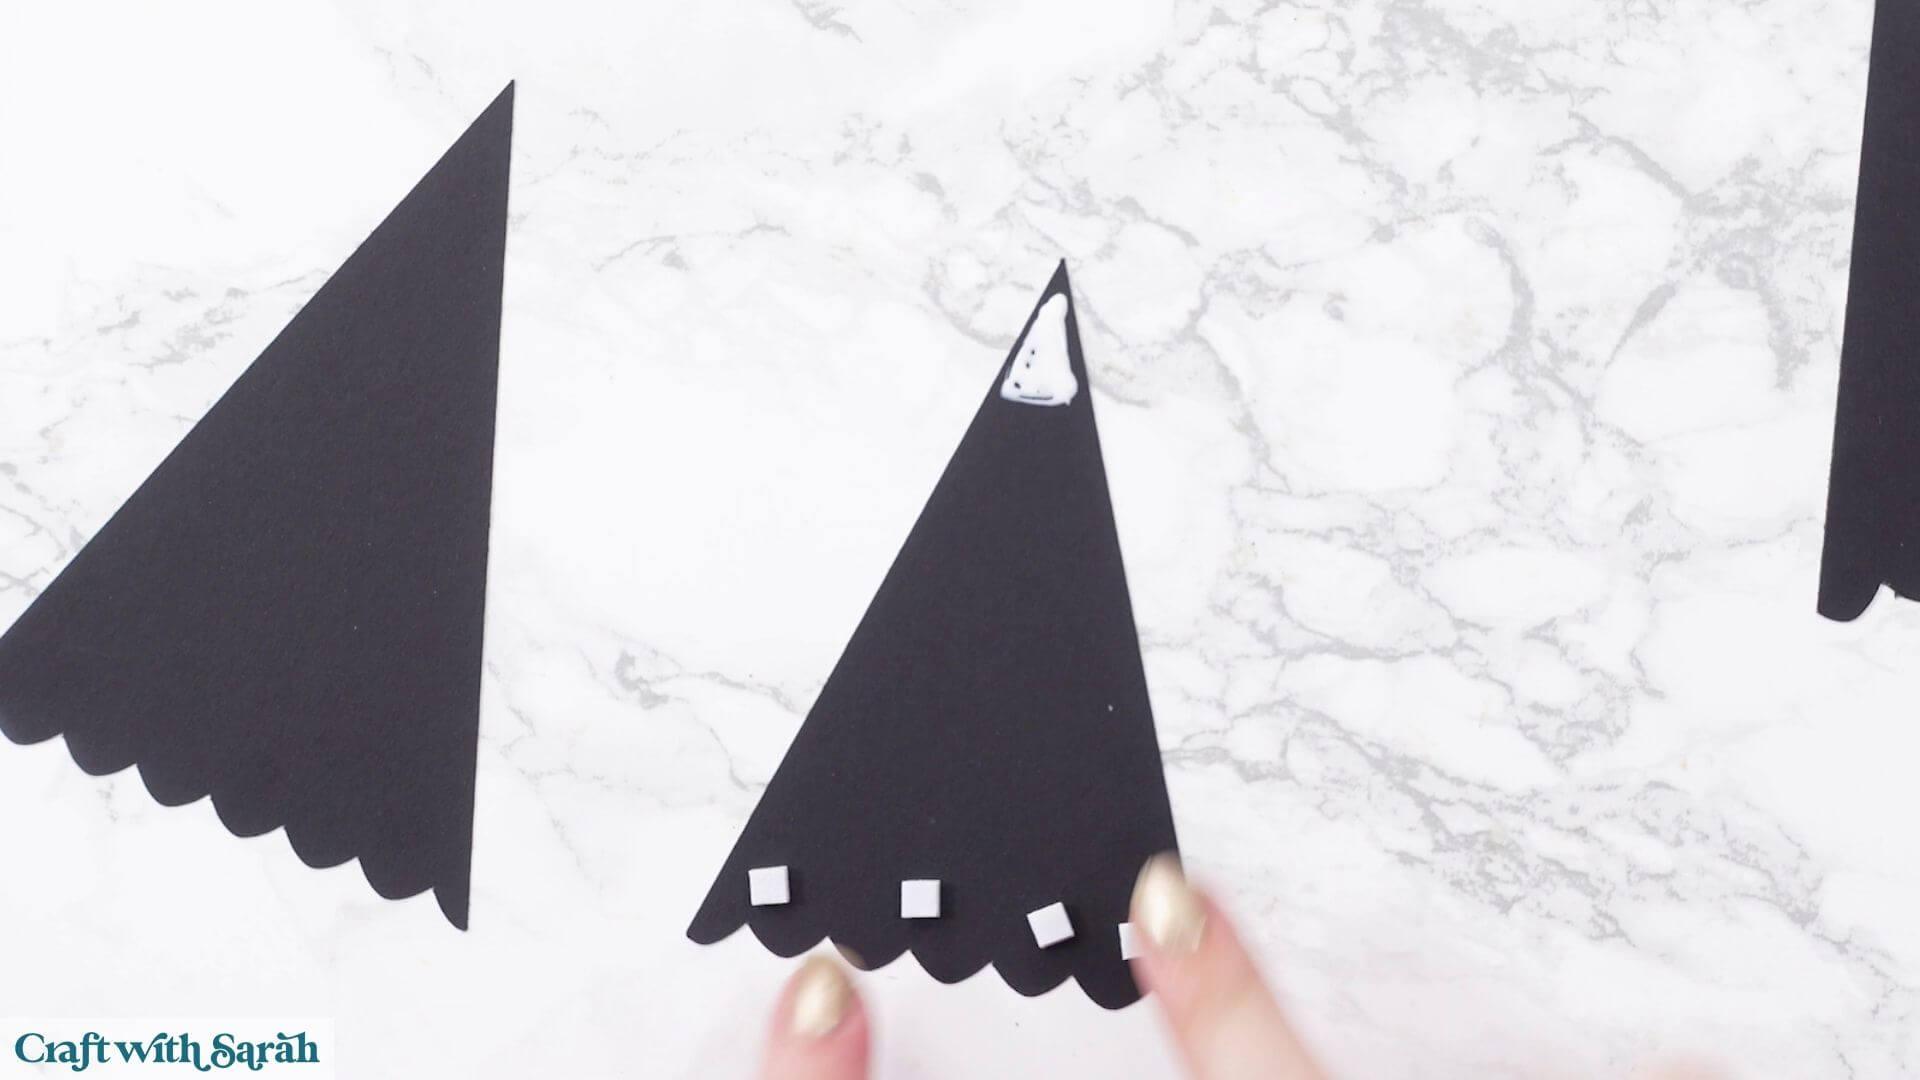
Position it onto the roof panel, lining up the top point and sides.
The foam squares lift the bottom edge while the glued section remains flat, creating the first level of the tiled effect.
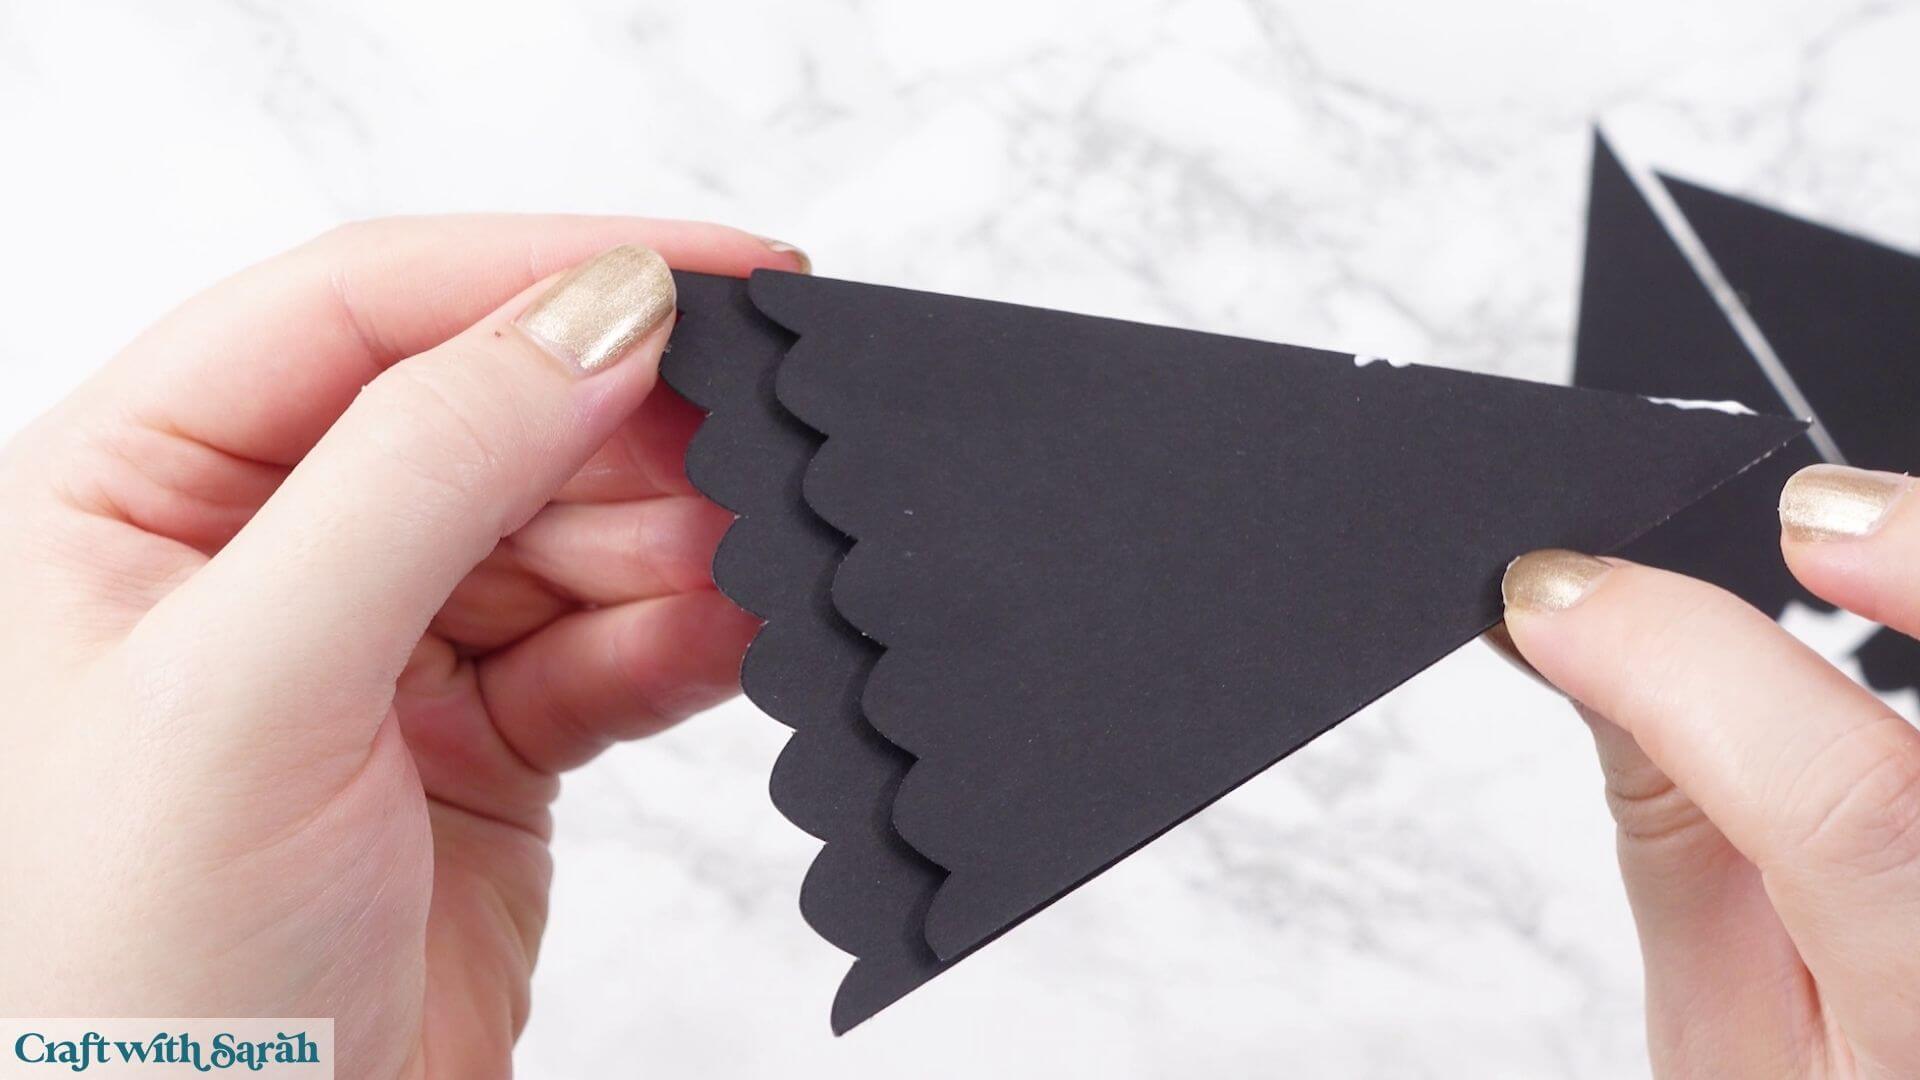
Repeat with each progressively smaller triangle.
Finally, add the bat detail with a foam square.
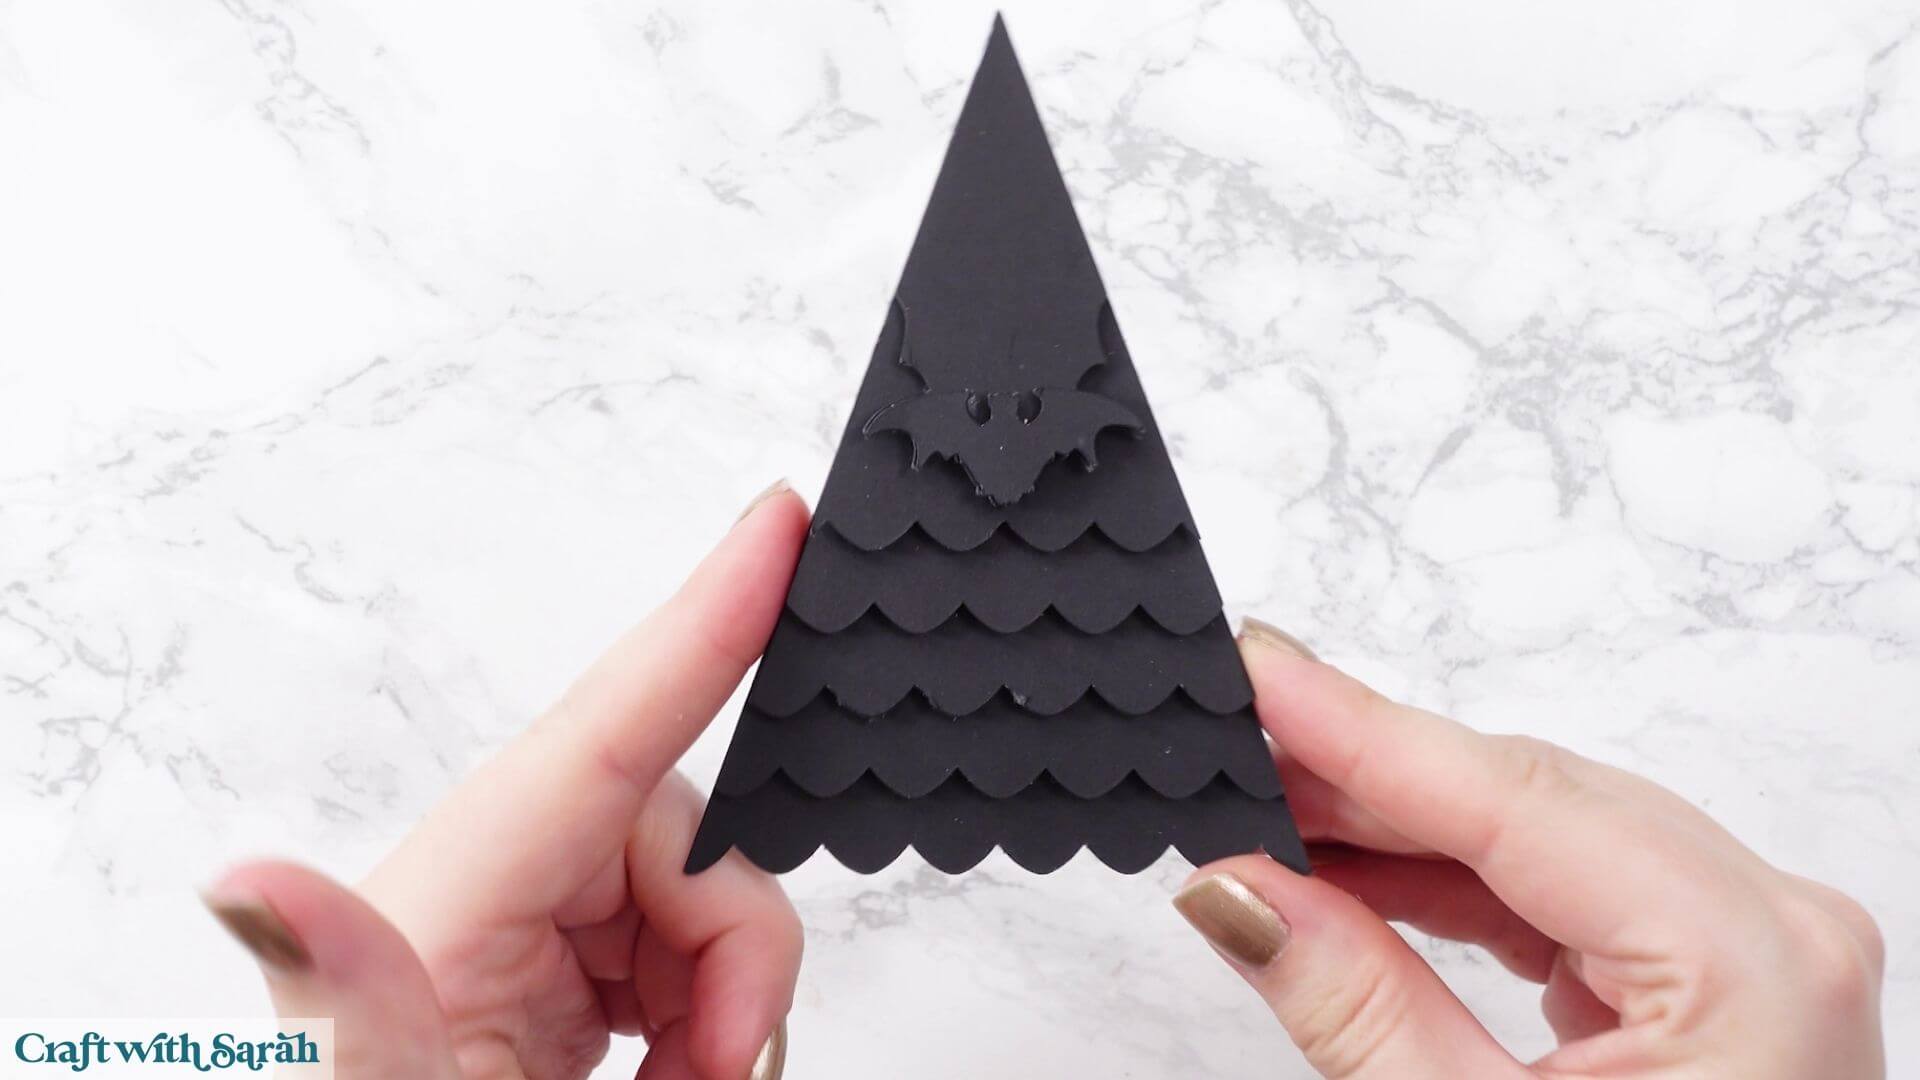
Repeat until all six roof panels are complete.
Step 11) Build the roof structure
Take the two main black roof pieces and fold all of the score lines inwards.
Use a brayer or scraper to make the folds crisp.
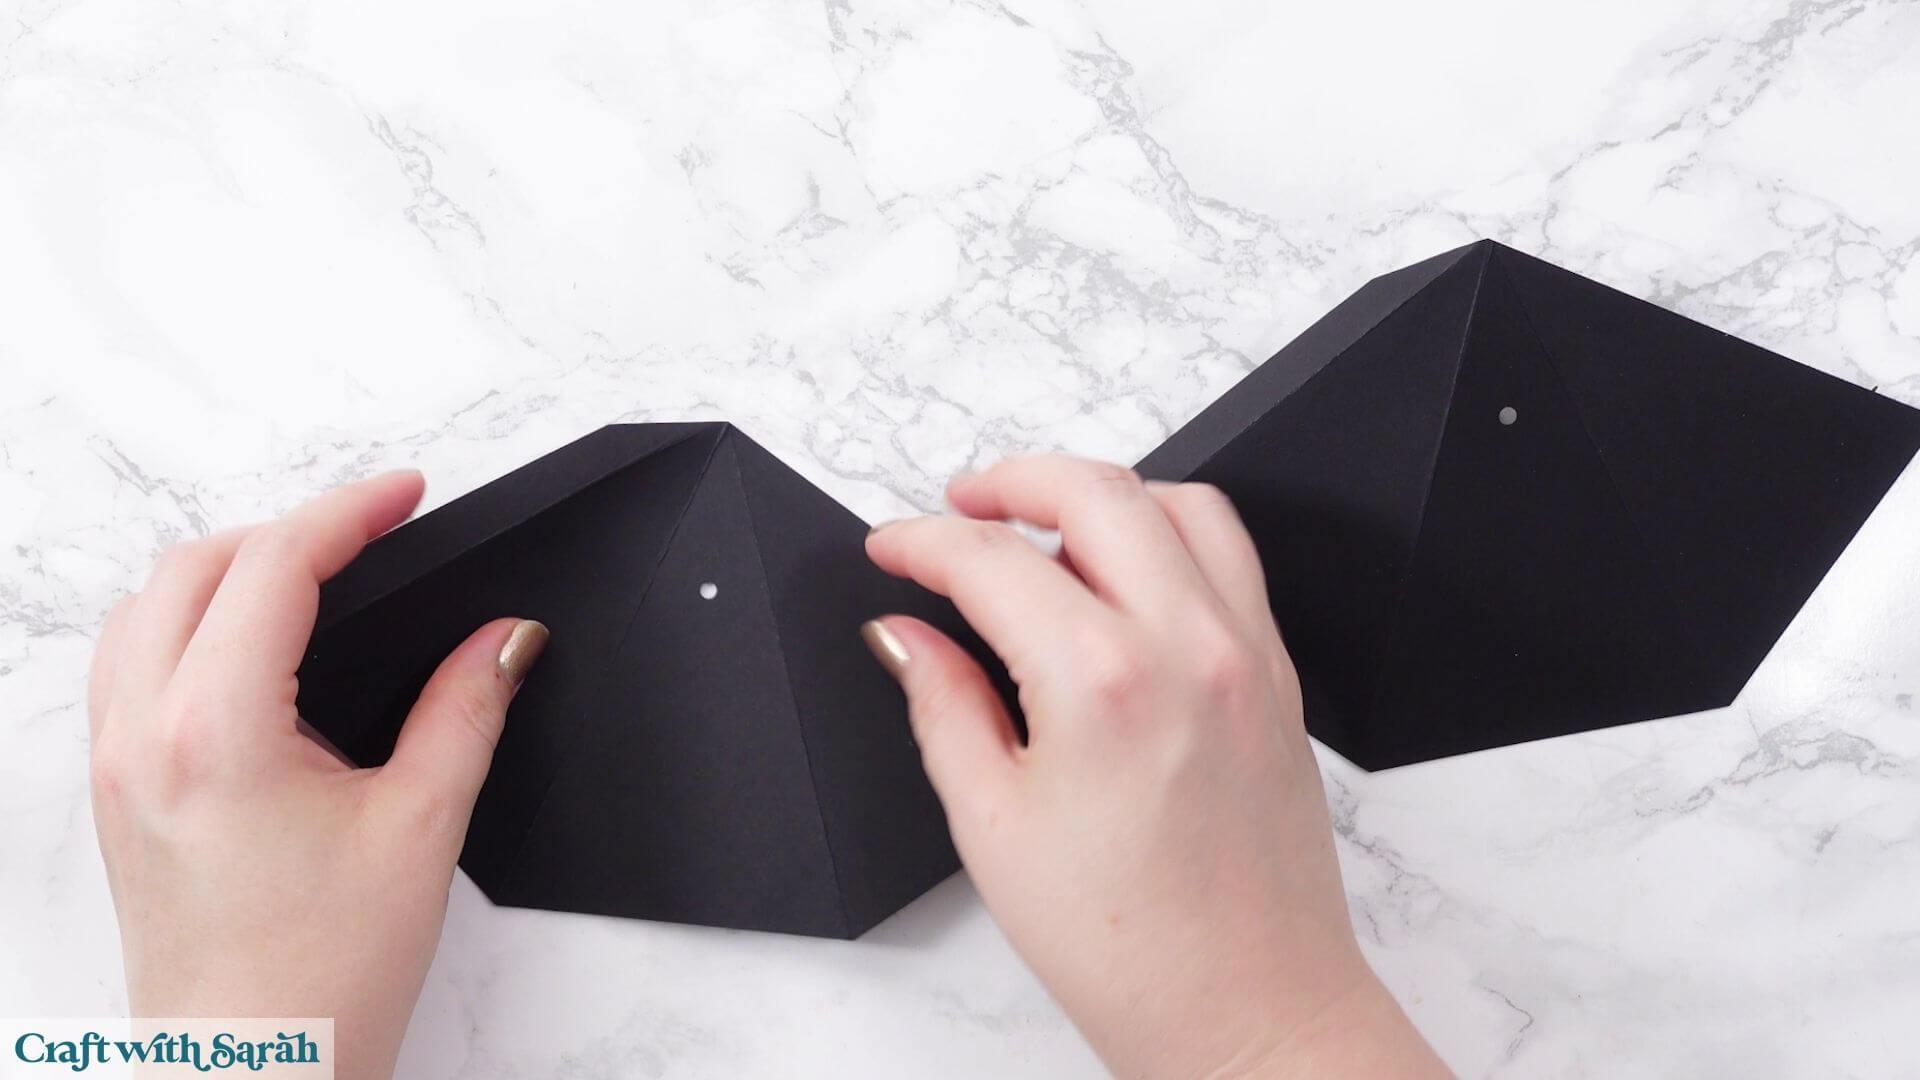
The two pieces are identical.
Glue the joining tab of one piece to the straight edge of the other, lining it up carefully with the score line.
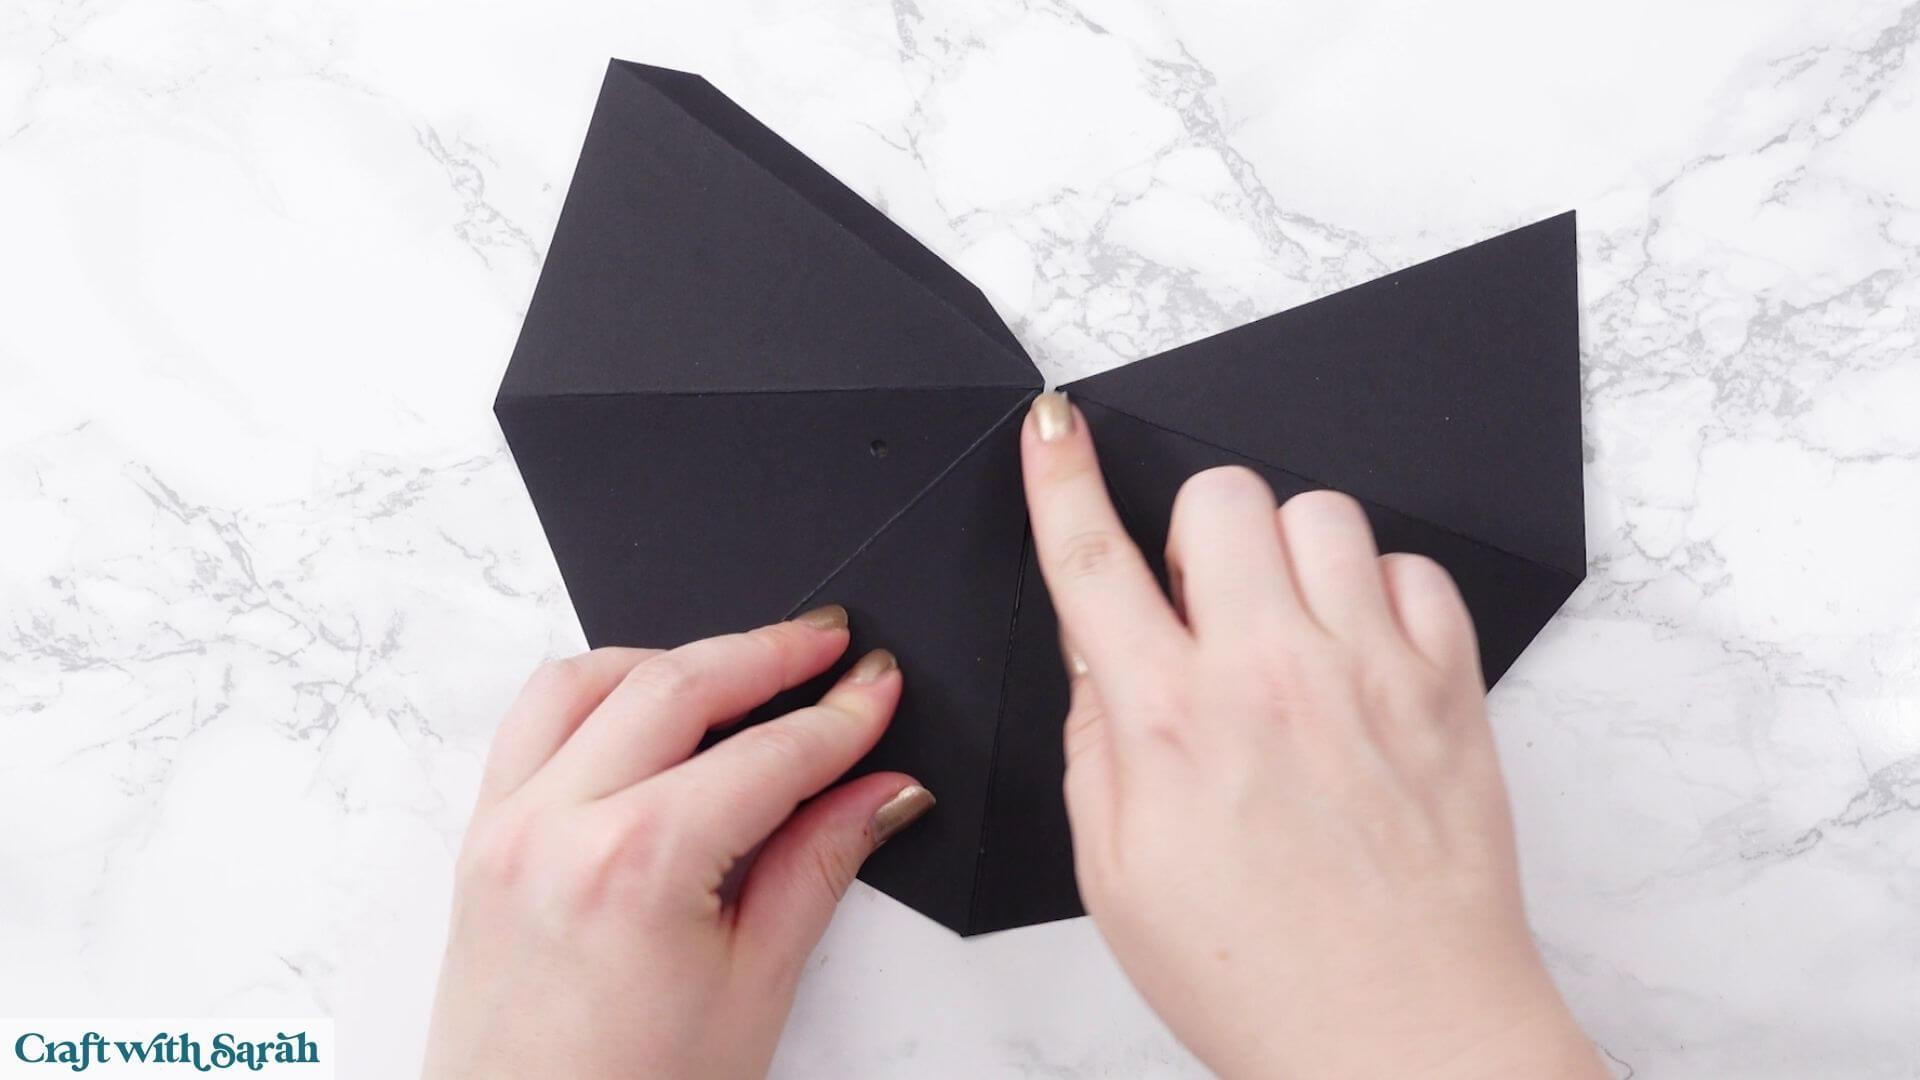
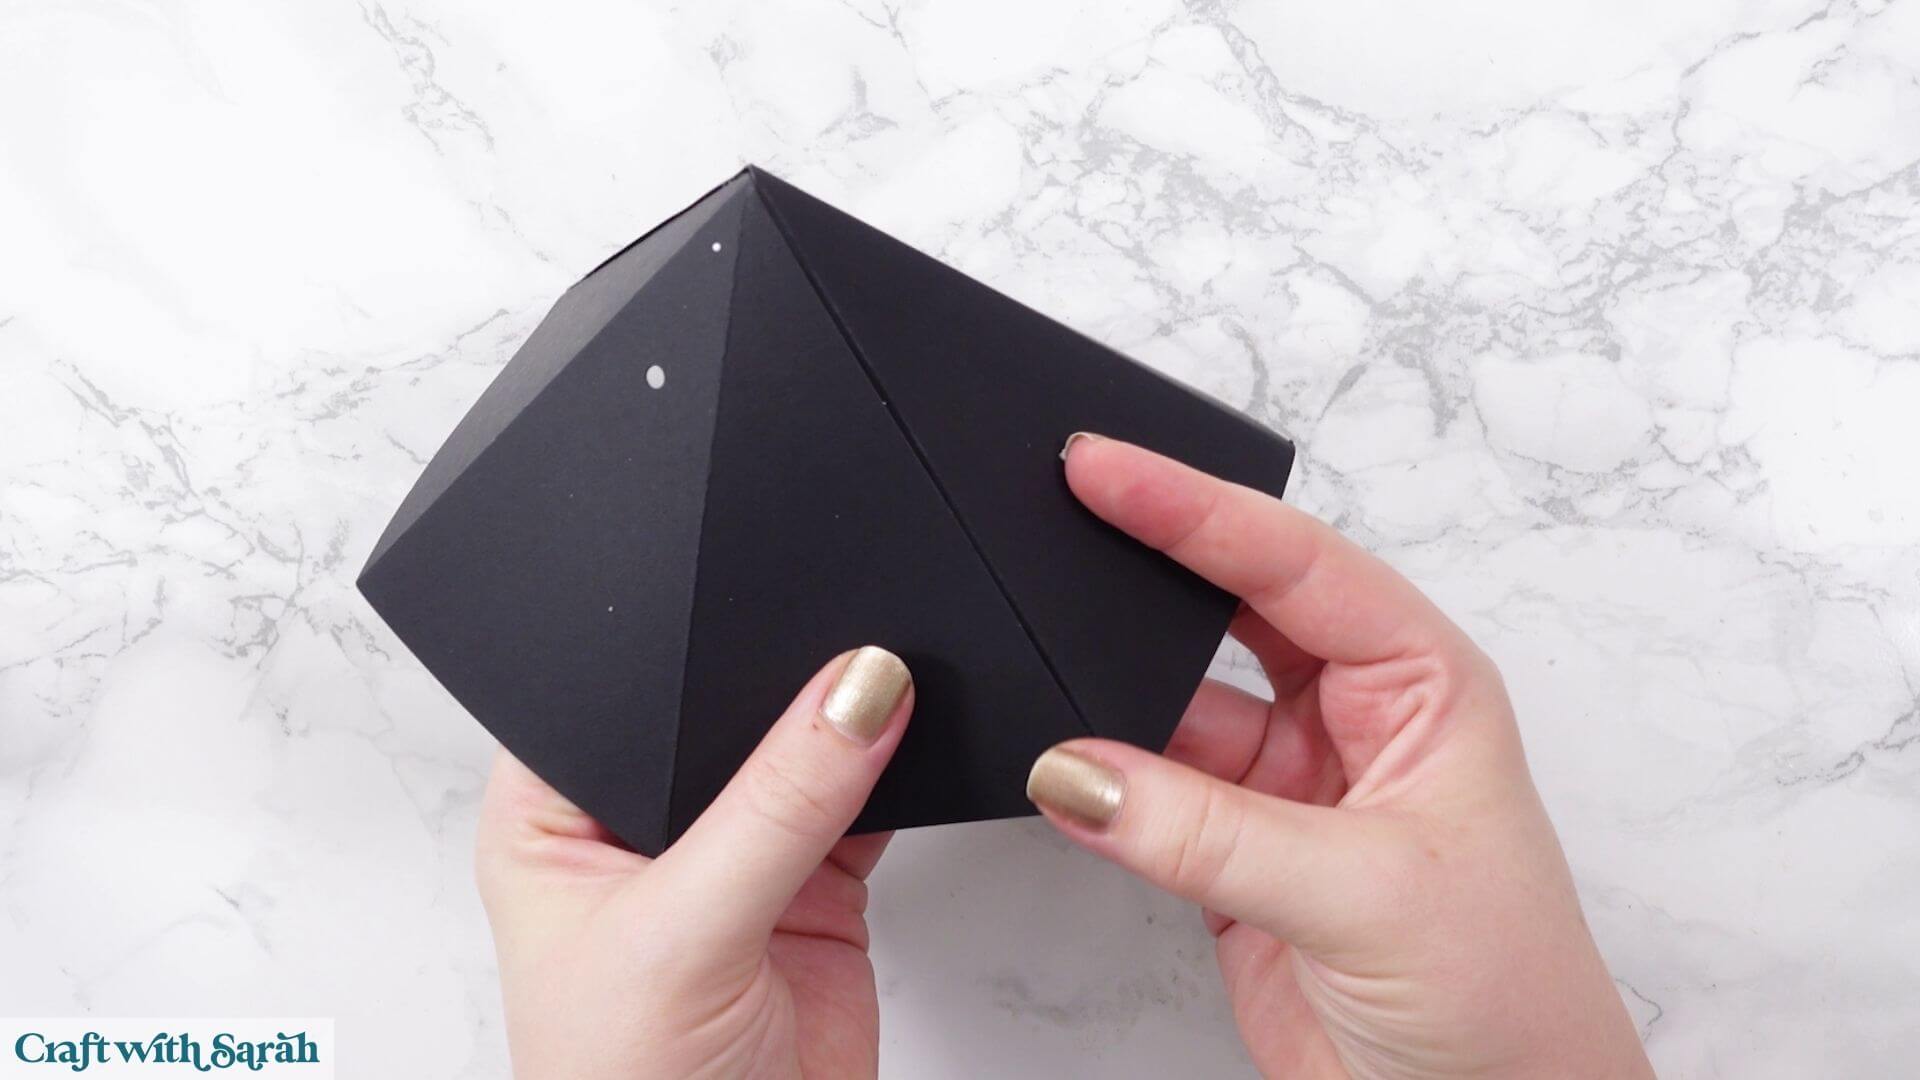
Bring the remaining sides around and glue the final tab to create the six-sided roof structure.
Don’t worry if any glue is visible on the outside. The decorative roof panels will completely cover these sections.
Step 12) Make the optional honeycomb bell
The bell is made using thin yellow paper rather than cardstock.
Fold every bell-shaped piece in half vertically.
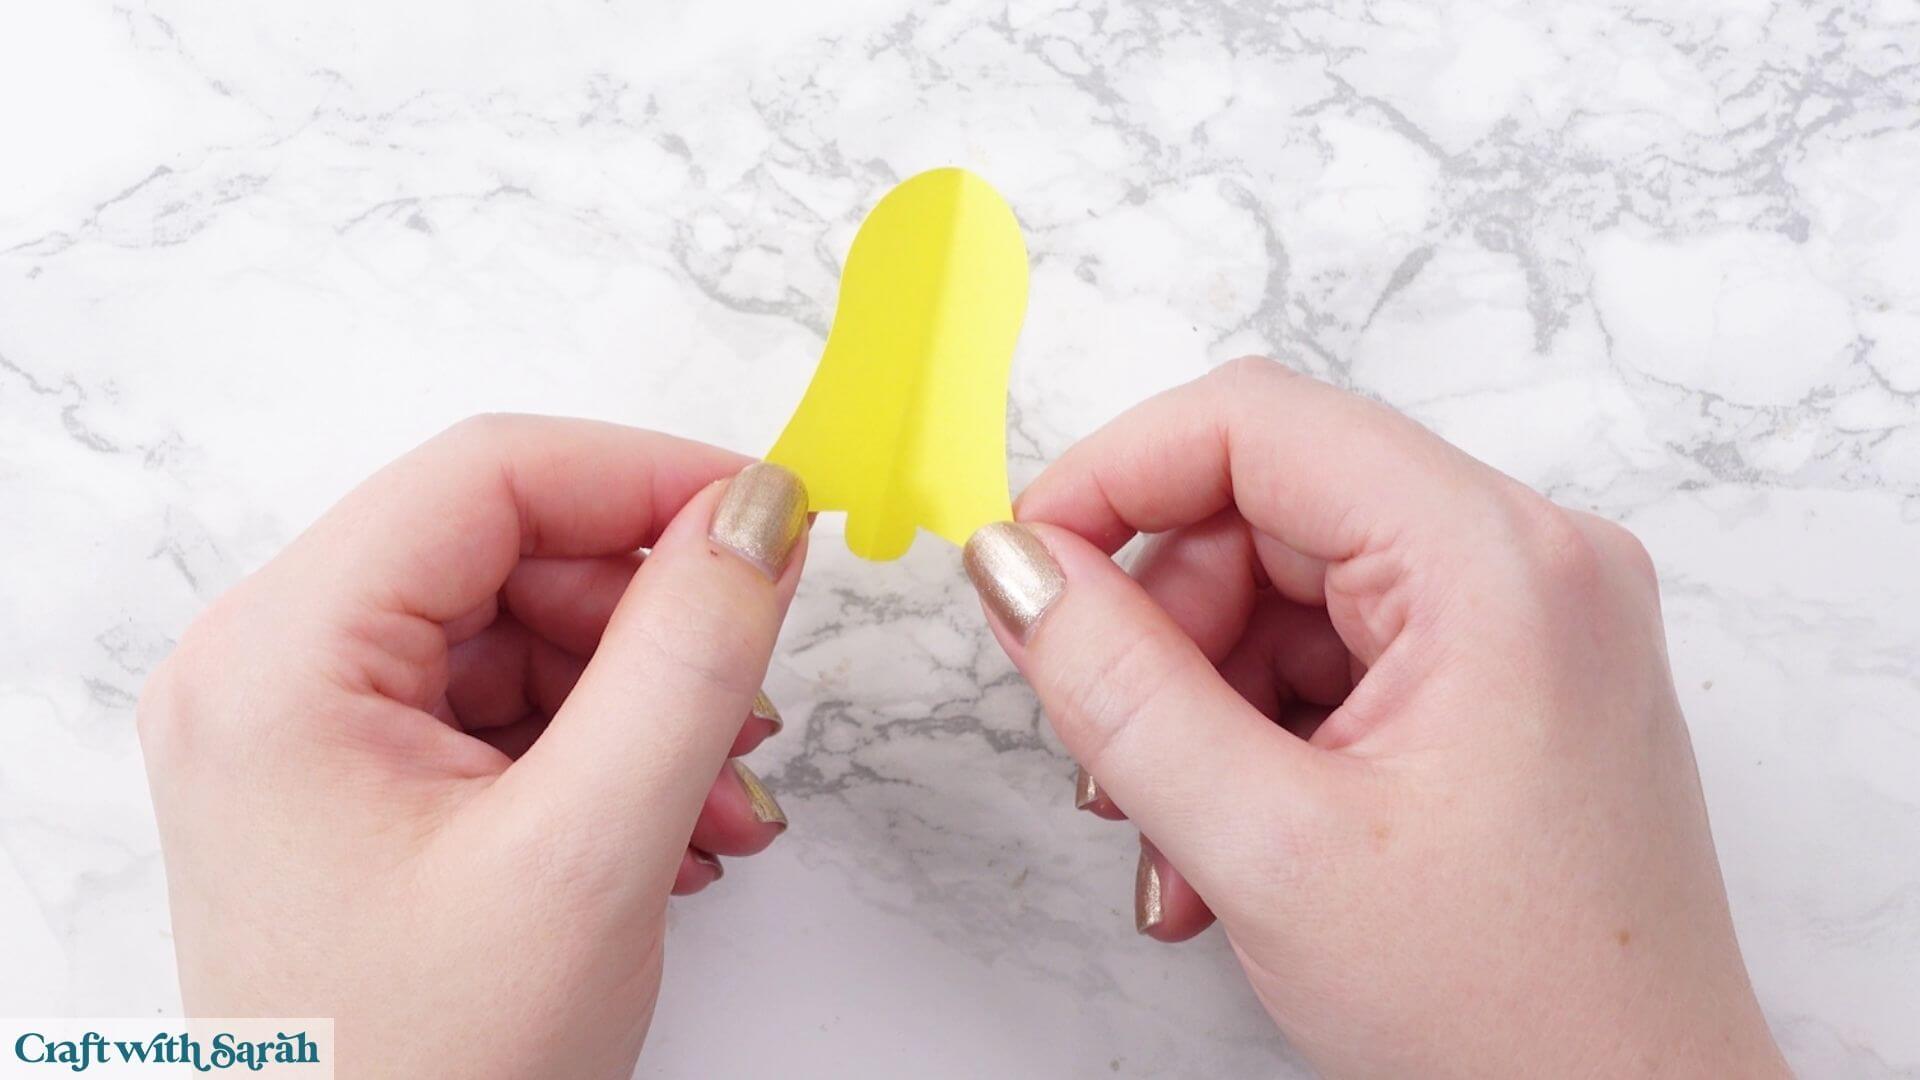
Open one piece and add a very thin line of glue approximately halfway across one side, stopping slightly before the outer edge.
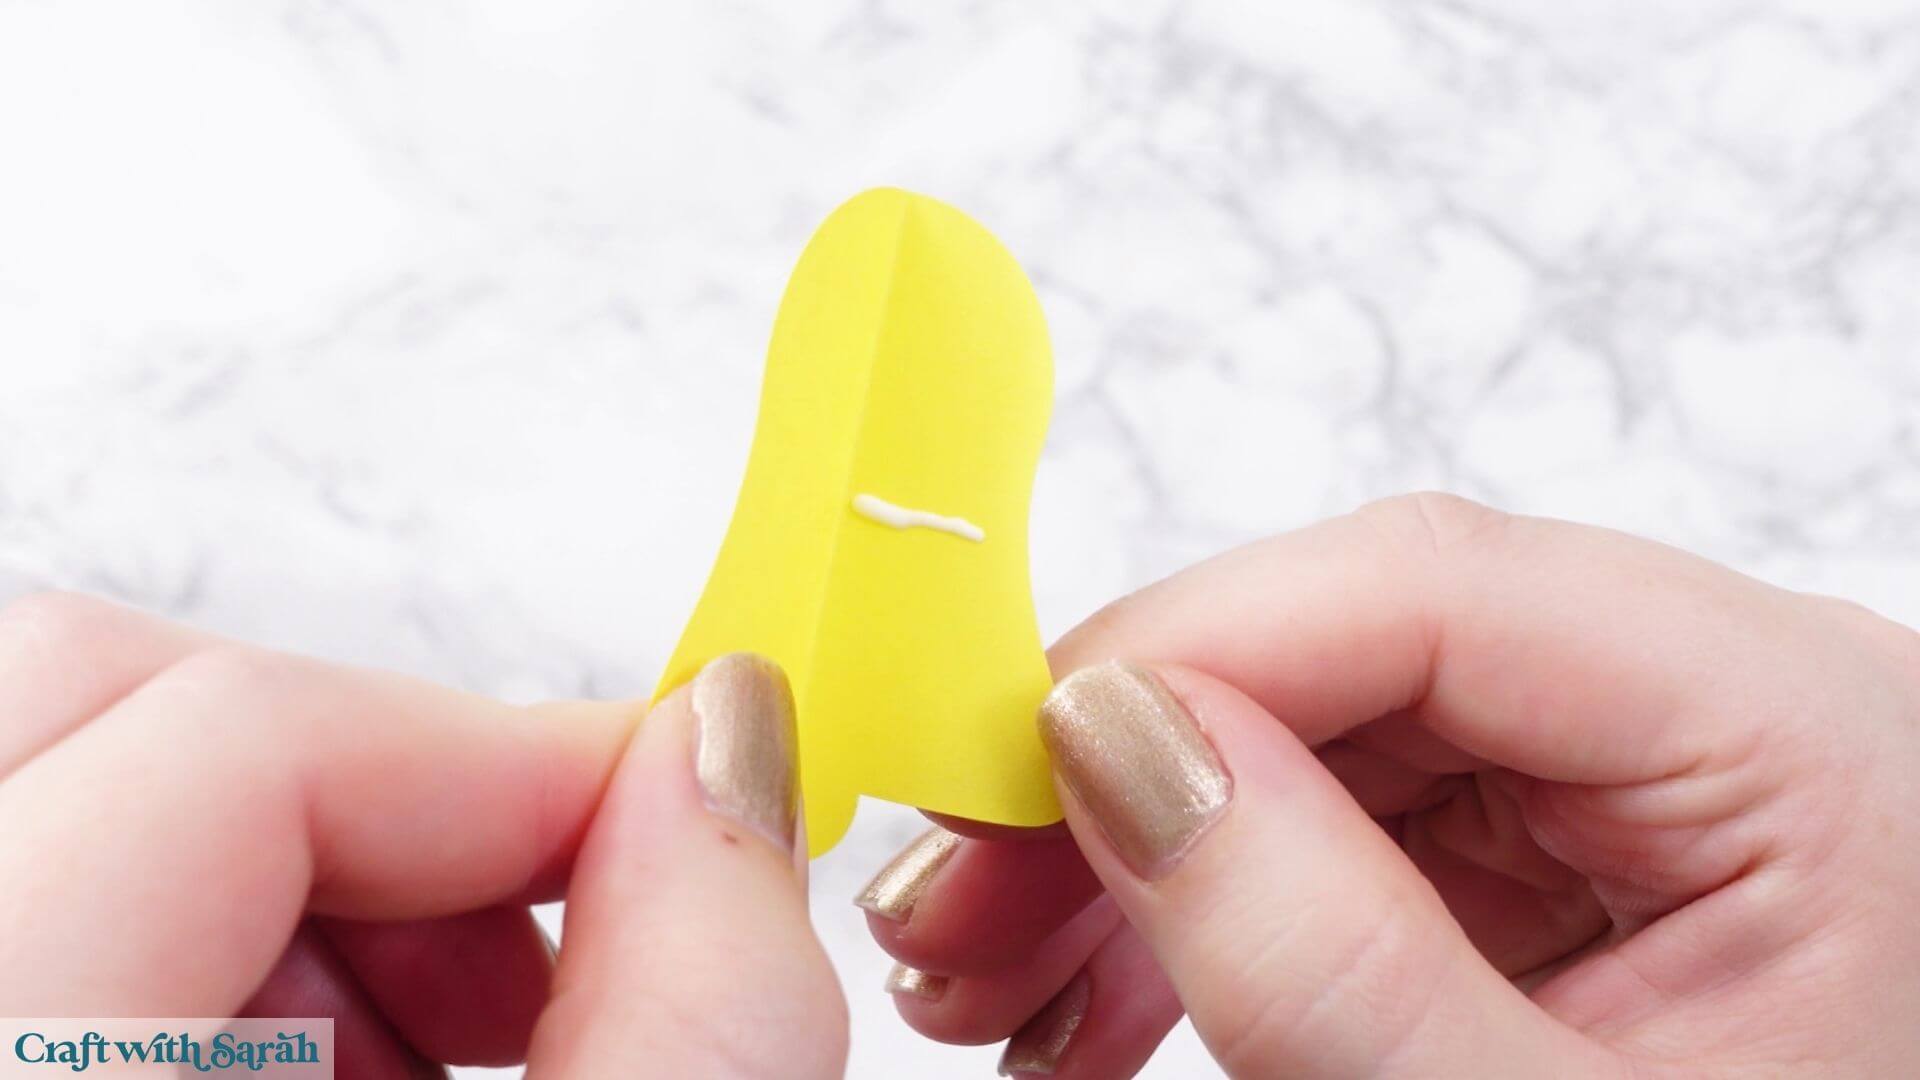
Fold it closed and gently press it together.
Repeat for all of the bell pieces.
Next, stack the folded pieces together.
Add two thin lines of glue to one folded bell piece – approximately one-third and two-thirds of the way across – then place the next folded bell on top.
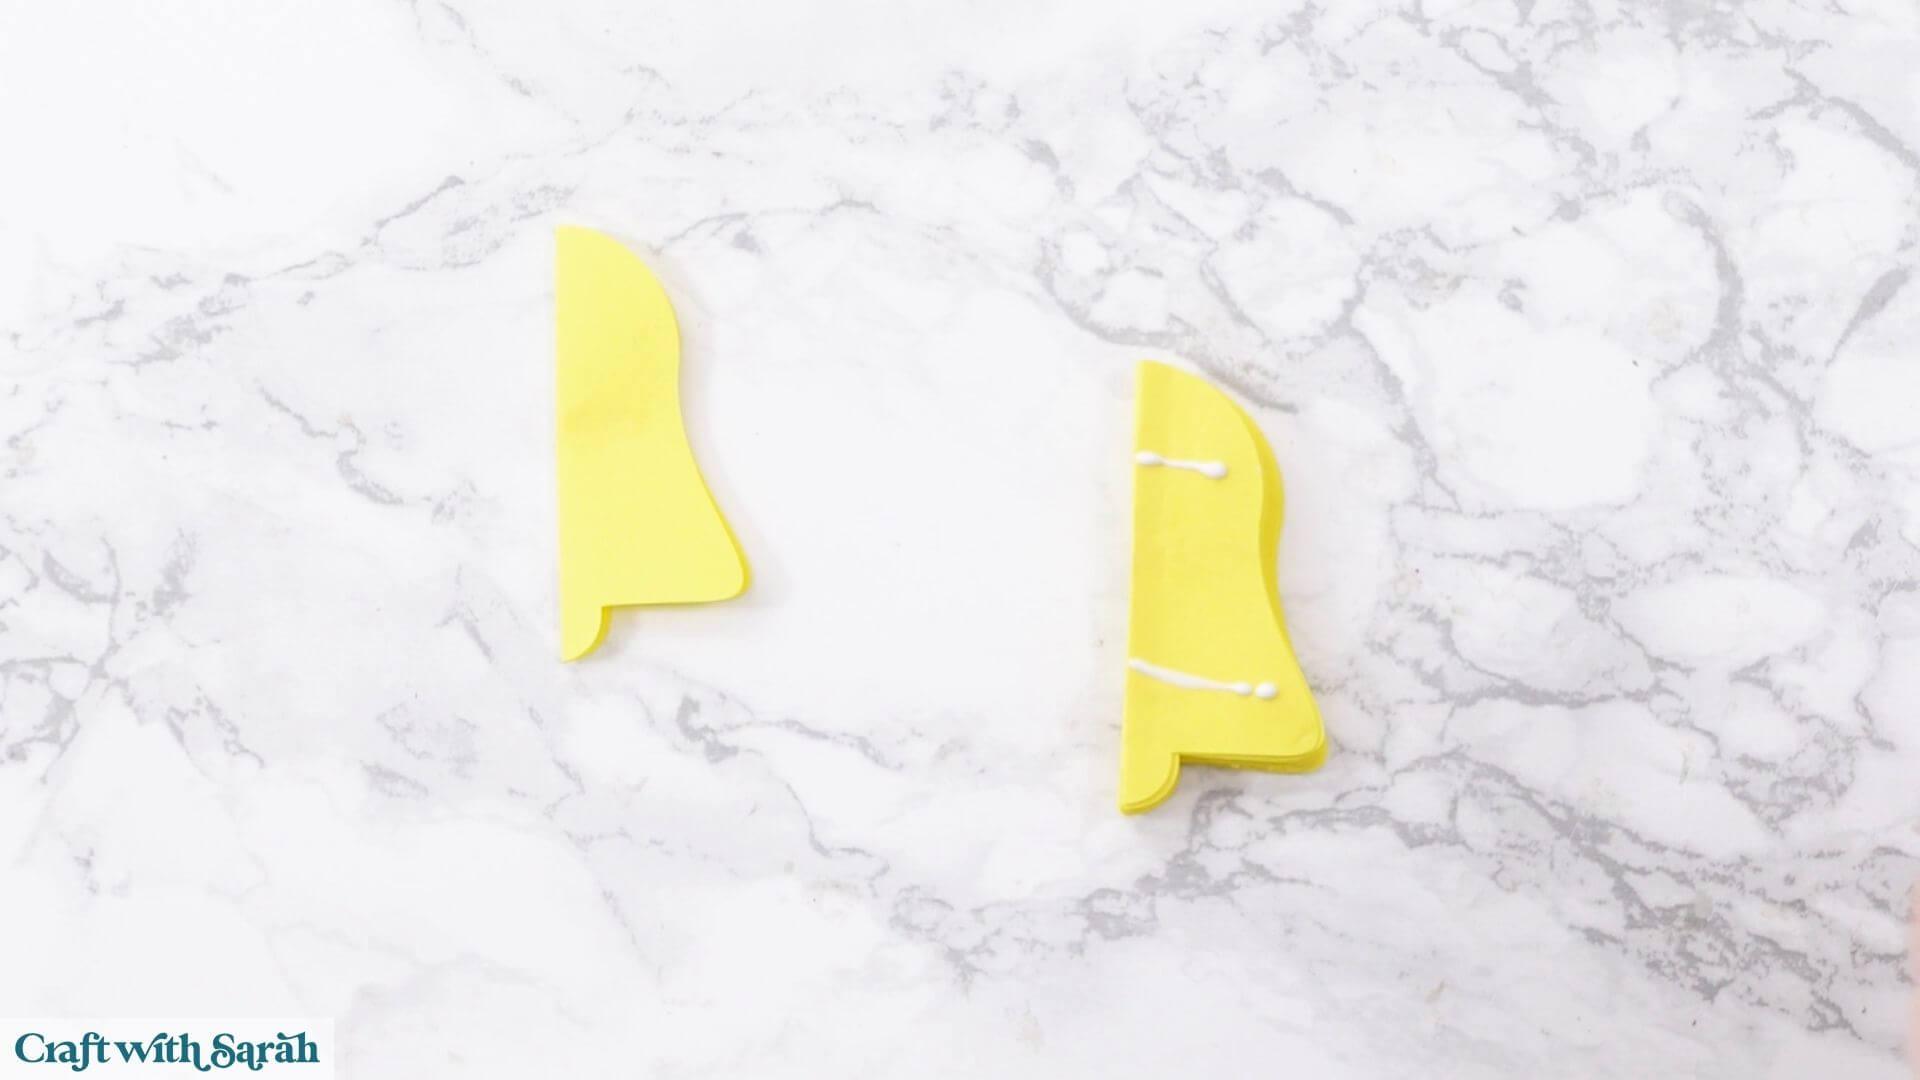
Continue until all of the pieces are joined.
Use bulldog clips or large paperclips to hold everything together while the glue dries.
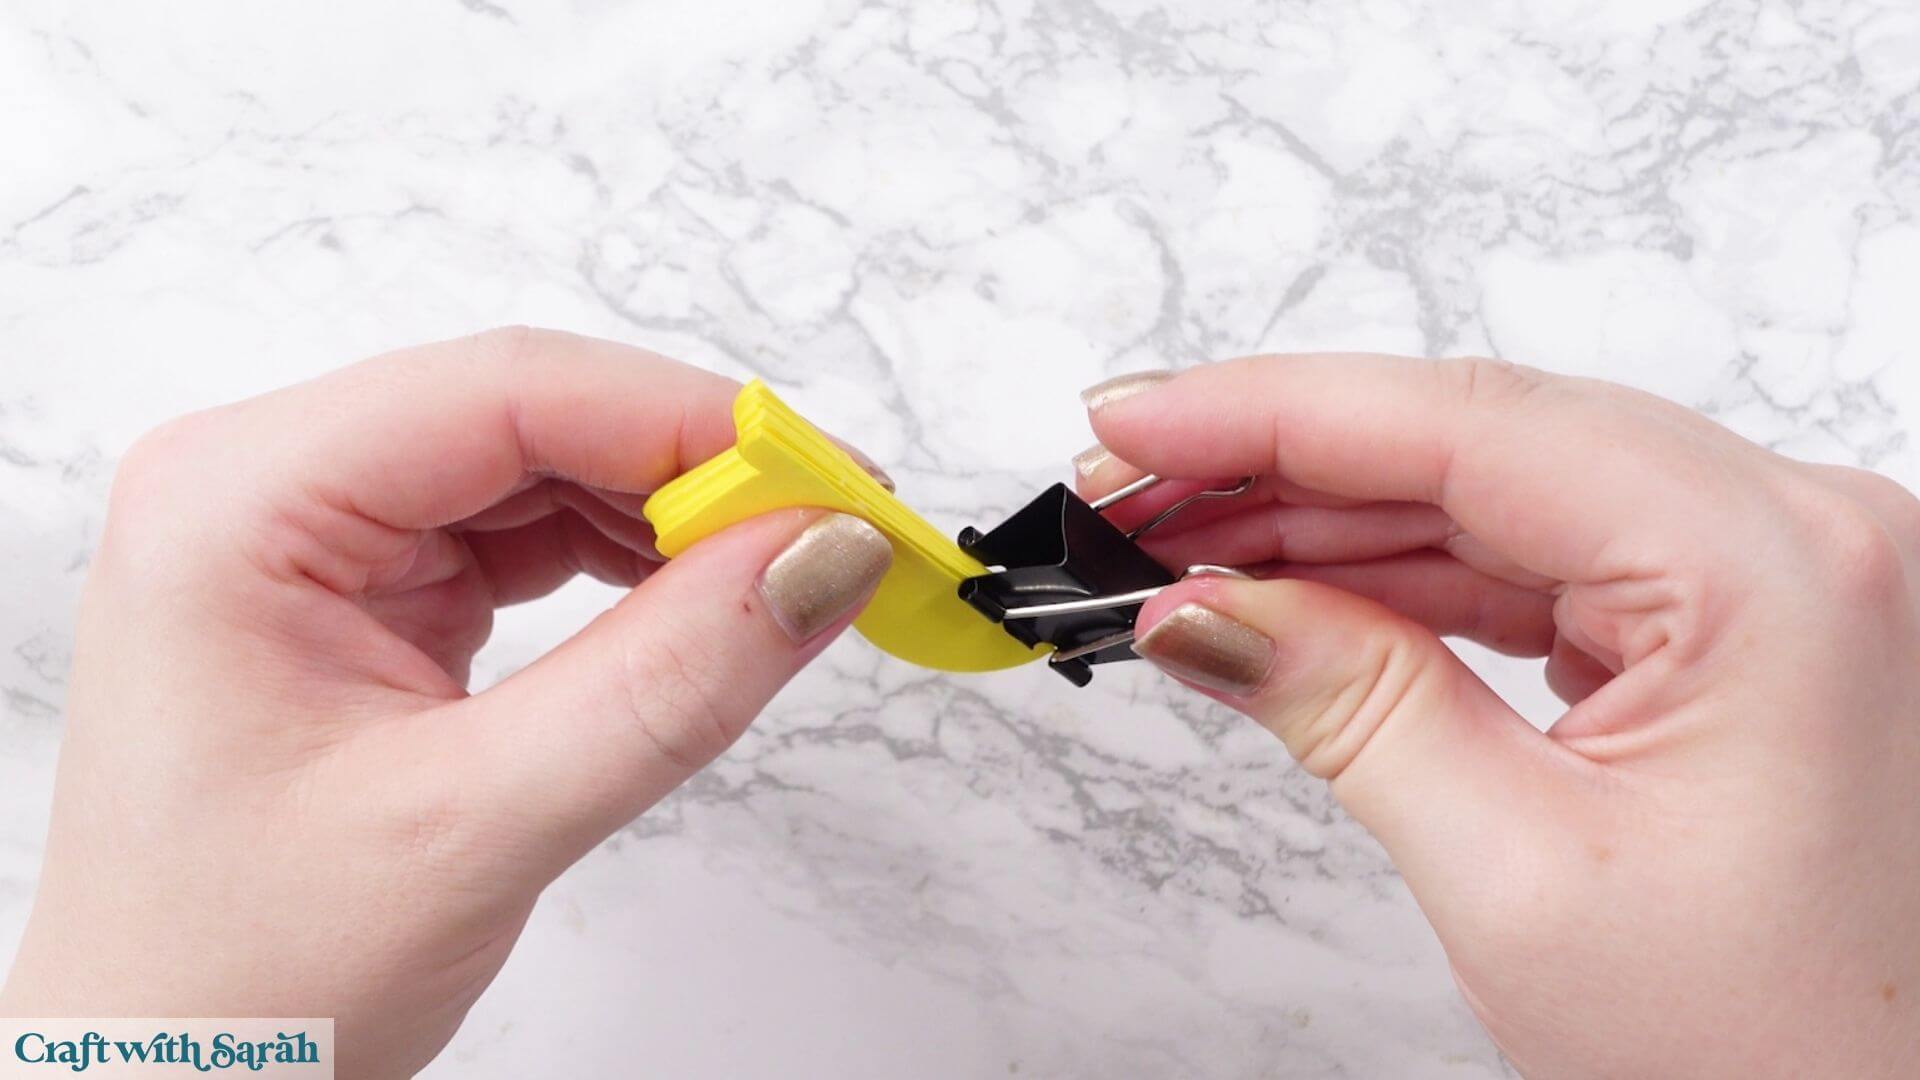
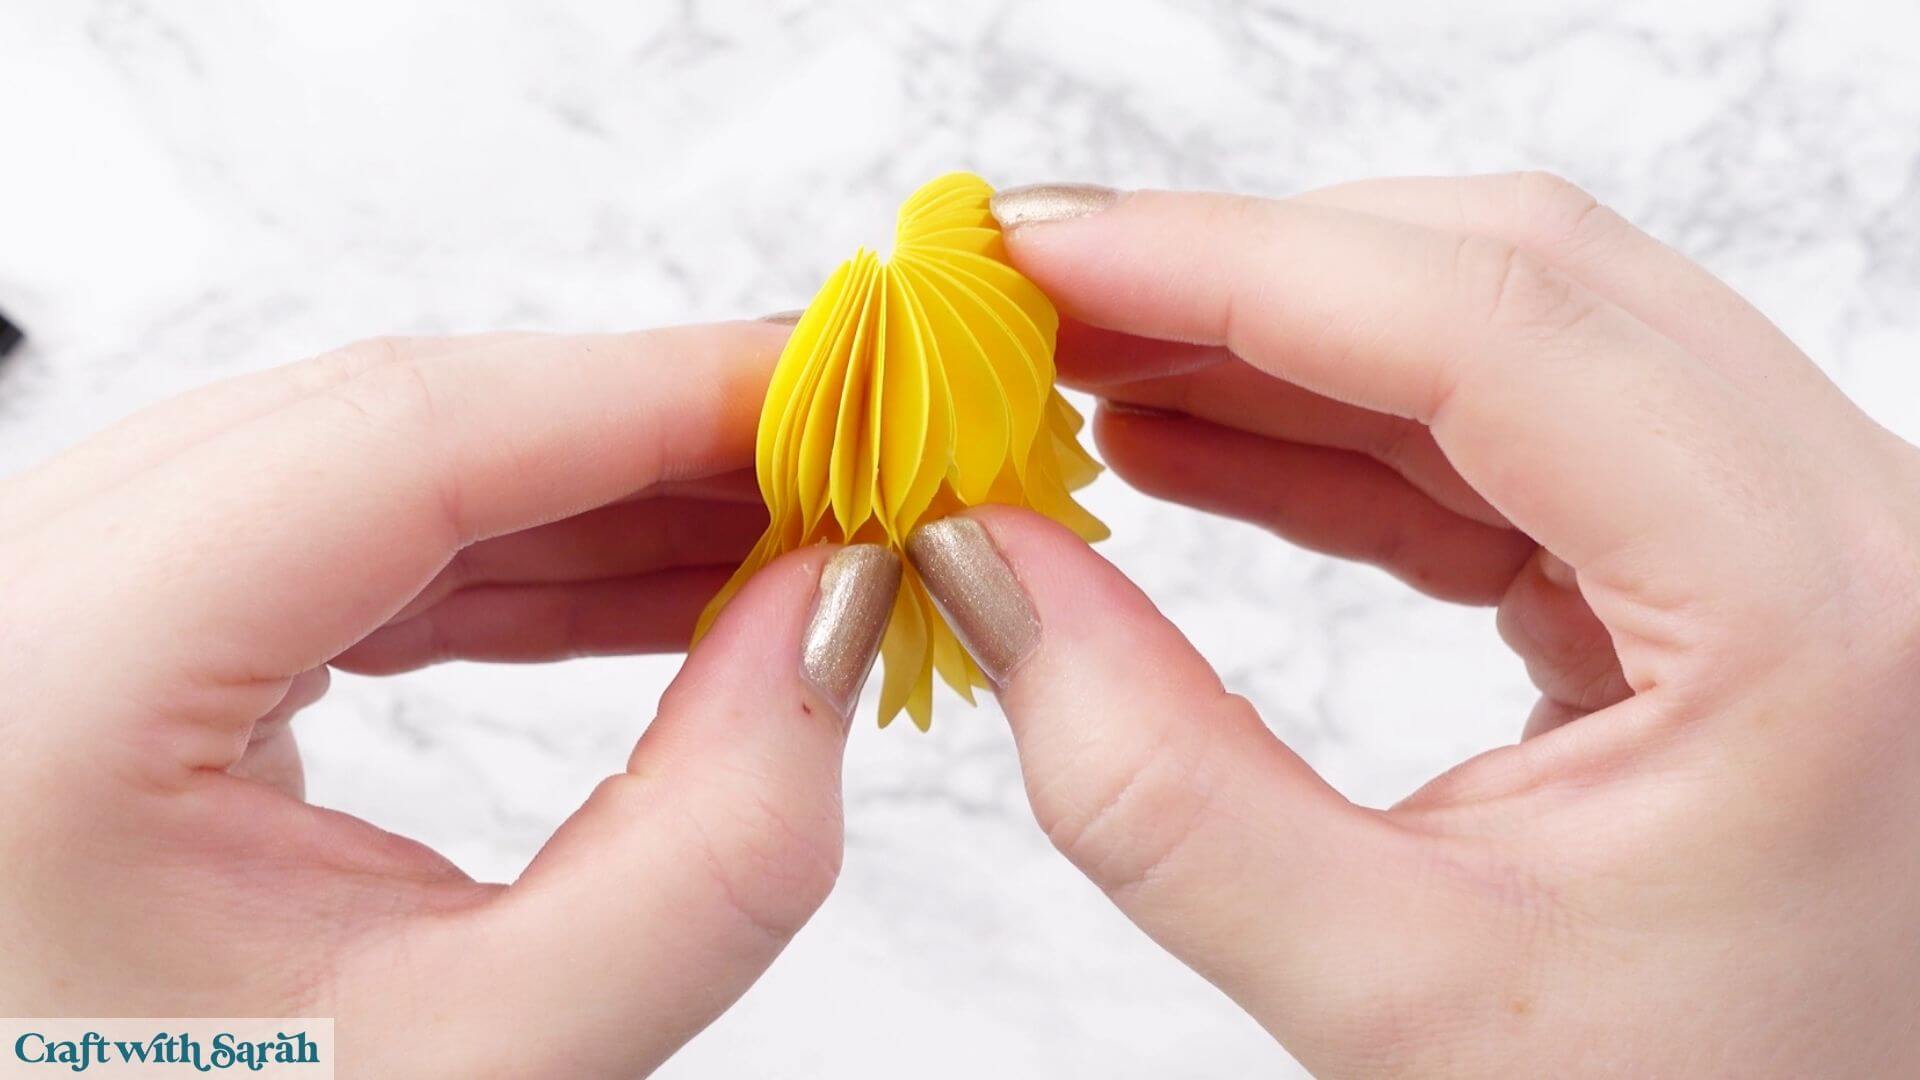
Once dry, remove the clips and carefully open the stack into the honeycomb shape.
If any sections have accidentally stuck together due to excess glue, very gently separate them.
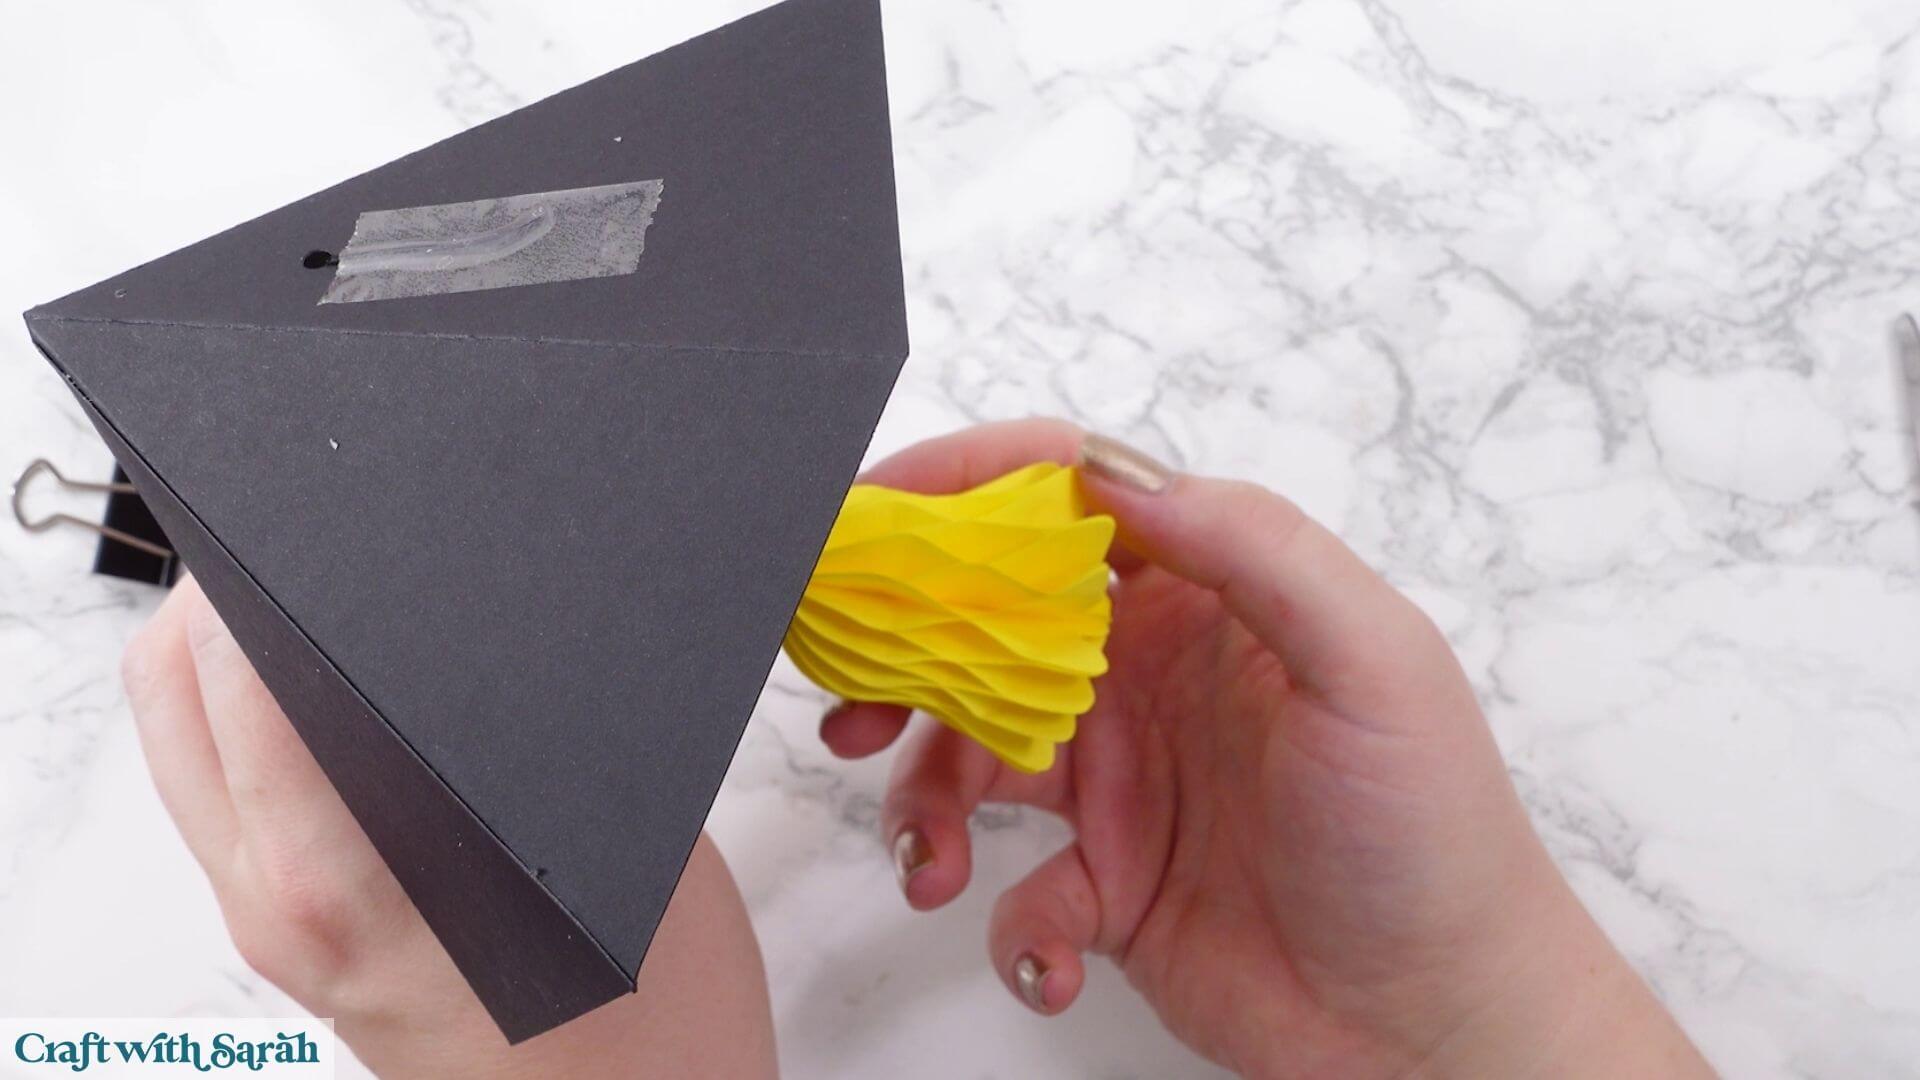
Glue the hanging piece inside the bell, making sure its loop extends above the top.
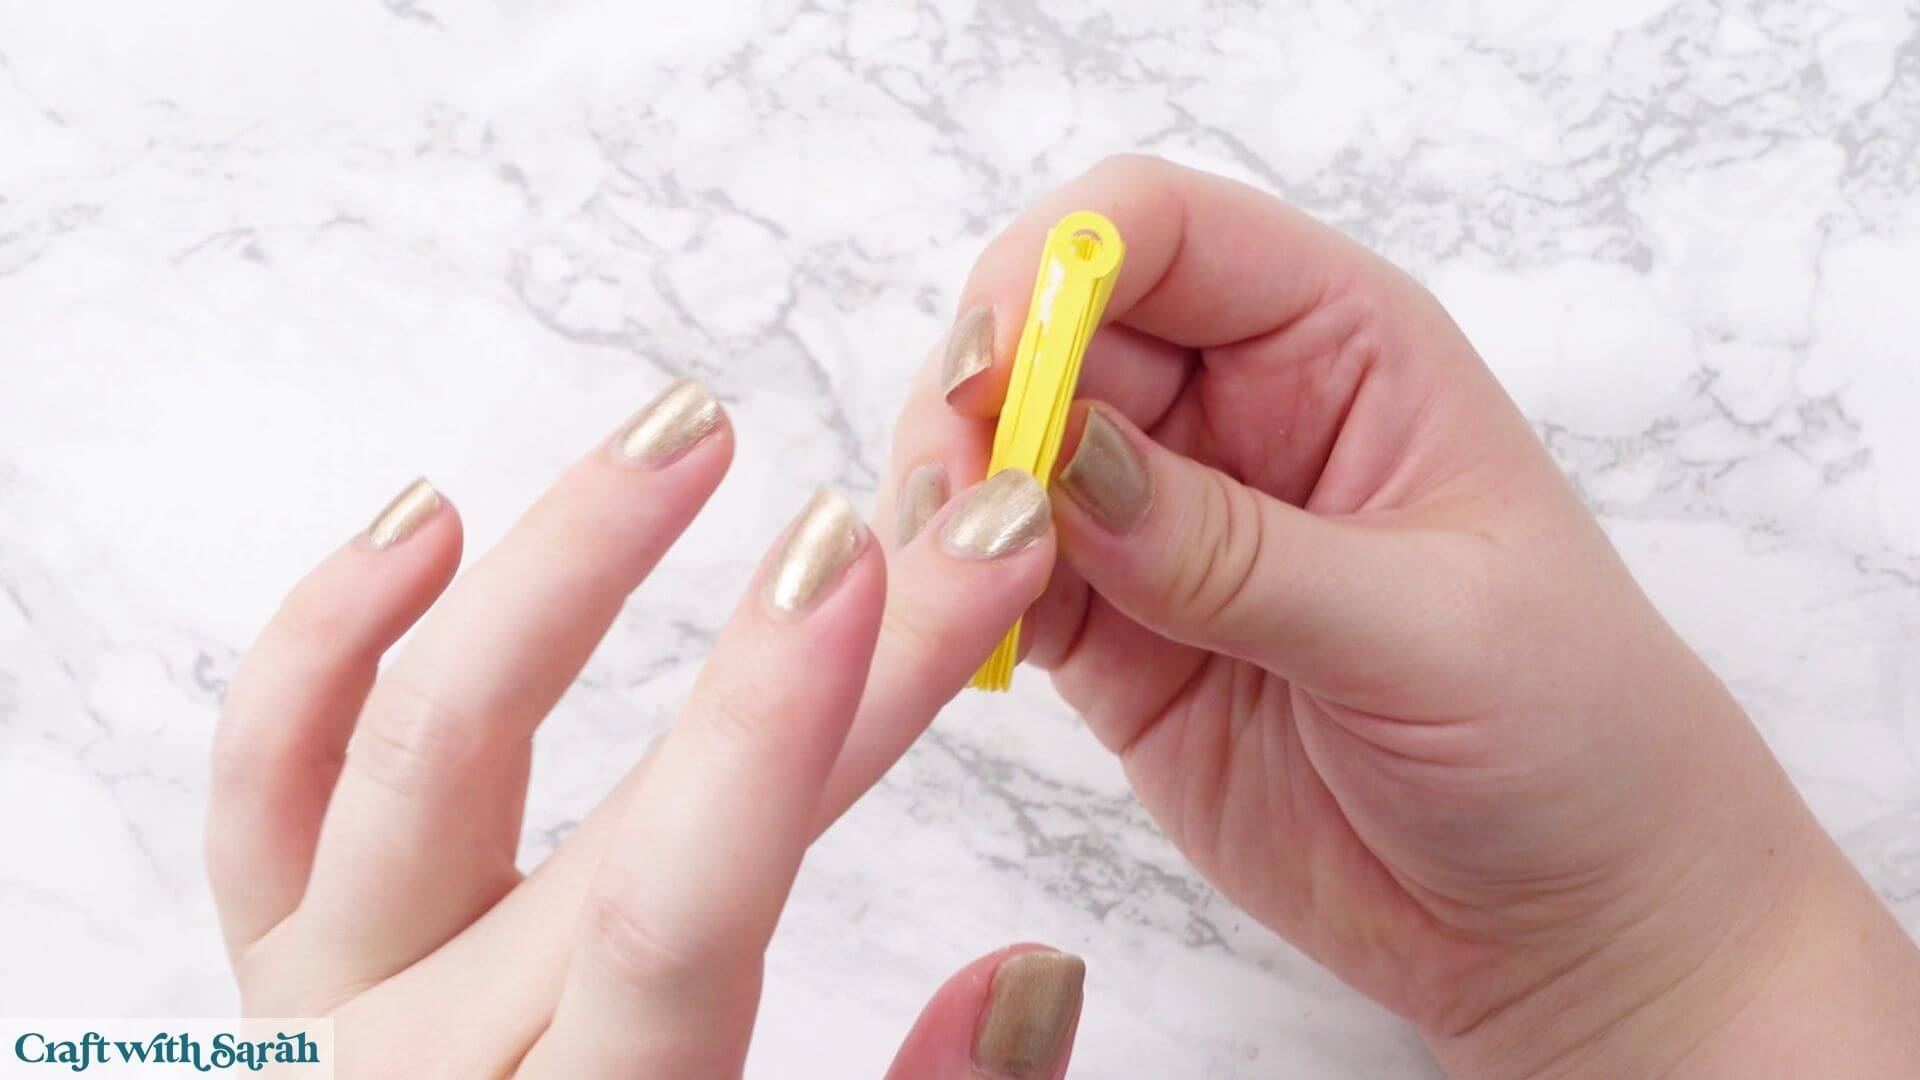
Bring the two outer sides of the honeycomb together and glue them closed.
Use paper clips to hold the bell while it dries.
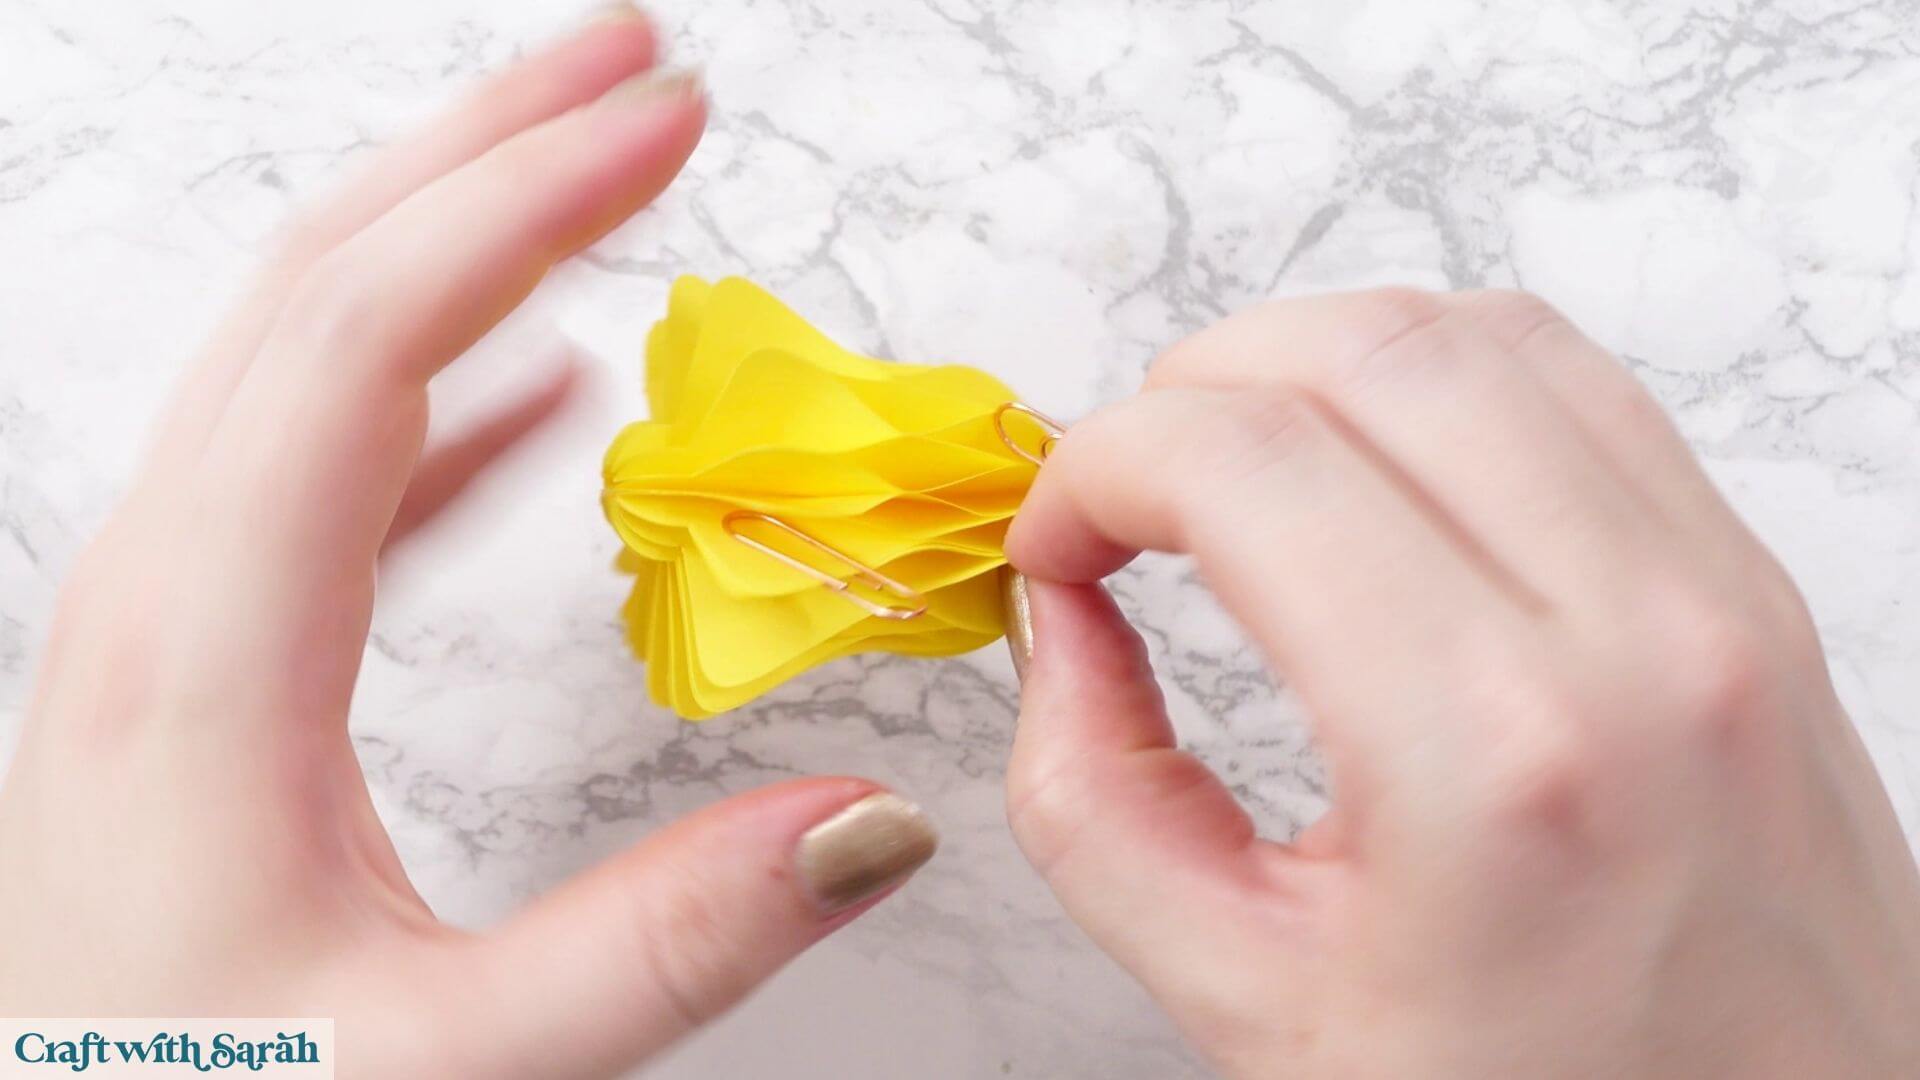
Step 13) Hang the bell inside the roof
Cut a length of embroidery thread, string or twine.
Thread it from inside the roof through one of the small holes and secure the end to the outside with sticky tape.
Take the thread across the inside of the roof and through the corresponding hole on the opposite side.
Pull it fairly taut without pulling so tightly that you distort the roof.
Tape the second end securely to the outside.
This creates a horizontal line of thread across the inside of the roof.
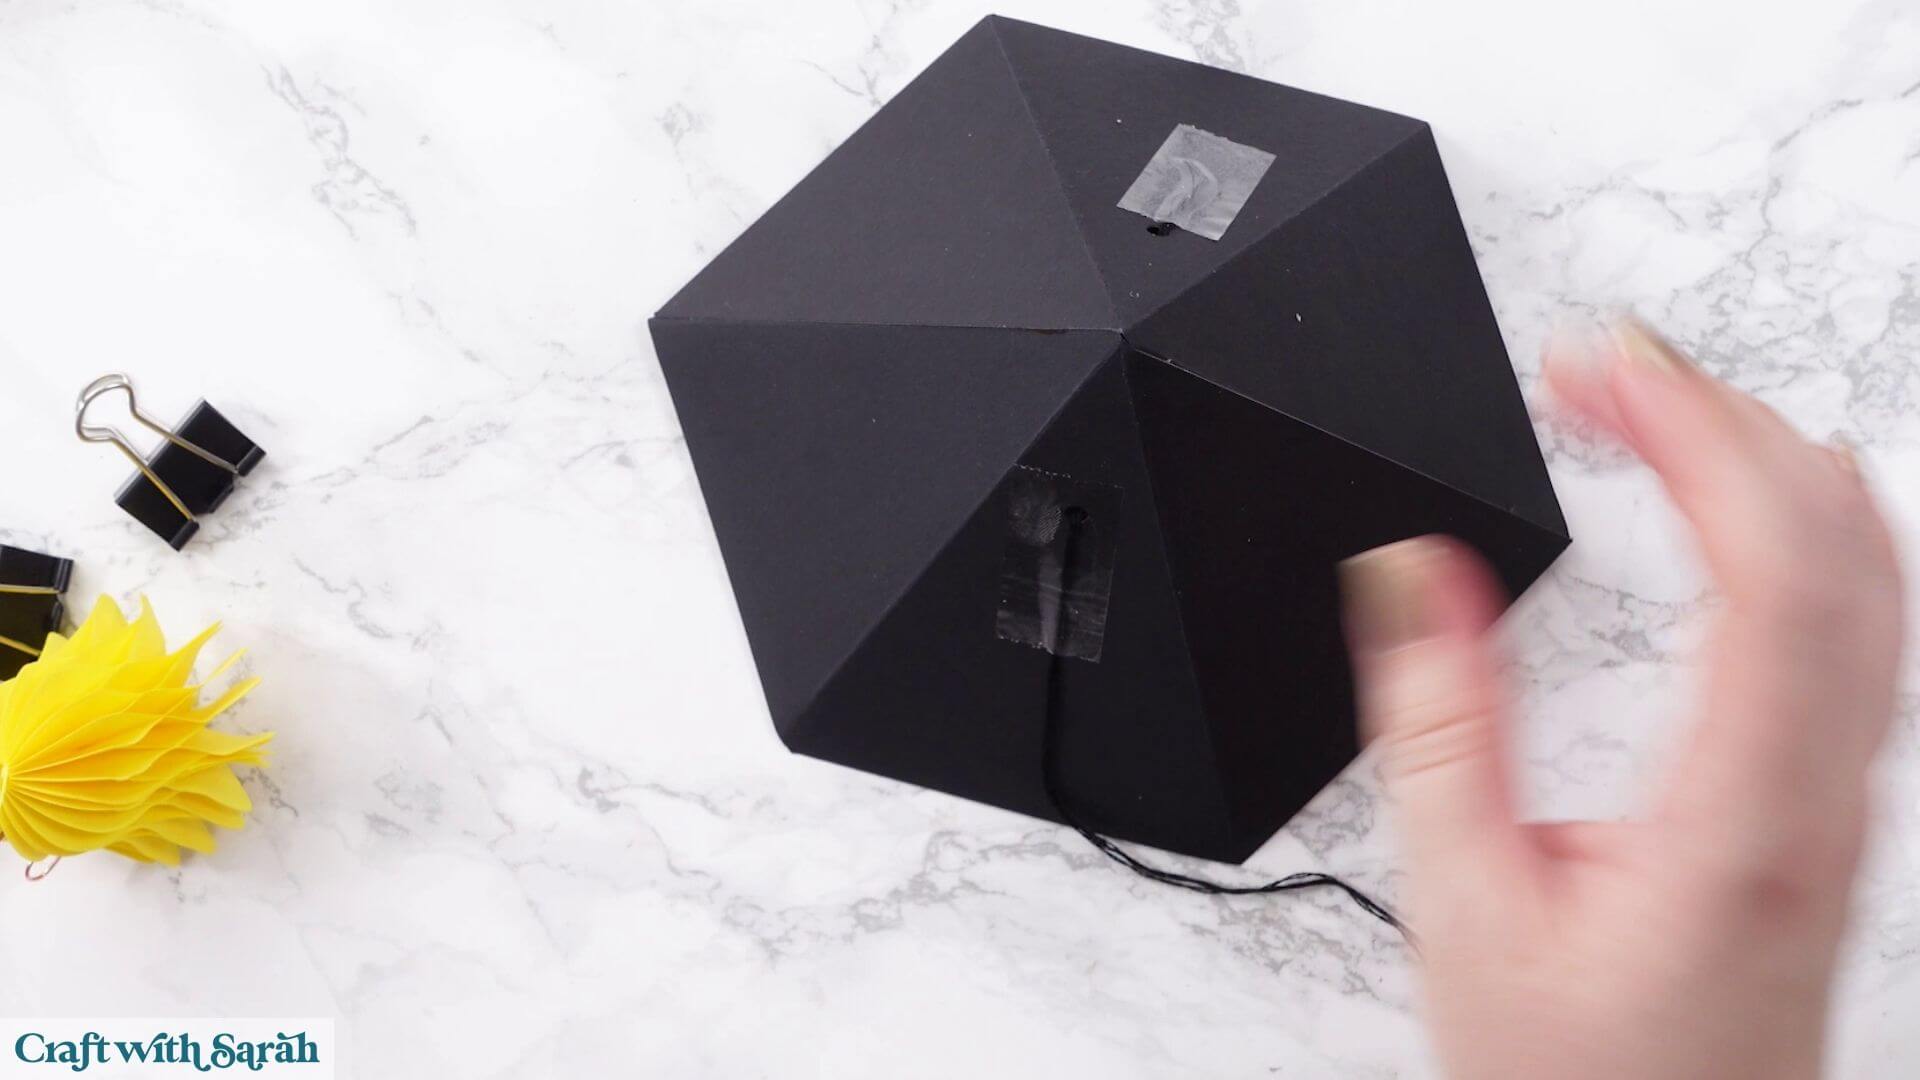
Take another piece of thread and fold it in half to create a loop.
Thread the loop through the hanger on the bell and secure it around the horizontal thread inside the roof.
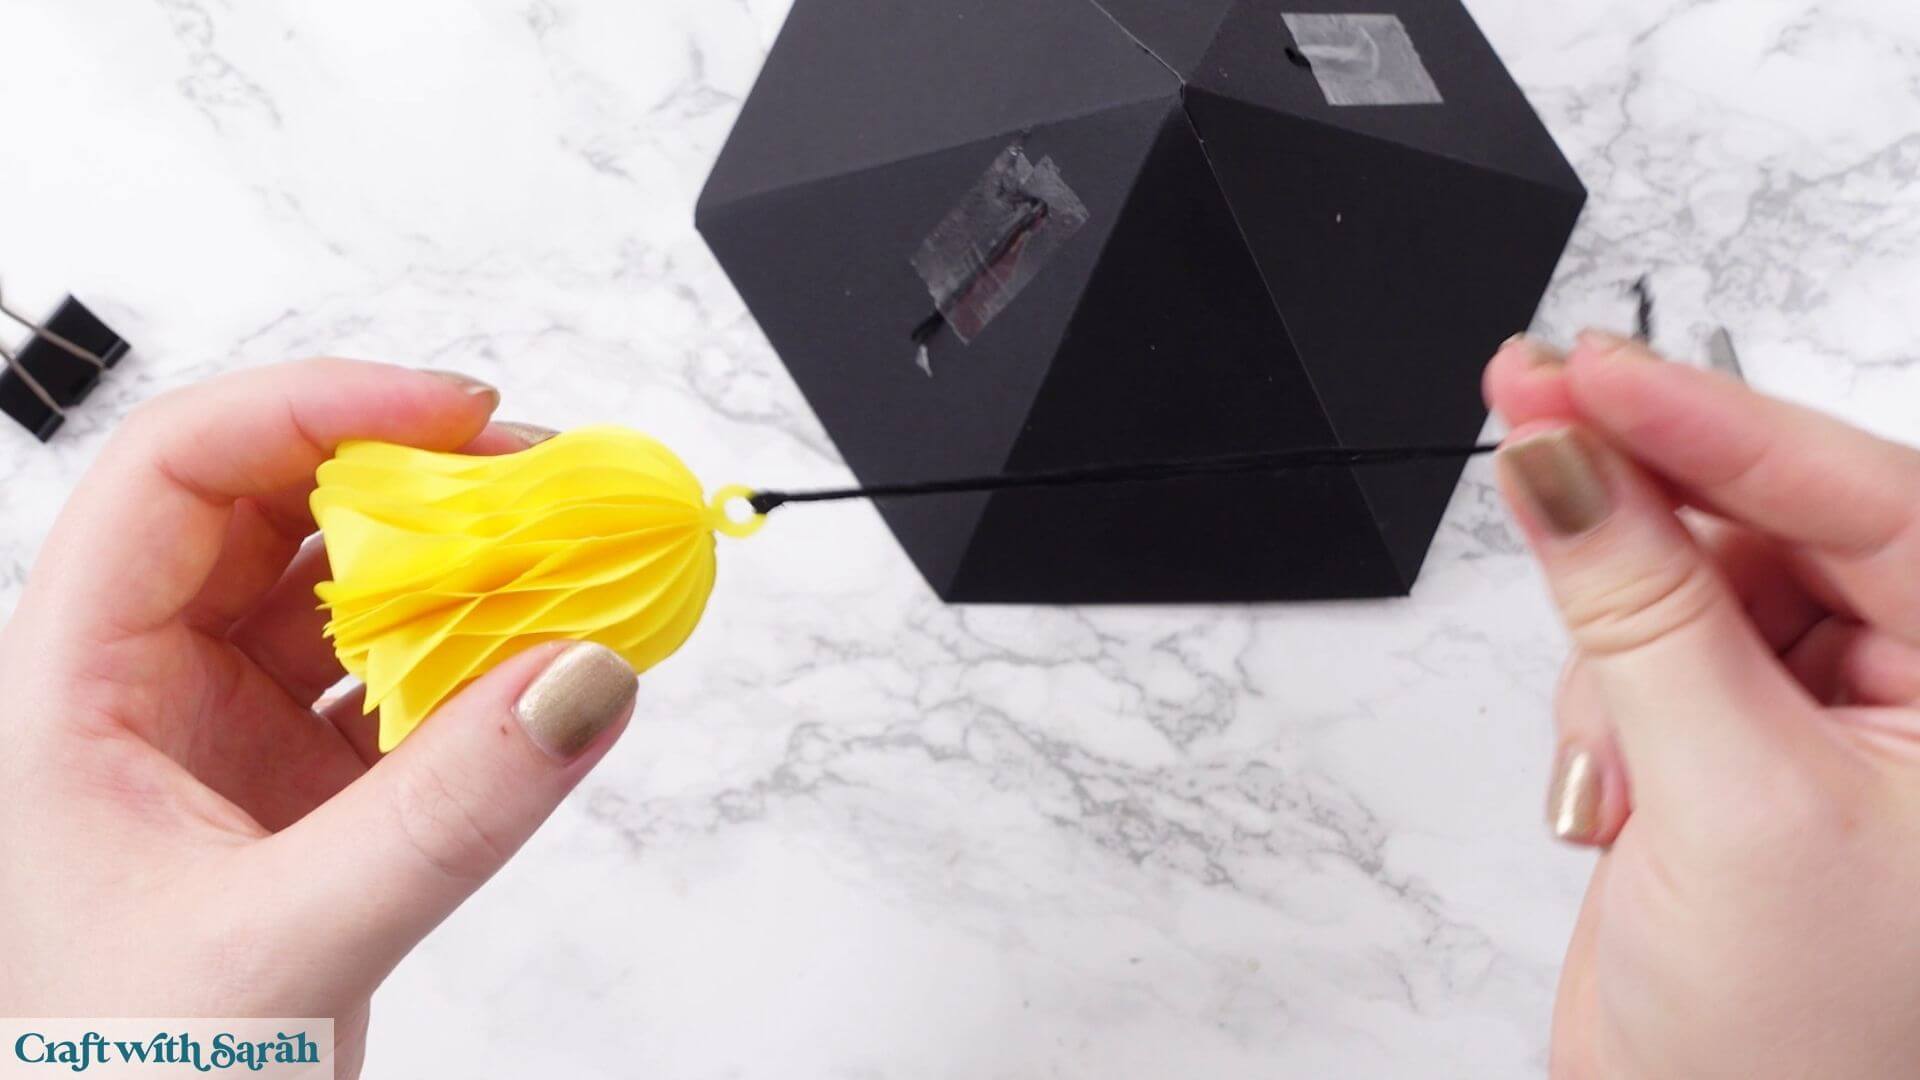
Adjust the height until the bell hangs visibly below the roof without hanging so low that it will touch the inner section of the tower.
You may need to experiment with the position before tying it securely.
Step 14) Add the decorative roof panels
Glue one completed tiled panel onto each side of the roof.
As the bottom edges are scalloped, don’t apply glue directly along the very bottom edge of the roof structure where it could remain visible.
I find it easier to add glue to the back of each decorative panel instead.
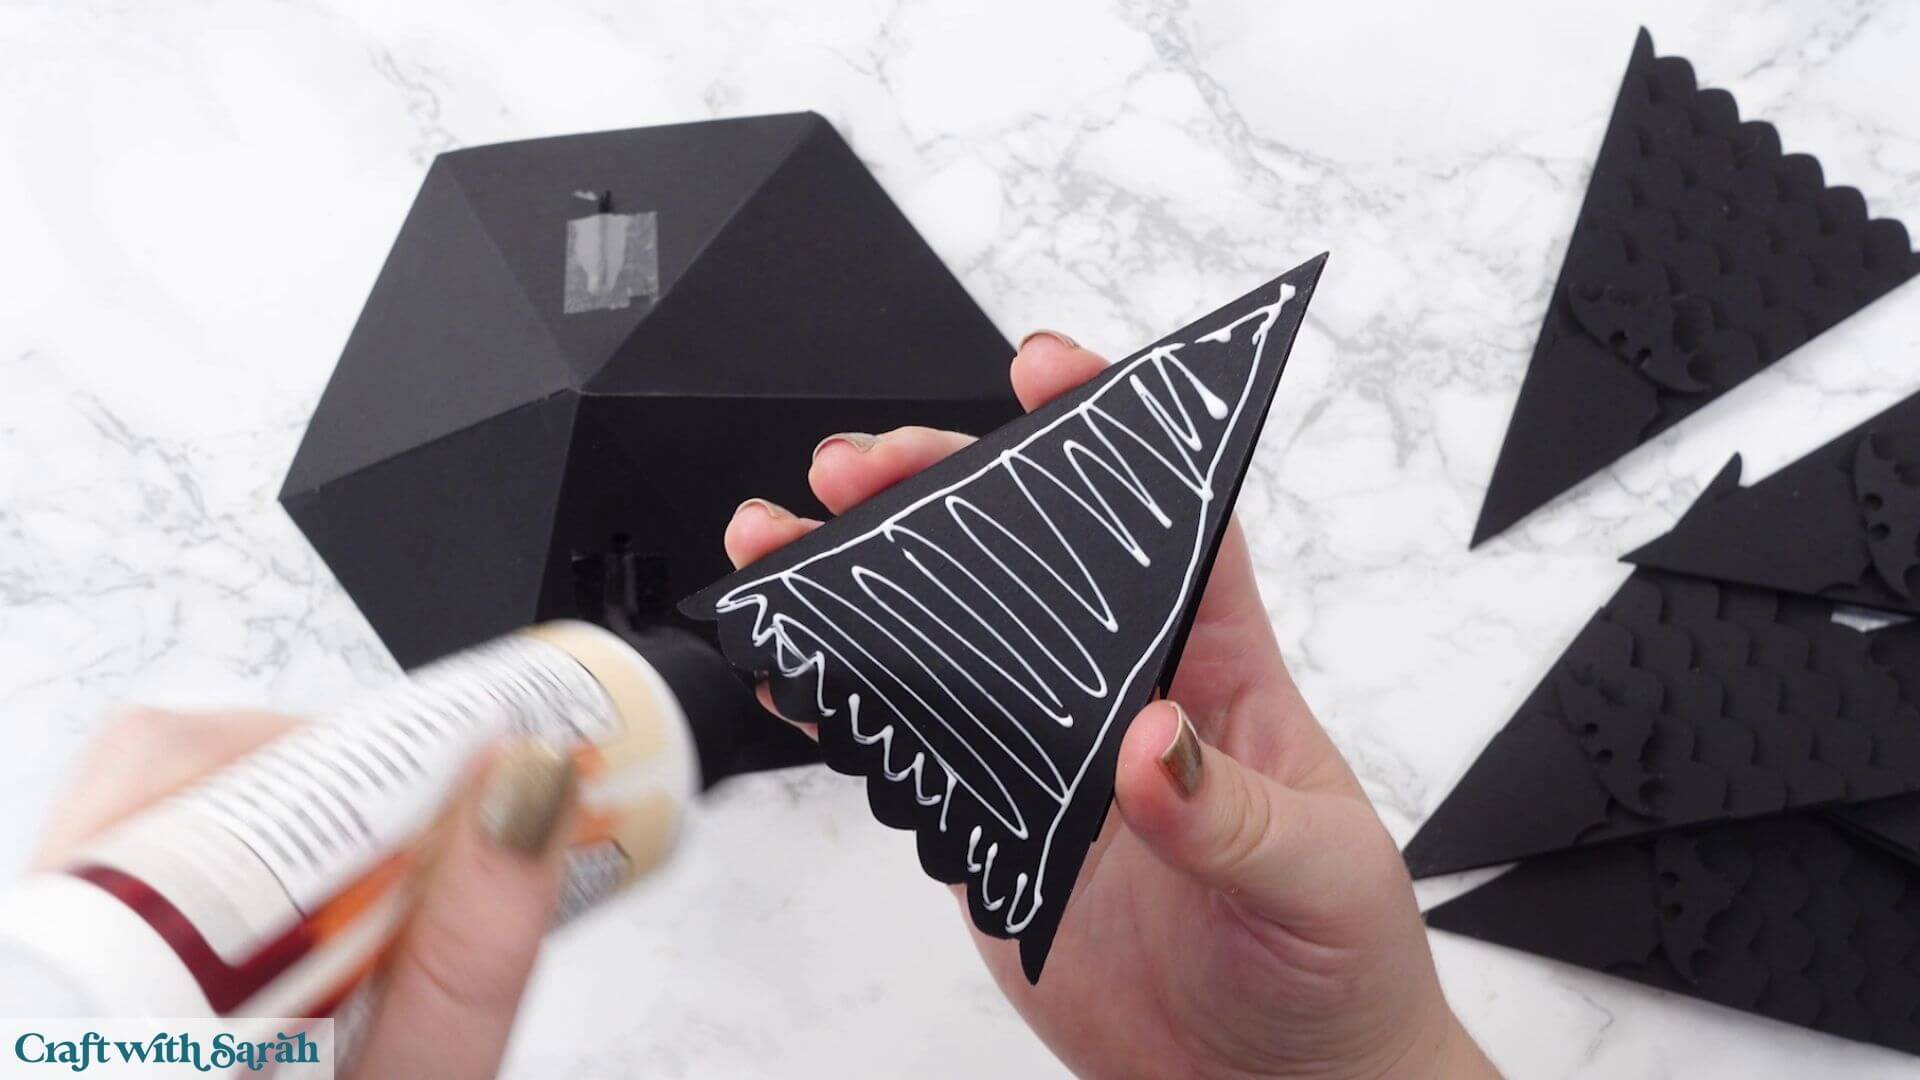
The layered cardstock makes these panels fairly heavy, so use a good amount of glue and hold each one in position until it begins to grab.
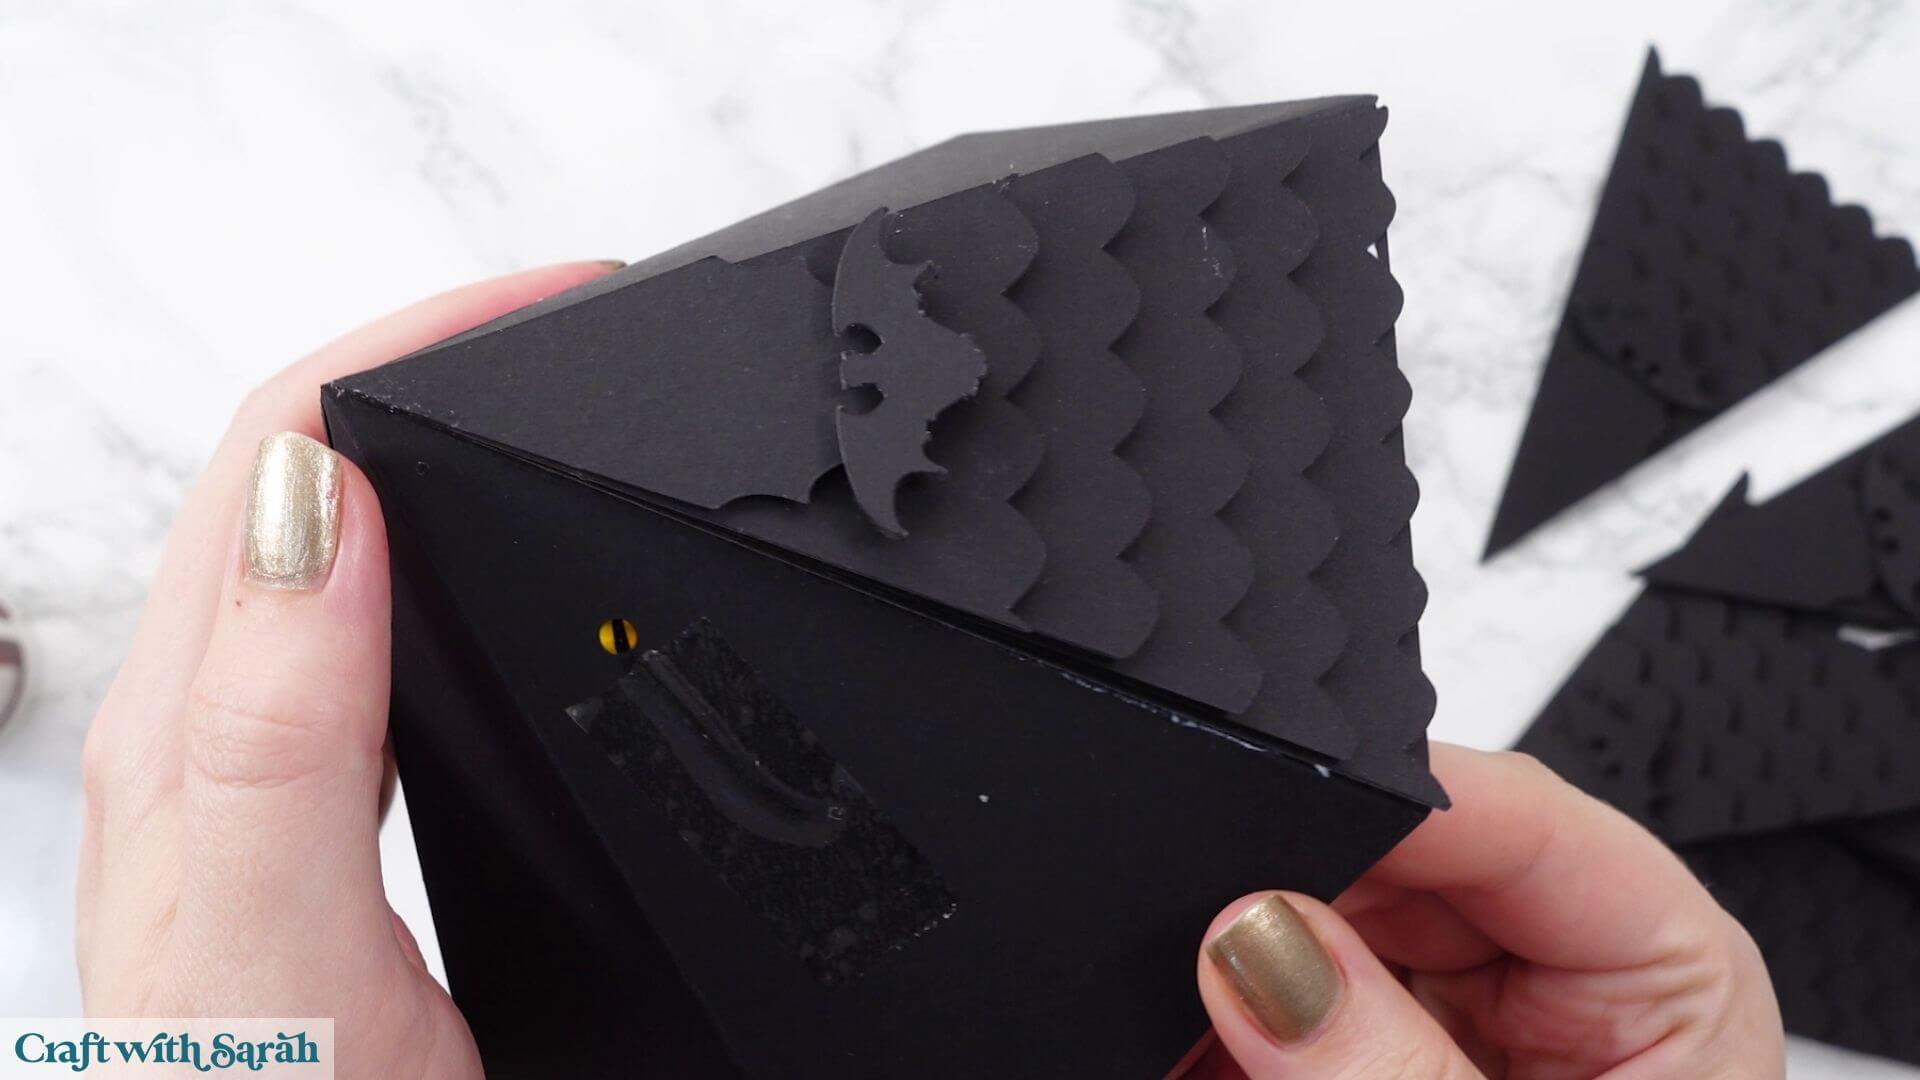
Repeat for all six sides.
Step 15) Make the bottom support
The tower has a hexagonal support structure inside the bottom to strengthen it and help it stand properly.
Take the piece with the six sides and fold all of the score lines.
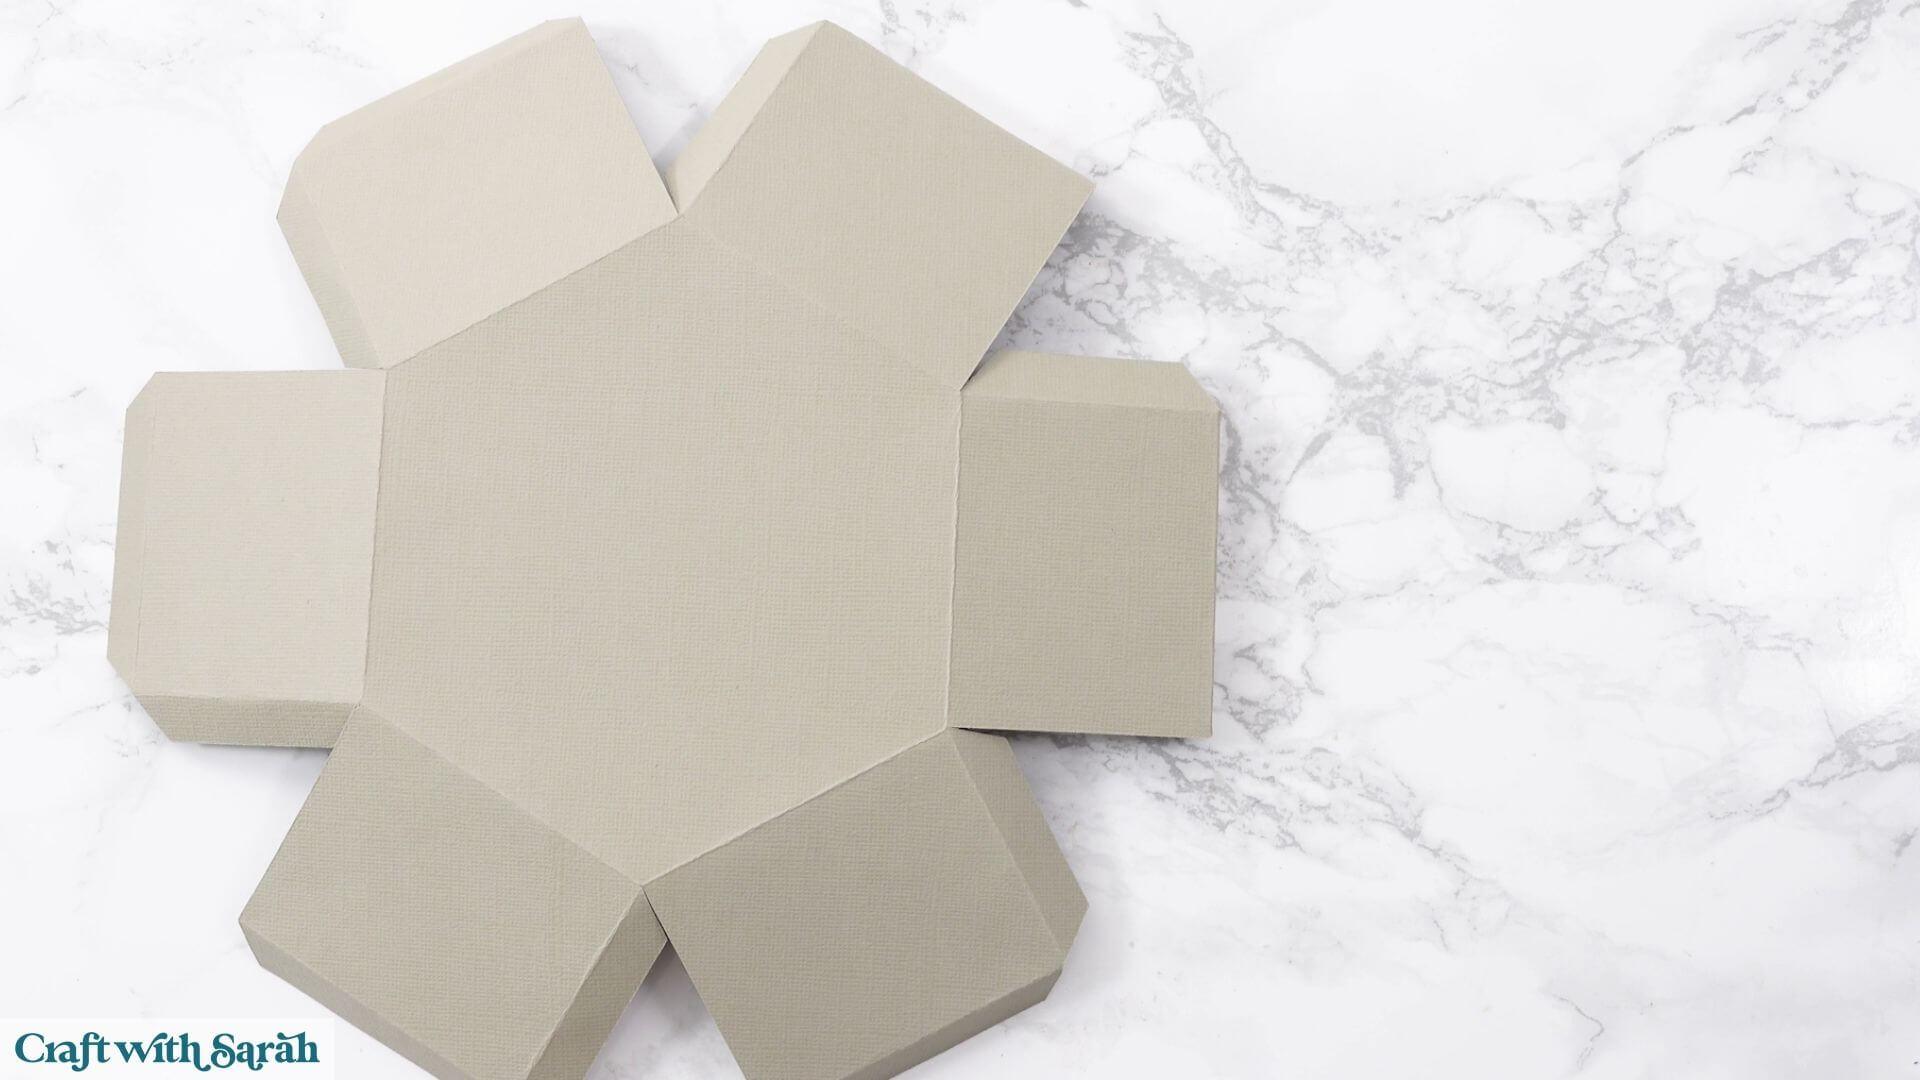
Bring two adjacent sides together, add glue to the joining tab and hold them until they stick.
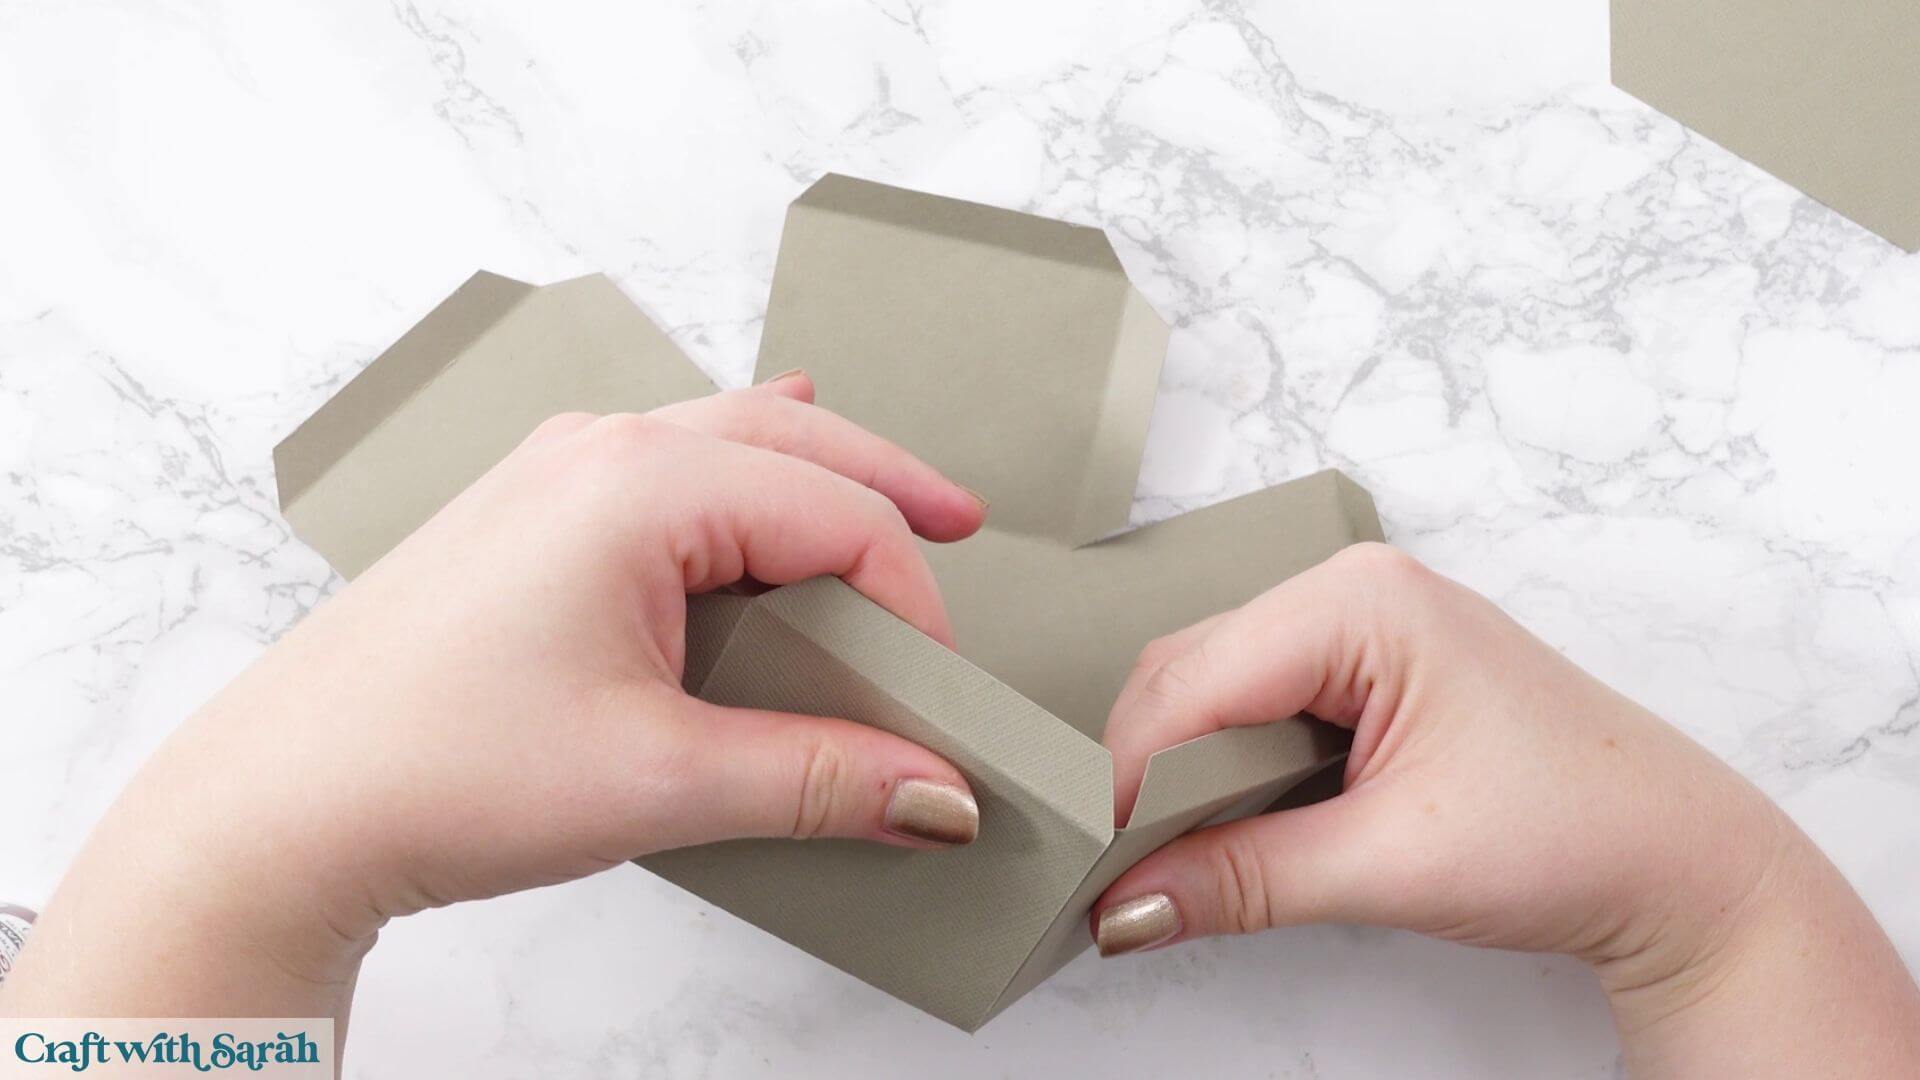
Continue around the shape until all six sides are joined, creating a shallow hexagonal box.
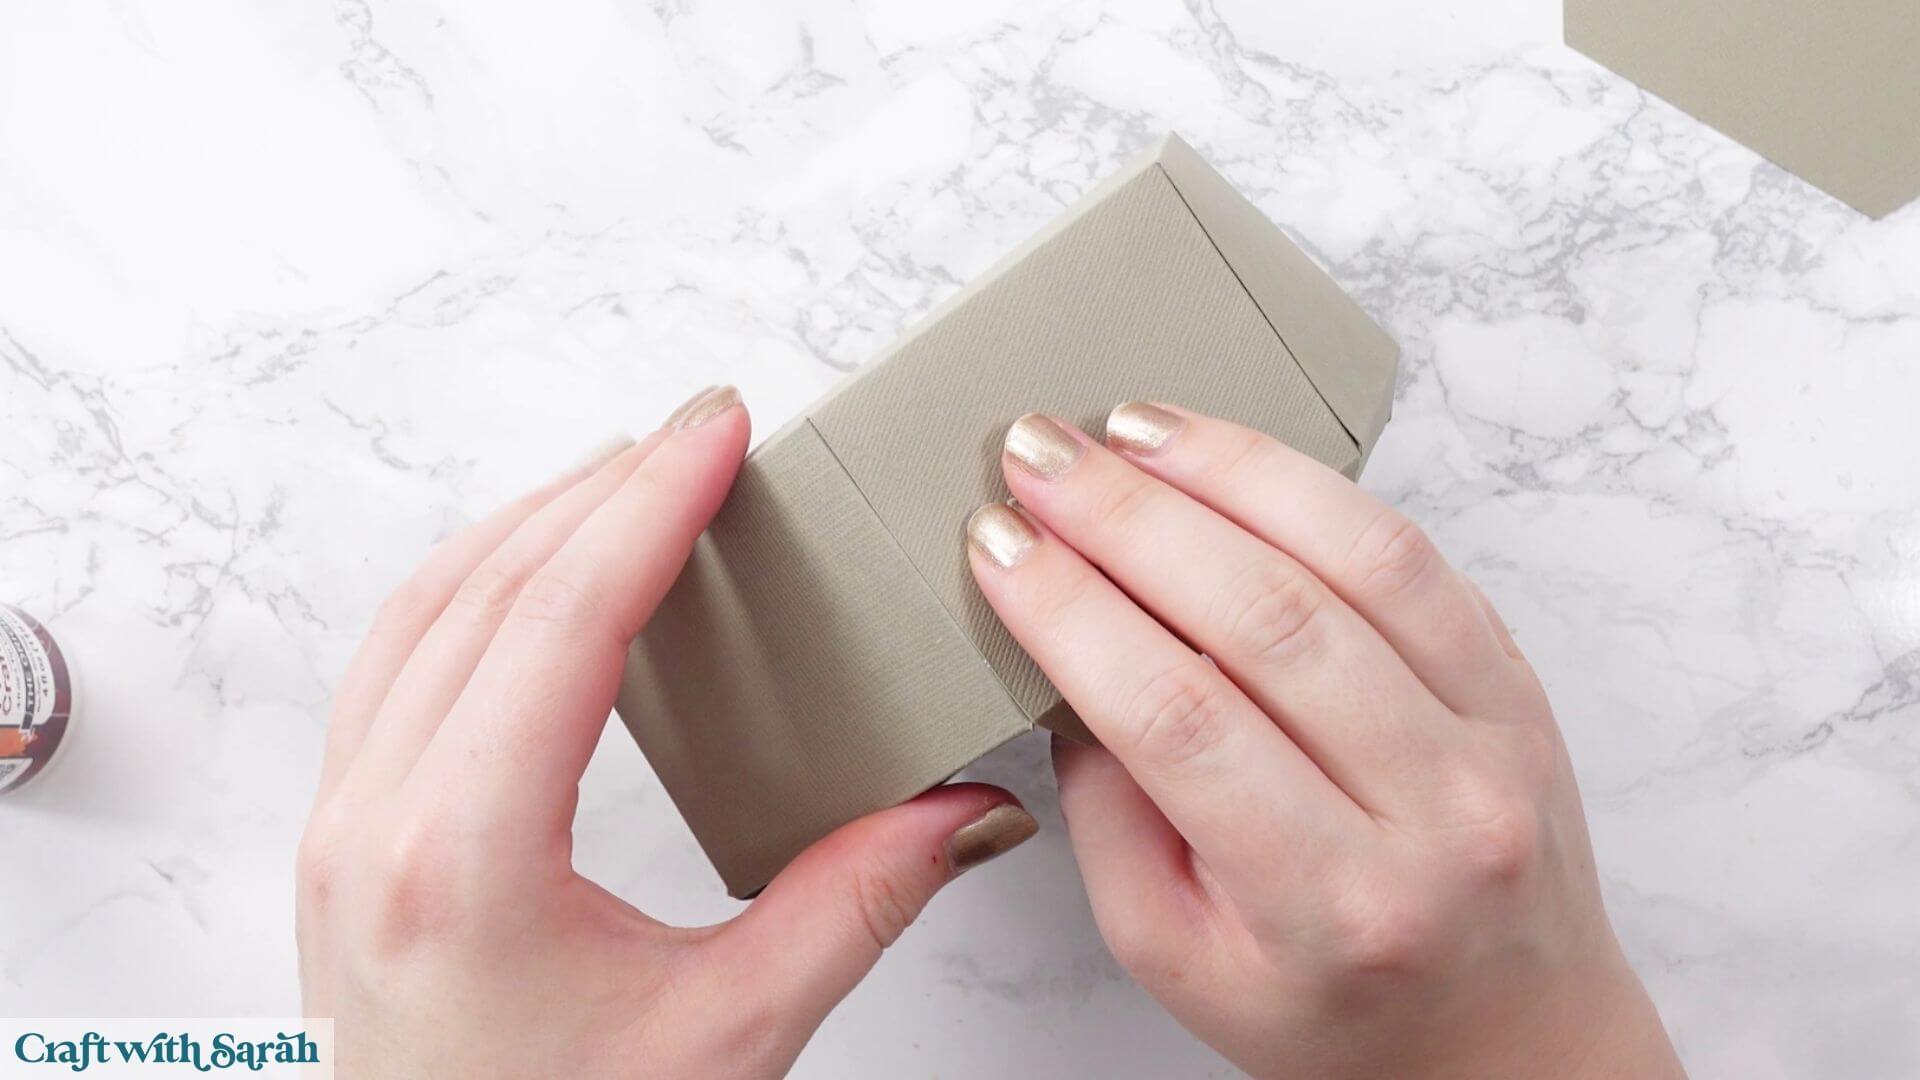
Fold the upper tabs horizontally.
Add glue to the tabs.
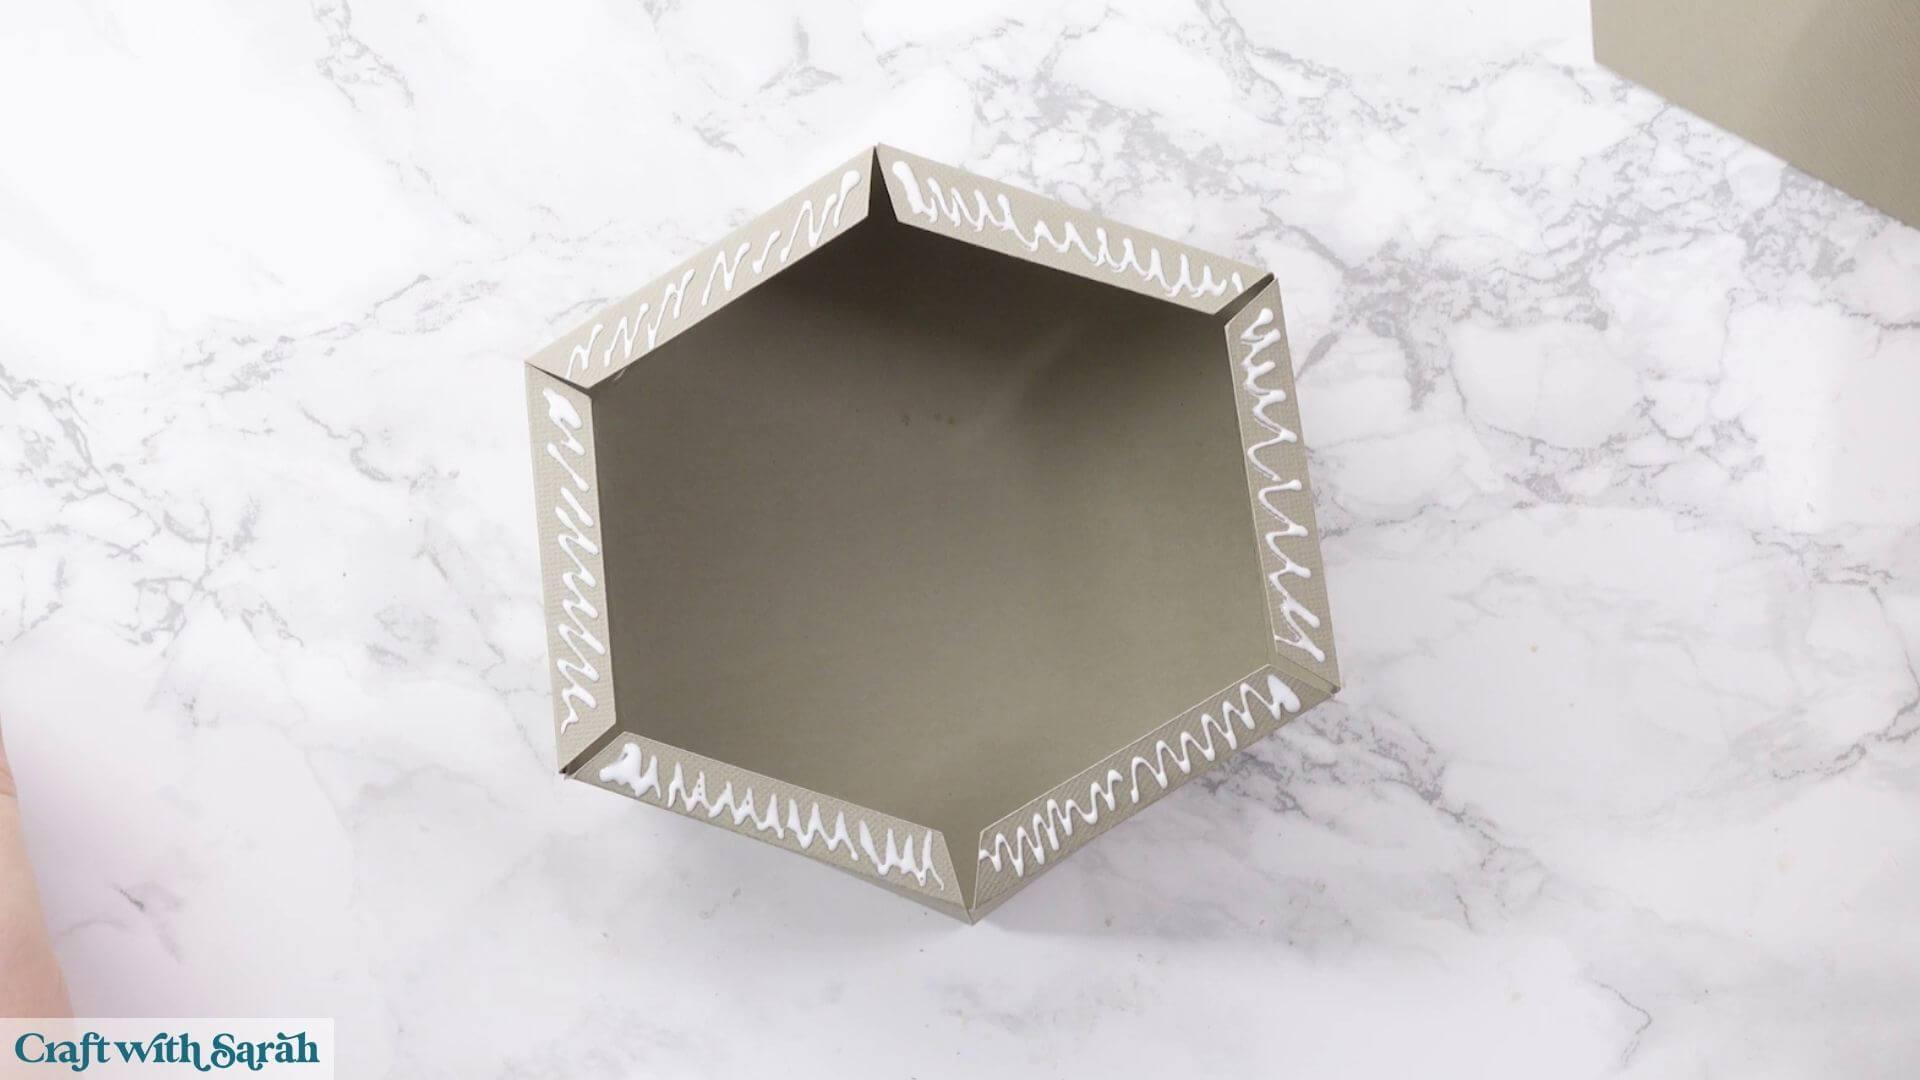
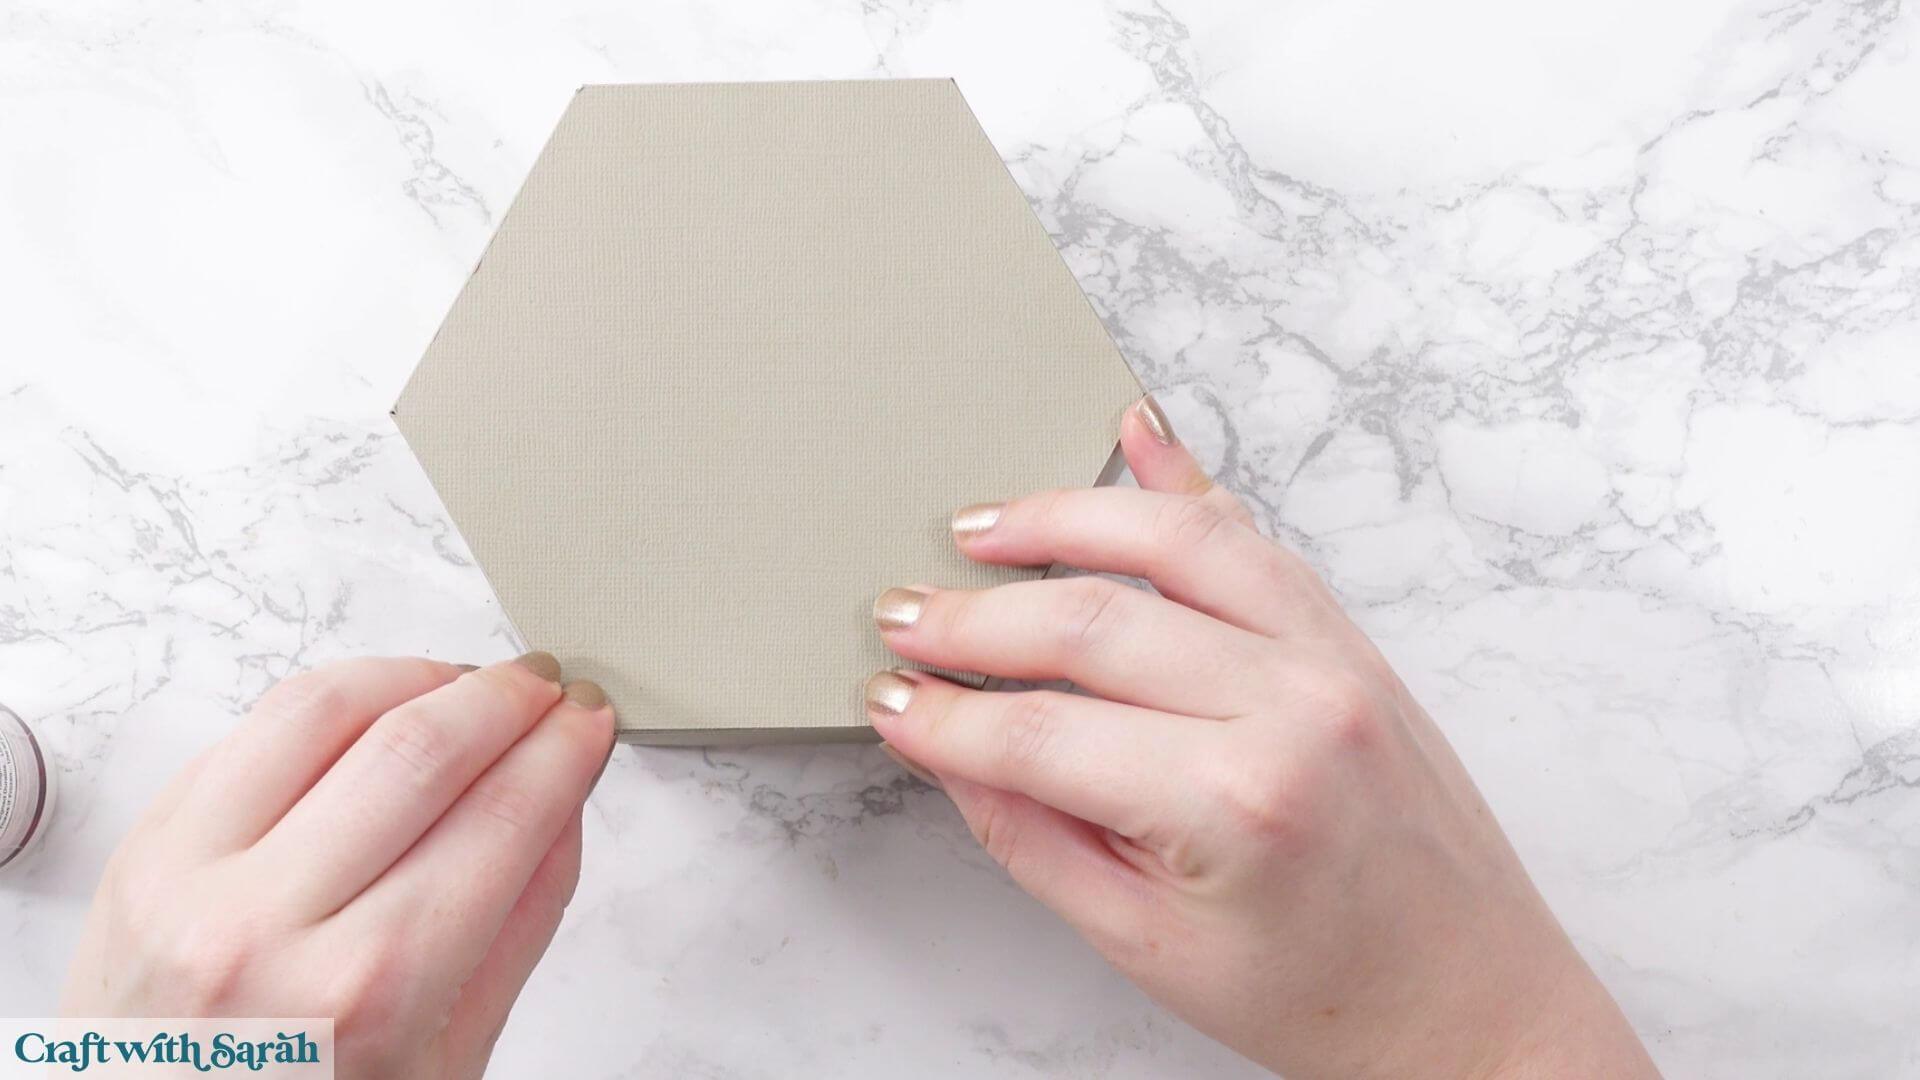
Place the plain hexagon on top.
As you position it, gently push the sides in so that they line up as closely as possible with the edges of the hexagon.
It’s important that none of the sides extend beyond the hexagon, otherwise the support may be too large to fit inside the tower.
Leave it to dry thoroughly.
Step 16) Prepare the upper internal support
There is another hexagonal piece with tabs around the sides.
This goes higher up inside the tower, just underneath the open bell section.
Its purpose is to hide all of the acetate, sticky tape and construction tabs inside the tower so that you can’t look through the windows and see how everything has been assembled.
Fold all of its score lines so that the tabs are ready to be glued inside the tower.
Step 17) Assemble the tower
Now it’s time to turn the flat wall sections into the finished tower.
This is probably the fiddliest part of the project, so take your time and allow the glue to begin drying before trying to move on too quickly.
Start by joining the two large wall sections together.
Add a generous amount of glue to the joining tabs and carefully line up the opposite section along the score lines.
Next, position the bottom support inside the tower.
Choose one wall and glue one side of the support against it, lining the bottom edge of the support perfectly with the bottom of the wall.
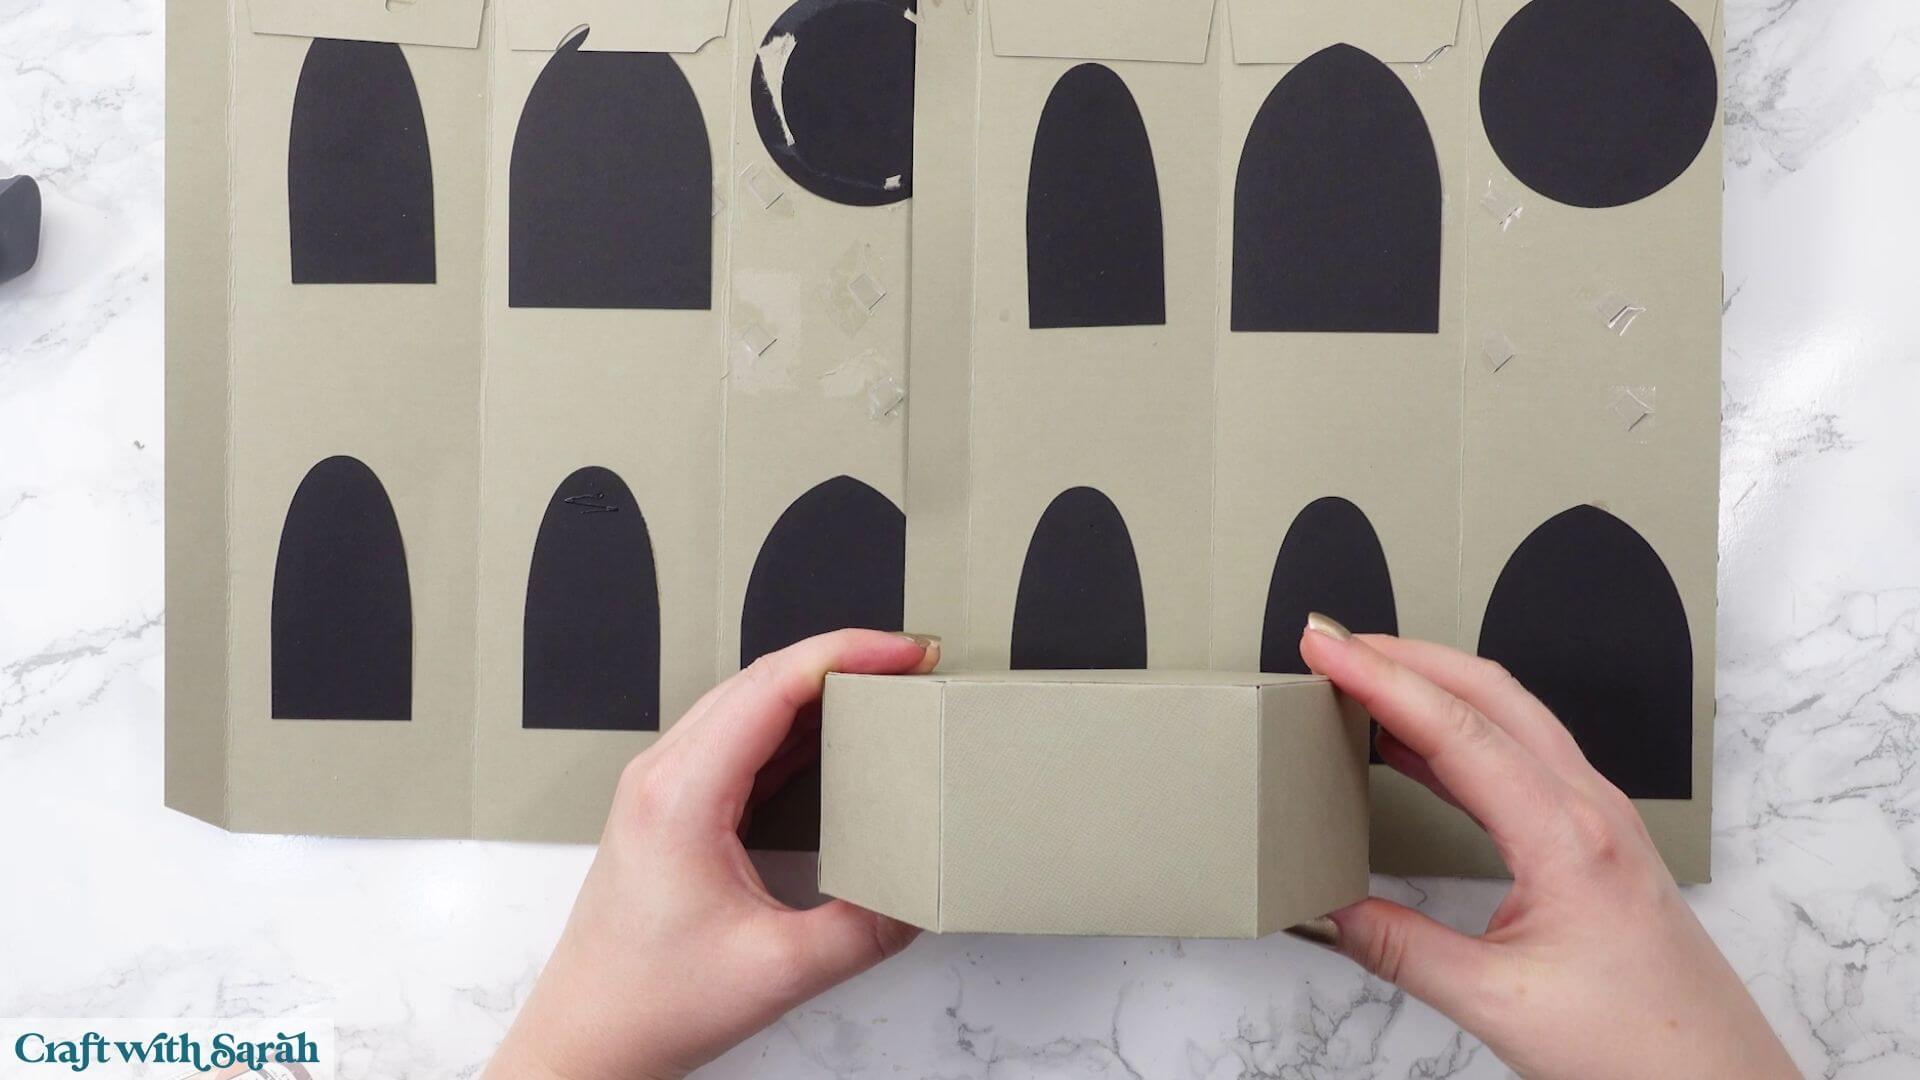
Add the upper hexagonal support in the same way, positioning it just underneath the window openings so that it hides the taped acetate pieces inside.
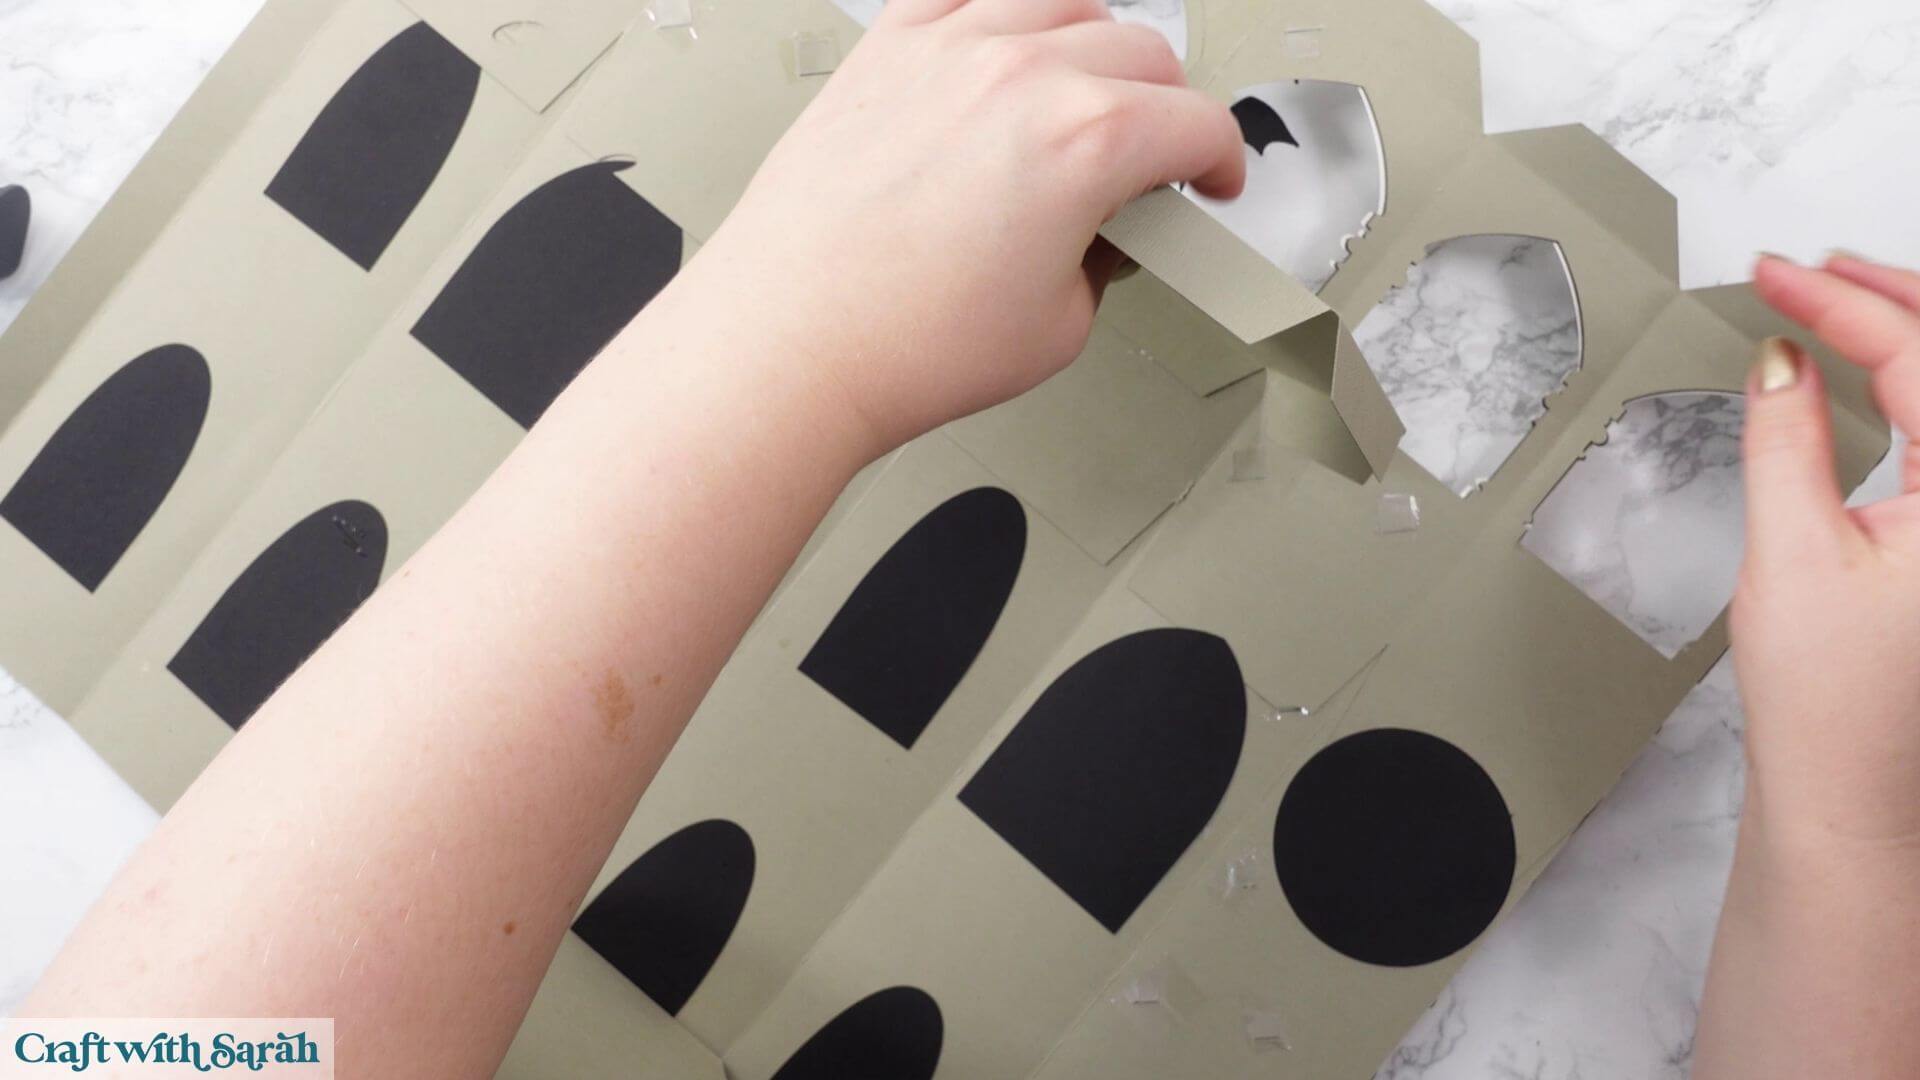
Move on to an adjacent wall.
Add glue to the corresponding sides of both internal supports and bring the wall around to meet them.
You can work one wall at a time, although I found that gluing two adjacent sides at once made the process a little easier.
Keep checking that the bottom edges stay level as you work around the tower.
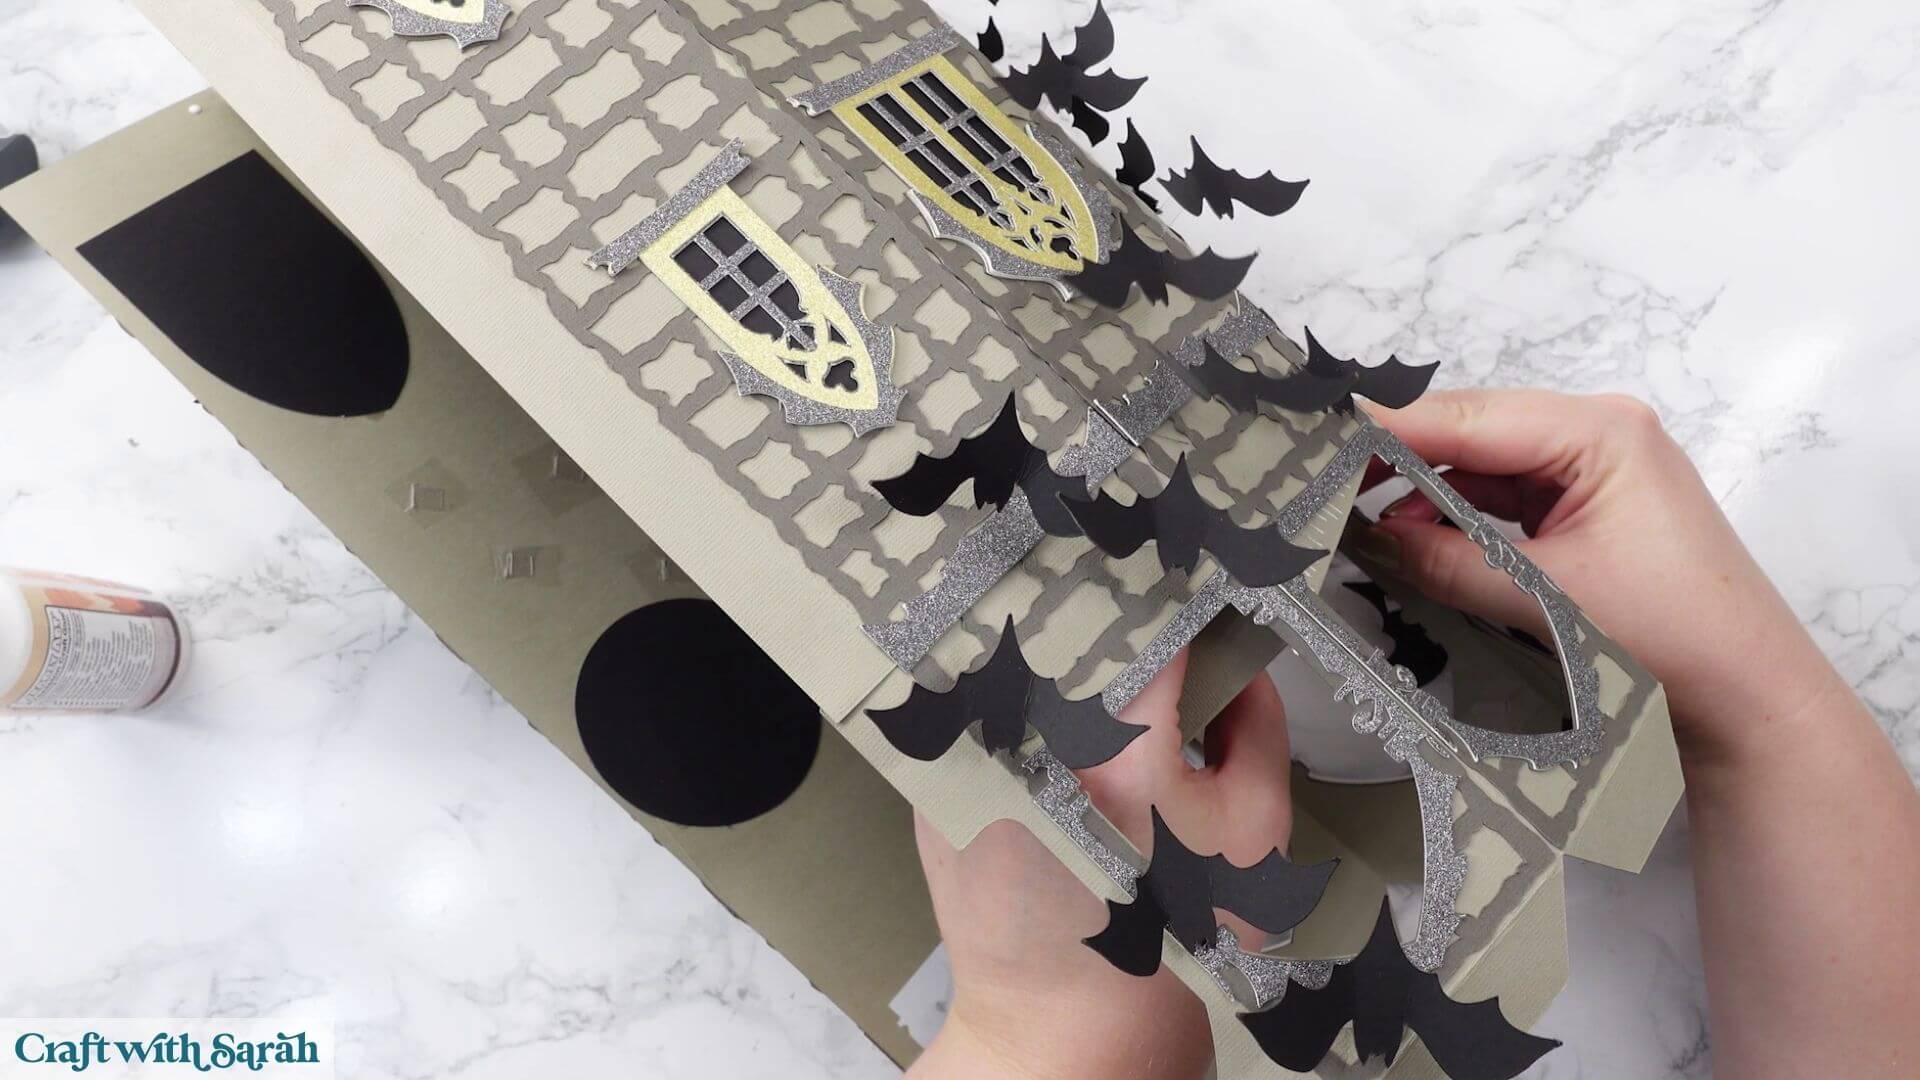
When you reach the final wall, don’t glue it closed too early. The joining tab from the opposite side needs to tuck underneath it.
Add glue to the internal supports and the joining tab, then carefully bring the final wall into position.
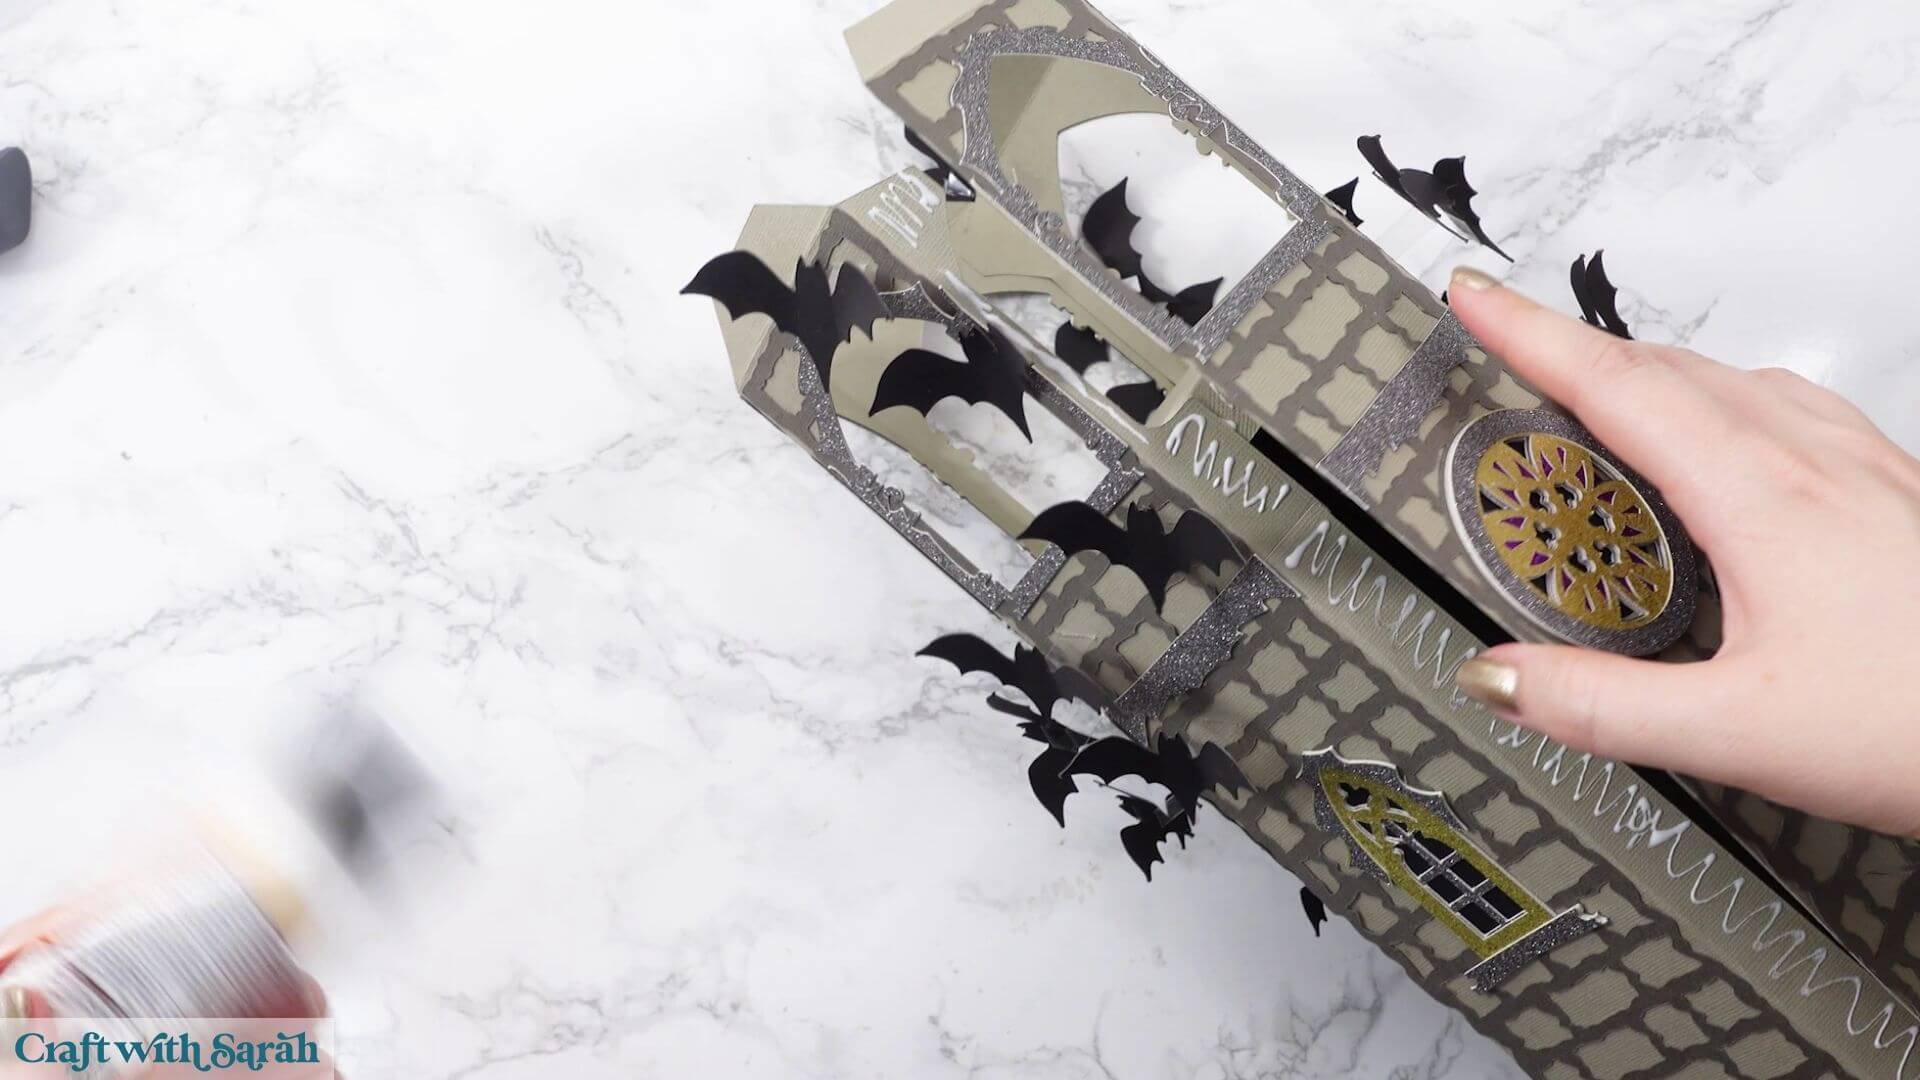
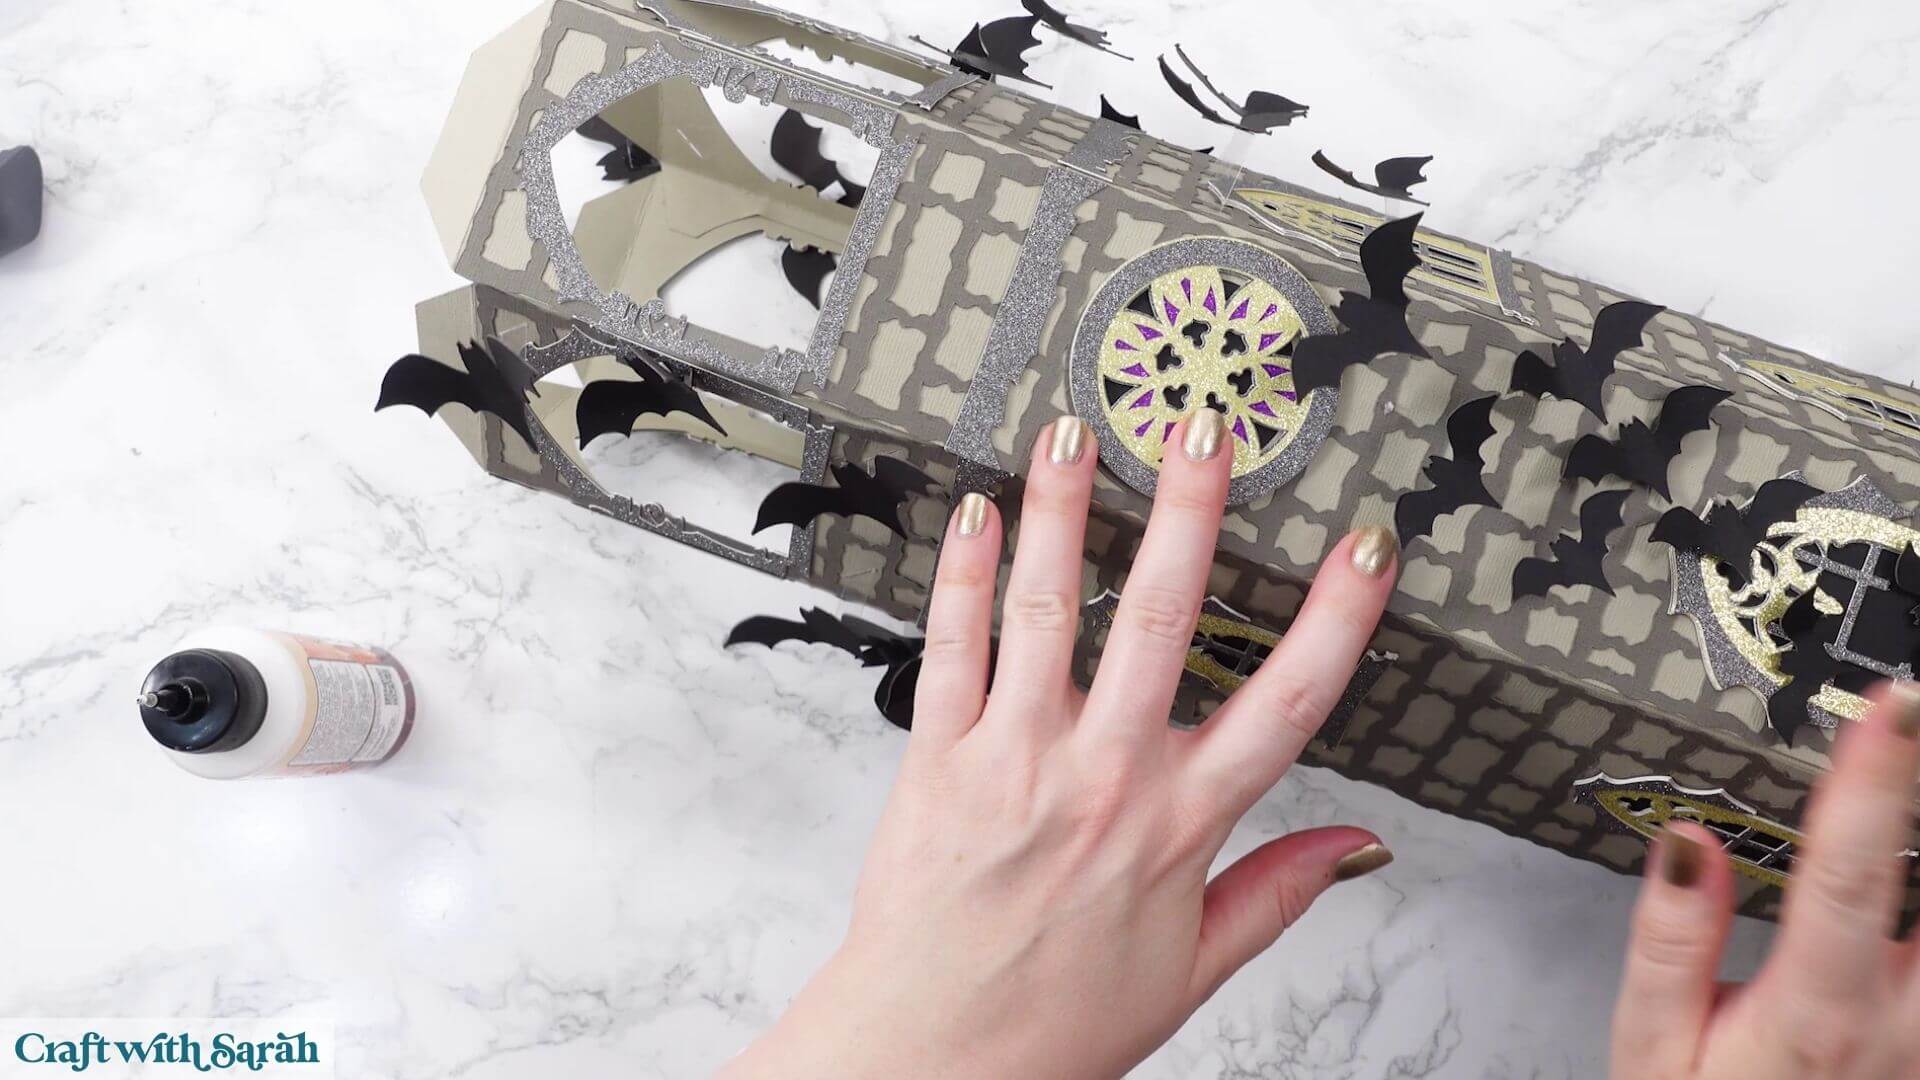
Hold everything together until the glue has begun to dry.
Masking tape or washi tape can be useful for temporarily holding stubborn sections while the glue sets.
Once the tower is fully closed, check all the joins and add a little extra glue anywhere that needs it.
Leave everything until the glue is completely dry.
Step 18) Add the roof
Once the tower is dry, gently bend the bat wings back into shape if any of them became flattened during assembly.
The roof doesn’t need to be permanently glued to the tower.
Flatten out the tabs on the top of the tower.
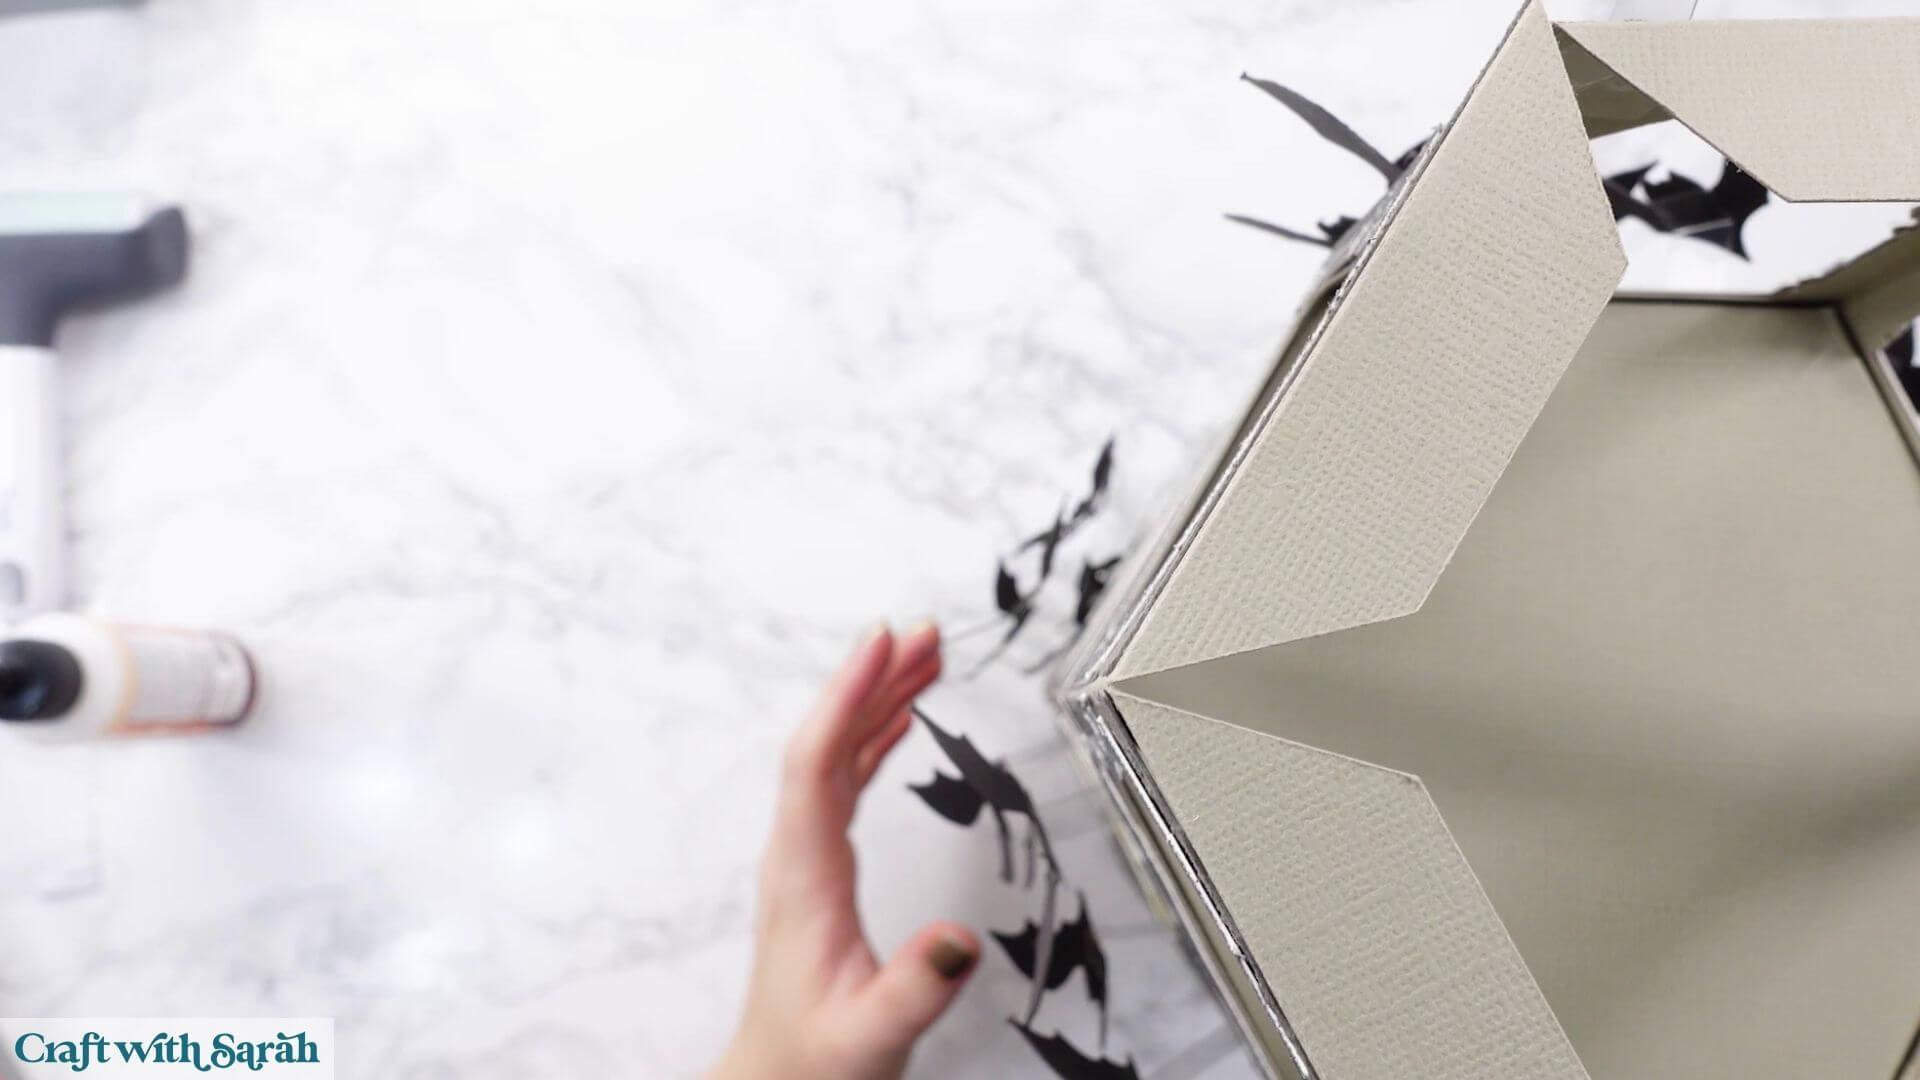
Position the roof over the top and carefully slide it down until it sits securely.
Some of the bats near the top may need gently moving or bending around the roof as it goes into place.
Check the position of the bell. It should hang down visibly into the open section without touching the internal support underneath.
If your bell hangs too low, tie another knot in the thread to raise it slightly.
If you’d prefer the roof to be permanently attached, you can add glue to the upper tabs before putting it into position.
Your 3D Halloween bat tower is finished!
Your spooky castle tower is ready for display!
I love all the little details in this project, from the gothic windows and layered roof tiles to the tiny honeycomb bell inside. But my favourite part has to be the swarm of bats bursting through the broken window.
The clear acetate makes them appear as though they’re actually flying around the tower, and gently bending the wings gives them even more dimension.
This is definitely a labour-of-love project with lots of pieces and several stages to the assembly, but the finished tower makes such an impressive Halloween decoration.
Store it carefully after Halloween and you’ll be able to bring it out year after year.
I hope you enjoy making this 3D bat tower with your Cricut machine.
Happy crafting,
Sarah x