Stagecoach & Horses 🦇 FCC 17
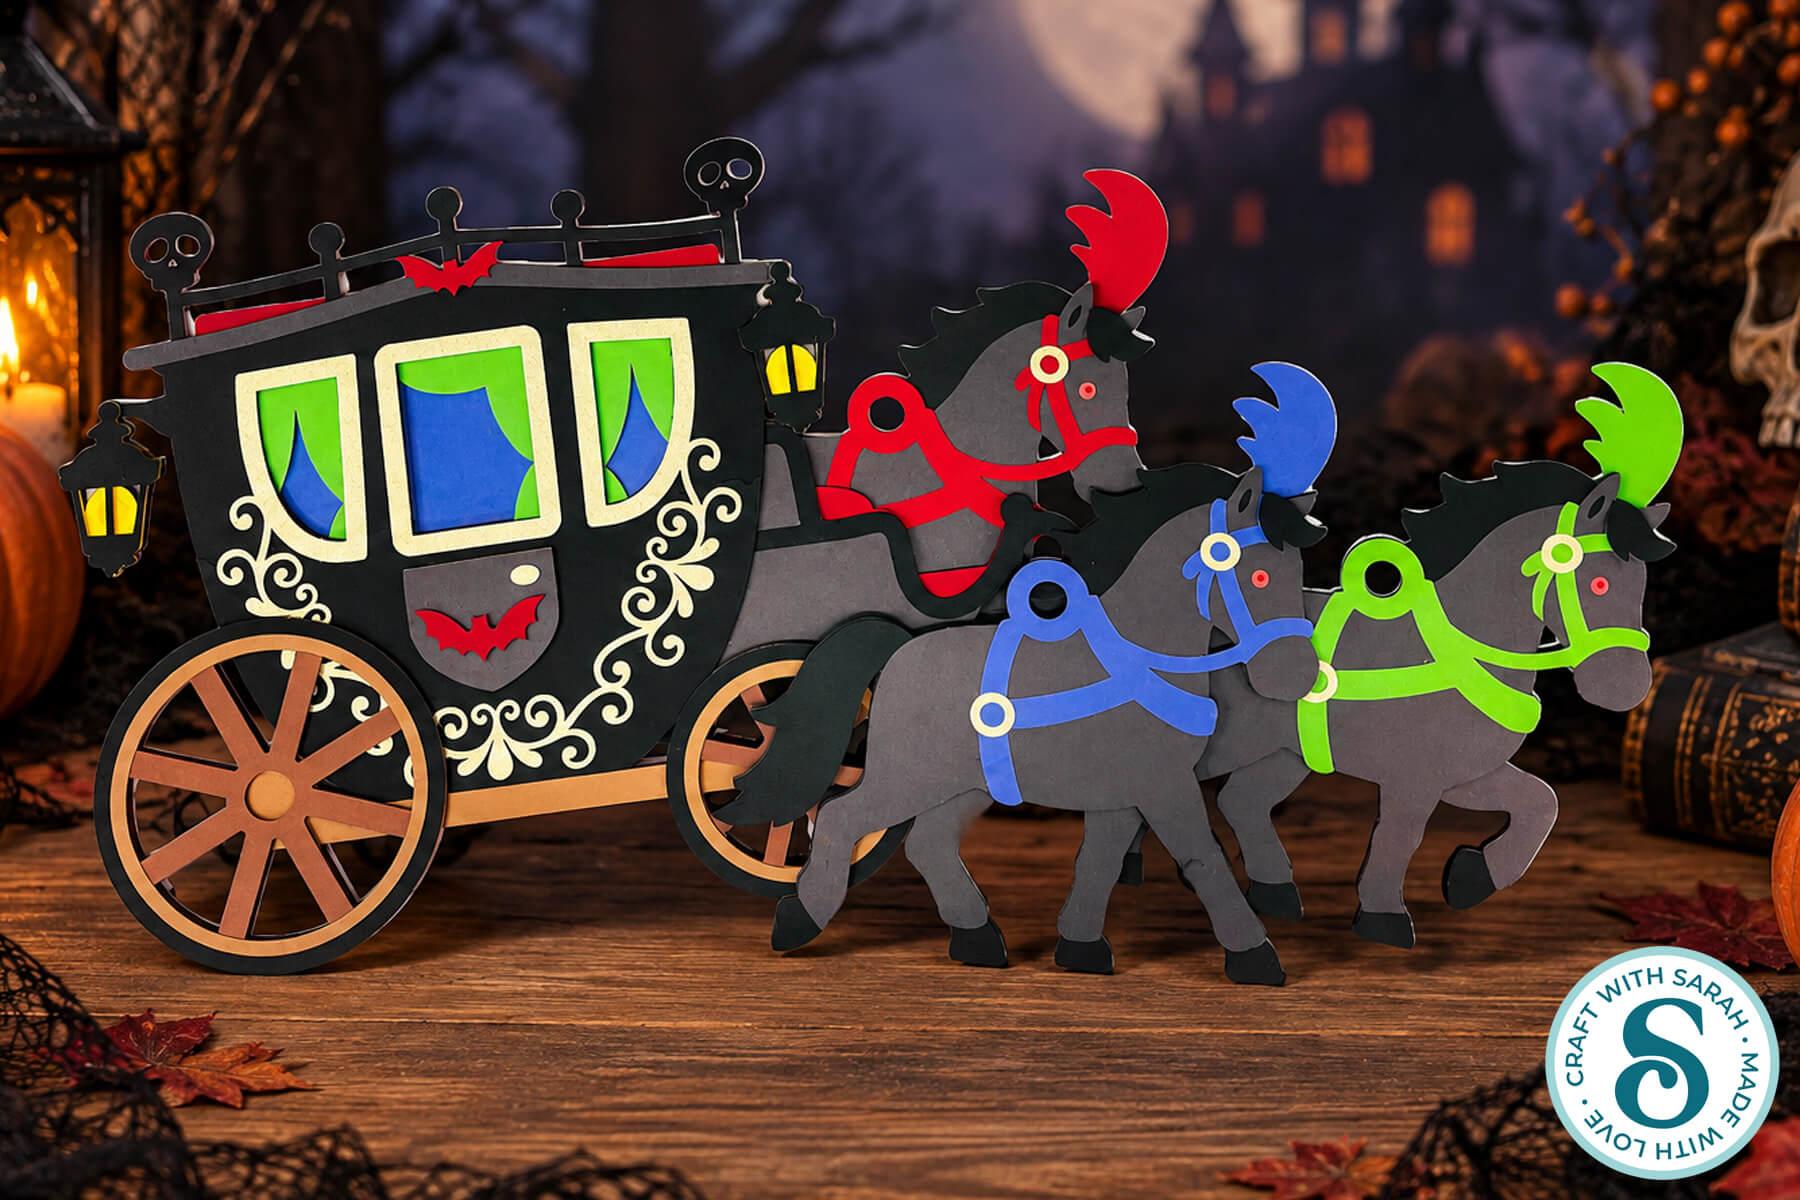
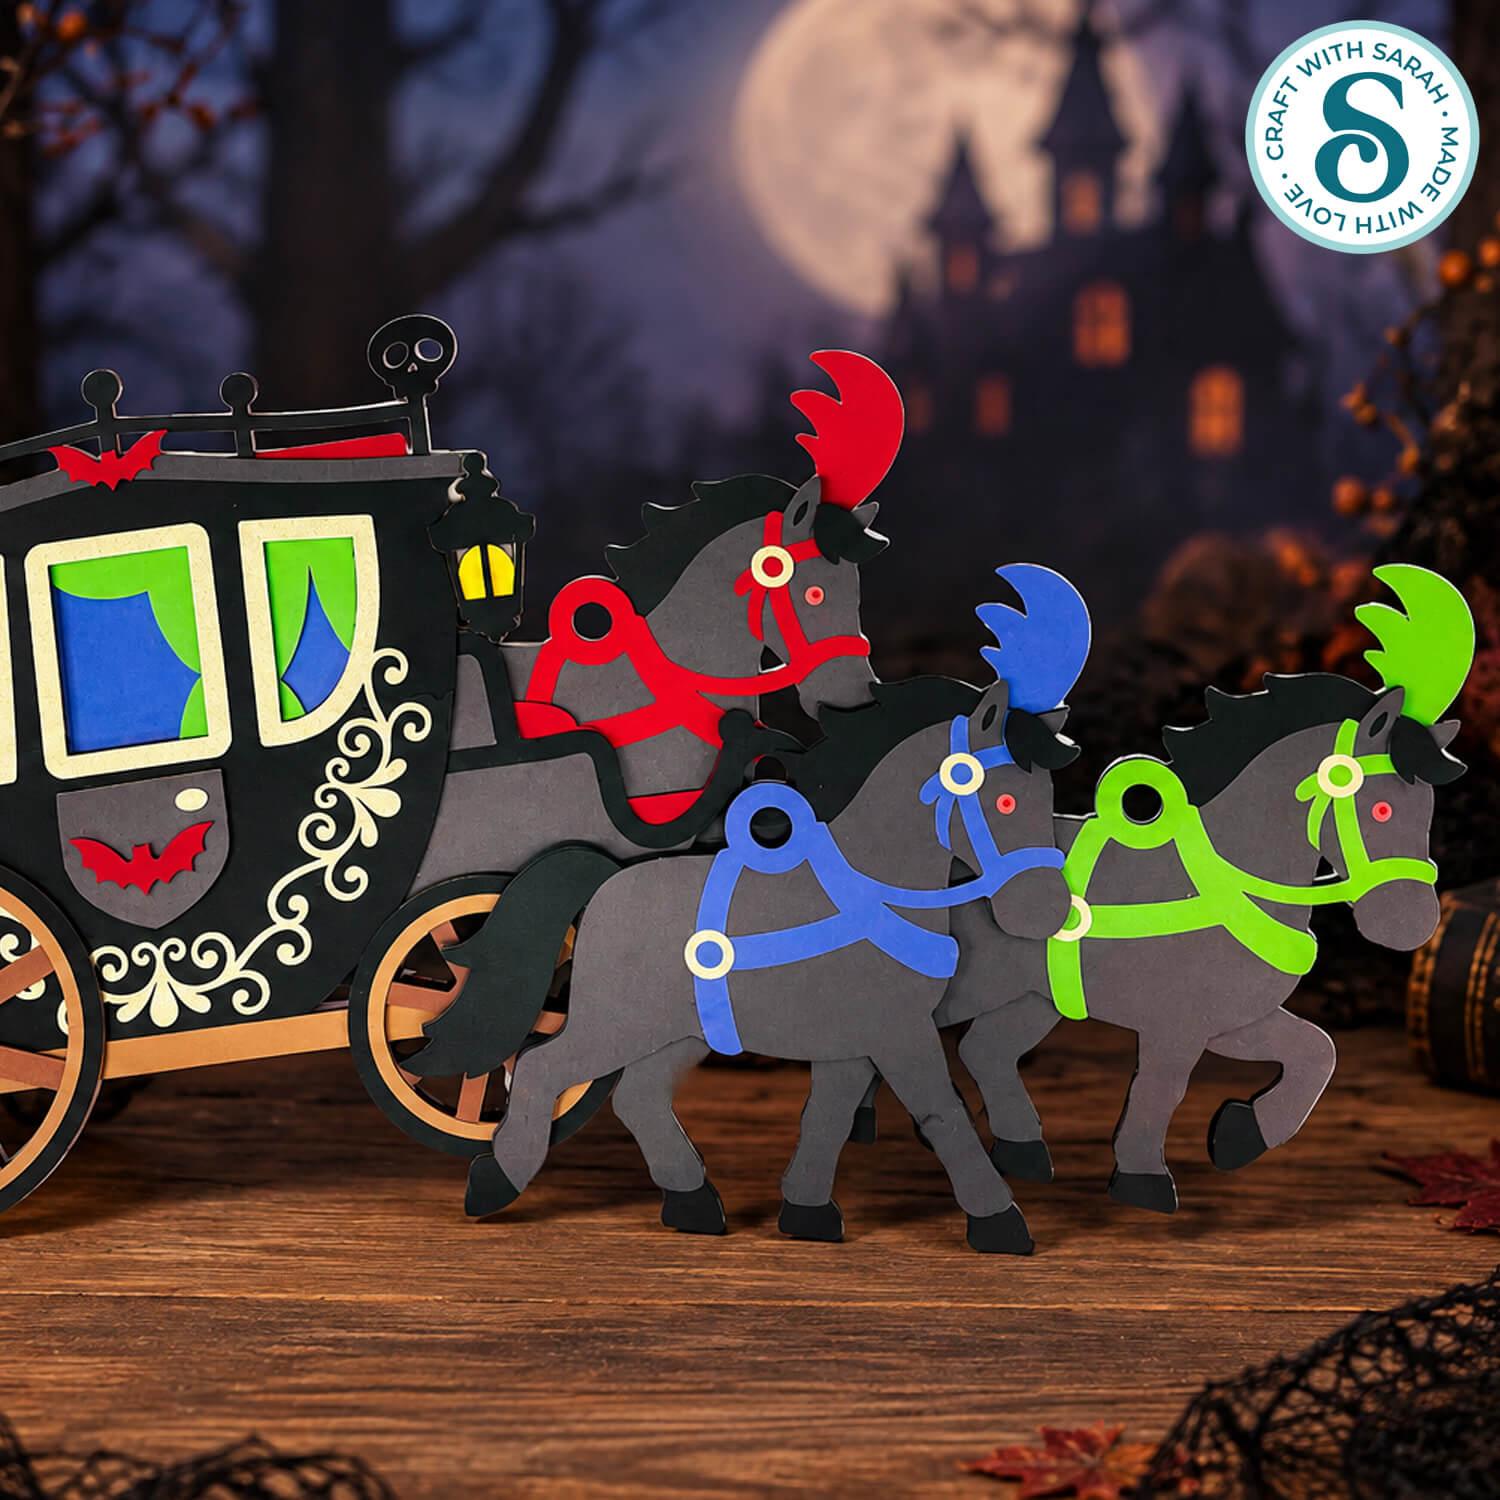
Make a showstopping Halloween decoration with this giant stagecoach and horses SVG.
This project is designed as a giant off-the-mat papercraft wall display.
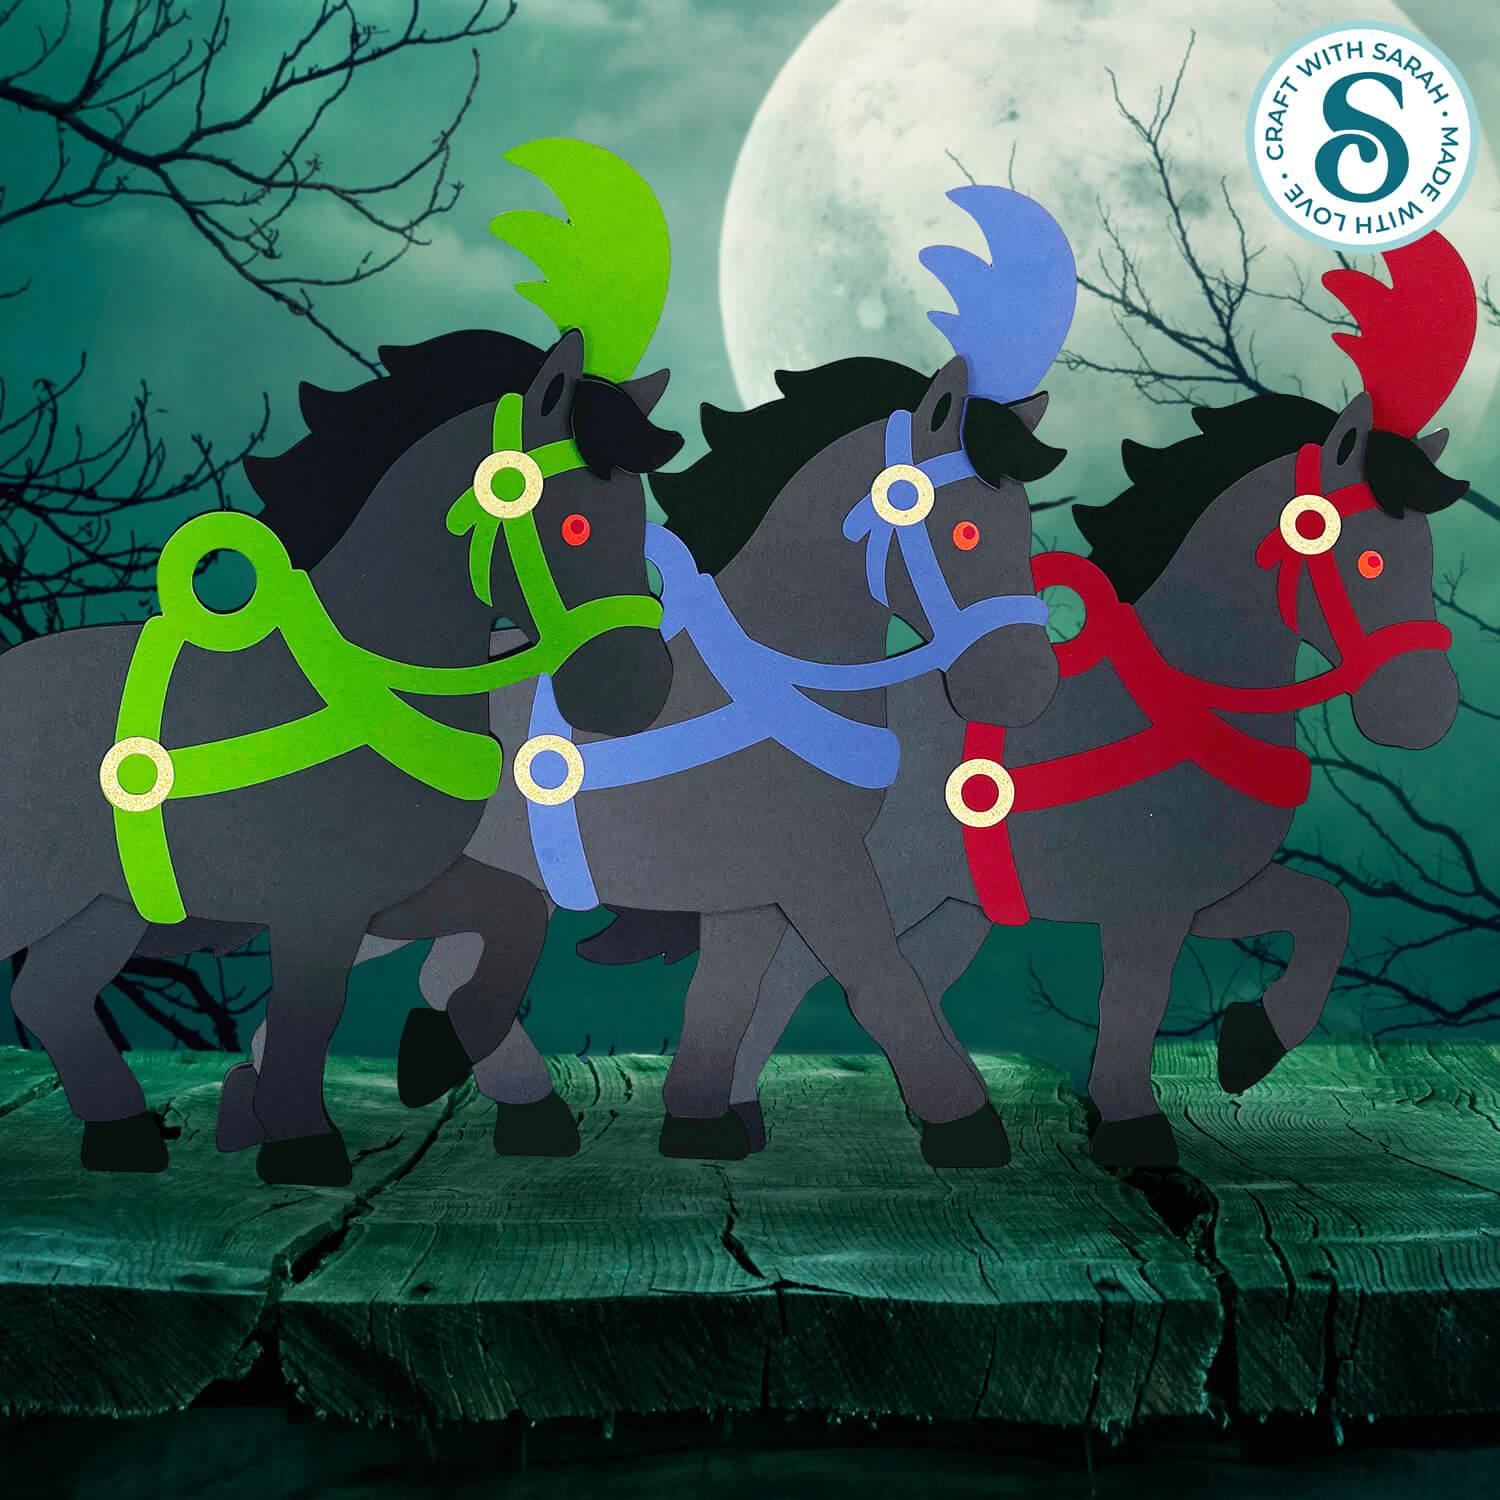
The finished design features a spooky stagecoach being pulled by three horses, with lots of layered details to give the whole project depth and dimension.
The carriage and horses are made separately and then connected together with ribbon, twine or string before being mounted on the wall.
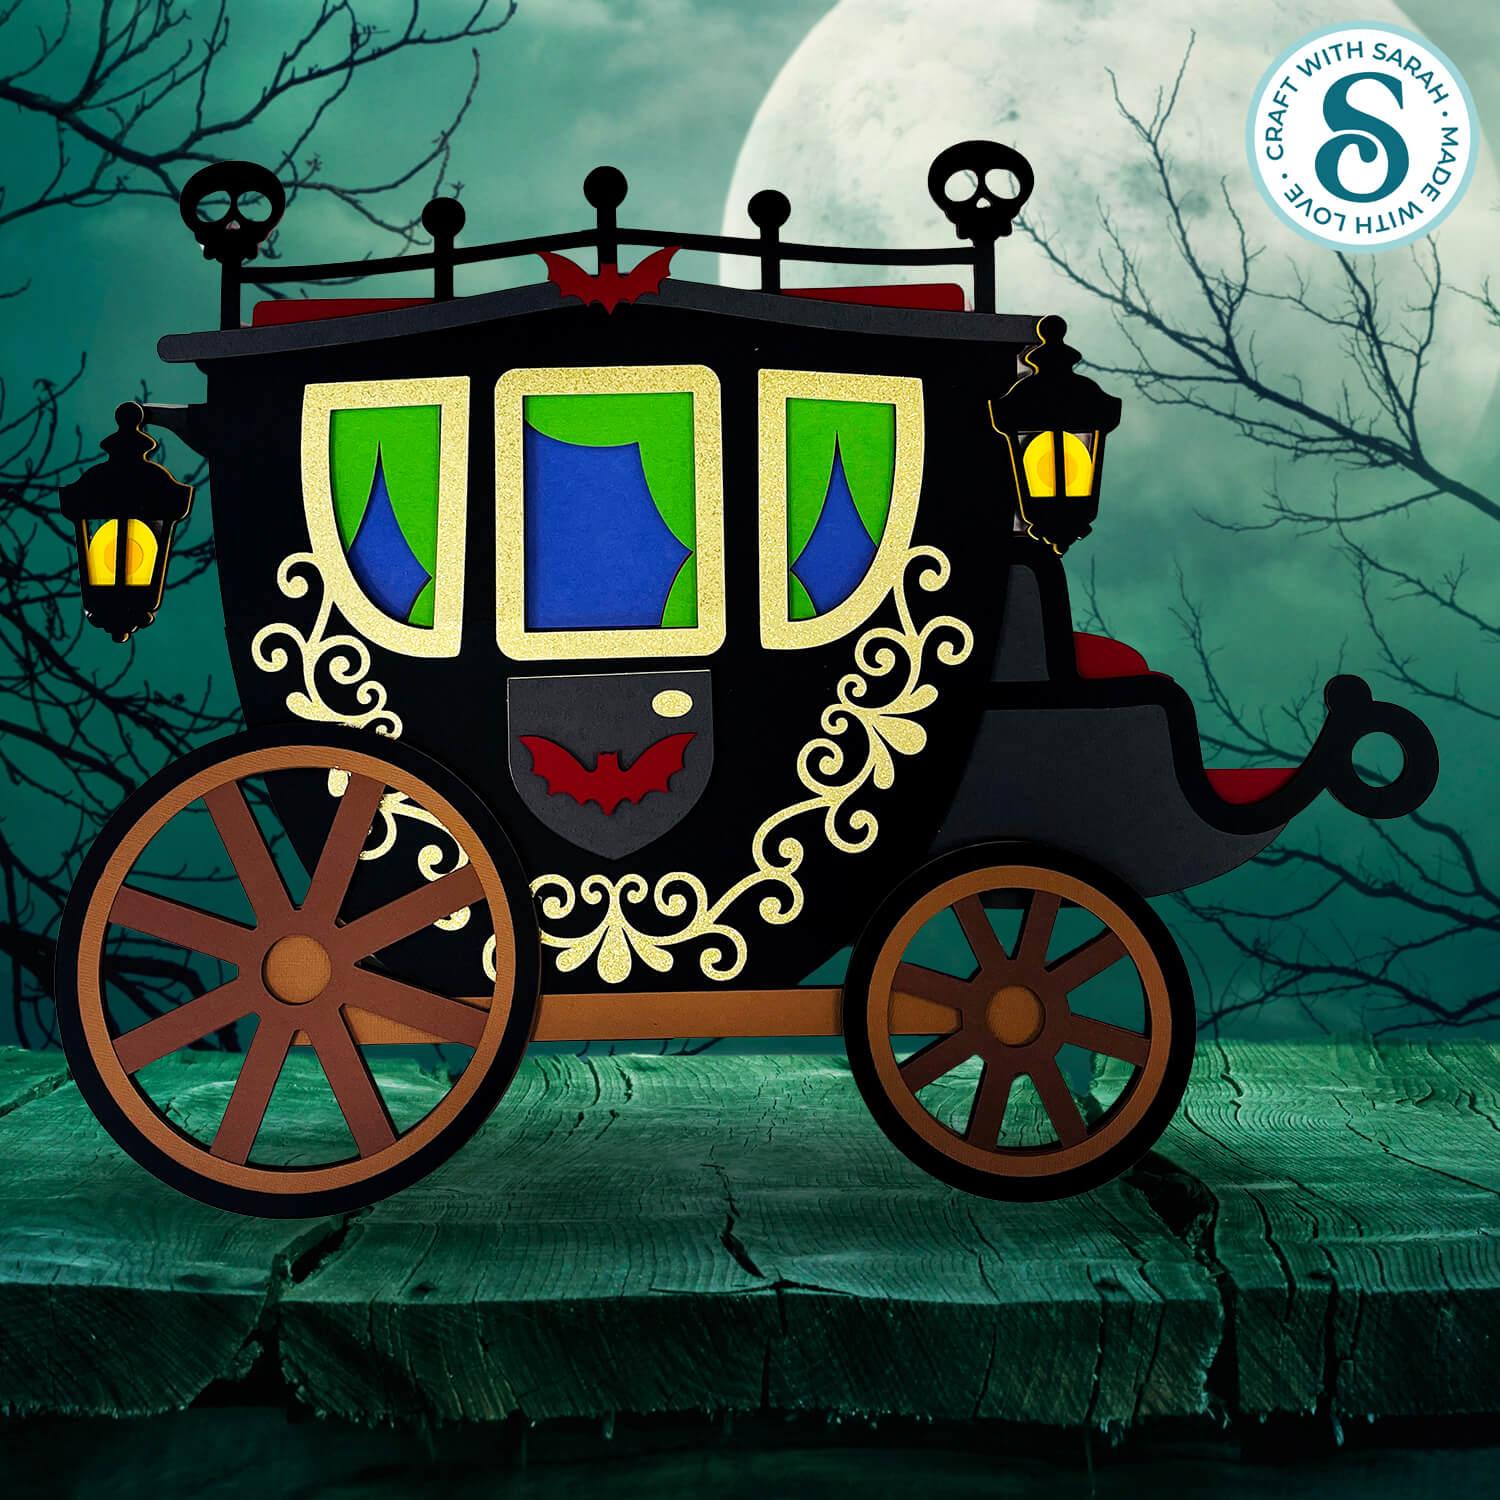
There are two versions of the SVG included in the download: a large version and a small version.
The smaller version works like a regular layered papercraft design and can be cut at regular sizes, whereas the large version has been specially divided into sections so that you can create a finished project that’s much bigger than a Cricut cutting mat.
The large version is the one I’ll be showing you how to make in this tutorial.
Note: this project does not include a hand-cutting version.
This project is part of the 2026 Falloween Craft Countdown
Stagecoach and horses materials supply list
Here is a list of the materials that I used to make this project.
Please note that some of the links included in this article are affiliate links, which means that if you click through and make a purchase I may receive a commission (at no additional cost to you). You can read my full disclosure at the bottom of the page.
- Cricut machine
- Light blue Cricut cutting mat
- Coloured Card (any thickness)
- Glue (I like Bearly Art Glue and Collall)
- 3D foam pads
- String, ribbon or twine
- Blu Tak or similar for mounting to the wall
This project is suitable for the following types of Cricut machines: Explore series, Maker series, Joy Xtra, Joy and Joy 2. You will need to resize the SVG smaller to cut with the Joy Xtra, Joy and Joy 2.
Foundation learning
If you're new to making papercrafts with your cutting machine, check out these links to get you started.
They include videos on topics such as: which file to use with your type of cutting machine, how to load the files into your cutting machine's software, how to cut cardstock with your type of cutting machine, how to recolor and modify/customize the cut files and tips for displaying your projects.
- How to use zip folder downloads
- Help guides for Cricut machines
- Help guides for Silhouette machines
- Help guides for ScanNCut machines
The following tutorials are Cricut-specific, but many of the ideas will work similarly with a Silhouette or ScanNCut machine and any cut files that are shared in them are compatible with all types of cutting machine.
- How to score with a Cricut (even without scoring tools)
- Print then cut tutorial
- Design Space tools (Combine, Attach, Slice, Weld, Flatten, etc.)
- Pattern fill tutorial (for making backgrounds & cutting images to a specific shape/size)
- Free envelope SVGs that can be sized to fit any card
- Presentation boxes for handmade cards
- How to write inside cards with Cricut pens
- How to cut layered designs at a small size
- Design Space tips & tricks
- Cricut pens tutorial
- How to mount multiple designs in the same frame with magic guides
Halloween stagecoach craft video tutorial
Watch the video below to see how to make this project. Keep scrolling for a written tutorial.
Written tutorial (with photos!)
Here’s how to make this spooky stagecoach with horses using a Cricut machine.
Step 1) Download the cutting file & upload to Design Space
Get the files using the box below.
Purchase the File(s)
This cut file is available as part of the Instant Access Bundle.
Or, purchase this design individually here
Before you upload the SVGs to Design Space, you need to unzip the download folder that they come in.
Not sure how to do this? Click here for a tutorial that covers all the following types of computer and device:
- How to unzip a folder on a Windows computer
- How to unzip a folder on a Mac
- How to unzip a folder on an iPad
- How to unzip a folder on an iPhone
- How to unzip a folder on an Android device
After unzipping, upload the SVG file(s) into your cutting machine software.
Not sure how to use cut files with your type of machine? The following links lead to tutorials on how to use cut files in:
- Cricut Design Space
- Silhouette Studio
- CanvasWorkspace (for ScanNCut machines)
If you are using Cricut Design Space, start a new project and then click the “Upload” button on the left of the screen.
You can then either click “Browse” to find the file on your computer, or drag-and-drop it.
Look in the “01 Cricut Version” subfolder.
There are two SVG files in there: svg-01-large-stagecoach-craftwithsarah.svg and svg-01-small-stagecoach-craftwithsarah.svg
The file with “large” in the name is designed for making projects larger than your Cricut mat. The bottom sections of the stagecoach come in sections that we’ll glue together to make the oversized project.
The file with “small” in the name is for smaller projects that don’t get cut up into sections.
I will be making the large version in this tutorial.
Select your chosen file.
Press “Upload” on the next screen.
After uploading, the design should be automatically inserted onto your Canvas.
To hide the left sidebar (to give you more space for designing!), click the arrow that’s about half way down the page.
Need help uploading SVGs? Get step-by-step instructions here in our detailed help guides for Cricut, Silhouette and ScanNCut.
The design should load at 48 inches wide and 14 inches tall.
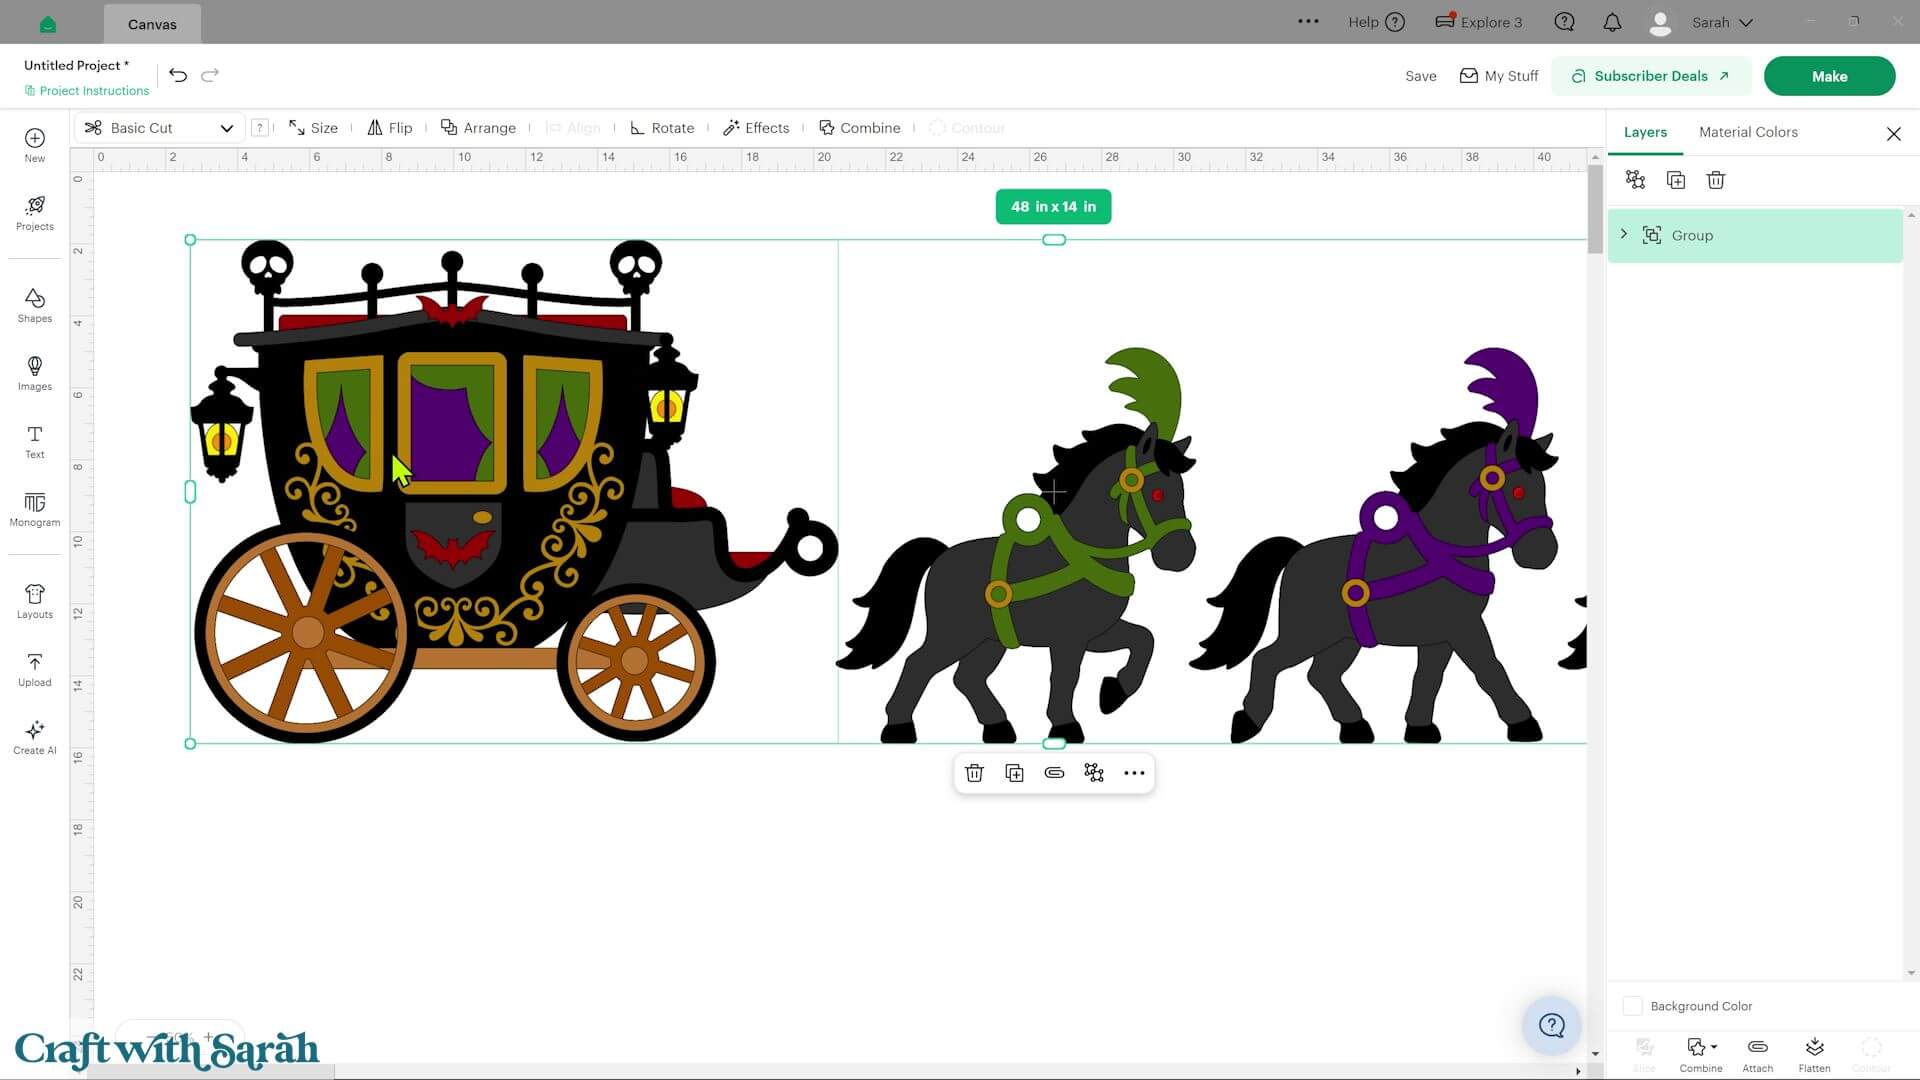
If you ungroup the design, you can click on the individual sections to see their finished sizes. The carriage is approximately 18 x 14 inches and each horse is around 10 x 11 inches.
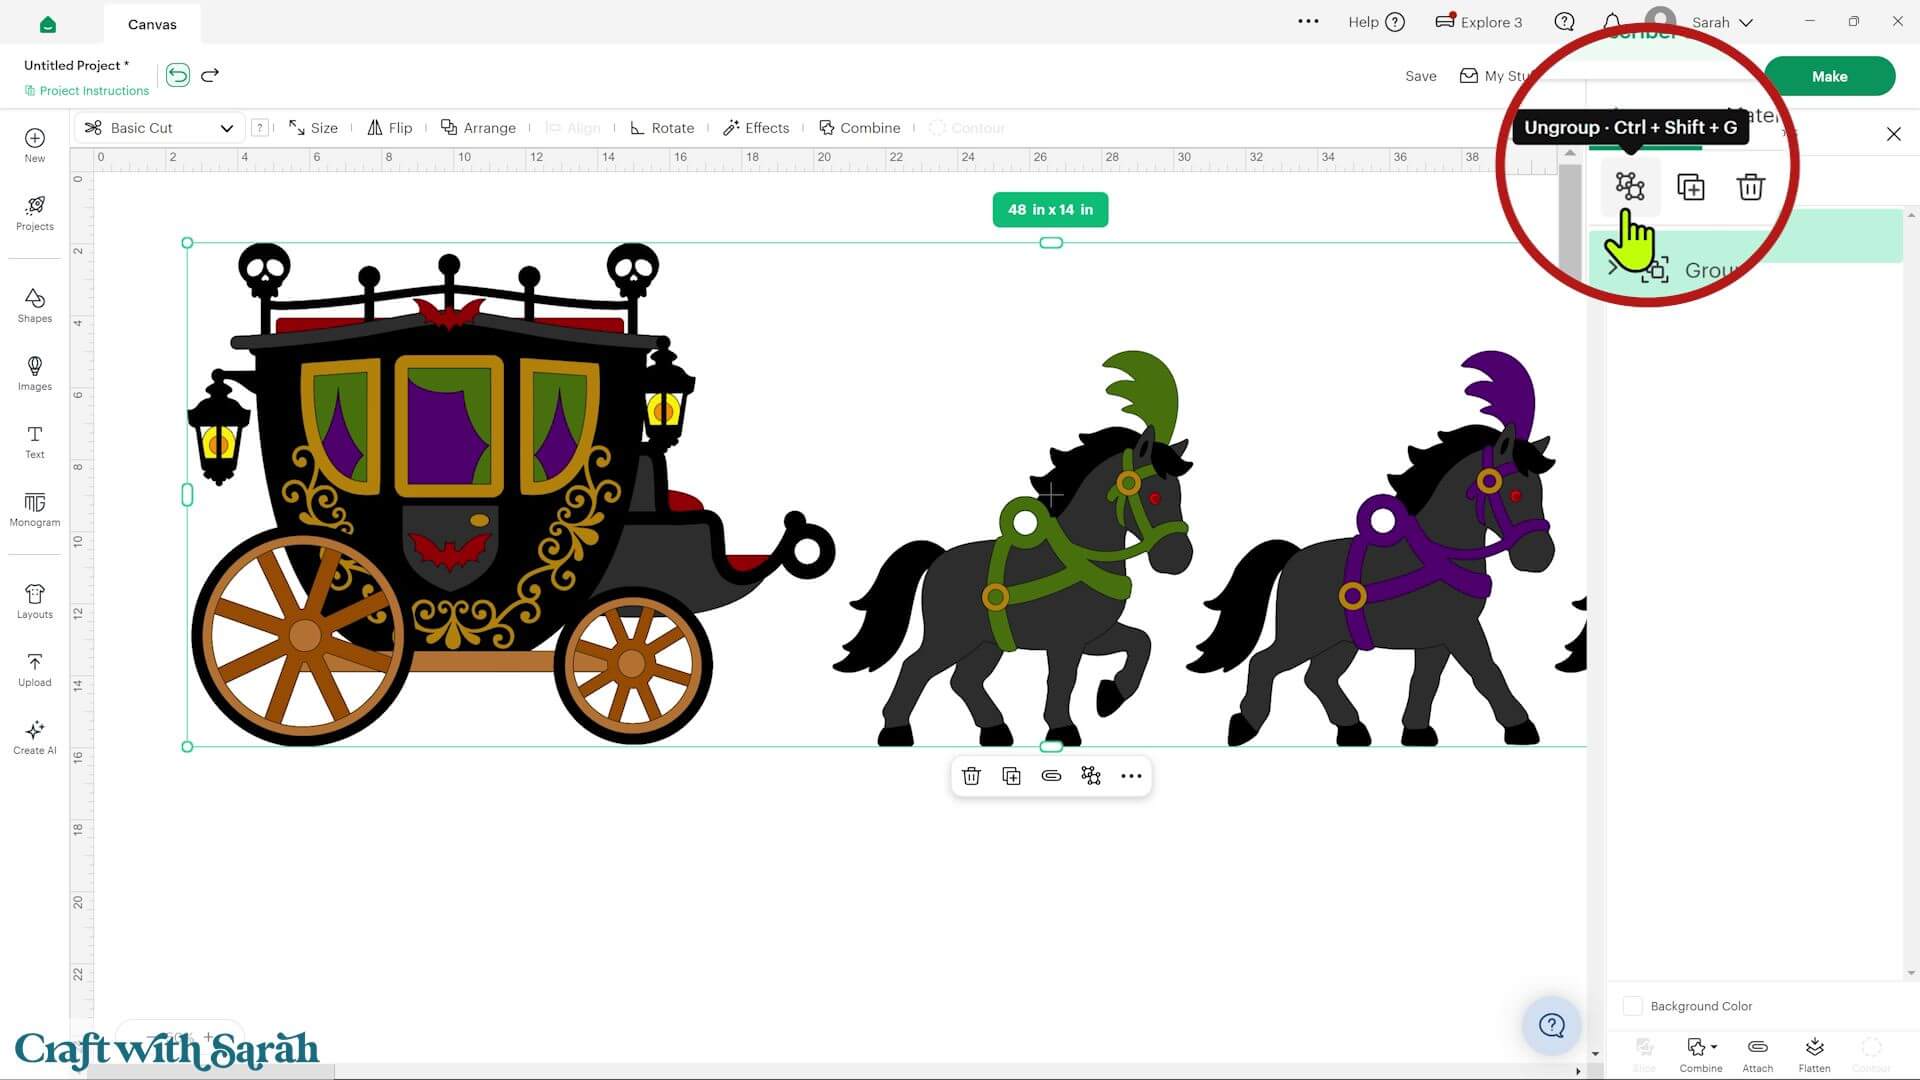
The horses can therefore be cut as single pieces on 12 x 12 inch cardstock.
The carriage is too large to cut in one piece. Instead, the larger layers have been divided into several smaller sections that will be joined together during assembly.
Don’t worry about the joins being visible. The pieces have been specifically designed so that the join lines will be covered by subsequent layers.
You will need 12 x 12 inch cardstock to make the large version at its original size. If you only have A4 or US Letter cardstock, resize the design smaller or use the smaller version of the SVG instead.
Step 2) Cut the project
When you’re happy with how the project is looking in Design Space, click “Make” and follow the instructions on-screen to cut out all the pieces.
There are both black and dark grey pieces in this design, so take care when preparing the project for cutting.
If the colors look too similar on your computer screen, you can temporarily change the dark grey to a lighter shade in Design Space.
Open one of the horse groups in the Layers panel. Towards the bottom you’ll see the feather at the top of the horse’s head, followed by the black layer for the hooves and then the dark grey body layer.
Change the dark grey layer to something lighter and then use “Material Colors” feature at the top of the layers panel to drag-and-drop the rest of the grey pieces to change all of the matching dark grey layers at once.
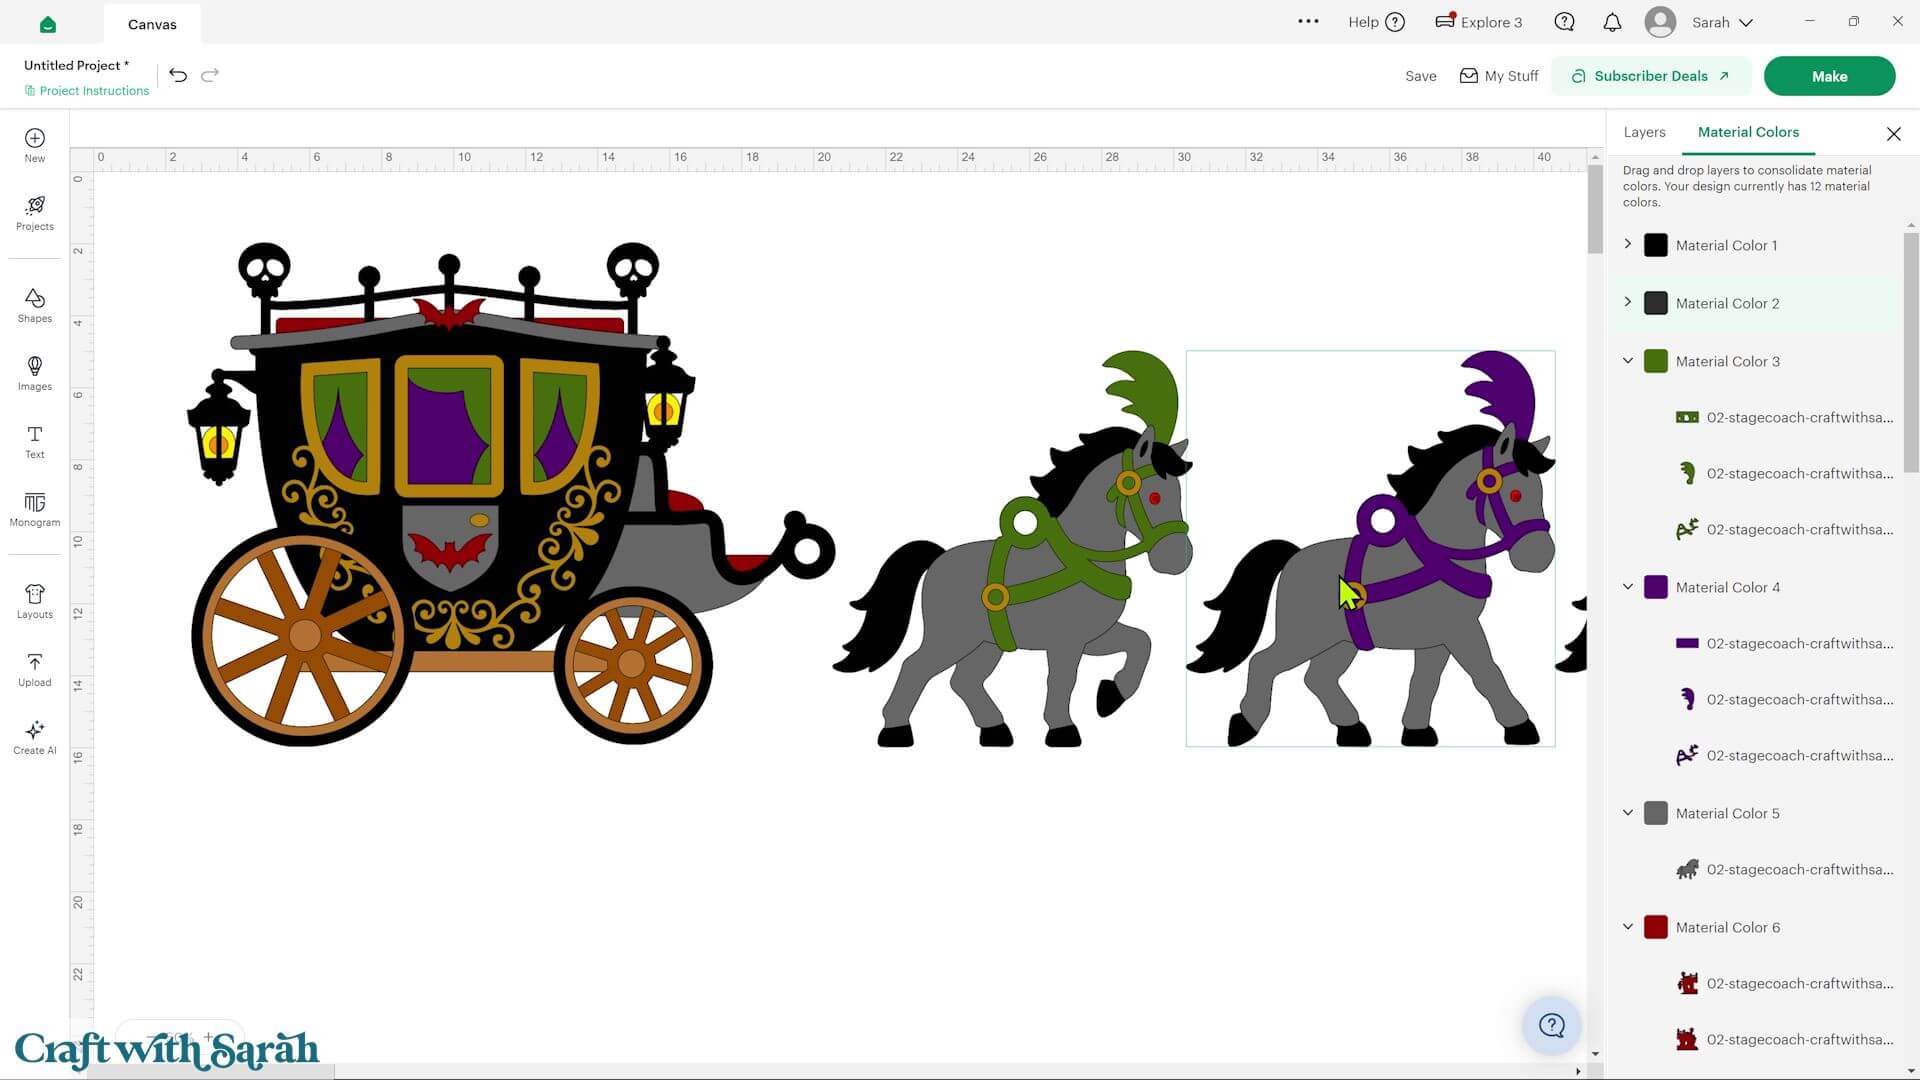
This makes it much easier to distinguish the grey cardstock from the black when you get to the cutting screen.
You can move pieces around on the mats to make better use of your cardstock, as long as none of the shapes overlap.
For some of the smaller pieces, you may also be able to change the material size and use scraps. The bright red eye pieces, for example, only require a very small amount of cardstock.
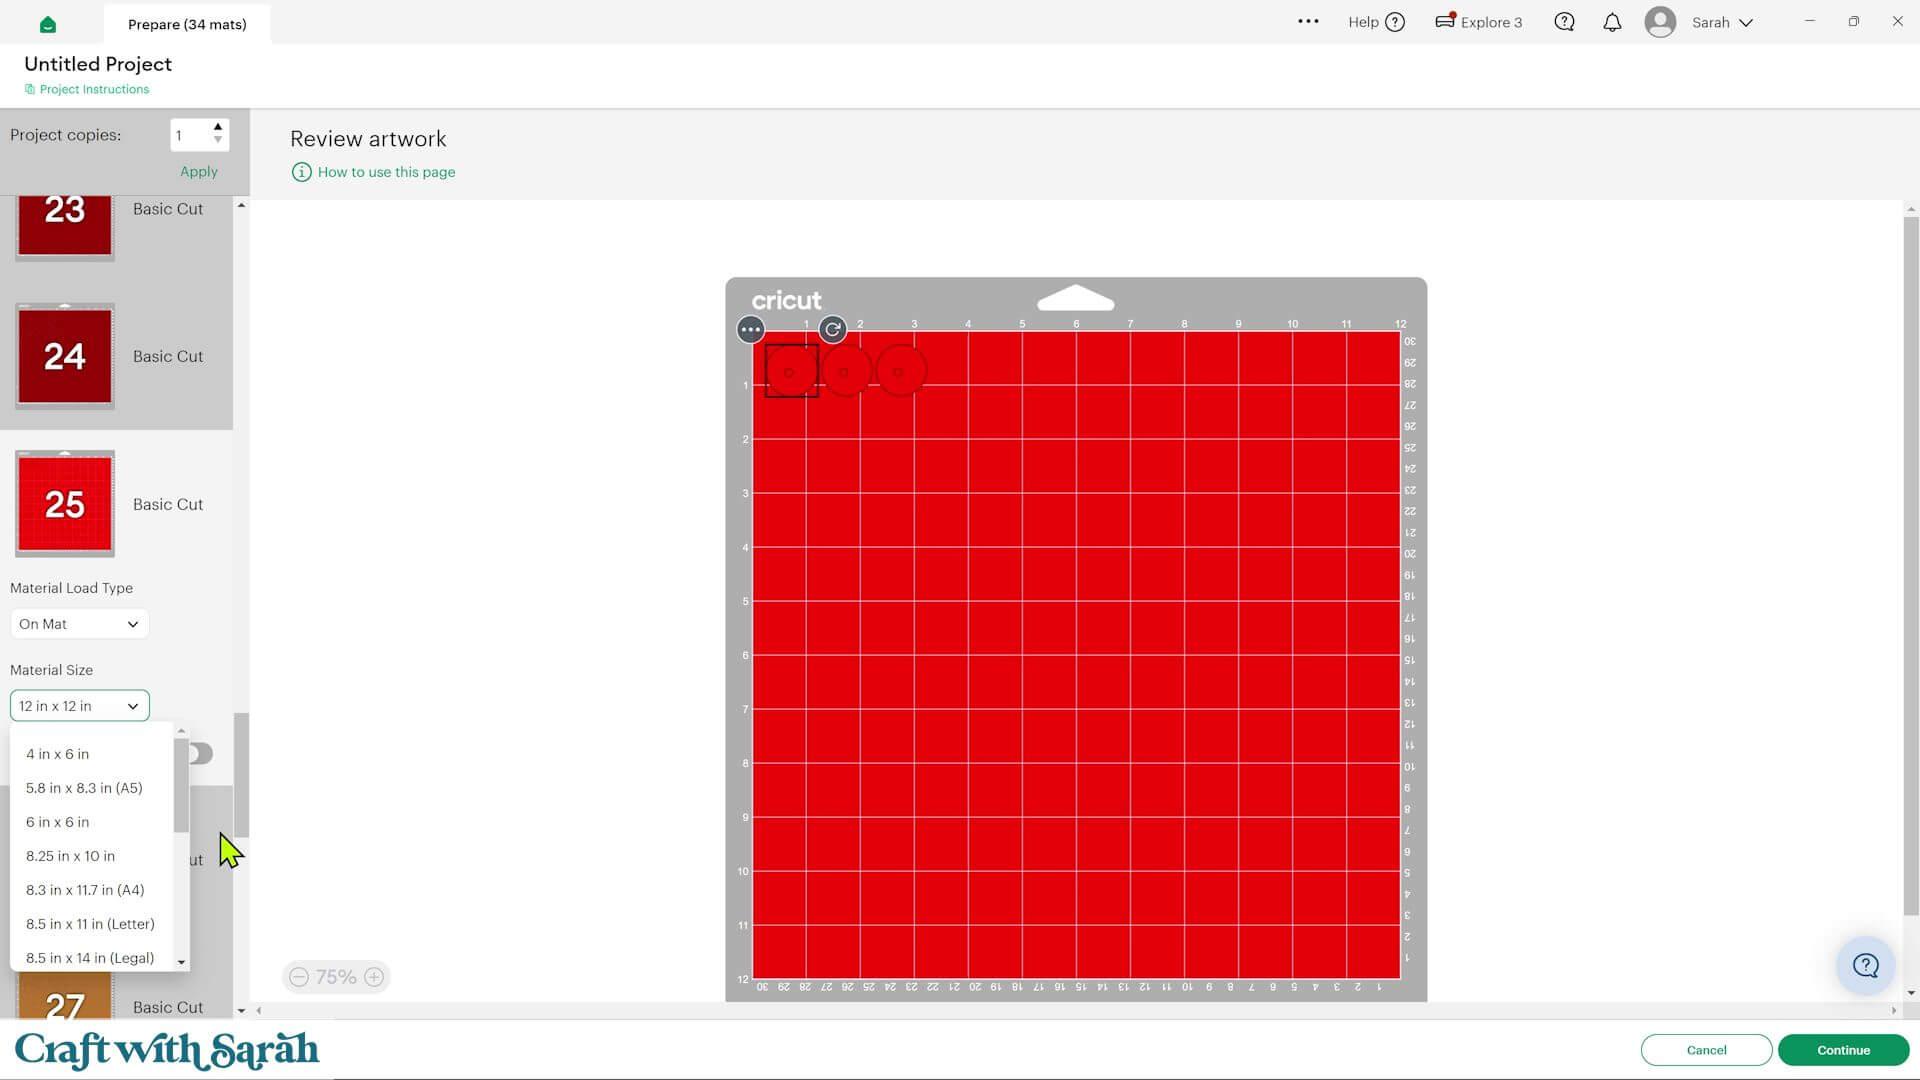
For the decorative swirls on the carriage, I recommend using gold cardstock if you have some. Metallic, mirror or glitter gold cardstock would all look wonderful and help make the carriage feel extra special.
Sometimes Design Space will put a small piece onto a second mat even though there is room for it on the first one. To move it, click the three dots on the piece and choose Move Object. Select another mat of the same color and press Confirm.
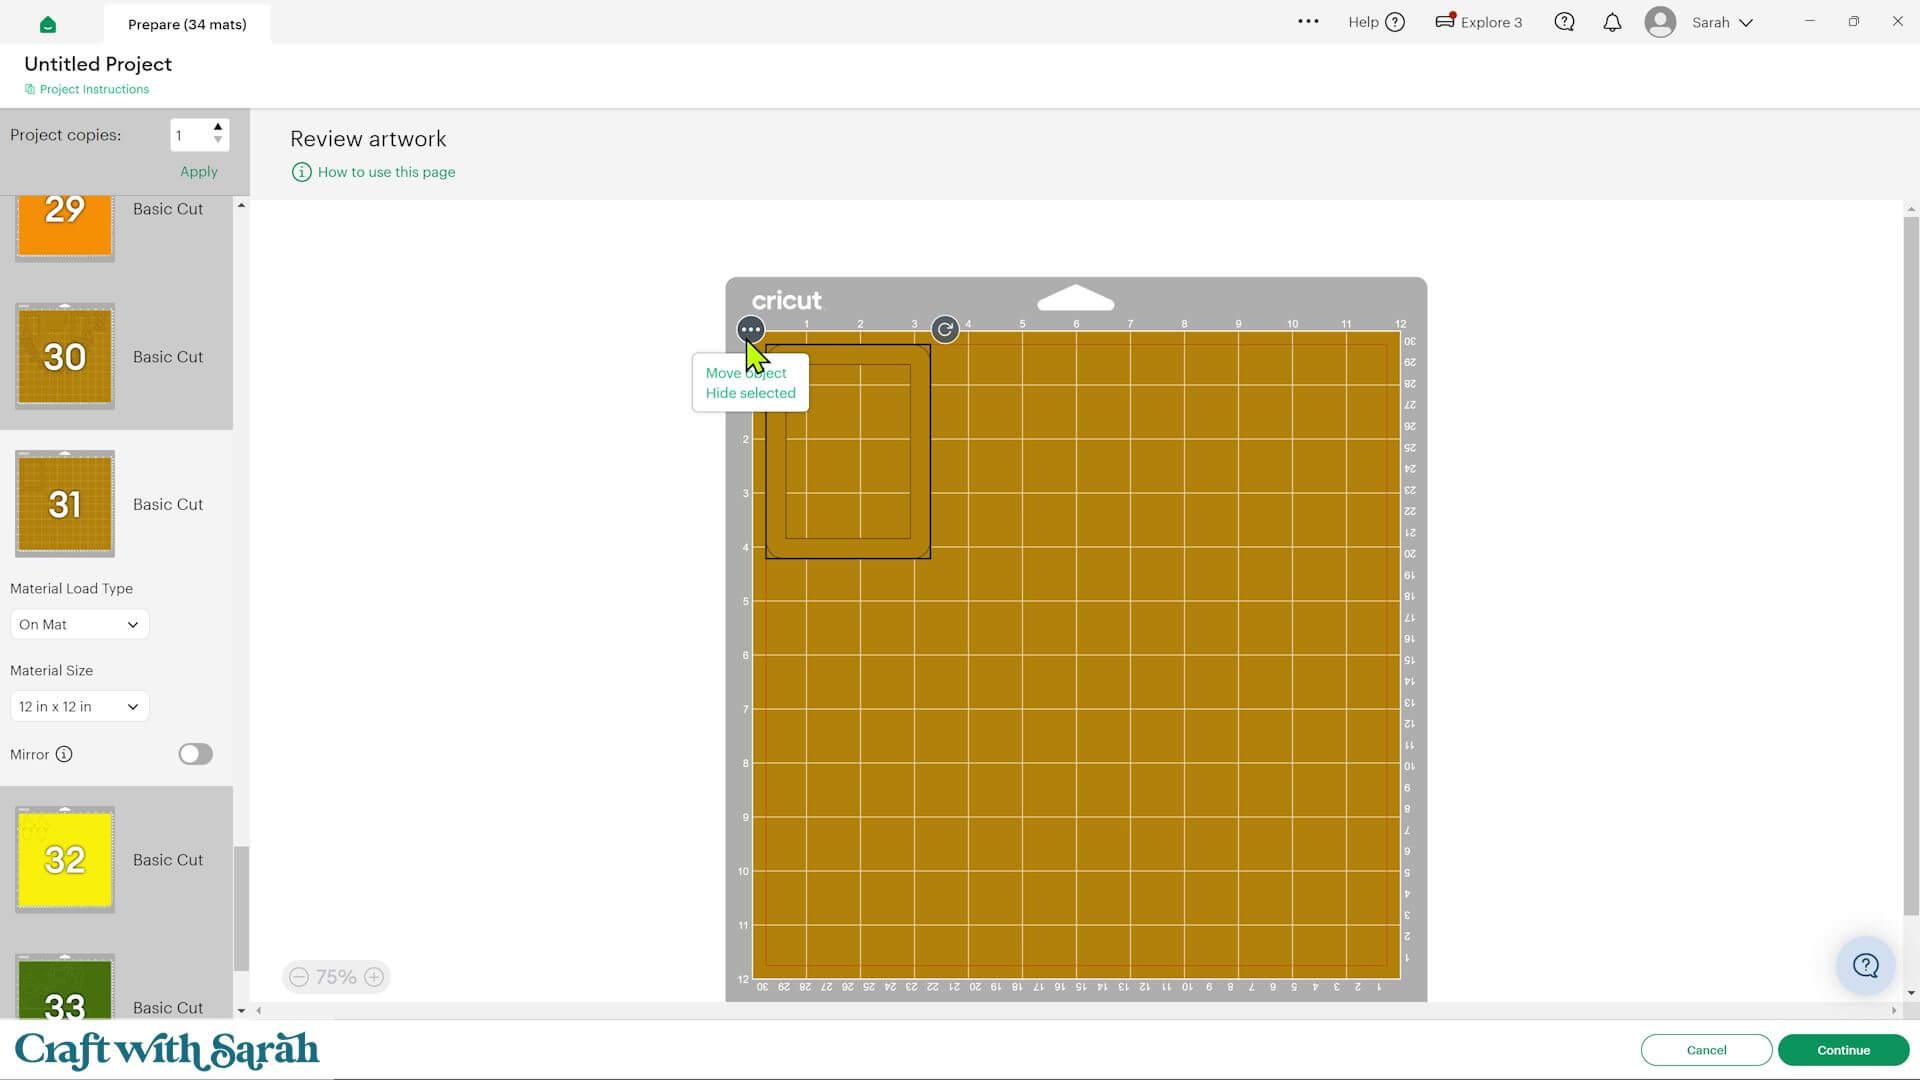
Any empty mats created as a result will disappear when you continue to the cutting stage.
Once you’re happy with all of your mats, press Continue and follow the on-screen instructions to get everything cut.
There are quite a lot of mats because this is such a large project, but most of the shapes are relatively simple, so it doesn’t take as long to cut as you might expect.
TIP: New to using cardstock with your cutting machine? Check out these machine help guides for Cricut, Silhouette and ScanNCut that go through every step of the process, including tips for getting the best quality cuts from your machine.
Step 3) Assemble the horses
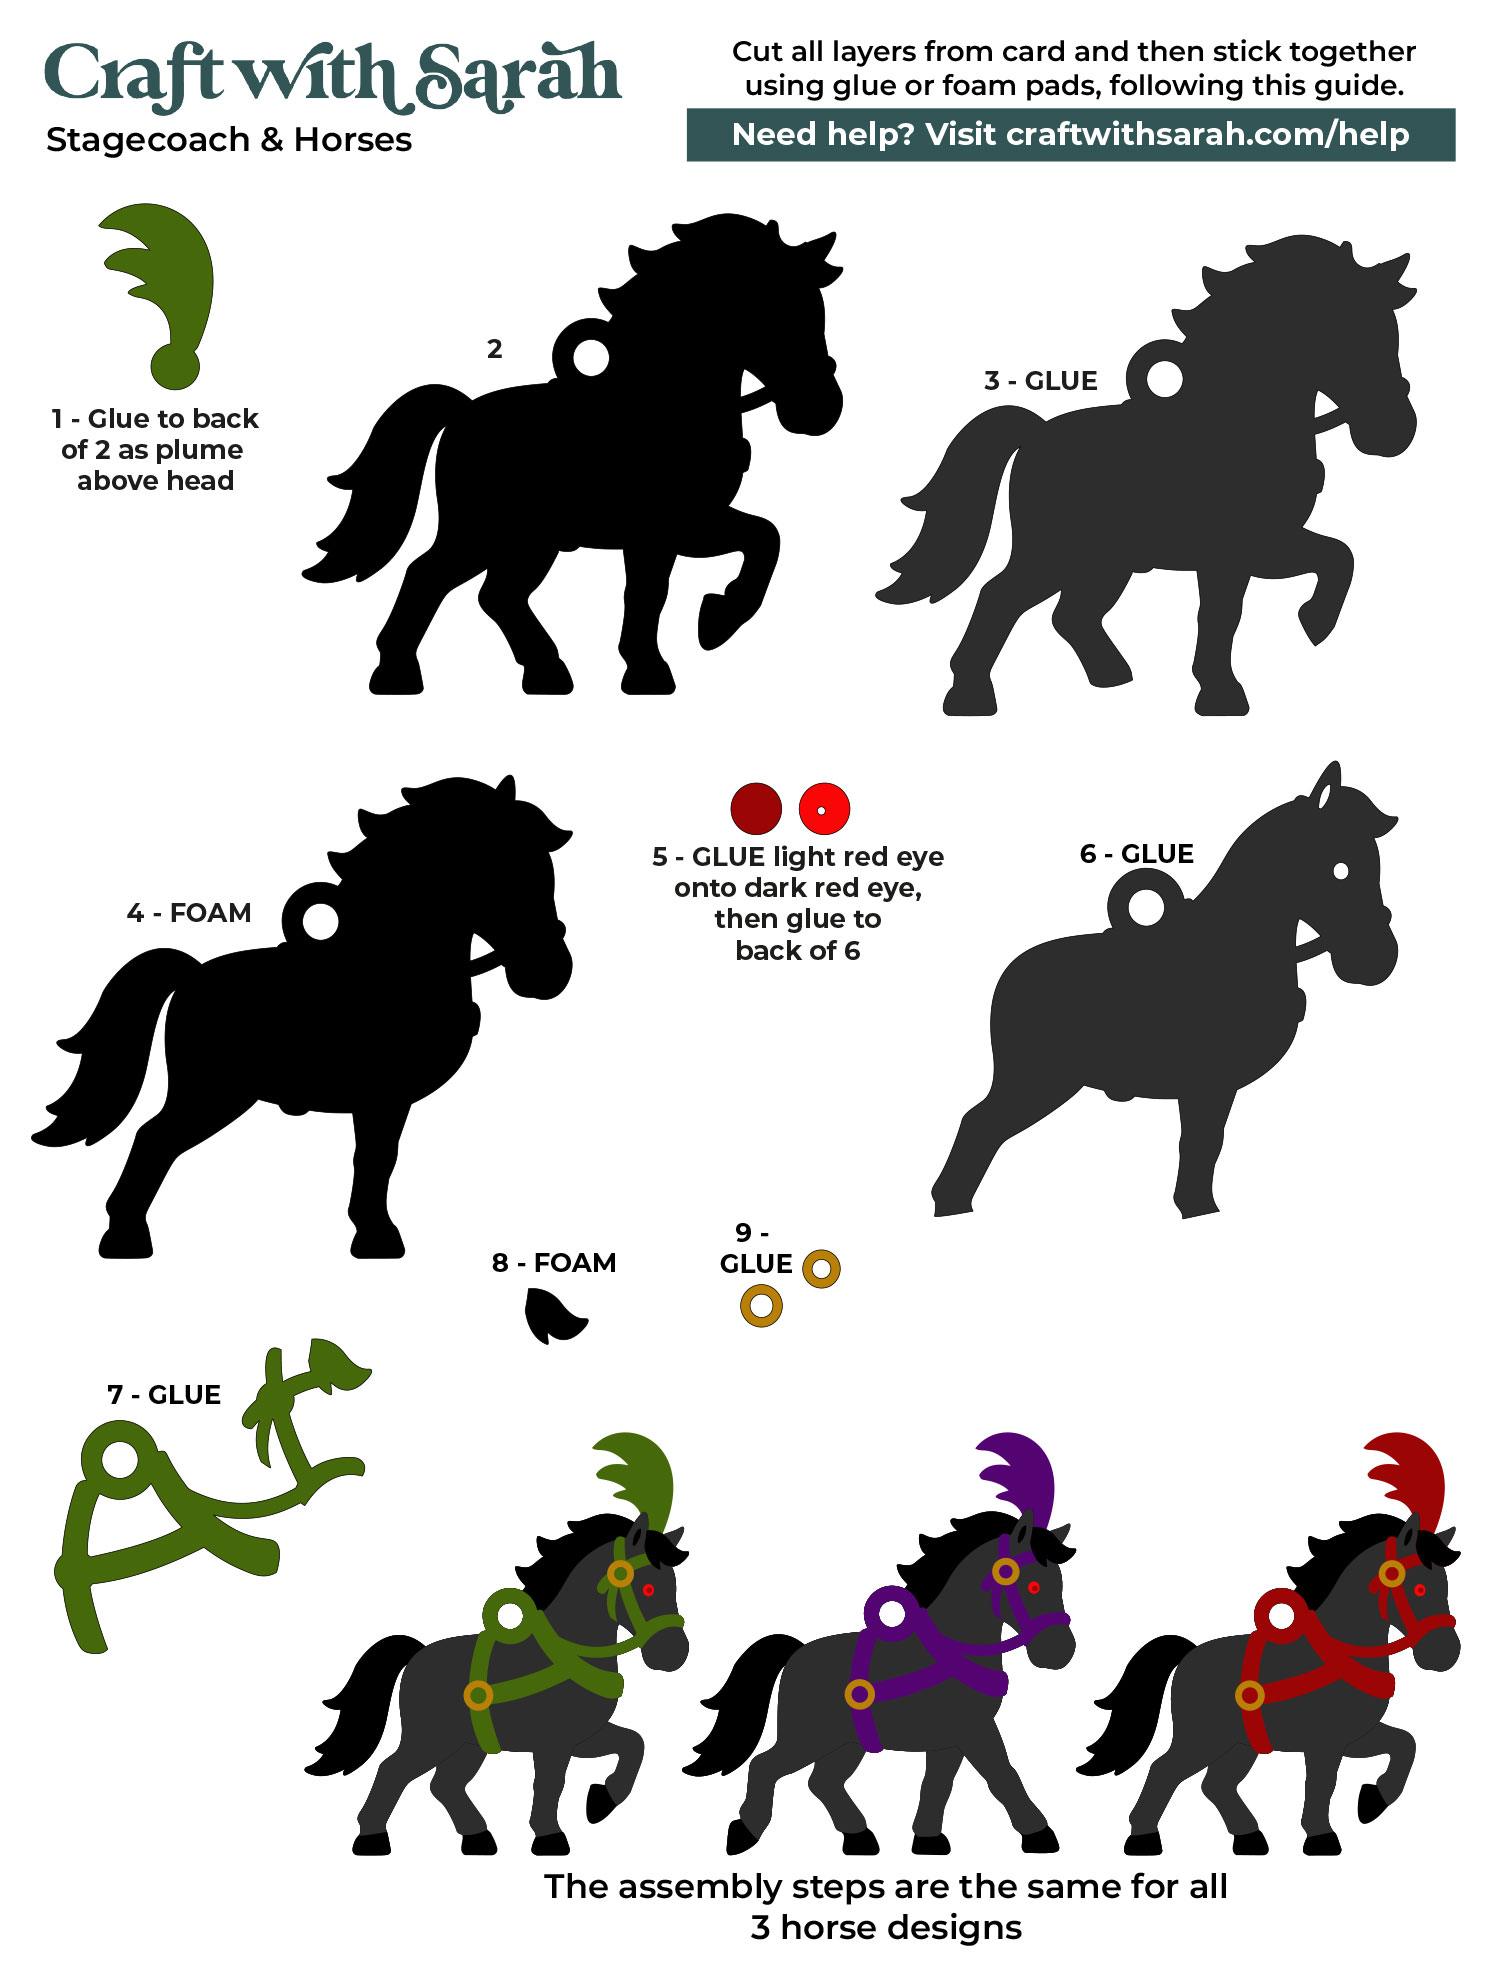
All three horses are assembled in the same way, although their leg positions are slightly different.
Note: the horses are assembled in the same way for the large and small versions of this project.
Before starting, lay the layers for one horse on top of each other according to the assembly guide included in the download folder. This is a good opportunity to check that you’re happy with your colors and haven’t accidentally missed any pieces.
We’ll be using a combination of glue and foam squares.
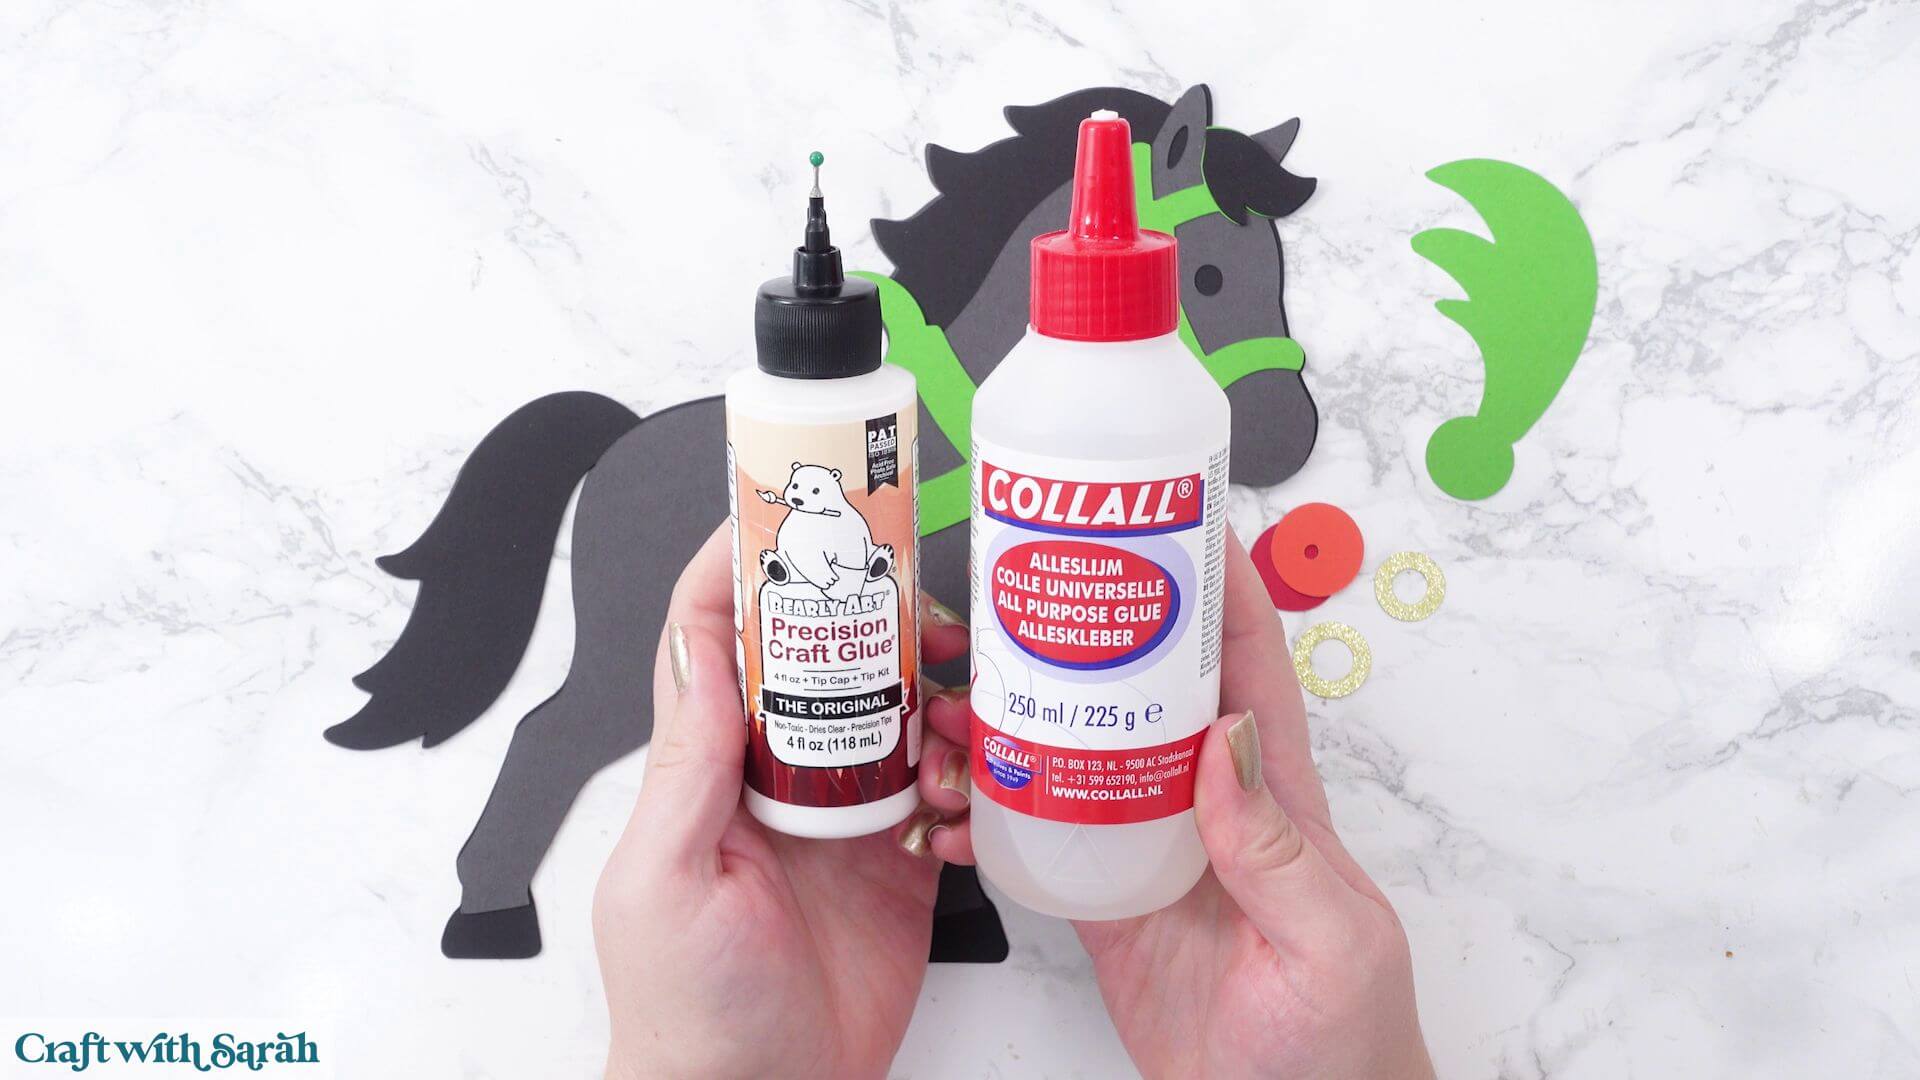
I’m using Bearly Art Glue, but Collall is another glue I like for papercrafting because these glues don’t tend to bend or wrinkle the cardstock.
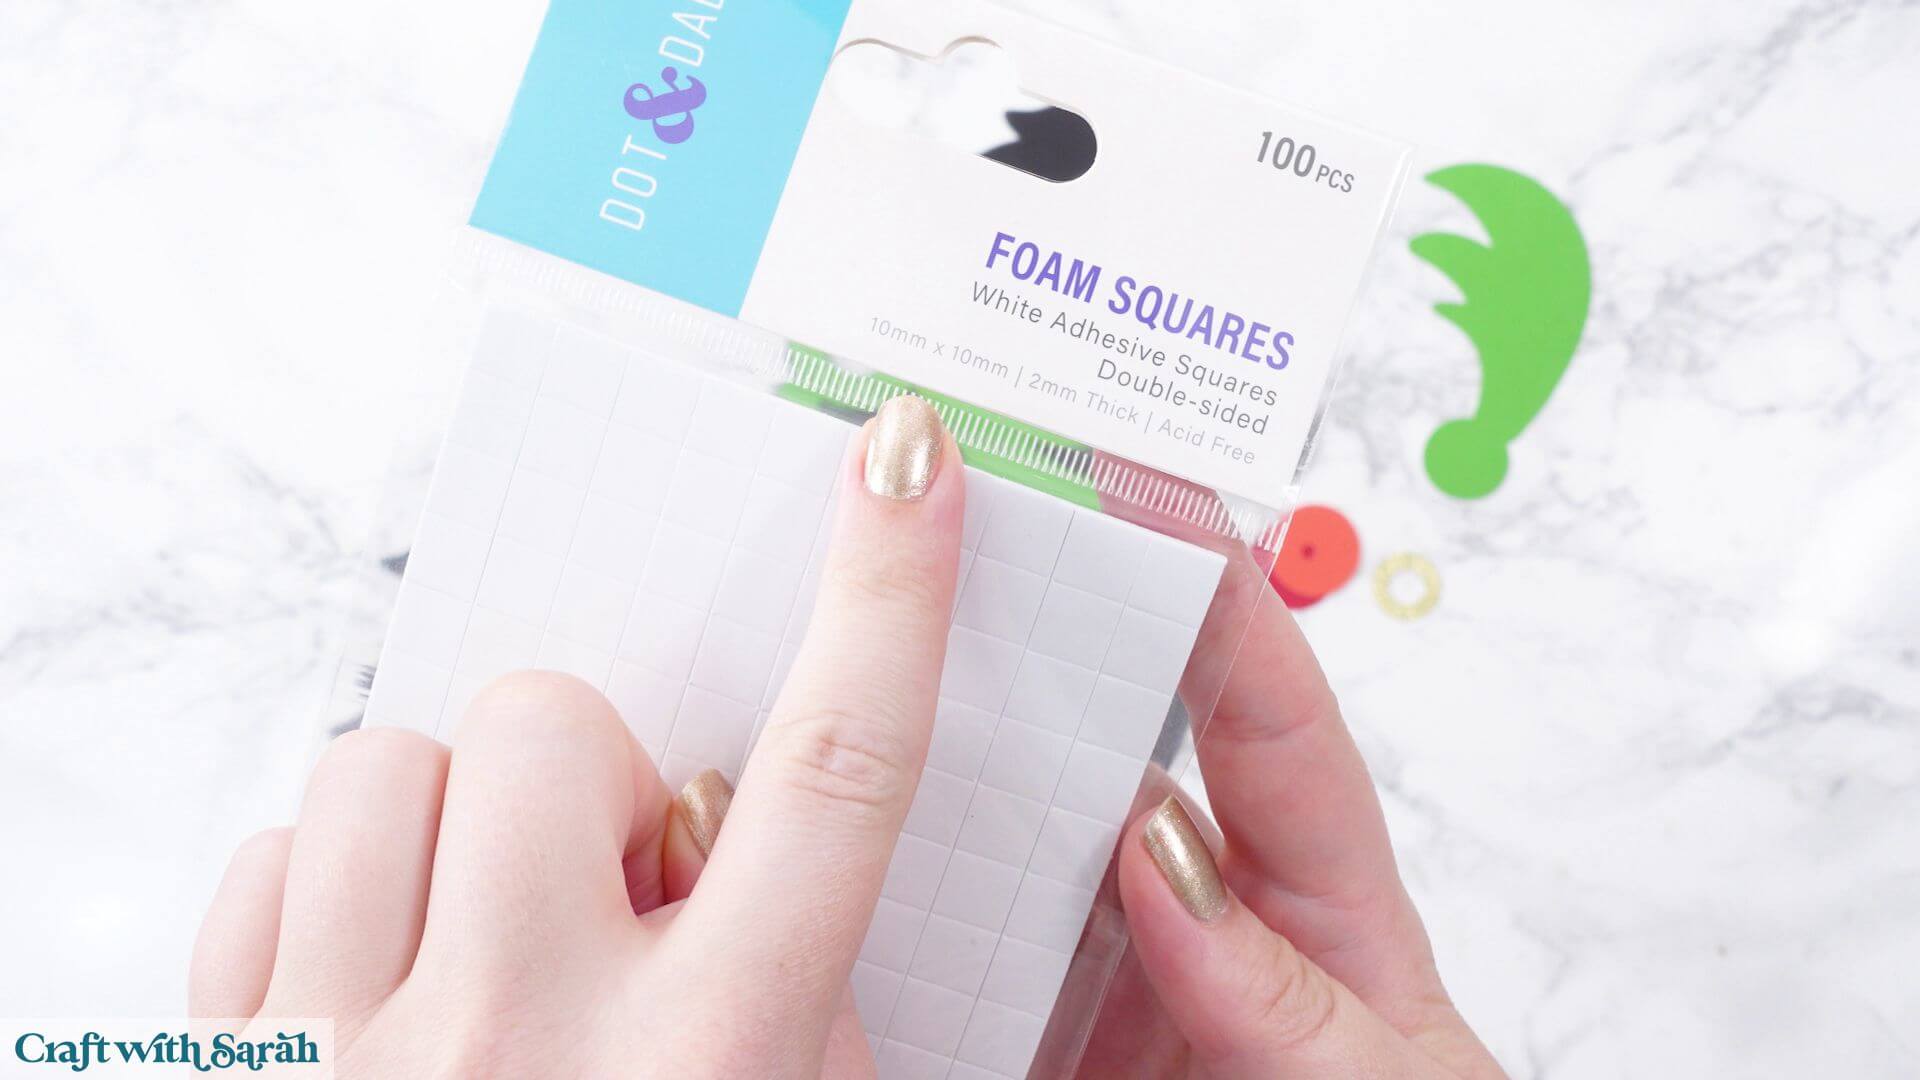
The foam pads that I use are from “Dot & Dab”, but any foam squares will work.
For this project, I’m mostly using 10×10 mm squares that are 2 mm thick. These are larger than I would normally use, but because this is such a big project, the larger squares make assembly much quicker.
When adding the foam pads to larger pieces of card, make sure you add some in the middles of the pieces of card so it gives stability to the middles.
If you don’t add any foam pads in the middles then it can “sag” under the weight of the other layers which doesn’t look as good.
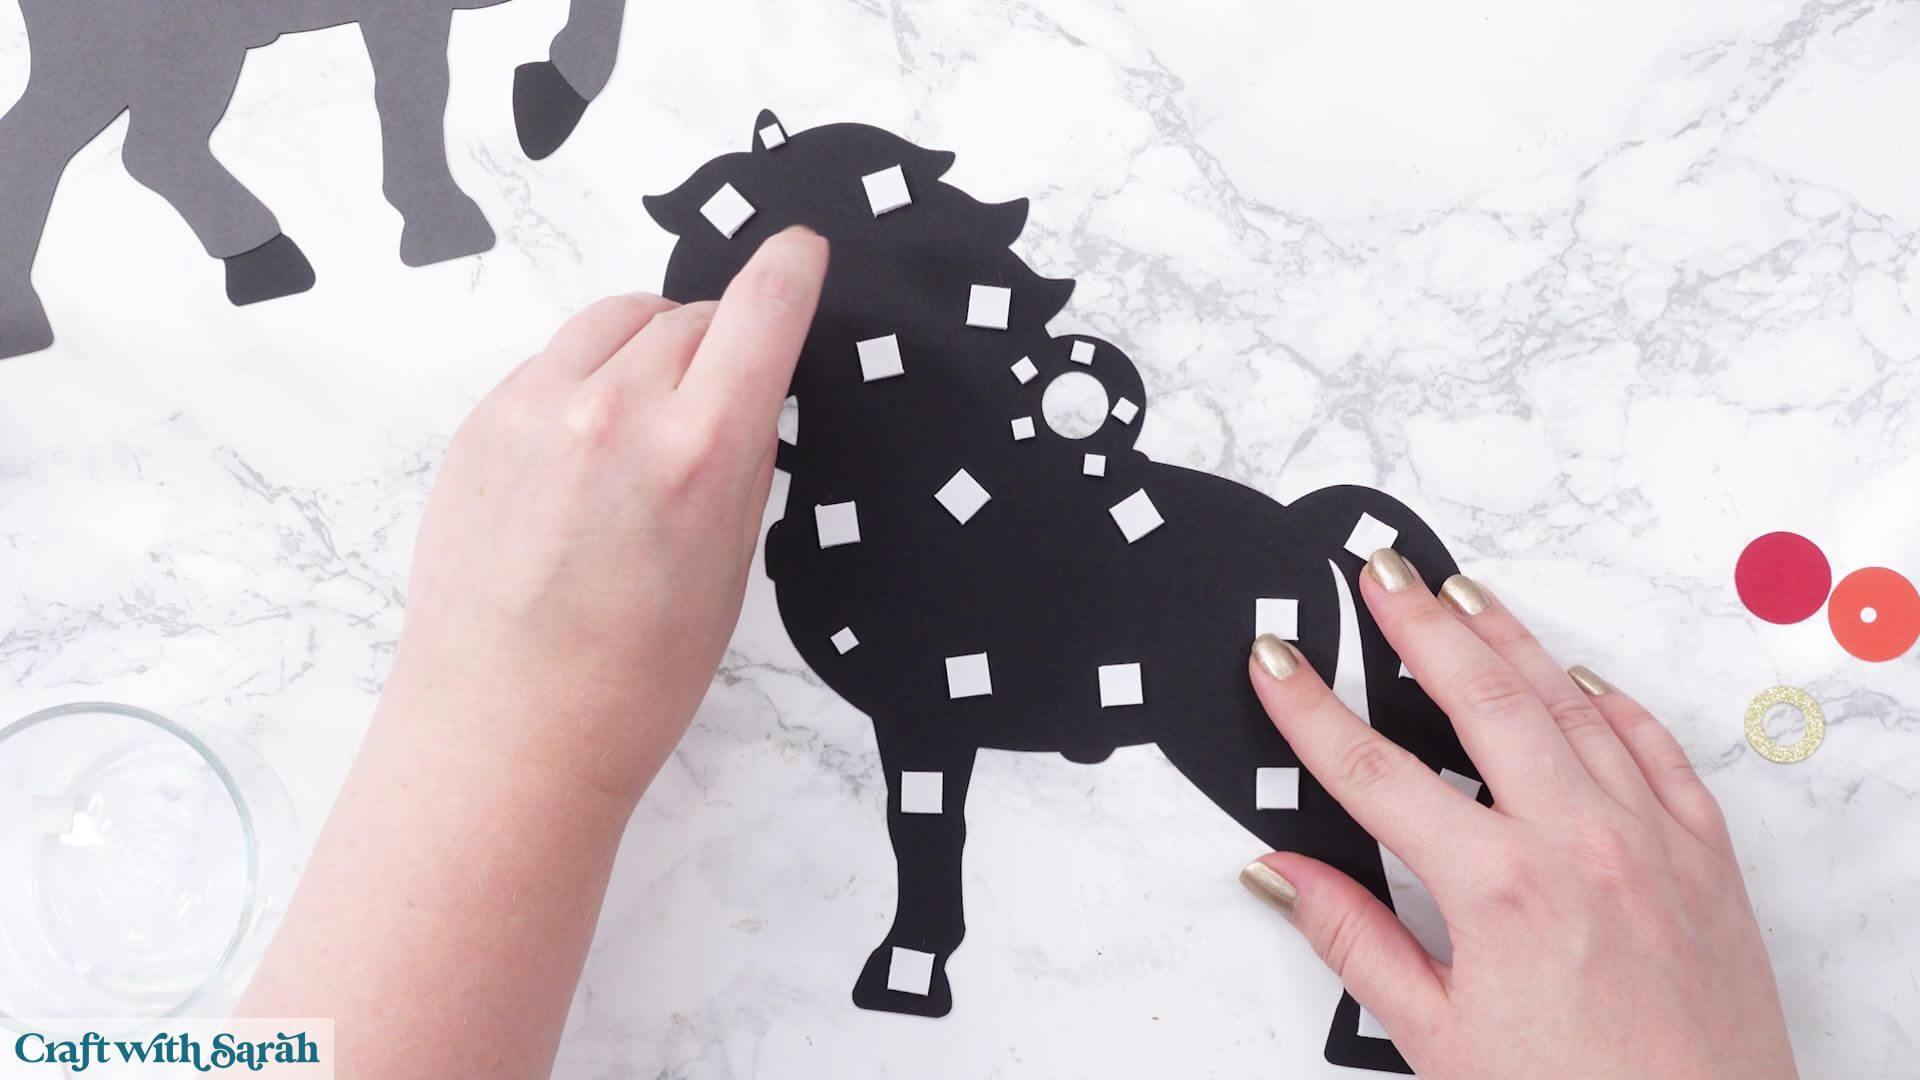
I also have some smaller 5×5 mm foam squares for the narrower areas.
Use the below assembly guide to see how to put the horses together.
There is a higher-quality printable version of the guide included in your download folder.
Your first horse is now finished!
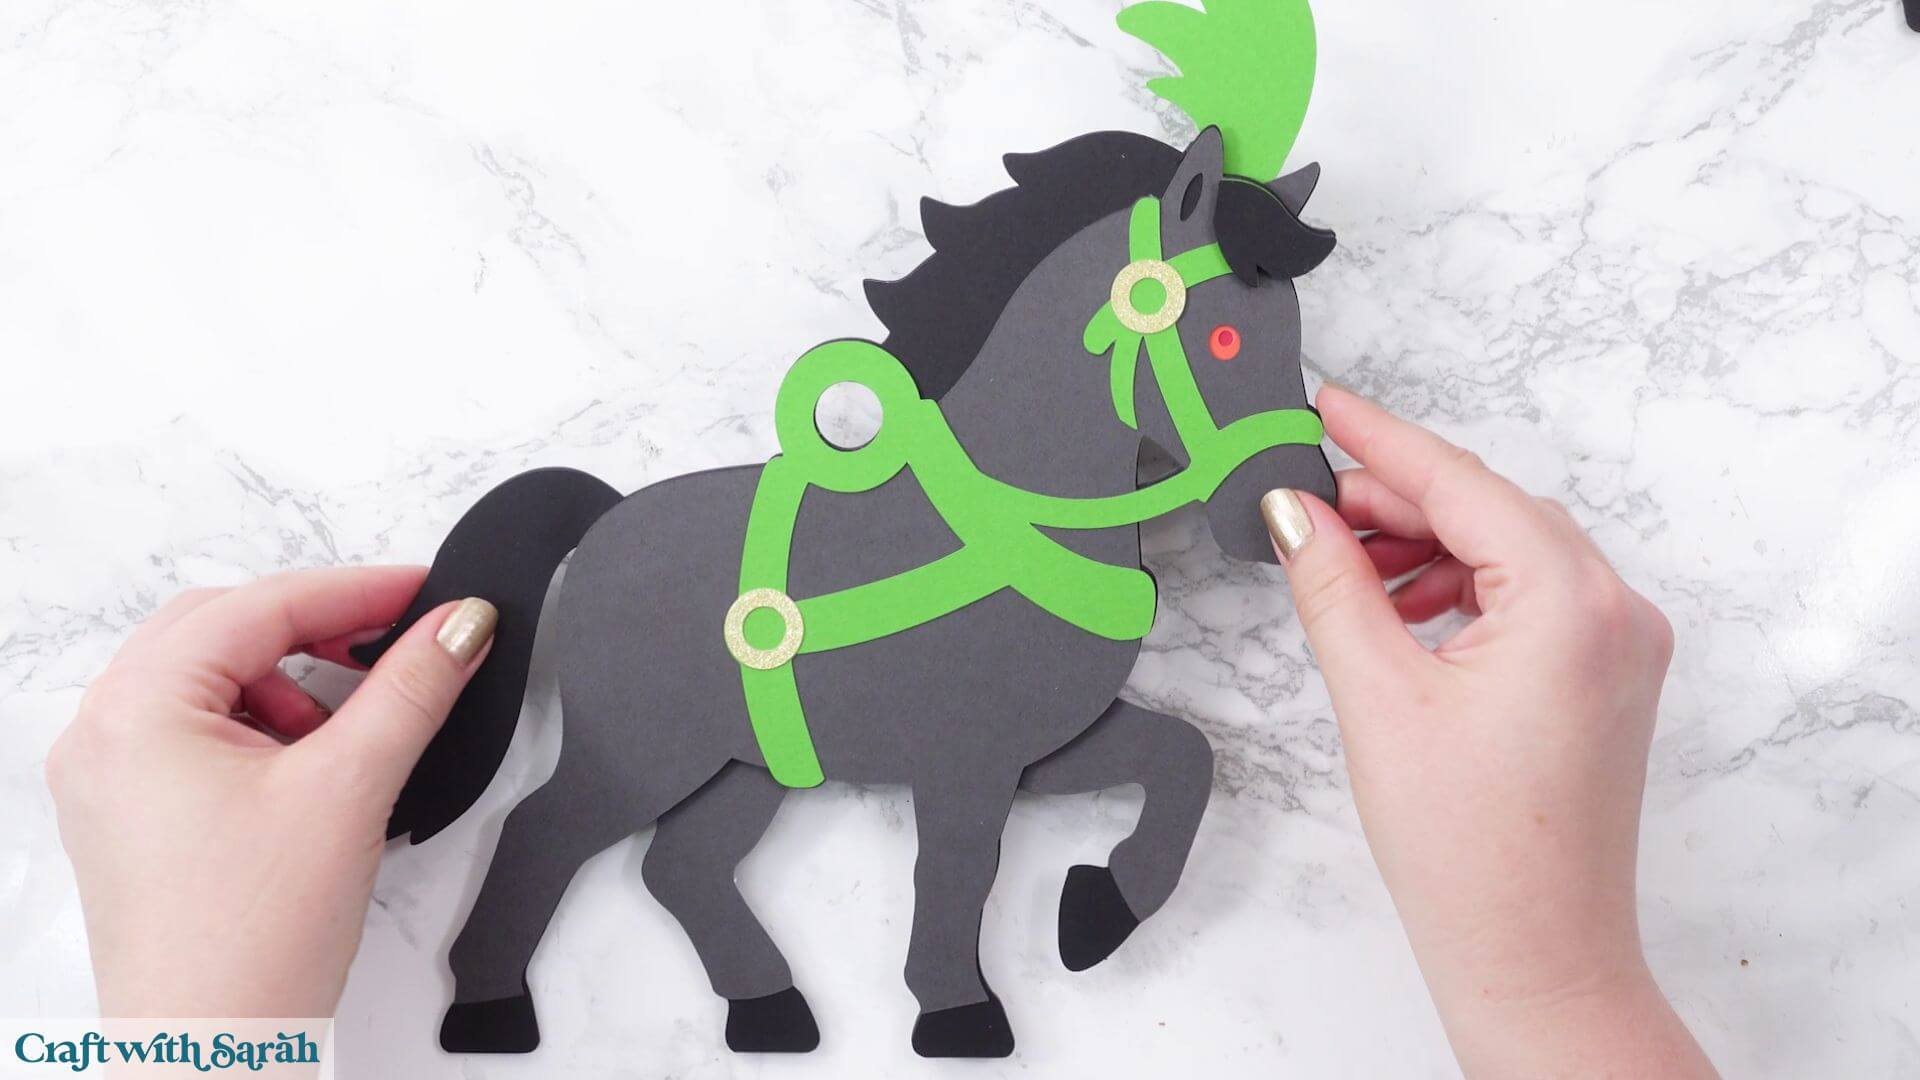
Repeat the same process for the remaining two horses. Their legs are positioned differently, but the layering process is the same.
Step 4) Assemble the stagecoach
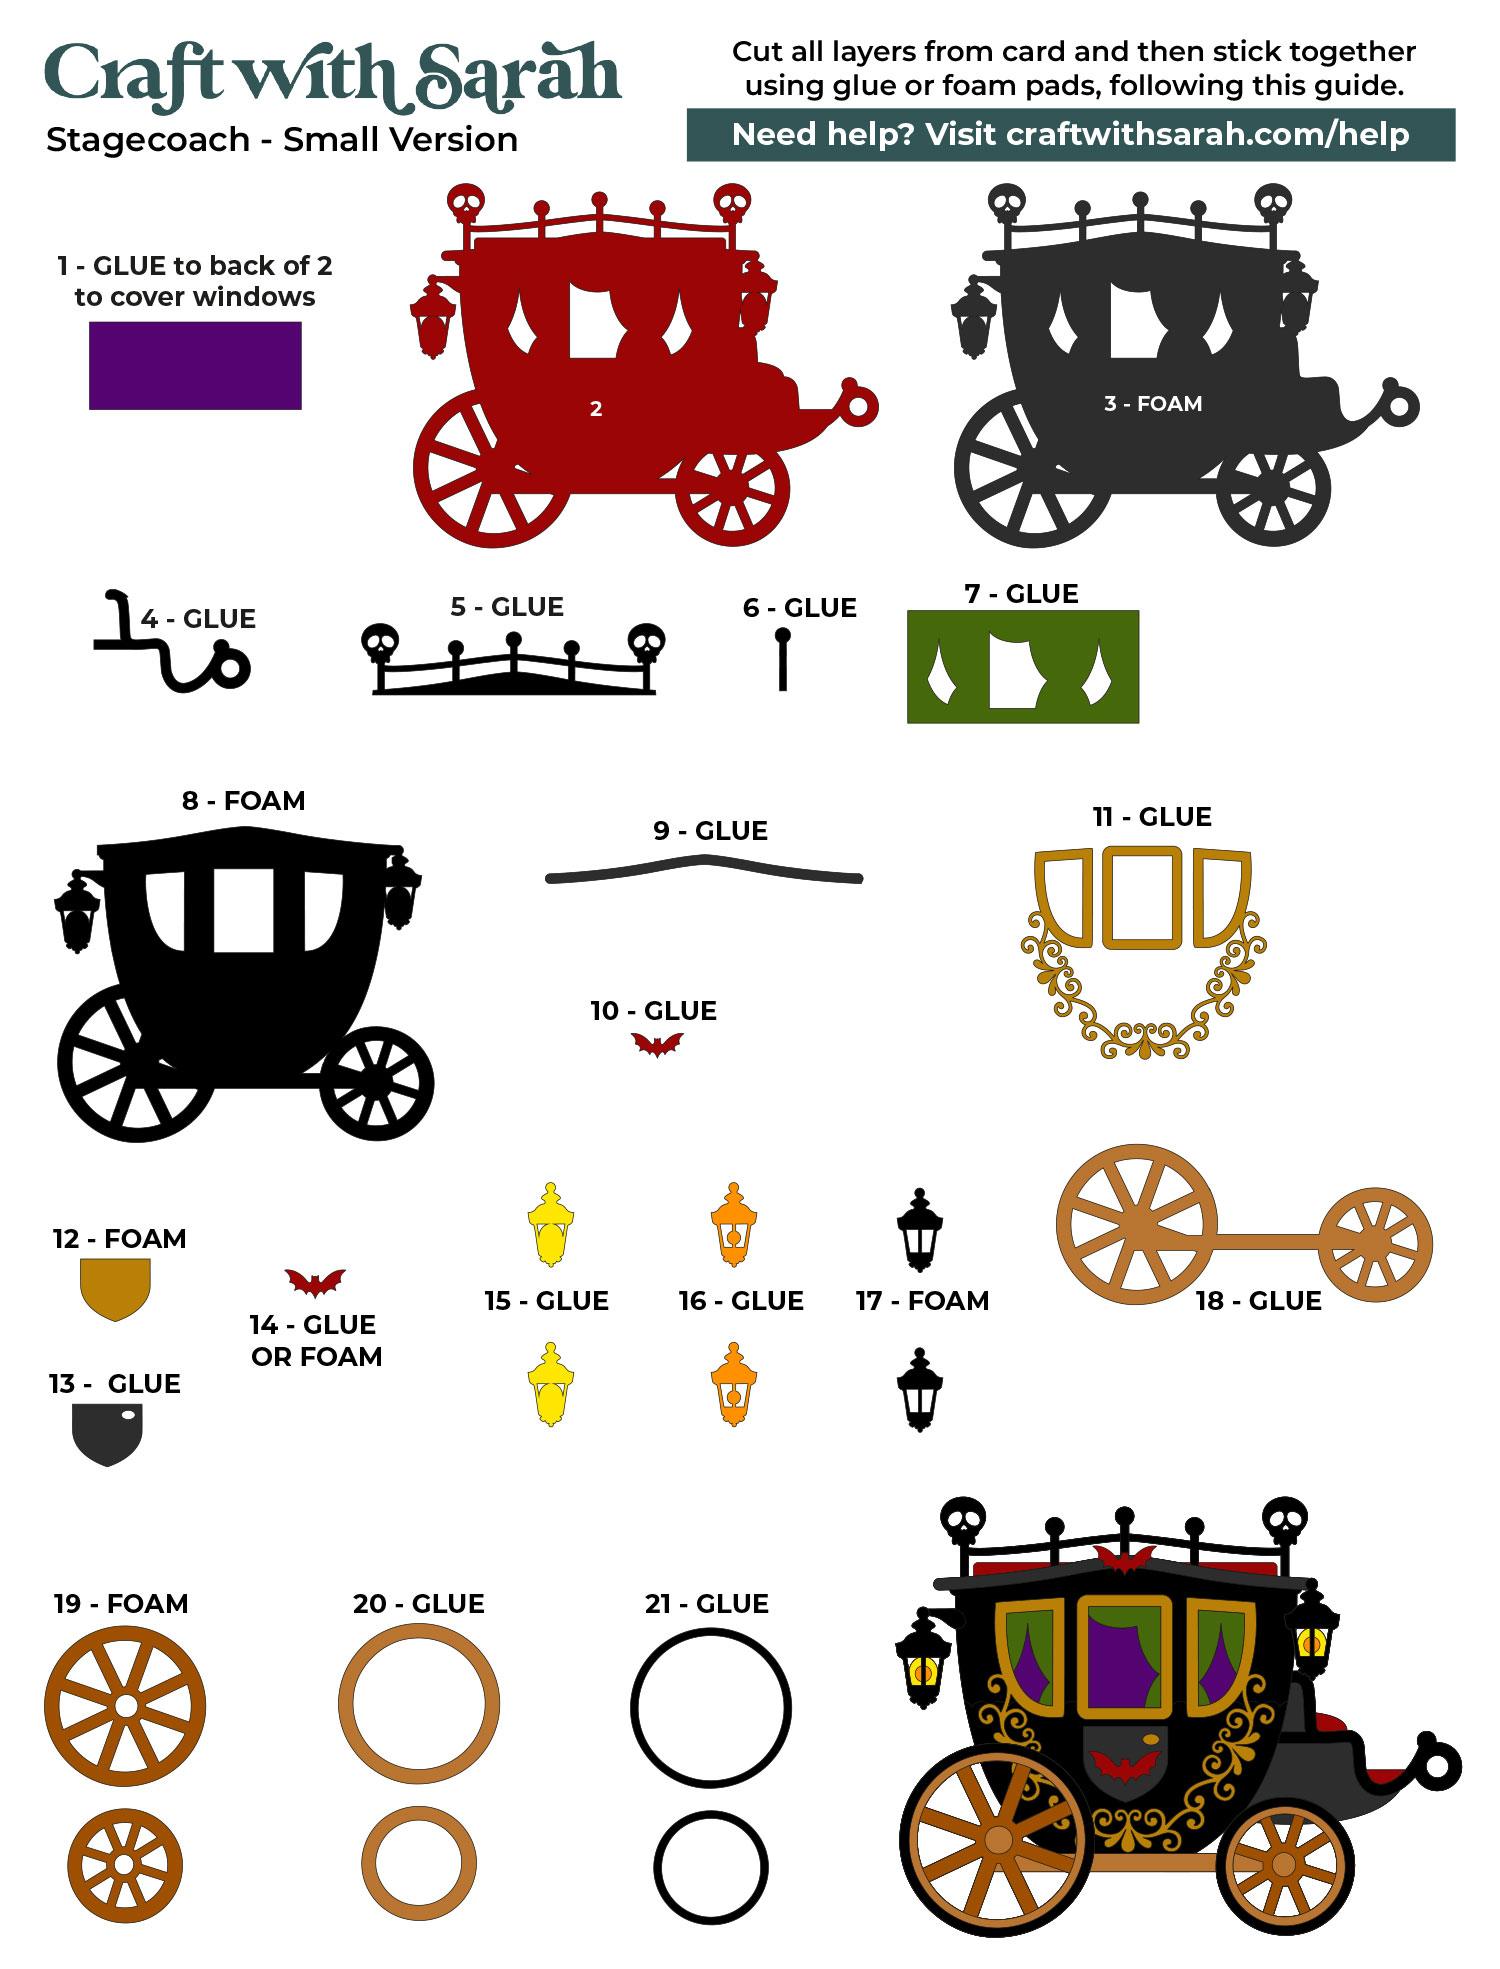
The carriage is the more complicated part of the project, so I strongly recommend keeping the assembly guide nearby.
You could print it out or have it open on your computer while you’re crafting.
If you’re making the smaller version of the design, this stage will be much simpler because the large pieces are already joined together.
For the giant version, however, several of the layers have been divided into sections so that they’ll fit onto your Cricut mat.
The assembly guide is shown below. Again, there is a higher-quality printable version included in your download folder.
Scroll down to underneath the assembly guides for more information about the steps and to see photos of the process.
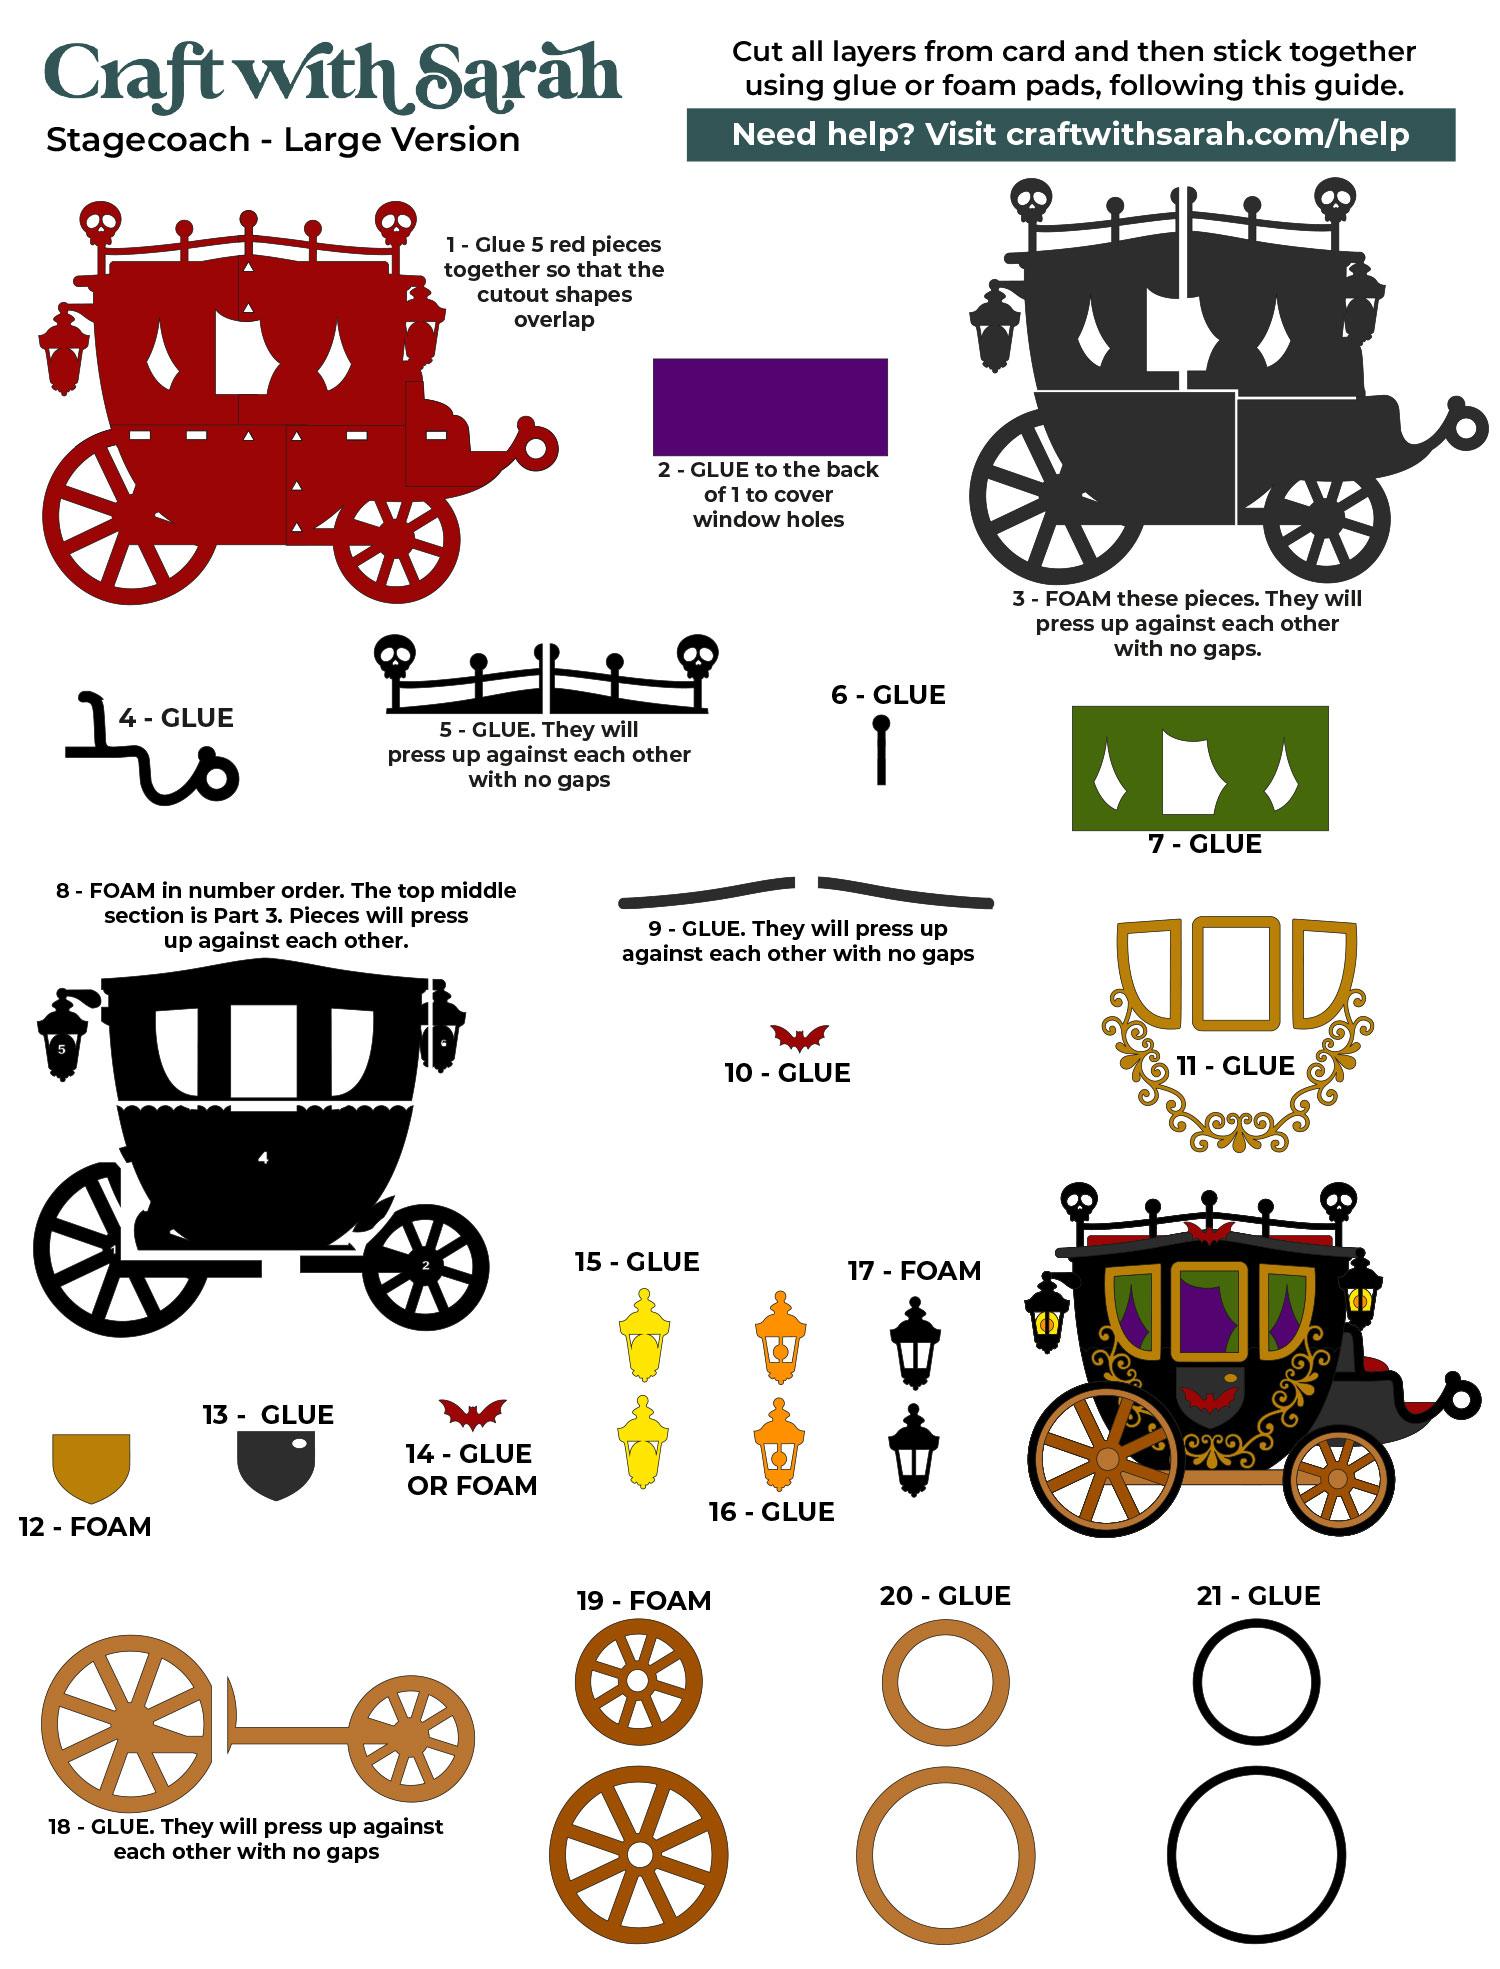
Carriage Part A) Base structure pieces
Start with the five dark red pieces that form the very bottom layer.
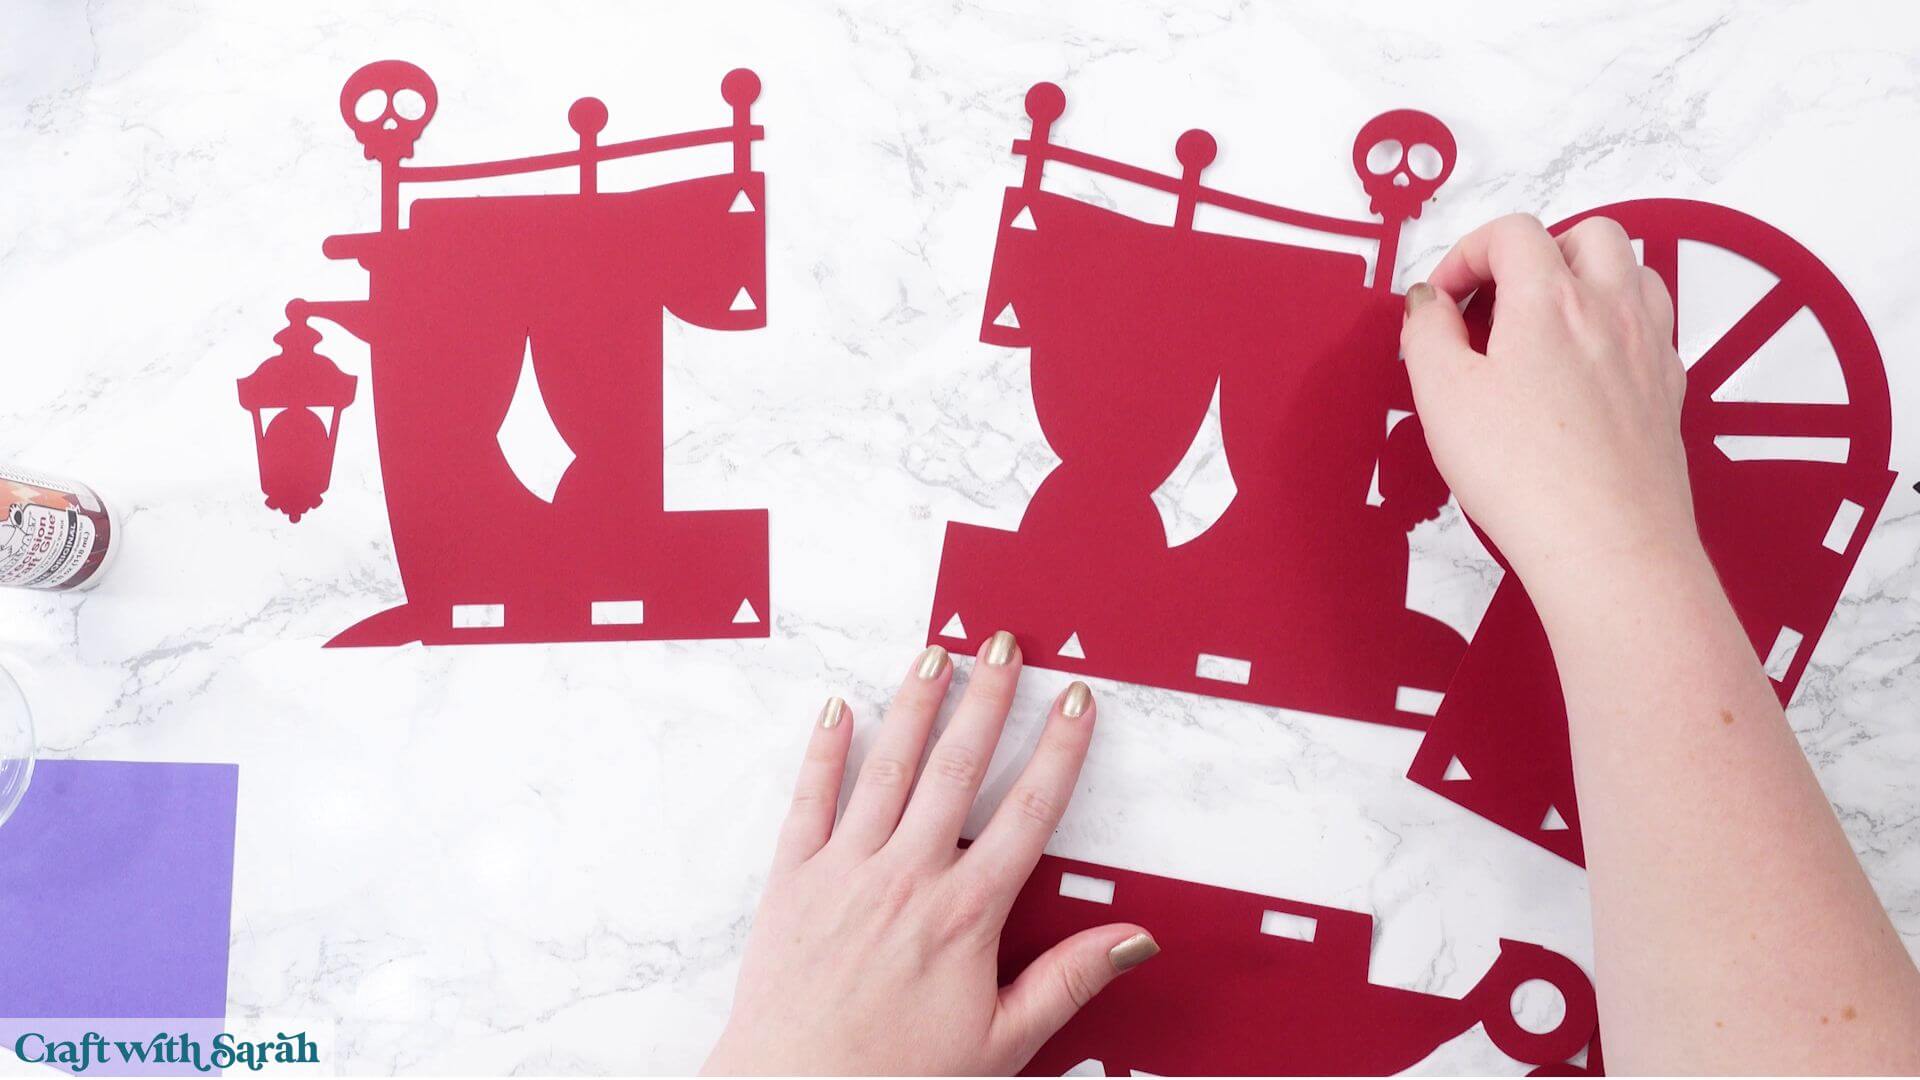
Lay them out like a jigsaw puzzle before adding any glue so you can see how they fit together.
Four of the pieces can be assembled first. Save the smallest fifth piece until last, as its positioning helps disguise one of the joins when the later layers are added.
Start gluing the first four sections together.
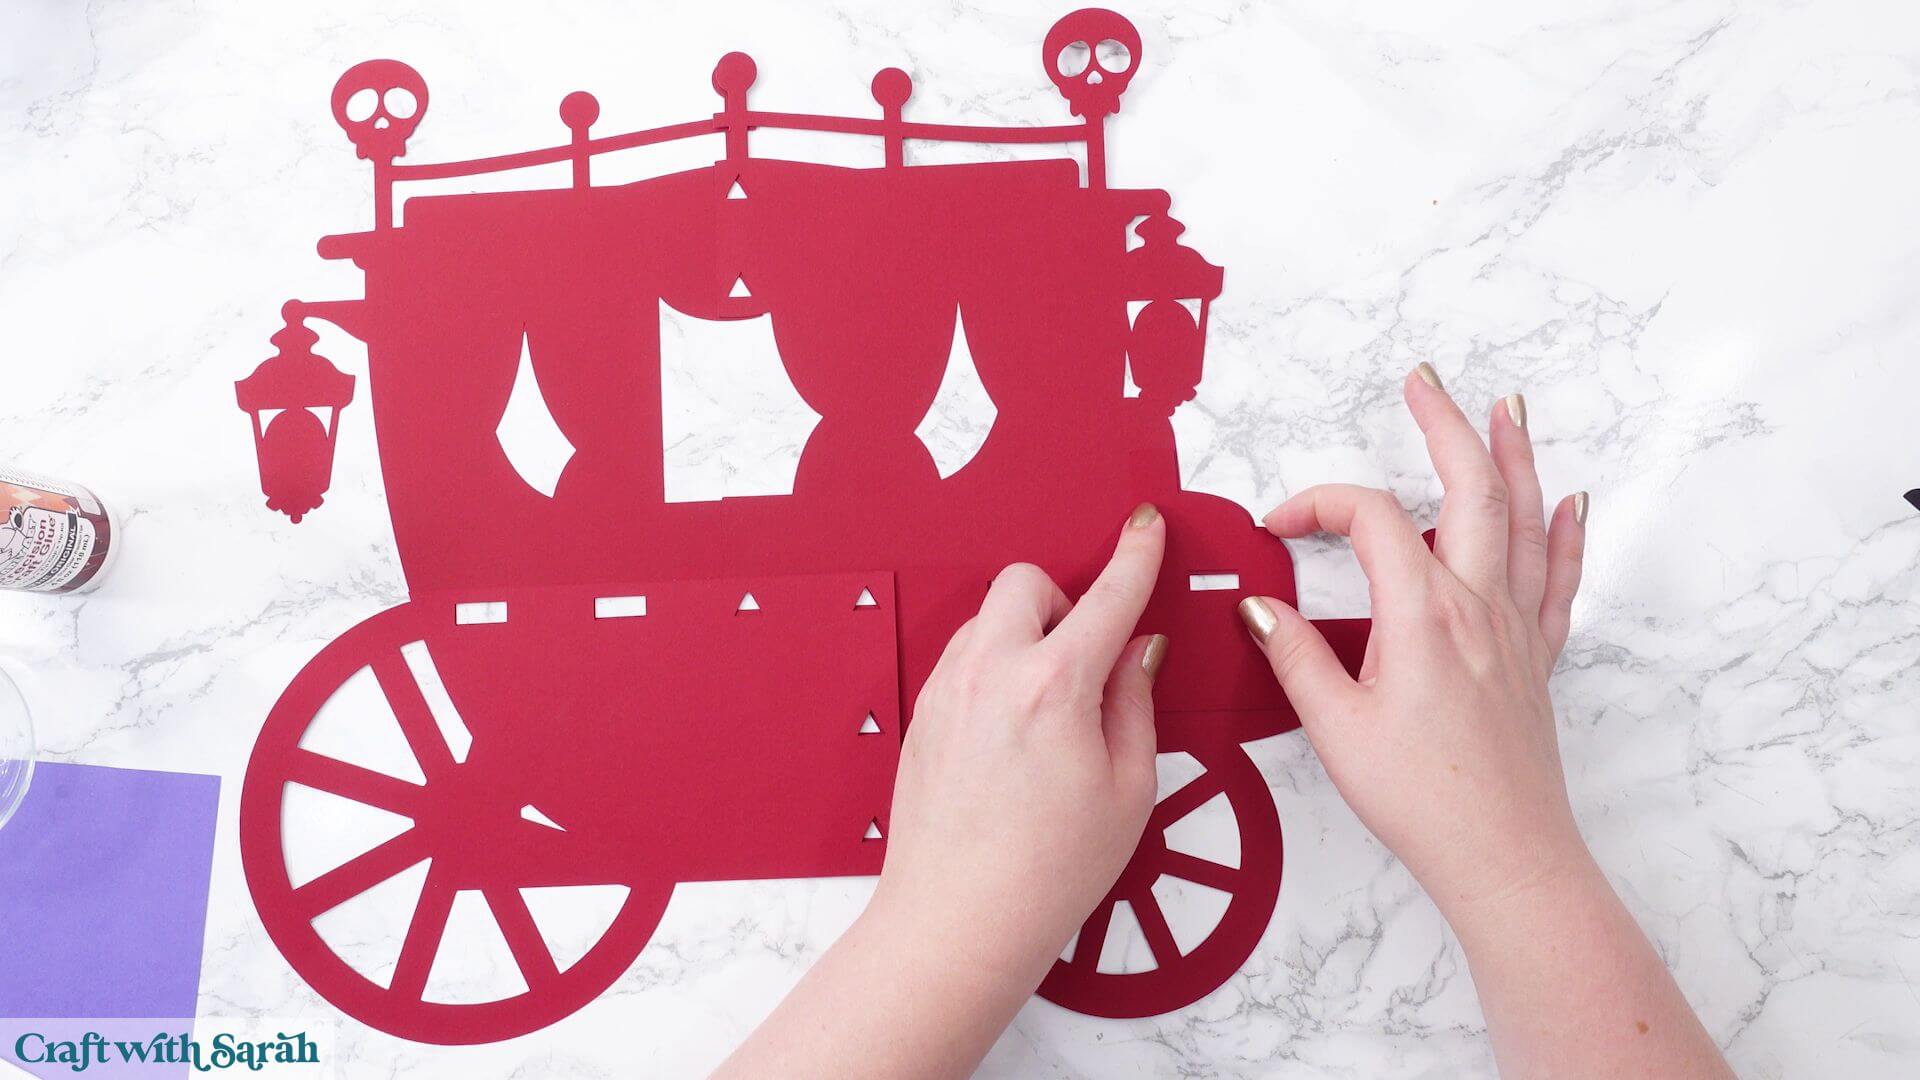
There are shapes and openings in the pieces that you can use as guides for positioning them.
Add glue only slightly beyond these shapes onto the areas that will overlap.
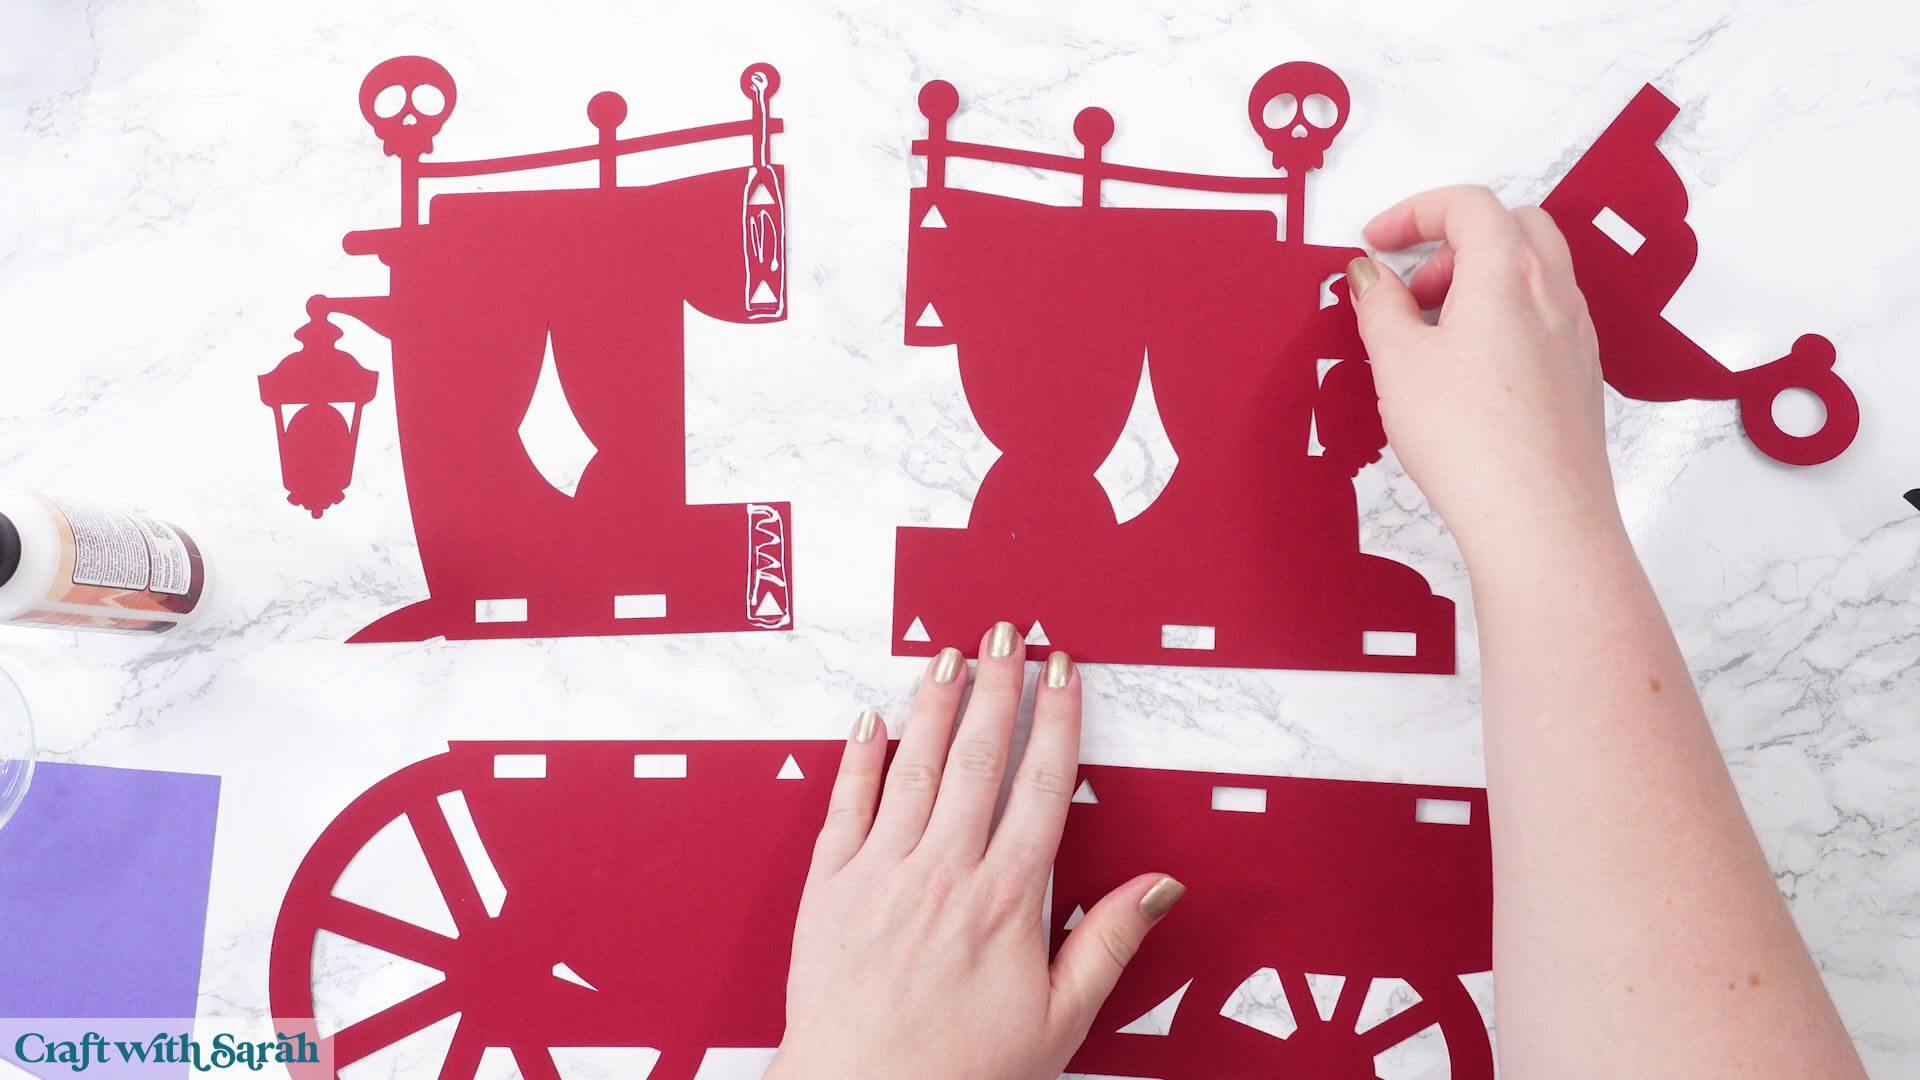
Try to get the openings and edges aligned as accurately as possible. This is important because all of the remaining carriage layers will be positioned on top of this base.
For the final section, it may be easier to add the glue directly to the back of the piece.
Don’t put glue on any areas that don’t have cardstock underneath them, otherwise you’ll accidentally glue the carriage to your work surface.
Use the circular and rectangular openings as guides, but prioritize getting the outer curved edge of the carriage neat.
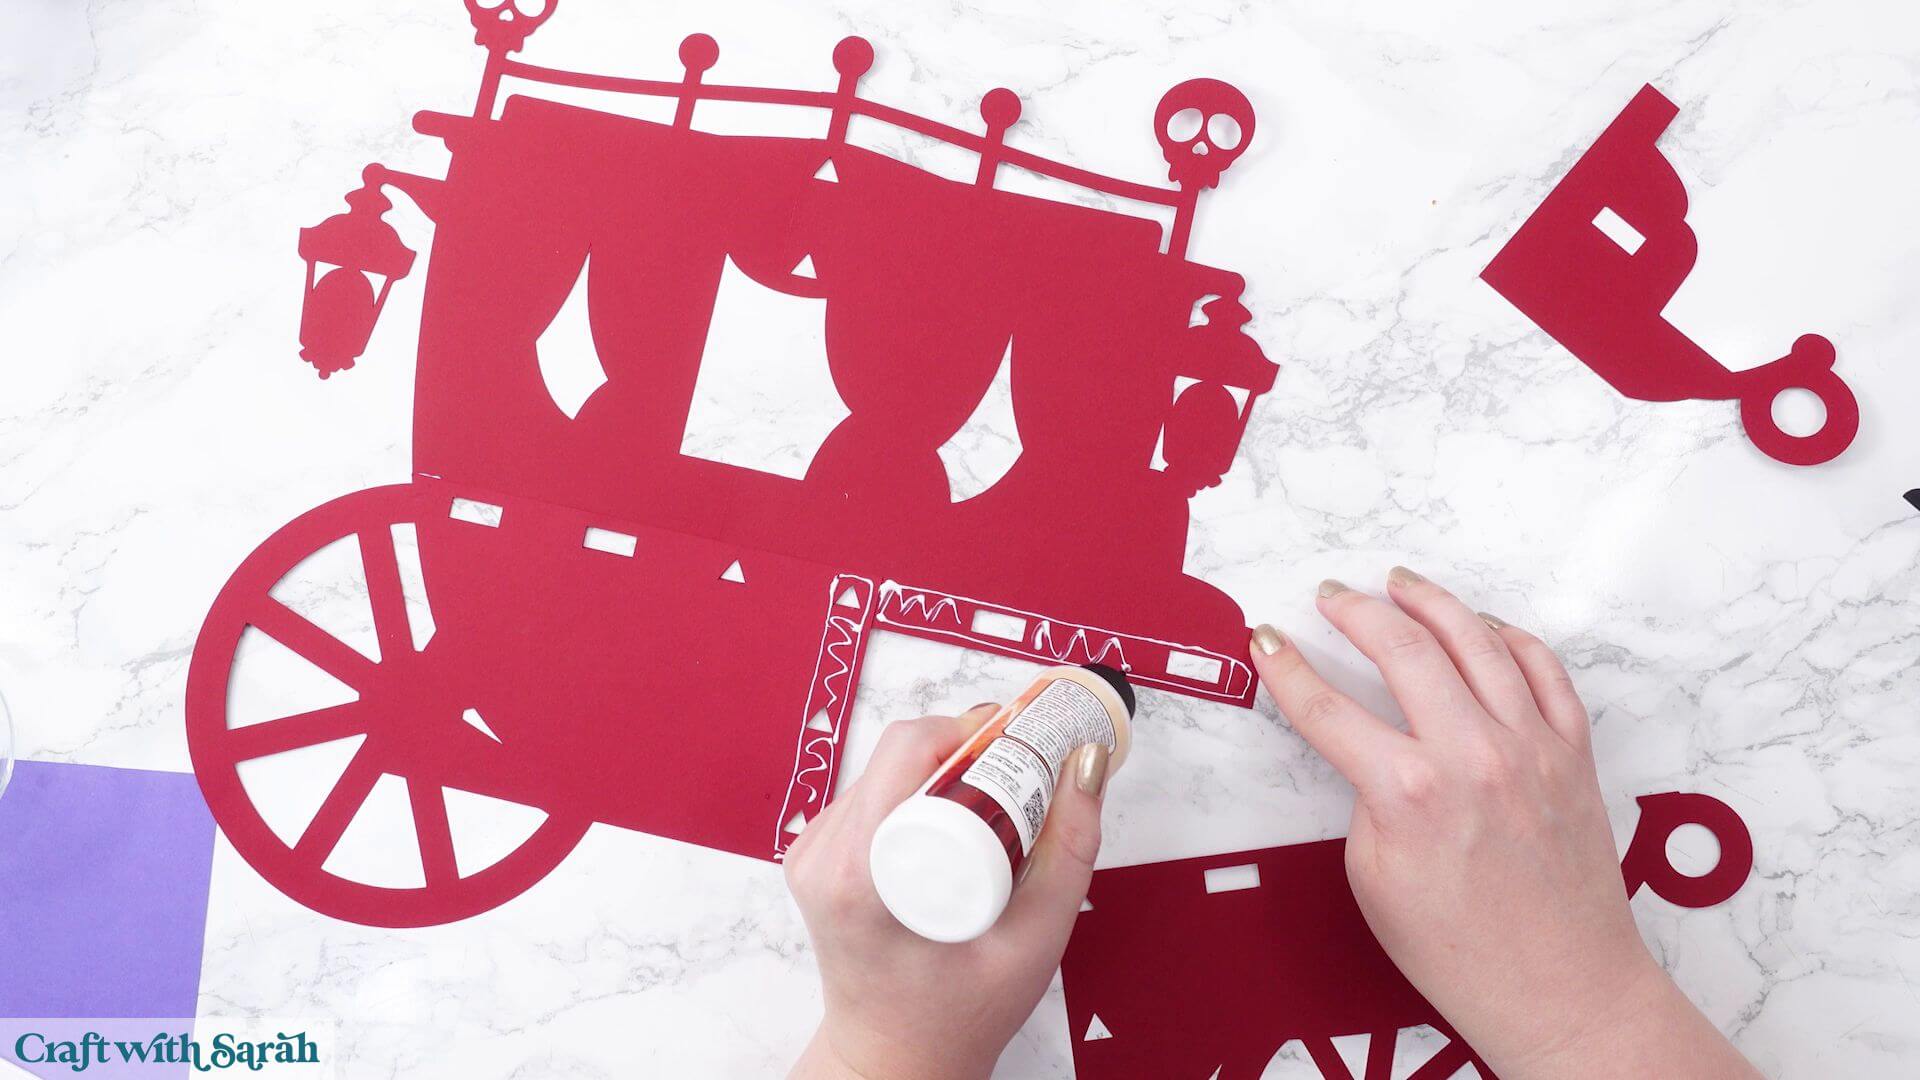
A tiny amount of misalignment in the internal openings isn’t the end of the world, as much of it will eventually be covered.
Once this layer is finished, you’ve completed one of the trickiest stages and have a full-size template to help position everything else.
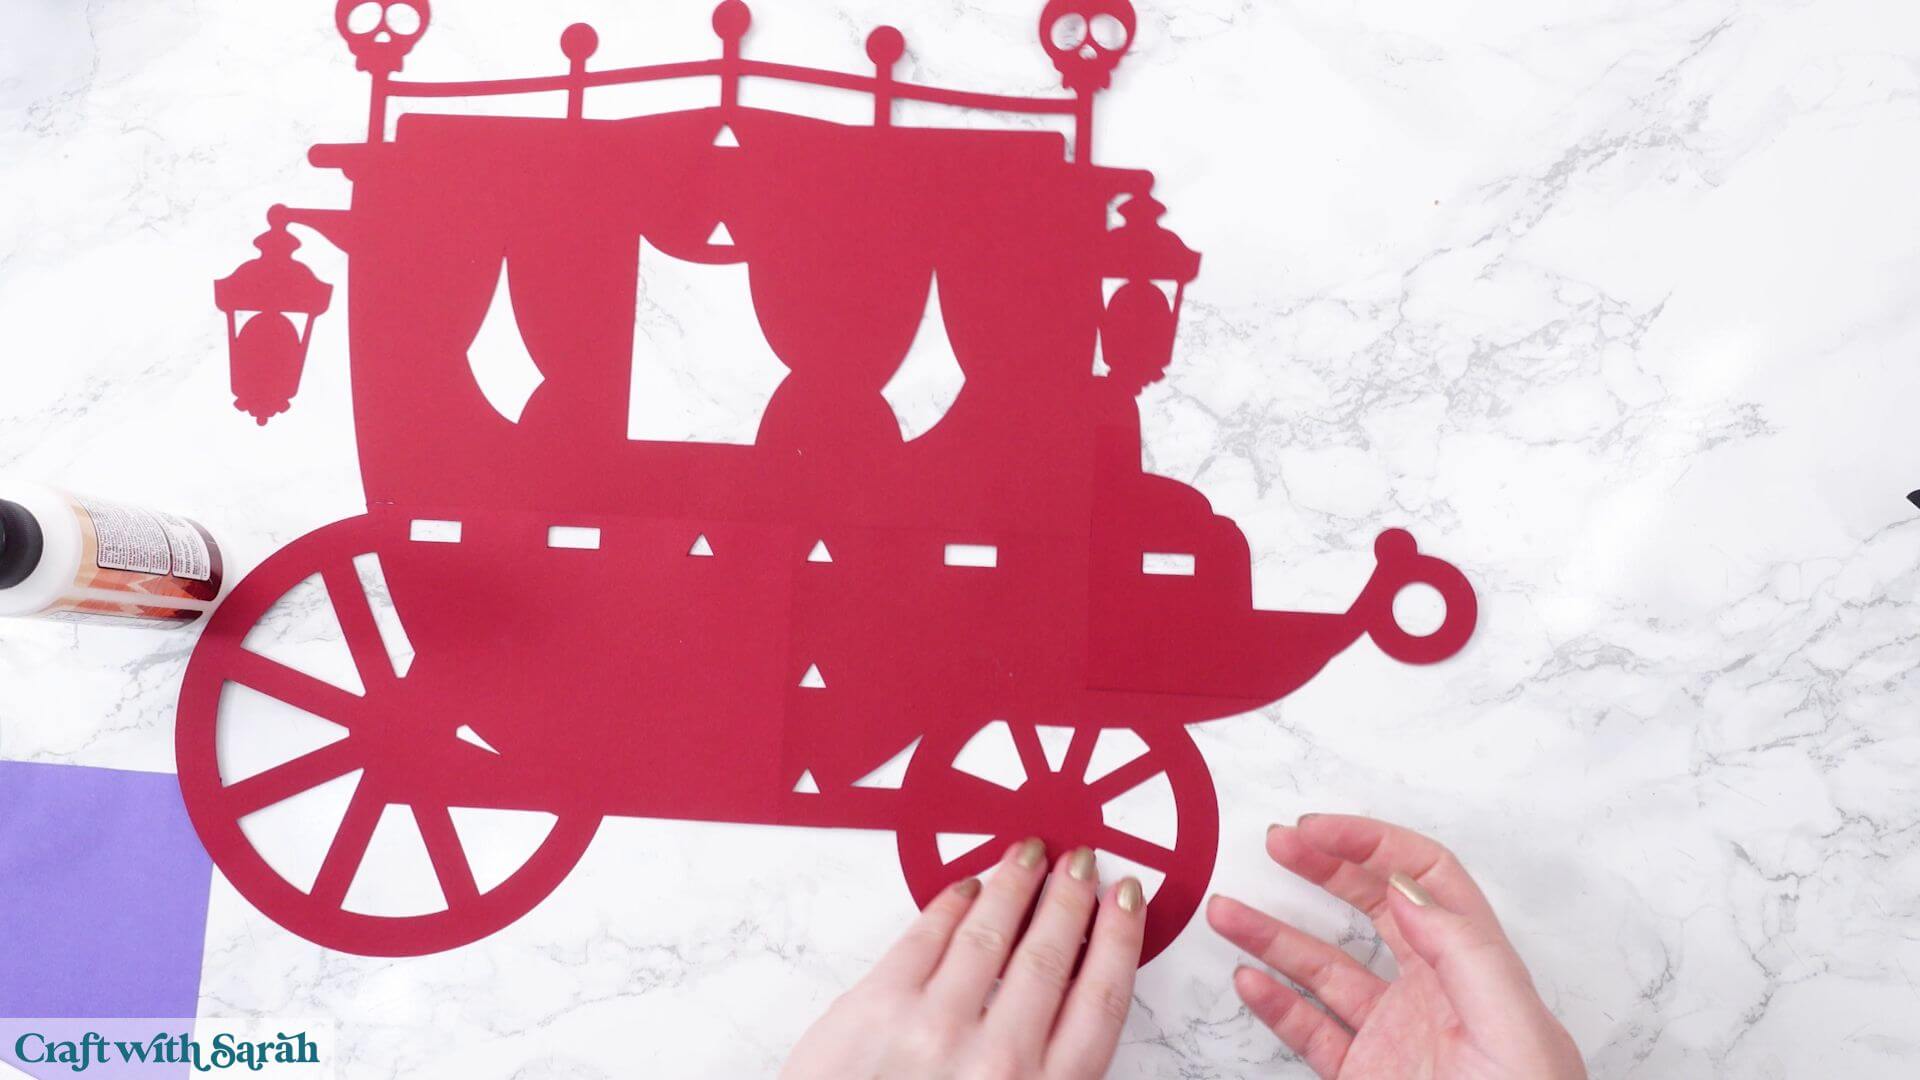
Carriage Part B) Add the purple window piece
Turn the carriage over.
Take the large purple rectangle and glue it behind the openings to fill in the windows.
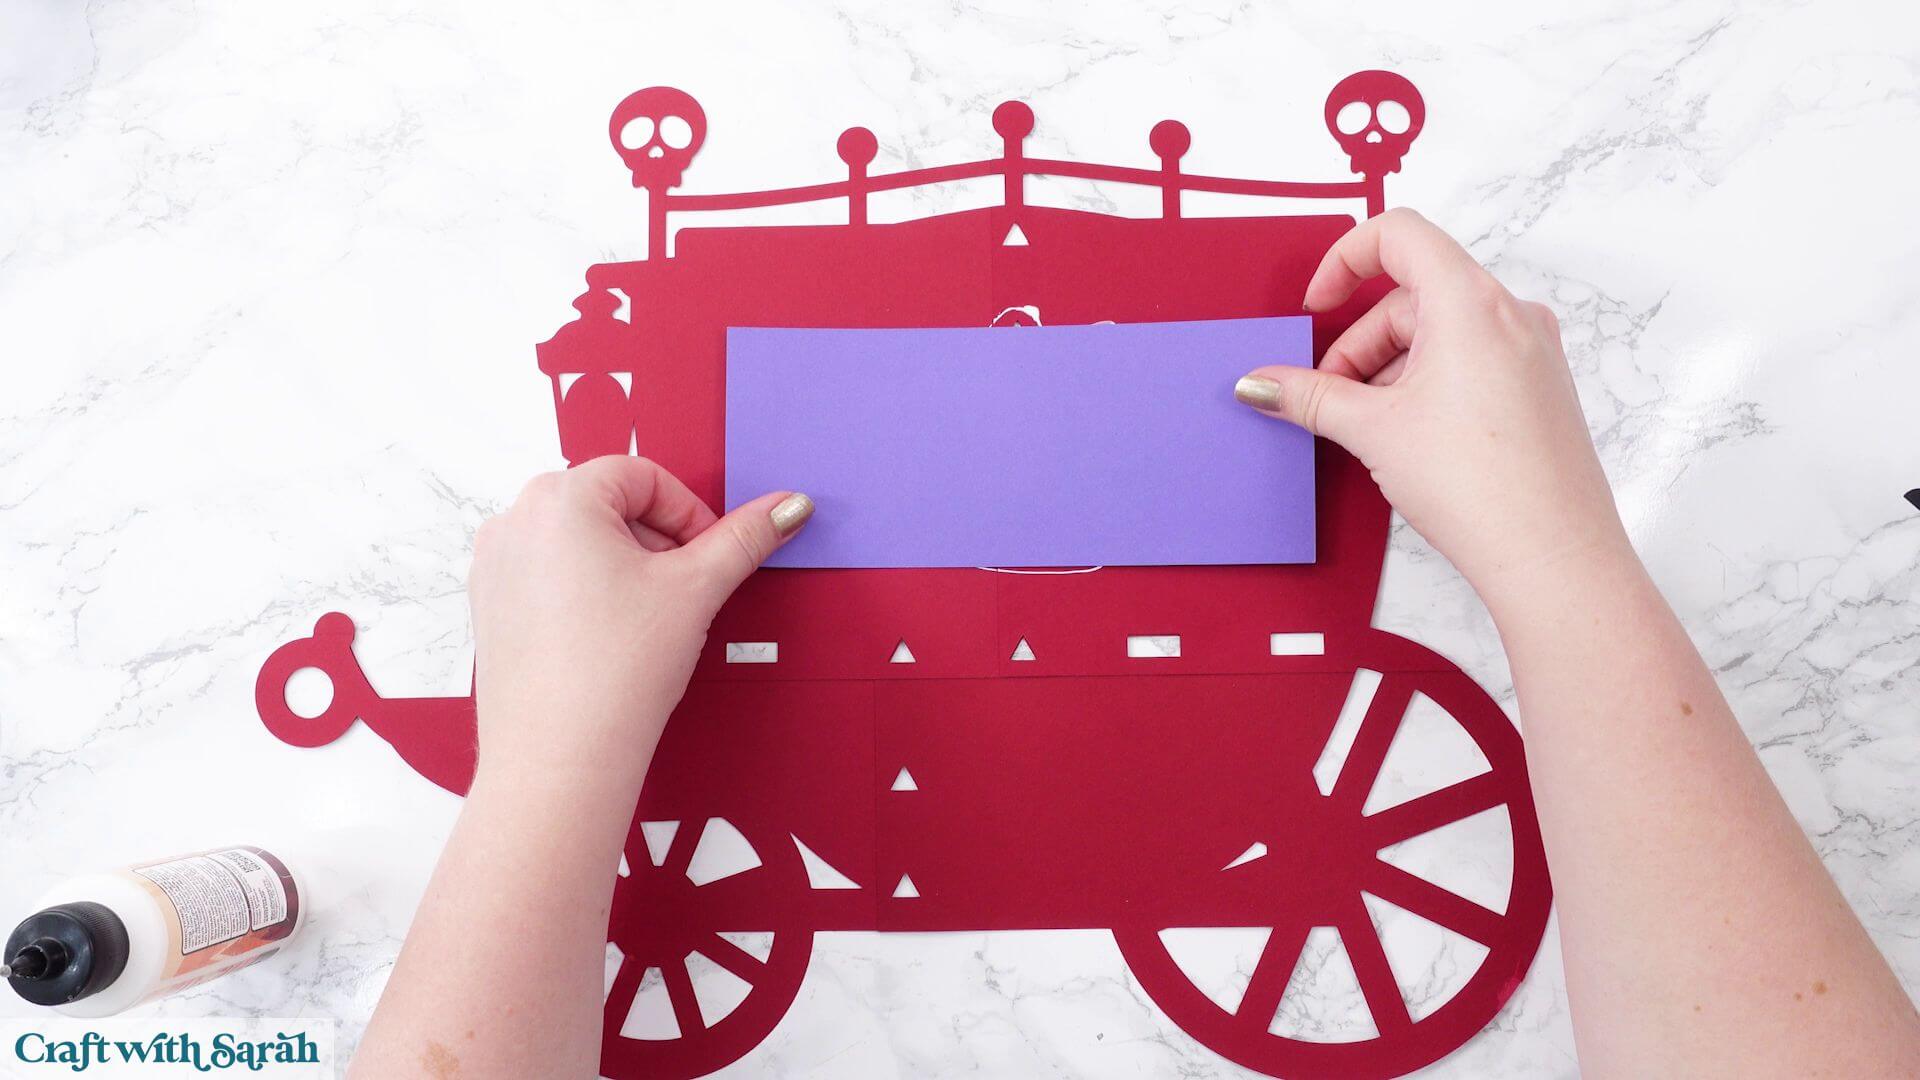
Carriage Part C) Add the grey layer that comes in pieces
The next carriage layer consists of four dark grey sections.
These are attached with foam squares.
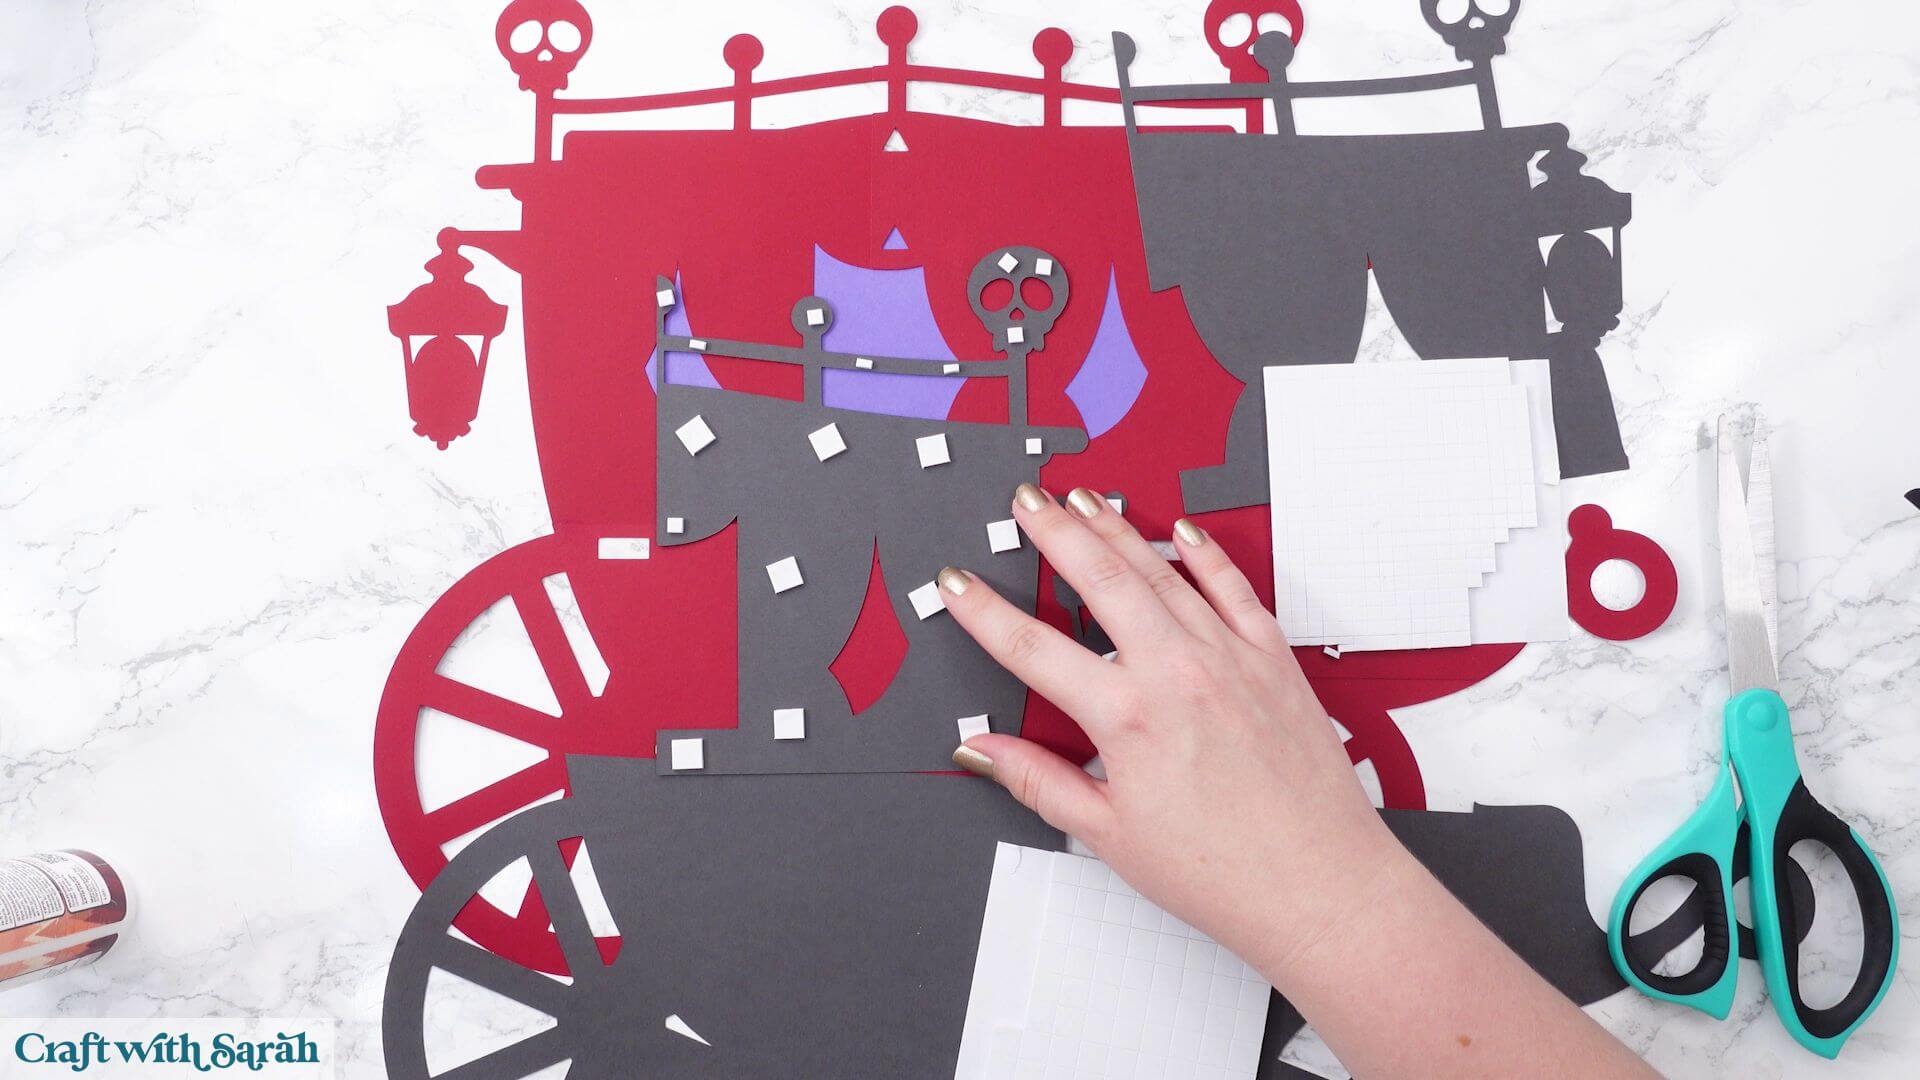
Unlike the base layer, these pieces don’t need to overlap significantly. Instead, they’ll push up against one another to create the complete shape.
Don’t worry about seeing the joins at this stage. Later decorative layers have been specifically positioned to disguise them.
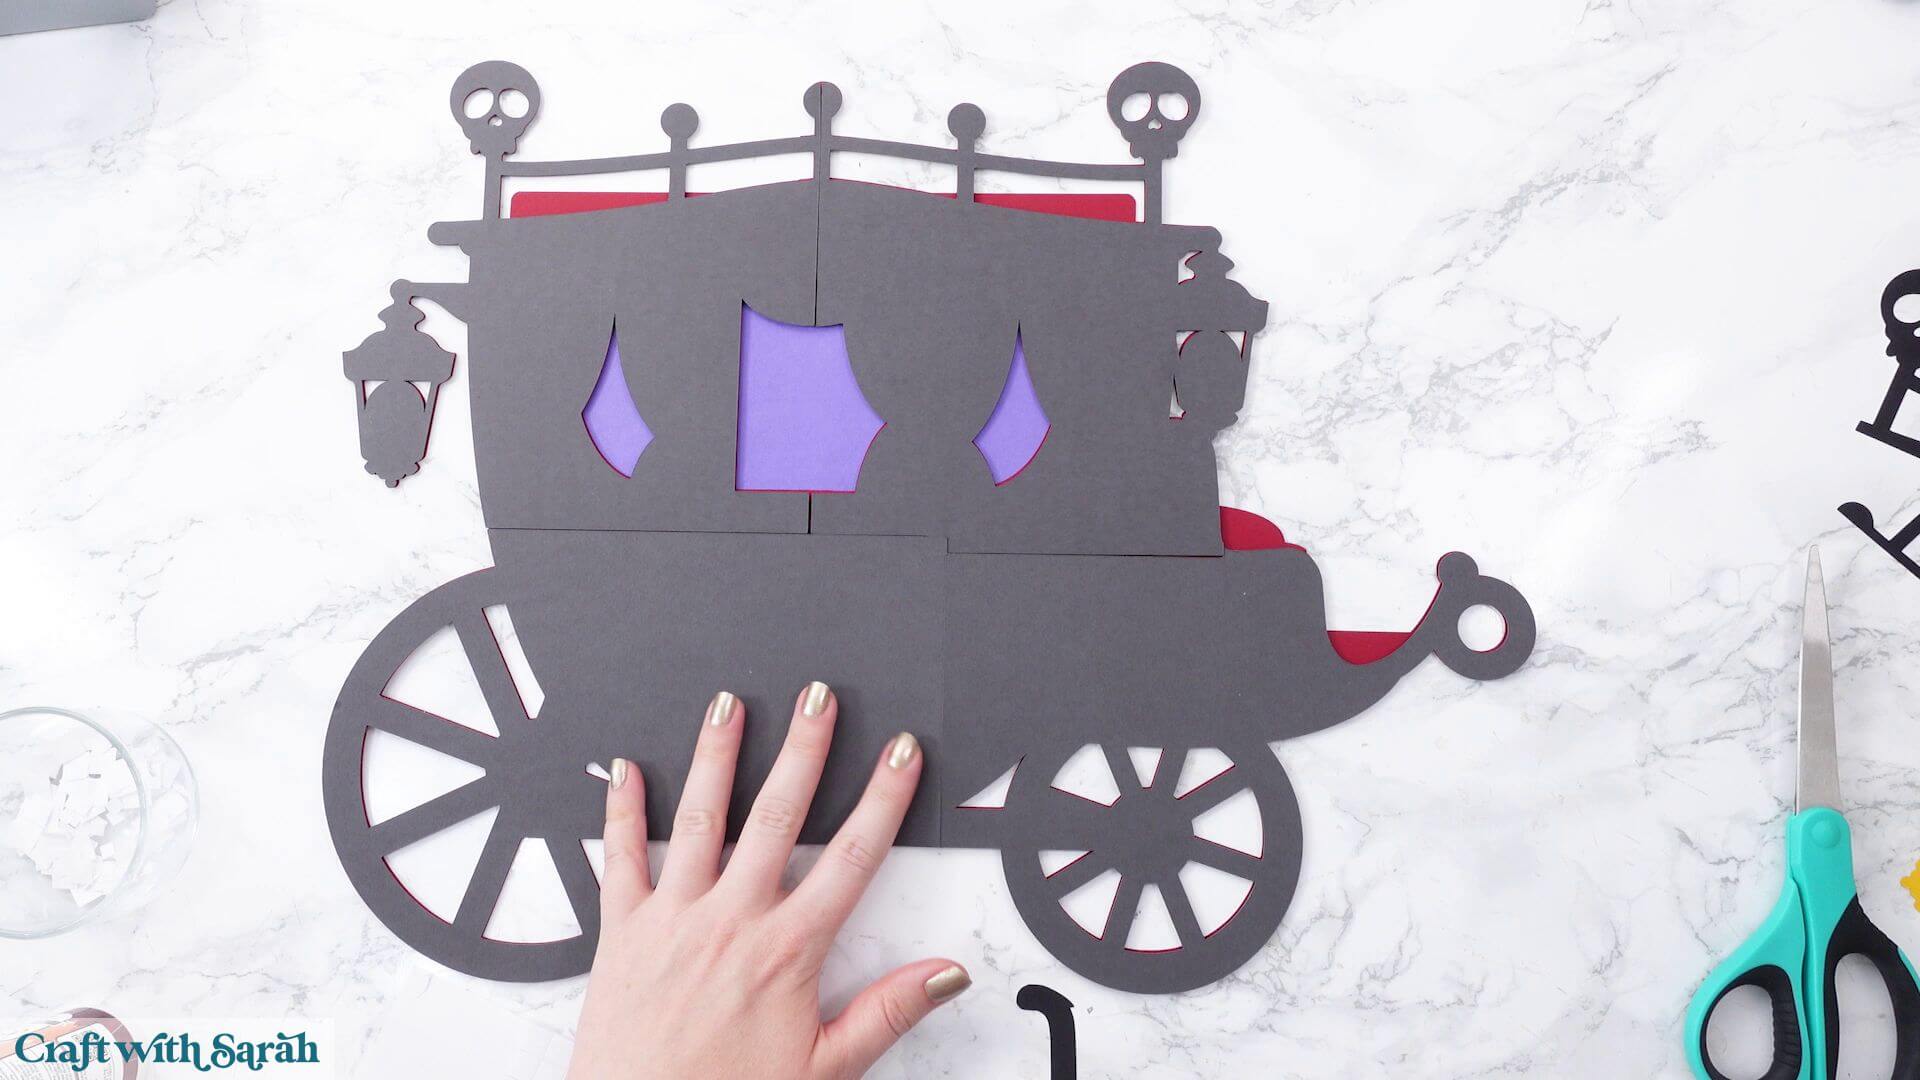
Work on one section at a time.
Add foam squares around the edges and throughout the larger internal areas so that the cardstock remains evenly supported.
For narrow sections such as the railings, cut your foam squares smaller if necessary.
Avoid placing foam squares over any holes or too close to an edge where another piece may overlap.
Position each section onto the dark red base.
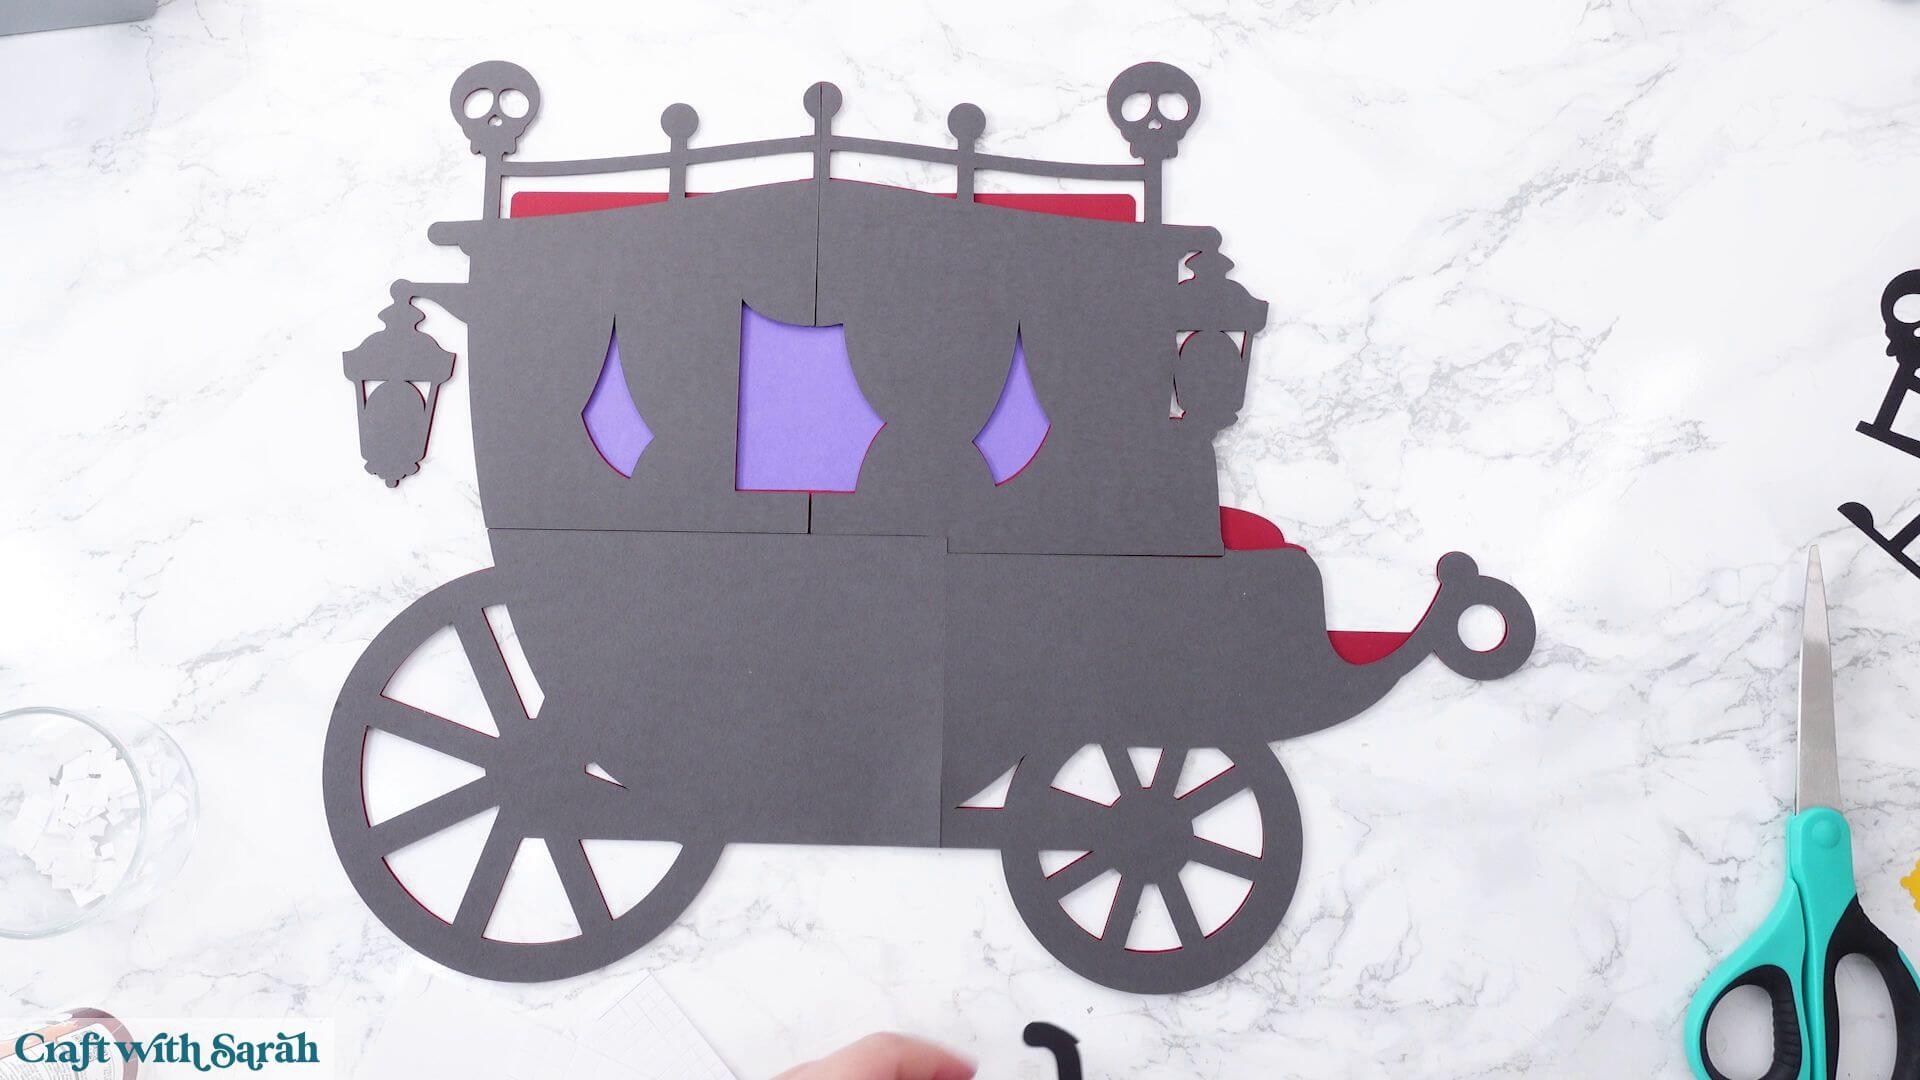
When lining them up, prioritize getting the outside edges of the carriage as neat as possible. Small gaps between the sections in the middle aren’t a problem because they’ll be hidden later.
Repeat until all four grey sections are attached.
Carriage Part D) Cover the first join lines
Now we can start hiding all those joins.
Glue the first black decorative section into position. This covers one of the visible join lines in the grey cardstock.
Next, glue the two black railing pieces along the top. These push against each other in the middle.
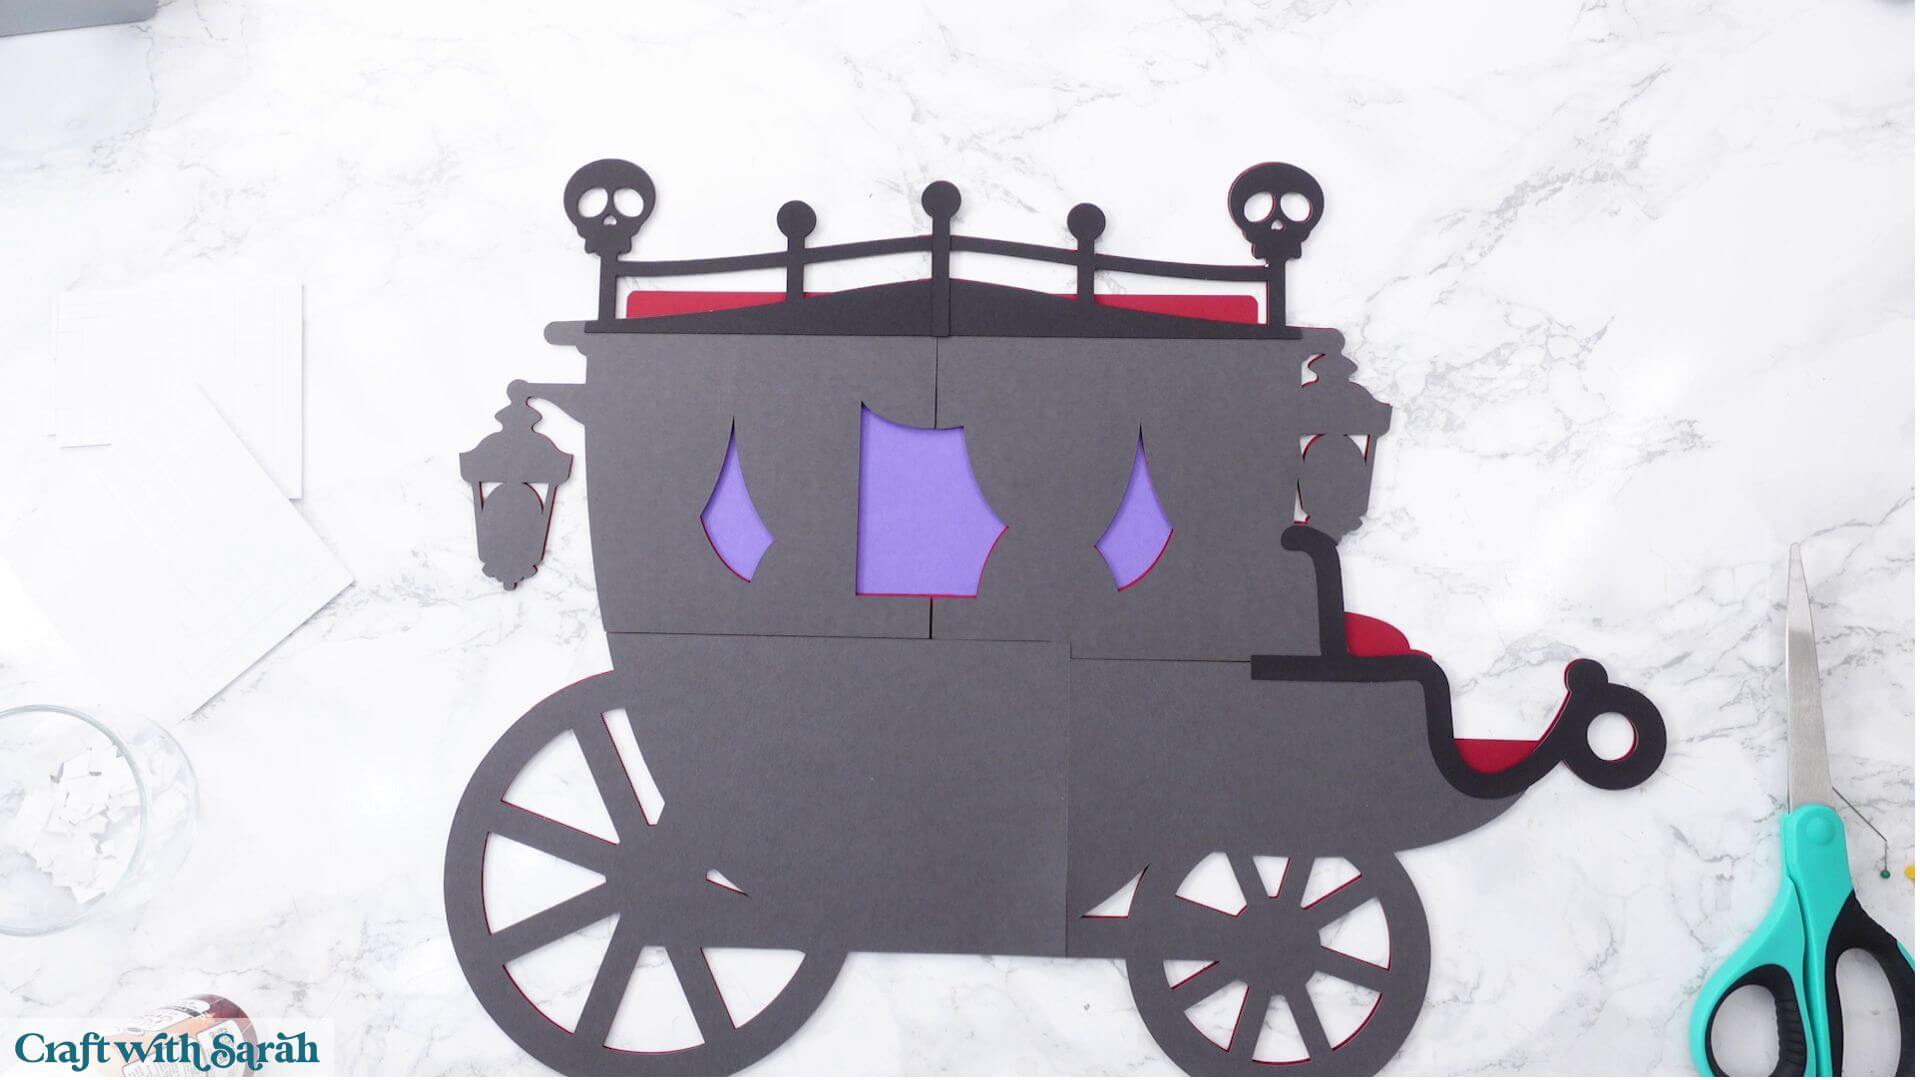
Glue the additional decorative piece over their meeting point to disguise the join.
Once that’s in place, the separate sections begin to look like one continuous piece of cardstock.
Glue the green curtain layer over the three window openings.
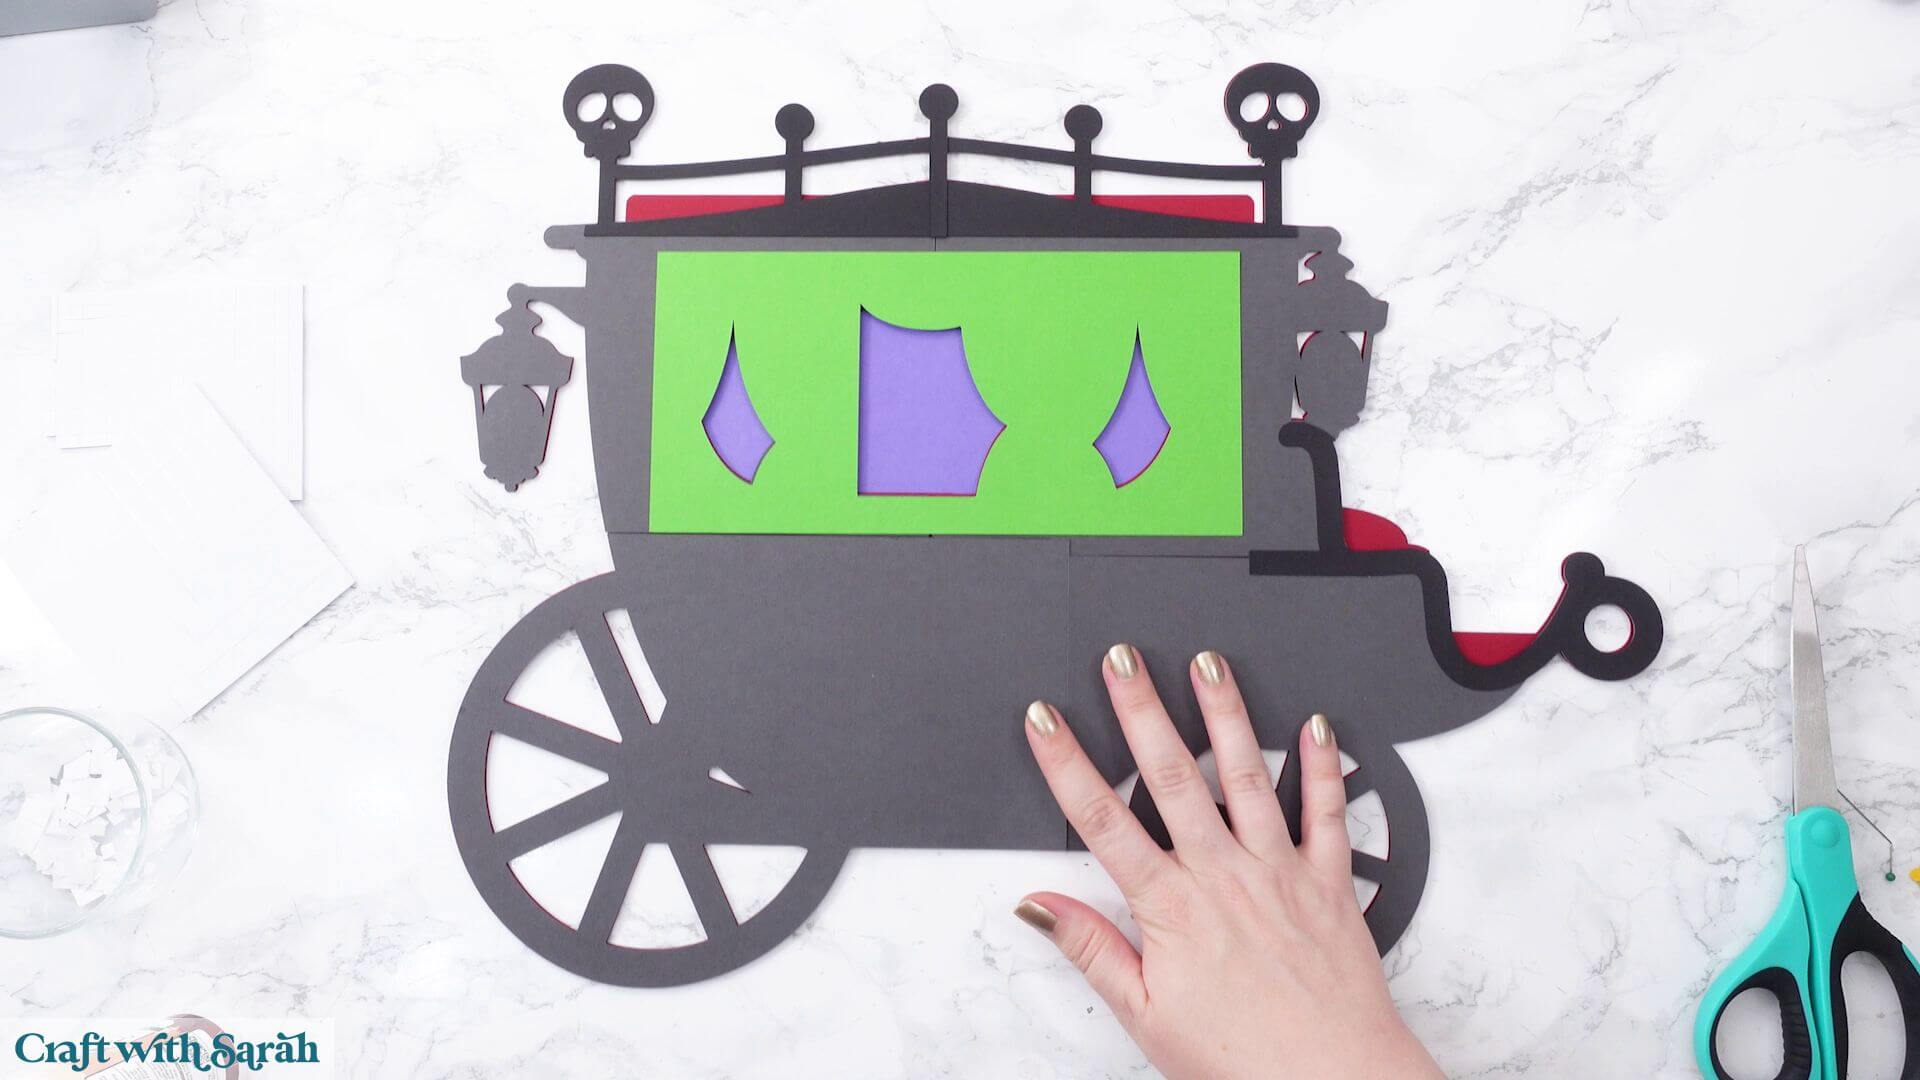
Carriage Part E) Numbered sections
The next pieces must be attached in a particular order.
Most of them have numbers cut into the cardstock to help you identify them. Don’t worry about those numbers showing, as they’ll all be covered by subsequent layers.
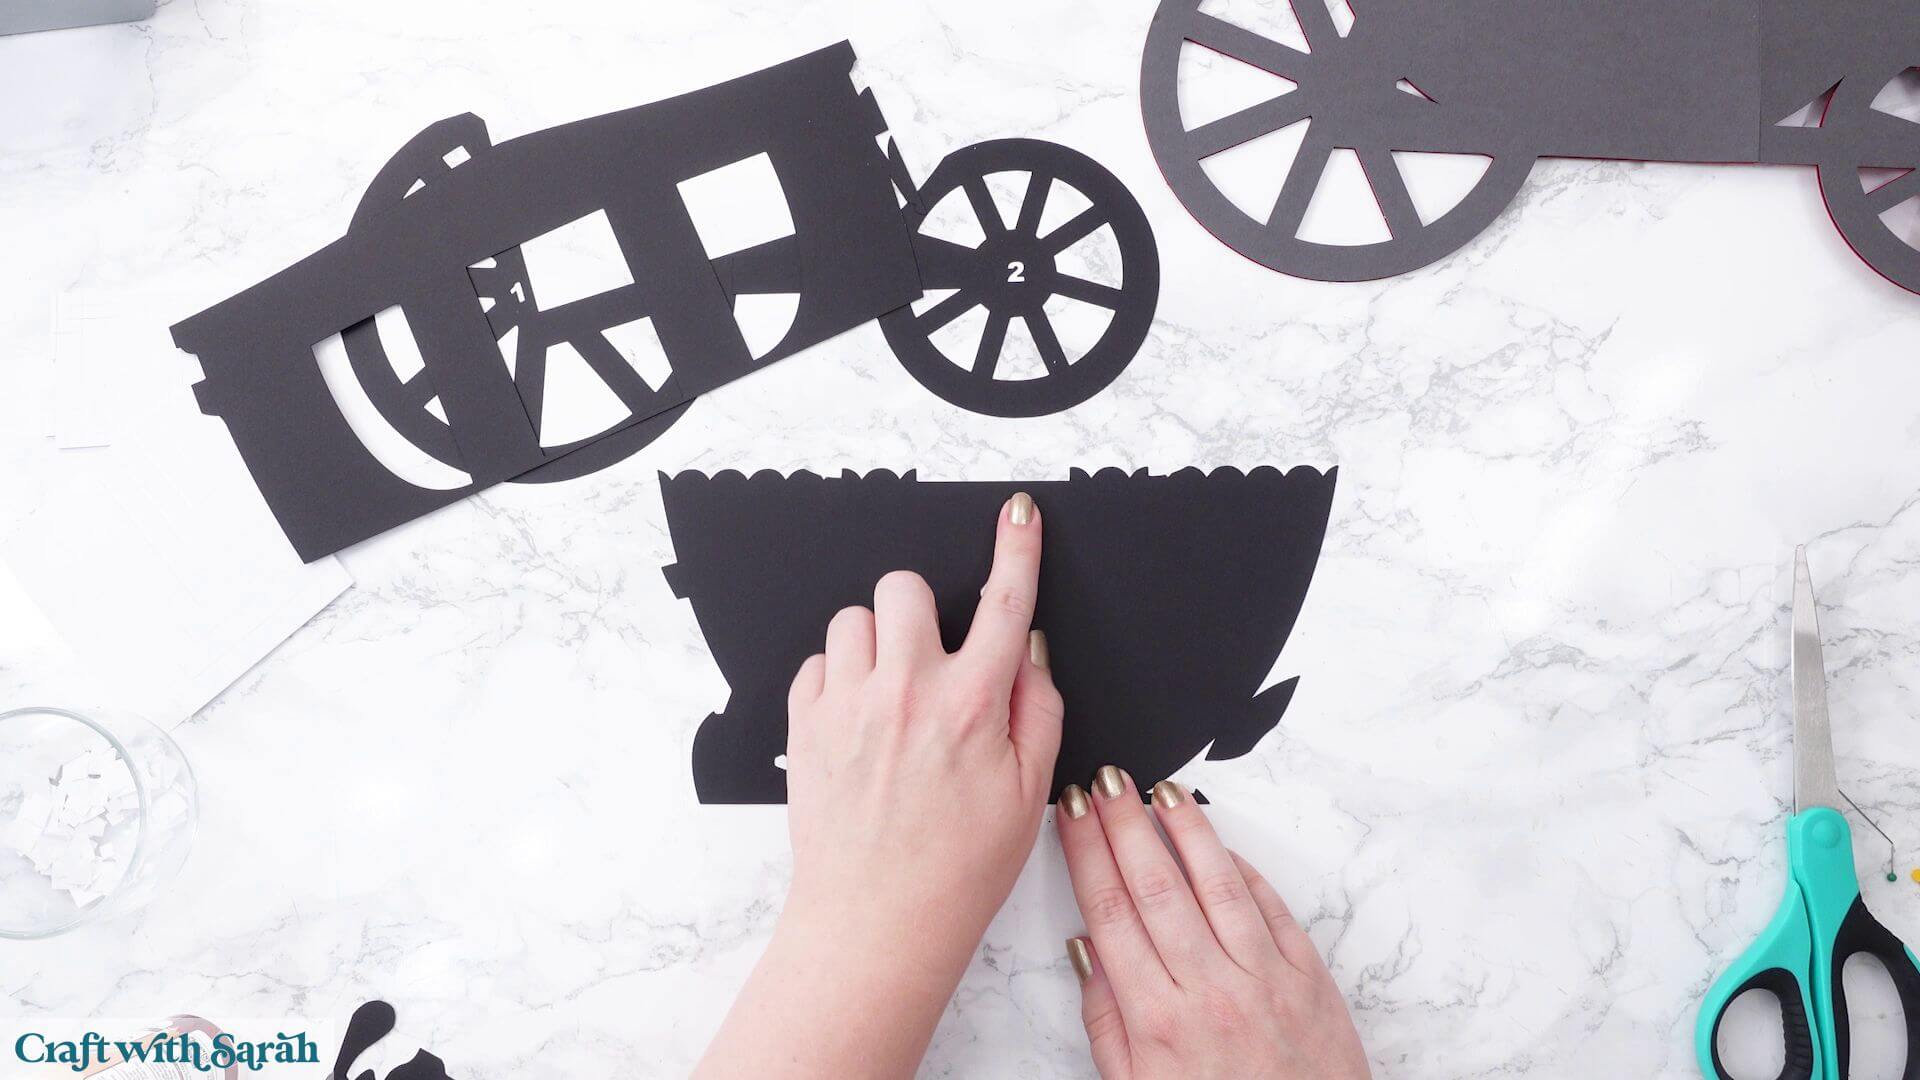
All of these pieces are attached with foam squares.
Start with number one and add foam squares across the back, including support around the wheel.
Attach it to the carriage.
Repeat with number two on the opposite side.
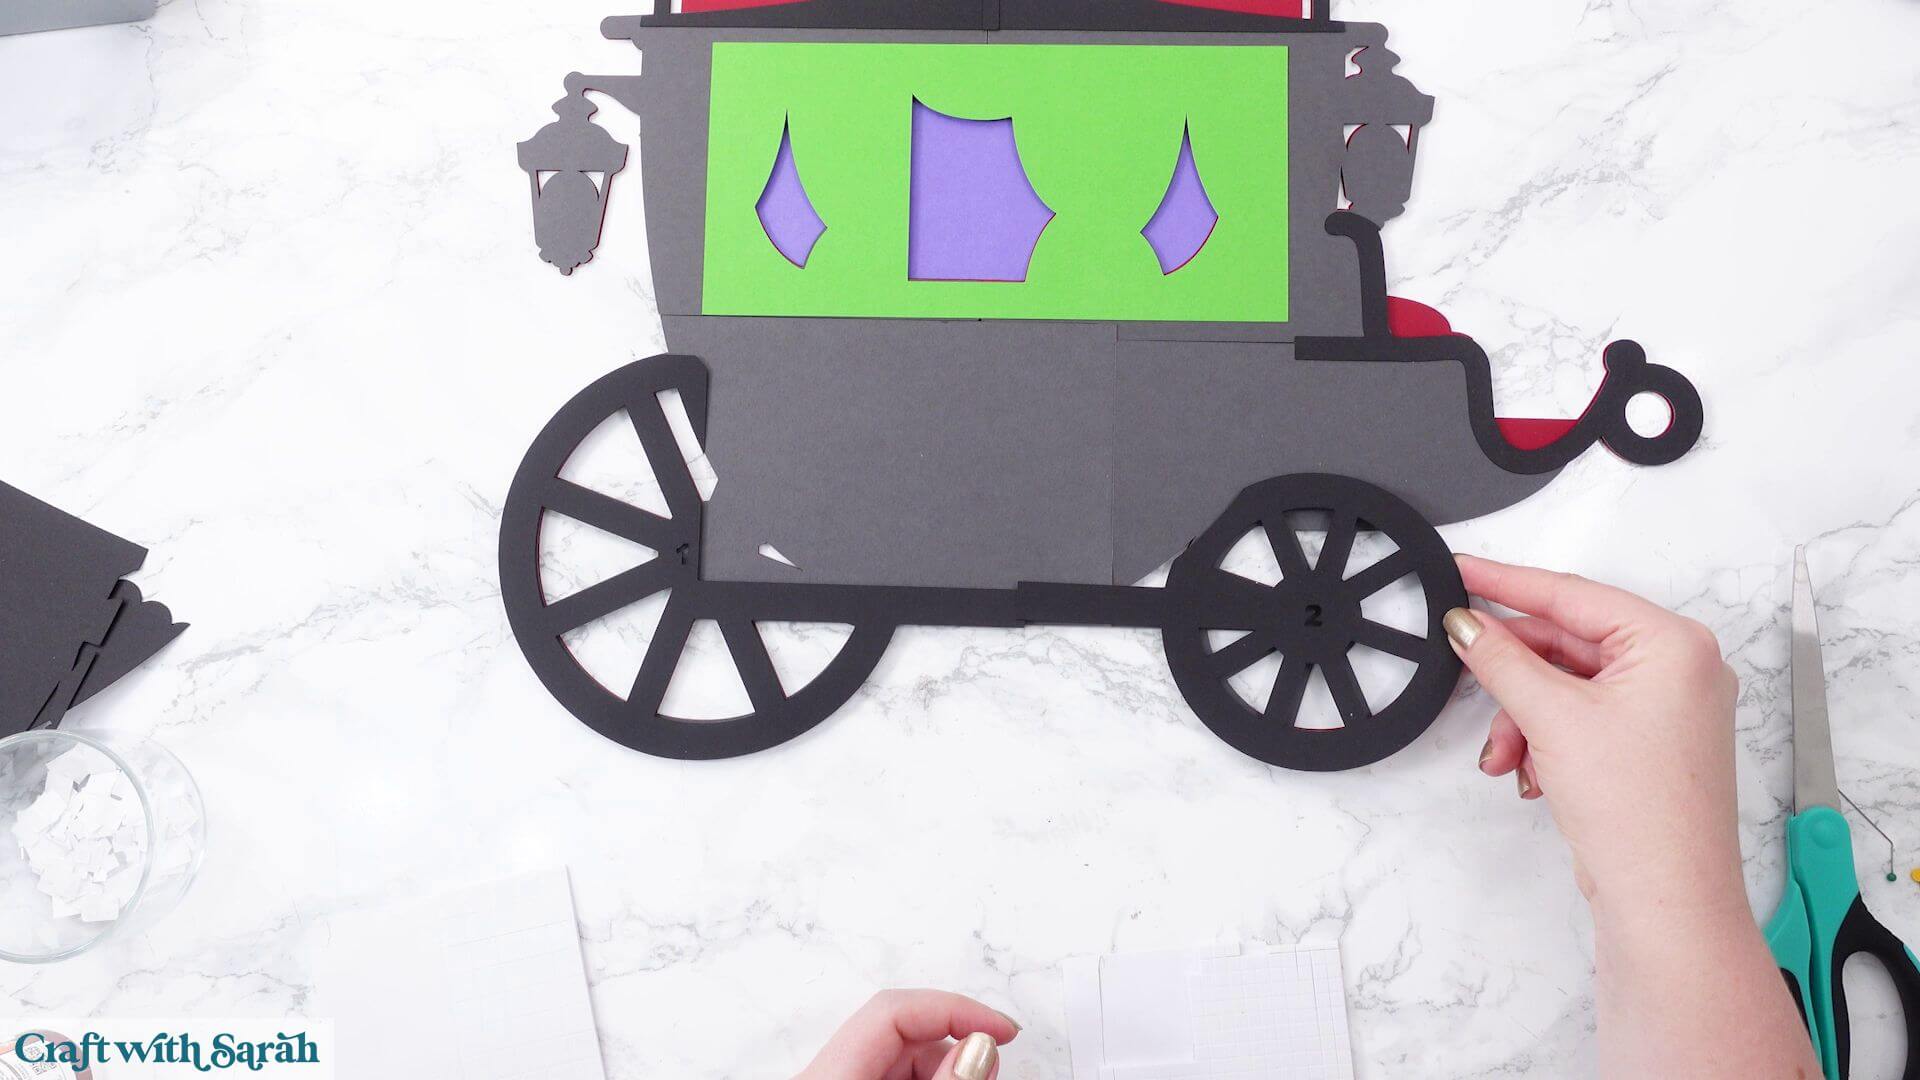
Next comes the unnumbered piece, which is effectively number three. Make sure you’ve got it facing the correct way. The extra lantern section should be on the right-hand side.
Use the curve of the carriage to help position it correctly.
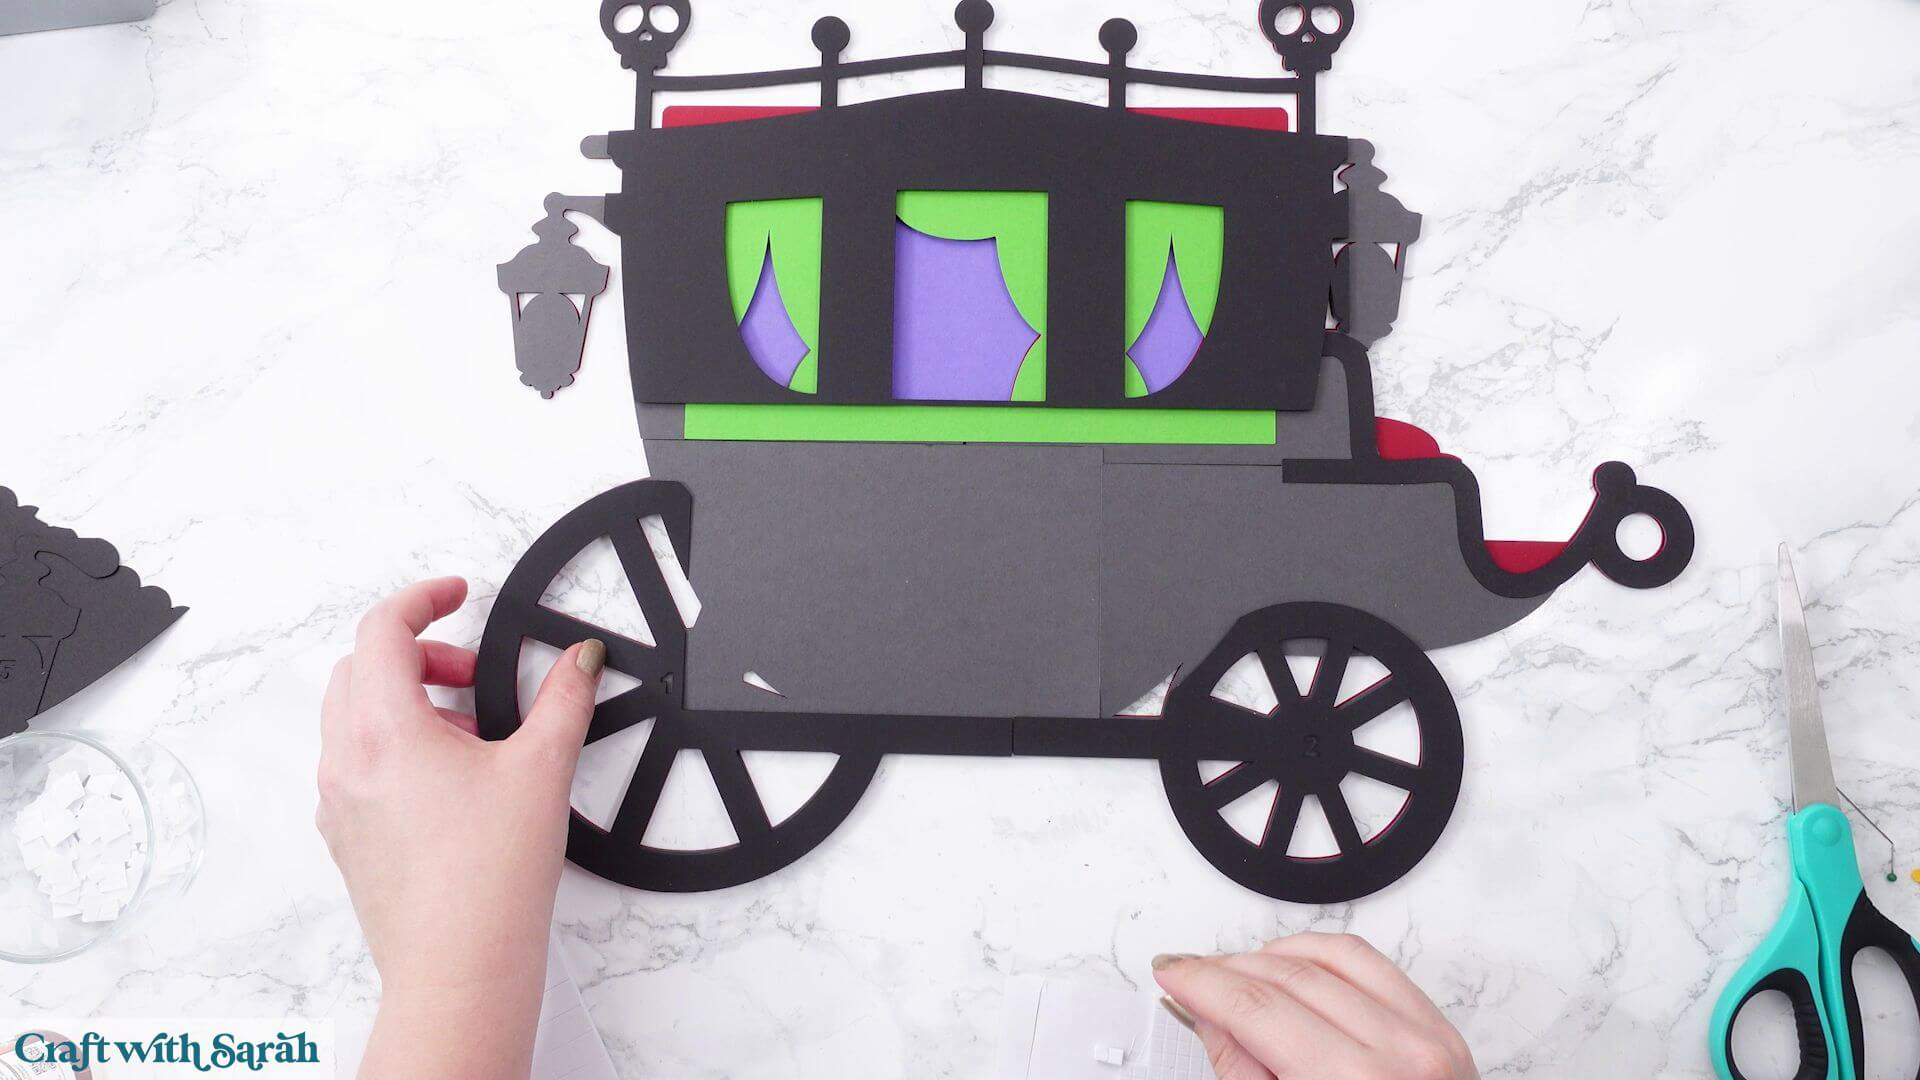
Next, attach number four. This overlaps slightly with the previous piece to create the scalloped edge.
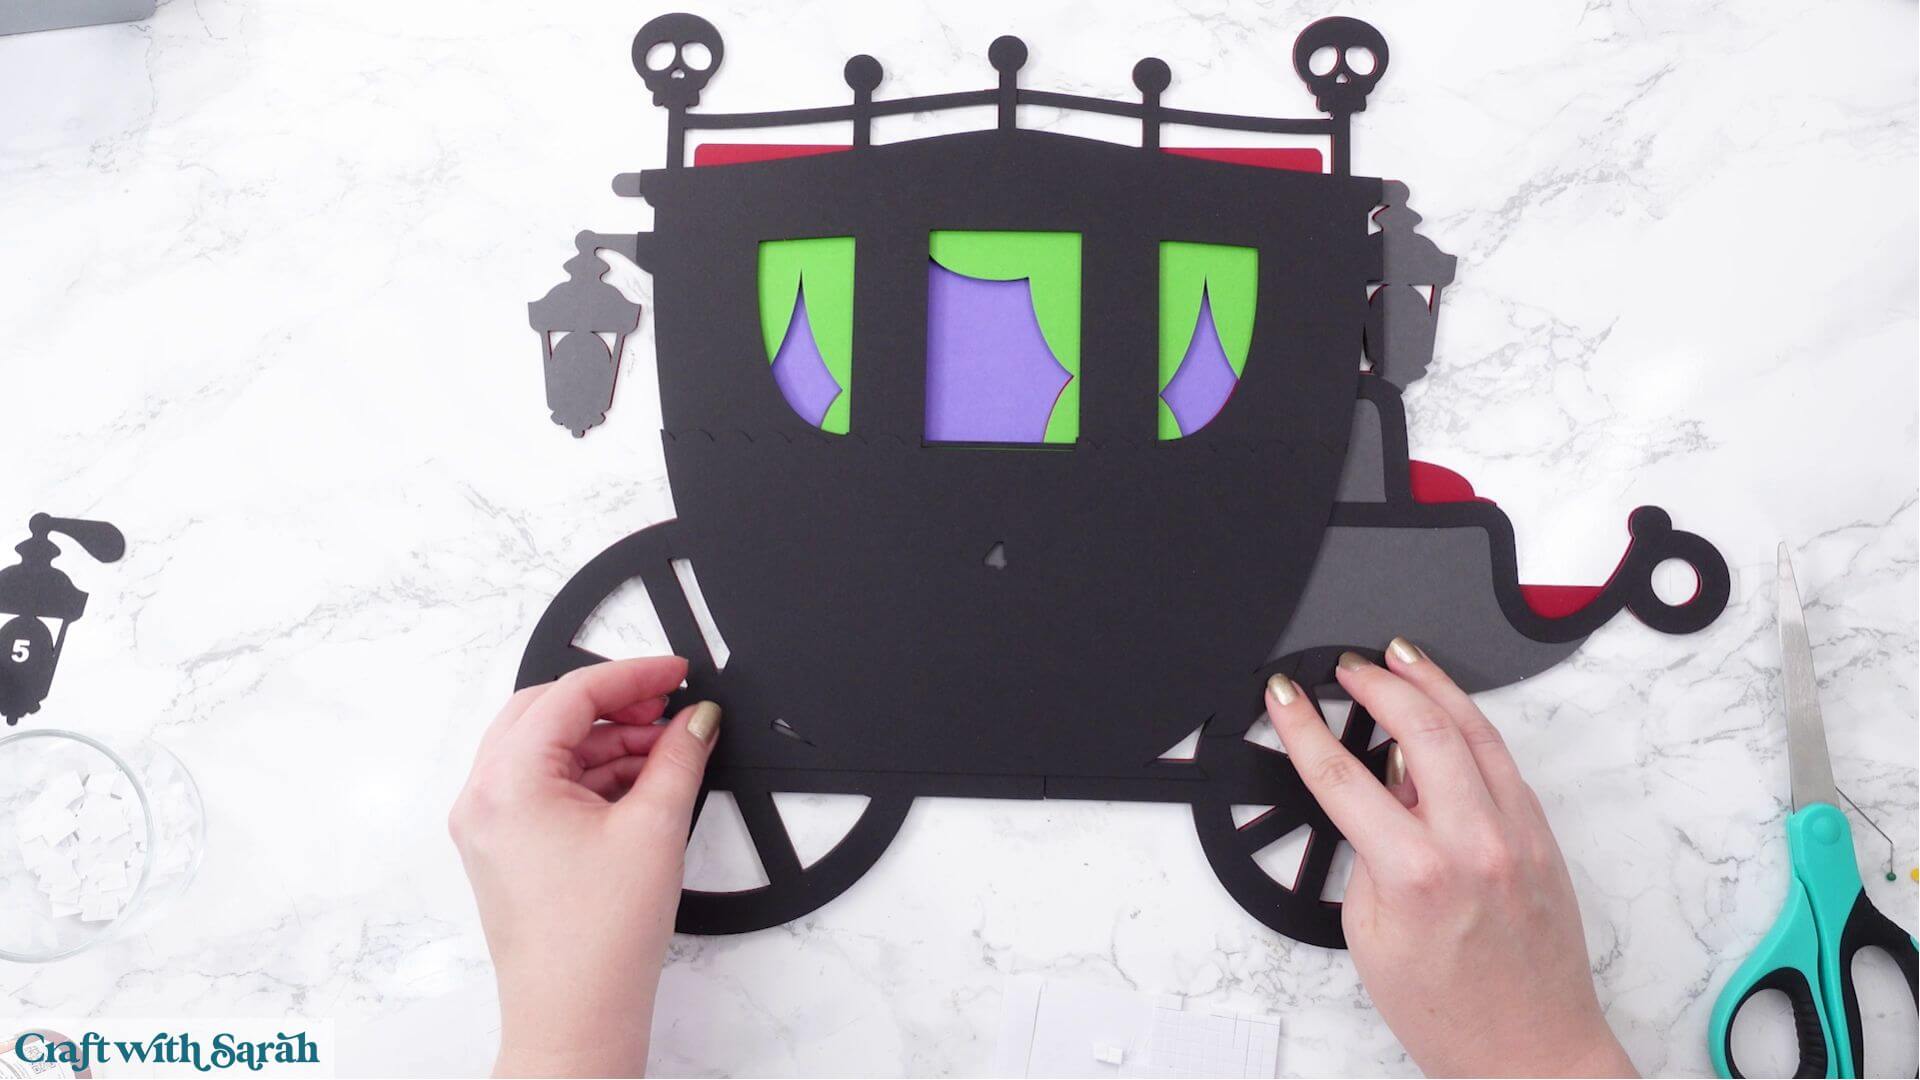
Avoid placing foam squares too close to the overlapping sections.
Use the openings and the edge of the wheel as guides to help you work out the correct position.
Then attach number five, the lantern-shaped piece. Again, avoid putting foam squares right into the corner where it overlaps the previous section.
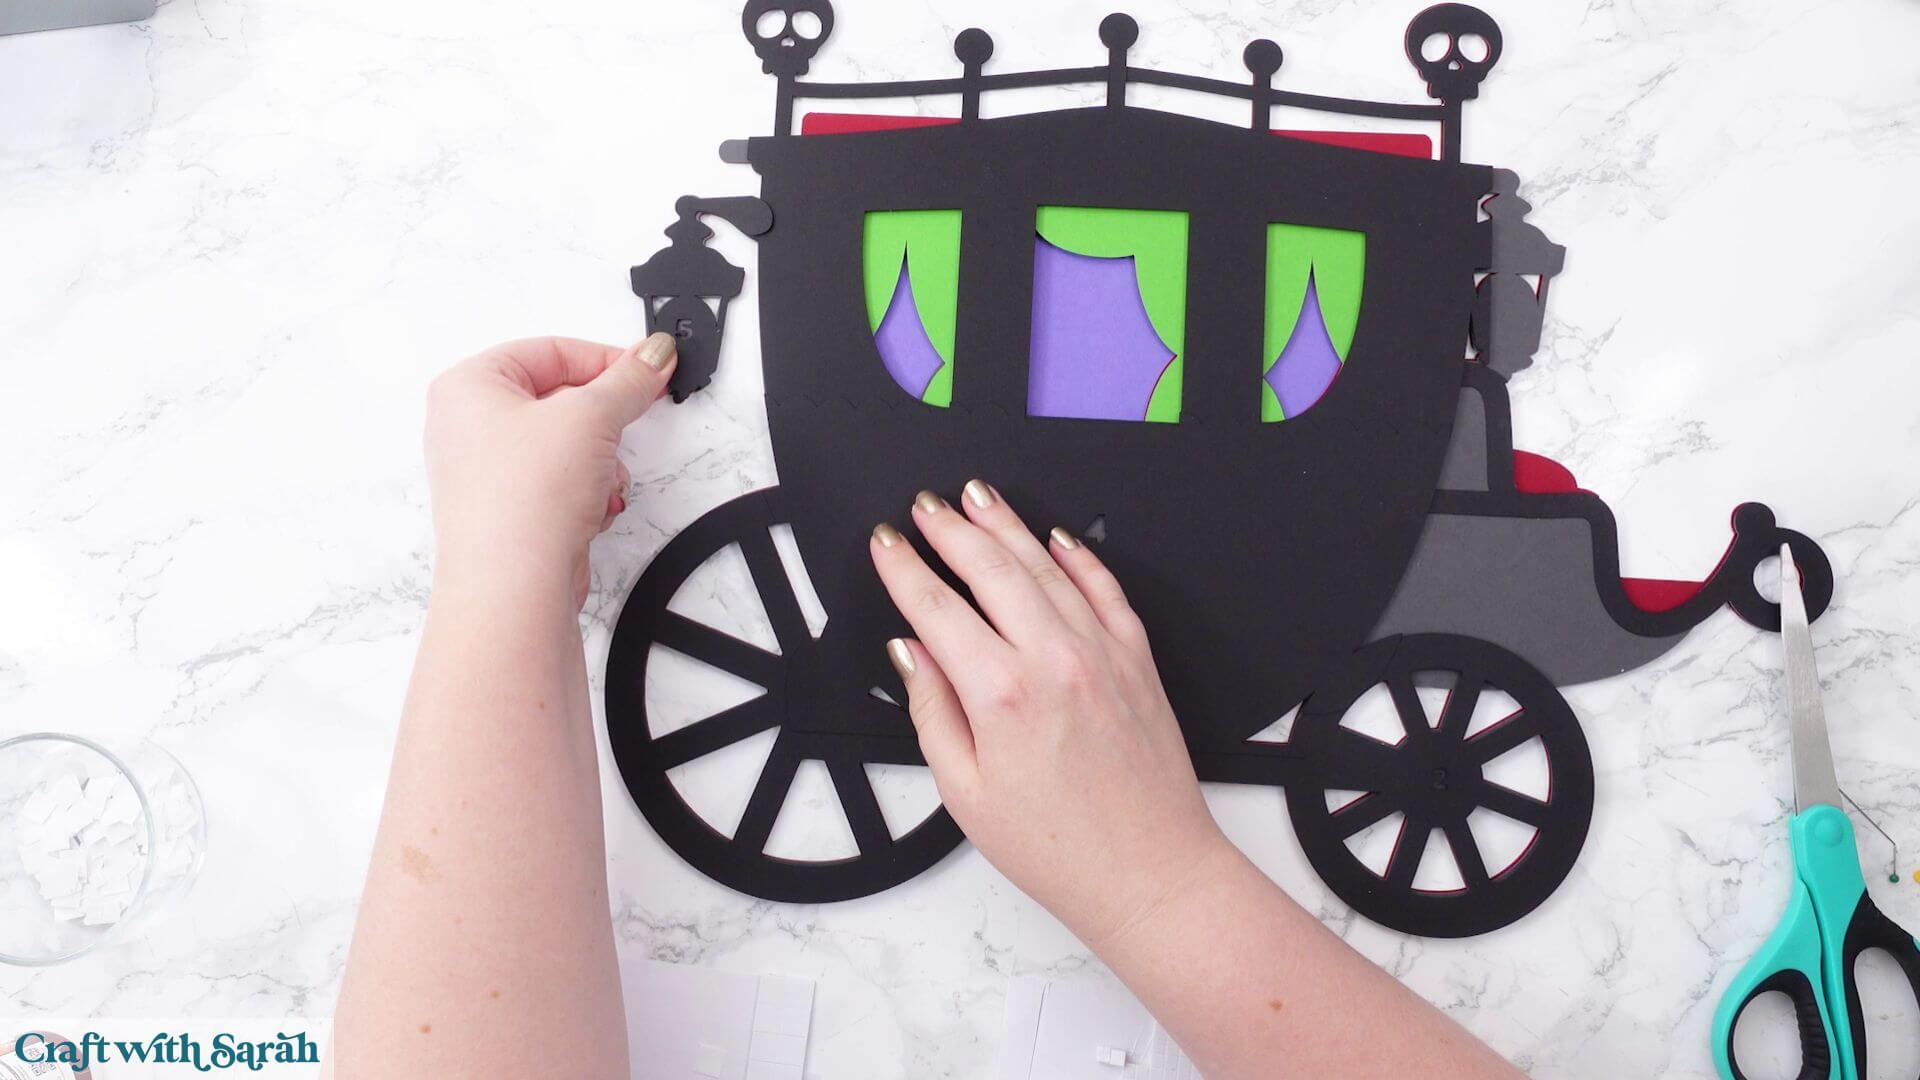
Finally, attach piece six so that it covers the lantern section.
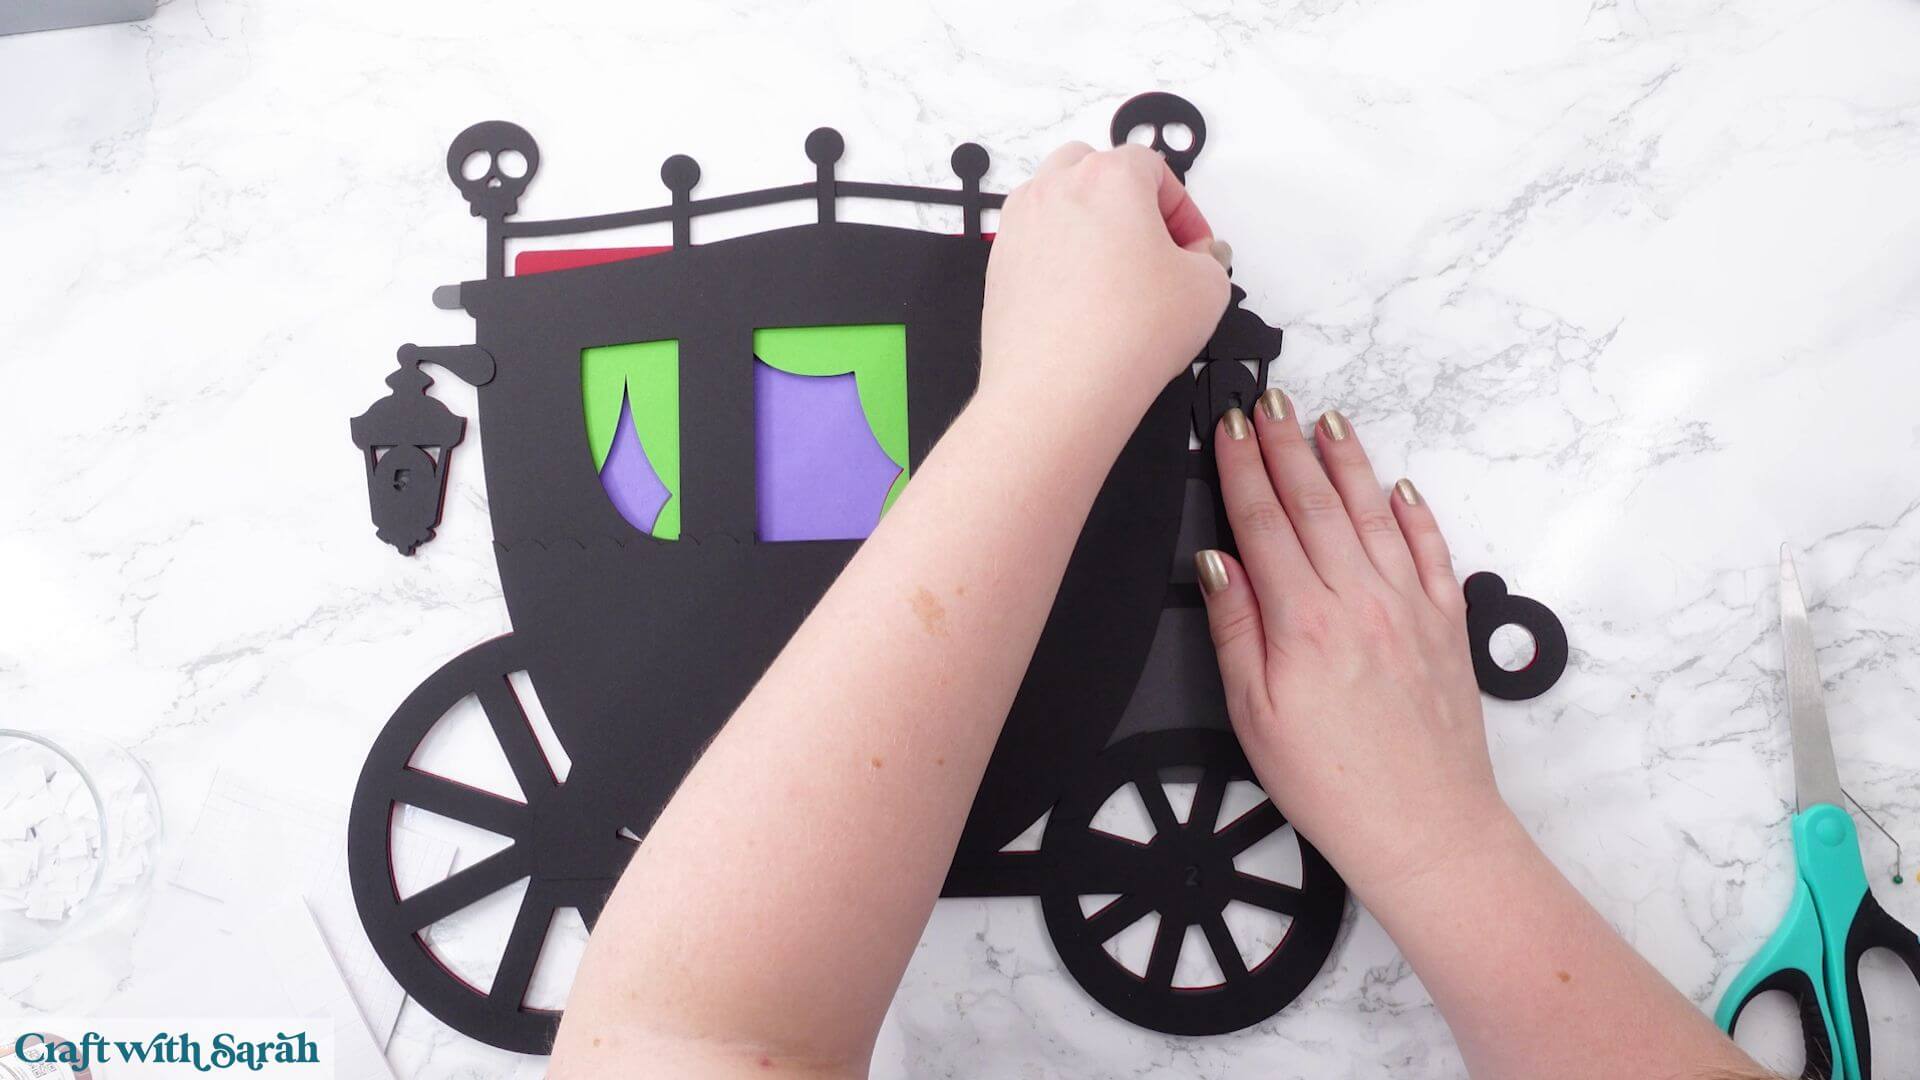
There may still be a couple of uncovered areas around the edges at this point. Don’t worry – the next pieces will hide them.
That’s the hardest part of the carriage finished!
Carriage Part F) Finish the top edge
Take the two grey pieces that fit along the upper section of the carriage.
These are glued into position and meet in the middle.
It may be easier to put a thin line of glue directly onto the carriage rather than trying to apply it to the backs of these narrow pieces.
Line up the first section carefully, then add the second.
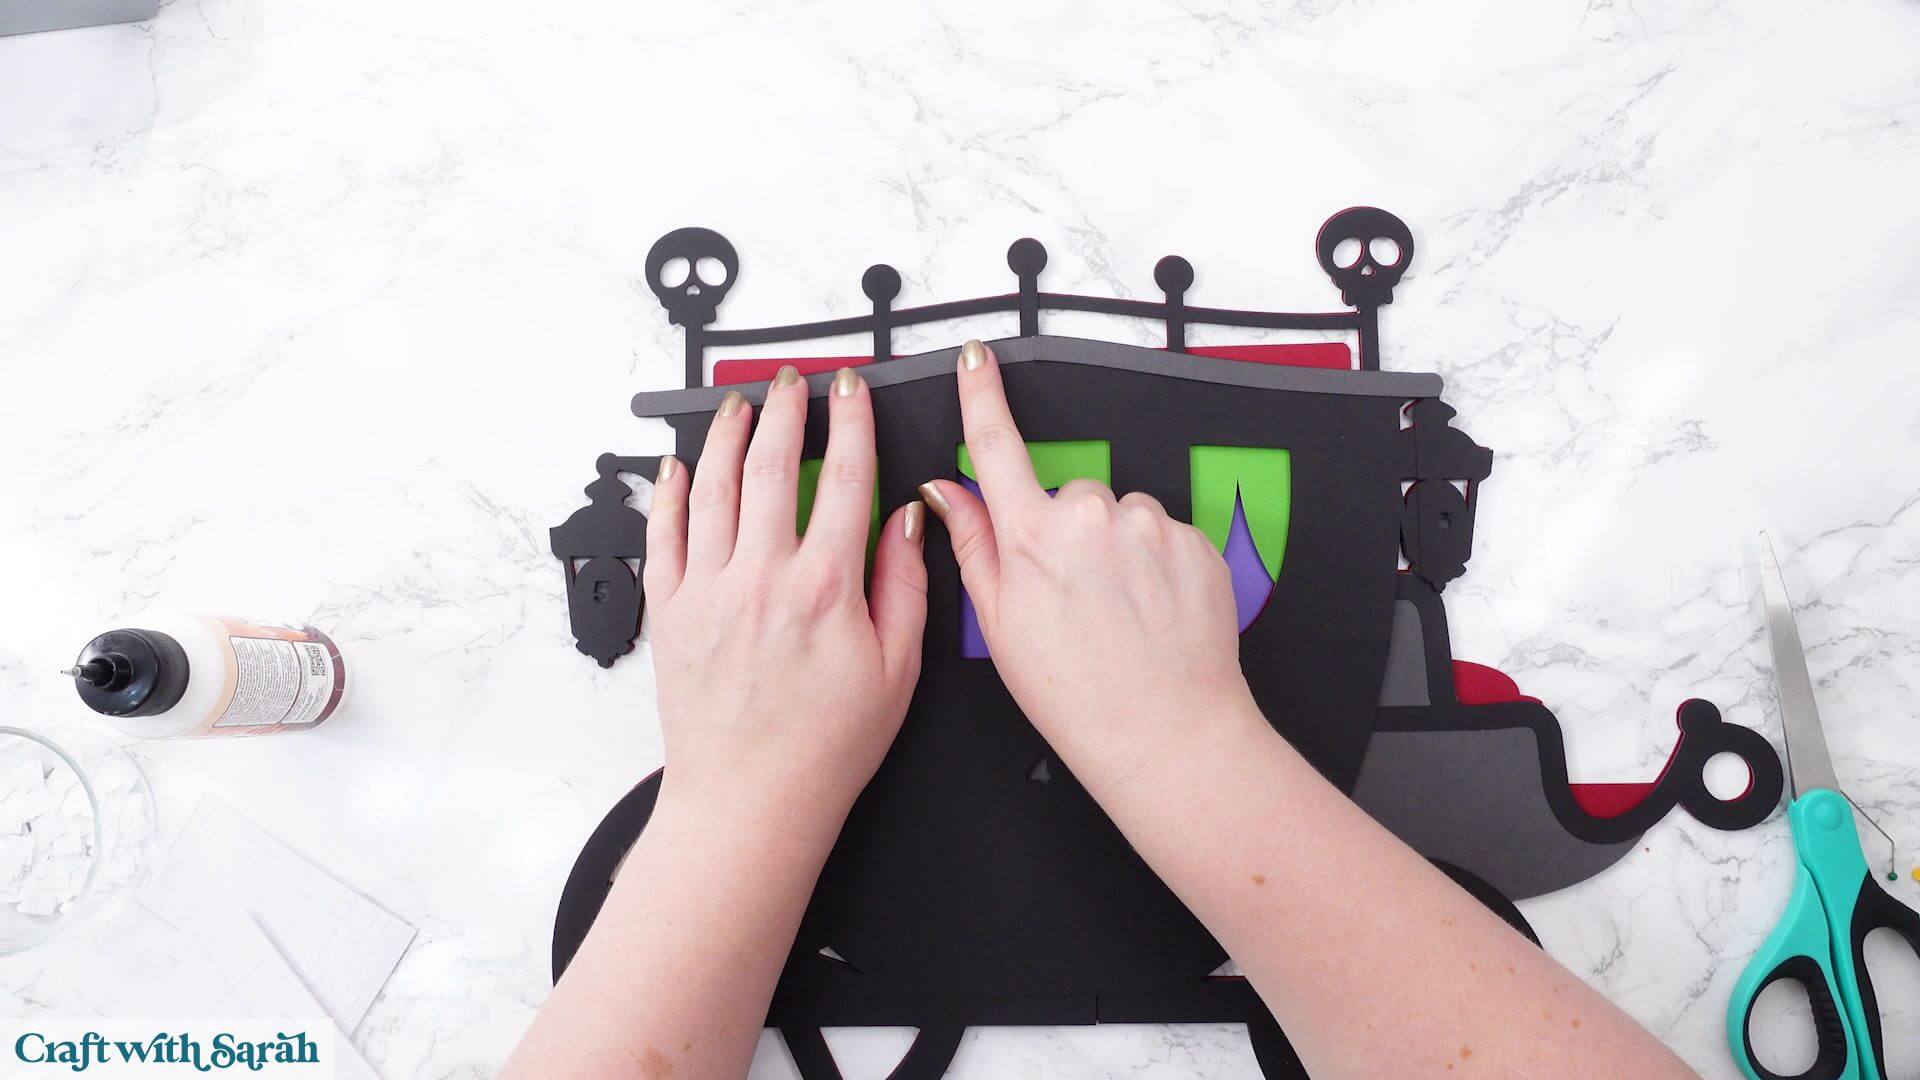
Together, they finish the outer edges and cover the areas that weren’t quite hidden by the previous layers.
Take the smaller of the two bat shapes and glue it over the join in the middle.
Position the bat so that its body completely covers the line.
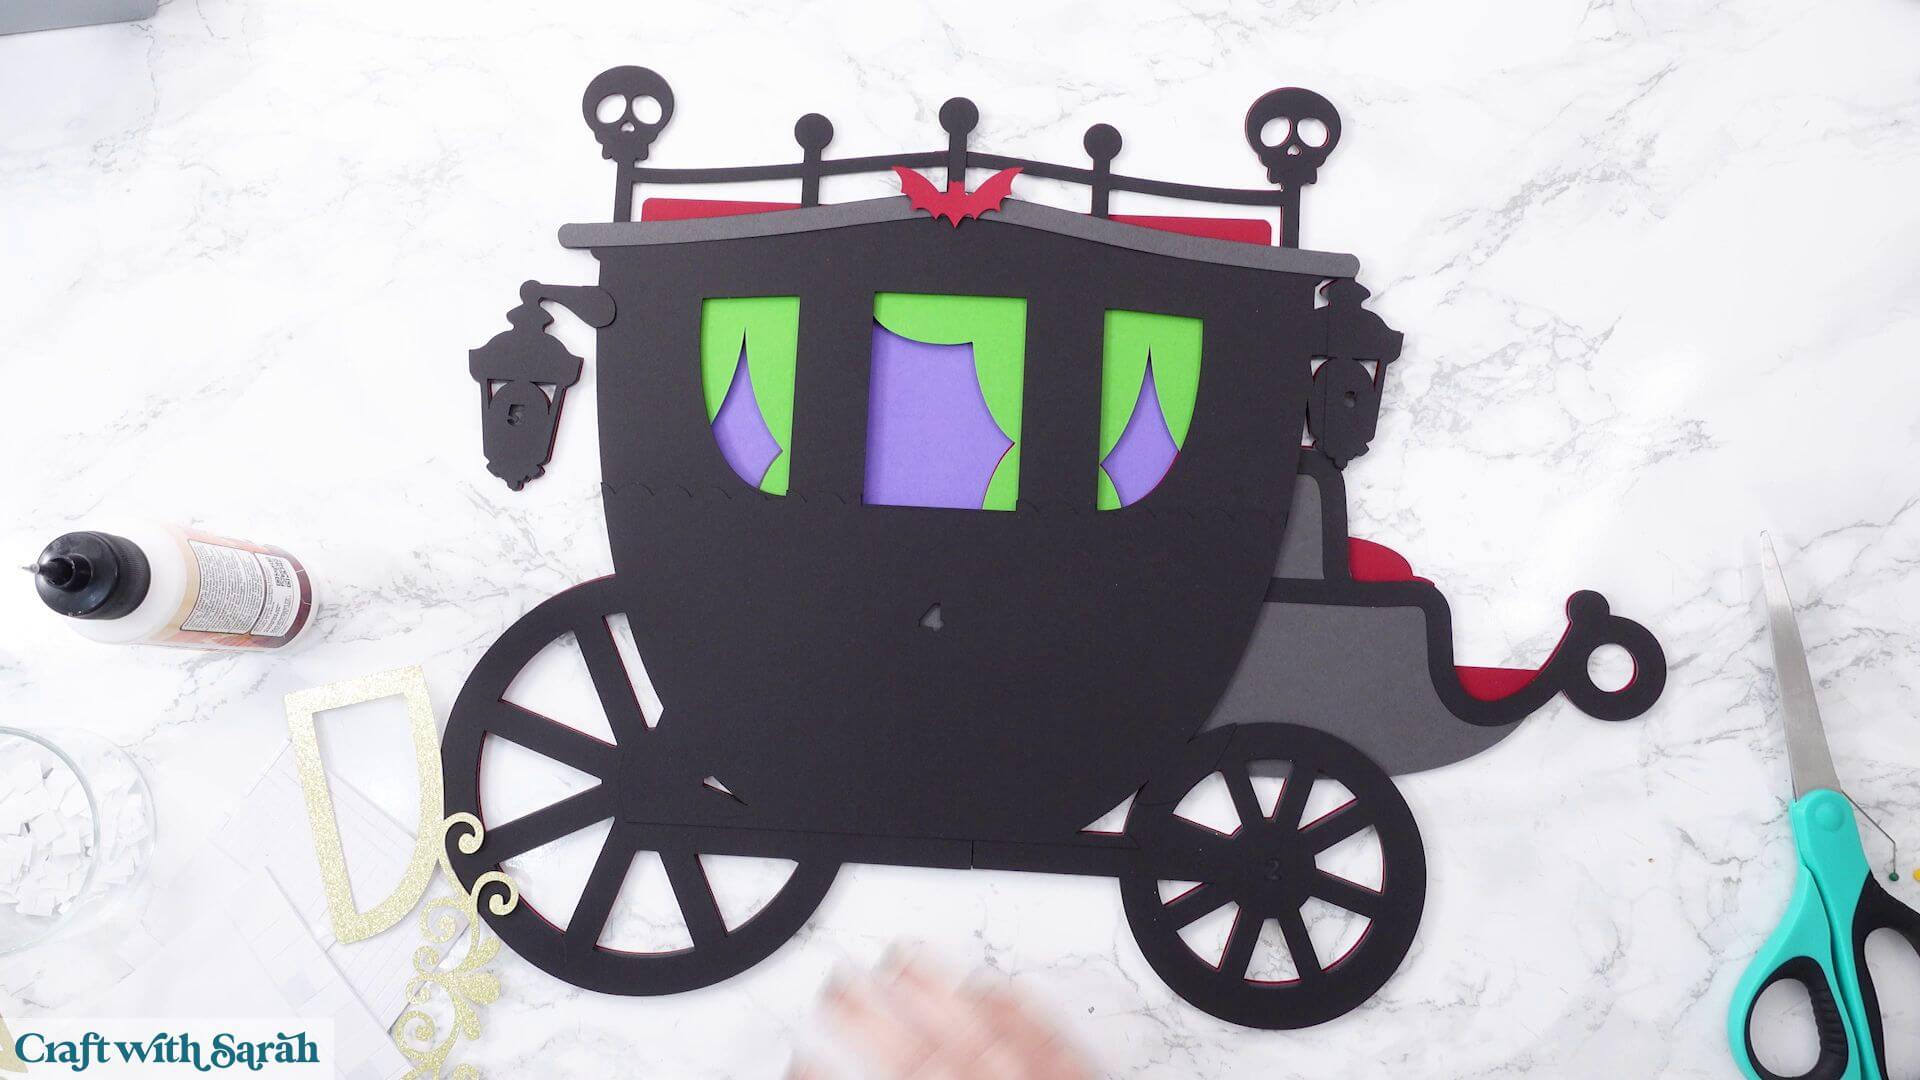
Now it looks as though the layer underneath was cut from one continuous piece of cardstock.
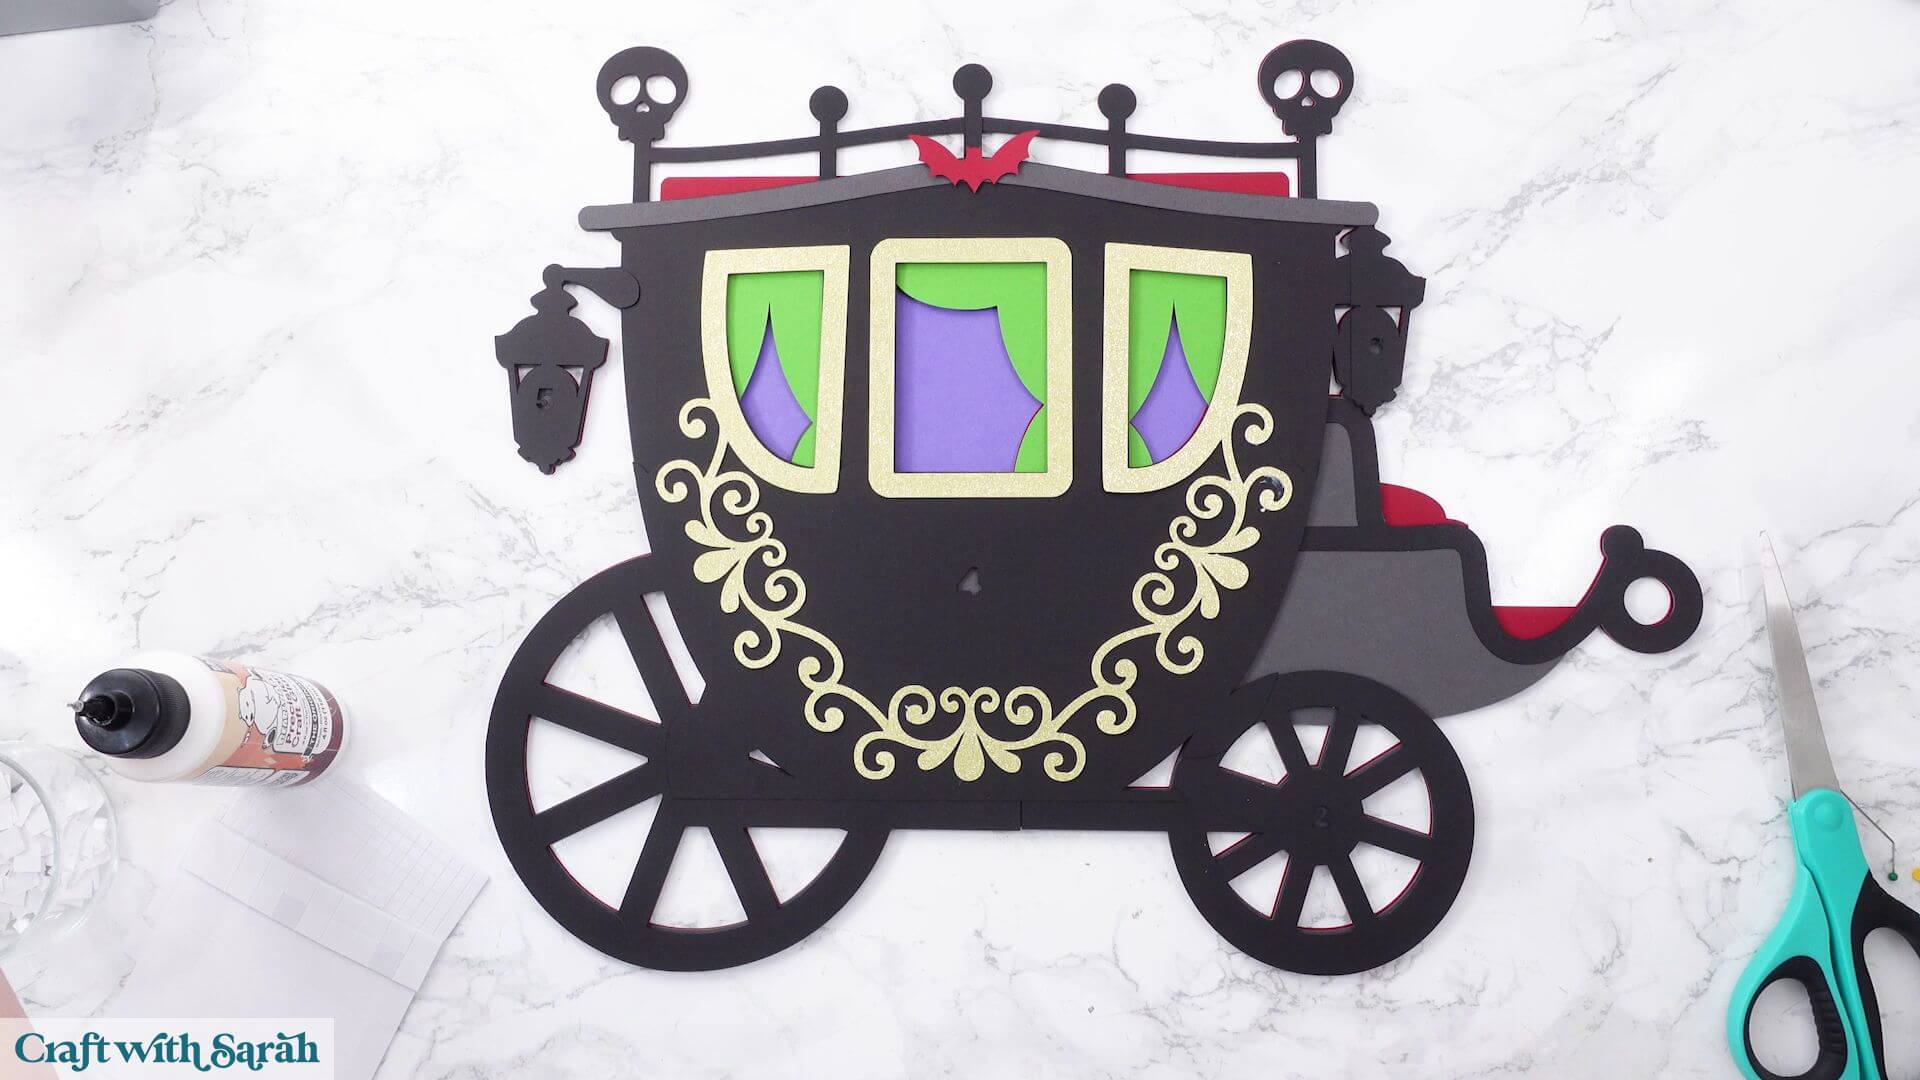
Carriage Part G) Add the gold window details
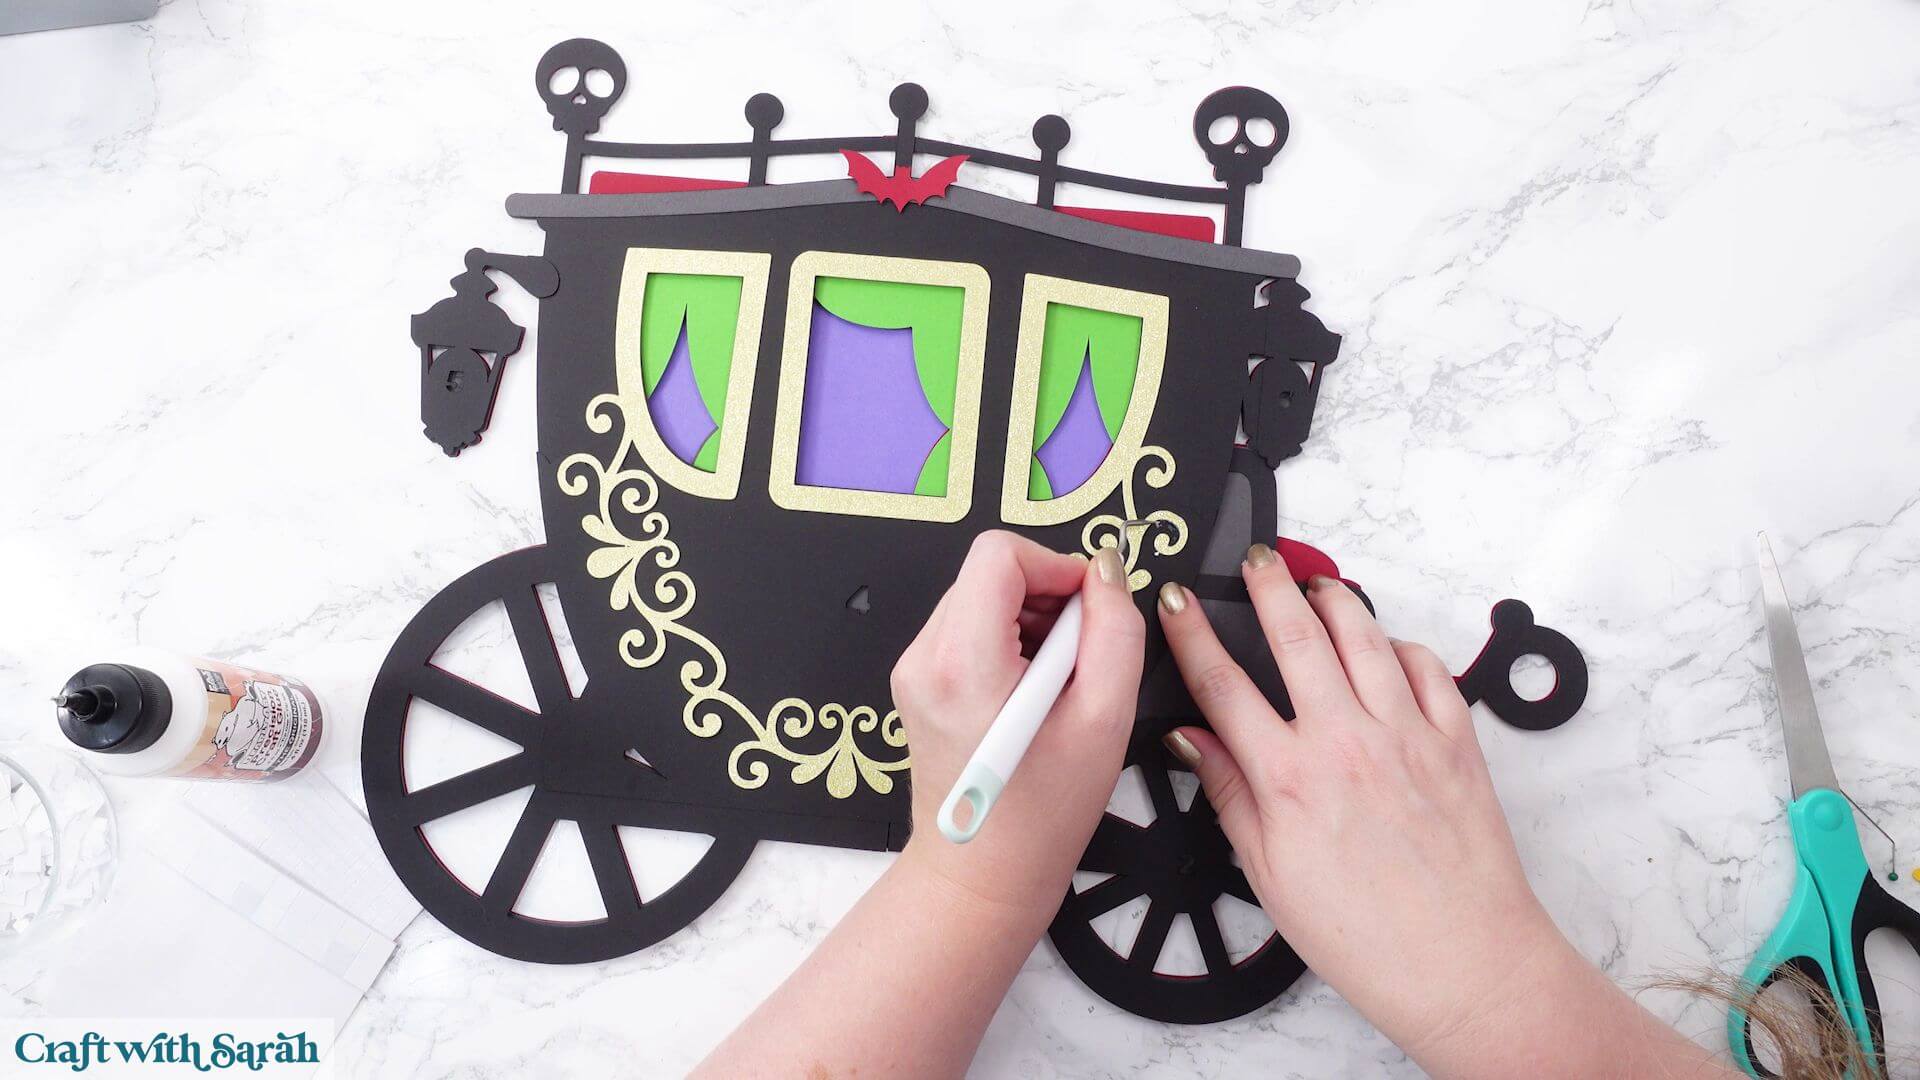
Next, add the decorative gold pieces around the windows.
There’s a smaller piece for one window and a larger, intricate swirly section that goes around the other two.
Glue these pieces into position.
The larger swirly section is quite delicate and wobbly, so take your time.
It’s helpful to use the windows themselves as the main alignment points. Get those positioned correctly first, while the glue is still wet, and then gently arrange and press down the swirls.
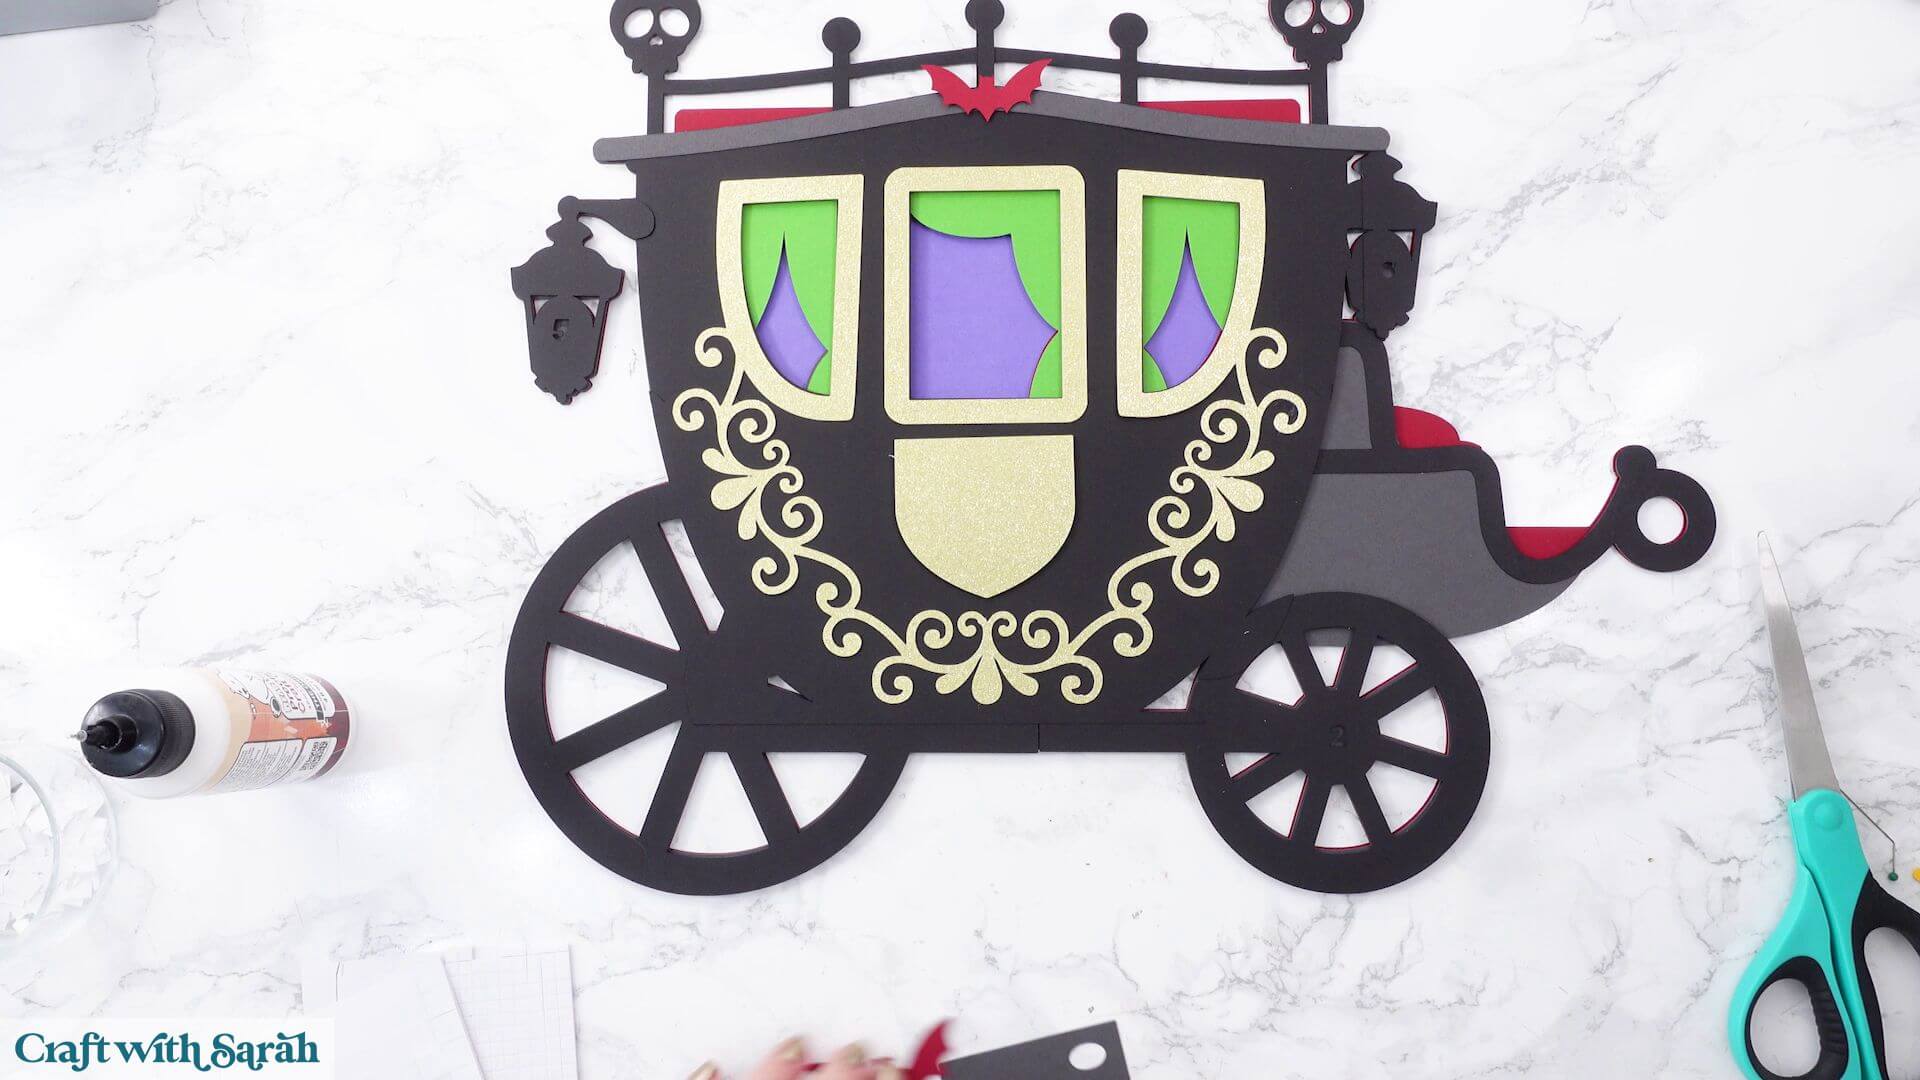
Carriage Part H) Make the carriage door
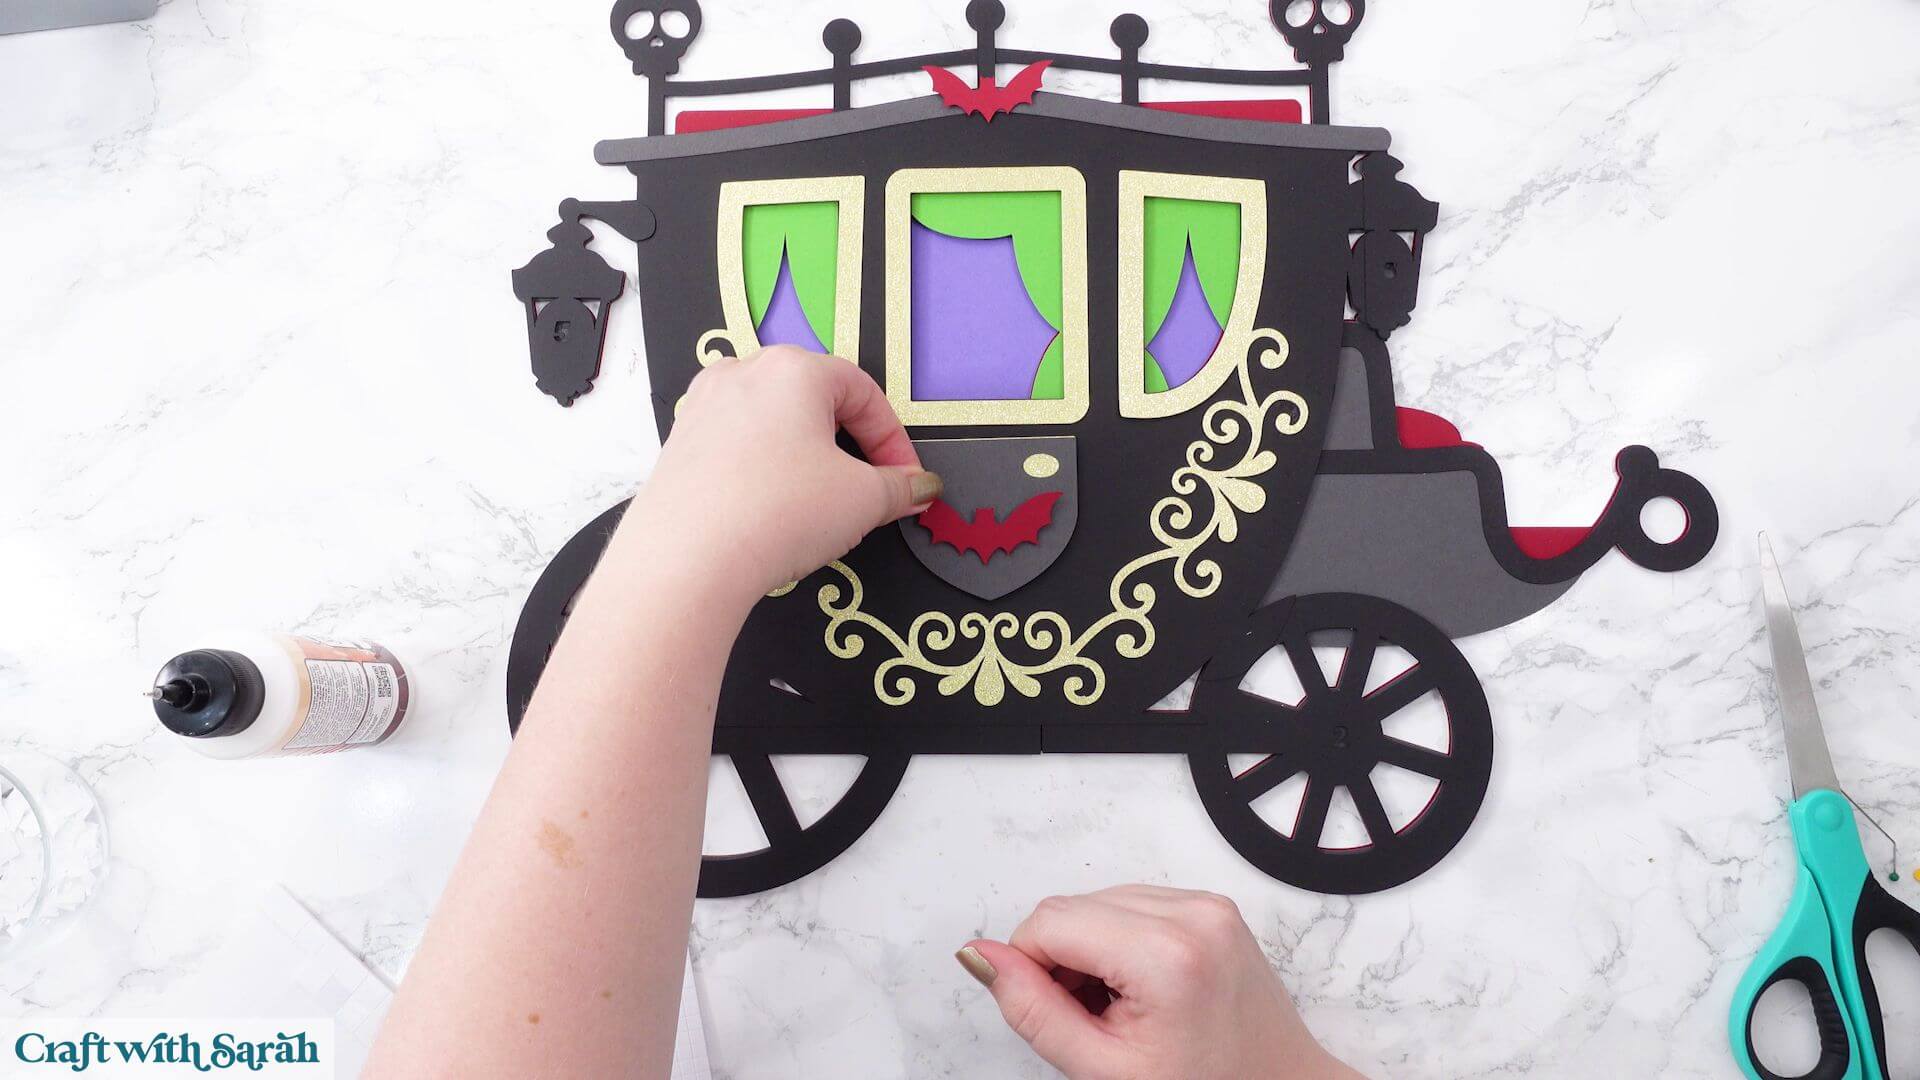
Attach the gold door layer using foam squares.
This will cover the number four that’s visible in the black cardstock underneath.
Glue the next detail layer on top.
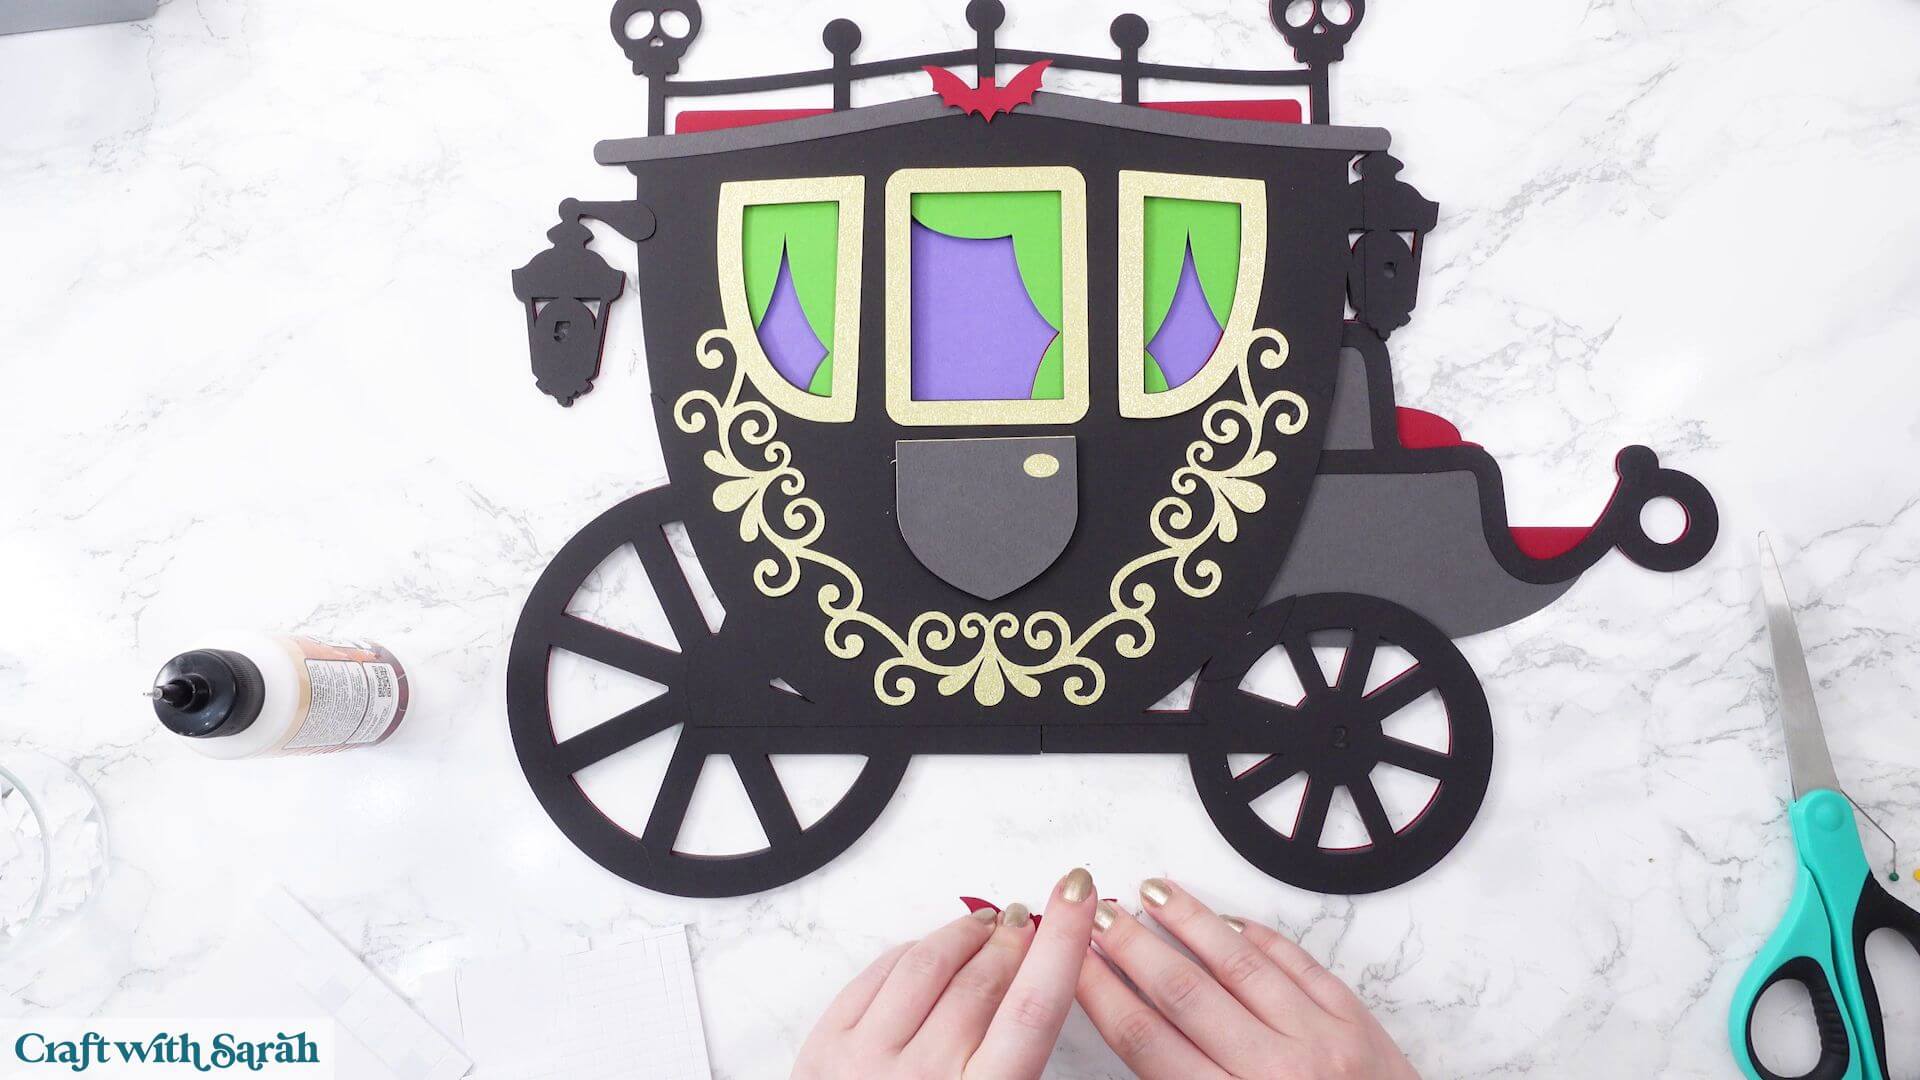
The small bat can then either be glued or attached with foam squares. I’m using foam squares to give it a little more dimension.
Carriage Part I) Build the lanterns
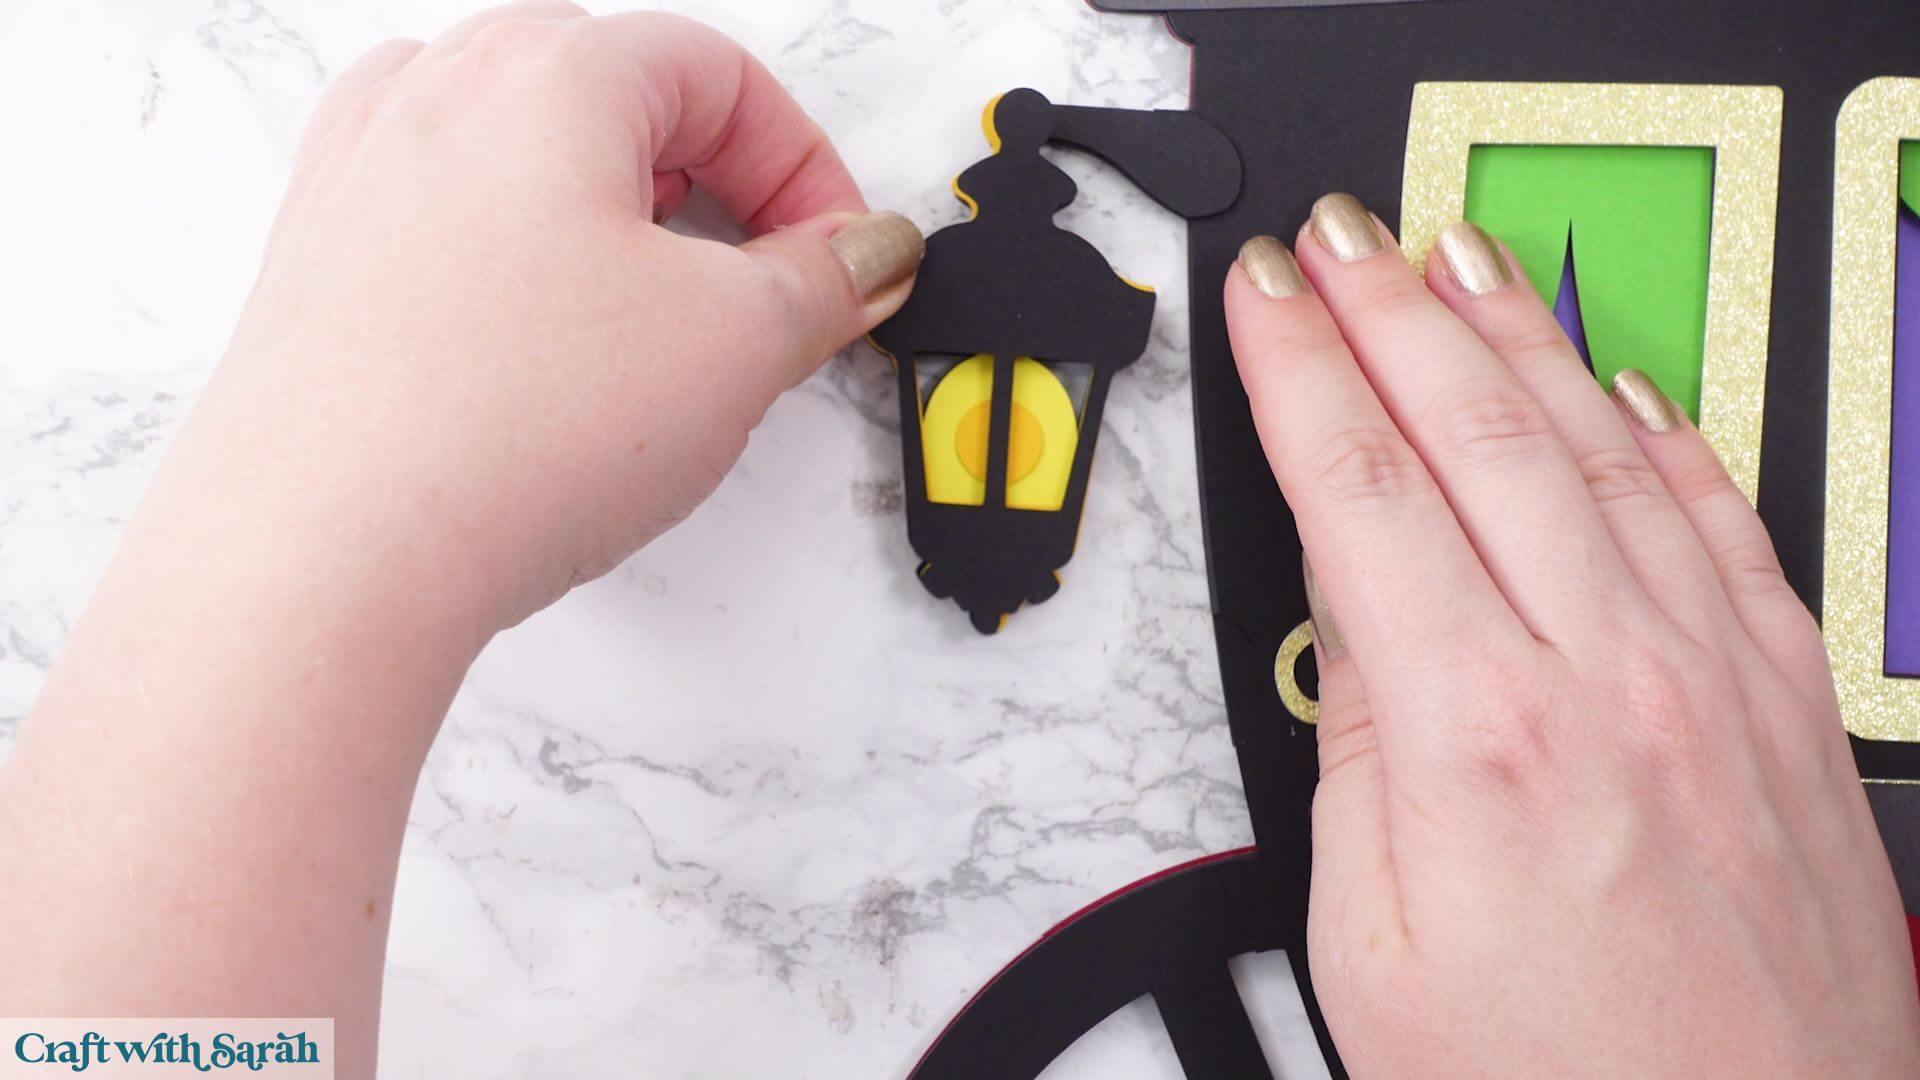
There are two lanterns on the carriage, one at the front and one at the back.
They are both assembled in exactly the same way.
Start by gluing on the yellow piece. This also helps cover the numbers that were cut into the underlying pieces.
Glue the orange piece on next.
Finish each lantern by attaching the black detail layer with foam squares.
Carriage Part J) Assemble the wheels
Start by gluing on the two joining pieces for the wheels.
Use the connection points and the vertical line on the larger wheel to help position everything correctly.
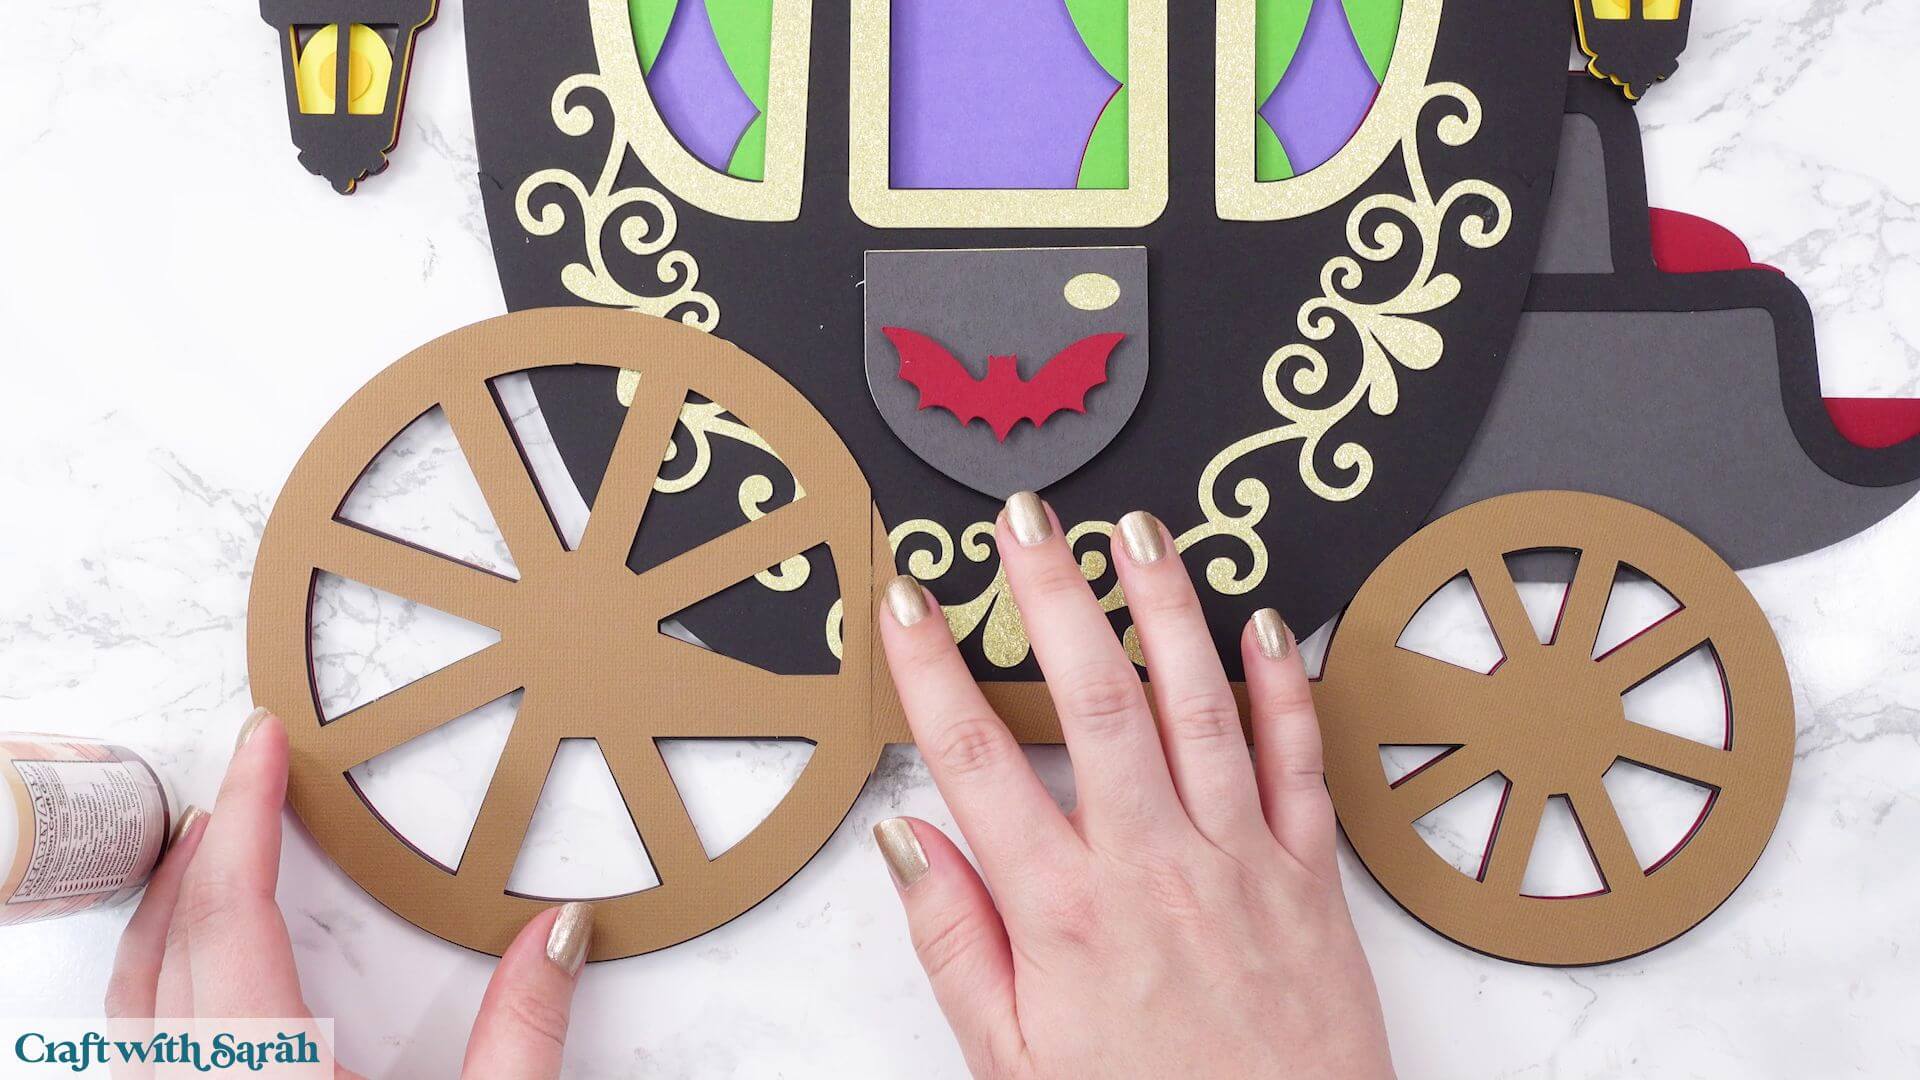
The next wheel layers are attached with foam squares.
When positioning them, line up the spokes carefully before pressing the foam squares firmly into place.
Glue the light brown detail pieces on top of both wheels.
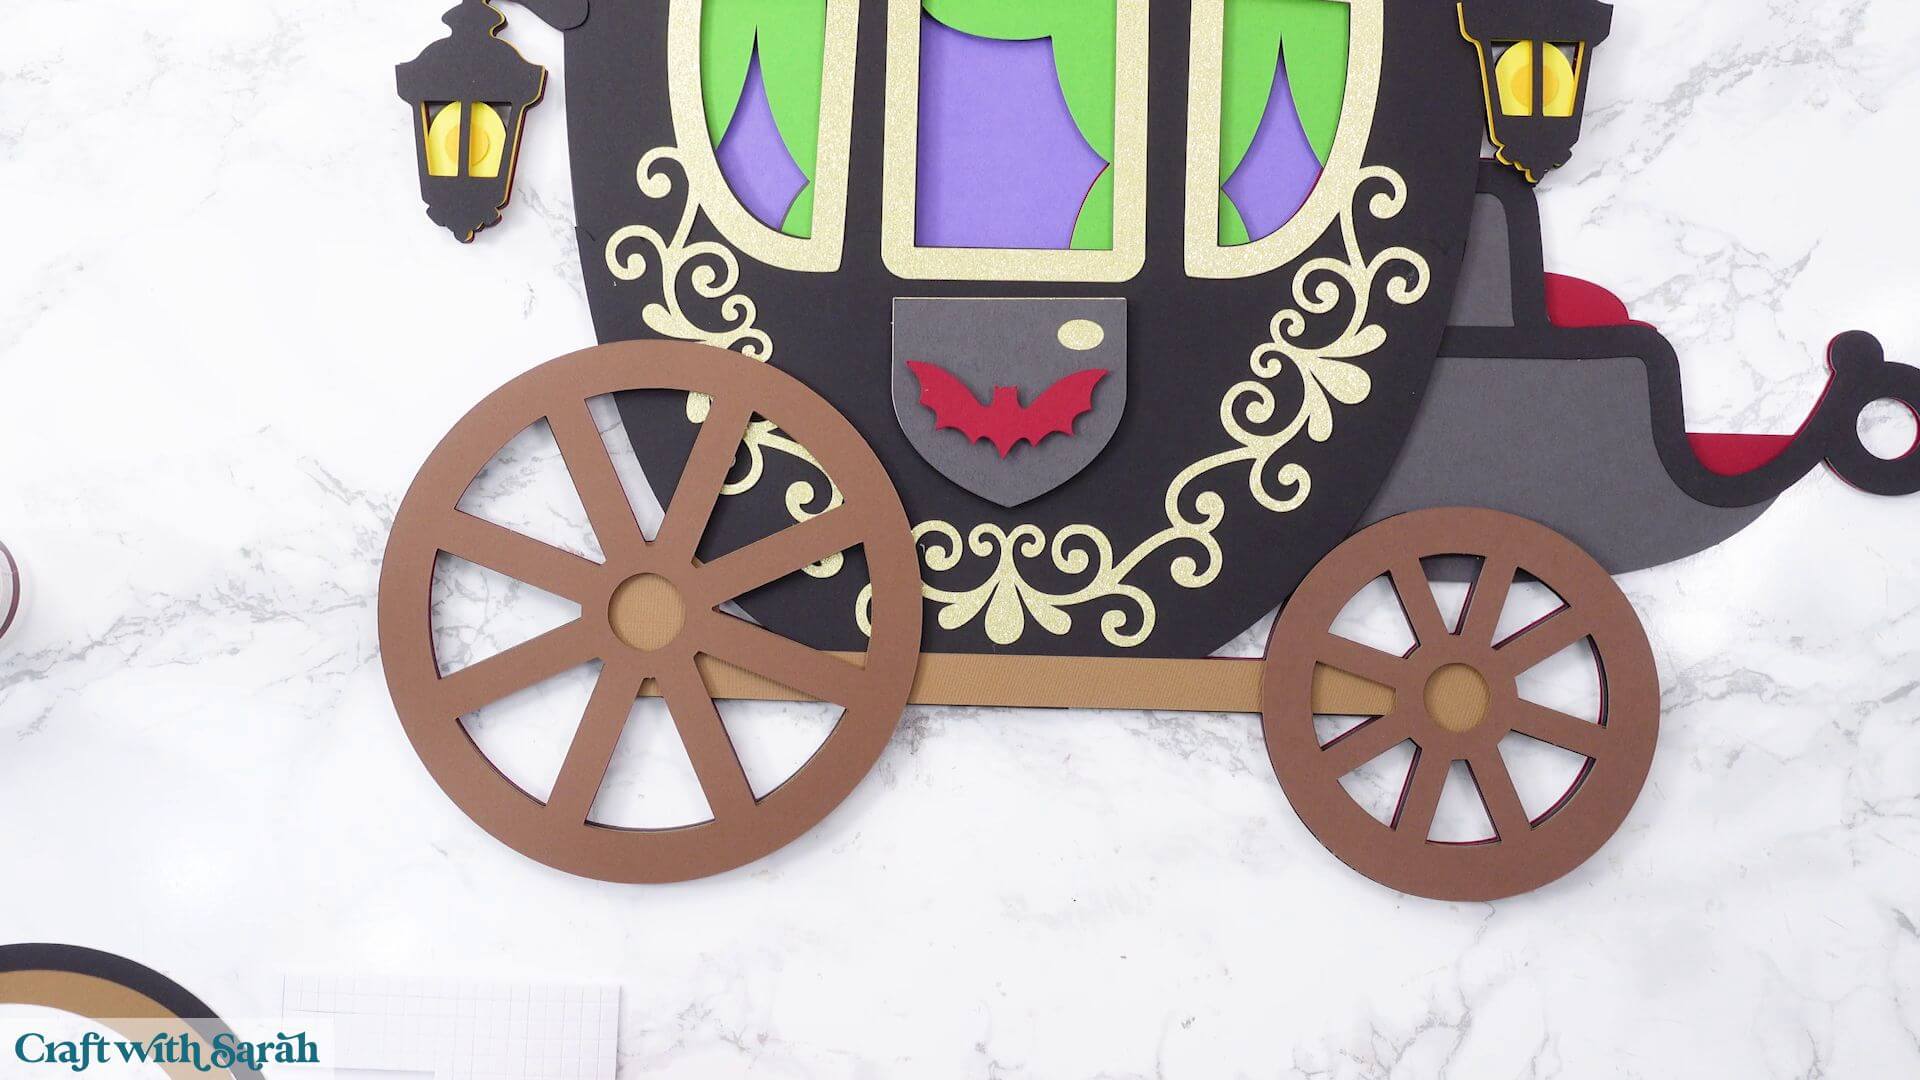
Glue the light brown detail pieces on top of both wheels.
Finally, glue on the black wheel details.
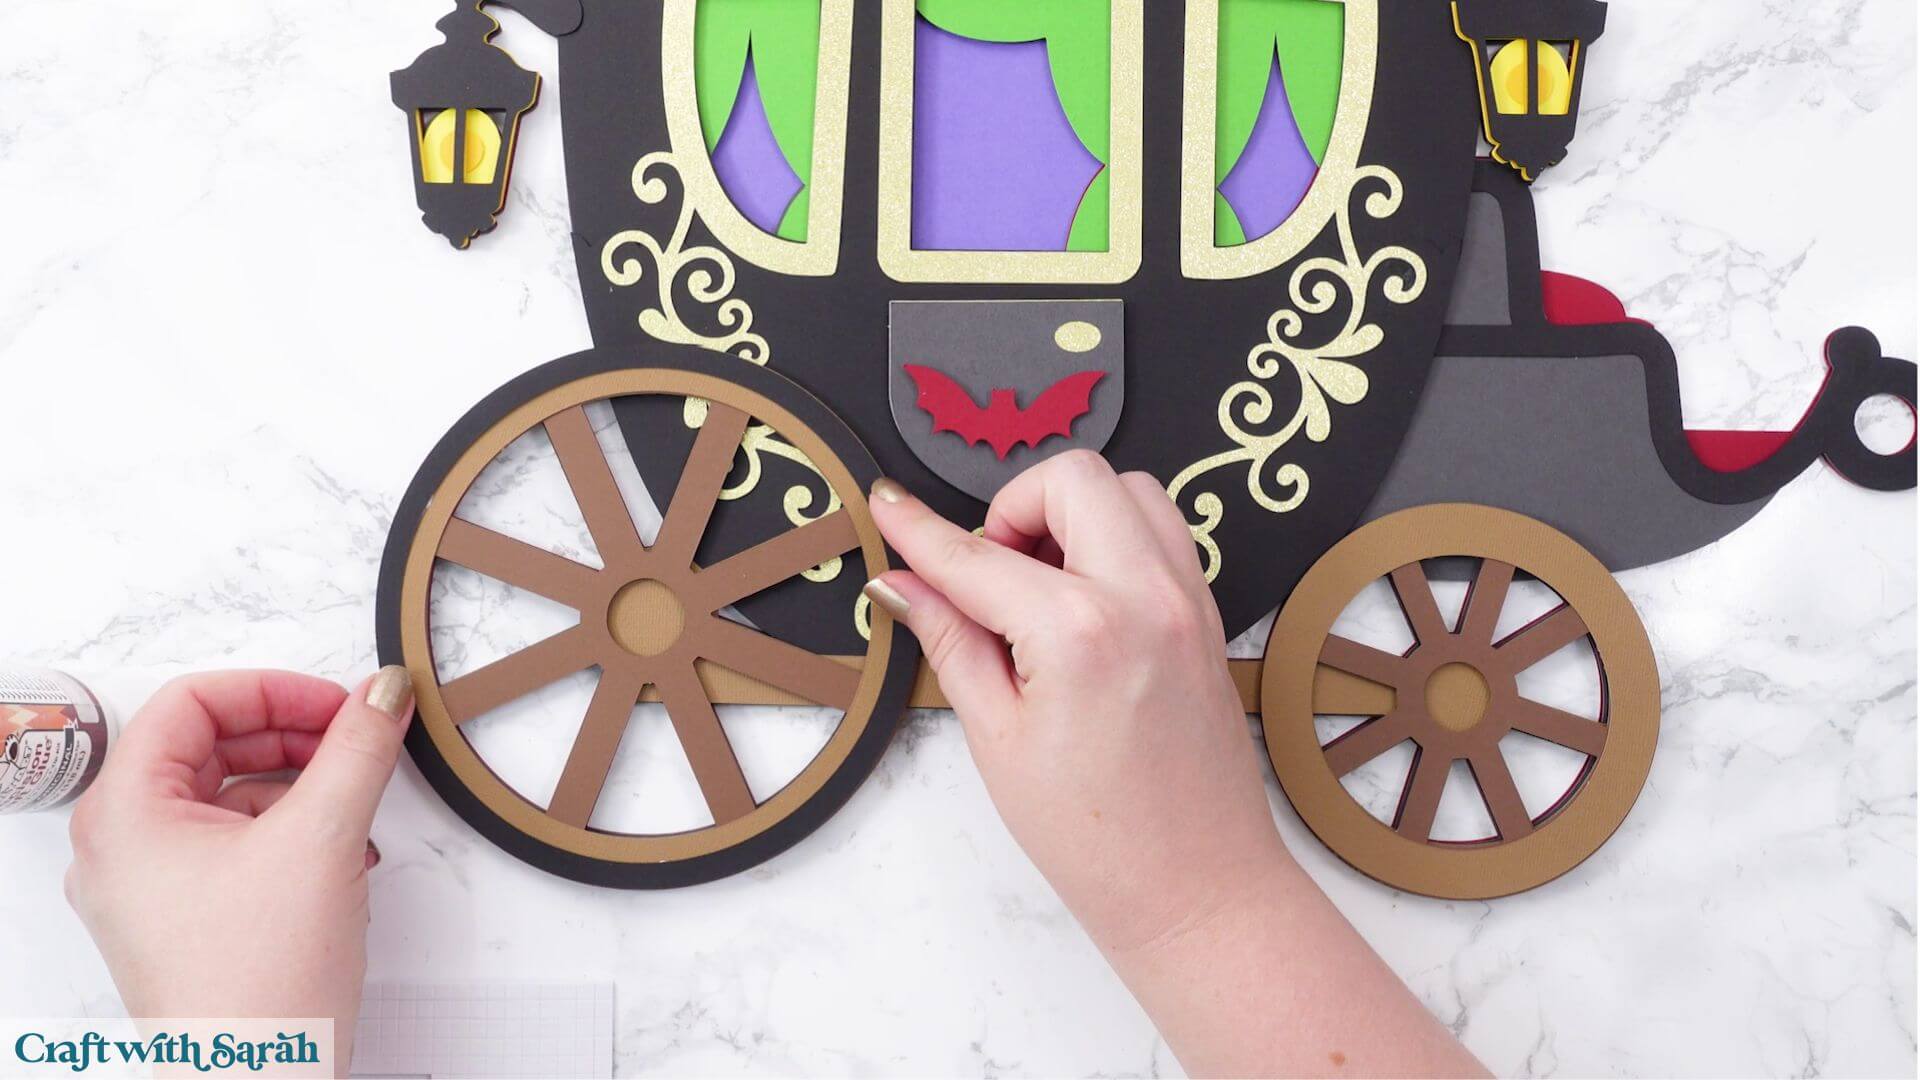
And that’s the giant carriage finished!
All of those joins from the individual sections should now be hidden, making the carriage look as though it was cut from much larger pieces of cardstock.
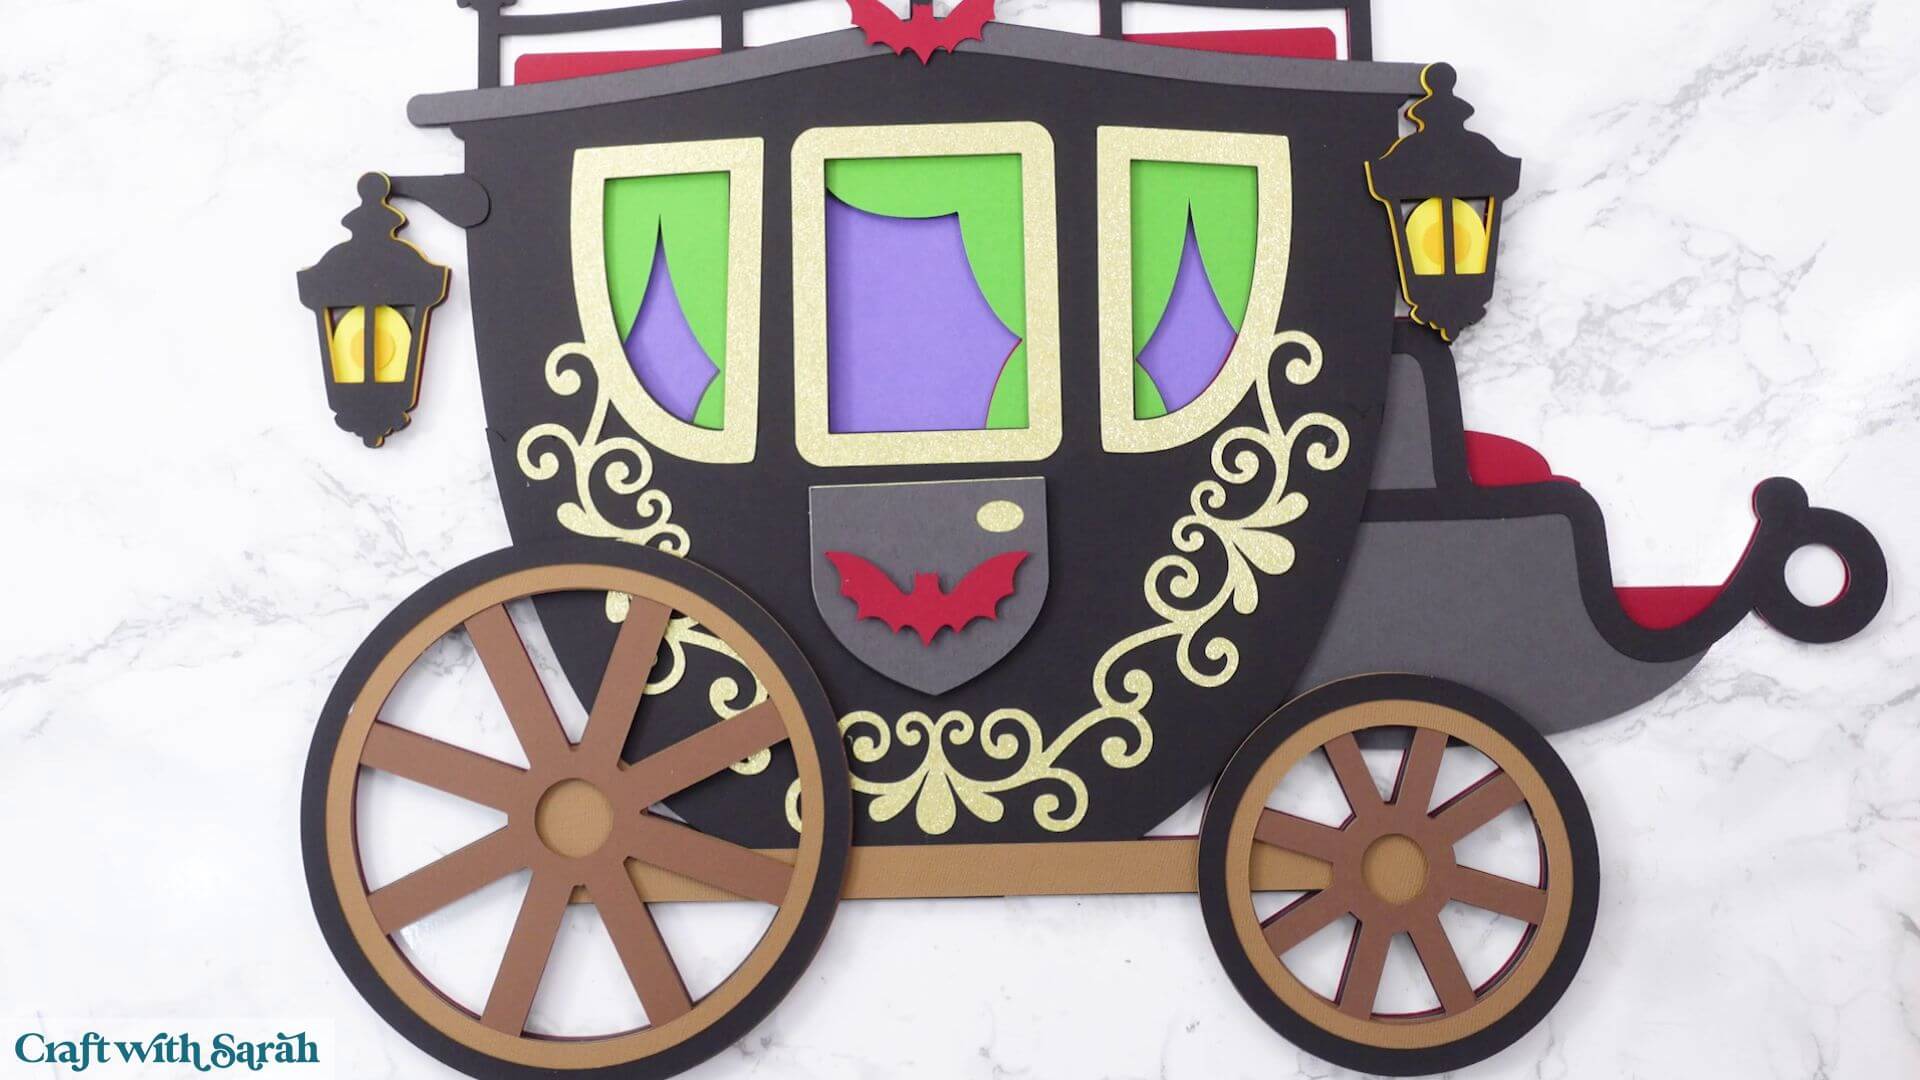
Step 5) Connect the stagecoach and horses
You can use twine, ribbon, thread or something similar to connect the three horses to the carriage.
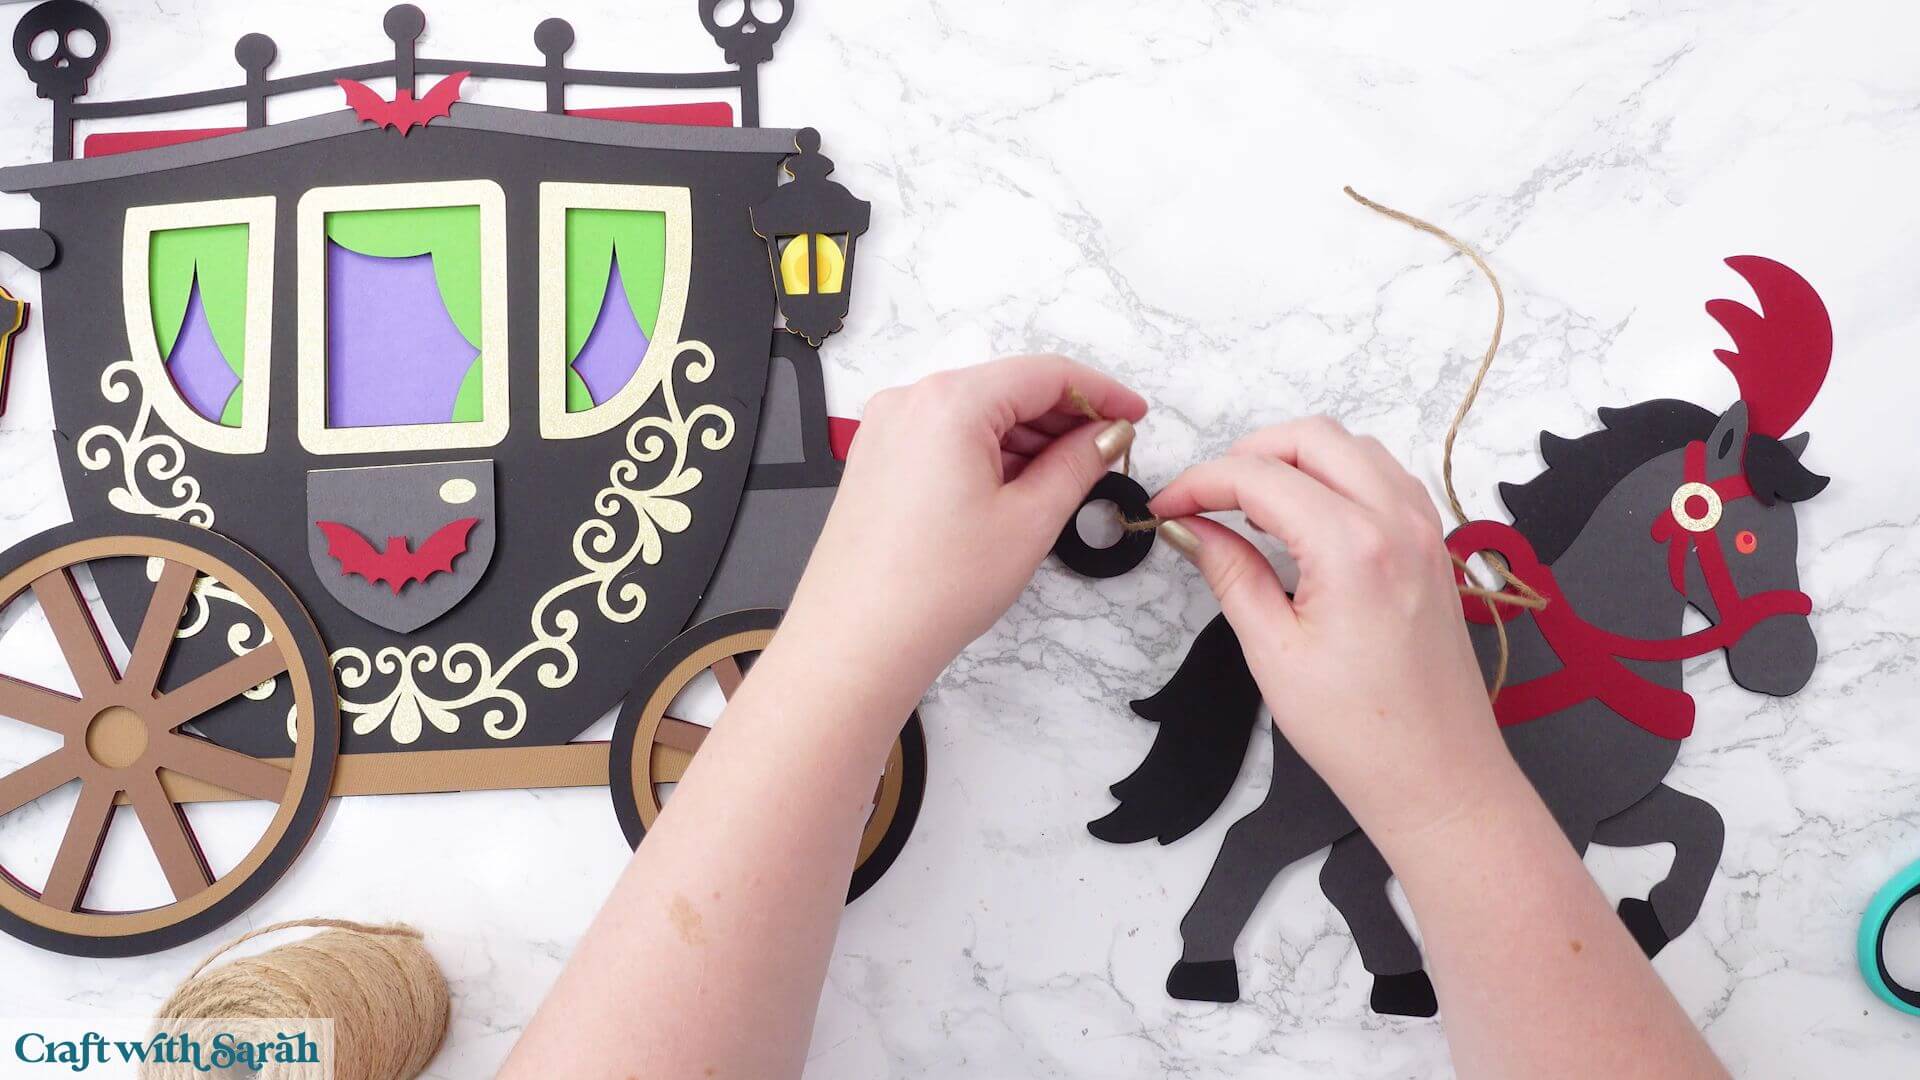
There isn’t really a right or wrong way to do this.
You could tie the material in a knot around each connection point, or loop it through and tie it at the back to create a double strand.
You can also choose how much distance you want between the horses and the carriage.
It may be easier to position all four pieces on your wall first so you can see exactly how much space you have available before deciding on the lengths of ribbon or twine.
When connecting the horses together, thread your ribbon or twine from behind.
This means the joining material can run behind the horses rather than across their faces and bodies, keeping the finished display looking neater.
Continue through the connection points until all three horses are joined together, then connect them to the carriage.
Step 6) Display on the wall
The final step is to mount your stagecoach and horses onto the wall.
I used Blu Tack for mine, which is a tacky putty designed for temporarily attaching lightweight items to suitable walls.
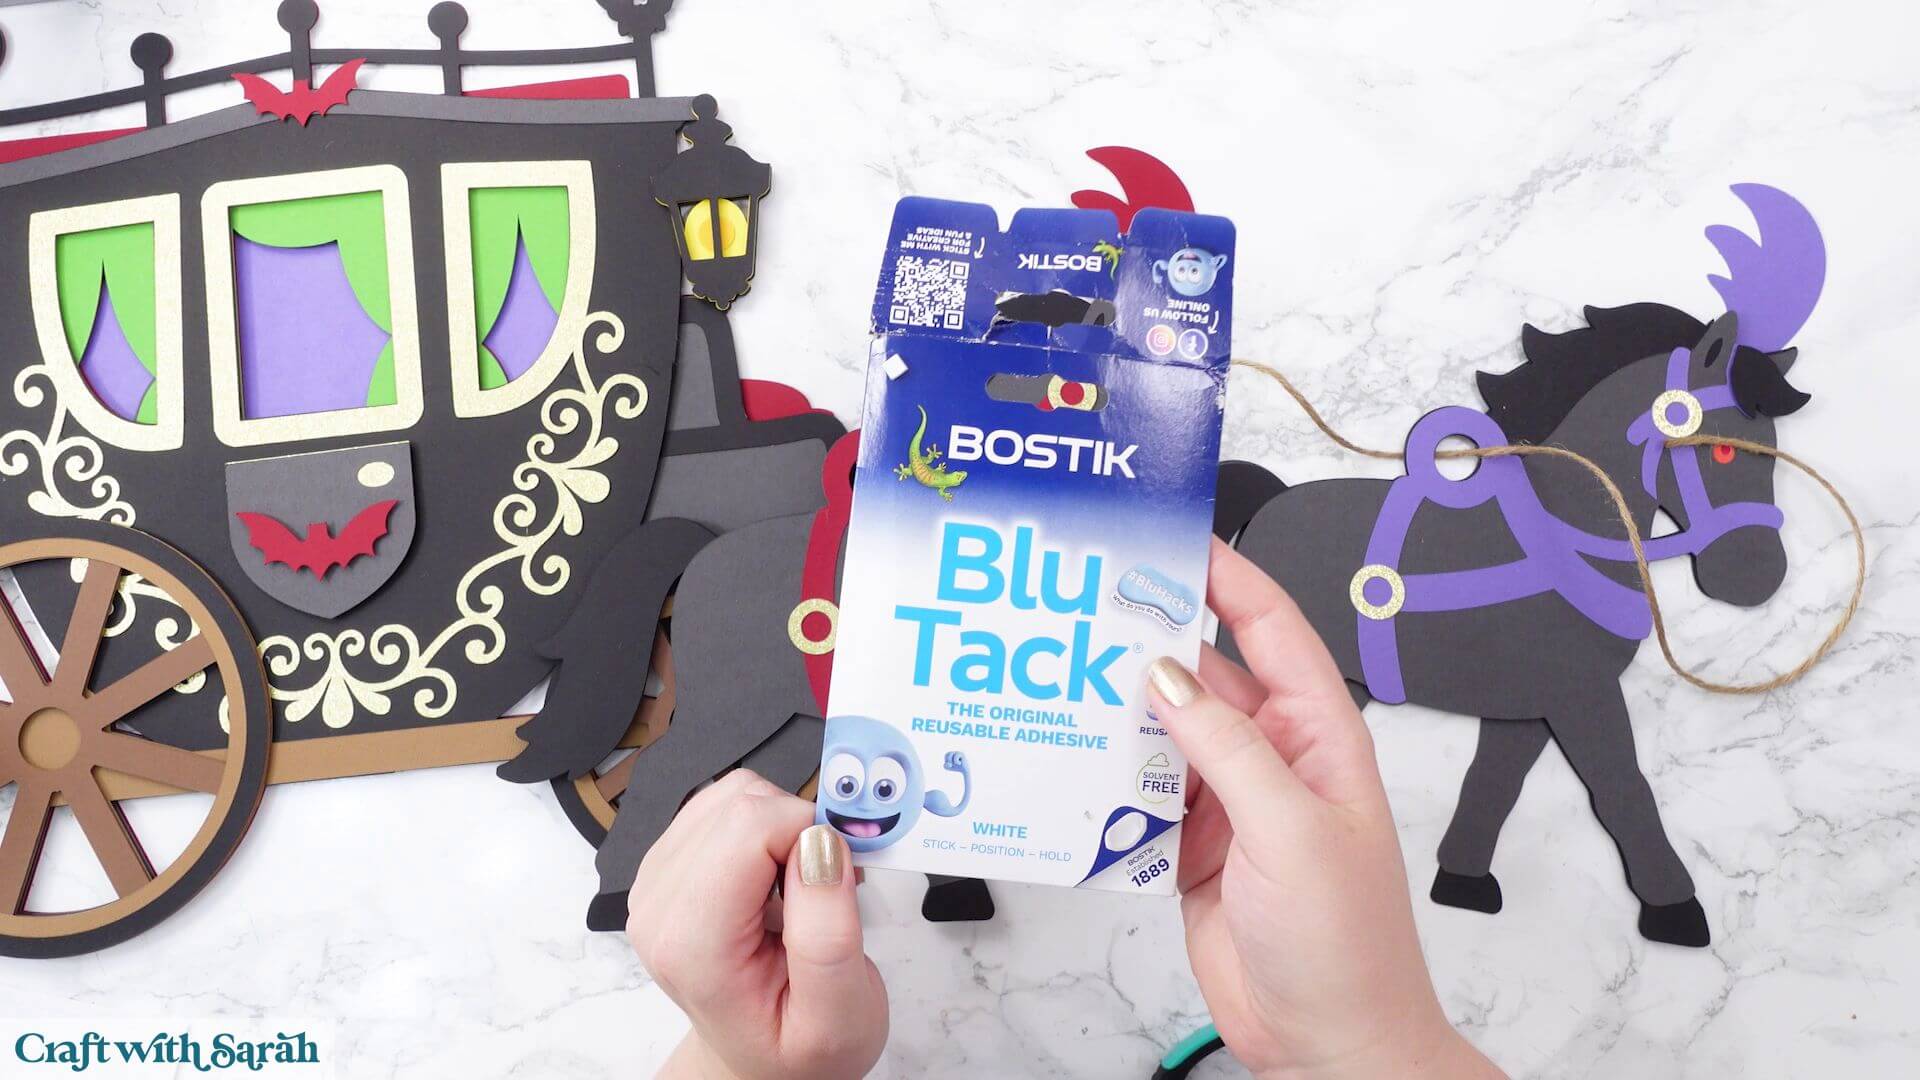
Depending on your wall surface and how permanent you want your display to be, you could use another removable mounting method instead.
Arrange the carriage and horses until you’re happy with the spacing and the angle of the complete scene.
My finished stagecoach and horses are displayed above the window in my craft studio, where the long shape of the project fits the space beautifully.
And that’s the giant Halloween stagecoach and horses complete!
Spooky Halloween stagecoach and horses to make with a Cricut
I love how dramatic this project looks when it’s displayed on the wall.
Making the giant version takes a little more patience because of all the sections that need joining together, but the layers have been designed so that those joins disappear as you build up the carriage.
If you don’t have the space for such an enormous decoration, you can make the smaller version instead for the same spooky stagecoach effect on a more manageable scale.
Whichever version you choose, I hope you have heaps of fun making your stagecoach and horses.
Happy crafting,
Sarah x