Haunted House Greetings Card 🦇 FCC 11
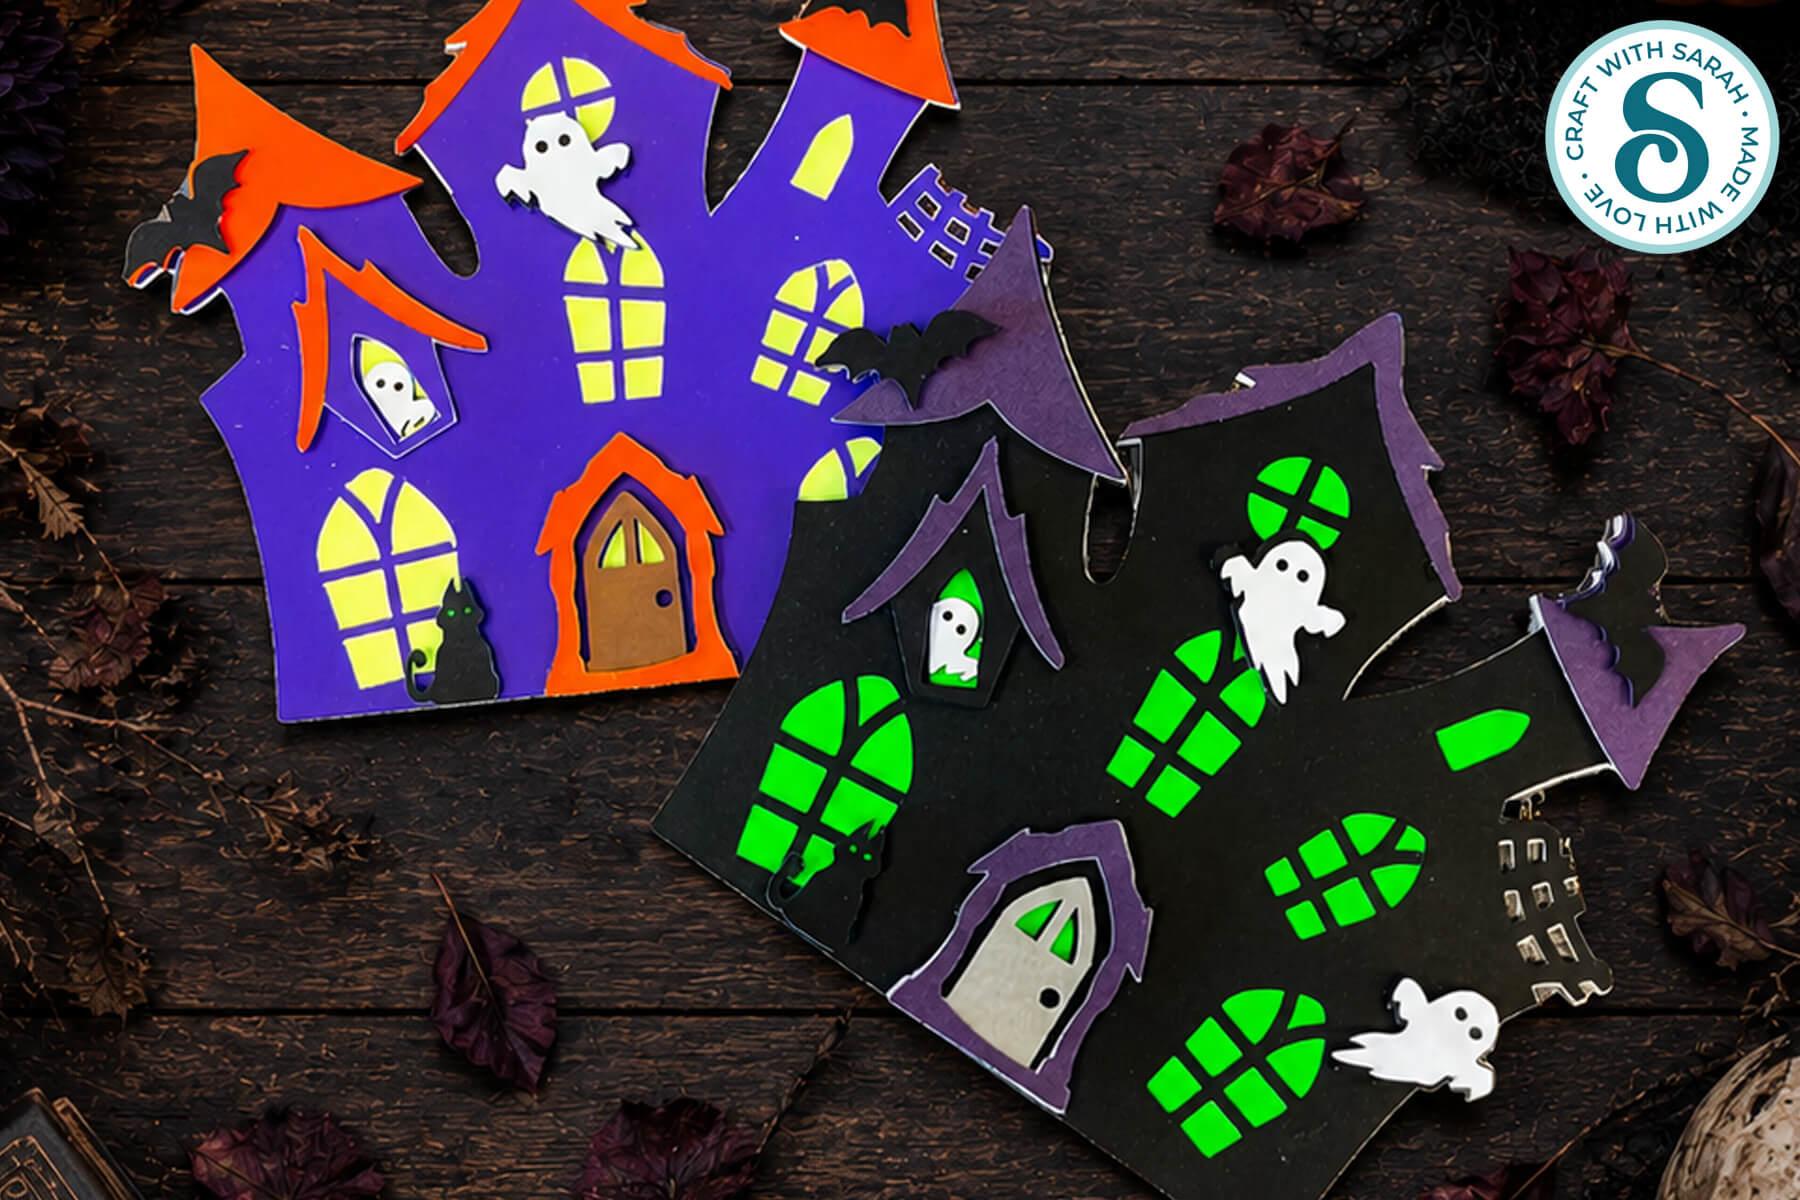
Make a haunted house shaped card with your Cricut machine.
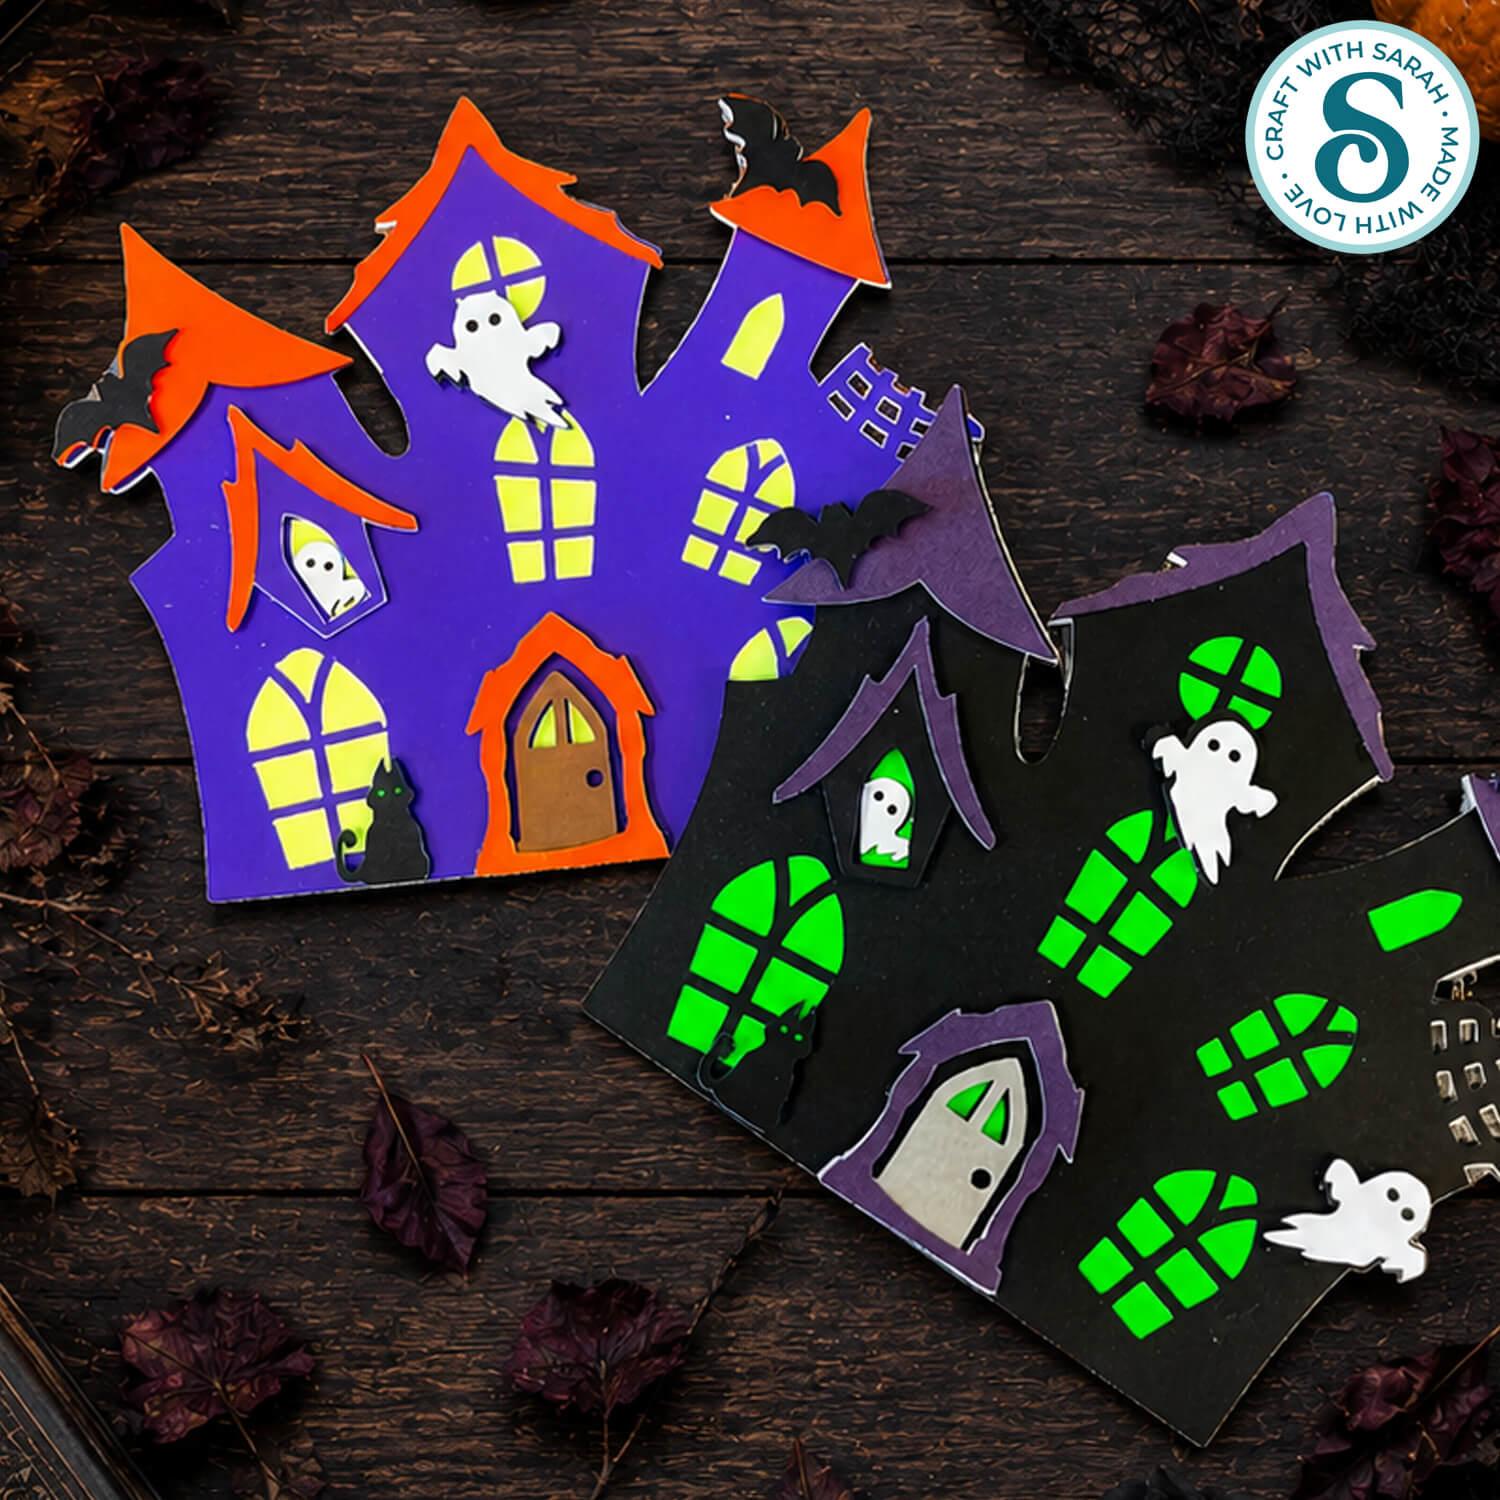
Send spooky Halloween wishes with this haunted house-shaped greetings card!
This fun design is quick to make and includes a matching envelope, making it perfect for posting to friends and family or handing out in person.
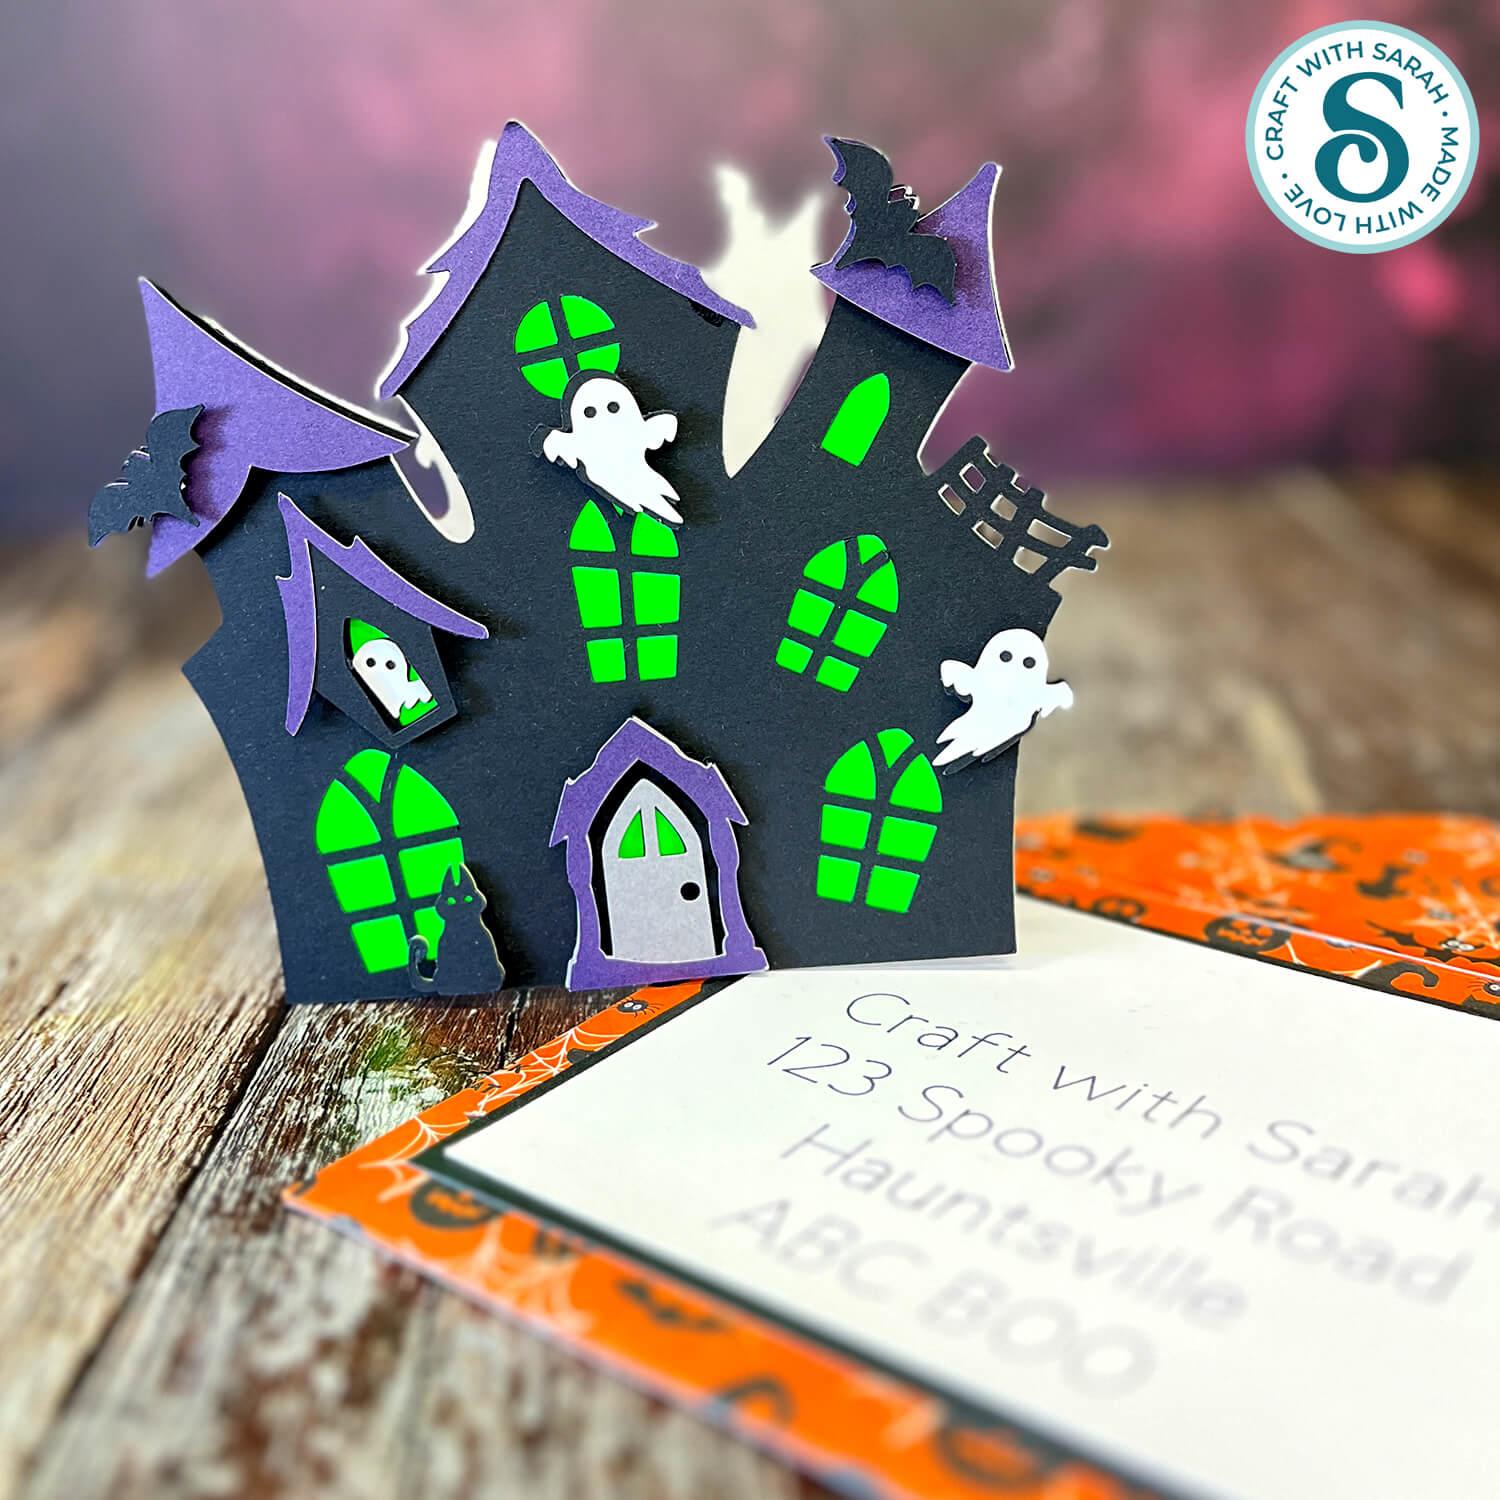
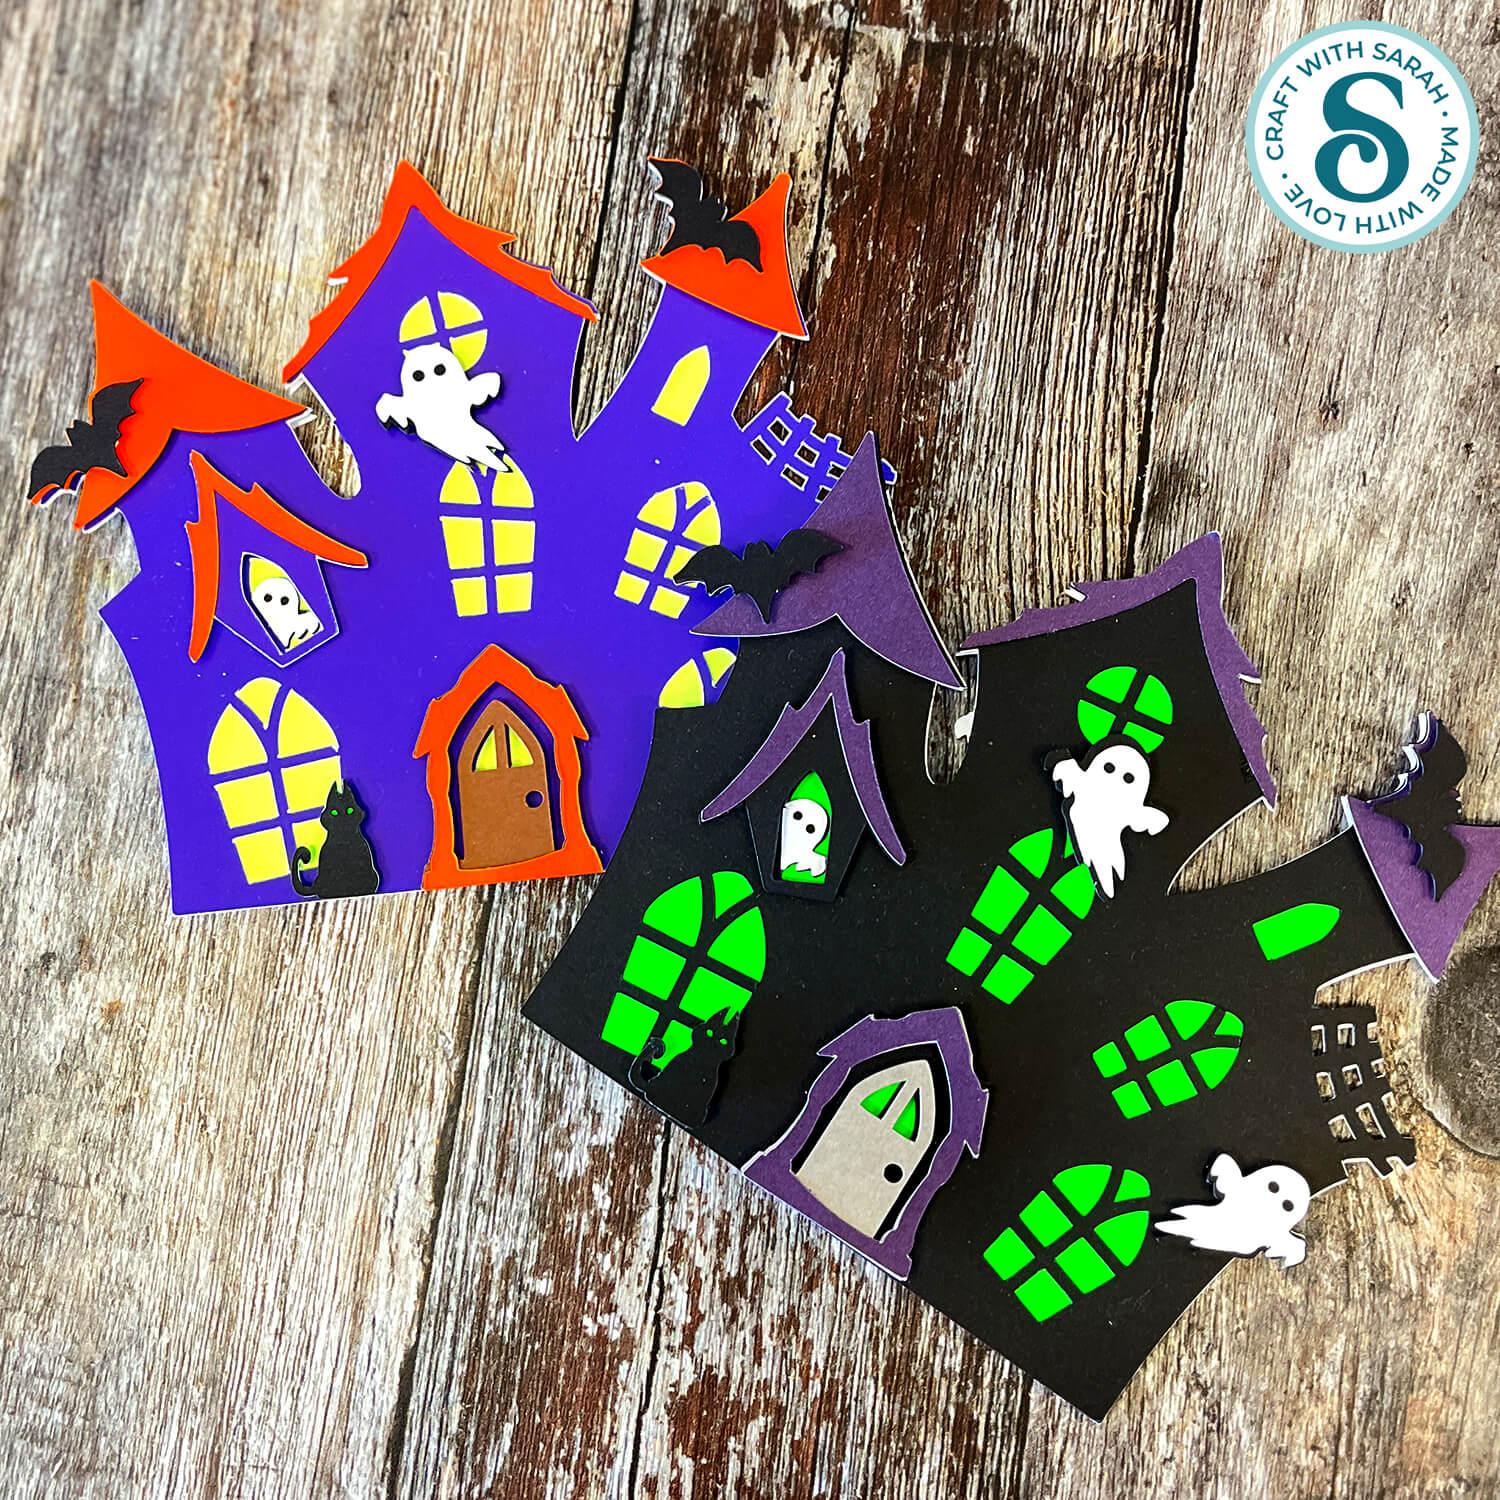
The card can be made entirely from cardstock, or you can add glow-in-the-dark heat transfer vinyl behind the windows for an extra spooky surprise when the lights go out.
This tutorial shows you how to prepare the SVG files in Cricut Design Space, assemble the layered haunted house and make the matching envelope.
This project is part of the 2026 Falloween Craft Countdown
Haunted house card materials supply list
Here is a list of the materials that I used to make this project.
Please note that some of the links included in this article are affiliate links, which means that if you click through and make a purchase I may receive a commission (at no additional cost to you). You can read my full disclosure at the bottom of the page.
- Cricut machine
- Light blue Cricut cutting mat
- Coloured Card (any thickness)
- Glue (I like Bearly Art Glue and Collall)
- 3D foam pads
- Cricut scoring wheel or stylus
- Patterned paper (for making the envelope
- Glow-in-the-dark heat transfer vinyl (optional)
- Weeding tool (if using vinyl)
- Cricut EasyPress mini or similar (if using vinyl)
- Teflon pressing sheet or similar (if using vinyl)
This project is suitable for the following types of Cricut machines: Explore series, Maker series and Joy Xtra. It is too large to cut on the Joy or Joy 2.
Foundation learning
If you're new to making papercrafts with your cutting machine, check out these links to get you started.
They include videos on topics such as: which file to use with your type of cutting machine, how to load the files into your cutting machine's software, how to cut cardstock with your type of cutting machine, how to recolor and modify/customize the cut files and tips for displaying your projects.
- How to use zip folder downloads
- Help guides for Cricut machines
- Help guides for Silhouette machines
- Help guides for ScanNCut machines
The following tutorials are Cricut-specific, but many of the ideas will work similarly with a Silhouette or ScanNCut machine and any cut files that are shared in them are compatible with all types of cutting machine.
- How to score with a Cricut (even without scoring tools)
- Print then cut tutorial
- Design Space tools (Combine, Attach, Slice, Weld, Flatten, etc.)
- Pattern fill tutorial (for making backgrounds & cutting images to a specific shape/size)
- Free envelope SVGs that can be sized to fit any card
- Presentation boxes for handmade cards
- How to write inside cards with Cricut pens
- How to cut layered designs at a small size
- Design Space tips & tricks
- Cricut pens tutorial
- How to mount multiple designs in the same frame with magic guides
Halloween greetings card craft video tutorial
Watch the video below to see how to make this project. Keep scrolling for a written tutorial.
Before you start…
The download contains two separate SVG files: one for the haunted house card and one for the matching envelope.
The card folds to approximately 5 x 5 inches, but the envelope is designed specifically to fit the finished card.
If you’re planning to add glow-in-the-dark heat transfer vinyl, you’ll need to make a small change in Cricut Design Space before cutting, as detailed later in this tutorial.
Written tutorial (with photos!)
Here’s how to make this haunted house greetings card using a Cricut machine.
Step 1) Download the cutting file & upload to Design Space
Get the files using the box below.
Purchase the File(s)
This cut file is available as part of the Instant Access Bundle.
Or, purchase this design individually here
Before you upload the SVGs to Design Space, you need to unzip the download folder that they come in.
Not sure how to do this? Click here for a tutorial that covers all the following types of computer and device:
- How to unzip a folder on a Windows computer
- How to unzip a folder on a Mac
- How to unzip a folder on an iPad
- How to unzip a folder on an iPhone
- How to unzip a folder on an Android device
After unzipping, upload the SVG file(s) into your cutting machine software.
Not sure how to use cut files with your type of machine? The following links lead to tutorials on how to use cut files in:
- Cricut Design Space
- Silhouette Studio
- CanvasWorkspace (for ScanNCut machines)
If you are using Cricut Design Space, start a new project and then click the “Upload” button on the left of the screen.
You can then either click “Browse” to find the file on your computer, or drag-and-drop it.
Select the file in the “01 Cricut Version” subfolder called svg-01-haunted-house-card-craftwithsarah.svg.
Press “Upload” on the next screen.
After uploading, the design should be automatically inserted onto your Canvas.
To hide the left sidebar (to give you more space for designing!), click the arrow that’s about half way down the page.
Need help uploading SVGs? Get step-by-step instructions here in our detailed help guides for Cricut, Silhouette and ScanNCut.
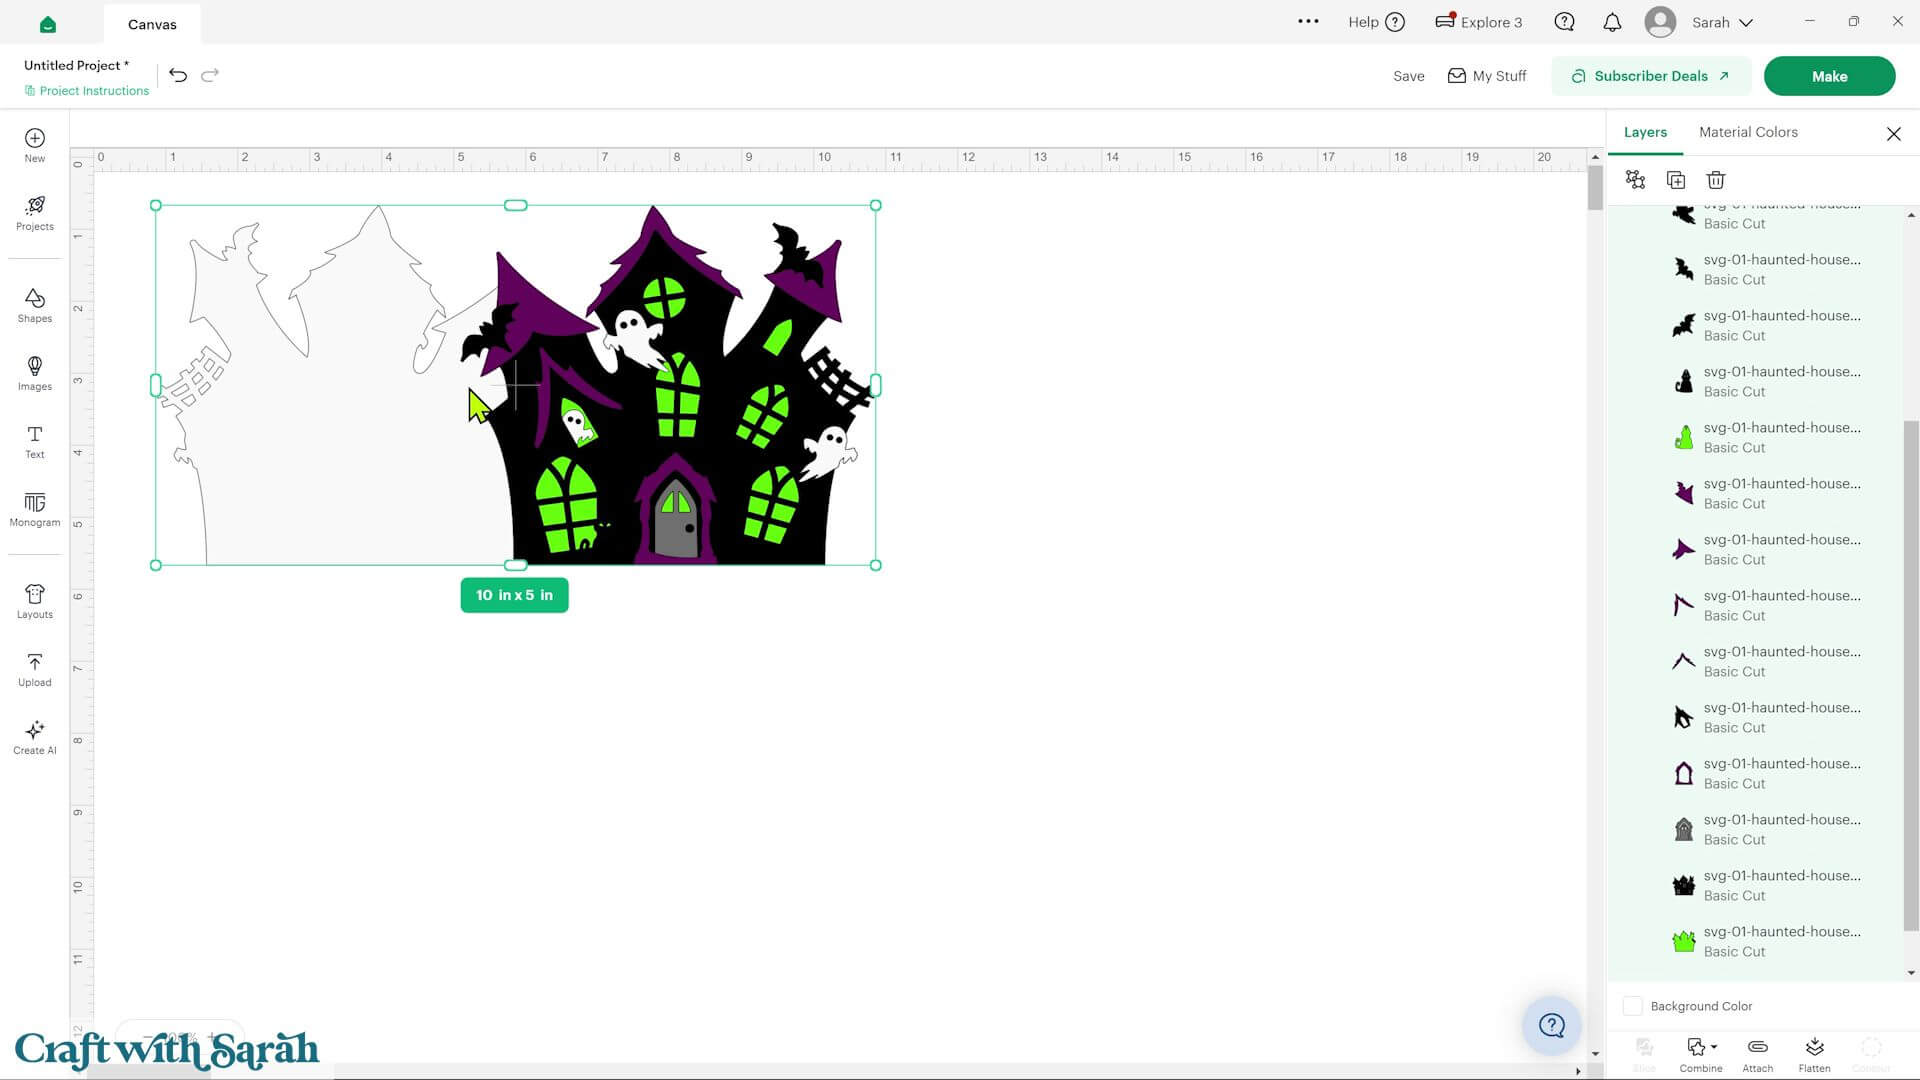
The design should load at approximately 10 inches wide by 5 inches high.
Step 2) Add a score line (optional)
If you’d like the card to fold more easily, add a score line to the base card.
Ungroup the design.
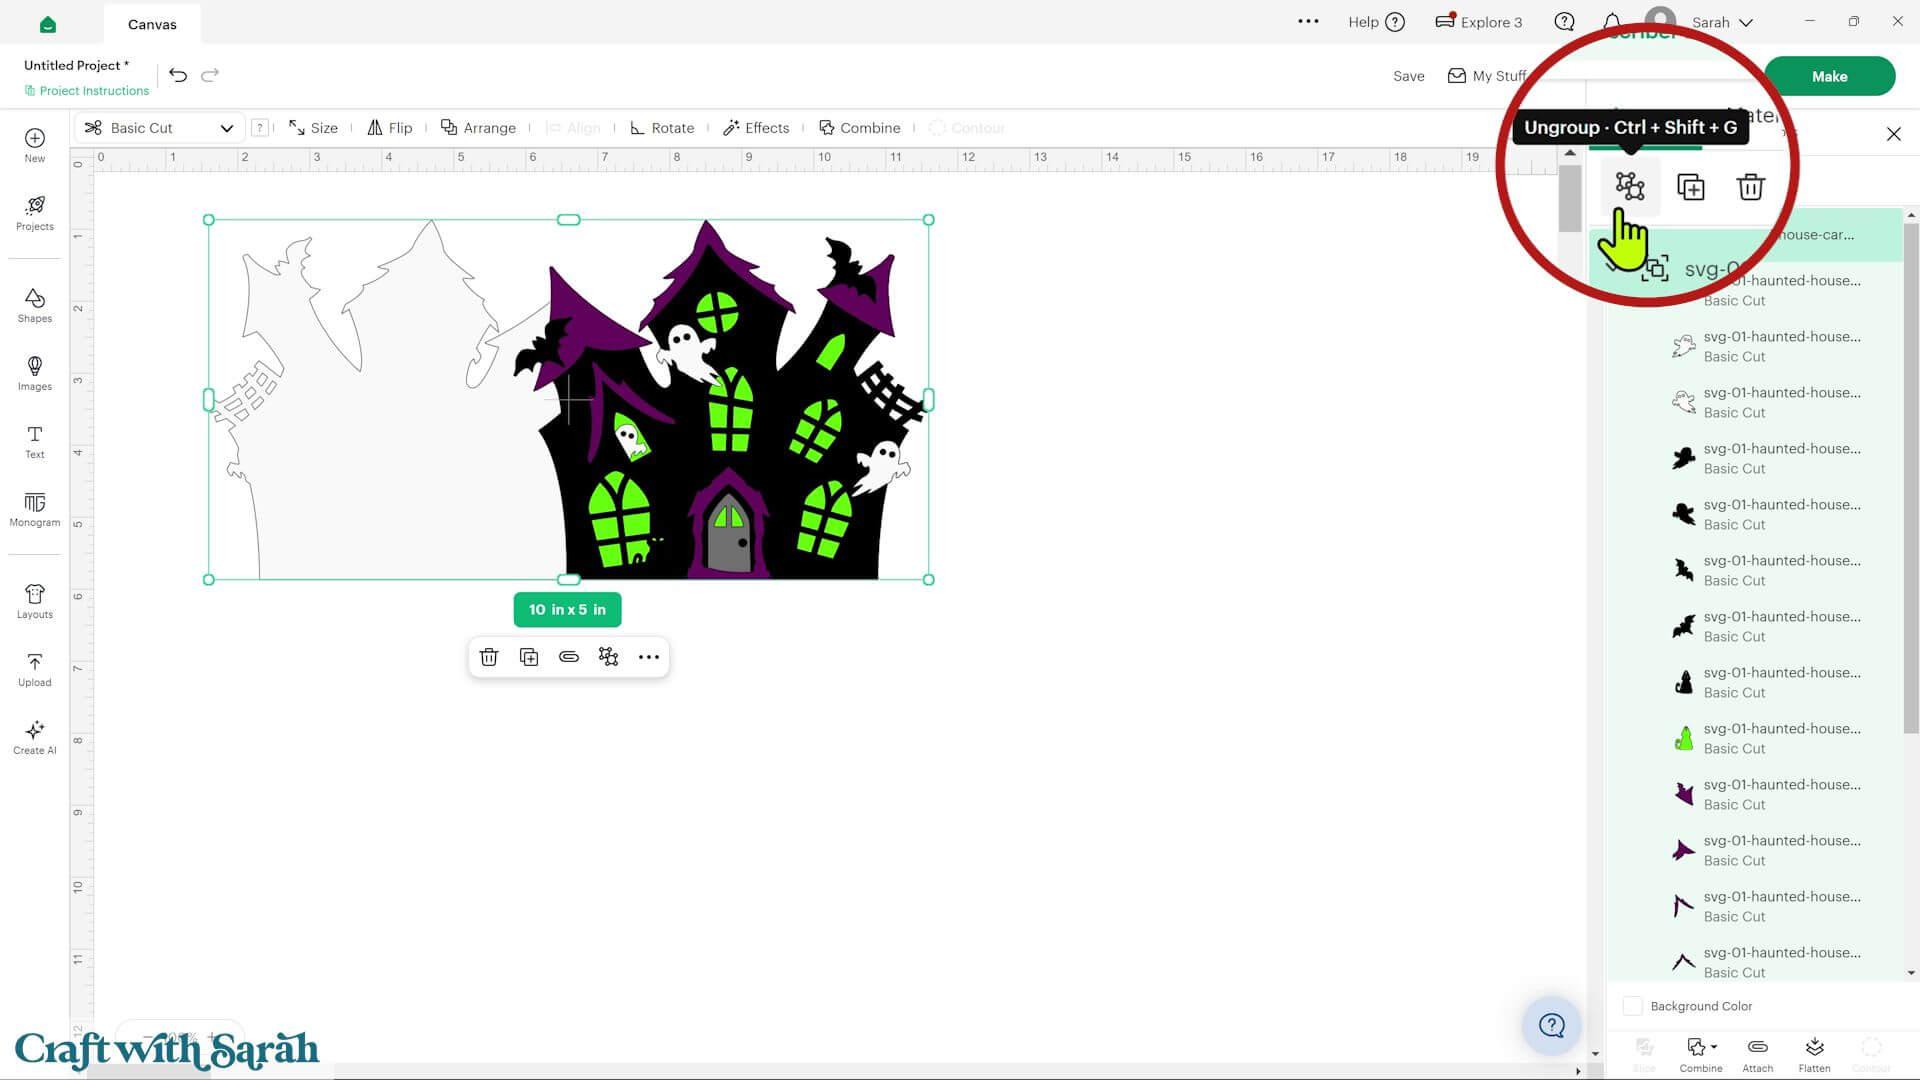
Insert a score line from the “Shapes” menu. Make it the same height as your card.
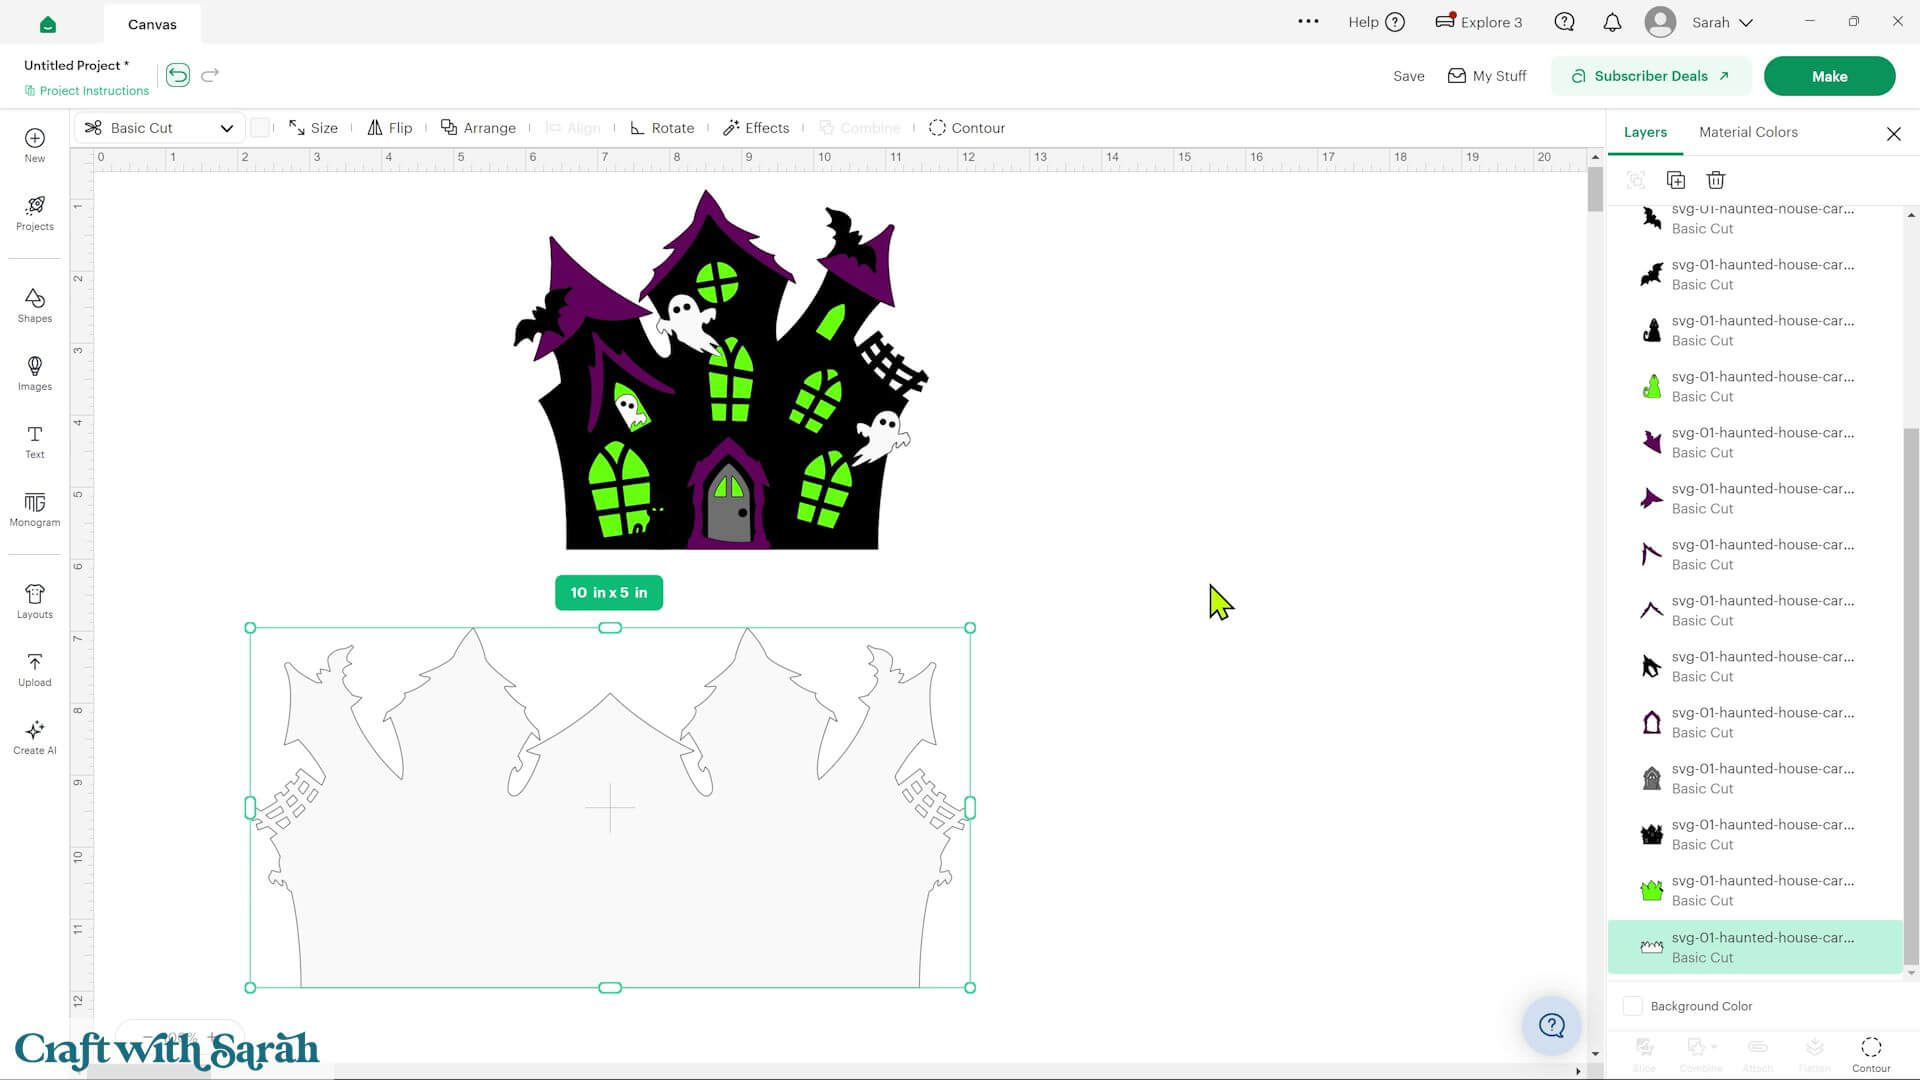
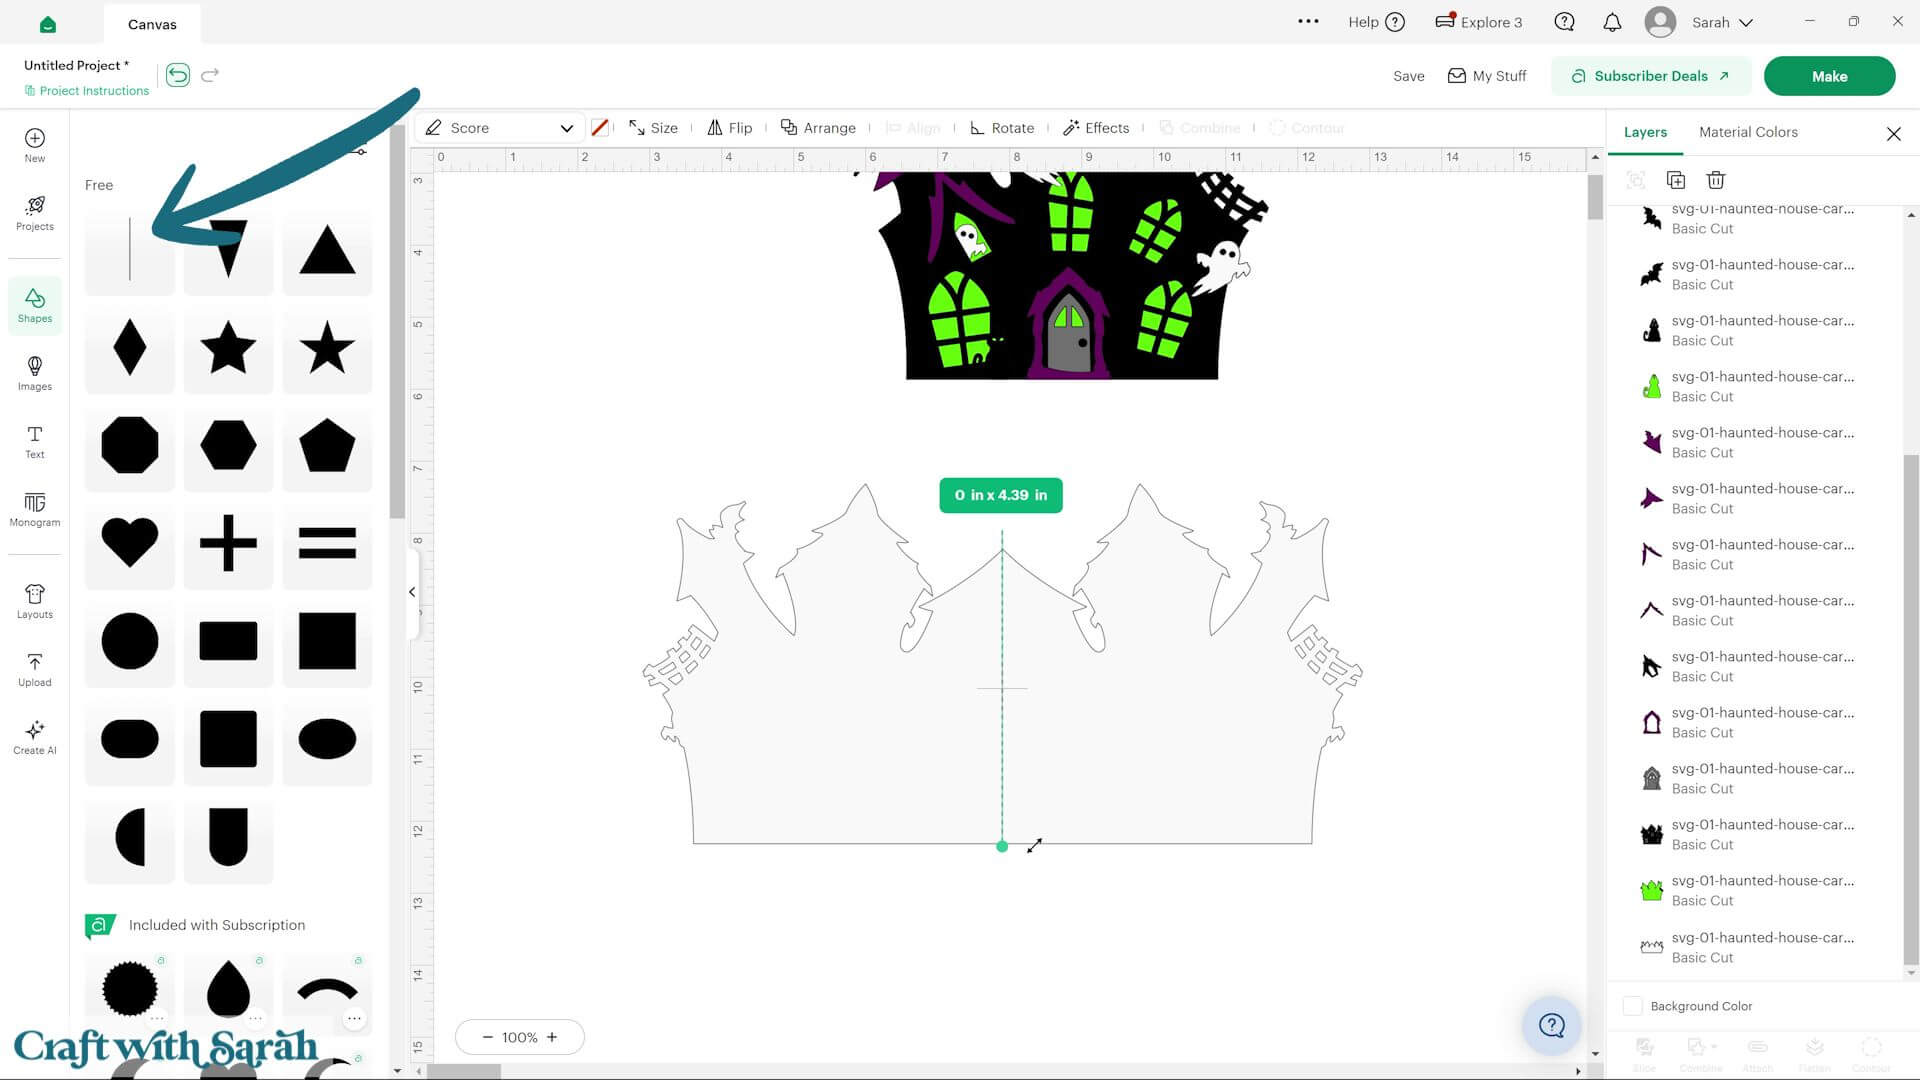
Select the score line and the card base layer and press Align > Horizontal and then Align > Bottom.
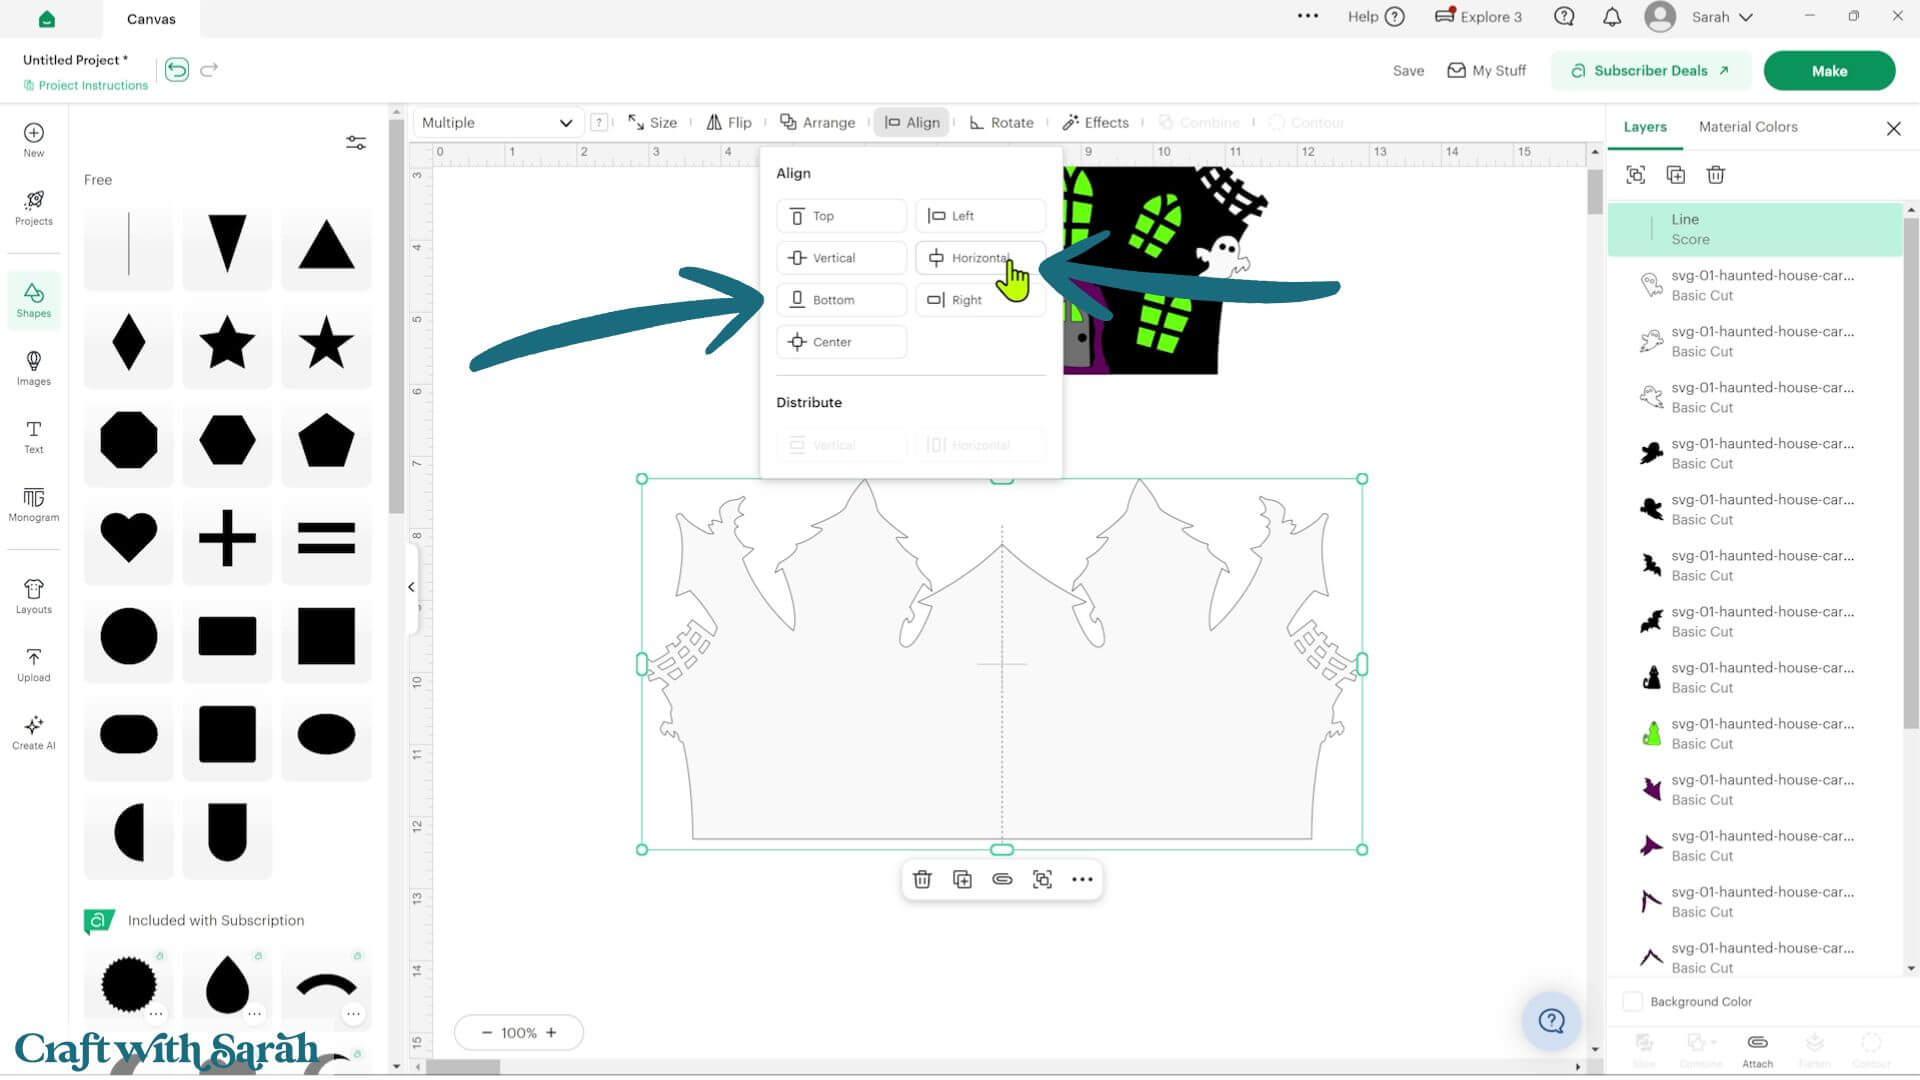
Then select both layers and click ‘Attach’ at the bottom of the layers panel.
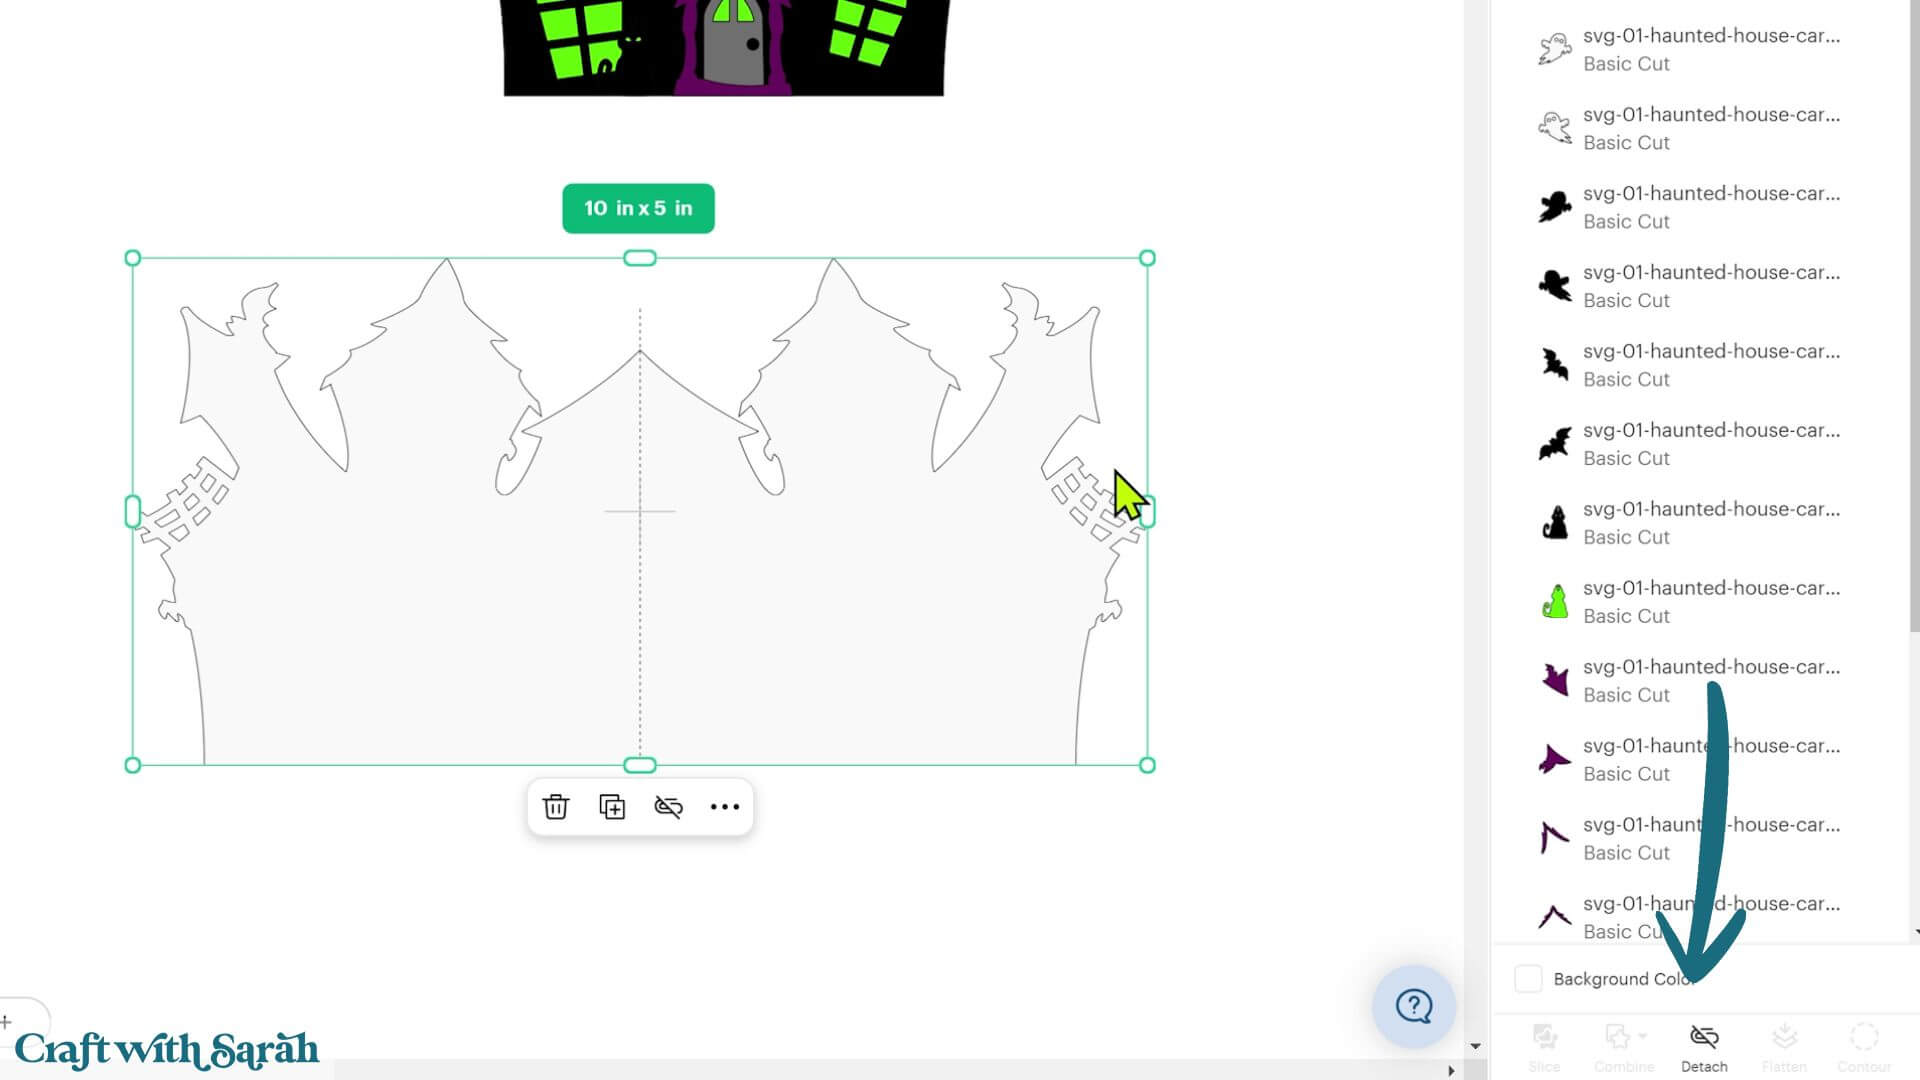
Attach is what tells the Cricut to do the score line on the base card shape.
If you’re making the standard cardstock version, the file is now ready to cut.
Step 3) Prepare for glow-in-the-dark vinyl (optional)
If you’d like the windows to glow when the lights go out, change the front panel of the card to white cardstock.
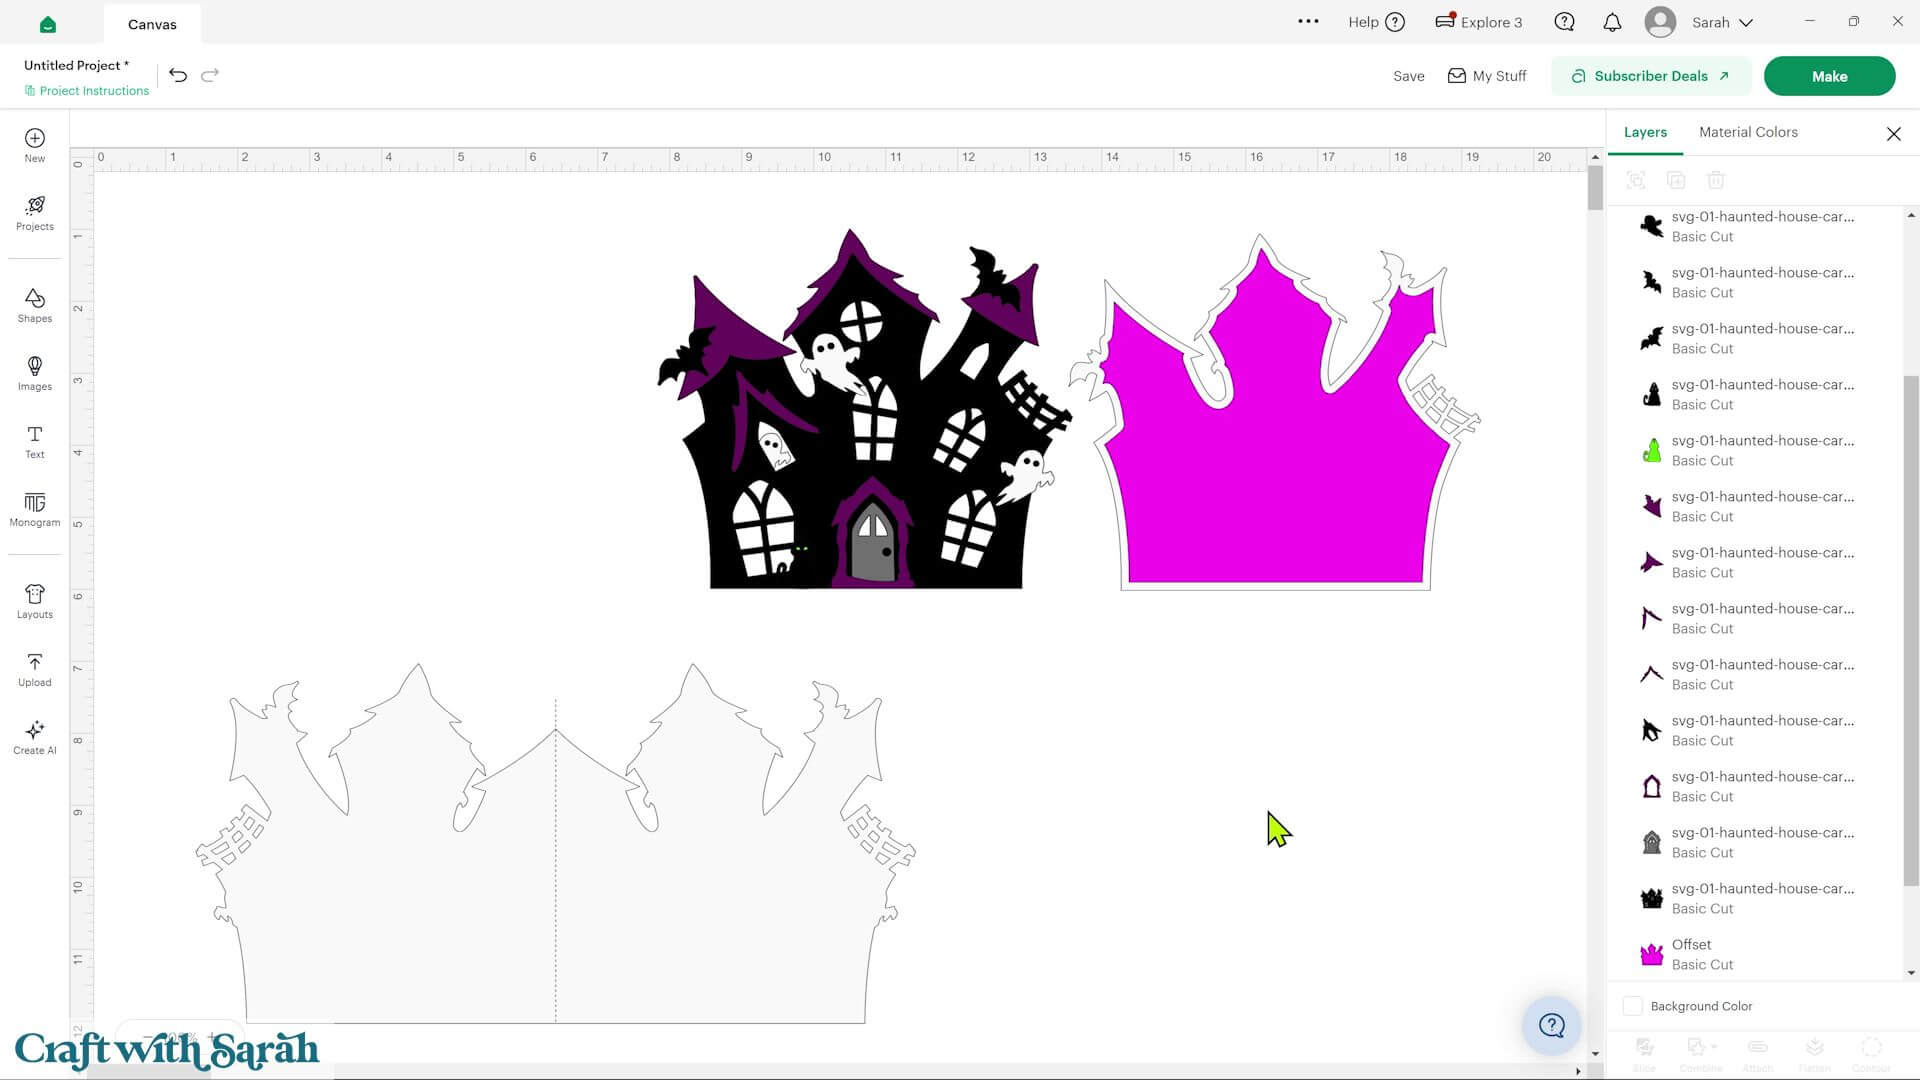
Create a slightly smaller version of this layer using ‘Offset’ with a small negative value.
This creates a backing piece for the heat transfer vinyl while leaving a tiny border that makes everything easier to line up during assembly.
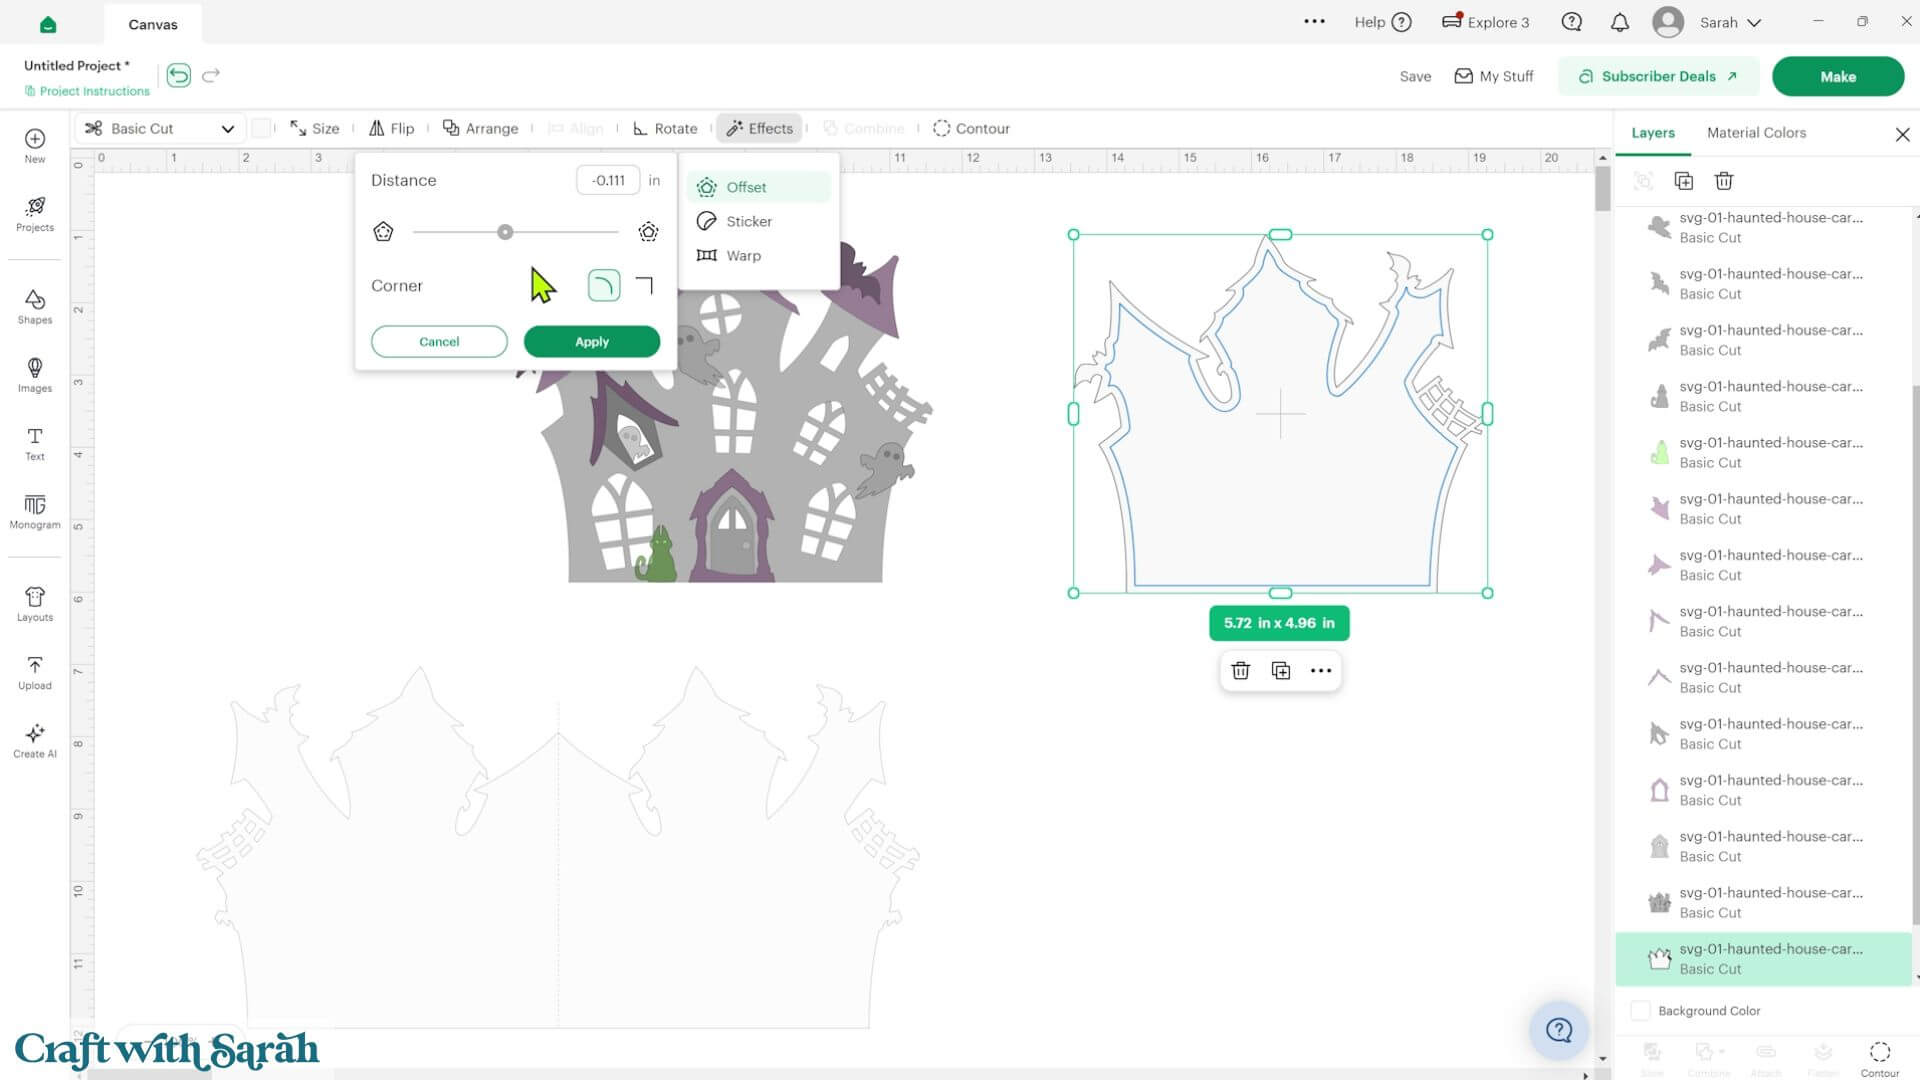
Check that the offset still completely covers all of the window openings before cutting.
Change this offset layer to a different colour in Design Space so it cuts on its own mat.
Step 4) Cut out all the pieces
When you’re happy with how the project is looking in Design Space, click “Make” and follow the instructions on-screen to cut out all the pieces.
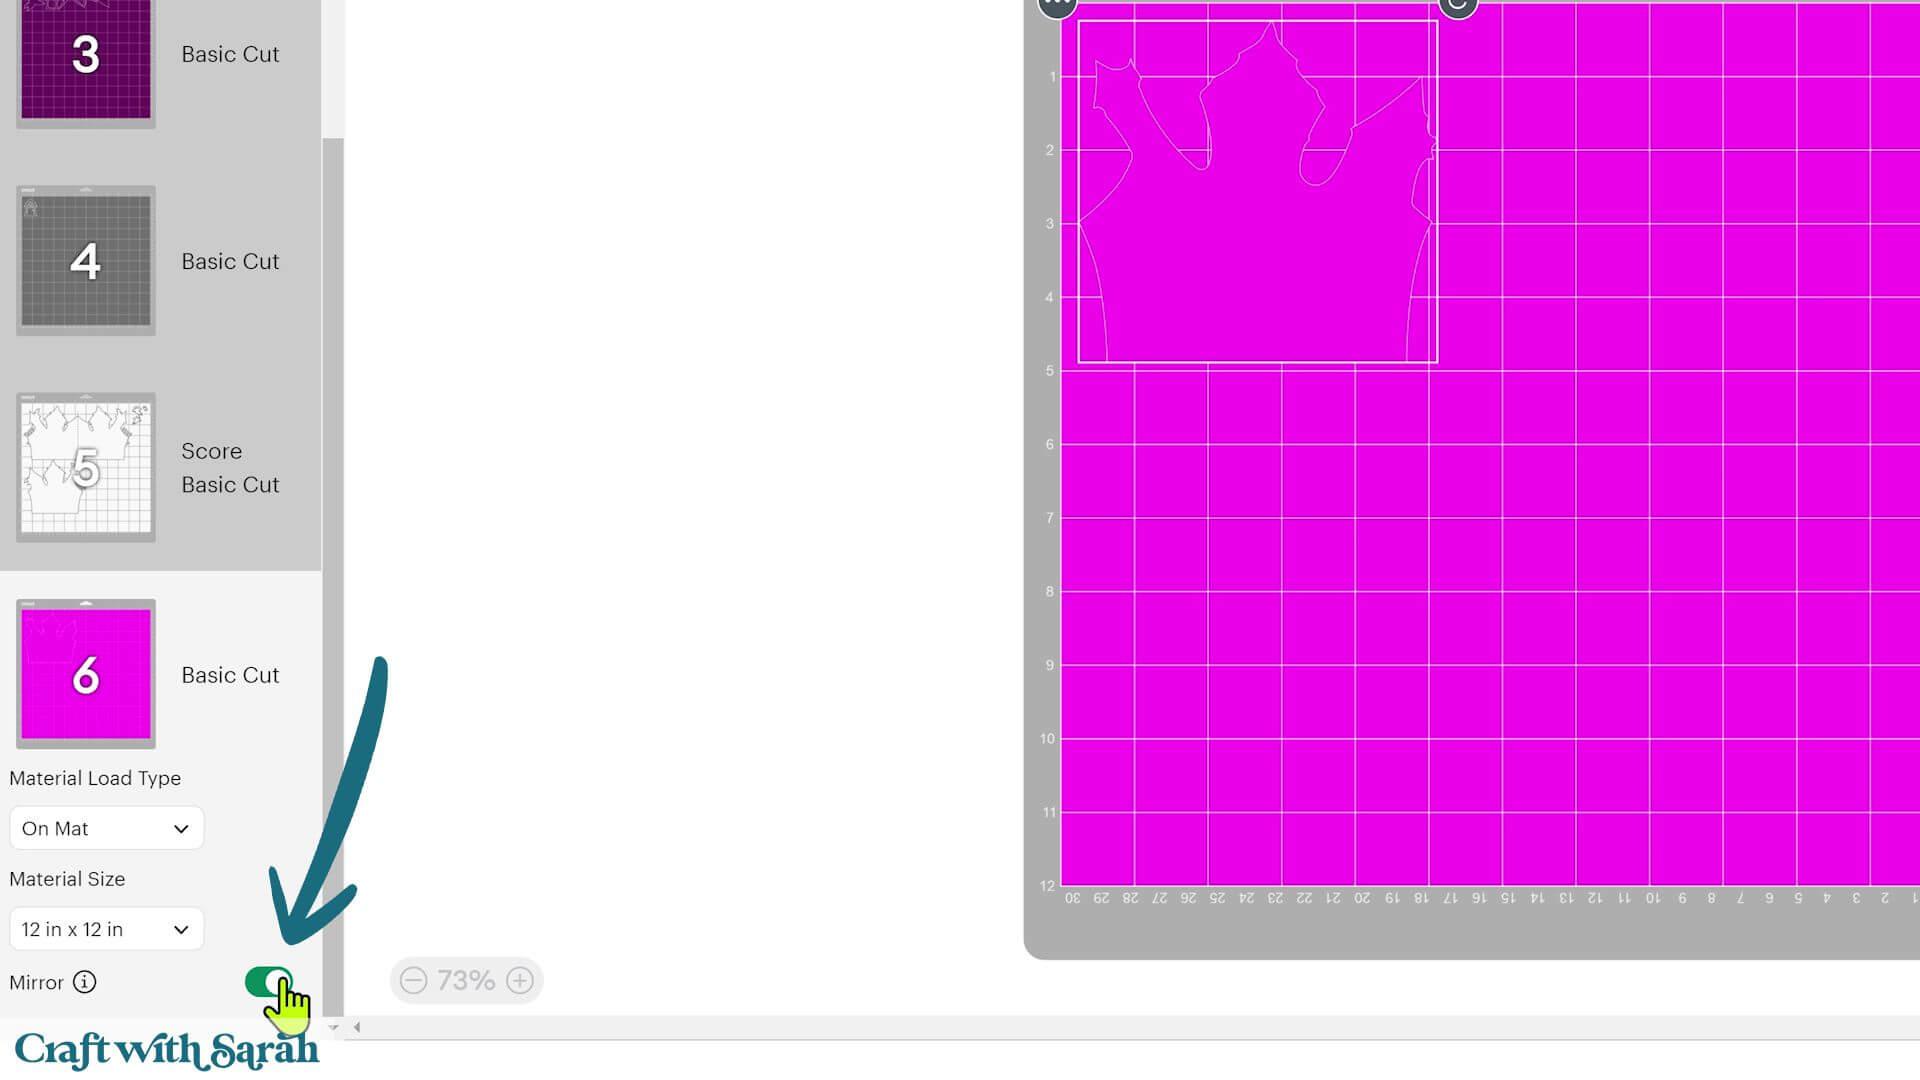
To change the paper size, go into the dropdowns over on the left side of the screen and choose the paper size that you want to use. You need to change it for every single colour.
To save space on your cardstock, you can move things around by clicking and dragging. Make sure when you’re moving things about that nothing overlaps because otherwise, it won’t cut out properly.
If you’re cutting heat transfer vinyl, remember to mirror the vinyl layer before cutting.
None of the cardstock pieces should be mirrored.
TIP: New to using cardstock with your cutting machine? Check out these machine help guides for Cricut, Silhouette and ScanNCut that go through every step of the process, including tips for getting the best quality cuts from your machine.
Step 5) Prepare the base card
Fold the base card in half along the score line.
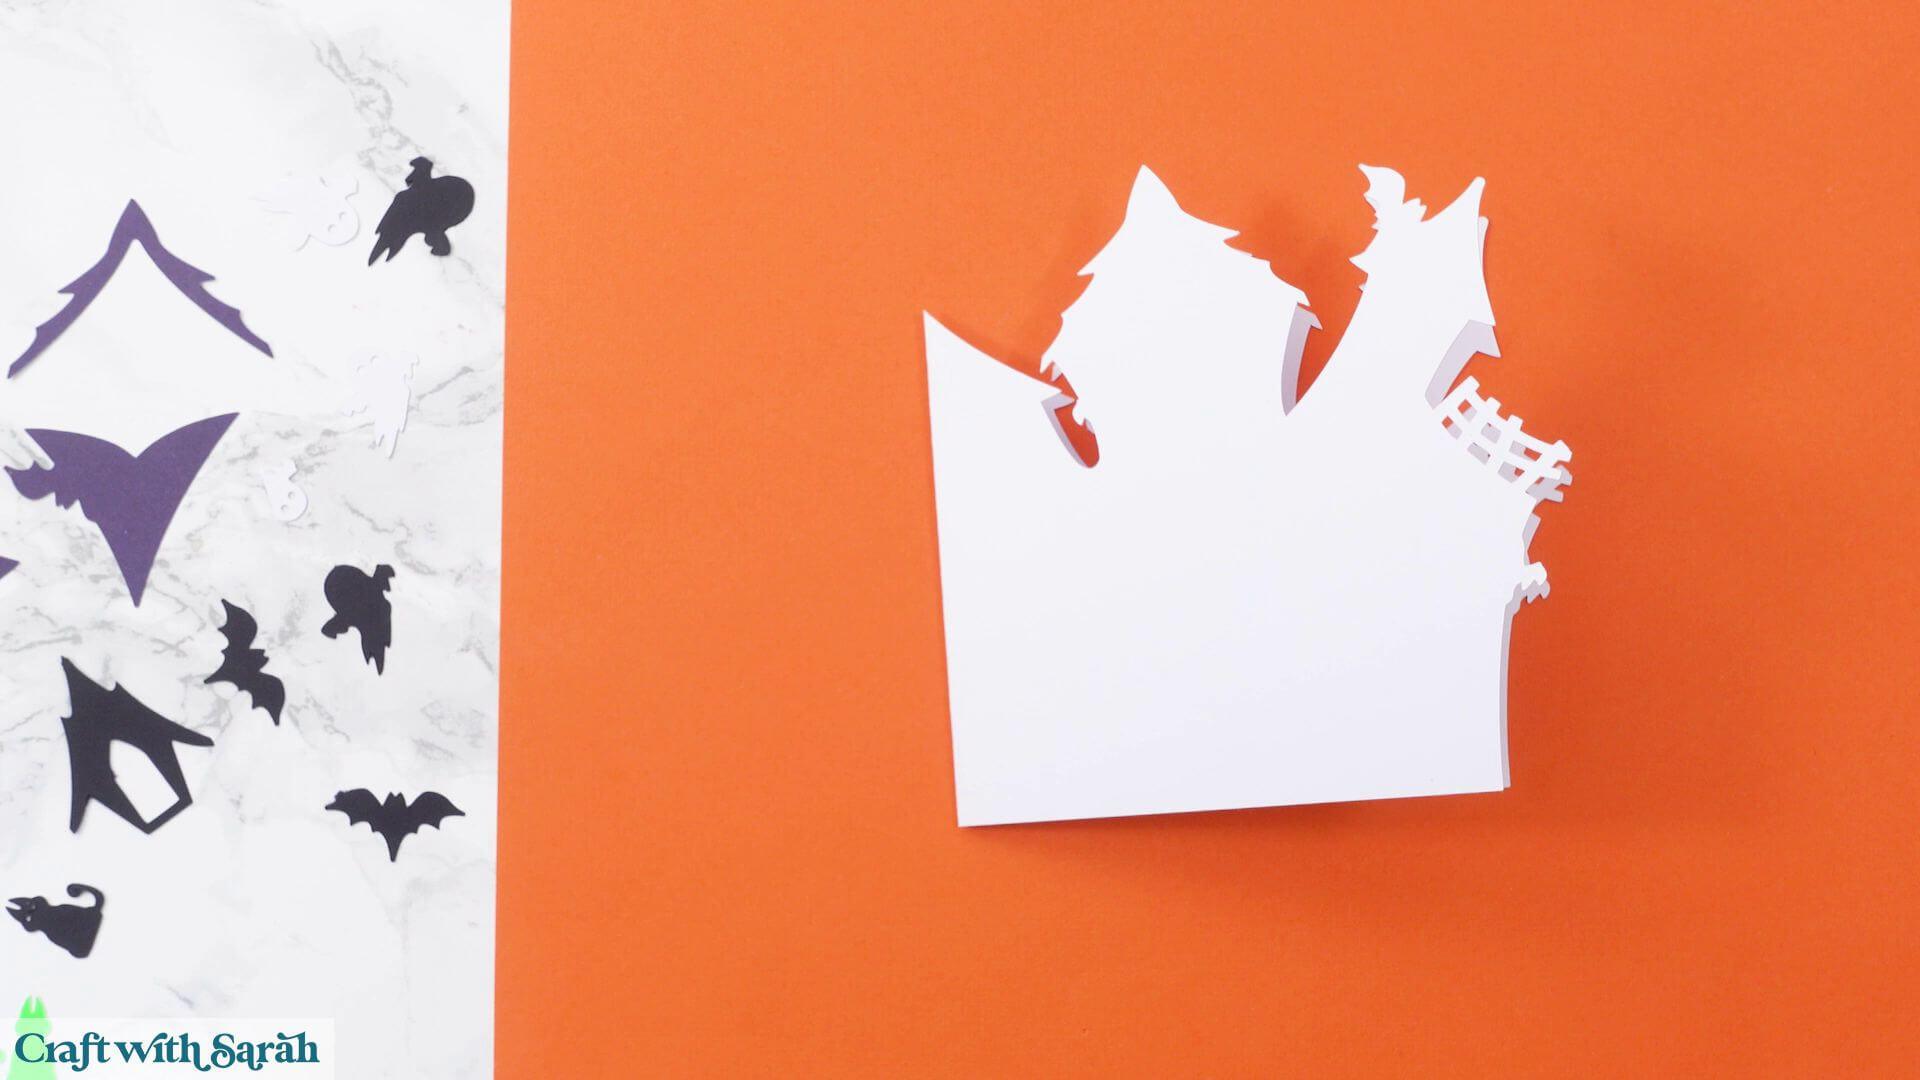
For the standard cardstock version, glue the coloured backing layer onto the front of the card.
If you’re making the glow-in-the-dark version of the card, the heat transfer vinyl needs to be applied before you begin assembling the card.
Weed away the excess vinyl, leaving only the window shapes on the carrier sheet. Trim around the outside if you’d like to make it a little easier to position.
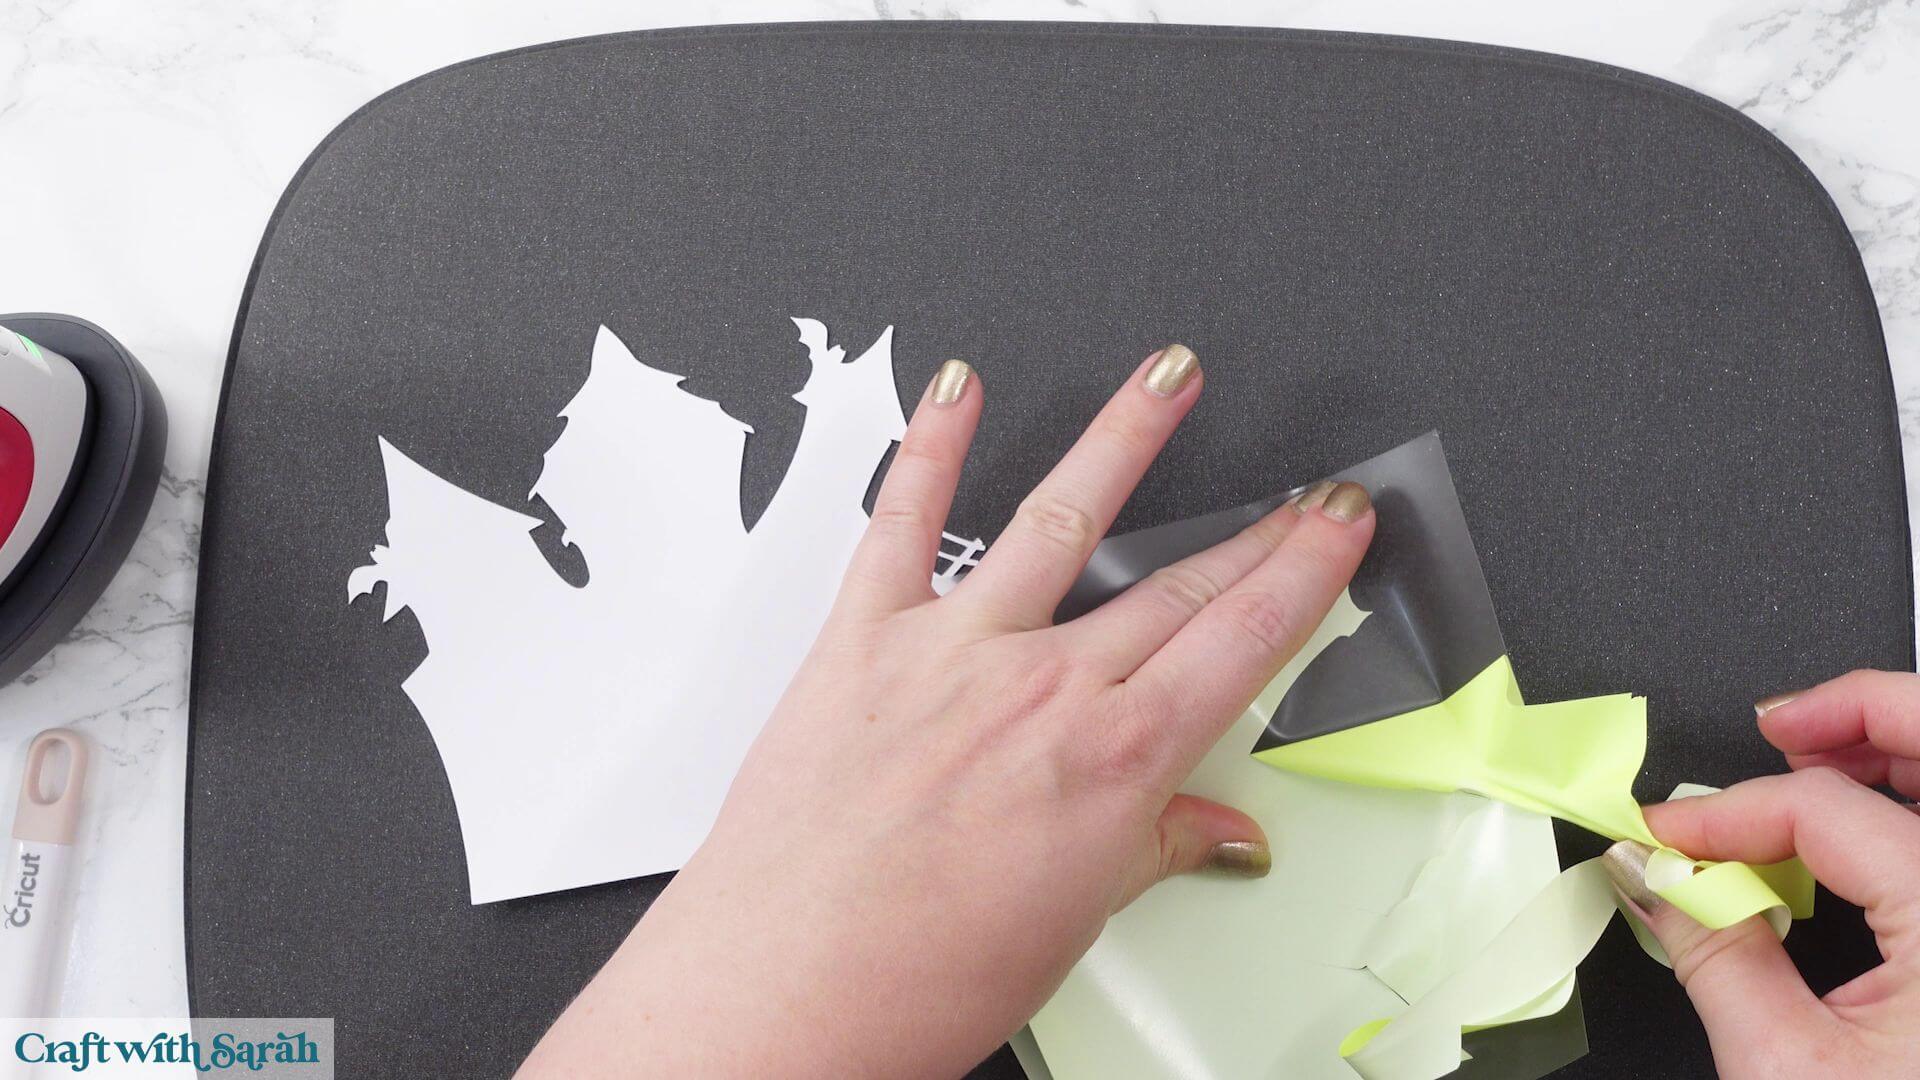
Place the vinyl onto the white cardstock backing piece, keeping an even border all the way around the edges. This should line up with the offset layer you created in Cricut Design Space.
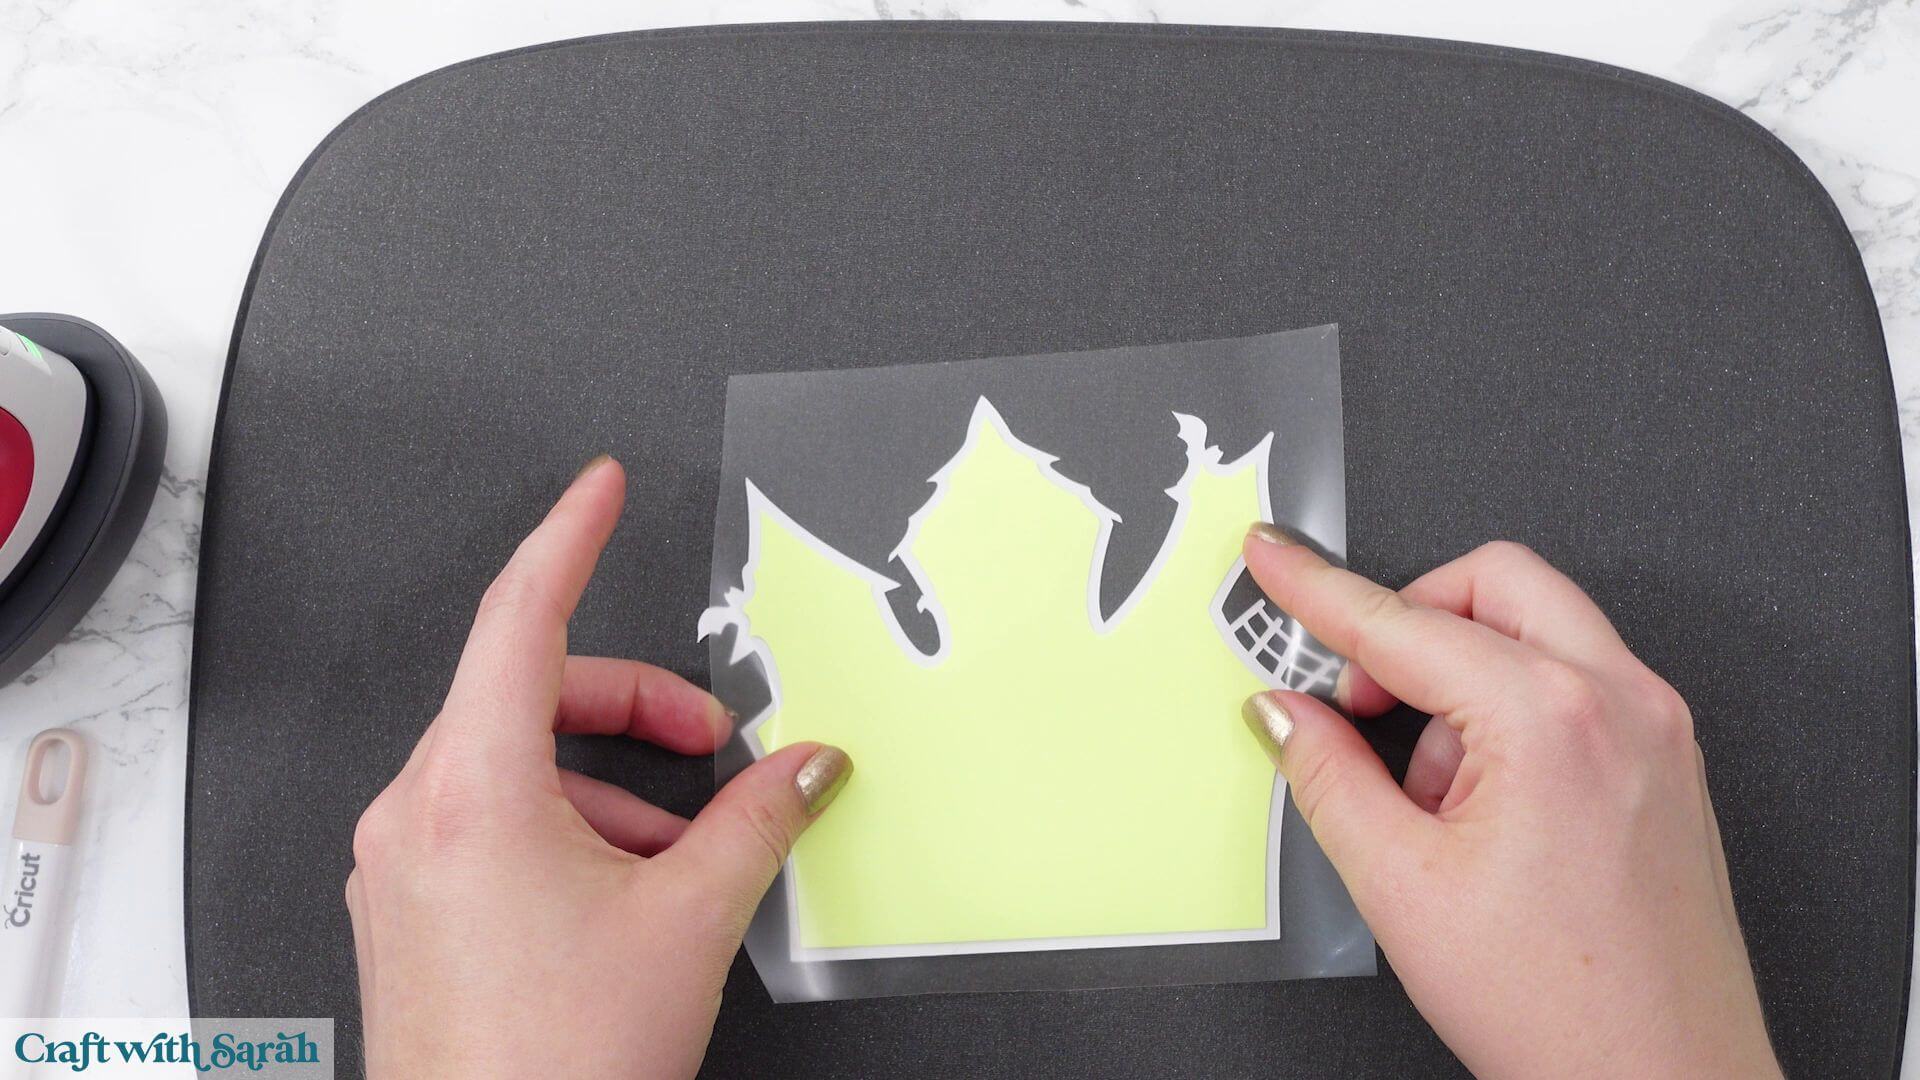
Cover the design with a Teflon or pressing sheet before applying heat. If you don’t have one, take extra care if pressing directly onto the carrier sheet.
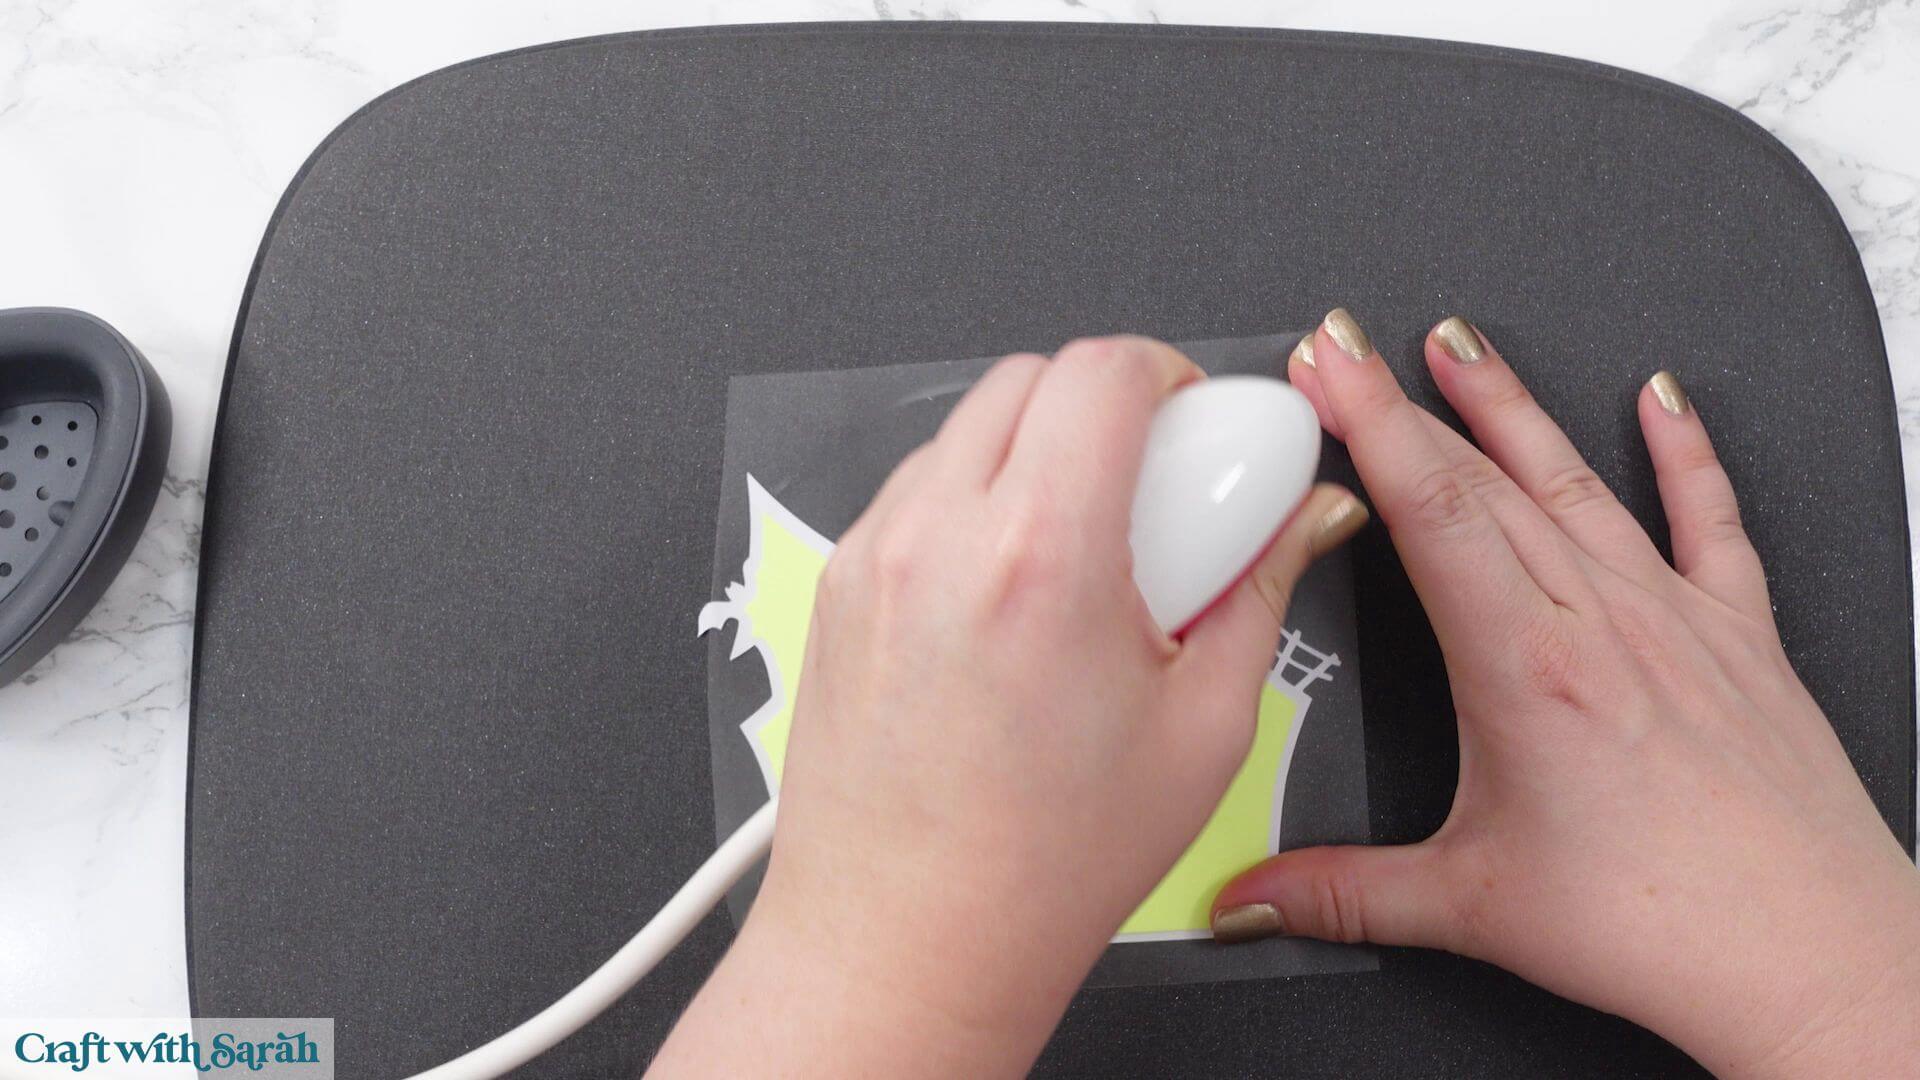
Because you’re applying the vinyl to cardstock rather than fabric, you only need light pressure and a short pressing time. Move your heat press slowly over the design until the vinyl has adhered to the cardstock.
Allow the vinyl to cool, or peel while warm if recommended by the manufacturer, then carefully remove the carrier sheet.
Your window backing layer is now ready to be assembled into the card.
Step 6) Stick the card together
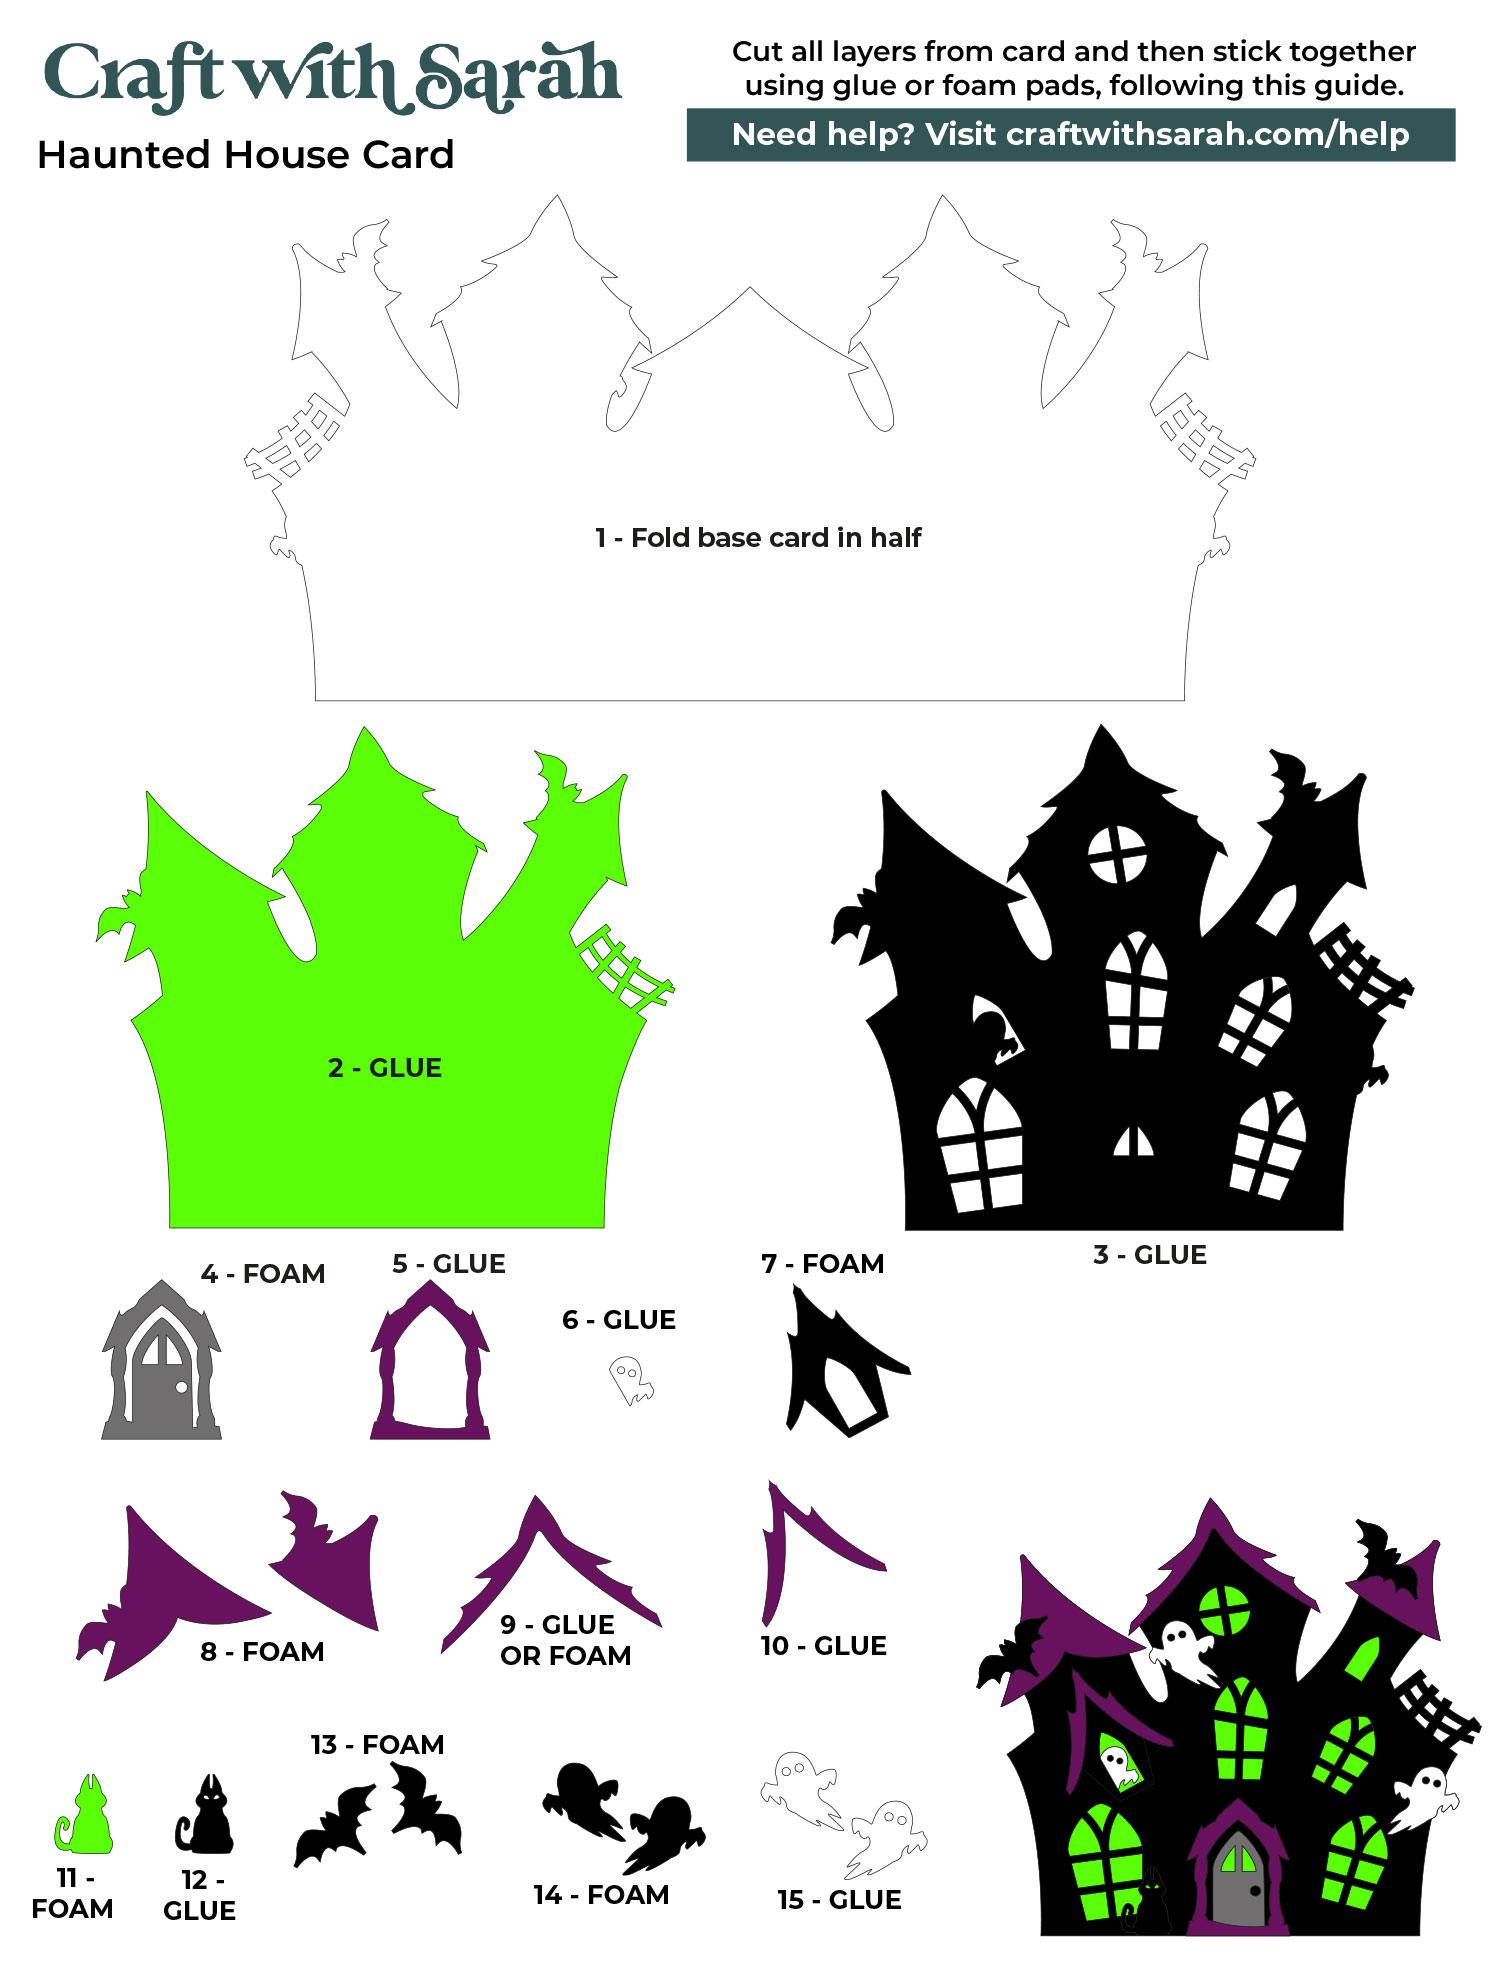
Use 3D foam pads and glue to stick the layers together.
Use this guide to see the order to stick the layers together in.
A printable version of this assembly guide is included in the folder when you download the cut files.
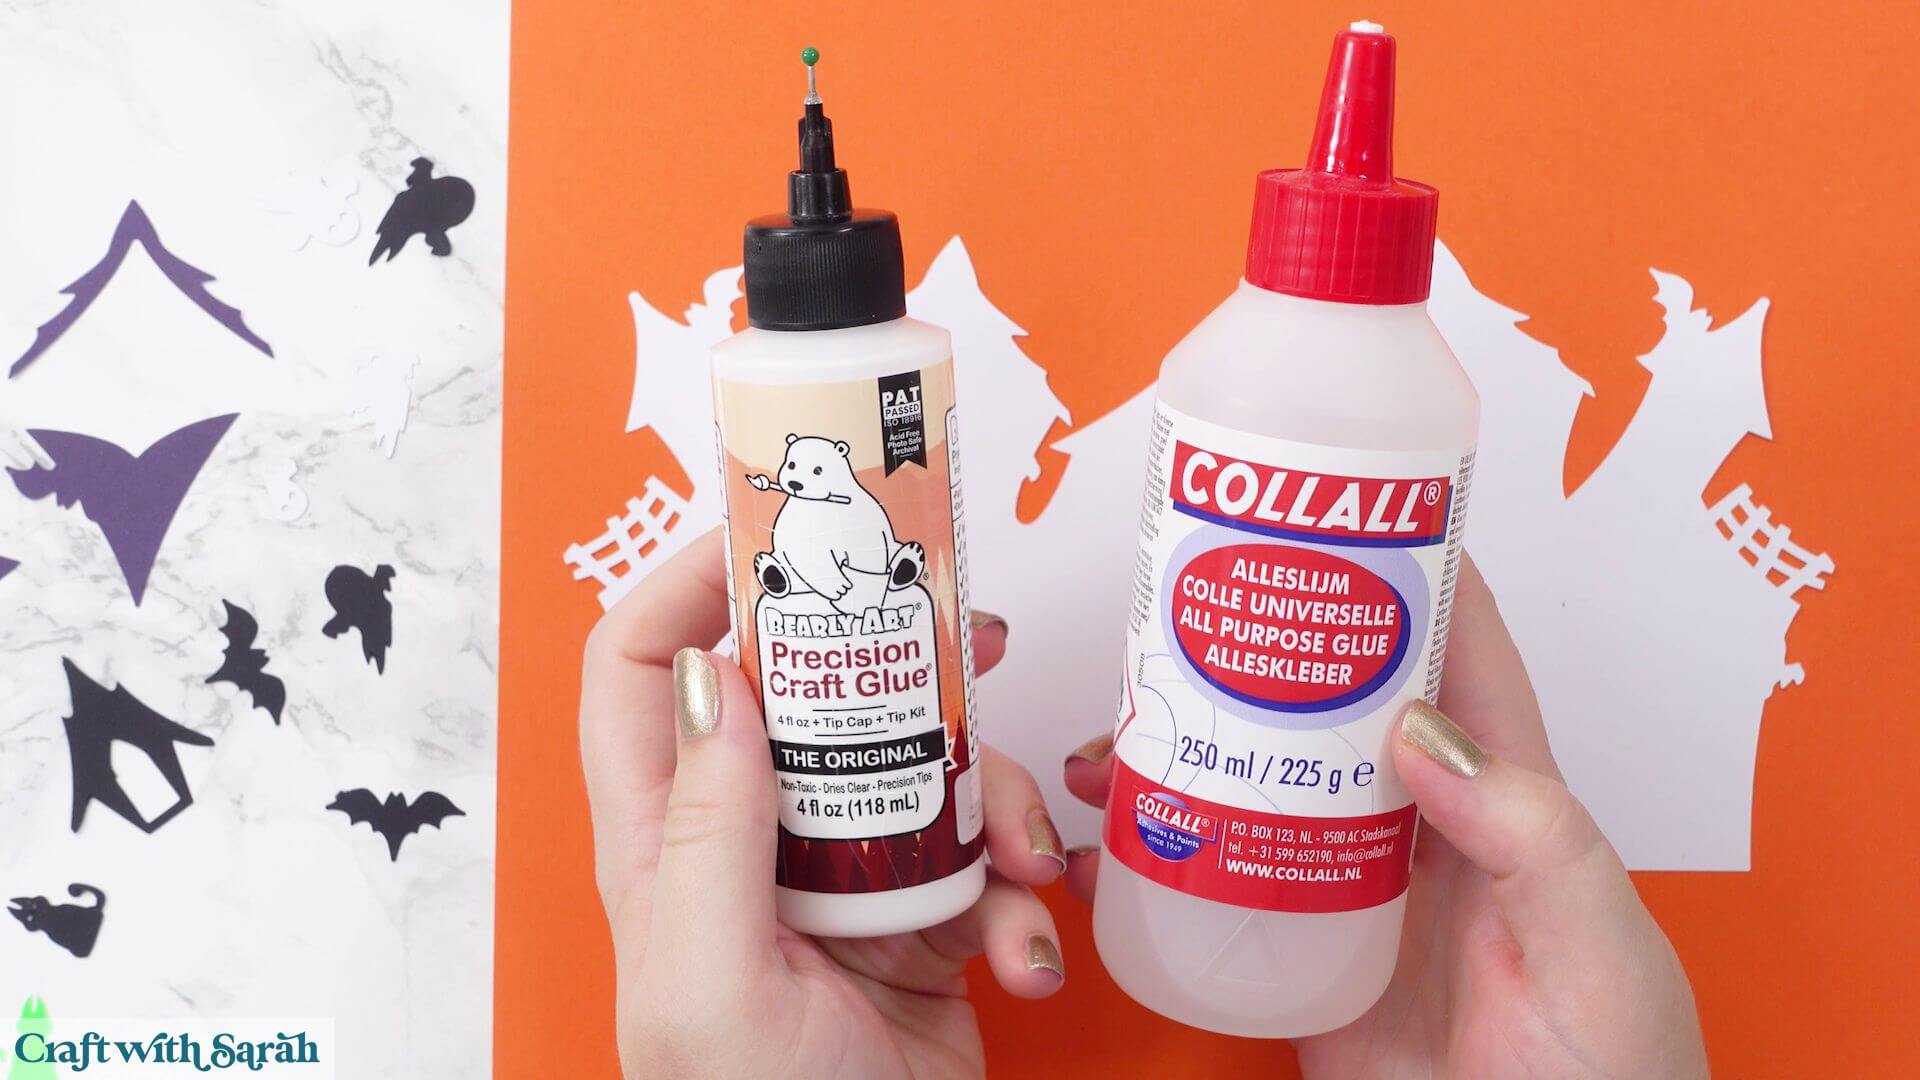
My favourite glues to use on papercraft projects are Bearly Art Glue and Collall All Purpose Glue.
These are great because they don’t “warp” or bend the cardstock like some glues do. You can use as much of it as you want and the card stays perfect – and it dries perfectly clear too!
Bearly Art Glue comes with a tiny nozzle to make it easy to apply glue to small areas of card. The Collall glue doesn’t come with this, so it’s easiest to decant it into needle tip applicator bottles so that you have more control.
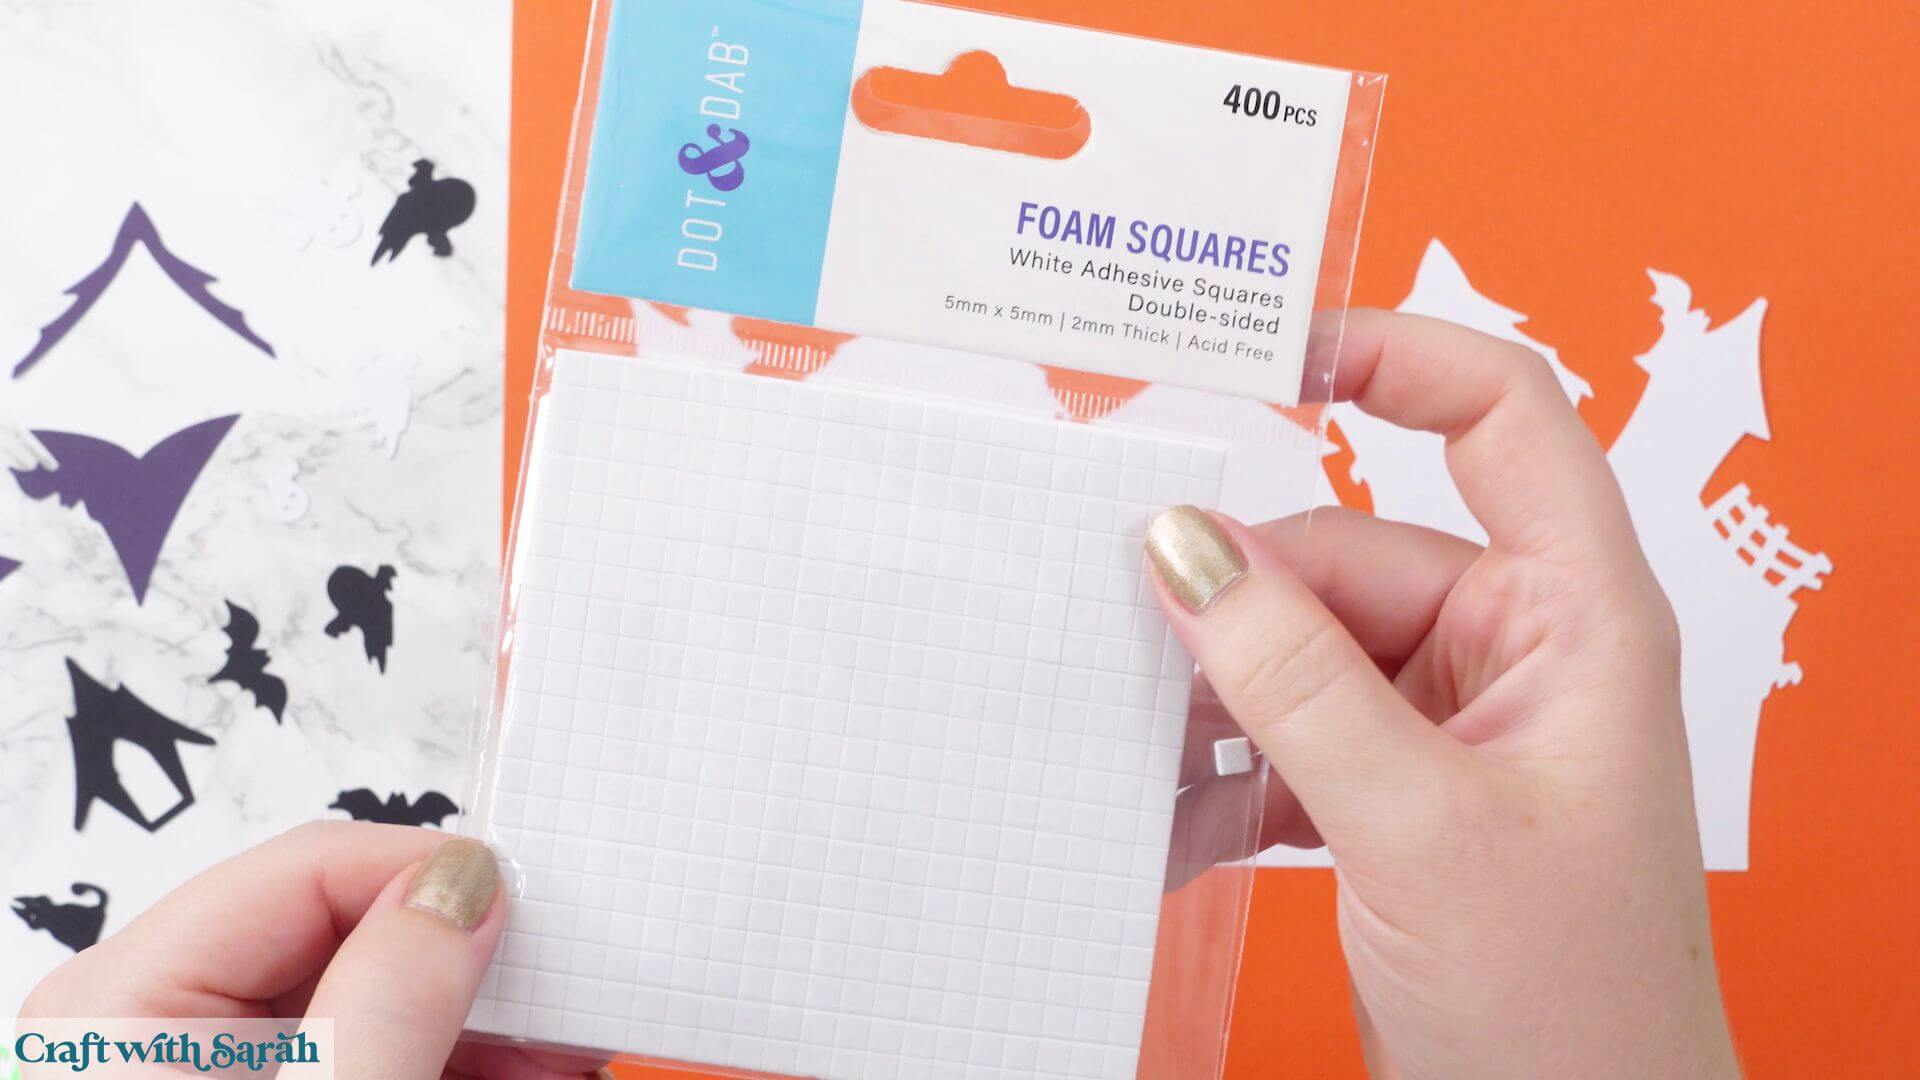
The foam pads that I use are from “Dot & Dab”, but any foam squares will work. If yours are big then you may need to cut them smaller with scissors to fit inside the edges of the layers.
When adding the foam pads to larger pieces of card, make sure you add some in the middles of the pieces of card so it gives stability to the middles.
If you don’t add any foam pads in the middles then it can “sag” under the weight of the other layers which doesn’t look as good.
Continue sticking the pieces together, following the assembly guide, until your papercraft is all finished.
Step 7) Prepare the envelope SVG
Upload the separate envelope SVG into Cricut Design Space.
The file should load at 12 x 12 inches.
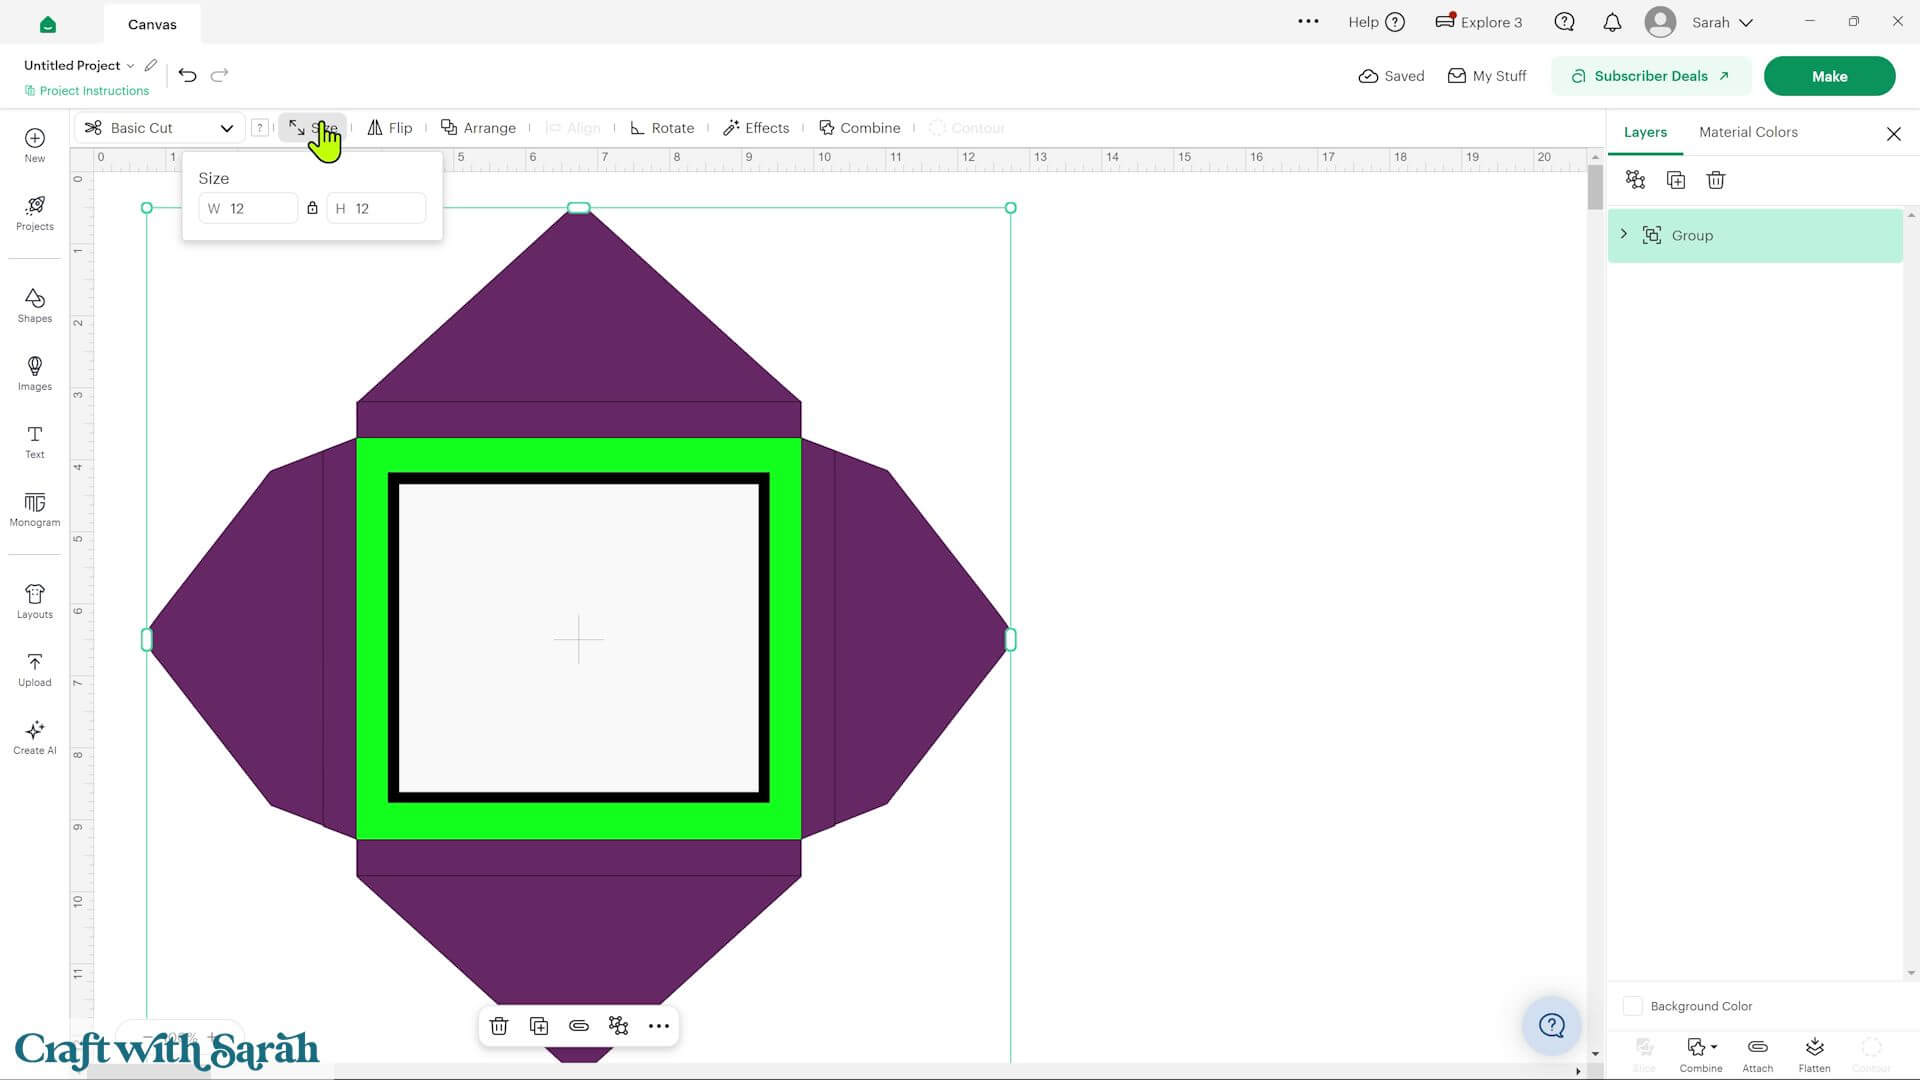
Ungroup the design and locate the green rectangle.
Change this layer to ‘Score’.
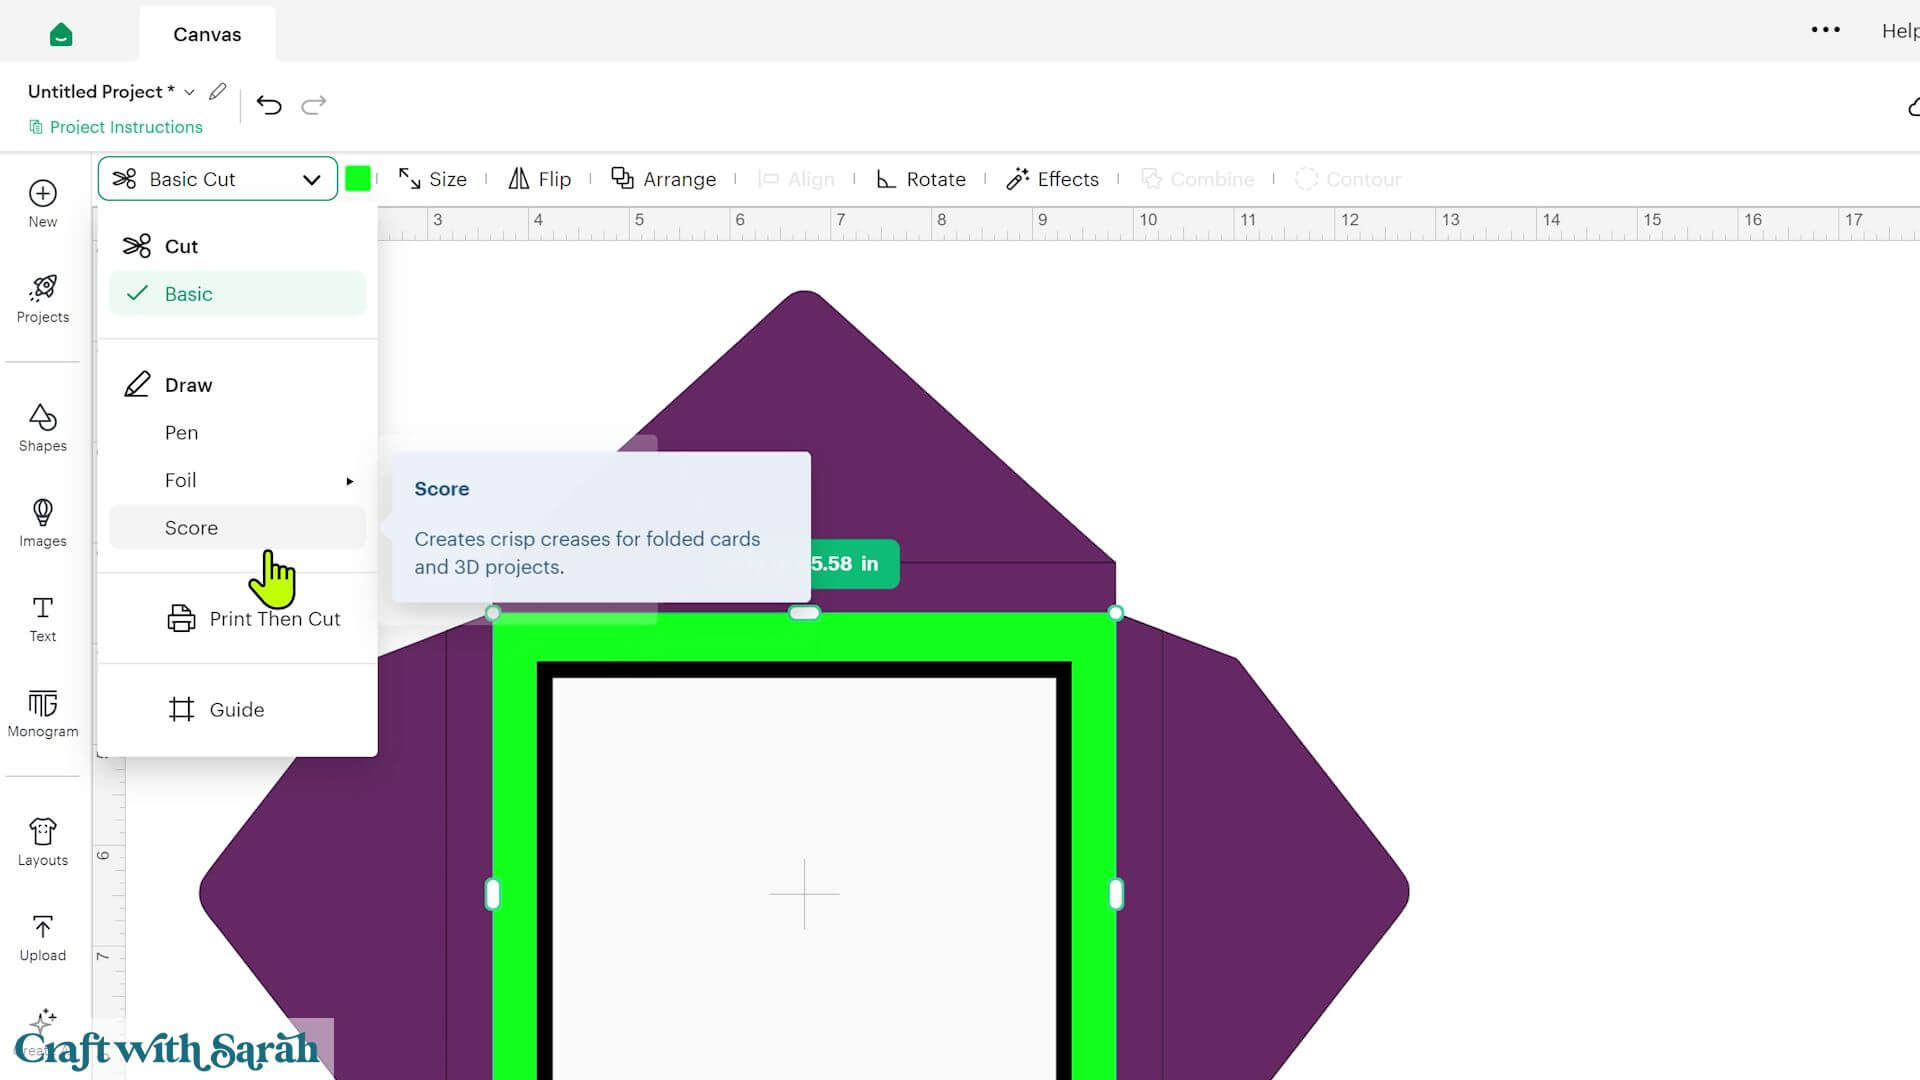
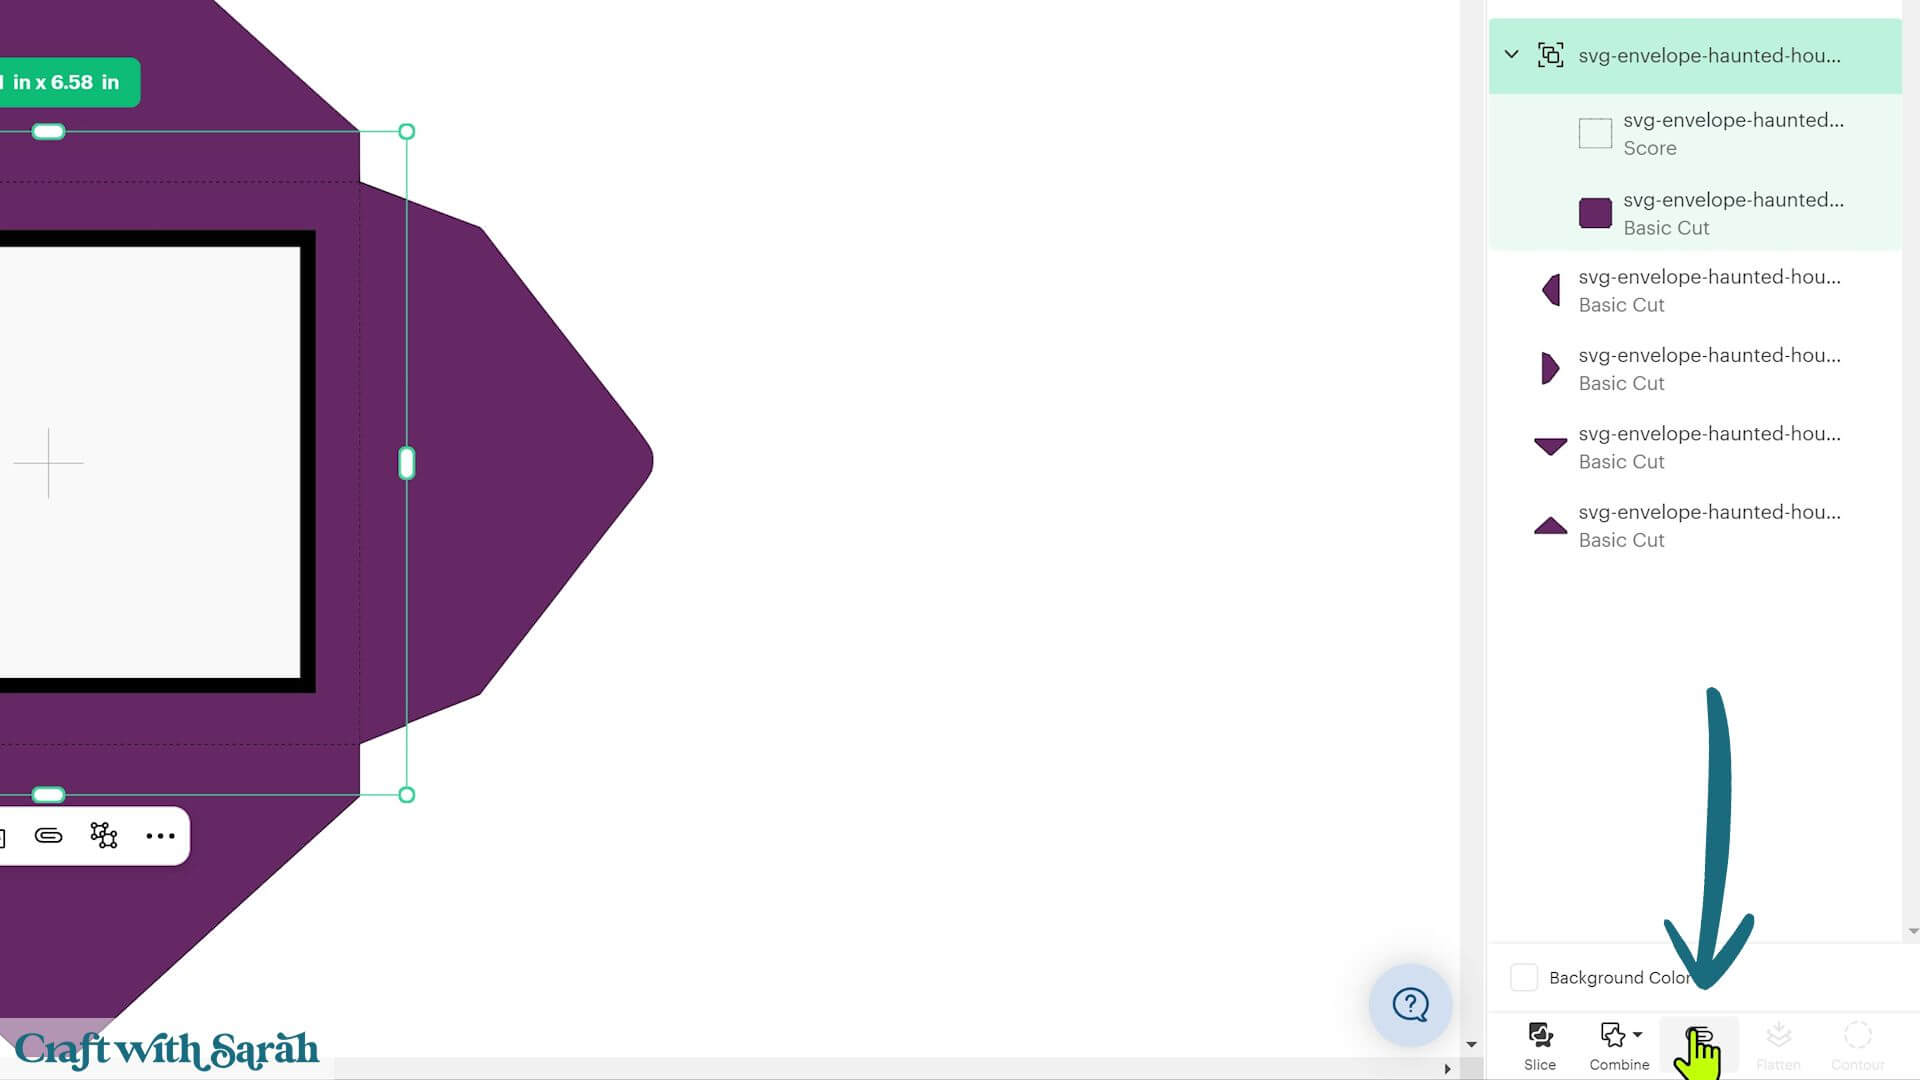
Then select it together with the envelope base and click ‘Attach’.
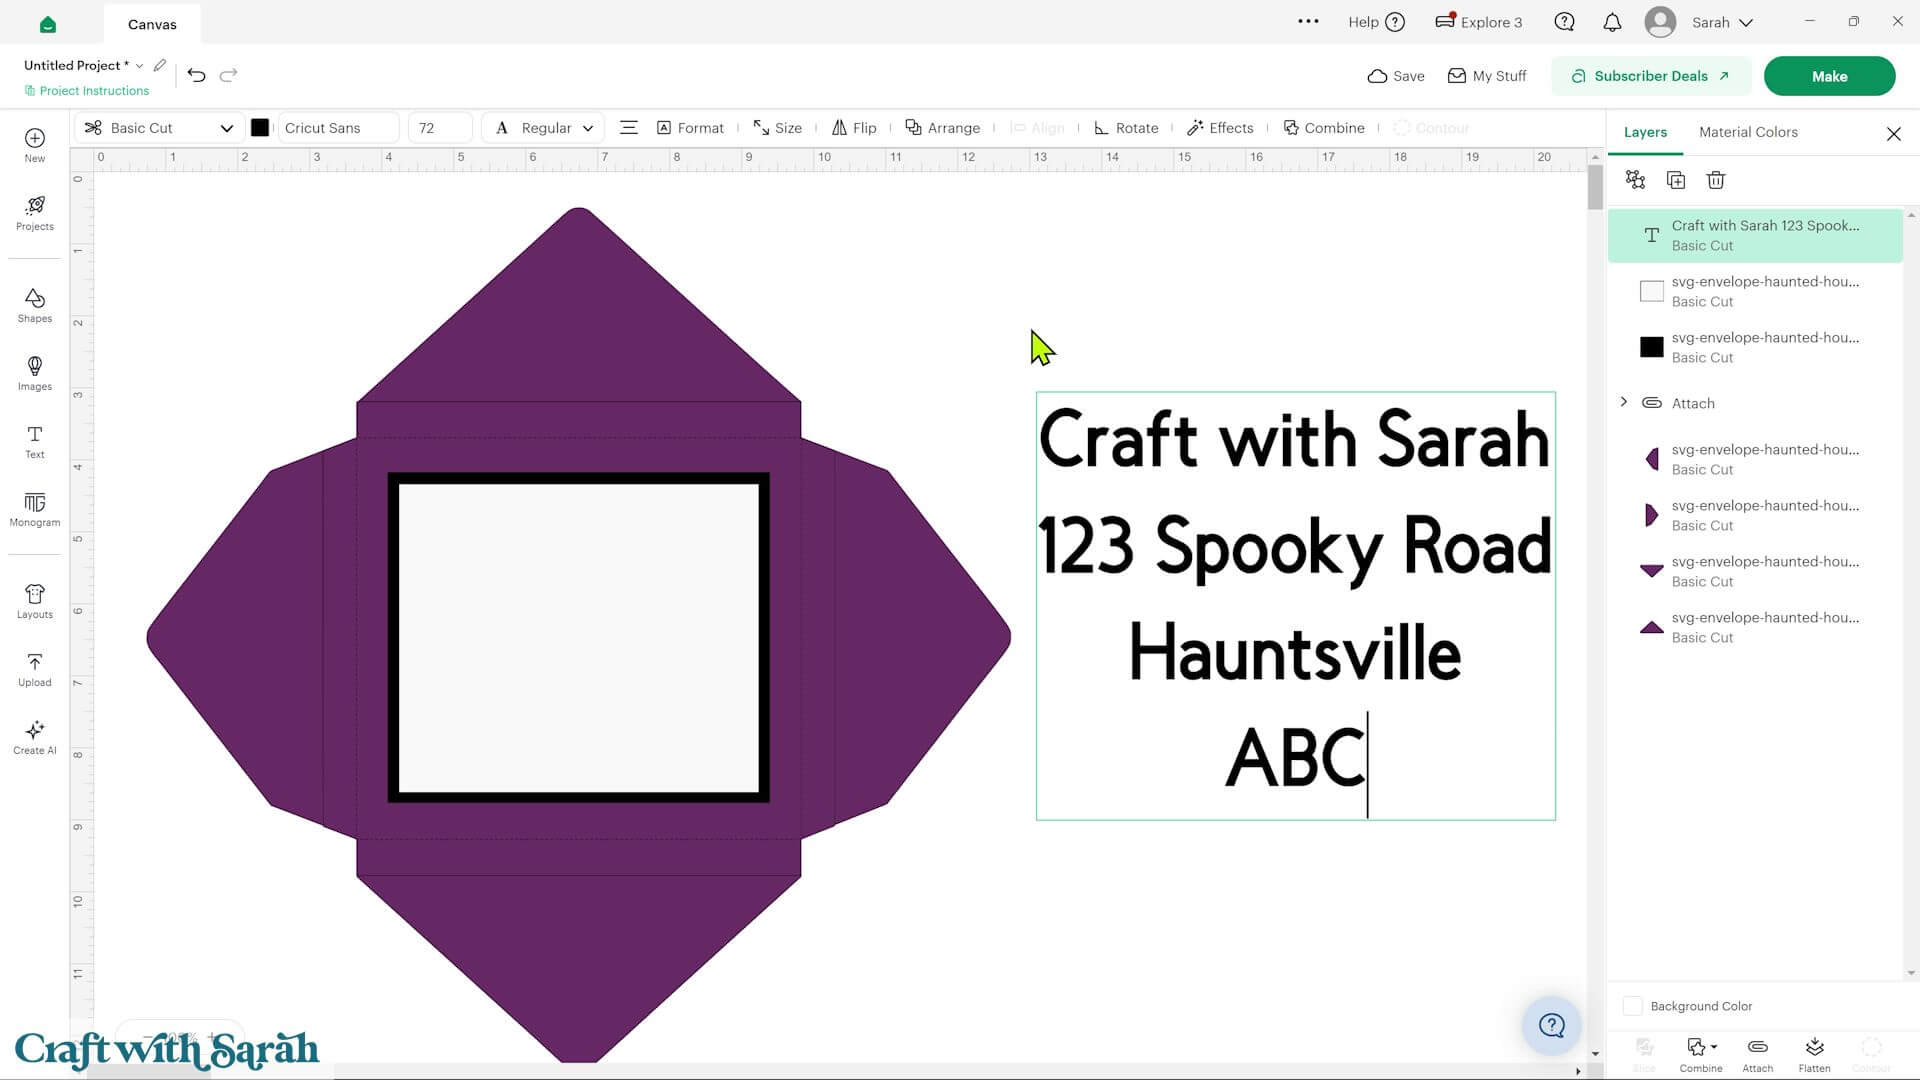
The envelope also includes an optional address panel.
If you’d like your Cricut to write the address for you, add a text box in Design Space and type the address.
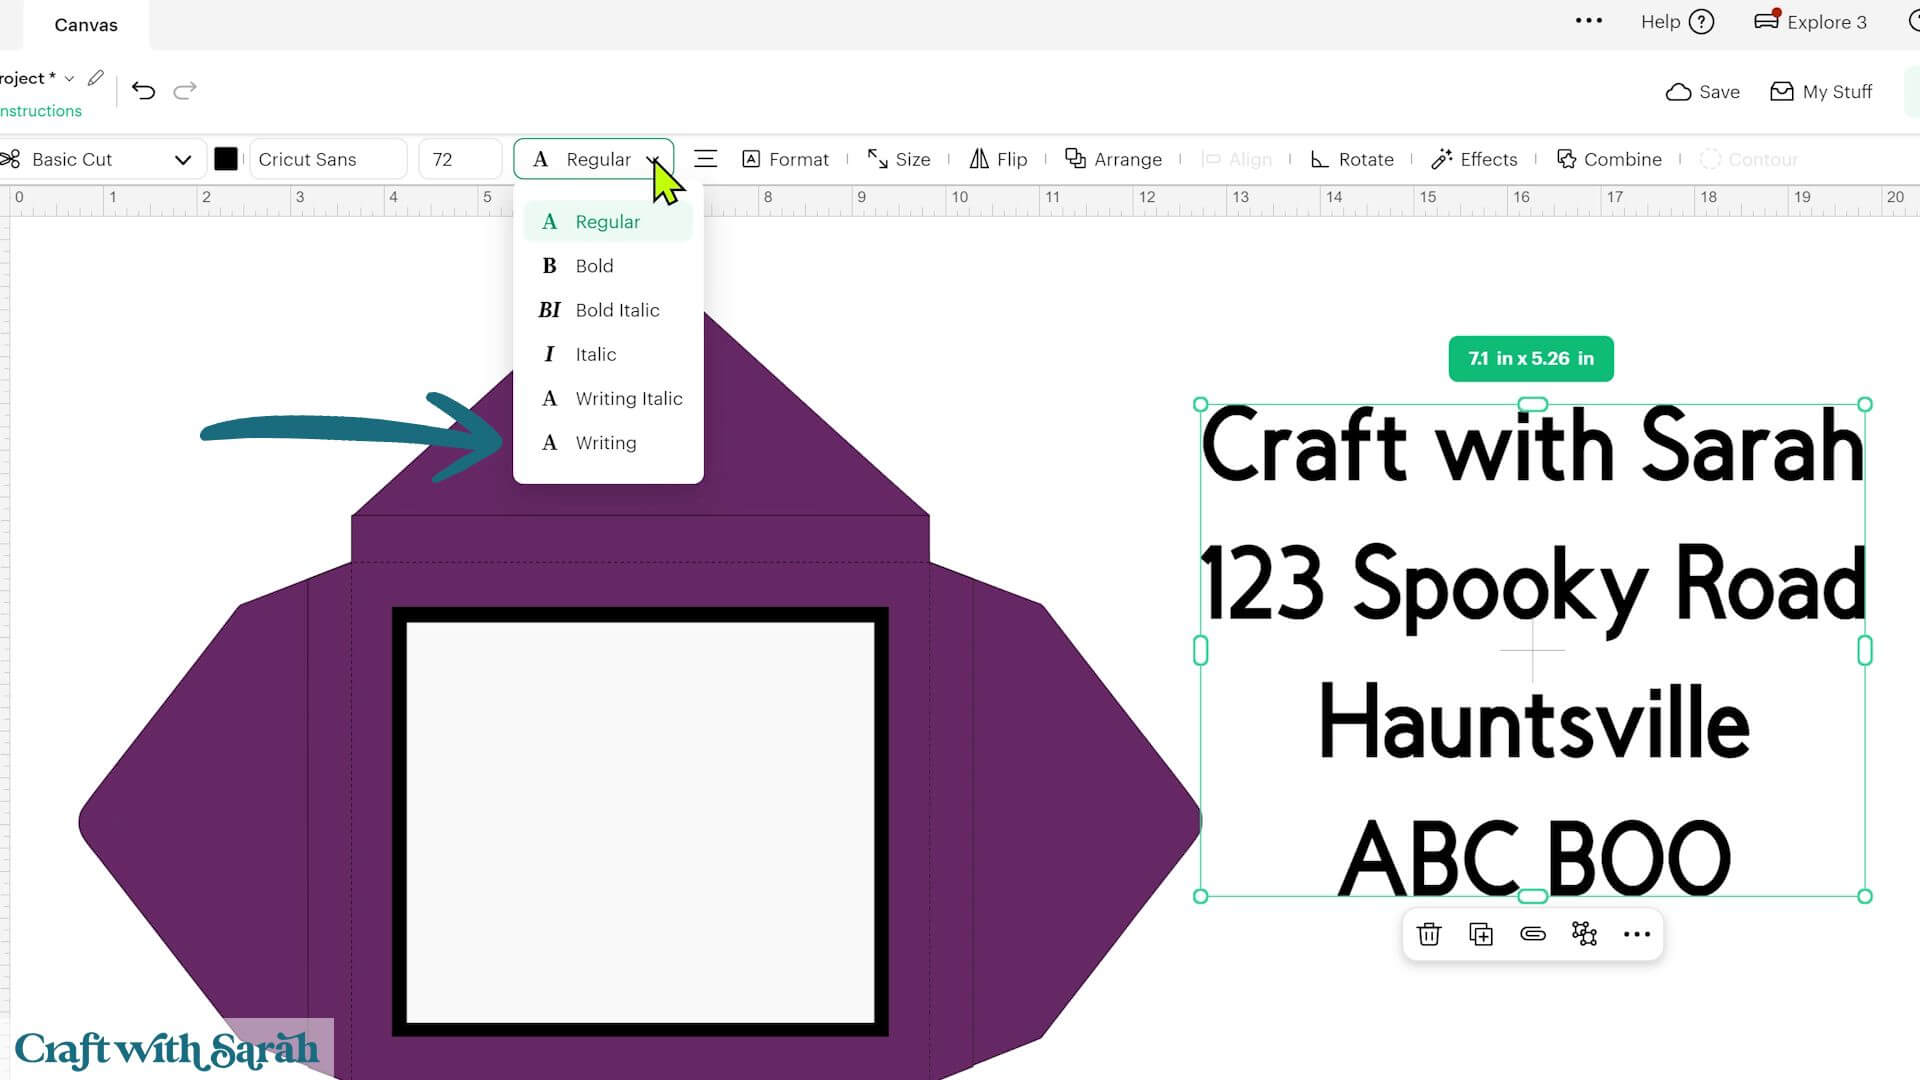
Change the text operation to ‘Writing’, resize it to fit the address panel and align it centrally.
Select both the address and the white address panel before clicking ‘Attach’ so the machine writes in the correct position during cutting.
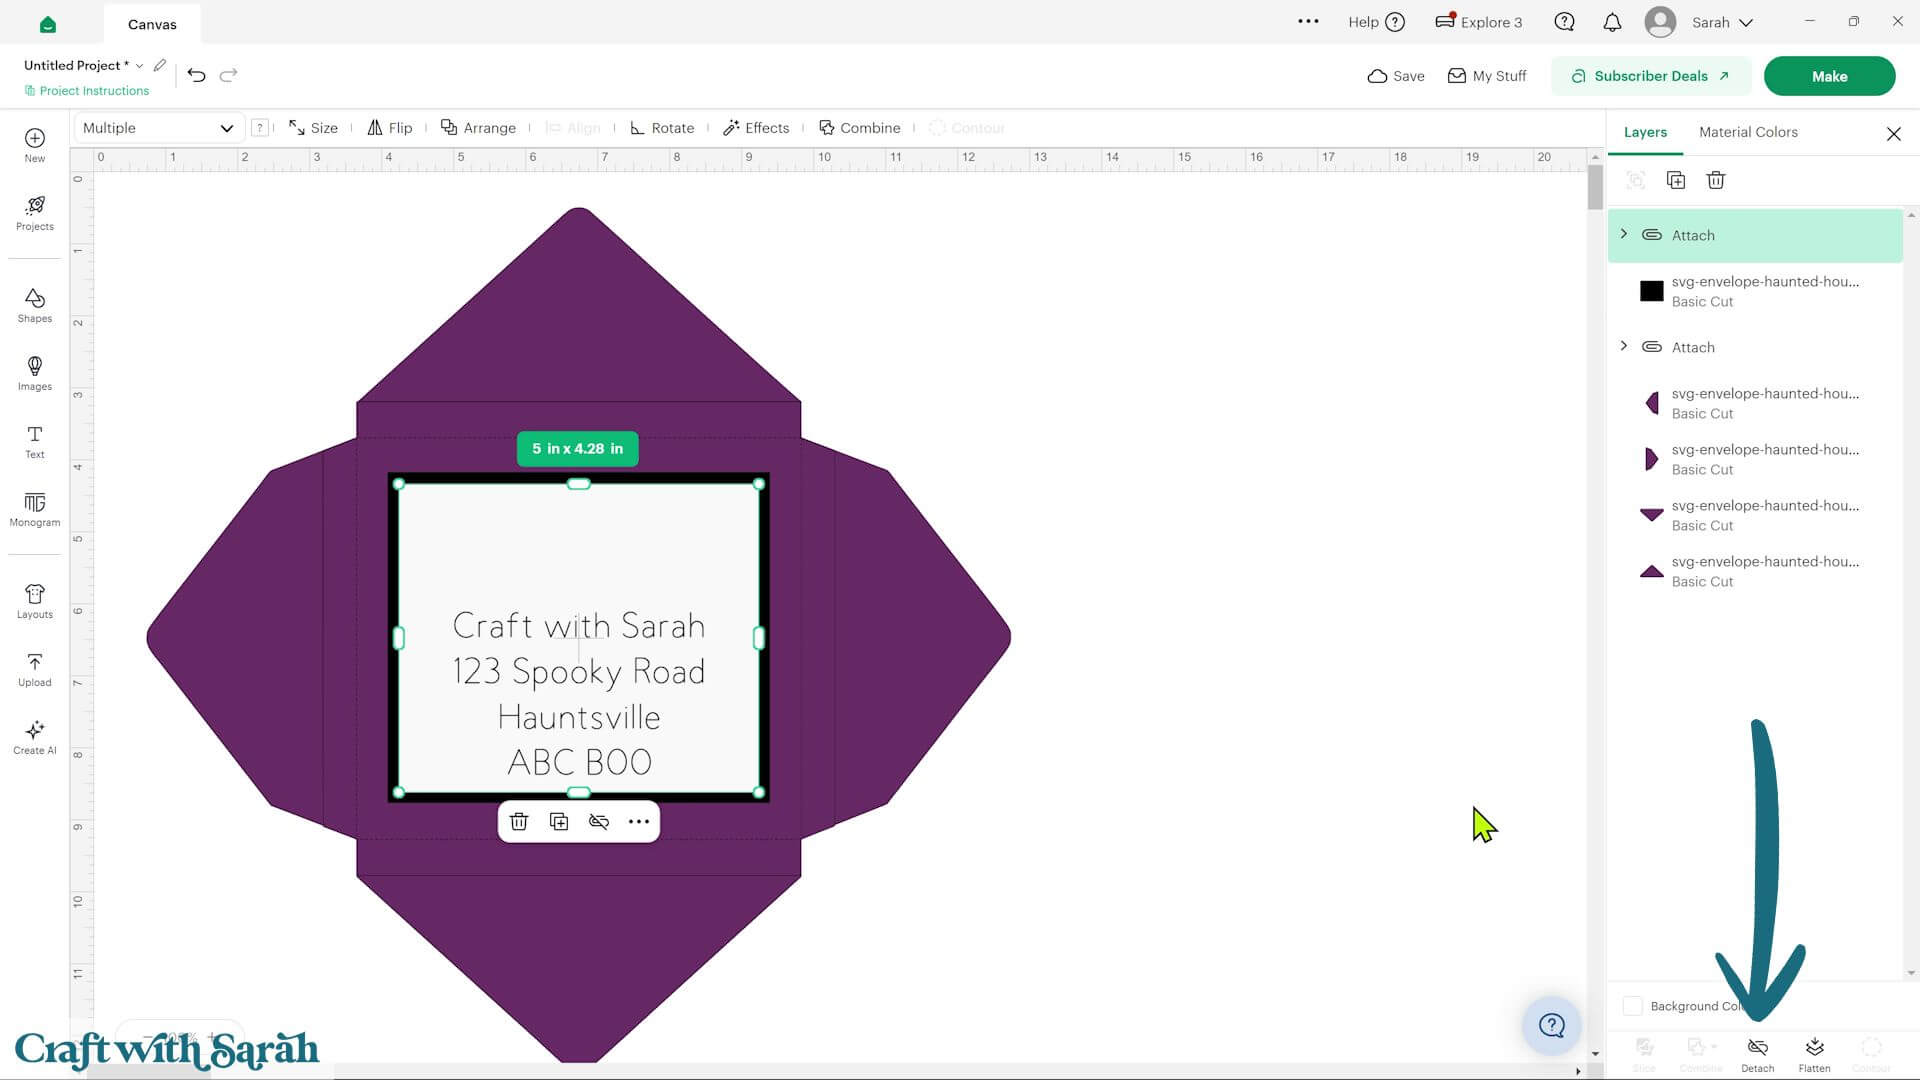
If you’re cutting your envelope from patterned paper, this provides a handy place to write or draw the address. If you’re using plain white cardstock, you can simply write directly onto the envelope instead.
For the best results, use lightweight cardstock or scrapbook paper of approximately 180 gsm (65 lb).
Step 8) Make the envelope
Glue the address panel onto its backing piece first.
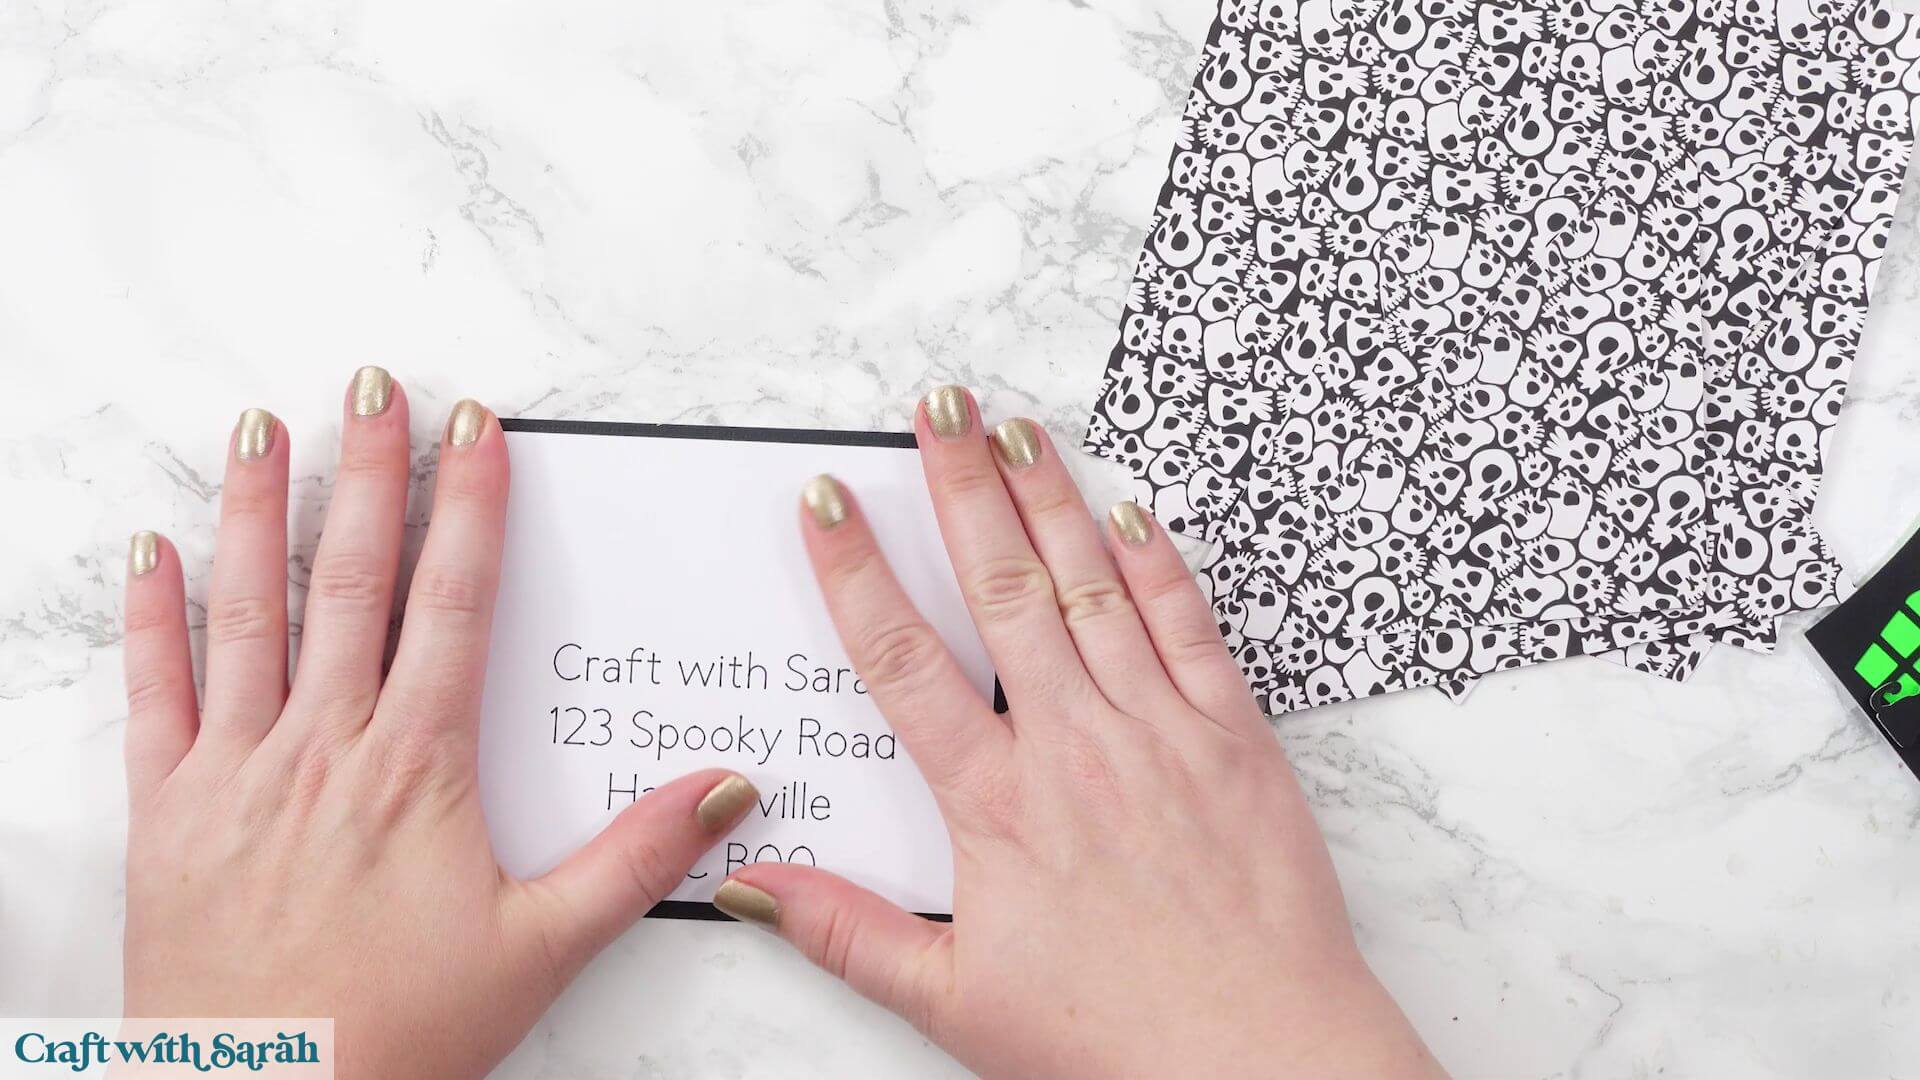
Choose which side of your patterned paper you would like to appear on the outside of the envelope, then fold all of the score lines away from you.
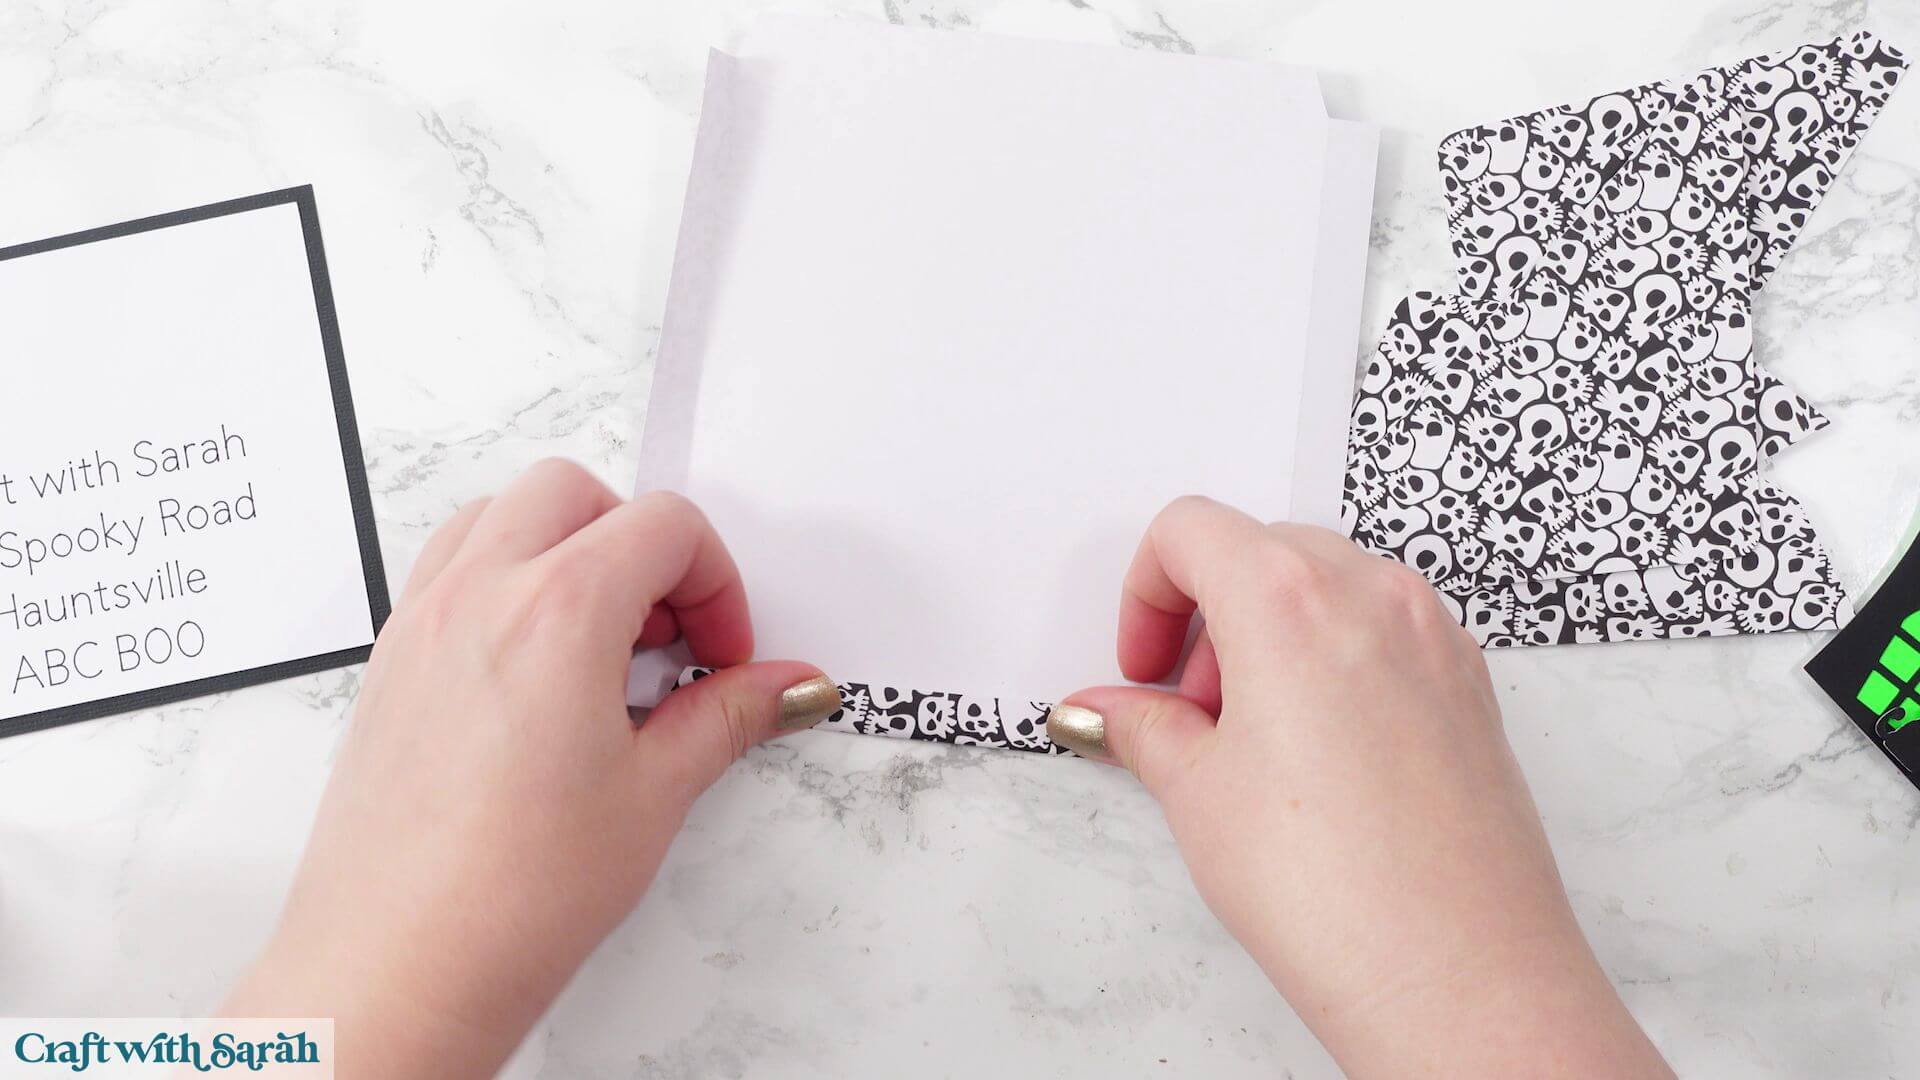
Glue the four side panels onto the main envelope base, matching each flap to the correct position.
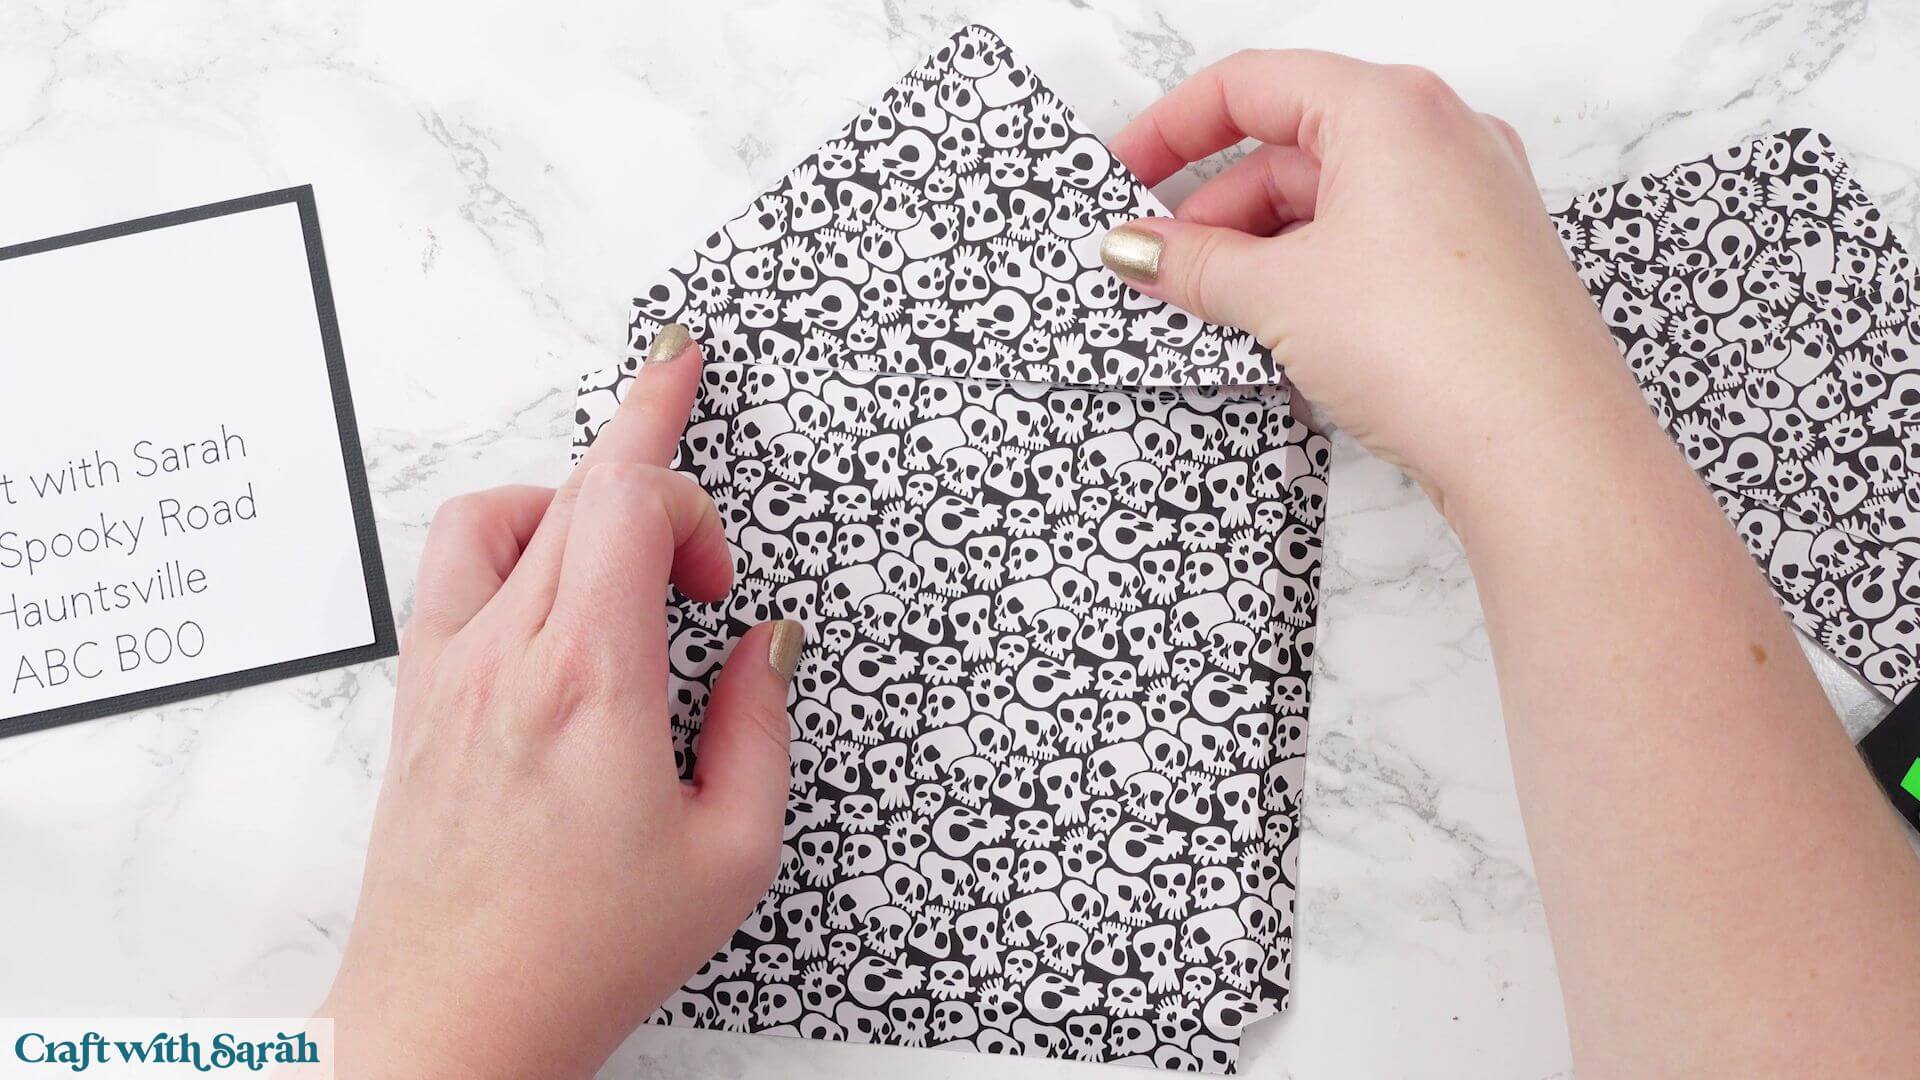
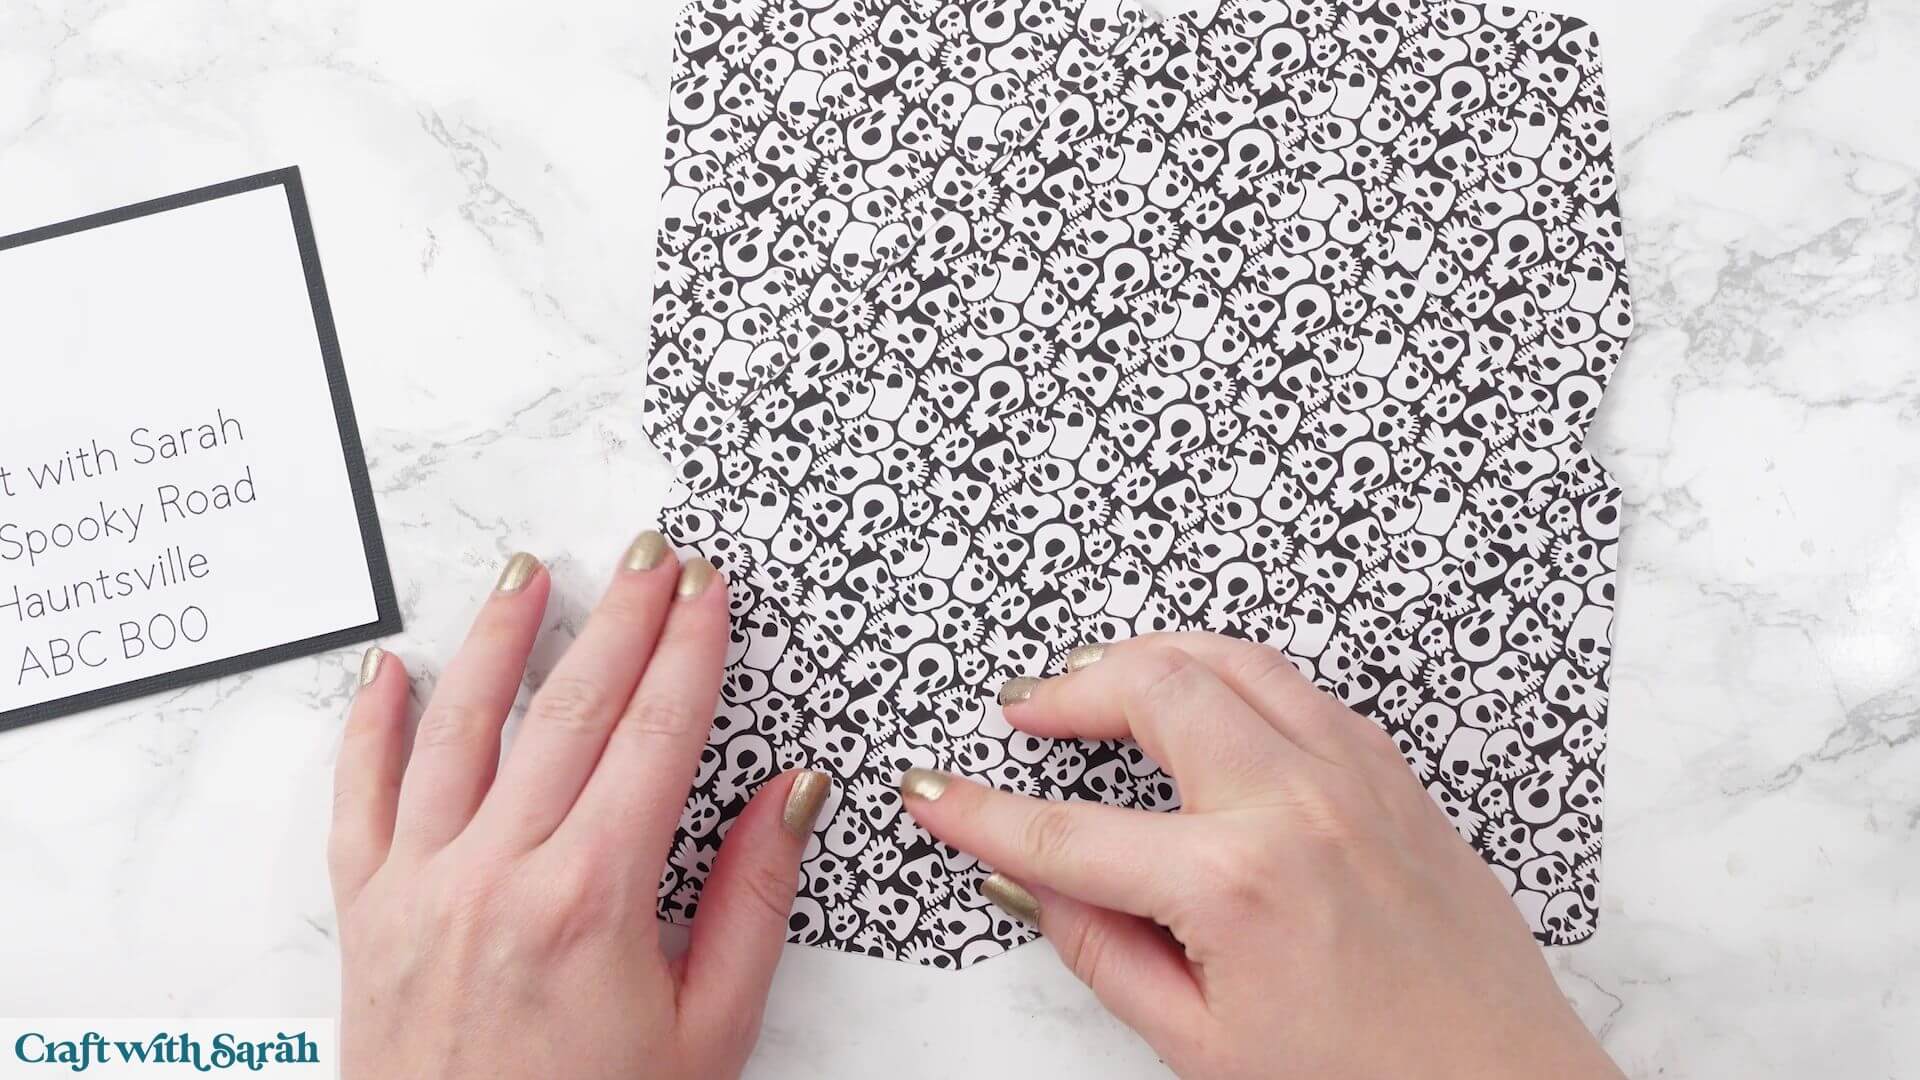
When assembling the envelope, make sure the longer flaps are at the top and bottom so the finished card fits correctly.
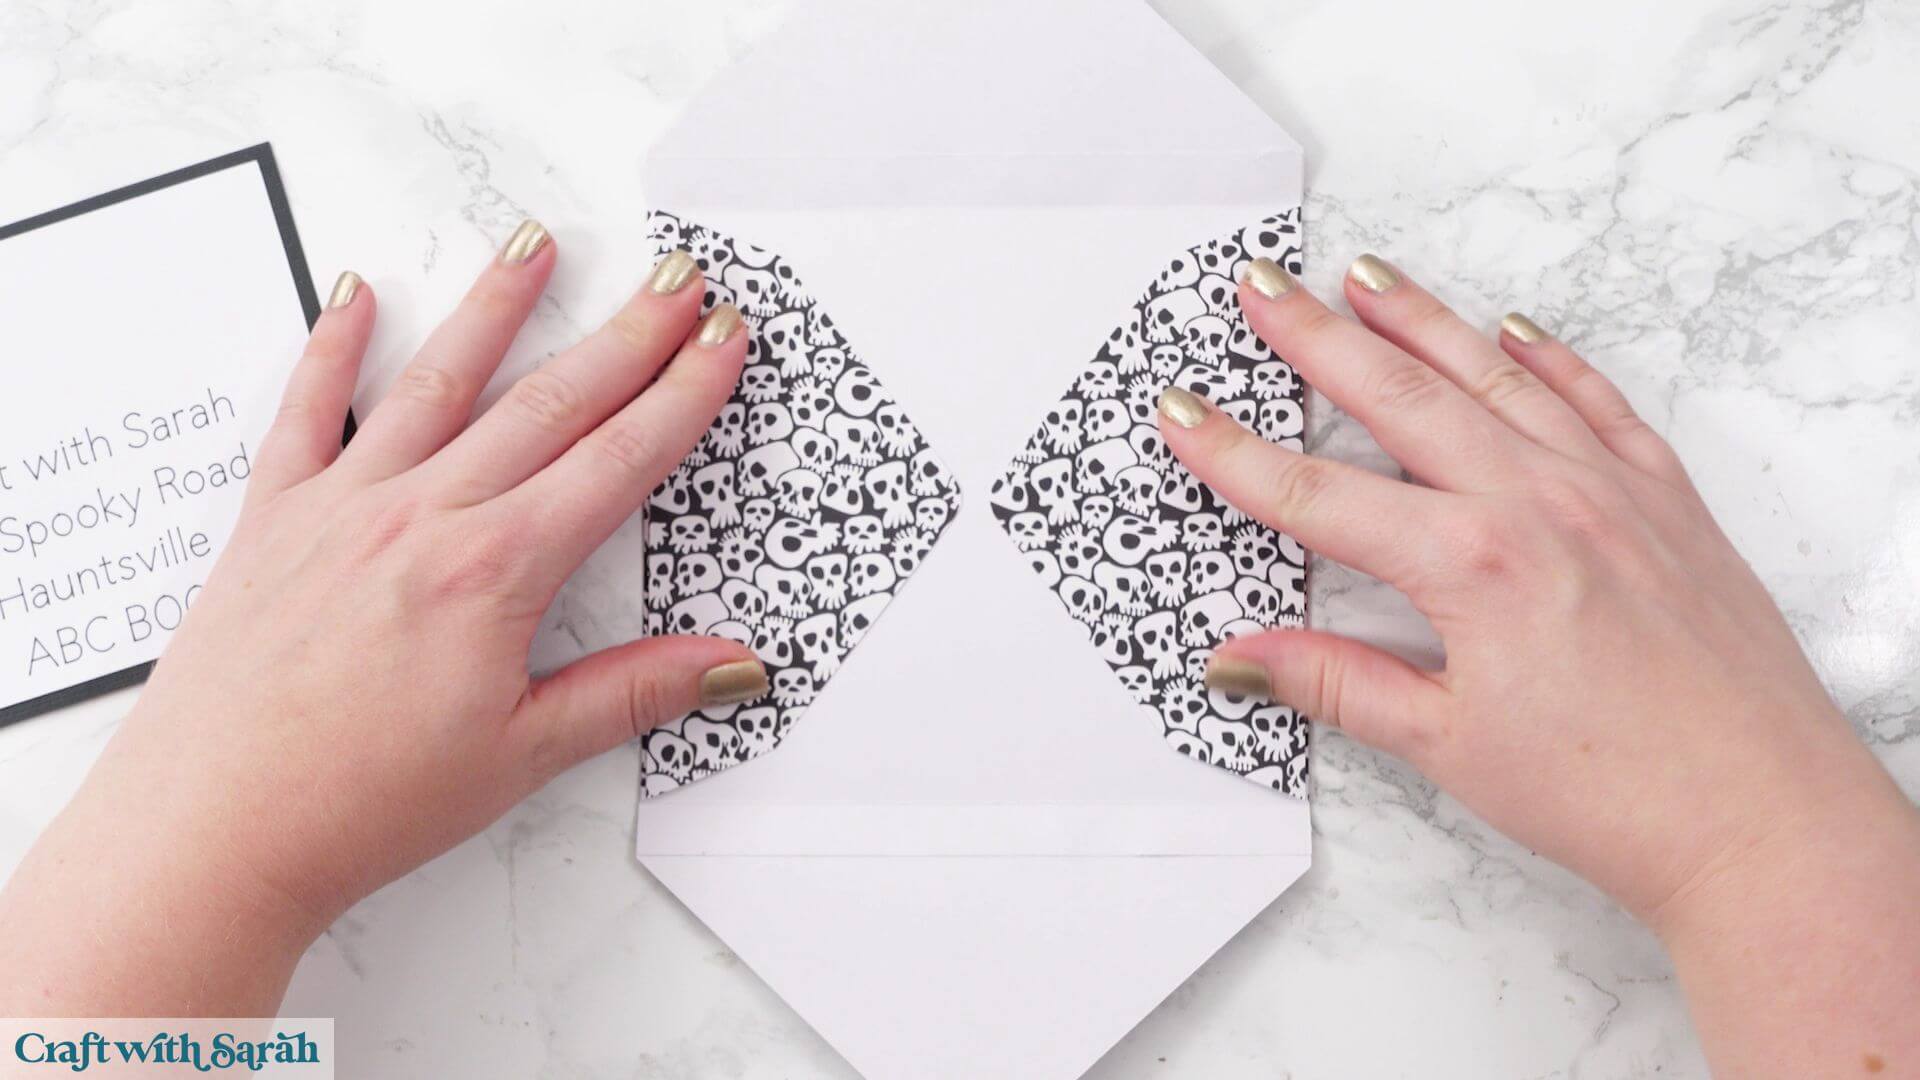
Finally, glue the top flap over the two side flaps, taking care not to make the envelope too tight. Leaving a tiny amount of space helps accommodate the thickness of the layered card.
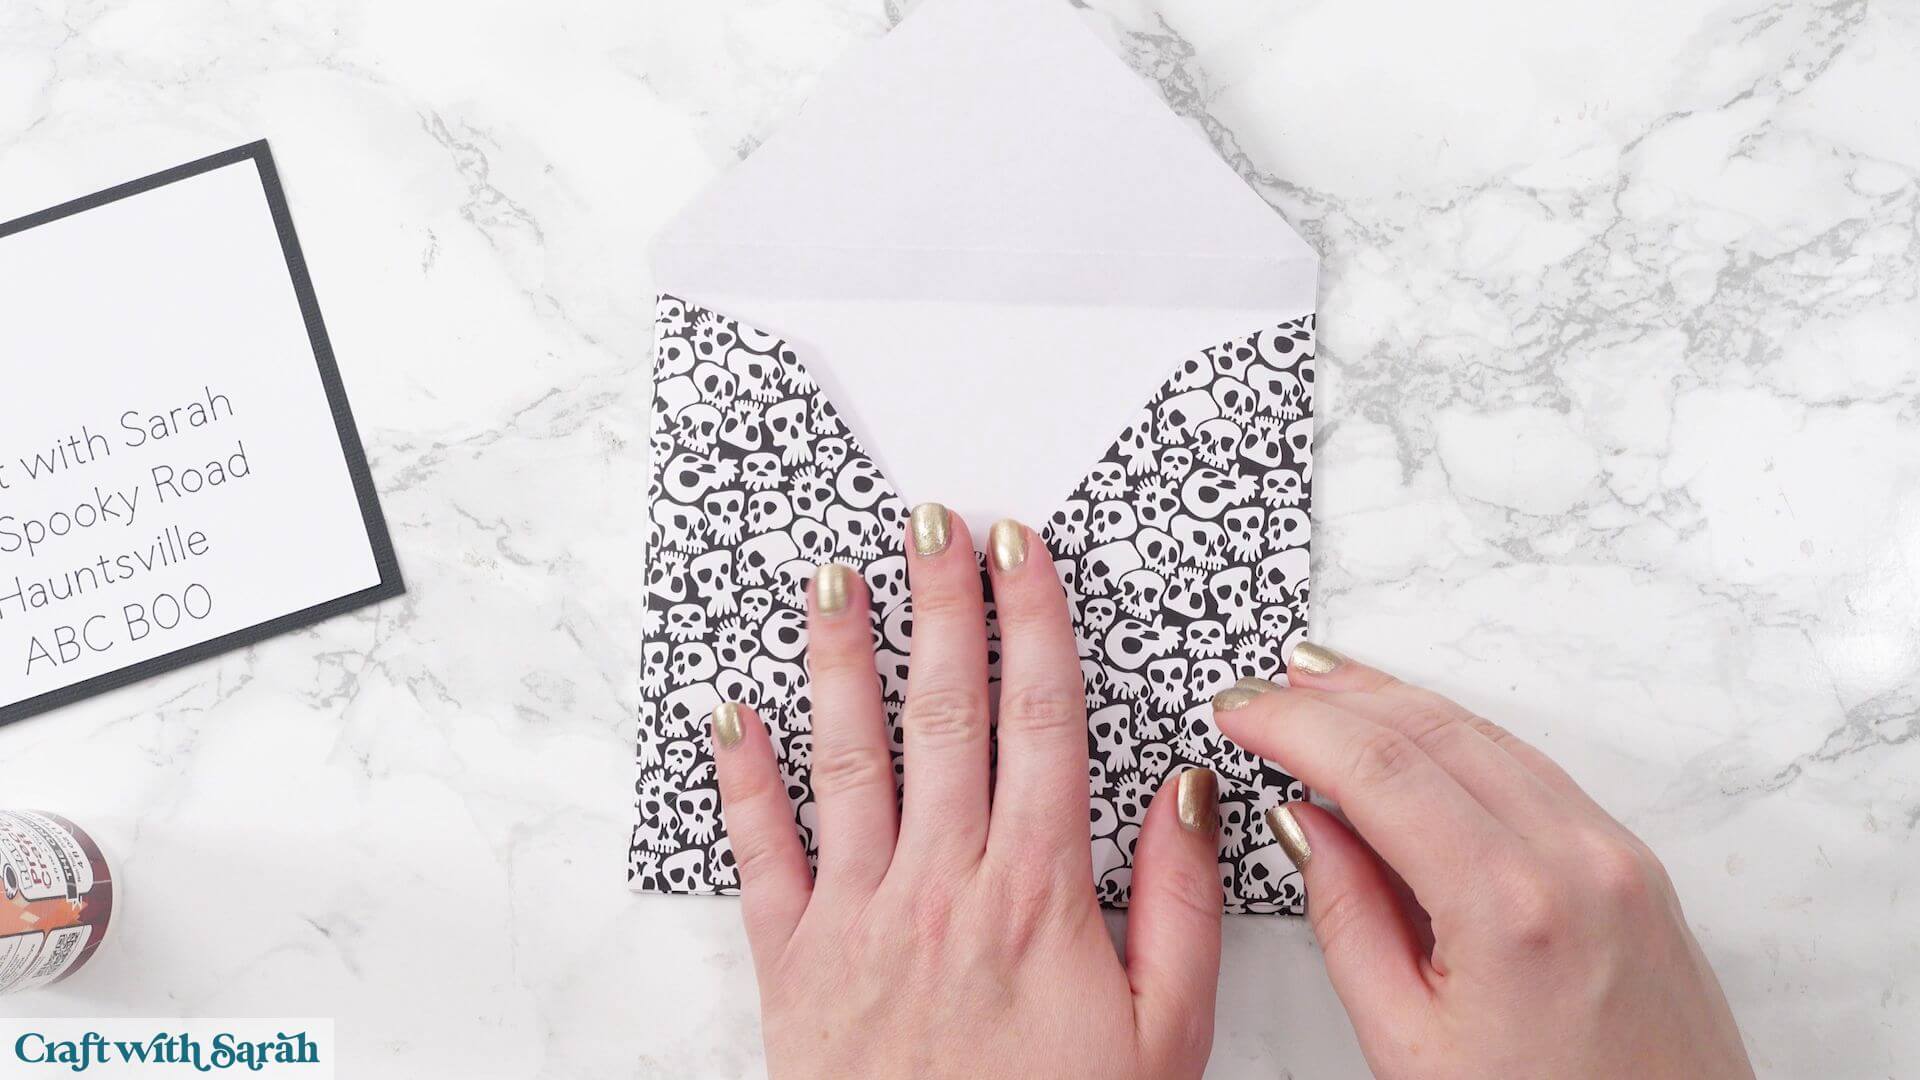
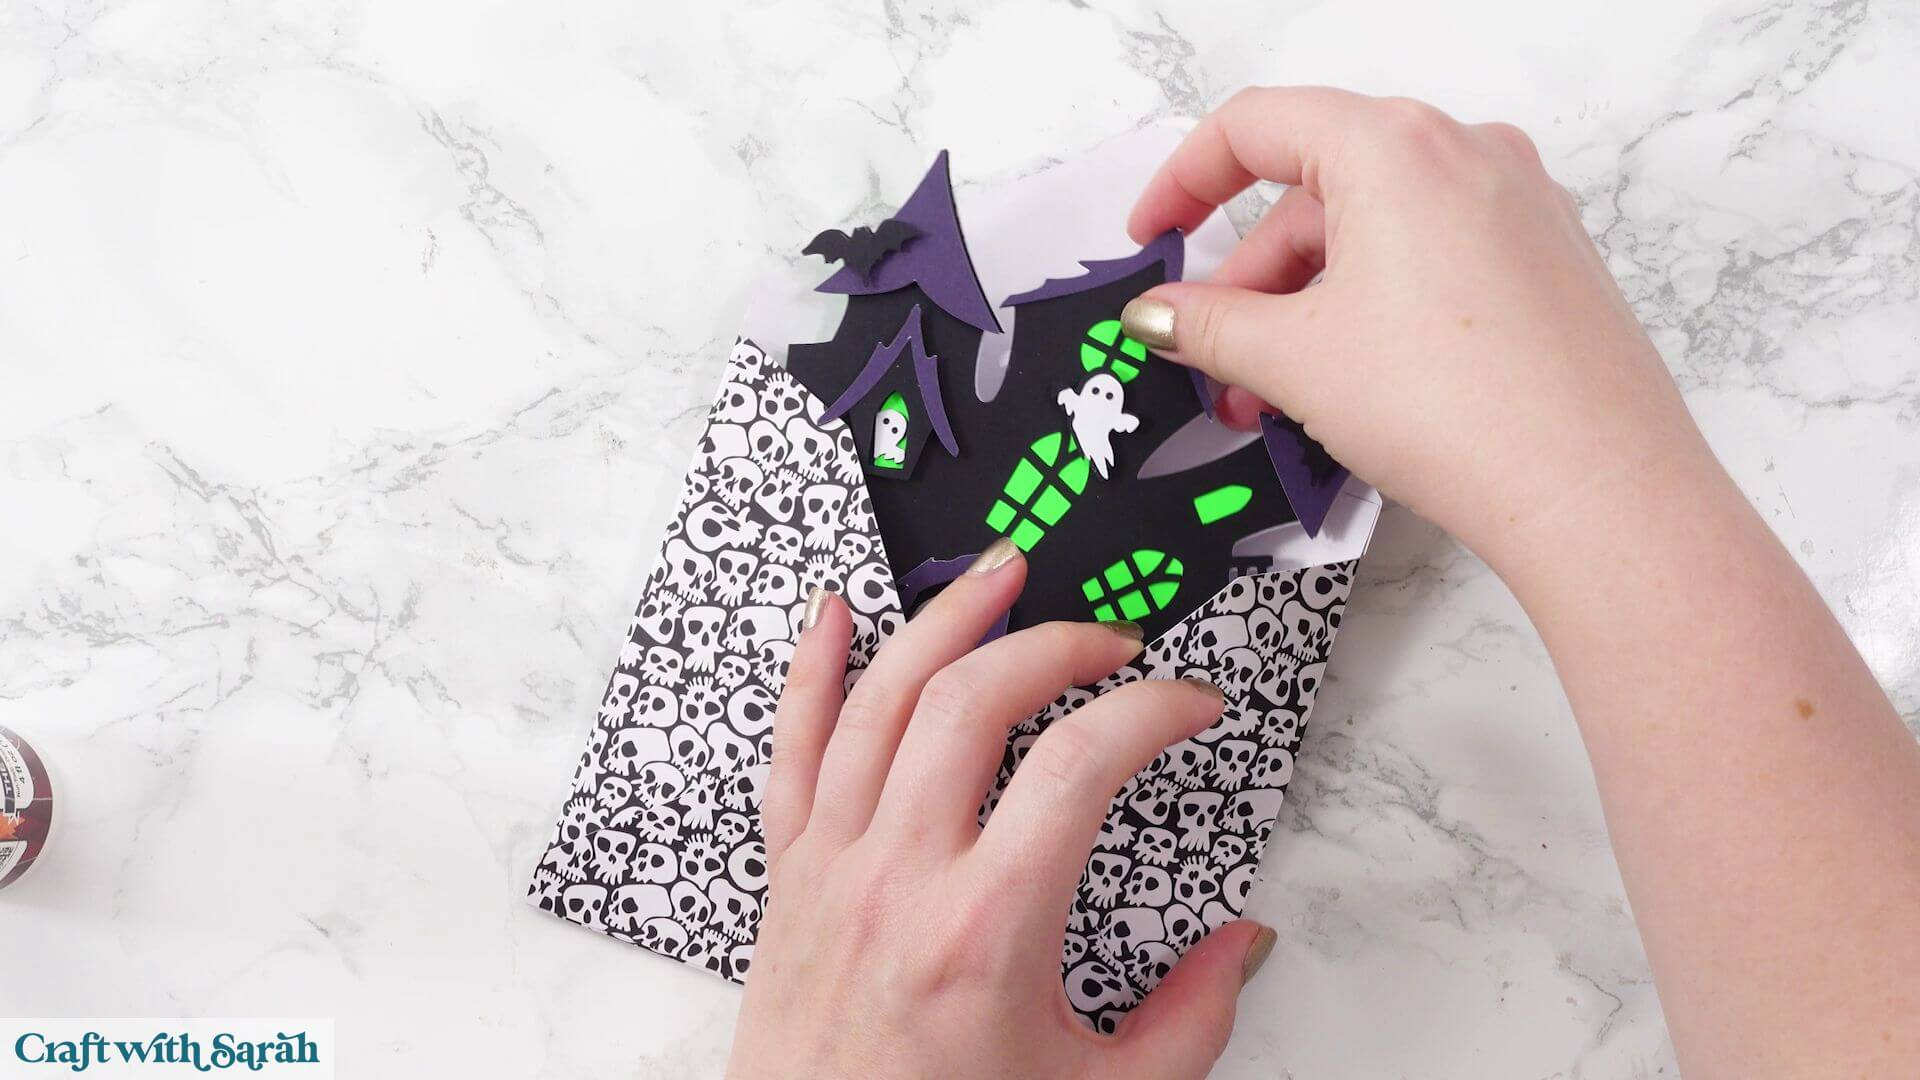
Spooky haunted house shaped card to make with a Cricut
Your haunted house-shaped Halloween card is now ready to send!
Whether you choose the classic layered cardstock version or add glow-in-the-dark heat transfer vinyl for an extra spooky effect, this card makes a fun Halloween greeting that recipients are sure to remember.
The matching envelope finishes the project perfectly and keeps the shaped card protected if you’re sending it through the post.
Happy crafting,
Sarah x