Autumn Leaves Greetings Card 🍂 FCC 04
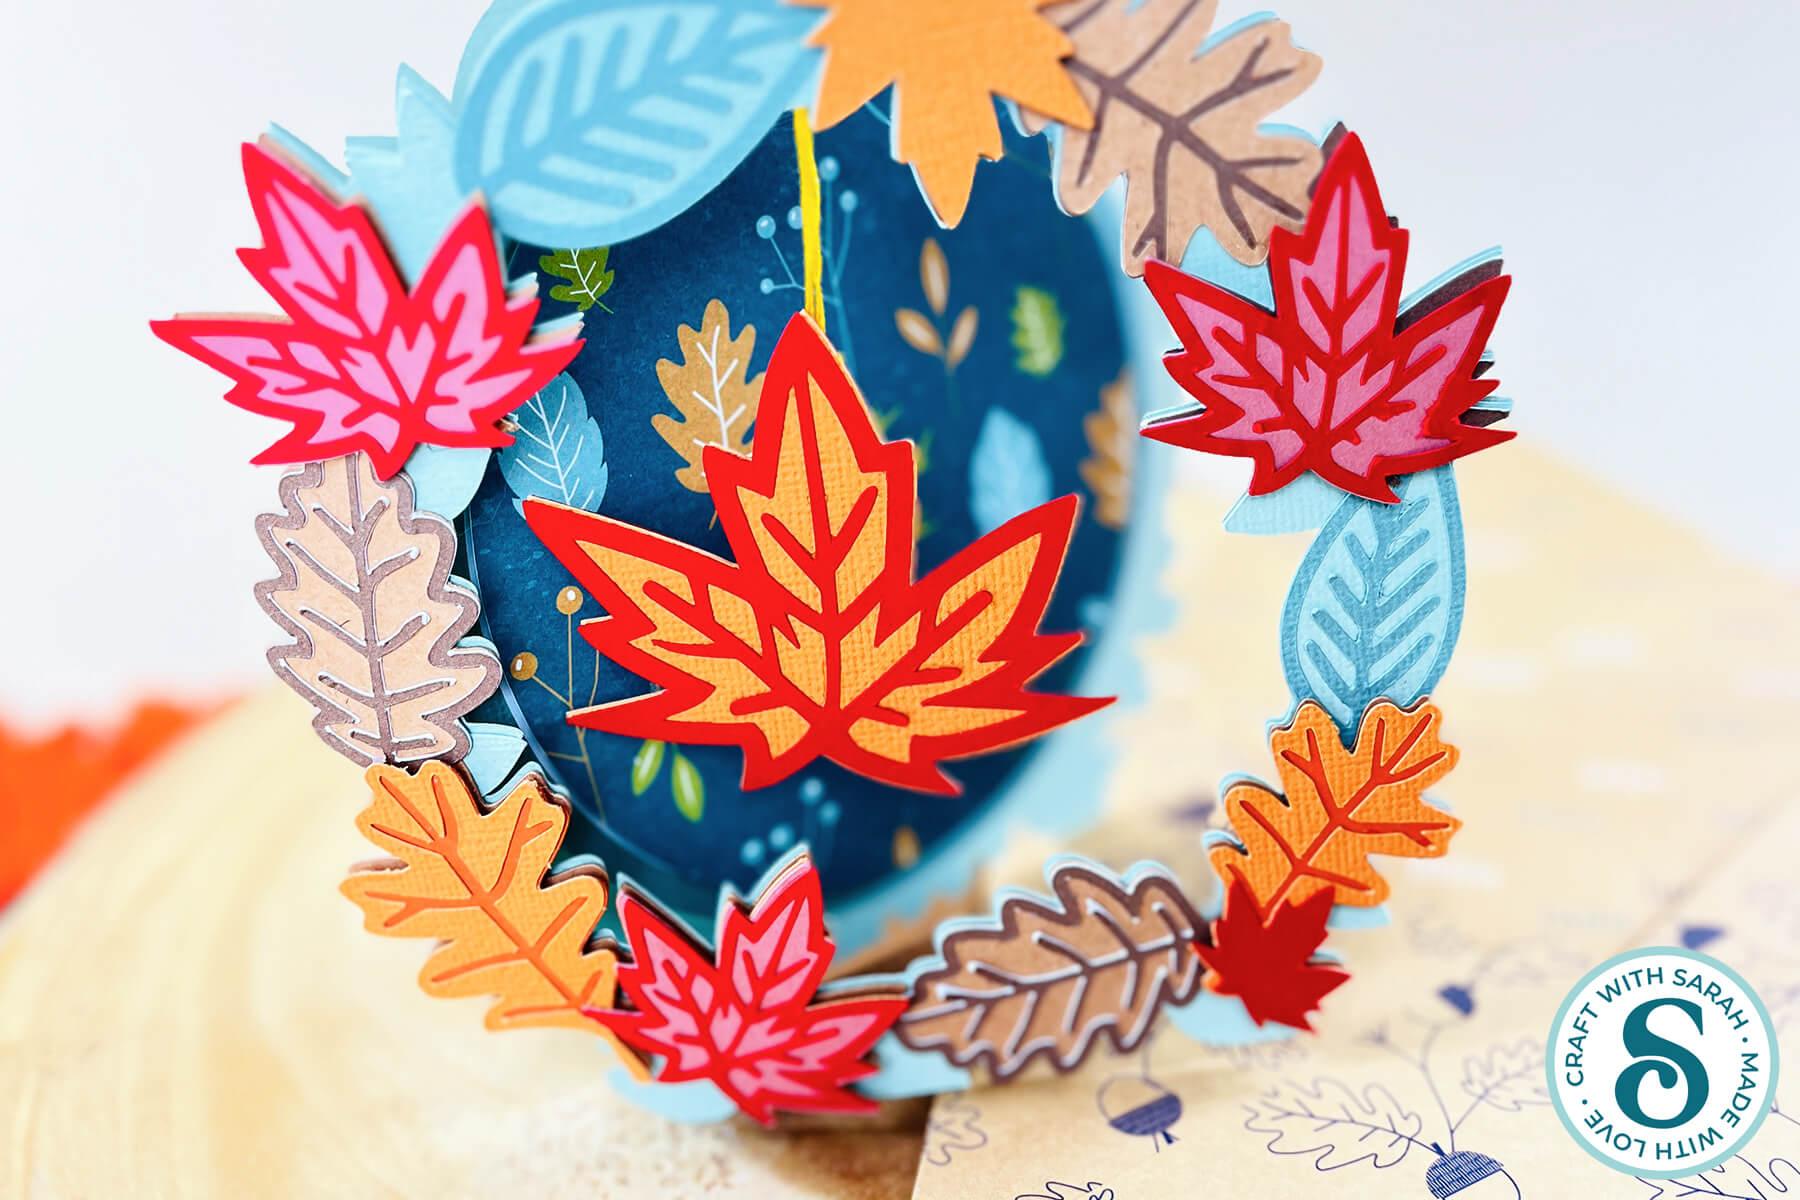
The perfect shaped card for Autumn!
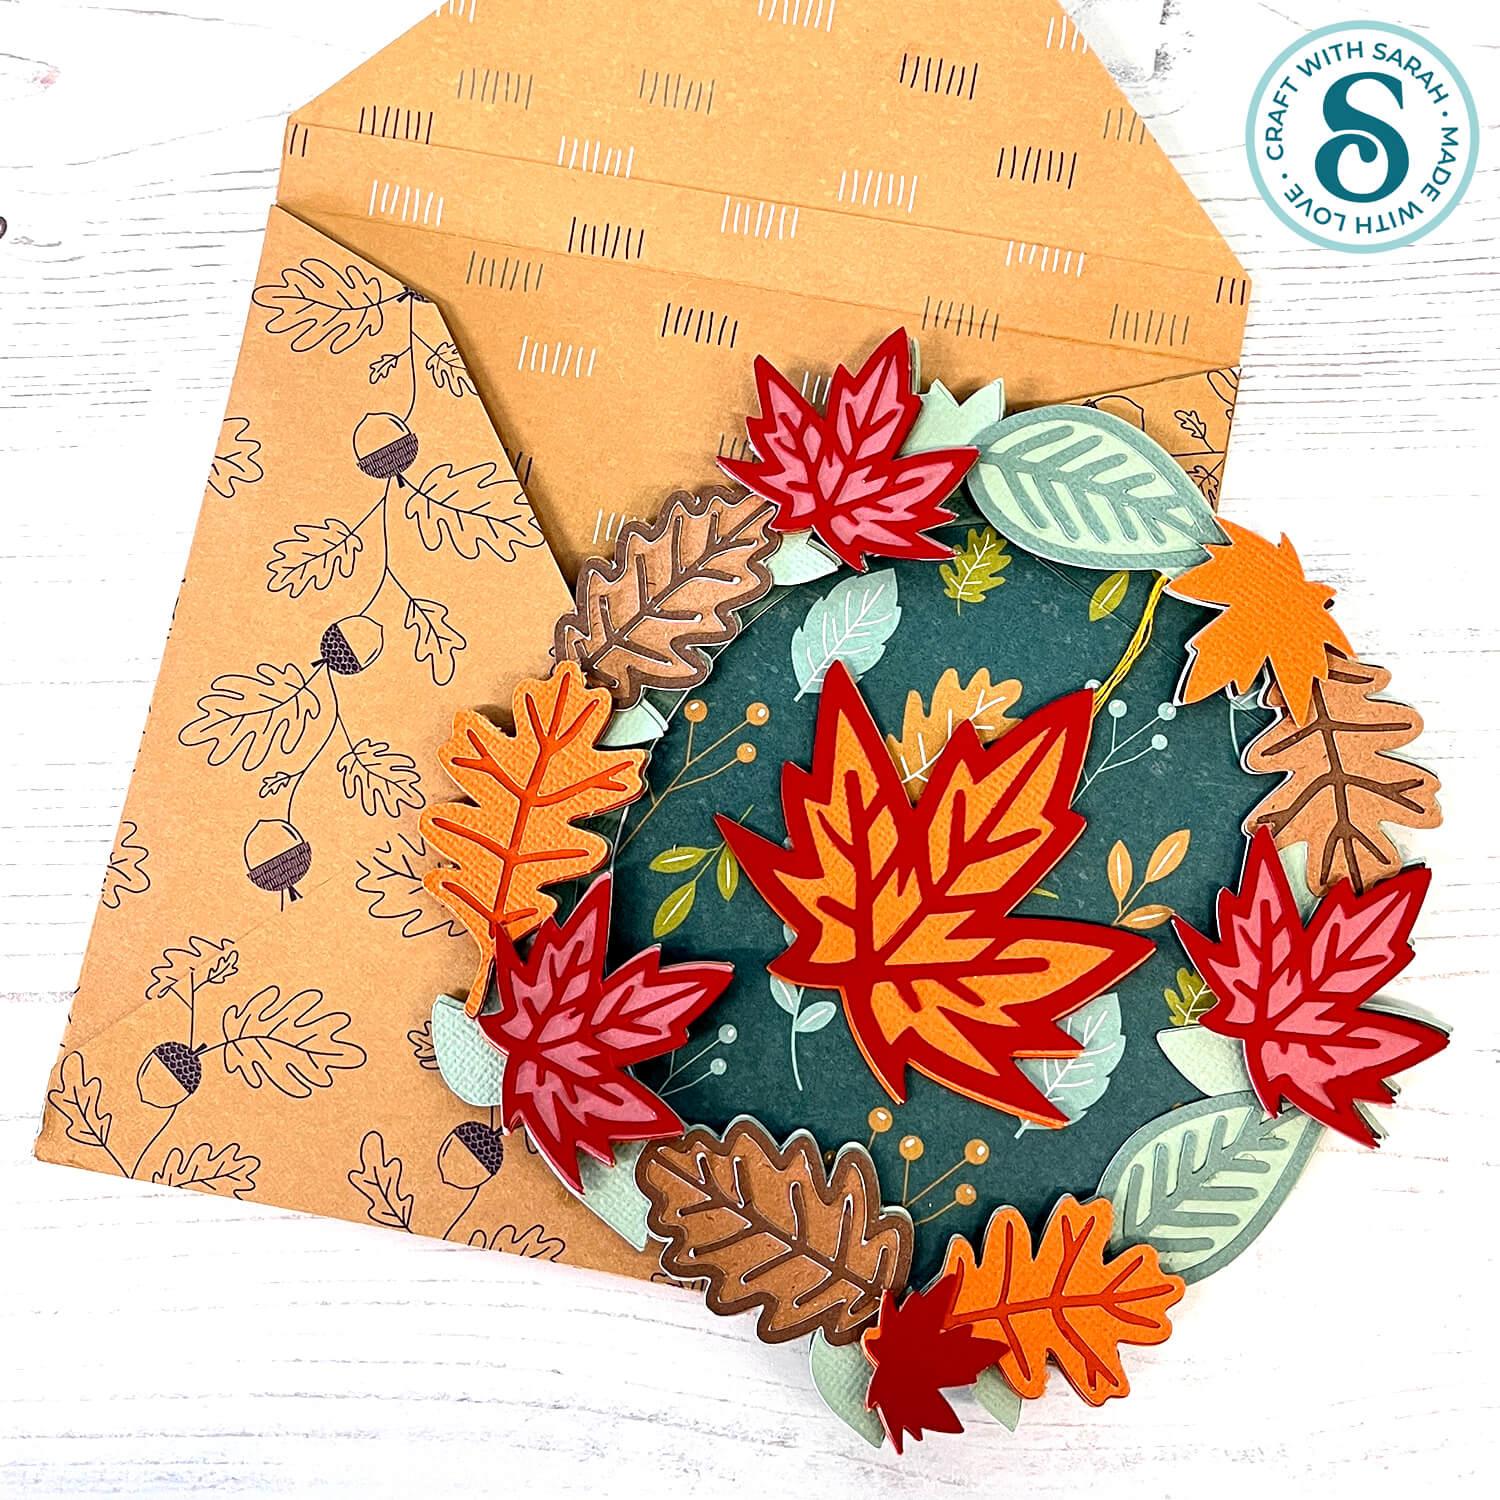
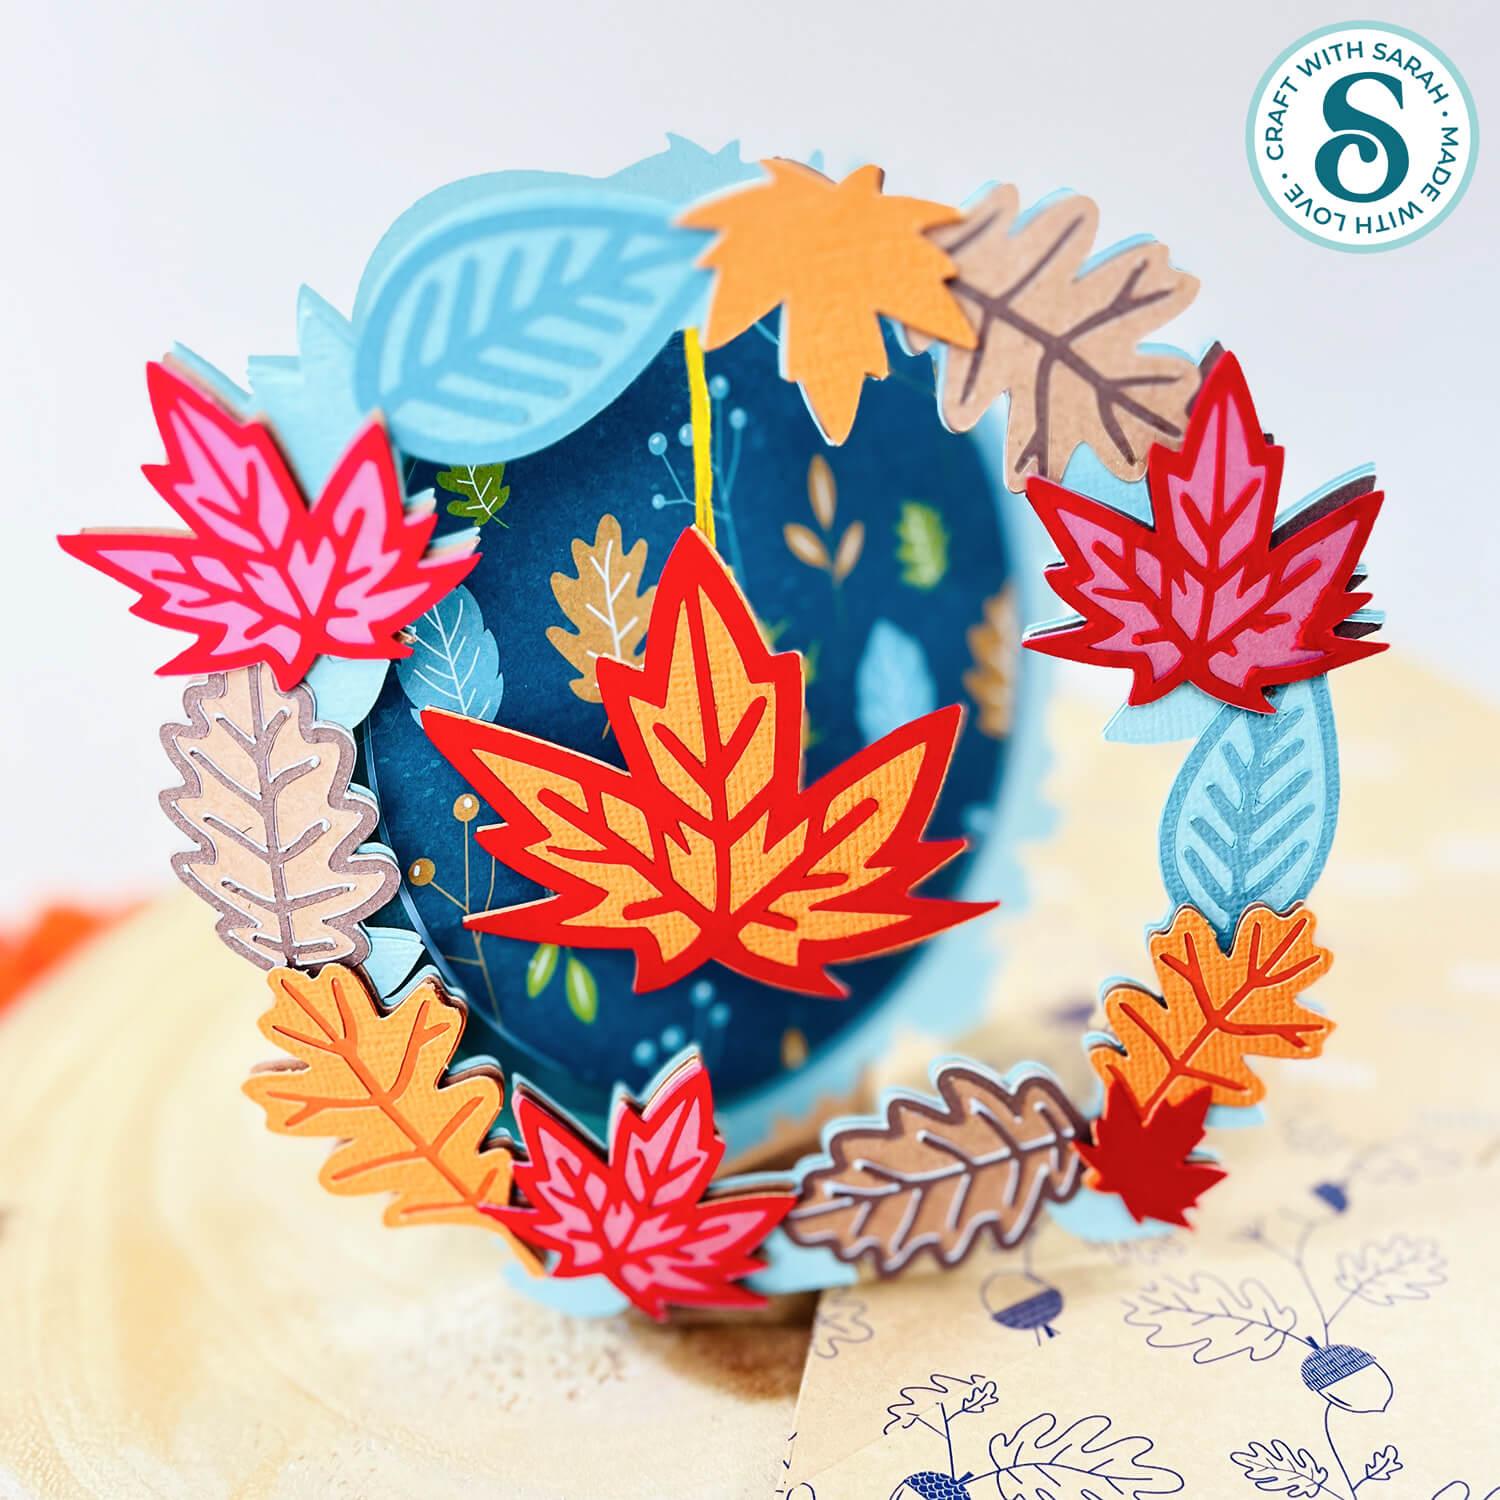
Make a beautiful autumn greetings card with colourful leaves arranged around a circular opening and a double-sided leaf hanging in the centre.
The dangling leaf adds something a little unusual to the design, while patterned paper inside the card shows through the opening when the card is on display.
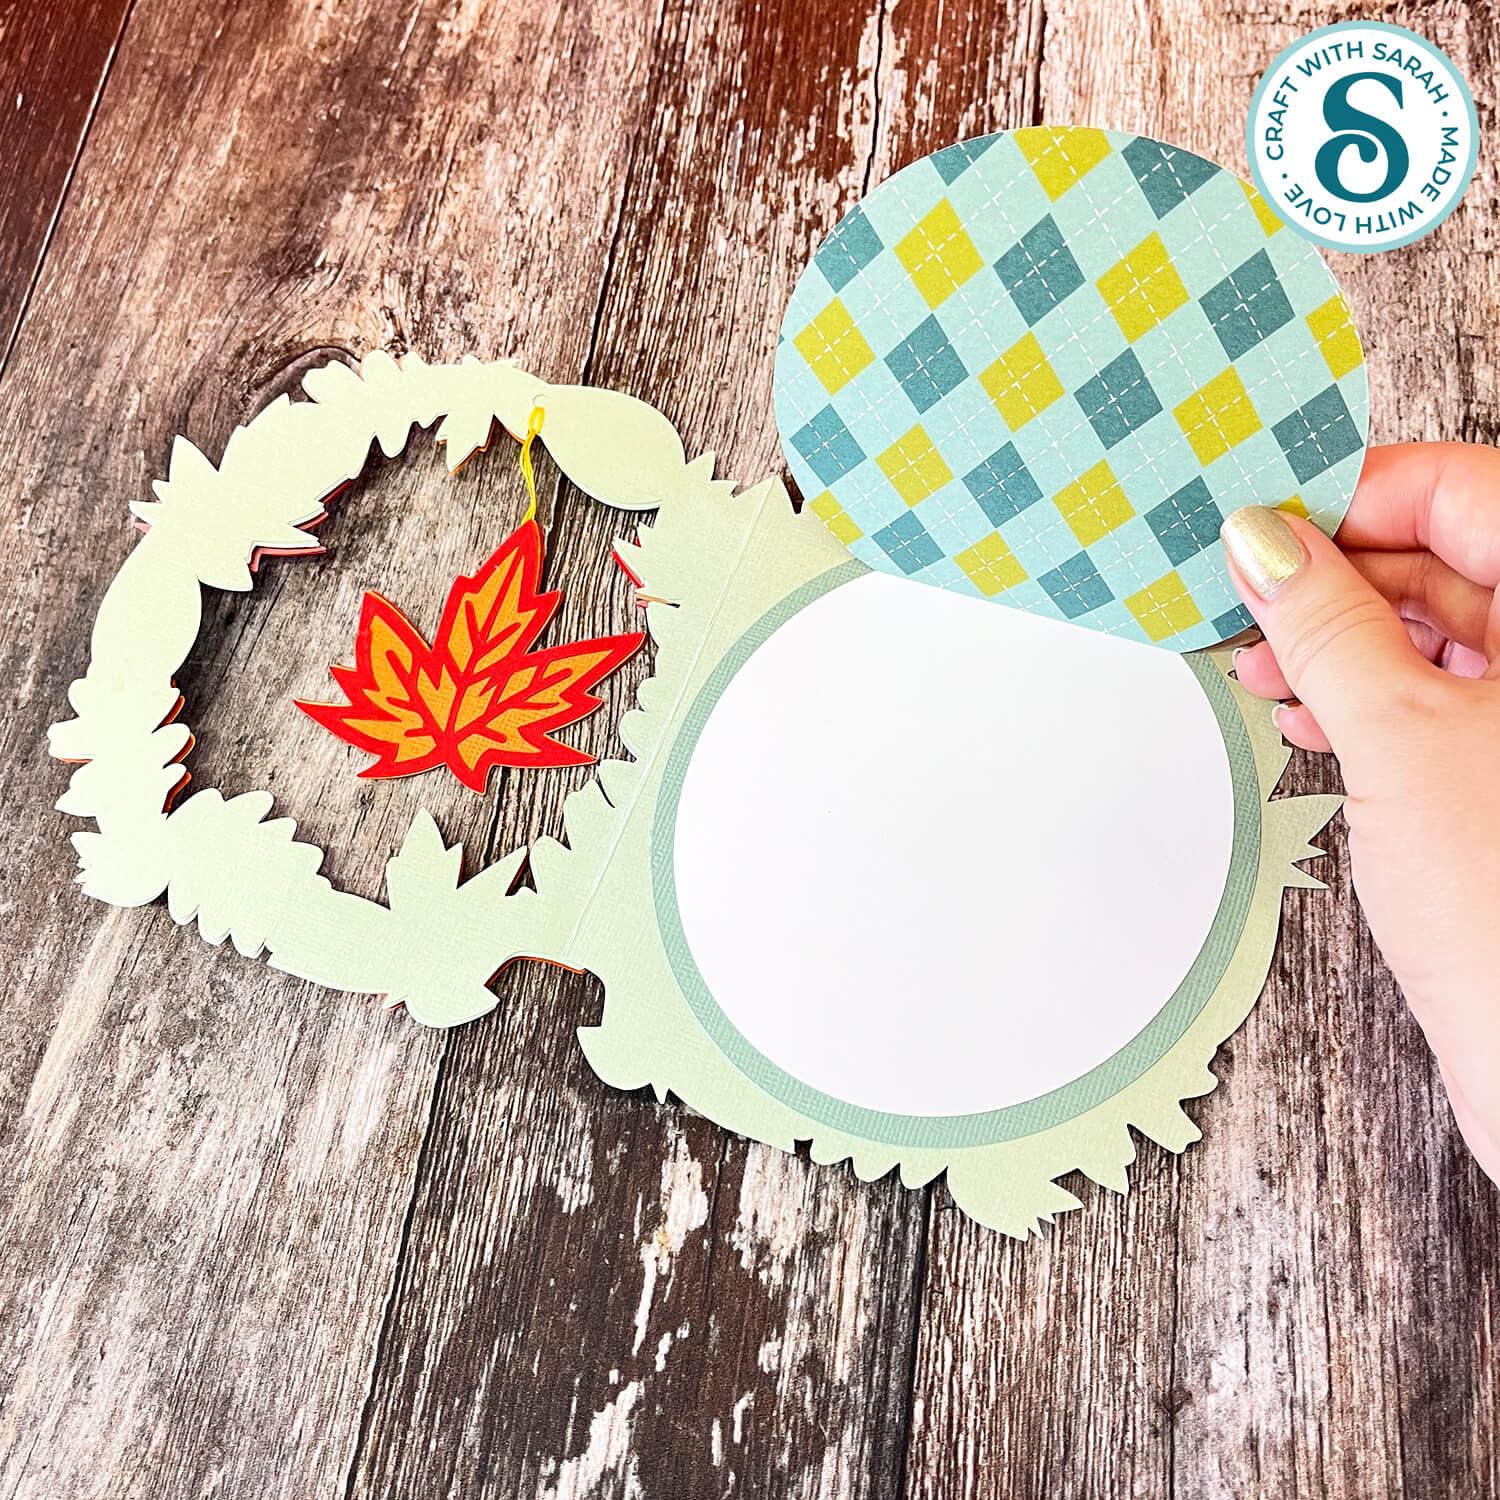
There are two different ways to add your message. You can hide it underneath the patterned paper inside the card with a secret “hidden message” panel, or add it to the back of the card instead.
The download also includes a custom envelope SVG that’s perfectly sized for the finished card.
Please note that this project does not include a hand-cutting version.
This project is part of the 2026 Falloween Craft Countdown
Autumn leaves card materials supply list
Here is a list of the materials that I used to make this project.
Please note that some of the links included in this article are affiliate links, which means that if you click through and make a purchase I may receive a commission (at no additional cost to you). You can read my full disclosure at the bottom of the page.
- Cricut machine
- Light blue Cricut cutting mat
- Coloured Card (any thickness)
- Glue (I like Bearly Art Glue and Collall)
- 3D foam pads
- Cricut scoring wheel or stylus
- Thread or thin twine/ribbon
This project is suitable for the following types of Cricut machines: Explore series, Maker series and Joy Xtra. It is too large to cut on the Joy or Joy 2.
Foundation learning
If you're new to making papercrafts with your cutting machine, check out these links to get you started.
They include videos on topics such as: which file to use with your type of cutting machine, how to load the files into your cutting machine's software, how to cut cardstock with your type of cutting machine, how to recolor and modify/customize the cut files and tips for displaying your projects.
- How to use zip folder downloads
- Help guides for Cricut machines
- Help guides for Silhouette machines
- Help guides for ScanNCut machines
The following tutorials are Cricut-specific, but many of the ideas will work similarly with a Silhouette or ScanNCut machine and any cut files that are shared in them are compatible with all types of cutting machine.
- How to score with a Cricut (even without scoring tools)
- Print then cut tutorial
- Design Space tools (Combine, Attach, Slice, Weld, Flatten, etc.)
- Pattern fill tutorial (for making backgrounds & cutting images to a specific shape/size)
- Free envelope SVGs that can be sized to fit any card
- Presentation boxes for handmade cards
- How to write inside cards with Cricut pens
- How to cut layered designs at a small size
- Design Space tips & tricks
- Cricut pens tutorial
- How to mount multiple designs in the same frame with magic guides
Autumn greetings card craft video tutorial
Watch the video below to see how to make this project. Keep scrolling for a written tutorial.
Written tutorial (with photos!)
Here’s how to make this circular shaped greetings card using a Cricut machine.
Step 1) Download the cutting file & upload to Design Space
Get the files using the box below.
Purchase the File(s)
This cut file is available as part of the Instant Access Bundle.
Or, purchase this design individually here
Before you upload the SVGs to Design Space, you need to unzip the download folder that they come in.
Not sure how to do this? Click here for a tutorial that covers all the following types of computer and device:
- How to unzip a folder on a Windows computer
- How to unzip a folder on a Mac
- How to unzip a folder on an iPad
- How to unzip a folder on an iPhone
- How to unzip a folder on an Android device
After unzipping, upload the SVG file(s) into your cutting machine software.
Not sure how to use cut files with your type of machine? The following links lead to tutorials on how to use cut files in:
- Cricut Design Space
- Silhouette Studio
- CanvasWorkspace (for ScanNCut machines)
If you are using Cricut Design Space, start a new project and then click the “Upload” button on the left of the screen.
You can then either click “Browse” to find the file on your computer, or drag-and-drop it.
Select the file in the “01 Cricut Version” subfolder called svg-01-leaf-card-craftwithsarah.svg.
Press “Upload” on the next screen.
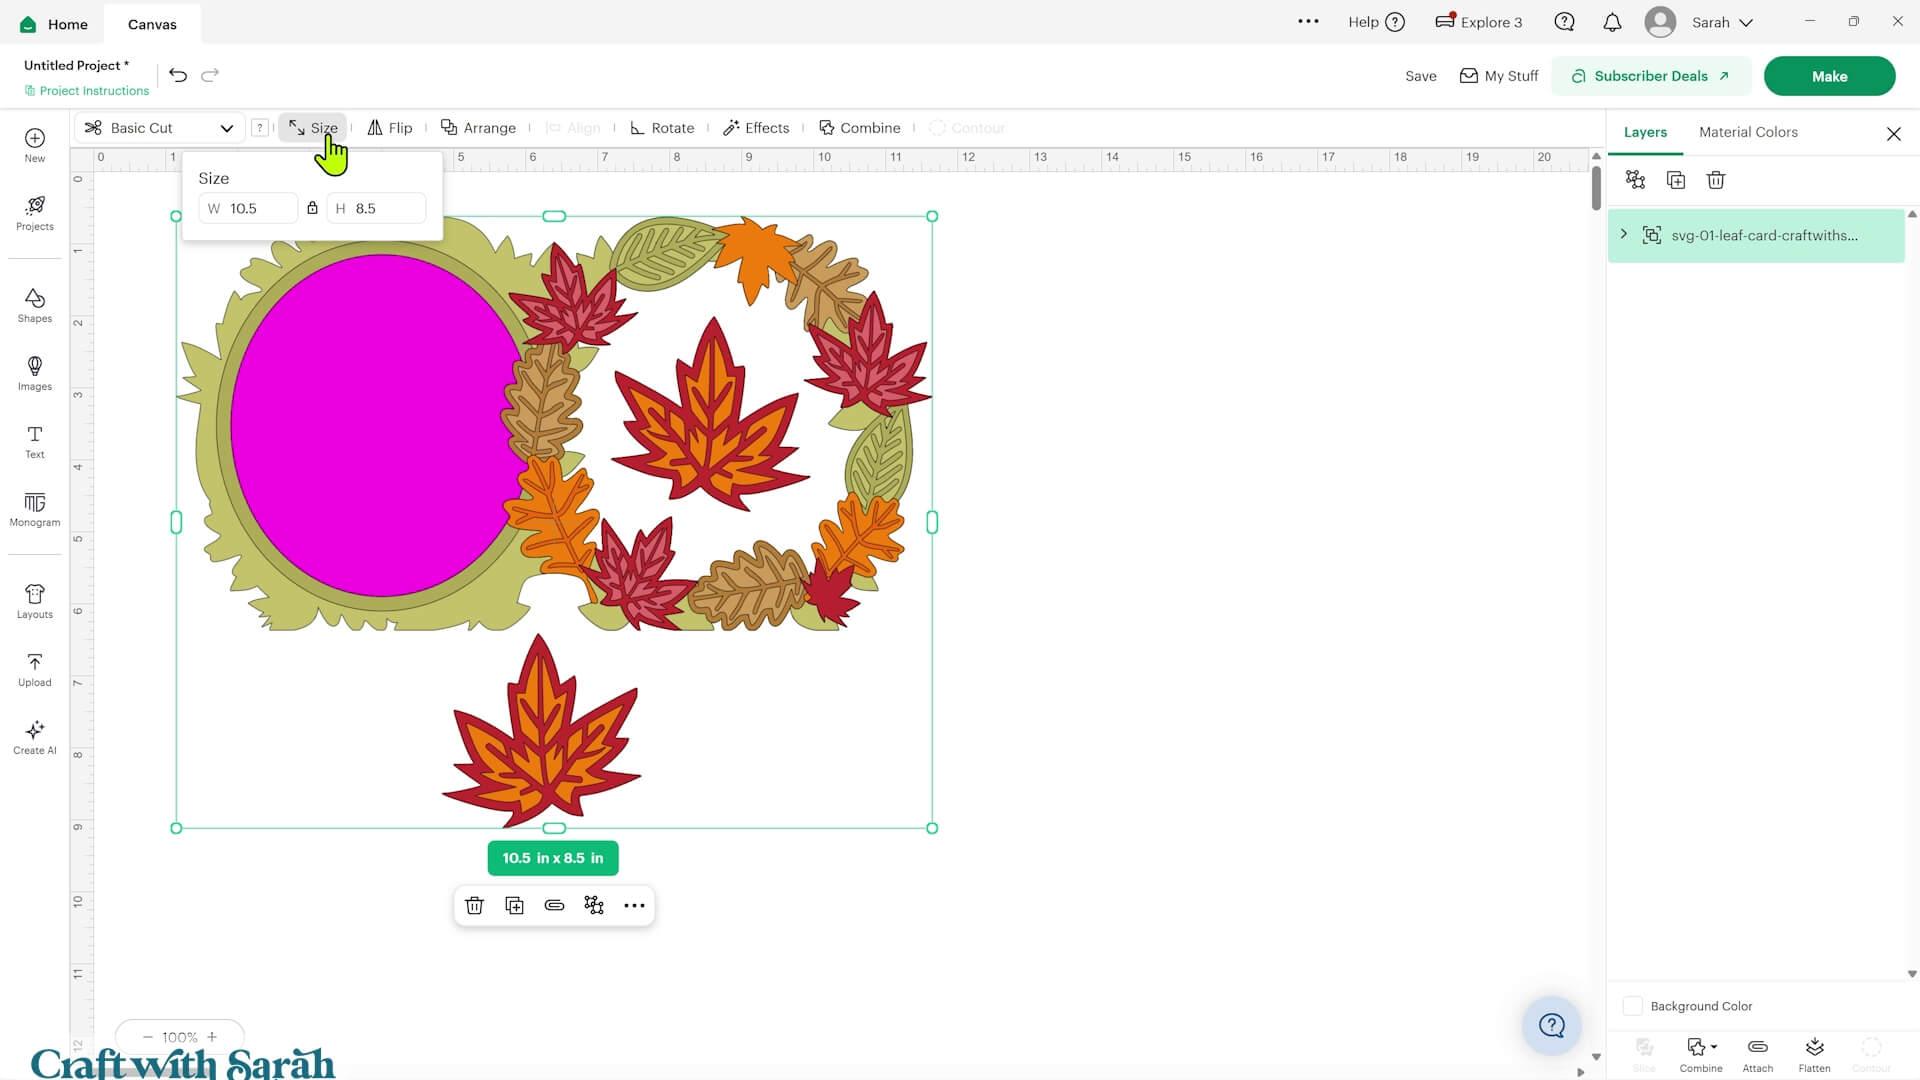
After uploading, the design should be automatically inserted onto your Canvas.
To hide the left sidebar (to give you more space for designing!), click the arrow that’s about half way down the page.
Need help uploading SVGs? Get step-by-step instructions here in our detailed help guides for Cricut, Silhouette and ScanNCut.
The whole design should load in at 10.5 inches wide and 8.5 inches tall. This will make a finished card that’s approximately 6 inches x 5.75 inches.
Step 2) Add a score line (optional)
If you have a scoring wheel or scoring stylus for your Cricut machine, you can add a score line to make the card easier to fold.
Click the design and press ‘Ungroup’ at the top of the Layers panel to separate all the pieces.
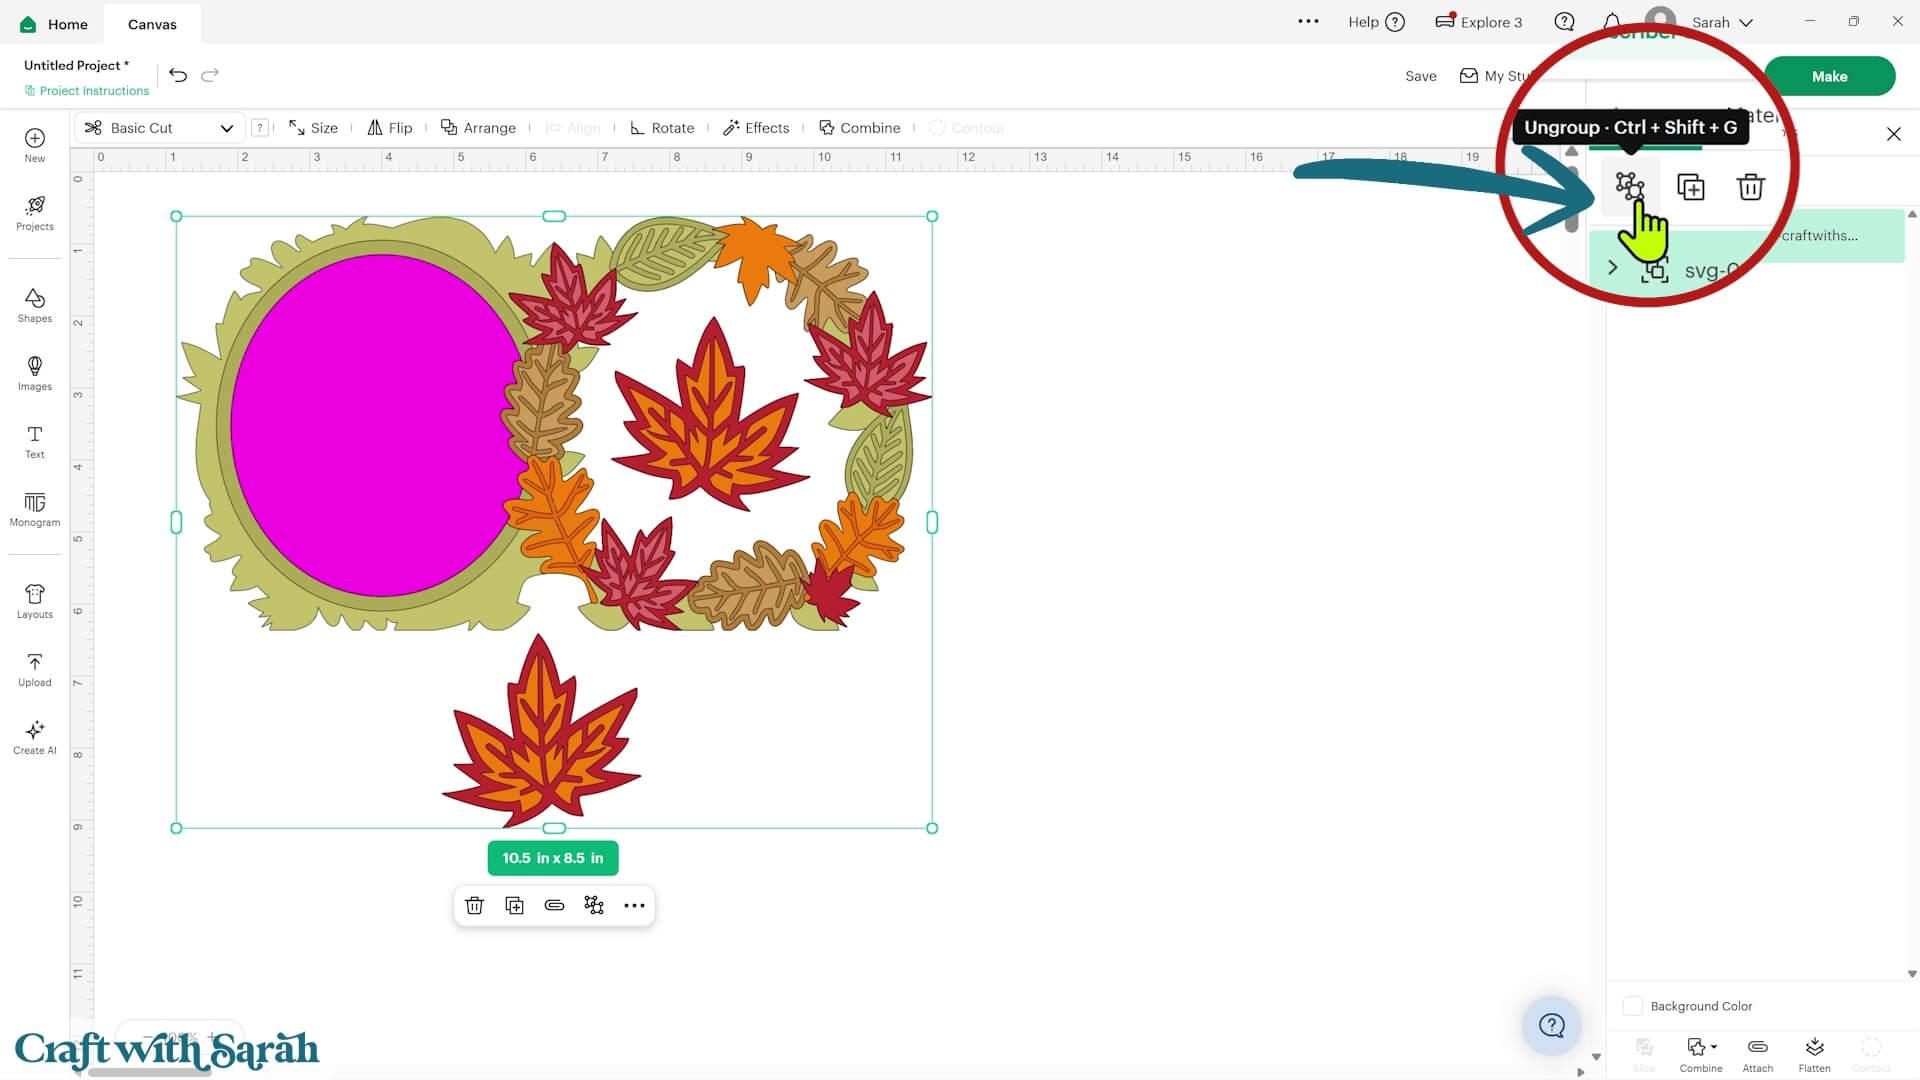
Move the base card over to one side so that it’s easier to work with.
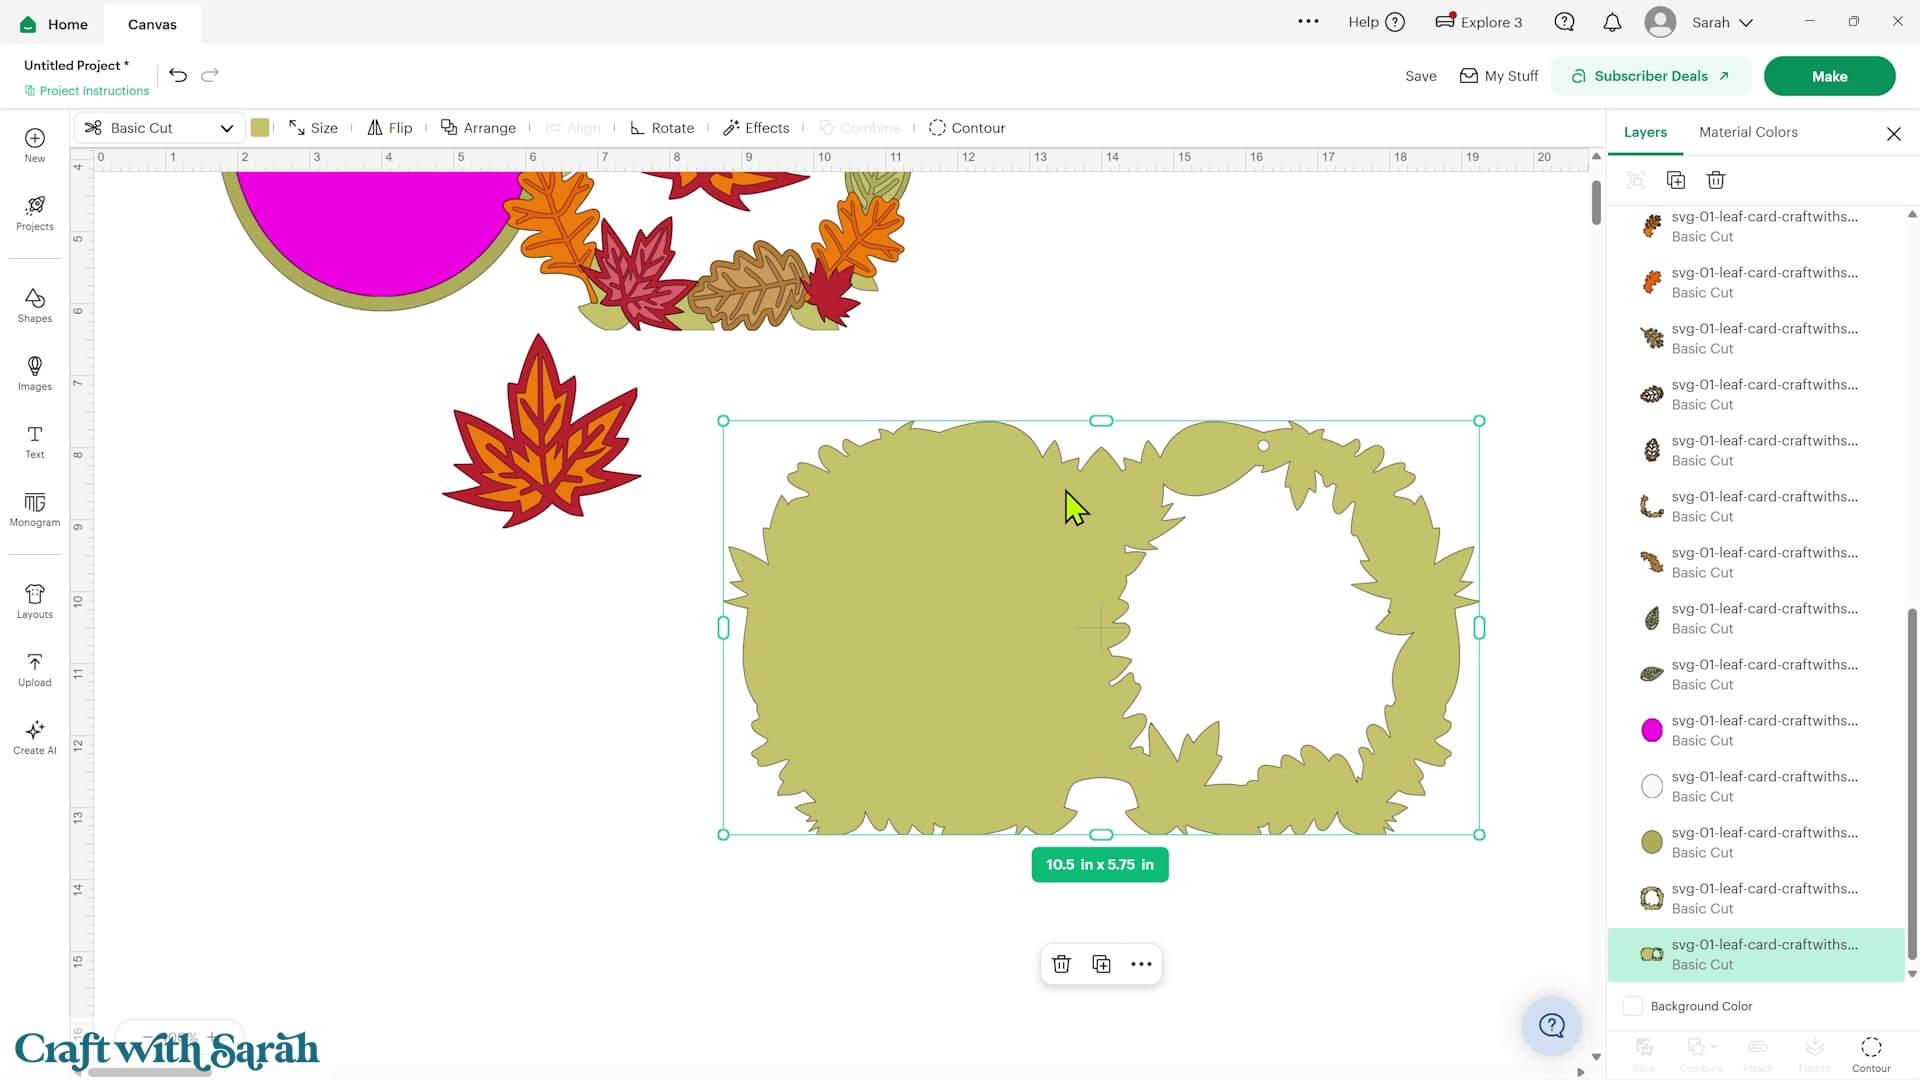
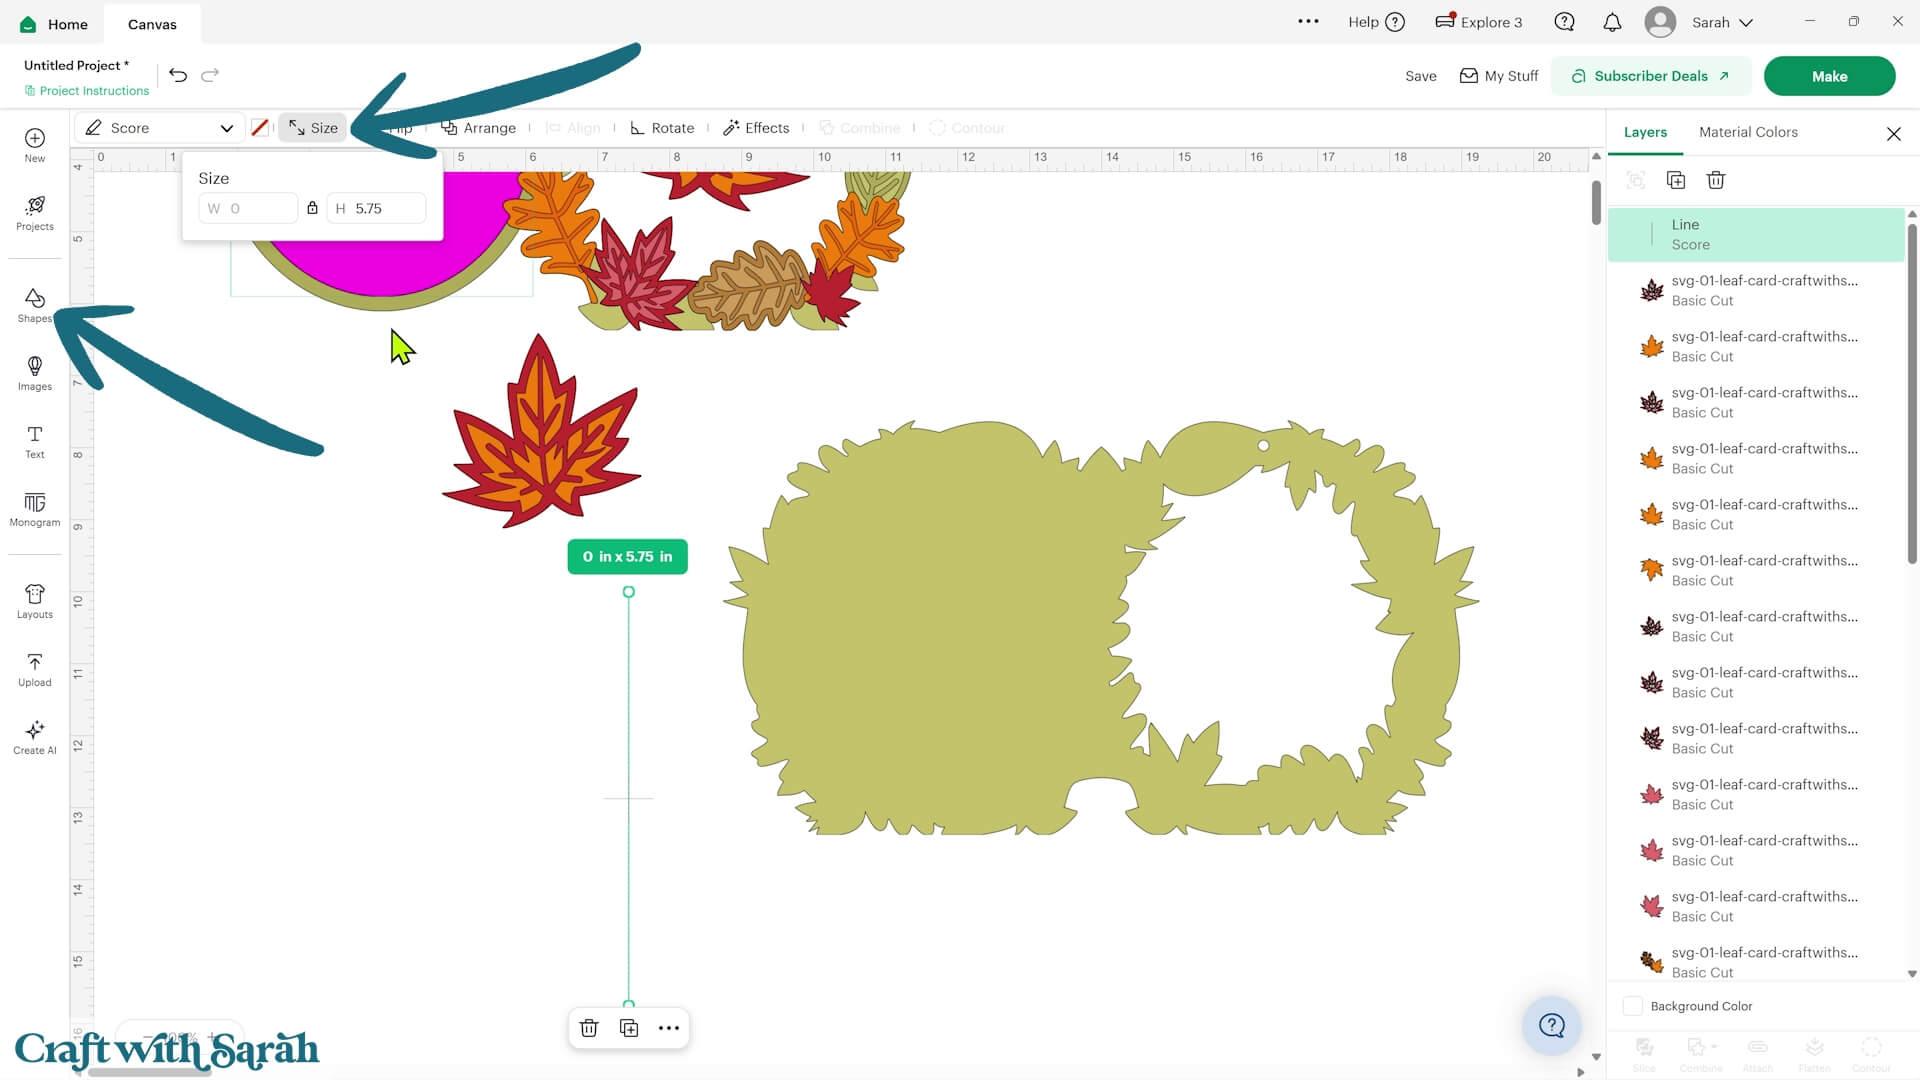
Go into ‘Shapes’ and choose a score line. Change the height of the score line to 5.75 inches.
Drag a box around the base card and score line, then press ‘Align’ > ‘Center’.
With both layers still selected, press ‘Attach’. This tells your Cricut to score the line in that exact position on the card.
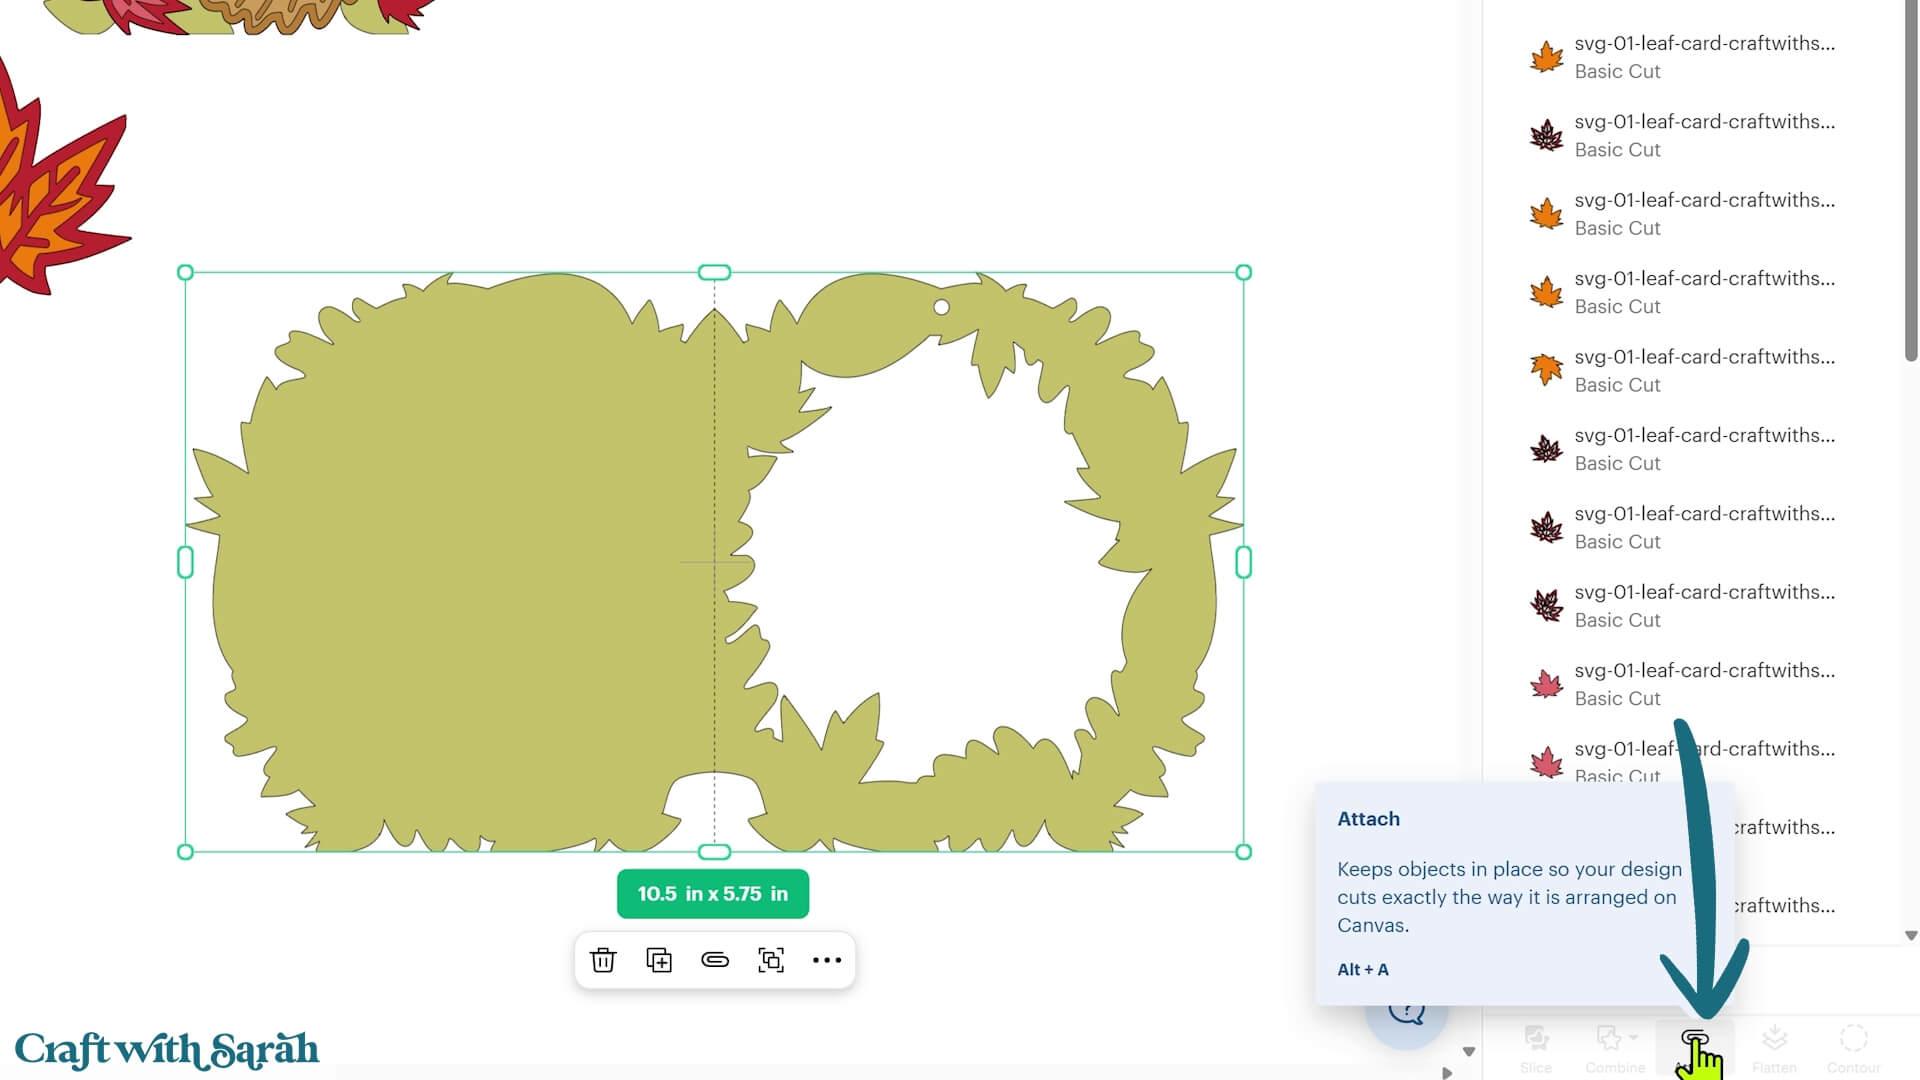
Don’t worry that the score line appears to extend slightly above and below the middle section of the card. This is because the middle of the card isn’t quite as tall as the tallest points of the design.
Step 3) Choose where to put your message
If you use the SVG exactly as it loads in, there are three pieces for the inside of the card.
The bright pink piece is intended to be cut from patterned paper.
The white oval is for your written message and the slightly larger green oval creates a decorative border.
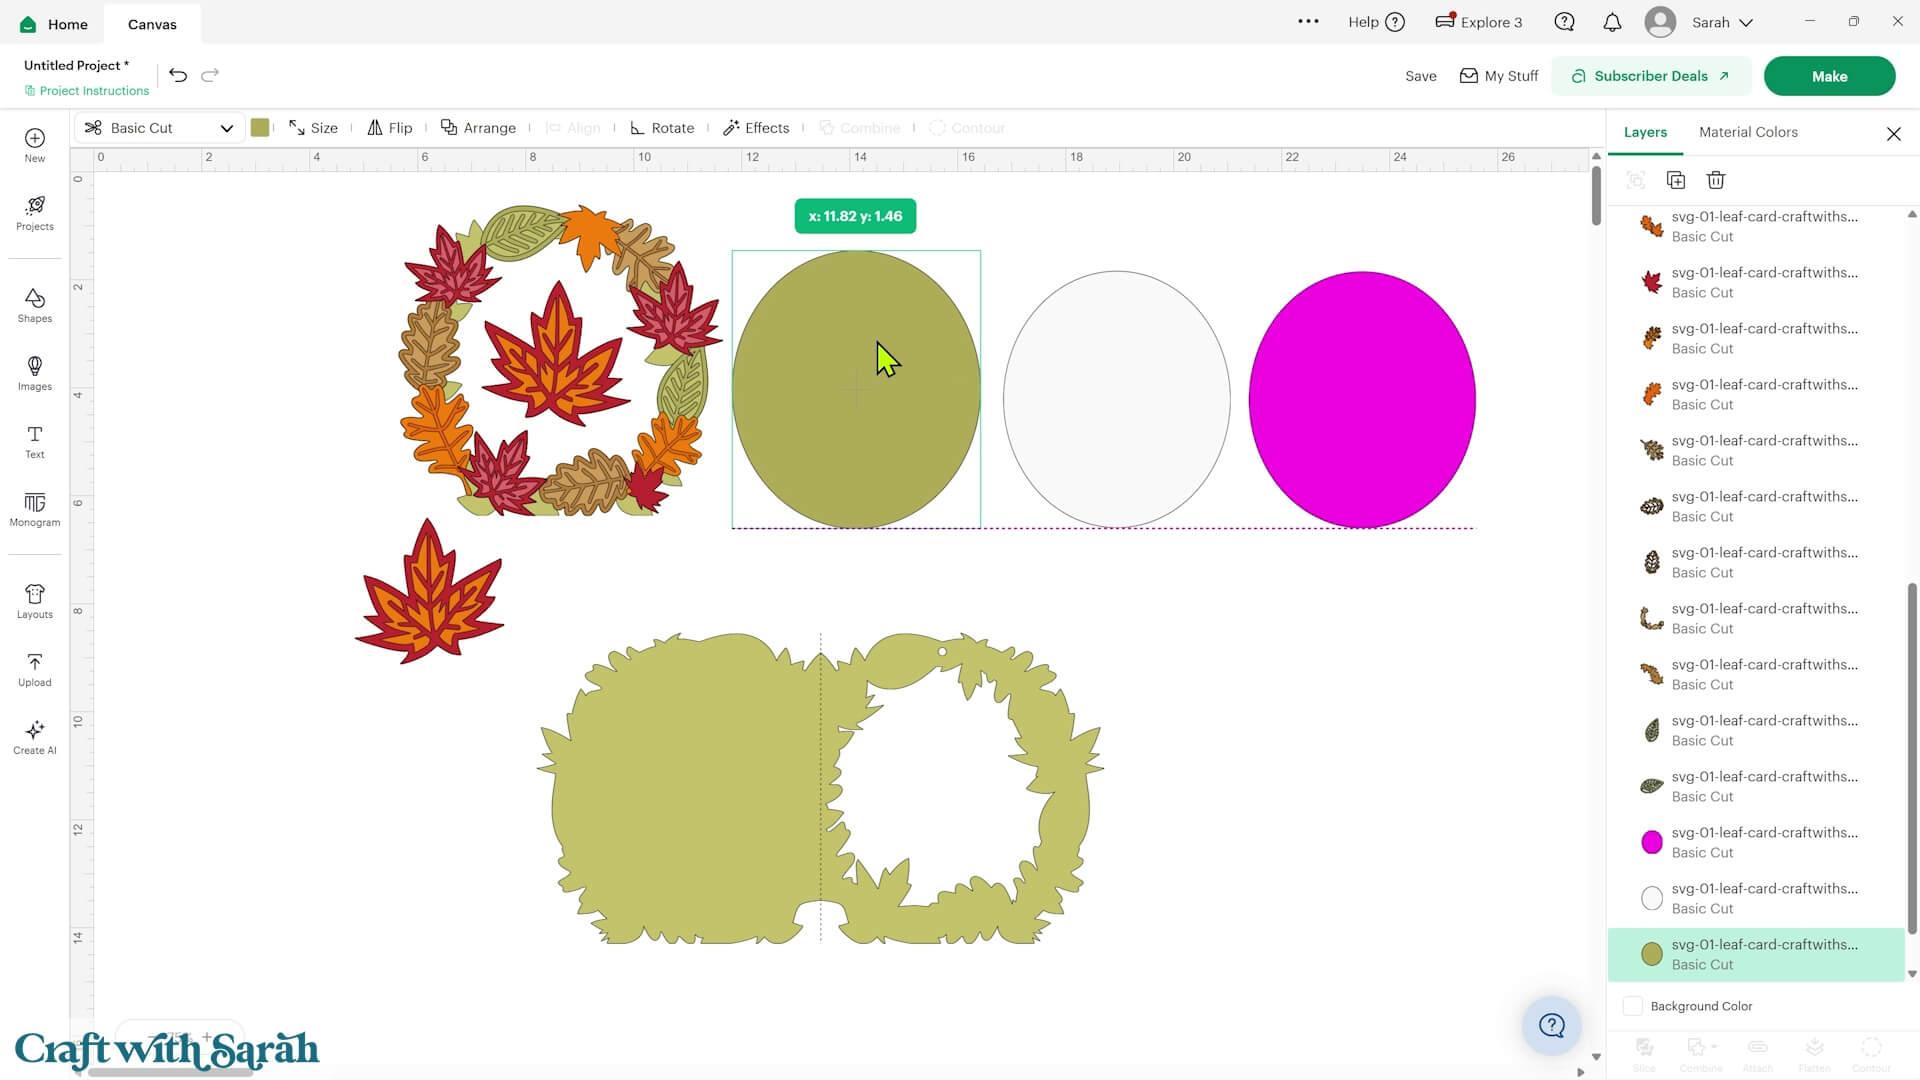
You have two options for adding your message.
The default option is to hide the message underneath the patterned paper inside the card. This is the version I’m making.
But if you would prefer to have your patterned paper glued fully on the inside of your card, and the written message on the back of the card, you can do that with a few tweaks in Design Space.
To do this, Duplicate the green oval. You’ll then have one green oval underneath the patterned paper inside the card and another on the back, with the white message panel glued on top.
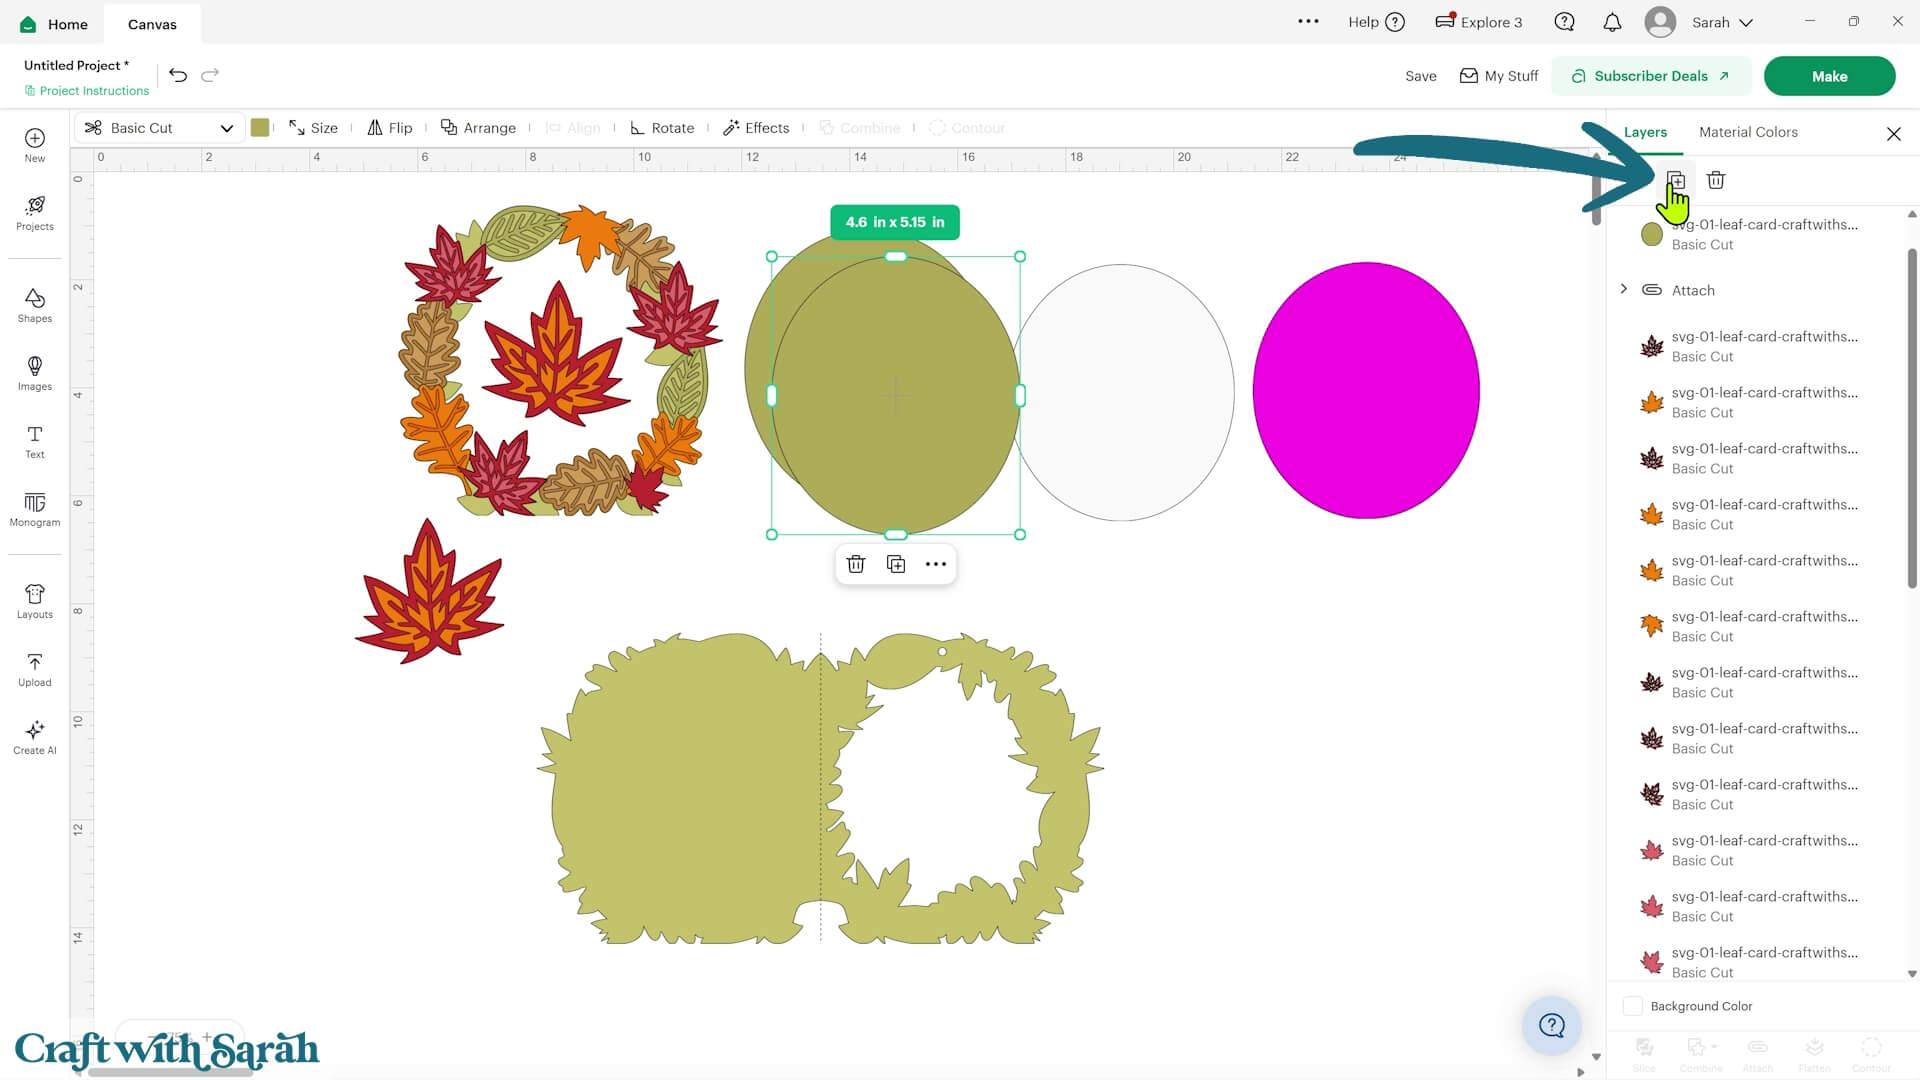
If you are adding the “hidden message” then you don’t need to duplicate the green oval. Instead, add a score line towards the top of the patterned paper piece so that it can be lifted to reveal your message underneath.
Go into ‘Shapes’ and choose a score line. Rotate it by typing 90 into the Rotate box.
Position the score line horizontally near the top of the patterned paper oval and resize it so that it’s slightly wider than the oval.
Select the patterned paper oval and the score line and press ‘Attach’.
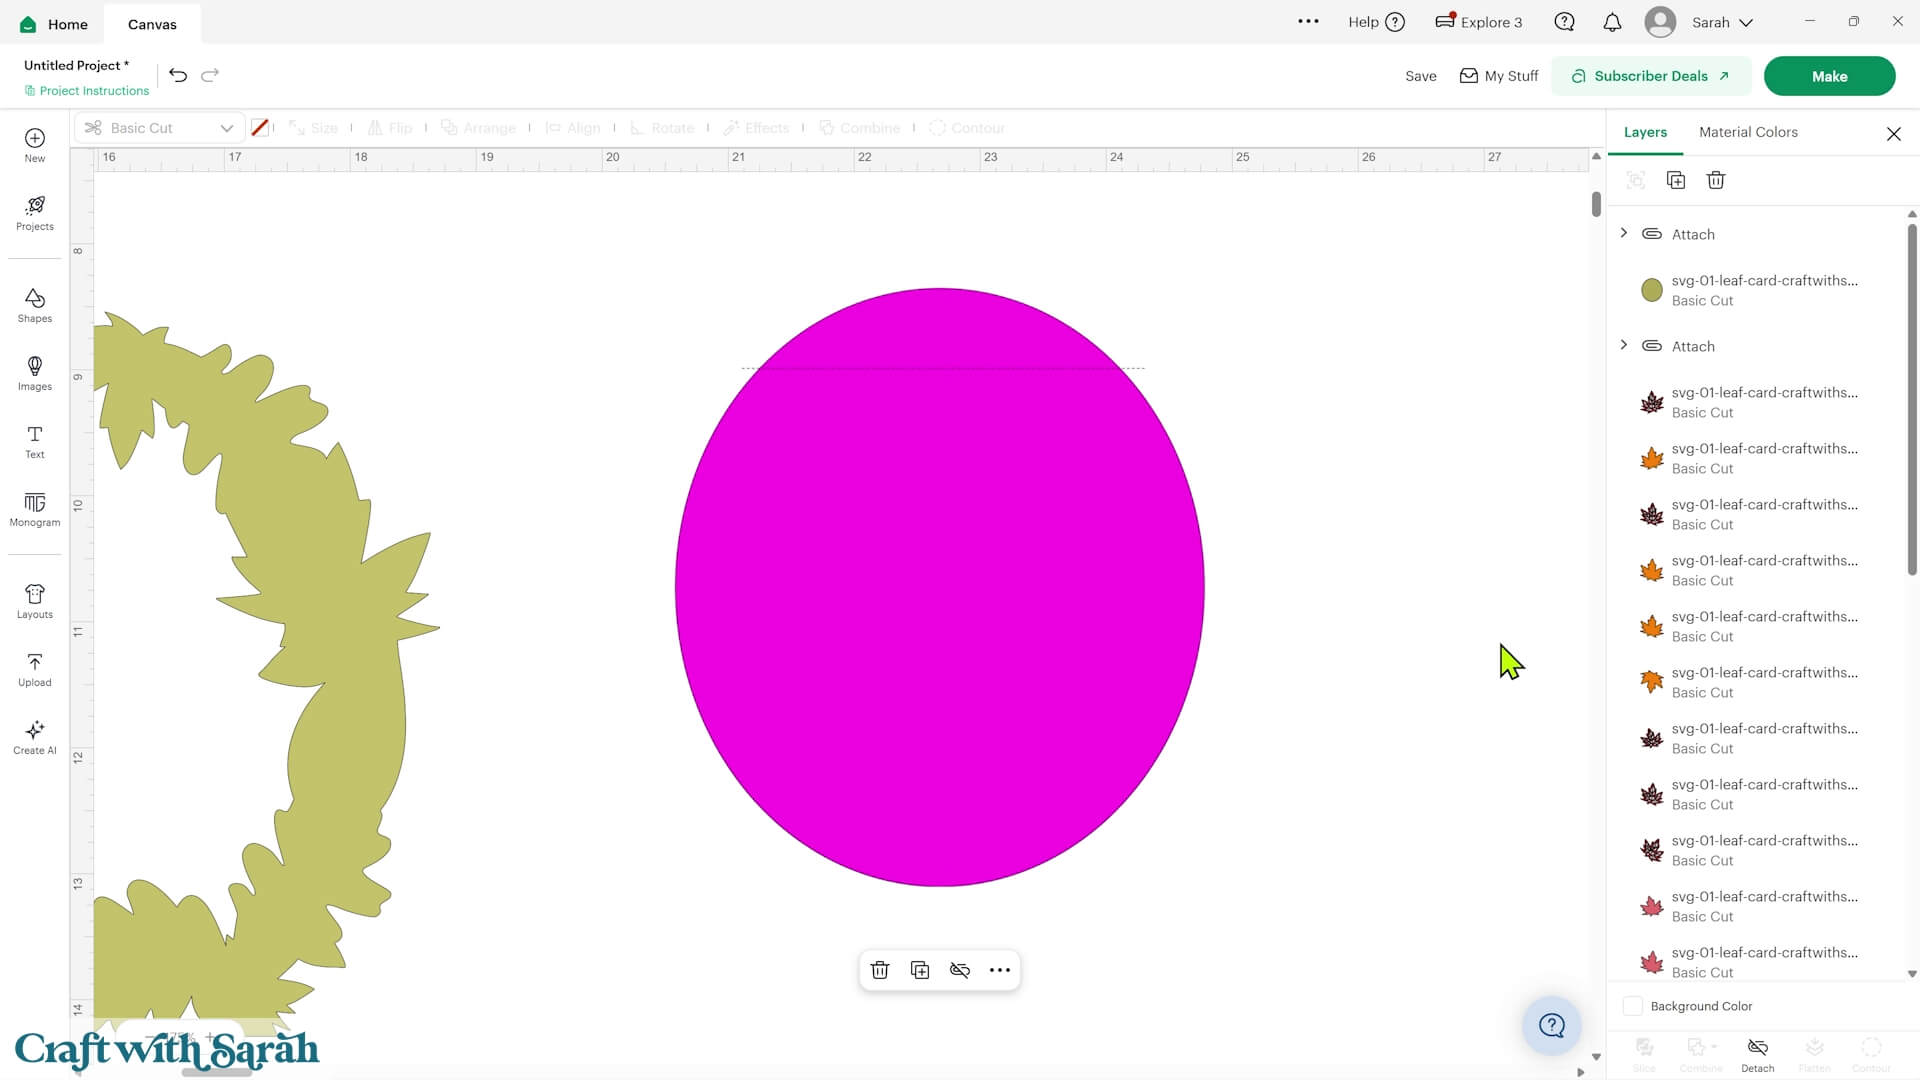
The card is now ready to cut.
Step 4) Cut the card pieces
Connect to your Cricut machine and press ‘Make’.
Cricut Design Space will separate the different colours onto individual mats.
You can change the material size using the dropdown menu and move or rotate the pieces to make better use of your cardstock.
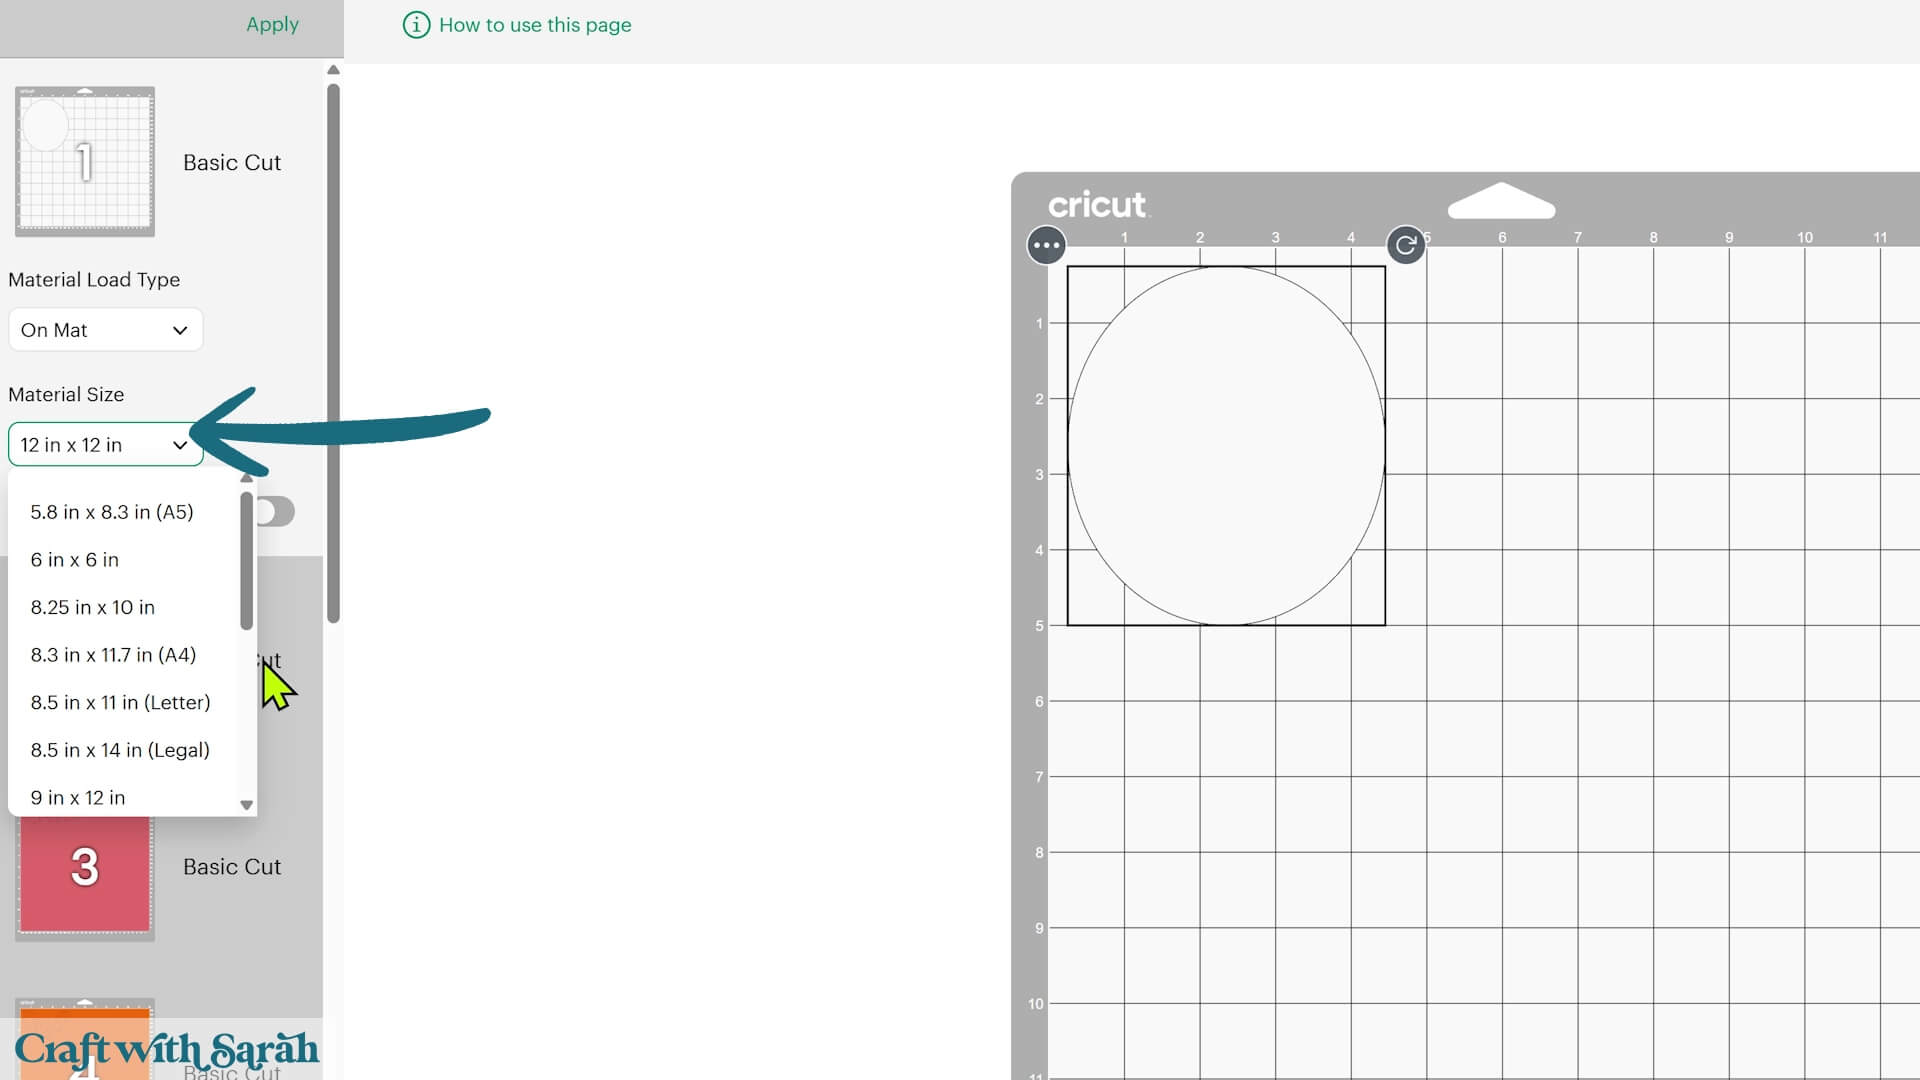
This project uses relatively small amounts of several different autumn colours, so it’s a great opportunity to use up leftover pieces of cardstock from other projects.
Just make sure none of the pieces overlap when you’re moving them around on the mats, otherwise they won’t cut correctly.
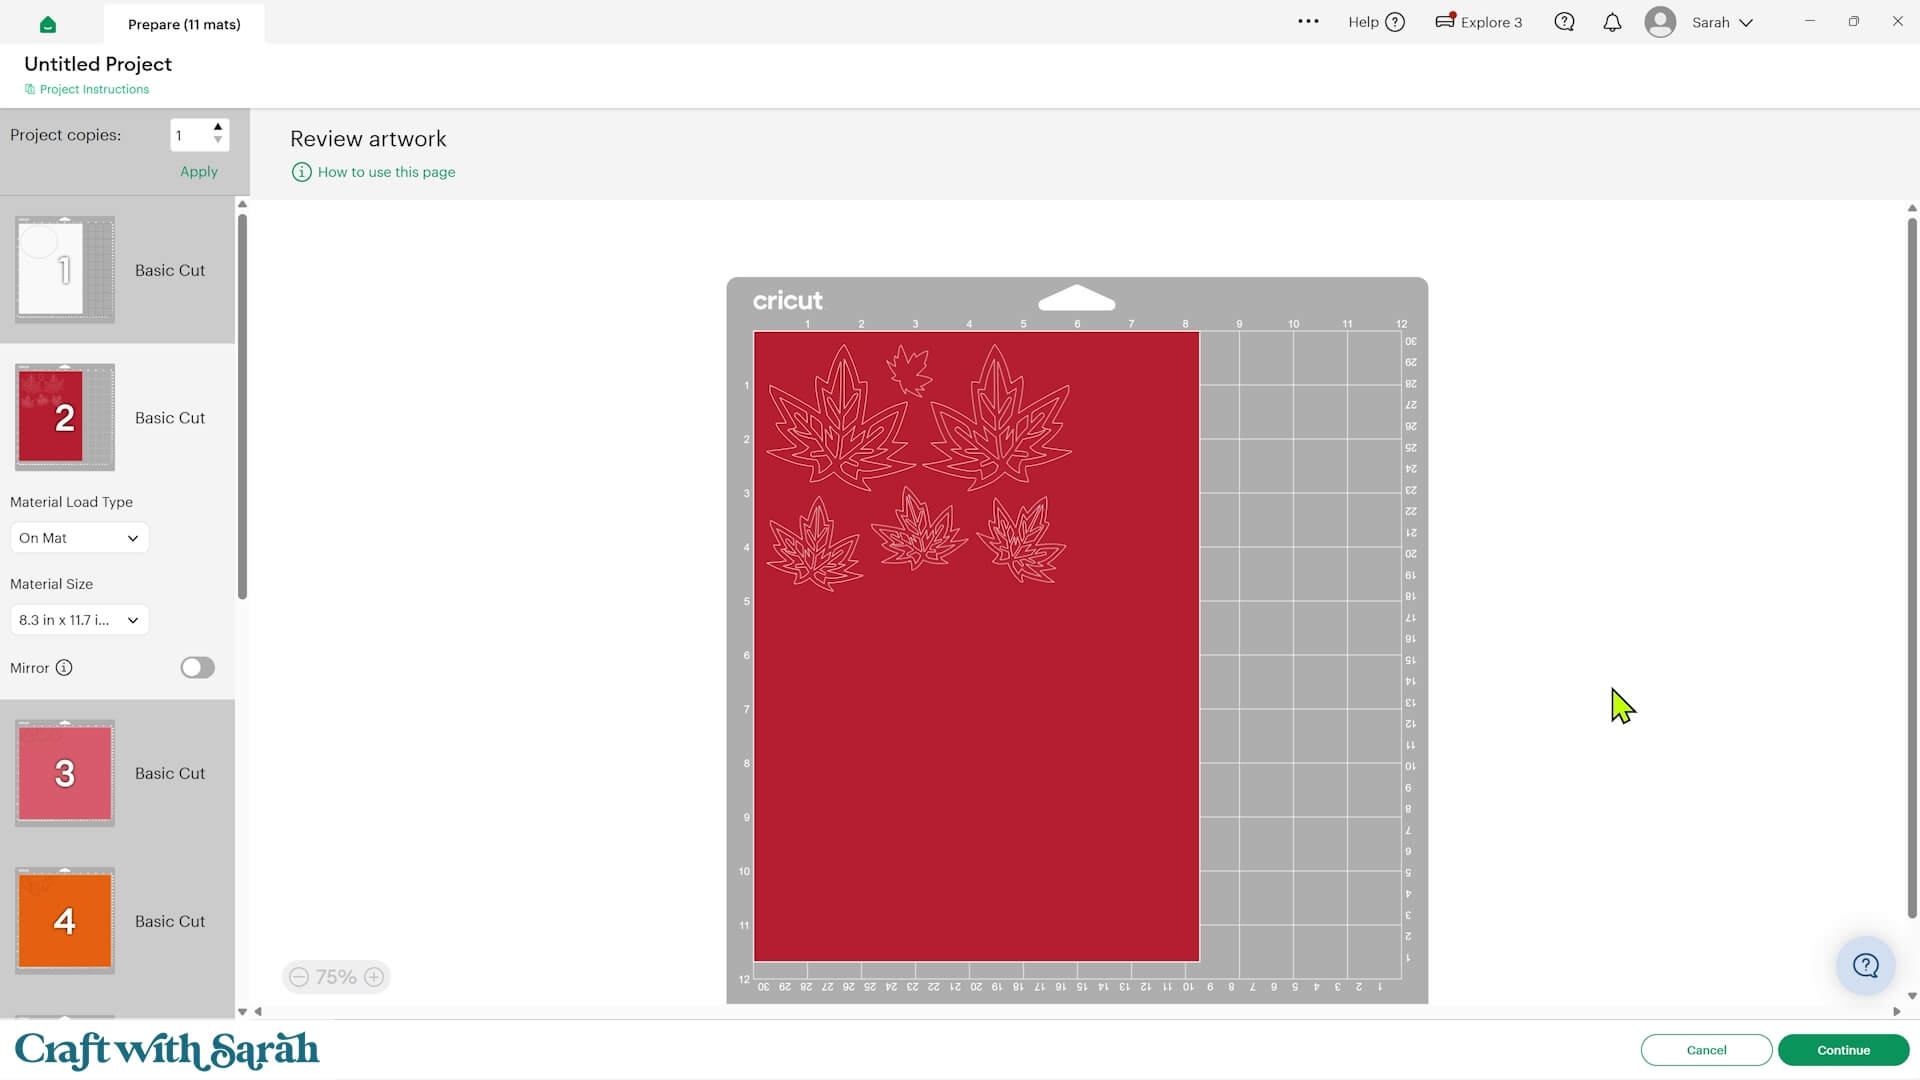
When you’re happy with the mat layouts, press ‘Continue’ and follow the on-screen instructions to get everything cut.
Step 5) Prepare the base card
The base card can be a little tricky to fold because the score line is very close to the large opening in the front.
I found it easier to fold the card the ‘wrong’ way first.
I’m using textured cardstock, so the textured side will be the outside of my finished card.
Place a ruler along the score line, covering the front section of the card with the opening.
Fold the back of the card all the way around in the opposite direction to how you eventually want it to sit.
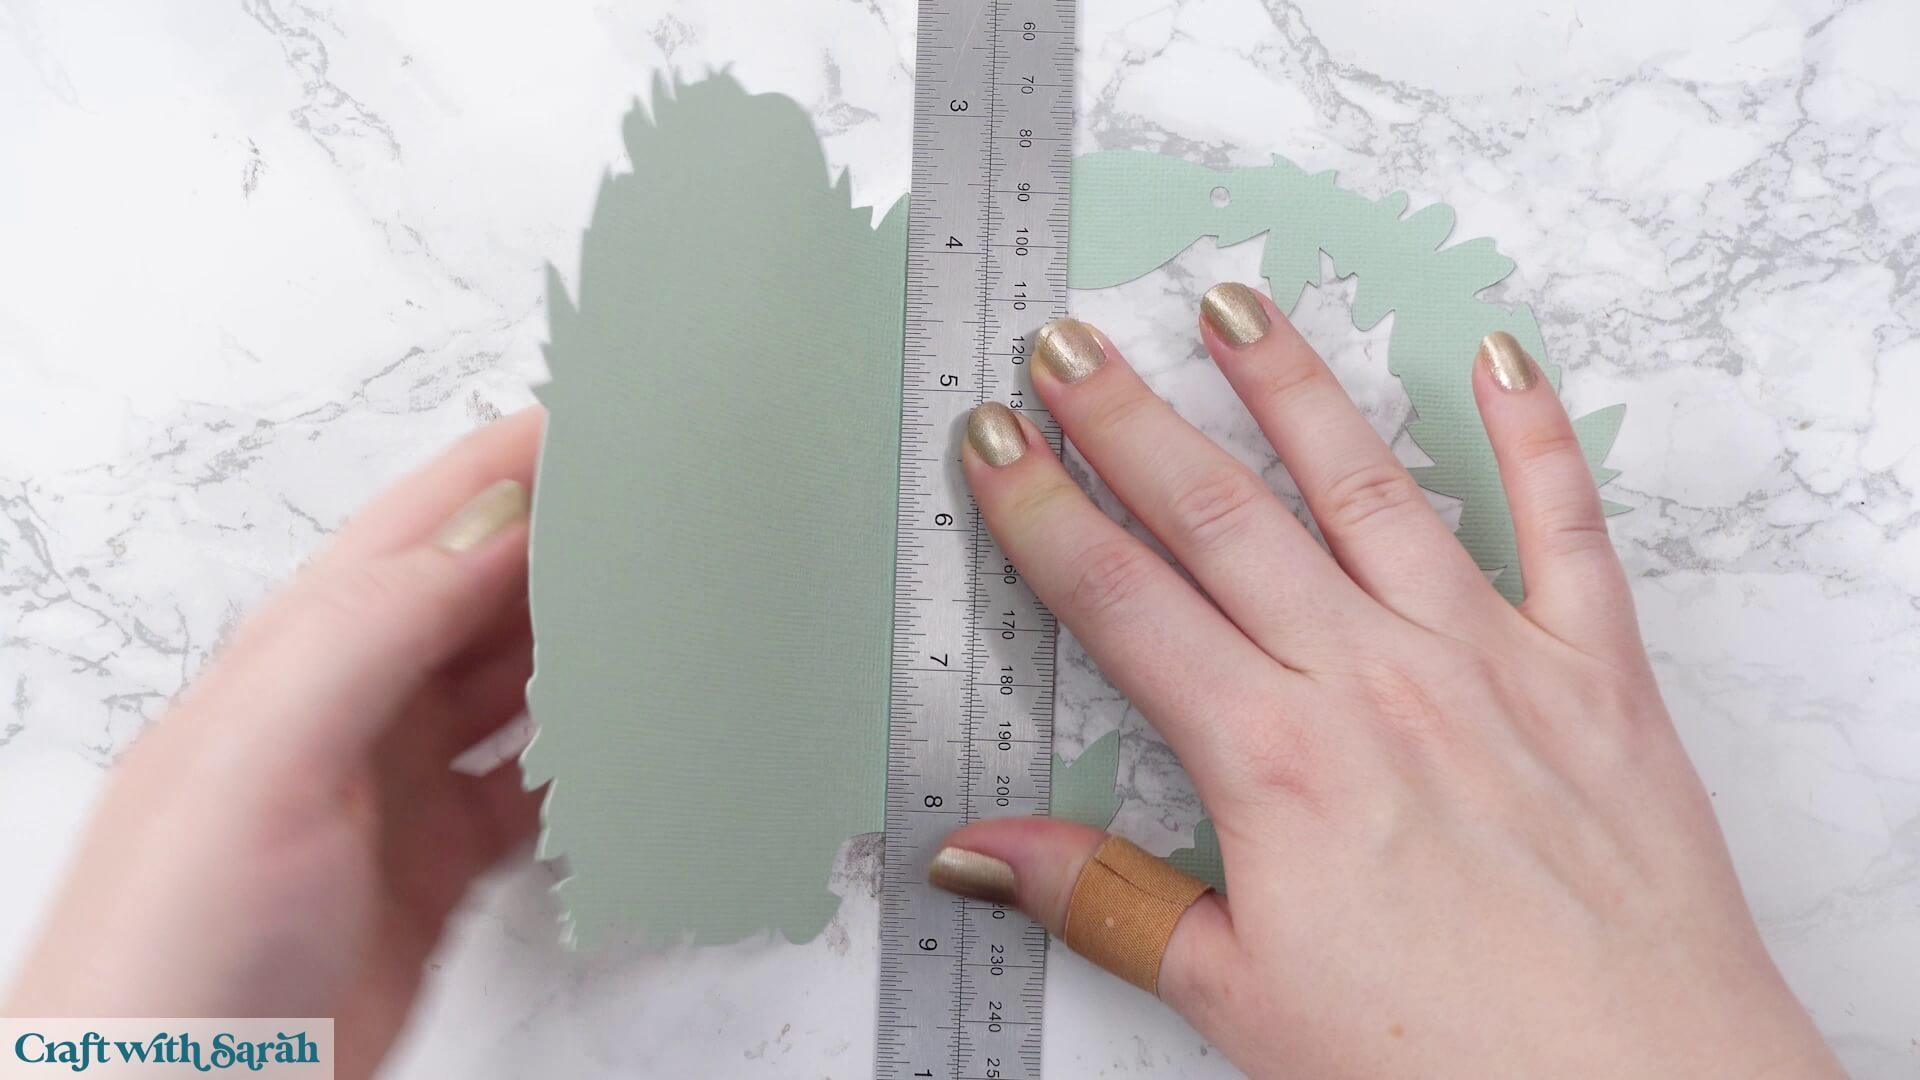
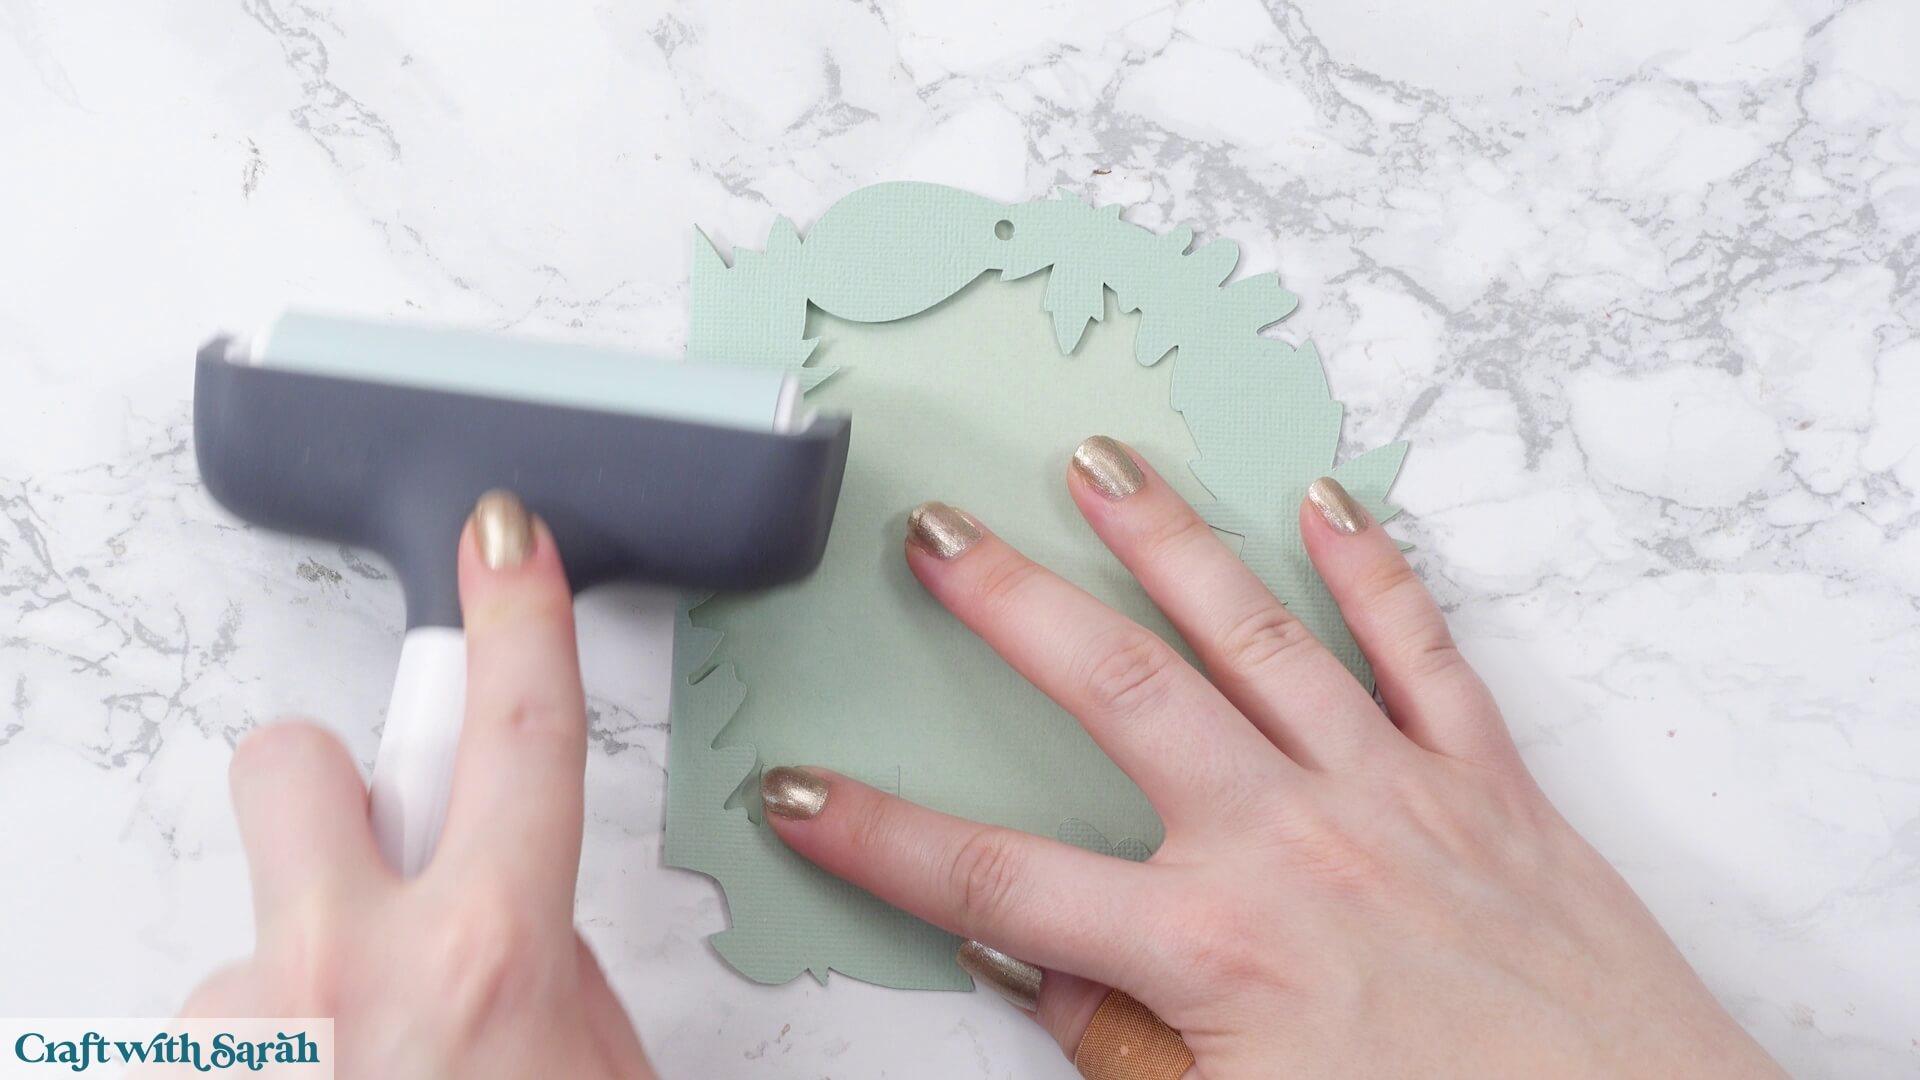
Go firmly down the fold with a brayer or scraper tool to make it crisp.
Open the card again. Now that you’ve established a strong fold, it should be much easier to fold it back the other way into its correct position.
Go down the fold once more with your brayer or scraper.
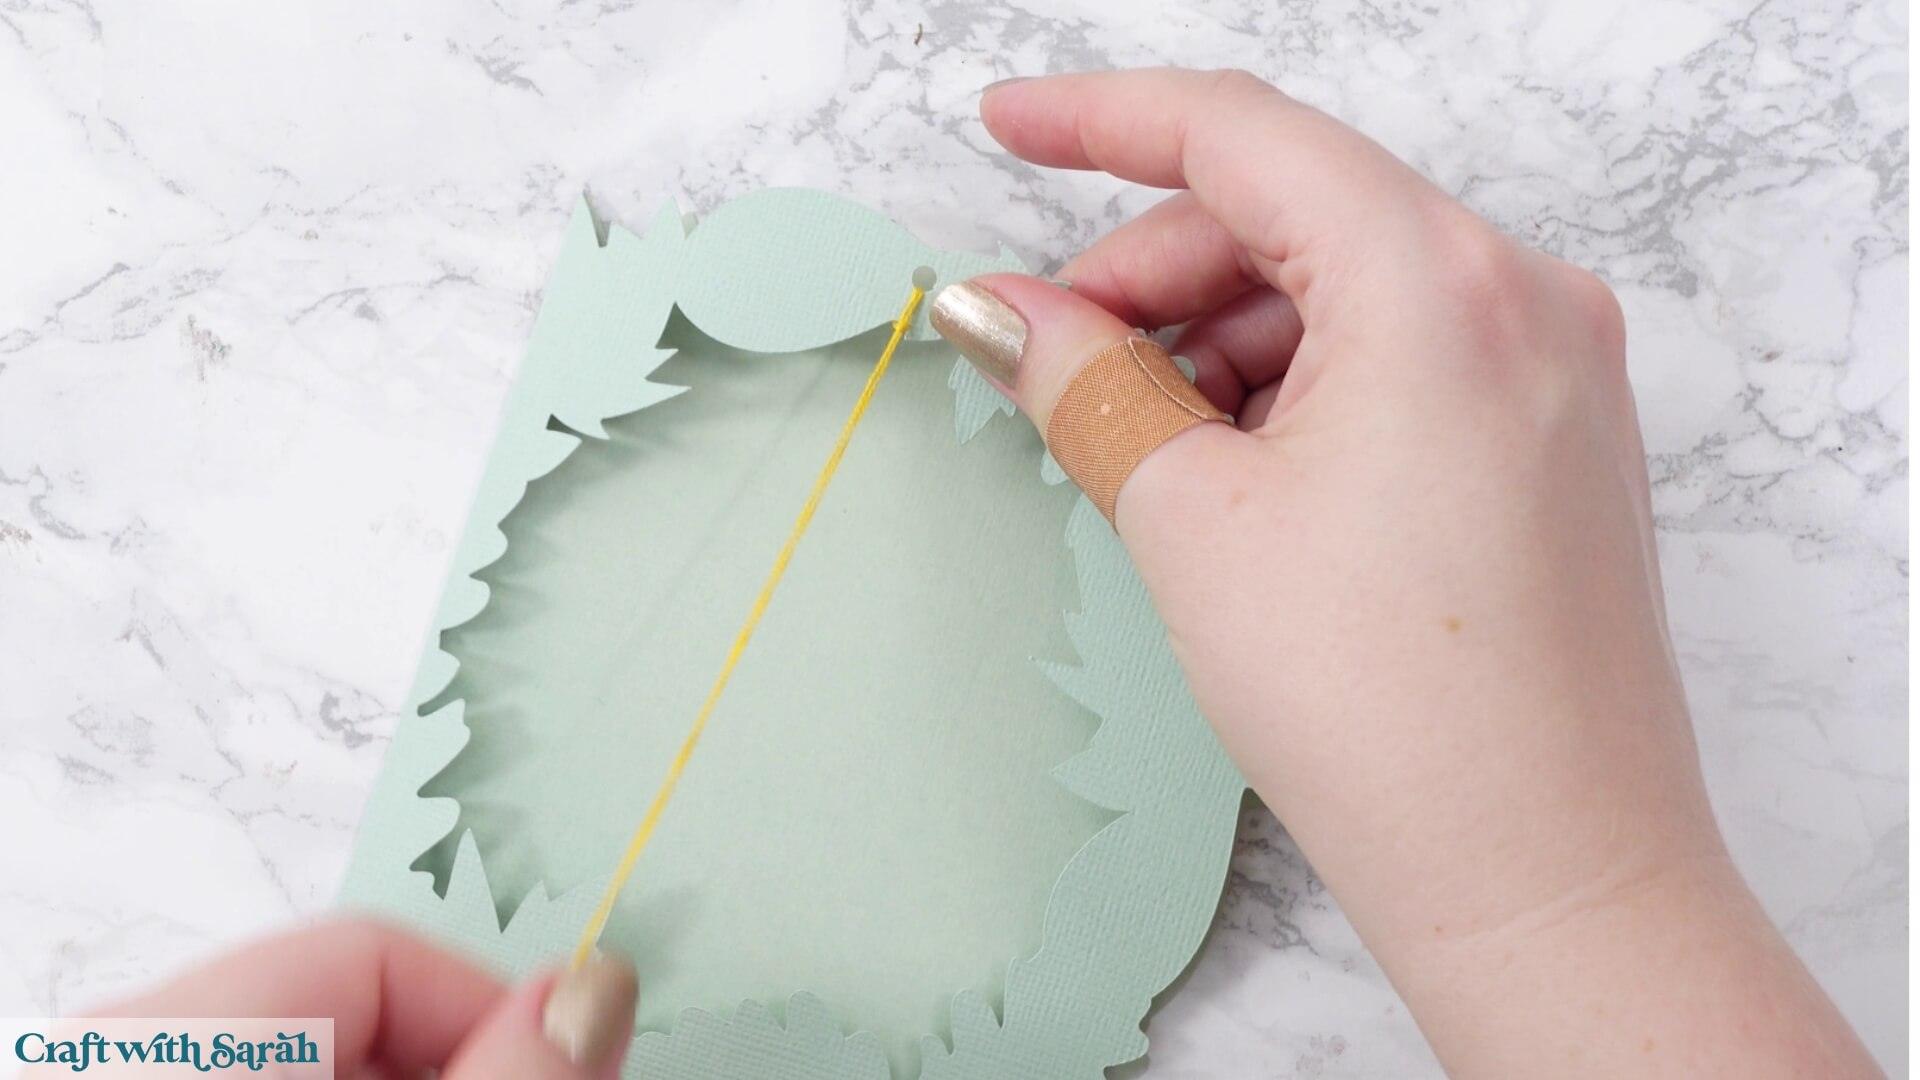
Before adding the decorative pieces to the front, attach the thread that will hold the dangling leaf.
I’m using embroidery thread, but you could use any thin thread, twine or ribbon that will fit through the hole in the card.
I separated my embroidery thread down to two strands. Fold the thread in half to form a loop.
Push the loop through the hole at the top of the card, then feed the loose ends through the loop and pull it tight.
Leave the remaining thread loose for now. We’ll work out the correct length when we add the hanging leaf later.
Step 6) Assemble the card layers
We’ll be putting the card together with a combination of glue and foam squares.
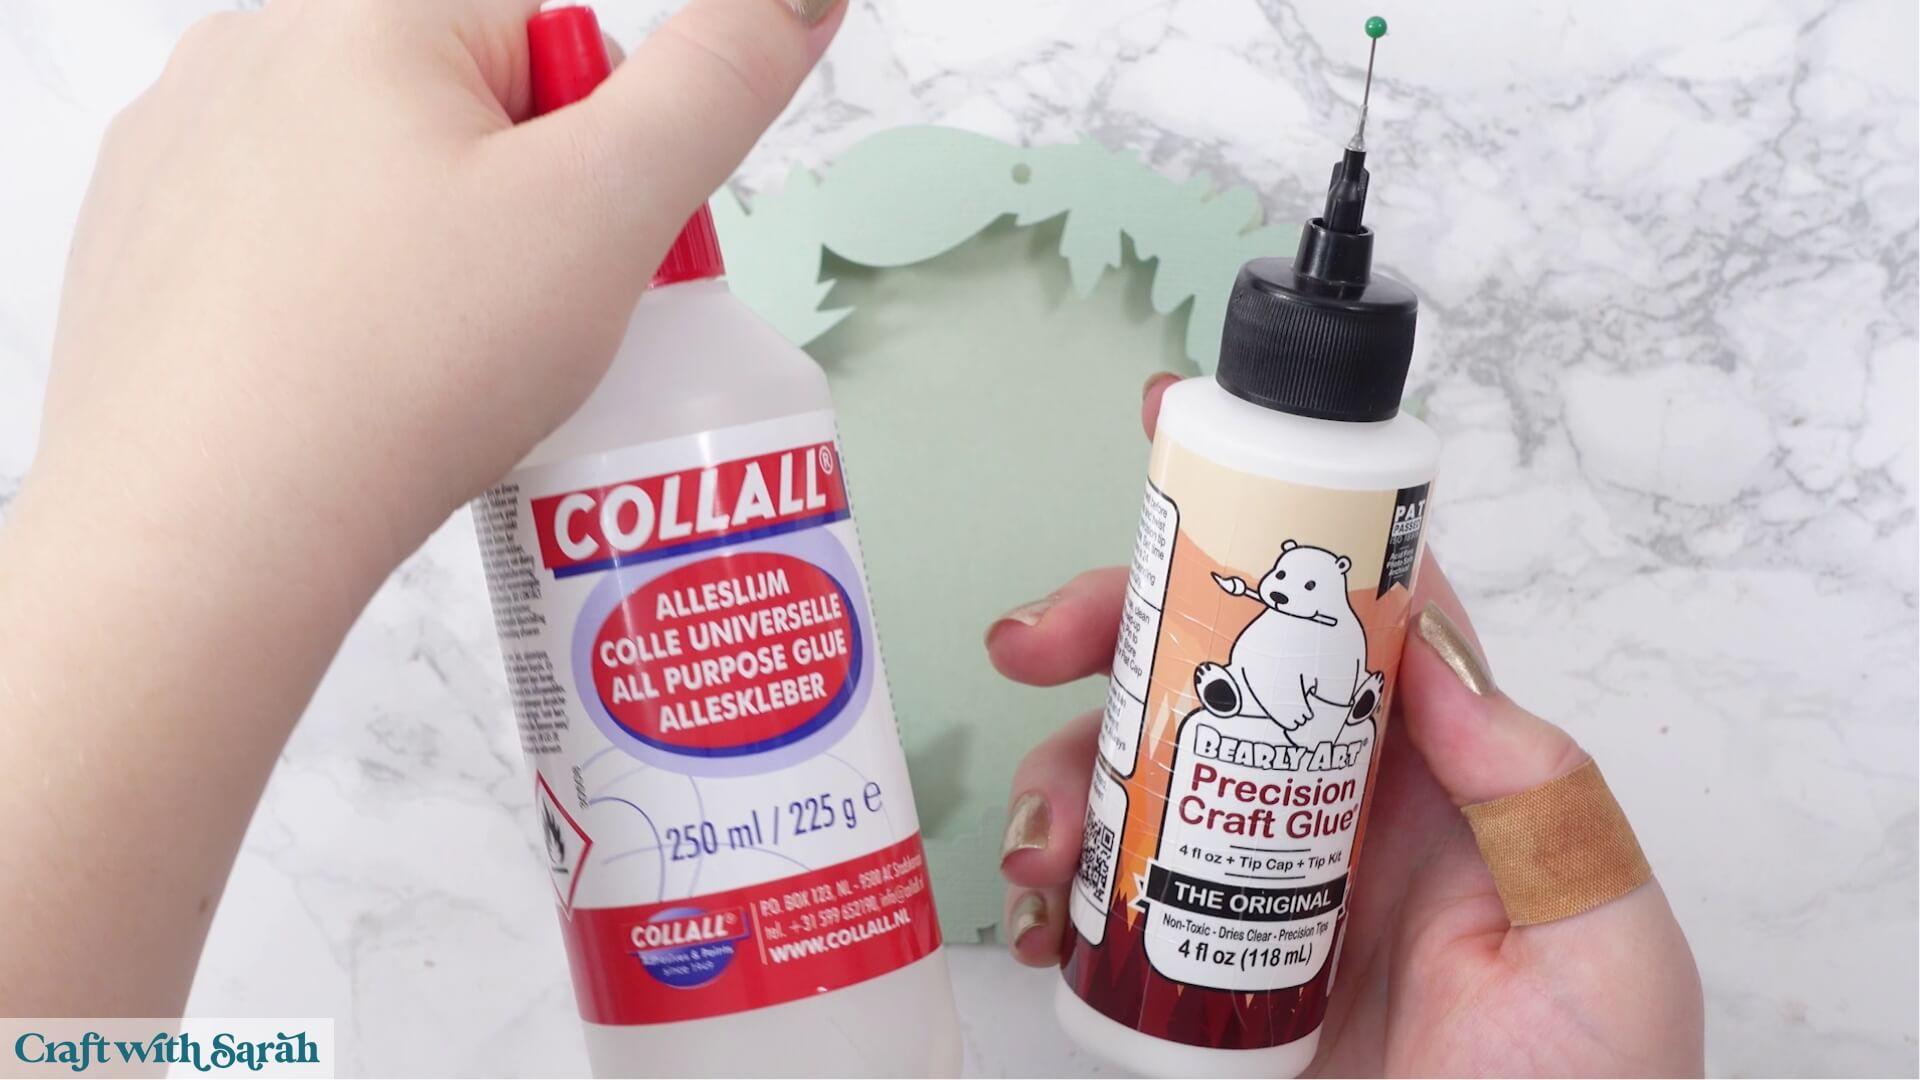
I’m using Bearly Art Glue, although I also like Collall. These glues are good for papercrafting because they don’t bend or wrinkle the cardstock like some glues can.
My foam squares are from Dot & Dab and measure 5 x 5 mm and 2 mm thick, but any brand or size is fine. If your foam squares are large then you may need to cut them smaller with scissors.
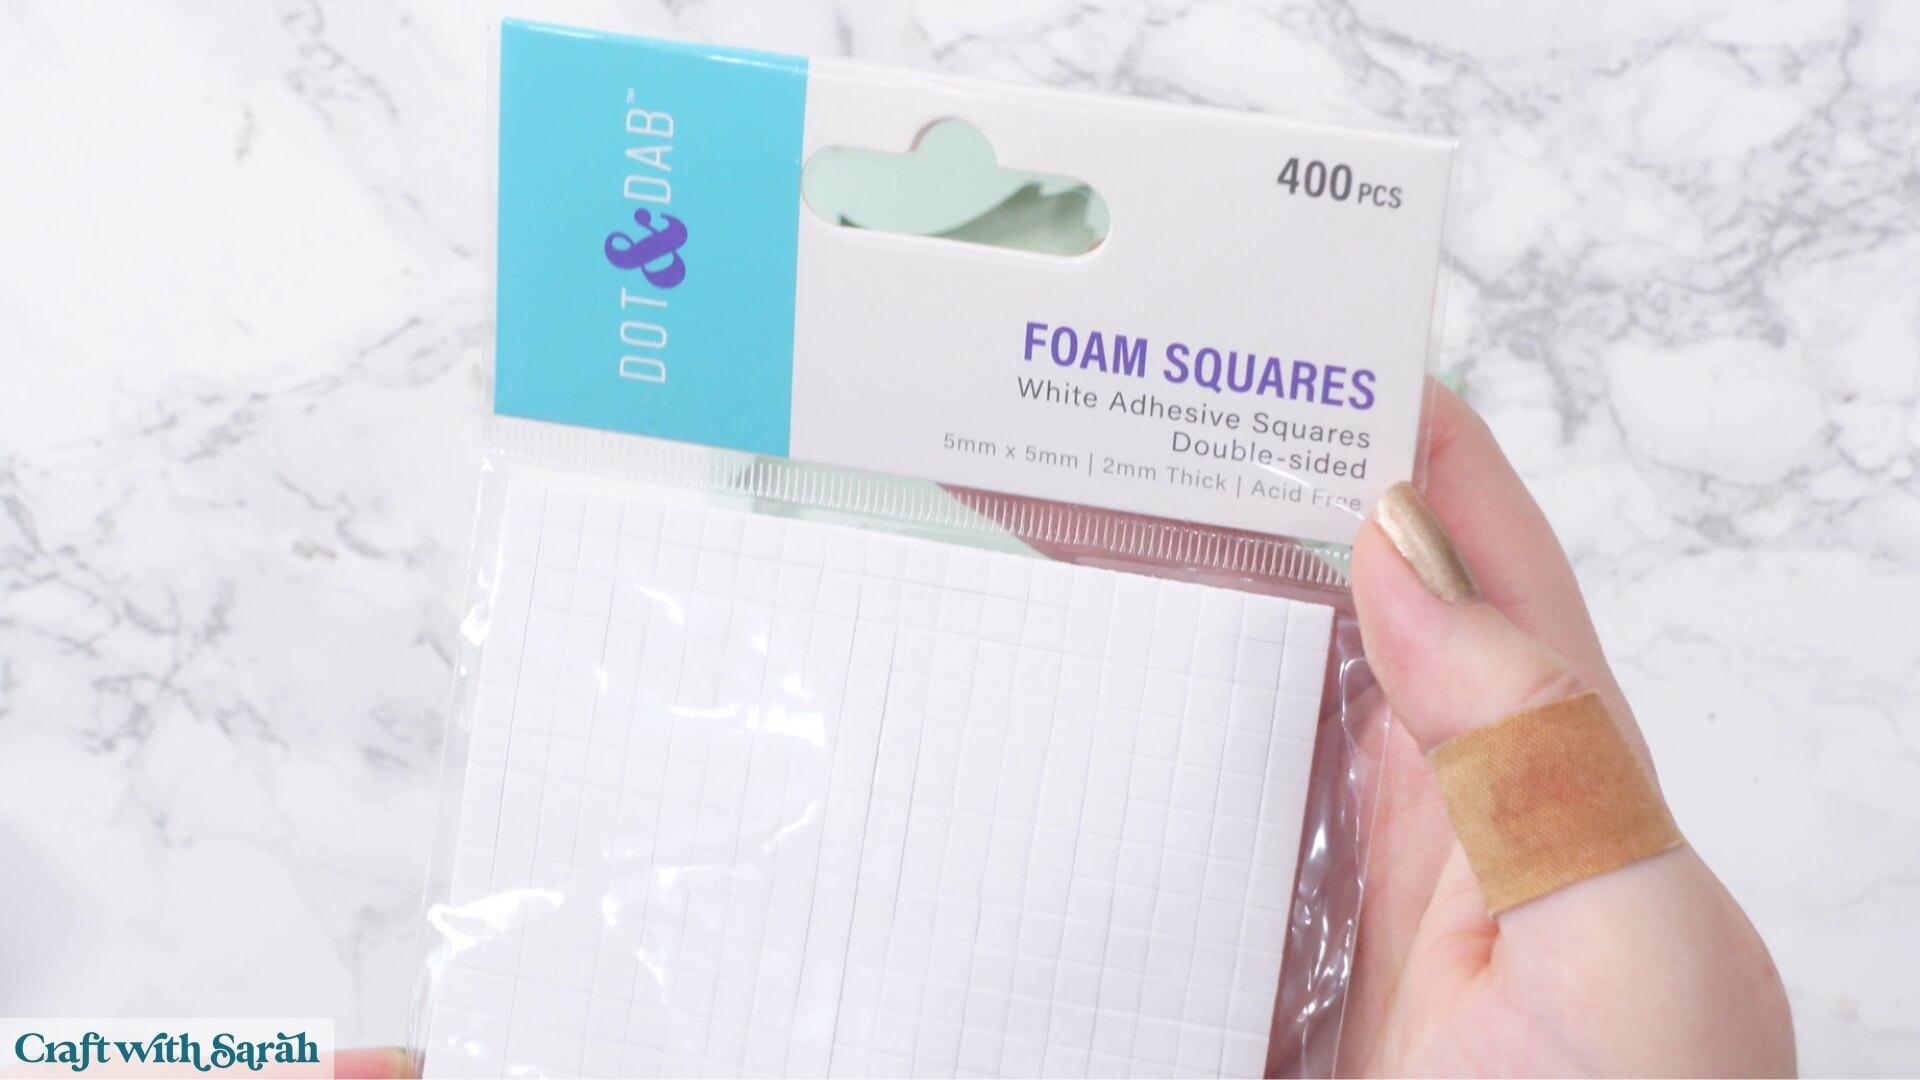
If you want to keep your finished card thinner for posting, you can glue all the layers instead.
Alternatively, use thinner 1 mm foam squares to add some dimension without making the card quite as thick.
Take the large piece that completes the leafy circle on the front of the card.
This piece serves two purposes. It covers the score line on the left to complete the circular shape and it also helps to secure and hide the thread.
Add glue to the base card rather than the decorative piece. Otherwise, you may end up putting glue on sections that don’t actually touch the card underneath.
Avoid putting glue directly onto the thread.
Line up the decorative piece and gently press it into position.
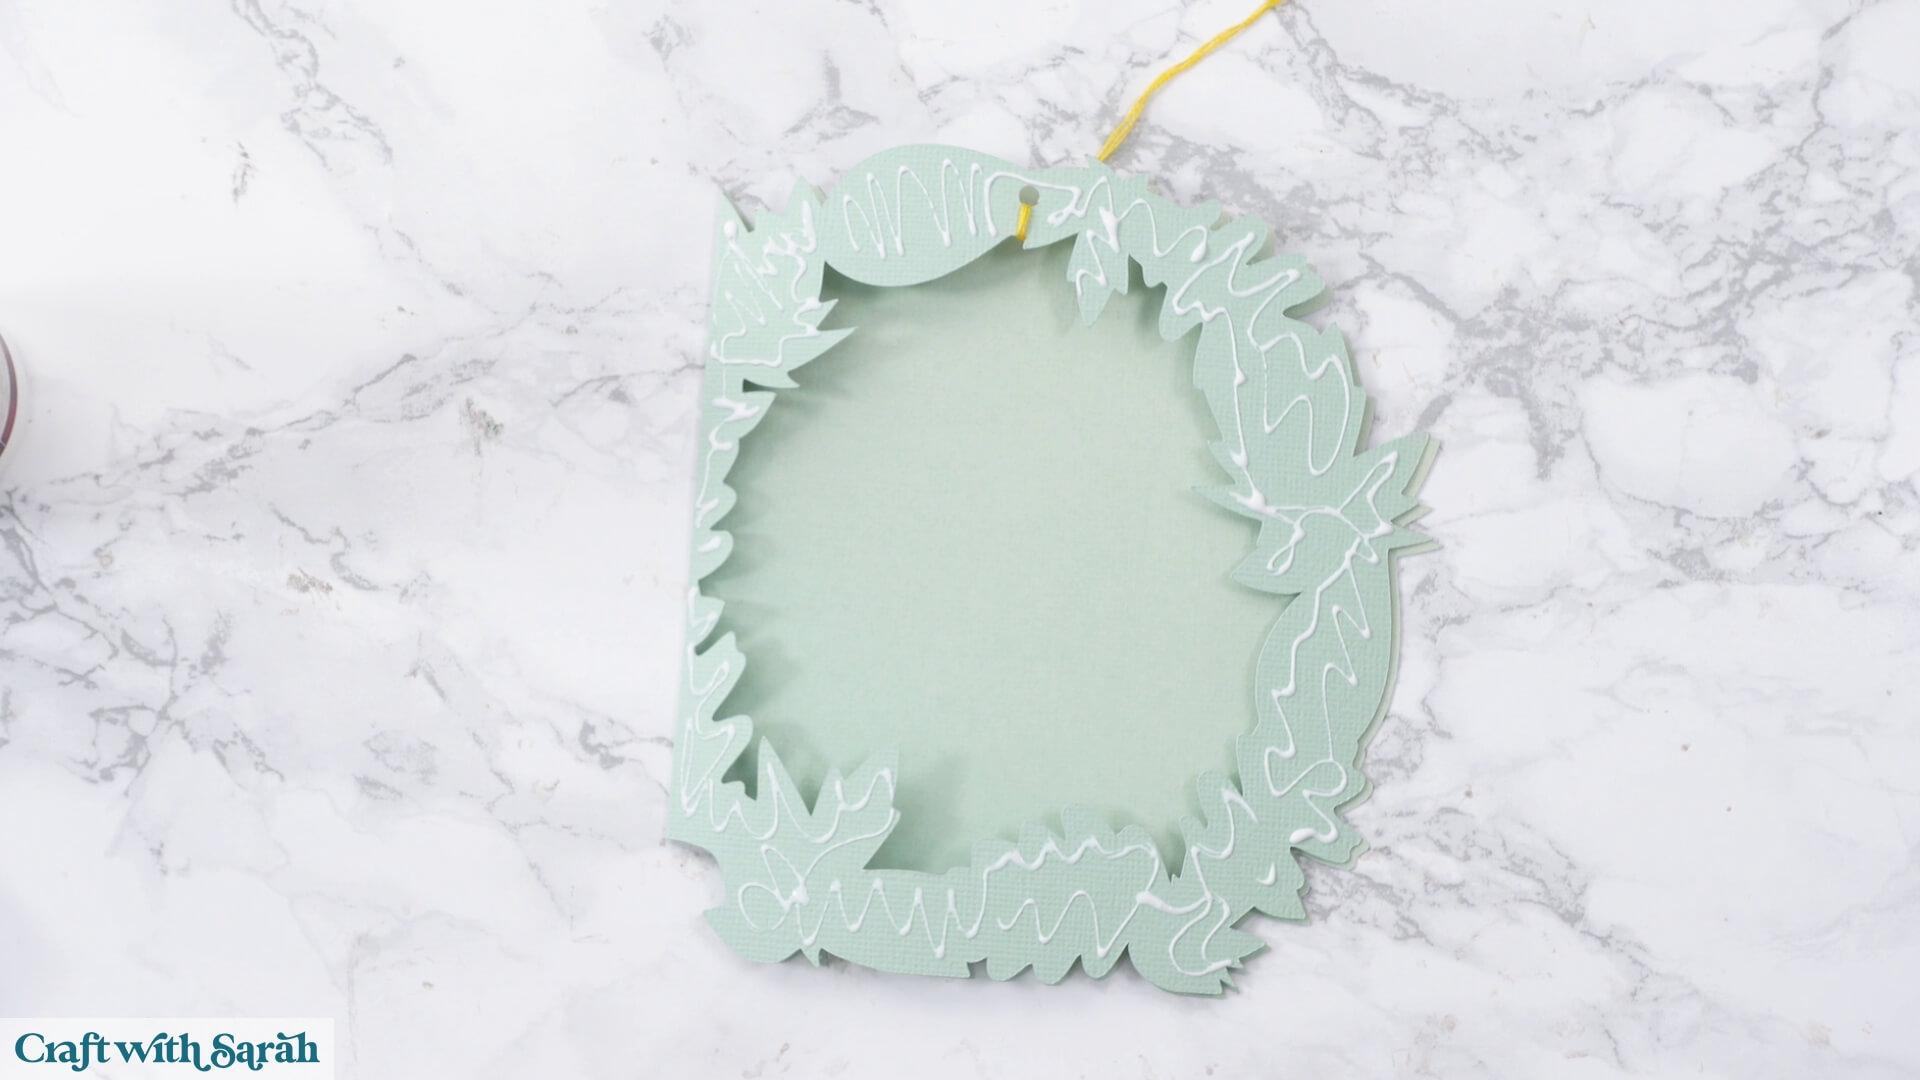
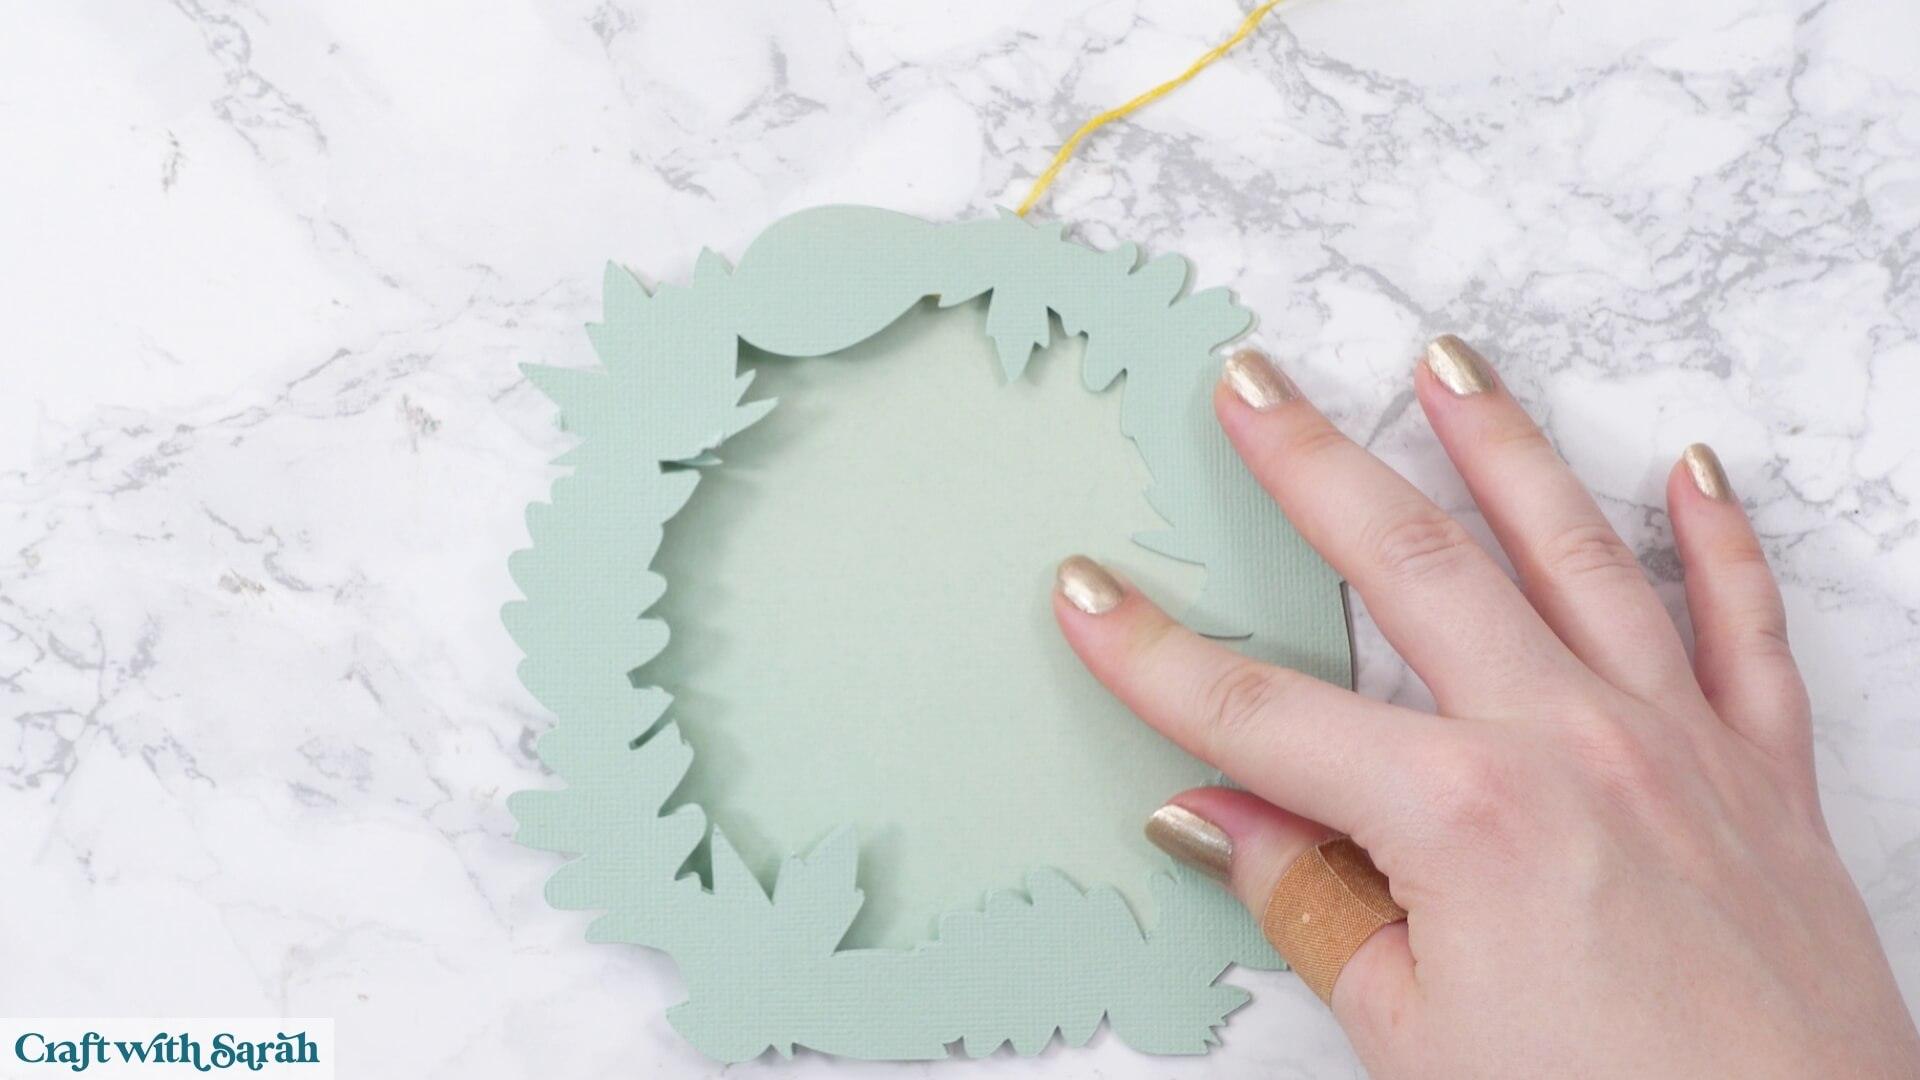
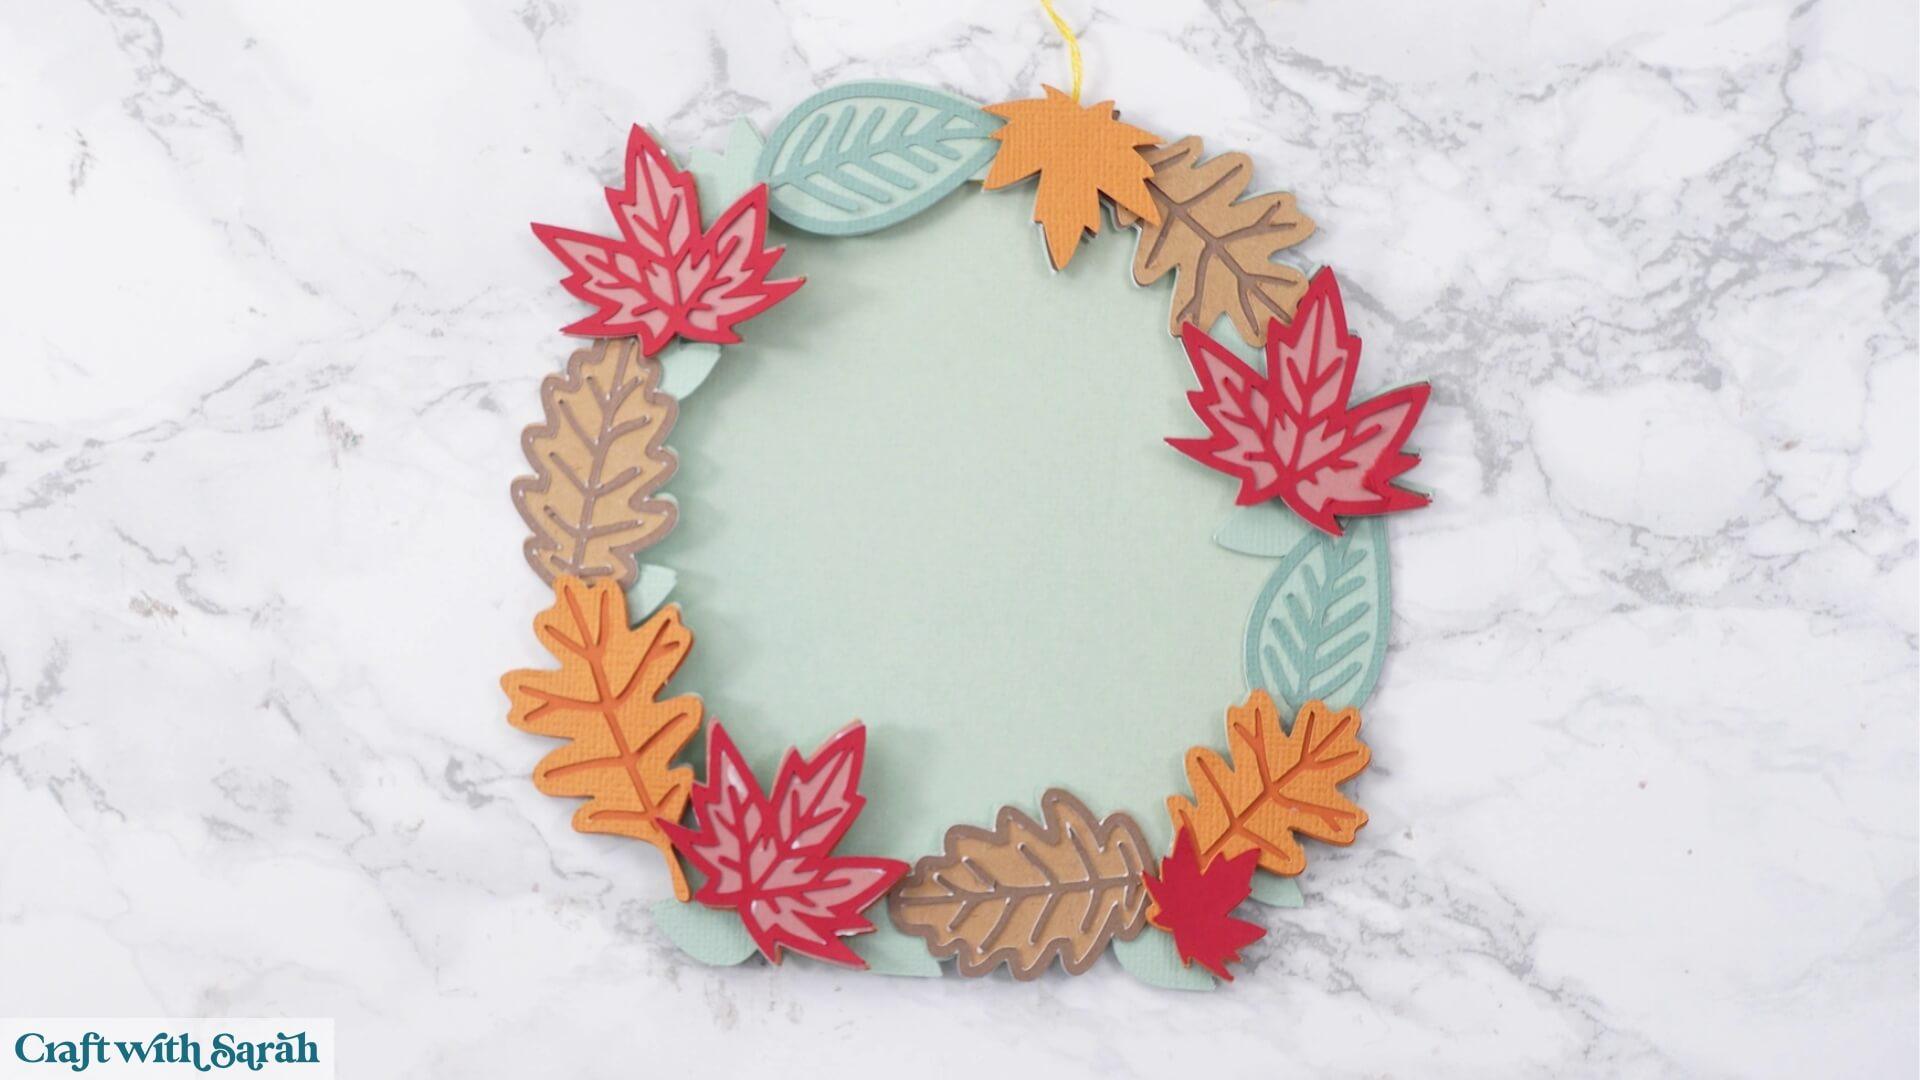
Use 3D foam pads and glue to stick the rest of the pieces together.
Use this guide to see the order to stick the layers together in.
A printable version of this assembly guide is included in the folder when you download the cut files.
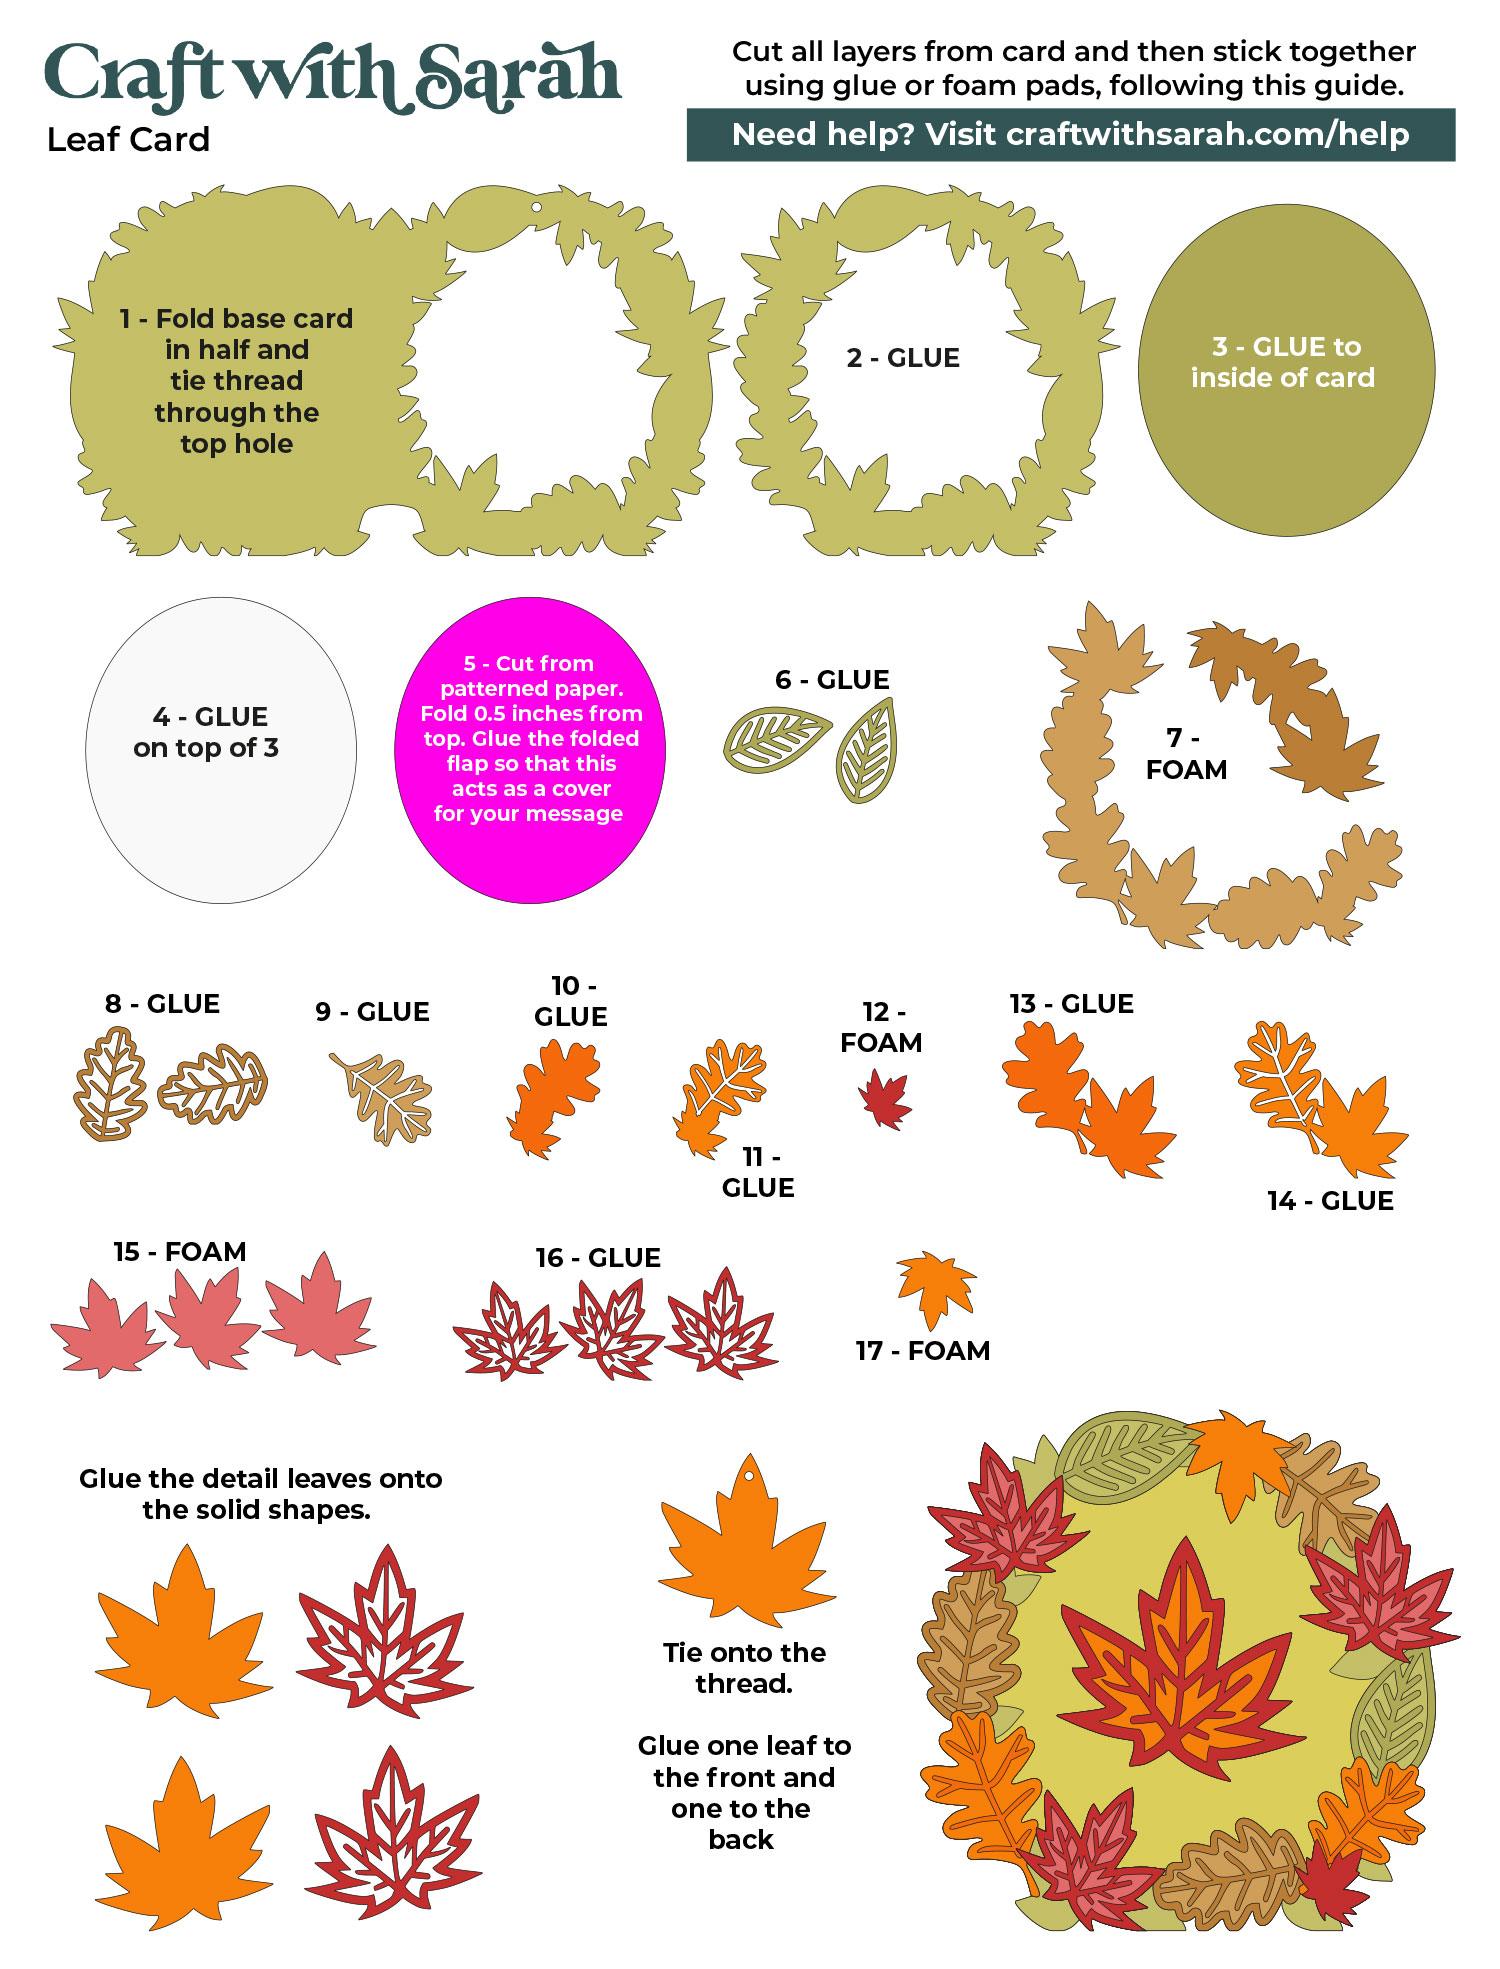
Continue sticking the pieces together, following the assembly guide, until the outside of the circular card shape is all finished.
Step 7) Add your message panel
The exact pieces you have at this stage will depend on which message option you chose in Cricut Design Space.
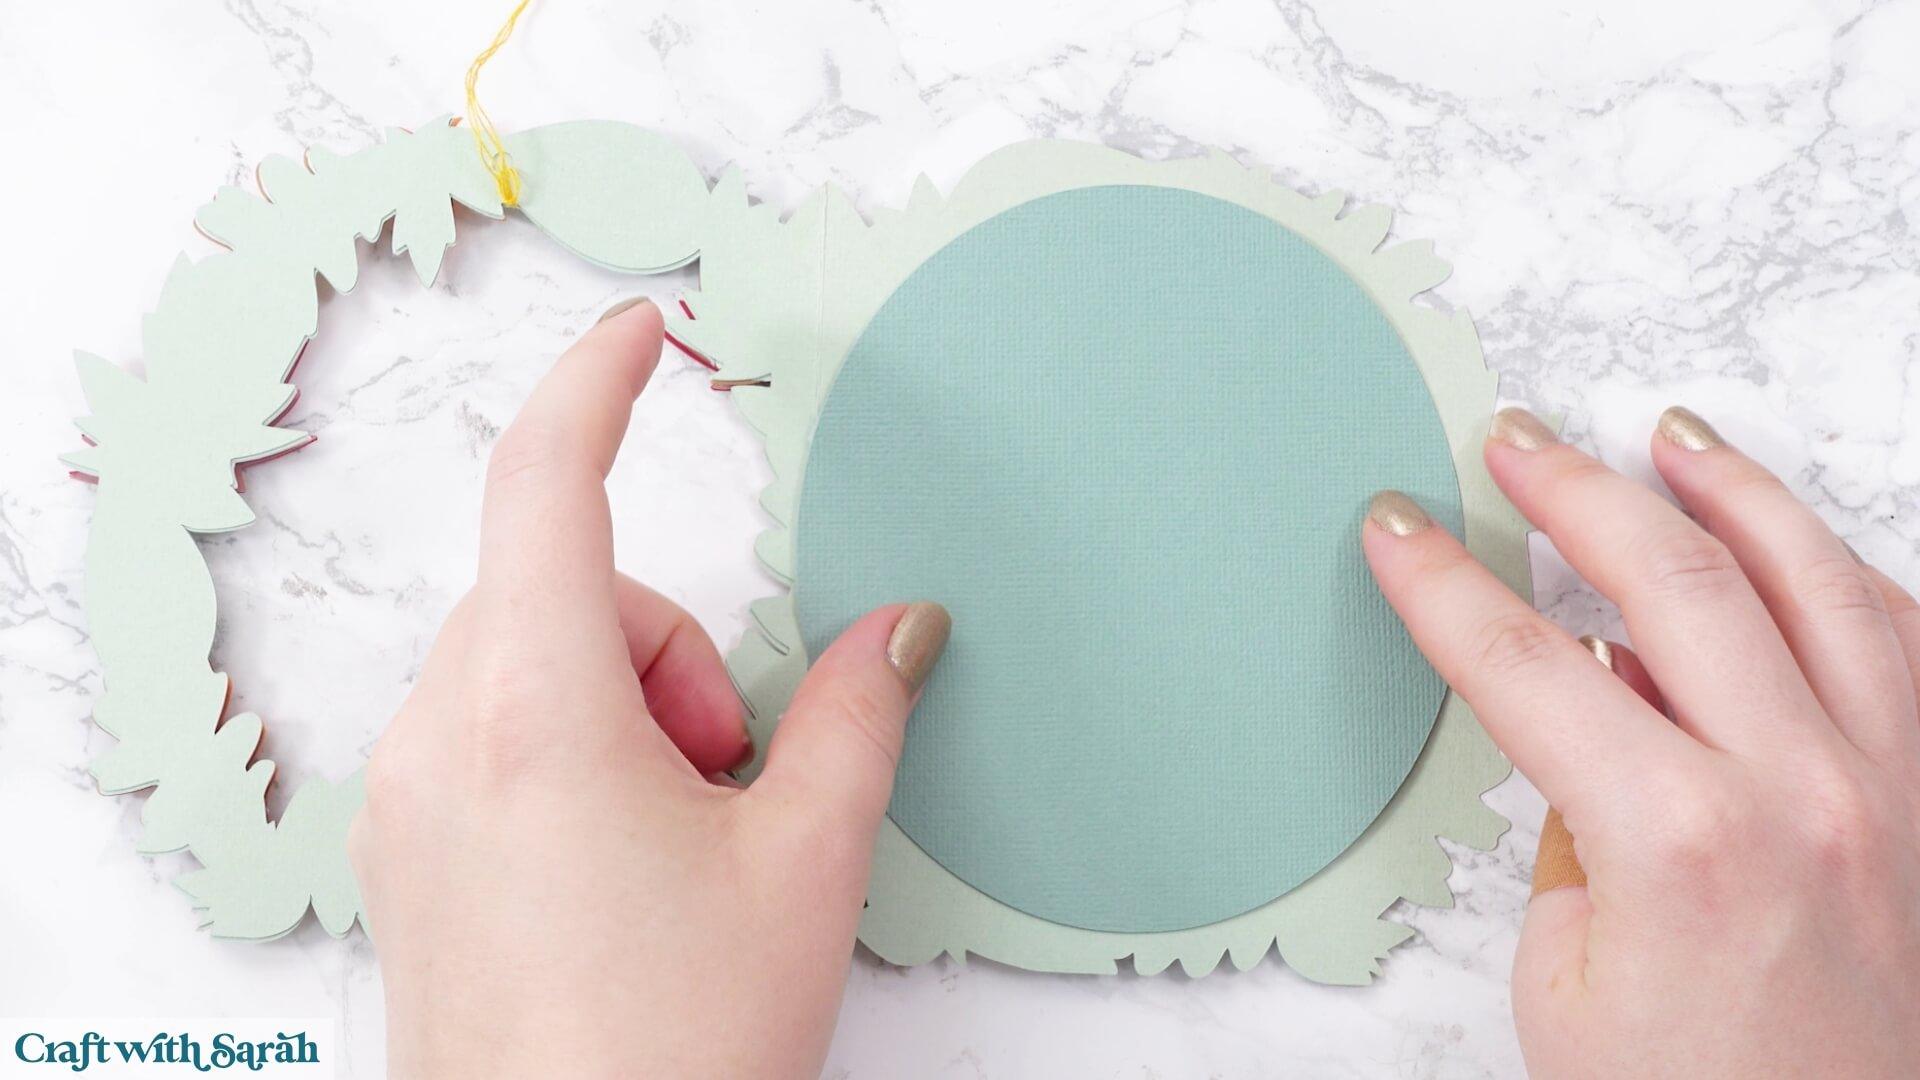
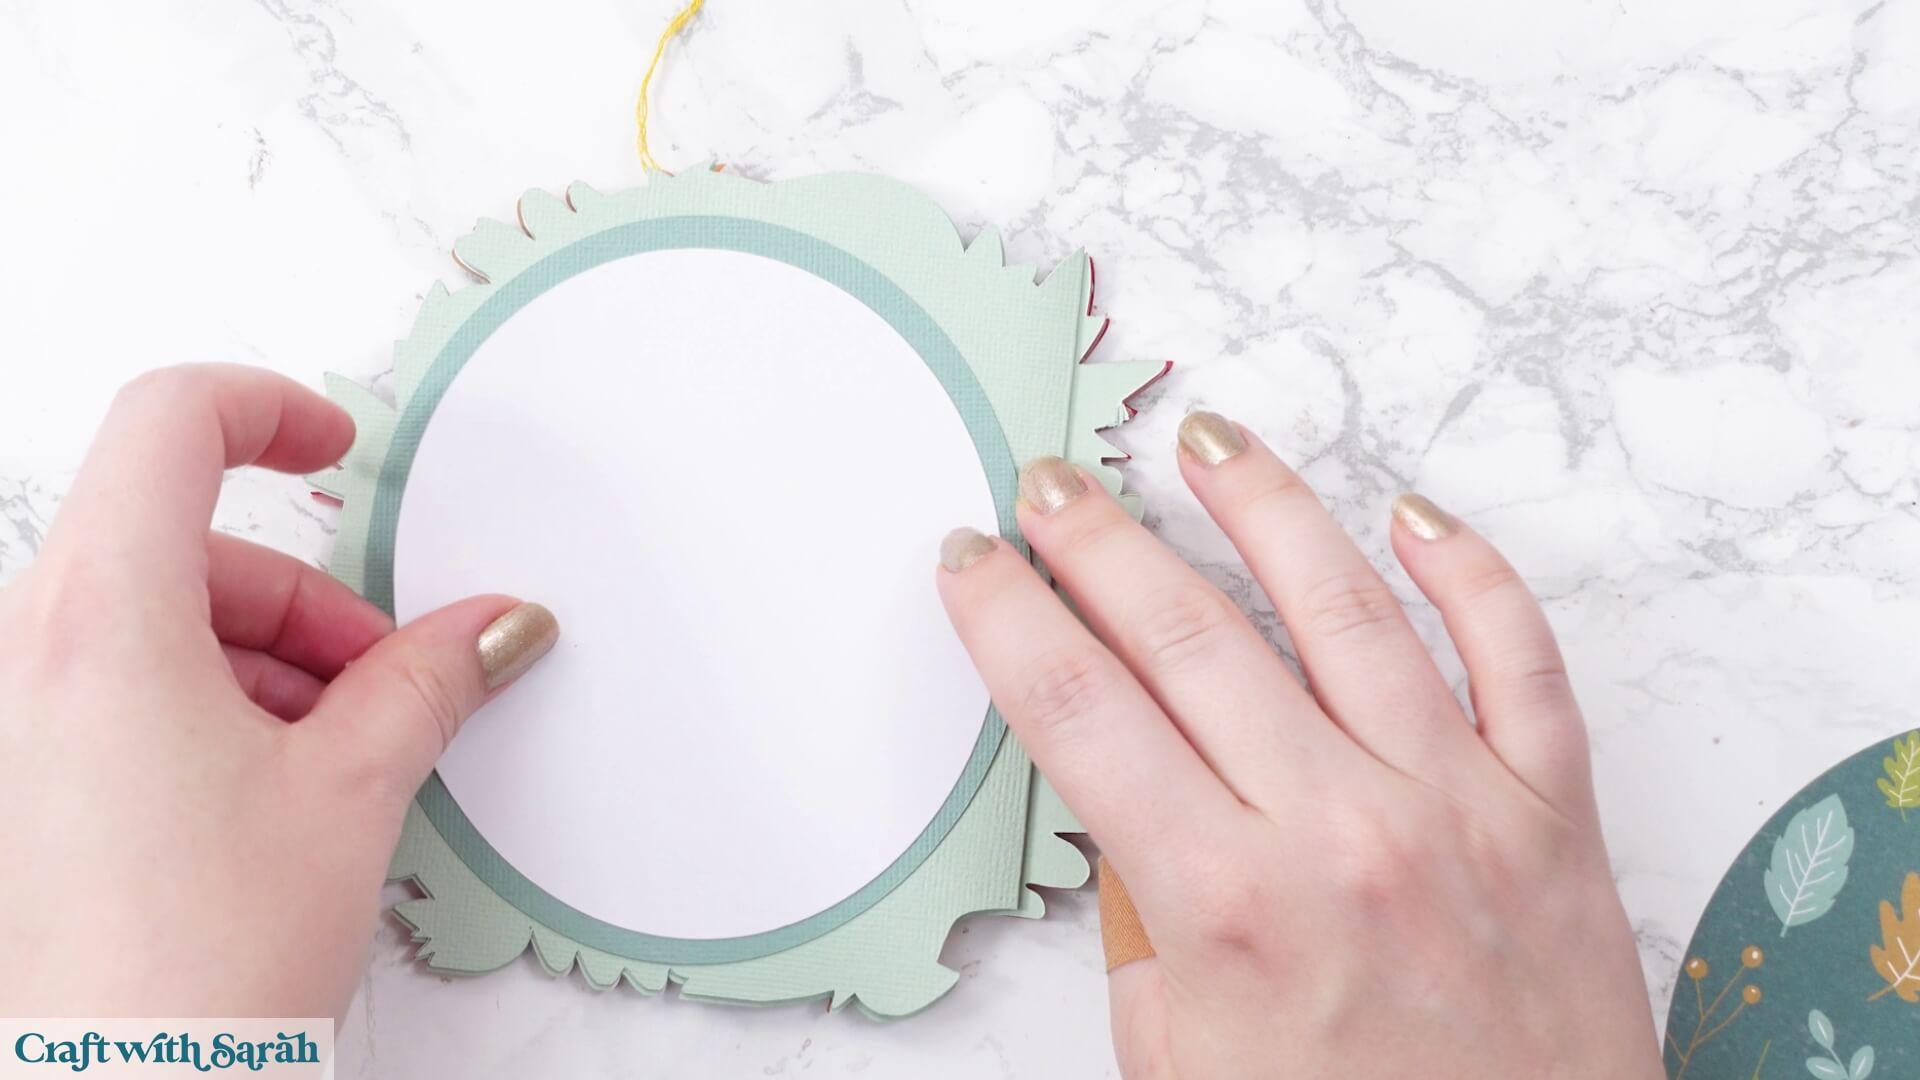
For the hidden-message version, glue the large green oval to the inside of the card.
Make sure you don’t put glue over the card’s middle score line.
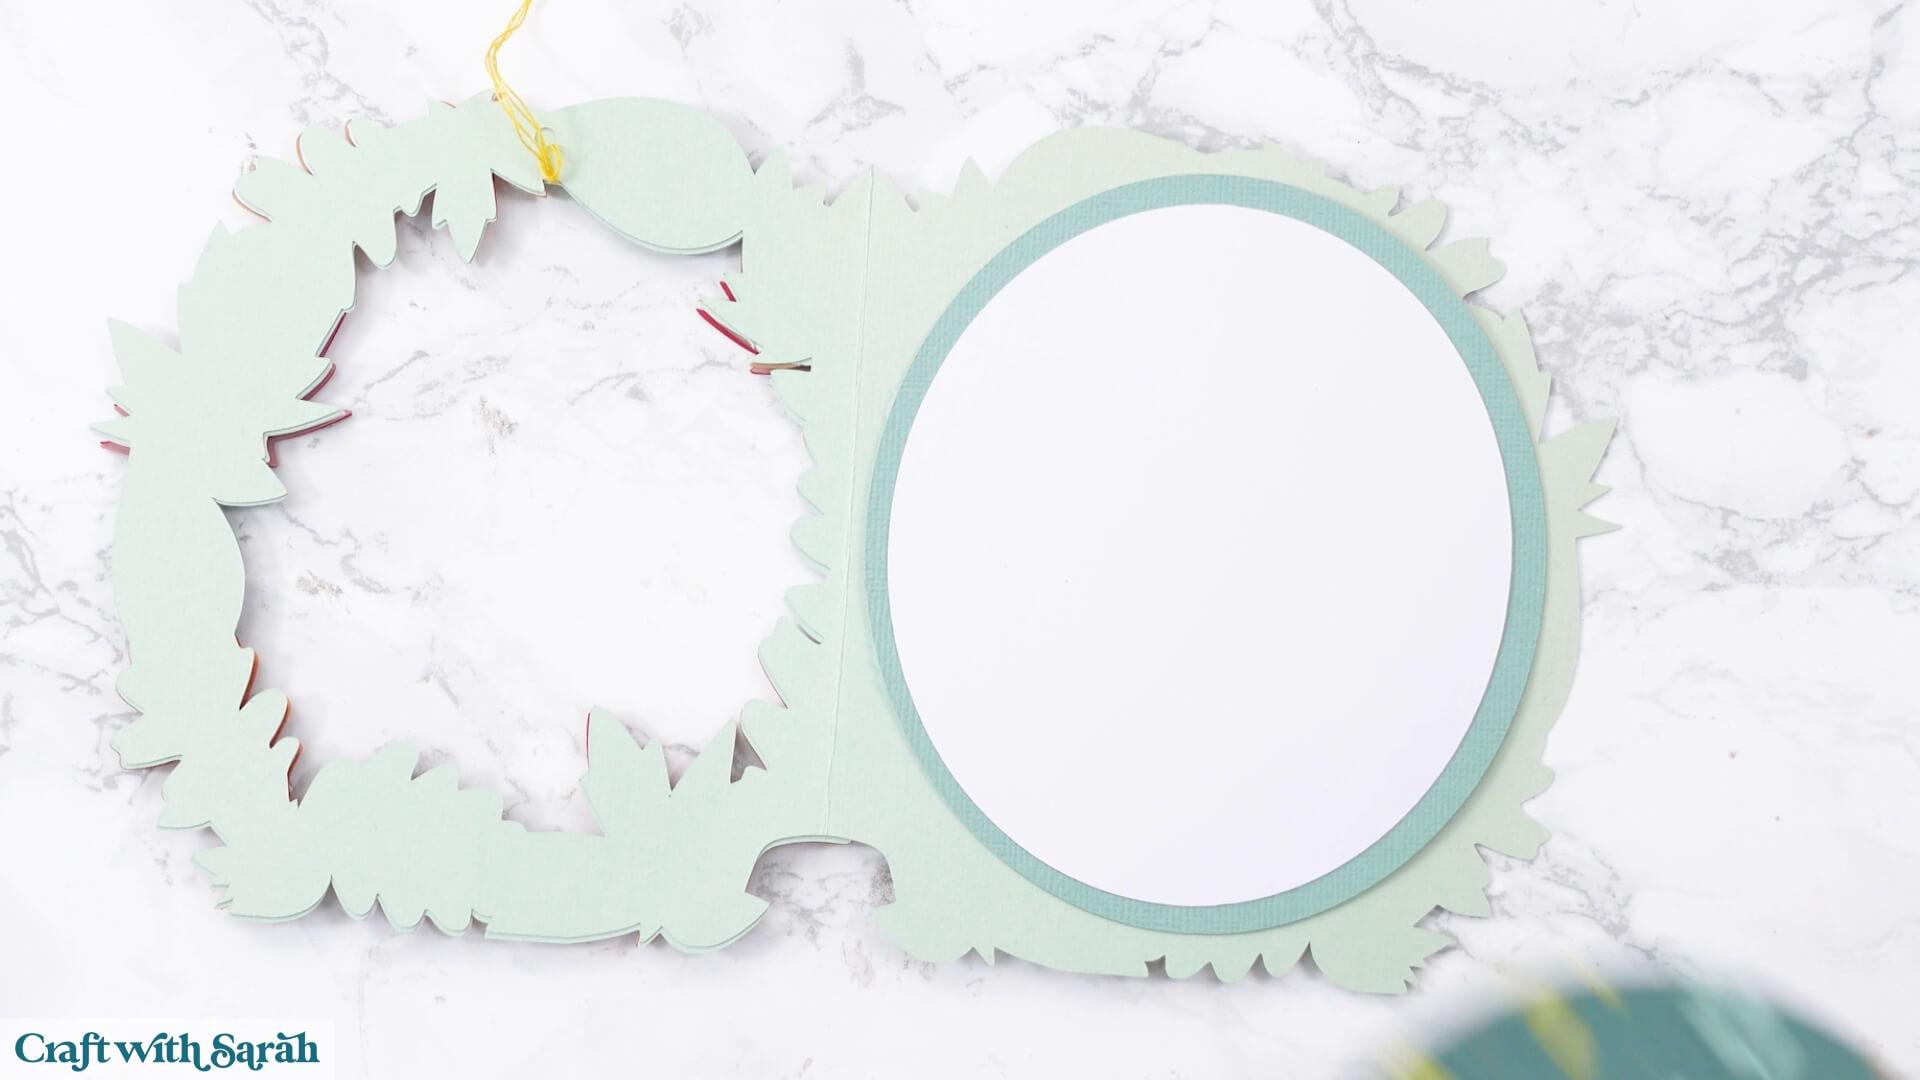
Next, glue the white message panel into the centre, leaving an even green border around the outside.
Fold the patterned paper along the score line that you added in Cricut Design Space.
Add glue only to the small section above the score line and position the patterned paper over the message panel.
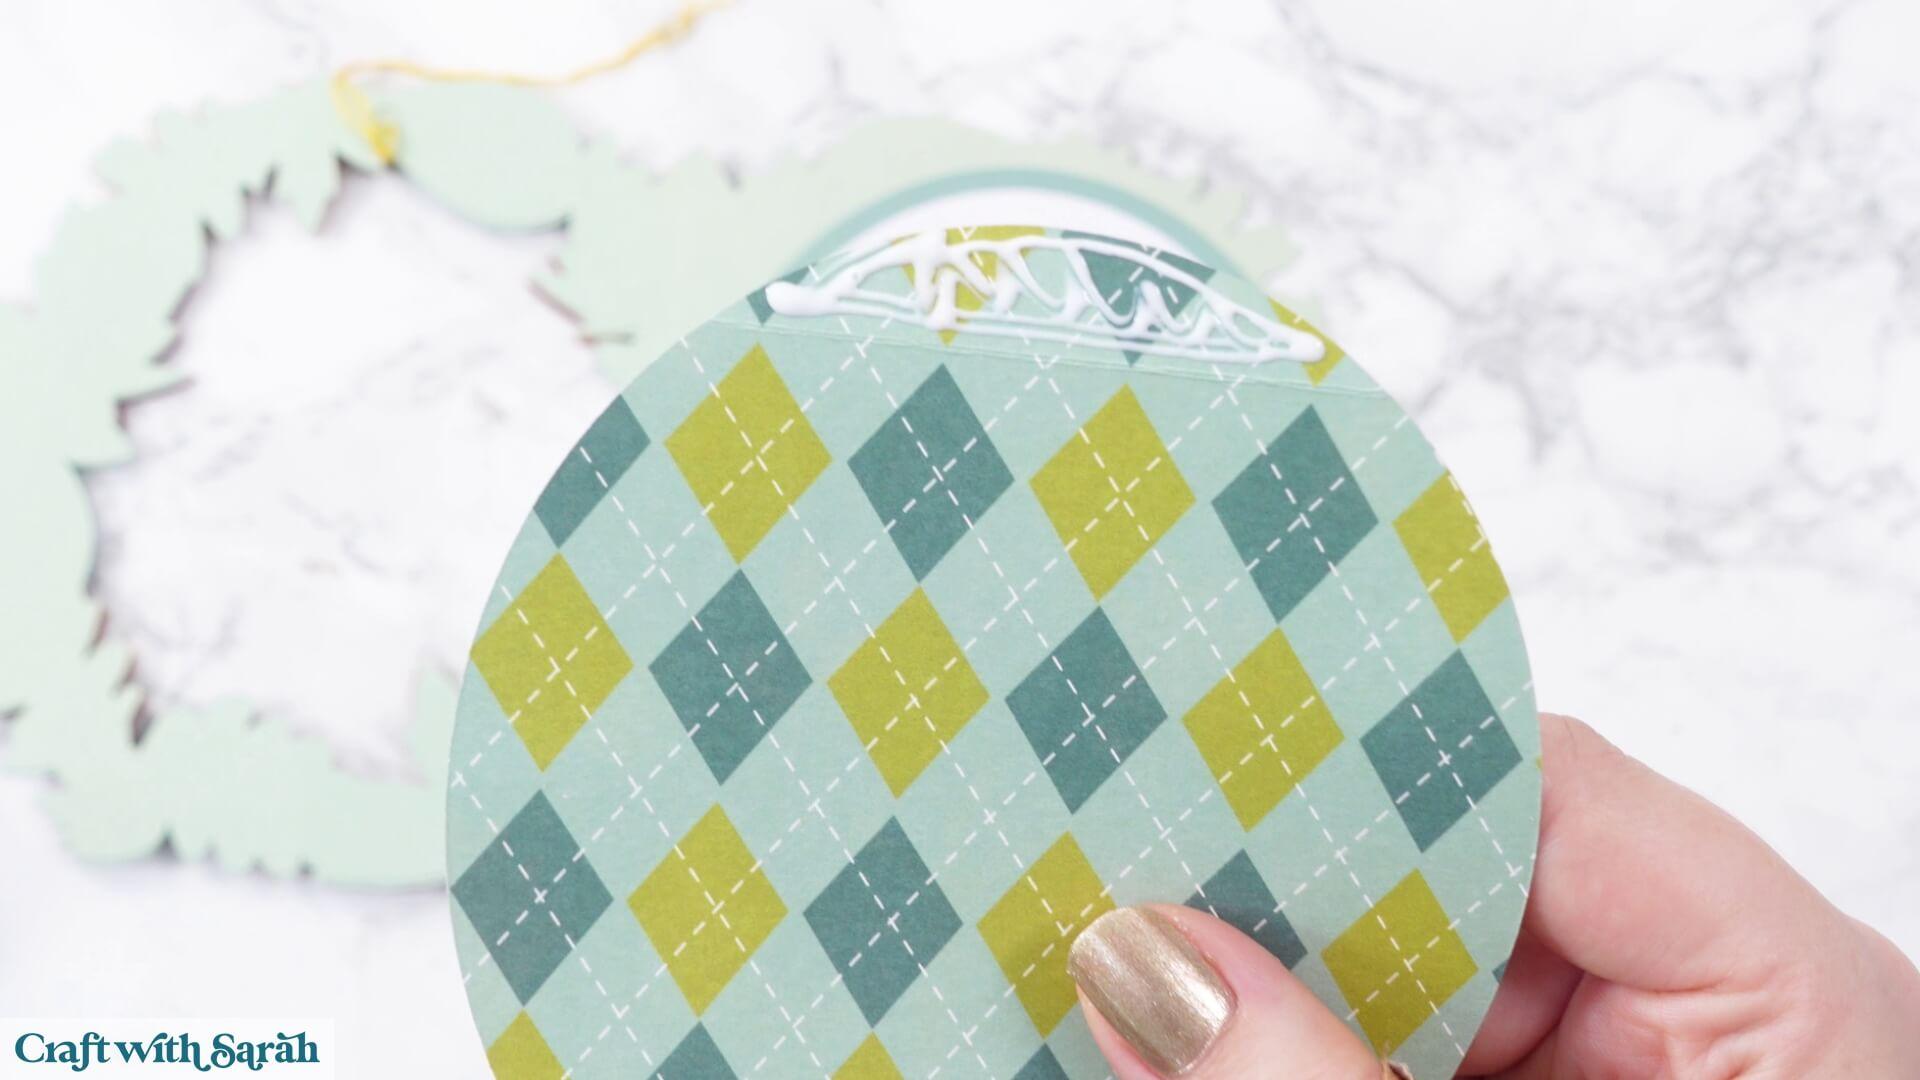
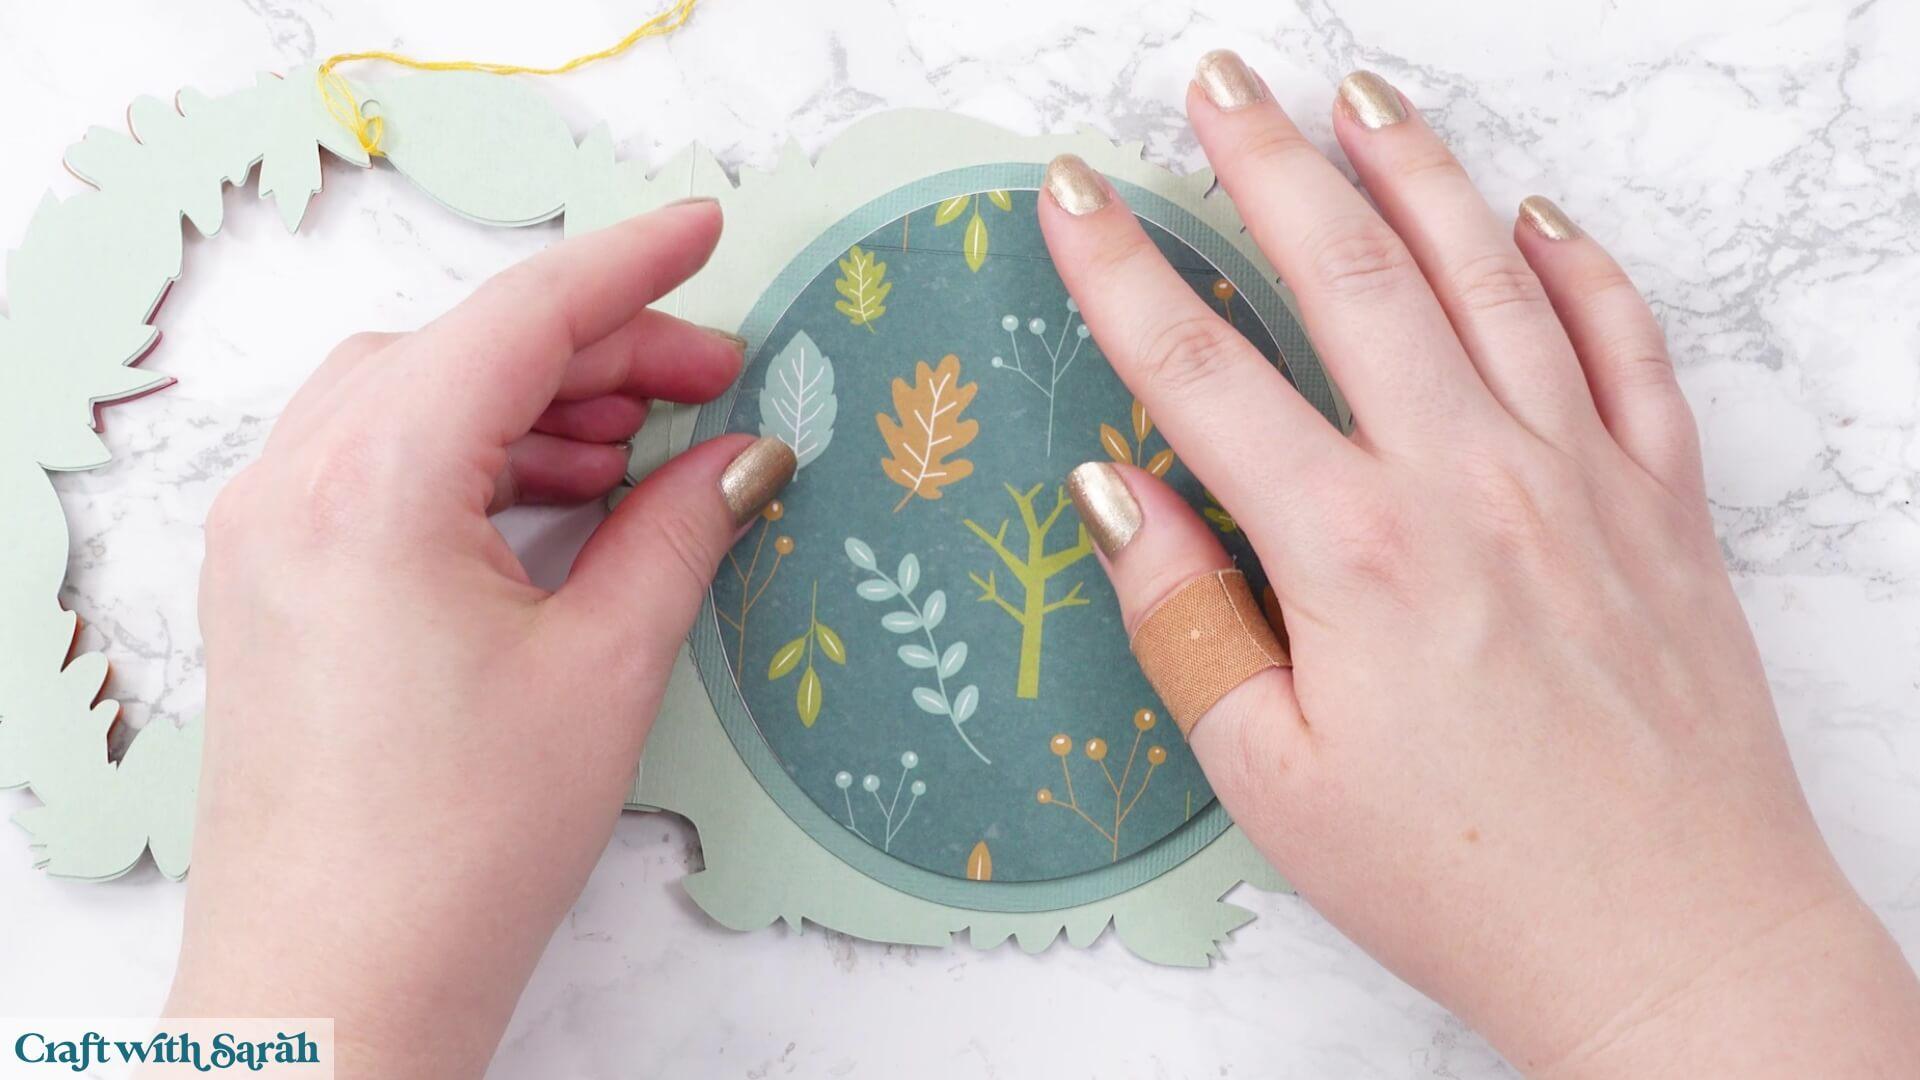
Wait until the glue is completely dry before lifting the patterned paper.
You can now lift it to reveal the hidden message underneath, but when the card is closed and on display, the patterned paper shows beautifully through the leafy opening.
If you chose the alternative version, glue the patterned paper inside the card without a score line. Add your second green oval to the back of the card and glue the white message panel on top.
Step 8) Add the hanging leaf
The final part of the card is the leaf that hangs in the middle.
You’ll have a leaf with a small hole at the top, two solid orange pieces and two red outline pieces.
The pieces include mirrored versions so that the finished leaf looks pretty from both sides.
Thread the loose ends of your embroidery thread through the hole in the leaf and tie them securely.
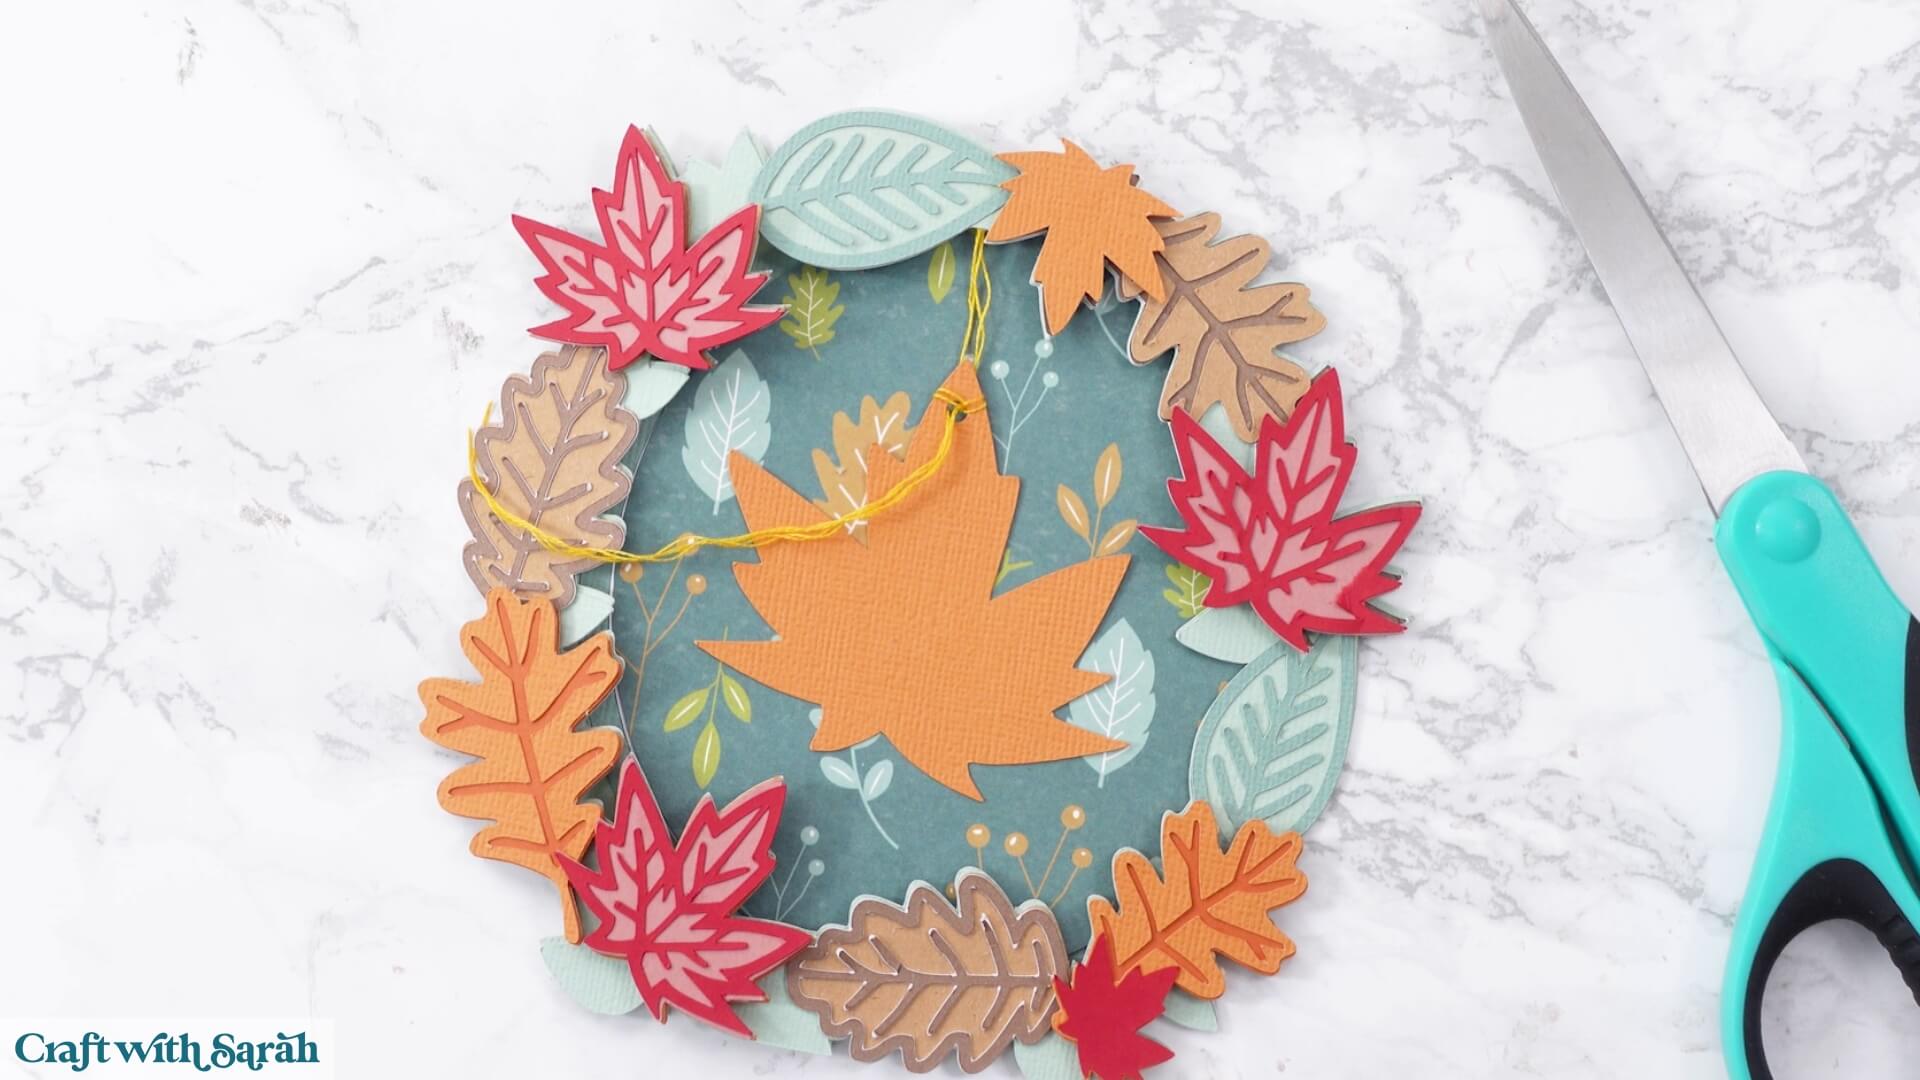
Before finishing the knot, hold the card upright and check the position of the leaf.
Adjust the thread until the leaf hangs nicely in the centre of the opening without dropping too low.
Once you’re happy with the position, secure the knot. You can also add a small piece of sticky tape for extra security.
Trim away any excess thread.
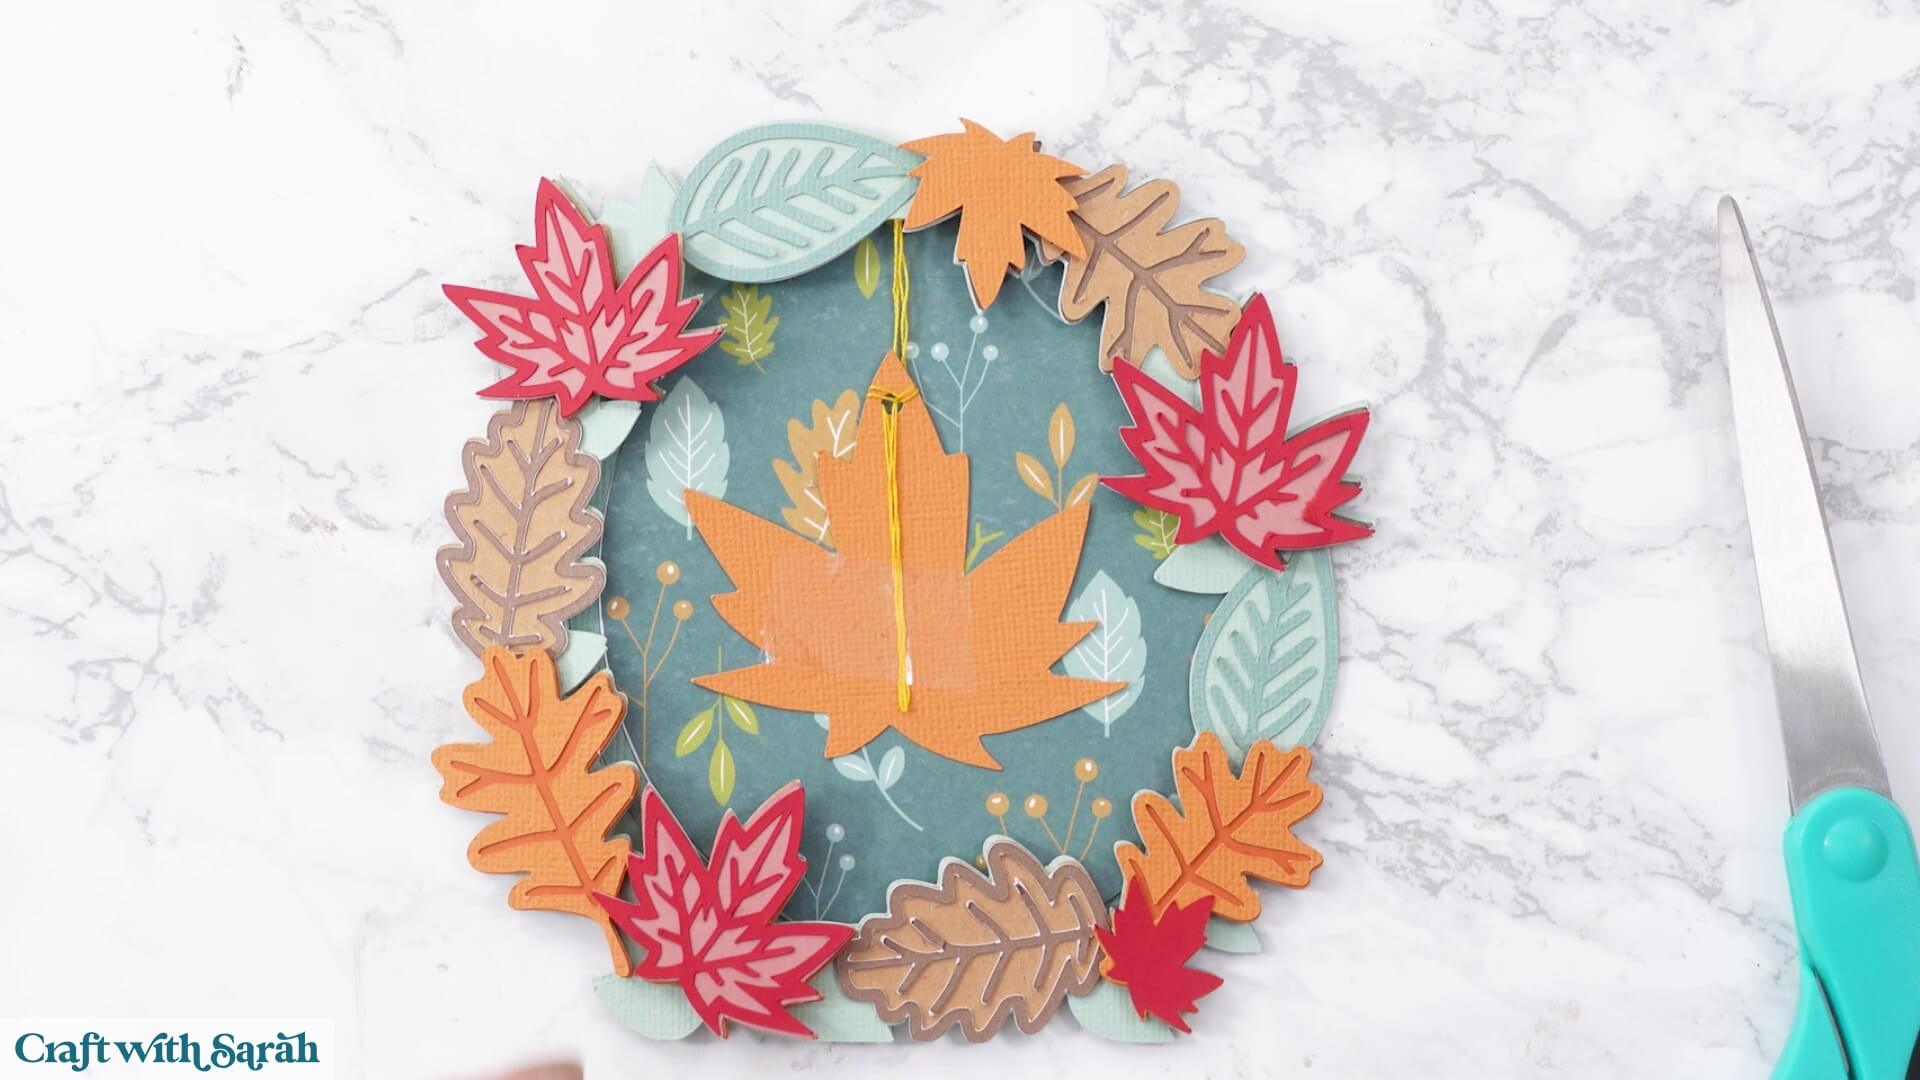
Glue one of the solid leaf shapes over the thread and hole, followed by the matching outline piece.
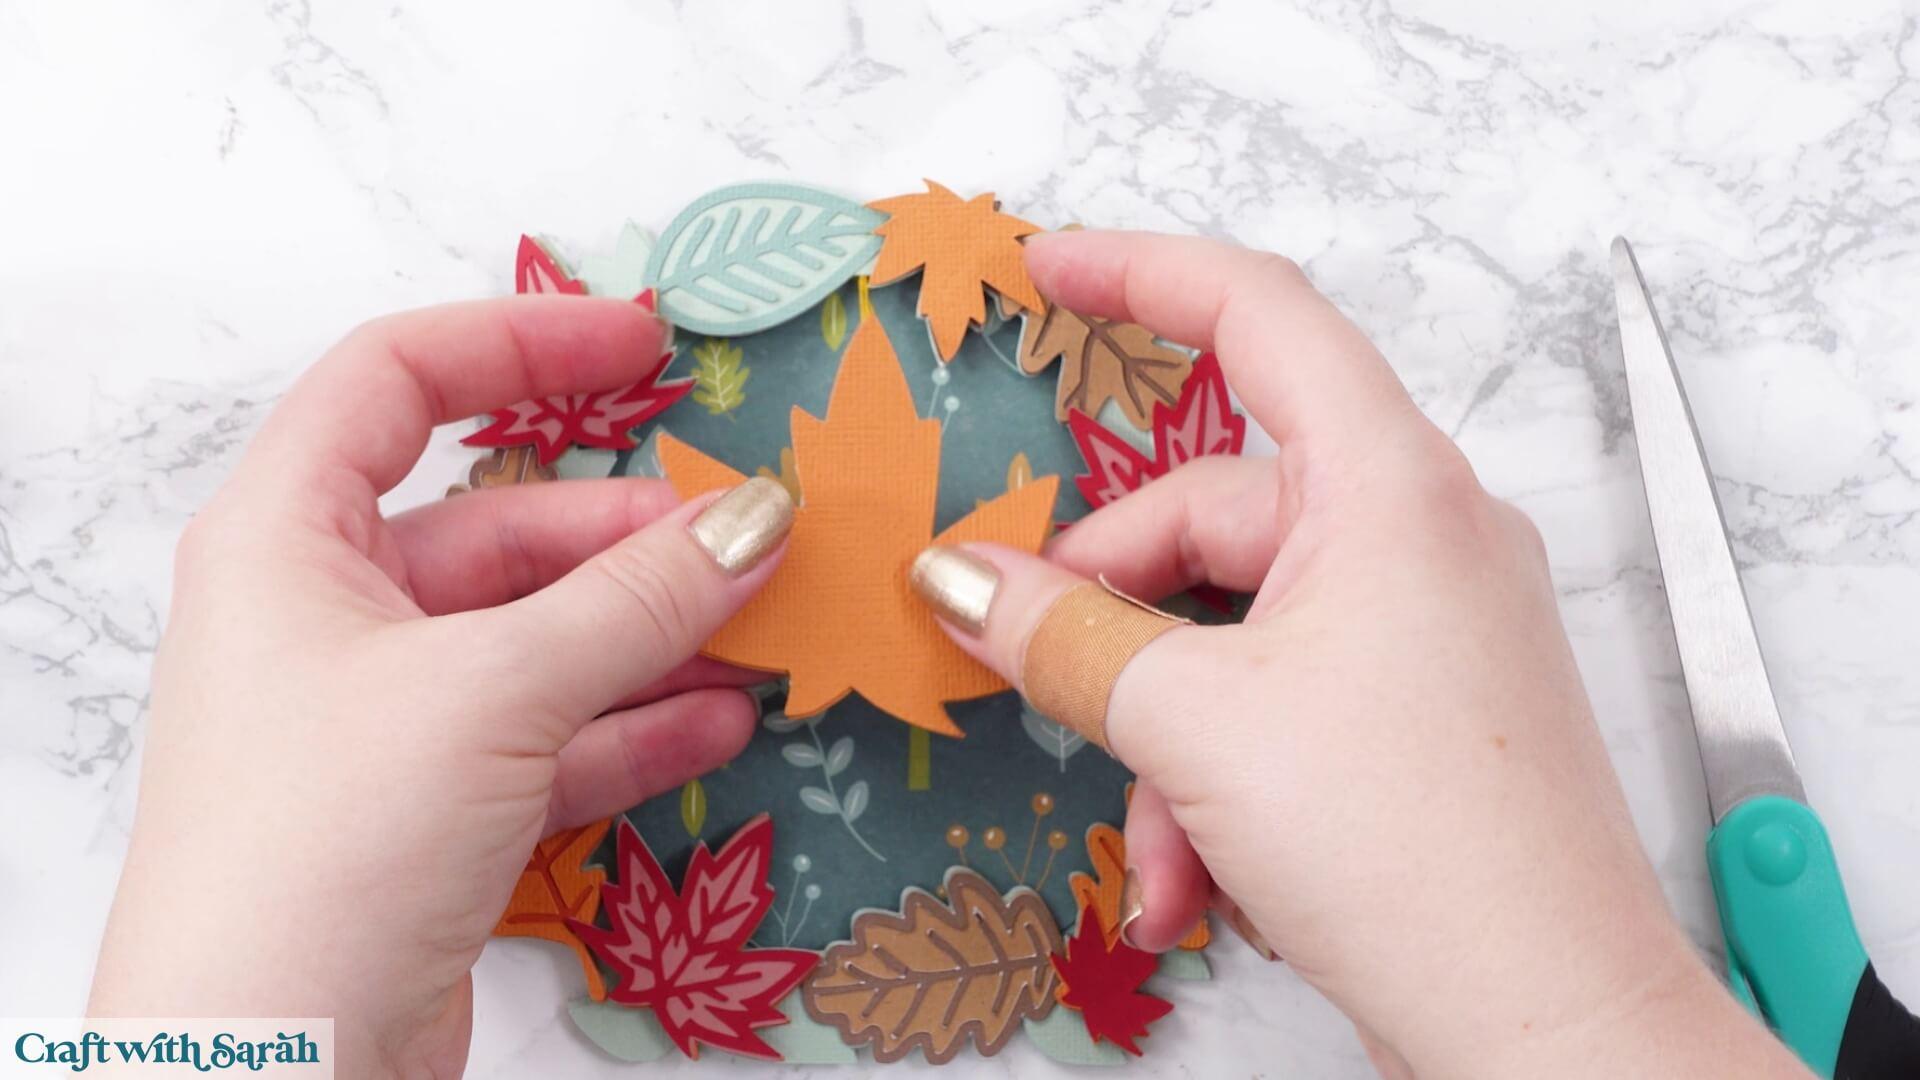
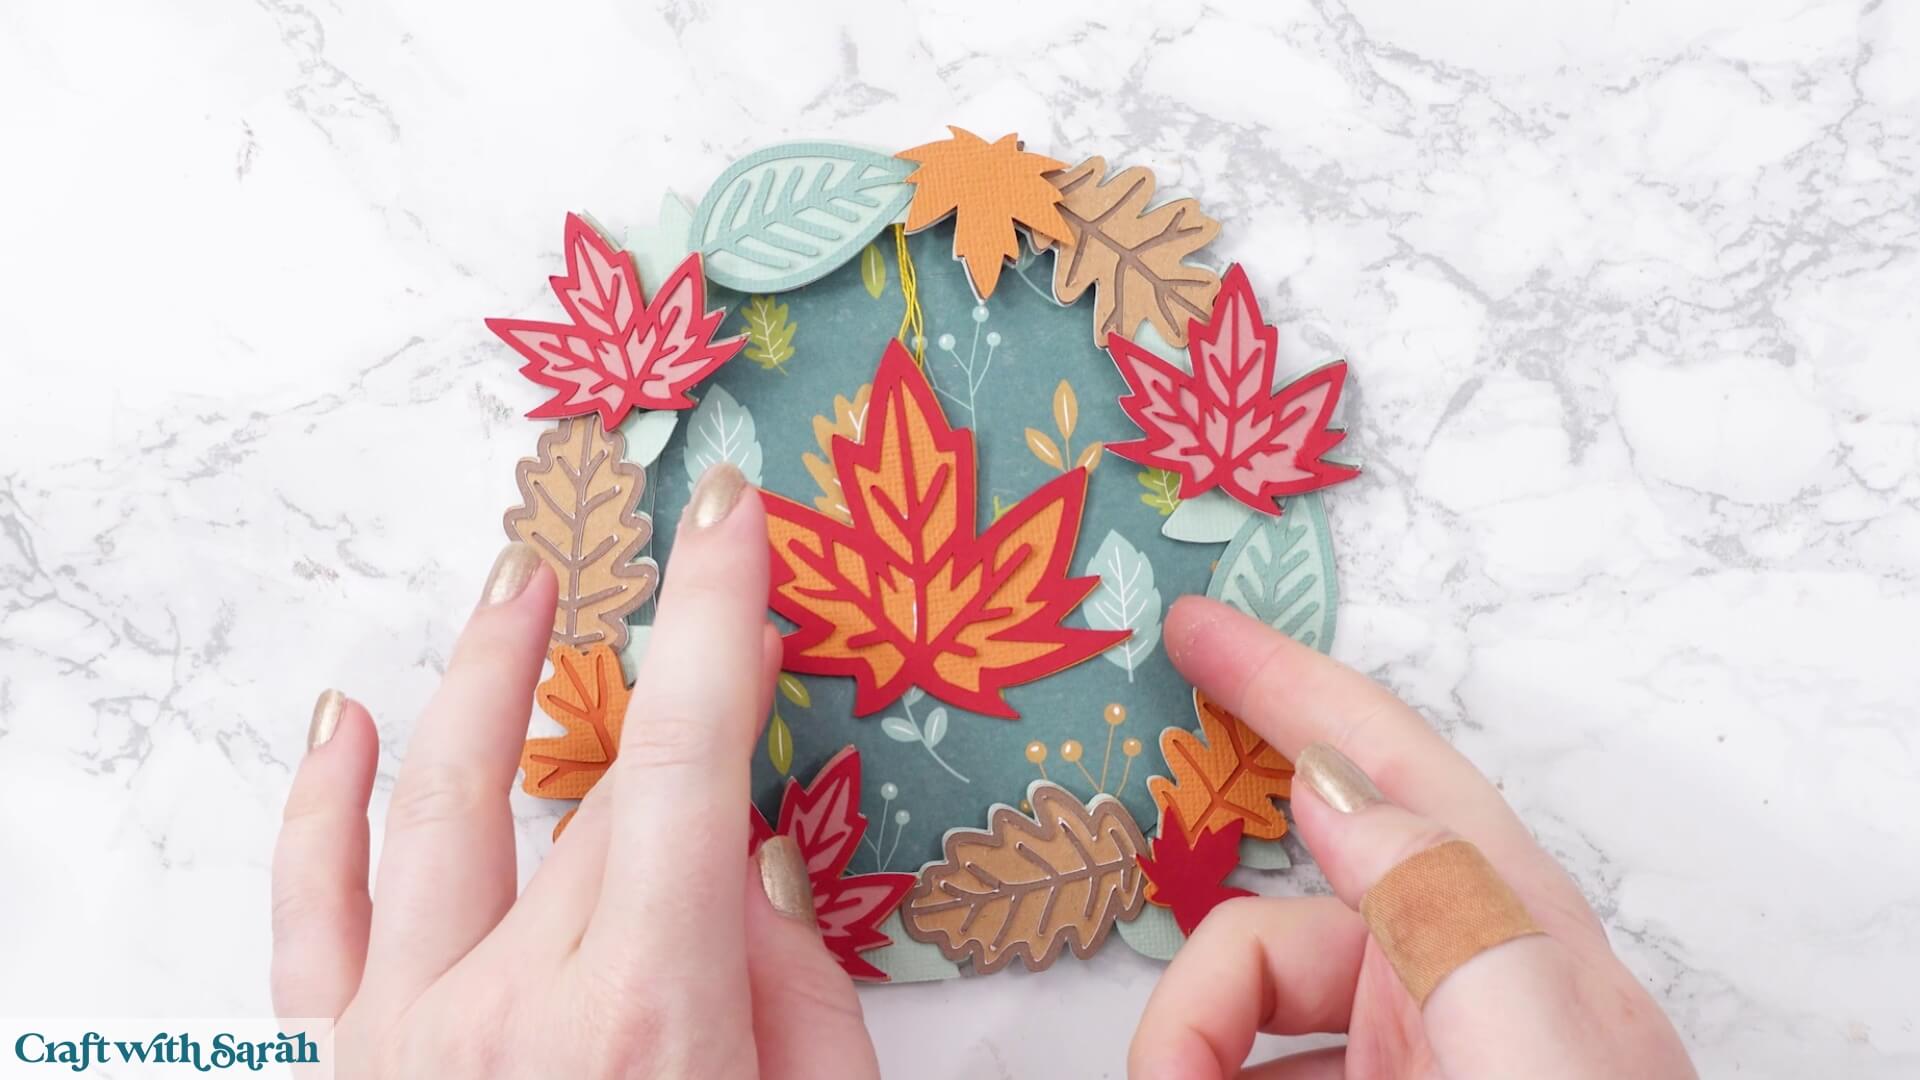
Turn the leaf over and repeat with the mirrored pieces on the other side.
This makes the hanging leaf double-sided, which is important because it will naturally twist and spin when the card is standing up.
Your autumn leaf card is now finished!
Step 9) Prepare the custom envelope in Cricut Design Space
Because this card is an unusual size, the download includes a custom envelope SVG.
Upload the envelope into Cricut Design Space.
It should load in at 12.5 inches wide by 13.5 inches tall.
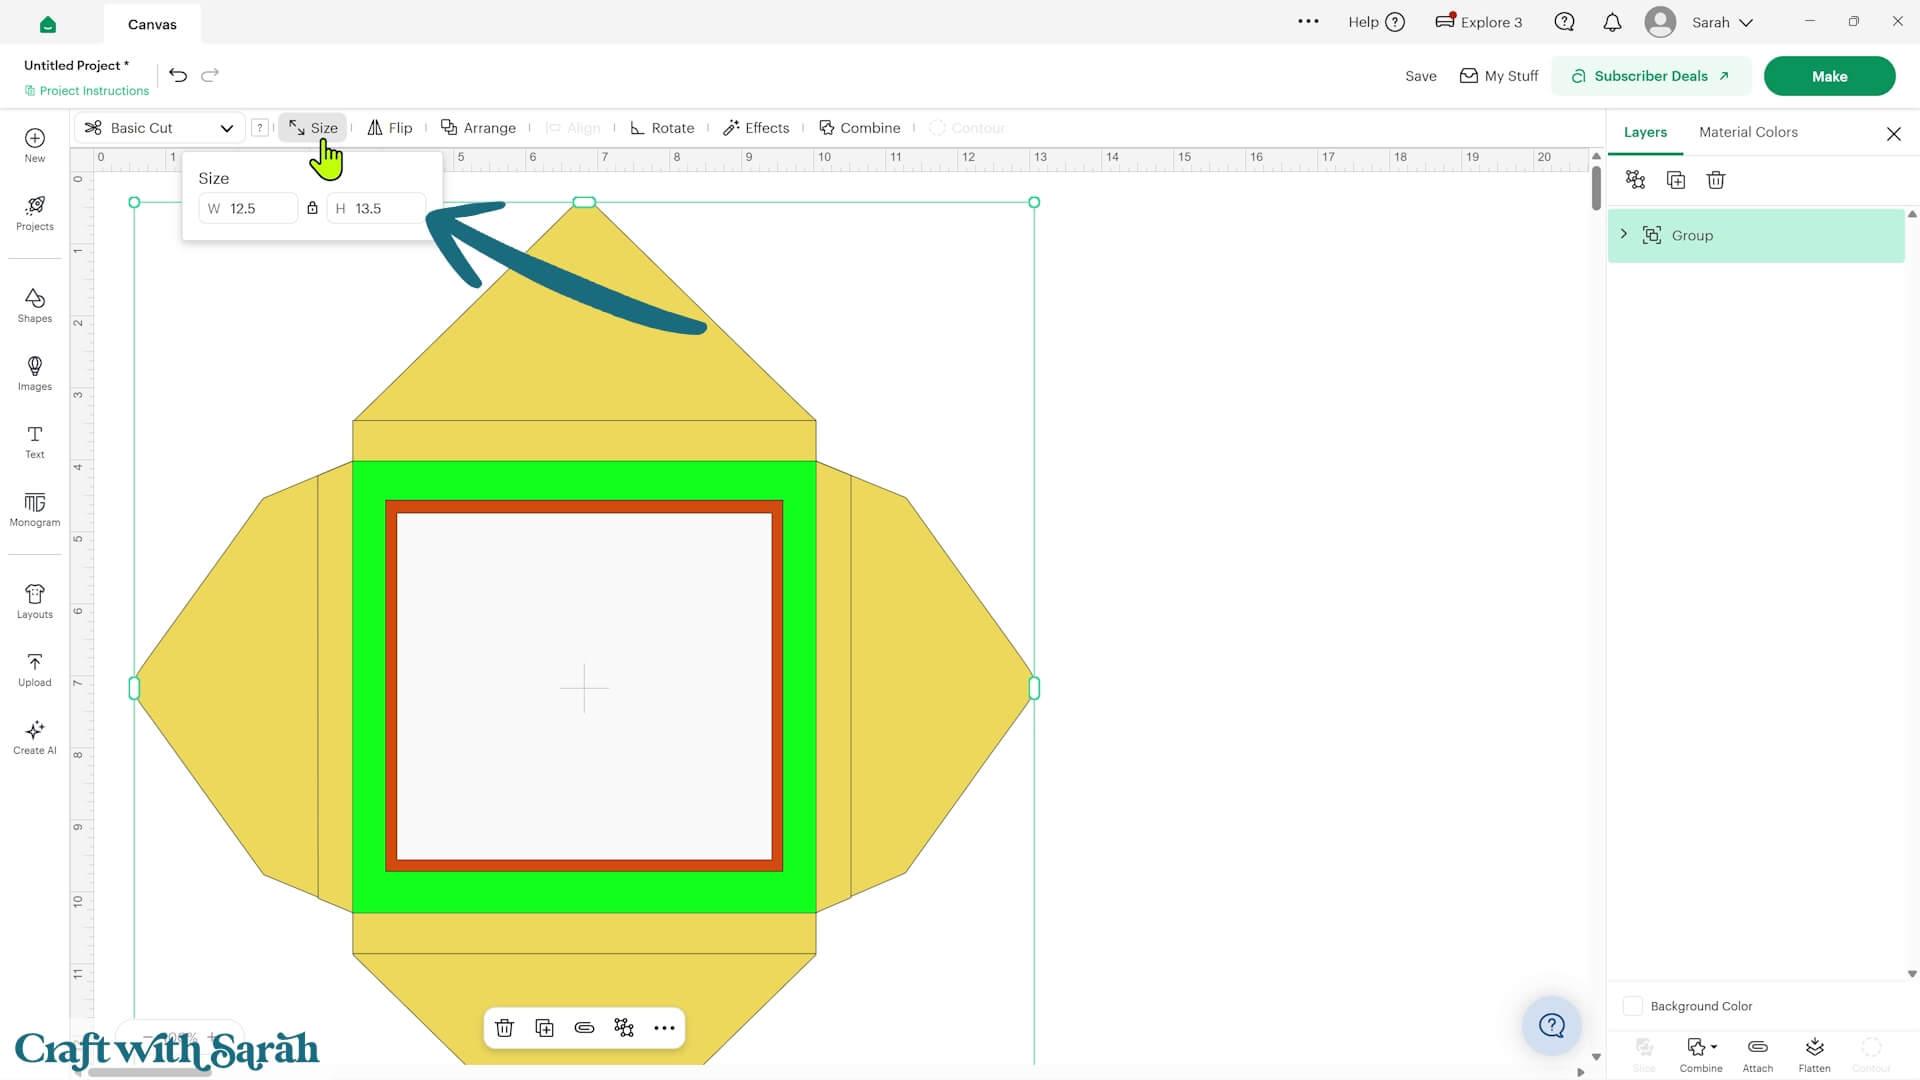
The finished envelope is larger than a standard Cricut cutting area, so it’s designed in separate sections.
Ungroup the design.
Inside you’ll find another group. Open it using the chevron arrow in the Layers panel.
Select the green square layer and change the Operation to ‘Score’.
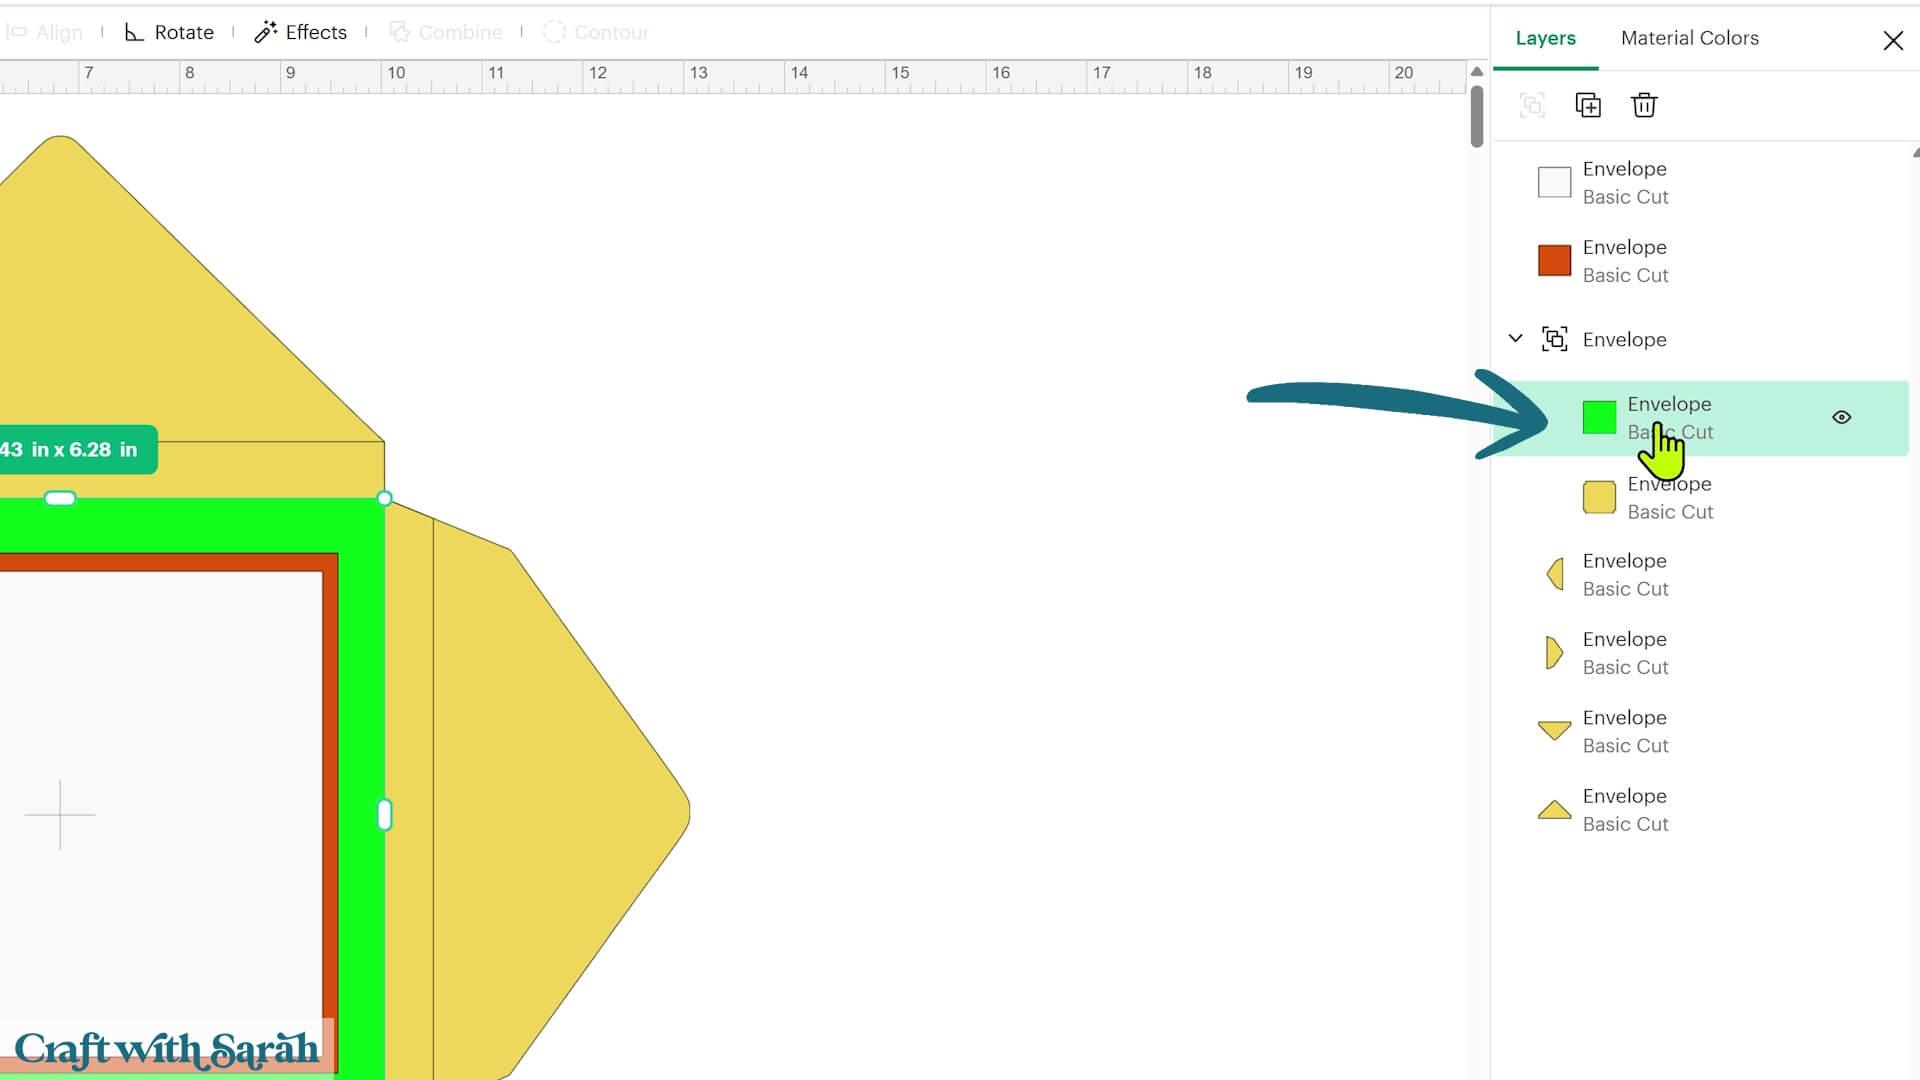
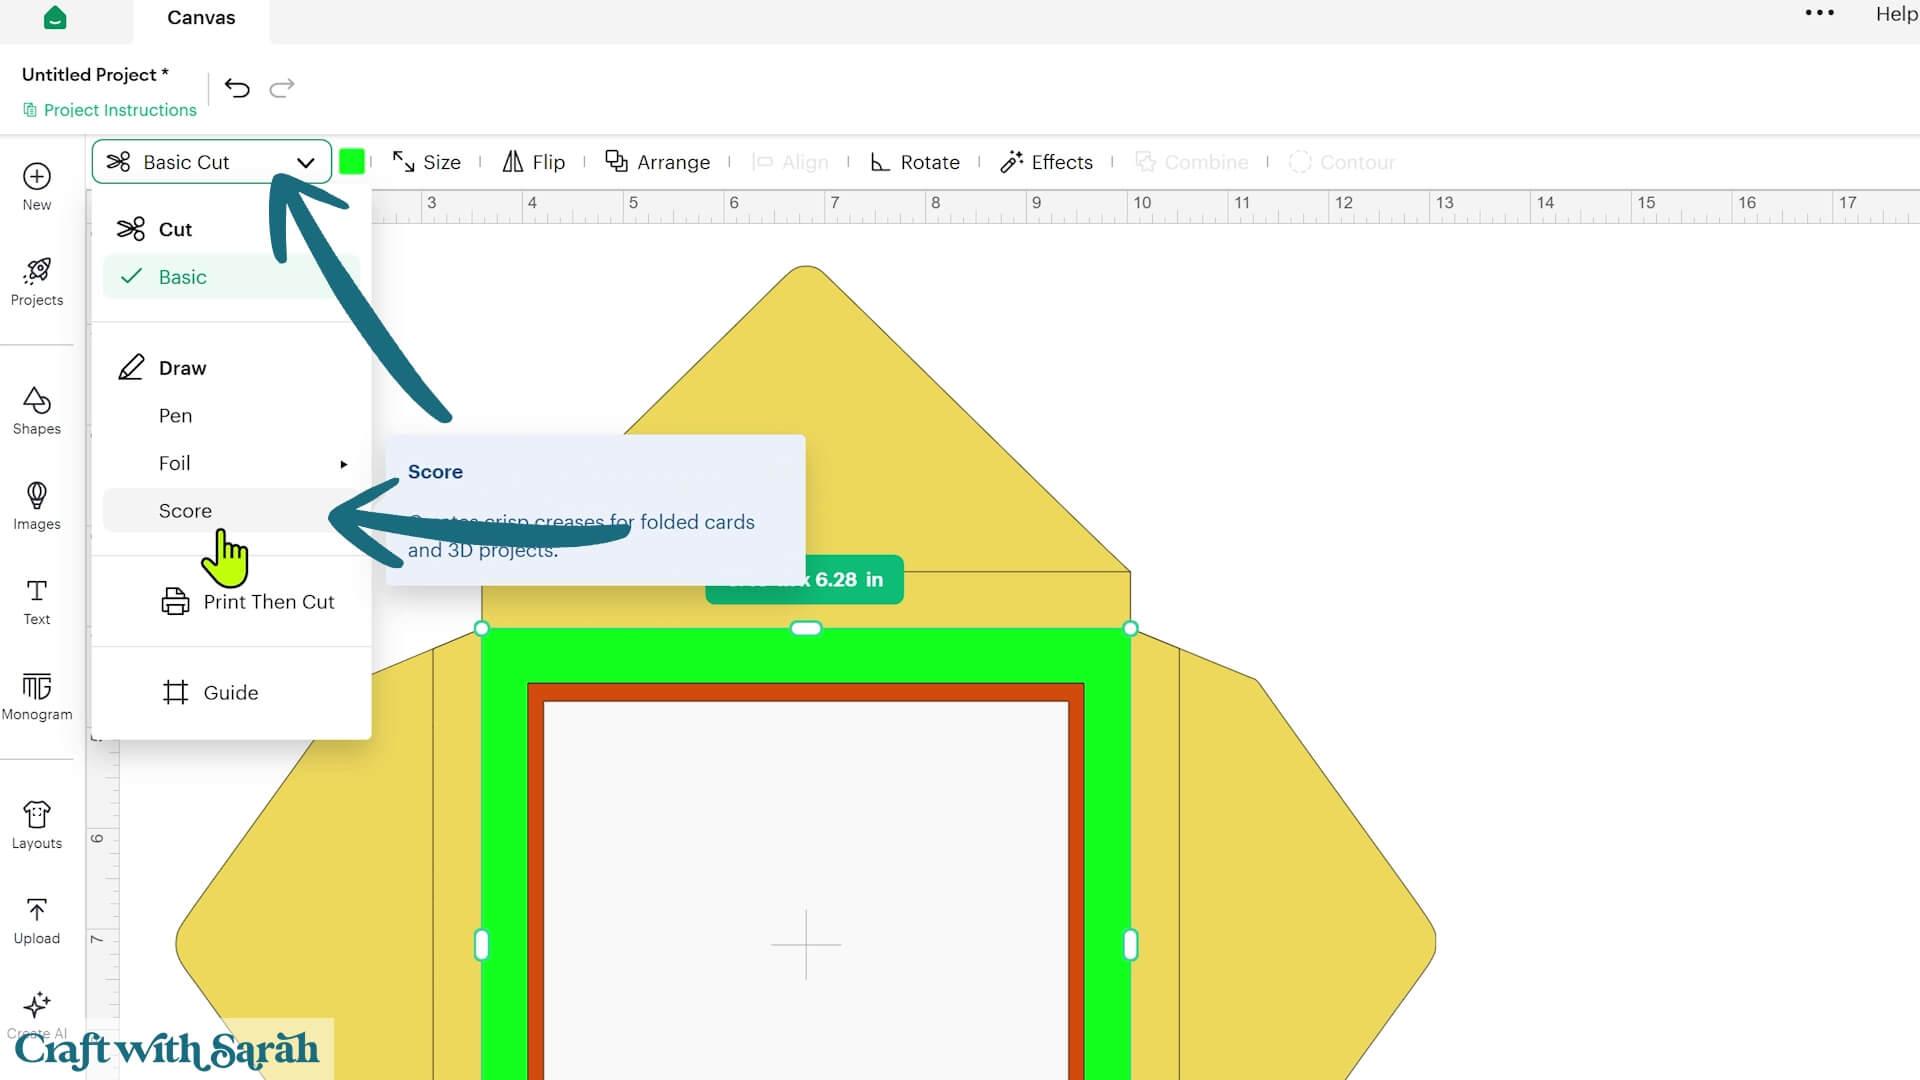
Select the whole group so that both the yellow base shape and score line are selected, then press ‘Attach’.
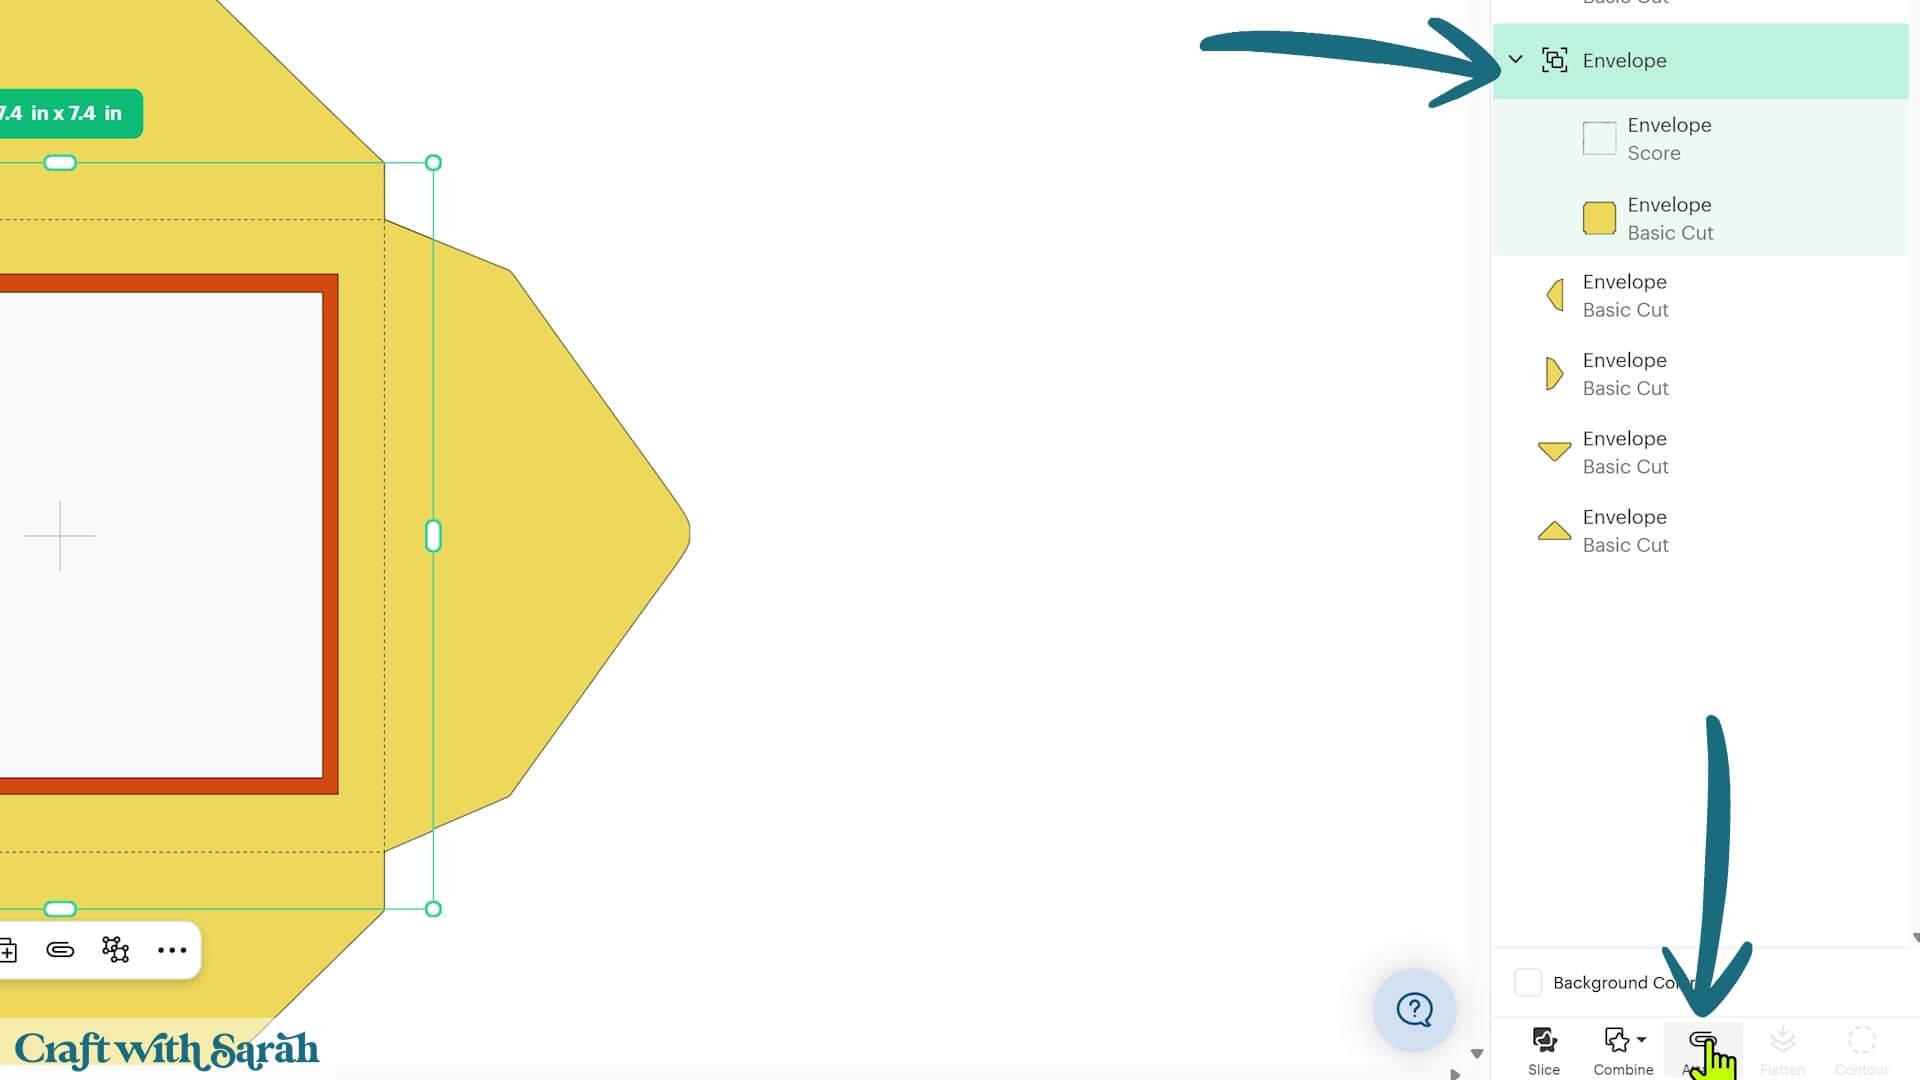
The four envelope flaps will be cut separately.
I’ve also included a coloured border piece and a white rectangle for the address. These are optional, so you can delete them if you don’t want to use them.
If you want, you can get your Cricut to write the address on the envelope.
You can write directly onto the envelope or onto the white address panel.
If you’re using dark or heavily patterned paper, I recommend using the white panel so that the address is easy to read.
Go into ‘Text’ and type the address.
Choose a clear, easy-to-read font. Cricut Sans works well for this.
Change the text to ‘Writing’ so that it will be drawn with a Cricut pen rather than cut from the cardstock.
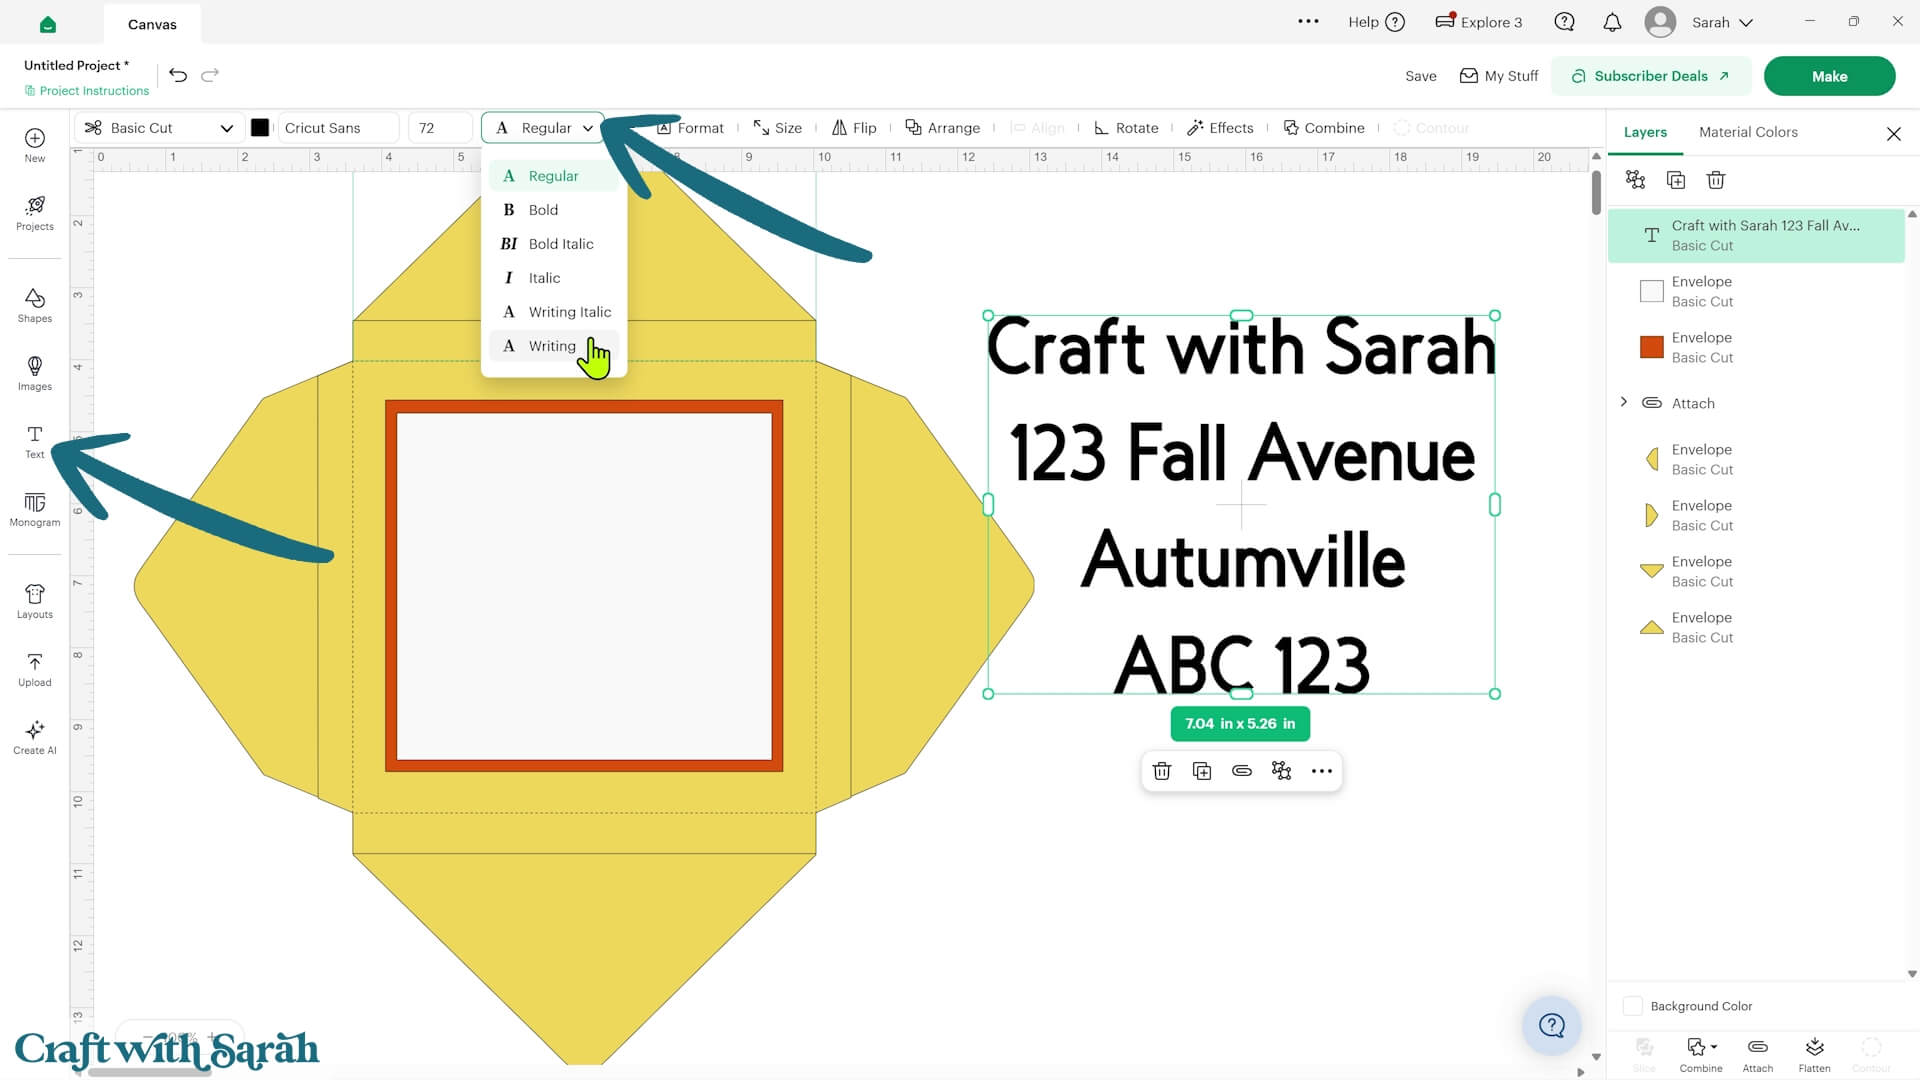
Resize the address and position it on the white panel, remembering to leave room for your postage stamp.
Select the address and white rectangle, then use ‘Align’ > ‘Center Horizontally’ to position it neatly.
With both still selected, press ‘Attach’.
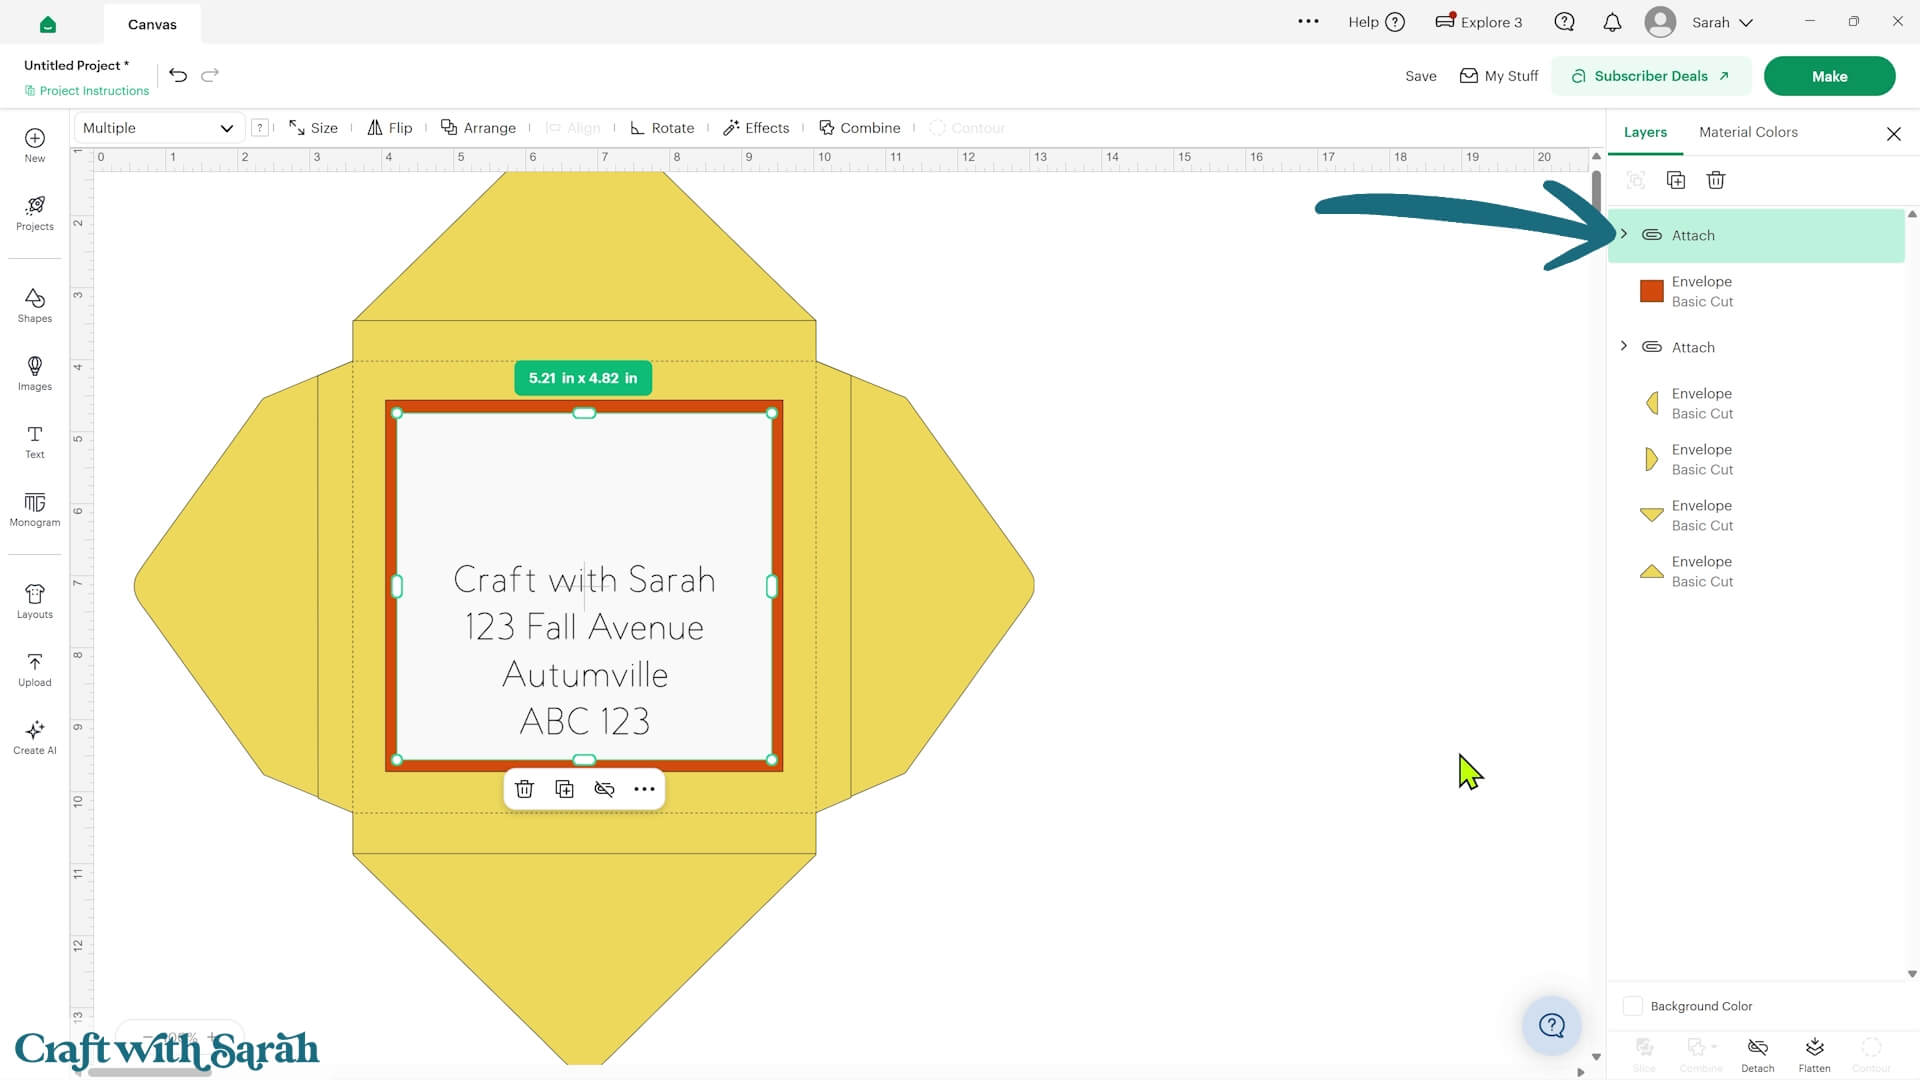
When you go through to the Make screen, check that the written address appears on the same mat as the piece you want it drawn onto.
If it appears separately, return to the Canvas and check that you’ve attached the layers correctly.
Step 10) Make the envelope
Cut all the envelope pieces from your chosen materials.
I like using patterned scrapbook paper for envelopes because you get to see both sides of the paper when the envelope is opened.
Fairly lightweight cardstock or scrapbook paper works best. Very thick cardstock can make the folds more difficult.
Take the central envelope piece and fold along all four score lines.
If the score lines are difficult to see or your paper isn’t folding easily, place a ruler along each line to help start the fold.
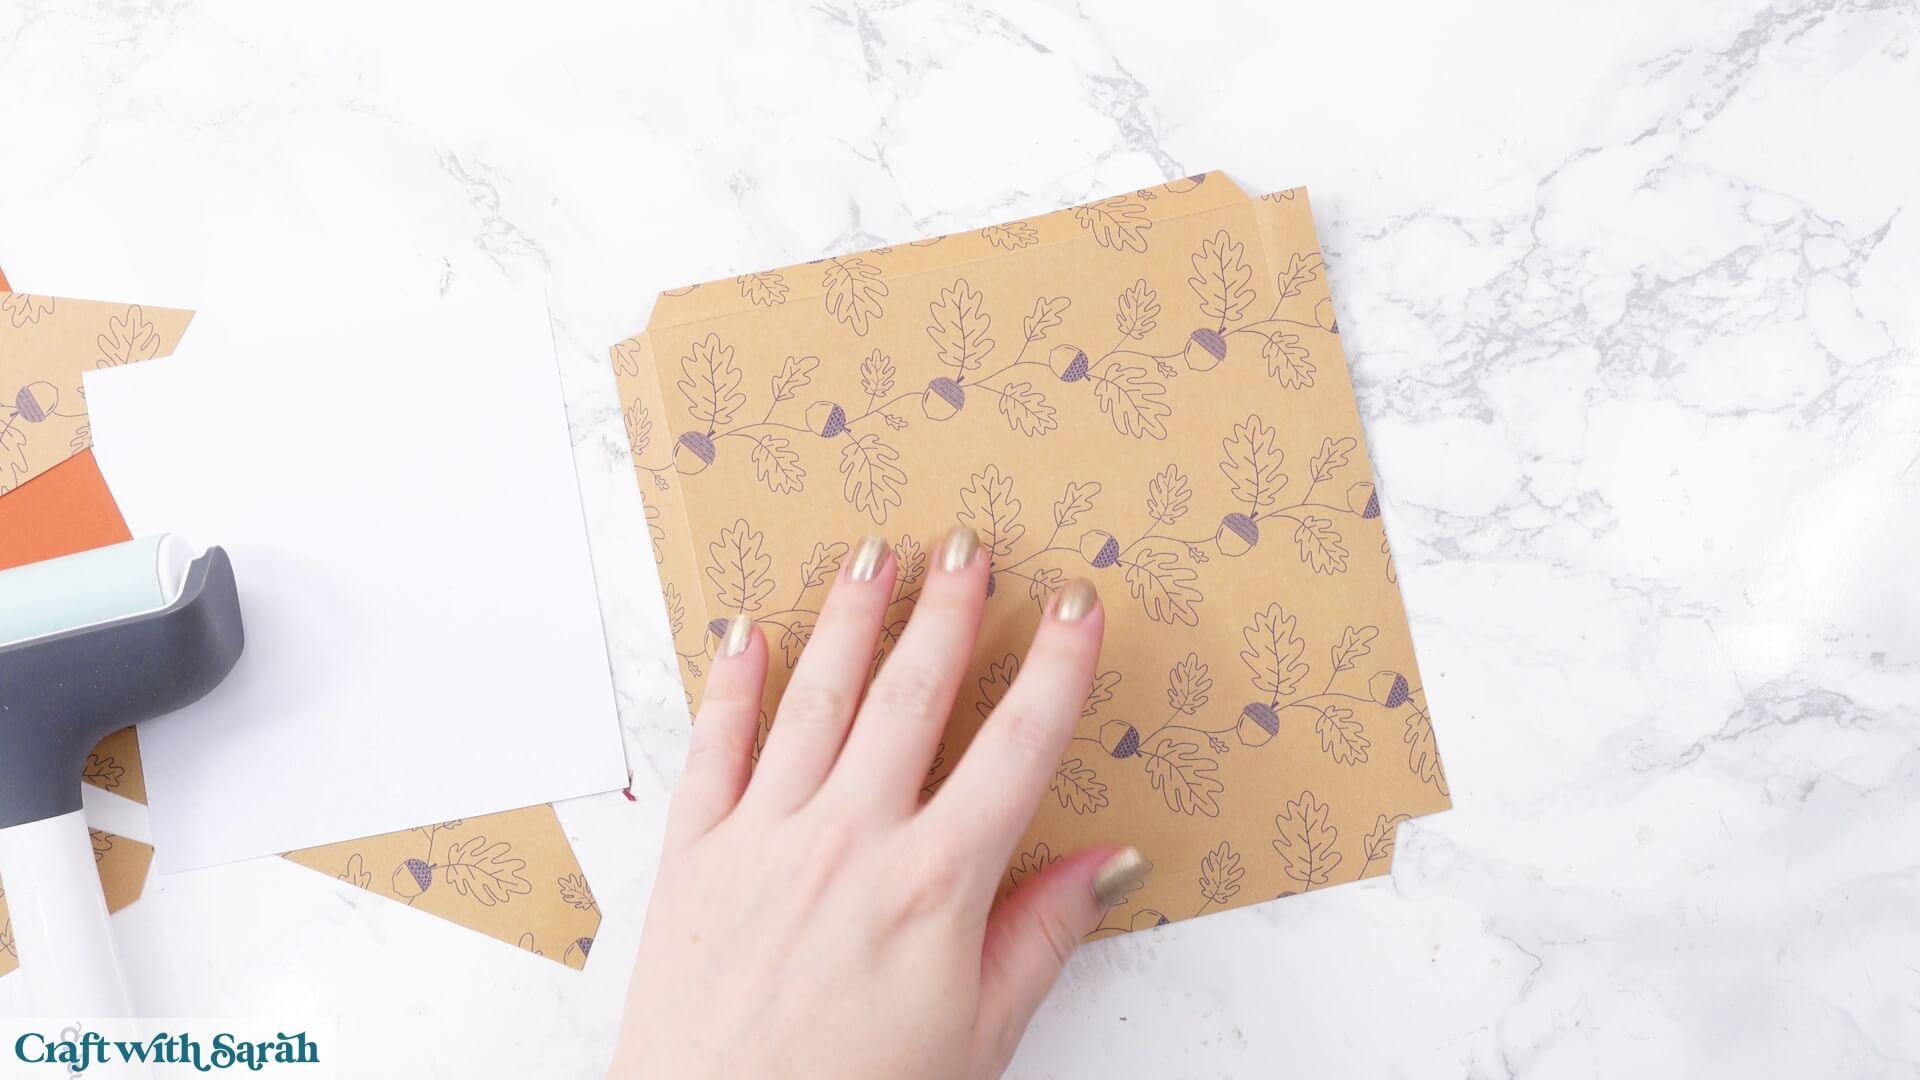
Next, glue on the four separate flaps.
There are two longer side pieces with straight vertical edges and two slightly smaller pieces with diagonal edges. Match the shapes carefully to the corresponding sides of the central piece.
Only add glue up to the score lines. I recommend stopping slightly short of them because the glue will spread when you press the pieces together.
Wait for the glue to dry completely before folding the envelope into shape.
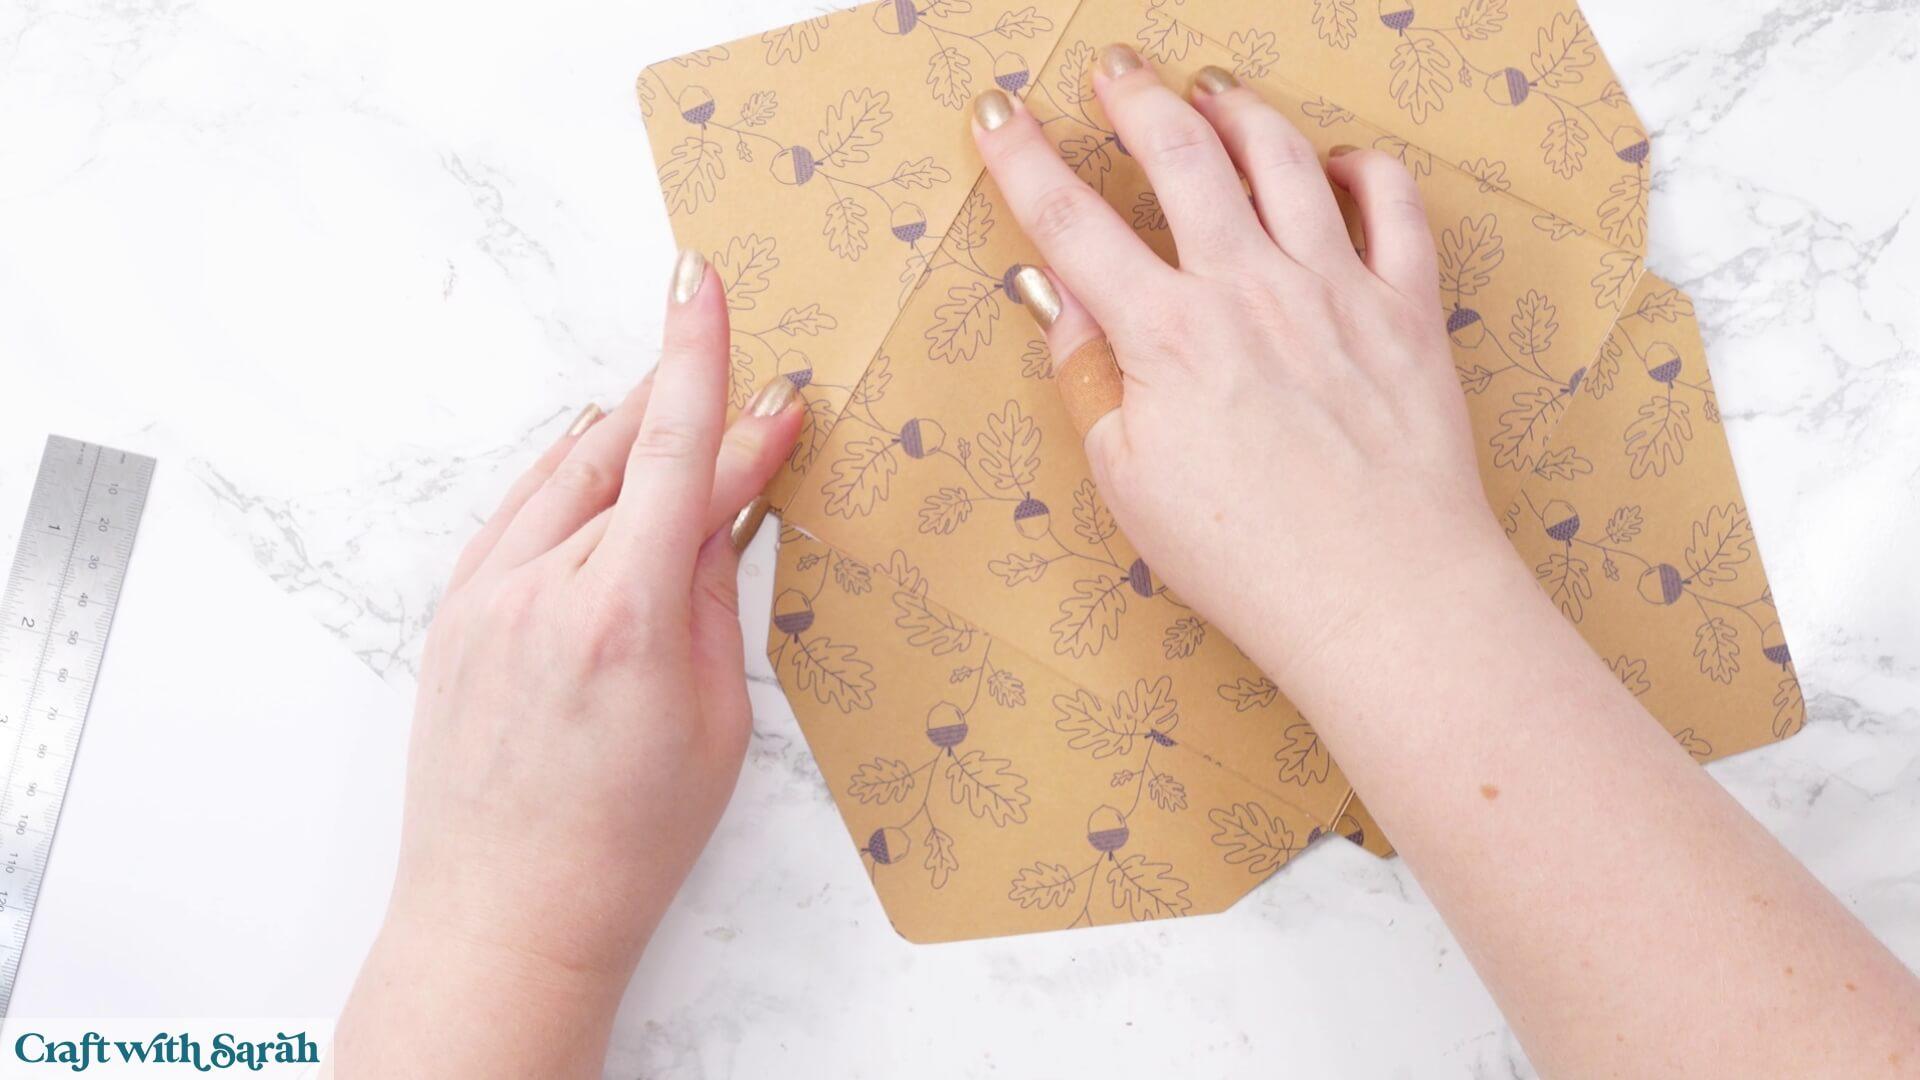
Fold the two sides of the envelope inwards.
The edges with the diagonal sections should form the sides, while the bottom section with the straight vertical edges folds upwards over them.
Check the positioning before adding any glue.
If you fold it the wrong way, the pieces won’t meet neatly in the middle.
Once you’re happy, add a thin bead of glue along the appropriate edges of the side flaps.
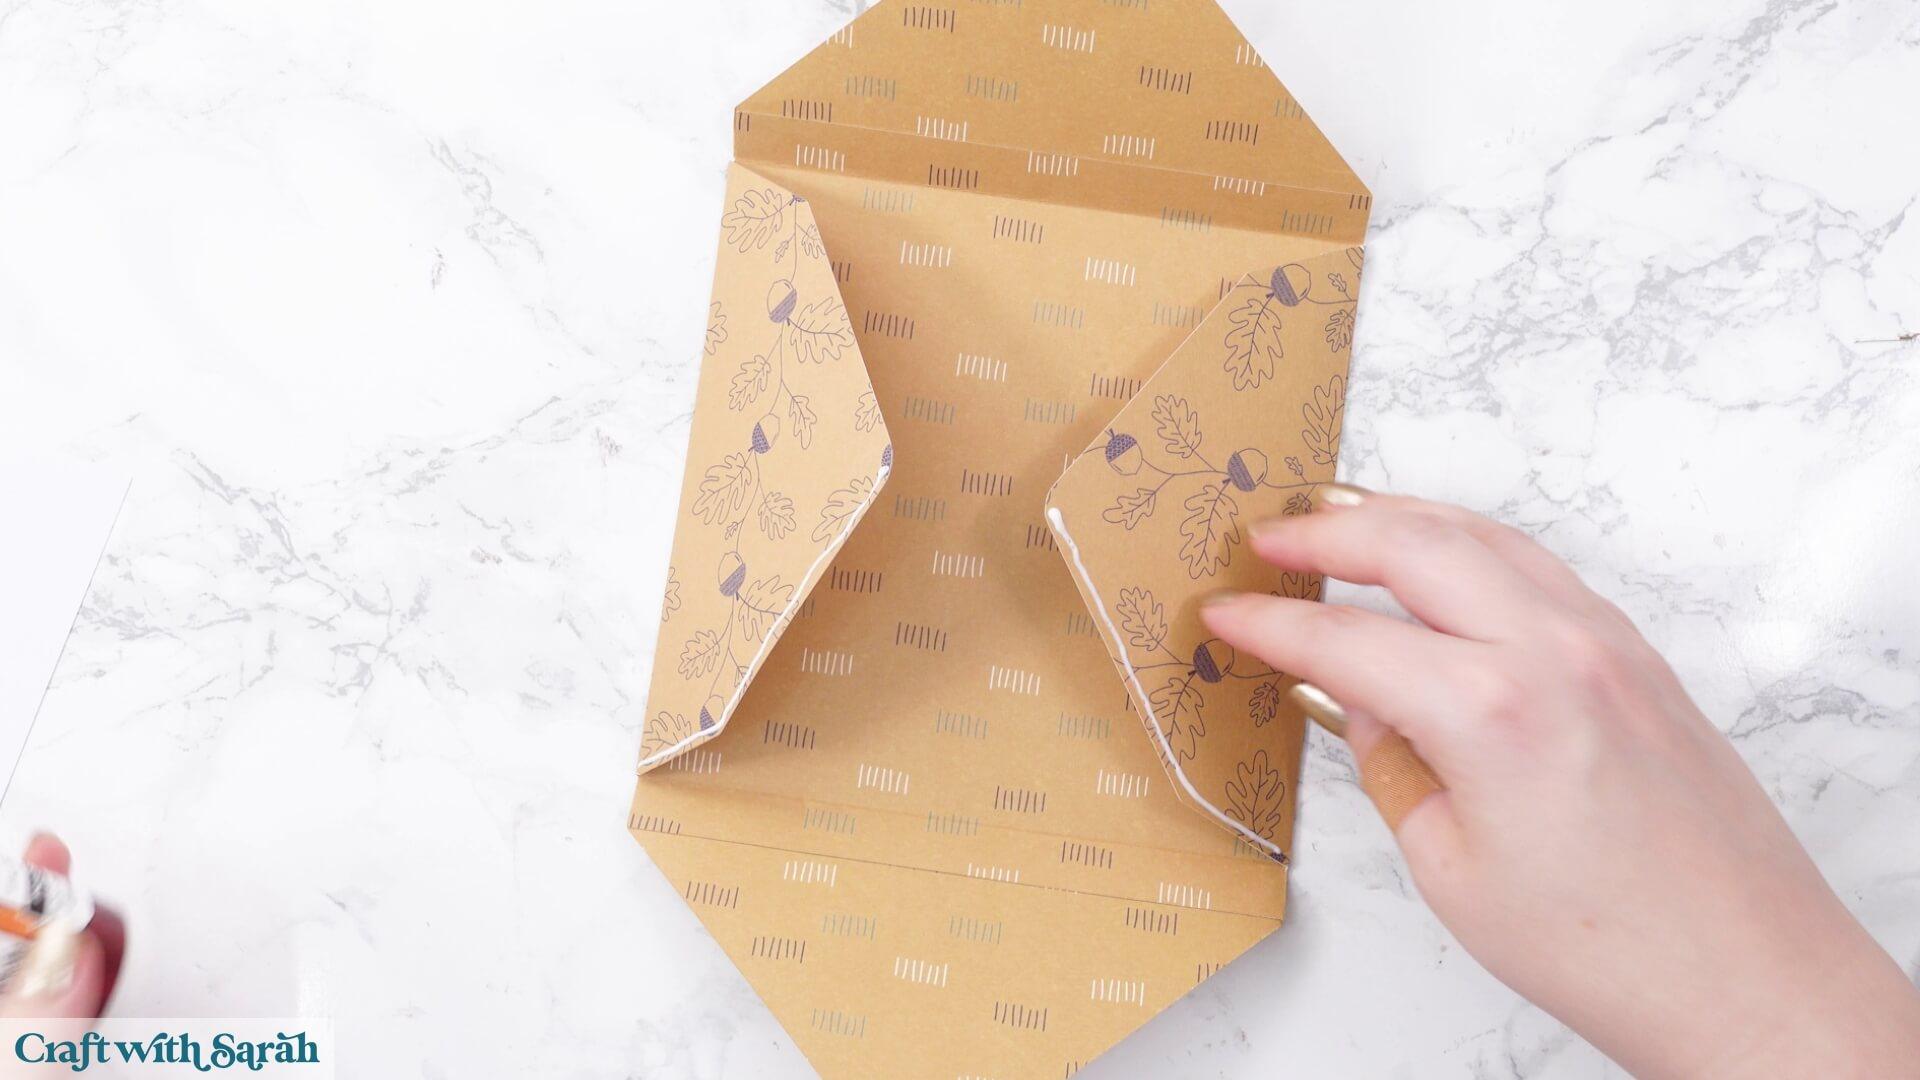
Fold the bottom upwards over them. Hold everything in position until the glue starts to dry.
Be careful not to press so firmly that glue squeezes inside and accidentally sticks the envelope closed.
Leave it until the glue is completely dry.
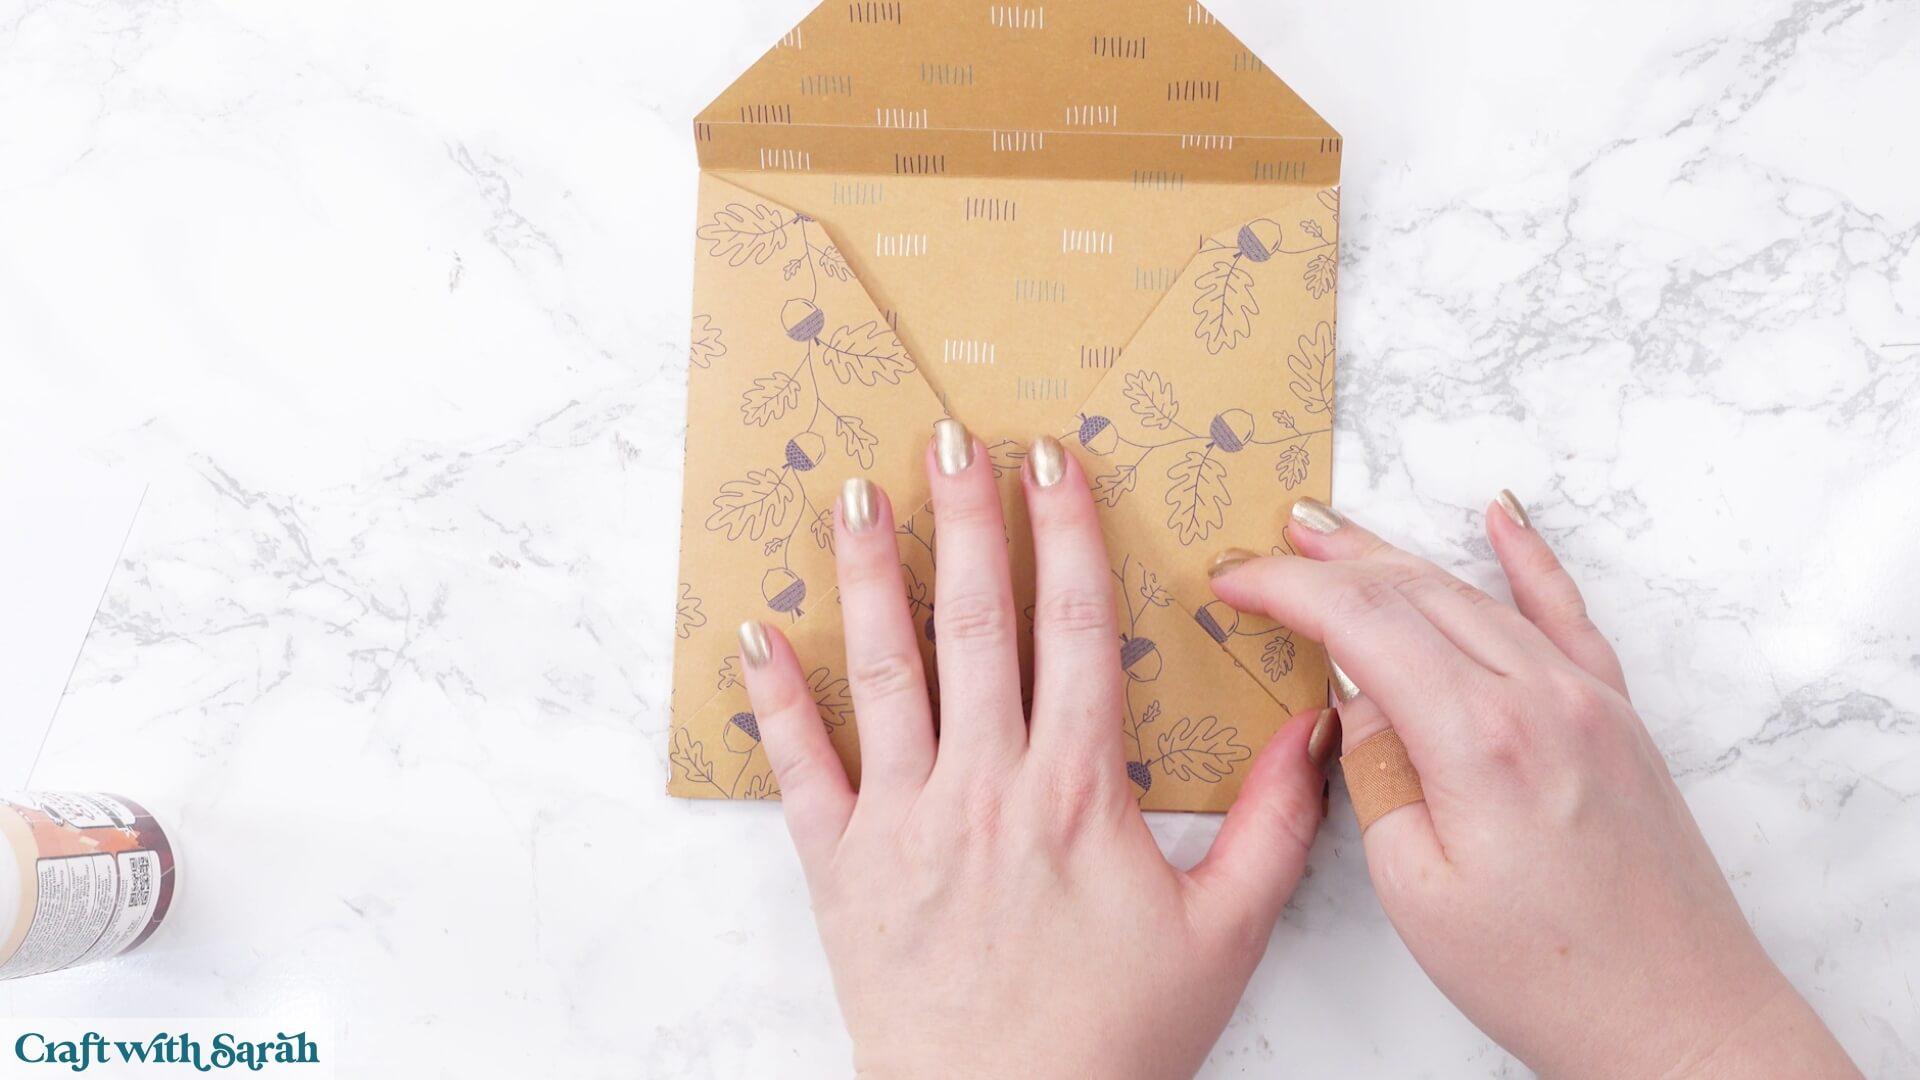
Decorate the front with the coloured rectangle and white address panel if you’re using them.
Make sure the rectangular pieces are positioned the correct way around so that you have an even border on all four sides.
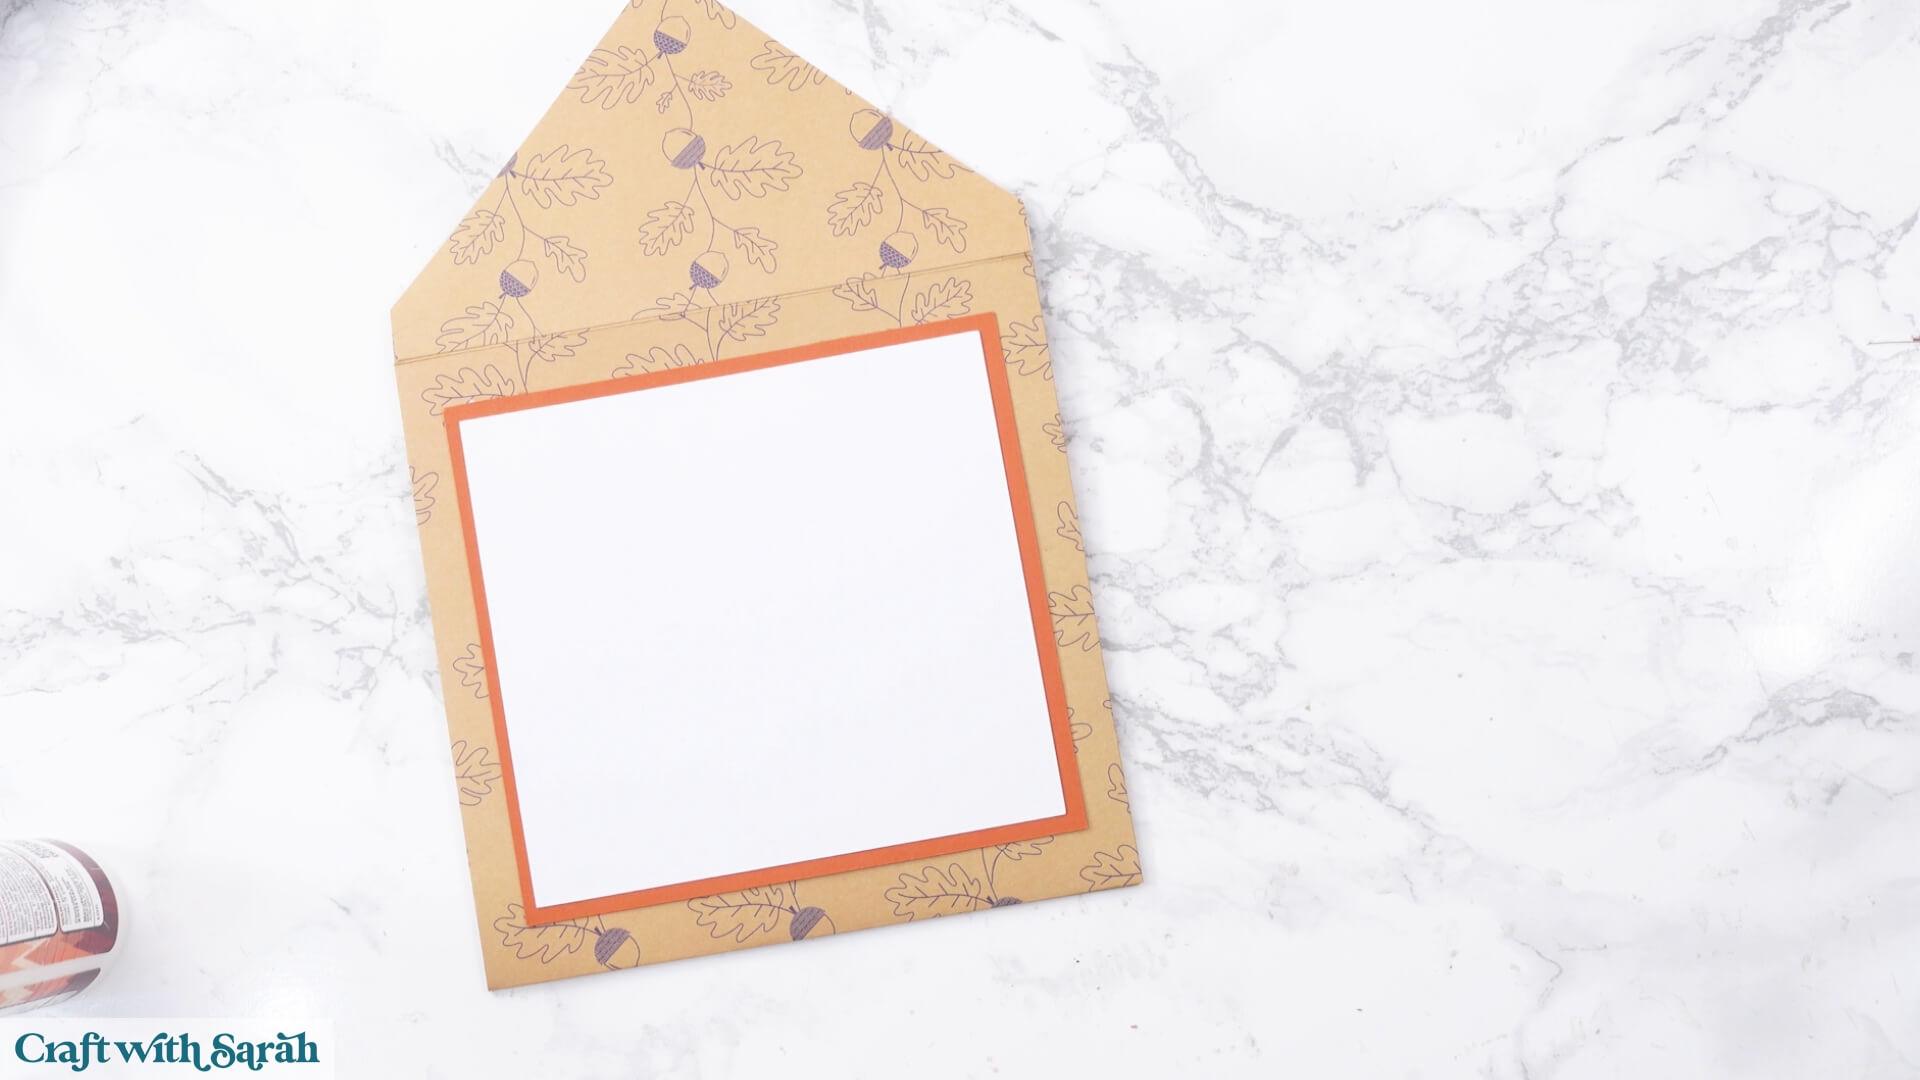
Carefully slide your finished card inside the envelope, making sure none of the delicate leaves get caught.
If the card catches near the bottom, it may be hitting the internal score line. Gently lift the card towards the front of the envelope and push it down again.
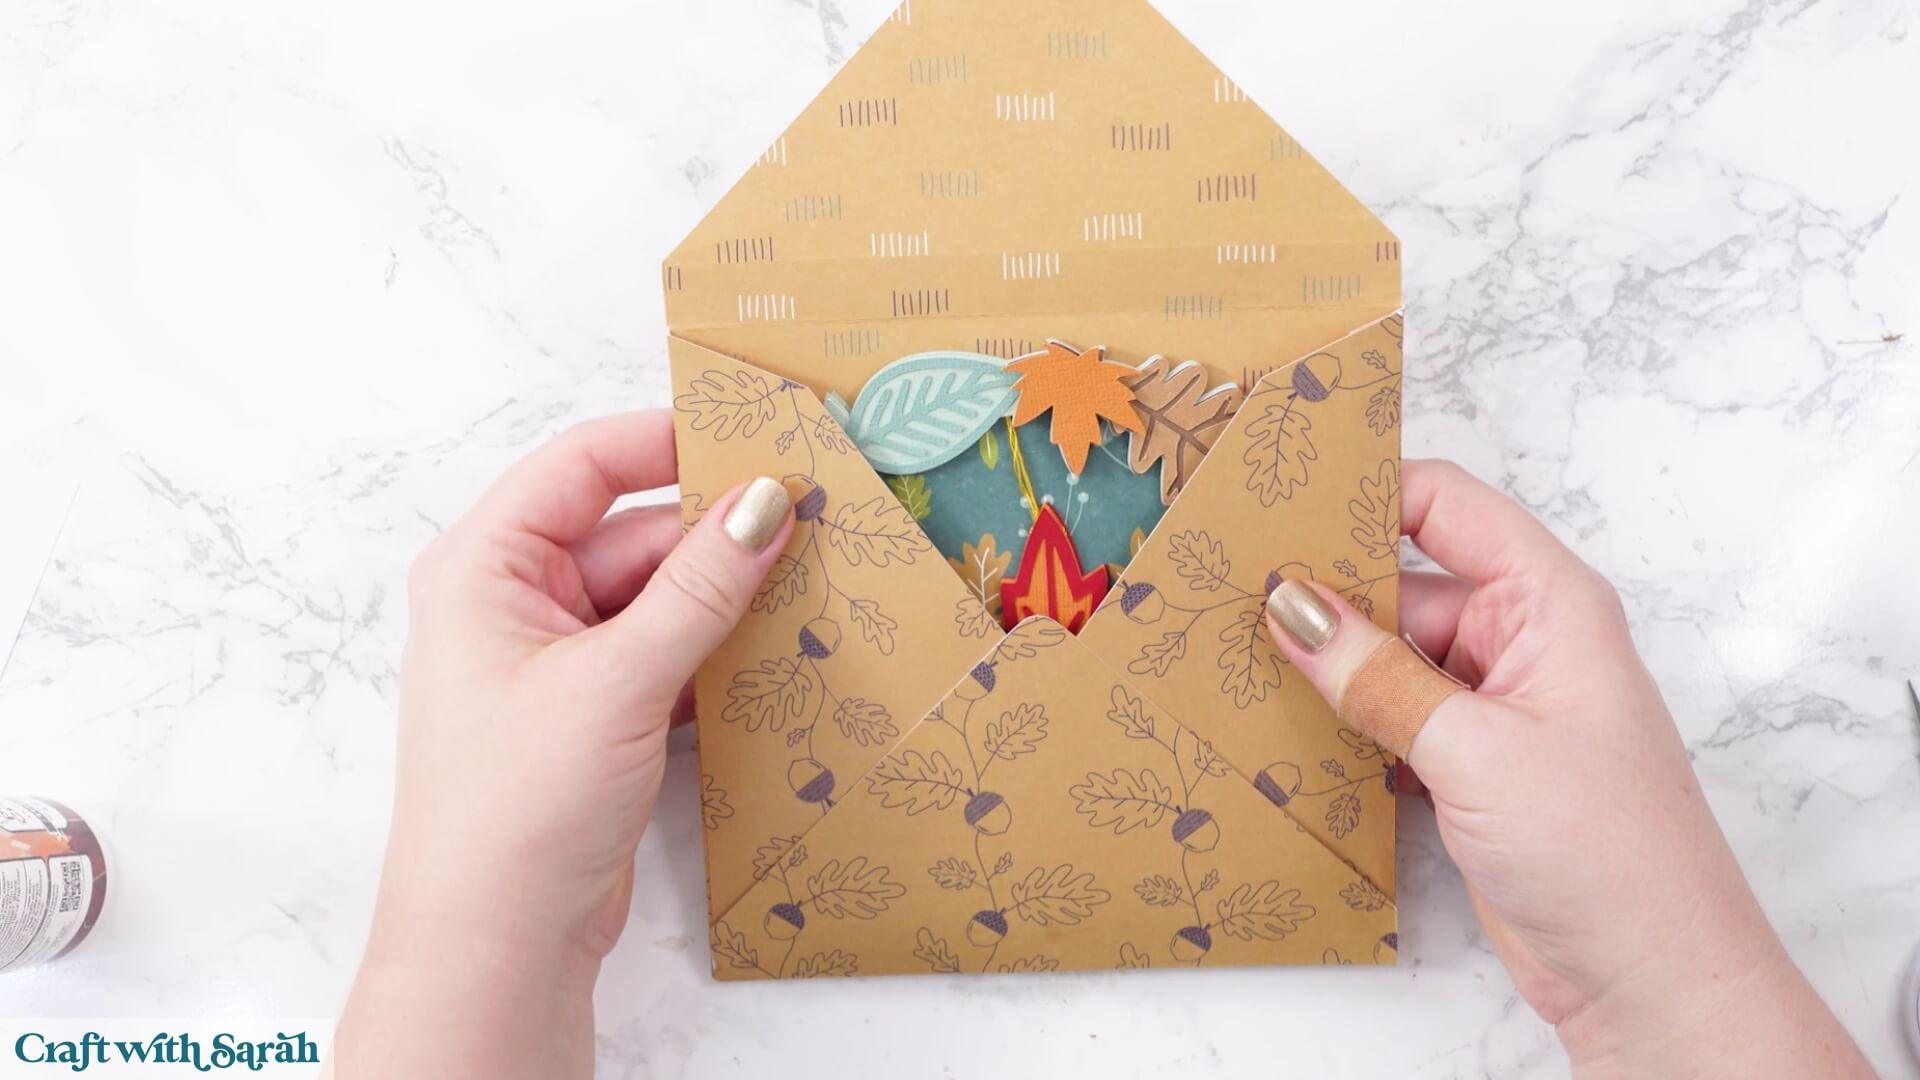
When you’re ready to send the card, fold over the top flap and secure it with glue, double-sided tape, a sticker or even a wax seal.
Pretty autumn card with matching envelope
Your autumn leaf greetings card and matching custom envelope are now complete!
The combination of autumn colours, layered leaves, circular shaped edge and the dangling centrepiece makes this such an unusual card for the season.
I especially love how the patterned paper shows through the opening when it’s standing up, with the hidden message tucked away underneath.
Happy crafting,
Sarah x