Light-Up Paper Pumpkin 🍂 FCC 02
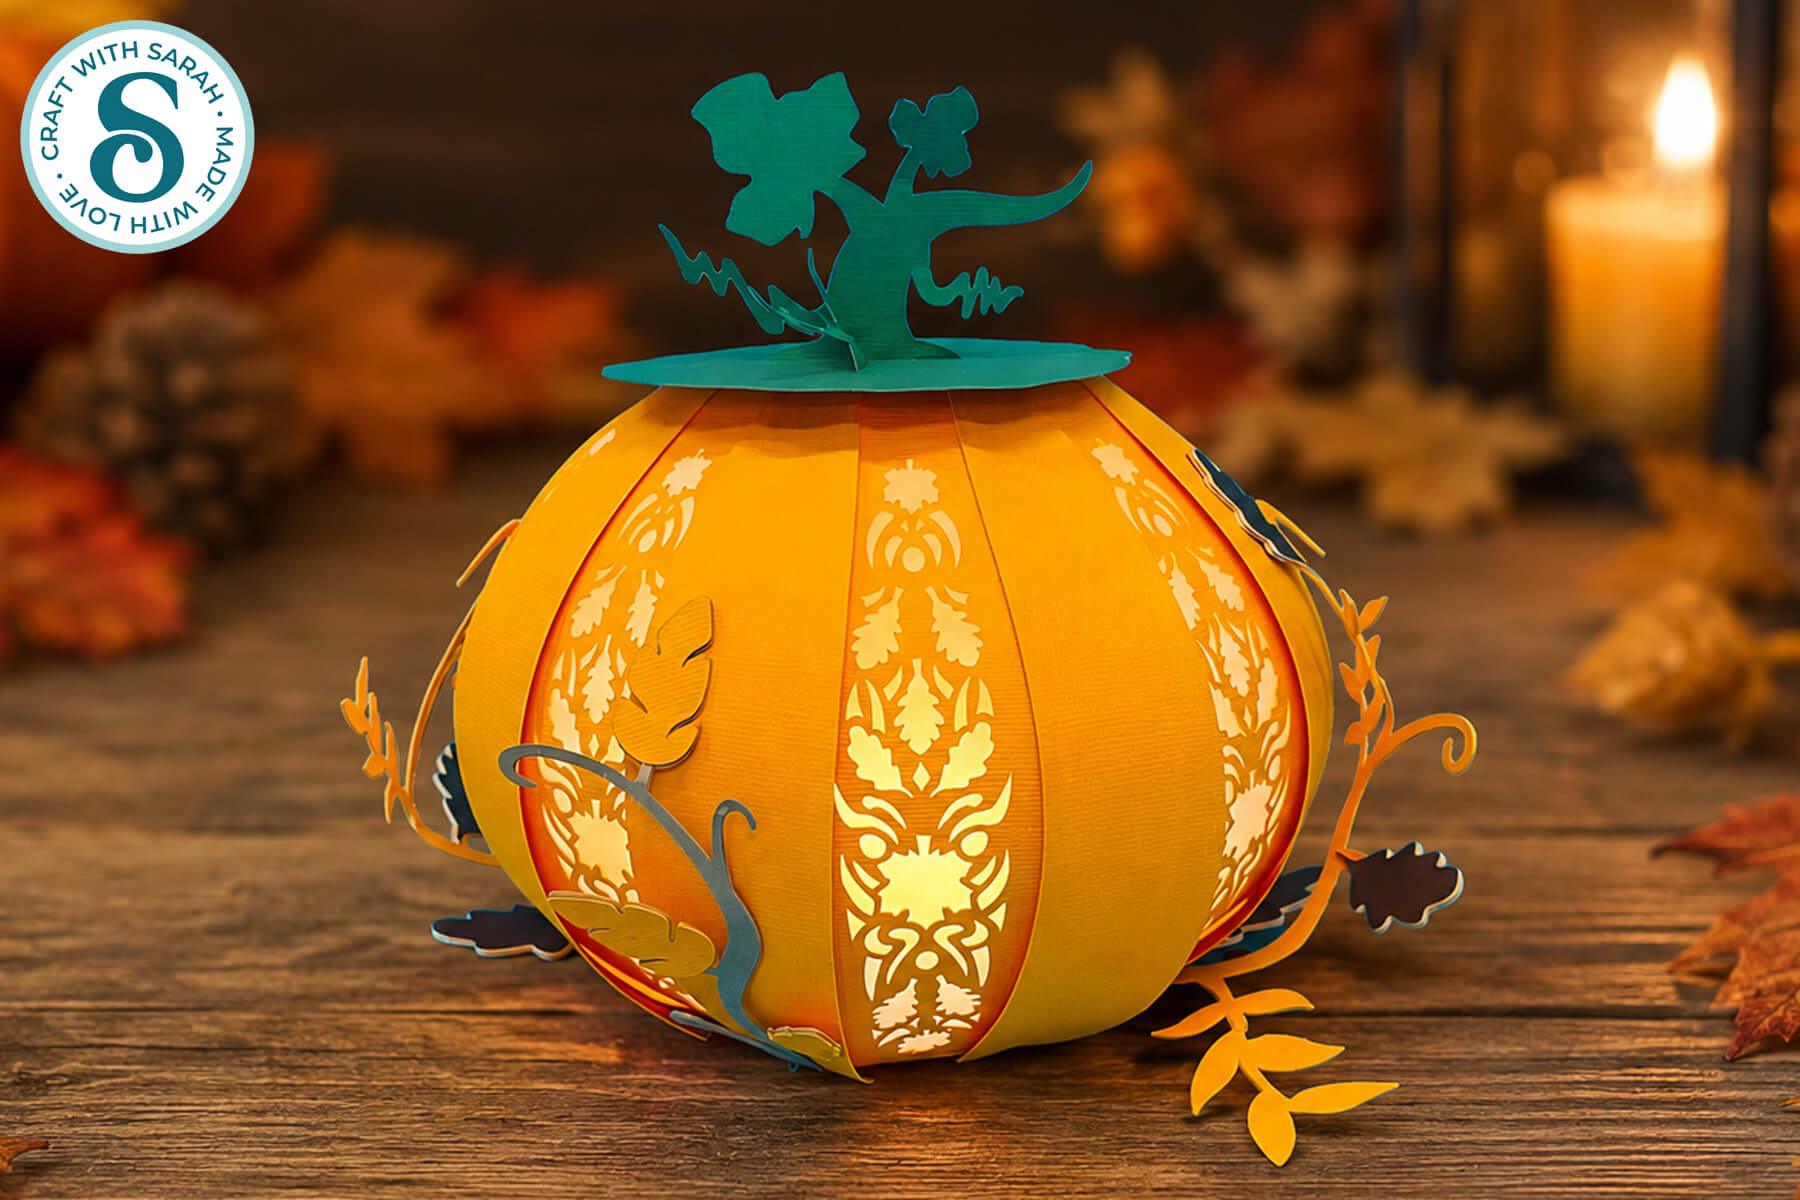
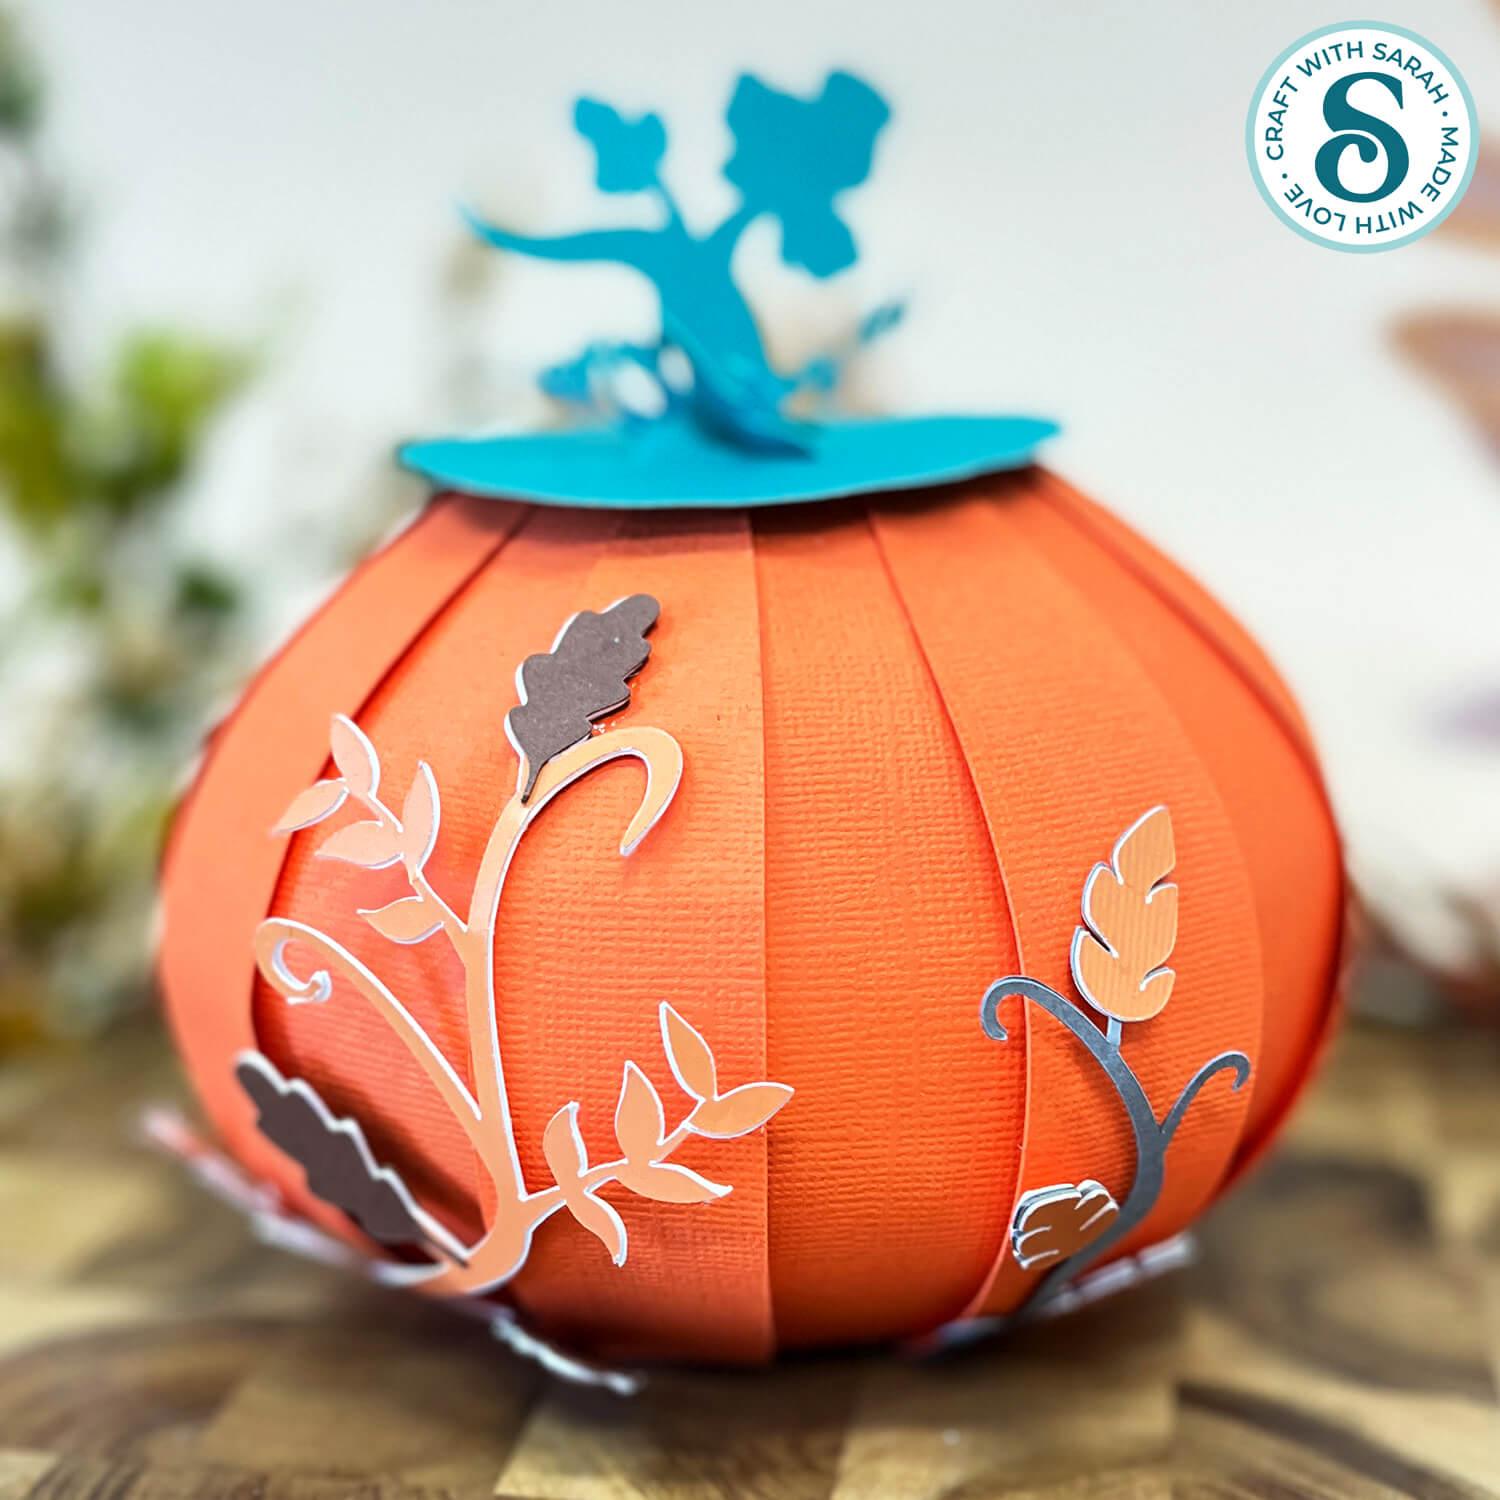
Make a beautiful 3D paper pumpkin for your fall decorations with this Cricut craft project.
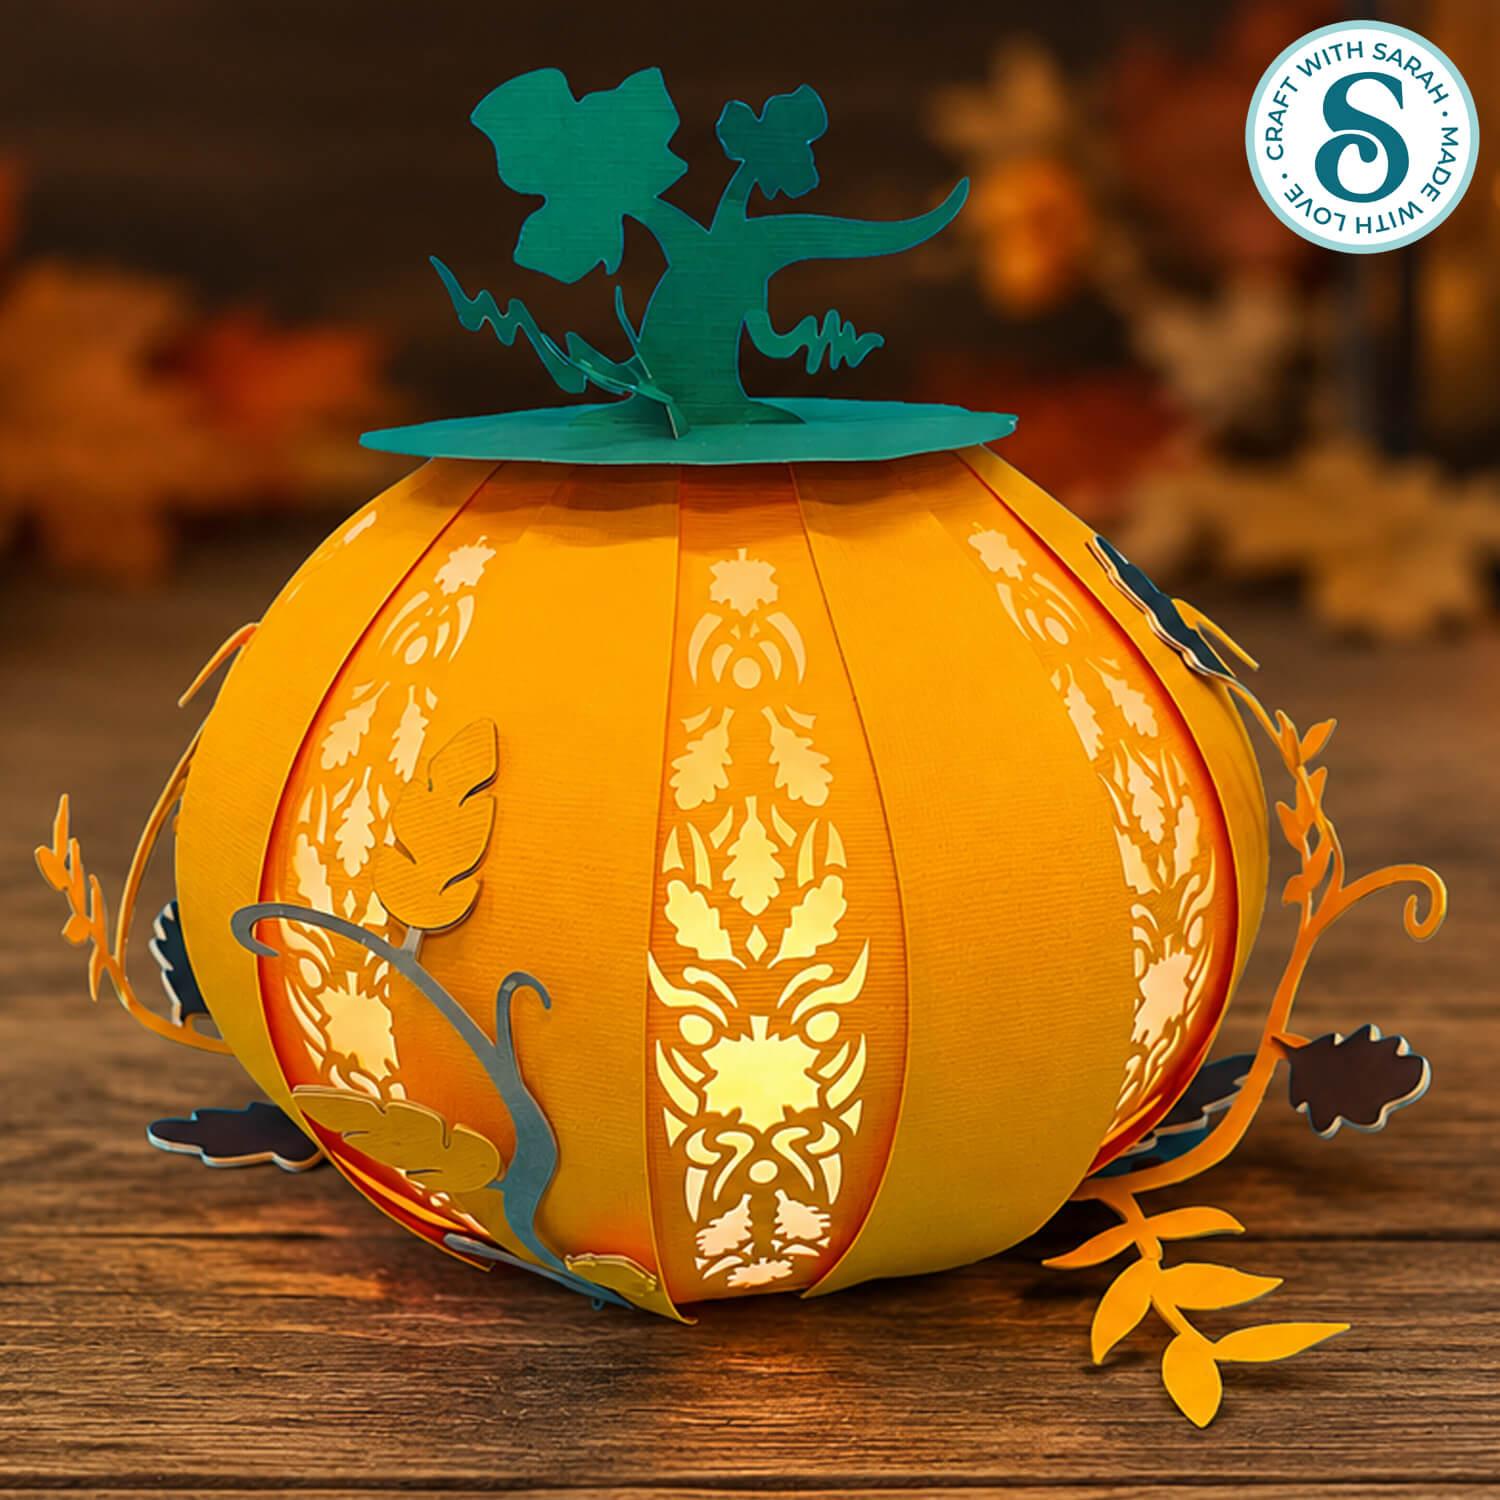
This pumpkin has intricate cutout details around the sides which allow light to shine through from inside.
Add vellum or tracing paper behind the cutouts to diffuse the light, then illuminate the pumpkin with battery-powered fairy lights or small LED lights.
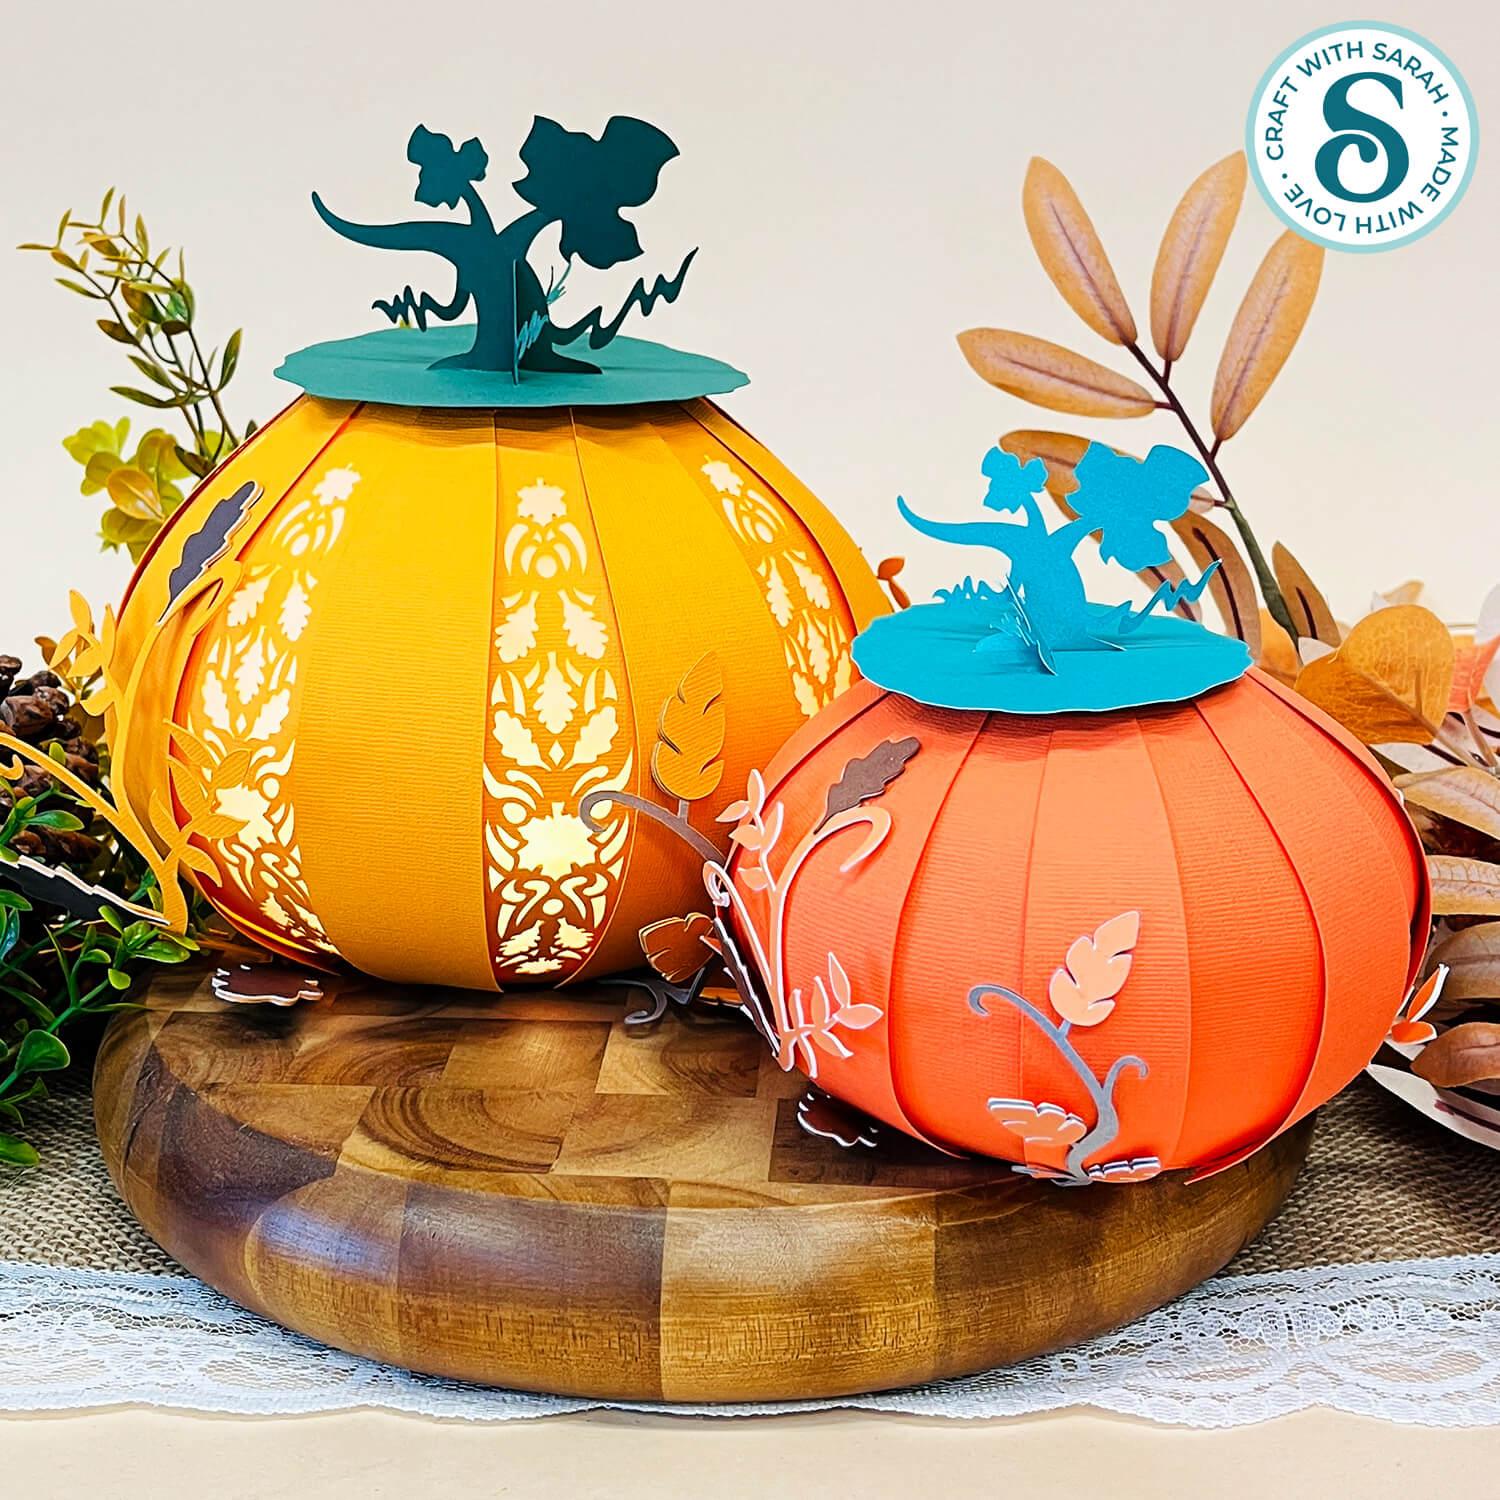
If you don’t want to make a lantern, there is also an option to fill in the decorative cutouts in Cricut Design Space to create a solid 3D pumpkin instead.
Decorative leaves and swirls can be added around the outside for extra detail, or you can leave them off for a simpler look.
Please note that this project does not include a hand-cutting version.
This project is part of the 2026 Falloween Craft Countdown
Paper pumpkin lantern supply list
Here is a list of the materials that I used to make this project.
Please note that some of the links included in this article are affiliate links, which means that if you click through and make a purchase I may receive a commission (at no additional cost to you). You can read my full disclosure at the bottom of the page.
- Cricut machine
- Light blue Cricut cutting mat
- Coloured Card (any thickness)
- Glue (I like Bearly Art Glue and Collall)
- Cricut scoring wheel or stylus
- Vellum, tracing paper or similar
- Paperclips (to hold pieces in place while the glue dries)
- Sticky tape
- Battery-powered fairy lights or submersible LED lights
This project is suitable for the following types of Cricut machines: Explore series, Maker series and Joy Xtra. It will need to be made smaller for the Joy Xtra. It is too large to cut on the Joy or Joy 2.
Foundation learning
If you're new to making papercrafts with your cutting machine, check out these links to get you started.
They include videos on topics such as: which file to use with your type of cutting machine, how to load the files into your cutting machine's software, how to cut cardstock with your type of cutting machine, how to recolor and modify/customize the cut files and tips for displaying your projects.
- How to use zip folder downloads
- Help guides for Cricut machines
- Help guides for Silhouette machines
- Help guides for ScanNCut machines
The following tutorials are Cricut-specific, but many of the ideas will work similarly with a Silhouette or ScanNCut machine and any cut files that are shared in them are compatible with all types of cutting machine.
- How to score with a Cricut (even without scoring tools)
- Print then cut tutorial
- Design Space tools (Combine, Attach, Slice, Weld, Flatten, etc.)
- Pattern fill tutorial (for making backgrounds & cutting images to a specific shape/size)
- Free envelope SVGs that can be sized to fit any card
- Presentation boxes for handmade cards
- How to write inside cards with Cricut pens
- How to cut layered designs at a small size
- Design Space tips & tricks
- Cricut pens tutorial
- How to mount multiple designs in the same frame with magic guides
Pumpkin lantern craft video tutorial
Watch the video below to see how to make this project. Keep scrolling for a written tutorial.
Written tutorial (with photos!)
Here’s how to make this 3D pumpkin paper craft using a Cricut machine.
Step 1) Download the cutting file & upload to Design Space
Get the files using the box below.
Purchase the File(s)
This cut file is available as part of the Instant Access Bundle.
Or, purchase this design individually here
Before you upload the SVGs to Design Space, you need to unzip the download folder that they come in.
Not sure how to do this? Click here for a tutorial that covers all the following types of computer and device:
- How to unzip a folder on a Windows computer
- How to unzip a folder on a Mac
- How to unzip a folder on an iPad
- How to unzip a folder on an iPhone
- How to unzip a folder on an Android device
After unzipping, upload the SVG file(s) into your cutting machine software.
Not sure how to use cut files with your type of machine? The following links lead to tutorials on how to use cut files in:
- Cricut Design Space
- Silhouette Studio
- CanvasWorkspace (for ScanNCut machines)
If you are using Cricut Design Space, start a new project and then click the “Upload” button on the left of the screen.
You can then either click “Browse” to find the file on your computer, or drag-and-drop it.
Select the file in the “01 Cricut Version” subfolder called svg-light-up-pumpkin-craftwithsarah.svg.
Press “Upload” on the next screen.
After uploading, the design should be automatically inserted onto your Canvas.
To hide the left sidebar (to give you more space for designing!), click the arrow that’s about half way down the page.
Need help uploading SVGs? Get step-by-step instructions here in our detailed help guides for Cricut, Silhouette and ScanNCut.
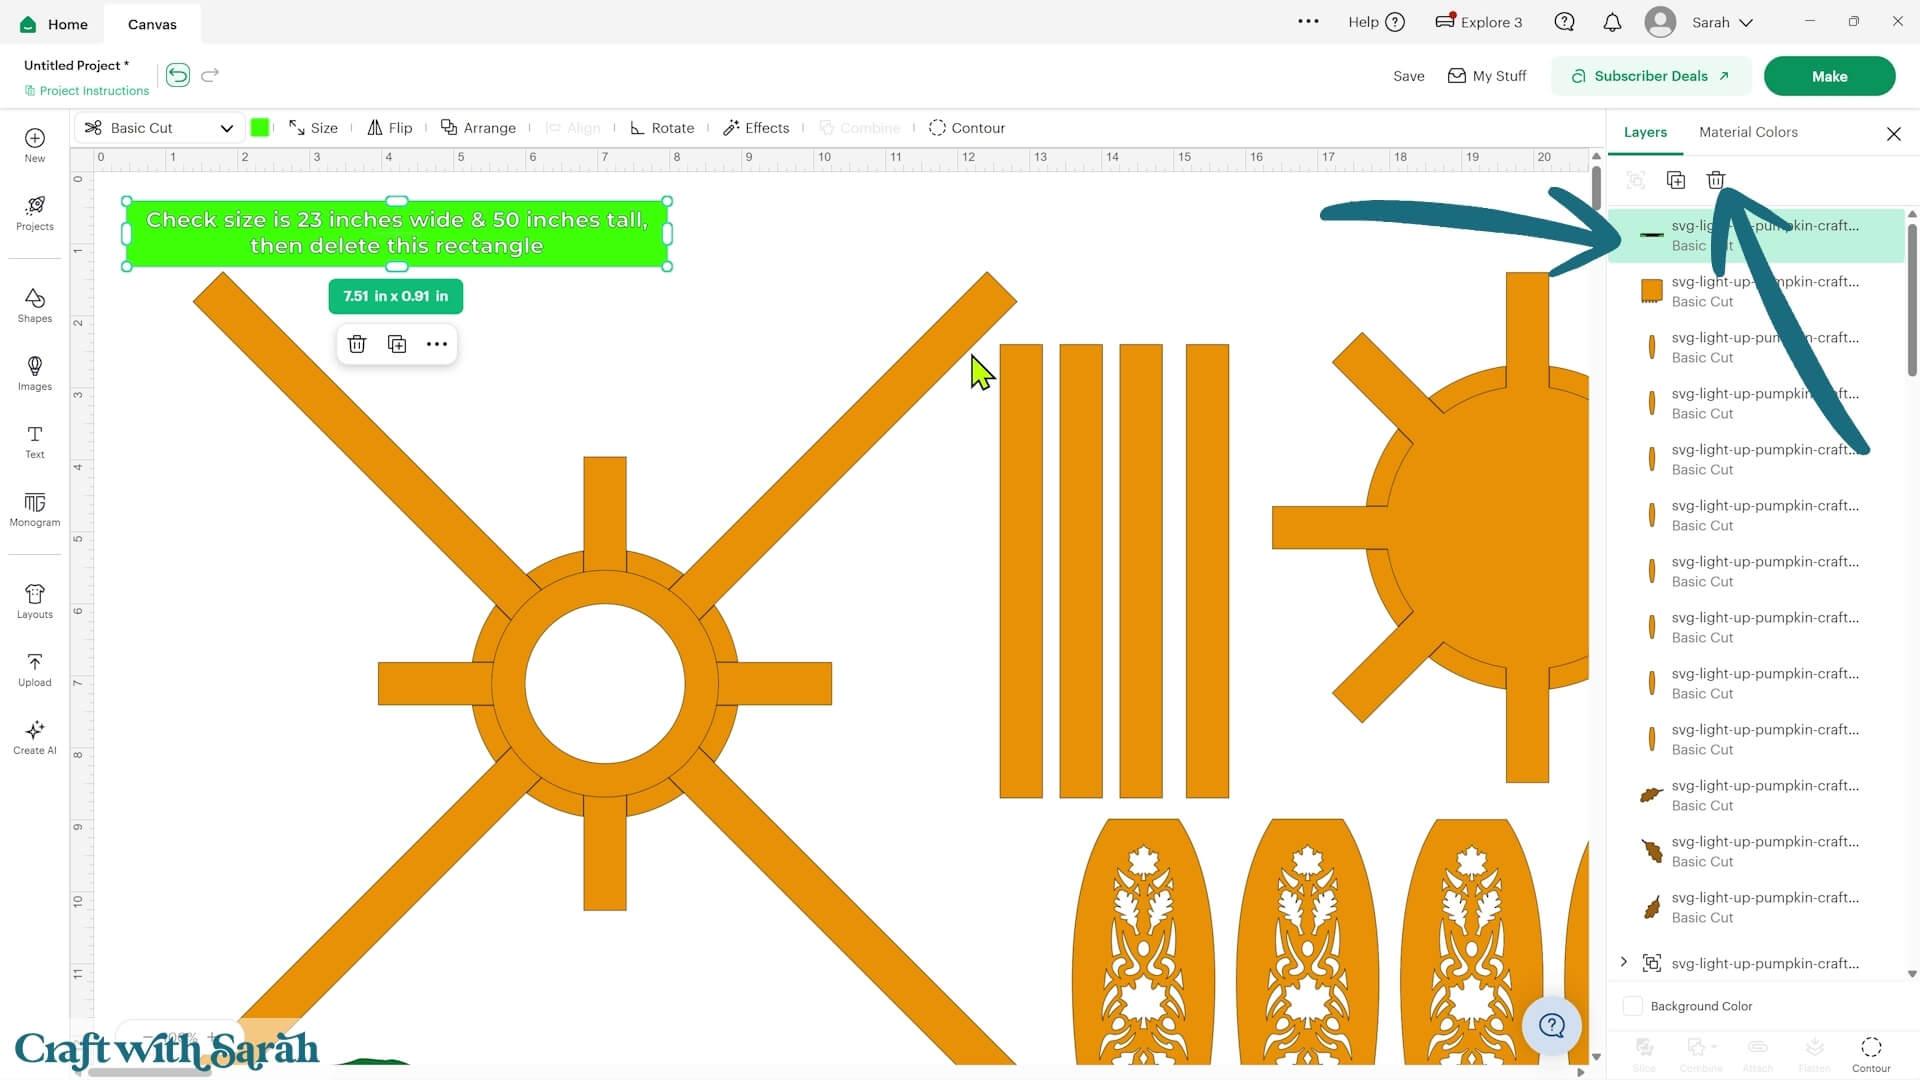
The complete design should load in at 23 inches wide and 50 inches tall. Check the size before making any changes and adjust it if necessary.
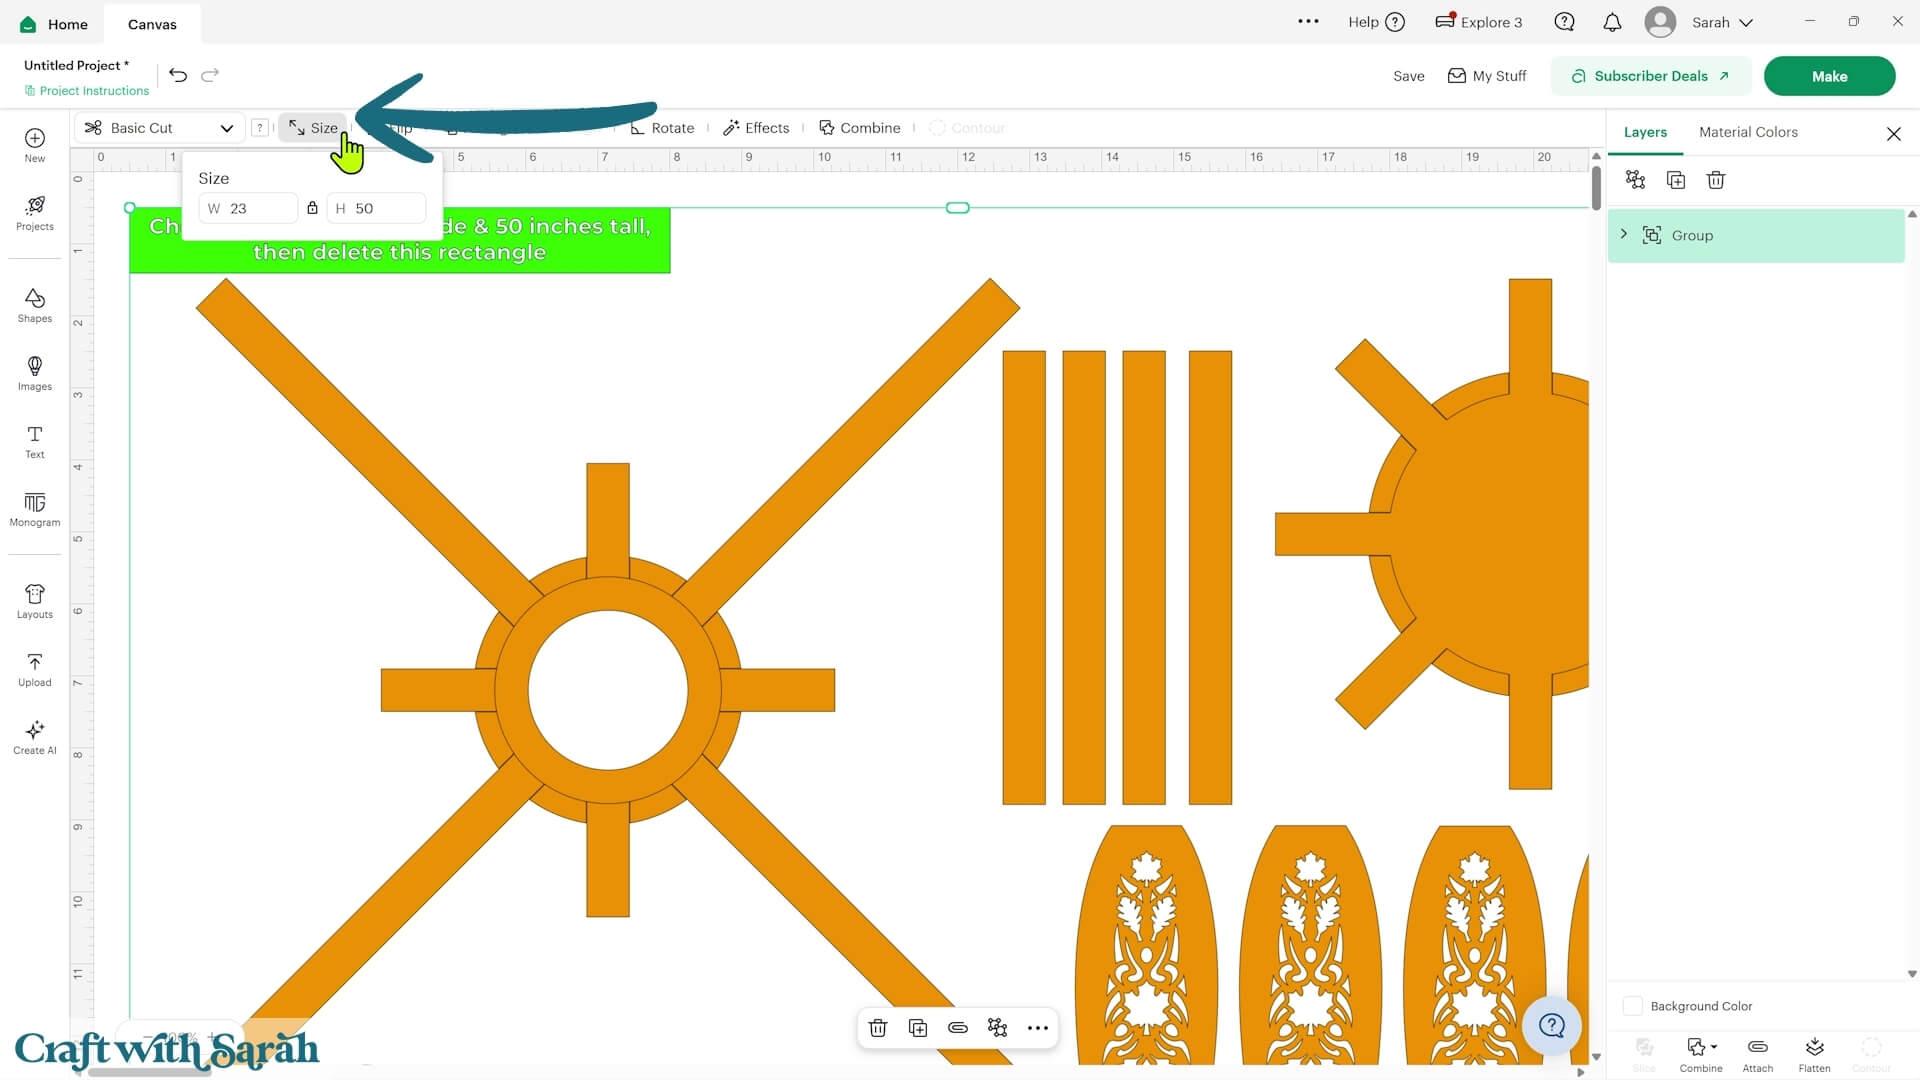
If you need to make the pumpkin smaller for the Cricut Joy Xtra, change the width to 15 inches. This will make it just over 32.5 inches tall.
At this smaller size, you may find it easier to make the solid version of the pumpkin instead of the lantern, as some of the decorative cutouts will become very small.
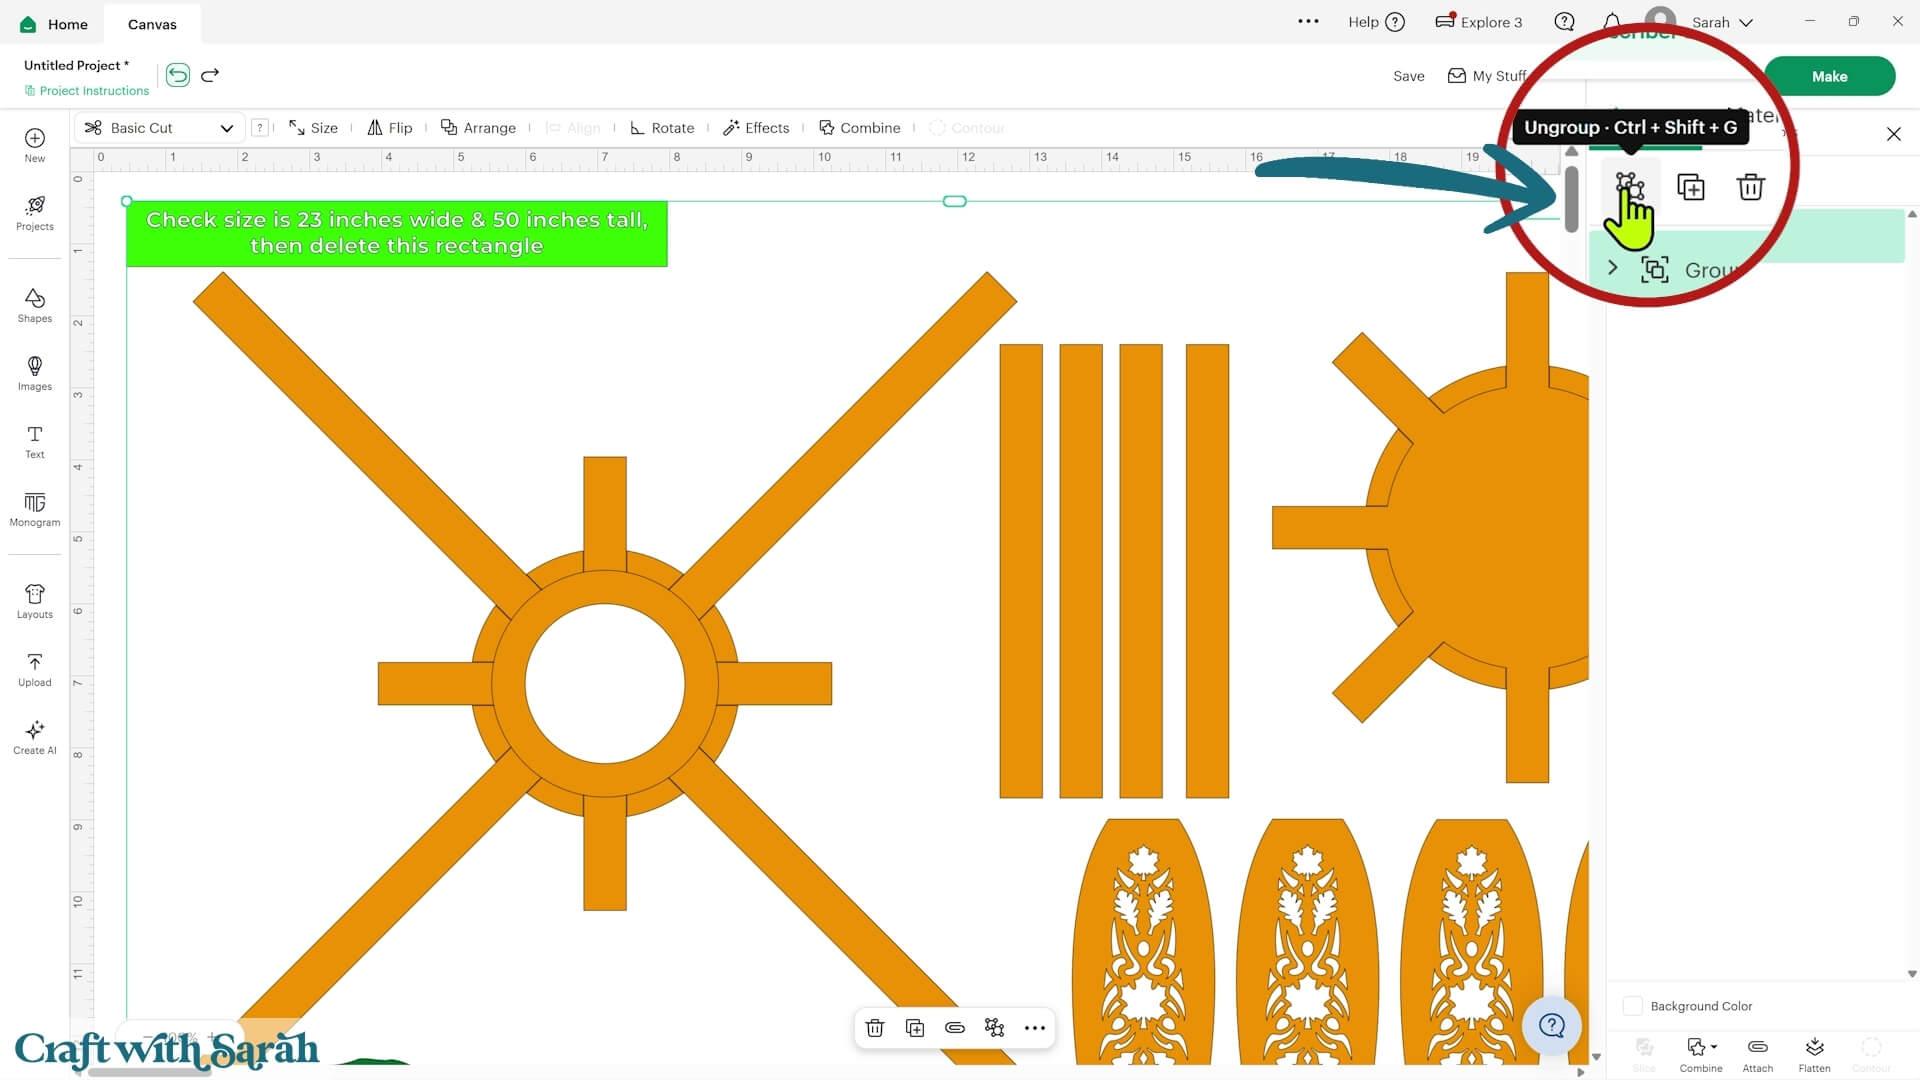
When you’re happy with the size, “Ungroup” the design and delete the lime green size guide layer.
Step 2) Customise the pumpkin design (optional)
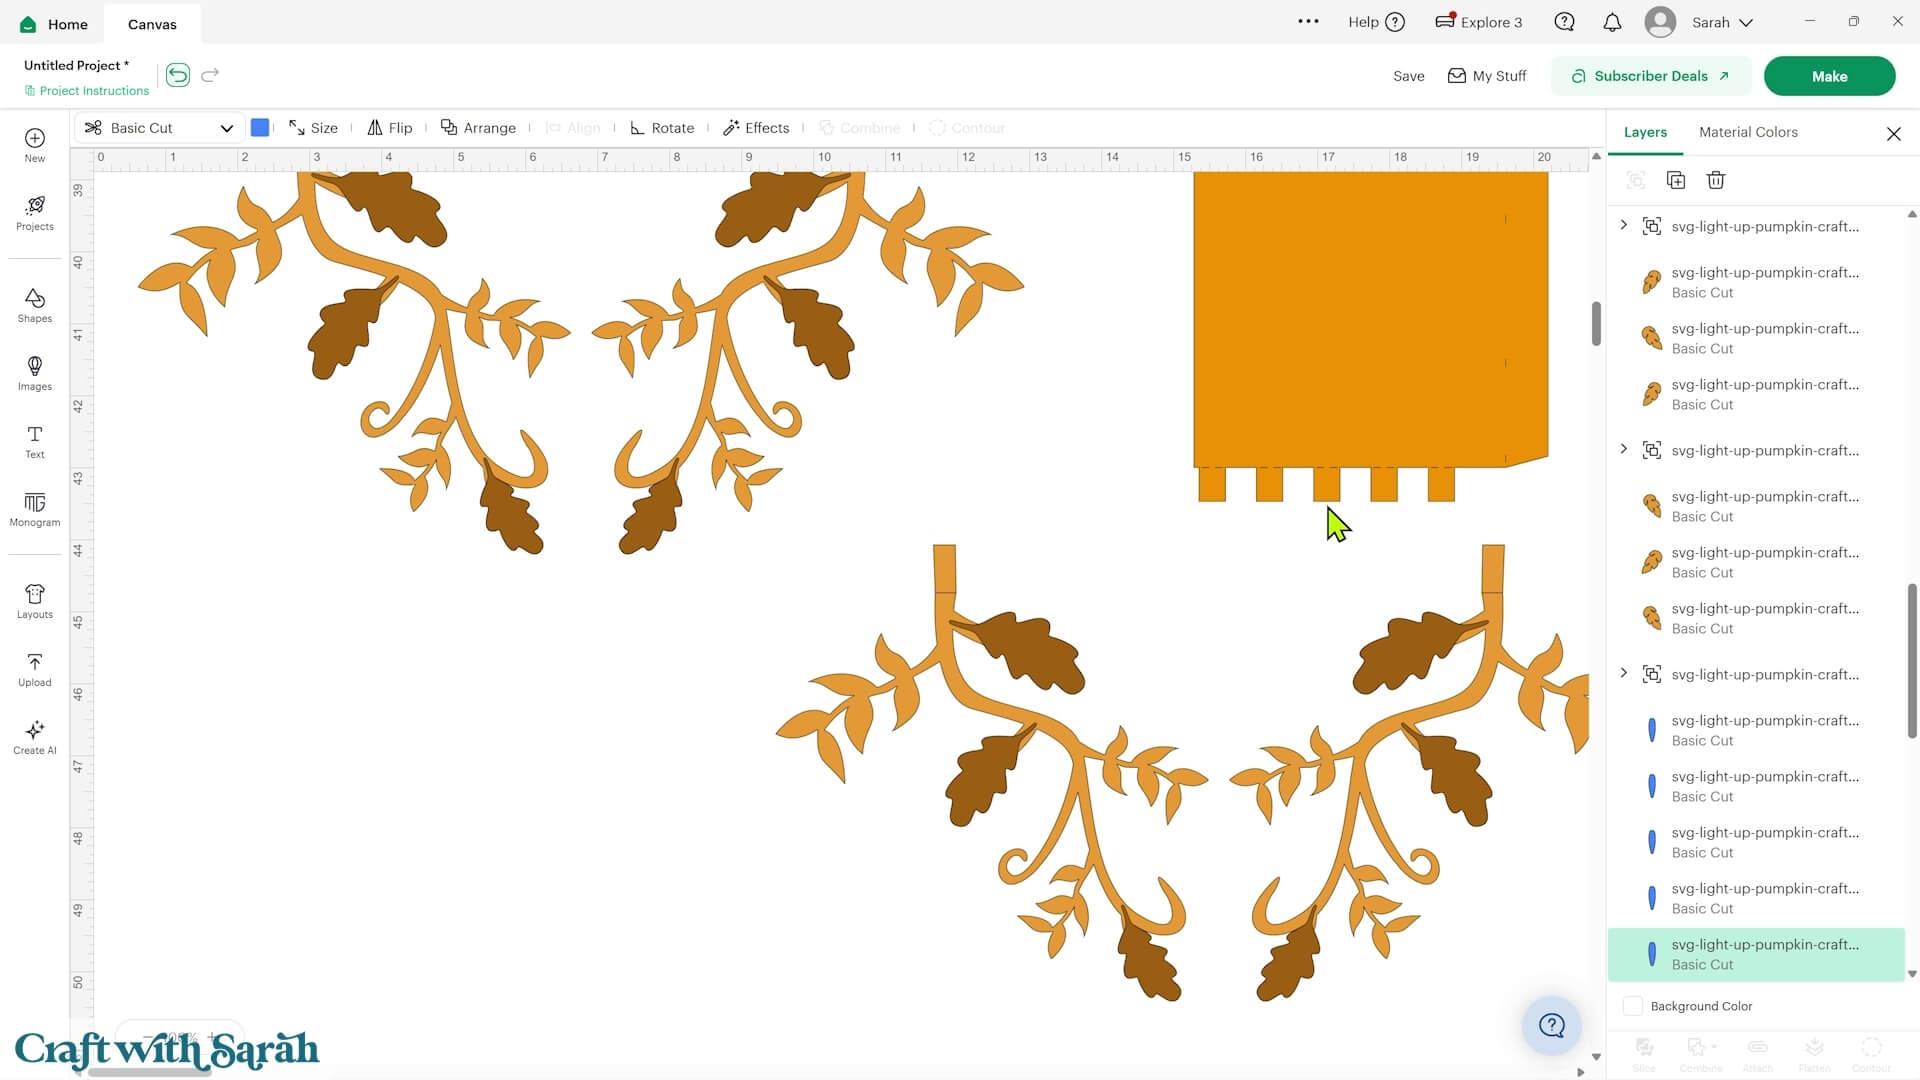
The decorative leaves and stems are optional. If you would prefer a simpler pumpkin, select those layers and delete them.
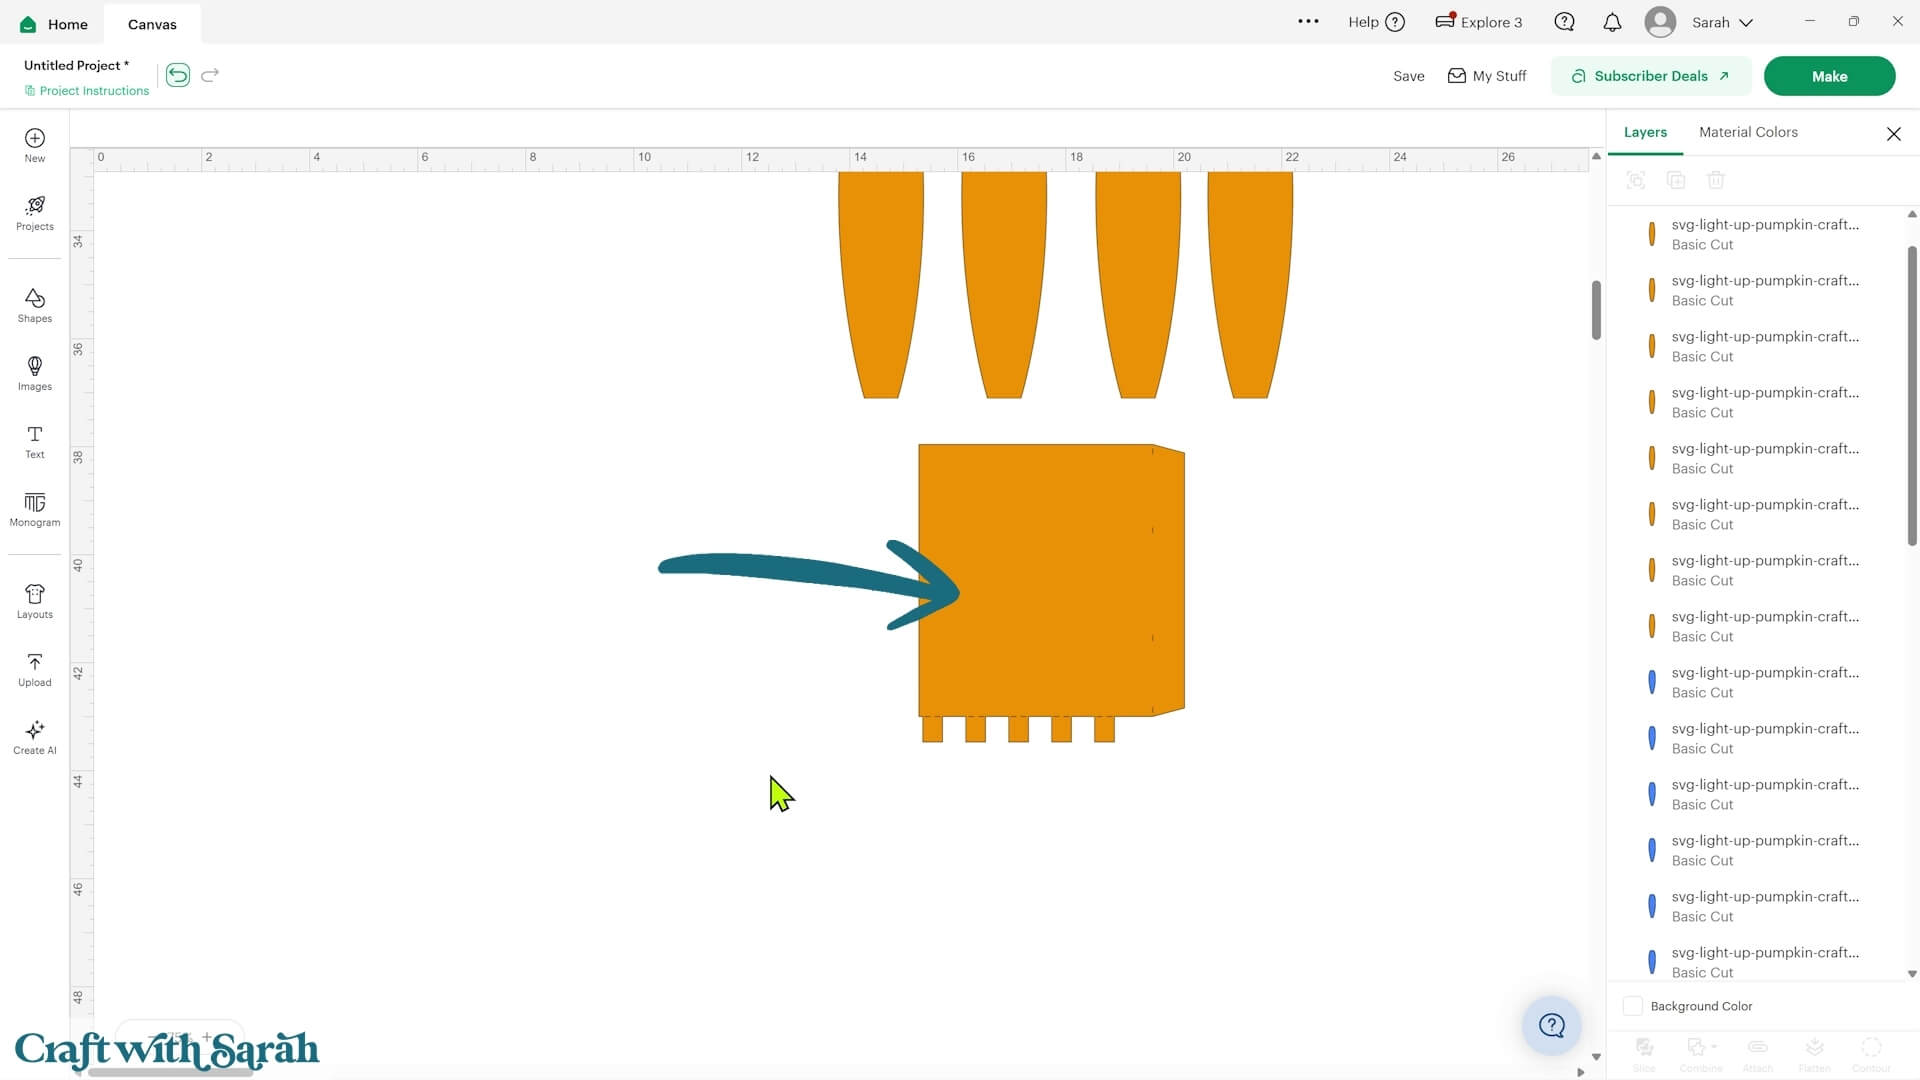
There is a piece which forms a lighting tower for the inside of the pumpkin. This is used for wrapping battery-powered fairy lights around. If you’re using individual LED lights instead, you can delete the lighting tower.
If you don’t want your pumpkin to light up, you can fill in the decorative cutouts to make solid sides.
To do this, delete all but one of the decorative side panels.
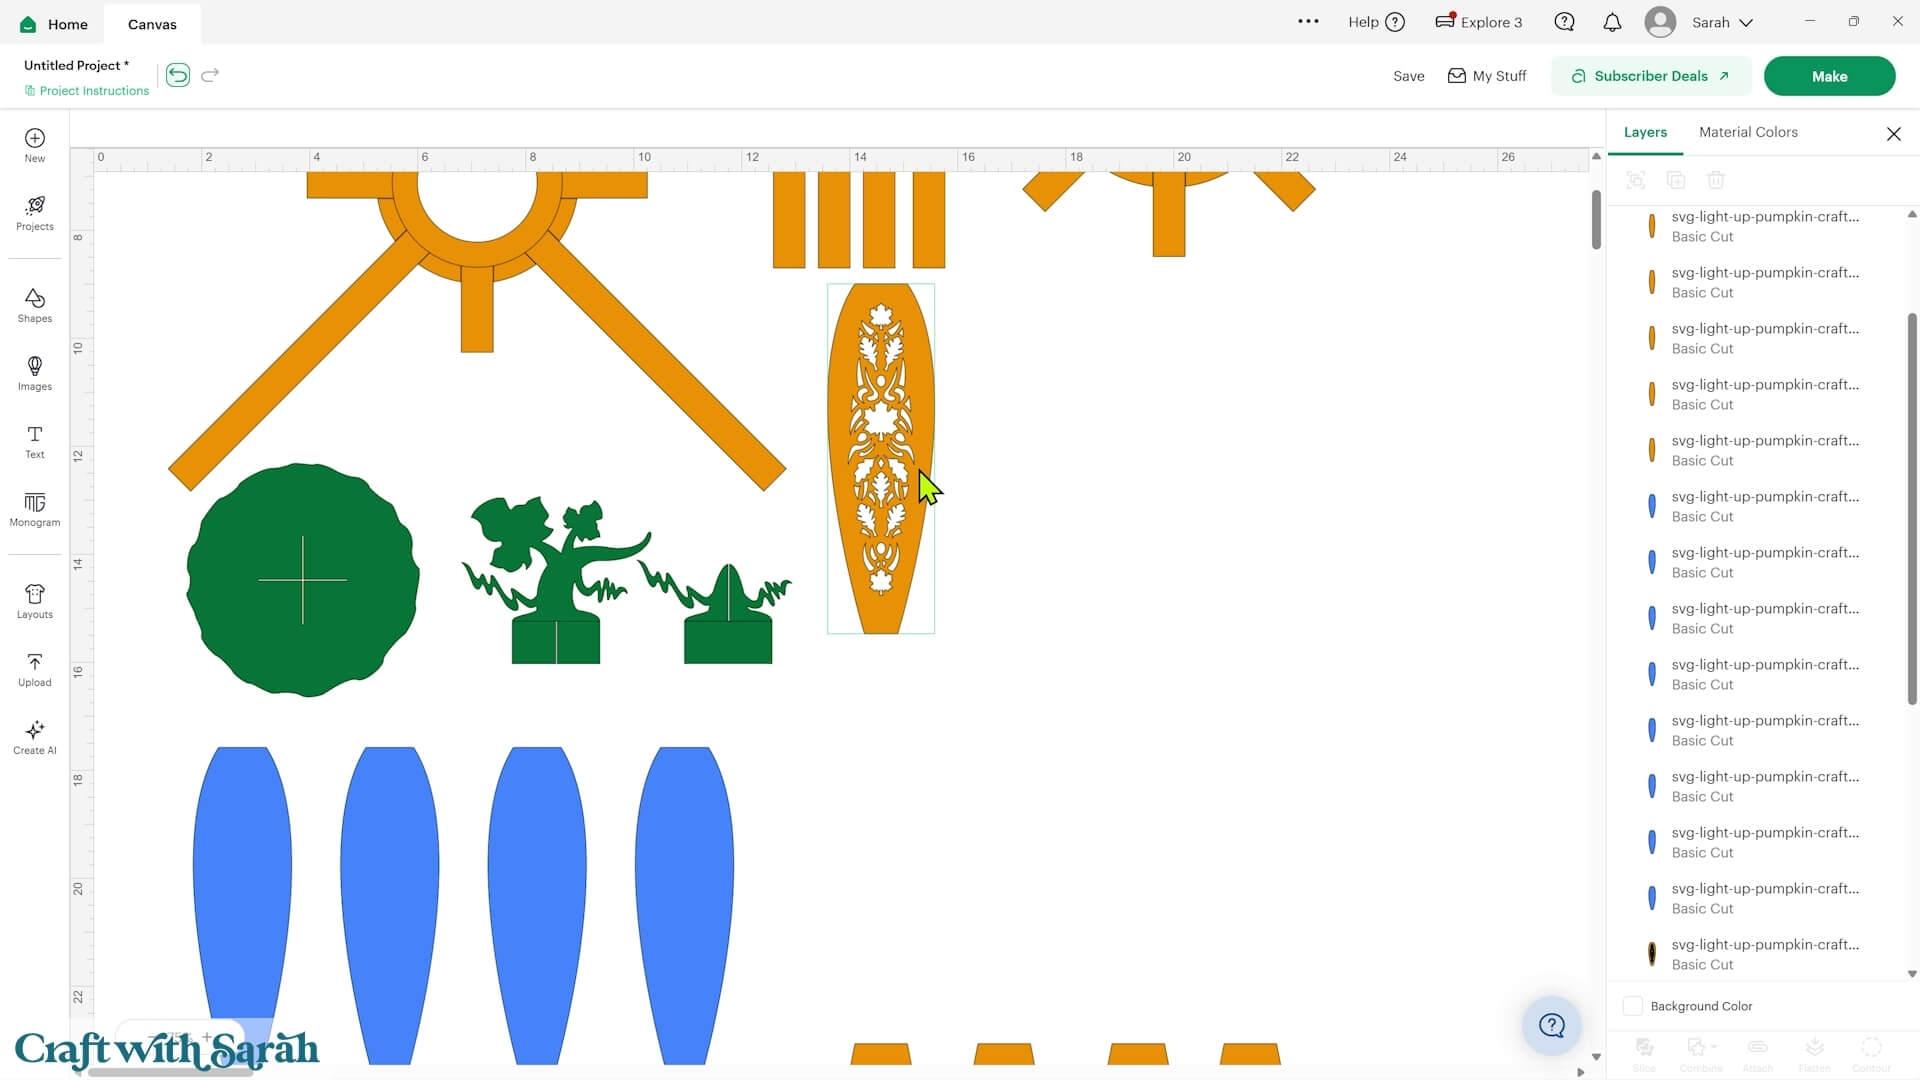
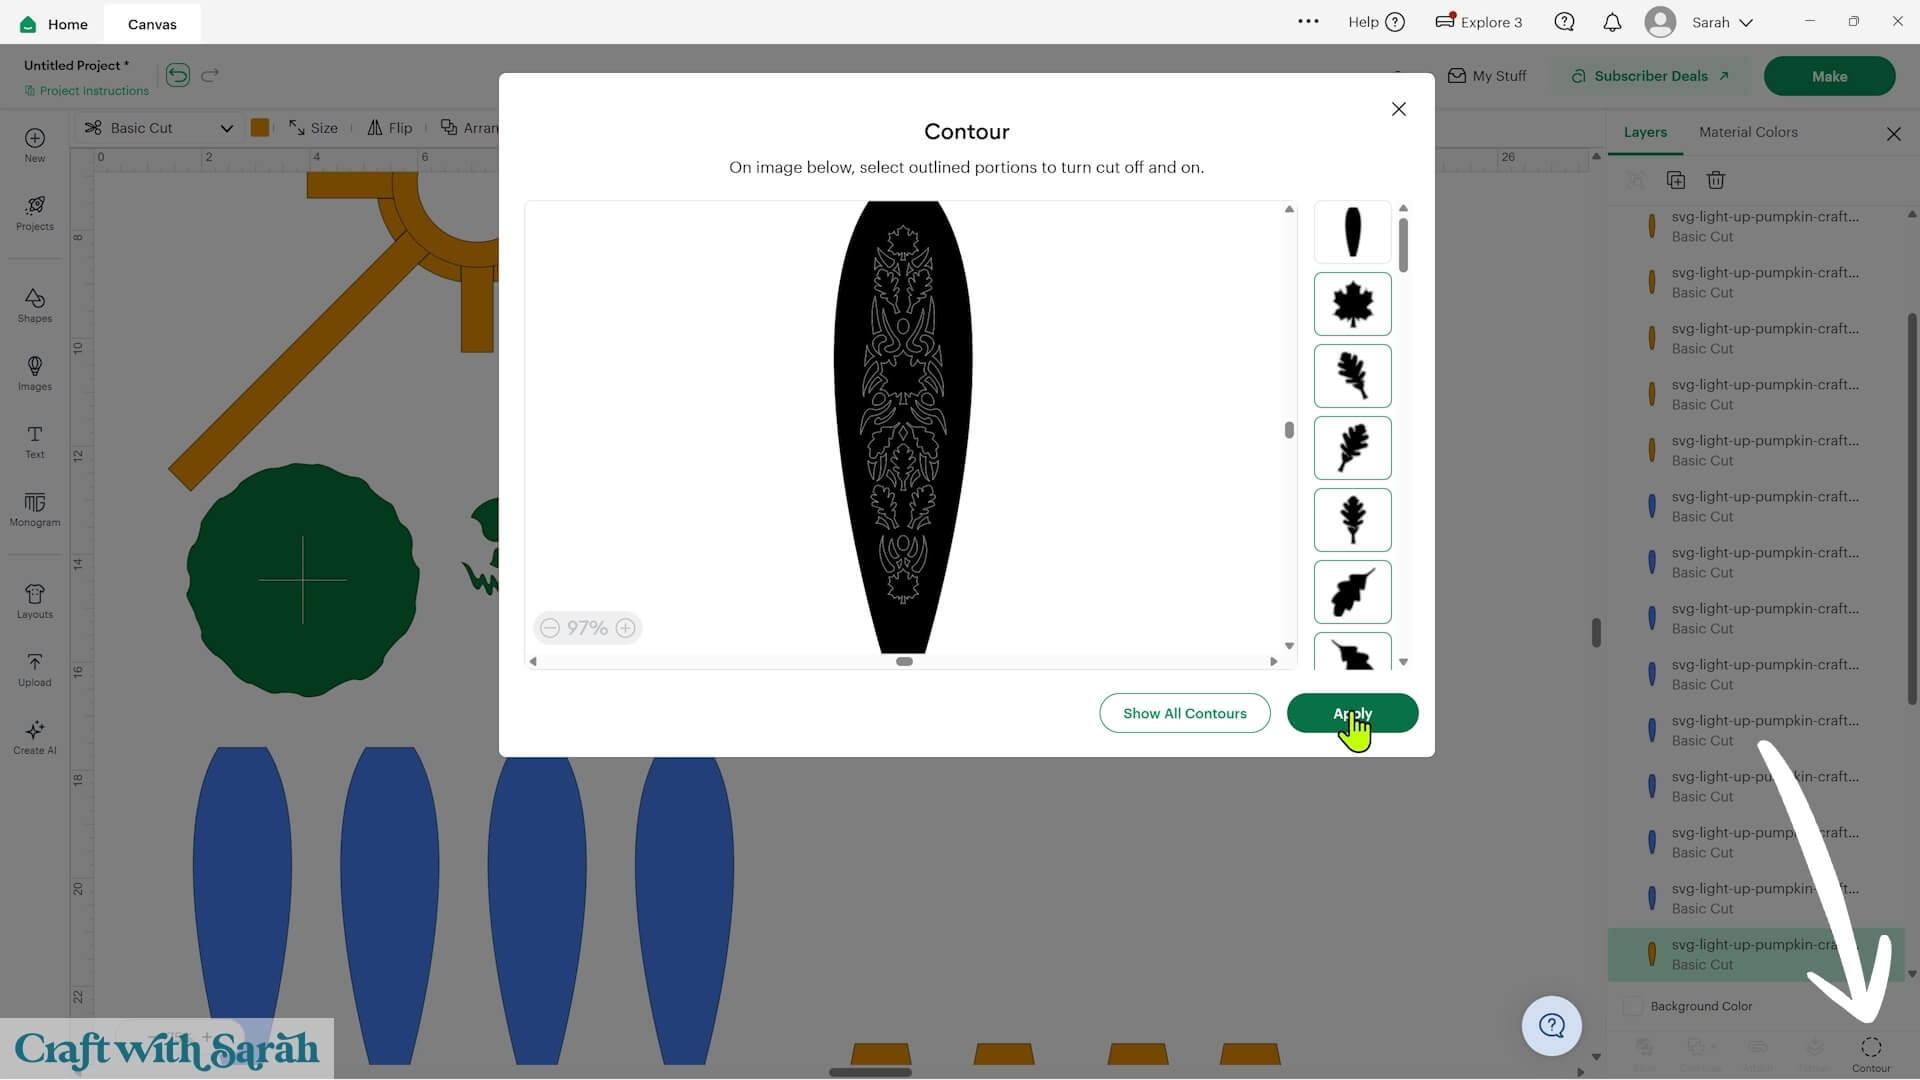
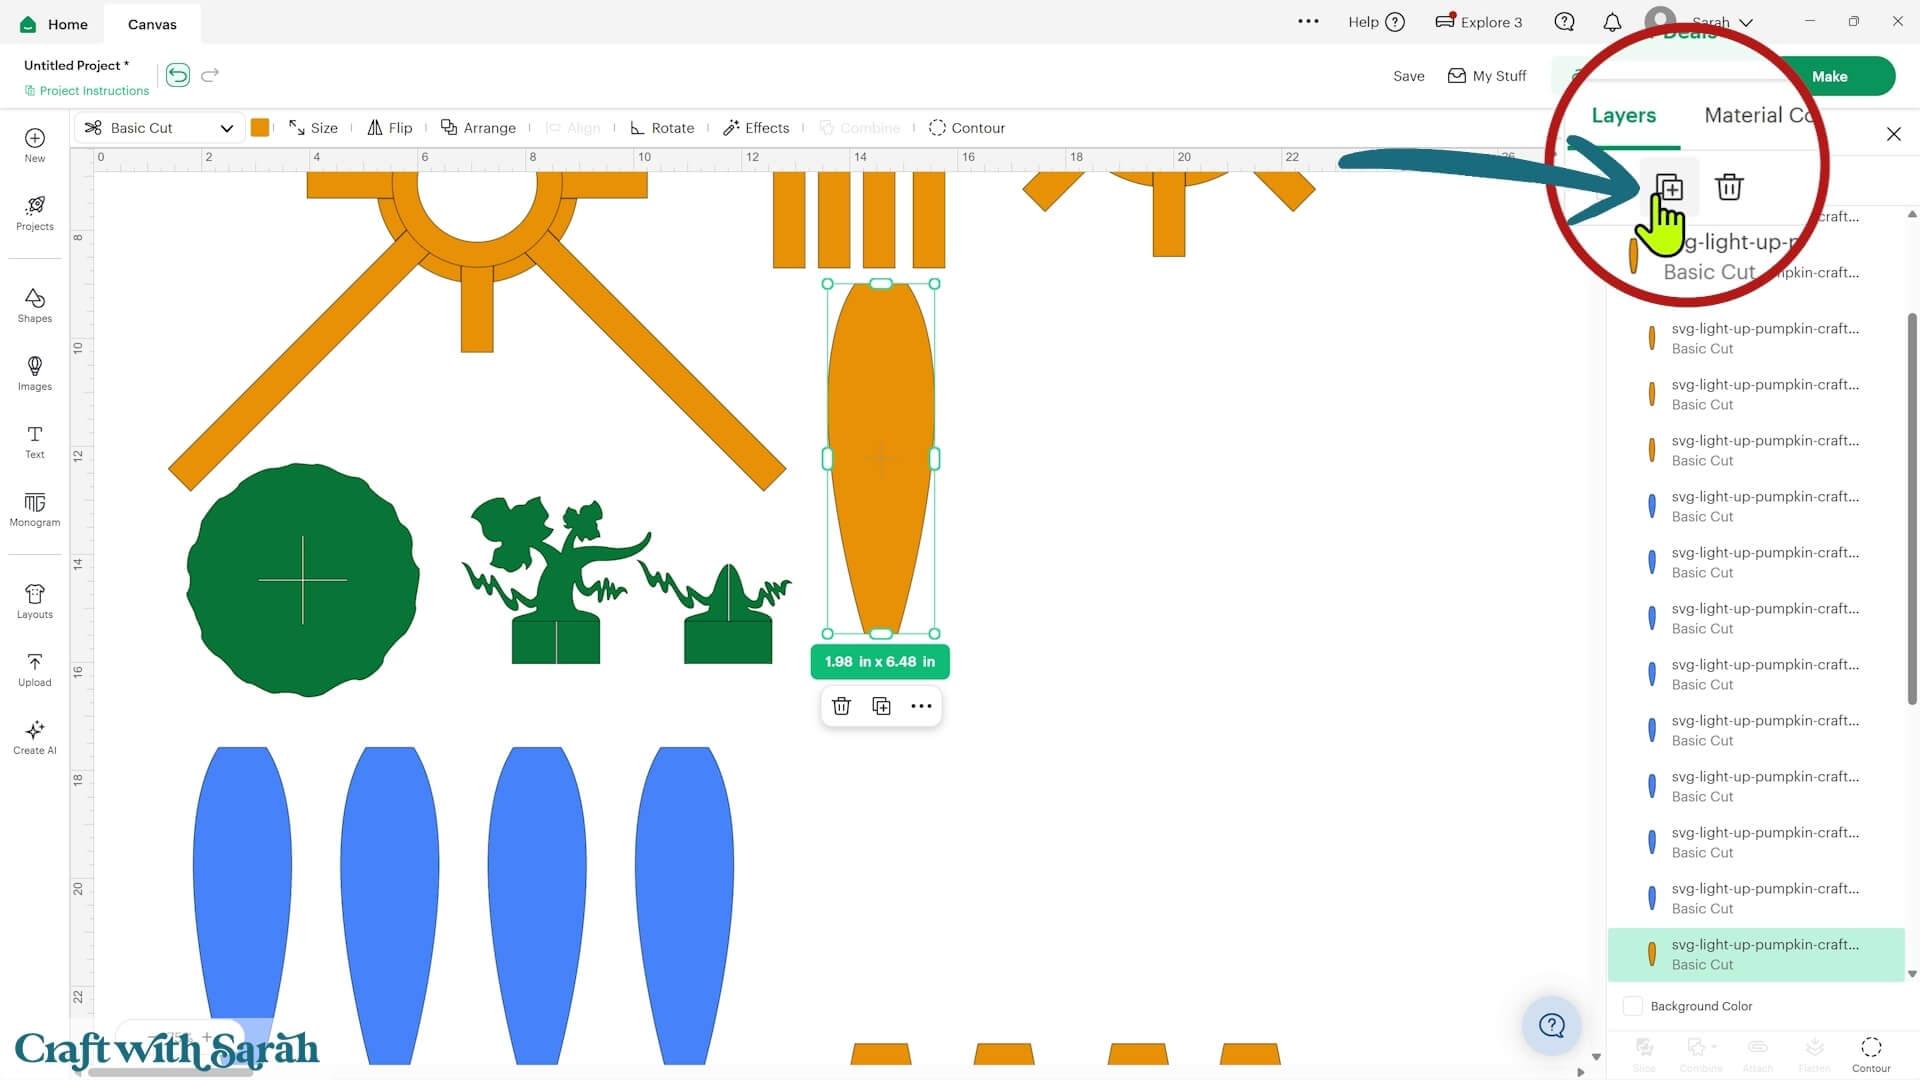
Select the remaining panel and press ‘Contour’. Choose ‘Hide All Contours’ and then ‘Apply’ to fill in all the decorative gaps.
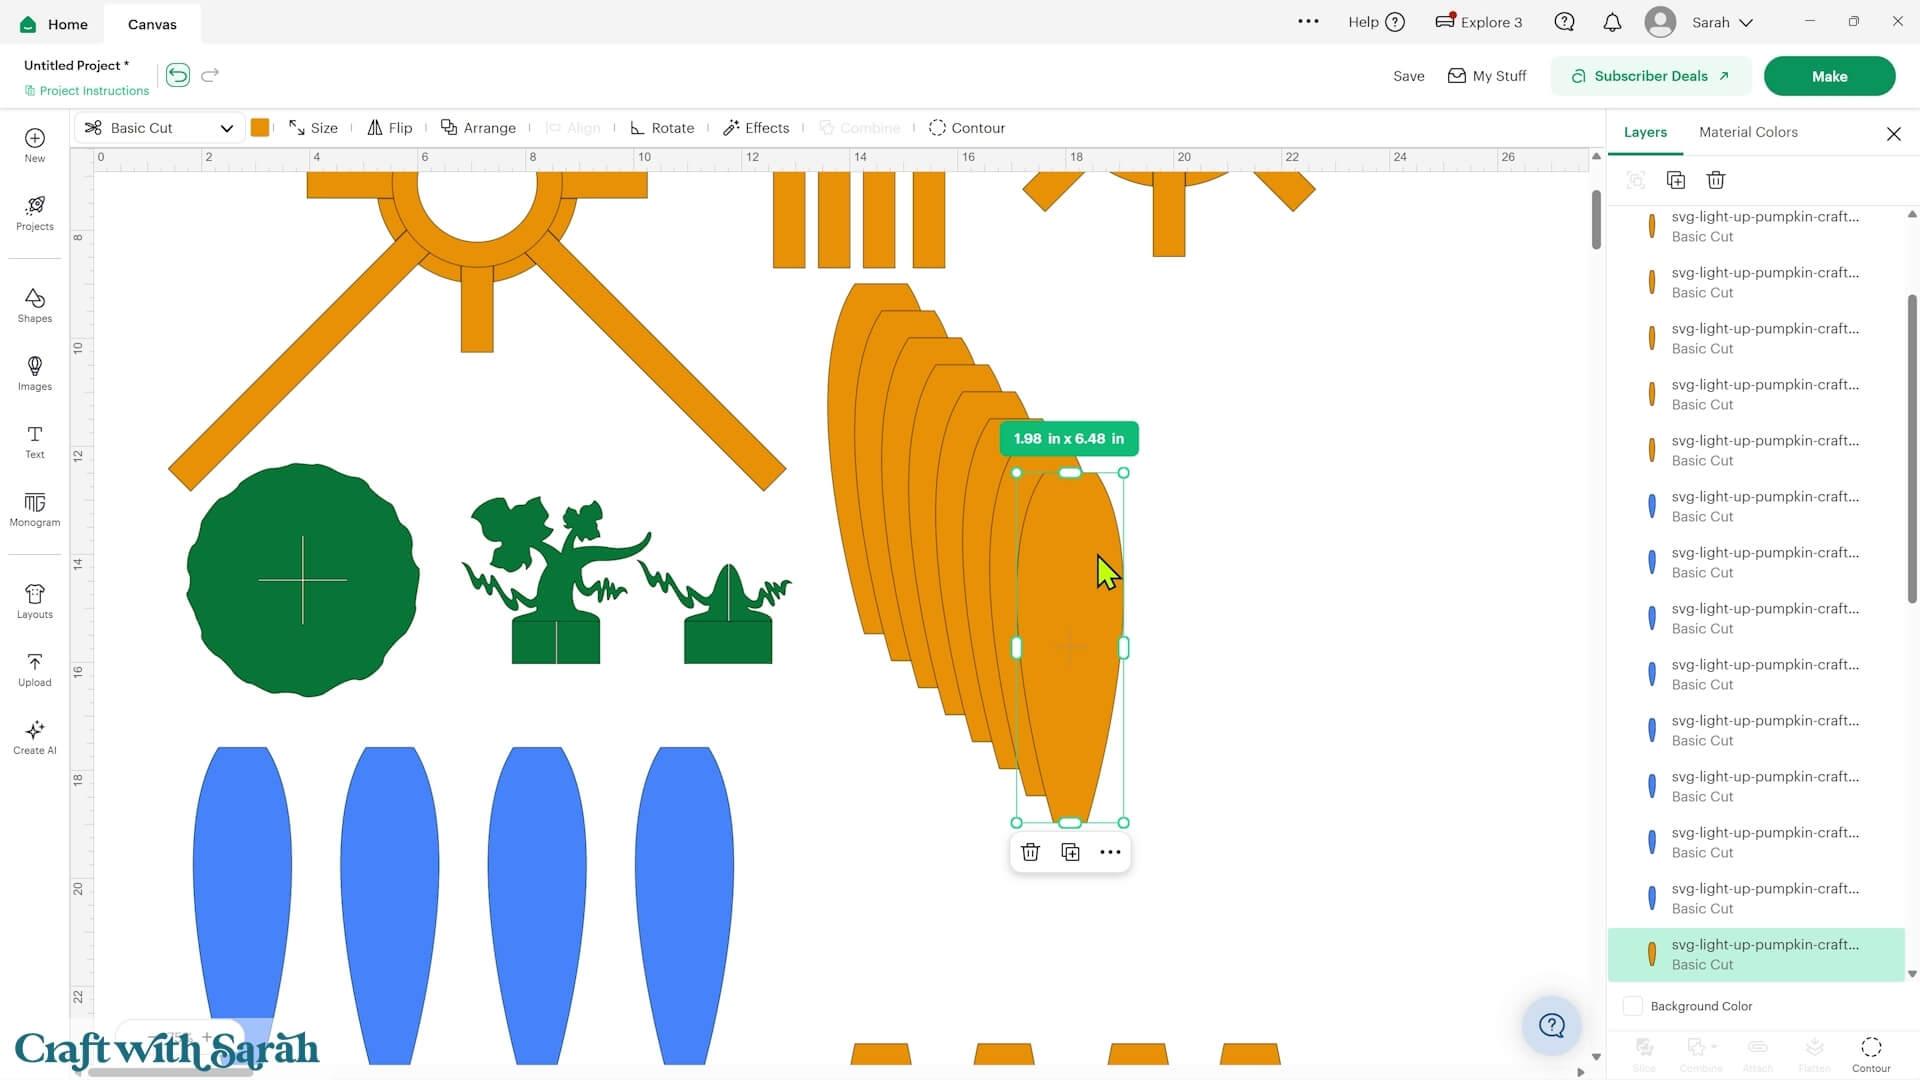
Duplicate the resulting solid shape until you have eight copies in total.
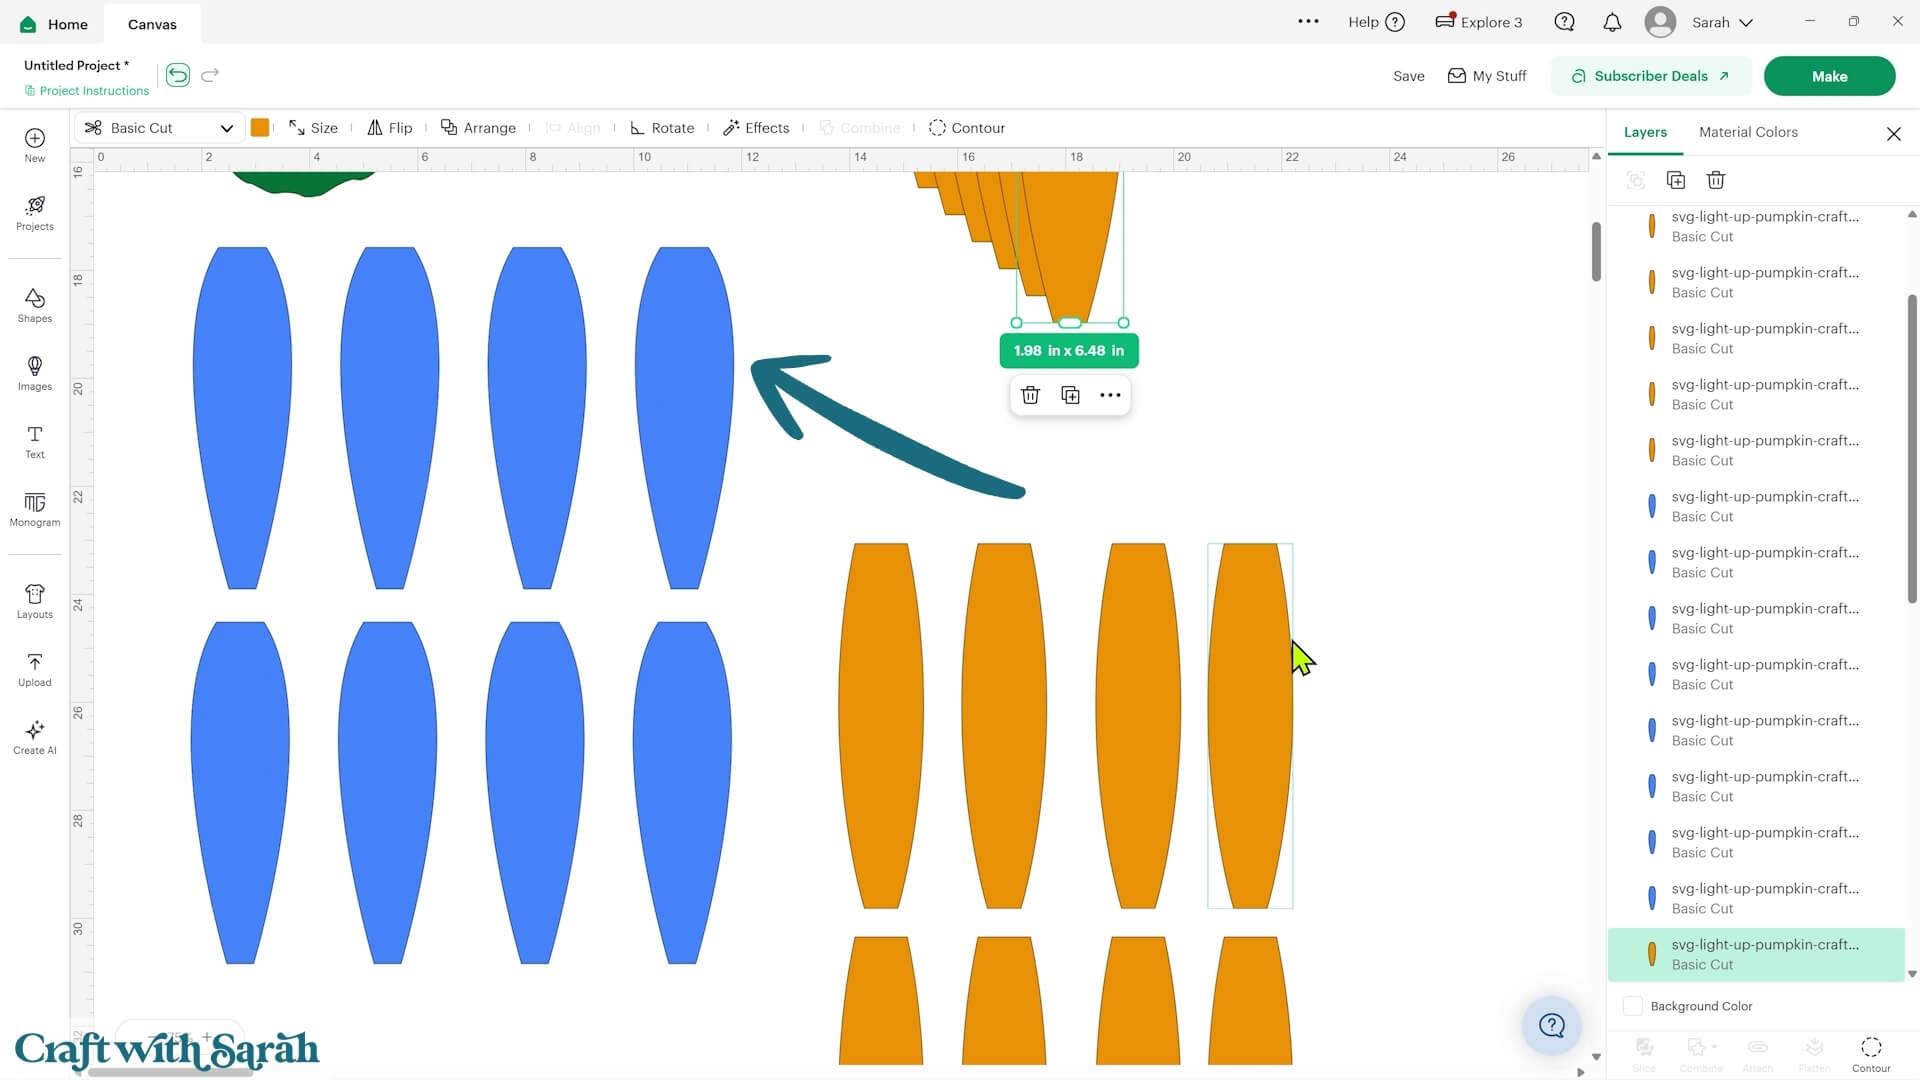
The blue pieces in the SVG are intended to be cut from vellum, tracing paper or another translucent material. These will sit behind the decorative cutouts to diffuse the light and prevent the lighting mechanism from being visible through the sides.
If you aren’t lighting up your pumpkin then you can delete these pieces.
Step 3) Format the score lines
There are several pieces in the SVG that need to be formatted as score lines before cutting.
Start with the large orange piece on the left of the design.
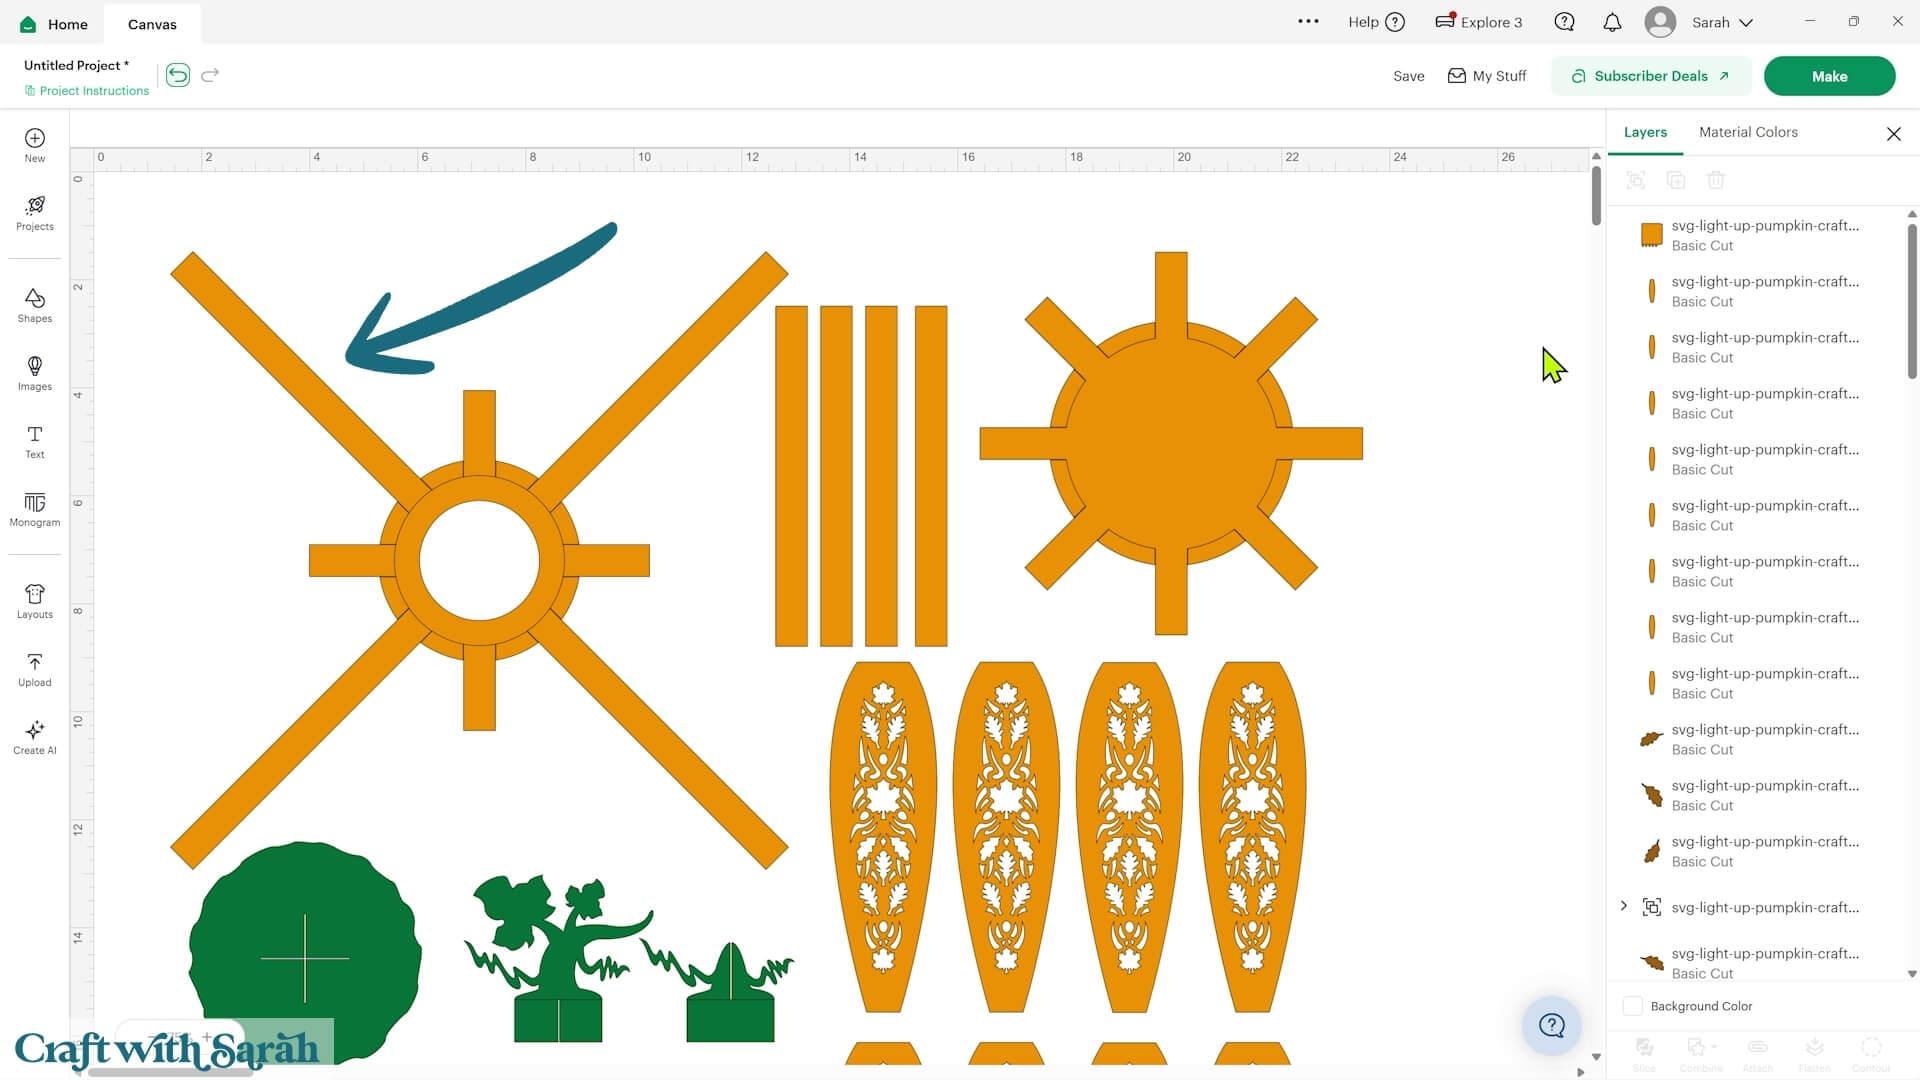
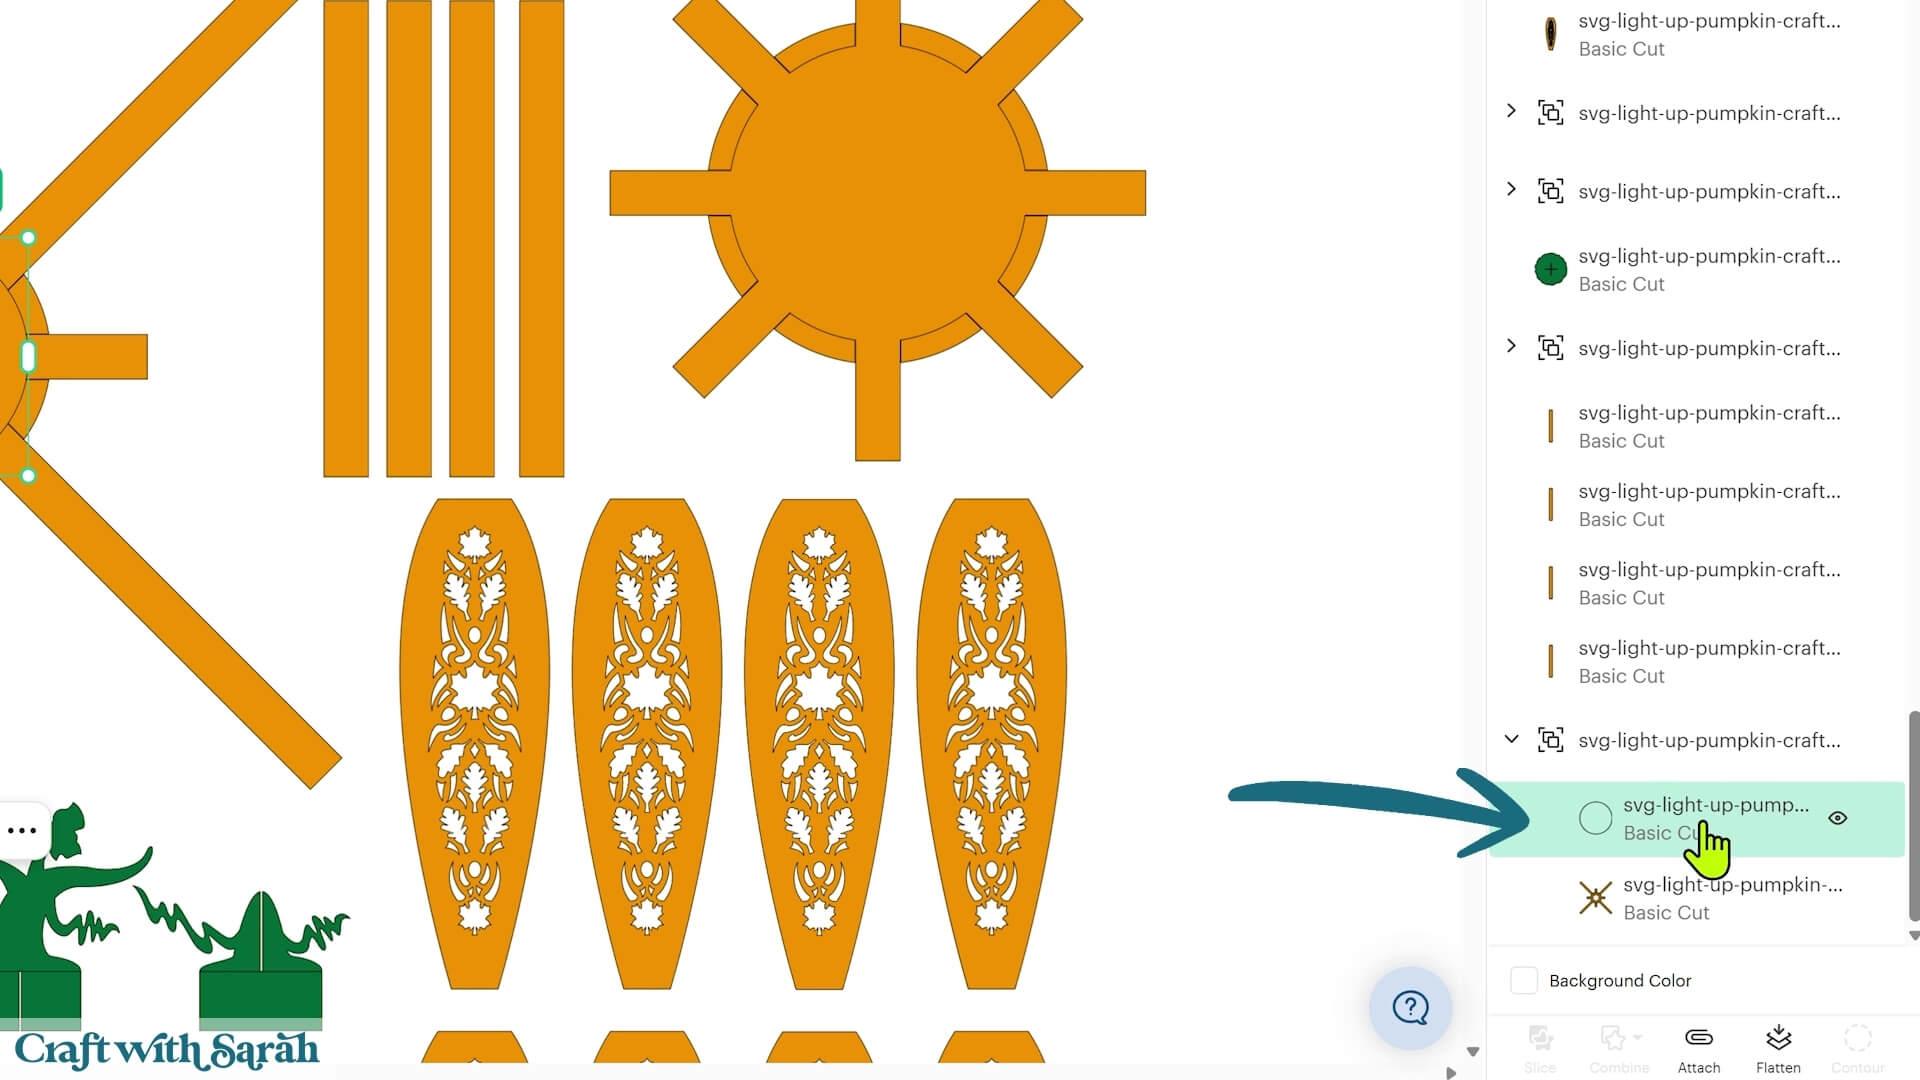
Open its group in the Layers panel and select the top layer that appears as a black outline.
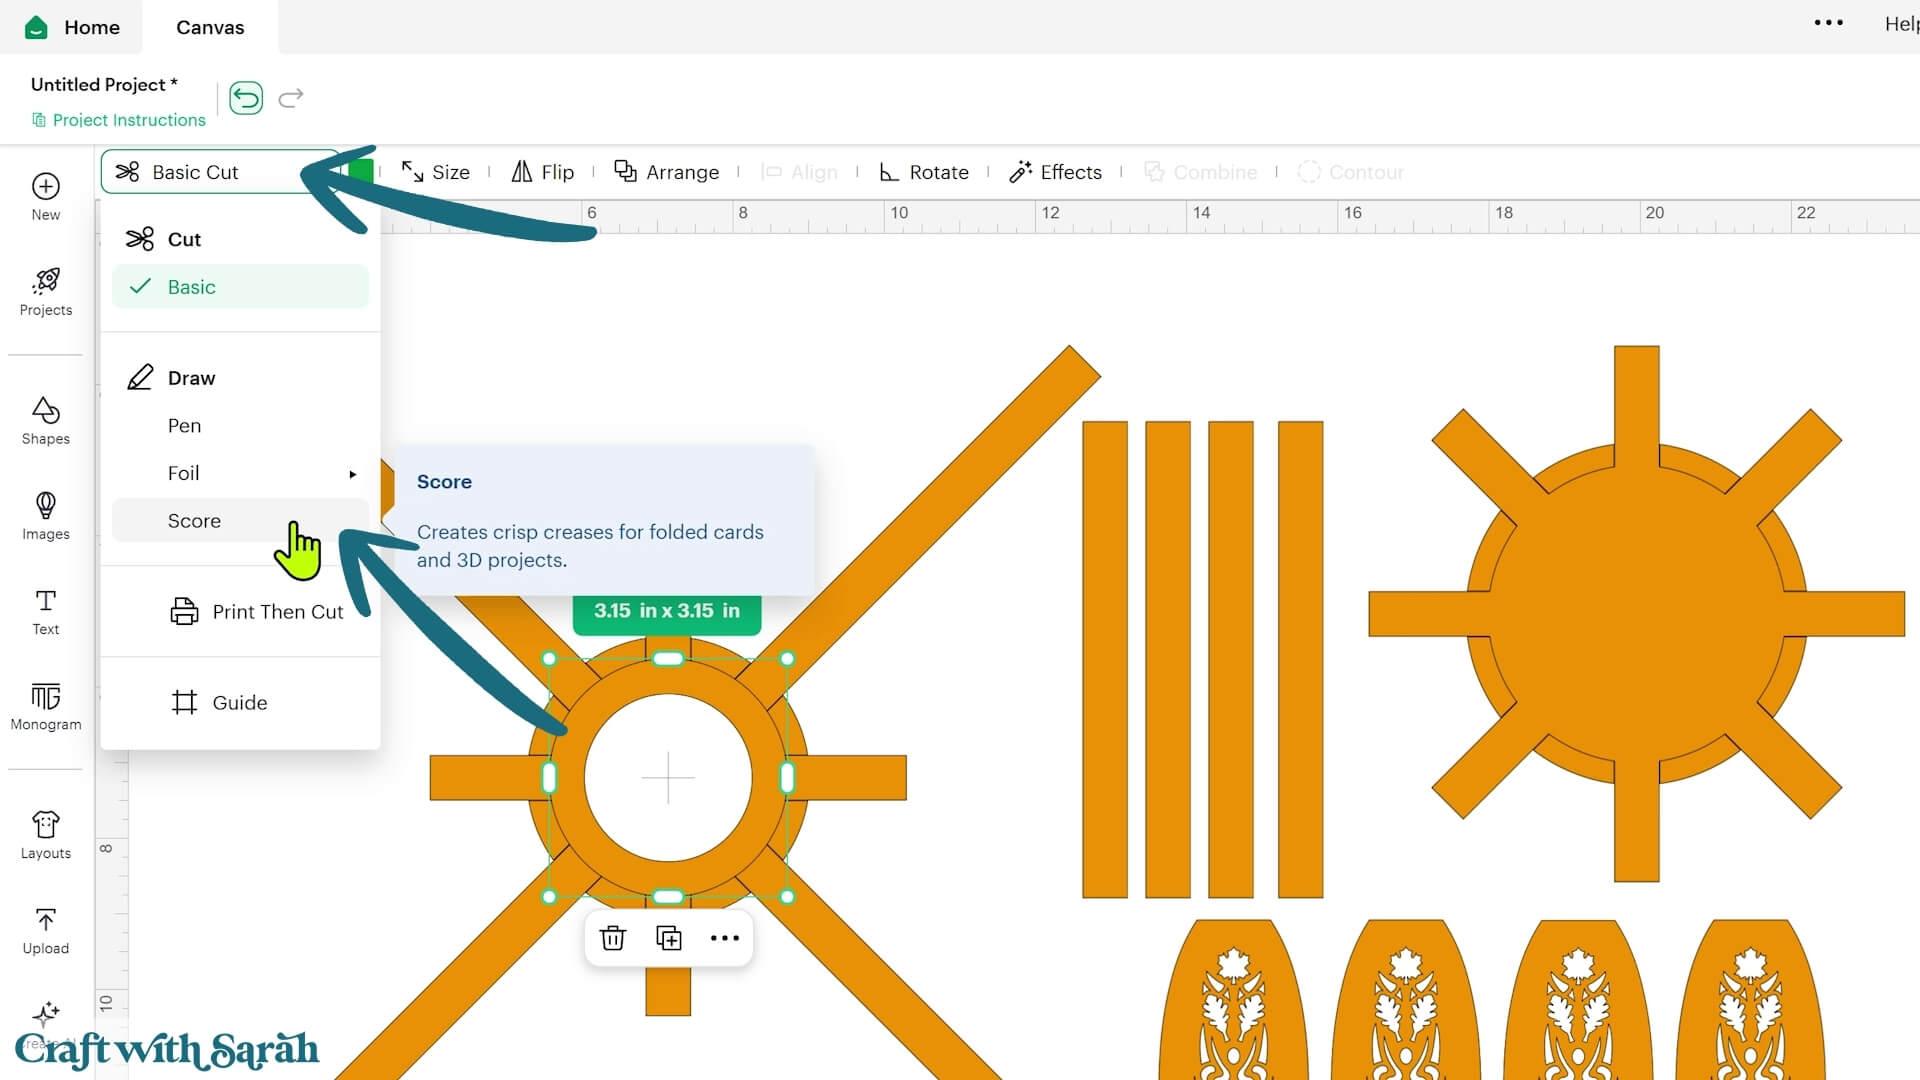
Change the Operation to ‘Score’ in the dropdown menu along the top of the screen.
Select the whole group and press ‘Attach’. This tells Cricut Design Space exactly where the scoring should be positioned on the cardstock.
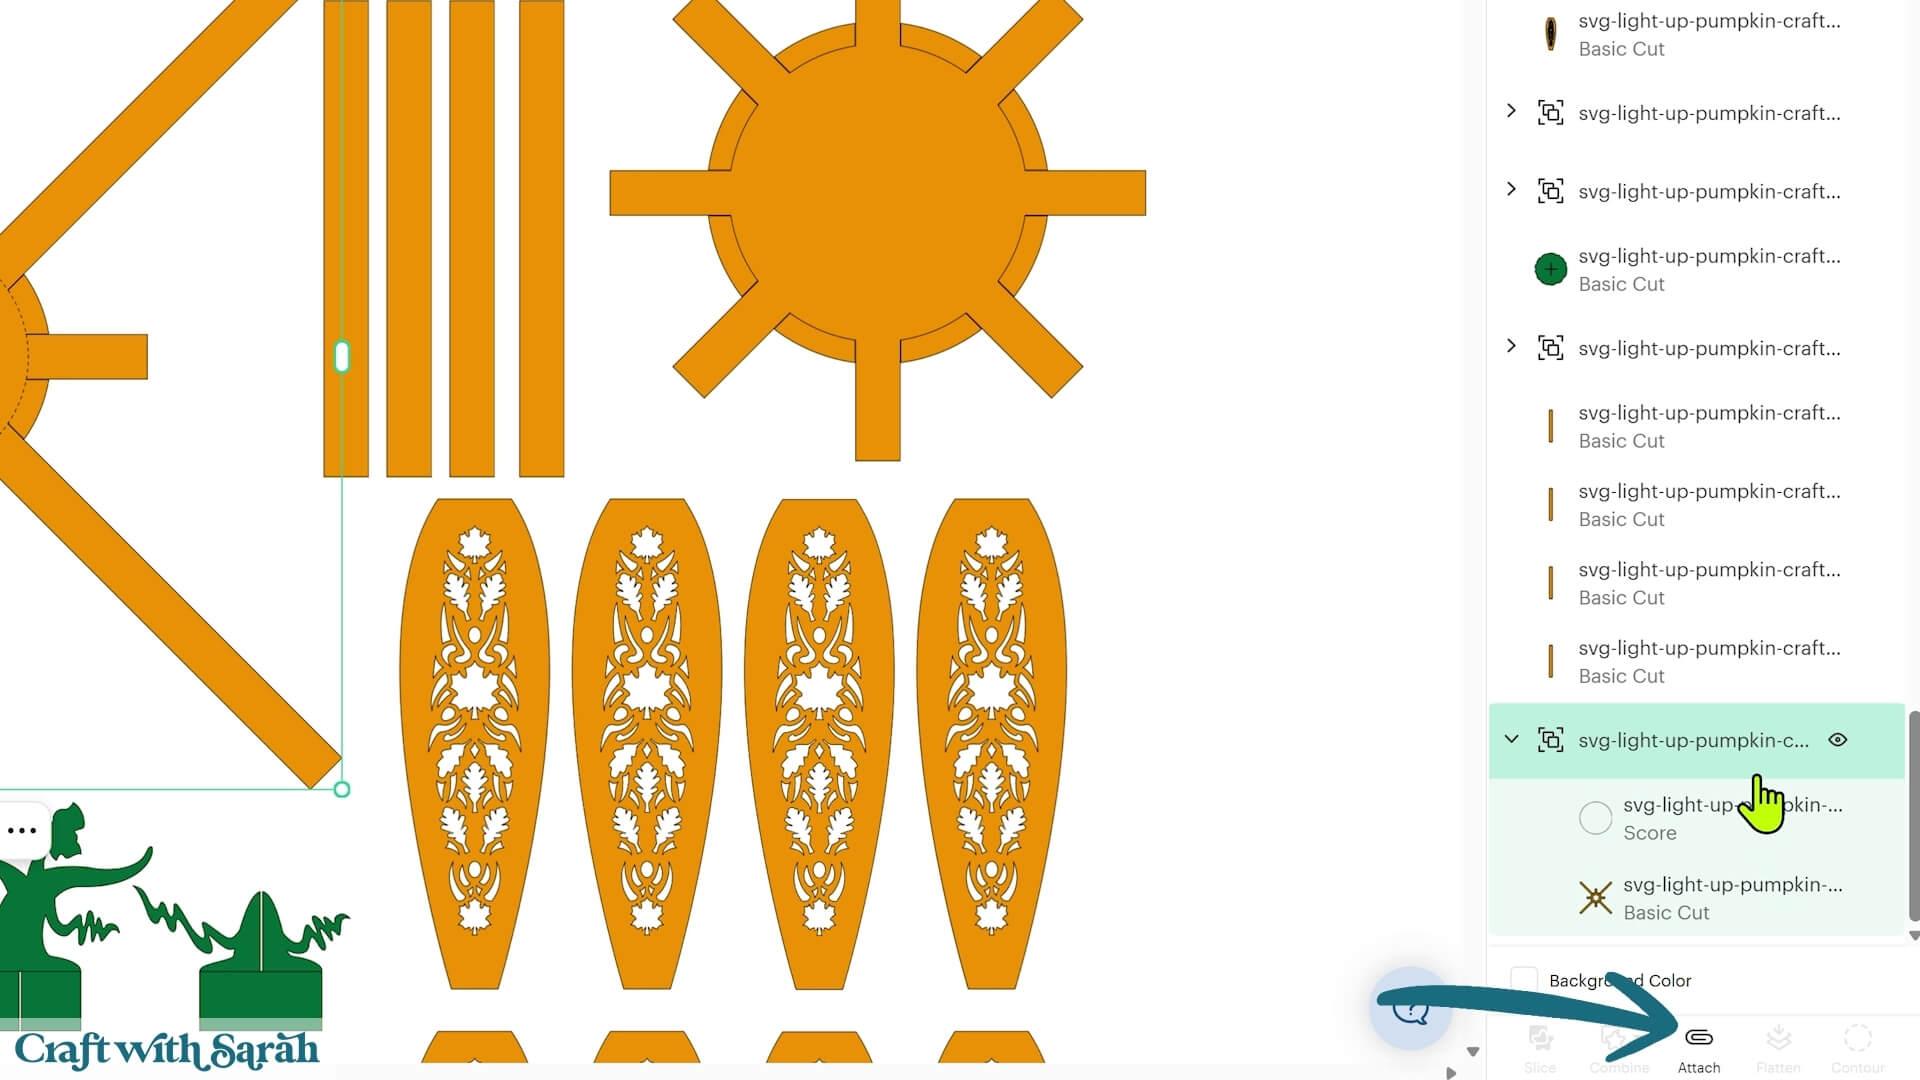
Repeat this process for the other grouped pieces that contain score lines, including the pieces for the top of the pumpkin.
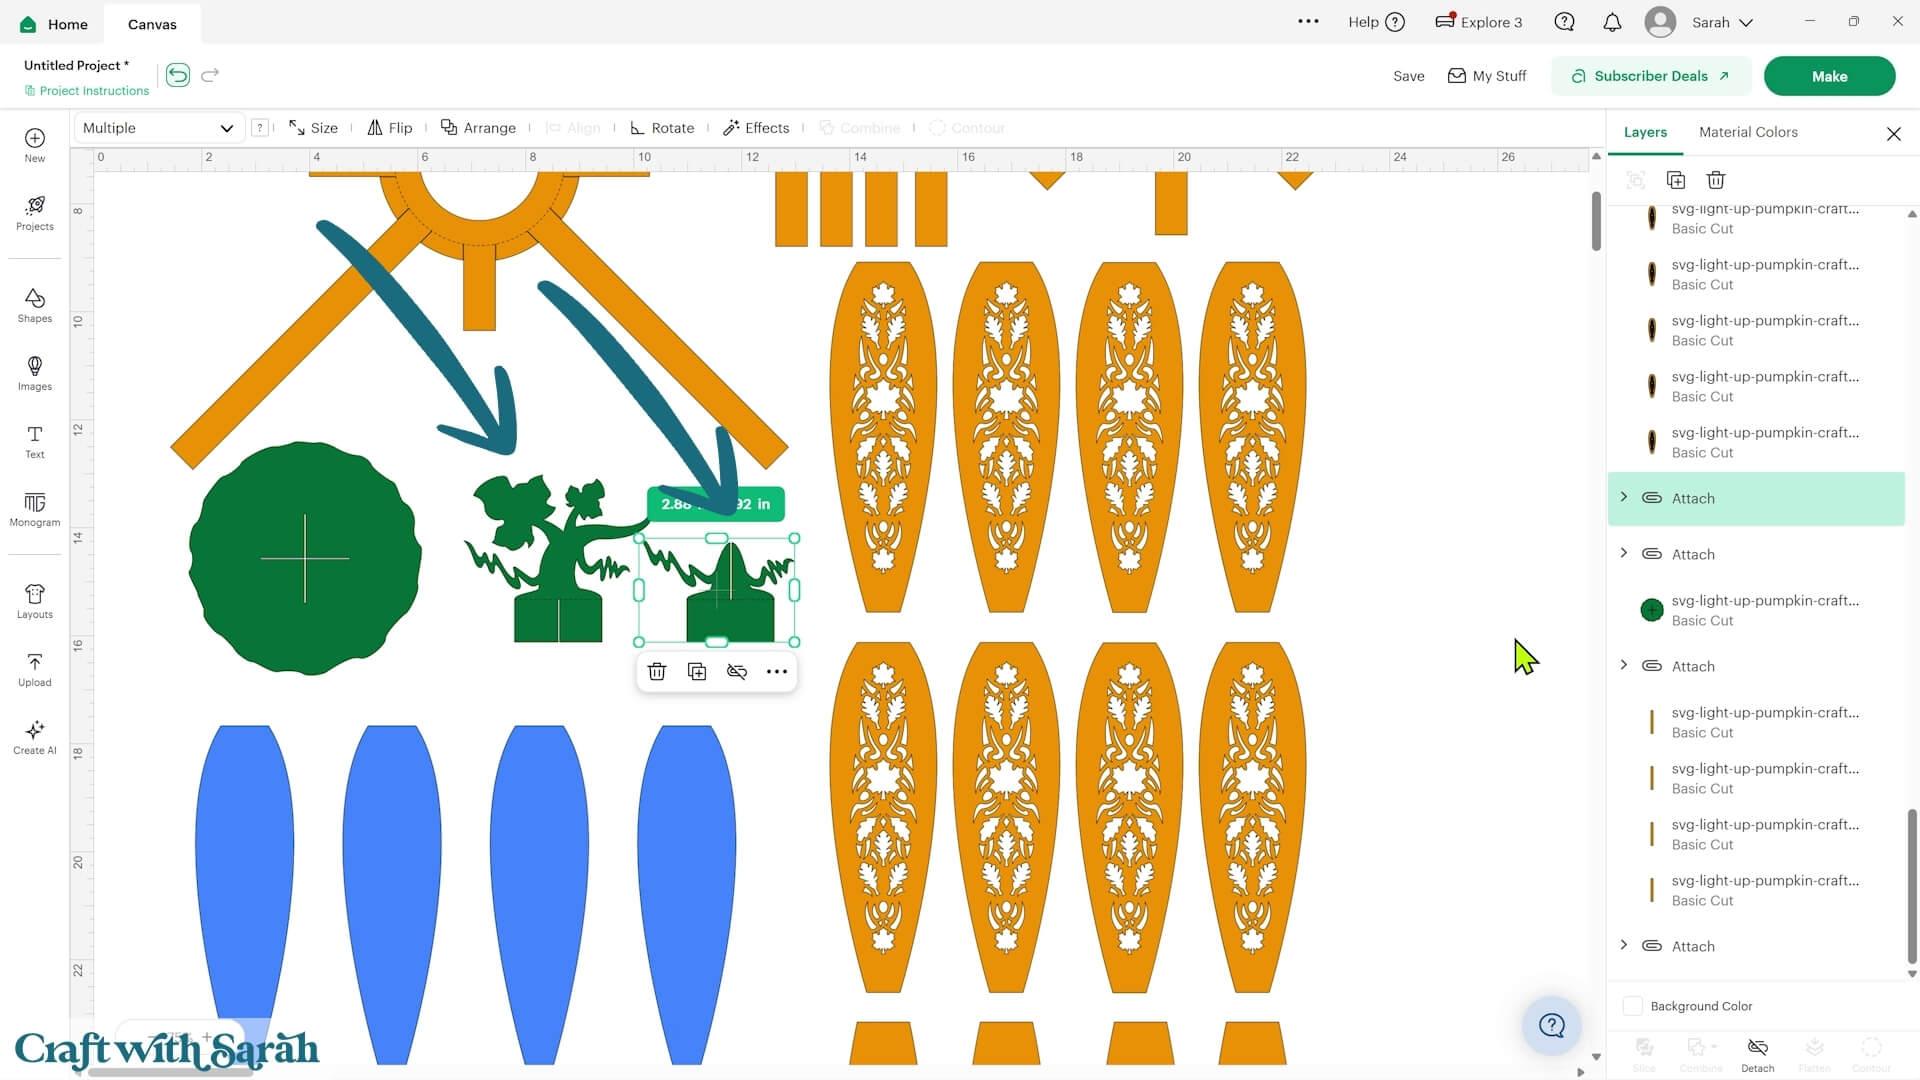
The SVG includes front and back versions of the decorative stems.
This is particularly useful if your cardstock is coloured on one side and white on the other. By gluing two matching pieces back-to-back, the decorations will look finished from both sides when they curve around the pumpkin.
If you’re using double-sided cardstock, you can delete one copy of each stem if you prefer. However, using two layers also makes the stems stronger.
The decorative stems also contain score lines. Open each group, change the appropriate layer to ‘Score’, select the whole group and press ‘Attach’.
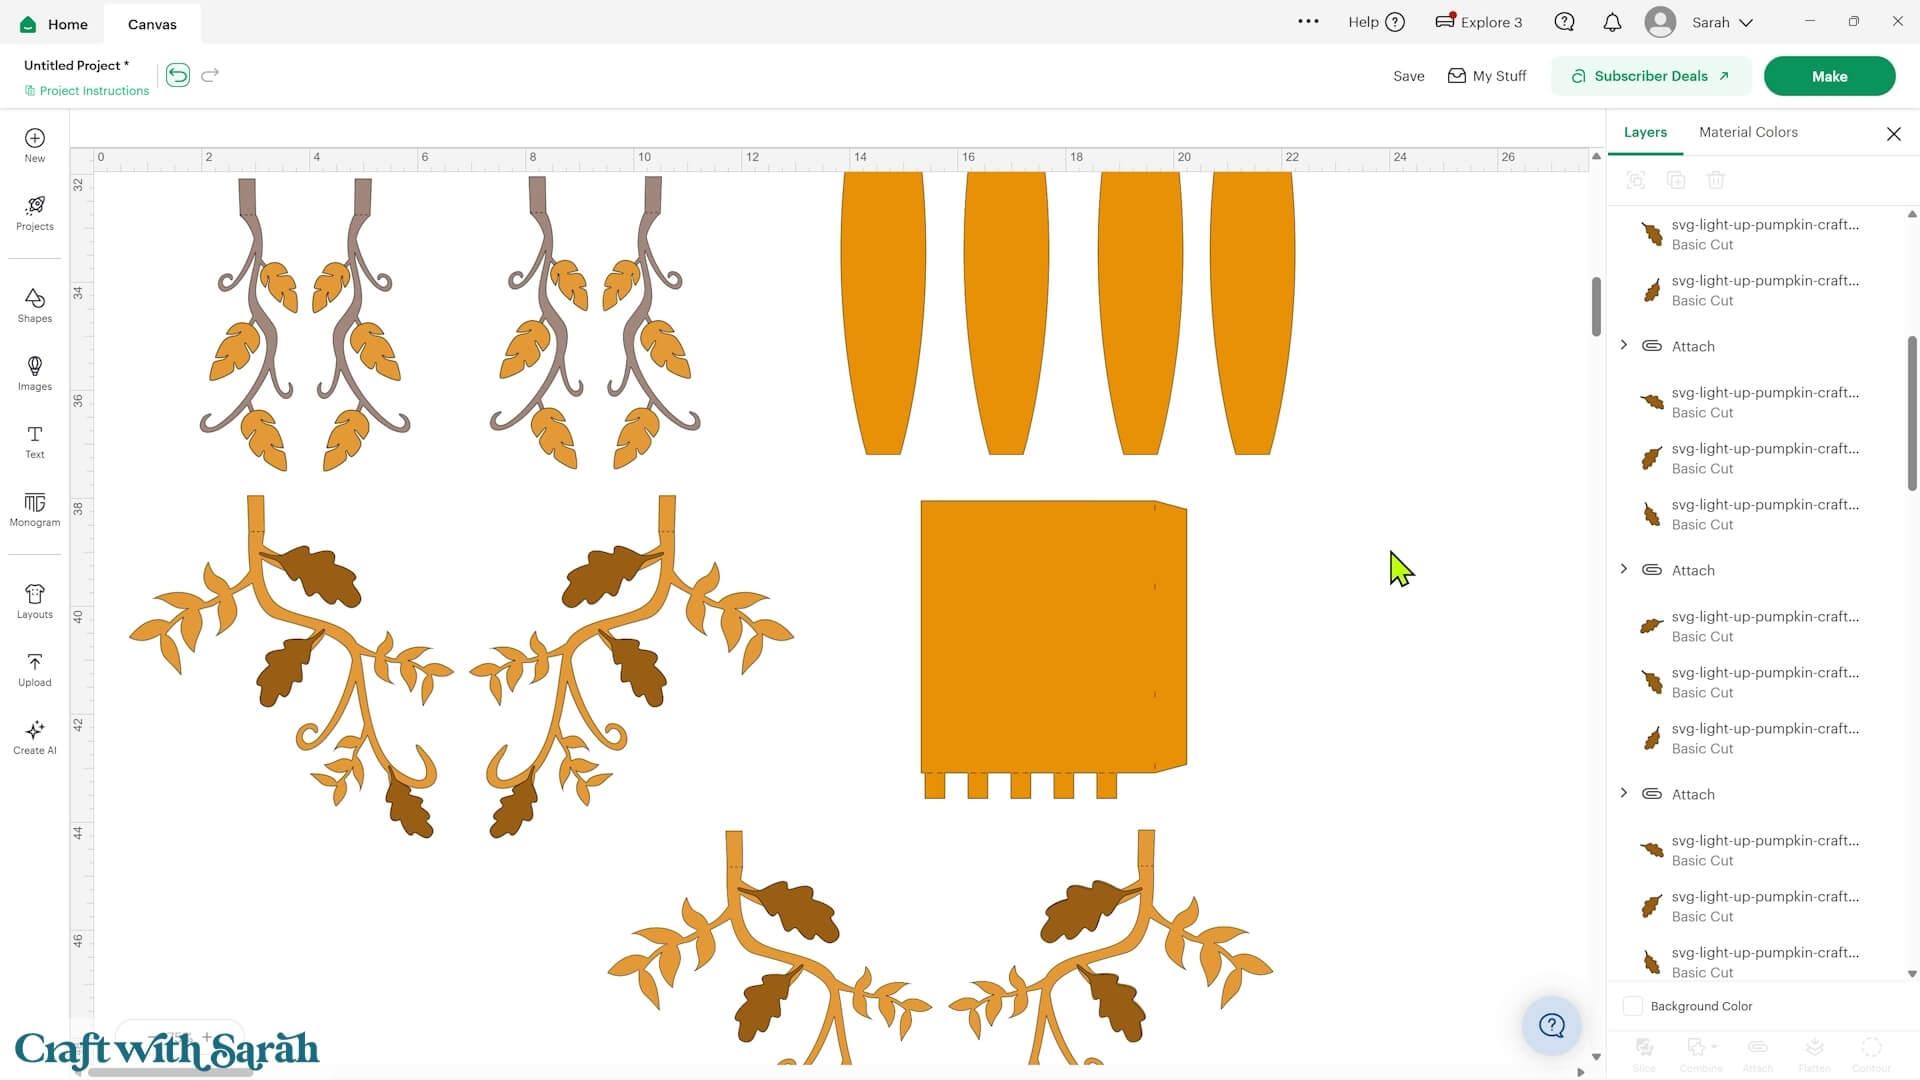
The small lines on the lighting tower are cut lines rather than score lines, so you don’t need to change those.
Step 4) Prepare the decorative leaves and stems
Before gluing anything, lay all of the stems and leaves out in their correct positions.
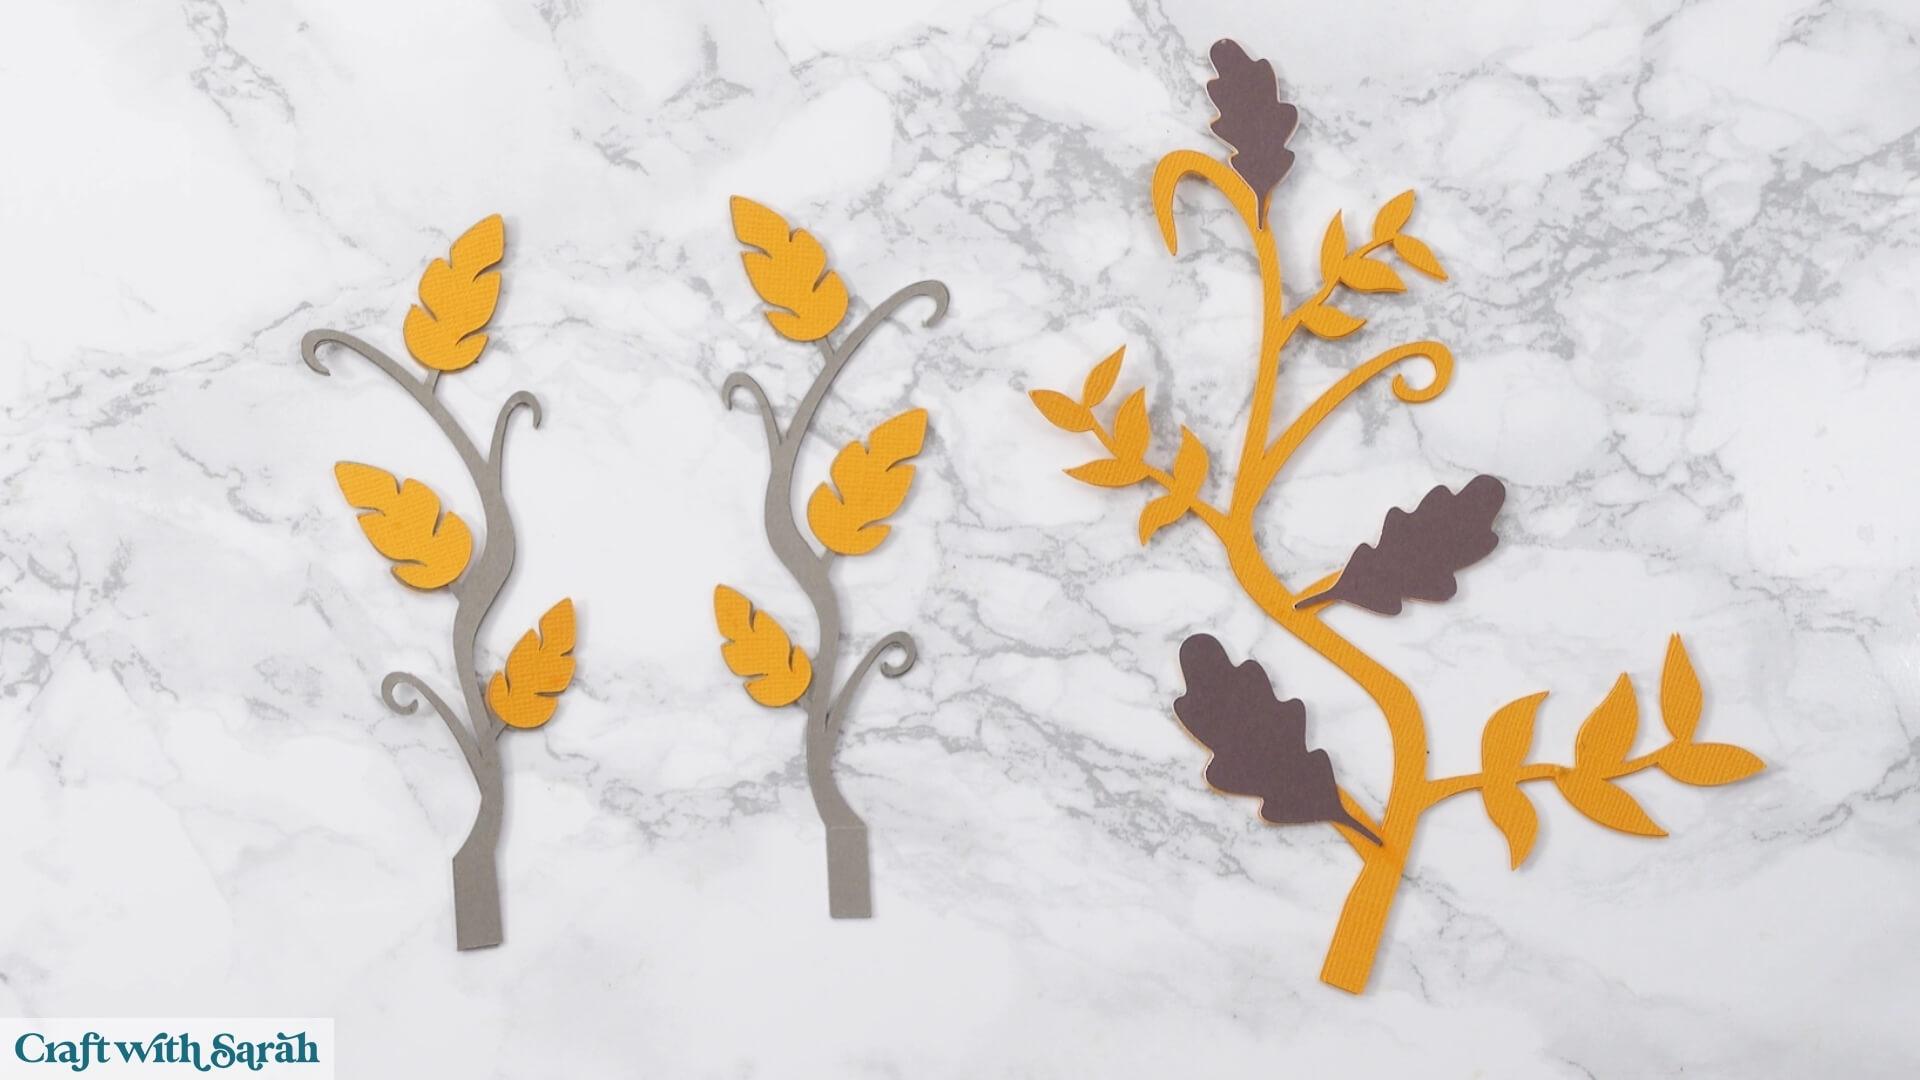
The leaves come in different sizes, so checking their placement first will help prevent you from accidentally sticking the wrong leaf onto a stem.
Glue each leaf onto the corresponding stem.
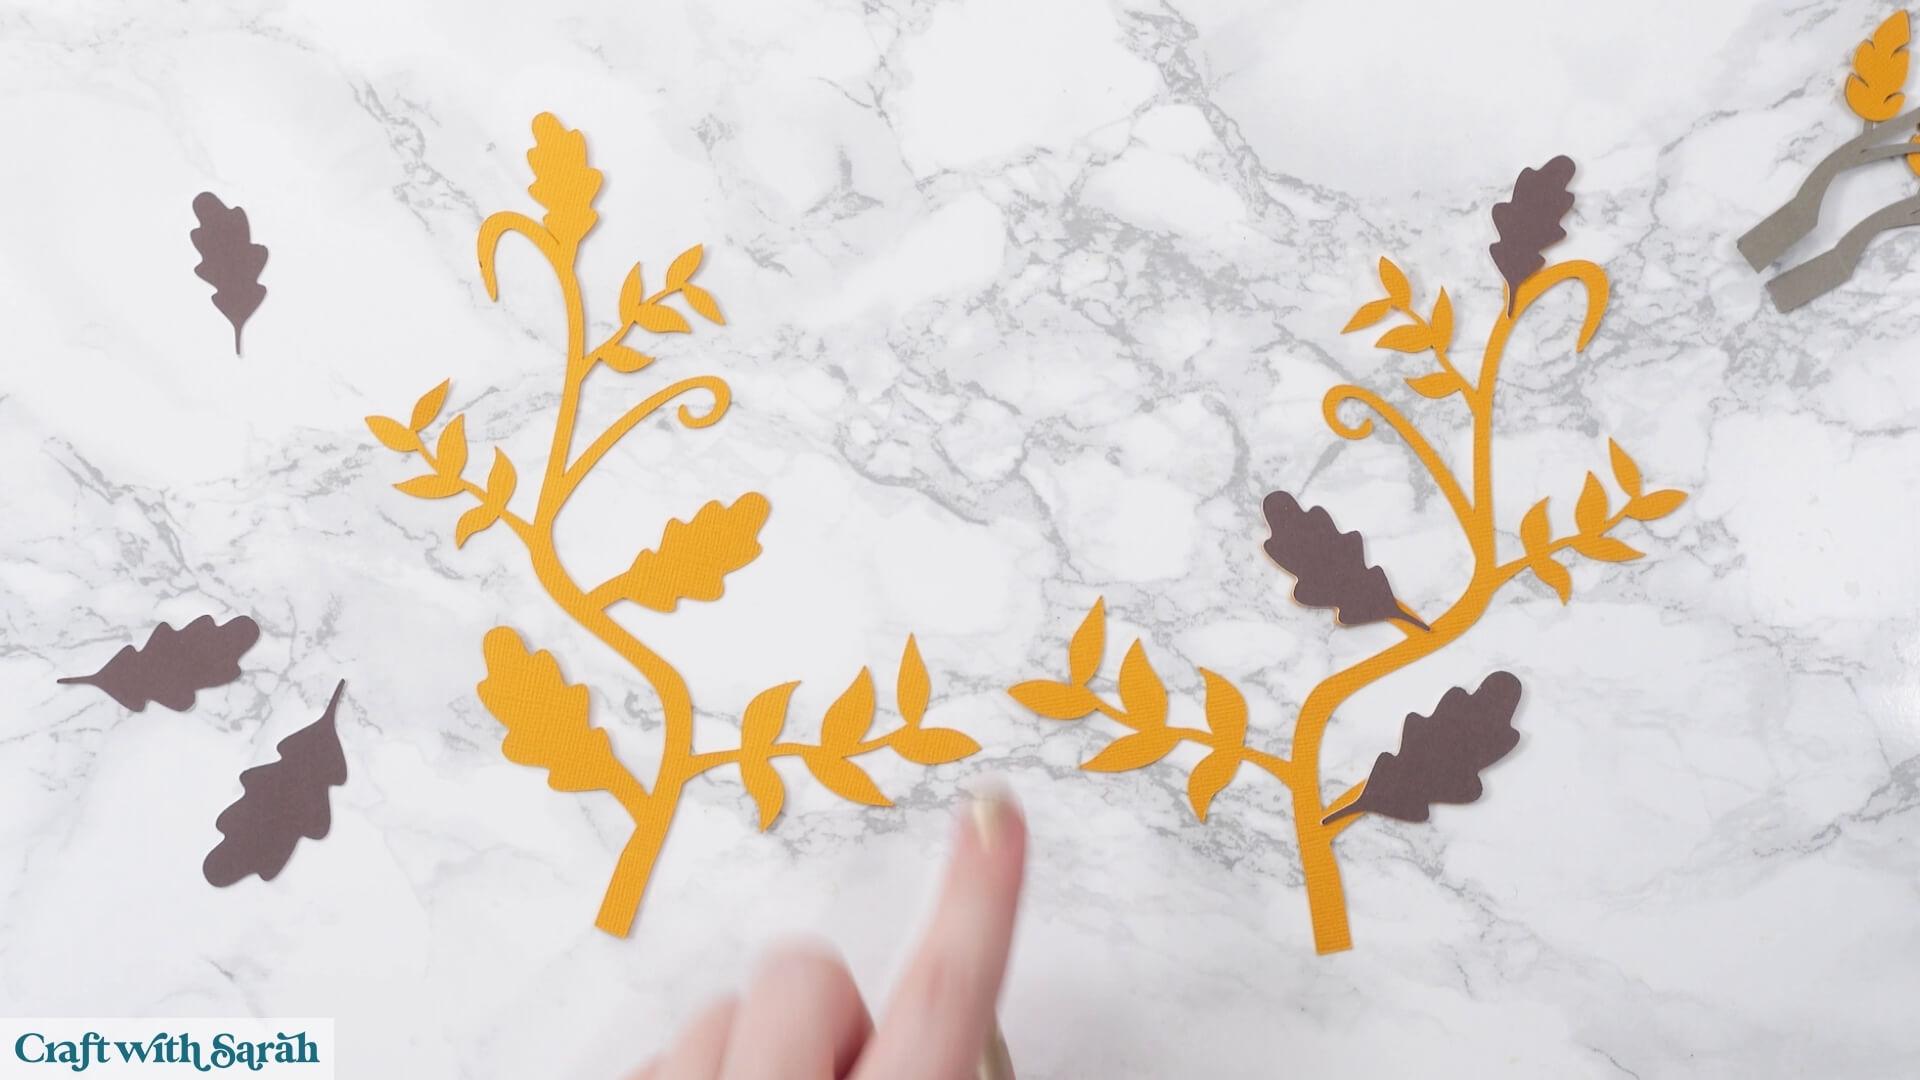
If you’re using two copies of each stem, glue the matching pieces back-to-back, carefully lining up the edges.
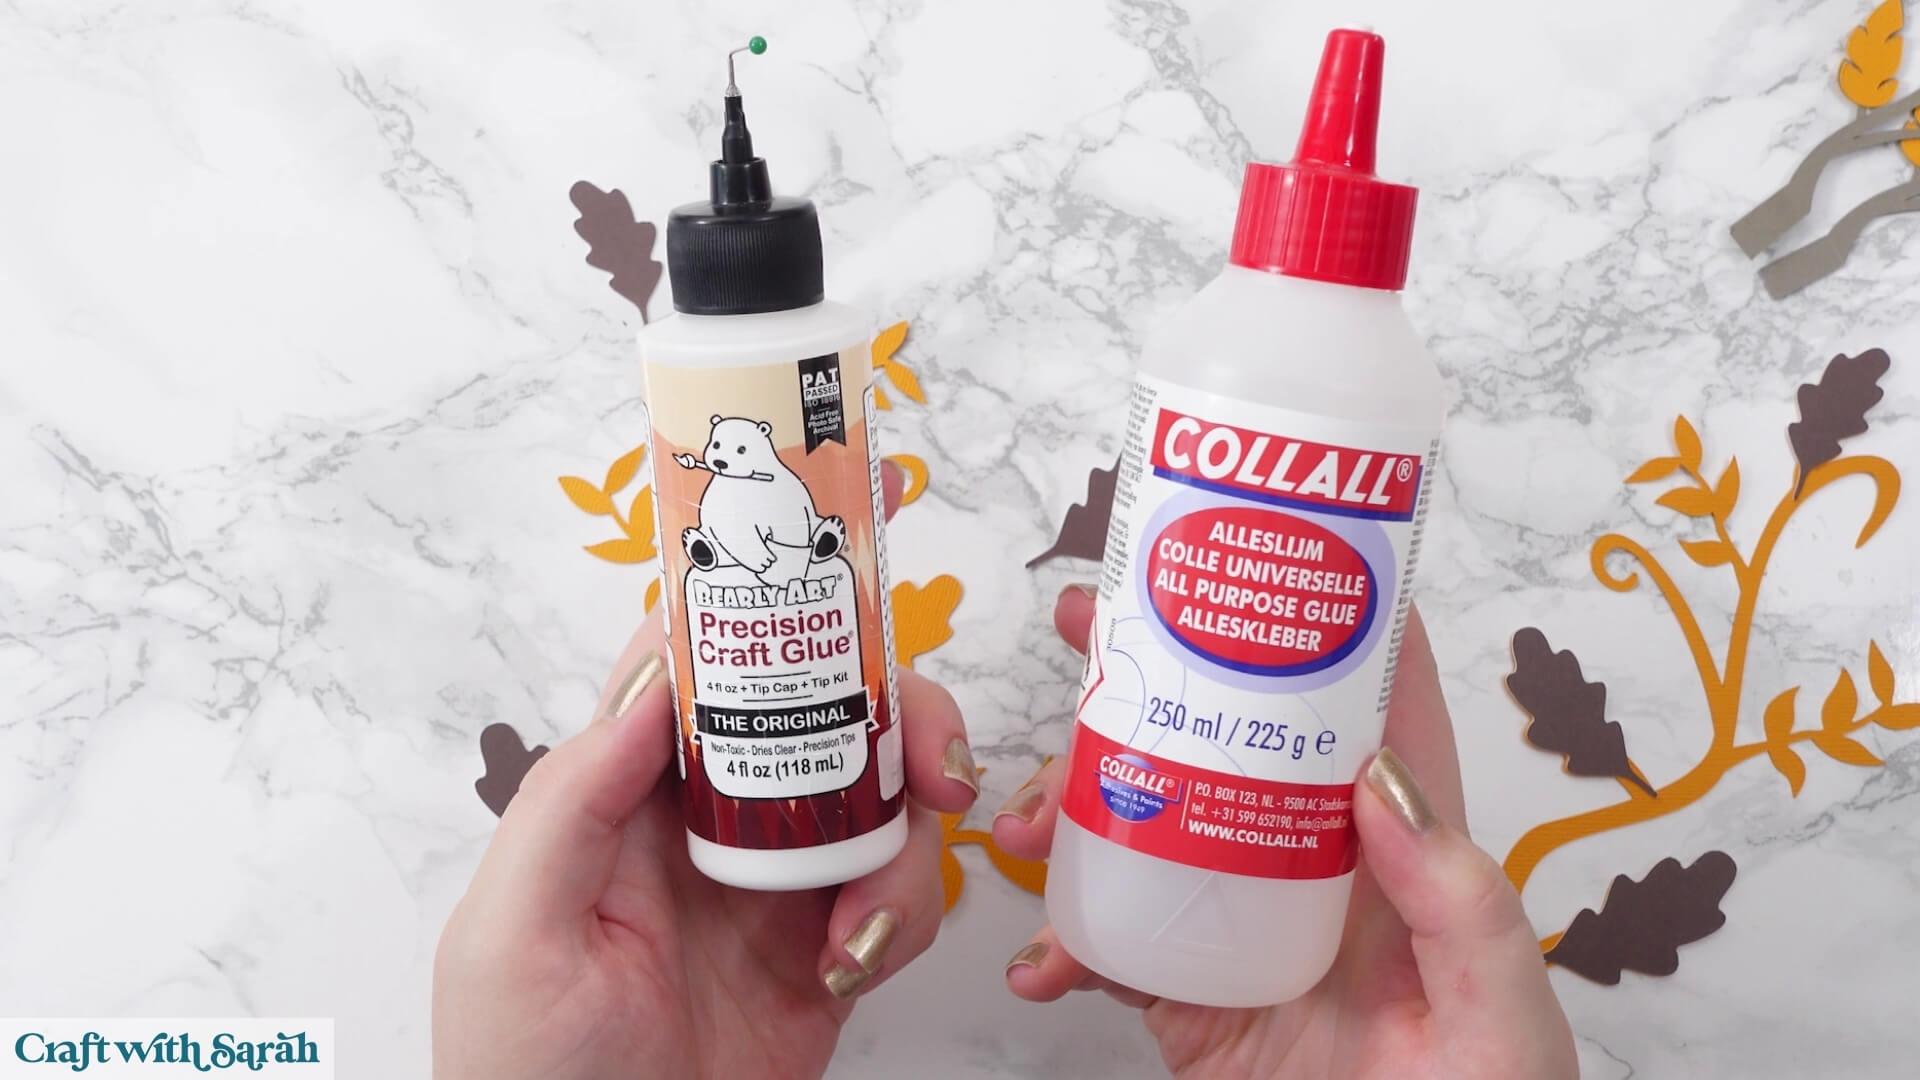
I’m using Bearly Art Glue, although I also like Collall. These glues are good for papercrafting because they don’t bend or wrinkle the cardstock like some glues can.
Put the finished foliage pieces to one side for later.
Step 5) Add the vellum to the side panels
If you’re making the lantern version, glue vellum or tracing paper behind each decorative pumpkin panel.
Turn a panel upside down and add glue around the edge.
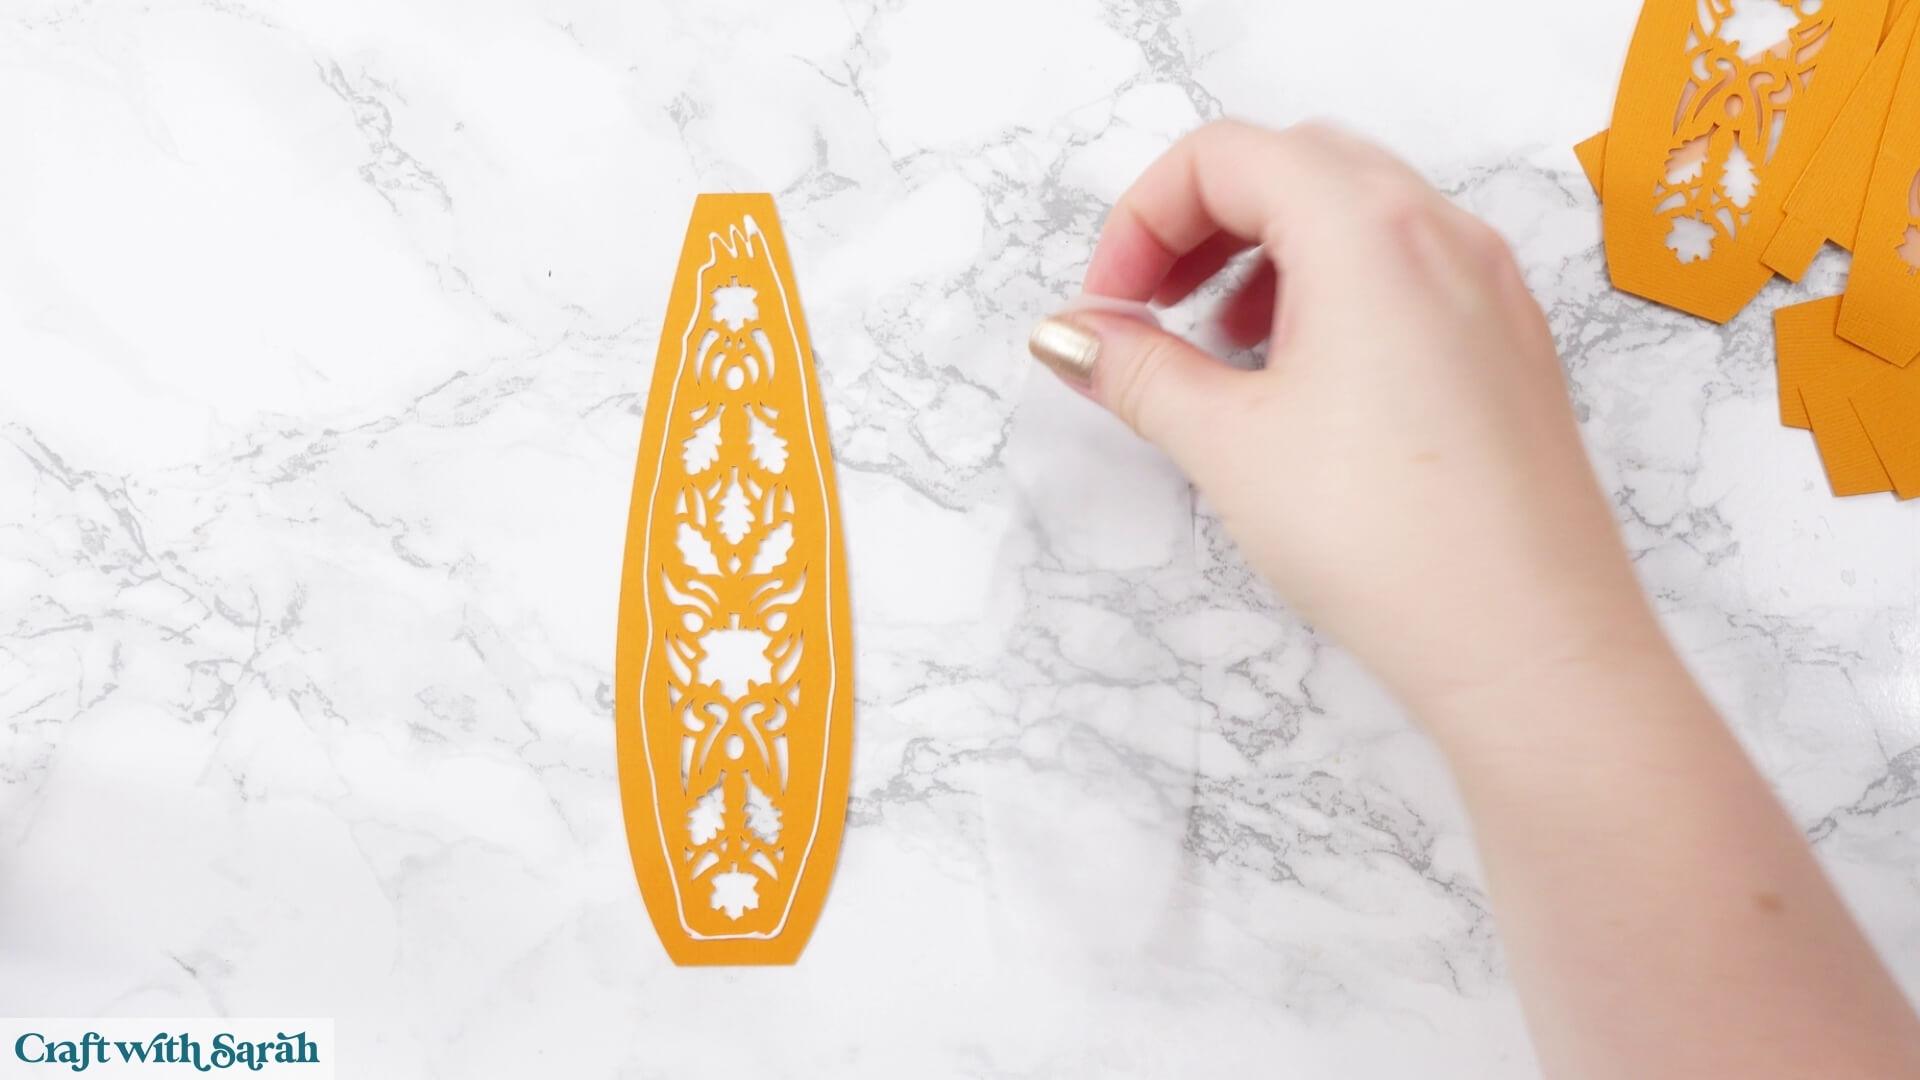
Place the vellum on top. It won’t go all the way to the outside edge of the cardstock, which gives you a little wiggle room when positioning it.
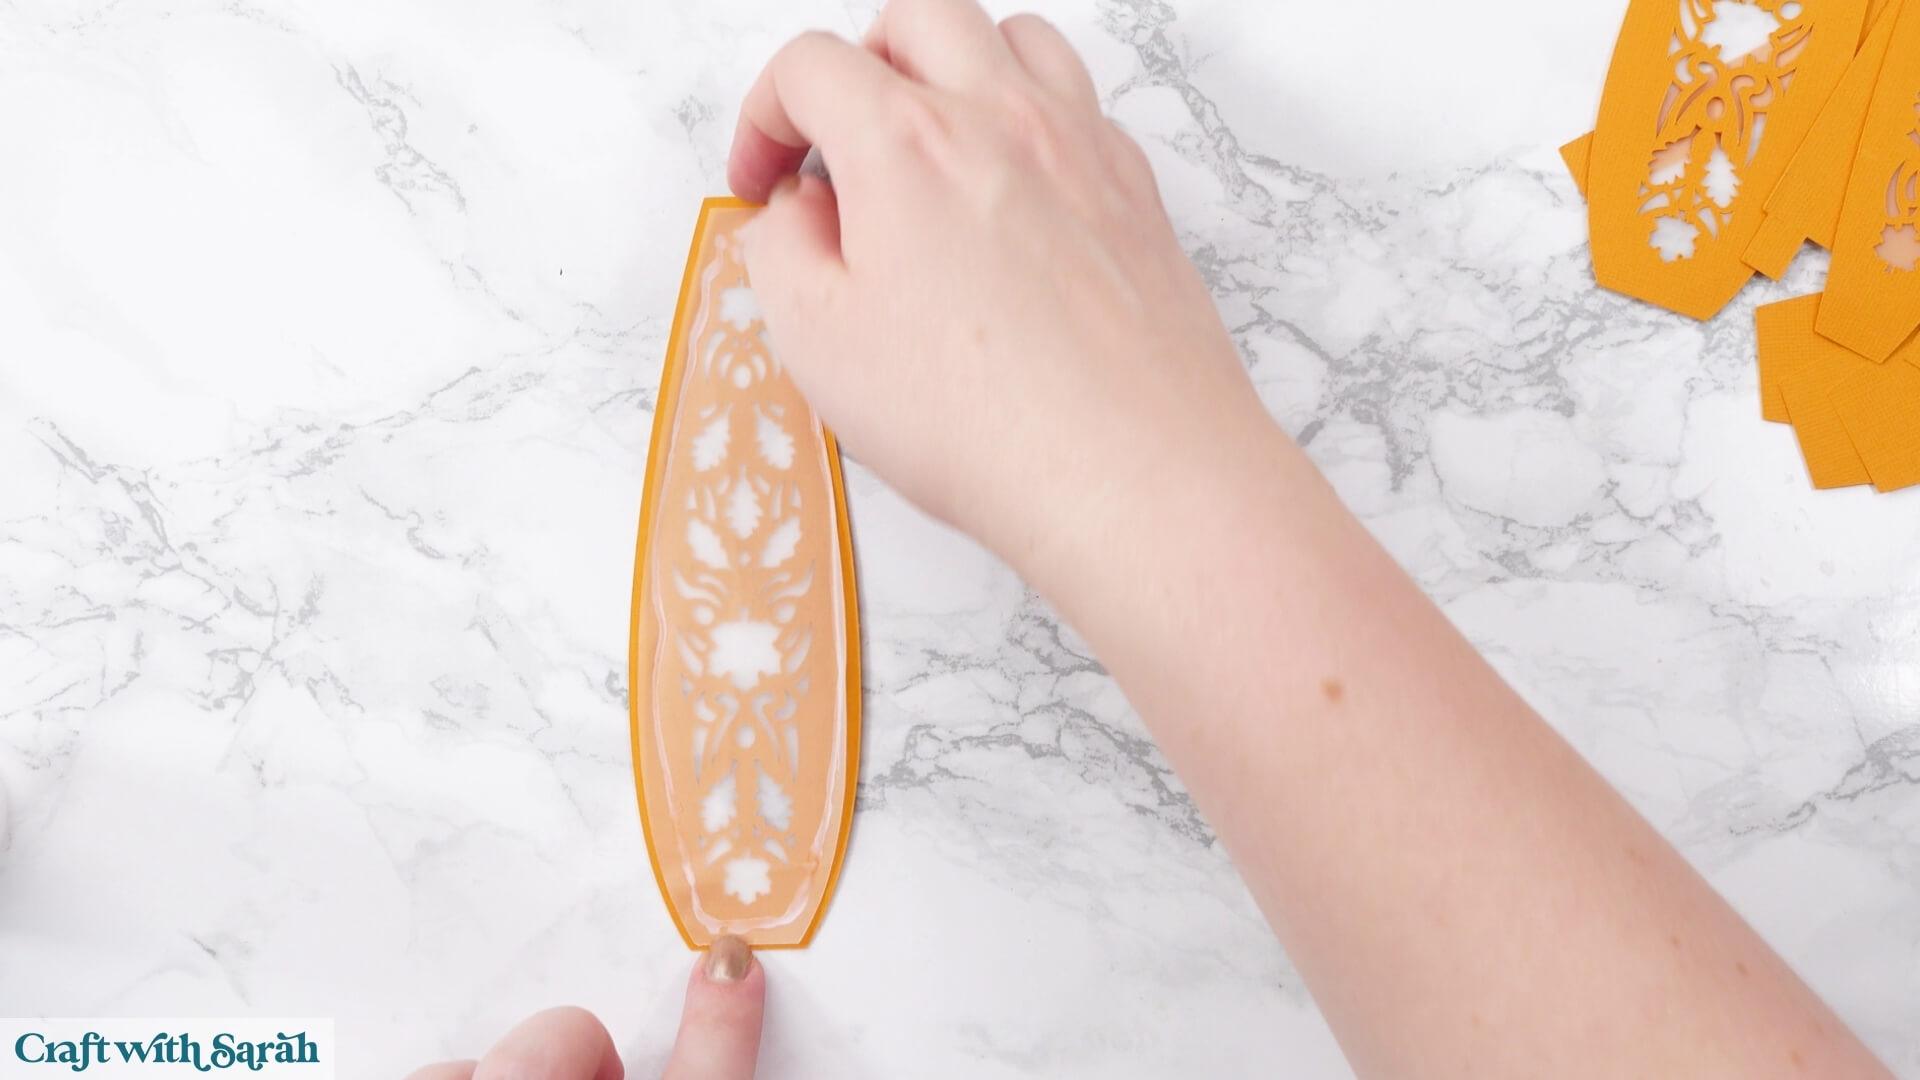
Repeat until all of the decorative panels have vellum behind them.
Step 6) Prepare the structure pieces
Take the large piece with the hole in the middle and the four separate strips.
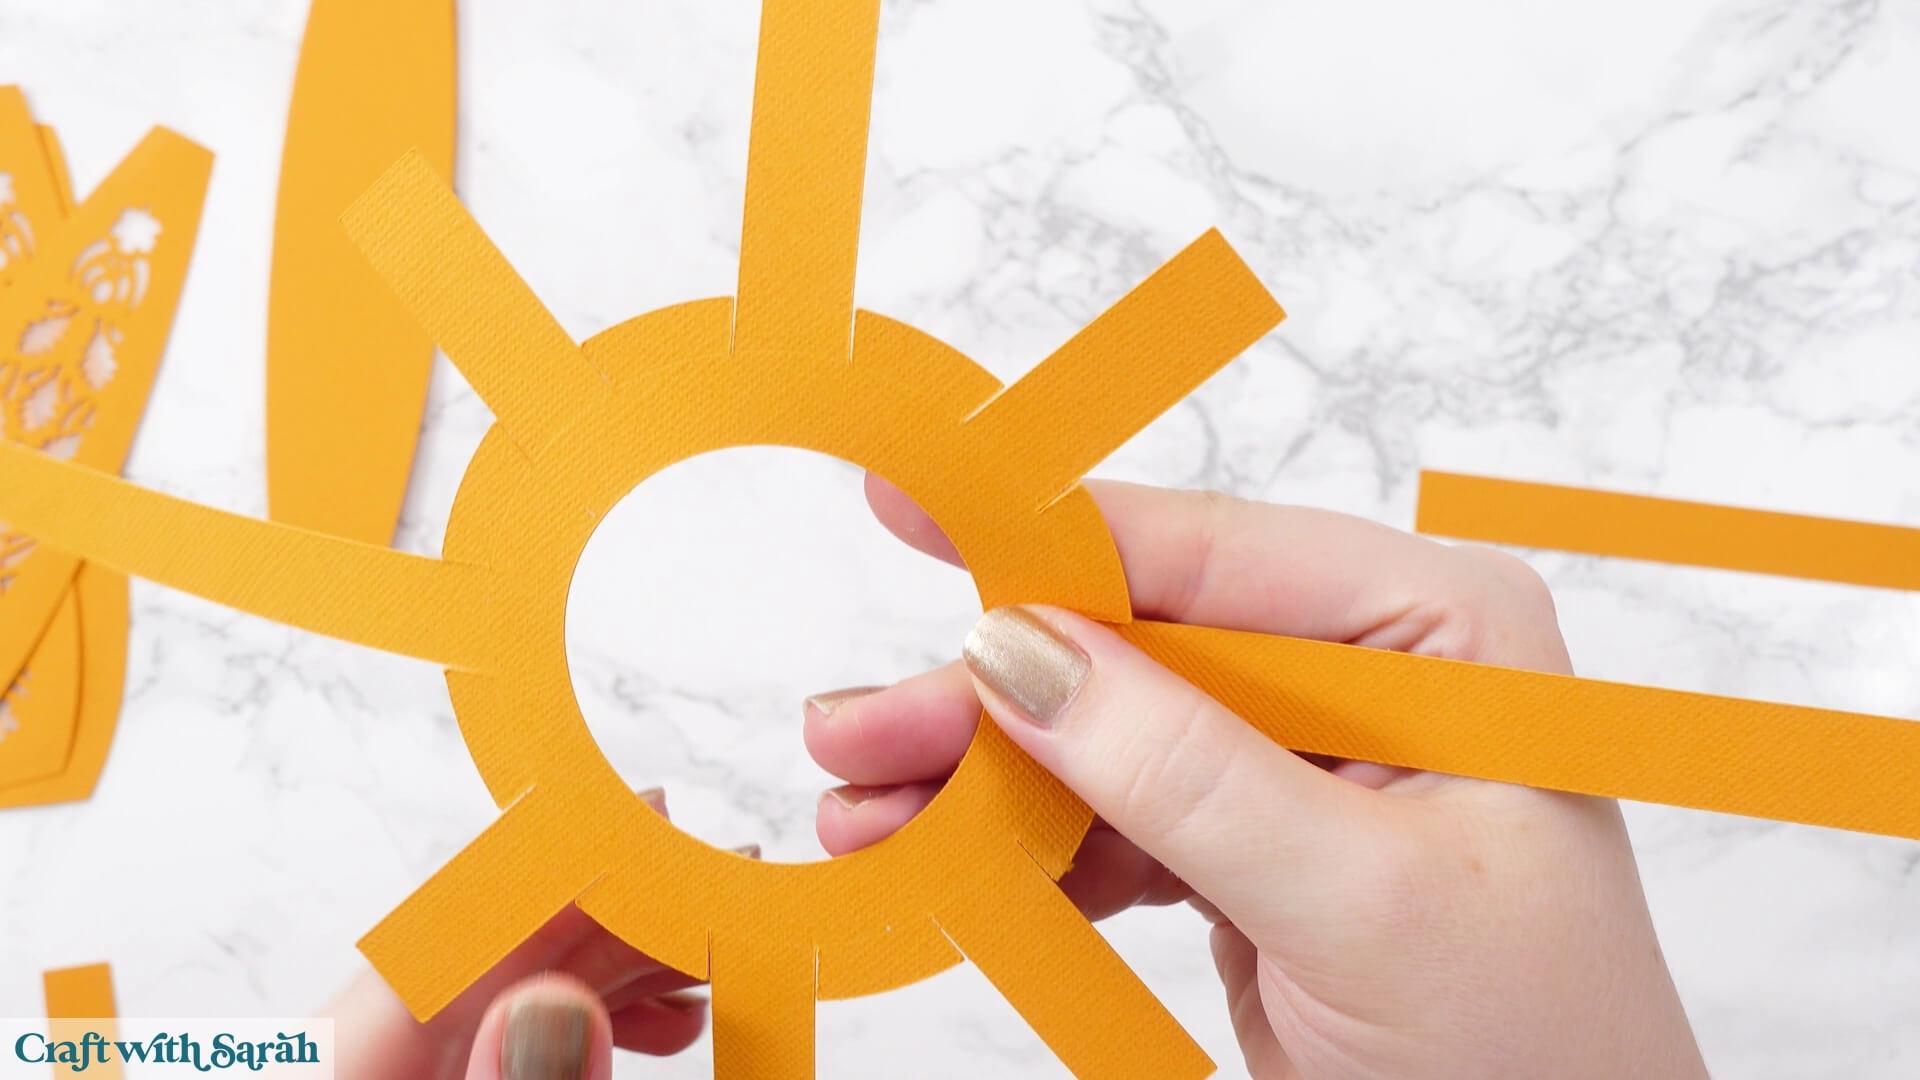
Glue the strips over the four sections that don’t already have strips incorporated into the design.
Line the rectangles up between the ends of the small cut lines.
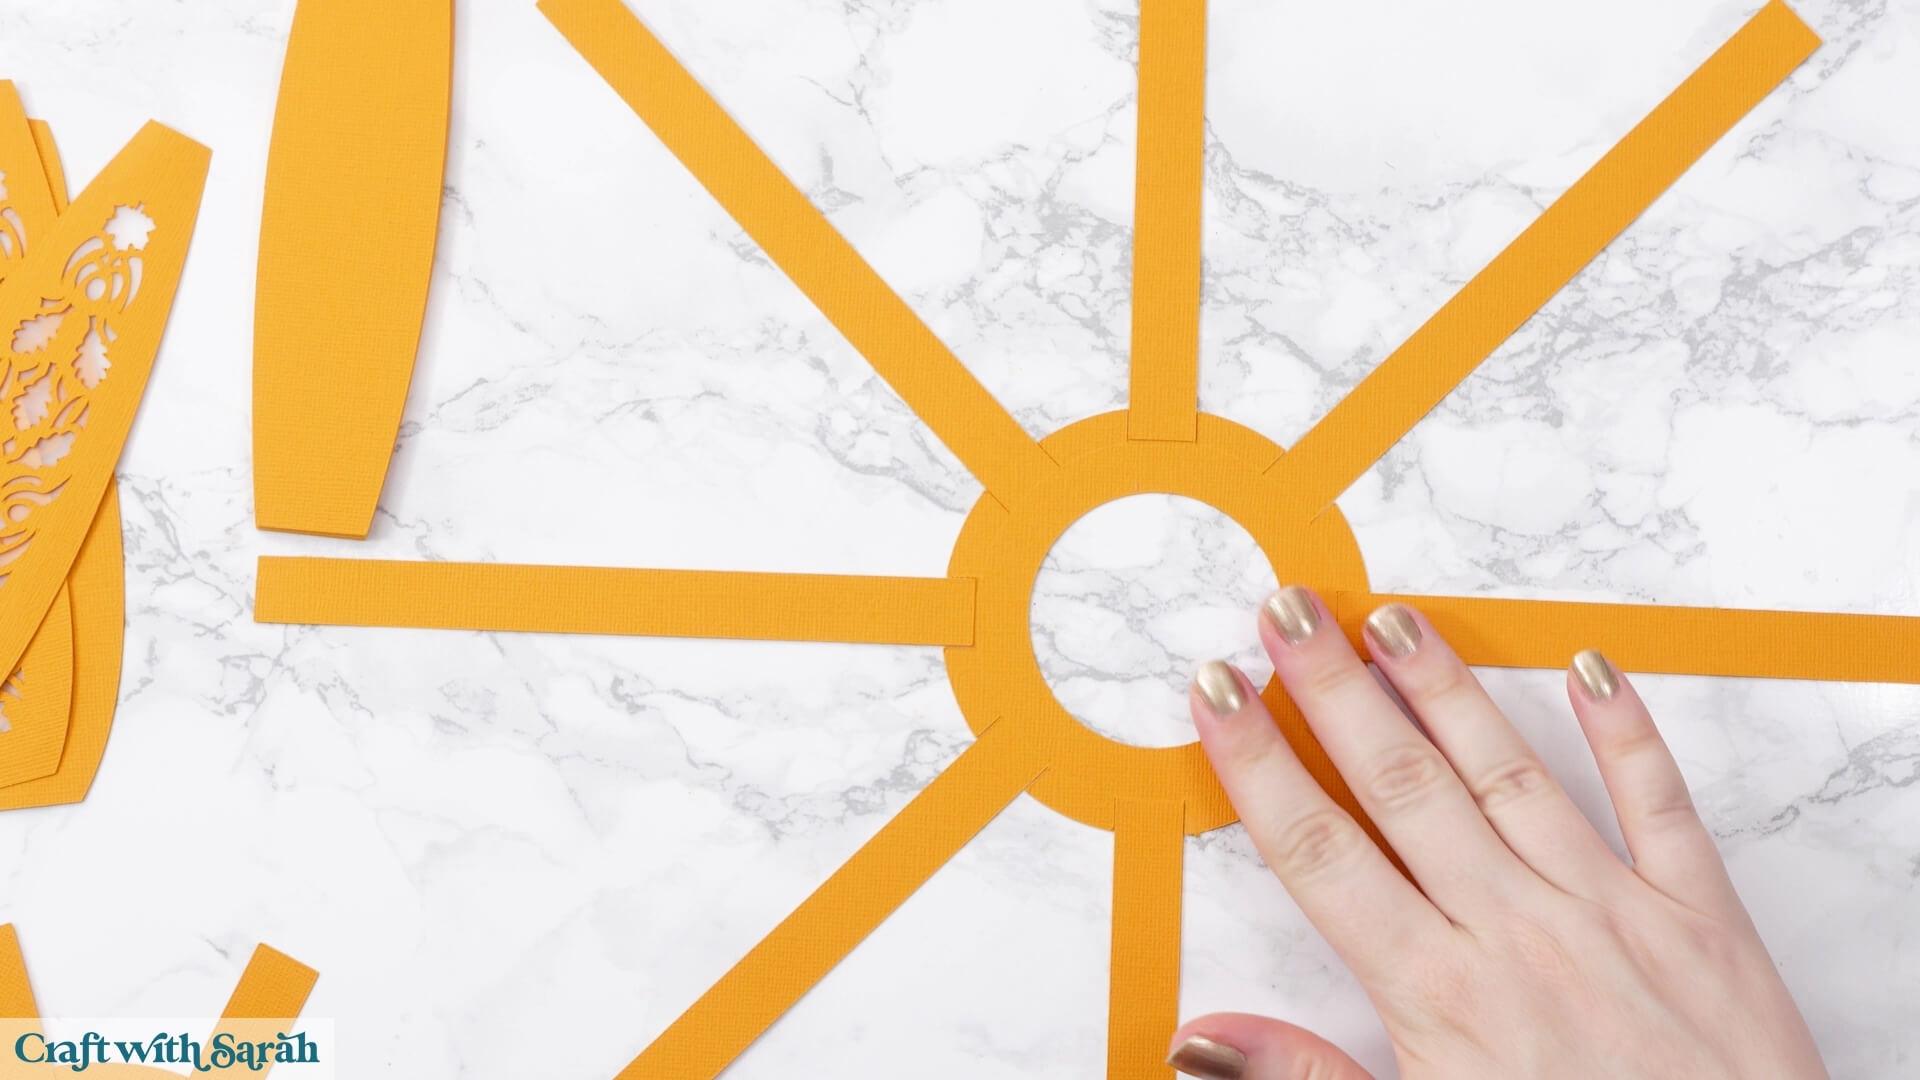
While you’re waiting for the glue to dry, take the base piece and fold all of the small tabs upwards along the score lines.
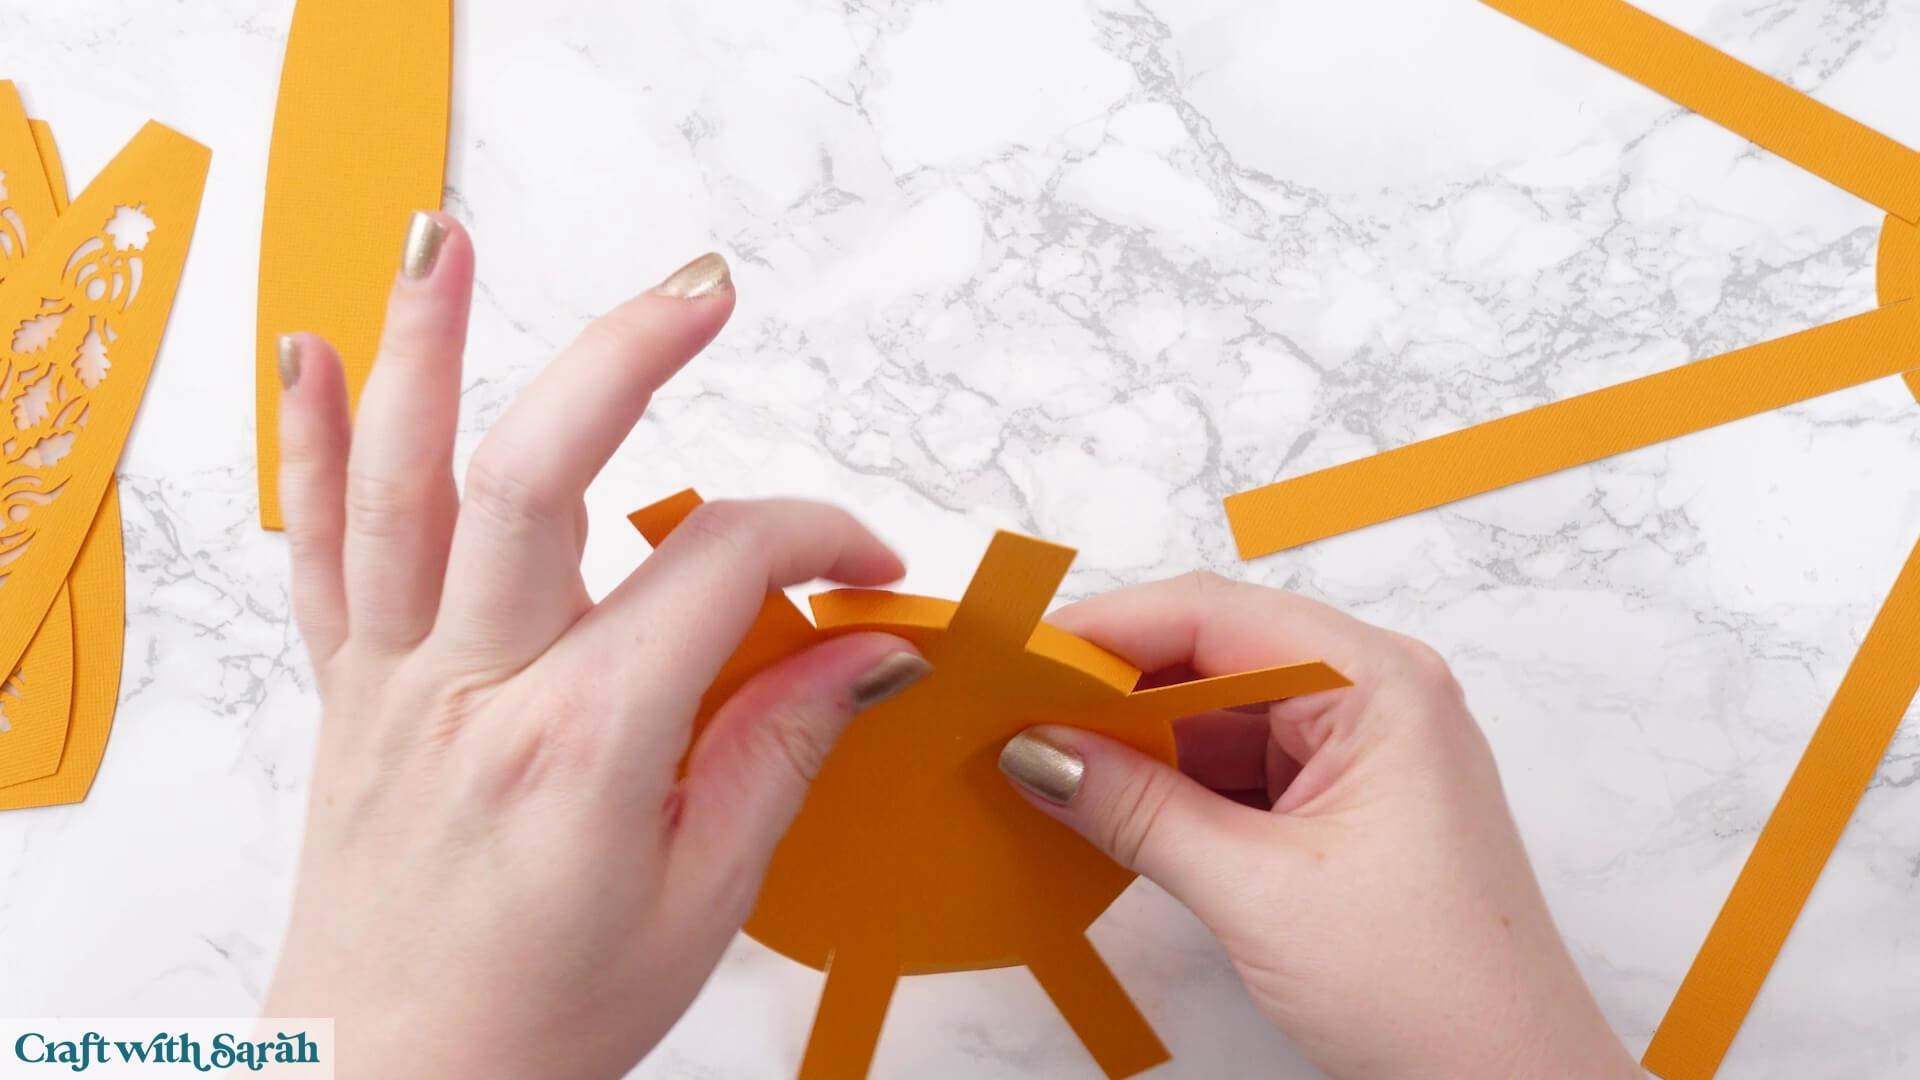
Return to the piece you have just glued together and fold the small tabs in the middle down.
Fold the larger rectangular sections down too.
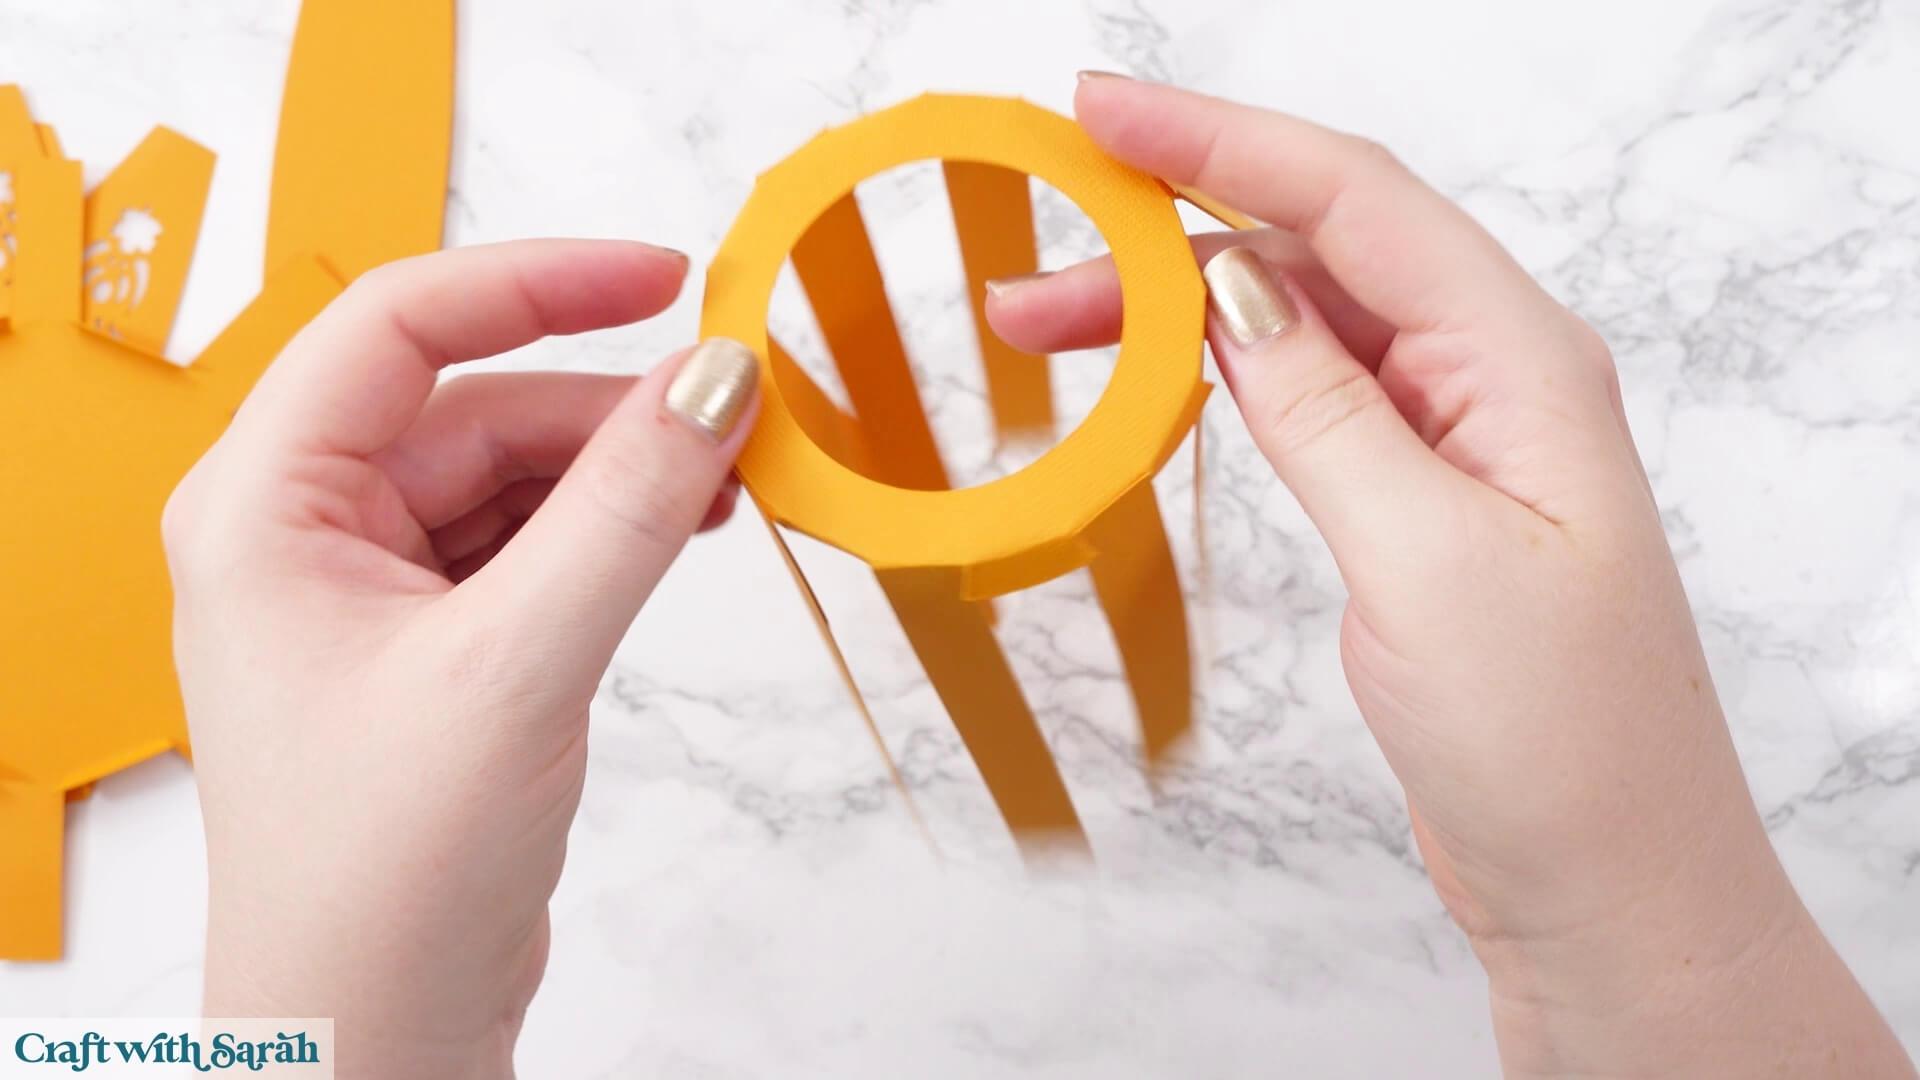
These larger sections look a little like spider legs and will help pull the finished project into its pumpkin shape.
Step 7) Build the inner pumpkin shape
Glue the ‘spider leg’ sections onto the outside of the corresponding pieces on the base.
Work your way around in order rather than trying to glue everything at once.
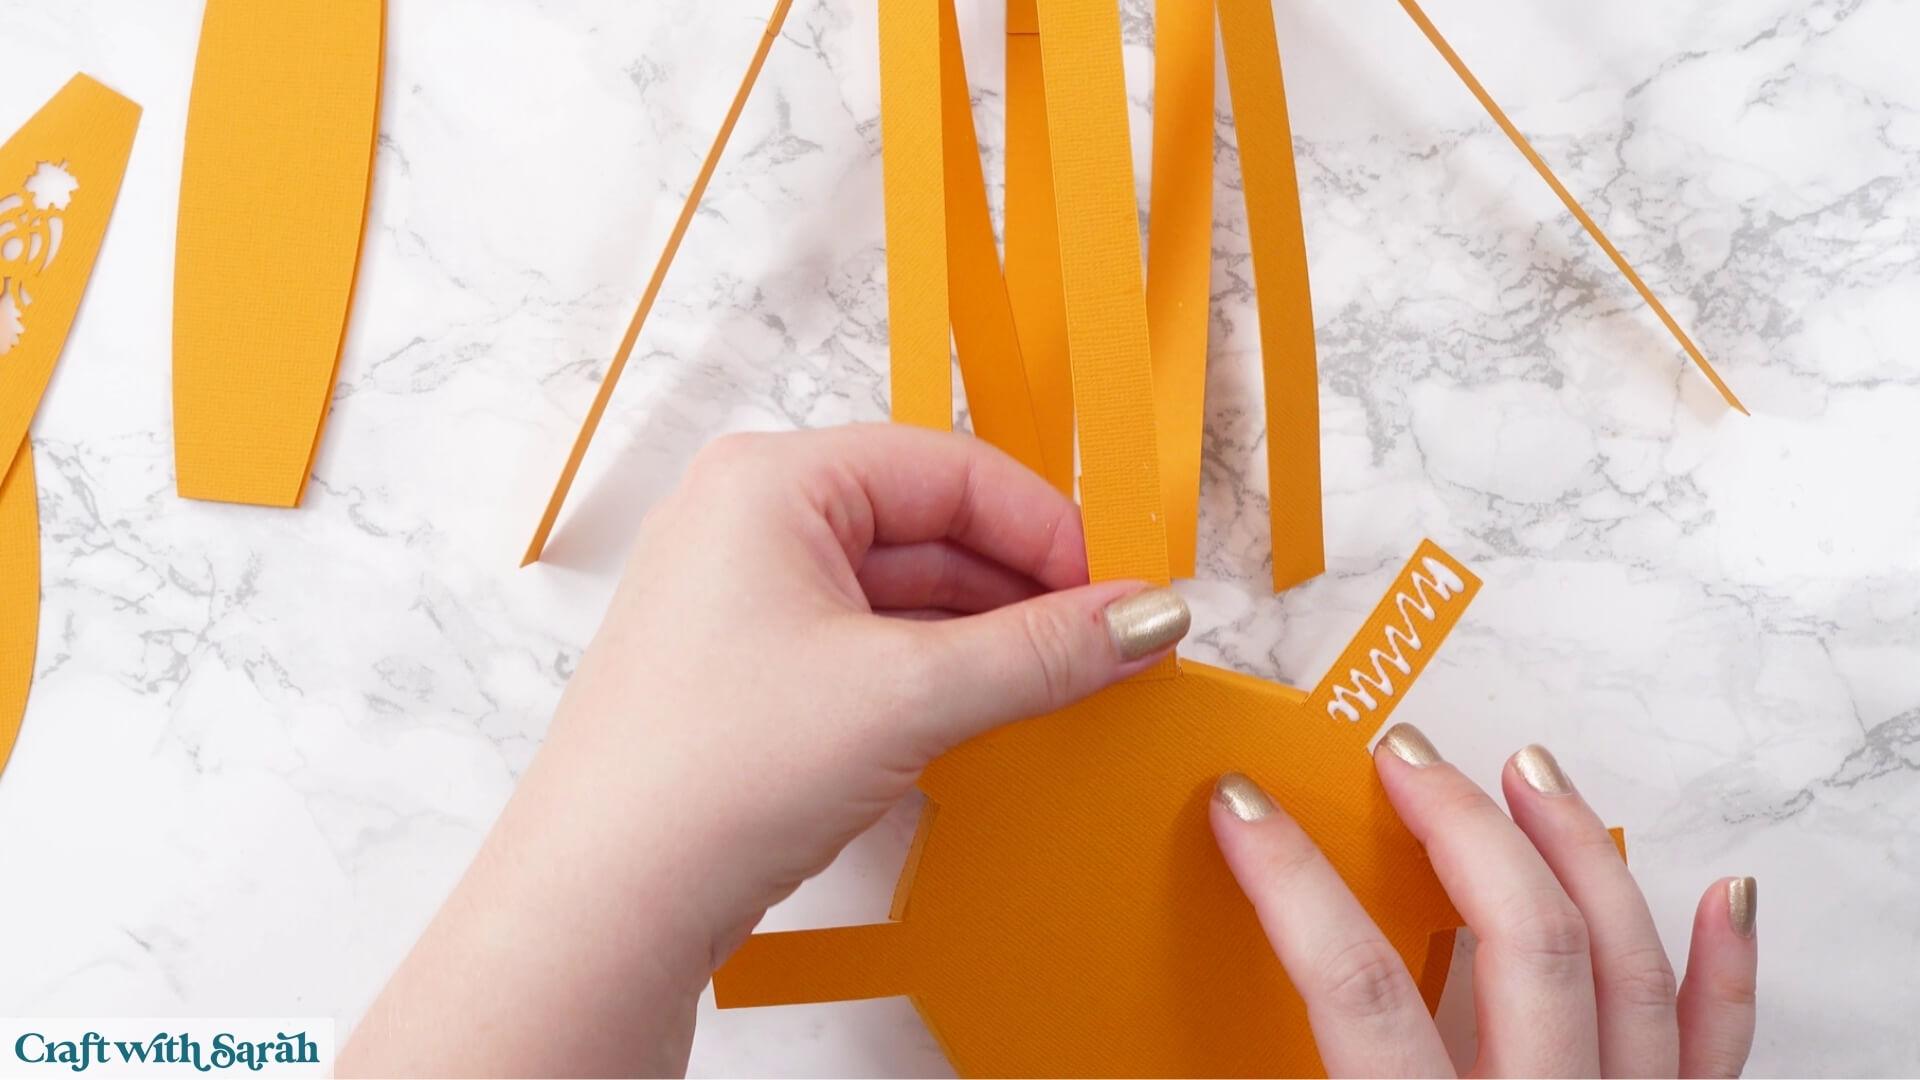
Paper clips are very helpful here. Use them to hold the cardstock together while the glue dries, particularly at the top and bottom of each join.
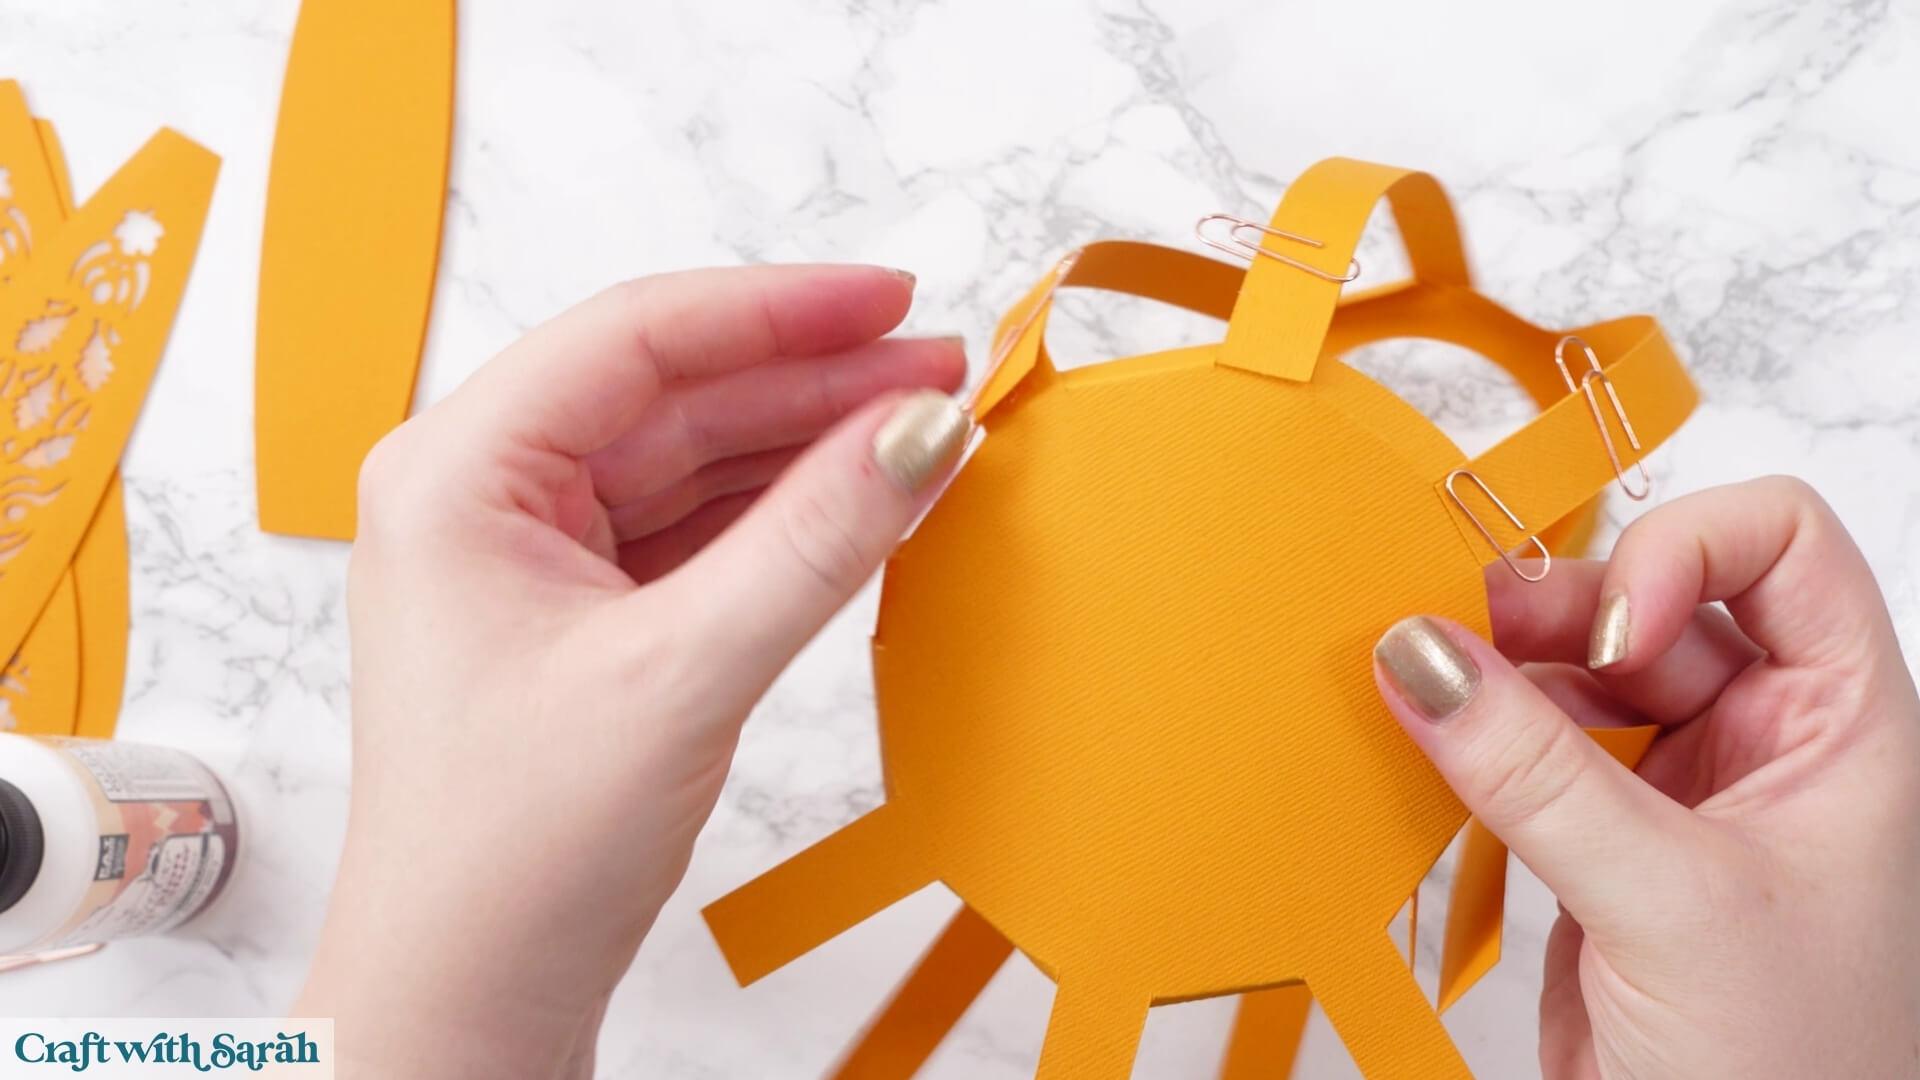
Once all the pieces are attached, leave the glue to dry thoroughly before continuing.
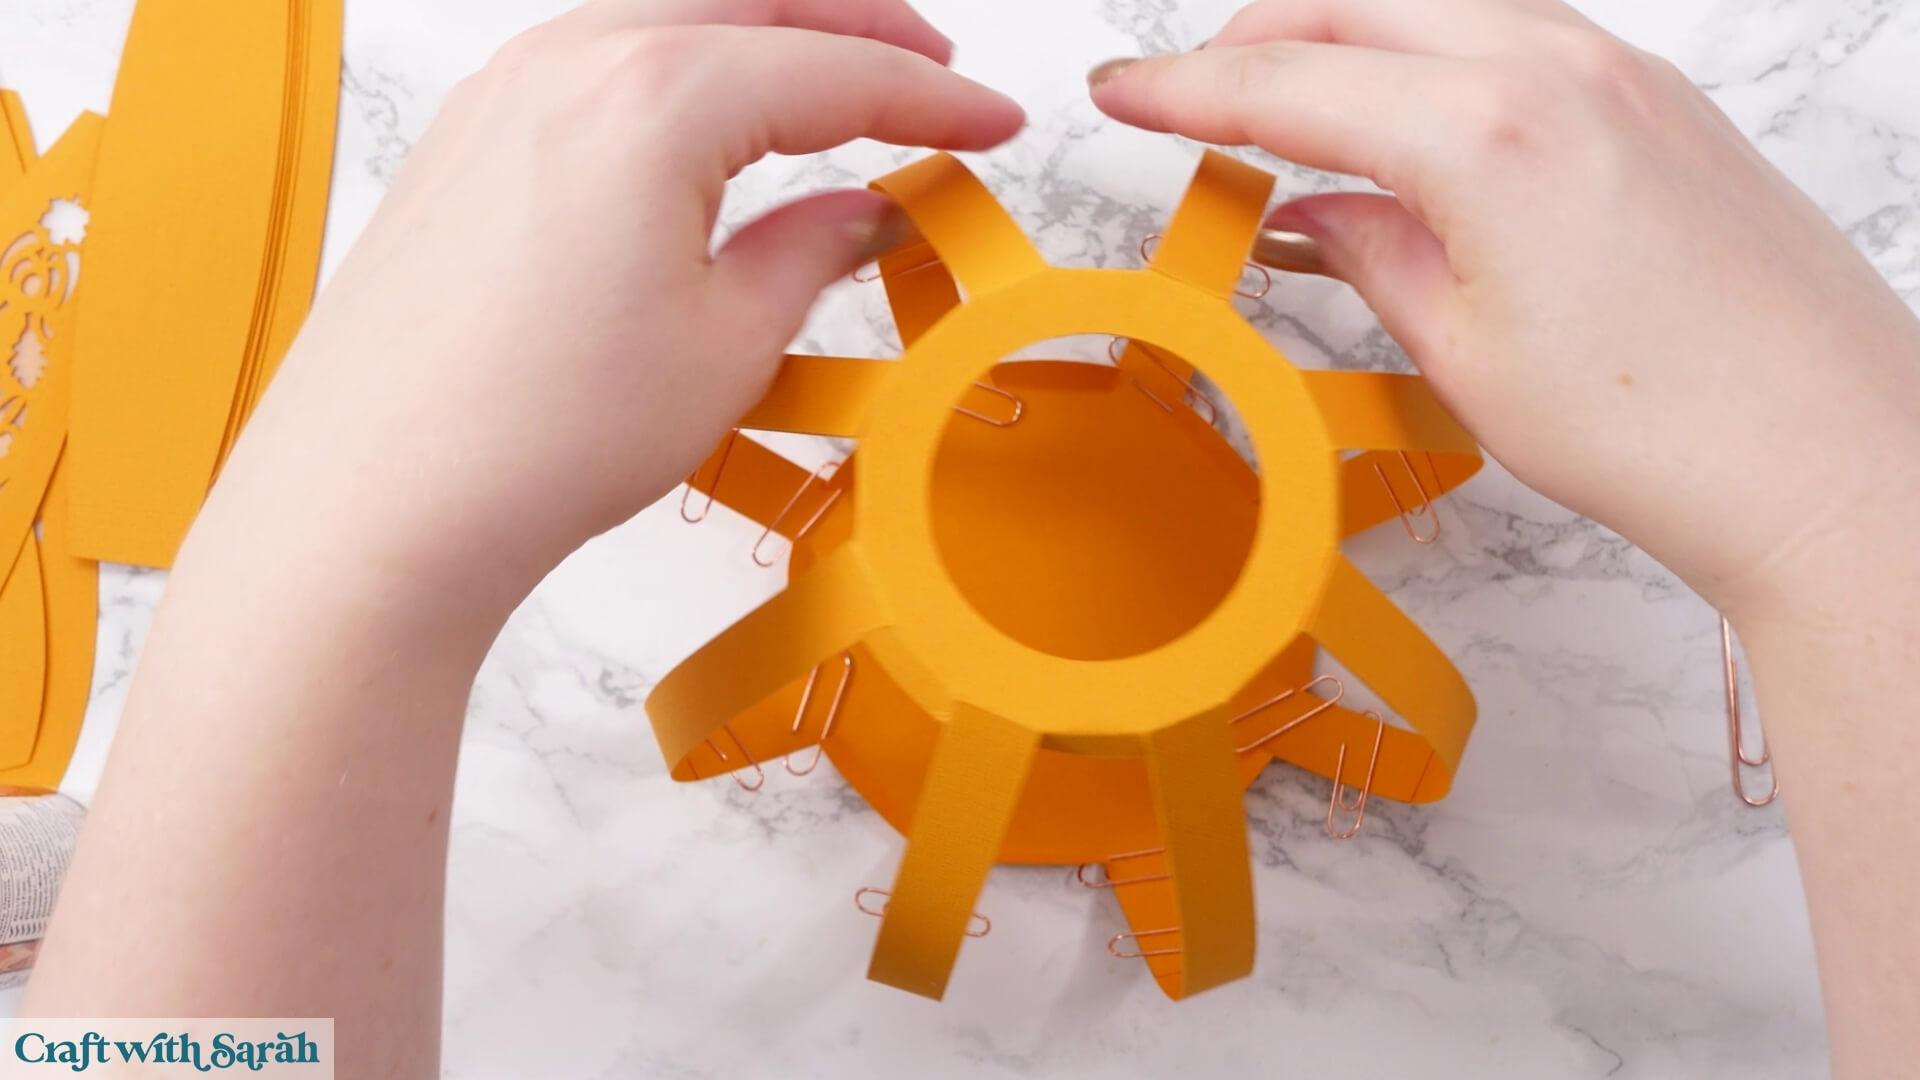
At this stage, the structure will begin to look like a pumpkin, although the shape won’t be quite right yet.
If necessary, gently manipulate the cardstock to make the top sit level, but be careful not to pull apart any of your glued joins.
Step 8) Add the first set of pumpkin sides
Separate the side panels into two piles before you start.
This is particularly important if you’re making the solid version because the two shapes look very similar, but they are not exactly the same size.
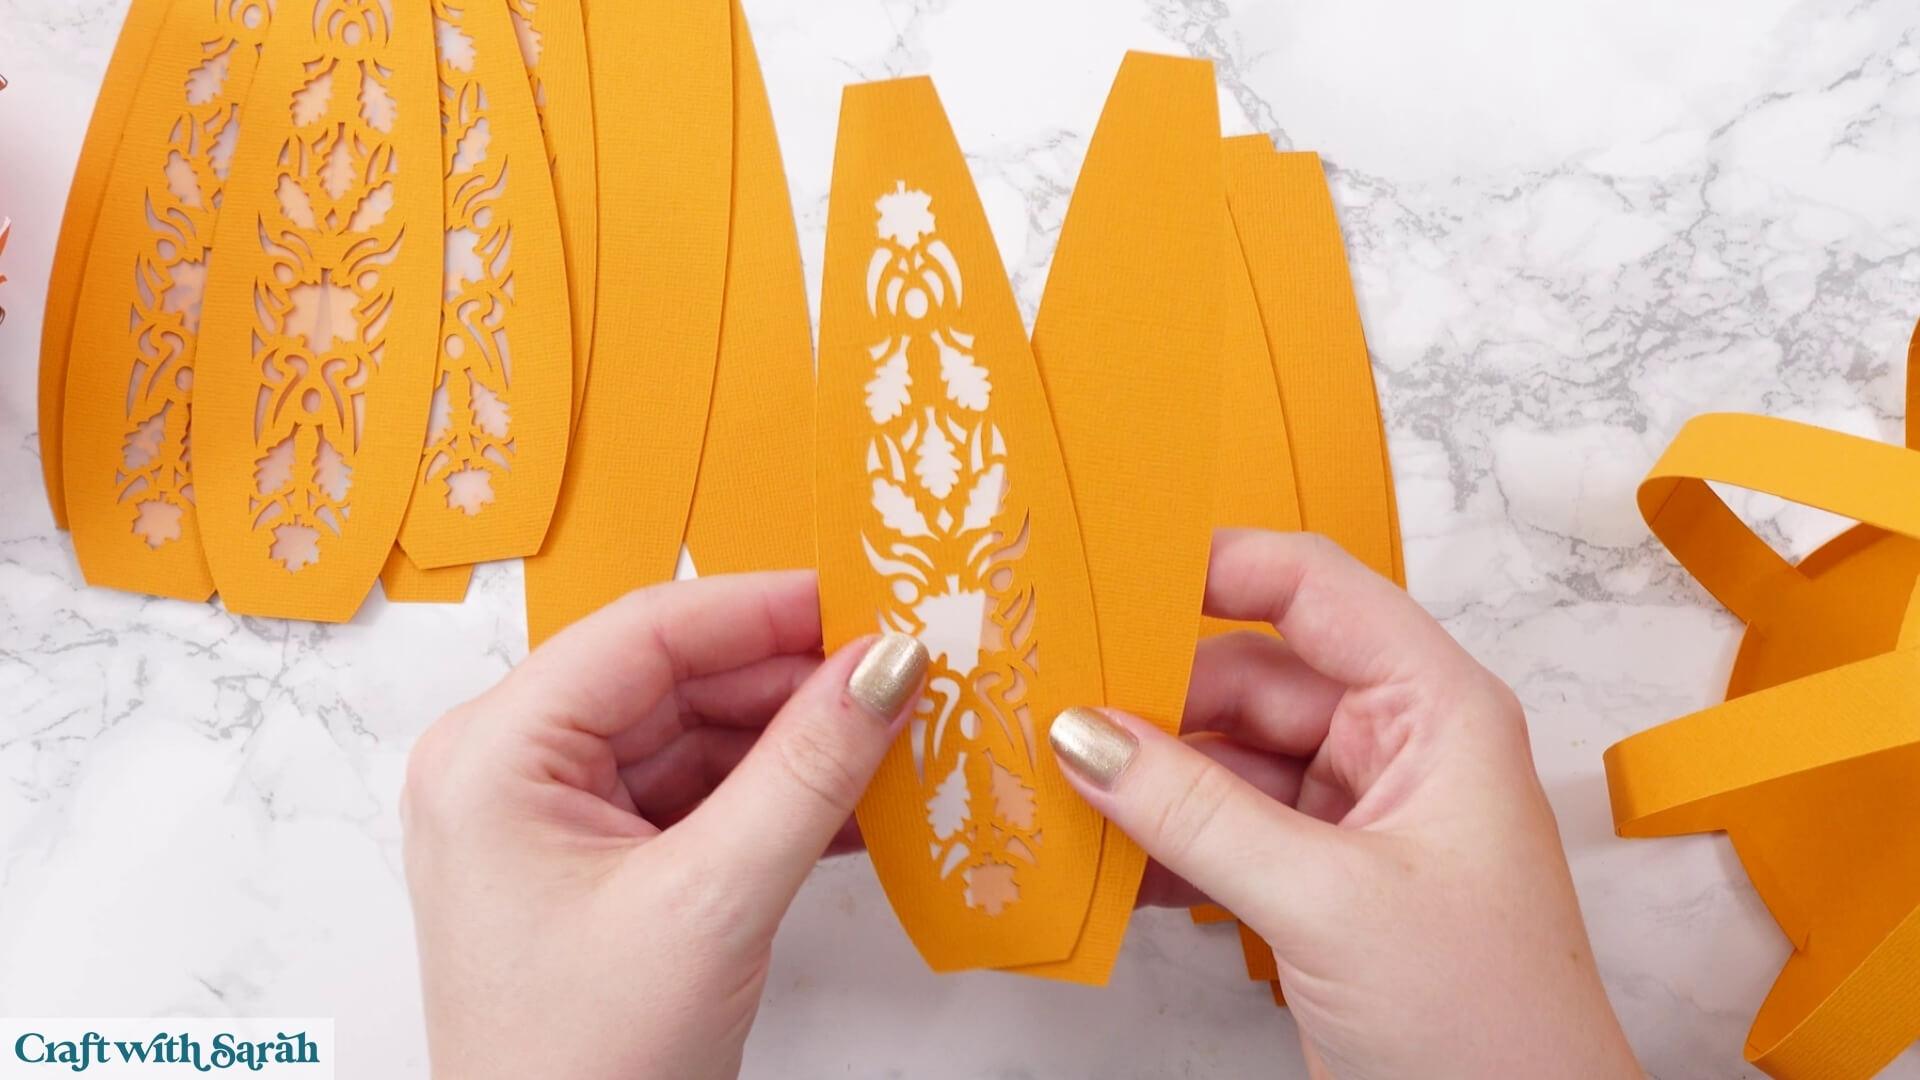
Start with the decorative cutout panels. If you’ve made the solid version, use the shorter of the two panel shapes first.
Pull the small tabs at the top and bottom of the pumpkin structure outwards so they’re easier to access.
Glue all of the top edges of the panels first.
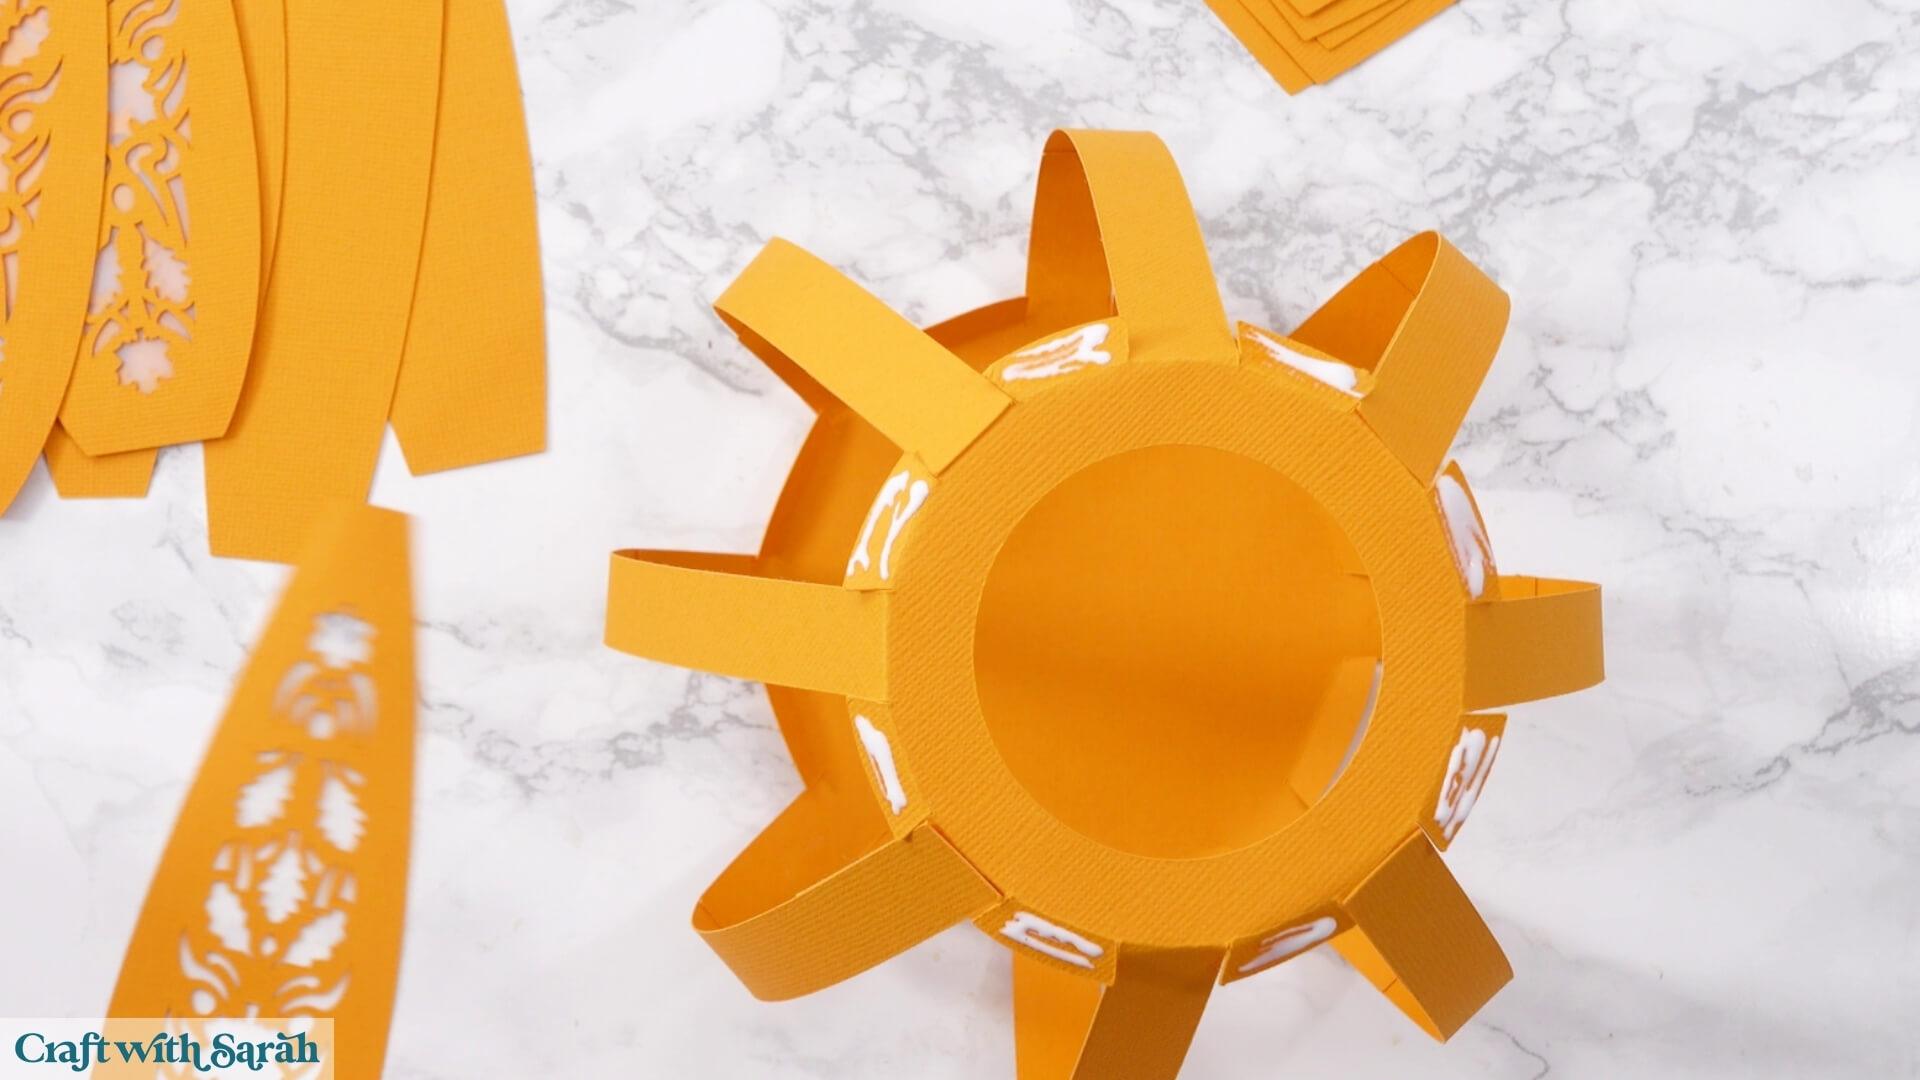
Once all of the top sections are attached, leave the glue to dry completely. This is important because the joins will be put under pressure when the panels are curved around the pumpkin.
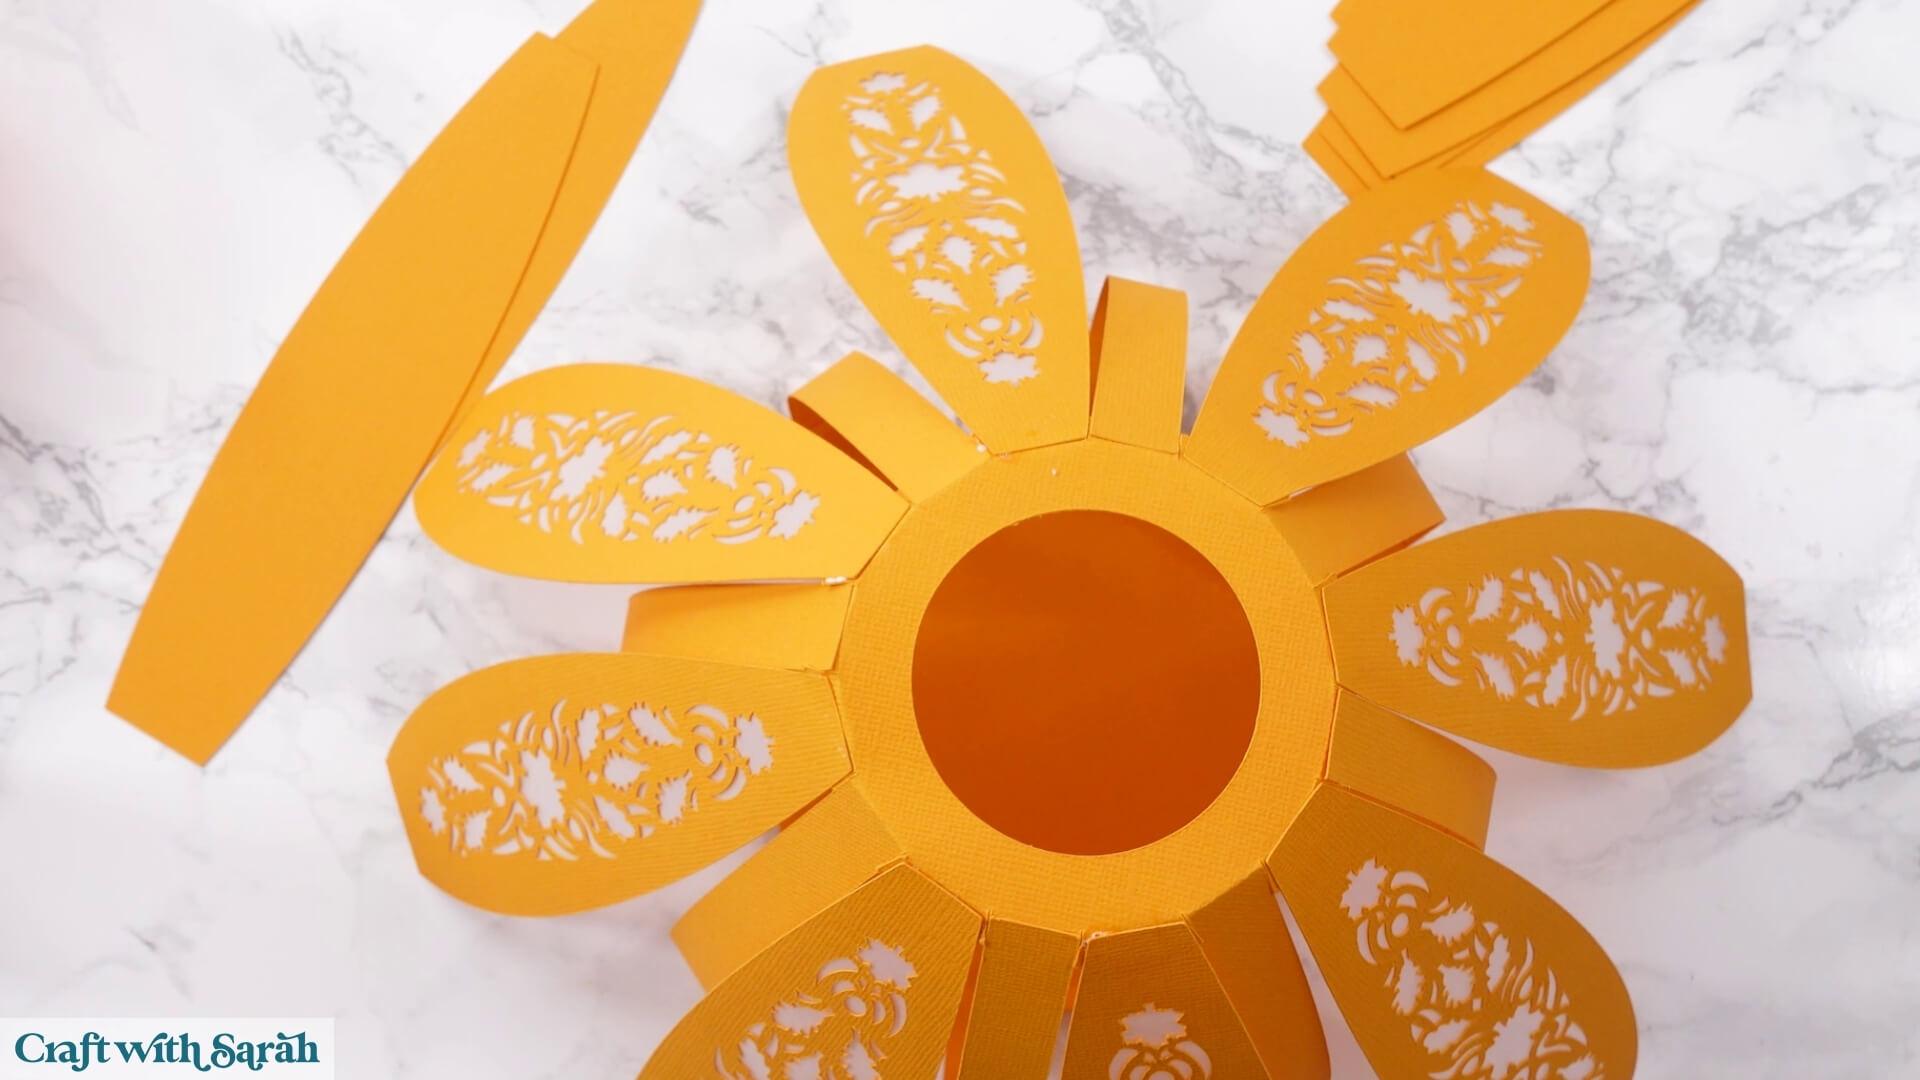
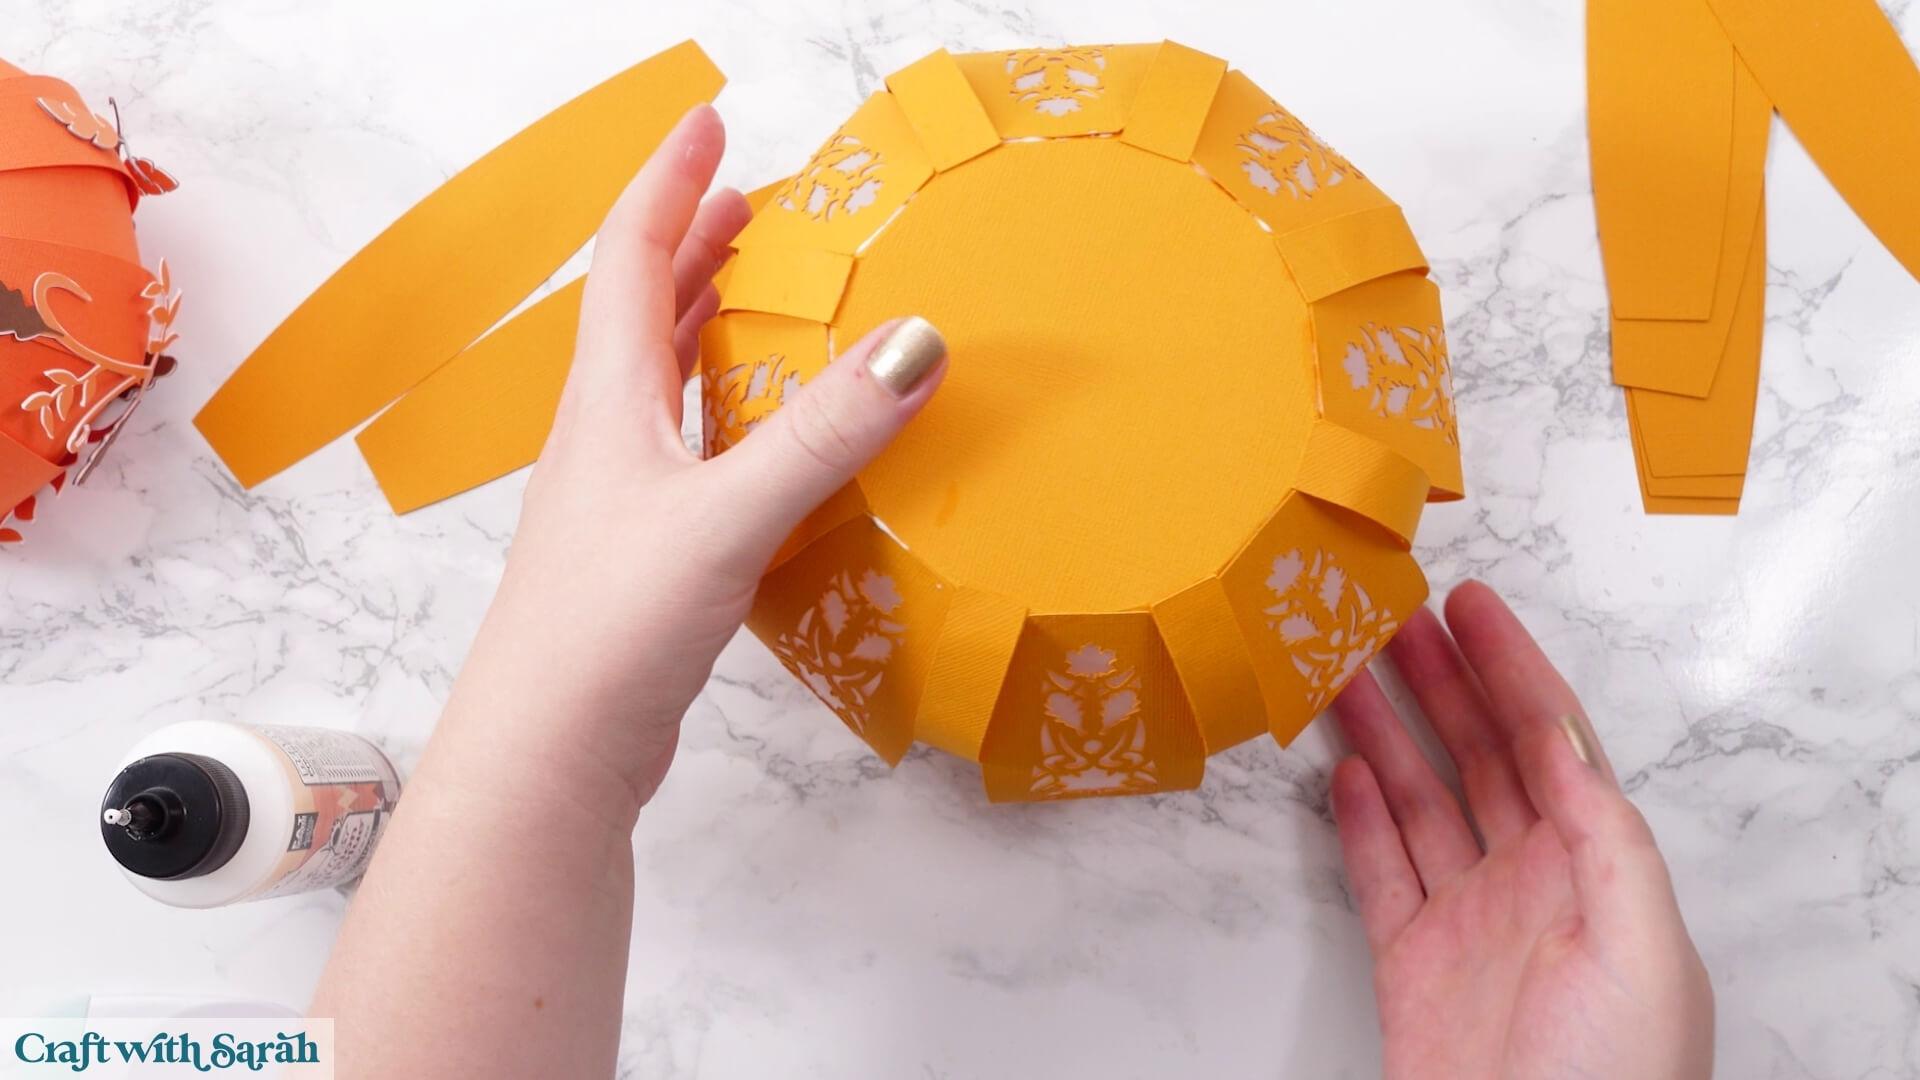
When the glue is completely dry, turn the pumpkin upside down.
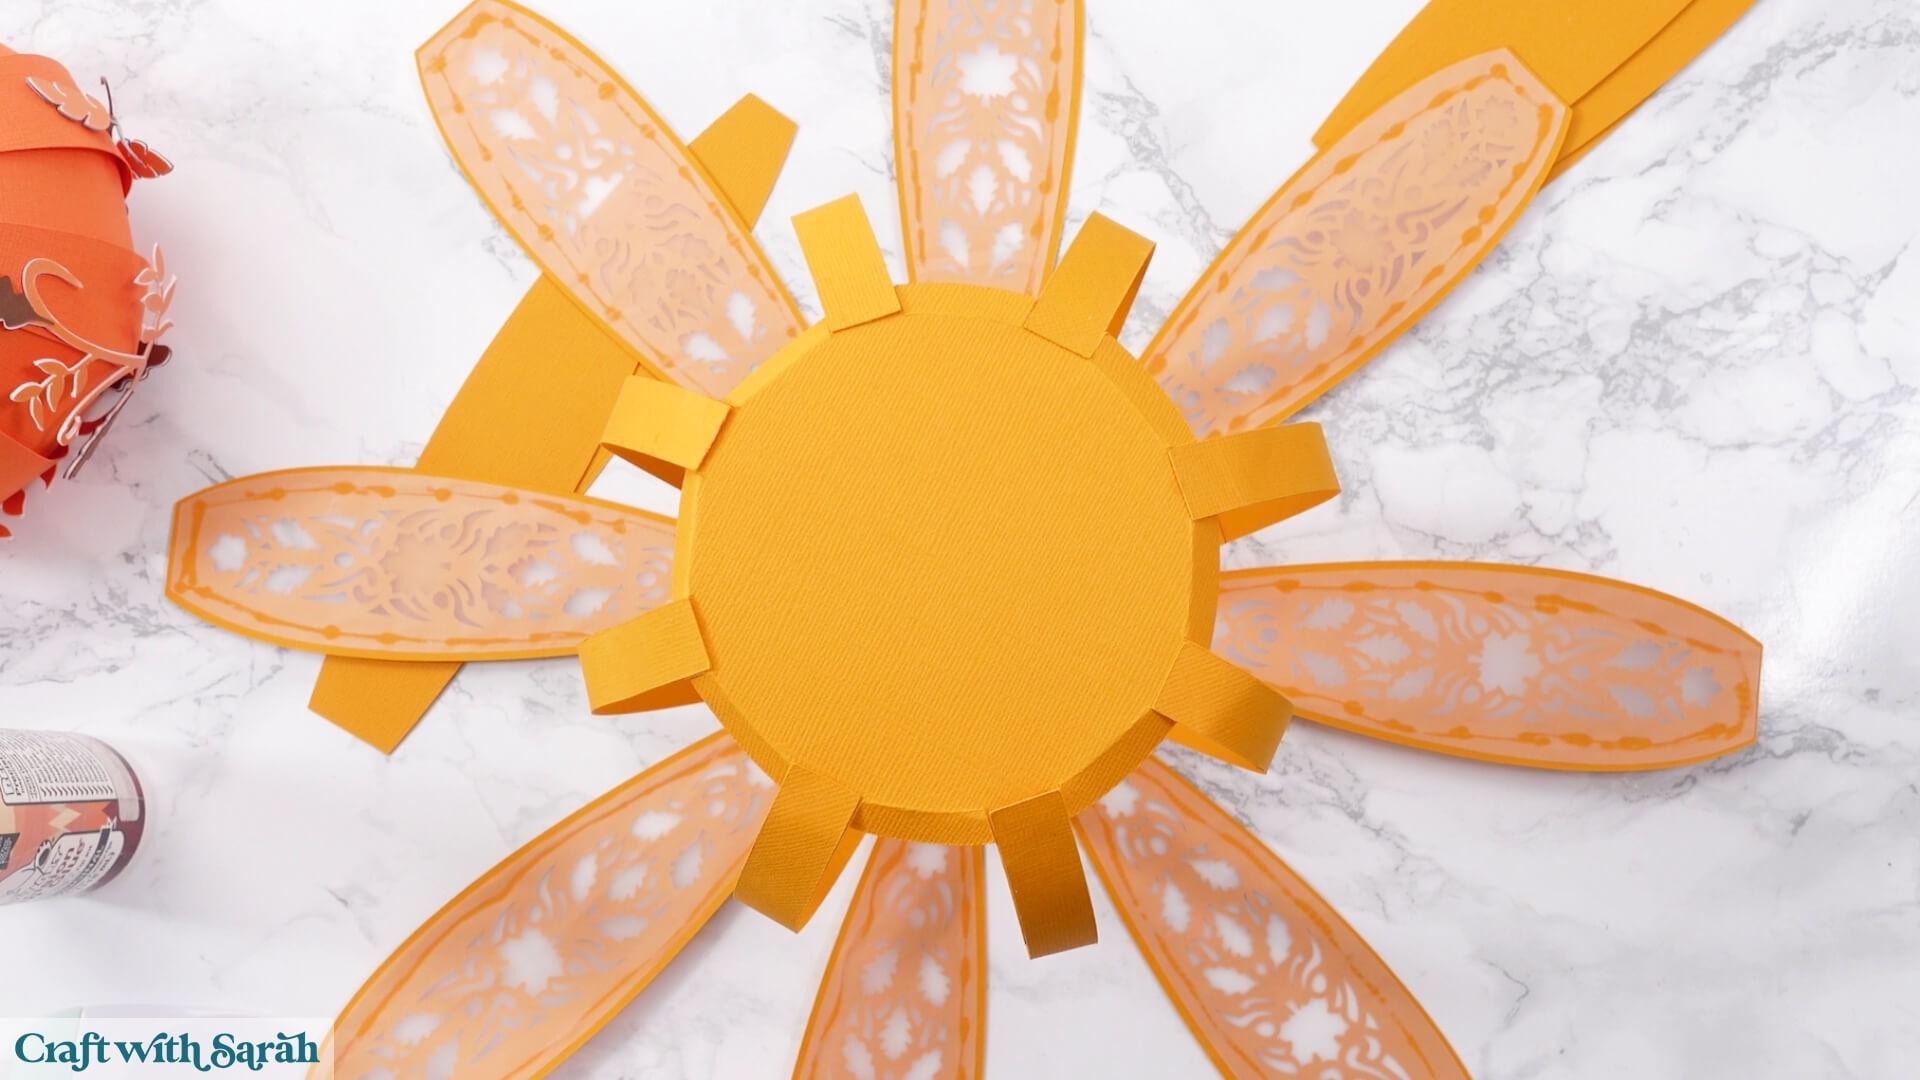
Curve each panel around towards its corresponding bottom tab.
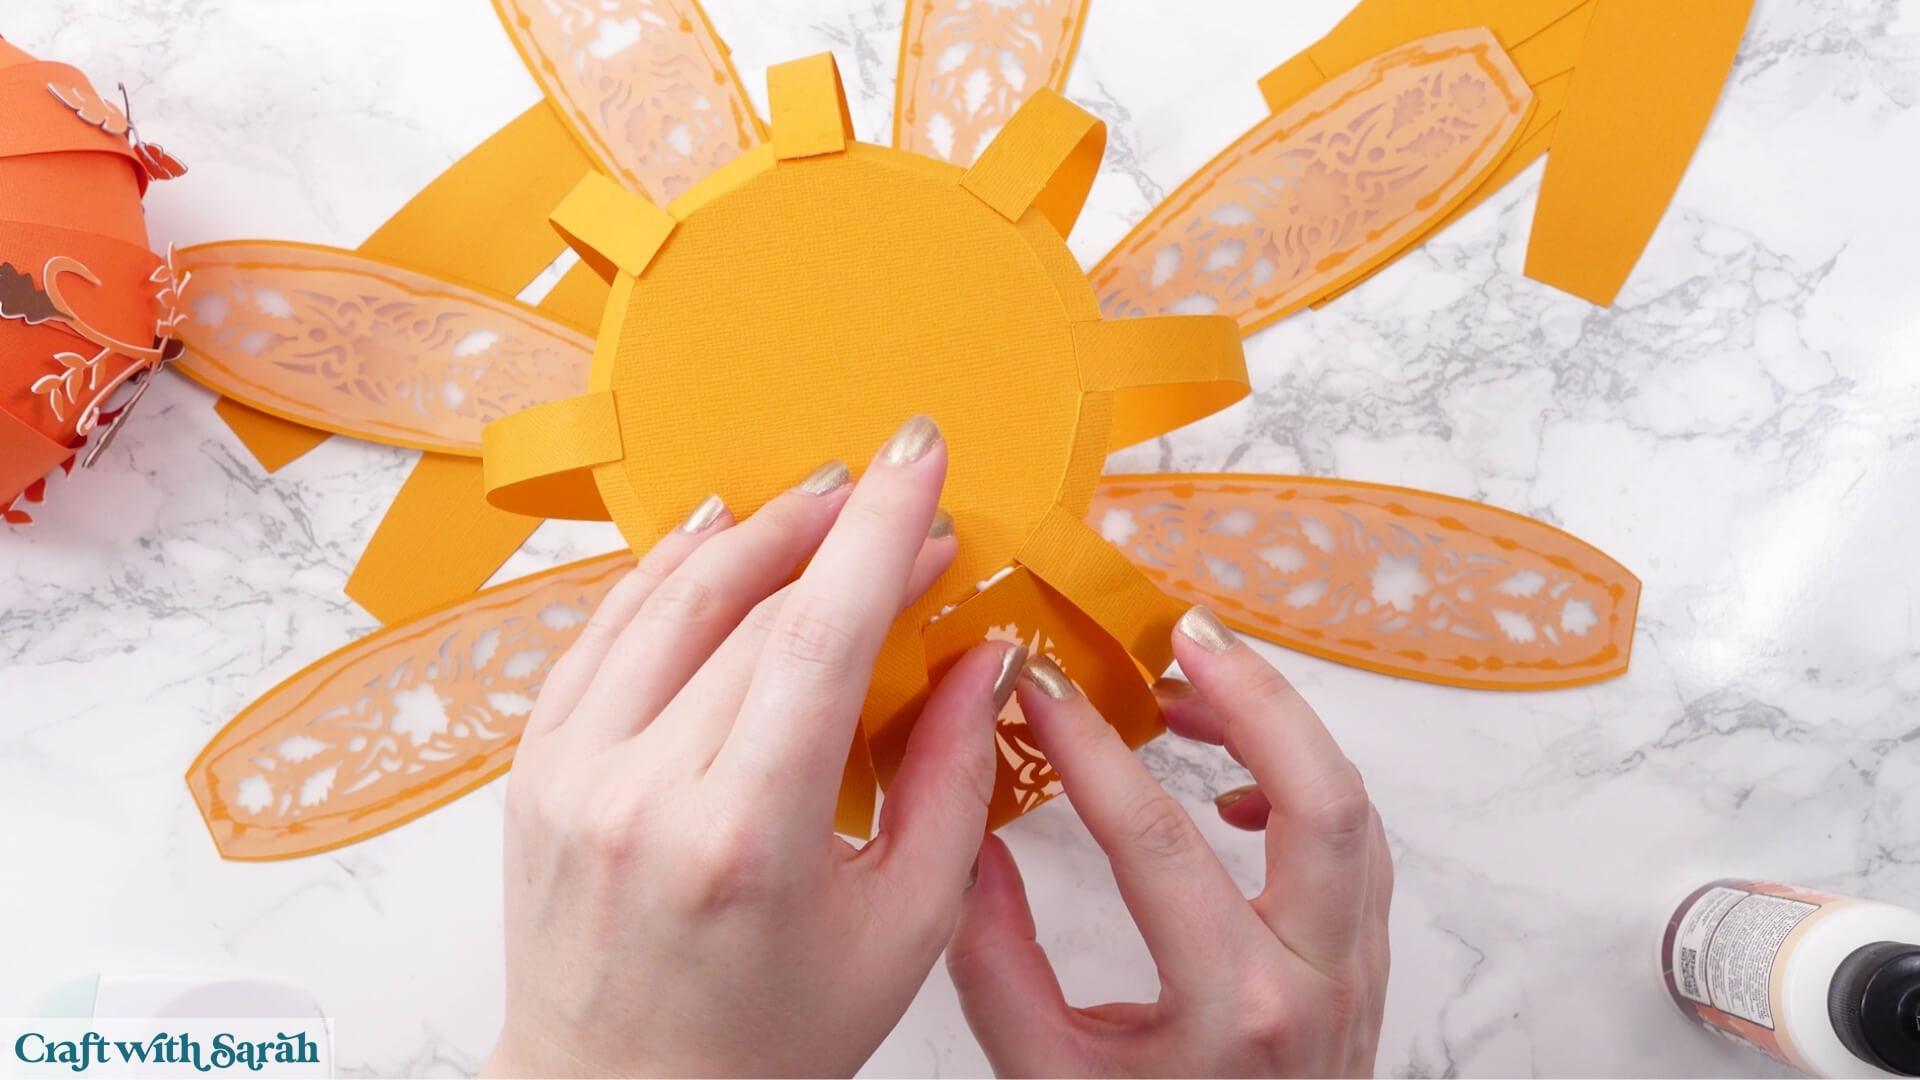
The panel may catch against the inner ‘spider leg’ structure. To avoid this, push the middle of the panel slightly down between the inner pieces and then slide it upwards into position over the tab.
Glue it into place and repeat for all of the panels.
Leave the glue to dry completely again.
Step 9) Add the final pumpkin panels
Turn the pumpkin the right way up.
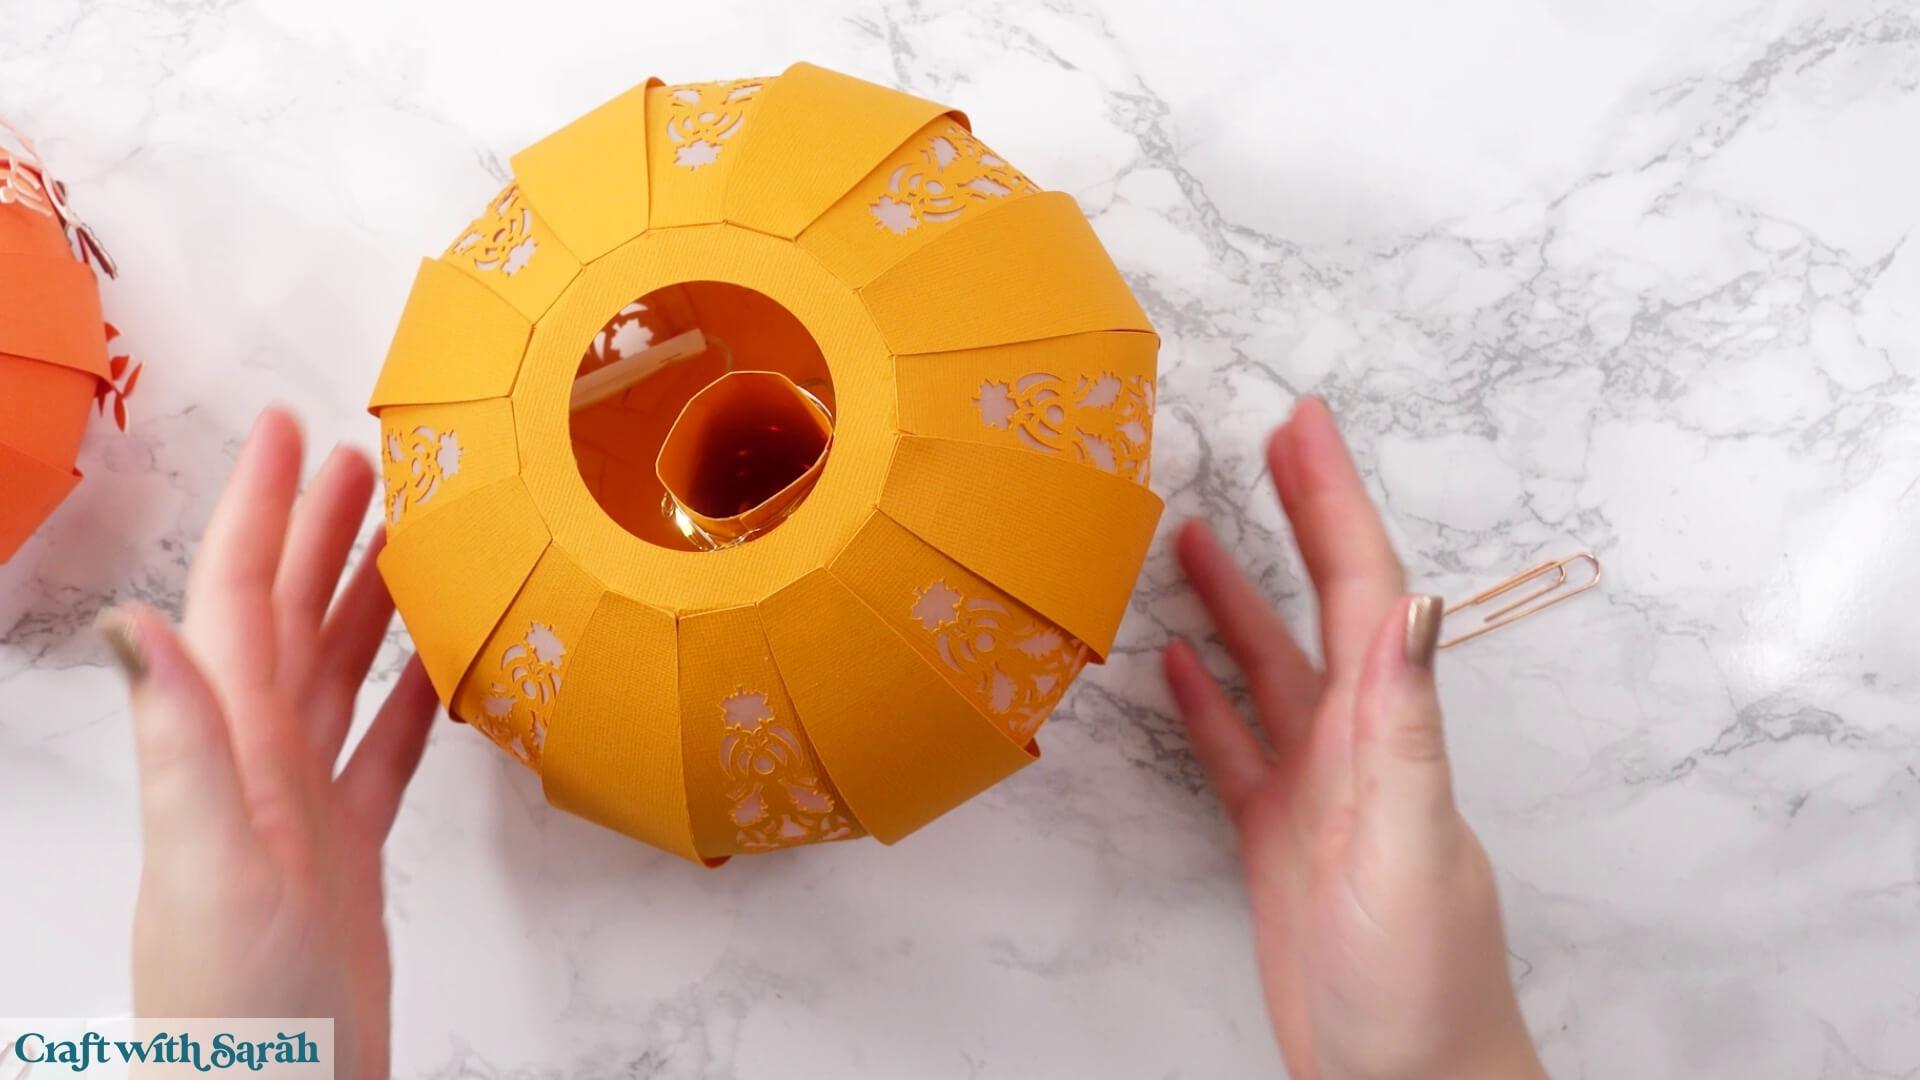
You should now have a much more recognisable pumpkin shape.
Take the remaining side panels. These have a thinner end and a thicker end; the thinner end goes at the top.
Glue the top of each panel onto the corresponding tab. You only need a small amount of glue on the strips.
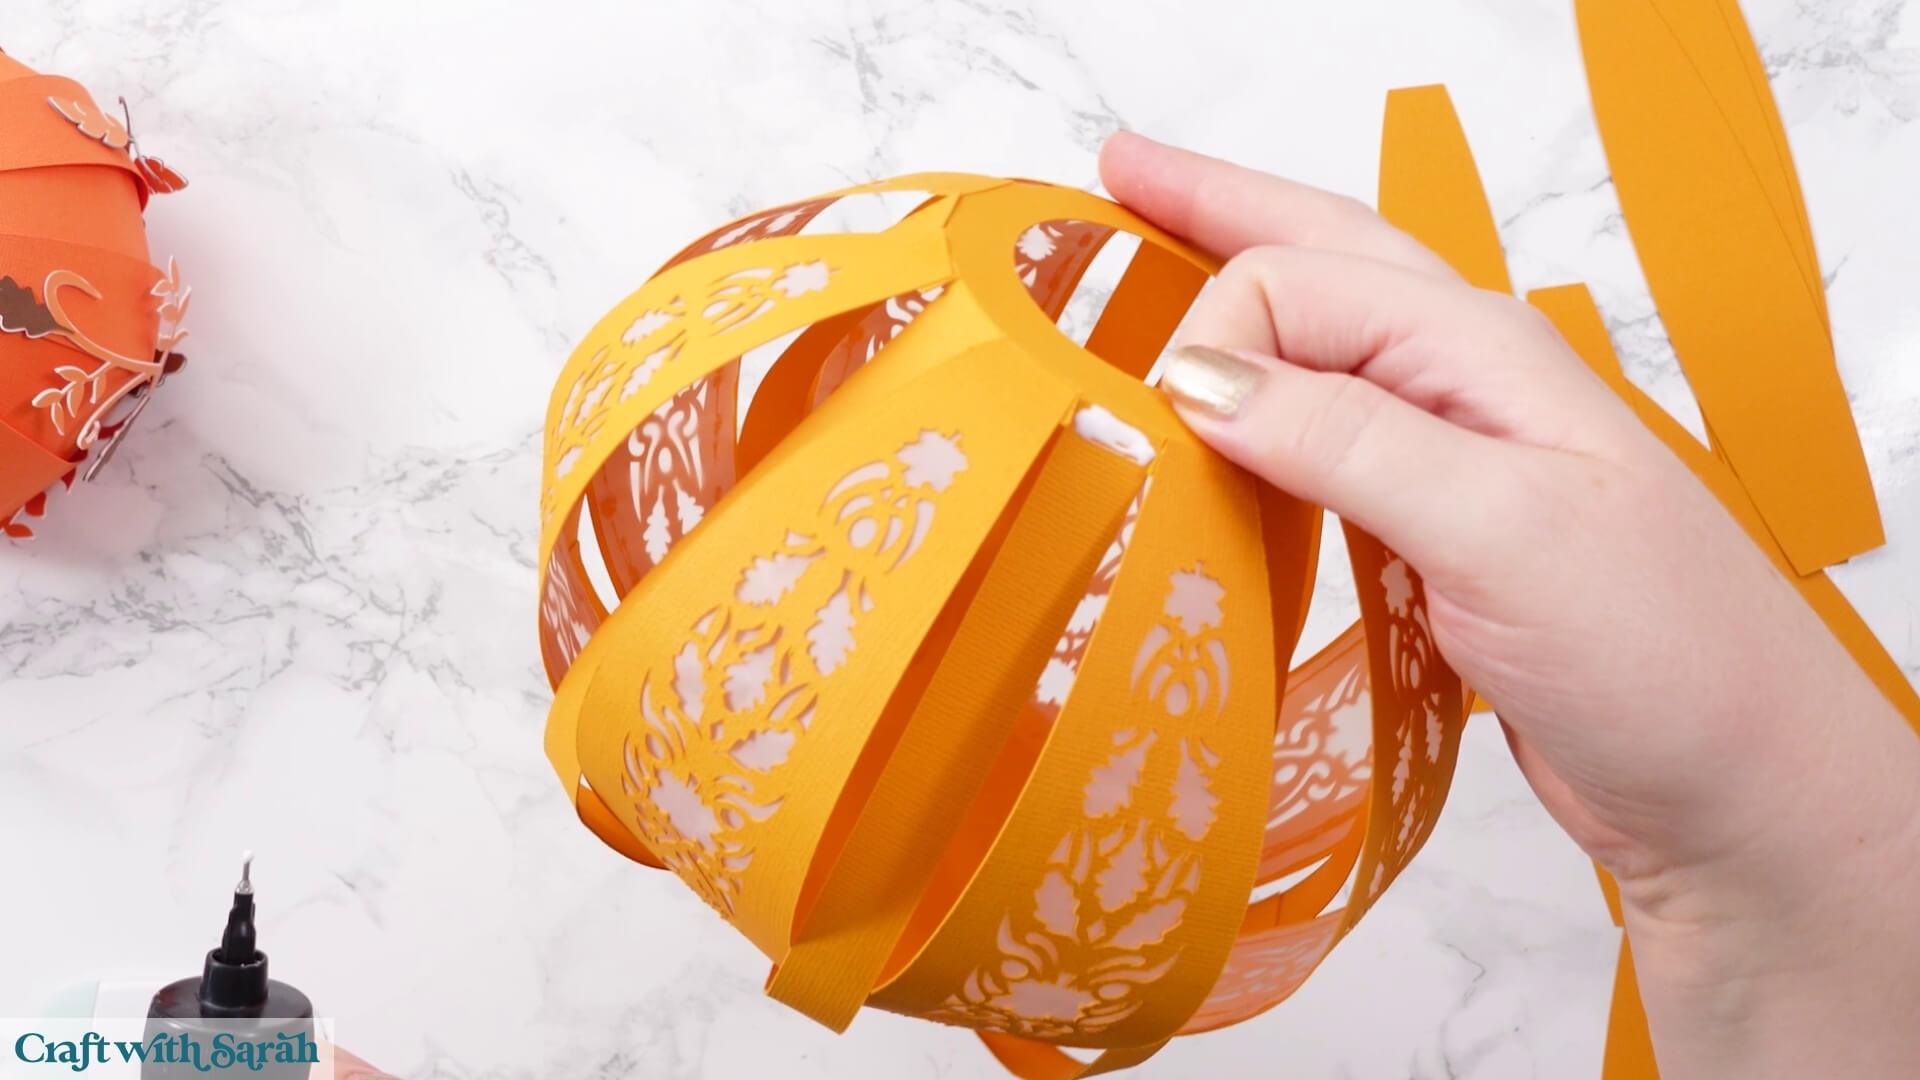
The new panel pieces should slightly overlap the edges of the decorative panels. This hides the joins and creates the appearance of individual pumpkin segments.
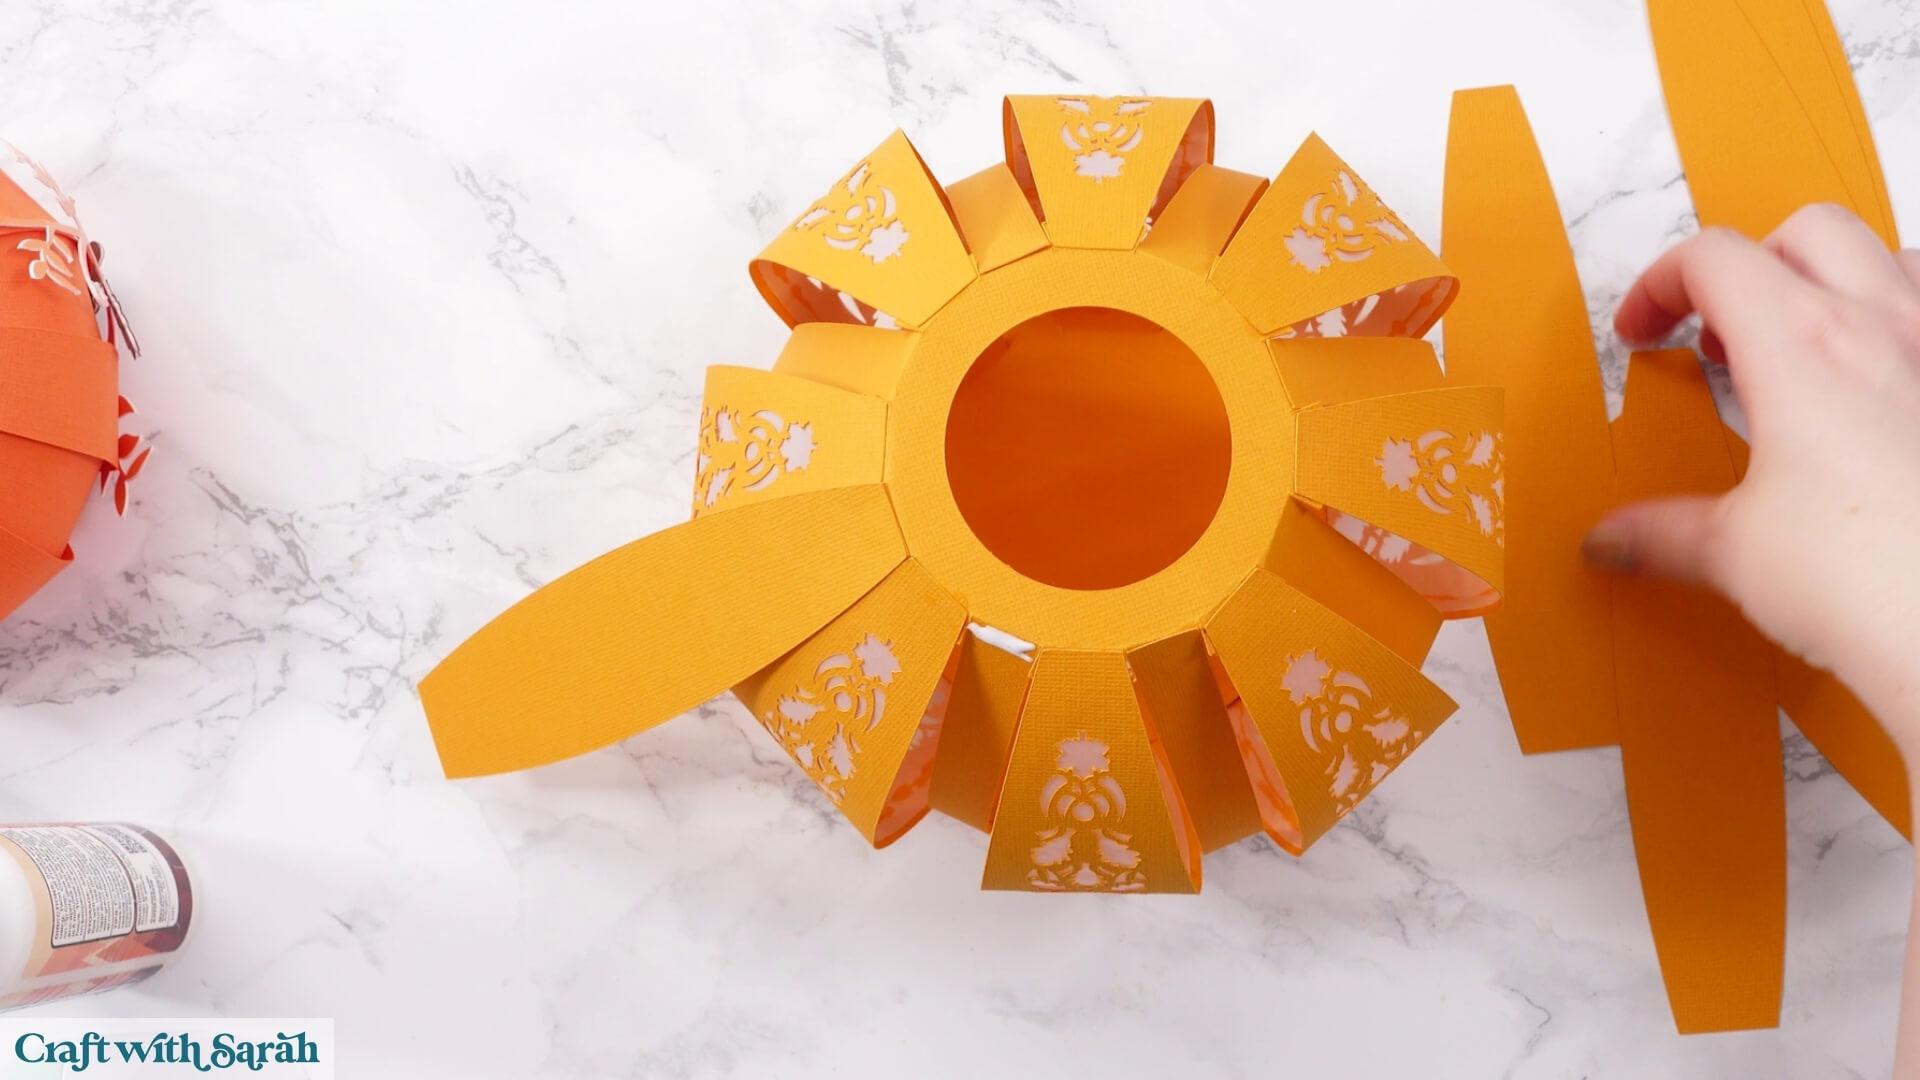
Work all the way around the pumpkin and then leave the glue to dry completely.
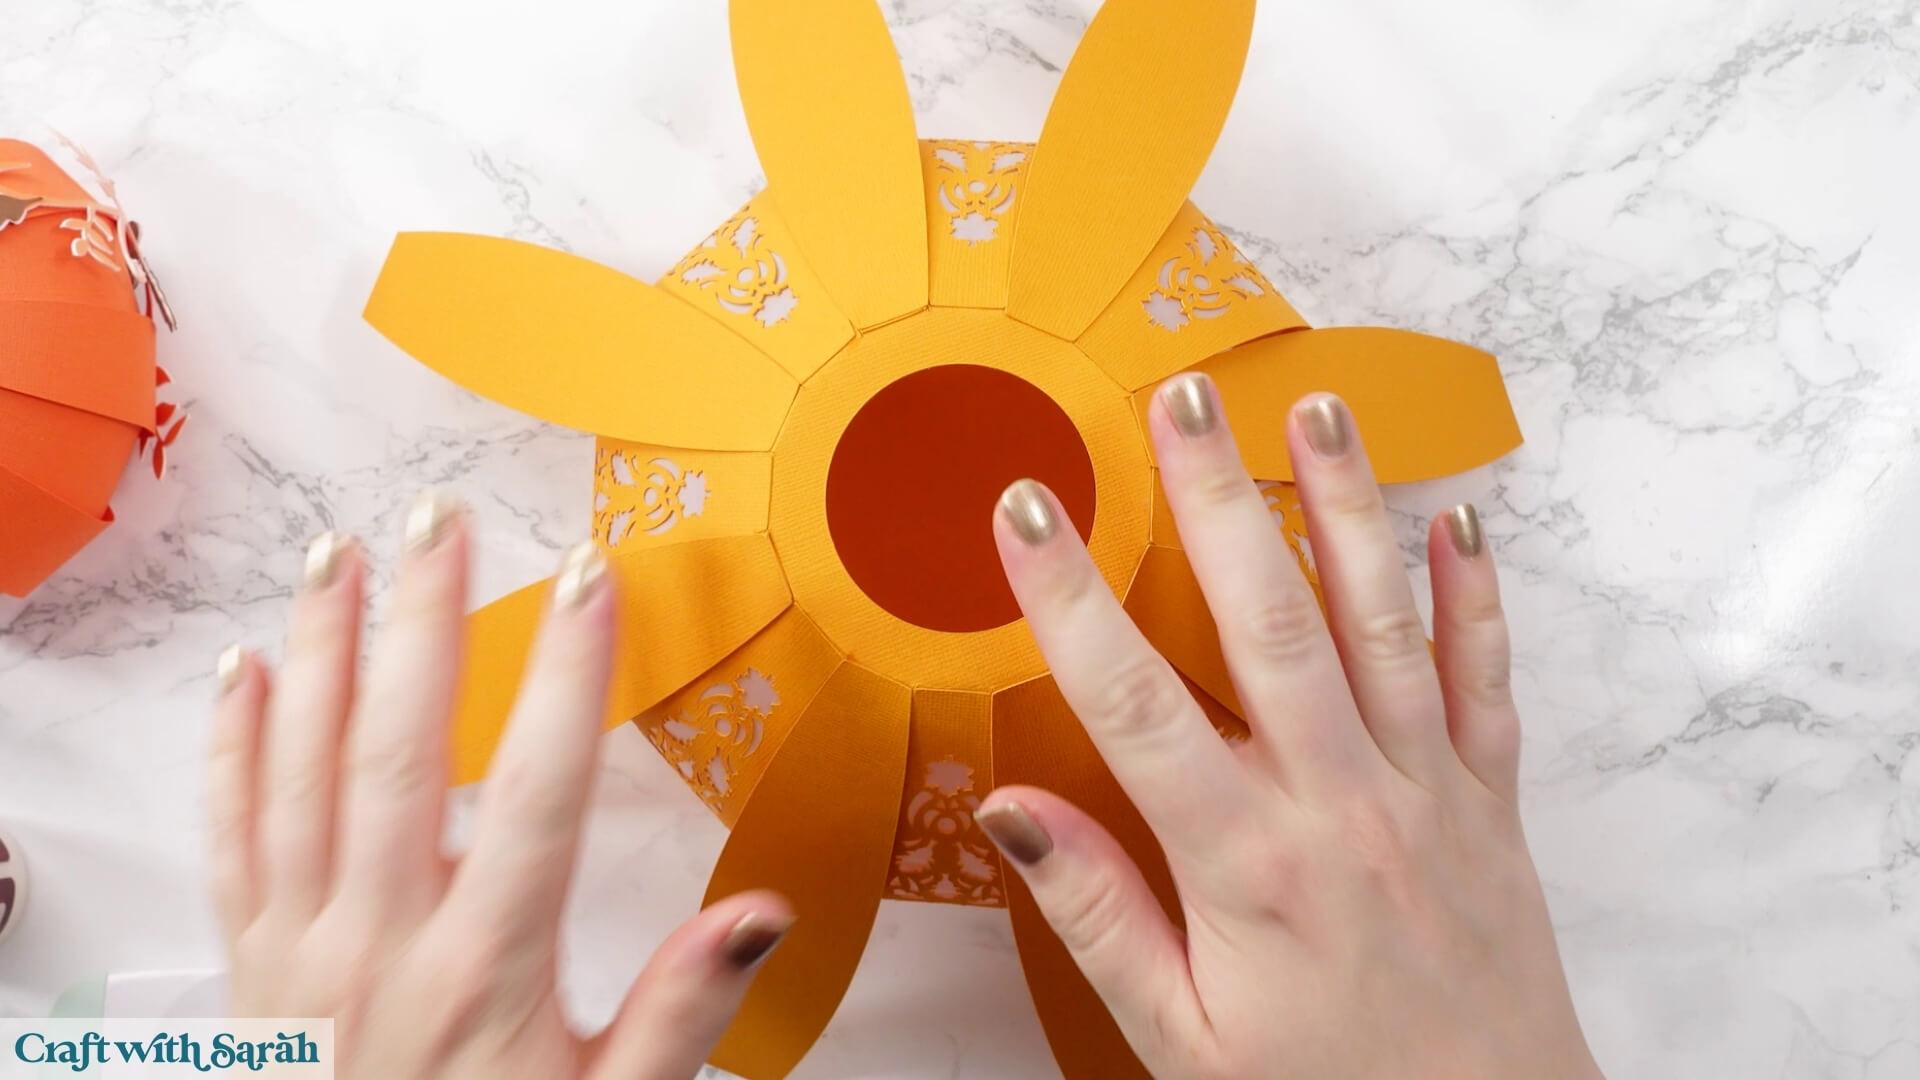
Turn the pumpkin upside down and glue the bottom of each panel onto the corresponding section of the inner structure.
Again, you only need a small strip of glue.
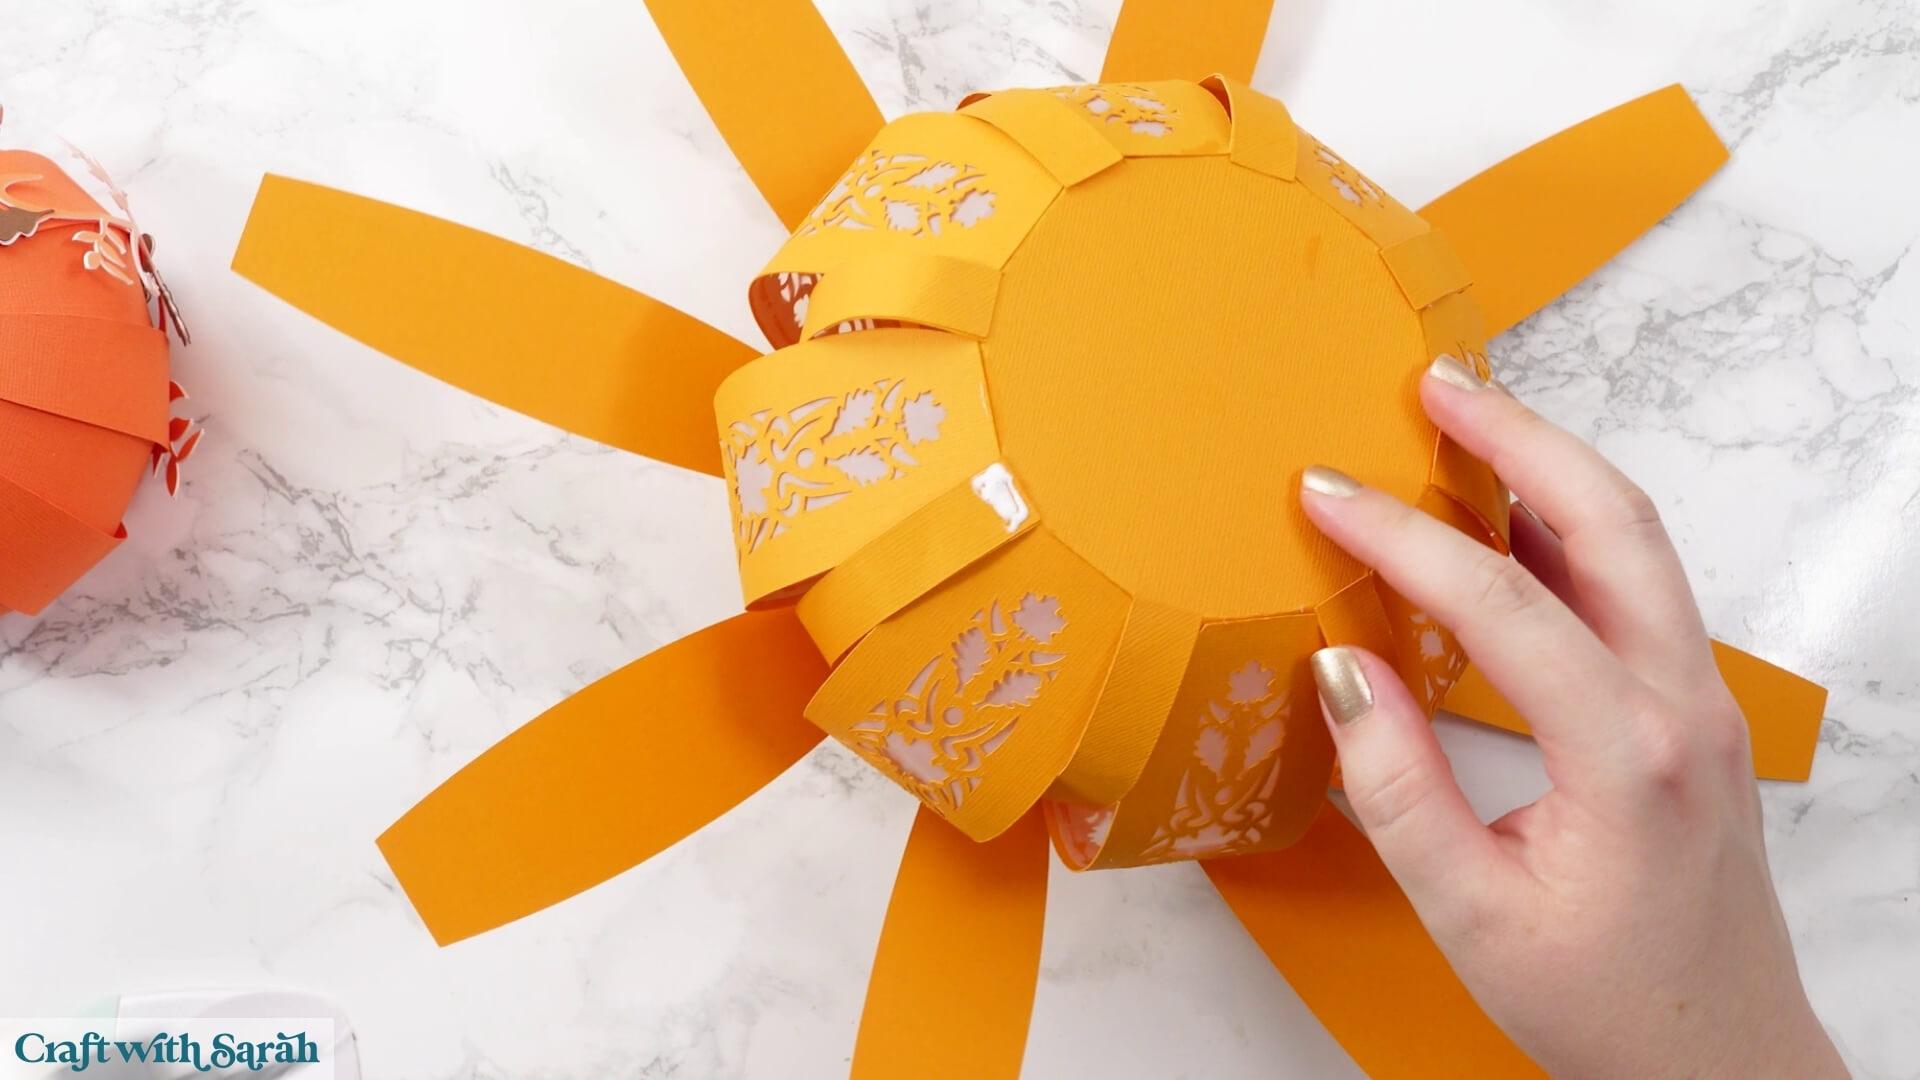
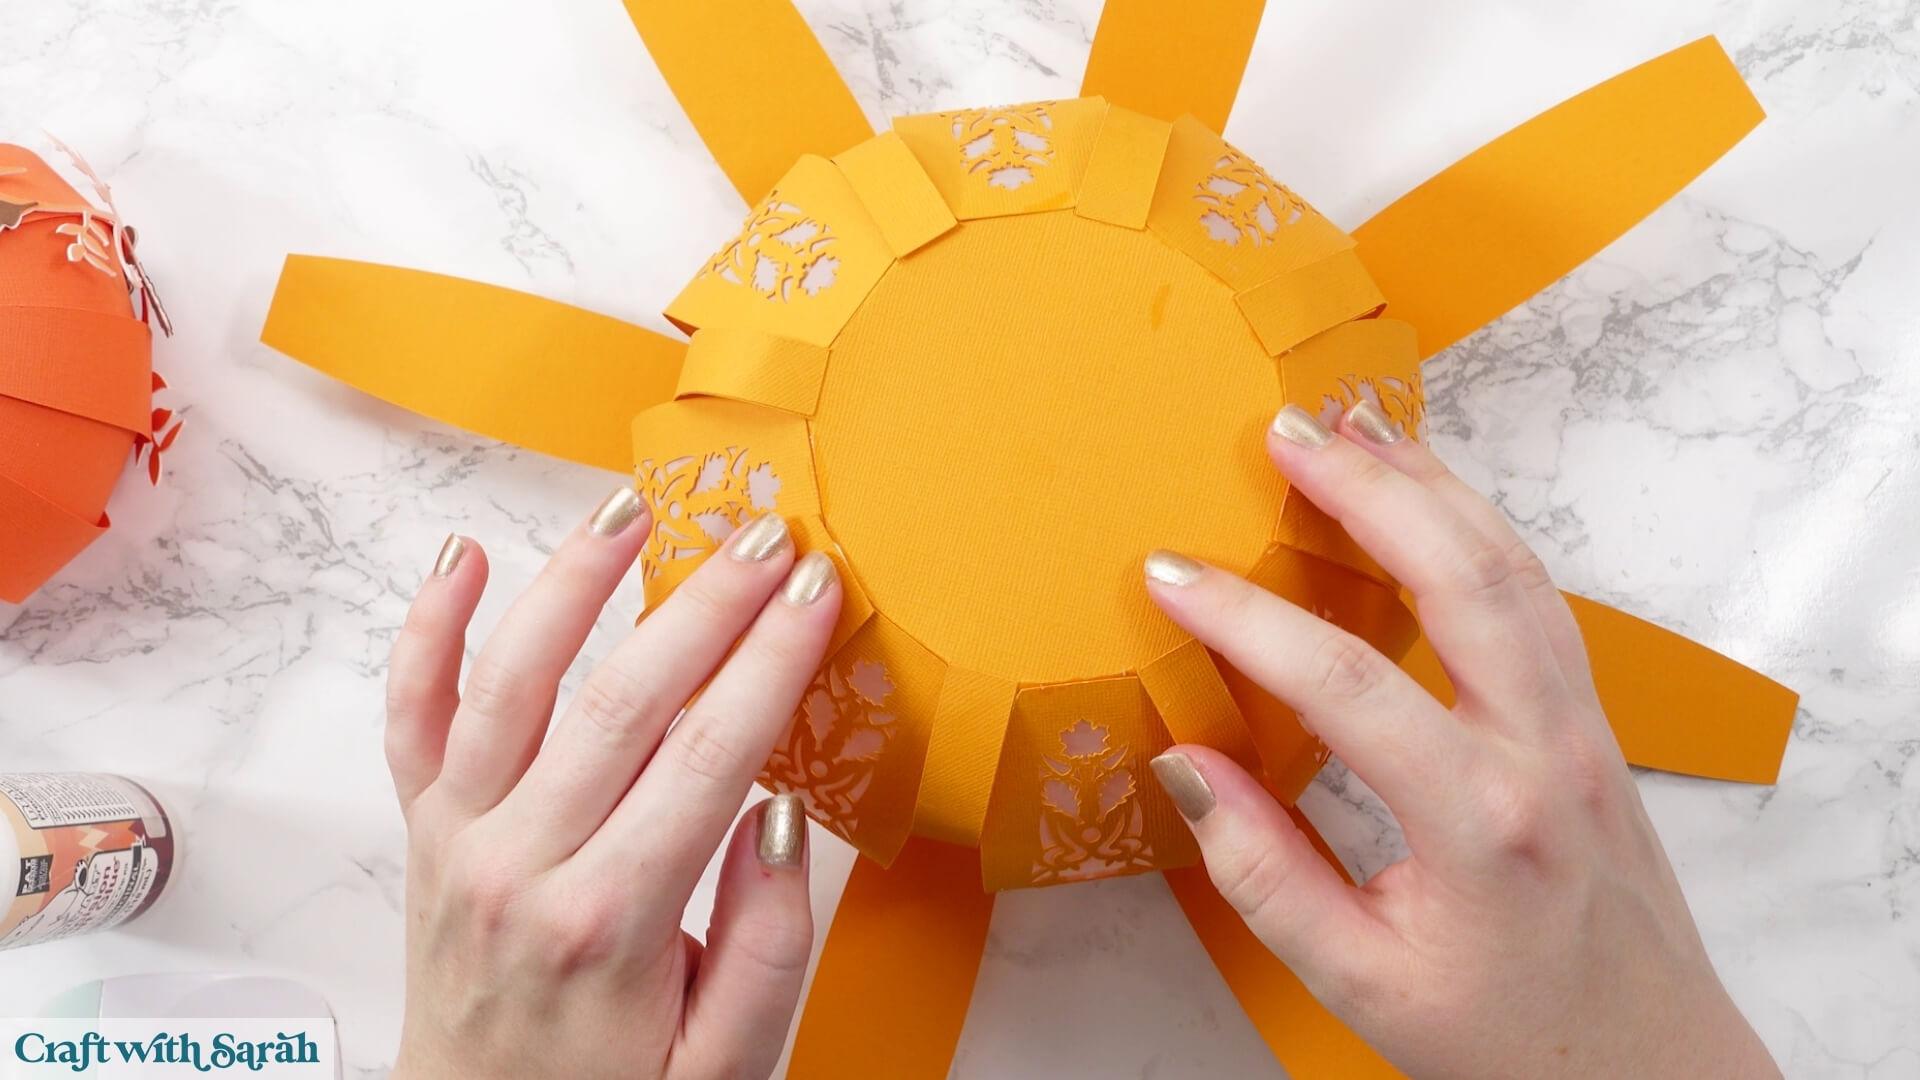
These joins can have a tendency to pop apart while the glue is wet, so hold them down until the glue starts to dry. You can work on several at once using your fingers, or work through them in smaller batches.
Once everything is secure, leave the glue to dry.
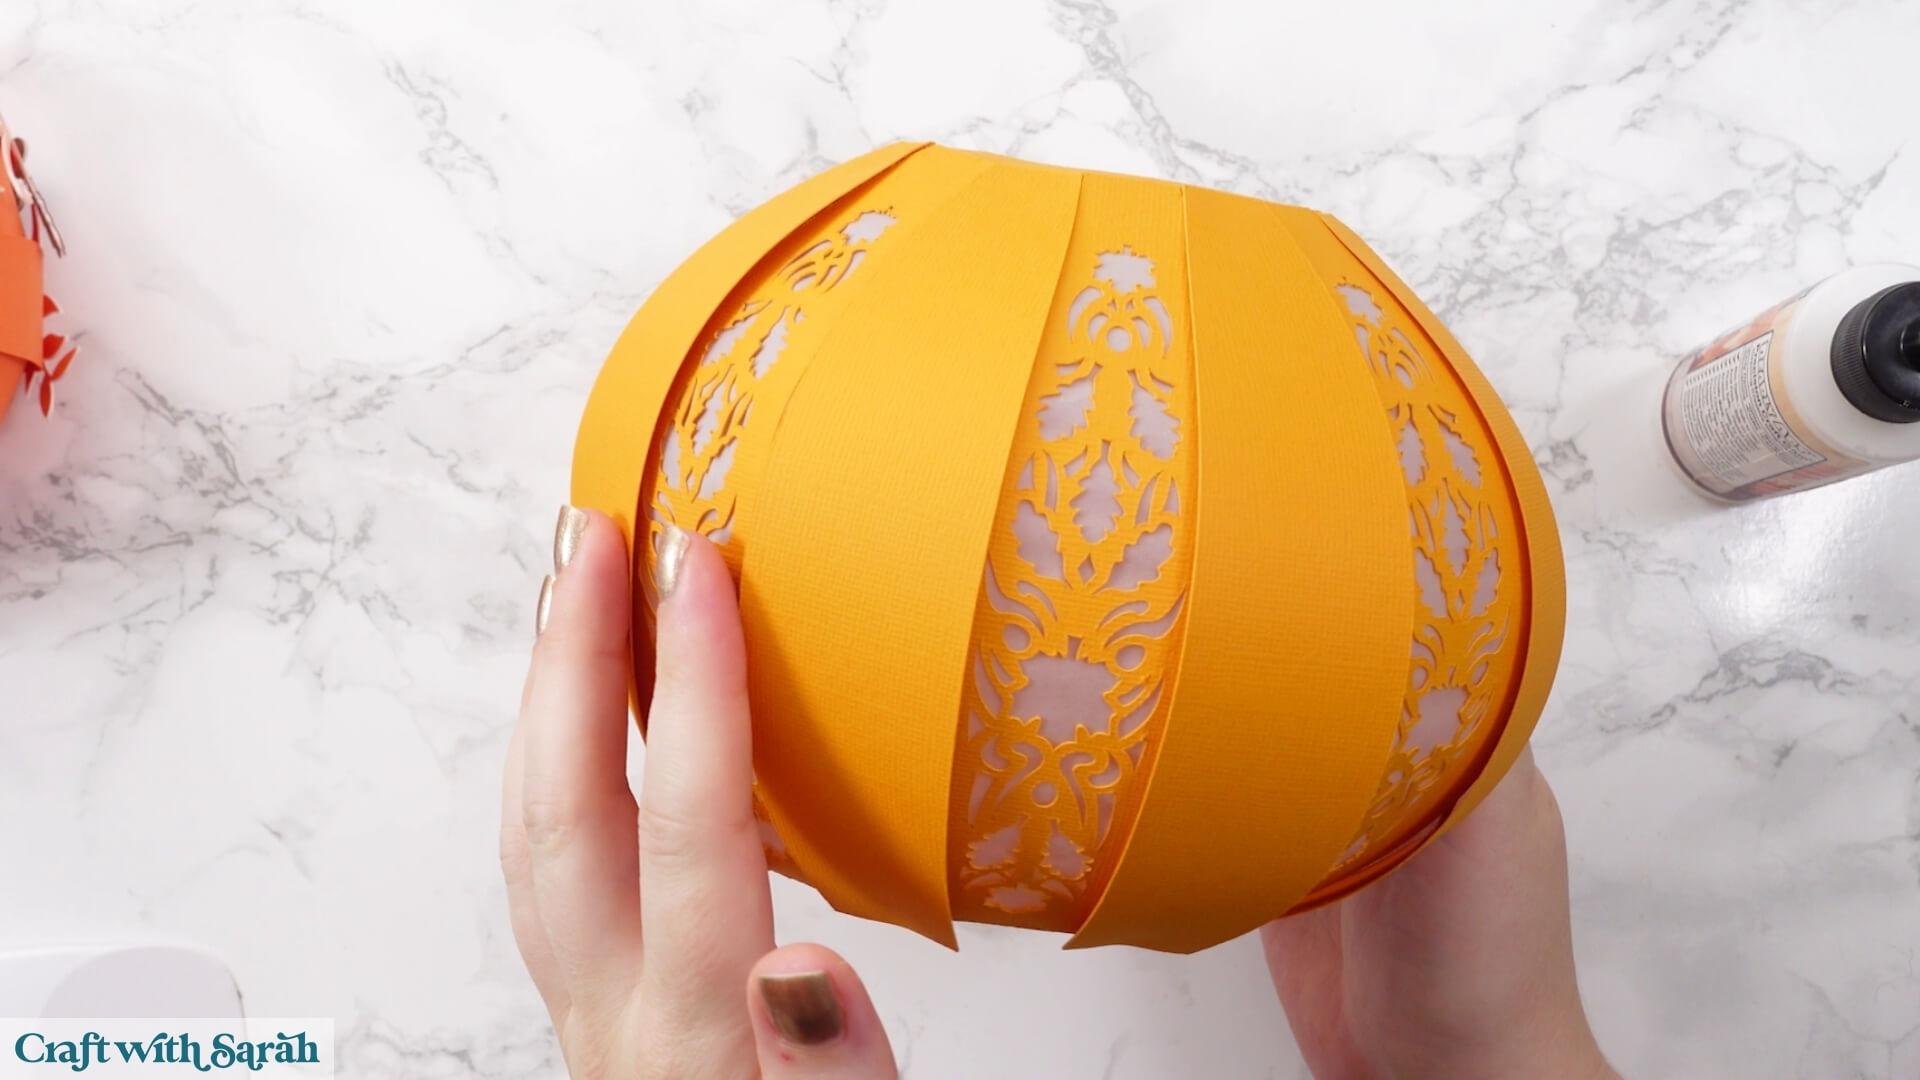
Step 10) Add the lights
There are two different ways to illuminate the pumpkin.
The first is to use small submersible LED lights. Switch them on and drop them through the opening at the top of the pumpkin.
You may need several lights to get a strong glow. If you struggle to get them to land the correct way up, try carefully lowering them inside on a spoon.
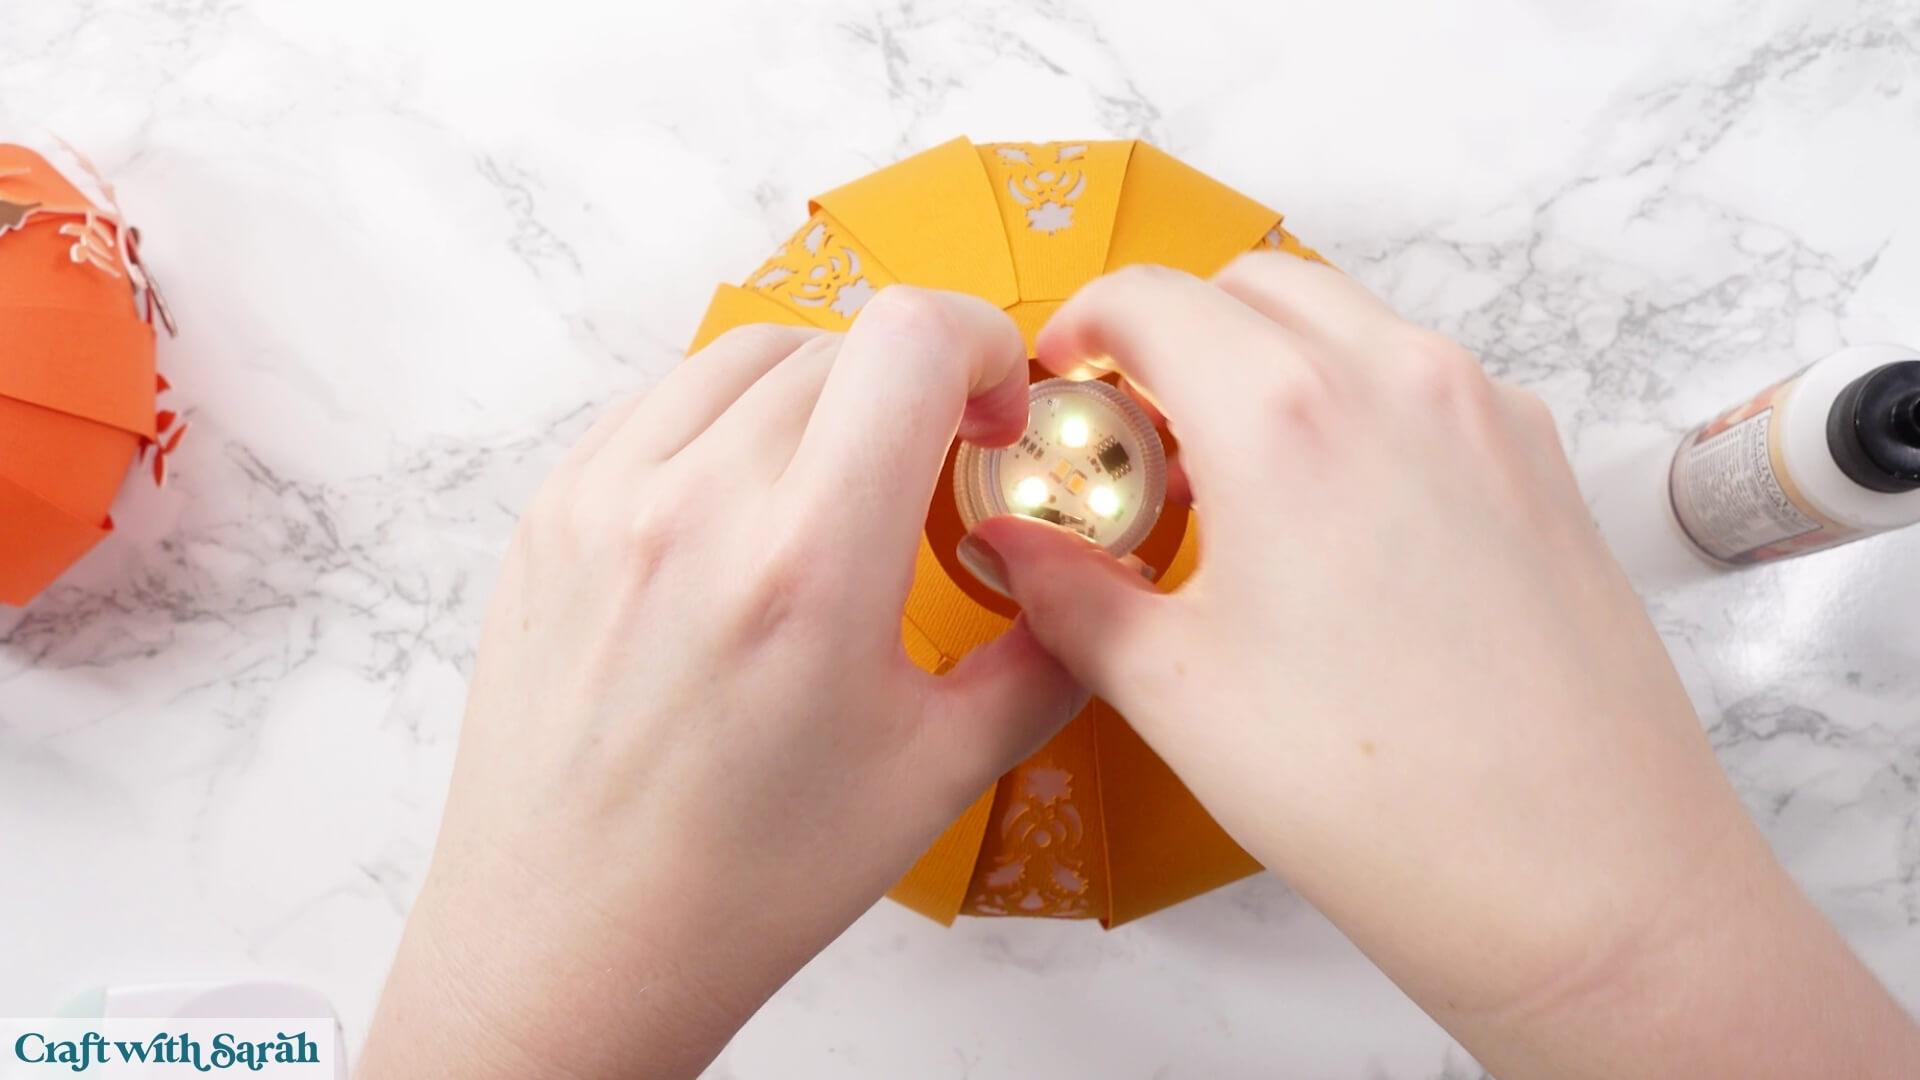
The second option, and the one that gives a more consistent glow from top to bottom, is to use battery-powered fairy lights.
For this method, take the lighting tower piece and roll it into a cylinder.
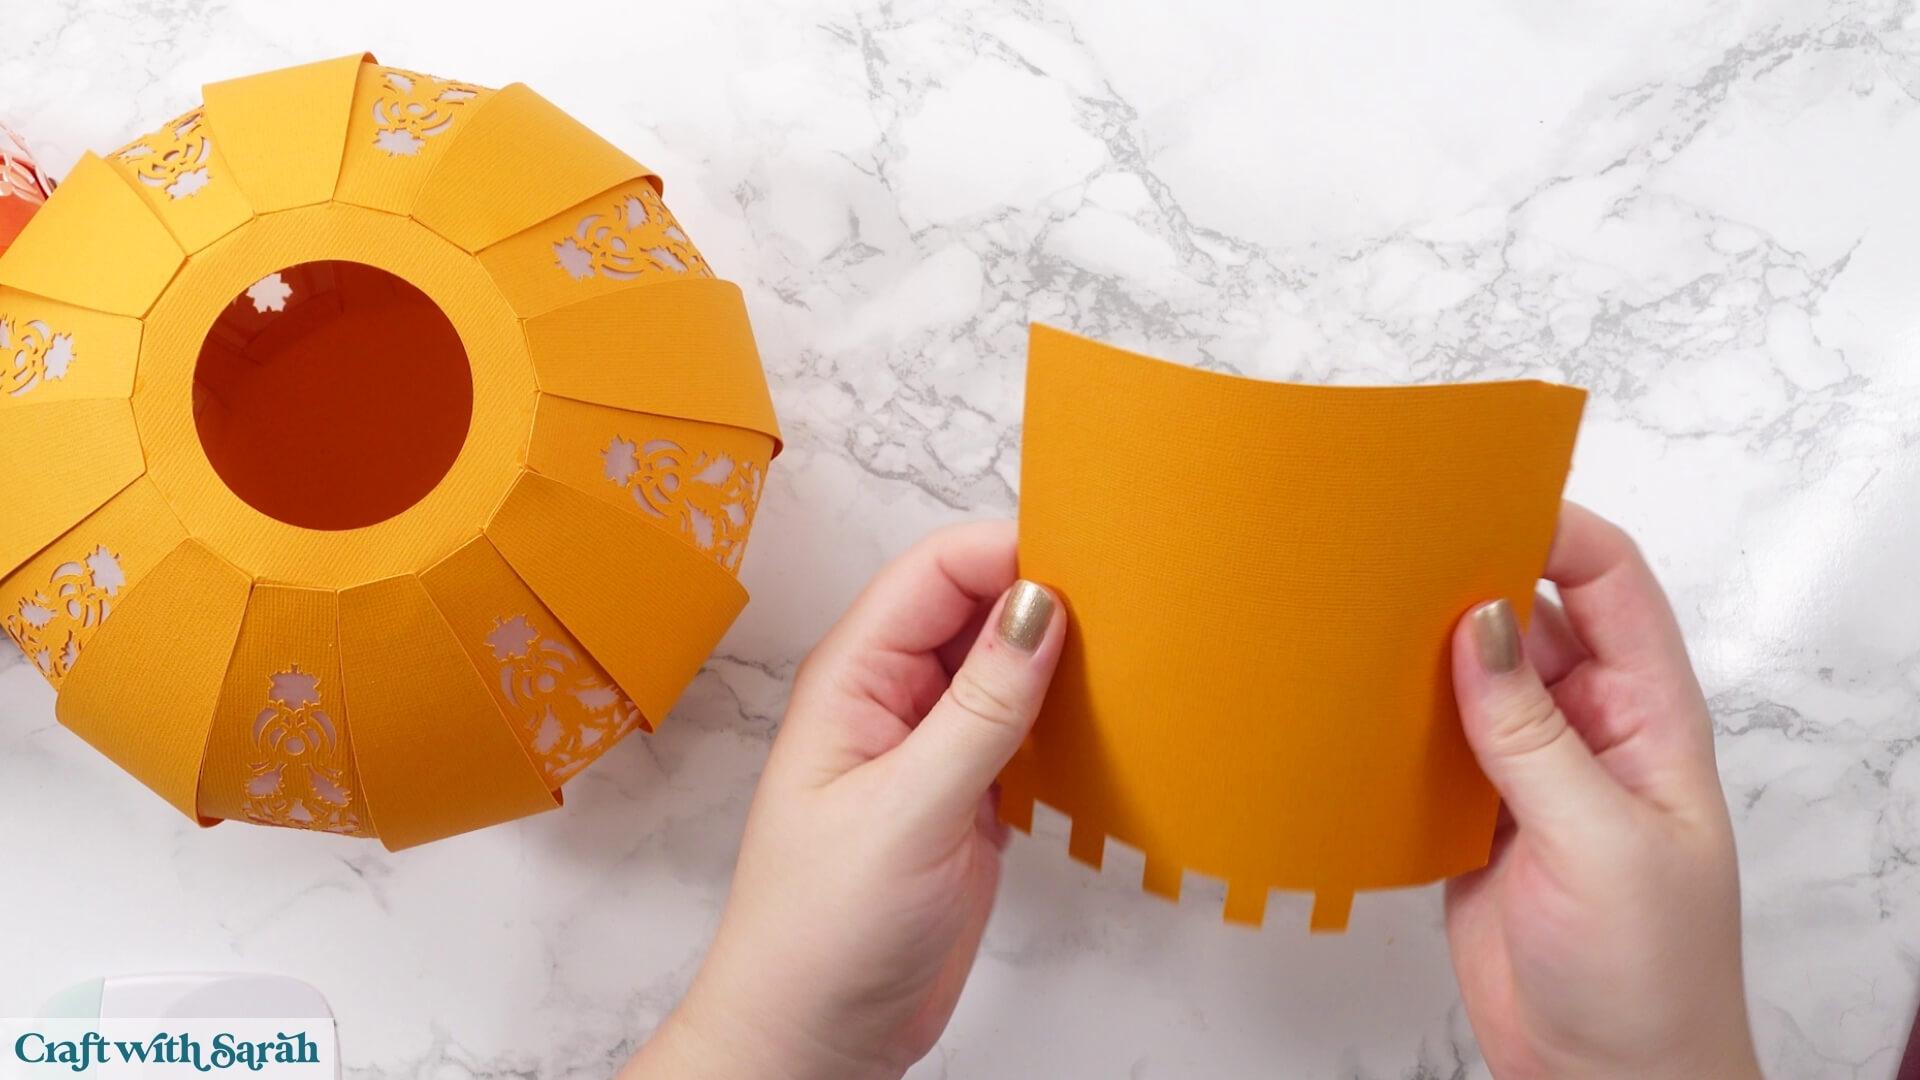
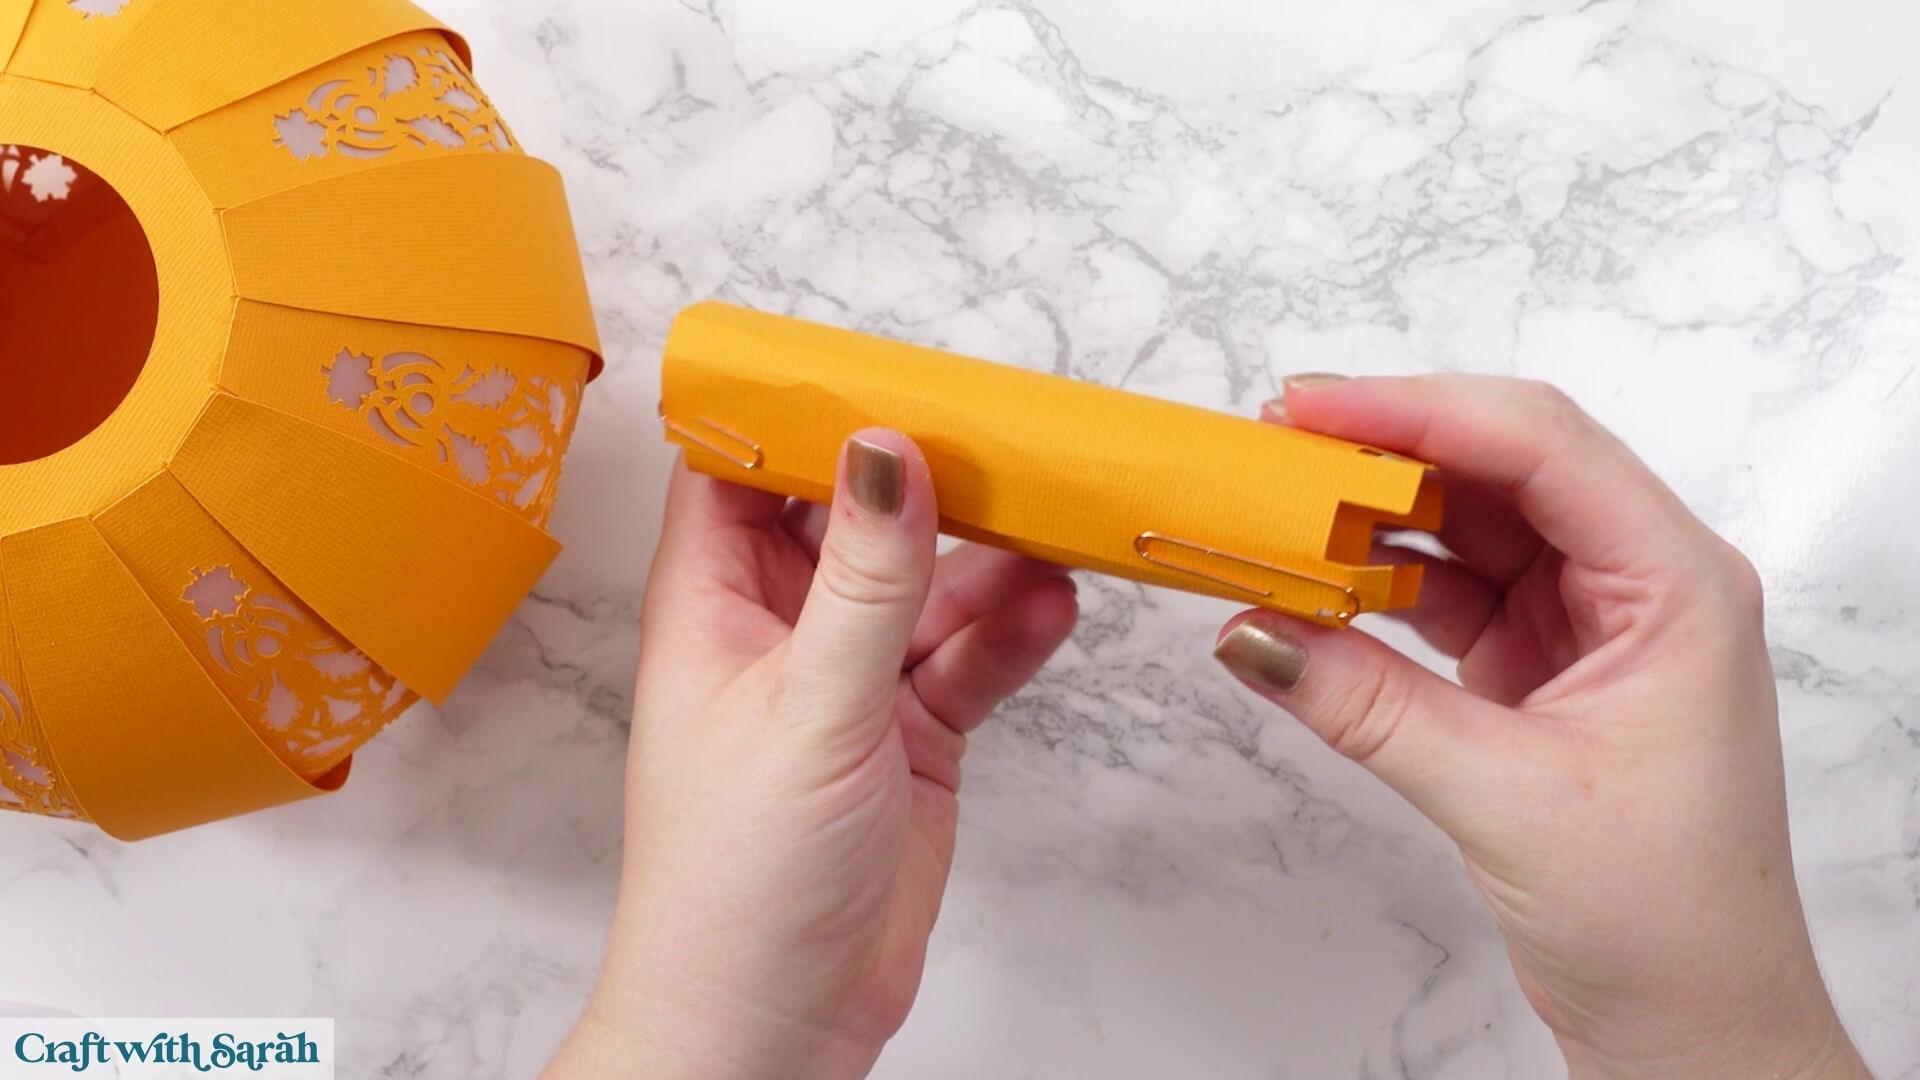
Glue the cylinder together and use paper clips to hold it while the glue dries. Fold the small tabs at the bottom outwards to help it stand up.
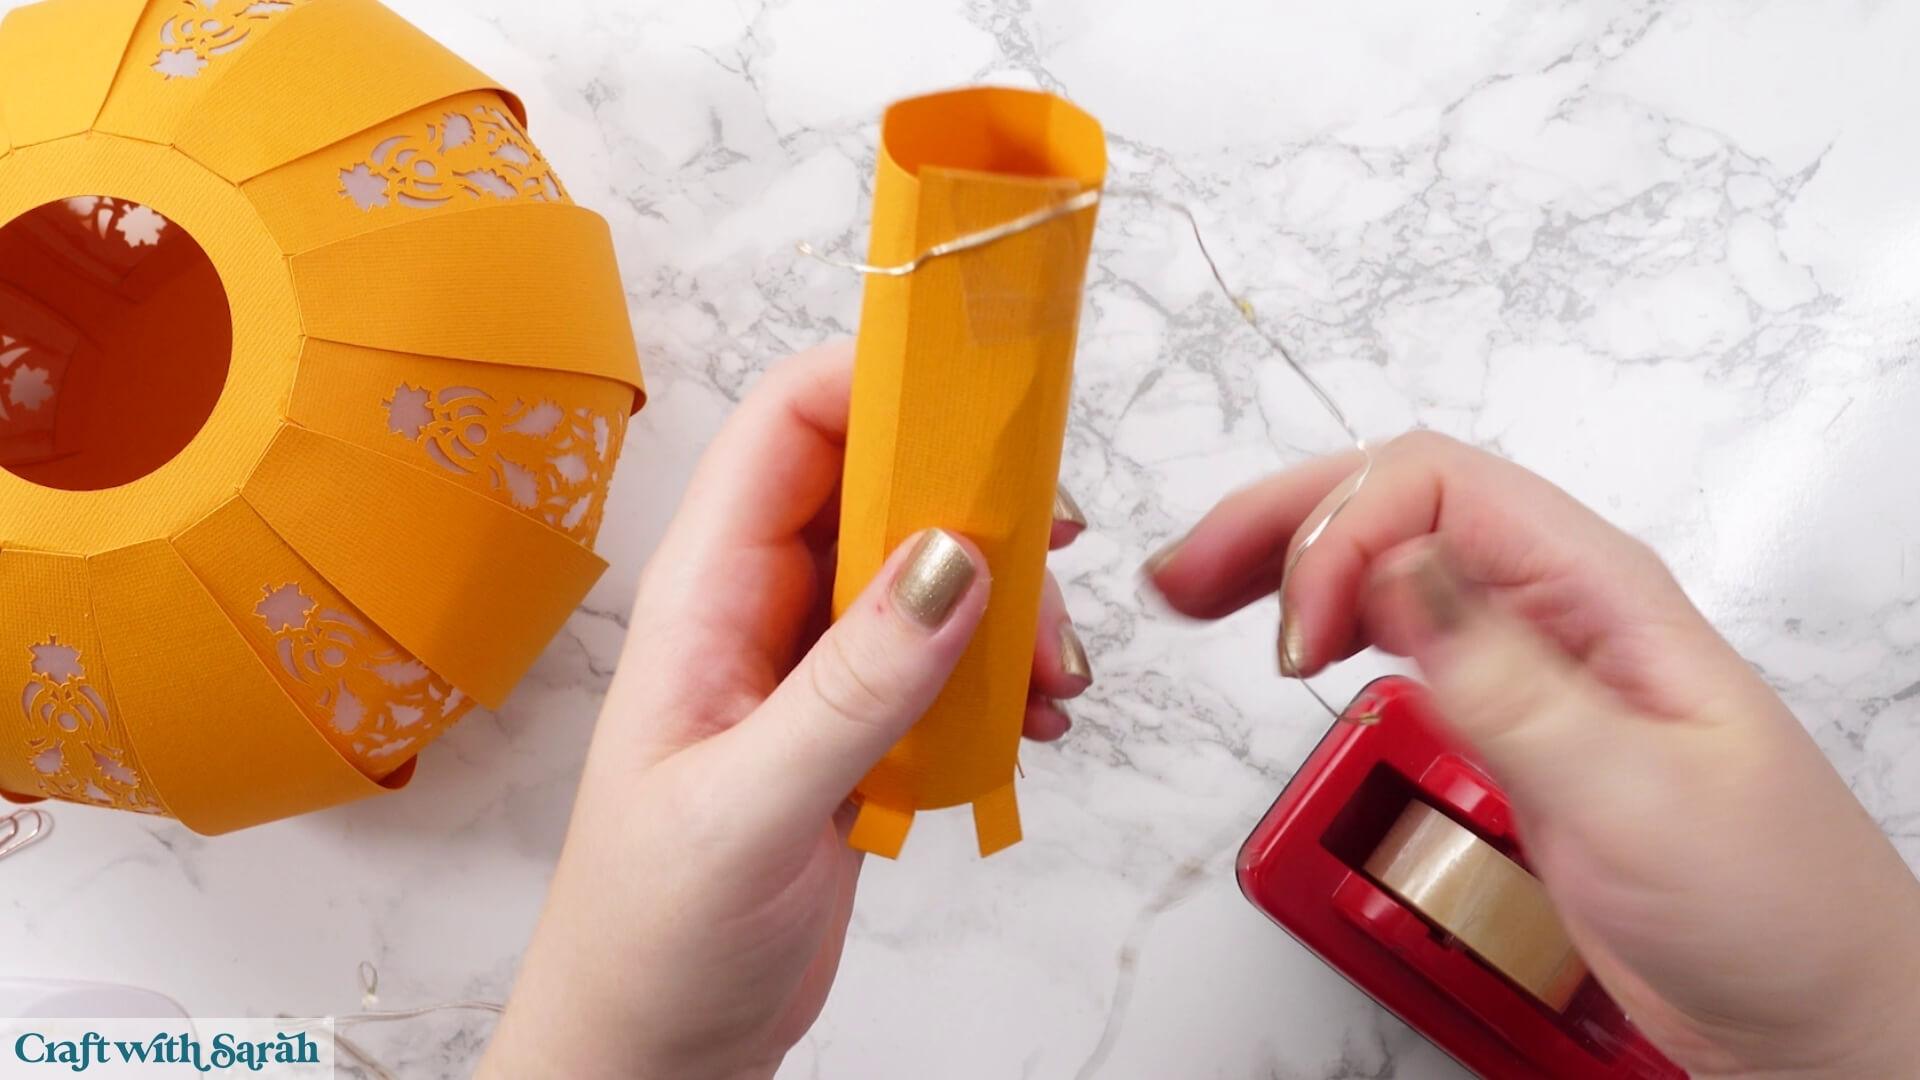
Tape the end of your fairy lights to the cylinder and loosely wrap the lights around it from one end to the other.
Don’t pull them too tightly against the cardstock.
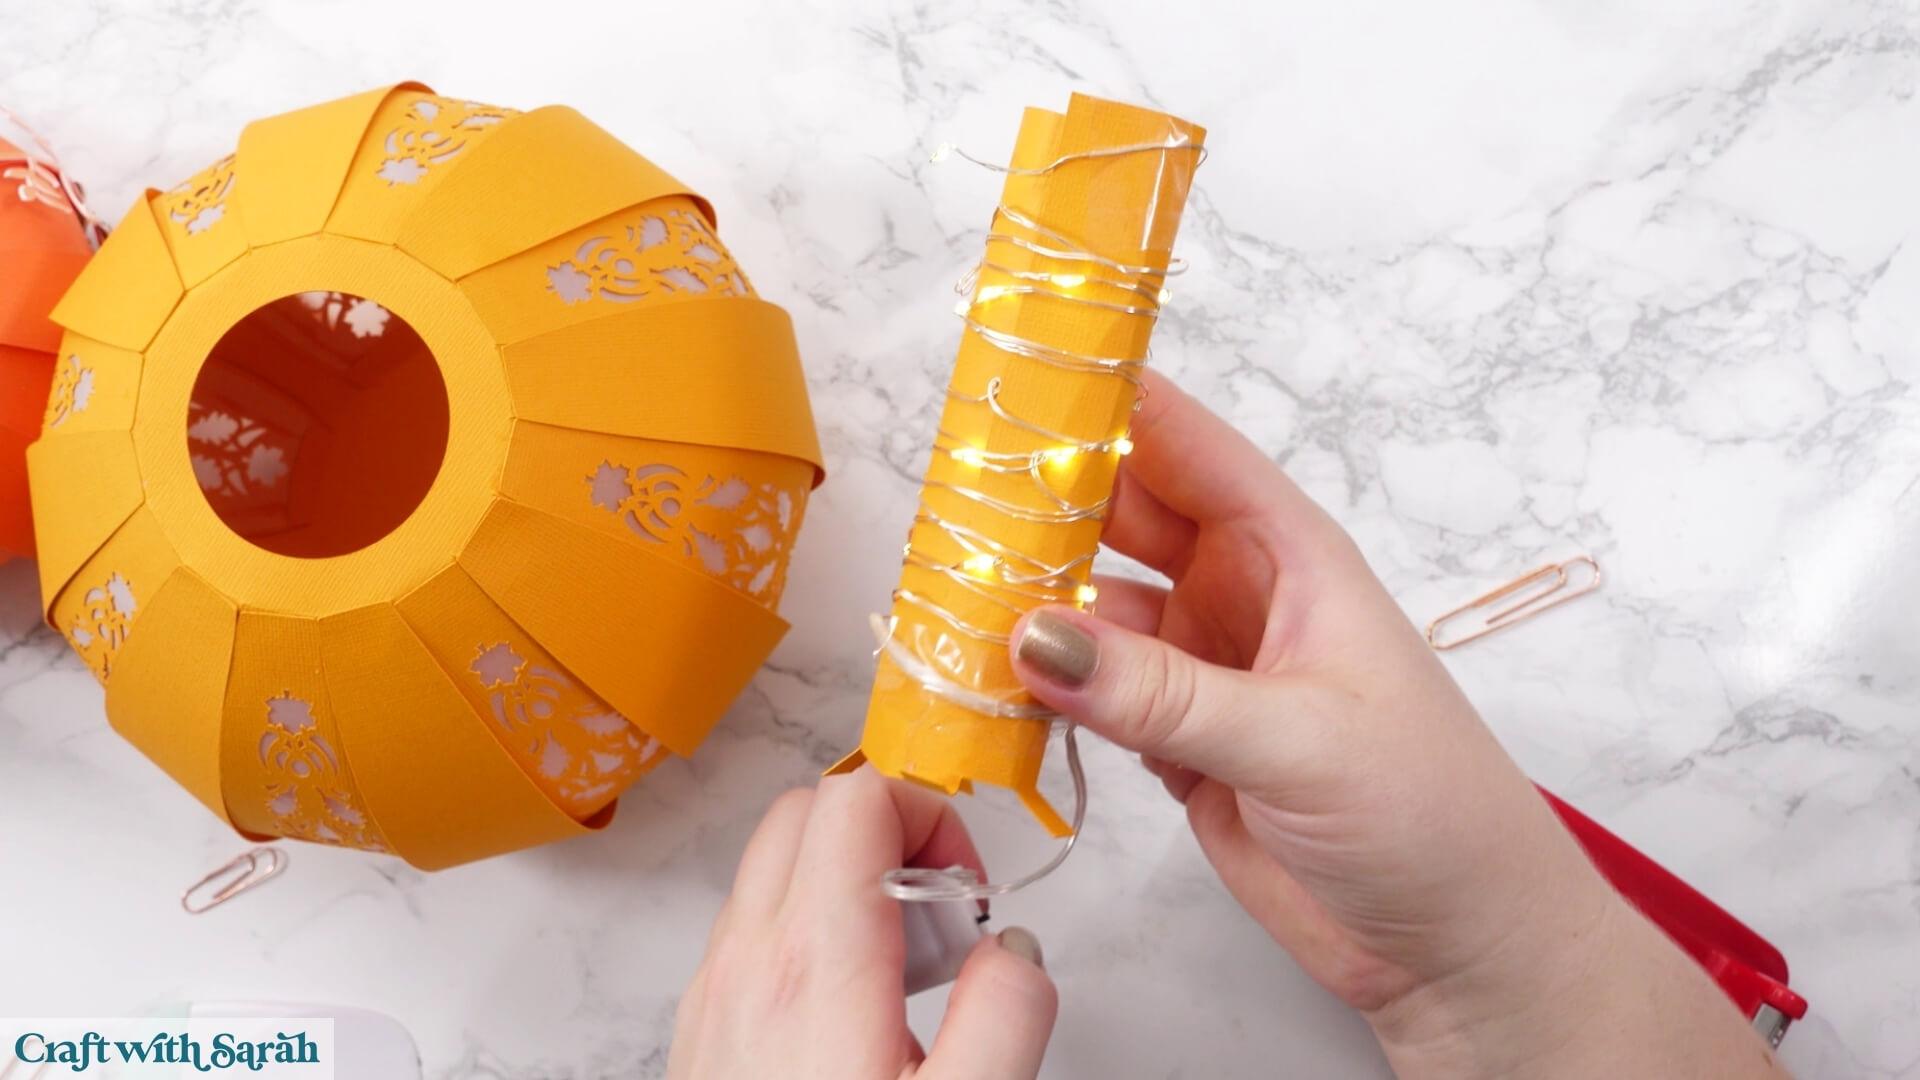
Tape the other end into place and then slide the complete lighting tower through the opening in the top of the pumpkin.
It will sit inside the pumpkin and help distribute the lights all the way from the bottom to the top.
Step 11) Make the pumpkin stalk
Take the three stalk pieces and fold them along their score lines.
For the piece with a slit down the middle, fold one section towards you and the other away from you. Open it back out afterwards.
For the other slotted piece, fold both sections in the same direction and then open it out again.
Slide the two pieces together where the slits intersect to create a cross shape.
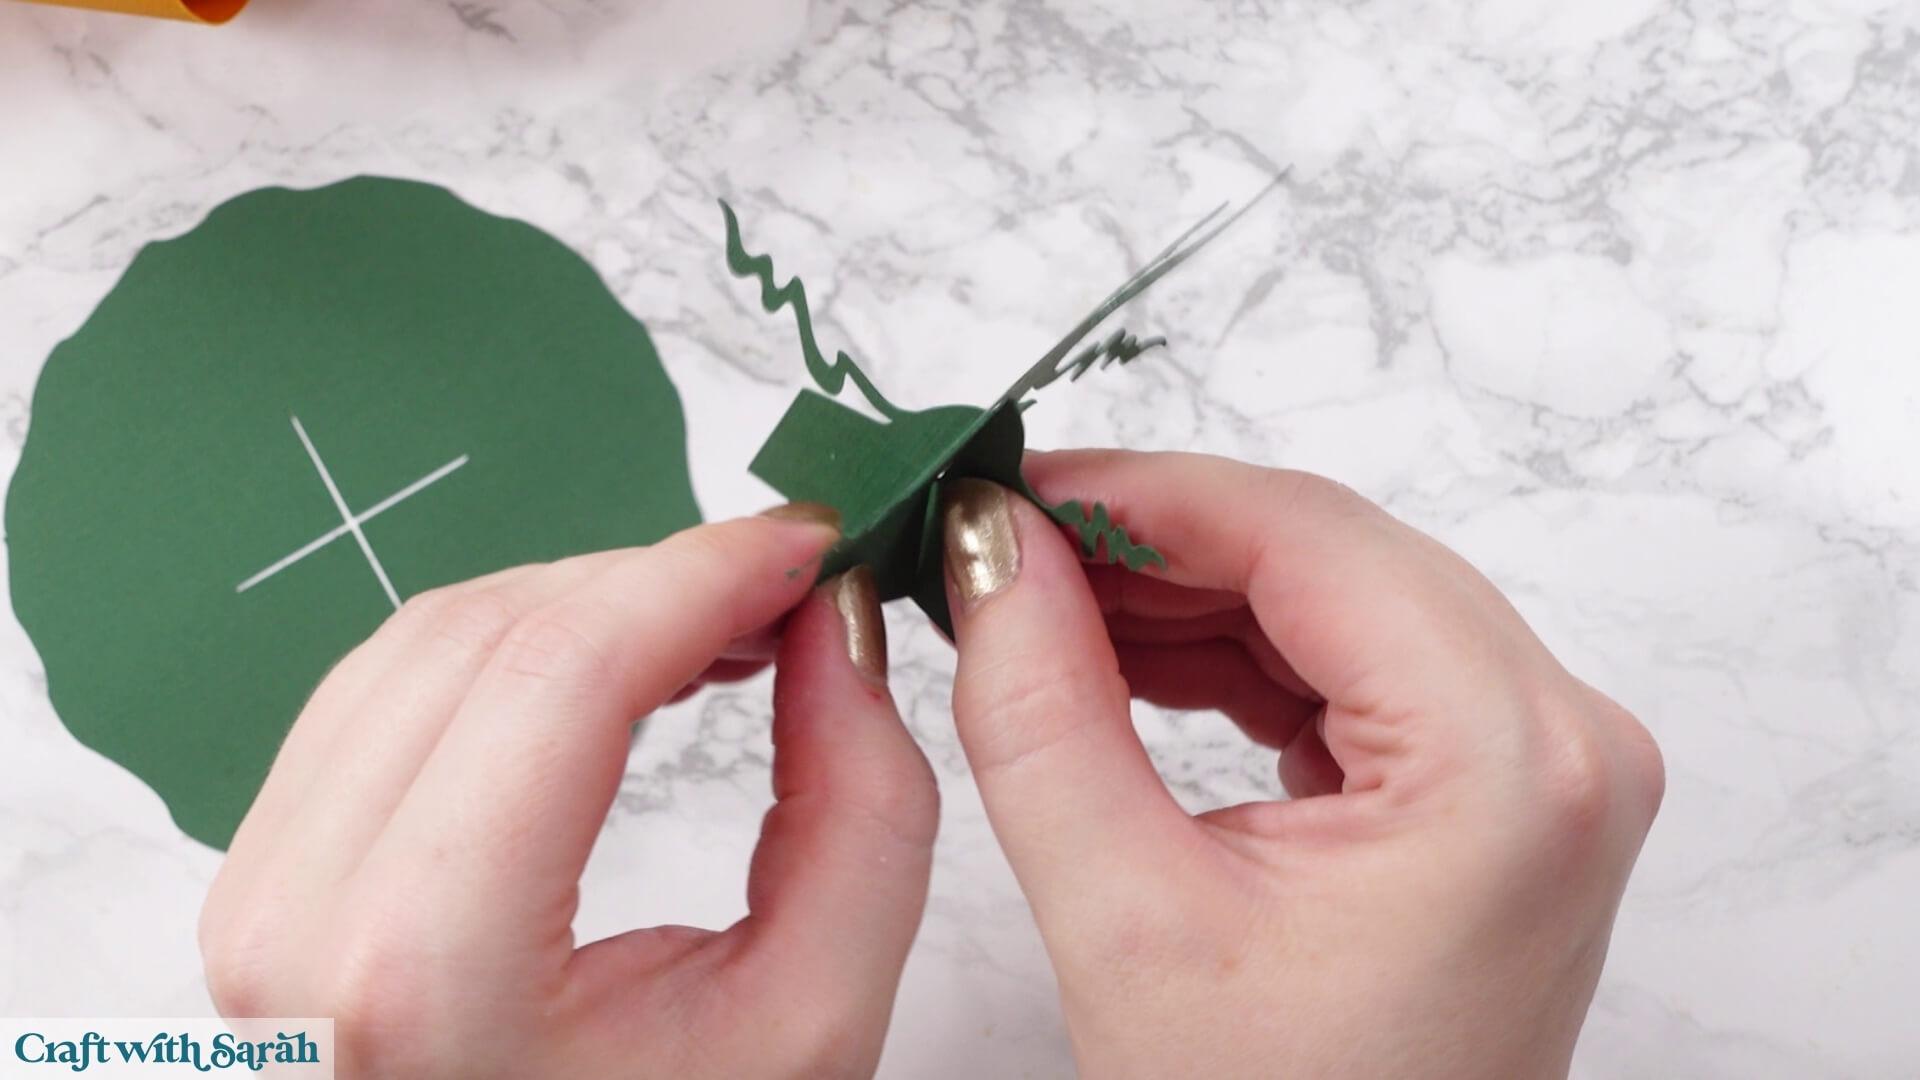
Push this cross through the corresponding opening in the remaining stalk piece.
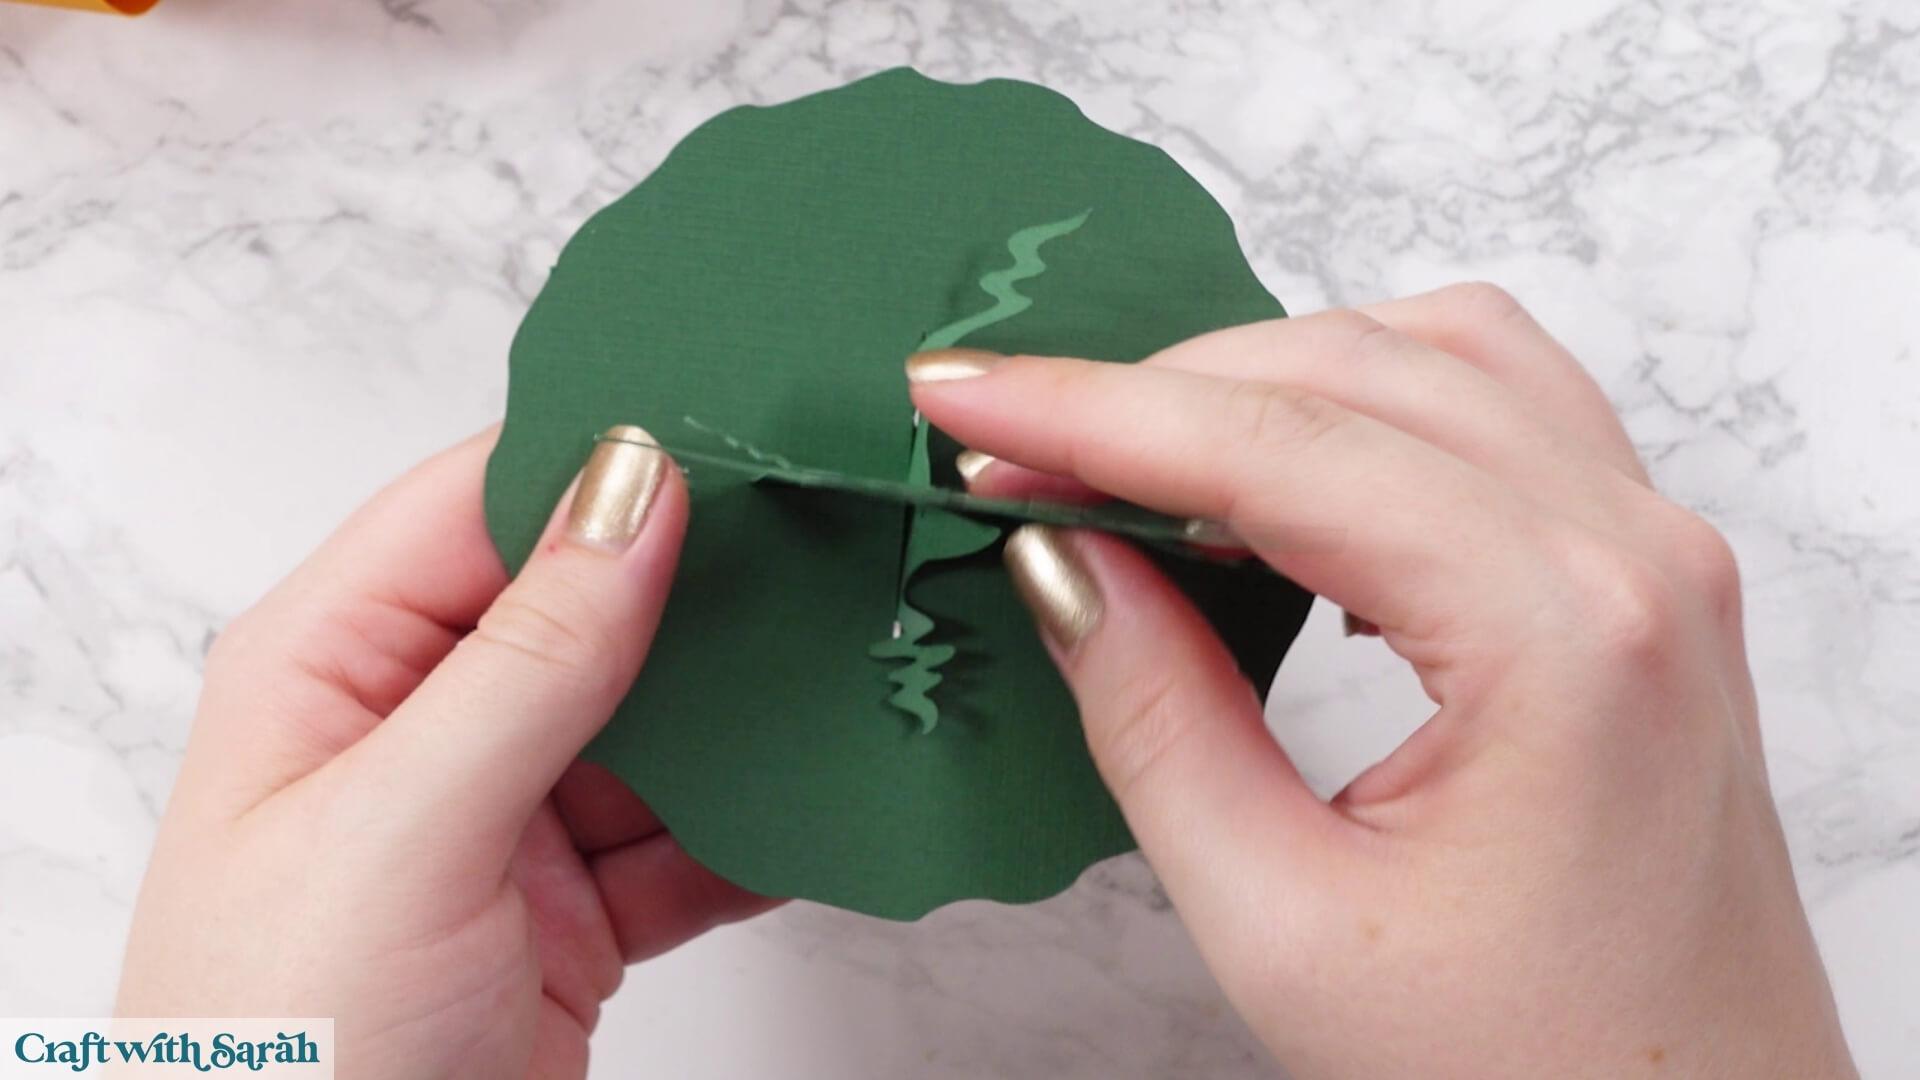
Turn it over and glue the tabs that were folded in opposite directions down on opposite sides.
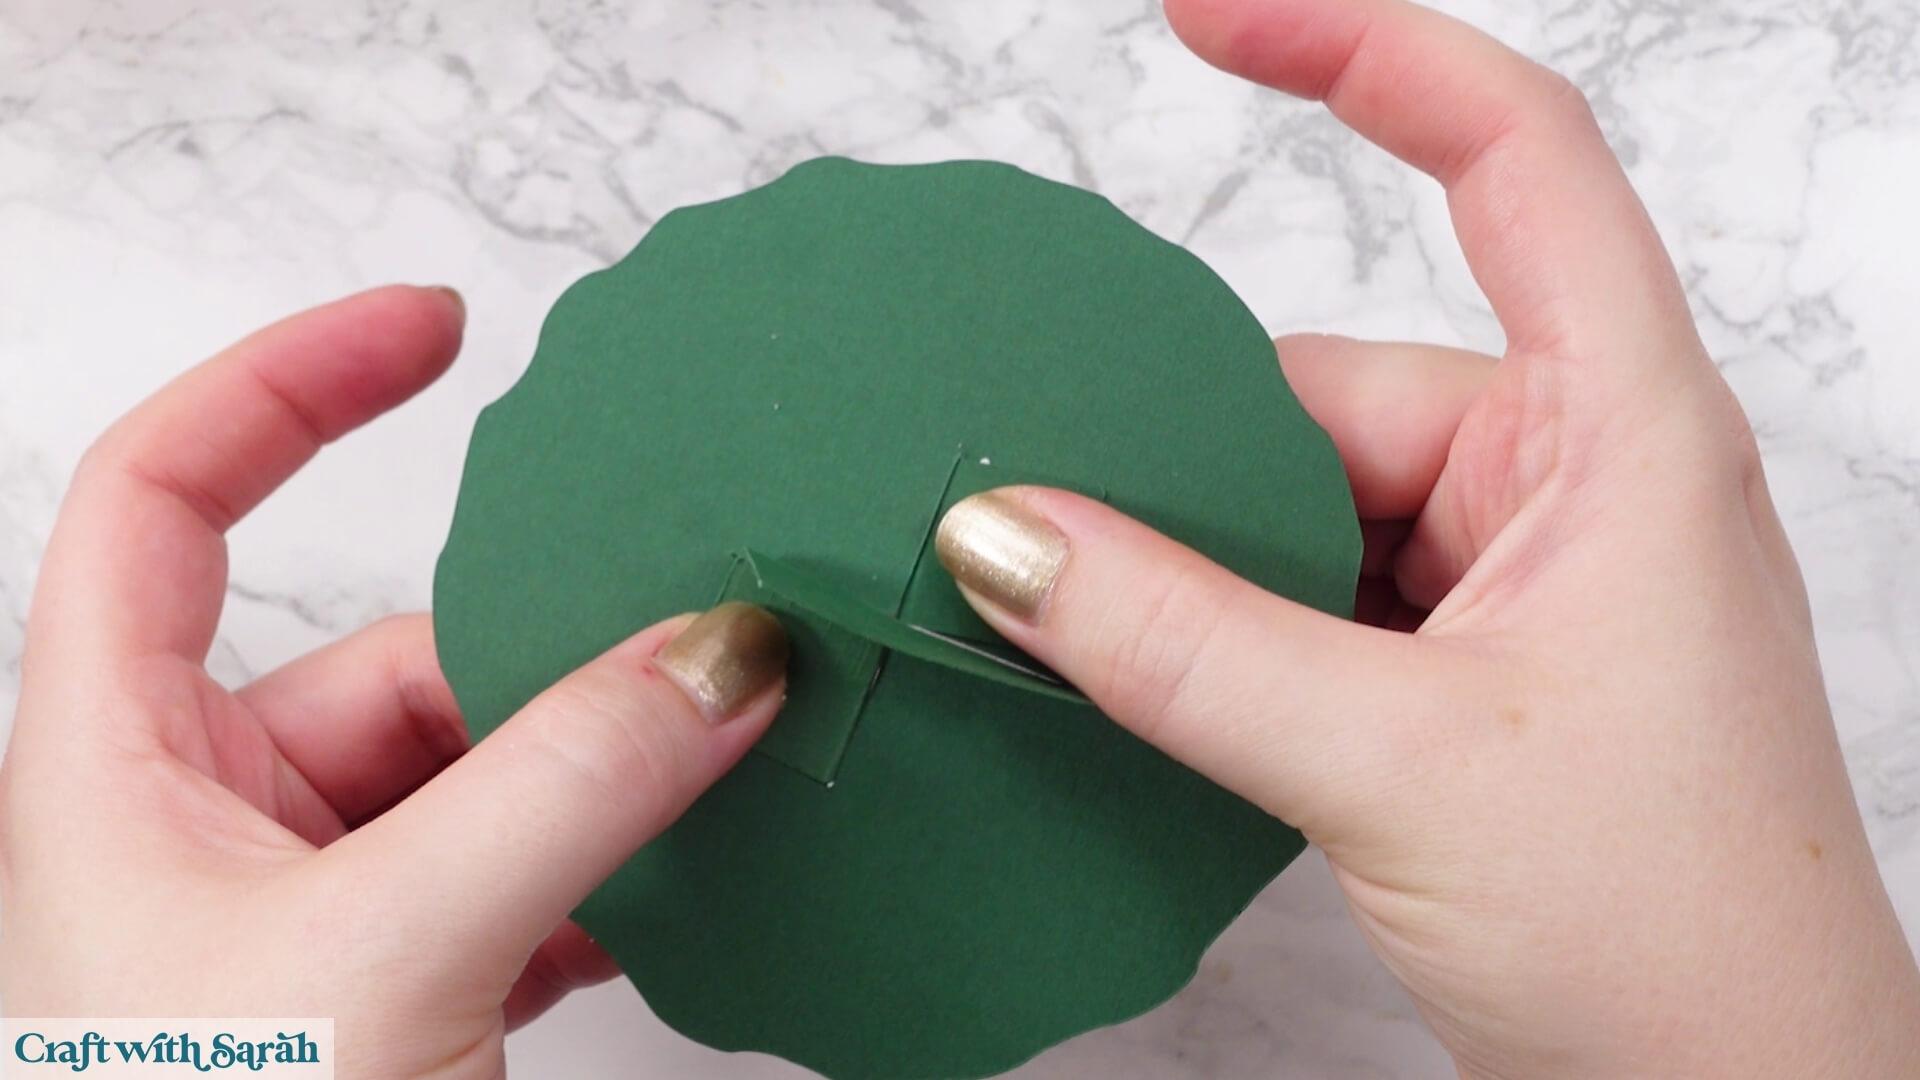
Glue the other tab down in one direction, being careful to keep the stalk upright and straight.
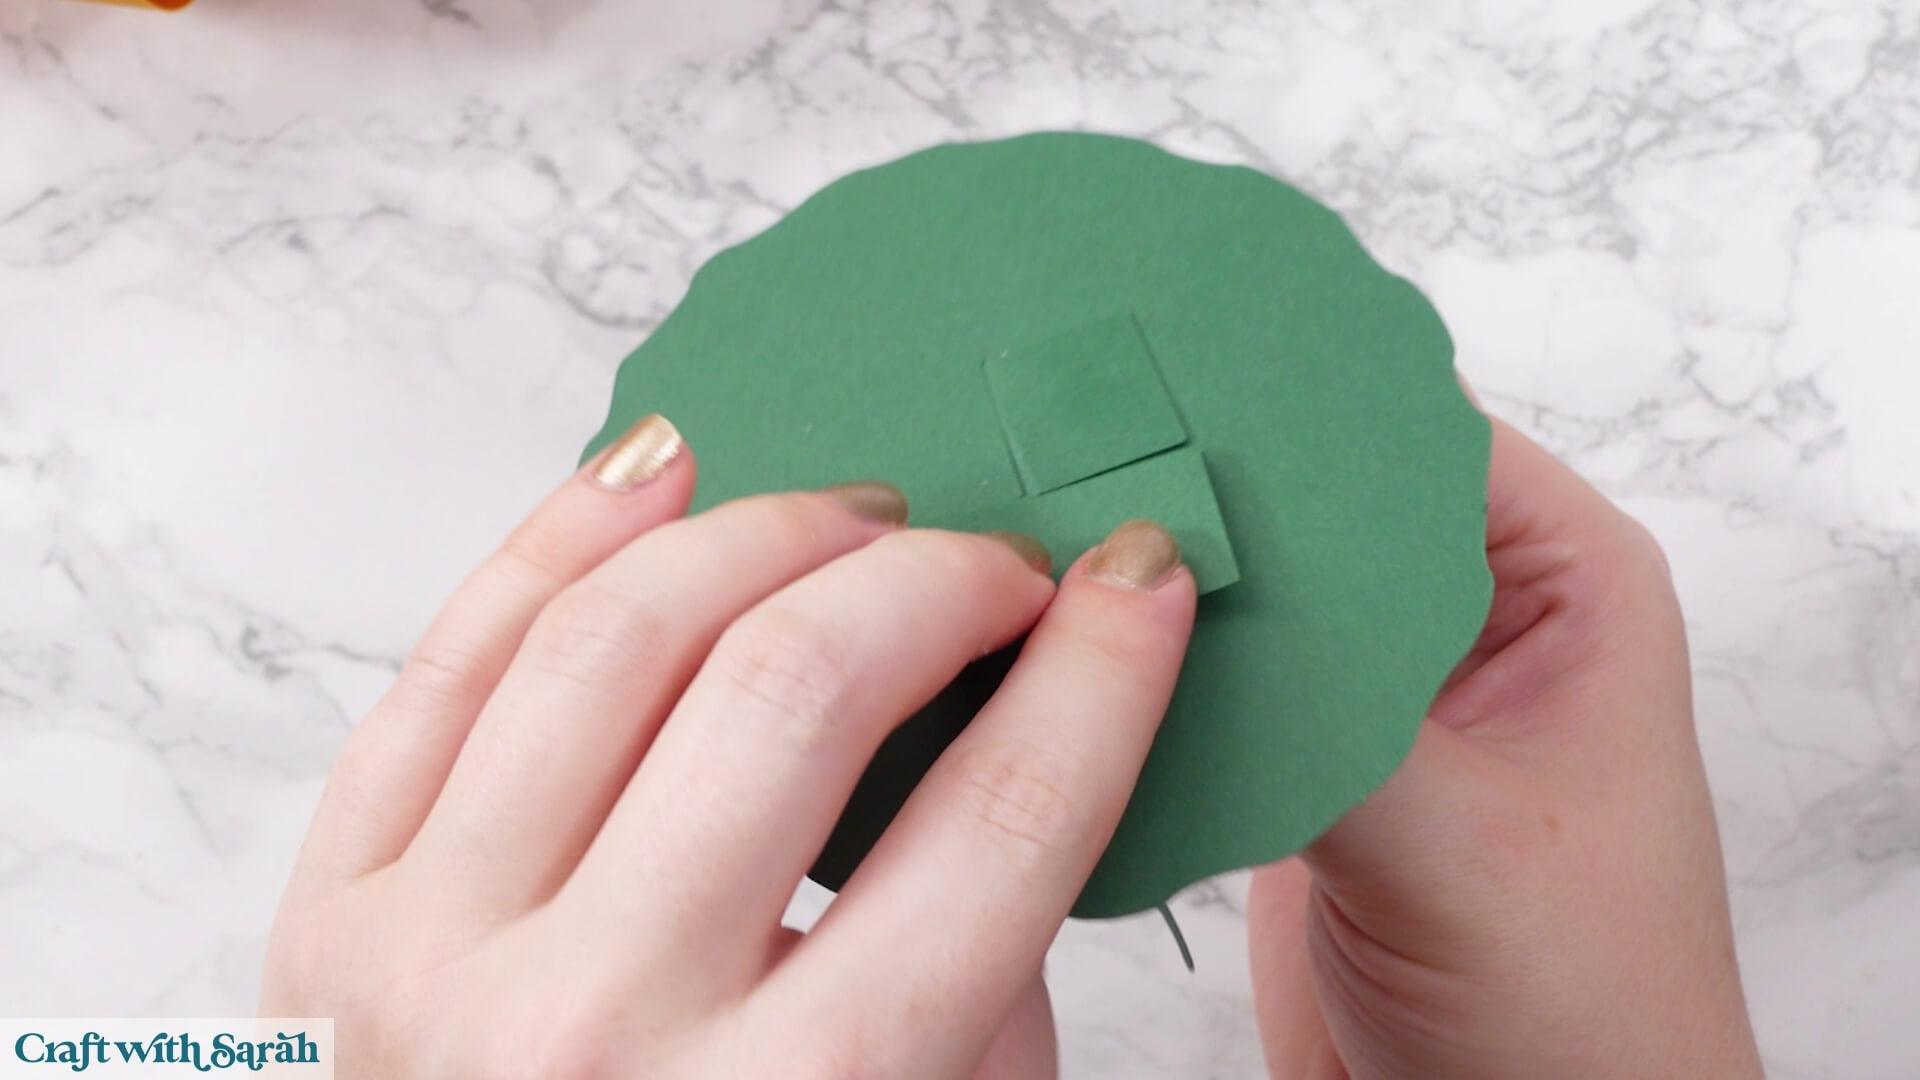
The completed stalk simply sits on top of the opening at the top of the pumpkin.
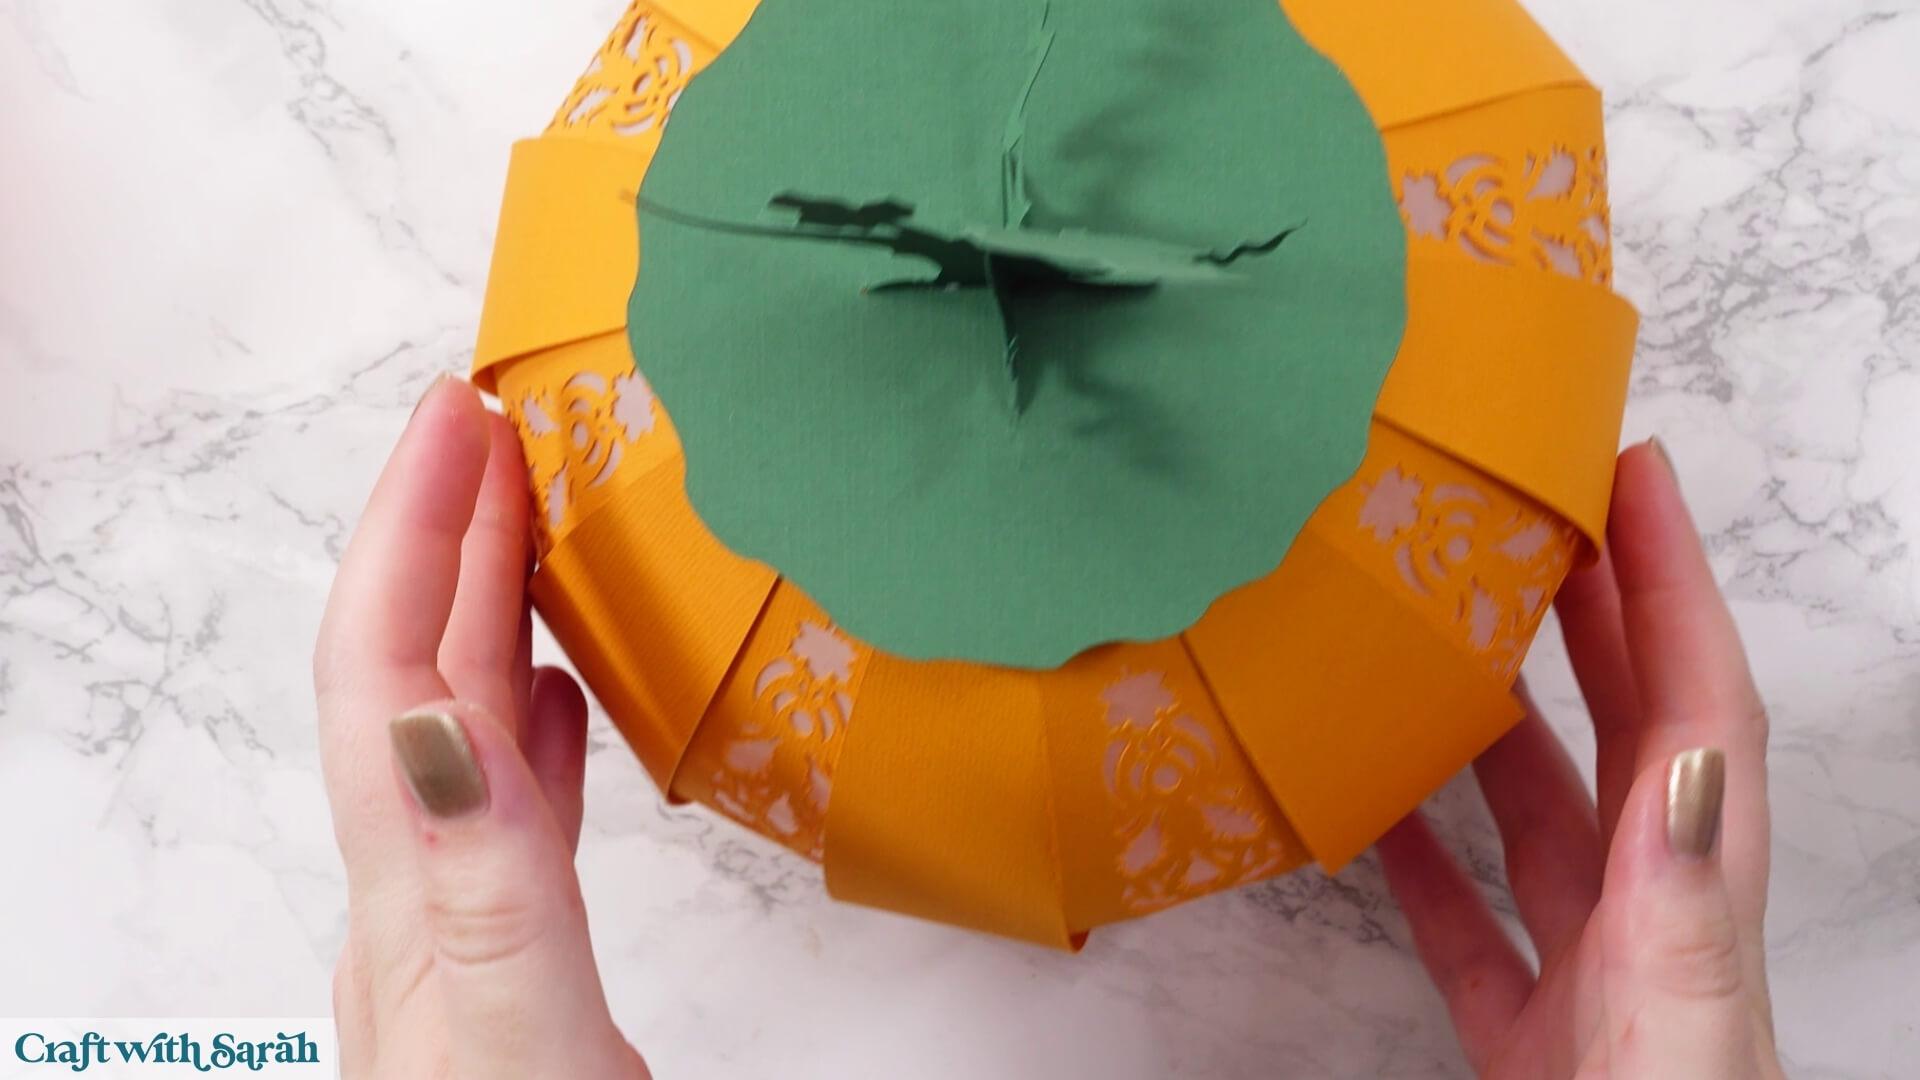
Step 12) Add the decorative foliage
If you’re adding the optional leaves and stems, turn the pumpkin upside down.
Each foliage piece has a score line near the base. Fold along this line to create a tab for attaching it to the pumpkin.
You can gently curve the stems so that they follow the rounded shape of the pumpkin.
There isn’t a specific position that the foliage needs to go in, so arrange the orange and brown pieces however you think looks best.
Glue the tabs to the underside of the pumpkin and hold them in place until the glue dries.
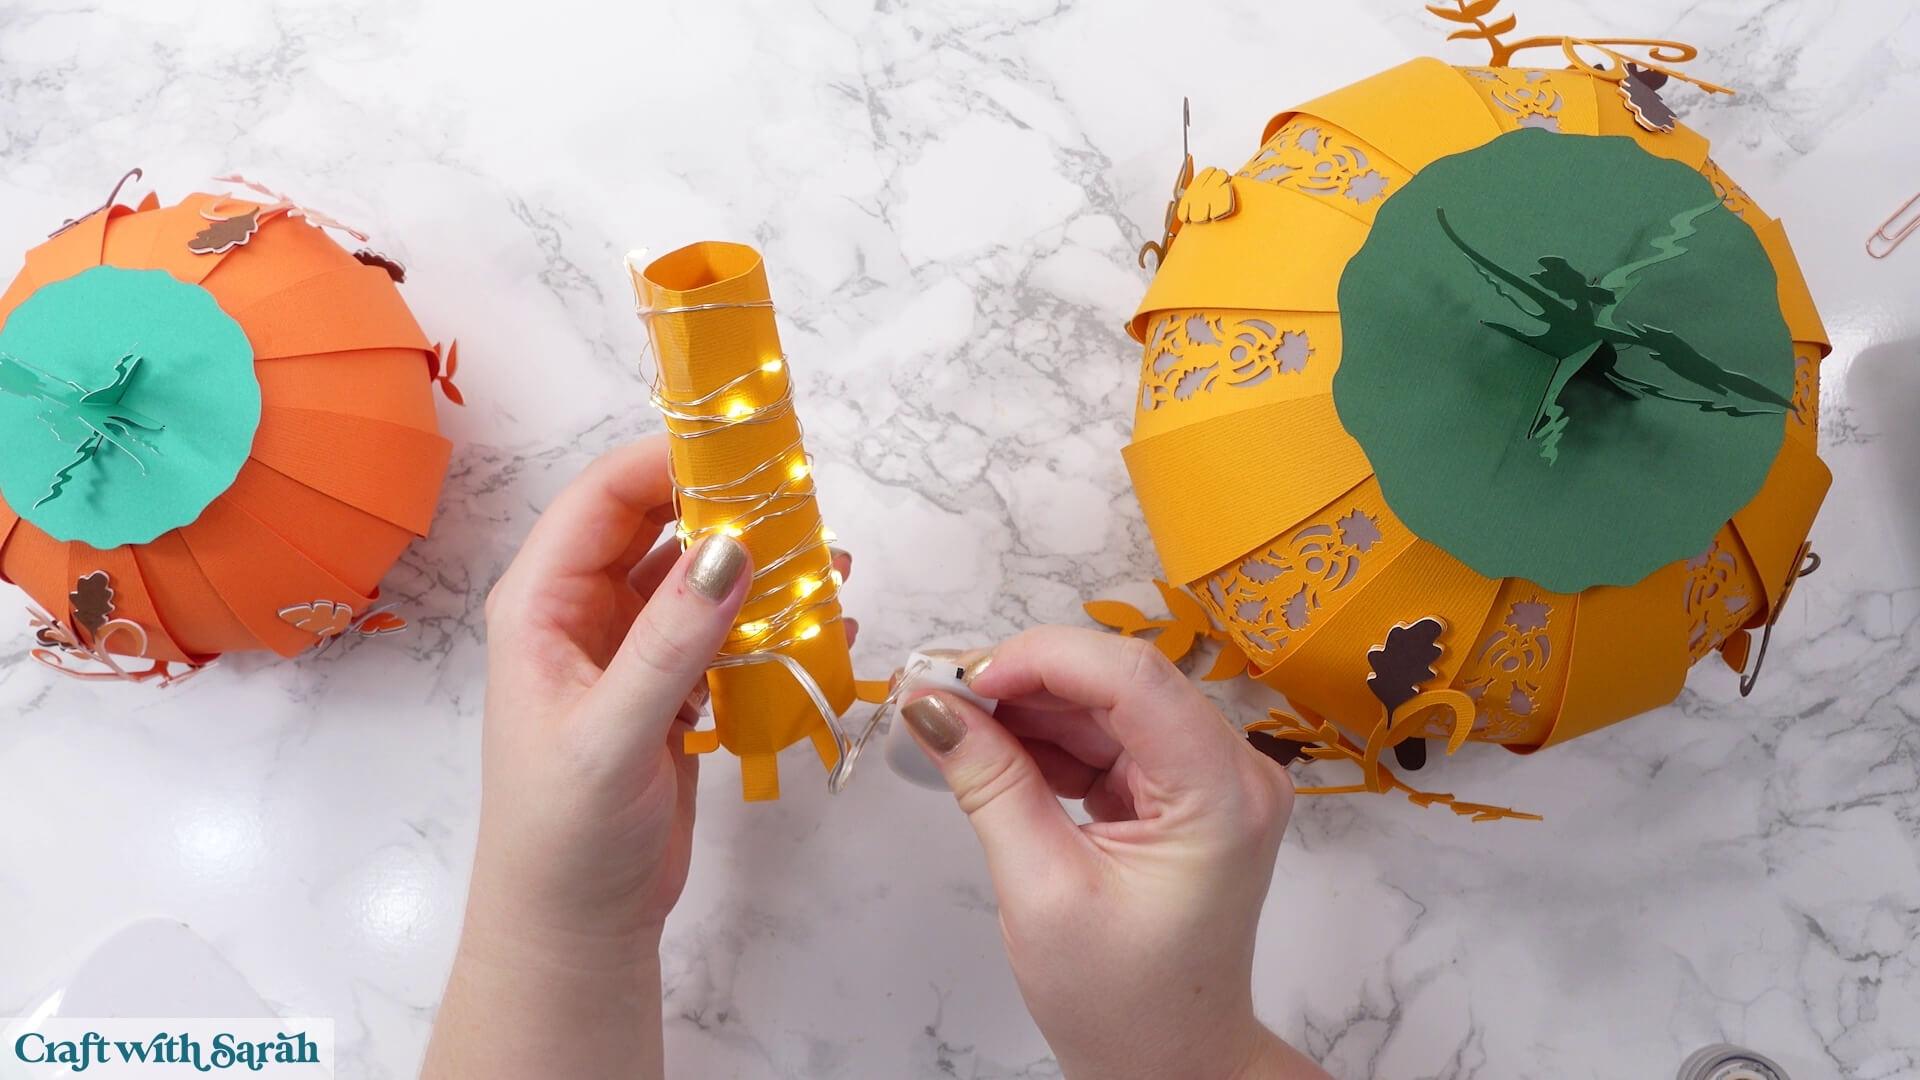
I used some of my LED lights as weights to hold the foliage in place while the glue dries which is why you can see lights on the image below!
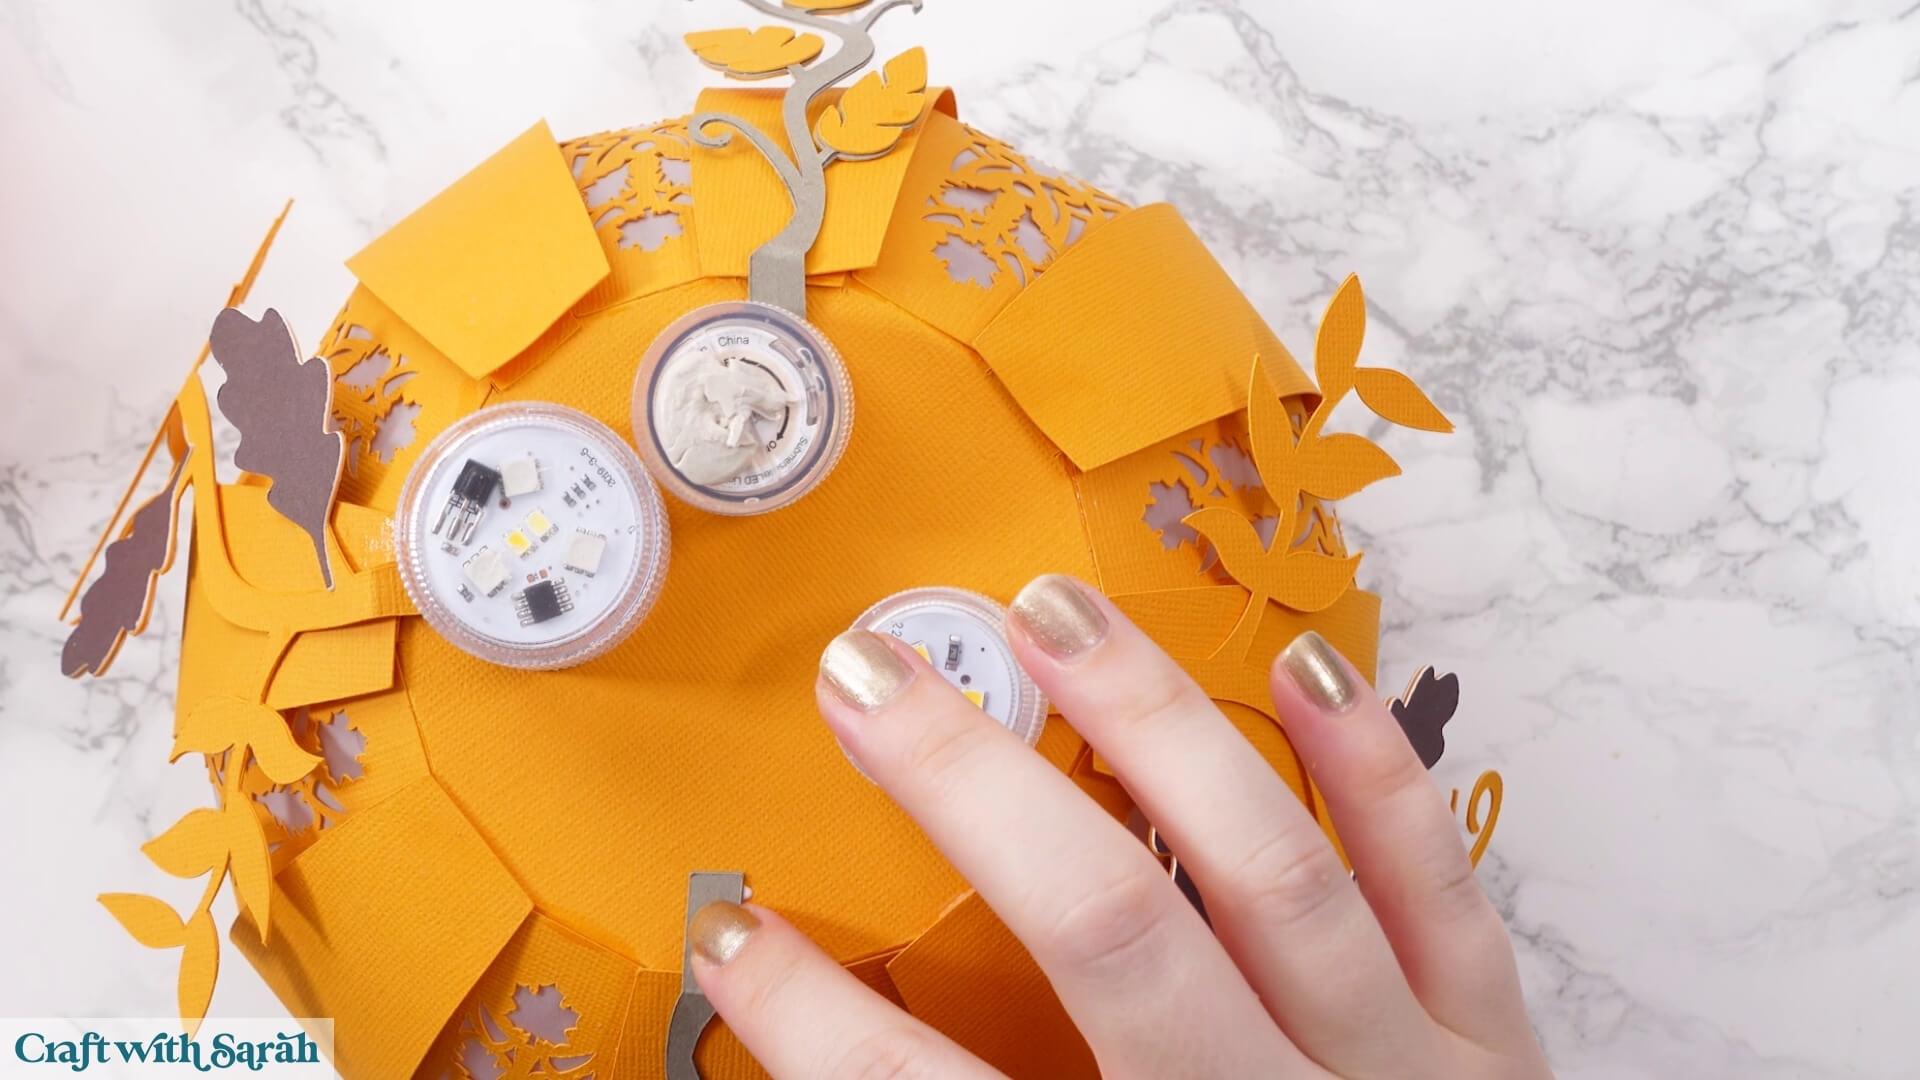
Once everything is secure, turn the pumpkin back over and look at how the leaves are sitting against the sides.
You can leave them sticking out for a more dimensional appearance, or add a small amount of glue underneath the top leaves to secure them against the pumpkin and pull the foliage closer to the sides.
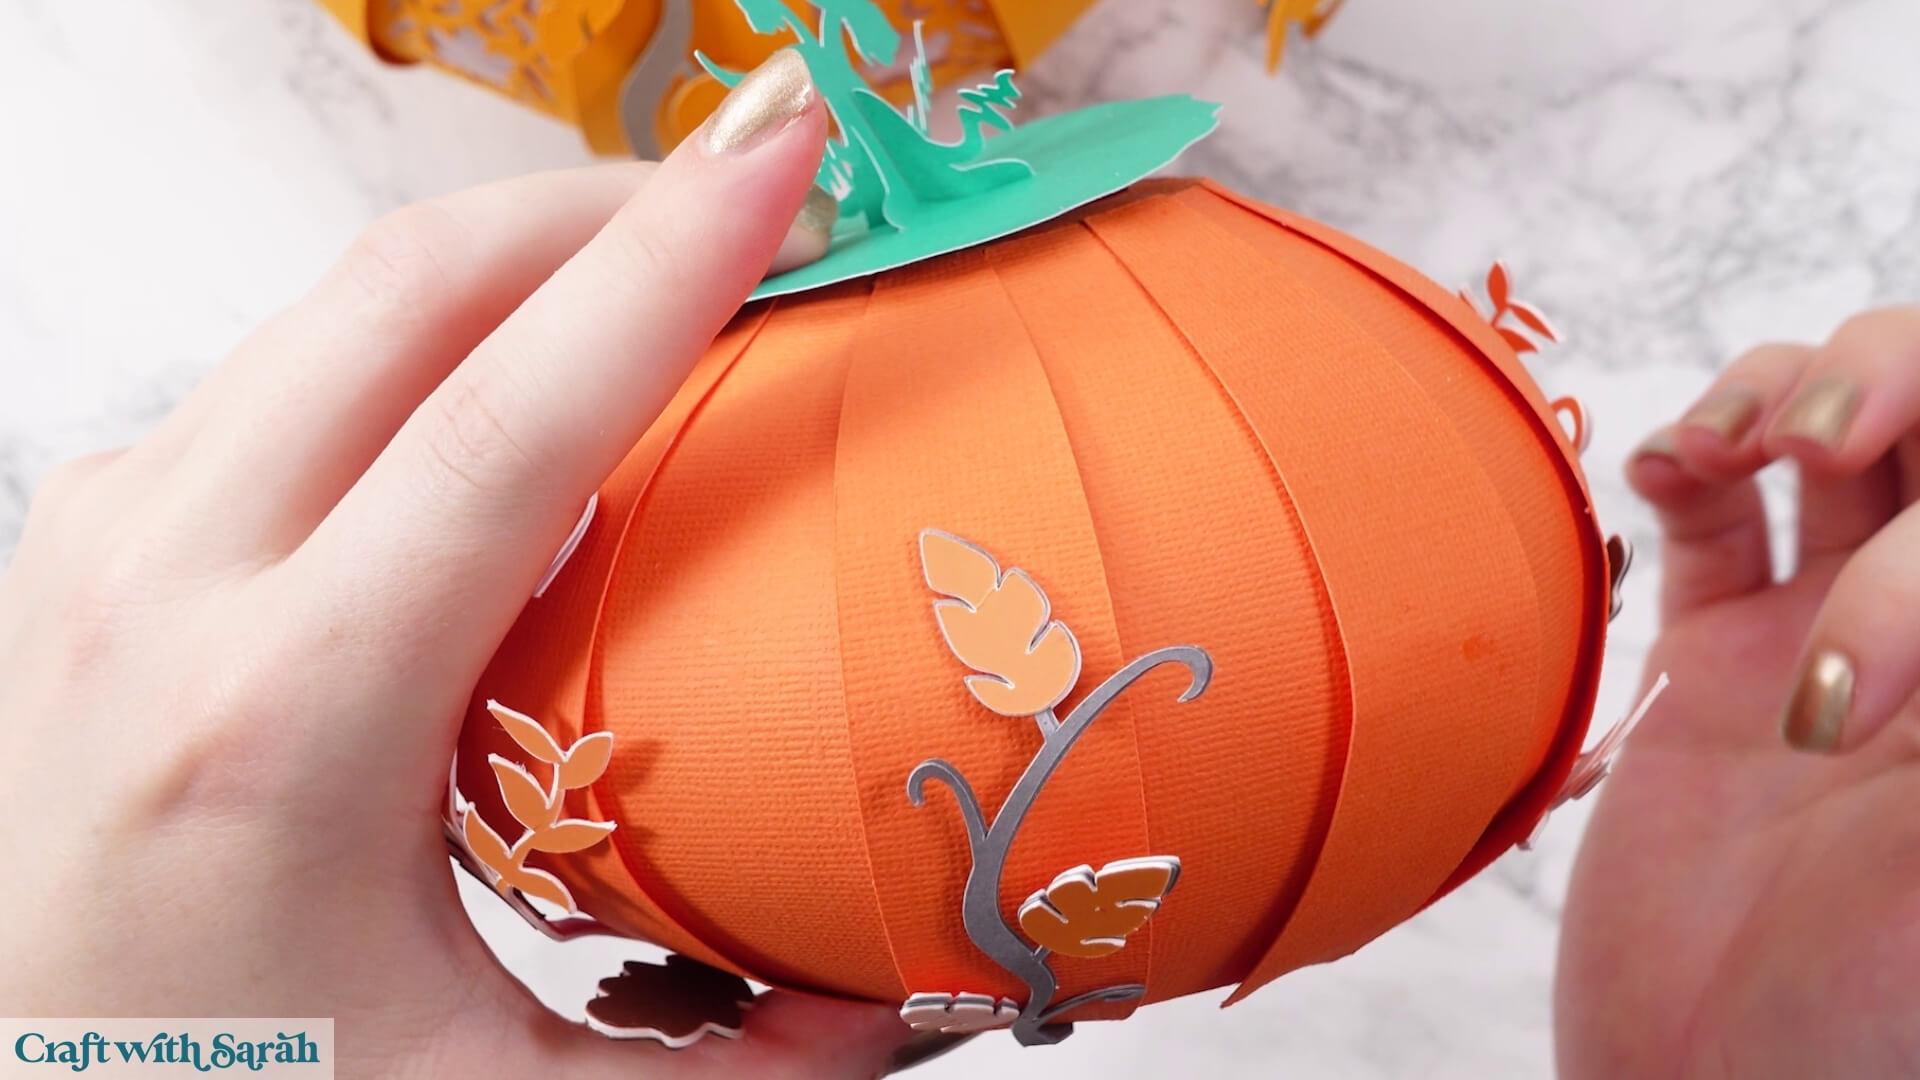
Pretty paper pumpkins with fall leaves
Your 3D paper pumpkin is now finished!
Add your lights and watch the intricate designs around the sides glow through the vellum.
Whether you make the full light-up lantern, a solid pumpkin or leave off the decorative foliage for a simpler version, this makes a beautiful piece of handmade fall decor that you can bring out year after year.
Happy crafting,
Sarah x