Pumpkin Patch Gnomes 👻 HCC 2025
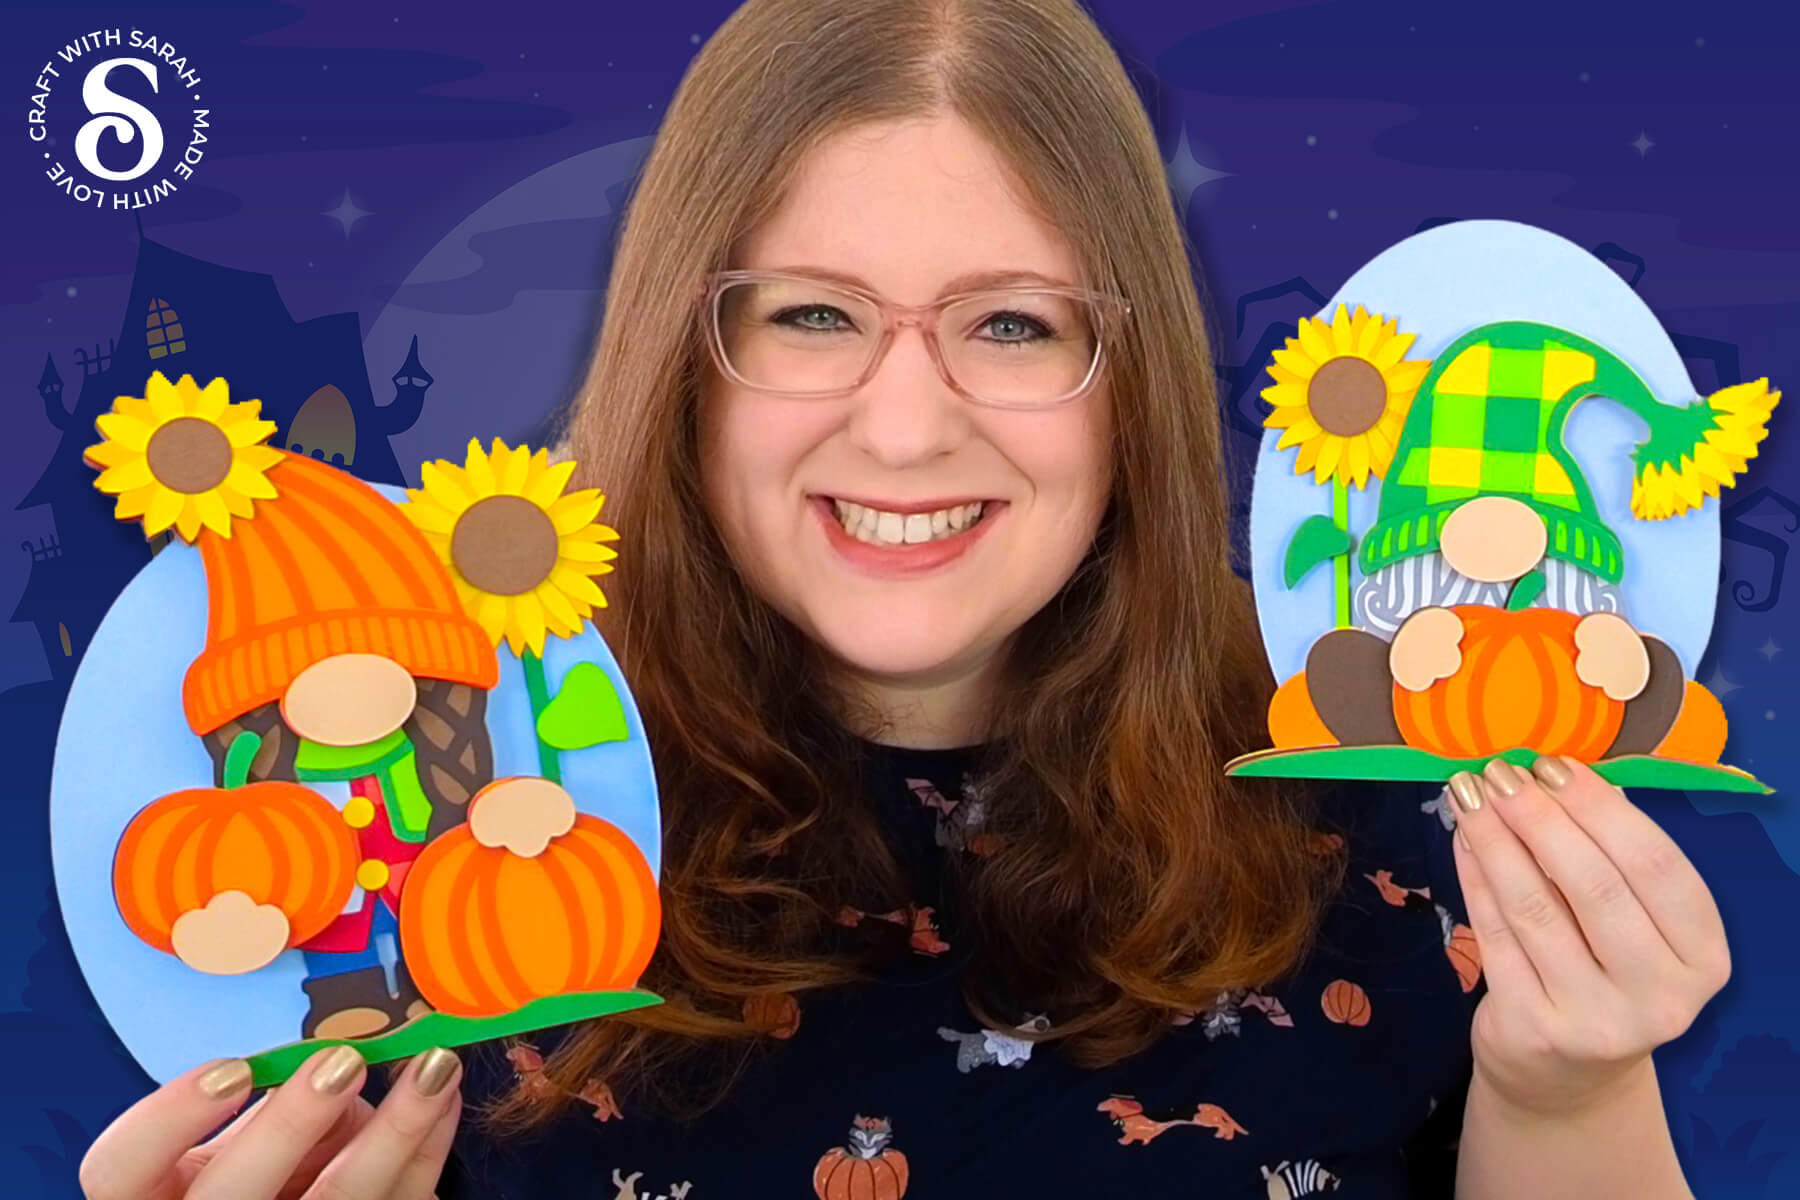
Make a pair of adorable pumpkin patch gnomes to display in your home. They are the perfect layered gnome SVGs for autumn!
If you’re a fan of Cricut gnomes, you’re going to enjoy this cozy, seasonal project that celebrates everything we love about Fall.
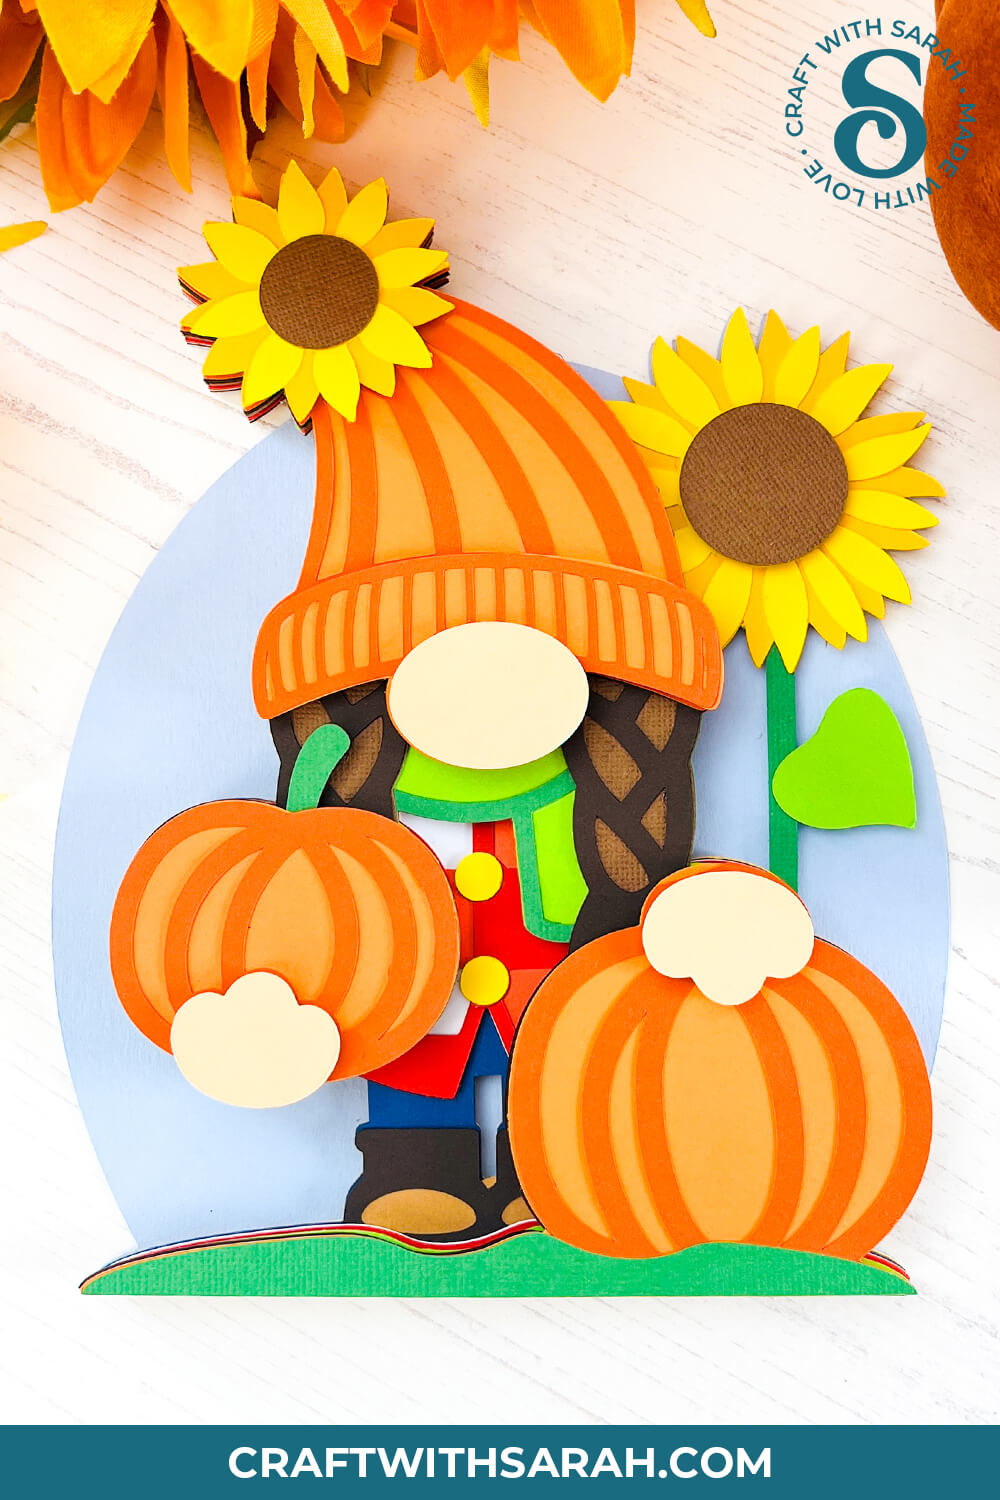
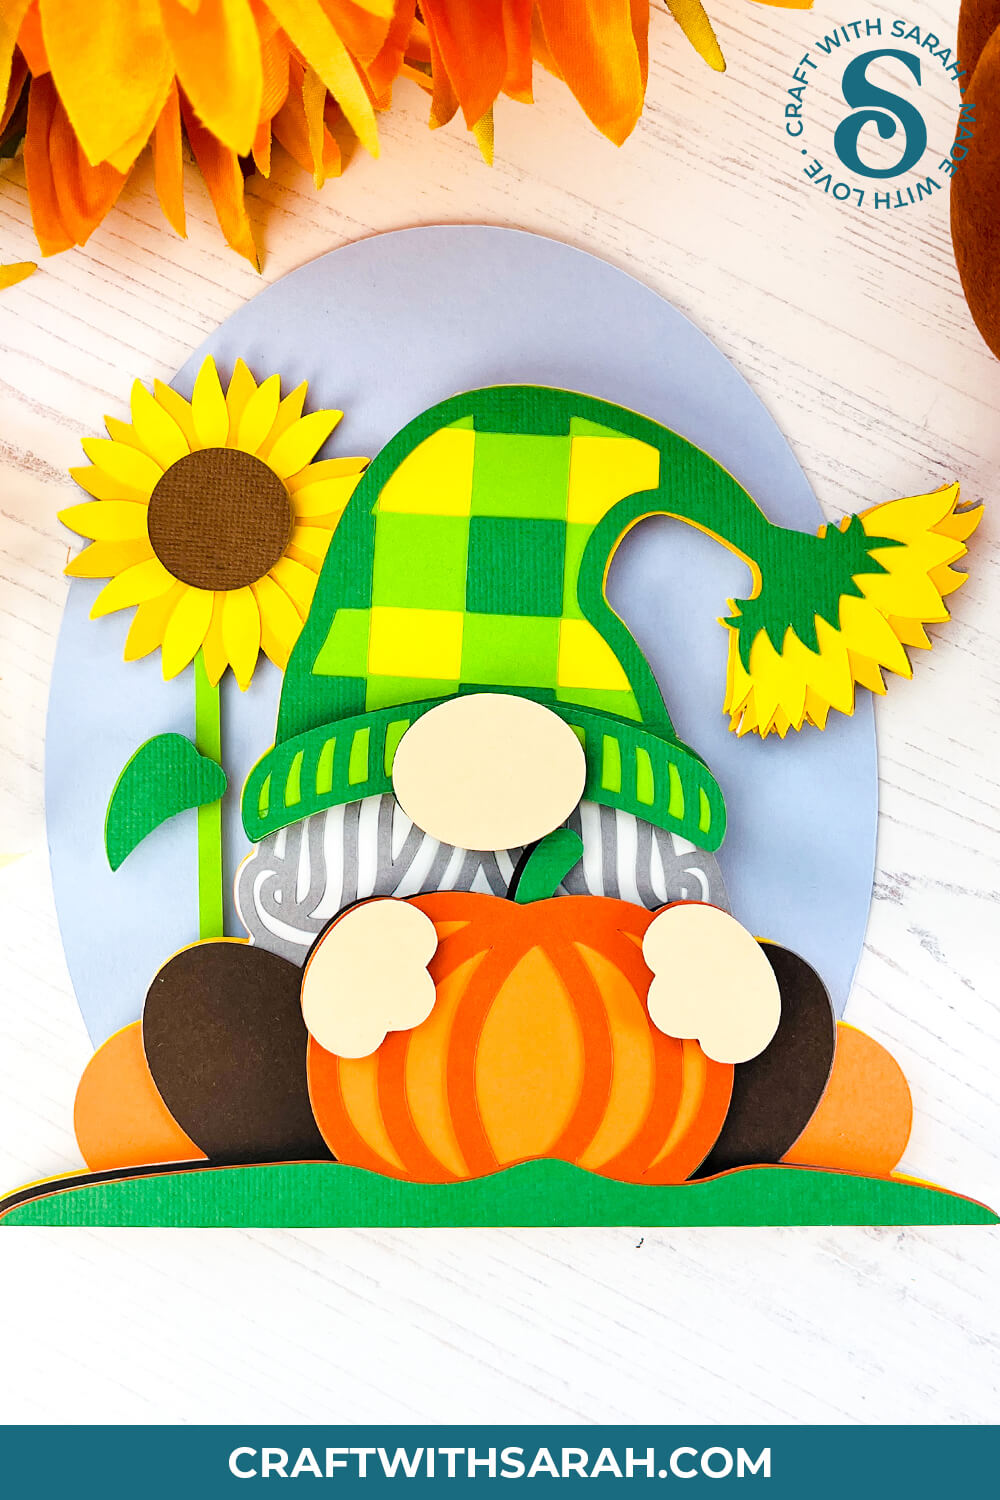
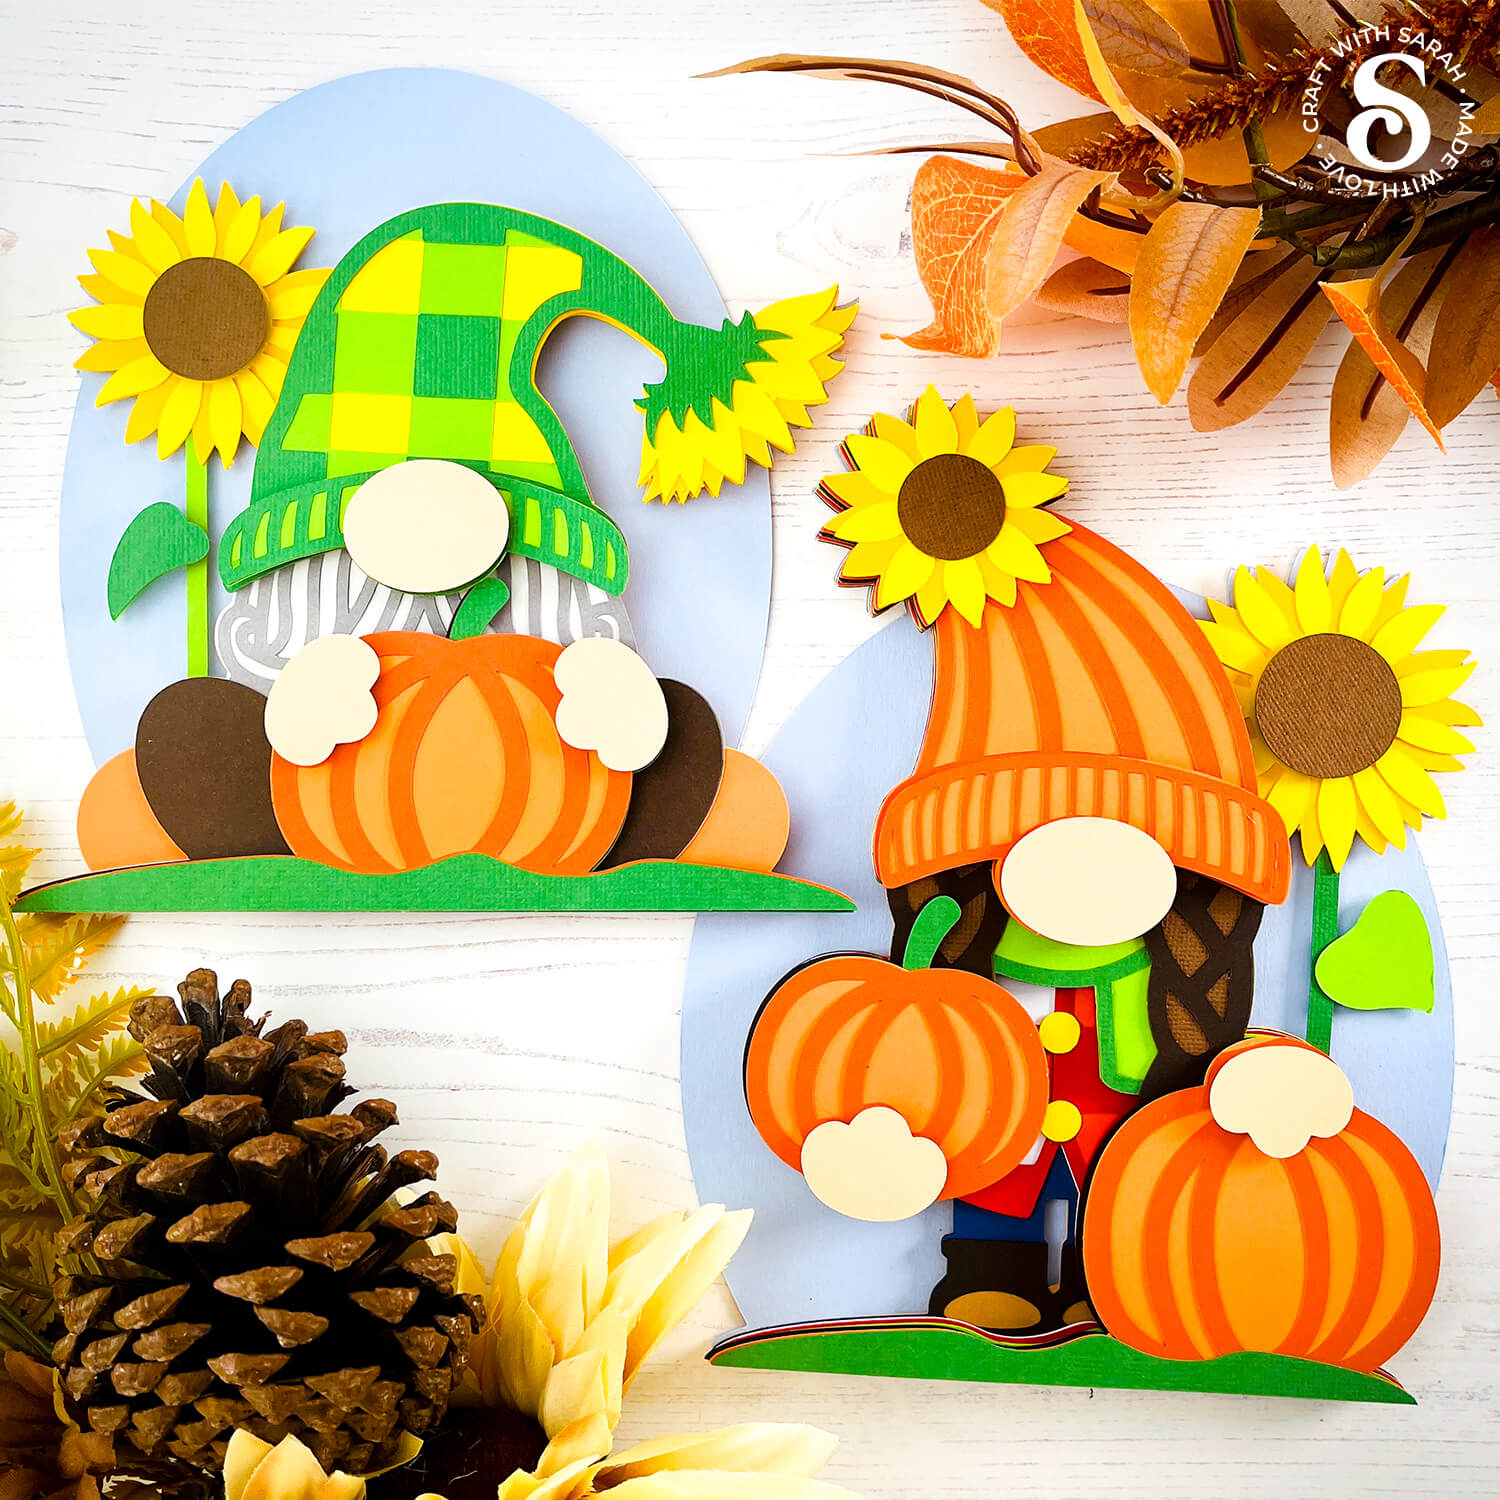
In this tutorial, we’re crafting a pair of autumn-themed gnomes — one male, one female — designed to bring a warm, rustic touch to your pumpkin patch decor.
These gnomes are holding their freshly picked pumpkins and enjoying the crisp air and golden sunshine in the autumn outdoors.
Gnomes have always been some of the most popular designs from my Craft Countdown events, and I always enjoy creating new ones.
This gnome SVG set leans more toward a Fall aesthetic than Halloween, but it still fits perfectly with this time of year.
Each design features a sunflower detail that adds warmth and contrast, tying the elements together beautifully.
These new gnomes match nicely with the Autumn themed gnomes from 2022, as well the Autumn Mega Bundle designs.
Whether you’re just starting out with gnome themed SVG projects, or you’re adding to your already extensive collection, these two are sure to become a favorite this season. 🍂
This project was part of the 2025 Halloween Craft Countdown.
Materials supply list
Here is a list of the materials that I used to make this project.
Please note that some of the links included in this article are affiliate links, which means that if you click through and make a purchase I may receive a commission (at no additional cost to you). You can read my full disclosure at the bottom of the page.
- Cricut machine
- Light blue Cricut cutting mat
- Coloured Card
- Glue (I like Bearly Art Glue and Collall)
- 3D foam pads
This project is suitable for the following types of Cricut machines: Explore series, Maker series, Joy Xtra and Joy. You will need to make the design smaller to cut on the original Joy.
Foundation learning
If you're new to making papercrafts with your cutting machine, check out these links to get you started.
They include videos on topics such as: which file to use with your type of cutting machine, how to load the files into your cutting machine's software, how to cut cardstock with your type of cutting machine, how to recolor and modify/customize the cut files and tips for displaying your projects.
- Help guides for Cricut machines
- Help guides for Silhouette machines
- Help guides for ScanNCut machines
The following tutorials are Cricut-specific, but many of the ideas will work similarly with a Silhouette or ScanNCut machine and any cut files that are shared in them are compatible with all types of cutting machine.
- How to score with a Cricut (even without scoring tools)
- Print then cut tutorial
- Design Space tools (Combine, Attach, Slice, Weld, Flatten, etc.)
- Pattern fill tutorial (for making backgrounds & cutting images to a specific shape/size)
- Free envelope SVGs that can be sized to fit any card
- Presentation boxes for handmade cards
- How to write inside cards with Cricut pens
- How to cut layered designs at a small size
- Design Space tips & tricks
- Cricut pens tutorial
- How to mount multiple designs in the same frame with magic guides
Video tutorial
Watch the video below to see how to make this project. Keep scrolling for a written tutorial.
A big Design Space update is currently rolling out that changes how the screen looks, including the position of some of the buttons and tools. I had already recorded all the Countdown videos before the update was released, so unfortunately there will be areas of the videos that look different to your screen.
To help with this, I've recorded a walkthrough video that explains all of the Design Space changes so that you can see how to do everything in the new version.
Written tutorial (with photos!)
Here’s how to turn the Fall gnome SVGs into a finished papercraft, using a Cricut machine.
Step 1) Download the cutting files & upload to Design Space
Get the files using the box below.
Purchase the File(s)
This cut file is available as part of the Instant Access Bundle.
Or, purchase this design individually here
Before you upload the SVGs to Design Space, you need to unzip the download folder that they come in.
- How to unzip a folder on Windows computer
- How to unzip a folder on a Mac
- How to unzip a folder on an iPad/iPhone
- How to unzip a folder on an Android device
After unzipping, upload the SVG file(s) into your cutting machine software.
Not sure how to use cut files with your type of machine? The following links lead to videos on how to open cut files in:
- Cricut Design Space
- Silhouette Studio
- CanvasWorkspace (for ScanNCut machines)
The download folder also contains printable PDF versions of the templates for hand cutting.
If you are using Cricut Design Space, start a new project and then click the “Upload” button on the left of the screen.
You can then either click “Browse” to find the files on your computer, or drag-and-drop them in.
Upload the files in the “01 Cricut Version” subfolders that begin svg-01 in the filename.
This is how it should look after you have selected one of the gnomes:
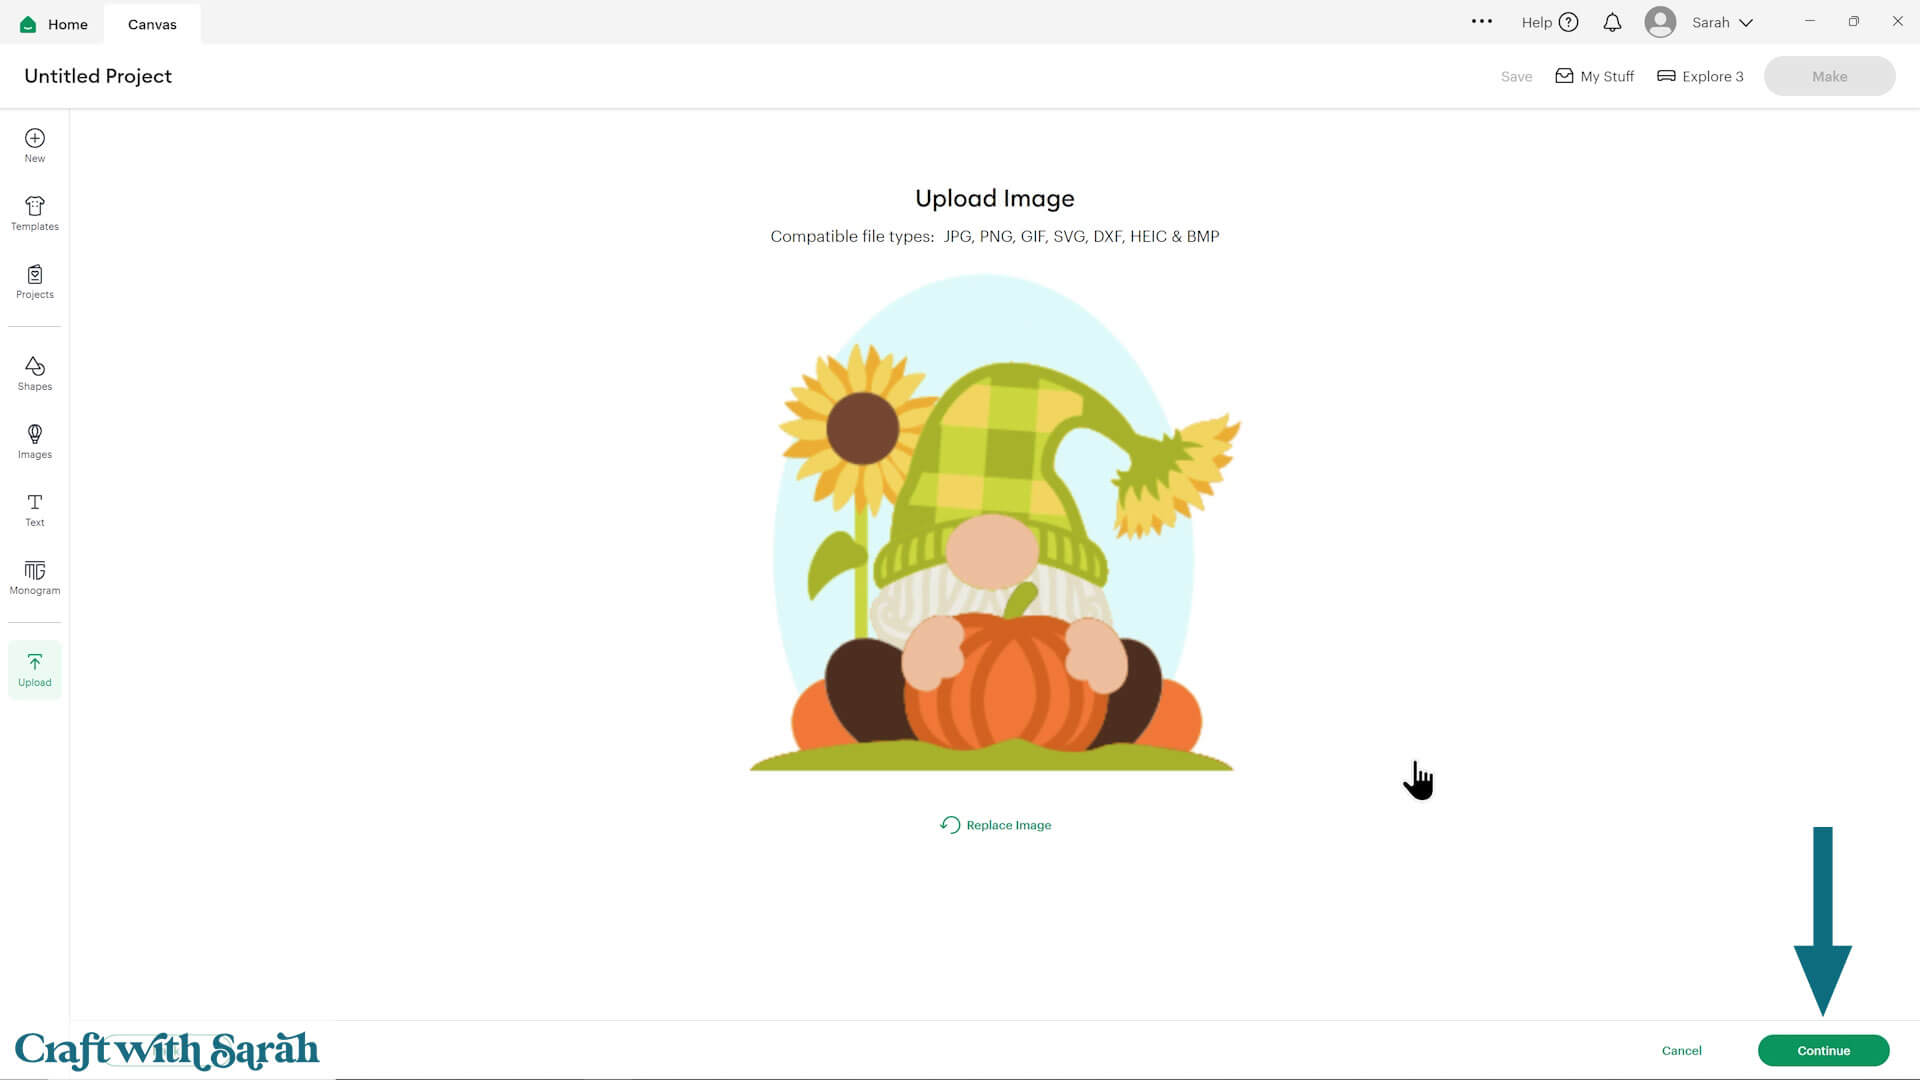
Don’t worry if the image preview appears blurry – it will show in full quality once it’s inserted onto your project.
Press “Upload” on the next screen.
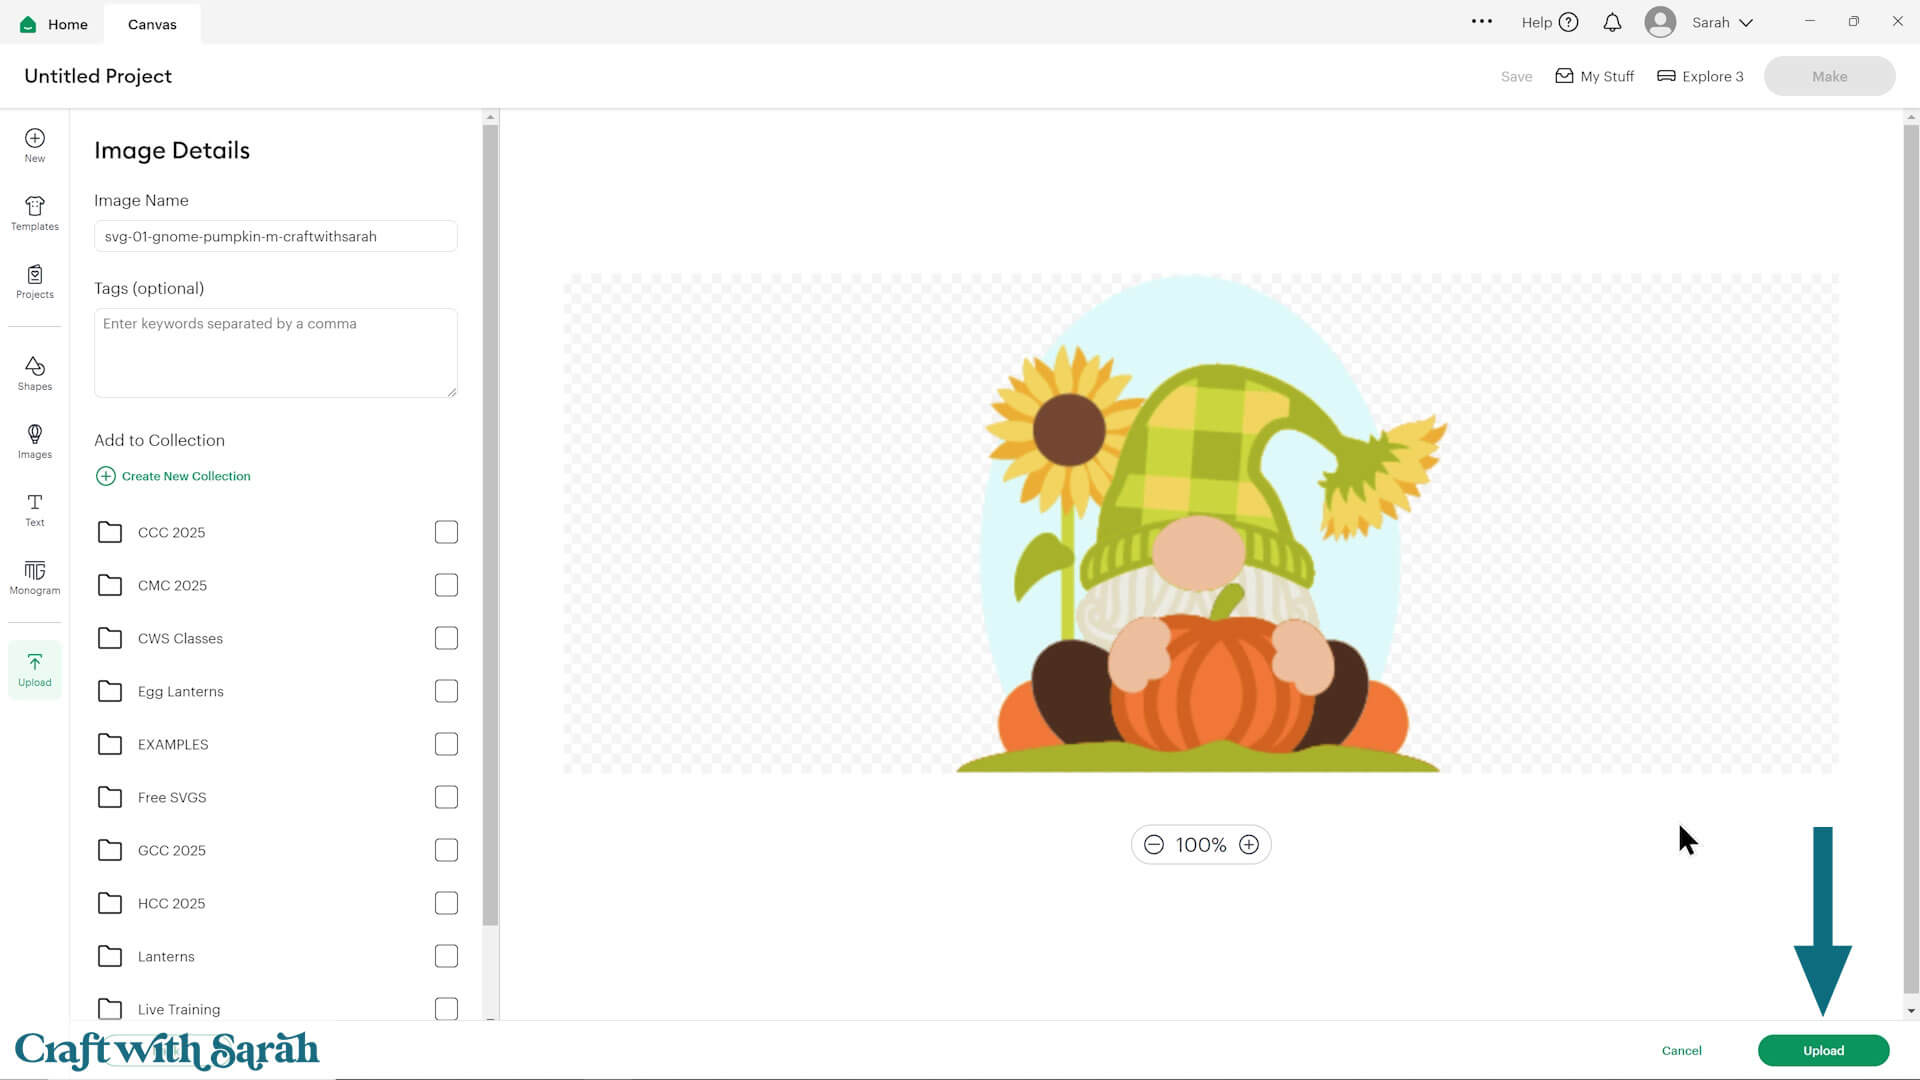
After uploading, the design should be automatically inserted onto your Canvas.
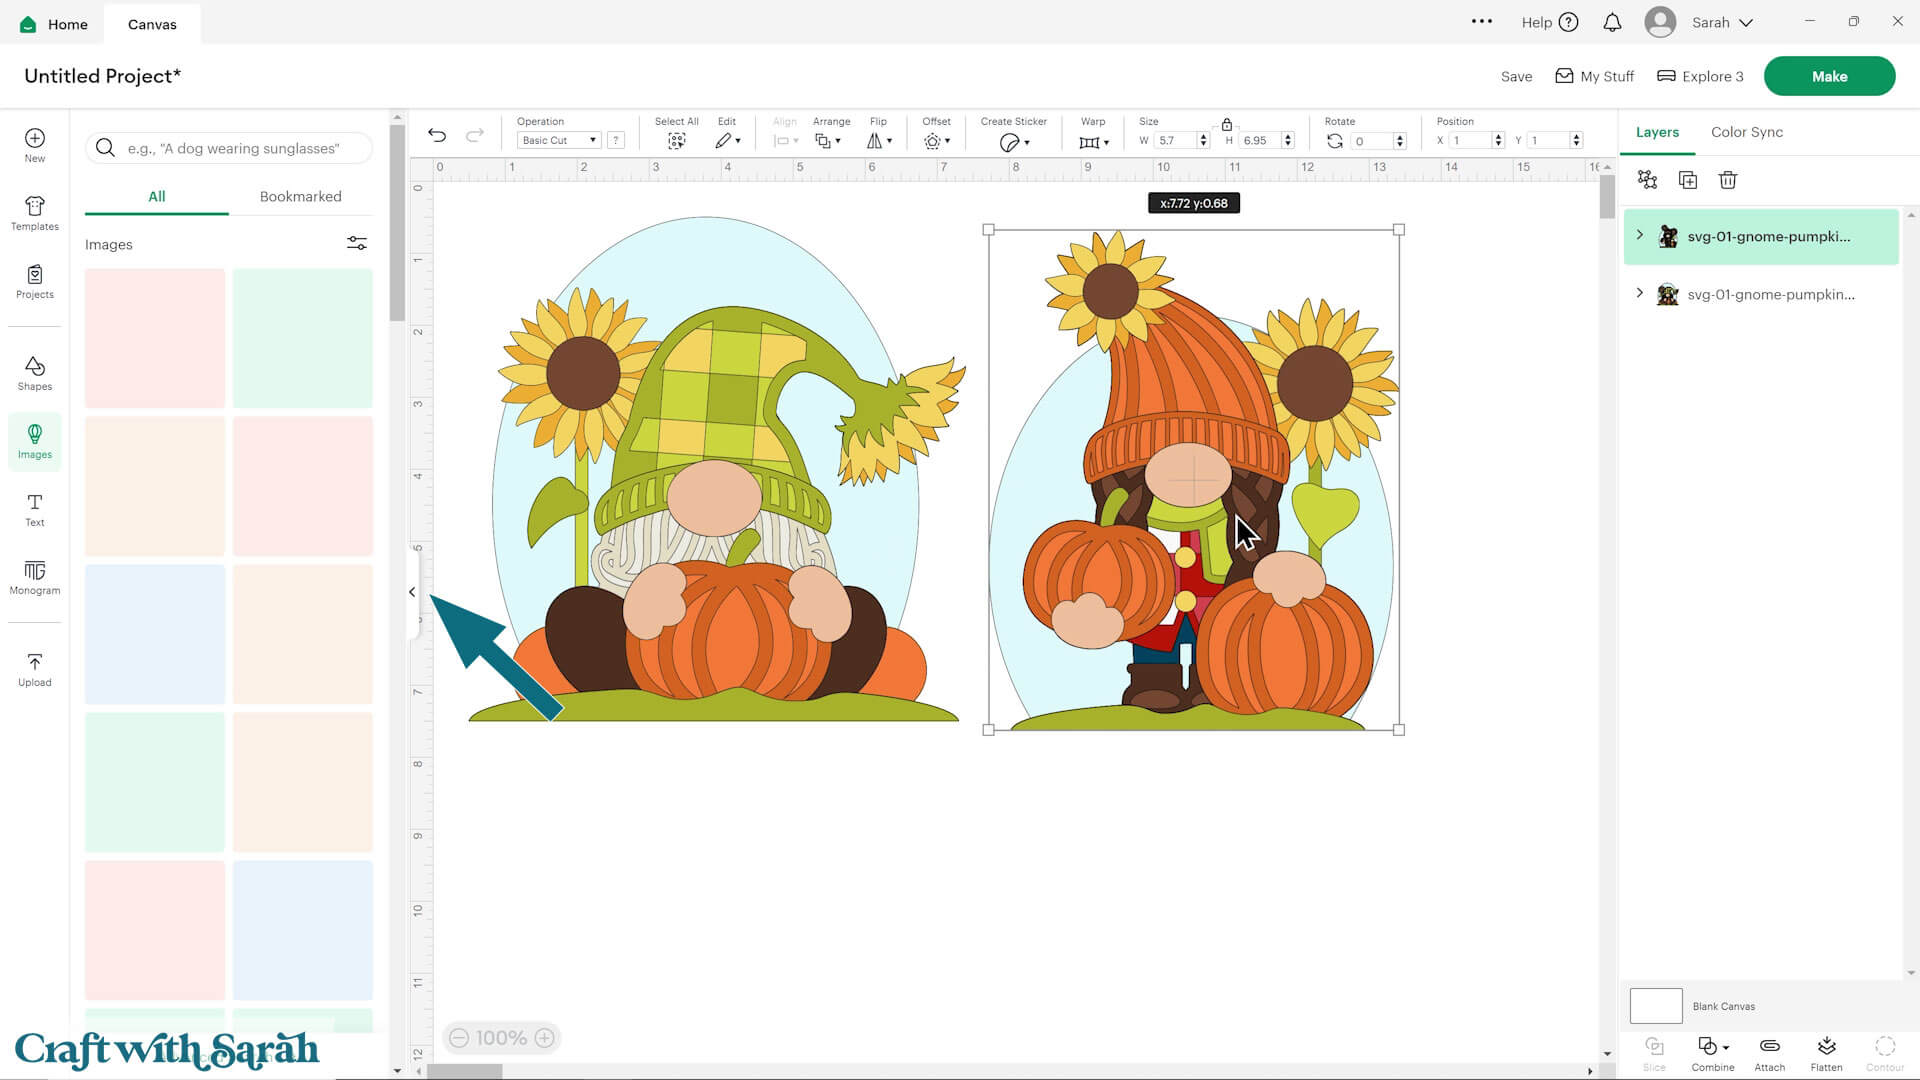
Repeat the same steps for the other gnome.
Cricut have recently (as of June 2025) introduced a feature where you get a “pop out” bar of similar images when you Upload a design. To hide this bar (to give you more space for designing!), click the arrow that’s about half way down the page.
If the design doesn’t get inserted onto your Canvas, it will show under “Uploads” in your “Recently Uploaded Images”. Click on it and then press “Add to Canvas” to put it onto your Project.
Step 2) Size the design
Click the design on your canvas and use the width/height boxes near the top of the screen to make it the size that you want to cut.
TIP: Make sure the padlock icon above the width/height boxes is CLOSED before you resize. If it appears “open”, click it with your mouse to close it.
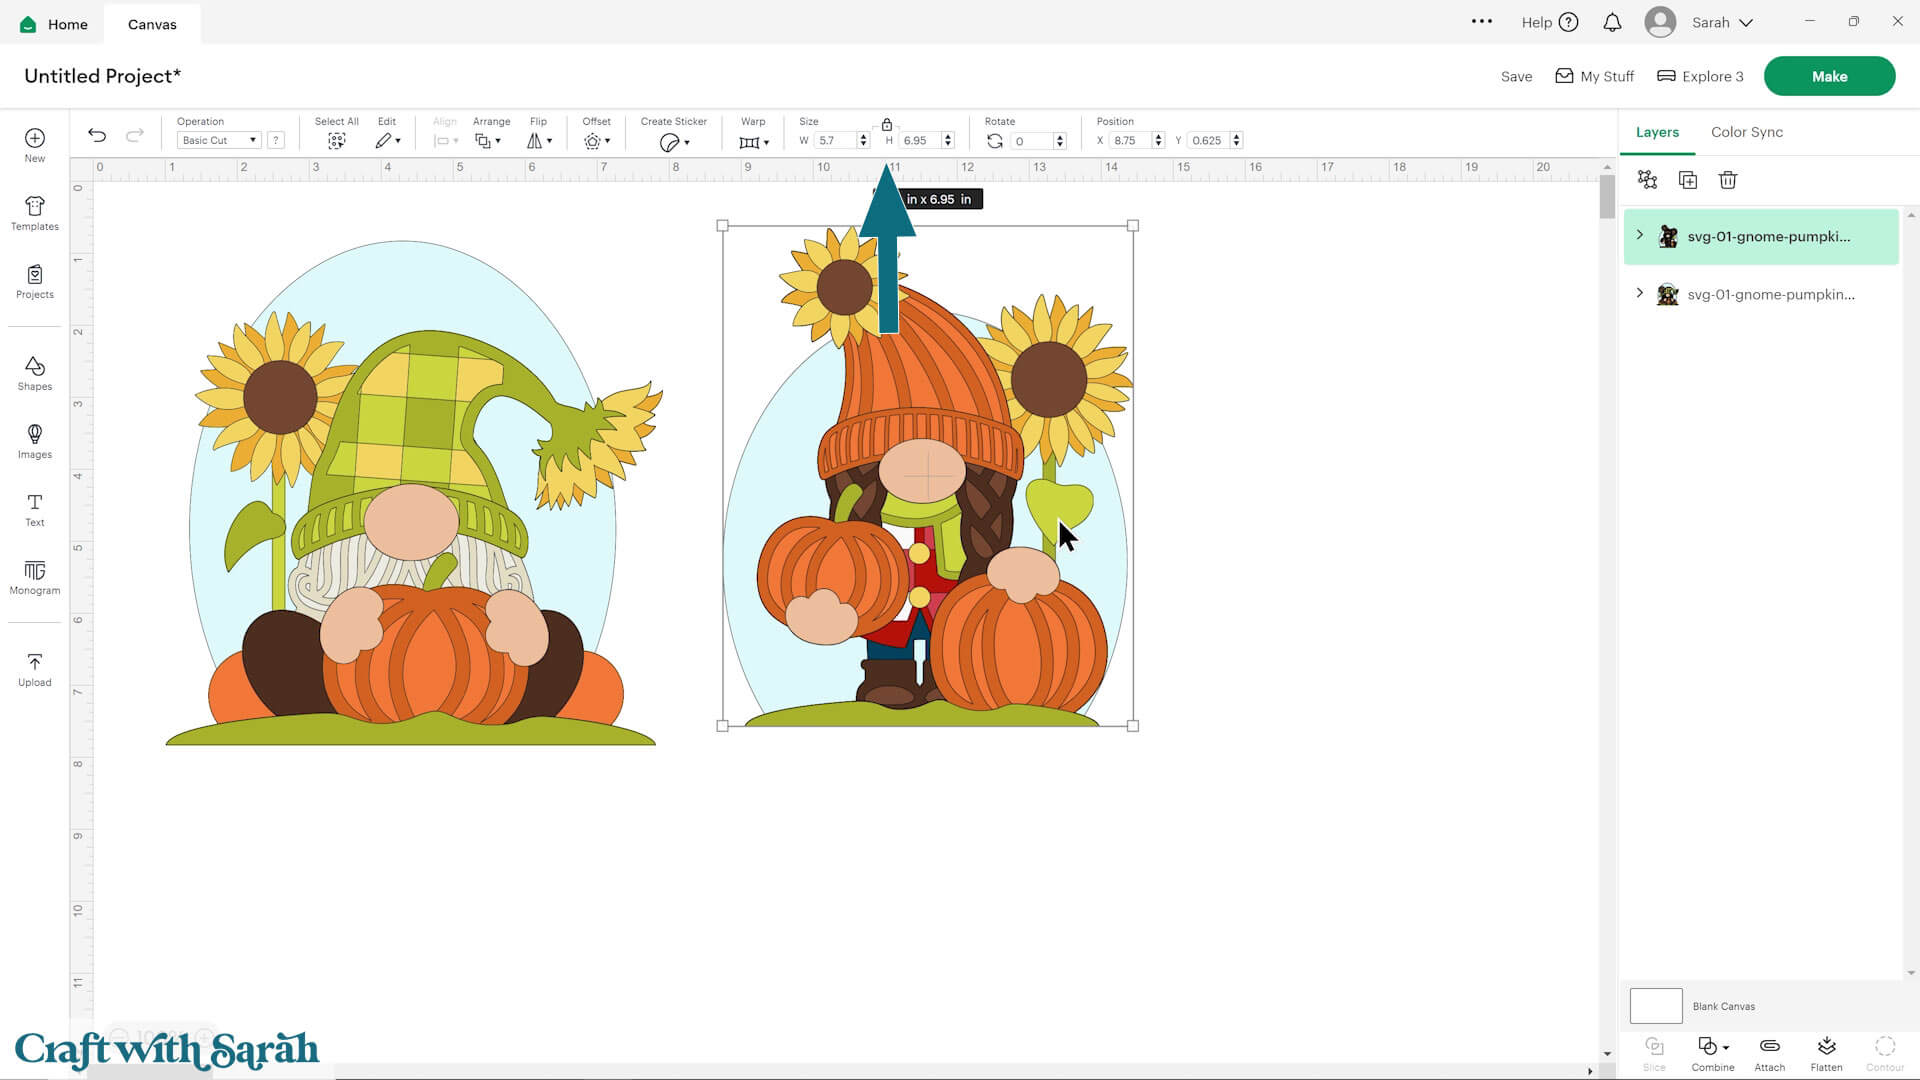
I cut my male gnome at 7 inches tall and 6.9 inches wide.
The female gnome was cut at 7.75 inches tall and 6.356 inches wide.
The gnomes can be made quite small – even as tiny as 3 inches tall! Here’s a tutorial on how to cut designs really small with a Cricut.
If you are cutting these designs on the original Cricut Joy machine, you’ll need to make each one a maximum of 4.5 inches on the smallest side.
Here are some tips for making sure the design fits perfectly into a shadow box frame:
The below video has some tips on how to frame your craft project, including my Number One hack for making sure that your design will fit perfectly every time without wasting any of your craft materials.
Don't have a Cricut? Check out my top framing tips for:
- Silhouette Studio (for Silhouette machines)
- CanvasWorkspace (for ScanNCut machines)
Want to learn more about designing your own shadow box backgrounds? Check out this CWS Premium Class on creating custom backgrounds for frames and greetings cards.
There are matching versions of this video for Silhouette and ScanNCut machines on the Cutting Machine Help page.
Step 3) Cut out all the layers
When you’re happy with how the project is looking in Design Space, click “Make” and follow the instructions on-screen to cut out all the pieces.
To change the paper size, go into the dropdowns over on the left side of the screen and choose the paper size that you want to use. You need to change it for every single colour.
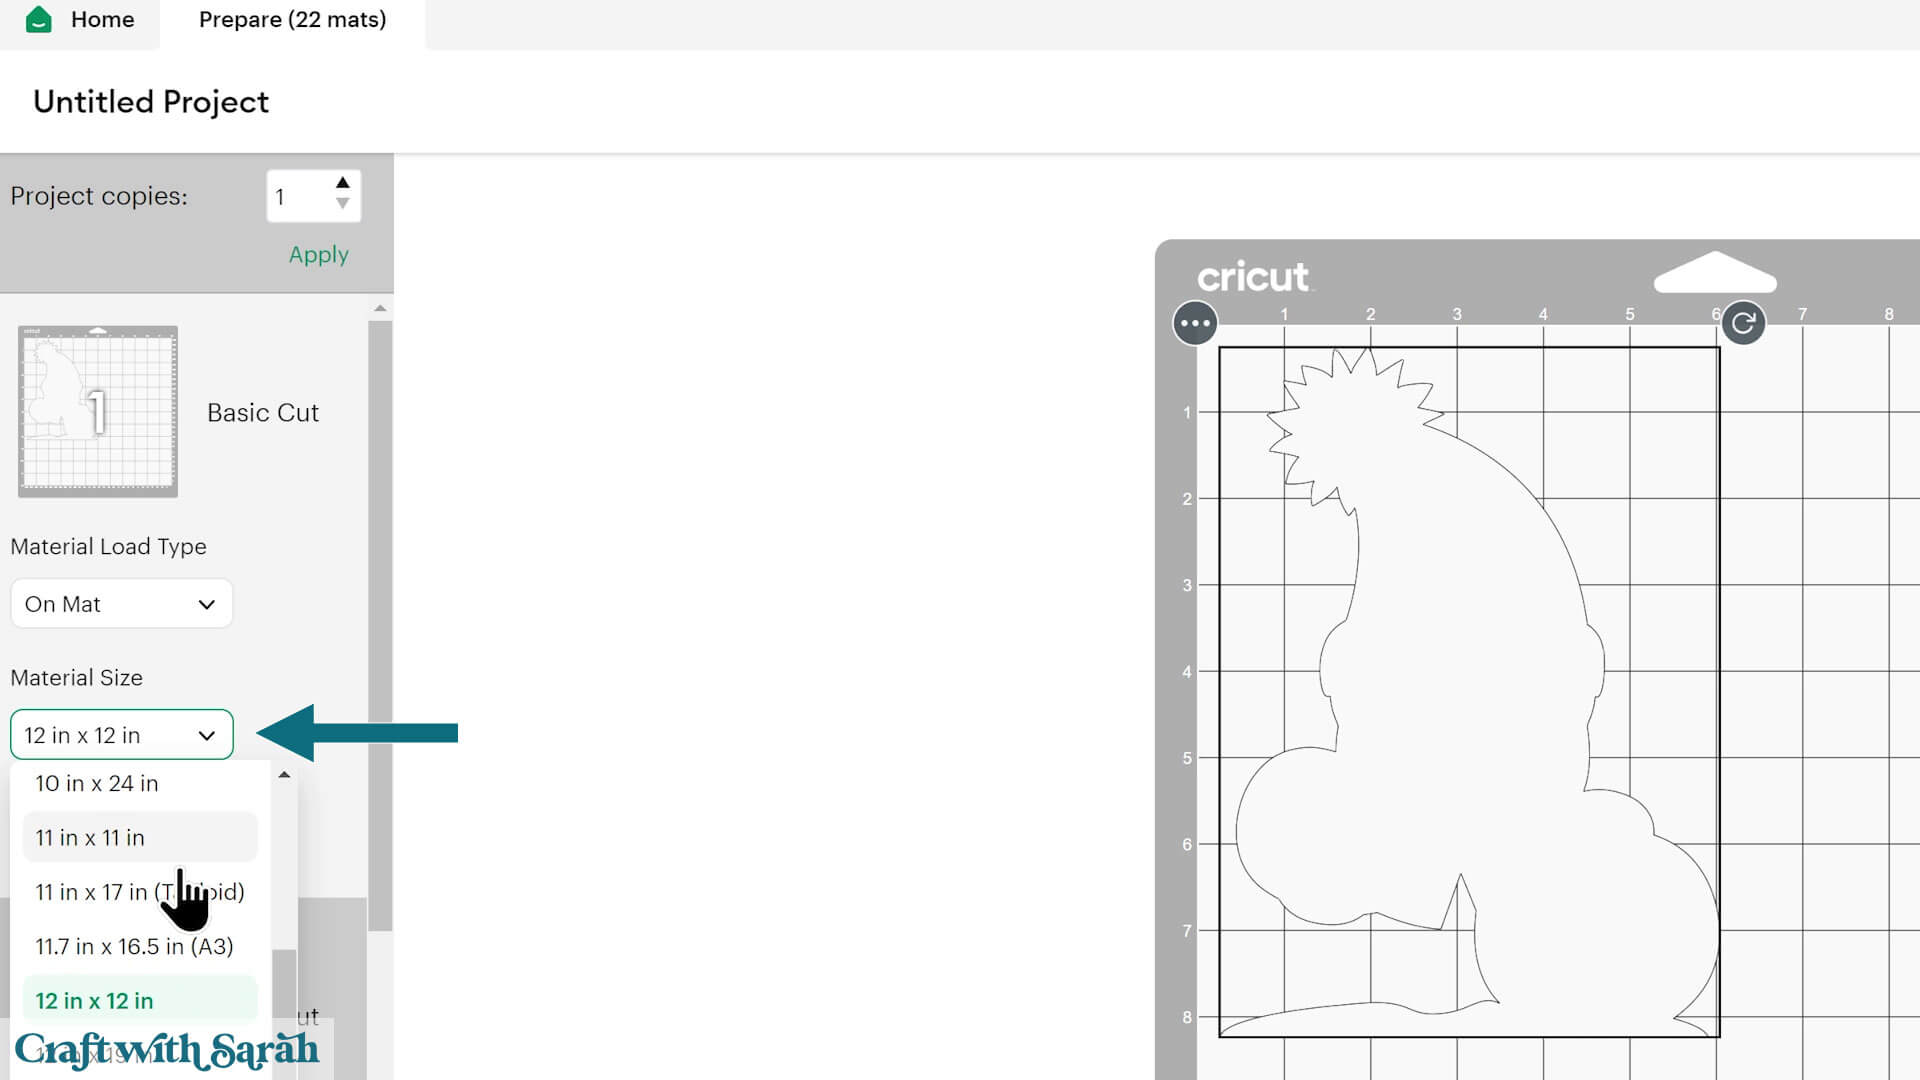
To save space on your cardstock, you can move things around by clicking and dragging. Make sure when you’re moving things about that nothing overlaps because otherwise, it won’t cut out properly.
TIP: New to using cardstock with your cutting machine? Check out these machine help guides for Cricut, Silhouette and ScanNCut that go through every step of the process, including tips for getting the best quality cuts from your machine.
Step 4) Stick the project together
Use 3D foam pads and glue to stick the layers together.
Use these guides to see the order to stick the layers together in.
Printable versions of these assembly guides are included in the folder when you download the cut files.
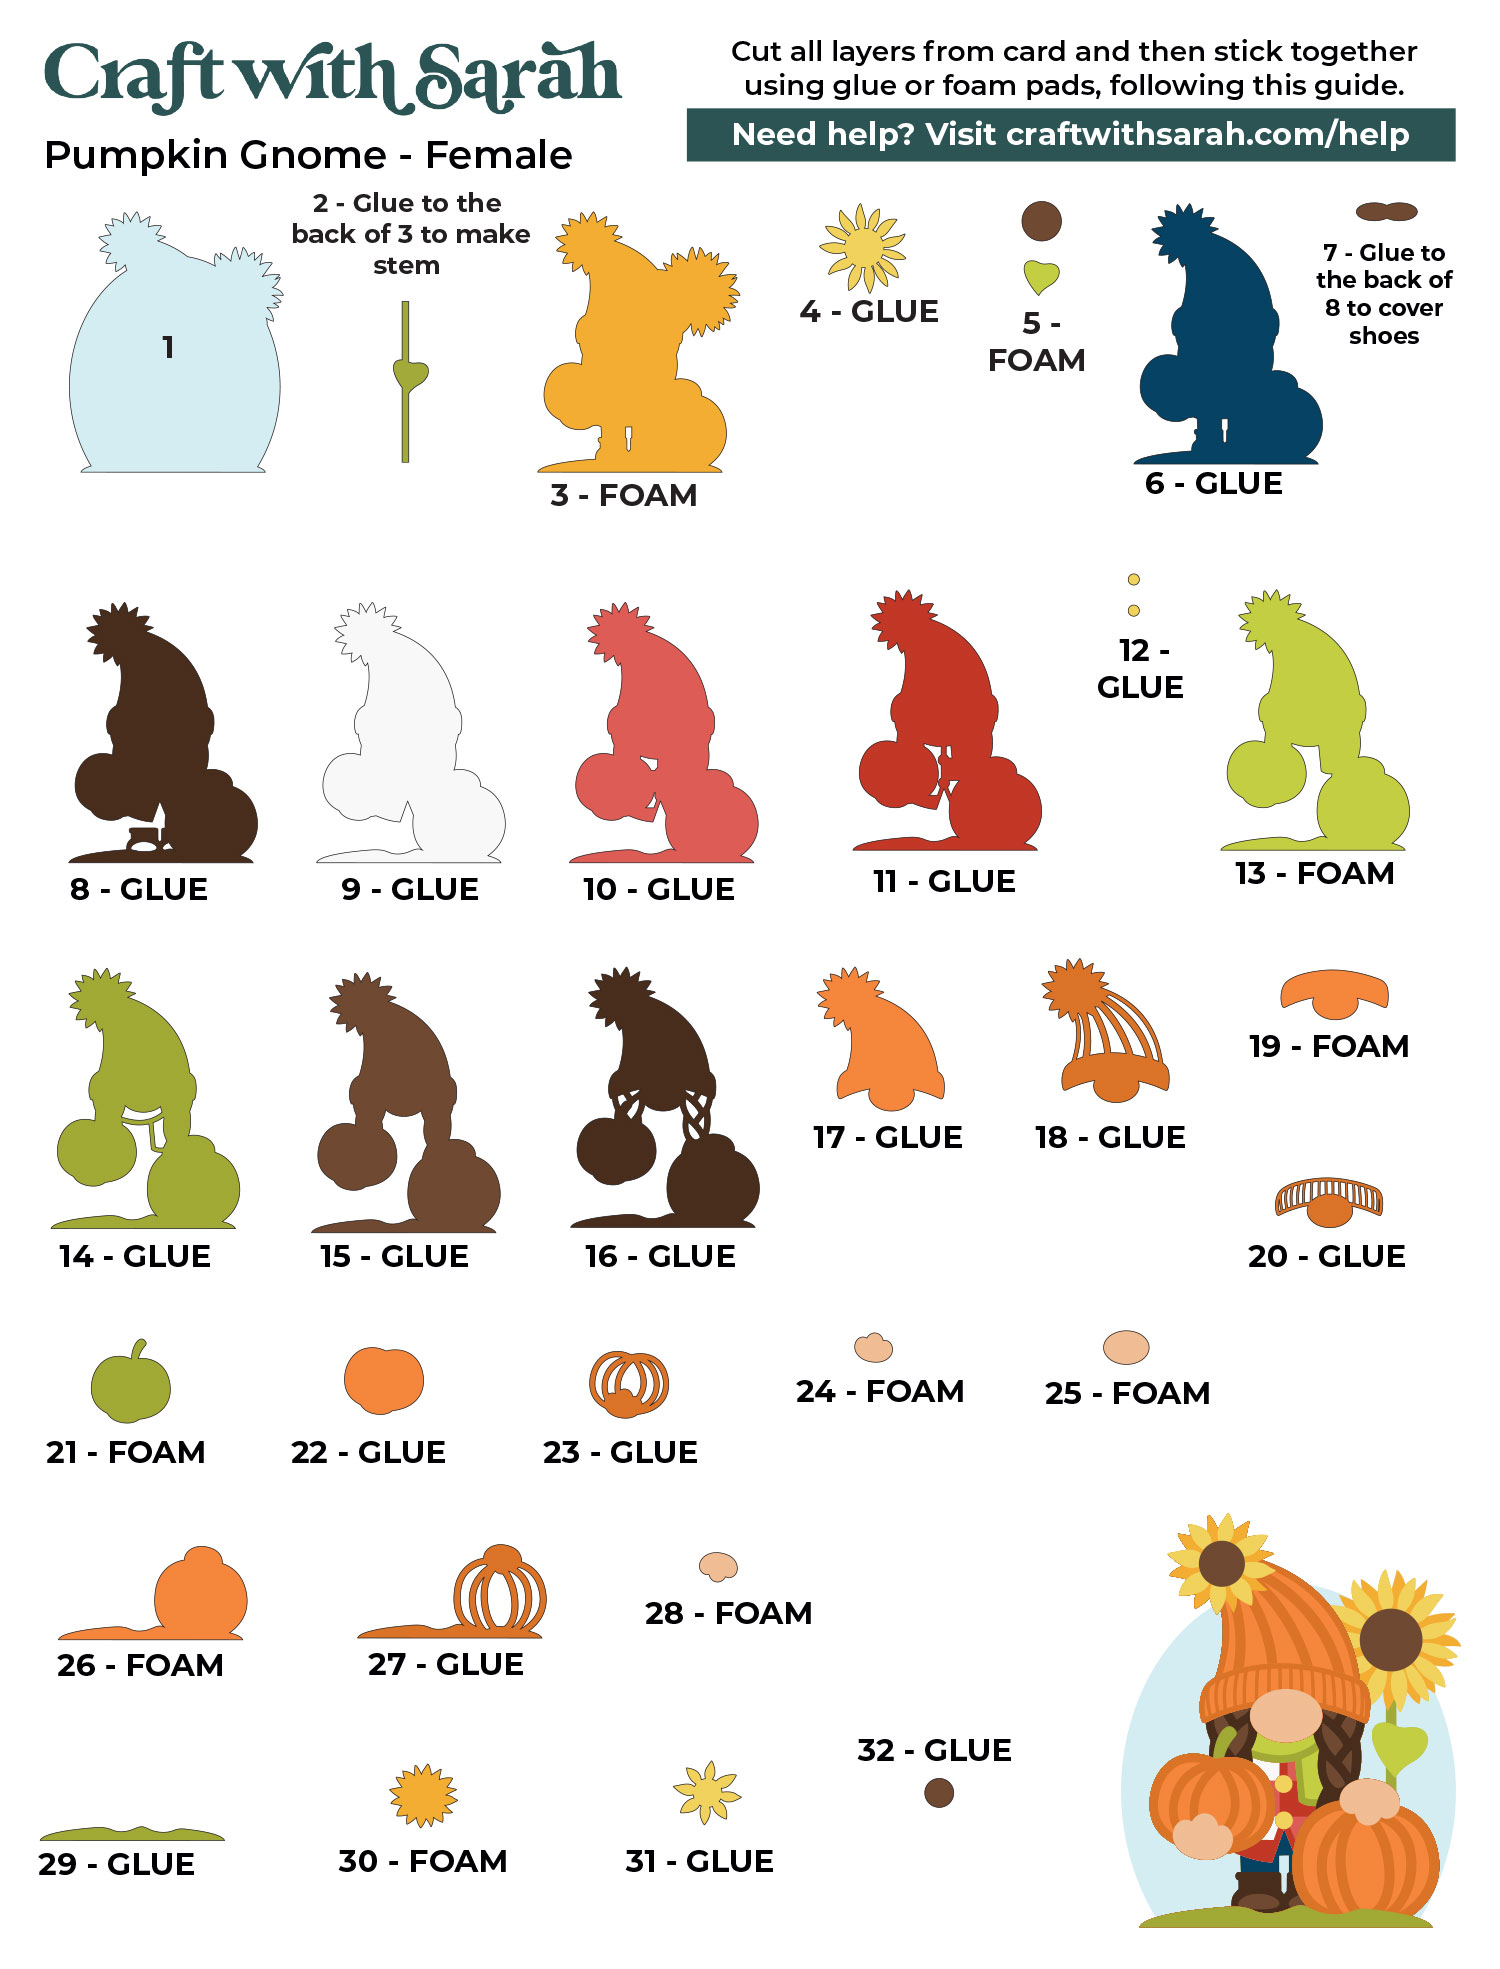
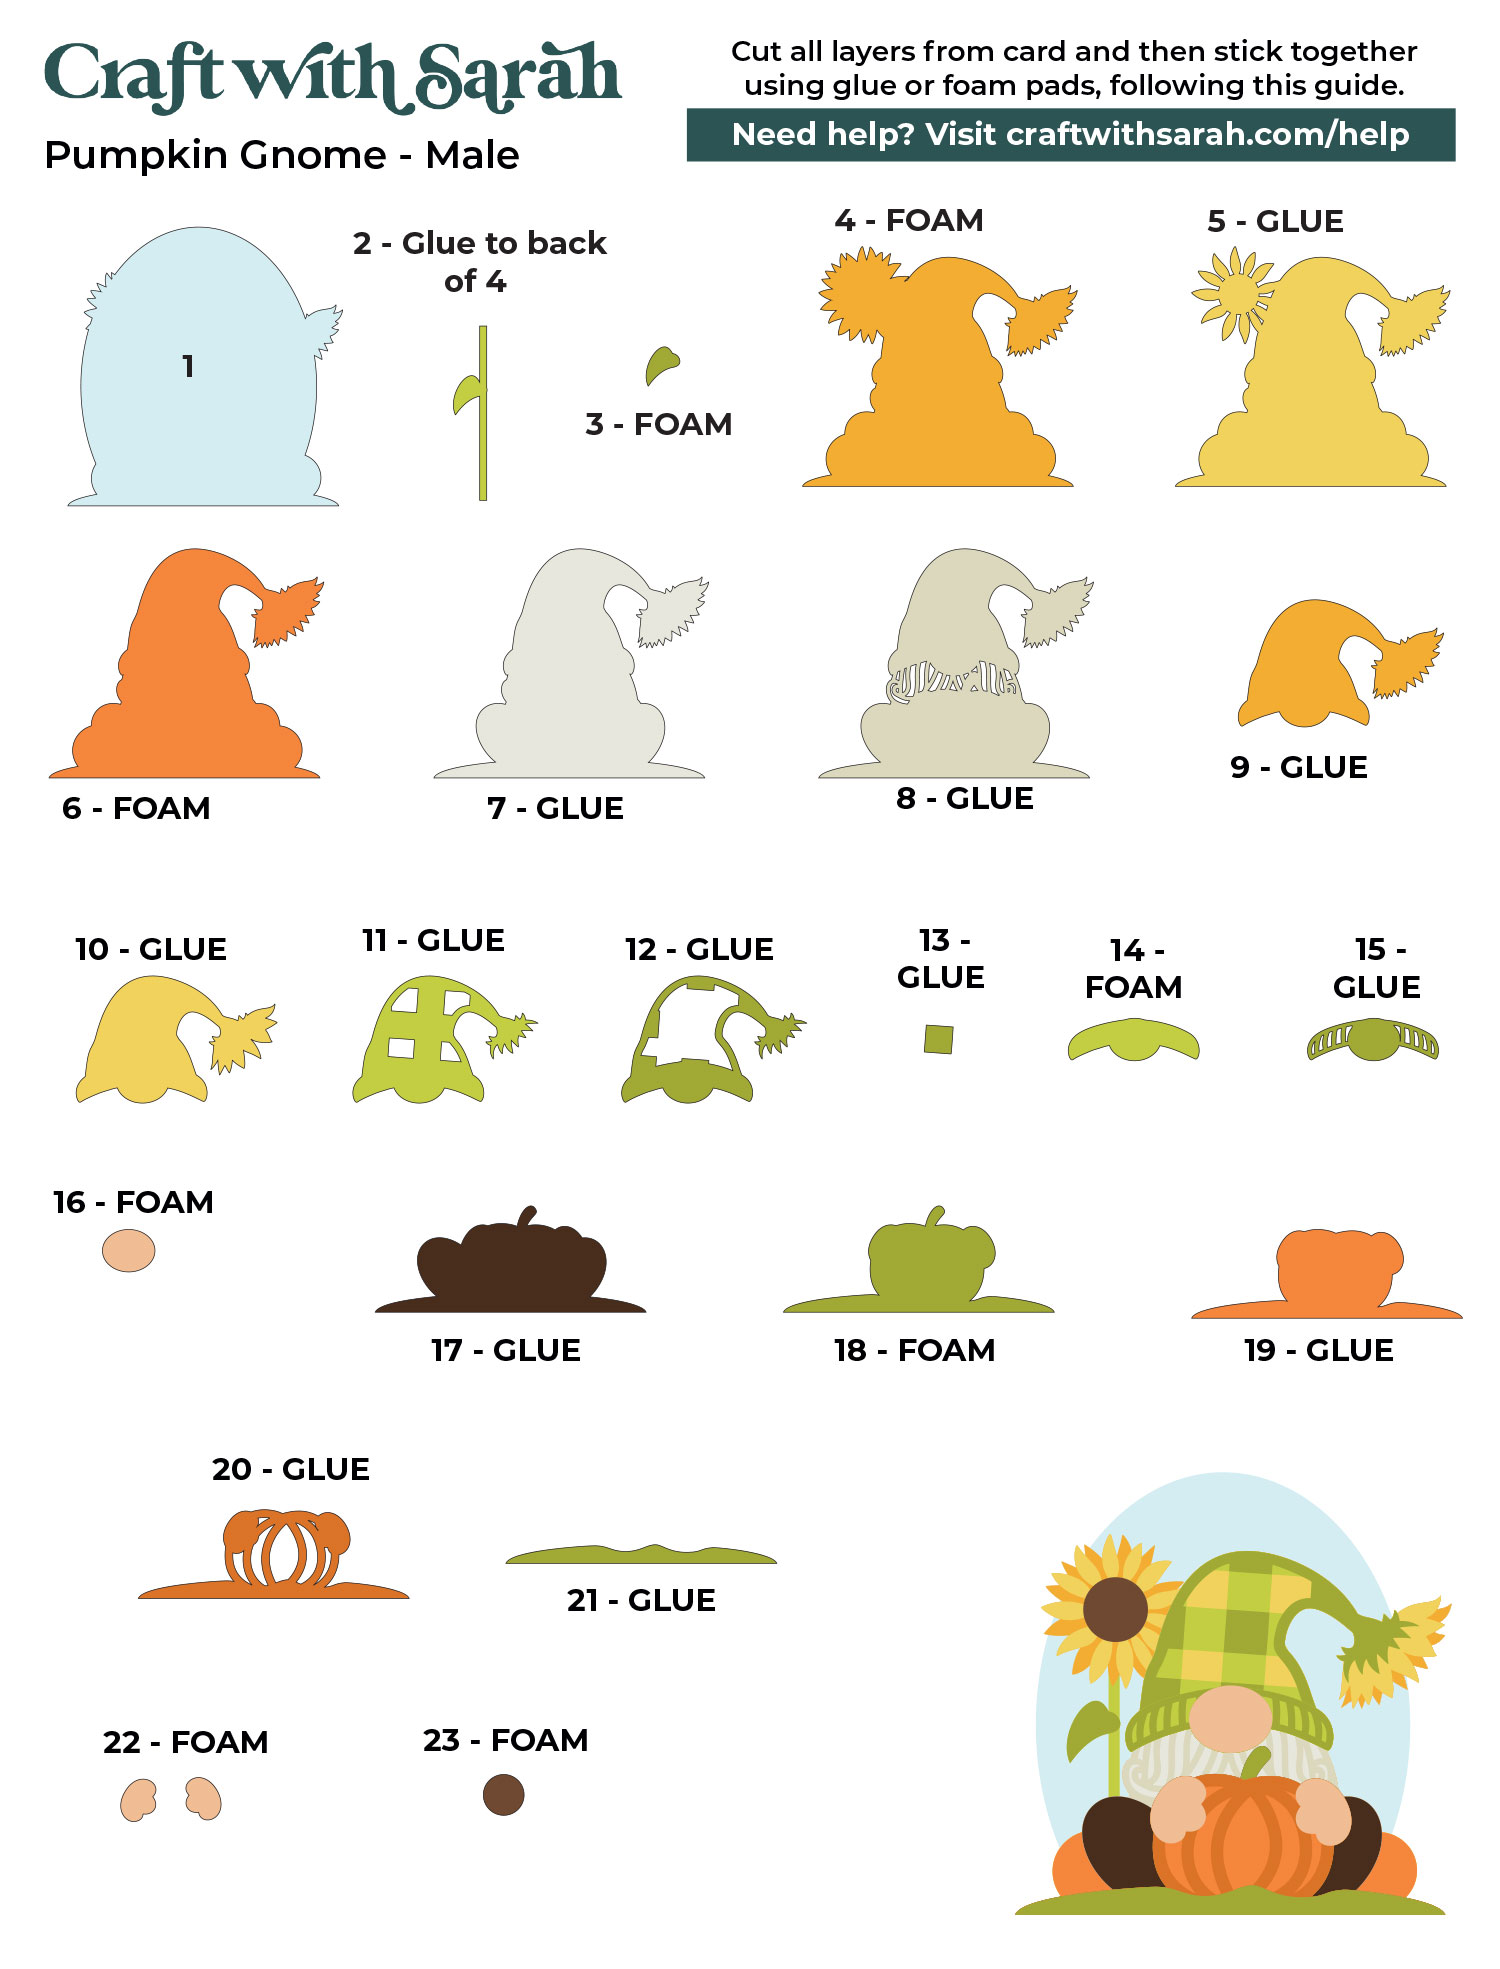
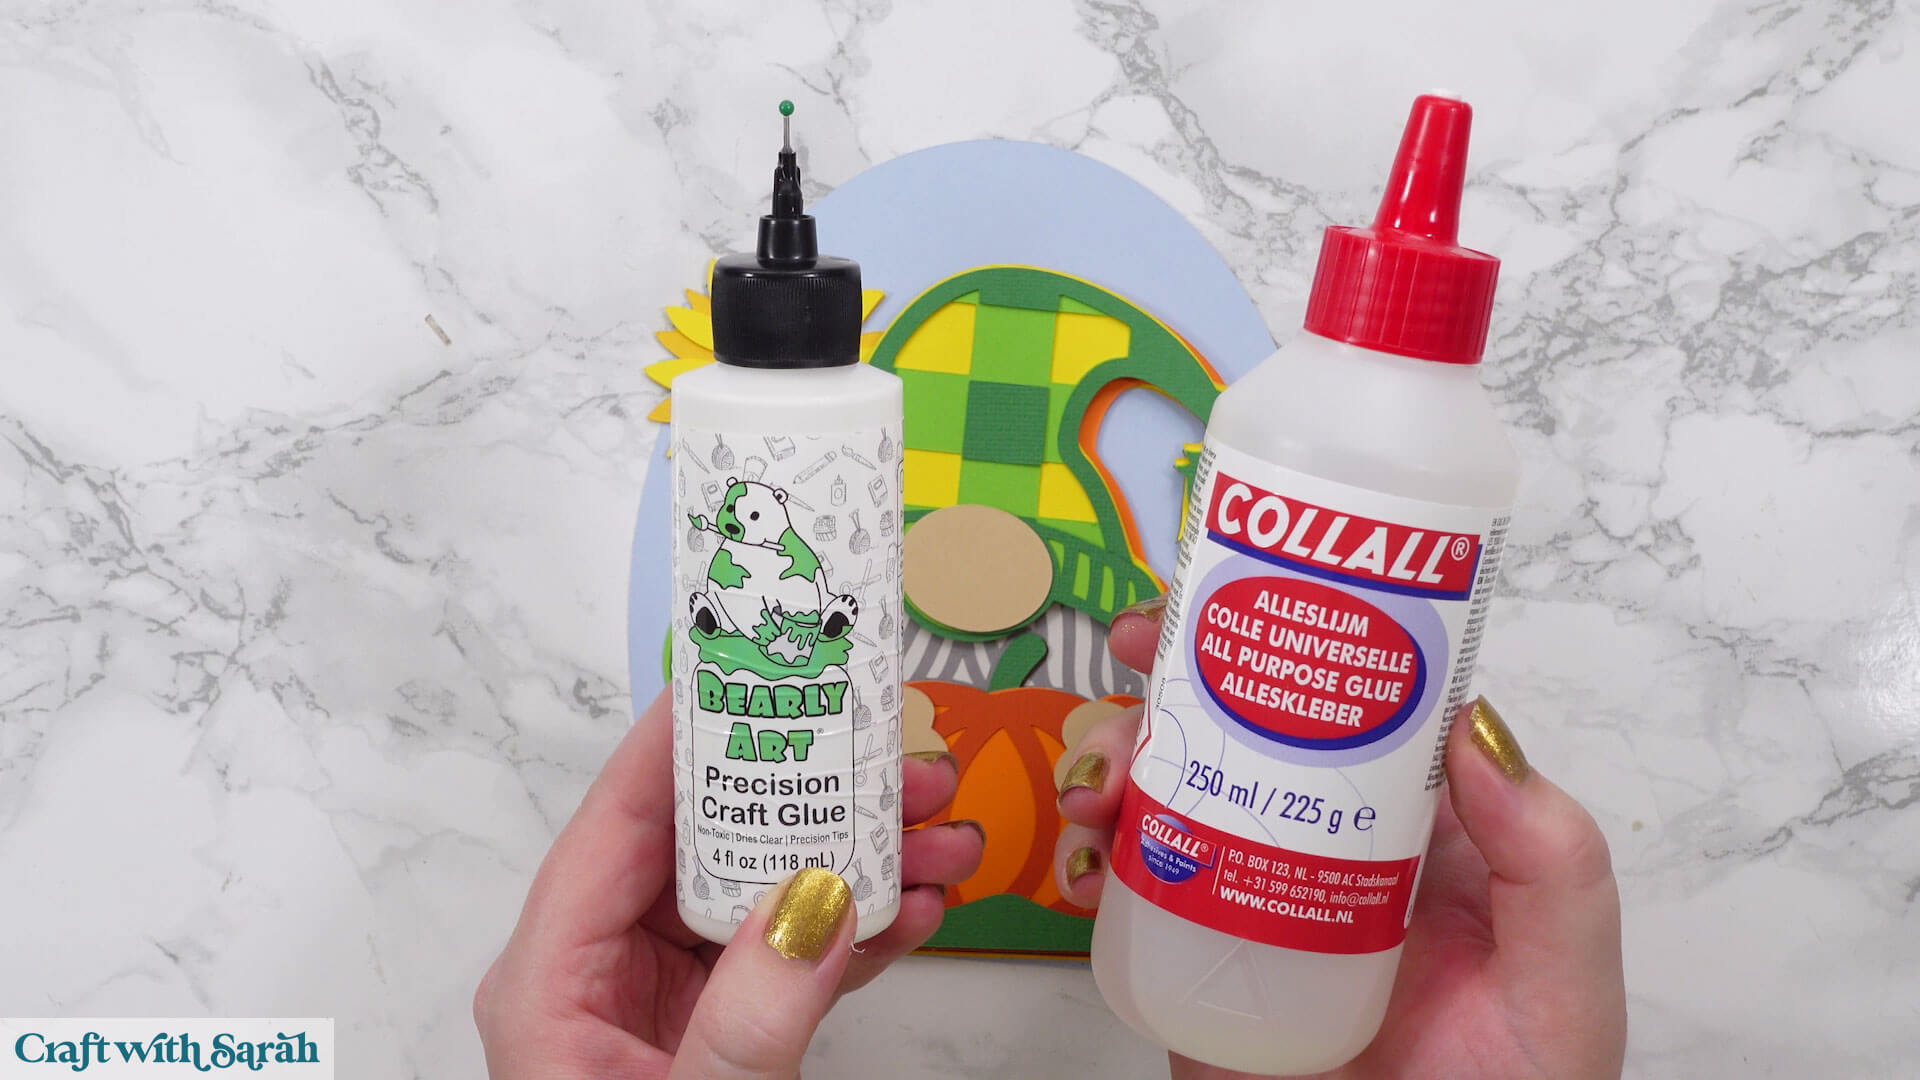
My favourite glues to use on papercraft projects are Bearly Art Glue and Collall All Purpose Glue.
These are great because they don’t “warp” or bend the cardstock like some glues do. You can use as much of it as you want and the card stays perfect – and it dries perfectly clear too!
Bearly Art Glue comes with a tiny nozzle to make it easy to apply glue to small areas of card. The Collall glue doesn’t come with this, so it’s easiest to decant it into needle tip applicator bottles so that you have more control.
The foam pads that I use are from “Dot & Dab”, but any foam squares will work. If yours are big then you may need to cut them smaller with scissors to fit inside the edges of the layers.
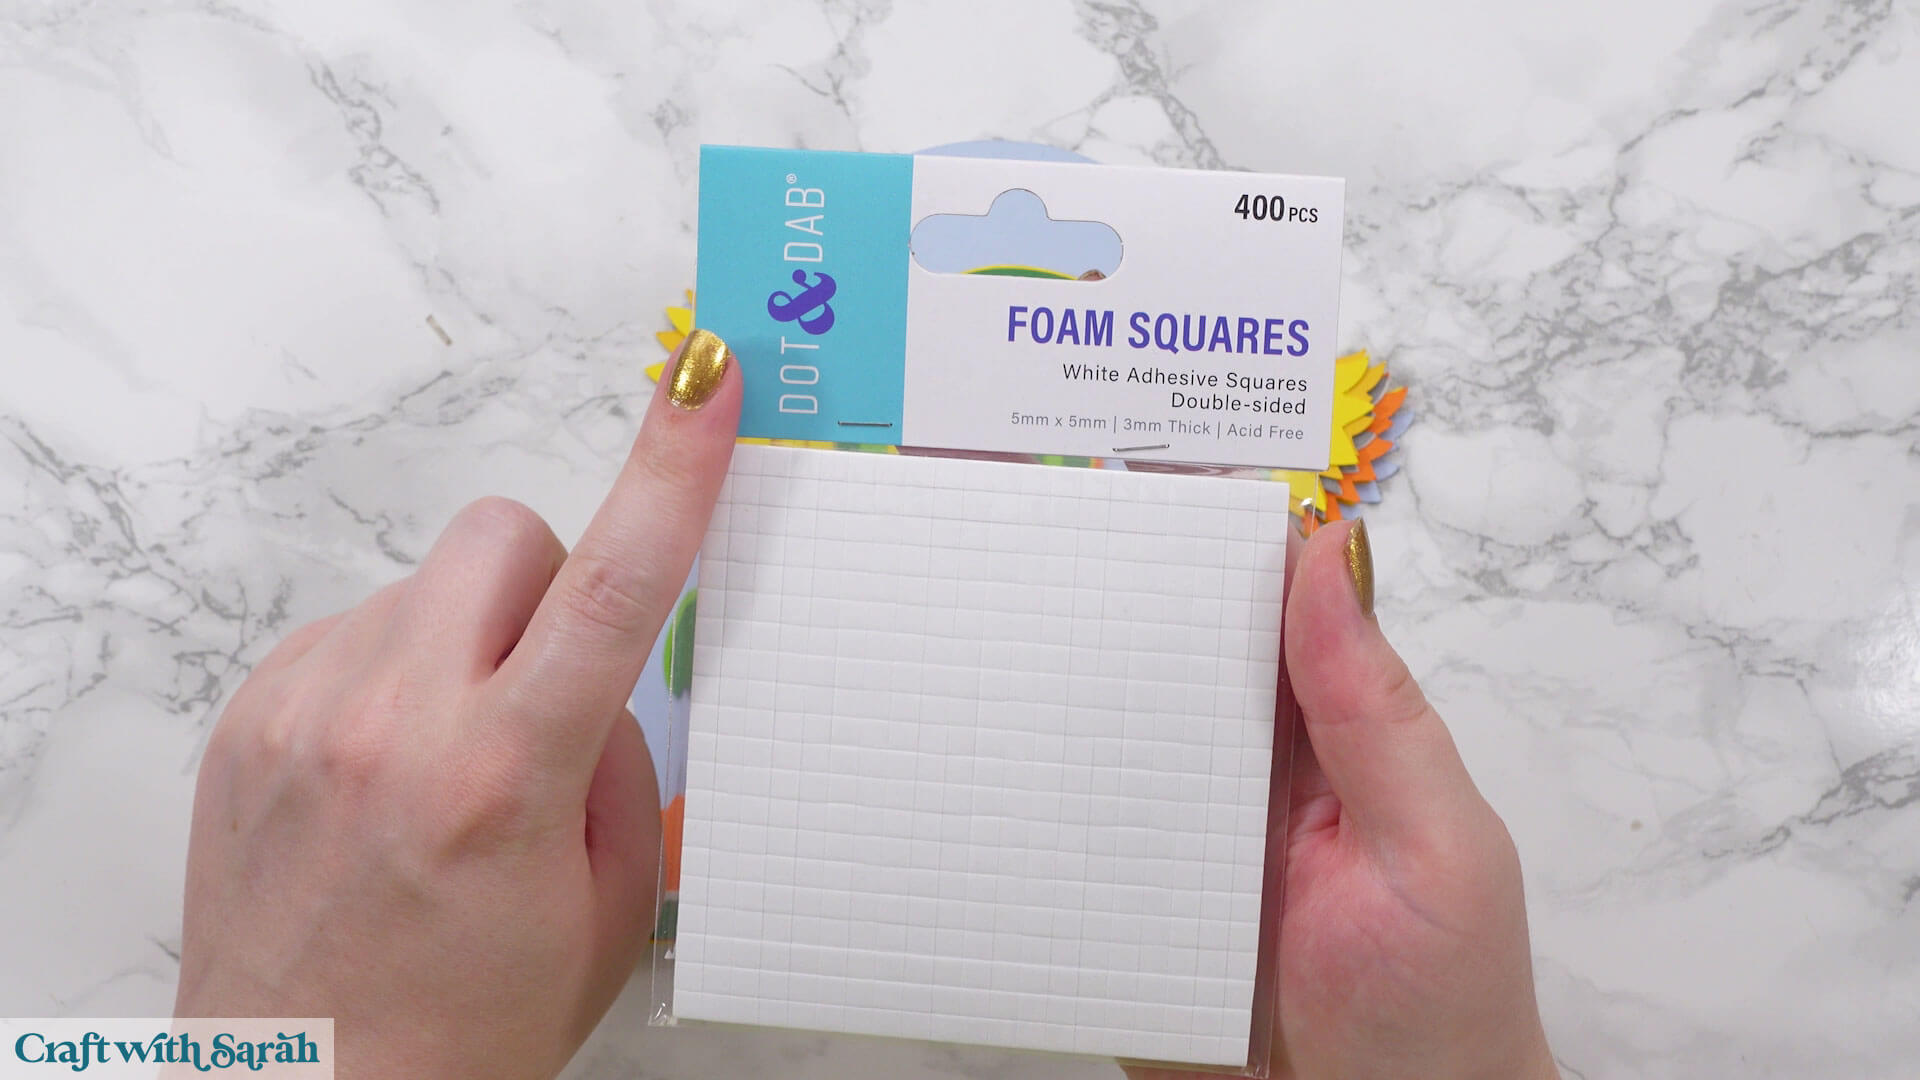
When adding the foam pads to larger pieces of card, make sure you add some in the middles of the pieces of card so it gives stability to the middles.
If you don’t add any foam pads in the middles then it can “sag” under the weight of the other layers which doesn’t look as good.
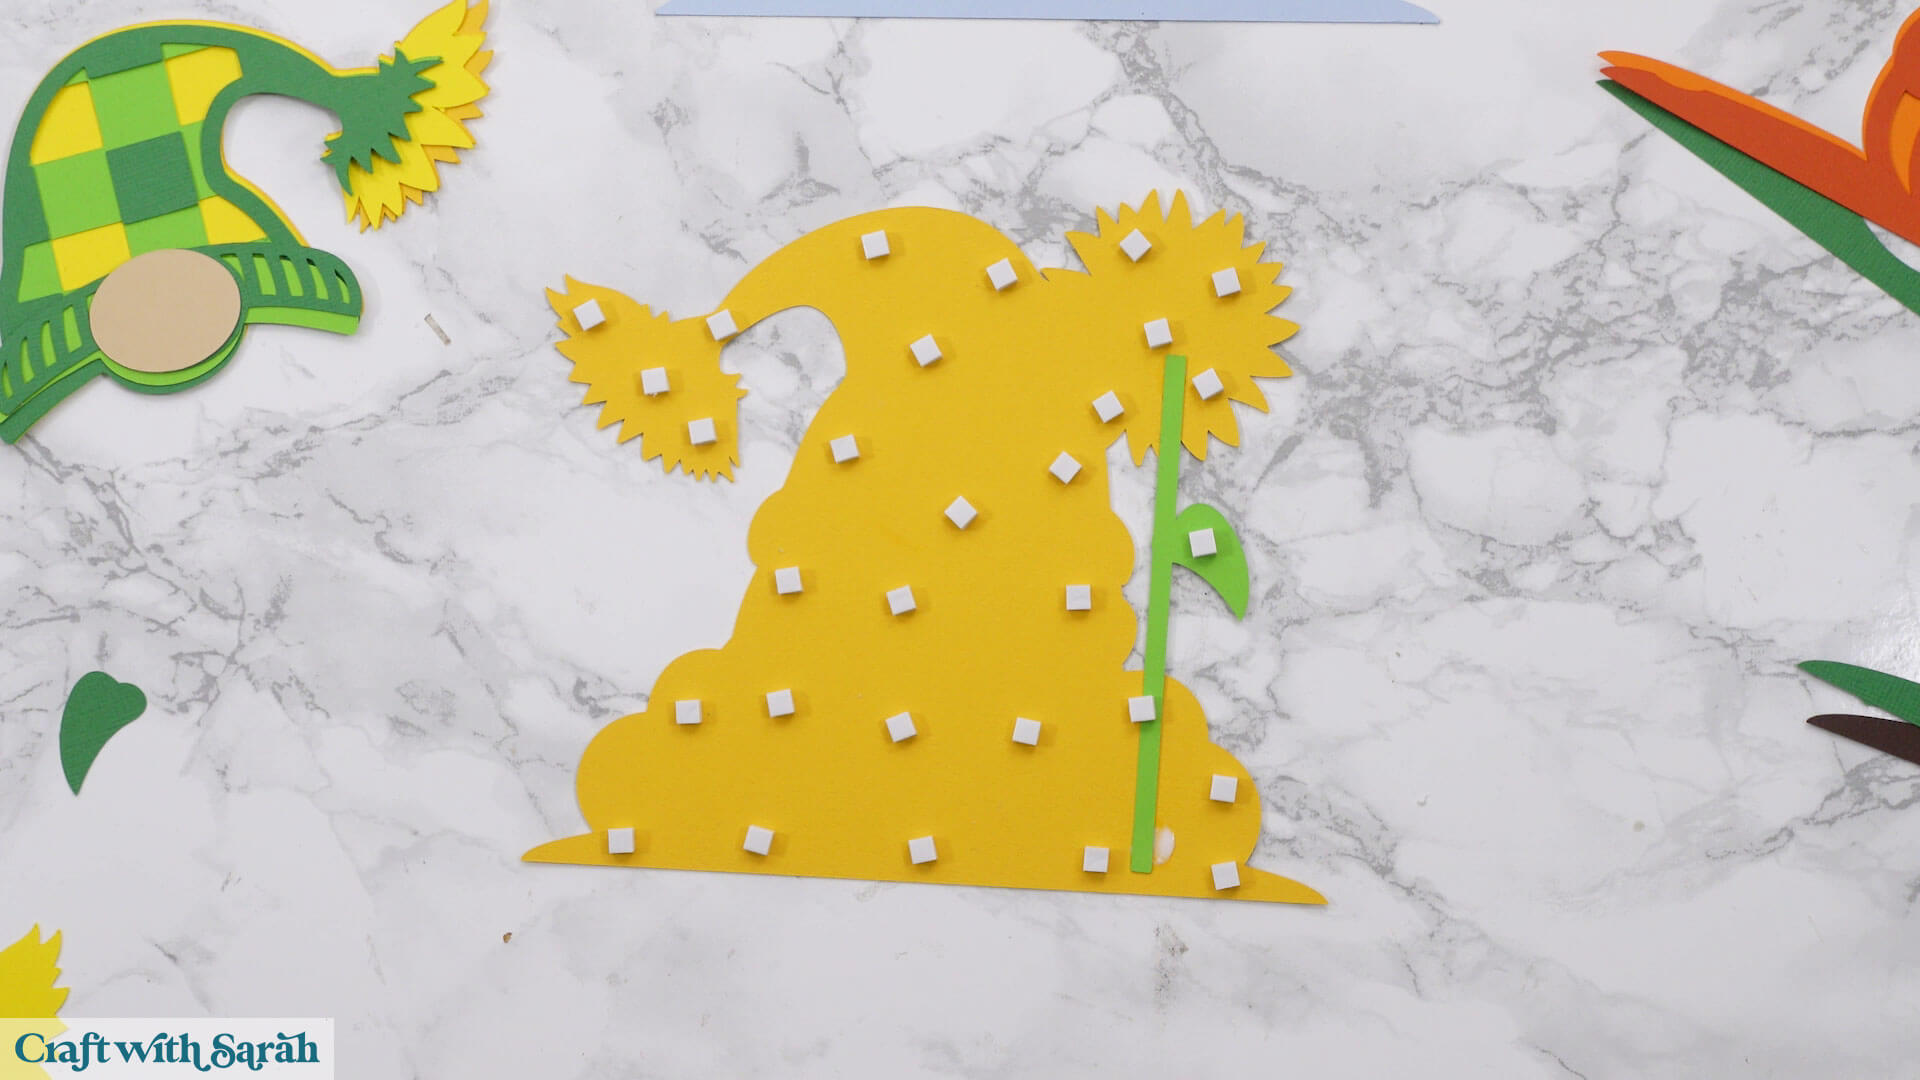
Continue sticking the pieces together, following the assembly guides, until your gnomes are all finished.
Adorable pumpkin patch gnomes to make with a Cricut
After sticking all the pieces of card together, your two little gnomes are all finished!
You could then mount them in a shadow box or glue them to the front of a greetings card.
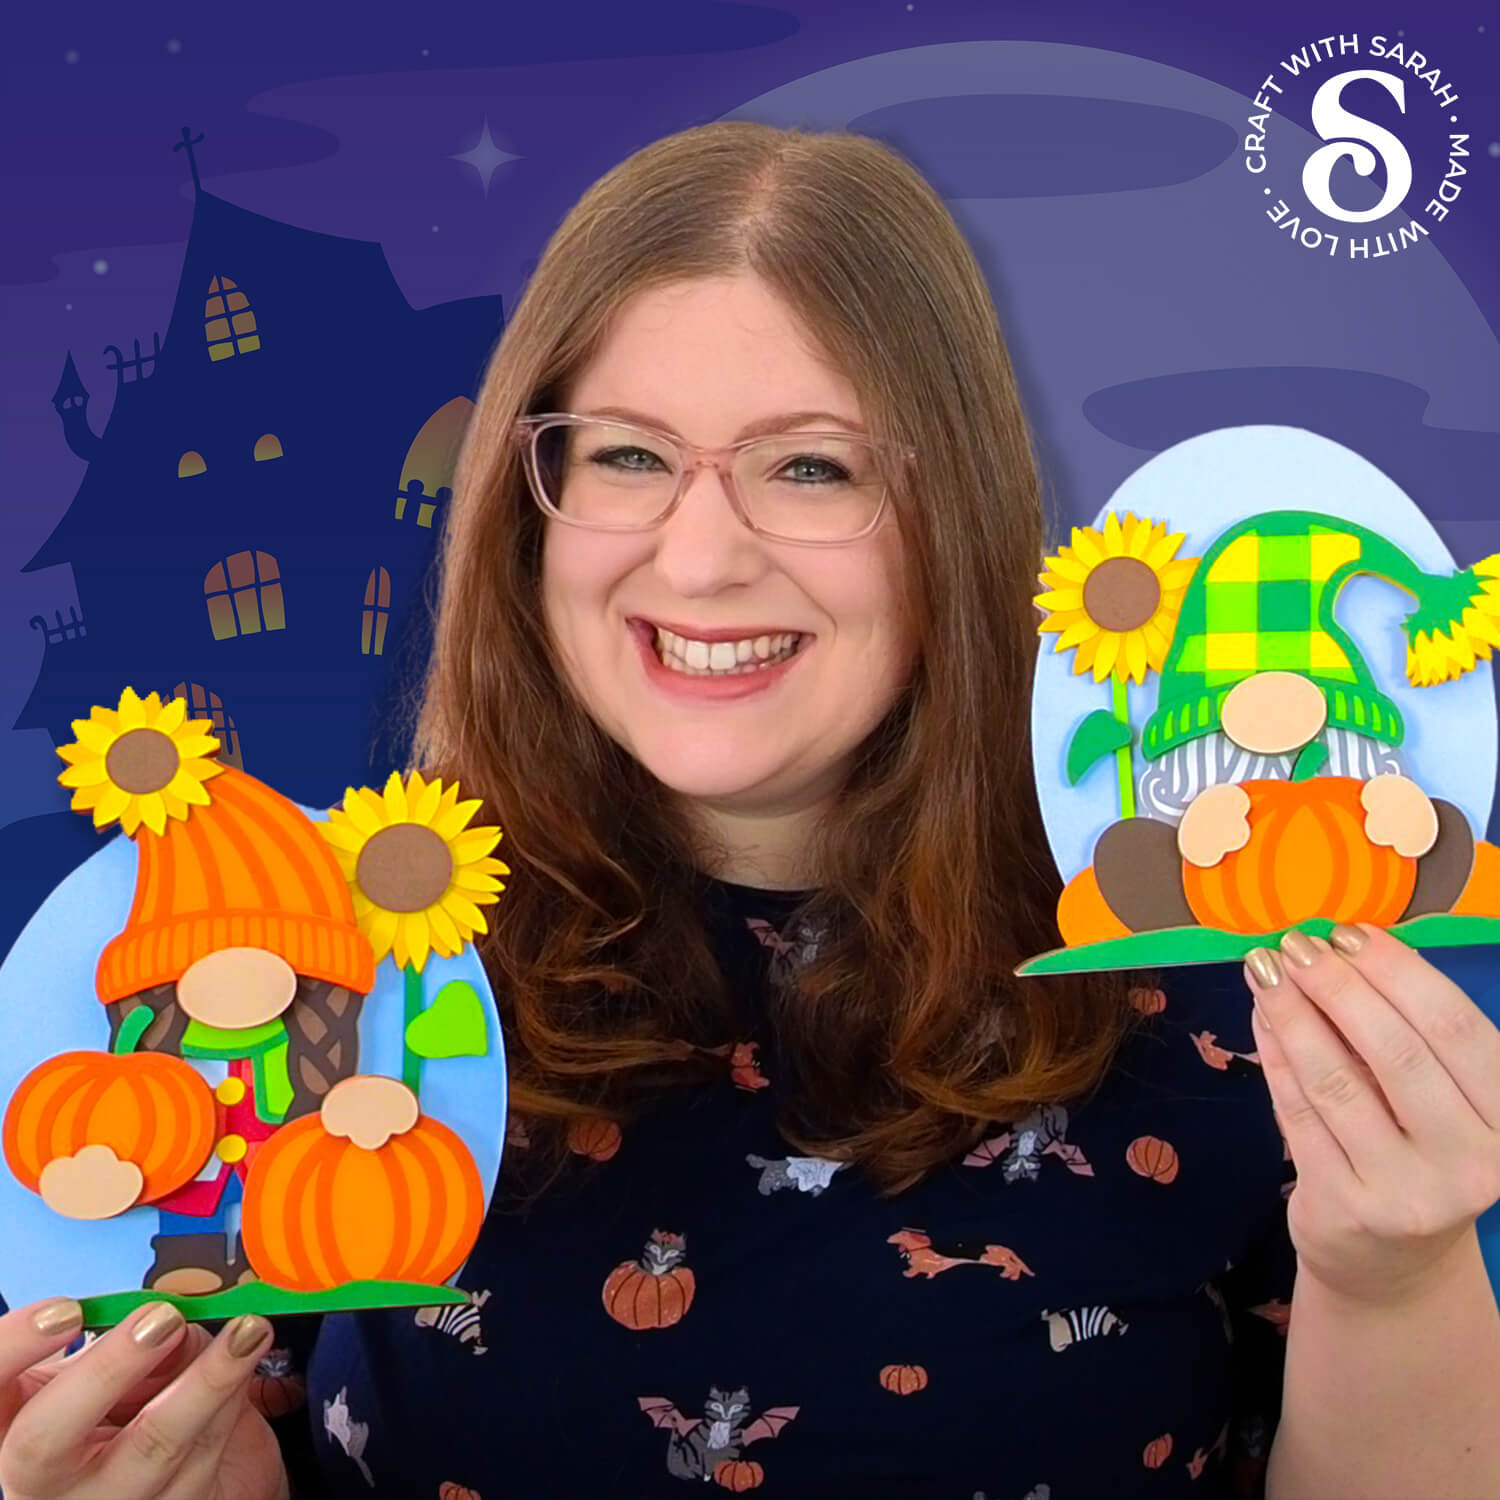
If you’d rather not mount your gnomes in a shadow box, check out these free easel stands for two alternative ways to display them.
Or, go for a more simplistic approach by making a triangle stand or nail hook.
The triangle stands are completely invisible from the front of the project, making the projects look like they are standing up by magic! The hooks allow you to hang the designs straight on the wall without a frame.
Happy crafting,
Sarah x

