Window Cling Cauldron 👻 HCC 2025

Halloween is the perfect time to bring a little sparkle and magic into your home, and this bubbling cauldron diy window cling project is a fun way to do it.
Window cling is one of those craft materials that feels almost magical on its own: it clings easily to glass, shines when the light hits it, and creates a glowing effect that’s hard to beat.
Whether you’re looking to decorate for trick-or-treaters or simply add a little seasonal personality to your space, this cauldron craft will make your windows come alive.
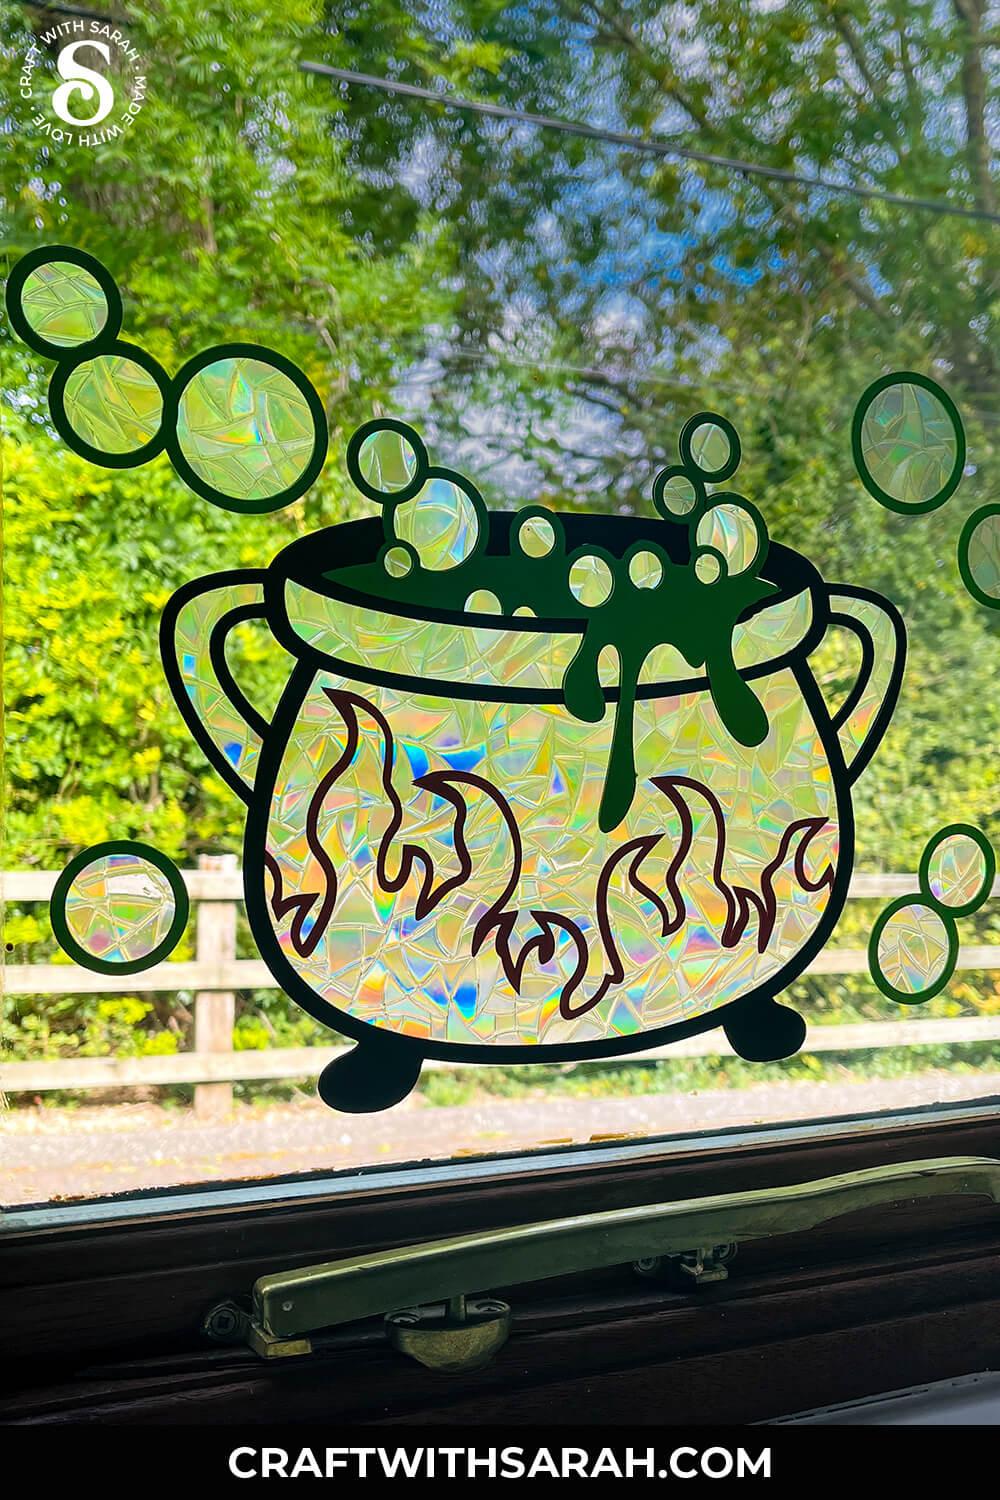
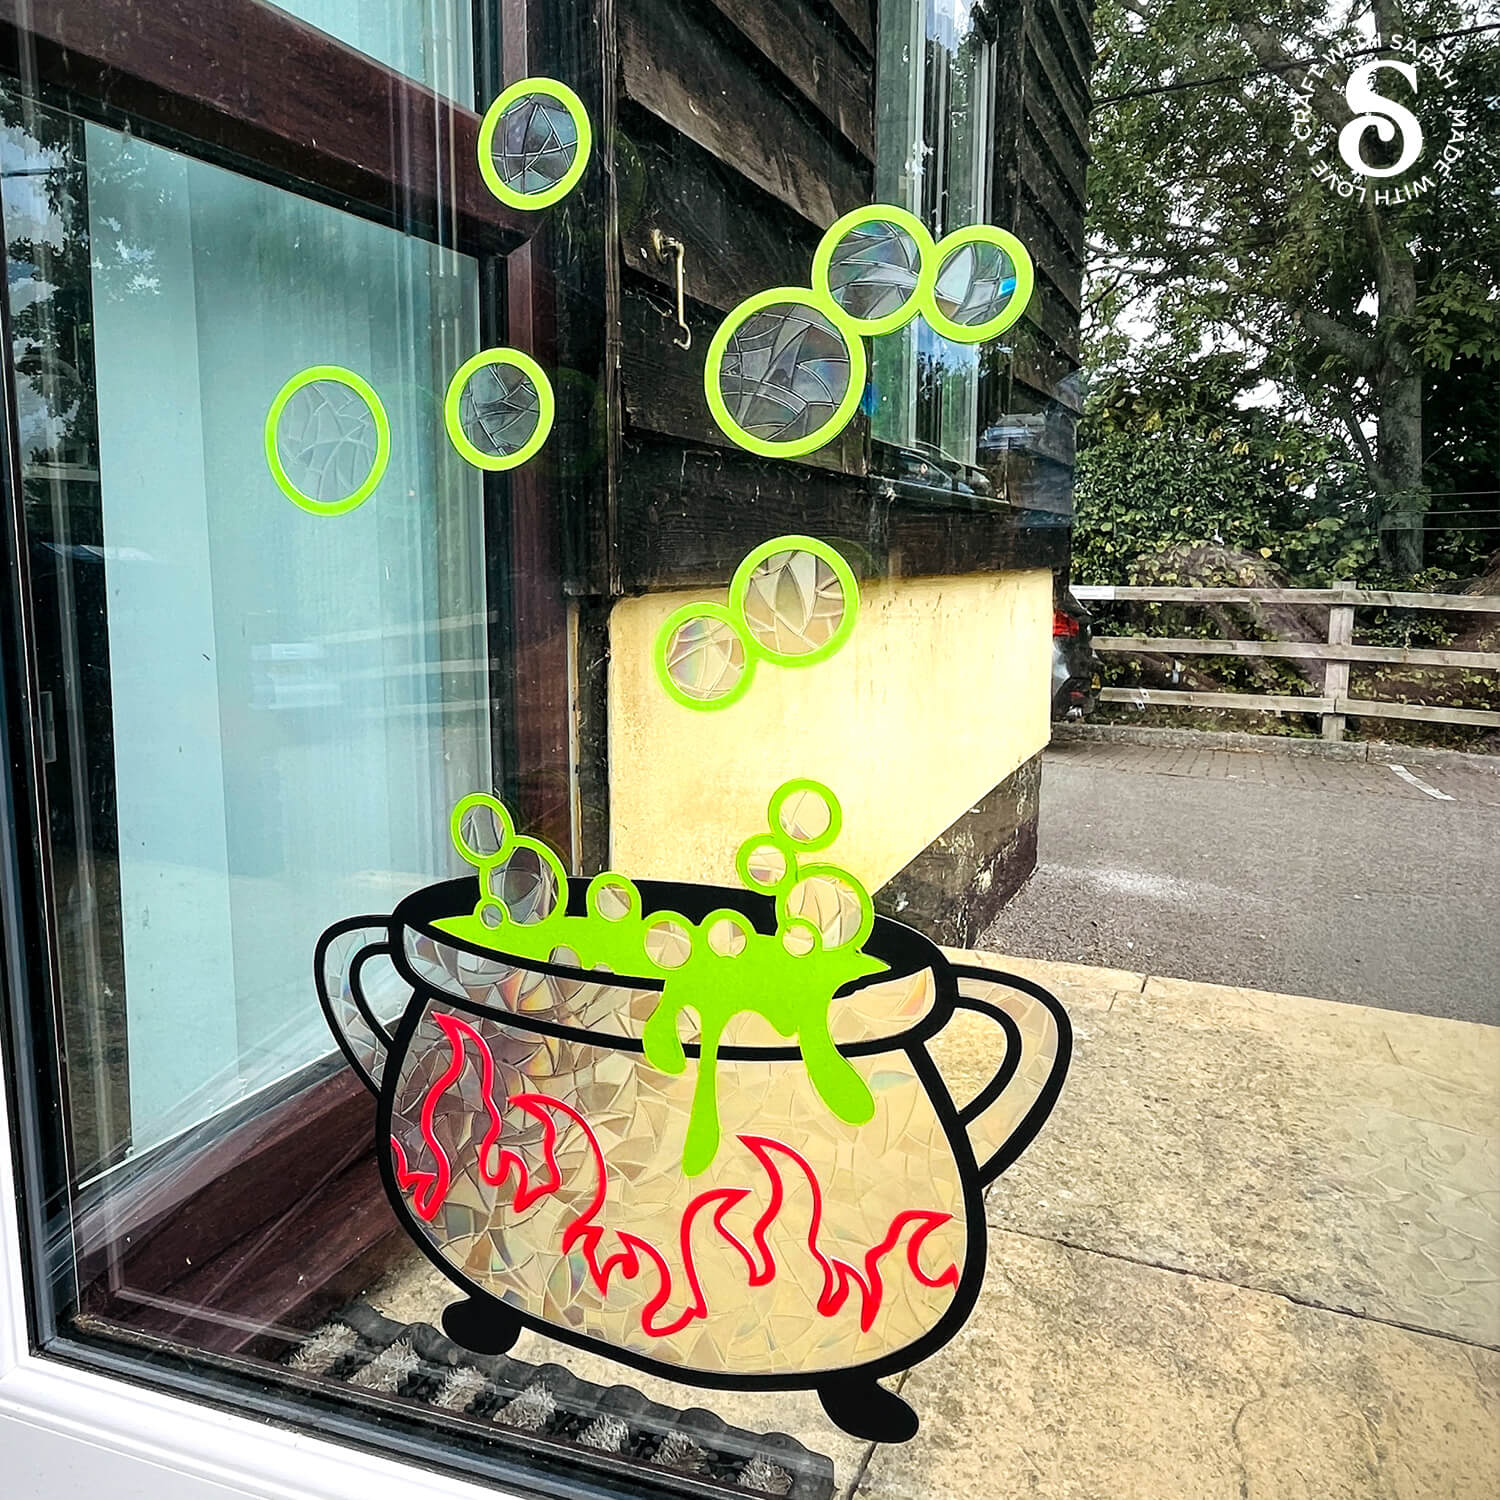
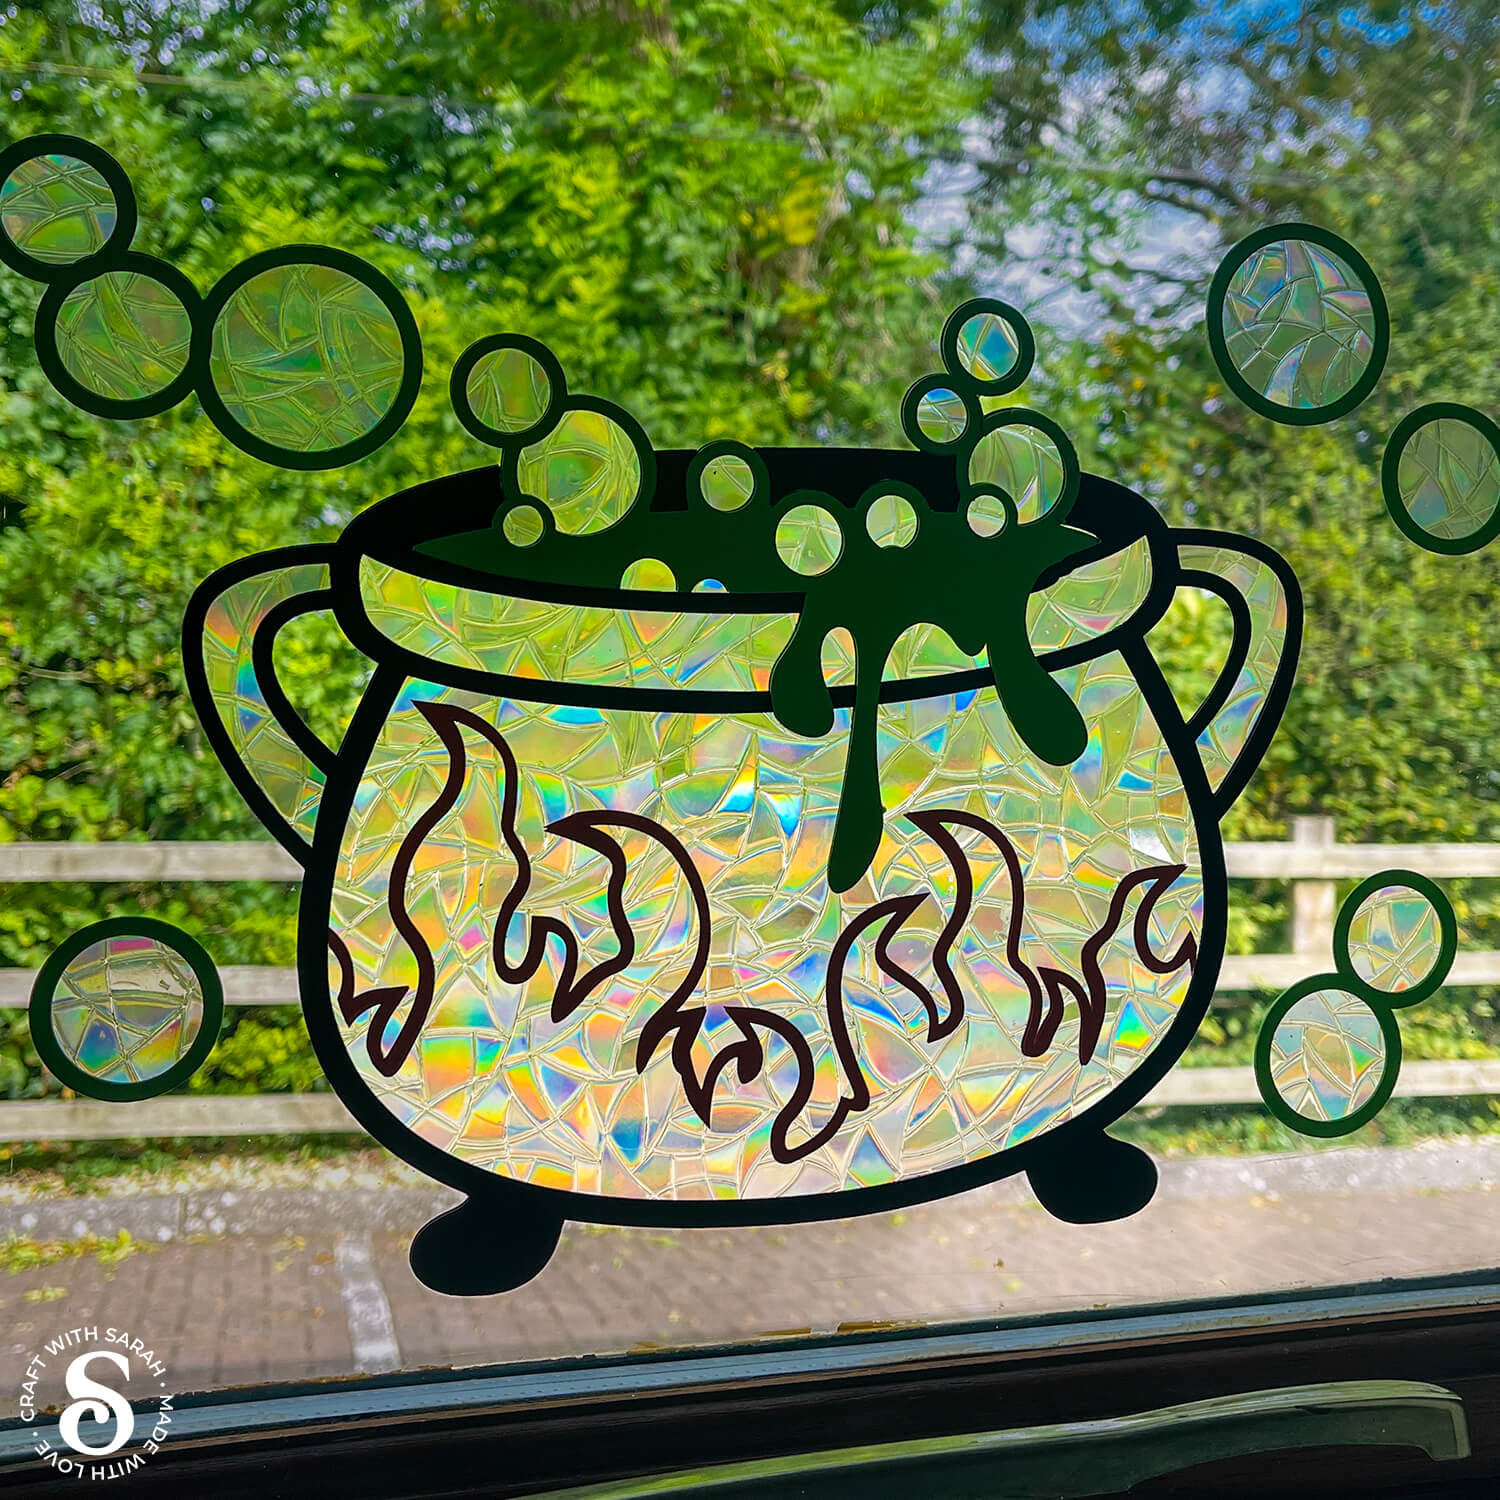
The design features a bubbling witch cauldron, complete with colorful details that light up beautifully when the sun streams through.
The translucent material turns rainbow colors, catching the light in a way that adds sparkle both inside and outside your home. That means your DIY cauldron project will look just as eye-catching to neighbors walking by as it does to guests inside your living room.
Working with window cling is refreshingly simple. If you have a Cricut machine, you’ll find that the standard blade handles this material with no trouble at all. Cutting out your bubbling cauldron DIY shapes is quick and straightforward, and the decorating process is where the fun really begins.
Since the design shows on both sides, your cauldron craft will look wonderful from all angles!
This project was part of the 2025 Halloween Craft Countdown.
Cauldron Craft Supply List
Here is a list of the materials that are needed to make this project.
Please note that some of the links included in this article are affiliate links, which means that if you click through and make a purchase I may receive a commission (at no additional cost to you). You can read my full disclosure at the bottom of the page.
- Cricut machine
- Light blue Cricut cutting mat
- Colored Cardstock – black, green and red
- Glue (I like Bearly Art Glue and Collall)
- Window Cling
- A paintbrush or cotton ball for applying water to help it “cling” to the window (optional)
This project is suitable for the following types of Cricut machines: Explore series, Maker series and Joy Xtra. You will need to make the project smaller to cut it on the Joy Xtra. It is too large to cut with the original Joy machines.
Foundation learning
If you're new to making papercrafts with your cutting machine, check out these links to get you started.
They include videos on topics such as: which file to use with your type of cutting machine, how to load the files into your cutting machine's software, how to cut cardstock with your type of cutting machine, how to recolor and modify/customize the cut files and tips for displaying your projects.
The following tutorials are Cricut-specific, but many of the ideas will work similarly with a Silhouette or ScanNCut machine and any cut files that are shared in them are compatible with all types of cutting machine.
- How to score with a Cricut (even without scoring tools)
- Print then cut tutorial
- Design Space tools (Combine, Attach, Slice, Weld, Flatten, etc.)
- Pattern fill tutorial (for making backgrounds & cutting images to a specific shape/size)
- Free envelope SVGs that can be sized to fit any card
- Presentation boxes for handmade cards
- How to write inside cards with Cricut pens
- How to cut layered designs at a small size
- Design Space tips & tricks
- Cricut pens tutorial
- How to mount multiple designs in the same frame with magic guides
DIY Cauldron Video Tutorial
Watch the video below to see how to make this project. Keep scrolling for a written tutorial.
A big Design Space update is currently rolling out that changes how the screen looks, including the position of some of the buttons and tools. I had already recorded all the Countdown videos before the update was released, so unfortunately there will be areas of the videos that look different to your screen.
To help with this, I've recorded a walkthrough video that explains all of the Design Space changes so that you can see how to do everything in the new version.
Choosing your Window Cling
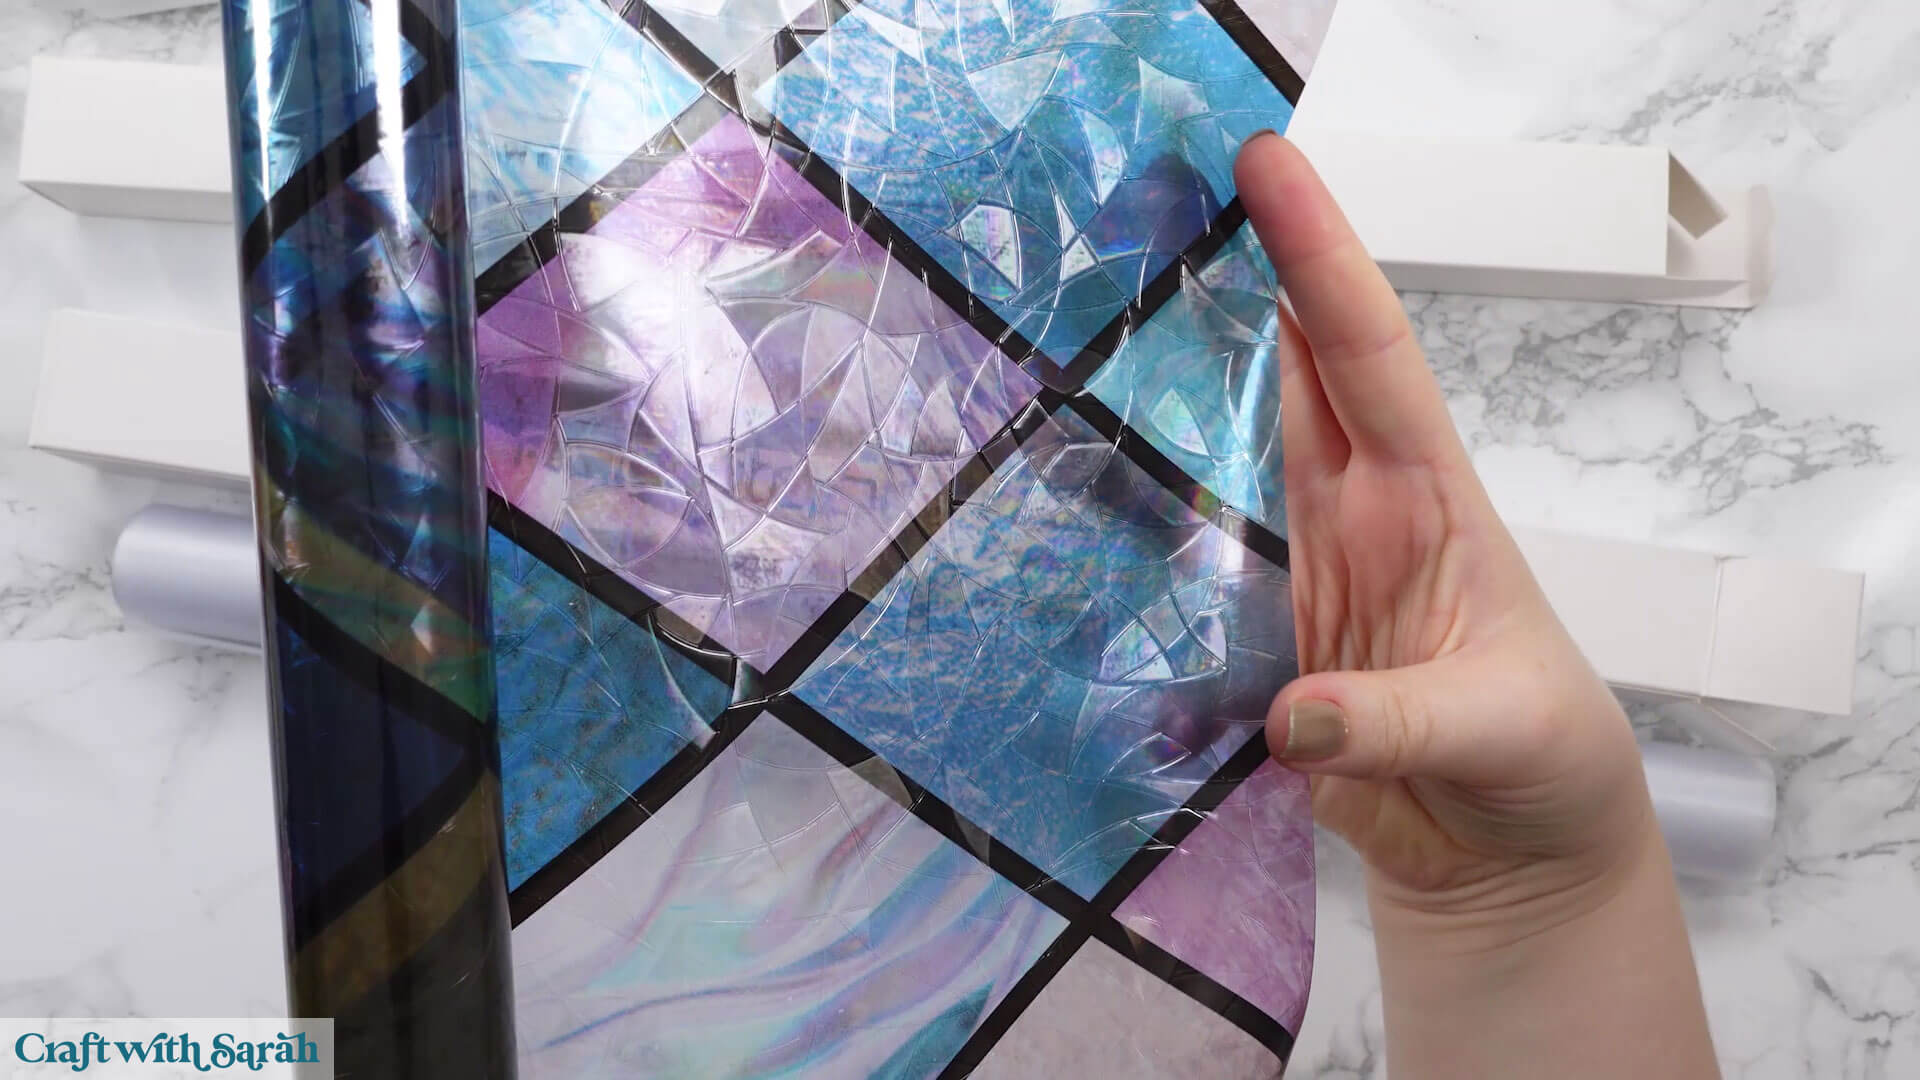
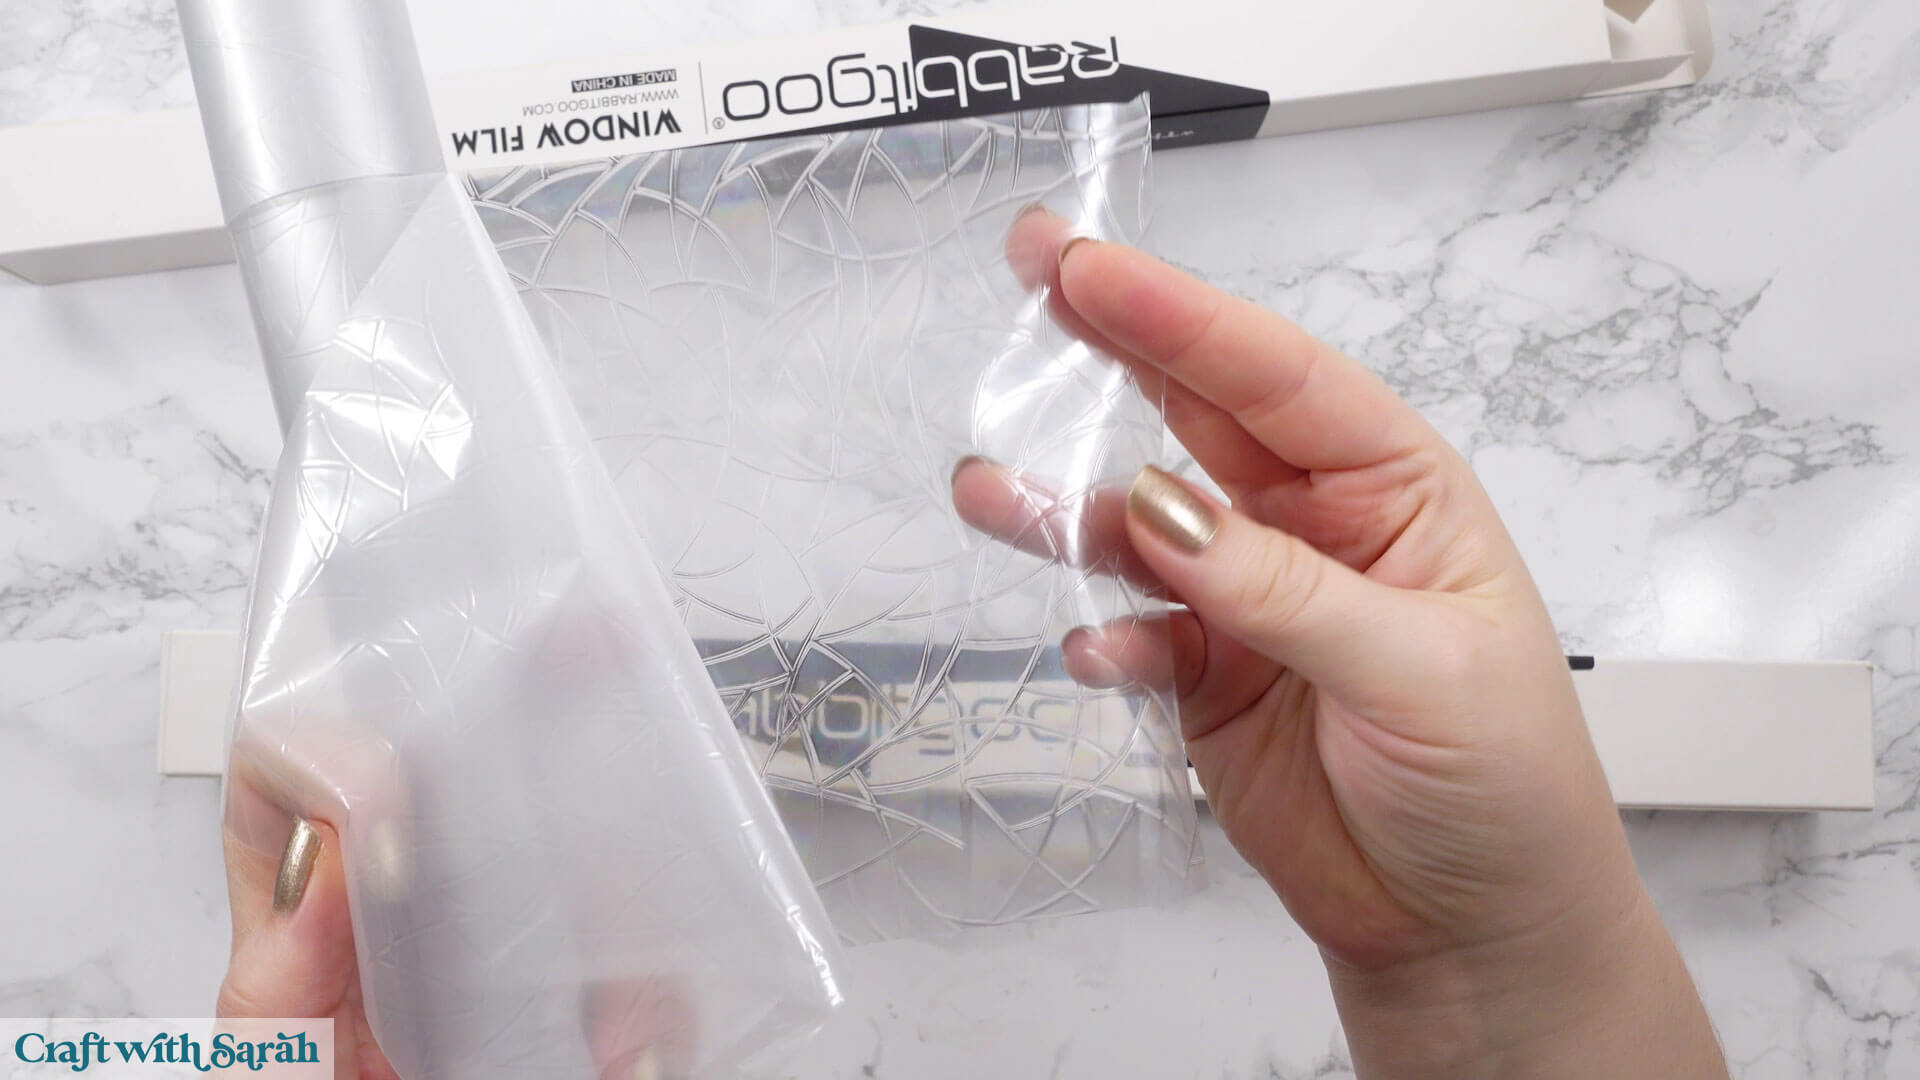
Window cling comes in lots of colors and patterns. The one I used has a stained-glass effect that shows rainbow colors when the light shines through. You can also find silver versions or even printed patterns.
Here’s one that’s more colorful and detailed than the one I ended up using, just to show the variety of designs that are available.
For Cricut cutting, cut the cling down to about 12×12 inches so it fits on your mat. You can place it cling-side up or flip it over and cut through the backing sheet if that works better for your blade.
I usually use the Heavy Cardstock setting, but if your machine struggles then try the Kraftboard setting instead.
The backing helps keep it clean and preserves the tackiness. Ideally, you’ll put your cauldron on the window as soon as you are done making it.
How to Make a Bubbling Cauldron DIY Craft
Here’s how to make this spooky window cling cauldron for Halloween using a Cricut machine.
Step 1) Download the cutting files & upload to Design Space
Get the files using the box below.
Purchase the File(s)
This cut file is available as part of the Instant Access Bundle.
Or, purchase this design individually here
Before you upload the SVGs to Design Space, you need to unzip the download folder that they come in.
- How to unzip a folder on Windows computer
- How to unzip a folder on a Mac
- How to unzip a folder on an iPad/iPhone
- How to unzip a folder on an Android device
After unzipping, upload the SVG file(s) into your cutting machine software.
Not sure how to use cut files with your type of machine? The following links lead to videos on how to open cut files in:
- Cricut Design Space
- Silhouette Studio
- CanvasWorkspace (for ScanNCut machines)
The download folder also contains printable PDF versions of the templates for hand cutting.
If you are using Cricut Design Space, start a new project and then click the “Upload” button on the left of the screen.
You can then either click “Browse” to find the files on your computer, or drag-and-drop them in.
Navigate to the “01 Cricut Version” subfolder and then select the file called svg-01-window-cauldron-craftwithsarah.svg
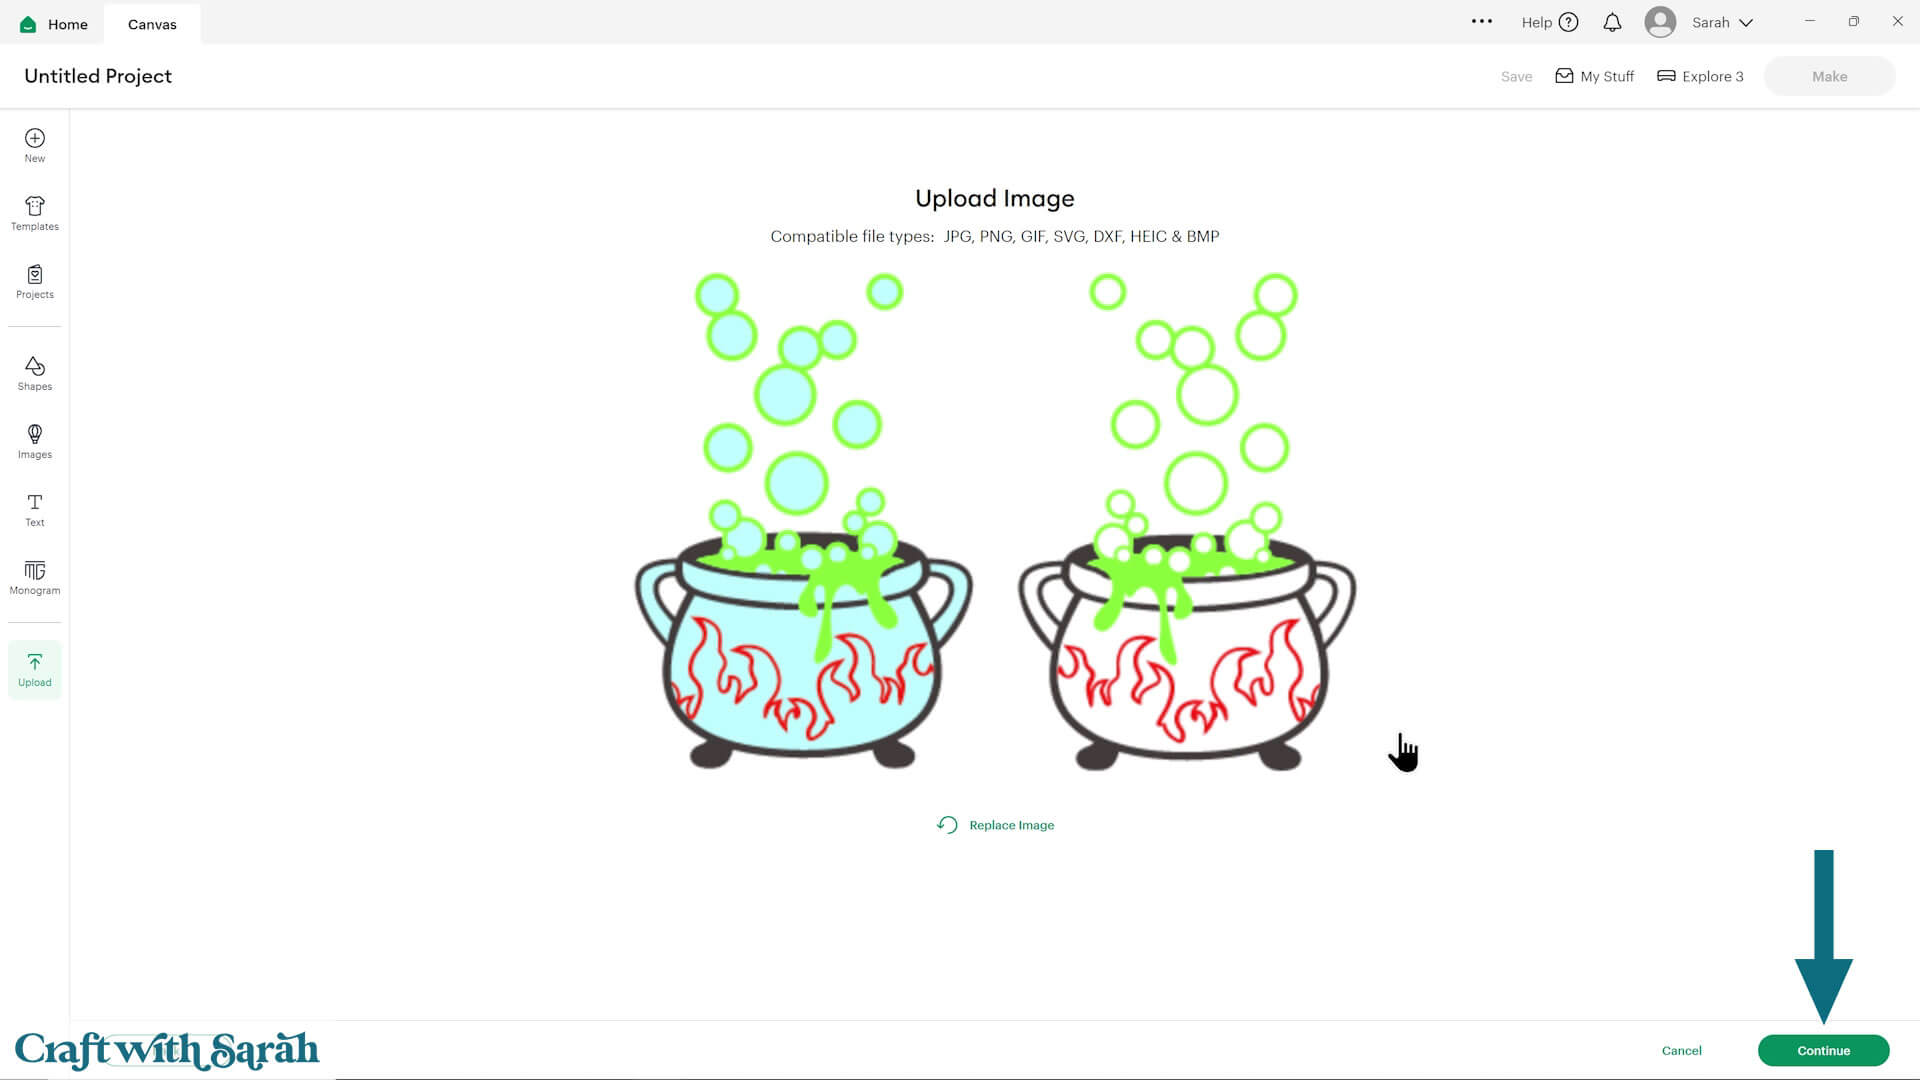
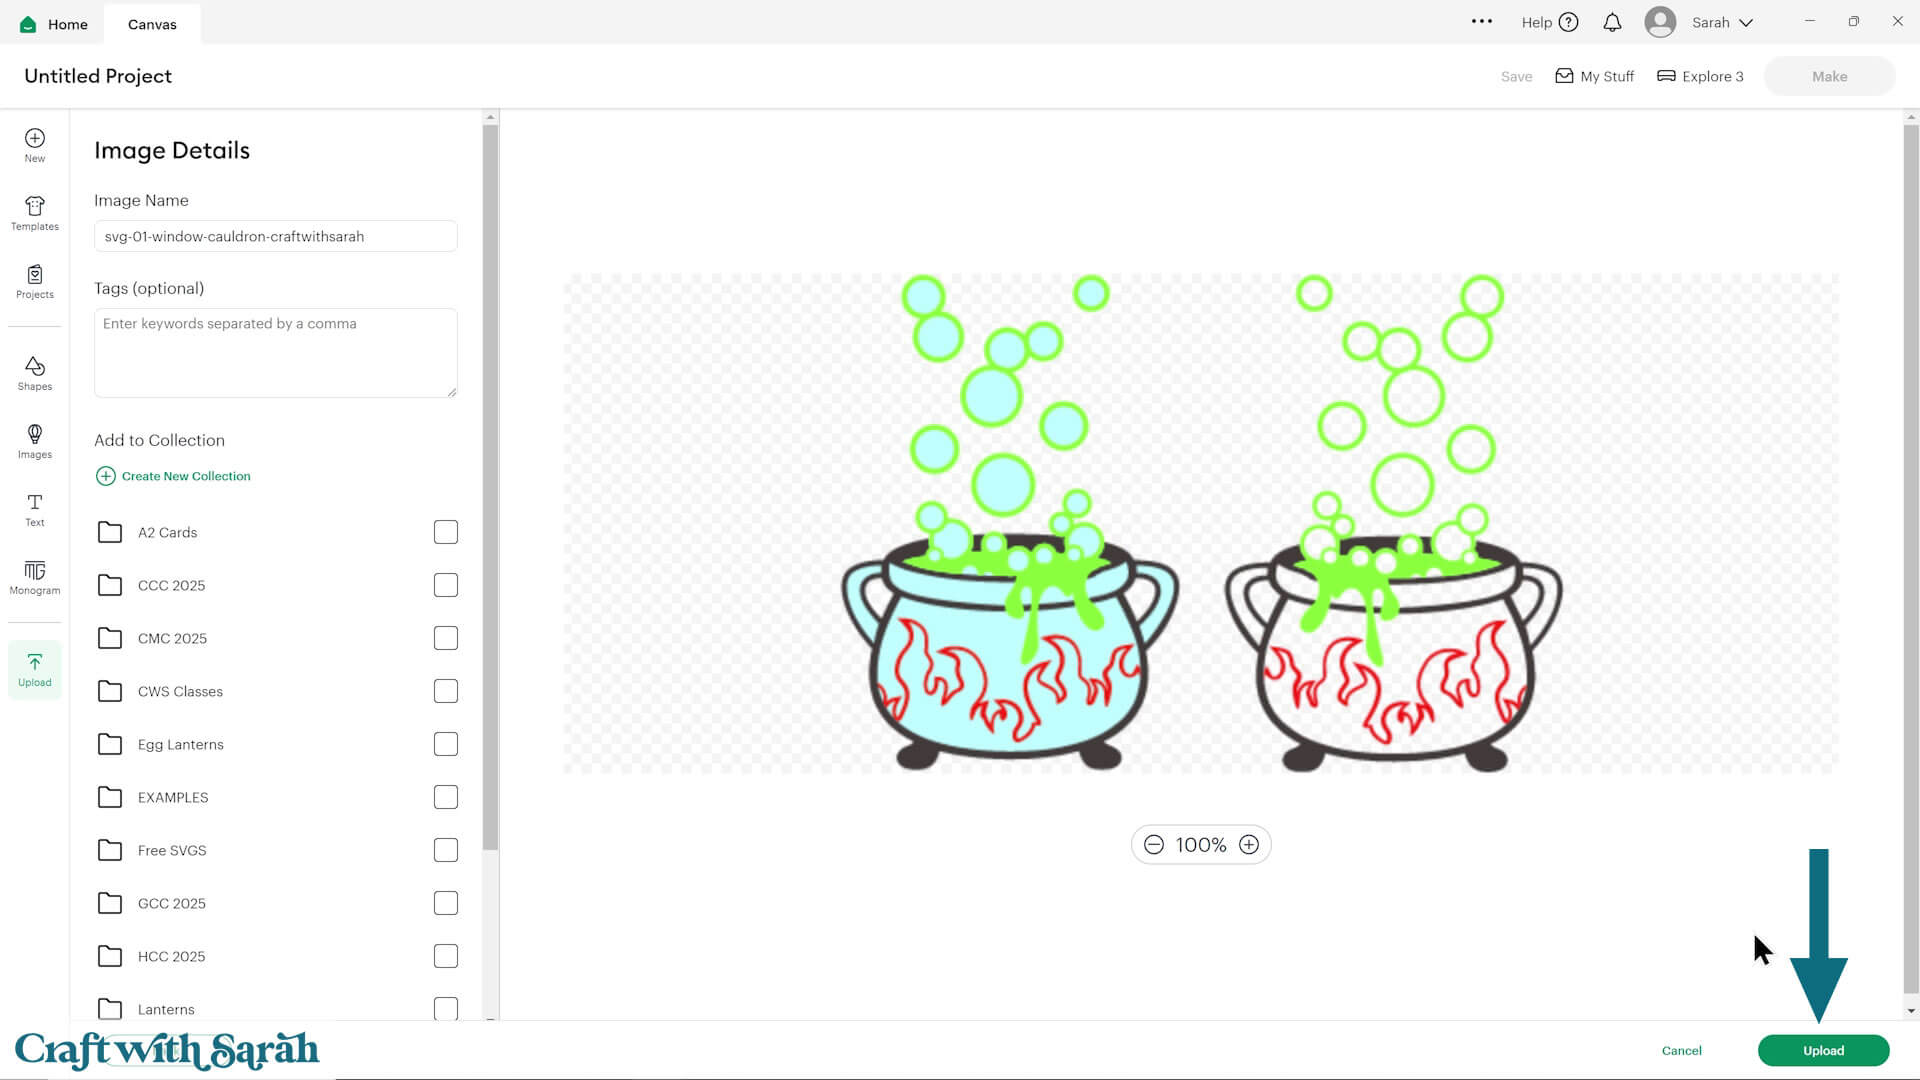
Don’t worry if the image preview appears blurry – it will show in full quality once it’s inserted onto your project.
Press “Upload” on the next screen.
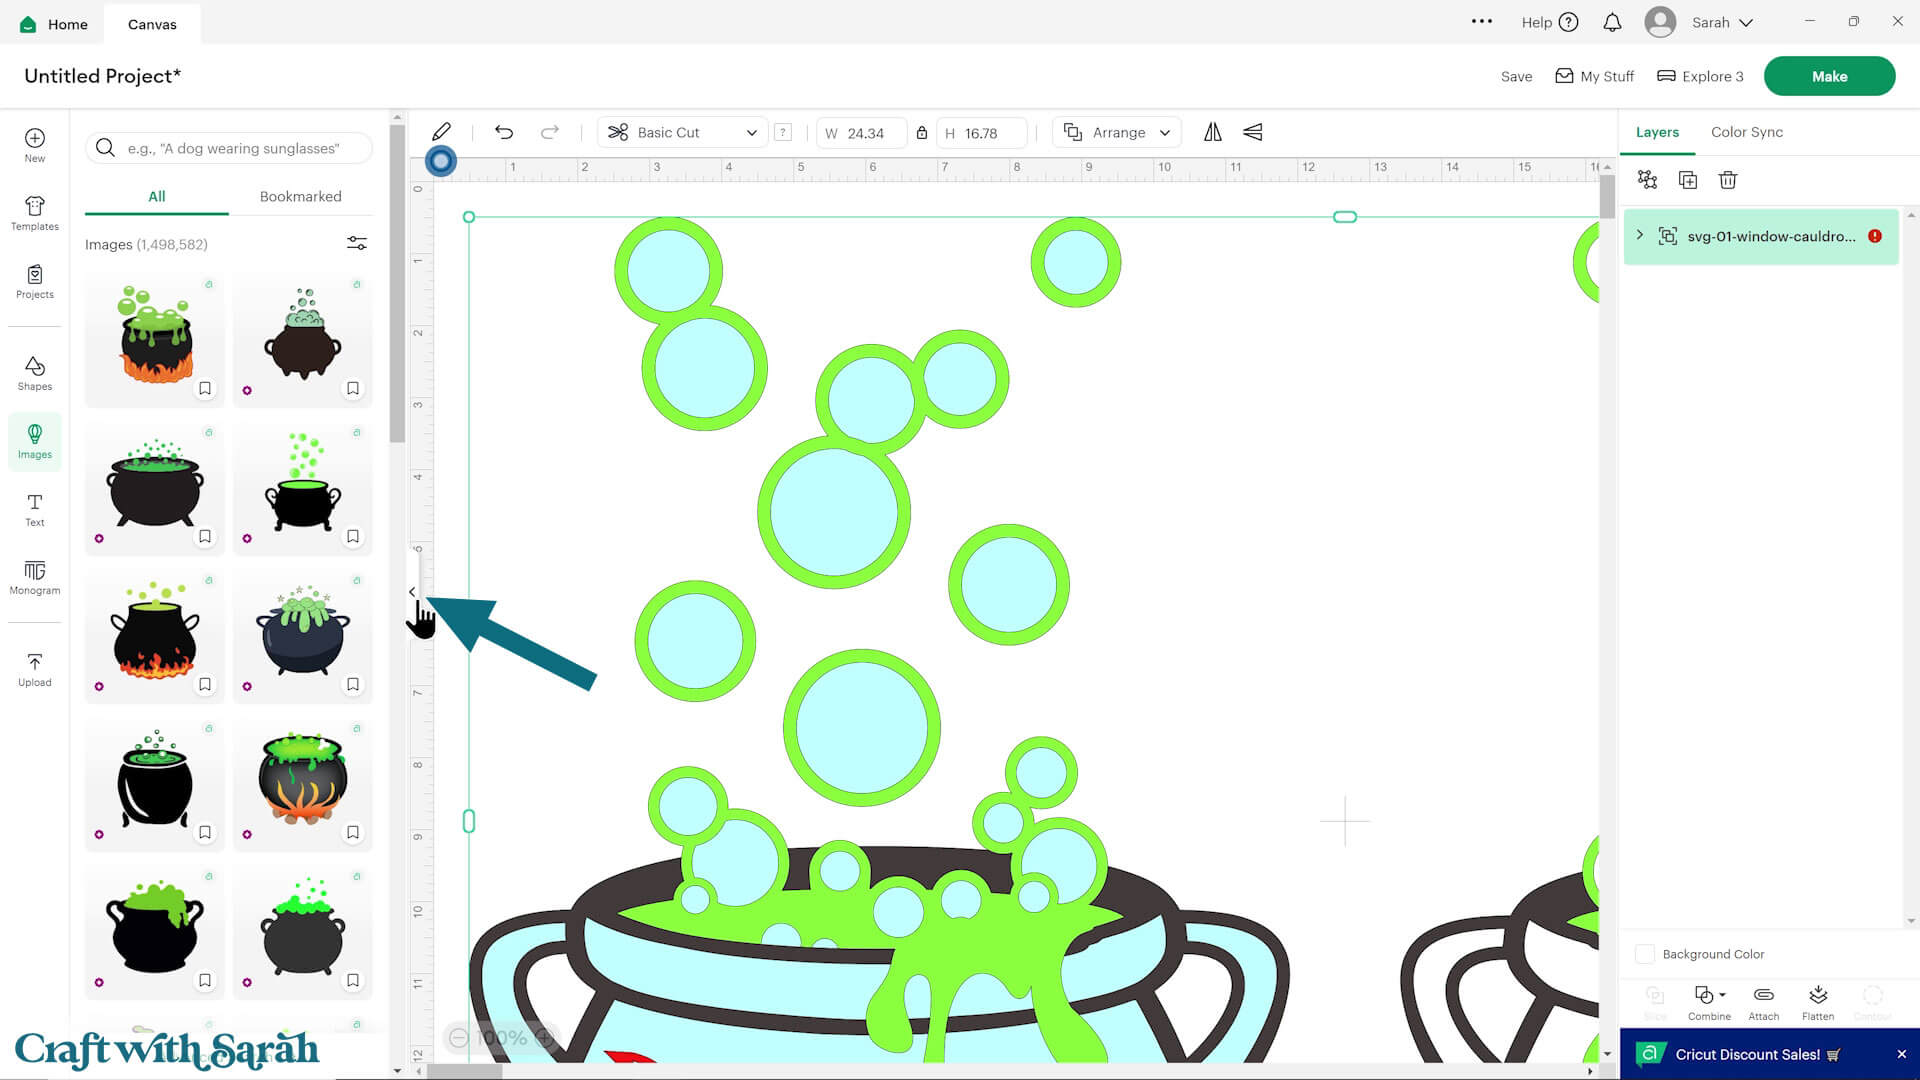
After uploading, the design should be automatically inserted onto your Canvas.
Cricut have recently (as of June 2025) introduced a feature where you get a “pop out” bar of similar images when you Upload a design. To hide this bar (to give you more space for designing!), click the arrow that’s about half way down the page.
If the design doesn’t get inserted onto your Canvas, it will show under “Uploads” in your “Recently Uploaded Images”. Click on it and then press “Add to Canvas” to put it onto your Project.
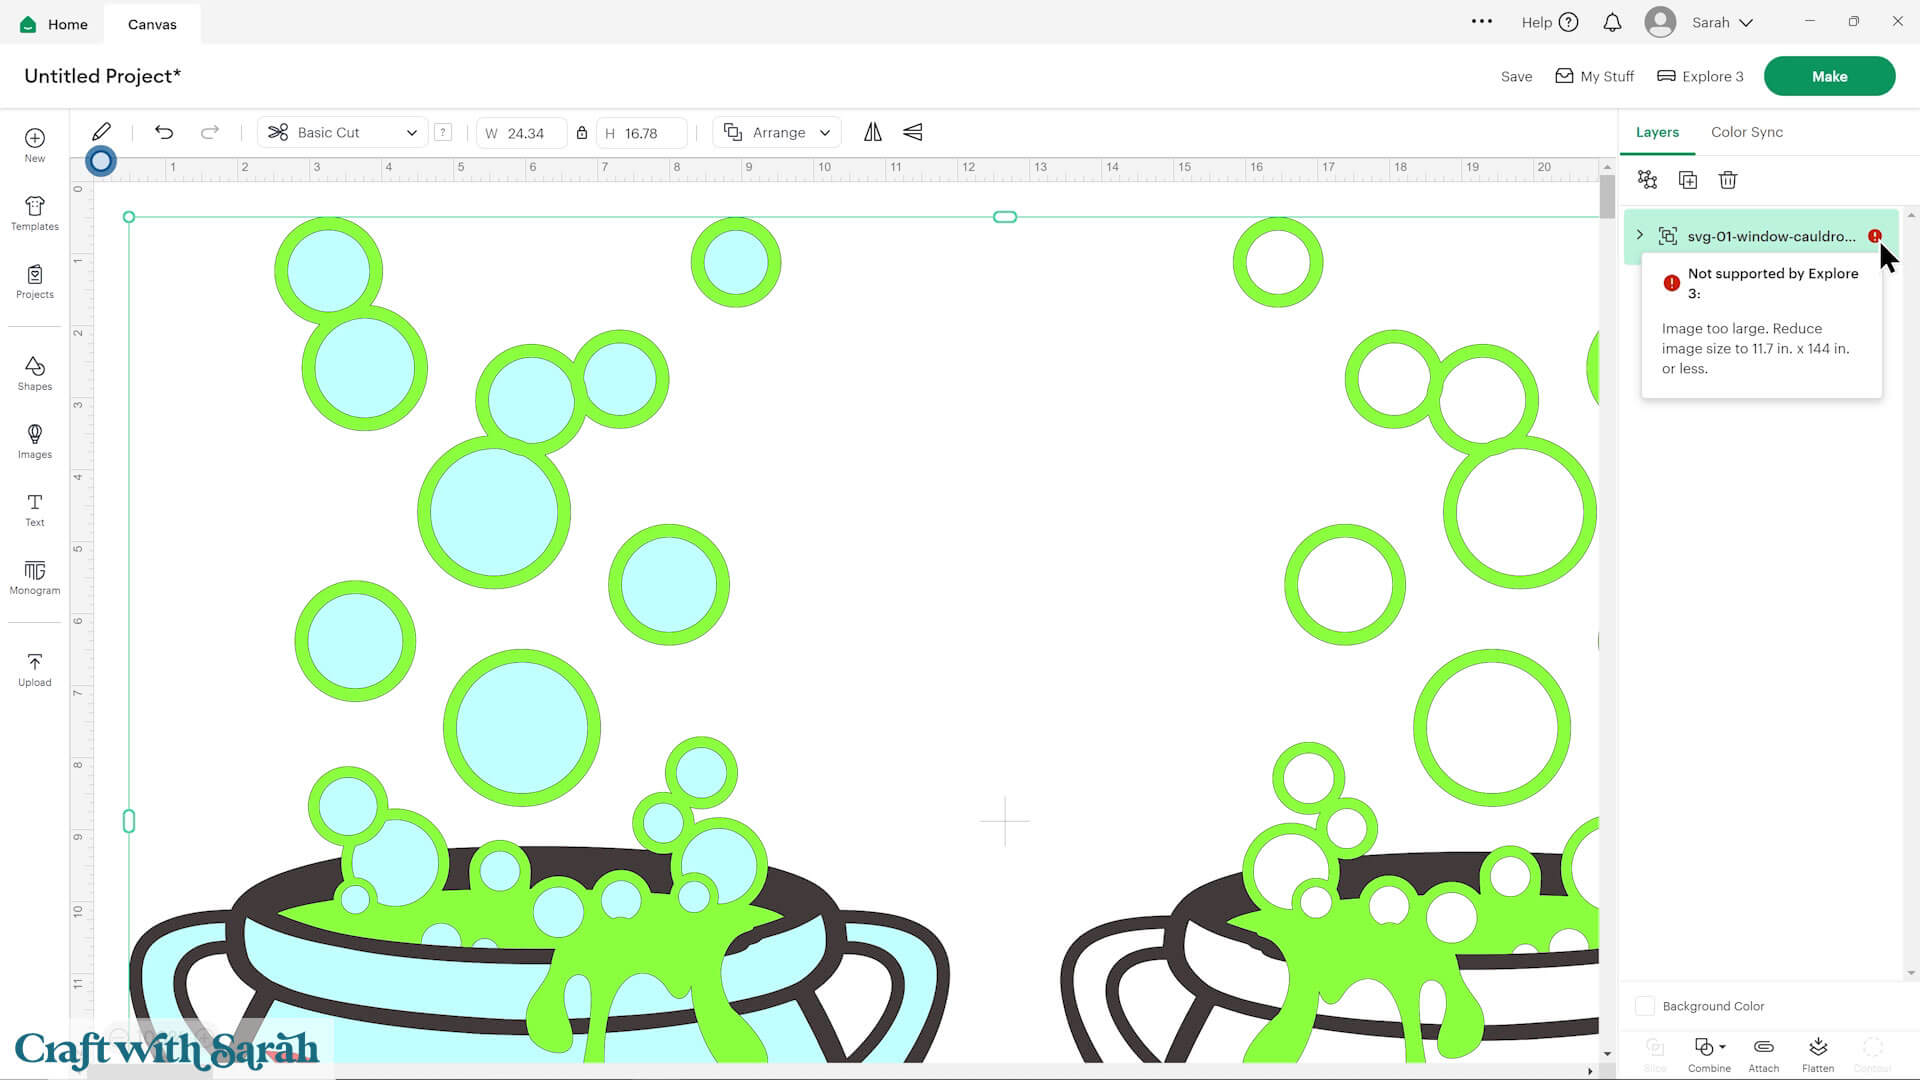
The project should load in at 24 inches wide and 16.75 inches tall.
IMPORTANT! There is currently (as of Aug 2025) a bug in Design Space where it’s showing an “image too large to cut” error in the layers panel, even though this design CAN be cut on a Cricut.
To remove this error, click on the giant sign and “Ungroup” the layers.
Step 2) Cut the cauldron craft
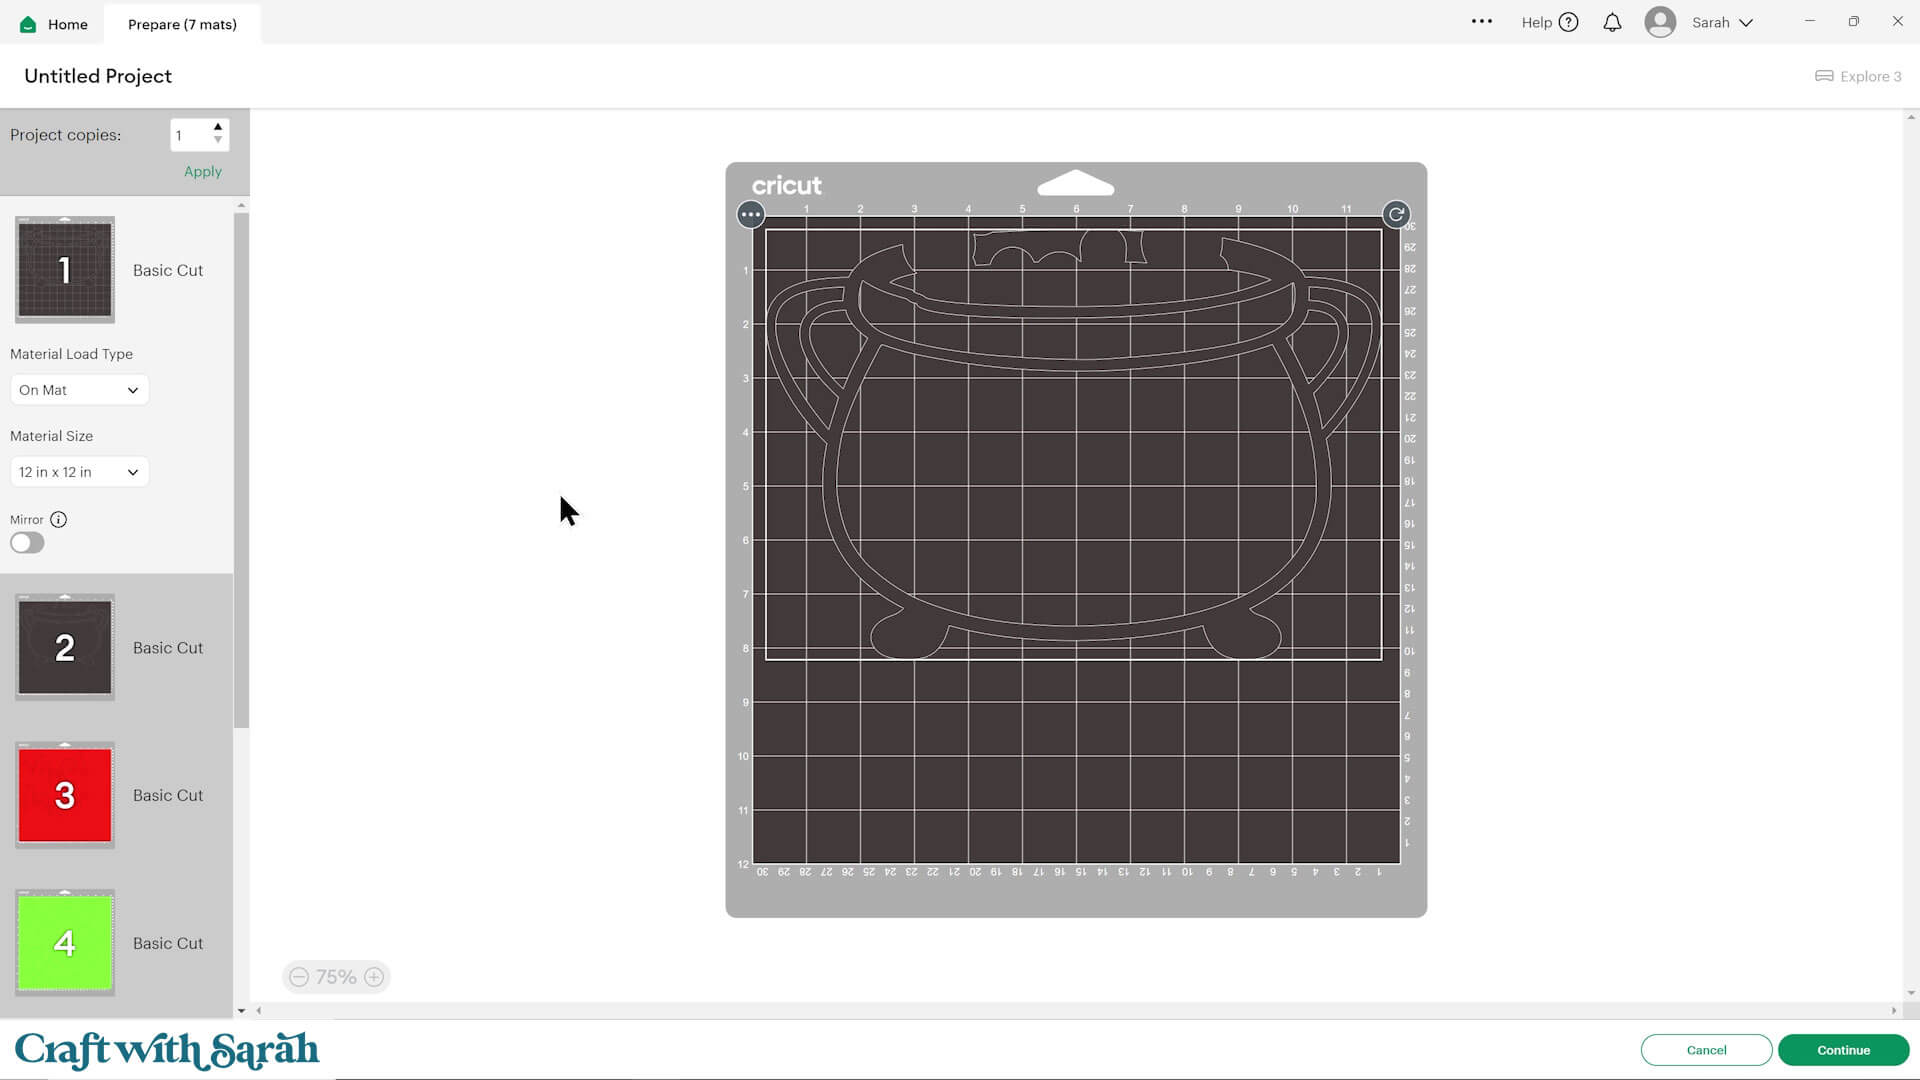
When you’re happy with how the project is looking in Design Space, click “Make” and follow the instructions on-screen to cut out all the pieces.
To change the paper size, go into the dropdowns over on the left side of the screen and choose the paper size that you want to use. You need to change it for every single colour.
You’ll need 12×12 inch cardstock to cut the cauldron at the original size.
To make it smaller, “Cancel” the cut to go back to the project.
Press Ctrl and A (Windows) or Command and A (Mac) to select all layers.
You can then resize the whole project and all the pieces will change in proportion with each other.
When you’re happy with the size, go back to the “Make” screen.
To save space on your cardstock, you can move things around by clicking and dragging. Make sure when you’re moving things about that nothing overlaps because otherwise, it won’t cut out properly.
TIP: New to using cardstock with your cutting machine? Check out these machine help guides for Cricut, Silhouette and ScanNCut that go through every step of the process, including tips for getting the best quality cuts from your machine.
Step 3) Build the window cling cauldron
Lay the window cling on your work surface, keeping the backing side down.
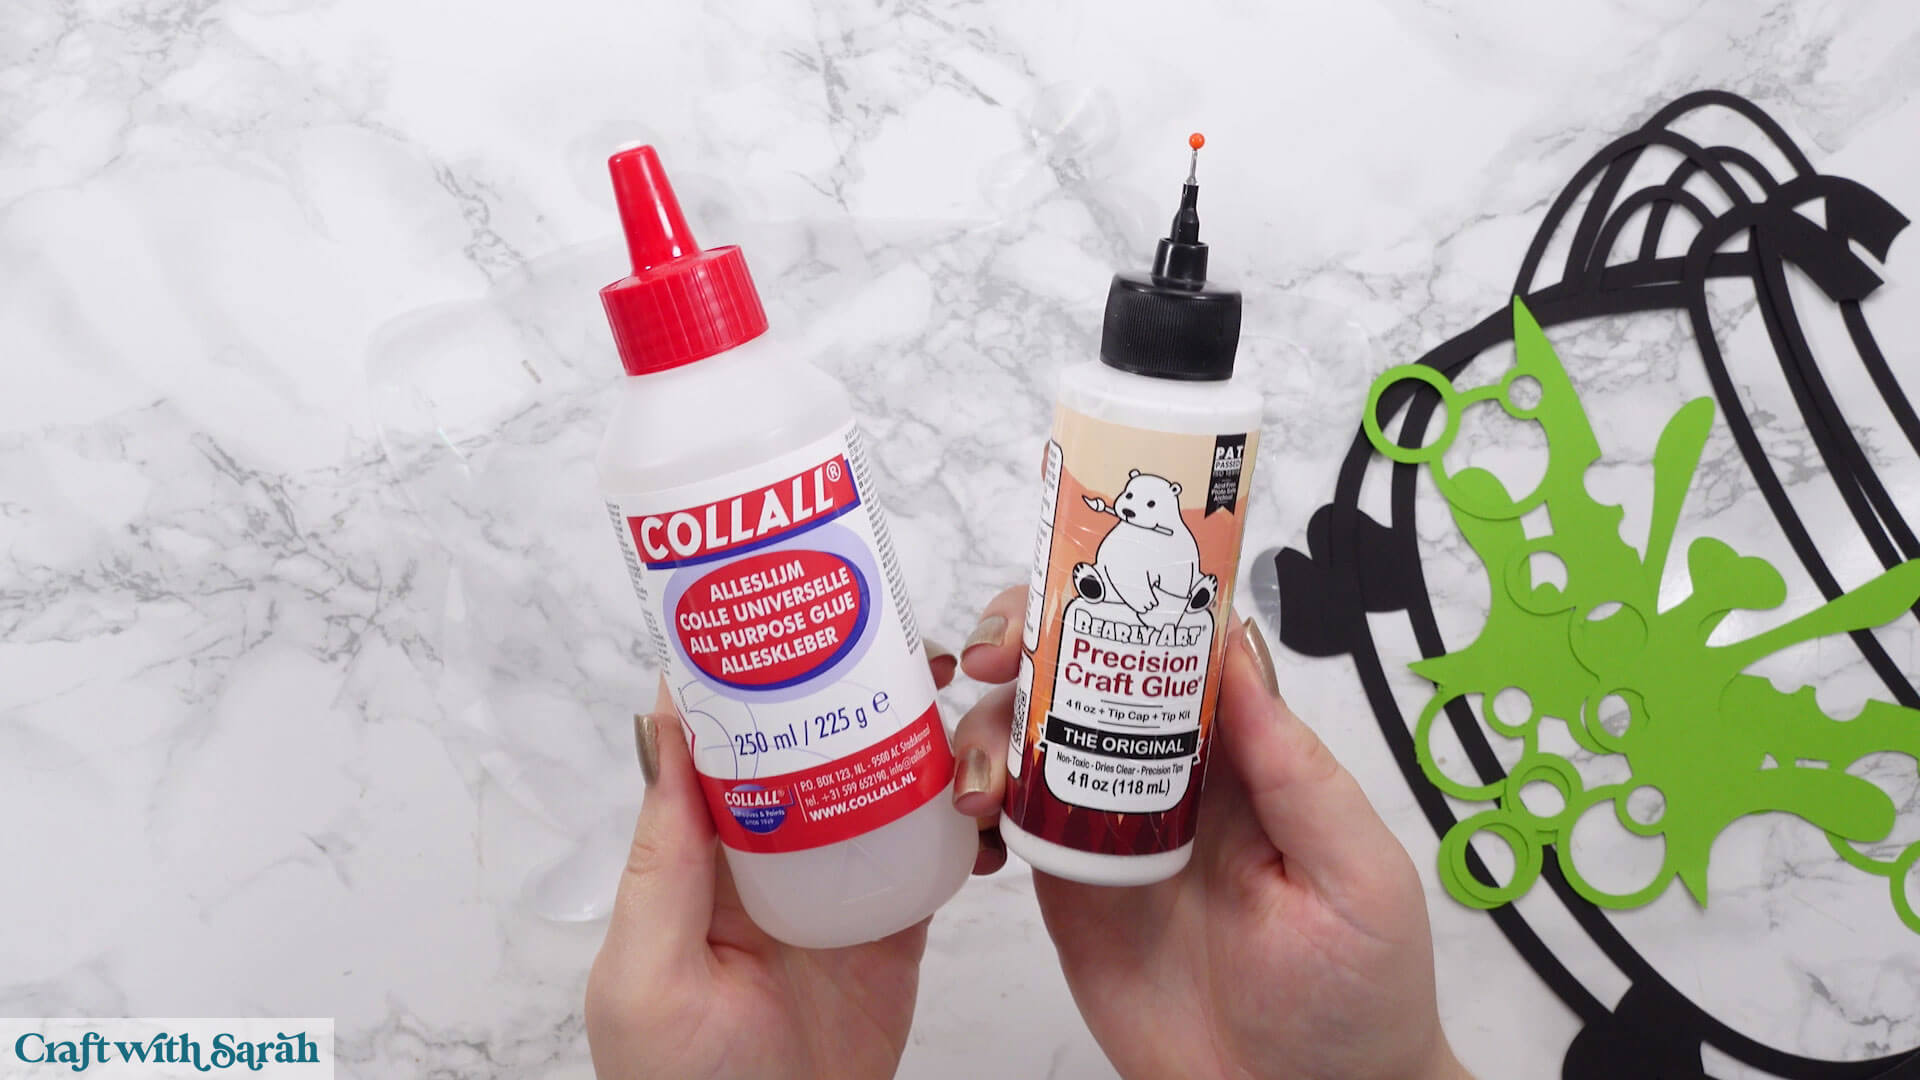
My favourite glues to use on papercraft projects are Bearly Art Glue and Collall All Purpose Glue.
These are great because they don’t “warp” or bend the cardstock like some glues do. You can use as much of it as you want and the card stays perfect – and it dries perfectly clear too!
Bearly Art Glue comes with a tiny nozzle to make it easy to apply glue to small areas of card. The Collall glue doesn’t come with this, so it’s easiest to decant it into needle tip applicator bottles so that you have more control.
Start with the black cauldron frame and glue it onto the cling. You may want to lift up the backing slightly to check you’re glueing it to the correct front of the window cling, and not to the backing.

Then glue on the green potion layer and the small black details.
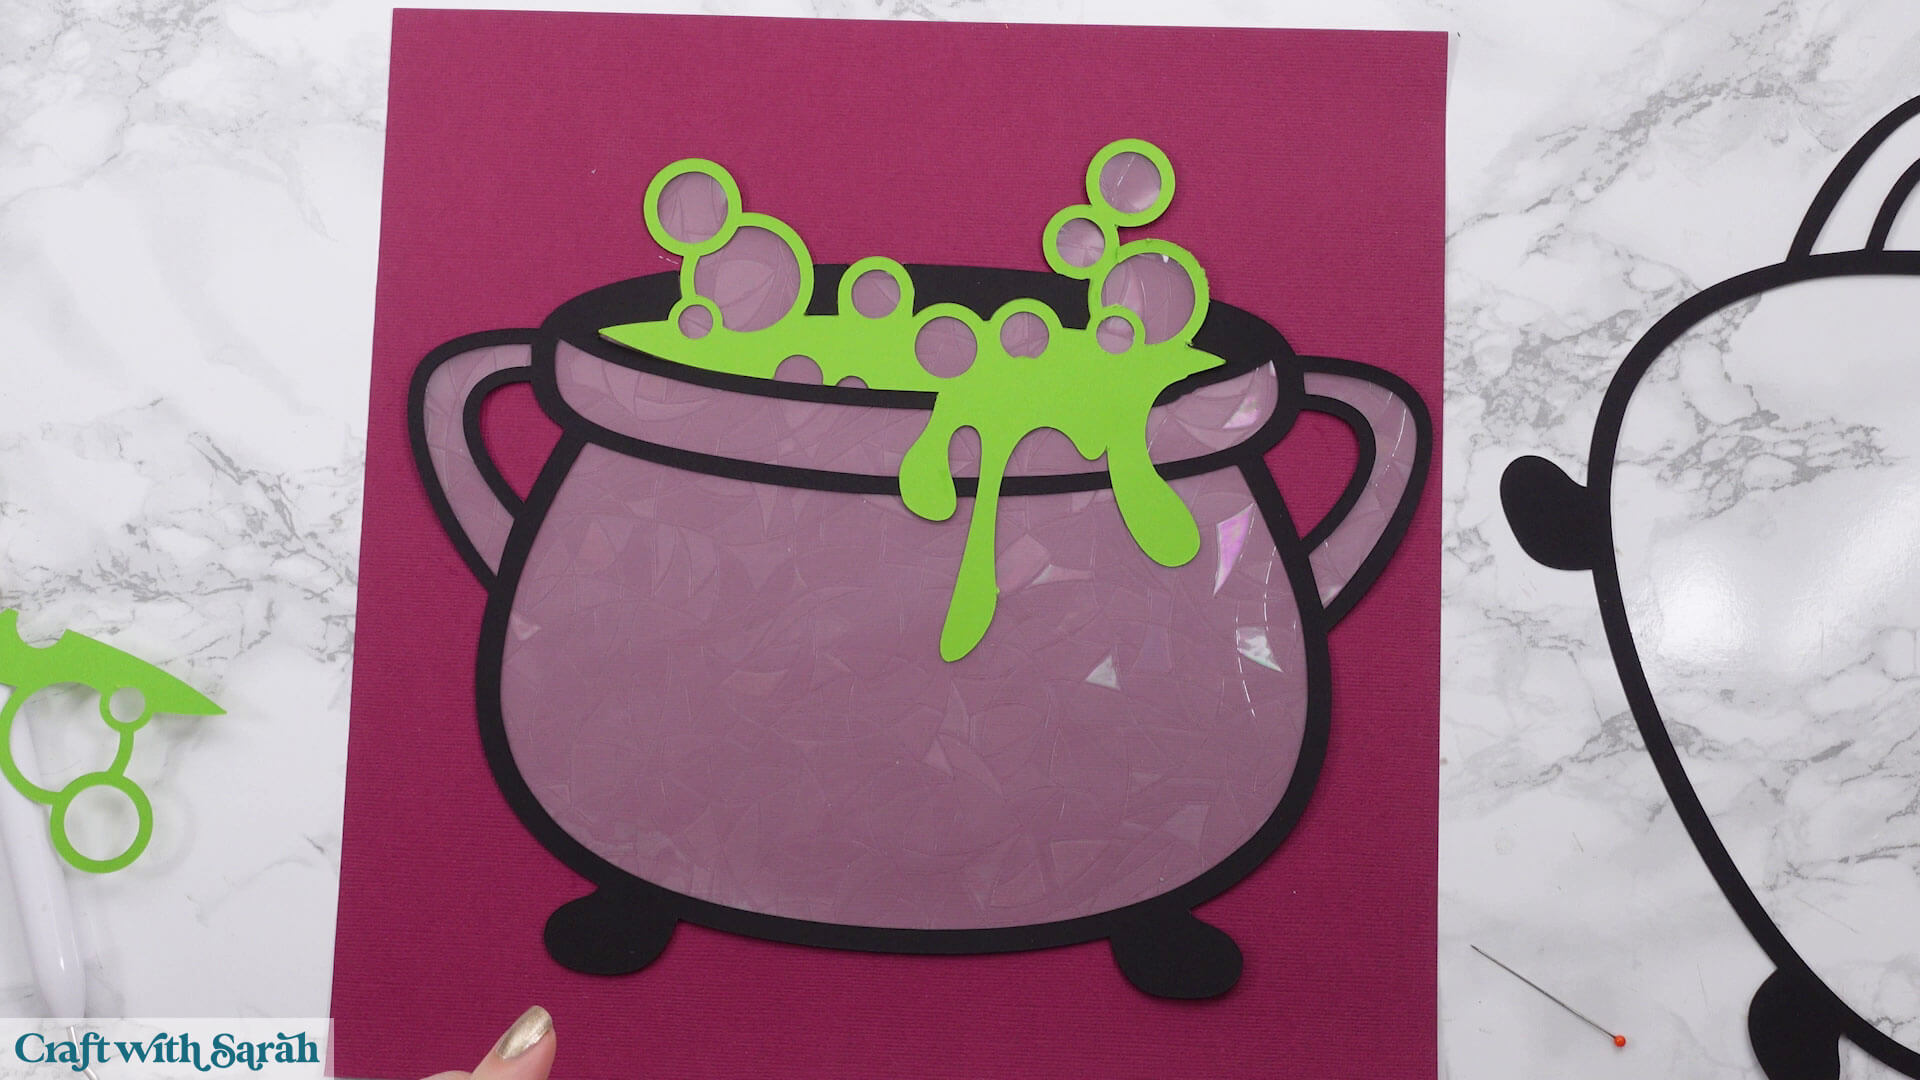
Then you can add the flames. This part can be a little fiddly, especially with the thin flame shapes. If you find them tricky, you could cut that part from adhesive vinyl instead of cardstock so it sticks like a sticker.
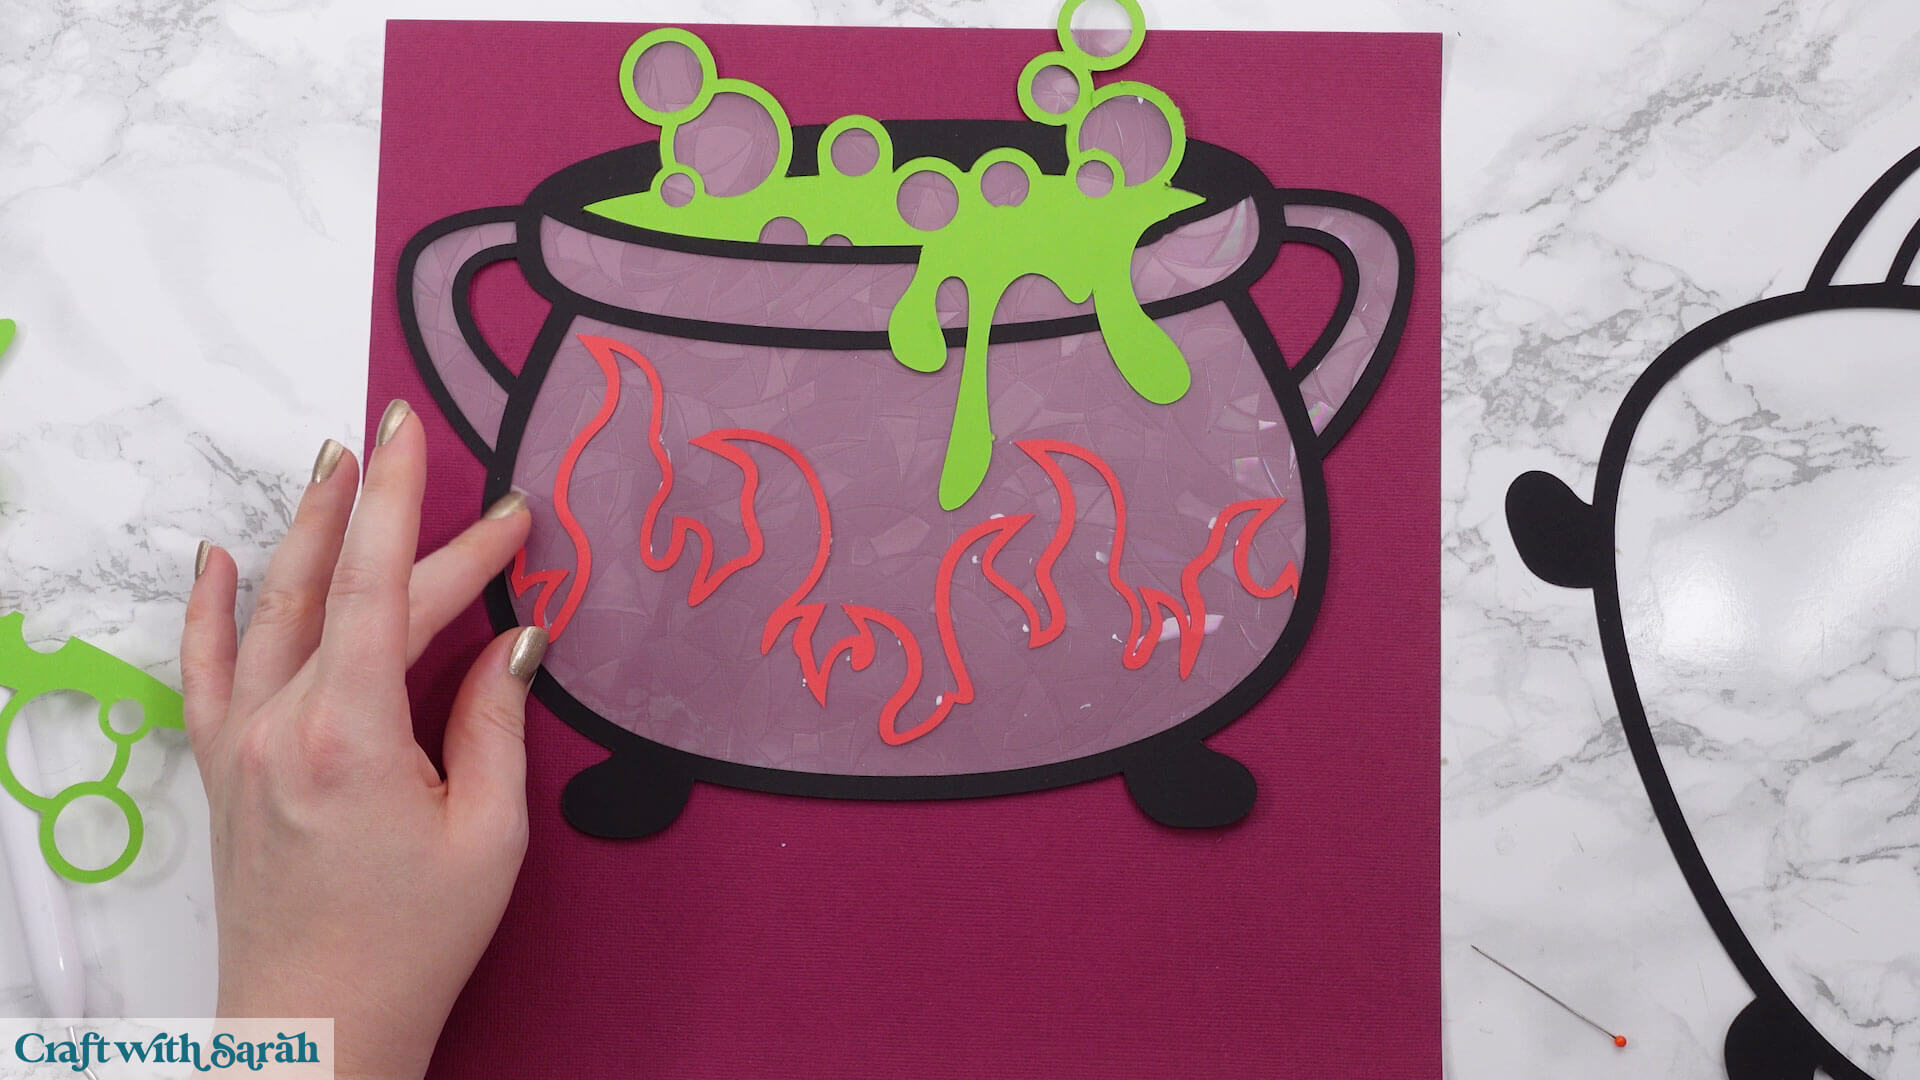
Once the front side is finished, turn the project over and remove the backing from the window cling.
Then repeat the glueing process on the back side of the cling. This way, your cauldron looks neat from both inside and outside the house. You can move onto the bubbles whilst one side of the cauldron dries.
If you get glue on the cling, let it dry and gently rub it off instead of smearing it.
If you prefer, you can skip decorating the back side of the cauldron and just hang the front-facing version. It won’t look as polished from outside, but it will still be pretty indoors.
Step 4) Assemble the bubbles
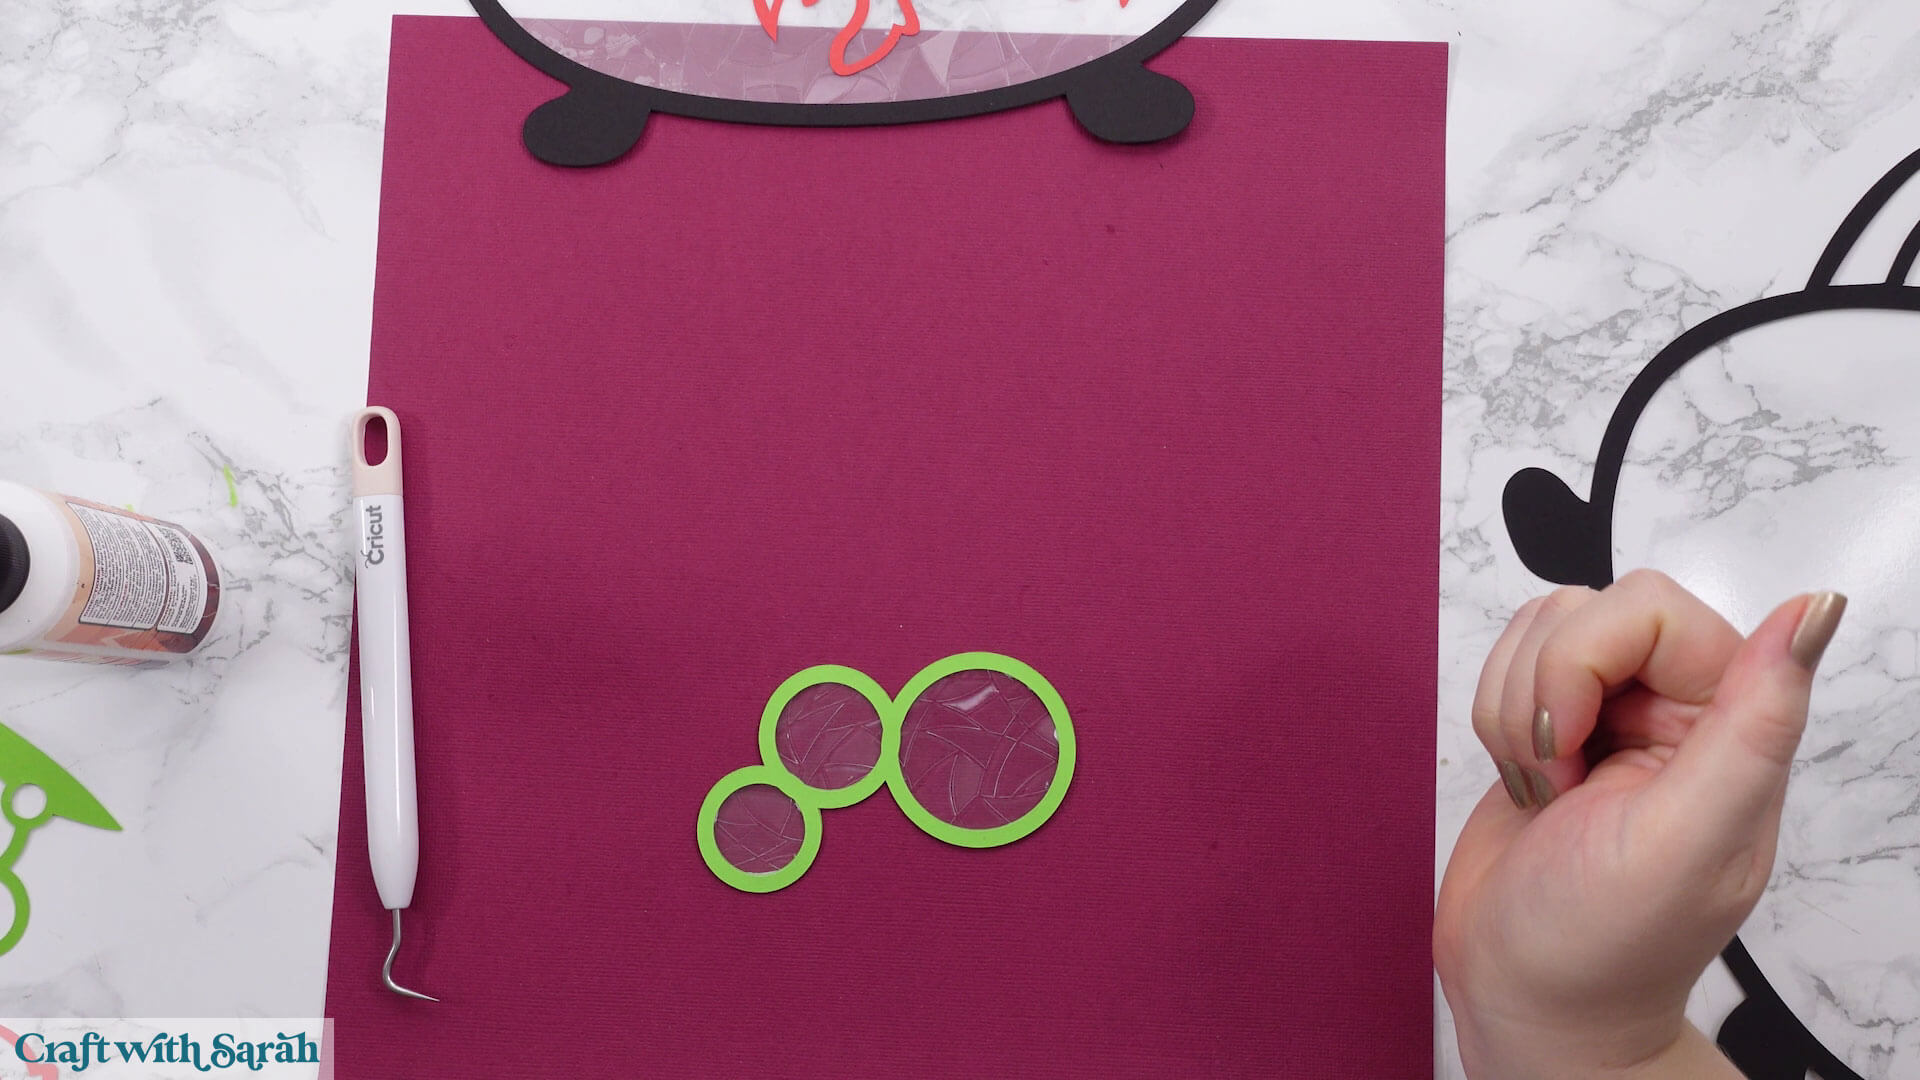
The bubble pieces are cut separately, so you can arrange them however you like on your window. Spread them out to fill more space or group them together if you have a smaller window.
Glue the card stock outlines to the cling, then remove the backing from the window cling and glue the matching pieces on the other side.
Step 5) Add the project onto your window
First, clean your window on the inside to remove any dirt or dust.
The window cling works much better on clean windows.
When you’re ready to display your cauldron, lightly dampen the cling side with a small amount of water. A paintbrush or cotton ball works best for this so you don’t leave fingerprints.
Try not to get water on any parts of the cardstock, as it may mark or damage it.
Press the cauldron onto the inside of your window.
Never put it outside, since rain or condensation could damage the paper layers.
Beautiful Rainbow Witch Cauldron from Window Cling
Once your witch cauldron is finished and placed on the window, you’ll notice how it instantly transforms the space.
The glowing effect of the window cling makes the colors look richer during the day, and at night the design still stands out under indoor lights.
It’s a simple project, but the end result feels polished and eye-catching, making your home look ready for the Halloween season in a unique way.
This cauldron craft is more than just decoration. It’s a creative way to enjoy the season and add a personal touch to your home.
Taking the time to make DIY window decorations brings that satisfying feeling of creating something with your own hands, and the sparkling results are worth every step.
With this bubbling cauldron, you’ll have a decoration that shines bright, brings joy, and adds just the right amount of Halloween magic. ✨
Happy crafting,
Sarah x

