3D Spell Book Boxes 👻 HCC 2025
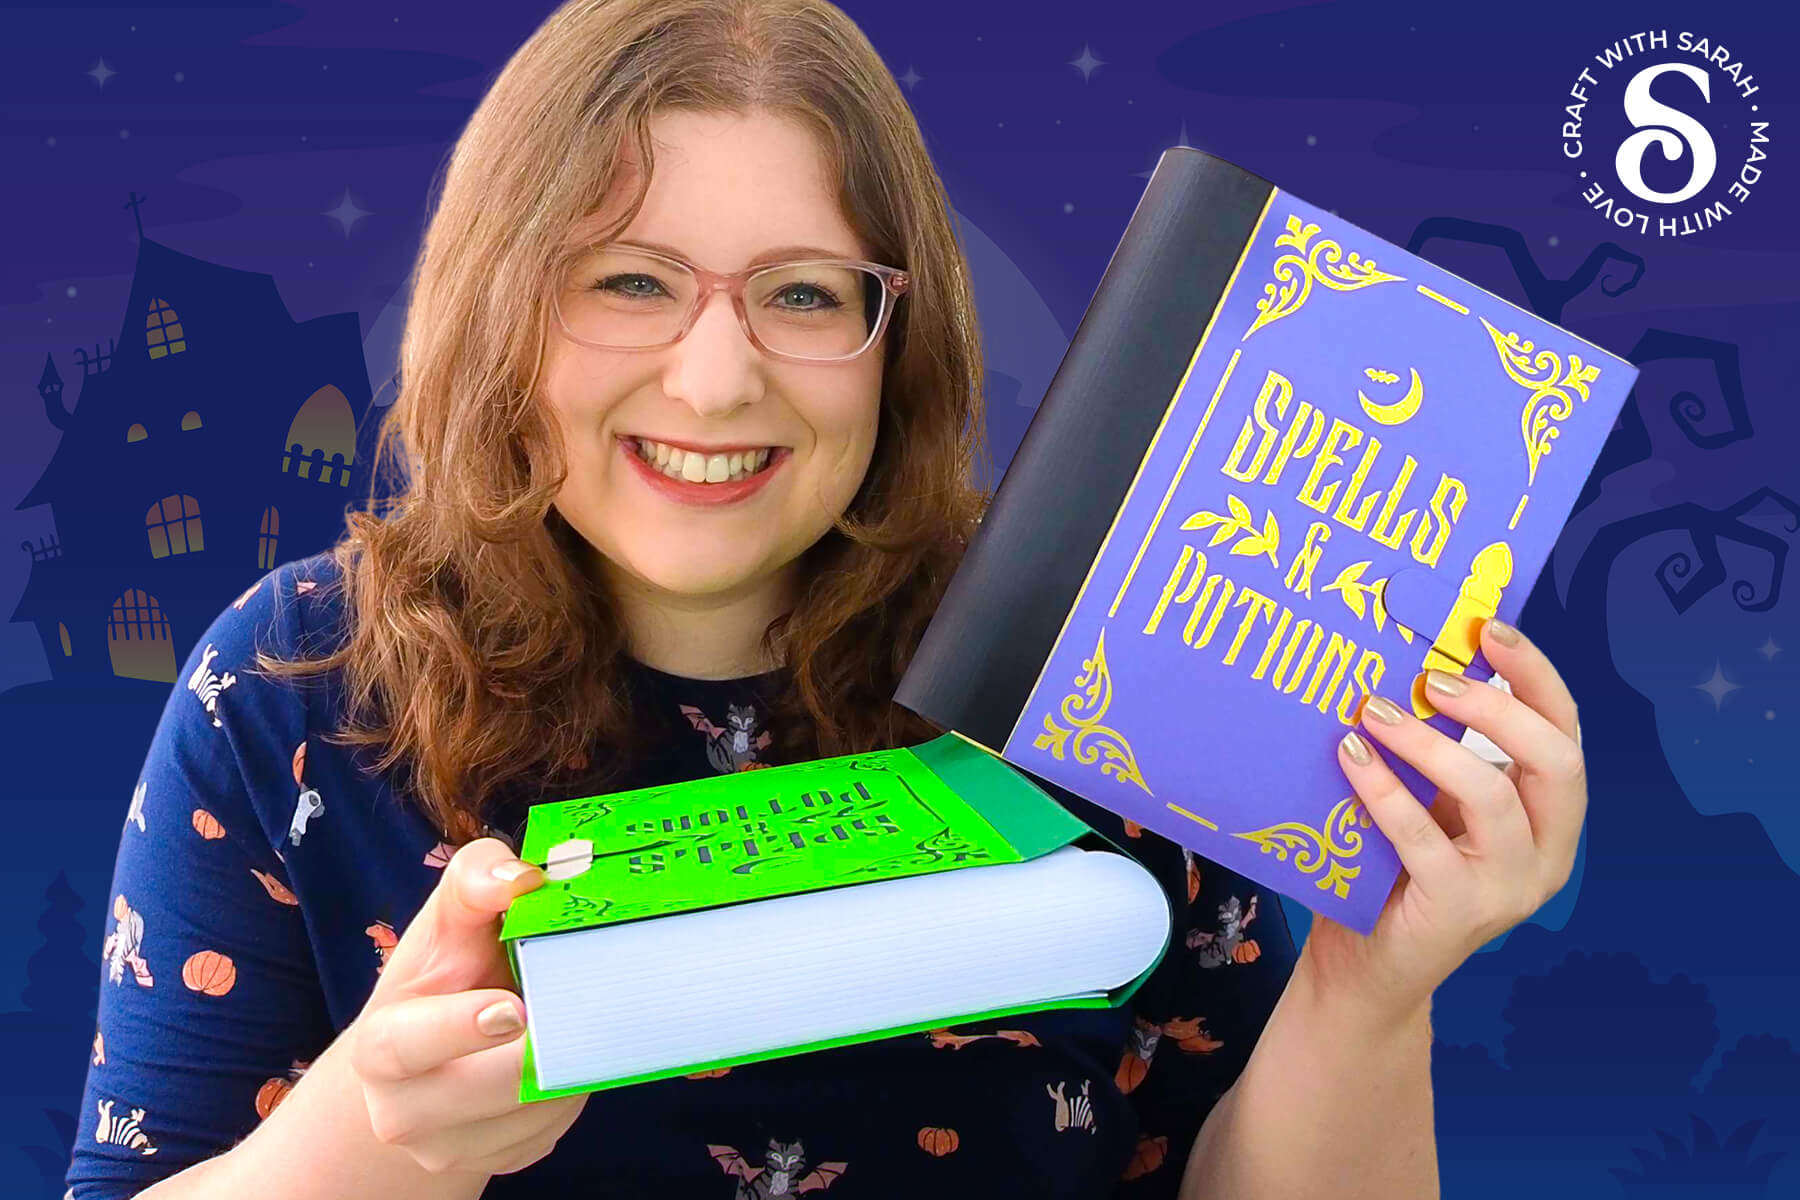
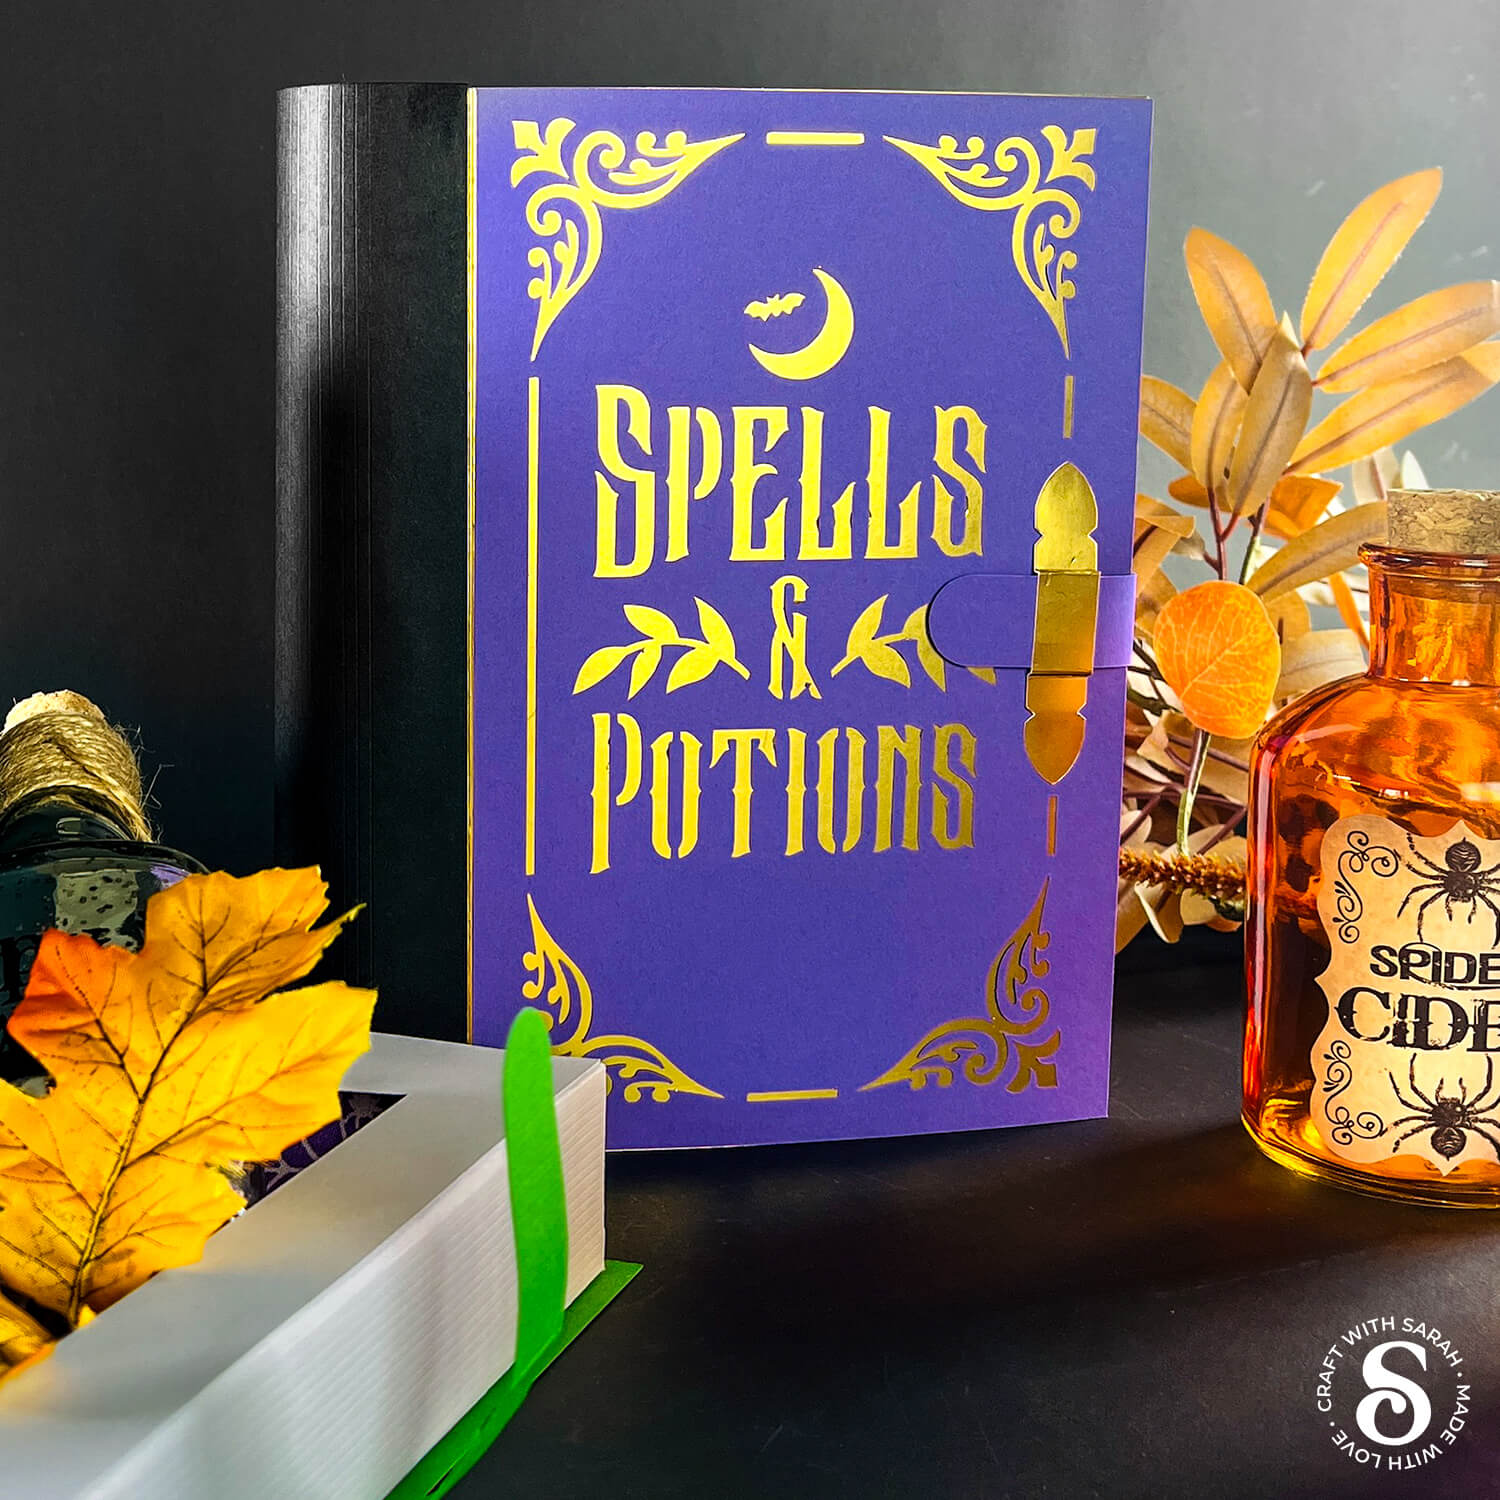
If you’re looking for a Halloween paper craft that’s both eye-catching and functional, these potion book boxes are a great project to dive into.
Designed to look like aged spellbooks straight from a witch’s library, they’re made entirely from cardstock but sturdy enough to hold trinkets, treats, or small gifts.
The boxes are secured with a belt-style strap that threads through a decorative clasp on the front cover, giving them the look of an old locked spellbook.
The spine and panels create a realistic book shape, so when closed, the project stands up like a real book on a shelf.
If you’re after a Halloween box that’s a little different from the usual treat bags or containers, this one brings something unique to the table.
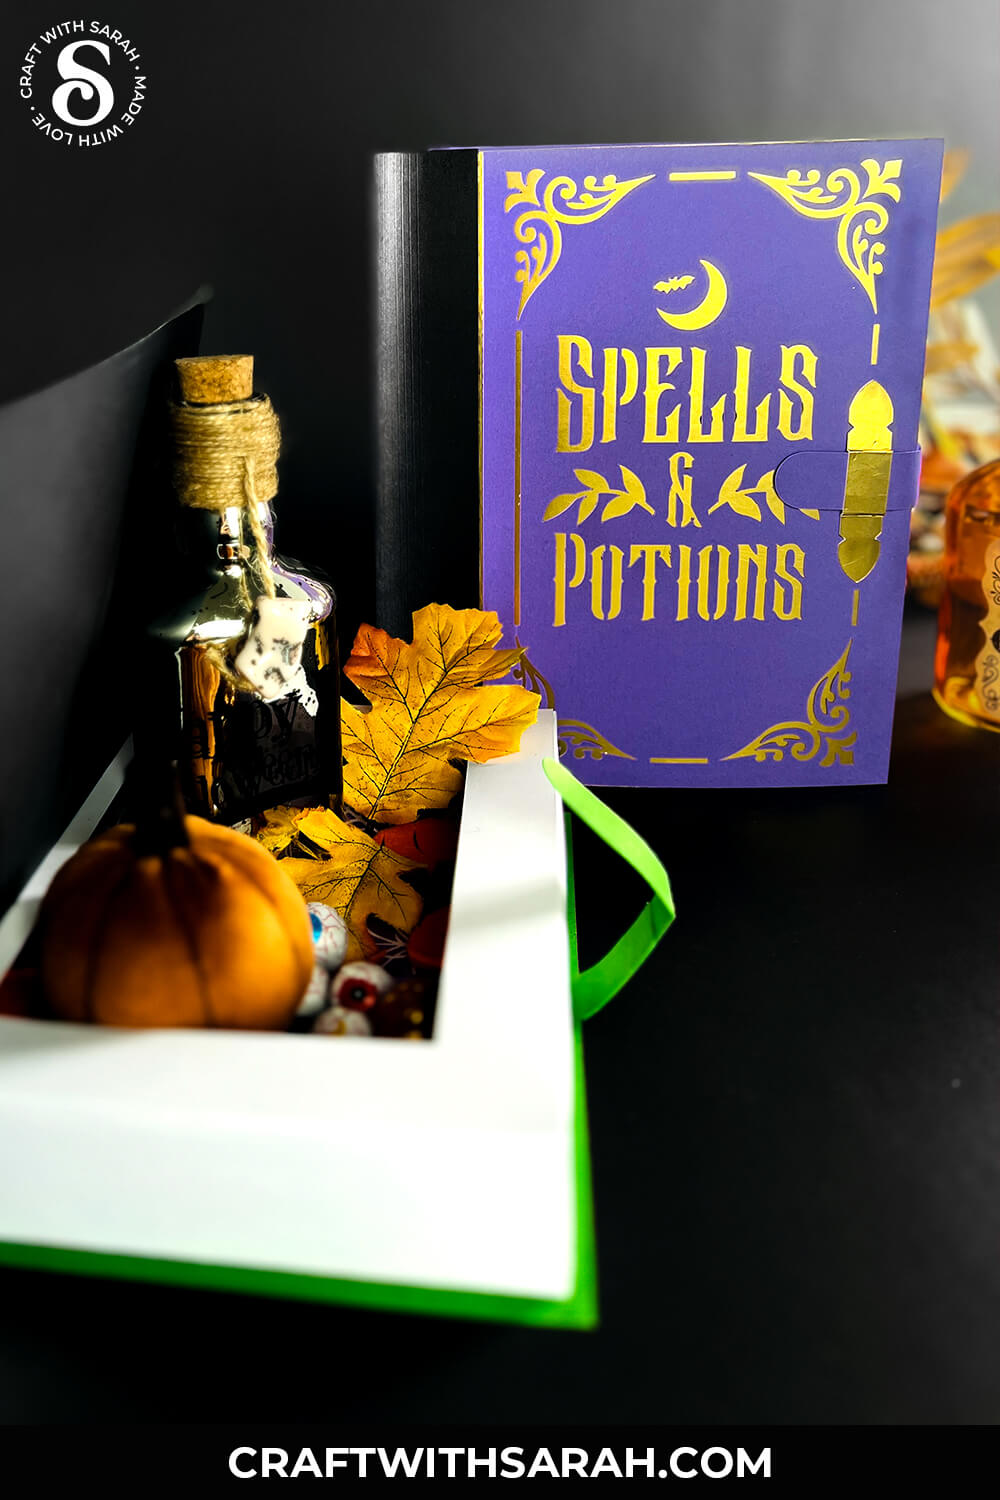
The front of the book features a detailed spellbook cover that reads “Spells & Potions” in a bold, gothic style. You can personalise the design with different colours, textures, or even names to make it part of a larger magic spell book collection.
Add extra detail to the “pages” of the book with cleverly placed score lines.
This is a great option if you enjoy building 3D paper crafts with practical use. The final project works well as a gift box, decoration, or storage for small Halloween keepsakes.
This project was part of the 2025 Halloween Craft Countdown.
Magic Spell Book Supply List
Here is a list of the materials that are needed to make this project.
The project requires a scoring tool. Click here for scoring alternatives for if you do not have one, or if you’re using a Joy Xtra.
Please note that some of the links included in this article are affiliate links, which means that if you click through and make a purchase I may receive a commission (at no additional cost to you). You can read my full disclosure at the bottom of the page.
- Cricut machine
- Light blue Cricut cutting mat
- Colored Cardstock
- Glue (I like Bearly Art Glue and Collall)
- Cricut scoring stylus or scoring wheel
- Christmas ornament that comes apart into two halves
- Paperclips and/or masking tape to hold pieces together while the glue dries (optional)
This project is suitable for the following types of Cricut machines: Explore series, Maker series and Joy Xtra. You will need to make the project smaller to cut it on the Joy Xtra. It is too large to cut with the original Joy machines.
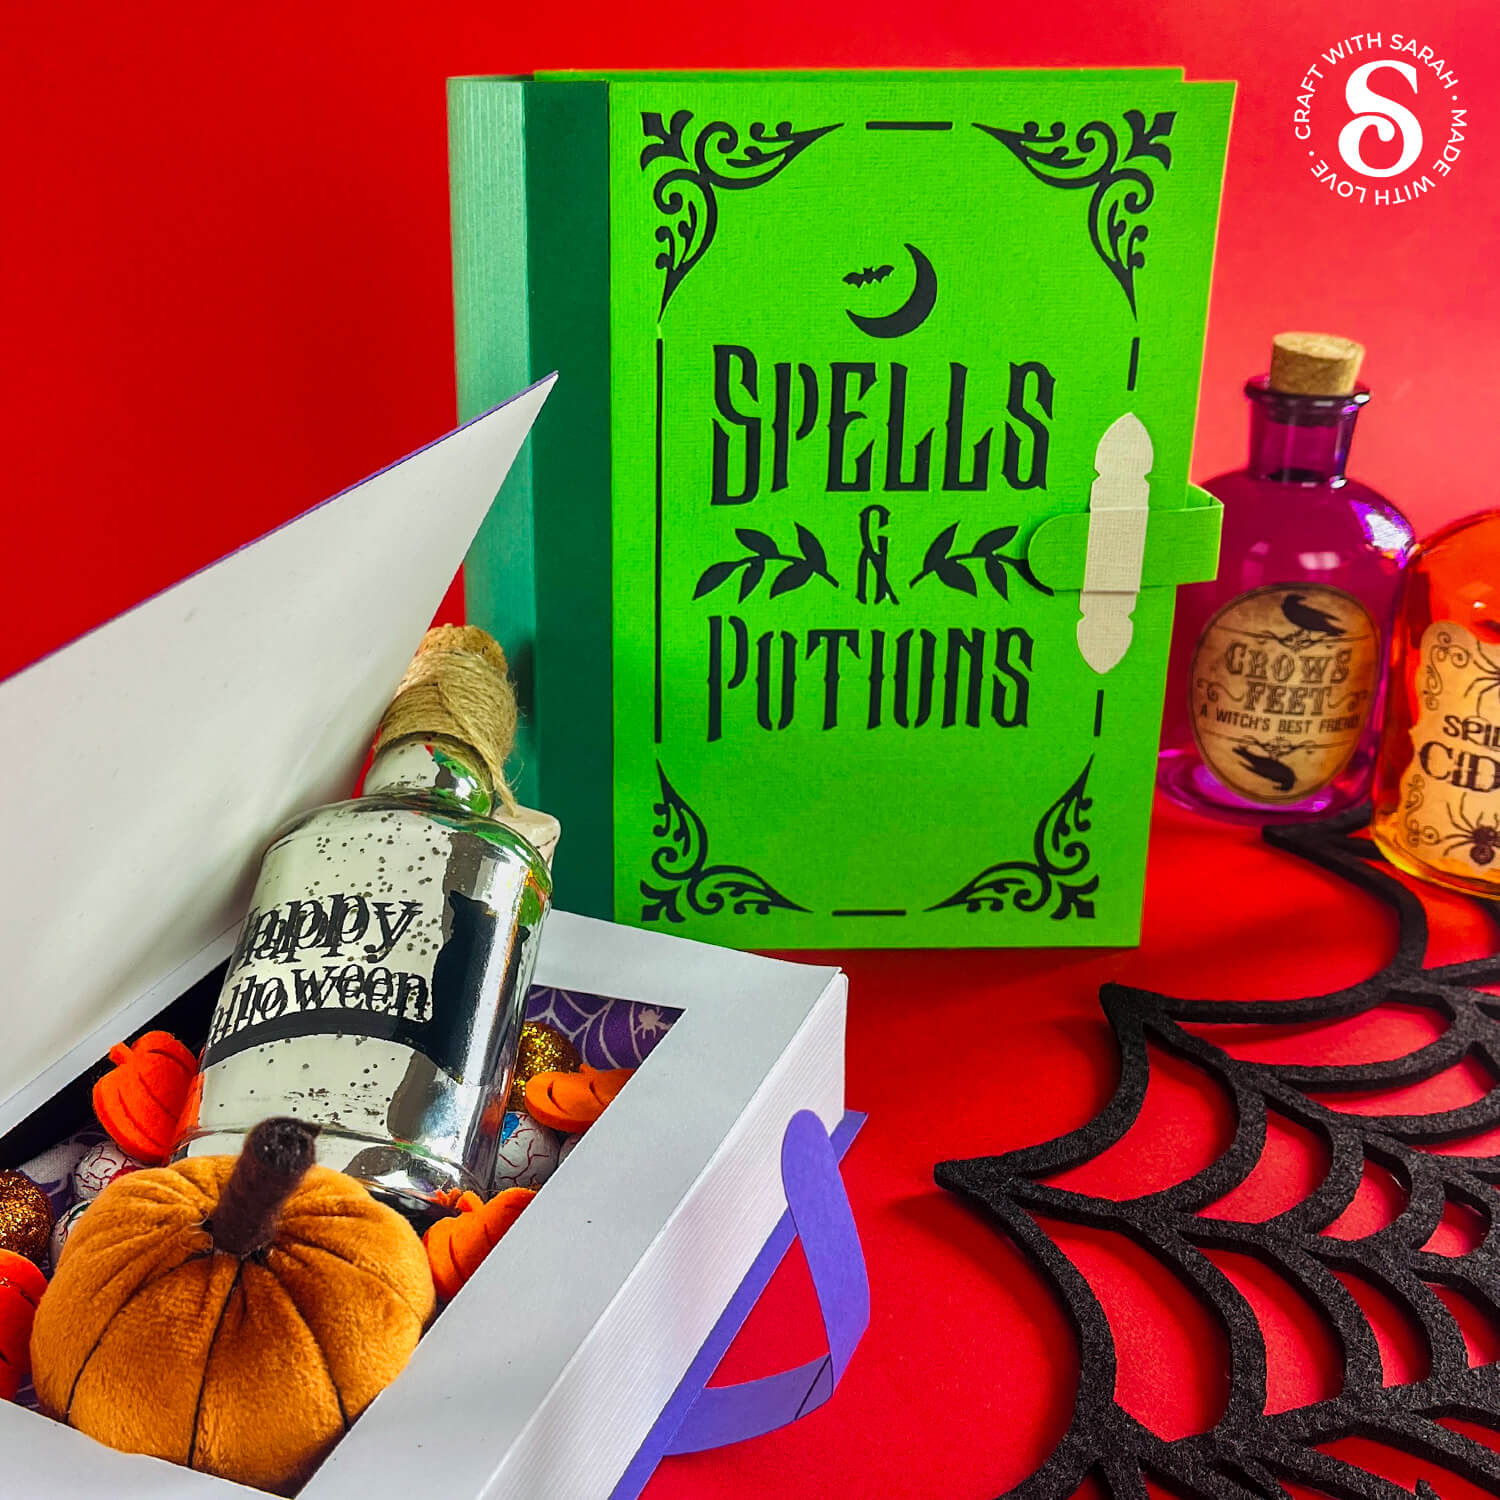
The sides of the boxes are decorated with score lines to emulate the look of pages inside the book.
This works best with smooth cardstock.
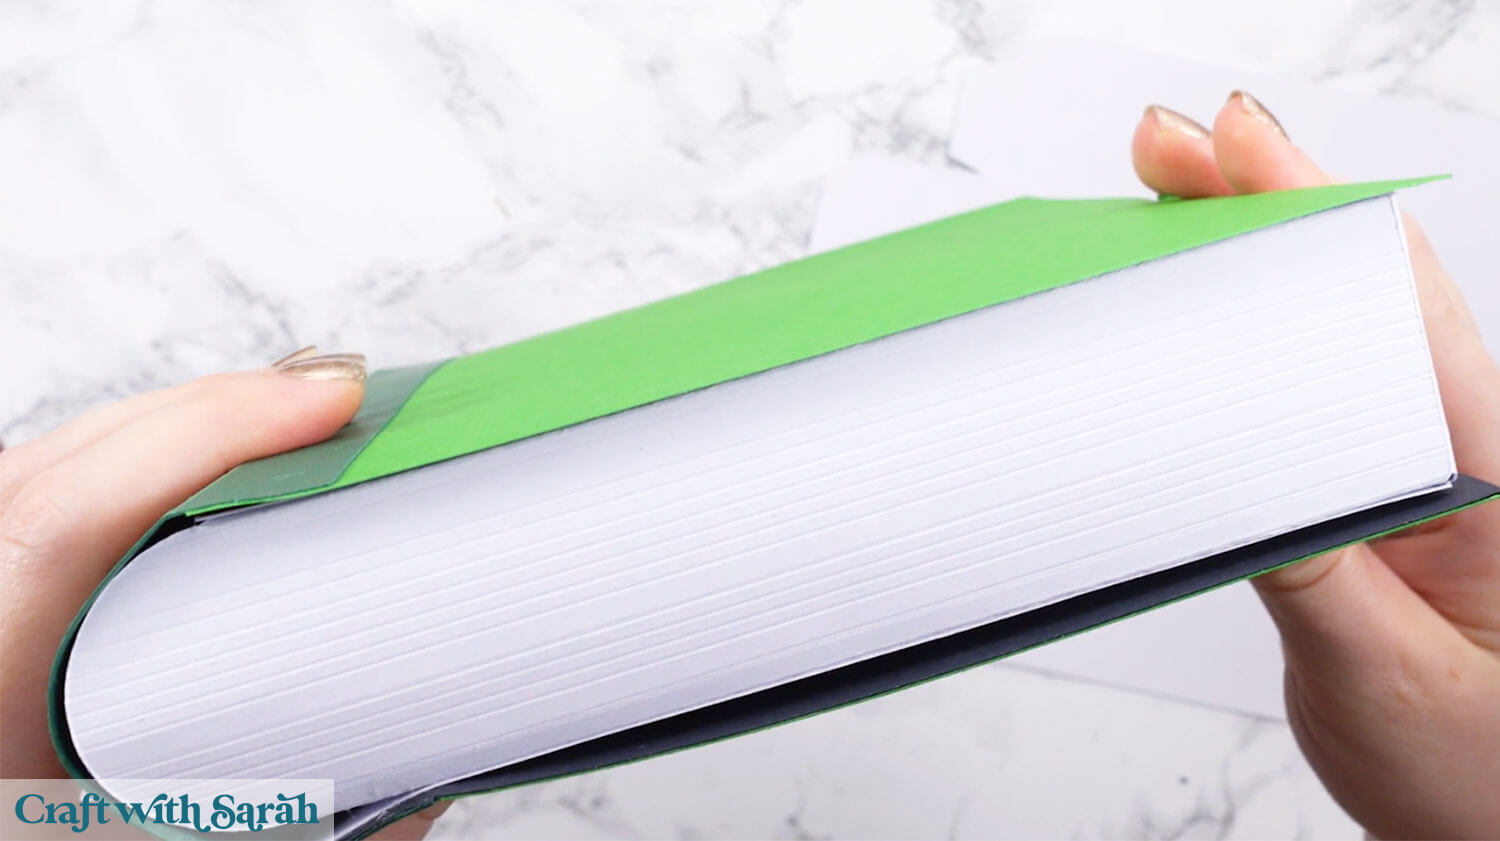
If you use textured cardstock, such as linen effect, then the score lines will not show up, as shown below.
Yup.. that piece of cardstock has the same score lines on it as the first picture!
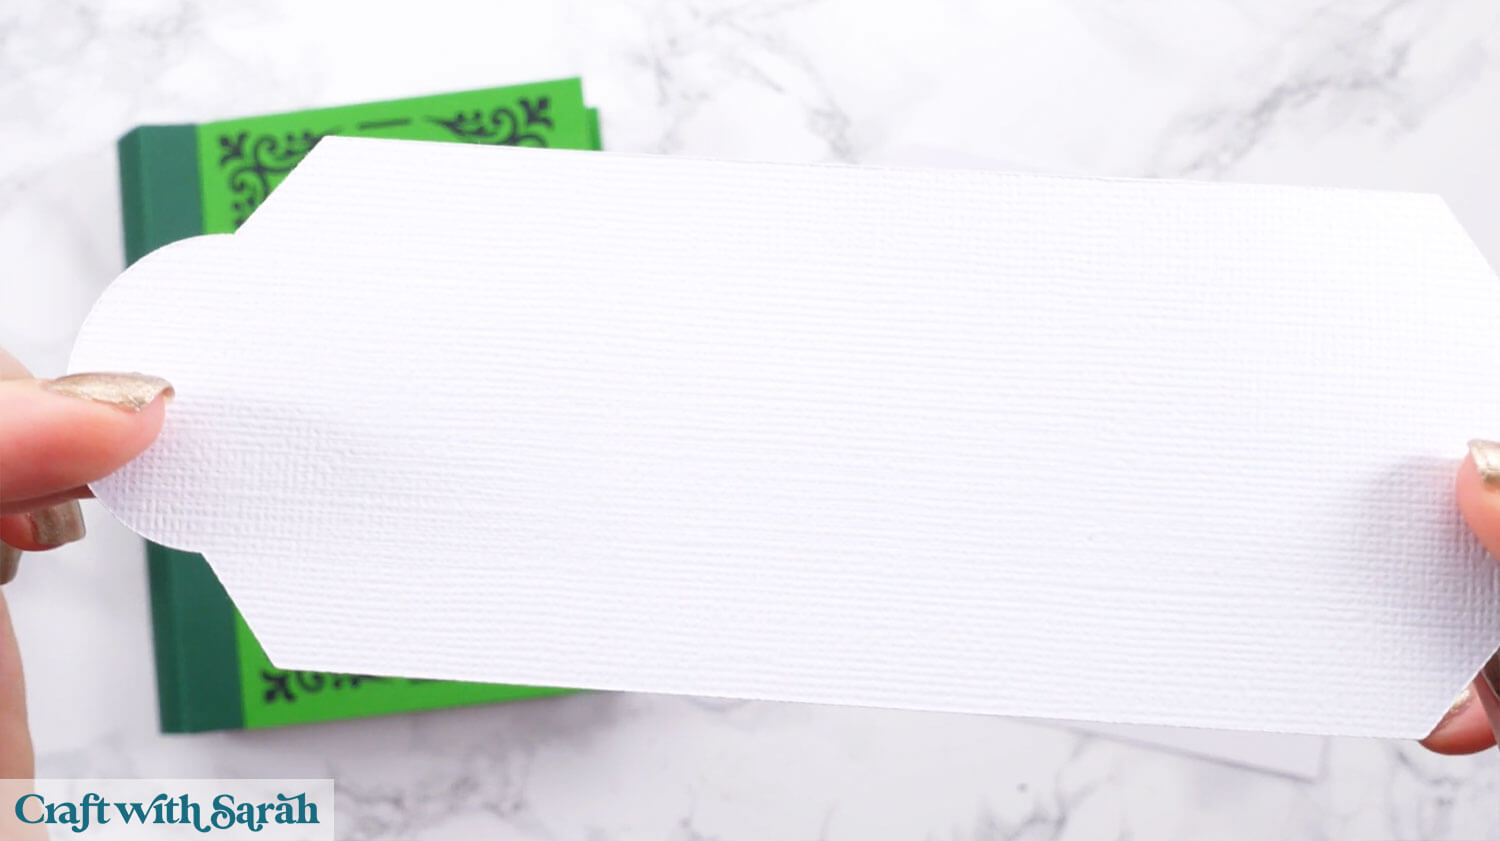
The tutorial shows how to remove the optional page decoration score lines to leave only the functional score lines, so that if you are using textured card then you won’t waste time on score lines that don’t show up!
Foundation learning
If you're new to making papercrafts with your cutting machine, check out these links to get you started.
They include videos on topics such as: which file to use with your type of cutting machine, how to load the files into your cutting machine's software, how to cut cardstock with your type of cutting machine, how to recolor and modify/customize the cut files and tips for displaying your projects.
The following tutorials are Cricut-specific, but many of the ideas will work similarly with a Silhouette or ScanNCut machine and any cut files that are shared in them are compatible with all types of cutting machine.
- How to score with a Cricut (even without scoring tools)
- Print then cut tutorial
- Design Space tools (Combine, Attach, Slice, Weld, Flatten, etc.)
- Pattern fill tutorial (for making backgrounds & cutting images to a specific shape/size)
- Free envelope SVGs that can be sized to fit any card
- Presentation boxes for handmade cards
- How to write inside cards with Cricut pens
- How to cut layered designs at a small size
- Design Space tips & tricks
- Cricut pens tutorial
- How to mount multiple designs in the same frame with magic guides
Halloween Box Video Tutorial
Watch the video below to see how to make this project. Keep scrolling for a written tutorial.
A big Design Space update is currently rolling out that changes how the screen looks, including the position of some of the buttons and tools. I had already recorded all the Countdown videos before the update was released, so unfortunately there will be areas of the videos that look different to your screen.
To help with this, I've recorded a walkthrough video that explains all of the Design Space changes so that you can see how to do everything in the new version.
How to Make a Spellbook Cover Keepsake Box
Here’s how to make this spooky spell book for Halloween using a Cricut machine.
Step 1) Download the cutting files & upload to Design Space
Get the files using the box below.
Purchase the File(s)
This cut file is available as part of the Instant Access Bundle.
Or, purchase this design individually here
Before you upload the SVGs to Design Space, you need to unzip the download folder that they come in.
- How to unzip a folder on Windows computer
- How to unzip a folder on a Mac
- How to unzip a folder on an iPad/iPhone
- How to unzip a folder on an Android device
After unzipping, upload the SVG file(s) into your cutting machine software.
Not sure how to use cut files with your type of machine? The following links lead to videos on how to open cut files in:
- Cricut Design Space
- Silhouette Studio
- CanvasWorkspace (for ScanNCut machines)
The download folder also contains printable PDF versions of the templates for hand cutting.
If you are using Cricut Design Space, start a new project and then click the “Upload” button on the left of the screen.
You can then either click “Browse” to find the files on your computer, or drag-and-drop them in.
Navigate to the “Cutting Machine Versions” subfolder and then select the file called svg-potion-book-box-craftwithsarah.svg
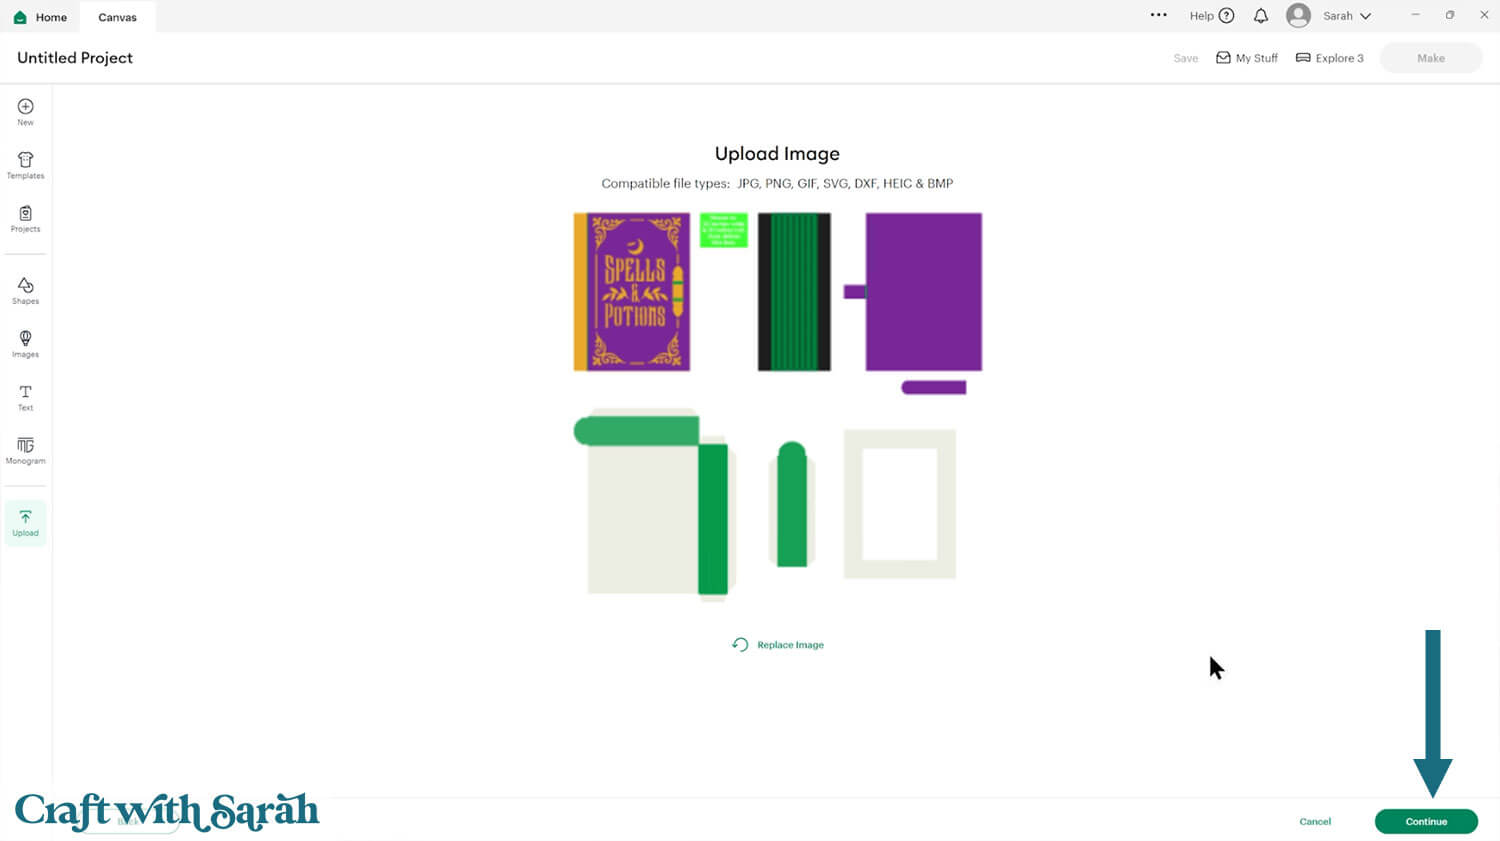
Don’t worry if the image preview appears blurry – it will show in full quality once it’s inserted onto your project.
The strange-looking green rectangles/lines are the score lines. They will look a bit weird during the upload process, but they correct themselves once the file is uploaded.
Press “Upload” on the next screen.
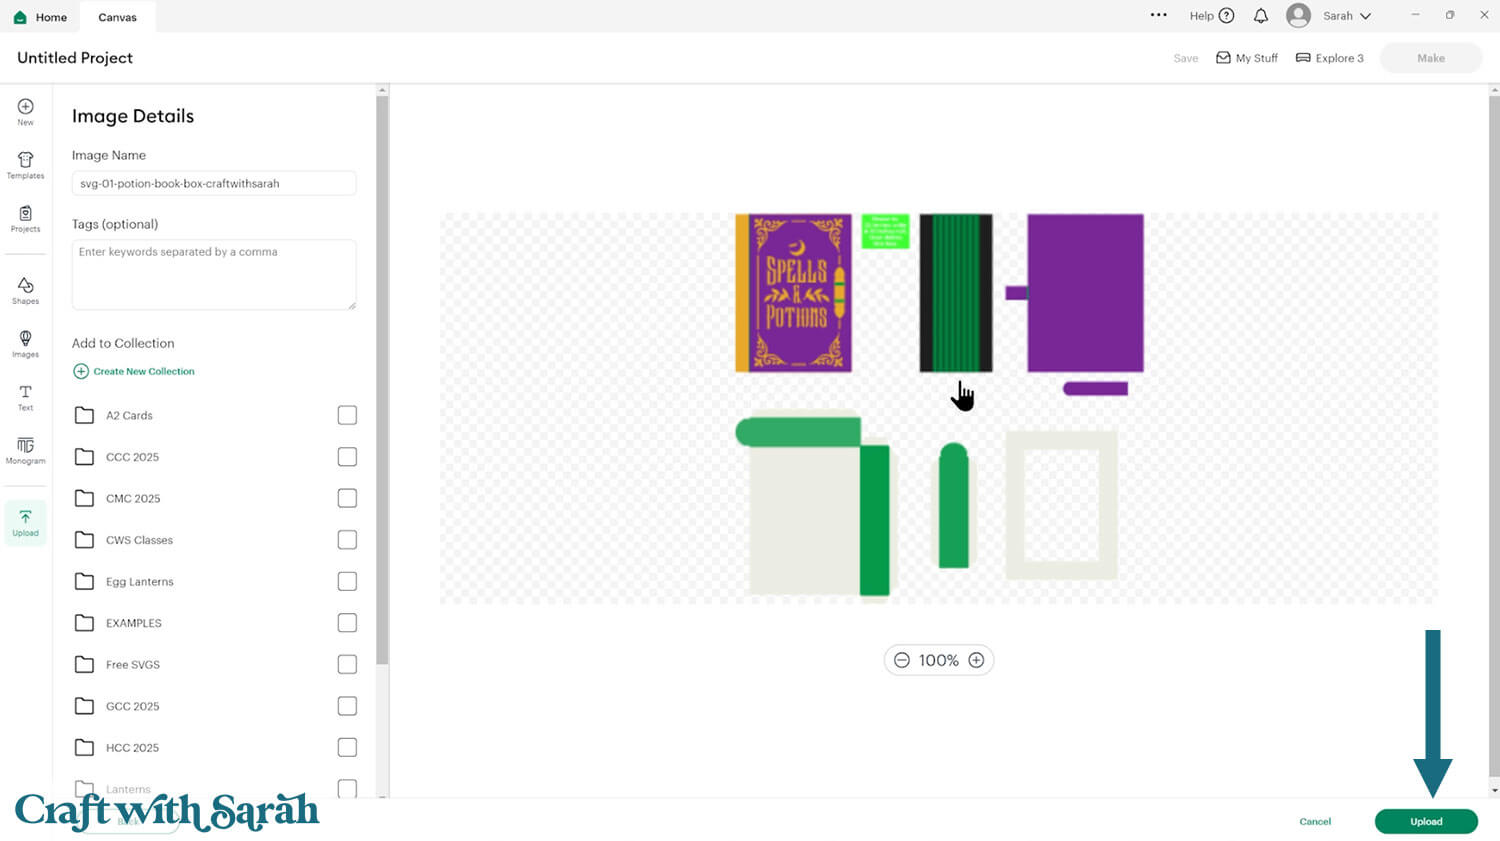
After uploading, the design should be automatically inserted onto your Canvas.
Cricut have recently (as of June 2025) introduced a feature where you get a “pop out” bar of similar images when you Upload a design. To hide this bar (to give you more space for designing!), click the arrow that’s about half way down the page.

If the design doesn’t get inserted onto your Canvas, it will show under “Uploads” in your “Recently Uploaded Images”. Click on it and then press “Add to Canvas” to put it onto your Project.
Step 2) Format the project
Check that the project has loaded in at 22 inches wide and 21 inches tall. If not, resize it to those measurements.
Click the design and press “Ungroup”.
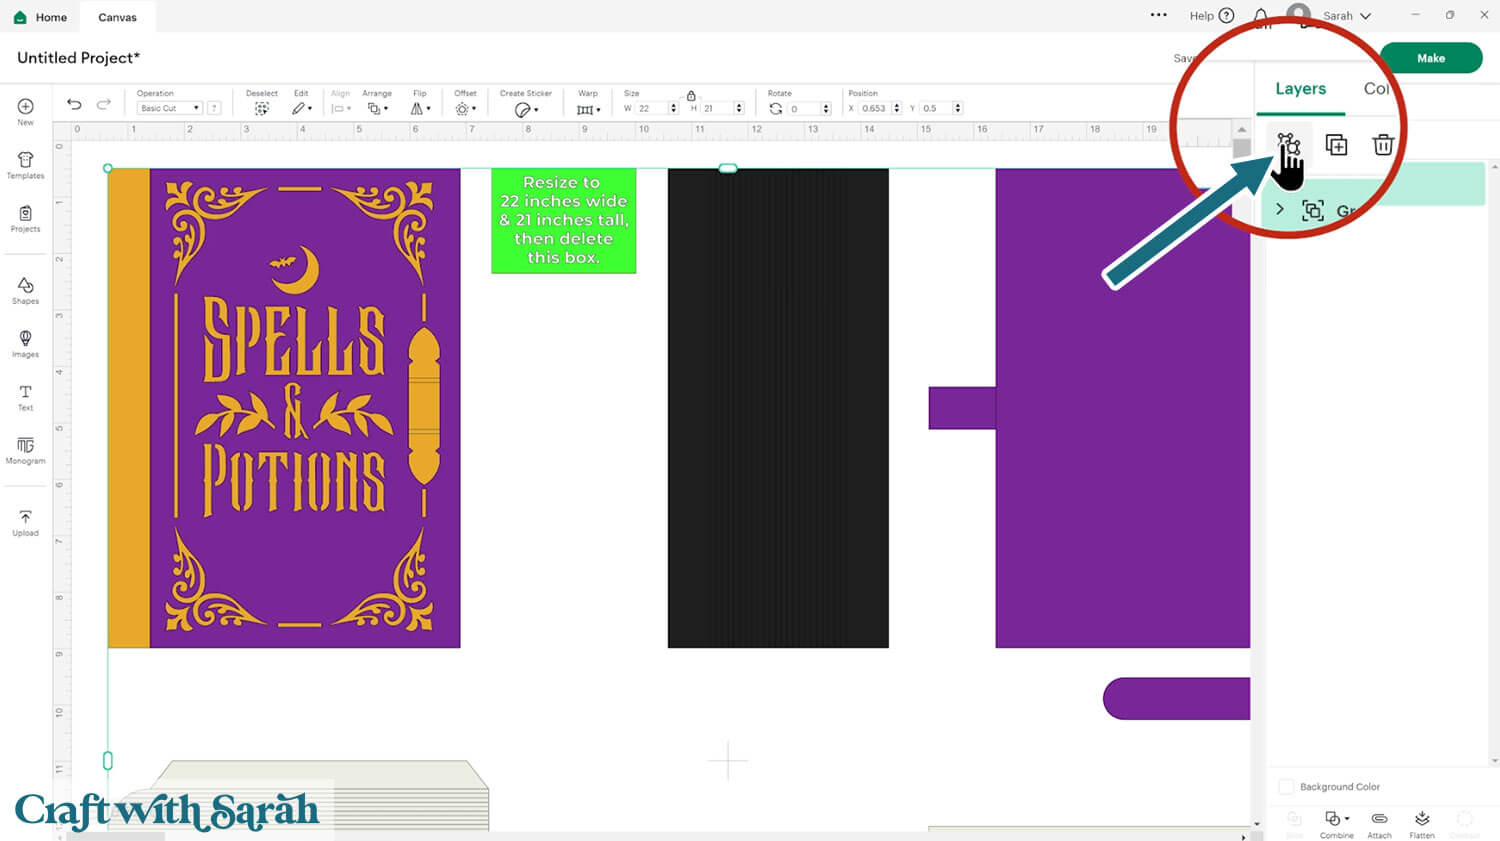
Click the green rectangle layer with the size information and delete it.
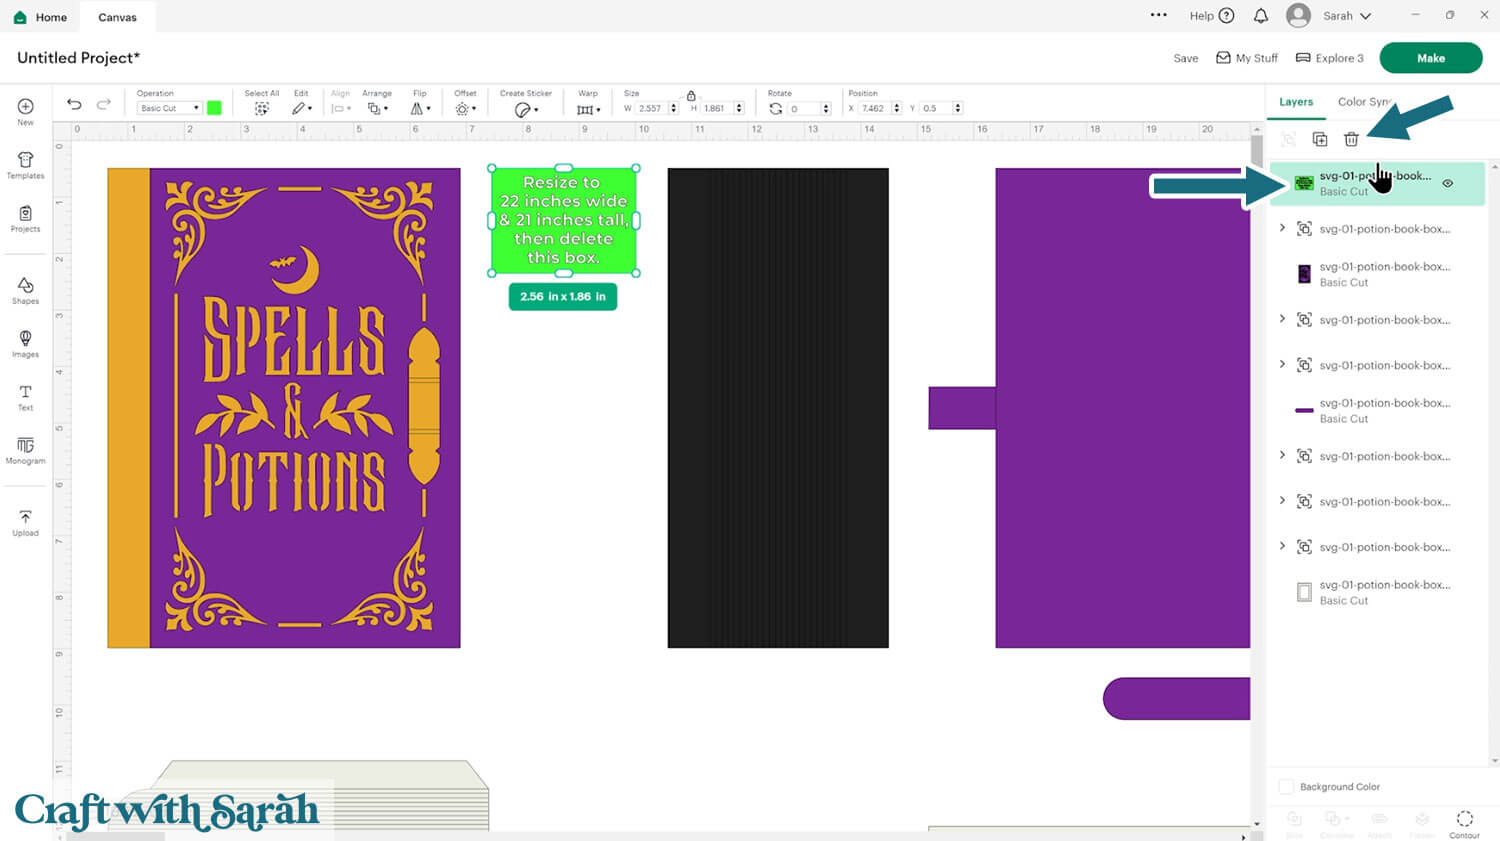
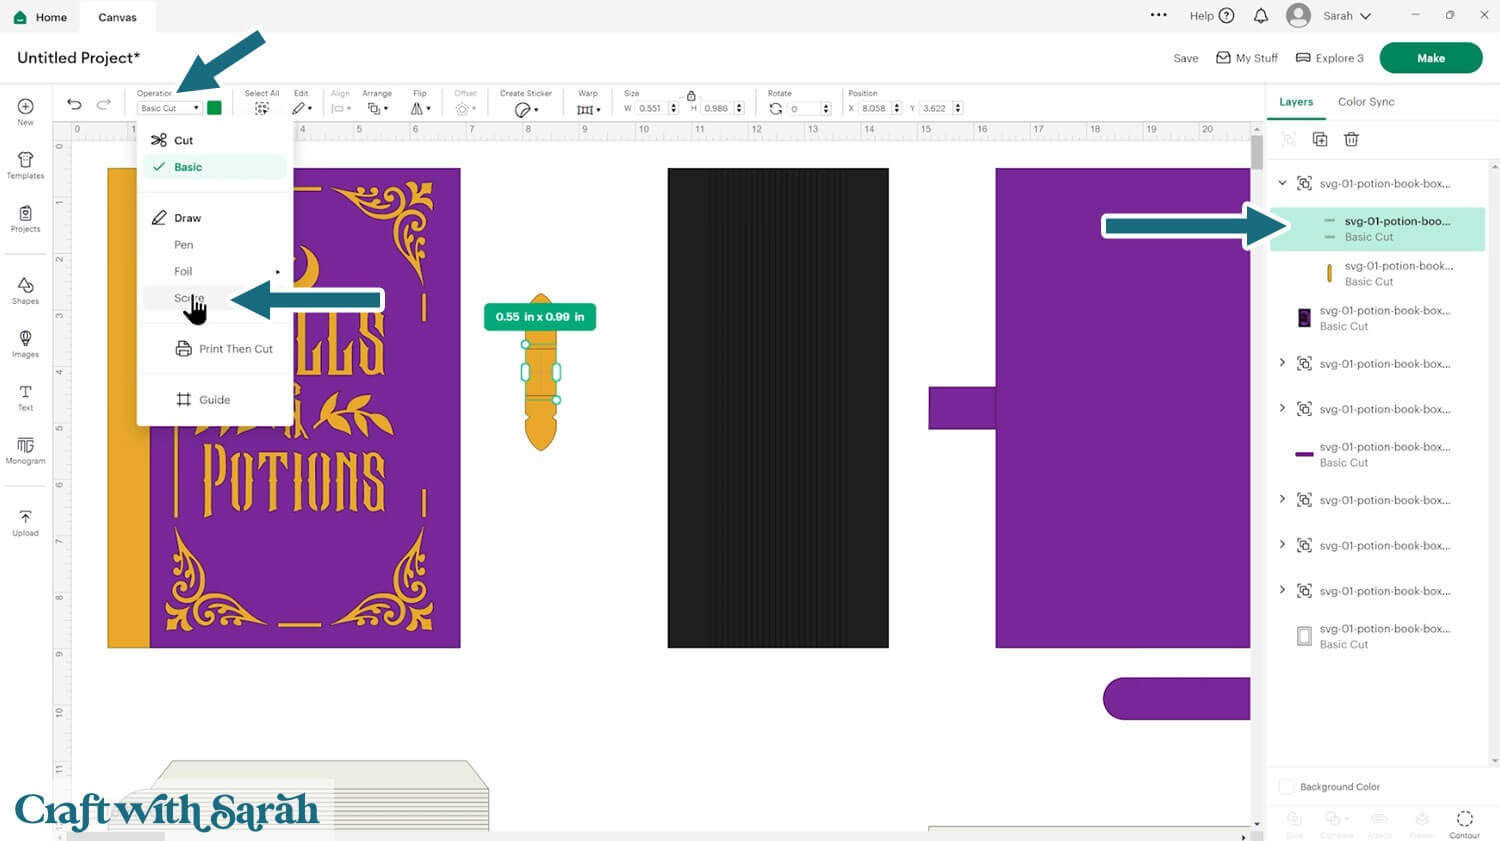
This project comes with some lines that need to be changed to “Score”.
To find the score lines, look down the layers panel until you see a chevron (arrow) icon.
Click it to open up the Group.
Select the top layer within that group.
Change it to “Score” under the “Operations” dropdown.
With the Score layer and the solid layer underneath selected, click “Attach”.
Attach is what tells the Cricut where to do the scoring.
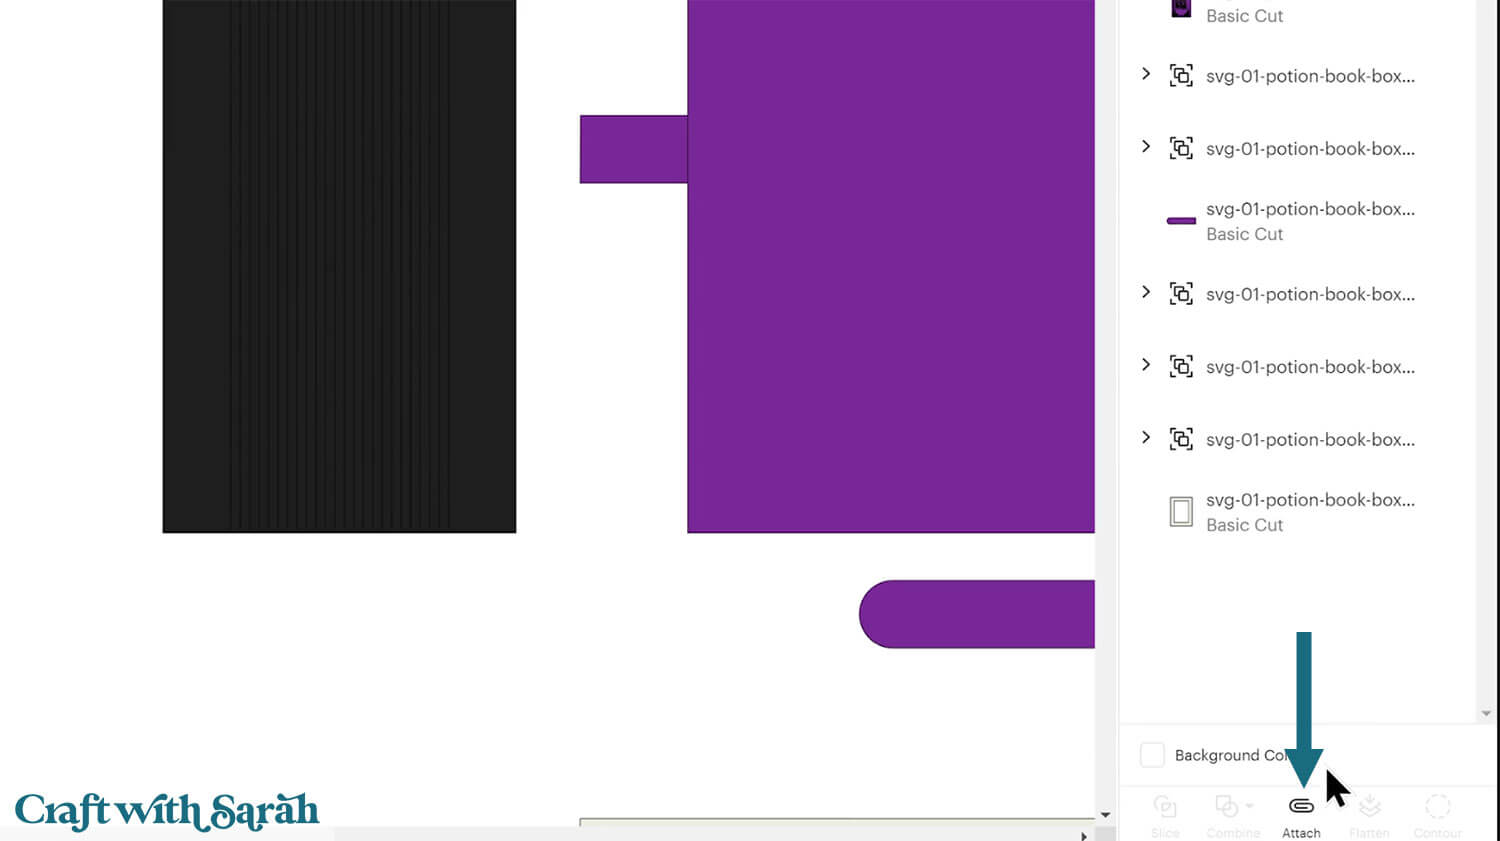
Repeat this for all of the groups in the layers panel that have score lines.
If you notice a layer to change to “Score” that is lots of narrow lines next to each other, that means that it’s an optional score layer to make the page decorations to the sides.
You can delete those layers if you would rather not score the “pages”.

Step 3) Cut the magic spell book papercraft
When you’re happy with how the project is looking in Design Space, click “Make” and follow the instructions on-screen to cut out all the pieces.
To change the paper size, go into the dropdowns over on the left side of the screen and choose the paper size that you want to use. You need to change it for every single colour.
You’ll need 12×12 inch cardstock to cut the potion book at the original size.

To make it smaller, “Cancel” the cut to go back to the project.
Press Ctrl and A (Windows) or Command and A (Mac) to select all layers.
You can then resize the whole project and all the pieces will change in proportion with each other.
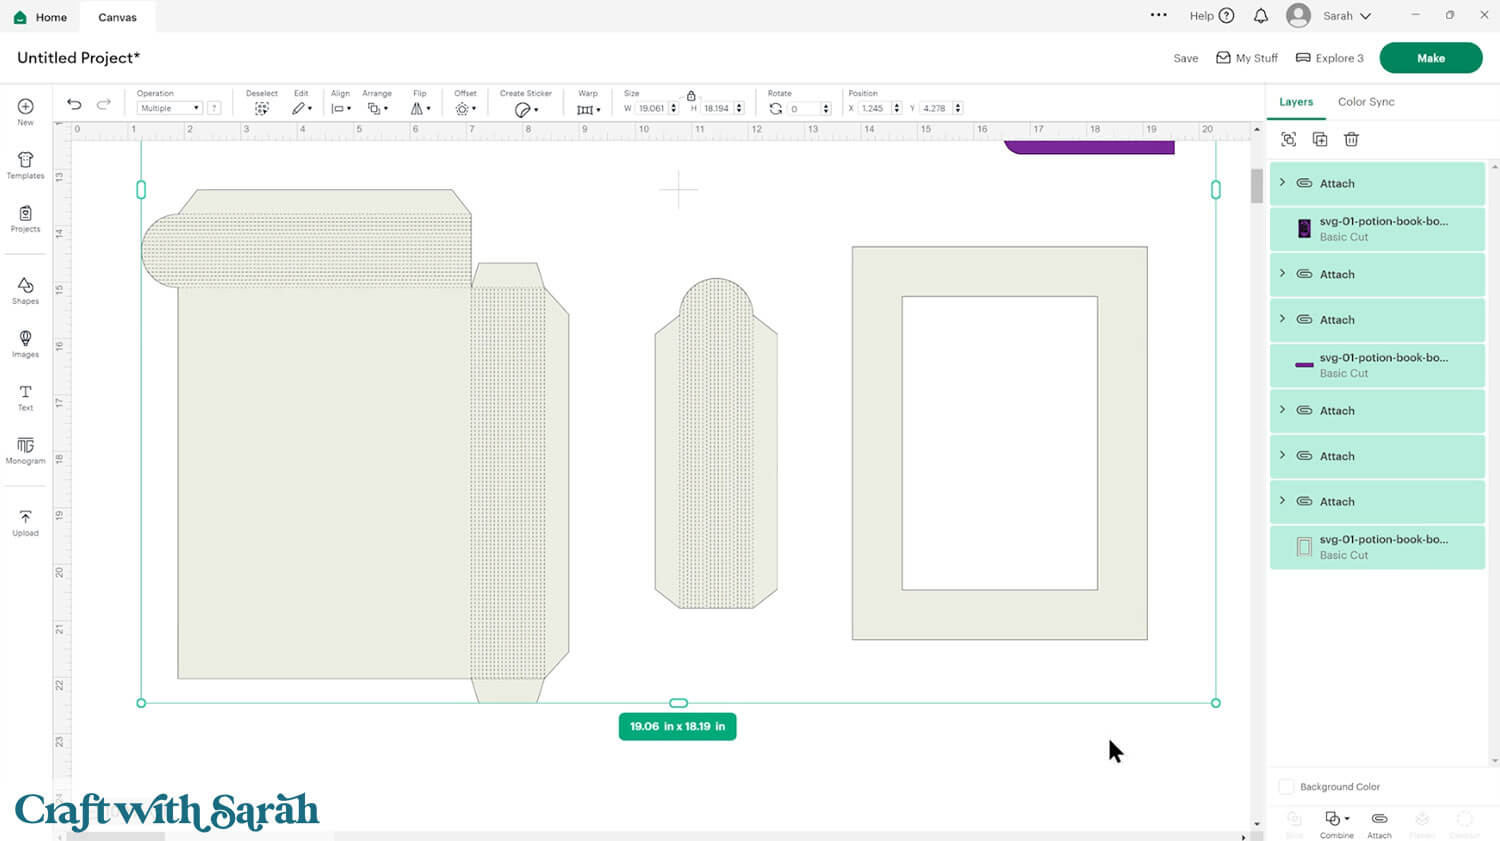
When you’re happy with the size, go back to the “Make” screen.
To save space on your cardstock, you can move things around by clicking and dragging. Make sure when you’re moving things about that nothing overlaps because otherwise, it won’t cut out properly.
TIP: New to using cardstock with your cutting machine? Check out these machine help guides for Cricut, Silhouette and ScanNCut that go through every step of the process, including tips for getting the best quality cuts from your machine.
Step 4) Build the Halloween box structure
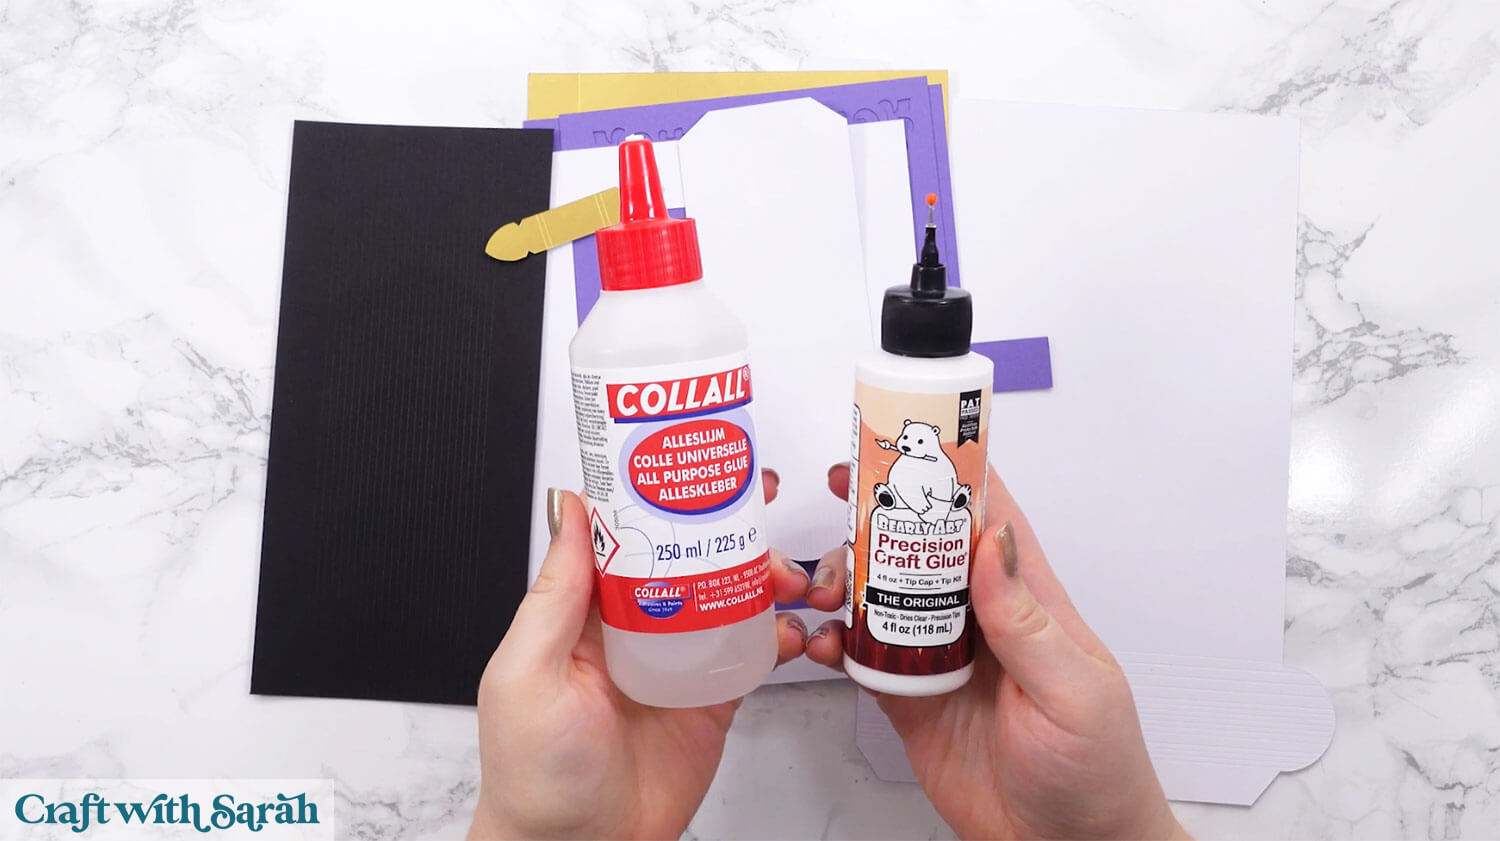
My favourite glues to use on papercraft projects are Bearly Art Glue and Collall All Purpose Glue.
These are great because they don’t “warp” or bend the cardstock like some glues do. You can use as much of it as you want and the card stays perfect – and it dries perfectly clear too!
Bearly Art Glue comes with a tiny nozzle to make it easy to apply glue to small areas of card. The Collall glue doesn’t come with this, so it’s easiest to decant it into needle tip applicator bottles so that you have more control.
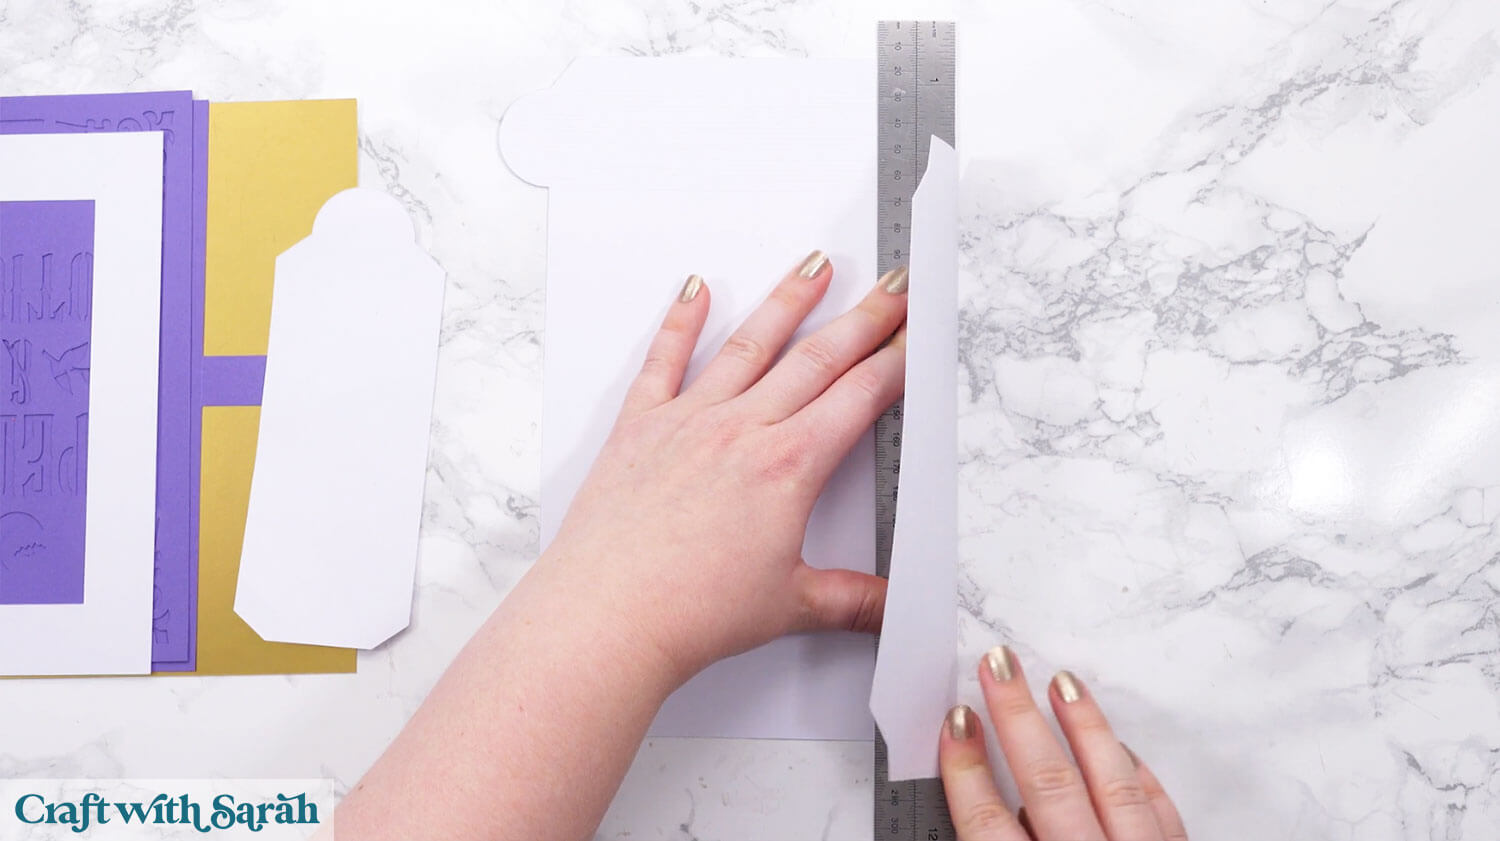
Select the largest structure piece and fold it up along all the required score lines.
It is a bit tricky to fold in the correct place due to the decorative score lines on the side.
I found it easiest to place a ruler along the line I wanted to fold on, so that it folded correctly.
I folded the card slightly upwards towards me to start with, to get the fold going, then turned the card upside down to fold back the correct way.
I used this ruler method for all pieces of the project with score lines.
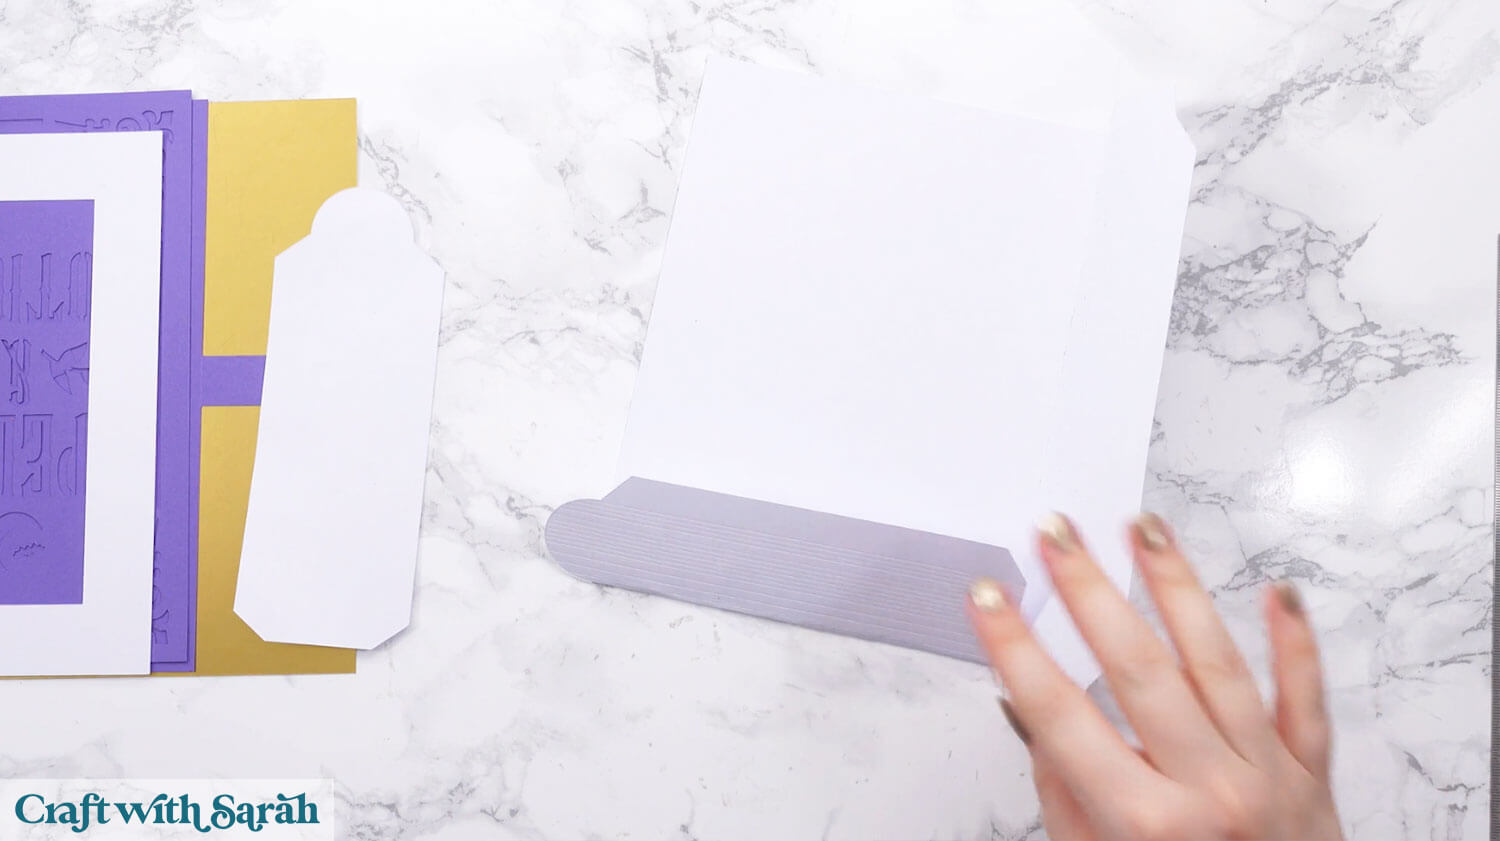
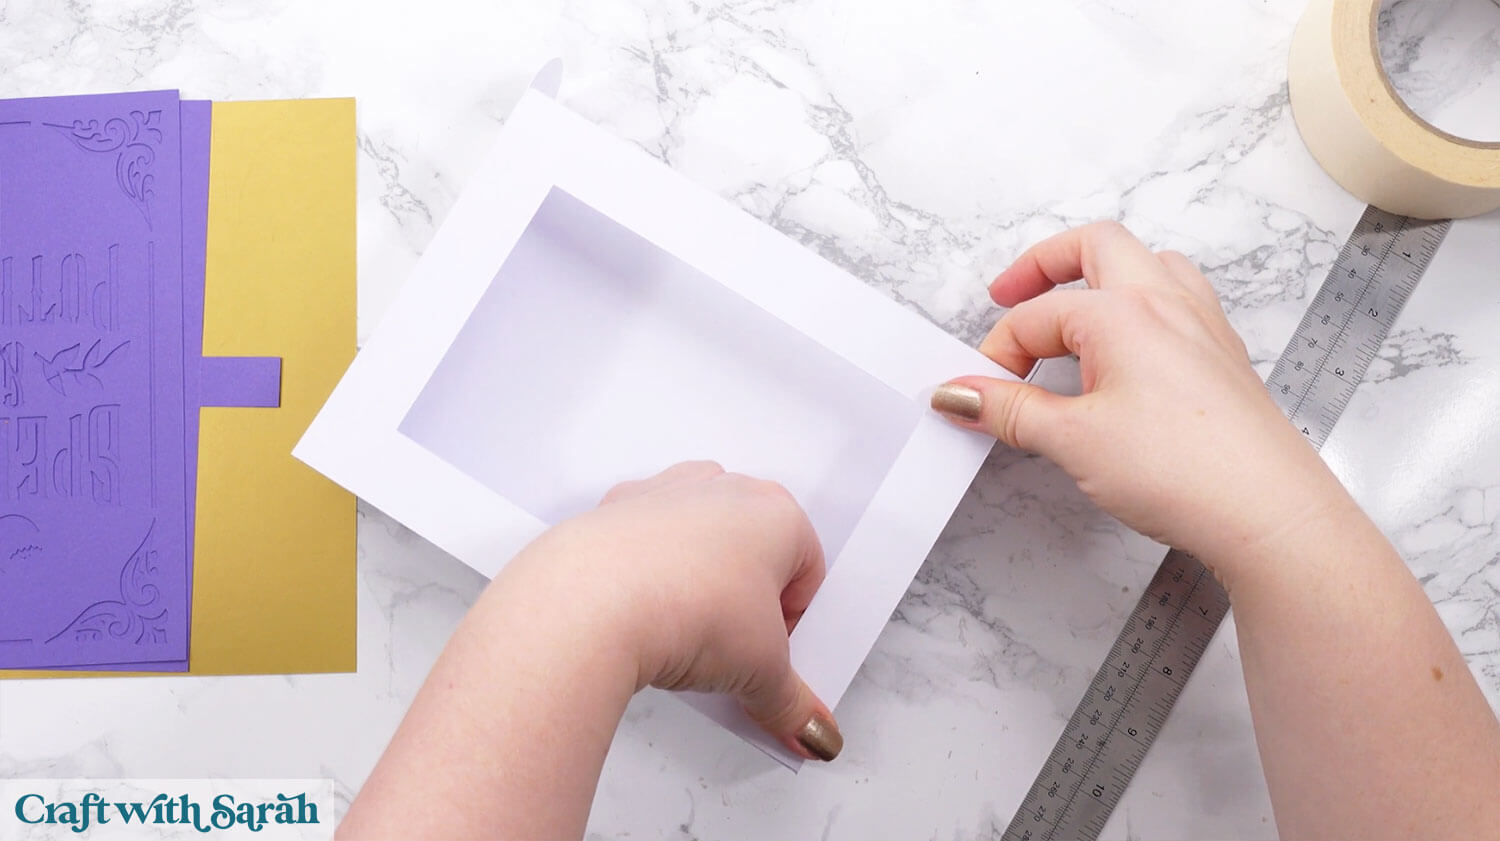
Fold the two tabs of the other white page part.
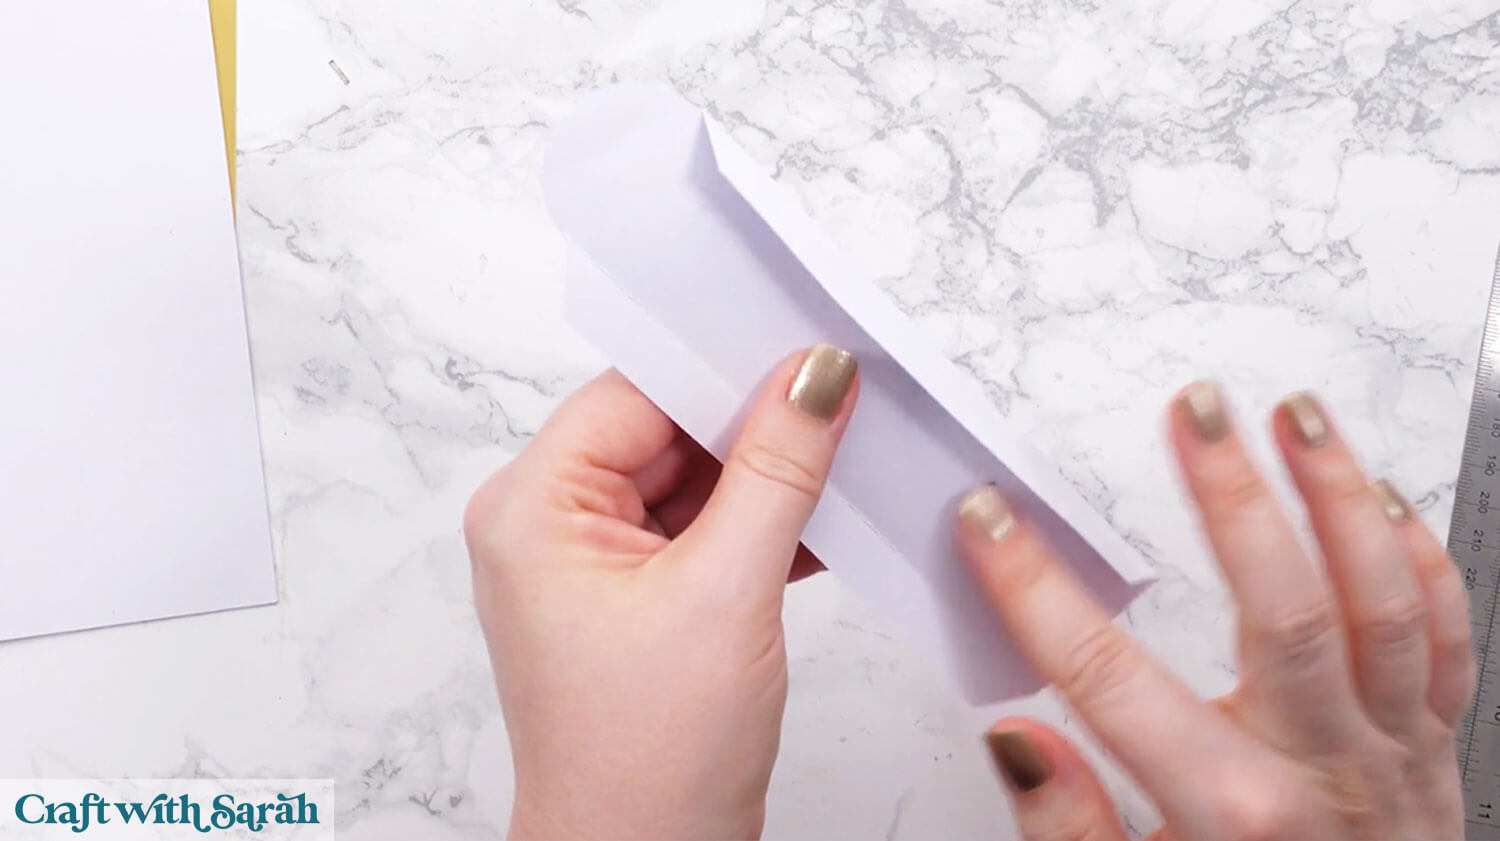
Glue one of the tabs to the back of the main structure piece.
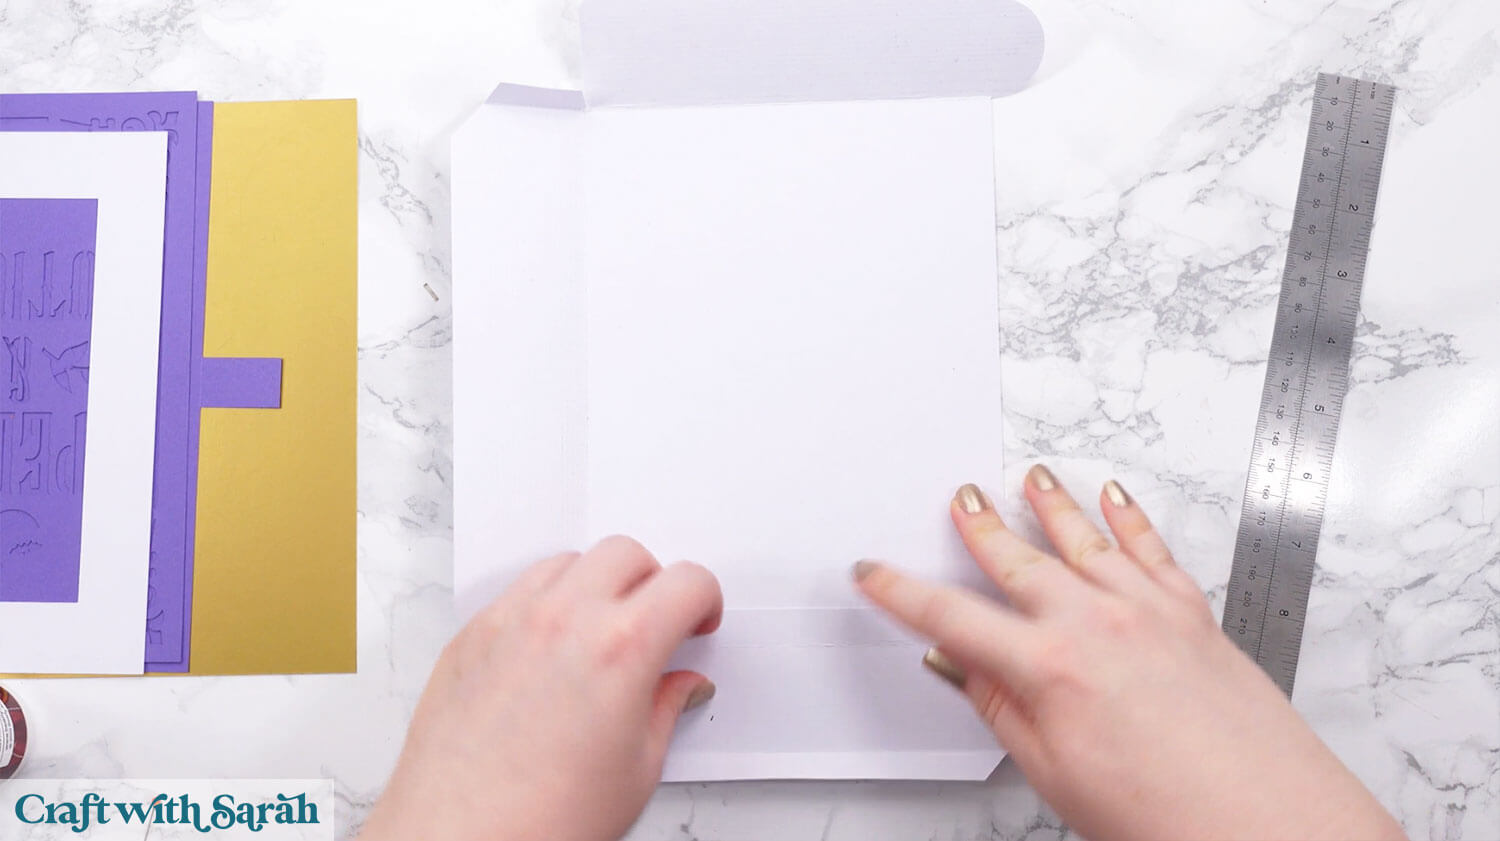
Fold the tabs inwards and glue them to the adjacent side to make a box shape.
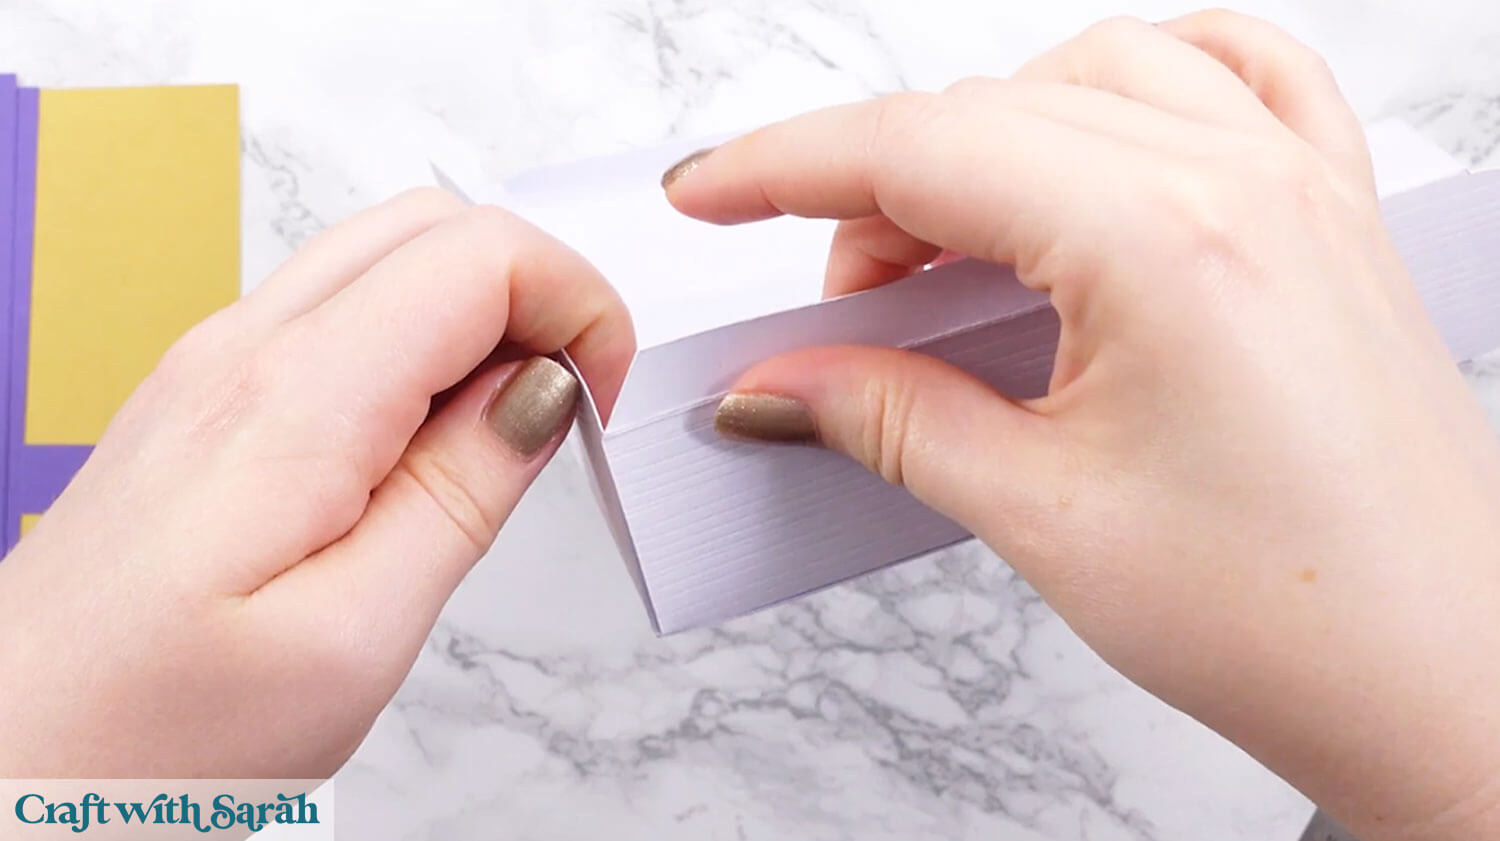
You may wish to add some masking tape to hold the sides in place while the glue dries.

Fold the remaining tabs downwards so that they are horizontal, facing inwards.
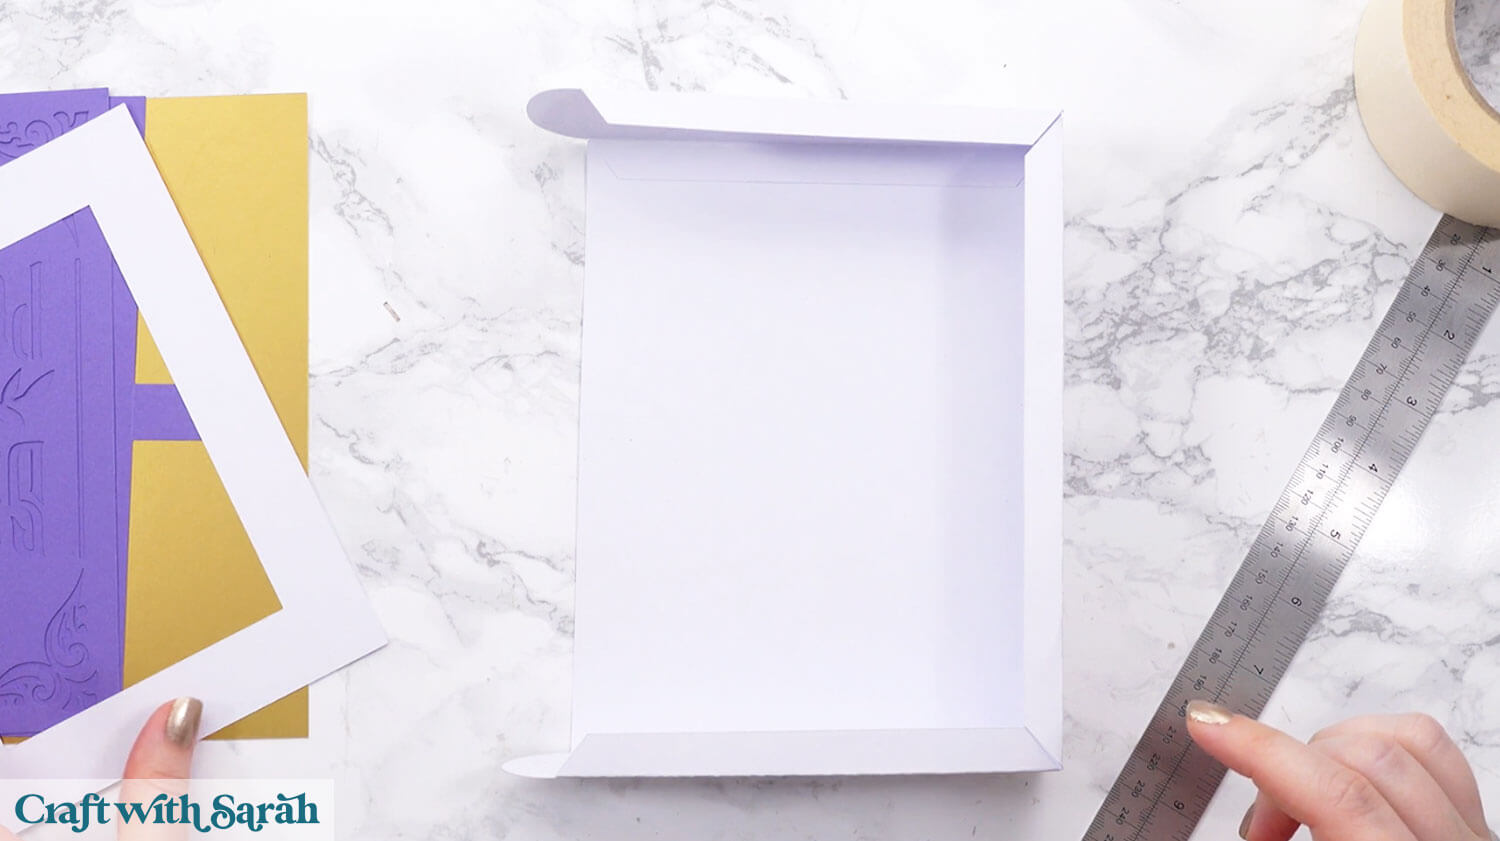
Glue the white rectangle cutout on top.
Push the sides of the book in so they align nicely with the rectangle.
Step 5) Add the spellbook cover
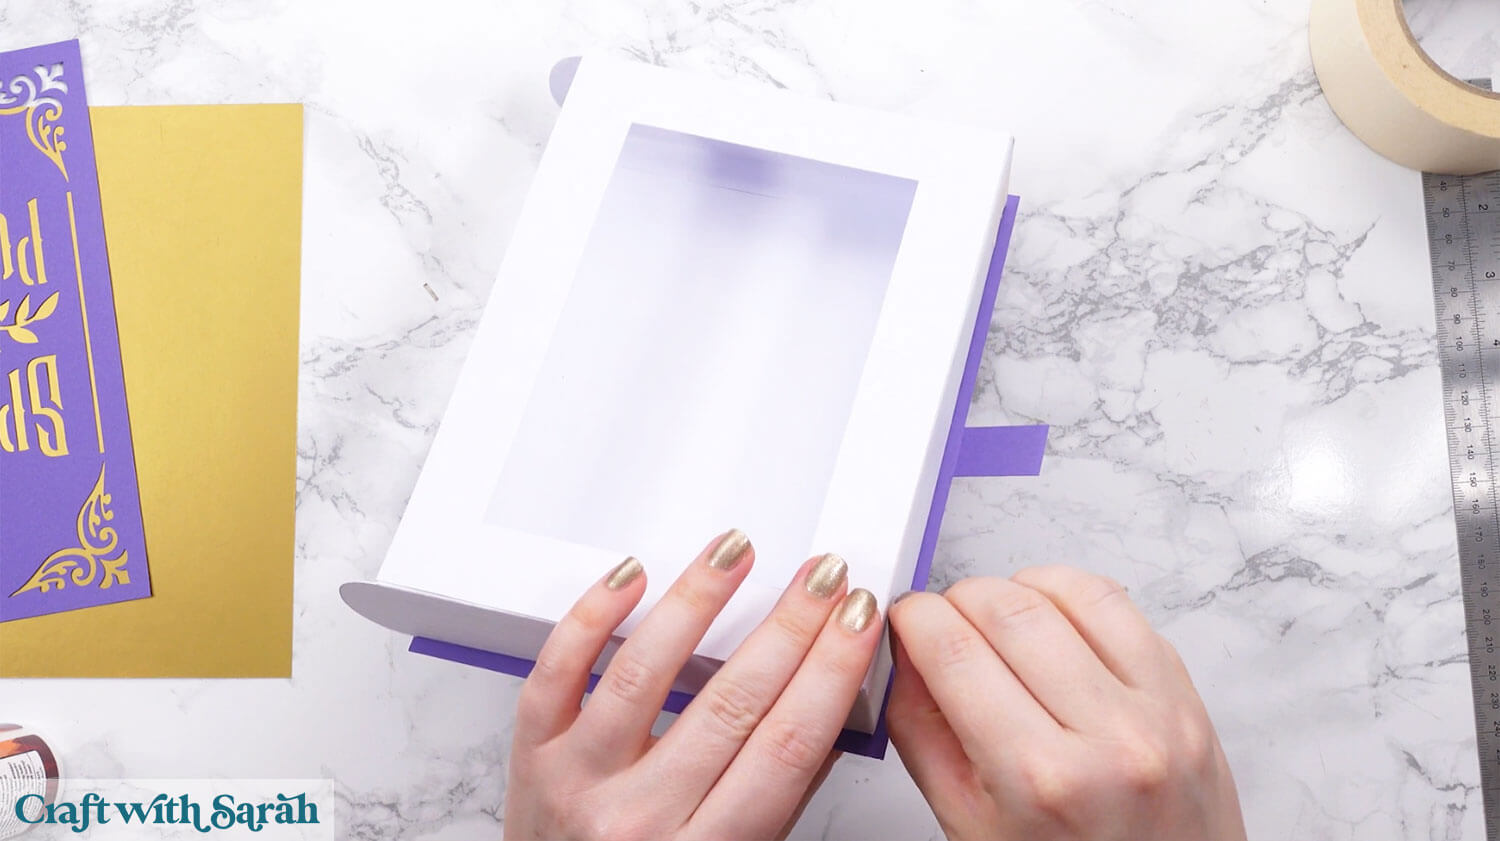
Select the cover piece for the back of the book.

Glue it to the bottom of the box.
The cover piece lines up along the left of the box and will overlap the other three sides to give a realistic hardback cover appearance.
Position it so that the overlap is the same width on the top and bottom of the box.
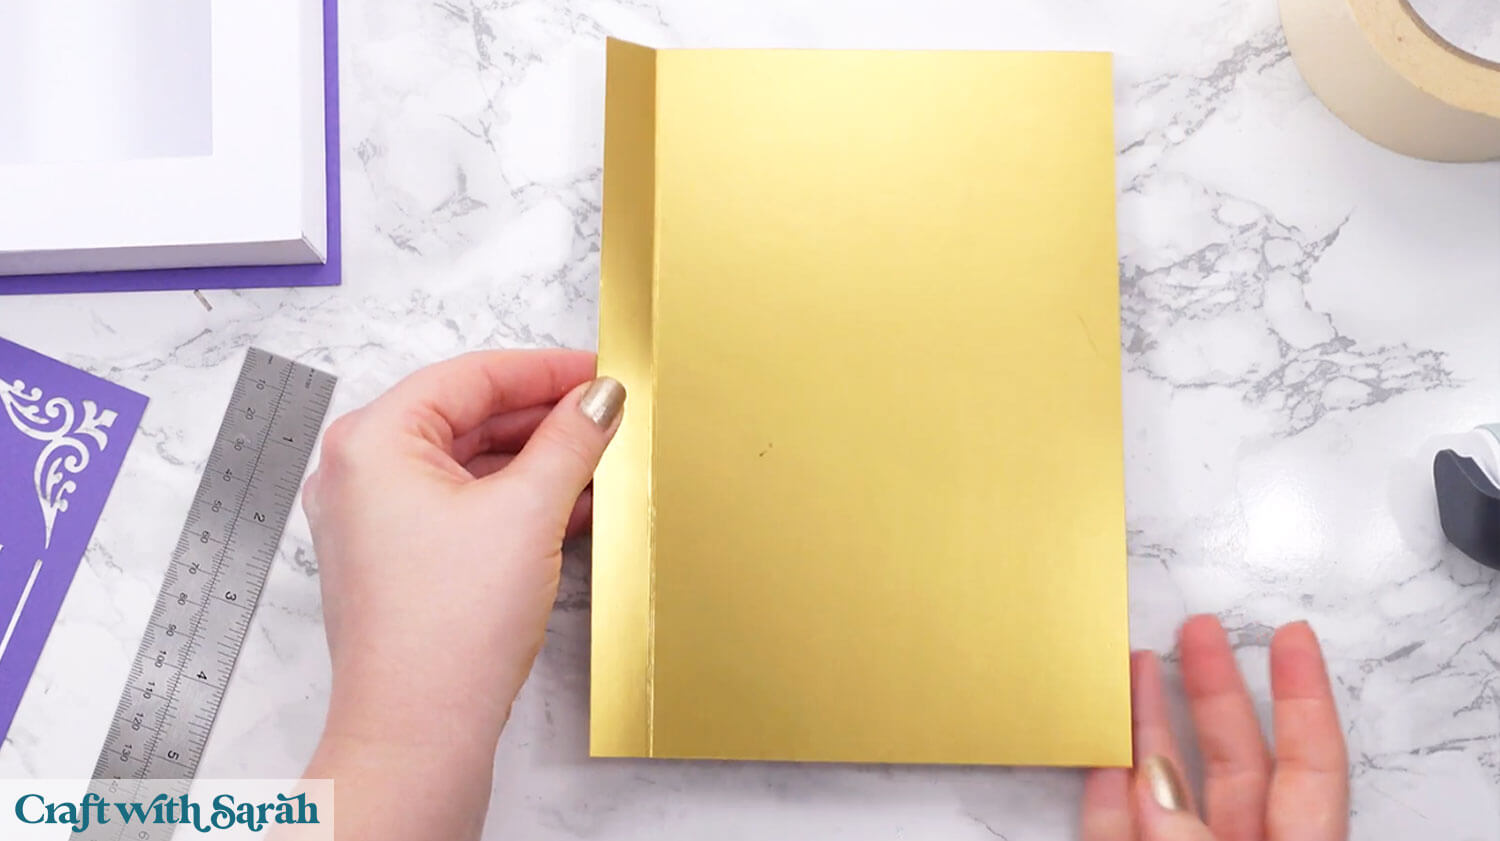
Valley fold the crease on the front cover backing piece.
Glue the book cover pieces with the stencil cutouts on top.
Line it up against the score line.
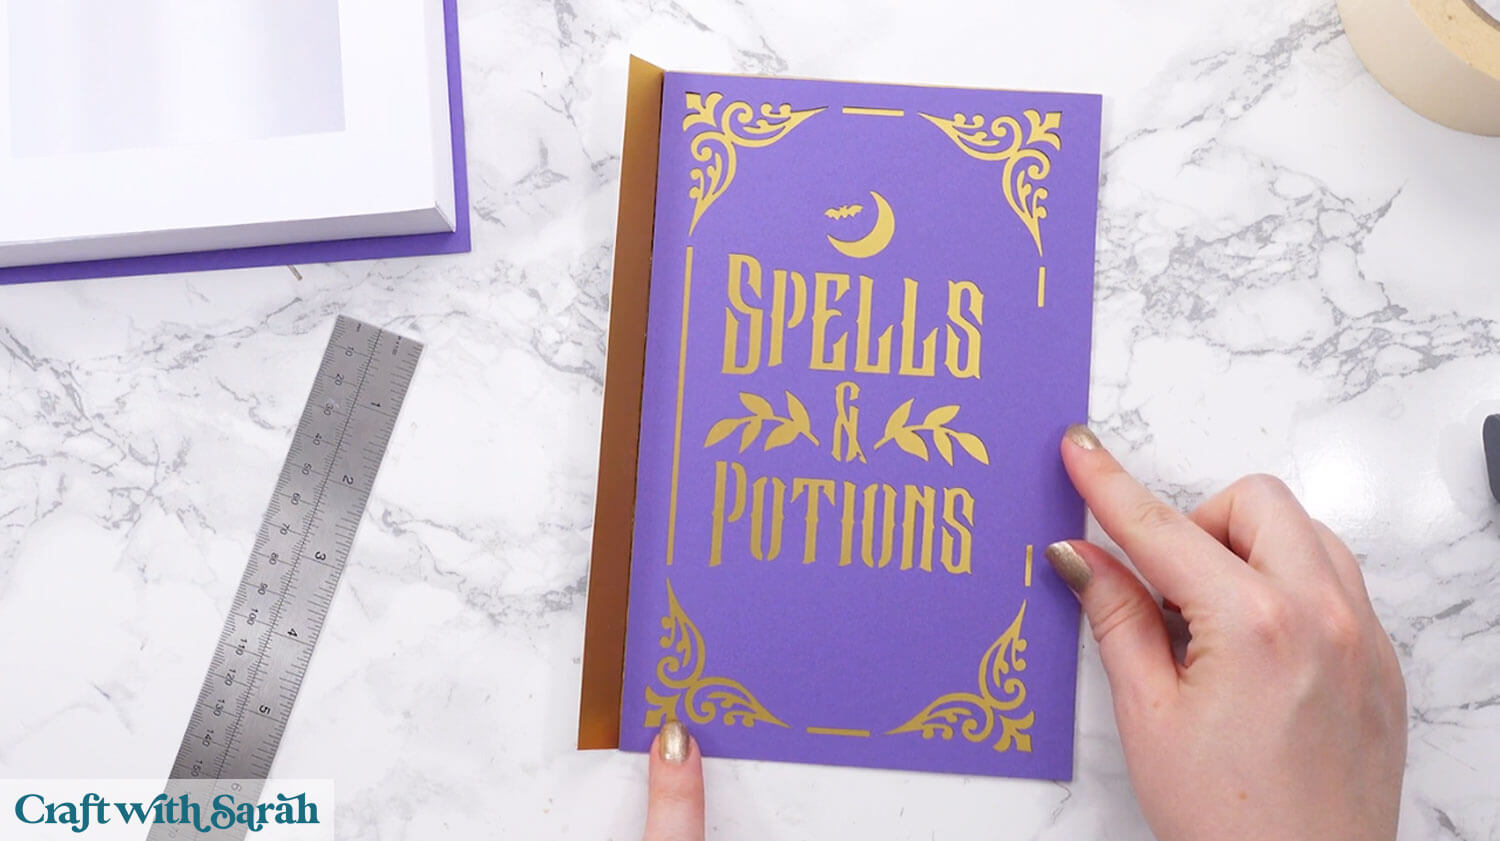
Add glue down the back of the left tab up to the score line. Leave a gap of about 1cm on the top and bottom without any glue on it, as that will be the overlap.
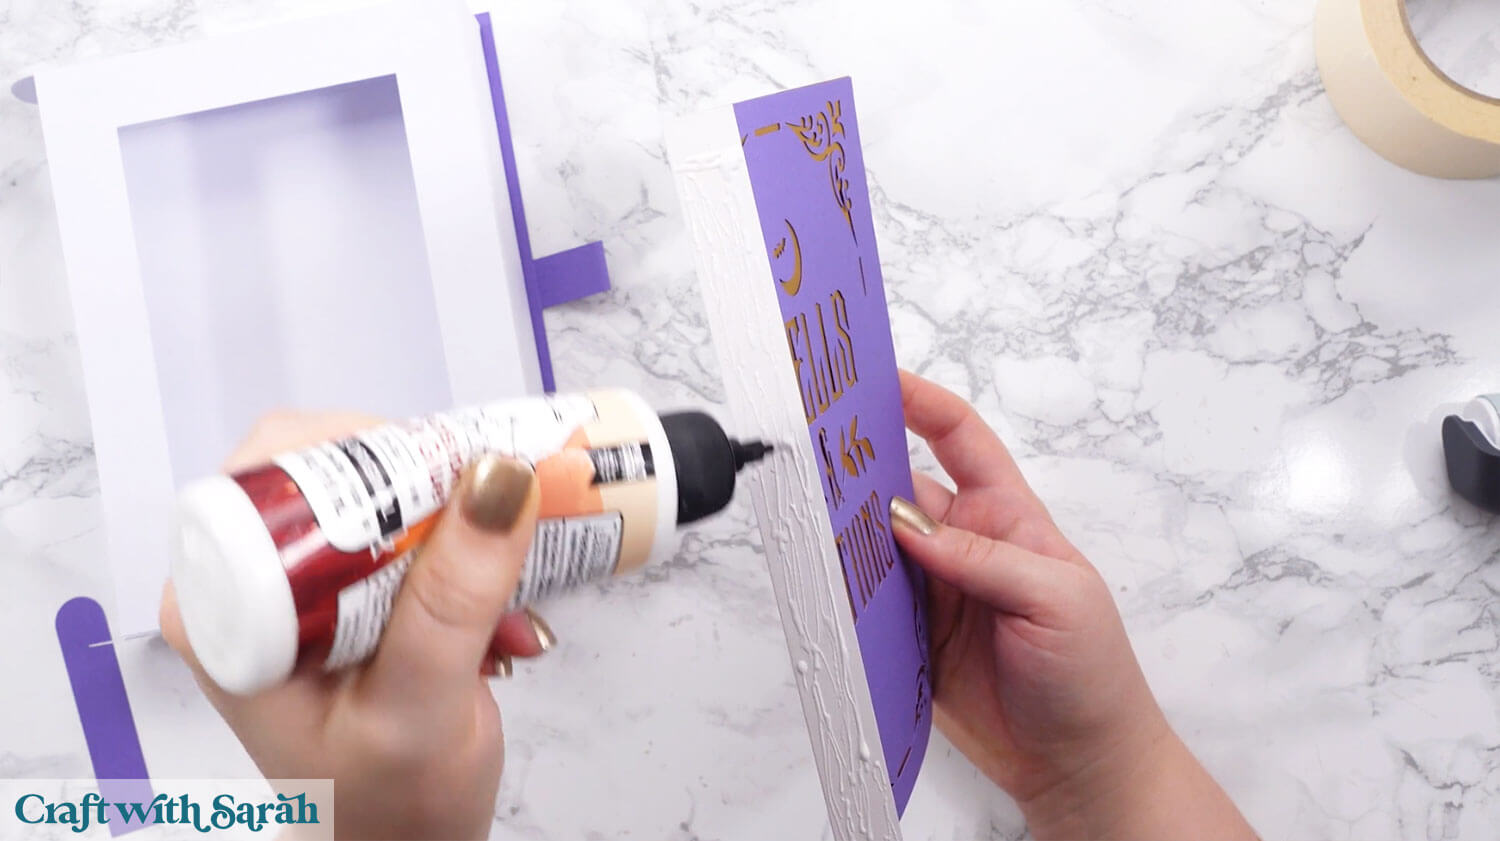
Line the edge of the gold piece along the left of the white box and glue it down. Overlap the top and bottom the same amount as you did for the back cover.
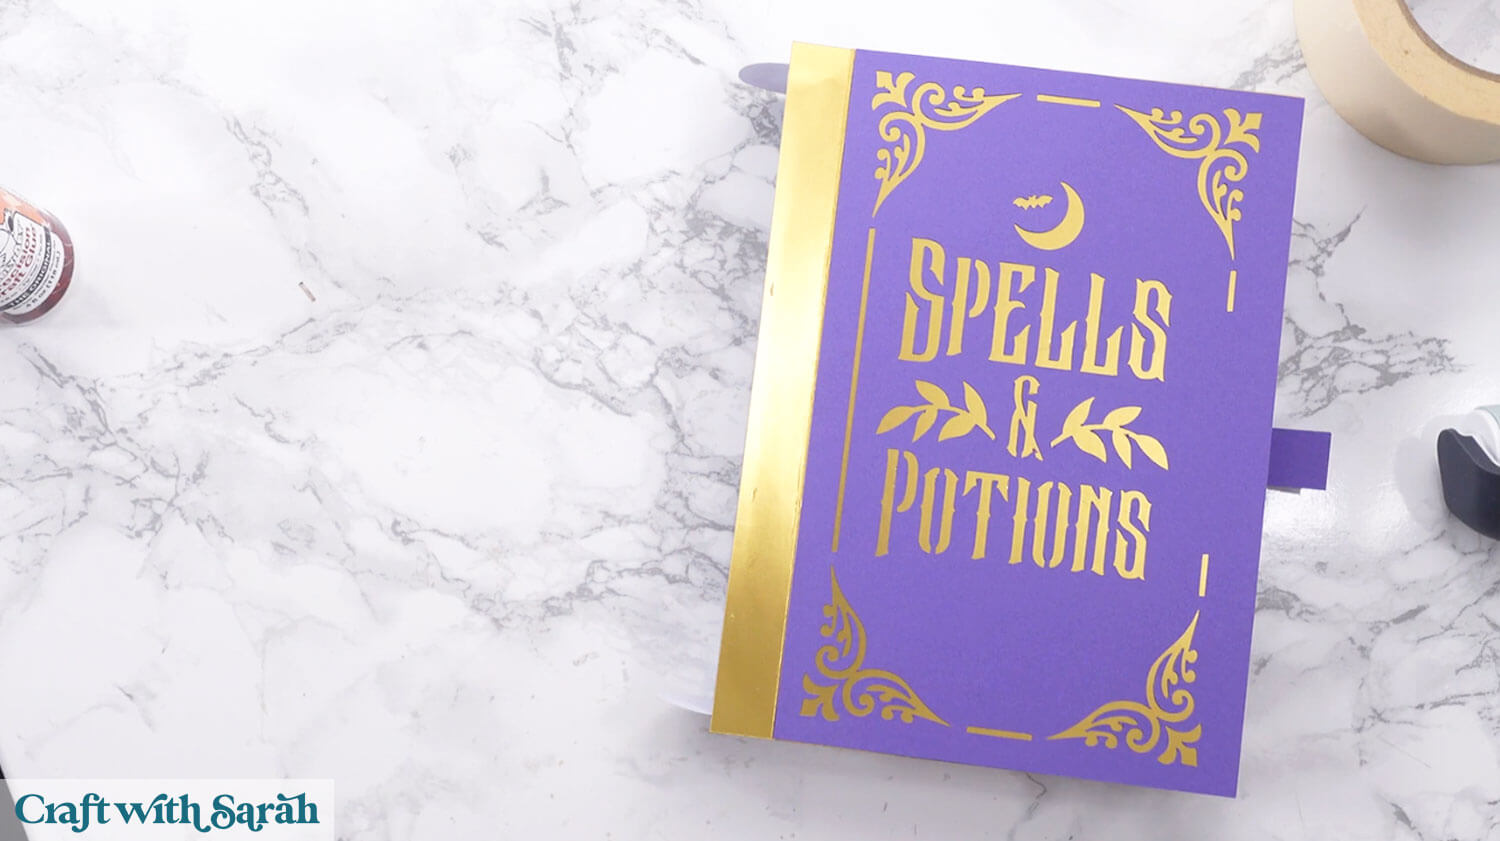
<h3) Step 6) Add the spine of the book
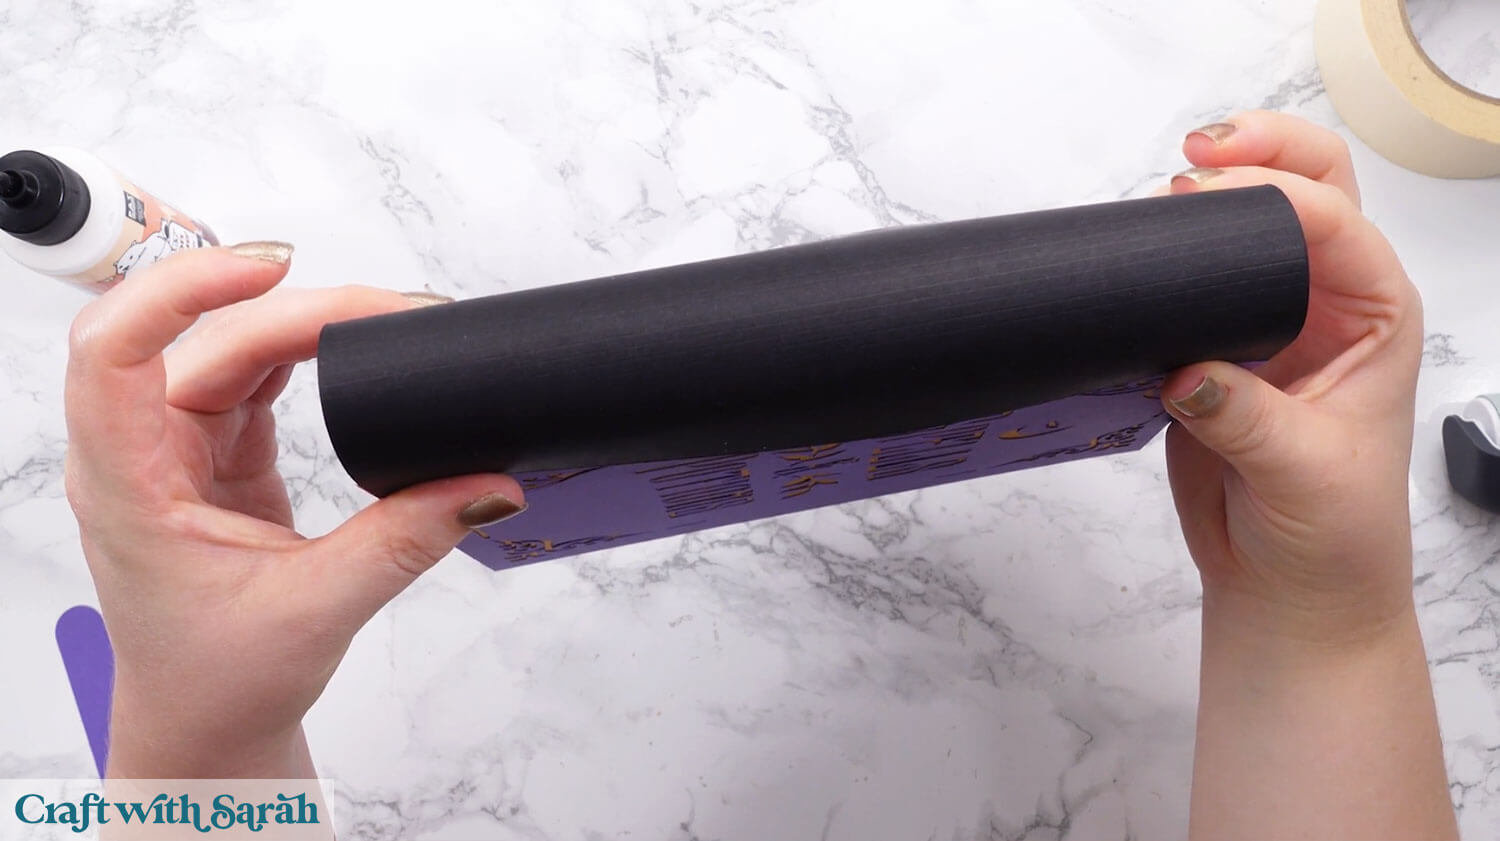
This part can be a little tricky! We need to curve the spine of the book around the box shape to make it rounded.
Start by gently rolling the card around to help train it into the correct position.

It will be glued around the front and back of the book like this:
Add glue to the tab on the front of the box.
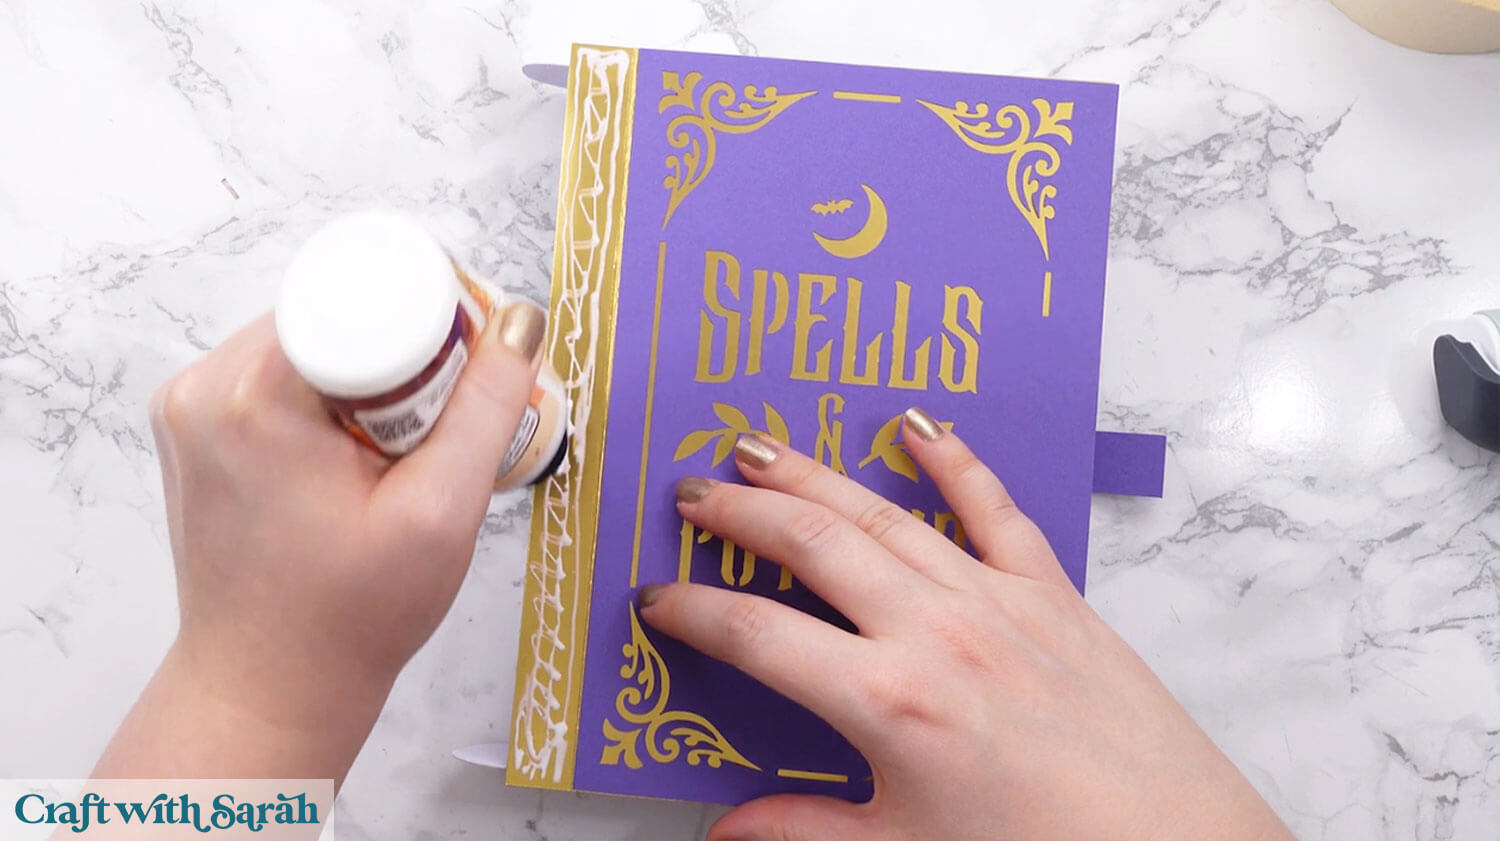
Line one side of the spine along that line. Again, it will overlap the top and bottom a little.
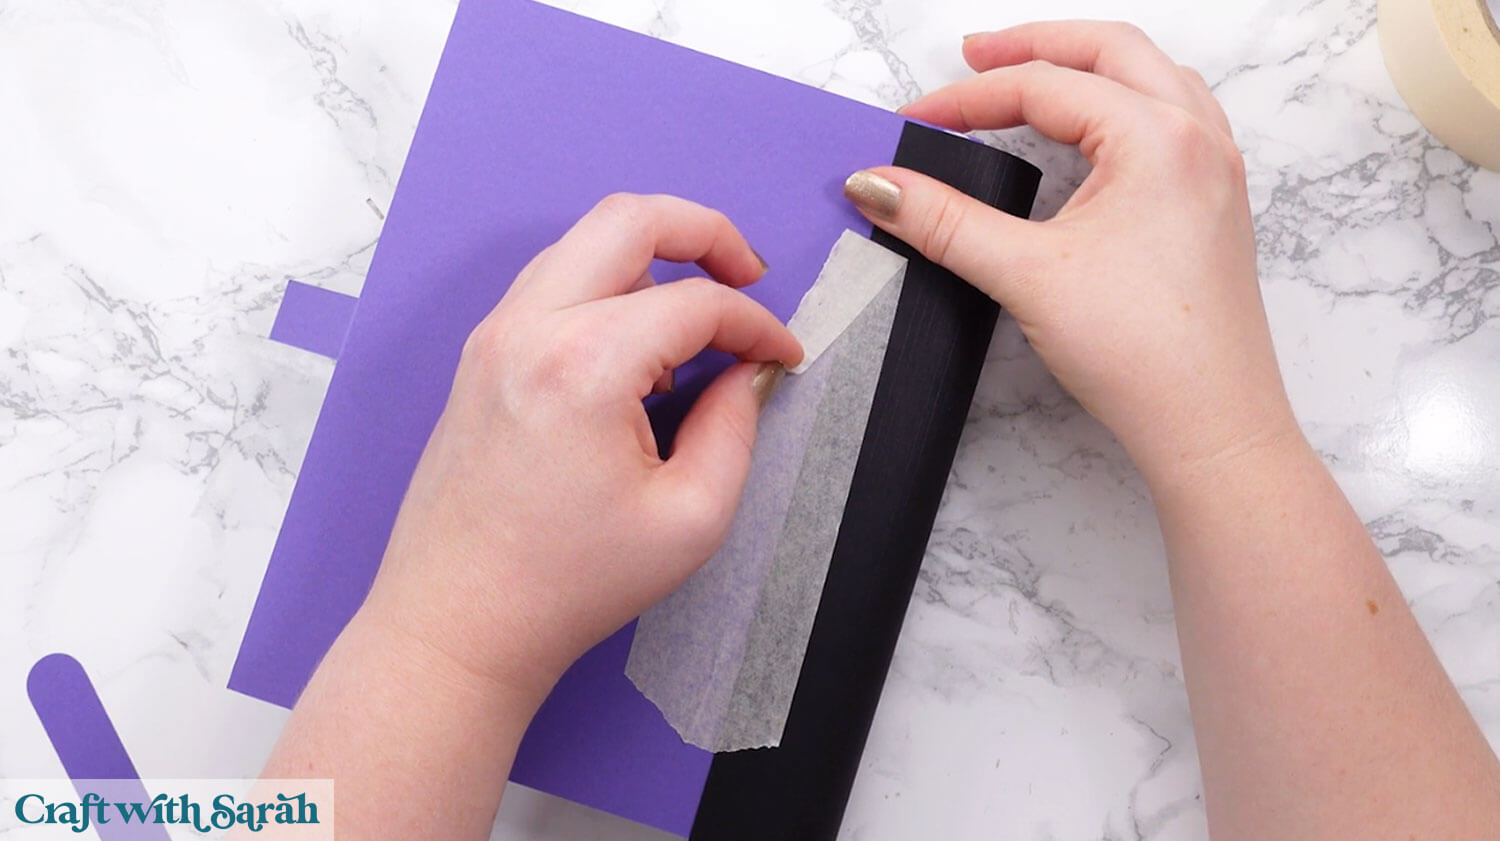
I was having a little trouble with the glue drying on my mirror card, so I added some tape to help hold it in place.

Wait for the glue to fully dry before attempting to roll the spine.
Add glue that covers around 1cm of the side of the back of the book.

Carefully roll the spine around and stick it down.
Again, you may need some tape to help here.
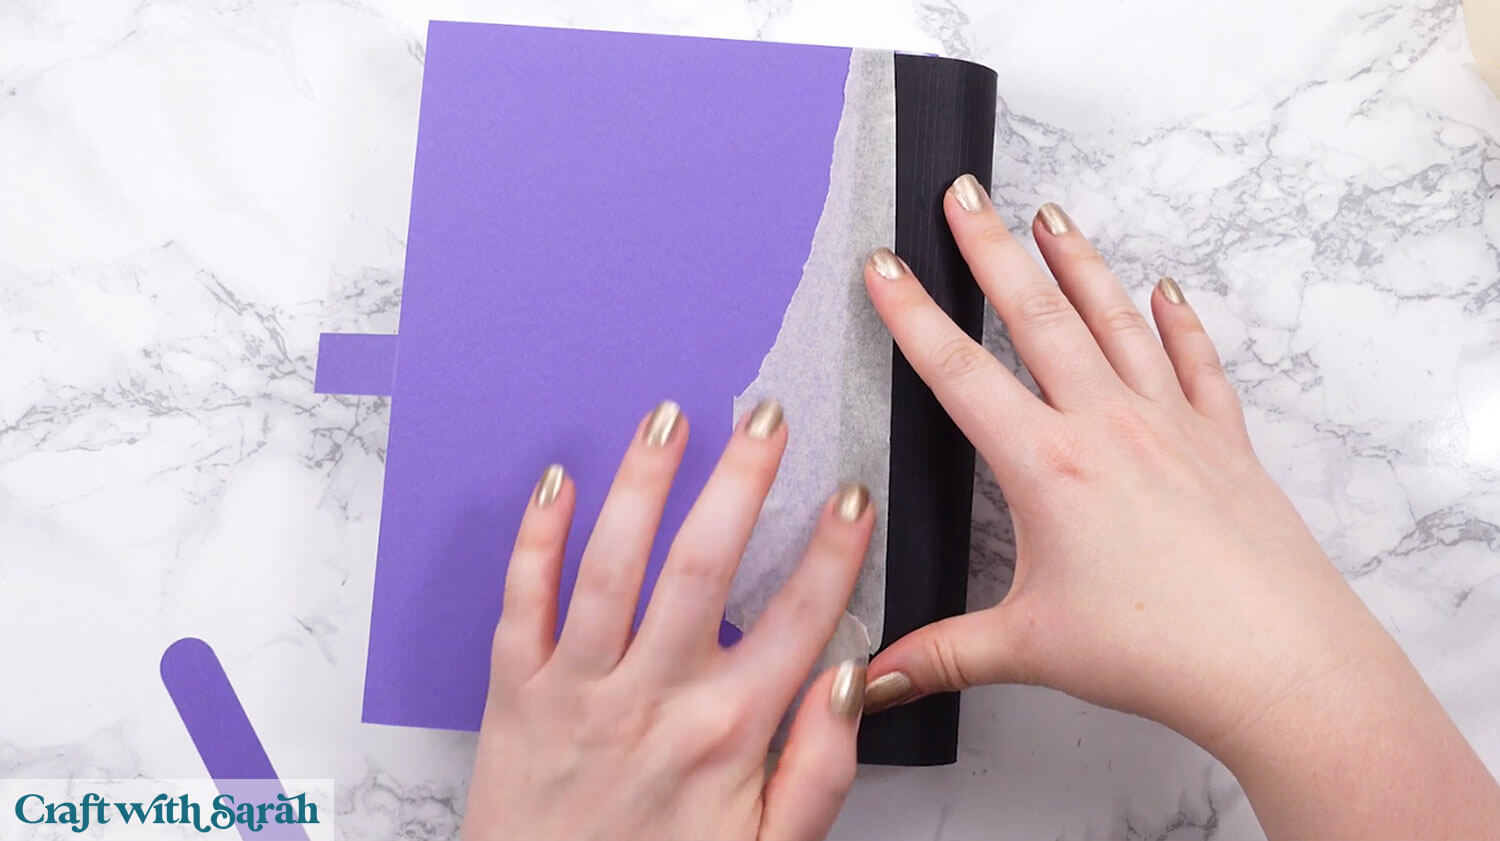
Before the glue dries, turn the box over and use your fingers to run down the edge inside the box cutout to press the spine onto the card really securely.

Remove the masking tape if used.
To stop it from marking the card, using a very slow, gentle pull.
Step 7) Add the finishing touches
Turn the book upside down and add glue up to the score line on the start of the belt.
Glue the separate belt piece on top.
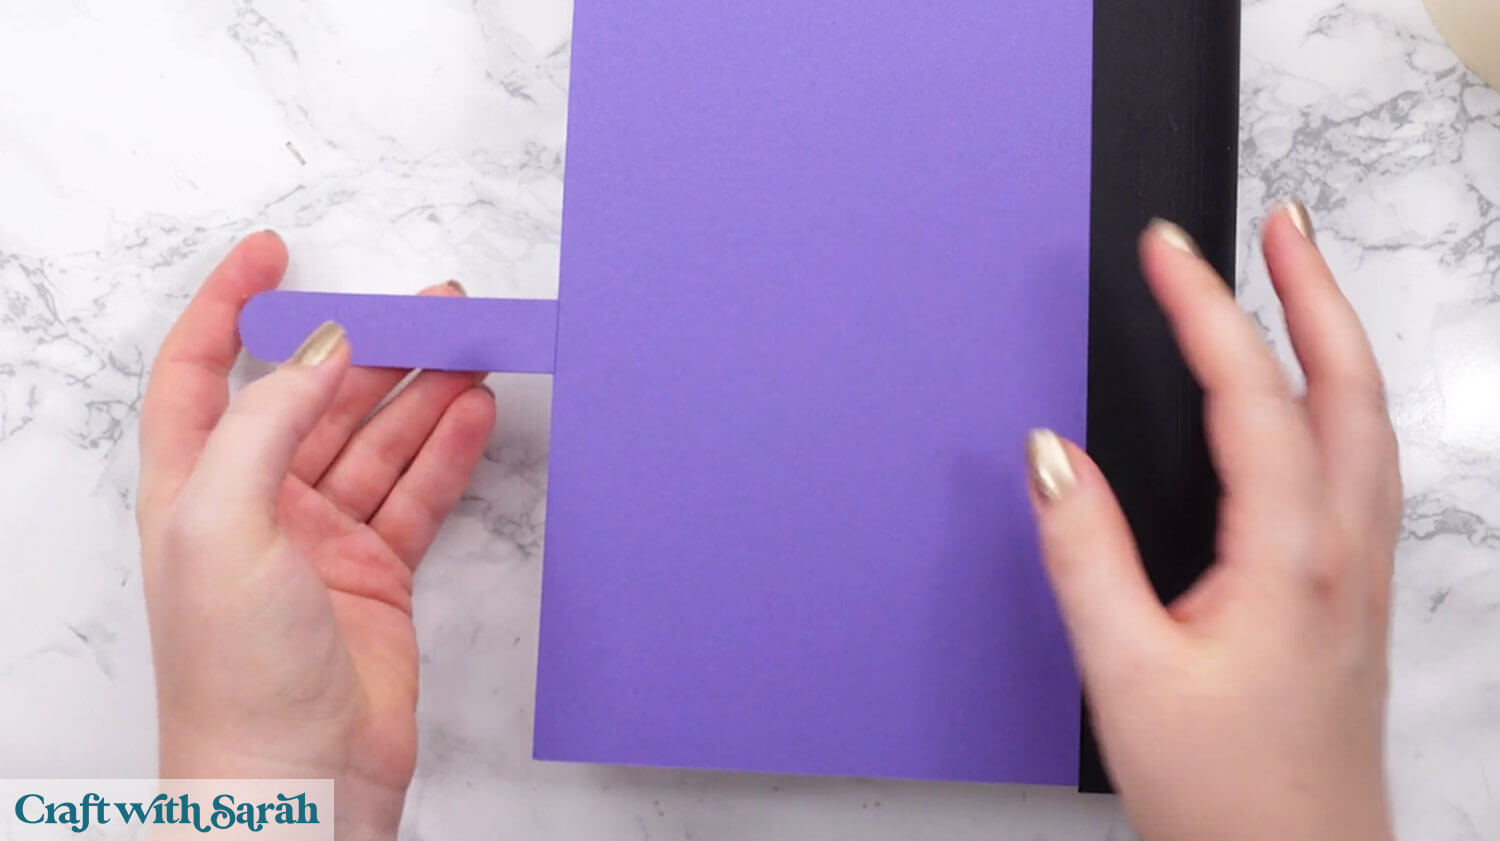
The latch on the front of the book will be built to have a slight bridge on it.
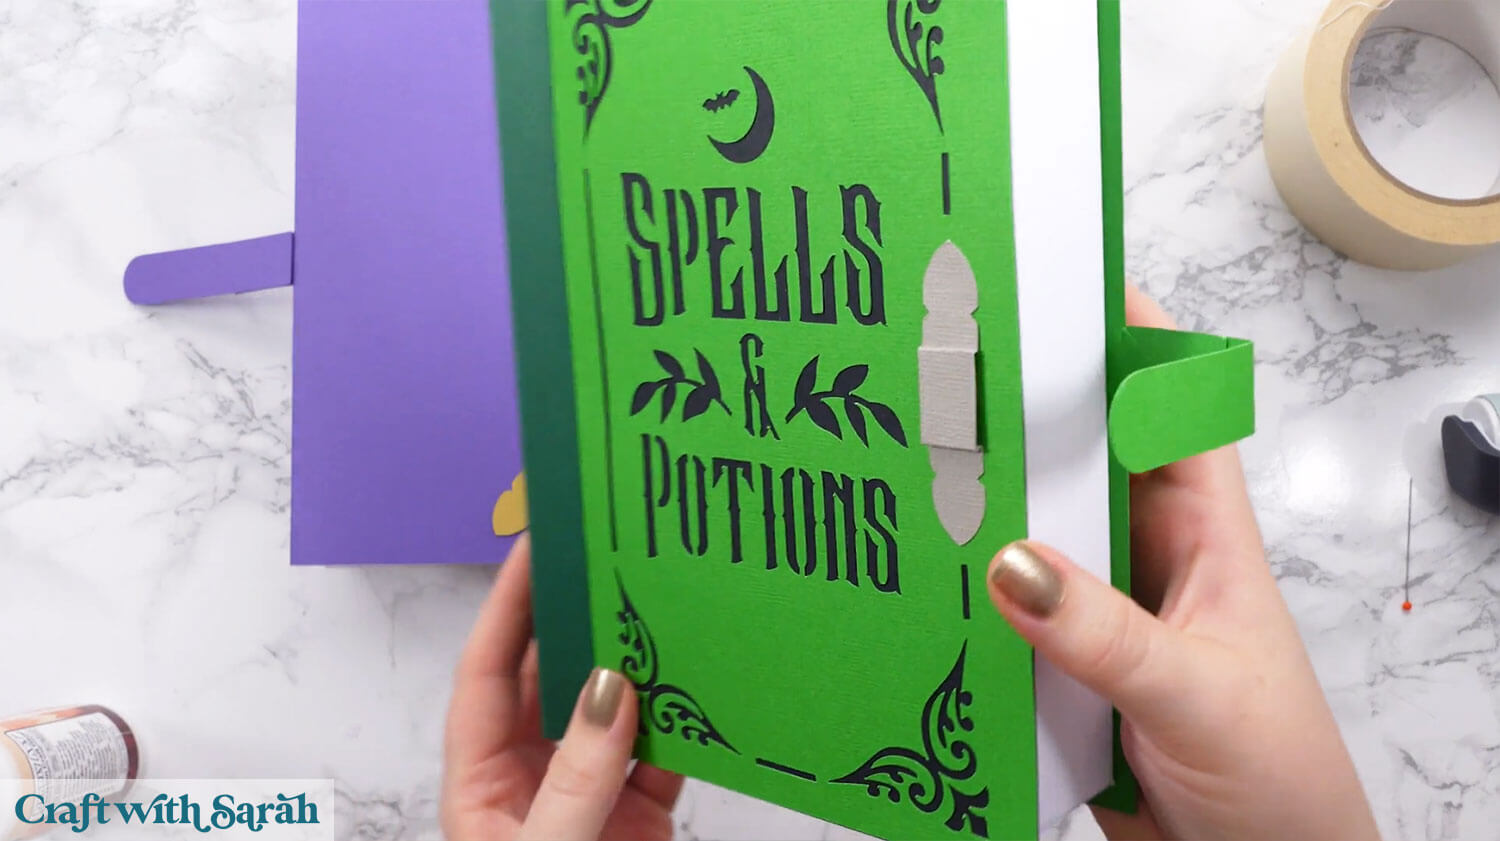
This was very hard to show on camera as the piece is so small, but essentially you are trying to “concertina” against the double score lines on the left and right, to form the bridge.
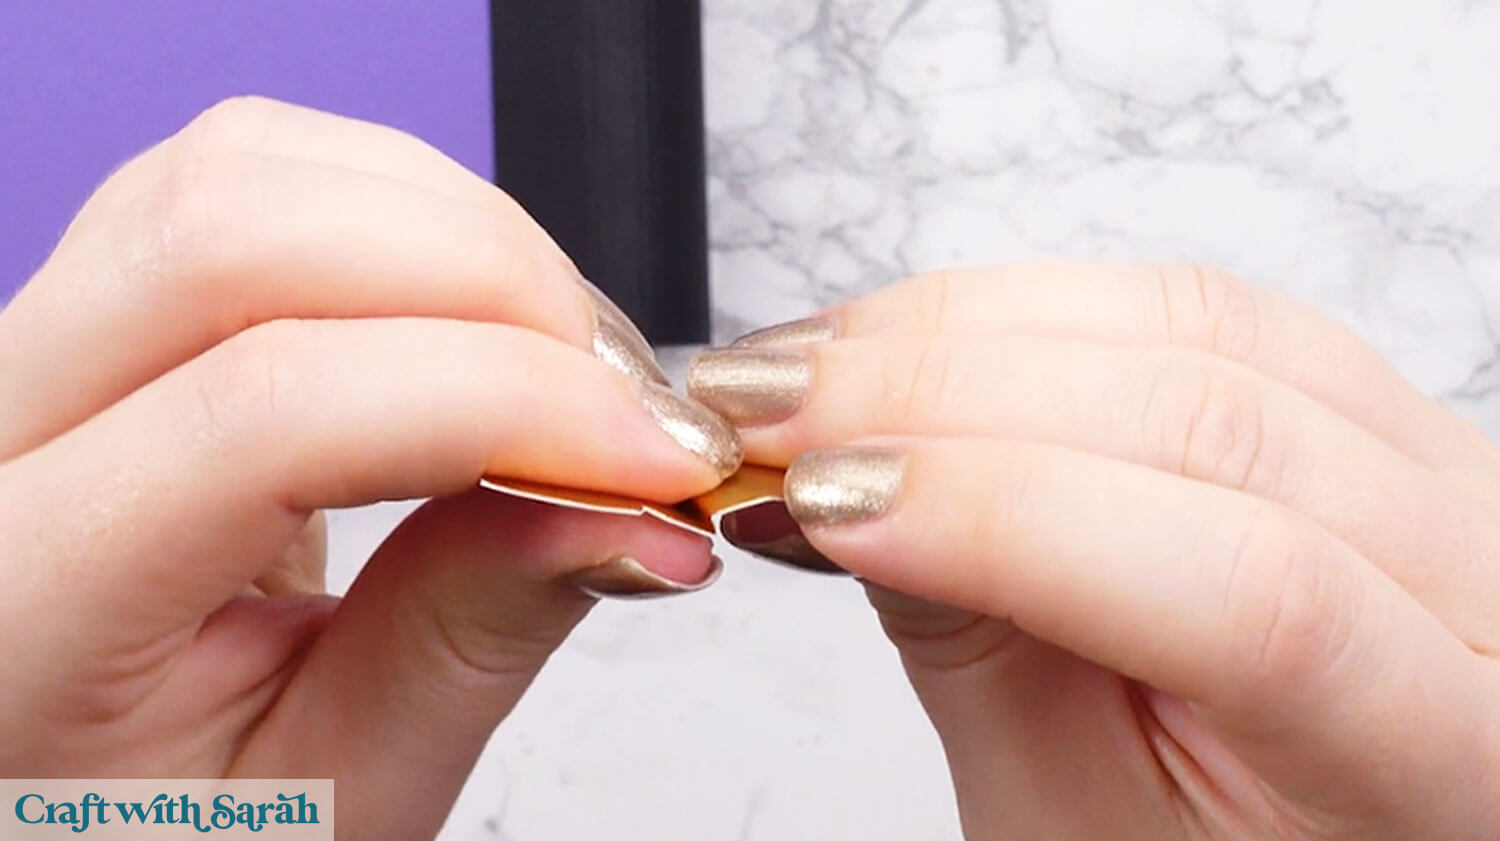
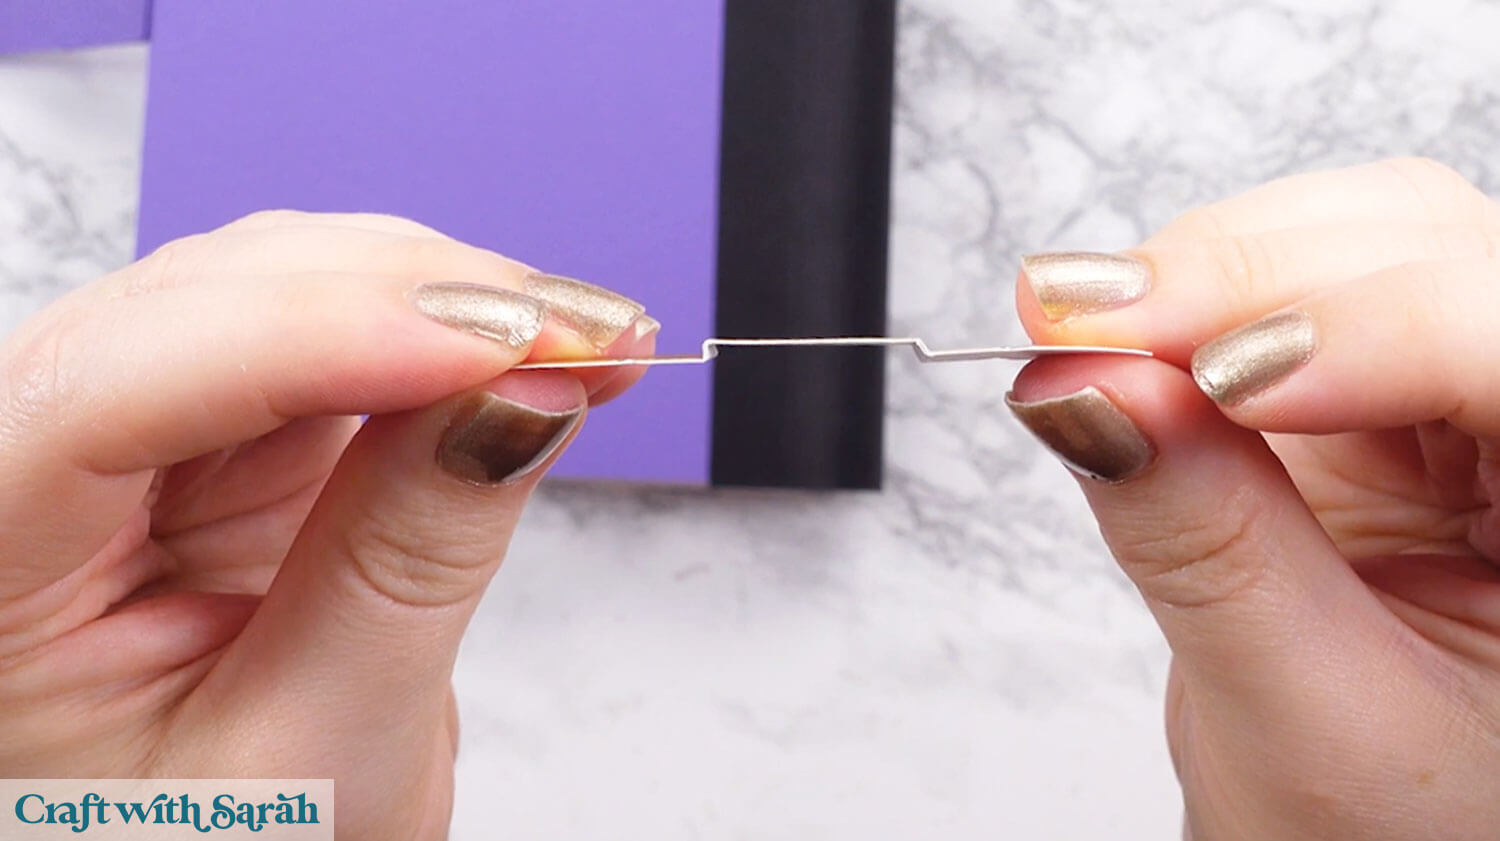
Hold the belt in place along the front so that you know exactly where it is going to go.
Glue the buckle on top, so that the belt sits inside the bridge shape.
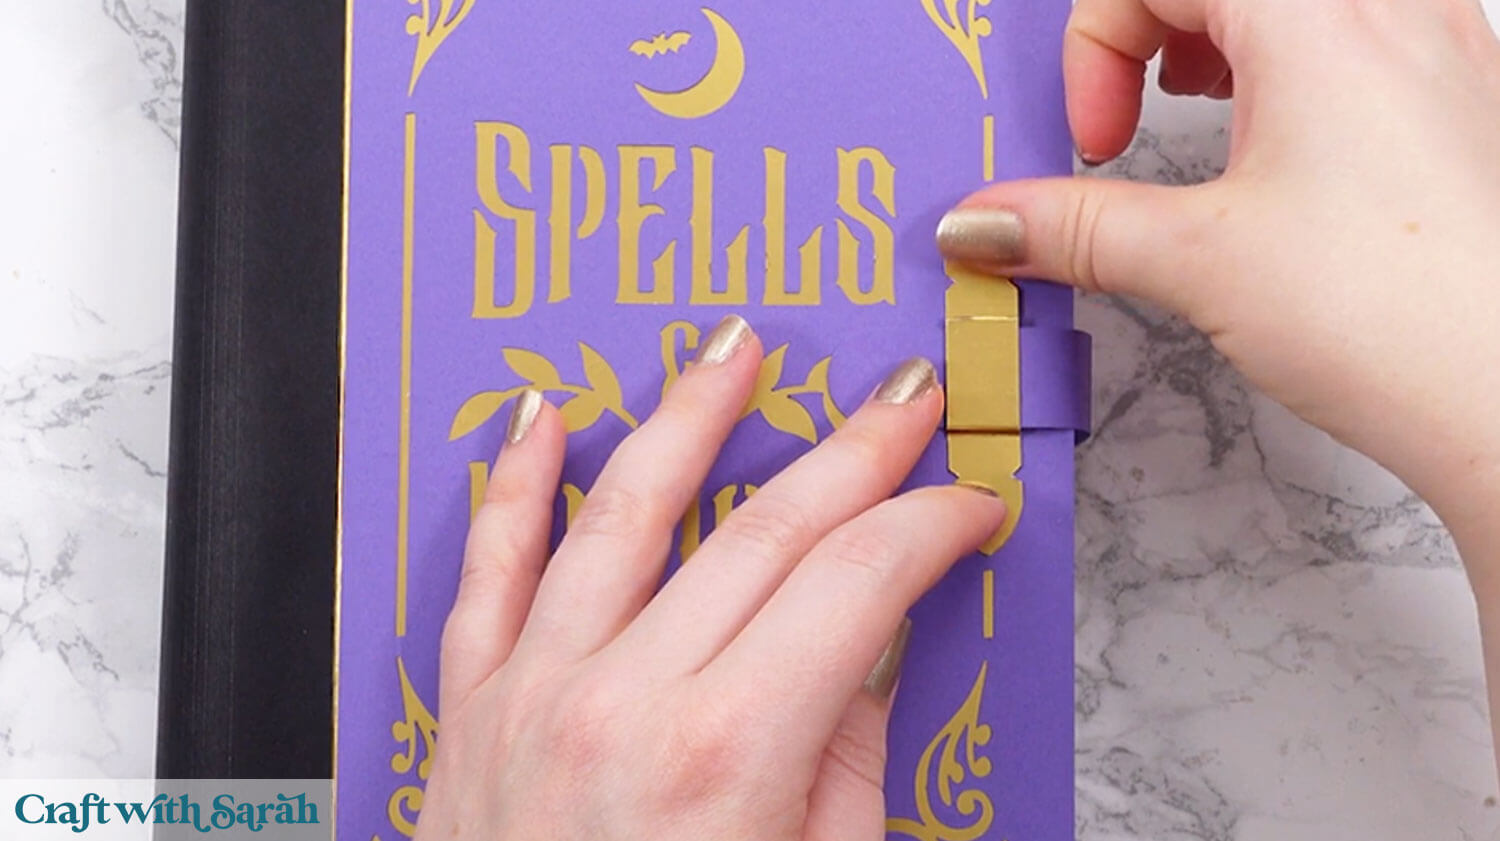
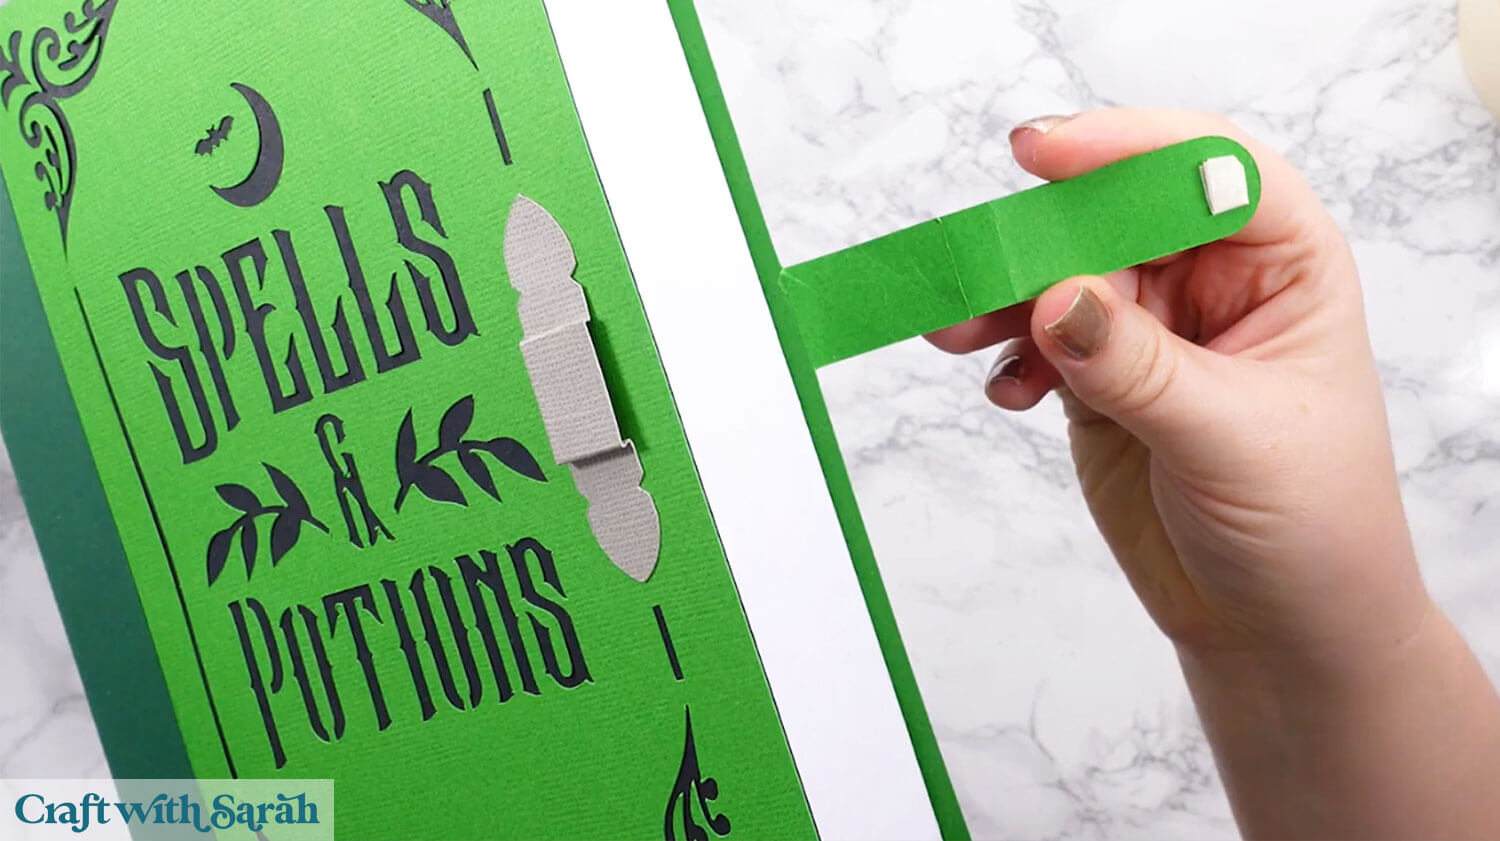
If your belt isn’t staying in place, use some masking tape, foam square, double-sided tape, velcro or other temporary adhesive to help.
Gothic Inspired Halloween Spell Books
Once assembled, your potion book box becomes more than just a decorative piece — it’s a functional Halloween box that can hold treats, notes, or small surprises.
The belt-style closure and detailed spellbook cover give it a stunning finish that feels complete from every angle.
It’s a project that’s satisfying to make and even better to show off or share.
Whether you use it as part of a Halloween display, a creative gift box, or simply as a fun way to store your crafting supplies, this magic spell book adds something special to your spooky craft projects.
Happy crafting,
Sarah x

