Slide Open Gift Card Holder 🌟 CCC 2025
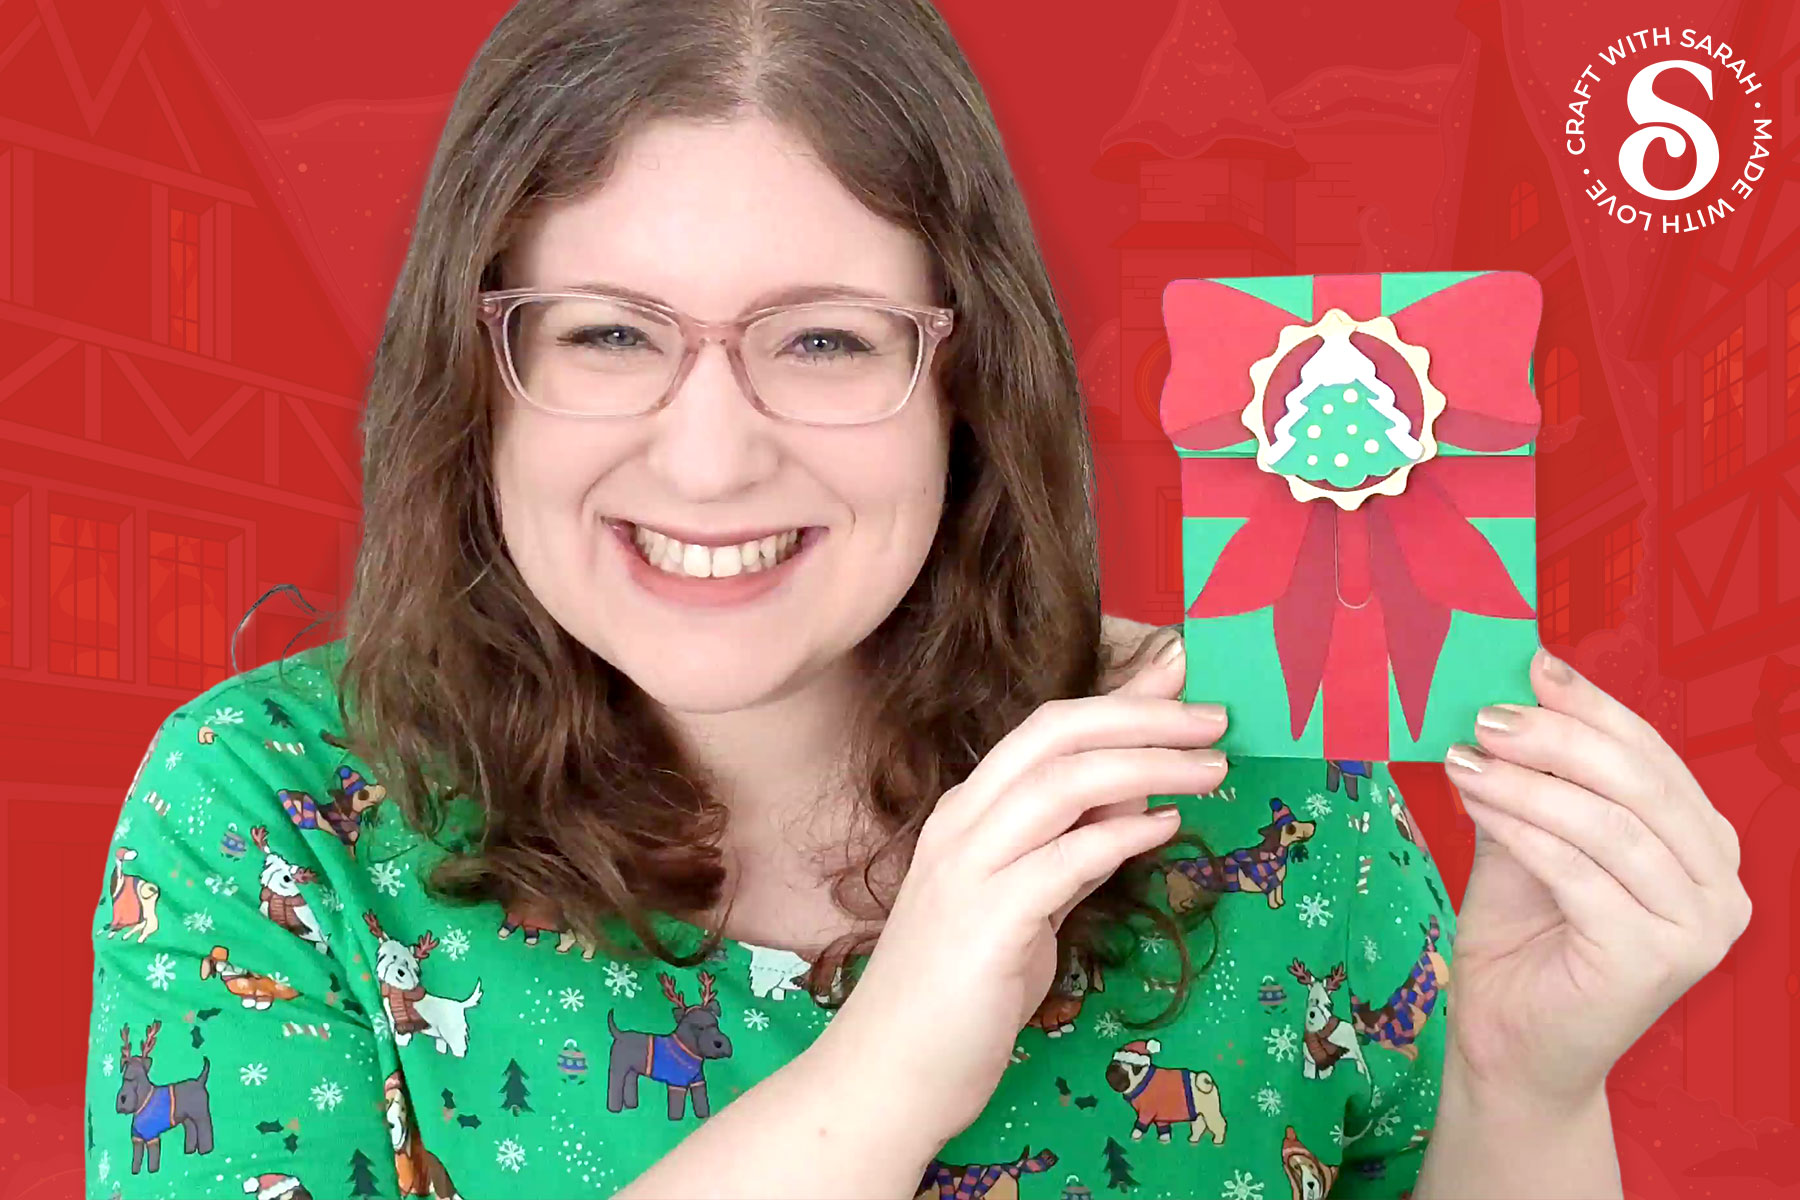
It isn’t quite a greetings card, and it isn’t quite a gift card holder – it’s a little bit of both!
I wanted to create another greetings card for today’s project, so I started looking back at some older designs for inspiration.
That’s when I came across my penny slider cards, originally designed back in 2021 (which seems like such a long time ago now!).
These cards allowed a picture to move along the front, following the shape of the template.
I thought it would be fun to combine the penny slider element with a gift card holder, to create something interactive.
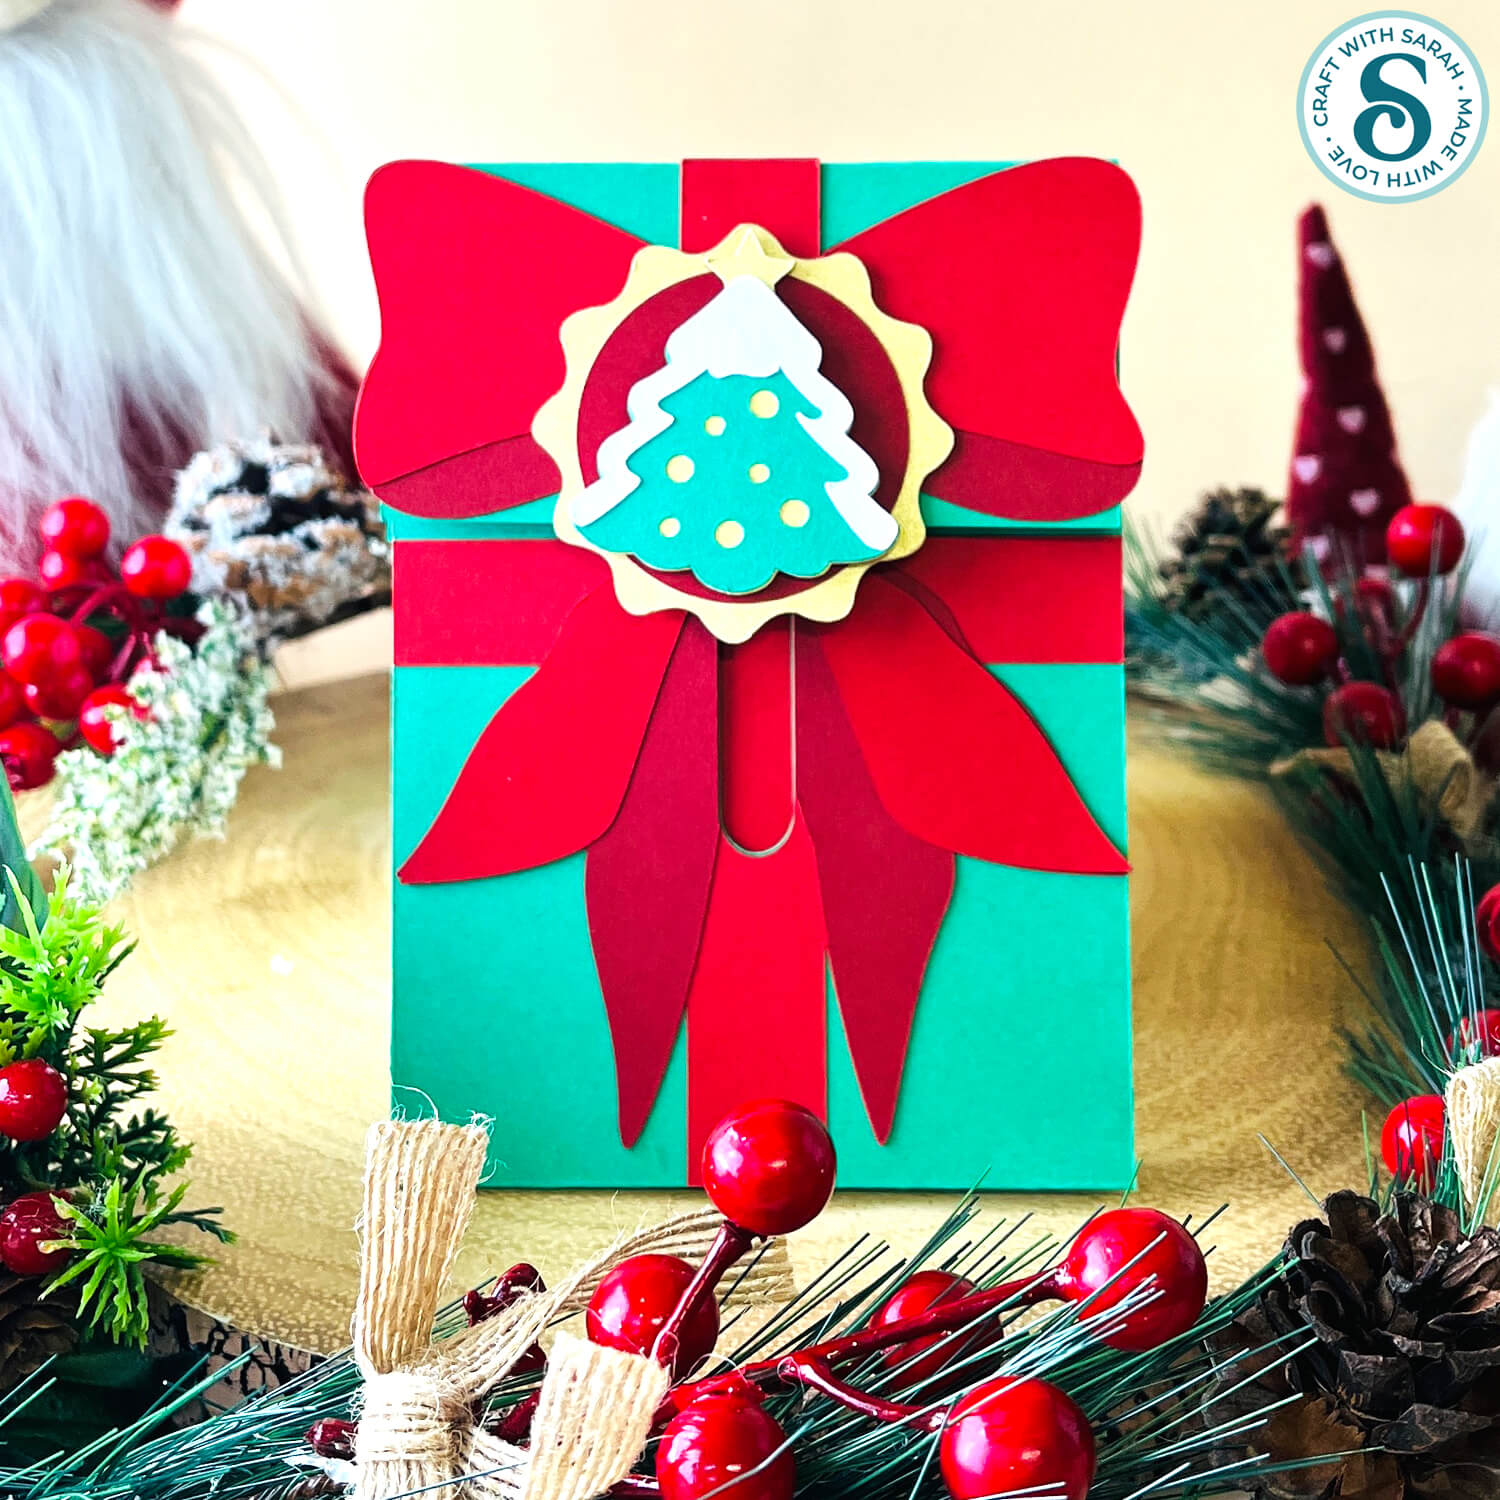
At first glance, it looks like a beautiful Christmas greetings card. It opens up just like a normal card, with a festive design on the front – but it’s hiding a little secret.
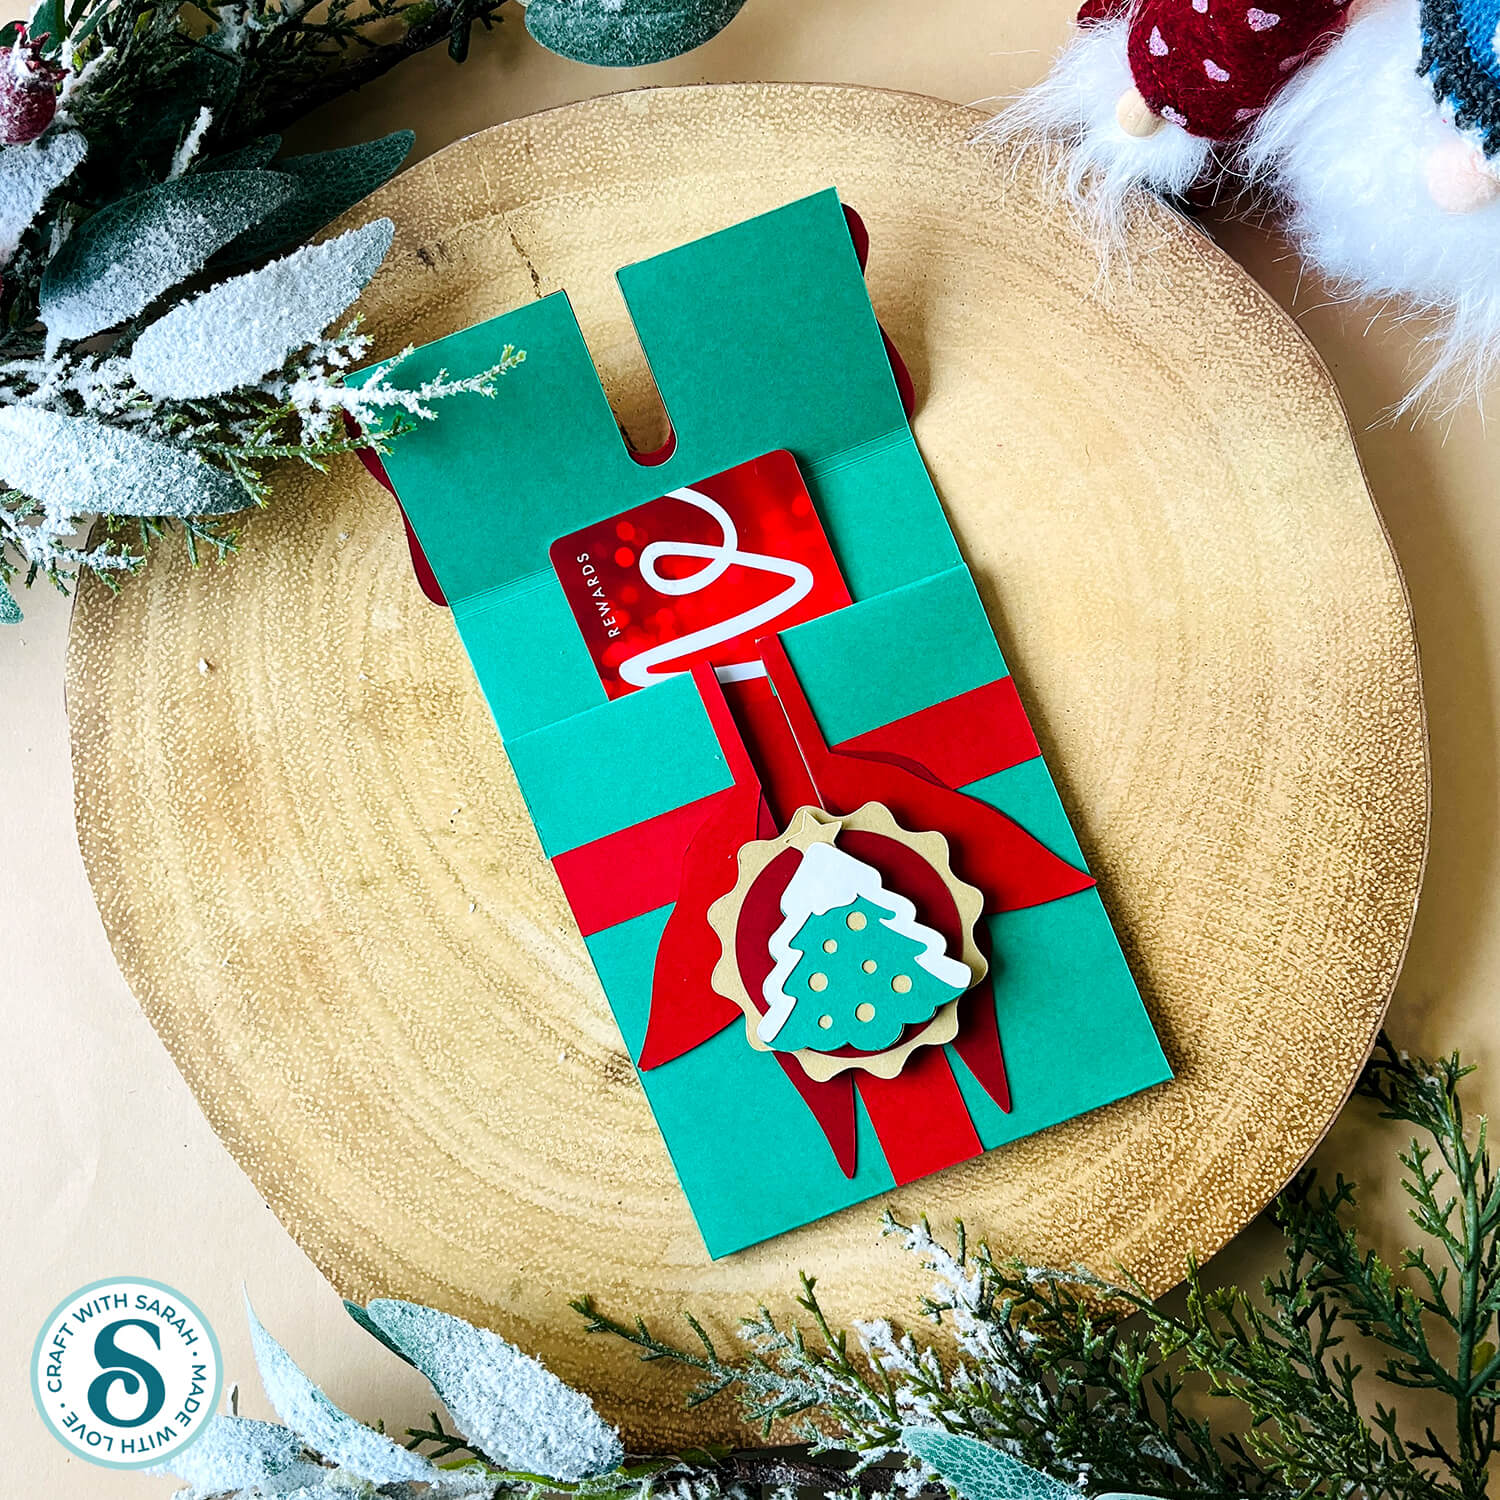
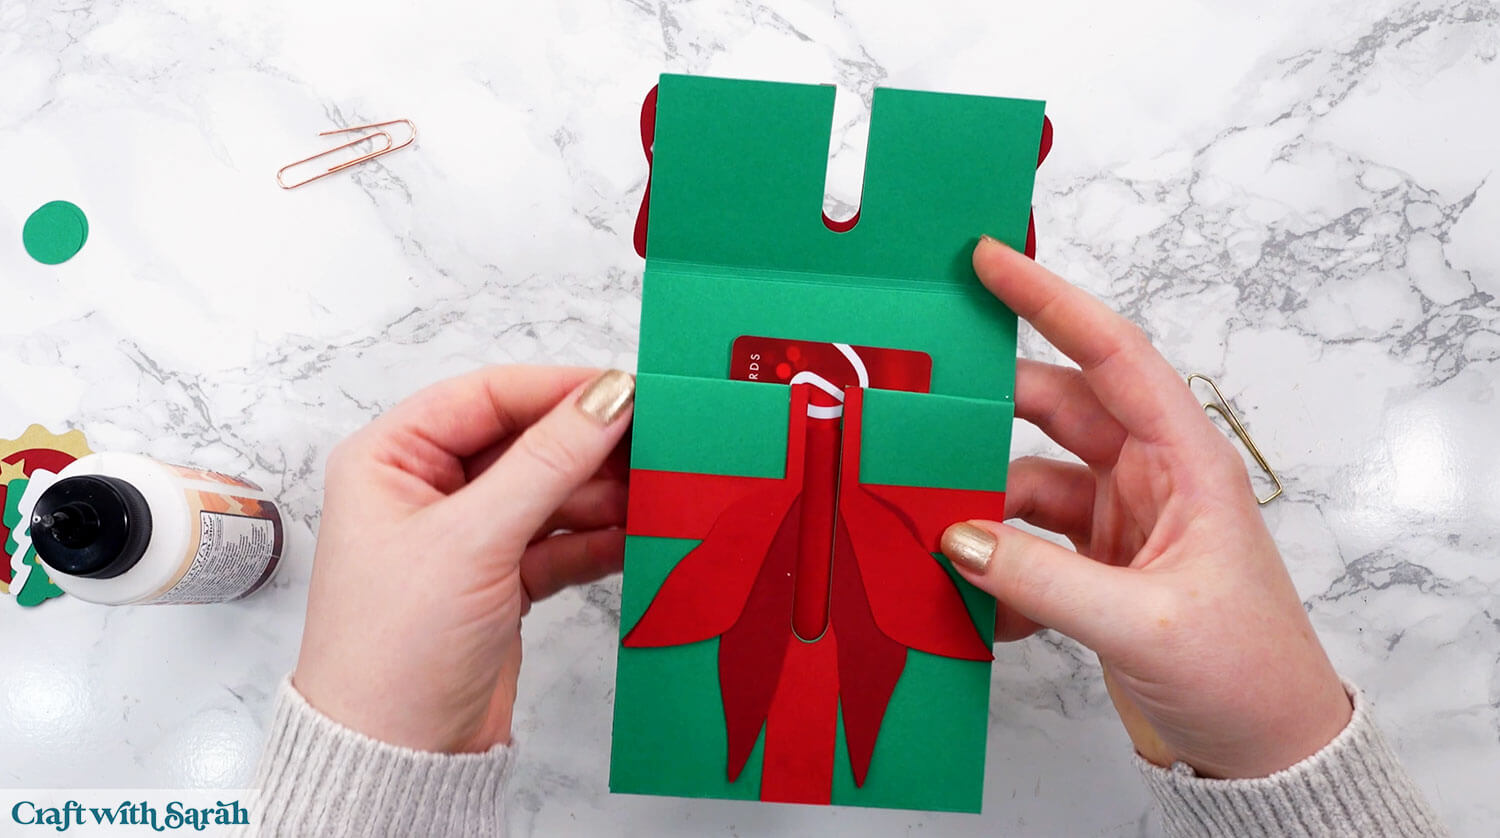
On the front, you’ll notice a badge. When this badge is pulled down, the top section opens to reveal a hidden compartment that holds a gift card! You can slide the gift card in and out easily, and it fits snugly so it won’t fall down too far.
It’s perfect for tucking in a gift card, a lottery ticket, or even a scratch card.
Once you’ve inserted the card, fold the top over again, slide the picture back into place, and it’s completely hidden.
It’s a surprise, a bit of mystery, and best of all – it’s quick and easy to make.
This project is part of the 2025 Christmas Craft Countdown.
Materials list for gift card slider
Here is a list of the materials that I used to make this project.
Please note that some of the links included in this article are affiliate links, which means that if you click through and make a purchase I may receive a commission (at no additional cost to you). You can read my full disclosure at the bottom of the page.
- Cricut machine
- Light blue Cricut cutting mat
- Scoring wheel or scoring stylus (don’t have one? Try these tips)
- Coloured Card (any thickness)
- Glue (I like Bearly Art Glue and Collall)
- Foam squares
This project is suitable for the following types of Cricut machines: Explore series, Maker series and Joy Xtra. It is too large to cut on the Cricut Joy.
Foundation learning
If you're new to making papercrafts with your cutting machine, check out these links to get you started.
They include videos on topics such as: which file to use with your type of cutting machine, how to load the files into your cutting machine's software, how to cut cardstock with your type of cutting machine, how to recolor and modify/customize the cut files and tips for displaying your projects.
The following tutorials are Cricut-specific, but many of the ideas will work similarly with a Silhouette or ScanNCut machine and any cut files that are shared in them are compatible with all types of cutting machine.
- How to score with a Cricut (even without scoring tools)
- Print then cut tutorial
- Design Space tools (Combine, Attach, Slice, Weld, Flatten, etc.)
- Pattern fill tutorial (for making backgrounds & cutting images to a specific shape/size)
- Free envelope SVGs that can be sized to fit any card
- Presentation boxes for handmade cards
- How to write inside cards with Cricut pens
- How to cut layered designs at a small size
- Design Space tips & tricks
- Cricut pens tutorial
- How to mount multiple designs in the same frame with magic guides
DIY gift card holder video tutorial
Watch the video below to see how to make this project. Keep scrolling for a written tutorial.
Written tutorial (with photos!)
Here’s how to make an interactive gift card holder using a Cricut machine.
Step 1) Download the cutting files & upload to Design Space
Get the files using the box below.
Purchase the File(s)
This cut file is available as part of the Instant Access Bundle.
Or, purchase this design individually here
Before you upload the SVGs to Design Space, you need to unzip the download folder that they come in.
- How to unzip a folder on Windows computer
- How to unzip a folder on a Mac
- How to unzip a folder on an iPad/iPhone
- How to unzip a folder on an Android device
After unzipping, upload the SVG file(s) into your cutting machine software.
Not sure how to use cut files with your type of machine? The following links lead to videos on how to open cut files in:
- Cricut Design Space
- Silhouette Studio
- CanvasWorkspace (for ScanNCut machines)
The download folder also contains printable PDF versions of the templates for hand cutting.
If you are using Cricut Design Space, start a new project and then click the “Upload” button on the left of the screen.
You can then either click “Browse” to find the file on your computer, or drag-and-drop it.
Upload the file in the “01 Cricut Version” subfolder called svg-01-gift-card-slider-craftwithsarah.svg
Press “Upload” on the next screen.
After uploading, the design should be automatically inserted onto your Canvas.
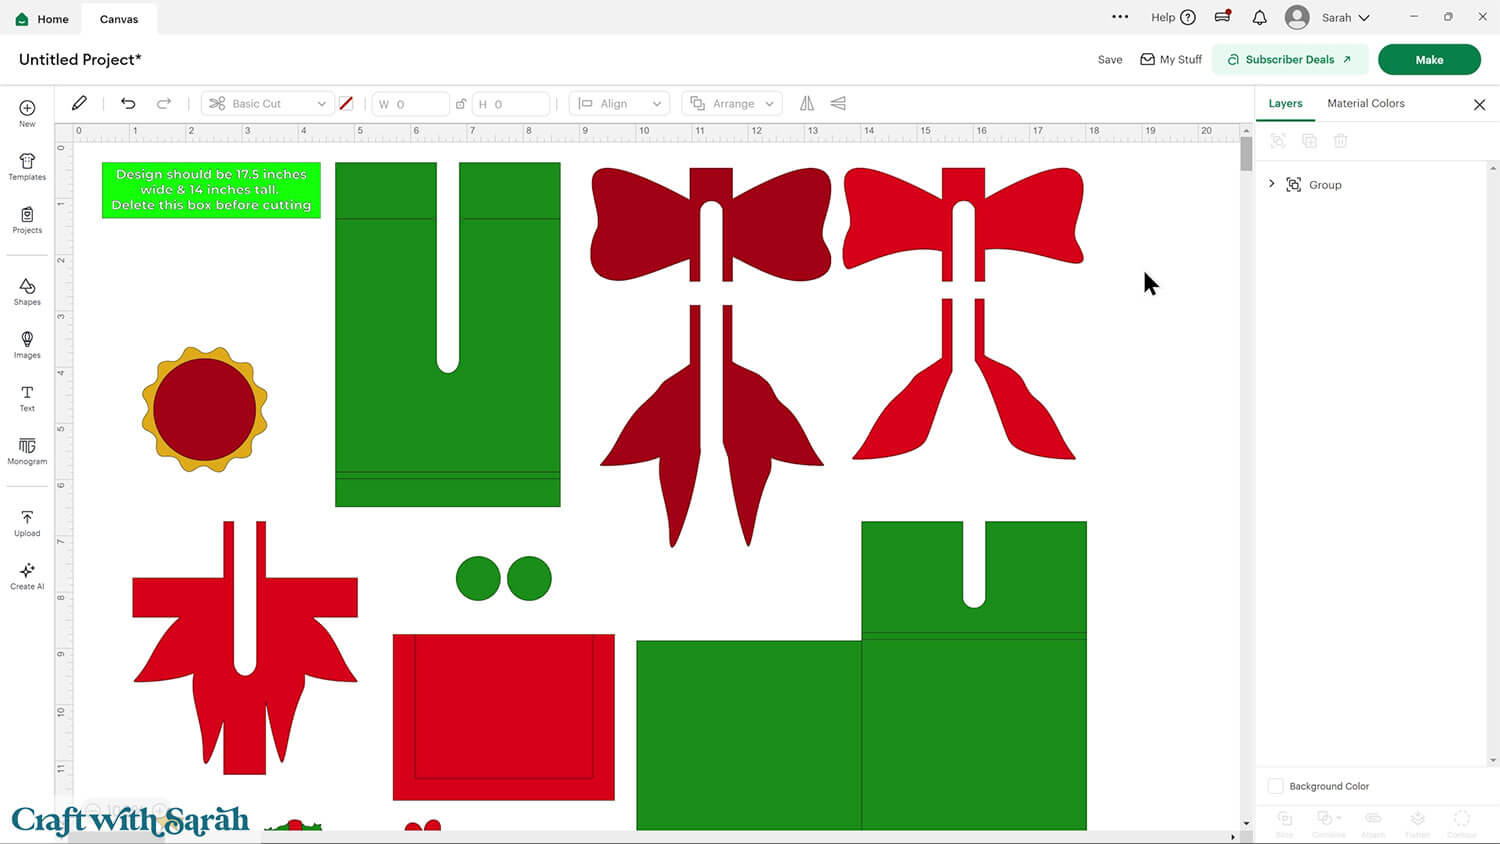
To hide the left sidebar (to give you more space for designing!), click the arrow that’s about half way down the page.
If the design doesn’t get inserted onto your Canvas, it will show under “Uploads” in your “Recently Uploaded Images”. Click on it and then press “Add to Canvas” to put it onto your Project.
The design should load in at 17.5 inches wide and 14 inches tall. If yours is different, change it to those measurements.
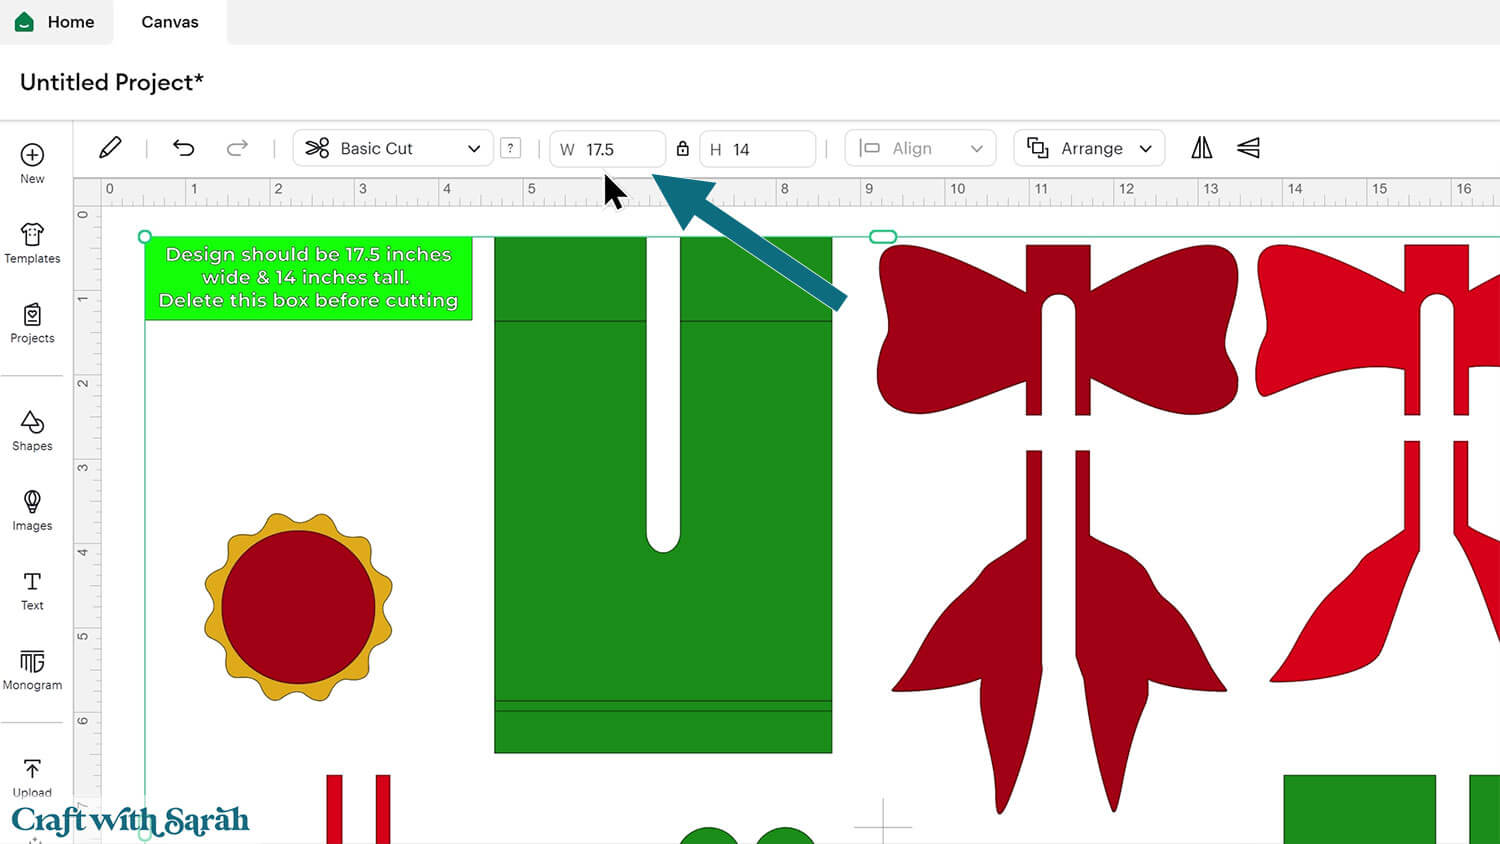
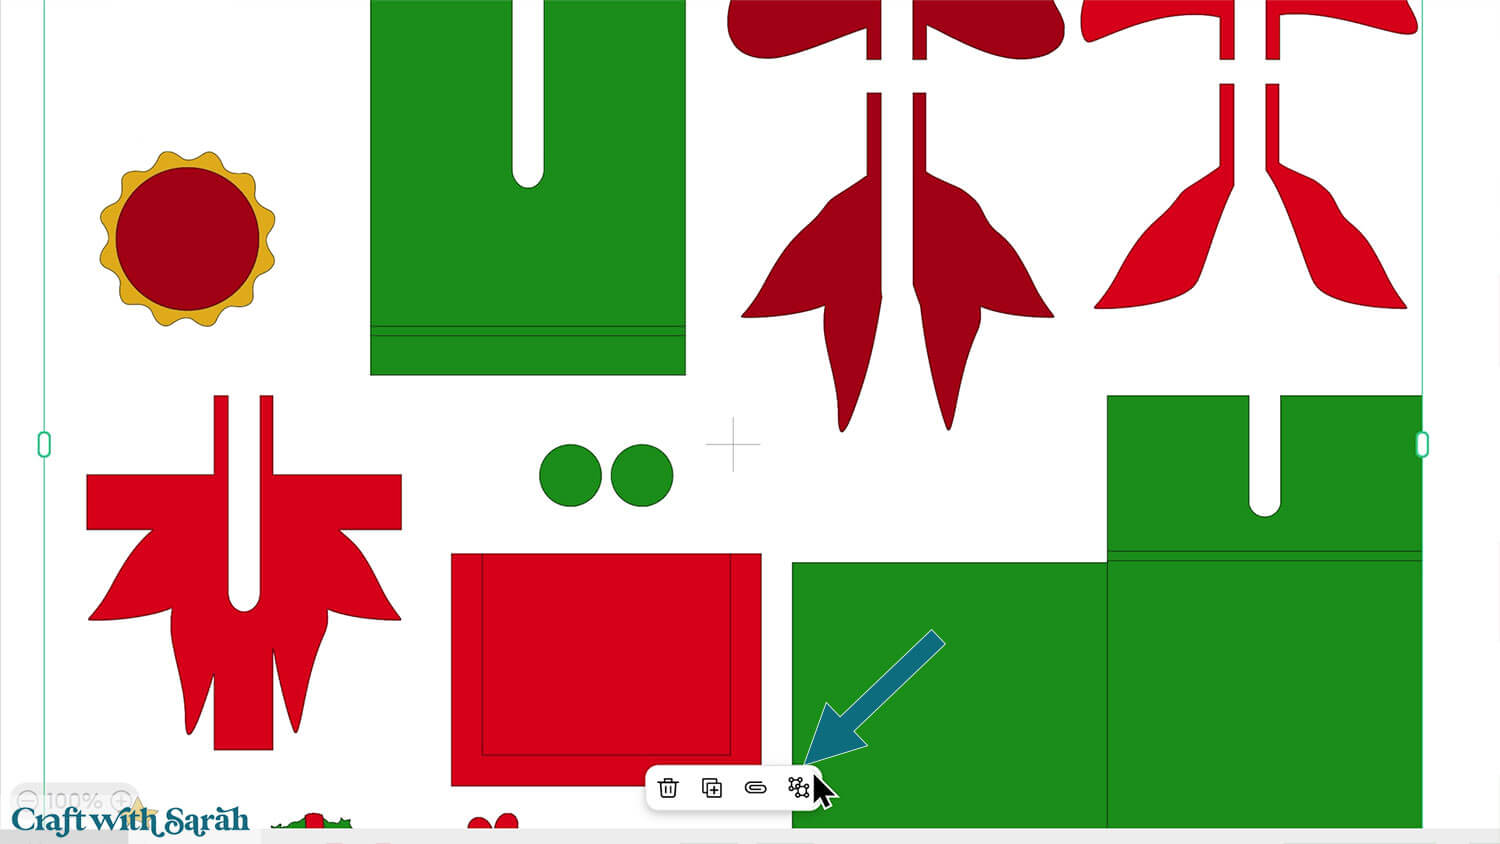
After checking the size is correct, click the design and press “Ungroup”, which is located at the top of the layers panel and in the floating bar along the bottom of the screen.
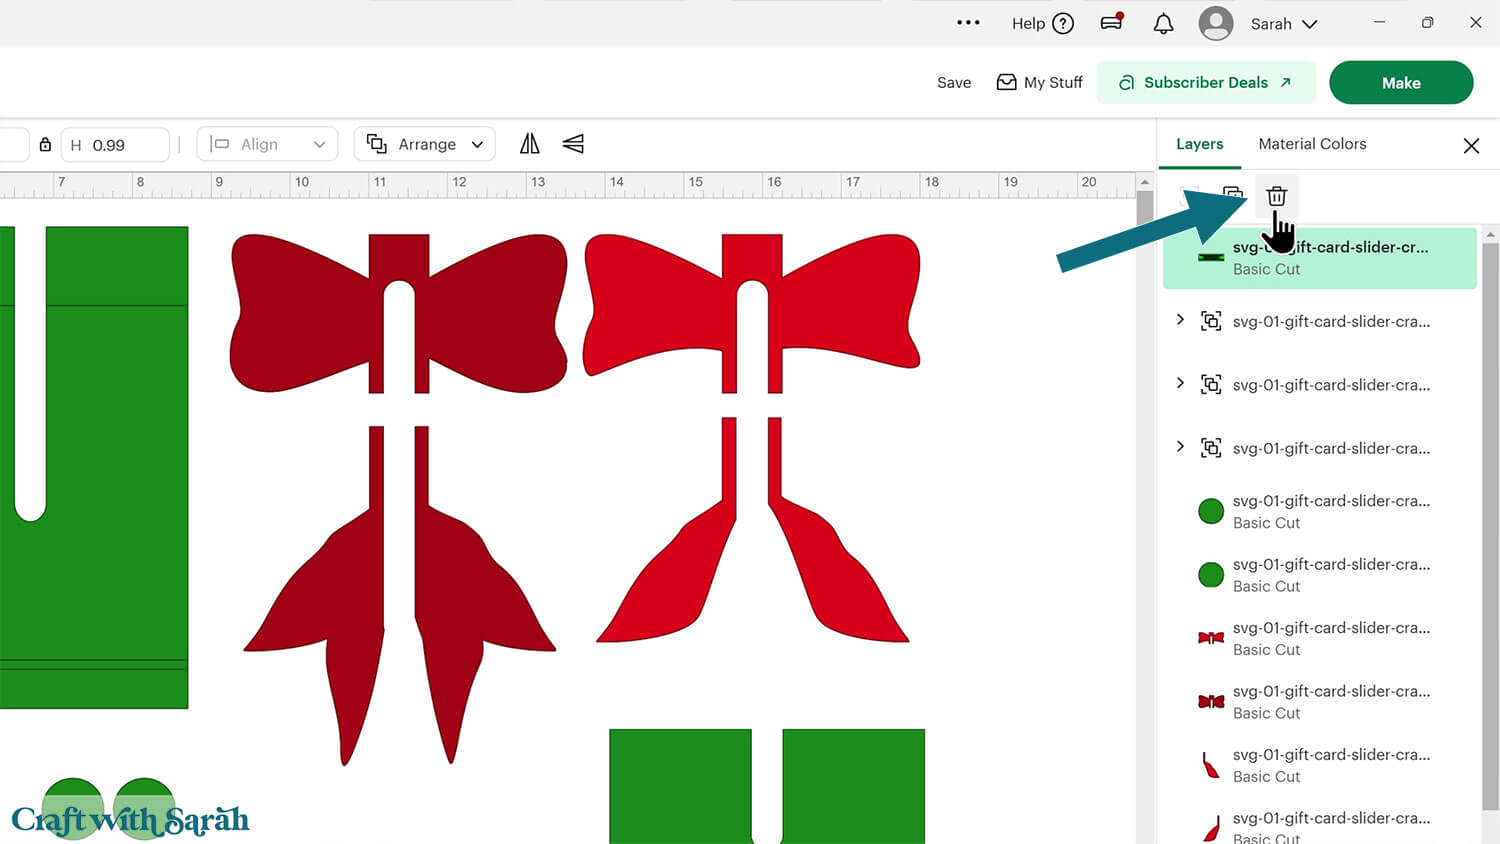
Click the green rectangle layer with the sizing information and delete it.
Step 2) Format the score lines
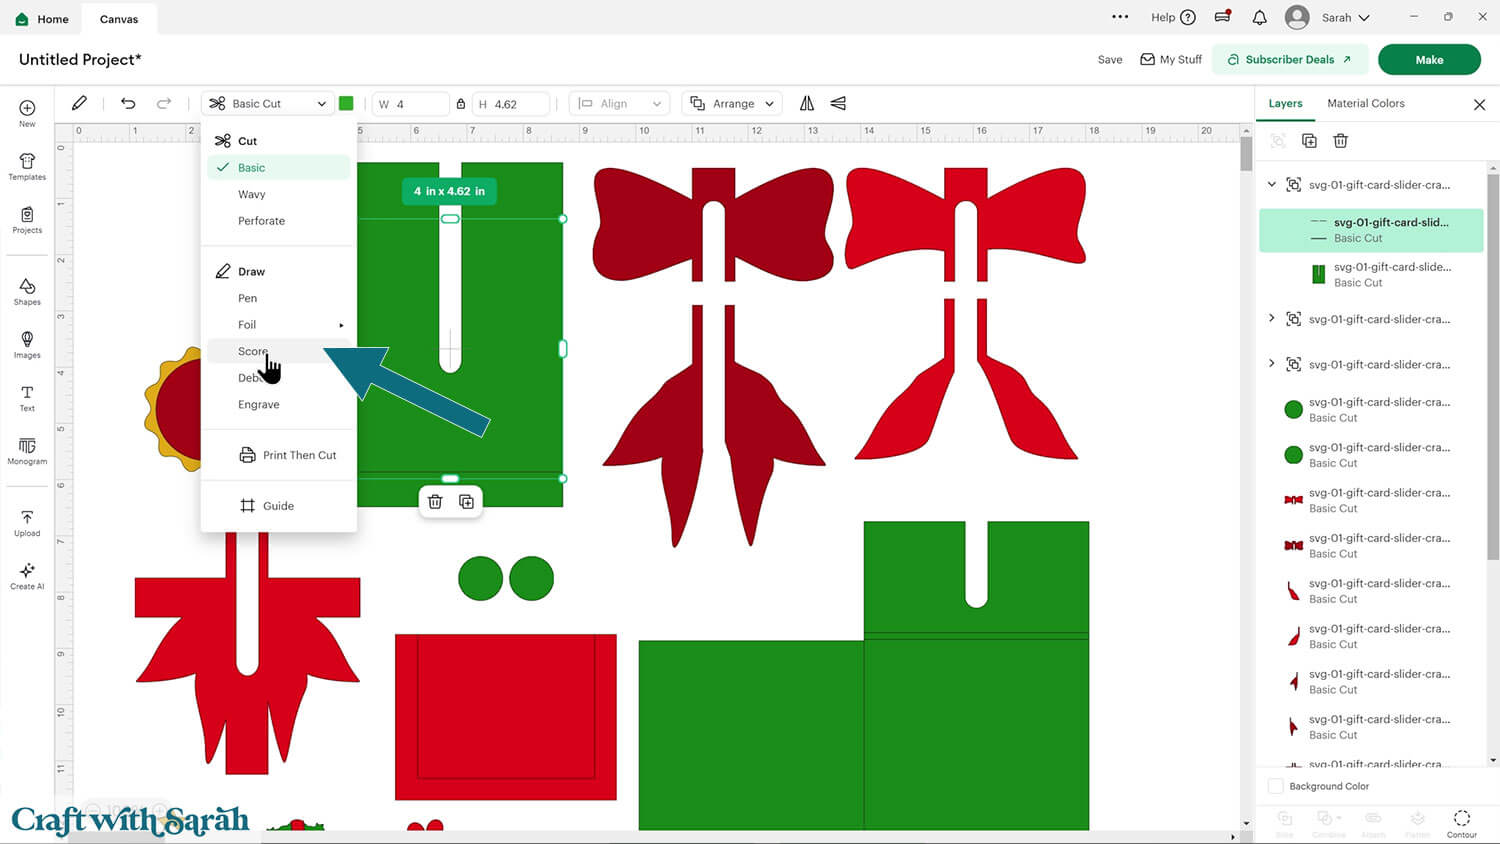
You need to format the score lines of the design to tell the Cricut to score them instead of cutting them.
Look down the layers panel, starting at the top, until you come to the first subgroup.
You know when you have arrived at one because there is a chevron arrow next to the group name.
Click the arrow to open up the subgroup to see the layers inside.
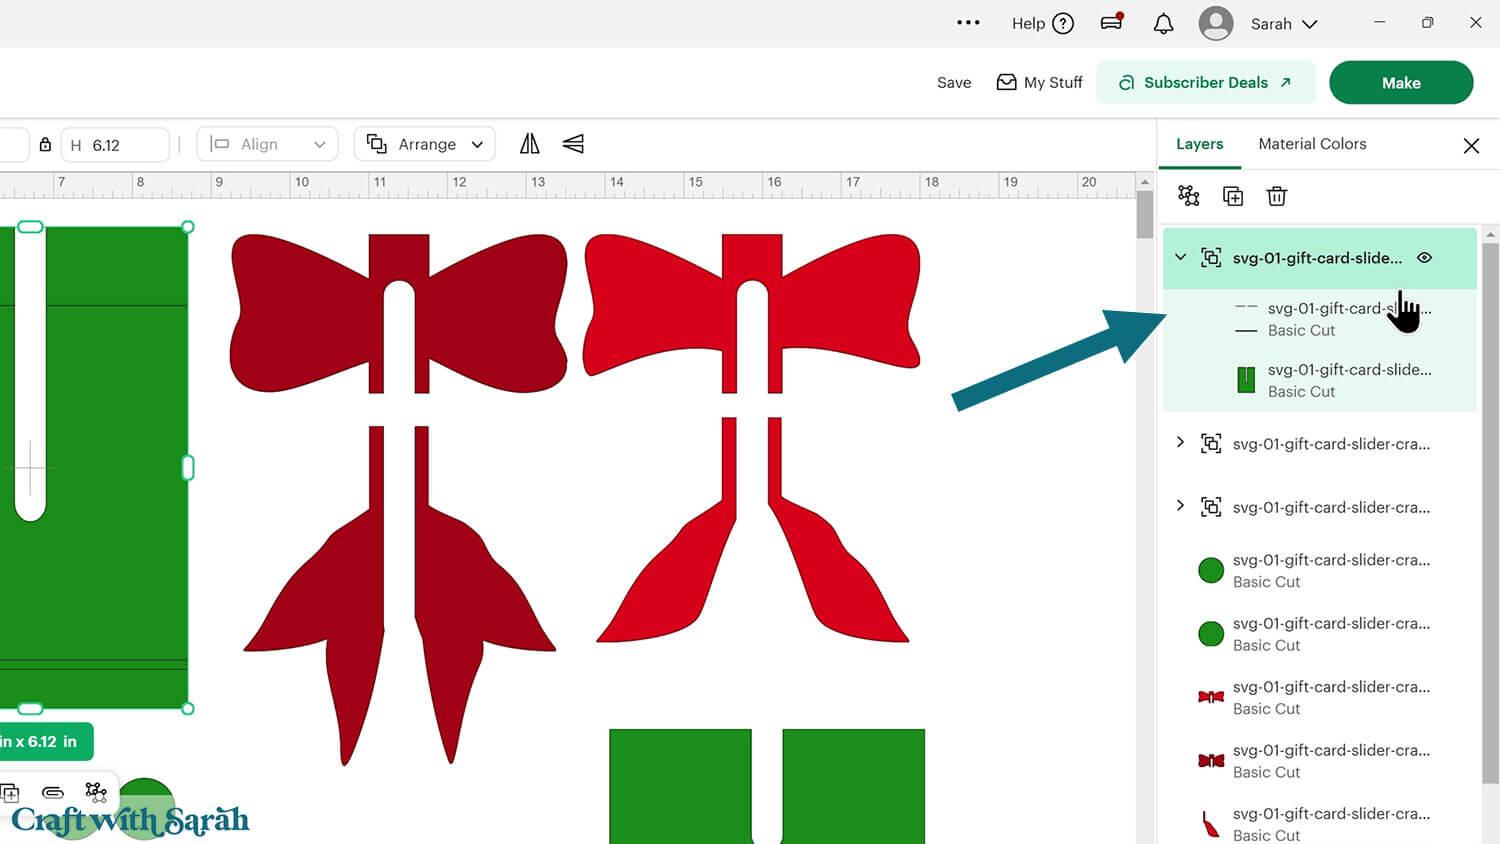
Click on the top layer within that subgroup. Depending on which subgroup you have opened, it will look like either one, or several, black lines in varying directions.
Change that layer to “Score” in the Operations dropdown.
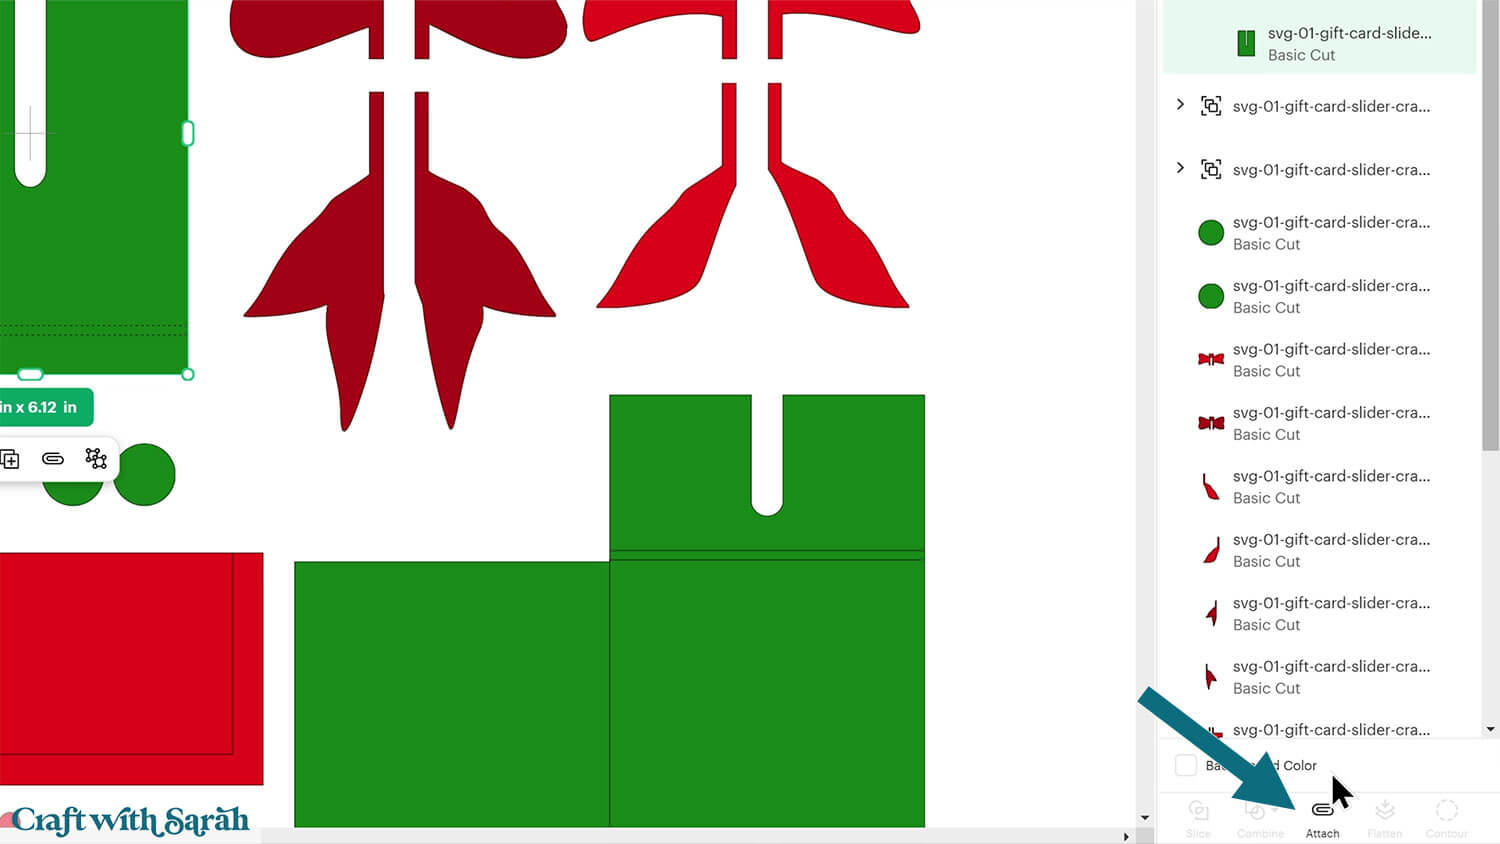
Click the subgroup name to select that whole subgroup (i.e the new score line and the blue piece underneath).
With both layers selected, click “Attach” (the paperclip icon). Attach is what tells the Cricut to do the scoring on that underlying shape.
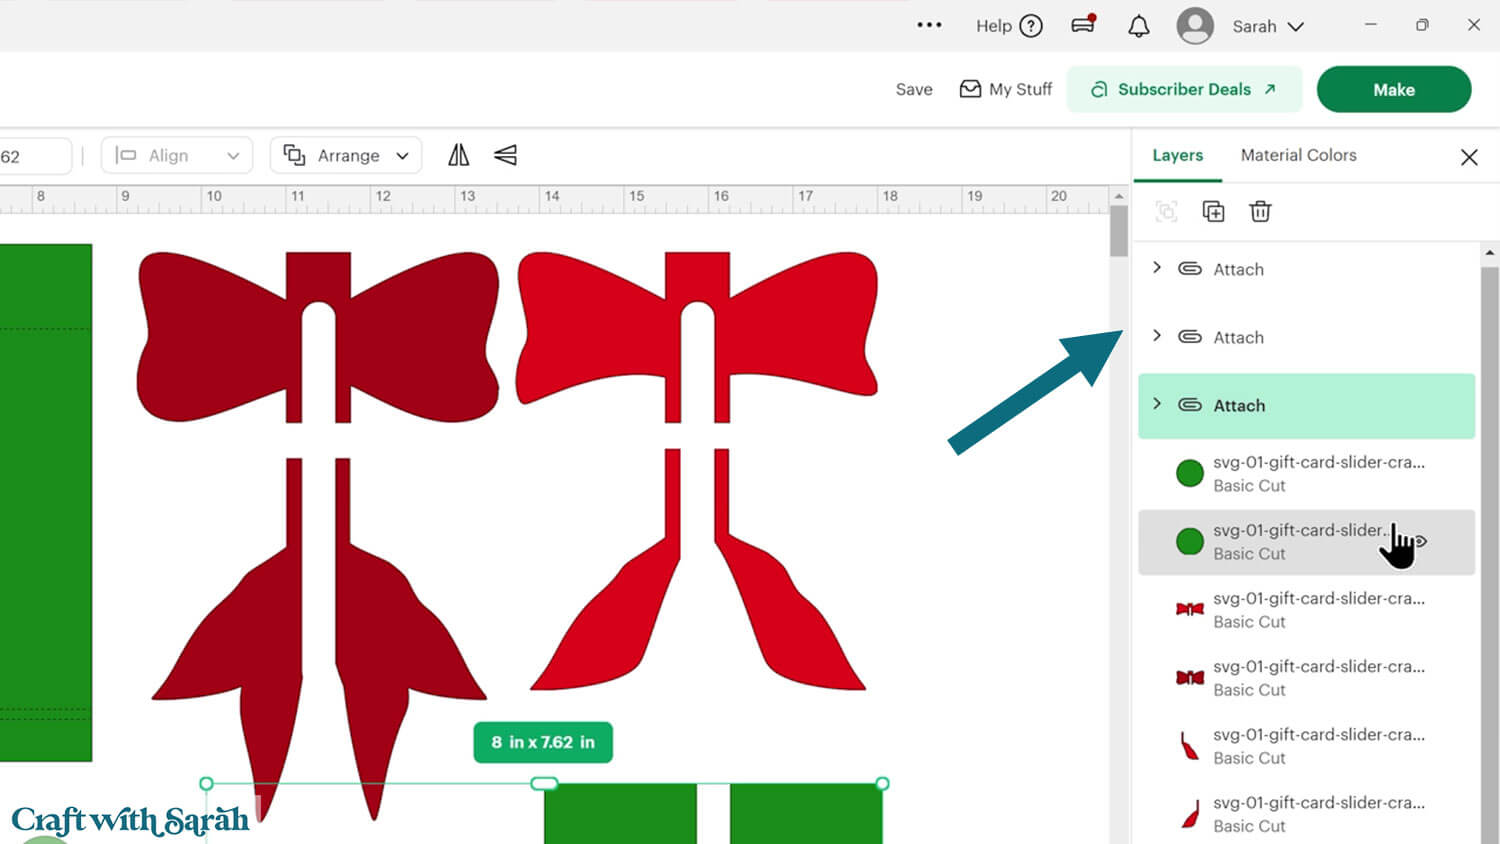
Continue working through the subgroups, formatting the score lines as needed.
There are three in total.
Step 3) Cut out all the pieces
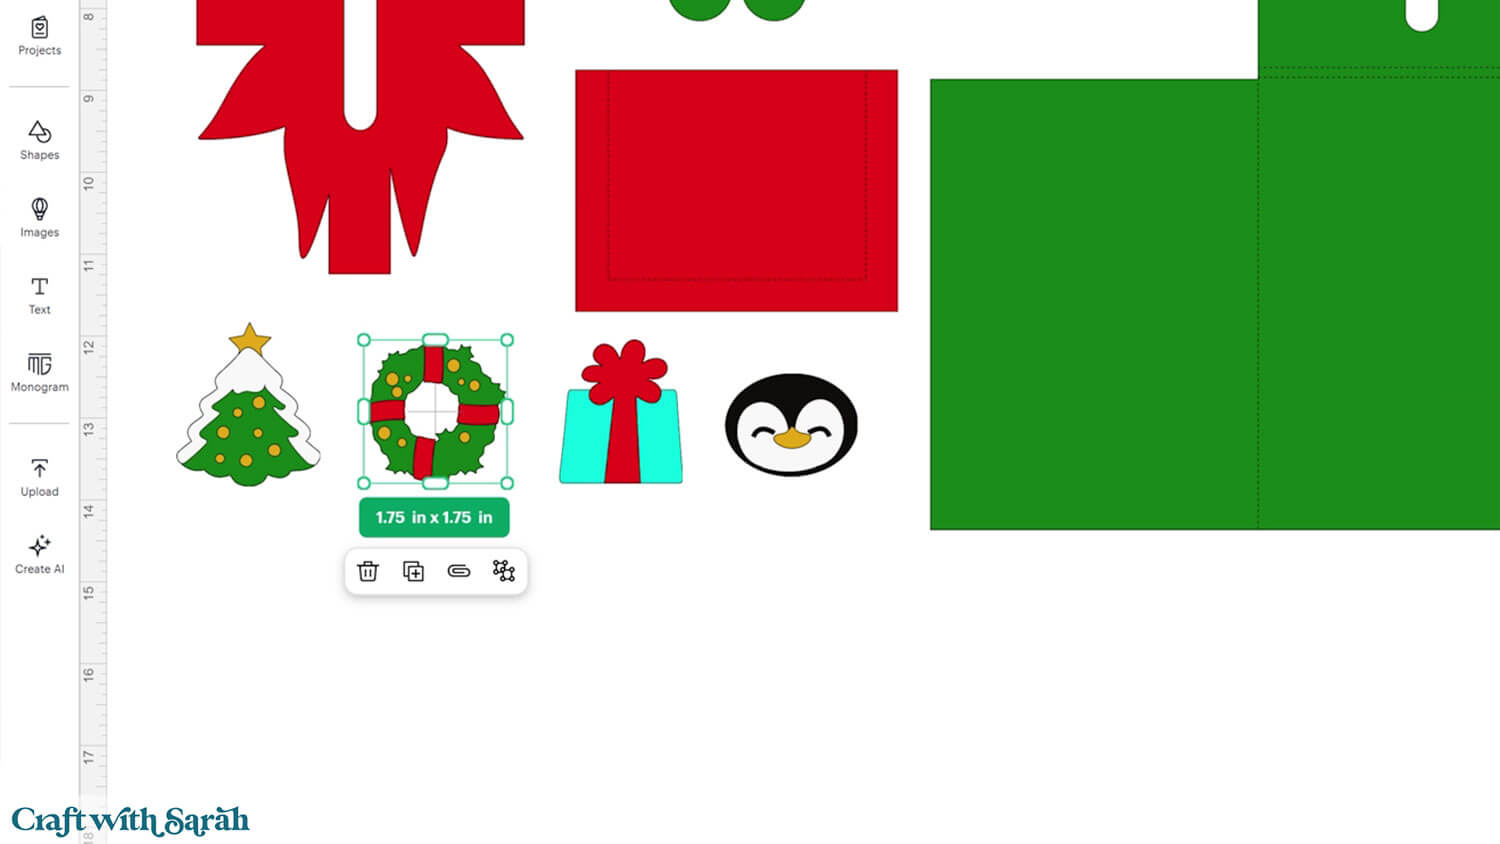
The design includes four optional badge pictures for the front of the slider. Choose your favorite and delete the others. You can even use your own picture if you prefer!
When you’re happy with how the project is looking in Design Space, click “Make” and follow the instructions on-screen to cut out all the pieces.
To change the paper size, go into the dropdowns over on the left side of the screen and choose the paper size that you want to use. You need to change it for every single colour.
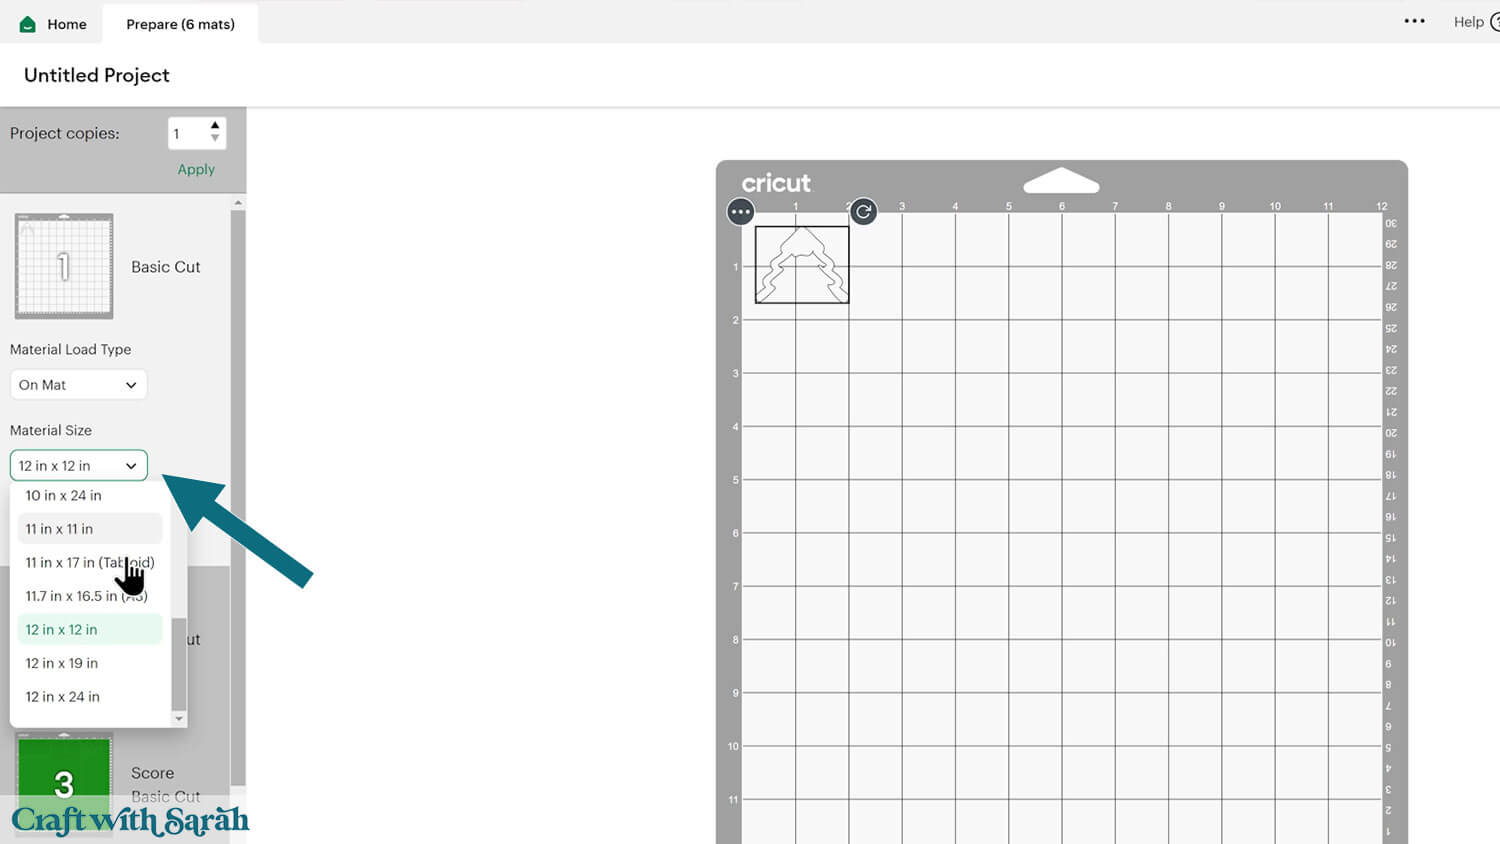
To save space on your cardstock, you can move things around by clicking and dragging. Make sure when you’re moving things about that nothing overlaps because otherwise, it won’t cut out properly.
TIP: New to using cardstock with your cutting machine? Check out these machine help guides for Cricut, Silhouette and ScanNCut that go through every step of the process, including tips for getting the best quality cuts from your machine.
Step 4) Stick the gift card holder together
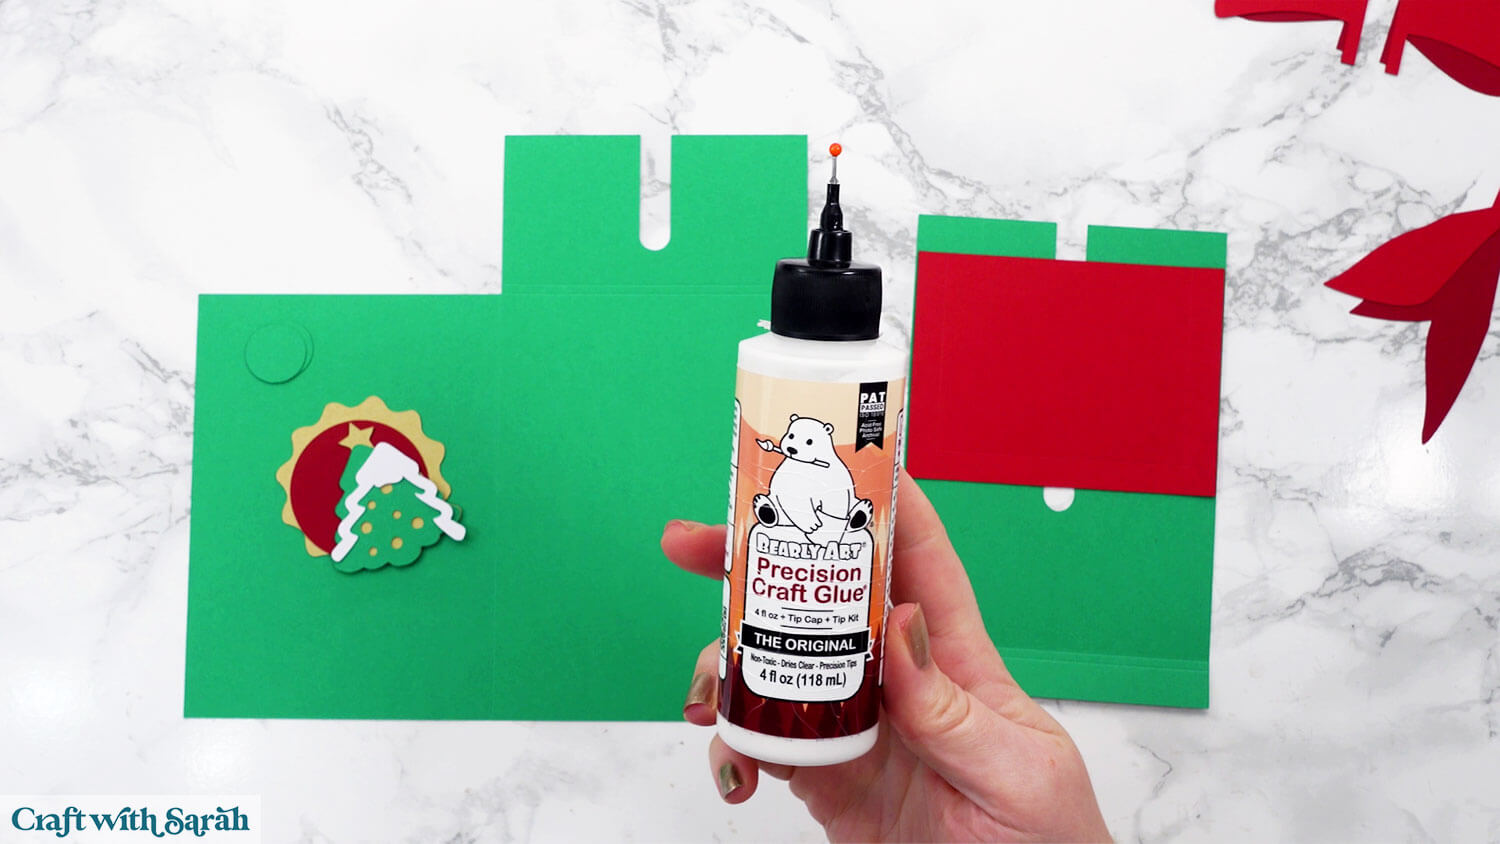
My favourite glues to use on papercraft projects are Bearly Art Glue and Collall All Purpose Glue.
These are great because they don’t “warp” or bend the cardstock like some glues do. You can use as much of it as you want and the card stays perfect – and it dries perfectly clear too!
Bearly Art Glue comes with a tiny nozzle to make it easy to apply glue to small areas of card. The Collall glue doesn’t come with this, so it’s easiest to decant it into needle tip applicator bottles so that you have more control.
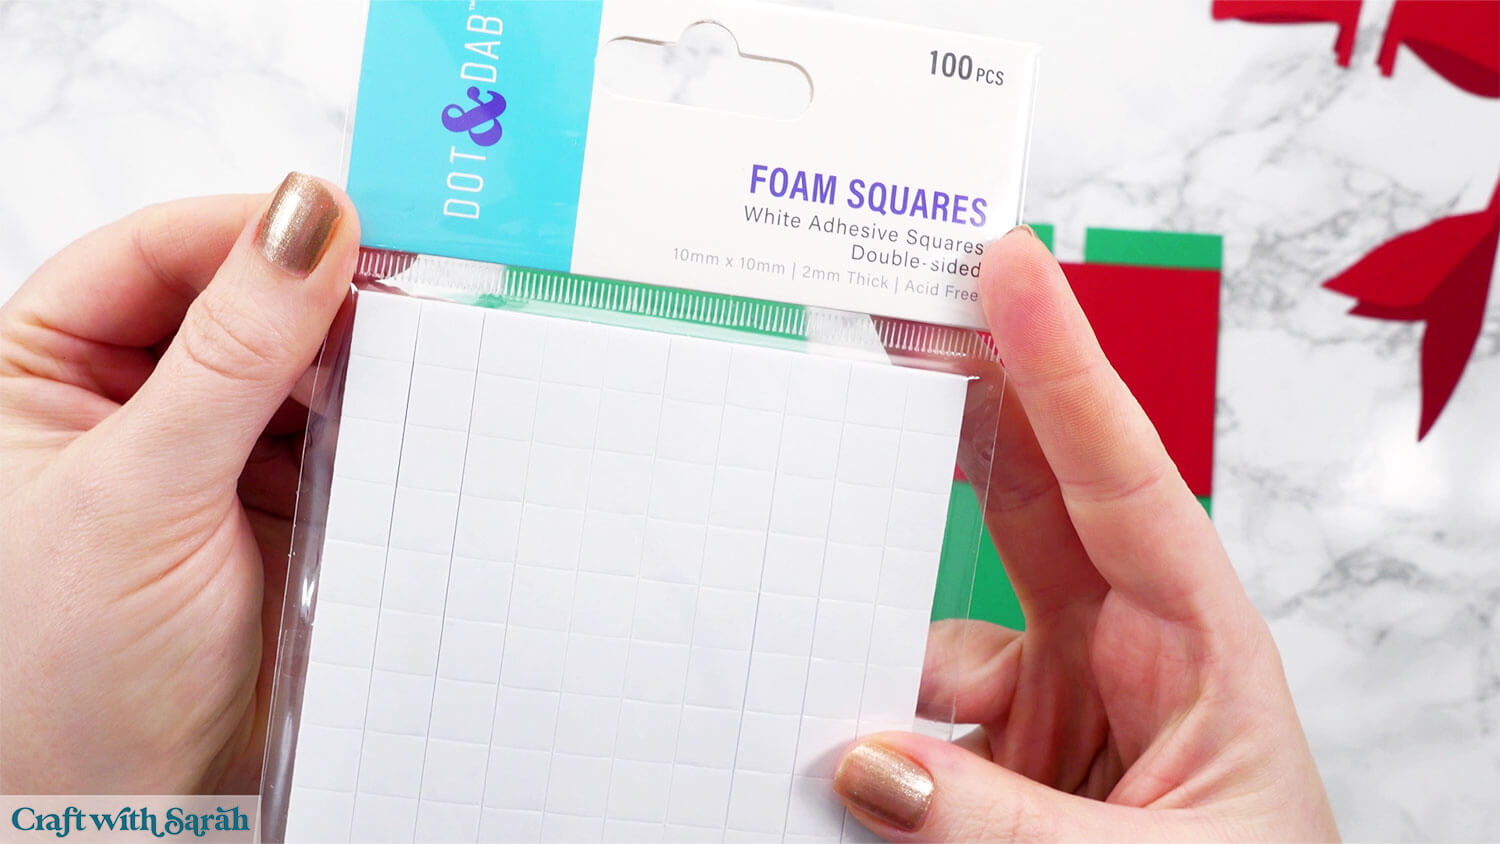
The foam pads that I use are from “Dot & Dab”, but any foam squares will work. If yours are big then you may need to cut them smaller with scissors to fit inside the edges of the layers.
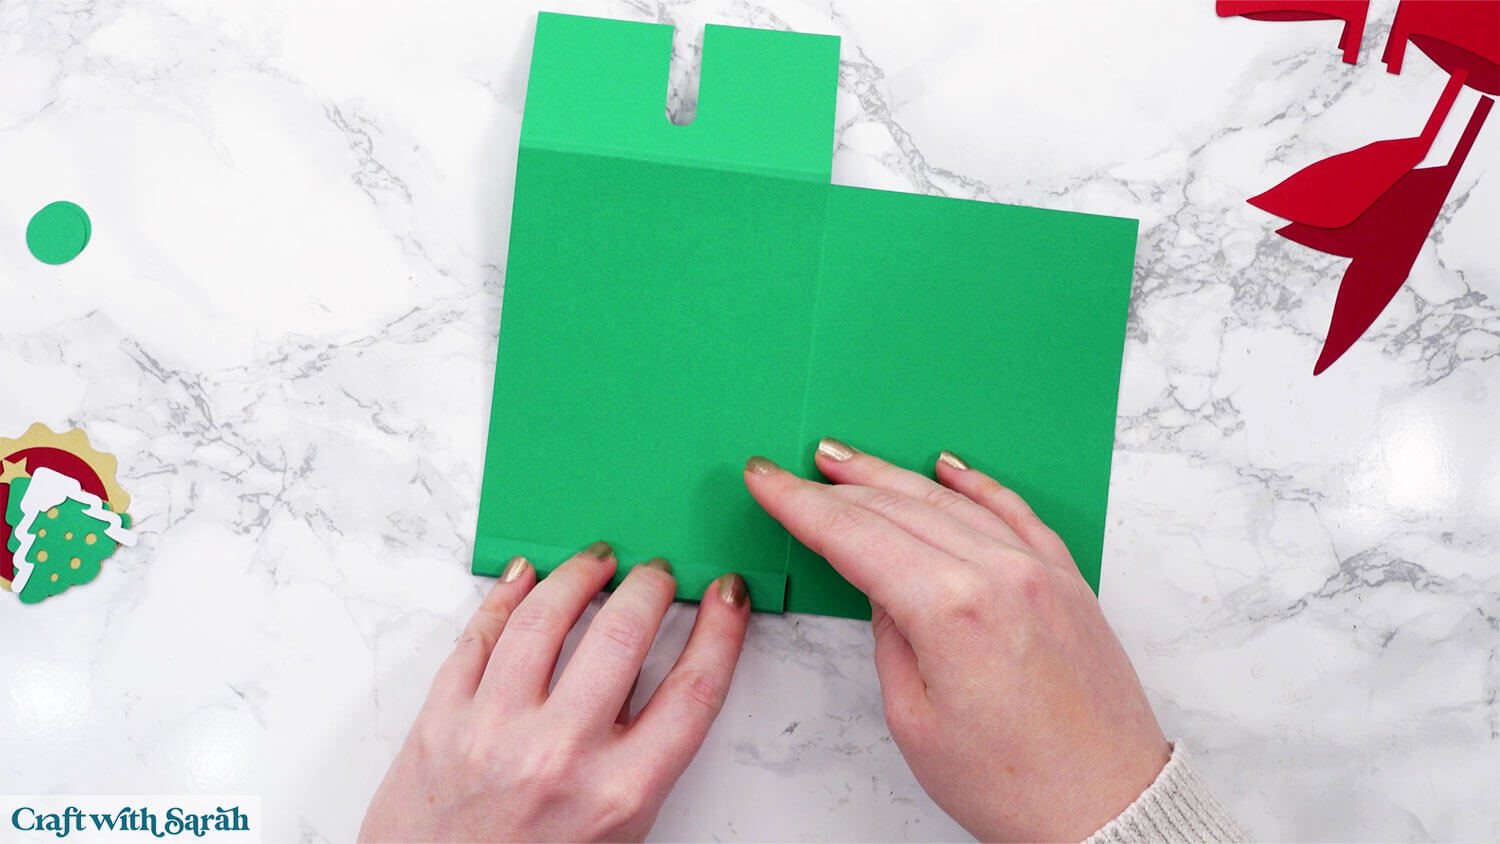
Start by folding the main piece in half along the central score line — this creates the greetings card base.
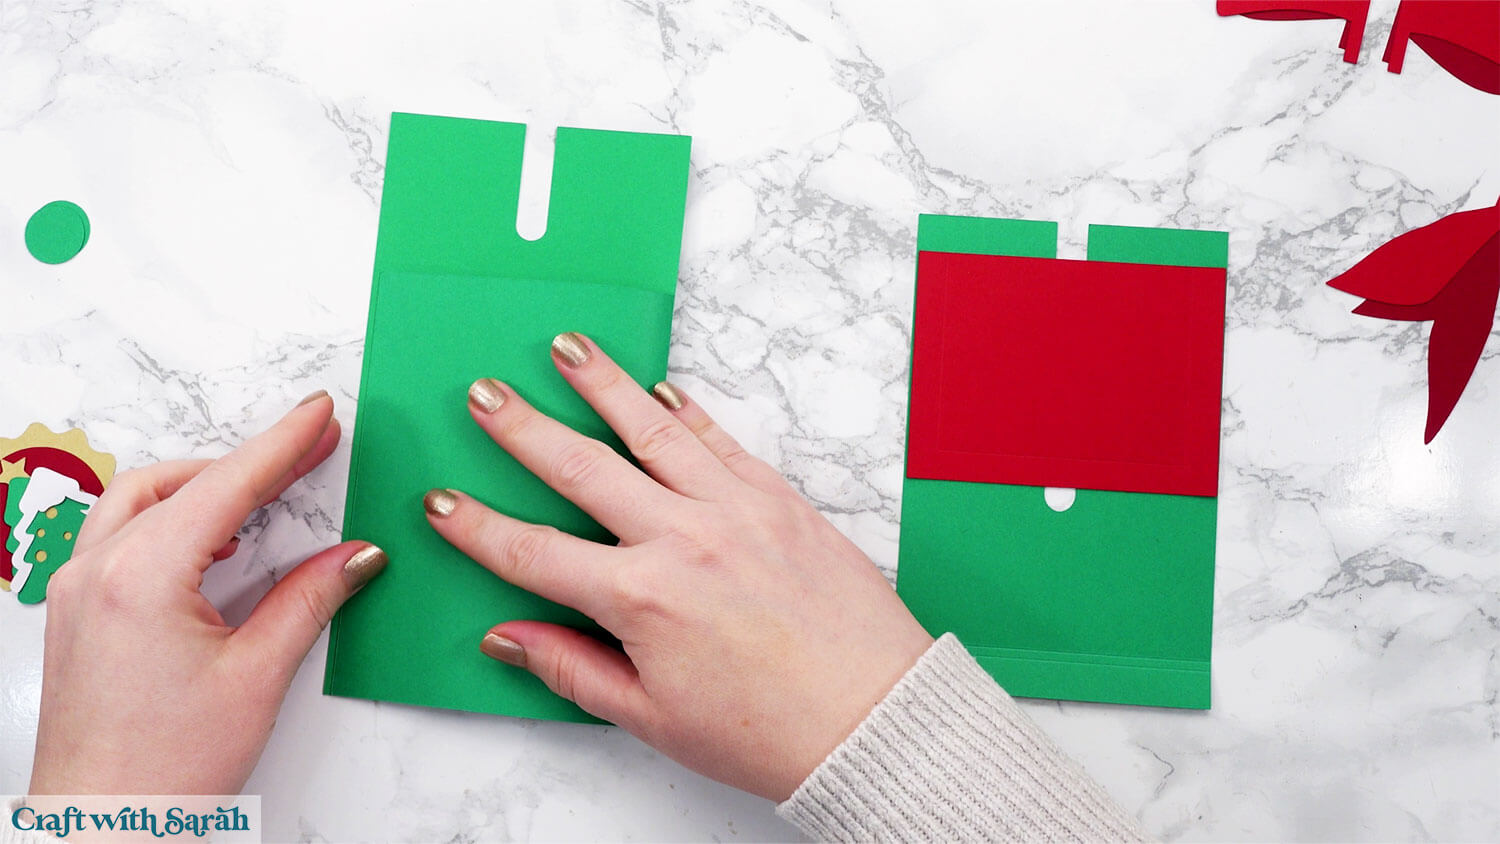
Next, fold the two score lines near the top of the card forward, towards you to make a little ridge.
This creates the top “bridge” section that allows the gift card pocket to slide smoothly.
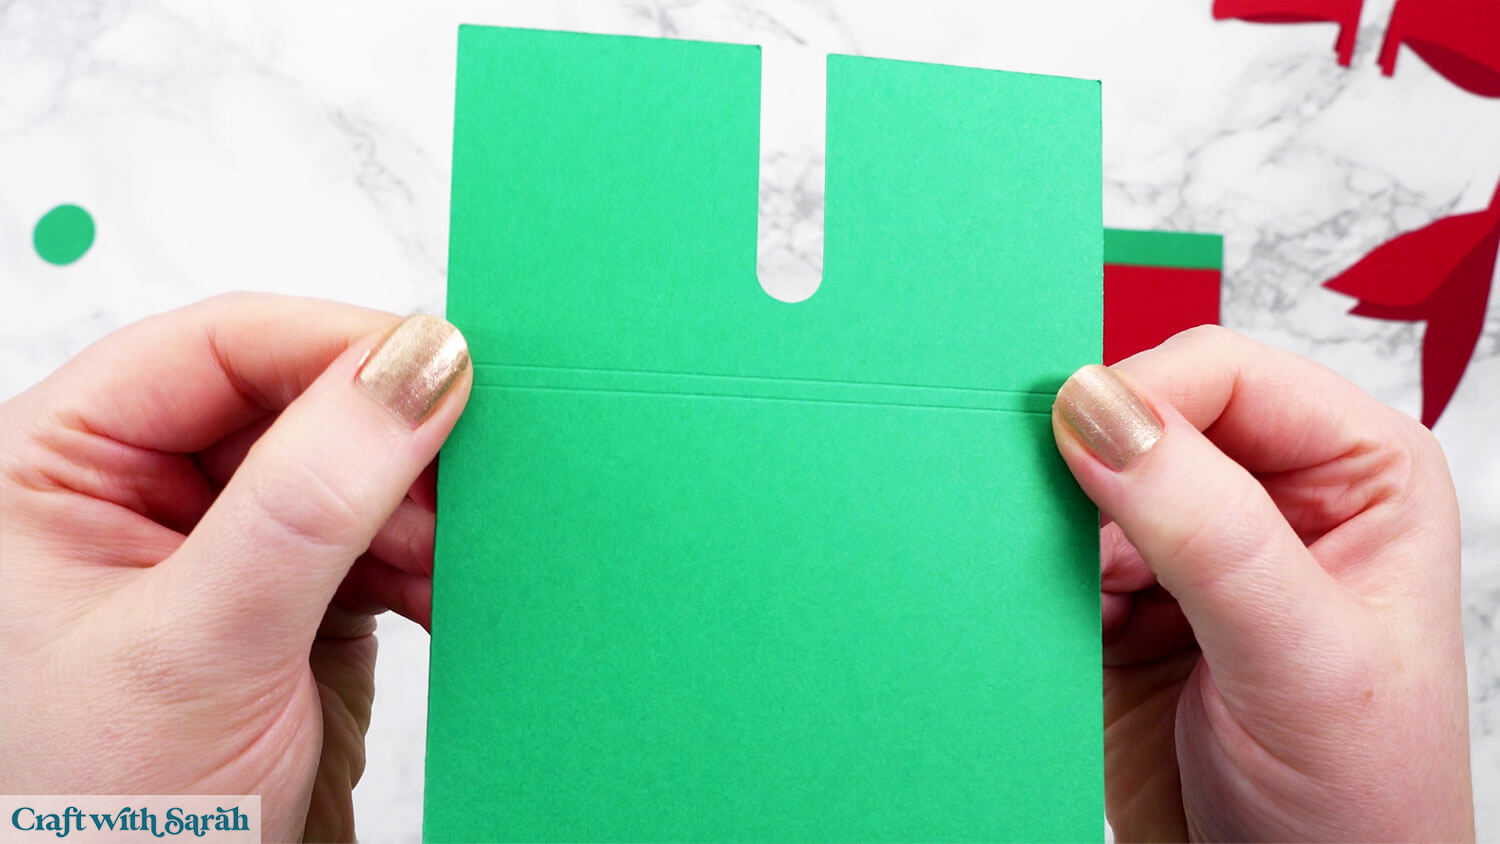
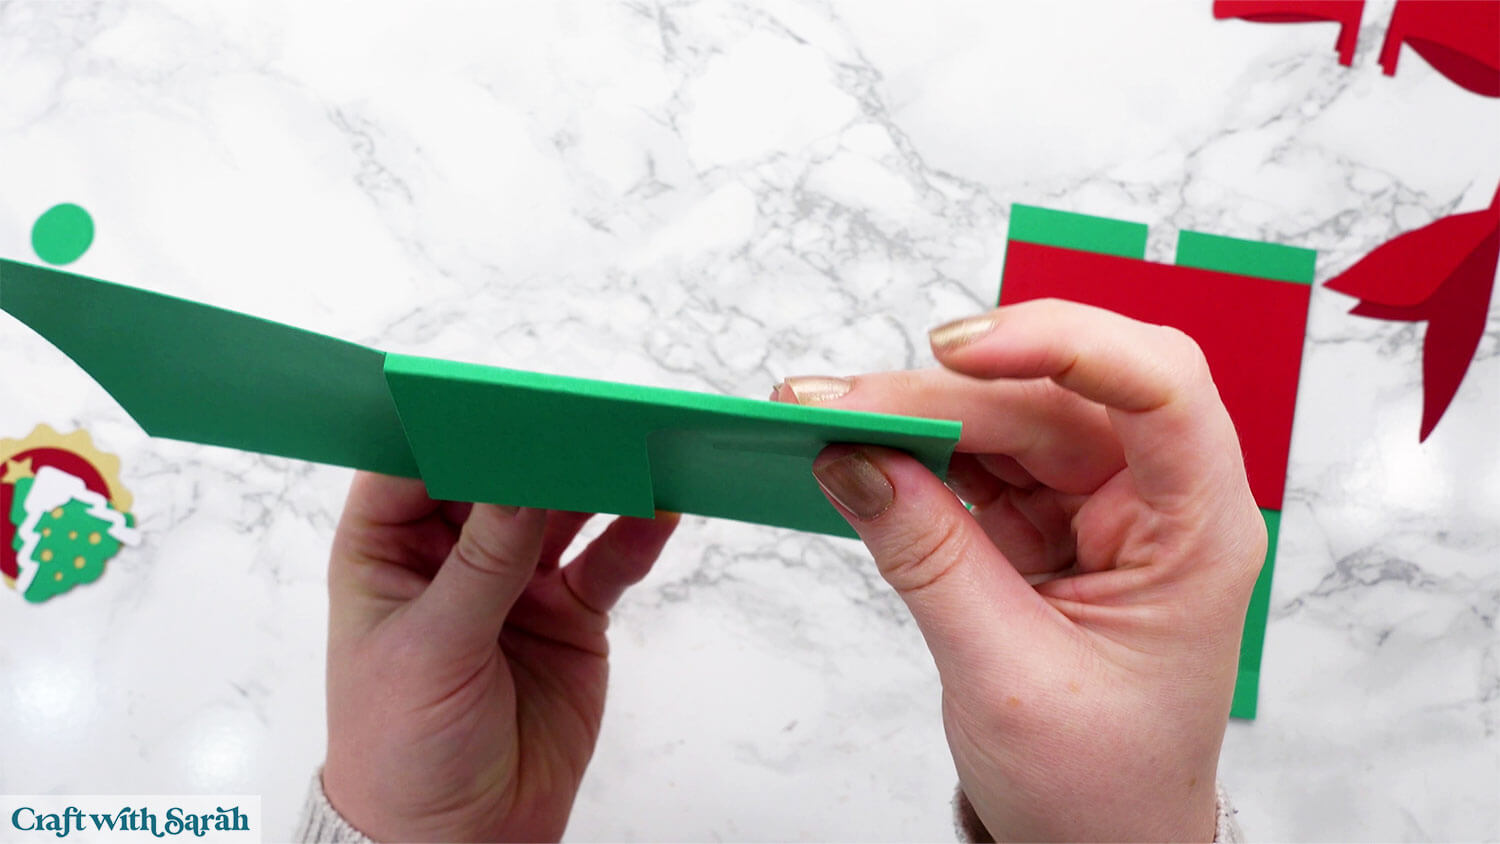
There’s a similar double-score bridge on one of the smaller green pieces. Fold these backwards to create the same ridge in the opposite direction.
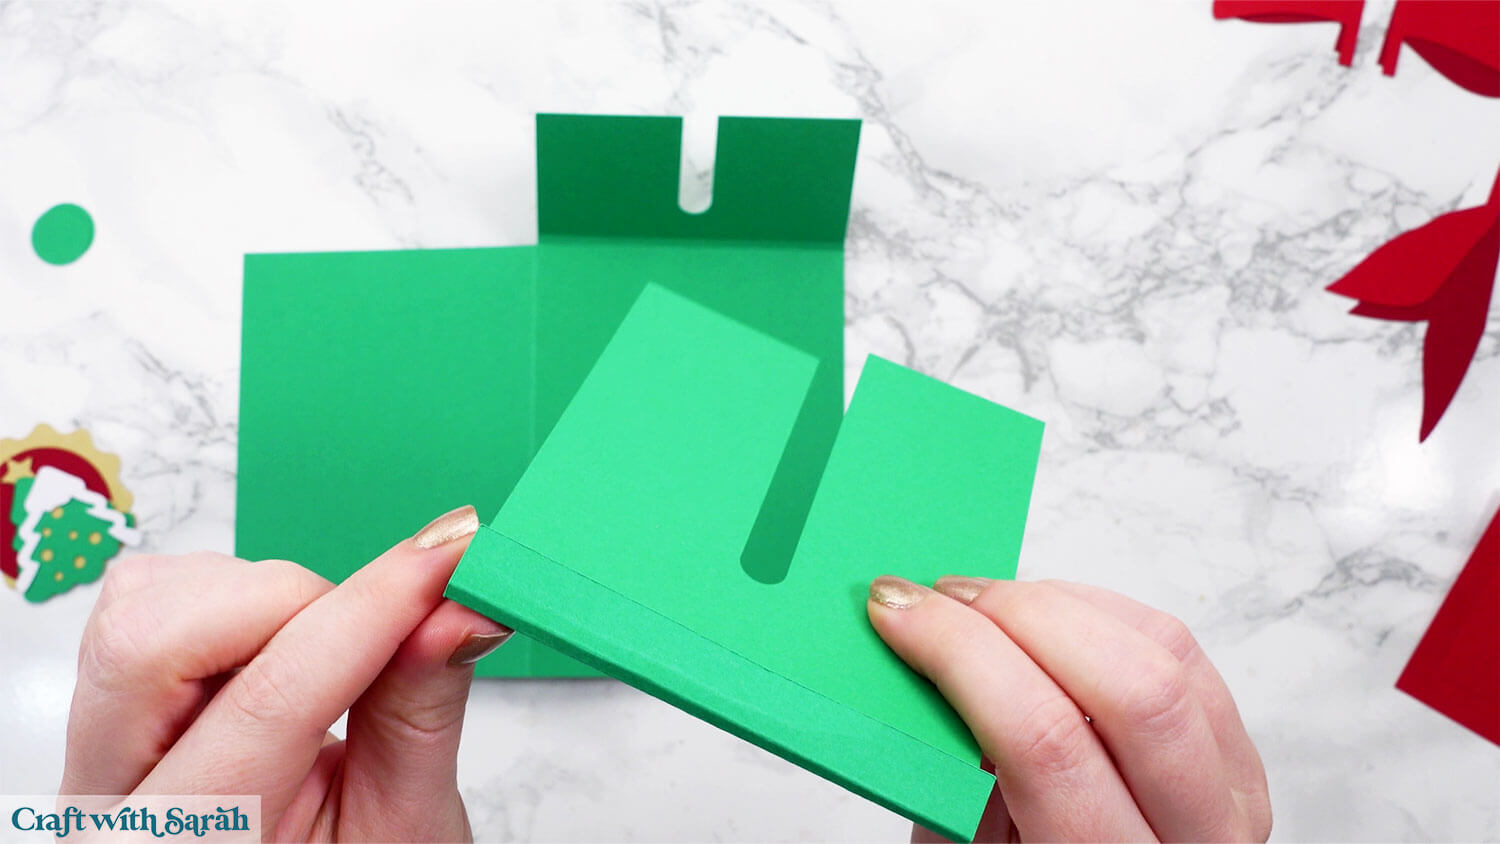
Then fold the two tabs at the other end backwards. These tabs will attach to the card and form the pocket.
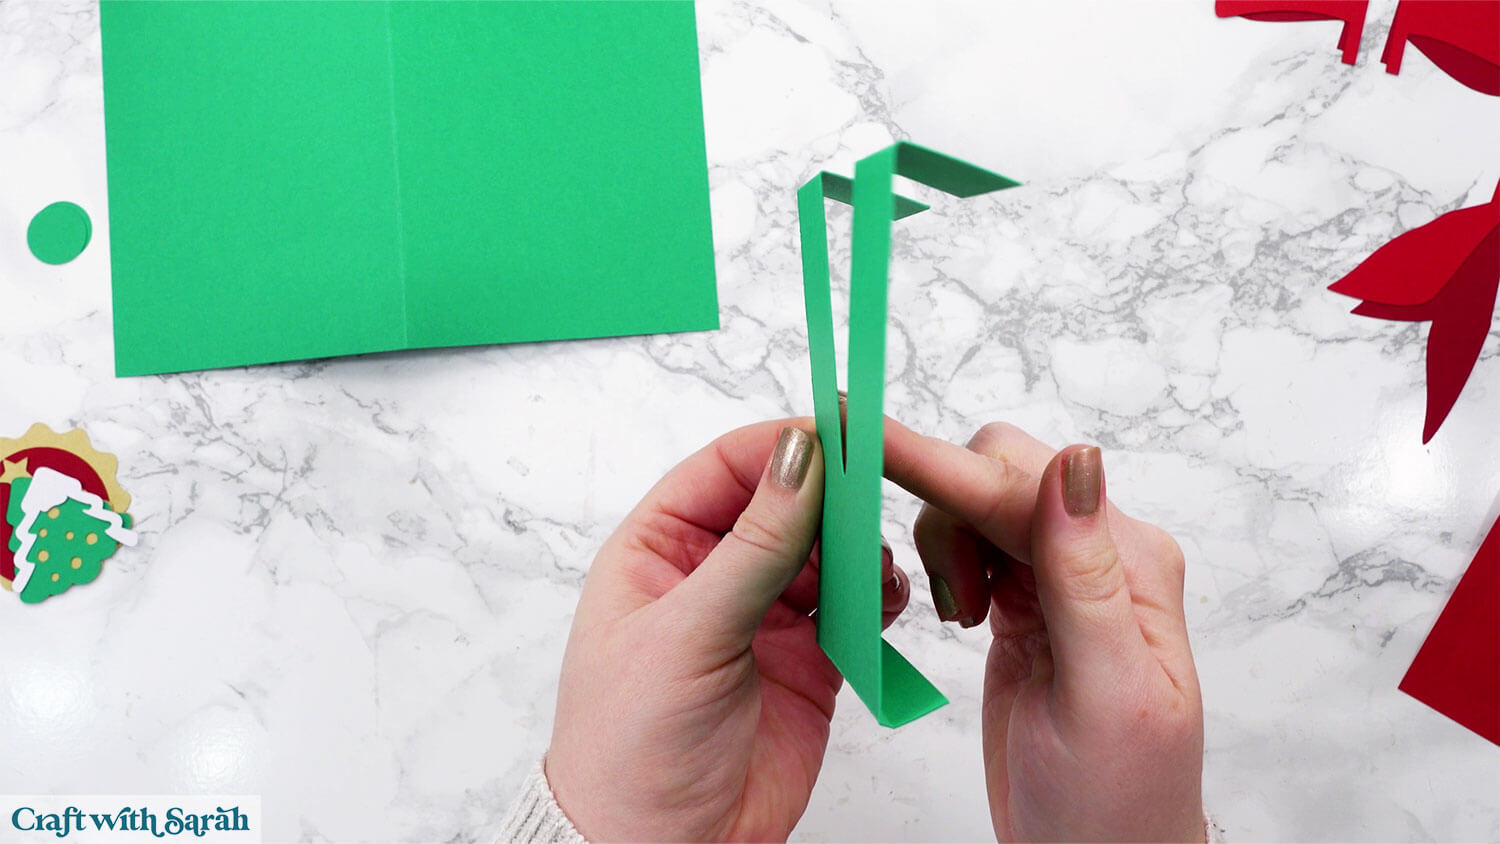
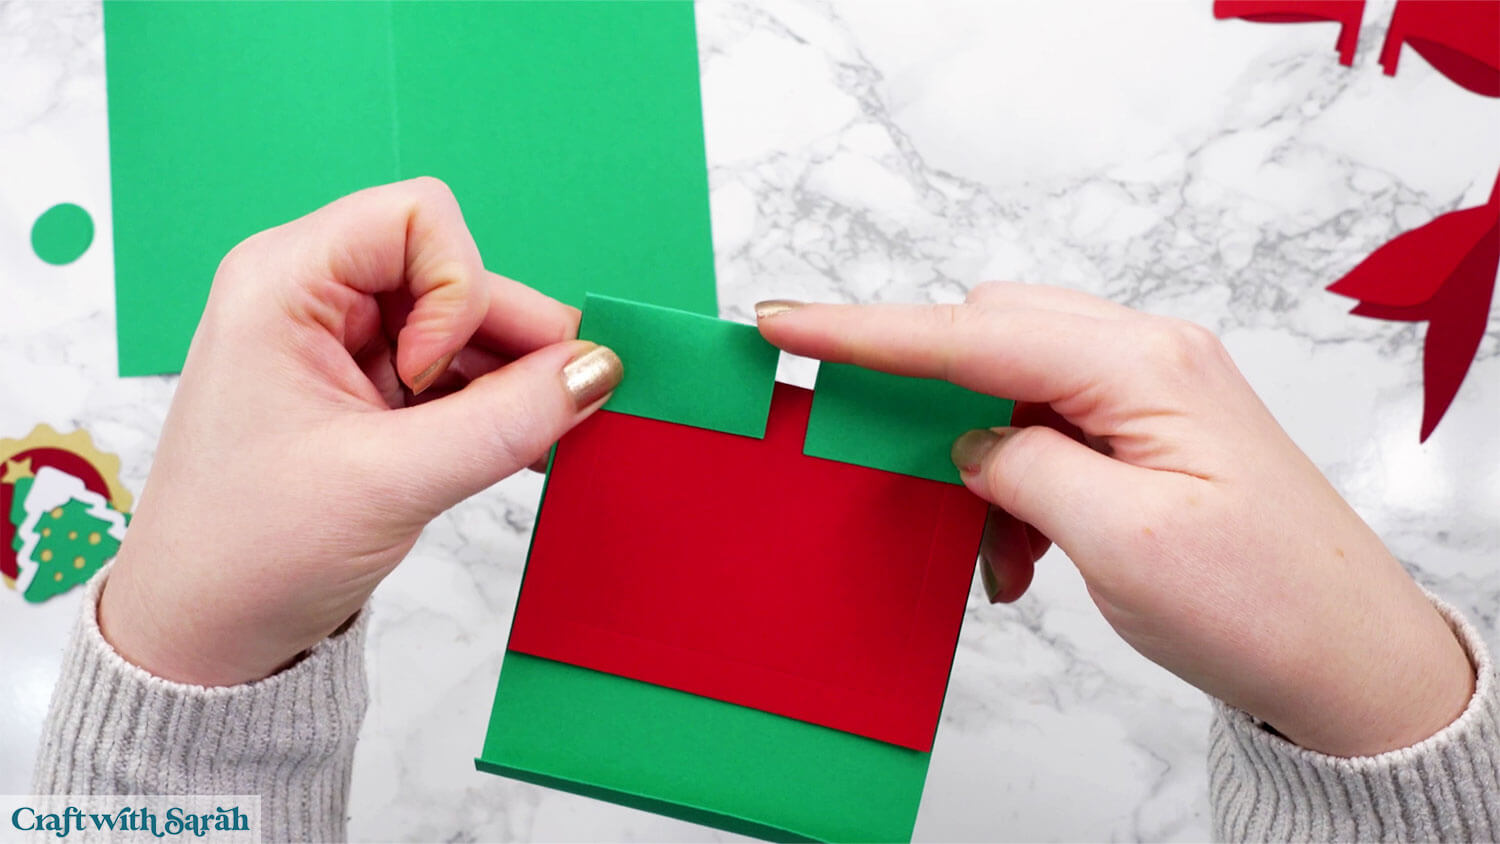
Take the small red rectangle and stick it to the inside of the smaller green piece like the image below.
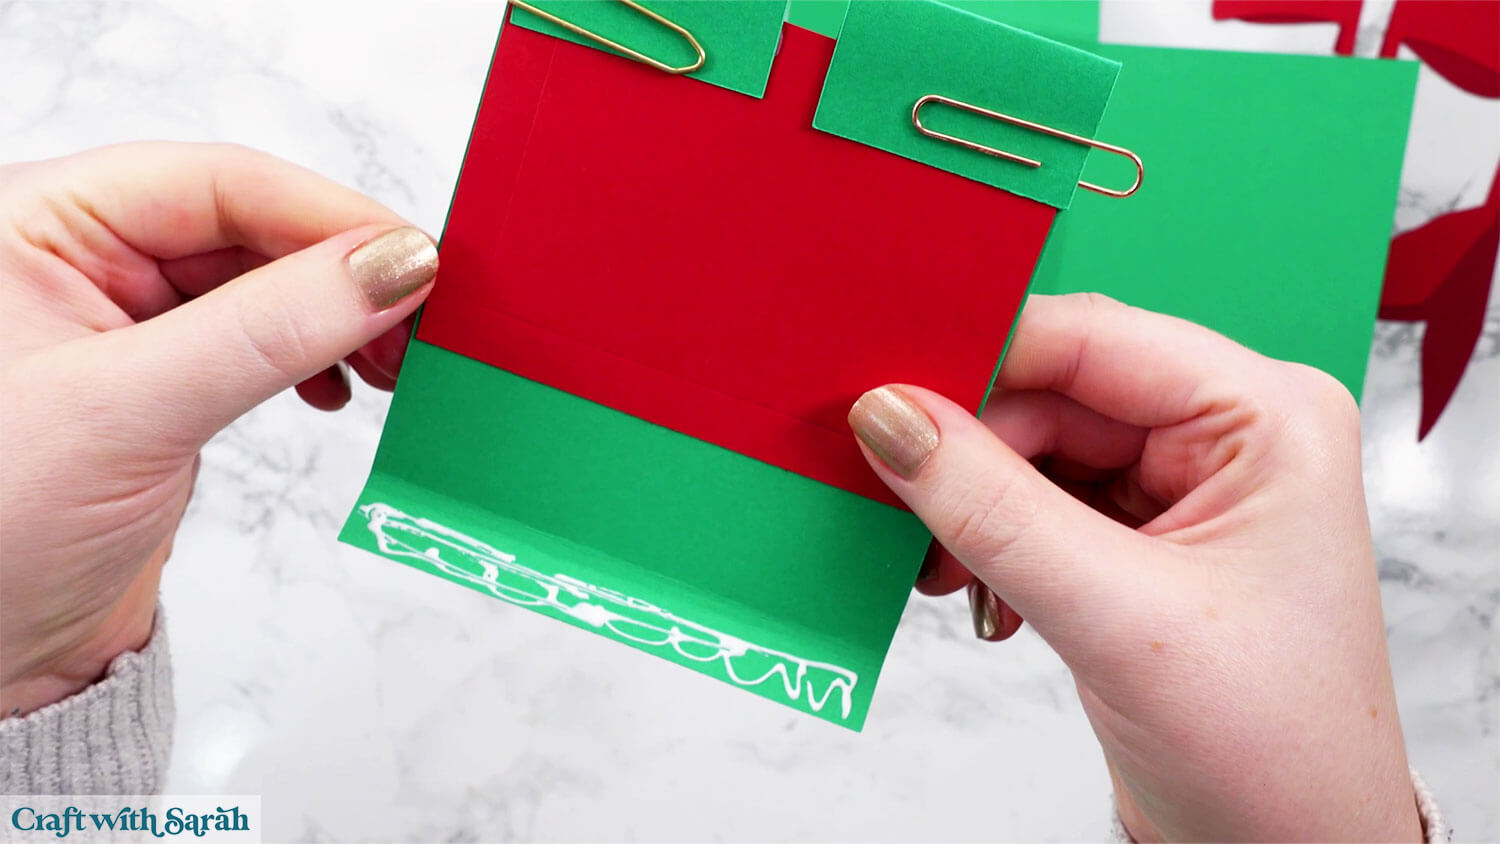
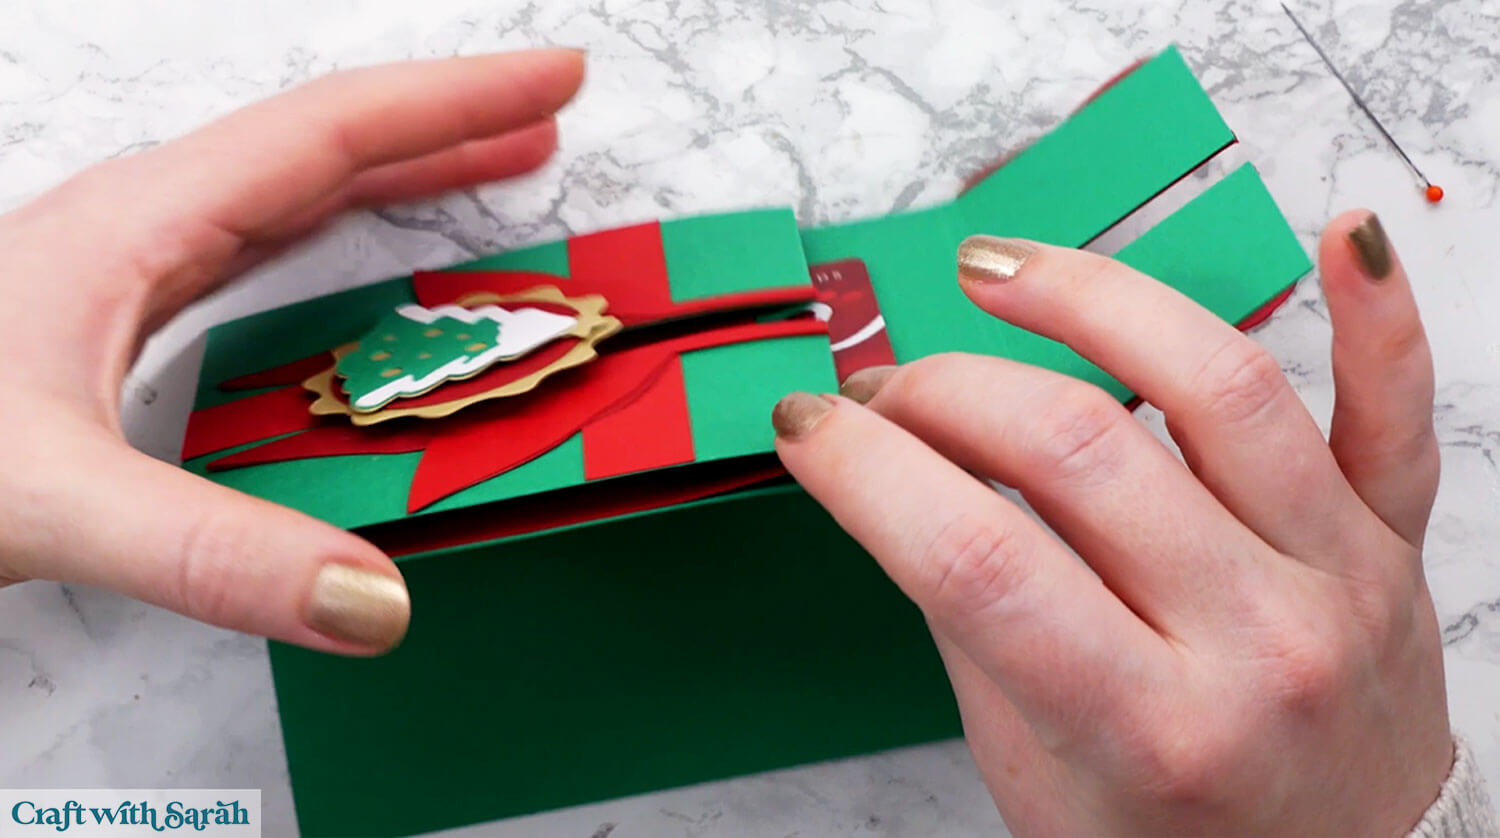
Apply glue halfway down each green tab and stick them to the back of the panel, leaving about a 1 cm gap at the top. Use paper clips to hold it while the glue dries.
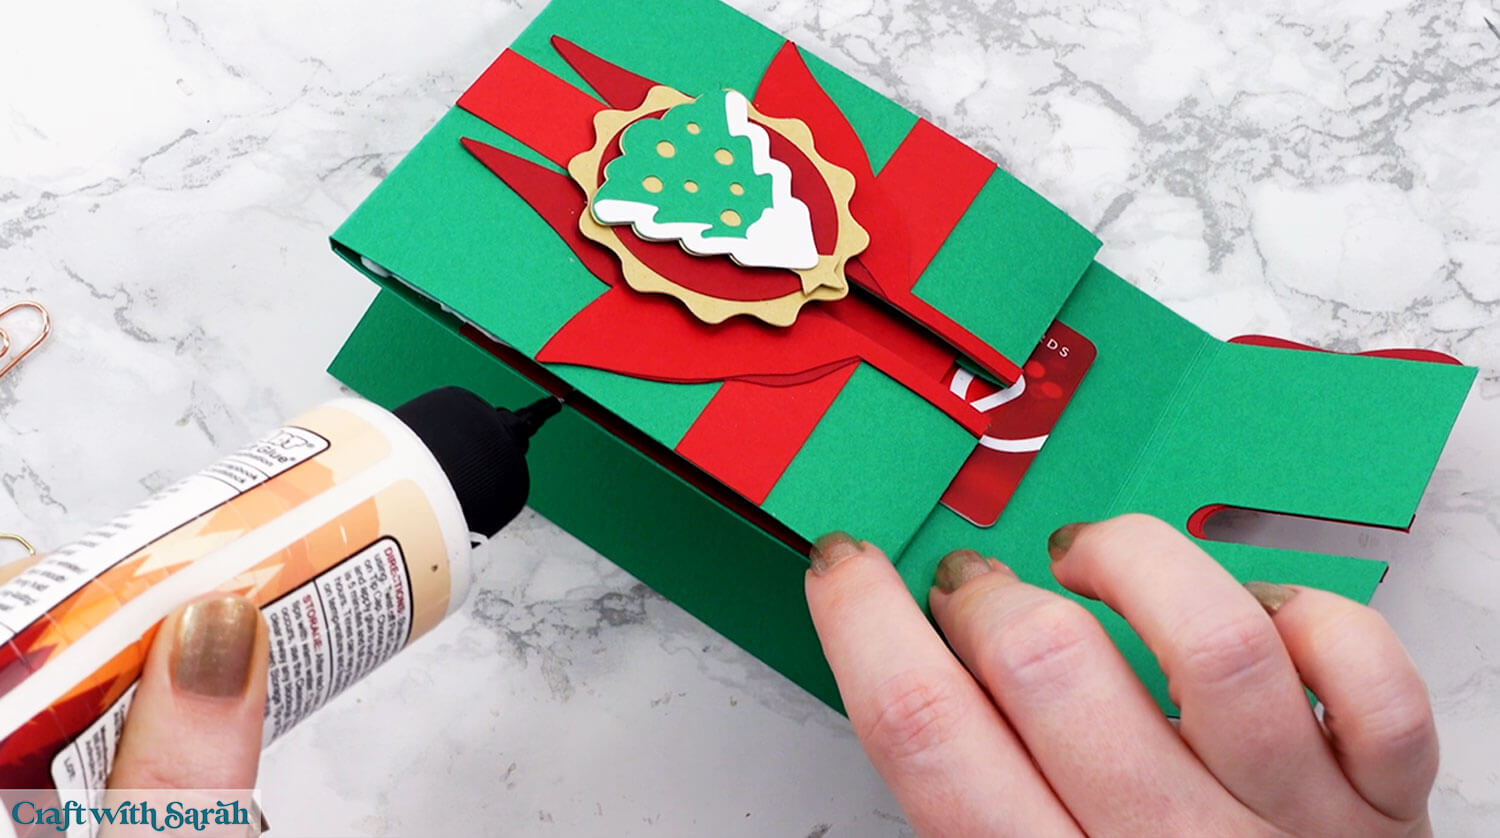
Once that’s dry, glue this section to the inside of your card, aligning it with the top score line first. Make sure you don’t glue over the bridge fold as that part needs to move freely. Just glue up to the score line.
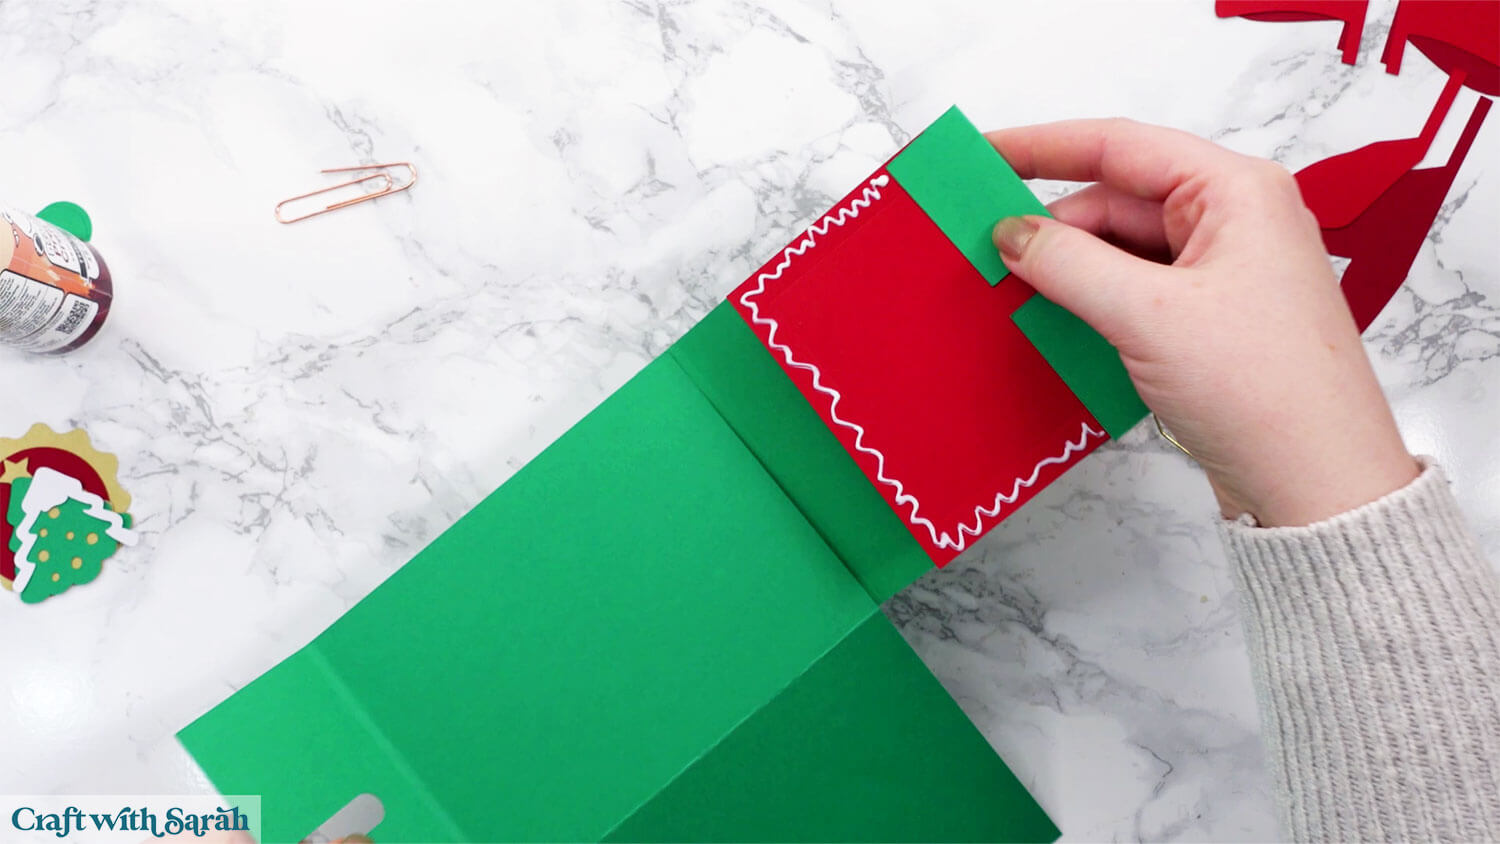
When everything is secure at the top, glue along the outer edges of the red panel (up to the score line only!) and fold it inwards to seal the pocket.
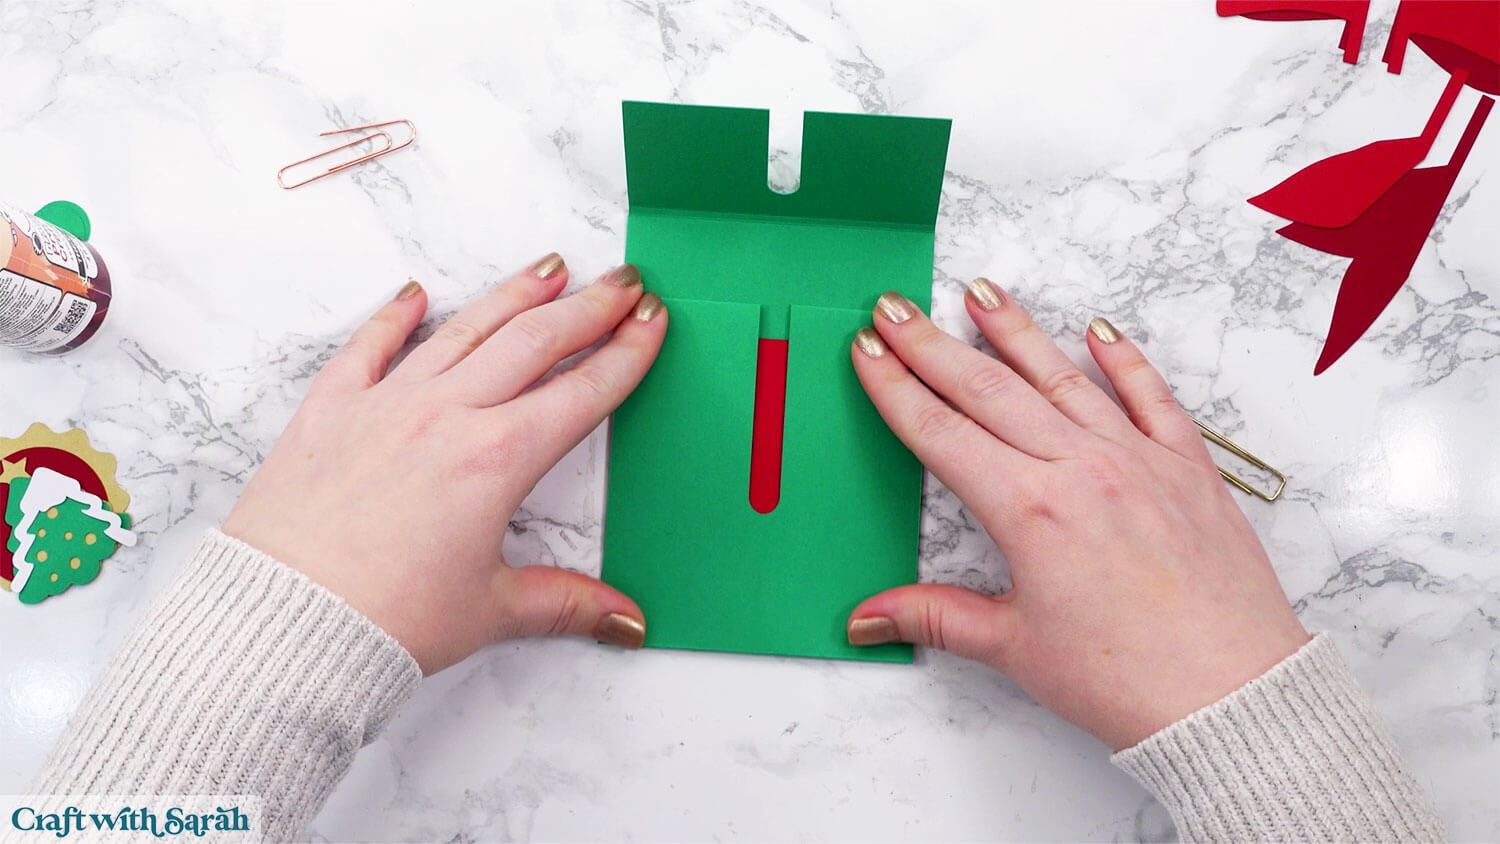
Step 5) Glue the details to the front
Glue the bottom light red decorative piece onto the lower half of the card, wrapping it neatly around the cutout.
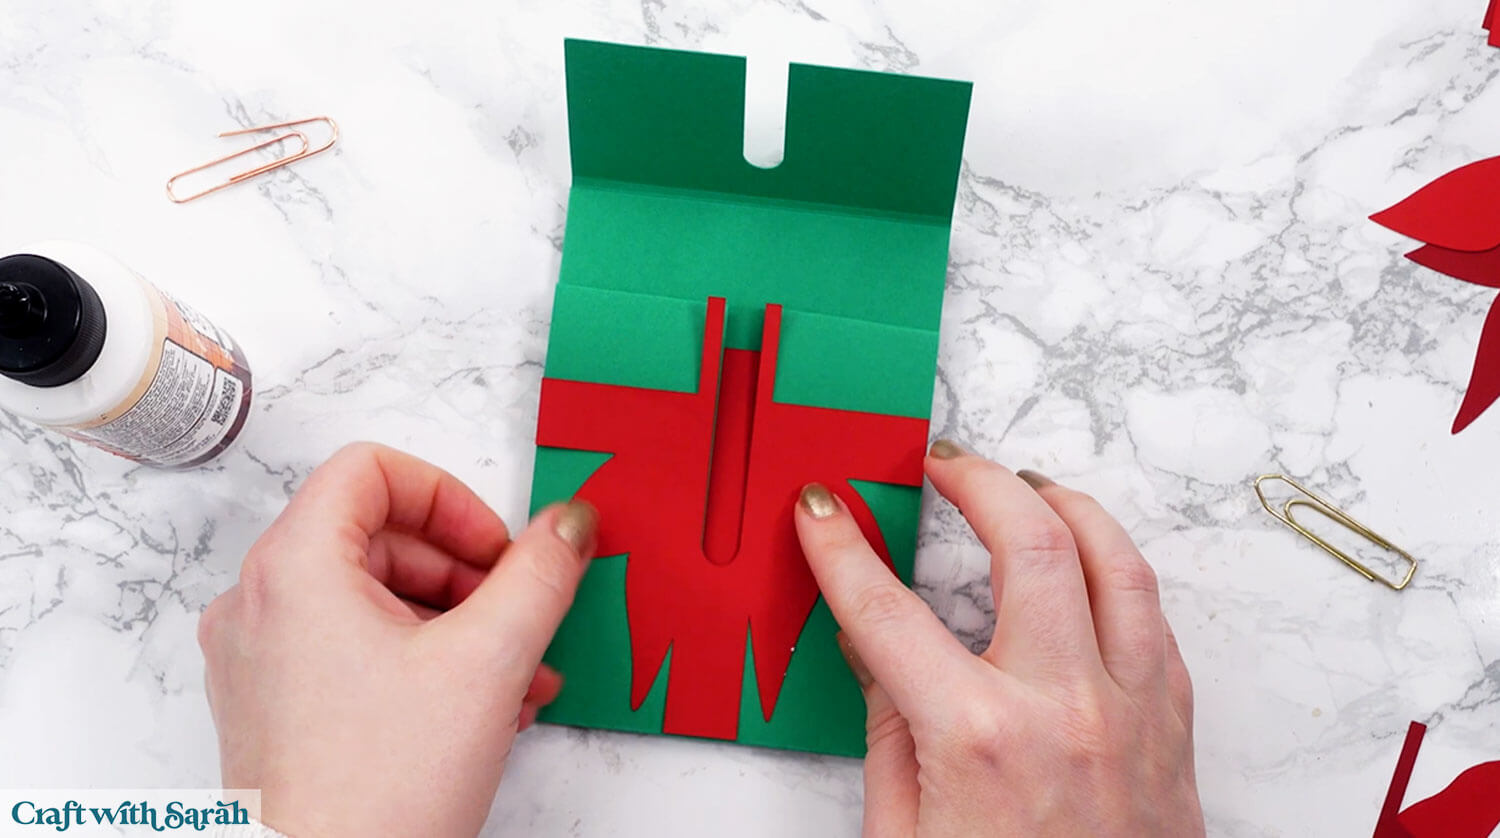
Glue the light red on top.
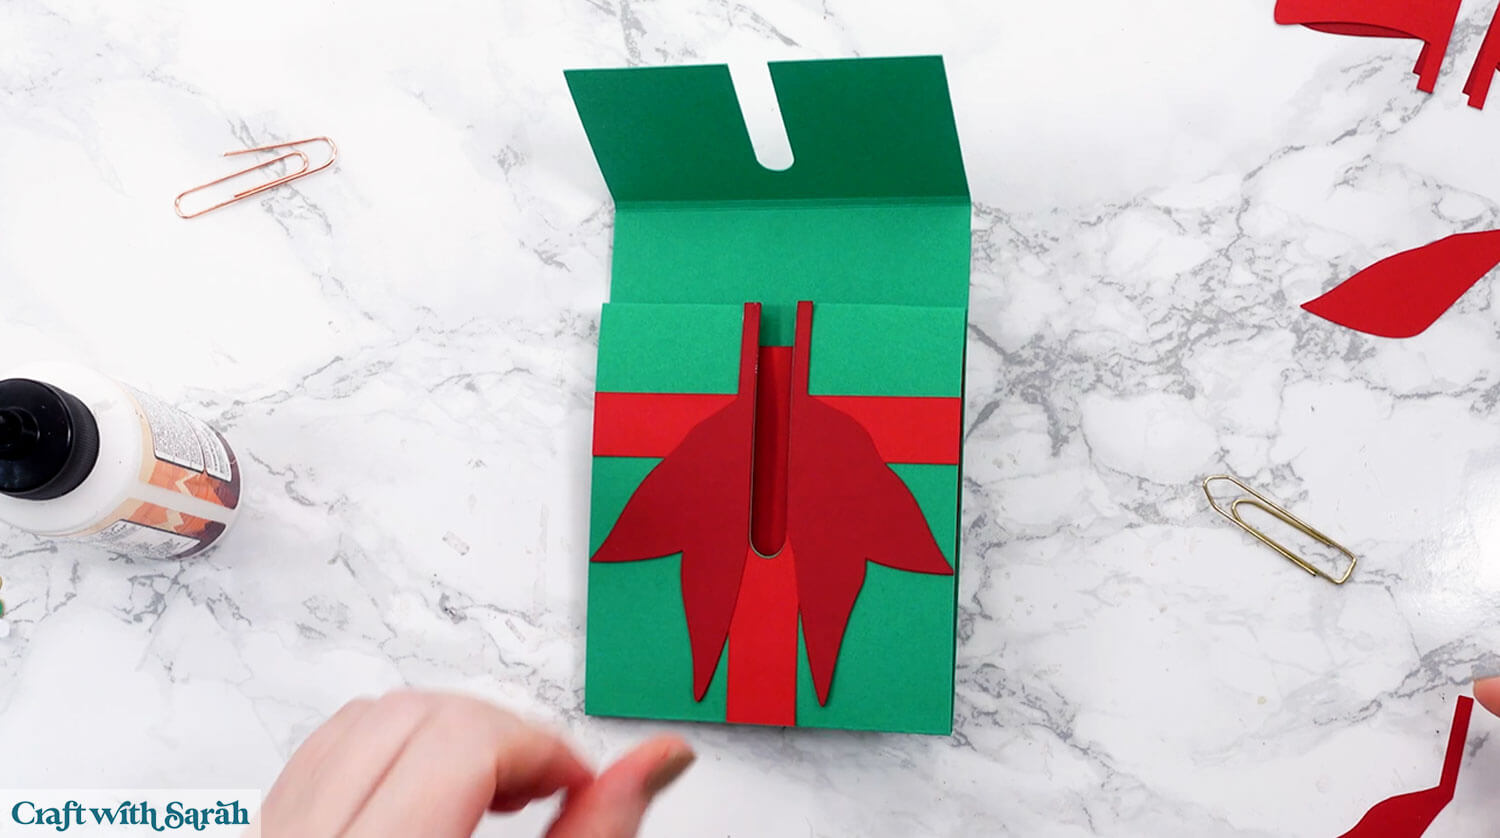
Then the dark red piece.
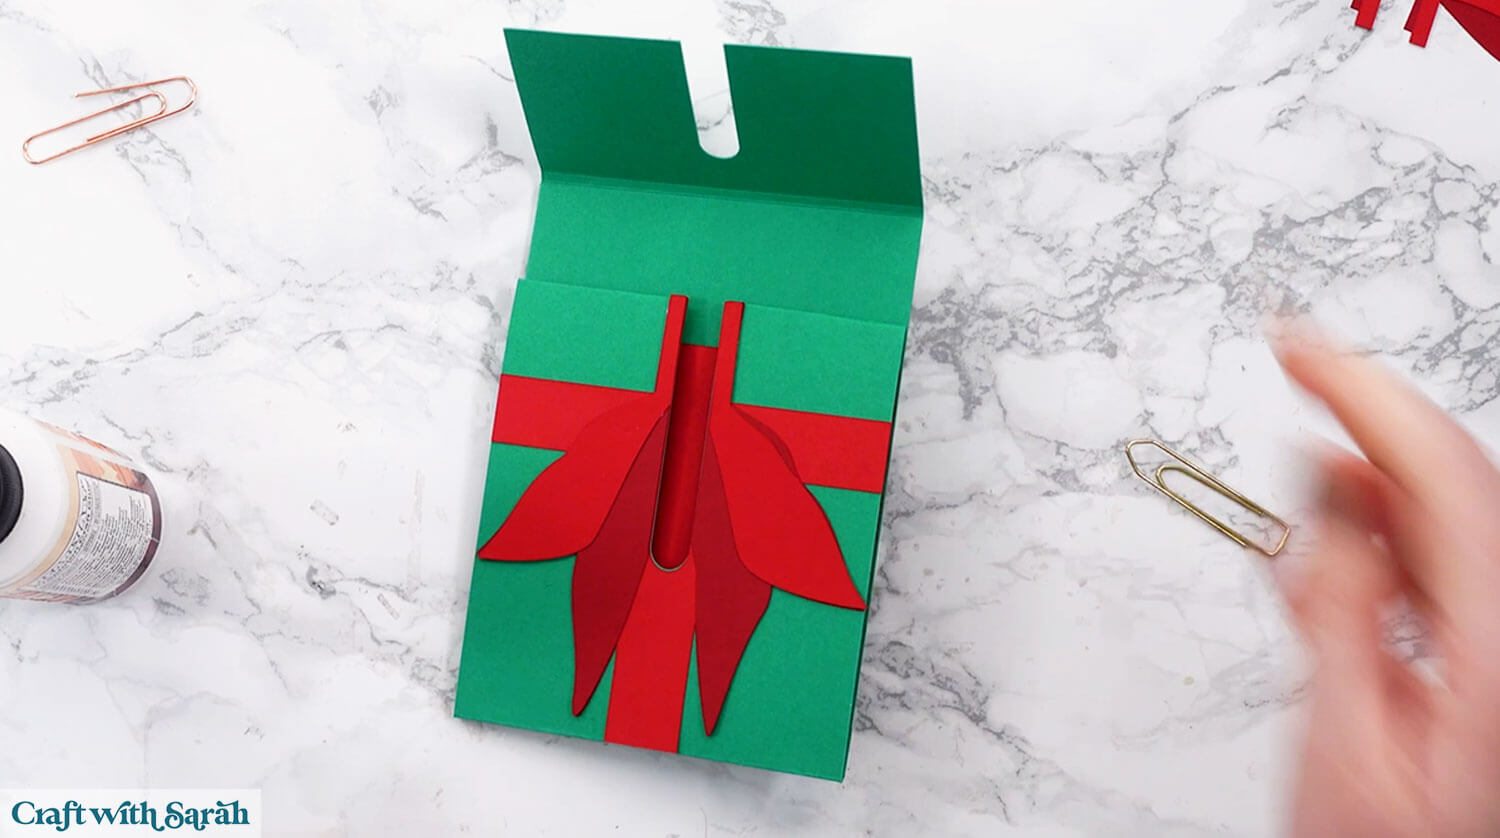
For the front of the gift card holder, glue on the dark red piece first.
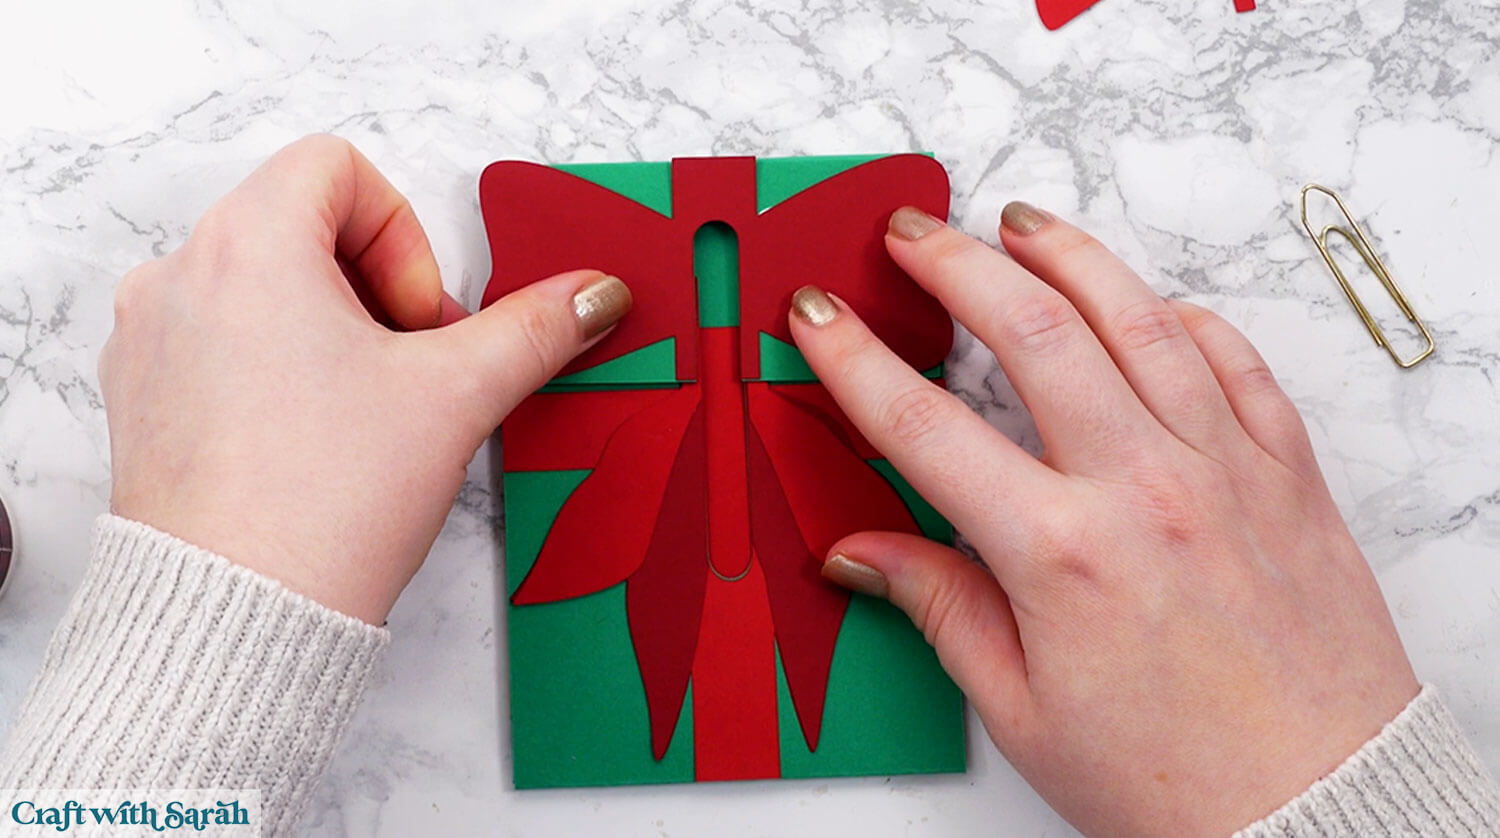
Then the light red.
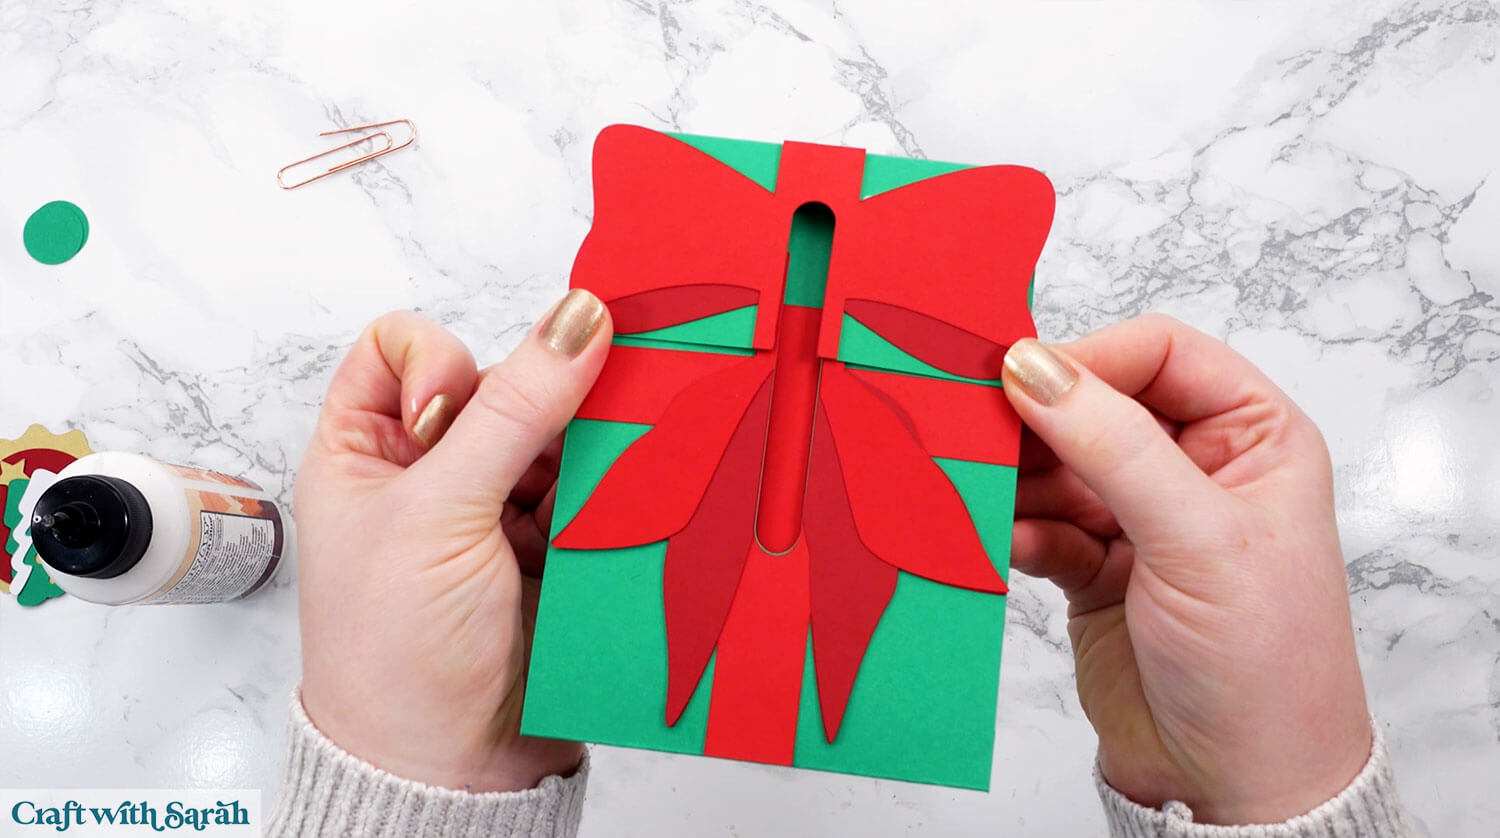
Once this is done, your front design will look like a wrapped Christmas present.
Slide the gift card inside.
Step 6) Make the badge for the slider
Now it’s time to stick the slider badge together.
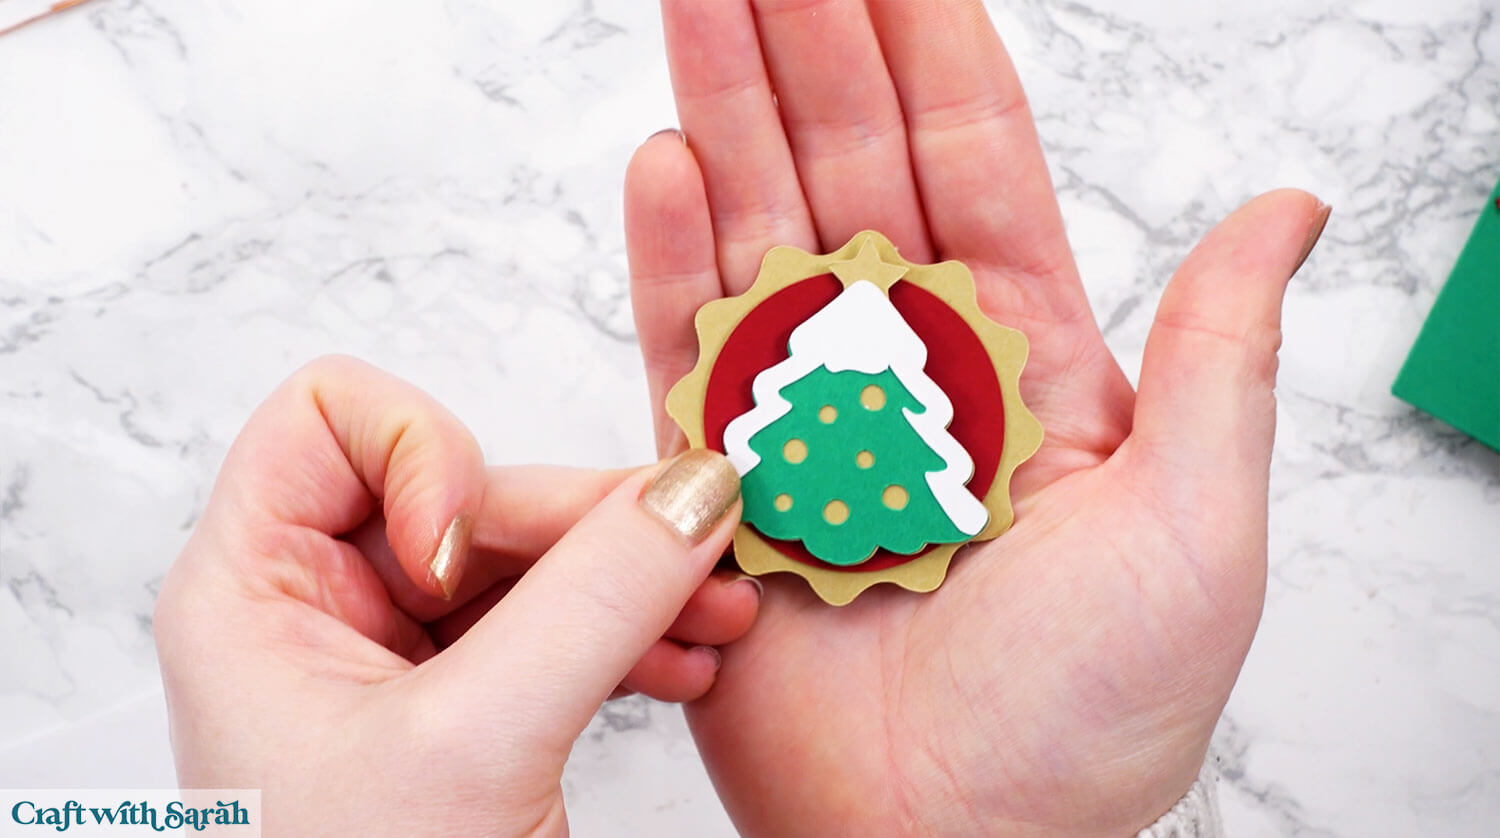
Glue the red circle onto the gold badge shape.
Glue the pieces of the topper picture together, then use foam squares to attach it to the badge.
Take the two small circles and thread one through the front slot so it’s under the opening.
Stick a foam square on it. If the foam square isn’t thick enough, double it up so the slider moves freely without catching.
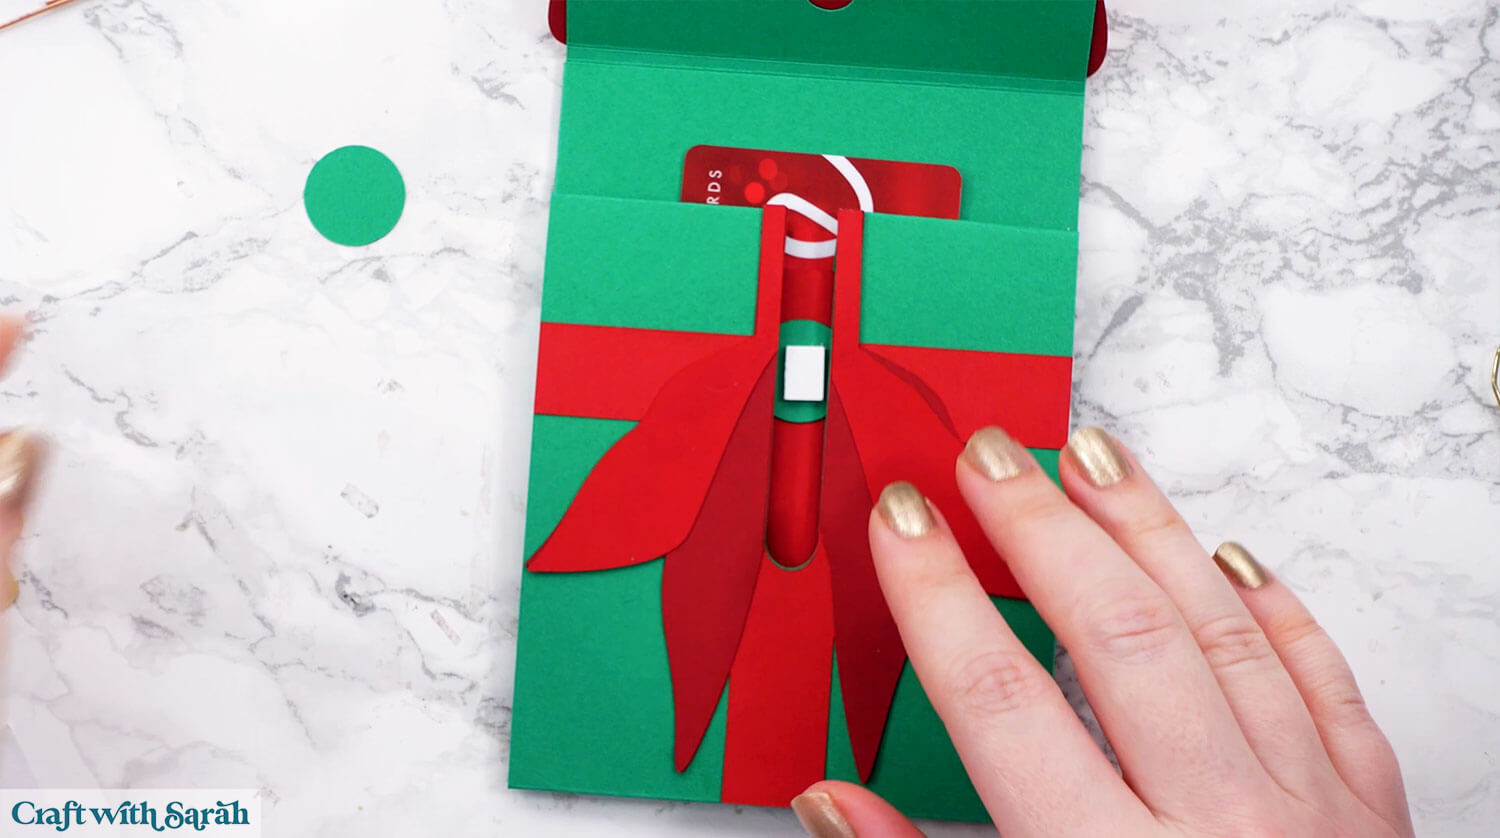
Attach the second circle on top.
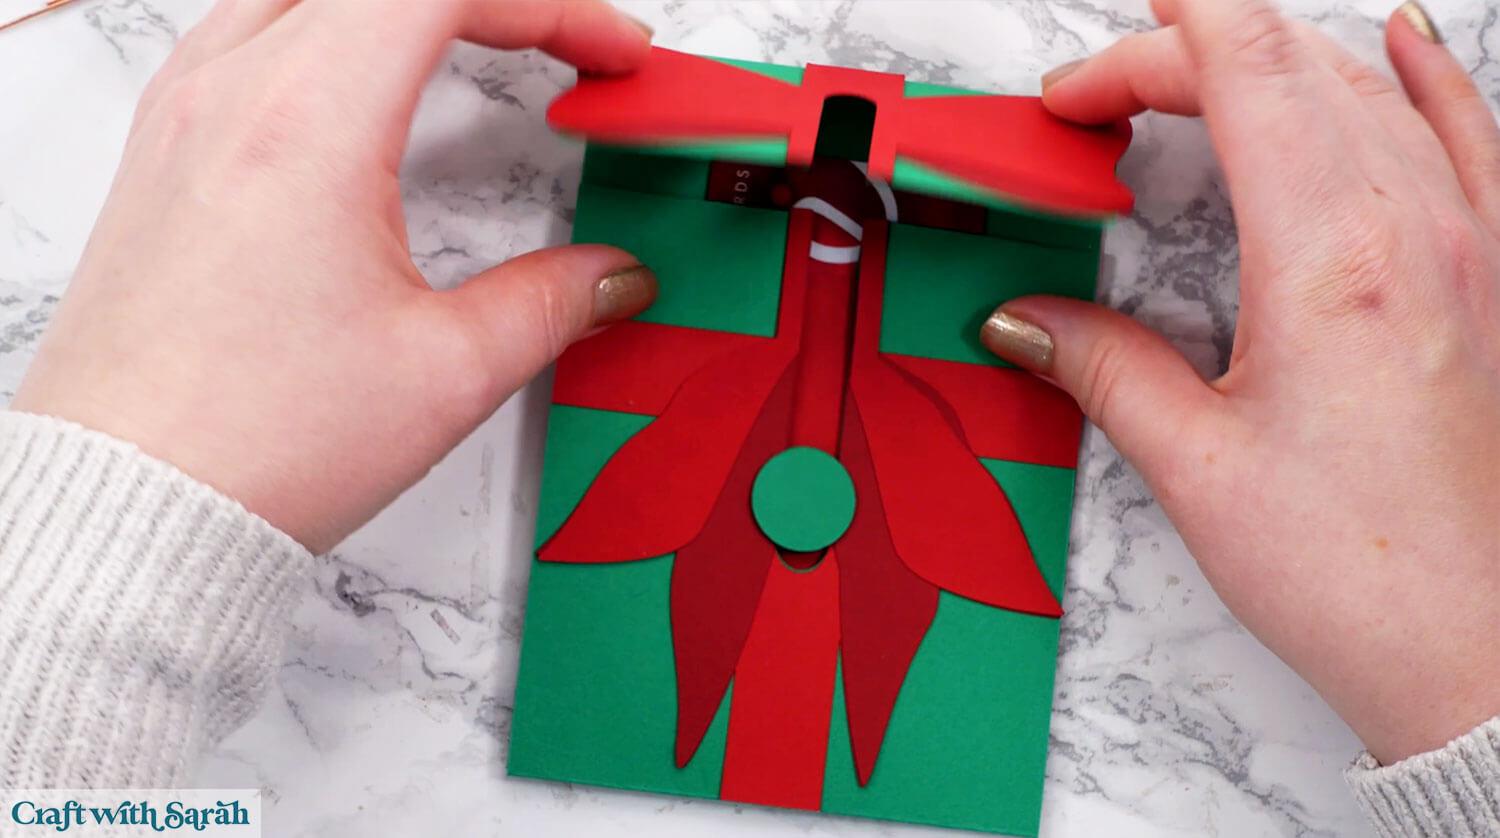
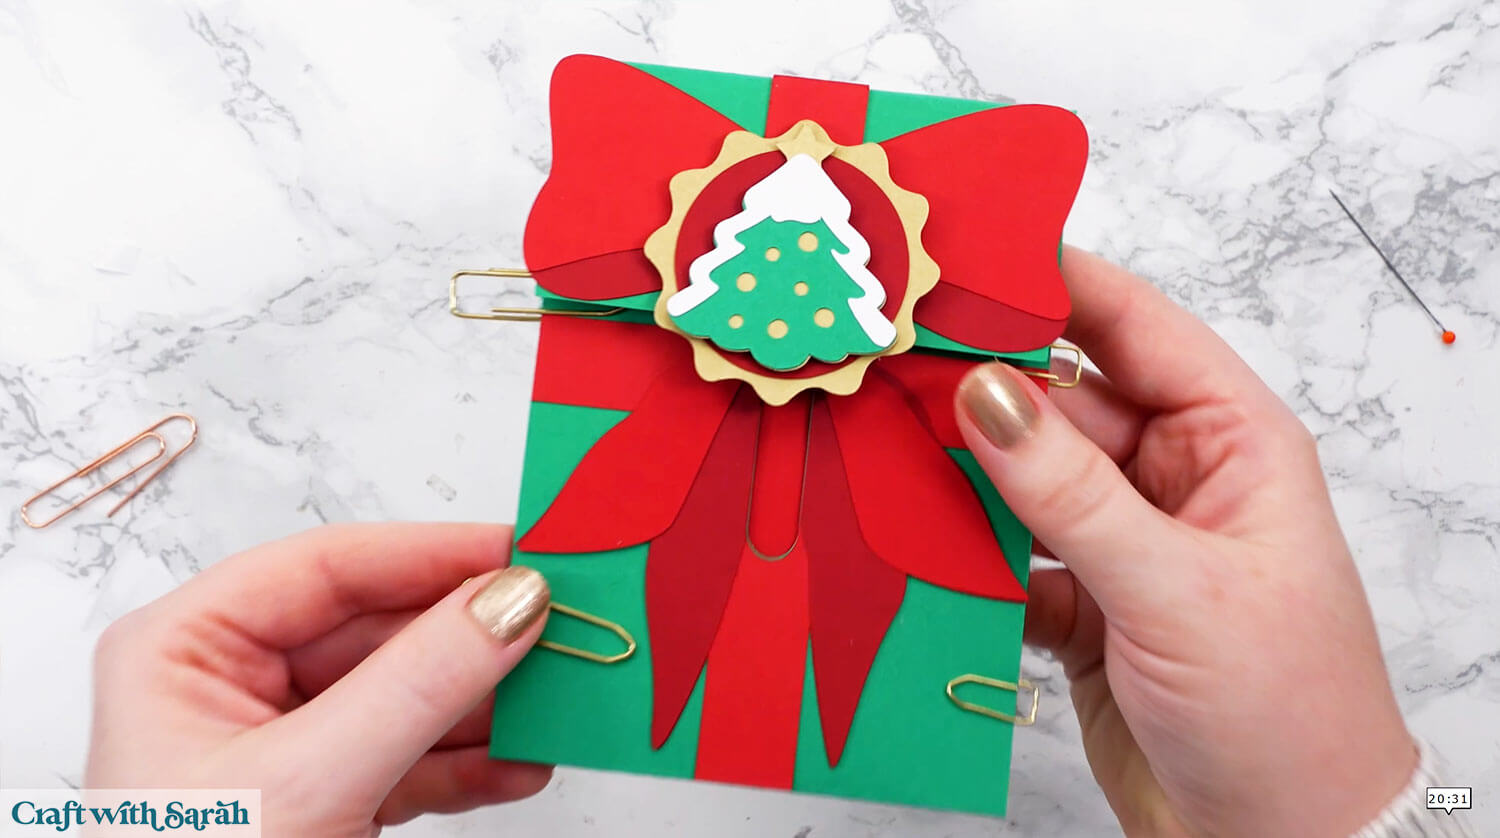
Once you’ve tested that it slides smoothly, glue your badge picture onto the top circle. Move it down while gluing so it doesn’t accidentally stick to the bow. Leave it to dry completely before testing again.
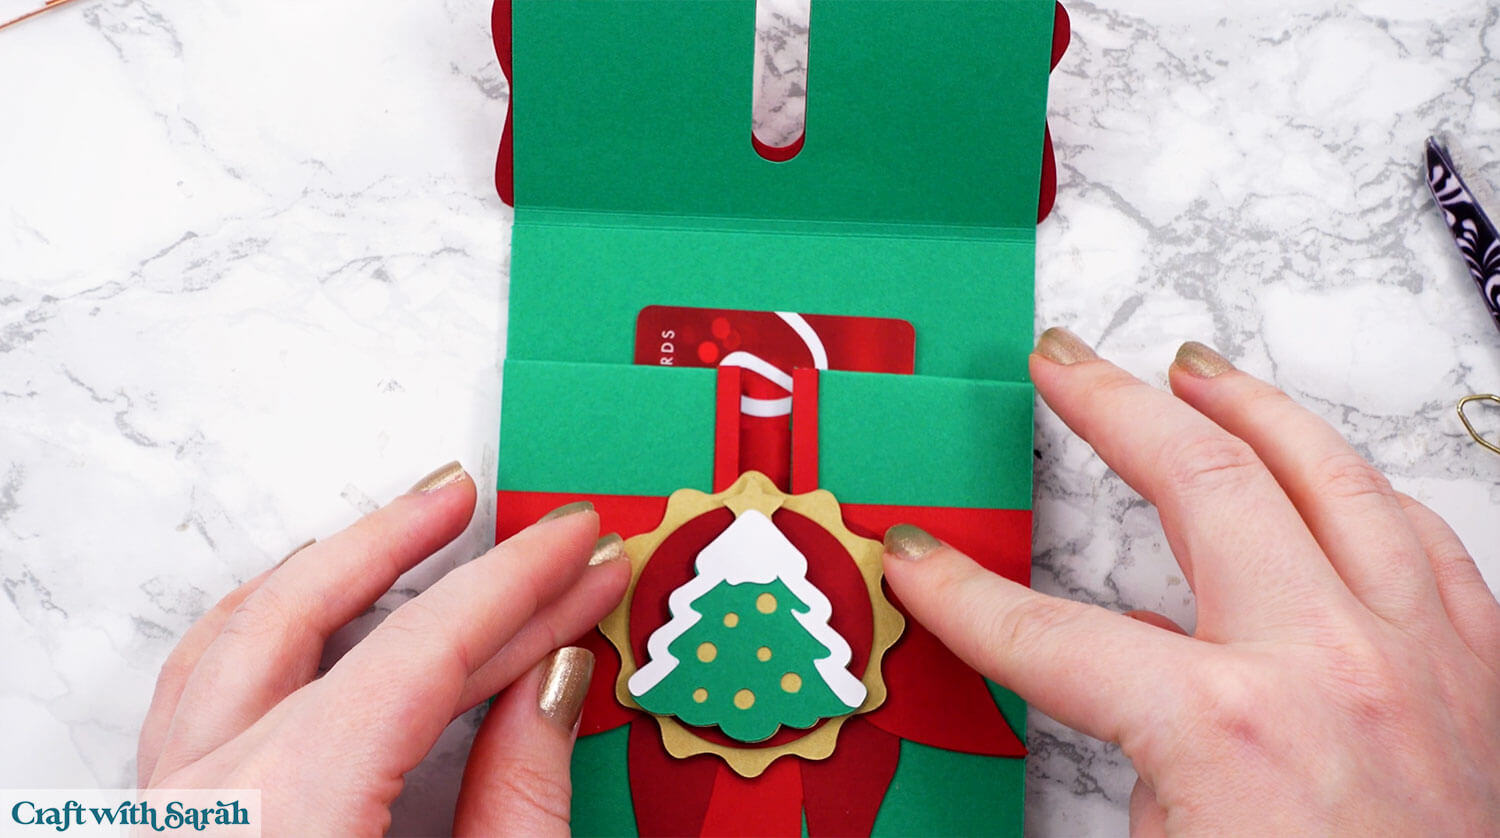
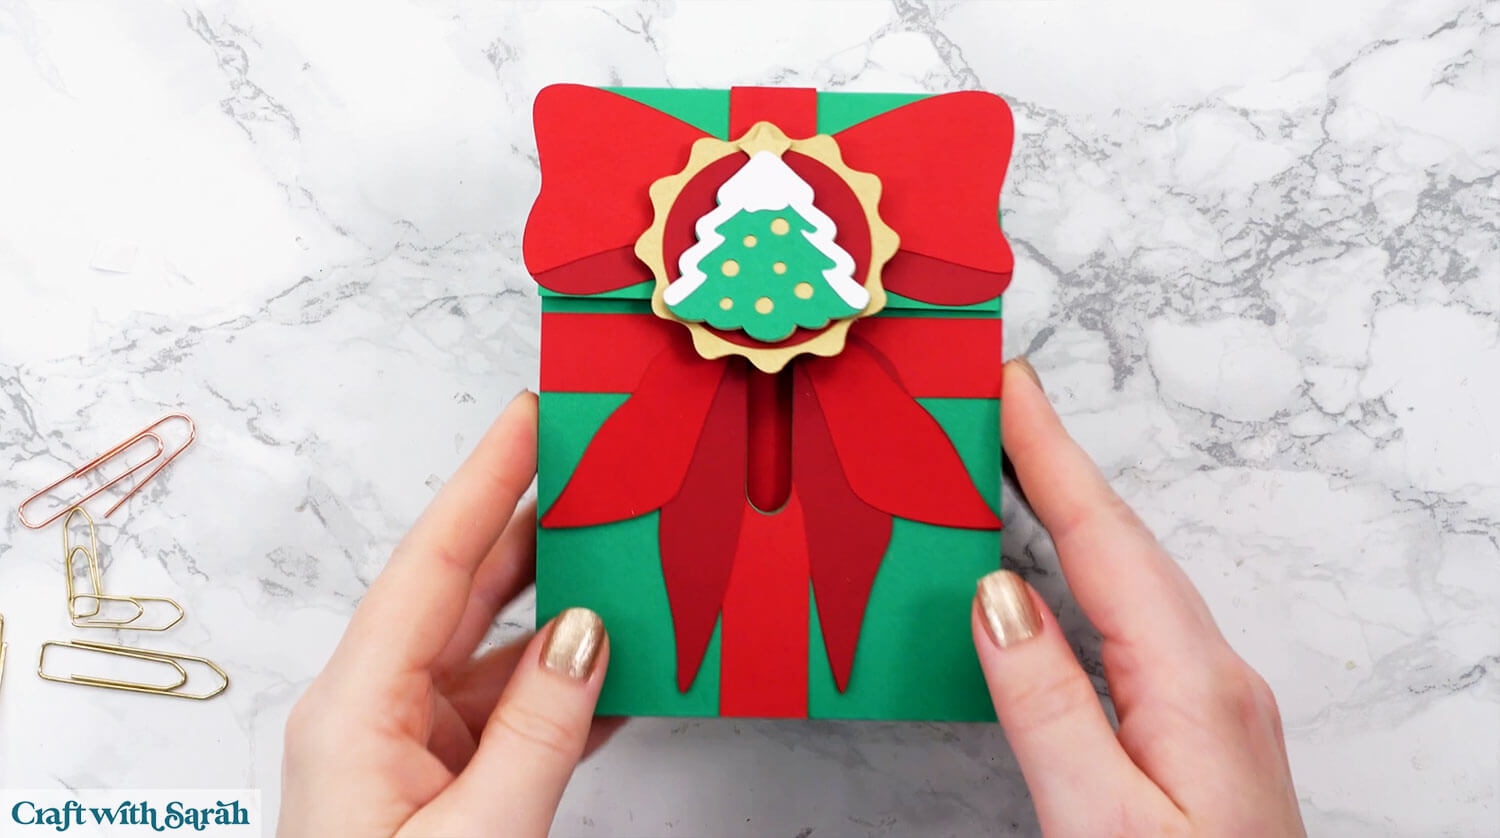
If you want a cleaner look, you can add a small bead of glue down the inside edges to close the sides slightly — just avoid the top bridge so the slider still works. Hold the glued edges with paper clips until dry.
Fun ways to present gift cards for Christmas
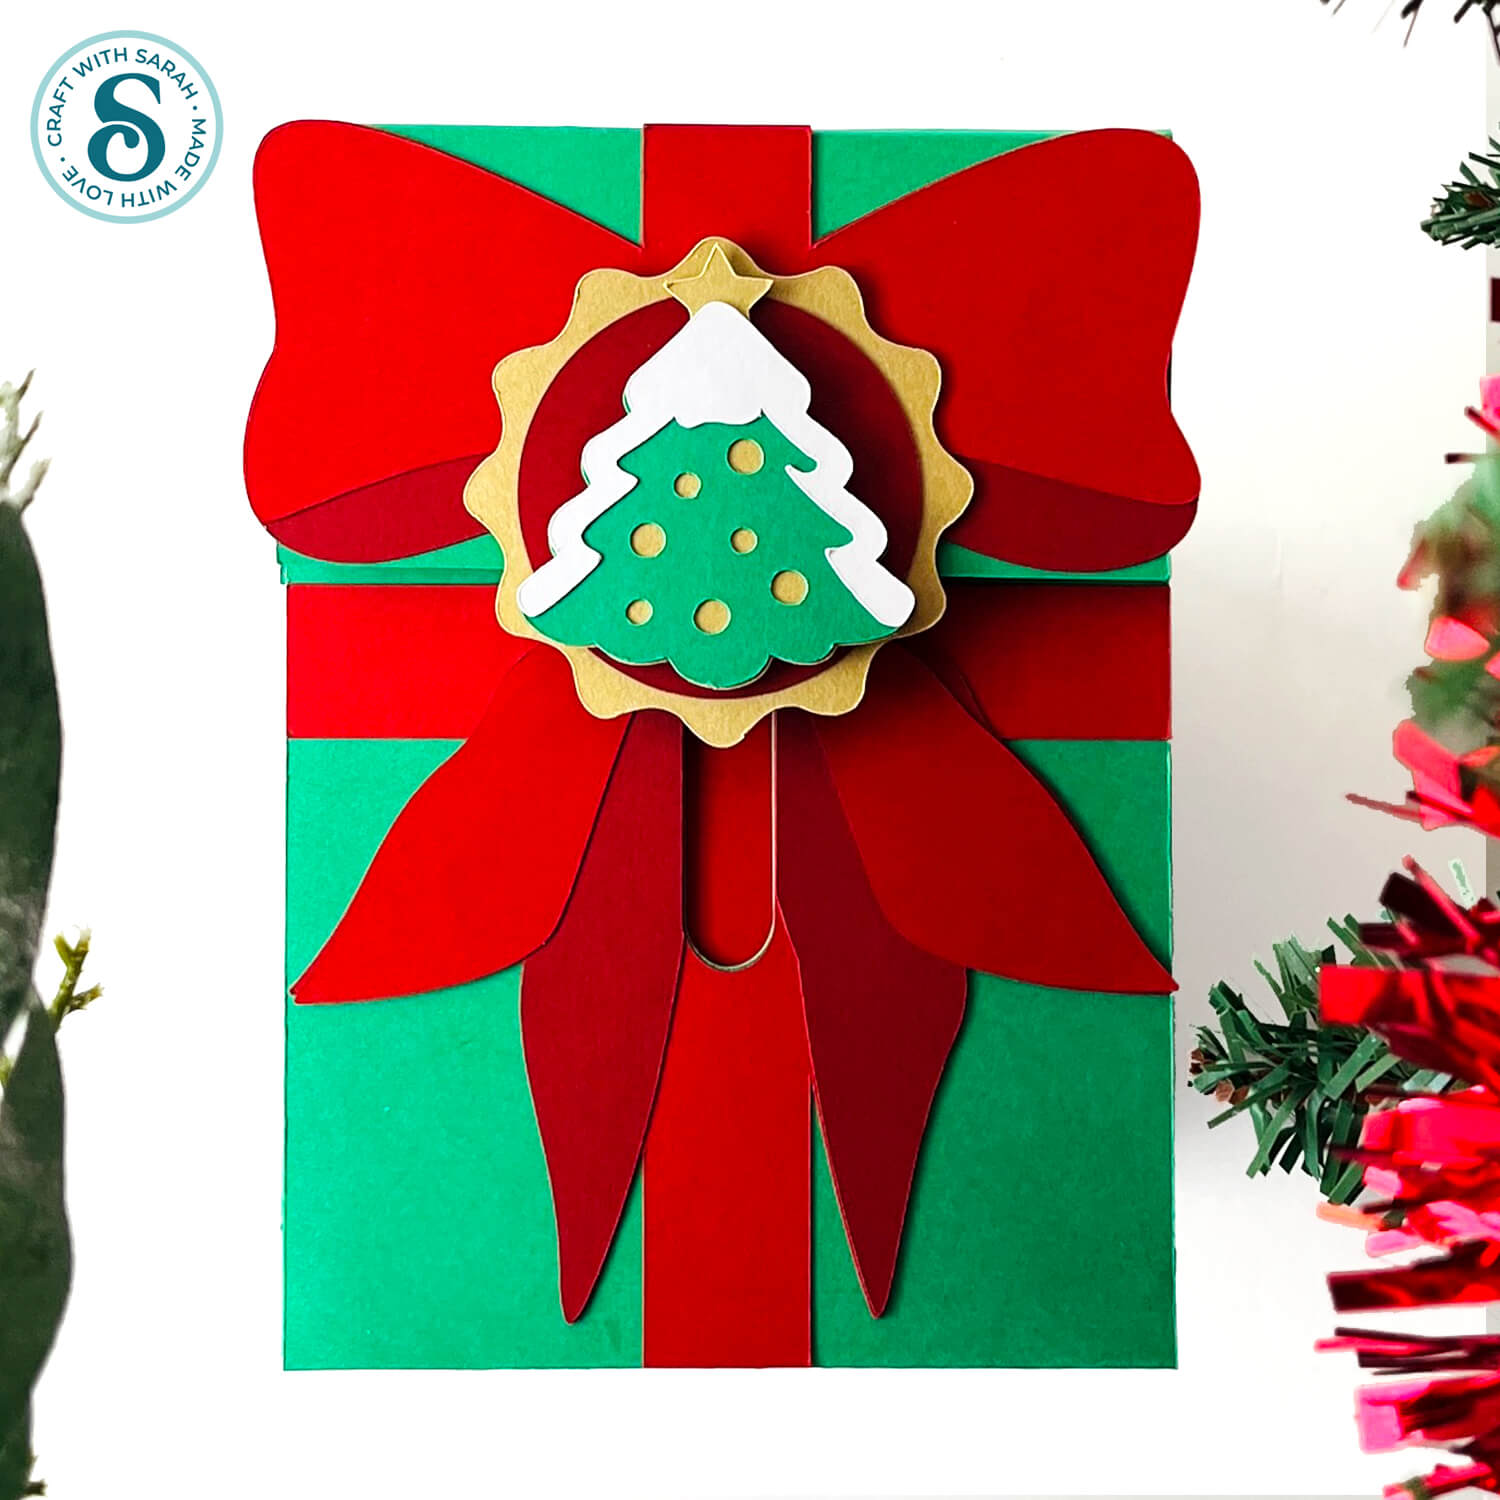
Now for the big reveal! Slide the badge up — the top section lifts, revealing your hidden gift card. When you slide it back down, it closes securely again.
You can write a personal message inside, or if you prefer it to be just a gift card holder, simply glue the inside edges shut.
It’s a fun, interactive way to give a gift card, and it feels extra special compared to a regular envelope.
Love making gift card holders with your Cricut?
Here are some more gift card and money holder SVGs:
- Simple gift card holder (free)
- Graduation money holders
- Popout square gift card holders
- Fireplace gift card holder
Happy crafting,
Sarah x

