Magical Letter to Santa 🌟 CCC 2025
Spread the magic of Christmas for children by having them write a letter to Santa with their gift wishlist… and they might just get a reply!
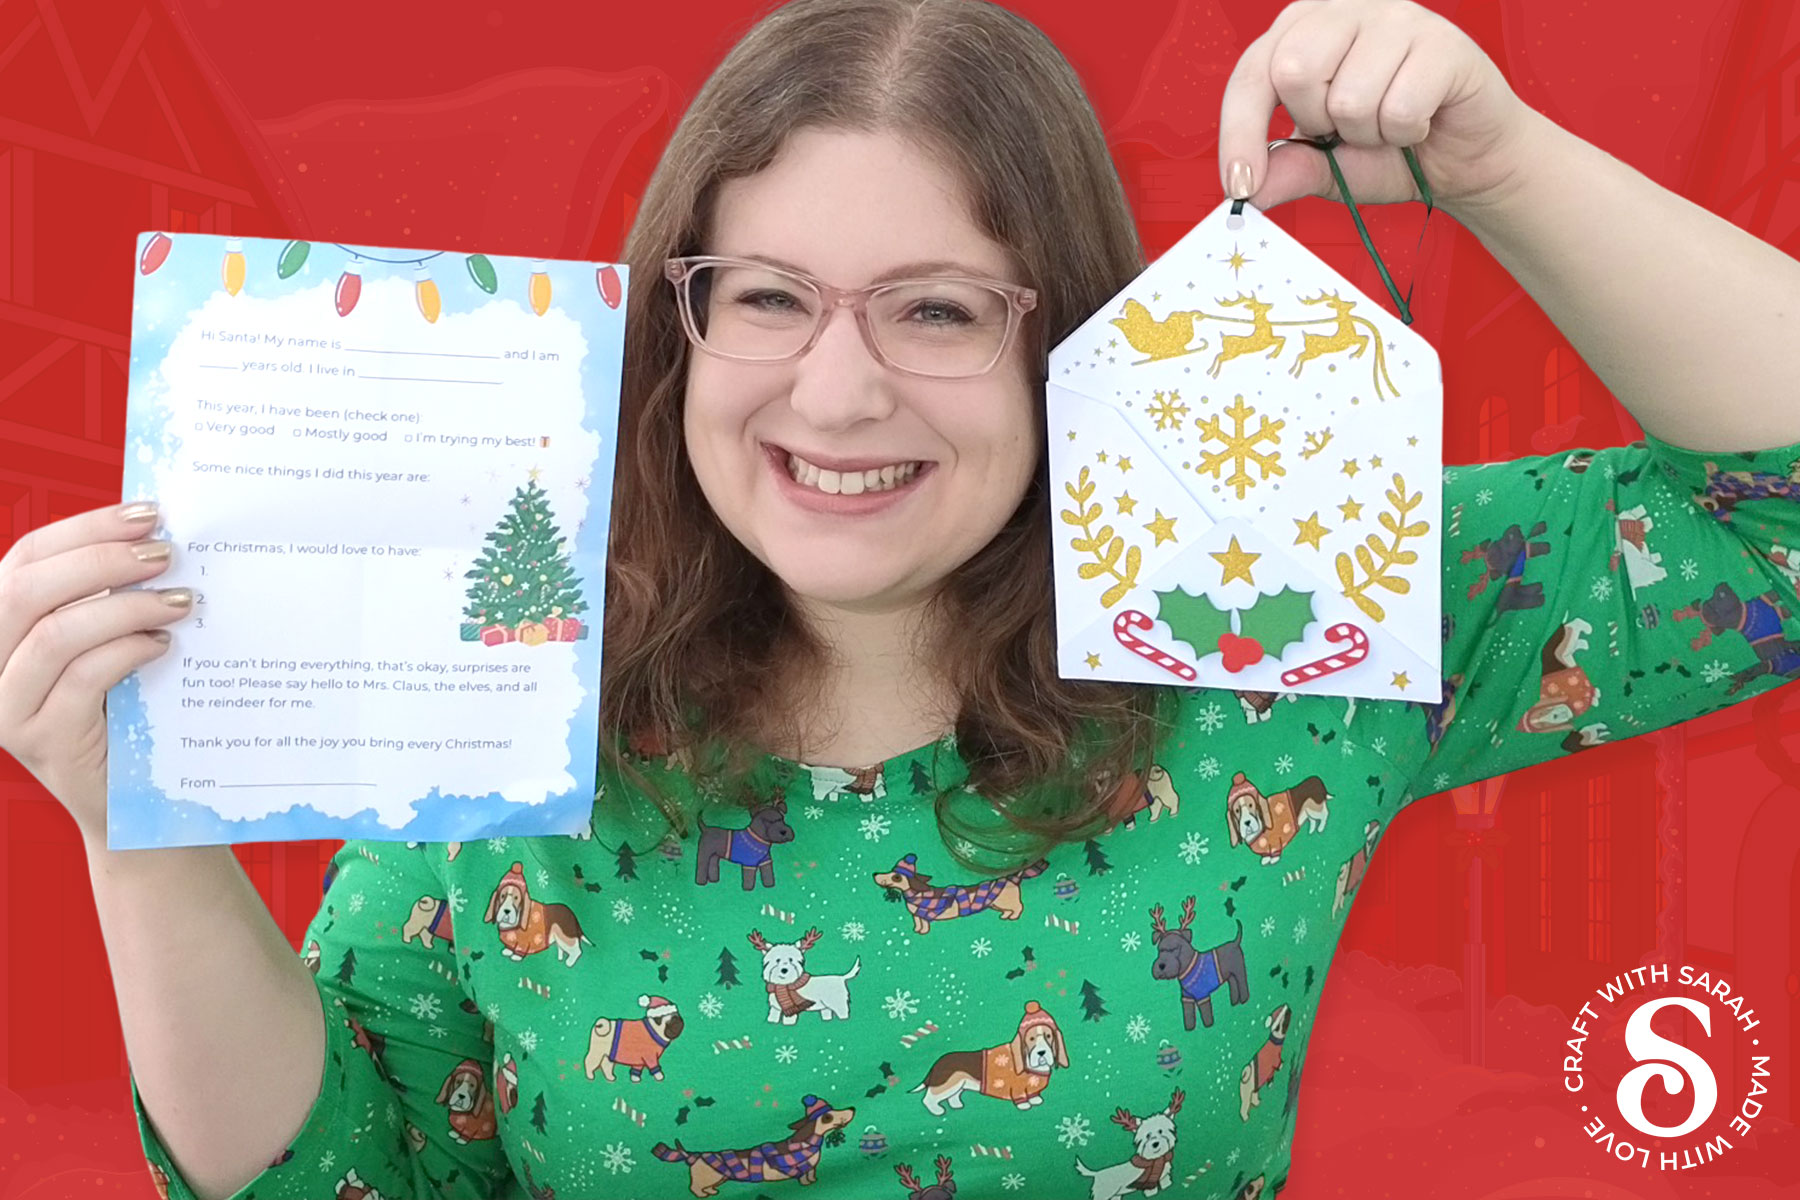
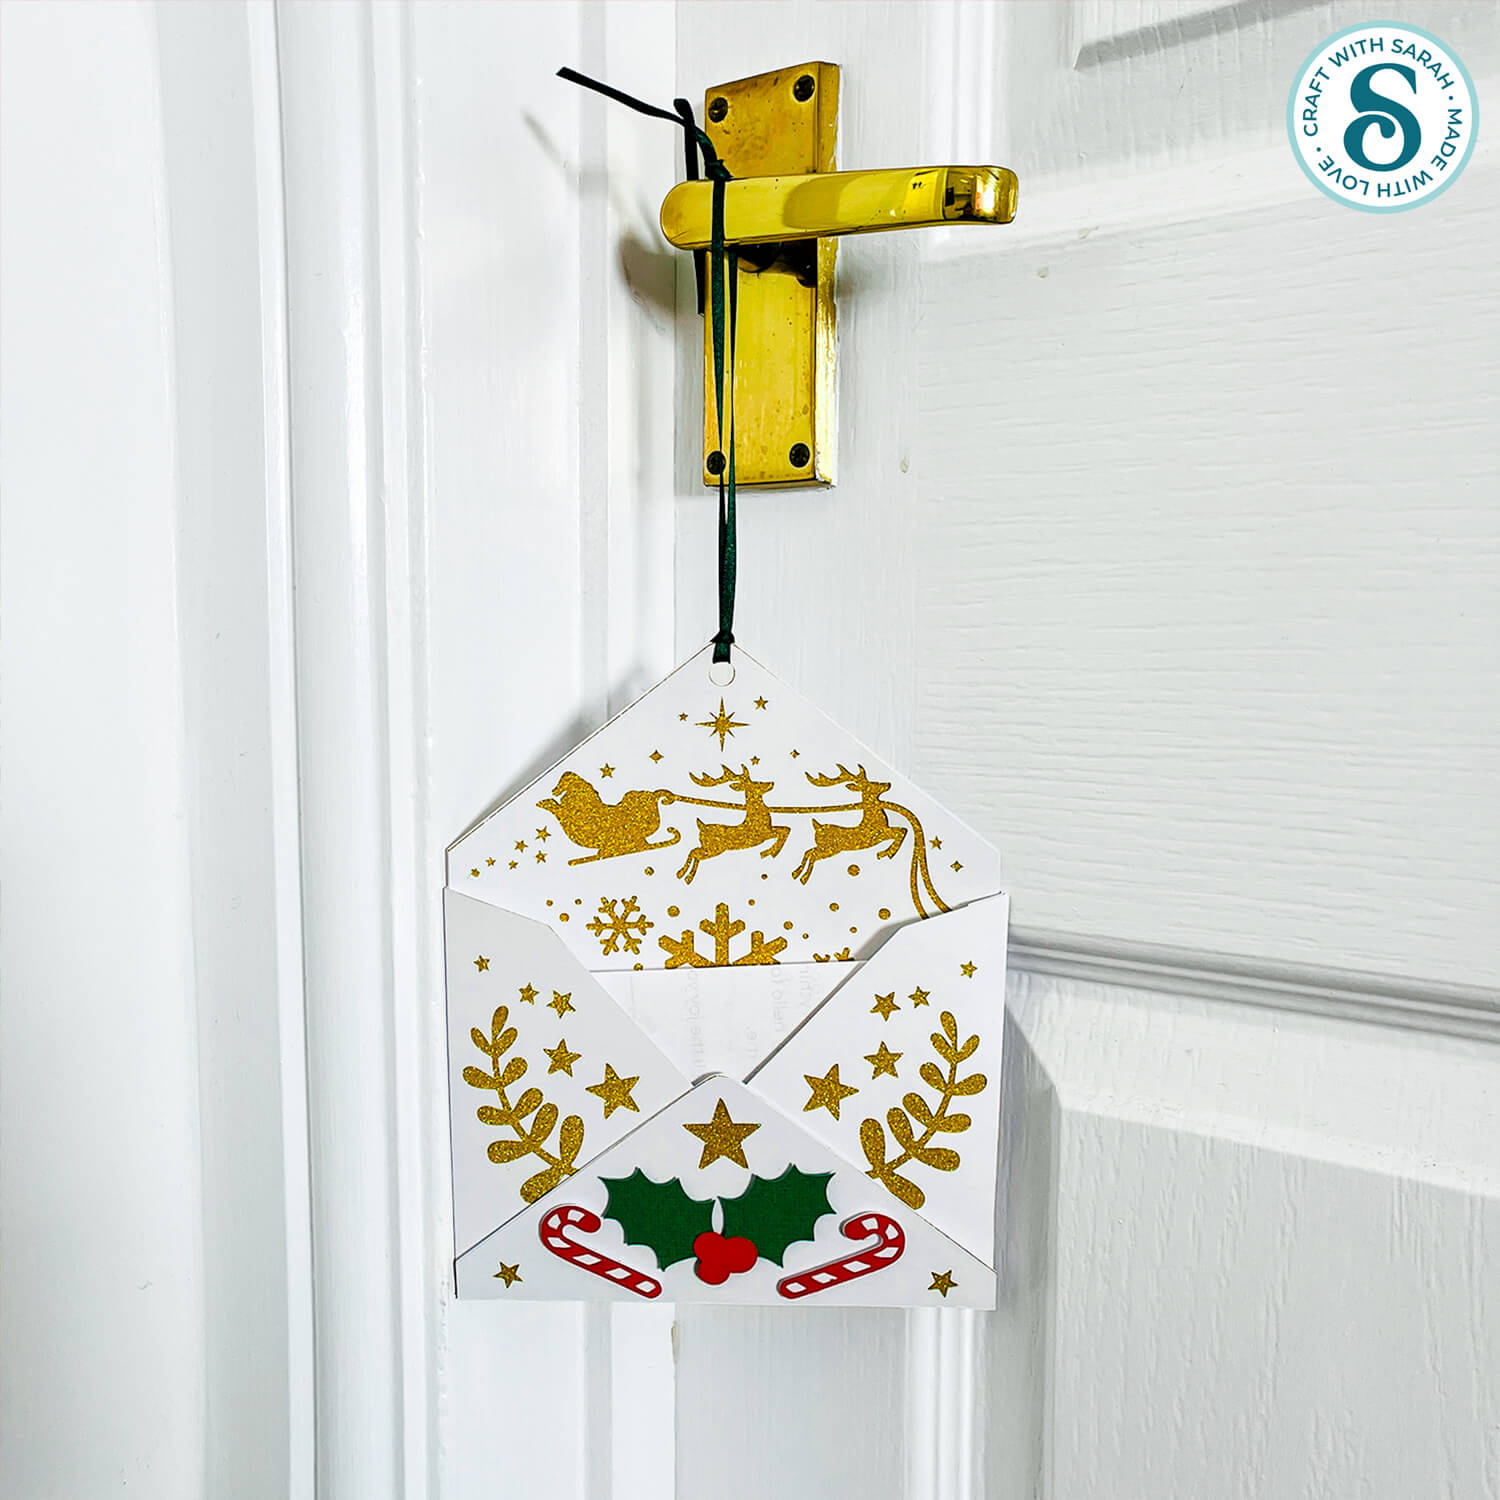
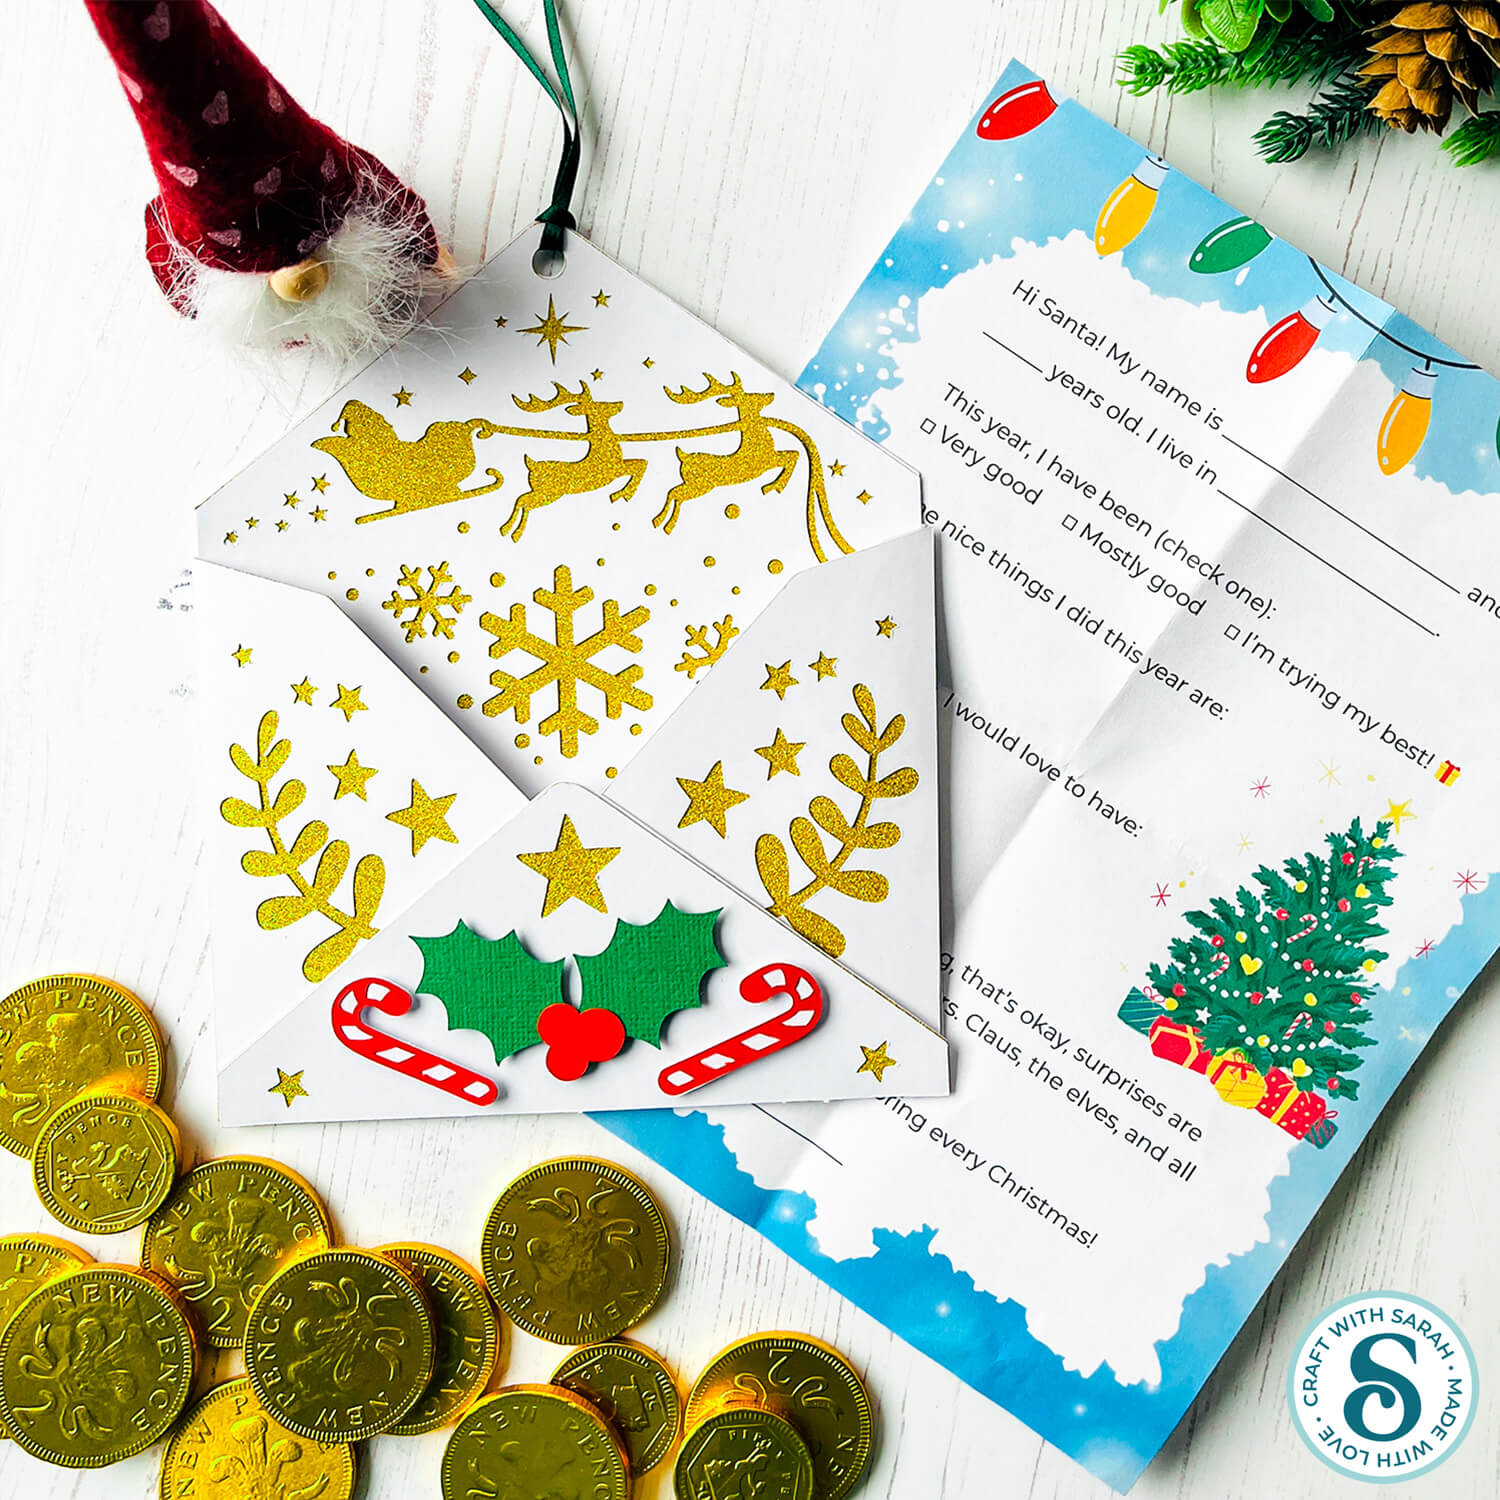
There’s something truly special about a child’s dear Santa letter, and this magical envelope craft adds an extra touch of wonder to the tradition.
In this project, we’re creating a beautiful cardstock envelope to hang on the Christmas tree, a doorknob, or anywhere else that feels just right for a delivery to the North Pole.
The design is easy to cut and assemble with your Cricut machine, and it’s sized ready for your child’s handwritten note, created using our printable letter to Santa template.
Once the envelope is hung and the wishlist is safely inside, the real magic begins. By morning, Santa’s elves will have stopped by to collect the note, and they’ll leave behind a personalized letter from Santa in response.

This idea turns the simple tradition of writing a Santa letter into something extra memorable. You can reuse the envelope year after year, and adapt it for multiple children by changing the names or adding extra notes and responses from Santa.
It’s the little touches like this that help build excitement and create traditions your family will treasure. With a bit of cardstock and creativity, you can spark a moment of joy they’ll always remember. ✨
If you decide not to use the printable letter templates, the envelope still makes a beautiful decoration for your Christmas tree. Resize the envelope smaller to be more “ornament-sized” and it makes a pretty, sparkly decoration to hang.
The Letters come in both English and French versions. (Les Lettres existent en versions anglaise et française.)
This project is part of the 2025 Christmas Craft Countdown.
Santa letter materials supply list
Here is a list of the materials that are used to make this project.
Please note that some of the links included in this article are affiliate links, which means that if you click through and make a purchase I may receive a commission (at no additional cost to you). You can read my full disclosure at the bottom of the page.
- Cricut machine
- Light blue Cricut cutting mat
- Scoring wheel or scoring stylus (don’t have one? Try these tips)
- Coloured Card (any thickness)
- Glue (I like Bearly Art Glue and Collall)
- 3D foam pads
- Colour printer
- Regular printer paper
- Ribbon, twine or similar to hang the envelope
This project is suitable for the following types of Cricut machines: Explore series, Maker series, Joy Xtra and Joy. You will need to make the envelope smaller to cut on the original Joy, and fold the letter more times so that it will fit inside.
Foundation learning
If you're new to making papercrafts with your cutting machine, check out these links to get you started.
They include videos on topics such as: which file to use with your type of cutting machine, how to load the files into your cutting machine's software, how to cut cardstock with your type of cutting machine, how to recolor and modify/customize the cut files and tips for displaying your projects.
- Help guides for Cricut machines
- Help guides for Silhouette machines
- Help guides for ScanNCut machines
The following tutorials are Cricut-specific, but many of the ideas will work similarly with a Silhouette or ScanNCut machine and any cut files that are shared in them are compatible with all types of cutting machine.
- How to score with a Cricut (even without scoring tools)
- Print then cut tutorial
- Design Space tools (Combine, Attach, Slice, Weld, Flatten, etc.)
- Pattern fill tutorial (for making backgrounds & cutting images to a specific shape/size)
- Free envelope SVGs that can be sized to fit any card
- Presentation boxes for handmade cards
- How to write inside cards with Cricut pens
- How to cut layered designs at a small size
- Design Space tips & tricks
- Cricut pens tutorial
- How to mount multiple designs in the same frame with magic guides
Printable Santa letter video tutorial
Watch the video below to see how to make this project. Keep scrolling for a written tutorial.
PART ONE: envelope template
Here’s how to make the hanging envelope template using a Cricut machine. Instructions for the printable Santa letter templates are further down the page.
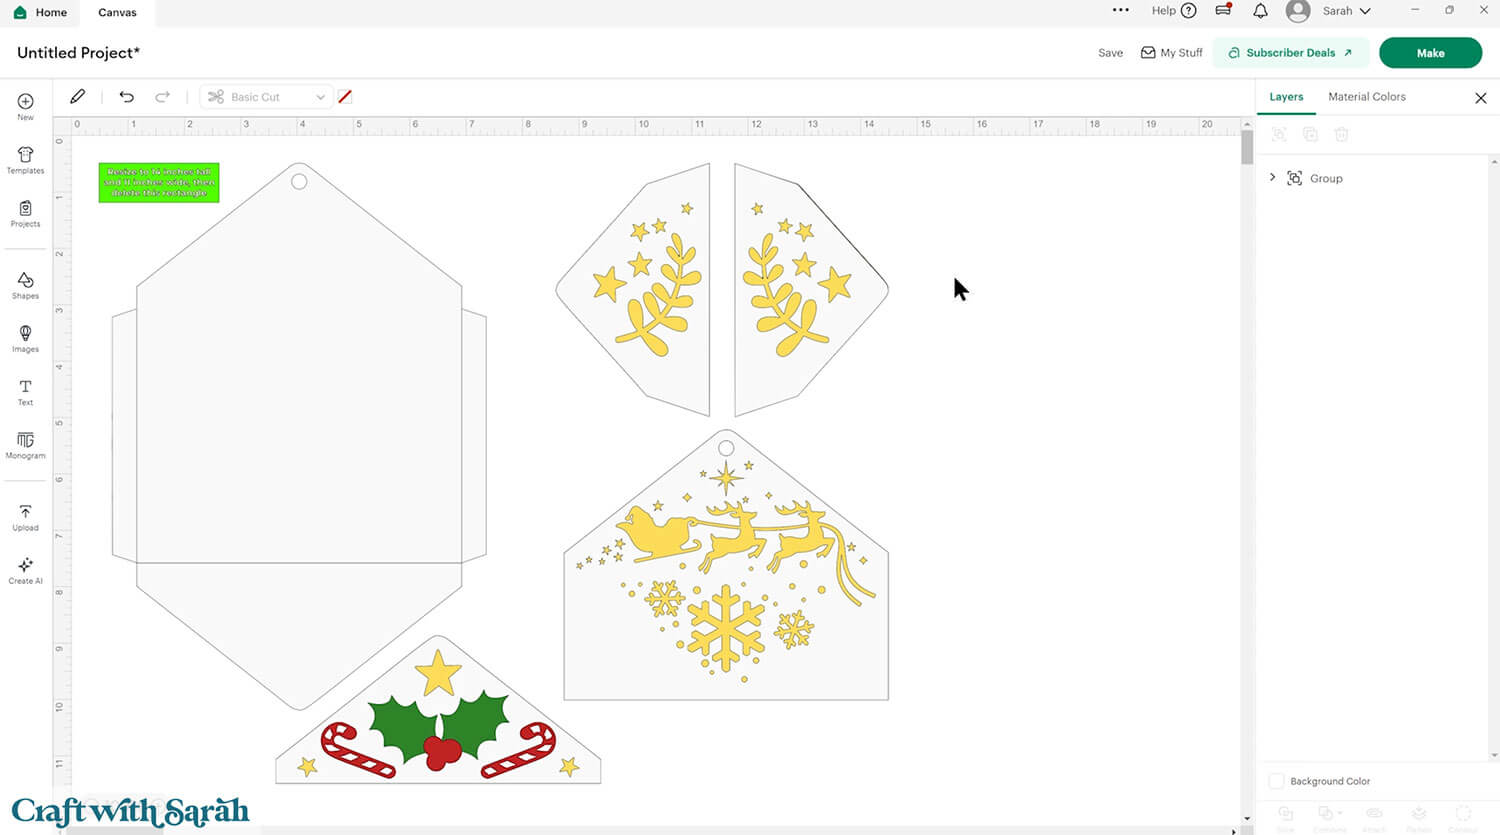
Step 1) Download the cutting file & upload to Design Space
Get the files using the box below.
Purchase the File(s)
This cut file is available as part of the Instant Access Bundle.
Or, purchase this design individually here
Before you upload the SVGs to Design Space, you need to unzip the download folder that they come in.
- How to unzip a folder on Windows computer
- How to unzip a folder on a Mac
- How to unzip a folder on an iPad/iPhone
- How to unzip a folder on an Android device
After unzipping, upload the SVG file(s) into your cutting machine software.
Not sure how to use cut files with your type of machine? The following links lead to videos on how to open cut files in:
- Cricut Design Space
- Silhouette Studio
- CanvasWorkspace (for ScanNCut machines)
The download folder also contains printable PDF versions of the templates for hand cutting.
If you are using Cricut Design Space, start a new project and then click the “Upload” button on the left of the screen.
You can then either click “Browse” to find the file on your computer, or drag-and-drop it.
Click into the “Envelope” subfolder and then select the file in the “01 Cricut Version” subfolder called svg-01-letter-to-santa-craftwithsarah.svg
Press “Upload” on the next screen.
After uploading, the design should be automatically inserted onto your Canvas.
To hide the left sidebar (to give you more space for designing!), click the arrow that’s about half way down the page.
If the design doesn’t get inserted onto your Canvas, it will show under “Uploads” in your “Recently Uploaded Images”. Click on it and then press “Add to Canvas” to put it onto your Project.
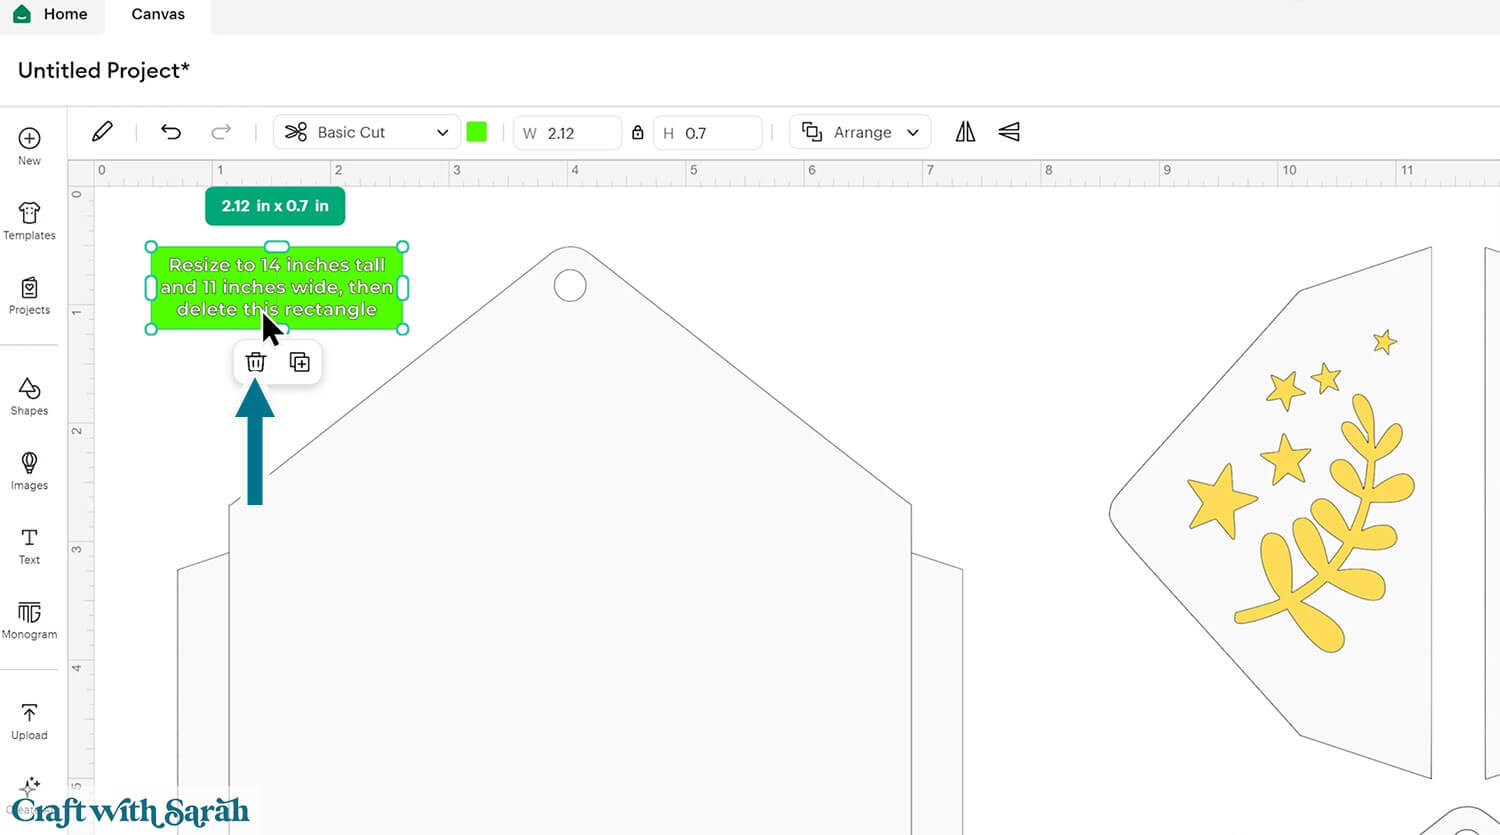
The design should load in at 25 inches wide and 26 inches tall. If yours is different, change it to those measurements.

After checking the size is correct, click the design and press “Ungroup”, which is located at the top of the layers panel and in the floating bar along the bottom of the screen.

Click the green rectangle layer with the sizing information and delete it.
Step 2) Format the score lines
You need to format the score lines of the design to tell the Cricut to score them instead of cutting them.
If you are making this project with a Cricut Joy Xtra, or if you don’t have a scoring tool, here is a tutorial on how you can still score with those type of machines.
If you look in the layers panel, you will see that some of the pieces in this design have a little arrow/chevron symbol to the left of them in the layers panel. This means that they are part of a Group.
Click the group and press the arrow to open up the layers.

Each group consists of two layers: a solid white shape at the bottom and a single-line layer on top.
Click the top layer in the group that you have opened.
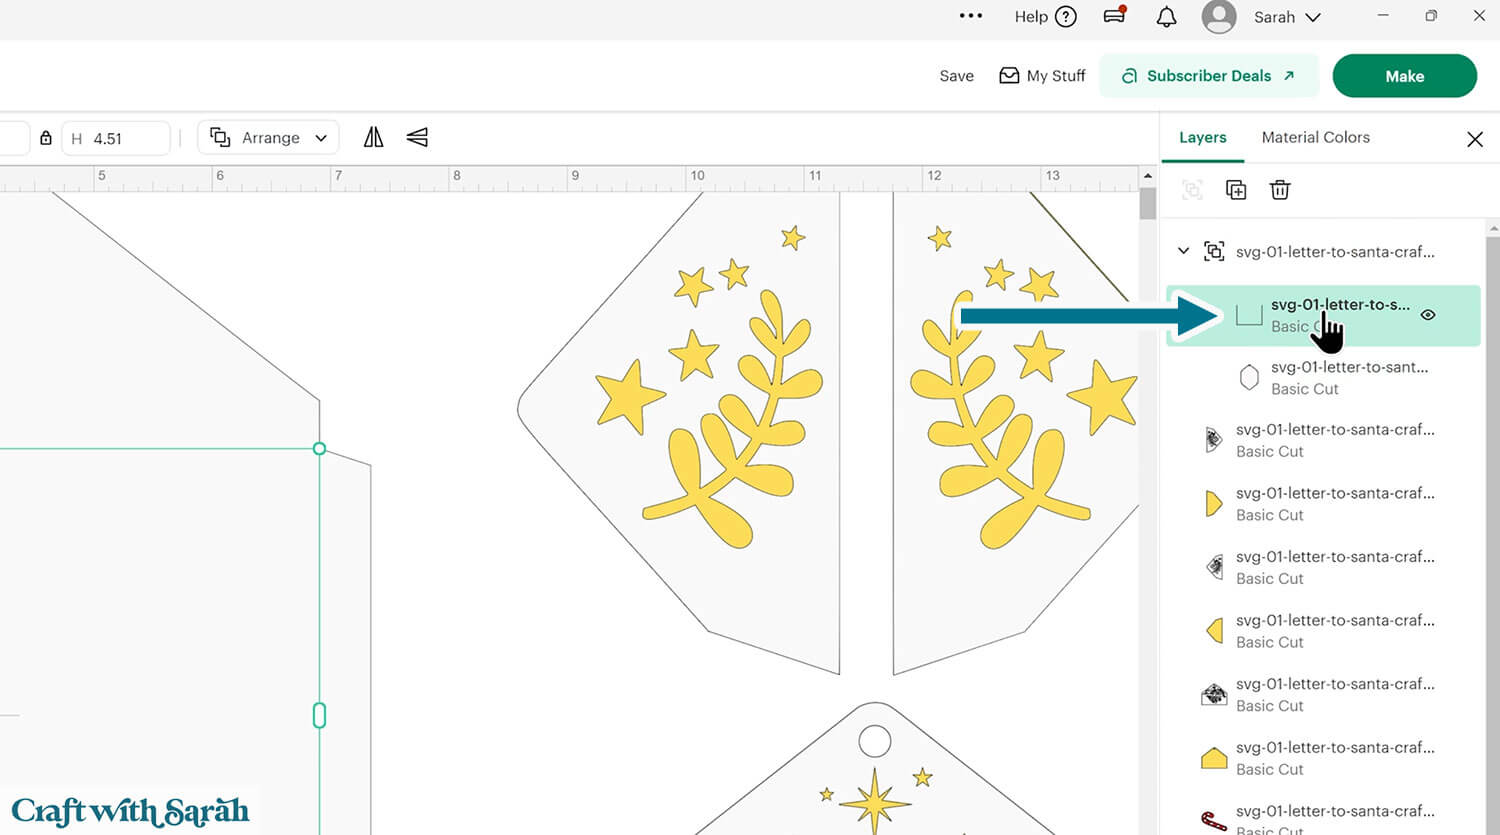
Change it to “Score” using the Operations dropdown menu.

Click to select the group (of 2 layers) and press “Attach”. Attach is what tells the Cricut where to do the scoring.

That is the only part of this design that requires scoring.
Step 3) Cut out all the layers
When you’re happy with how the project is looking in Design Space, click “Make” and follow the instructions on-screen to cut out all the pieces.
To change the paper size, go into the dropdowns over on the left side of the screen and choose the paper size that you want to use. You need to change it for every single colour.

To save space on your cardstock, you can move things around by clicking and dragging. Make sure when you’re moving things about that nothing overlaps because otherwise, it won’t cut out properly.

TIP: New to using cardstock with your cutting machine? Check out these machine help guides for Cricut, Silhouette and ScanNCut that go through every step of the process, including tips for getting the best quality cuts from your machine.
Step 4) Stick the envelope together
Use 3D foam pads and glue to stick the layers together.
My favourite glues to use on papercraft projects are Bearly Art Glue and Collall All Purpose Glue.
These are great because they don’t “warp” or bend the cardstock like some glues do. You can use as much of it as you want and the card stays perfect – and it dries perfectly clear too!
Bearly Art Glue comes with a tiny nozzle to make it easy to apply glue to small areas of card. The Collall glue doesn’t come with this, so it’s easiest to decant it into needle tip applicator bottles so that you have more control.
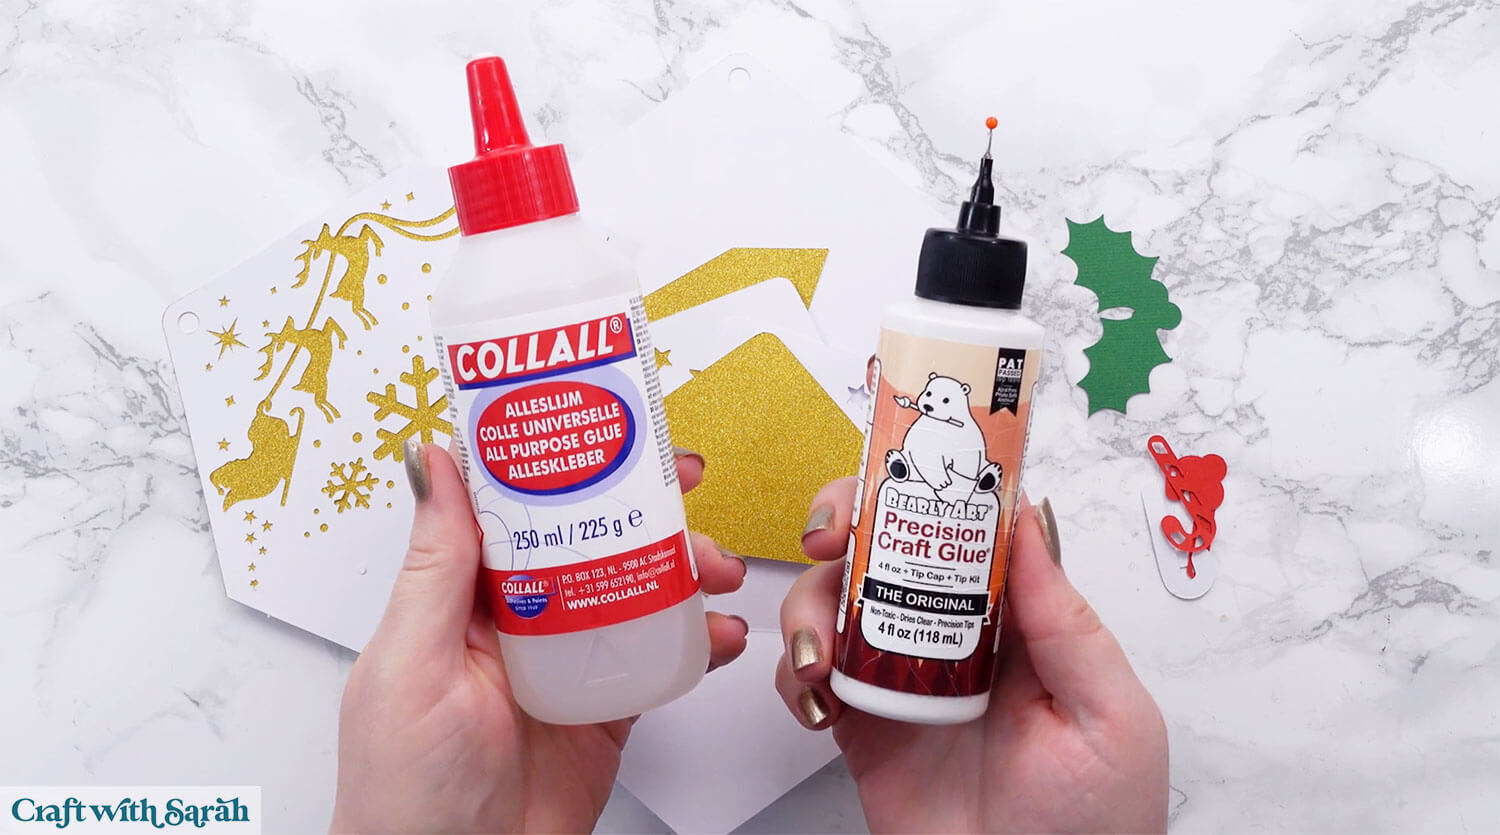
The foam pads that I use are from “Dot & Dab”, but any foam squares will work. If yours are big then you may need to cut them smaller with scissors to fit inside the edges of the layers.

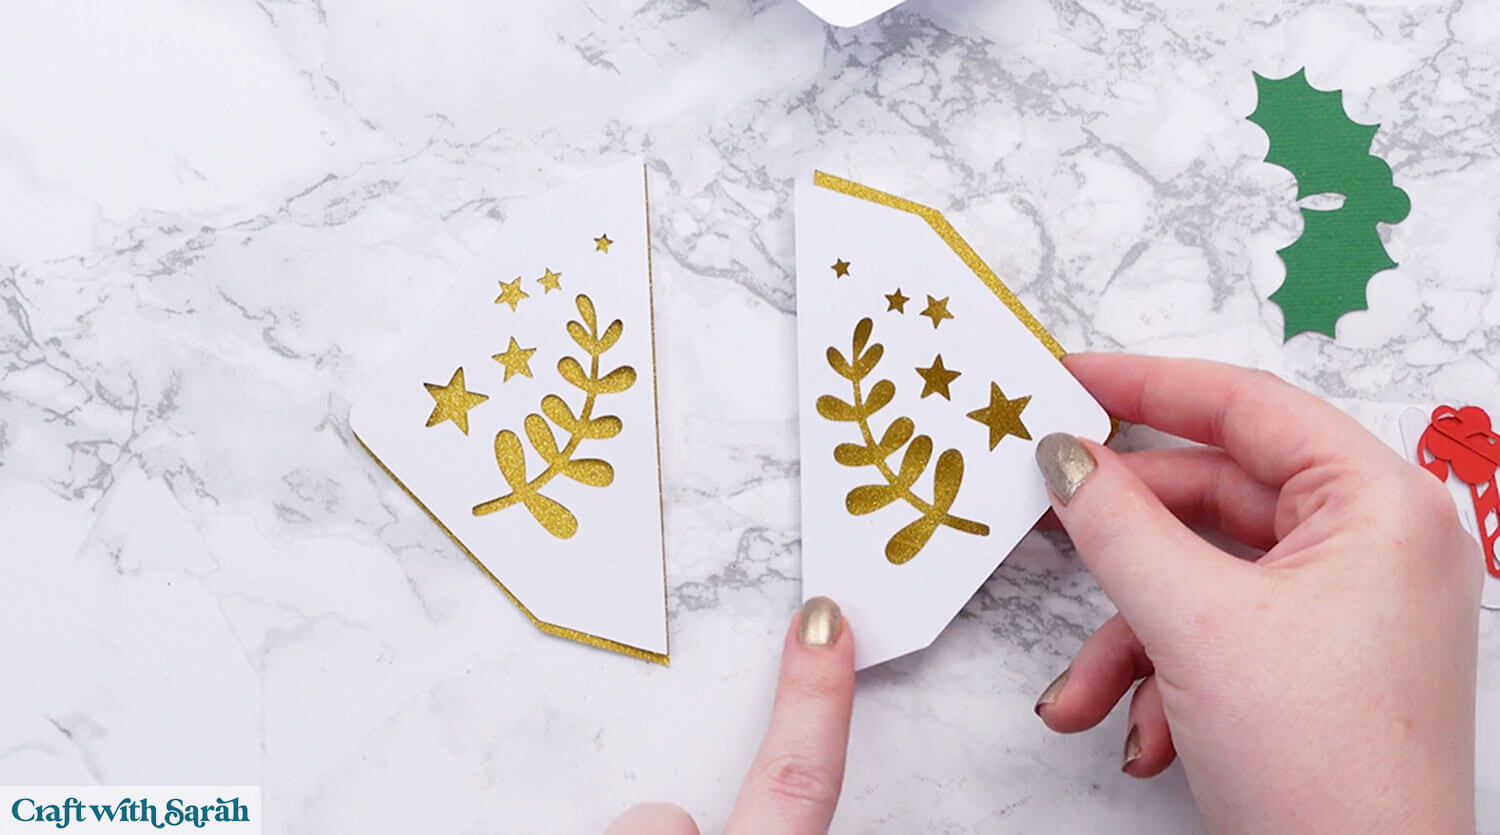
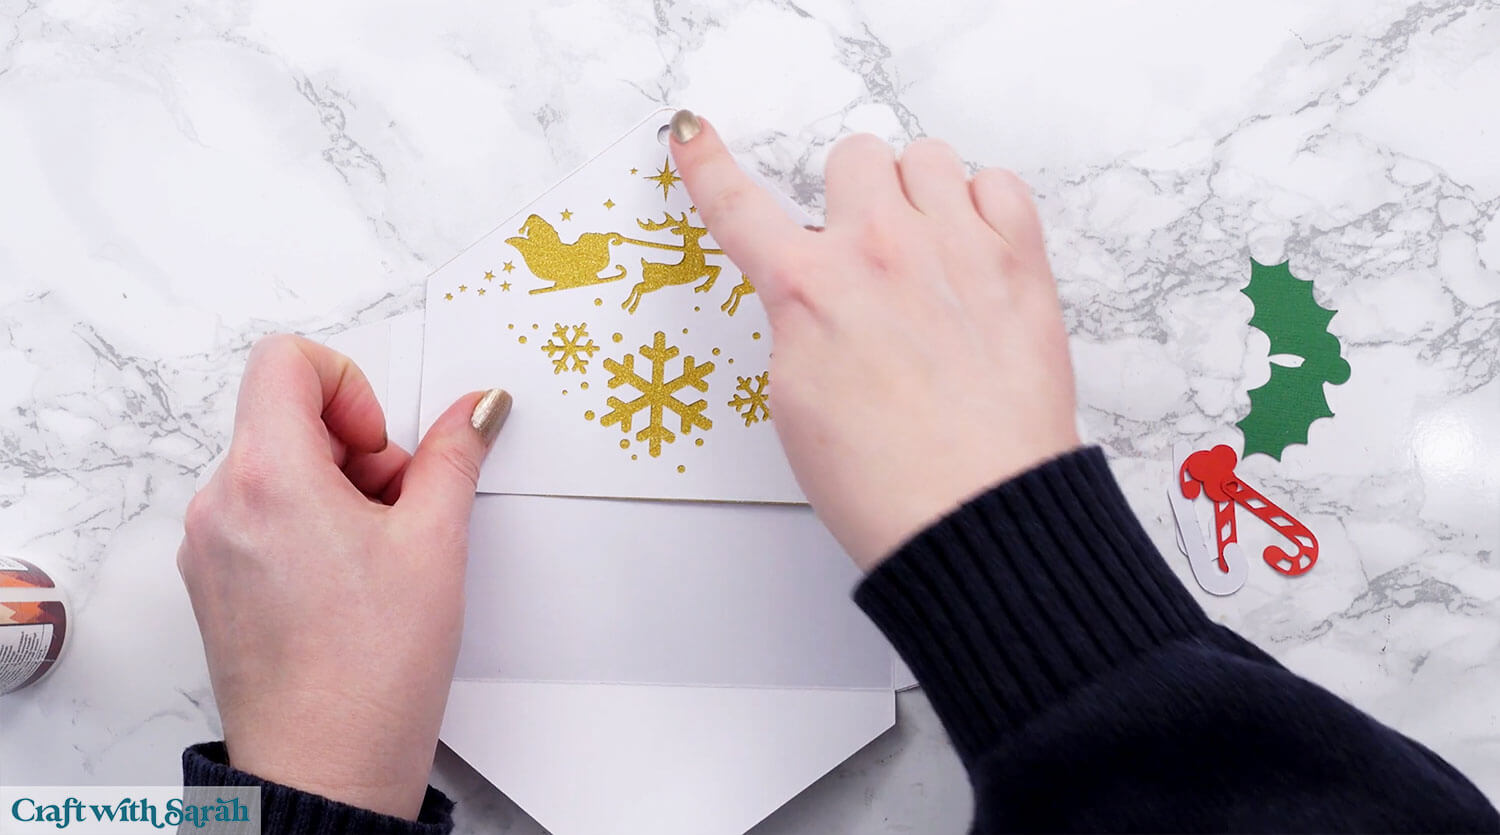
Start by gluing the white decorative layers onto the gold or glitter layers.
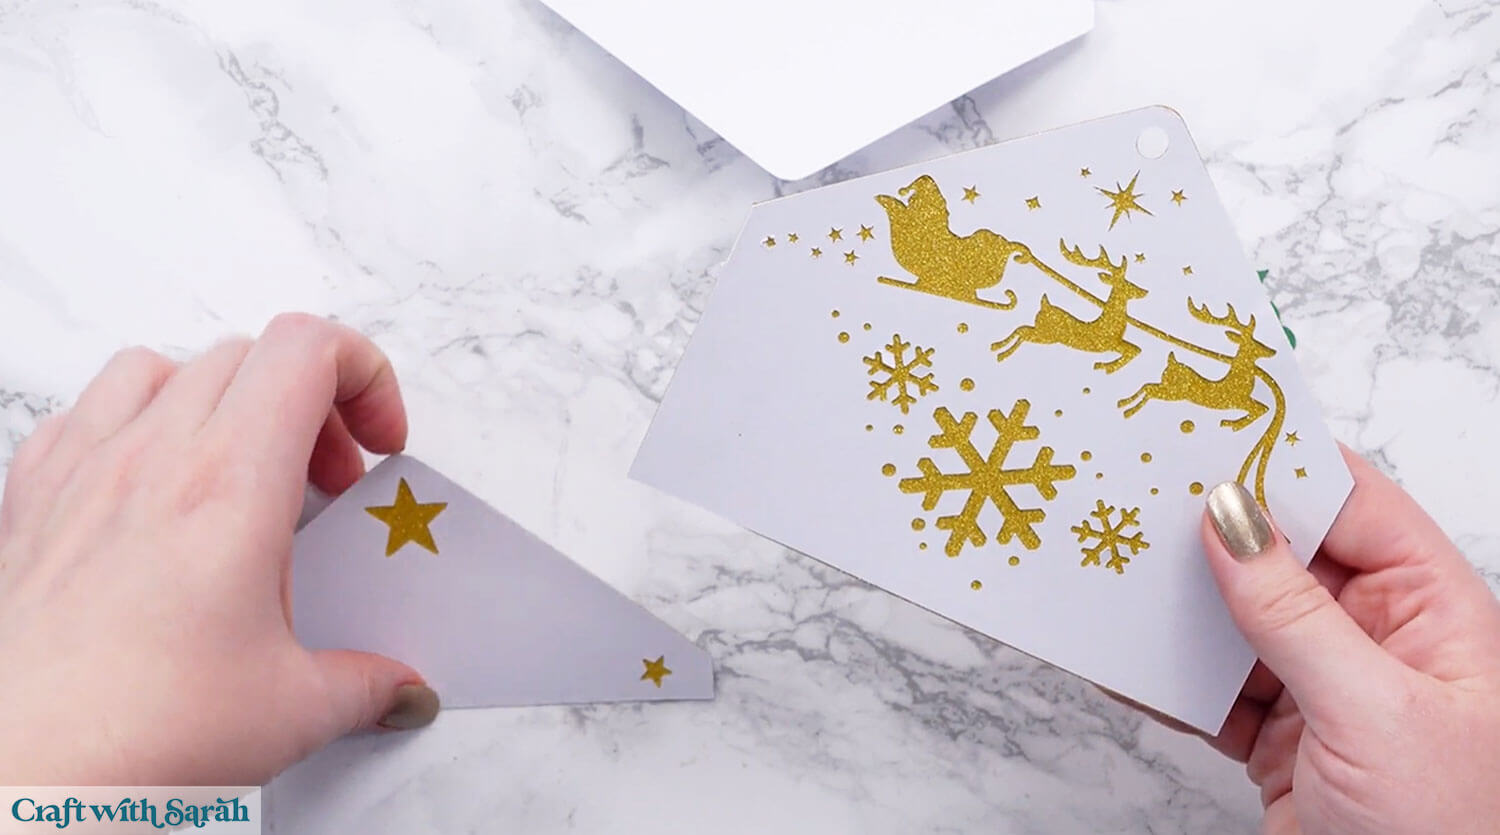
When gluing the two side pieces, make sure you line them up exactly as shown in Design Space (or in the photo below). The patterns have a specific direction, with stars at the top and leaves pointing downward.
If you flip them the wrong way, the stars will get covered by the flap once the envelope is folded.
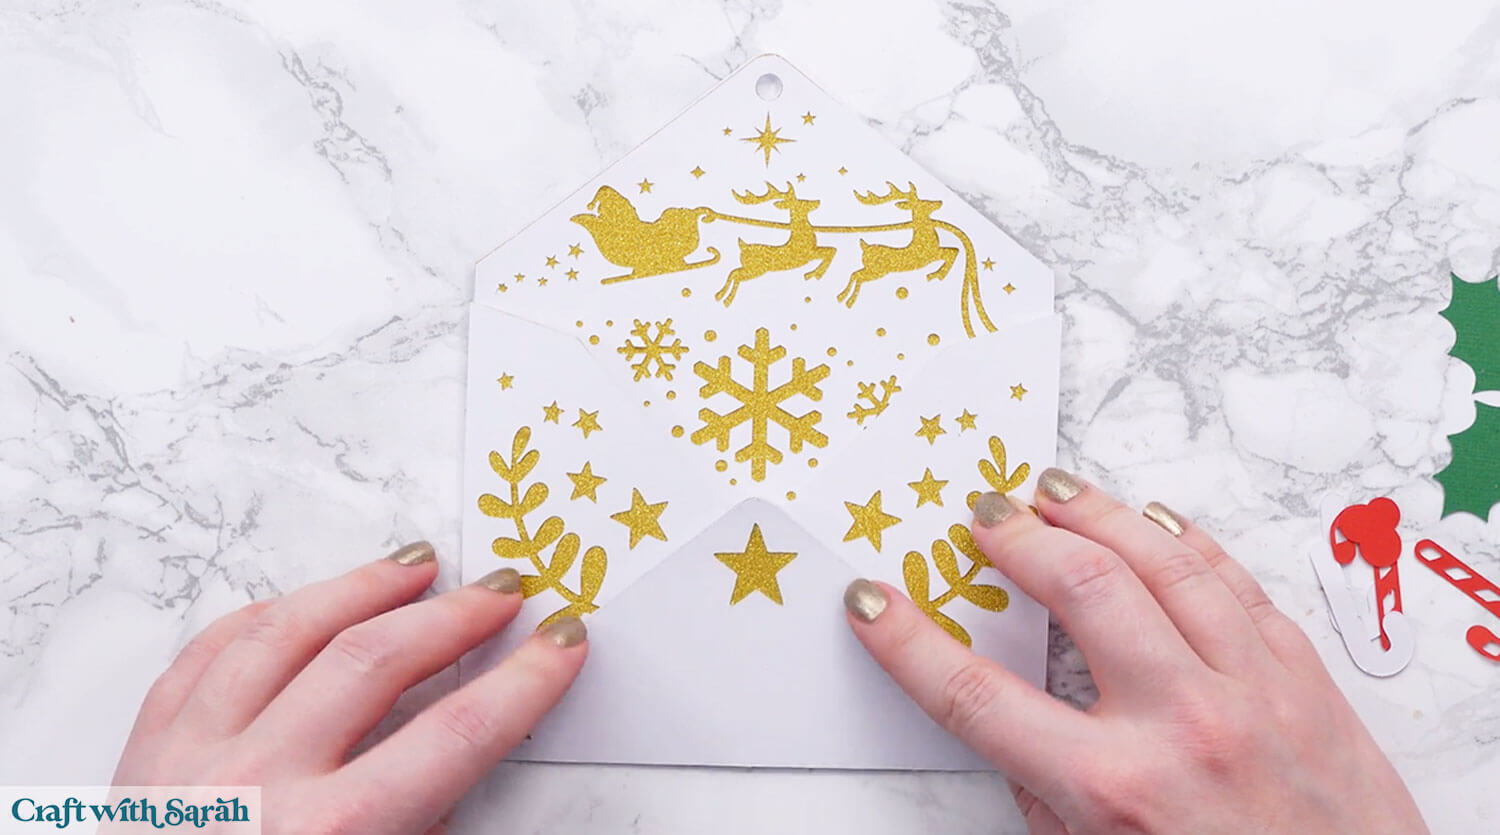
Fold along all the score lines so the tabs bend toward you.
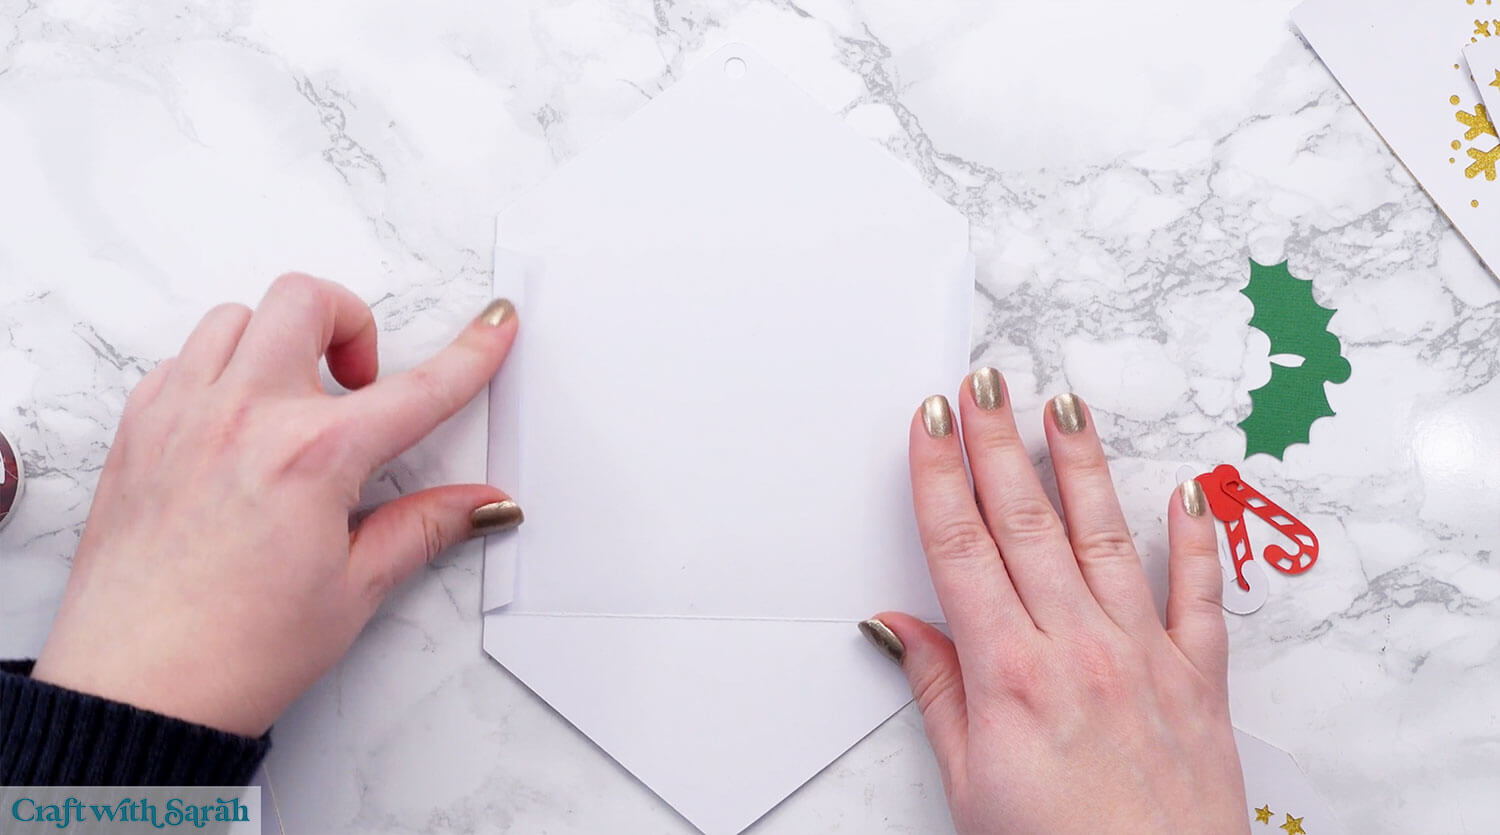
Turn it over and glue the side pieces onto the tabs on the main base piece.
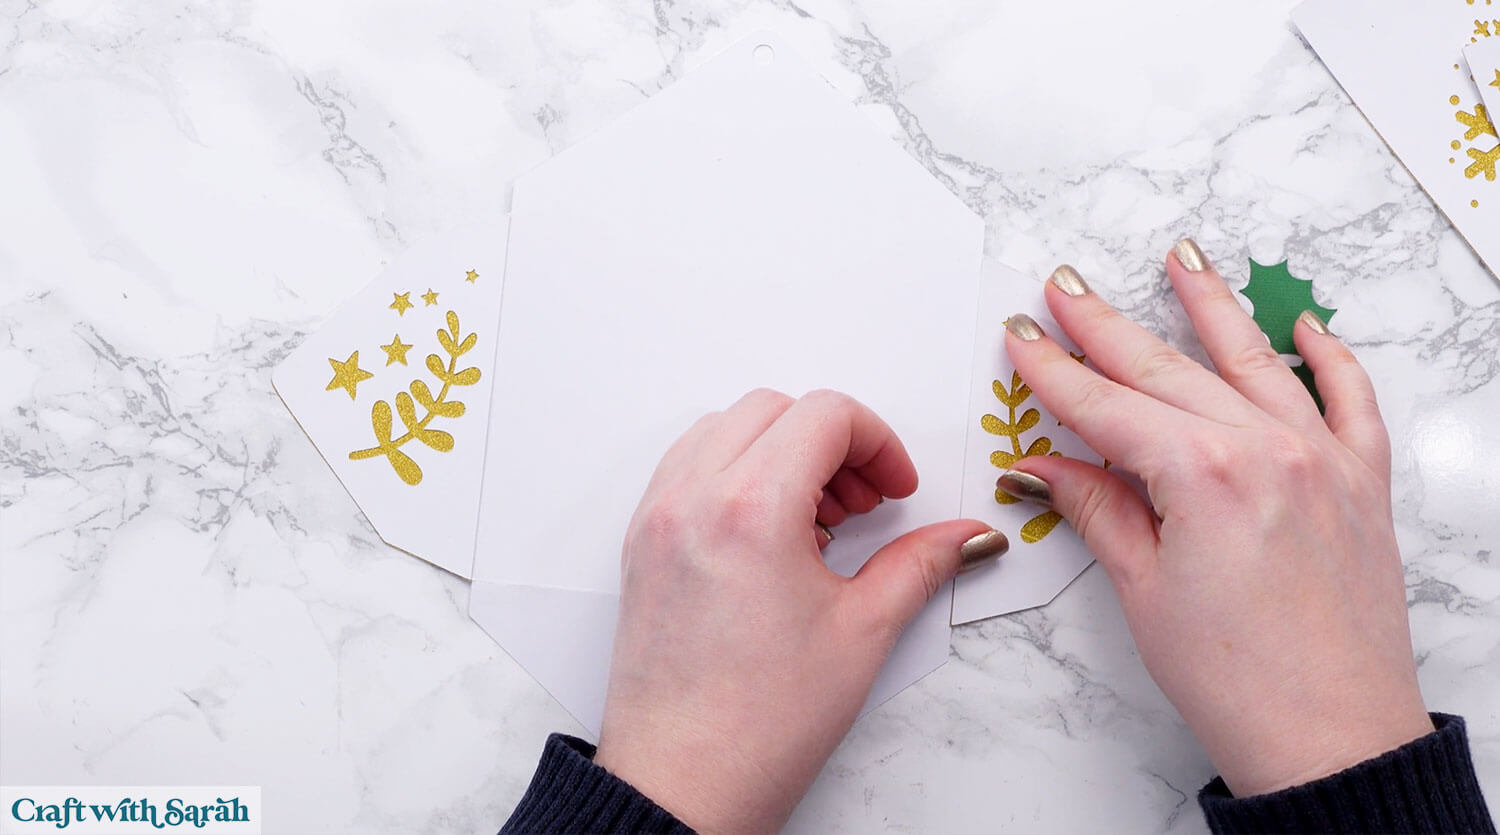
Turn the envelope upside down, fold the bottom flap upwards and glue the decorative piece on top.
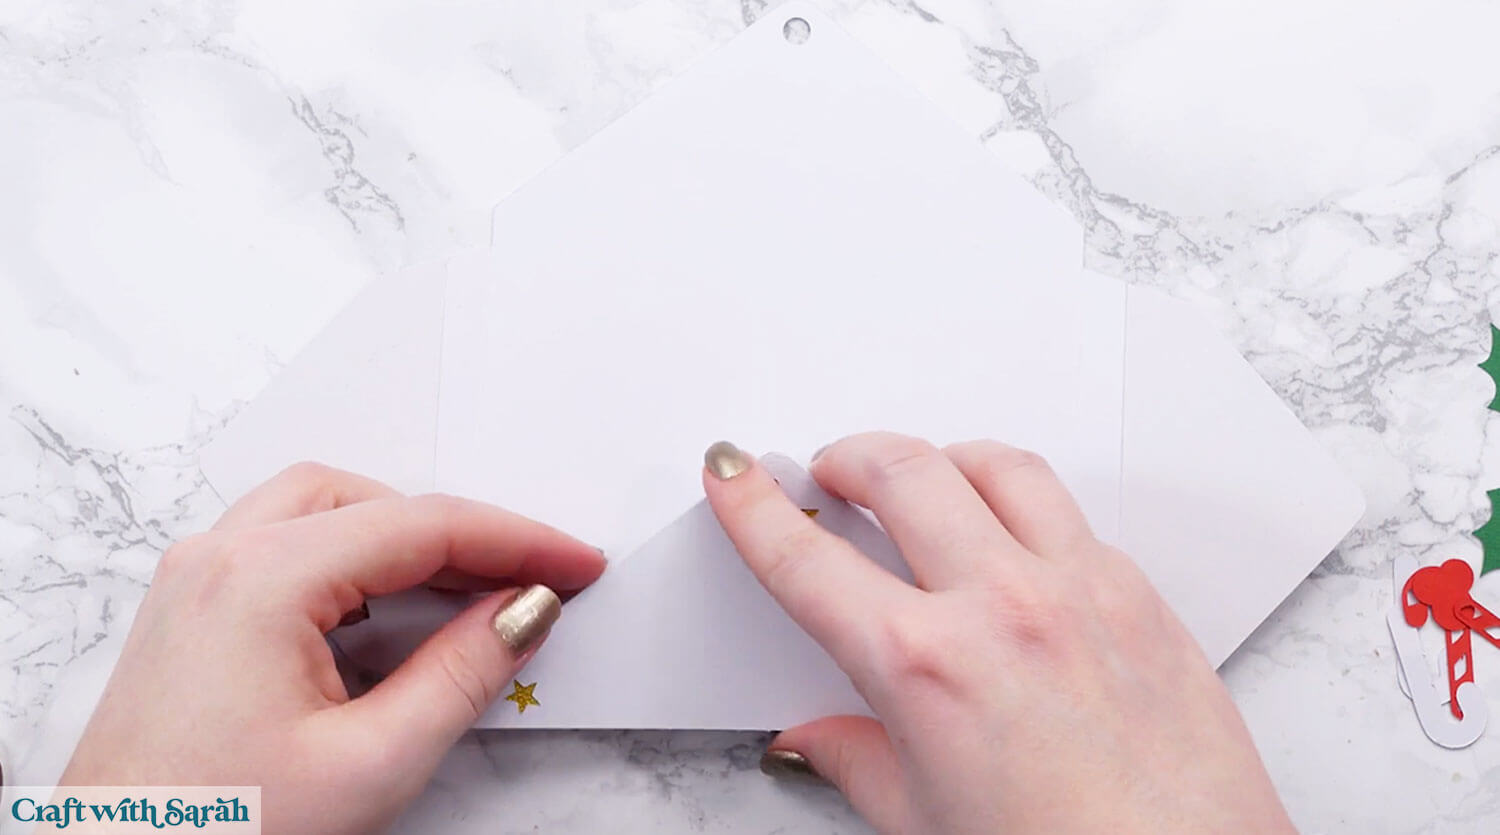
Glue the top piece with the Santa and sleigh into position.
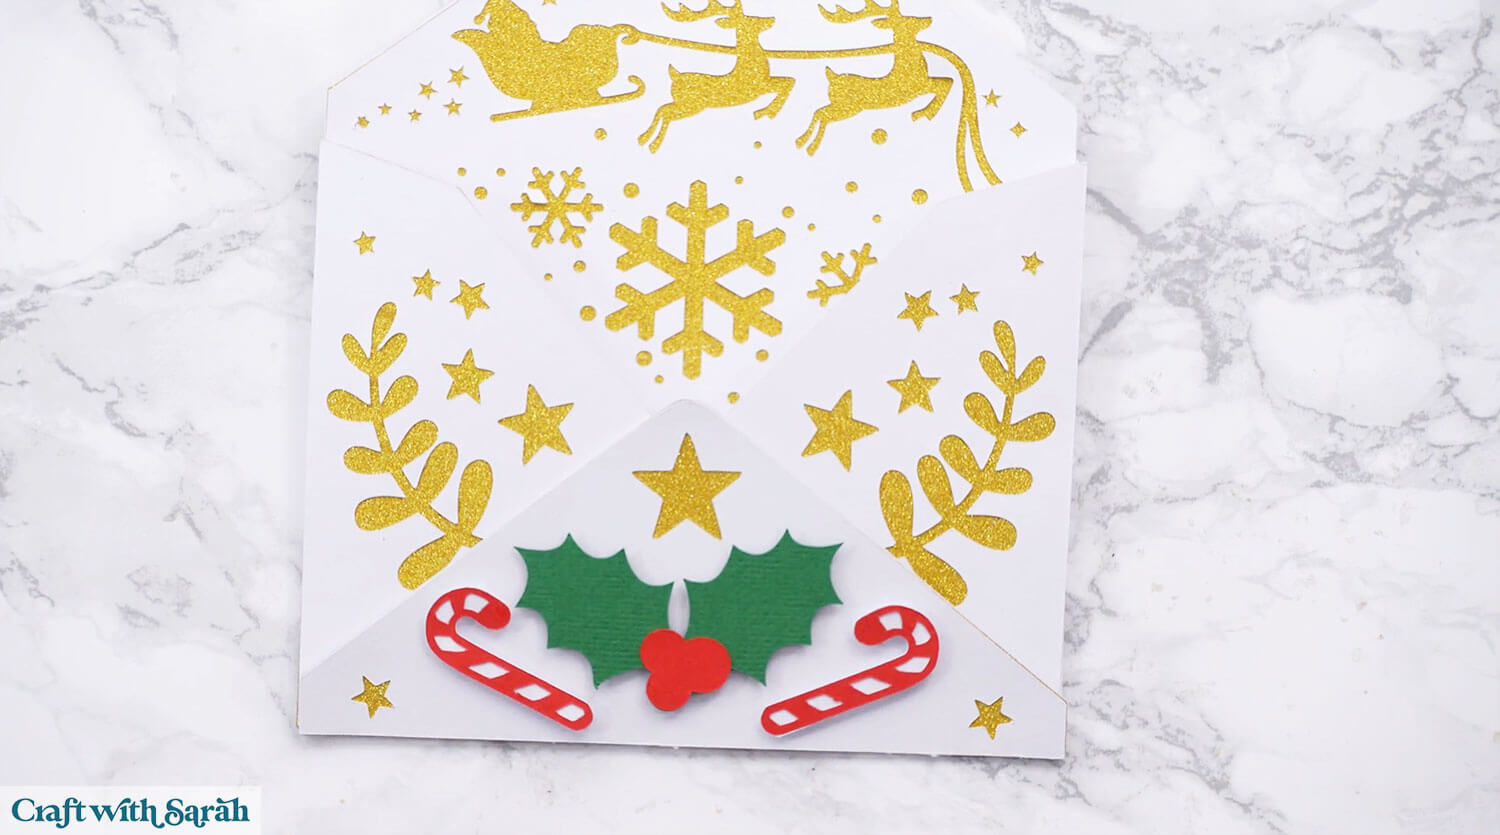
Fold in the two side flaps and add a thin line of glue to the edges, then fold up the bottom flap and attach to the glue.
Glue the red candy canes onto their matching white shapes, and glue the red berries onto the holly leaves.

Attach to the bottom of the envelope using foam squares.
Thread and tie some ribbon through the top hole.
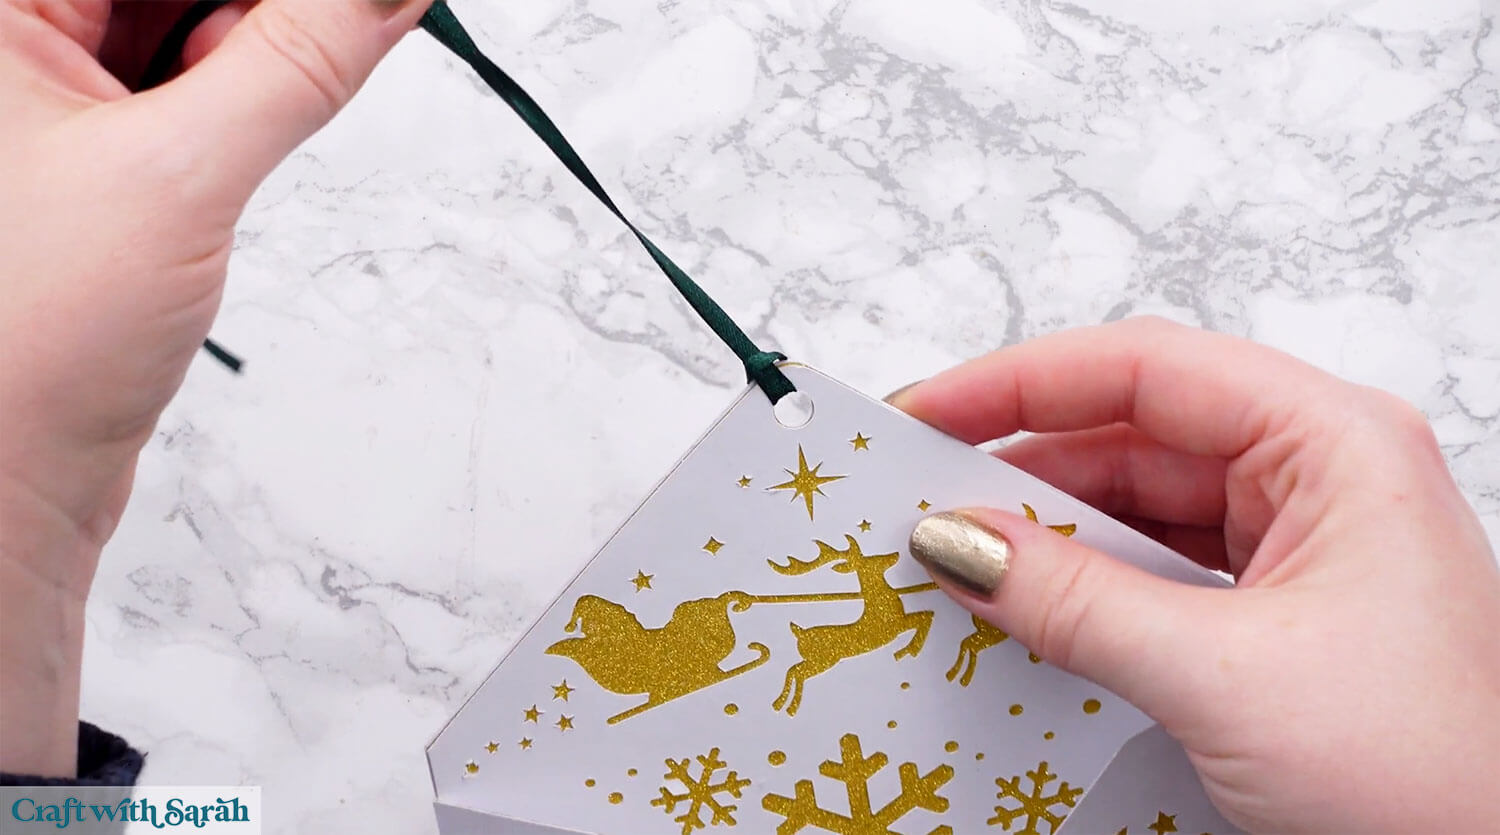
And that’s the envelope finished!
PART TWO: Letter from child
The Letters come in both English and French versions. (Les Lettres existent en versions anglaise et française.)
Here is how to use the printable letter to Santa template.
Look in the download folder in the “Letter from Child” subfolder.
The letter comes in three file formats: PDF, PNG and JPG.
Open your preferred file format and select File > Print (or however you print in the program that the file opens in).
Change your printer settings to high quality.
I’m using the PDF version of the template, opened in Adobe Acrobat. These steps will be different depending on what file version and program you are using, and also how your individual printer settings work.
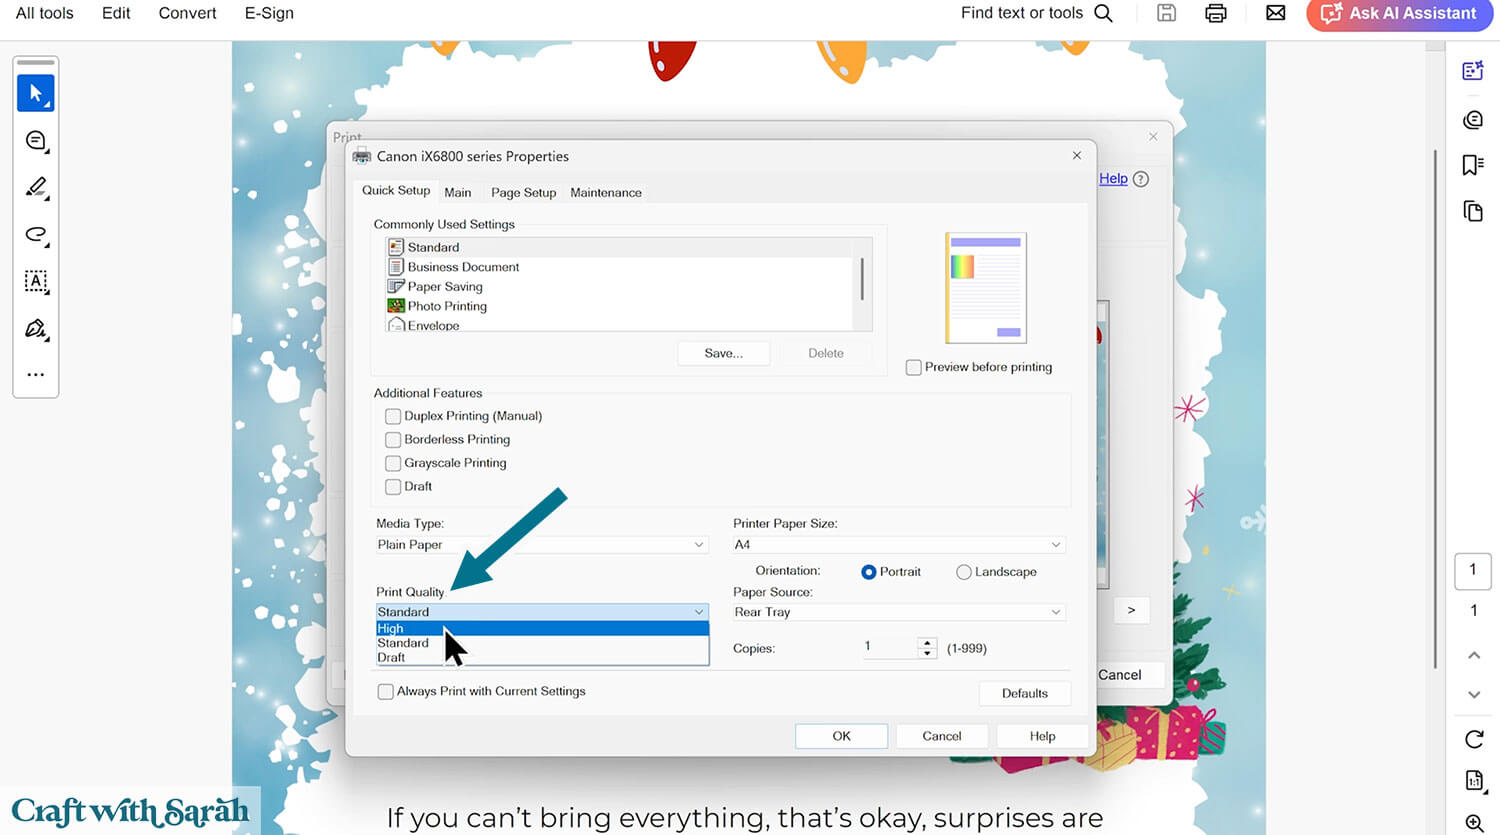
For me, after clicking File > Print, I see a printer settings box.
Click into “Preferences”.
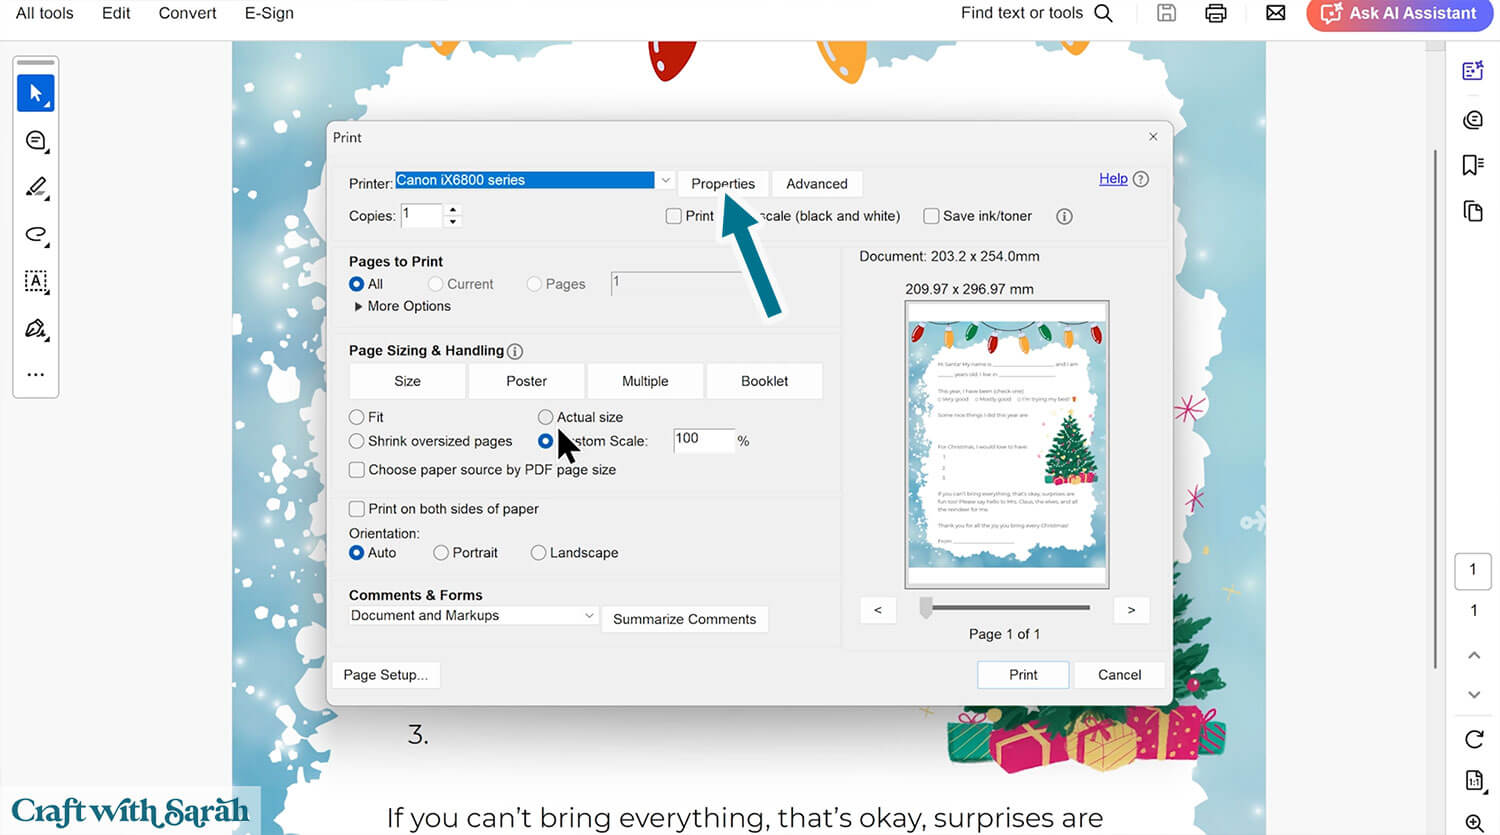
Change the “Print Quality” to “High”. Yours might say “Best” or “Higher” instead, or something similar.
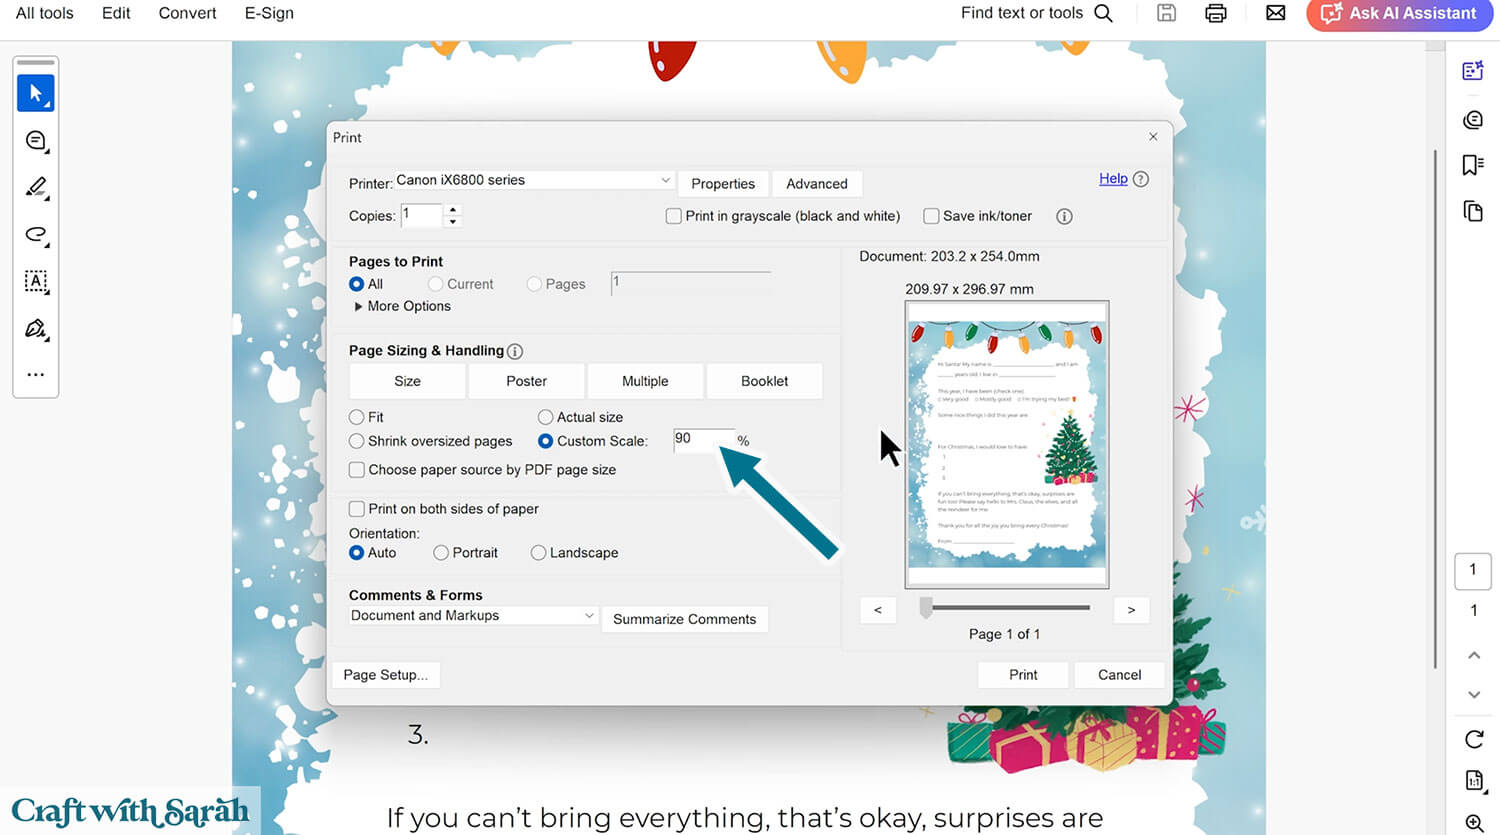
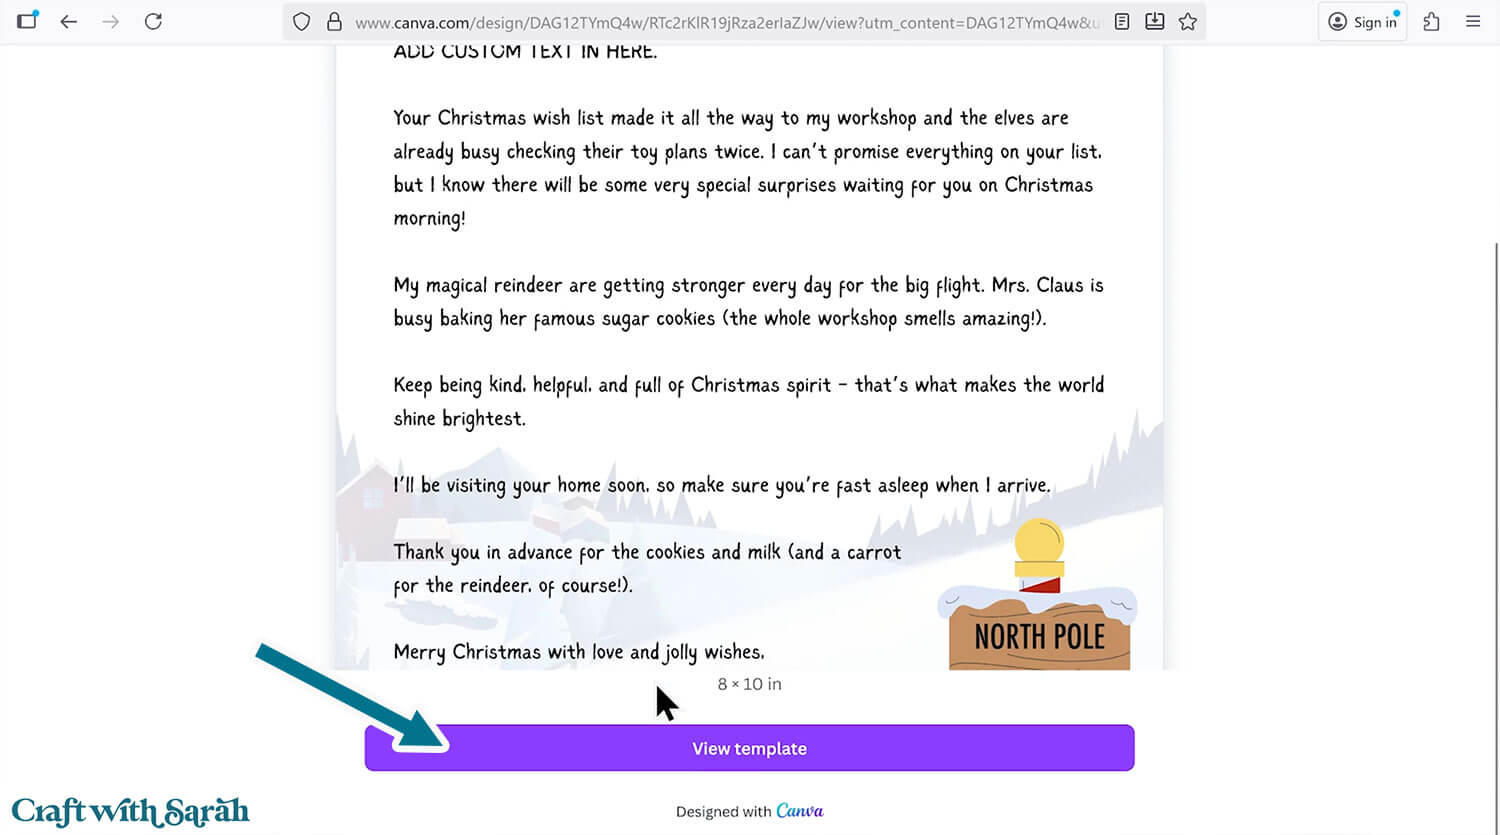
Change the size if desired – I printed mine at 90% of the full size. The full size us 8×10 inches.
Print onto regular printer paper.
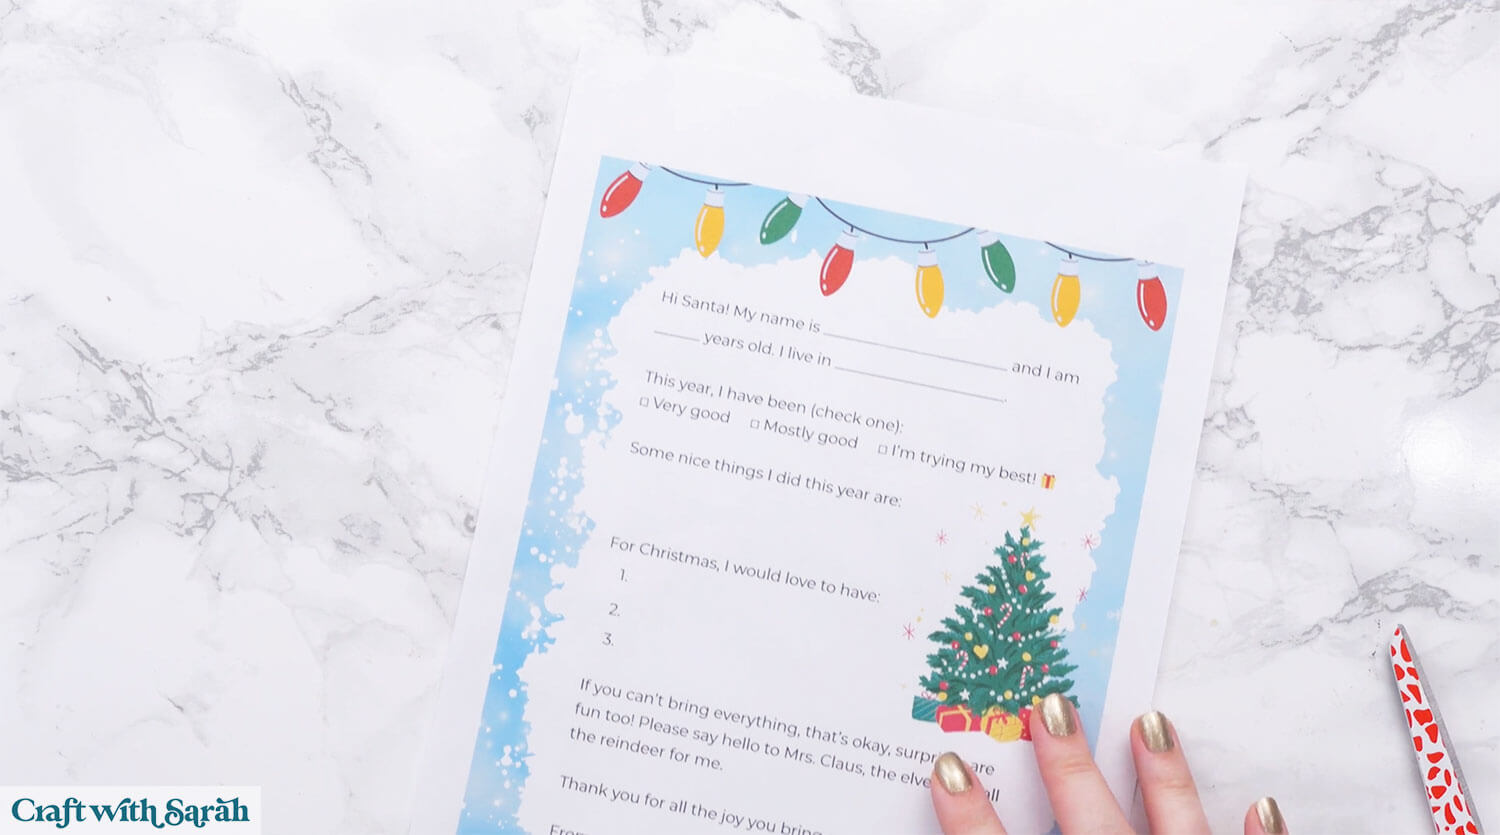
After printing, trim the white edges away if desired.

PART THREE: Letter from Santa
The Letters come in both English and French versions. (Les Lettres existent en versions anglaise et française.)
Give Santa and his elves a helping hand with this letter from Santa template. After all, they don’t have printers in the North Pole!
The letter is made using an online design tool called “Canva”. You will need to register an account, but it is free – you don’t need the paid “Canva Pro” subscription to use this template.
Visit this page to open the template
Scroll to the bottom of the page and click “View template”.
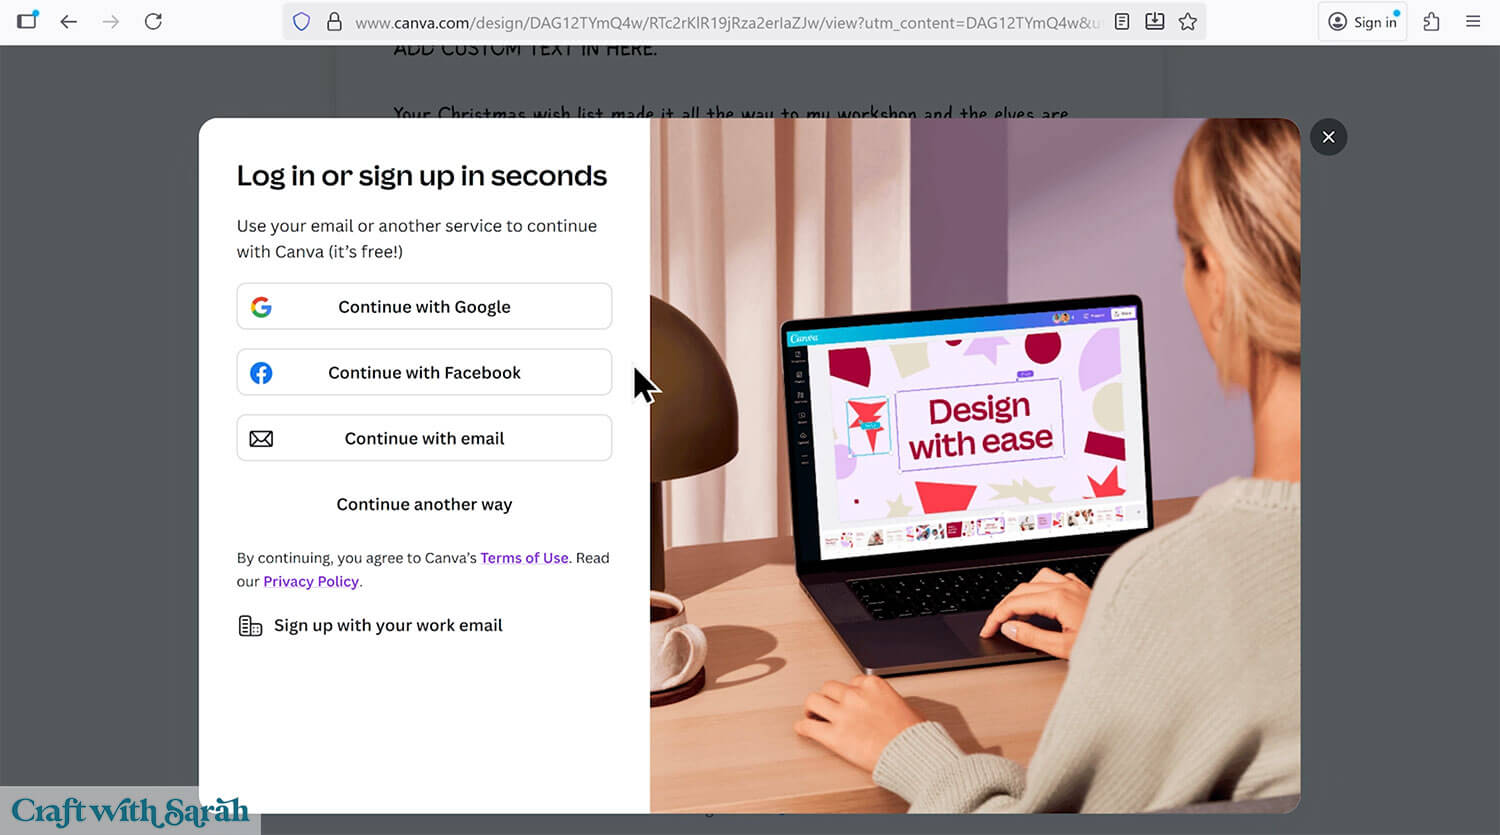
Login to your Canva account if you already have one, or register a free account if you don’t.
IMPORTANT – Canva only allows you to edit templates for free if you register with a personal email address, for example an email address with the following providers: Gmail, Yahoo, AOL, Hotmail, Outlook, Comcast, etc. If you use an email address with a custom website address/domain name (e.g. [email protected]) then it thinks you are a “business” and won’t let you edit for free.
If you have “Canva Pro” (their paid subscription) then it does not matter what type of email address you are using.
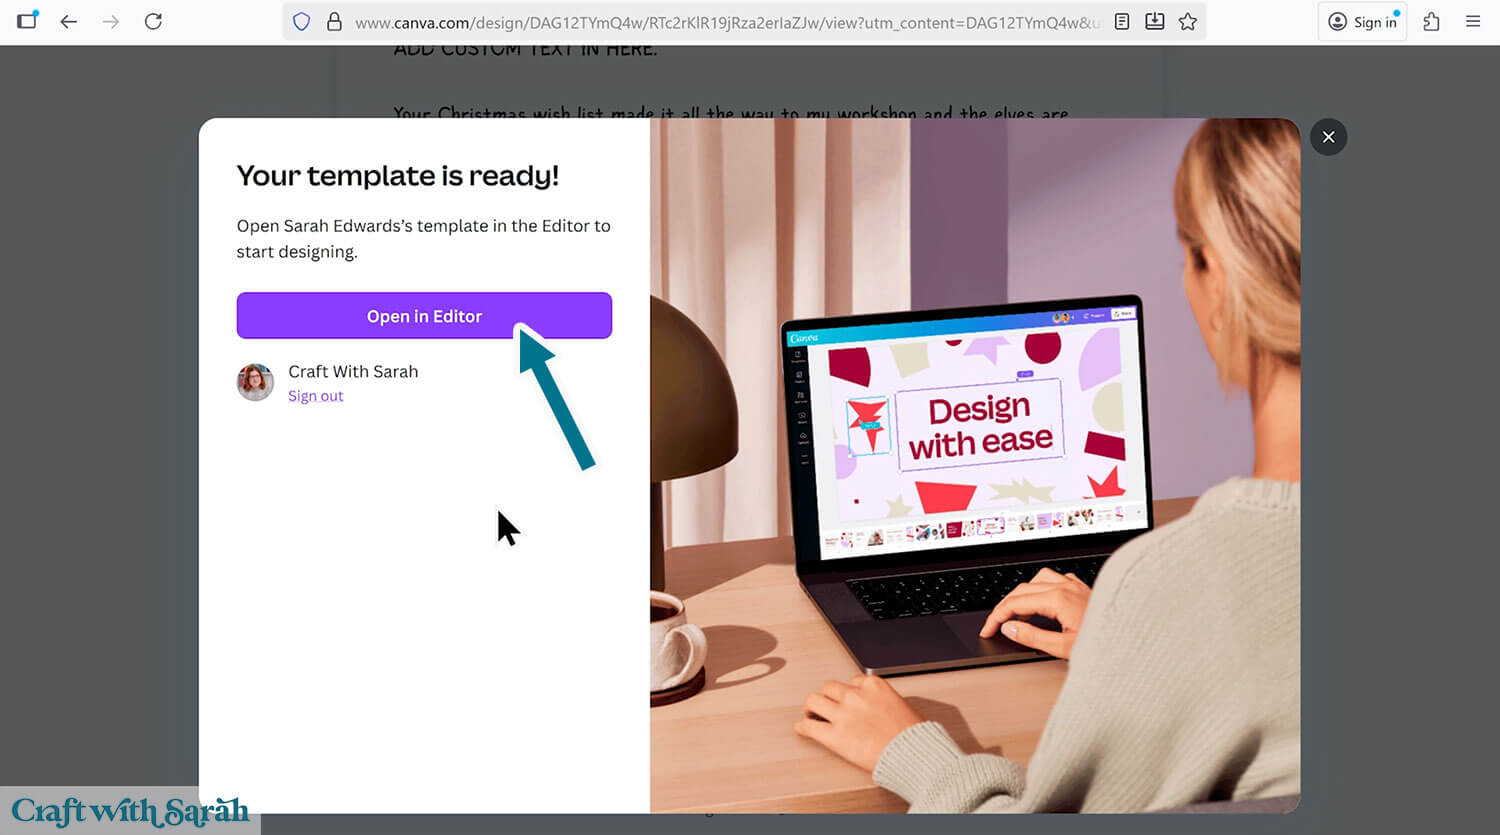
After logging in or registering an account, you’ll see the below screen. Click “Open in Editor”.
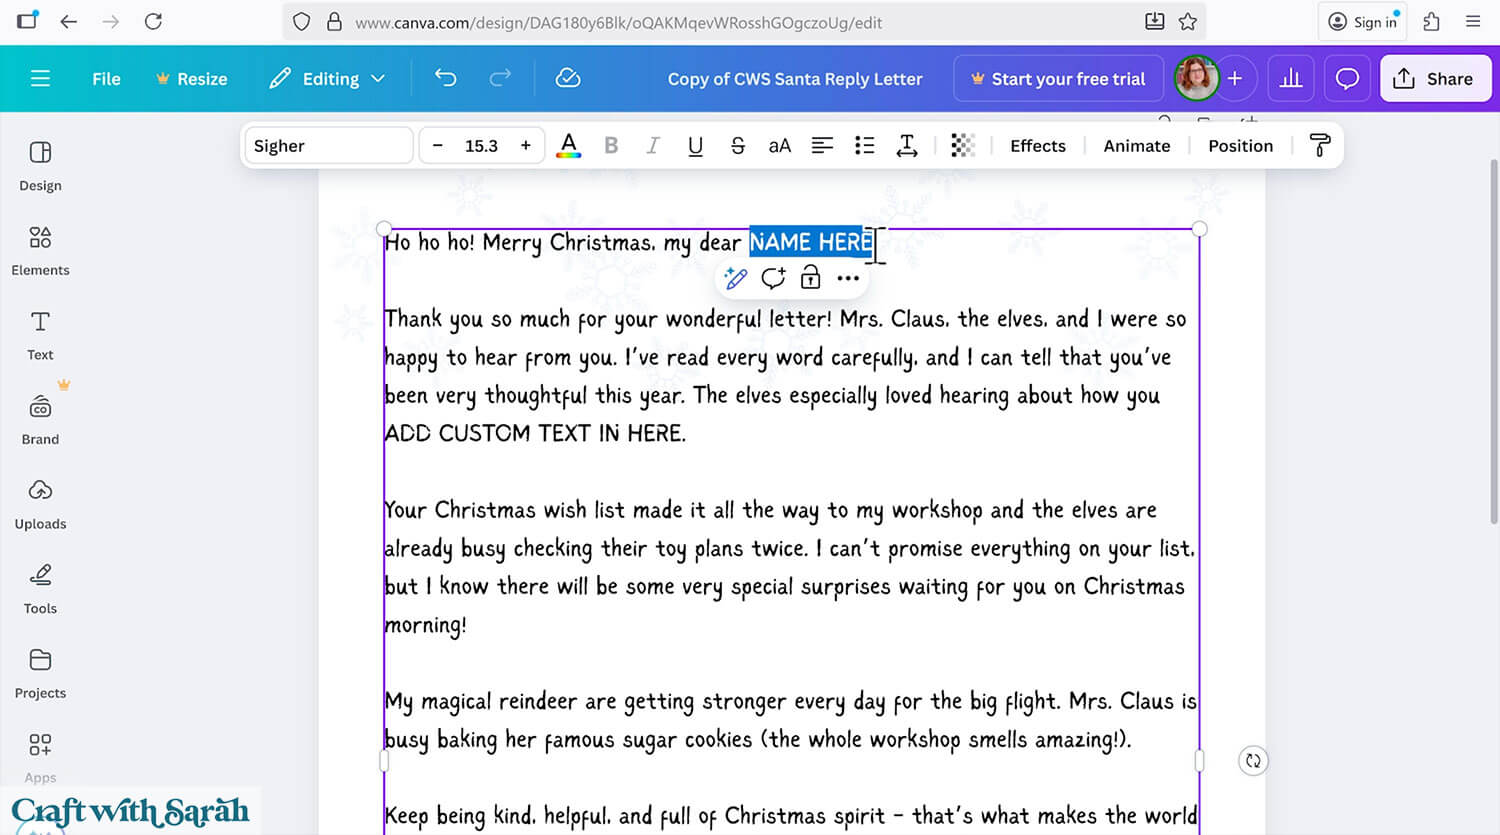
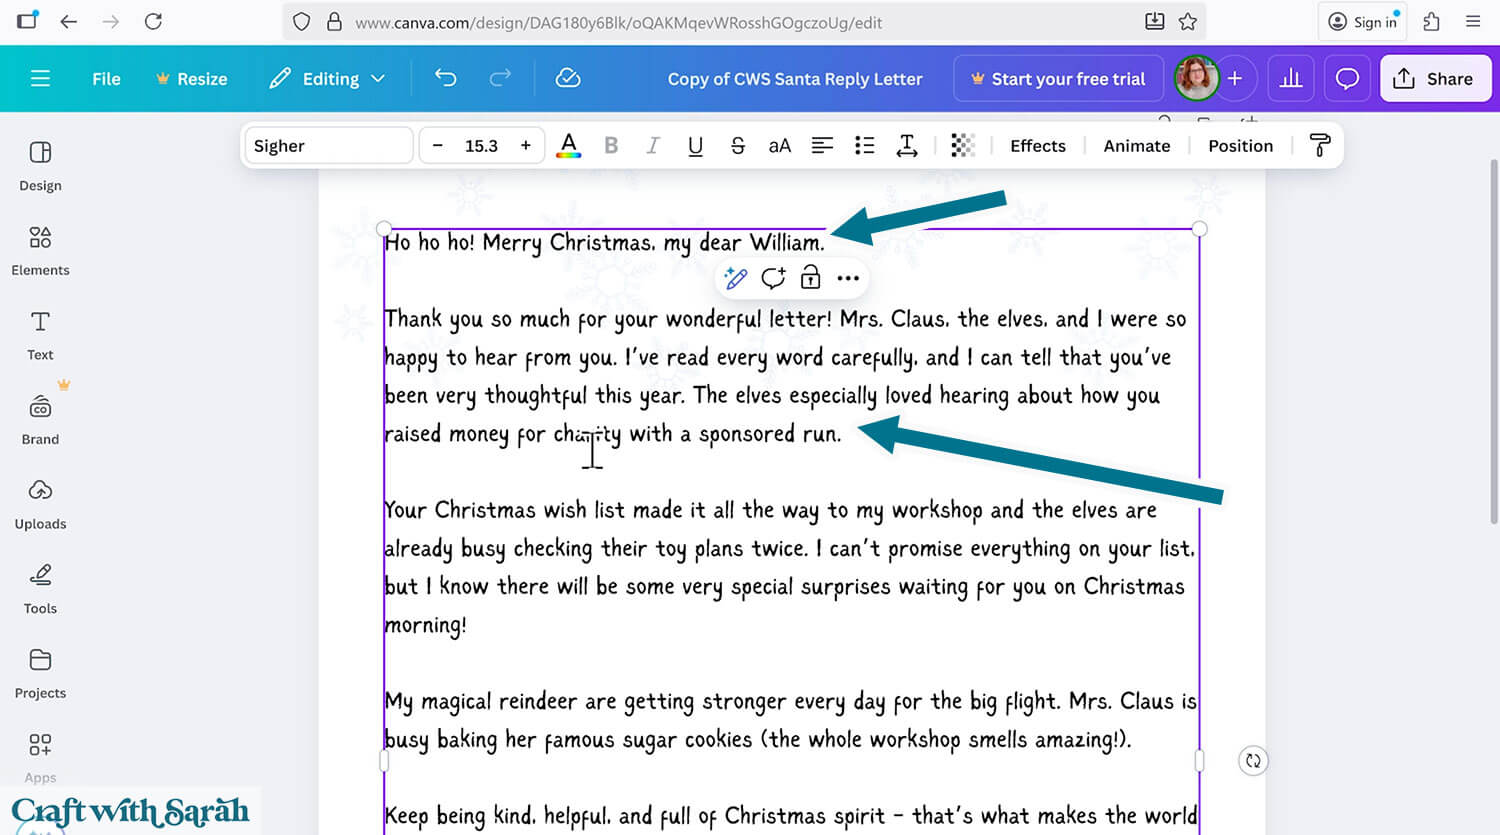
Double-click onto the letter text to change it. Add your child’s name, and some details from their original letter.
When you’re ready to print, click the “Share” button and then “Download”.
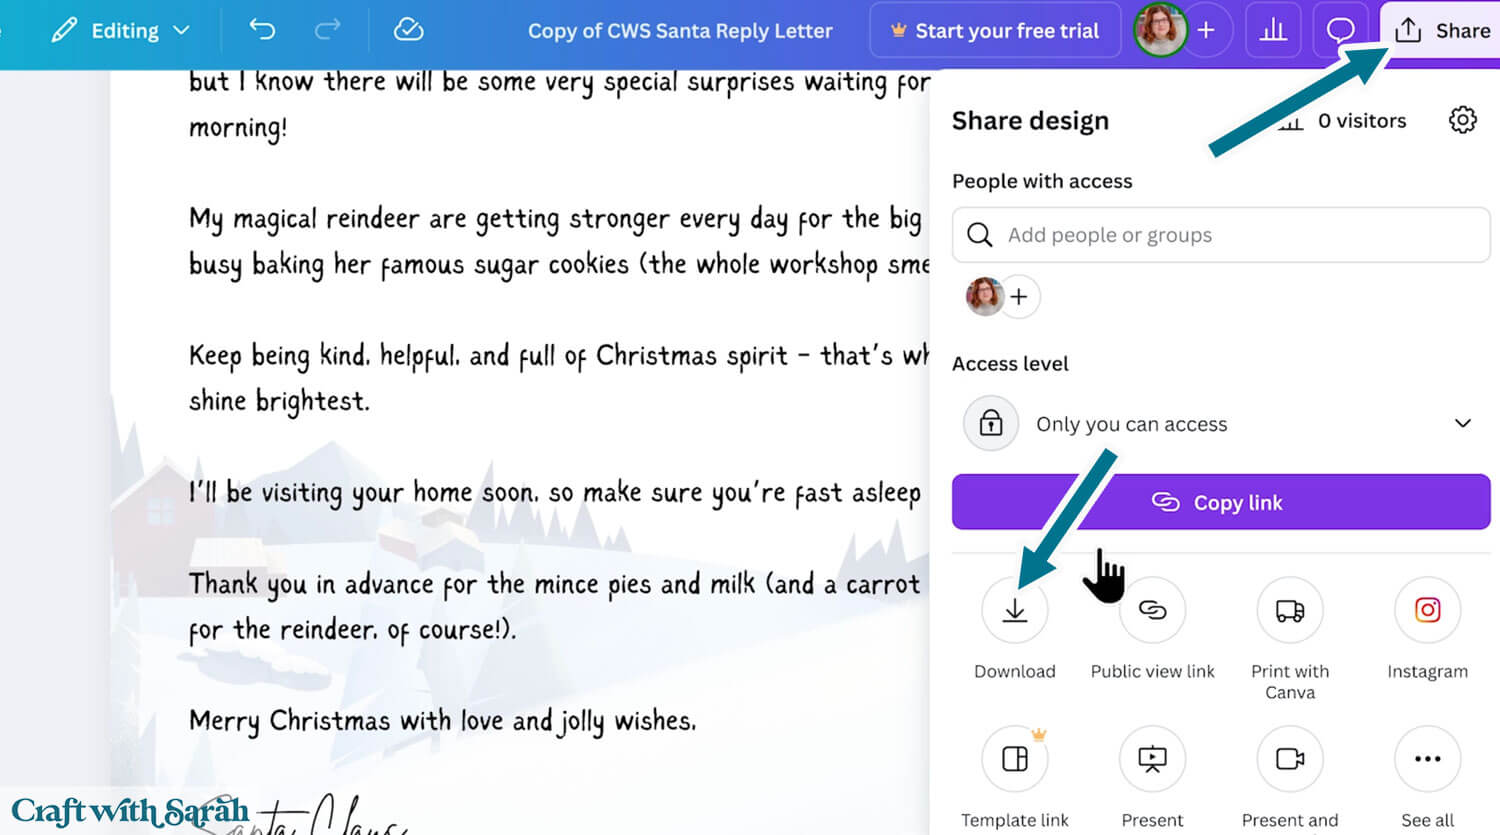
Select PDF Standard, JPG or PNG from the list of file types.

The file will be saved to your computer. It will probably go in your “downloads” folder.
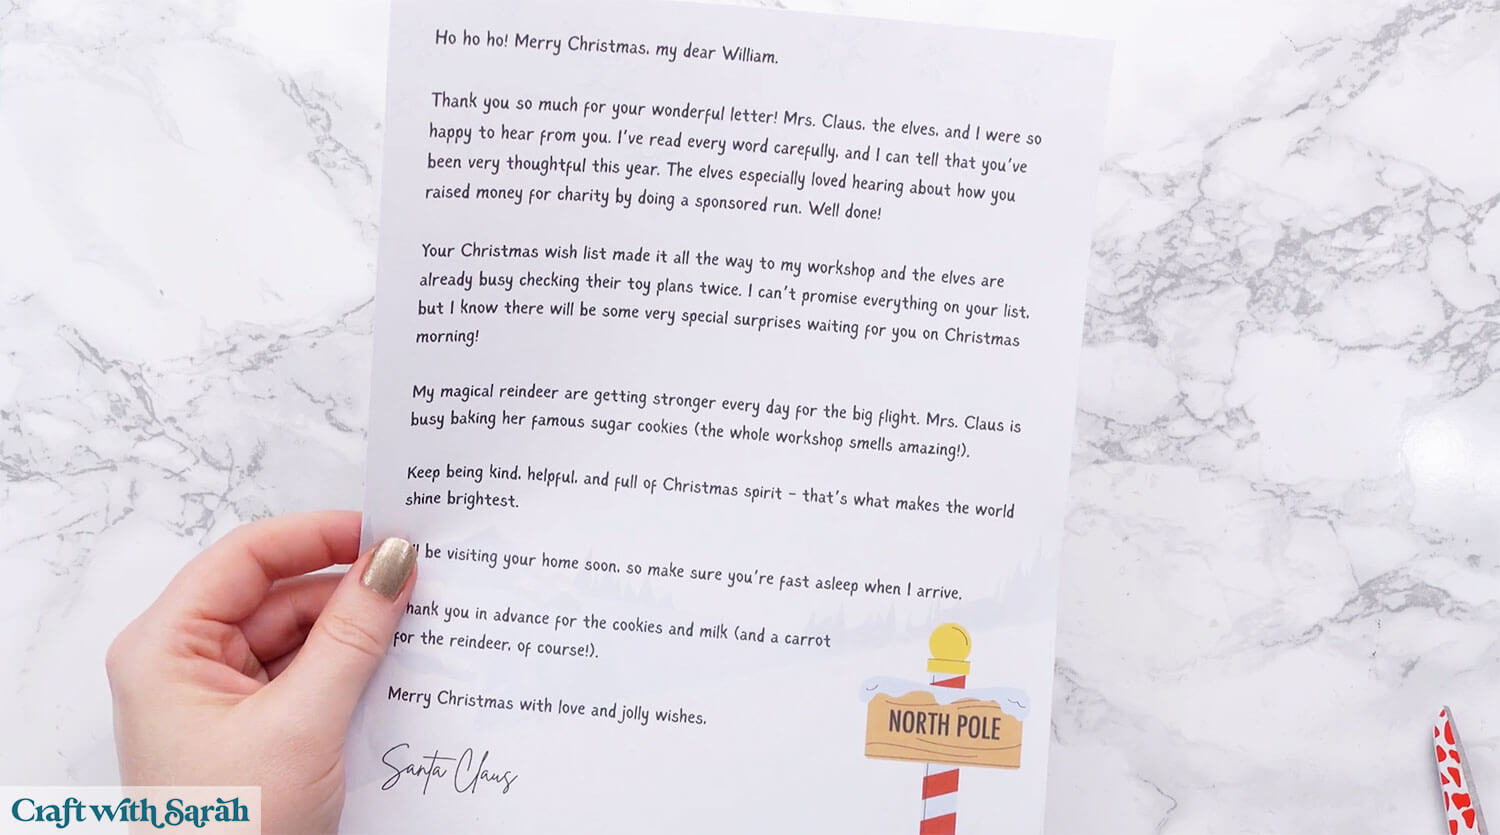
Open the file, print it out, trim off the edges and now Santa’s reply is all ready to go into the envelope overnight when your child hangs it up ready for the elves to collect.
Magical Santa letter and envelope made easy
Once you’ve made your envelope and filled it with a handwritten wishlist, the excitement really begins. Watching little ones carefully hang their letter and wake up to a reply from Santa himself is a memory worth making.
It’s a simple craft with a big impact, especially when you see their faces light up the next morning.
This is a project you can return to year after year, with new notes and new memories added each December.
Personalise the envelope design or pair it with your own Santa letter printable to make the tradition truly yours. It’s a fun and meaningful way to keep the magic alive.

Make Christmas magical for children
Check out these other Cricut crafts to make Christmas even more magical and special for children or grandchildren:
- Santa stop here sign
- Chimney advent calendar
- Snowman & reindeer “poop” printables
- Giant moveable nutcracker
- Christmas crackers
Happy crafting,
Sarah x

