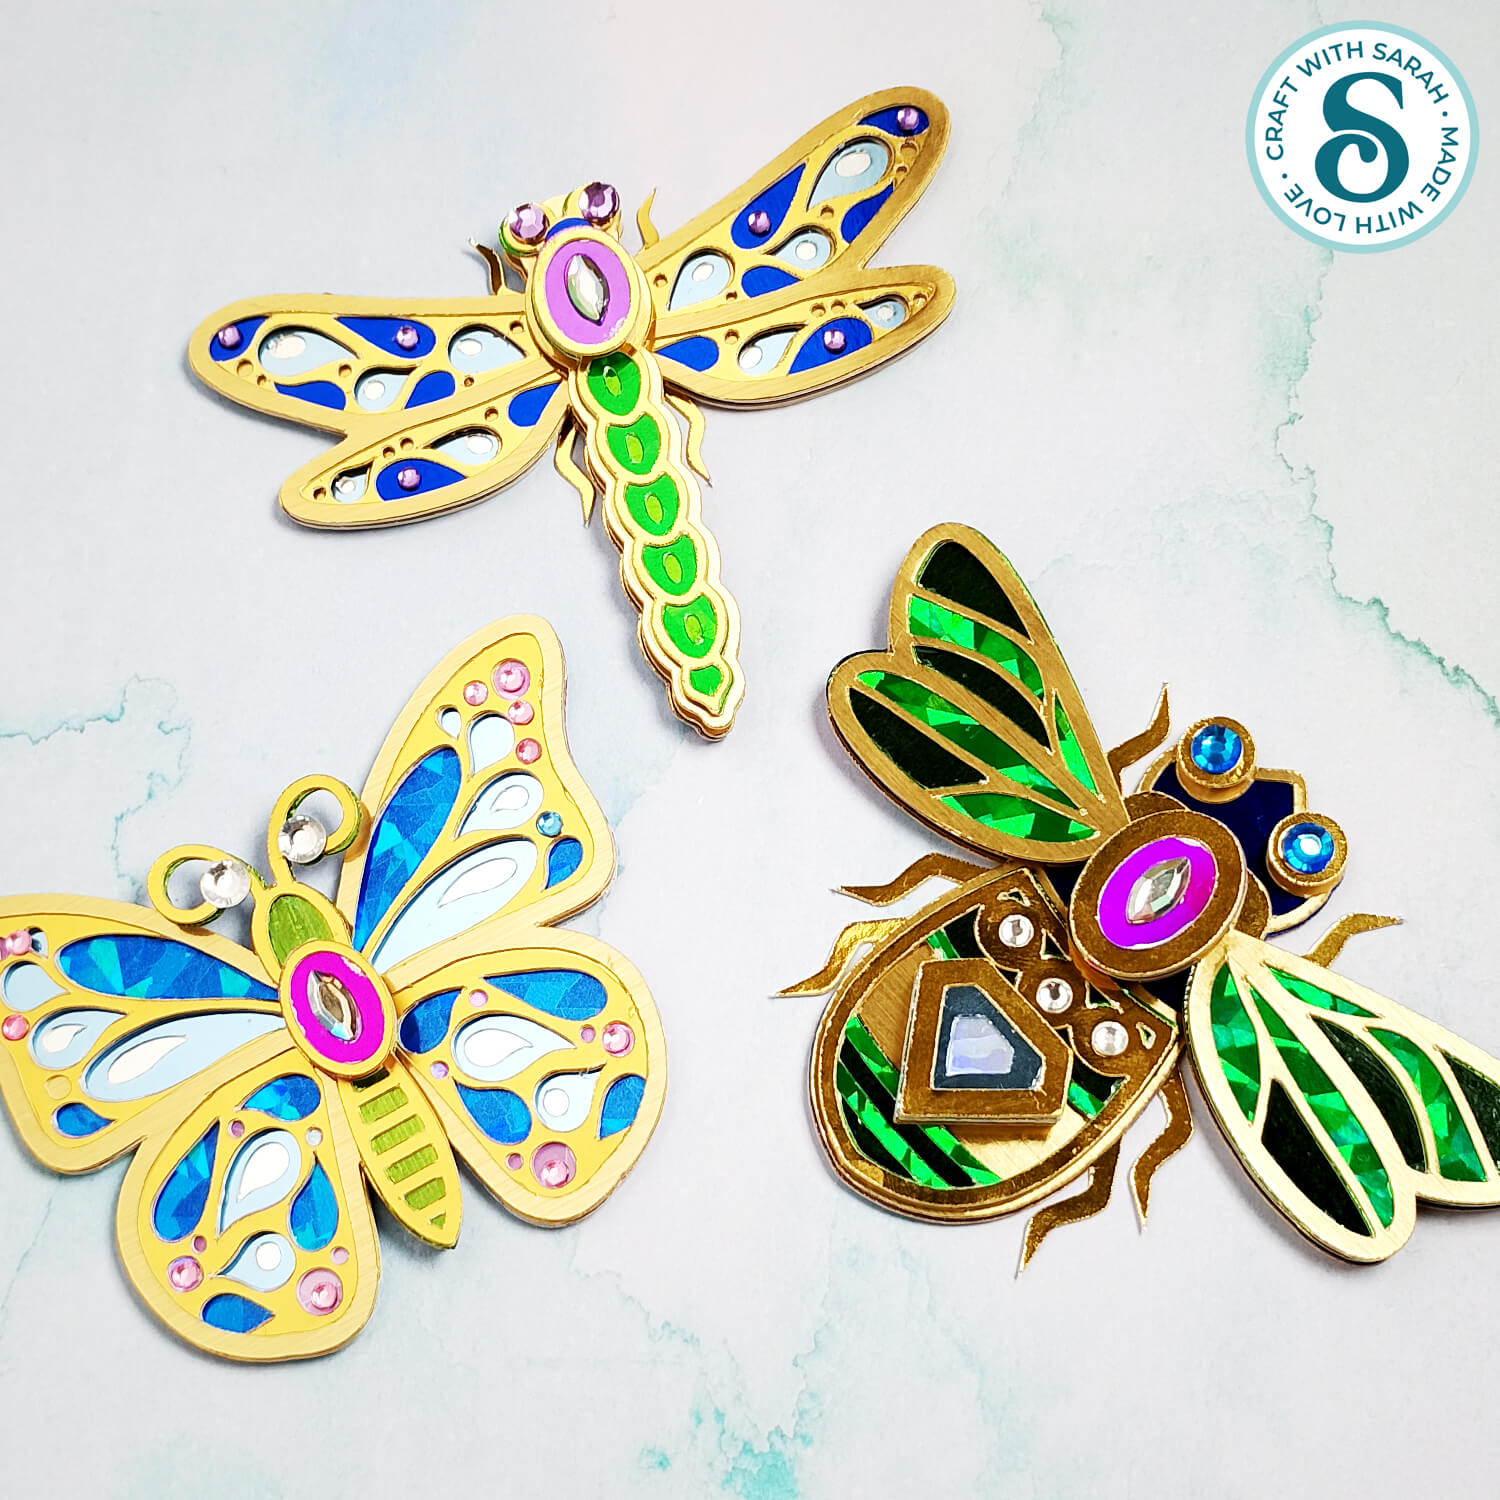
Insect “Jewellery” 🦋 Spring CC 2026
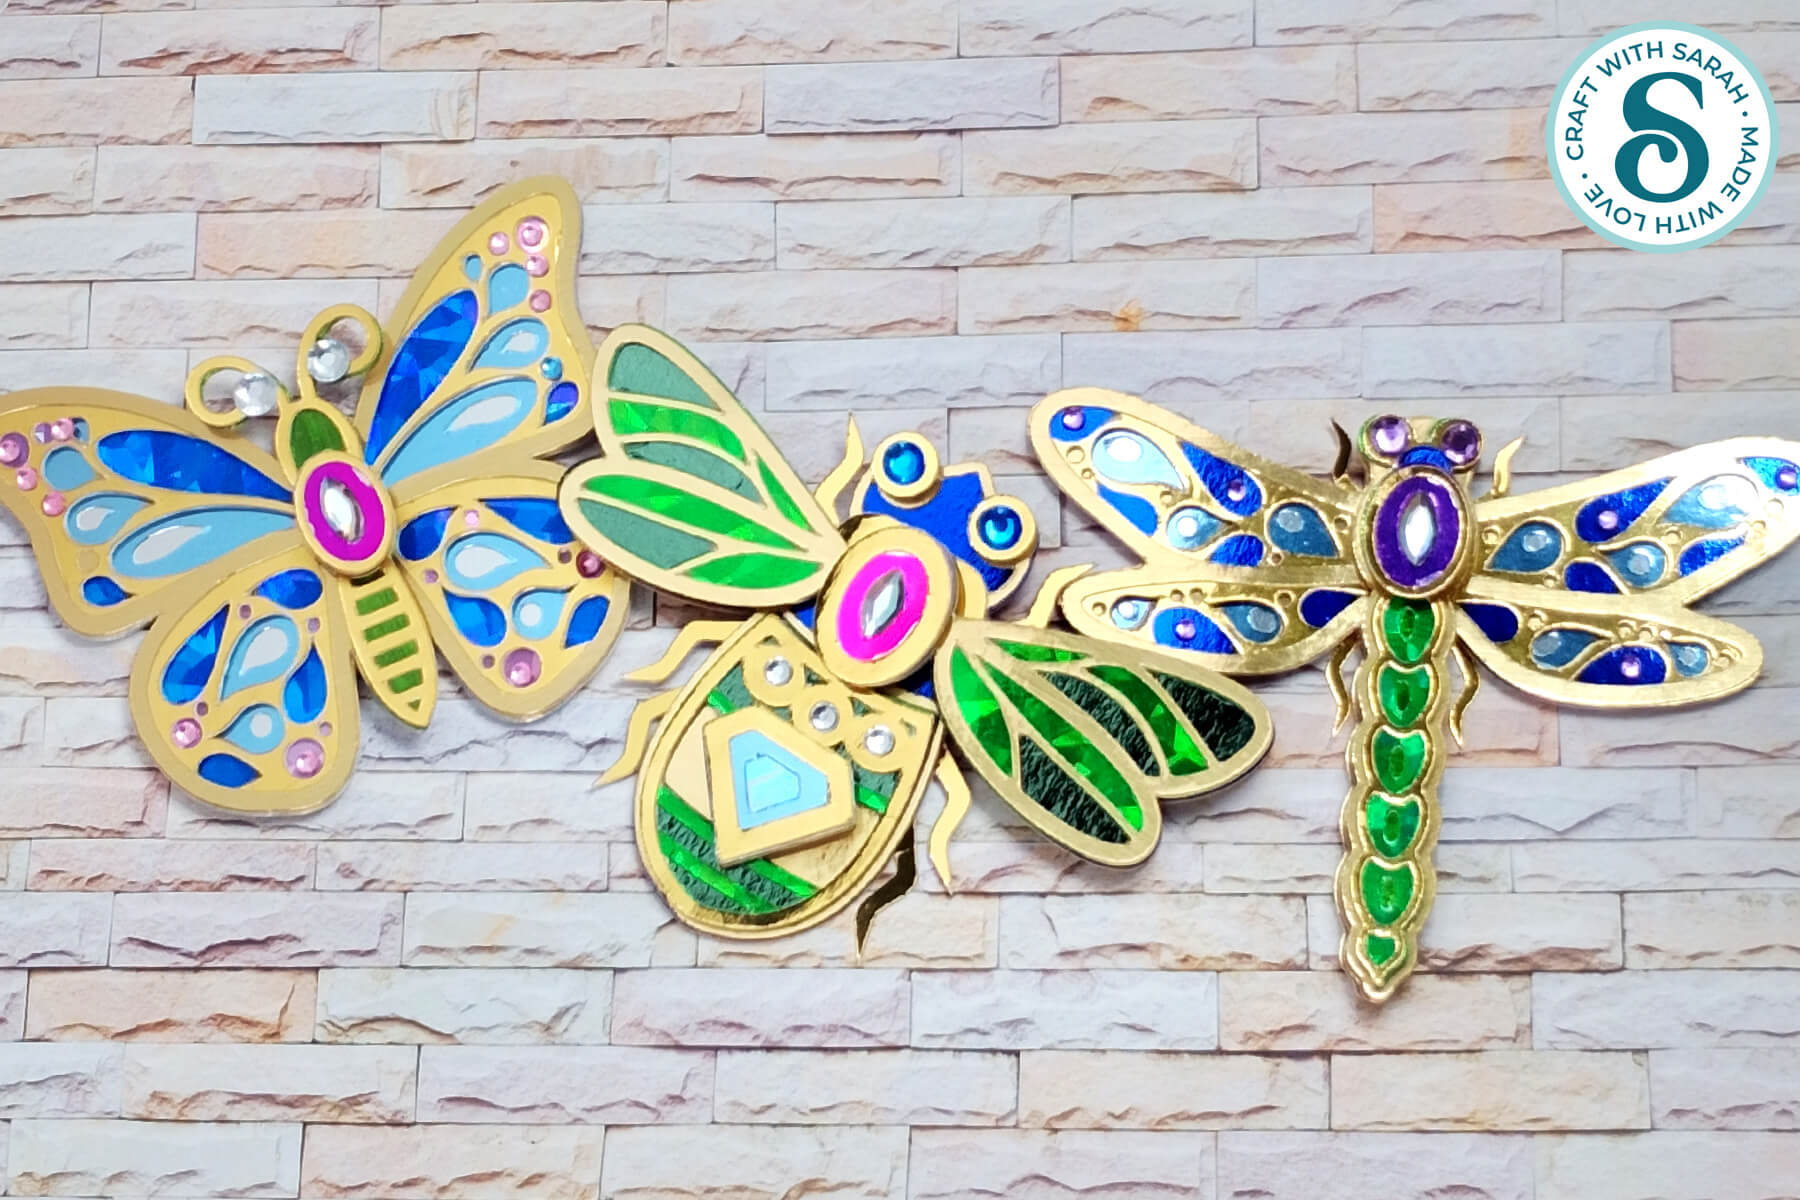
Make beautiful golden insects that look like precious jewels… but they’re really made from cardstock!
Add gemstones and coloured metallic accents for even more sparkle and shine.
This project was inspired by one of my favourite books that I read when I was younger: The Star of Kazan by Eva Ibbotson.
I came across the book recently while sorting out some boxes at home, and read it again for the first time in years.
The story features the most beautiful jewel designs, with wonderful descriptions.
That got me thinking… could we make something similar from cardstock?
And the answer is a resounding YES!!

Combining different colours of metallic and holographic card, along with some sticky-back gemstones, creates stunning designs that look as if they are moulded from precious metals.
Use them on greetings cards, in shadow boxes, on scrapbook pages, as fridge magnets or as wearable crafts by adding them to badges, brooches or hair clips.
This Project was part of the Spring Craft Countdown 2026
Paper jewellery materials supply list
Here is a list of the materials that I used to make this project.
Please note that some of the links included in this article are affiliate links, which means that if you click through and make a purchase I may receive a commission (at no additional cost to you). You can read my full disclosure at the bottom of the page.
- Cricut machine
- Light blue Cricut cutting mat
- Coloured Card (any thickness) – ideally all in metallic or holographic shades
- Glue (I like Bearly Art Glue and Collall)
- 3D foam pads
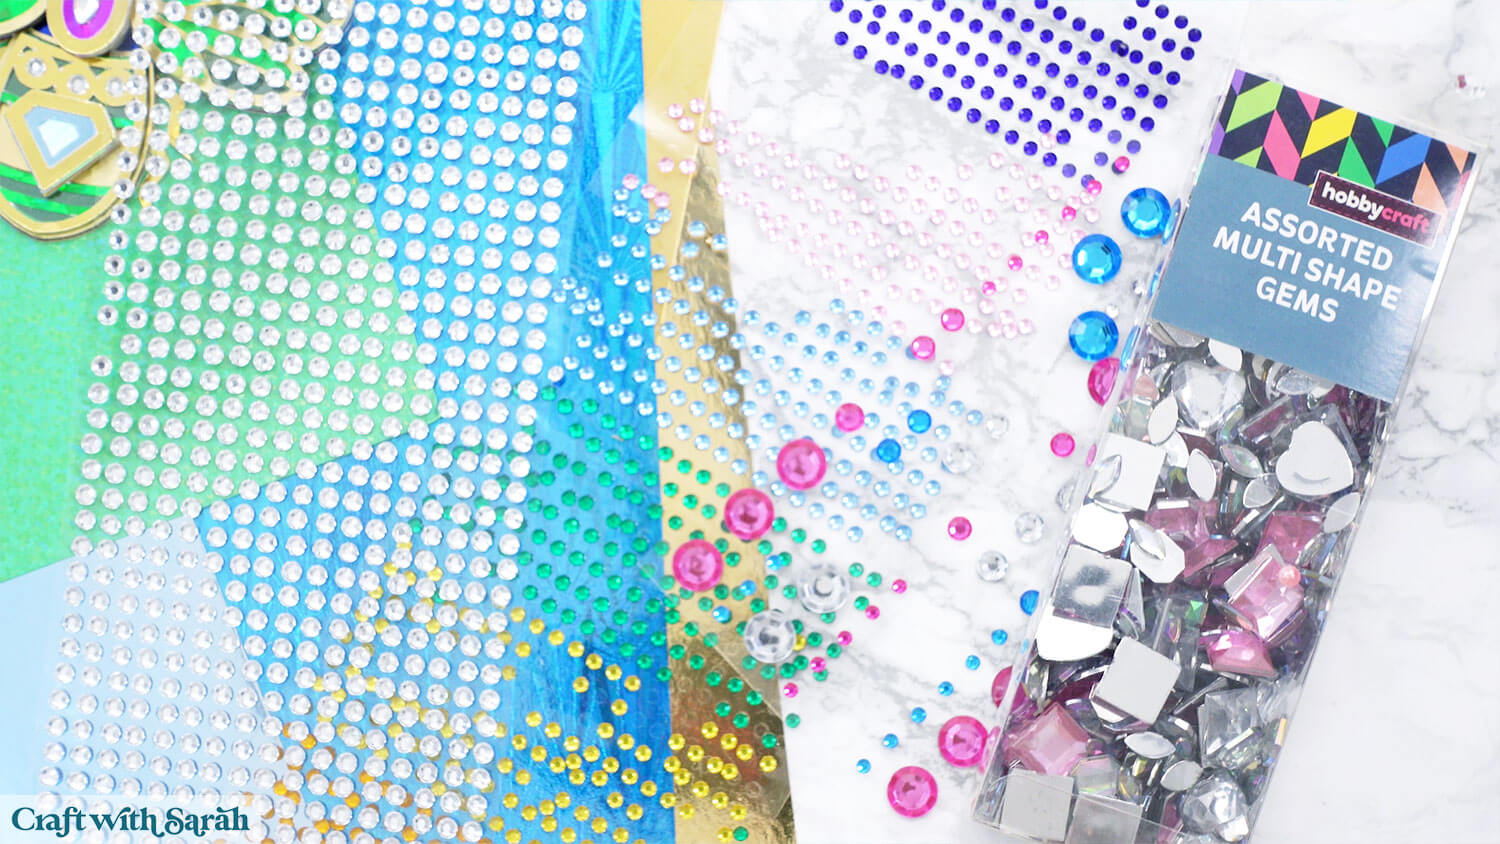
- Plastic flat-backed sticky gemstones (optional)
This project is great for using up scraps of holographic, metallic or glitter cardstock leftover from other crafts.
This project is suitable for the following types of Cricut machines: Explore series, Maker series, Joy Xtra, Joy and Joy 2. You will need to make the designs smaller to cut on the Joy or Joy 2.
Foundation learning
If you're new to making papercrafts with your cutting machine, check out these links to get you started.
They include videos on topics such as: which file to use with your type of cutting machine, how to load the files into your cutting machine's software, how to cut cardstock with your type of cutting machine, how to recolor and modify/customize the cut files and tips for displaying your projects.
- Help guides for Cricut machines
- Help guides for Silhouette machines
- Help guides for ScanNCut machines
The following tutorials are Cricut-specific, but many of the ideas will work similarly with a Silhouette or ScanNCut machine and any cut files that are shared in them are compatible with all types of cutting machine.
- How to score with a Cricut (even without scoring tools)
- Print then cut tutorial
- Design Space tools (Combine, Attach, Slice, Weld, Flatten, etc.)
- Pattern fill tutorial (for making backgrounds & cutting images to a specific shape/size)
- Free envelope SVGs that can be sized to fit any card
- Presentation boxes for handmade cards
- How to write inside cards with Cricut pens
- How to cut layered designs at a small size
- Design Space tips & tricks
- Cricut pens tutorial
- How to mount multiple designs in the same frame with magic guides
Cricut insect jewellery video tutorial
Watch the video below to see how to make this project. Keep scrolling for a written tutorial.
Written tutorial (with photos!)
Here’s how to make pretty insect jewellery using a Cricut machine.
Step 1) Download the cutting file & upload to Design Space
Get the files using the box below.
Purchase the File(s)
This cut file is available as part of the Instant Access Bundle.
Or, purchase this design individually here

Before you upload the SVGs to Design Space, you need to unzip the download folder that they come in.
- How to unzip a folder on Windows computer
- How to unzip a folder on a Mac
- How to unzip a folder on an iPad/iPhone
- How to unzip a folder on an Android device
After unzipping, upload the SVG file(s) into your cutting machine software.
Not sure how to use cut files with your type of machine? The following links lead to videos on how to open cut files in:
- Cricut Design Space
- Silhouette Studio
- CanvasWorkspace (for ScanNCut machines)
The download folder also contains printable PDF versions of the templates for hand cutting.
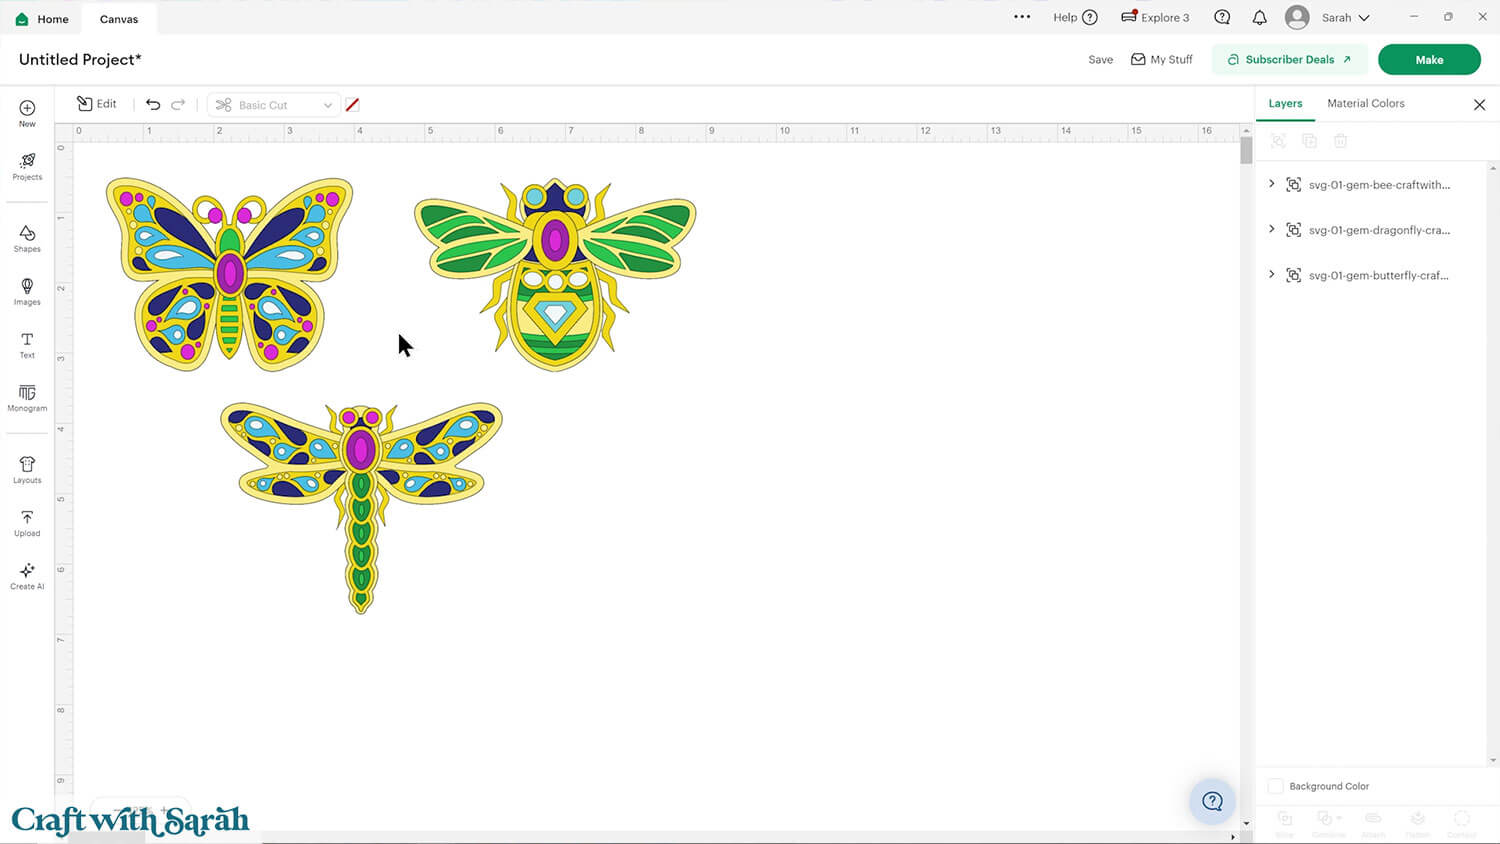
If you are using Cricut Design Space, start a new project and then click the “Upload” button on the left of the screen.
You can then either click “Browse” to find the files on your computer, or drag-and-drop them in.
Select the files in the “01 Cricut Version” subfolder. Each insect comes as a separate SVG file.
Press “Upload” on the next screen.
After uploading, the design should be automatically inserted onto your Canvas.
To hide the left sidebar (to give you more space for designing!), click the arrow that’s about half way down the page.
Need help uploading SVGs? Get step-by-step instructions here in our detailed help guides for Cricut, Silhouette and ScanNCut.
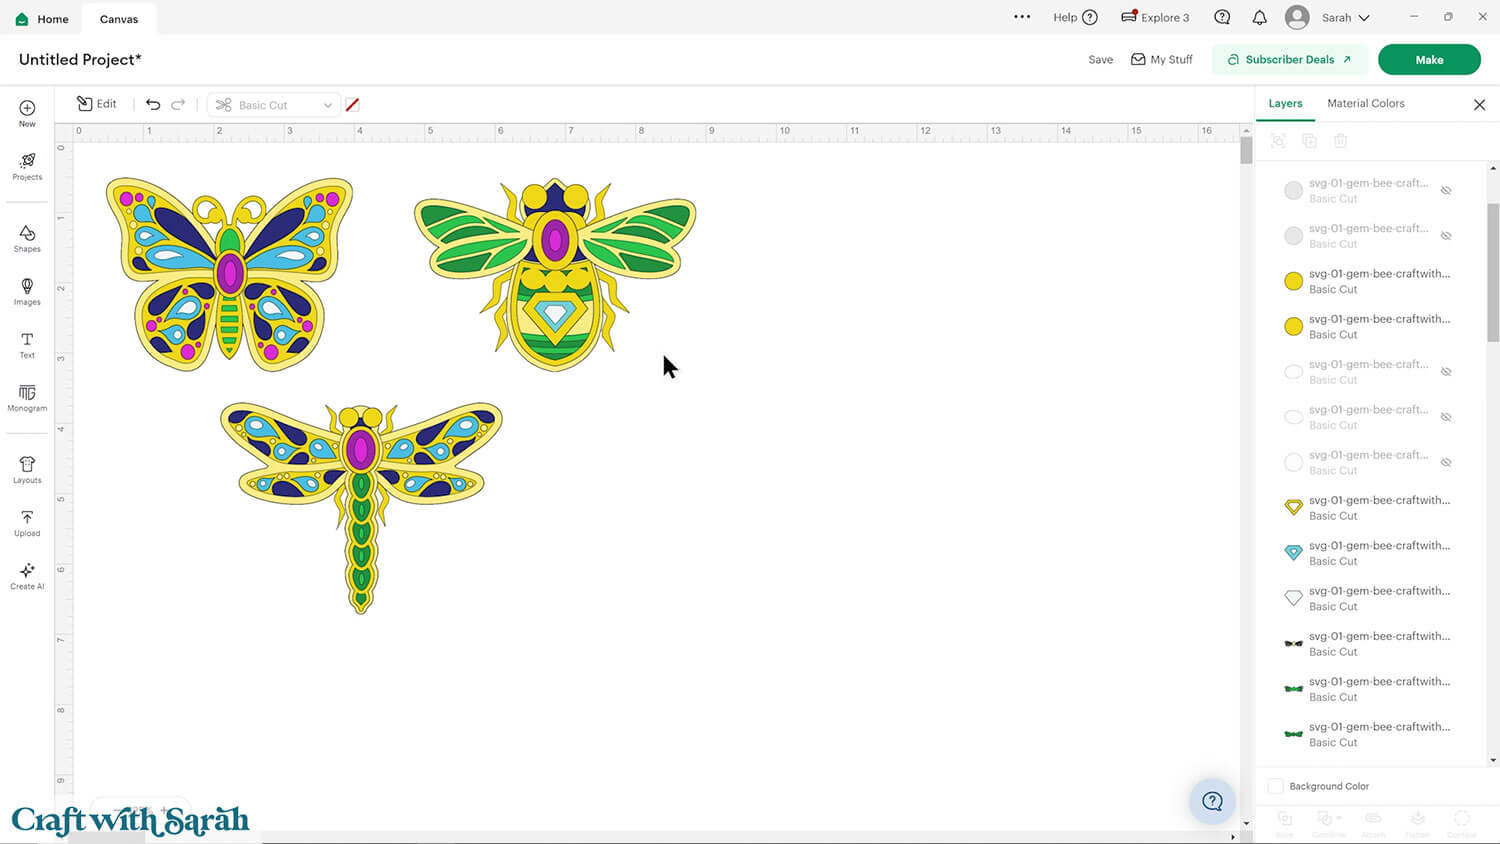
If you are going to use sticky gemstones on your insects then delete the smallest circle layers from each design.
Step 2) Size the design
Click the design on your canvas and use the width/height boxes near the top of the screen to make it the size that you want to cut.
TIP: Make sure the padlock icon above the width/height boxes is CLOSED before you resize. If it appears “open”, click it with your mouse to close it.

These insects are designed to cut well at small sizes, so that they are suitable for badges, brooches or hair clips.
Here’s a tutorial on how to cut designs really small with a Cricut.
If you are cutting this design on a Cricut Joy or Joy 2 machine then you’ll need to make it a maximum of 4.5 inches on the shortest side.
Step 3) Cut out all the layers
When you’re happy with how the project is looking in Design Space, click “Make” and follow the instructions on-screen to cut out all the pieces.
To change the paper size, go into the dropdowns over on the left side of the screen and choose the paper size that you want to use. You need to change it for every single colour.
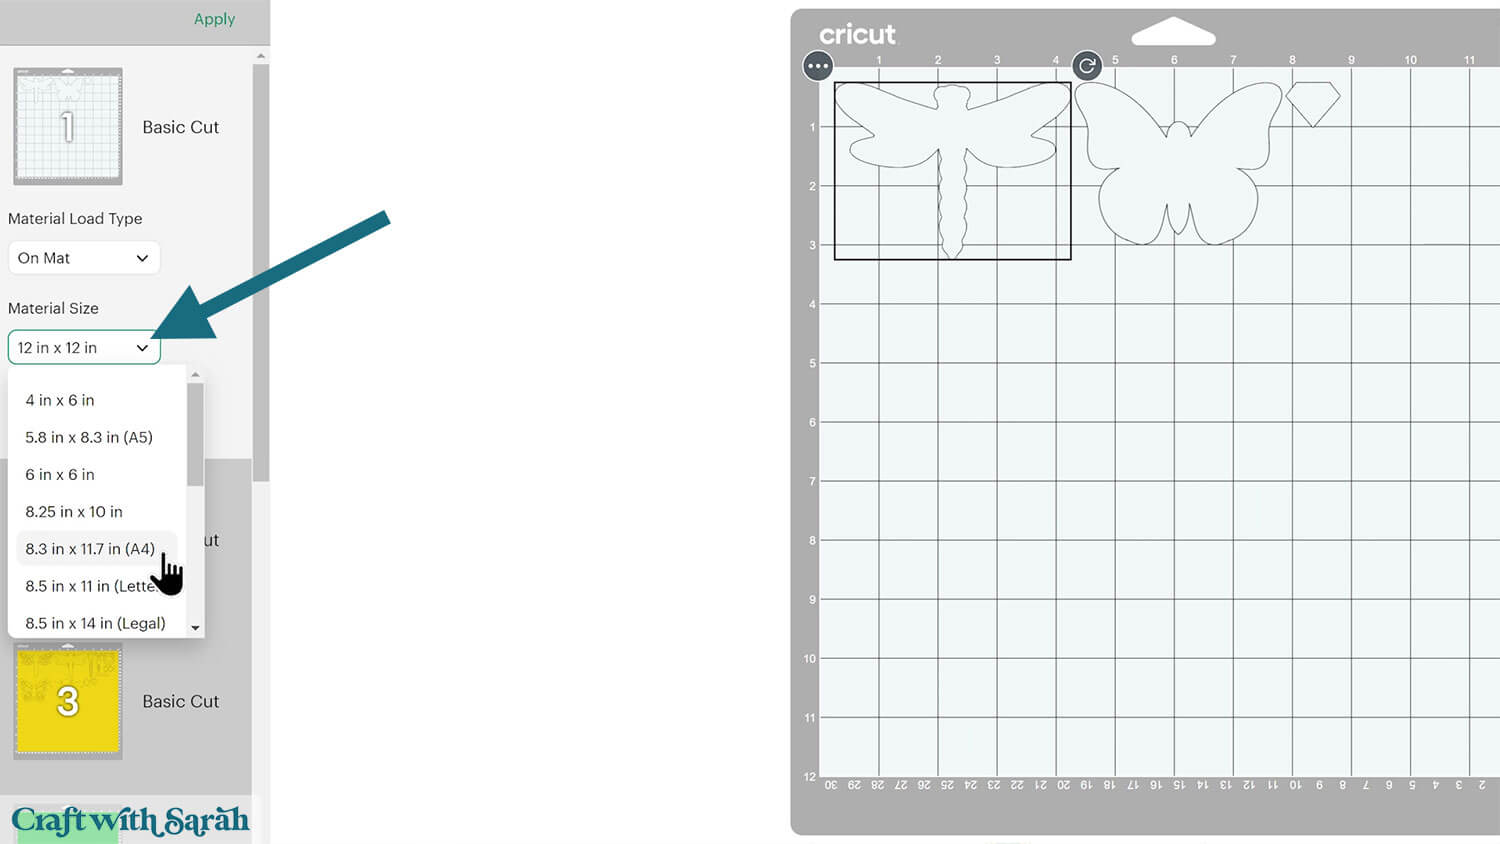
To save space on your cardstock, you can move things around by clicking and dragging. Make sure when you’re moving things about that nothing overlaps because otherwise, it won’t cut out properly.
TIP: New to using cardstock with your cutting machine? Check out these machine help guides for Cricut, Silhouette and ScanNCut that go through every step of the process, including tips for getting the best quality cuts from your machine.
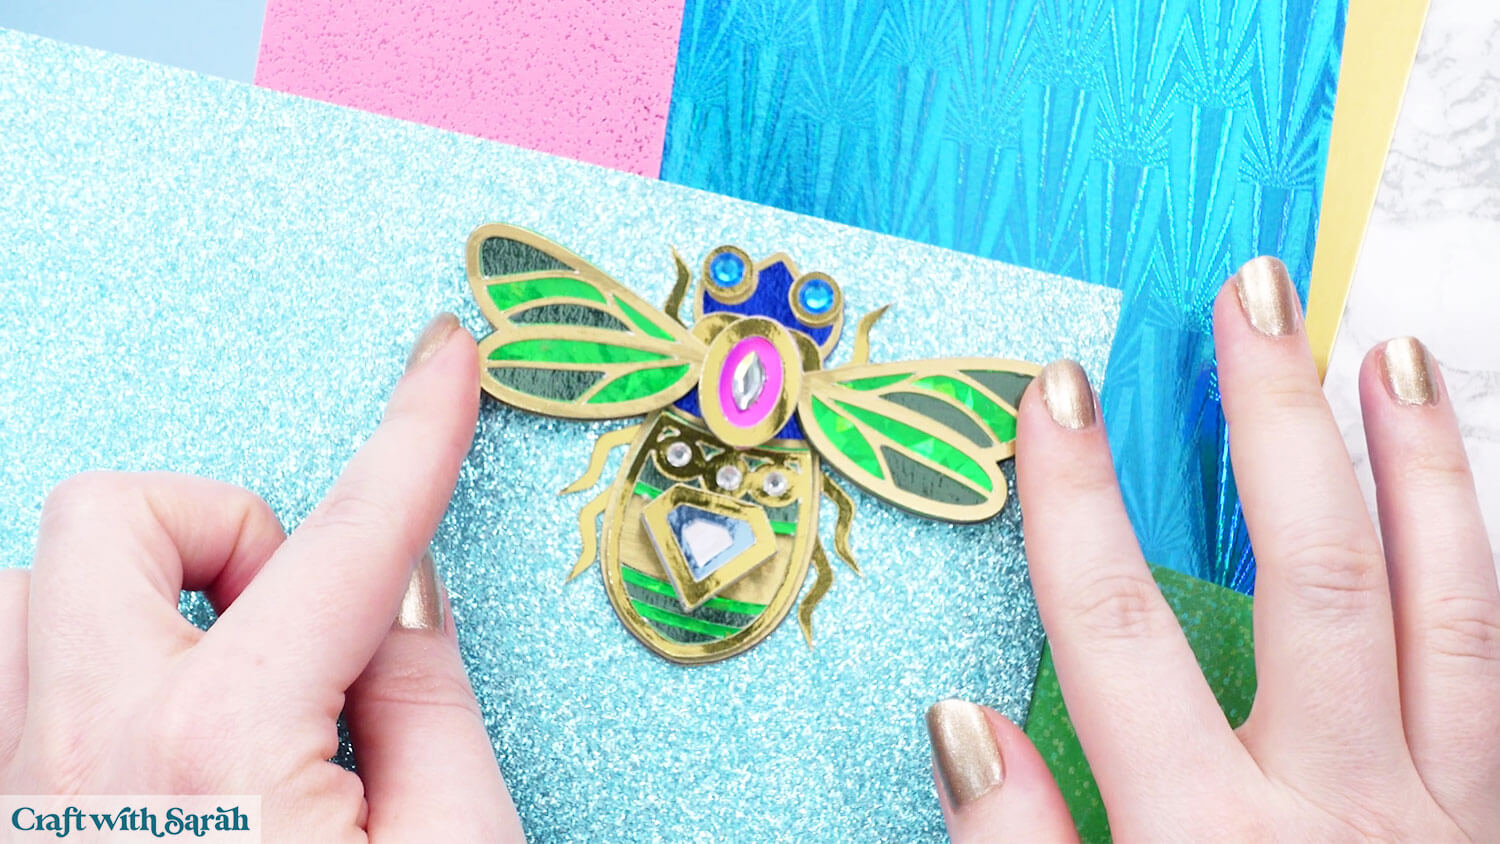
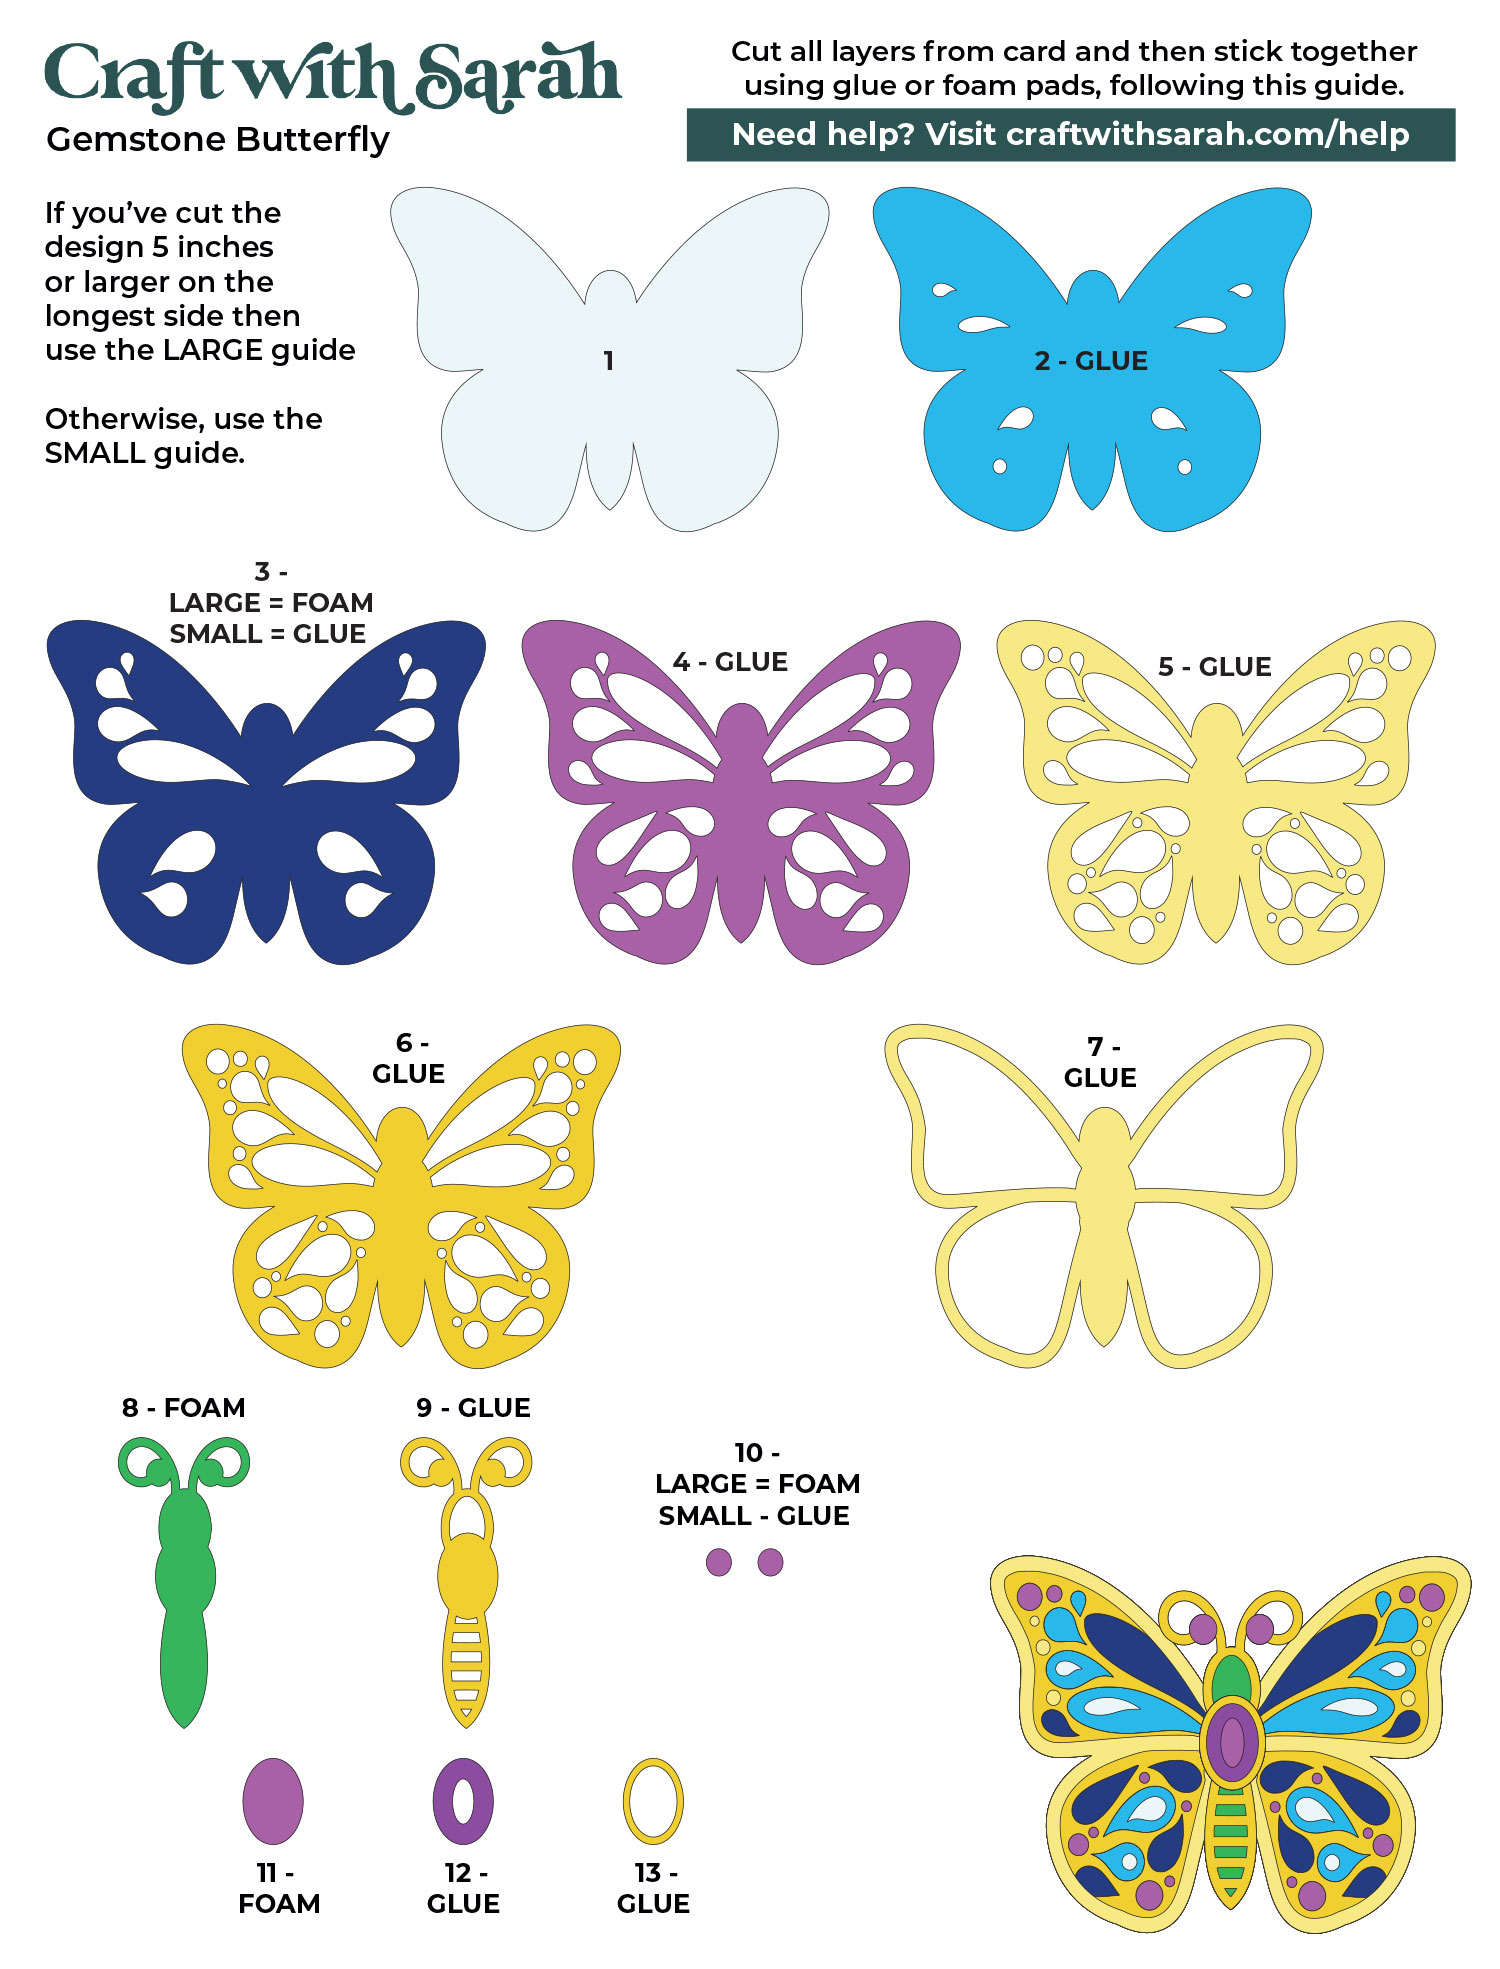
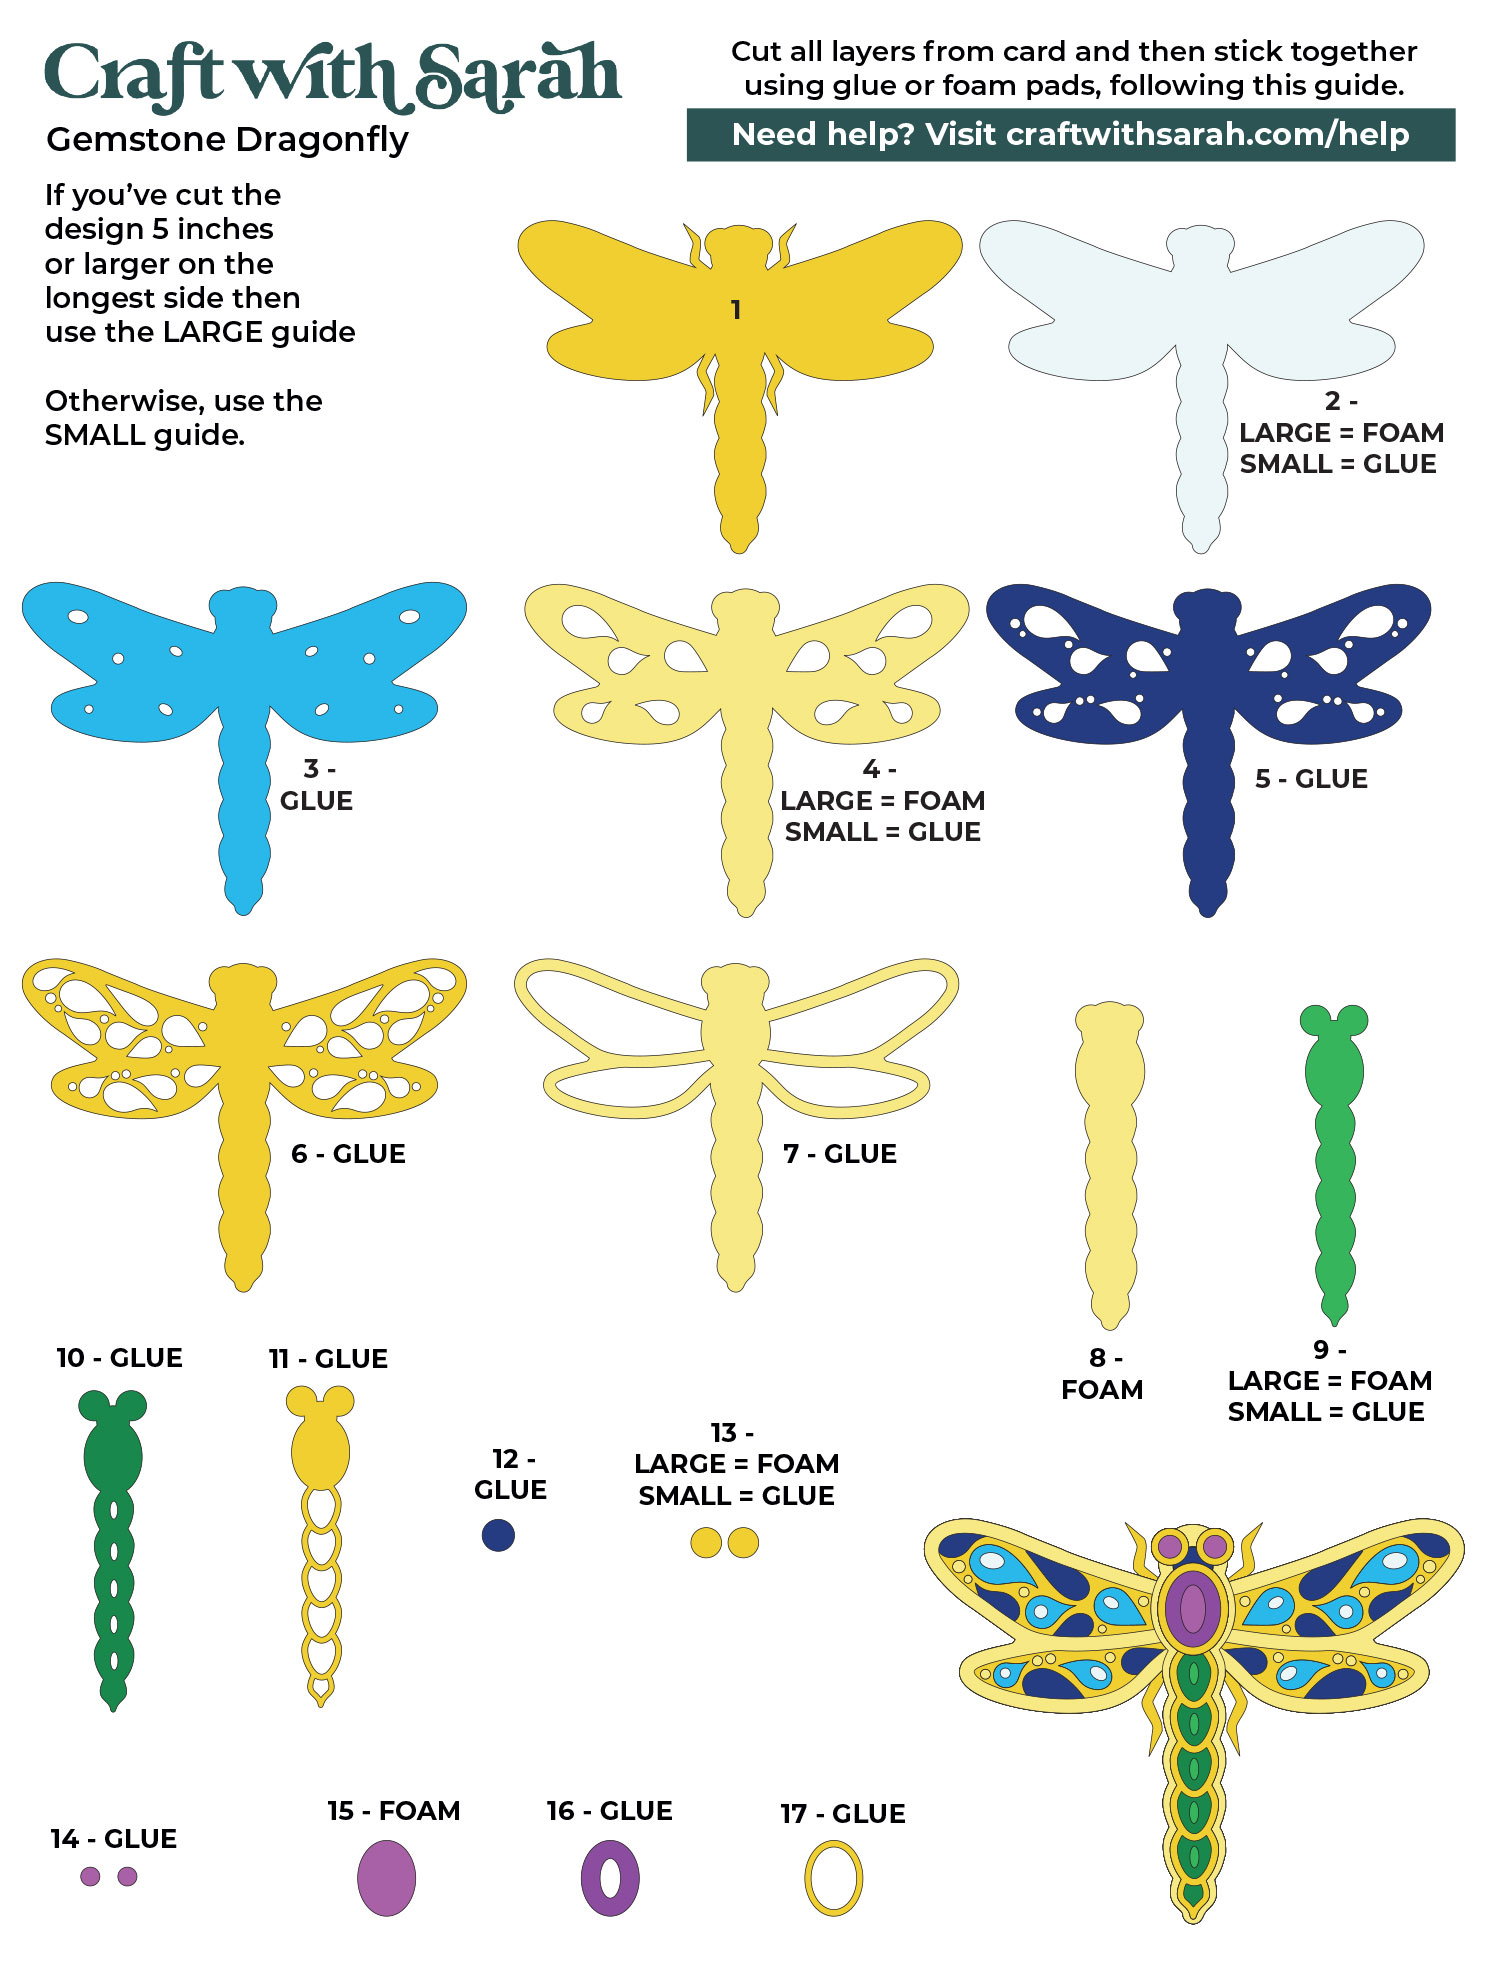
Step 4) Stick the project together
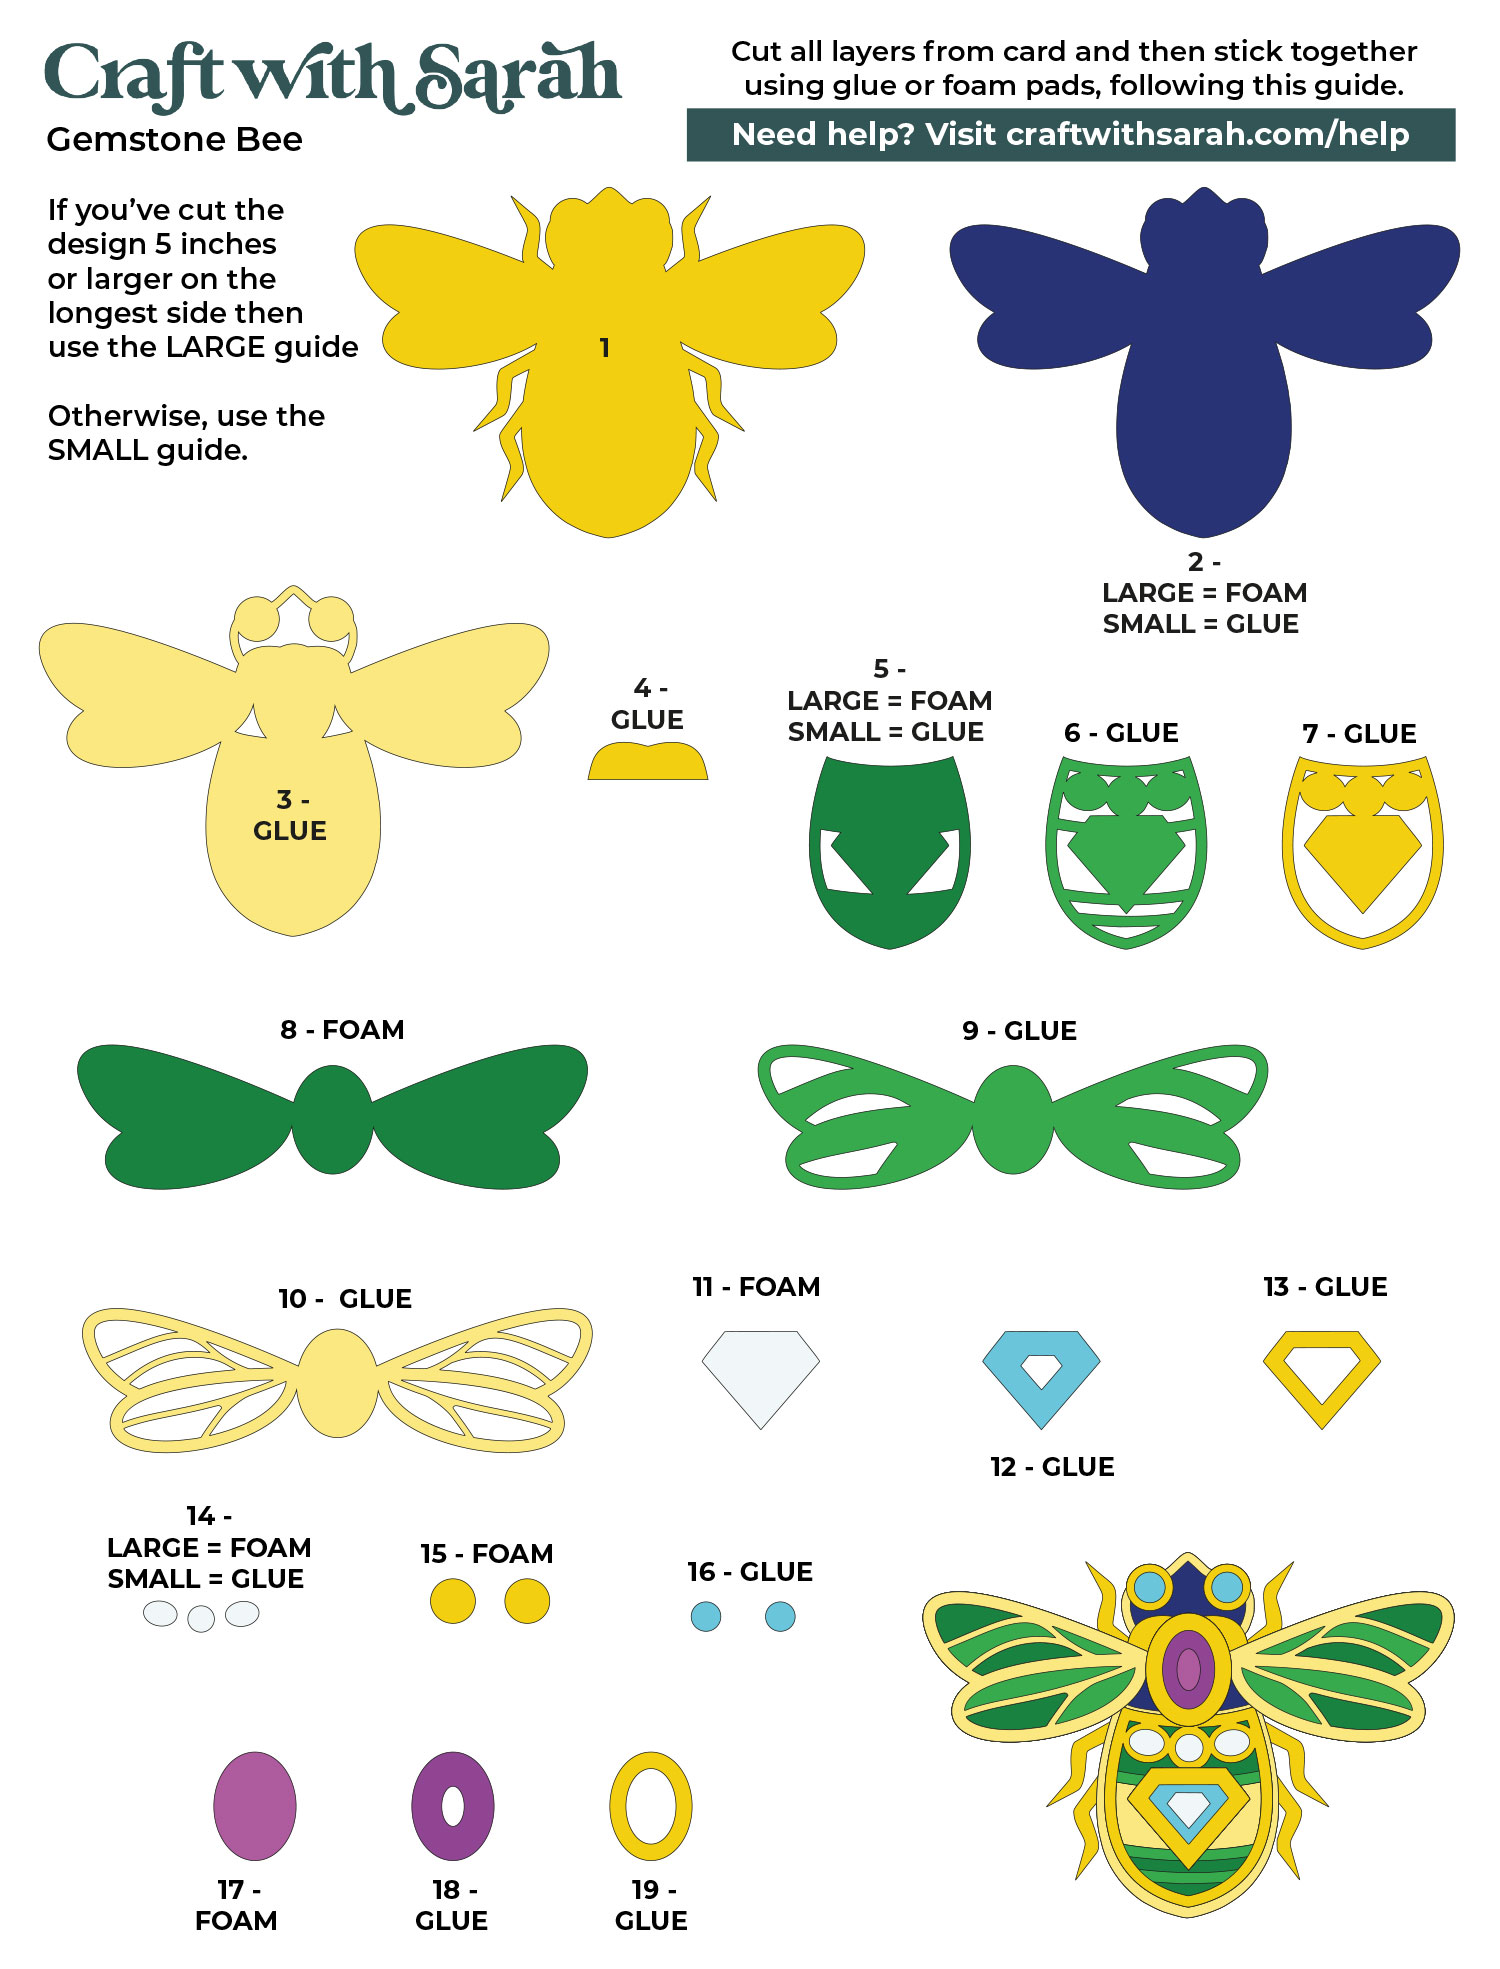
Use 3D foam pads and glue to stick the layers together.
Use these assembly guides to see the order to stick the layers together in.
These assembly guides are a bit different to the ones I usually create, as the instructions vary based on the size that you have cut the insects out at.
If you’ve cut them big (larger than 5 inches on the largest side) then it looks nicer to add more foam squares in the projects to build more depth.
For smaller sizes, they work better with fewer foam squares otherwise they look too “tall” and out of proportion.
Printable versions of these assembly guides are included in the folder when you download the cut files.
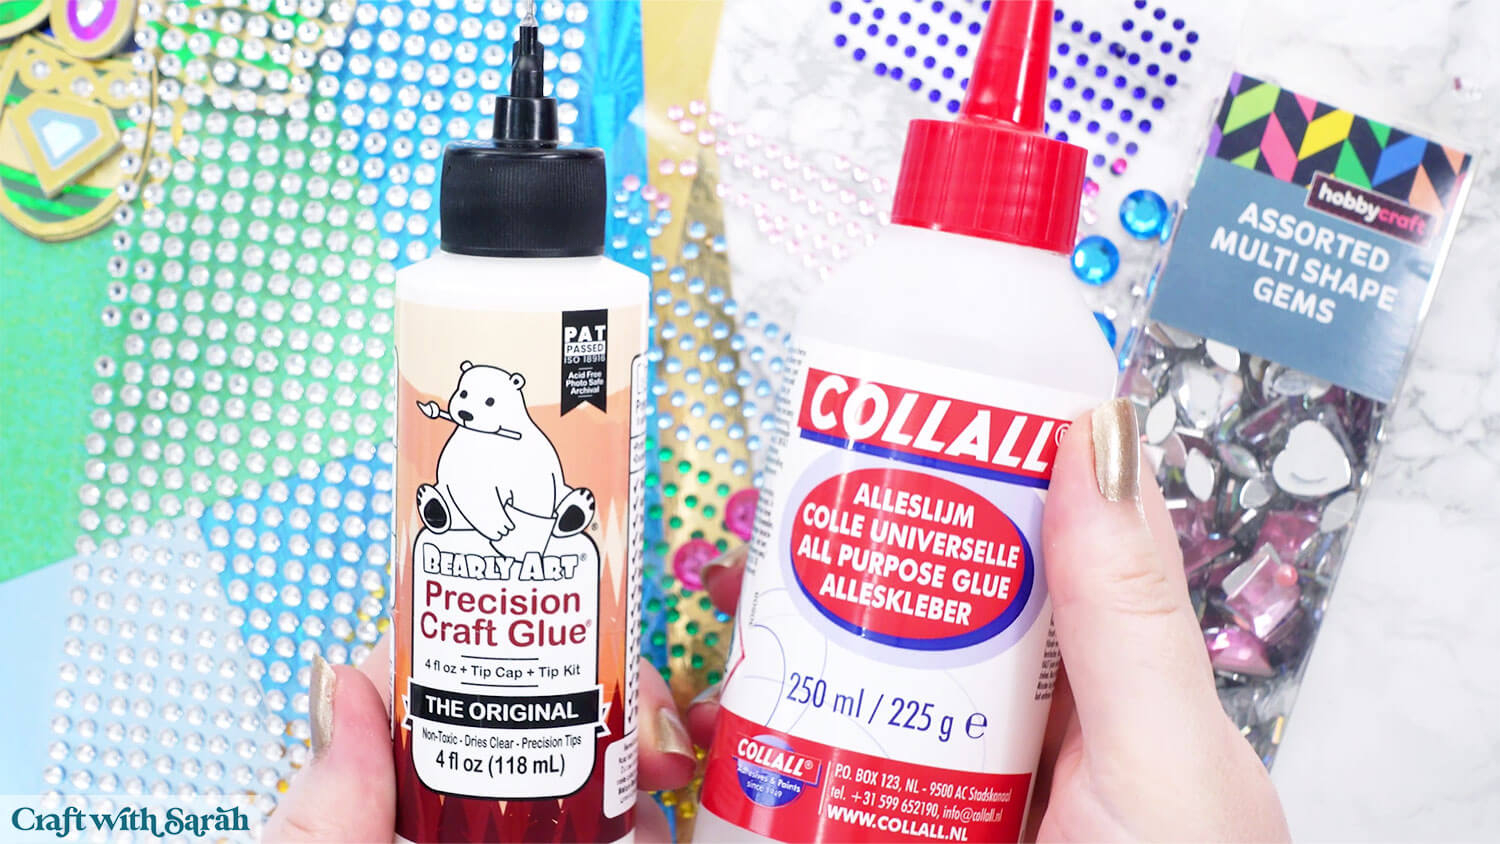
My favourite glues to use on papercraft projects are Bearly Art Glue and Collall All Purpose Glue.
These are great because they don’t “warp” or bend the cardstock like some glues do. You can use as much of it as you want and the card stays perfect – and it dries perfectly clear too!
Bearly Art Glue comes with a tiny nozzle to make it easy to apply glue to small areas of card. The Collall glue doesn’t come with this, so it’s easiest to decant it into needle tip applicator bottles so that you have more control.
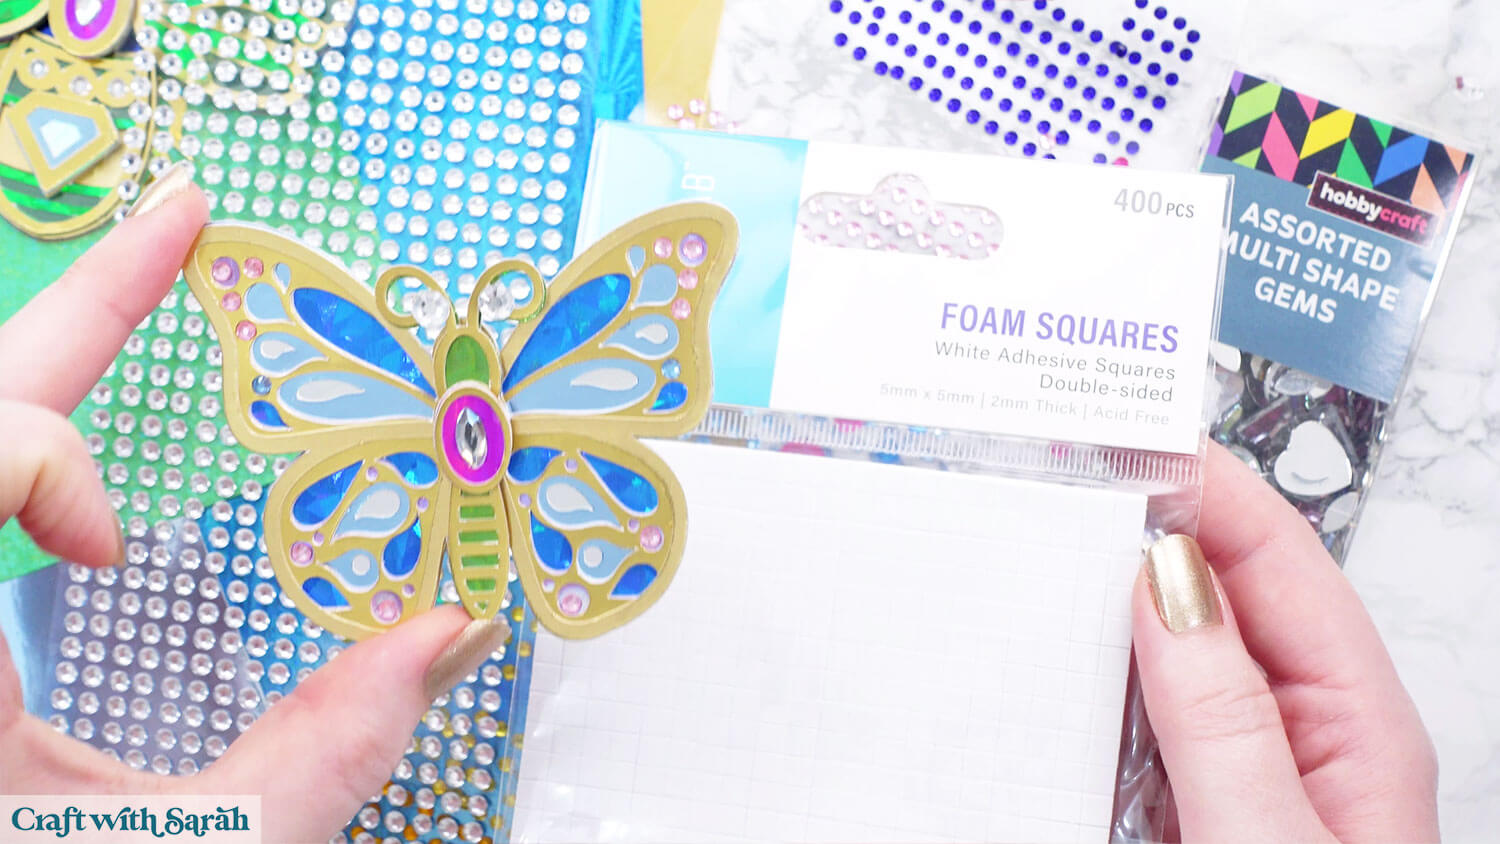
The foam pads that I use are from “Dot & Dab”, but any foam squares will work. If yours are big then you may need to cut them smaller with scissors to fit inside the edges of the layers.
Continue sticking the pieces together, following the assembly guides, until your insects are finished.
You can then use gemstones or similar to add extra “bling” and sparkle to the designs.
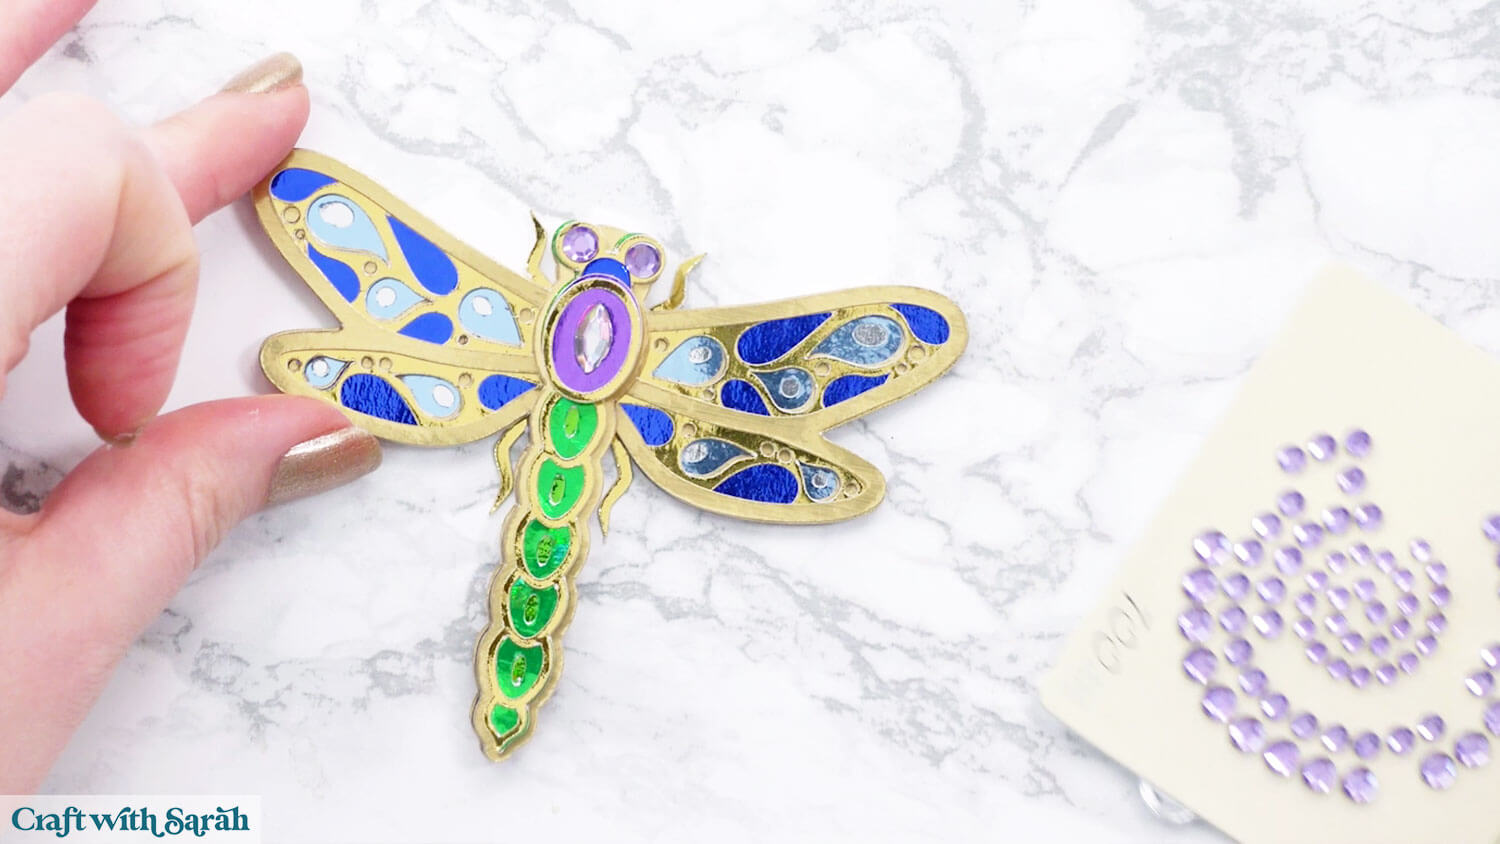
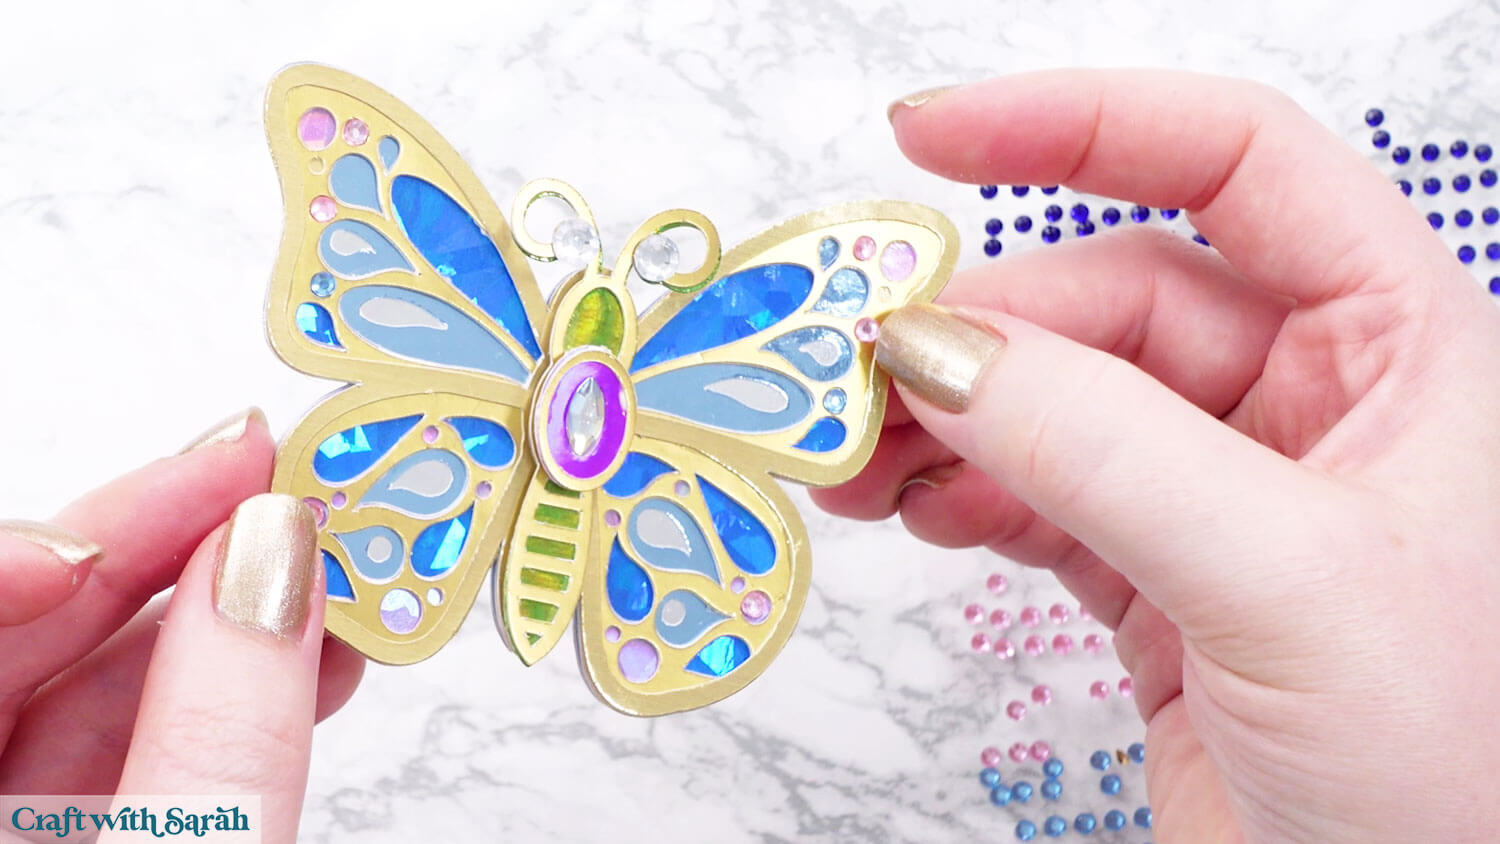
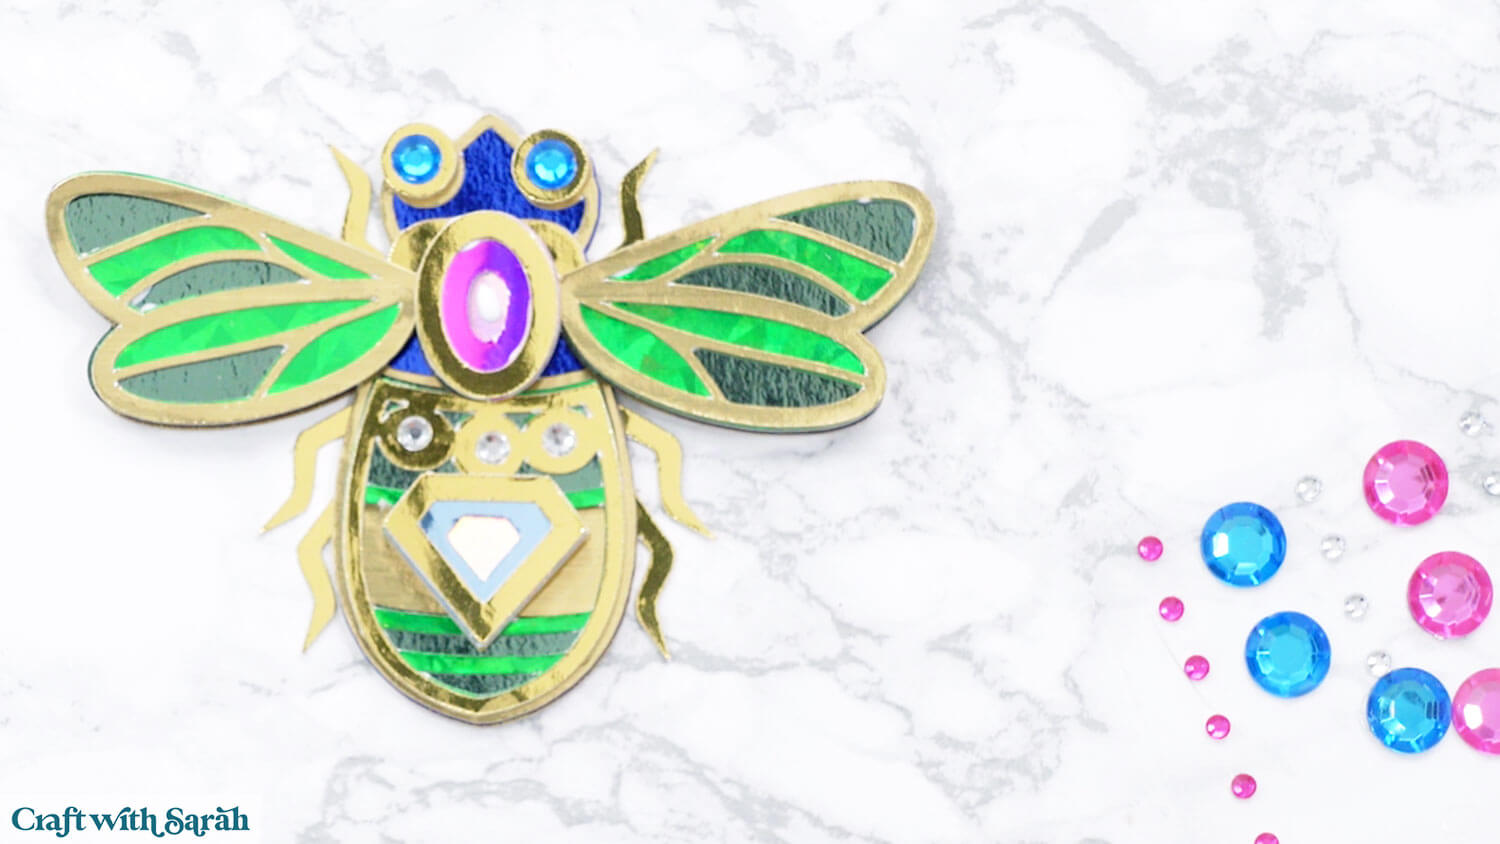
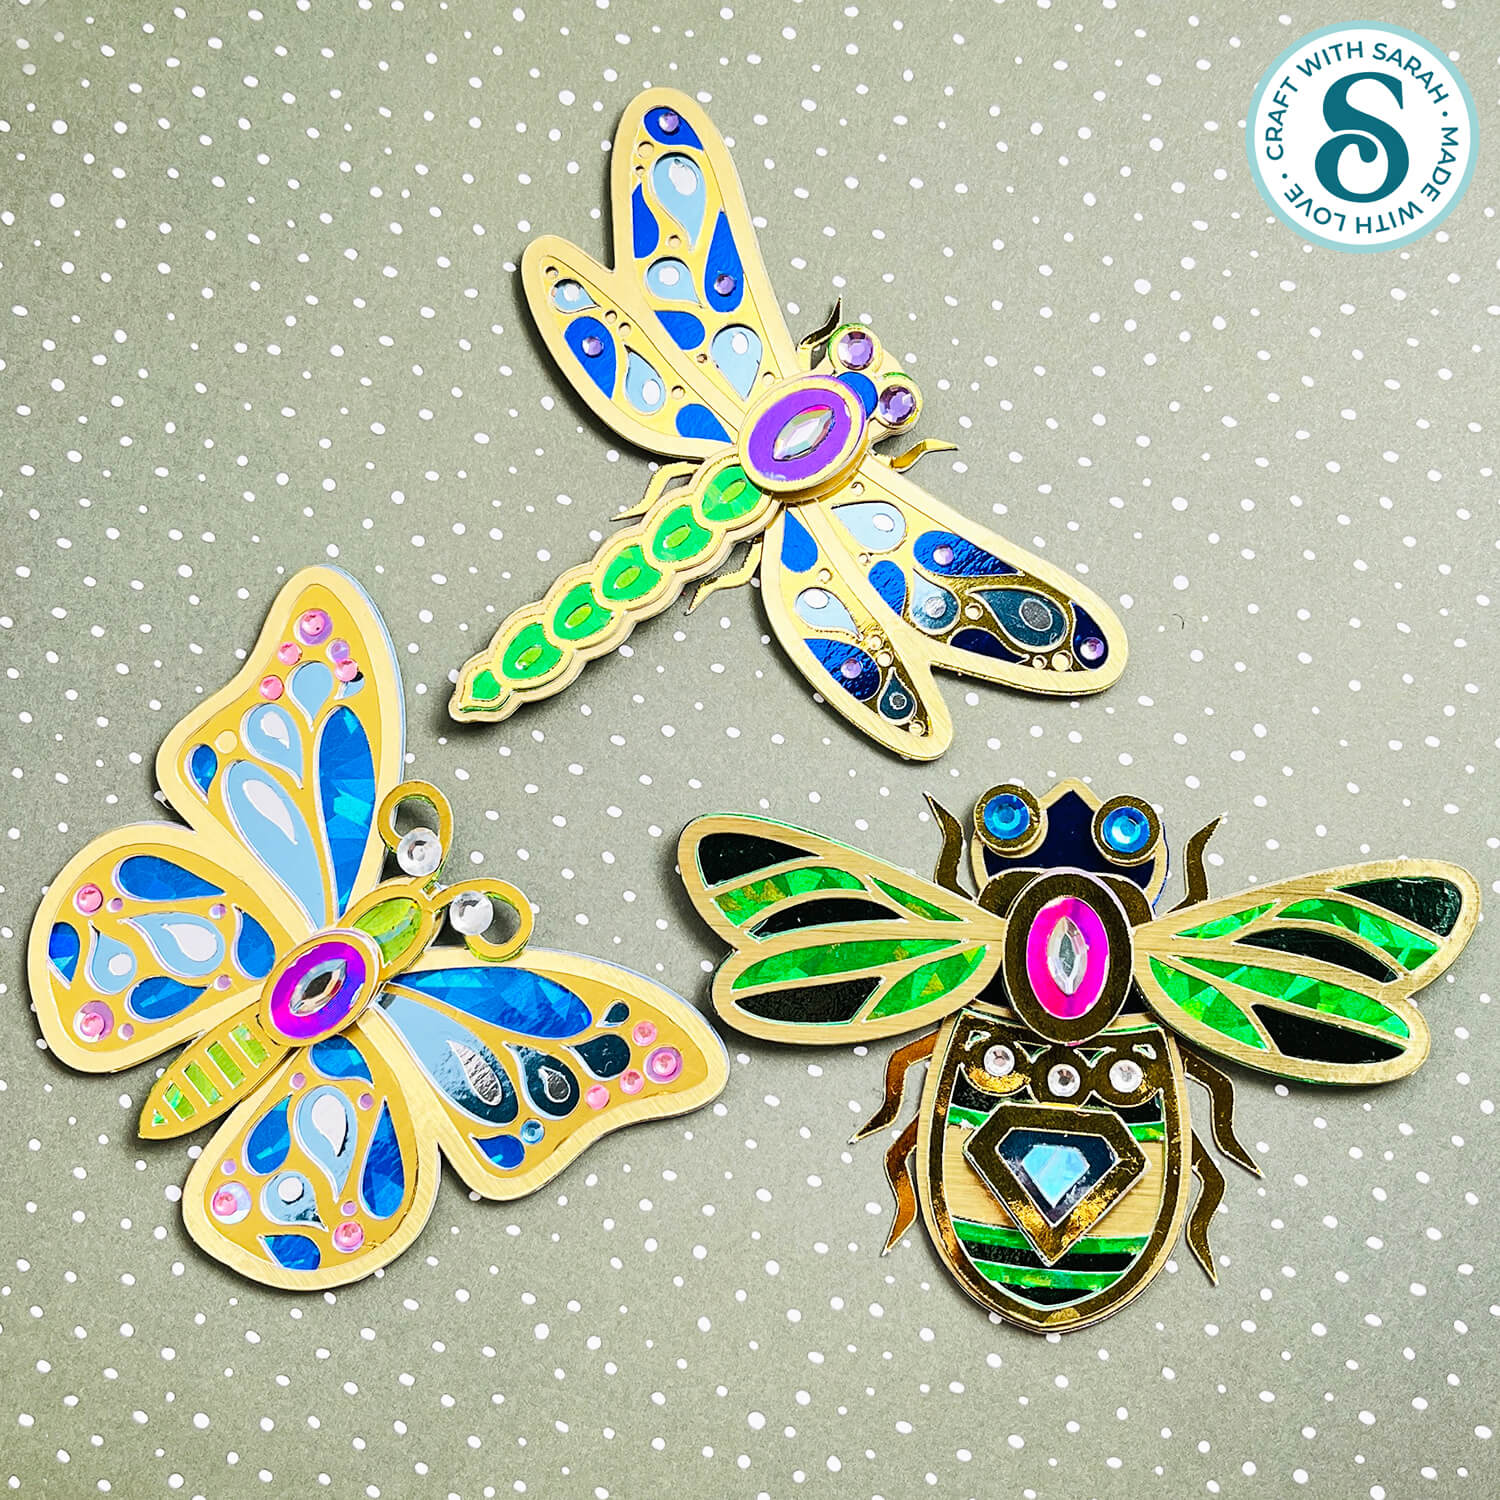
Jewel effect papercraft project to make with a Cricut
I love how these insects turned out. They are so pretty and shiny, and I love how the gemstones elevate the designs to give the illusion of real jewellery.
Love insect themed craft projects?
Check out these other bug themed Cricut crafts:
- Butterfly bookmarks (free!)
- Butterflies & flowers layered SVG
- Beehive lantern
- Dragonfly and flower layered SVG
- Butterfly popout card
Happy crafting,
Sarah x

