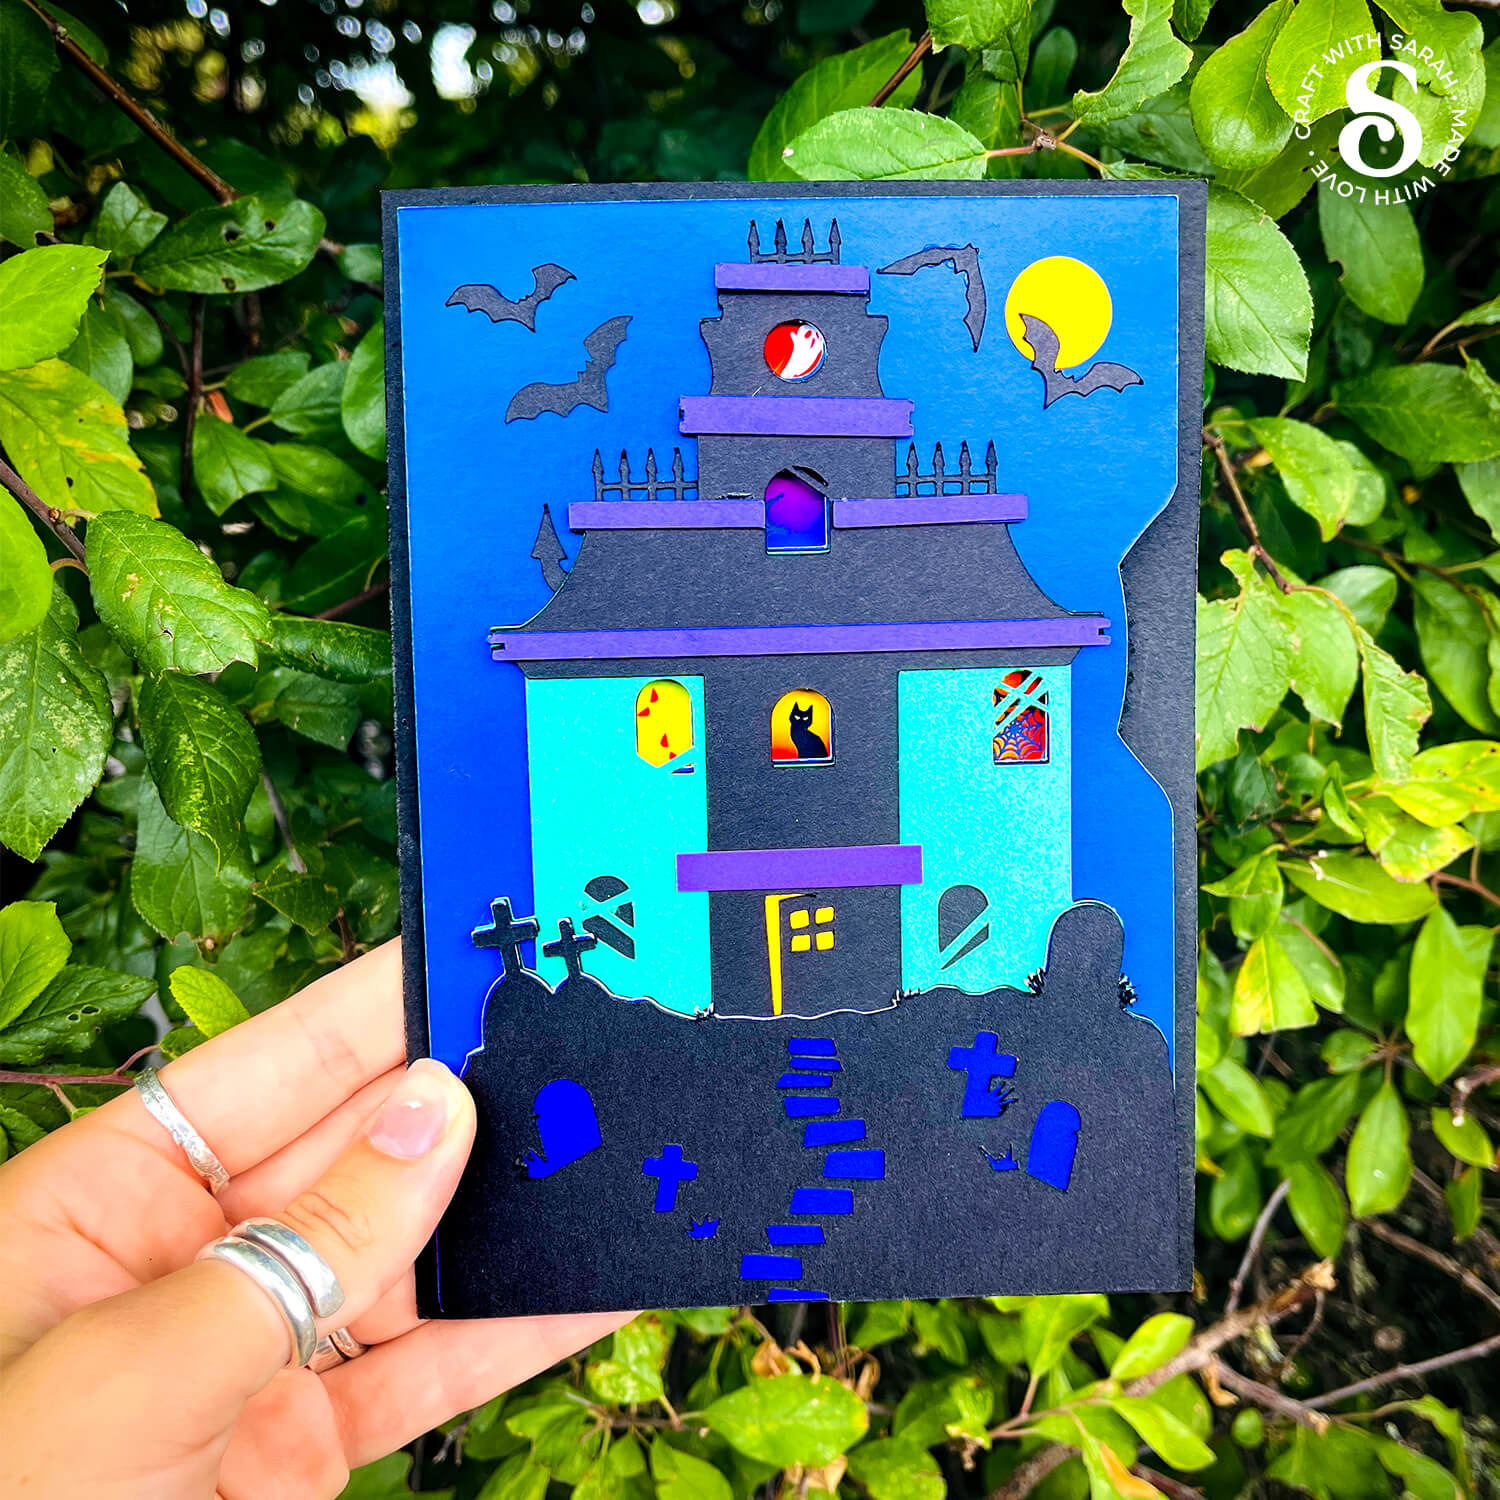
Haunted House Turn the Wheel Card 👻 HCC 2025
If you’re looking to make a Halloween card that goes beyond the usual cut-and-fold, this haunted house craft offers something with extra movement and surprise.
In this tutorial, we’re creating a turn the wheel card that reveals spooky surprises behind the windows of a haunted house.
It’s an eye-catching, interactive card design that comes together more easily than you might expect.
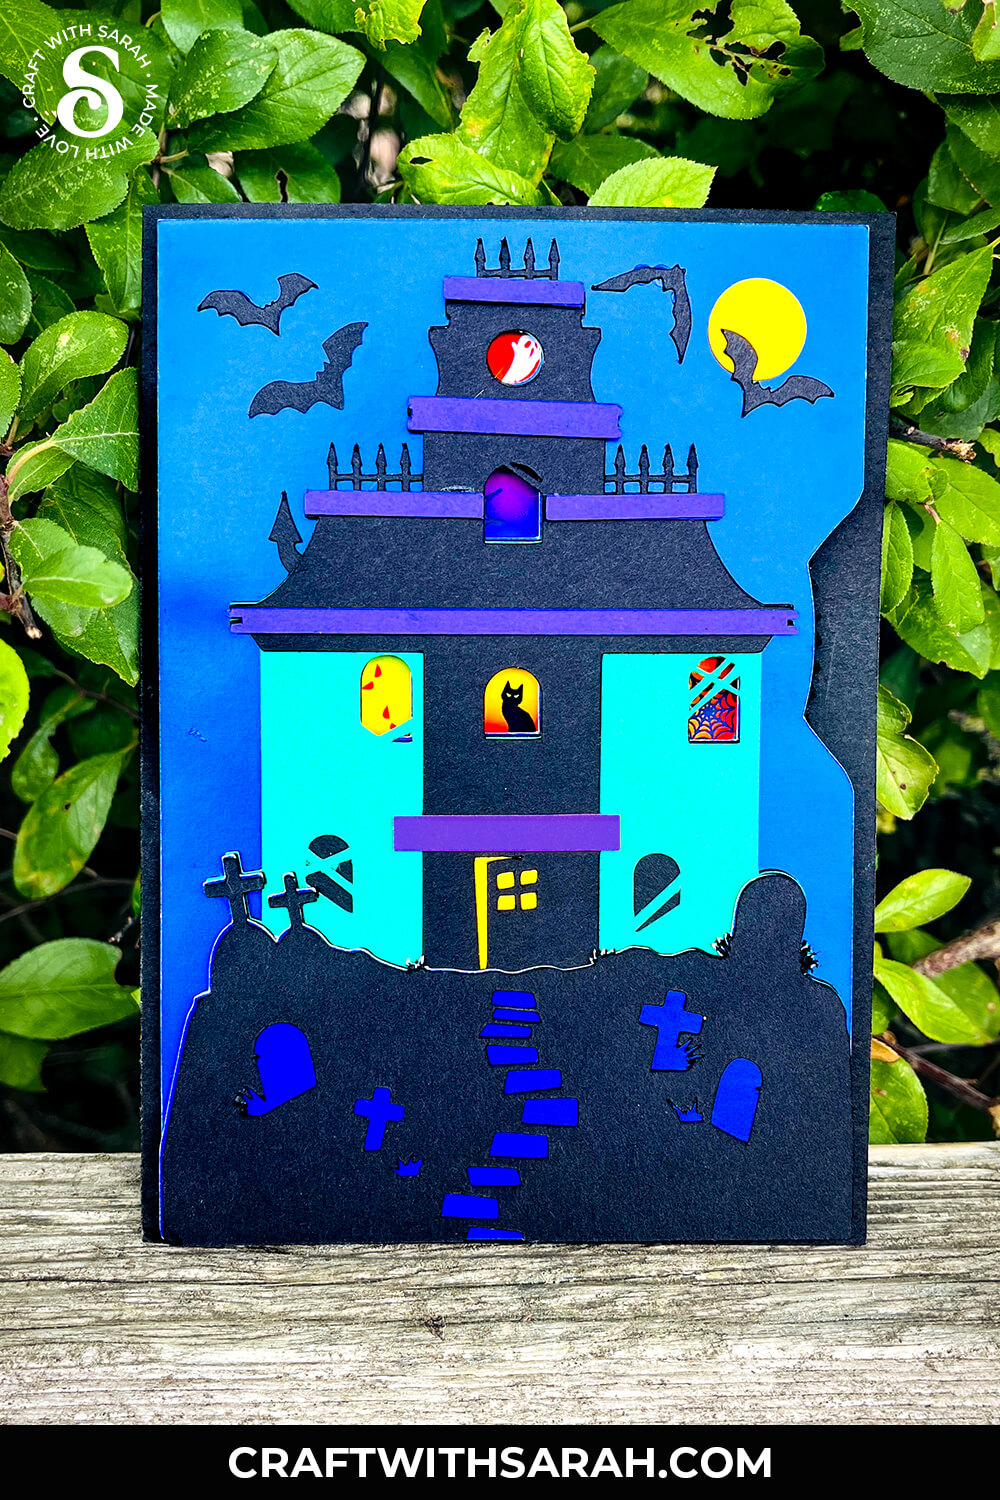
The finished piece is a 5×7 inch Halloween greeting card, designed with a turning wheel inside.
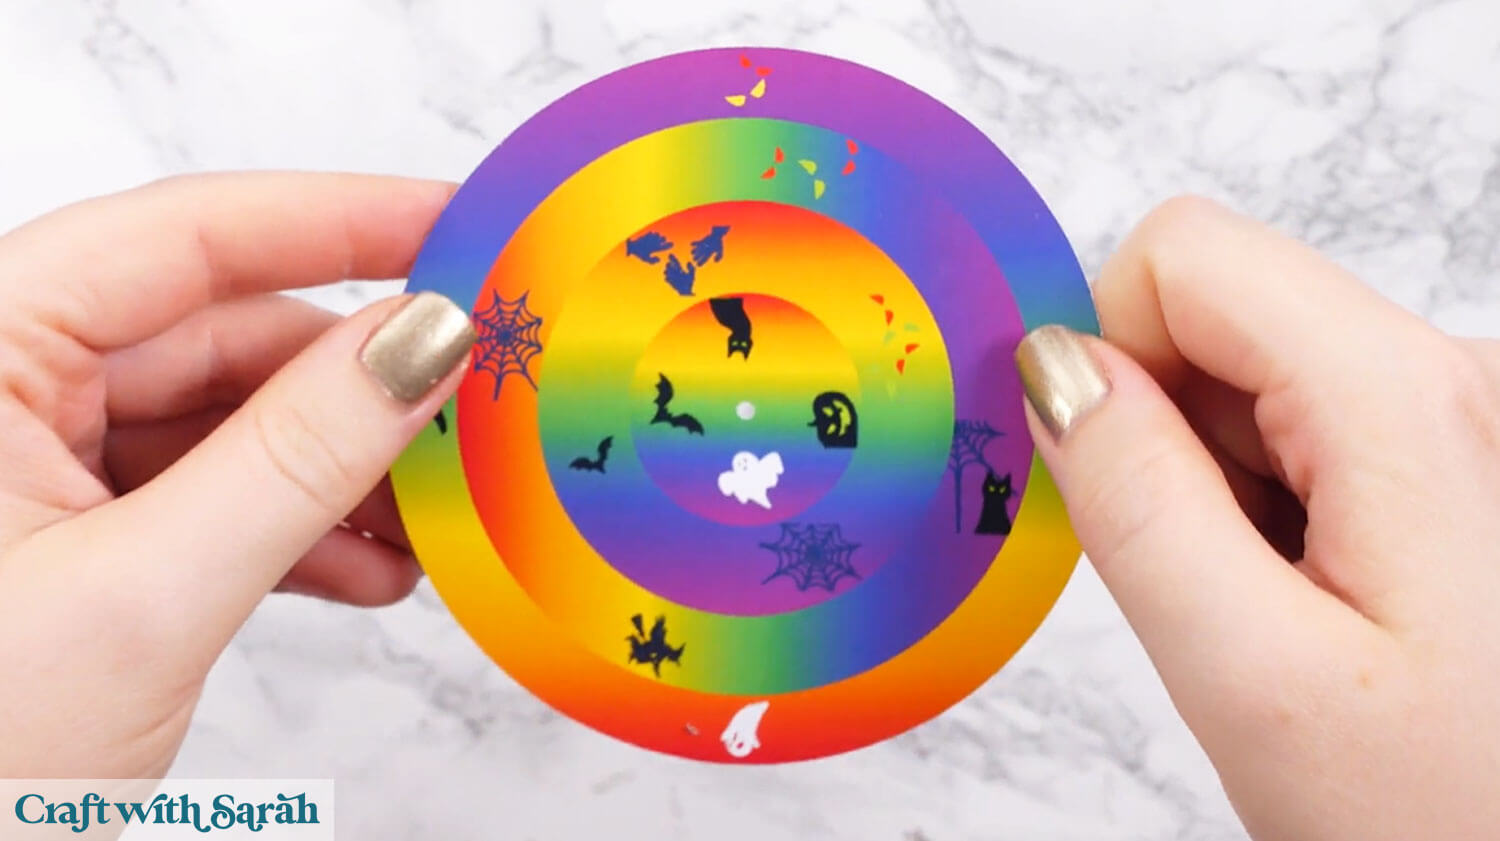
As you move the craft foam wheel using the opening on the right-hand side, different images appear in each window — from ghosts and cats to bats and other eerie creatures. 👻
After assembling the wheel mechanism, you’ll build up the haunted house paper craft layer by layer.
The card front includes detailed cutouts for windows, doors, rooftops, and more — all stacked in layers for a dimensional look. You can choose your own color palette, whether you prefer dark tones for a shadowy effect or pops of bold Halloween color.
Don’t have any craft foam to build the wheel? No problem, I’ve listed out alternatives below.
This project was part of the 2025 Halloween Craft Countdown.
Haunted House Card Supply List
Here is a list of the materials that are needed to make this project.
Please note that some of the links included in this article are affiliate links, which means that if you click through and make a purchase I may receive a commission (at no additional cost to you). You can read my full disclosure at the bottom of the page.
- Cricut machine
- Light blue Cricut cutting mat
- Colored Cardstock
- Glue (I like Bearly Art Glue and Collall)
- Fun foam / funky foam
- One brad / split pin
- Colour printer
- Glossy/matte photo paper or white card to print on
- Cricut scoring wheel or scoring stylus (optional)
- Deep point blade, knife blade or scissors (to cut the foam)
This project is suitable for the following types of Cricut machines: Explore series, Maker series and Joy Xtra. It cannot be made with the original Cricut Joy machines as they do not have print then cut functionality.
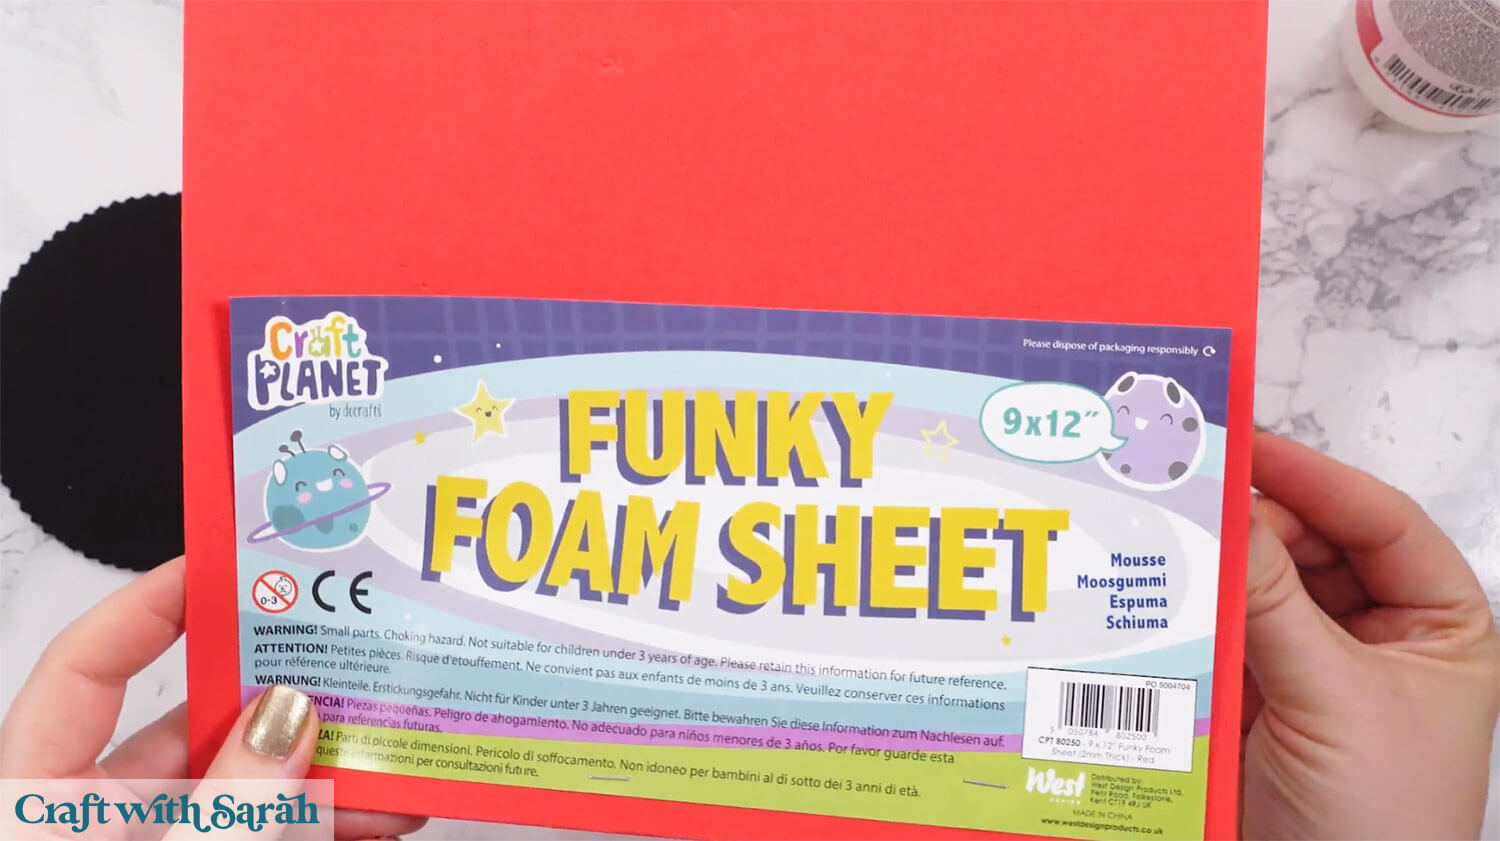
Fun foam
Fun foam, also known as funky foam or craft foam, is used to give stability and height to the wheel section so that it is easier to turn.
I used 2mm thick foam.
The colour doesn’t really matter as you’ll only see a small amount of the foam on the sides.
If you don’t have any fun foam then you could duplicate the pink wheel layer 3-4 times, cutting each from cardstock and glueing them together.
Cricut blades
To cut fun foam with a Cricut you will need either a deep point blade or a knife blade.
The deep point blade can be used with any of the Explore models of machine, or the Maker models of machine.
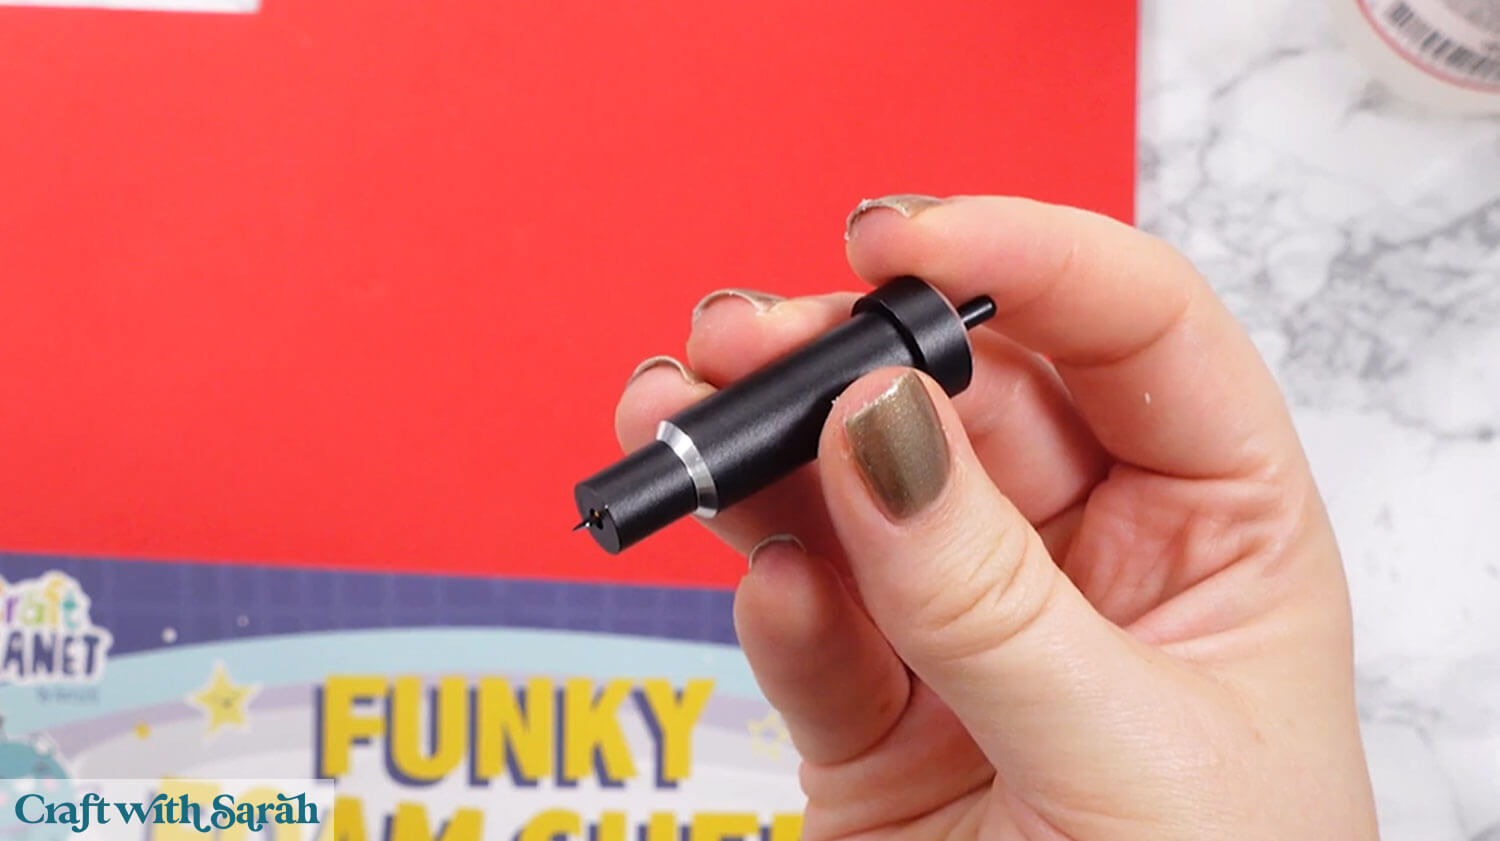
The knife blade only works with the Maker, Maker 3 and Maker 4.
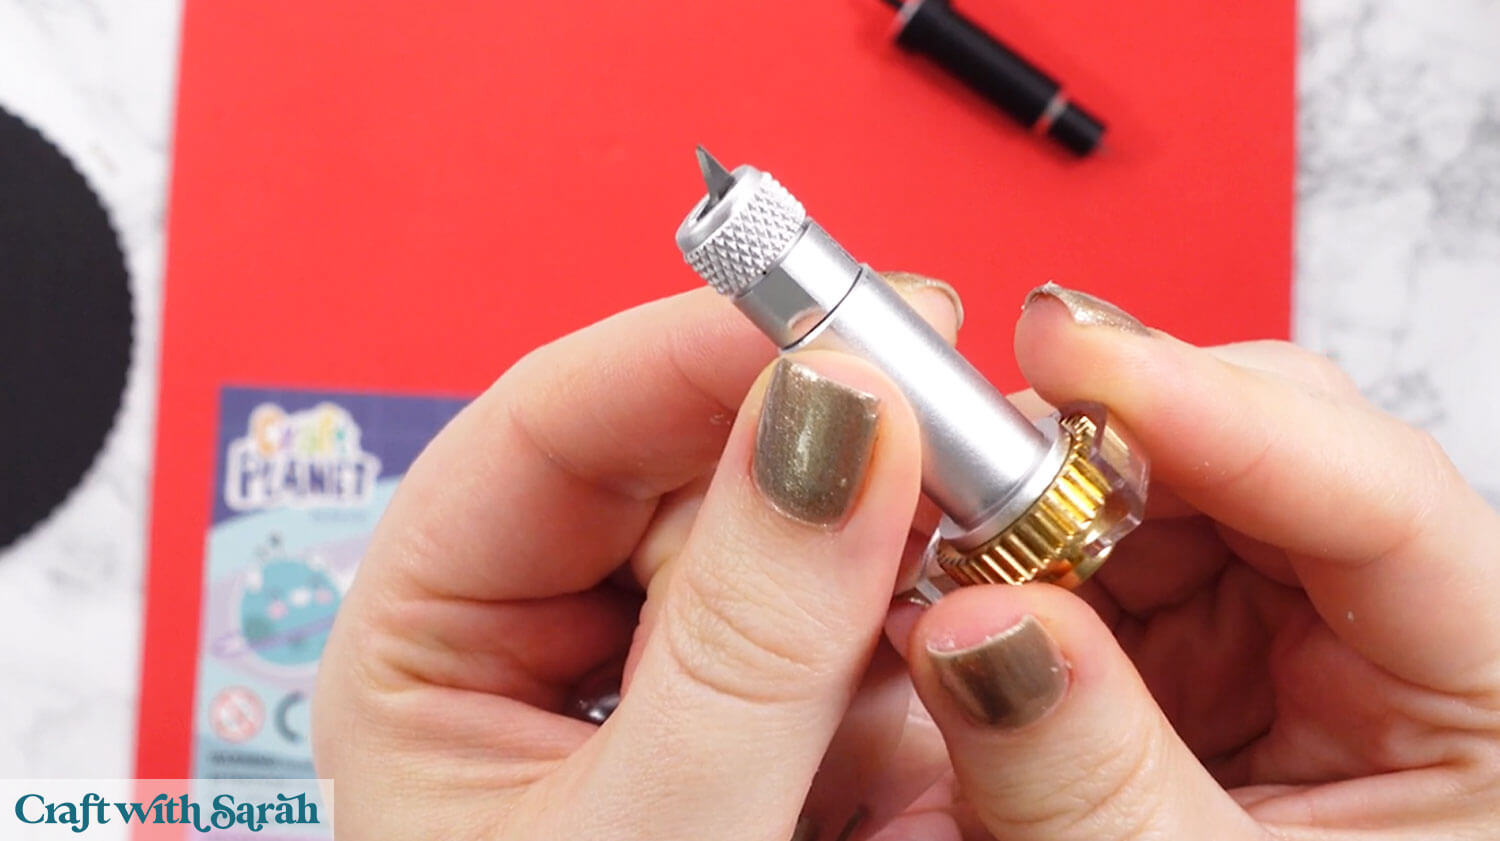
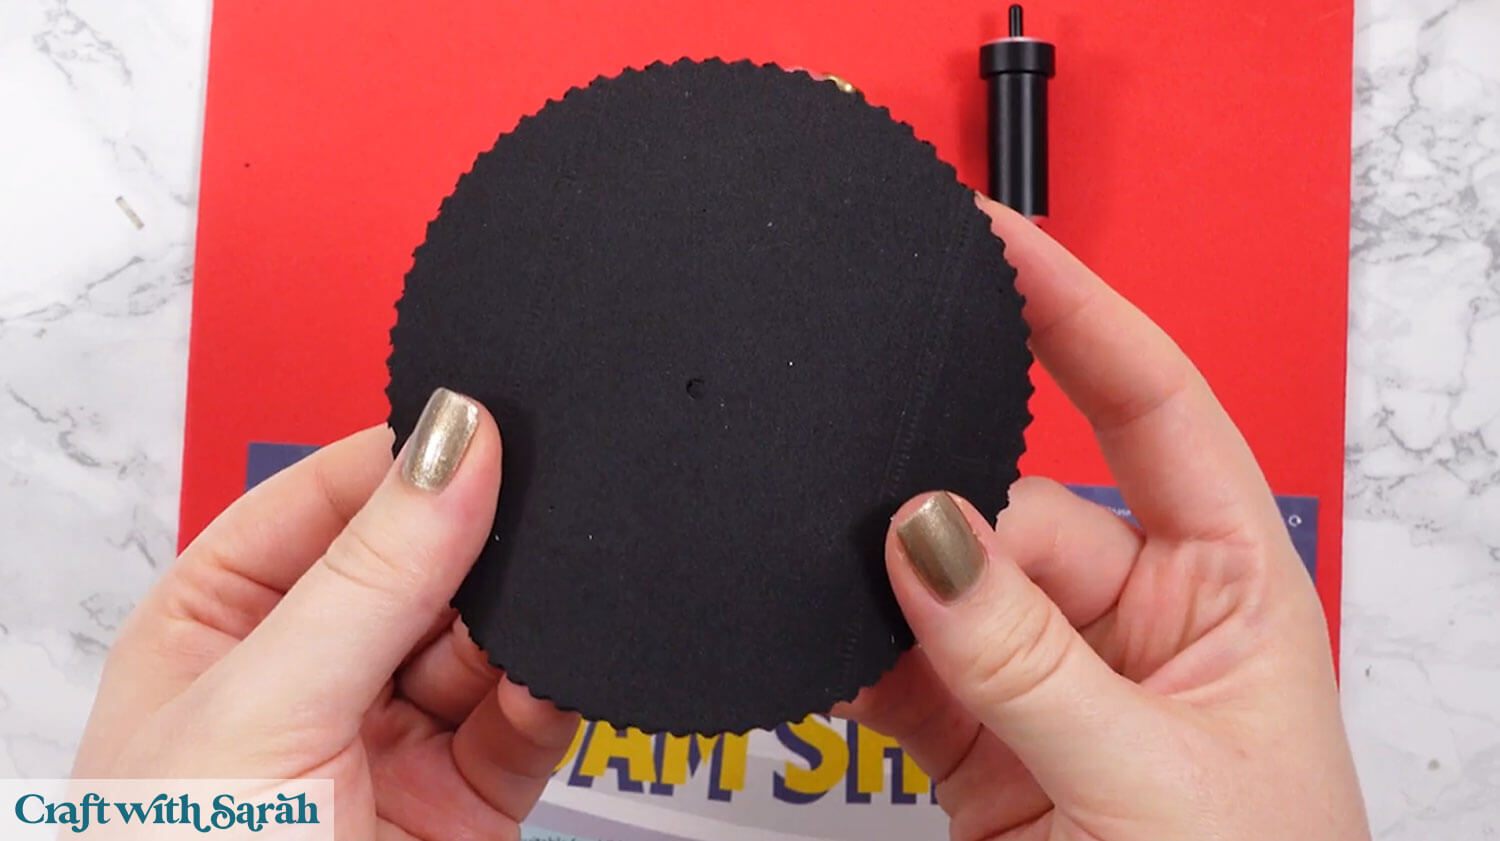
If you don’t have one of those blades, or if you’re using a Cricut Joy Xtra that is not compatible with them, then you can hand-cut this piece instead as a smooth-edge circle.
While the Cricut version of the “wheel” has a serrated edge so it’s easier to grip, it will still work with a smooth circle.
Brad / split pin
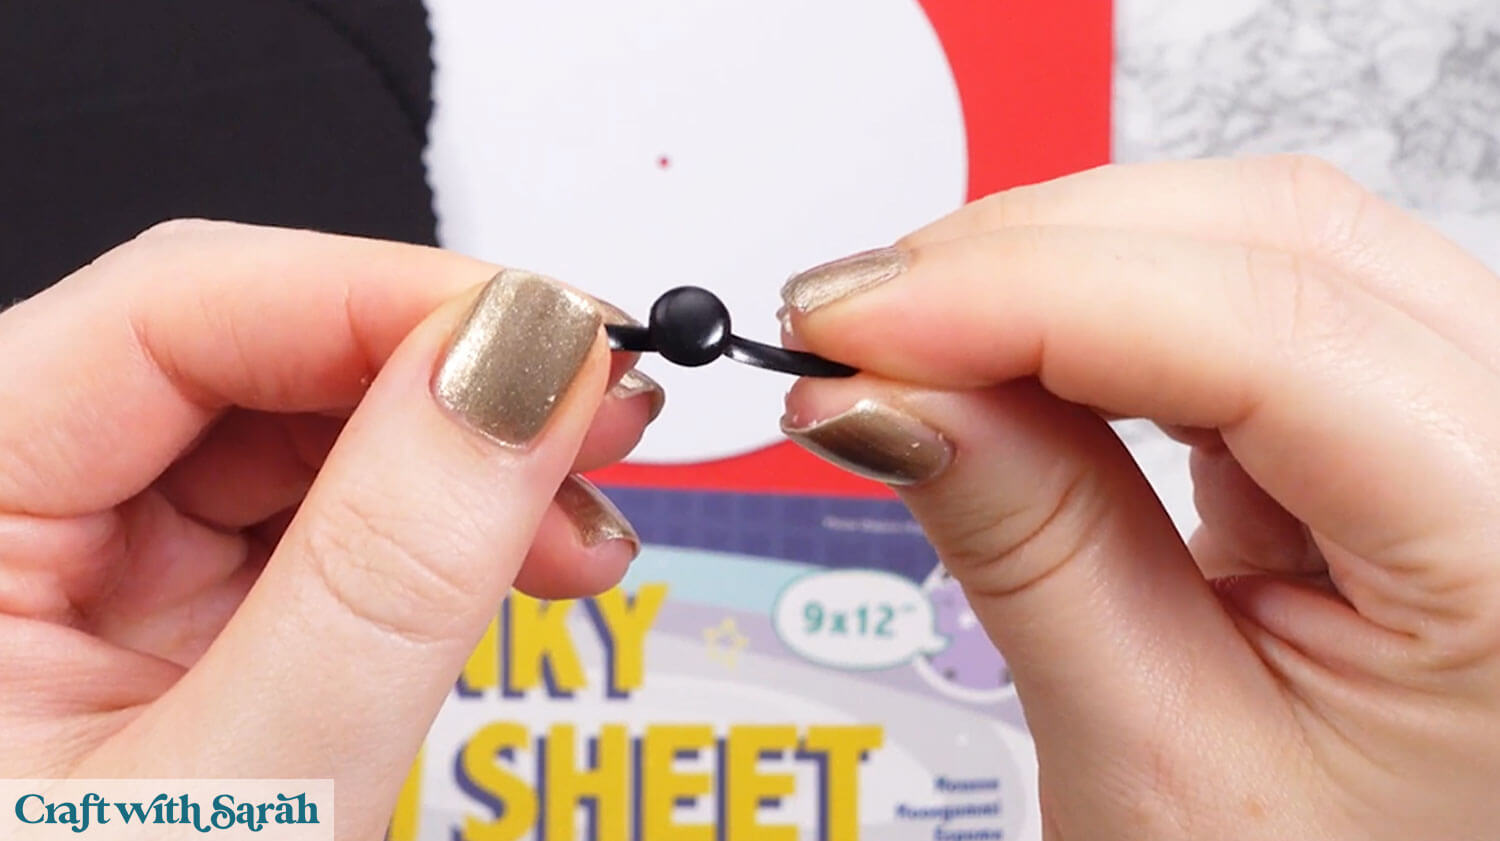
The “turning” functionality is done with a split pin, also known as a brad.
It’s a type of metal or plastic pin with two “legs” that can be opened out to secure the pieces of the card in place, while still allowing it to turn.
Print then cut project
The section of the wheel with all the pictures on it is a “print then cut” layer.
You’ll need a colour printer to be able to make this project.
This is the only print then cut project in the Halloween Craft Countdown, so if you don’t have a printer then don’t worry – it’s not needed for the other 19 projects 🙂
The colours will print best on photo paper. You can choose either glossy or matte effect photo paper. Or, print onto white cardstock.
Foundation learning
If you're new to making papercrafts with your cutting machine, check out these links to get you started.
They include videos on topics such as: which file to use with your type of cutting machine, how to load the files into your cutting machine's software, how to cut cardstock with your type of cutting machine, how to recolor and modify/customize the cut files and tips for displaying your projects.
- Help guides for Cricut machines
- Help guides for Silhouette machines
- Help guides for ScanNCut machines
The following tutorials are Cricut-specific, but many of the ideas will work similarly with a Silhouette or ScanNCut machine and any cut files that are shared in them are compatible with all types of cutting machine.
- How to score with a Cricut (even without scoring tools)
- Print then cut tutorial
- Design Space tools (Combine, Attach, Slice, Weld, Flatten, etc.)
- Pattern fill tutorial (for making backgrounds & cutting images to a specific shape/size)
- Free envelope SVGs that can be sized to fit any card
- Presentation boxes for handmade cards
- How to write inside cards with Cricut pens
- How to cut layered designs at a small size
- Design Space tips & tricks
- Cricut pens tutorial
- How to mount multiple designs in the same frame with magic guides
DIY Interactive Card Video
Watch the video below to see how to make this project. Keep scrolling for a written tutorial.
A big Design Space update is currently rolling out that changes how the screen looks, including the position of some of the buttons and tools. I had already recorded all the Countdown videos before the update was released, so unfortunately there will be areas of the videos that look different to your screen.
To help with this, I've recorded a walkthrough video that explains all of the Design Space changes so that you can see how to do everything in the new version.
How to Make a Haunted House Halloween Greeting Card
Here’s how to make this spooky greetings card for Halloween using a Cricut machine.
Step 1) Download the cutting files & upload to Design Space
Get the files using the box below.
Before you upload the SVGs to Design Space, you need to unzip the download folder that they come in.
- How to unzip a folder on Windows computer
- How to unzip a folder on a Mac
- How to unzip a folder on an iPad/iPhone
- How to unzip a folder on an Android device
After unzipping, upload the SVG file(s) into your cutting machine software.
Not sure how to use cut files with your type of machine? The following links lead to videos on how to open cut files in:
- Cricut Design Space
- Silhouette Studio
- CanvasWorkspace (for ScanNCut machines)
The download folder also contains printable PDF versions of the templates for hand cutting.
There are two files that need to be uploaded. We’ll start with the SVG.
If you are using Cricut Design Space, start a new project and then click the “Upload” button on the left of the screen.
You can then either click “Browse” to find the files on your computer, or drag-and-drop them in.
Navigate to the “01 Cricut Version” subfolder and then select the file called svg-01-haunted-house-wheel-card-craftwithsarah.svg
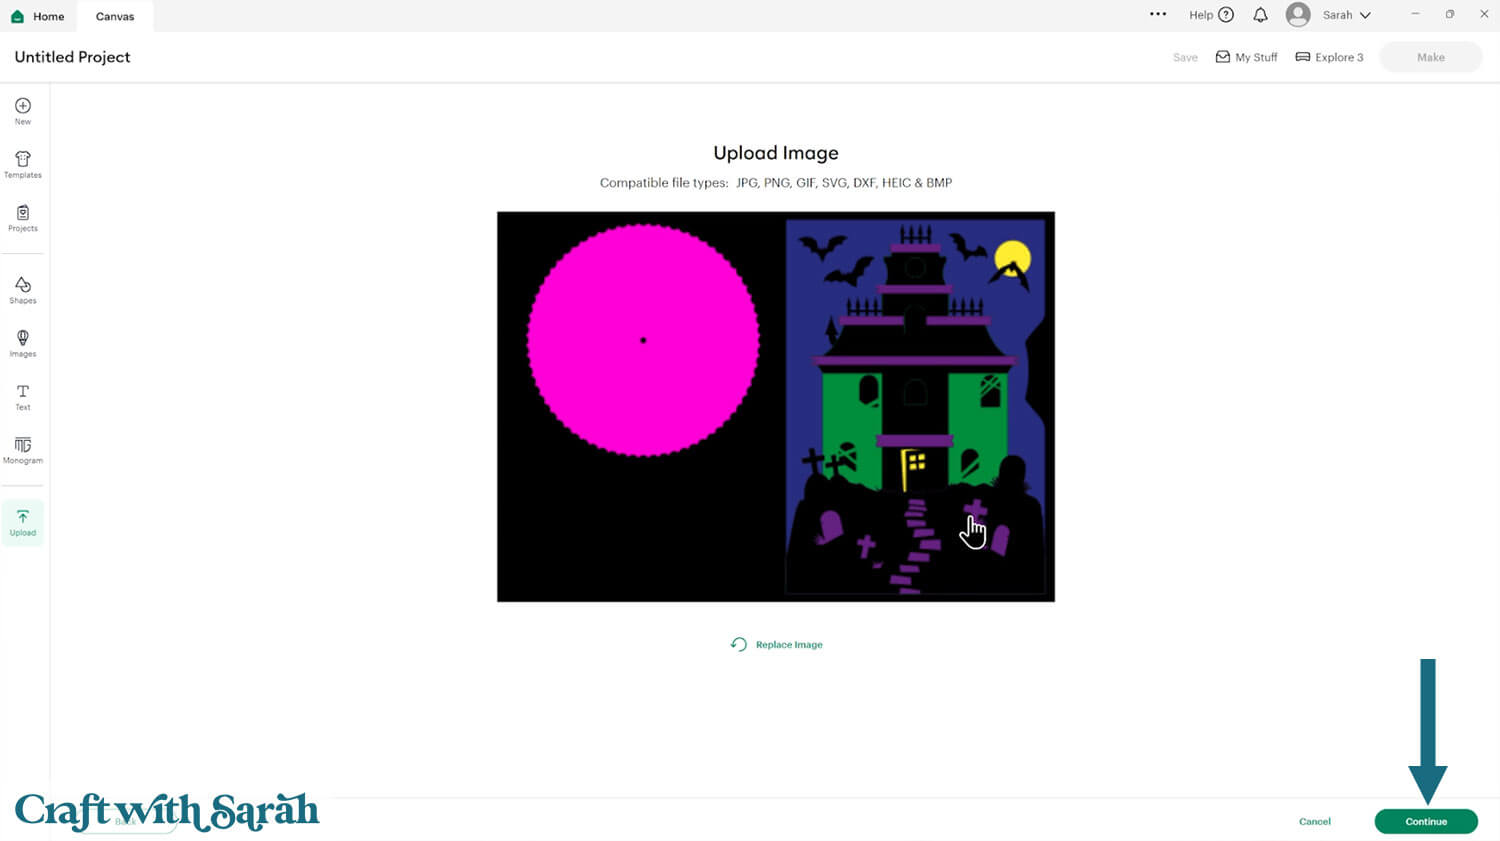
Don’t worry if the image preview appears blurry – it will show in full quality once it’s inserted onto your project.
Press “Upload” on the next screen.
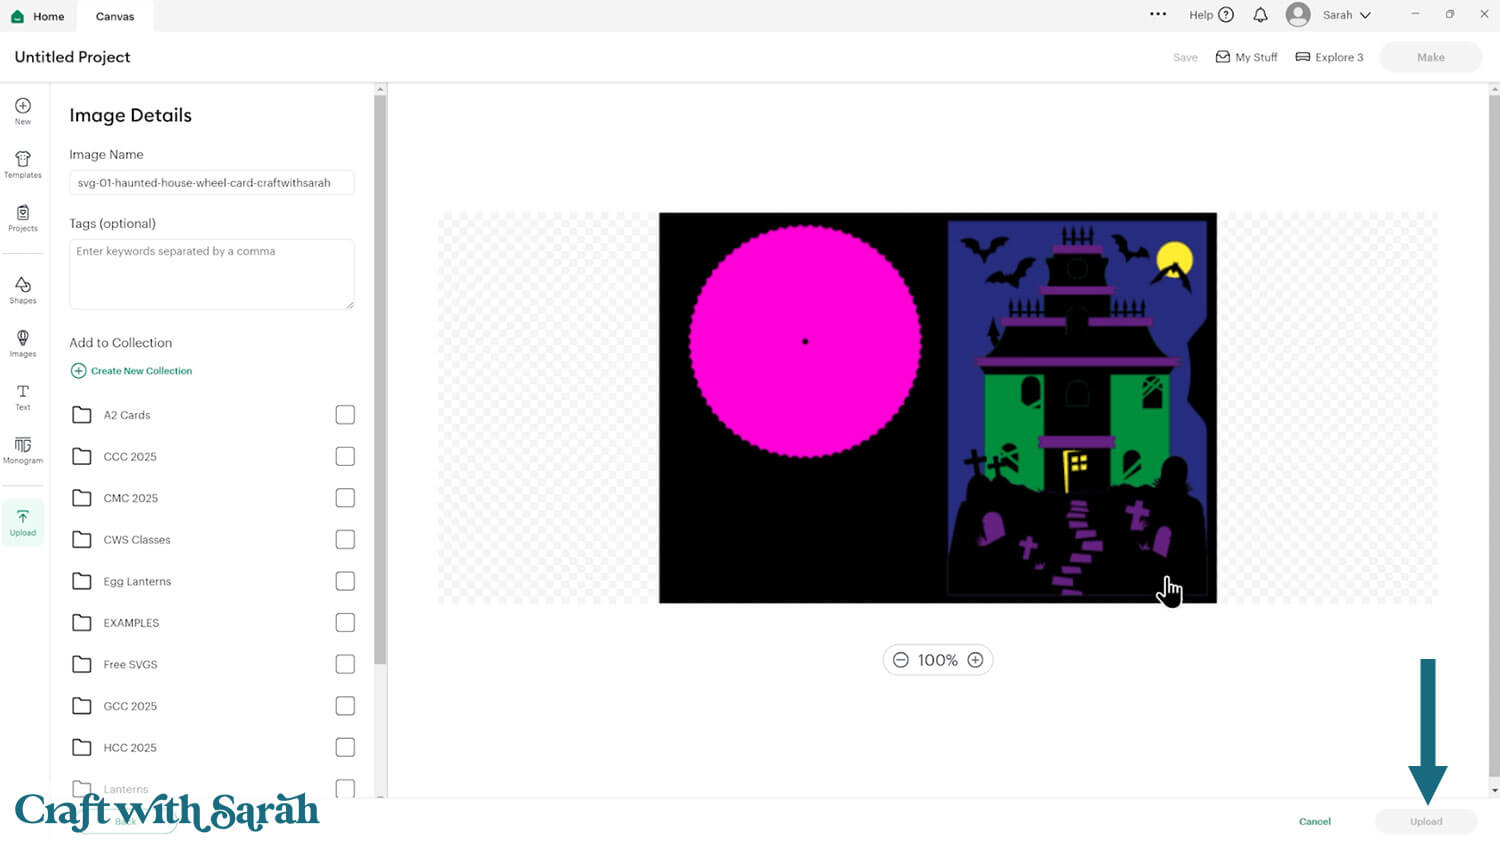
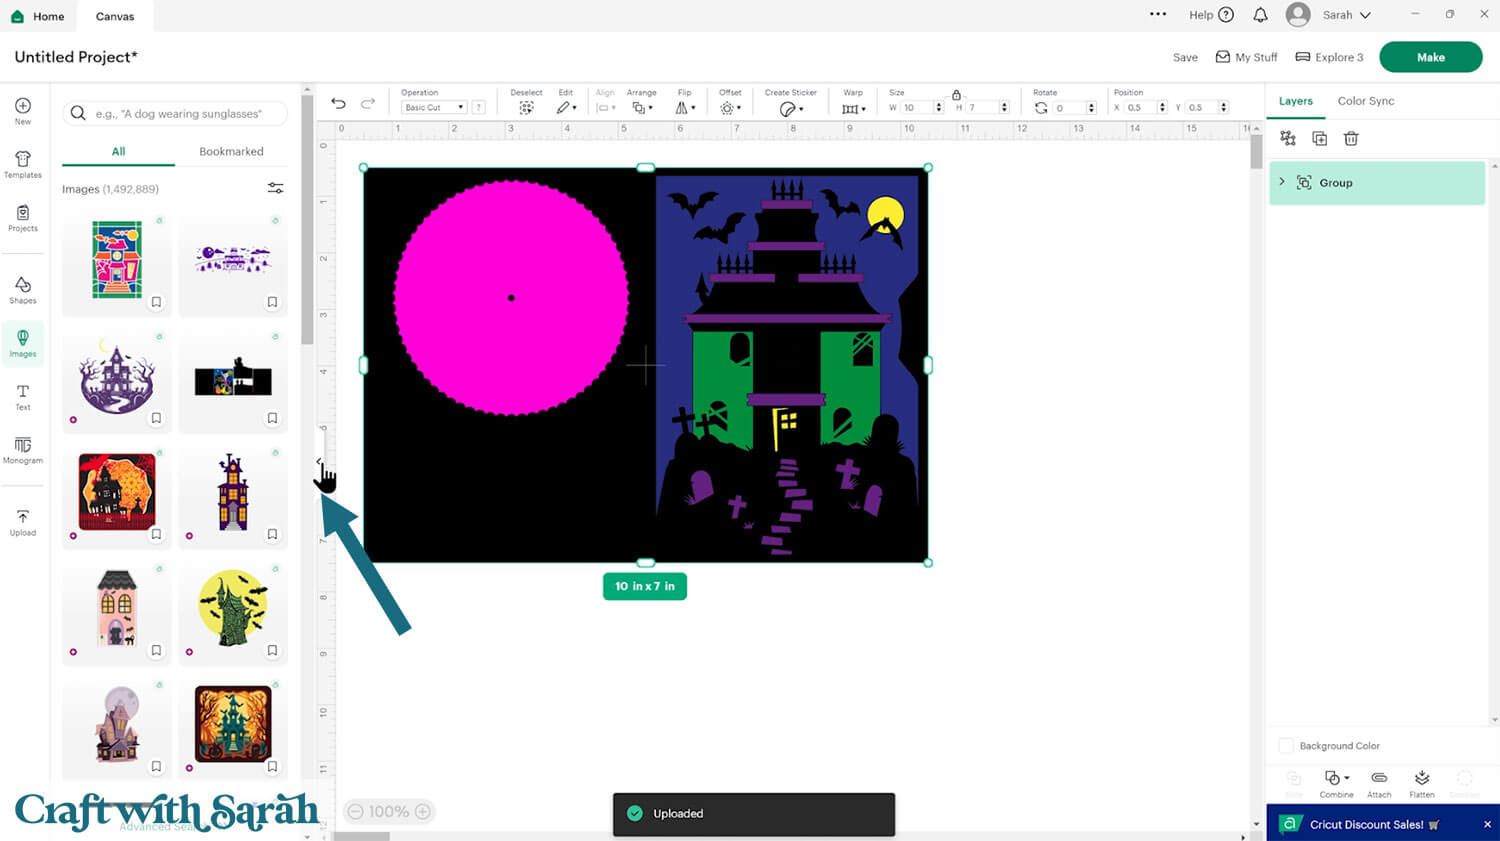
After uploading, the design should be automatically inserted onto your Canvas.
The project should load in at 10 inches wide and 7 inches tall. This will make a 5×7 inch card.
Cricut have recently (as of June 2025) introduced a feature where you get a “pop out” bar of similar images when you Upload a design. To hide this bar (to give you more space for designing!), click the arrow that’s about half way down the page.
If the design doesn’t get inserted onto your Canvas, it will show under “Uploads” in your “Recently Uploaded Images”. Click on it and then press “Add to Canvas” to put it onto your Project.
Next, let’s upload the printable wheel image.
Go back to “Upload” and “Upload Image”. This time, select the file called png-inner-wheel.png
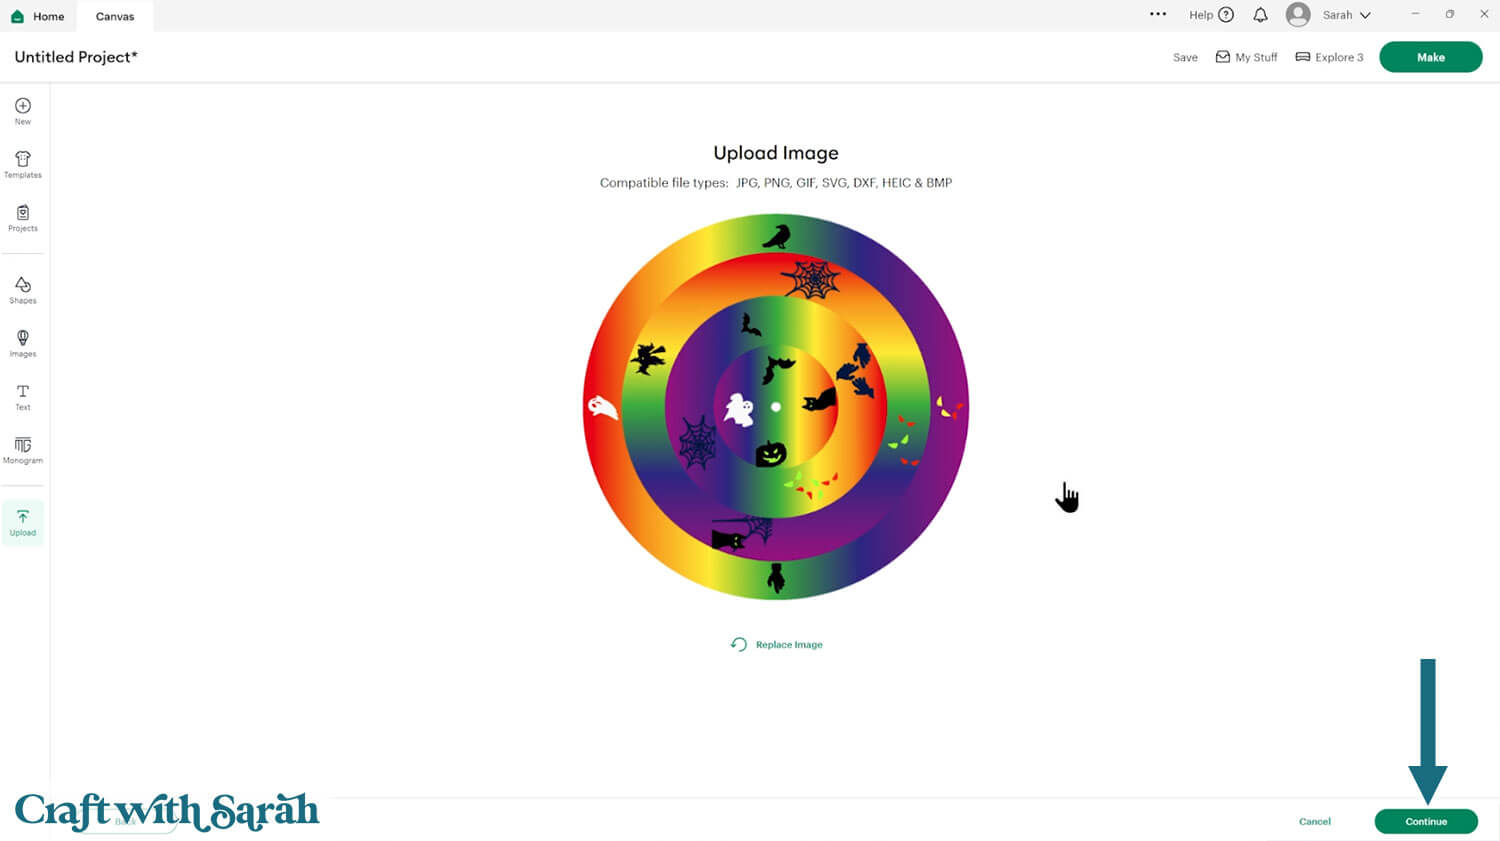
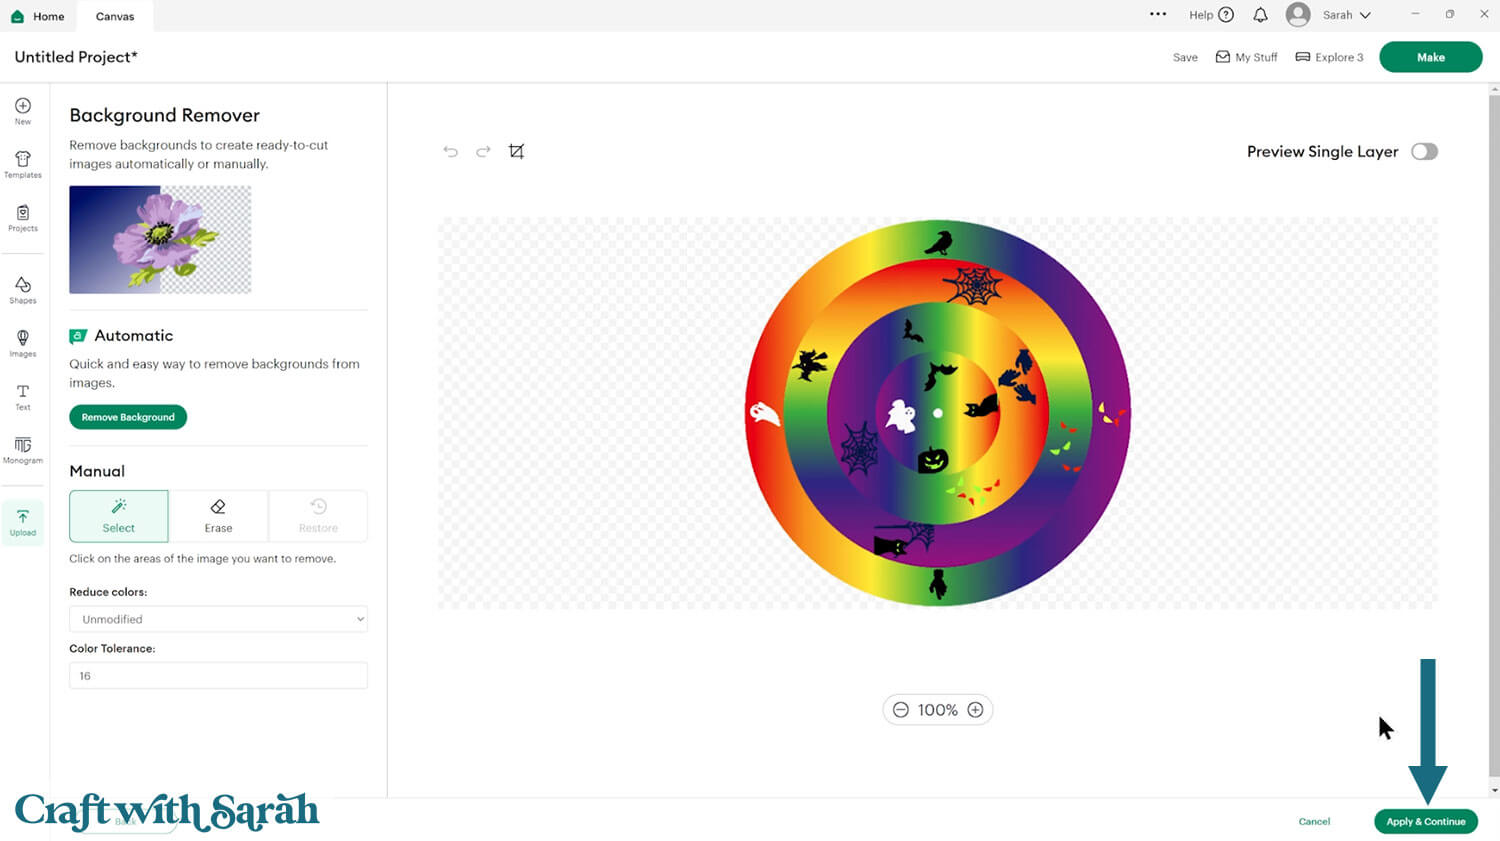
There’s no need to change anything on the next screen – just click “Apply & Continue”.
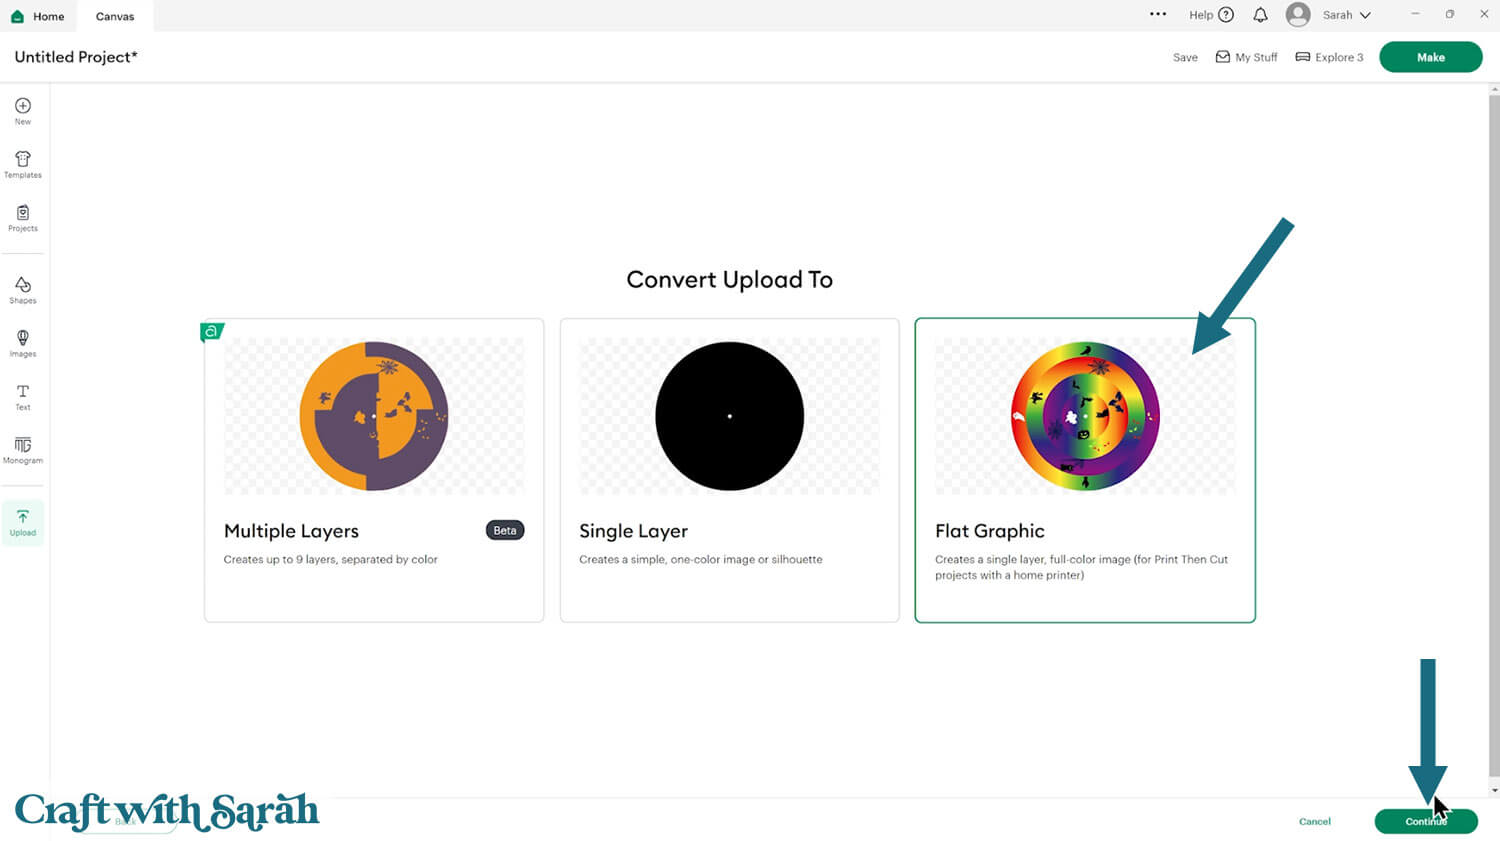
Select “Flat Graphic” on the next step.
Finally, press “Upload”.
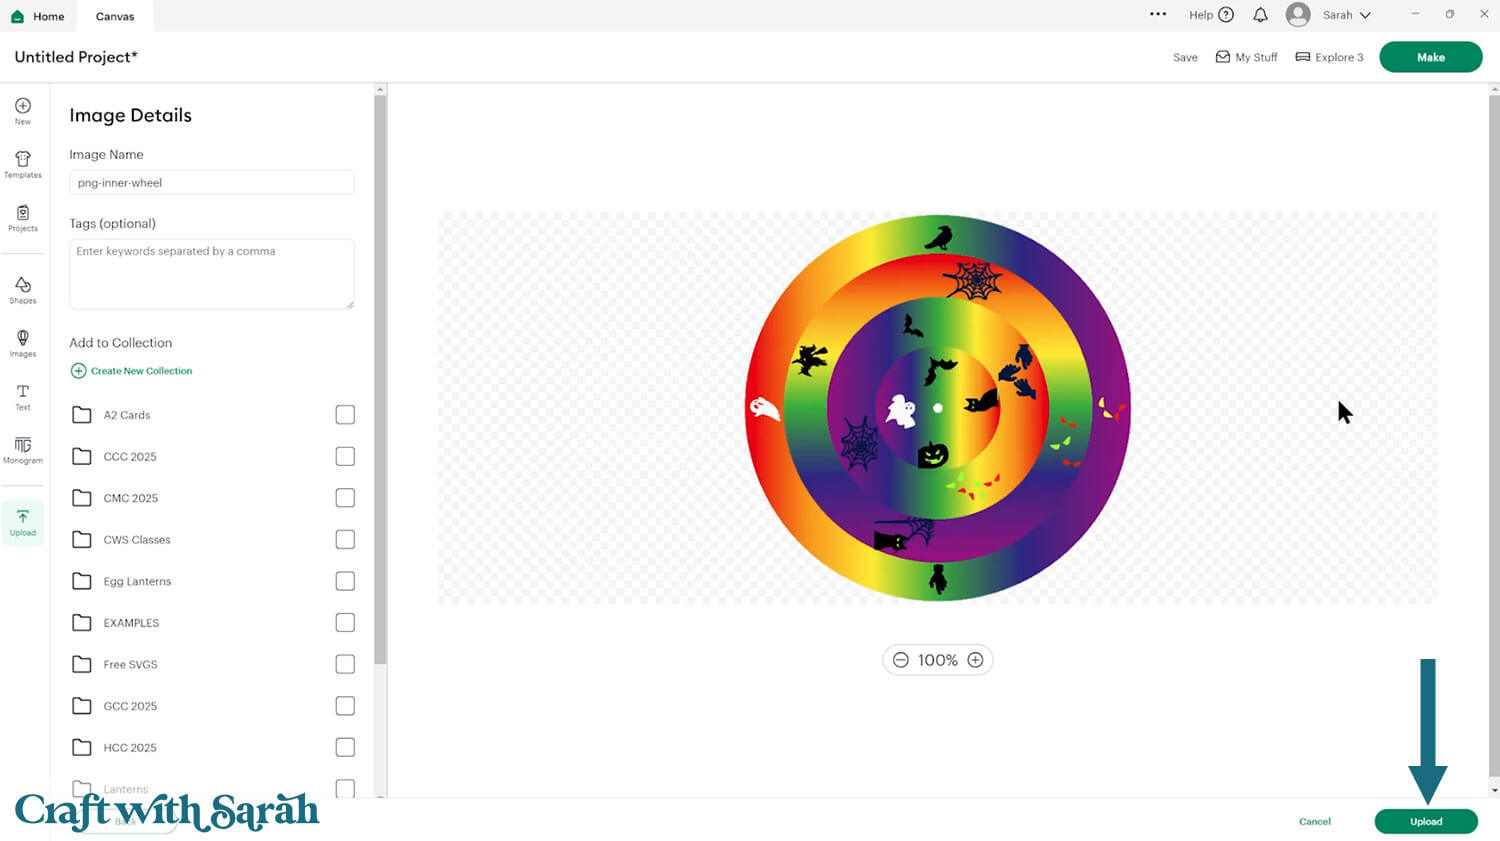
The printable wheel will now be inserted on your project. However, it will load in very big – bigger than the card!
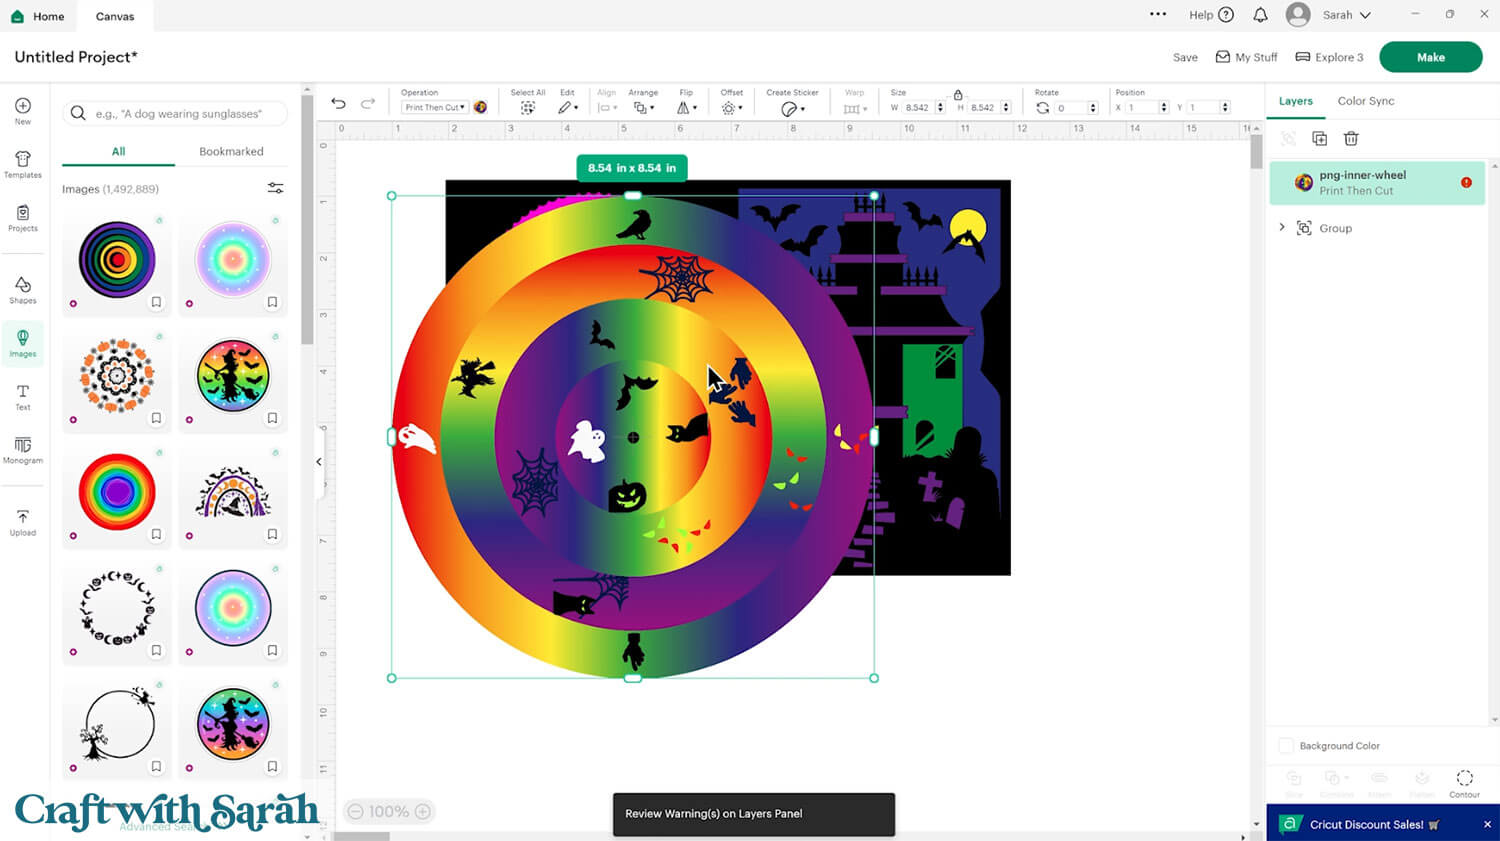
Click the haunted house card and “Ungroup” the layers.
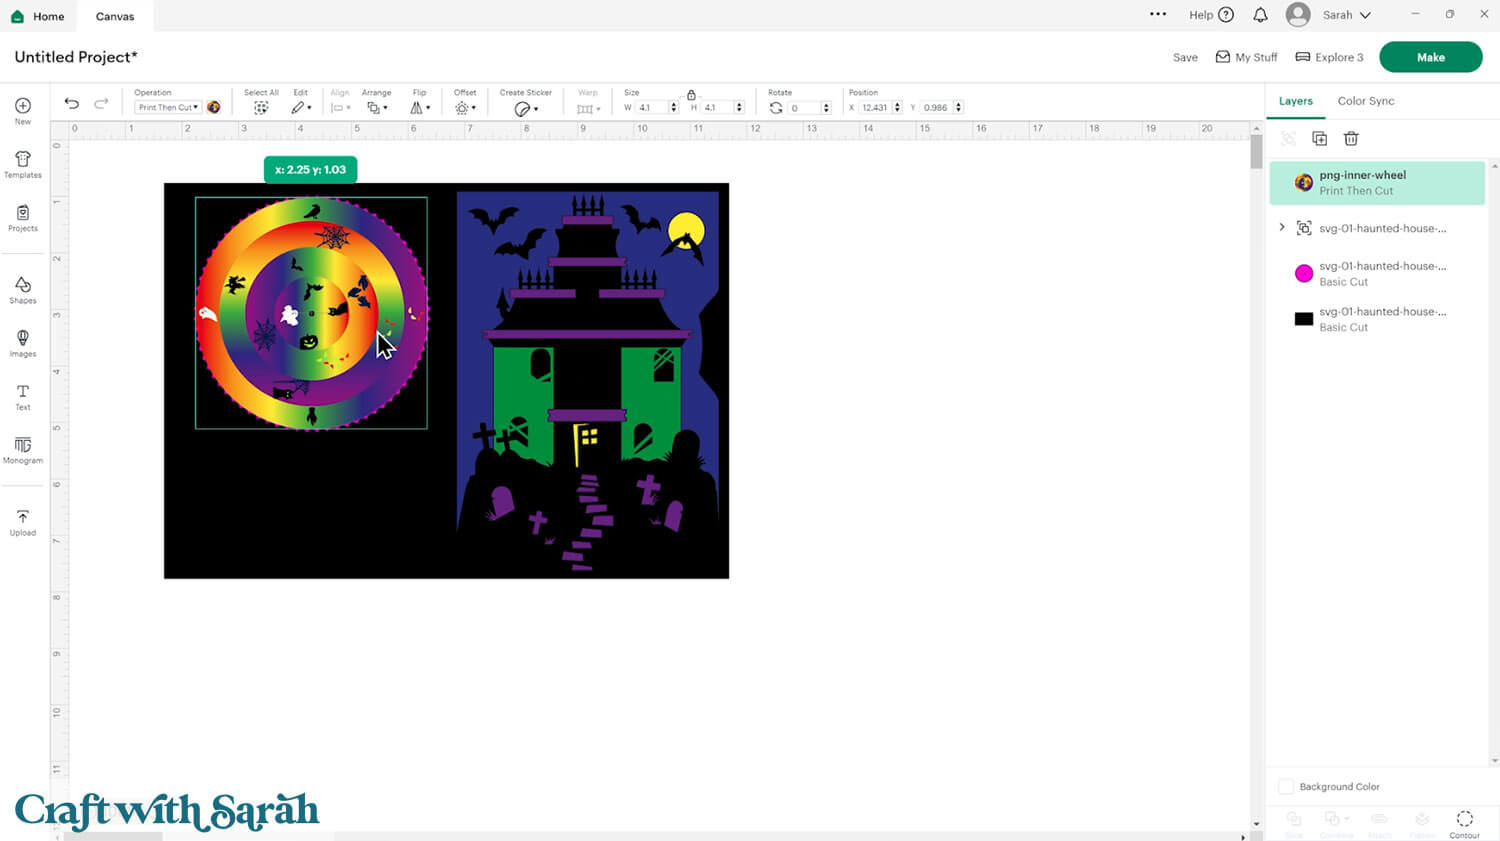
Click the printable wheel and change the size to either 4.1 or 4.2 inches.
4.1 will give you a little bit of a gap around the edge to see the foam. This option makes it slightly easier to turn the wheel.
4.2 will cover the foam completely.
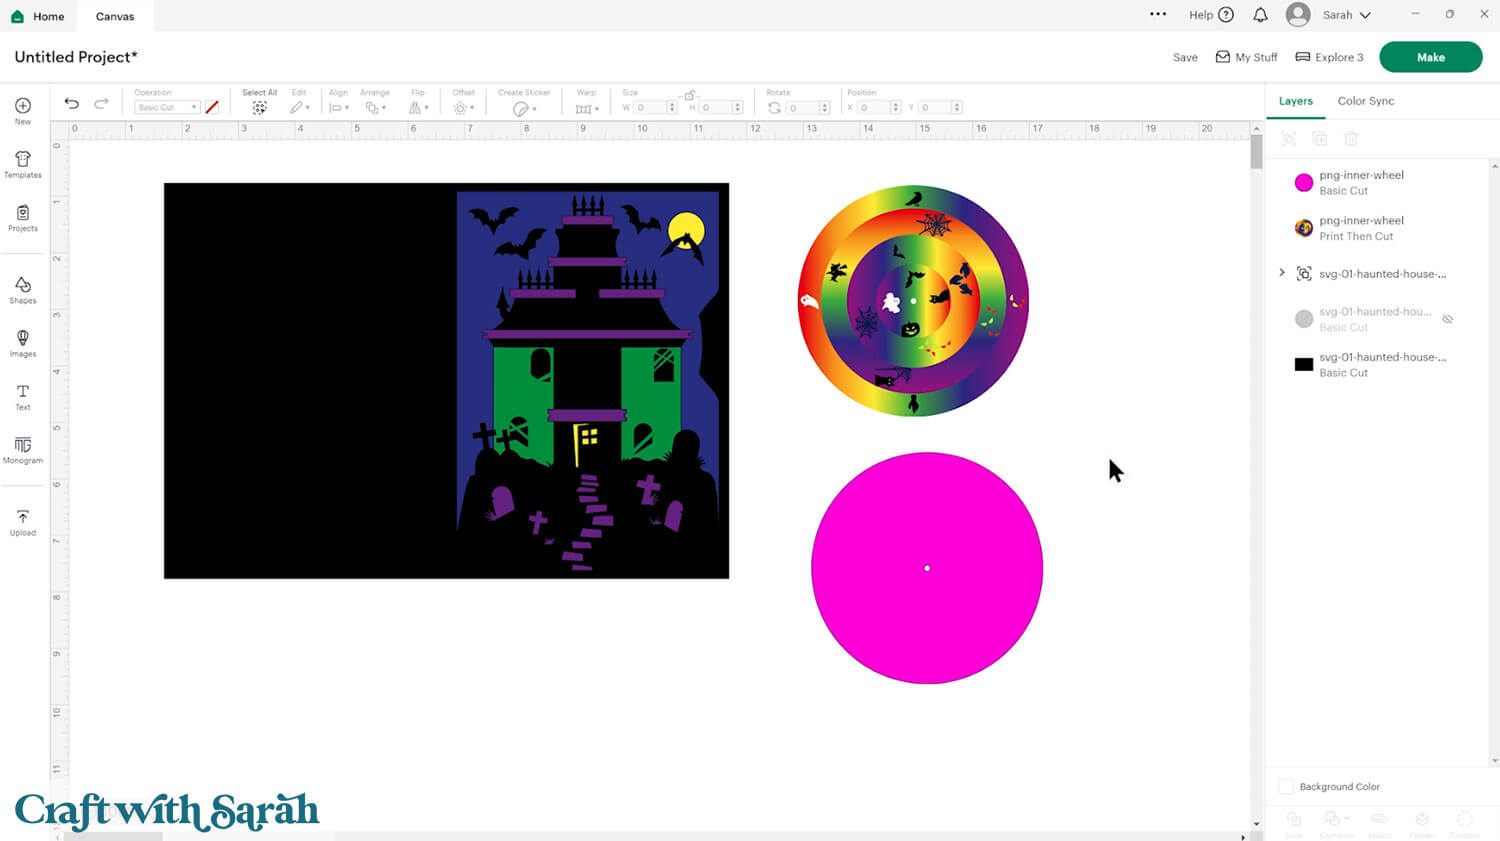
No deep point blade or knife blade? Here’s an alternative!
If you will be cutting the foam by hand then delete the pink wheel layer.
Click the printable wheel and press “Duplicate” at the top of the layers panel to make a copy.
Under the “Operations” dropdown, change this to “Basic Cut” and then change the colour back to a bright pink.
You’ll cut this piece from cardstock (any colour is fine) and use it as a template to draw around on your fun foam so that you can cut the shape from hand.
Step 2) Add a score line (optional)
The main haunted house card loads in ready to cut, but if you have a scoring wheel or scoring stylus for your Cricut then I recommend adding a score line to the base card to make it easier to fold.
To do this, first click on the card and “Ungroup” the layers if you haven’t already.
Click to “Shapes” and insert a Score Line.
Make the score line 7 inches tall.
Select the score line and the base card layer and press “Align > Center” to put the score line in the middle of the card.
This step may be easier if you temporarily change the colour of the base card from black to something lighter, so that you can see the score lines.
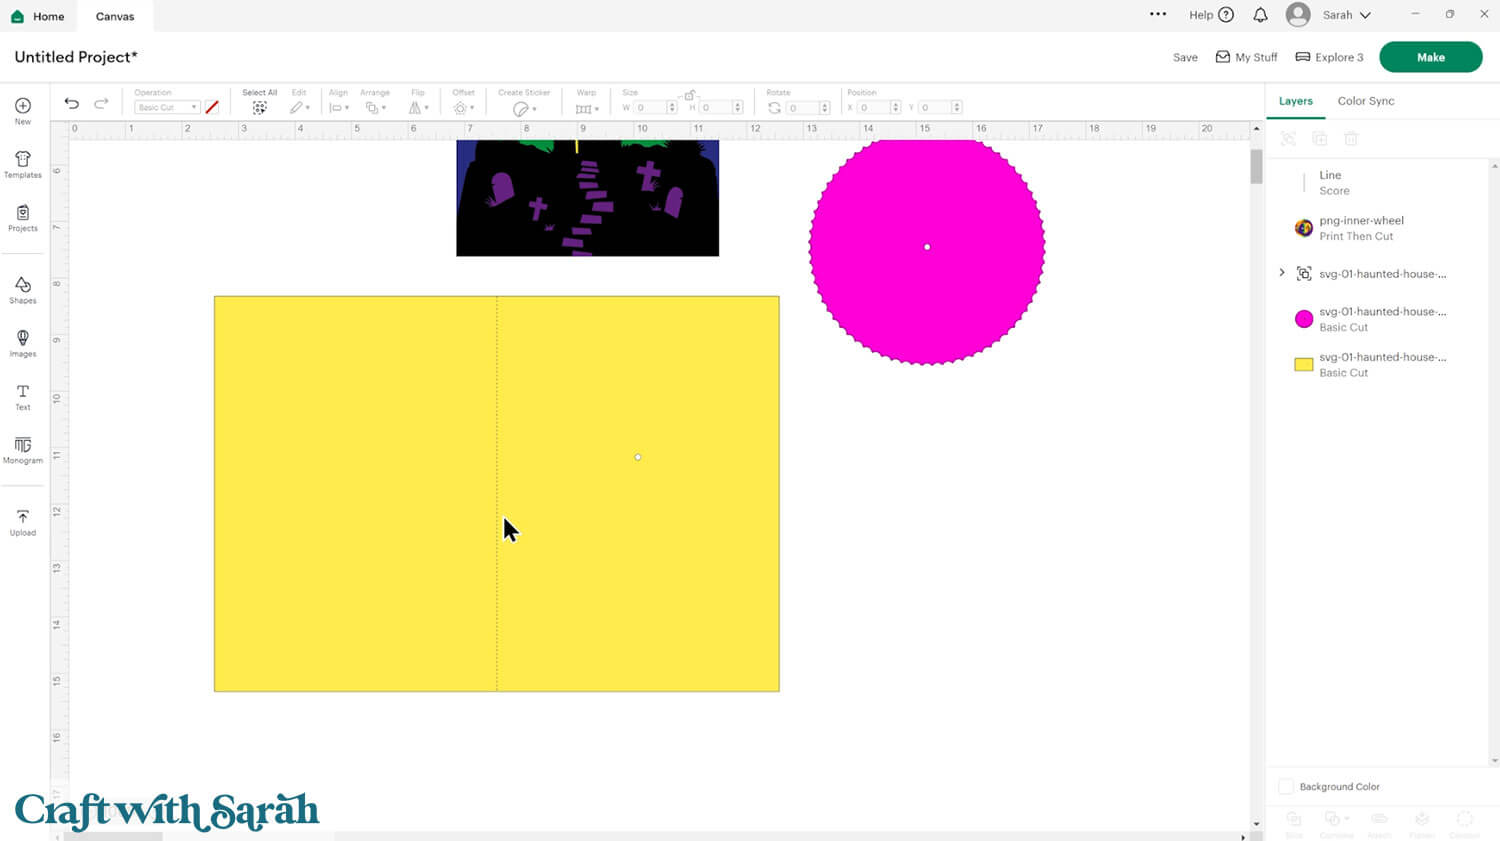
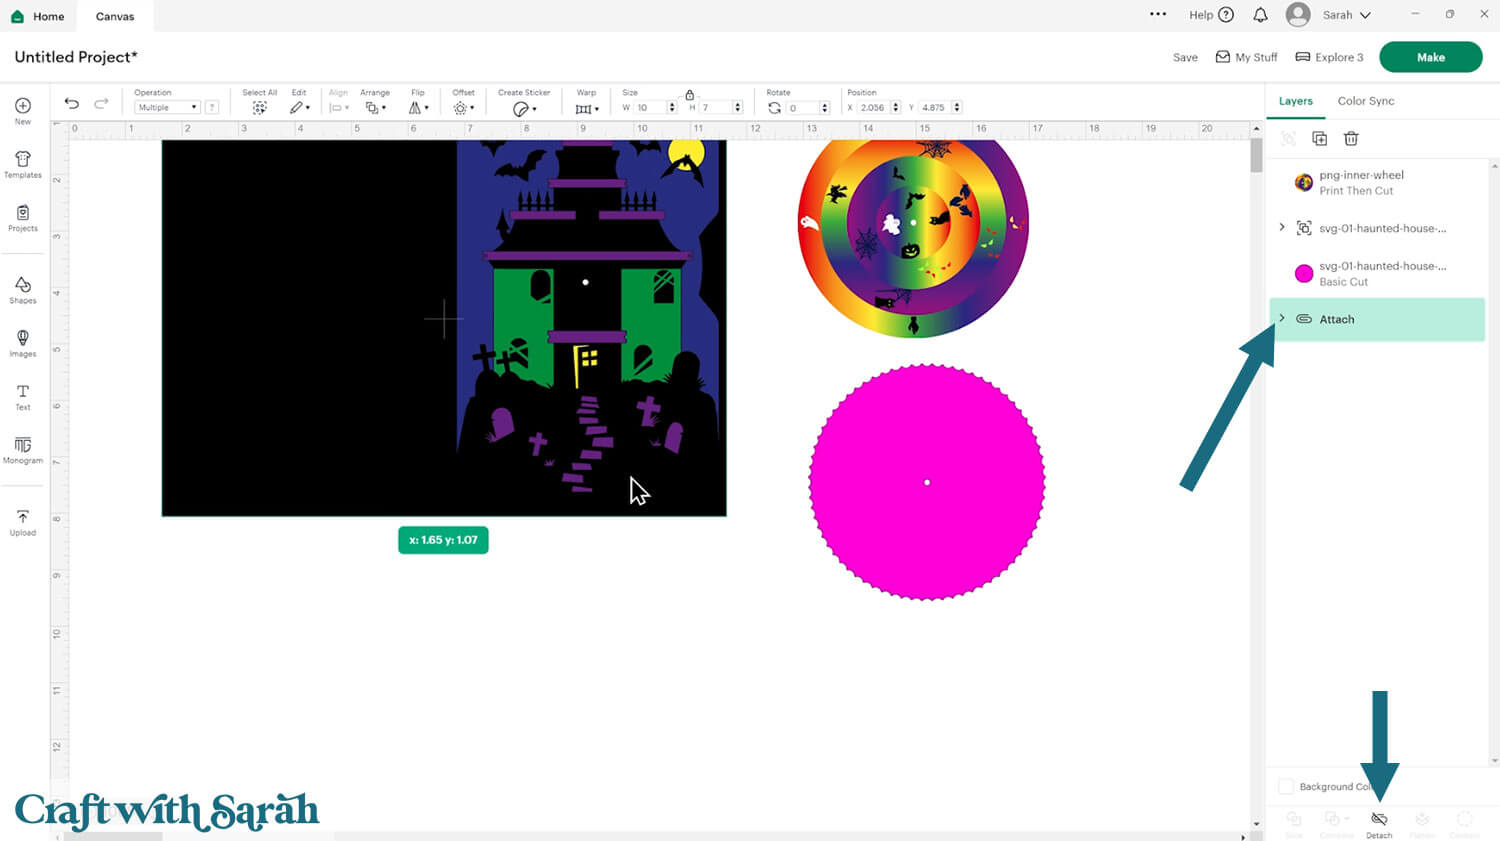
With both of those layers still selected, click the “Attach” button at the bottom of the layers panel. This tells the Cricut that we want it to do the scoring on the base card.
Put the colour of the card back to black if you changed it.
If Attaching the score line moves the base card to the top of the layers panel then you can click-and-drag it in the layers panel to move it back to the bottom, or press “Arrange > Send to Back”.
Step 3) Cut the haunted house craft
When you’re happy with how the project is looking in Design Space, click “Make” and follow the instructions on-screen to cut out all the pieces.
To change the paper size, go into the dropdowns over on the left side of the screen and choose the paper size that you want to use. You need to change it for every single colour.
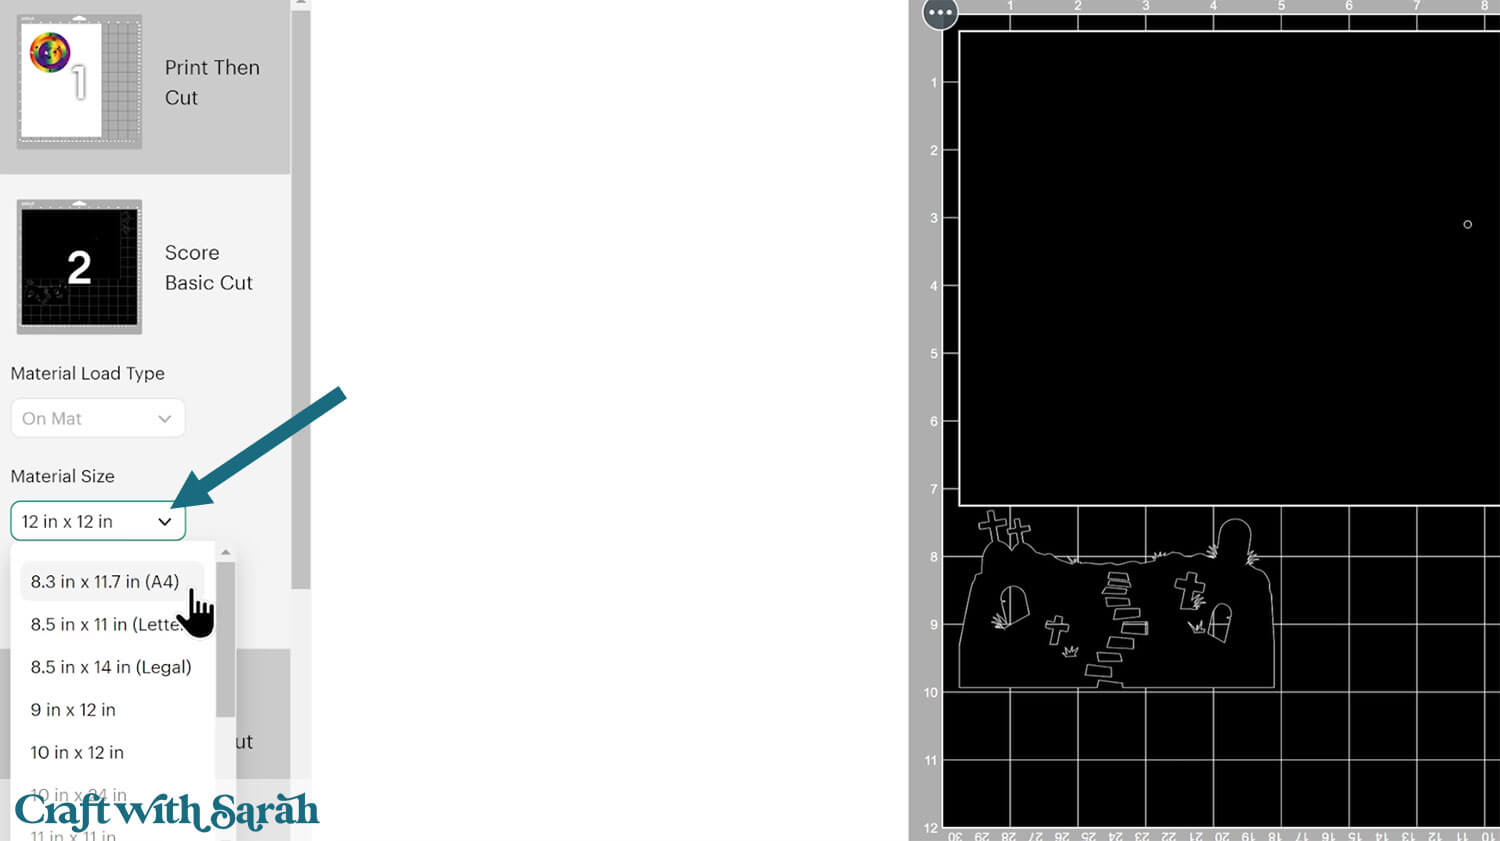
To save space on your cardstock, you can move things around by clicking and dragging. Make sure when you’re moving things about that nothing overlaps because otherwise, it won’t cut out properly.
TIP: New to using cardstock with your cutting machine? Check out these machine help guides for Cricut, Silhouette and ScanNCut that go through every step of the process, including tips for getting the best quality cuts from your machine.
You’ll notice that the printable wheel appears with a border around the edge of the page.
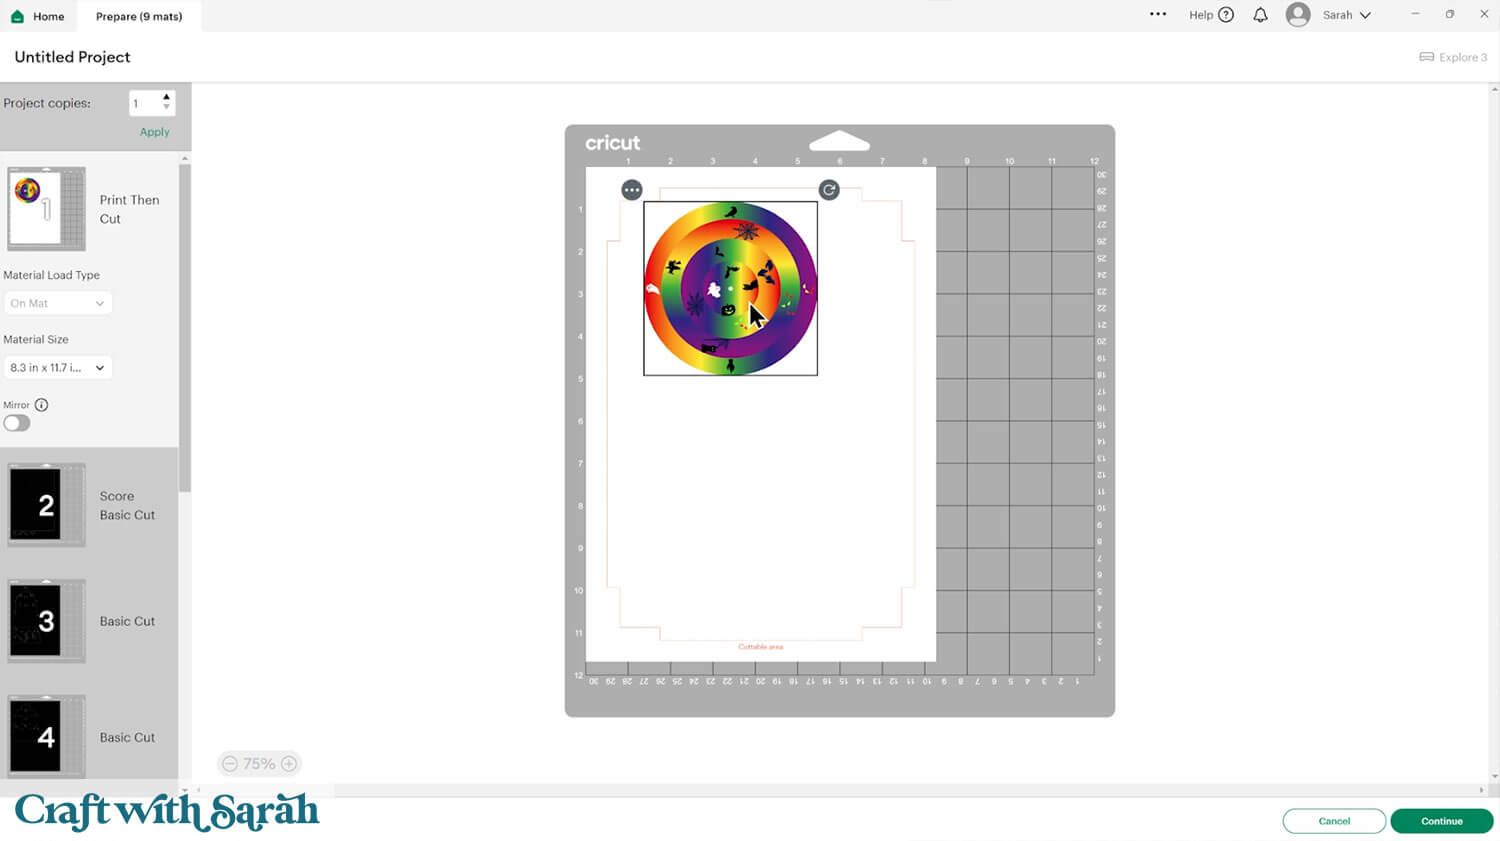
If you haven’t done print then cut with your Cricut for a while, the steps may look a little bit different to what you are used to. Cricut has done some updates to it recently to make the process a little bit easier to understand. However, the steps still work in a similar way.
The following screenshots are taken from an older tutorial, however the same steps should be followed for your Turn the Wheel card.
You might find when you’re doing your print then cut, or before you start, you get a popup appear asking you to calibrate your cutting machine. It’s up to you if you decide to follow that process through or not. If you’ve not done print and cut for a long time, it is kind of a good idea to get your machine calibrated for the best possible quality cut.
When you start the cut process, there’ll be an option that says “Send to Printer” on a green button.
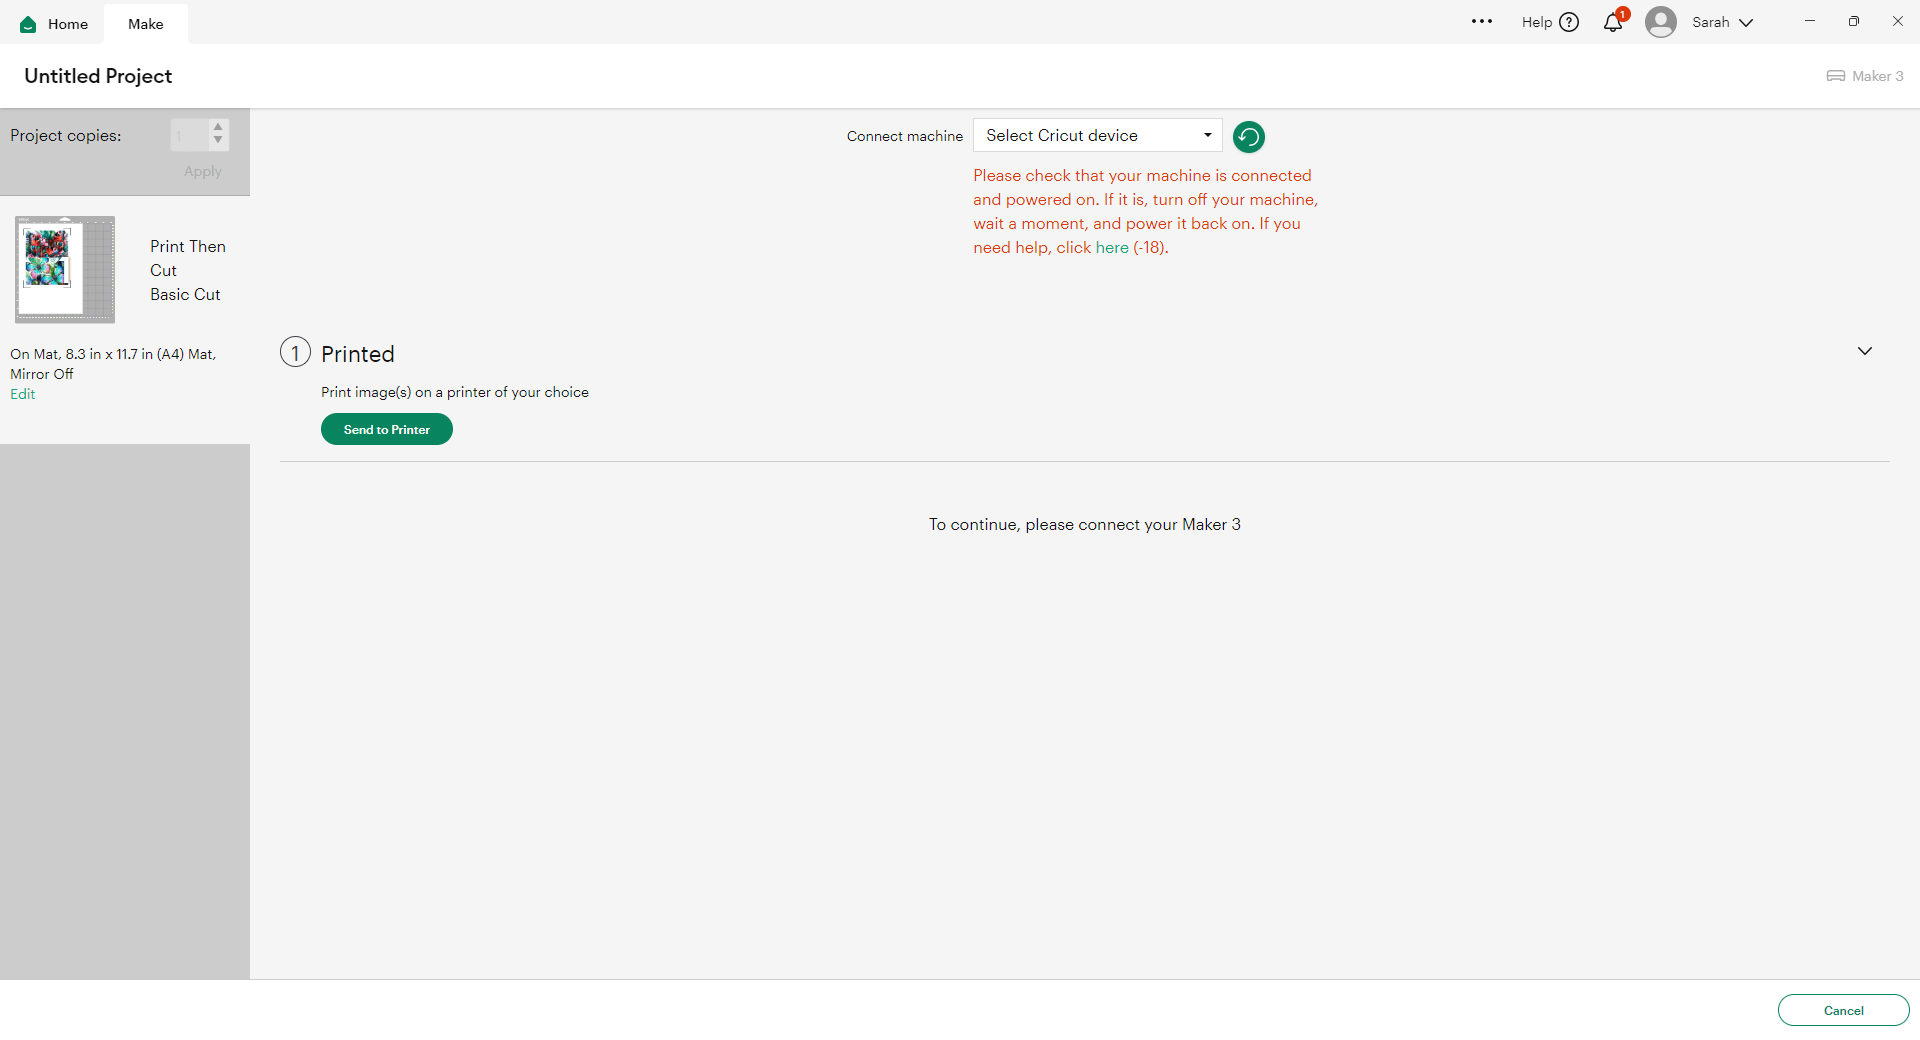
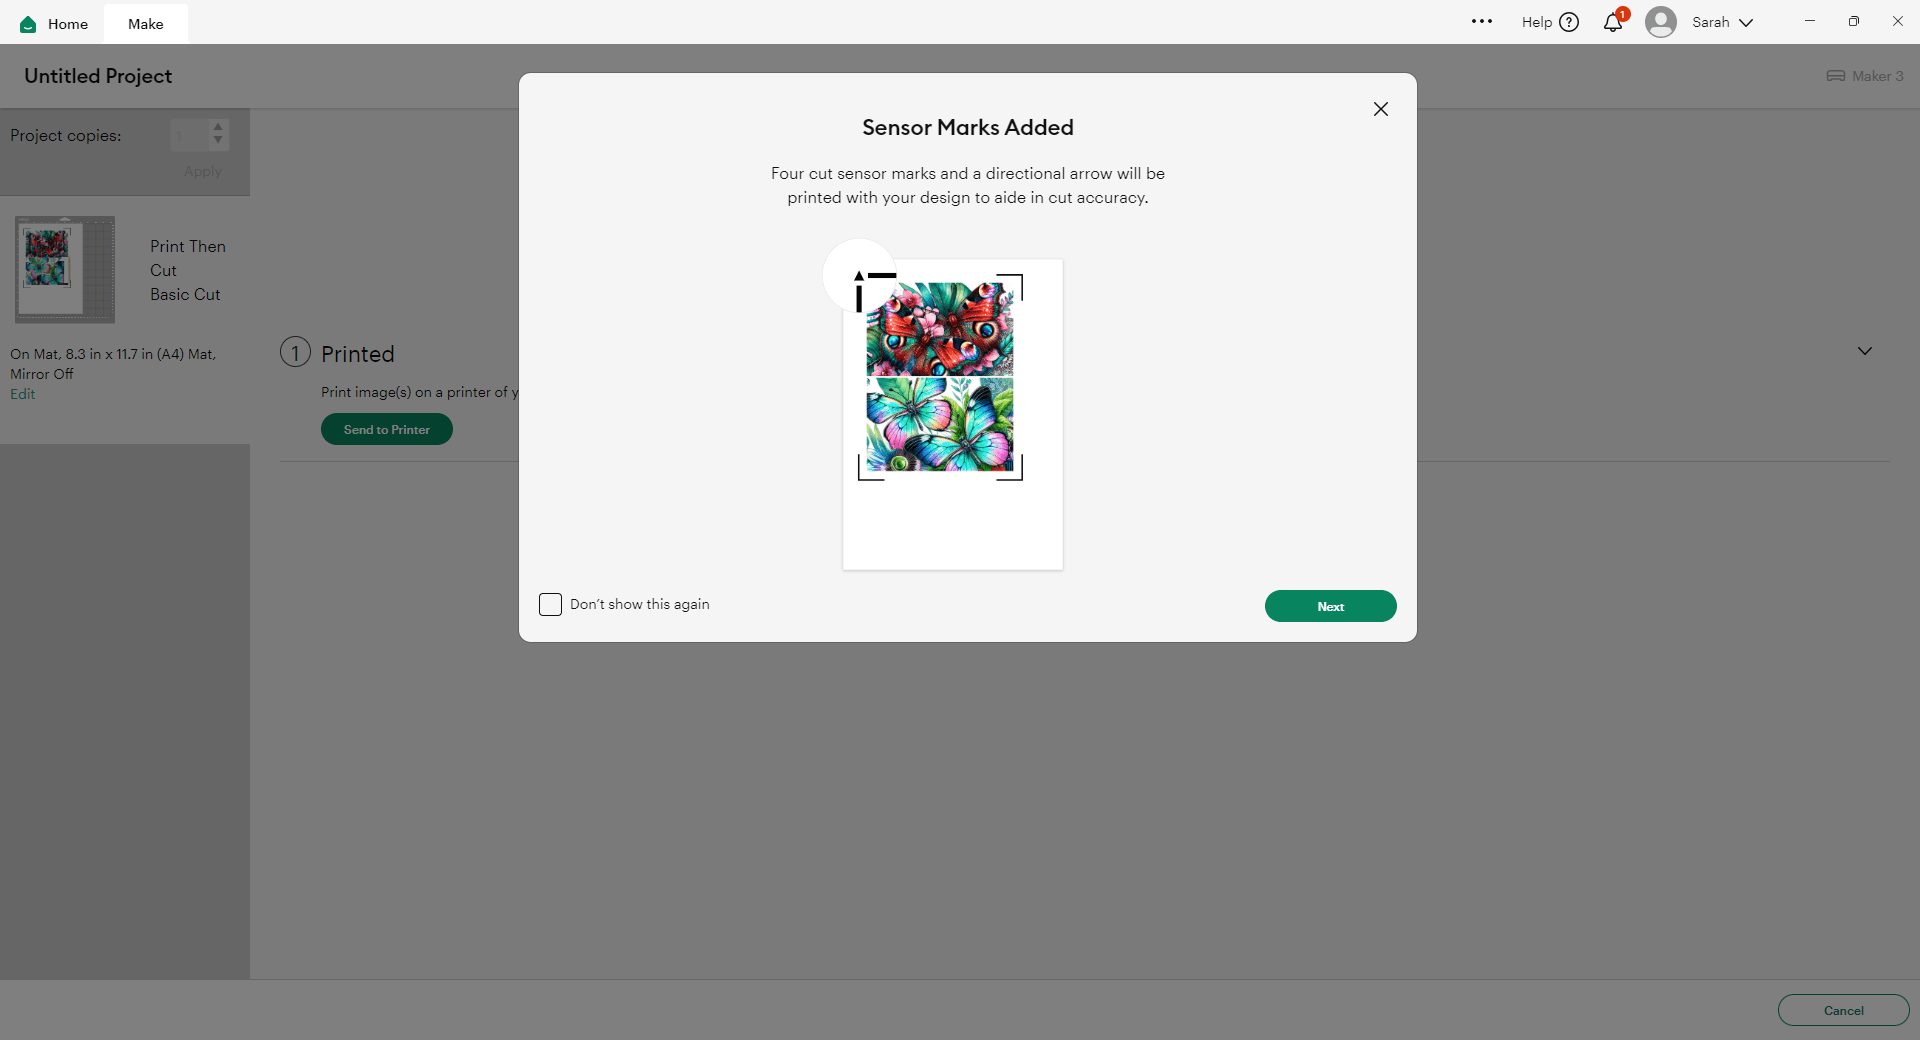
Click that button and it will open up the print settings. You might see a message telling you that sensor marks have been added. This is part of those new updates to the print and cut process. You don’t need to do anything on here — just press “Next”.
If you don’t want to see this message every time you do a print and cut, tick the box where it says “Don’t show this again.”
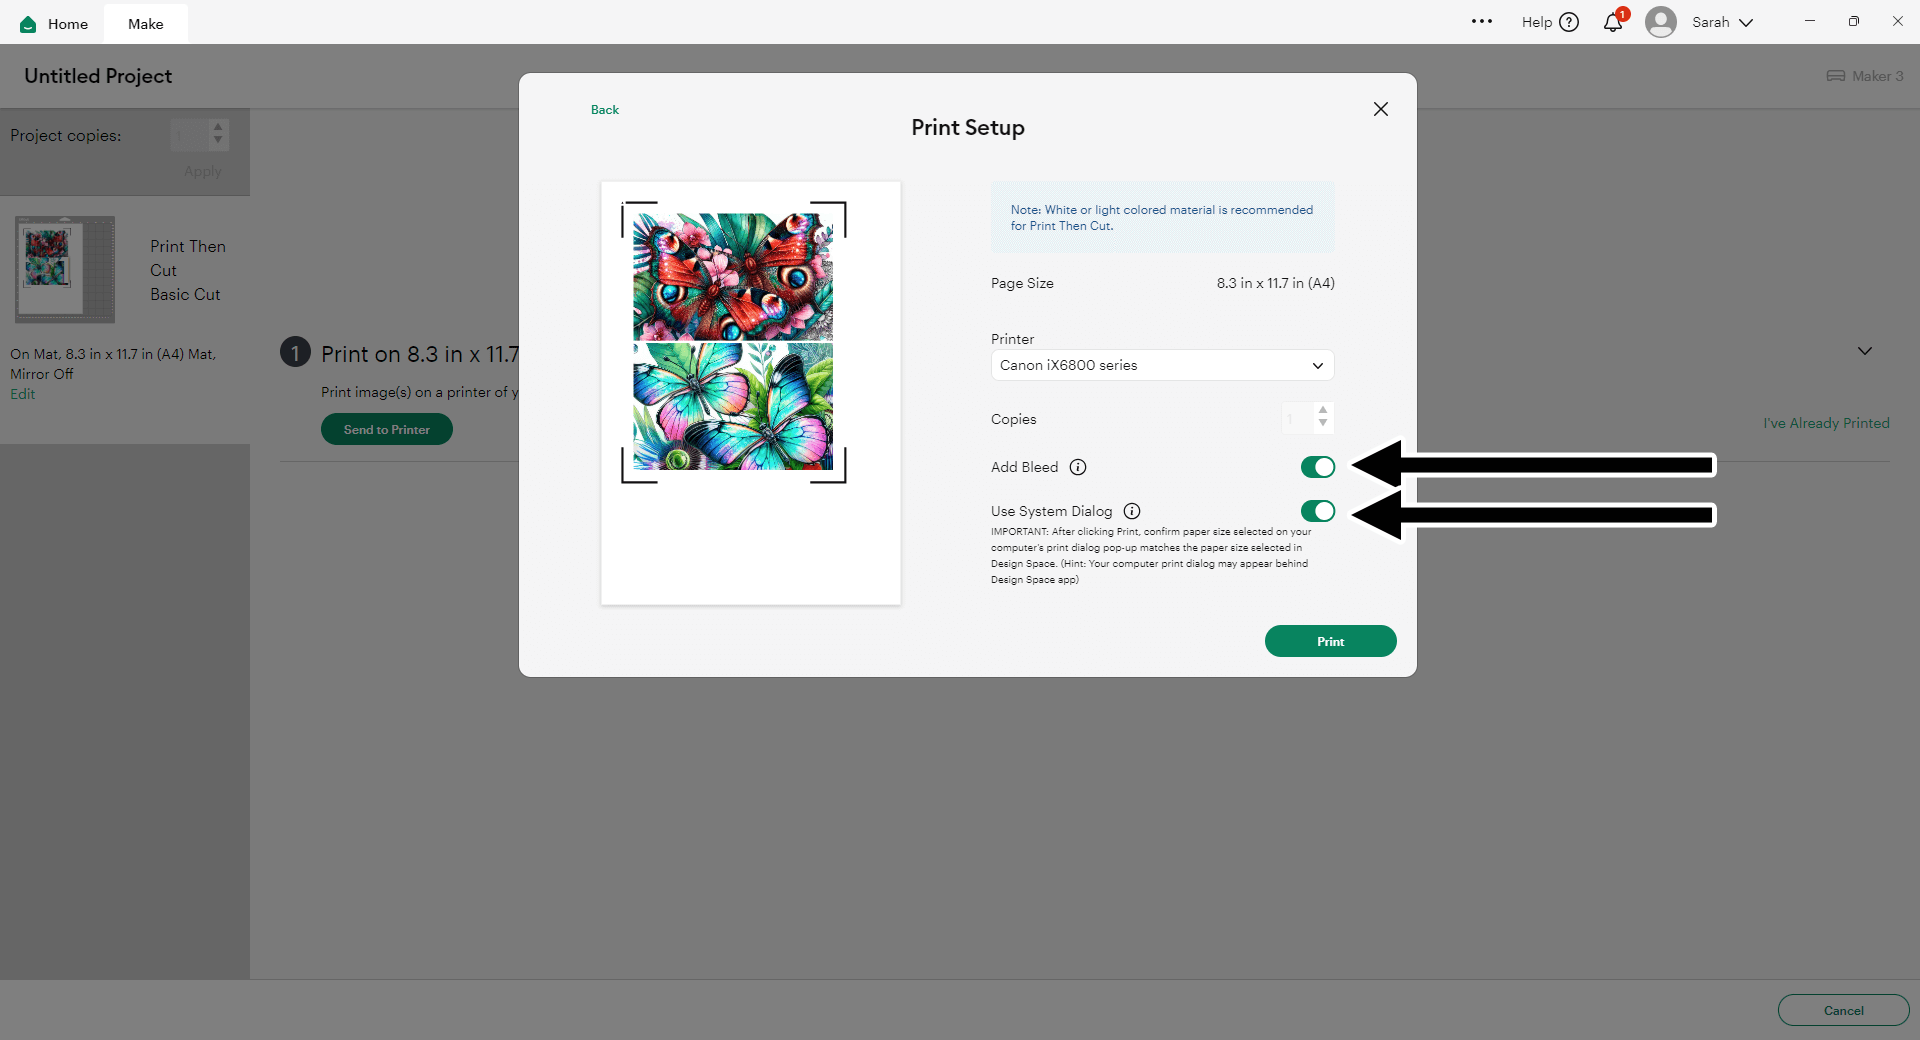
Next, you’ll see the print setup box. Choose the correct printer in the dropdown, and where it says “Add Bleed,” turn that on (toggle it so it appears green), as in my image.
Bleed adds a little bit of extra color around all of the edges which means that if your print and cut was slightly off and it didn’t quite cut right, you won’t end up with white edges of cardstock along the sides. It will still be printed and pretty.
Also, make sure you turn “Use System Dialog” on. That means after you click the print button, it will open up your printer settings so that you can make sure you’re printing at the best quality.
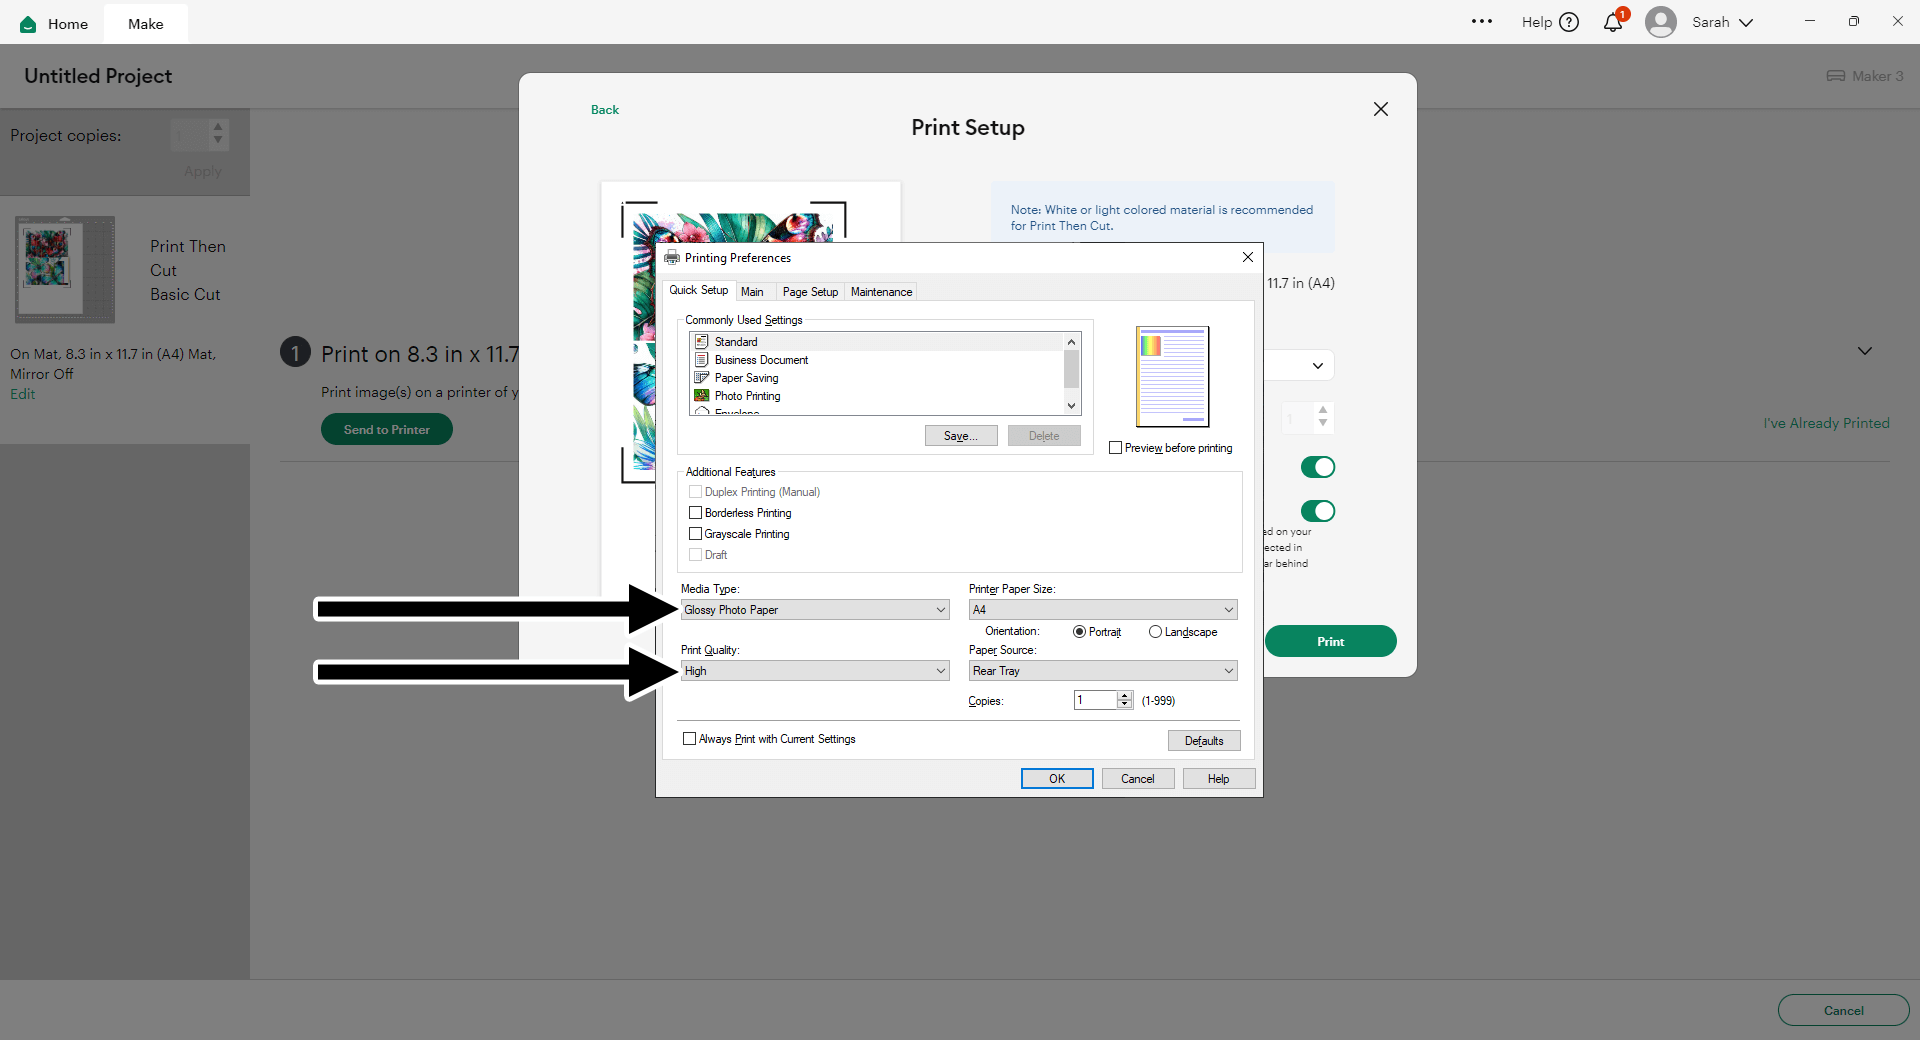
Choose the highest print quality in your printer settings, and set the paper to match what you are printing on. For me, that’s Glossy Photo Paper.
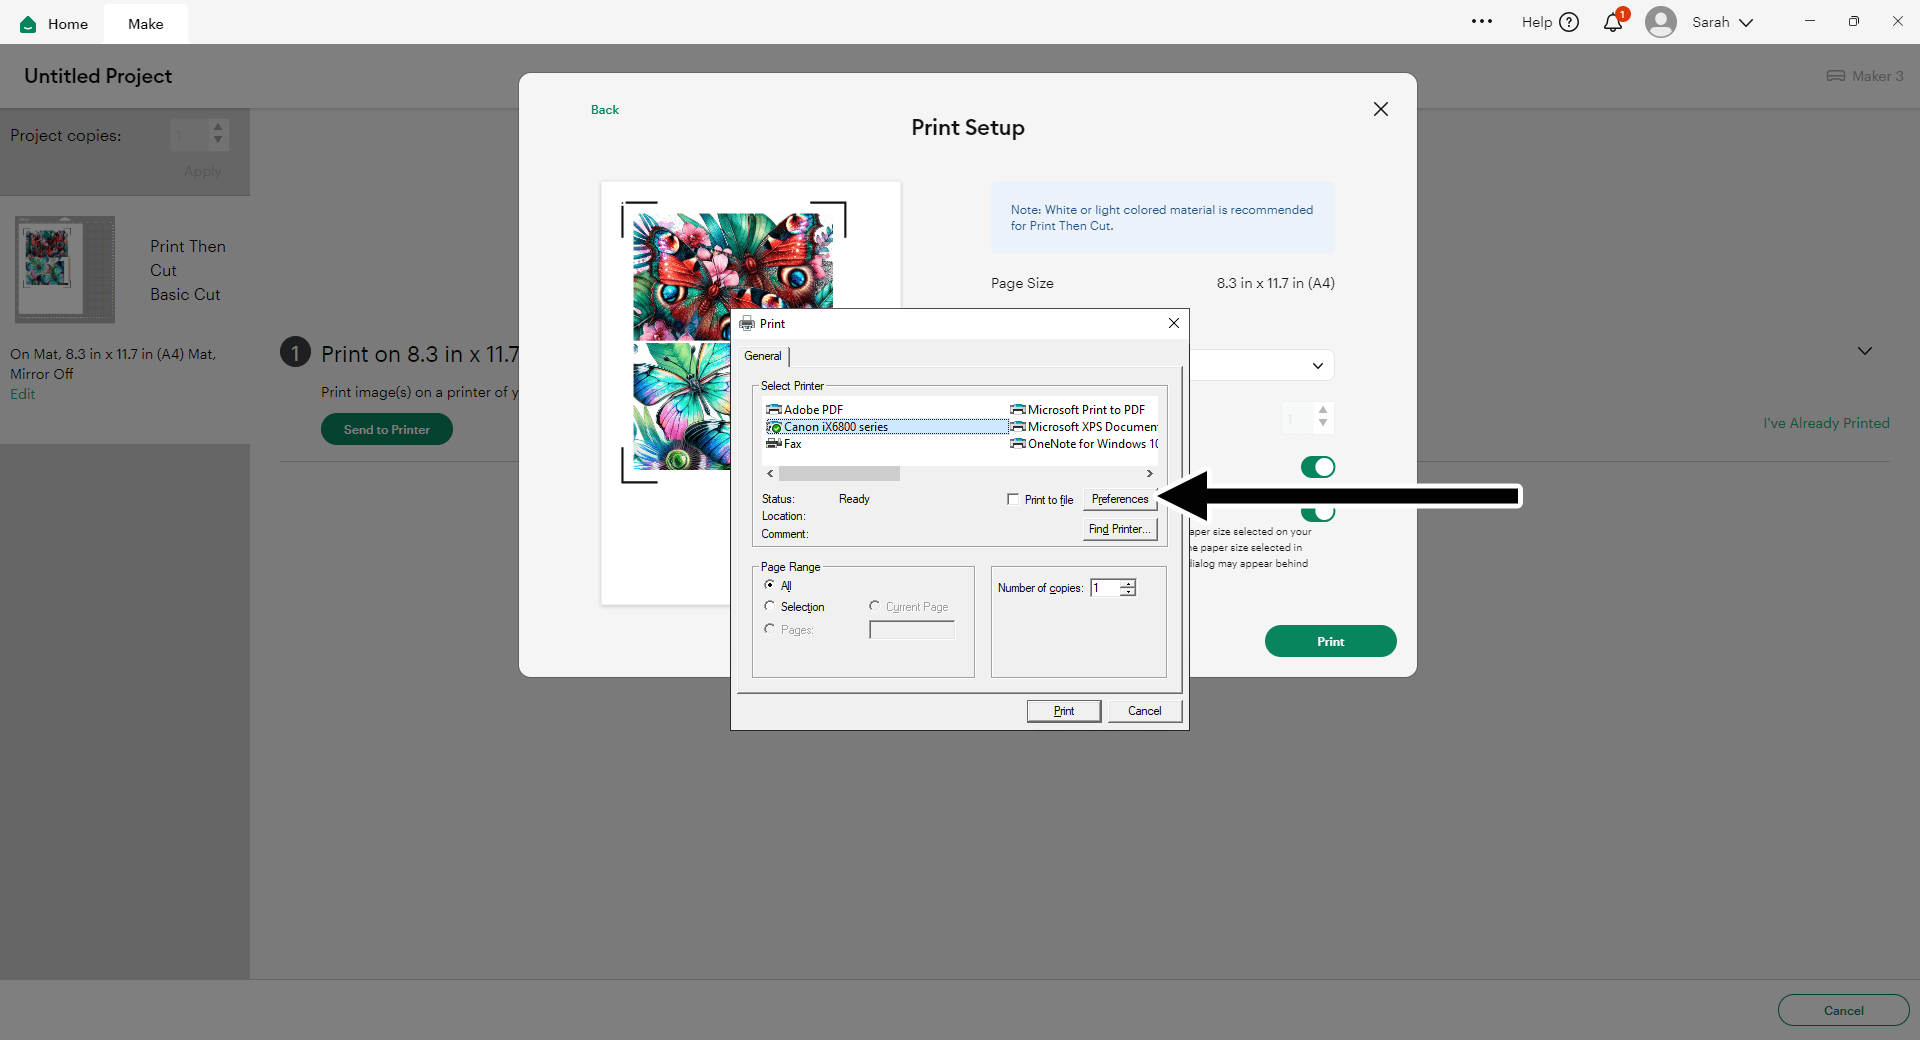
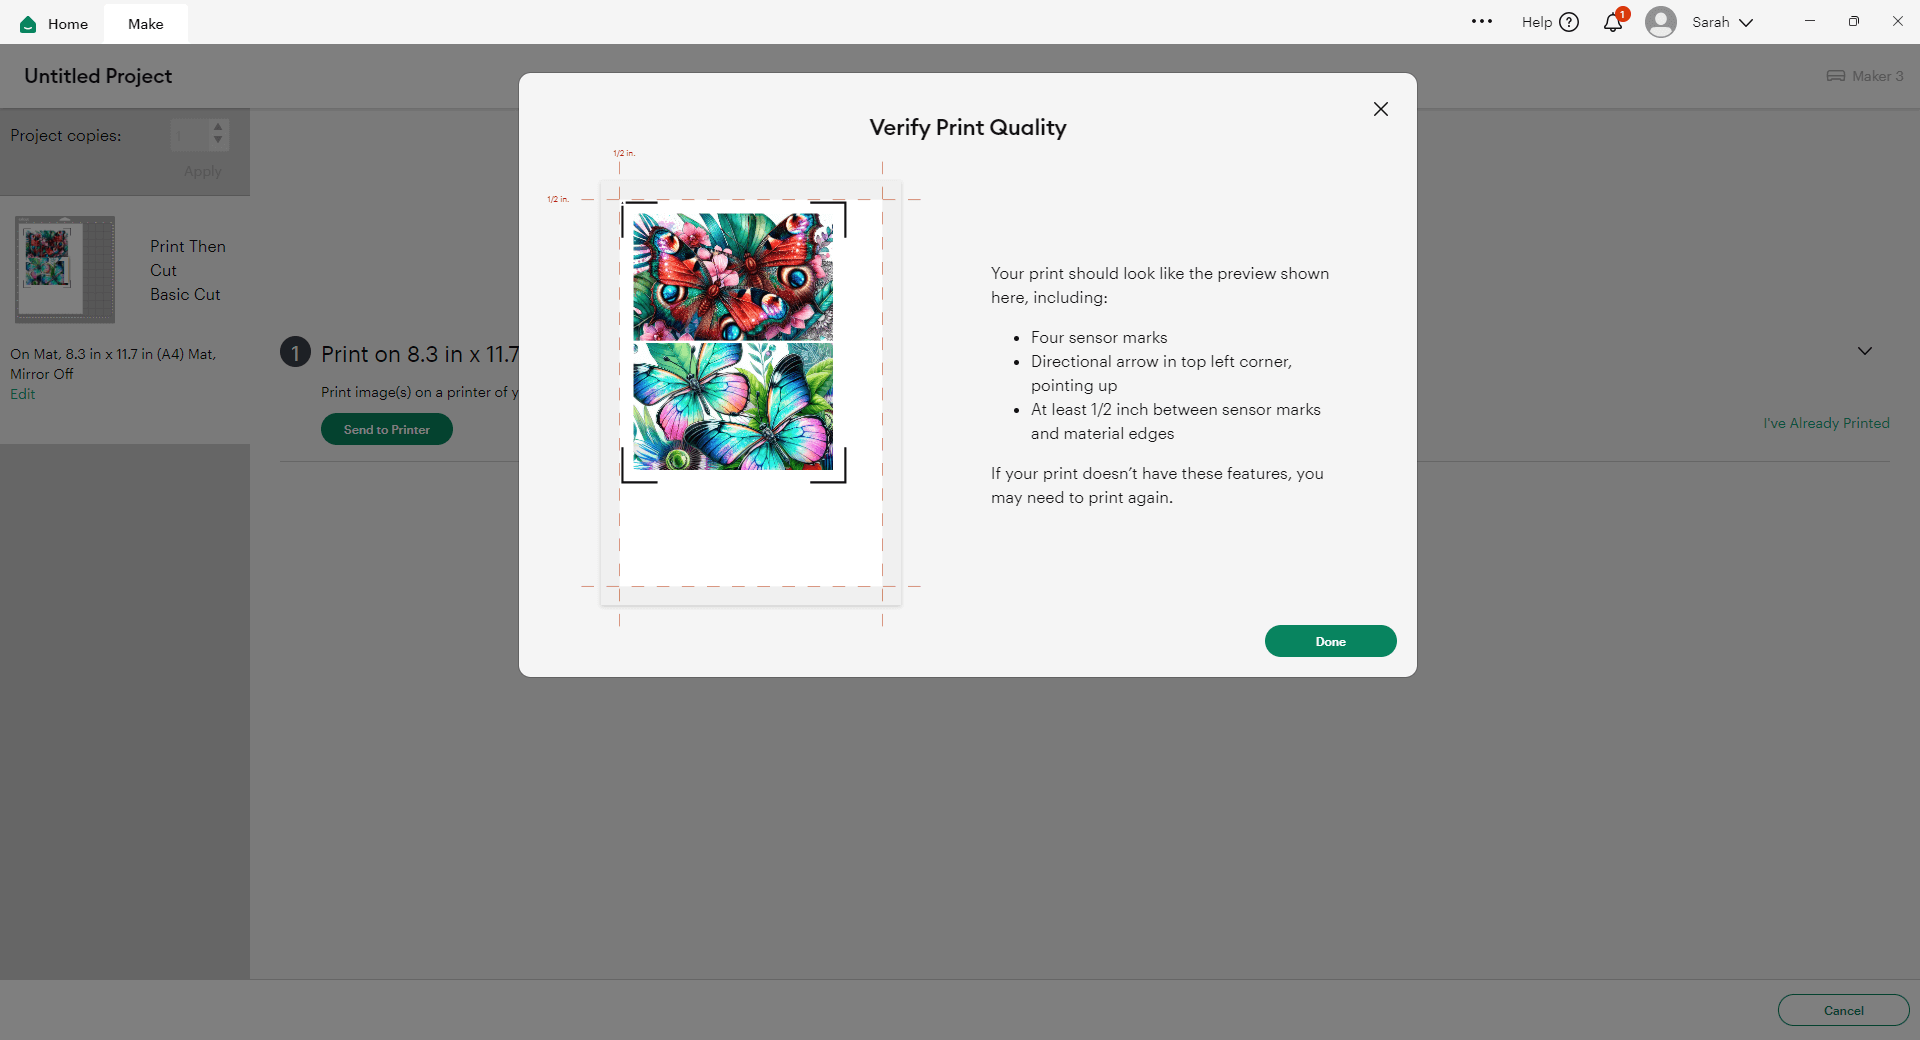
After you’ve sent your document to print, you’ll see a notification box which asks you to “Verify Print Quality”. It gives you some steps on there to make sure it’s printed exactly as it should.
Step 4) Build the wheel mechanism
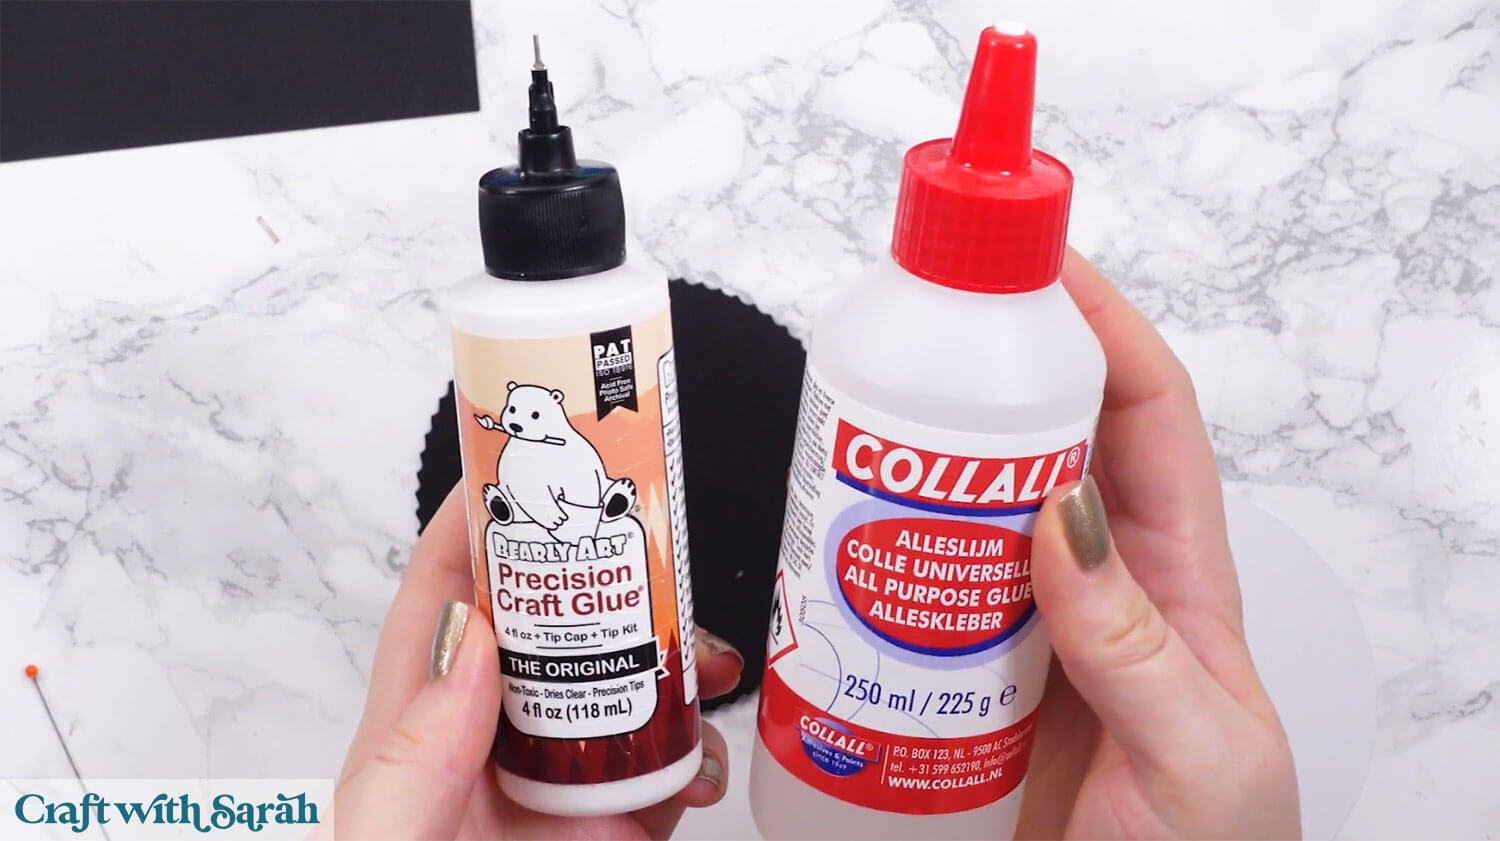
My favourite glues to use on papercraft projects are Bearly Art Glue and Collall All Purpose Glue.
These are great because they don’t “warp” or bend the cardstock like some glues do. You can use as much of it as you want and the card stays perfect – and it dries perfectly clear too!
Bearly Art Glue comes with a tiny nozzle to make it easy to apply glue to small areas of card. The Collall glue doesn’t come with this, so it’s easiest to decant it into needle tip applicator bottles so that you have more control.
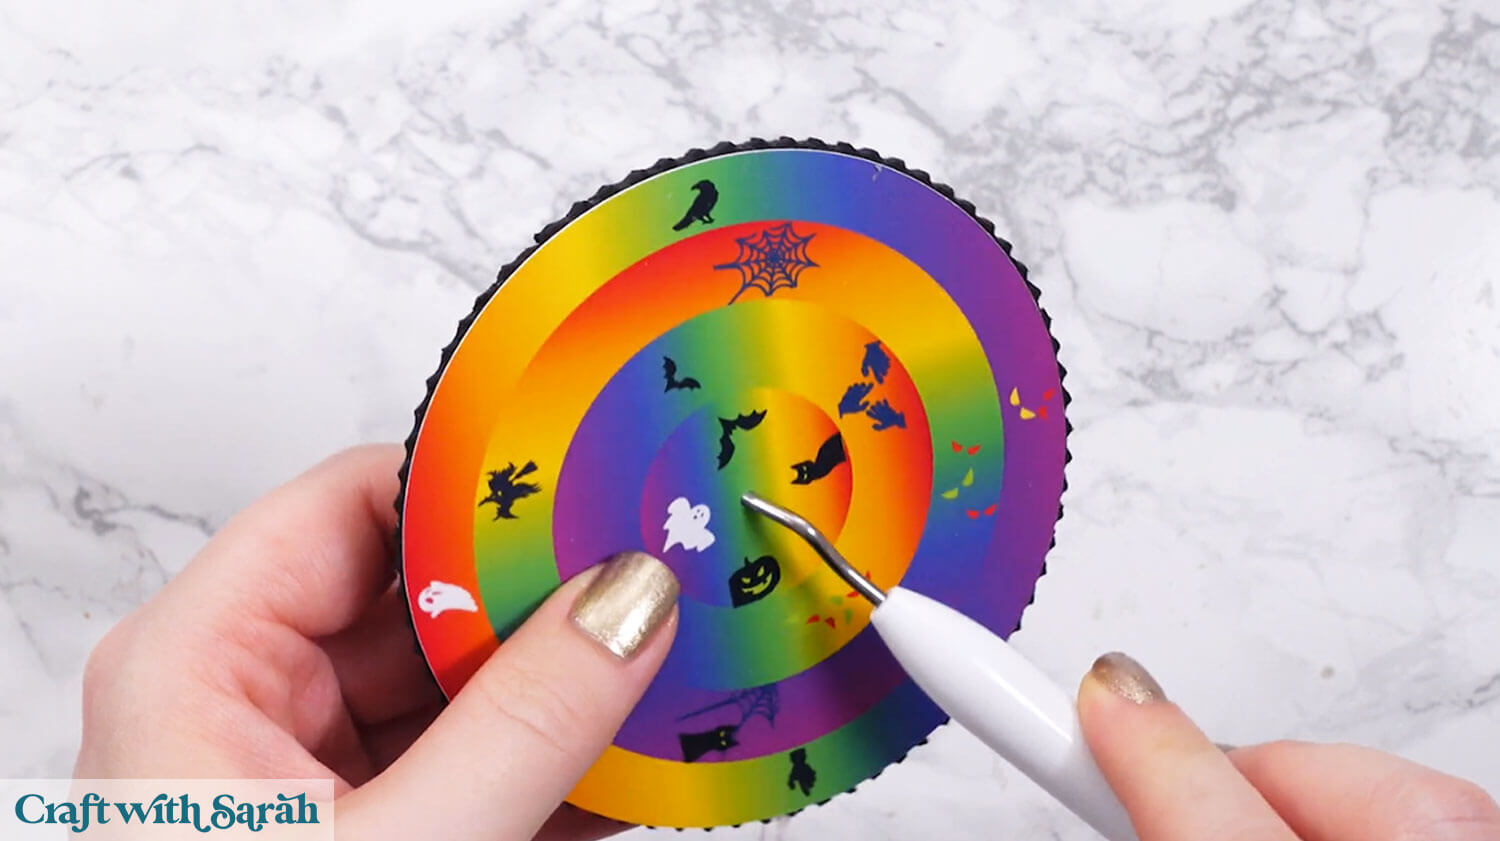
Glue the printed wheel onto the foam wheel.
Make sure the hold in the middle of the foam has cut all the way through. If not, use a weeding tool or similar to poke a hole.
Thread the split pin through the wheel and the front of the card.
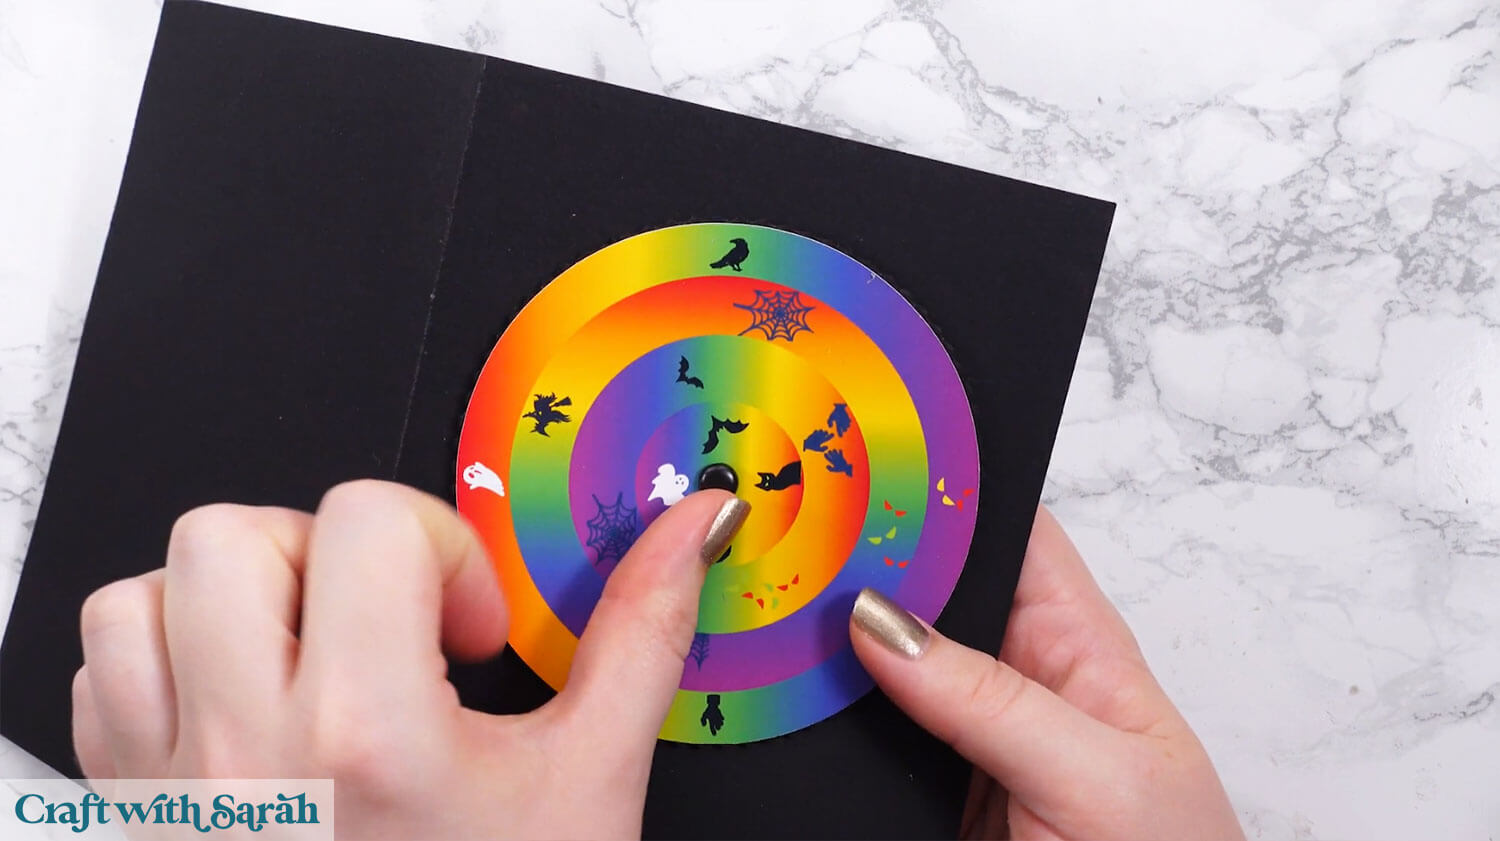
Open up the legs of the split pin on the inside of the card to hold it in place.
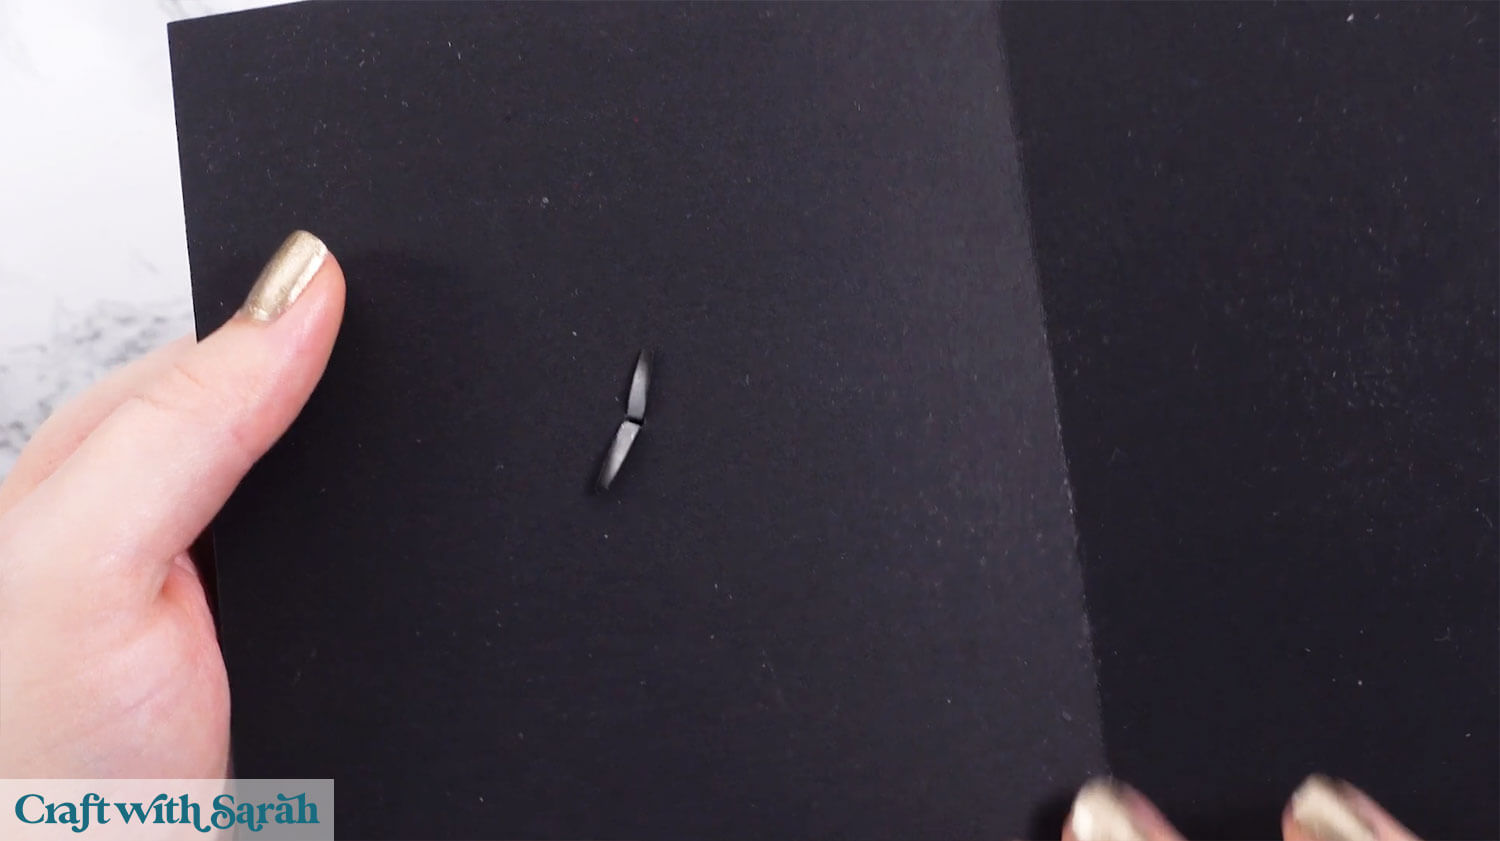
Step 5) Assemble the haunted house
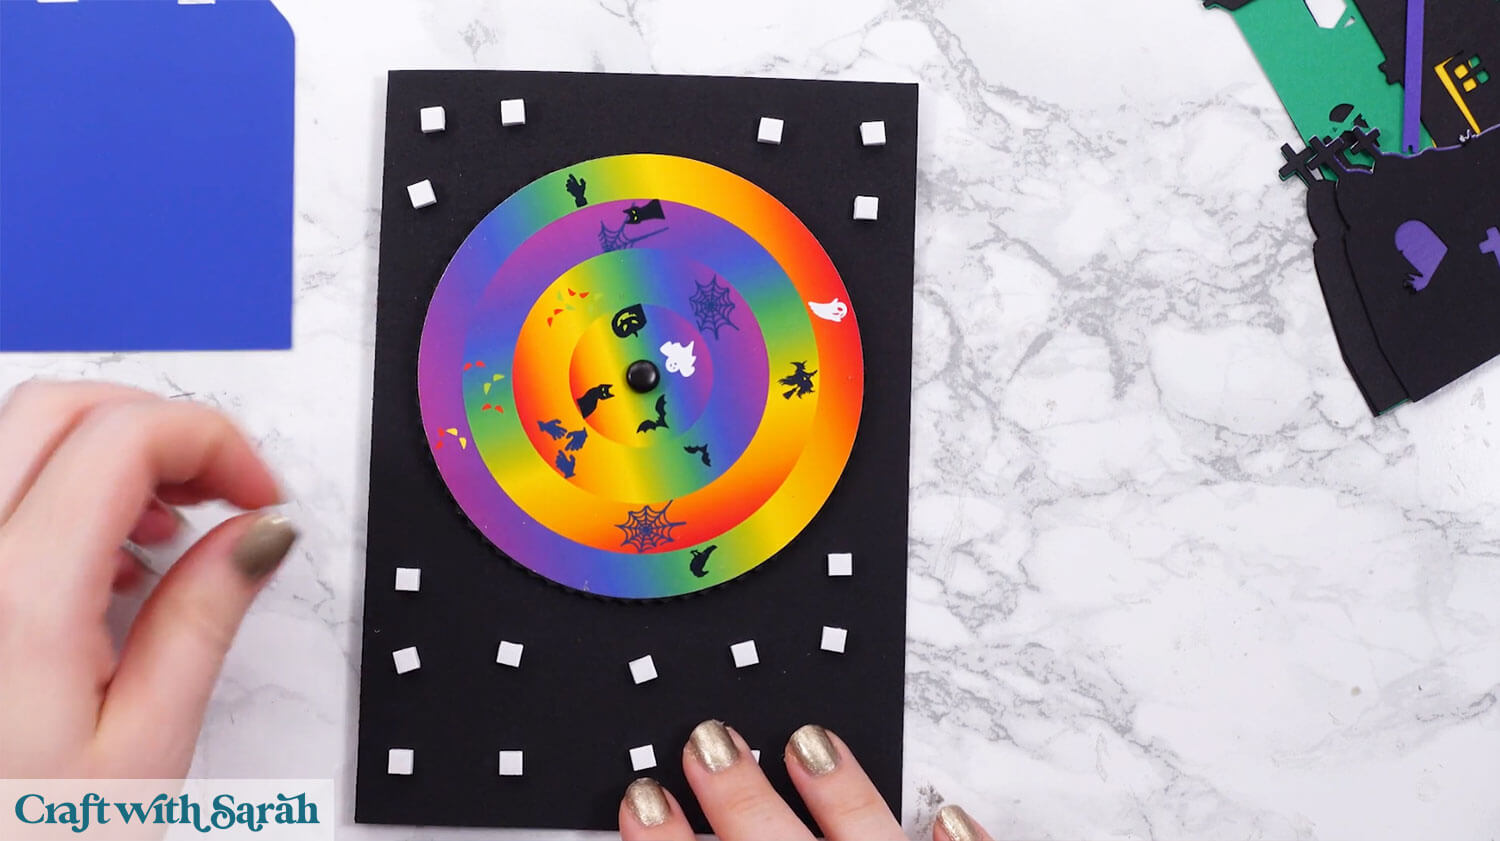
Use foam squares to attach the sky piece over the wheel. Make sure none of your foam squares touch the wheel, otherwise it won’t turn any more.
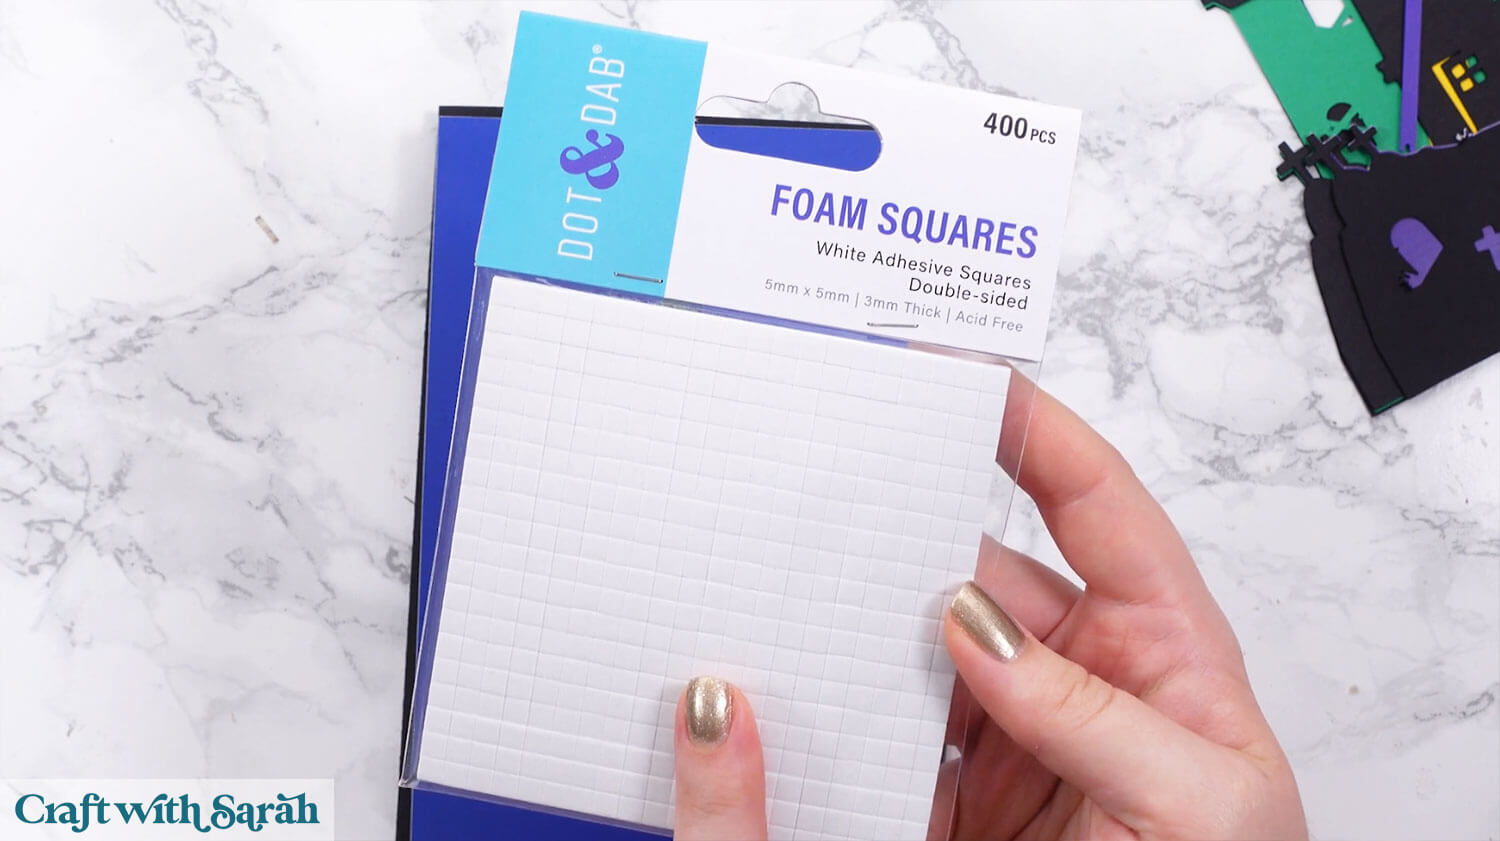
It’s easiest to put the foam squares onto the base card so that you are sure none of them touch the wheel.
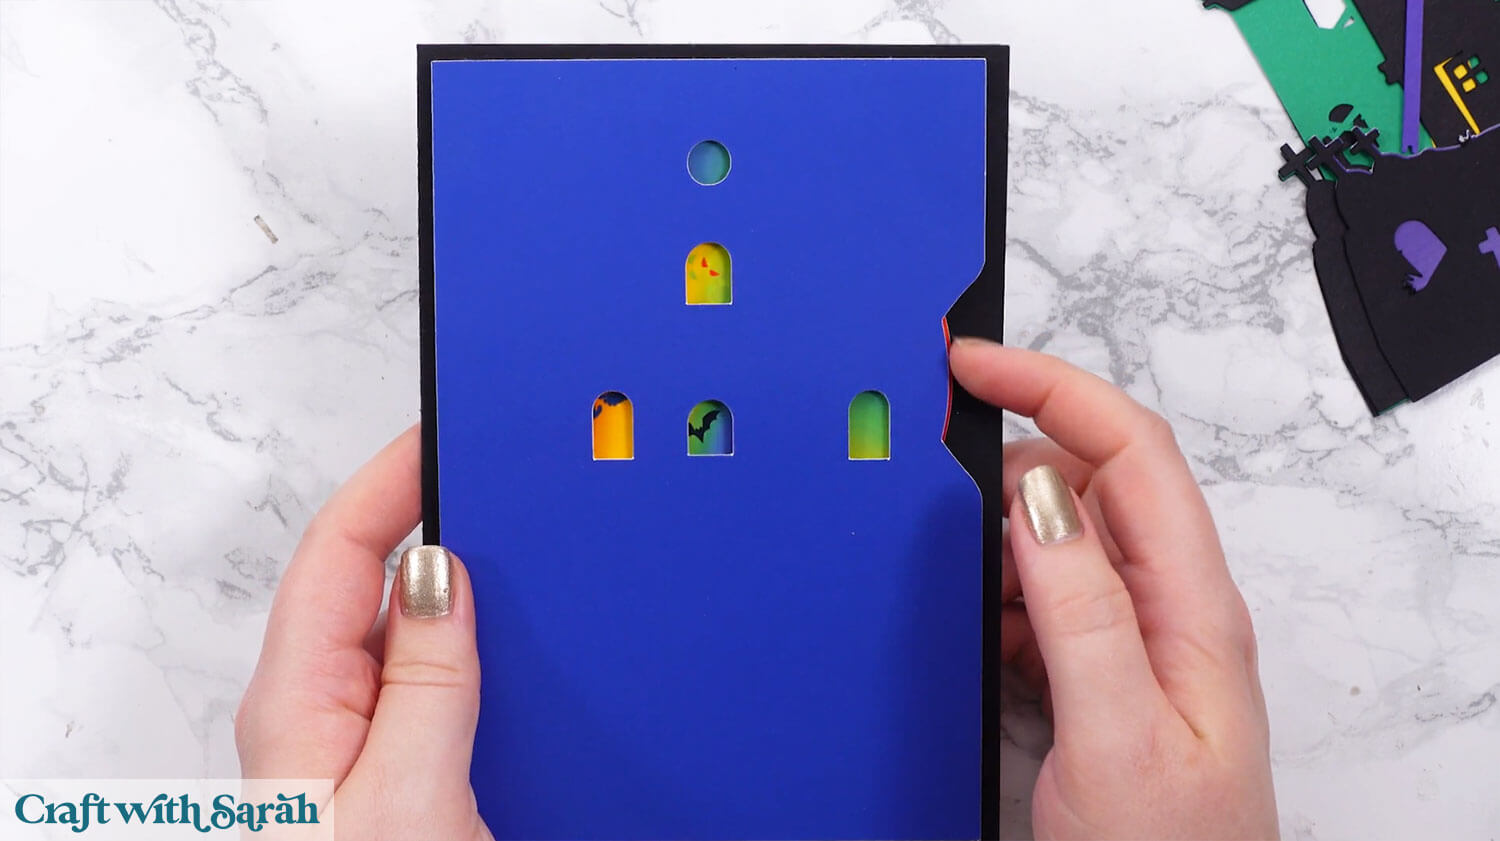
Build up the rest of the haunted house following the assembly guide below.
A high-quality printable version of the guide is included in your download folder.
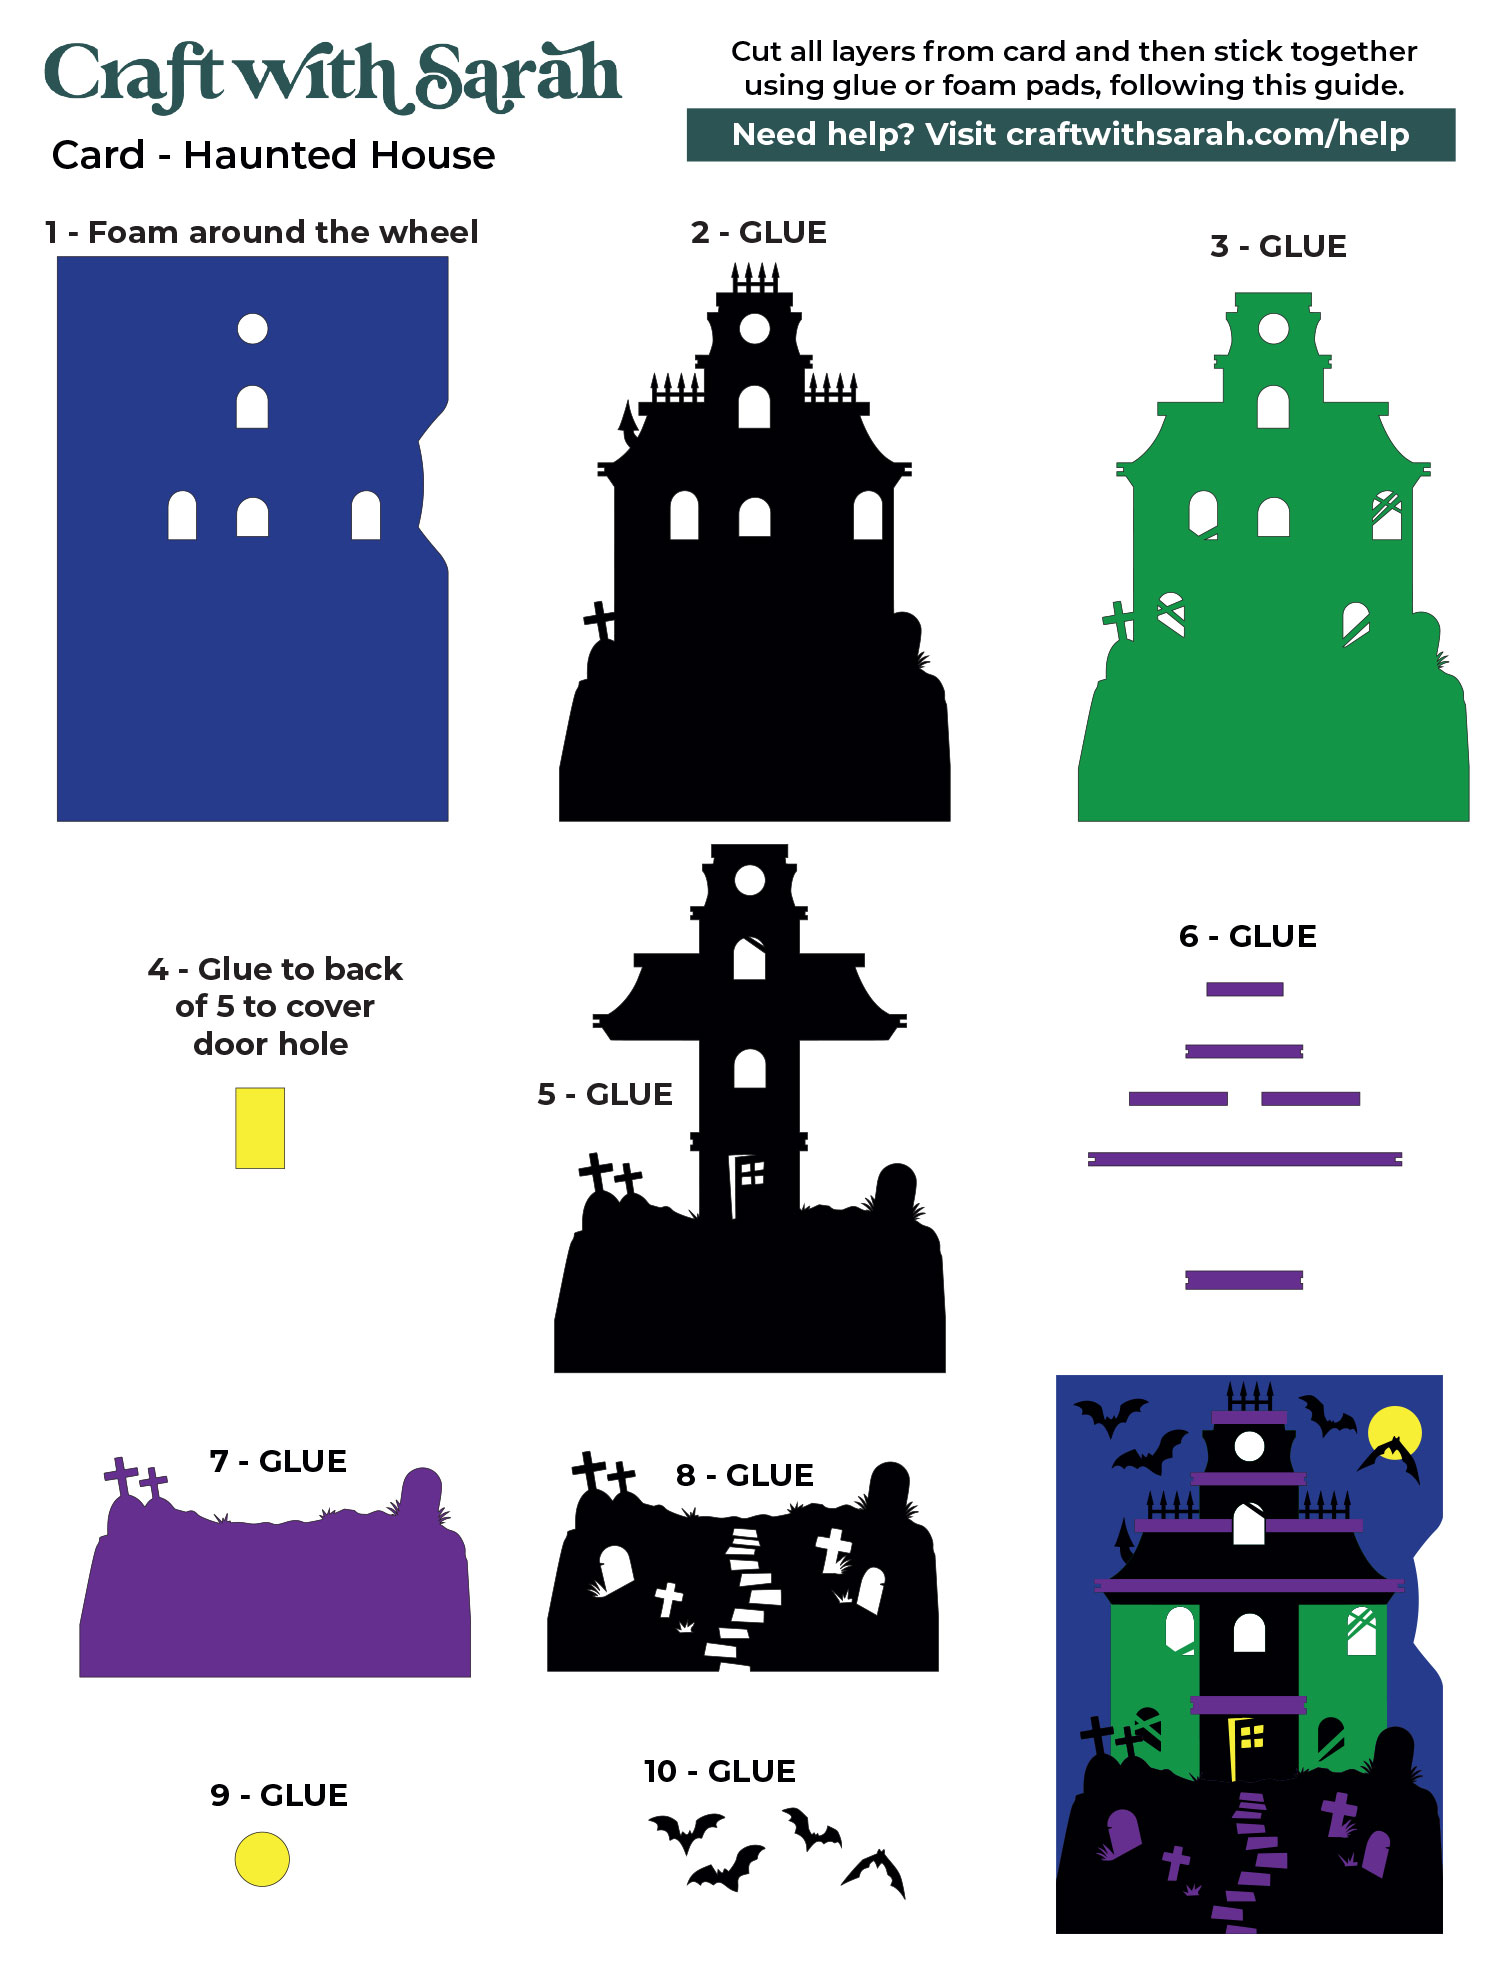
After sticking the pieces of the haunted house together, your turn the wheel card is finished.
Fun Haunted House Paper Craft Interactive Card
Once complete, this haunted house craft delivers both creativity and interaction in one fun card design.
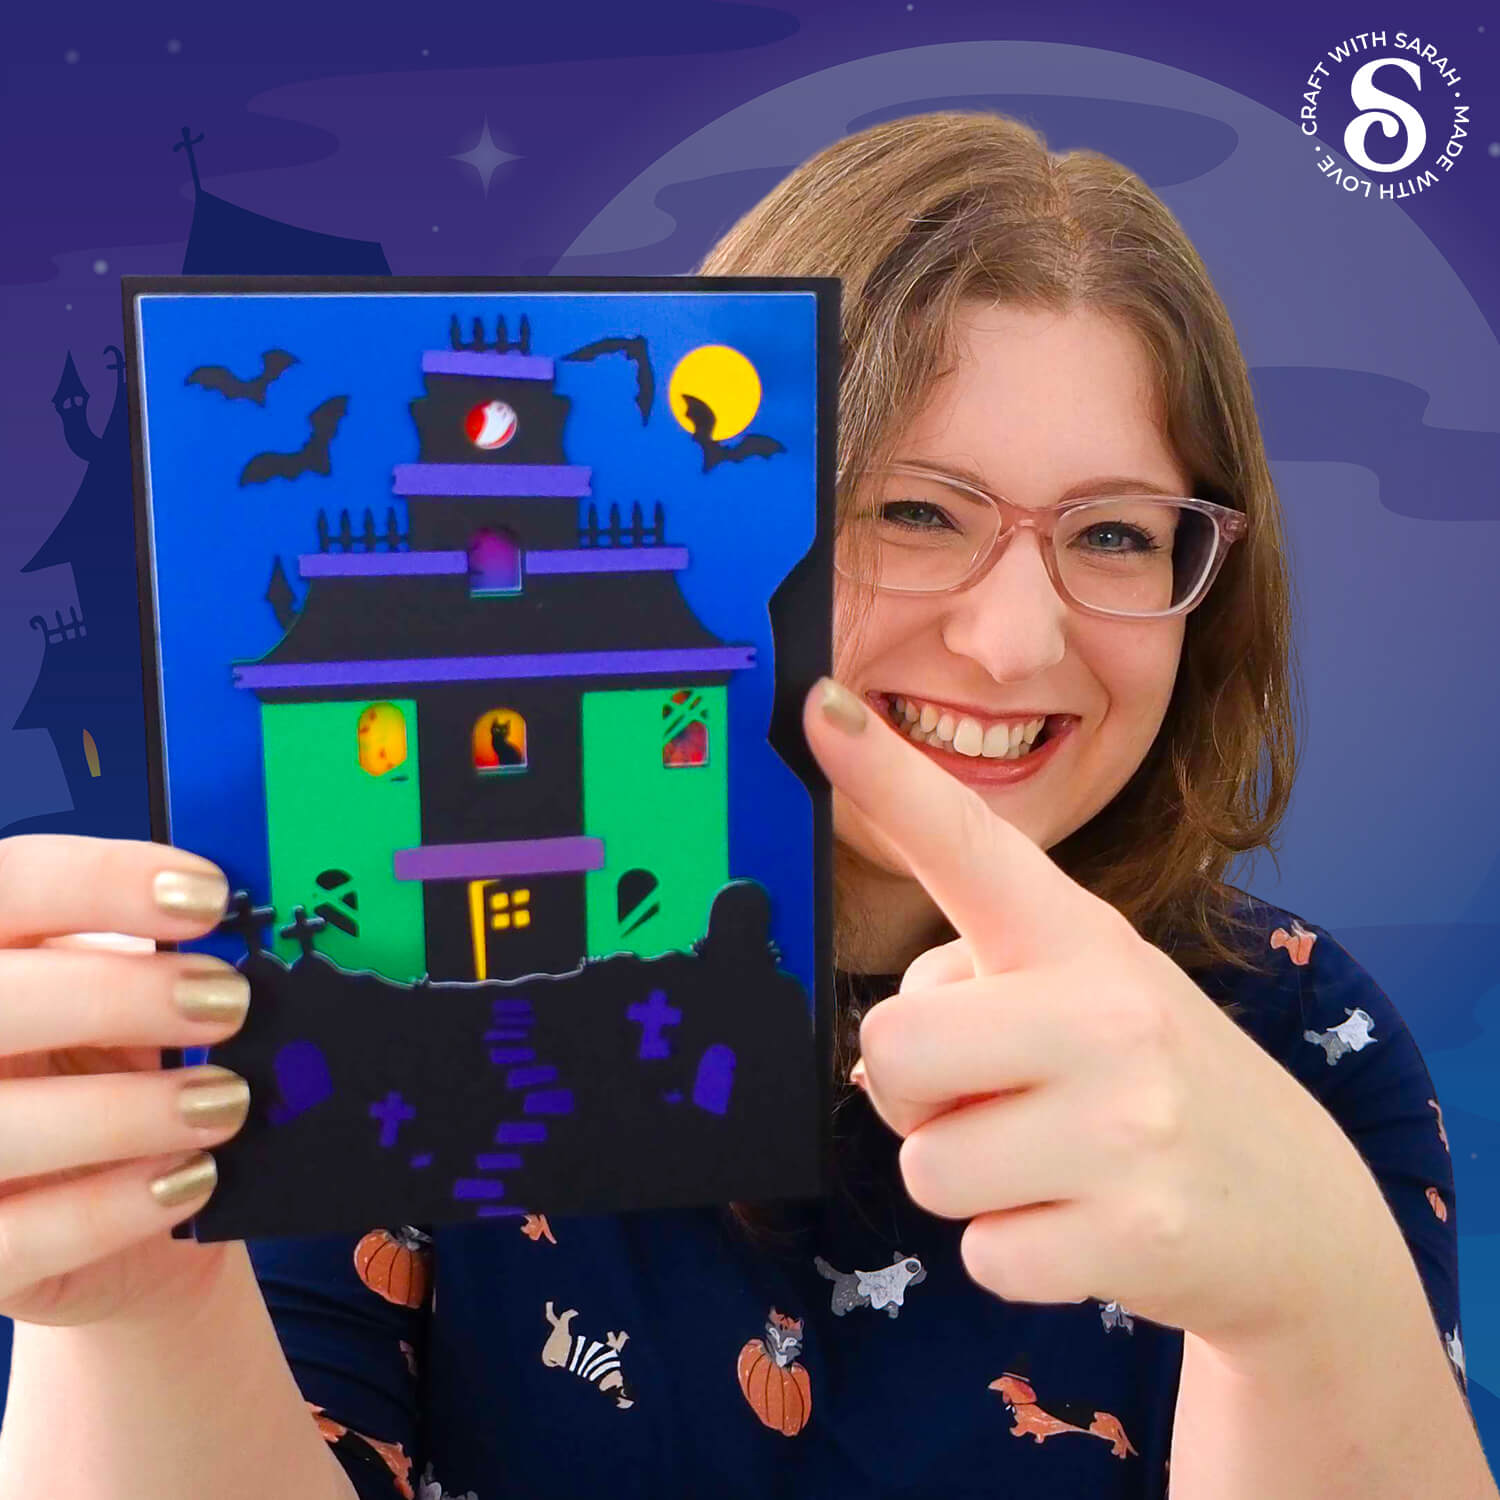
The turning wheel adds a unique element that invites the recipient to engage with the card, discovering new spooky surprises with every twist.
It’s a great way to add personality and movement to your Halloween cards.
Happy crafting,
Sarah x
