3D Crystal Ball Tower 👻 HCC 2025
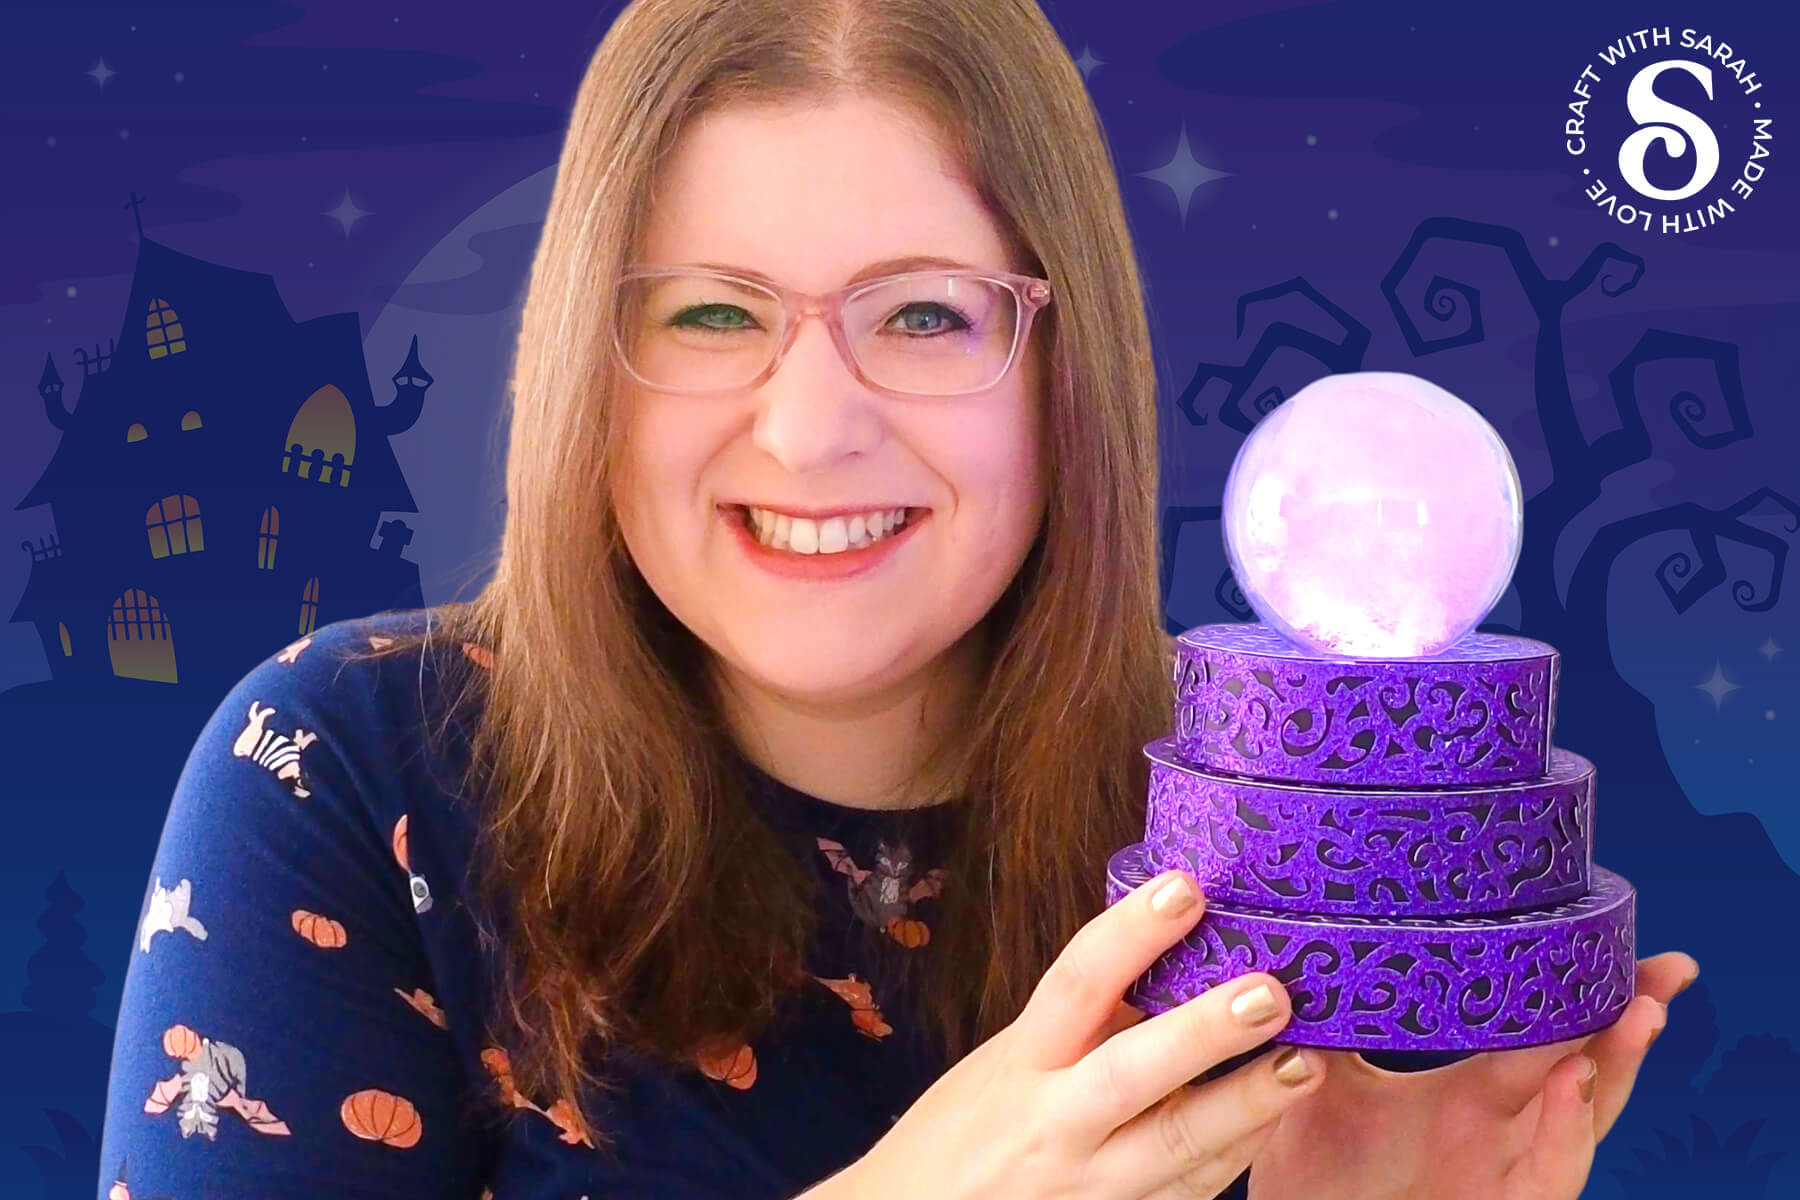
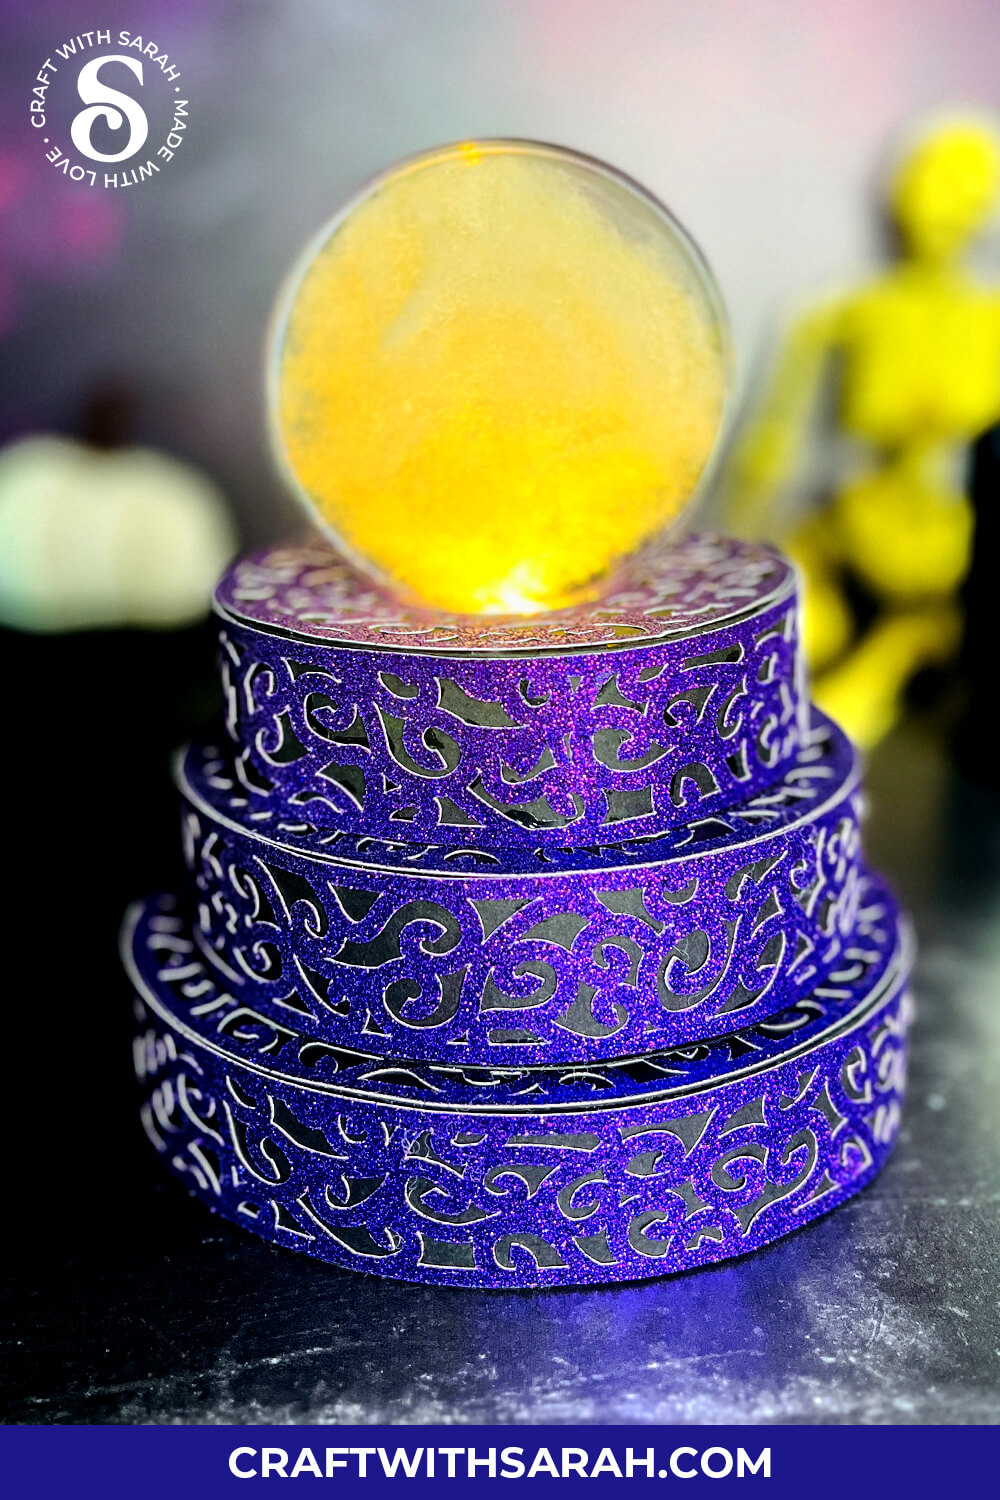
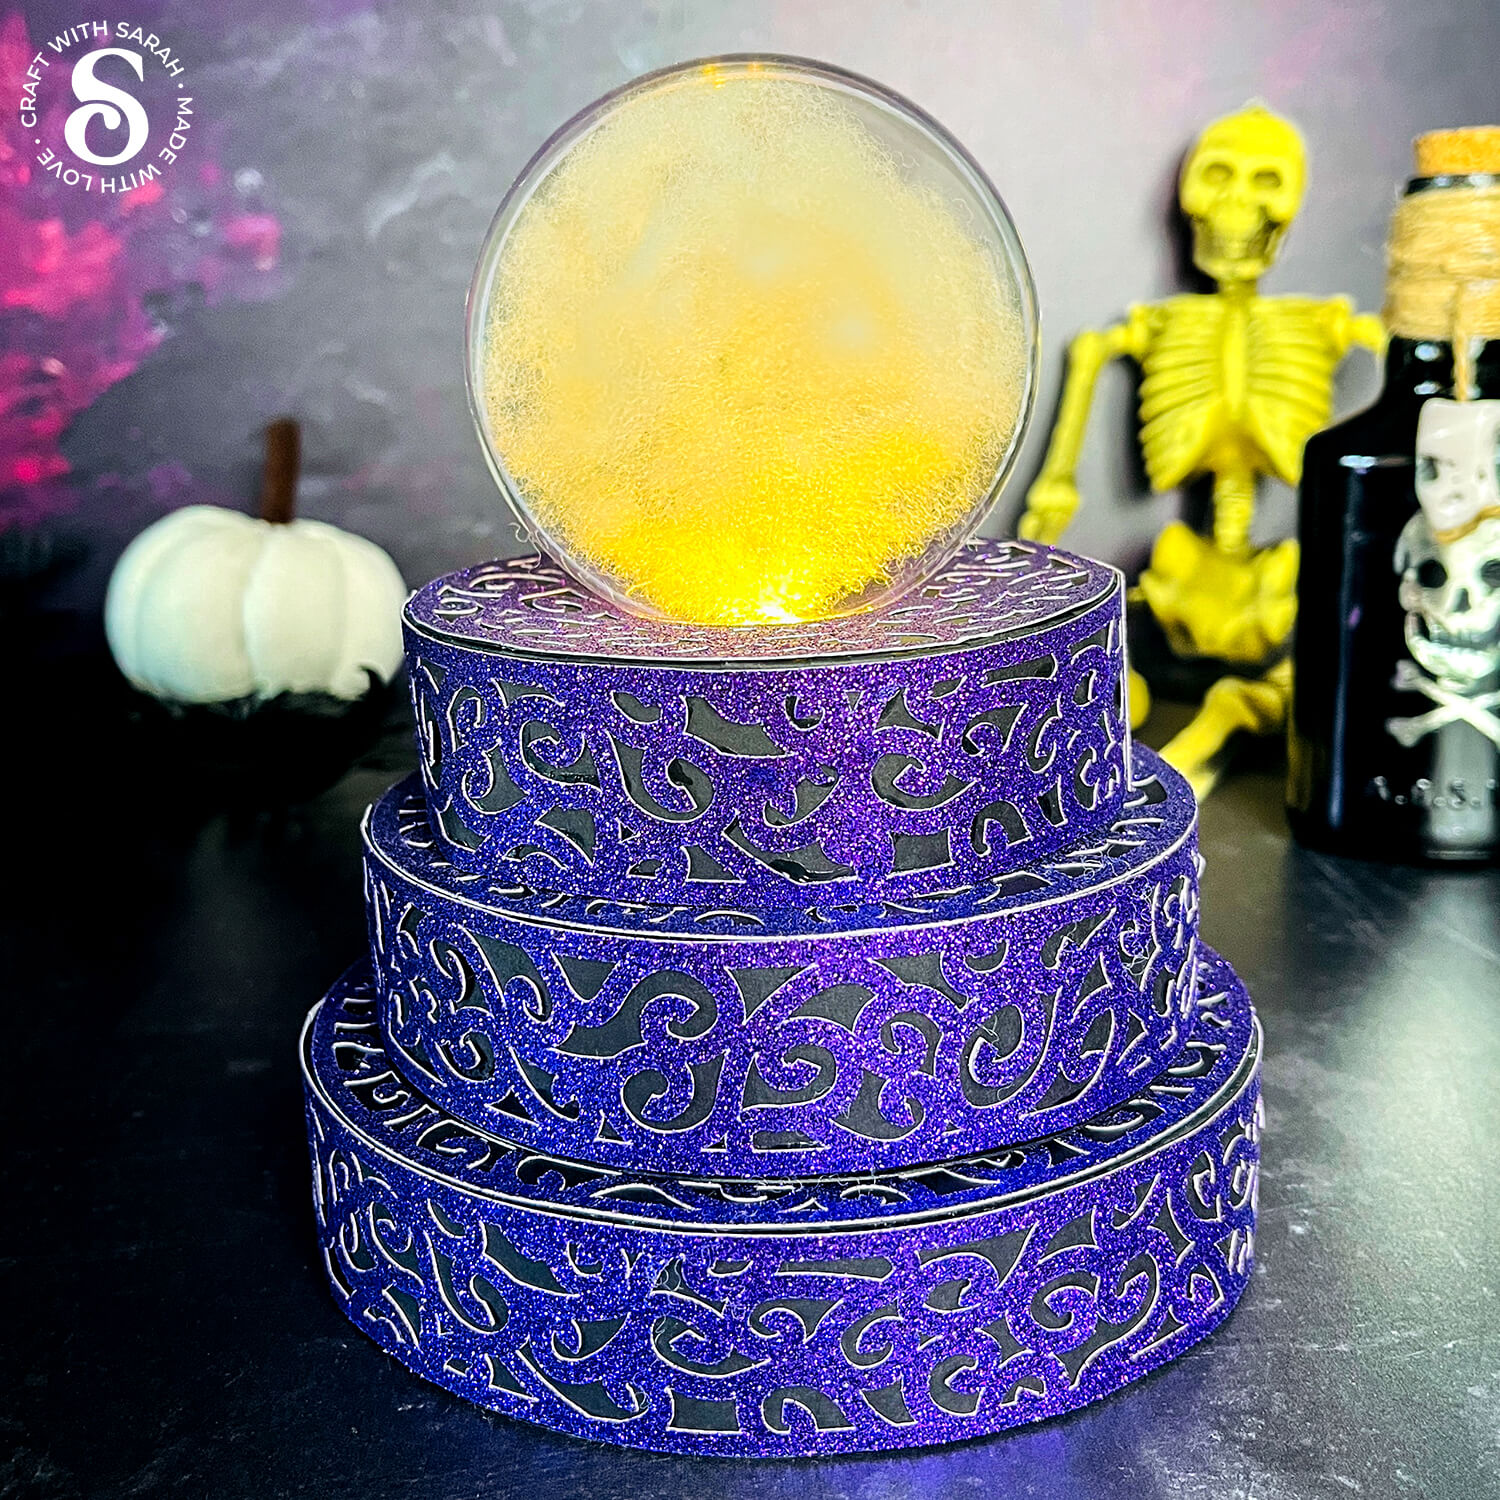
If you’re looking for a Halloween project with a bit of mystery and visual drama, this crystal ball tower might be just the right fit.
It’s a 3D papercraft featuring three stacked levels with intricate decorative edging. Add some sparkle with glitter cardstock, or keep things a little plainer – it’s completely up to you!
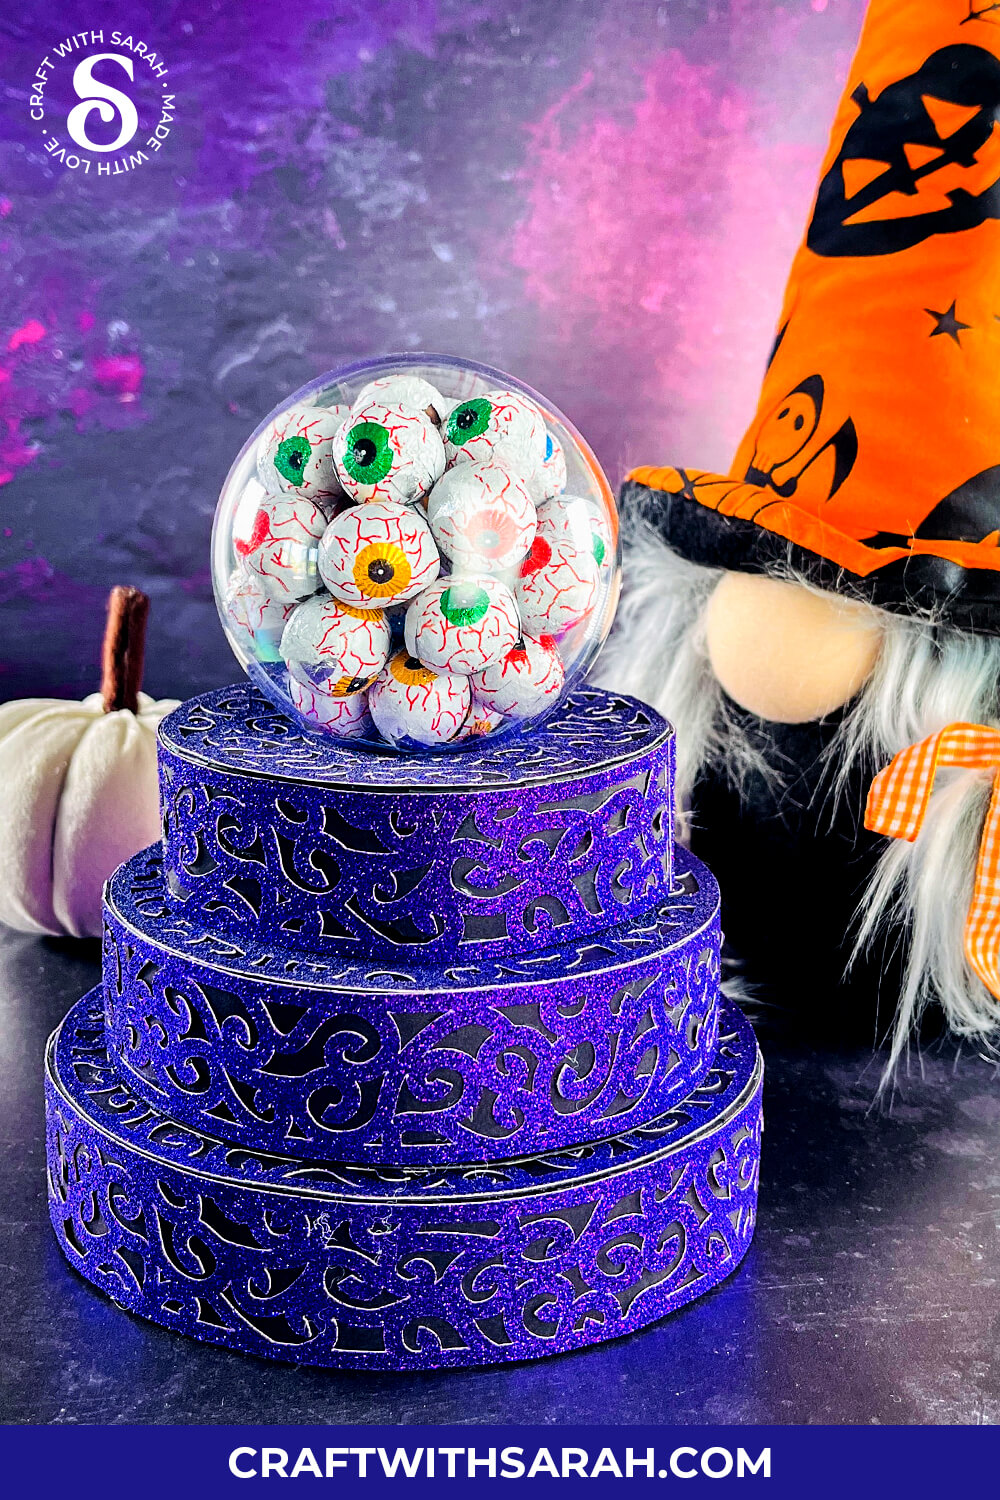
The centerpiece of the design is the magic crystal ball itself, created using a clear plastic ornament — the kind usually used for Christmas decorations. These baubles split into two halves, making them perfect for filling.
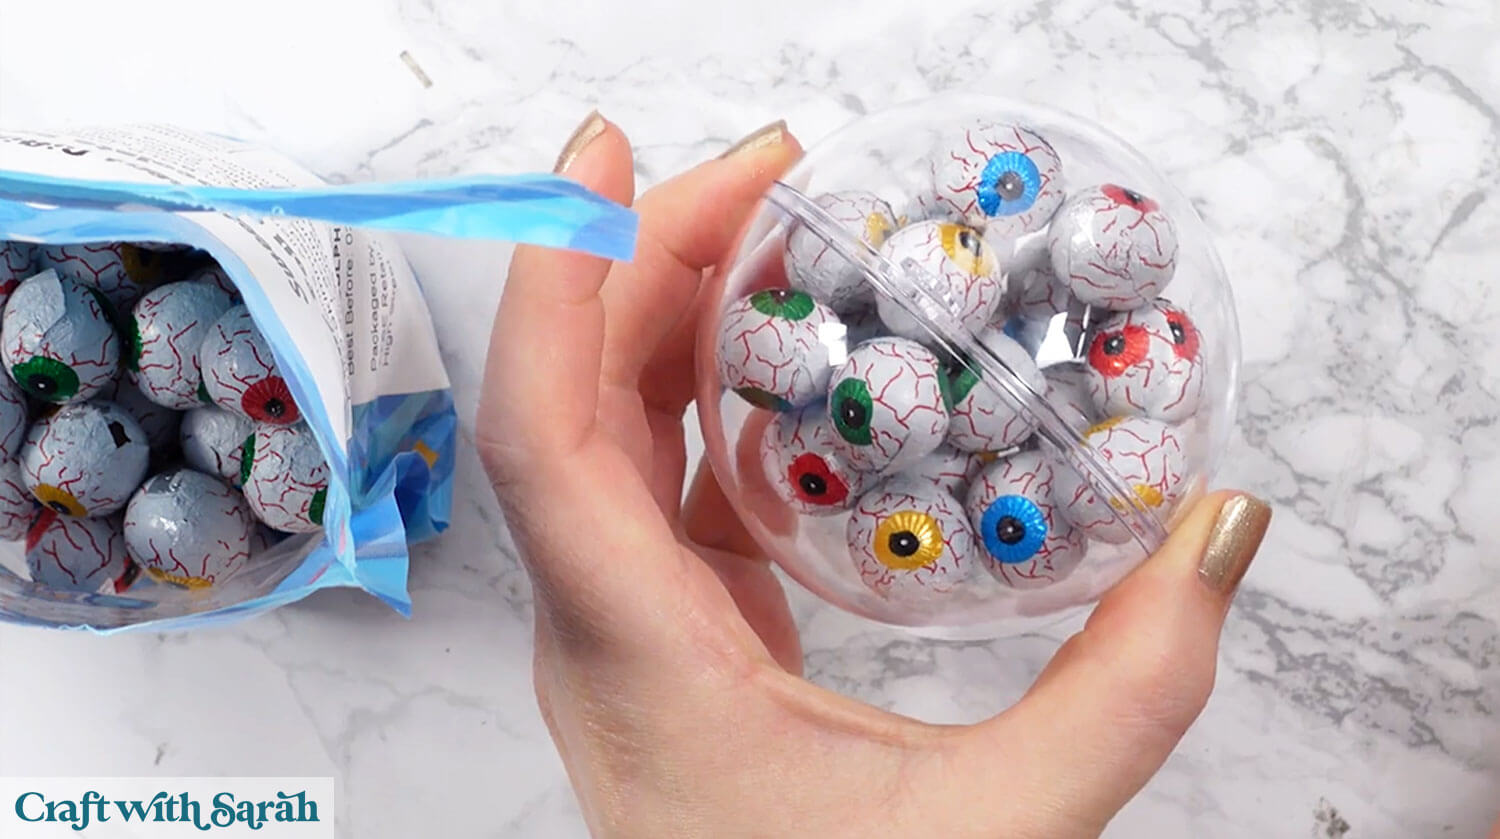
For a mysterious look, add soft toy stuffing or cotton wool to emulate smoke. Or, if you’re leaning more toward practical, fill it with small wrapped candies or Halloween treats for a little surprise hidden inside. 🎃
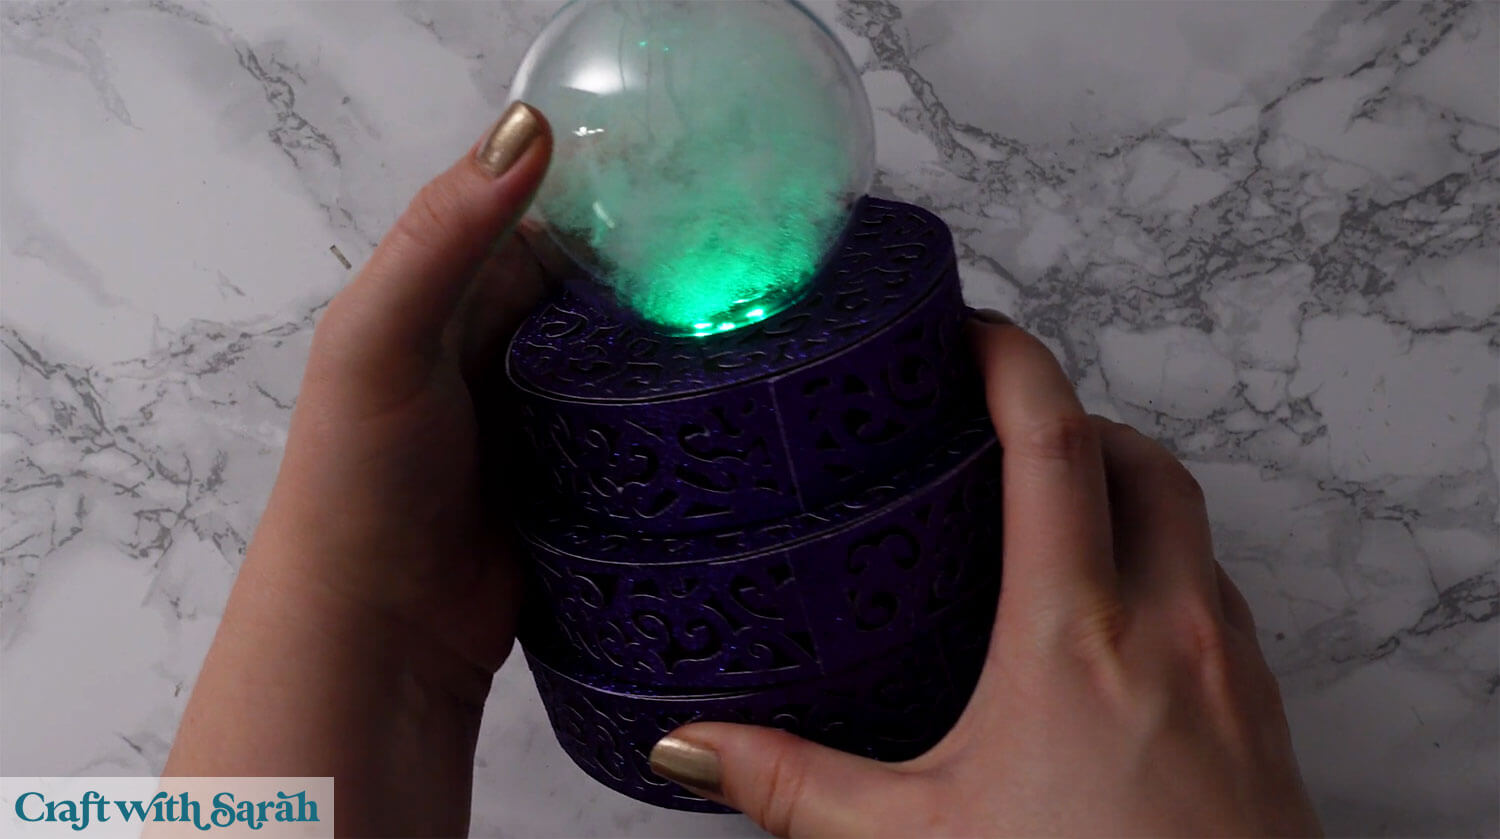
Hidden inside the base is a submersible LED light which gives the finished piece an eerie, glowing effect. It’s a simple touch that makes a big difference — especially if you’re trying to capture a crystal ball aesthetic or something inspired by traditional witch craft themes.
This project was part of the 2025 Halloween Craft Countdown.
Crystal Ball Supply List
Here is a list of the materials that are needed to make this project.
Please note that some of the links included in this article are affiliate links, which means that if you click through and make a purchase I may receive a commission (at no additional cost to you). You can read my full disclosure at the bottom of the page.
- Cricut machine
- Light blue Cricut cutting mat
- Cardstock in 2 colours (plain black and purple glitter works well) – heavier cardstock works best for this project so it’s sturdier
- Glue (I like Bearly Art Glue and Collall)
- Cricut scoring stylus or scoring wheel (optional but recommended)
- Christmas ornament that comes apart into two halves
- Cotton wool, soft-toy filling or similar (to add the smoke effect) OR candy/chocolates to fill the bauble
- LED submersible light (optional)
- Paperclips and/or masking tape to hold pieces together while the glue dries (optional)
This project is suitable for the following types of Cricut machines: Explore series, Maker series, Joy Xtra and Joy. You will need to make the project smaller to cut it on the Joy.
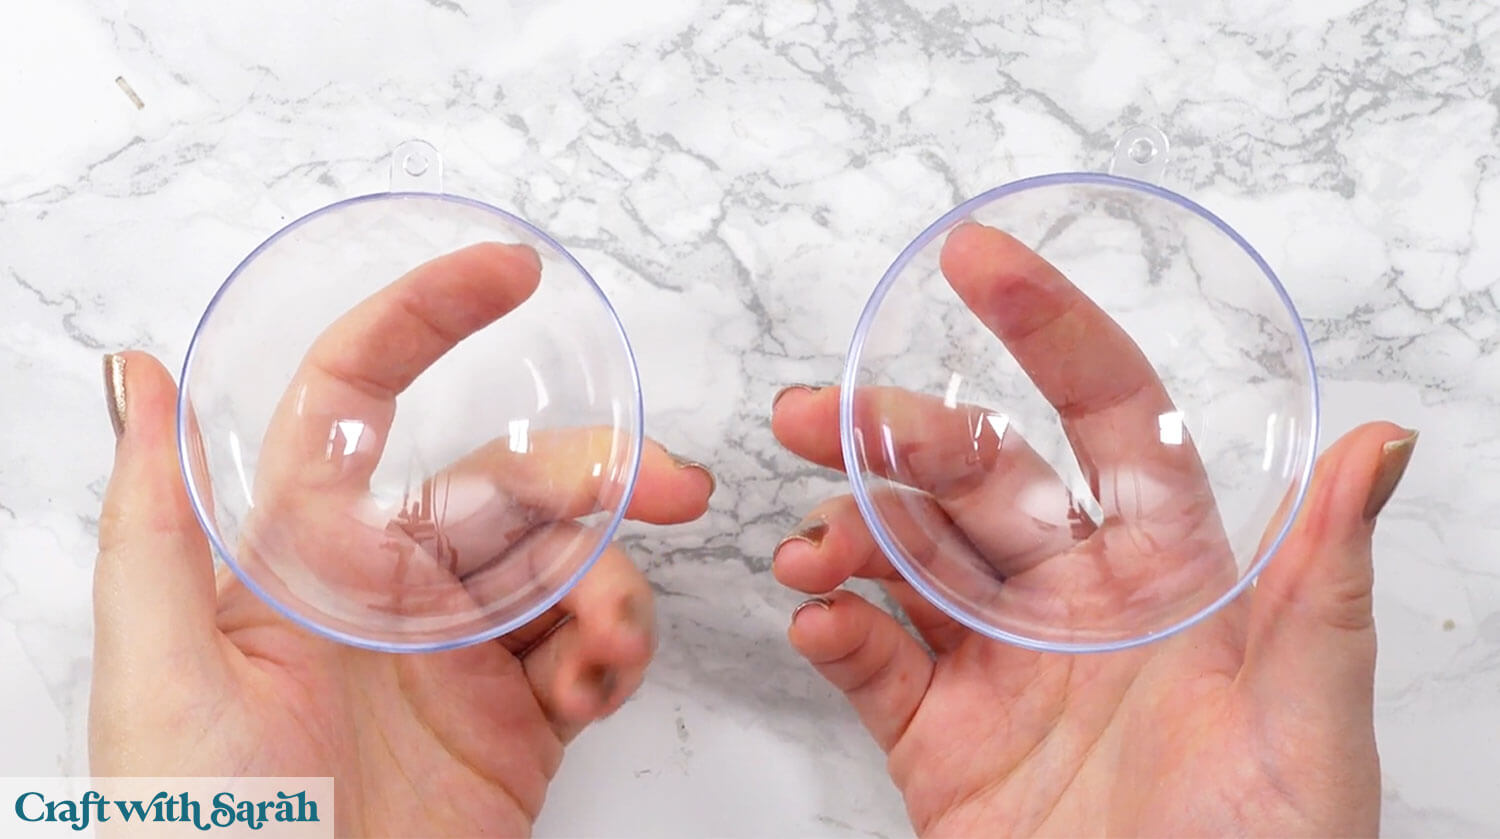
This is an example of what the Christmas baubles look like. The two segments push against each other to lock in place once the filling has been inserted.
The exact bauble size doesn’t matter, as the hole in the top of the tower will hold a variety of bauble widths.
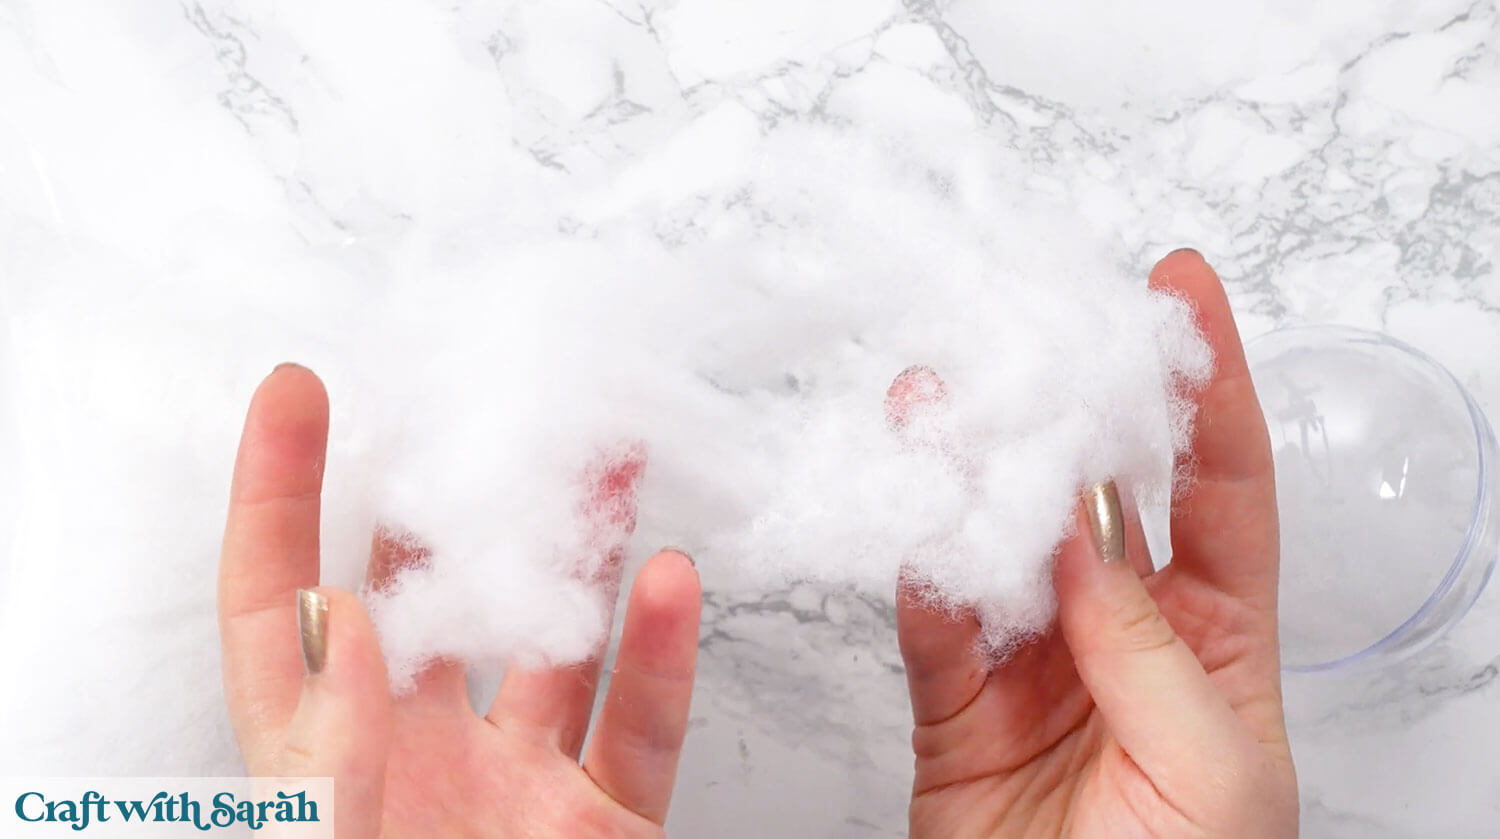
Soft toy filling or cotton wool pulled out really finely gives an illusion of smoke.
This is especially effective when lit up, using submersible LED lights such as the ones pictured below.

The glow from the lights is picked up beautifully by the toy filling, for a super spooky and bright glow throughout the whole of the bauble.
Foundation learning
If you're new to making papercrafts with your cutting machine, check out these links to get you started.
They include videos on topics such as: which file to use with your type of cutting machine, how to load the files into your cutting machine's software, how to cut cardstock with your type of cutting machine, how to recolor and modify/customize the cut files and tips for displaying your projects.
The following tutorials are Cricut-specific, but many of the ideas will work similarly with a Silhouette or ScanNCut machine and any cut files that are shared in them are compatible with all types of cutting machine.
- How to score with a Cricut (even without scoring tools)
- Print then cut tutorial
- Design Space tools (Combine, Attach, Slice, Weld, Flatten, etc.)
- Pattern fill tutorial (for making backgrounds & cutting images to a specific shape/size)
- Free envelope SVGs that can be sized to fit any card
- Presentation boxes for handmade cards
- How to write inside cards with Cricut pens
- How to cut layered designs at a small size
- Design Space tips & tricks
- Cricut pens tutorial
- How to mount multiple designs in the same frame with magic guides
Witch Crystal Ball Video Tutorial
Watch the video below to see how to make this project. Keep scrolling for a written tutorial.
A big Design Space update is currently rolling out that changes how the screen looks, including the position of some of the buttons and tools. I had already recorded all the Countdown videos before the update was released, so unfortunately there will be areas of the videos that look different to your screen.
To help with this, I've recorded a walkthrough video that explains all of the Design Space changes so that you can see how to do everything in the new version.
How to Make a DIY Crystal Ball Holder
Here’s how to make this spooky crystal ball tower for Halloween using a Cricut machine.
Step 1) Download the cutting files & upload to Design Space
Get the files using the box below.
Purchase the File(s)
This cut file is available as part of the Instant Access Bundle.
Or, purchase this design individually here
Before you upload the SVGs to Design Space, you need to unzip the download folder that they come in.
- How to unzip a folder on Windows computer
- How to unzip a folder on a Mac
- How to unzip a folder on an iPad/iPhone
- How to unzip a folder on an Android device
After unzipping, upload the SVG file(s) into your cutting machine software.
Not sure how to use cut files with your type of machine? The following links lead to videos on how to open cut files in:
- Cricut Design Space
- Silhouette Studio
- CanvasWorkspace (for ScanNCut machines)
The download folder also contains printable PDF versions of the templates for hand cutting.
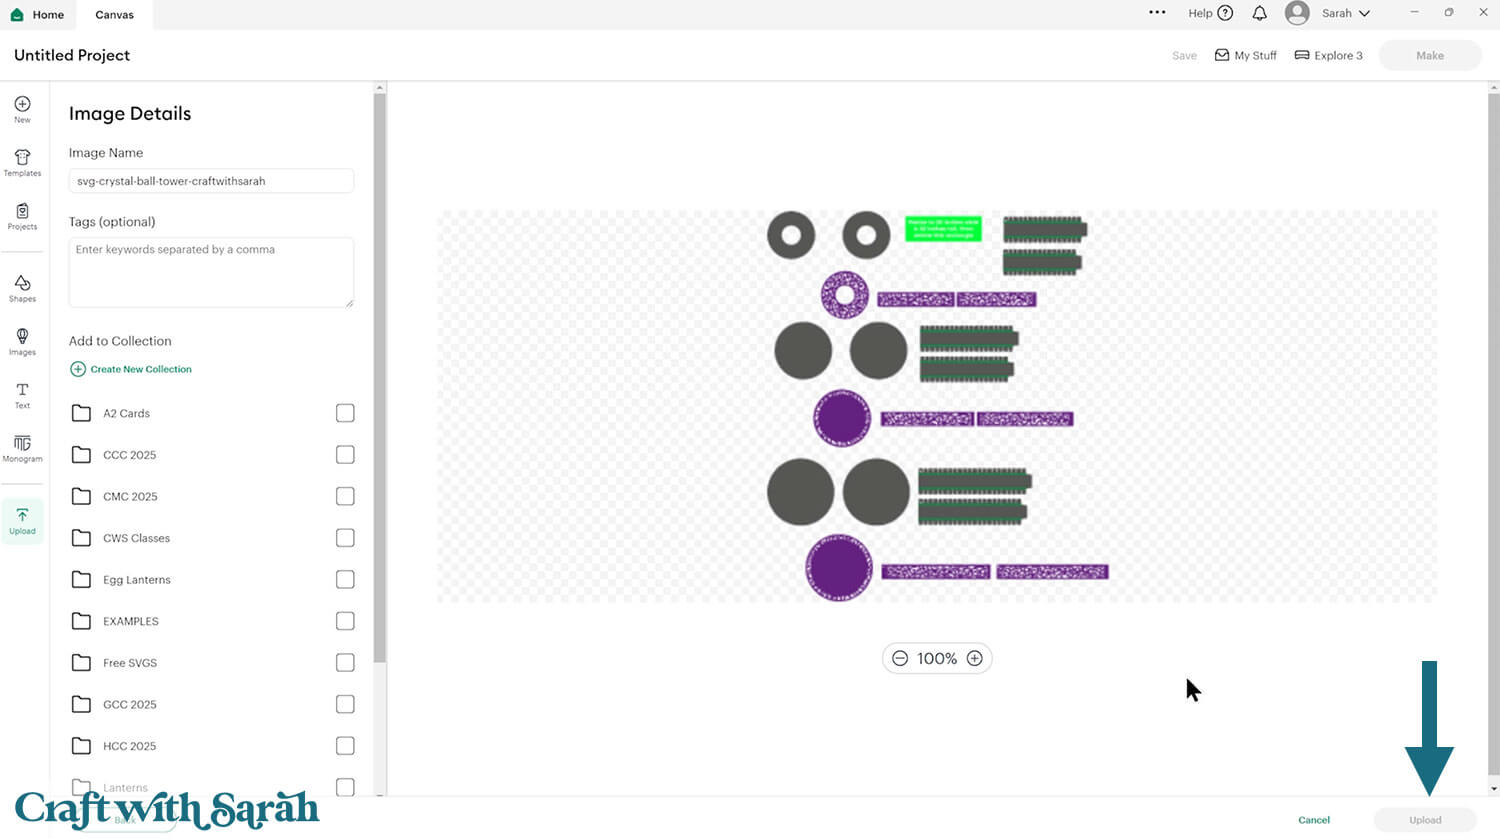
If you are using Cricut Design Space, start a new project and then click the “Upload” button on the left of the screen.
You can then either click “Browse” to find the files on your computer, or drag-and-drop them in.
Navigate to the “Cutting Machine Versions” subfolder and then select the file called svg-crystal-ball-tower-craftwithsarah.svg

Don’t worry if the image preview appears blurry – it will show in full quality once it’s inserted onto your project.
Press “Upload” on the next screen.
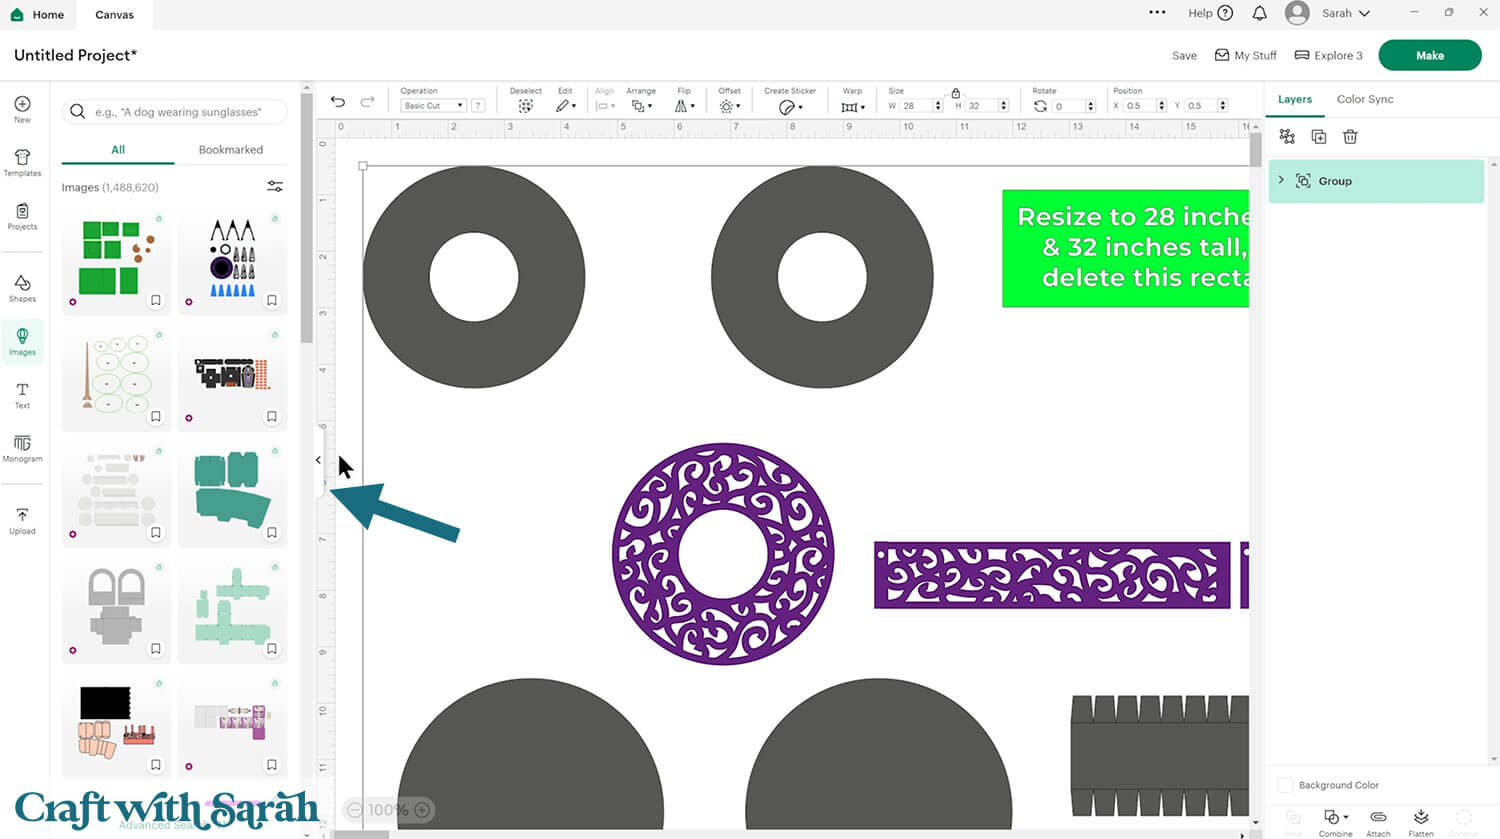
After uploading, the design should be automatically inserted onto your Canvas.
Cricut have recently (as of June 2025) introduced a feature where you get a “pop out” bar of similar images when you Upload a design. To hide this bar (to give you more space for designing!), click the arrow that’s about half way down the page.
If the design doesn’t get inserted onto your Canvas, it will show under “Uploads” in your “Recently Uploaded Images”. Click on it and then press “Add to Canvas” to put it onto your Project.
Step 2) Format the project
Check that the project has loaded in at 28 inches wide and 32 inches tall. If not, resize it to those measurements.
Click the design and press “Ungroup”.
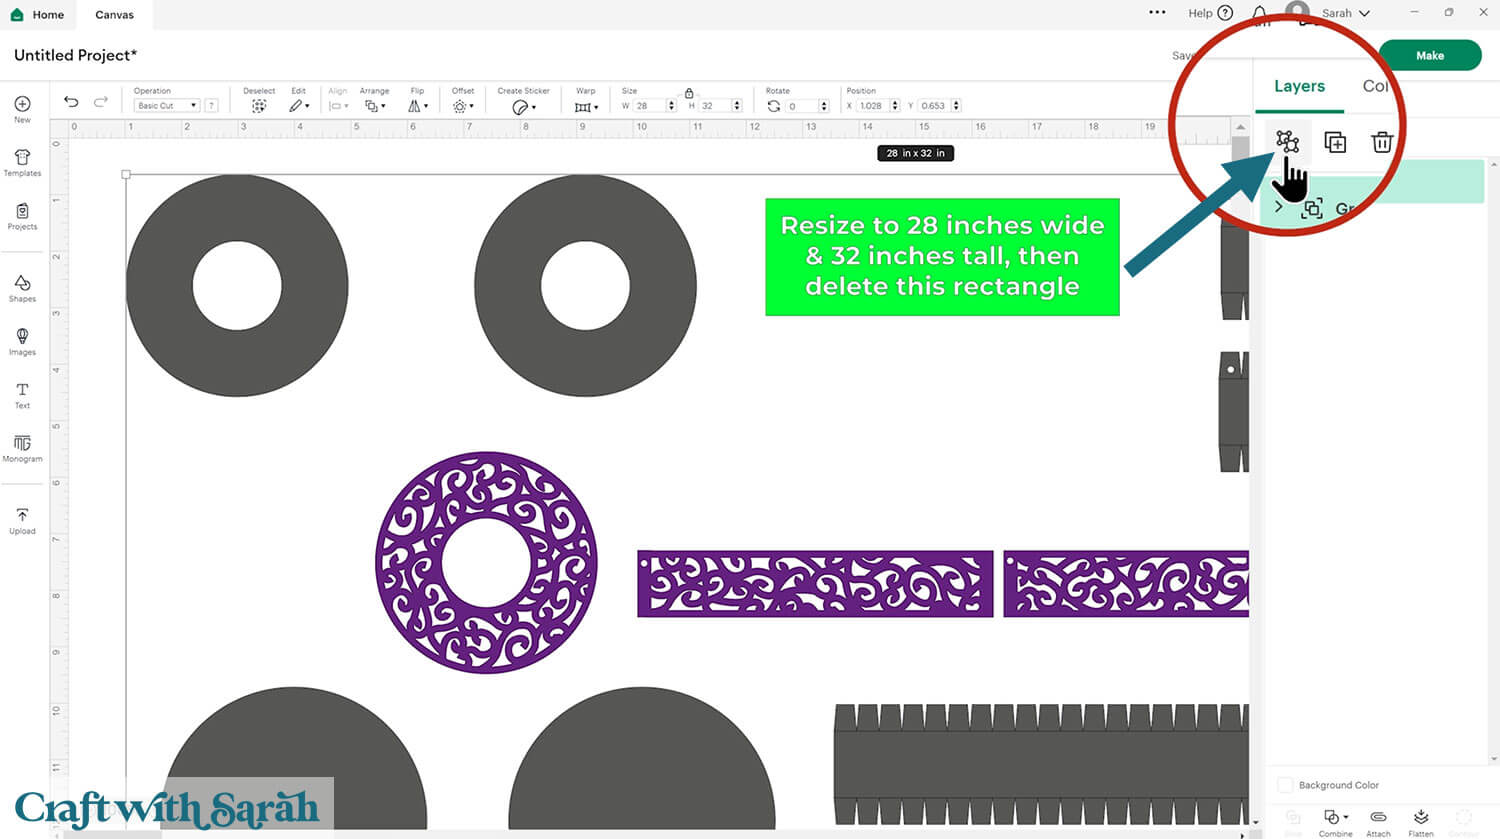
Click the green rectangle layer with the size information and delete it.

This project comes with some lines that need to be changed to “Score”.
It can be made without the score lines, but you’ll need to score by hand after cutting with your Cricut.
To find the score lines, look down the layers panel until you see a chevron (arrow) icon.
Click it to open up the Group.
Select the top layer within that group, which will look like two horizontal lines.
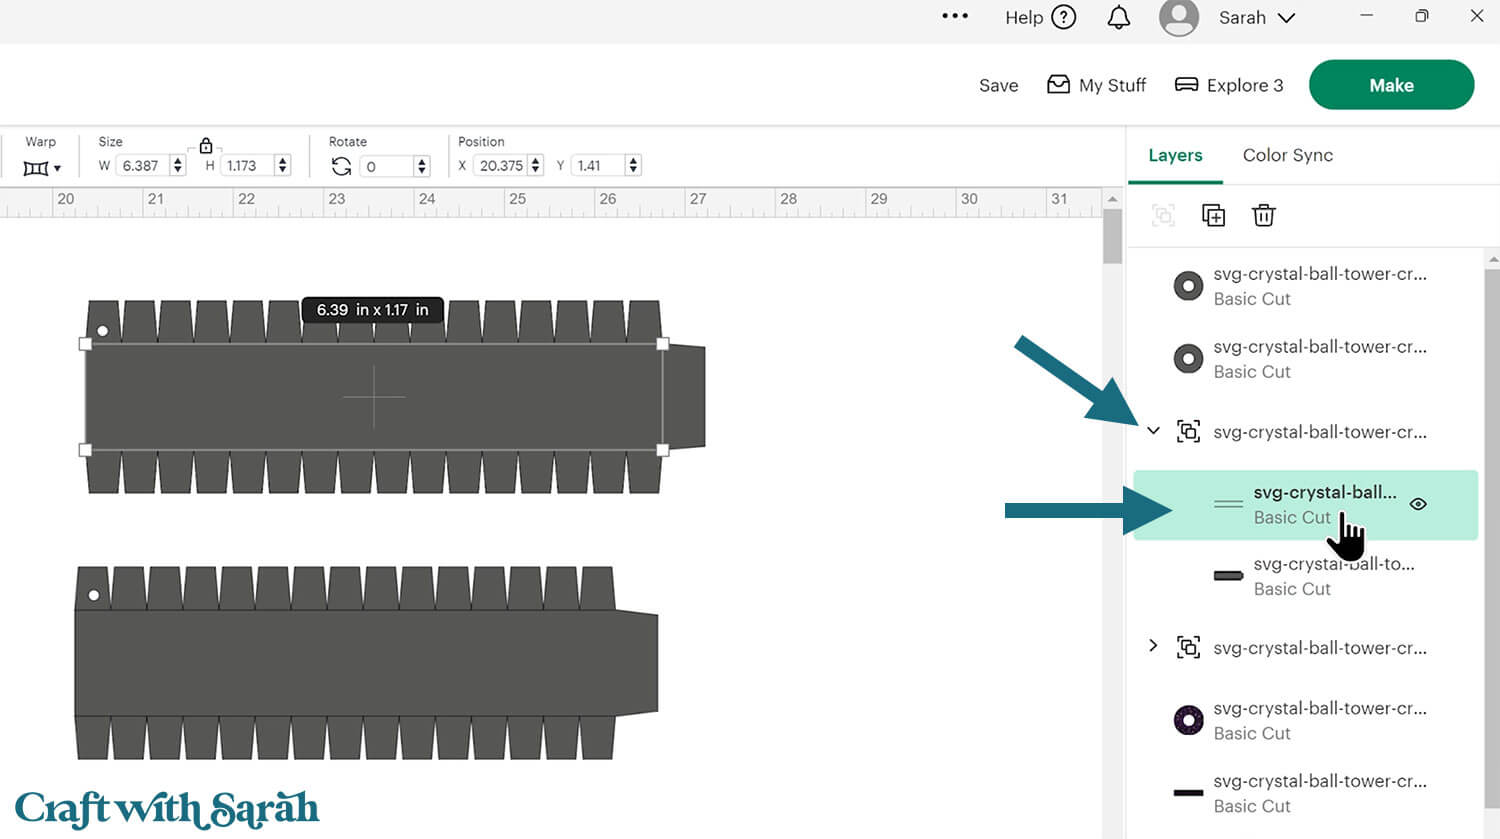
Either delete that layer if you aren’t going to do the scoring with your Cricut, or change it to “Score” under the “Operations” dropdown menu.
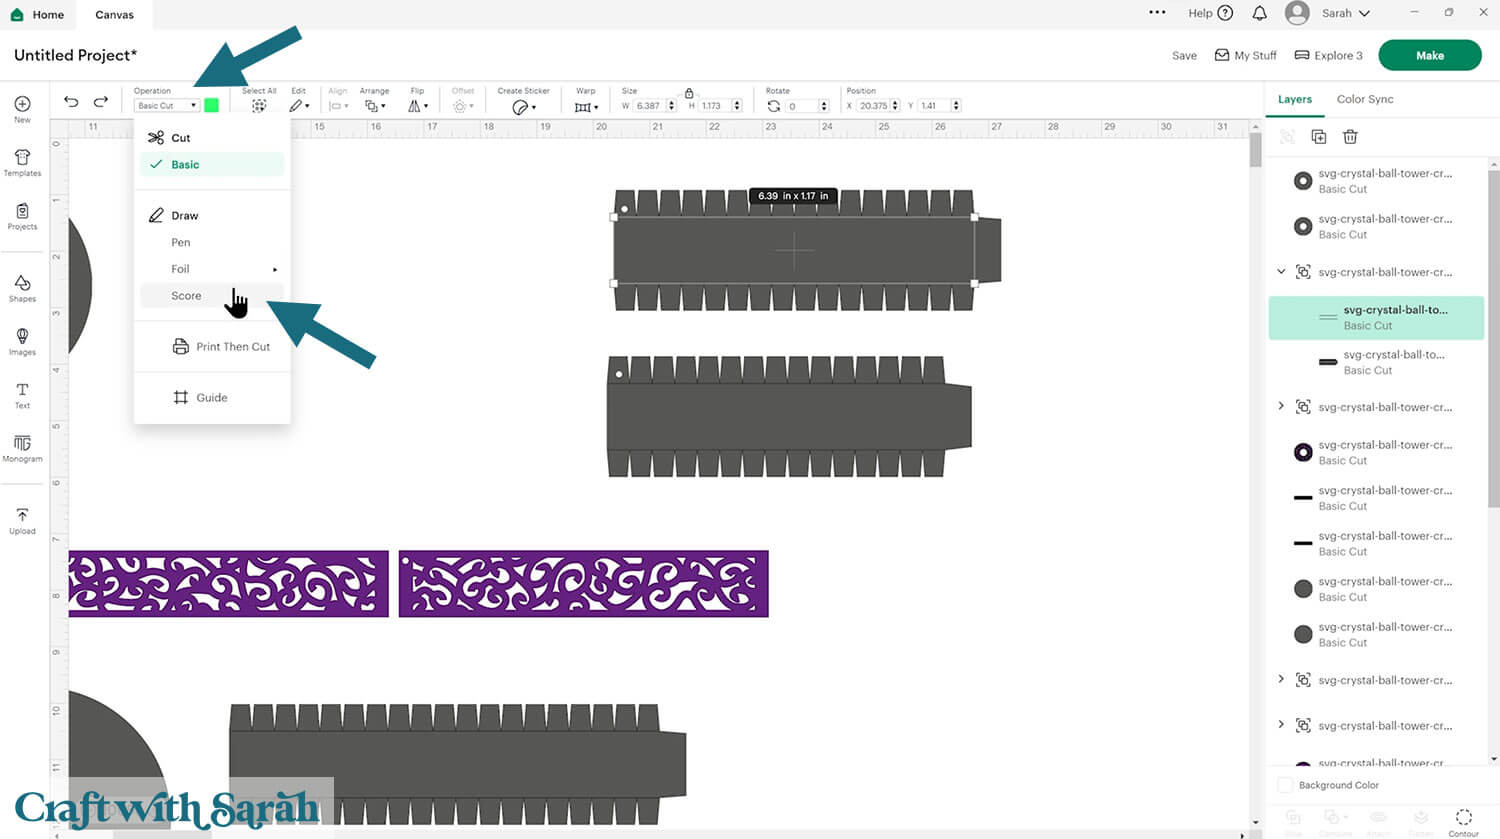
With the Score layer and the solid layer underneath selected, click “Attach”.
Attach is what tells the Cricut where to do the scoring.
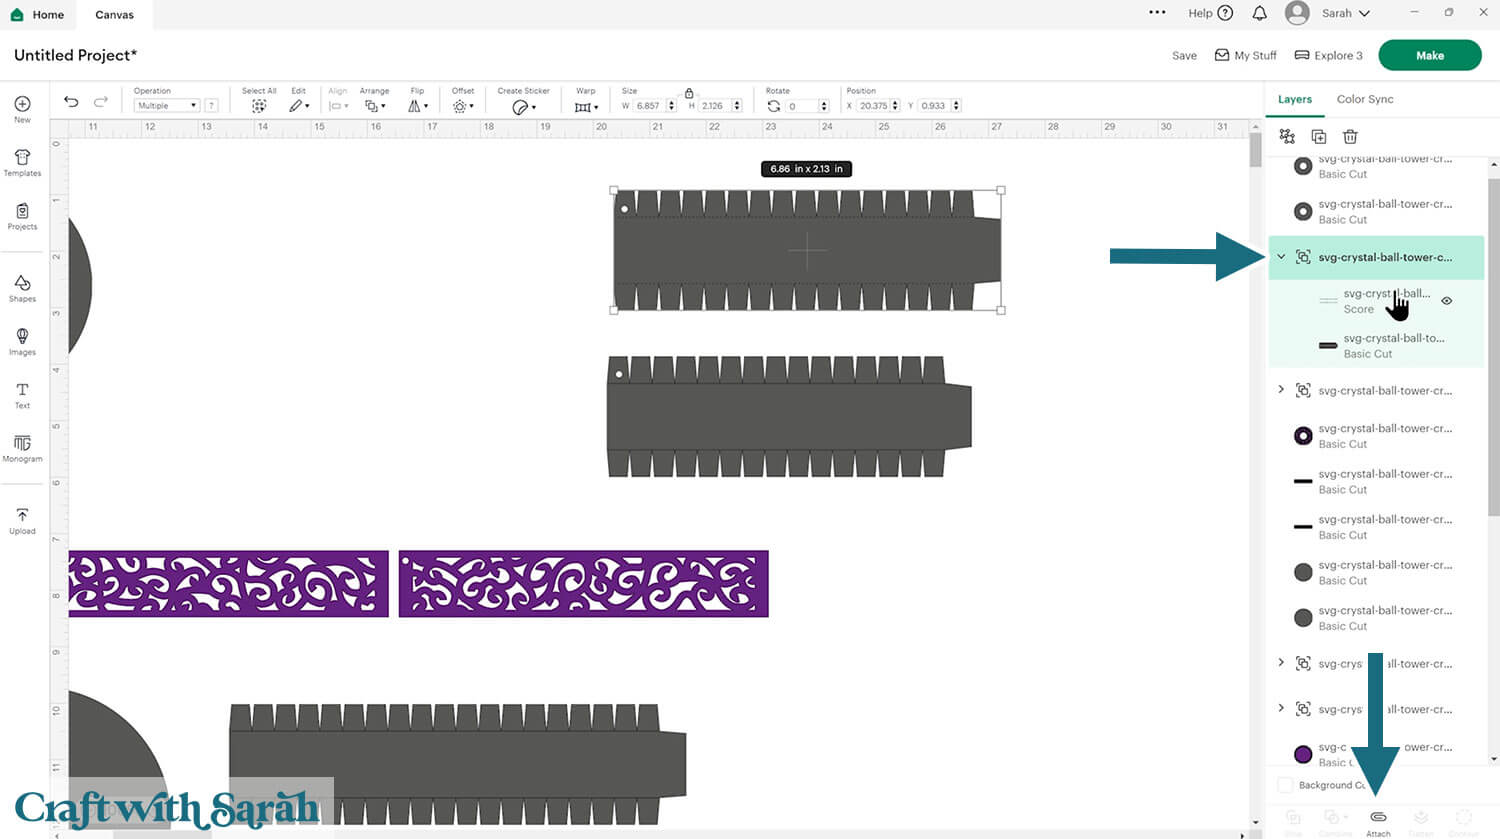
Repeat this for all of the groups in the layers panel that have score lines.
Step 3) Cut the crystal ball papercraft
When you’re happy with how the project is looking in Design Space, click “Make” and follow the instructions on-screen to cut out all the pieces.
To change the paper size, go into the dropdowns over on the left side of the screen and choose the paper size that you want to use. You need to change it for every single colour.
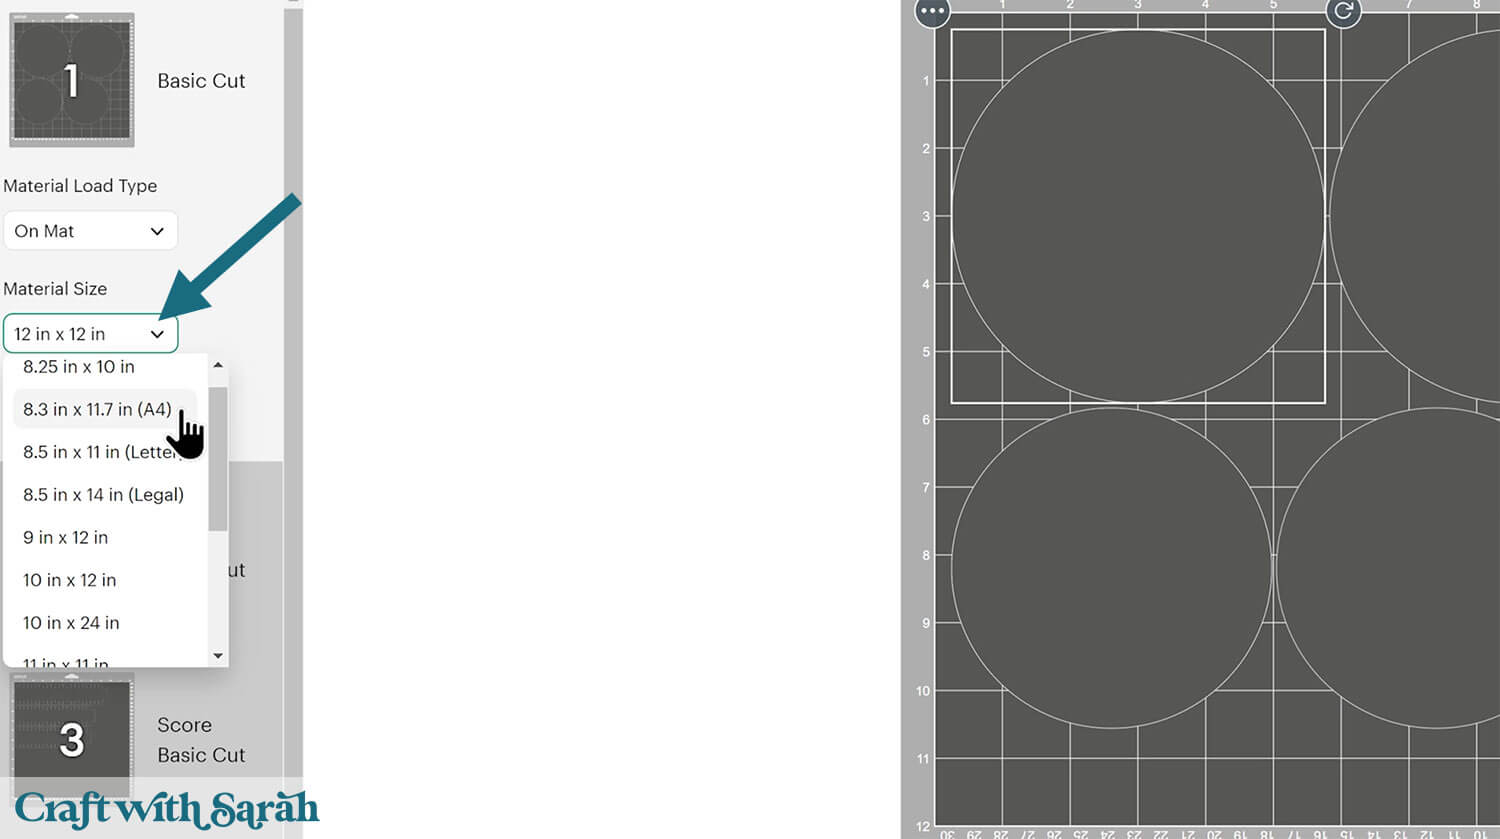
To save space on your cardstock, you can move things around by clicking and dragging. Make sure when you’re moving things about that nothing overlaps because otherwise, it won’t cut out properly.
TIP: New to using cardstock with your cutting machine? Check out these machine help guides for Cricut, Silhouette and ScanNCut that go through every step of the process, including tips for getting the best quality cuts from your machine.
Step 4) Build the tower sections
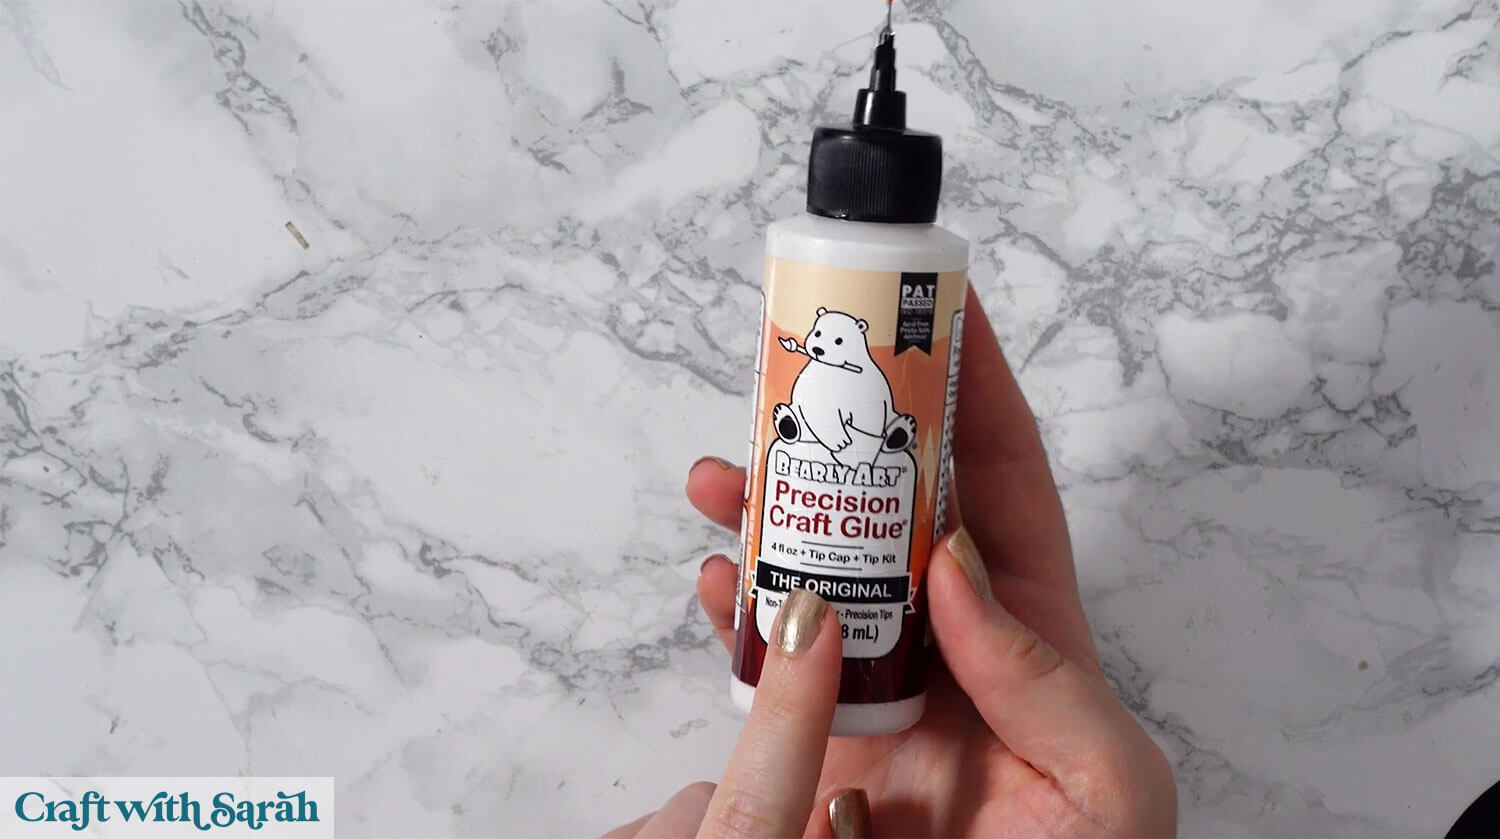
My favourite glues to use on papercraft projects are Bearly Art Glue and Collall All Purpose Glue.
These are great because they don’t “warp” or bend the cardstock like some glues do. You can use as much of it as you want and the card stays perfect – and it dries perfectly clear too!
Bearly Art Glue comes with a tiny nozzle to make it easy to apply glue to small areas of card. The Collall glue doesn’t come with this, so it’s easiest to decant it into needle tip applicator bottles so that you have more control.
The three segments of the crystal ball tower go together in the same way.
Pay careful attention to which pieces you are selected at each time, to ensure that the pieces that wrap around the sides match the size of the circles you are working with.
The sides for the smallest tower segment have little circle cutouts in them.
The sides for the middle tower segment do not have any shapes cutout from them.
The sides for the largest tower segment have little square cutouts in them.
The shapes are cut out from both the black and the purple pieces of card.
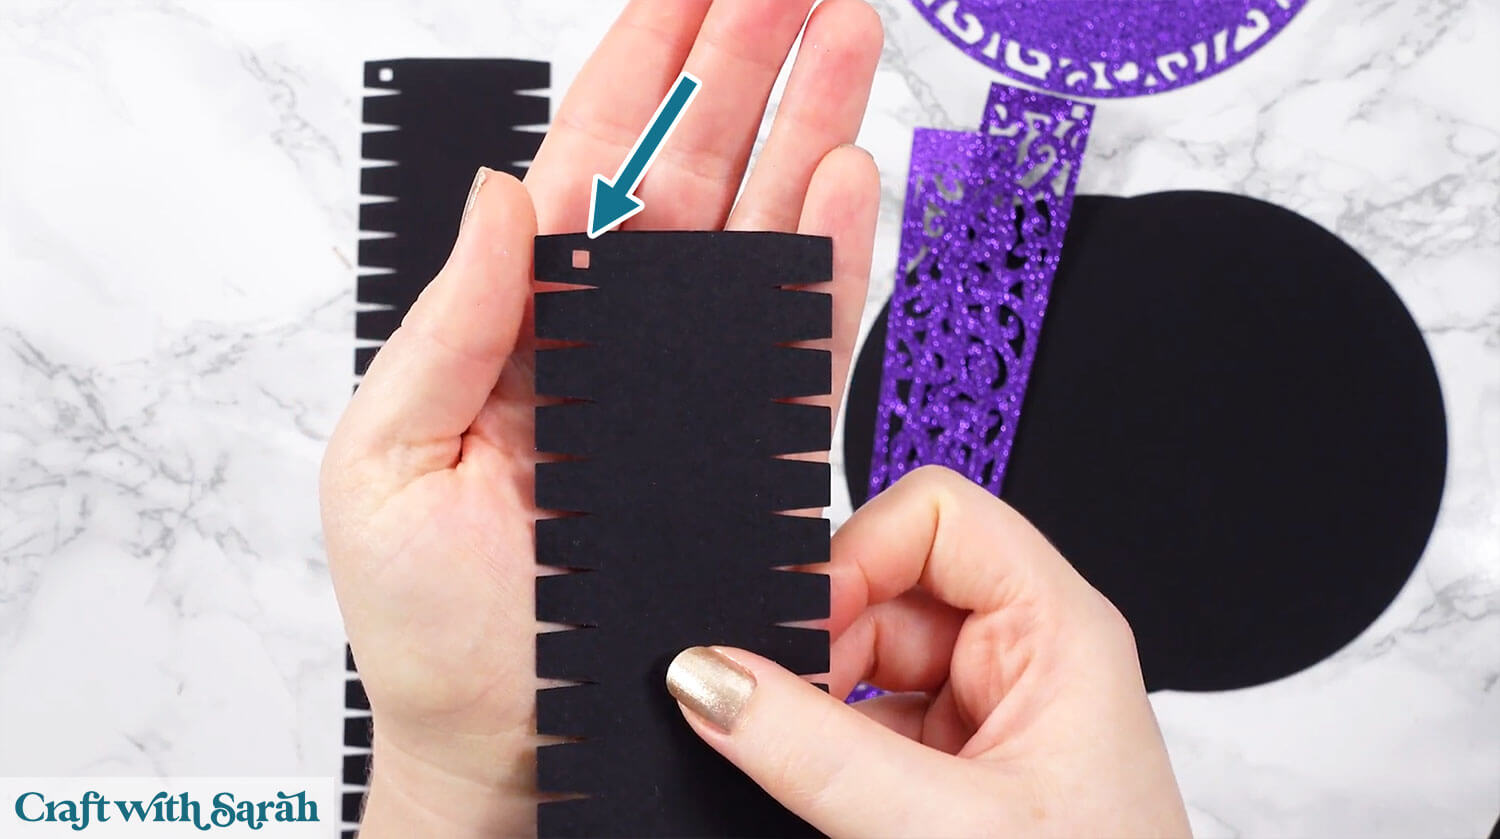
I’ll start with the largest tower segment.
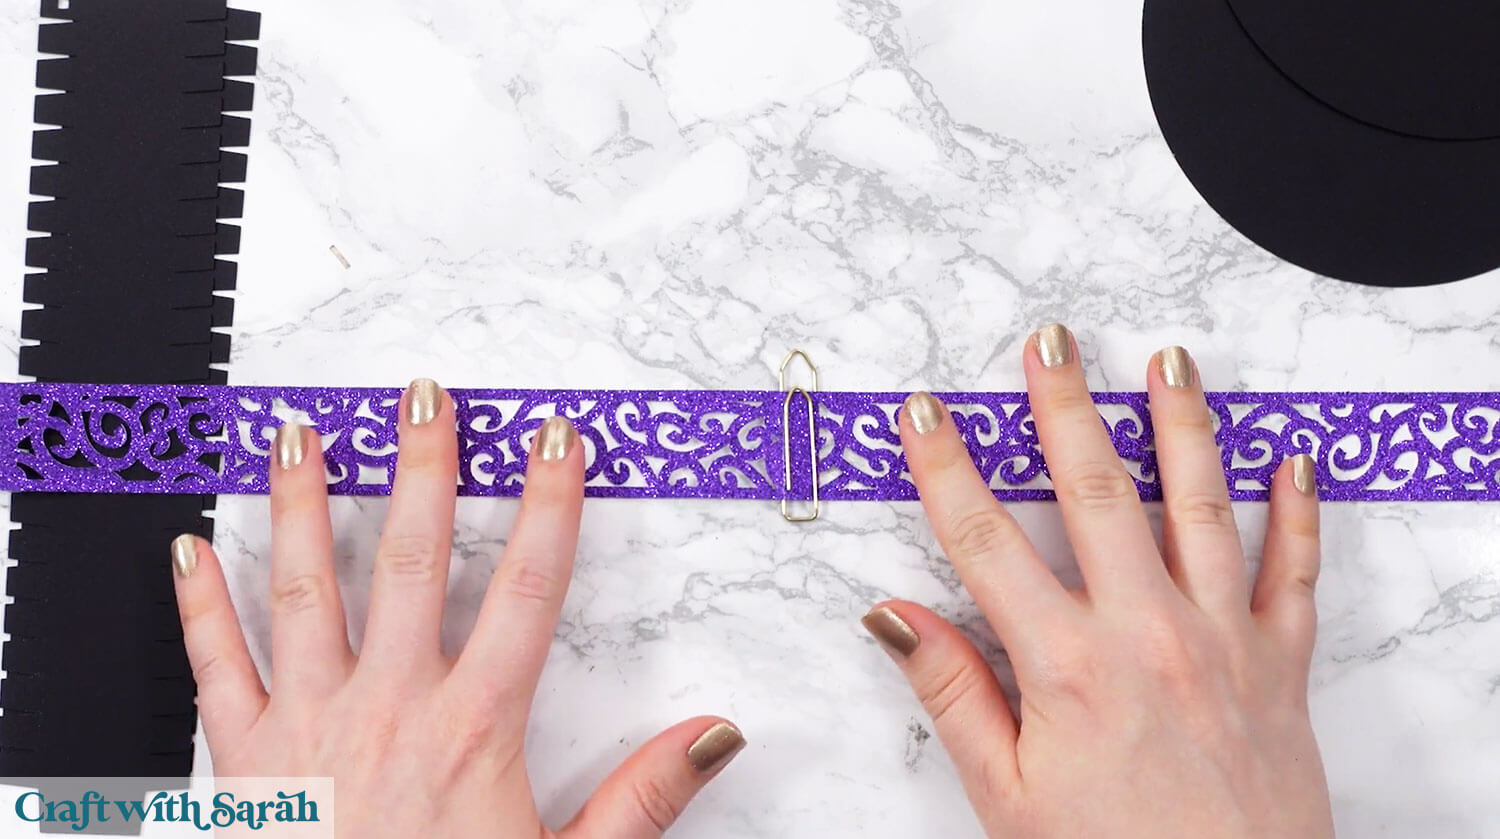
Take the two decorative pieces and lie them out so that both pieces have the cutout squares on the bottom right.
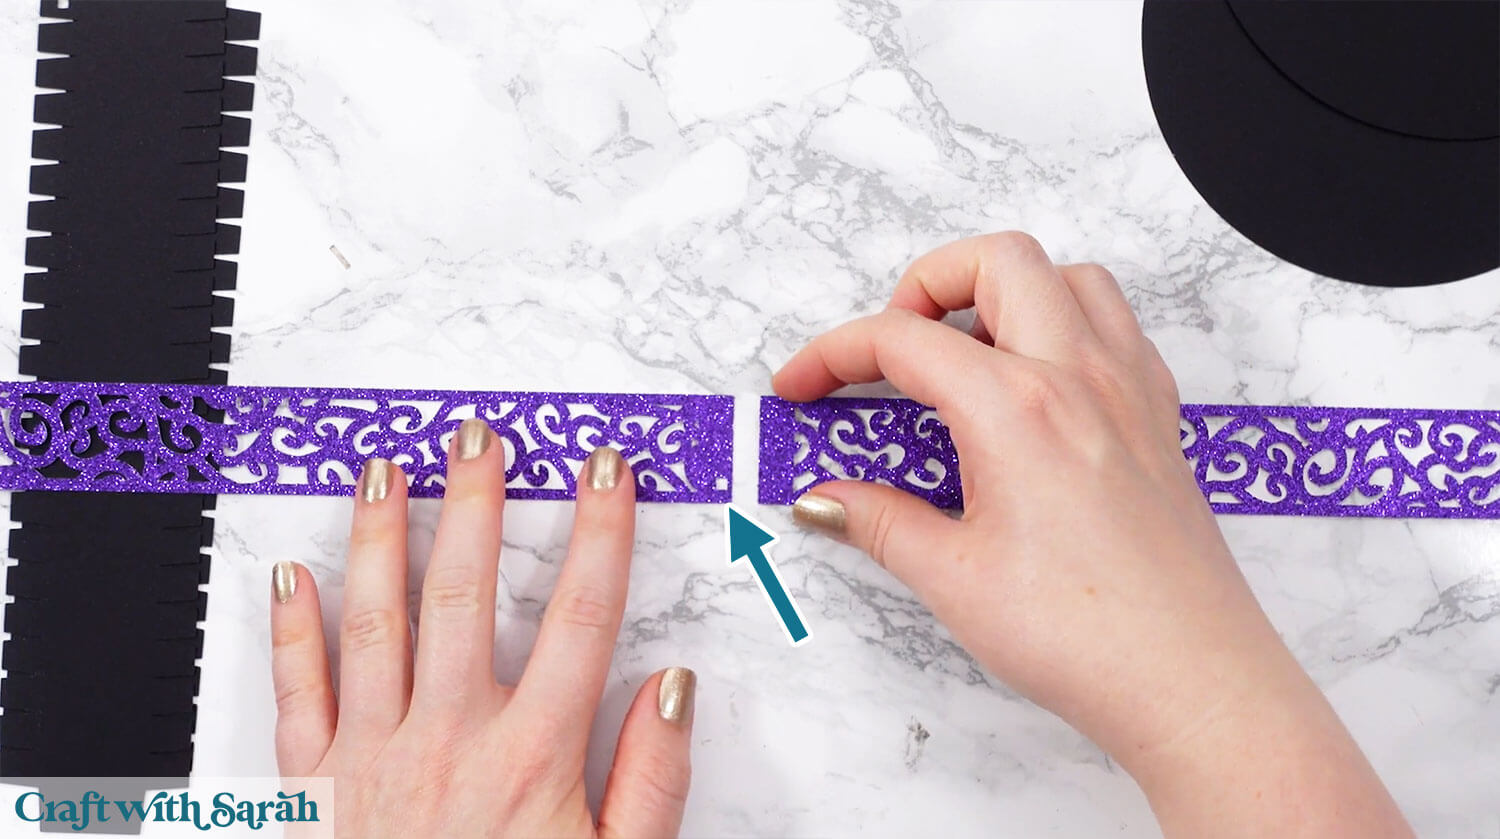
That means you can glue the left-hand side of the piece in your RIGHT hand on top of the end in your LEFT hand, to cover up the square.
Glue can take a long time to dry on glitter cardstock. I added a paperclip to hold the pieces in place until the glue was dry.
Glue the two black sides together.
I’ve marked the edges of the side on the right of my picture with red lines to show where to position the tab, as it’s hard to see two black pieces on top of each other in the photo!
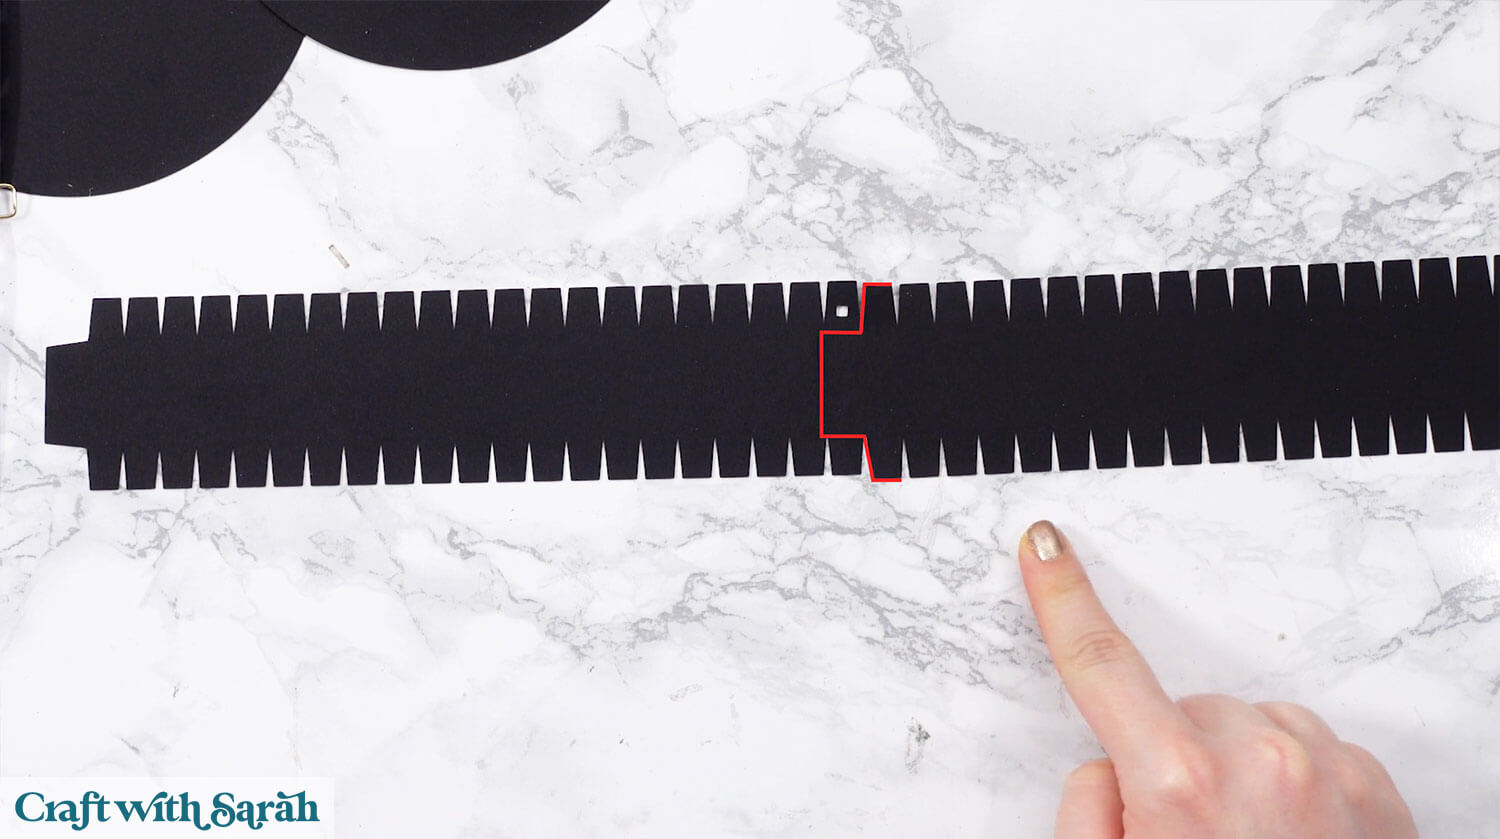
Fold all the “crocodile teeth” tabs upwards.
Carefully roll the strip into a circle shape and glue into place.
Make it as close to a perfect circle as you can.
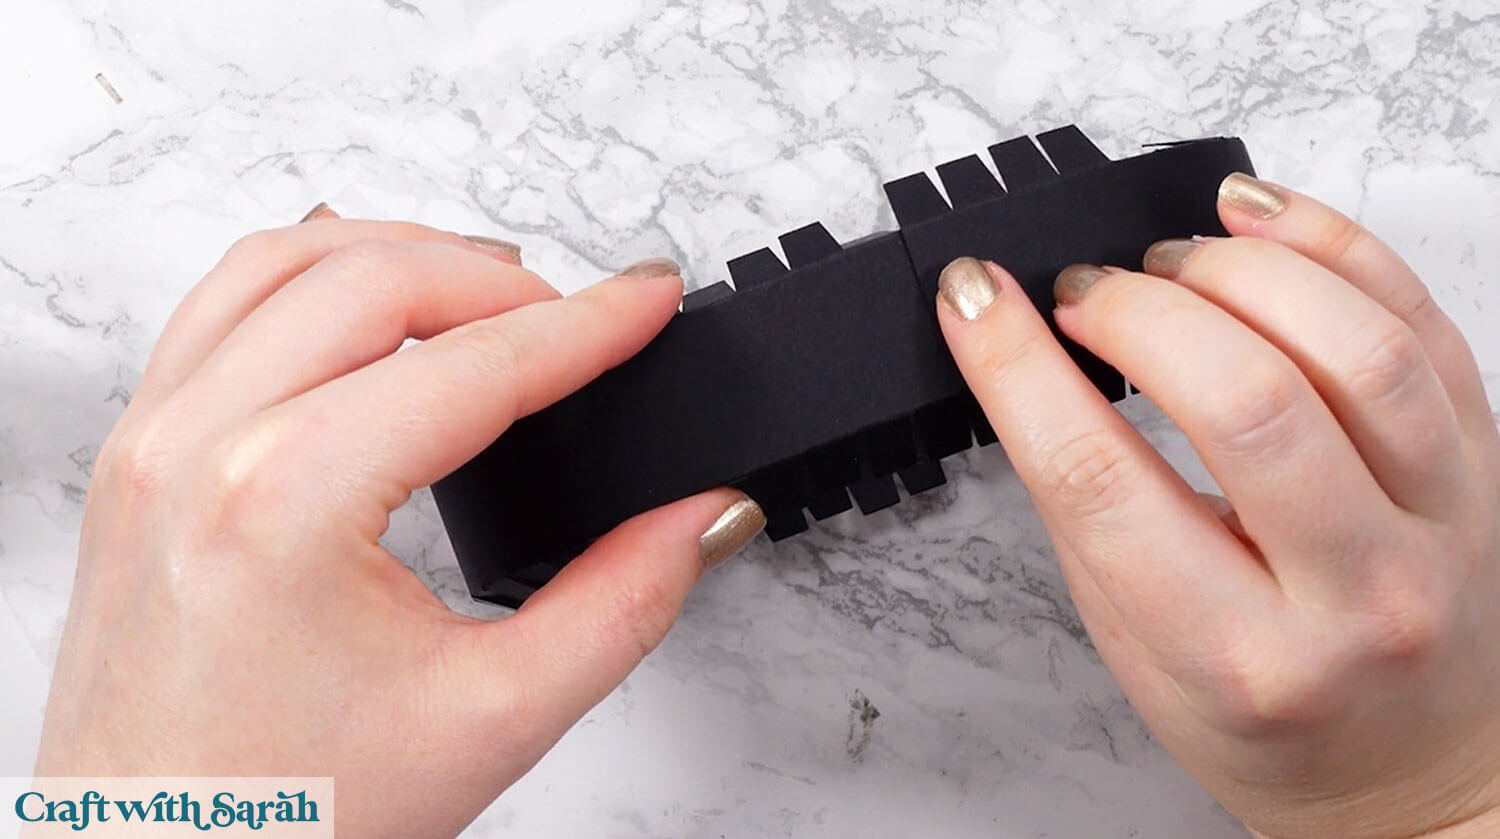
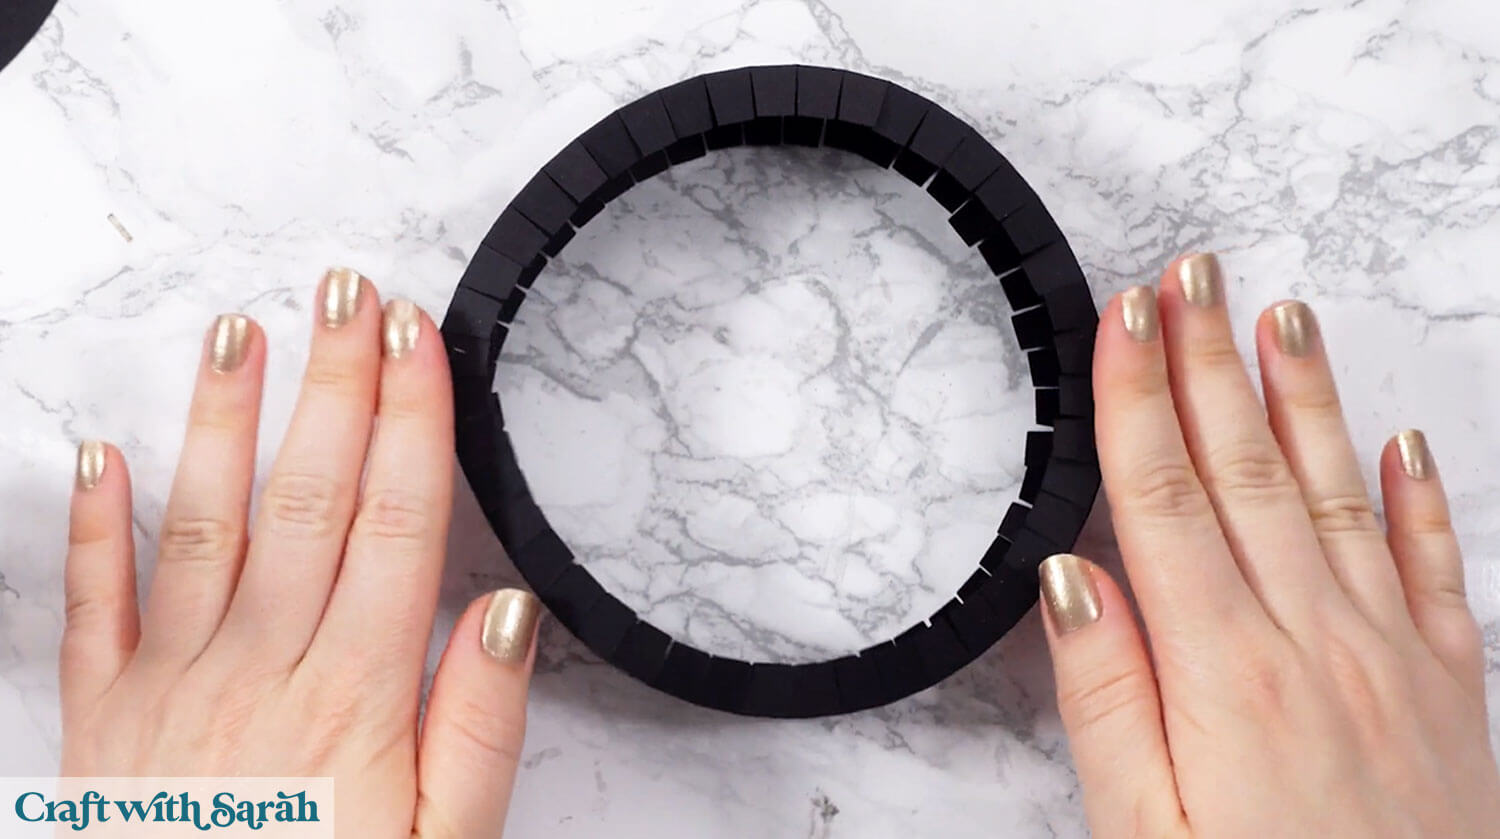
Add glue to the edges of one of the solid circles.
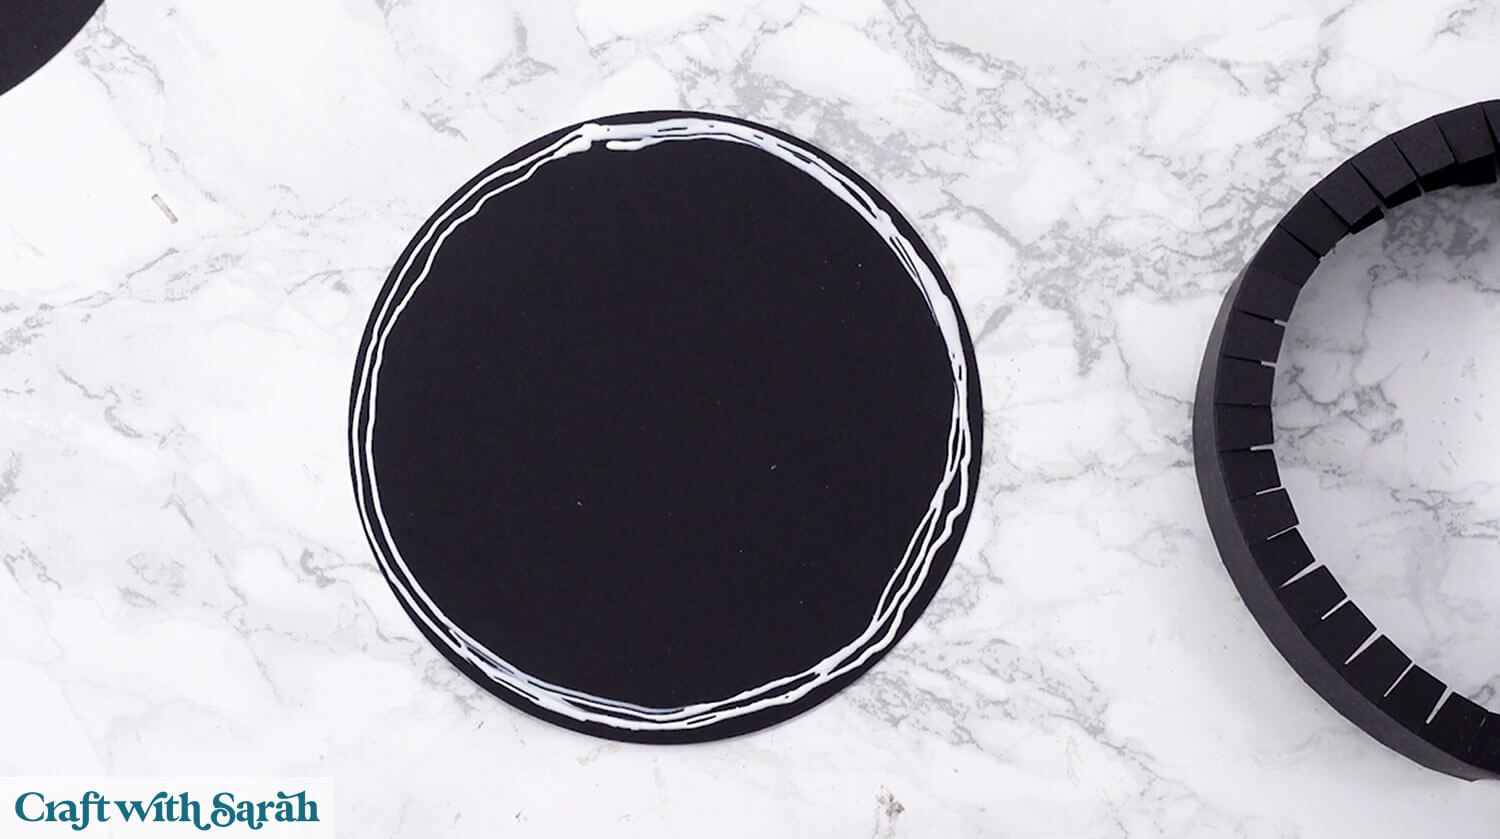
Glue the side piece on top, making sure you push all the tabs down into the glue so it’s very secure.
You may need to squish the edges of the sides a little to make them perfectly fit the circle base.
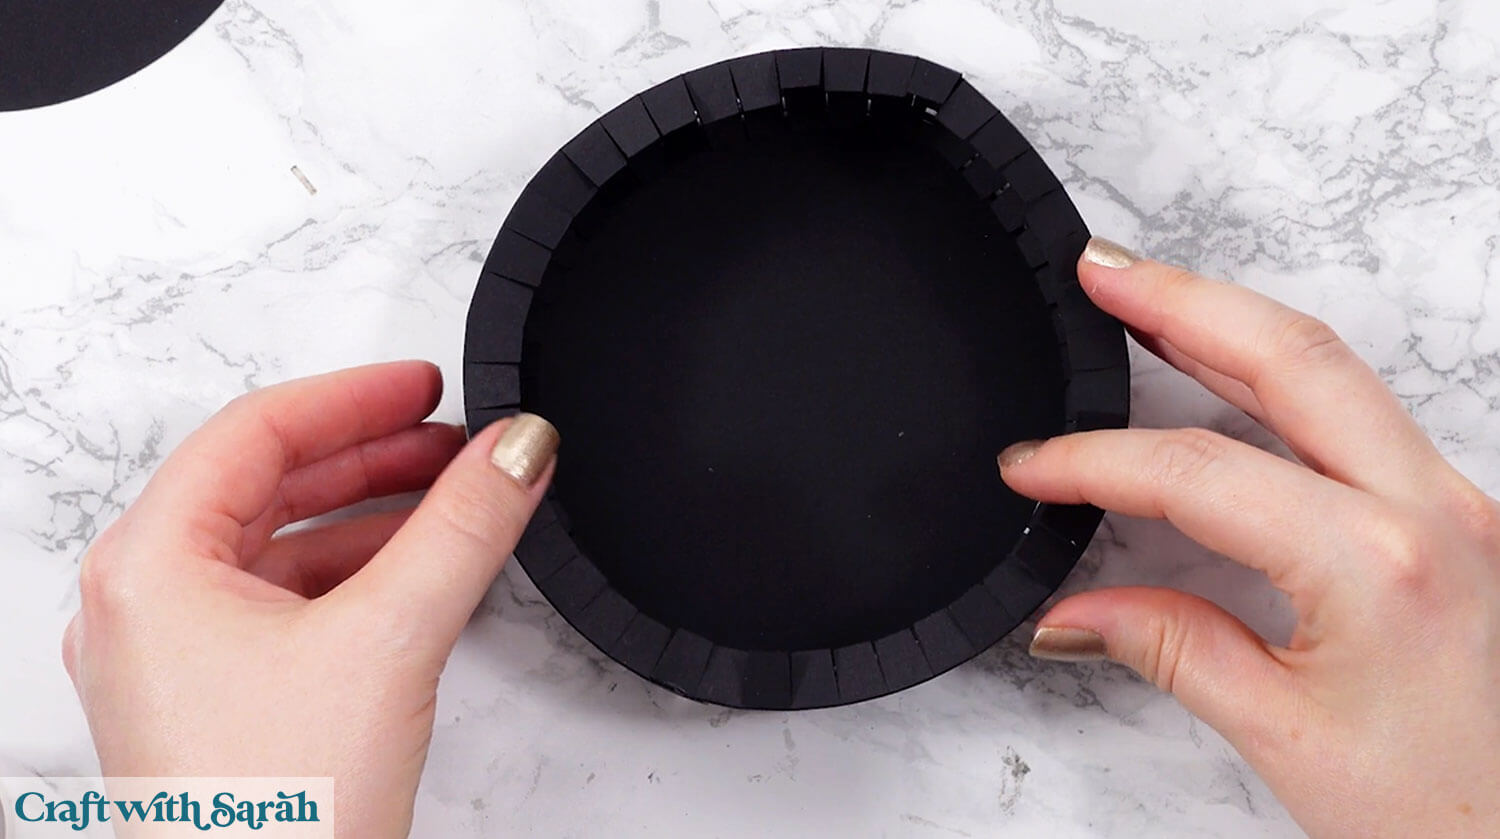
Add glue to the top of the crocodile teeth, then stick the second circle on top.
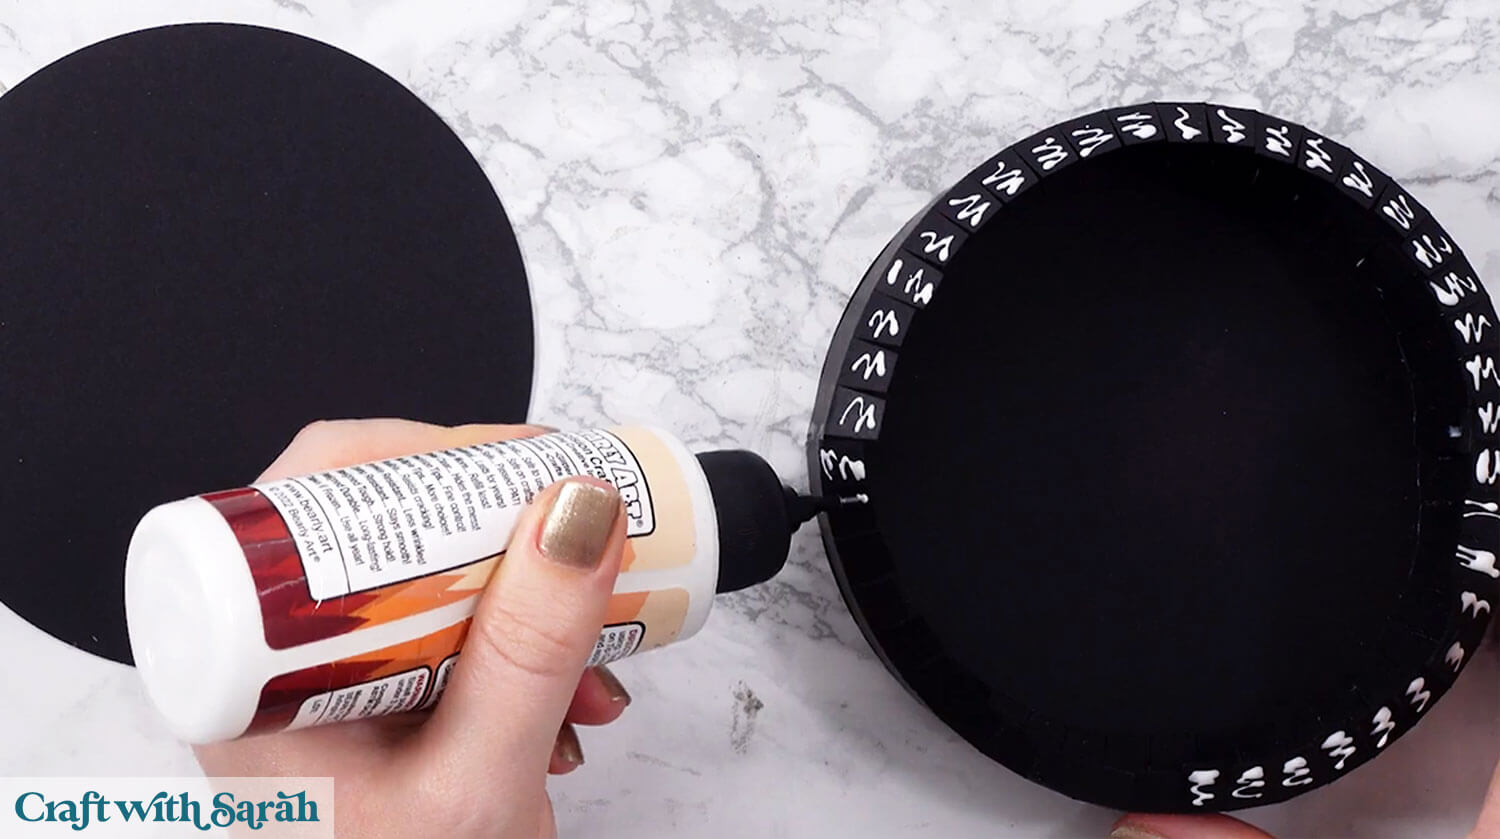
Glue the decorative circle on top of one of the black circles.
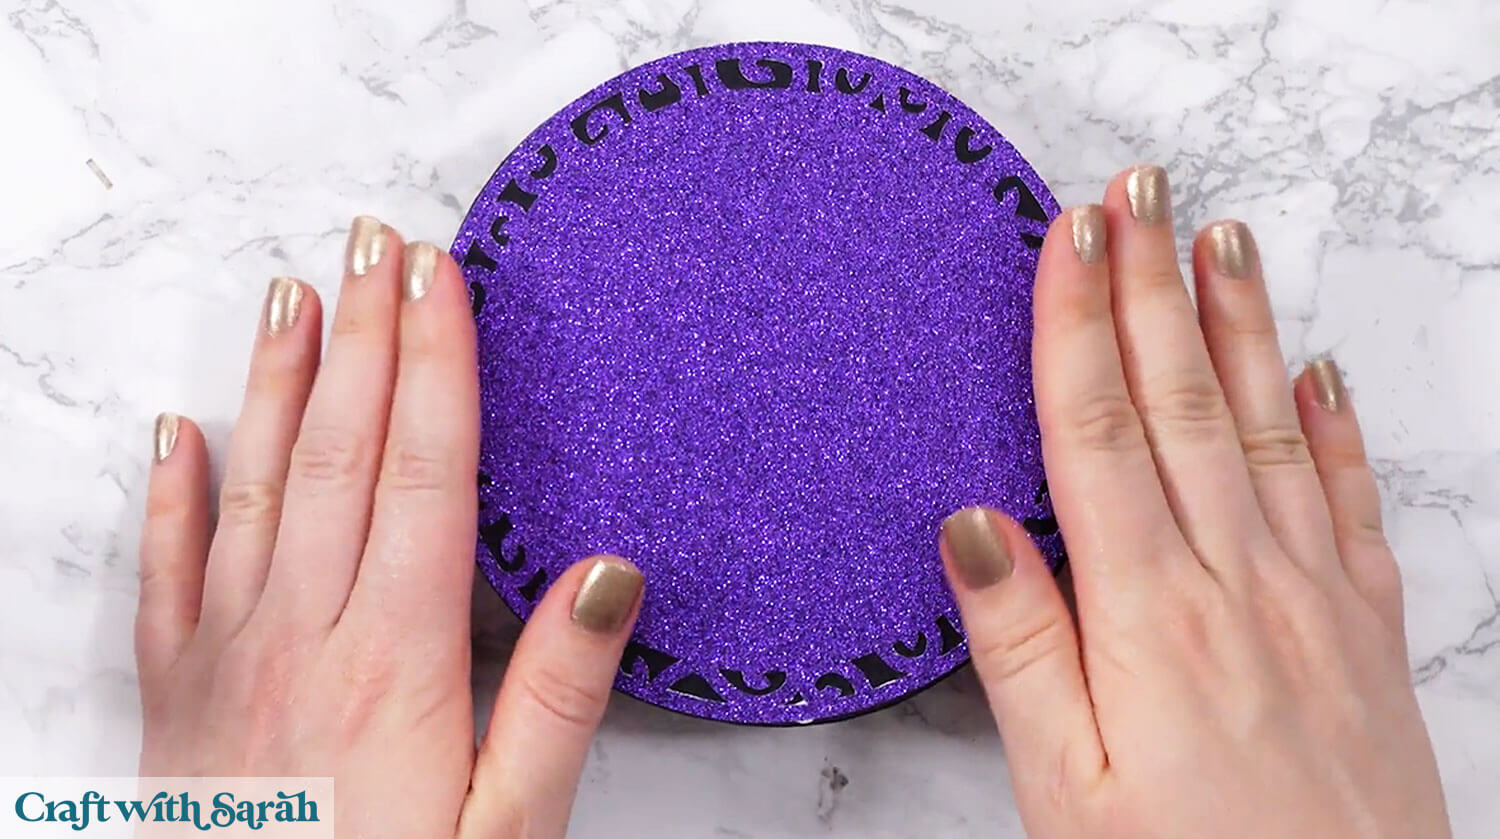
Glue the decorative sides around the edge.
When it comes to joining the two sides, make sure you cover up the small square/circle cutouts on the largest/smallest towers.
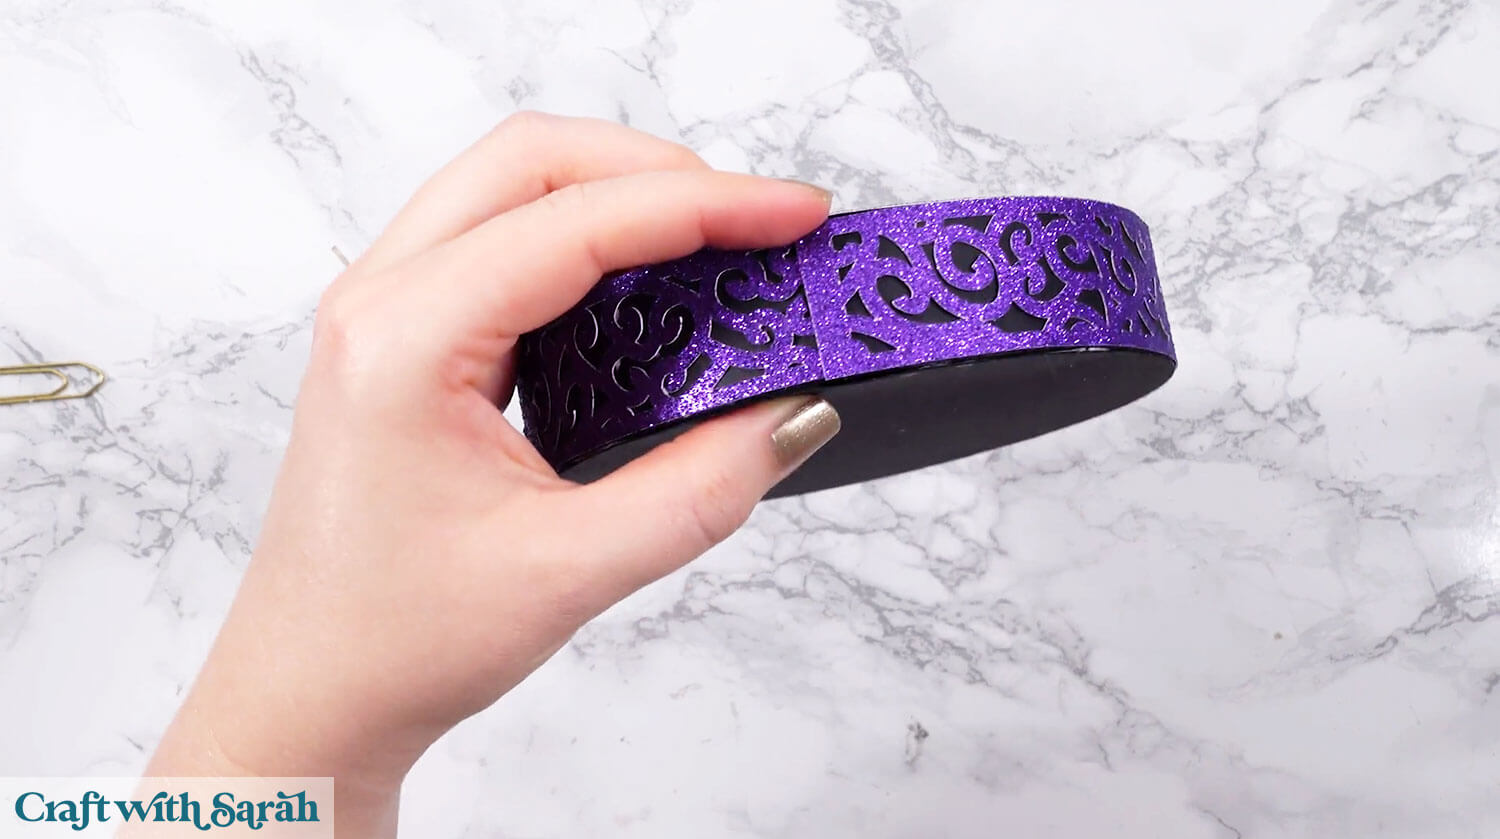
Repeat these steps for the other two tower segments.
The smallest piece has a hole in the top. This is where the Christmas bauble will sit.
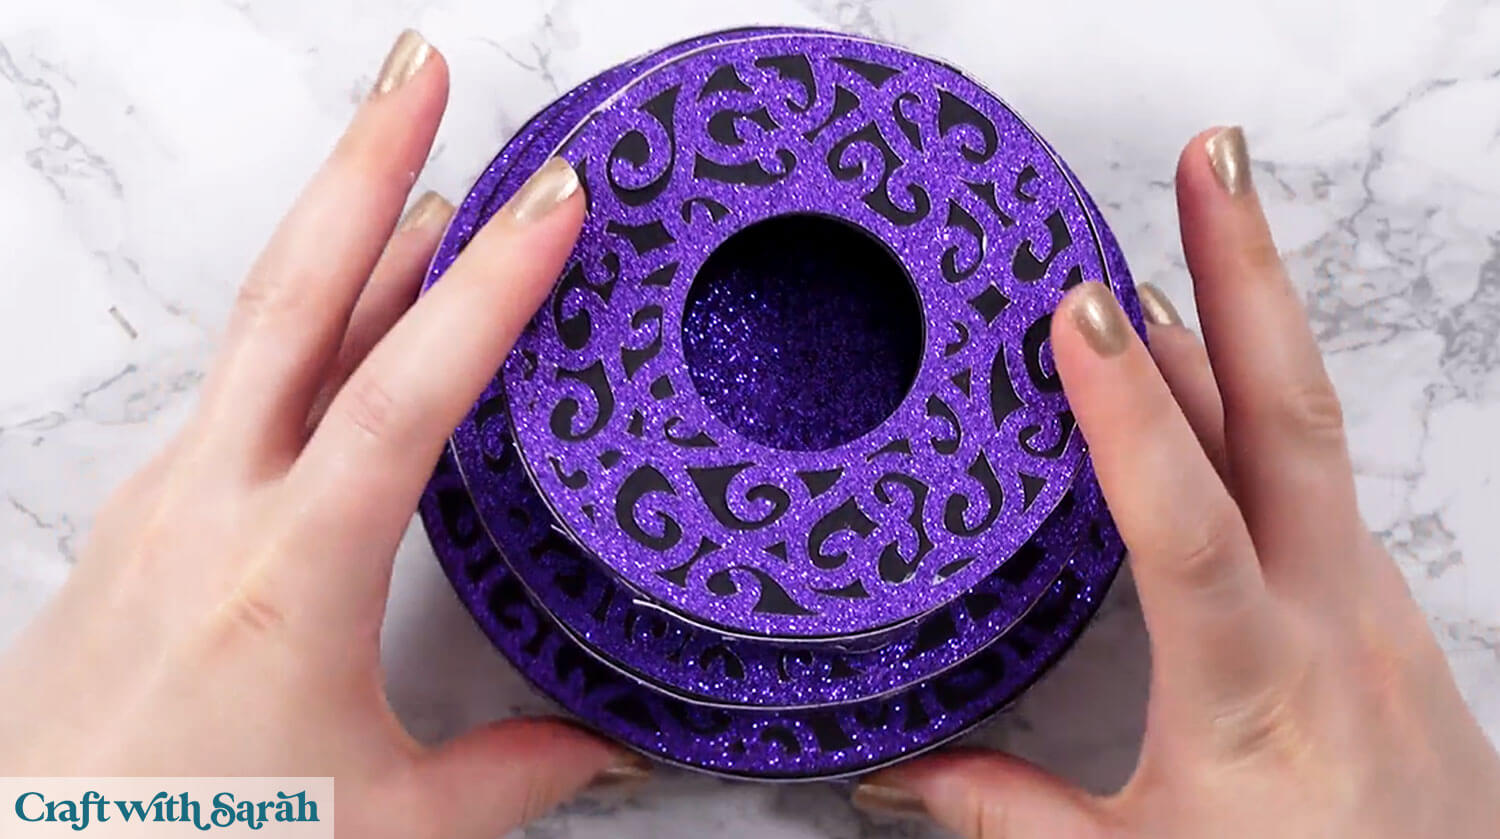
Glue each tower together to hold them in place.
If you’d rather make this easier to take apart after Halloween, you could use velcro or similar instead to make them temporarily attached.
Or, don’t attach them at all – just place them one on top of each other.
Step 5) Fill the crystal ball
To create a smokey effect, take some soft toy filling or cotton wool and use your fingers to gently tease it out so the material gets thin.
Gently place inside the bauble, being careful not to put it together again. You want it to look very fine and delicate, otherwise the light won’t be able to pass through it.
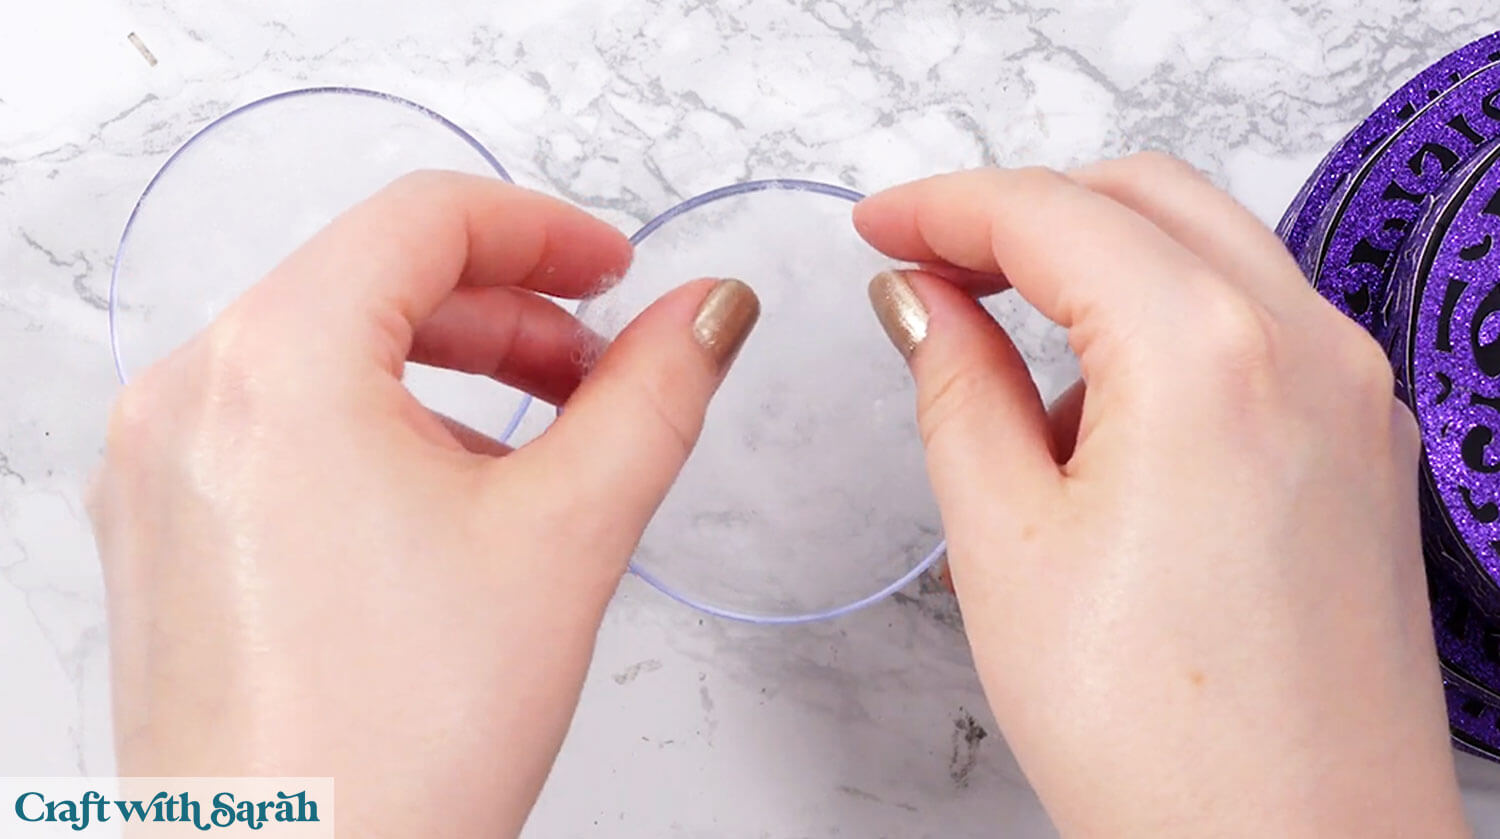
Turn the LED light on and place it inside the tower.
Gently press the sides of the bauble together, but don’t completely close it yet.
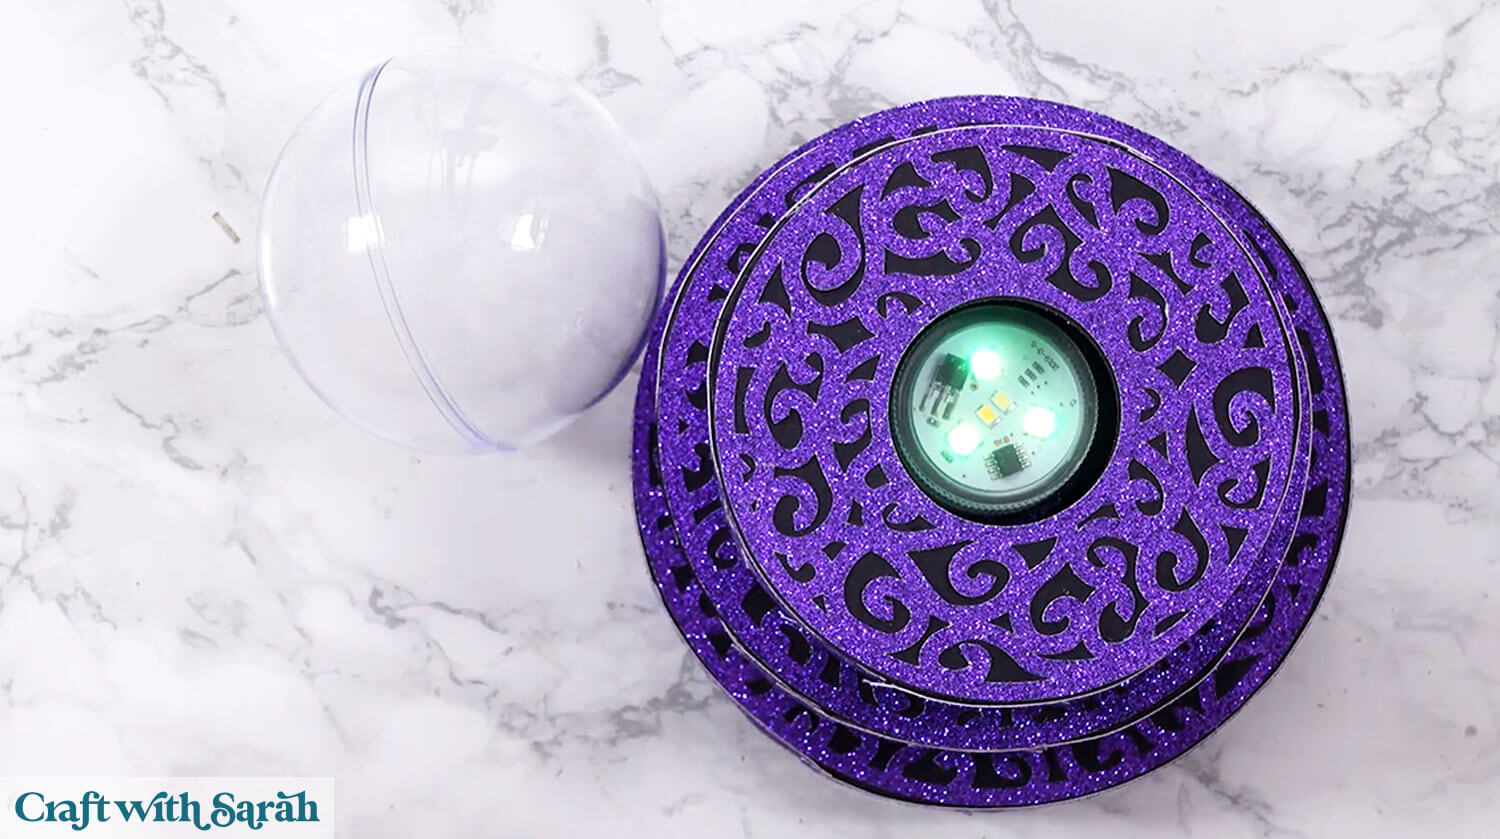
Place the bauble with the hanging part going down inside the hole in the tower.
See how the light is moving through the “smoke”. If it’s looking too dense, take the bauble apart, remove some of the filling and try again.
For instance, my filling was too thick on my first try, so the light couldn’t reach the top.
Or, skip the smoke and light, and fill the bauble with Halloween sweets instead!
Chocolate eyeballs, anyone? 😀
Magic Crystal Ball that GLOWS!
Your witch’s crystal ball tower is now all finished.
Whether you’ve filled it with “smoke” to watch it glow, or added a bunch of delicious Halloween treats, I hope that you have fun making this 3D Cricut papercraft.
This DIY crystal ball project is more than just a decoration — it’s a chance to add depth and creativity to your Halloween setup with a craft that feels a little more unexpected.
With the layered structure, glowing light, and customisable filling, it brings together both form and function in a way that fits right into your witch crystal ball collection or magical decor lineup.
Happy crafting,
Sarah x

