3D Candelabra Centerpiece 👻 HCC 2025
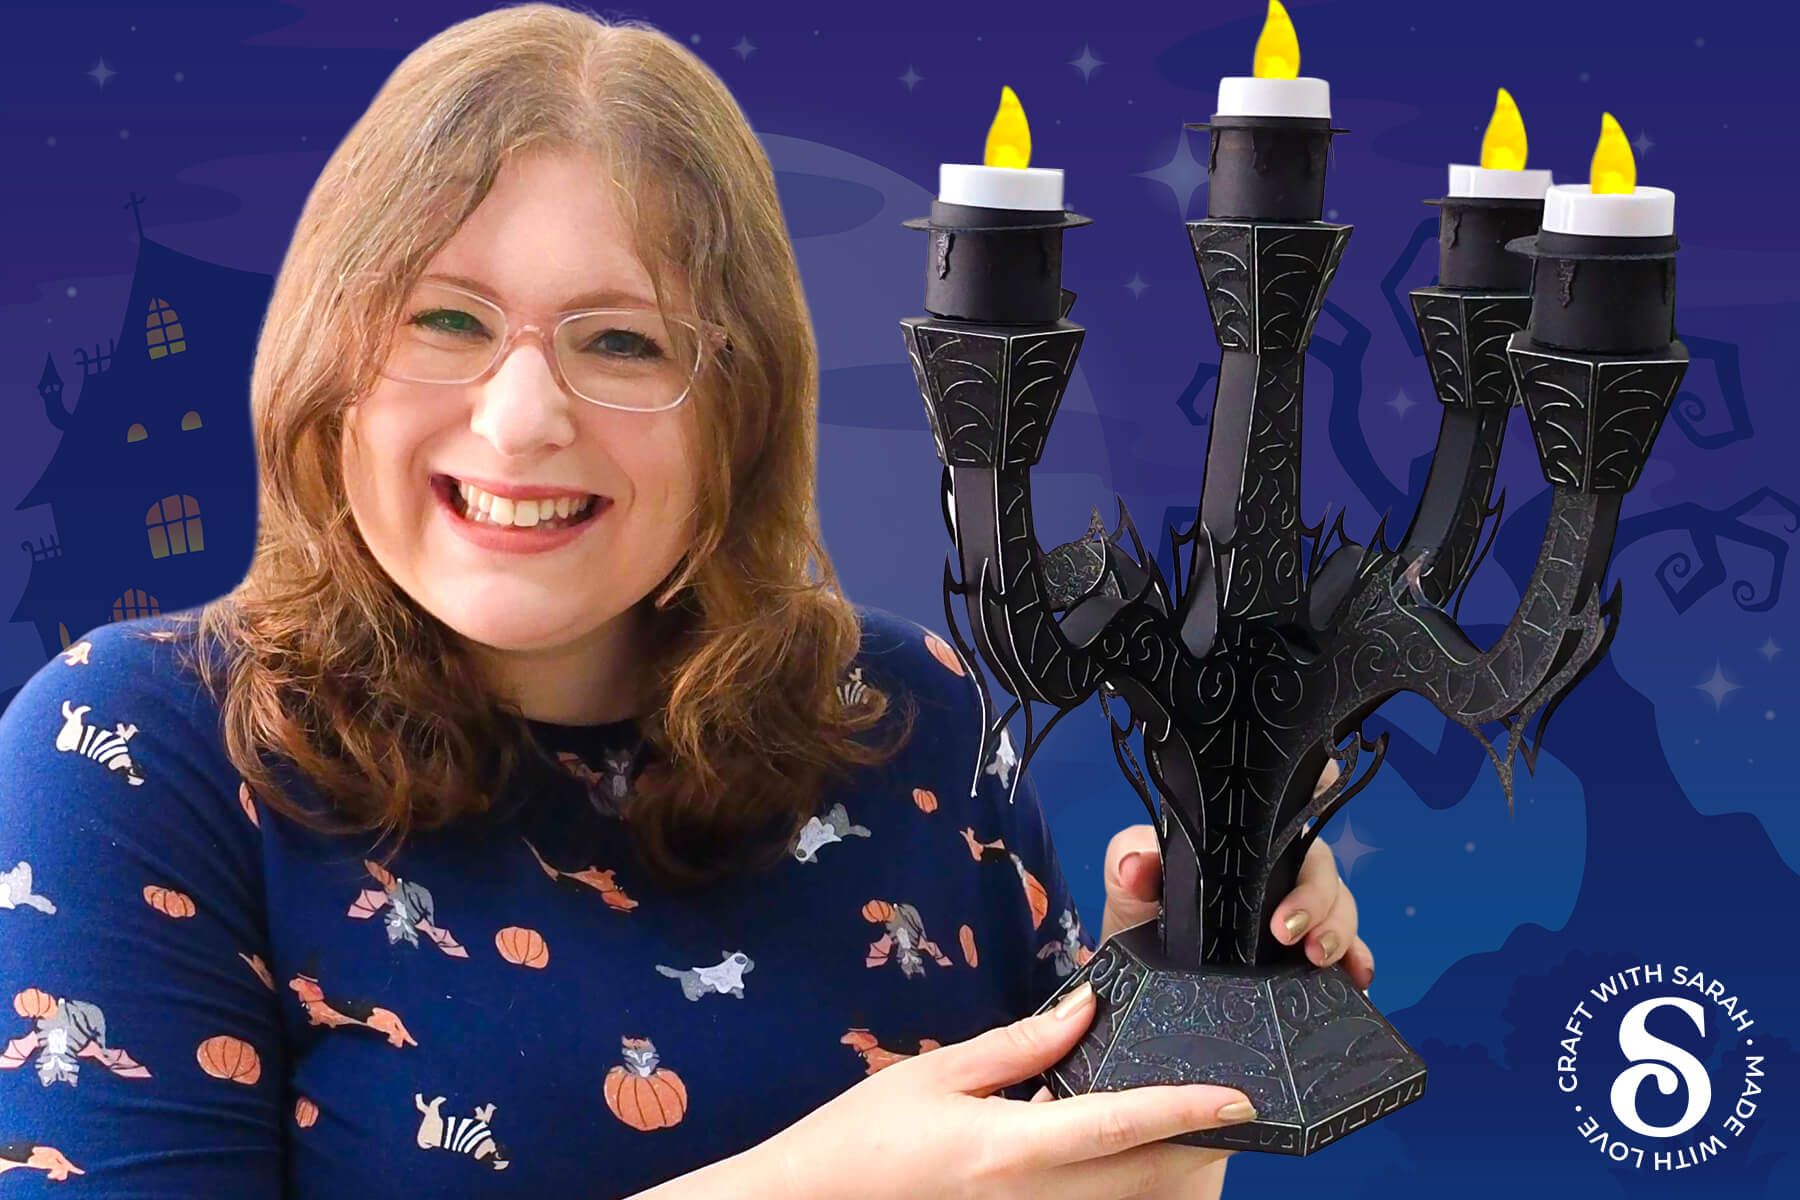
Make an impressive 3D candelabra centrepiece that’s perfect for Halloween decorations.
Every Craft Countdown needs one project that makes people stop and say, “Wow” — and this is it.
This candelabra craft is big, dramatic, and the kind of Cricut project that turns cardstock into something truly spectacular.
Designed to stand tall as a centerpiece or statement piece, it brings a bold gothic aesthetic to your Halloween decor.
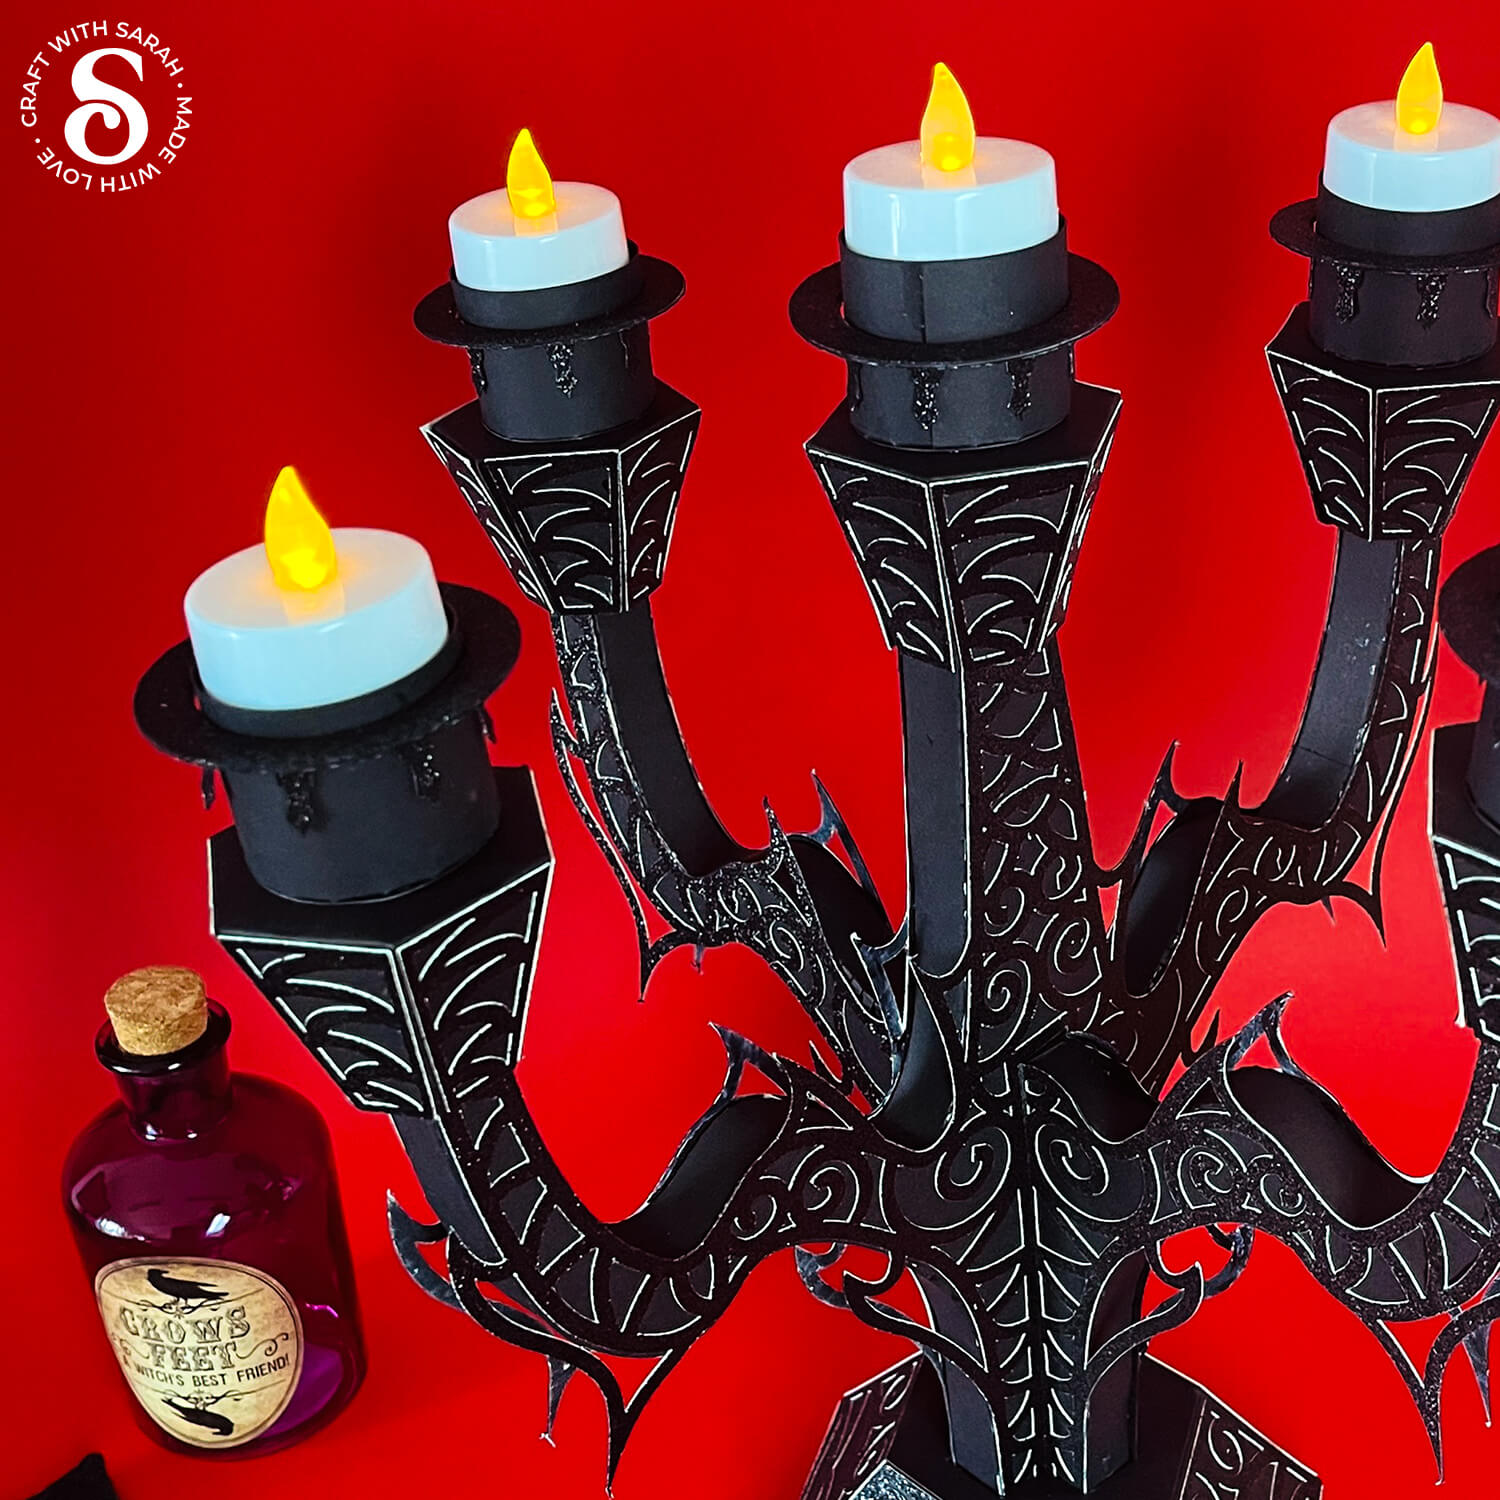
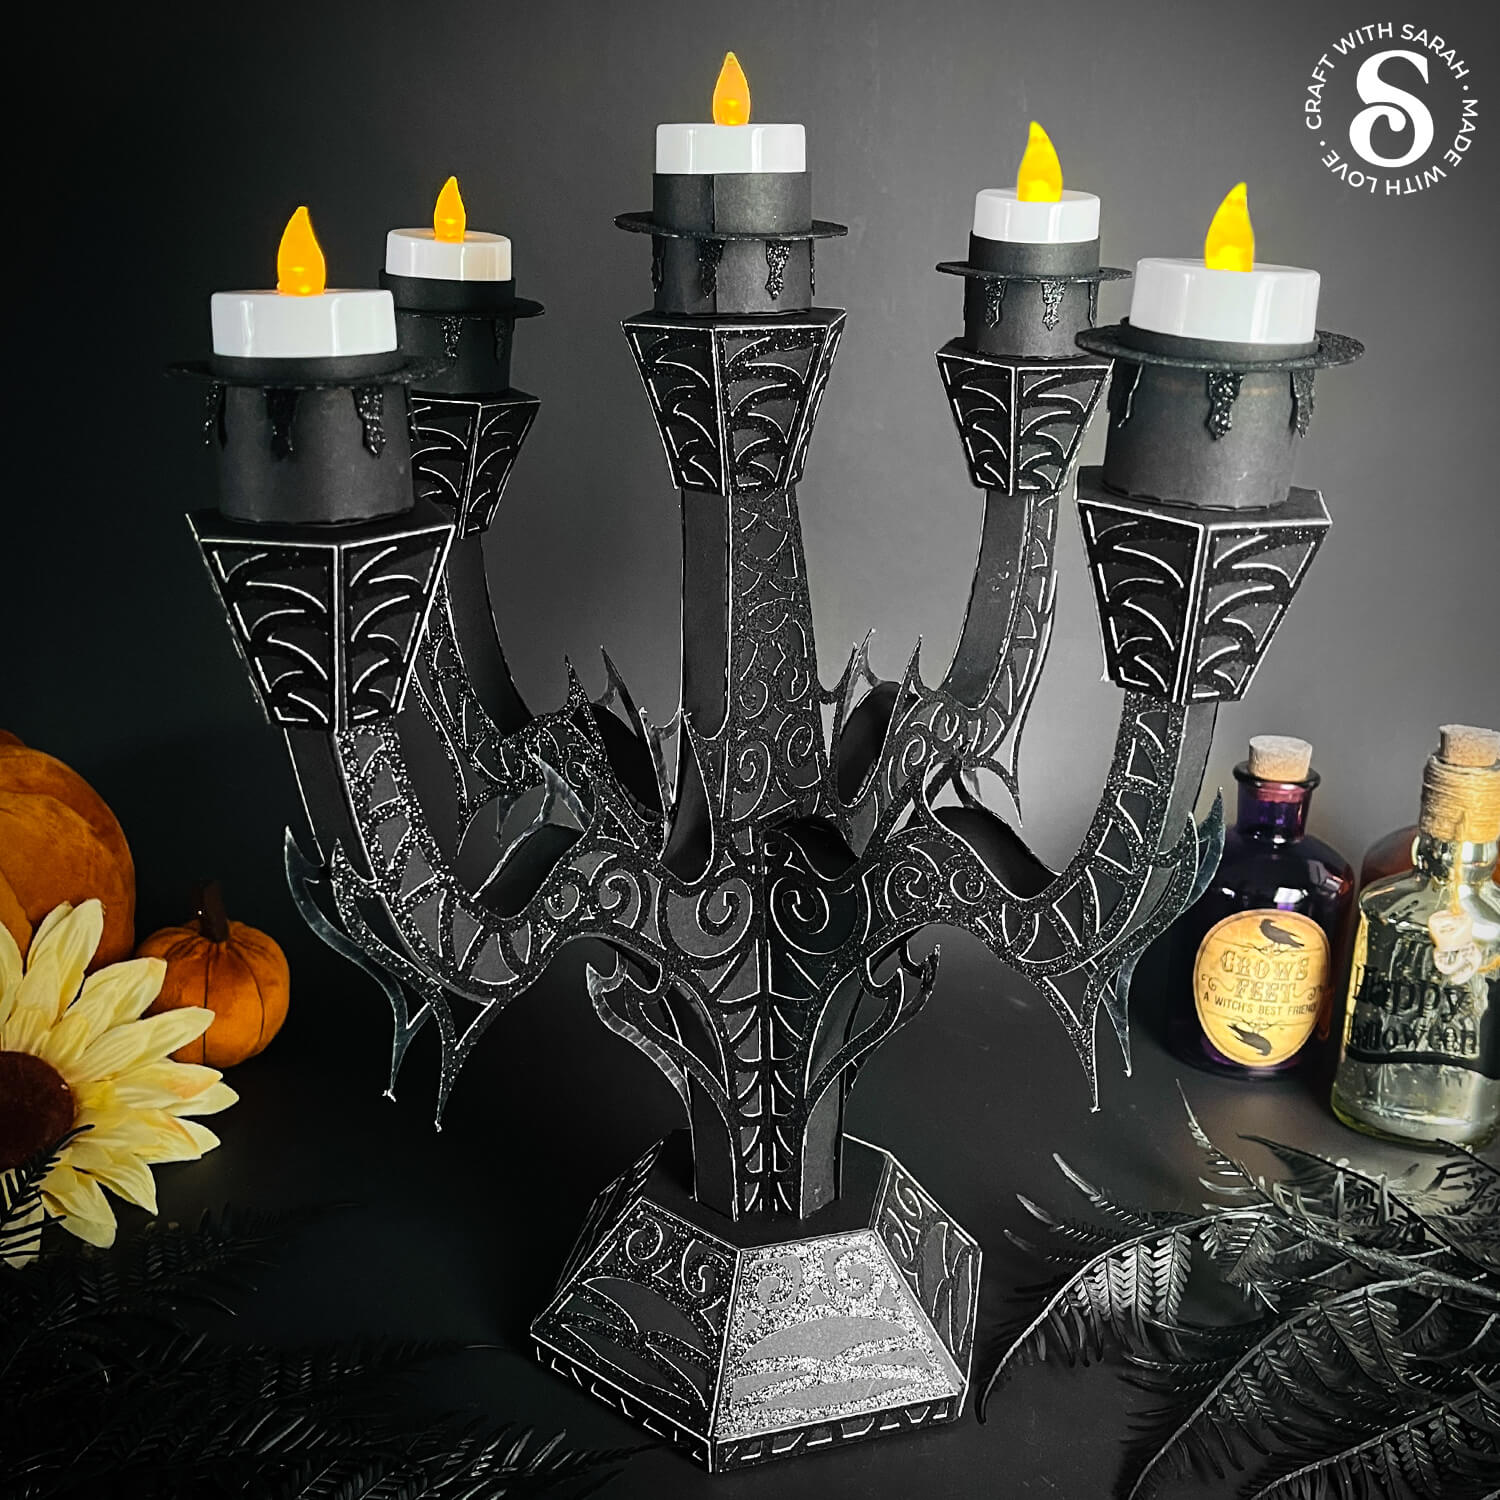
This 3D candelabra SVG creates an ornate structure, all cut from cardstock. It’s topped with battery-powered tealights to give it a soft flickering glow, and glitter cardstock adds just the right amount of sparkle when the lights hit it.
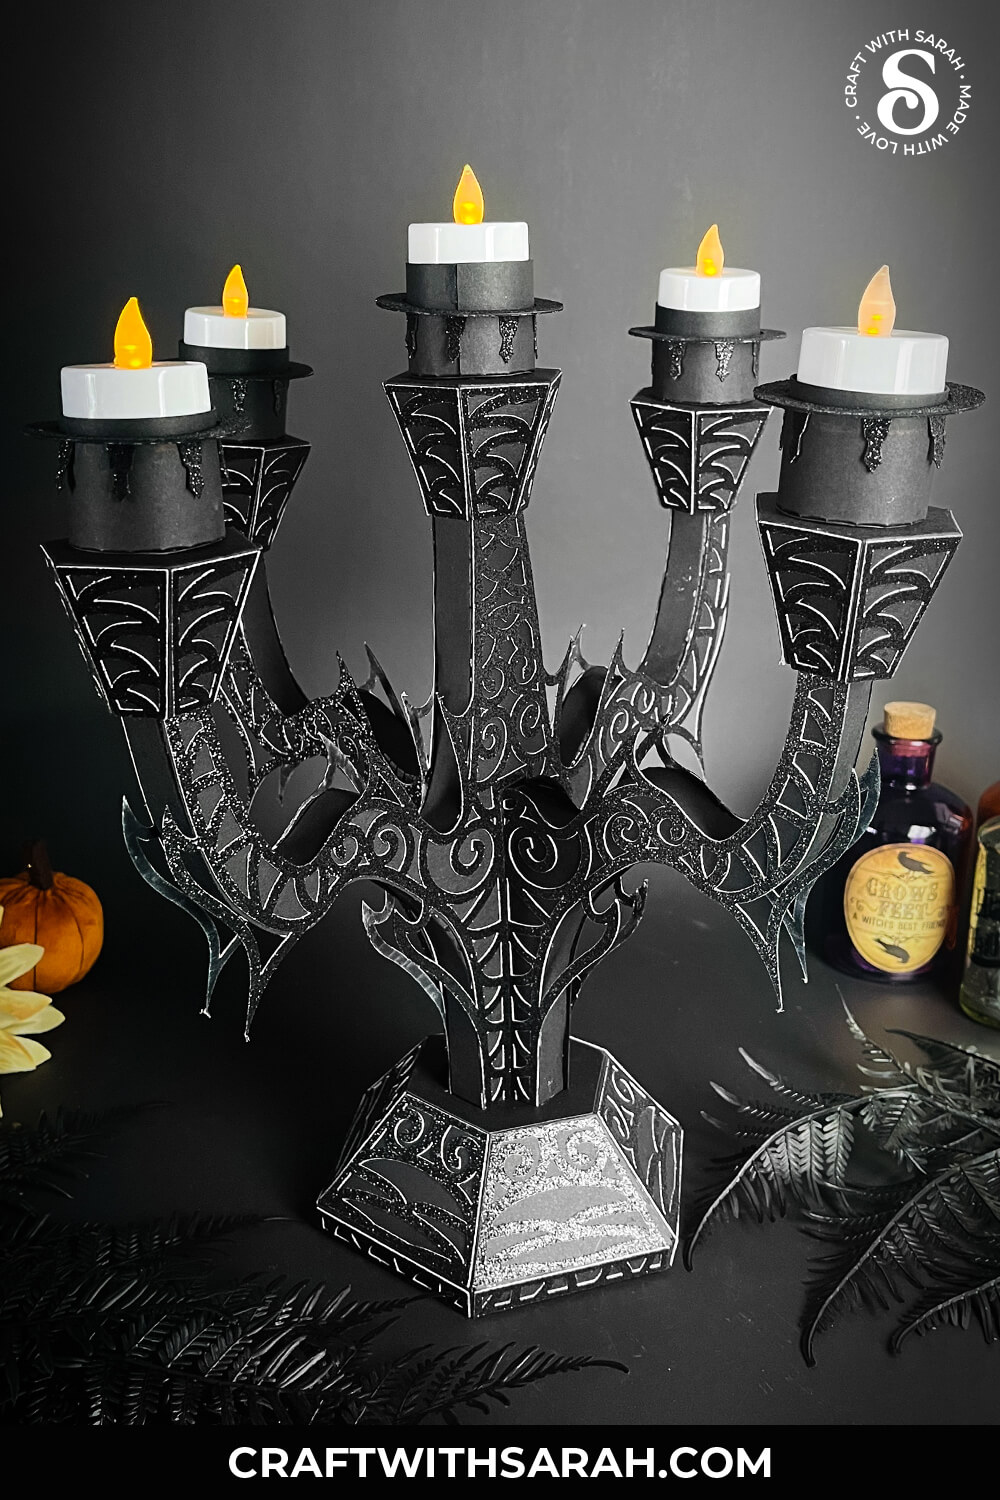
With a sturdy, well-balanced base and decorative sides from every angle, it’s a project that’s even more impressive in person as it looks in photos.
If you enjoy Cricut projects that push beyond flat designs and into dimensional builds, this is a satisfying project that gives you the space to experiment with texture and shape.
It’s also practical — the whole piece can be disassembled for flat storage, so you can bring it out again year after year without taking up space.
This DIY candelabra centerpiece is ideal for Halloween parties, entryway displays, or as part of your DIY gothic decor.
Please note that the design uses 12×12 inch cardstock, so it’s only suitable for cutting with Cricut machines in the Explore and Maker series.
This project was part of the 2025 Halloween Craft Countdown.
3D Candelabra Supply List
Here is a list of the materials that are needed to make this project.
The project requires a scoring tool. Click here for scoring alternatives for if you do not have one.
Please note that some of the links included in this article are affiliate links, which means that if you click through and make a purchase I may receive a commission (at no additional cost to you). You can read my full disclosure at the bottom of the page.
- Cricut machine
- Light blue Cricut cutting mat
- 12×12 inch black cardstock
- 12×12 inch black glitter cardstock (or another colour)
- Glue (I like Bearly Art Glue and Collall)
- Double sided tape
- Cricut scoring wheel or scoring stylus
- 5 battery powered tea lights
- Paperclips, painter’s tape or low-tack masking tape to hold pieces in place while the glue dries (optional)
This project is suitable for the following types of Cricut machines: Explore series and Maker series. It is too large to cut with the Joy Xtra or Joy and cannot be resized smaller because then the candles would not fit.
Foundation learning
If you're new to making papercrafts with your cutting machine, check out these links to get you started.
They include videos on topics such as: which file to use with your type of cutting machine, how to load the files into your cutting machine's software, how to cut cardstock with your type of cutting machine, how to recolor and modify/customize the cut files and tips for displaying your projects.
- Help guides for Cricut machines
- Help guides for Silhouette machines
- Help guides for ScanNCut machines
The following tutorials are Cricut-specific, but many of the ideas will work similarly with a Silhouette or ScanNCut machine and any cut files that are shared in them are compatible with all types of cutting machine.
- How to score with a Cricut (even without scoring tools)
- Print then cut tutorial
- Design Space tools (Combine, Attach, Slice, Weld, Flatten, etc.)
- Pattern fill tutorial (for making backgrounds & cutting images to a specific shape/size)
- Free envelope SVGs that can be sized to fit any card
- Presentation boxes for handmade cards
- How to write inside cards with Cricut pens
- How to cut layered designs at a small size
- Design Space tips & tricks
- Cricut pens tutorial
- How to mount multiple designs in the same frame with magic guides
DIY Gothic Decor Candelabra Video
Watch the video below to see how to make this project. Keep scrolling for a written tutorial.
A big Design Space update is currently rolling out that changes how the screen looks, including the position of some of the buttons and tools. I had already recorded all the Countdown videos before the update was released, so unfortunately there will be areas of the videos that look different to your screen.
To help with this, I've recorded a walkthrough video that explains all of the Design Space changes so that you can see how to do everything in the new version.
3D Cricut Project: Make a Halloween Candelabra
Here’s how to make this showstopper 3D candelabra project using a Cricut machine.
Step 1) Download the cutting files & upload to Design Space
Get the files using the box below.
Purchase the File(s)
This cut file is available as part of the Instant Access Bundle.
Or, purchase this design individually here
Before you upload the SVGs to Design Space, you need to unzip the download folder that they come in.
- How to unzip a folder on Windows computer
- How to unzip a folder on a Mac
- How to unzip a folder on an iPad/iPhone
- How to unzip a folder on an Android device
After unzipping, upload the SVG file(s) into your cutting machine software.
Not sure how to use cut files with your type of machine? The following links lead to videos on how to open cut files in:
- Cricut Design Space
- Silhouette Studio
- CanvasWorkspace (for ScanNCut machines)
The download folder also contains printable PDF versions of the templates for hand cutting.
If you are using Cricut Design Space, start a new project and then click the “Upload” button on the left of the screen.
You can then either click “Browse” to find the file on your computer, or drag-and-drop it in.
Navigate to the “Cutting Machine Versions” subfolder and then select the file called svg-3d-candelabra-craftwithsarah.svg
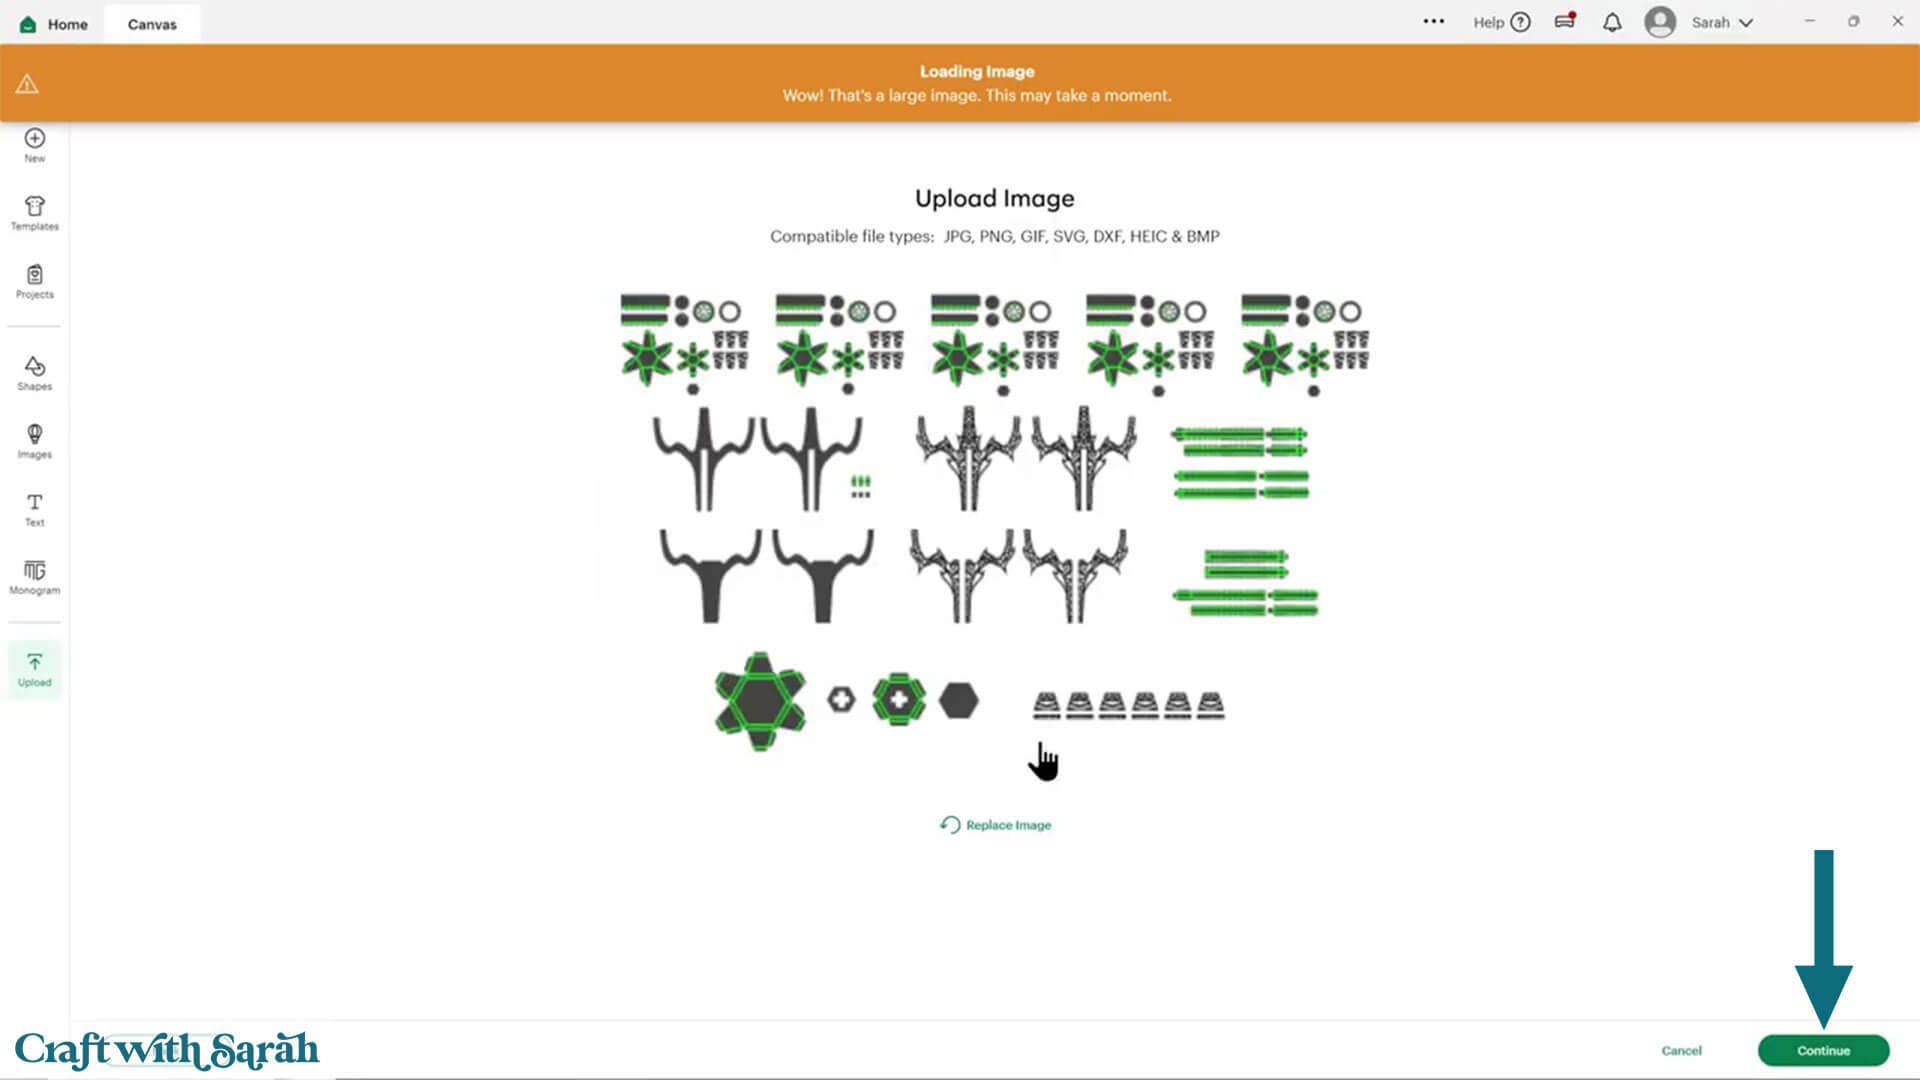
Don’t worry if the image preview appears blurry – it will show in full quality once it’s inserted onto your project.
Press “Upload” on the next screen.
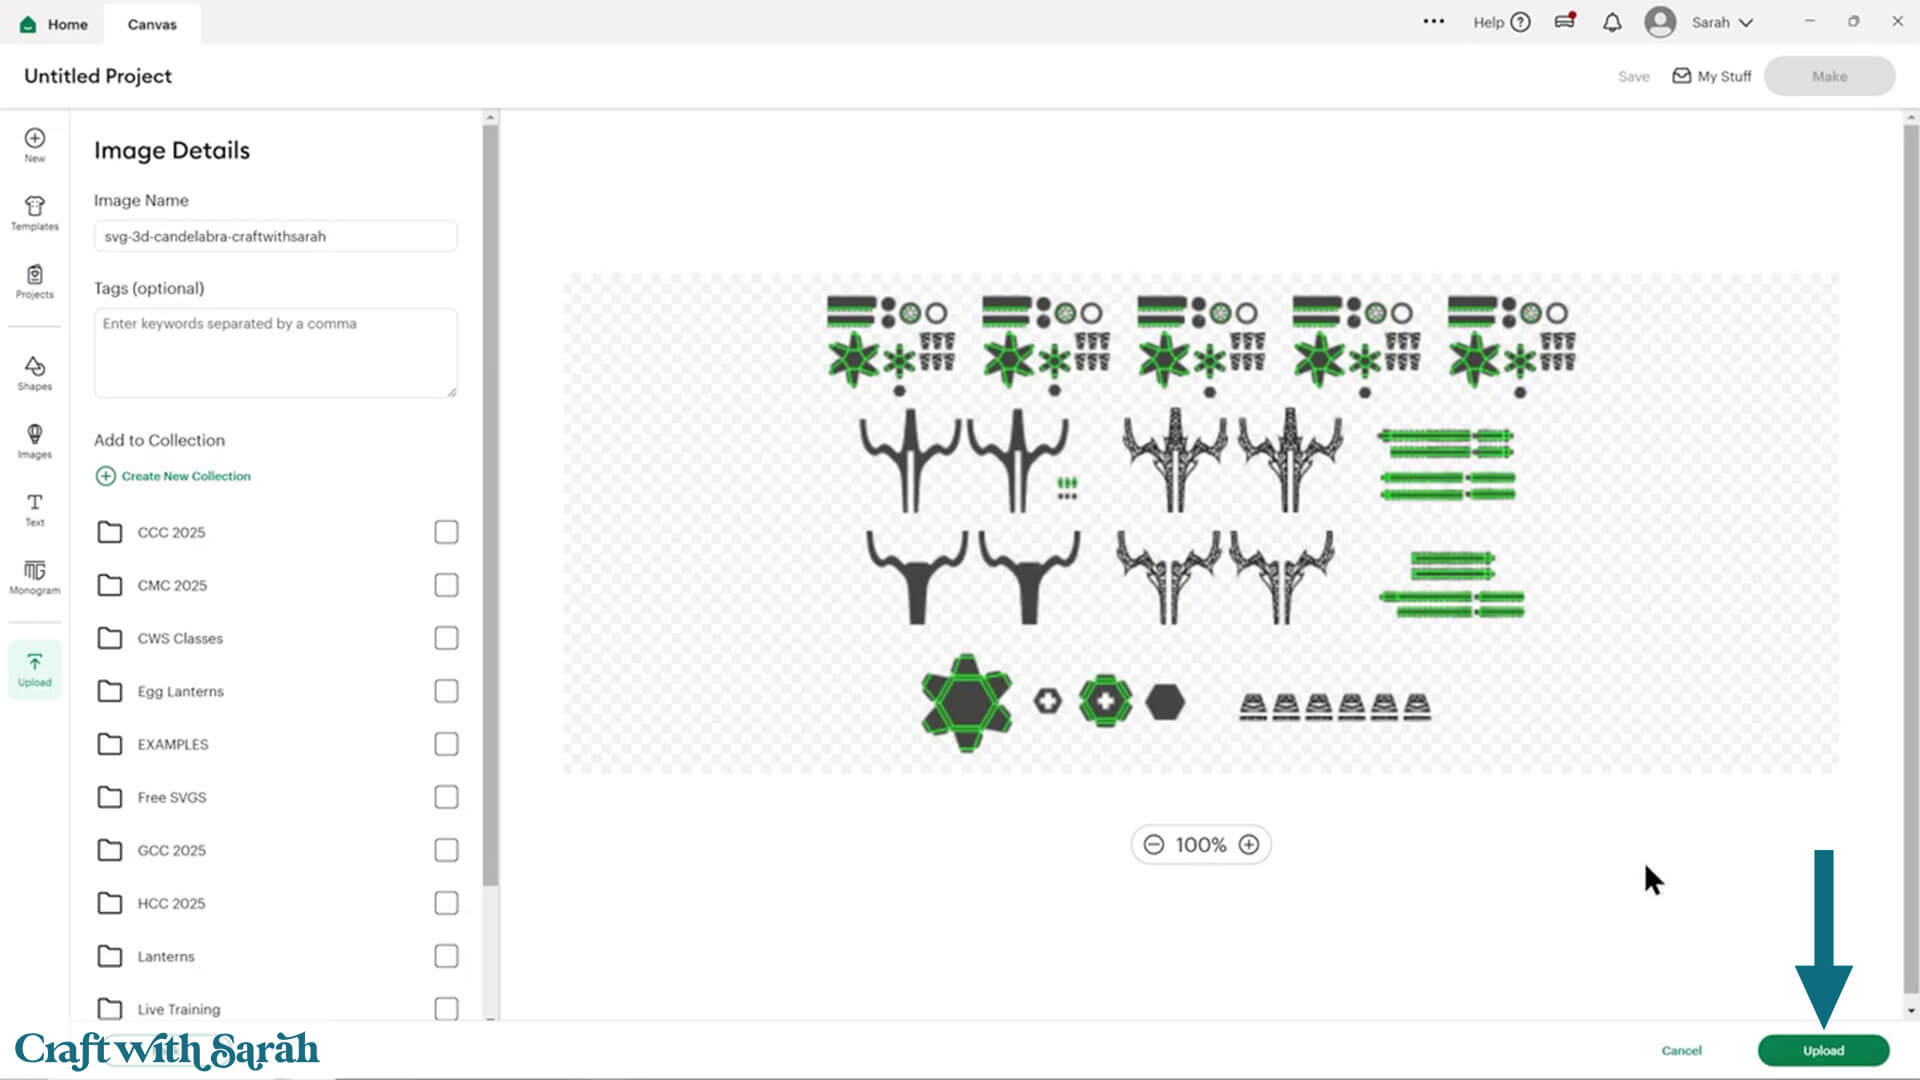
After uploading, the design should be automatically inserted onto your Canvas.
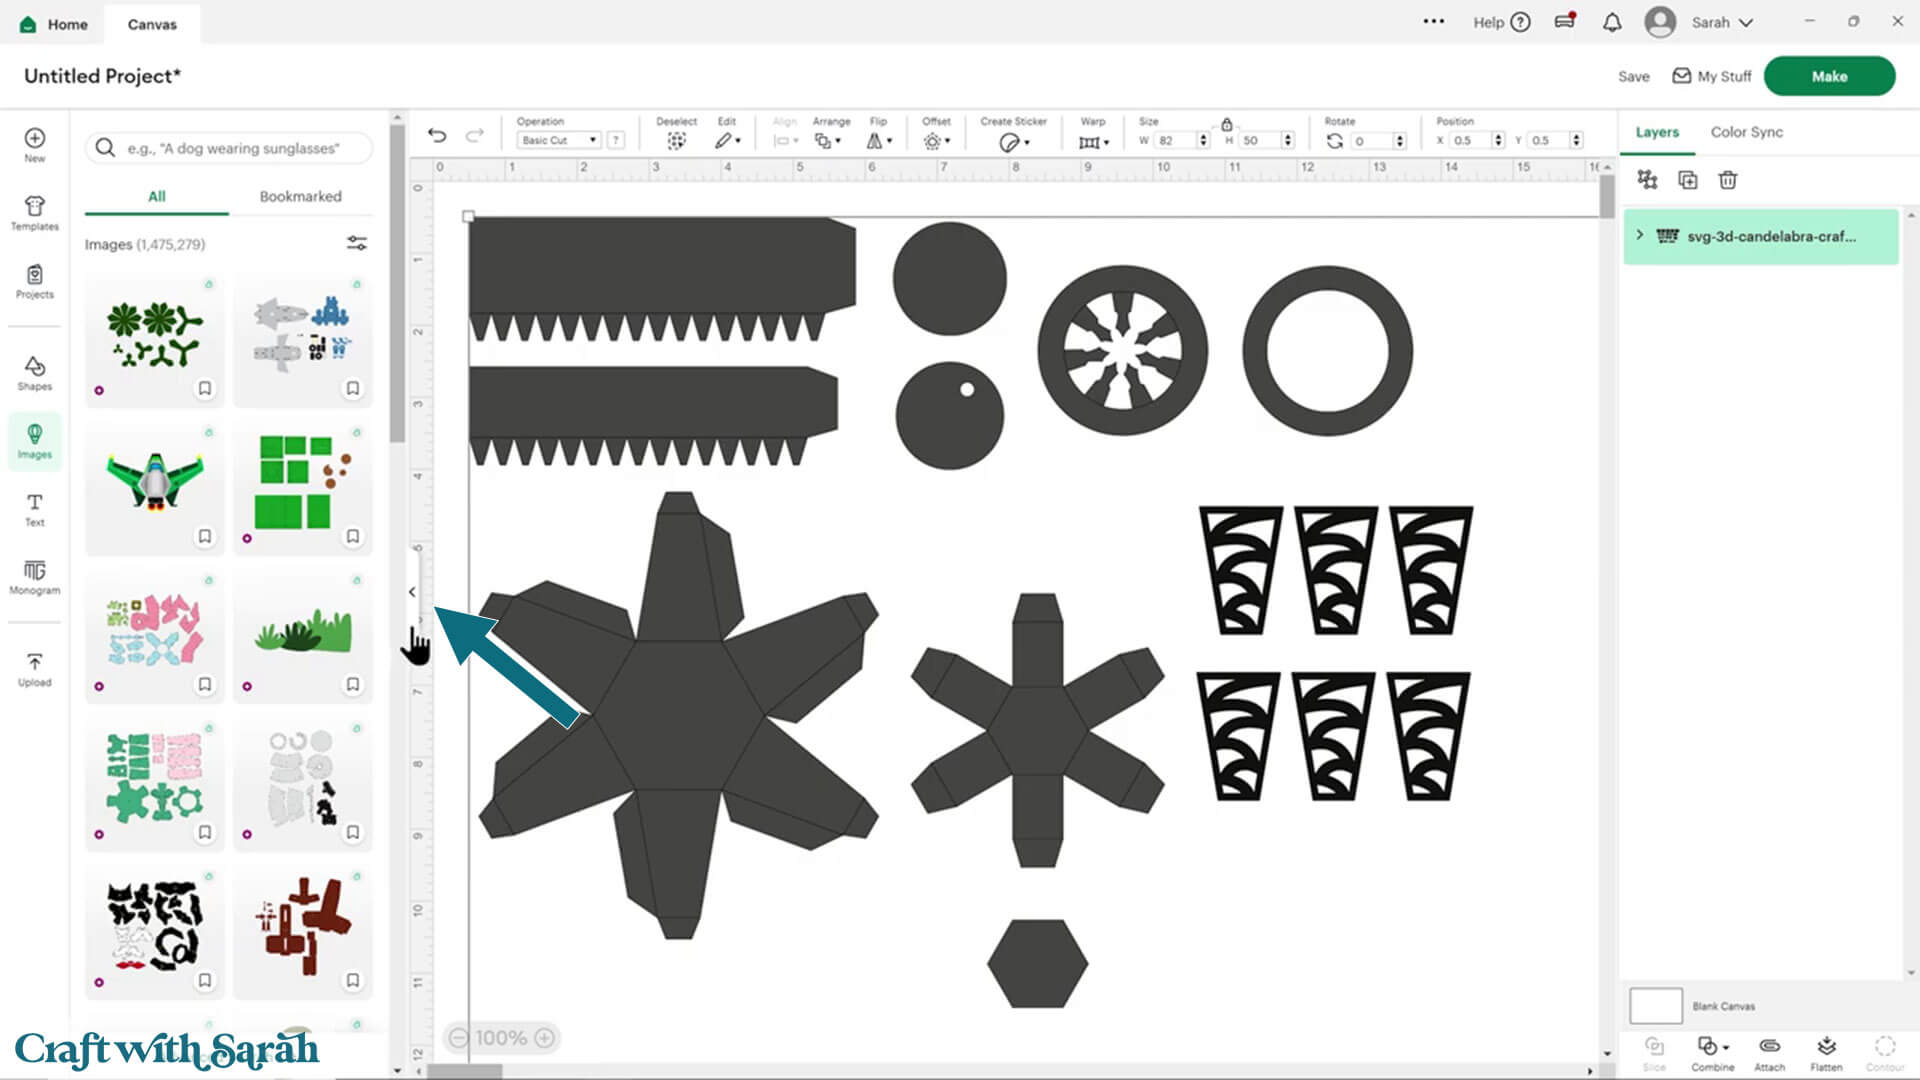
Cricut have recently (as of June 2025) introduced a feature where you get a “pop out” bar of similar images when you Upload a design. To hide this bar (to give you more space for designing!), click the arrow that’s about half way down the page.
If the design doesn’t get inserted onto your Canvas, it will show under “Uploads” in your “Recently Uploaded Images”. Click on it and then press “Add to Canvas” to put it onto your Project.
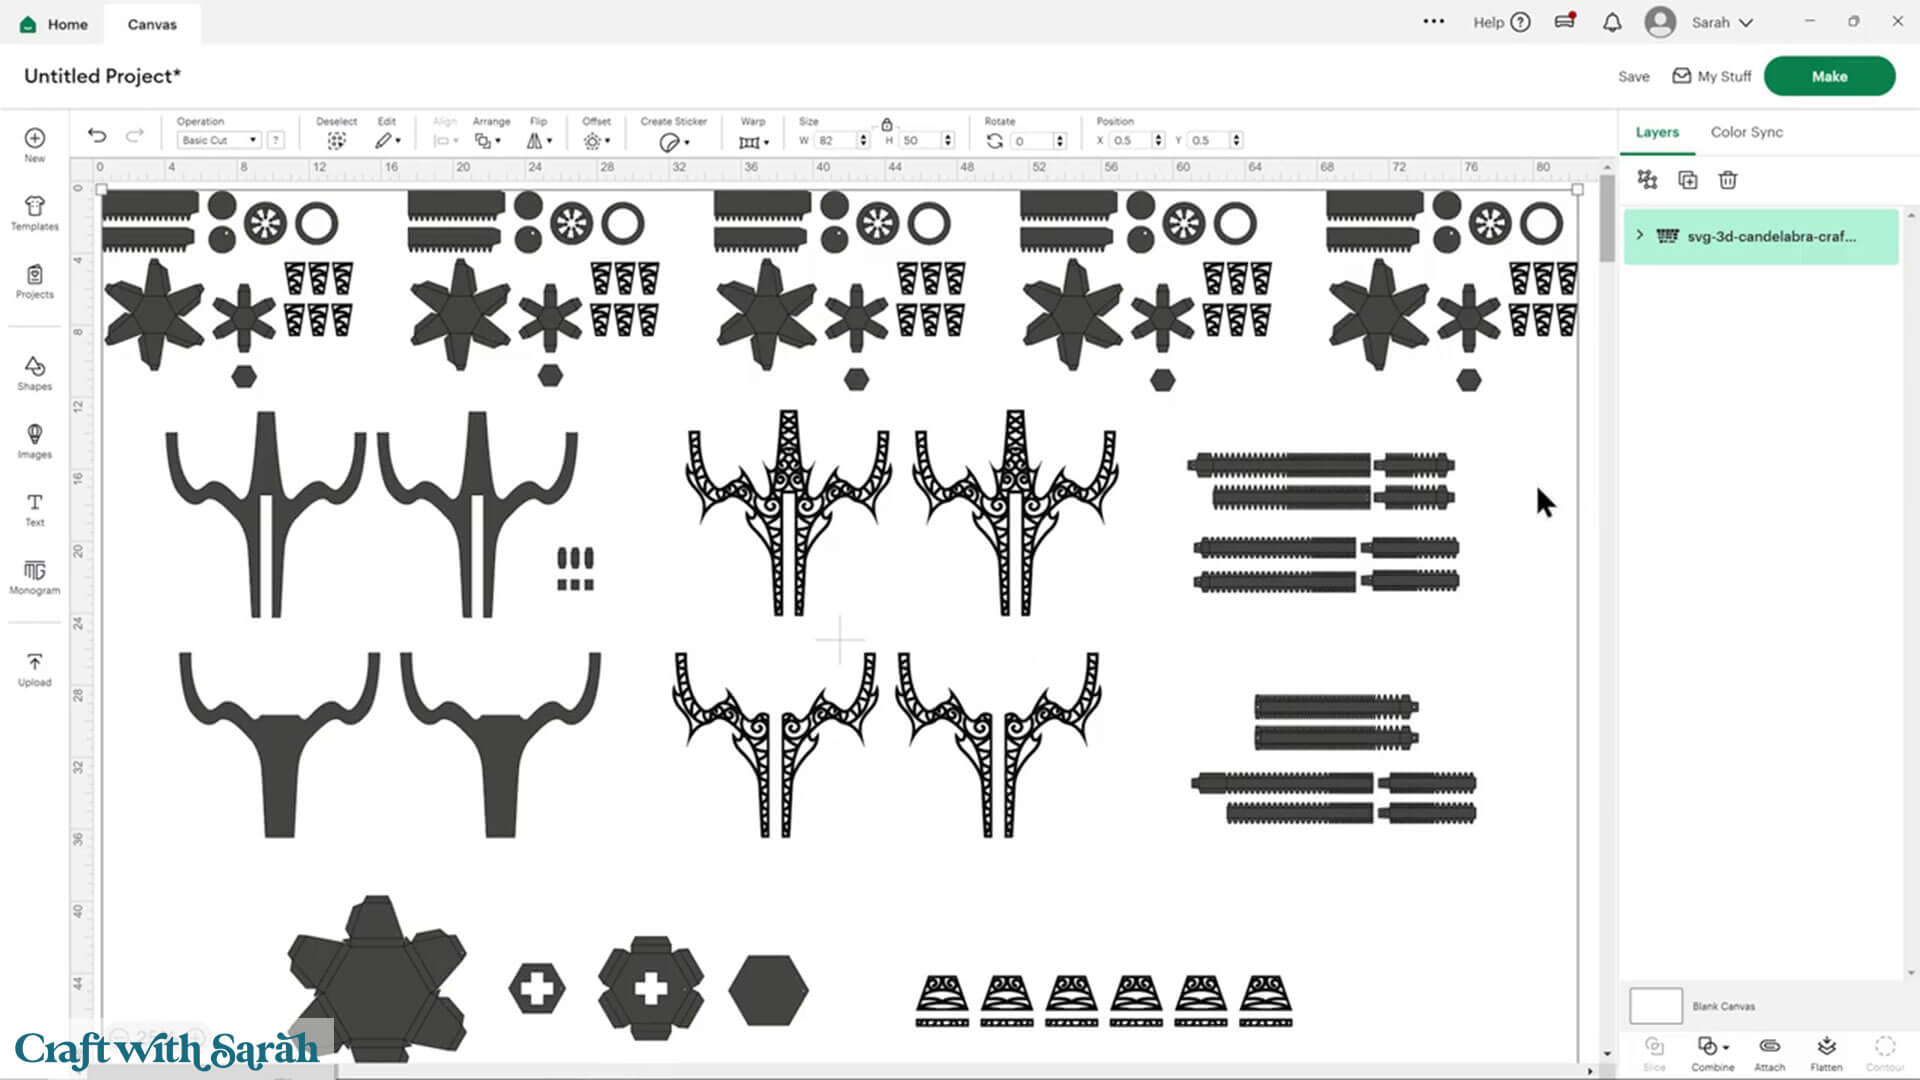
The design should load in at about 82 inches wide by 50 inches tall. If yours is different, change it to those measurements.
Don’t worry, every piece will cut on 12×12 cardstock or smaller. It looks large because all the pieces are laid out next to each other.
Zoom out to see all the parts. You’ll notice two main colors: one for the structure and one for the decorative details. I used solid black for the base and black glitter cardstock for the decorations.
Step 2) Format the score lines
This design needs score lines added so your Cricut knows where to score the cardstock so that you can fold the pieces in the correct places.
Click the design and “Ungroup” the layers.
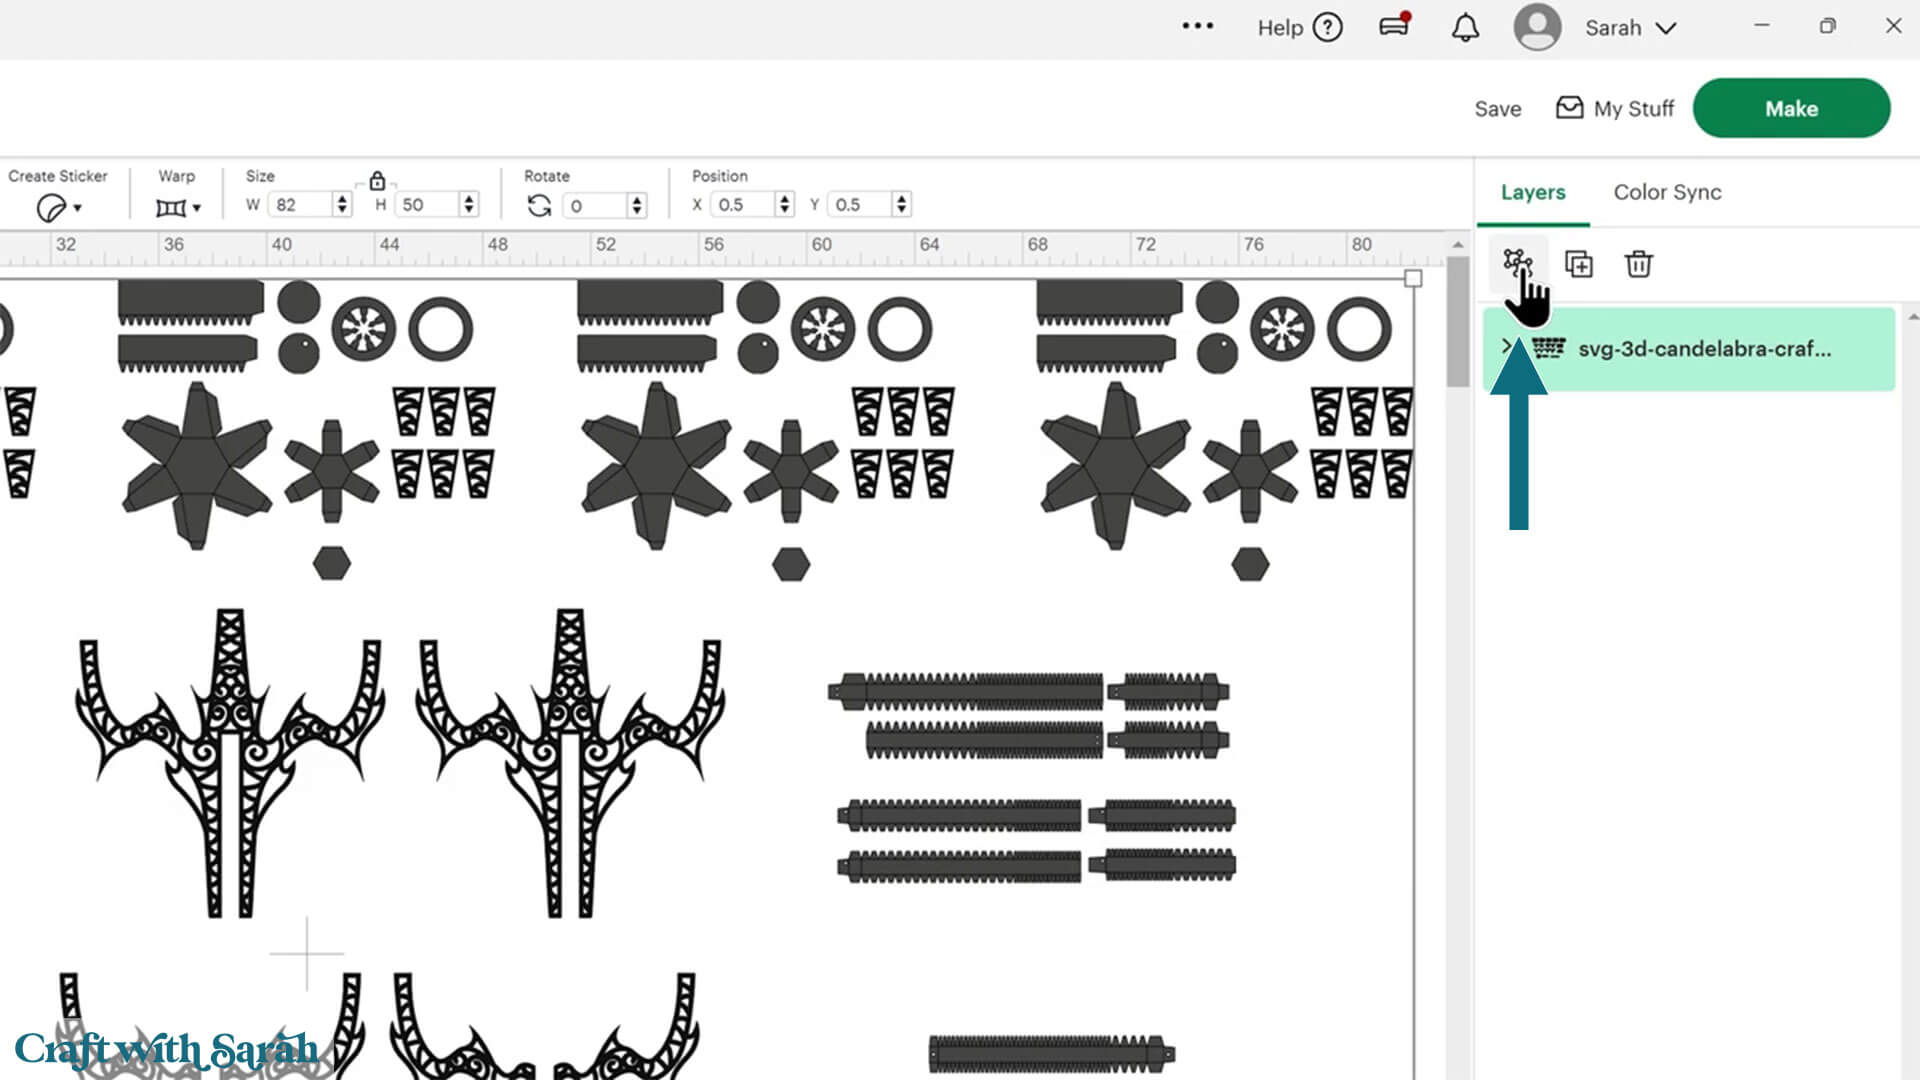
Along the top of the design are the five tealight holders. Each of these sub-groups contains the same pieces.
To make it quicker to format the score lines, delete four of them. We can then format the one remaining group and then copy it again once the formatting is done.
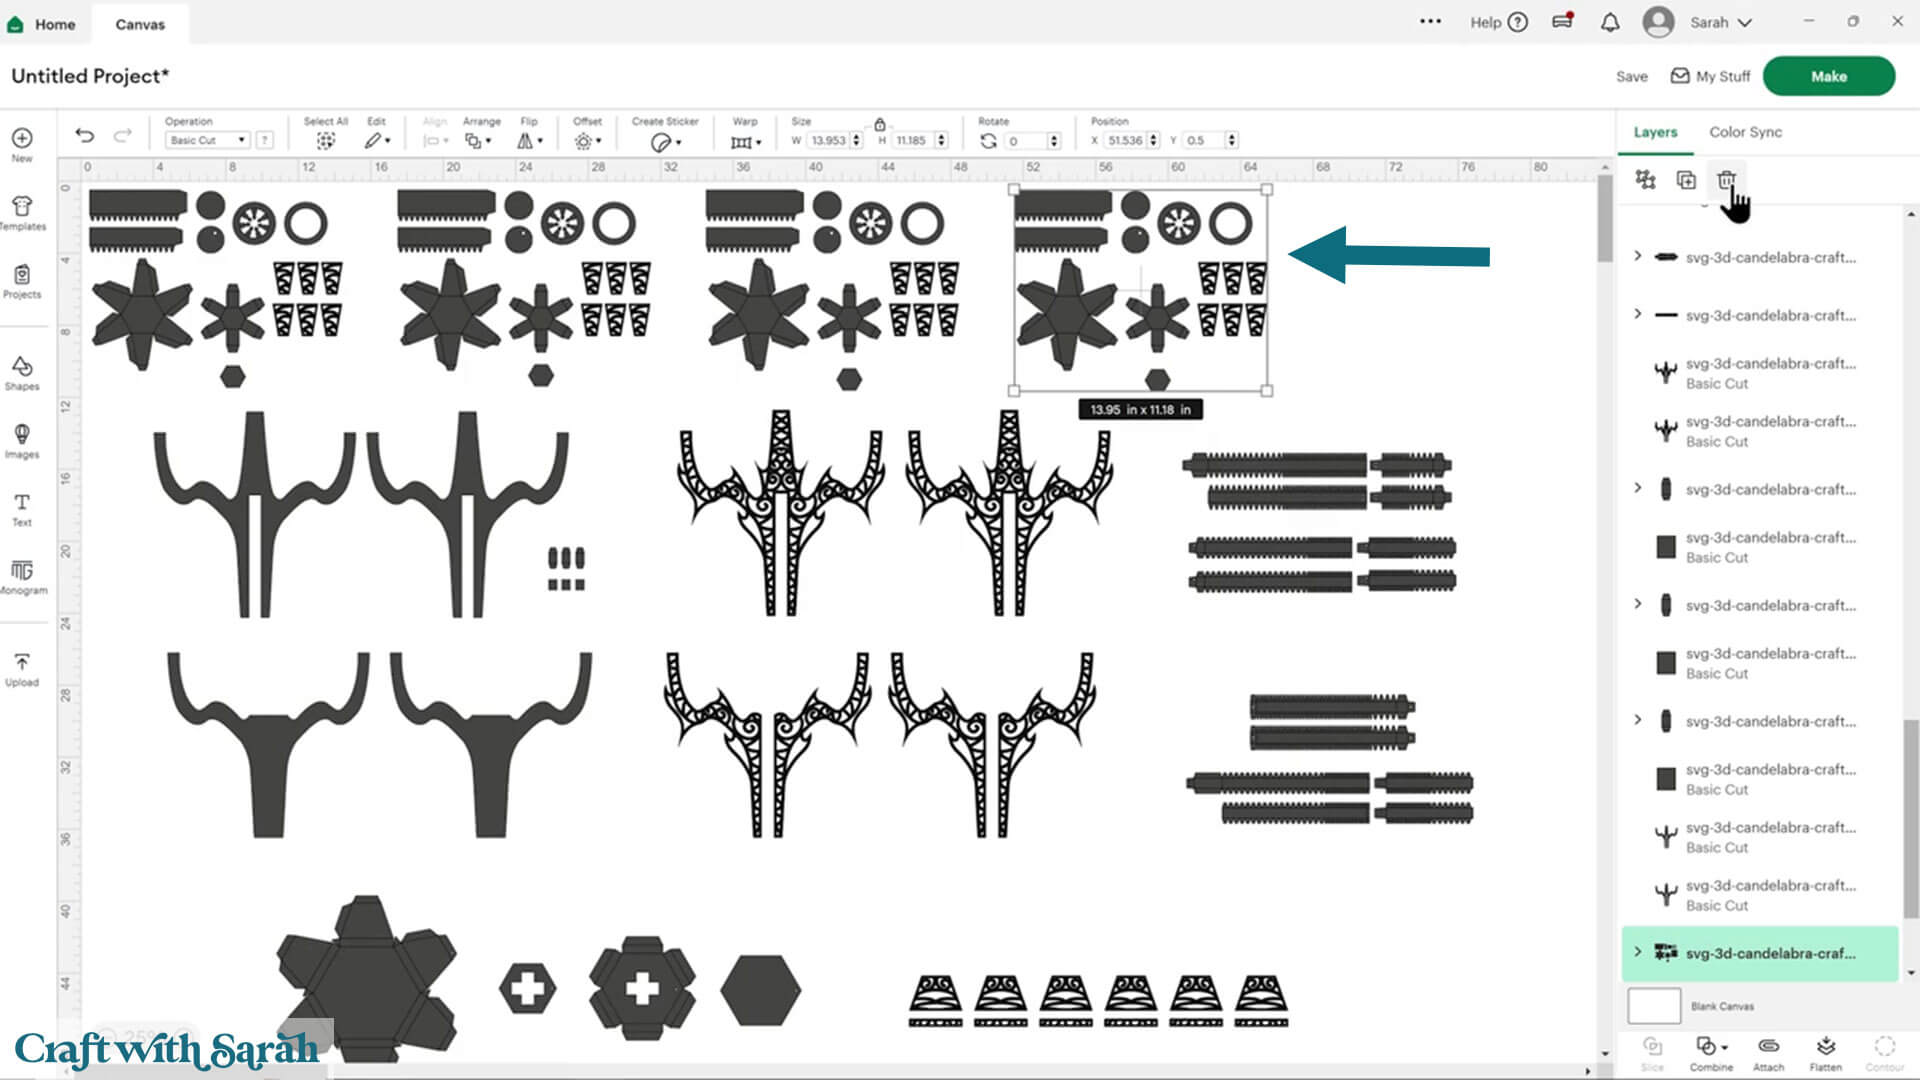
Ungroup the remaining tealight holder.
Look down the Layers panel until you see a Group of some of the pieces from the tealight holder. You’ll know this as there is a chevon icon next to it in the layers panel.
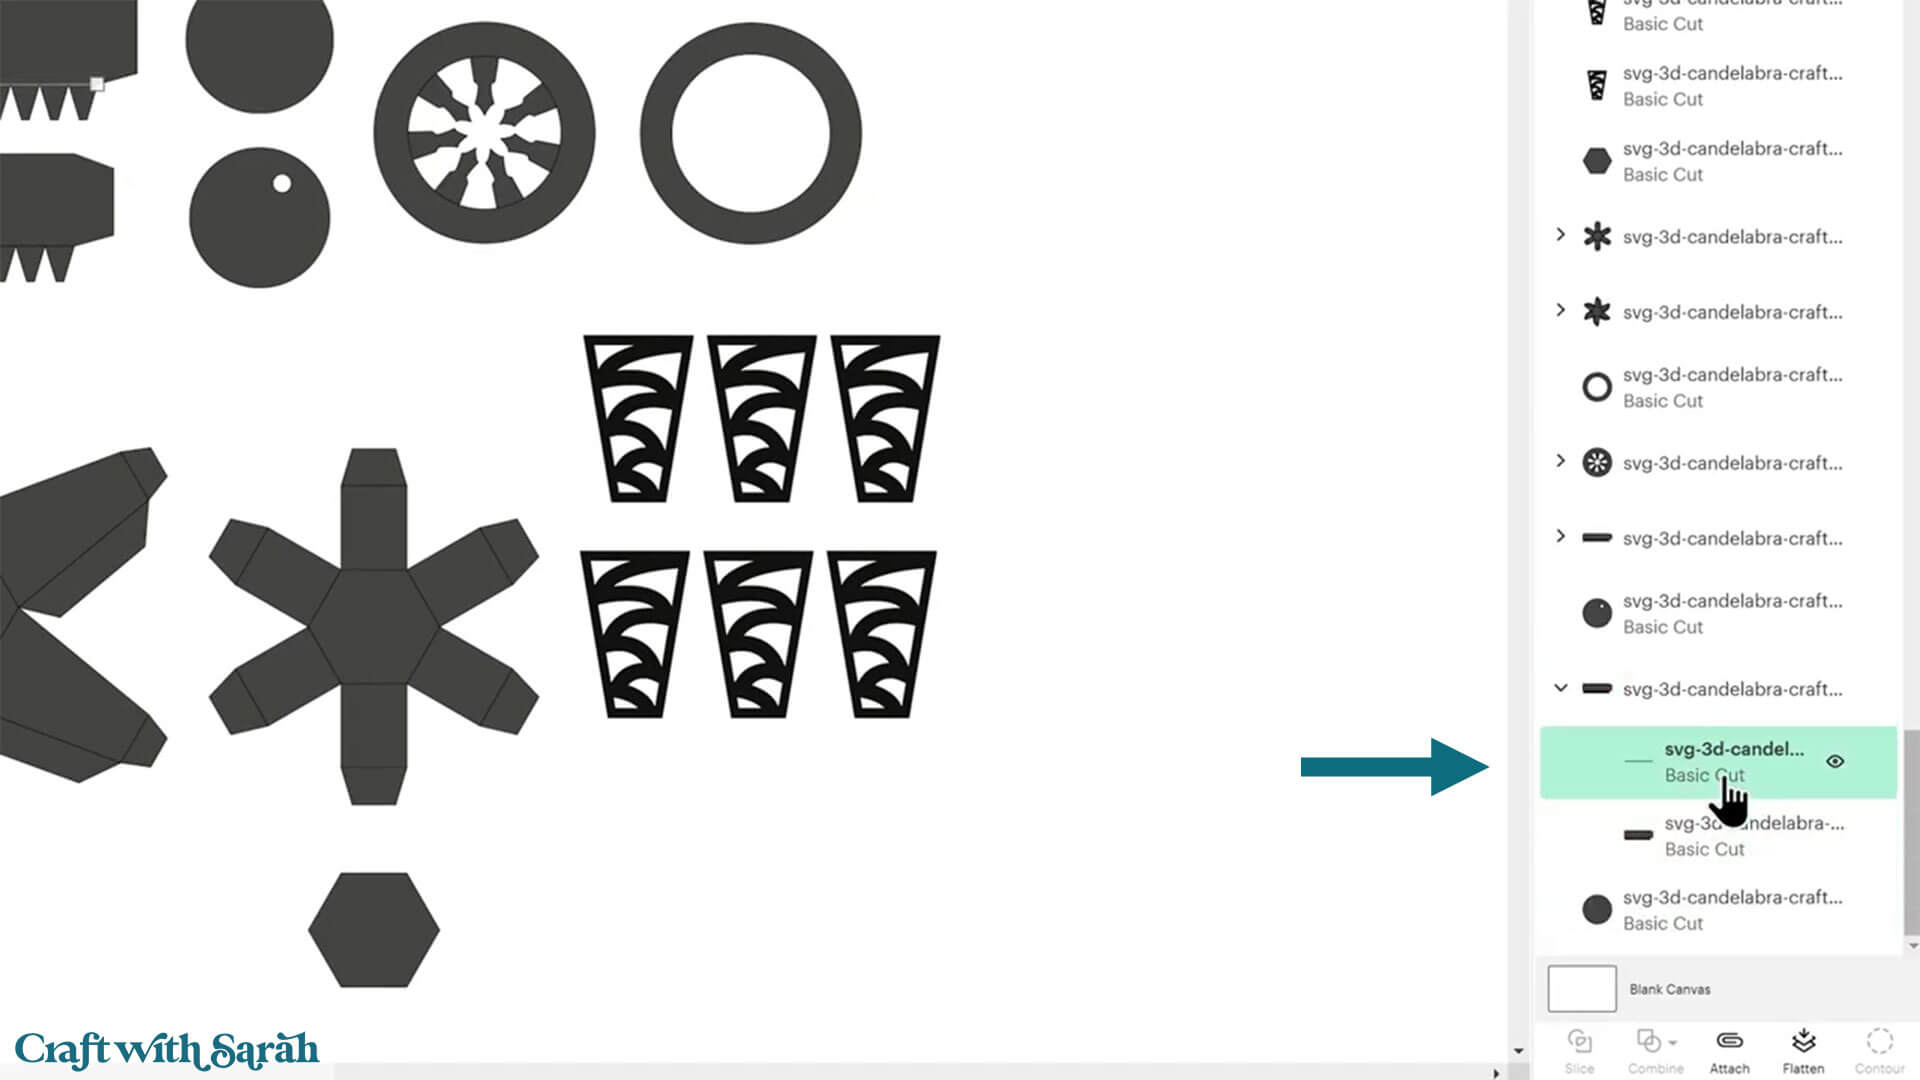
Click the chevron to open up the group so that you can see the layers.
Click on the cut lines (the top layer inside the group).
Change this layer to a “Score” layer in the “Operations” dropdown.
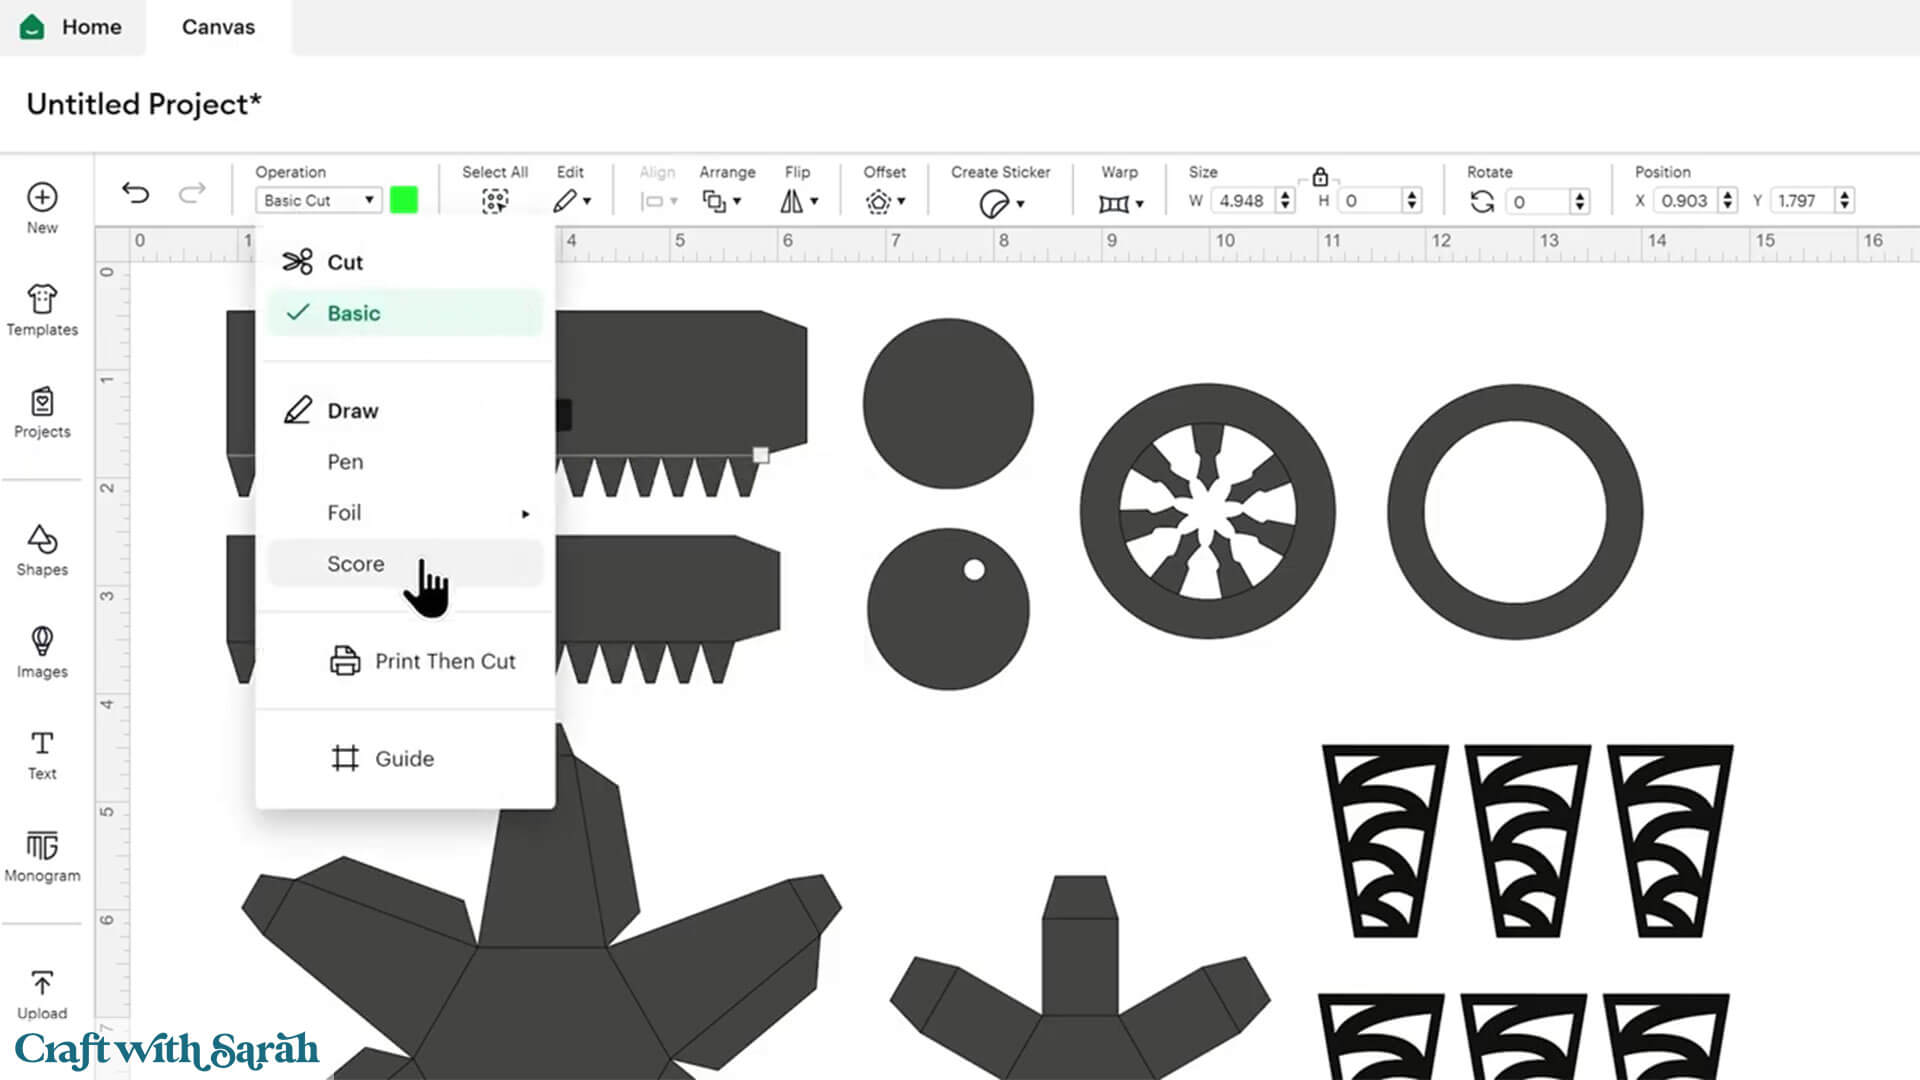
Click to select that mini group (2 layers) and then press “Attach”.
Attach is what tells the Cricut where to score.
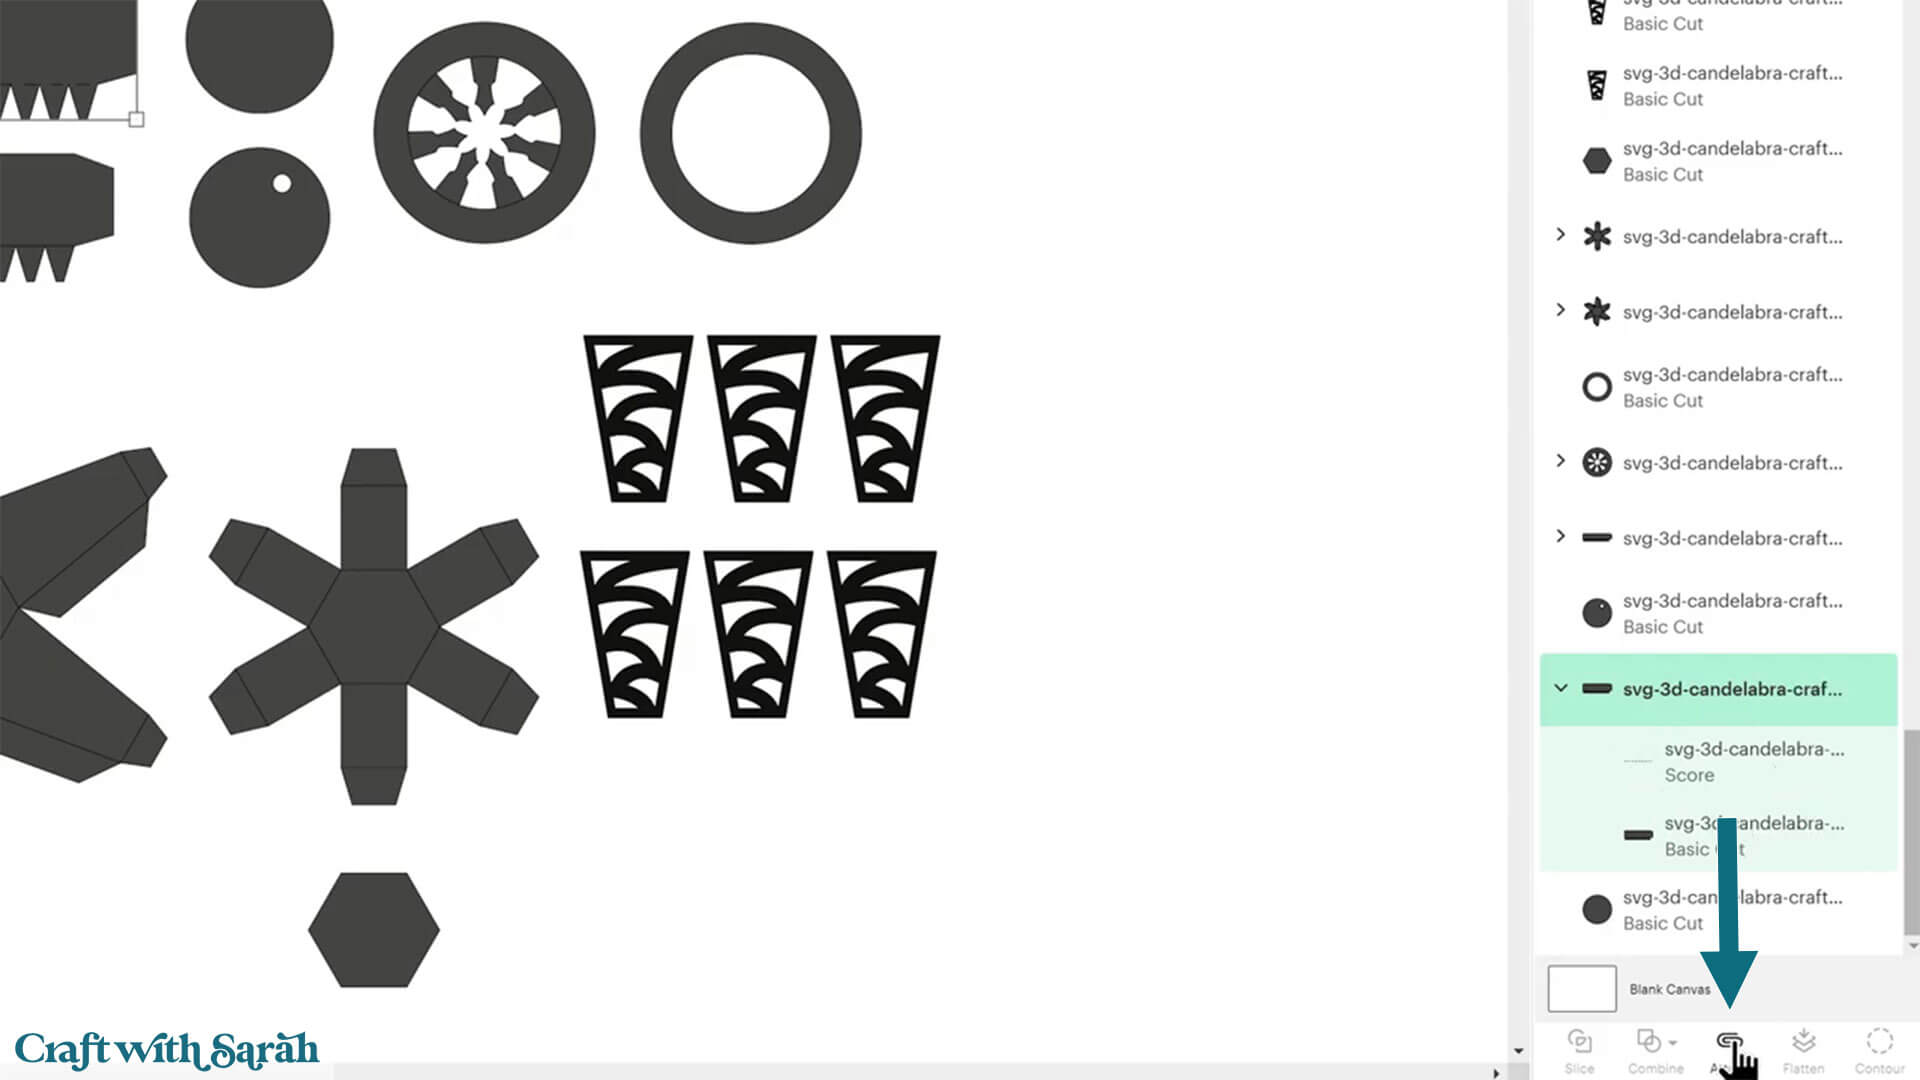
Finish all the score lines in the tealight holder, then select all the pieces and “Group” them. Duplicate the Group 4 times so that you once again have the five tealight holders along the top of your project.
Continue this process until you have formatted all the score lines in the whole design. There are quite a few!
For a step-by-step view of the whole scoring process, watch the video near the top of this tutorial.
Some pieces are repeated several times. To save time, you can delete duplicates, add the score lines to one, and then duplicate it back to the number needed.
Once all score lines are done, save your project. This way, you won’t need to redo the scoring if you want to make it again later.
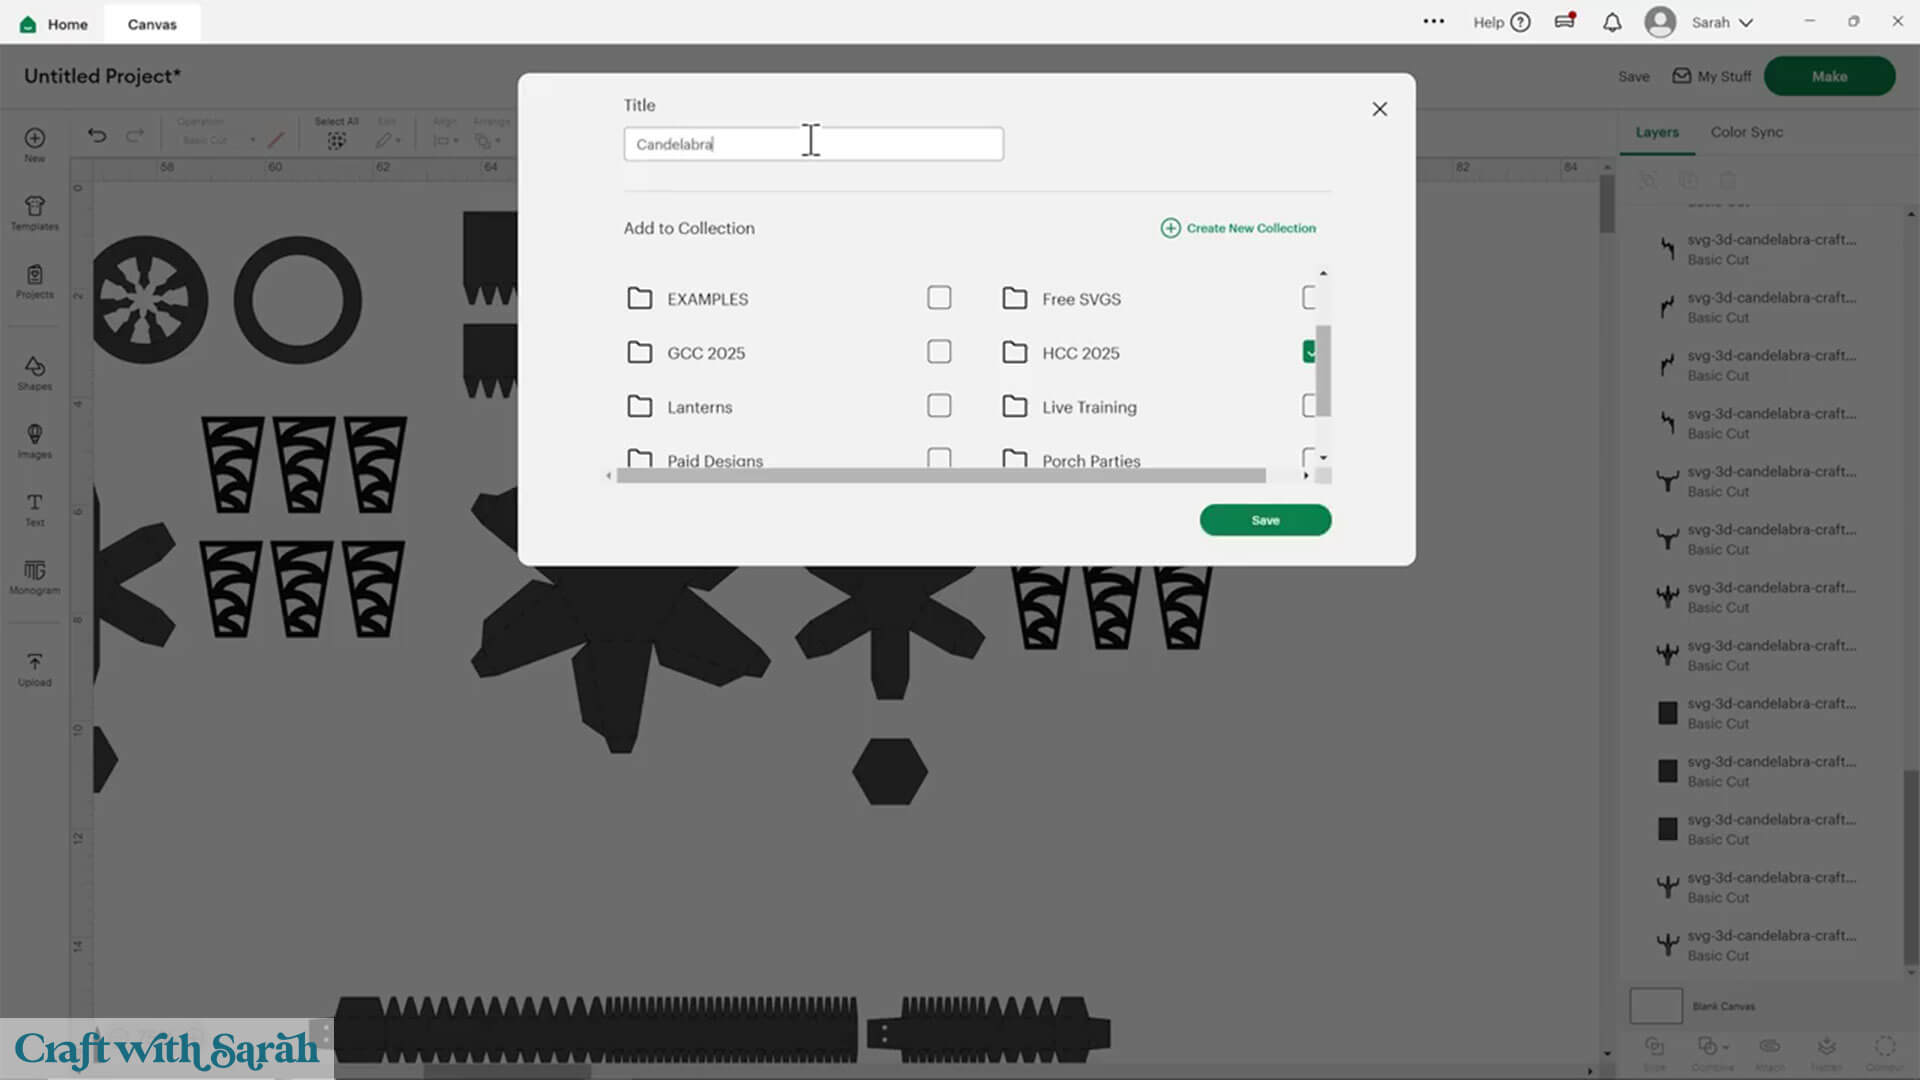
Step 3) Cut the candelabra craft
When you’re happy with how the project is looking in Design Space, click “Make” and follow the instructions on-screen to cut out all the pieces.
This project requires 12×12 cardstock. You’ll need quite a few sheets — about 16 in total, depending on how efficiently you place the shapes.
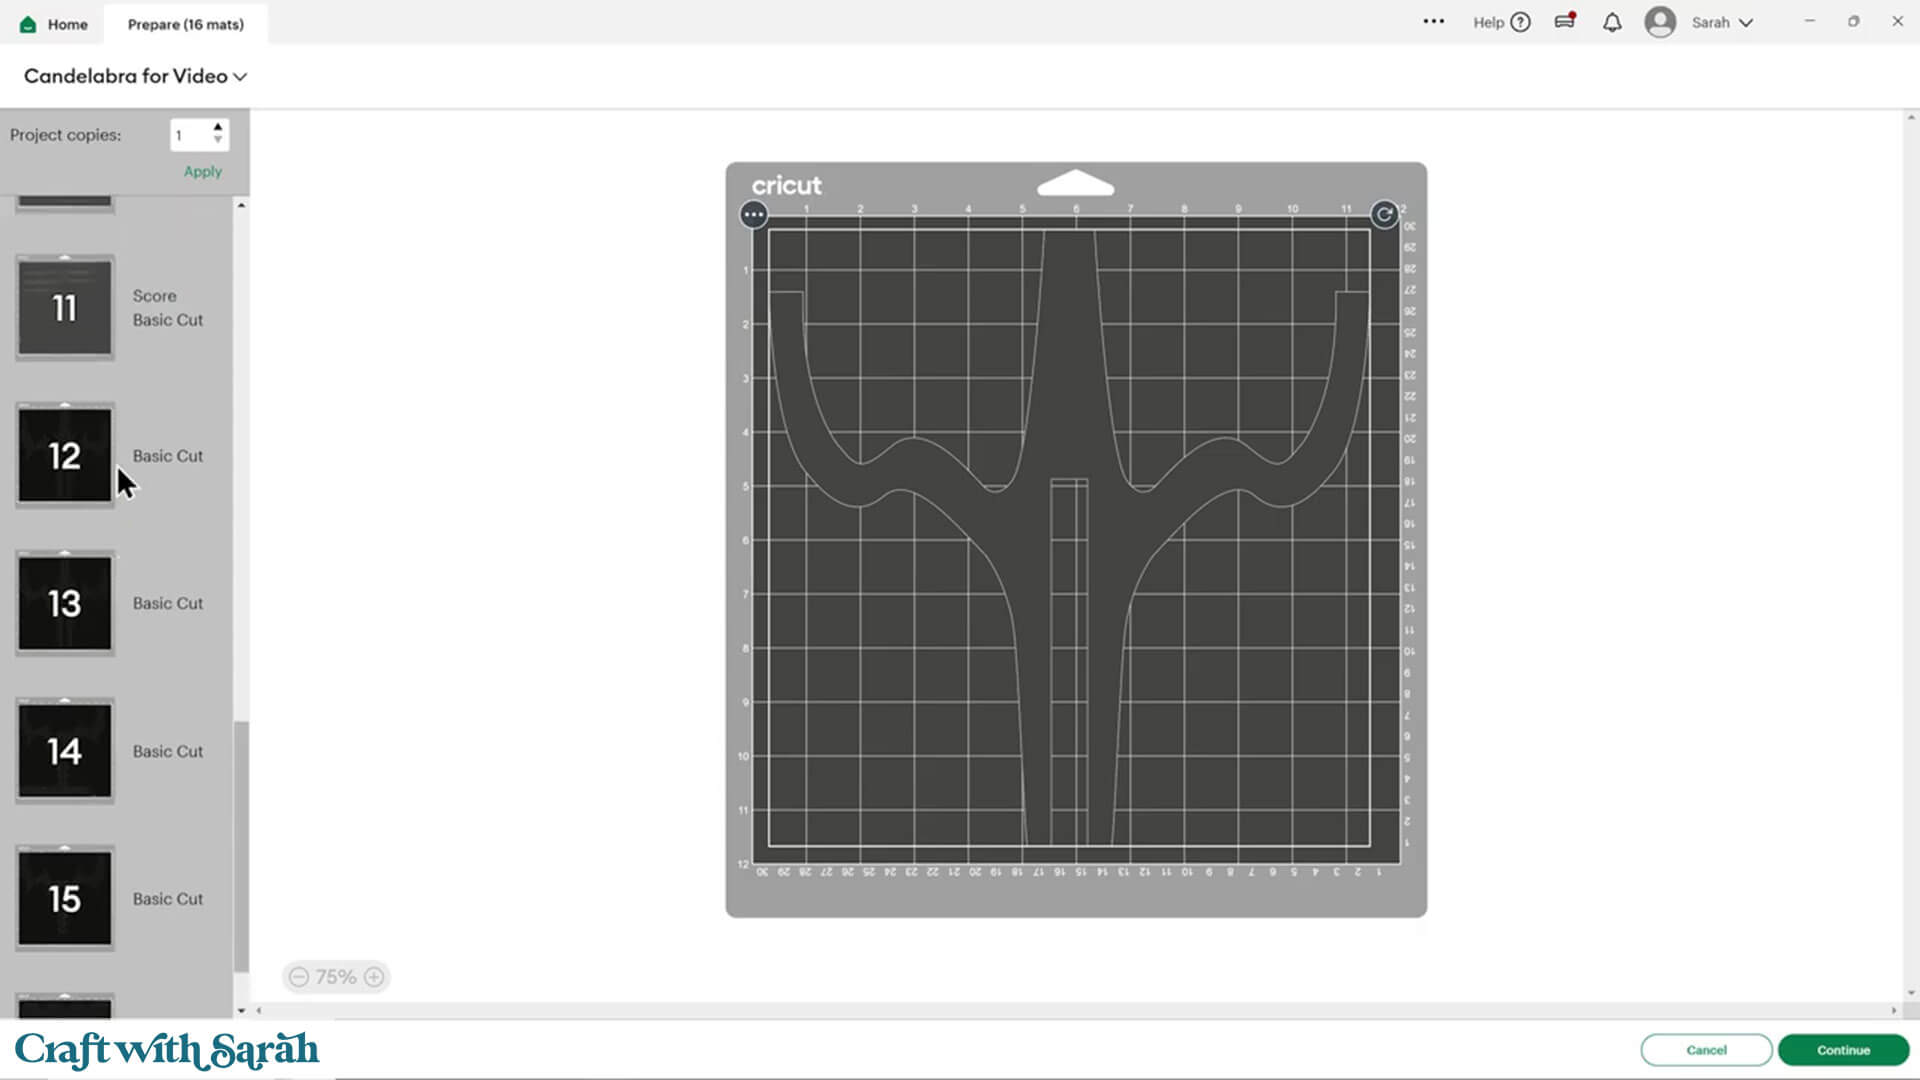
To save space on your cardstock, you can move things around by clicking and dragging. Make sure when you’re moving things about that nothing overlaps because otherwise, it won’t cut out properly.
TIP: New to using cardstock with your cutting machine? Check out these machine help guides for Cricut, Silhouette and ScanNCut that go through every step of the process, including tips for getting the best quality cuts from your machine.
Step 4) Assemble the tealight holders
Each tealight holder is made separately, then slotted onto the top of the candelabra.
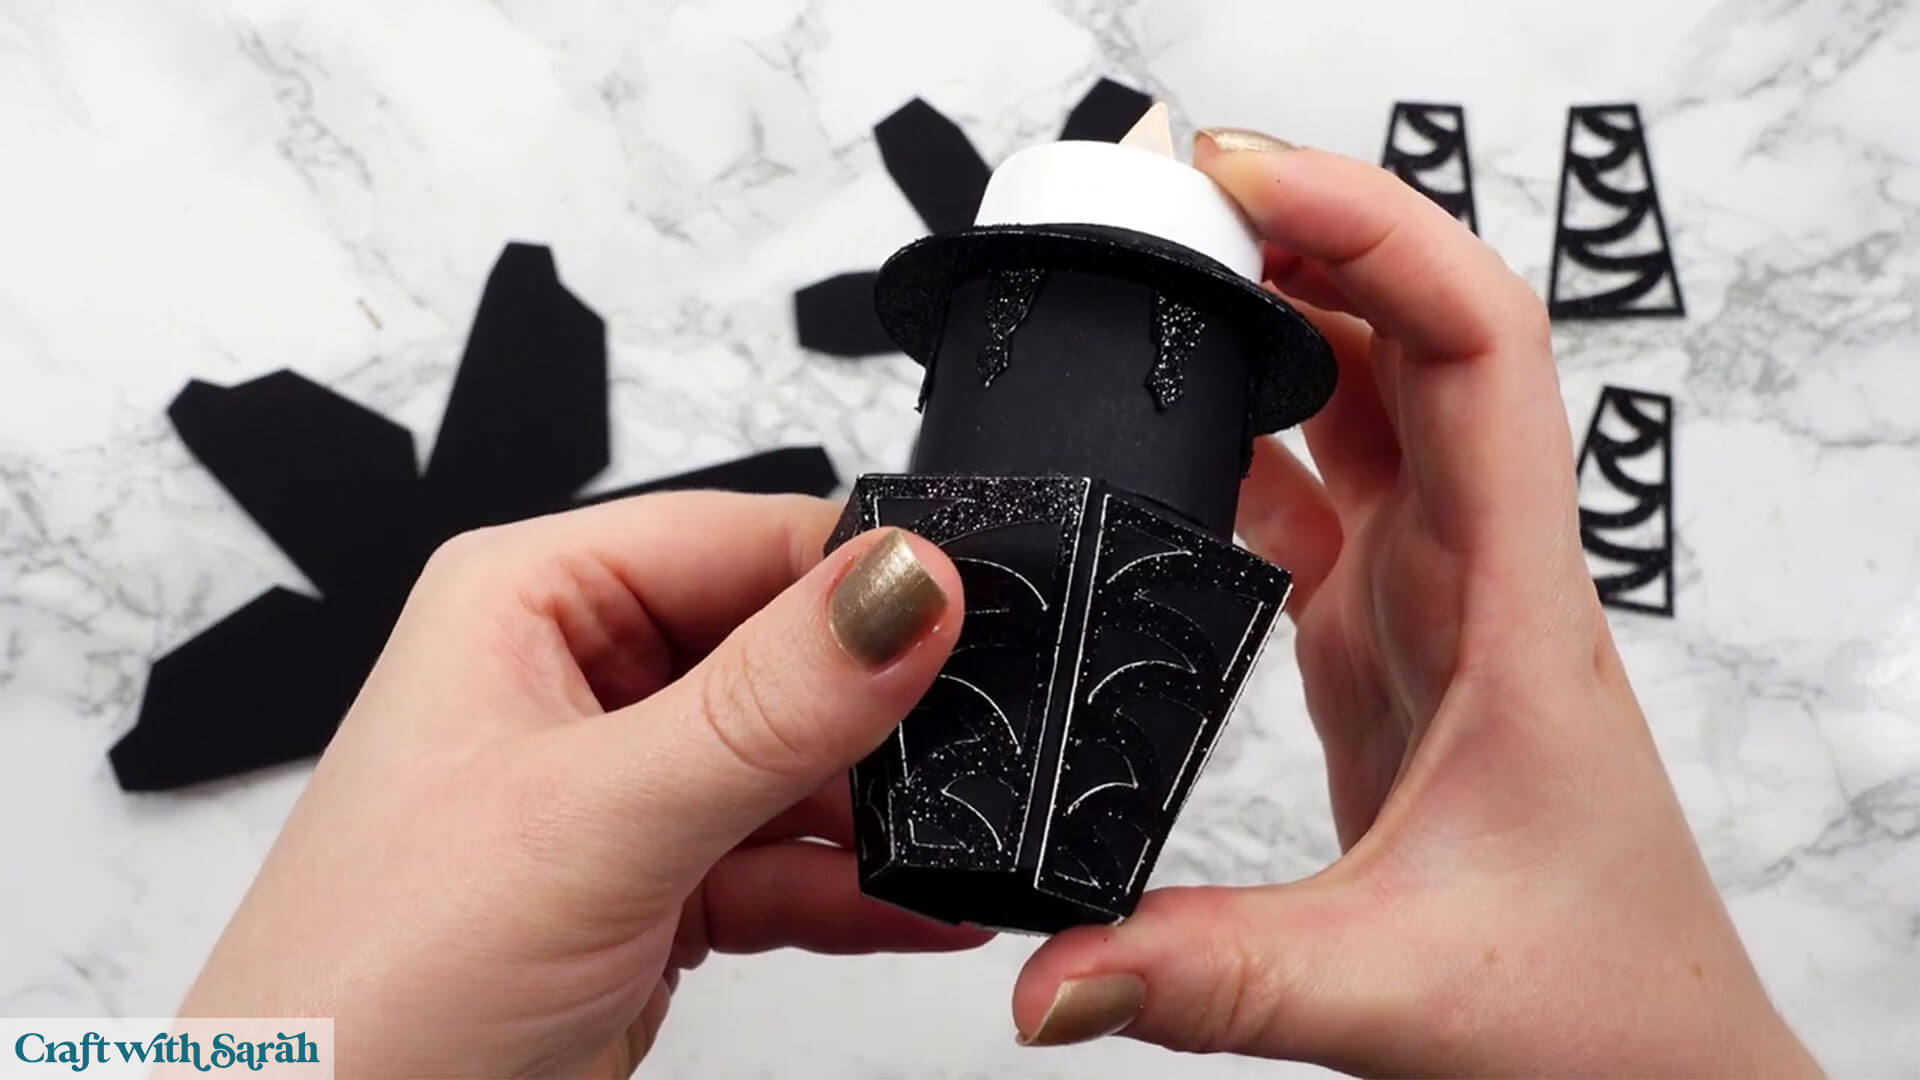
Each tealight holder has the following pieces:
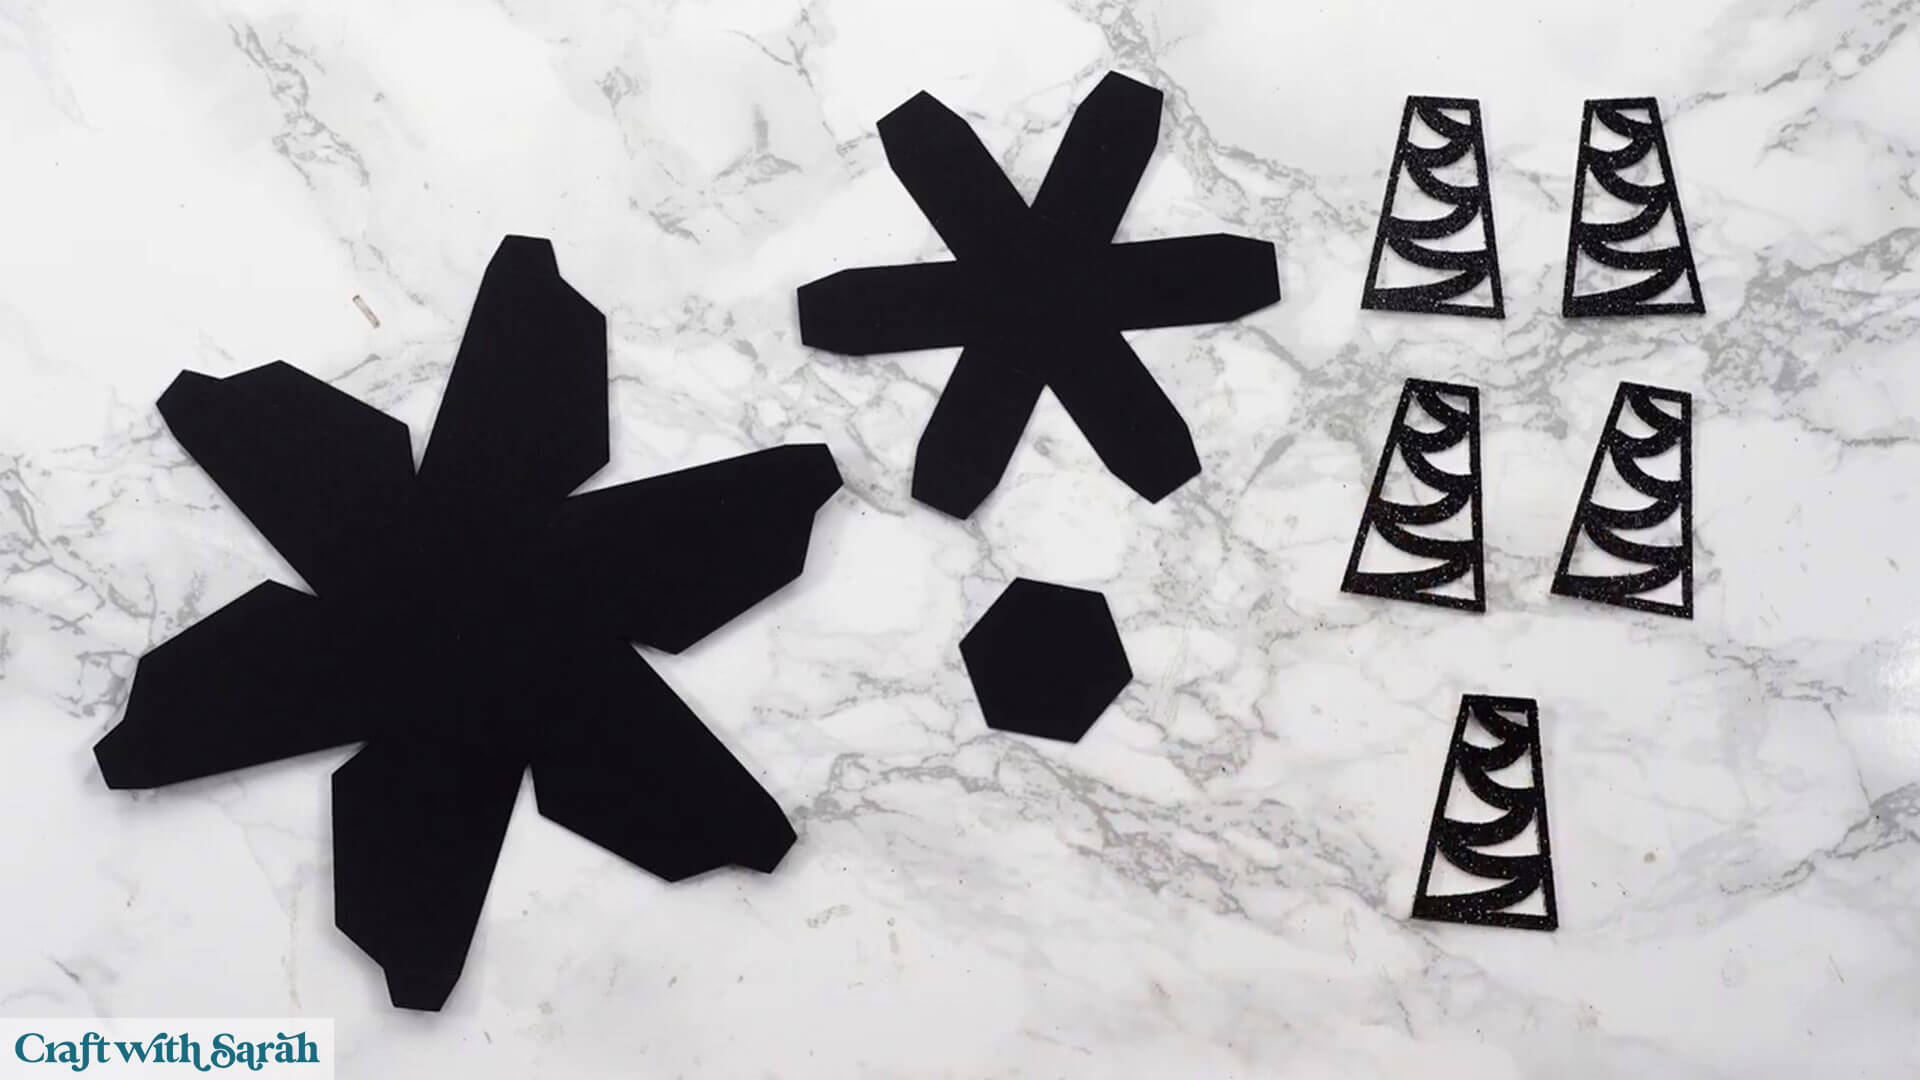
Begin by folding upwards along all score lines on the smaller, 6 sided shape.
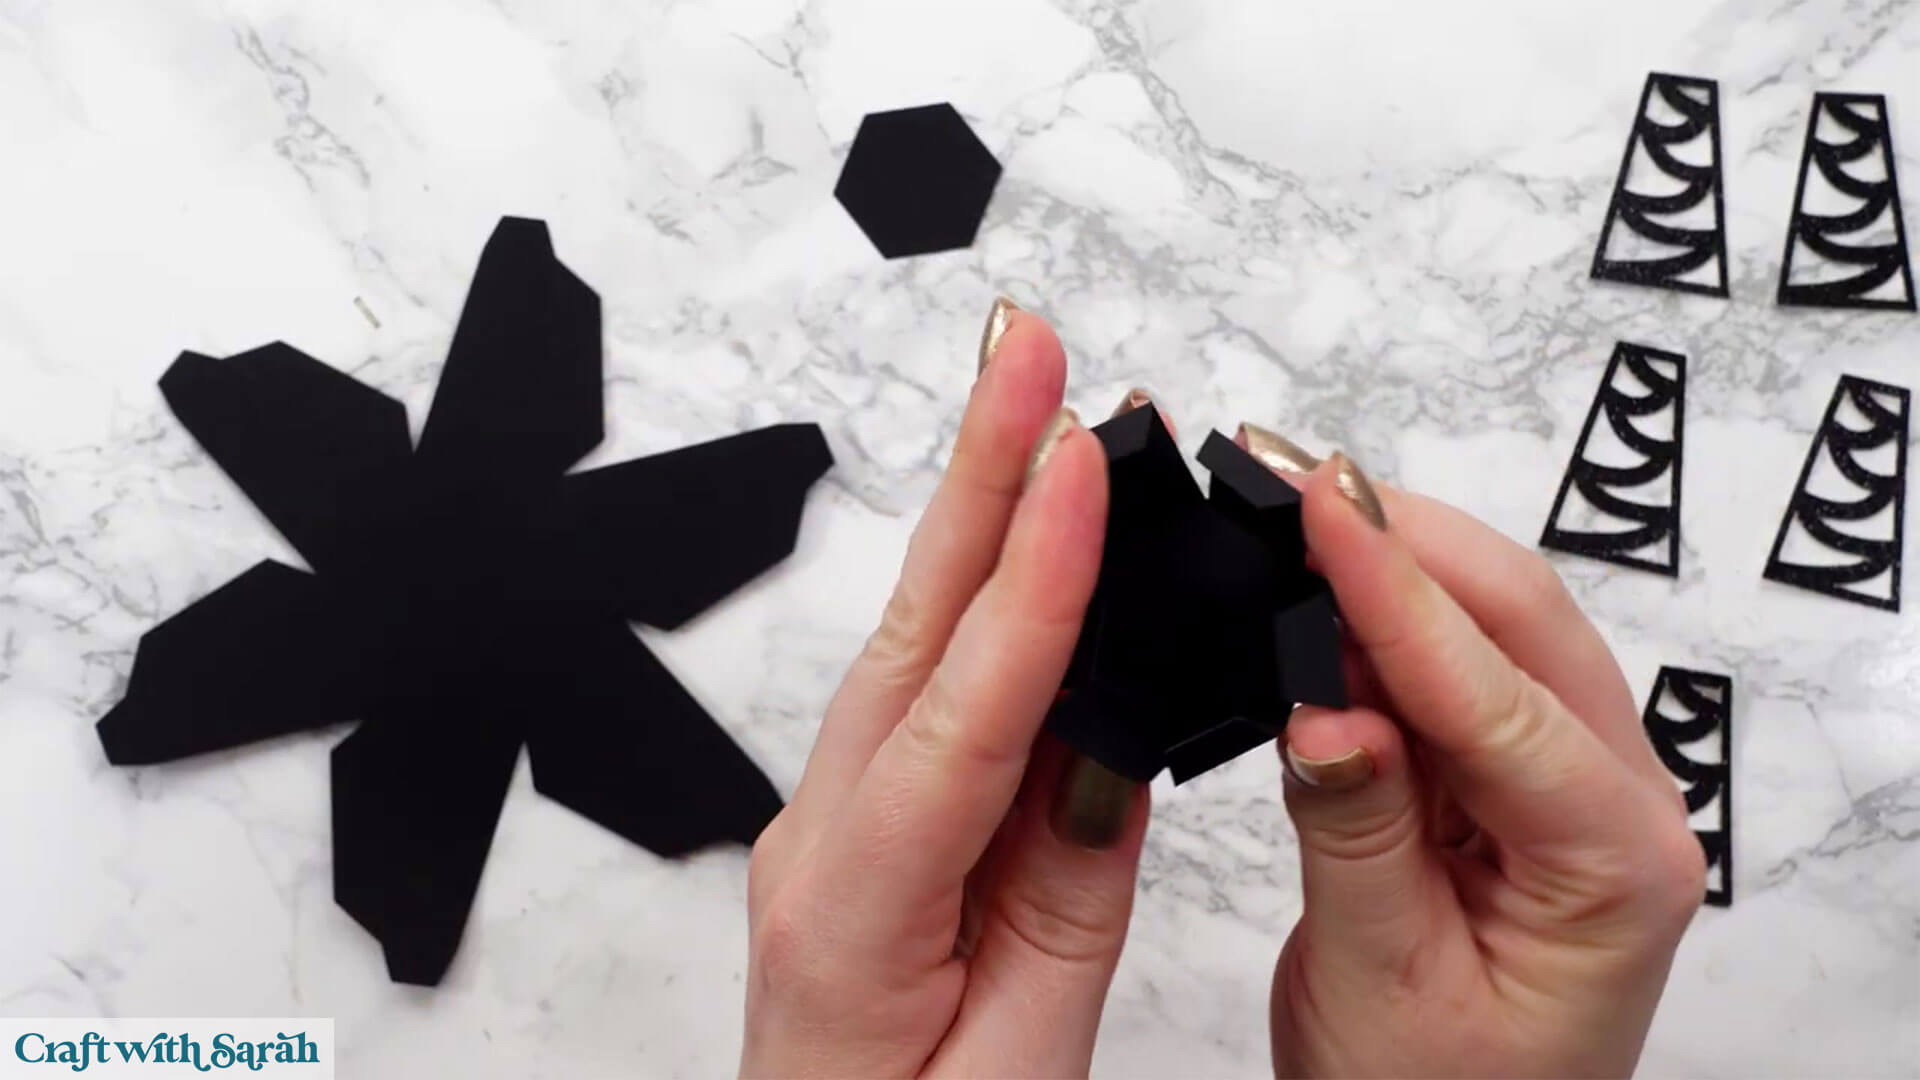
Glue all the tabs on the top of the shape and place the little hexagon on top to hold them altogether. This creates a ridge inside so the tealight sits securely.
You will need to bring all the sides together as you do this.
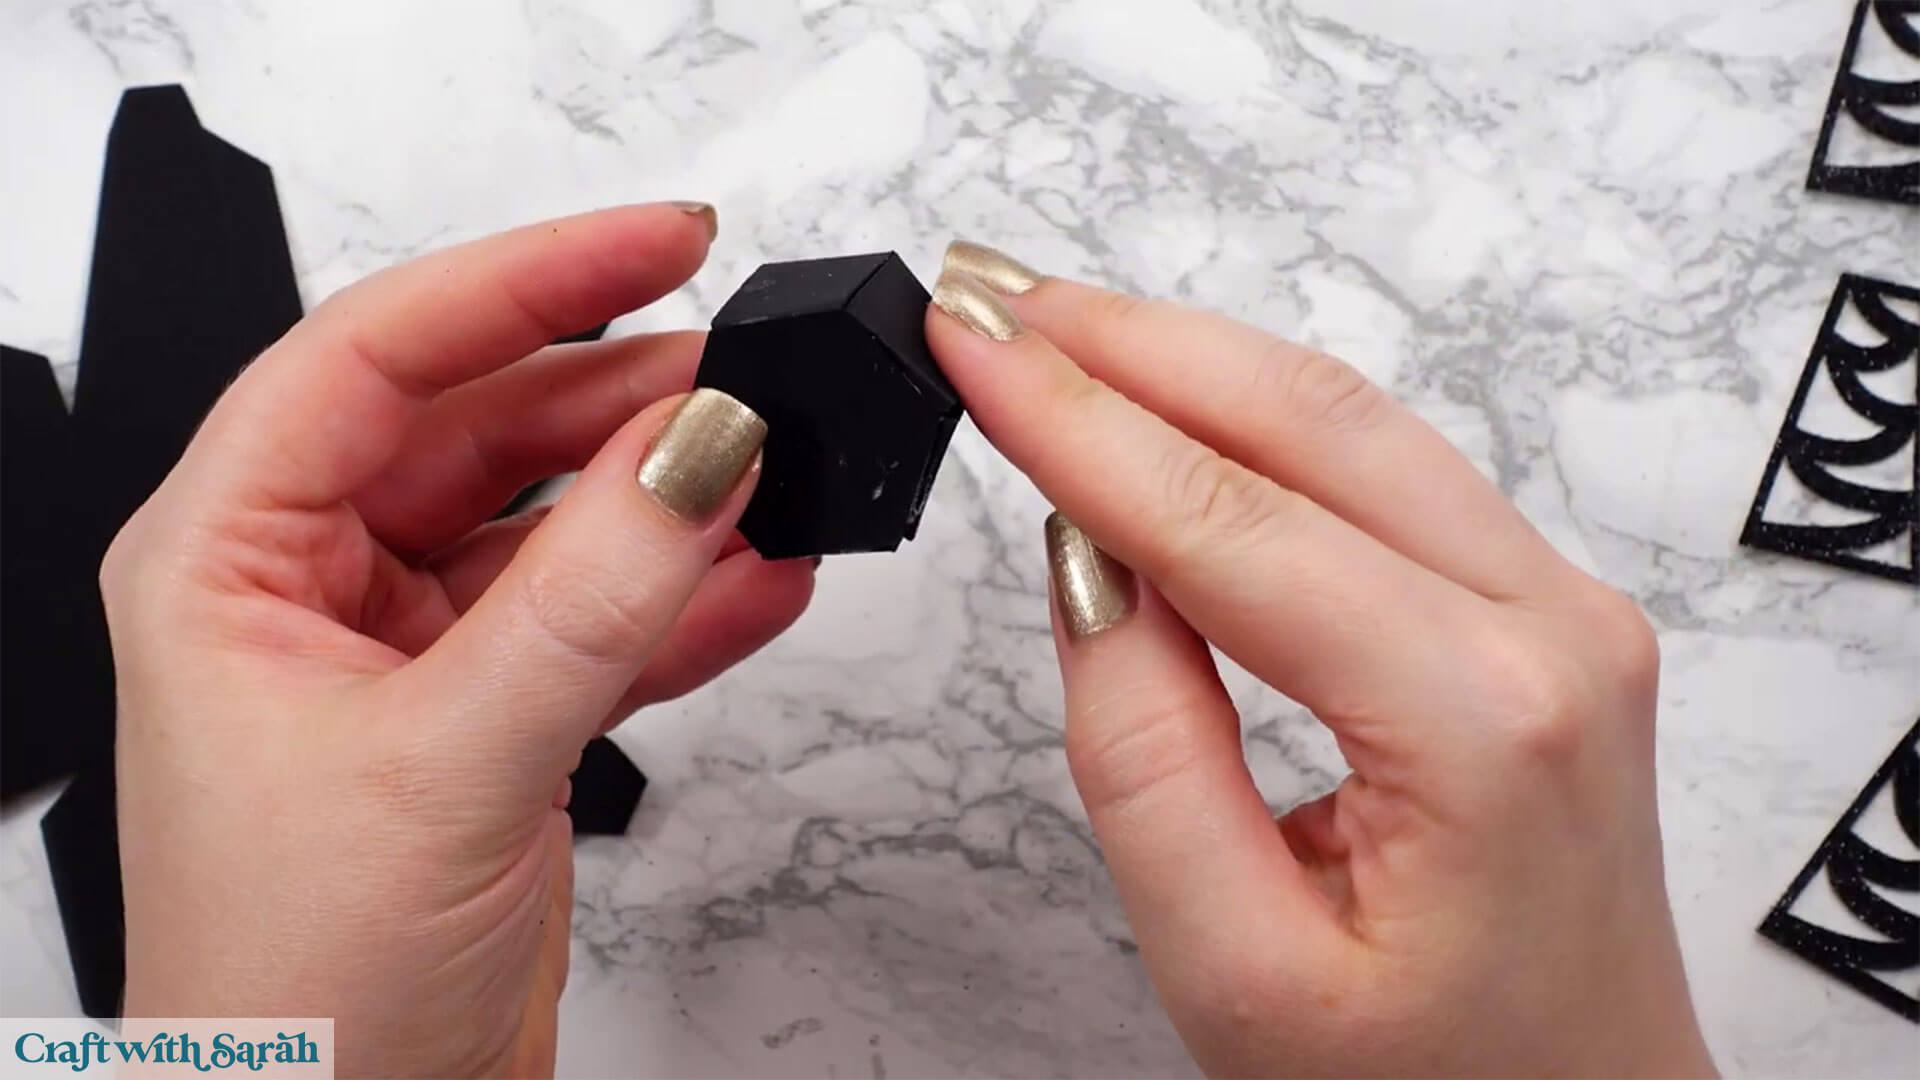
You can add masking tape or painters tape to hold it together whilst it dries. This will be helpful for all the different parts we will be gluing throughout the tutorial.
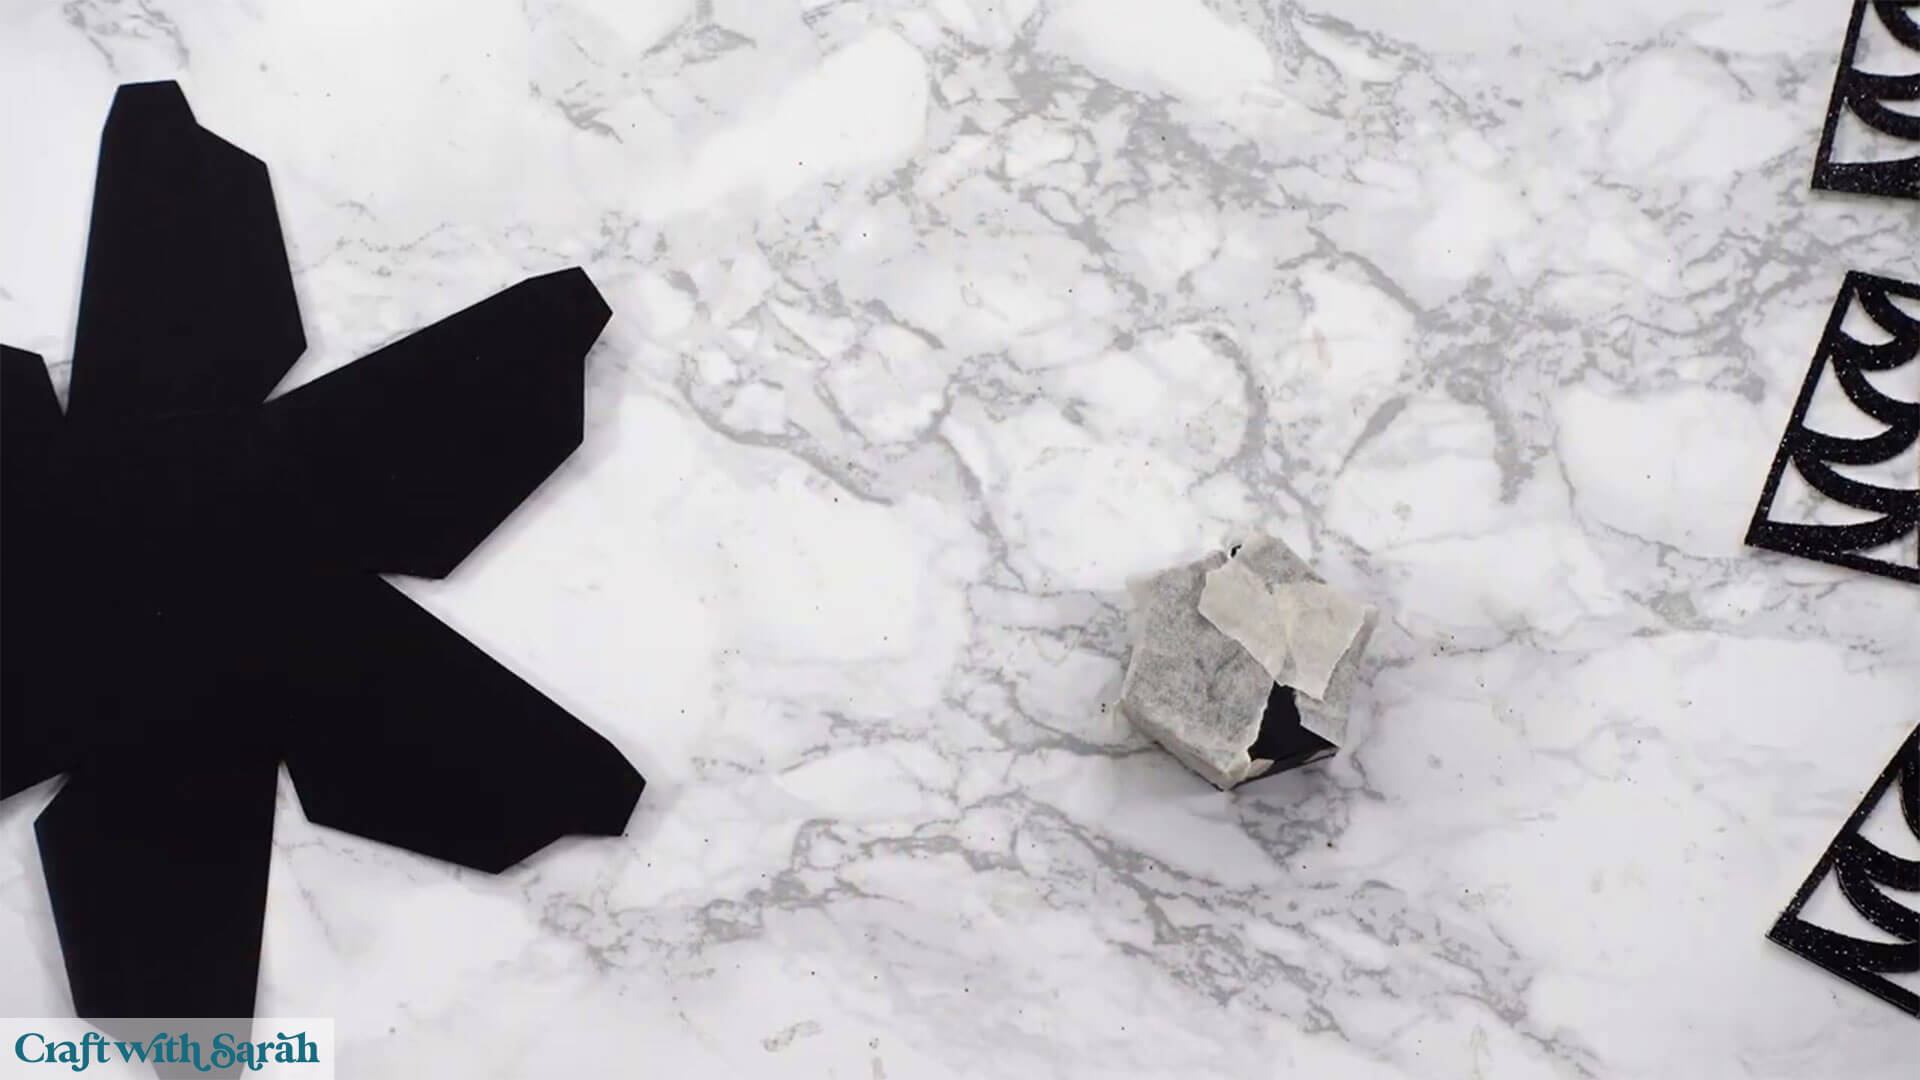
Whilst that piece is drying, take the other 6 sided piece and fold upwards along all the score lines again.
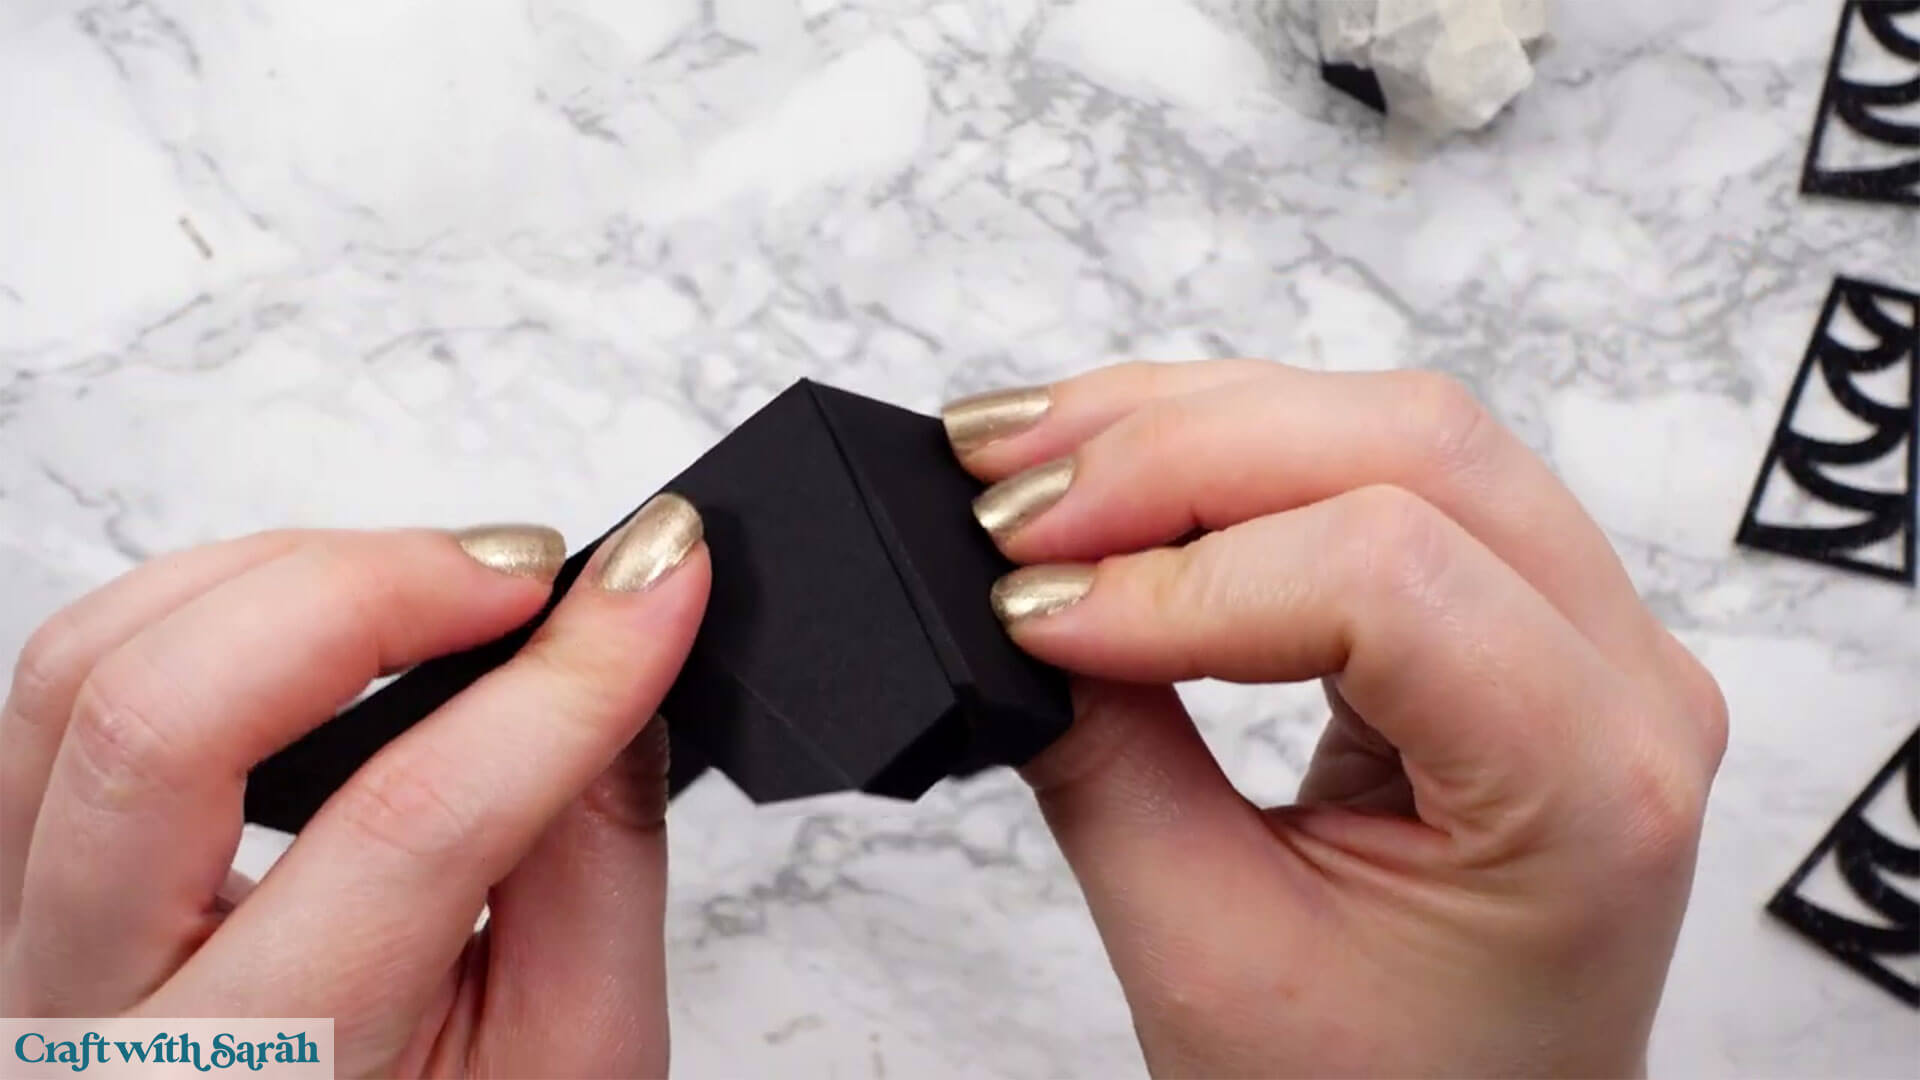
Glue the hexagon shape inside the one you just folded. It will sit inside to hold the “arms” of the candelabra in place.
Add glue to the big tabs and stick them all to the adjacent piece to bring the shape together.
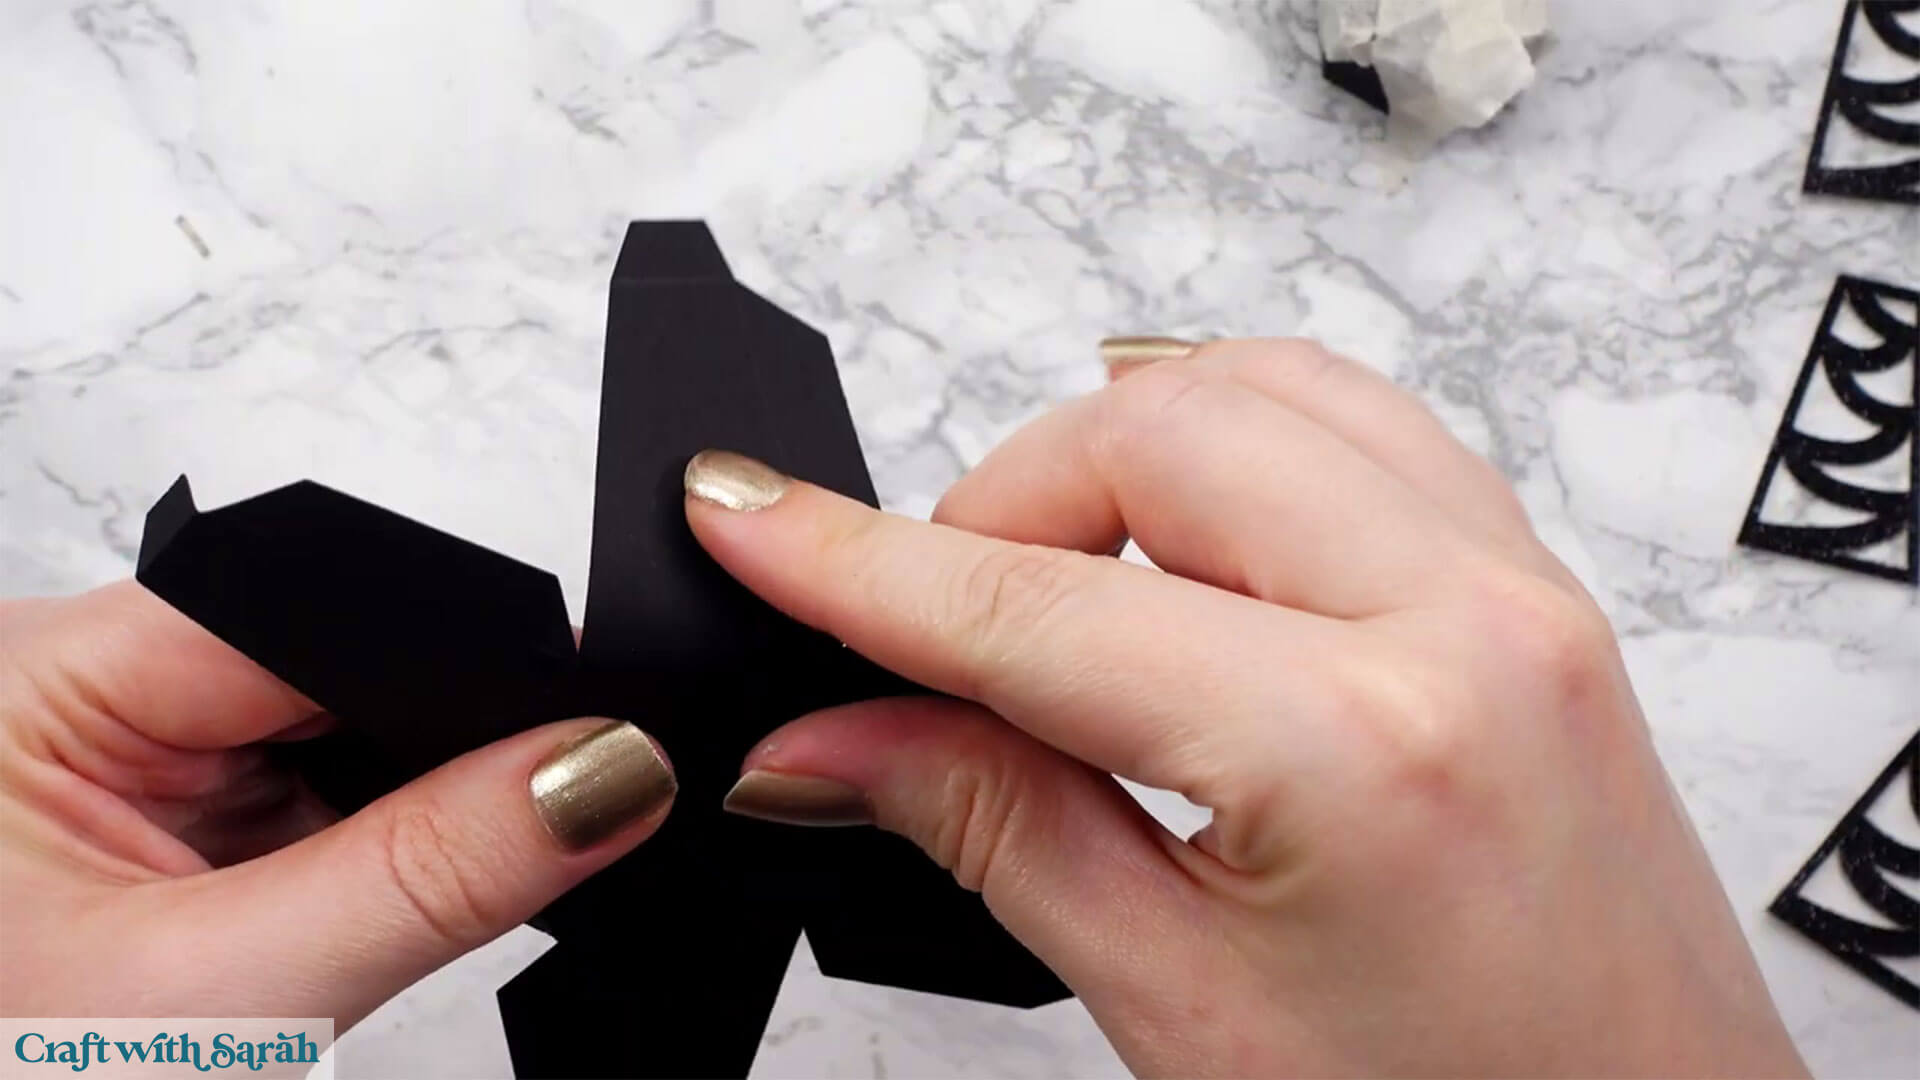
You don’t need to glue the smaller tabs, they will be left open. They will help hold the tealight holders onto the candelabra.
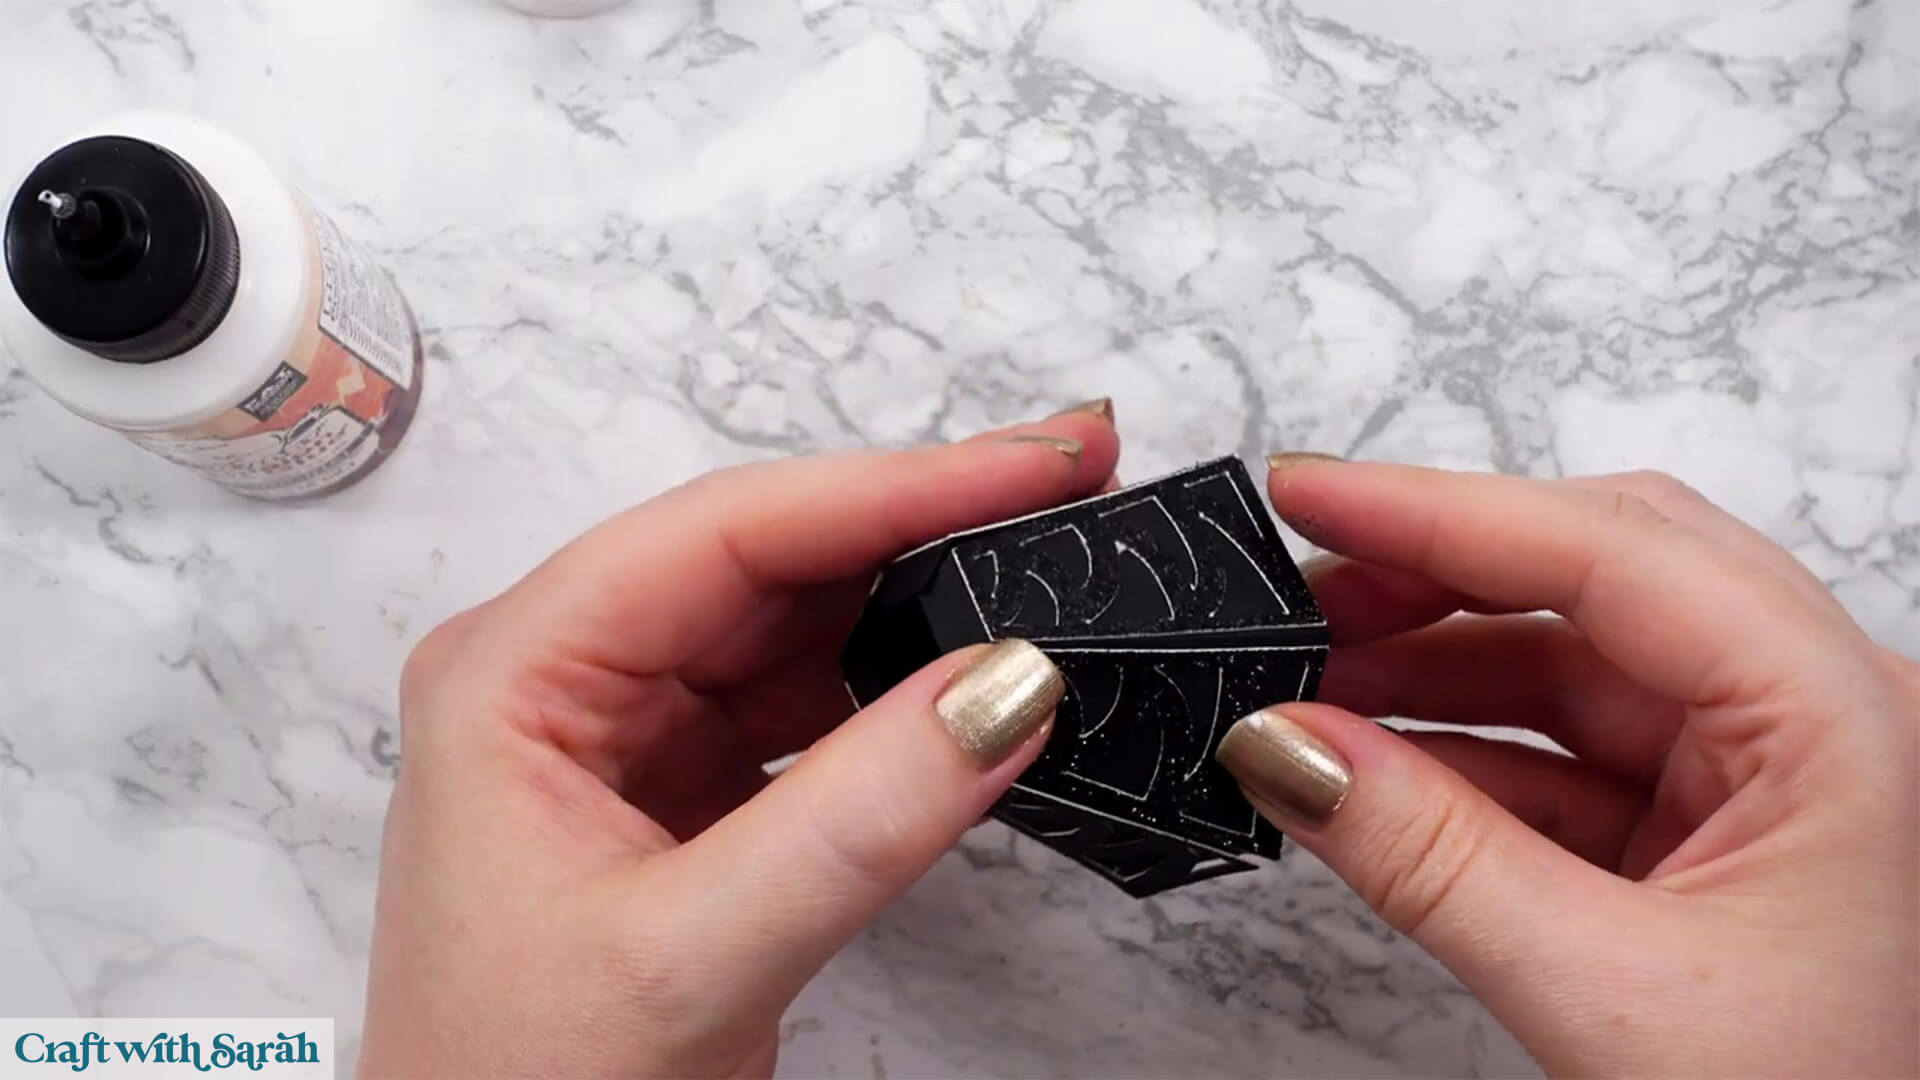
Then glue the glitter card detailing to each corresponding section.
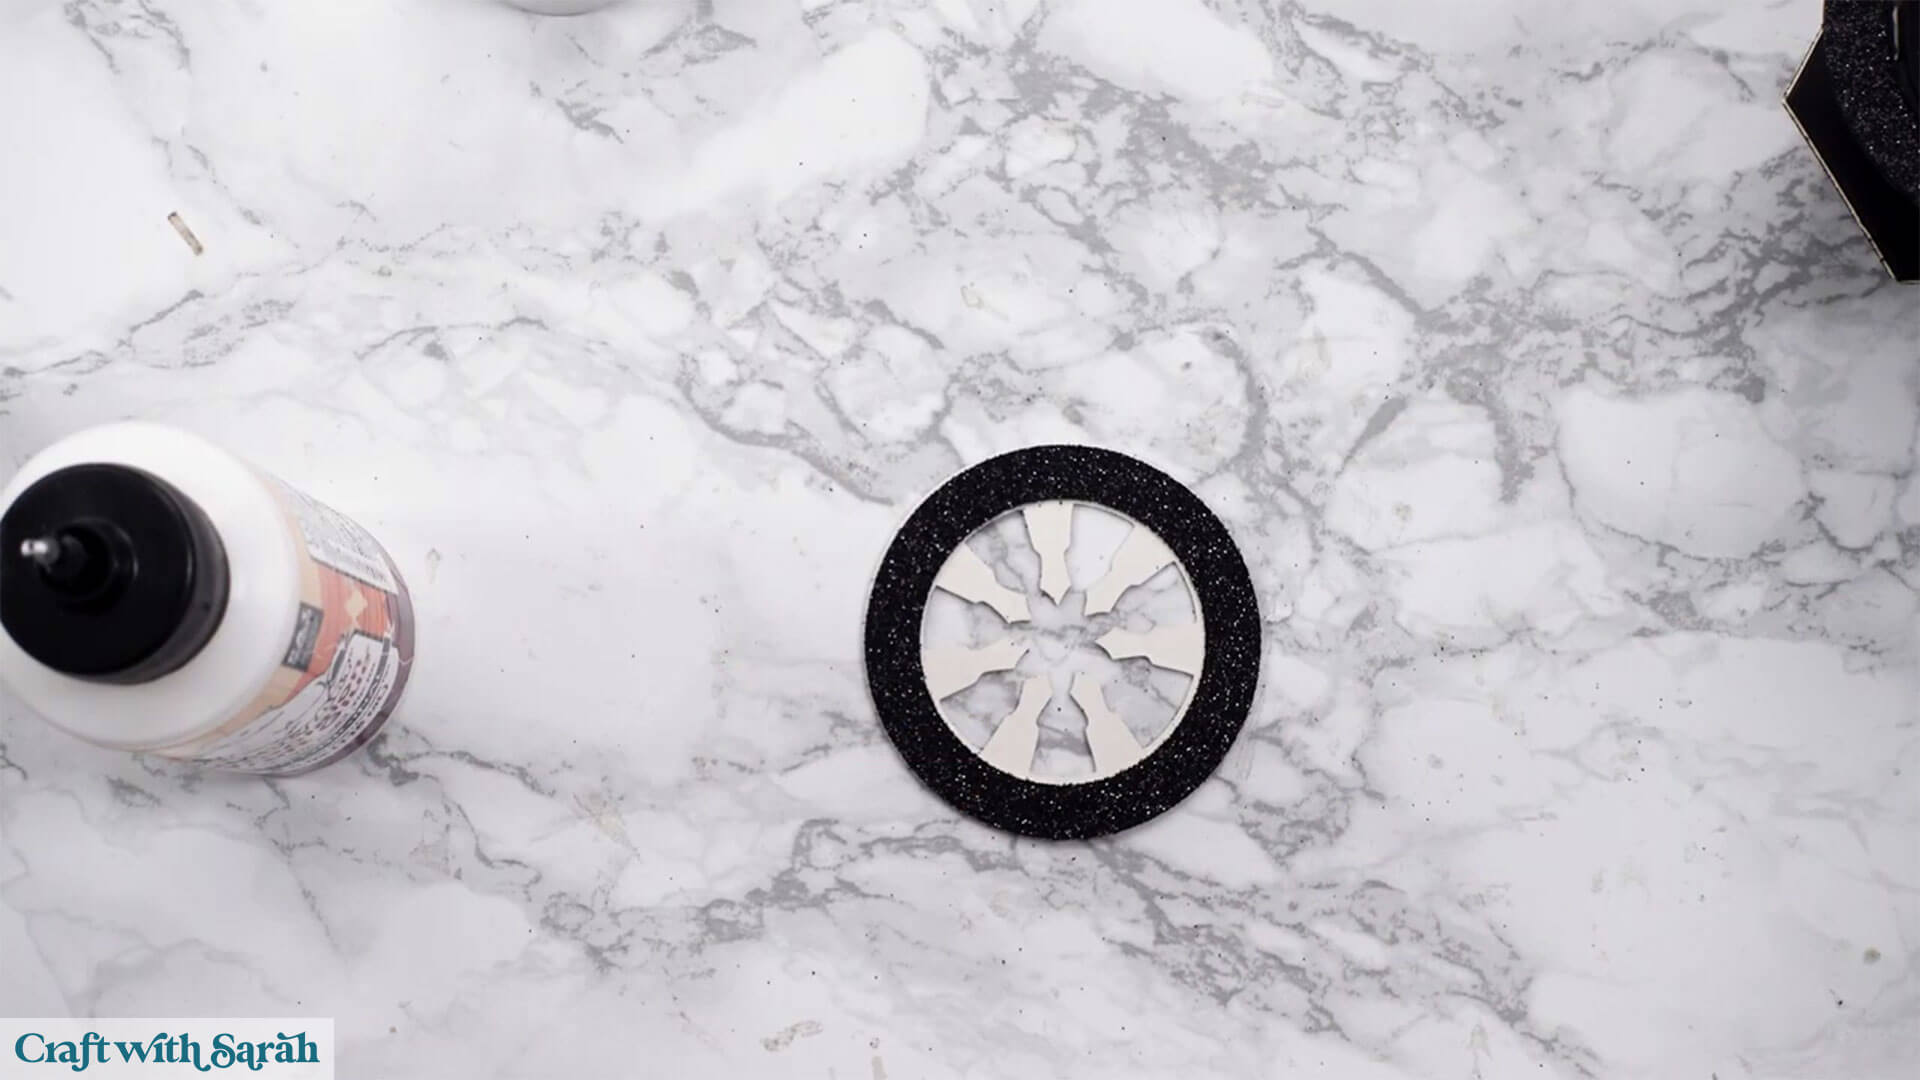
Take the two circular pieces: one is an outline and the other has 7 shapes pointing inwards.
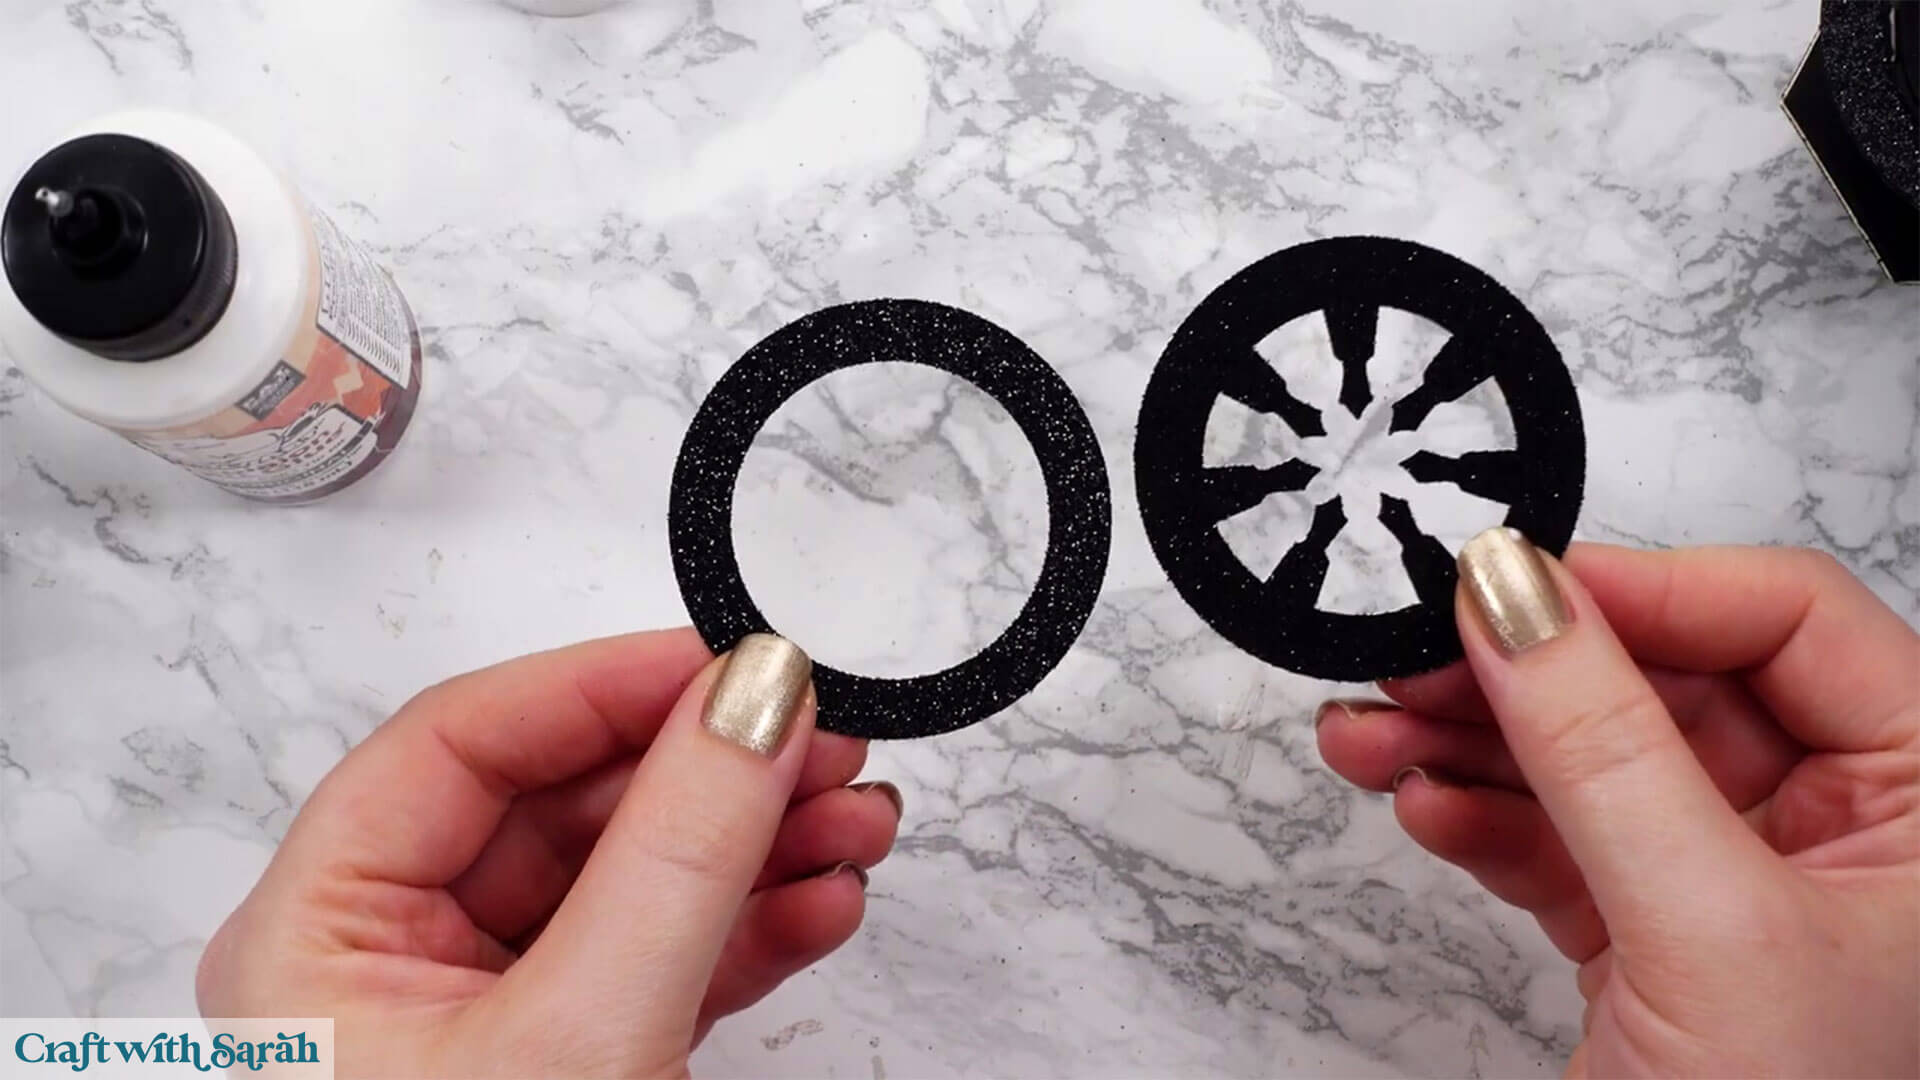
Glue them back to back.
Now take the next 4 pieces which you can see in the image below.
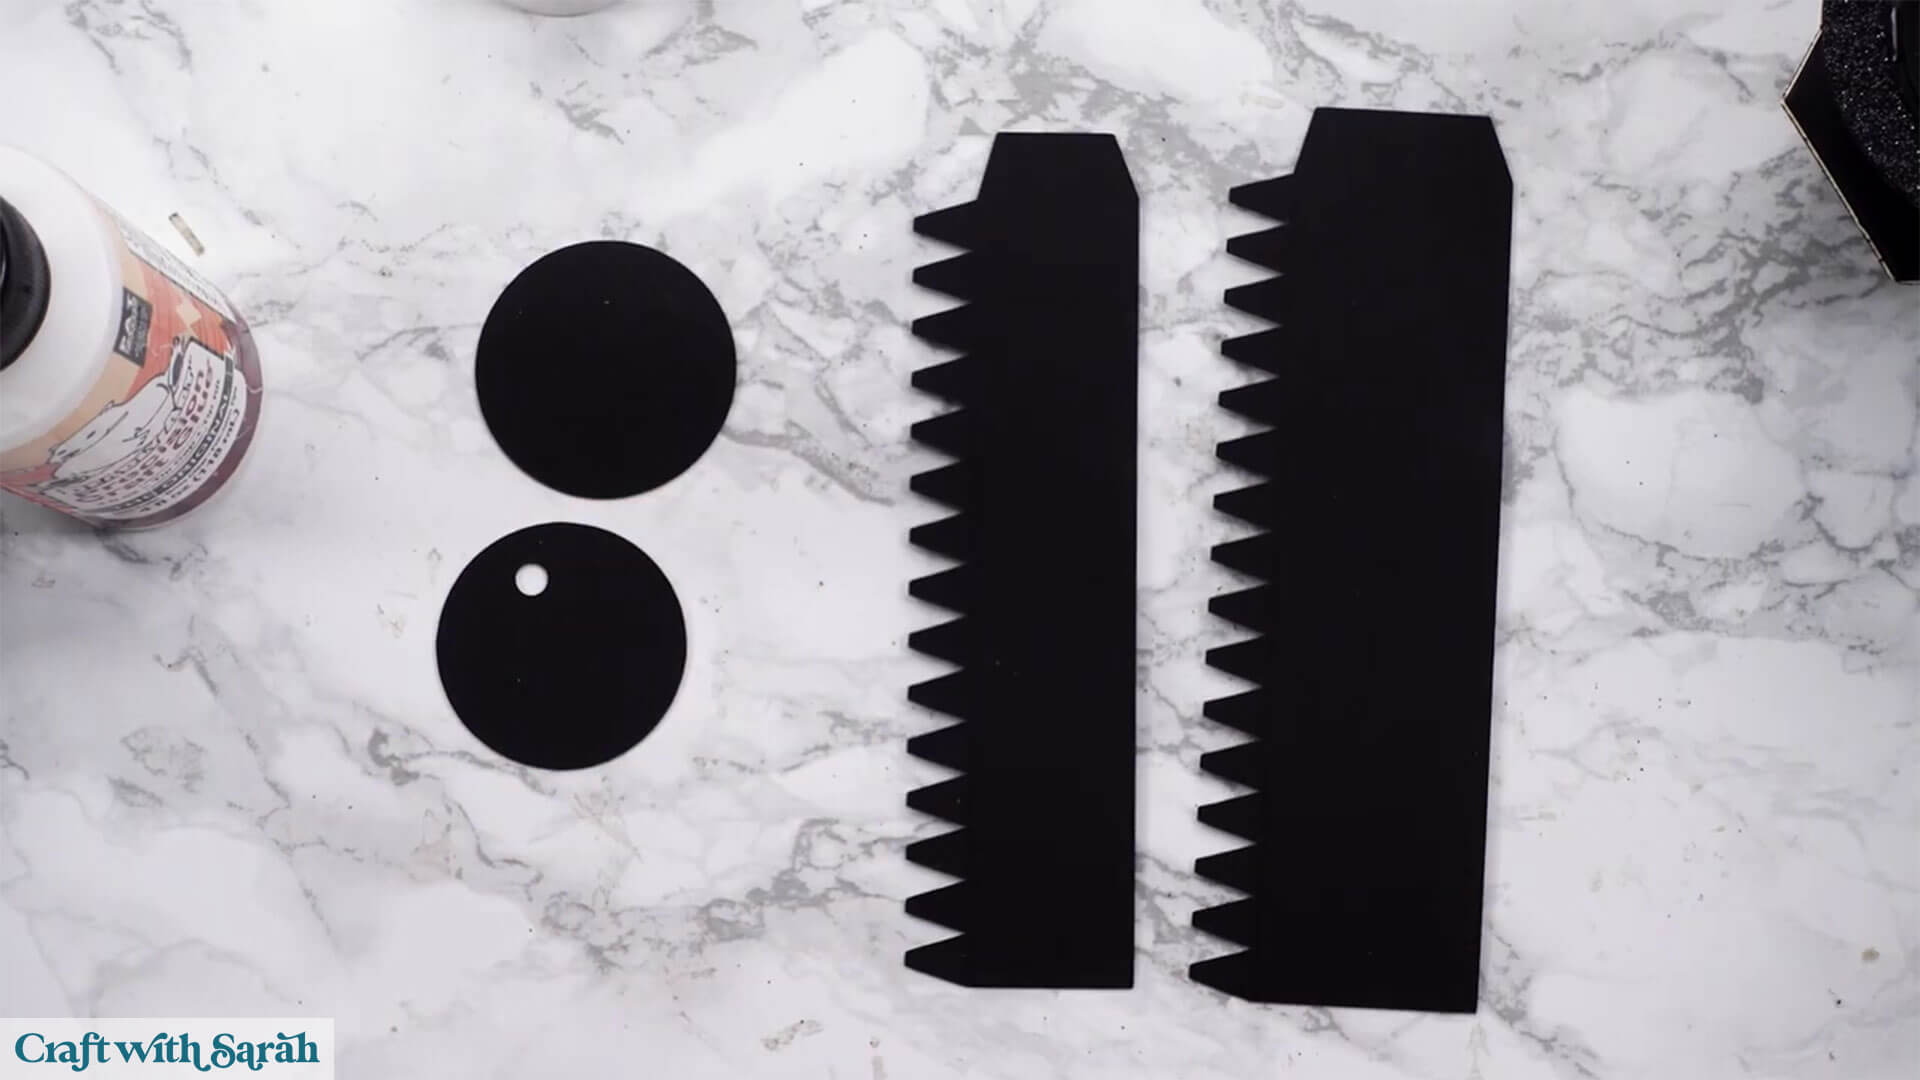
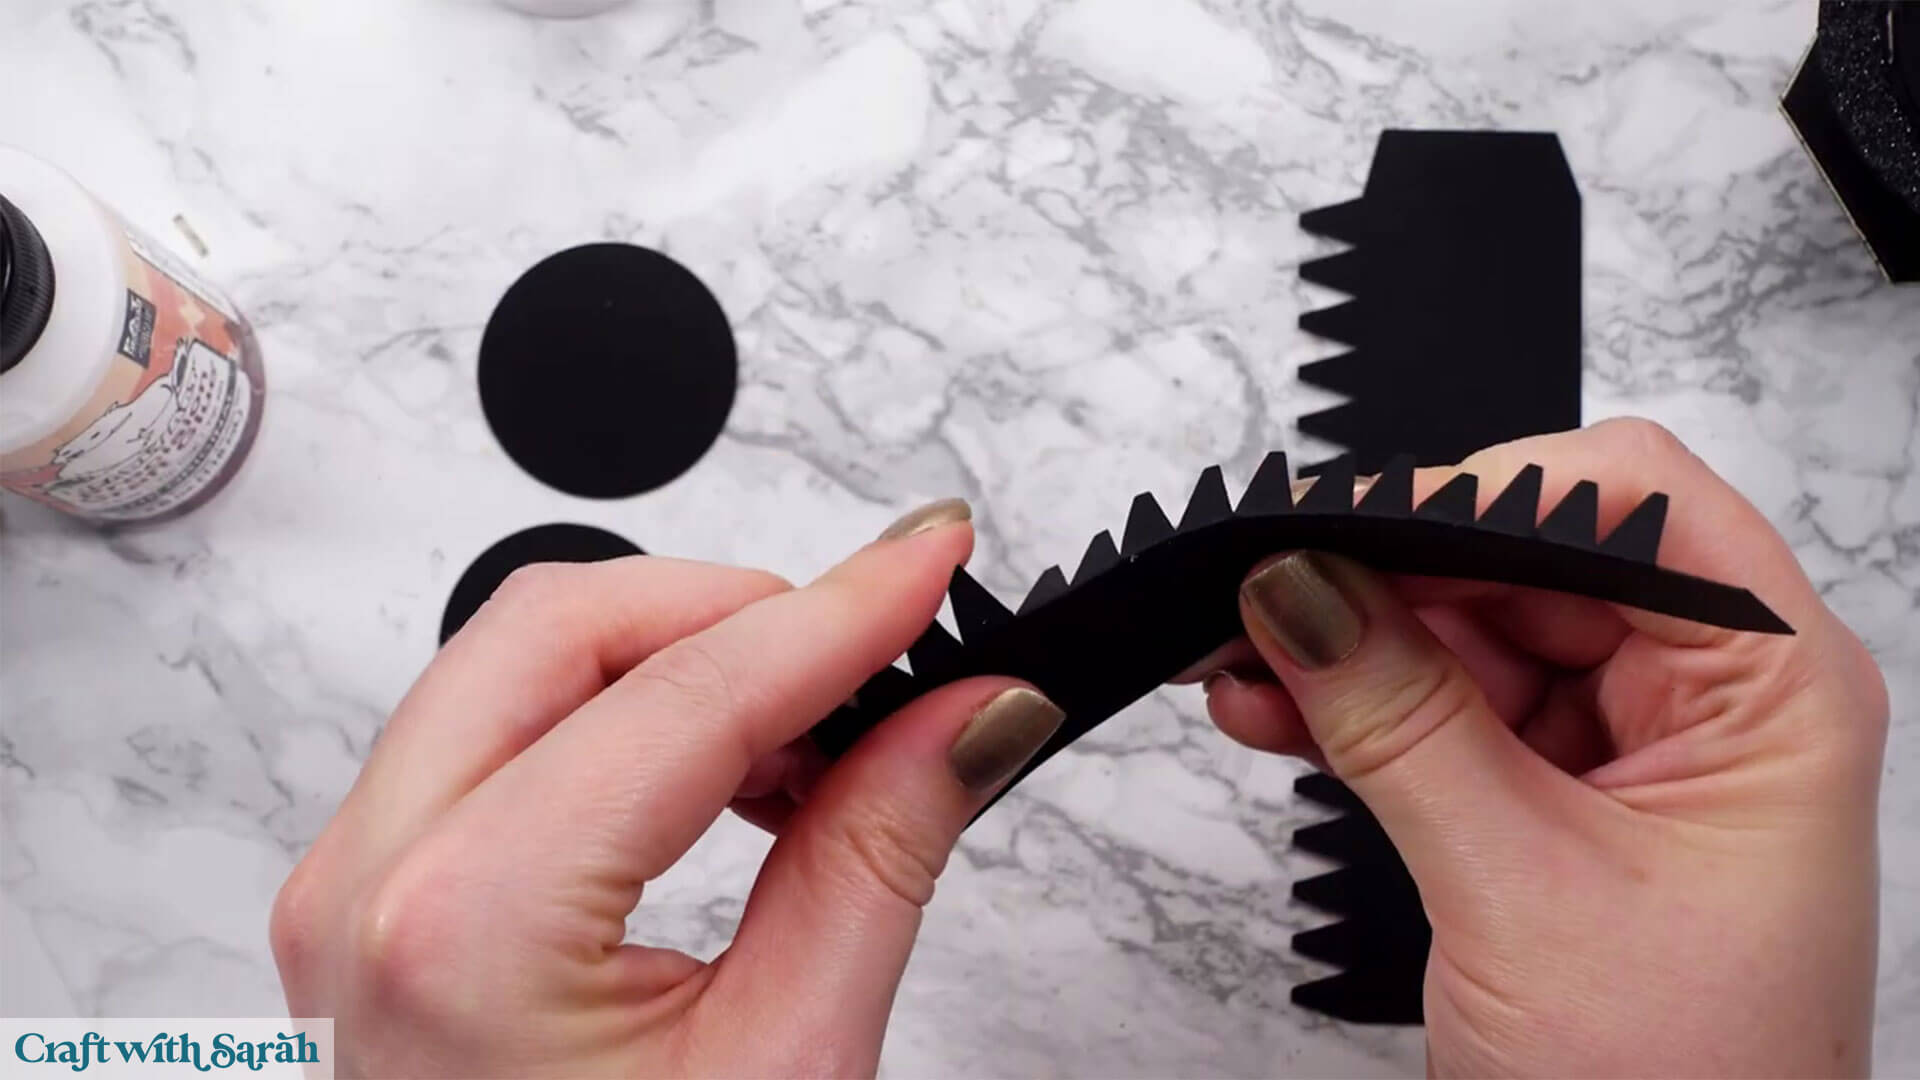
Start with the smaller of the crocodile teeth and fold all the tabs inwards.
Wrap it around itself and glue the tab to connect it. Try to keep it as circular as possible as this is what our tealight will sit in.
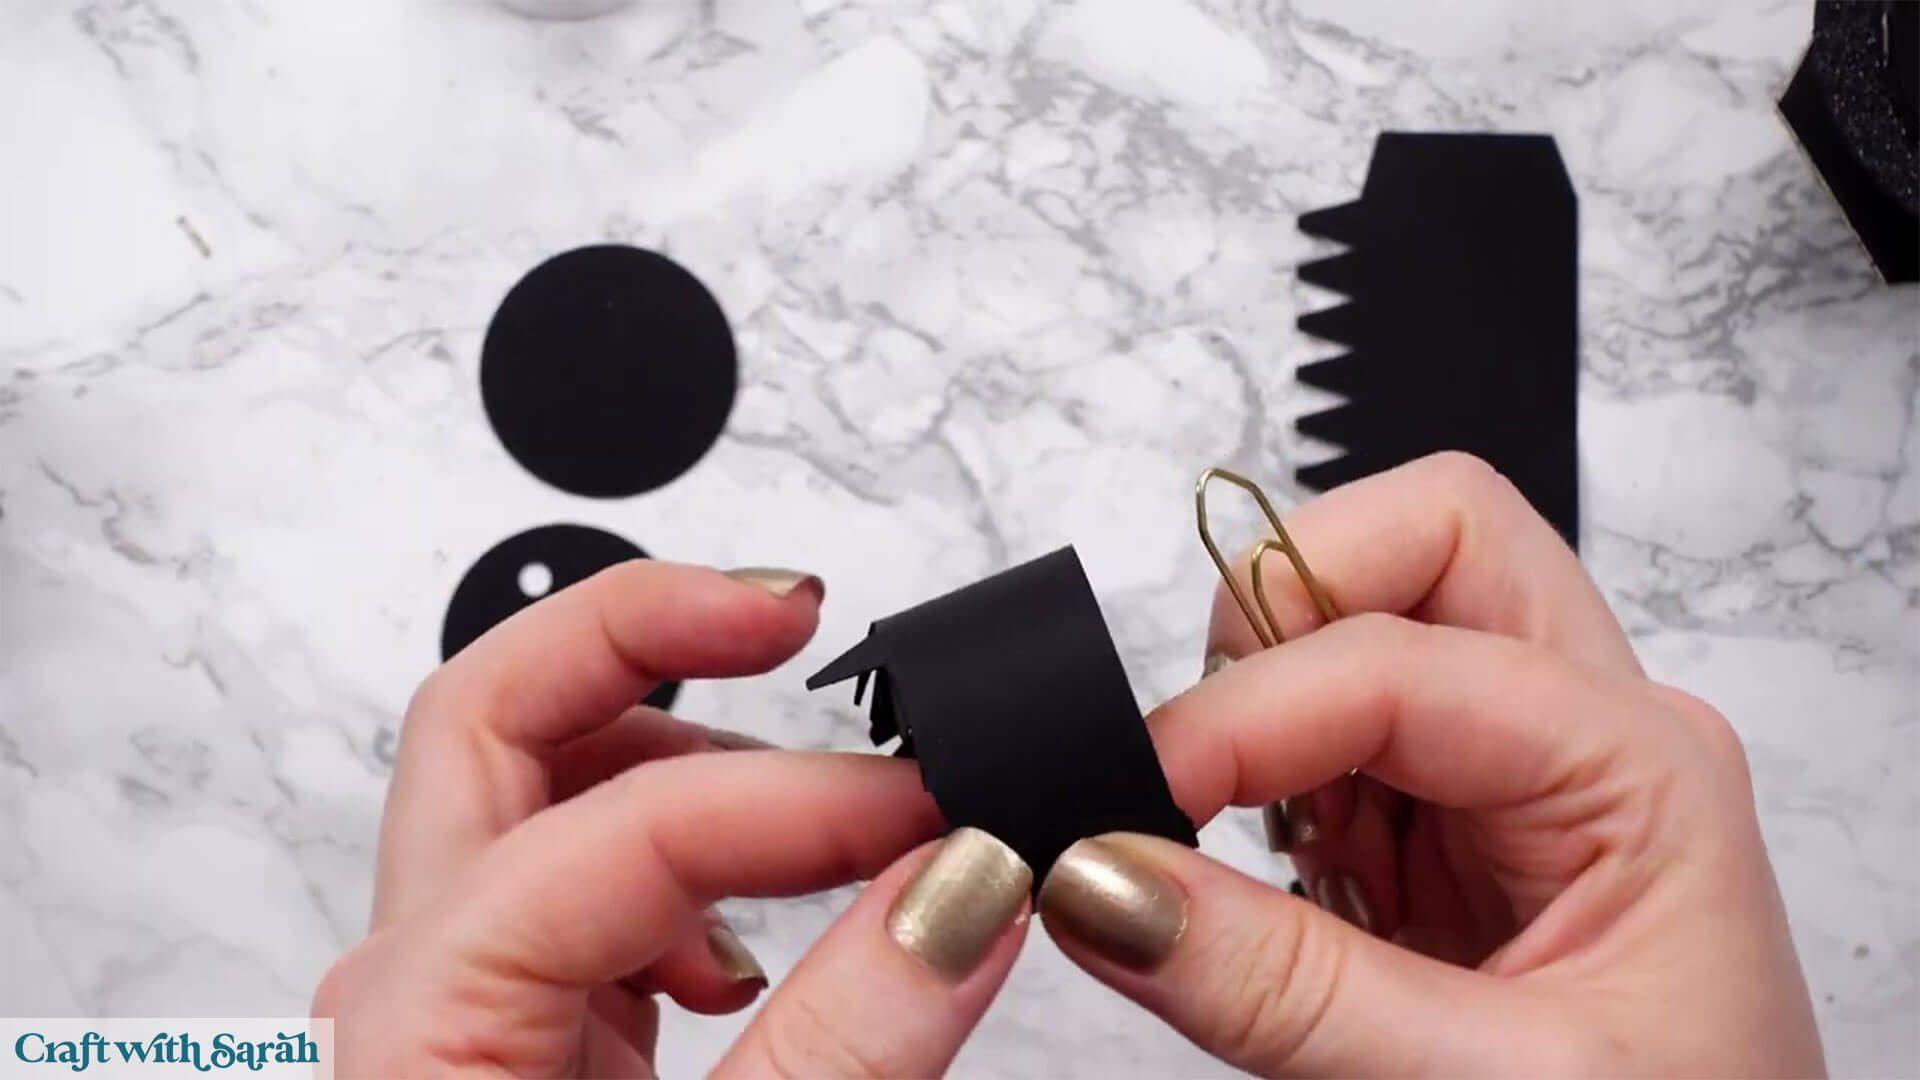
You can use a paperclip to hold it together whilst the glue dries.
Whilst it dries, tuck down all the crocodile teeth and stick the circle with the cutout on top.
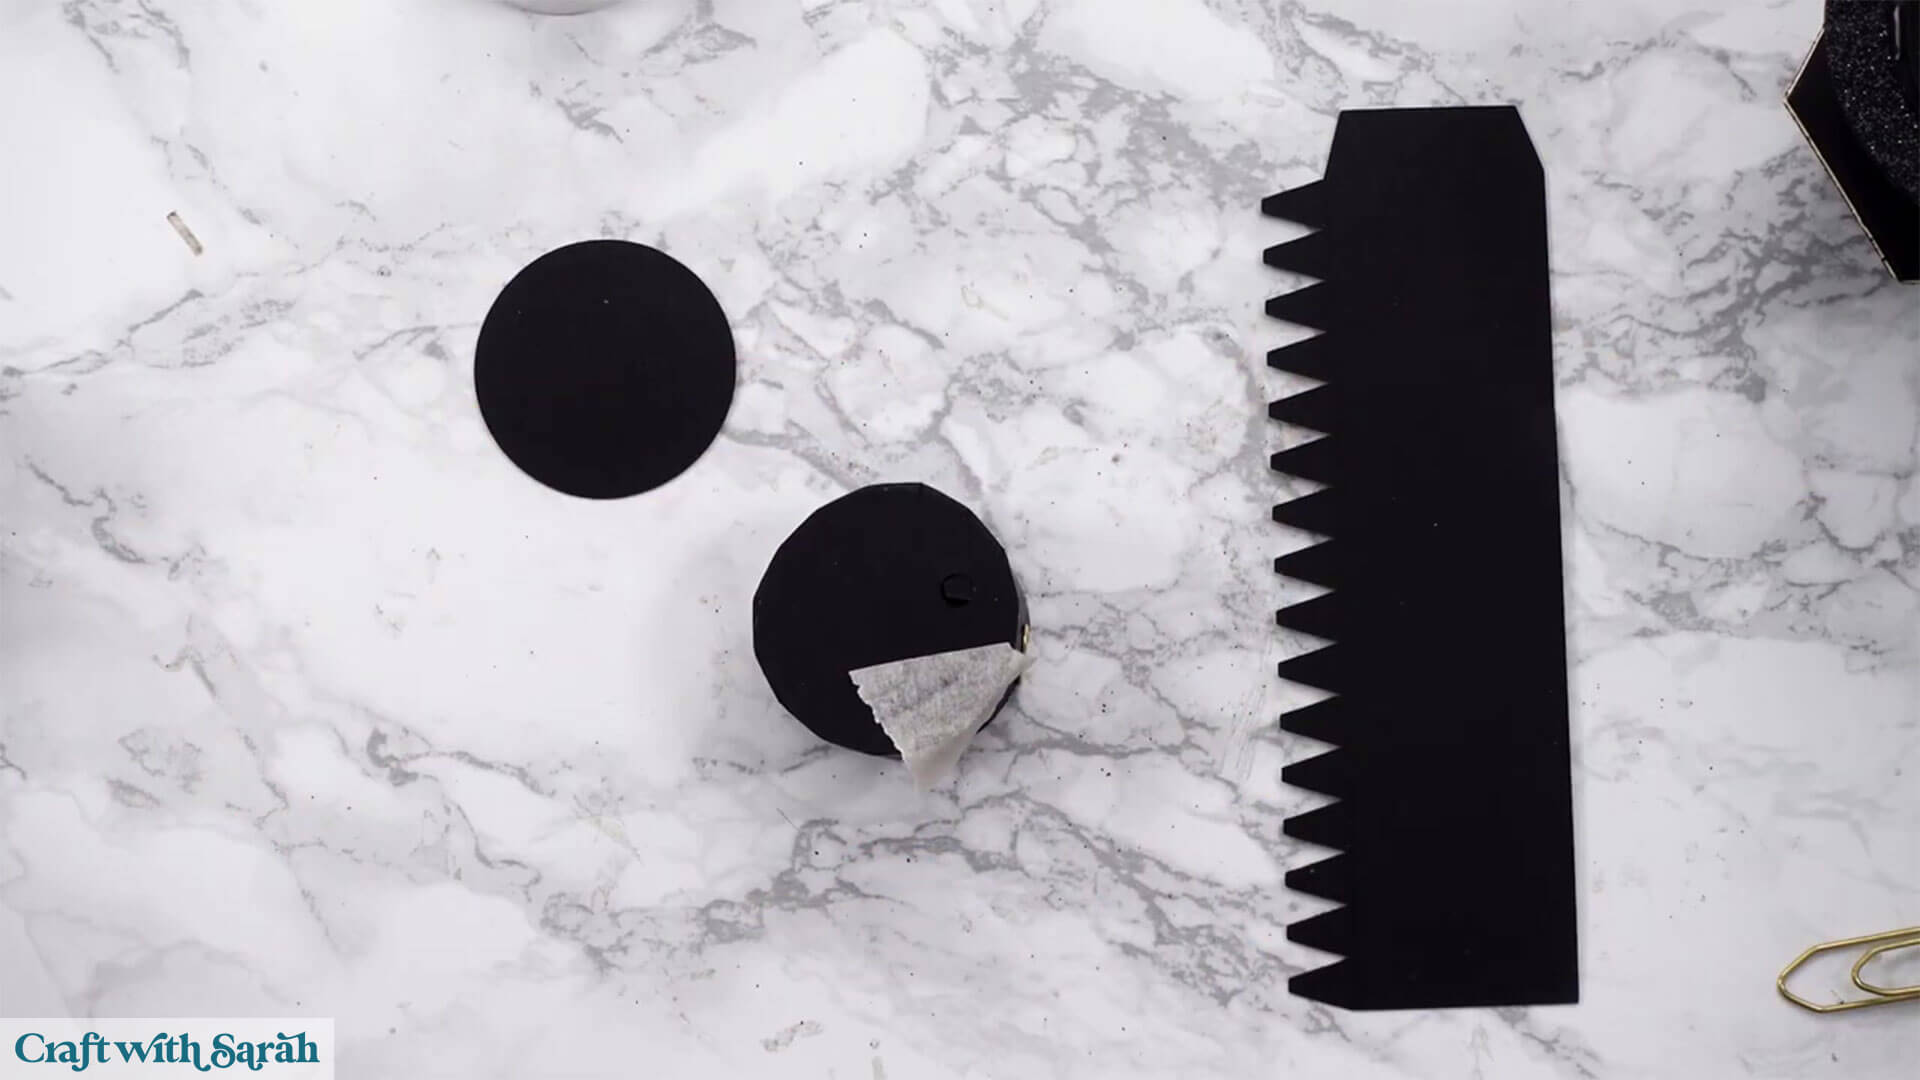
Repeat the steps for the other crocodile tooth piece but glue the other circle on top at the end.
Place the previous circular piece into the current which will make a little ridge for the tealight to sit on.
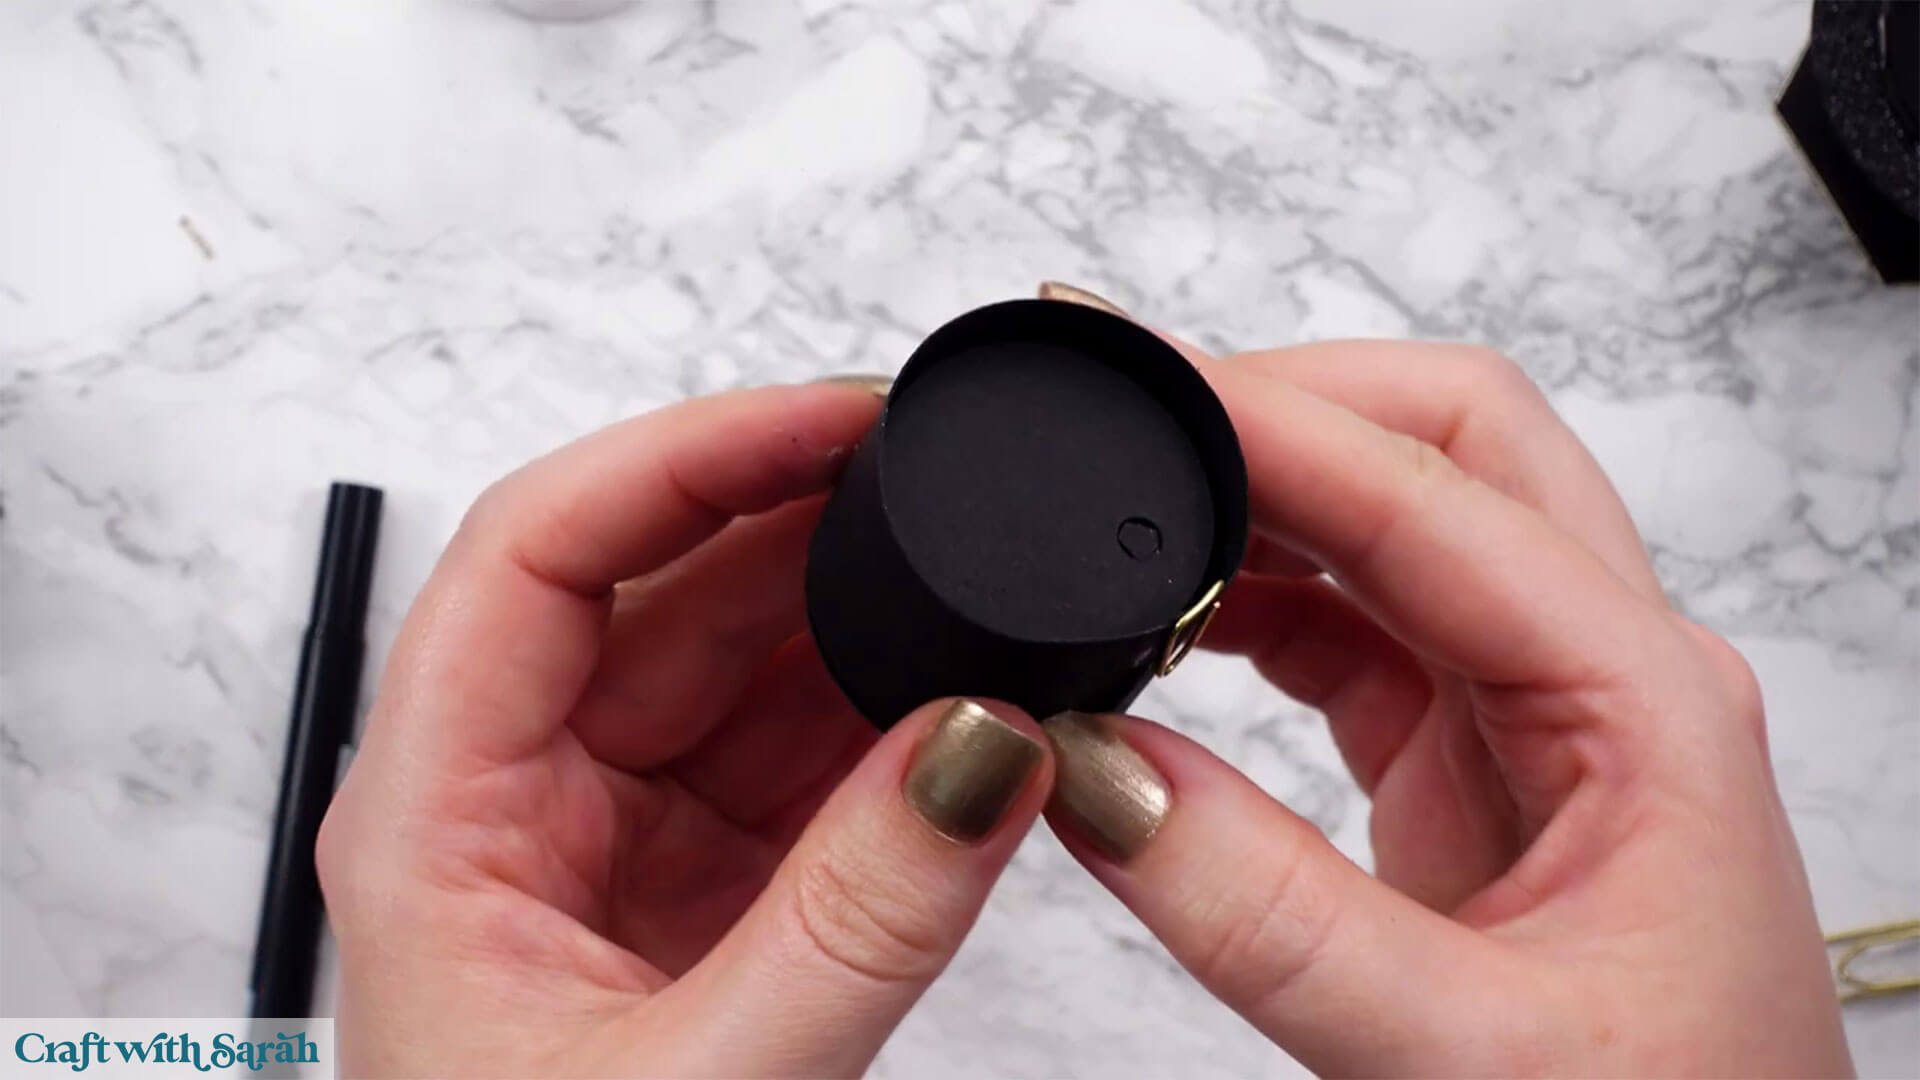
When all the glue is dry, take the decorative circle and push the decorative middle pieces up.
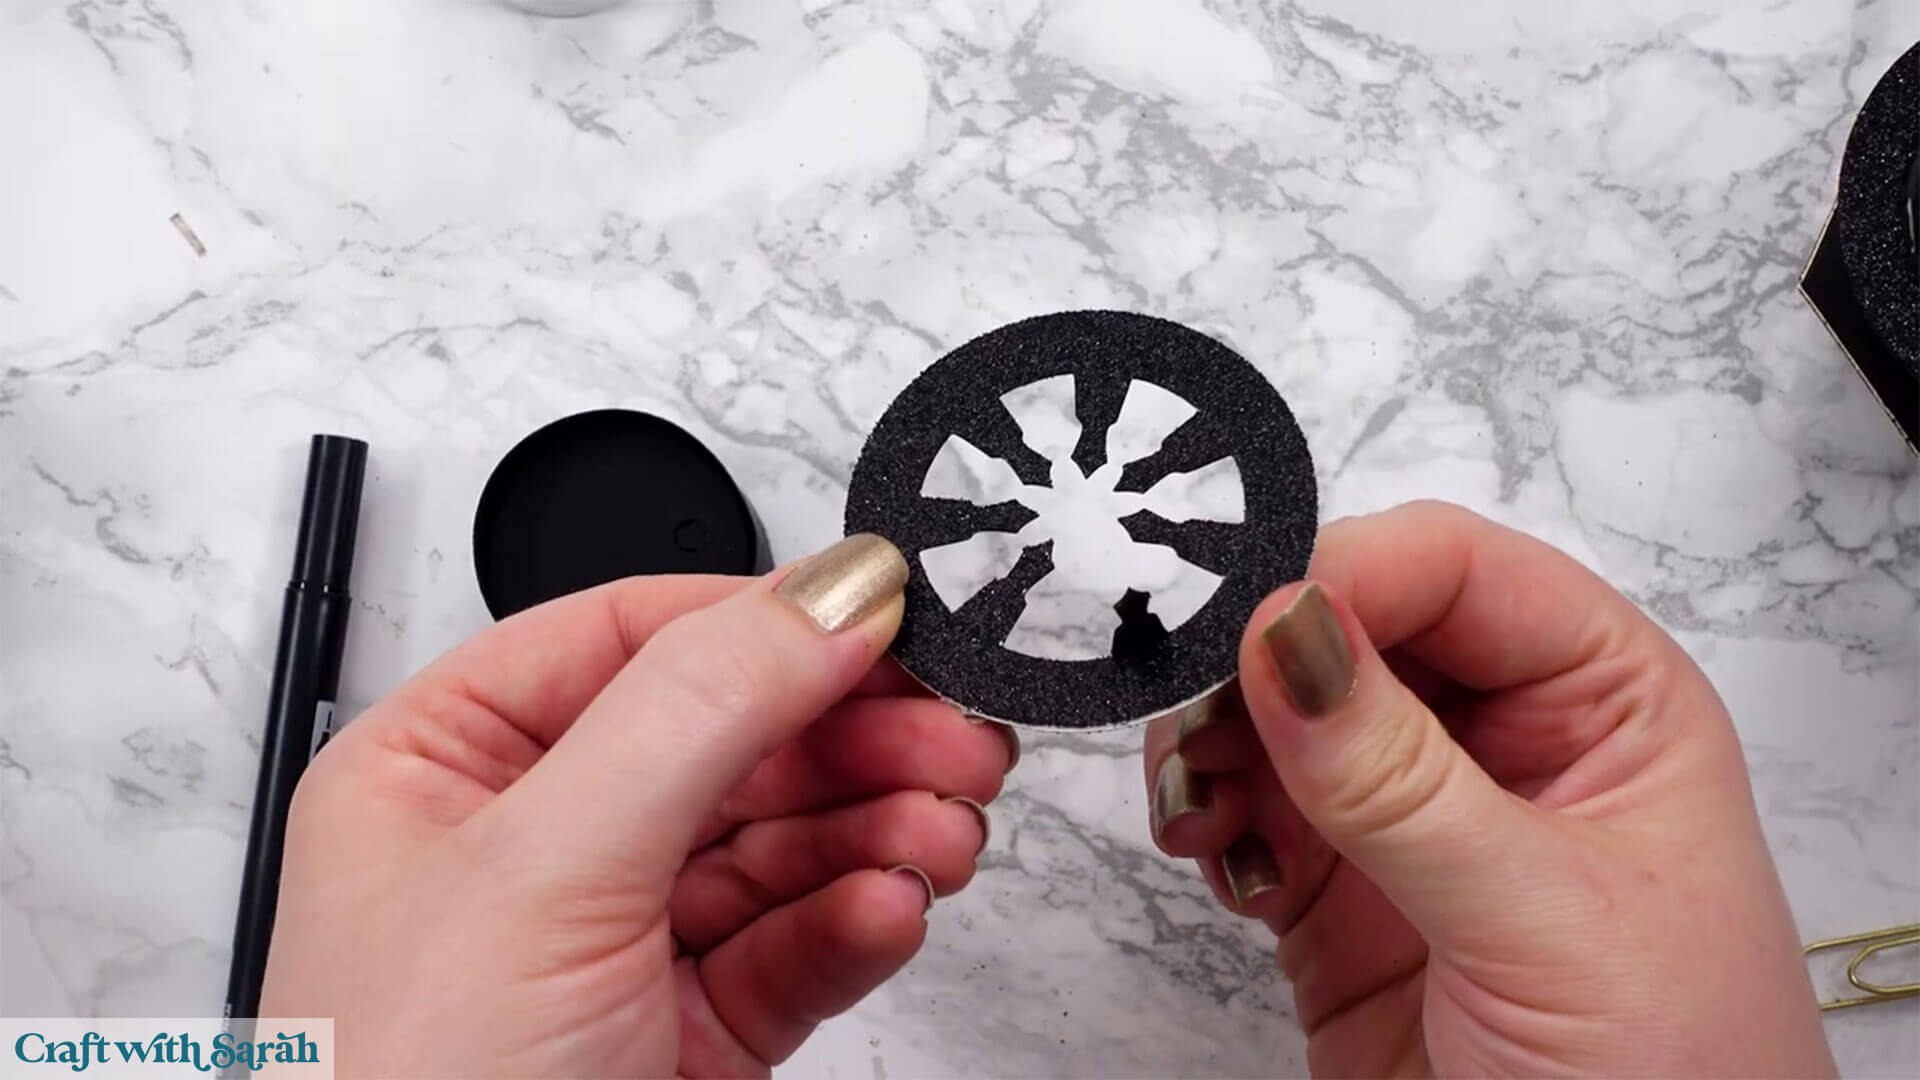
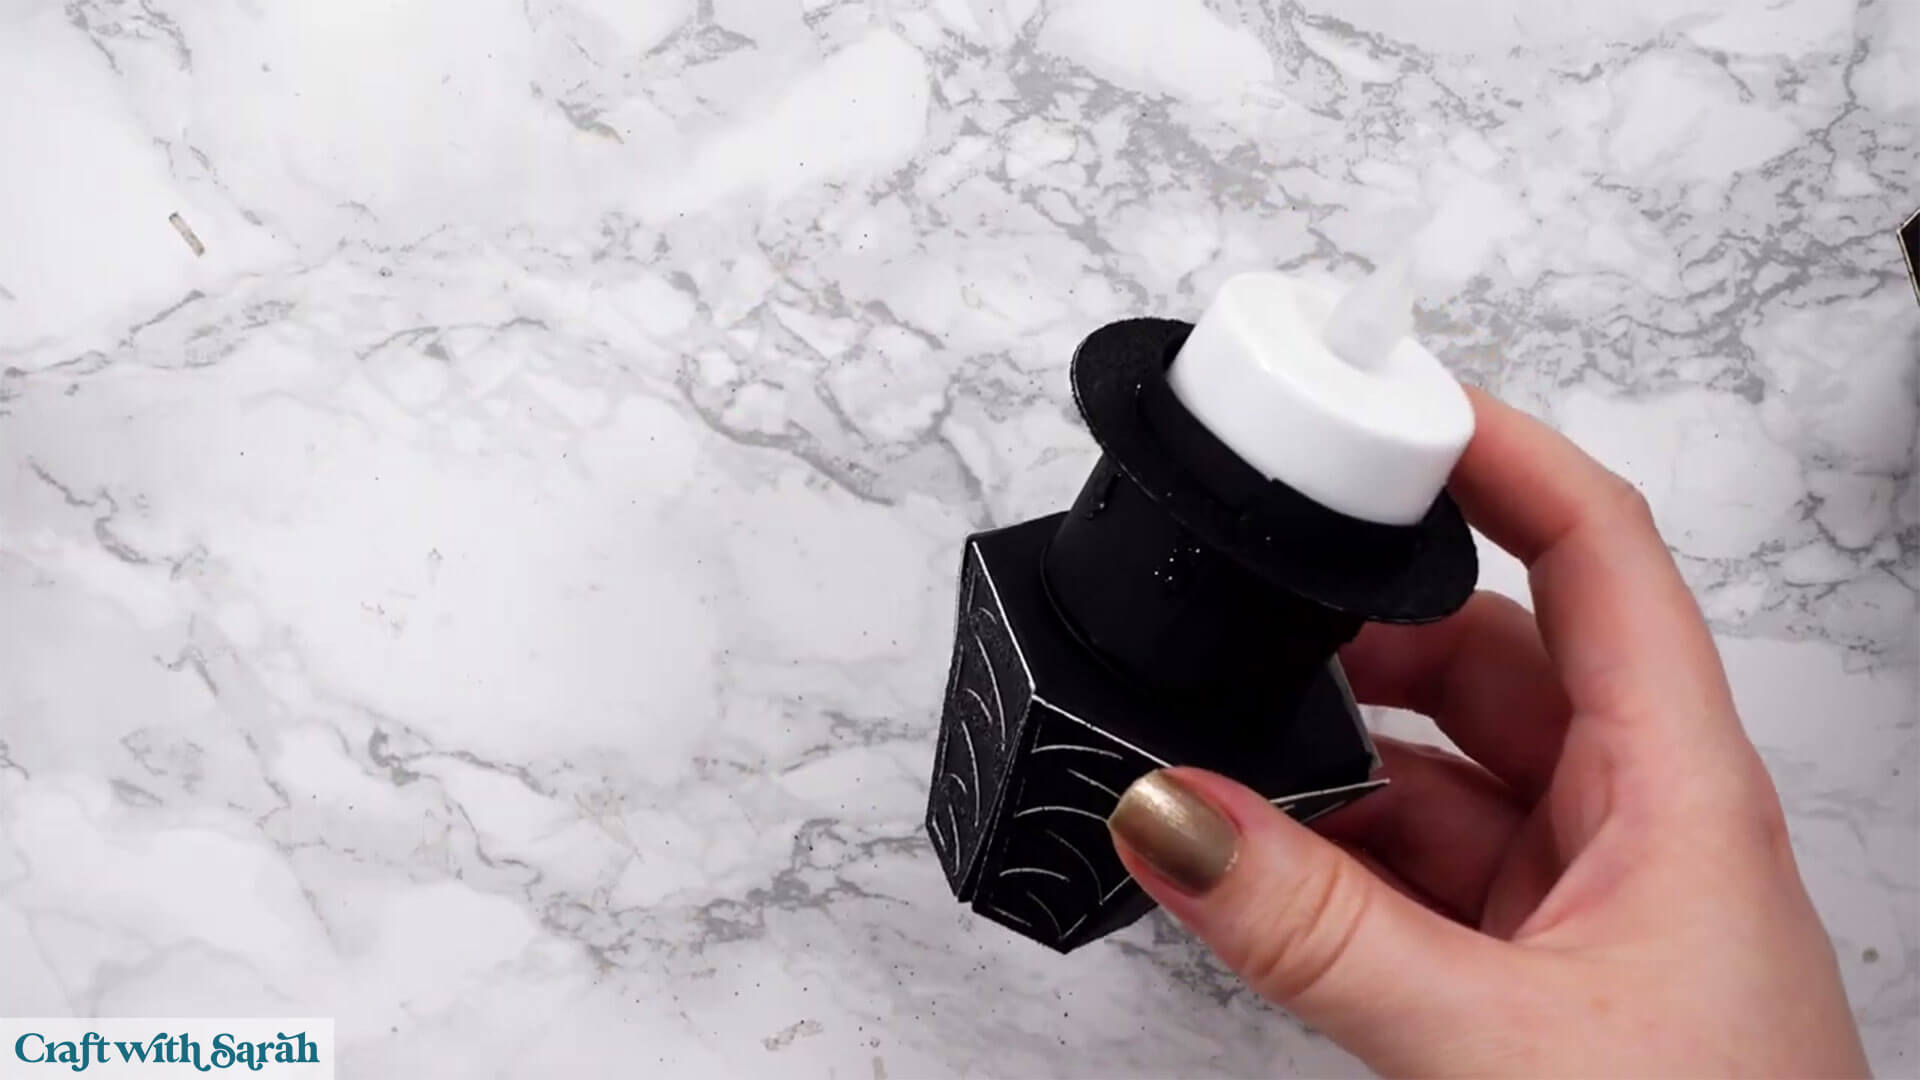
Place it on top of the tealight holder like the image below.
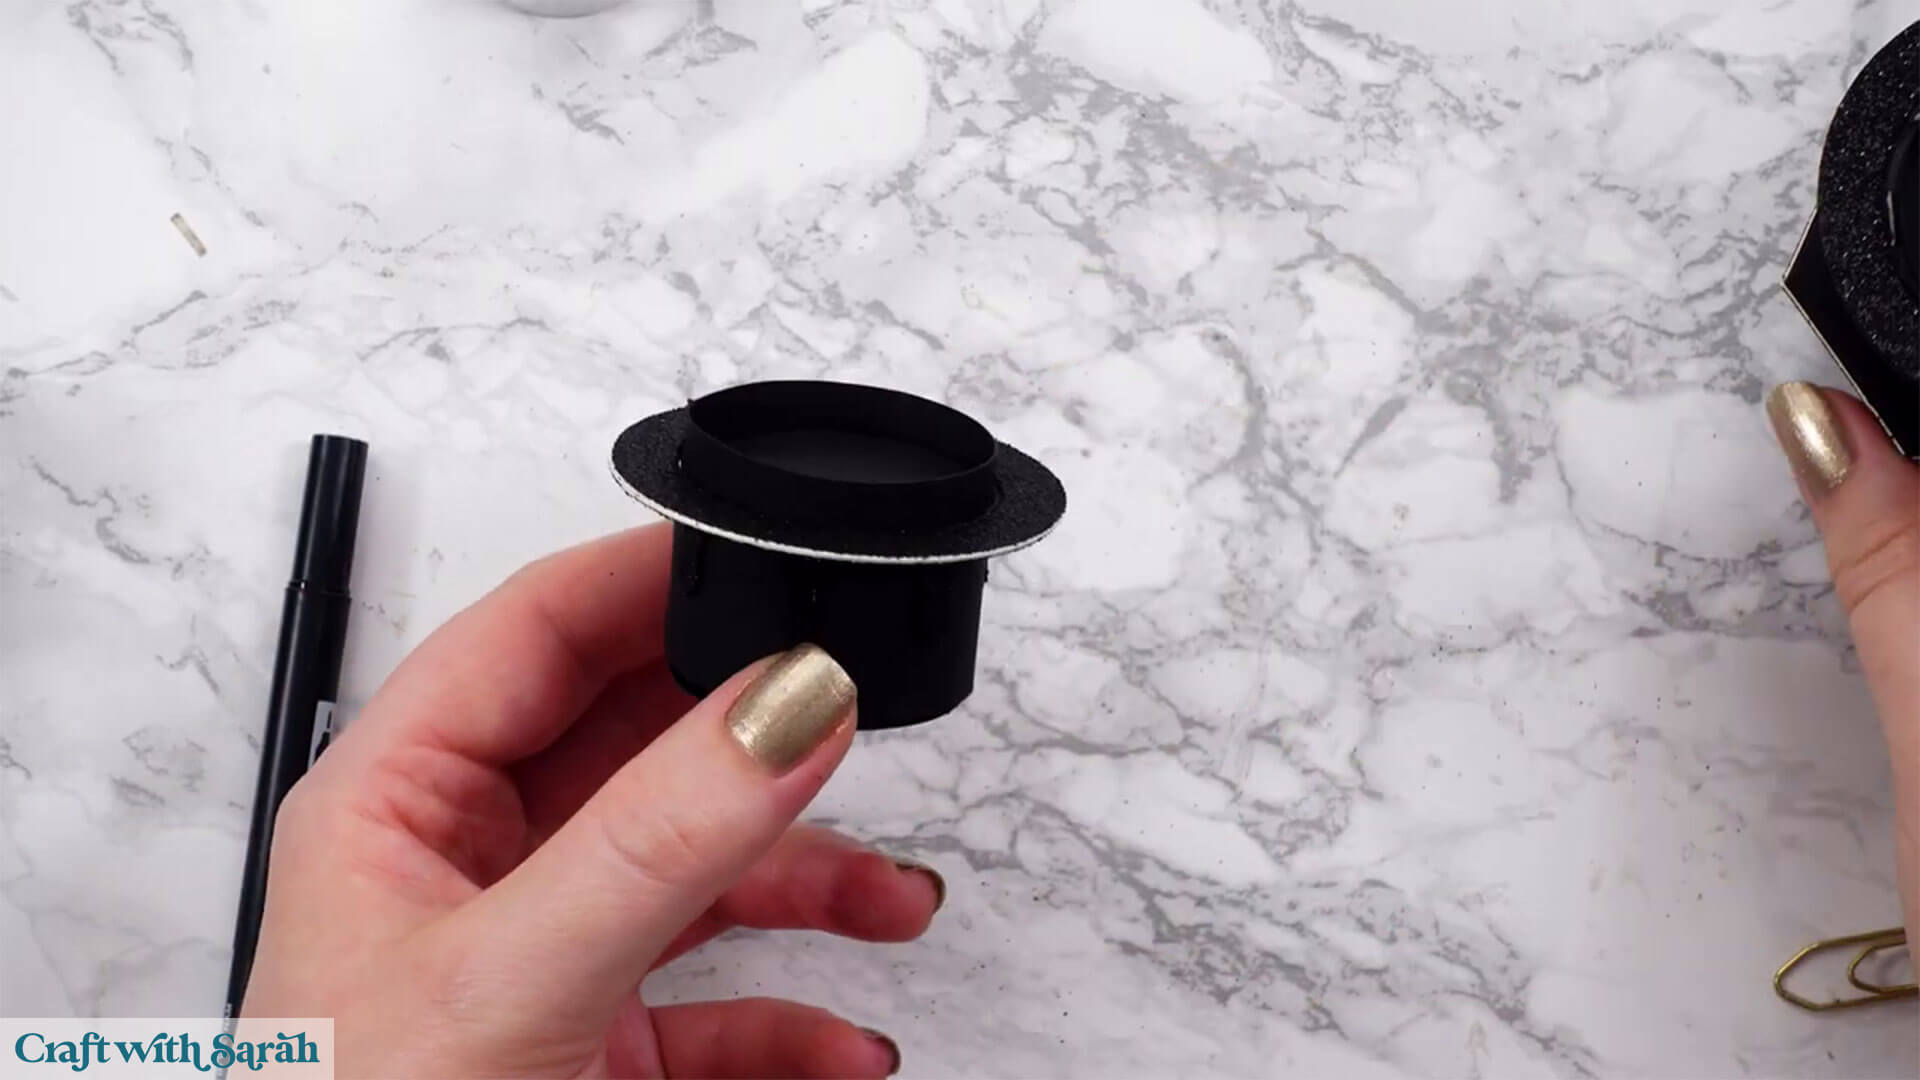
Take the base of the tealight that we were working on earlier and fold the tabs in at the bottom so that it will stand up on its own.
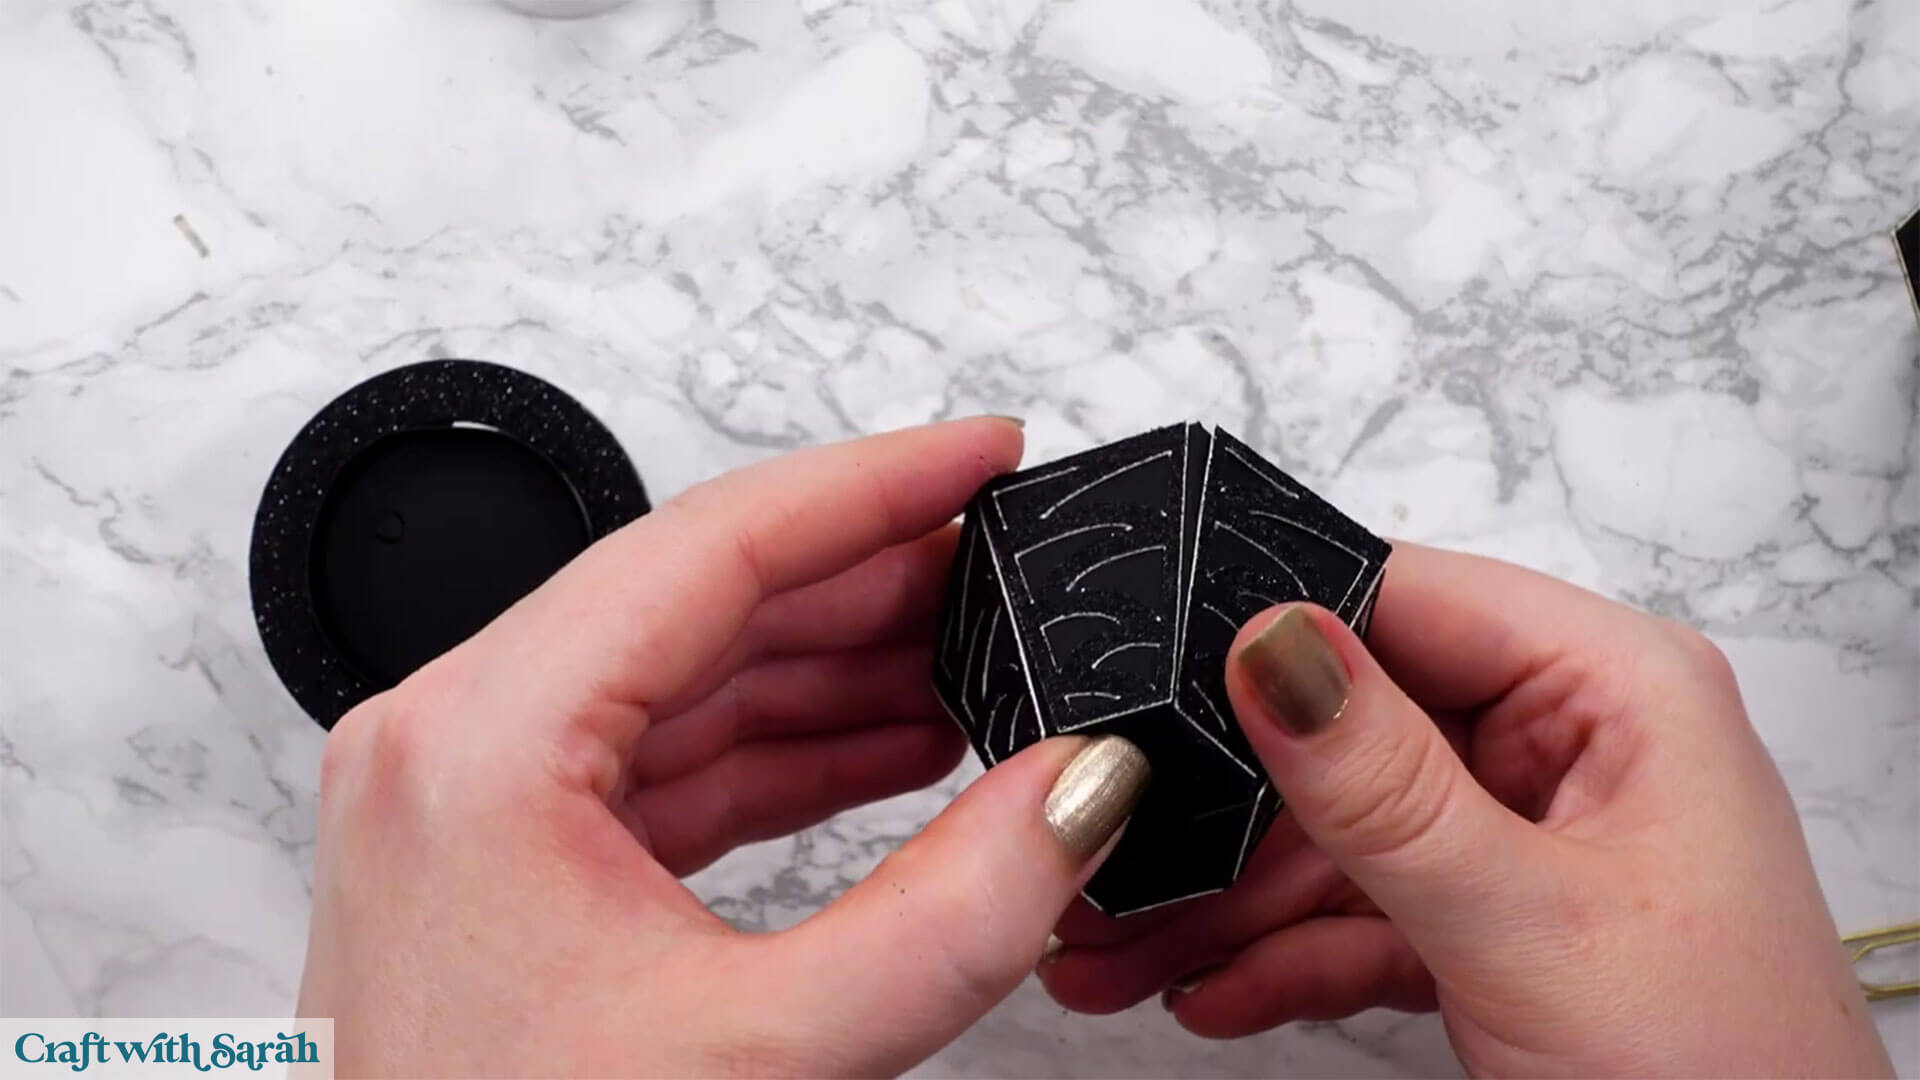
Glue the circular bottom of the top piece and stick it to the base.
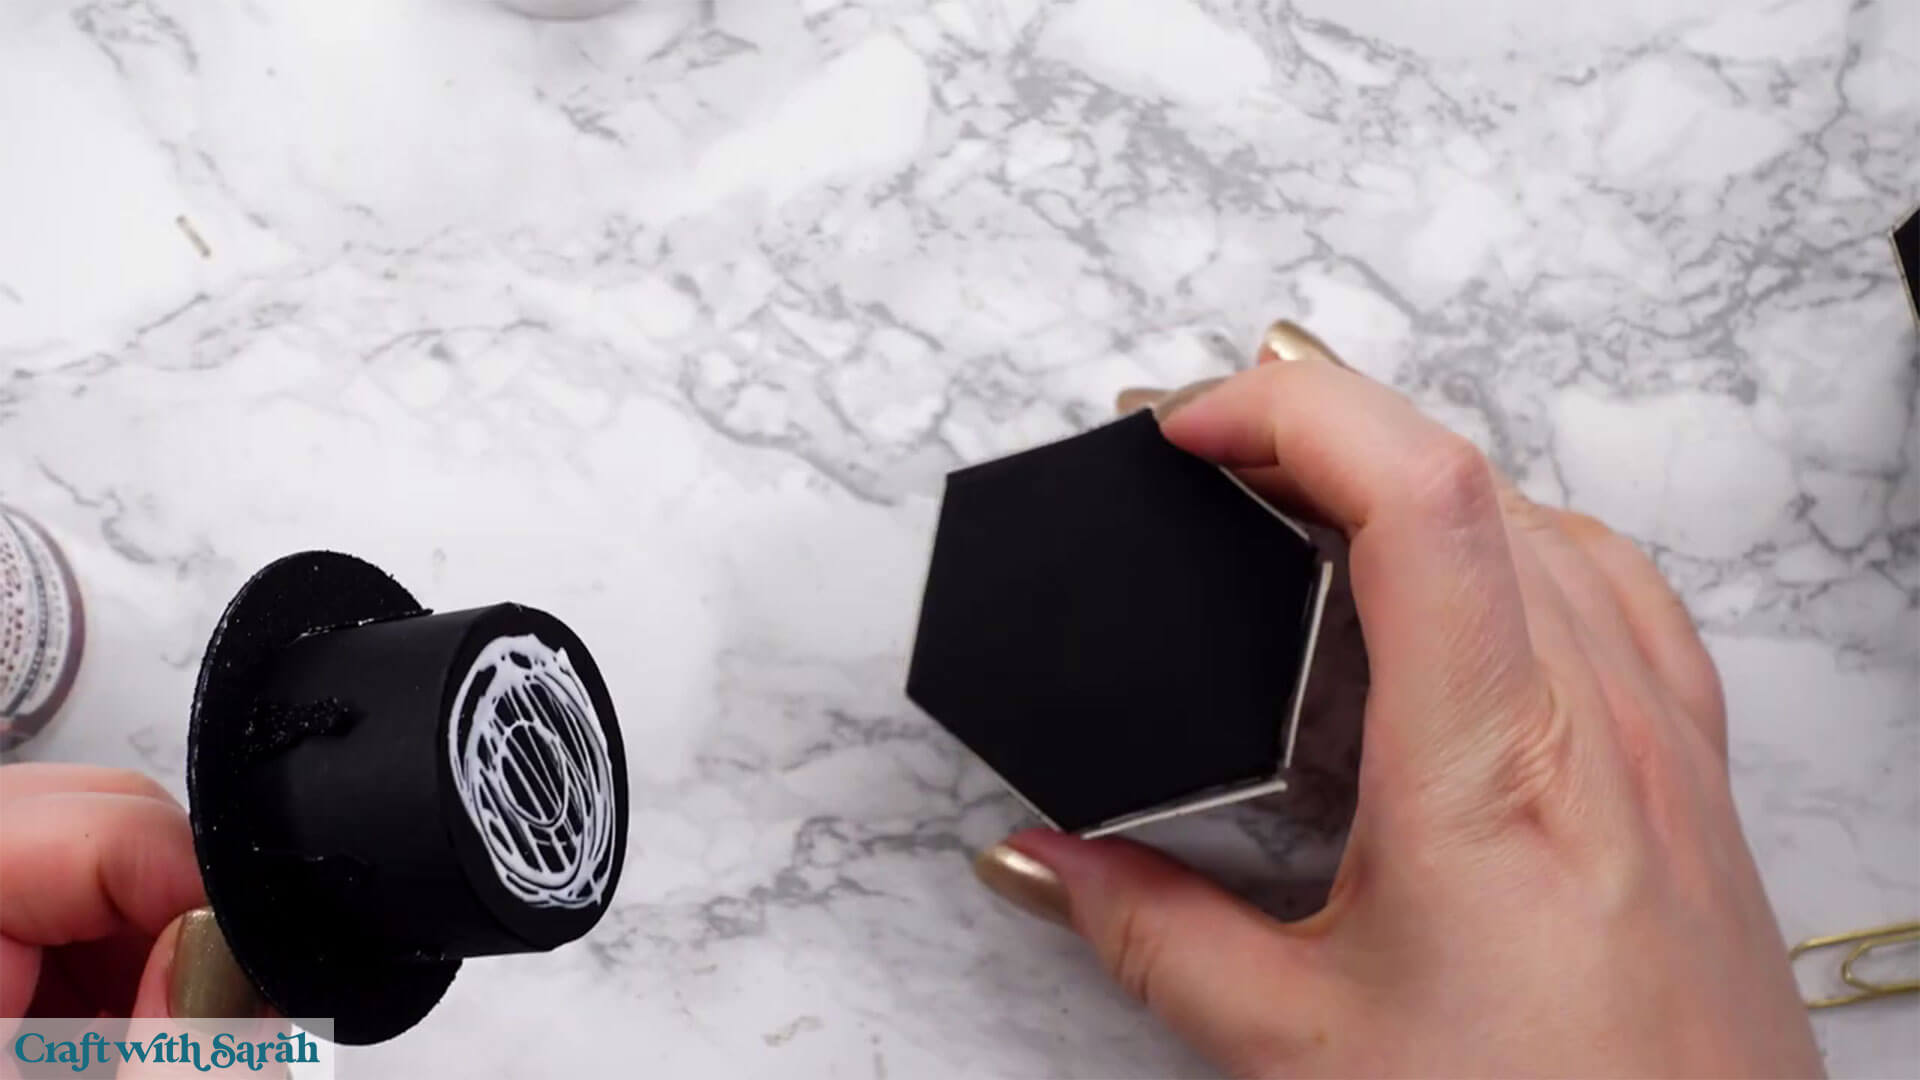
Follow the same steps until you have all 5 tealight holders assembled.
Tip: If your cardstock has a white core that shows along the edges, you can color the sides with a black marker to help them blend in.
Step 5) Assemble the base
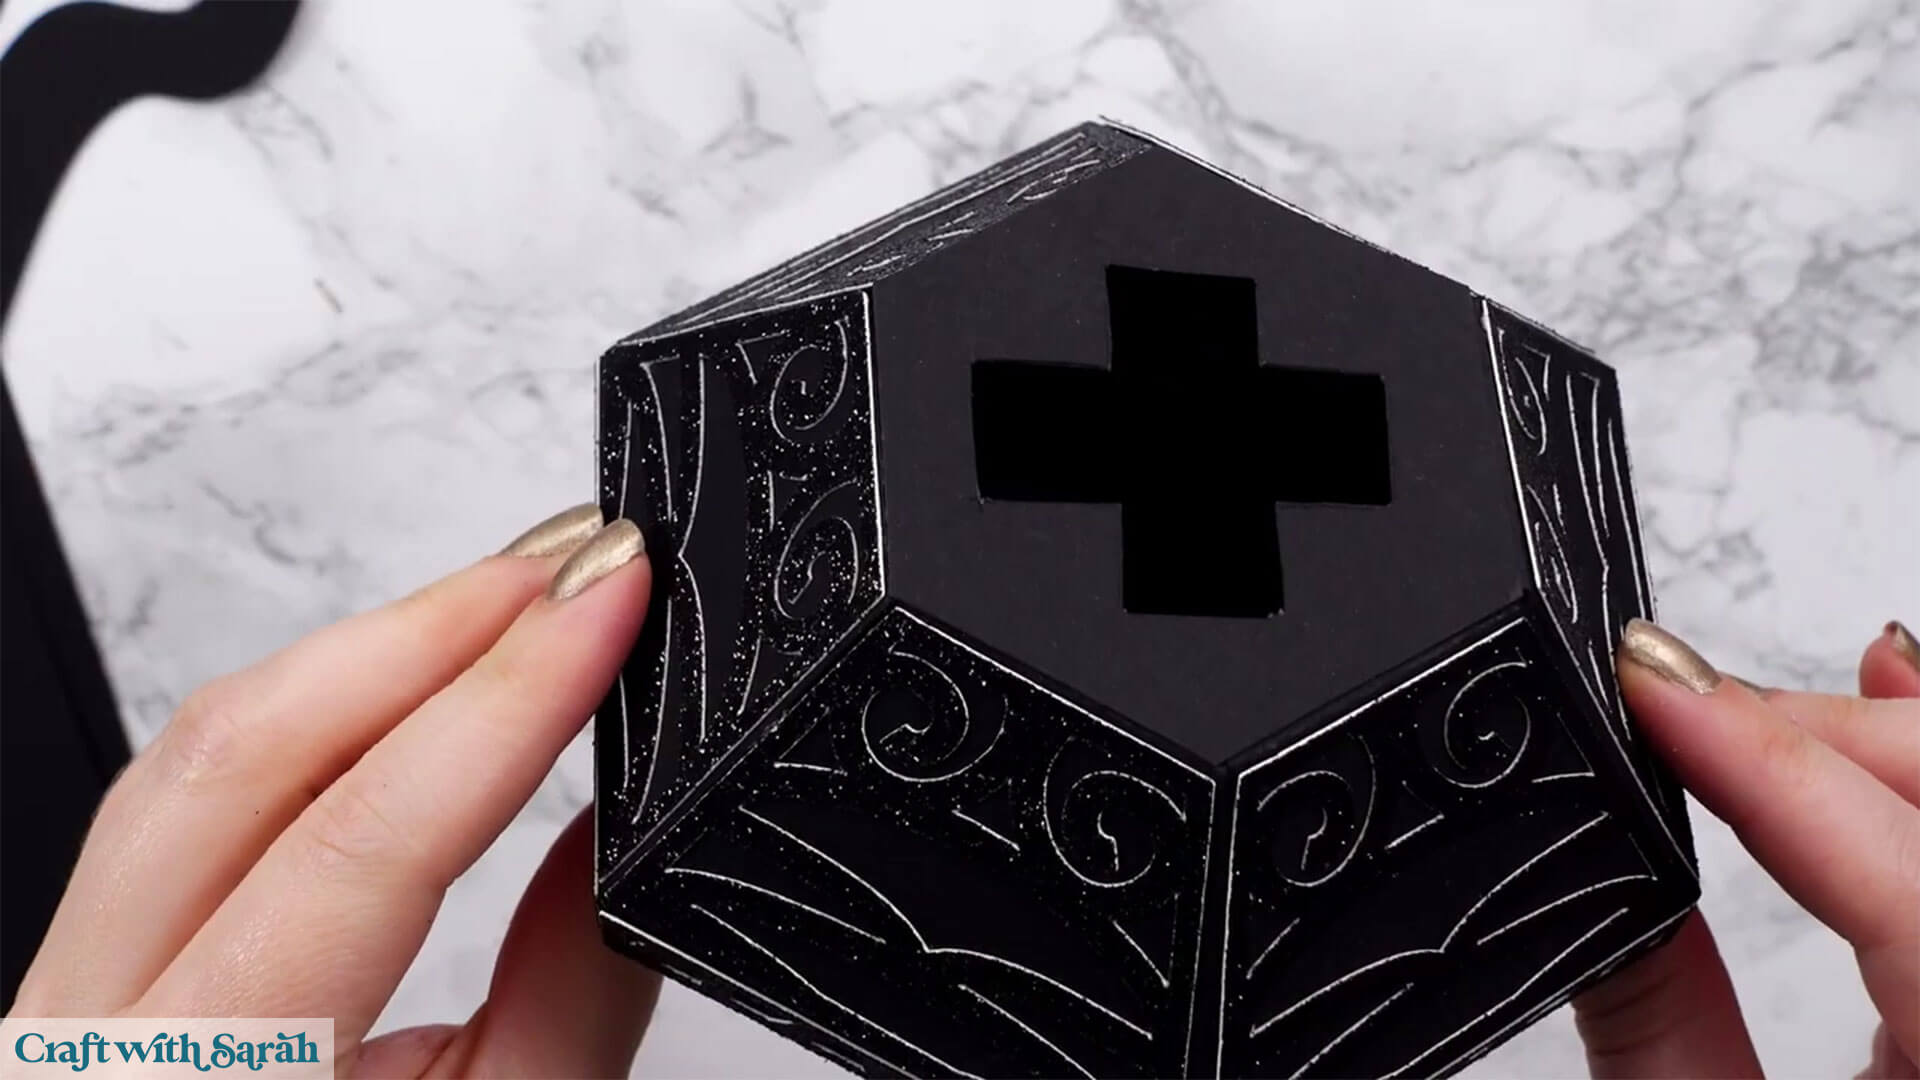
The base is made from several layered hexagon shapes with cross cutouts. These slot together to make a sturdy foundation. The image below highlights all the different pieces that you will need.
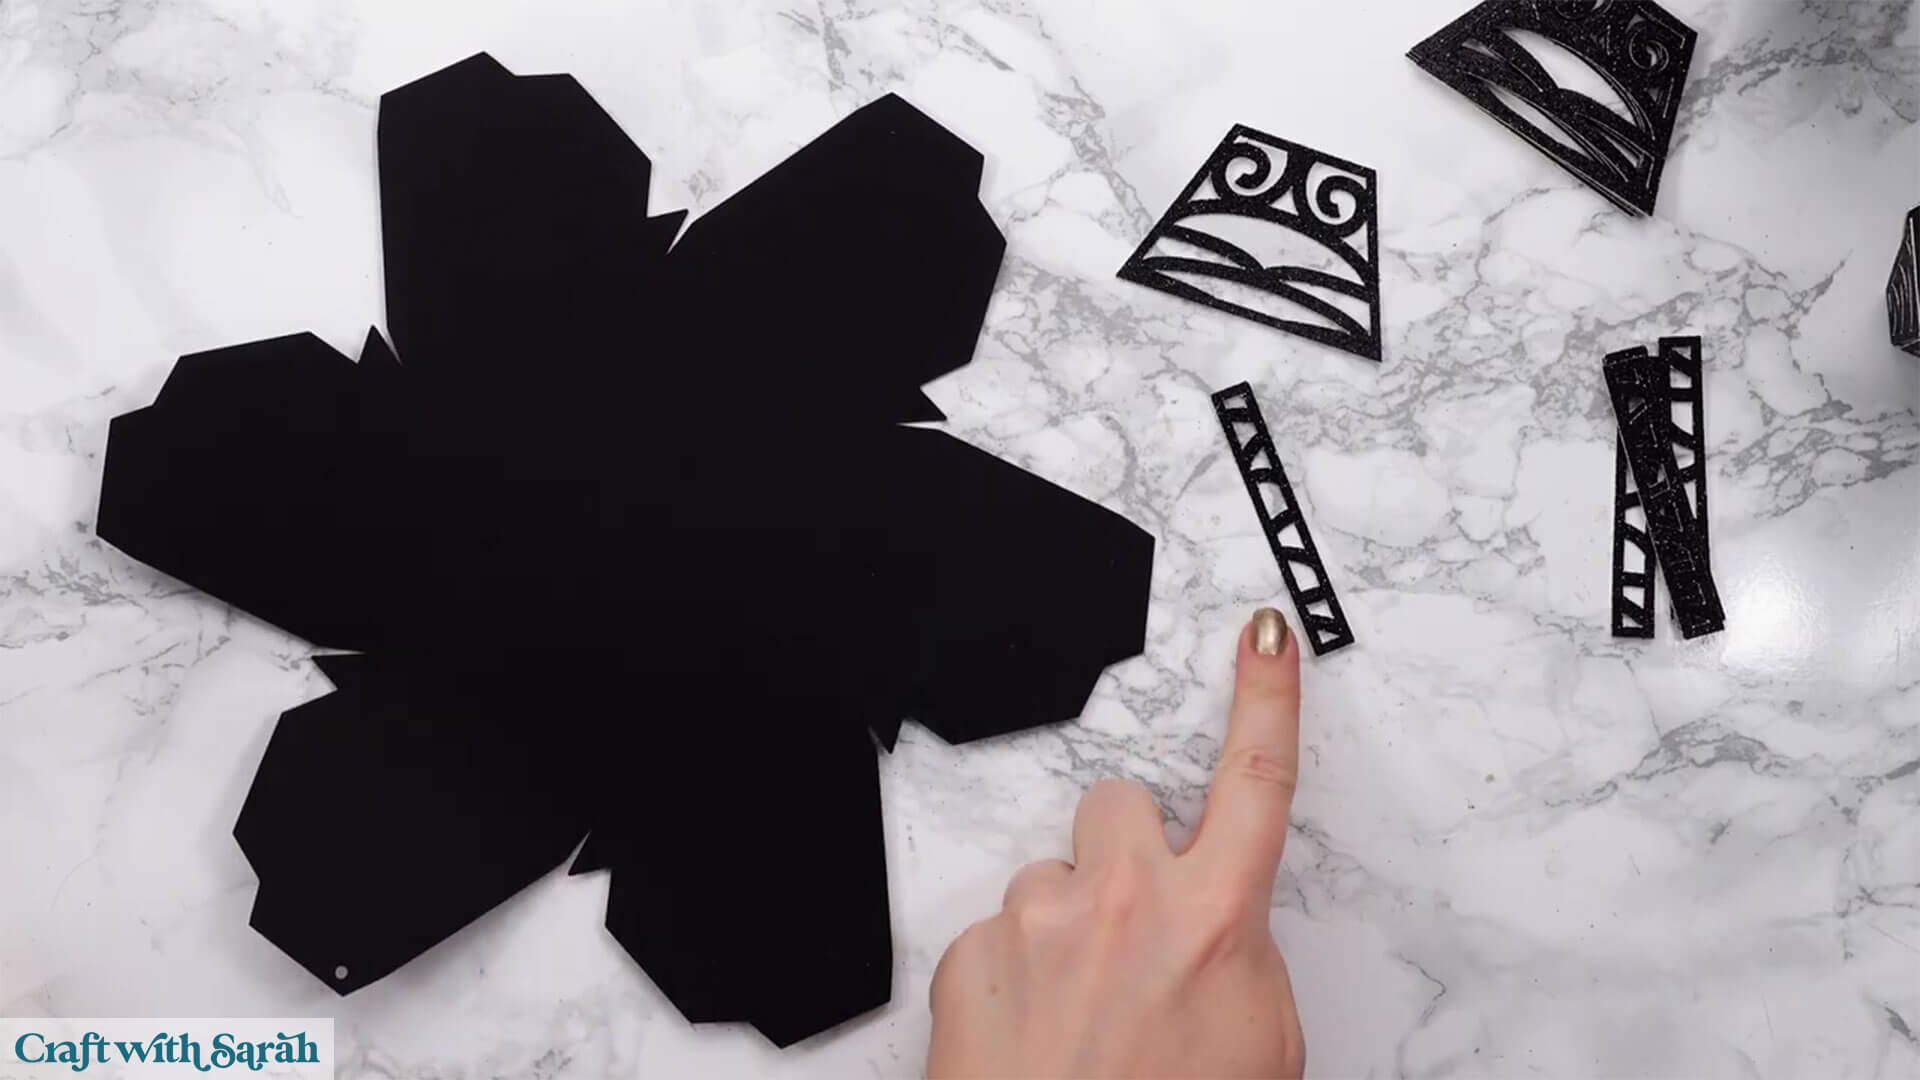
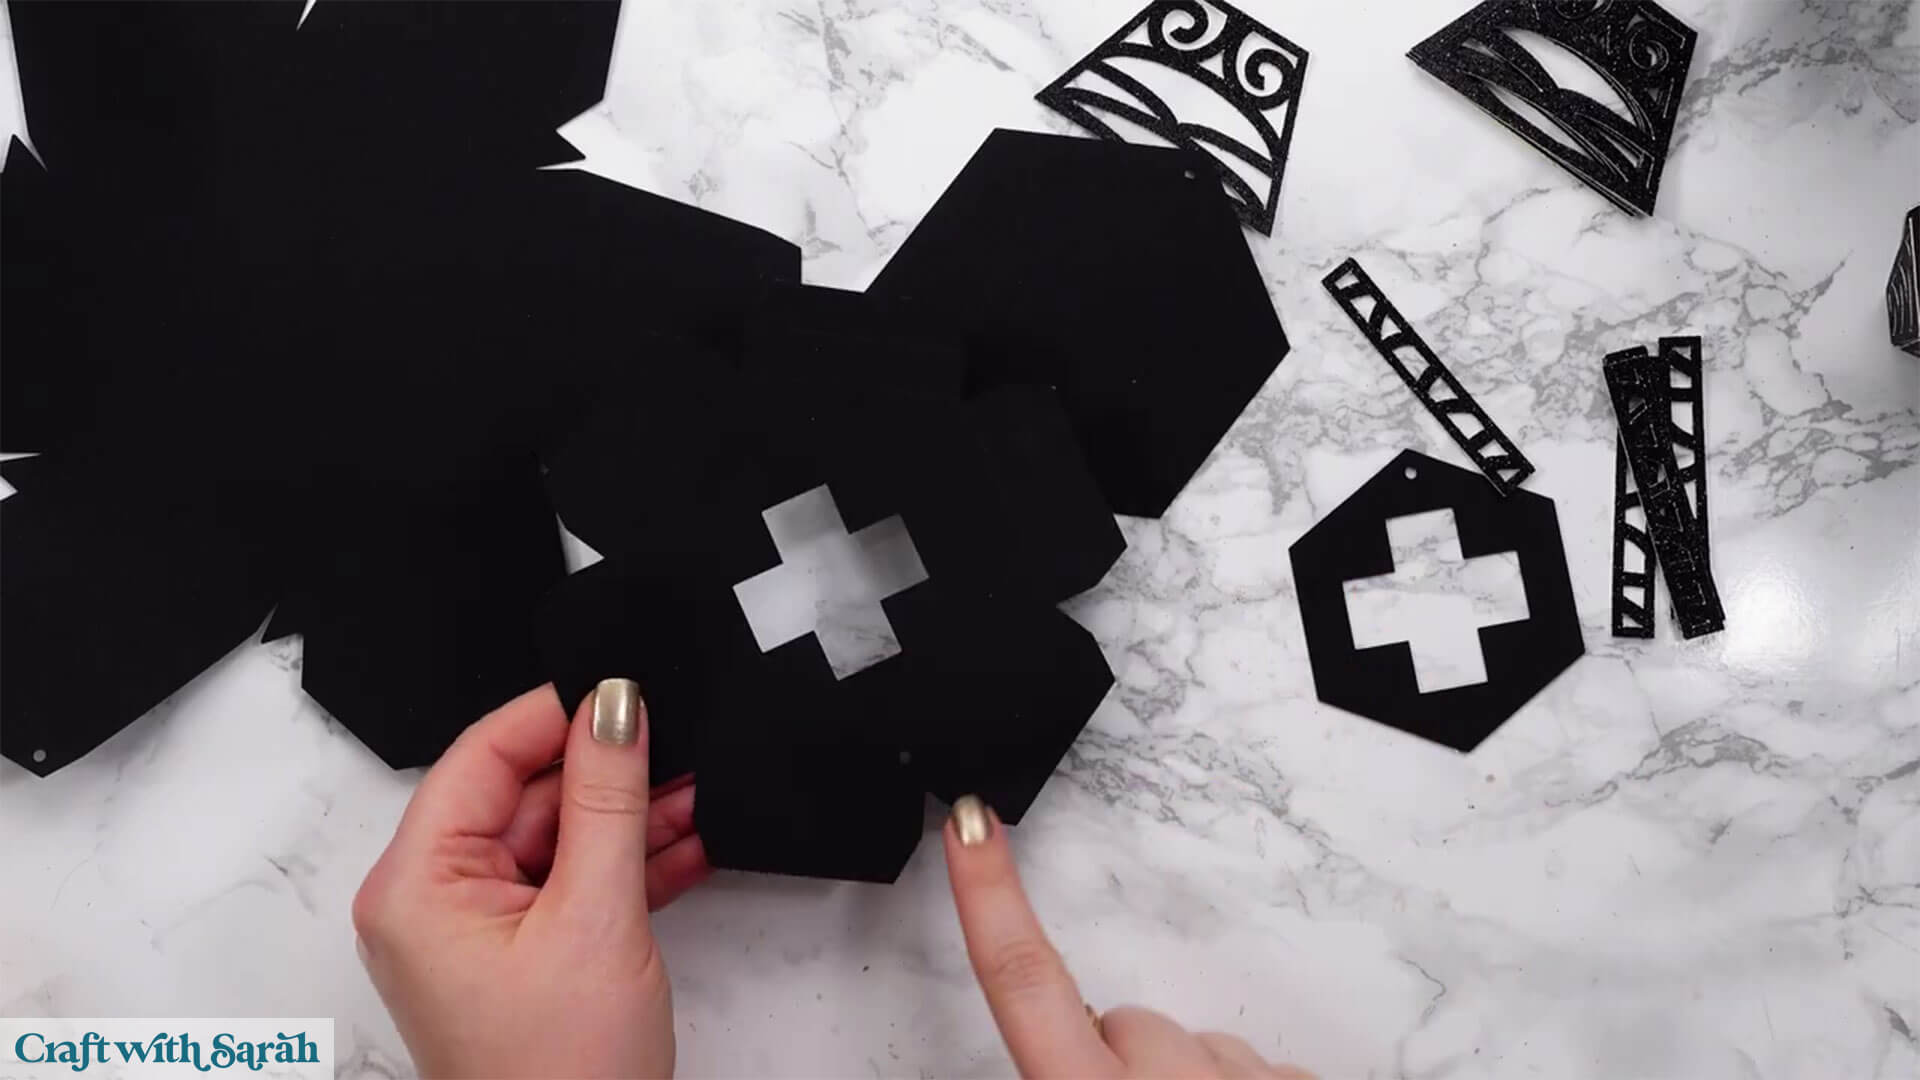
Take the piece which looks like a large flower with a cross cut out of the middle and fold along the score lines to create the box shape.
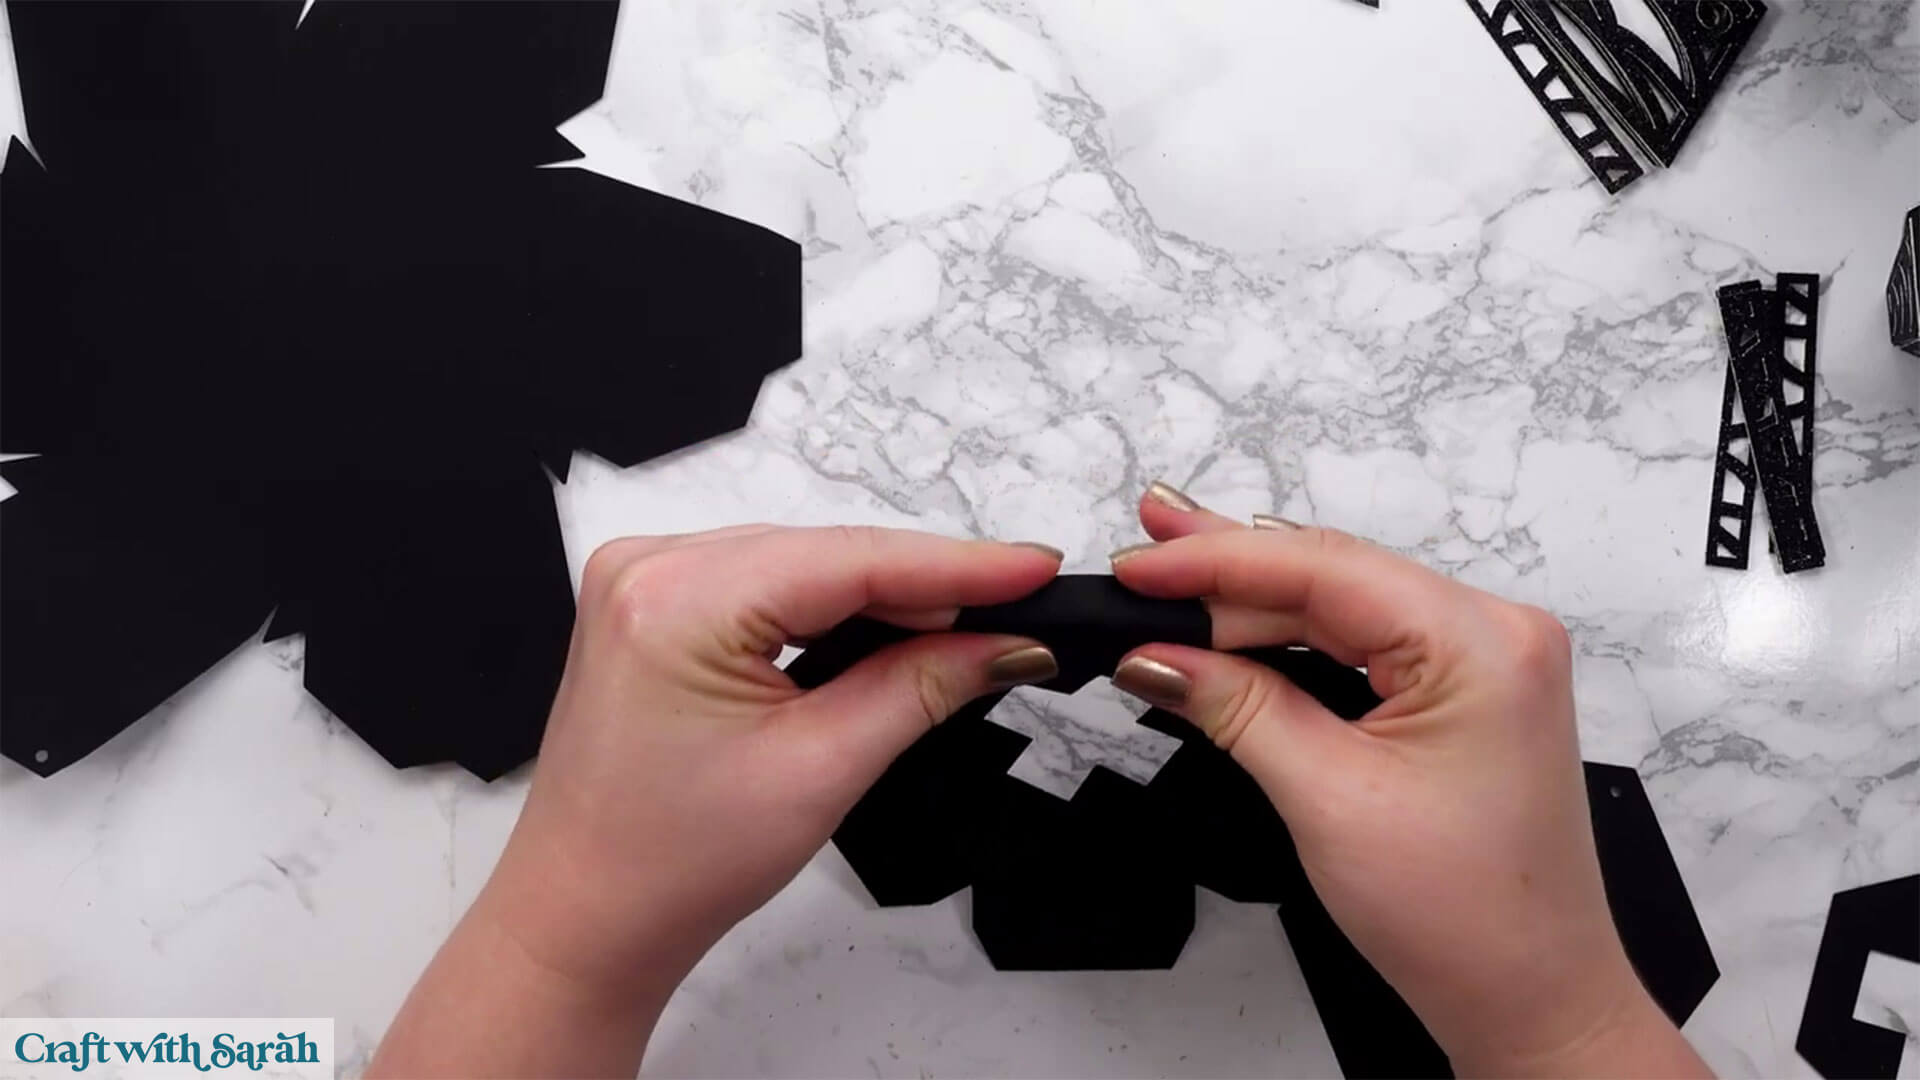
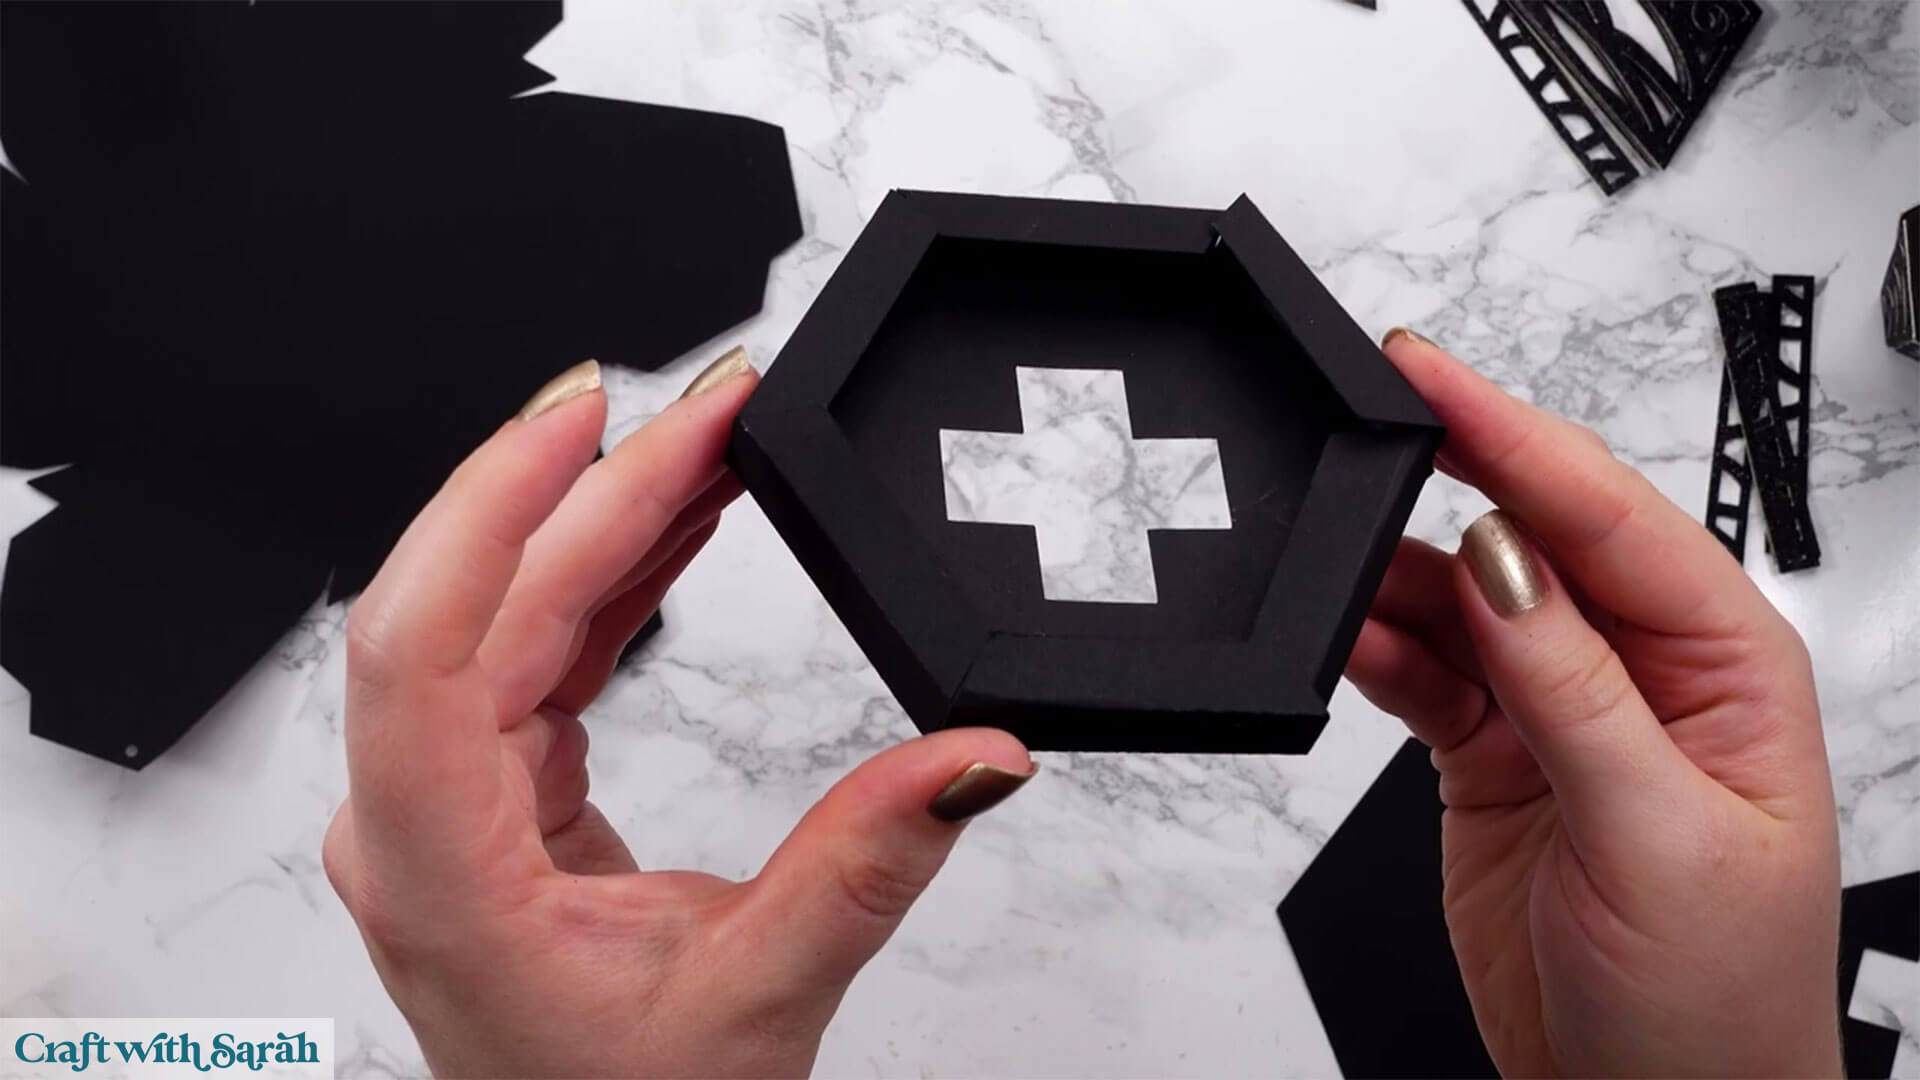
Add glue to all the tops of the tabs and stick the hexagon on top. Make sure you line up the little circle cutout.
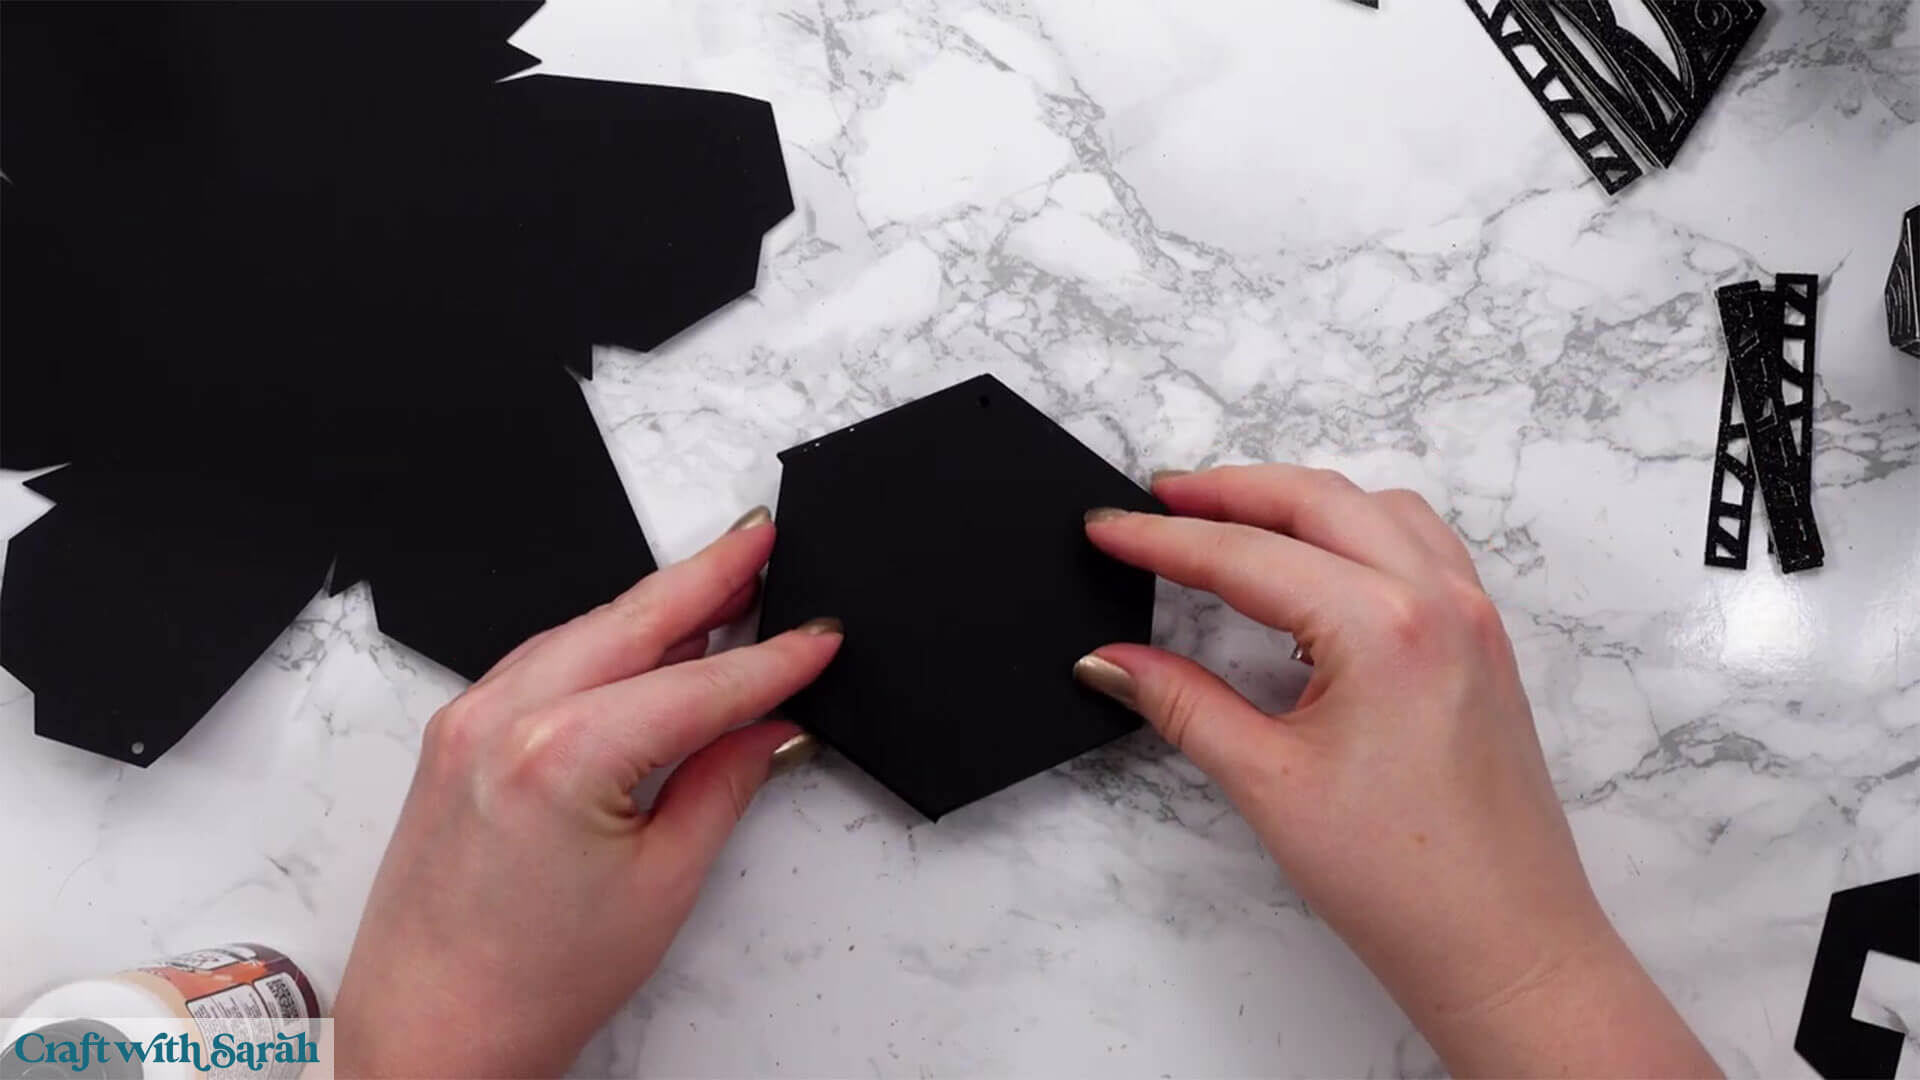
Take the small hexagon with a cross cut out and glue it on top. Make sure that the little circle cutout is facing the same way as the cutouts on the other pieces.
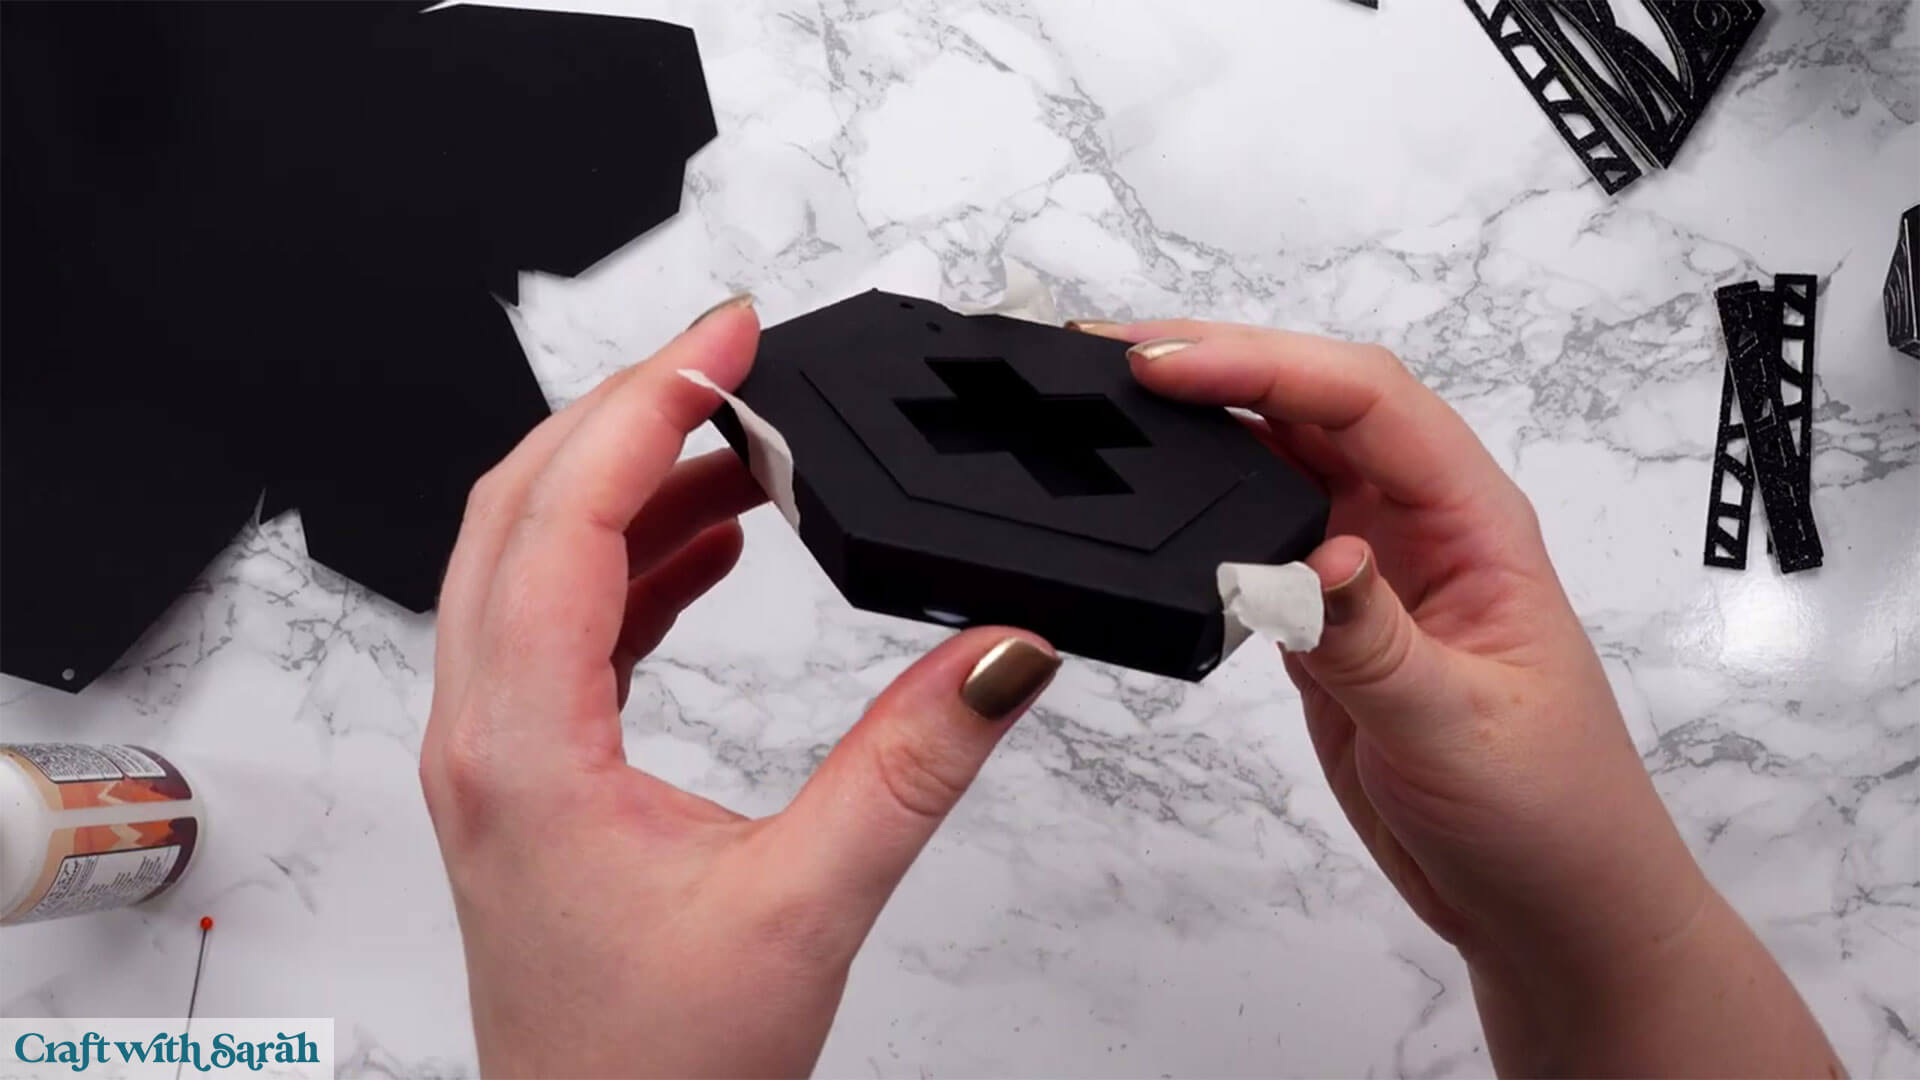
Allow it to dry and take the large base piece.
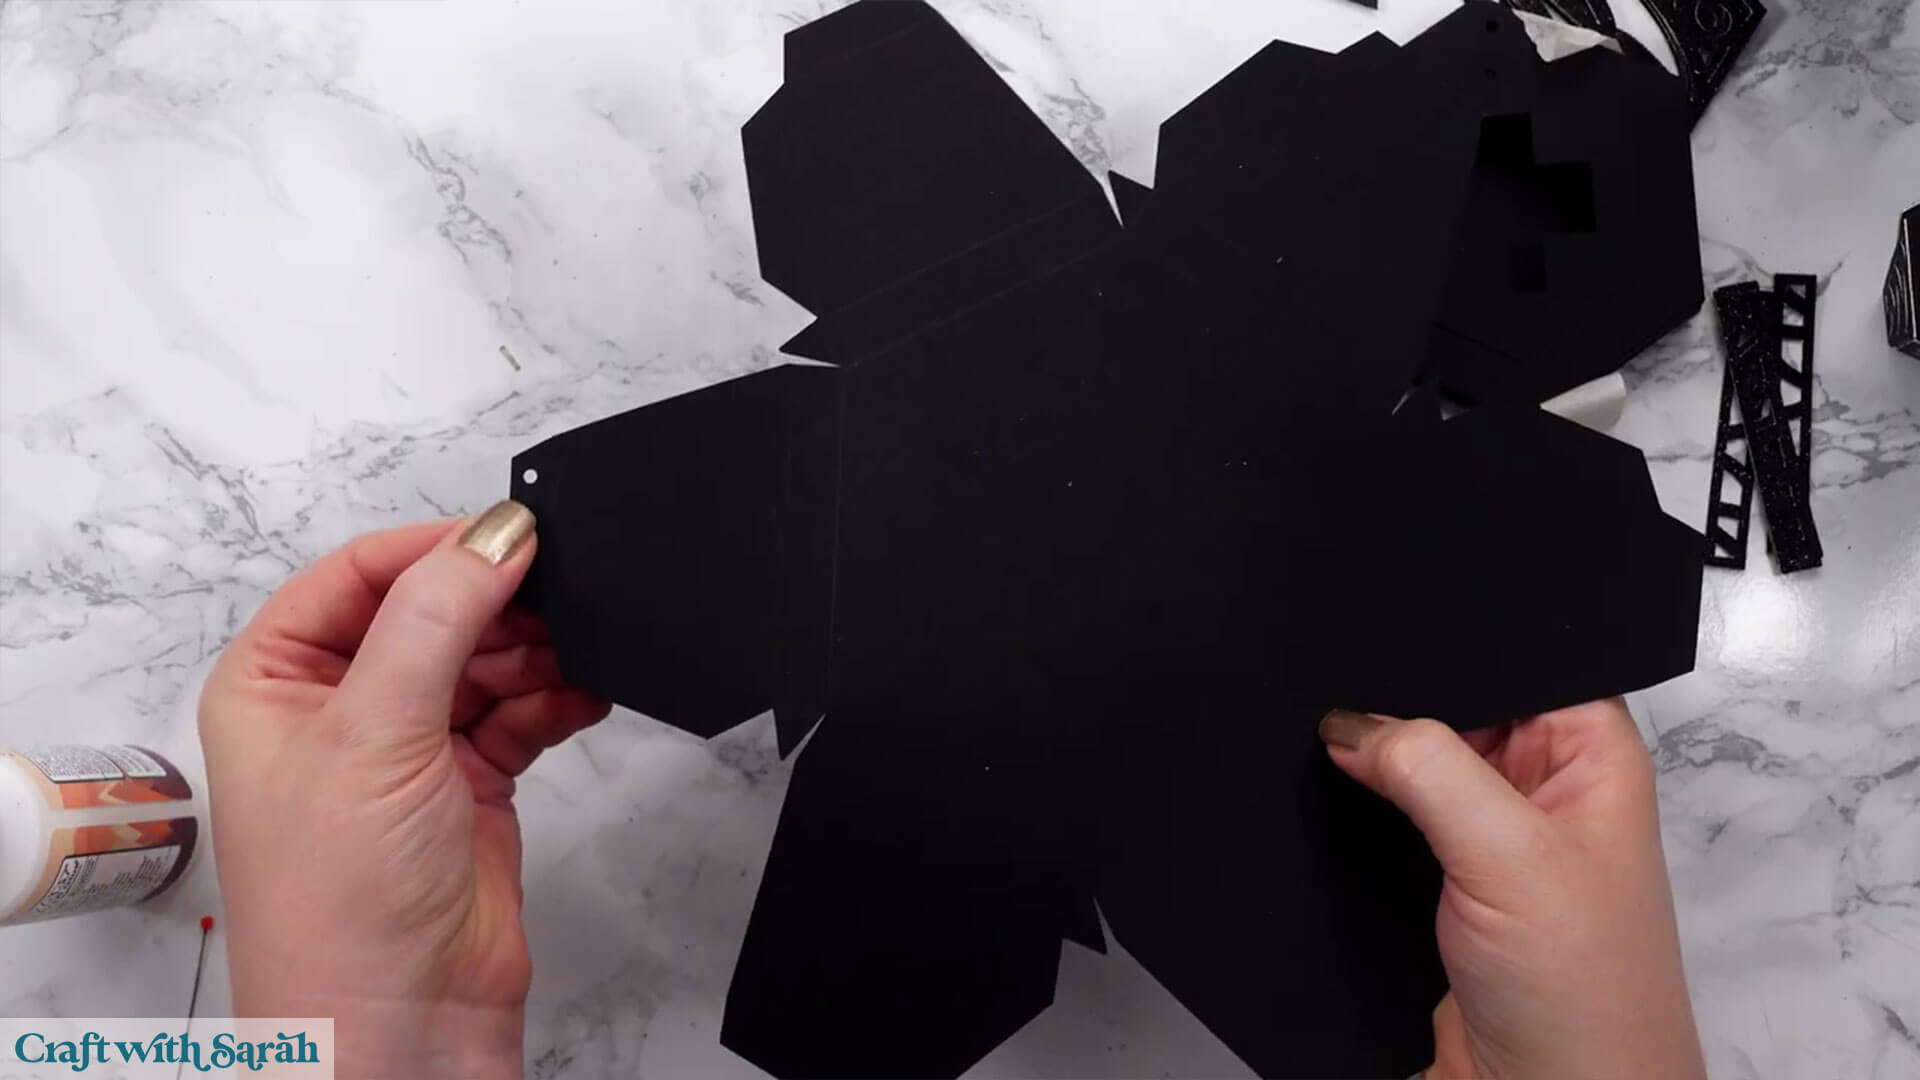
Fold along all the score lines.
It should look something like this.
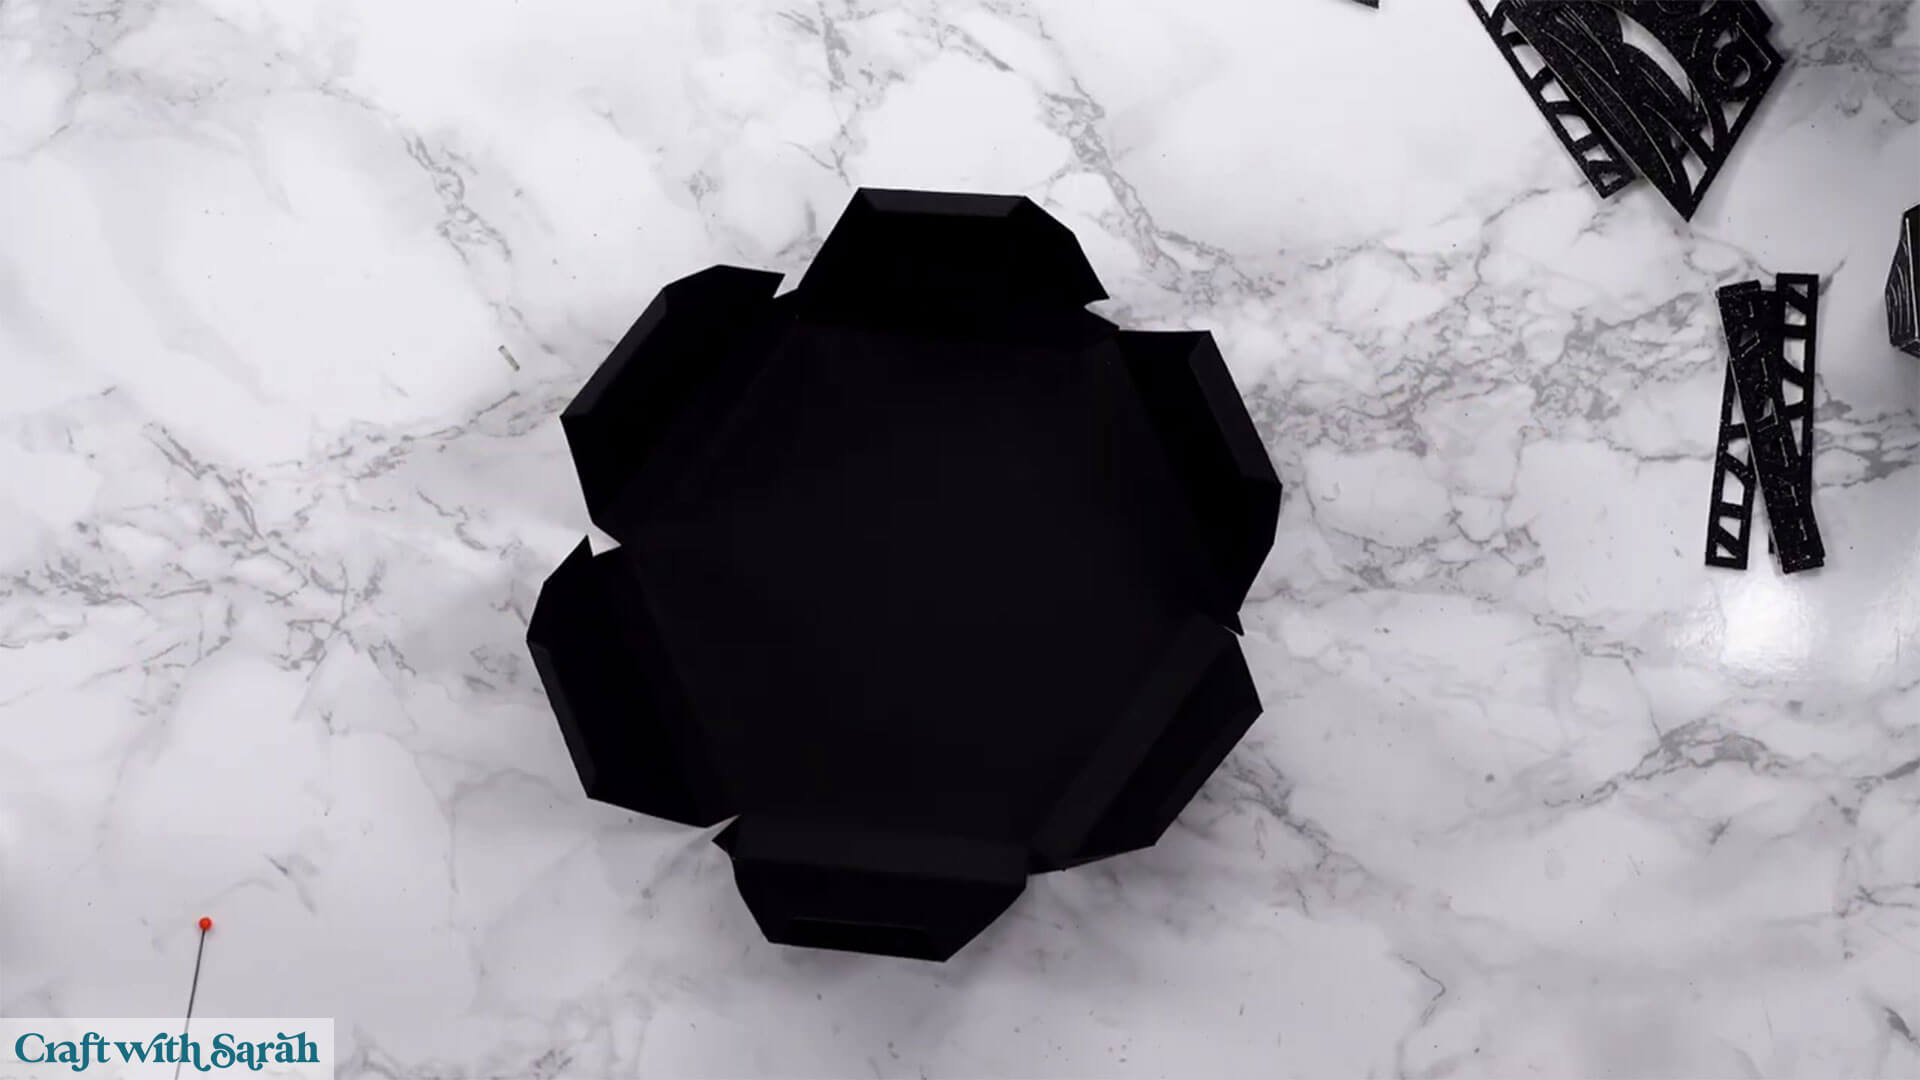
Take the box shape we were working on earlier and locate the circle cutout on both that piece and the large base piece.
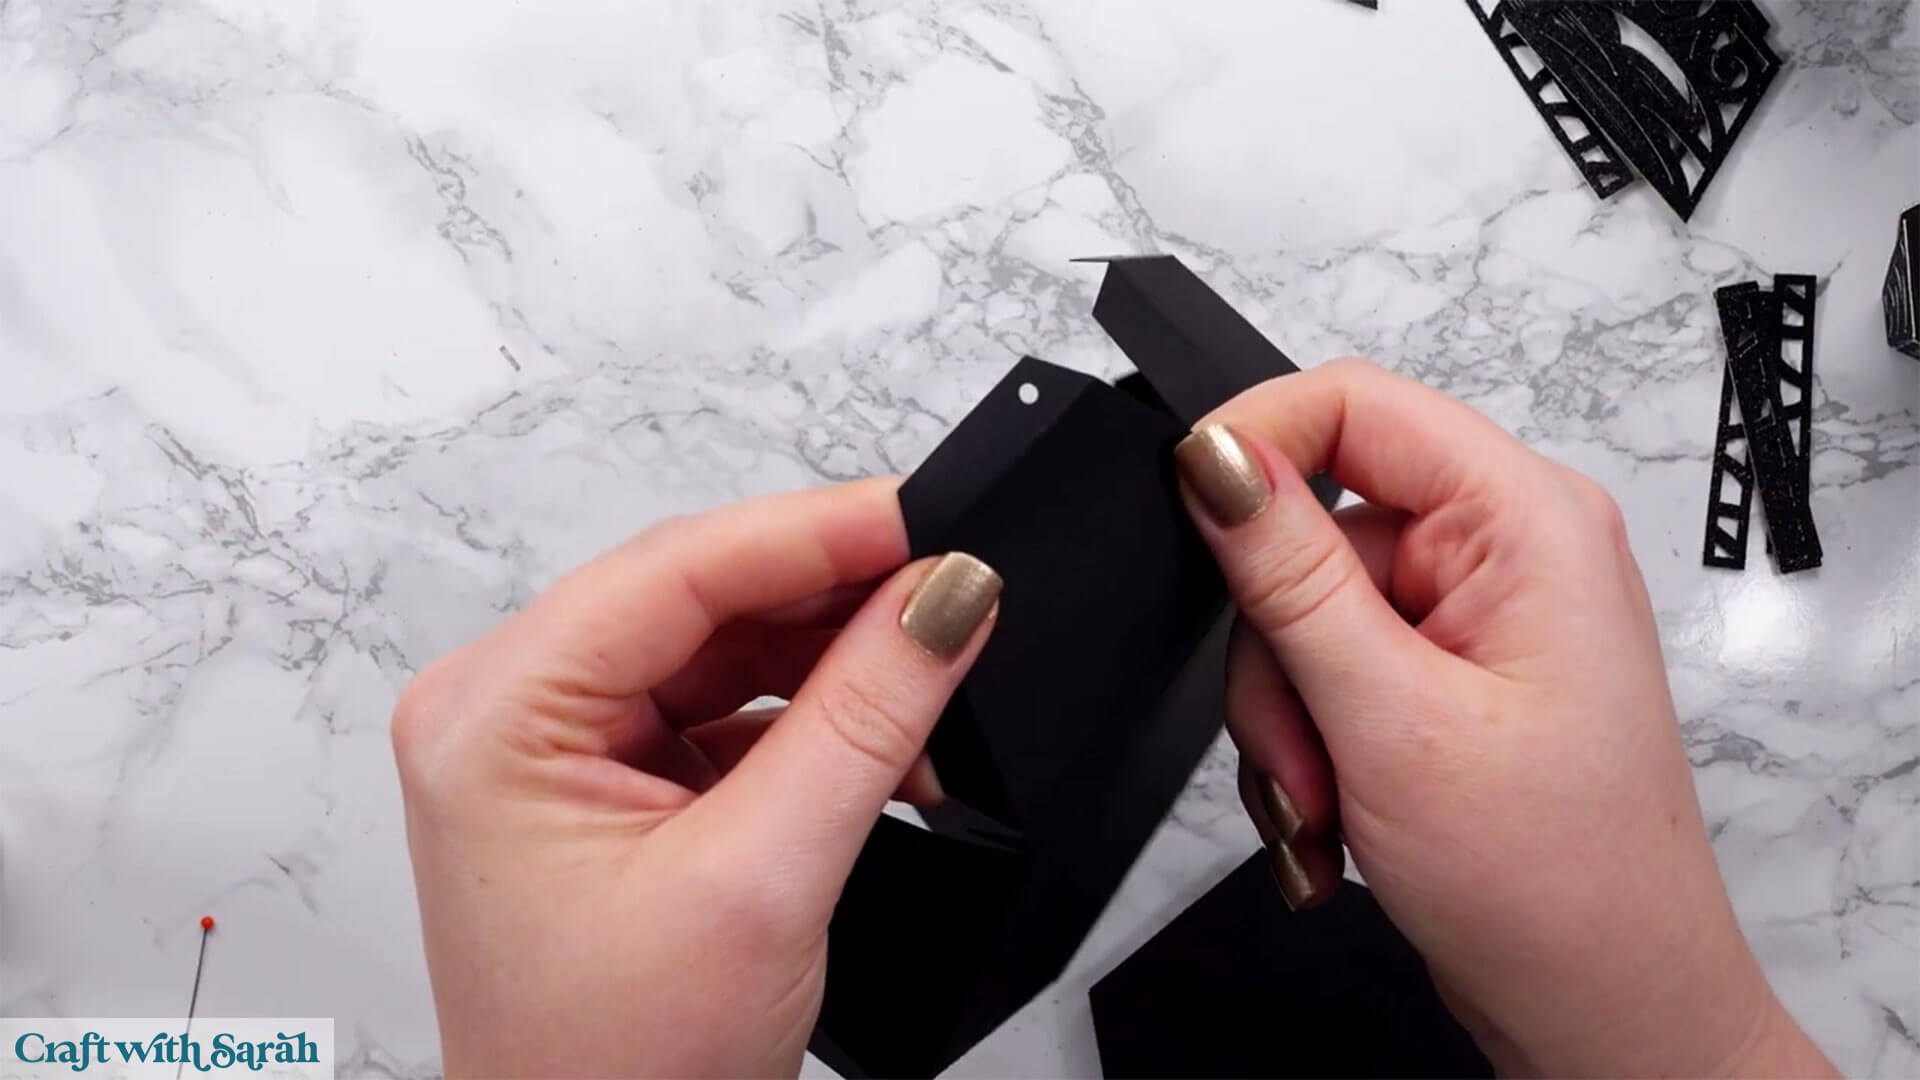
Glue the bottom of the small hexagon box and place it in the middle making sure you line up the circle cutouts with the left corner of where the cutout is.
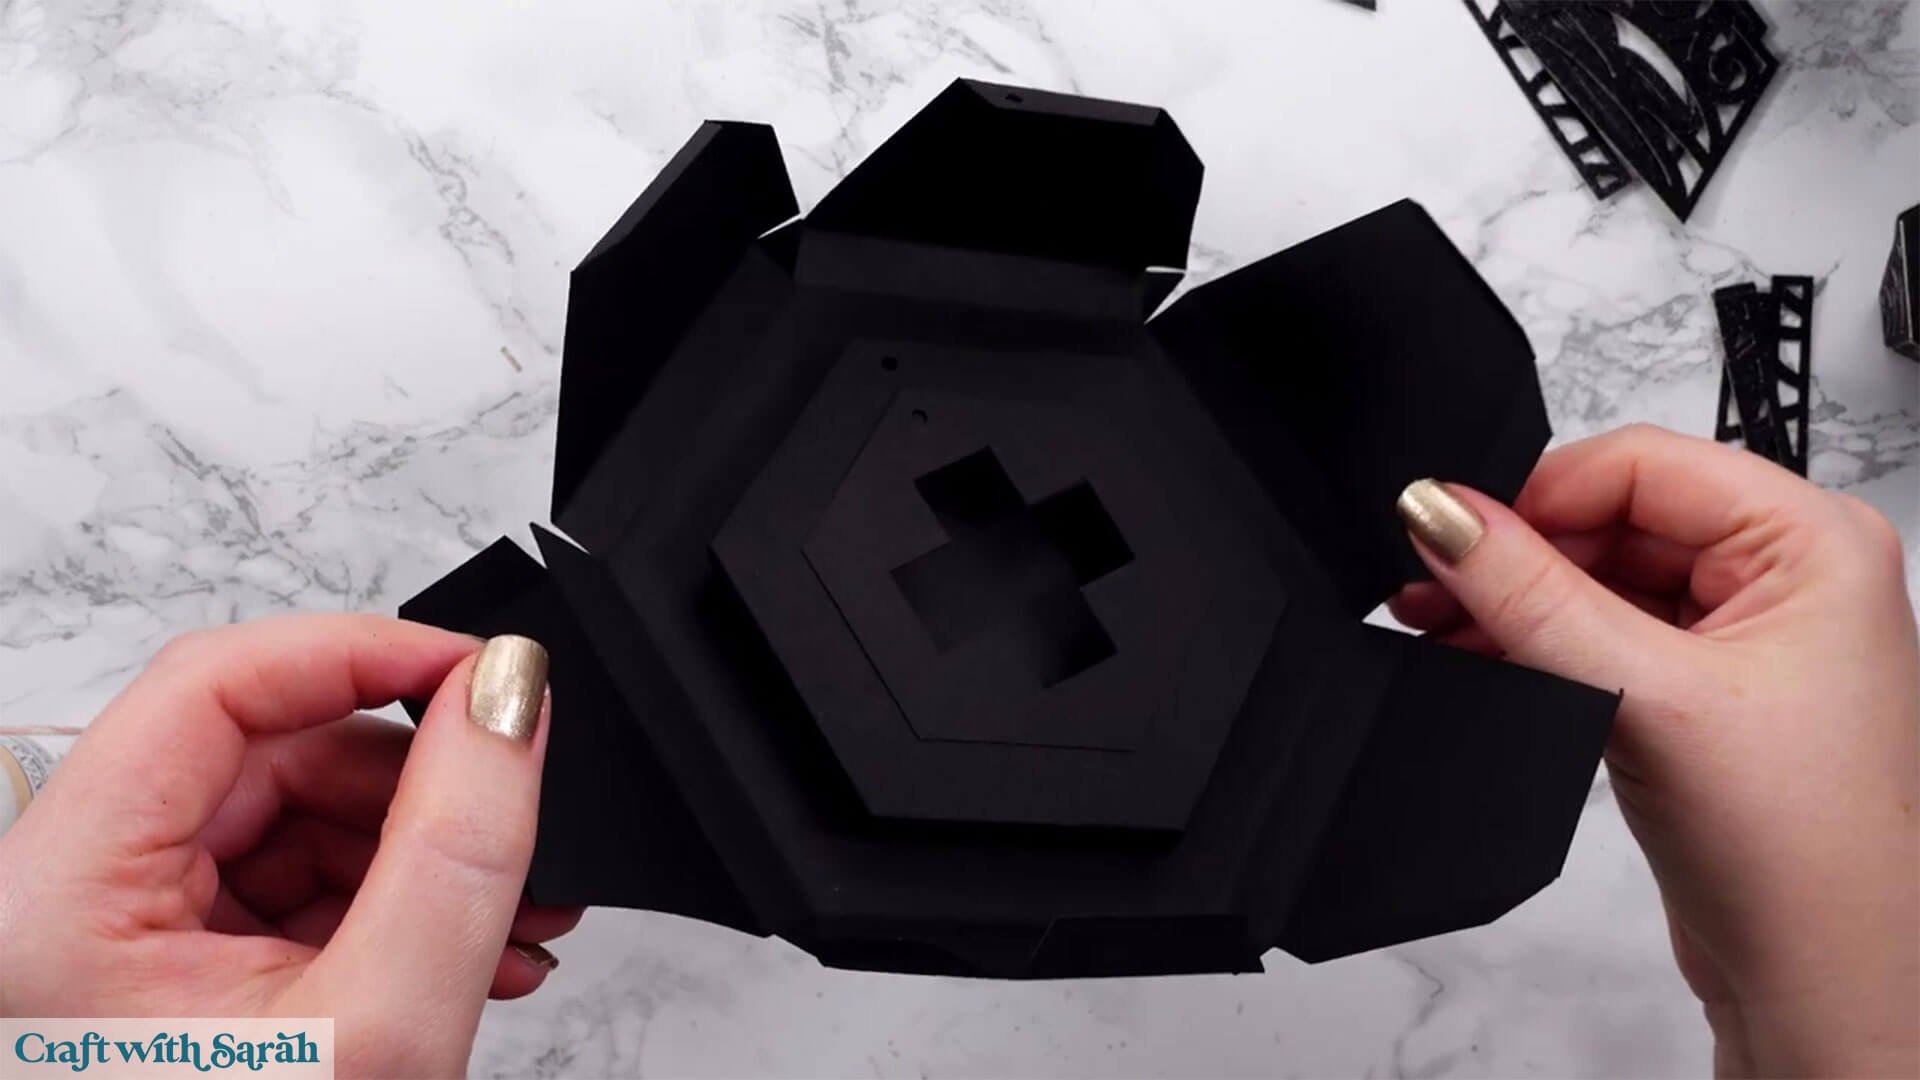
Now we can glue the tabs on the sides to stick the pieces together to build up the shape.
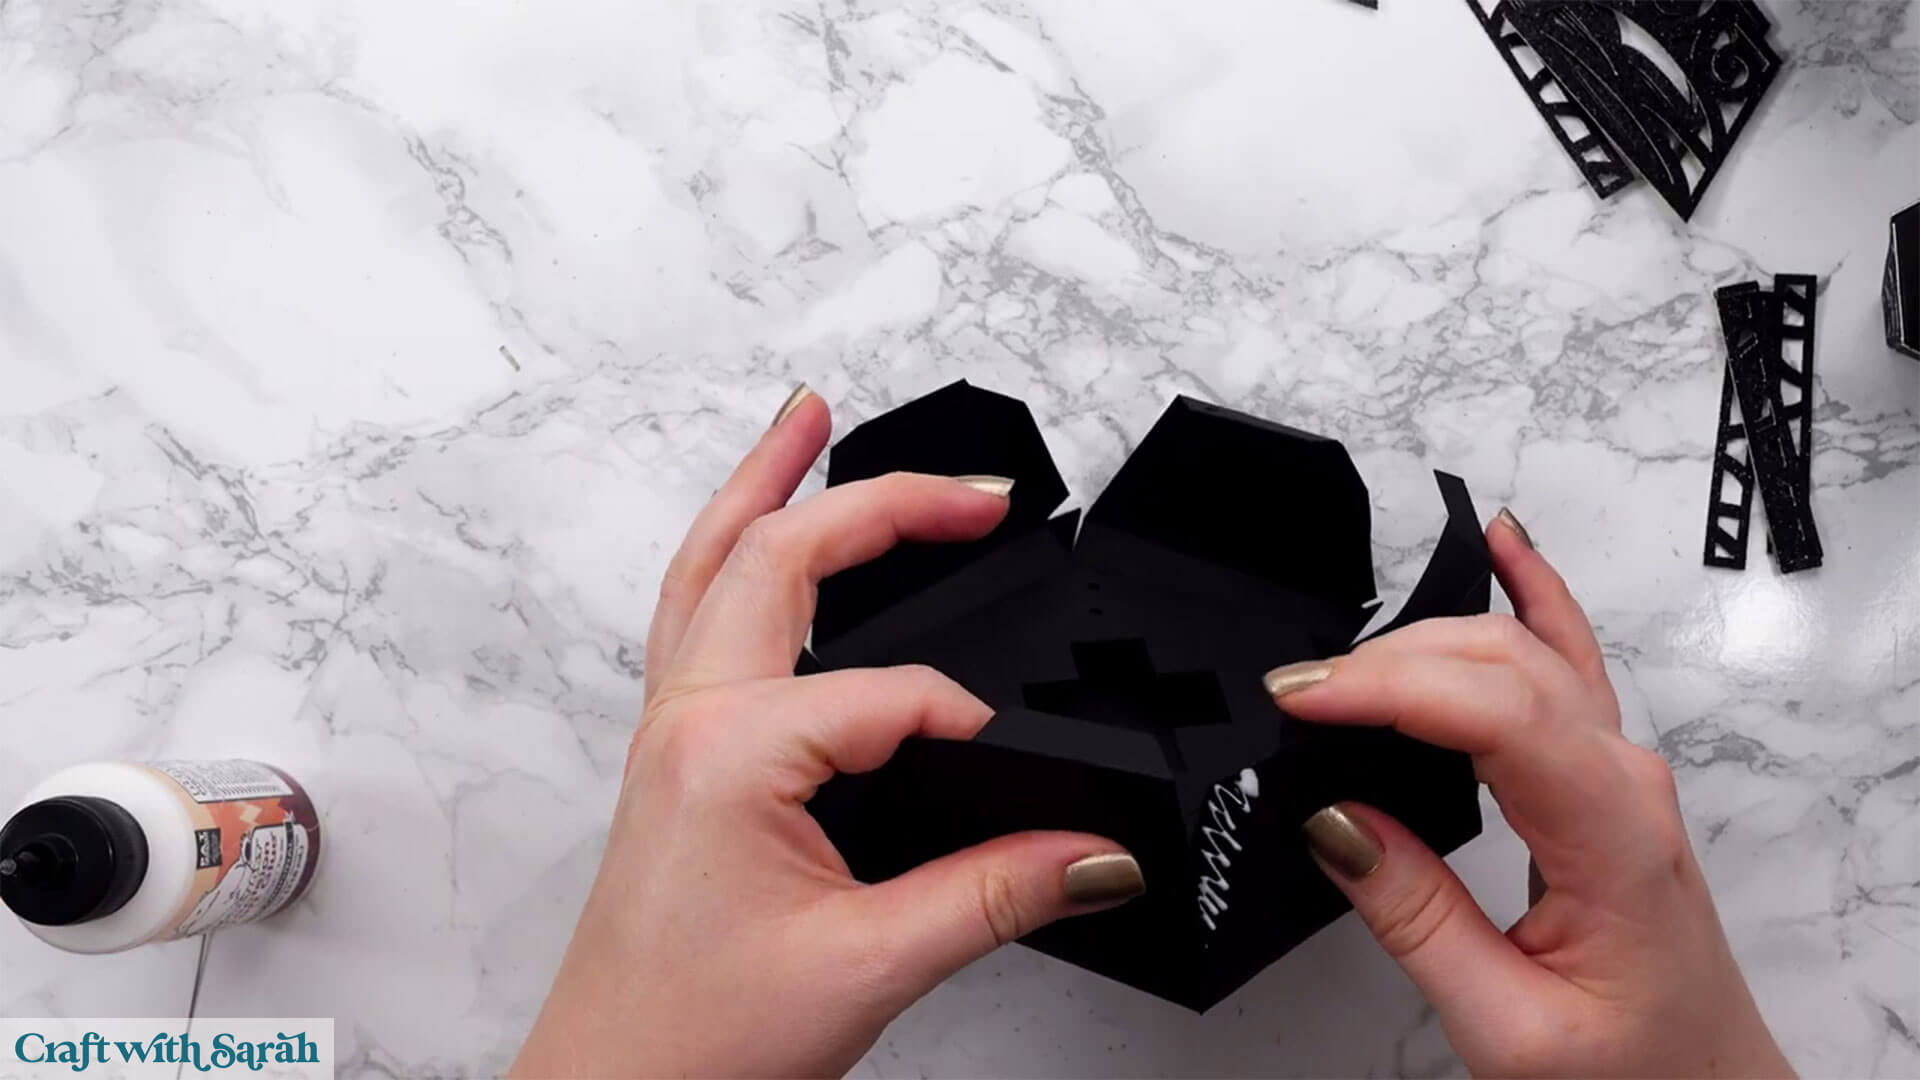
It should look like this:
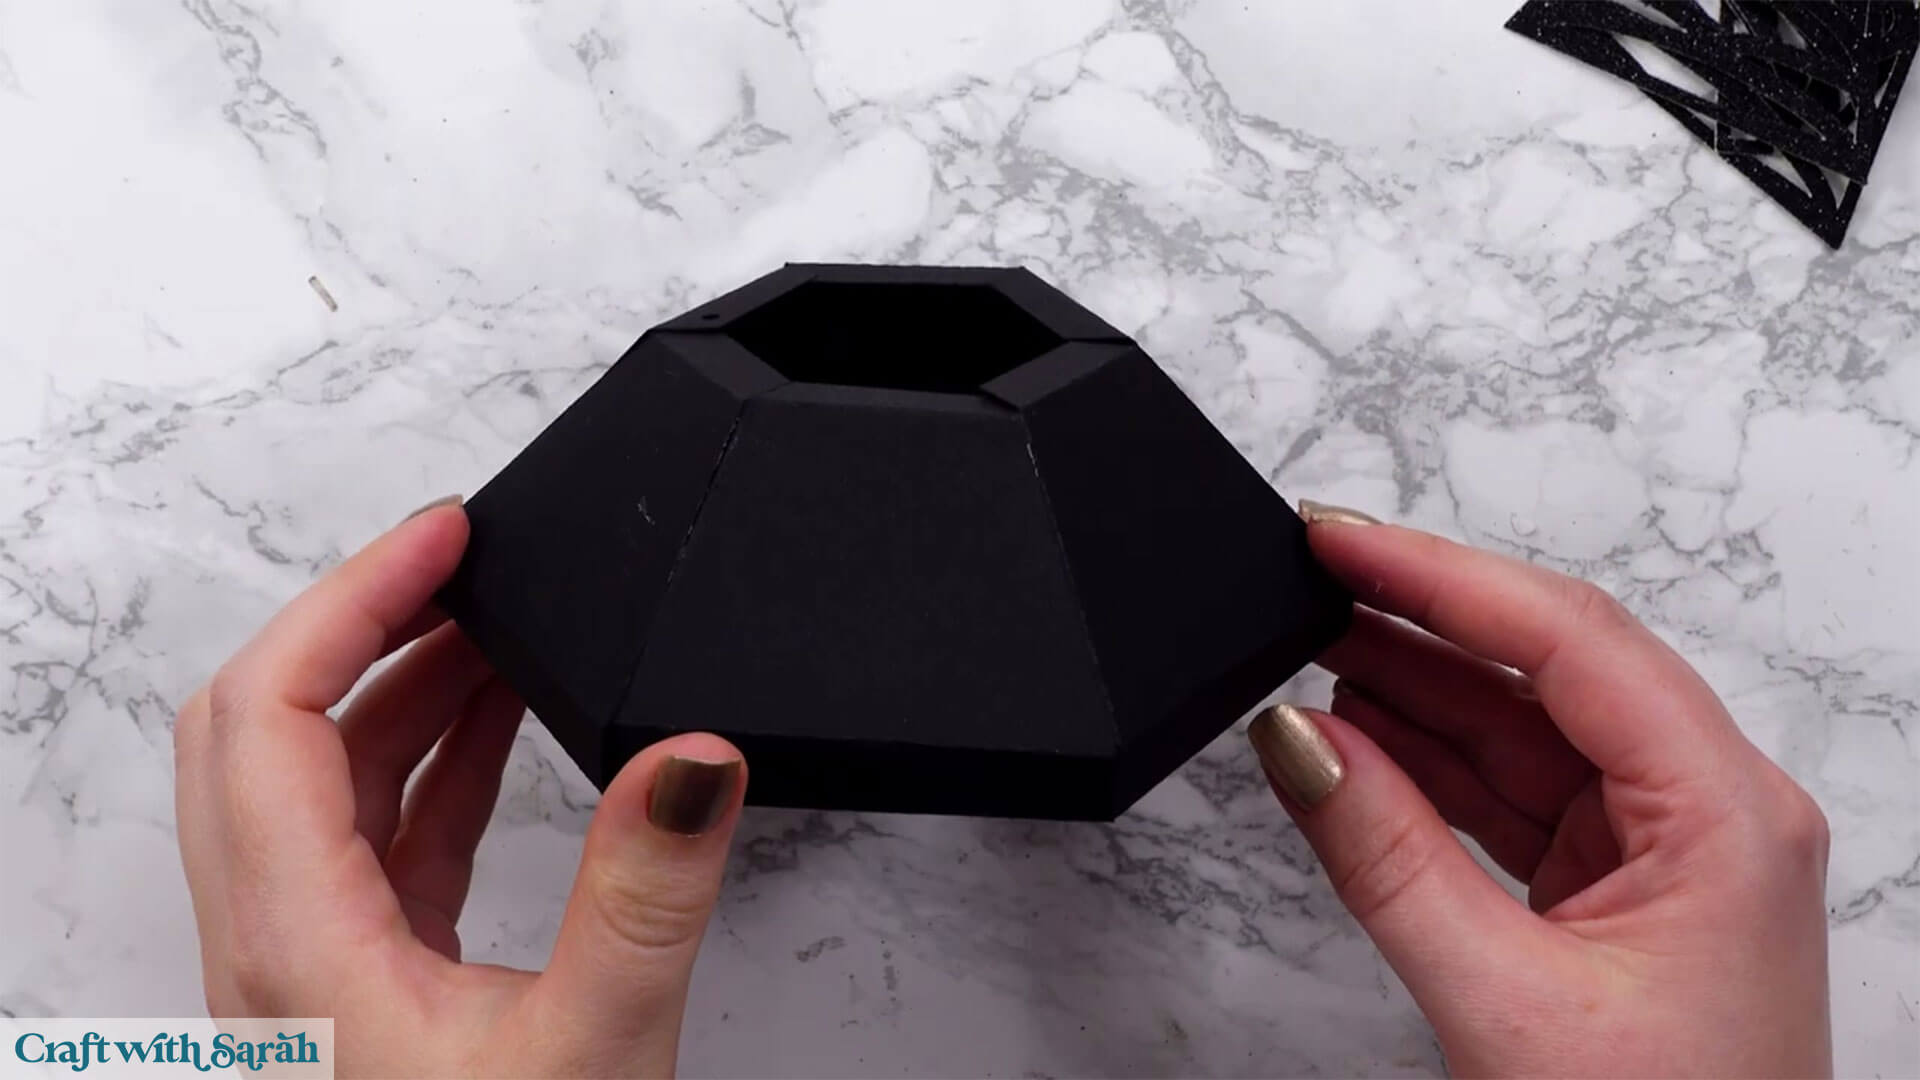
Take the other hexagon with the cross cutout and stick it on top. Make sure it sits in the same direction as the one inside.
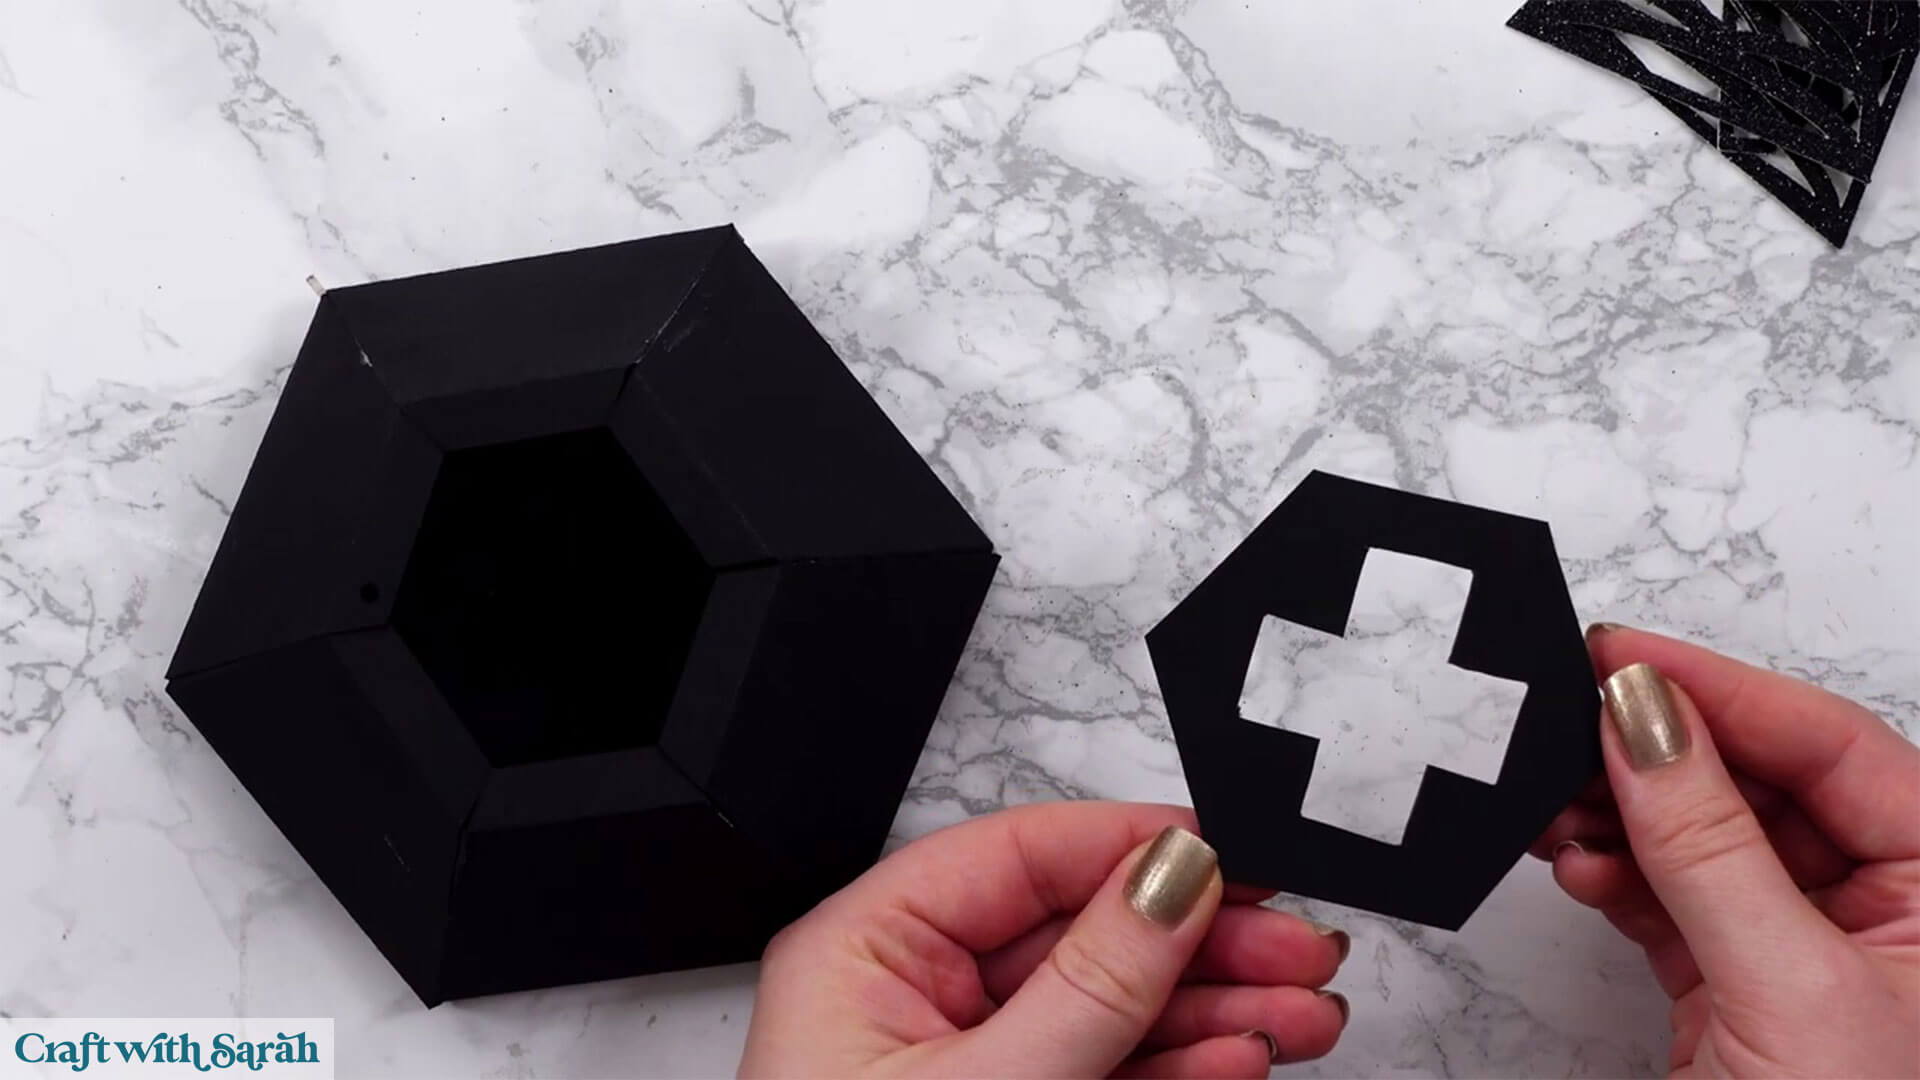
Now you can glue all the glitter card pieces on top to give it a nice finish. There are two pieces for each side. A thin rectangle and a trapezium.
Step 6) Build the sides of the candelabra
Now take locate the following pieces which look like this:
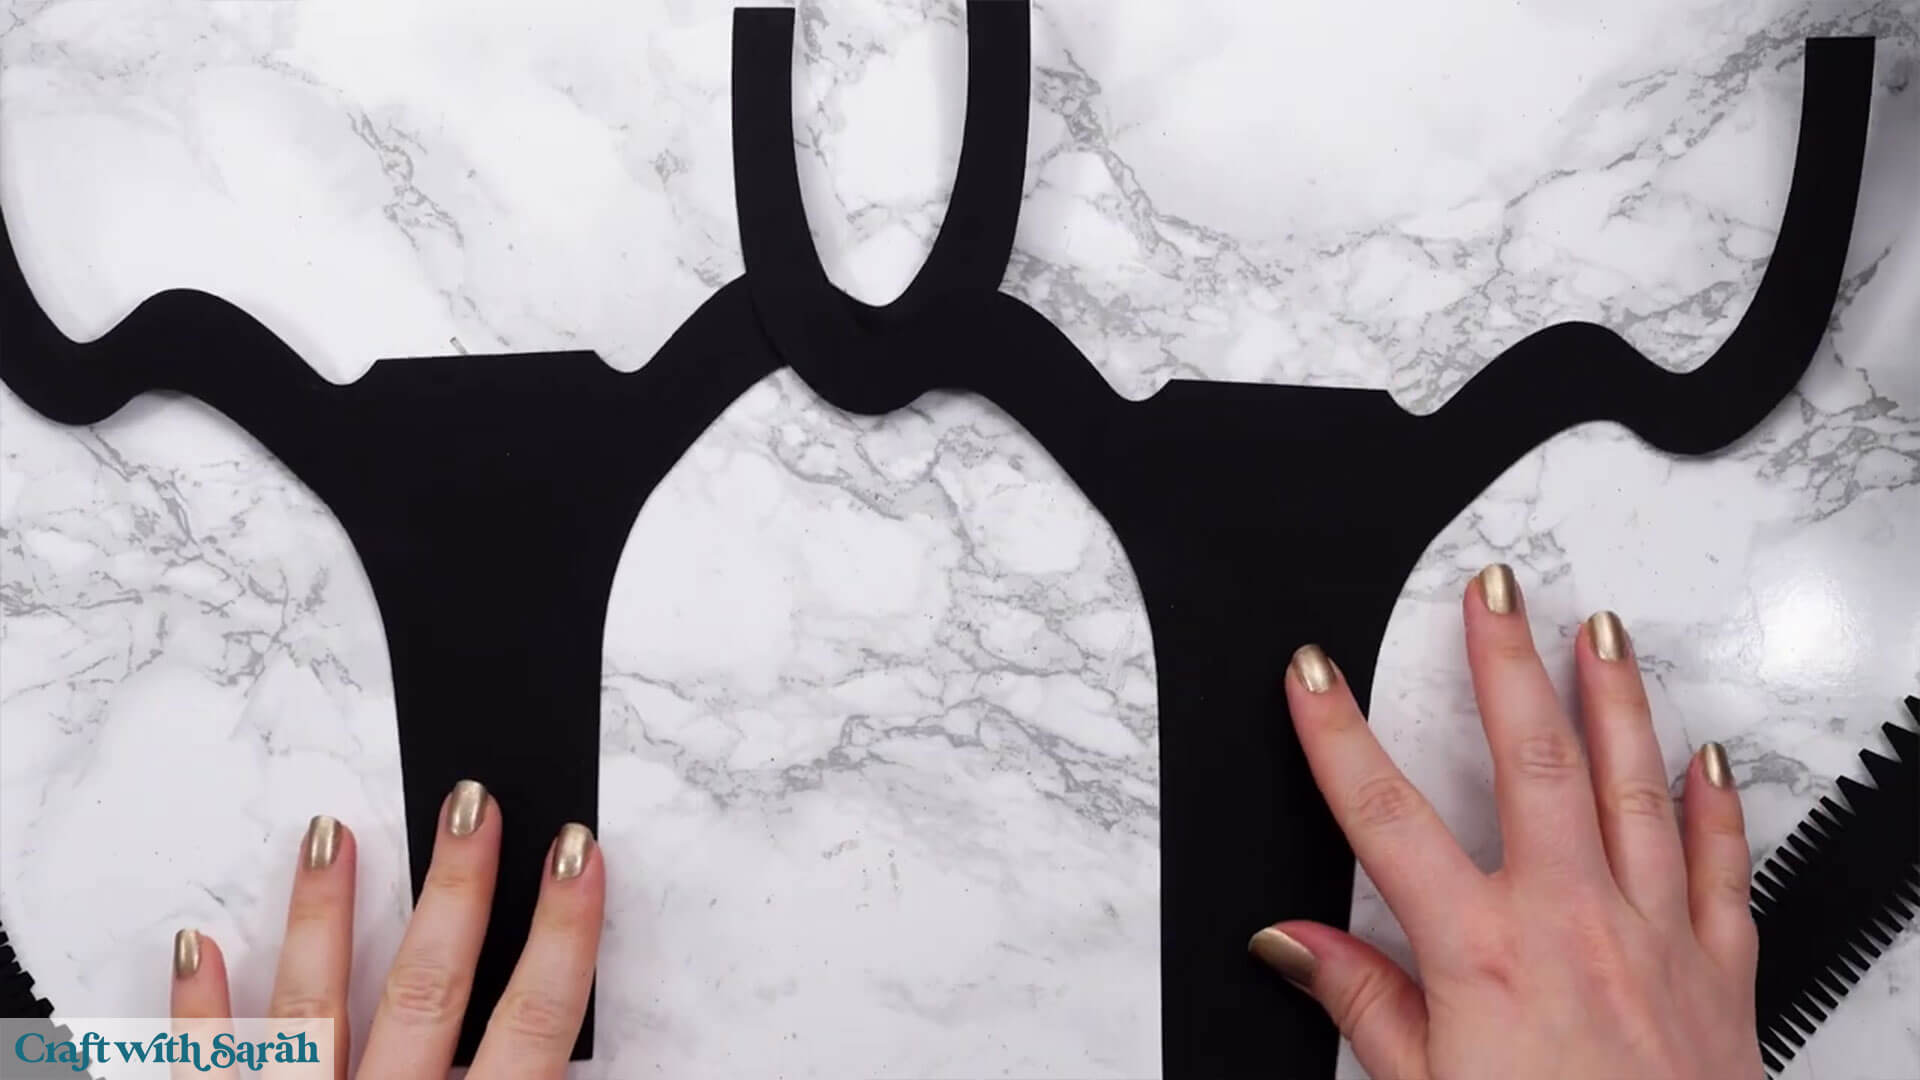
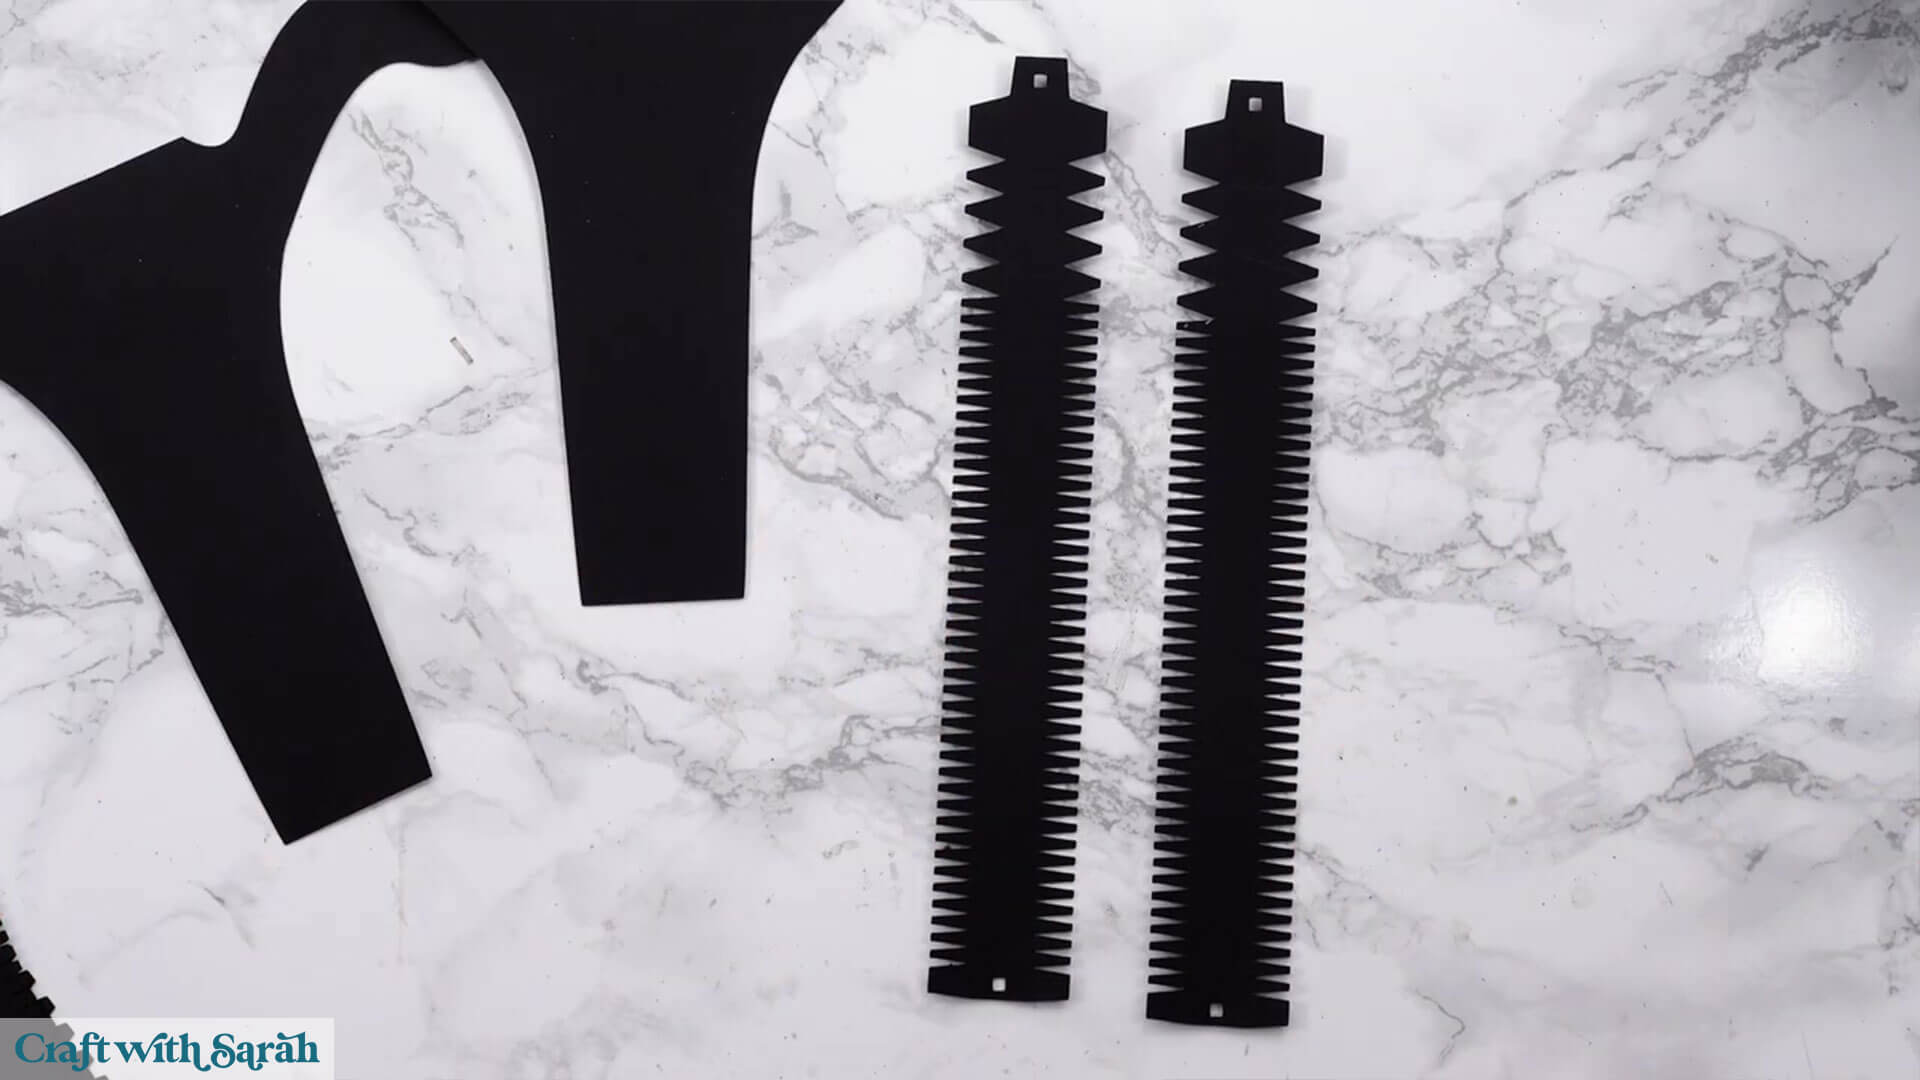
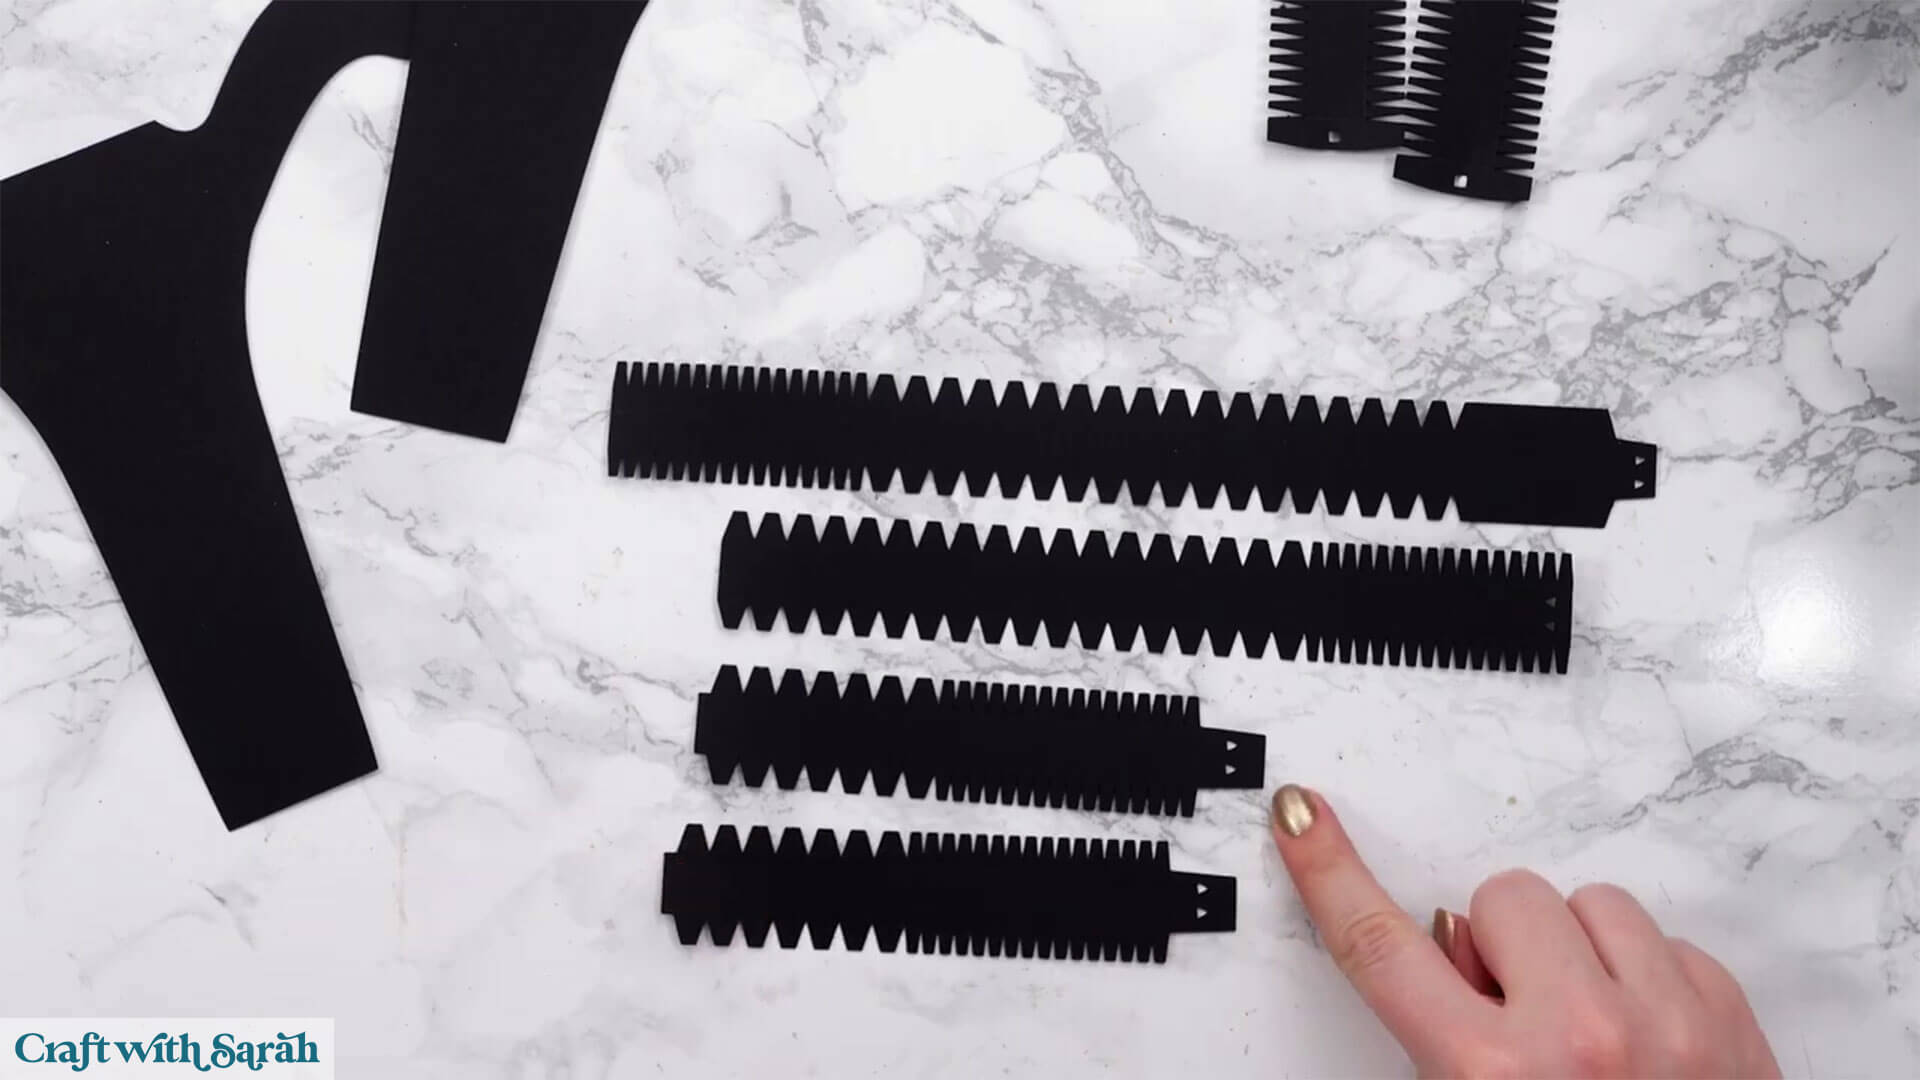
You will need all the pieces with the triangle cutouts and the larger crocodile teeth will have square cutouts.
Start with the square cutout pieces glue along one of the ends which have no tabs on.
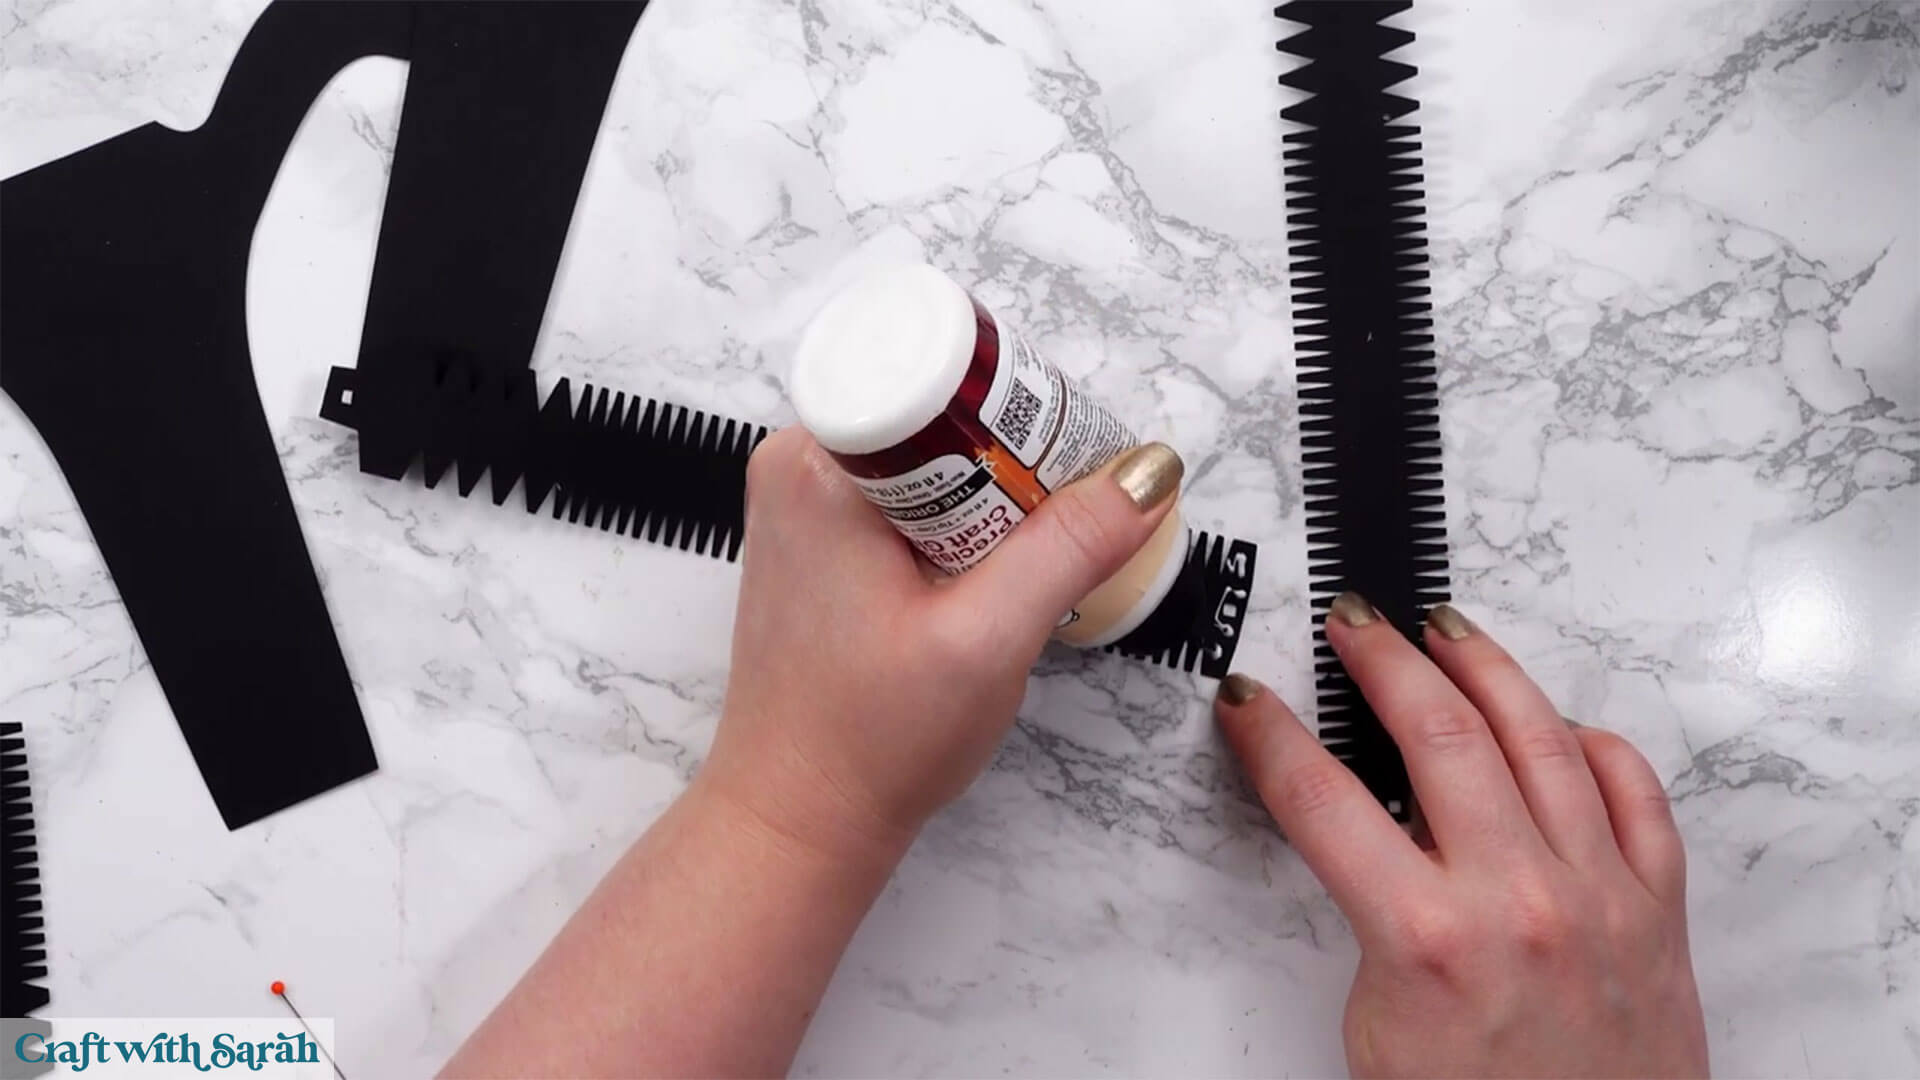
Overlap the end using the other piece and stick it on top to extend the length.
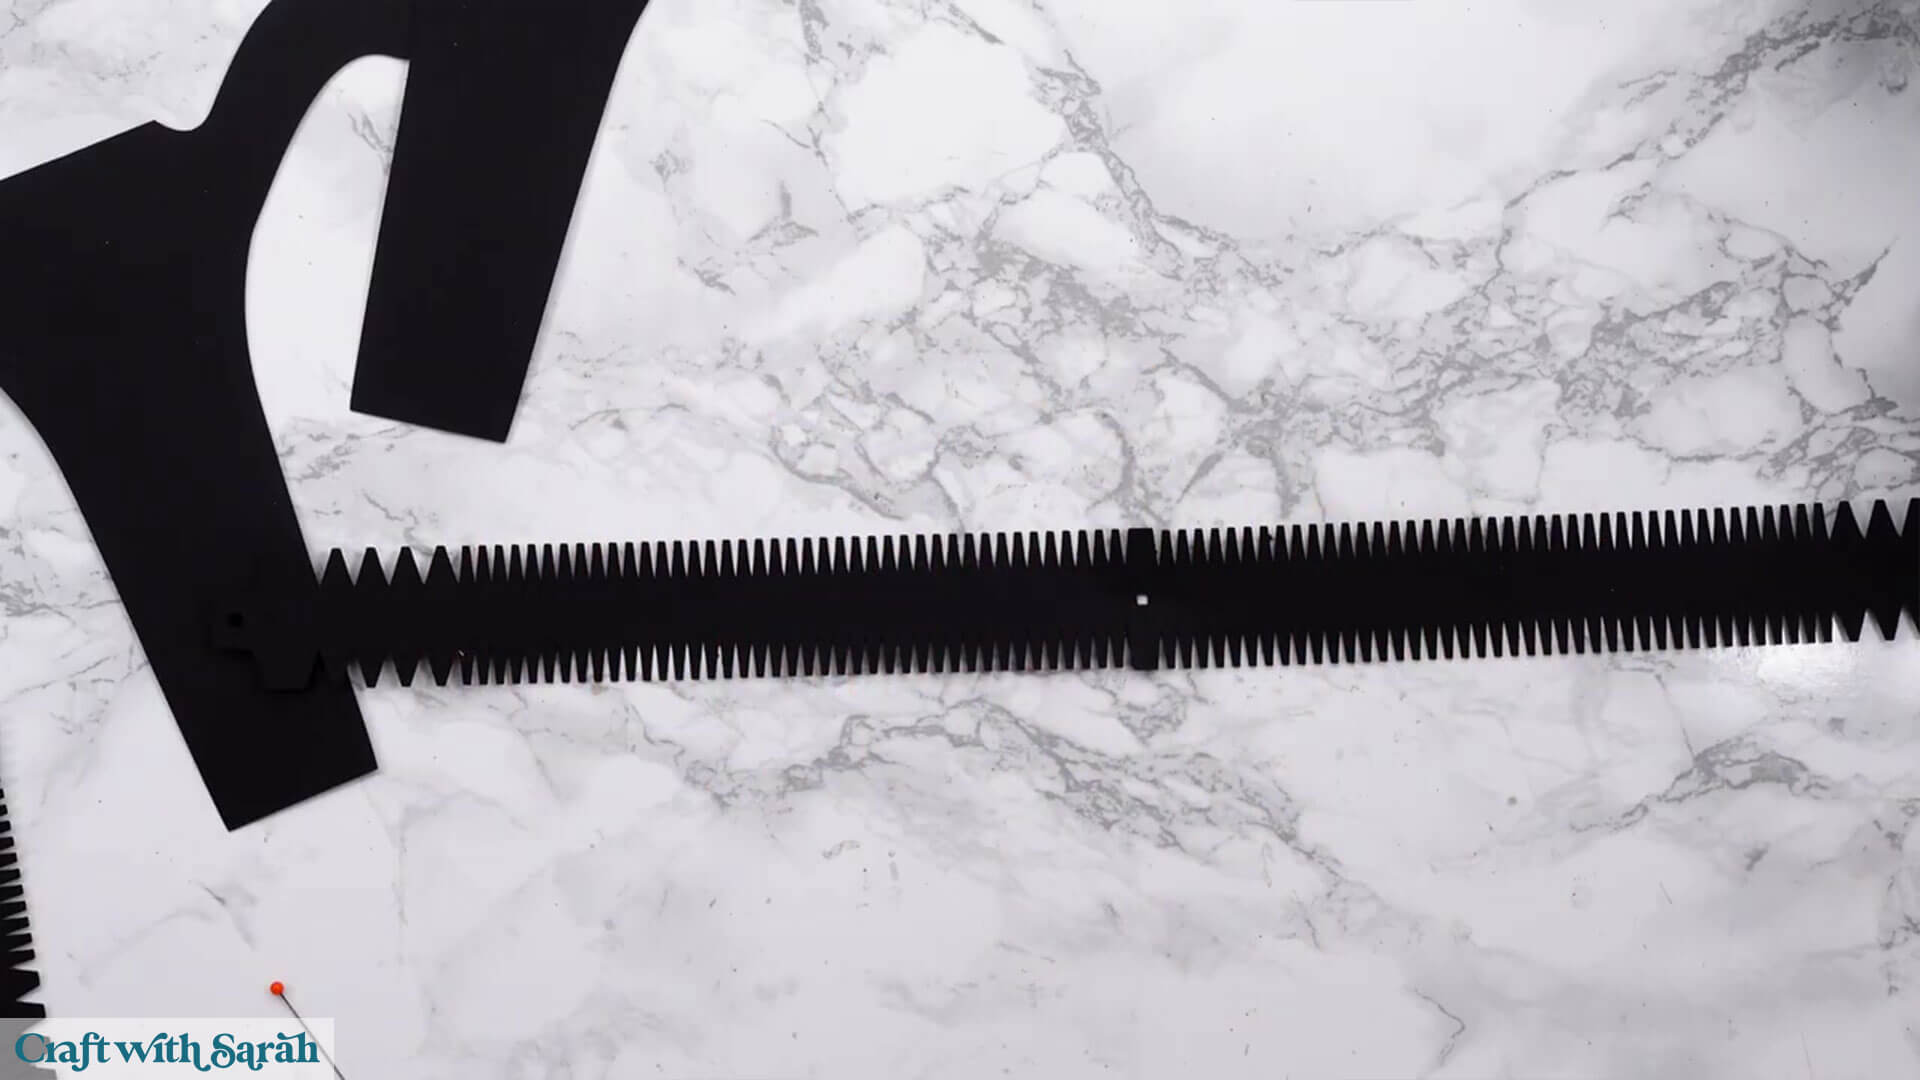
Whilst the glue dries, take this piece with the triangular cutouts and take the other triangular cutout piece and add glue to the end with the cutouts.
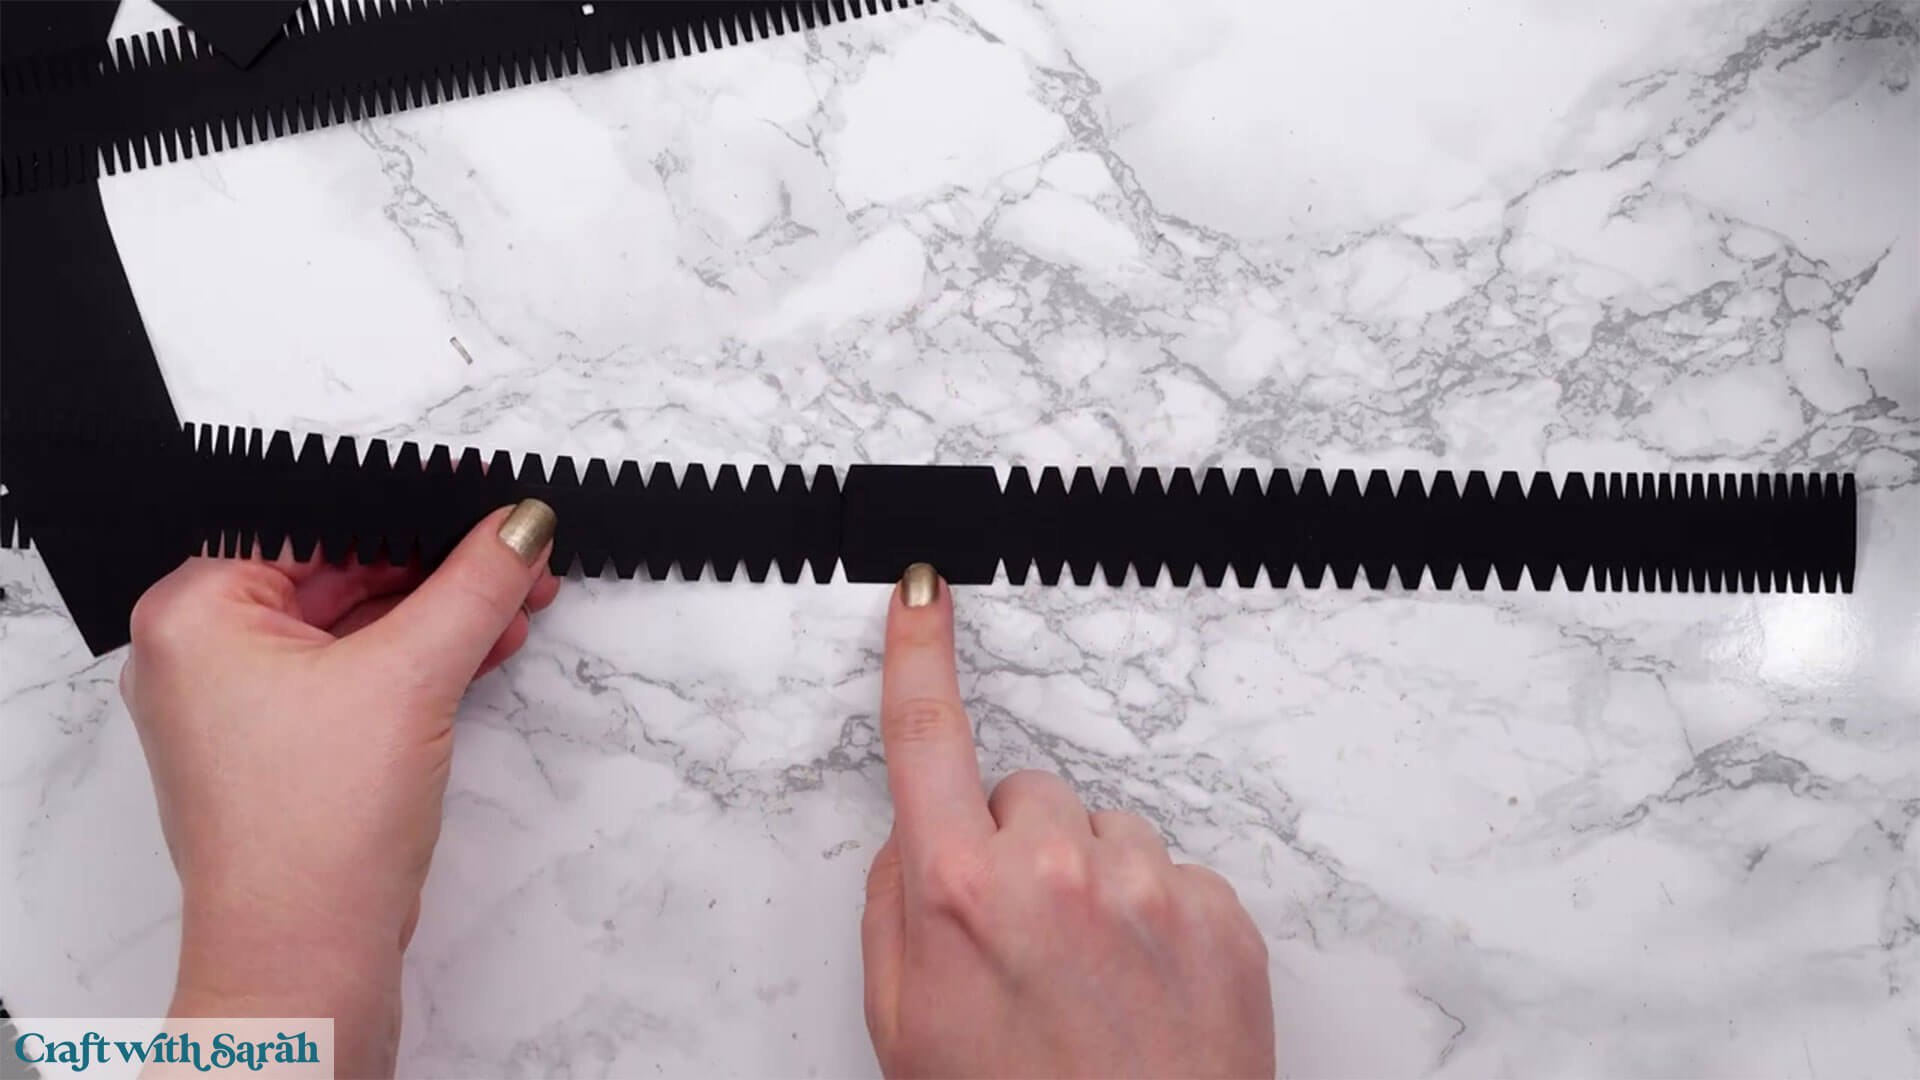
Join the pieces together by overlapping the triangle cutouts with the plain (no cutouts) end on the other piece.
It should look like this:
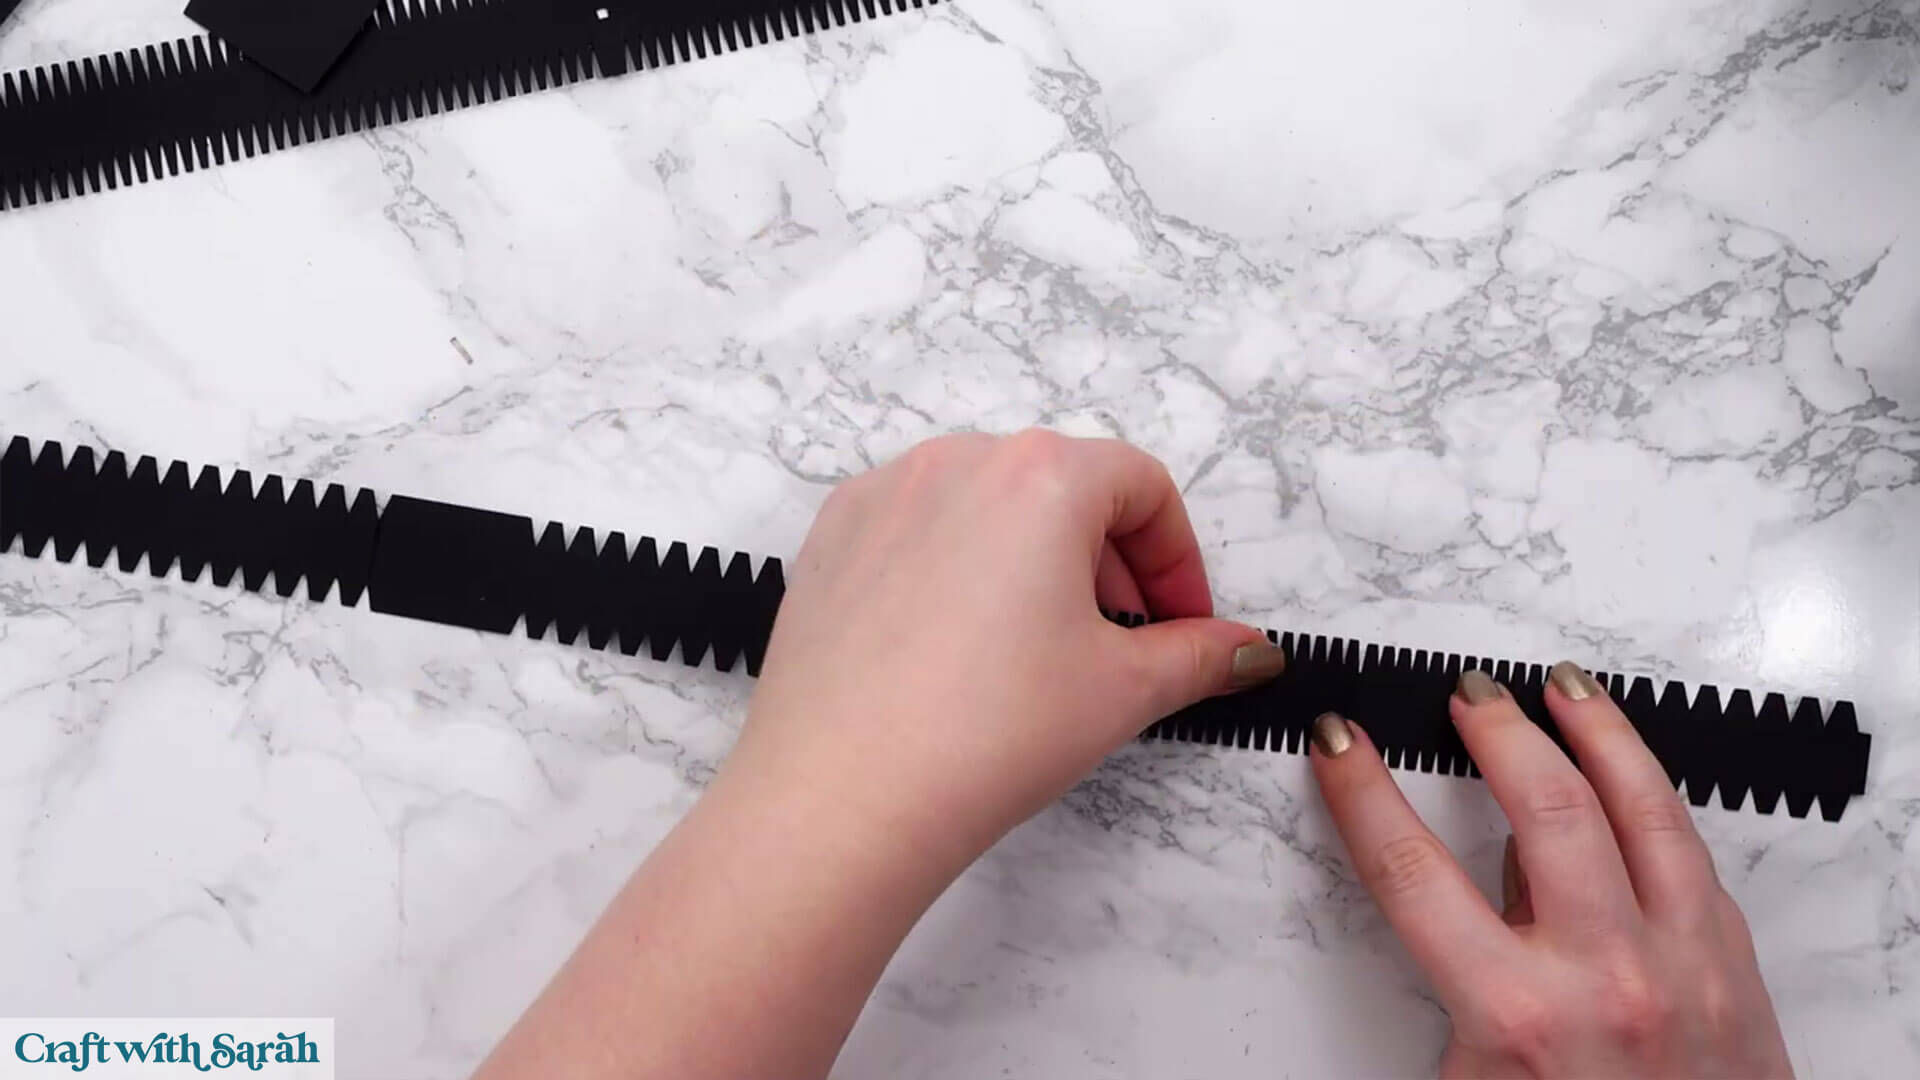
Do the same with the little pieces by glueing one on each end. One side will have the triangle cutouts to line up.
Take the original piece we were working on in this section and fold all the little crocodile teeth upwards. It might start looking like a millipede!
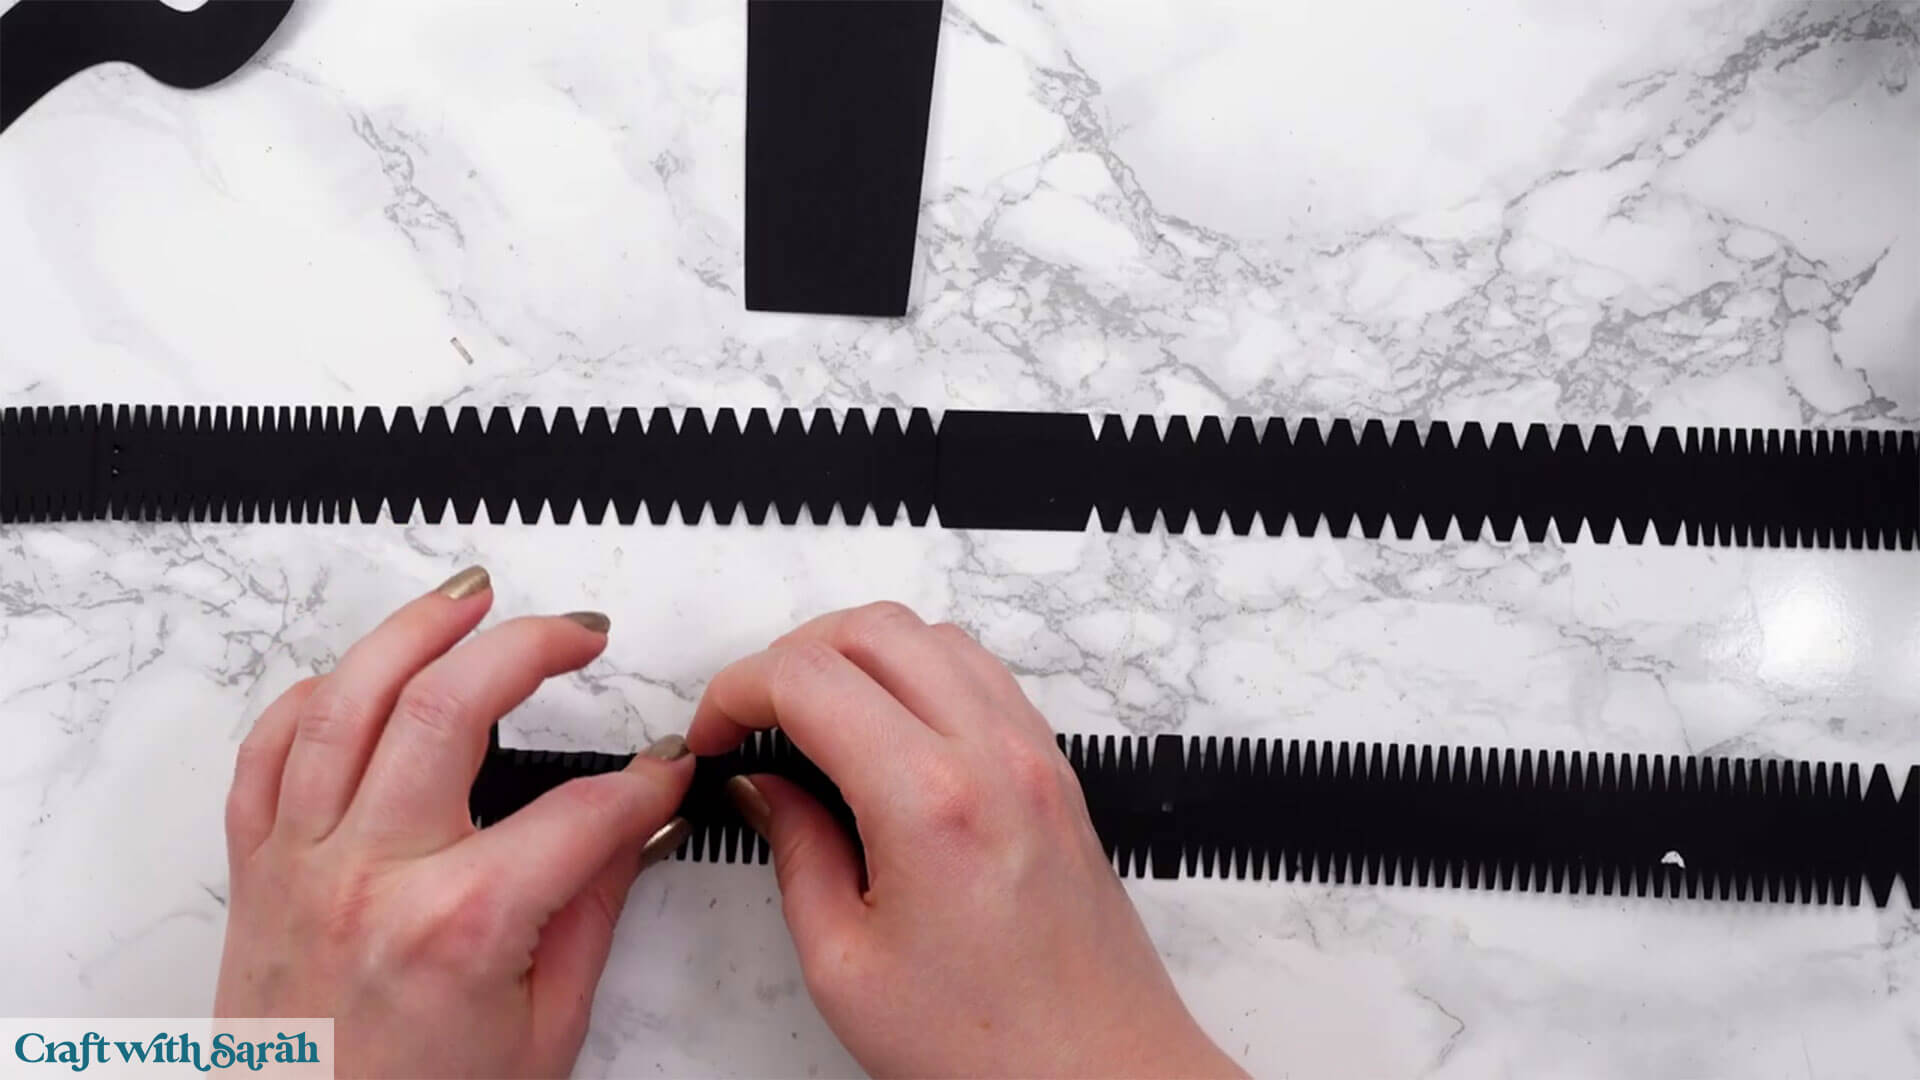
The next step can be quite challenging so I used a combination of glue and double sided tape which I added to my filled in structure piece before I got started.
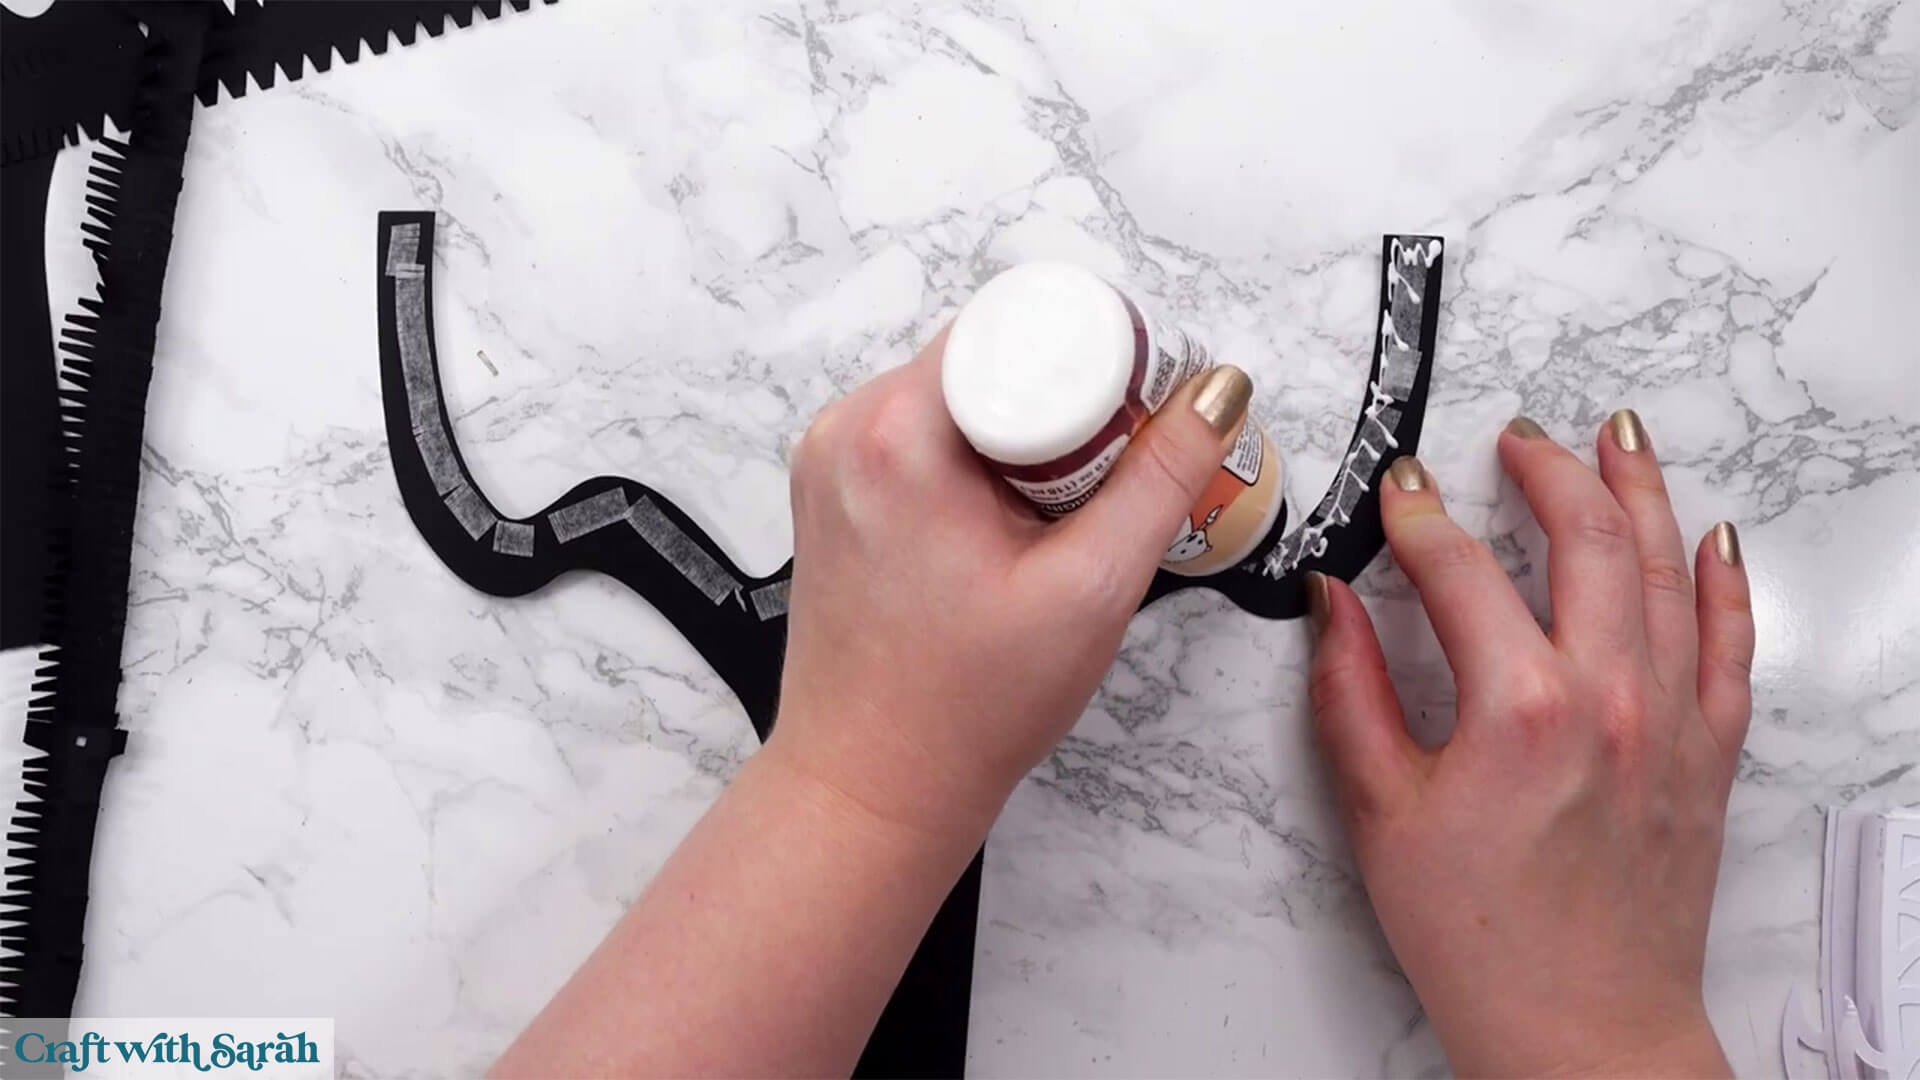
Start by sticking the side tab on the millipede shape to one end. Use the top square and side taps to fix it to the tip of the candelabra with a nice flat finish.
Then follow the shape of the structural piece and stick the little tabs to it from one end to the other.
You might find it easier to turn it upside down.
Now take the long tab piece and fold up all the crocodile teeth.
Match the middle, long tab with the bottom of the structural piece and stick the tabs down in the same way as we did for the other one.
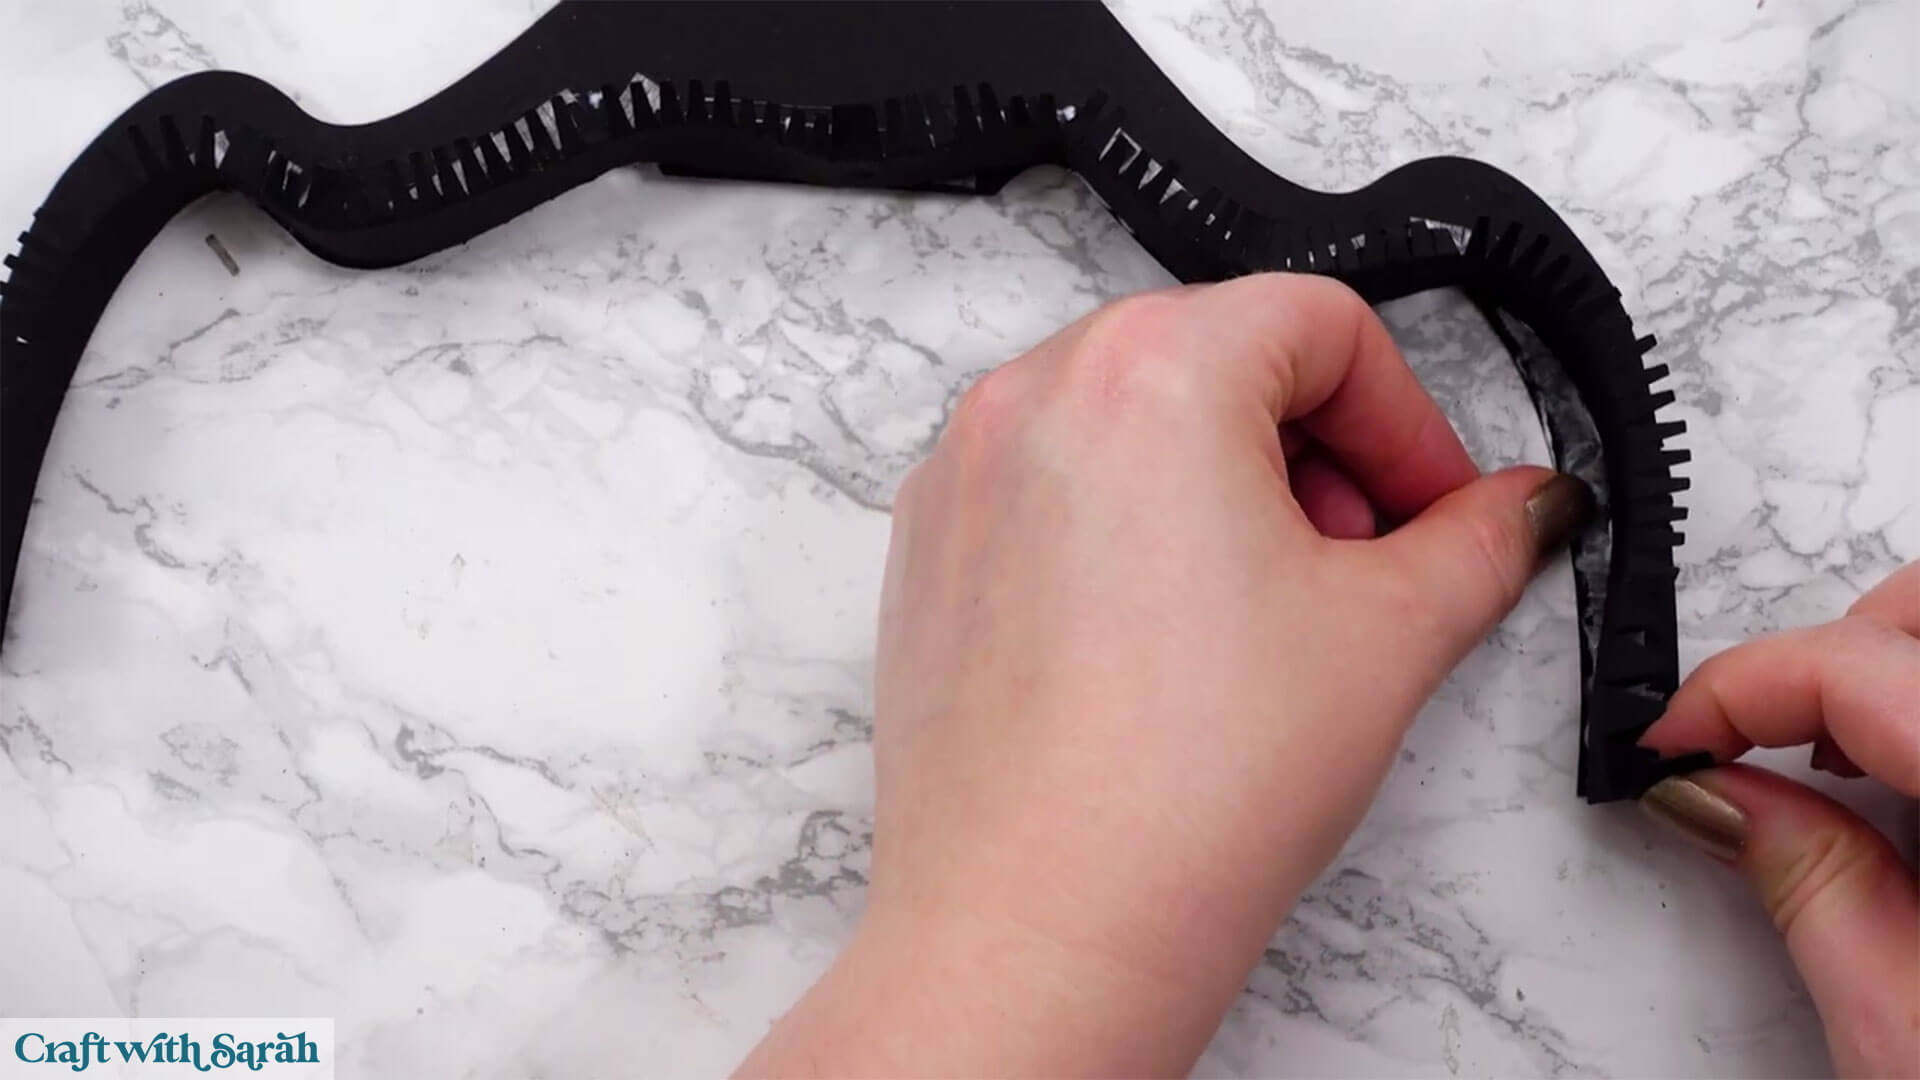
Secure the tabs to the other ones at each end.
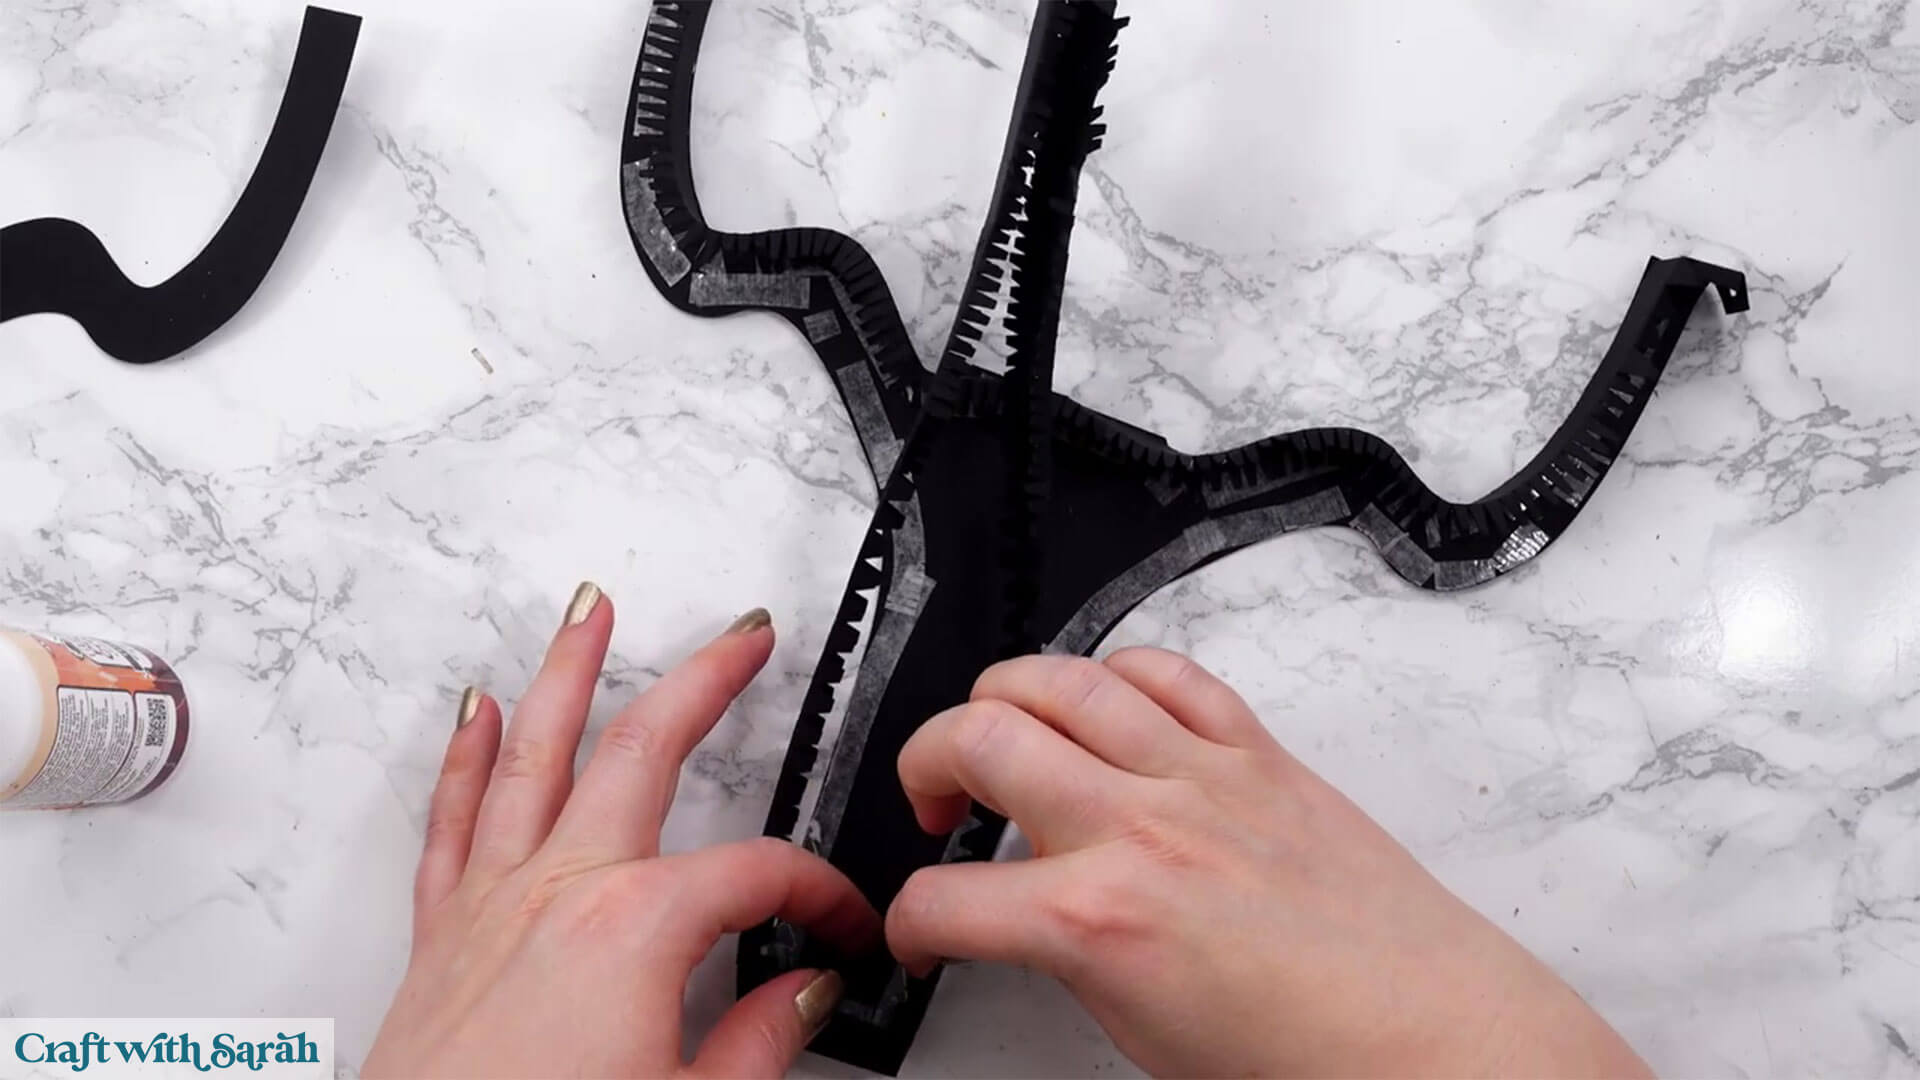
It should look like this:
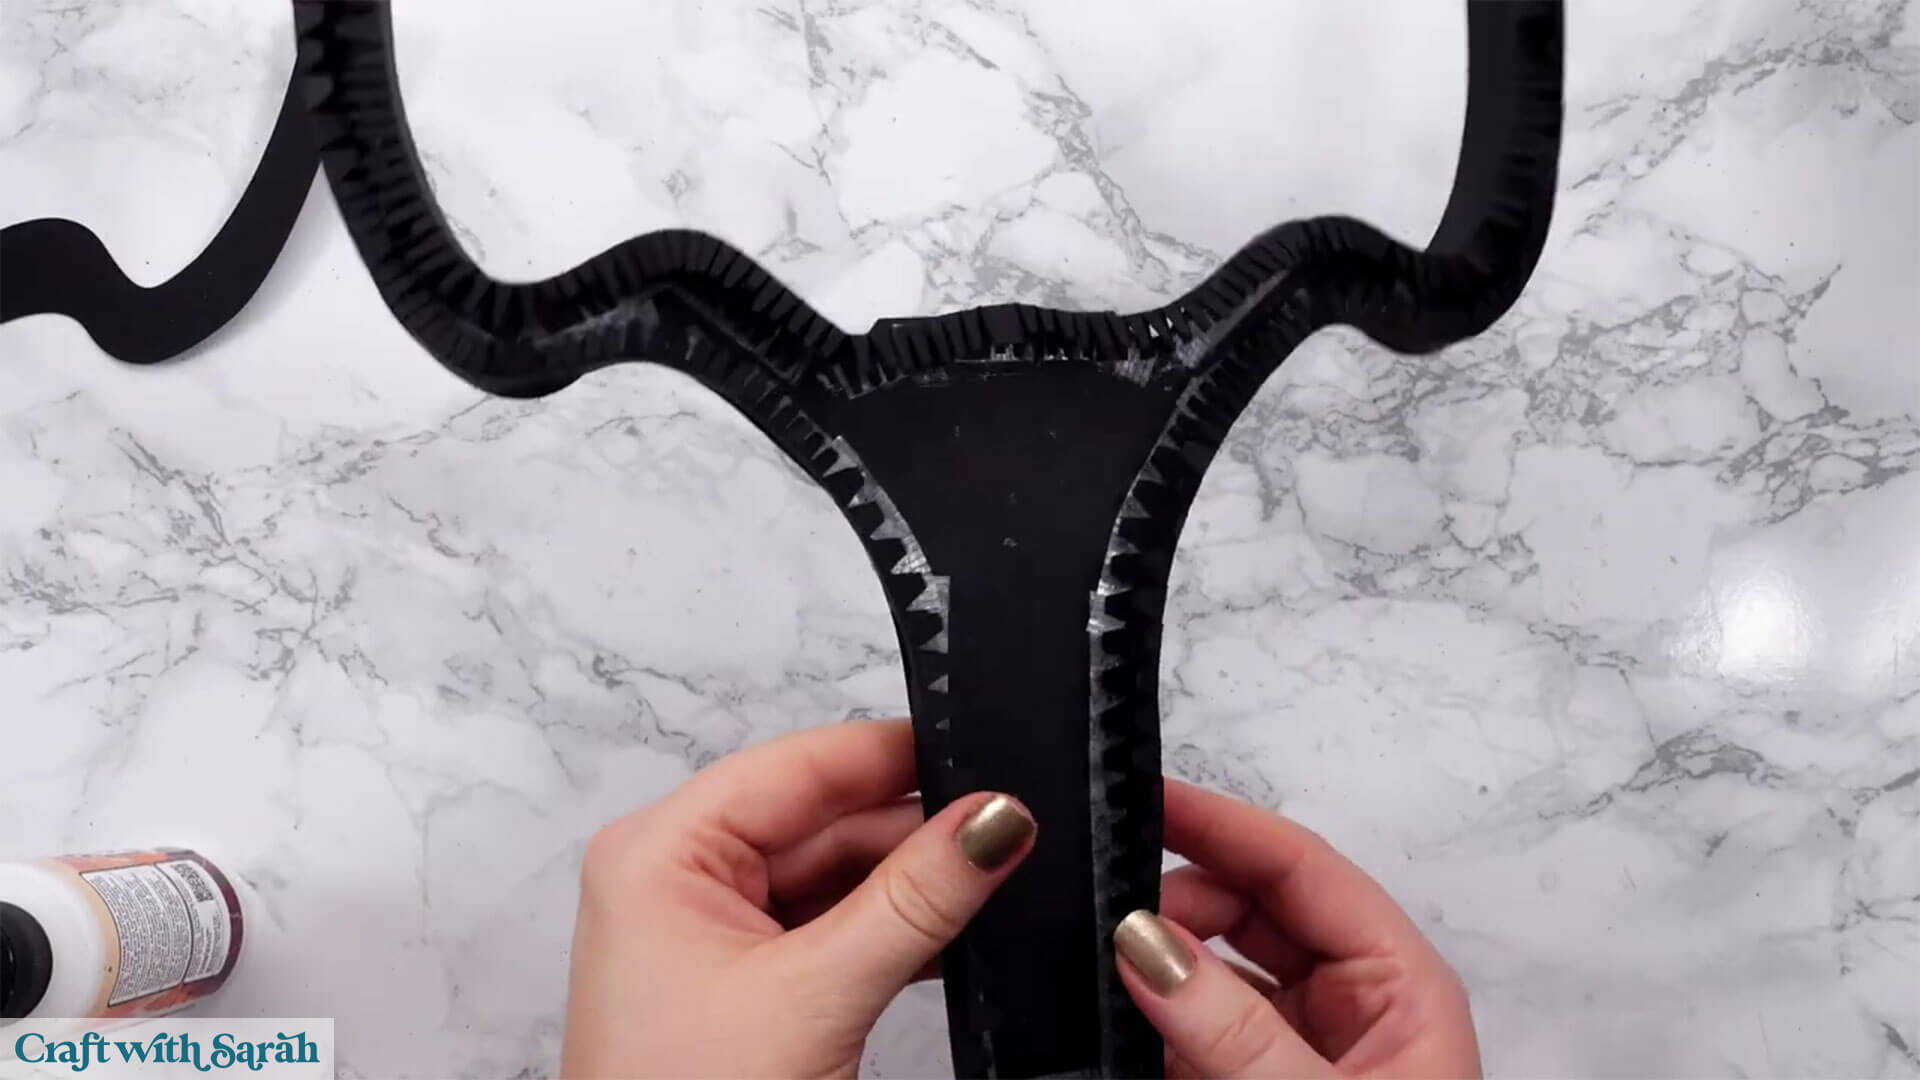
Now glue the matching structural piece on top.
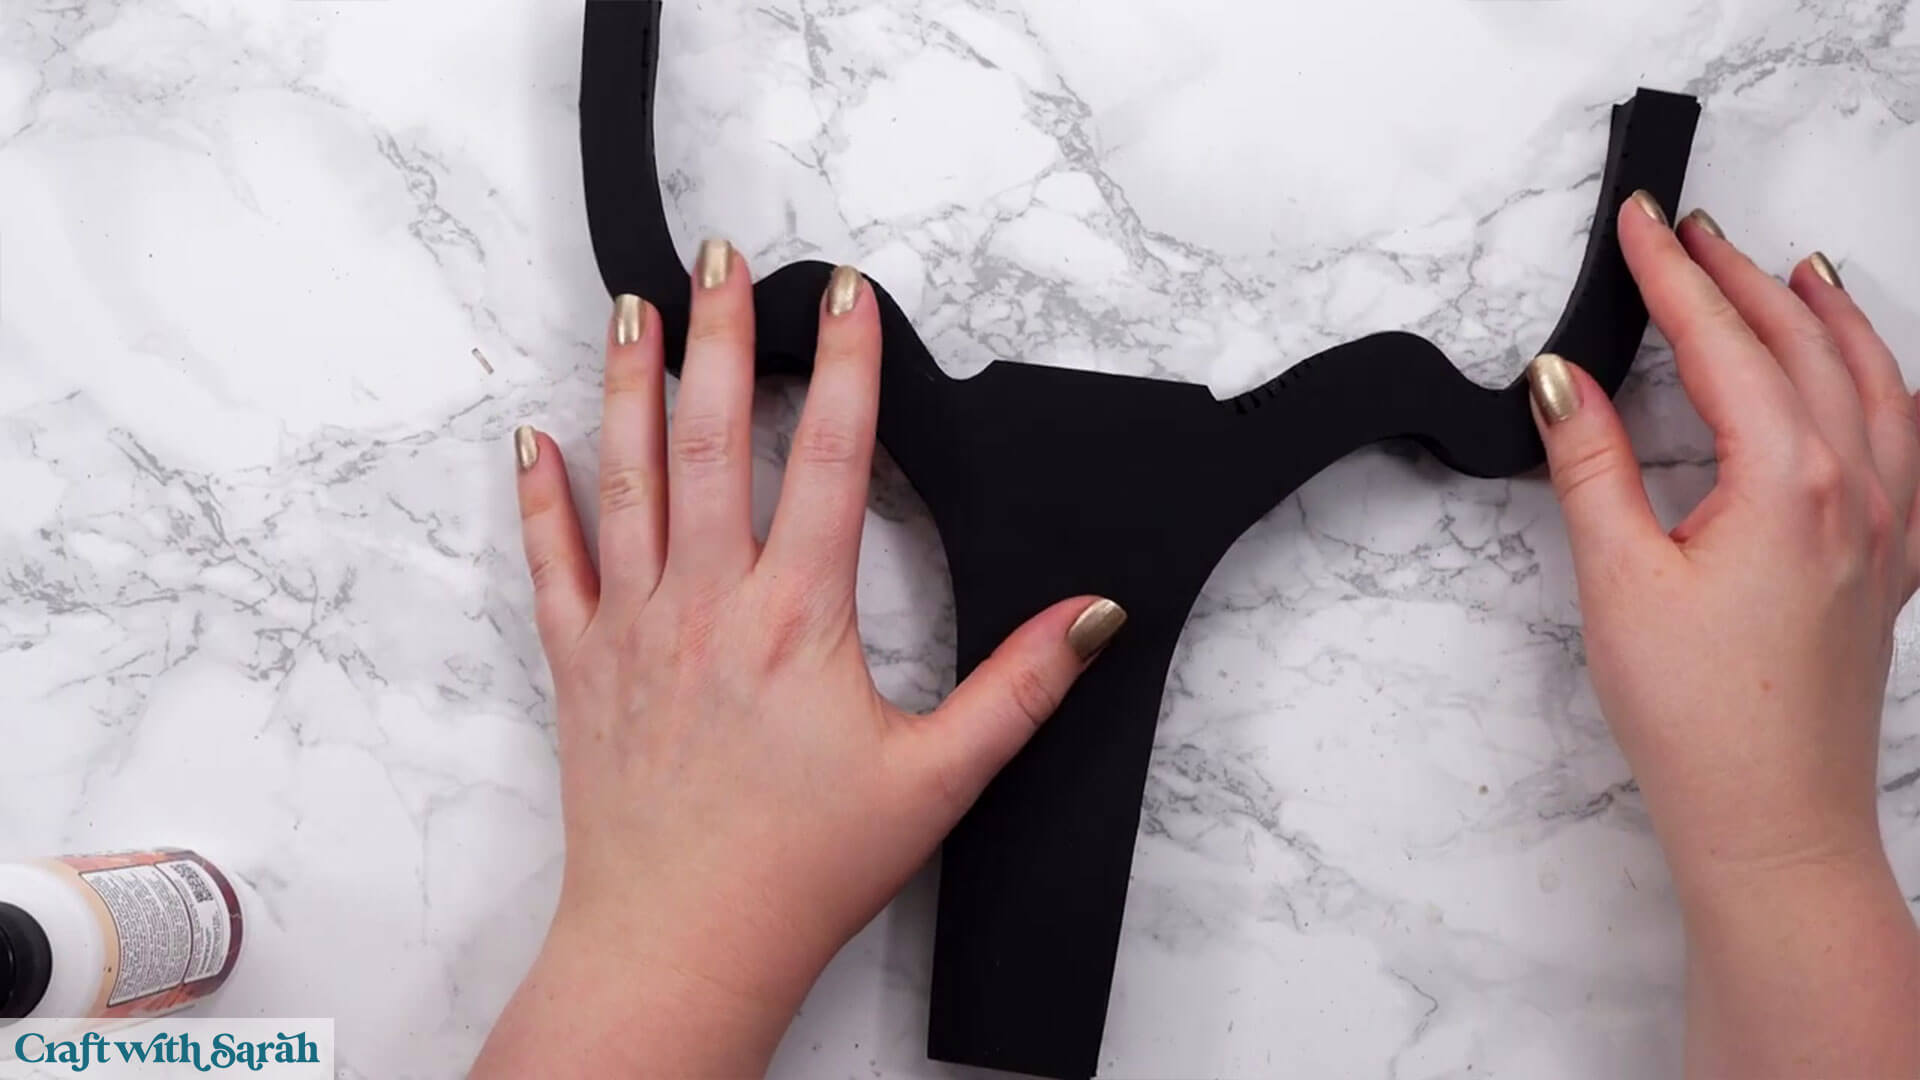
Now is a good time to use masking tape again to hold the structure together whilst it dries.
Glue the decorations on top. There are 4 pieces in total.
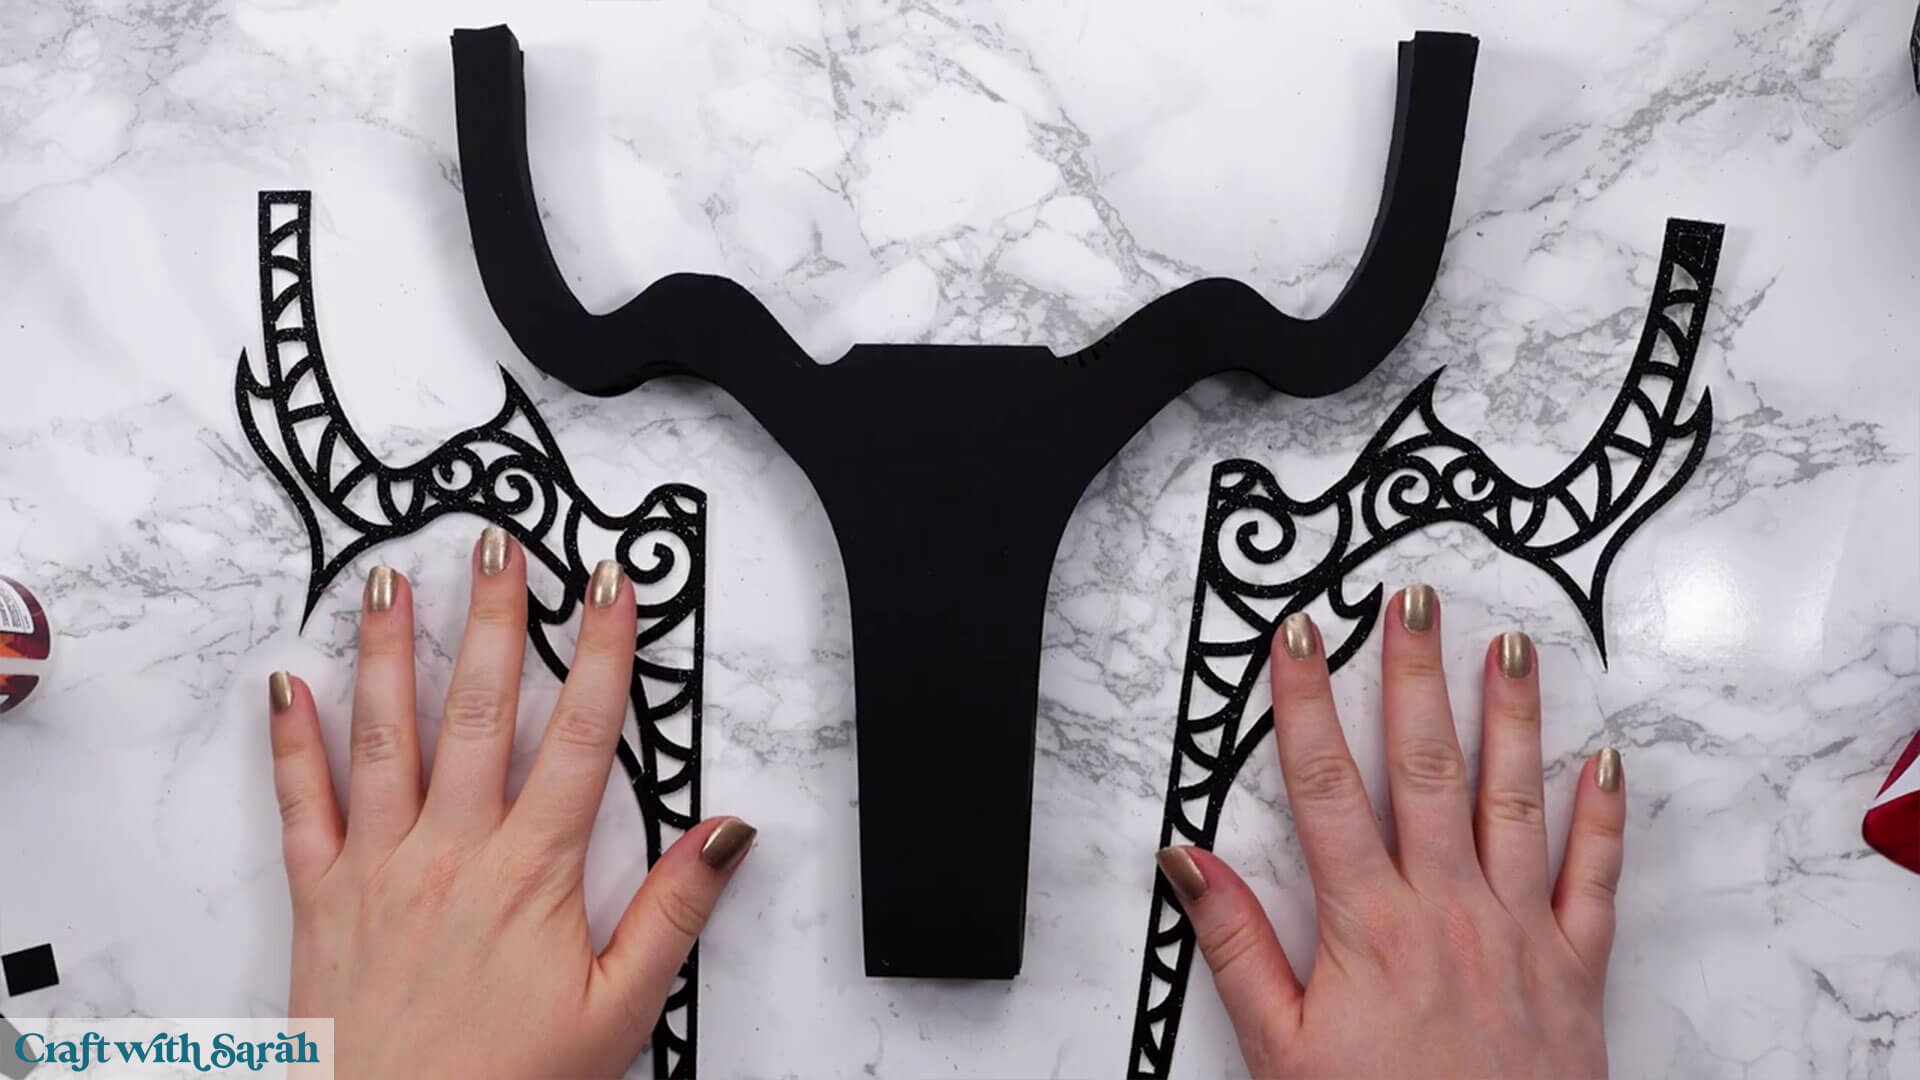
It’s best to line up the pieces before gluing so that you know which bits will need glue and which bits won’t as there are some sections which overhang the structure.
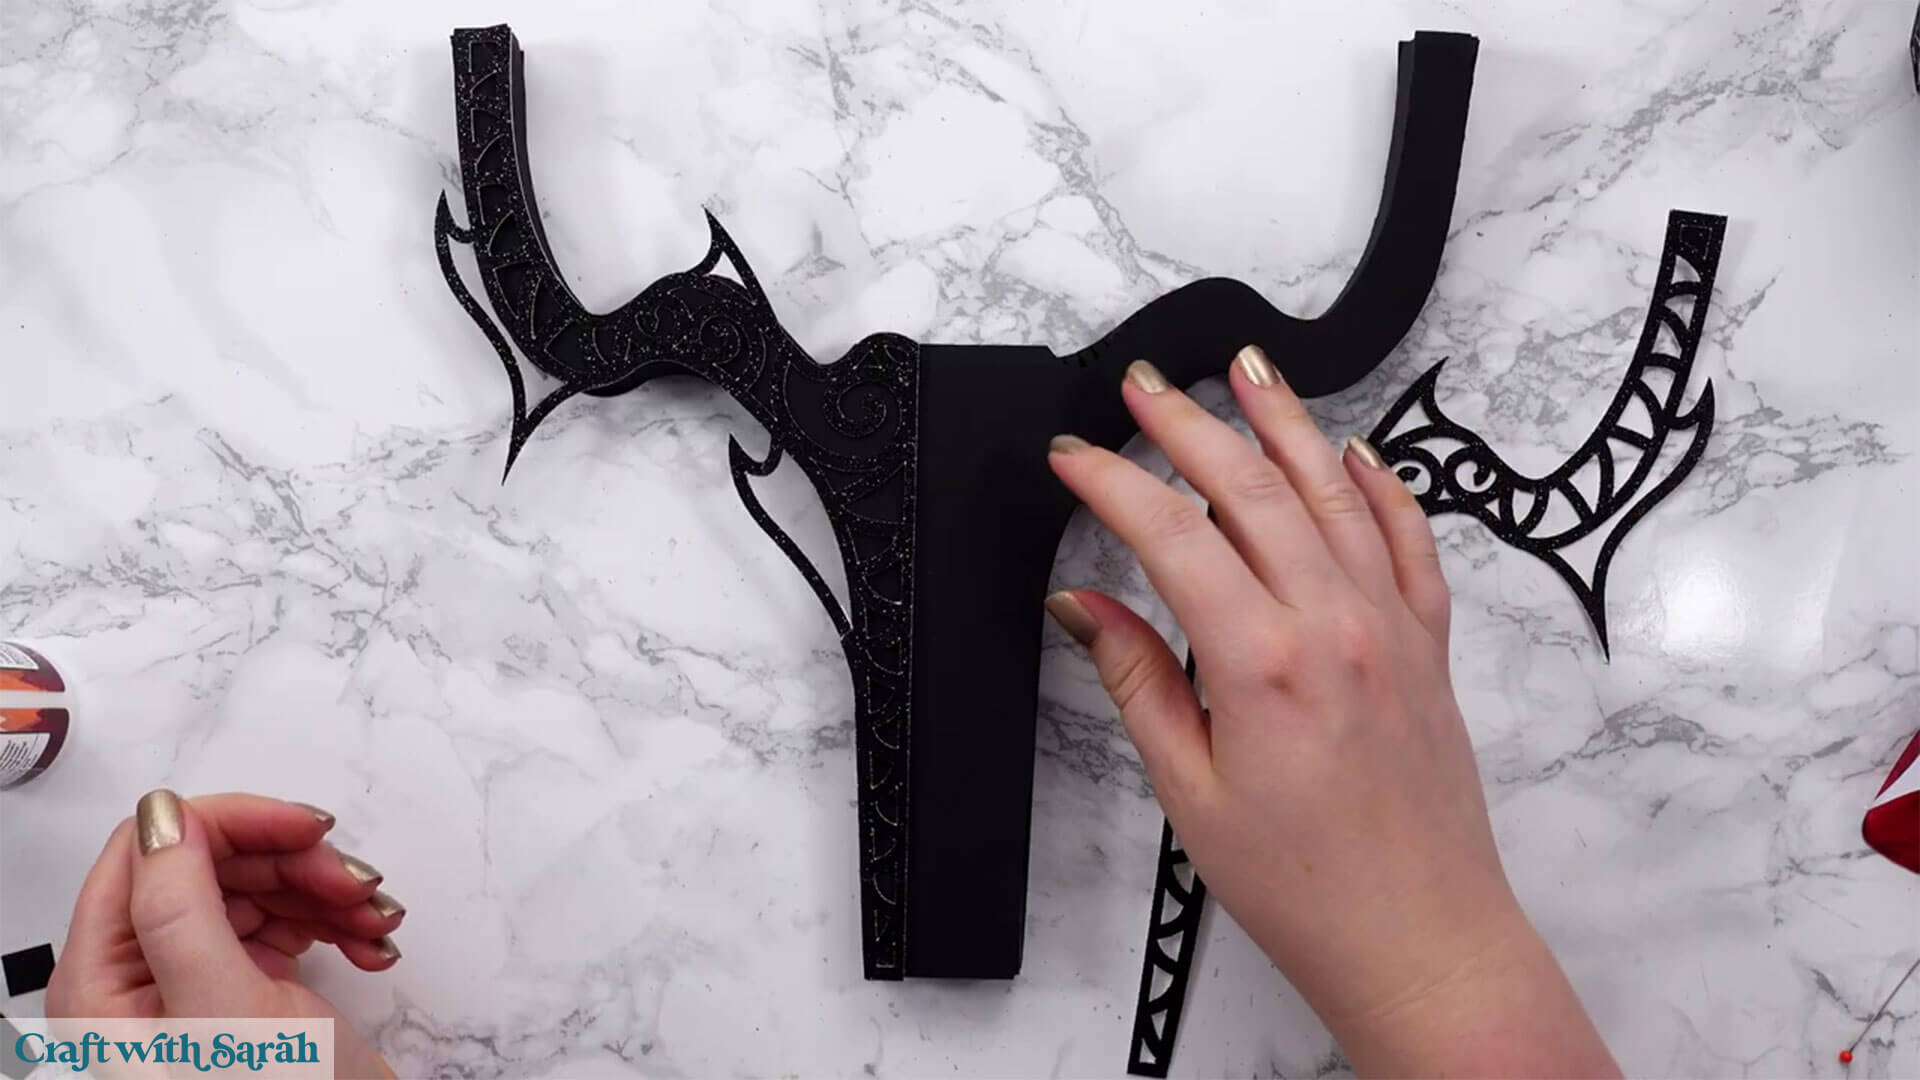
For the other structural piece we will follow similar steps but there are a few bits to add.
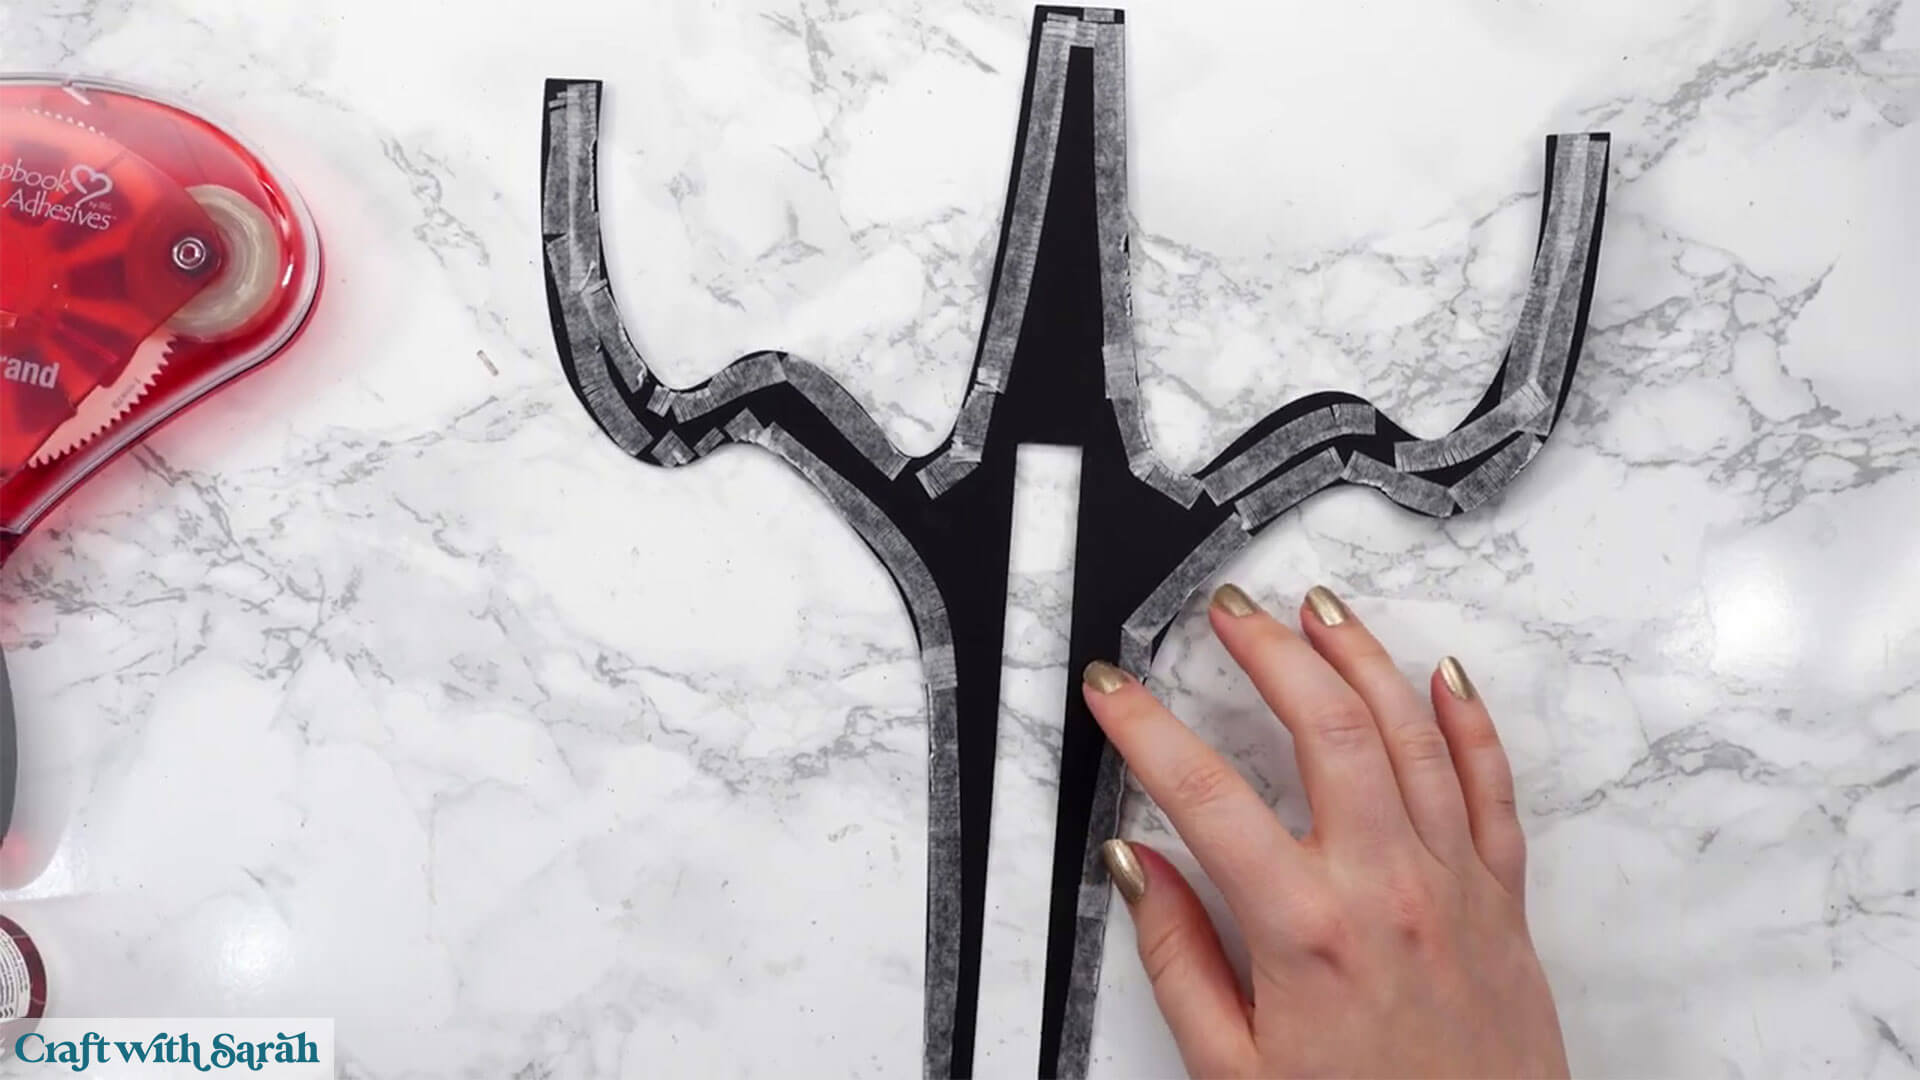
When you’re sticking, you don’t need to add glue or tape to the very inside around the cutout as there won’t be tabs to stick to.
You will also have some tiny tab pieces which look like this.
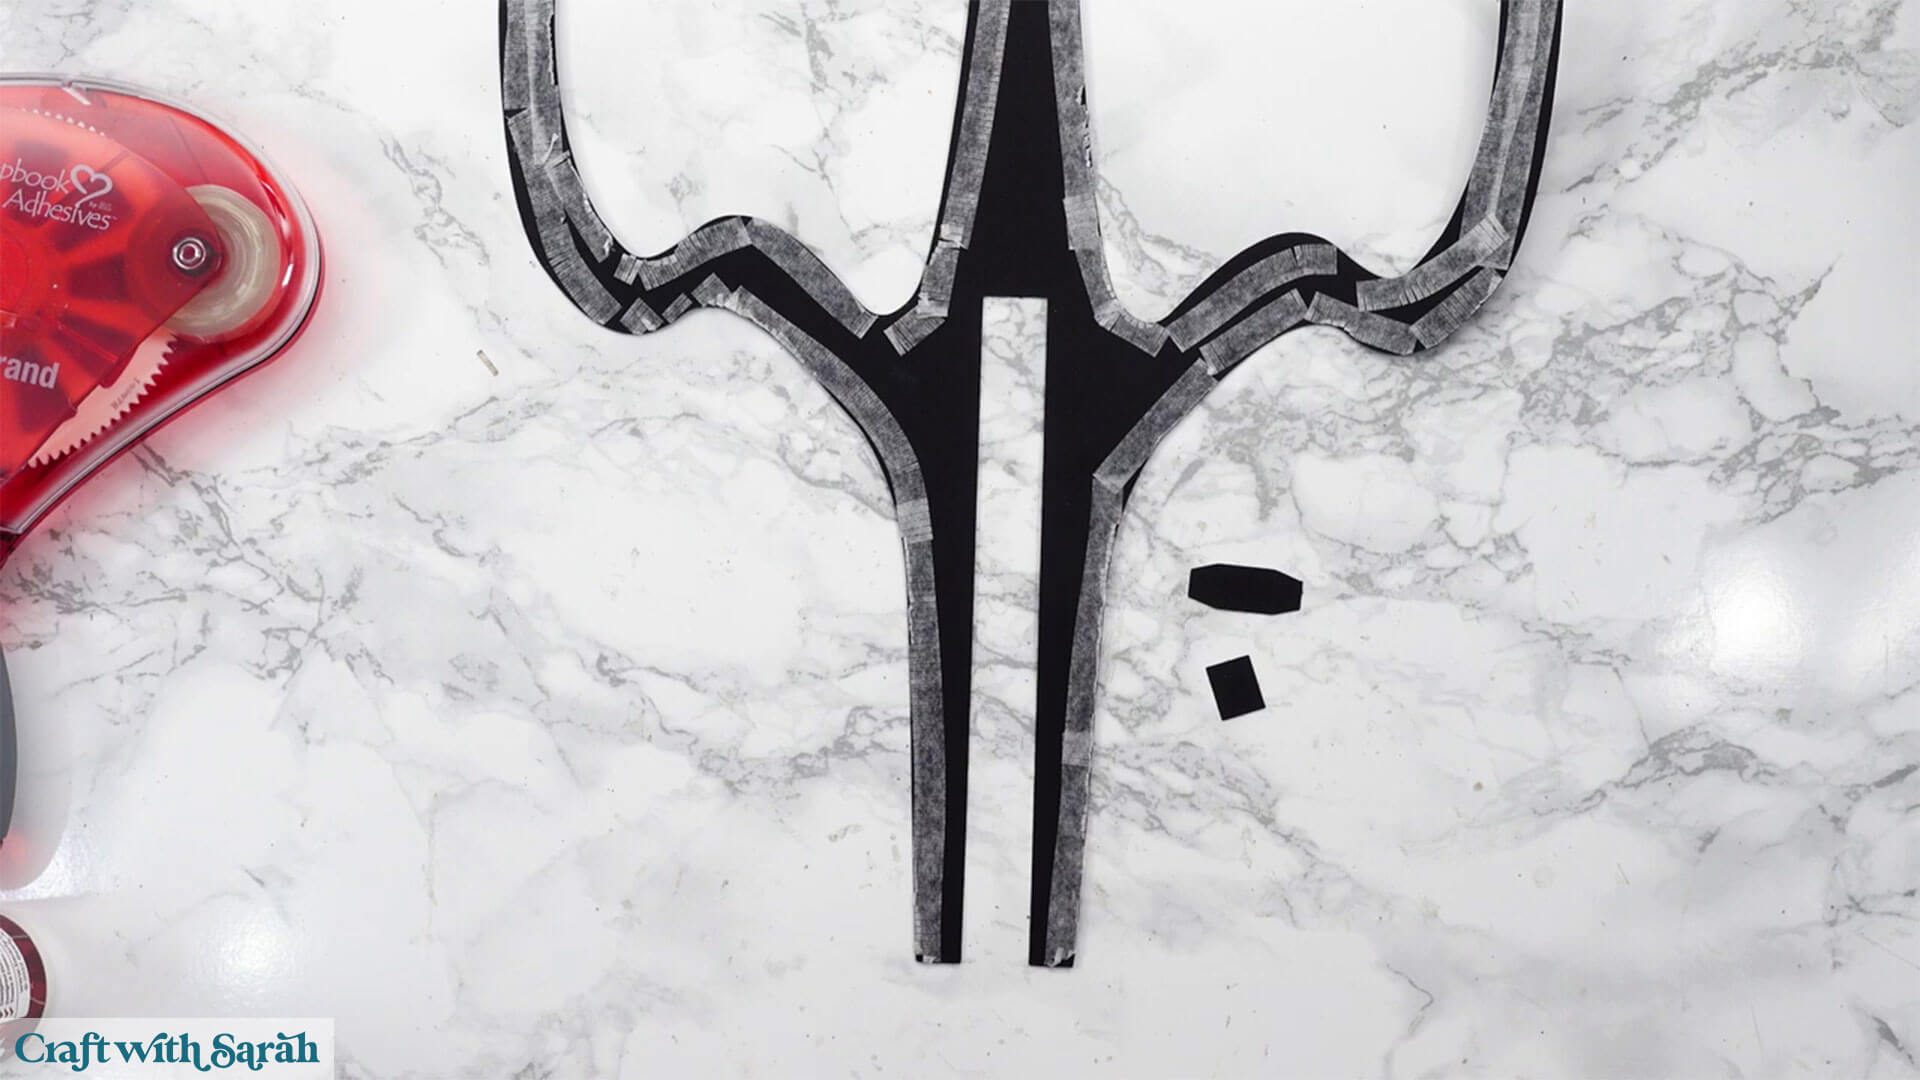
Fold along the score lines on the larger pieces.
Glue the middle (not the tabs) and stick the little rectangle inside.
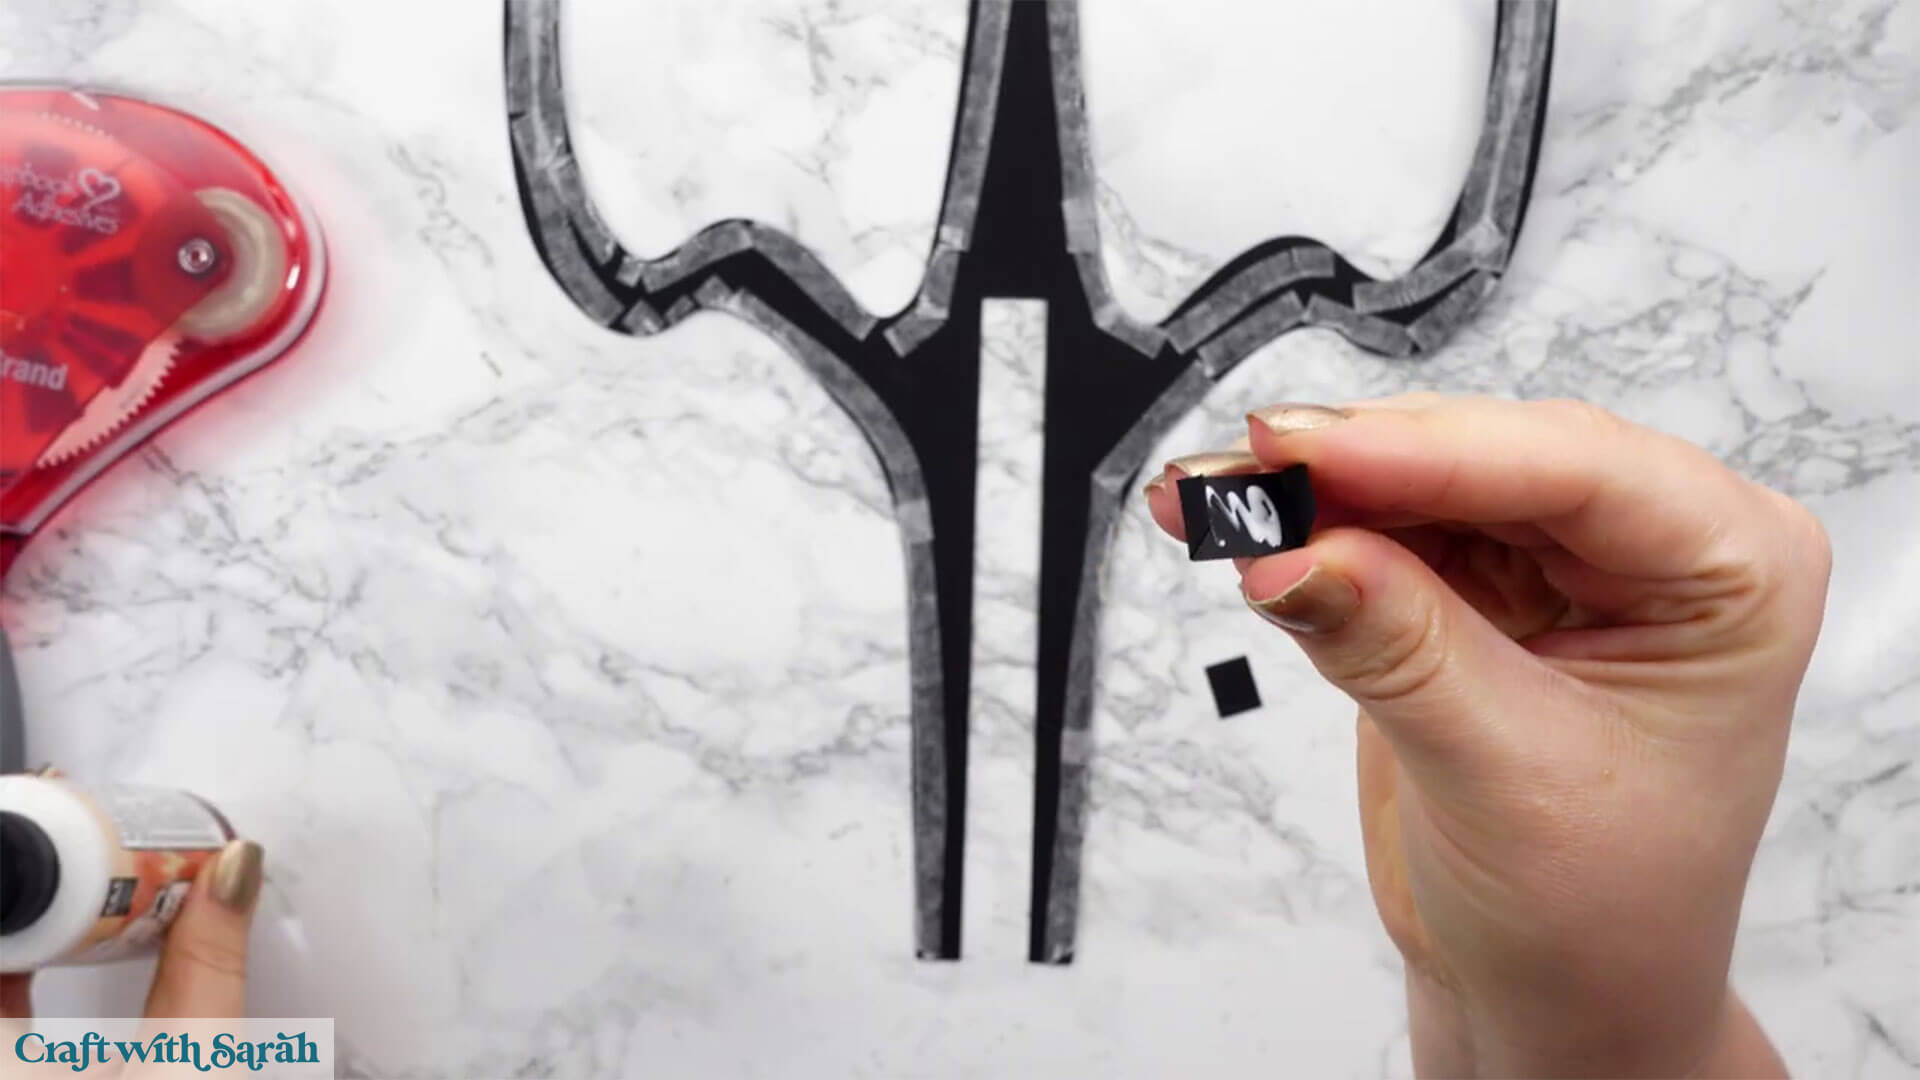
Repeat that so that you have 3 of those little pieces in total.
Add glue to these sections:
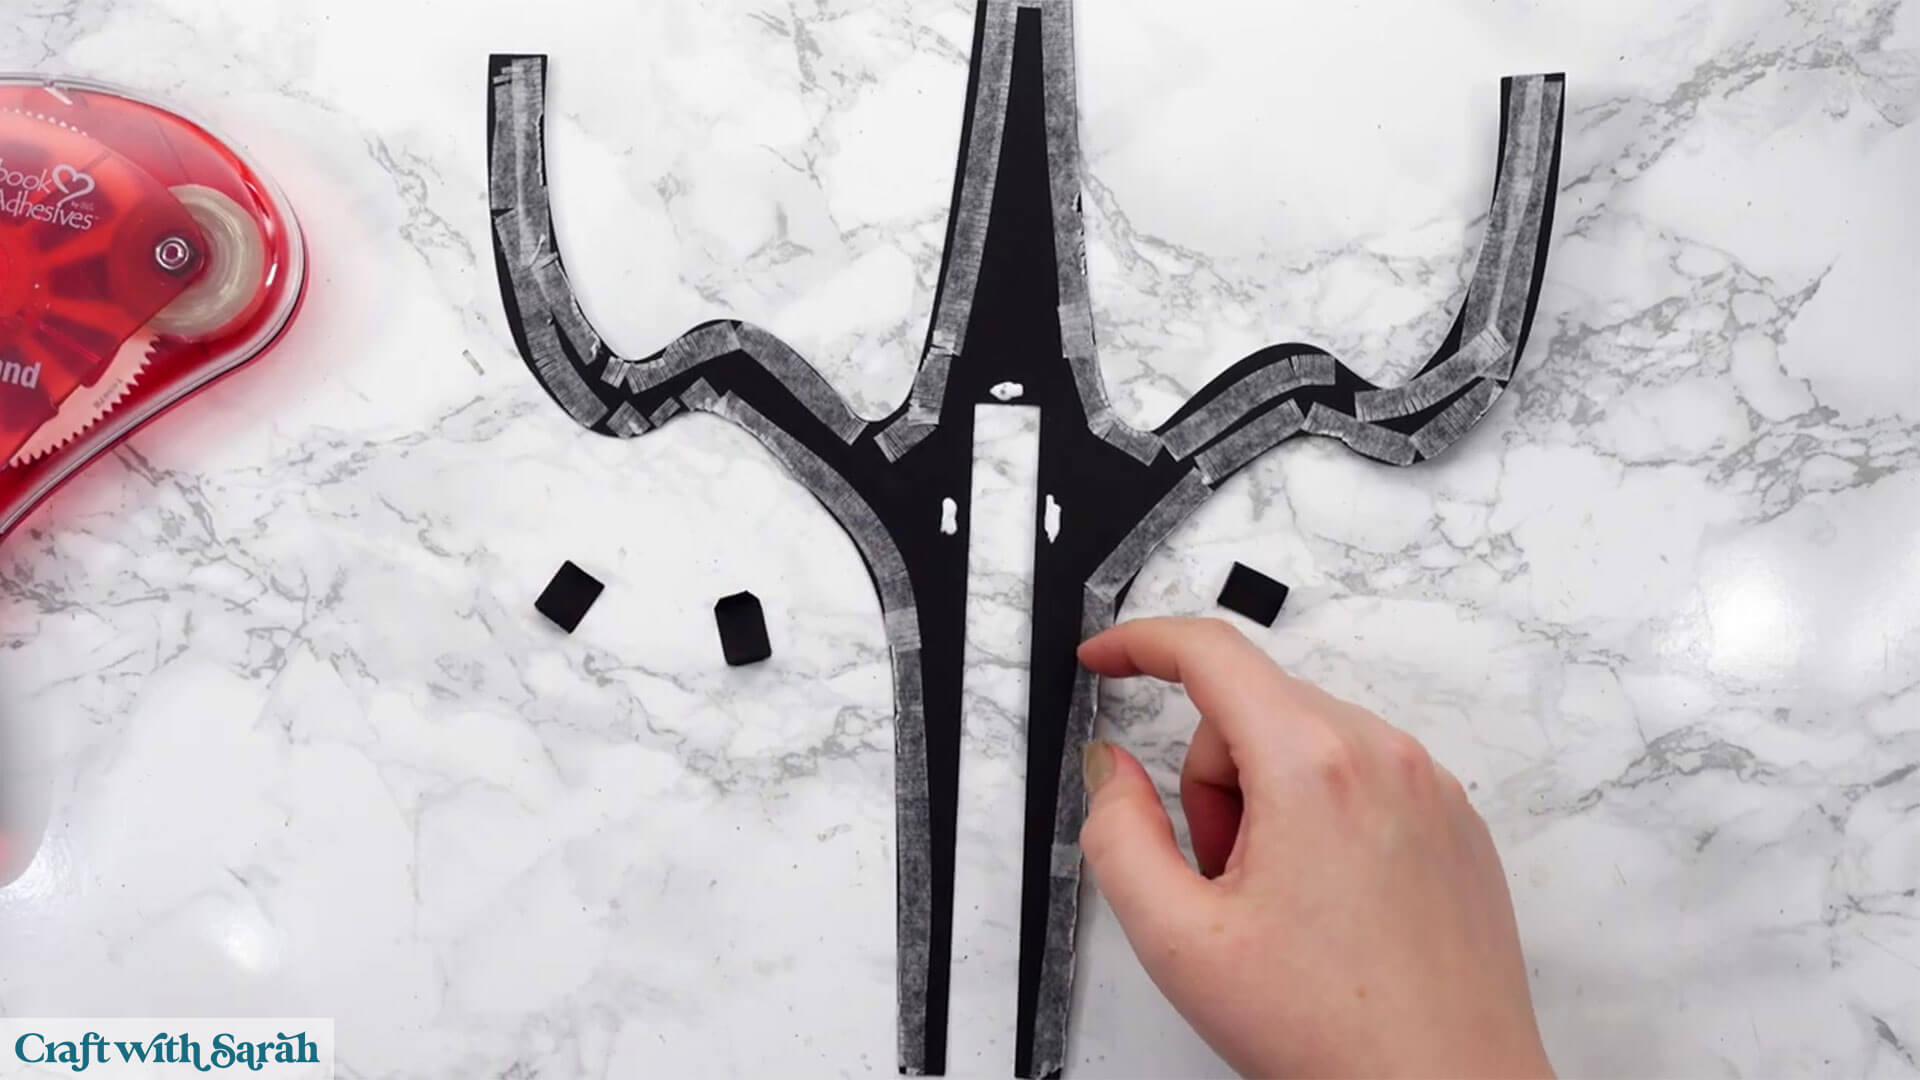
Stick the mini tabs on using the side tabs so that the rectangles all face the middle where the cutout is.
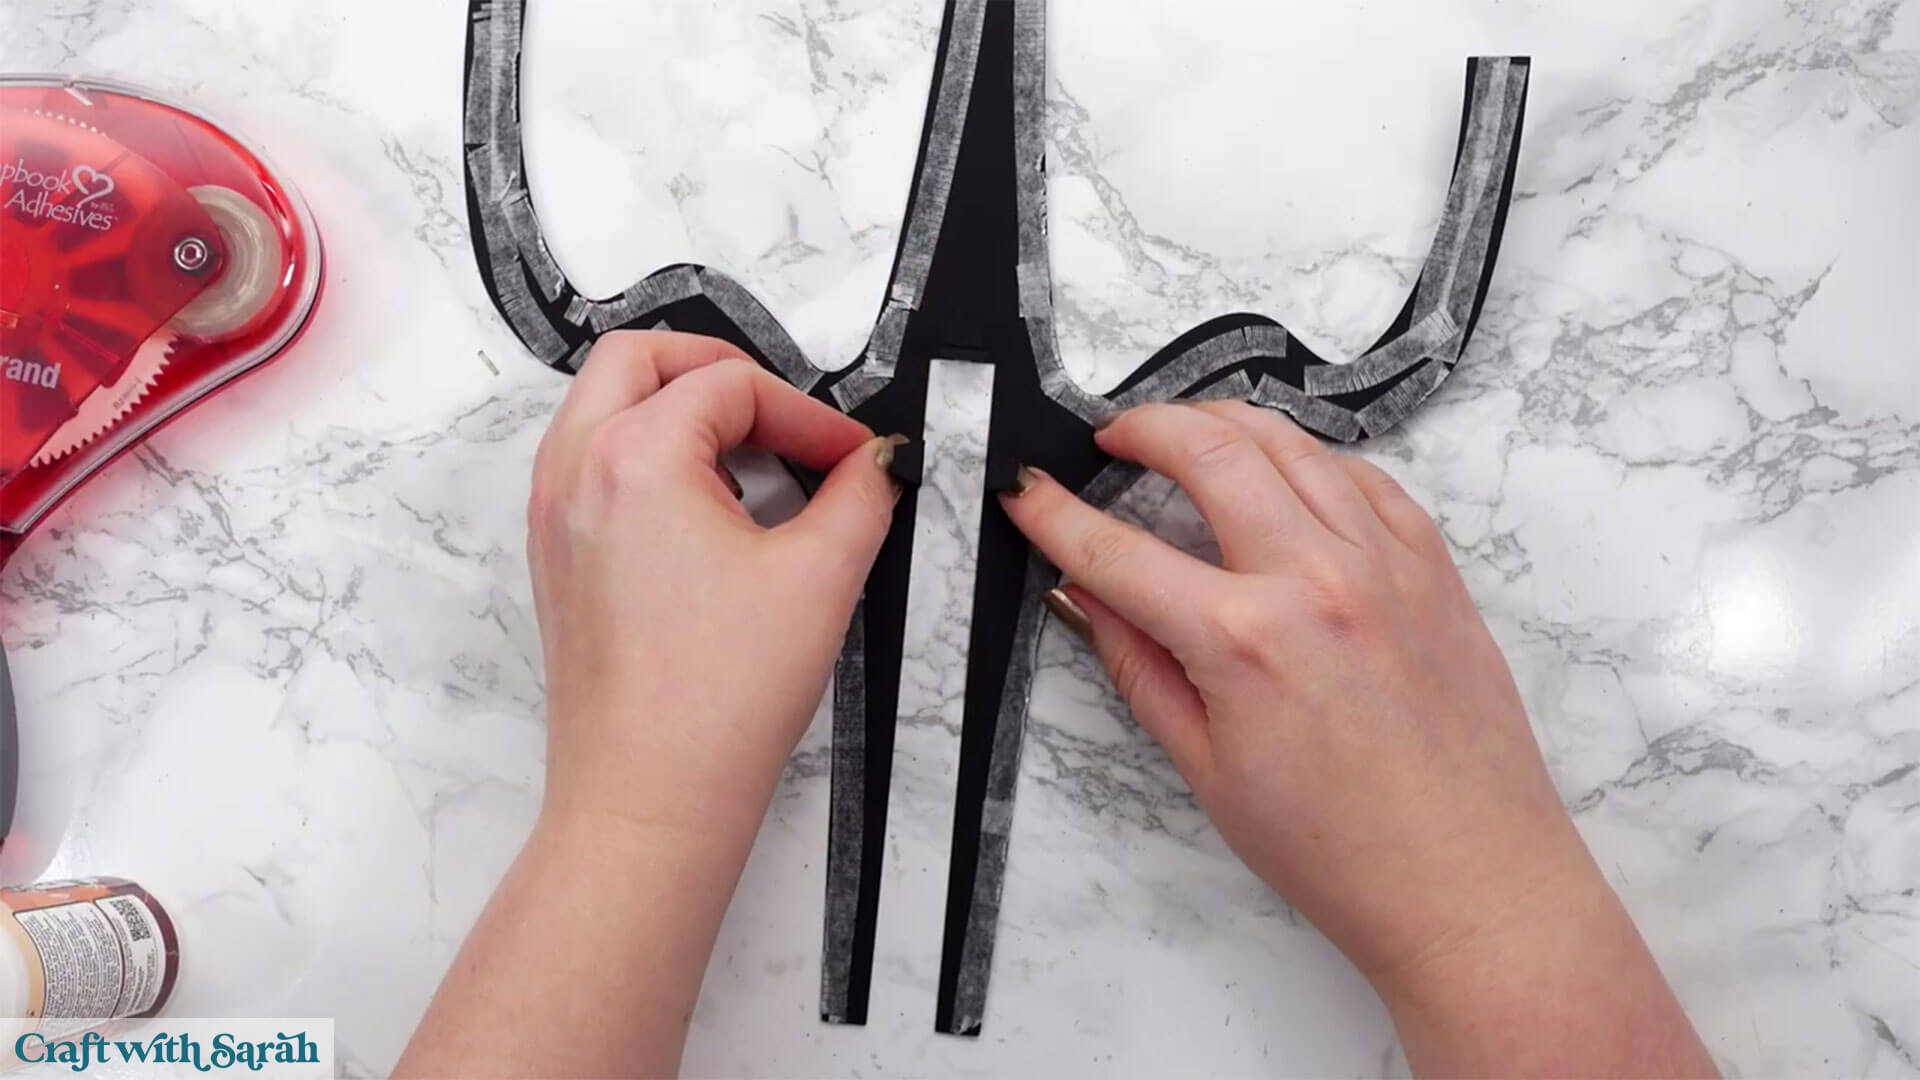
Whilst they dry, take the crocodile teeth with the circle cutouts.
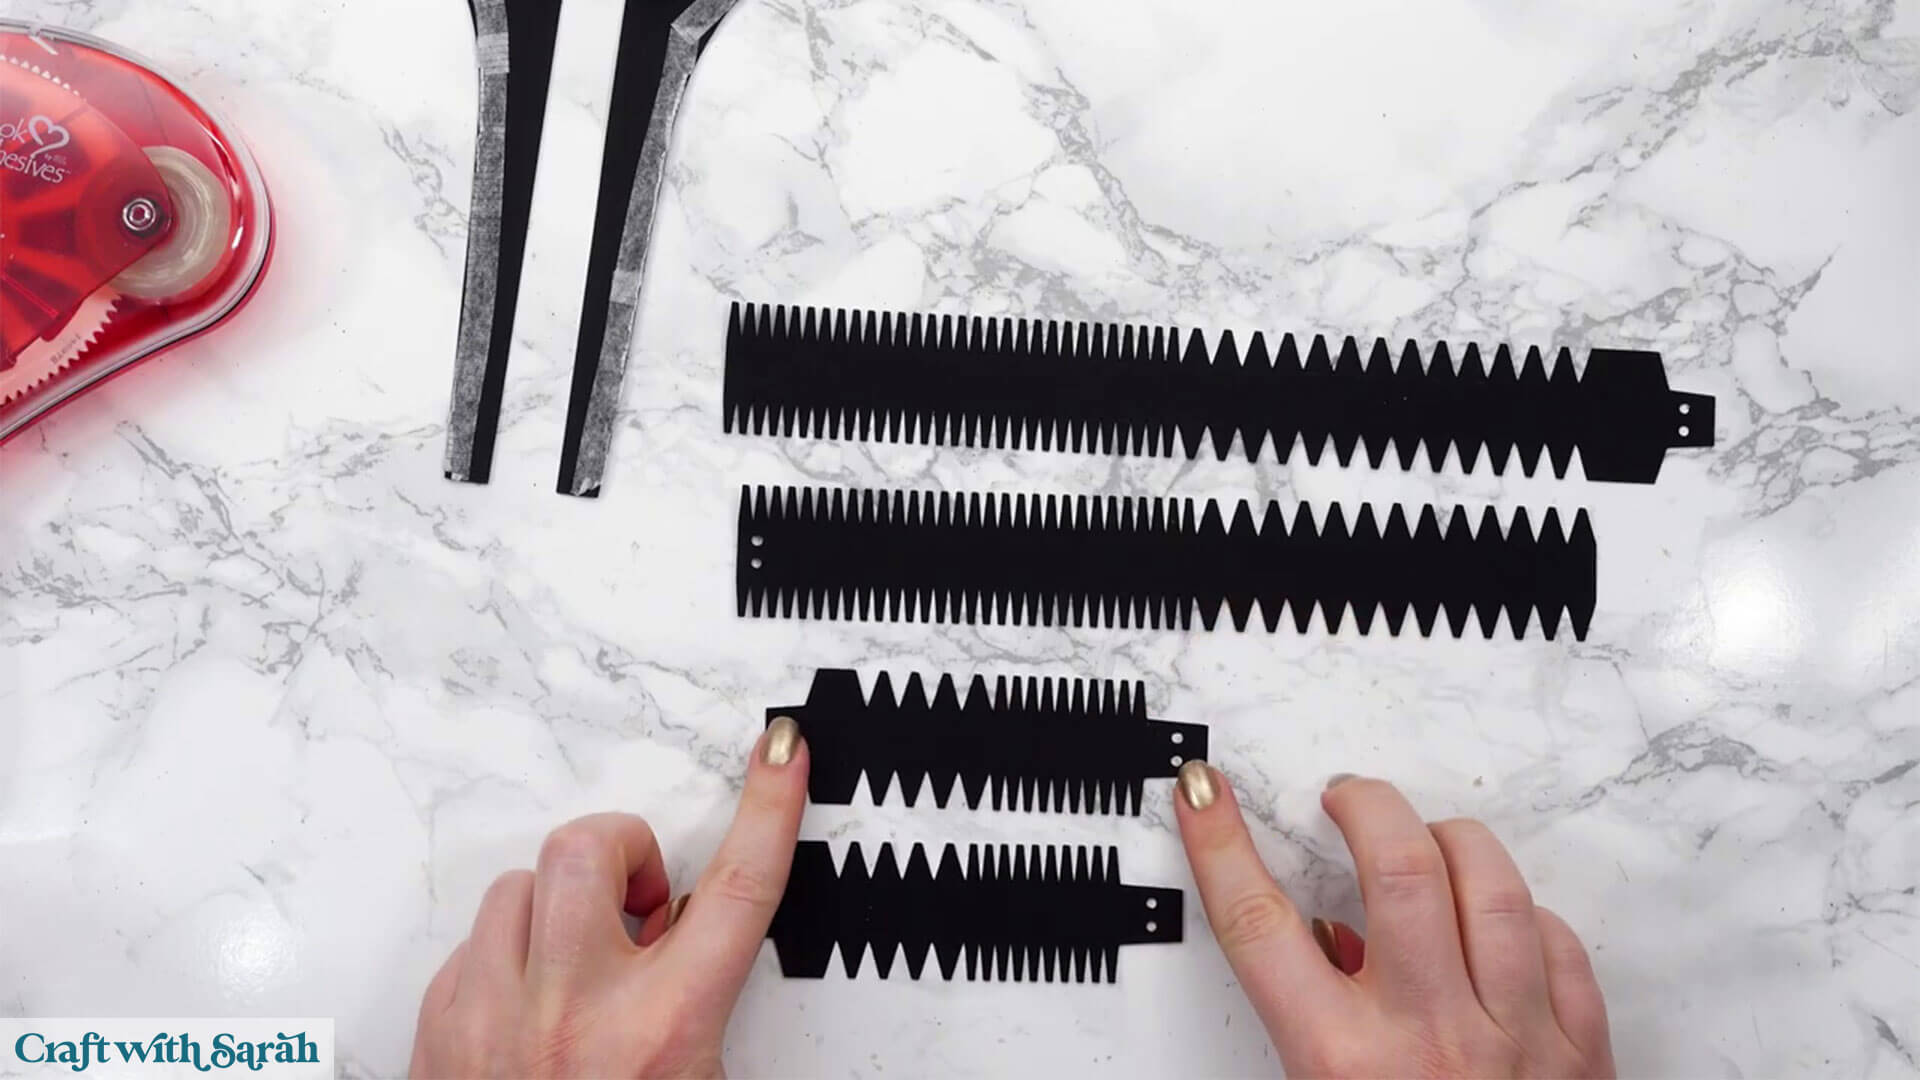
Take the longest piece and turn it round so that you have the cutouts on the left.
Stick the other piece on the end so that the final crocodile tooth overlaps with the cutouts you have just glued.
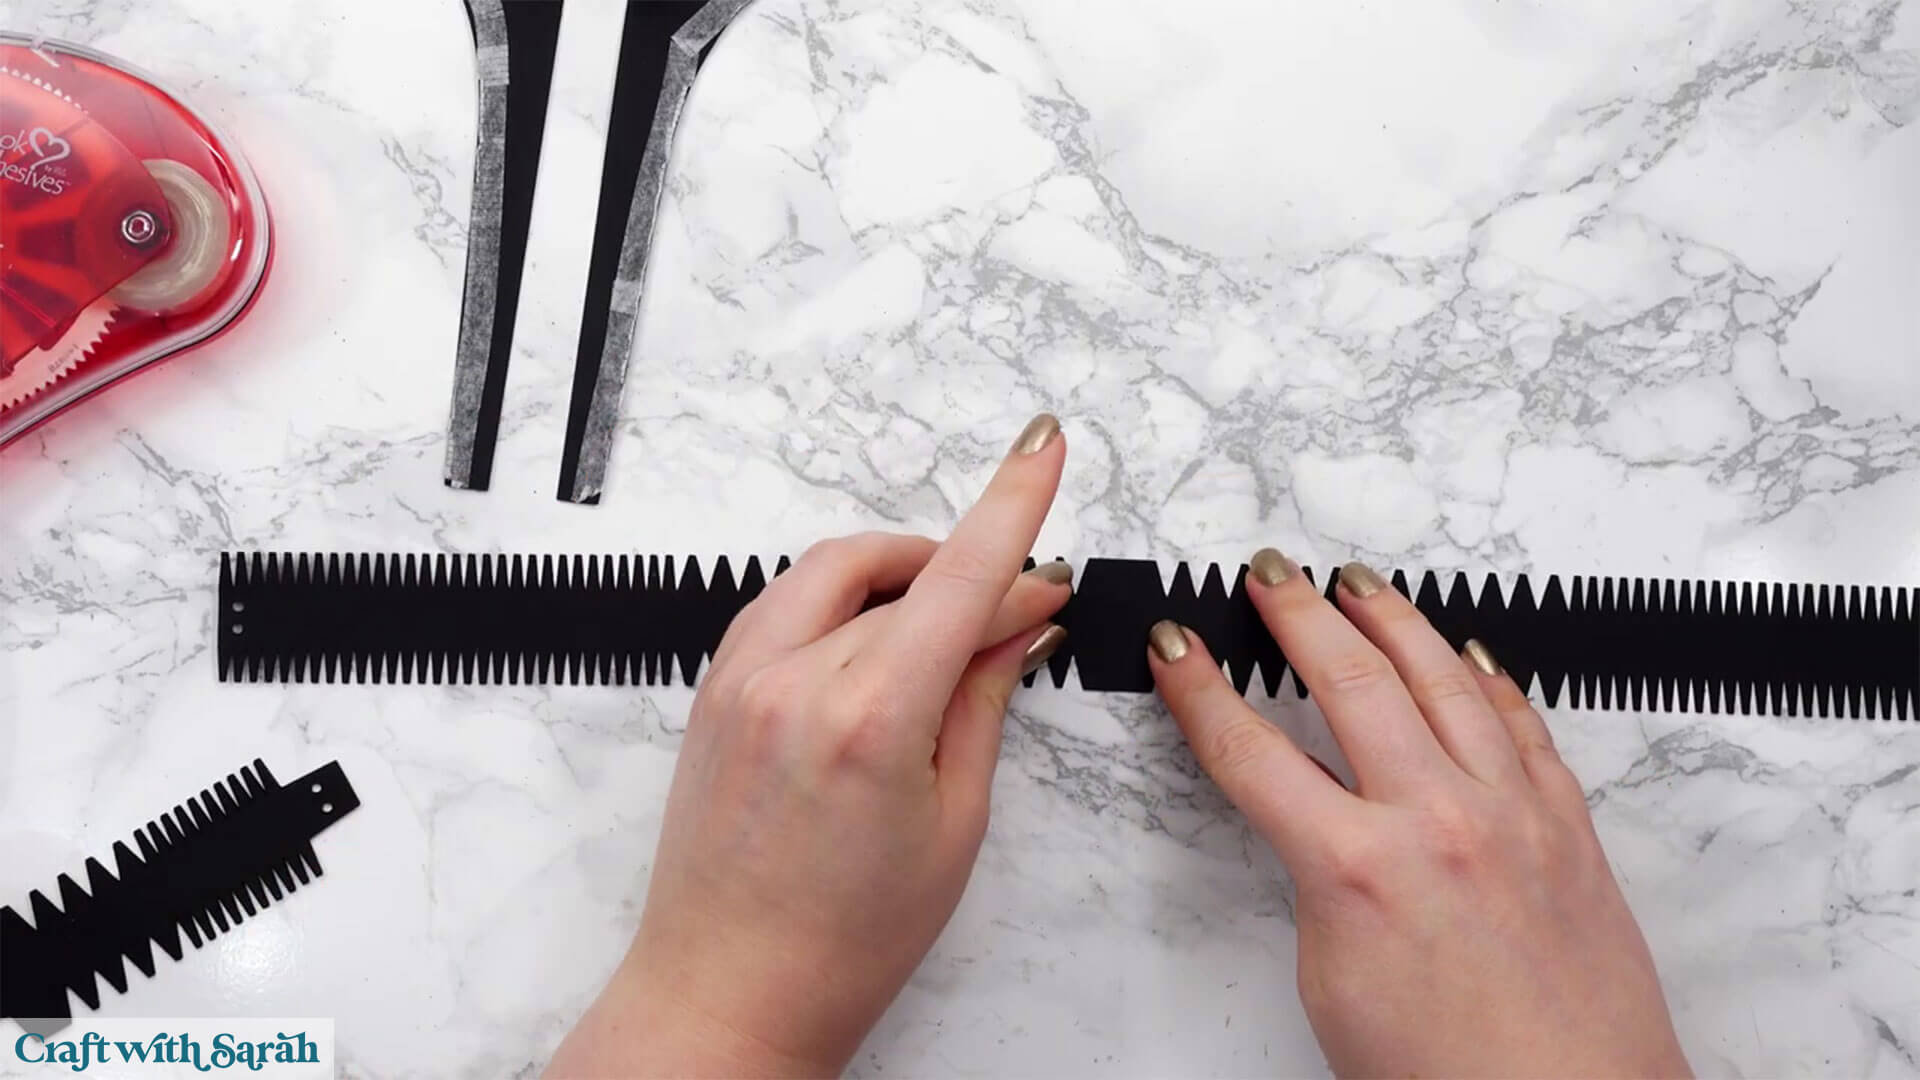
This will make one long piece.
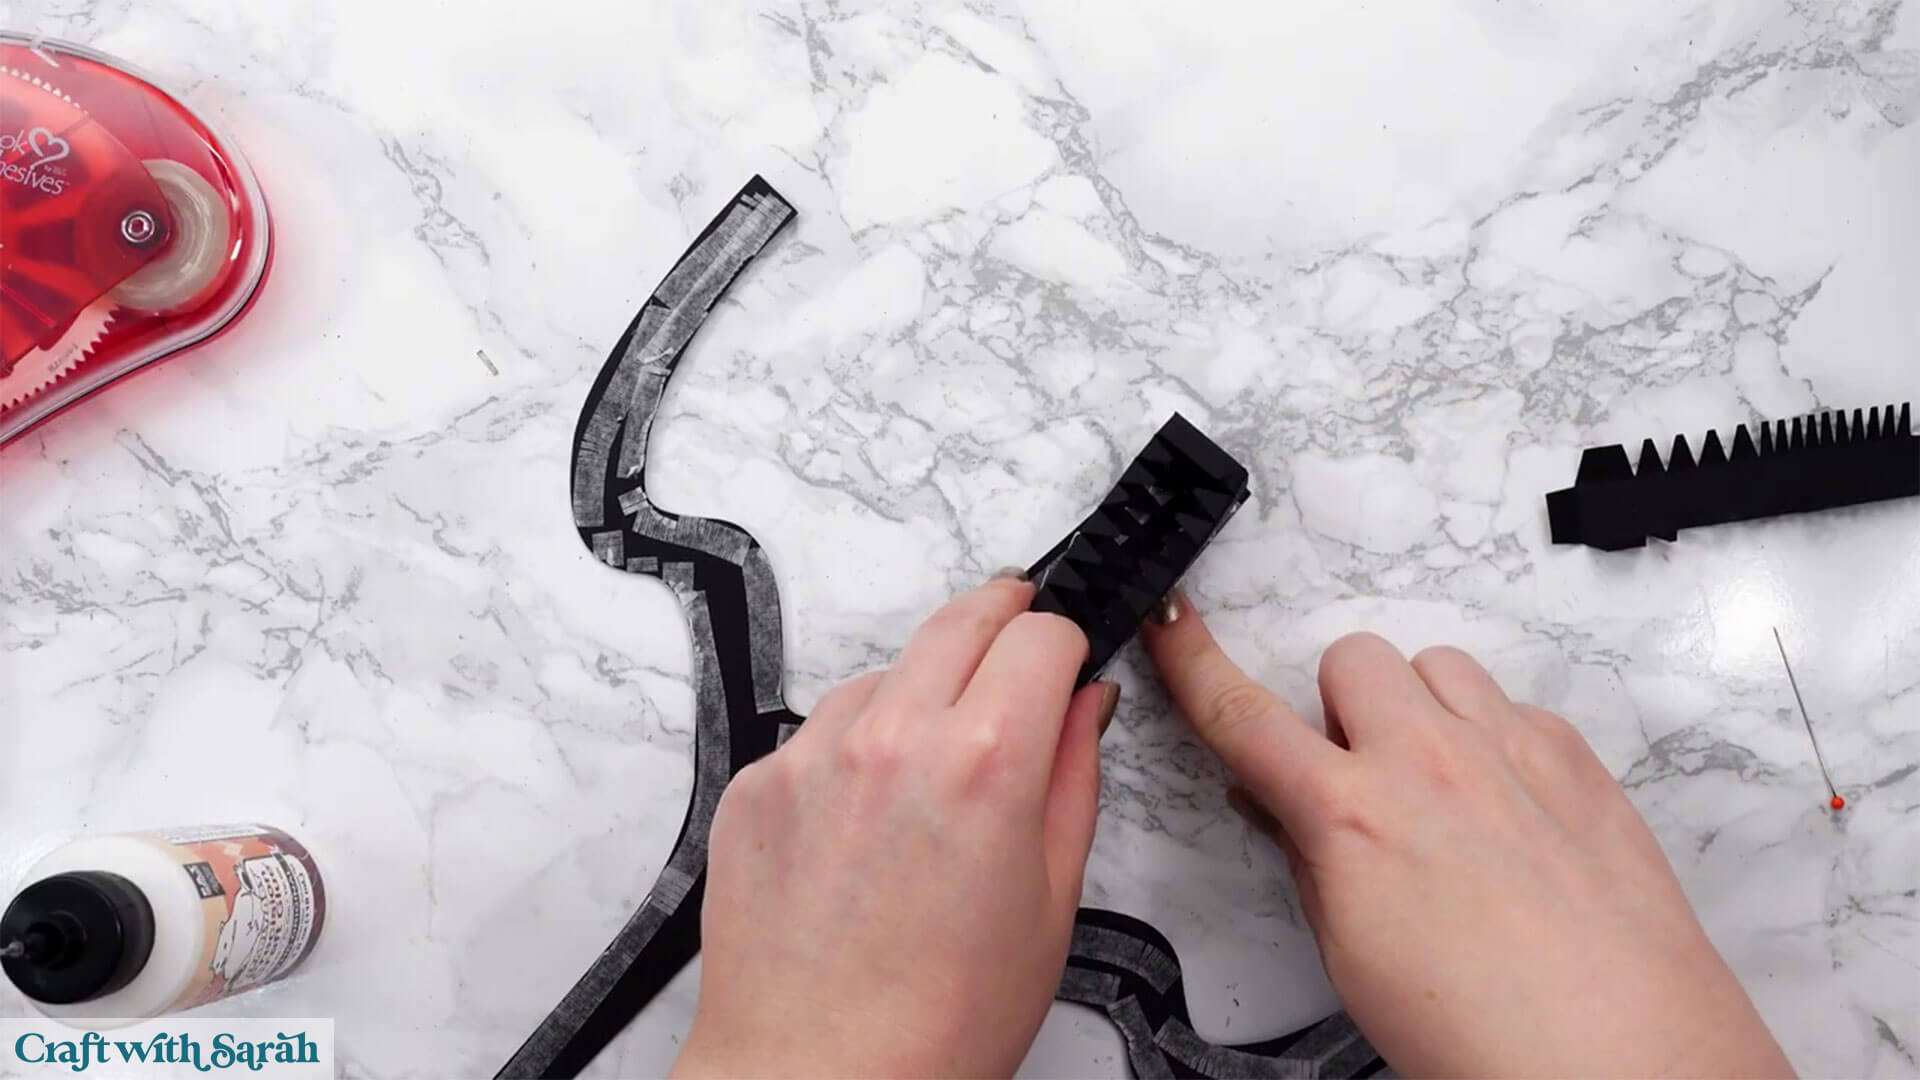
Fold along all the crocodile teeth to get that millipede shape again on the long piece and the two smaller ones.
The large middle tab will match with the top centre of the structural piece.
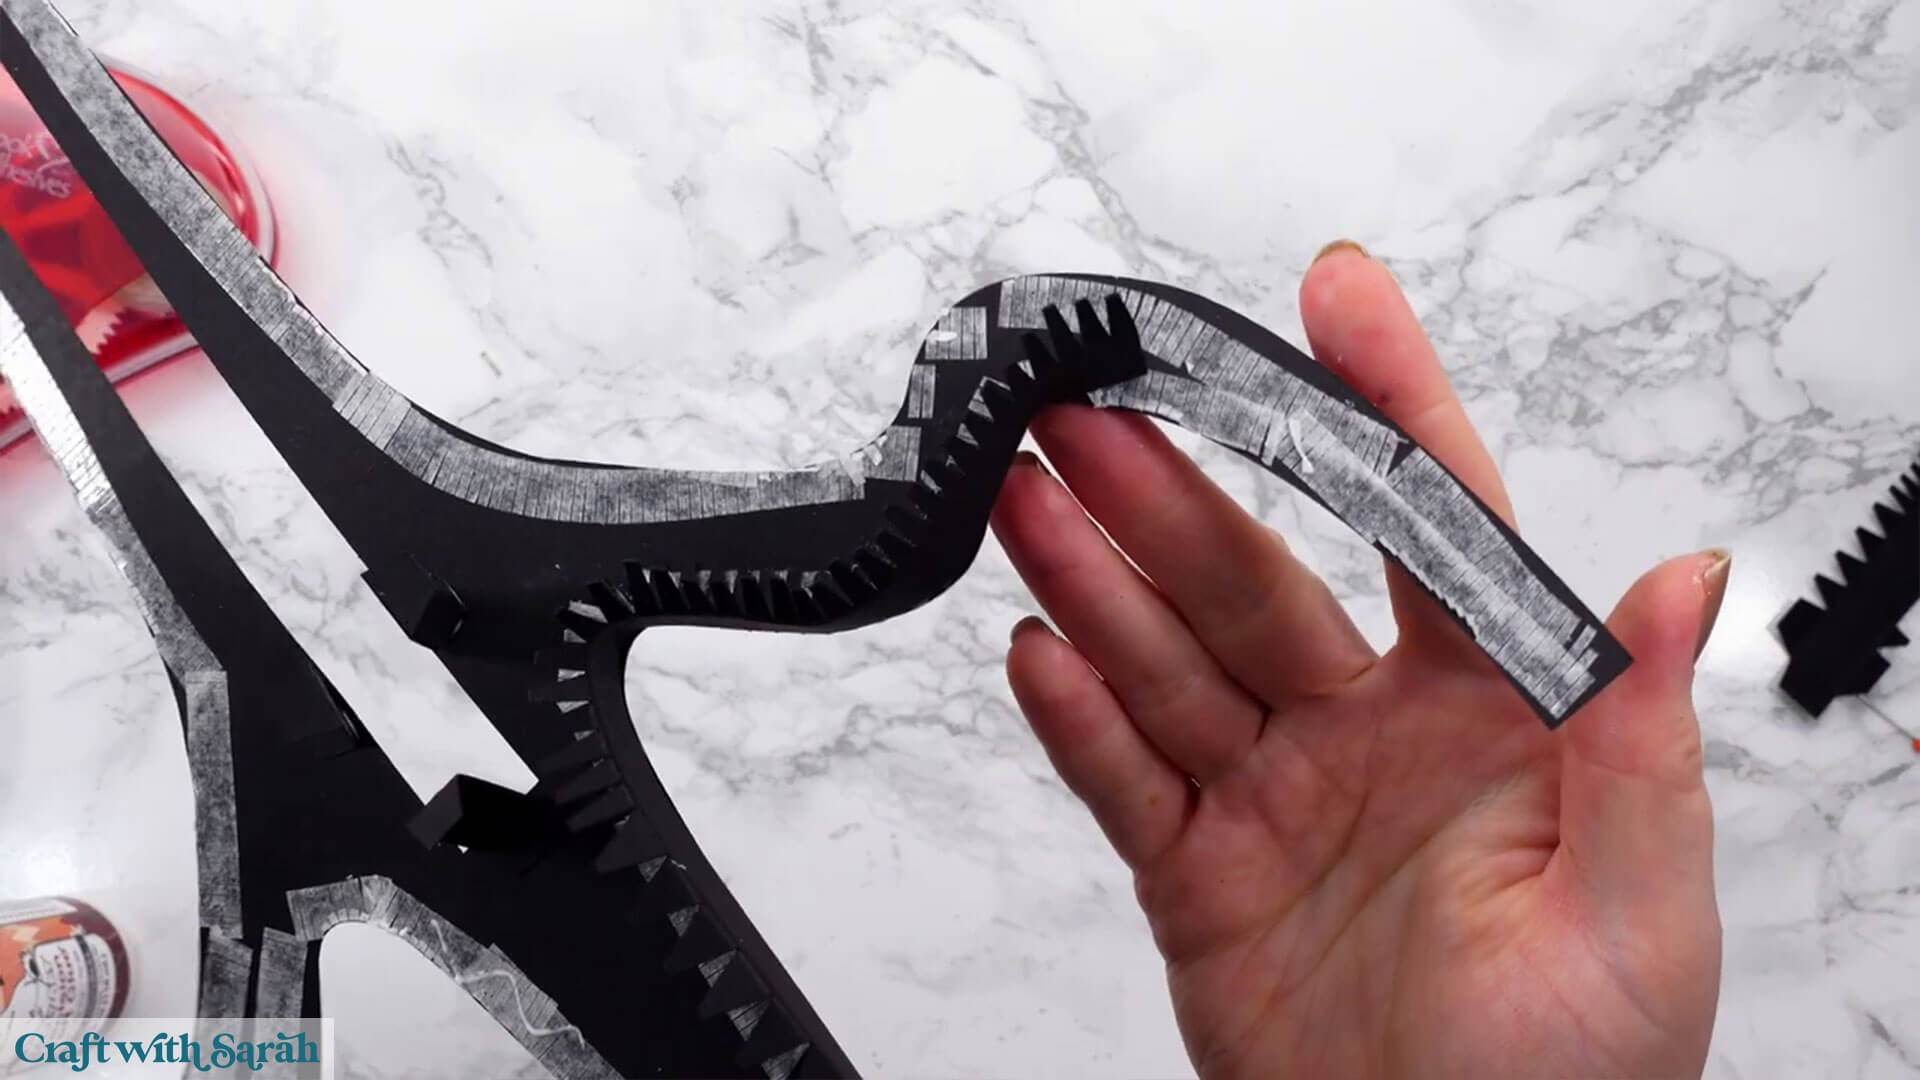
Stick the crocodile teeth to the shape just like we did in the previous section. It won’t go all the way to end on either side.
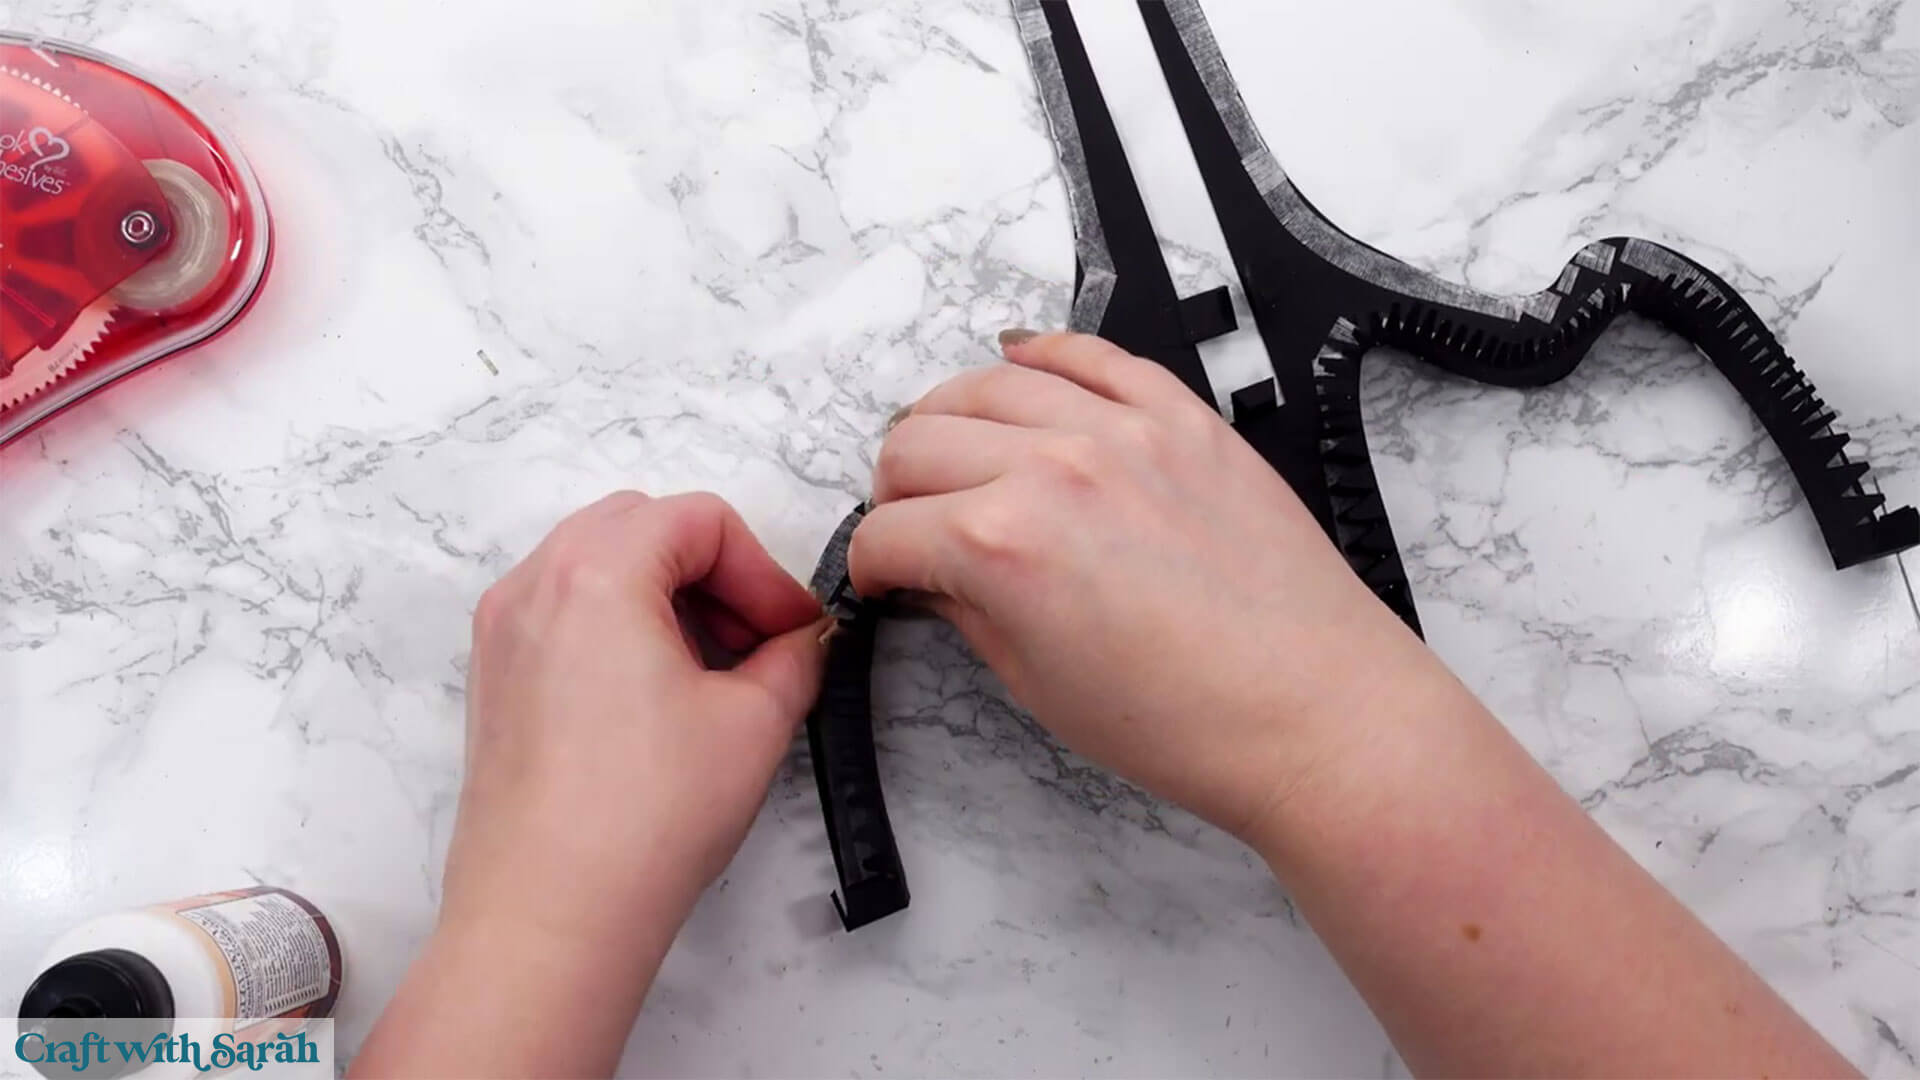
The two smaller pieces can be used for those sections. The box shape at the end will match up with the top to give a nice finish.
Take the final 4 crocodile teeth with just one circle cutout.
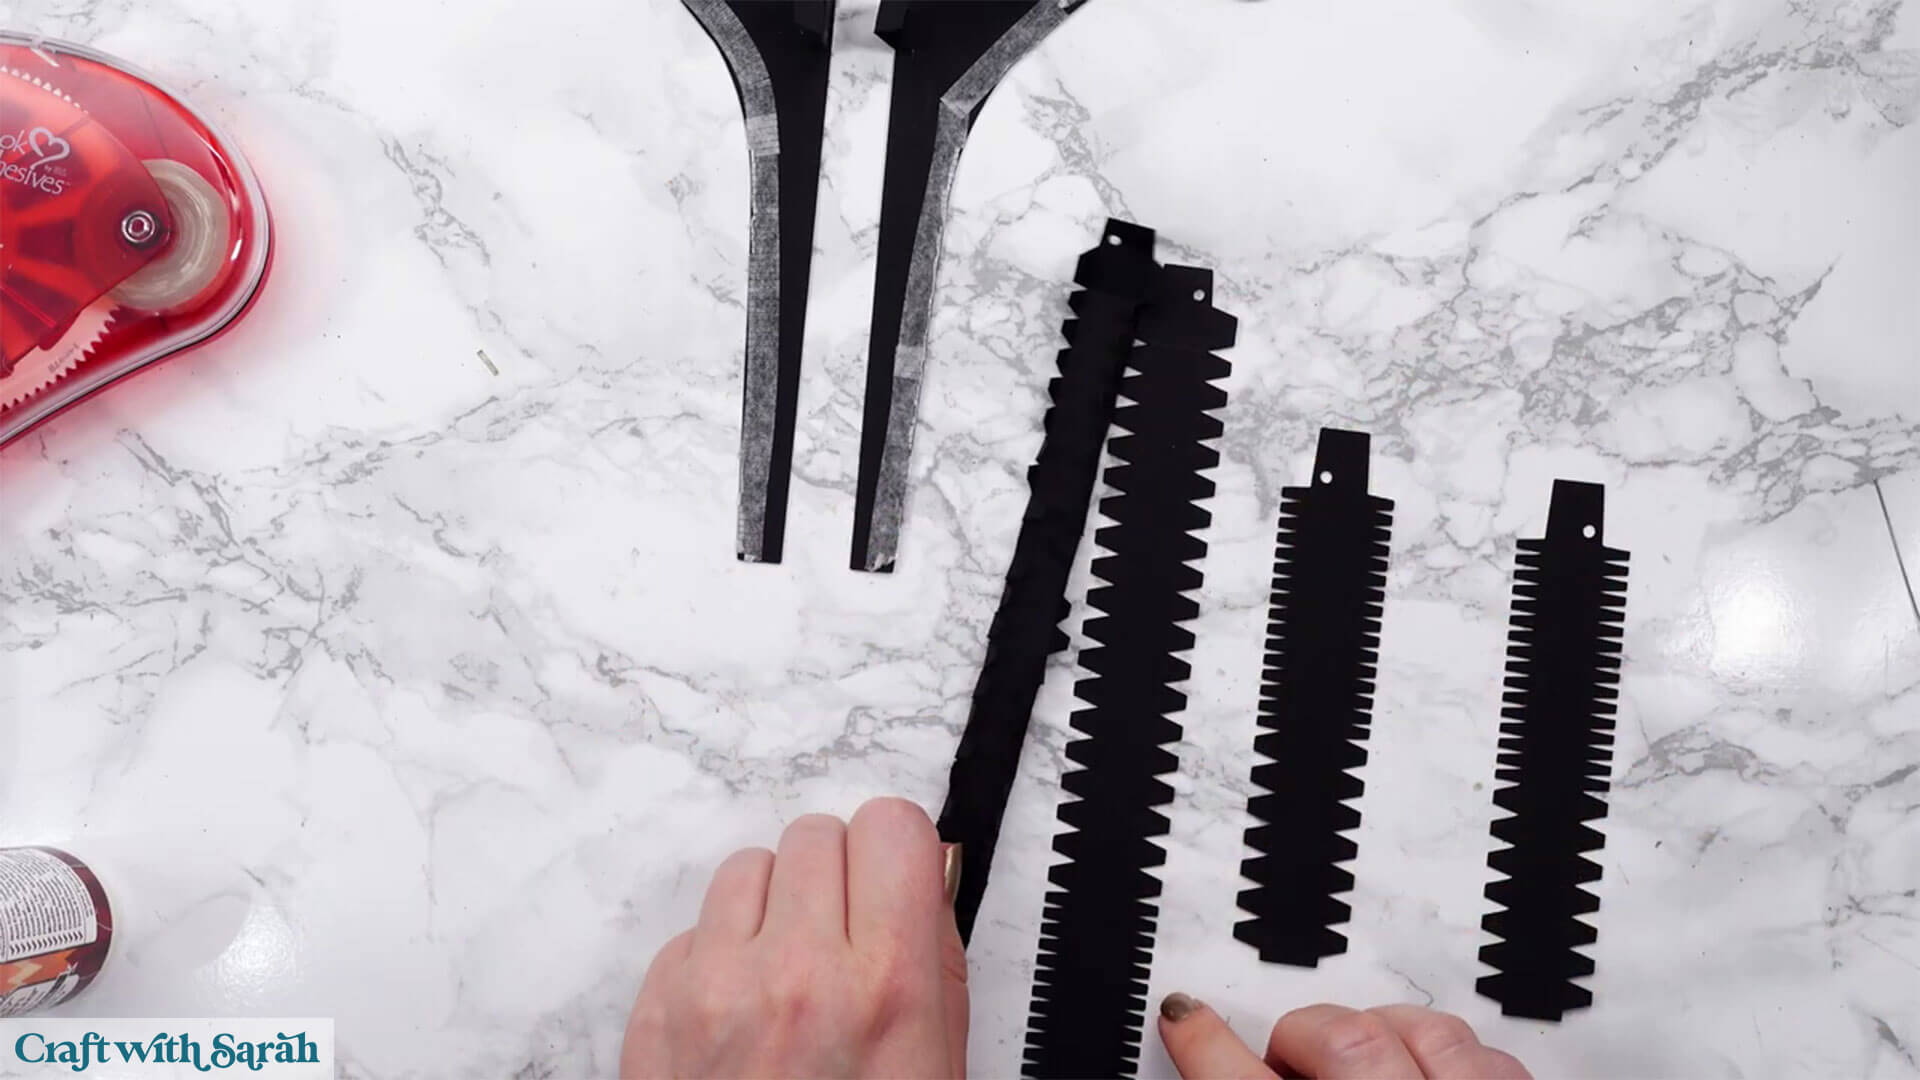
Fold up along all the tabs and glue them to the structural piece just as we have been doing.
The longer pieces will start at the bottom and run to the bottom of the curve.
The smaller pieces can be used to finish it off.
Make sure you glue the square tab ends to the ends of the structural piece to give the edges a nice finish just like we did with the other millipede looking pieces.
Once all the tabs are on you can glue the matching structural piece on top to finish the 3D shape.
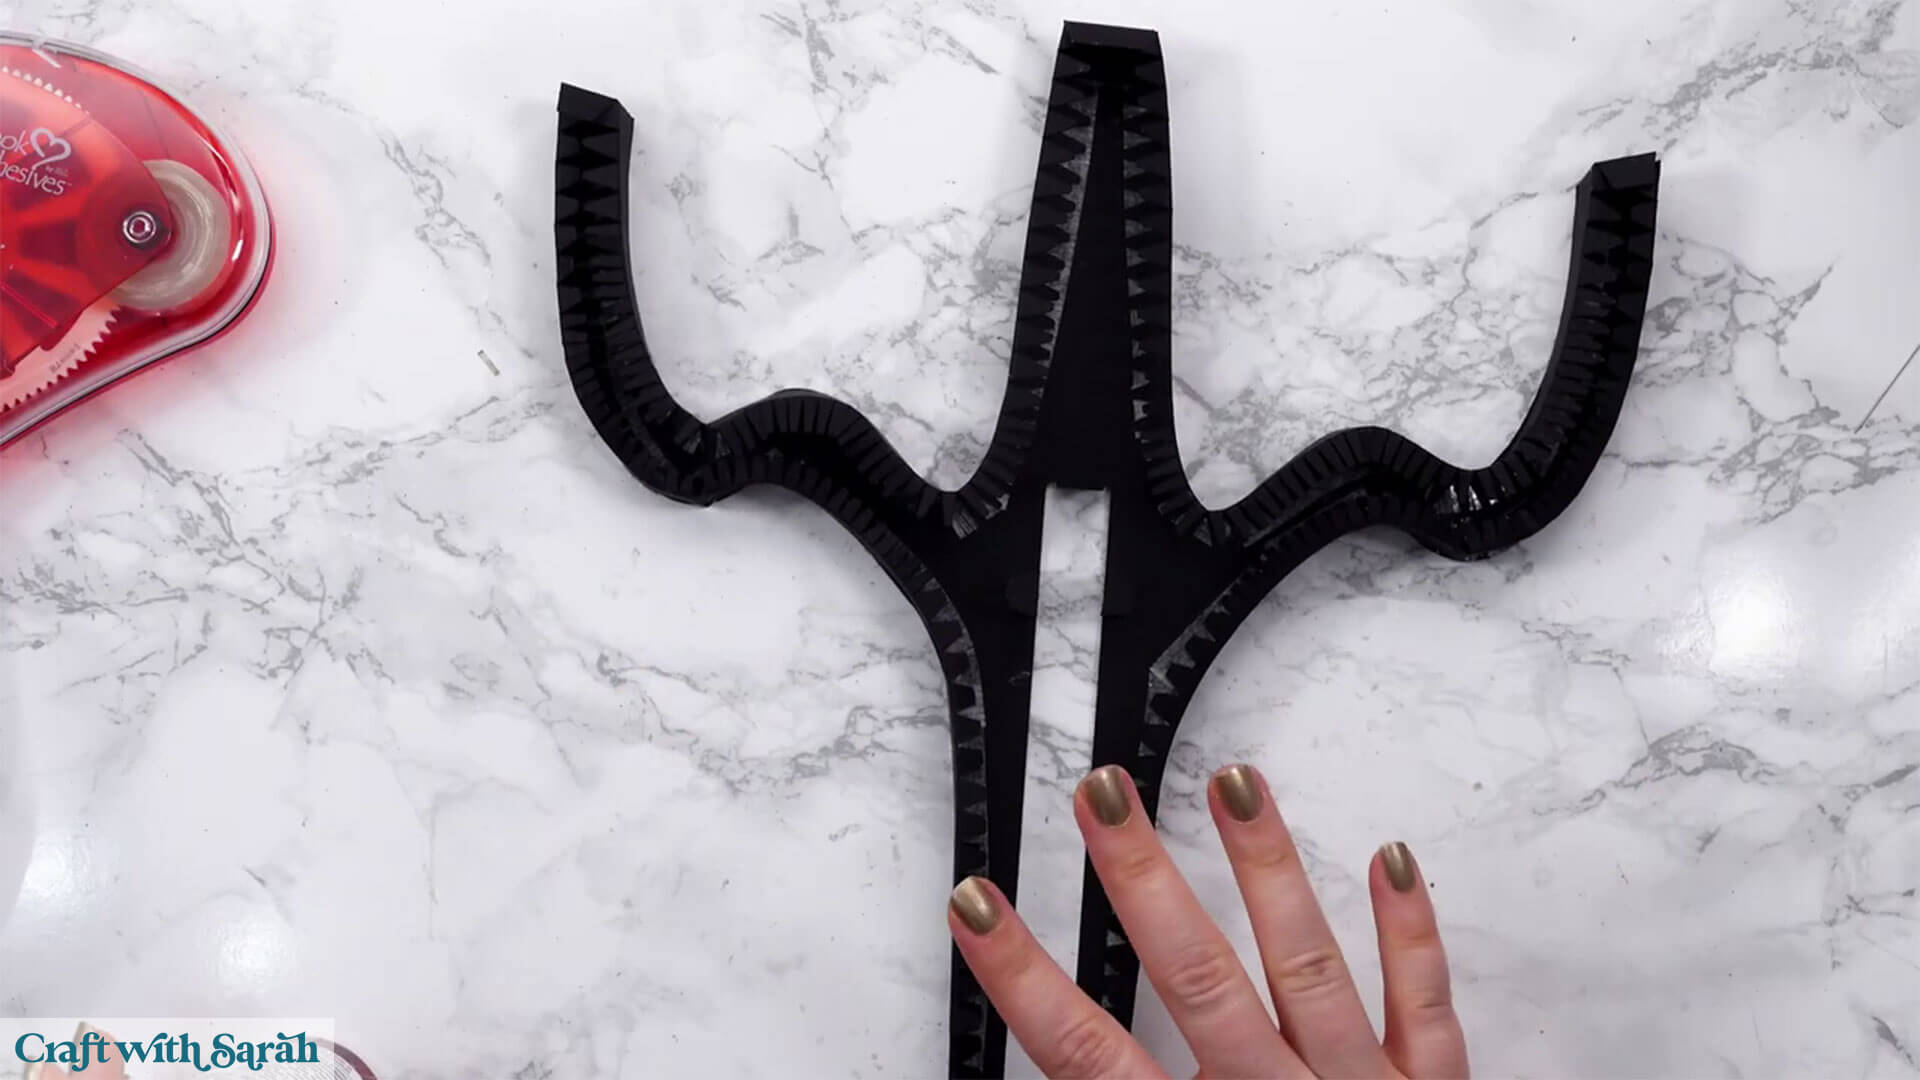
Now you can glue the decorative pieces on just like we did with the other piece.
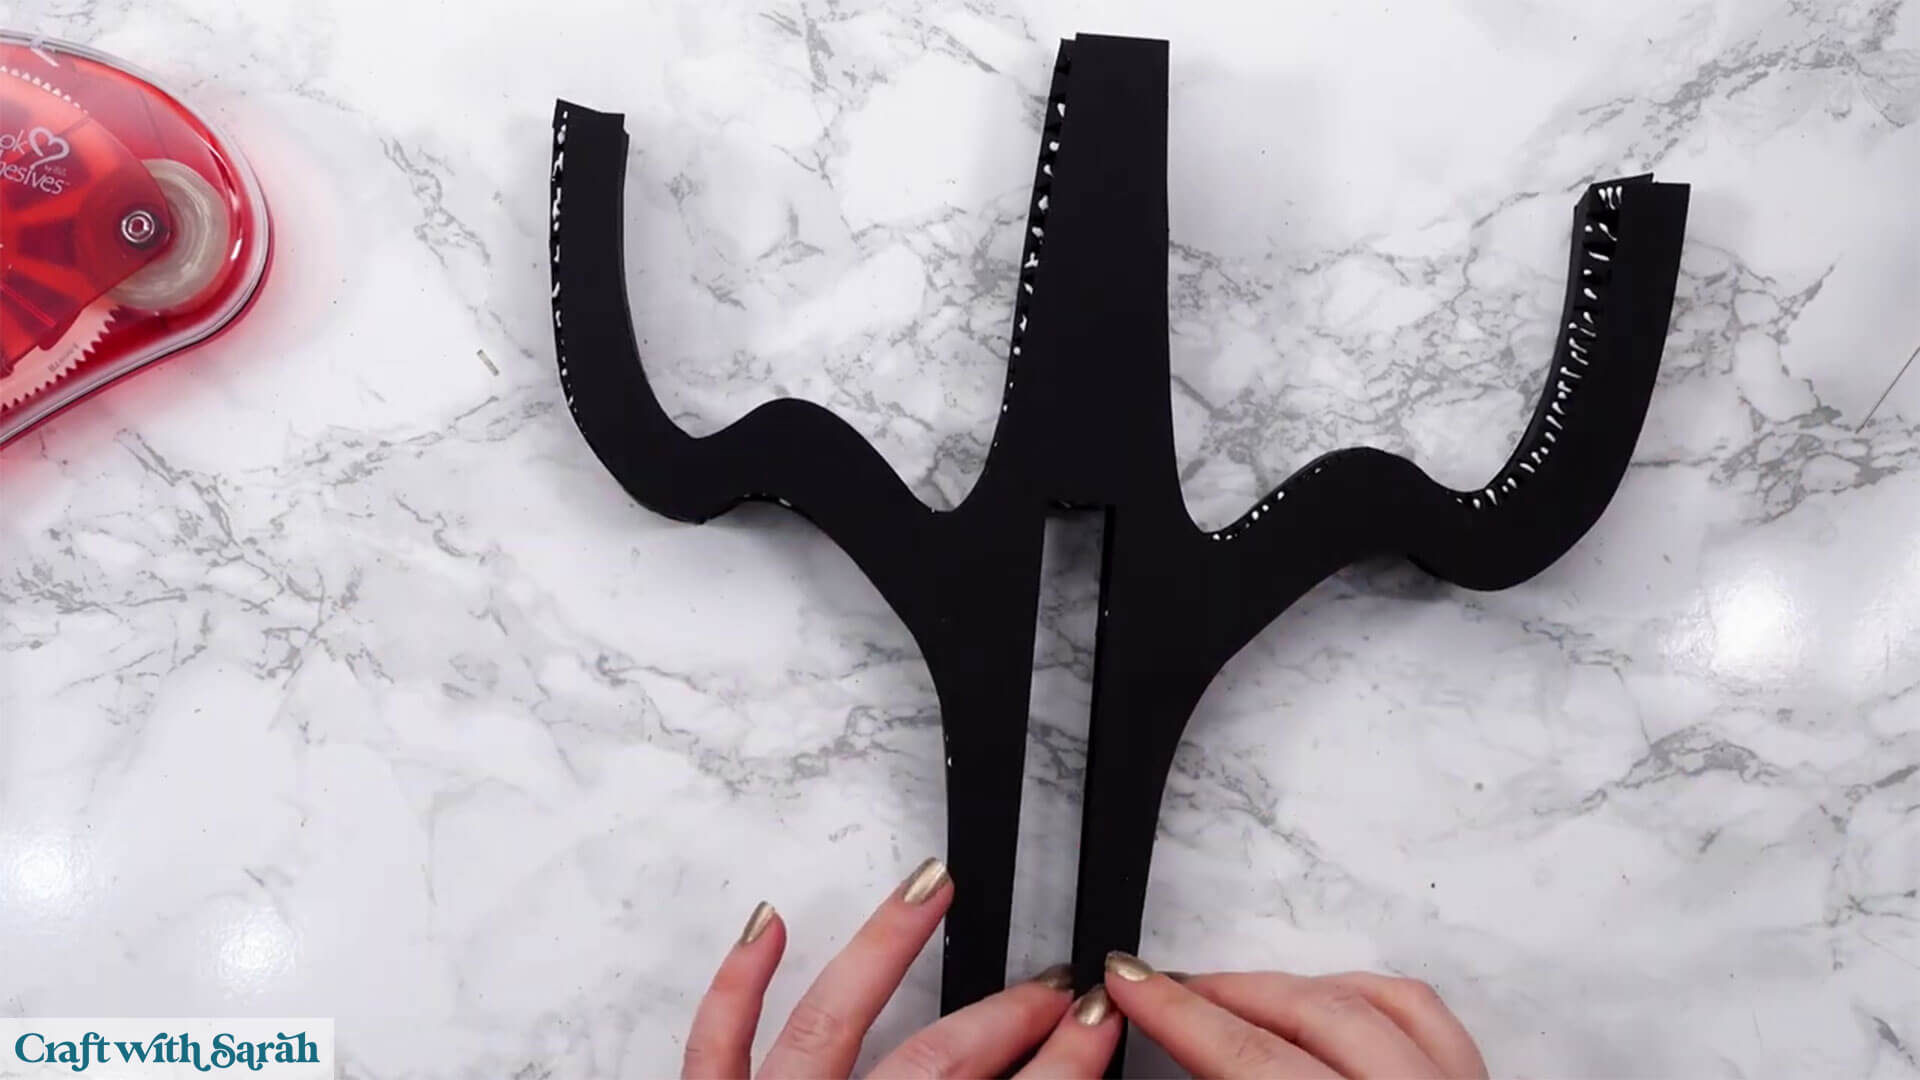
Step 7) Put all the pieces together
Take the two pieces we were just working on and slot them together using the middle cutout. You should have a cross shape at the bottom.
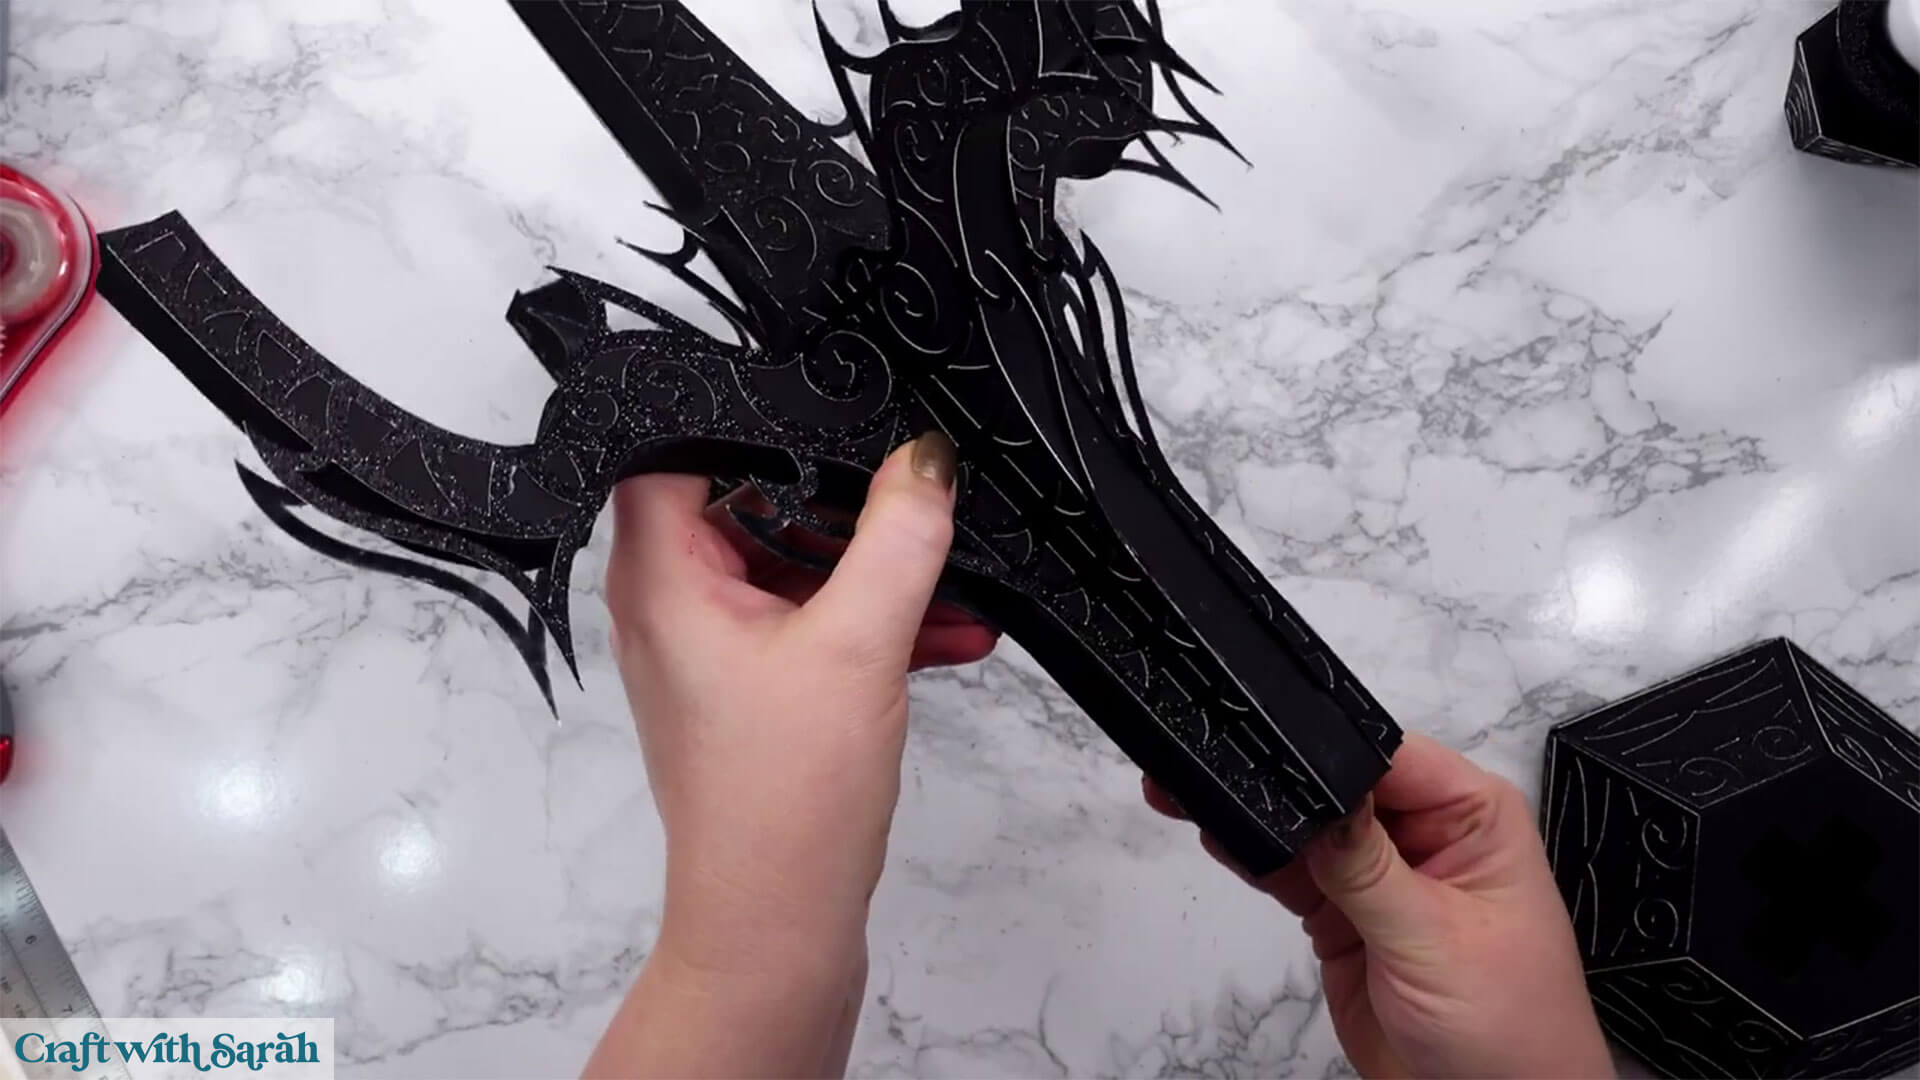
Slot that piece into the base making sure you line up the cross correctly.
Now your candelabra should be freestanding.
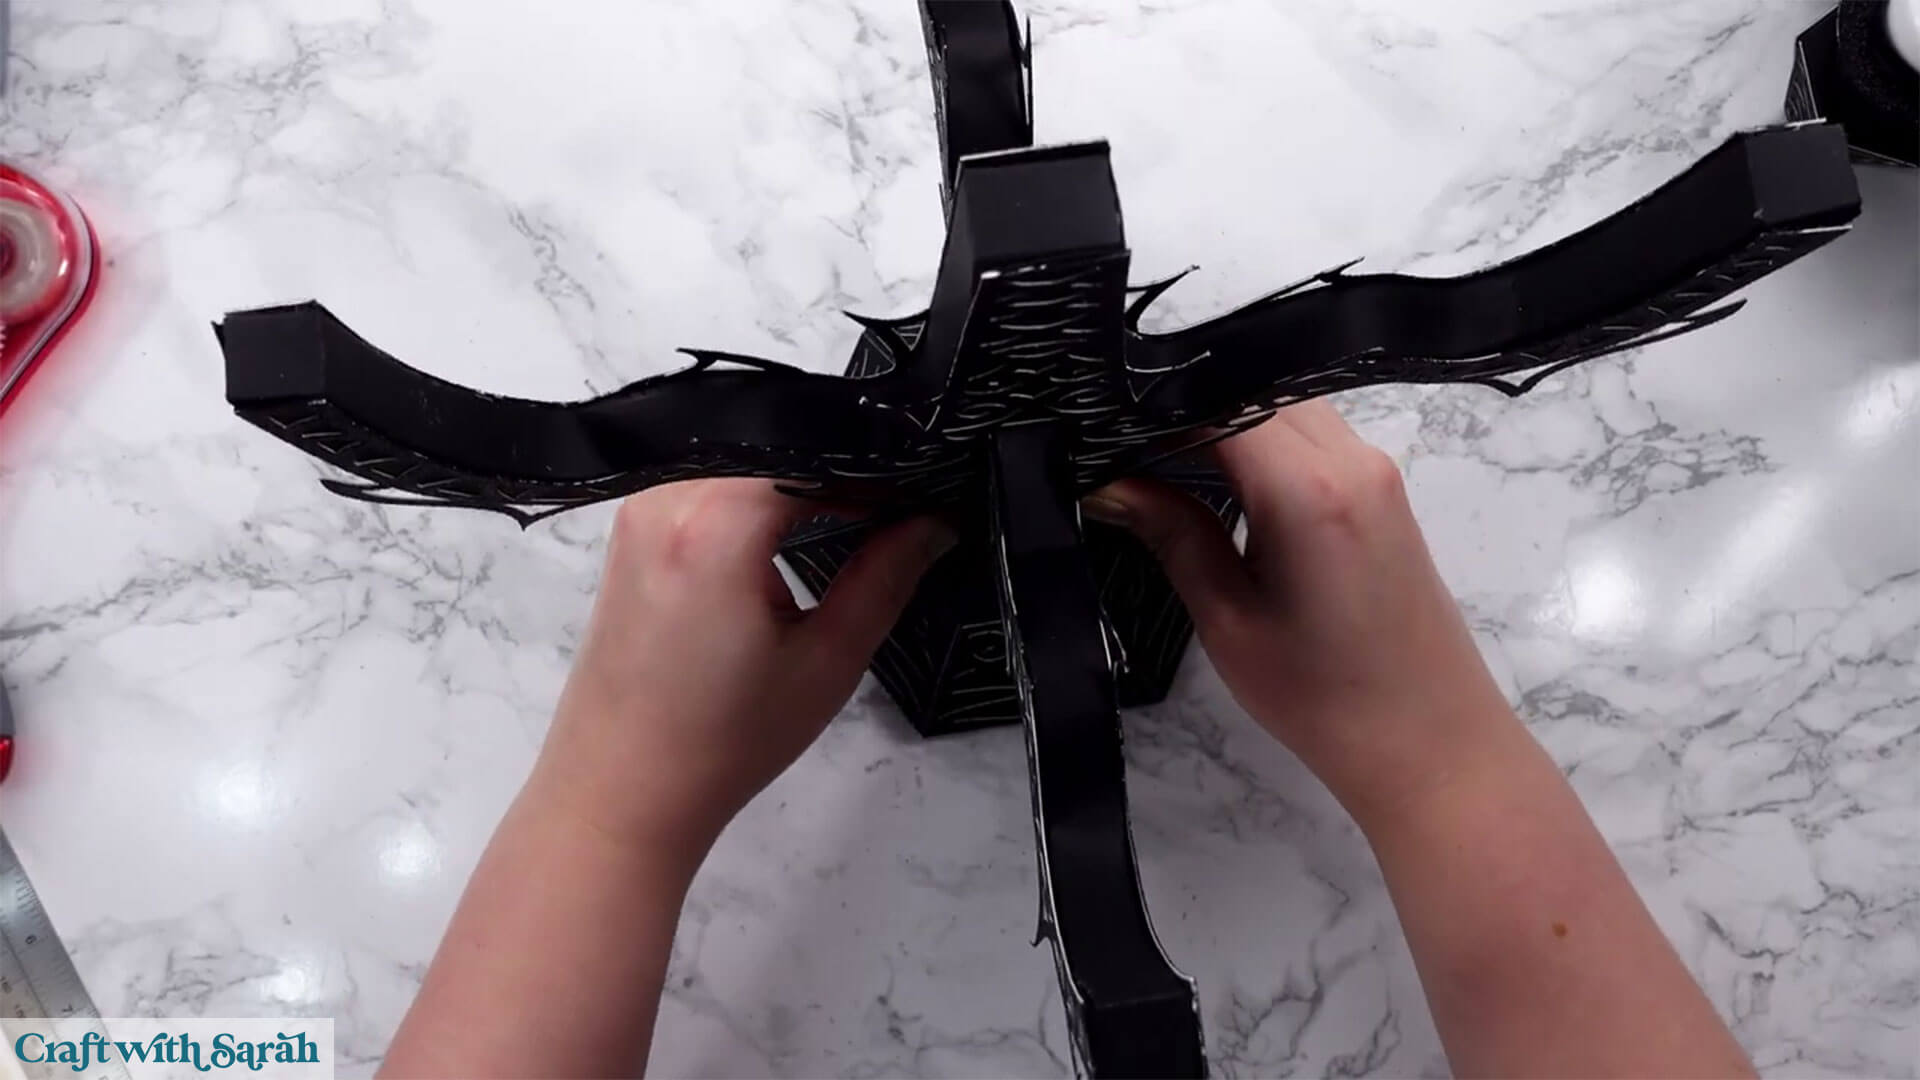
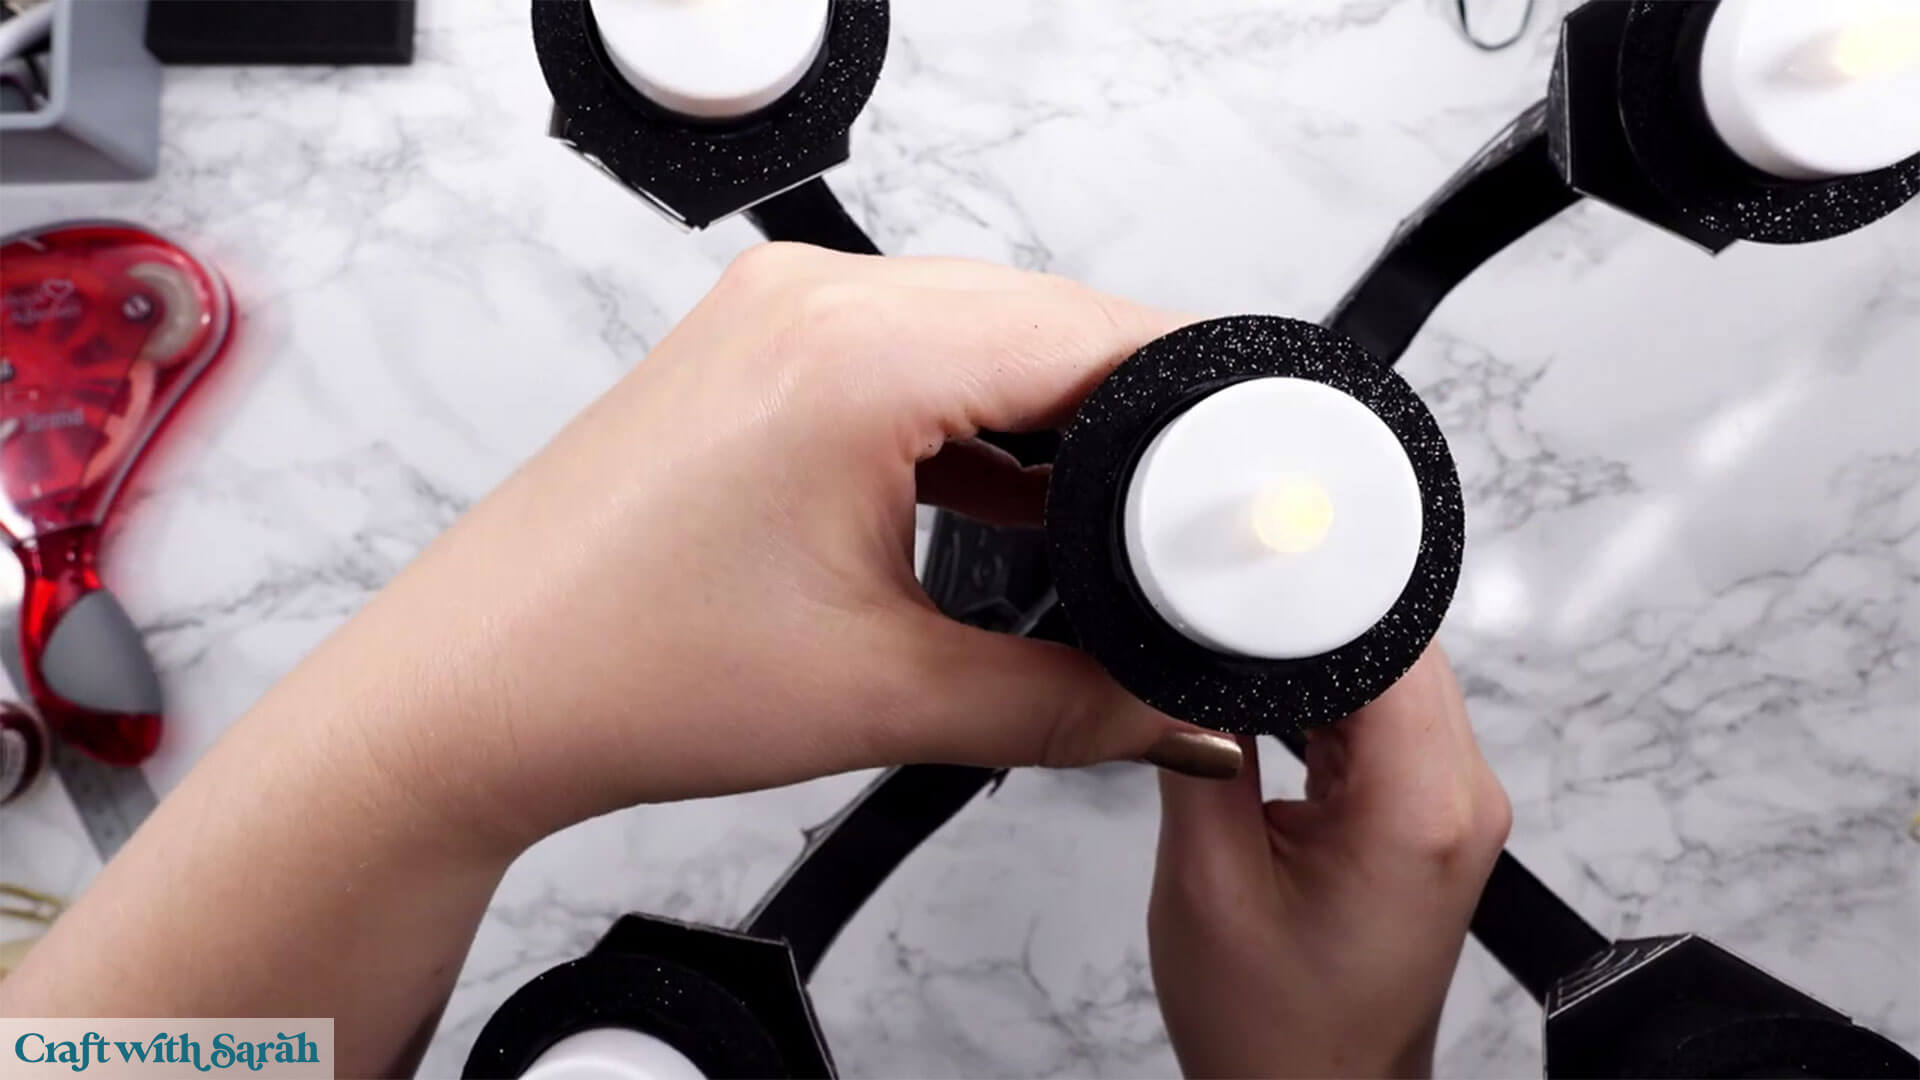
Add each tealight holder to the top arms of the candelabra. The small ledges you built earlier will stop them from sliding too far down.
The little flaps at the bottom will help them to hold securely.
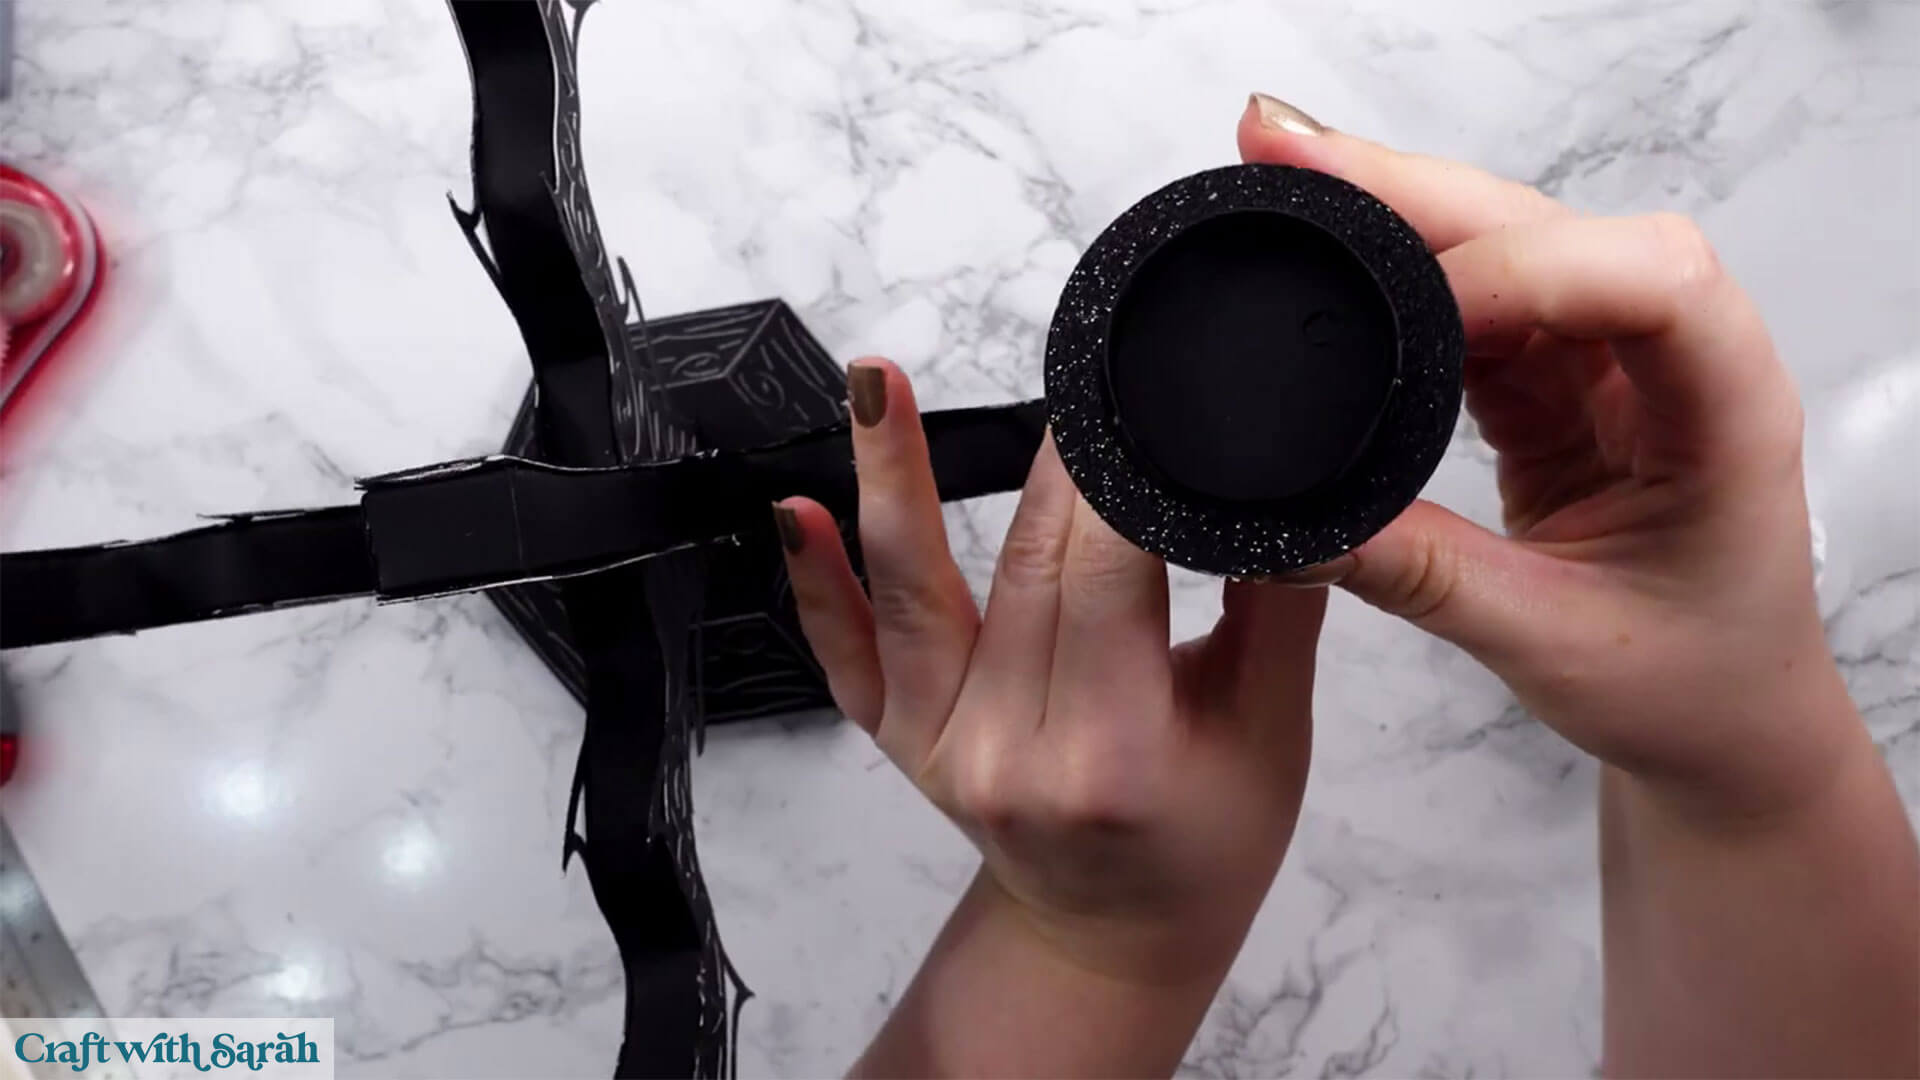
Now that your candelabra is assembled you can place the battery tealights inside the holders.
DIY Candelabra Canterpiece
And that’s it, your spooky Halloween candelabra is complete!
It’s freestanding, strong, and absolutely eye-catching. The glitter cardstock details add sparkle, and the tealights bring a spooky glow. Best of all, it comes apart into flat sections for easy storage.
This project does take some time, but the result is worth it. Now it’s time to have a nice hot cup of tea and a couple of biscuits after all that hard work!
Happy crafting,
Sarah x

