Custom Cards with Pen Greetings ⭐ Card Making Countdown 2026
Design your own cards that use Cricut pens in this step-by-step drawing tutorial.
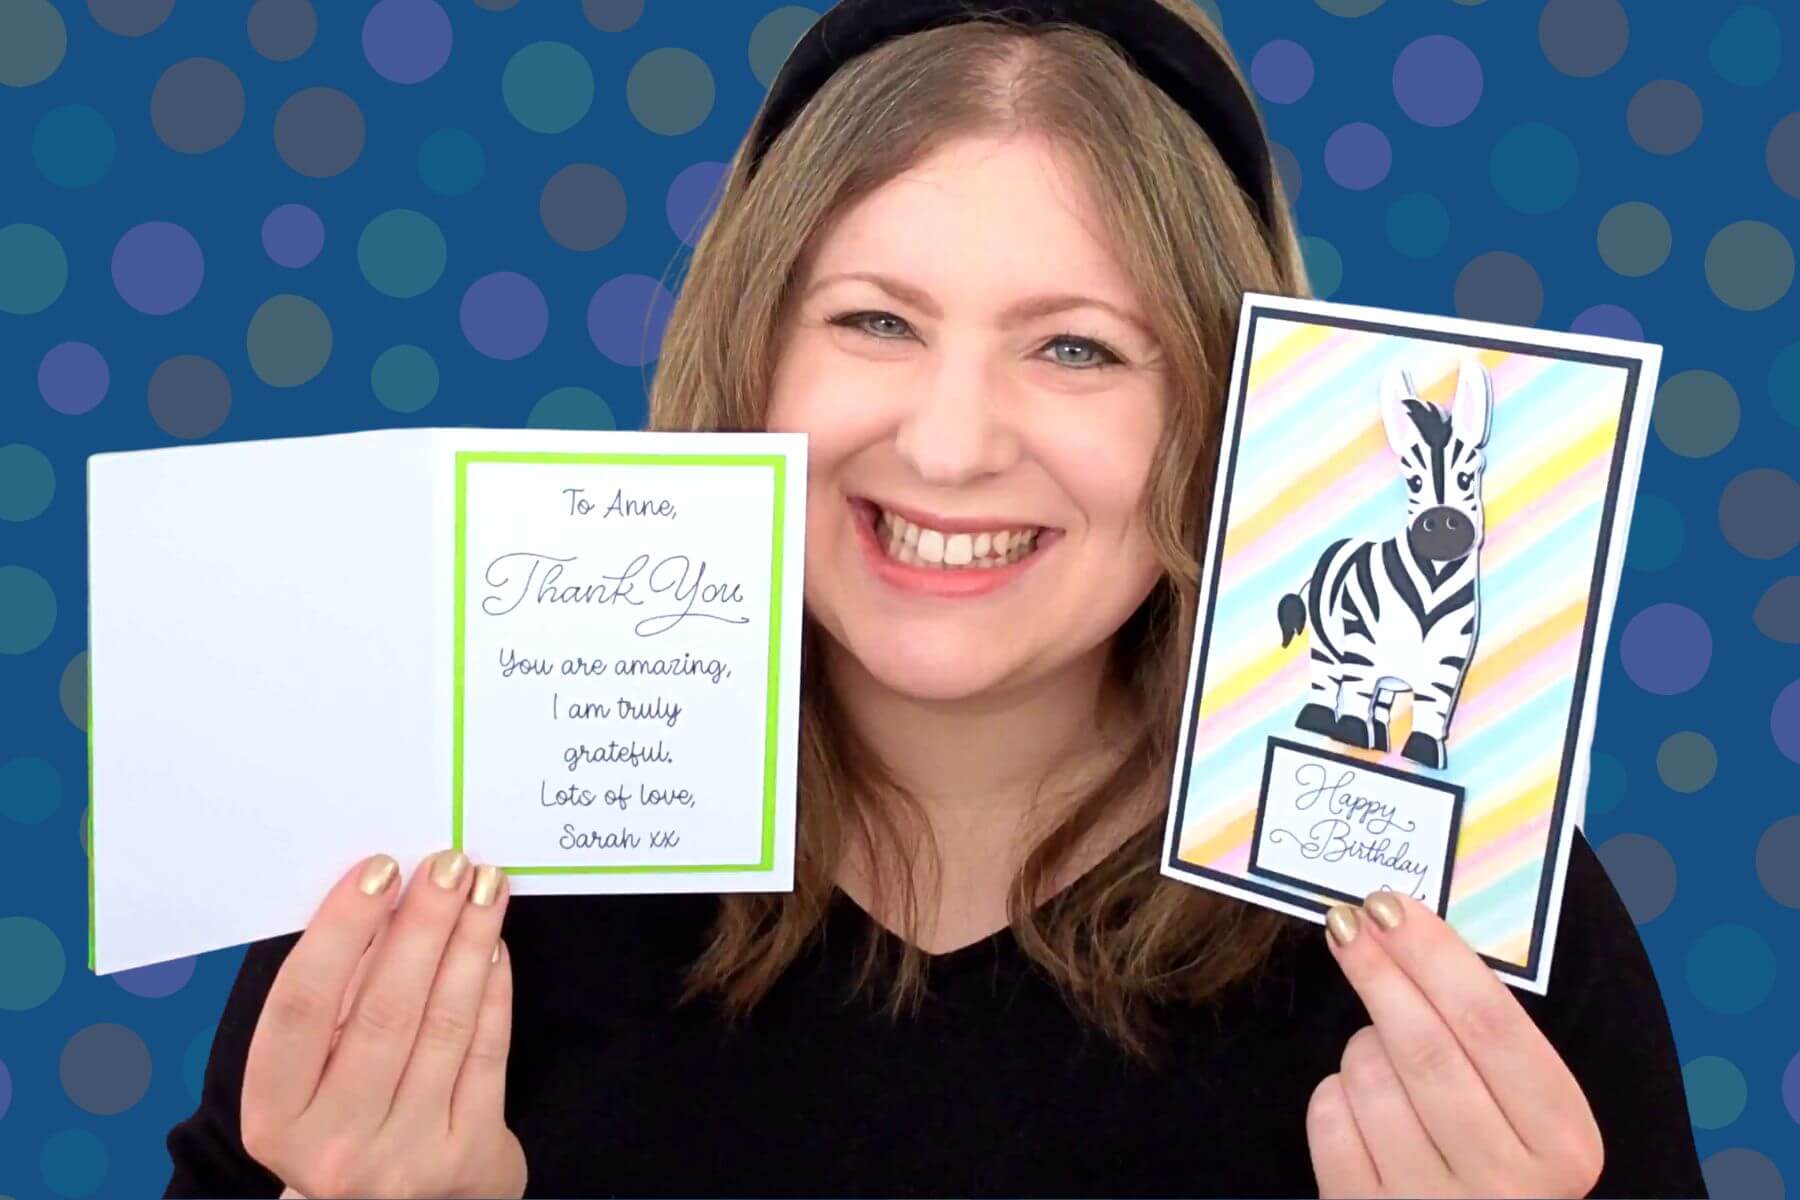
Welcome to Day 2 of the 2026 Card Making Countdown! In this tutorial, see how to use Cricut pens in a variety of ways to enhance your greetings cards.
10 different sentiments are included with today’s project, for a range of different occasions.
See how to load pen SVGs into Design Space, change the pen type and colour, and how to build them into your card design.
Then, learn how to write custom messages on the inside of your cards.
Then ten greetings that are included are:
- Best Wishes
- Congratulations
- Happy Birthday
- Happy Easter
- Just for You
- Merry Christmas
- On Your Special Day
- Thank You
- Thinking of You
- With Love
Note: today’s project does not come with hand-cutting versions but there are printable PNGs of each greeting that can be loaded into Canva, Photoshop, Google Docs, Microsoft Word or other graphics programs for printing with a colour printer.
This project is part of the 2026 Card Making Countdown
Greetings card with pens: supply list
Here is a list of the materials that are used to make this project.
Please note that some of the links included in this article are affiliate links, which means that if you click through and make a purchase I may receive a commission (at no additional cost to you). You can read my full disclosure at the bottom of the page.
- Cricut machine
- Light blue Cricut cutting mat
- Cricut pens that match your model of Cricut machine
- Coloured Card (any thickness)
- Glue (I like Bearly Art Glue and Collall)
- Cricut scoring wheel or scoring stylus (optional)
- Patterned paper (optional)
- Foam pads/squares (optional)
- Additional images/SVGs to decorate your card (optional)
This project is suitable for the following types of Cricut machines: Explore series, Maker series, Joy Xtra, Joy 2 and Joy.
Foundation learning
If you're new to making papercrafts with your cutting machine, check out these links to get you started.
They include videos on topics such as: which file to use with your type of cutting machine, how to load the files into your cutting machine's software, how to cut cardstock with your type of cutting machine, how to recolor and modify/customize the cut files and tips for displaying your projects.
- Help guides for Cricut machines
- Help guides for Silhouette machines
- Help guides for ScanNCut machines
The following tutorials are Cricut-specific, but many of the ideas will work similarly with a Silhouette or ScanNCut machine and any cut files that are shared in them are compatible with all types of cutting machine.
- How to score with a Cricut (even without scoring tools)
- Print then cut tutorial
- Design Space tools (Combine, Attach, Slice, Weld, Flatten, etc.)
- Pattern fill tutorial (for making backgrounds & cutting images to a specific shape/size)
- Free envelope SVGs that can be sized to fit any card
- Presentation boxes for handmade cards
- How to write inside cards with Cricut pens
- How to cut layered designs at a small size
- Design Space tips & tricks
- Cricut pens tutorial
- How to mount multiple designs in the same frame with magic guides
Cricut pens video tutorial
Watch the video below to see how to make this project. Keep scrolling for a written tutorial.
PART 1: Designing cards with pen greetings
First, we will start with how to use the 10 predesigned pen greetings that are included with today’s project.
Want to design your own card inserts? Keep scrolling for instructions on how to do that.
Step 1) Download the cutting files & upload to Design Space
Get the files using the box below.
Purchase the File(s)
This cut file is available as part of the Instant Access Bundle.
Or, purchase this design individually here

Before you upload the SVGs to Design Space, you need to unzip the download folder that they come in.
- How to unzip a folder on Windows computer
- How to unzip a folder on a Mac
- How to unzip a folder on an iPad/iPhone
- How to unzip a folder on an Android device
After unzipping, upload the SVG file(s) into your cutting machine software.
Not sure how to use cut files with your type of machine? The following links lead to videos on how to open cut files in:
- Cricut Design Space
- Silhouette Studio
- CanvasWorkspace (for ScanNCut machines)
The download folder also contains printable PDF versions of the templates for hand cutting.
If you are using Cricut Design Space, start a new project and then click the “Upload” button on the left of the screen.
You can then either click “Browse” to find the files on your computer, or drag-and-drop them in.
Select your chosen greeting in the “SVG Files” subfolder.
Each greeting comes as its own separate SVG, so they have to be loaded in one-at-a-time.
Press “Upload” on the next screen.
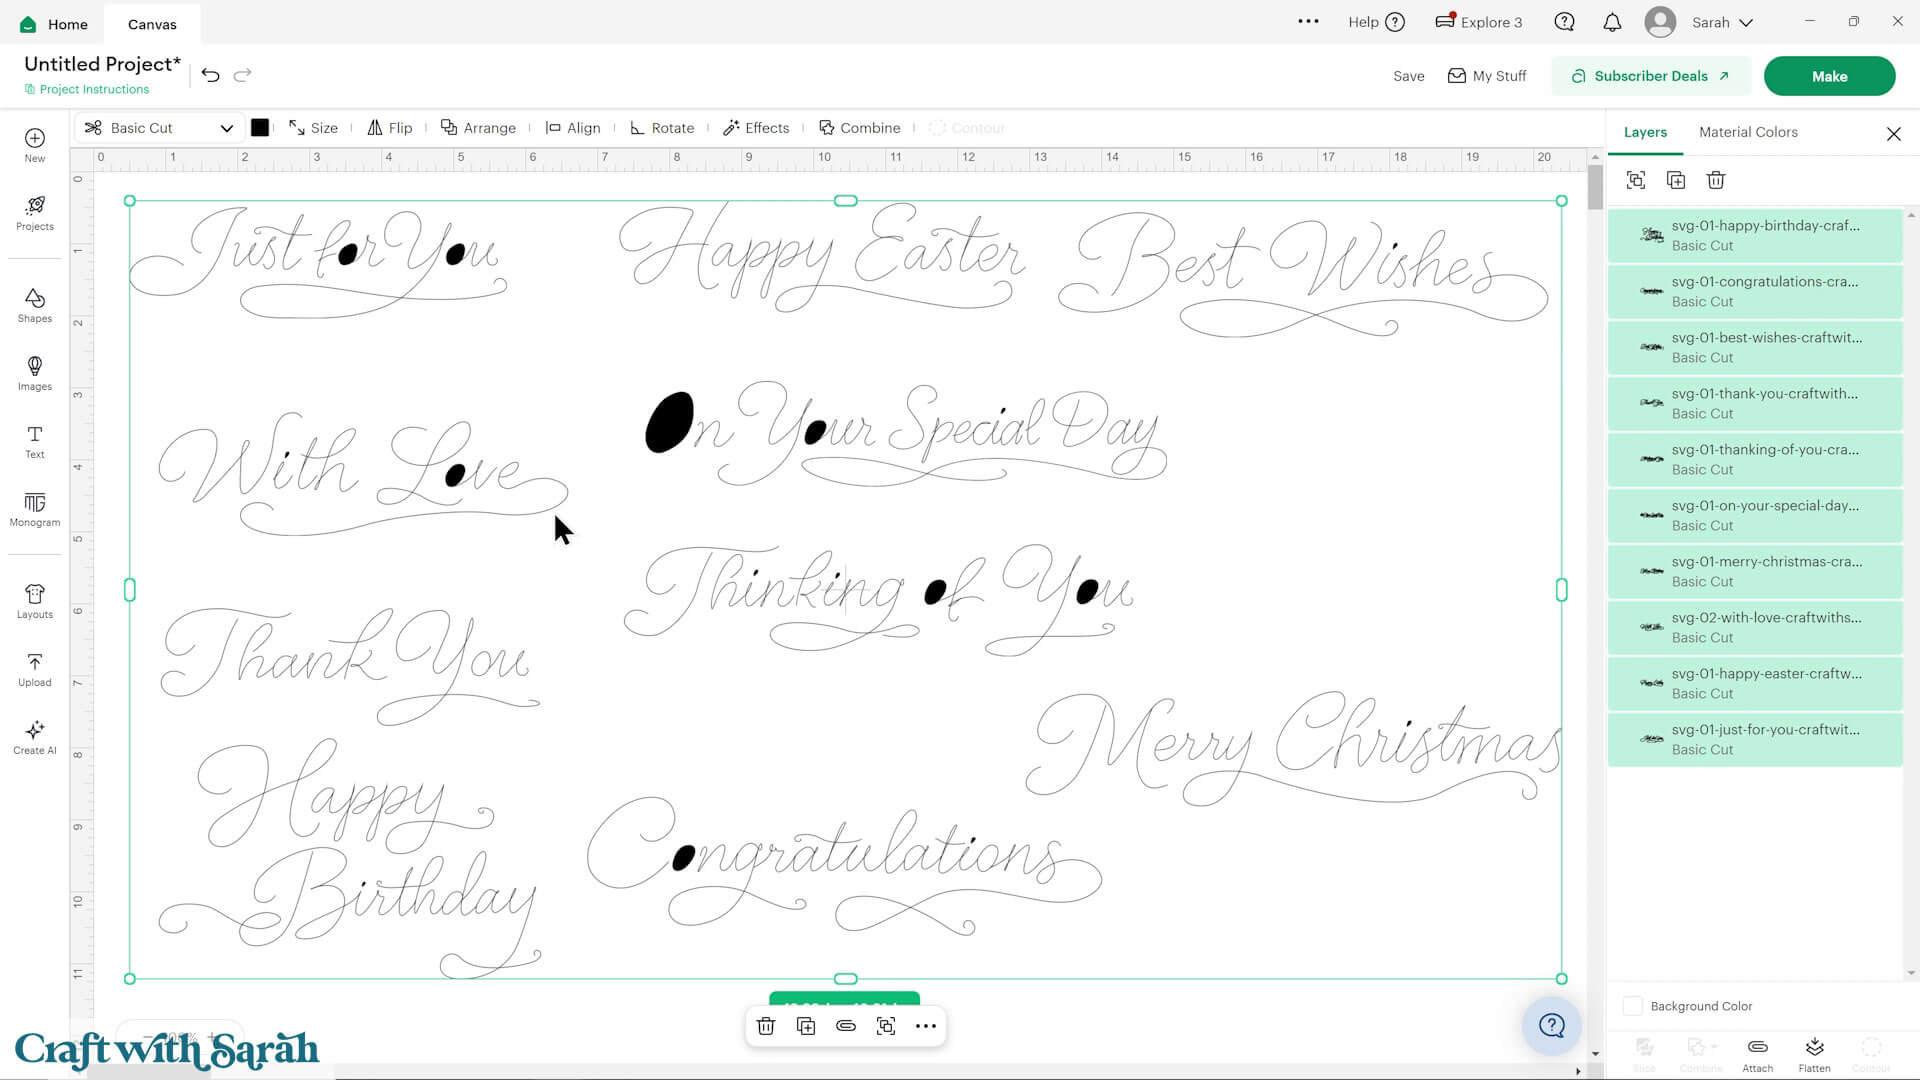
After uploading, the design should be automatically inserted onto your Canvas.
To hide the left sidebar (to give you more space for designing!), click the arrow that’s about half way down the page.
Don’t worry that the design looks a bit… strange… at the moment – especially any greetings with i or o letters in them. We will fix that during the next step.
If the design doesn’t get inserted onto your Canvas, it will show under “Uploads” in your “Recently Uploaded Images”. Click on it and then press “Add to Canvas” to put it onto your Project.
Need help uploading SVGs? Get step-by-step instructions here in our detailed help guides for Cricut, Silhouette and ScanNCut.
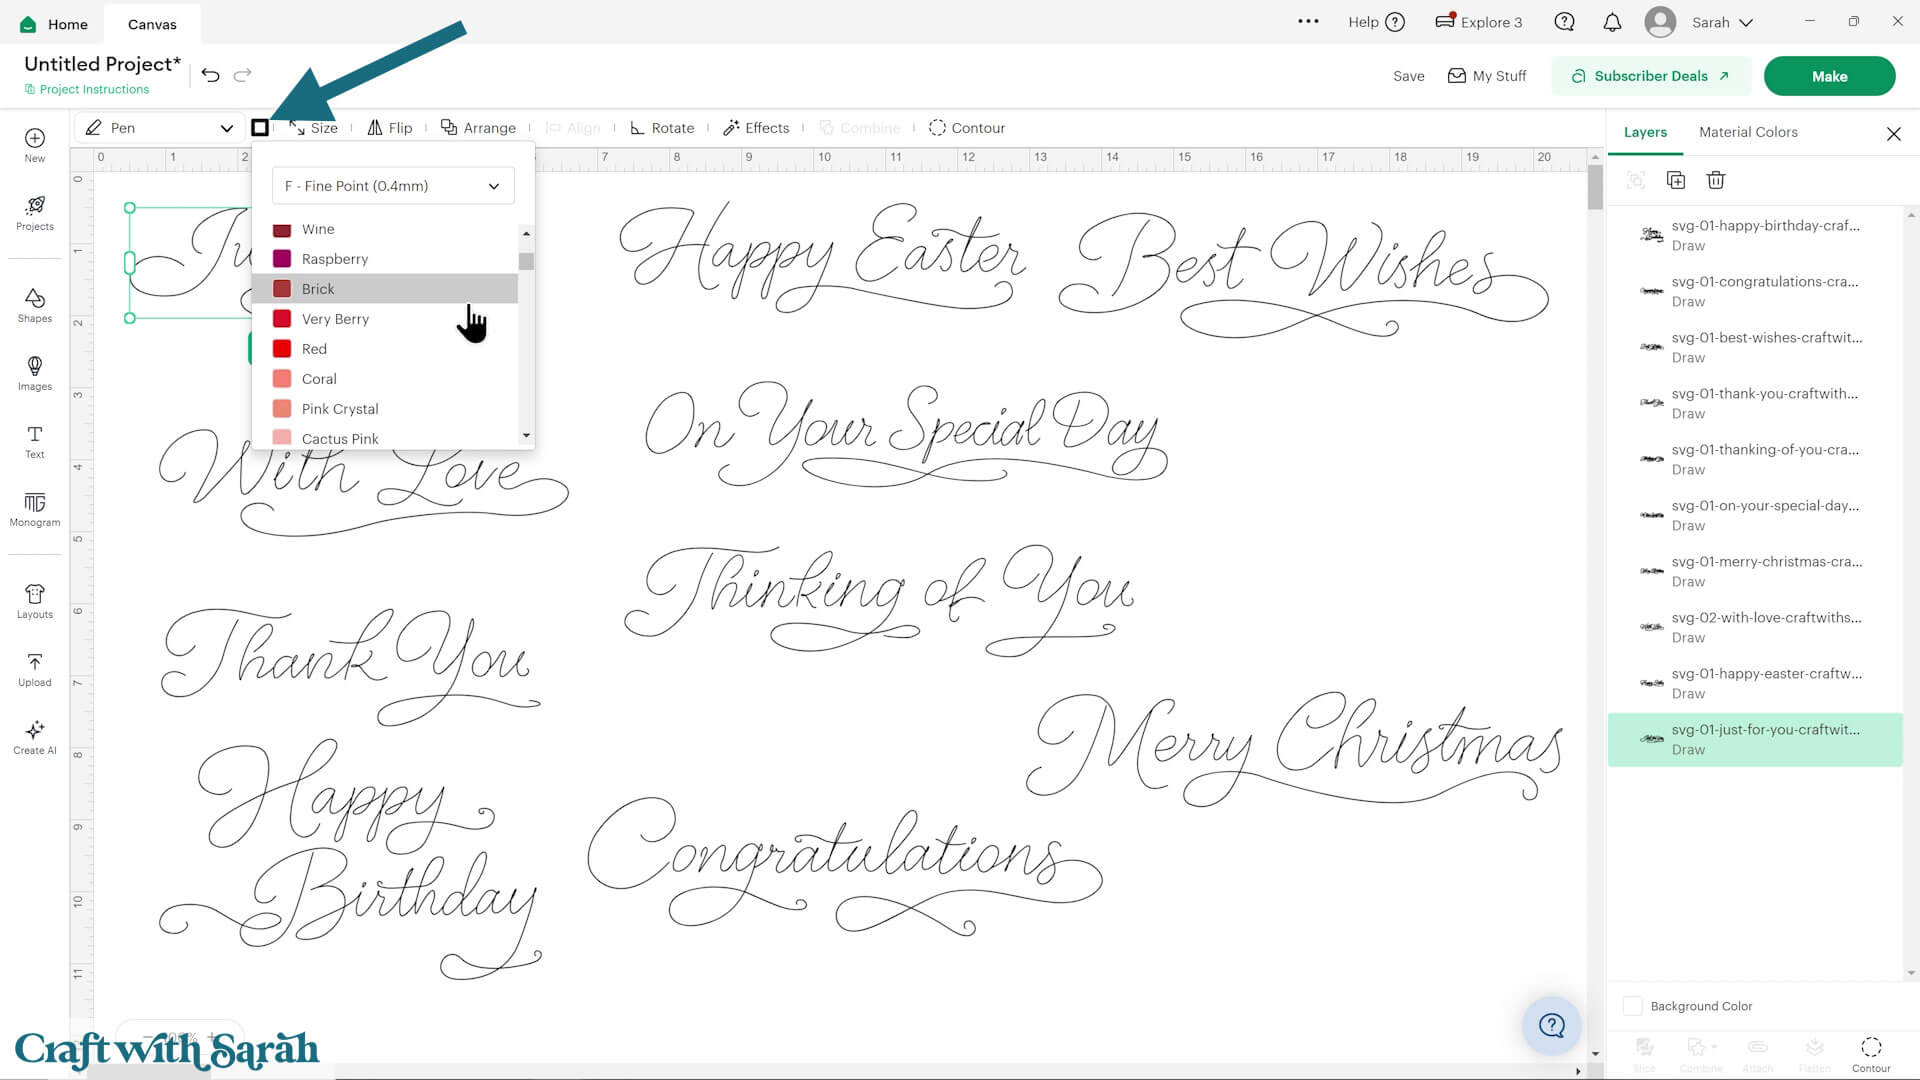
Step 2) Change to “Pen” style
By default, Design Space doesn’t understand that we want to draw the greetings with a pen, so it has loaded them in as “Cut” layers.
To fix this, click on the greetings, either one-at-a-time or you can select them all to do it all at once, and change them to “Pen” in the Operations dropdown.
Tip: These greetings also work well with Cricut’s foiling tip – to use this, change them to “Foil” instead.

Changing the layers to “Pen” will fix the “filled in” effect on some of the letters.
Use the colour box next to the Operations dropdown to choose your desired pen type and colour.
Tip: Make sure you have the correct Cricut machine selected on the top-right of your screen, as the type of pens you can see is based on that selection so that you can only choose pens that are compatible with that particular machine.
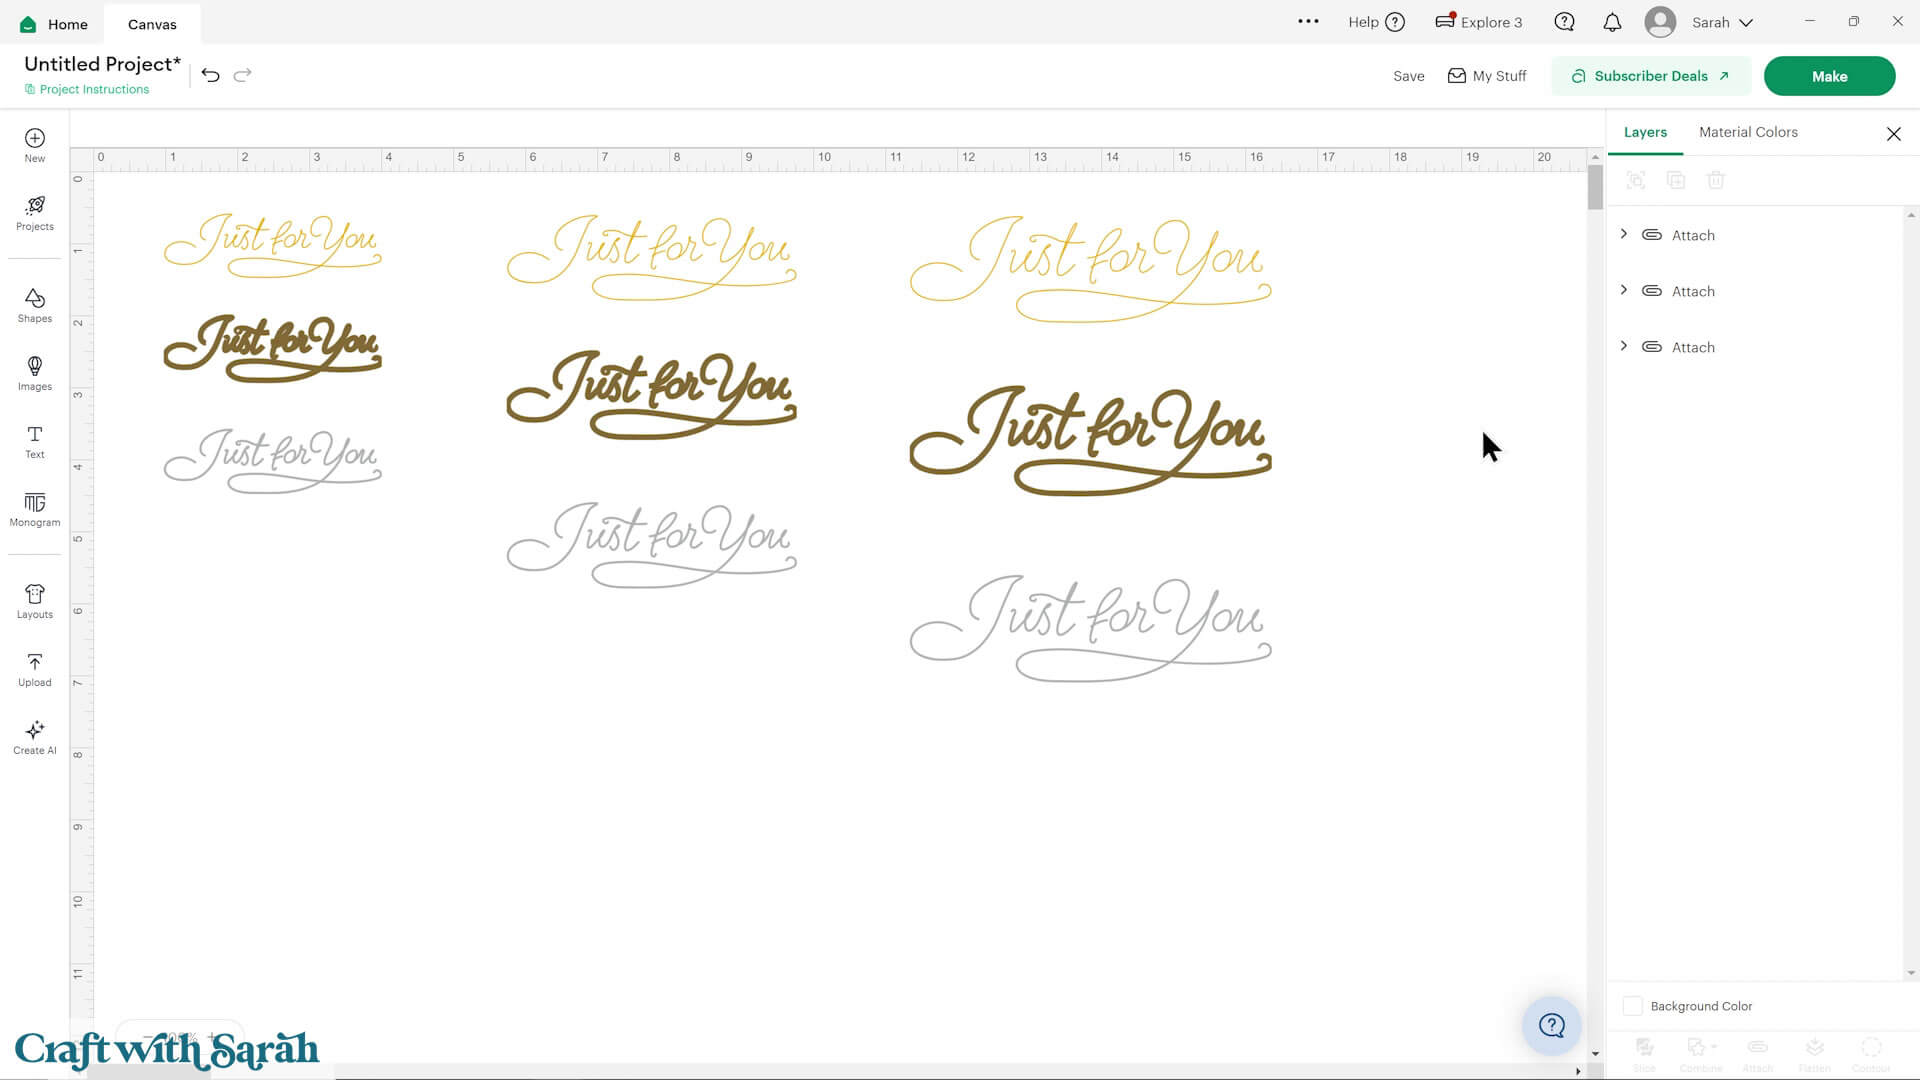
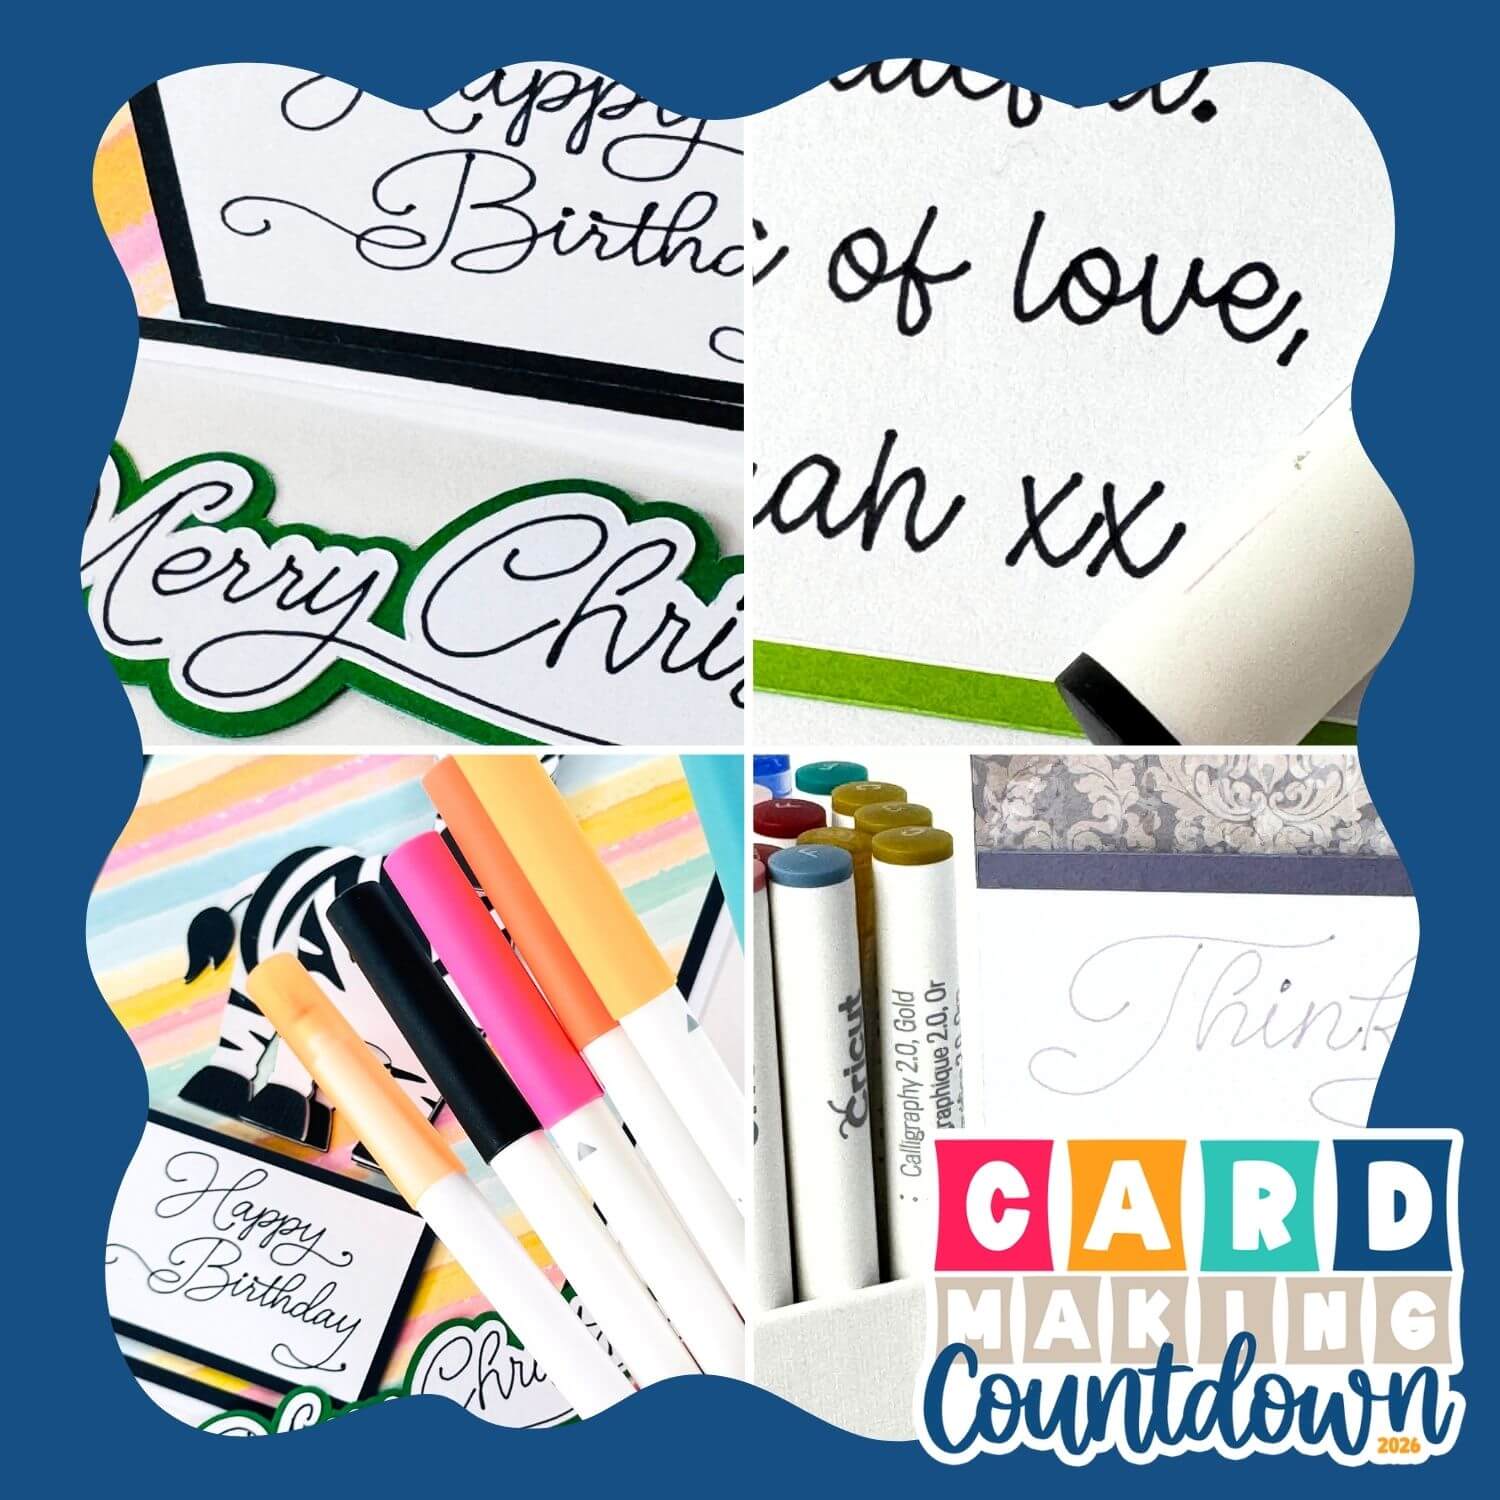
Some types of Cricut pen will draw thicker than others.
Here is an experiment to see how different pen types look:
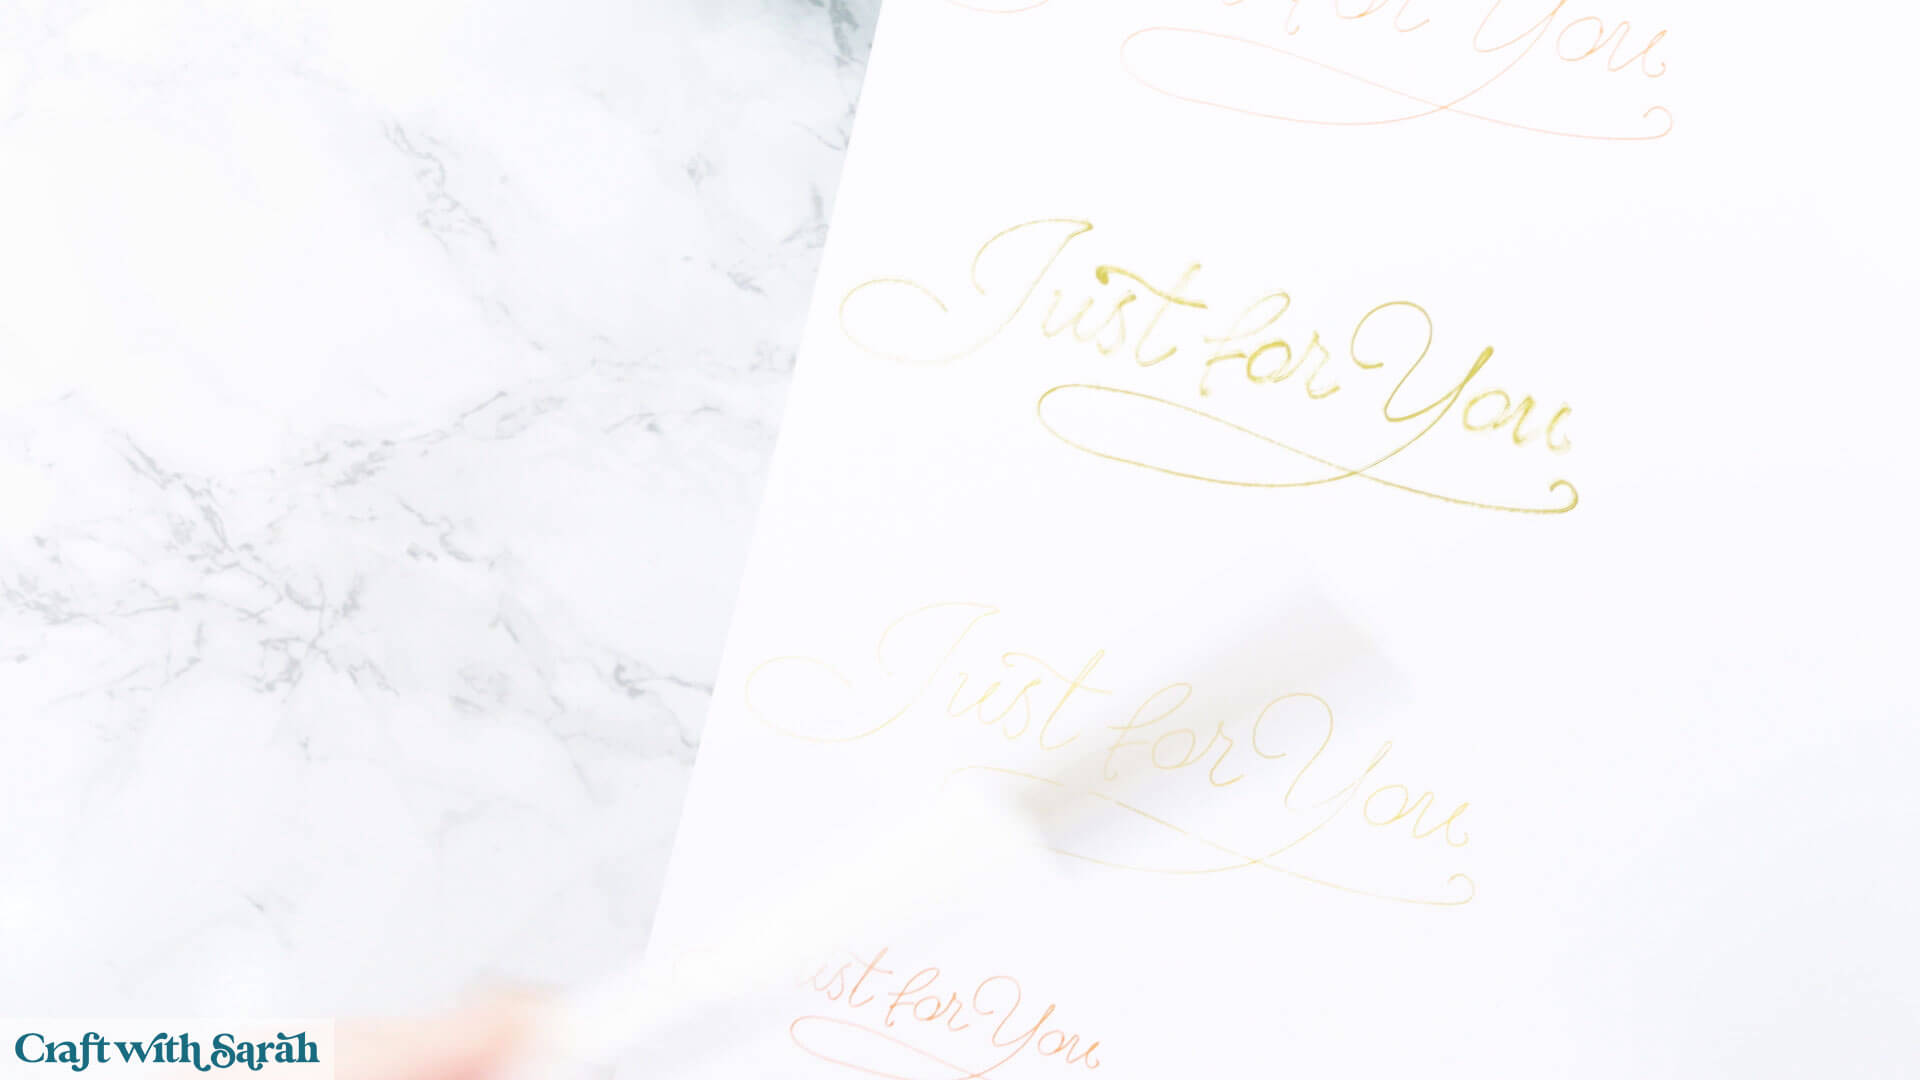
My camera didn’t pick up the colours very well as they are much clearer in real life, but here is what some of those designs look like when drawn.
My gold calligraphy pen is running out, which is why the thick gold sentiment looks like it hasn’t drawn properly.
Step 3) Design your craft project
Now that your greetings are ready, it’s time to create your craft project.
Here are some different ways that you could use the pen sentiments.
For a full step-by-step look at how to design greetings cards in Design Space, watch the video near the top of this tutorial.
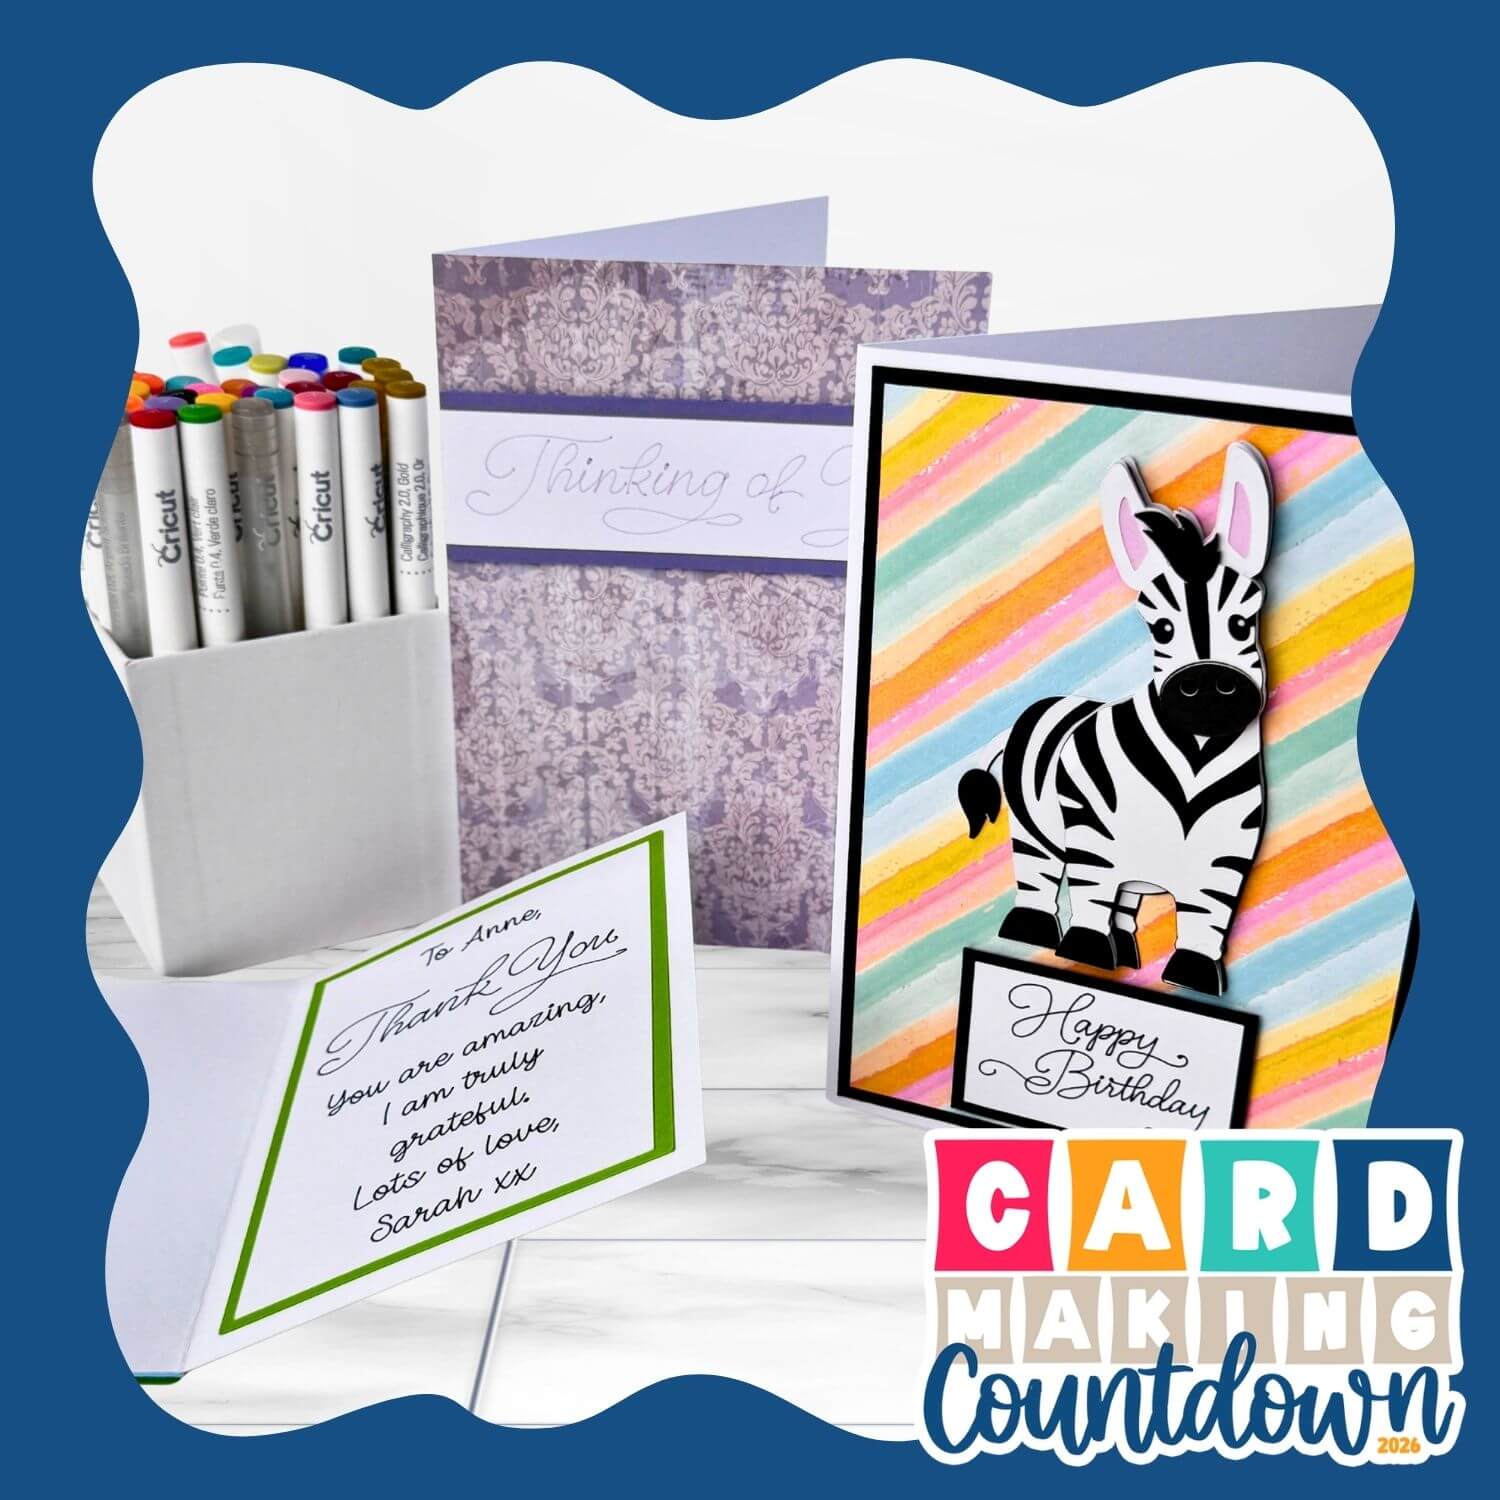
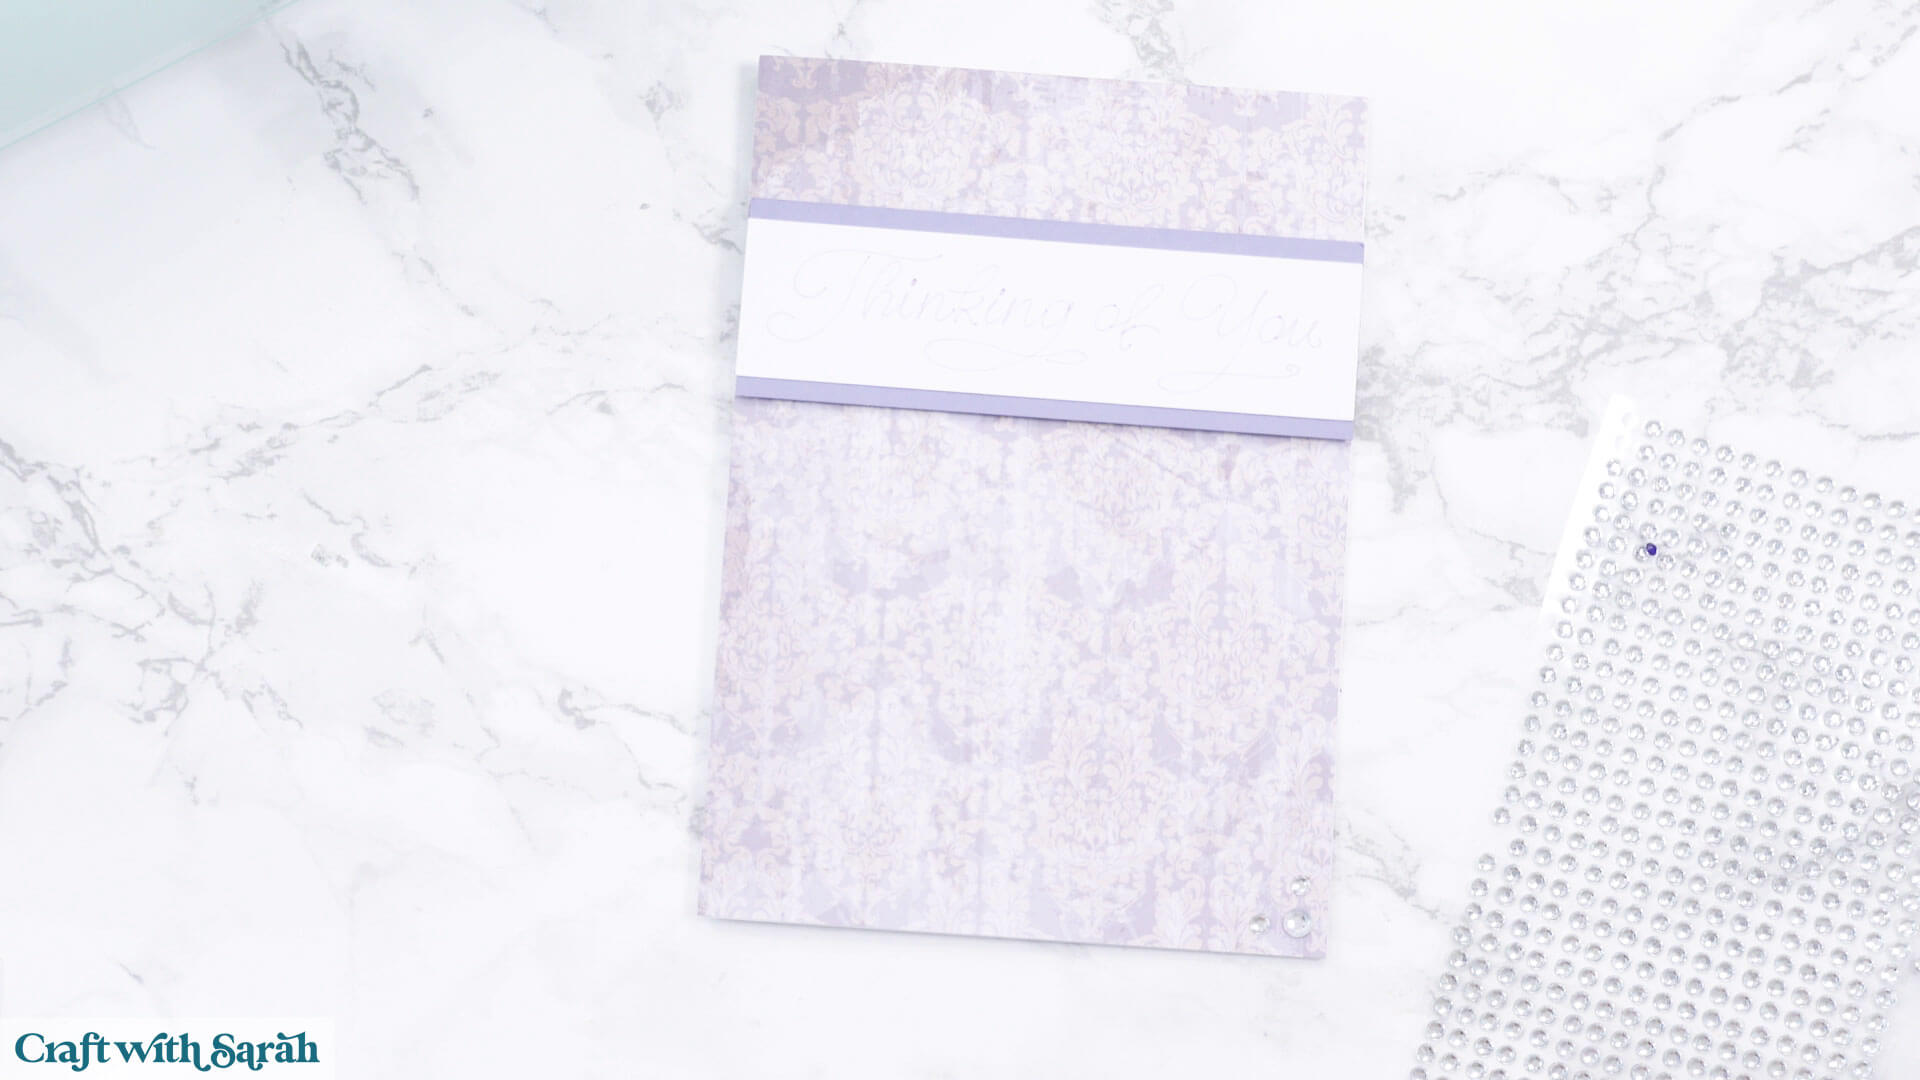
PROJECT 1 – SIMPLE STYLE WITH PATTERNED PAPER
For this card, I wanted the greeting to be the main focus.
I created a base card using a square shape that was 10 inches wide and 7 inches tall, so that when it’s folded in half the card will be 5×7.
I added a score line, made it 7 inches, selected the score line and the base card and pressed Align > Center and then “Attach”. This places the score line in the correct place.
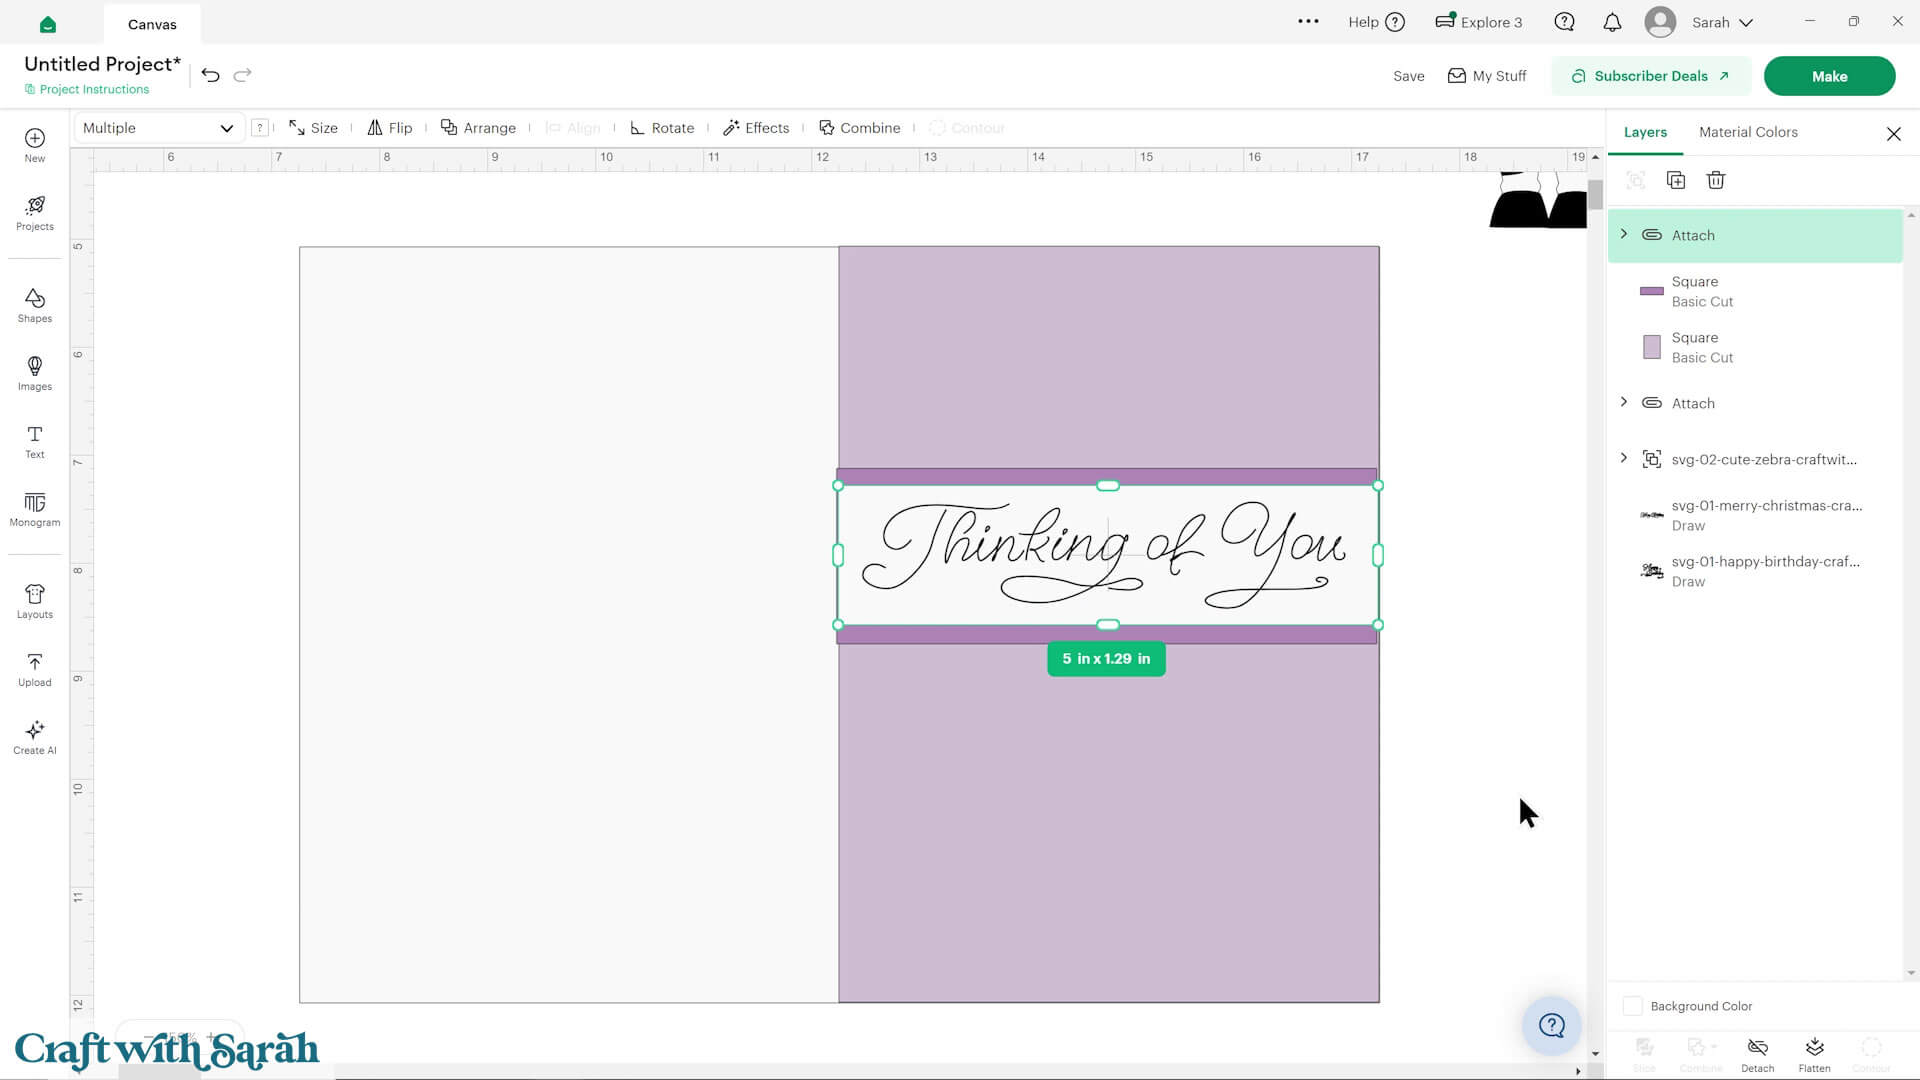
I added a 5×7 inch rectangle to the front in pale purple. I will use a subtle patterned paper for this.
For the main design, I inserted another rectangle and changed it to white, then made it 5 inches wide so it went all the way across the card, then added the greeting on top.
IMPORTANT – You need to “Attach” the pen greeting to the layer/shape that you want it to be drawn on.
Therefore, I selected the greeting and the white rectangle and pressed the “Attach” button at the bottom of the layers panel.
Finally, I added one more rectangle behind the greeting in a slightly darker shade of purple.
Here is what the card looks like once made. My camera really doesn’t like the pen greetings and was struggling to pick up the lines, but it looks much bolder and more vibrant in real life.
I used foam squares to “pop” the darker purple rectangle out from the card for a bit of dimension and put some sticky-back gemstones on the bottom right of the card.
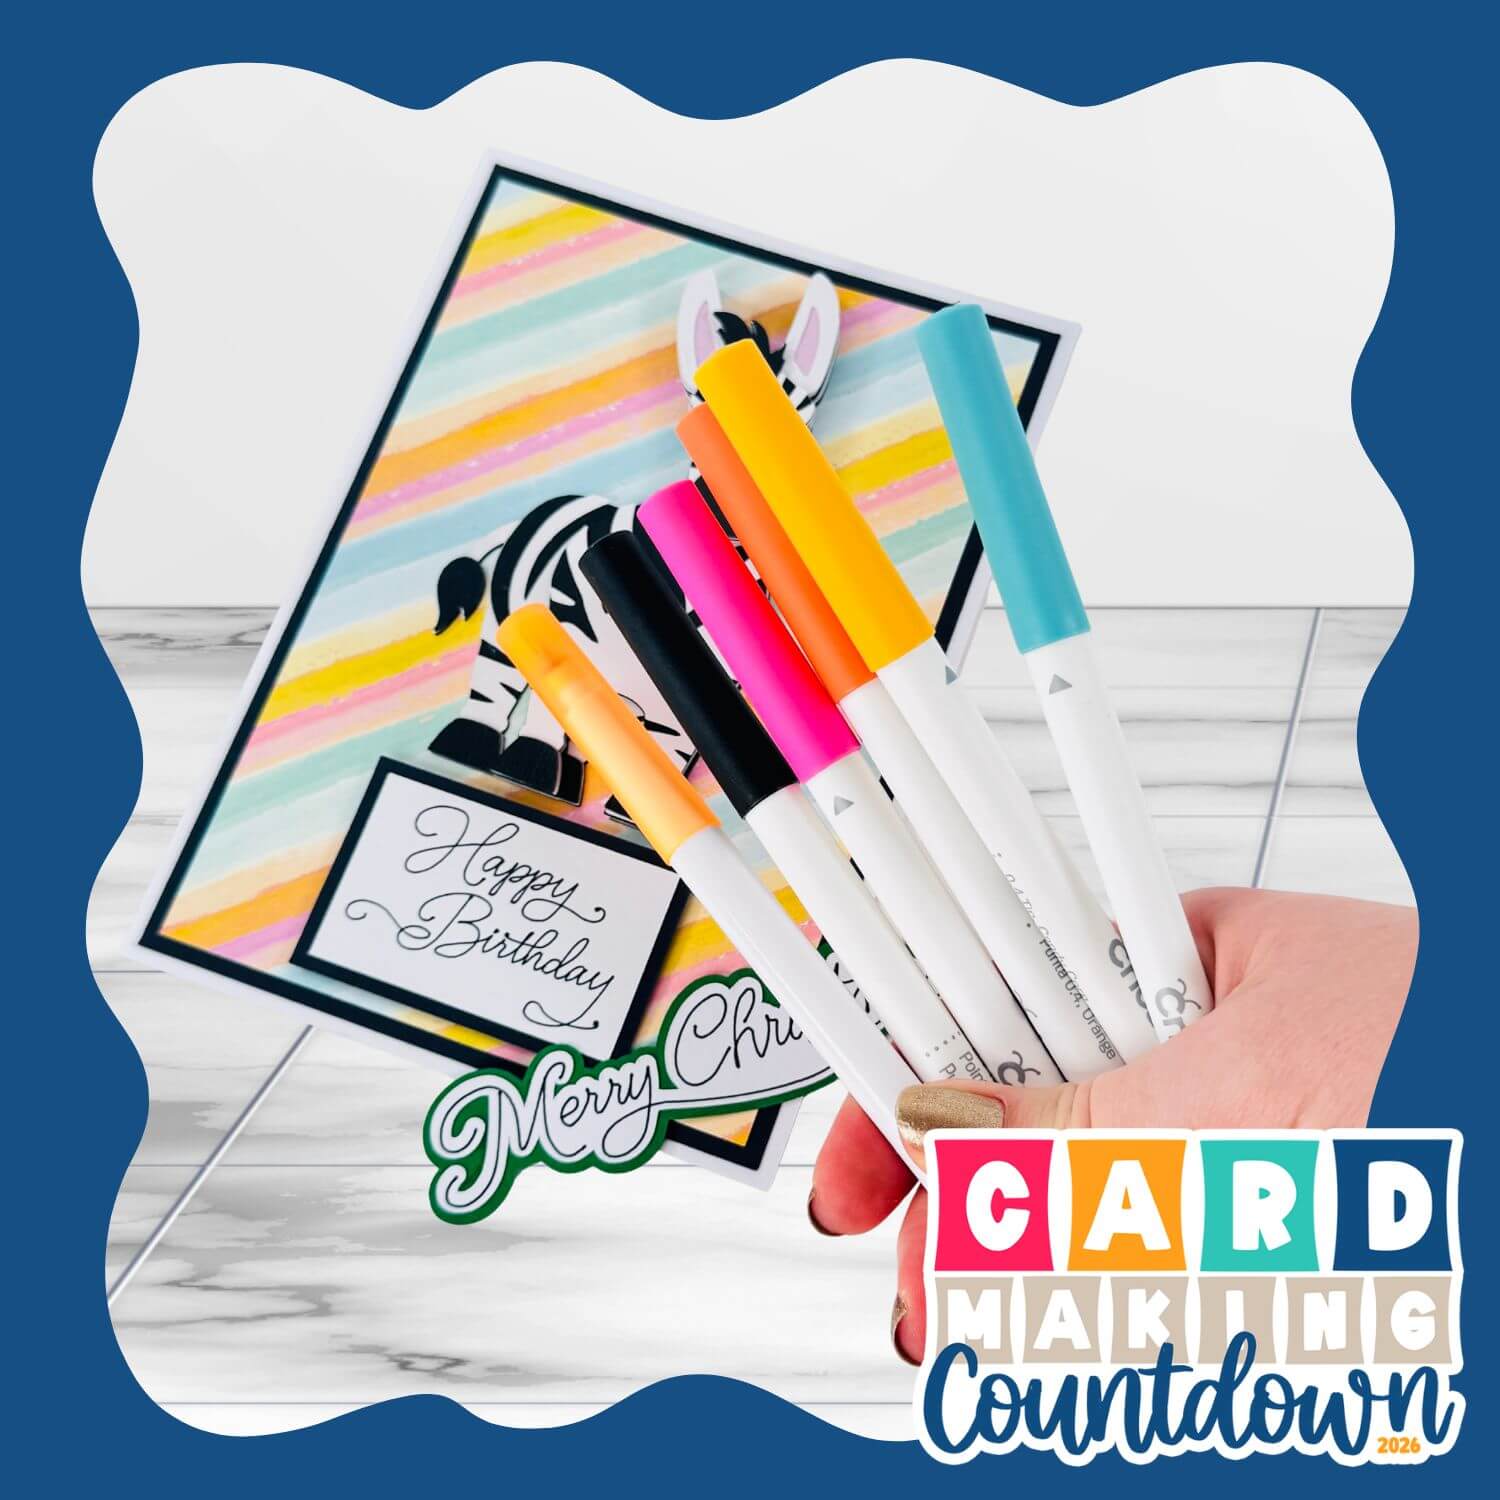
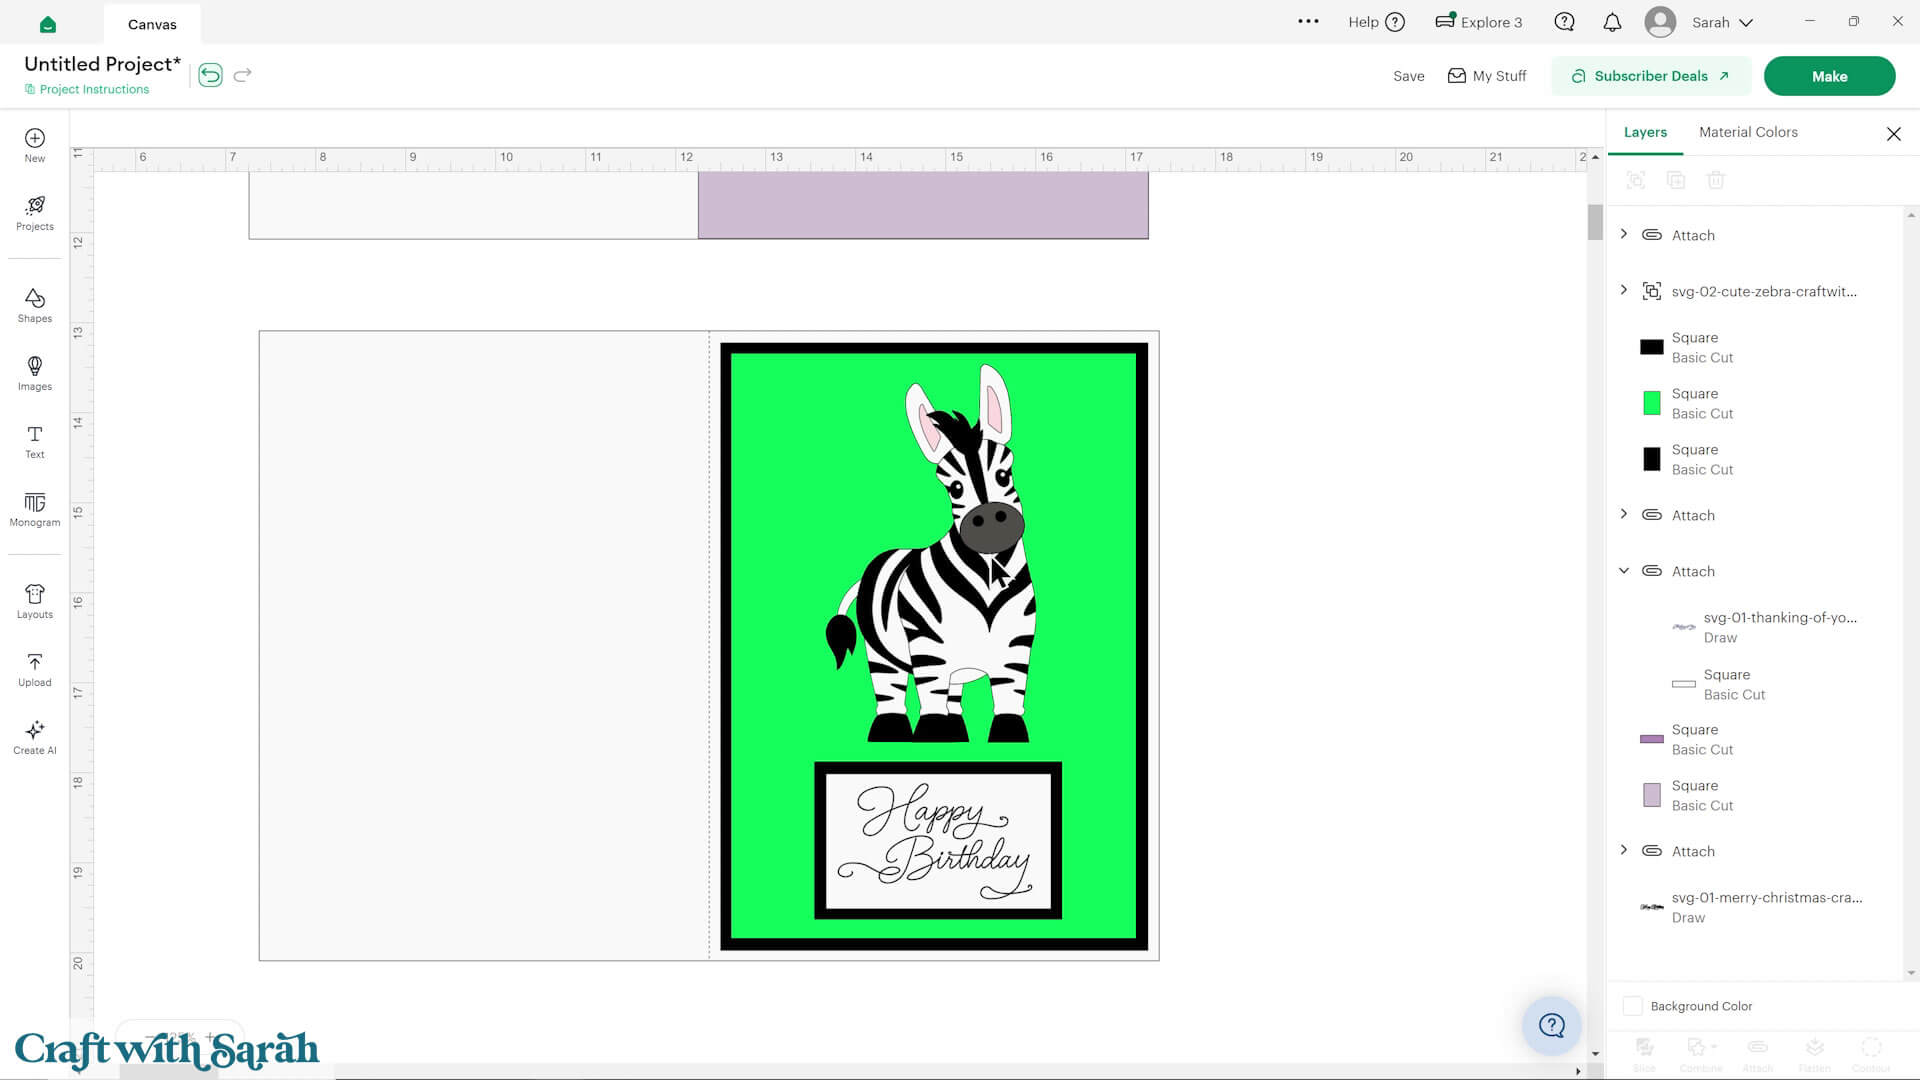
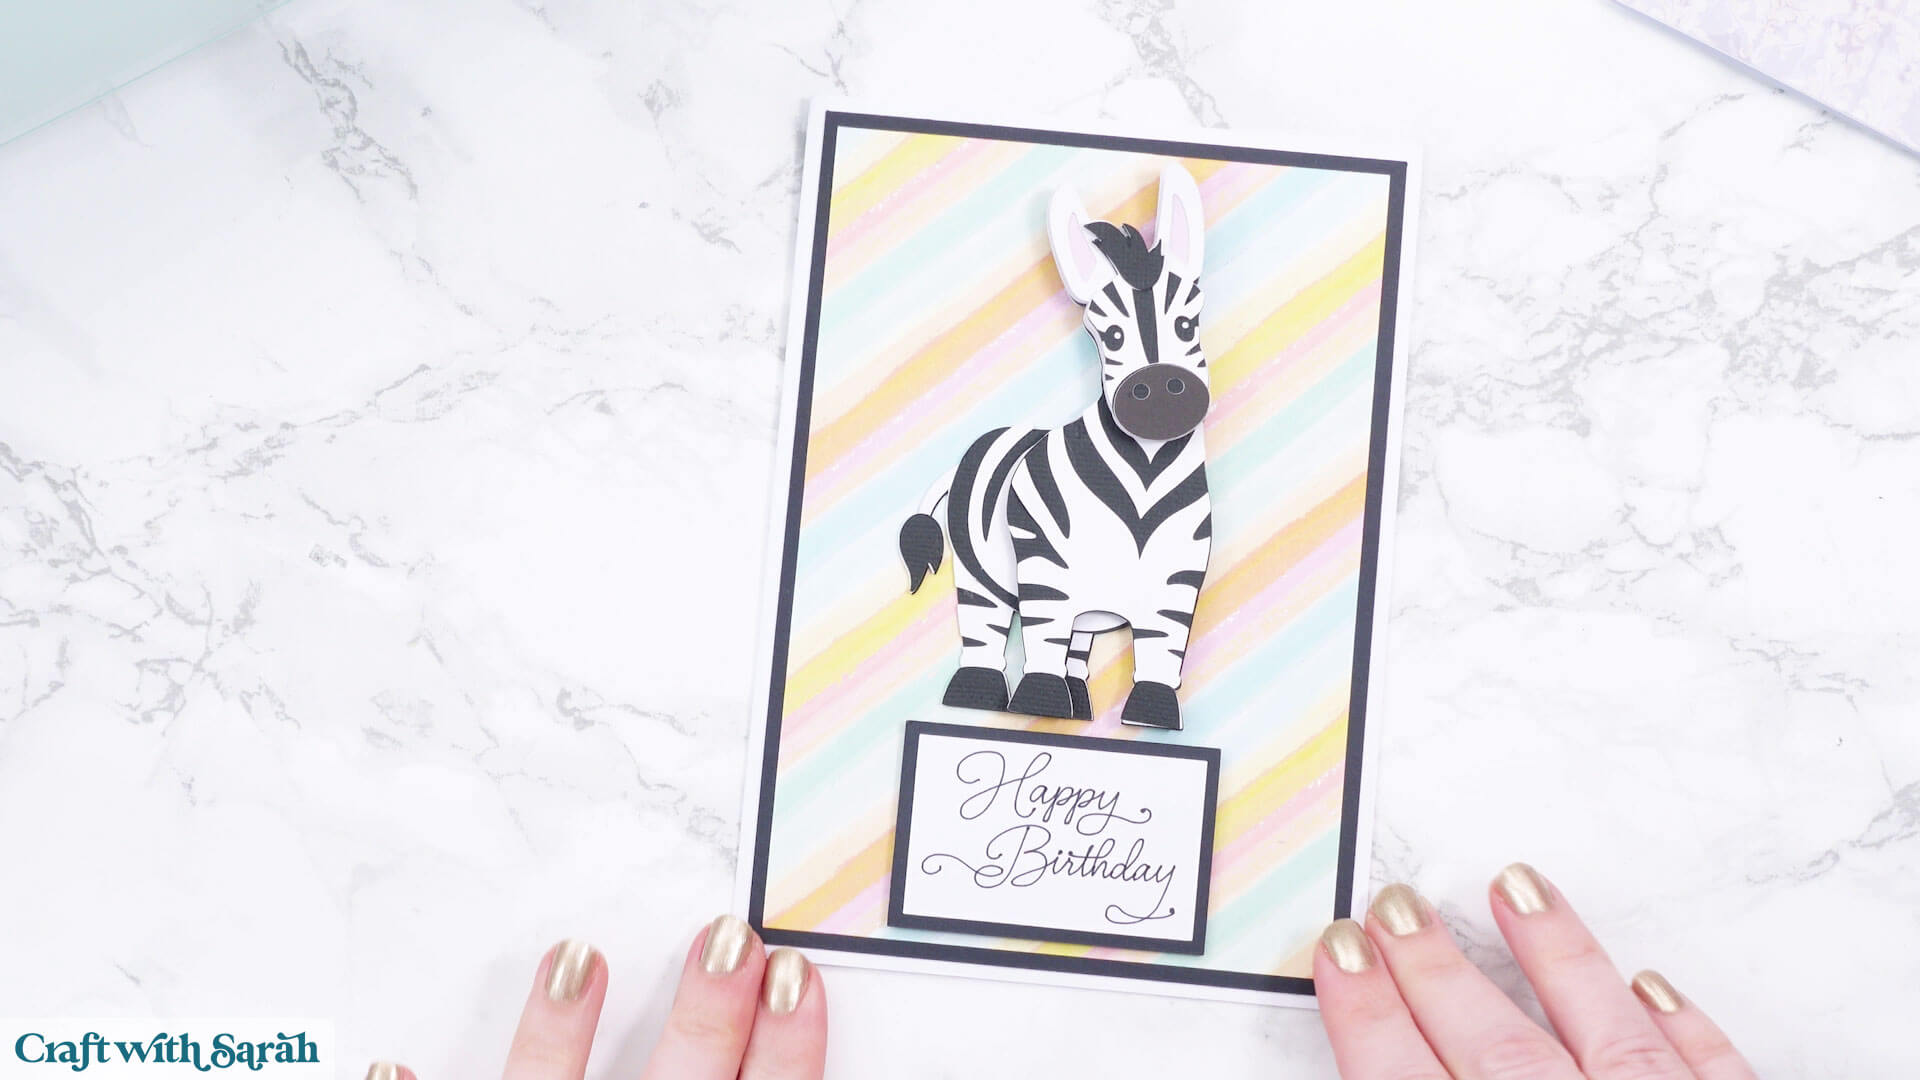
PROJECT 2 – IMAGE & TEXT
The pen greetings can be combined with layered SVGs or other design elements to make a more detailed card.
Here’s an example of that, using this cute zebra SVG.
I will cut the green rectangle from patterned paper. It won’t be green when I cut it, but I like to make shapes that I’ll be using patterned paper for a nice bright colour in Design Space to remind me that this is a pattern piece when I’m cutting it out.
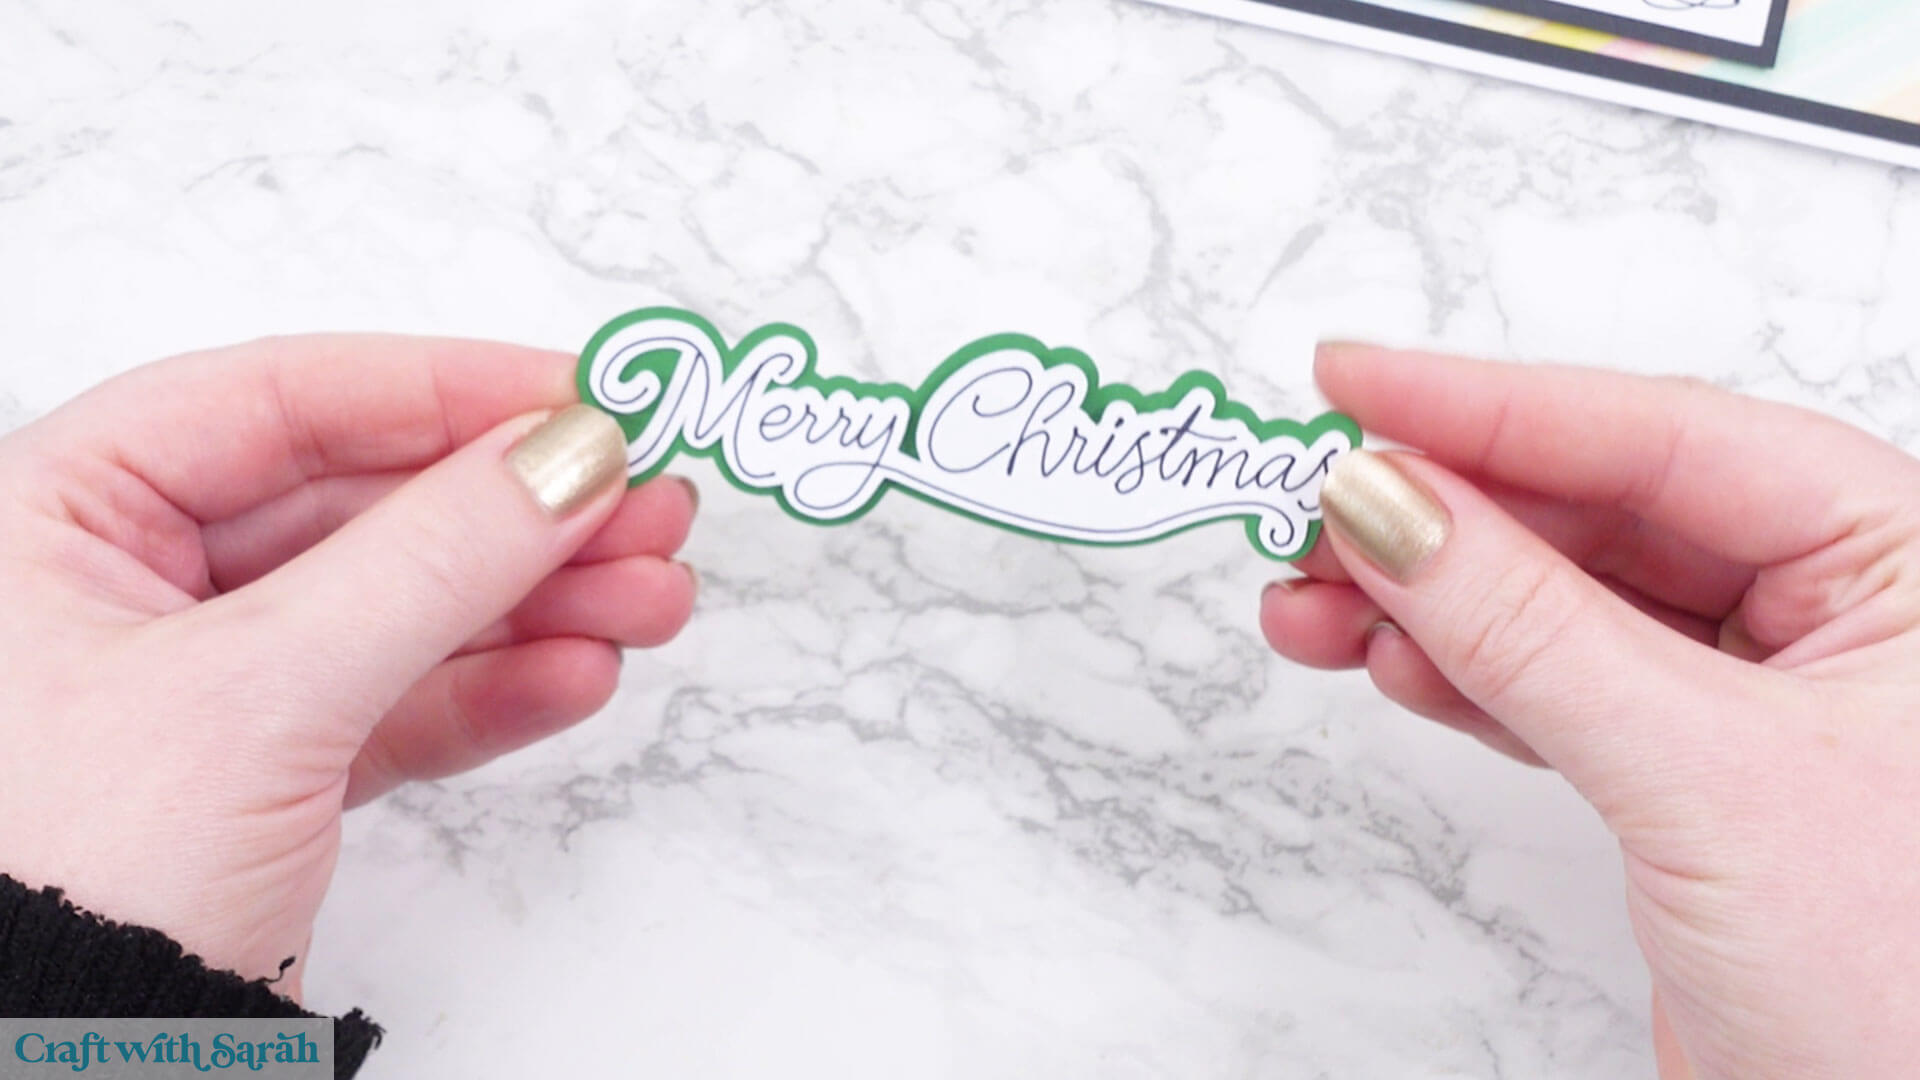
PROJECT 3 – SENTIMENT TOPPERS
You don’t need to decide on your final project today – you could prep ahead with a set of premade sentiment toppers to keep in your craft stash, ready for when you need them.
Resize your greeting to a size that would be suitable for the types of project you often make.
Click the greeting, then press “Effects > Offset”.
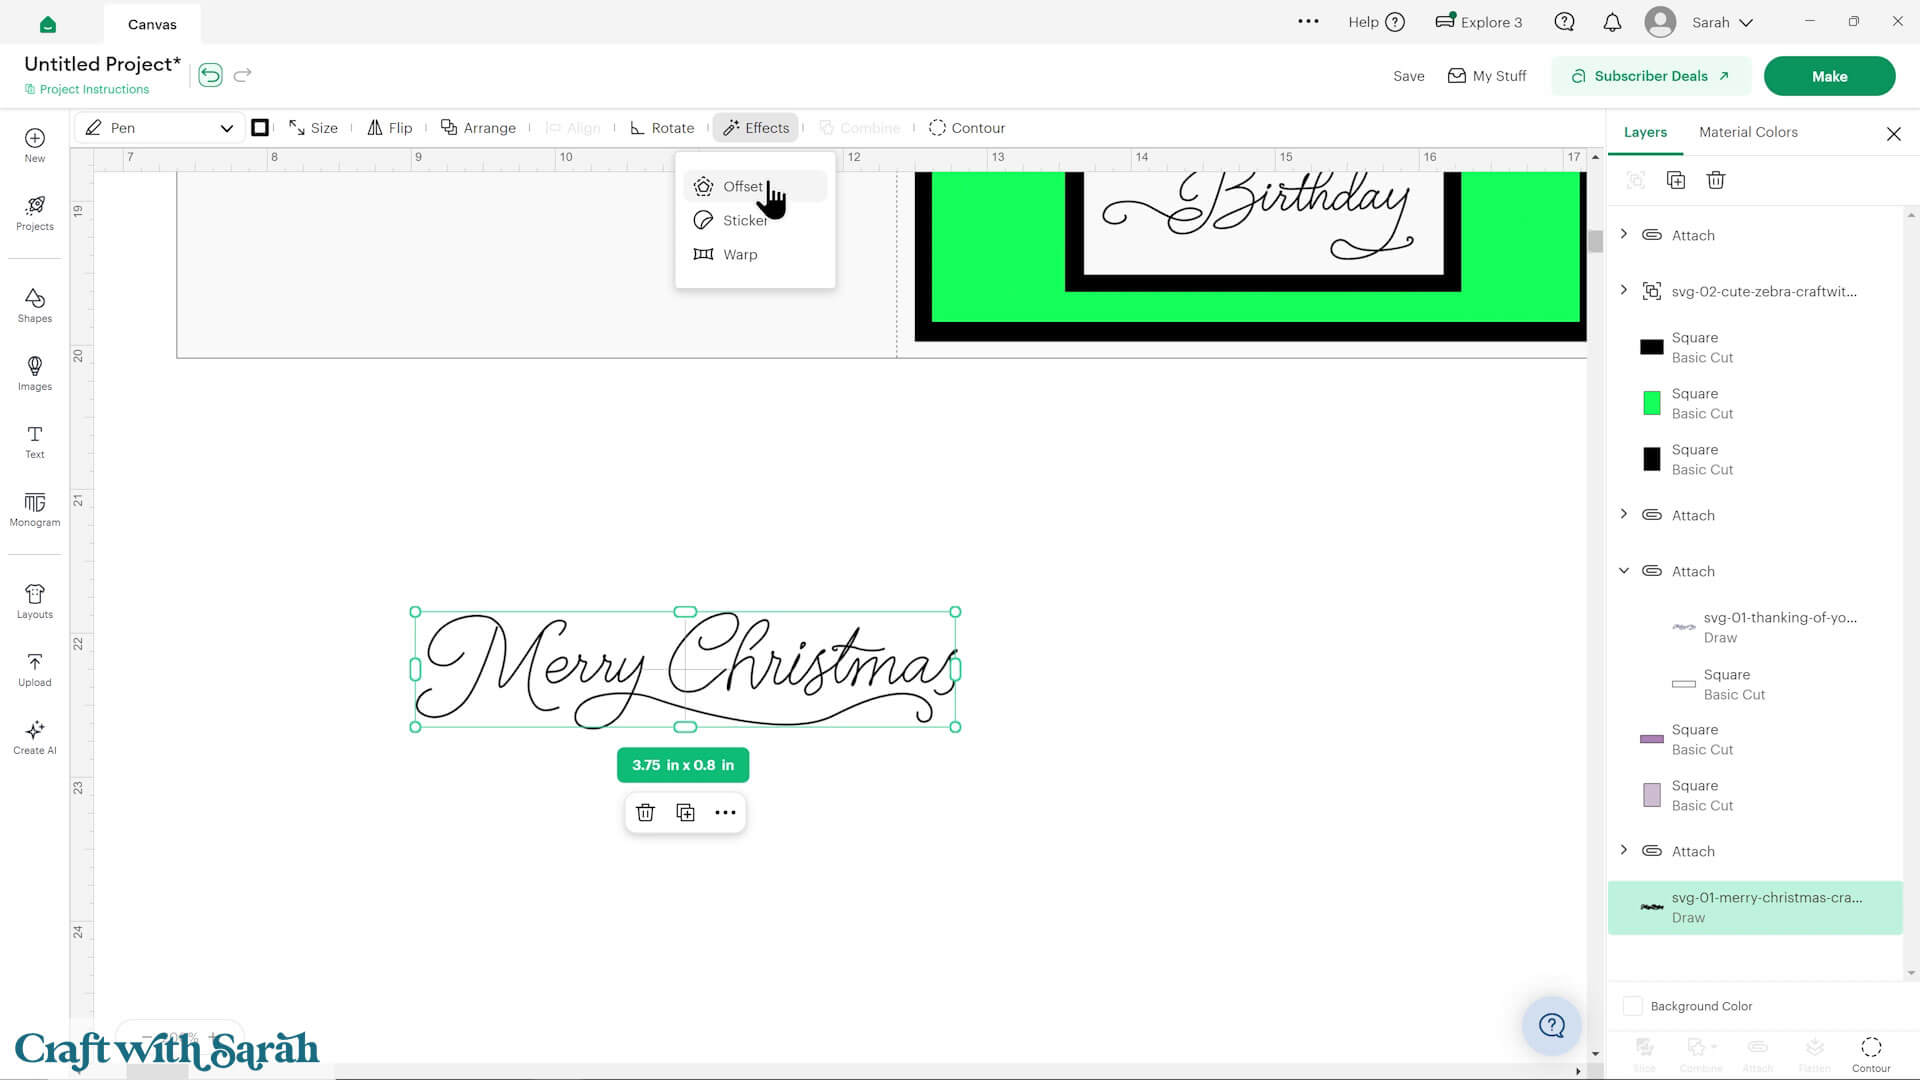
Choose a thickness for the Offset.
It should be far enough from the pen that the Cricut will be able to easily cut around the edge.
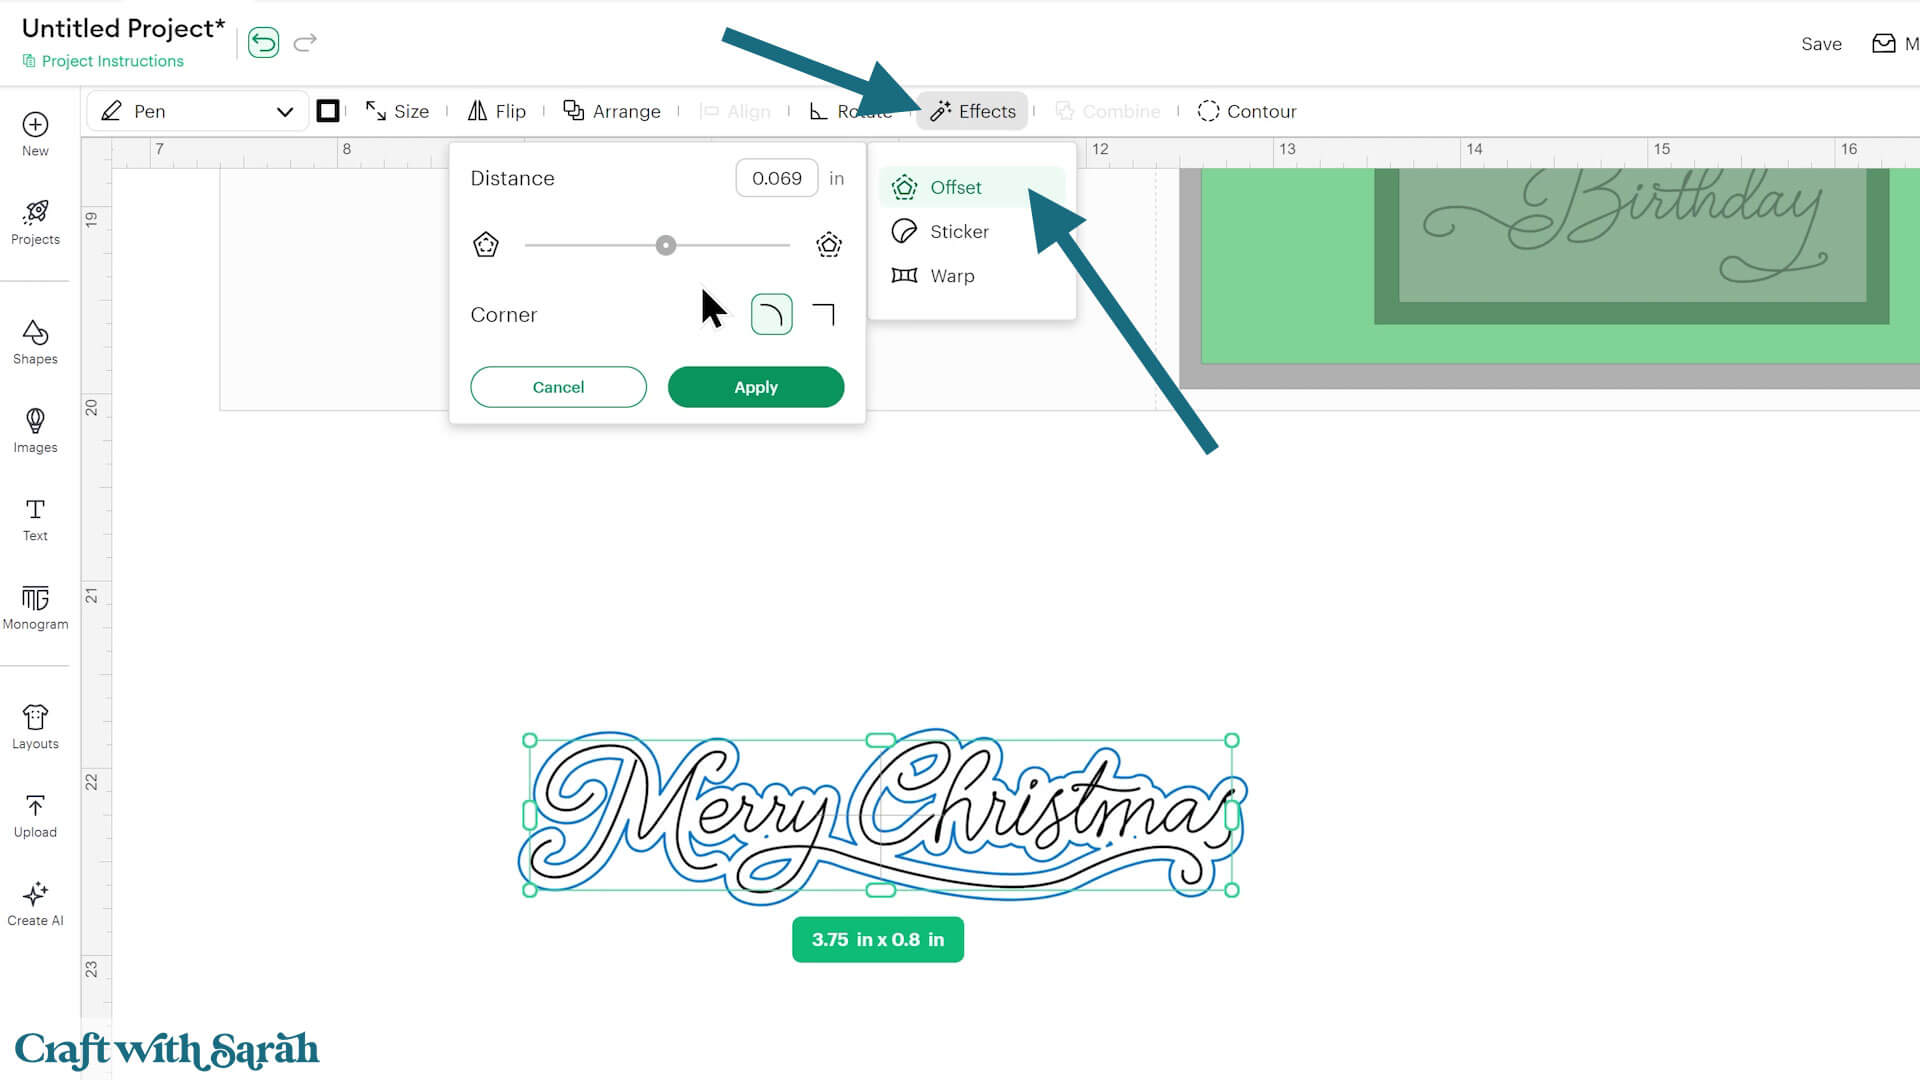
Click “Apply”.
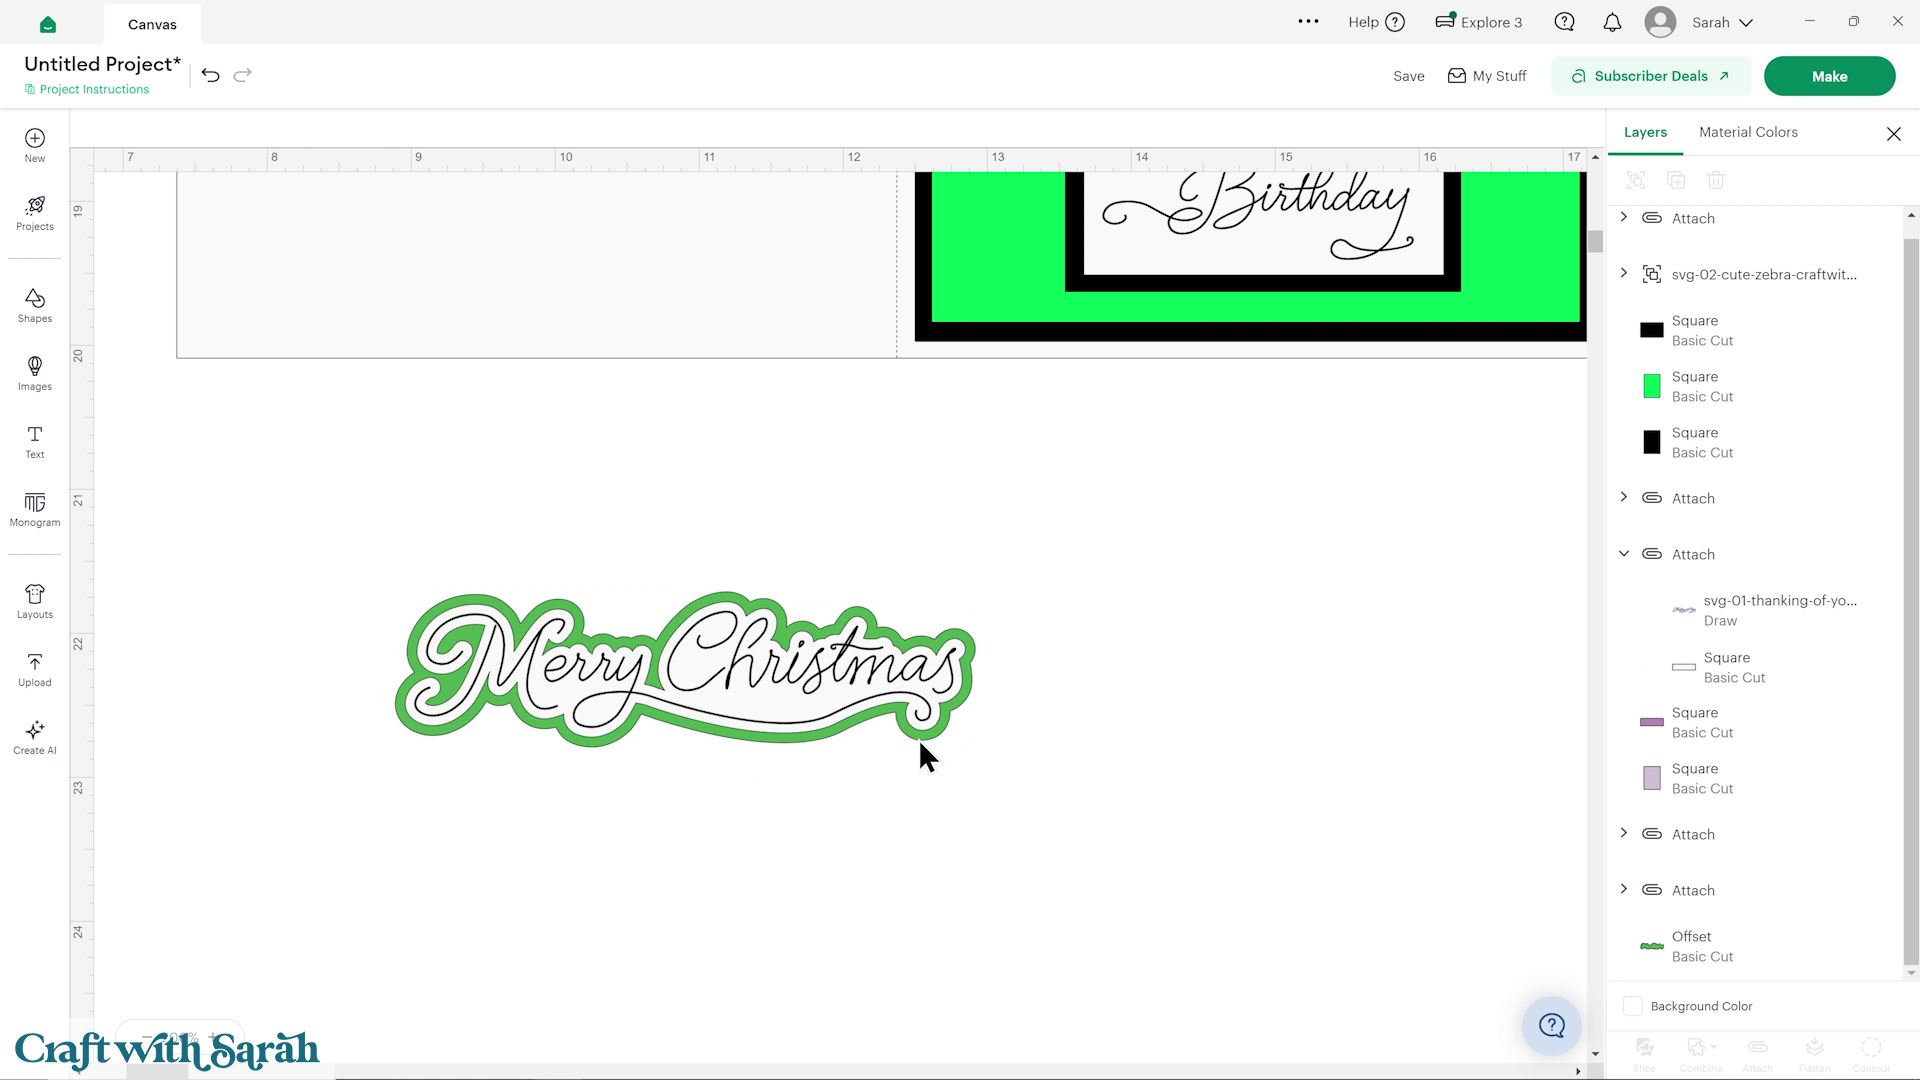
This adds a border around the text.
If the Offset layer is currently showing as a “Pen” layer, click it then change to “Basic Cut” in the Operations dropdown.
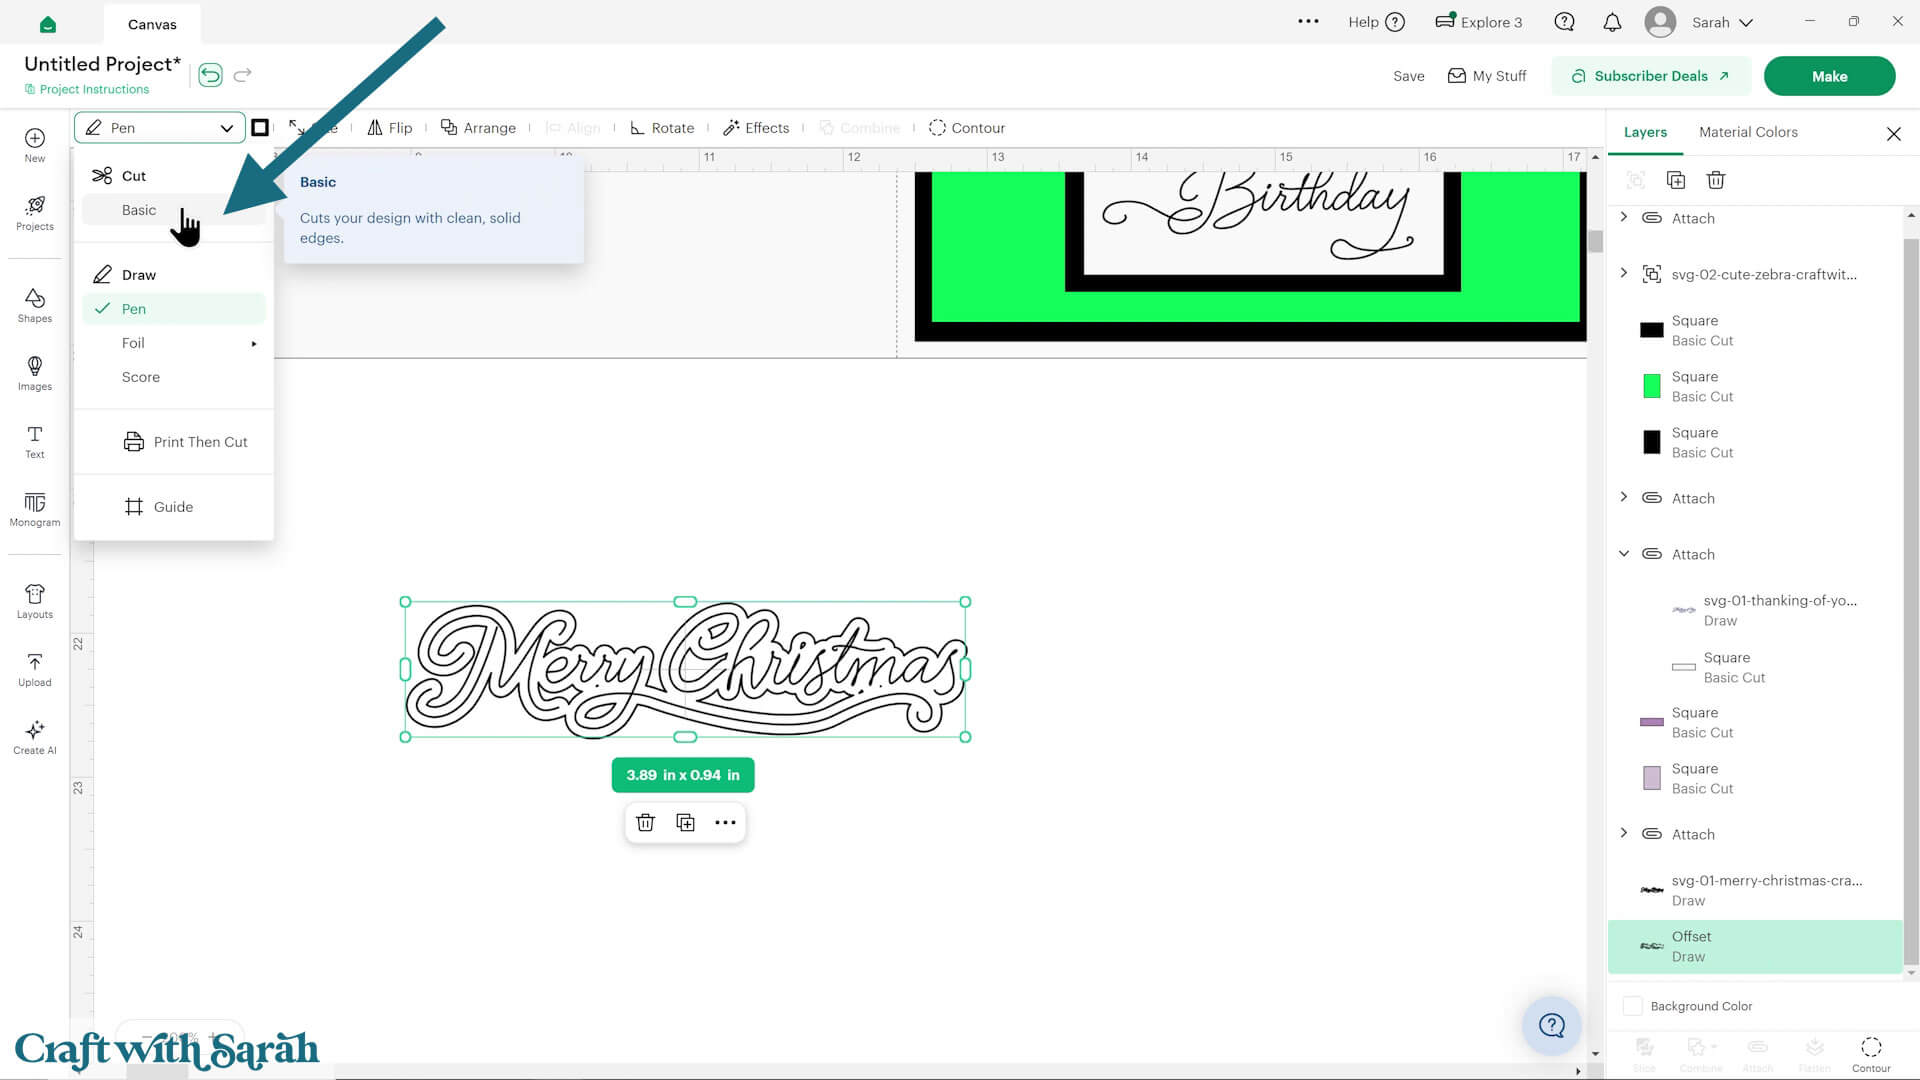
Change the colour to white.
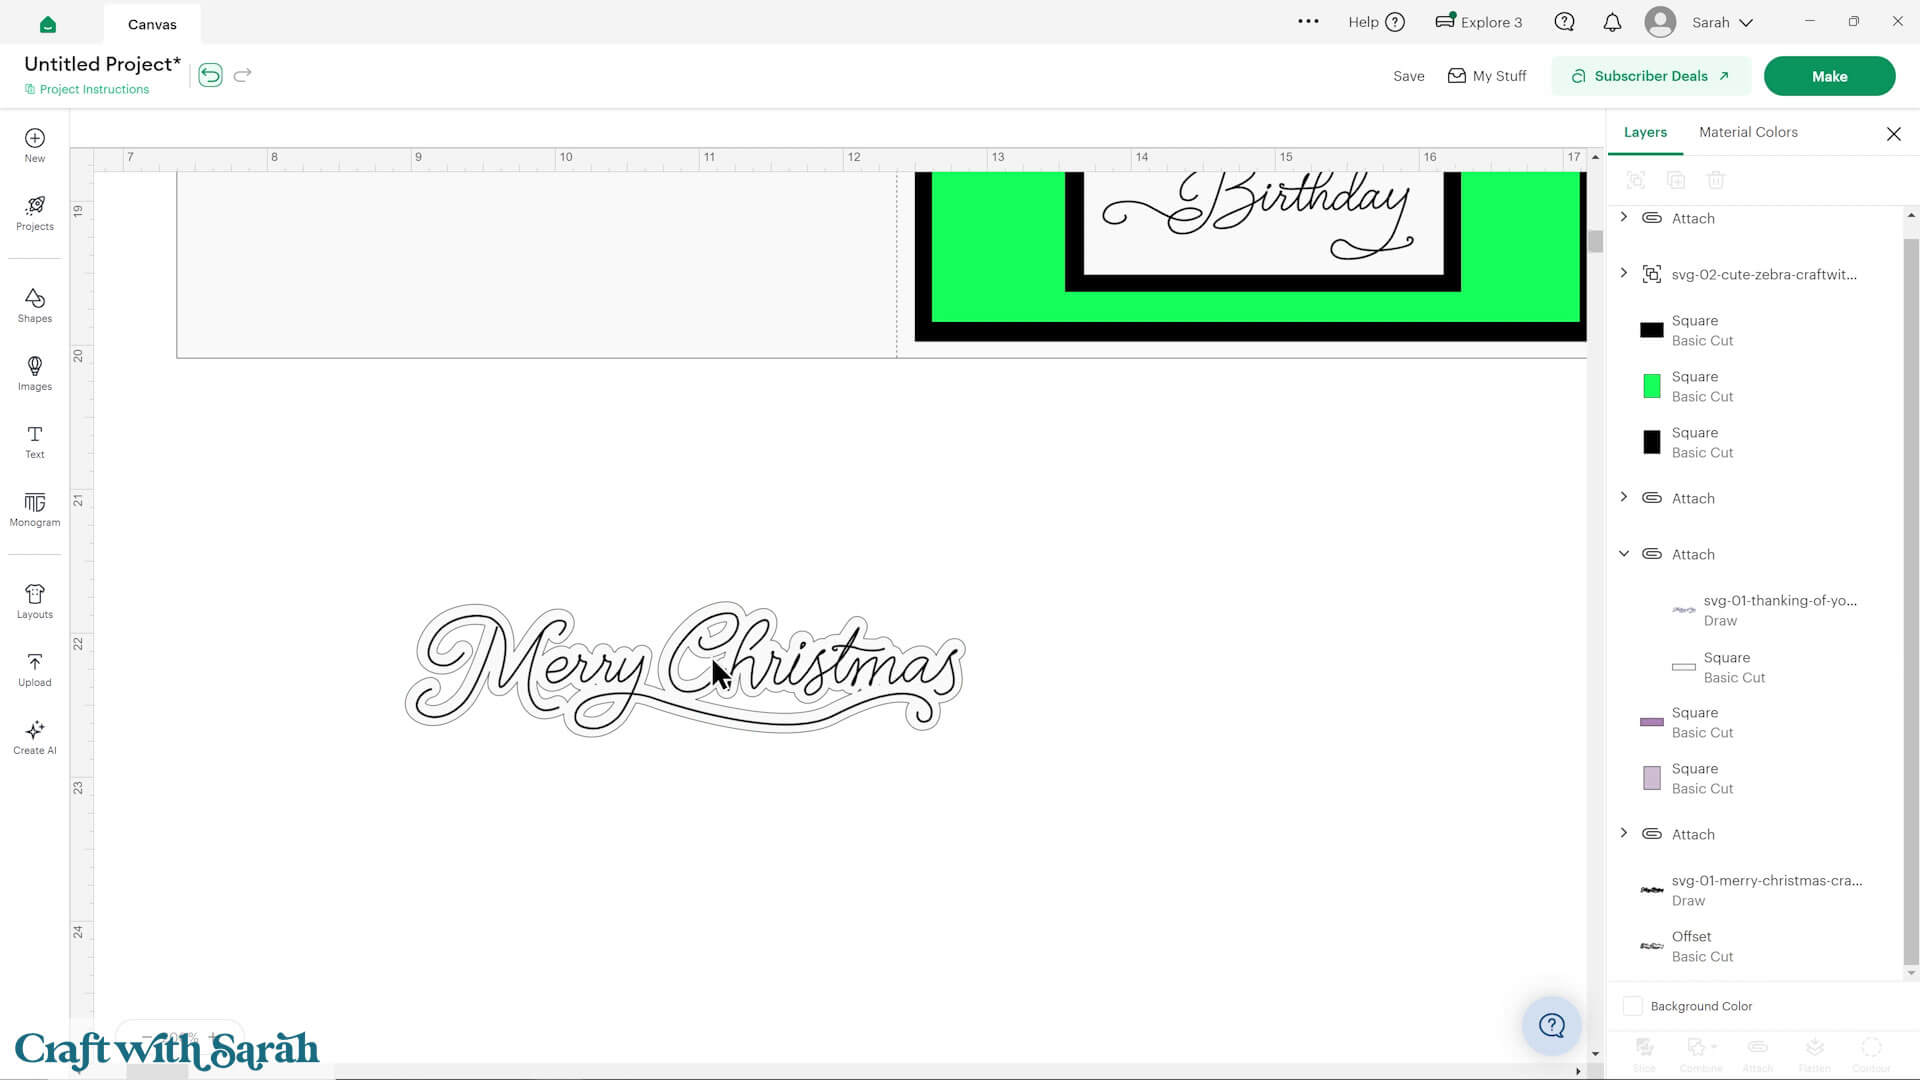
If there are small gaps in the Offset, you may wish to fill them in.
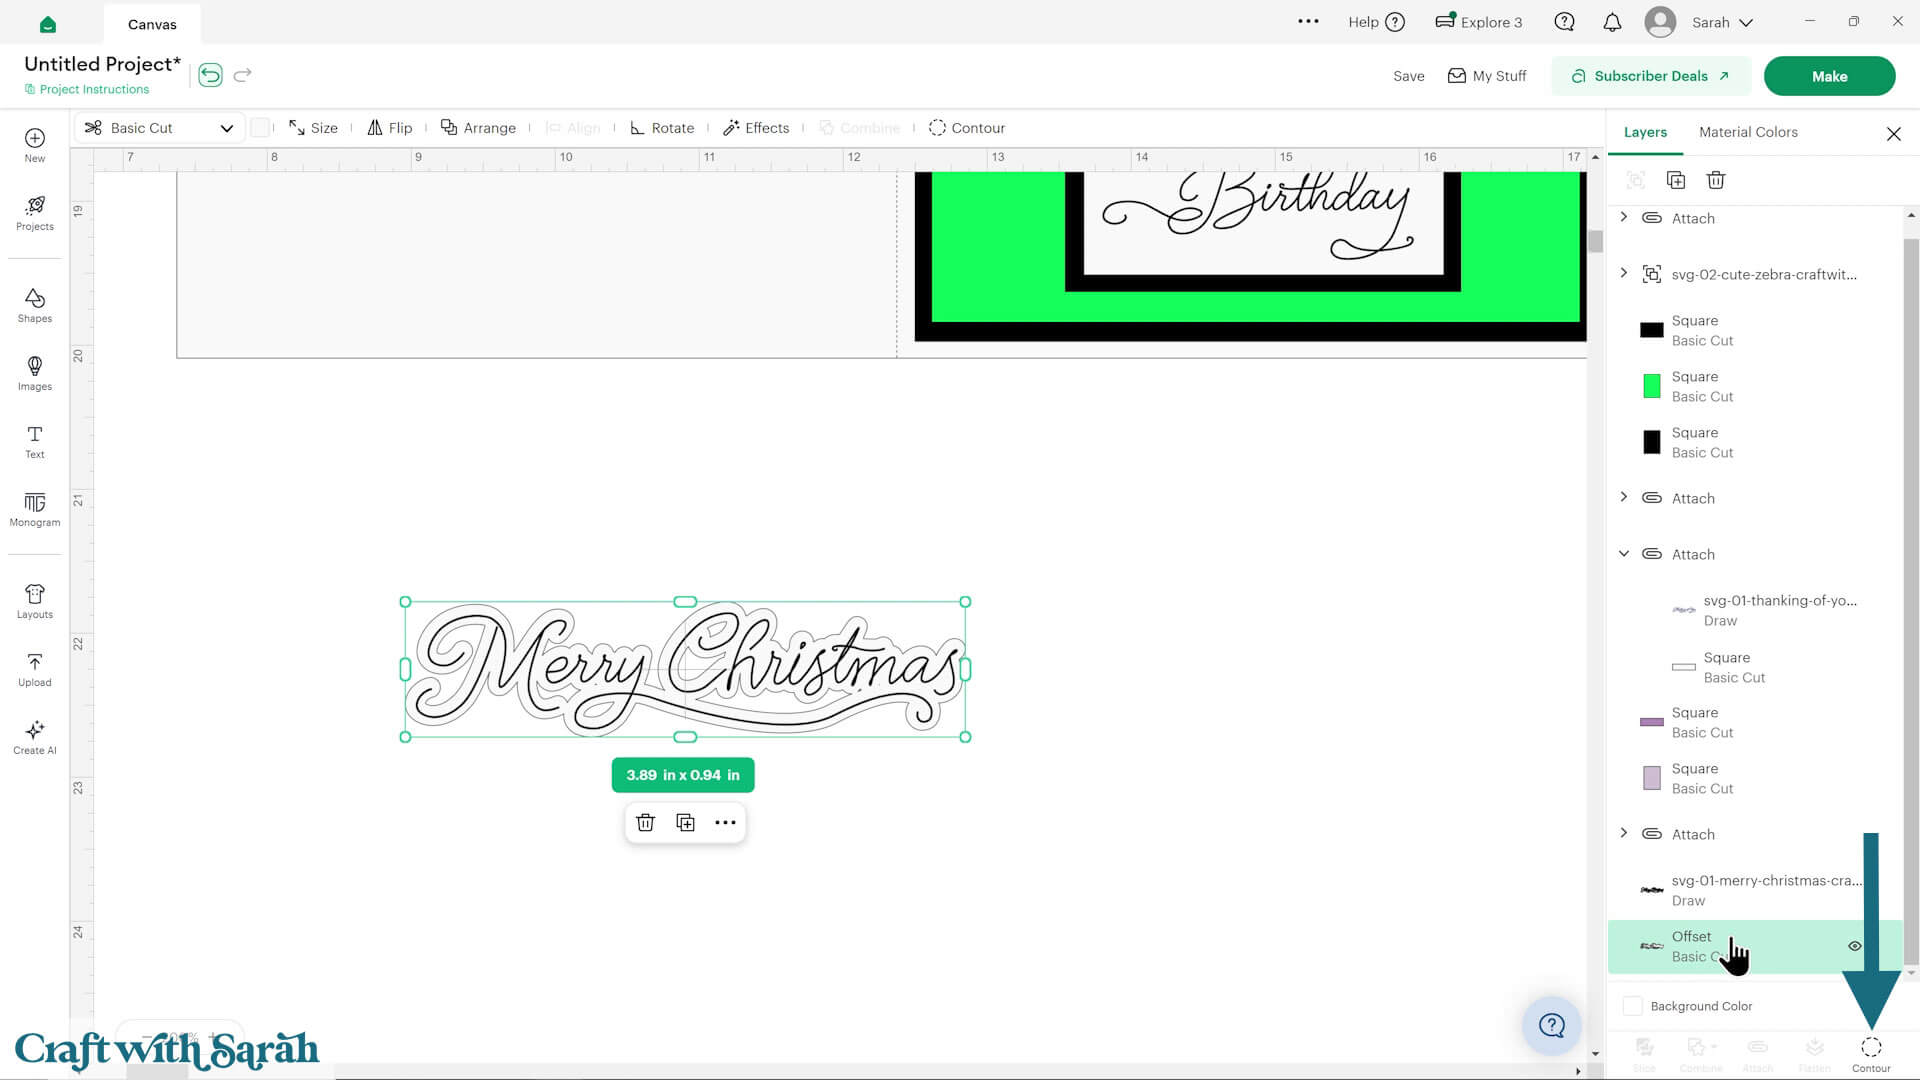
Select the Offset layer, then press “Contour” at the bottom of the layers panel.
Press “Hide All Contours” and then “Apply”.
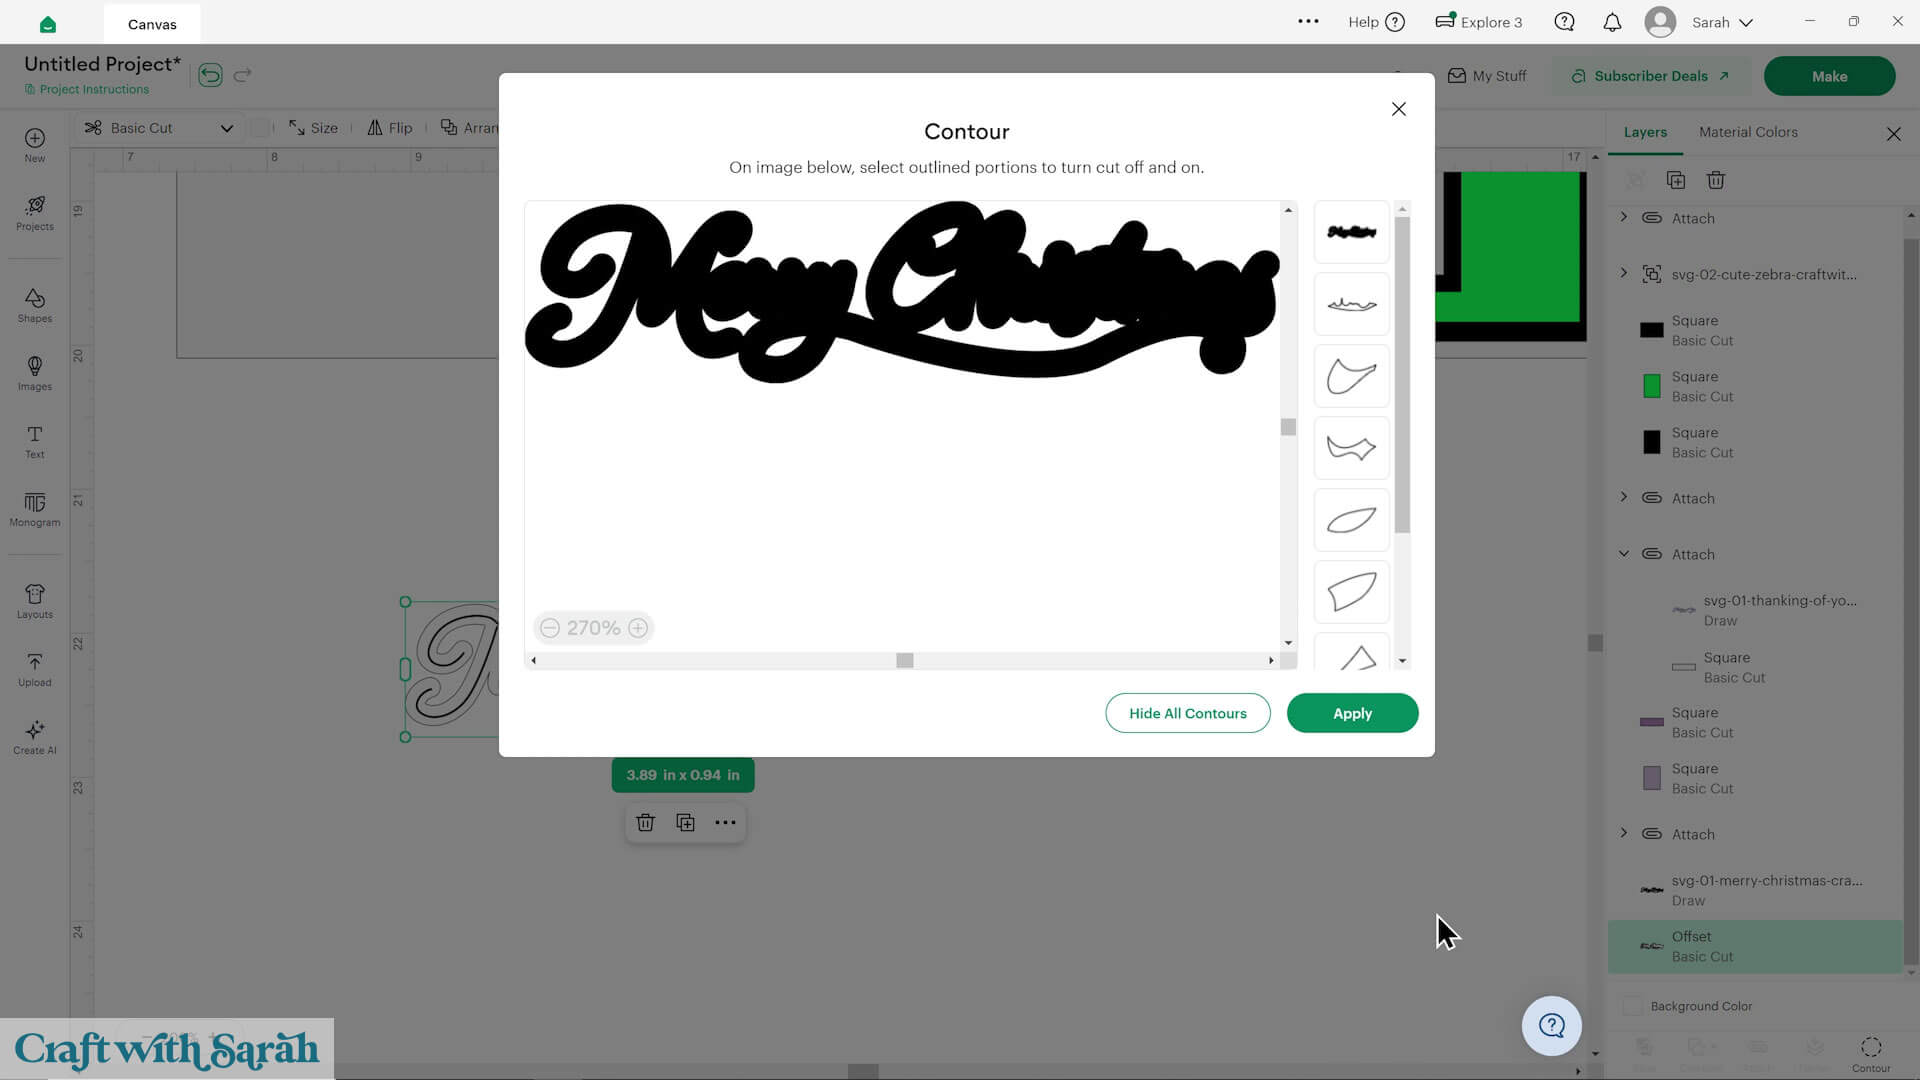
That hides all the gaps.
You can add further borders with the Offset tool if you want to layer up the greetings.
Finally, select the white Offset layer and the greeting and “Attach” them together.
After cutting, glue the two pieces together.
PART 2: How to draw with Cricut pens
Here is how to use pens with your Cricut machine.
After finishing your project design, save your work and press “Make” on the top-right of the screen.
This will separate out all the pieces of your project.
Look through the pages and make sure that the pen layers are showing correctly on top of their “backers”. If they aren’t, cancel the cut to go back to the project screen and make sure you have Attached each pen layer to its matching backer.
Choose your base material.
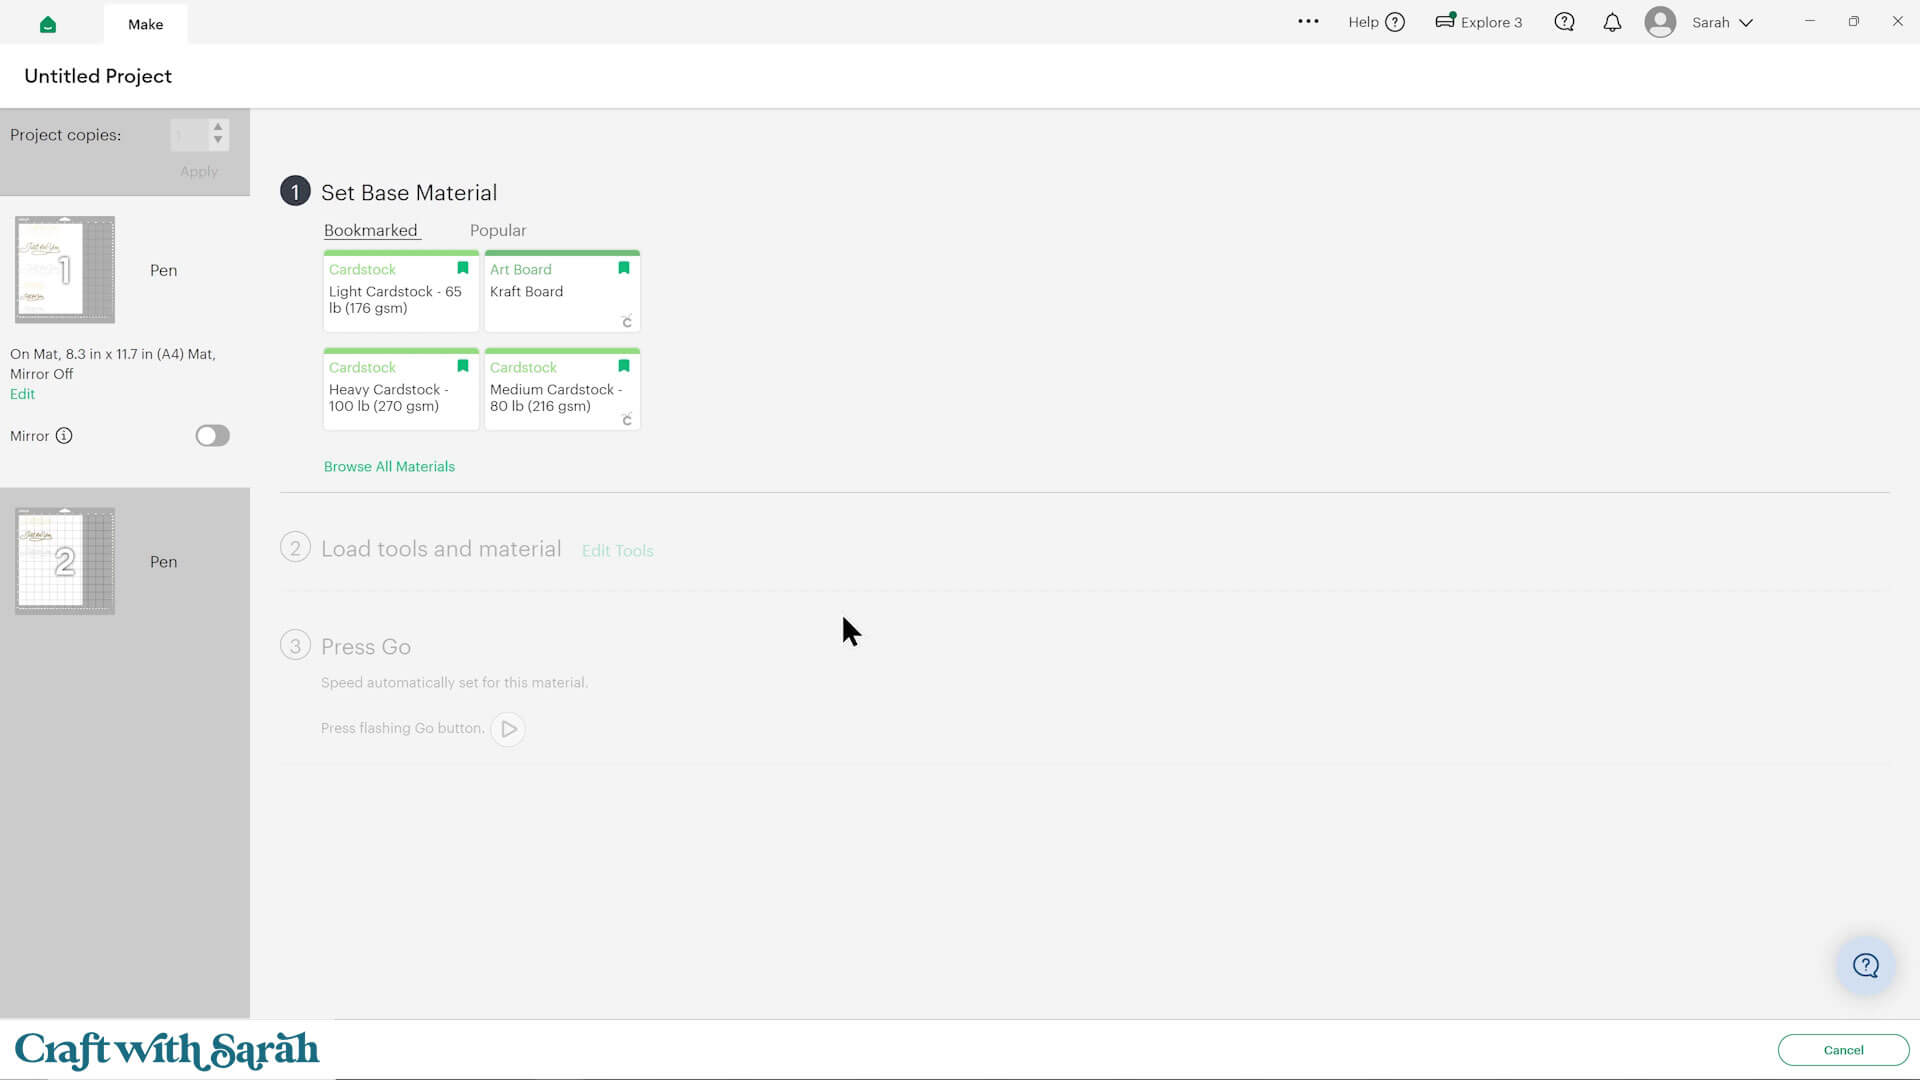
Design Space will then let you know which pen to load into the “A” clamp in your machine.
Note – for Joy and Joy Xtra models of machine, you will need to remove your blade from the machine to put the pen in its place, as those machines do not have separate holders for the pens.
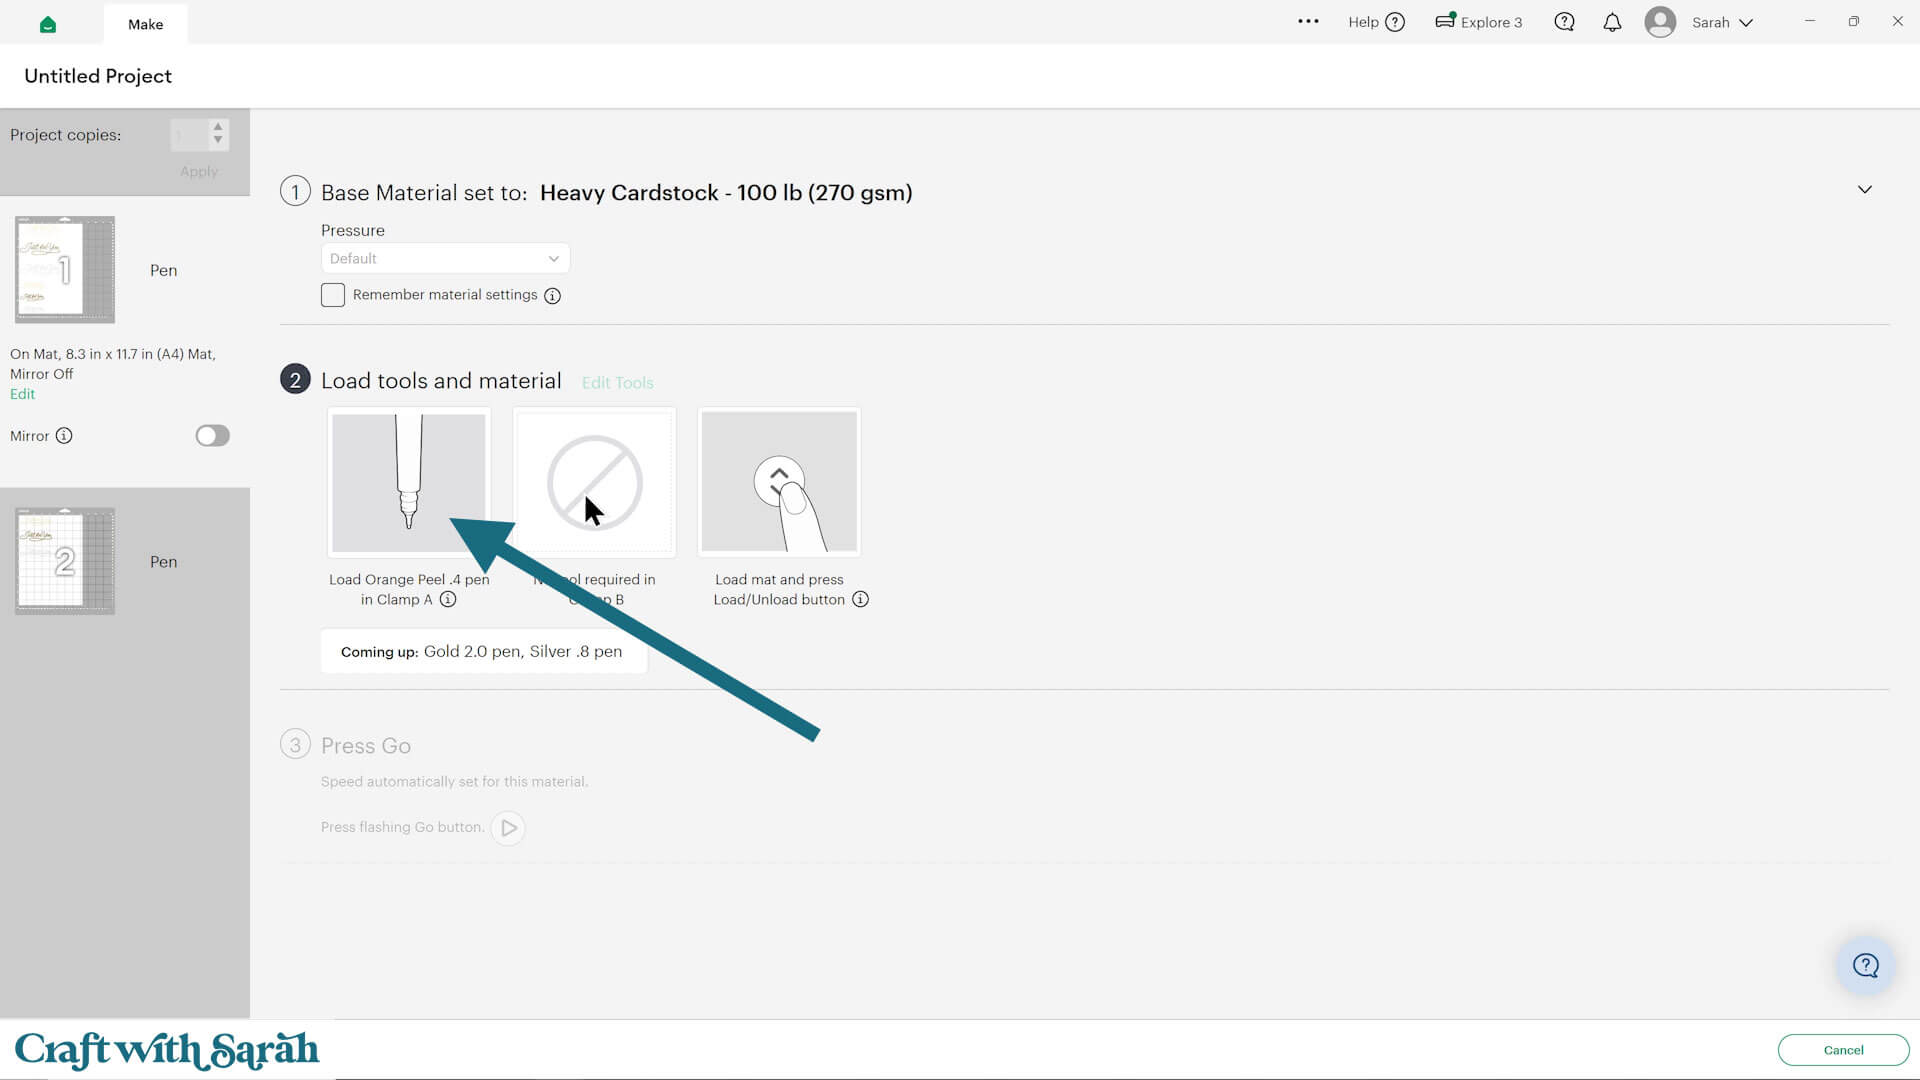
Remove the lid from the pen and insert it into the “A” clamp of your machine.
Press it in until you hear a “click” sound.
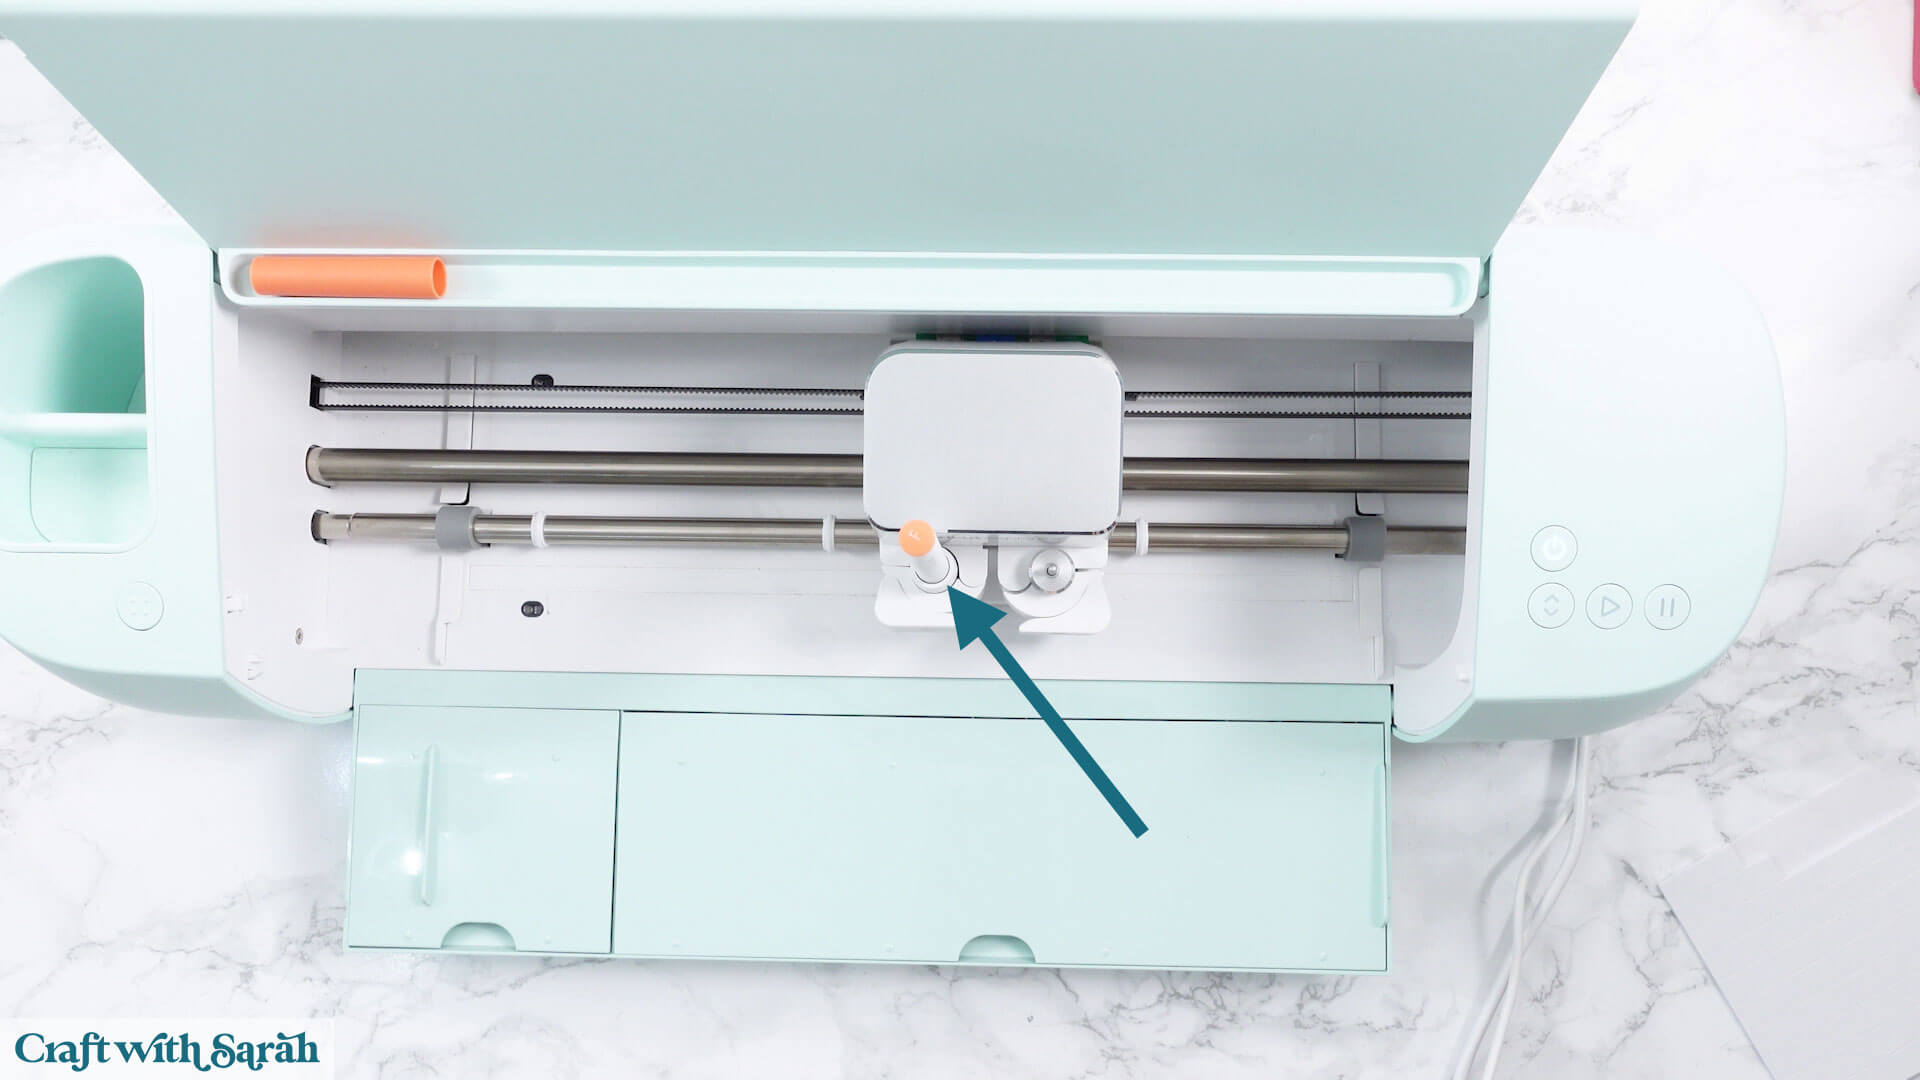
Load your mat as normal, set the machine cutting and watch it do its magic with the pens!
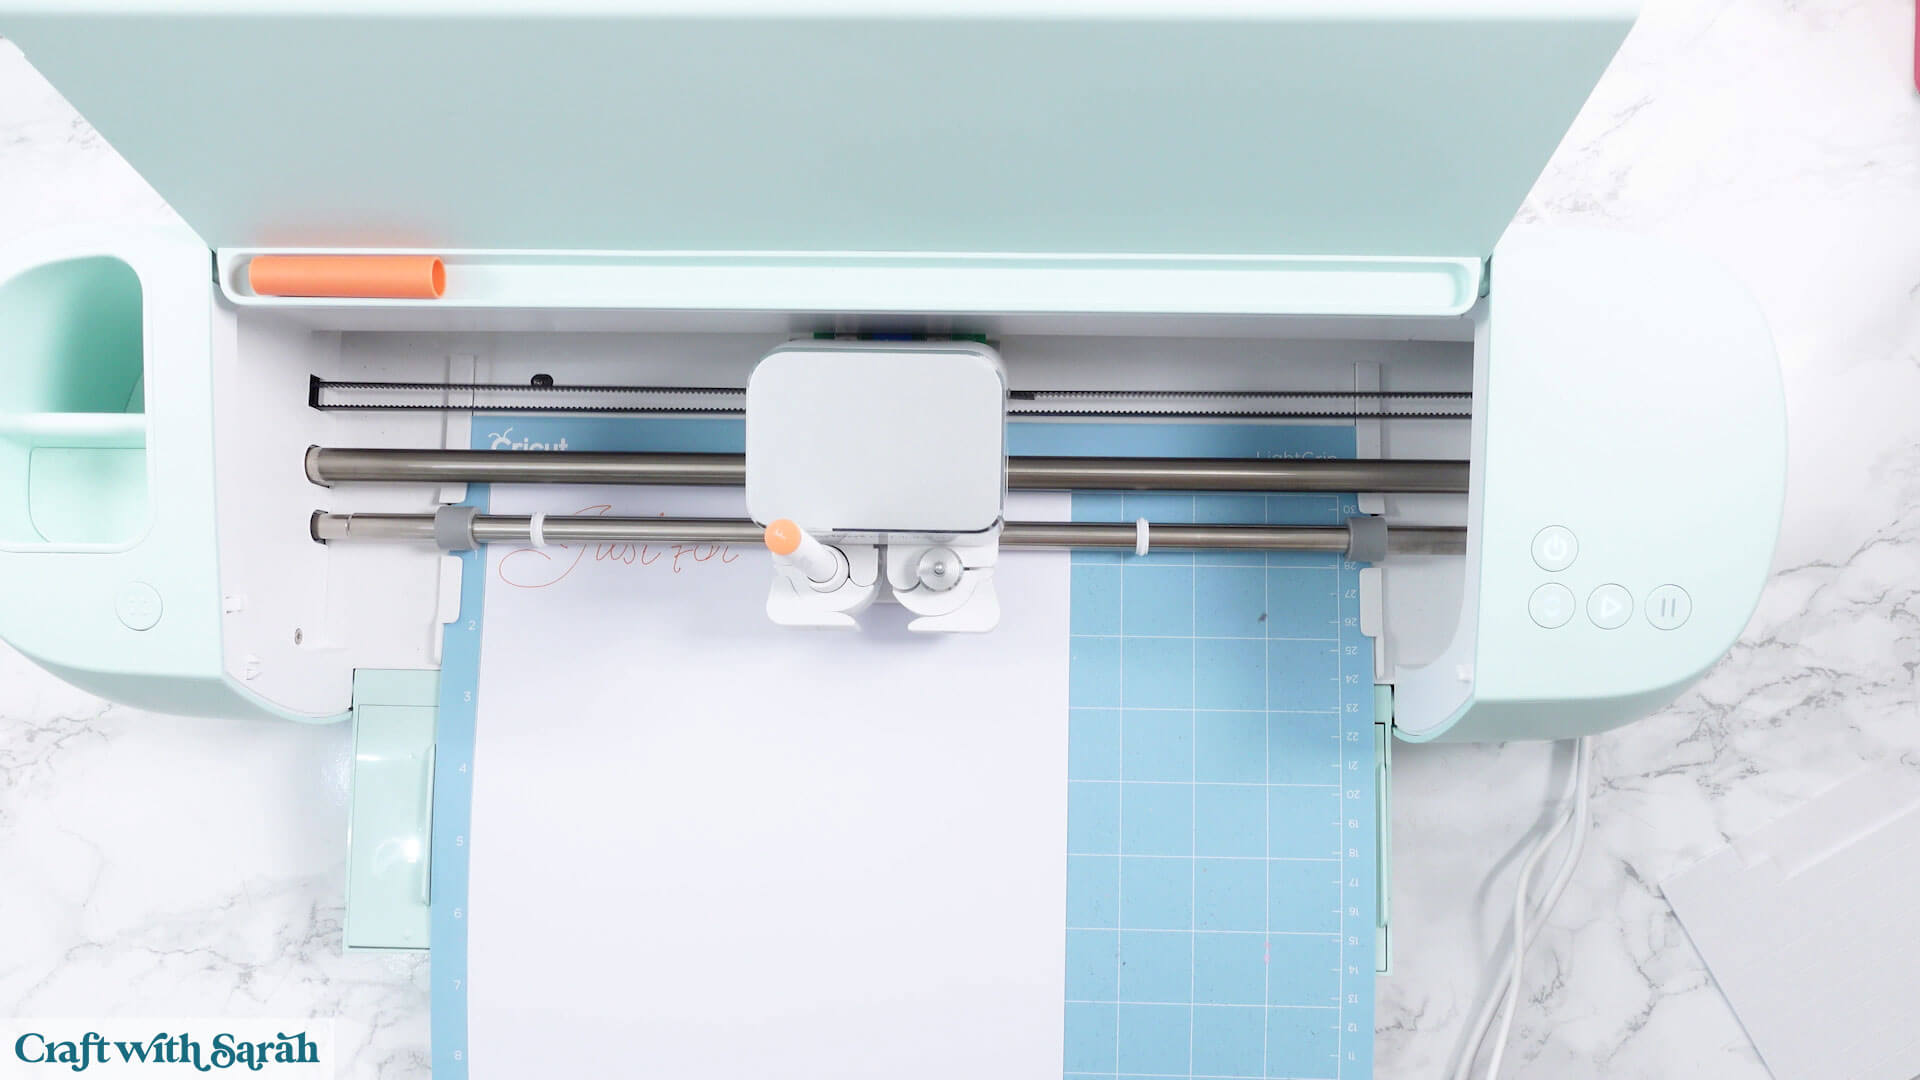
If your project has multiple pen colours then don’t eject the mat when it’s finished drawing the first colour – instead, look back at your computer screen to see which pen to load next.
Remove the first pen, add the new one and press the “Go” button again.
Repeat until the cut is complete.
PART 3: How to write inside a card with a Cricut
Here is how to create your own card inserts with custom messages.
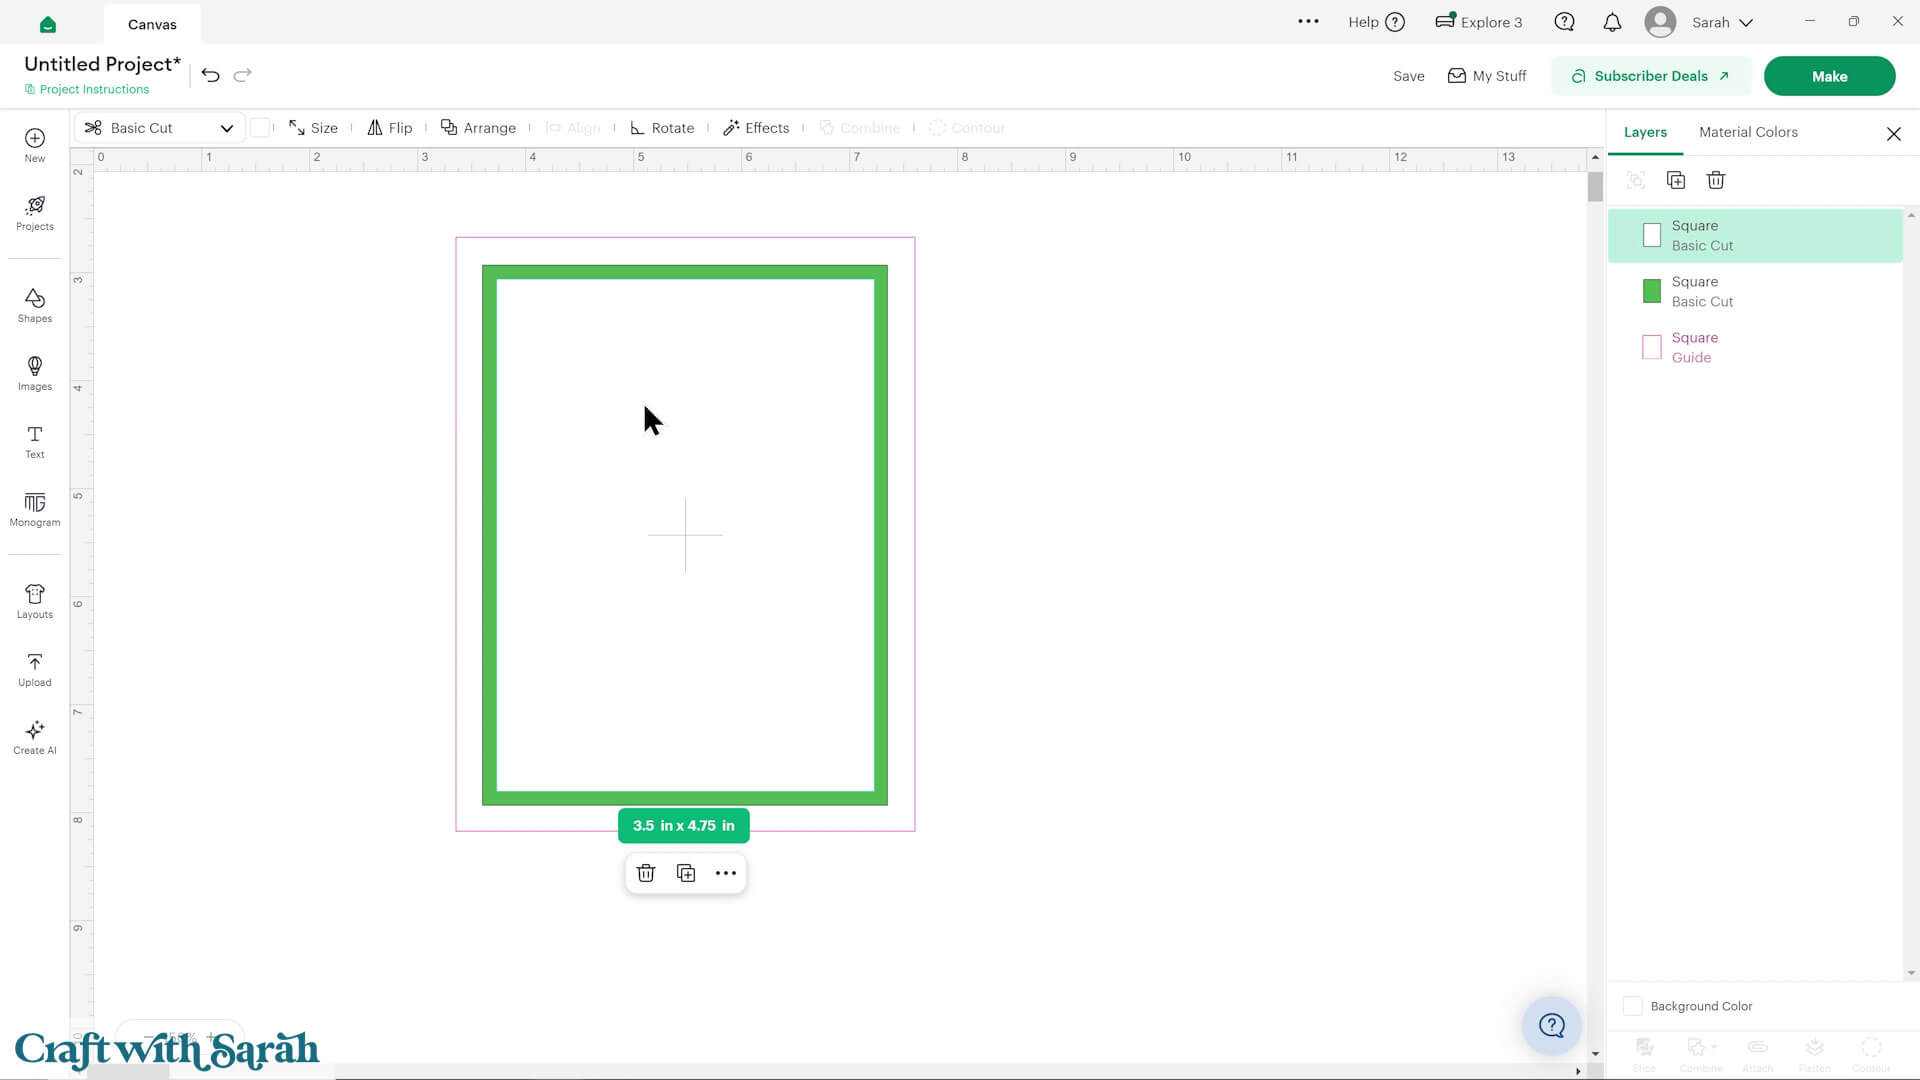
Step 1) Create a template
Insert a square shape and make it the size of your card.
Mine is an A2 card (4.25 inches wide and 5.5 inches tall).
Click the shape and change it to a “Guide” in the Operations dropdown.
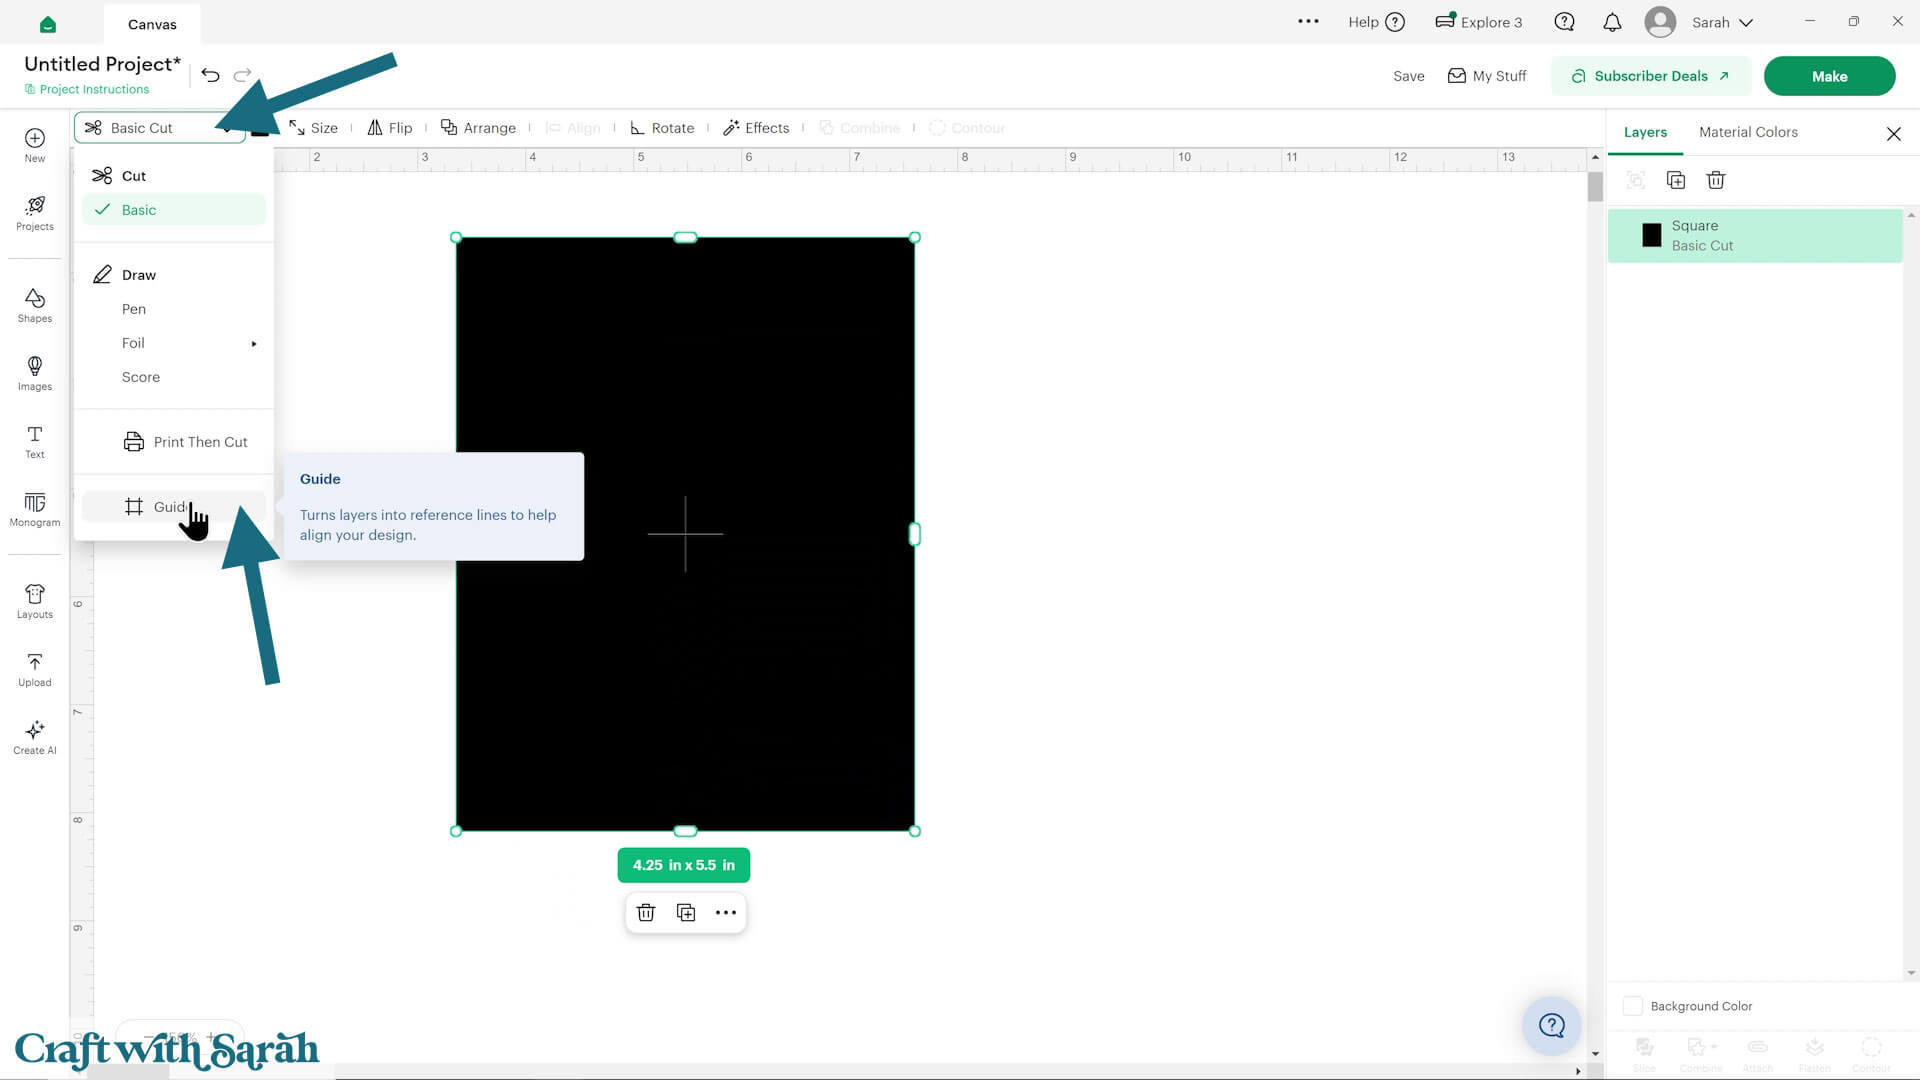
Add some layers for your insert.
I like to add a coloured rectangle that’s slightly smaller than the card design, then a smaller rectangle on top of that in white for the writing to go on.
Step 2) Add your text
If you are using one of the predesigned greetings, add that in place now.
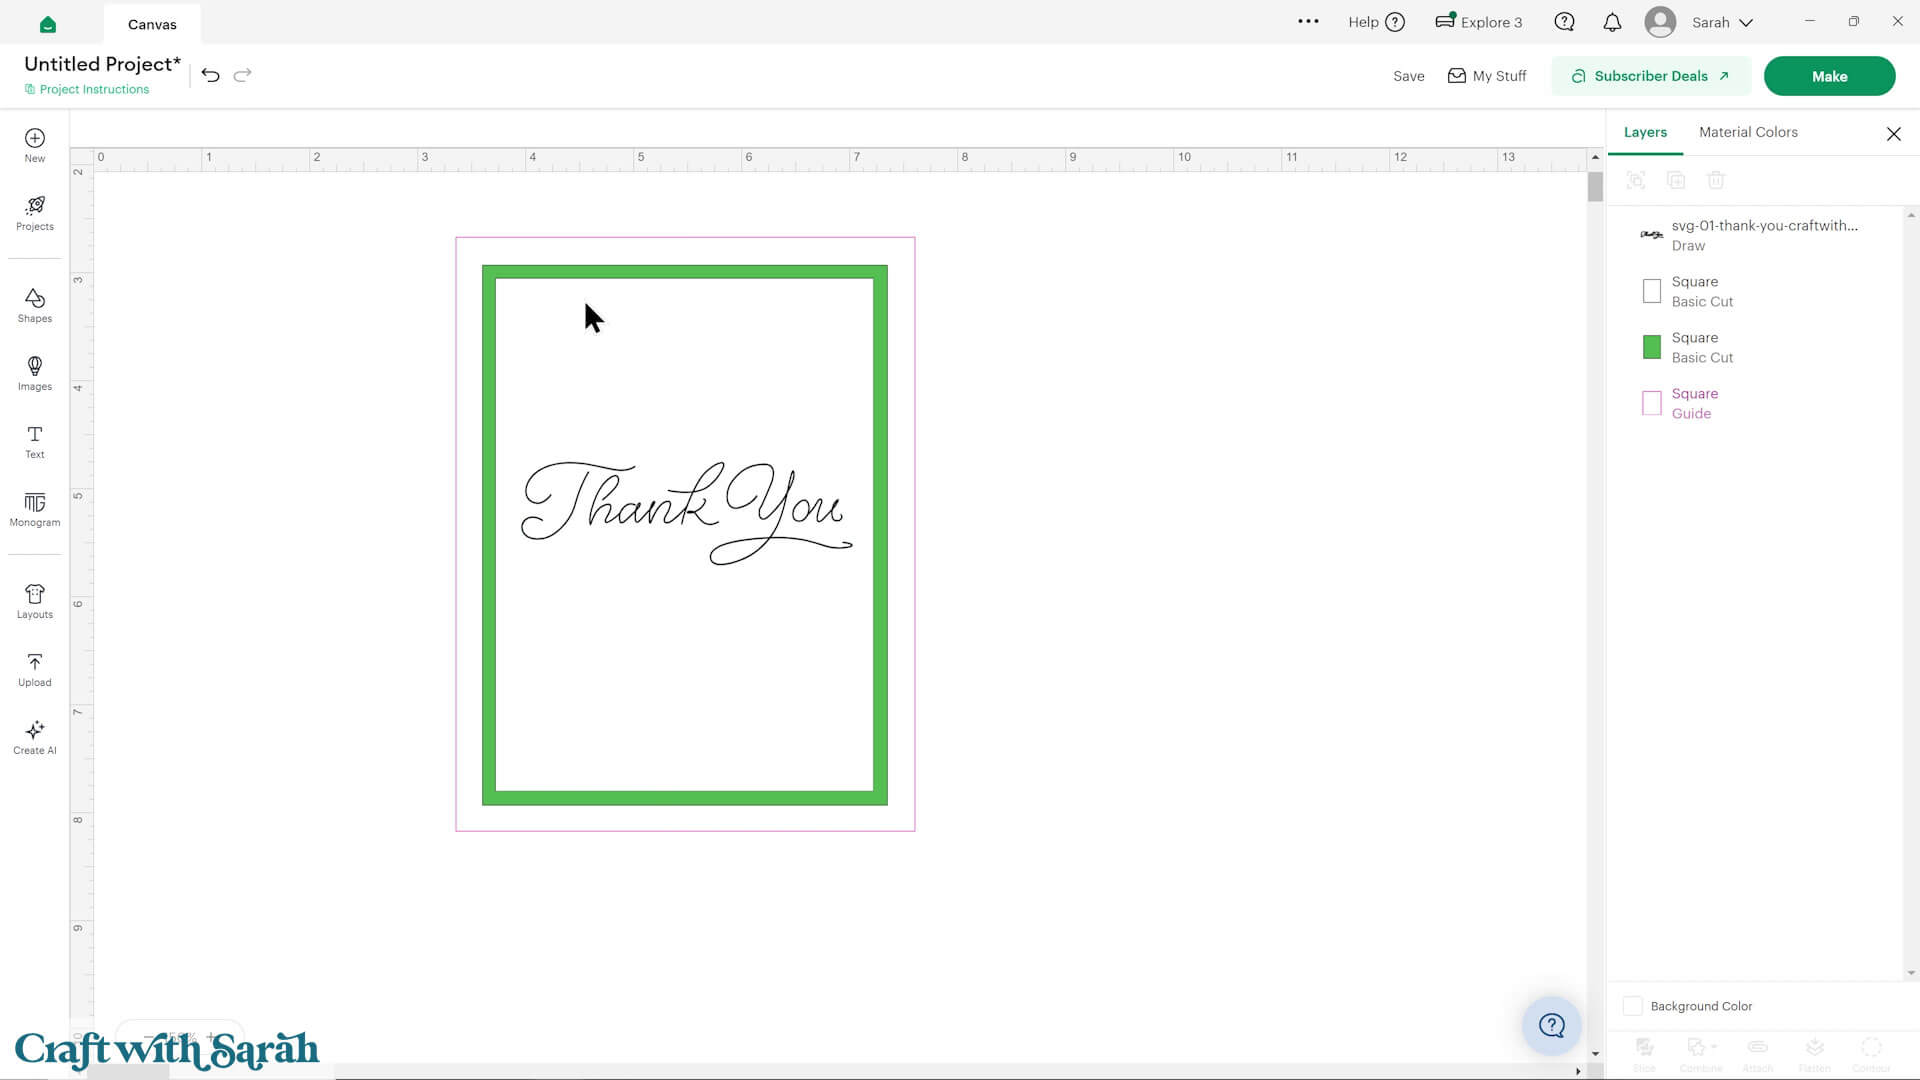
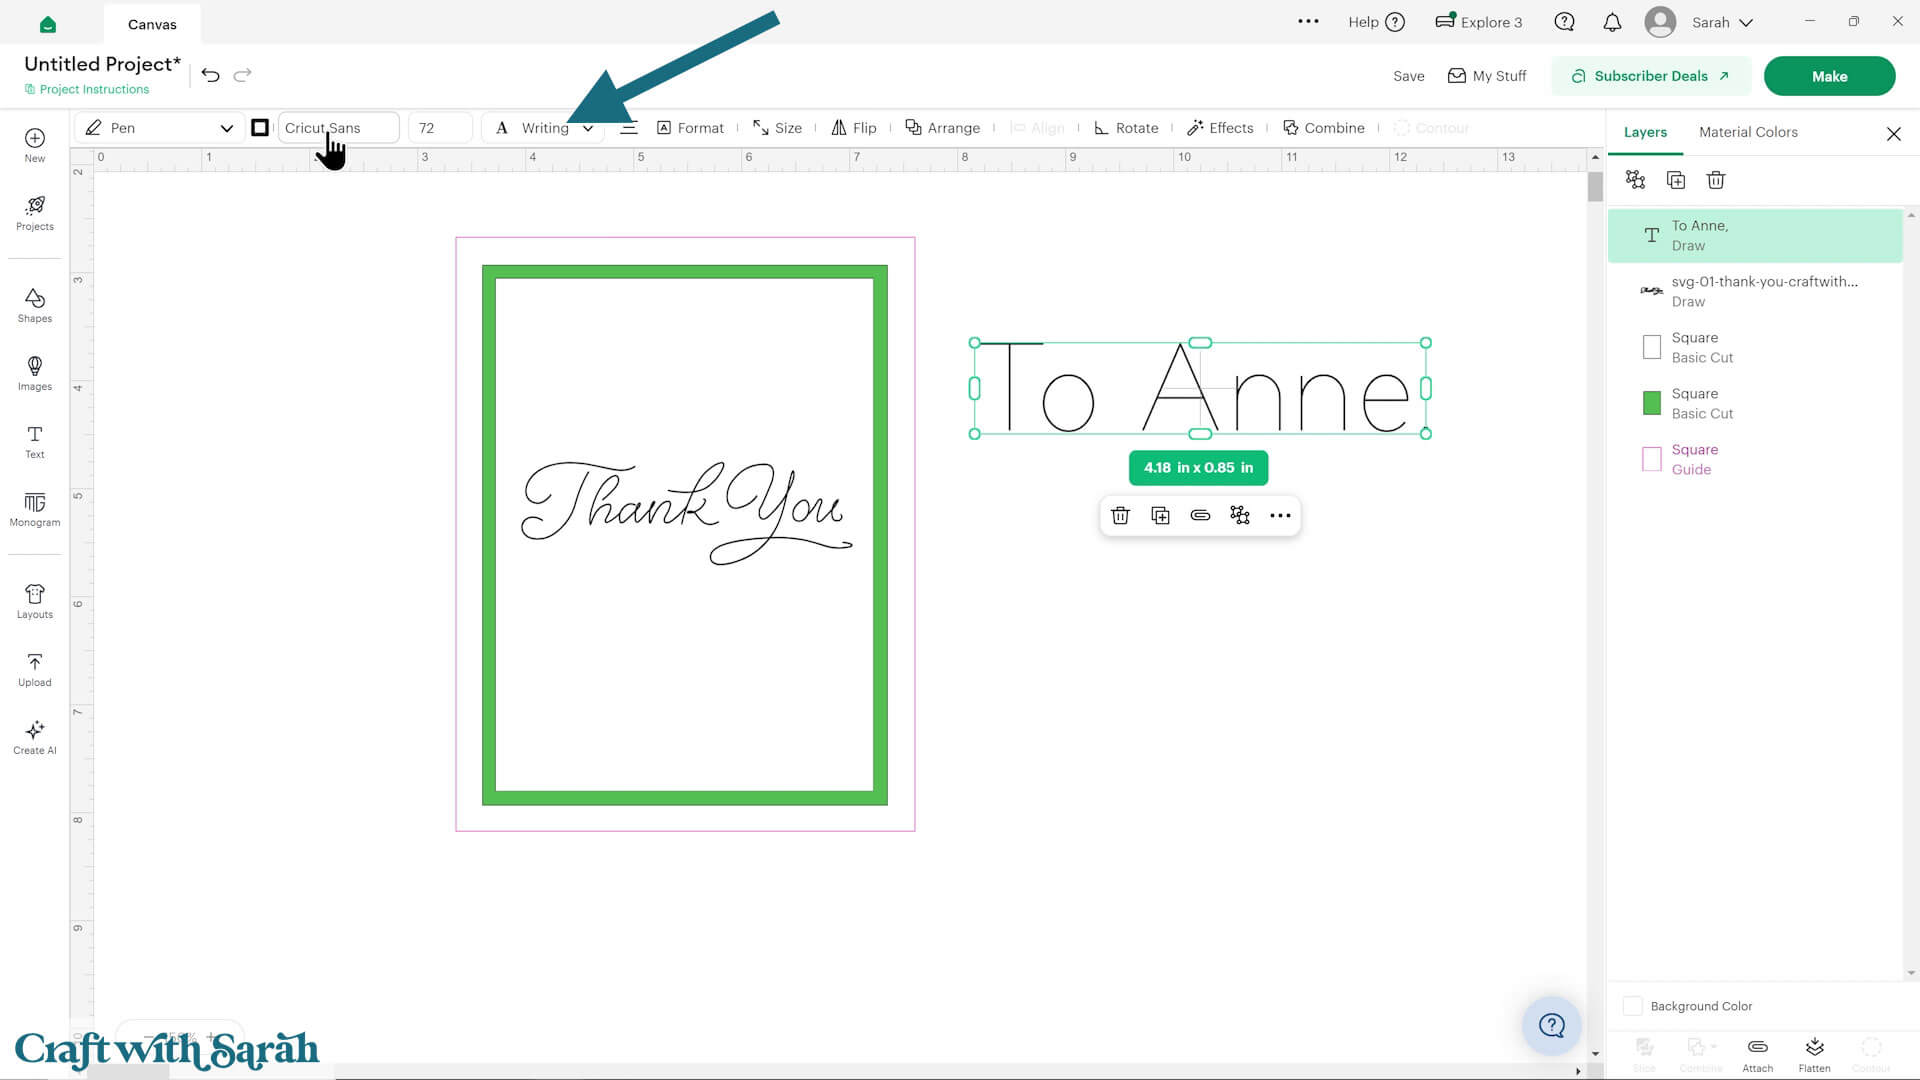
To write custom text, click “Text” and then type out your message.
Then, change it to “Pen” in the Operations” dropdown.
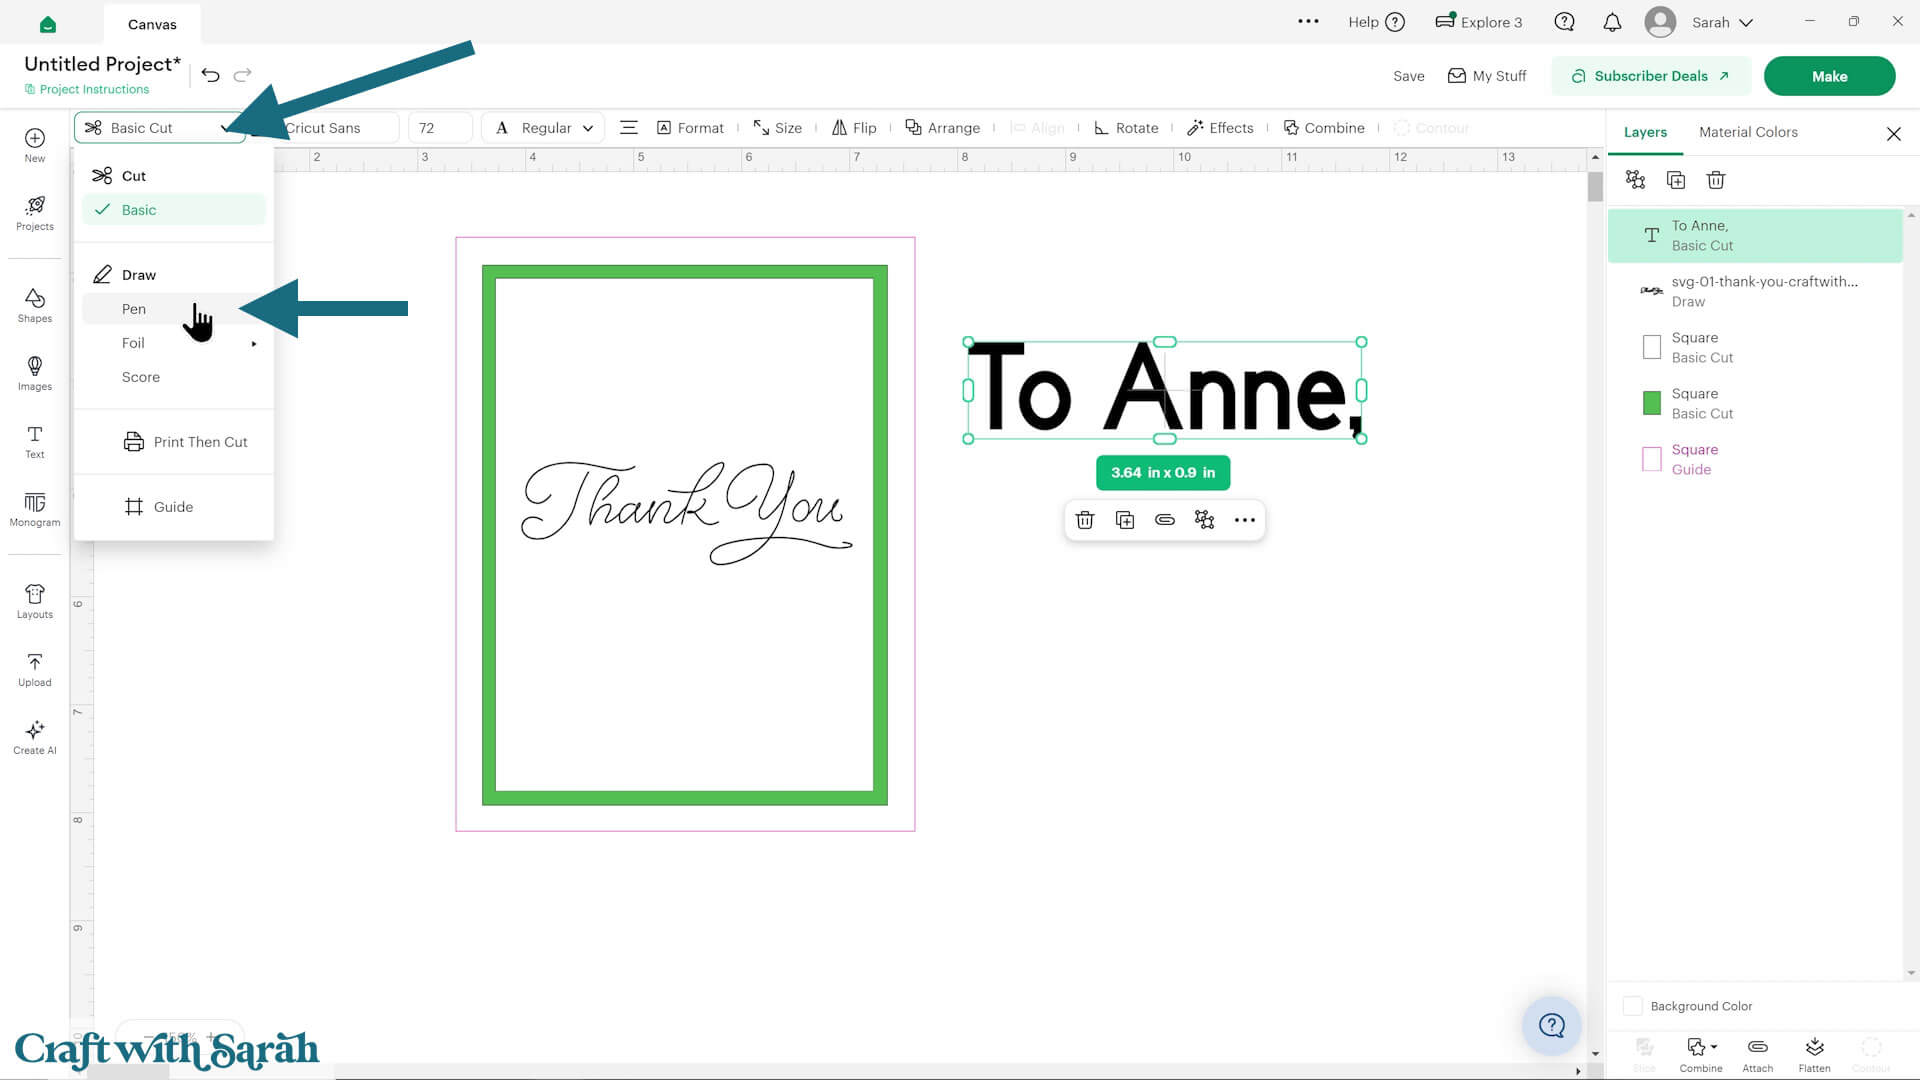
You’ll probably find that your letters look like outlines, rather than single line handwriting.
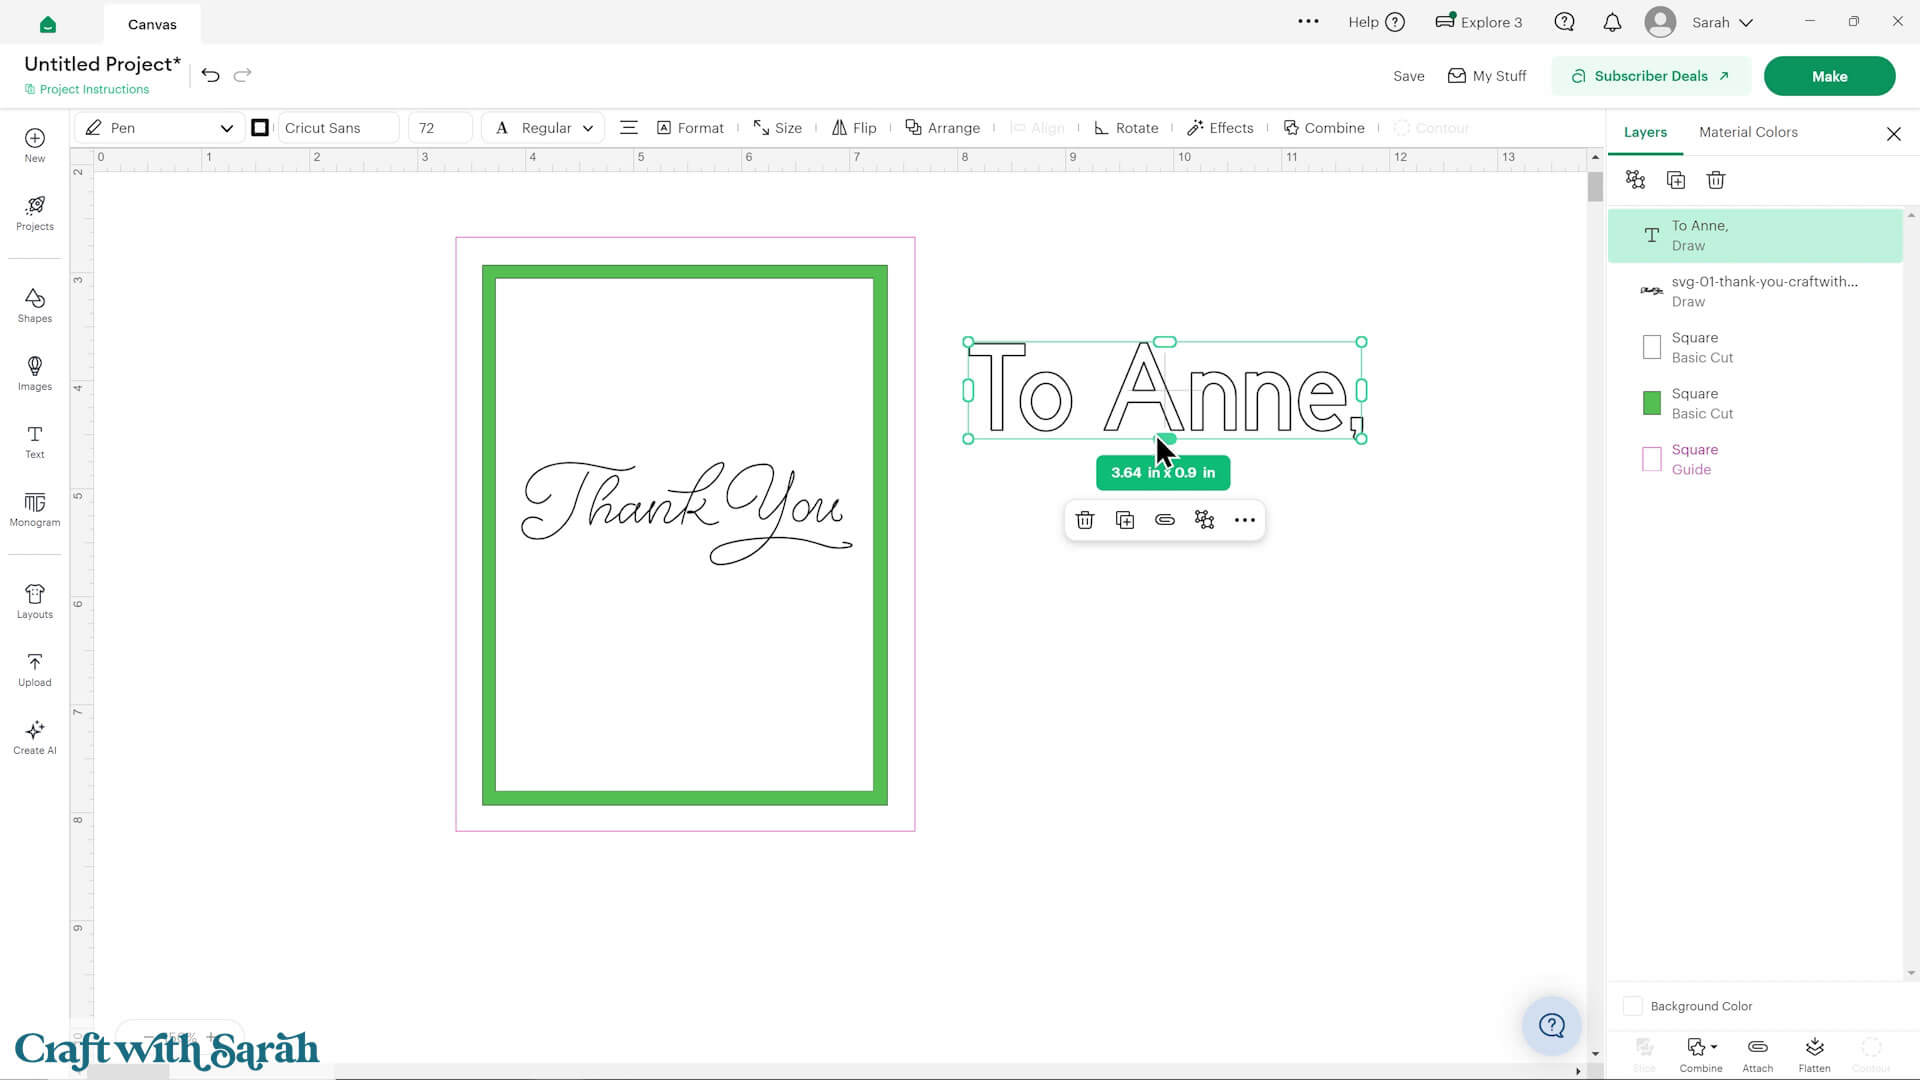
To fix this, change the font style to “Writing”.
Note – not all fonts have a writing version.
To change the font, select your text then click into the fonts dropdown along the top of the screen.
Click the filter icon and tick “Writing”.
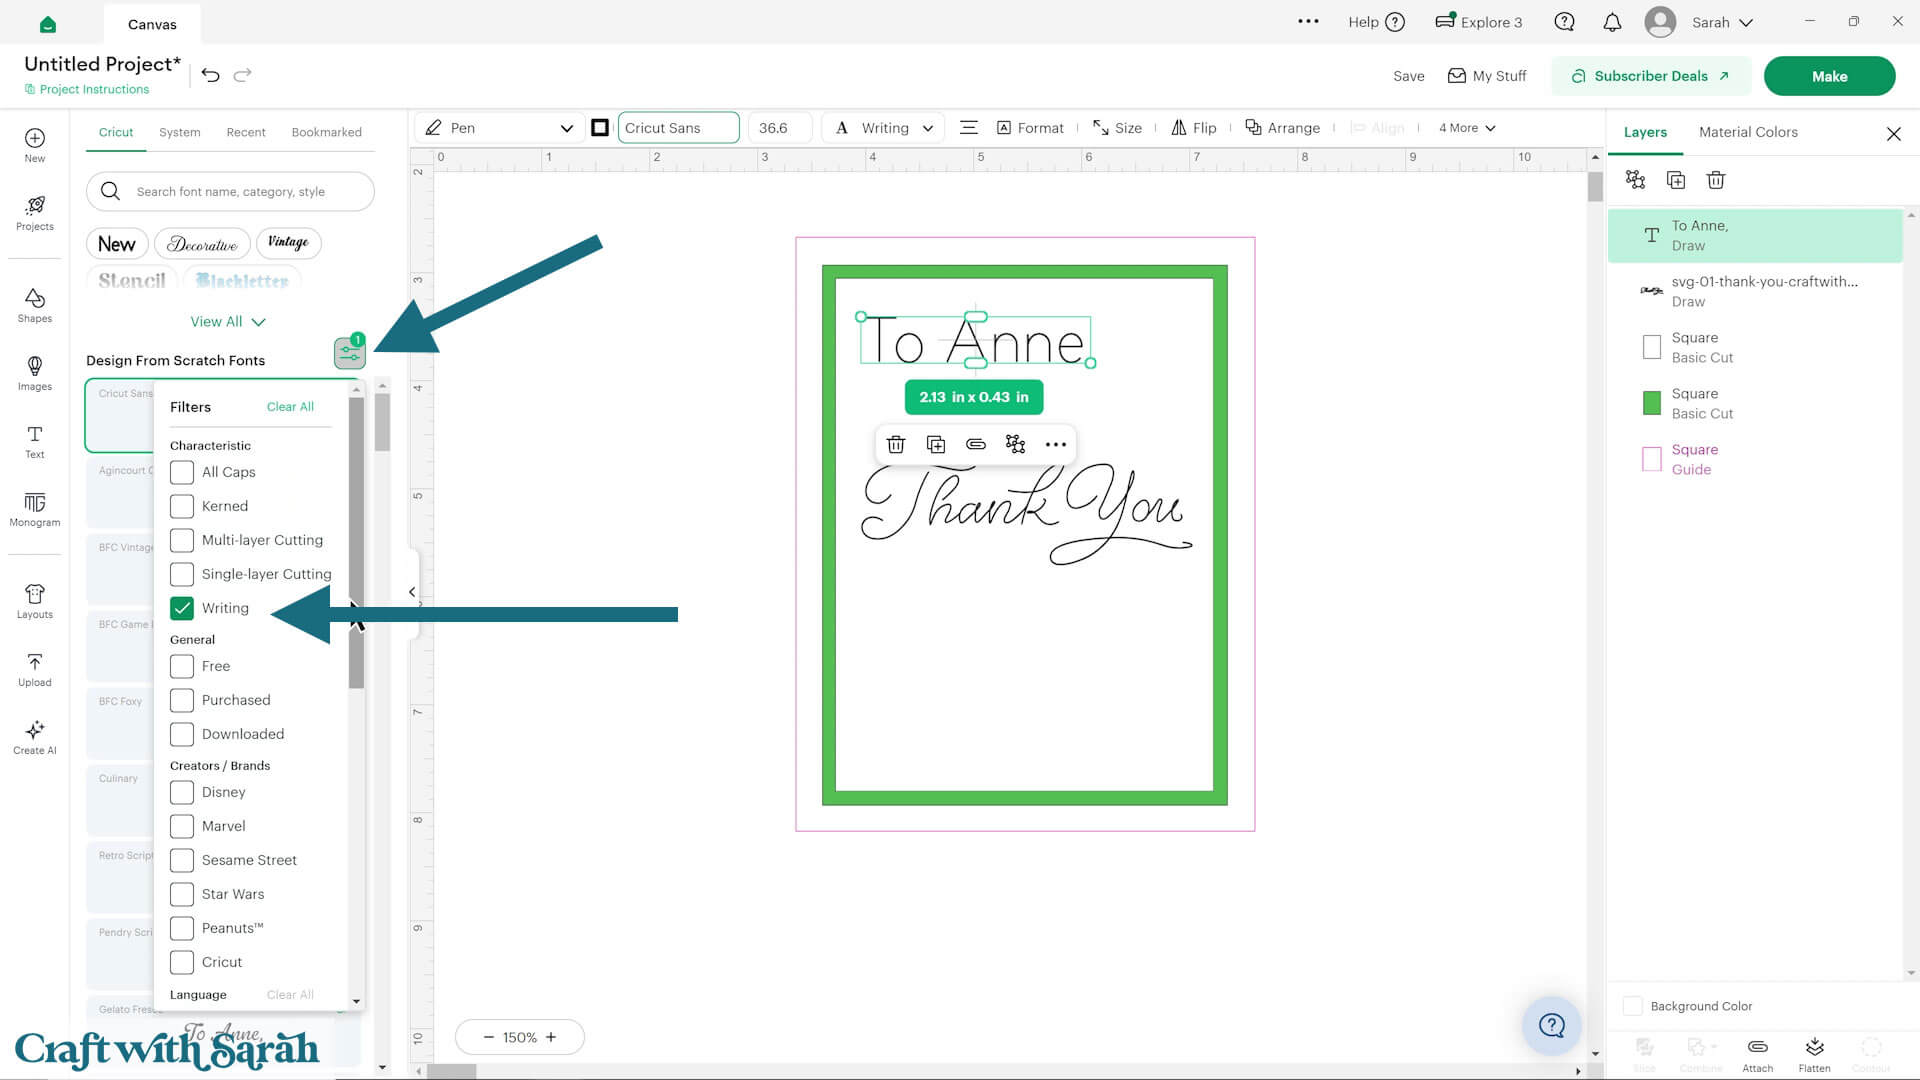
This will then only show the fonts that have single-line writing options.
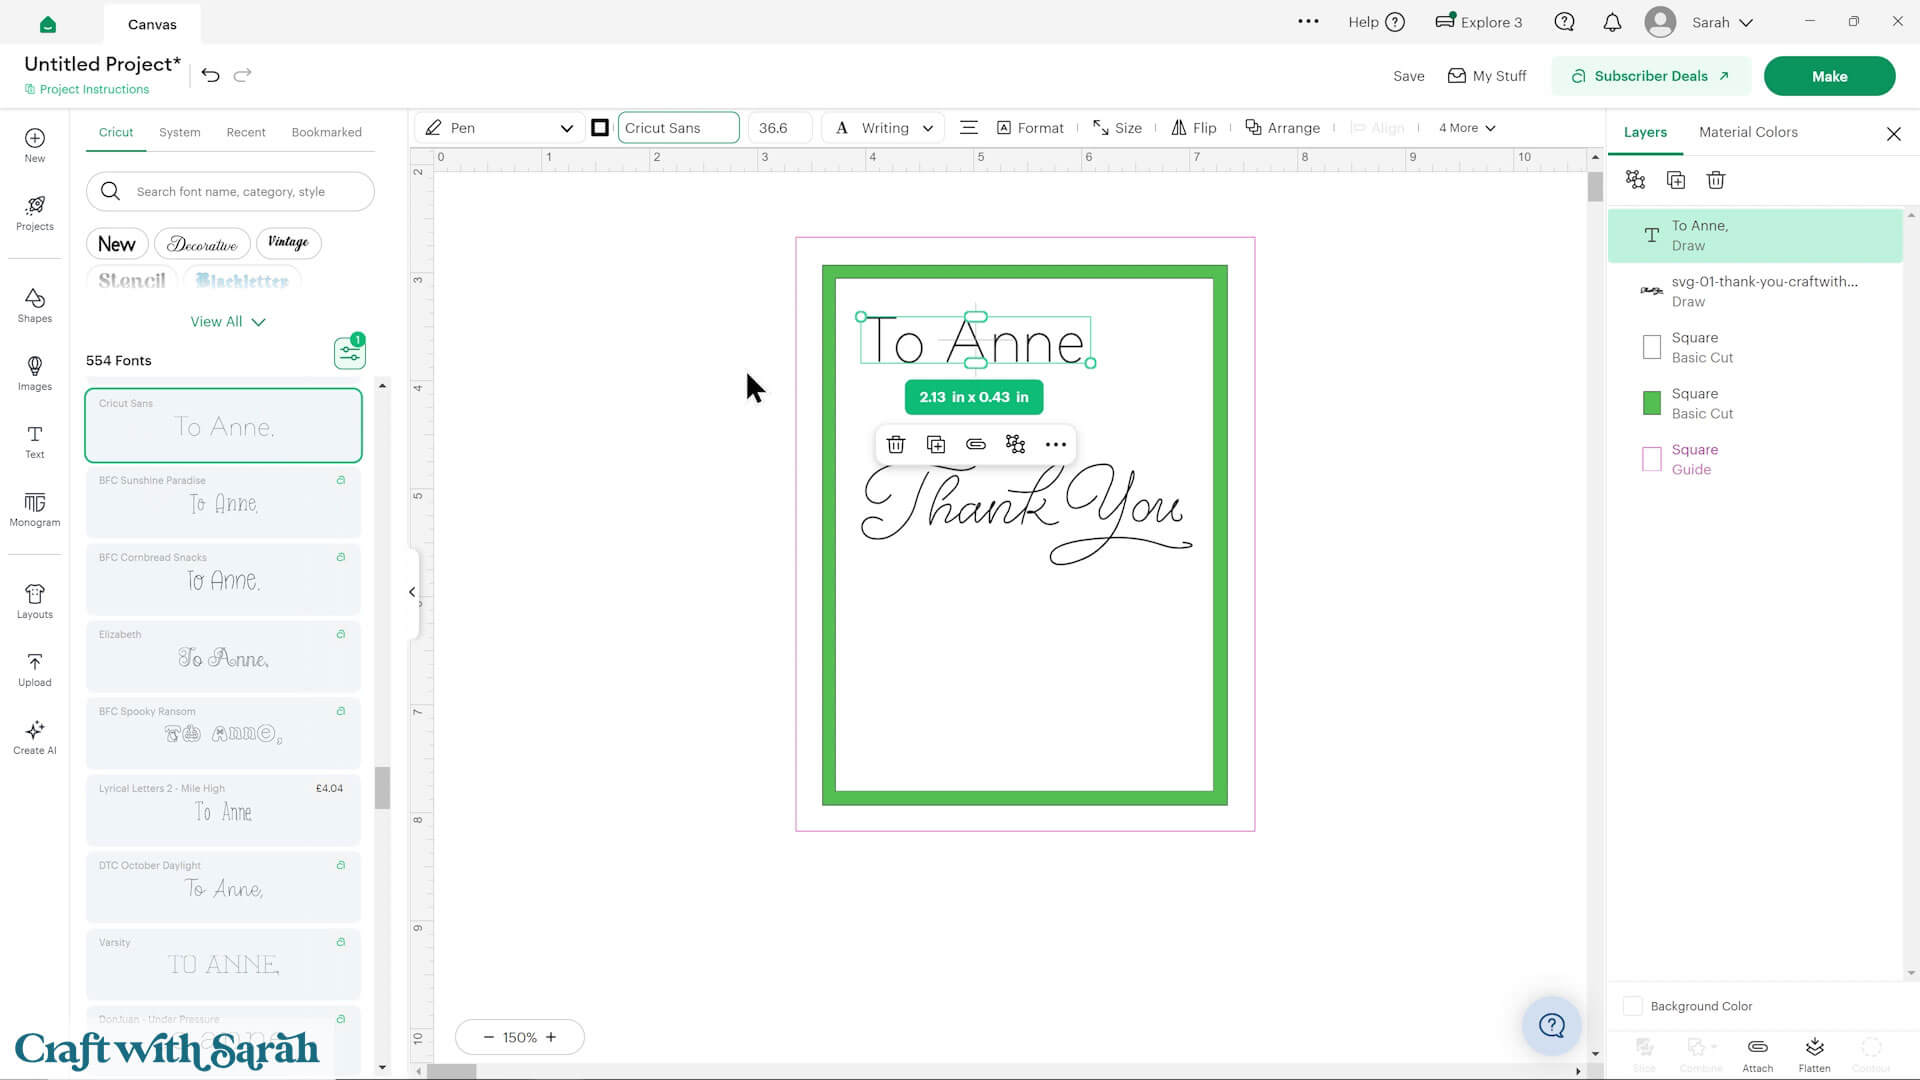
If the font has a green “A” next to it, that means that it requires the Cricut Access paid subscription to be able to use it at no cost.
If the font has a price and no “A”, this is a chargeable font, even if you have the Cricut Access subscription.
Some free writing fonts to use in Cricut Access are:
- Cricut Sans
- BFC Paper Craft
- Simple Celebrations
- Typewriter
- Stick
- Zen Old Mincho
- BIZ UDGothic
- Klee One
Note: Cricut sometimes change which fonts are free and which are not, so double-check the list above before using.
Here are some other handwriting fonts that can be downloaded and installed on your computer, for use in Design Space or other cutting machine software:
- JM Penwriting and JM Tall from Jennifer Maker (free)
- Delbert Sketch from Missy Meyer (free)
- Blush Font Co – various styles (paid)
- Sketchy Gossip on Creative Fabrica
- Dear Agatha on Creative Fabrica
- Mugglsy Sketch on Creative Fabrica
- Pinsetter Line on Creative Fabrica
- Norfleet Sketch on Creative Fabrica
Add all your text and position it on your insert piece.
Select all the text layers and the white rectangle and “Attach” together.
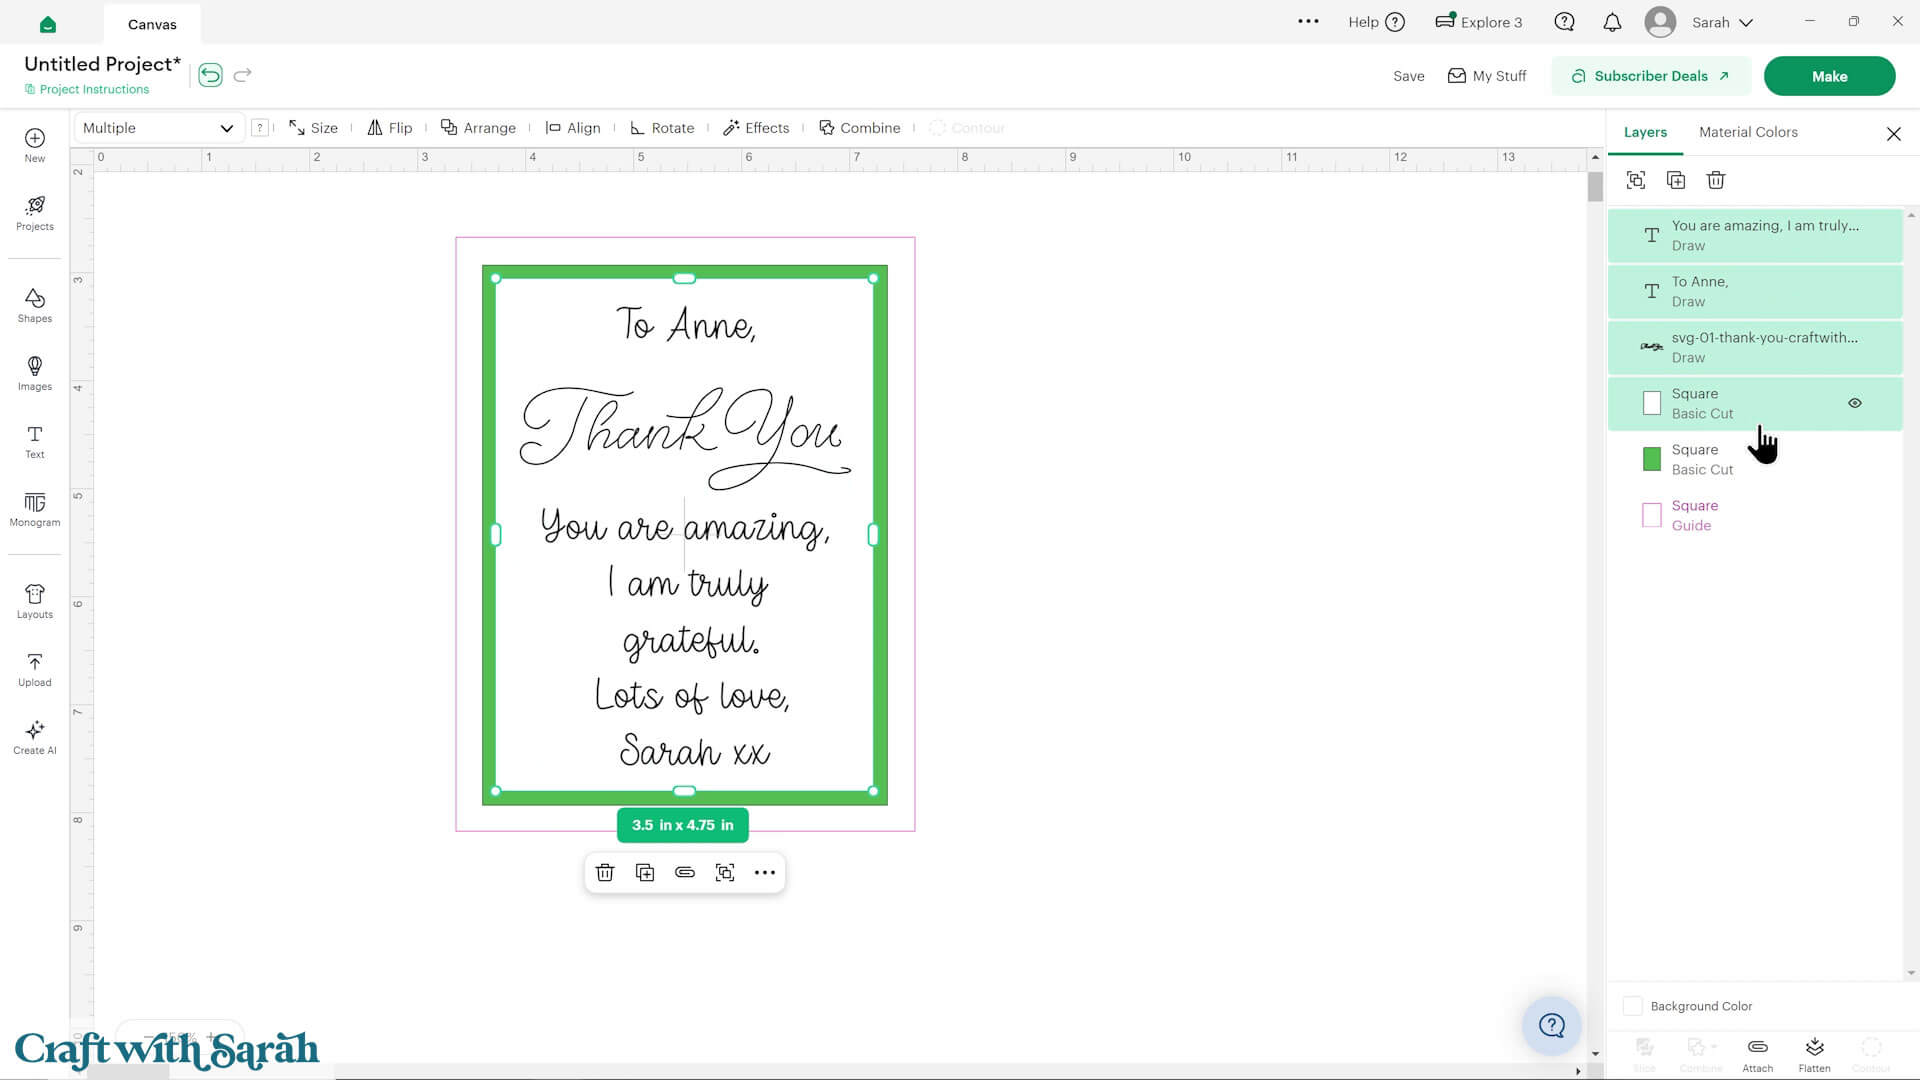
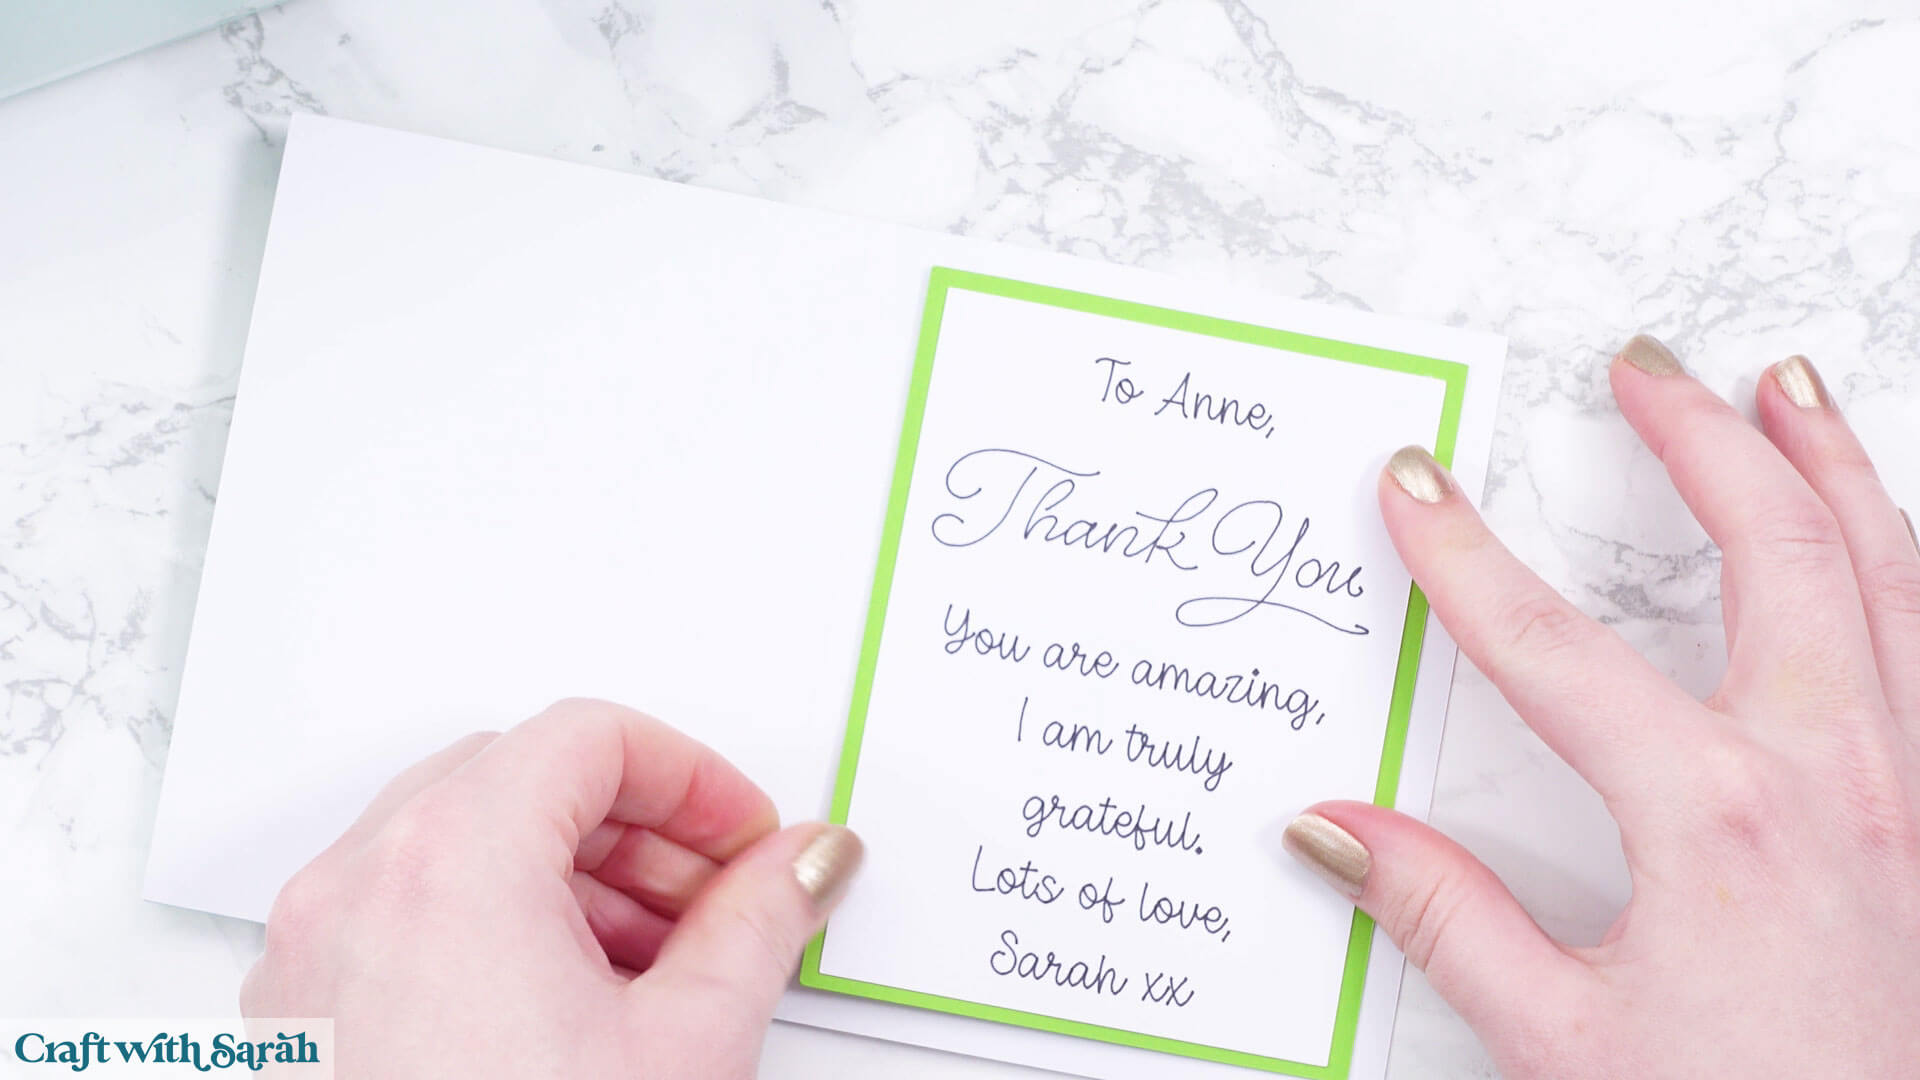
After cutting, glue the white rectangle onto the coloured rectangle underneath.
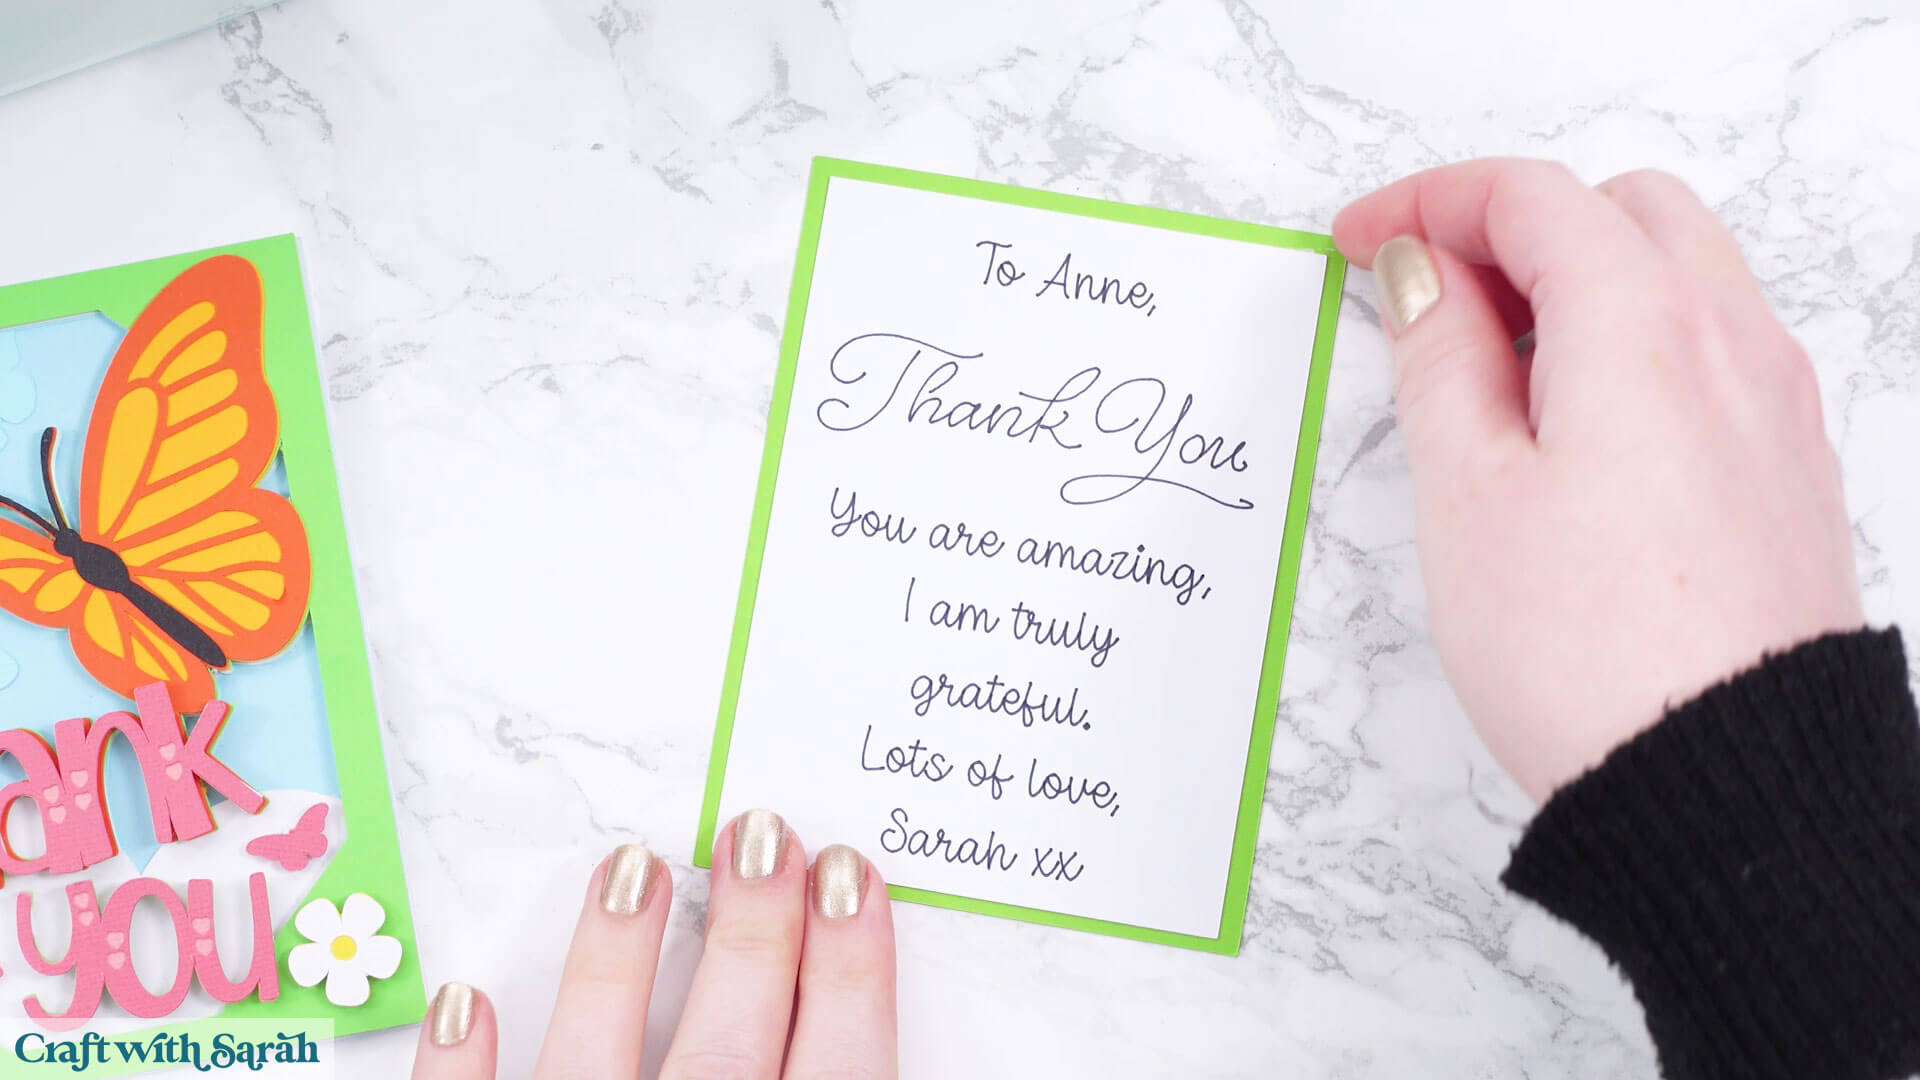
Then glue inside your card.
How to draw on cards with Cricut pens
I hope that you enjoyed this tutorial on how to draw with a Cricut machine – both with the premade greetings included with today’s project, and with your own custom typed messages.
I am looking forward to seeing all your lovely card designs!
After finishing your cards, you could put them in a custom envelope or 3D presentation box to make them even more special.
Happy crafting,
Sarah x

