GIANT Halloween Countdown Calendar 👻 HCC 2025
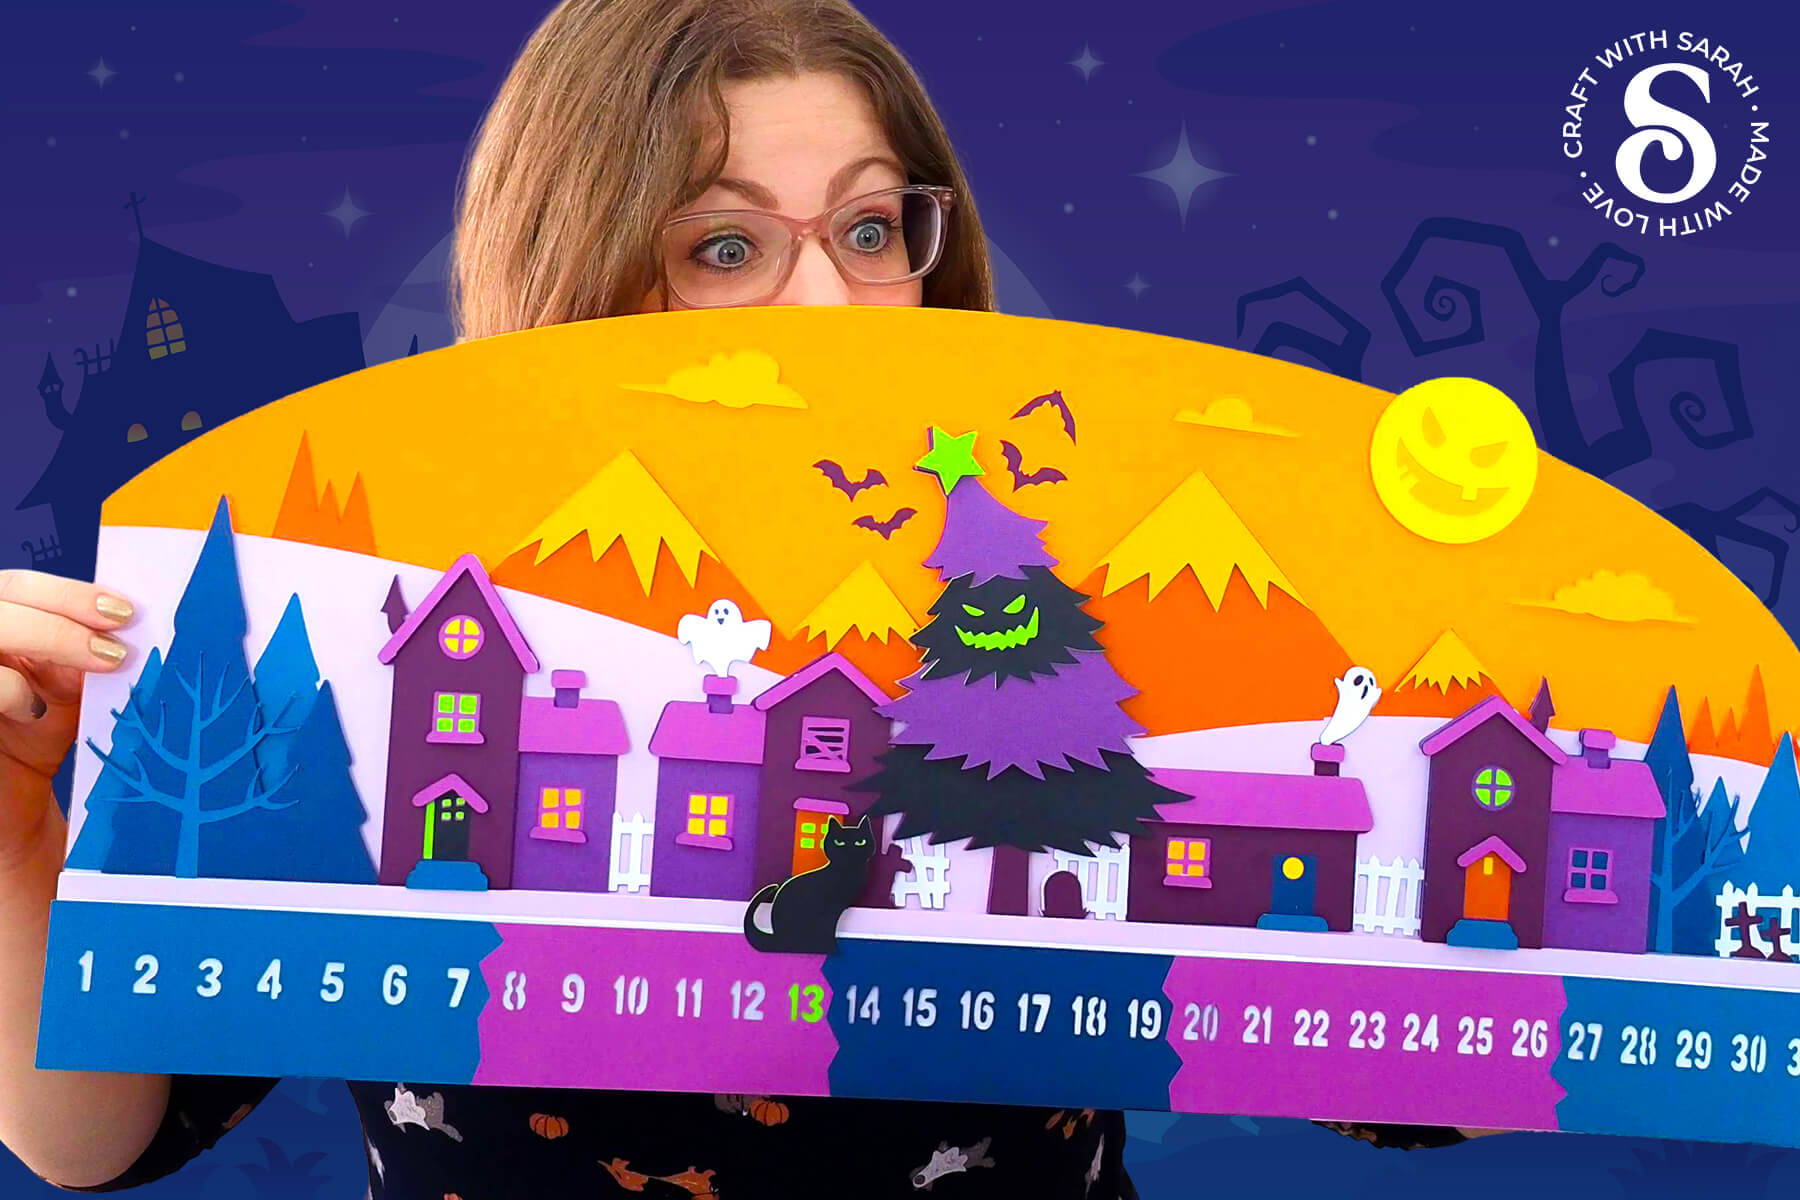
If you love big statement projects that celebrate the season in a bold way, this Halloween countdown calendar is a must-make for your crafting list.
Welcome to day one of the 2025 Halloween Craft Countdown, where I’m sharing 20 spooky themed Cricut papercraft projects in 20 days.
Inspired by a popular Christmas version I released back in 2022, this new Halloween design brings back the same structure — but with a spooky seasonal twist.
It’s the kind of craft that not only looks impressive on display but also adds a bit of fun to every day leading up to October 31st.
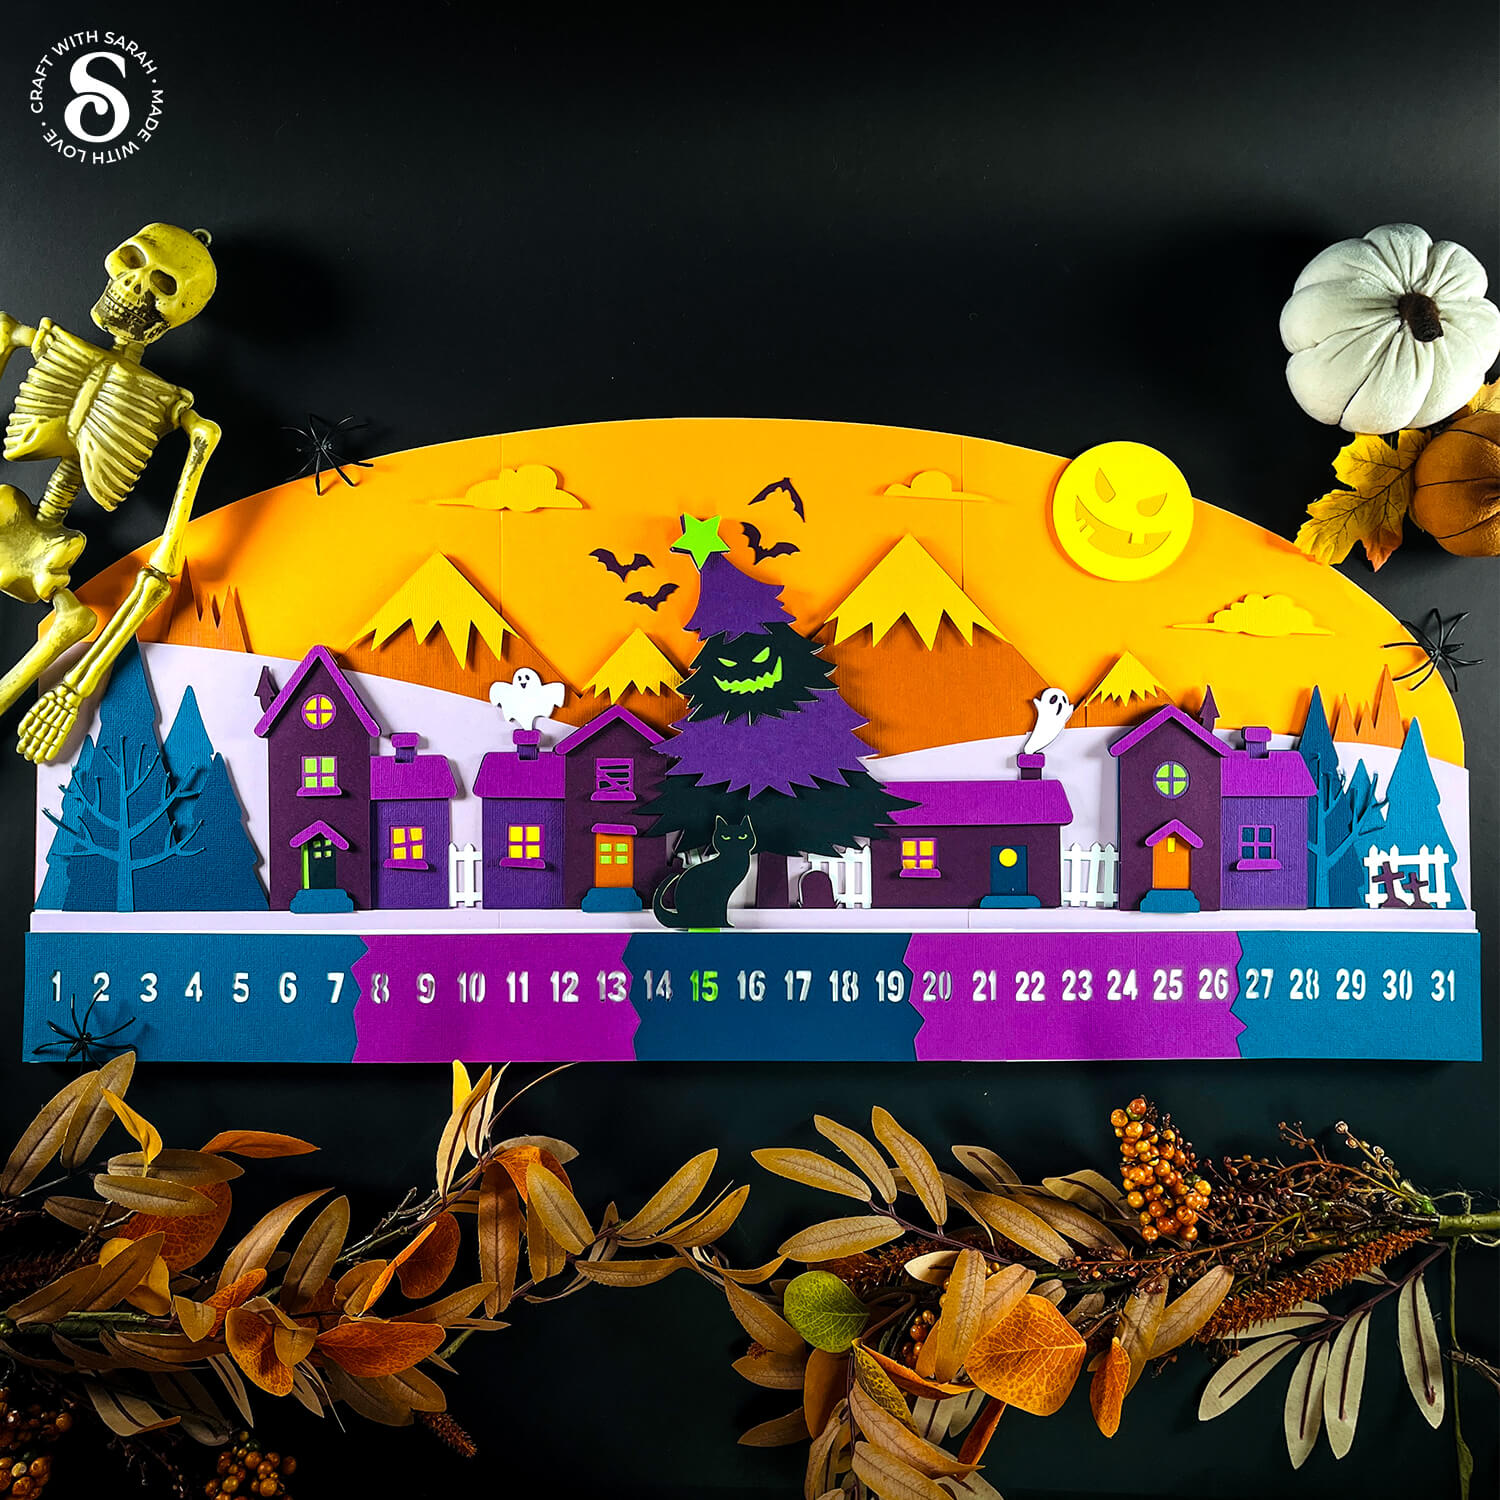
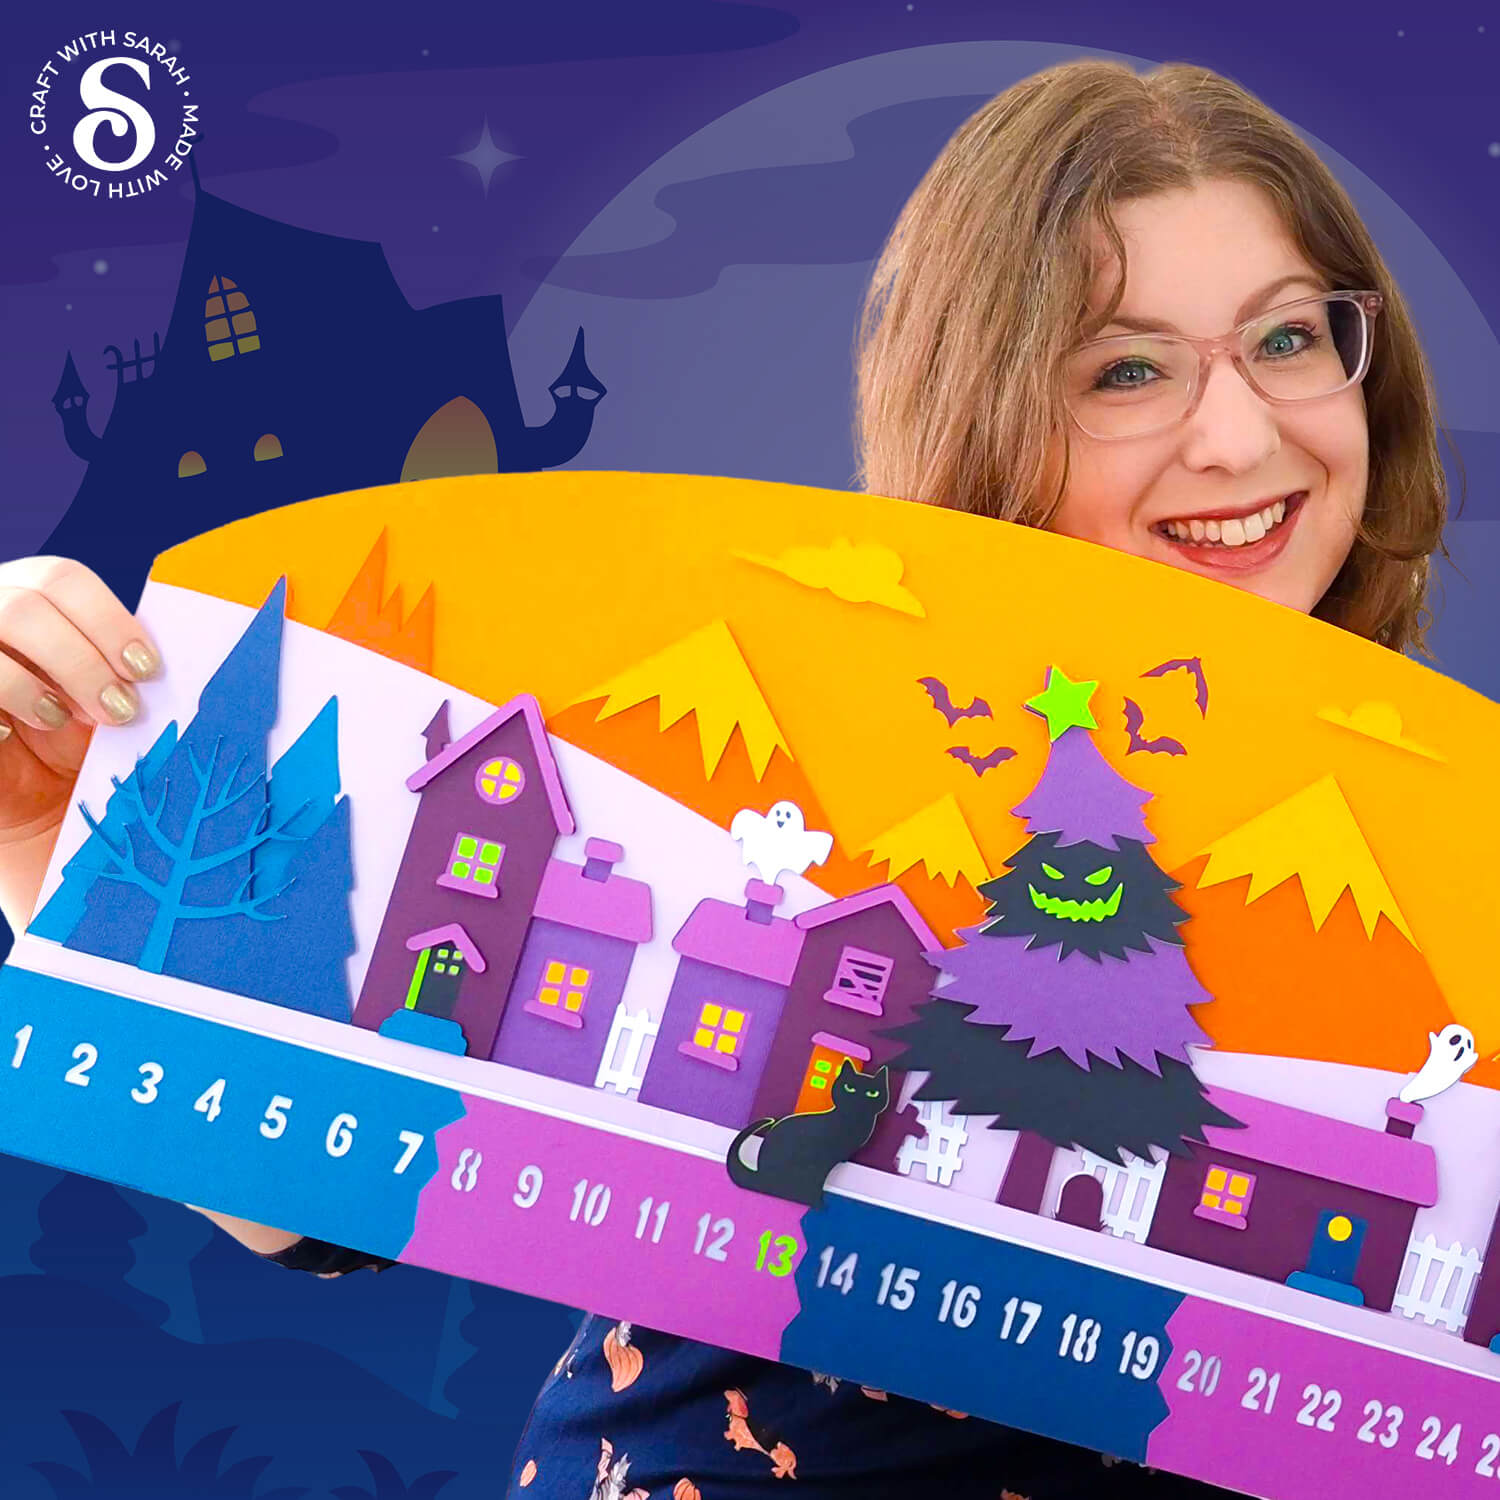
It features a layered Halloween village scene with crooked houses, crooked windows, and a large creepy tree right in the center. Tucked into the scene is a sliding black cat marker that lets you count down the days — simply move the cat along each numbered space until you reach the 31st October.
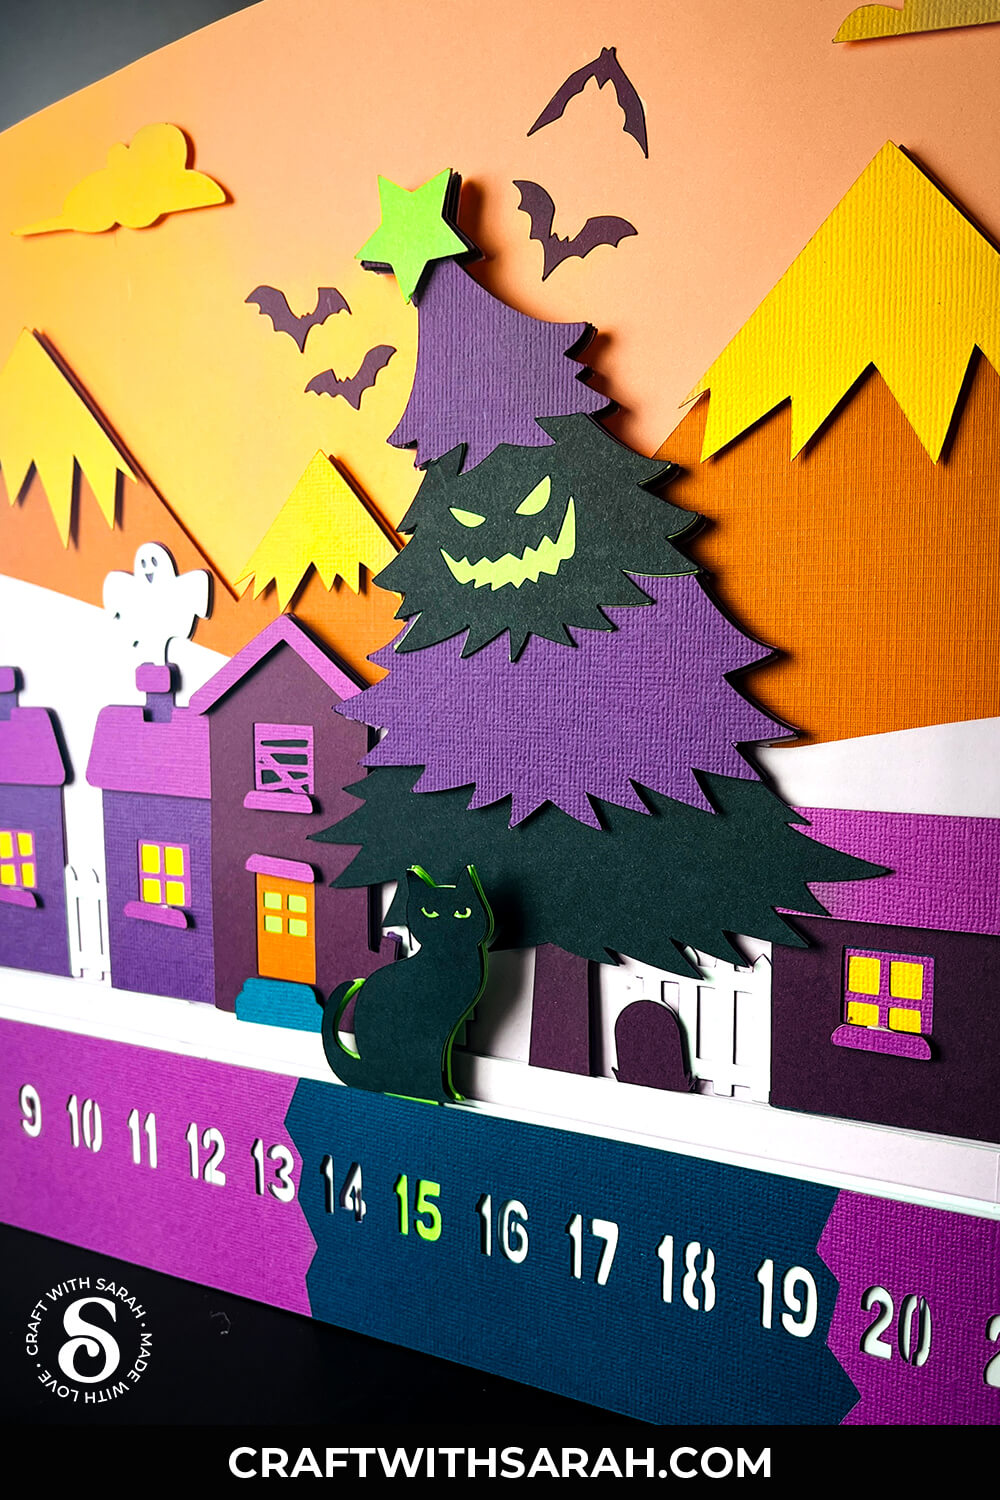
This off the mat Cricut project measures a full 27 inches wide by 12 inches tall.
Even though the sign is oversized, it’s still designed with regular cutting mats in mind. All the larger pieces are split into sections so you can cut them from standard 12×12, A4, or US Letter cardstock.
That makes this a great larger than mat Cricut project for anyone who wants to try something big without needing special tools or oversized materials.
The layers are simple to cut and easy to assemble, with a clear structure that comes together step by step.
It’s a bold project with a lot of visual impact — and a great excuse to dive into your cardstock stash and try something truly impressive!
This project was part of the 2025 Halloween Craft Countdown.
Halloween Countdown Calendar Supply List
Here is a list of the materials that are needed to make this project.
Please note that some of the links included in this article are affiliate links, which means that if you click through and make a purchase I may receive a commission (at no additional cost to you). You can read my full disclosure at the bottom of the page.
- Cricut machine
- Light blue Cricut cutting mat
- Coloured Card
- Glue (I like Bearly Art Glue and Collall)
- 3D foam pads
- Cricut scoring wheel or stylus OR a Cricut pen
- Sticky tape
This project is suitable for the following types of Cricut machines: Explore series, Maker series and Joy Xtra. It is too large to cut on the original Joy machines.
Foundation learning
If you're new to making papercrafts with your cutting machine, check out these links to get you started.
They include videos on topics such as: which file to use with your type of cutting machine, how to load the files into your cutting machine's software, how to cut cardstock with your type of cutting machine, how to recolor and modify/customize the cut files and tips for displaying your projects.
- Help guides for Cricut machines
- Help guides for Silhouette machines
- Help guides for ScanNCut machines
The following tutorials are Cricut-specific, but many of the ideas will work similarly with a Silhouette or ScanNCut machine and any cut files that are shared in them are compatible with all types of cutting machine.
- How to score with a Cricut (even without scoring tools)
- Print then cut tutorial
- Design Space tools (Combine, Attach, Slice, Weld, Flatten, etc.)
- Pattern fill tutorial (for making backgrounds & cutting images to a specific shape/size)
- Free envelope SVGs that can be sized to fit any card
- Presentation boxes for handmade cards
- How to write inside cards with Cricut pens
- How to cut layered designs at a small size
- Design Space tips & tricks
- Cricut pens tutorial
- How to mount multiple designs in the same frame with magic guides
Video Tutorial for Happy Halloween Sign
Watch the video below to see how to make this project. Keep scrolling for a written tutorial.
A big Design Space update is currently rolling out that changes how the screen looks, including the position of some of the buttons and tools. I had already recorded all the Countdown videos before the update was released, so unfortunately there will be areas of the videos that look different to your screen.
To help with this, I've recorded a walkthrough video that explains all of the Design Space changes so that you can see how to do everything in the new version.
How to Make a Larger than Mat Cricut Project for Halloween
Here’s how to make this giant Days Till Halloween Countdown sign with a Cricut machine.
Step 1) Download the cutting file & upload to Design Space
Get the files using the box below.
Purchase the File(s)
This cut file is available as part of the Instant Access Bundle.
Or, purchase this design individually here
Before you upload the SVGs to Design Space, you need to unzip the download folder that they come in.
- How to unzip a folder on Windows computer
- How to unzip a folder on a Mac
- How to unzip a folder on an iPad/iPhone
- How to unzip a folder on an Android device
After unzipping, upload the SVG file(s) into your cutting machine software.
Not sure how to use cut files with your type of machine? The following links lead to videos on how to open cut files in:
- Cricut Design Space
- Silhouette Studio
- CanvasWorkspace (for ScanNCut machines)
The download folder also contains printable PDF versions of the templates for hand cutting.
If you are using Cricut Design Space, start a new project and then click the “Upload” button on the left of the screen.
You can then either click “Browse” to find the file on your computer, or drag-and-drop it in.
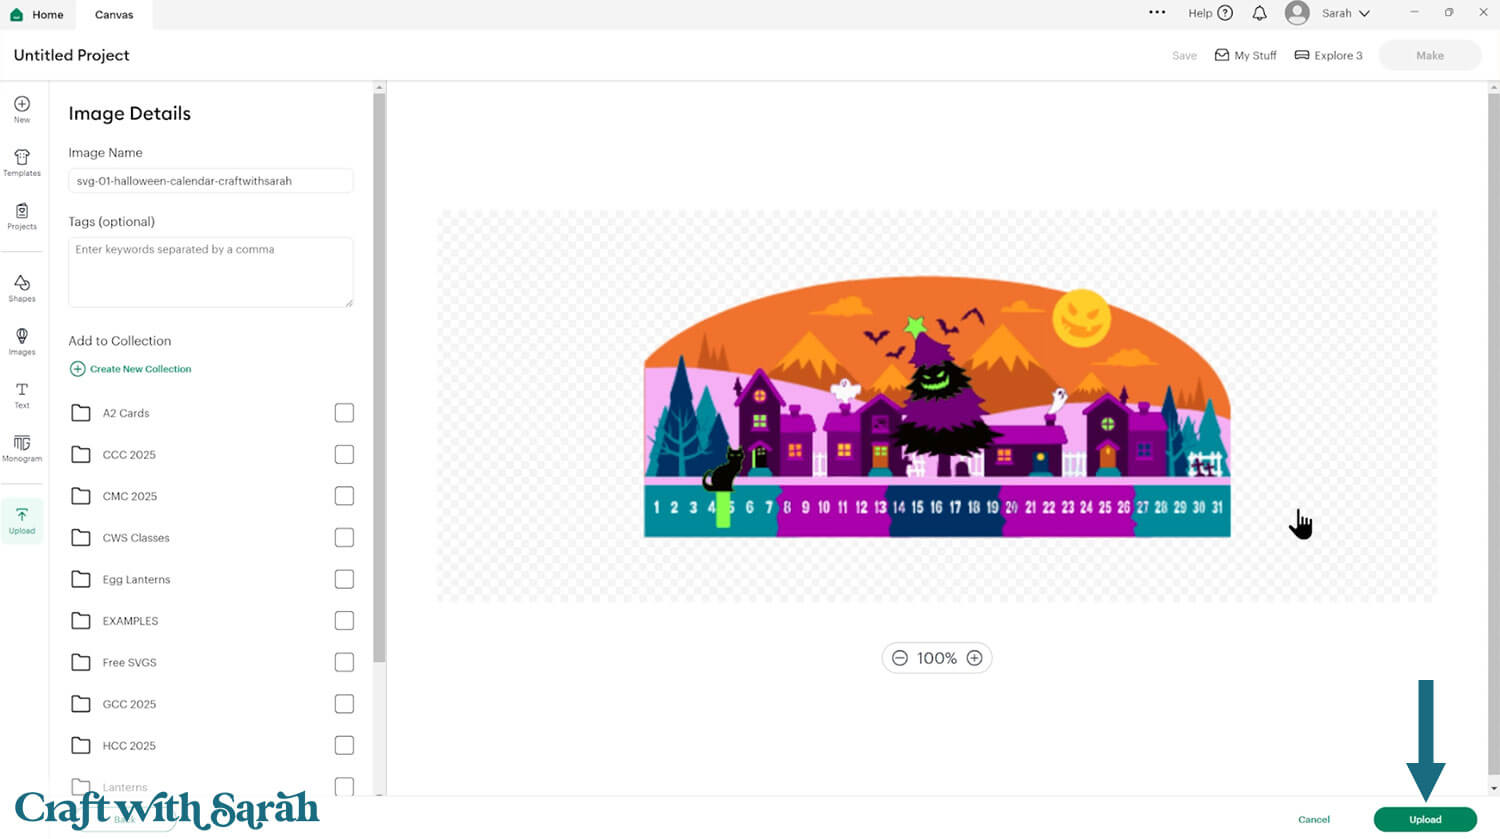
Upload the file in the “01 Cricut Version” subfolder called svg-01-halloween-calendar-craftwithsarah.svg
This is how it should look after you have selected the file:
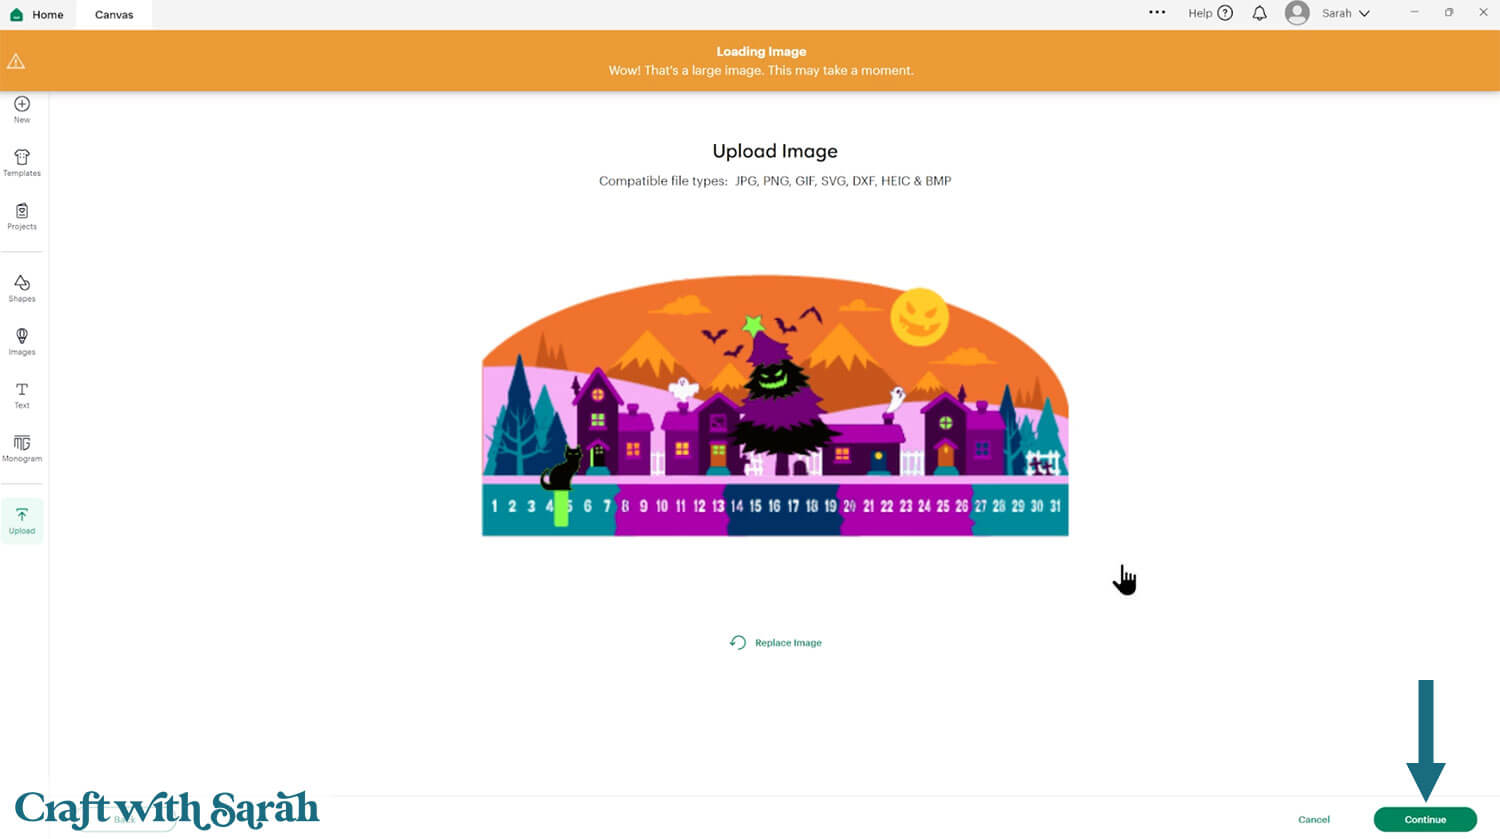
Don’t worry if the image preview appears blurry – it will show in full quality once it’s inserted onto your project.
Press “Upload” on the next screen.
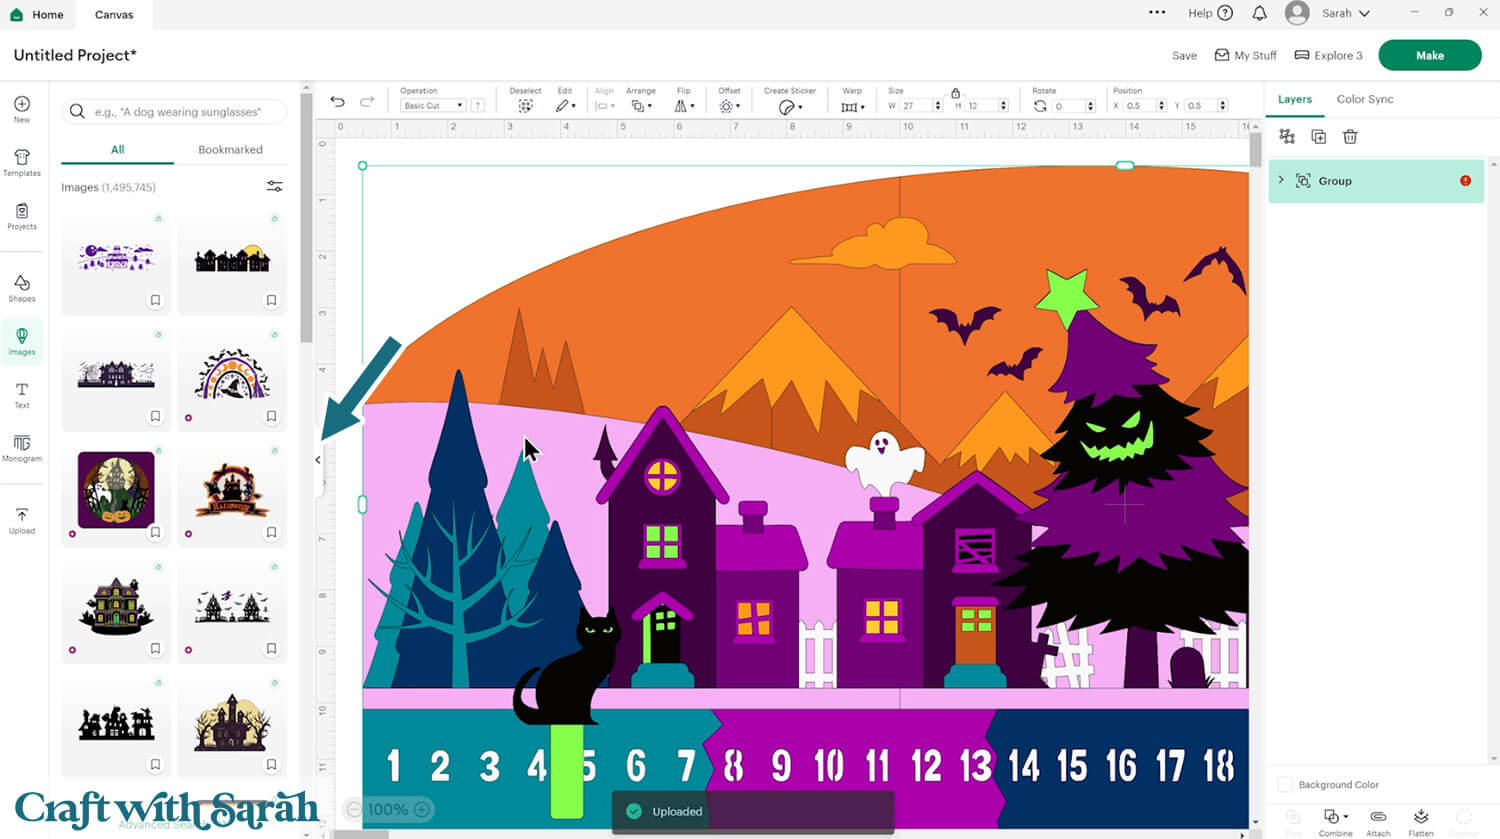
After uploading, the design should be automatically inserted onto your Canvas.
Cricut have recently (as of June 2025) introduced a feature where you get a “pop out” bar of similar images when you Upload a design. To hide this bar (to give you more space for designing!), click the arrow that’s about half way down the page.
If the design doesn’t get inserted onto your Canvas, it will show under “Uploads” in your “Recently Uploaded Images”. Click on it and then press “Add to Canvas” to put it onto your Project.
Make sure the cards load in at 8.5 inches wide and 5.5 inches tall.
Step 2) Format the Halloween Countdown project
This larger than mat Cricut project is almost ready to cut, but we need to do a couple of checks and changes first.
To start, check that the sign has loaded in at 27 inches wide and 12 inches tall.
If not, change it to match those measurements.
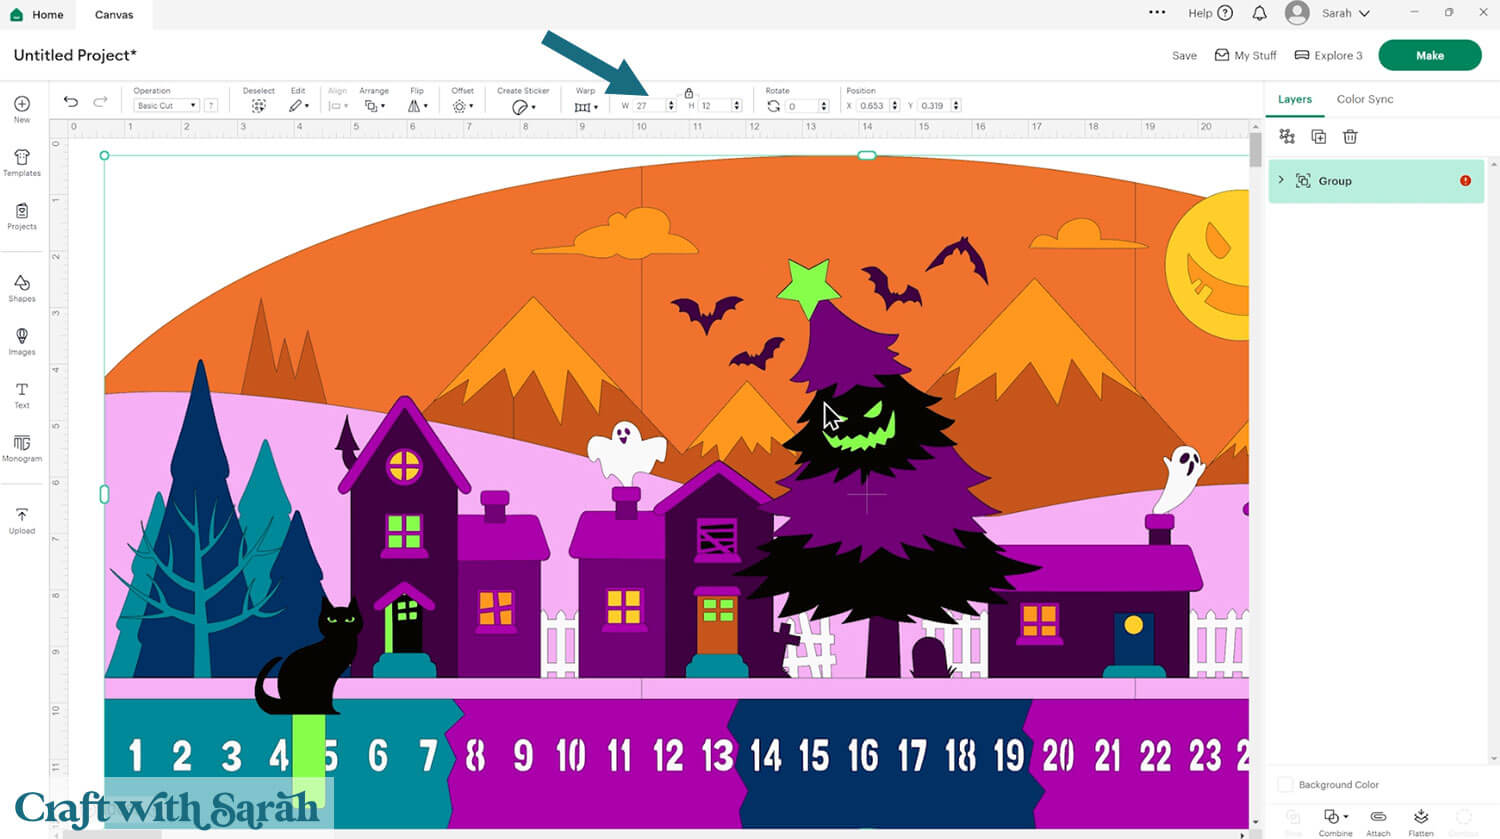
IMPORTANT! There is currently (as of Aug 2025) a bug in Design Space where it’s showing an “image too large to cut” error in the layers panel, even though this design CAN be cut on a Cricut.
To remove this error, click on the giant sign and “Ungroup” the layers.
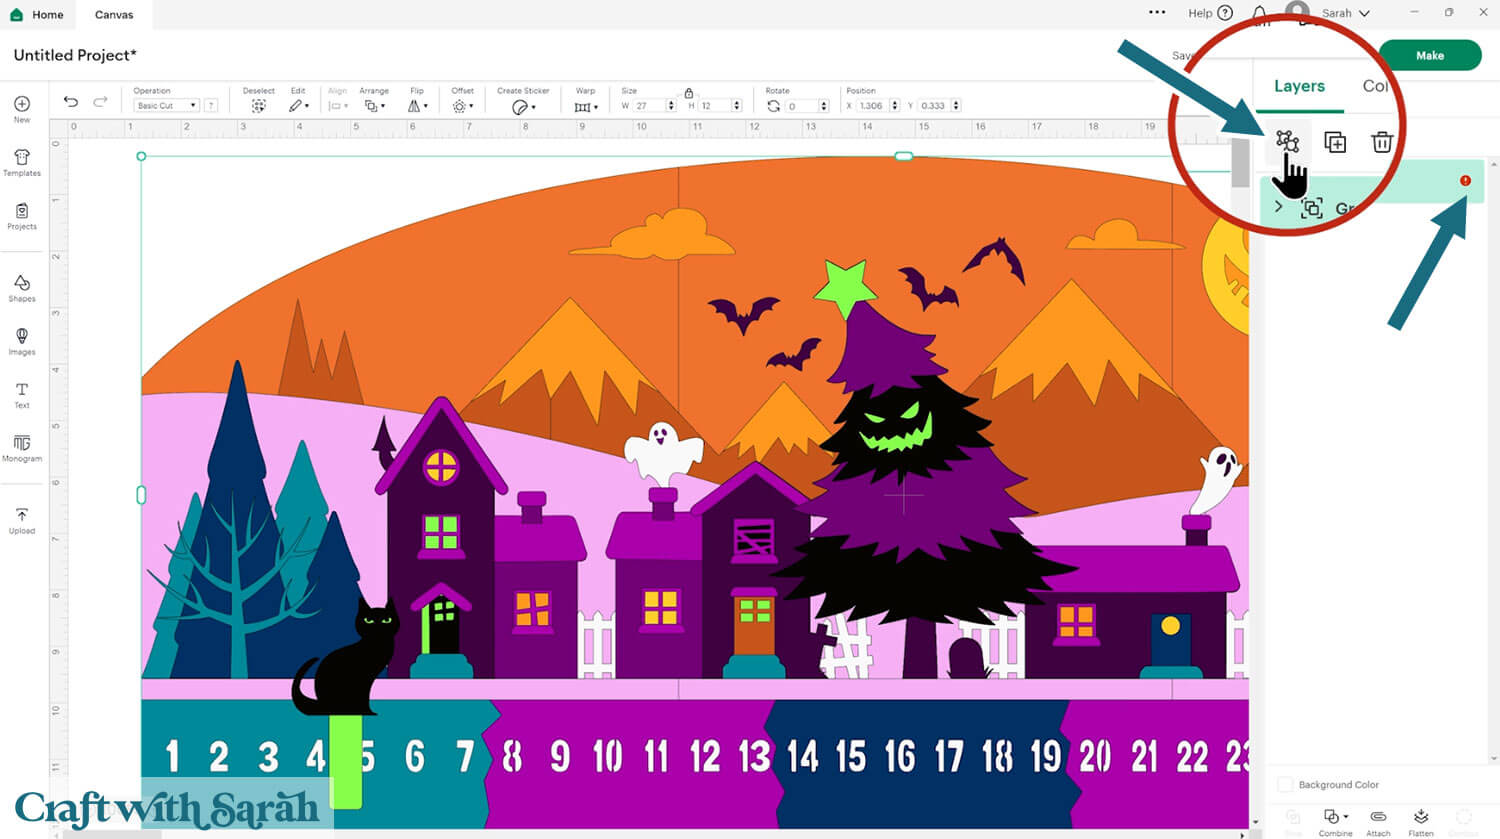
Scroll down the entire layers panel to see if any more red exclamation marks appear.
If they do, click the Group they are showing against and “Ungroup” them too.
Some parts of this off-the-mat Cricut project require gluing in a very specific place.
To make this easier, I’ve added some guide lines to the design.
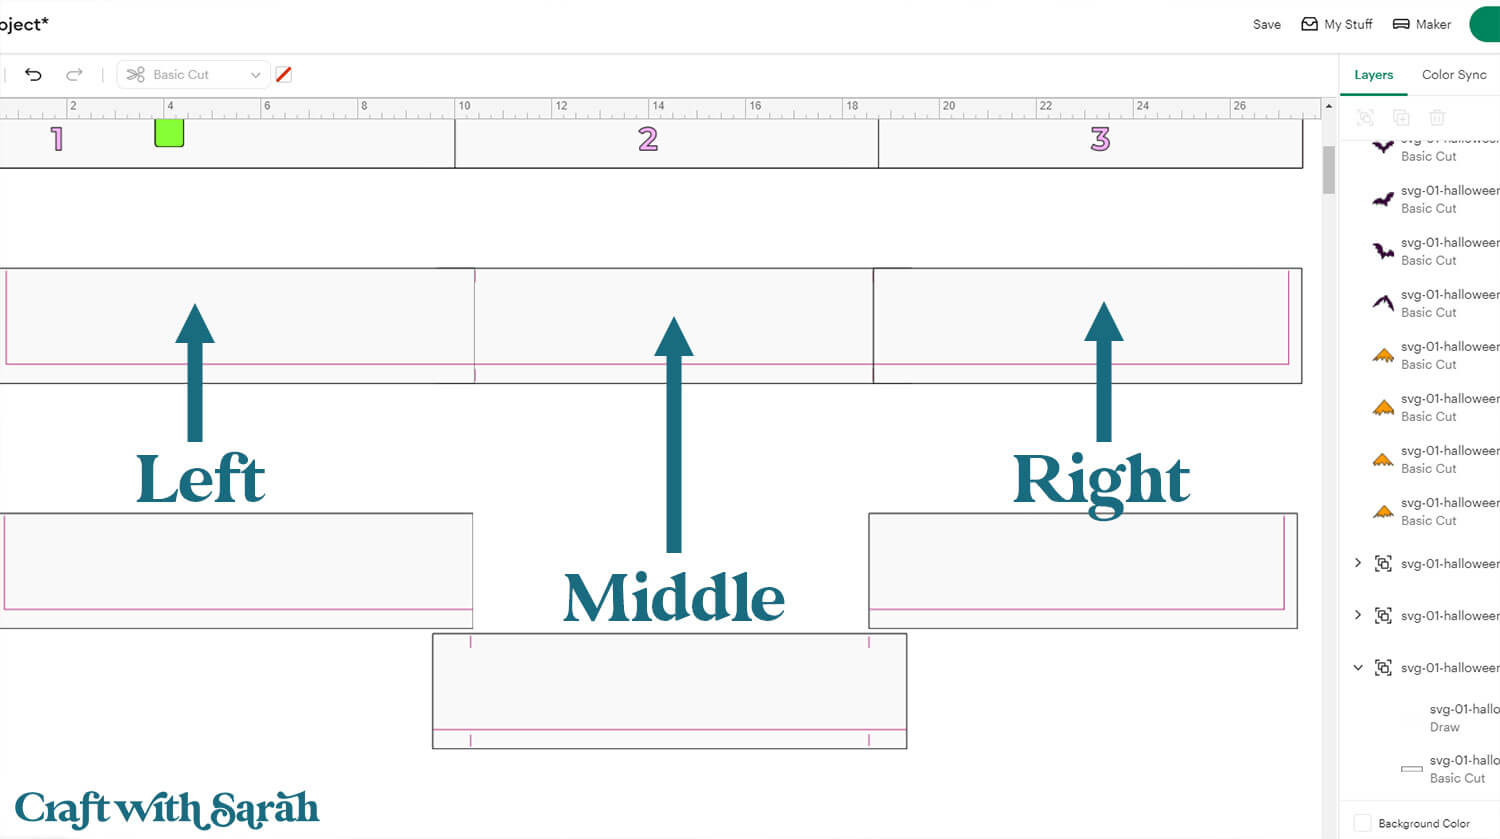
These need formatting to be either a “Score” line or a “Draw” line so that your Cricut will mark the guide lines on your cardstock.
Click the chevron icons next to the Groups in the layers panel until you find the Group that has a white layer and what looks like a single line on top.
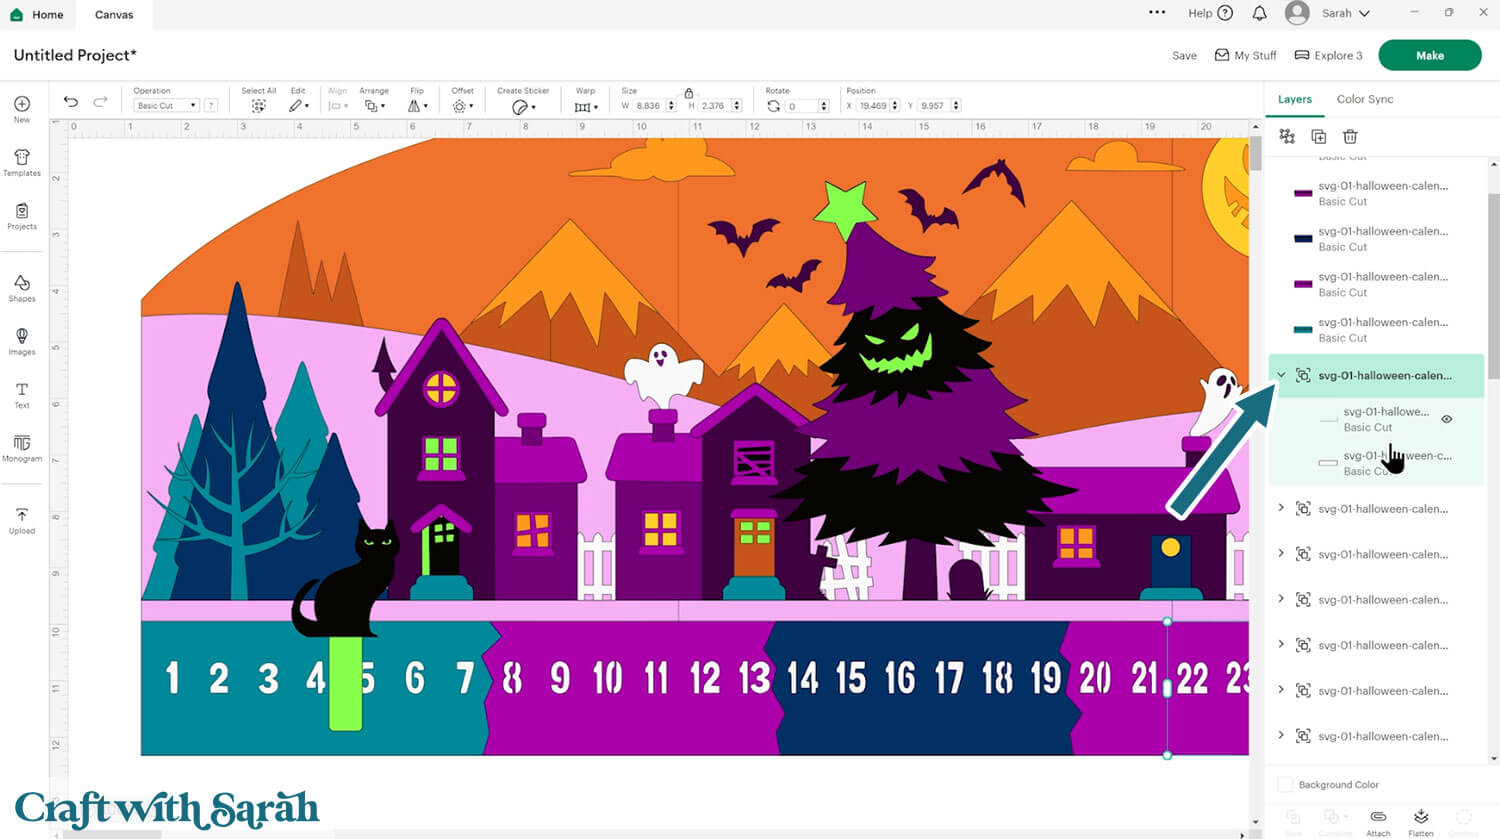
Click to select that top layer, then change it to “Score” or “Pen” in the “Operations” dropdown menu.
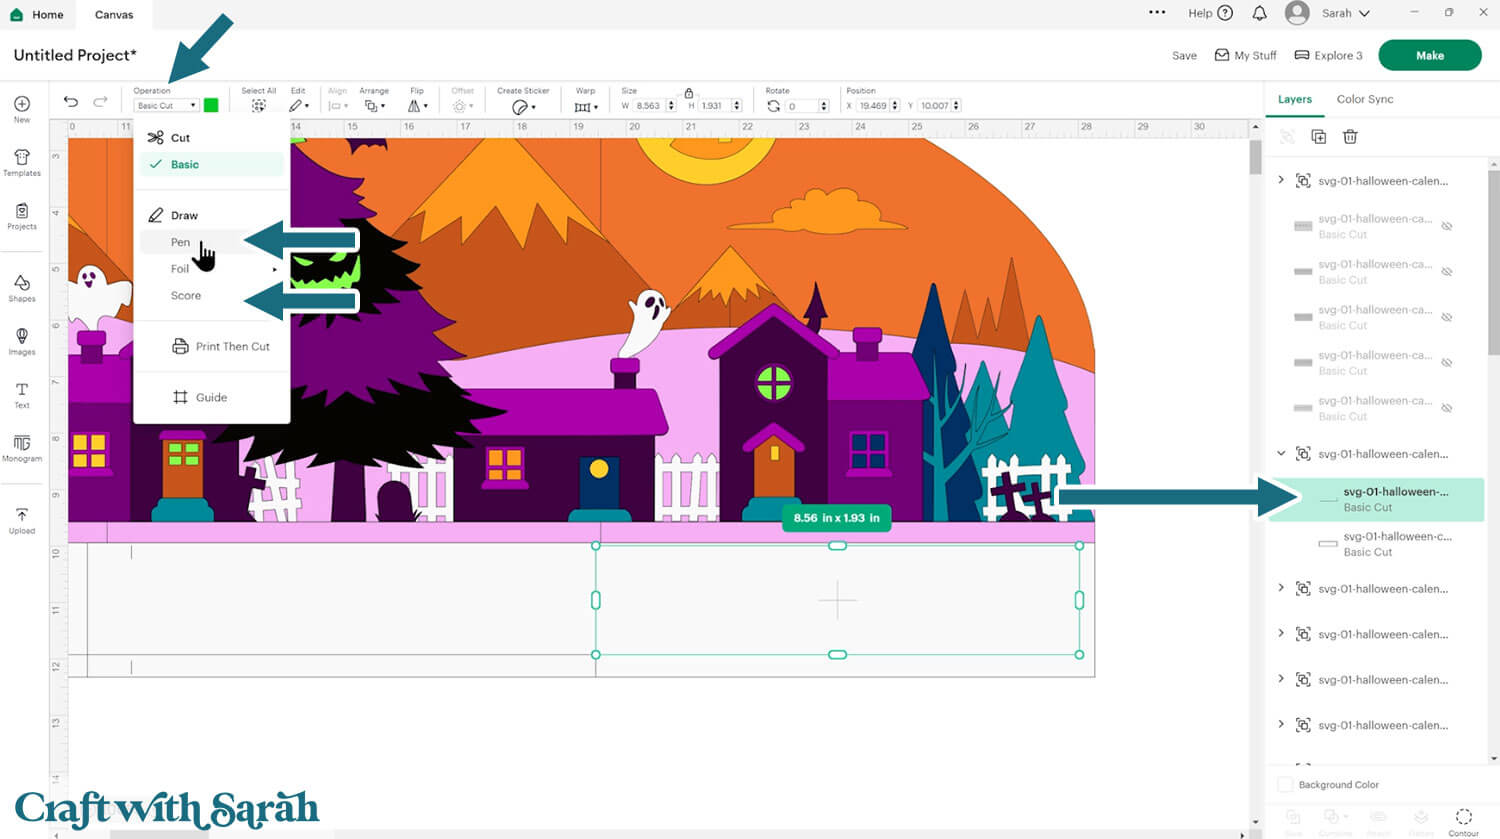
Select that layer and the white piece underneath and press “Attach”. This tells the Cricut that we want it to do the scoring/drawing on the white card.
There are three groups in total that have lines that need changing.
To make it easier, you could hide the number pieces in the layers panel to enable you to see the white pieces that you’re changing.
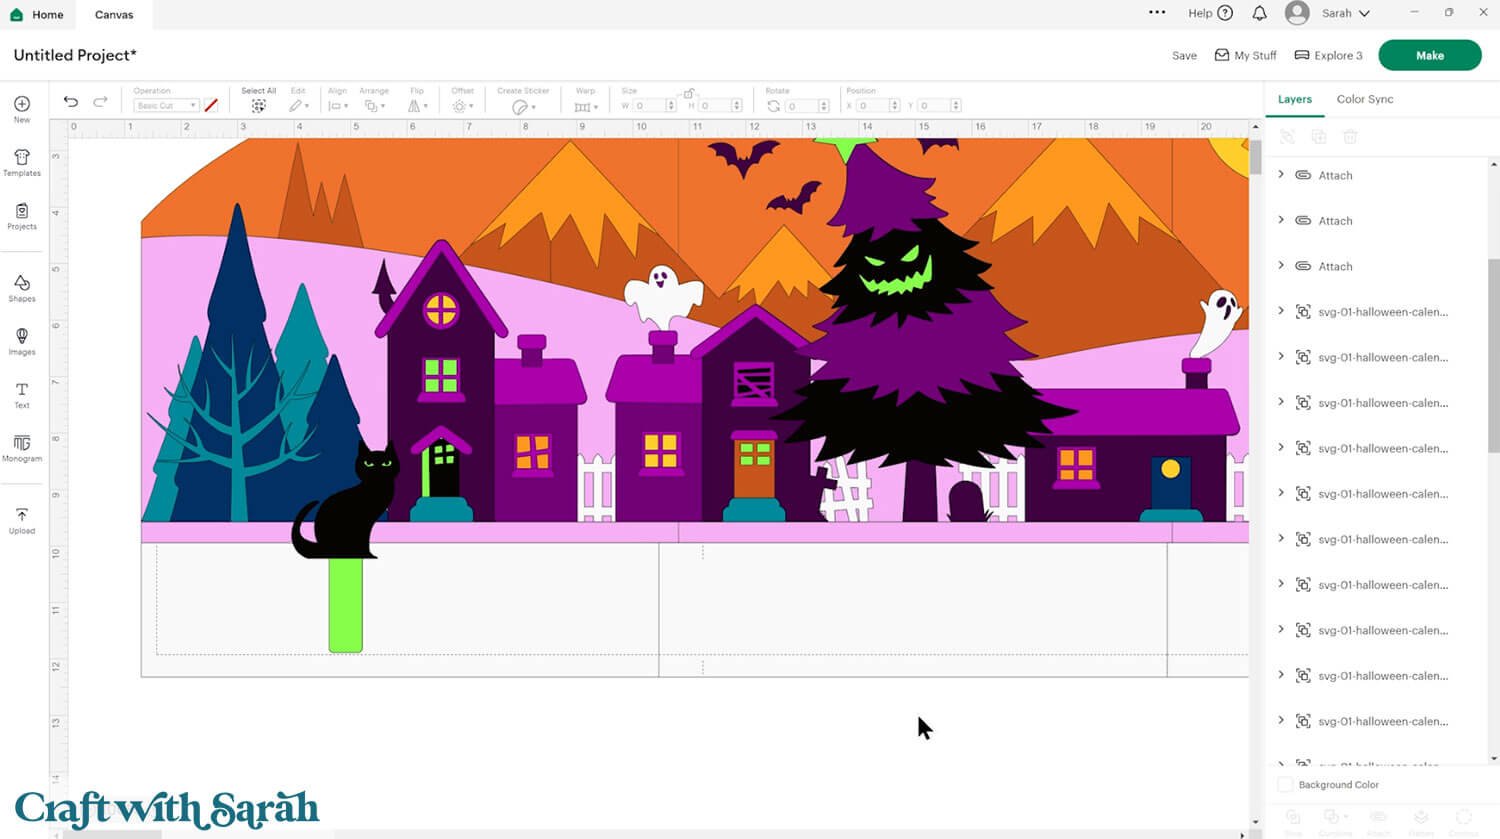
Step 3) Cut out the giant Halloween sign
When you’re happy with how the project is looking in Design Space, click “Make” and follow the instructions on-screen to cut out all the pieces.
To change the paper size, go into the dropdowns over on the left side of the screen and choose the paper size that you want to use. You need to change it for every single colour.
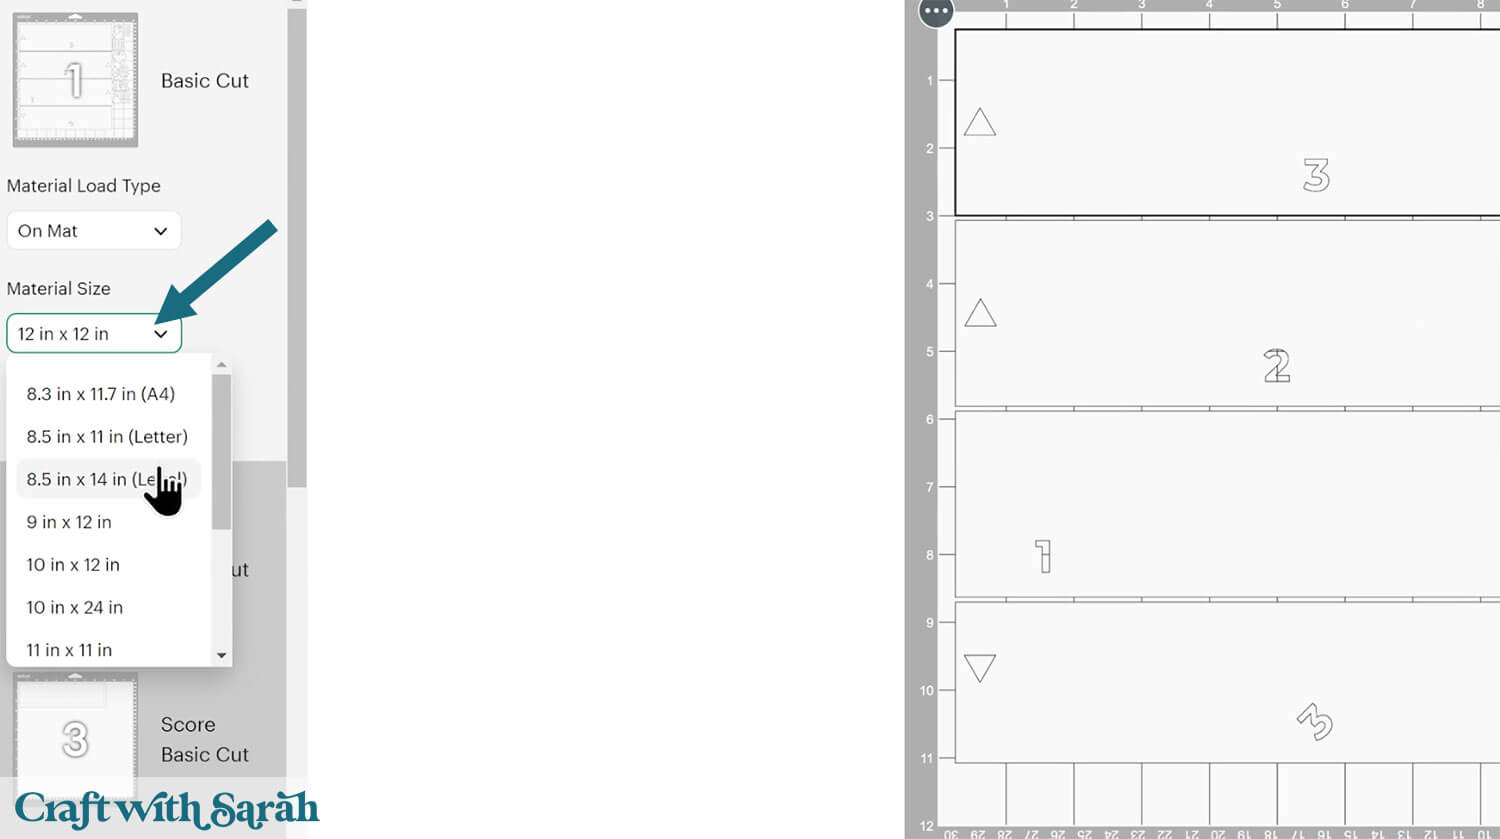
To save space on your cardstock, you can move things around by clicking and dragging. Make sure when you’re moving things about that nothing overlaps because otherwise, it won’t cut out properly.
TIP: New to using cardstock with your cutting machine? Check out these machine help guides for Cricut, Silhouette and ScanNCut that go through every step of the process, including tips for getting the best quality cuts from your machine.
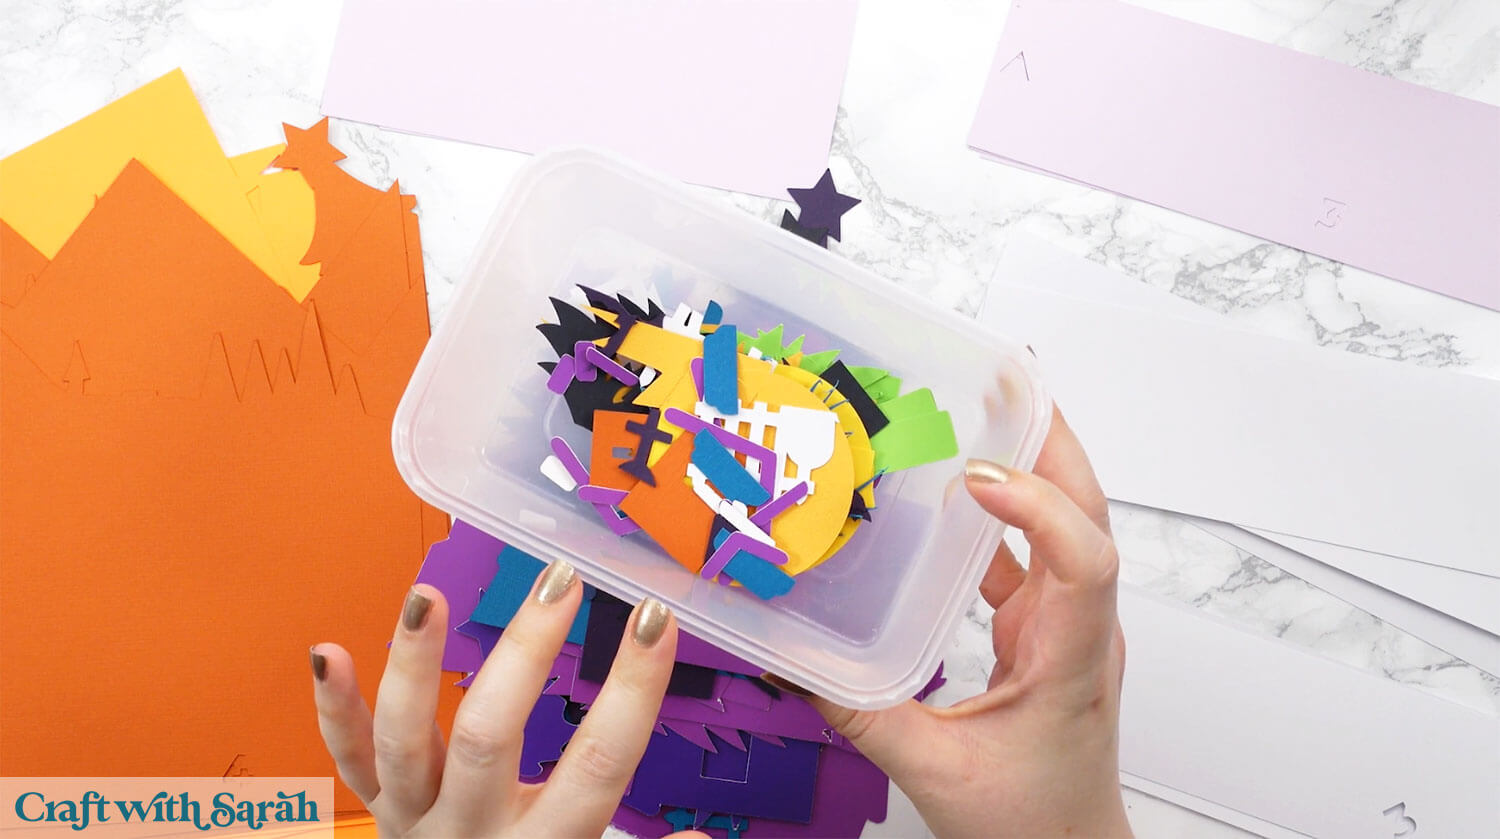
I recommend collecting the small pieces of the design in a dish to make sure you don’t accidentally lose any, or throw them away with your scraps.
Step 4) Stick the trees and houses together
This sign is easier to put together than you might first think. We’ll be doing it as a series of “mini builds”, first creating the different images to make up the village.
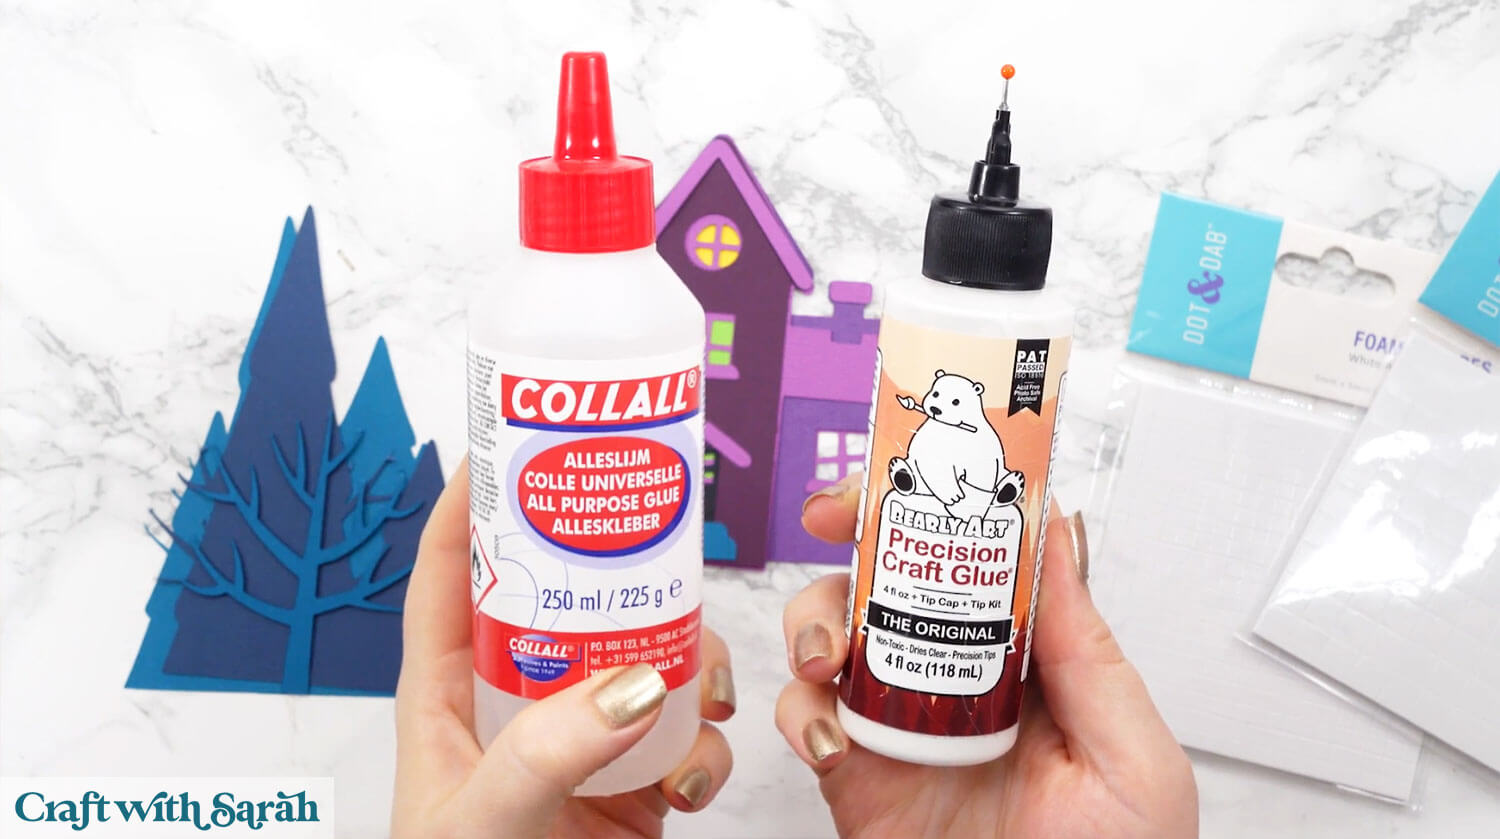
Use 3D foam pads and glue to stick the layers together.
My favourite glues to use on papercraft projects are Bearly Art Glue and Collall All Purpose Glue.
These are great because they don’t “warp” or bend the cardstock like some glues do. You can use as much of it as you want and the card stays perfect – and it dries perfectly clear too!
Bearly Art Glue comes with a tiny nozzle to make it easy to apply glue to small areas of card. The Collall glue doesn’t come with this, so it’s easiest to decant it into needle tip applicator bottles so that you have more control.
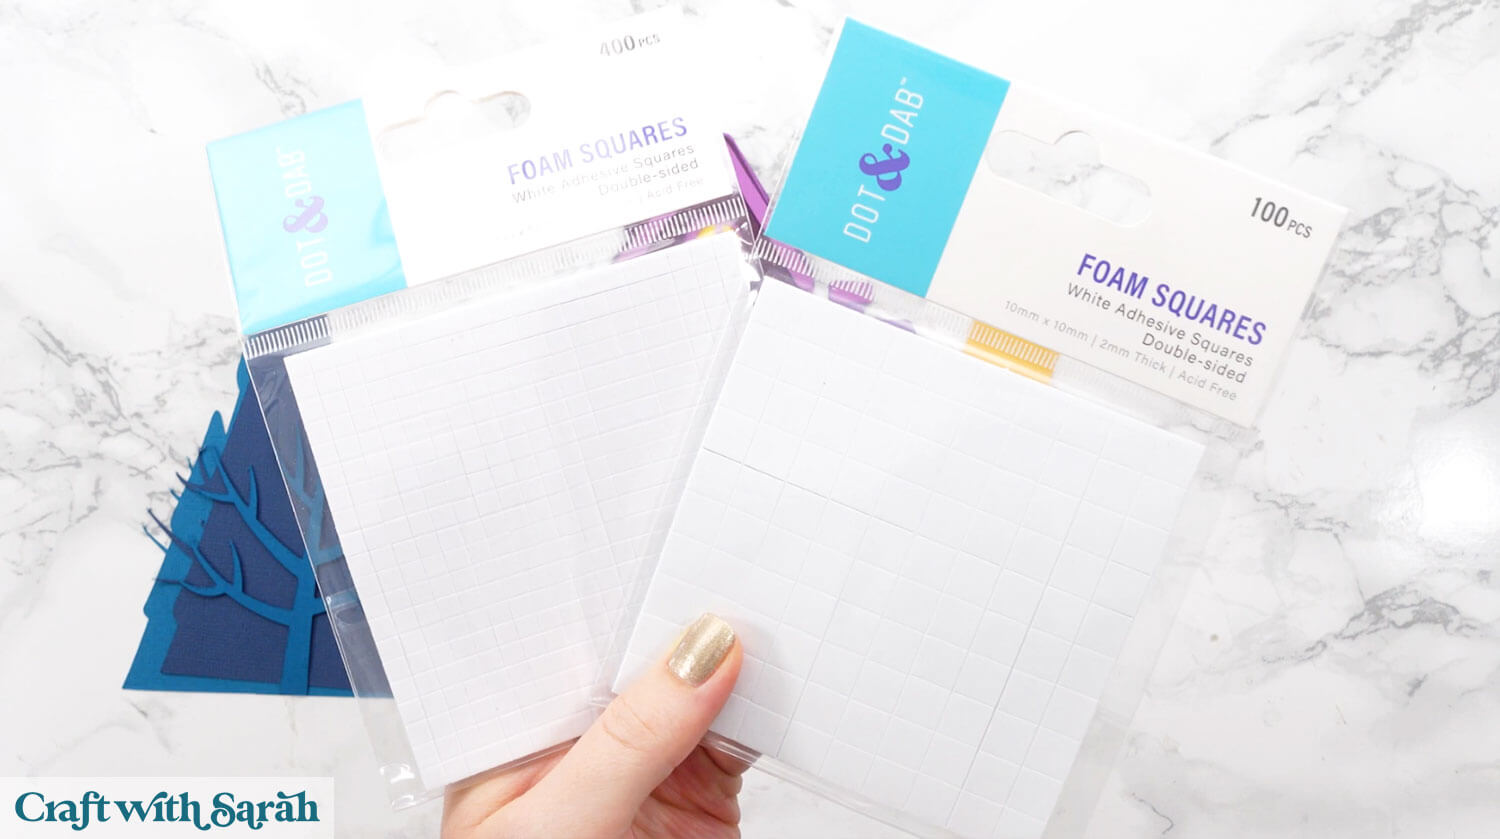
The foam pads that I use are from “Dot & Dab”, but any foam squares will work. If yours are big then you may need to cut them smaller with scissors to fit inside the edges of the layers.
I’ve got two different sizes, as larger foam squares will be easier to apply on the big background pieces.
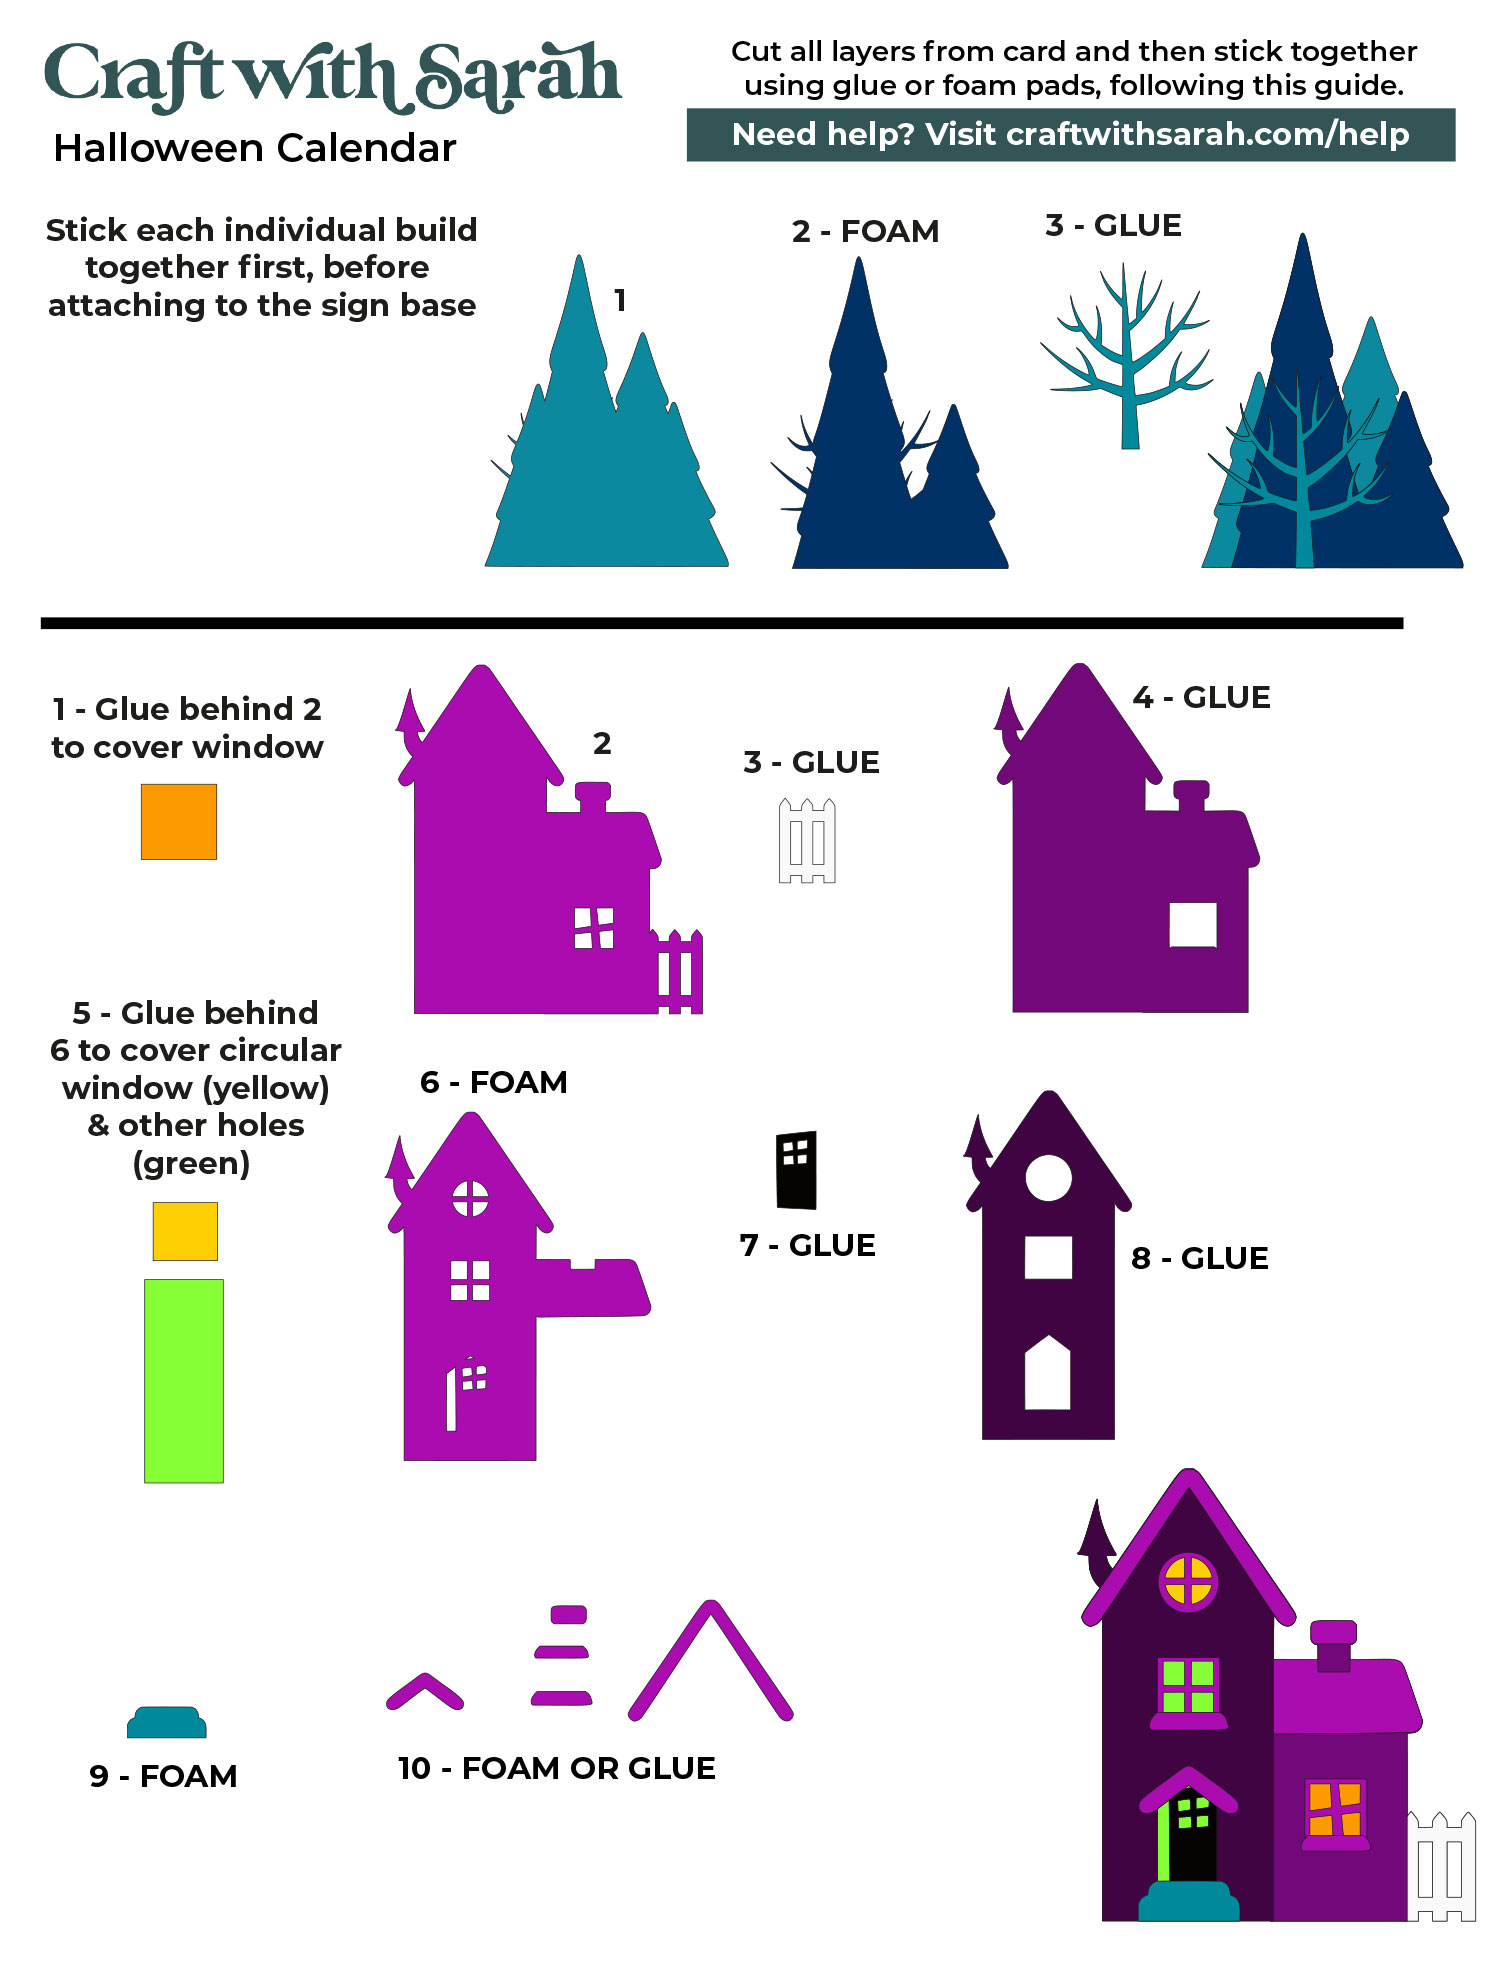
Use these guides to see the order to stick the layers together in.
Printable versions of the assembly guides are included in the folder when you download the cut files.
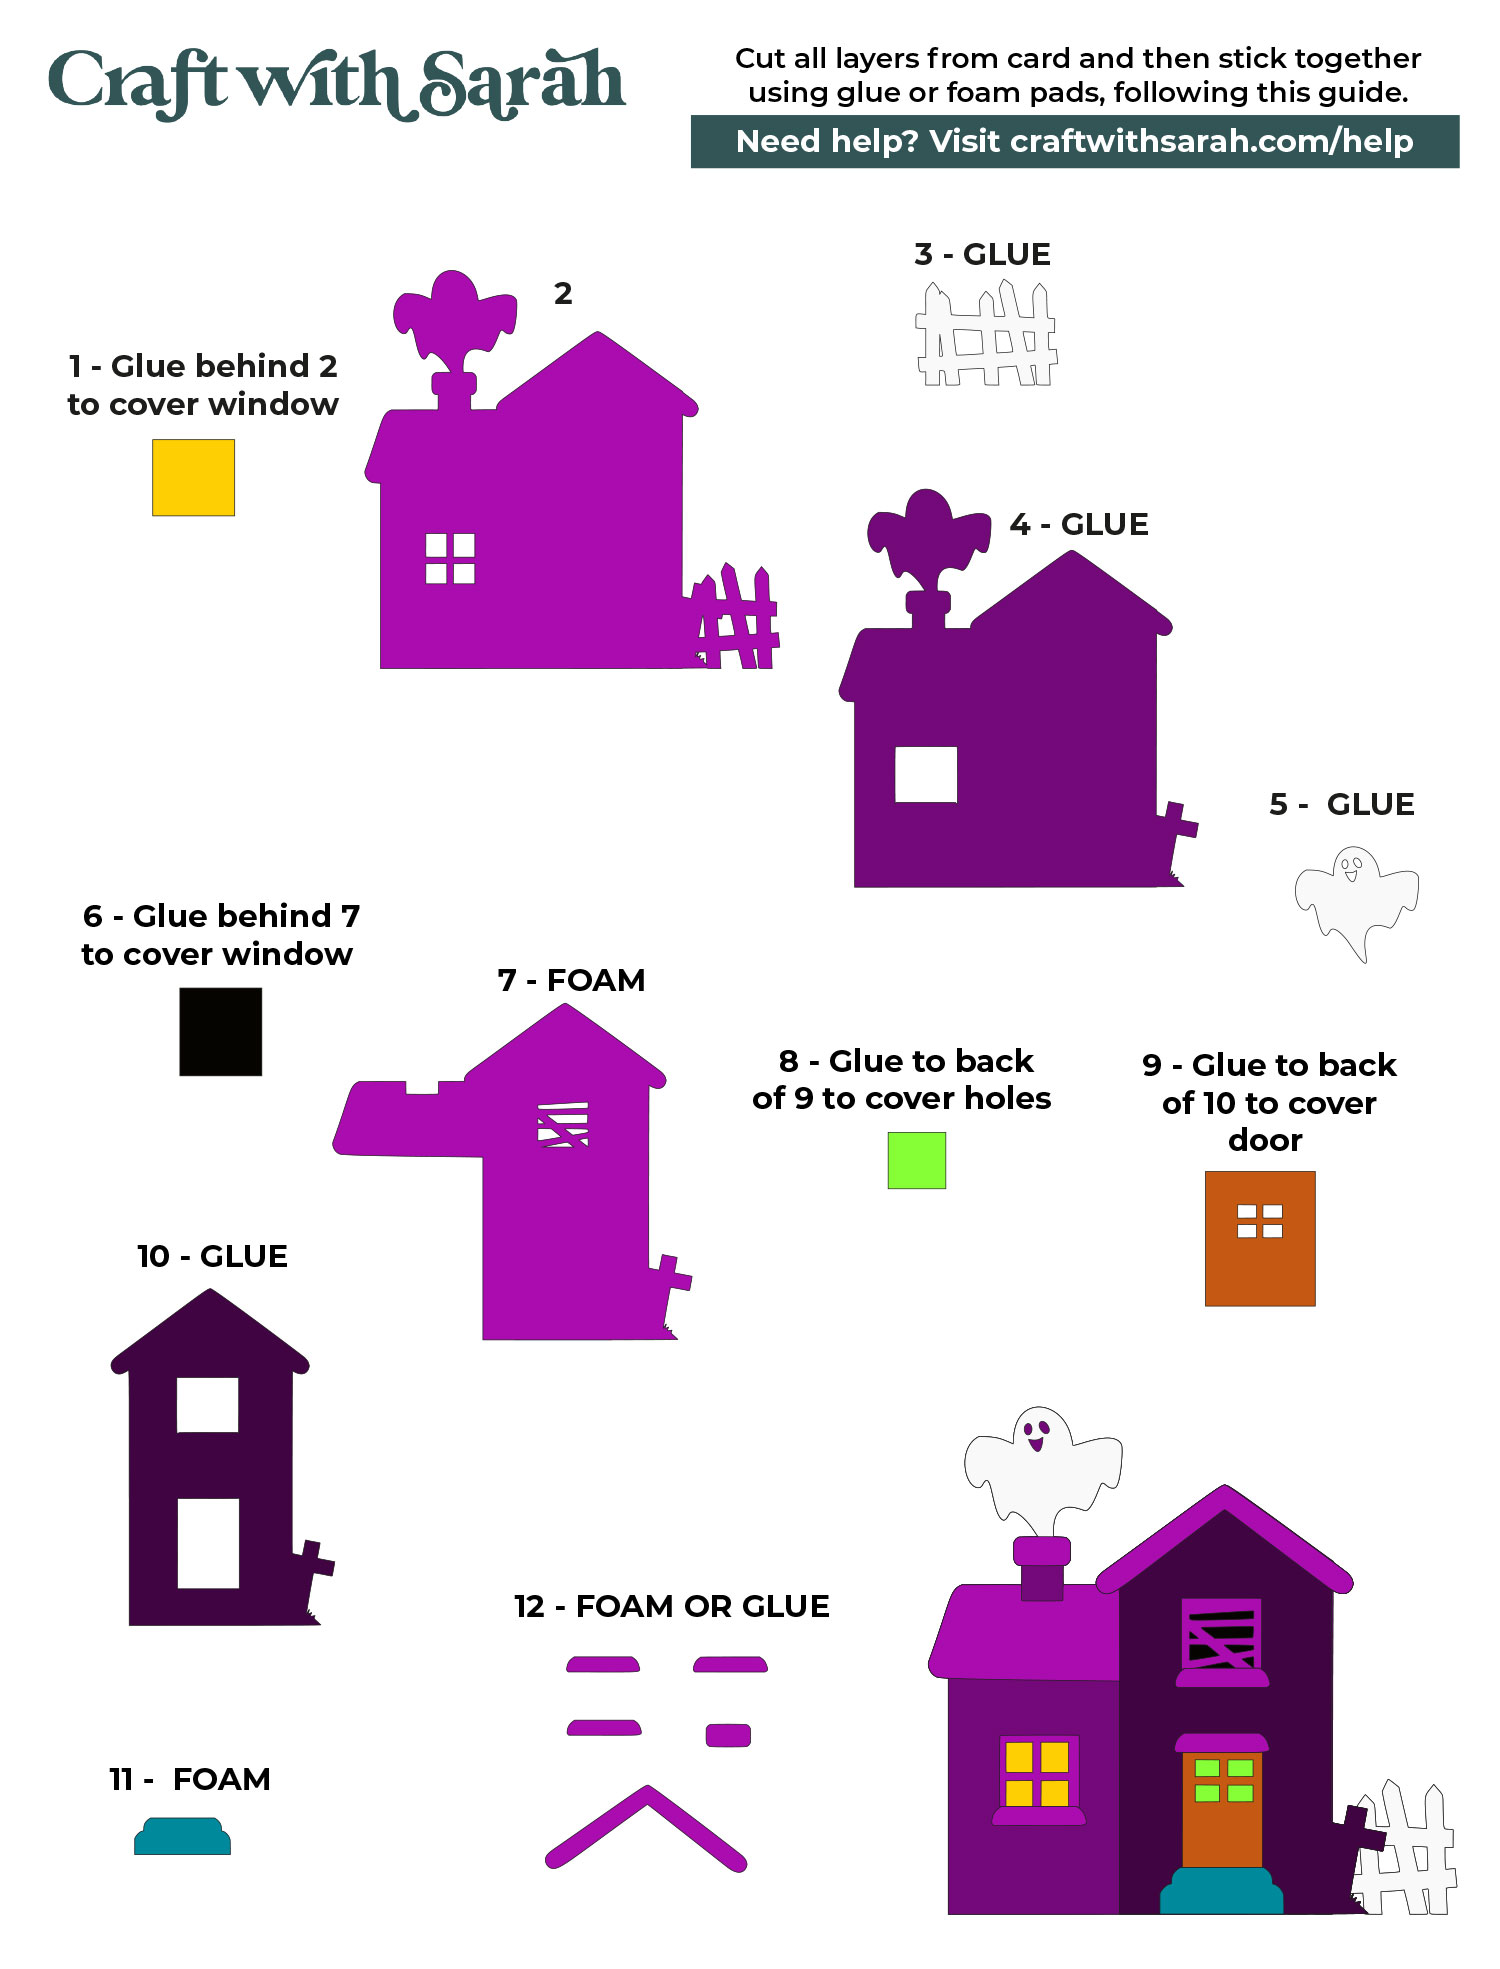
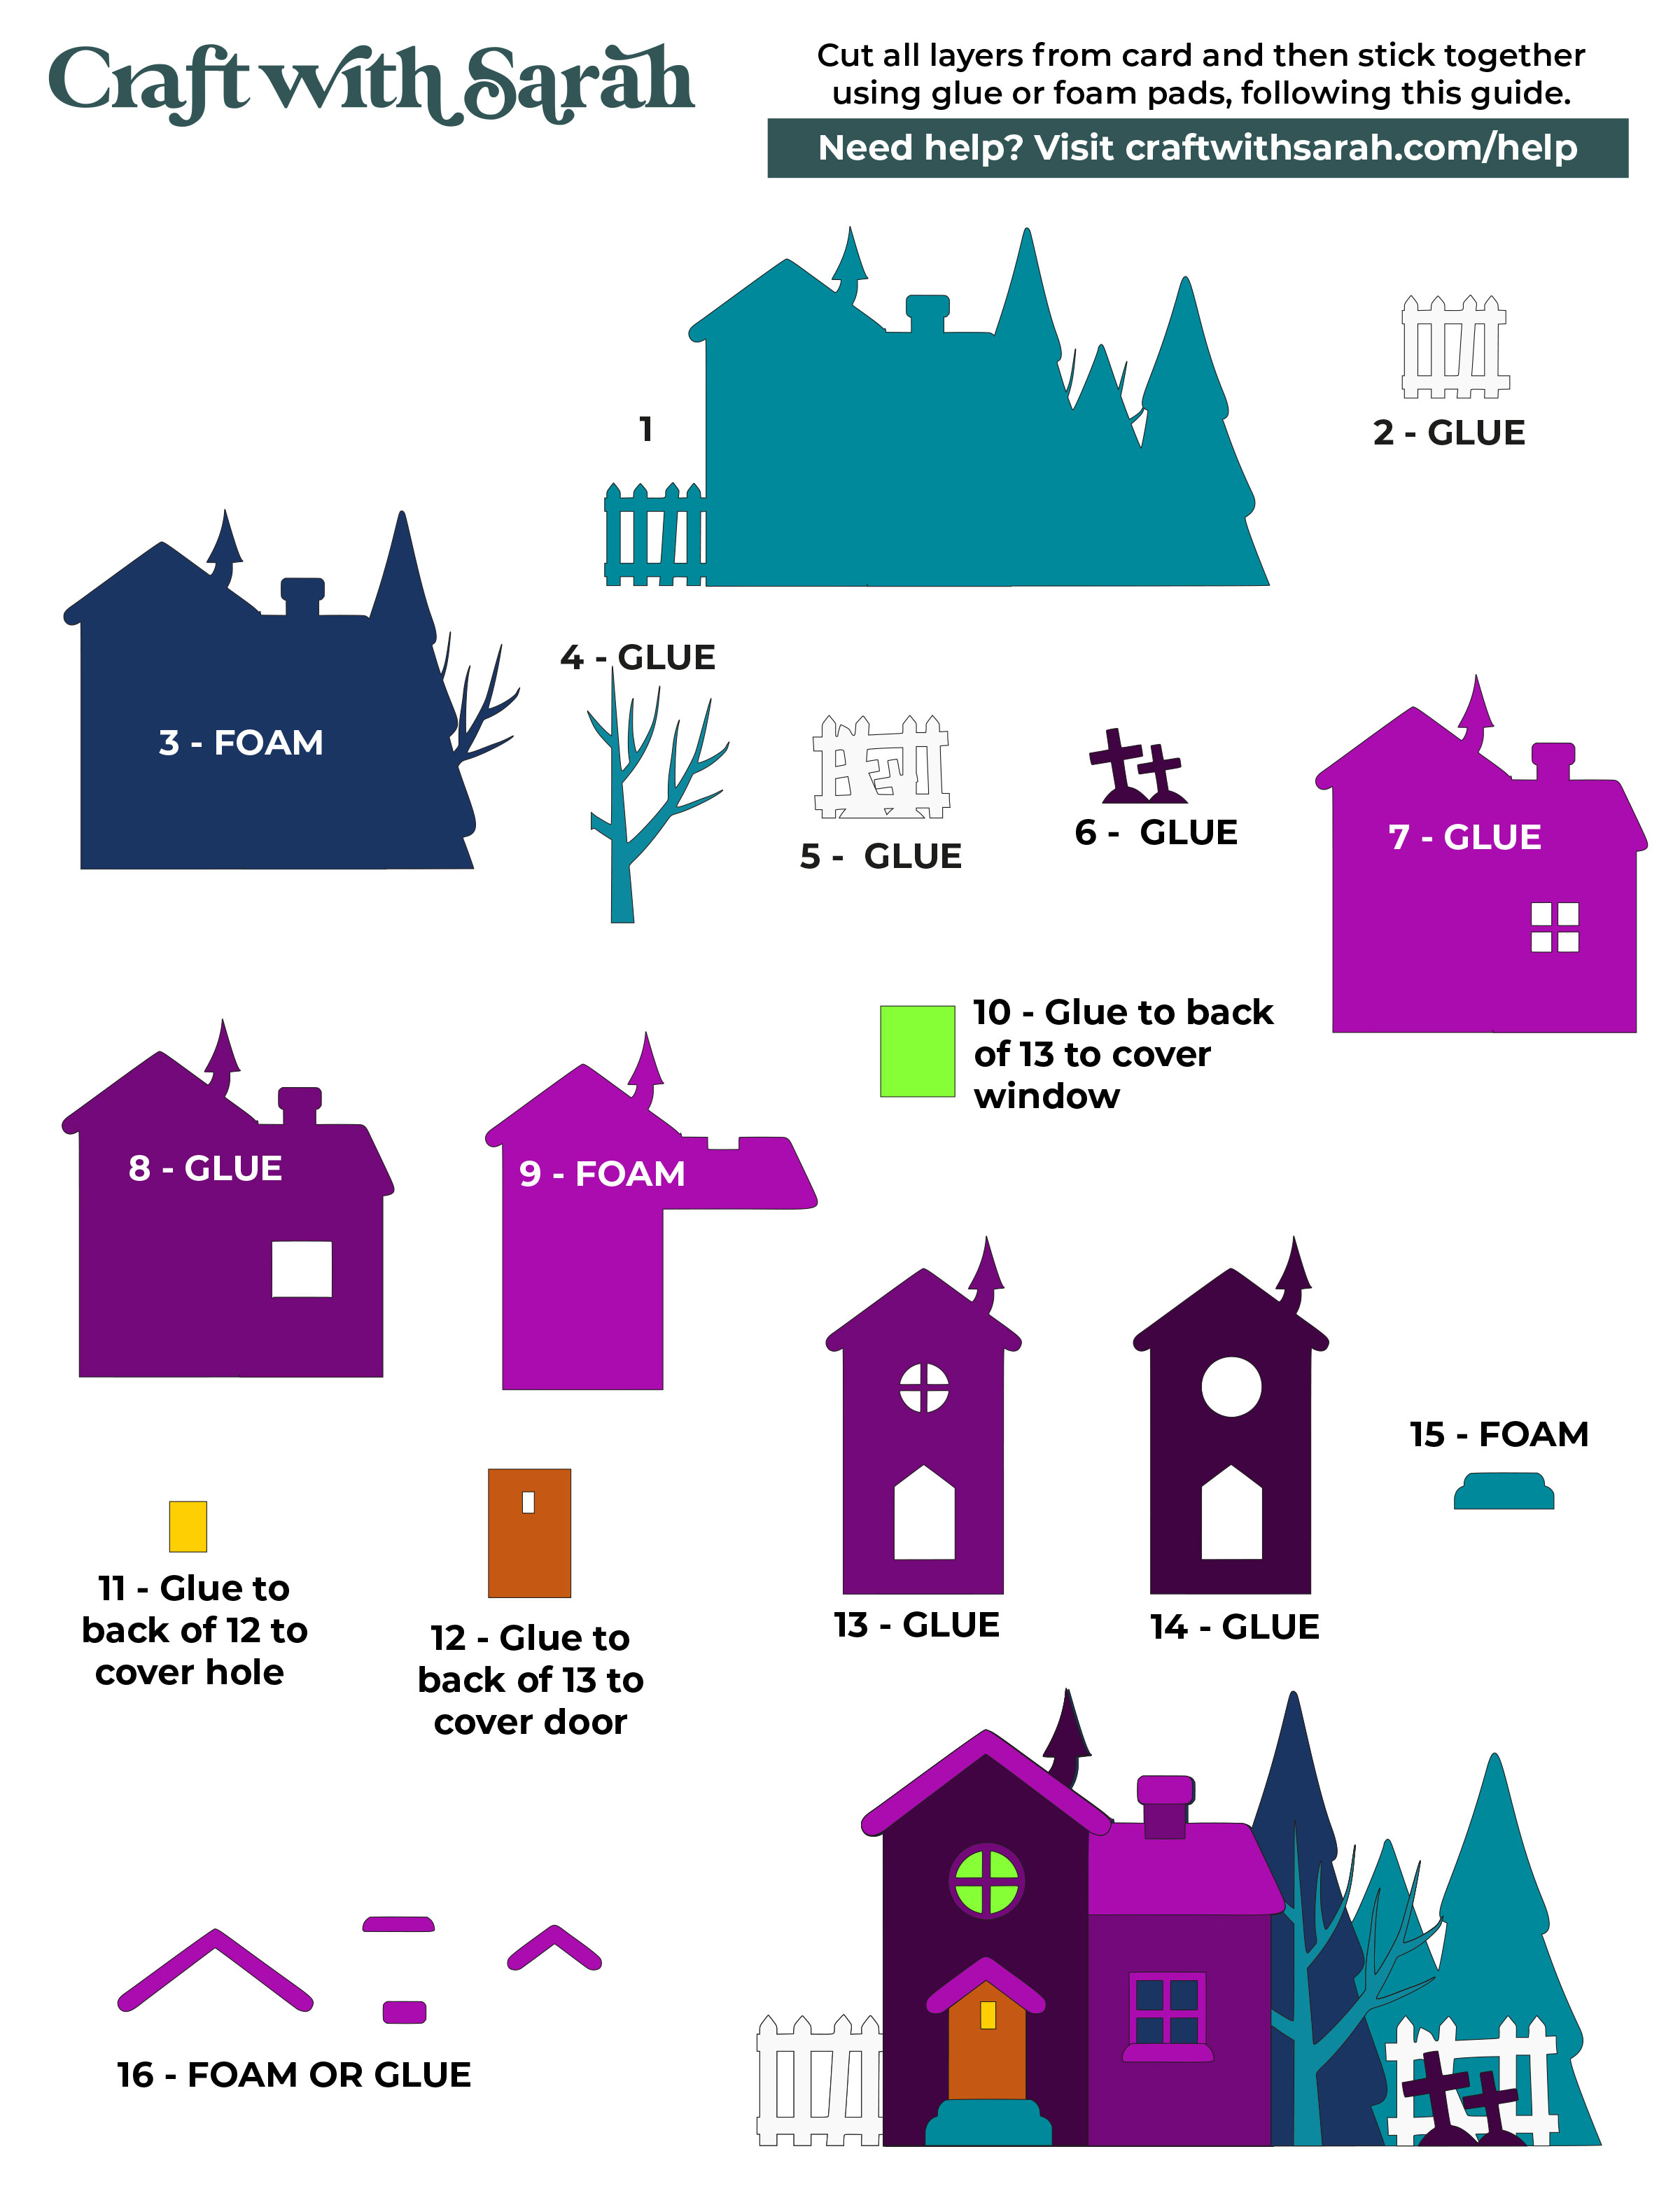
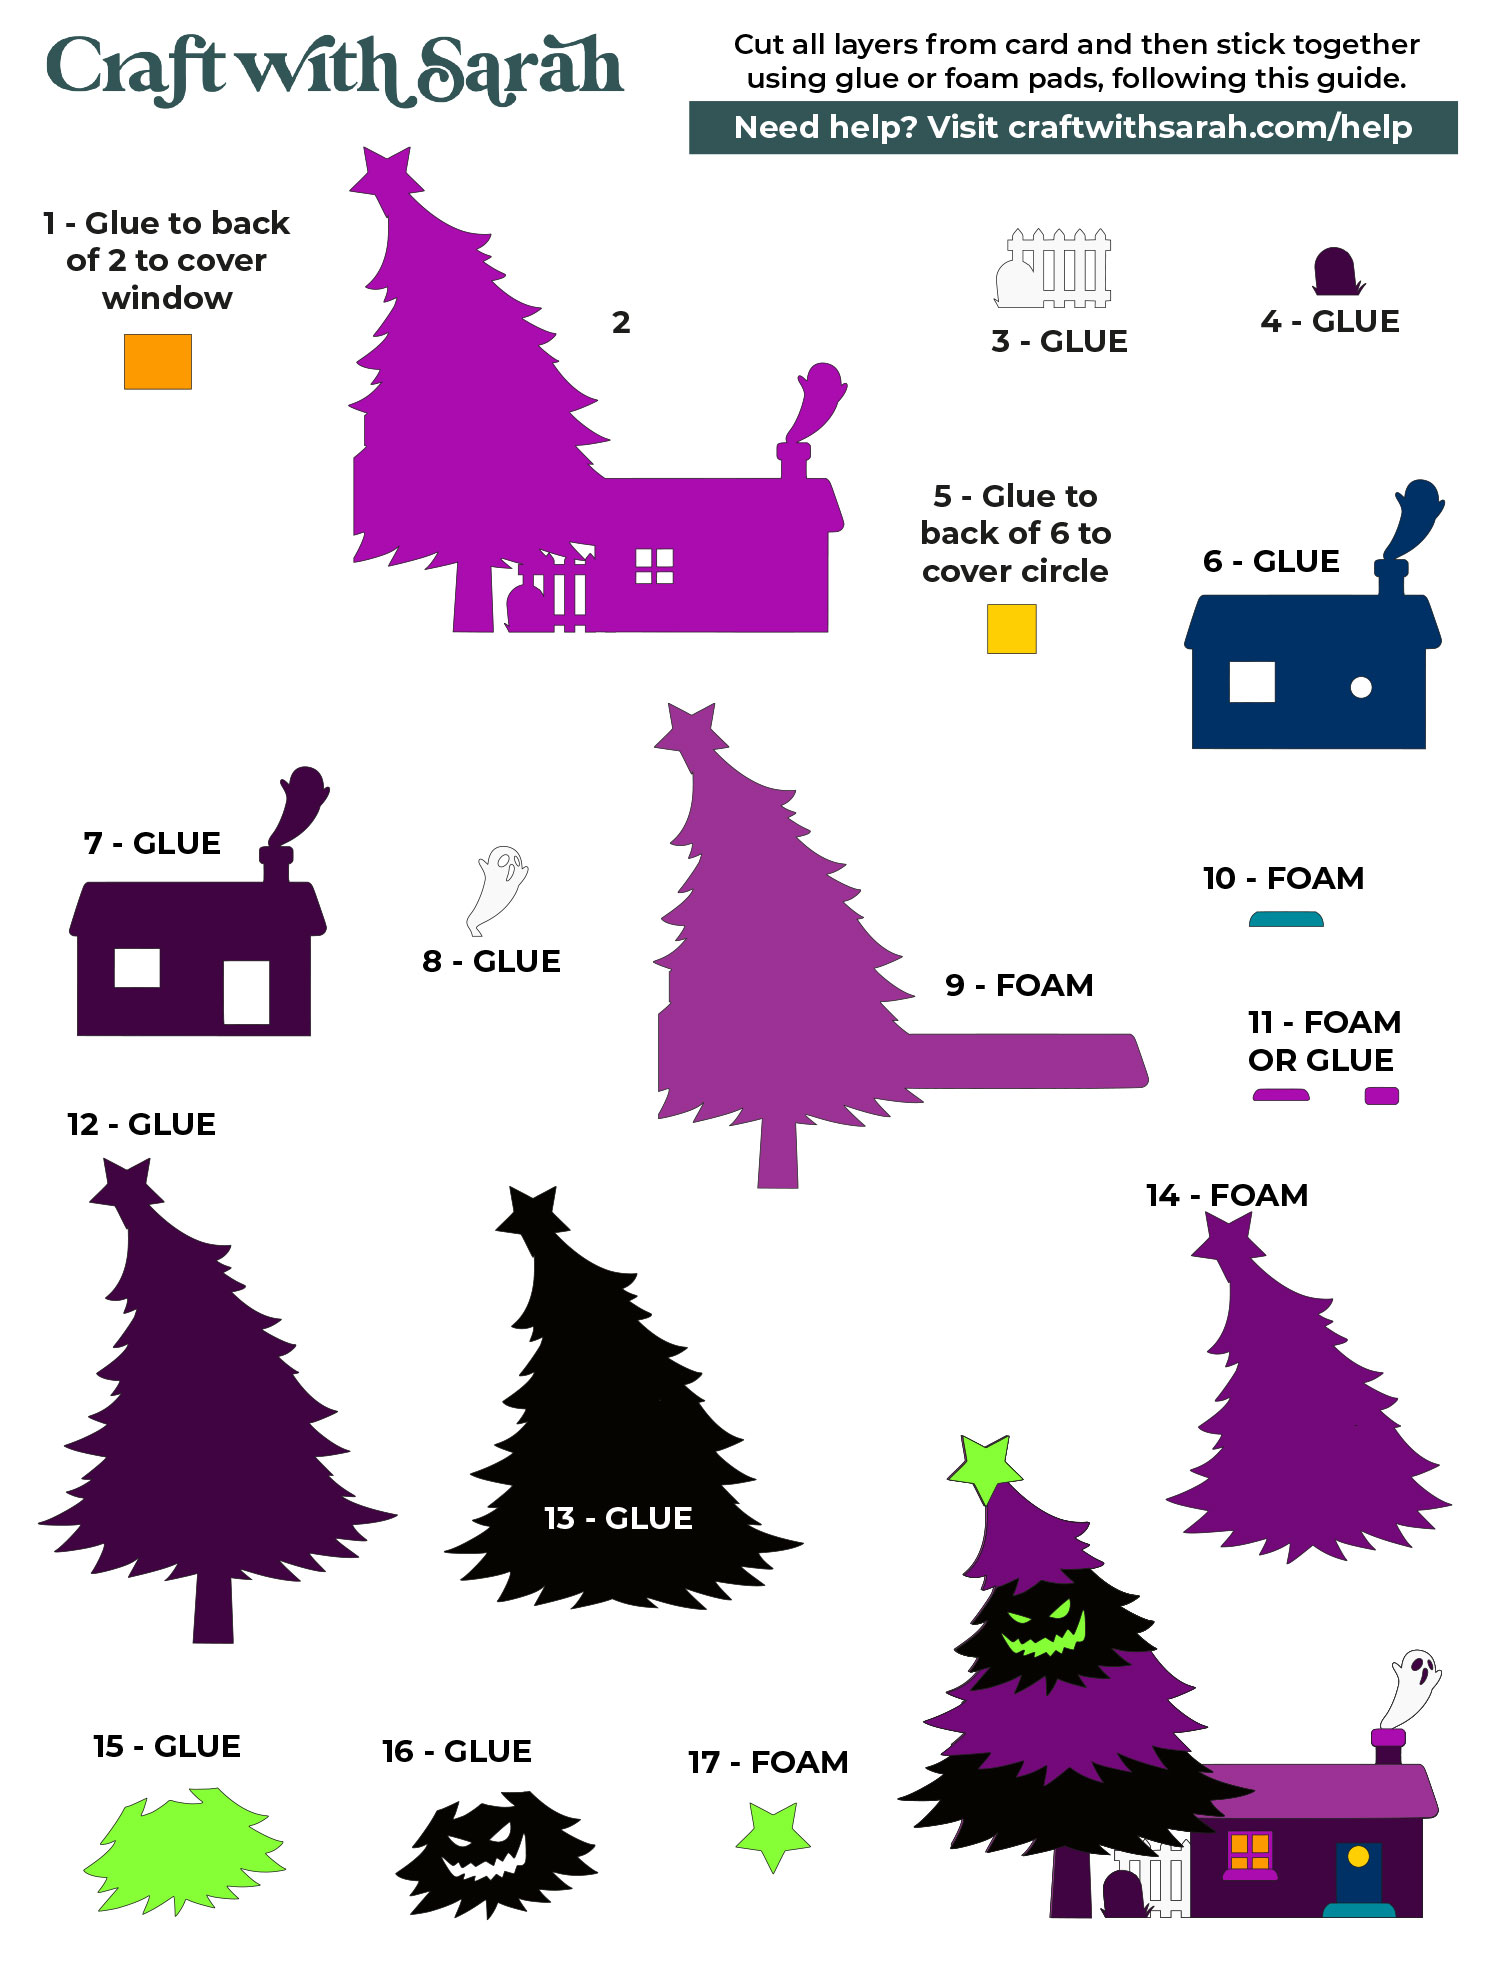
When adding the foam pads to larger pieces of card, make sure you add some in the middles of the pieces of card so it gives stability to the middles.
If you don’t add any foam pads in the middles then it can “sag” under the weight of the other layers which doesn’t look as good.
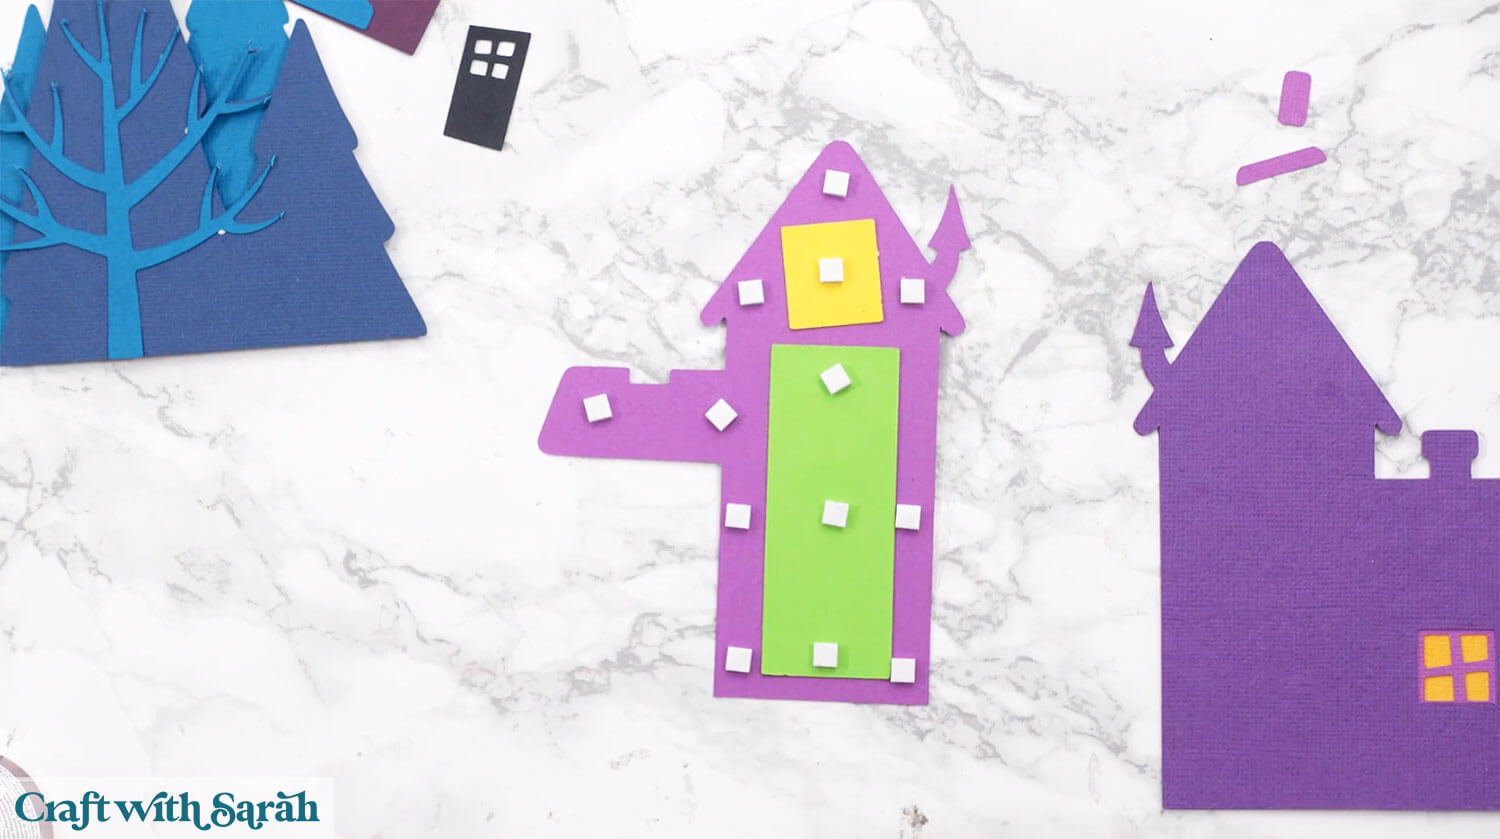
Continue sticking the pieces together, following the assembly guide, until your cards are all finished.
Step 5) Stick together the base of the giant sign
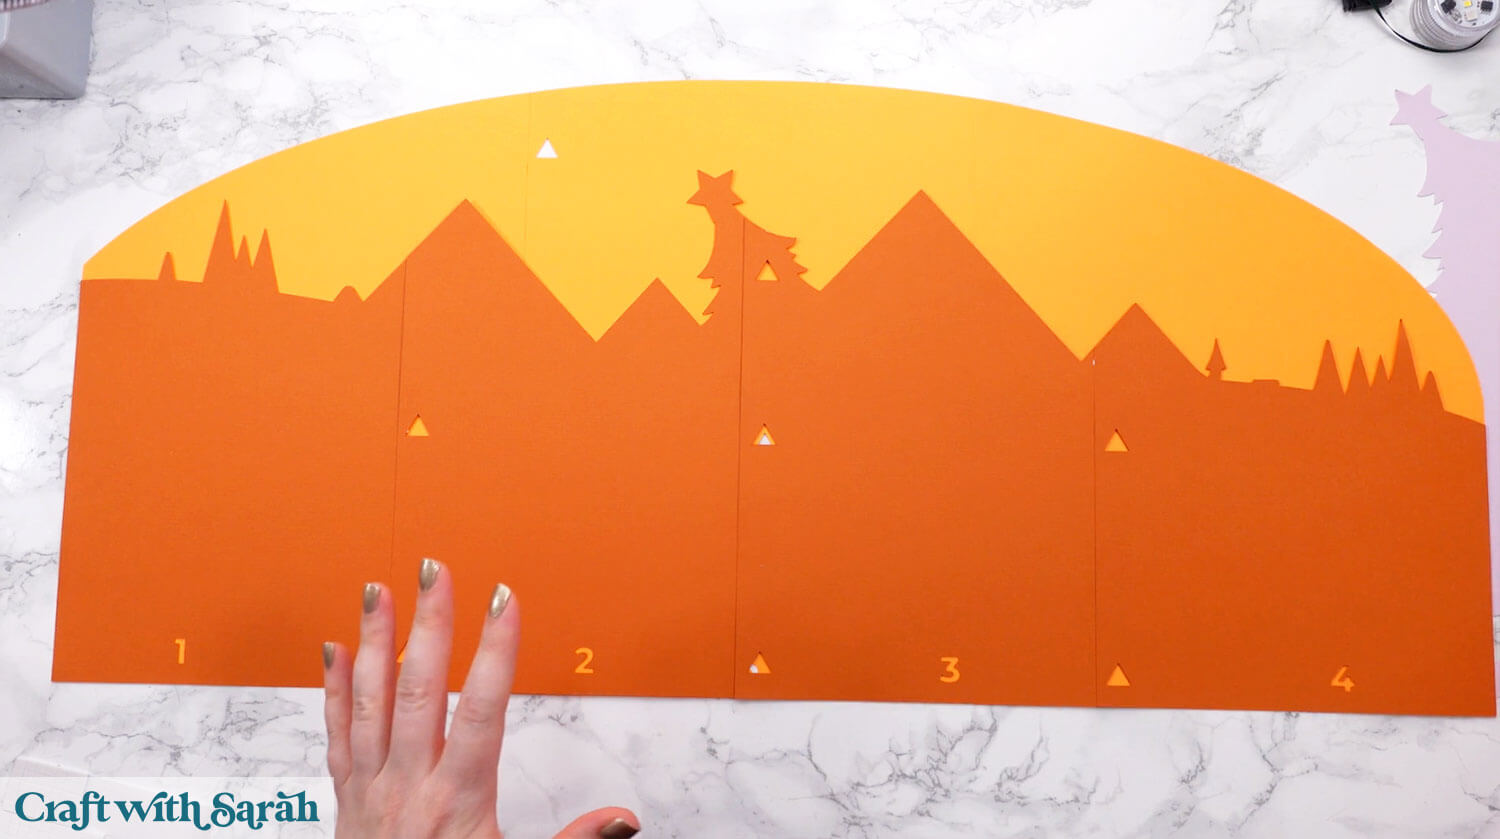
Select the six orange pieces that make up the sky. They all have triangles to line up the pieces and a number 1 – 6 along the bottom so you can easily tell what order they go in.
Glue the pieces together so that the triangles perfectly align with each other on each piece.
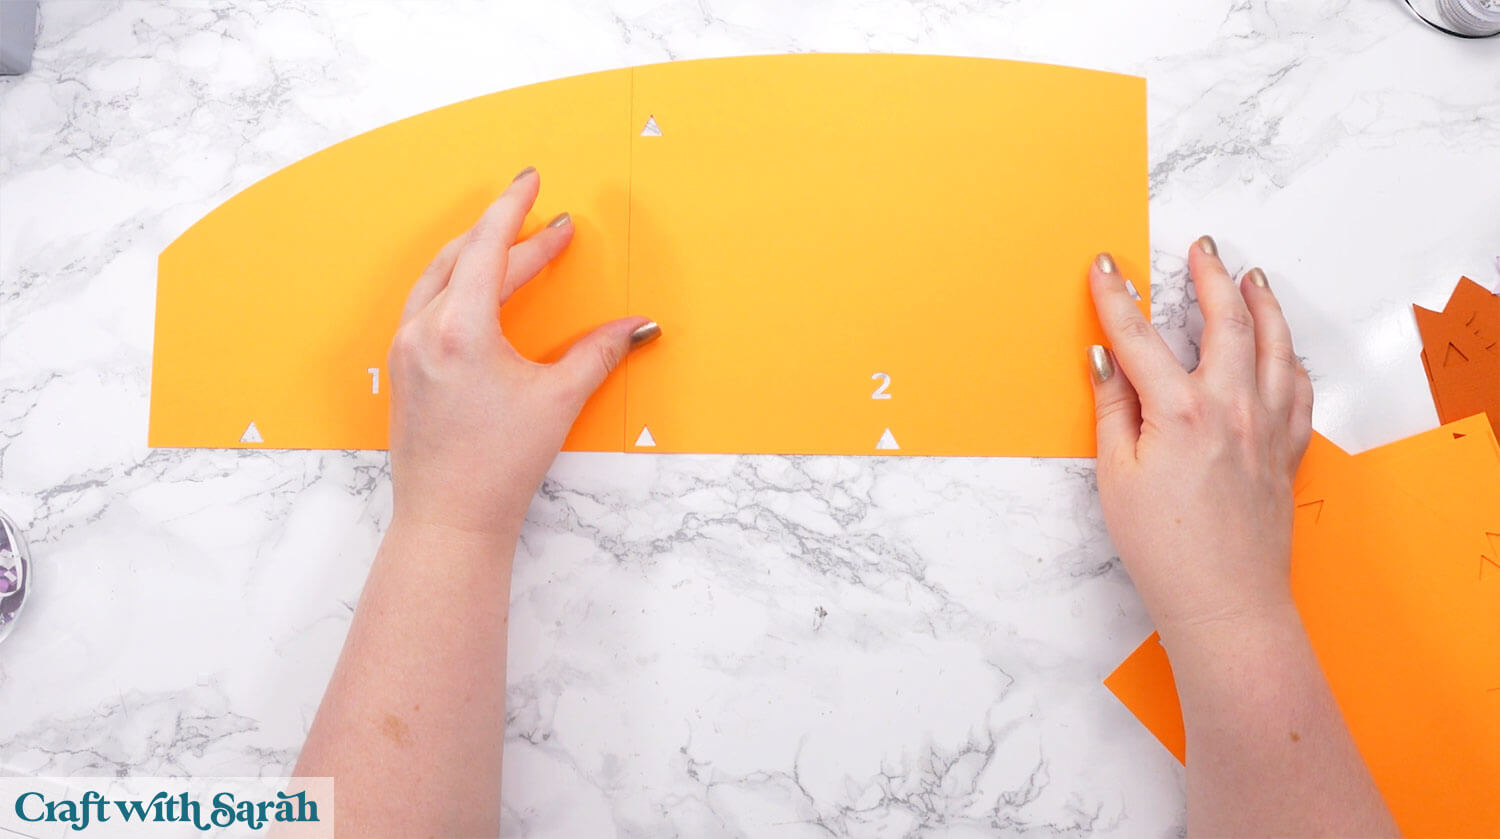
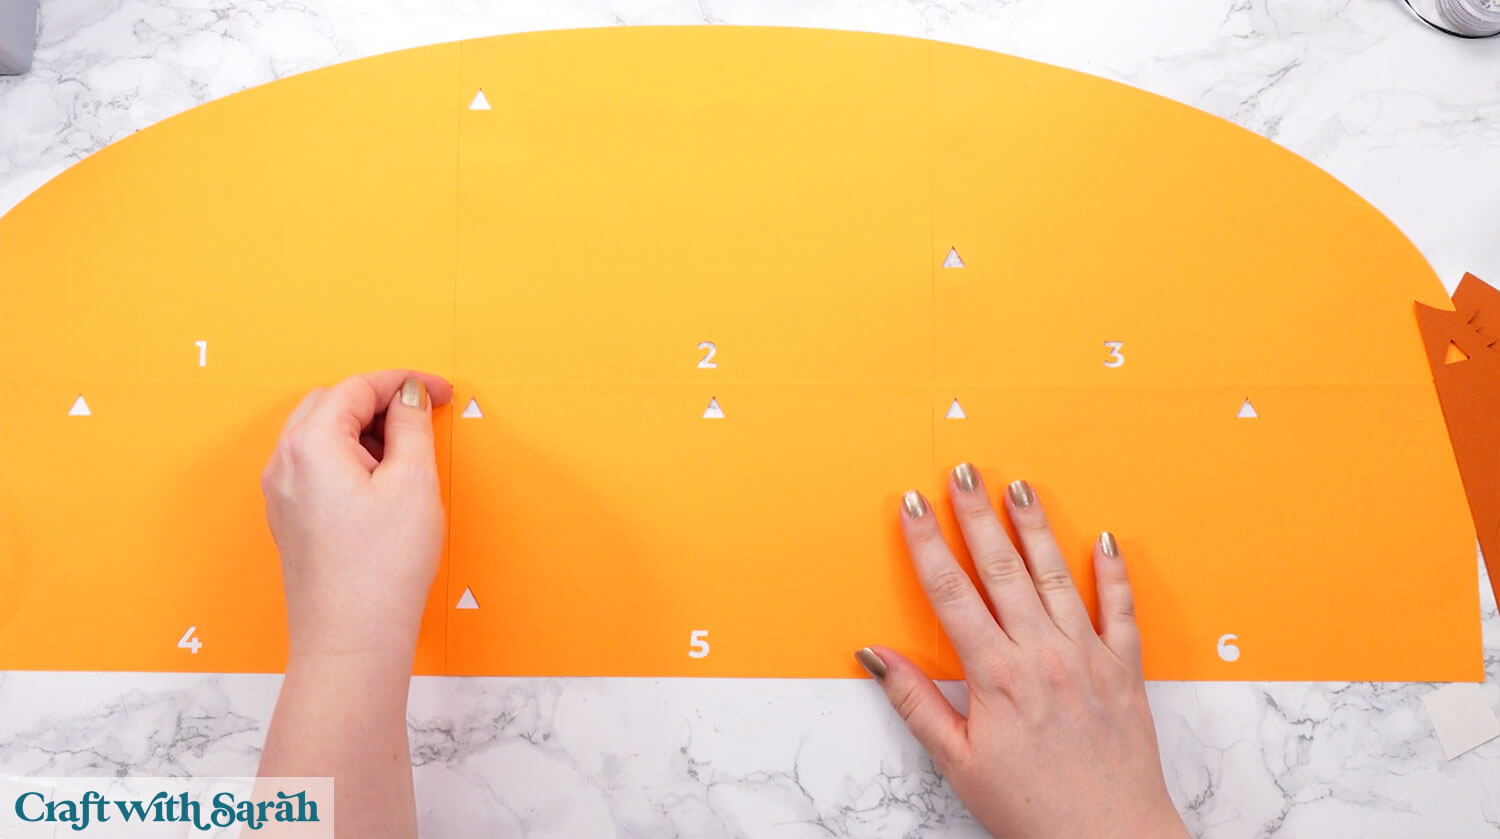
Once the glue has dried, turn the sign upside down and add sticky tape down all of the join lines to strengthen them.
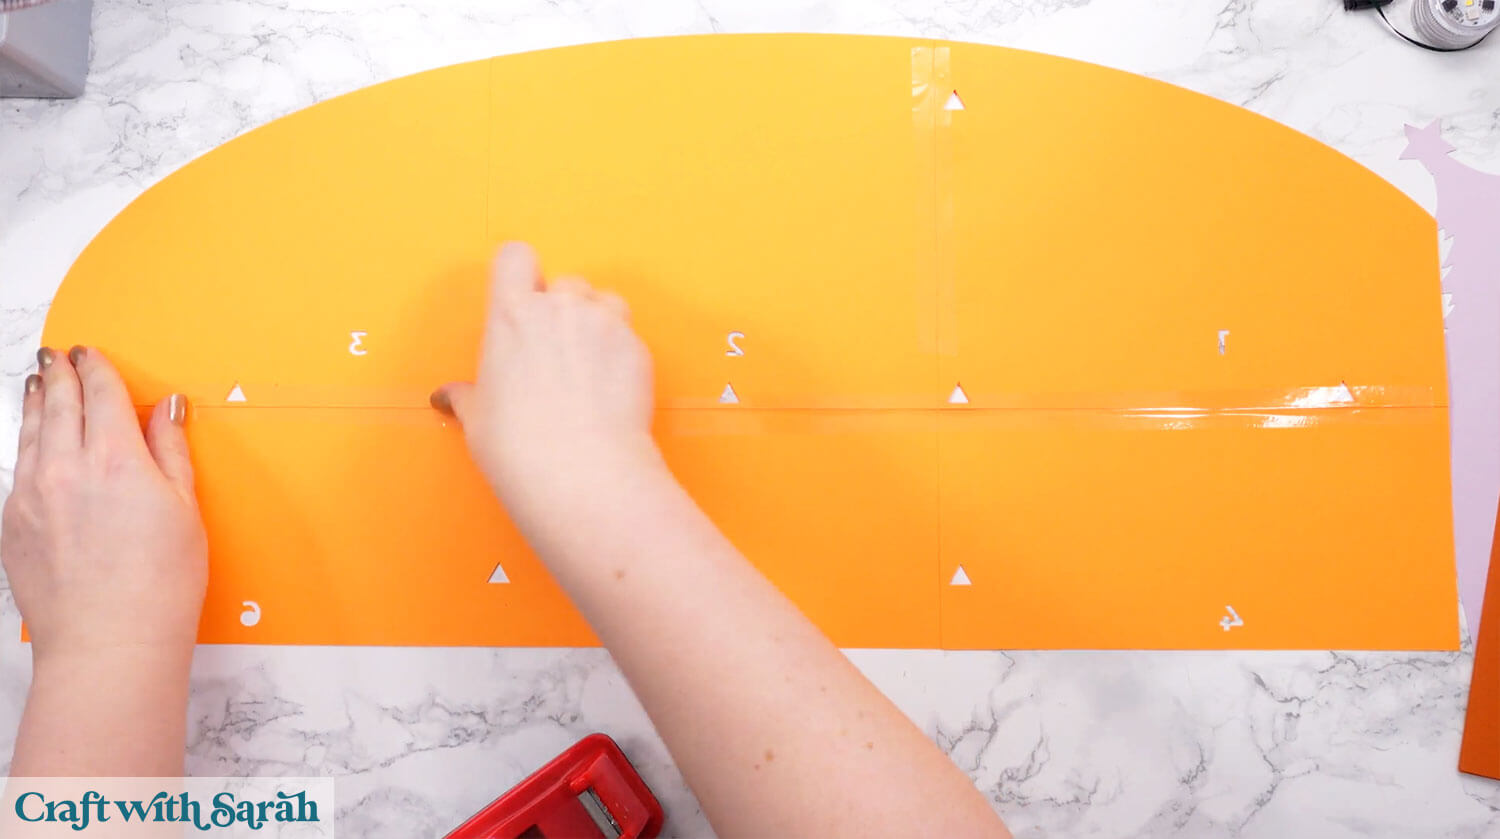
Turn the sign the correct way round again.
Glue the four darker orange pieces together. I lined them up on the main background to make sure my bottom edge was straight.
The triangle cutouts on the darker pieces should align with each other (but they don’t line up with the triangles on the light orange).
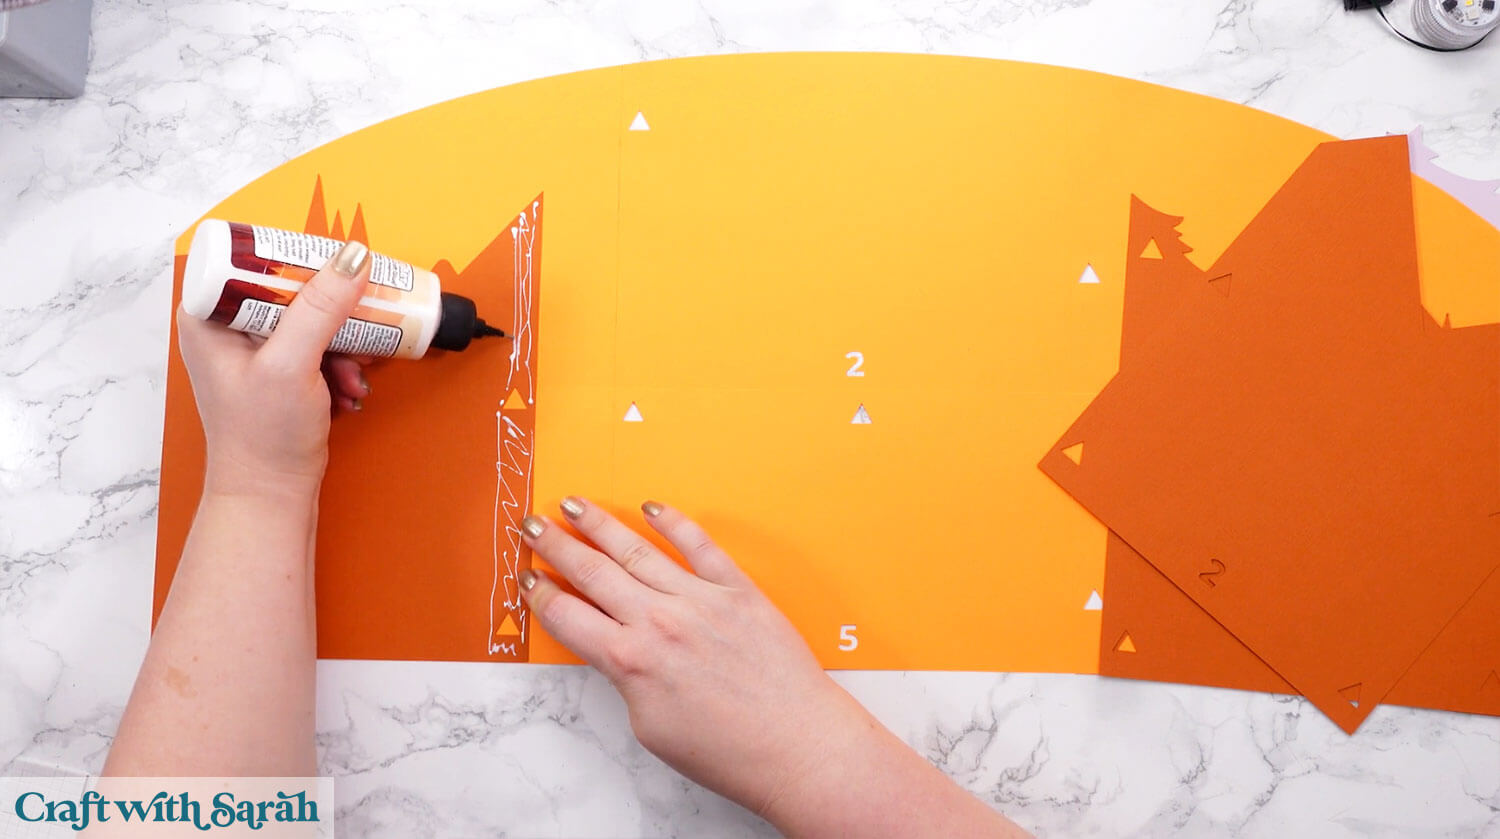
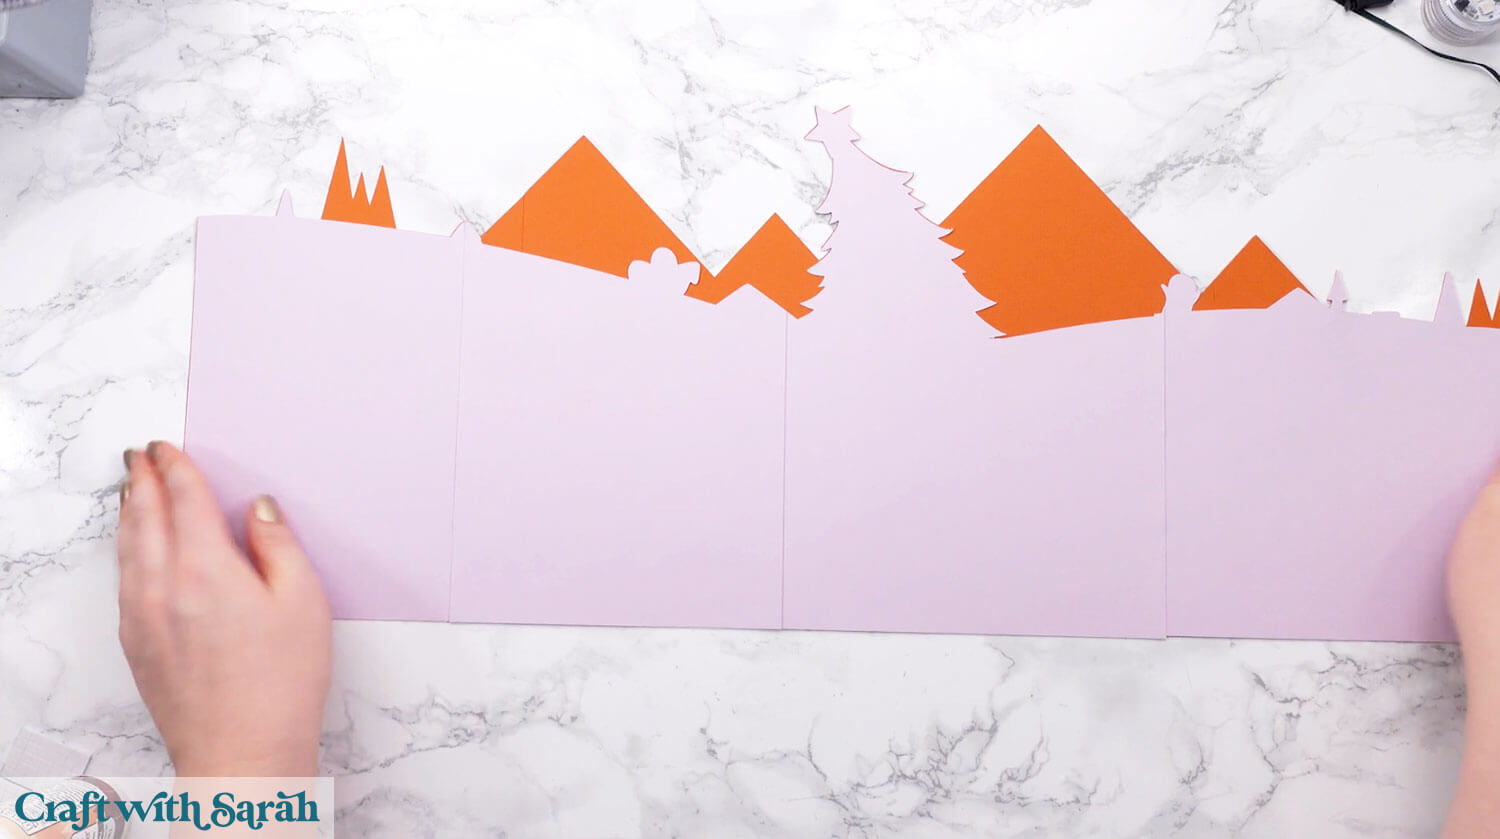
Glue the four light purple background pieces on top.
I found it easiest to glue the second piece last, because there isn’t a lot to line it up against.
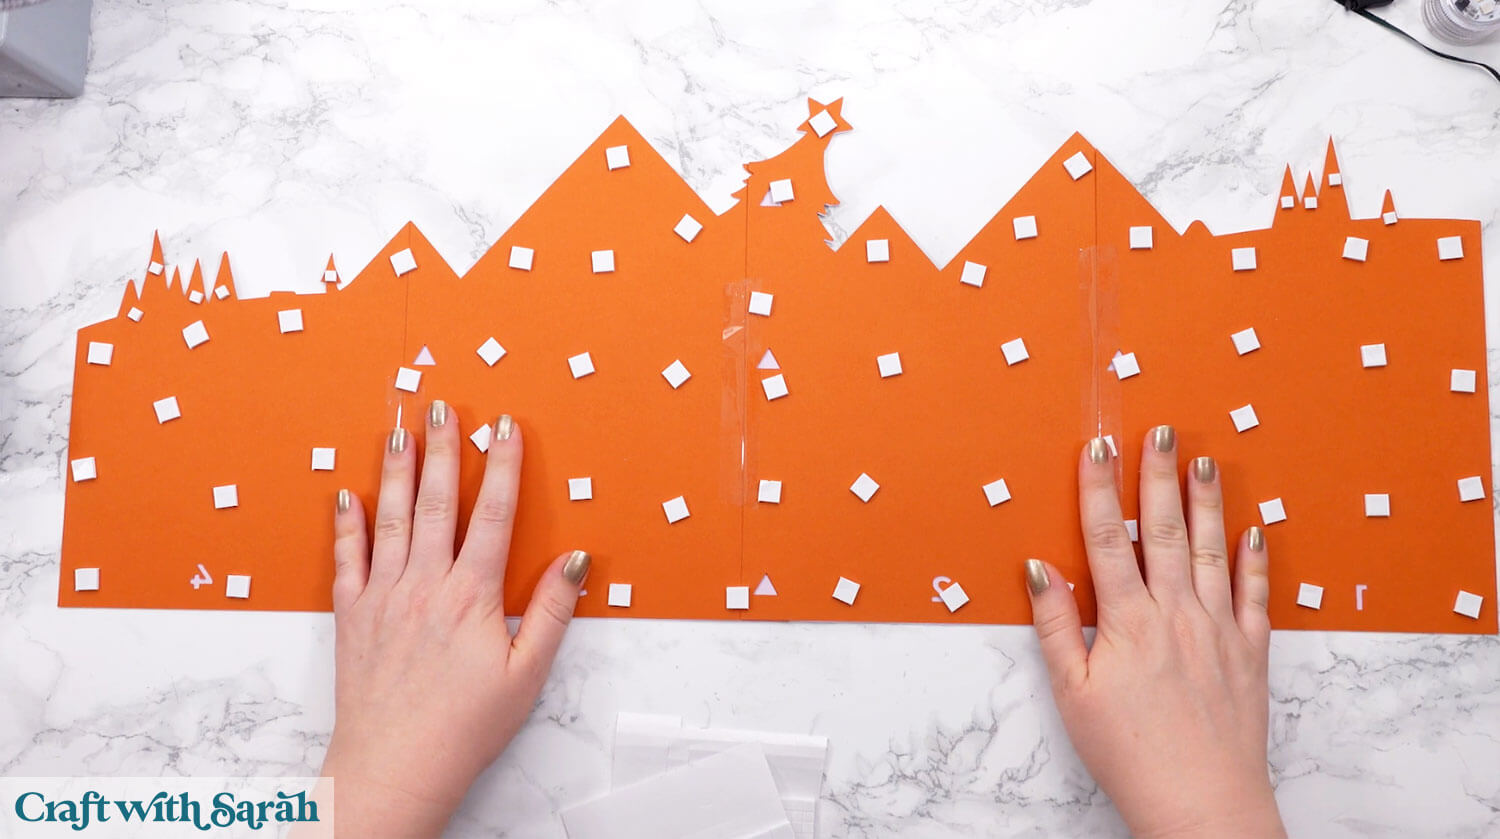
Turn the dark orange piece upside down and add foam squares all across the back.
You need lots on here to hold the weight and to give an even “lift” to the card.
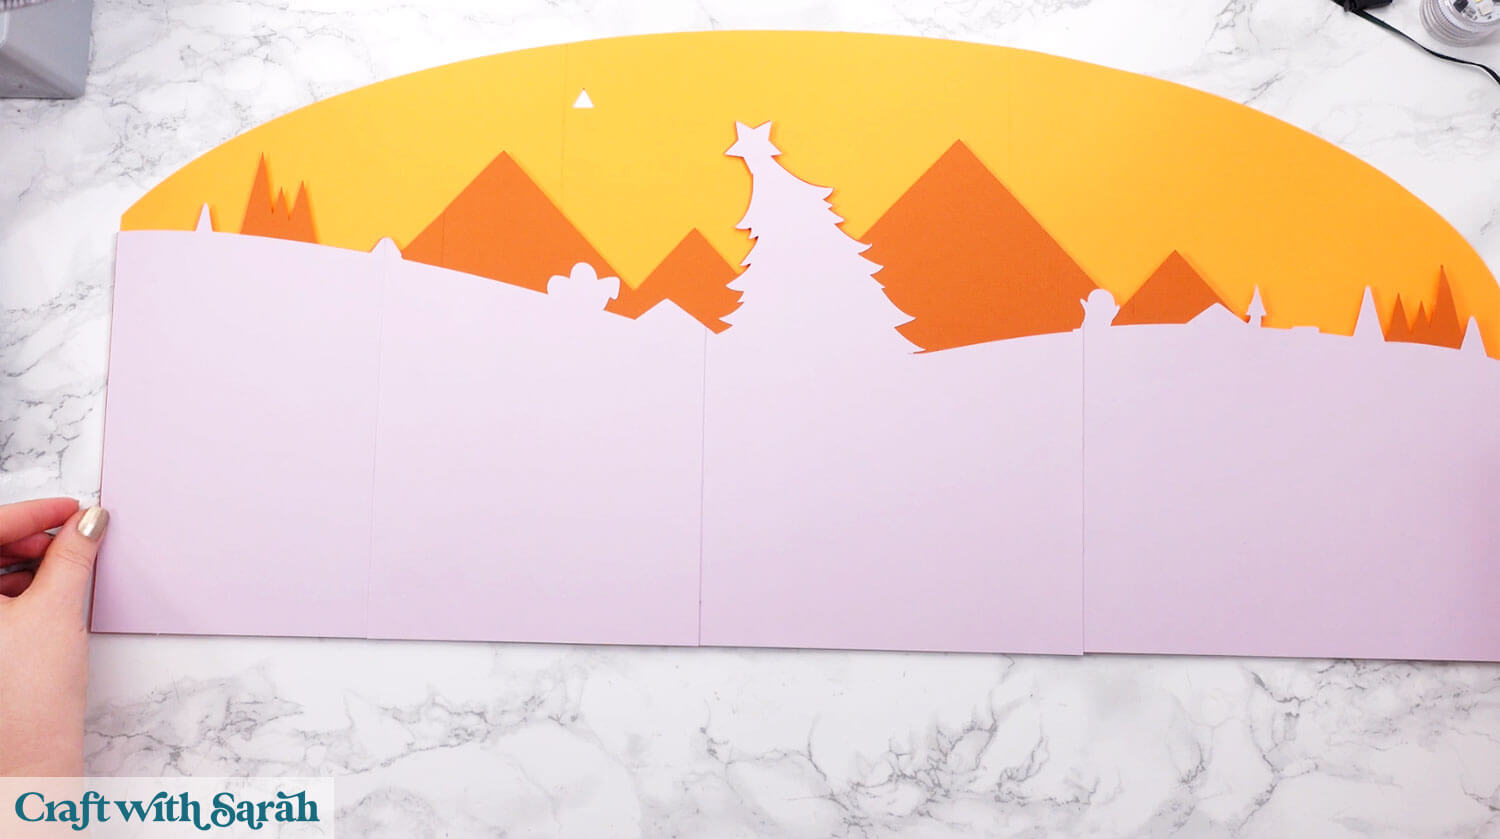
Stick it onto the light orange background. The most important line to get straight is the bottom edge.
Glue the four bats around the top of the tree.
Use foam squares for the tops of the mountains and the clouds.
Make sure the left cloud is positioned over the guide triangle to hide it from view.
Use foam squares for the bottom layer of the moon (the solid circle) and glue the face piece on top.
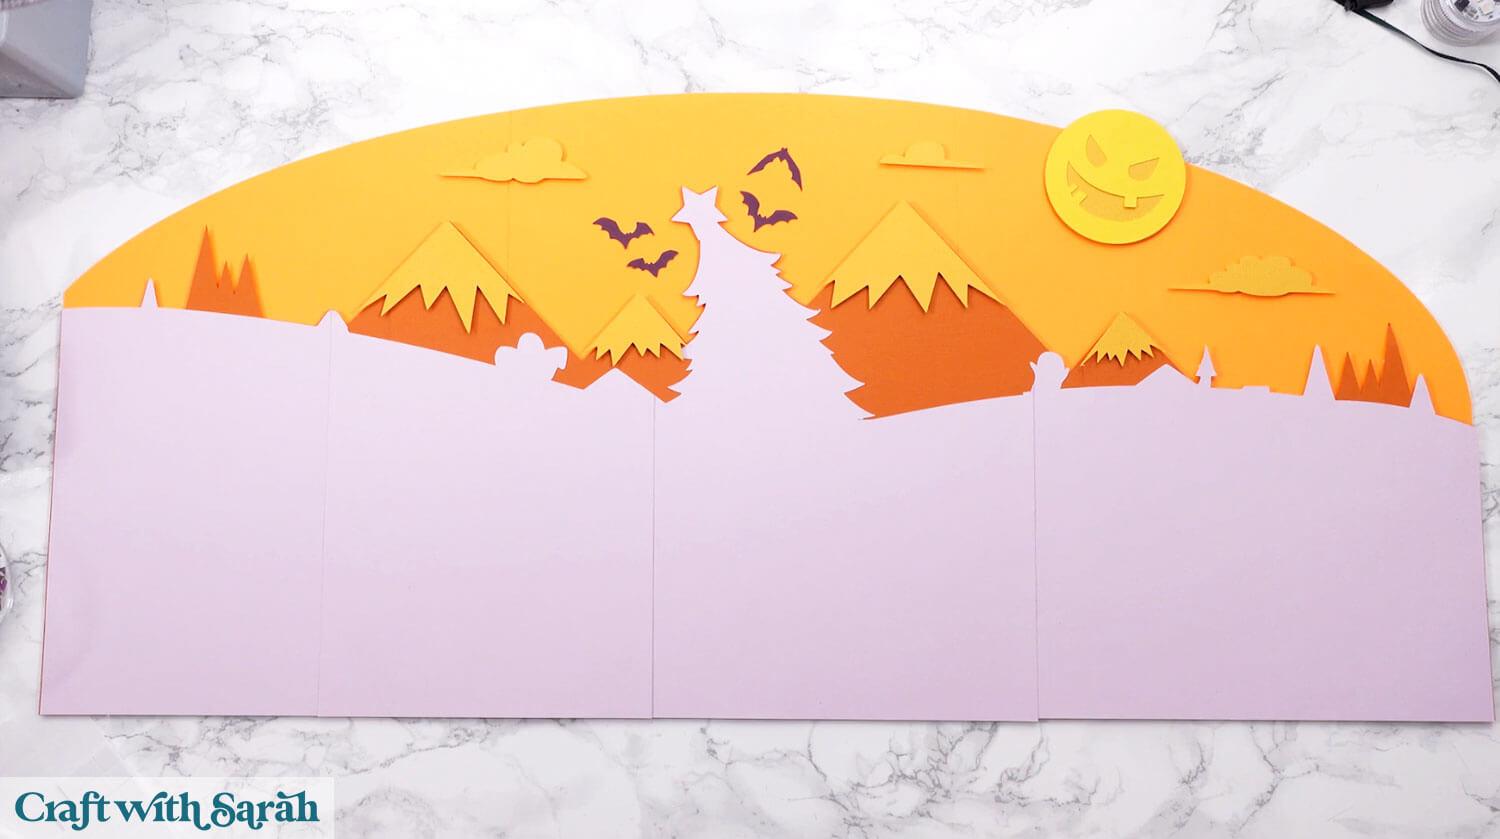
Step 6) Add on the village scene
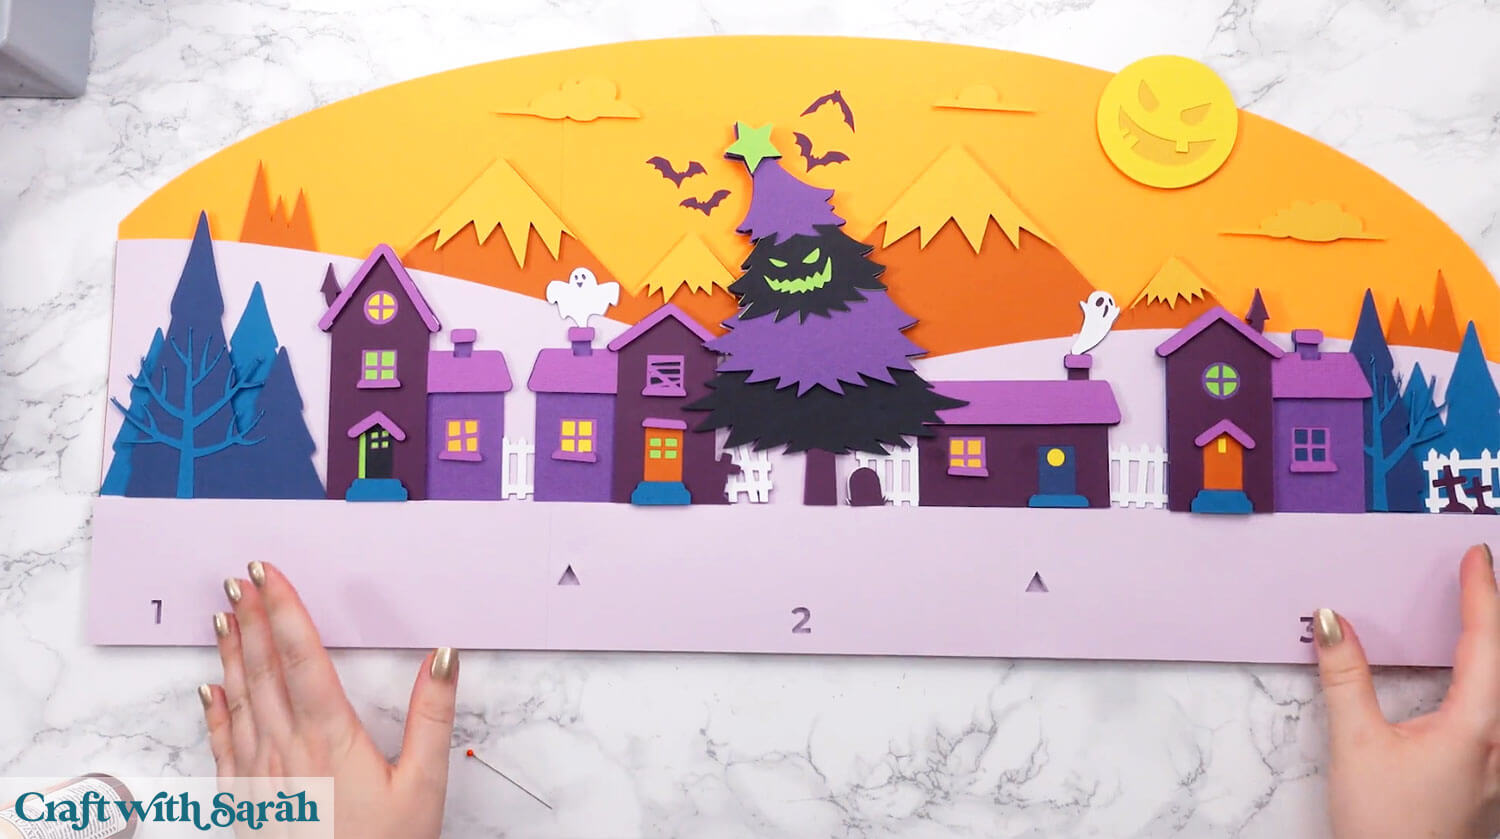
Select the three tallest white strips with numbers along the bottom.
These are the strips where the numbers are STRAIGHT and the alignment triangles have the point at the TOP.
Glue them together so that the triangles line up, then use foam squares to stick them to the sign.
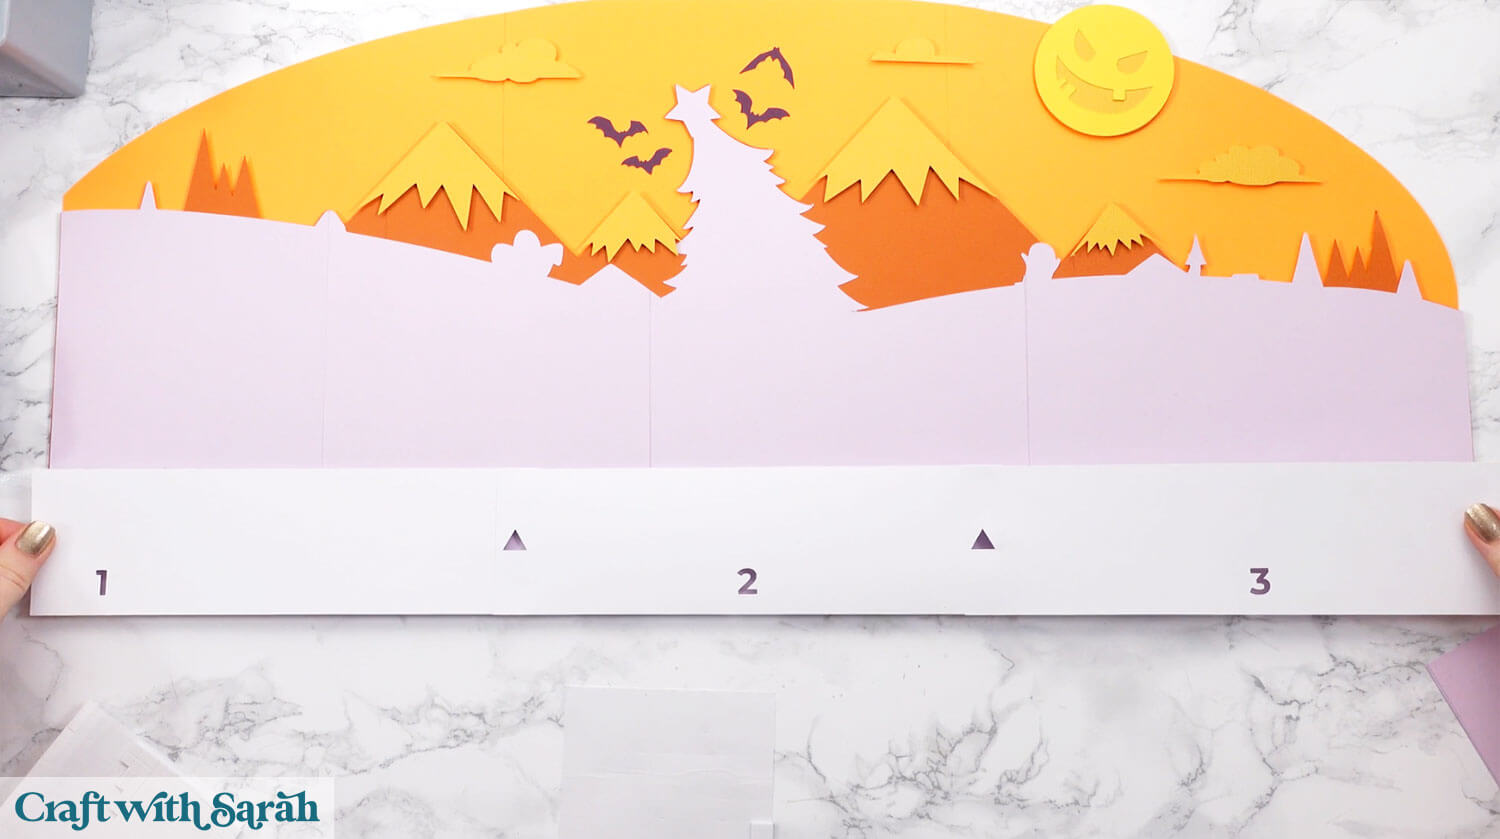
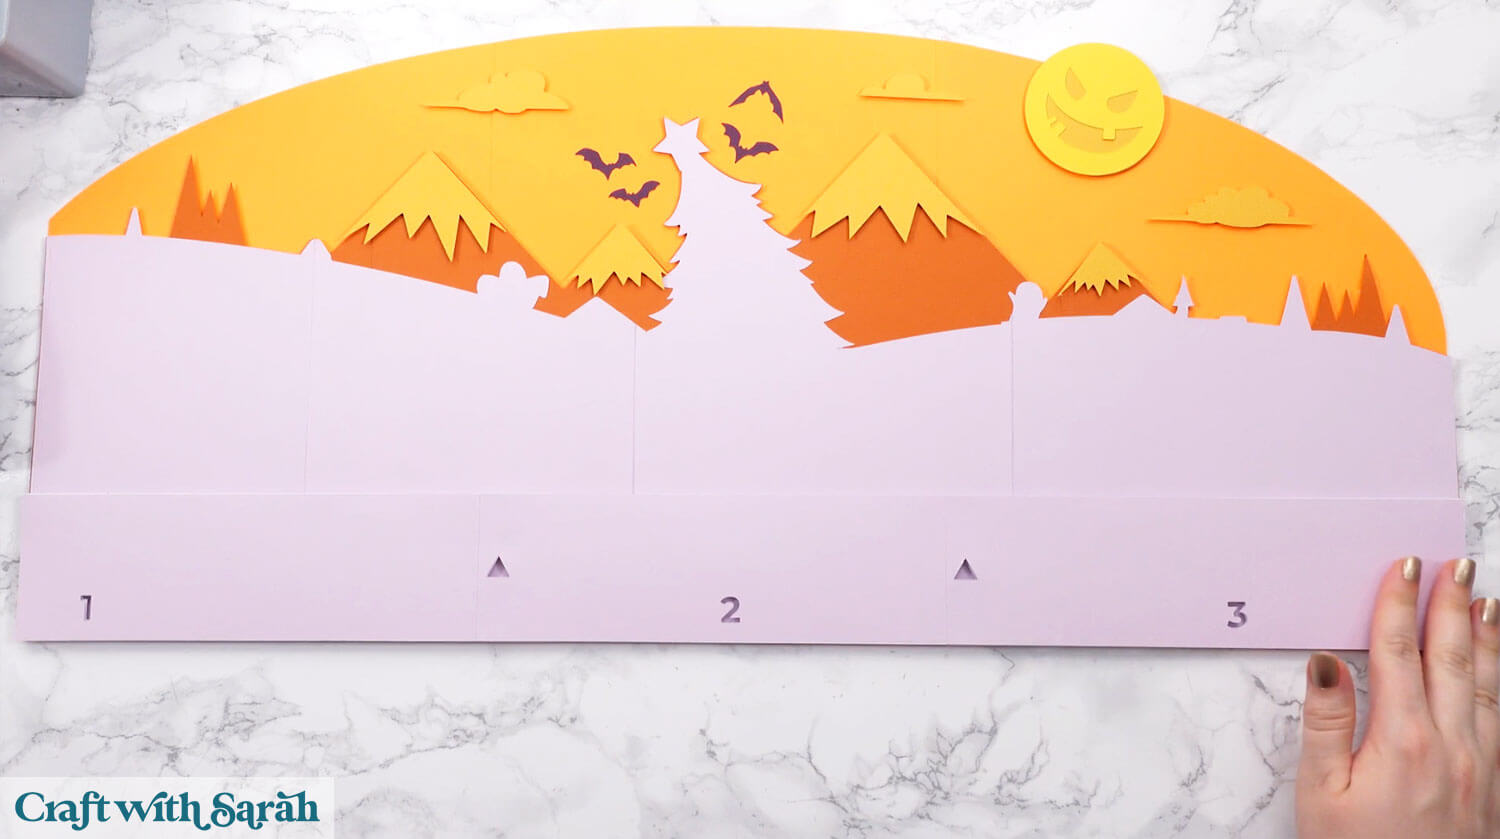
There are matching sized light purple strips. Glue these together, then use foam squares to stick them to the sign.
The layers of foam squares here are important, as we need to raise the countdown numbers up above the rest of the design so that the cat can easily slide across.
Glue the blue trees to the sign, then the first house.
Glue the house and trees that appear on the furthest right of the design.
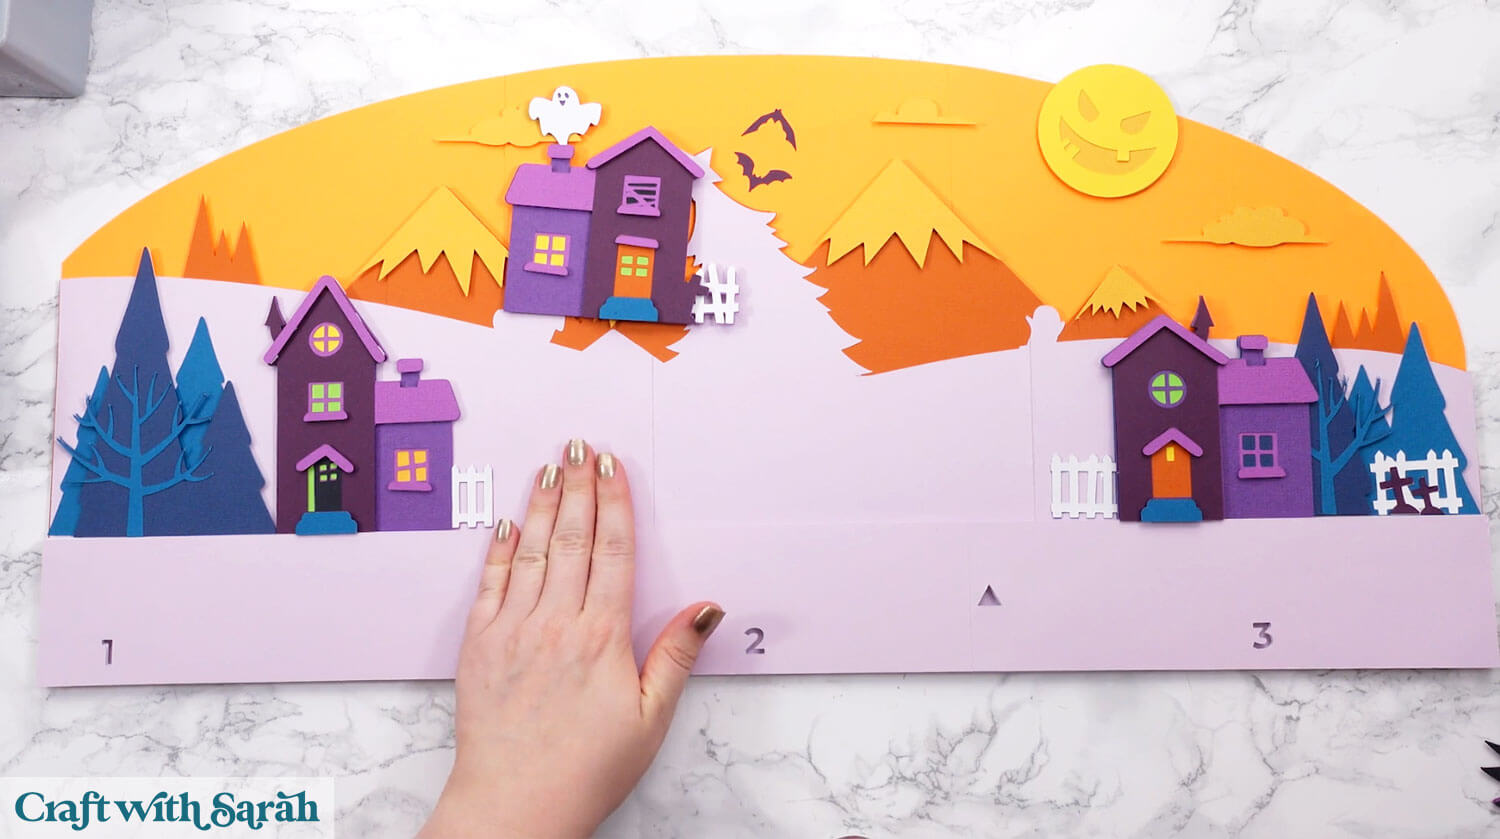
Glue the second-to-the-left house on next, and finally the house with the creepy tree.
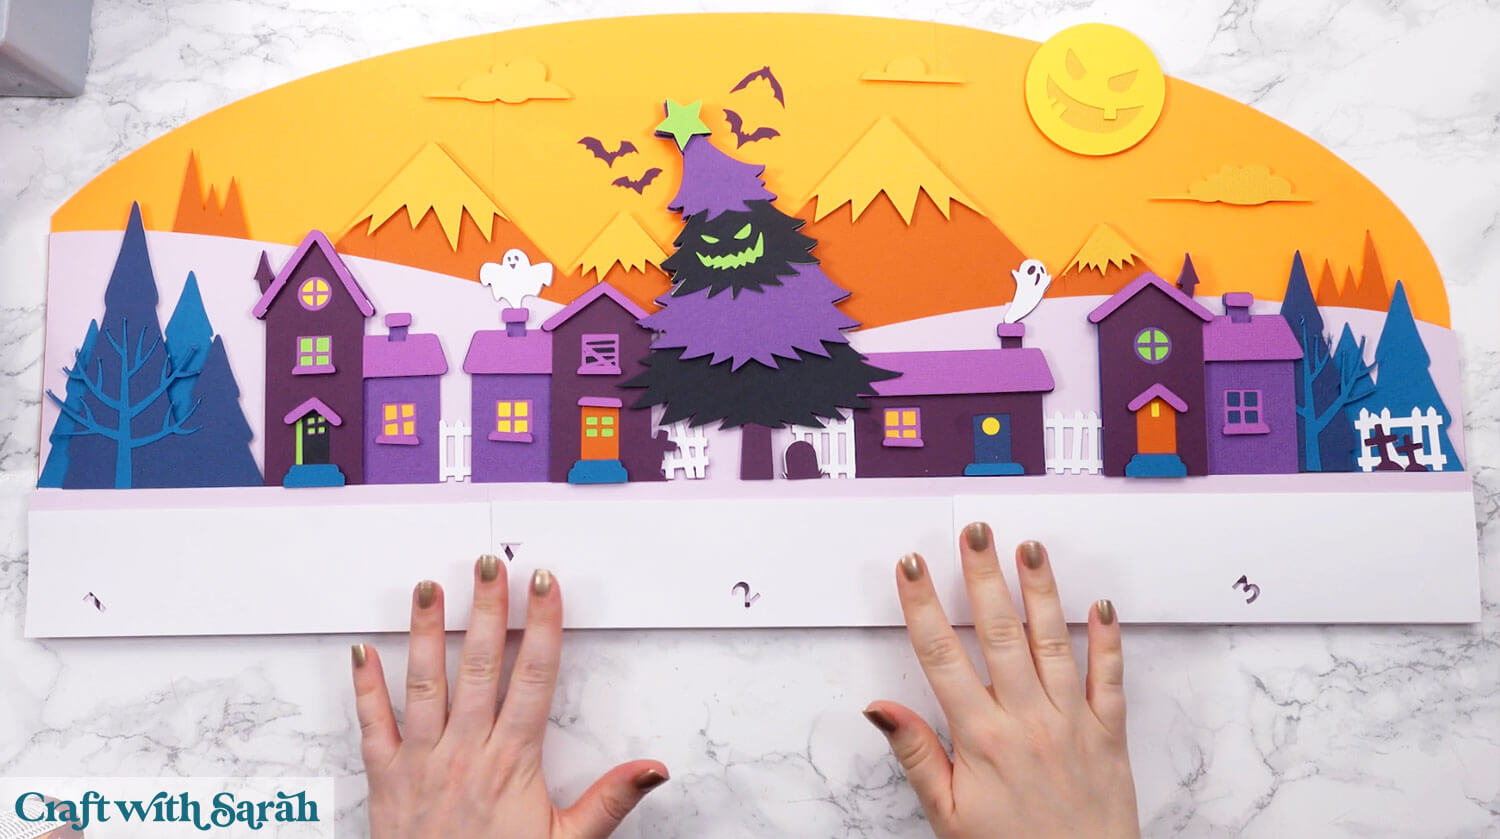
Glue together the three white rectangles with the alignment triangles have the point at the BOTTOM and the numbers are at an ANGLE.
Use foam squares to stick the long strip to the sign.
The remaining three white rectangles are the ones that have either your score or draw lines on them.
Glue the pieces together.
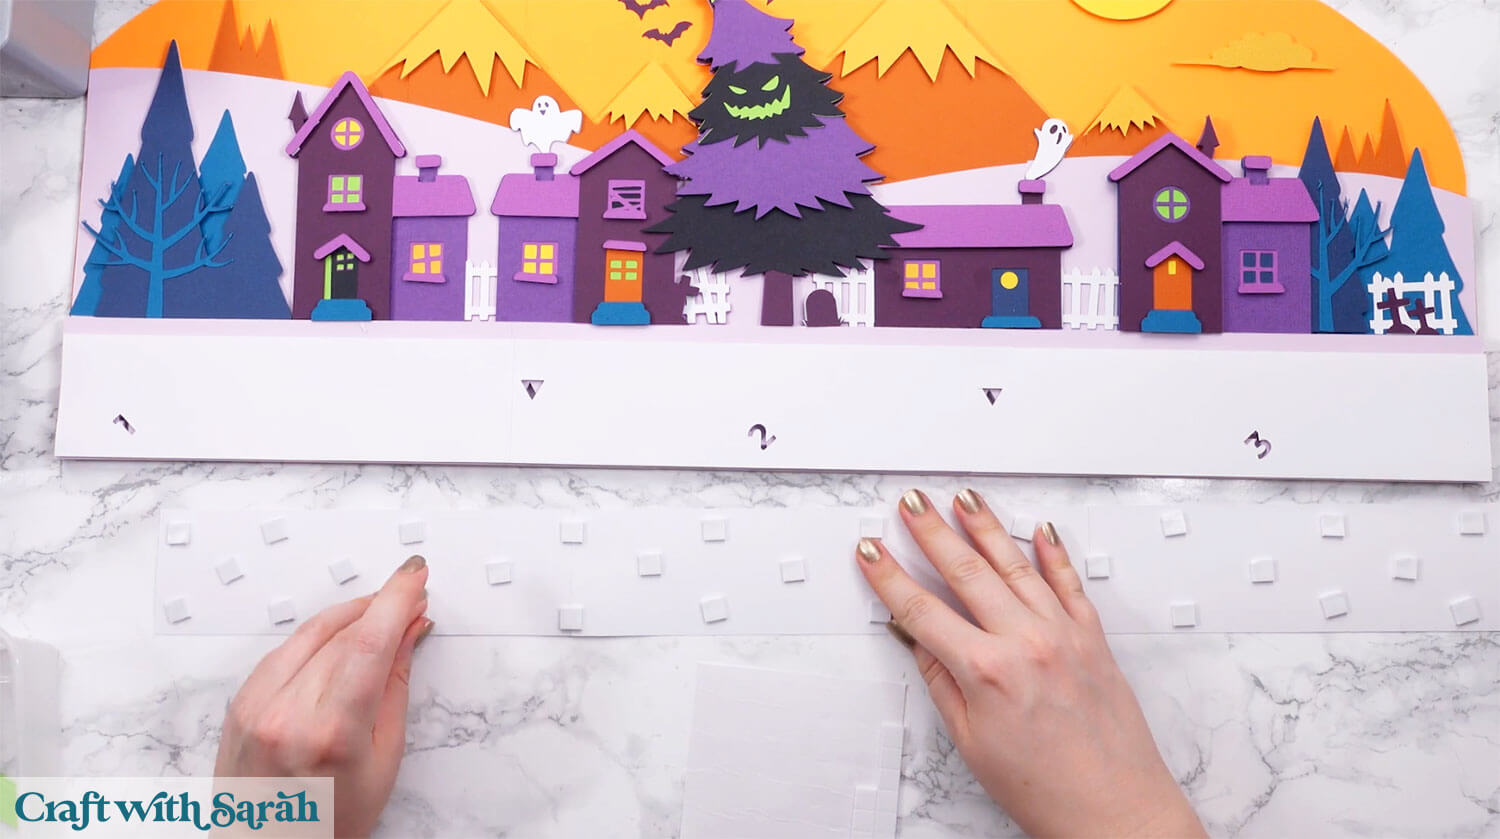
Use foams squares to attach to your sign, with the scored/drawn layers facing upwards (so you can still see them).
Glue the five coloured card pieces that make up the numbers to each other to form a long line.
It’s easiest to do with them lined up along the giant sign so that you can make sure they are straight, but do NOT glue the coloured card pieces to the sign yet!
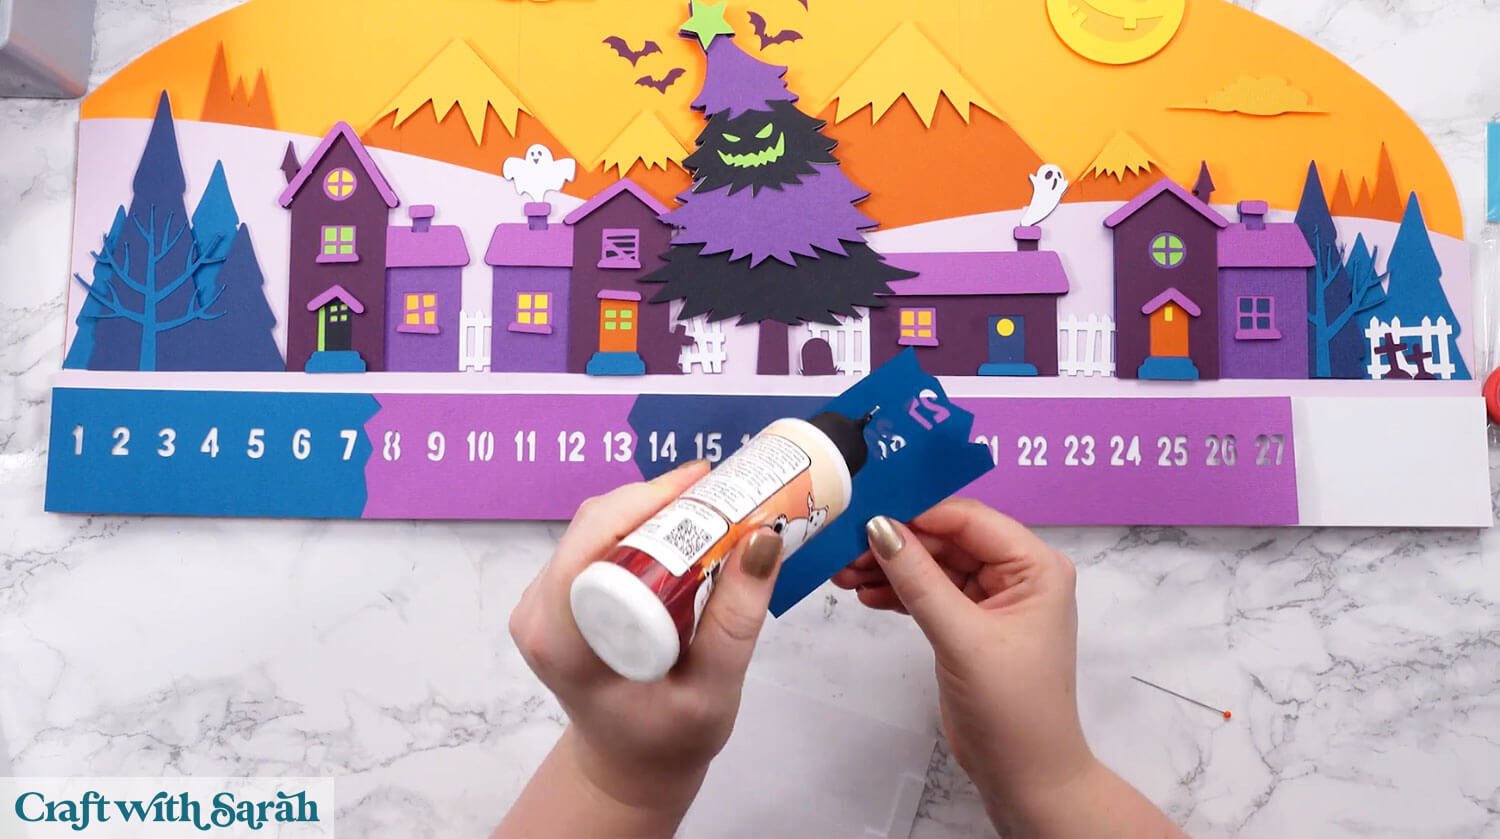
Add glue to the edge of the white strip on the left, bottom and right but ONLY put the glue up to the score/draw lines.
If you add glue any further inwards then the cat will not be able to move between the numbers.
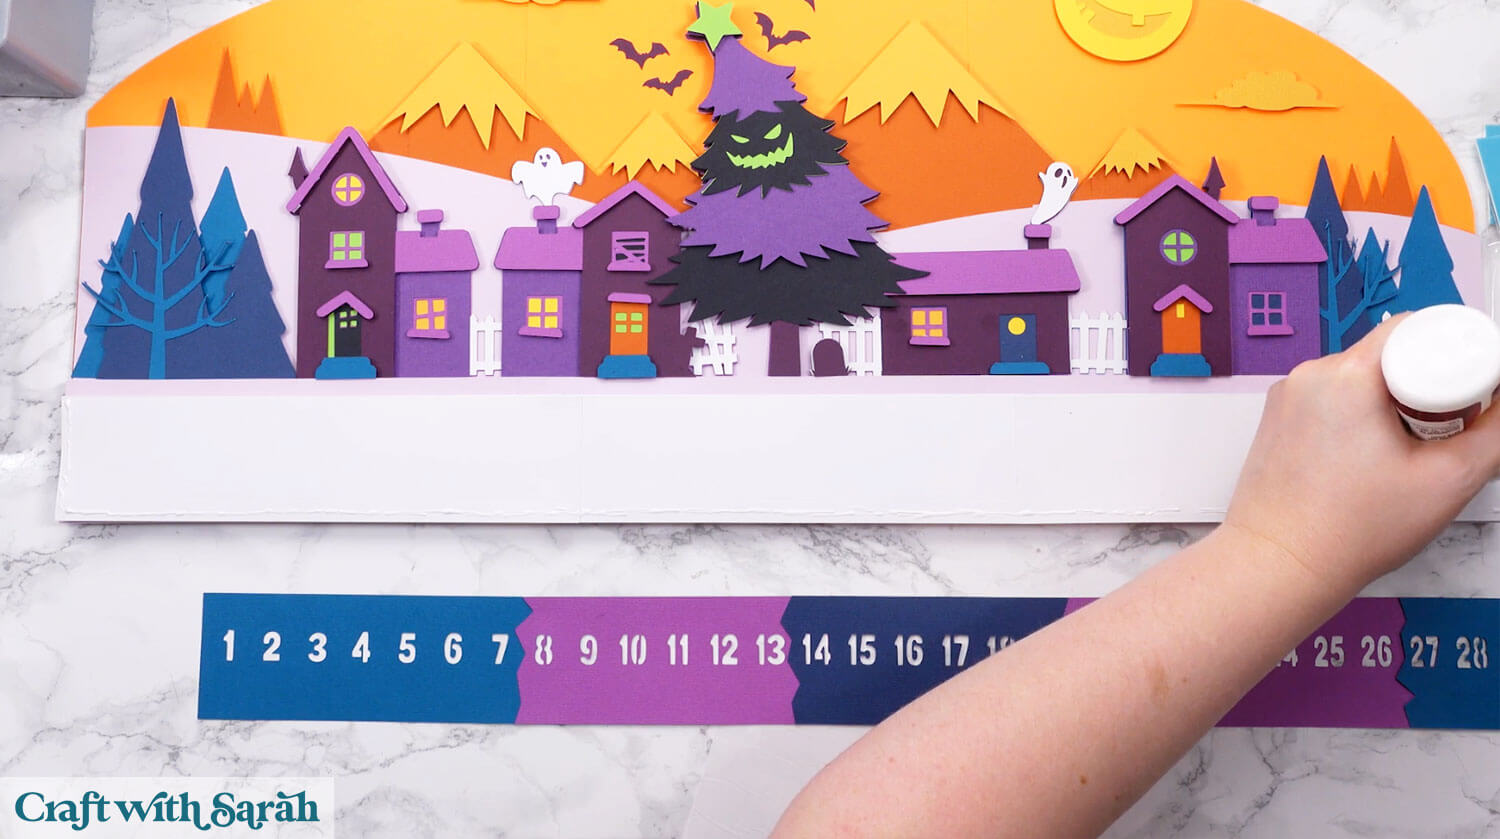
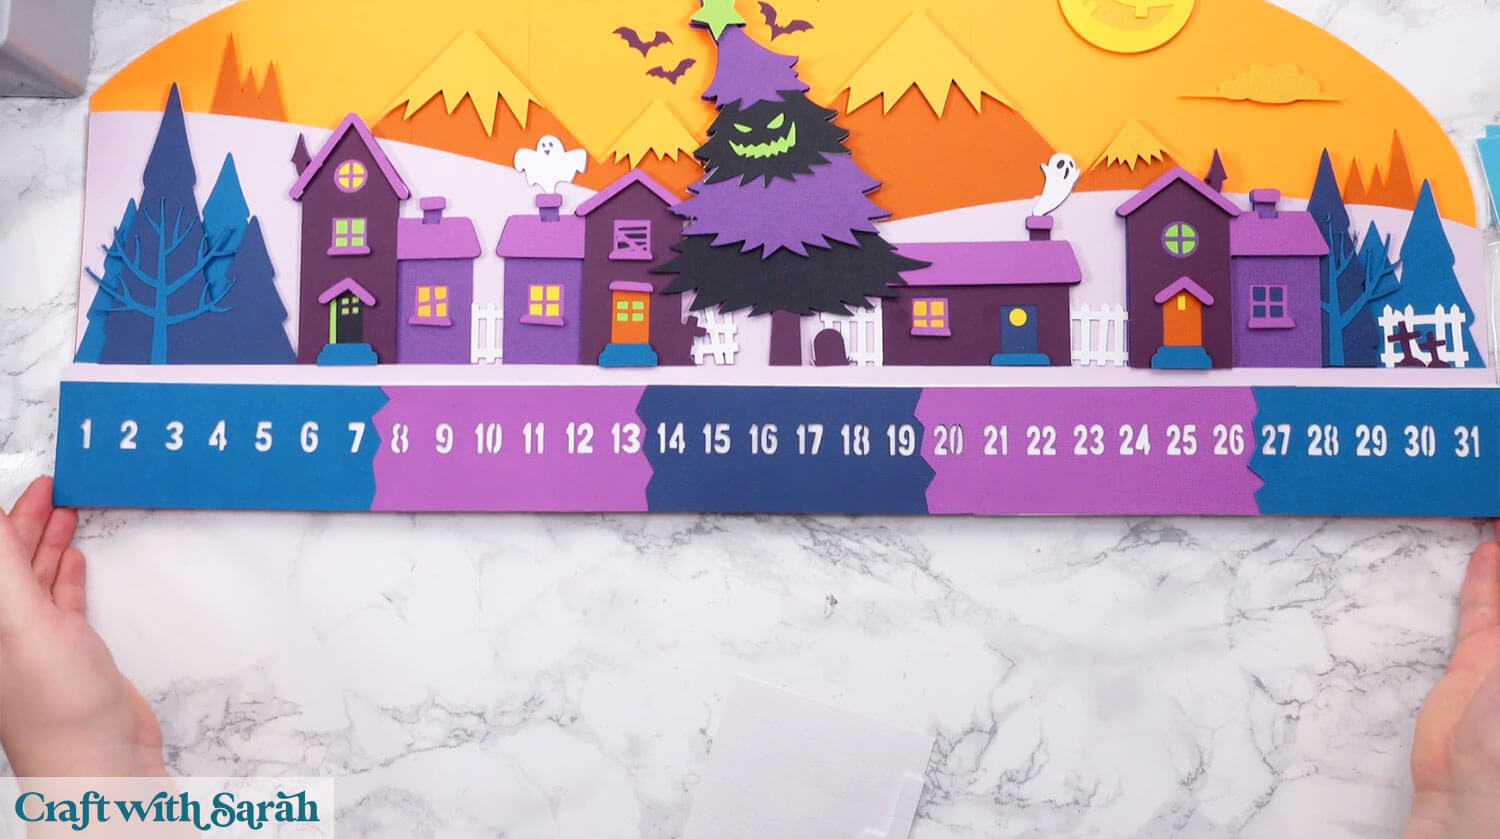
Step 7) Add the cat daily counter
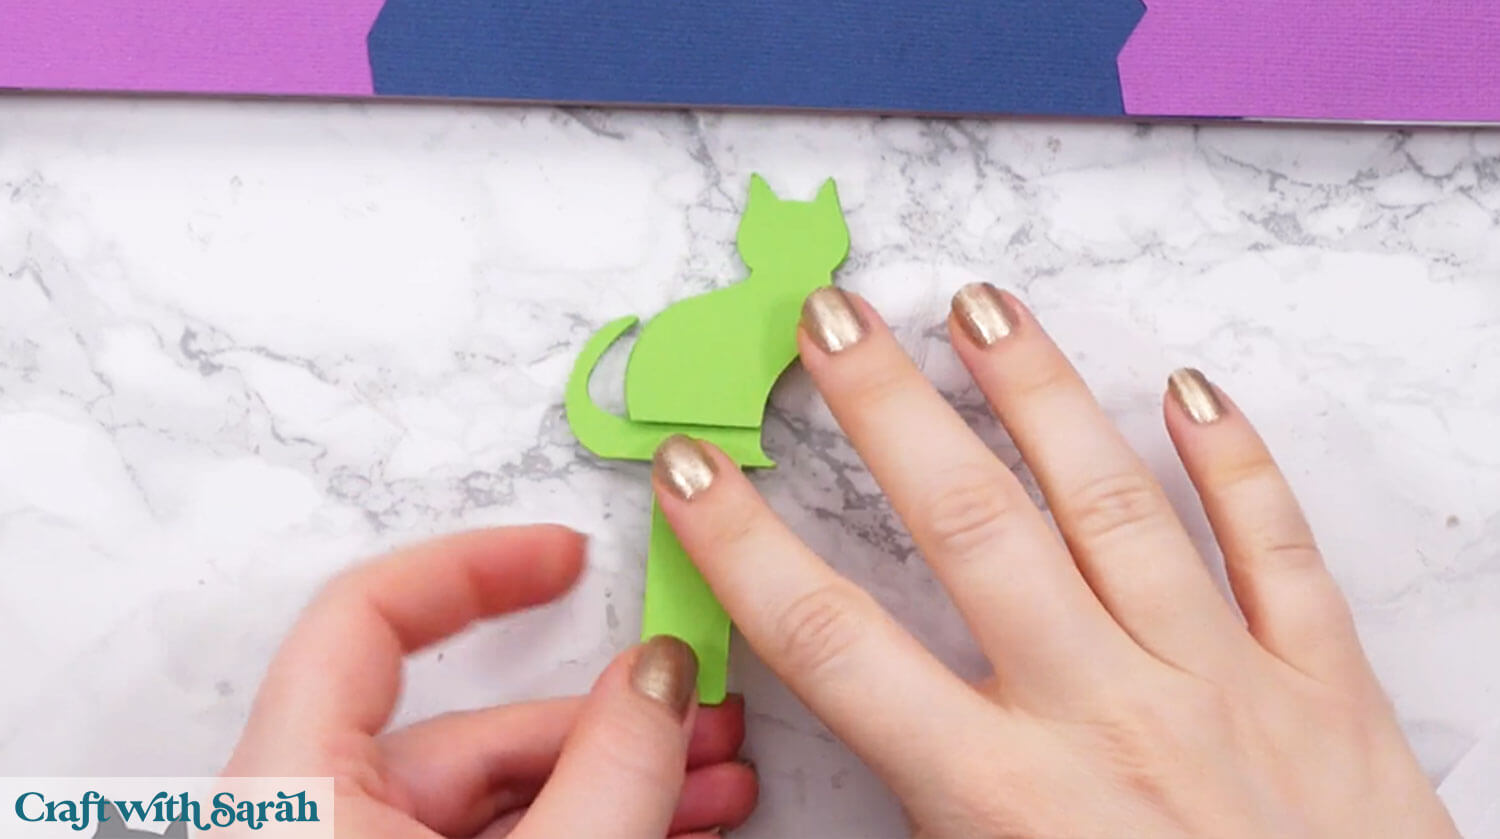
Glue the three pieces of the cat that are all cut in lime green.
This is to make the counter really sturdy so it’s easier to move.
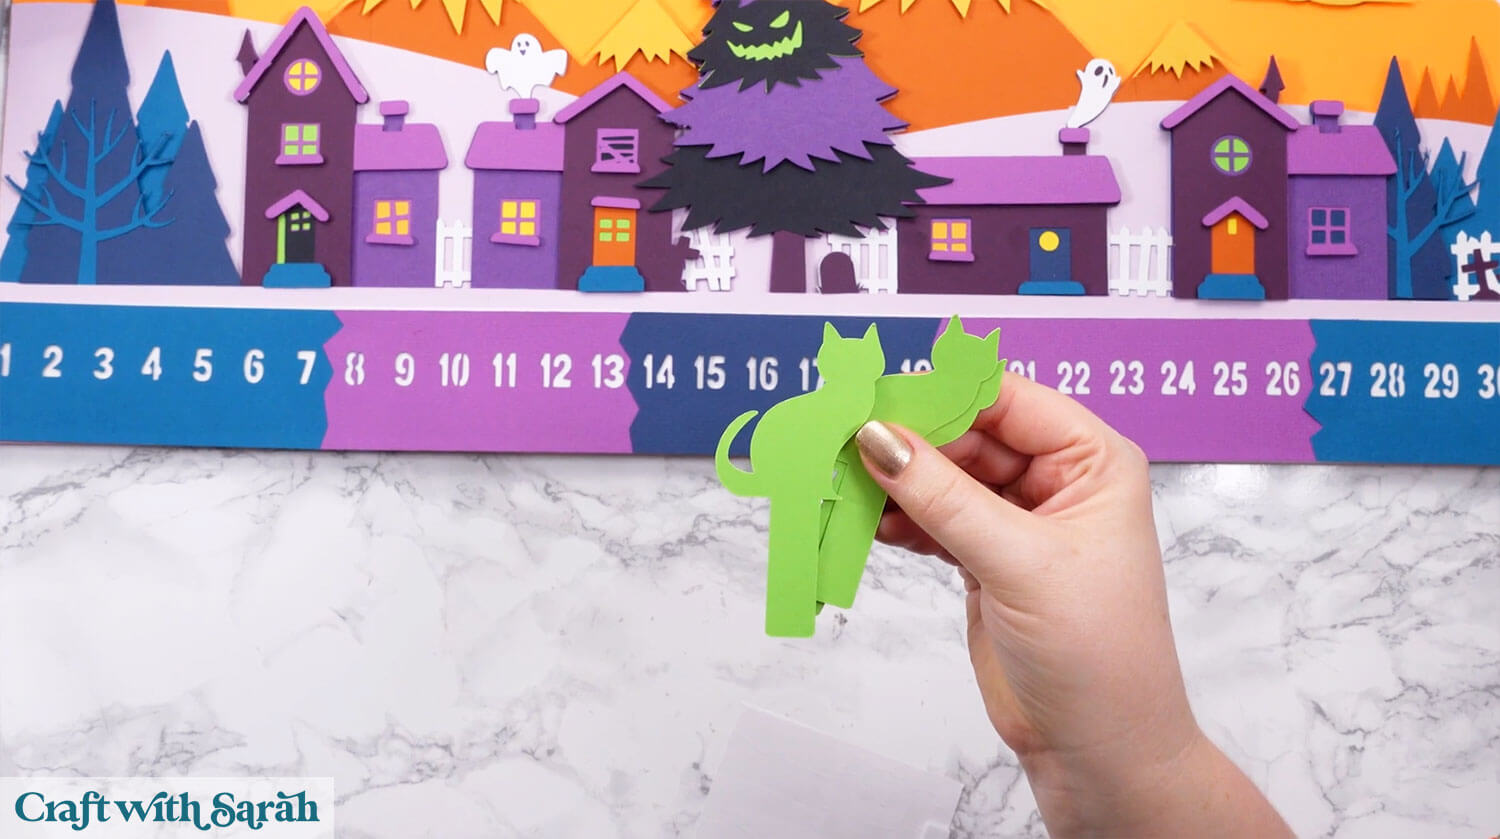
Use foam squares to attach the green cat piece that doesn’t have the tail as part of it.
Add glue to the top of that foamed piece.
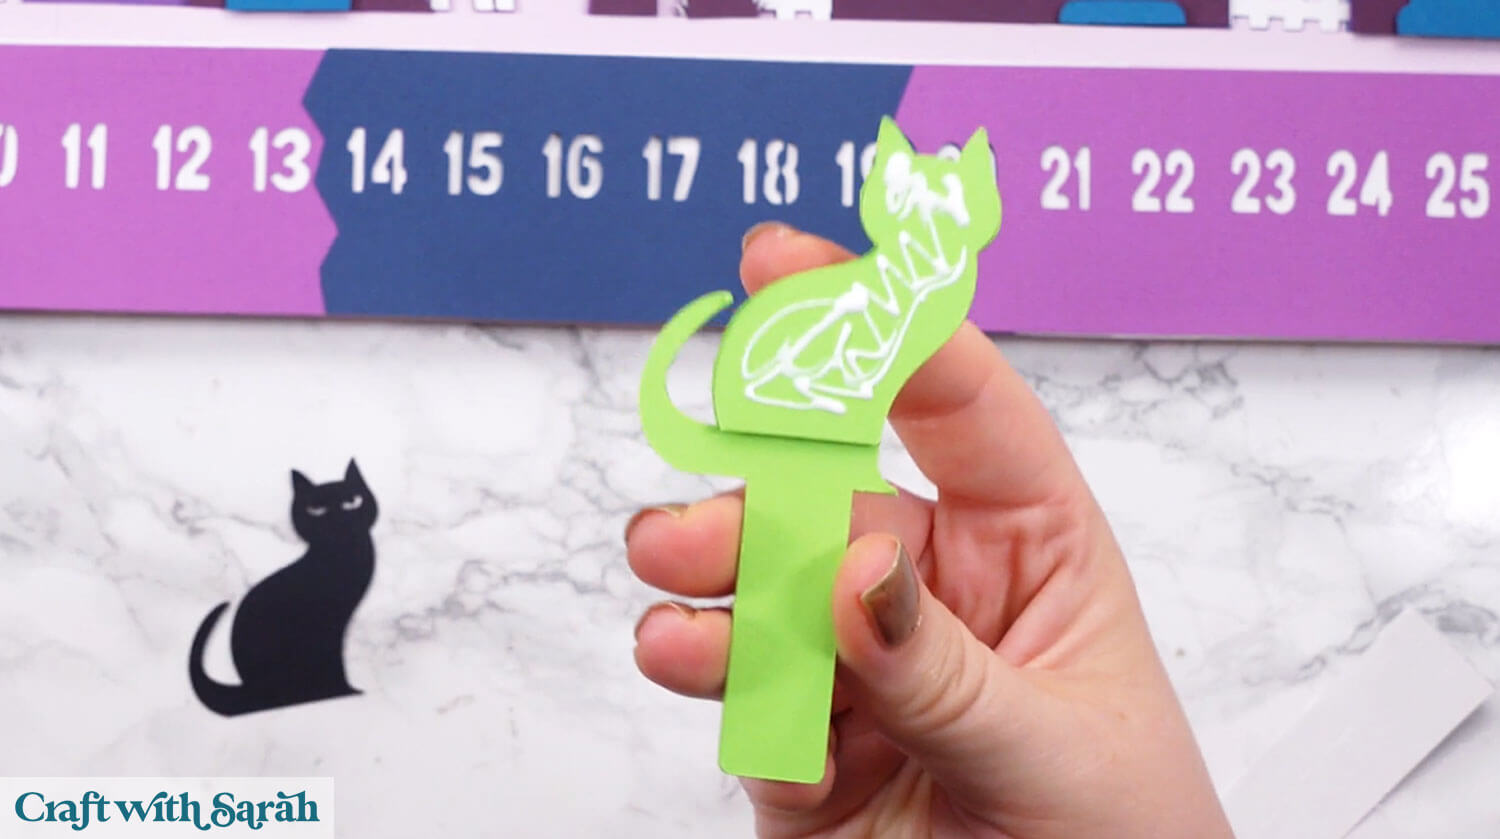
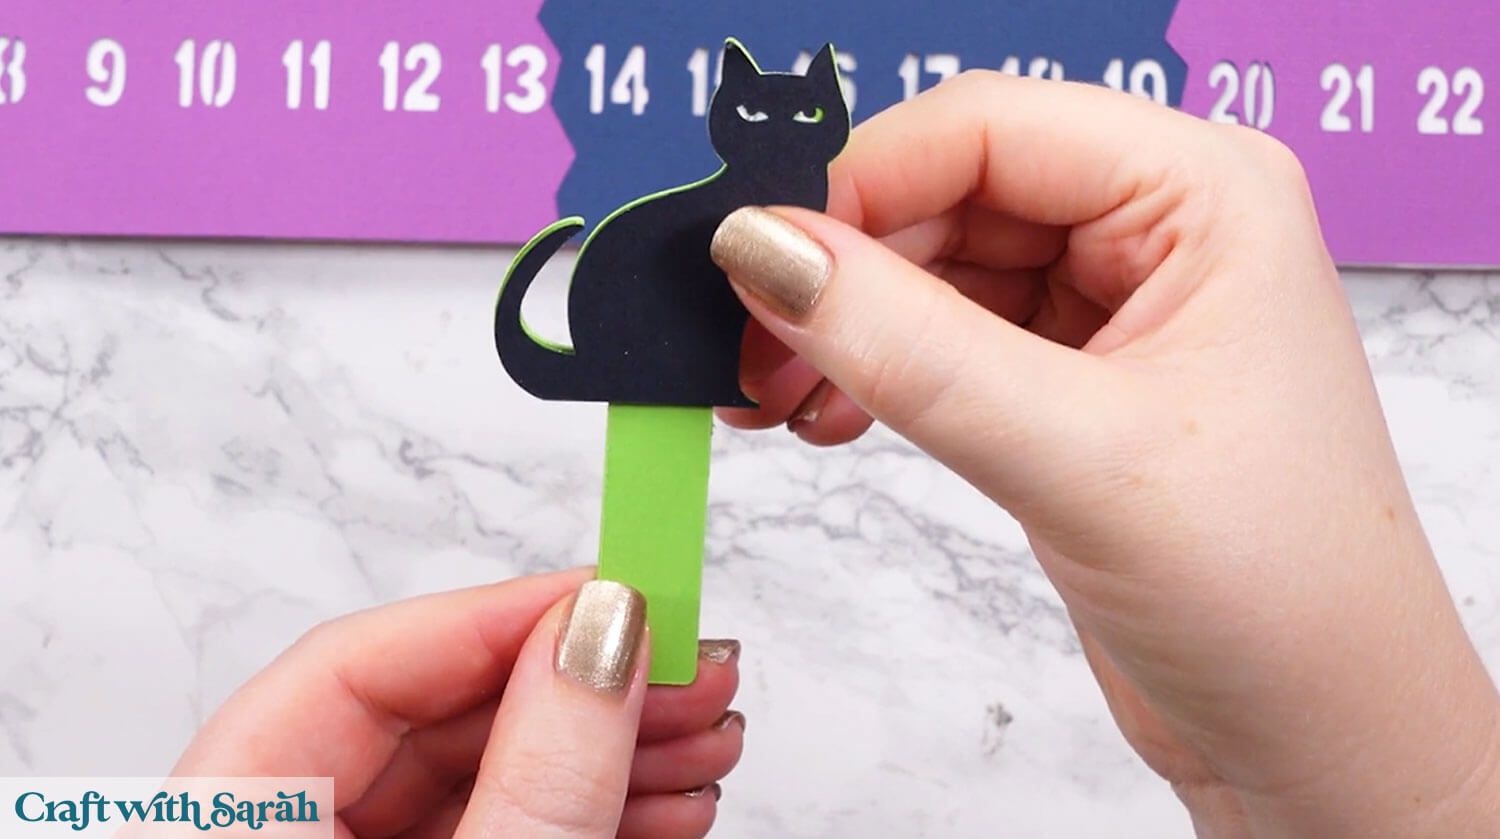
Stick the black cat on top.
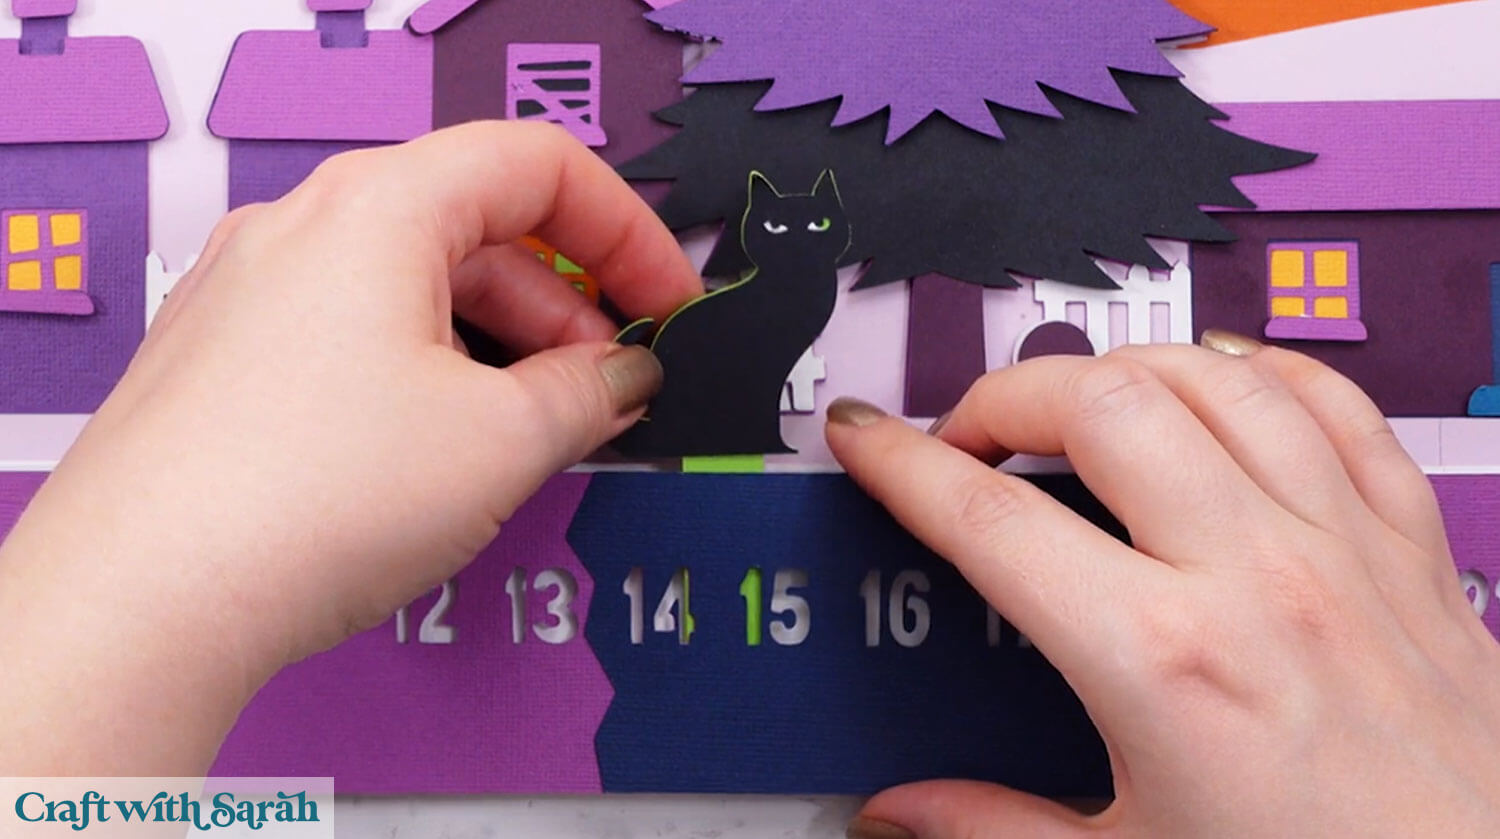
Slot it into the sign, below the number cutout pieces.
A Standout Halloween Cricut Project
Once finished, this Halloween countdown calendar becomes a standout piece you’ll be excited to bring out year after year.
The sliding black cat adds a fun interactive element, and the layered design gives depth and texture that make it really pop on display.
It’s a great way to keep track of the days while adding a handmade touch to your Halloween decor.
If you’ve been wanting to try a larger than mat Cricut project, this is a perfect opportunity to give it a go.
With manageable piece sizes, a clear assembly process, and lots of visual impact, this off the mat Cricut project is as rewarding to make as it is to use.
Bring your cardstock to life and enjoy the countdown to October 31st in your own creative way.
Happy crafting,
Sarah x

