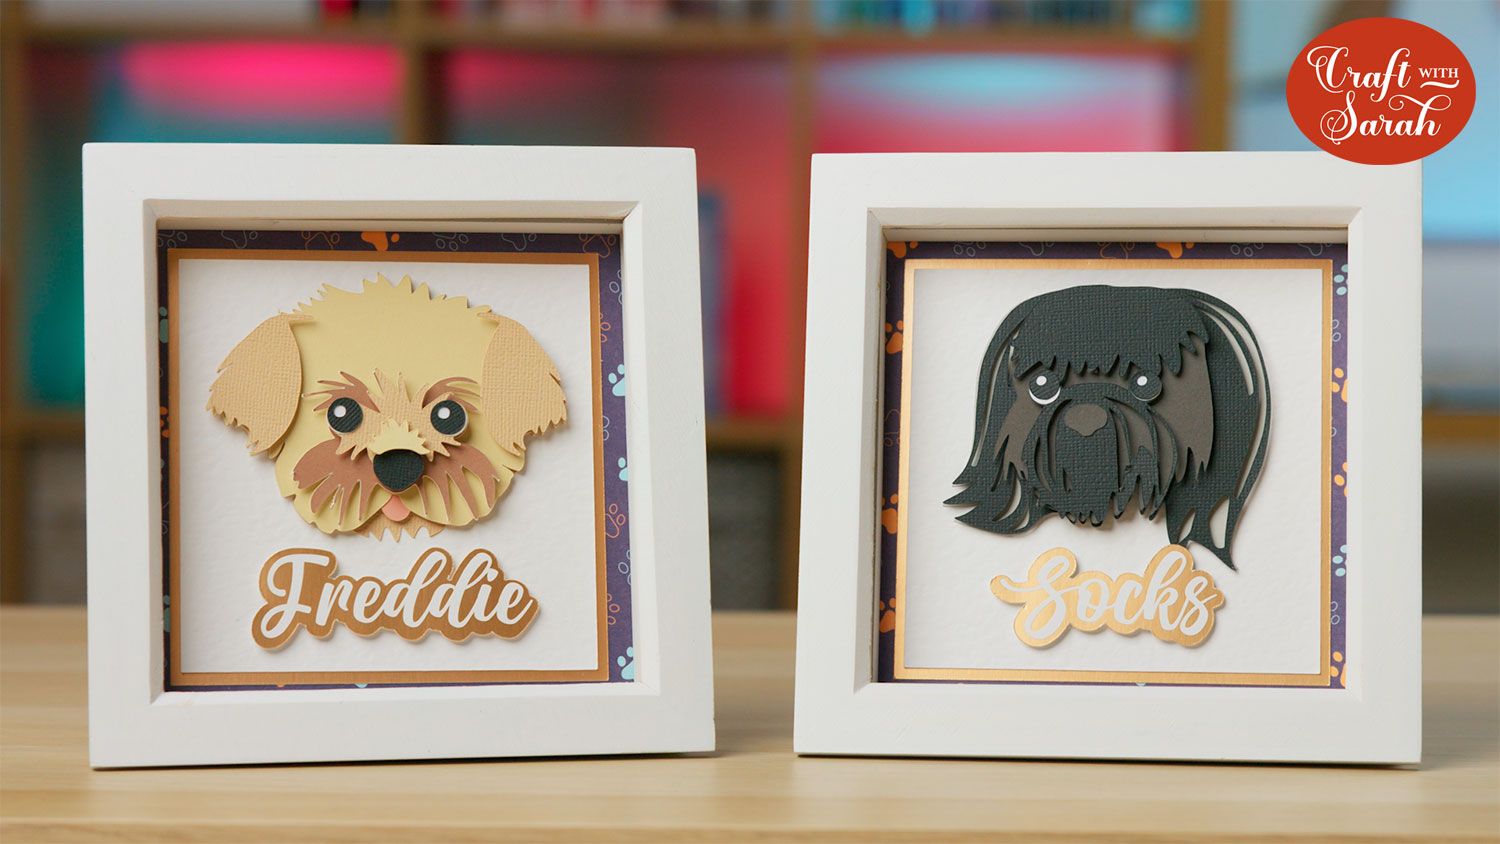
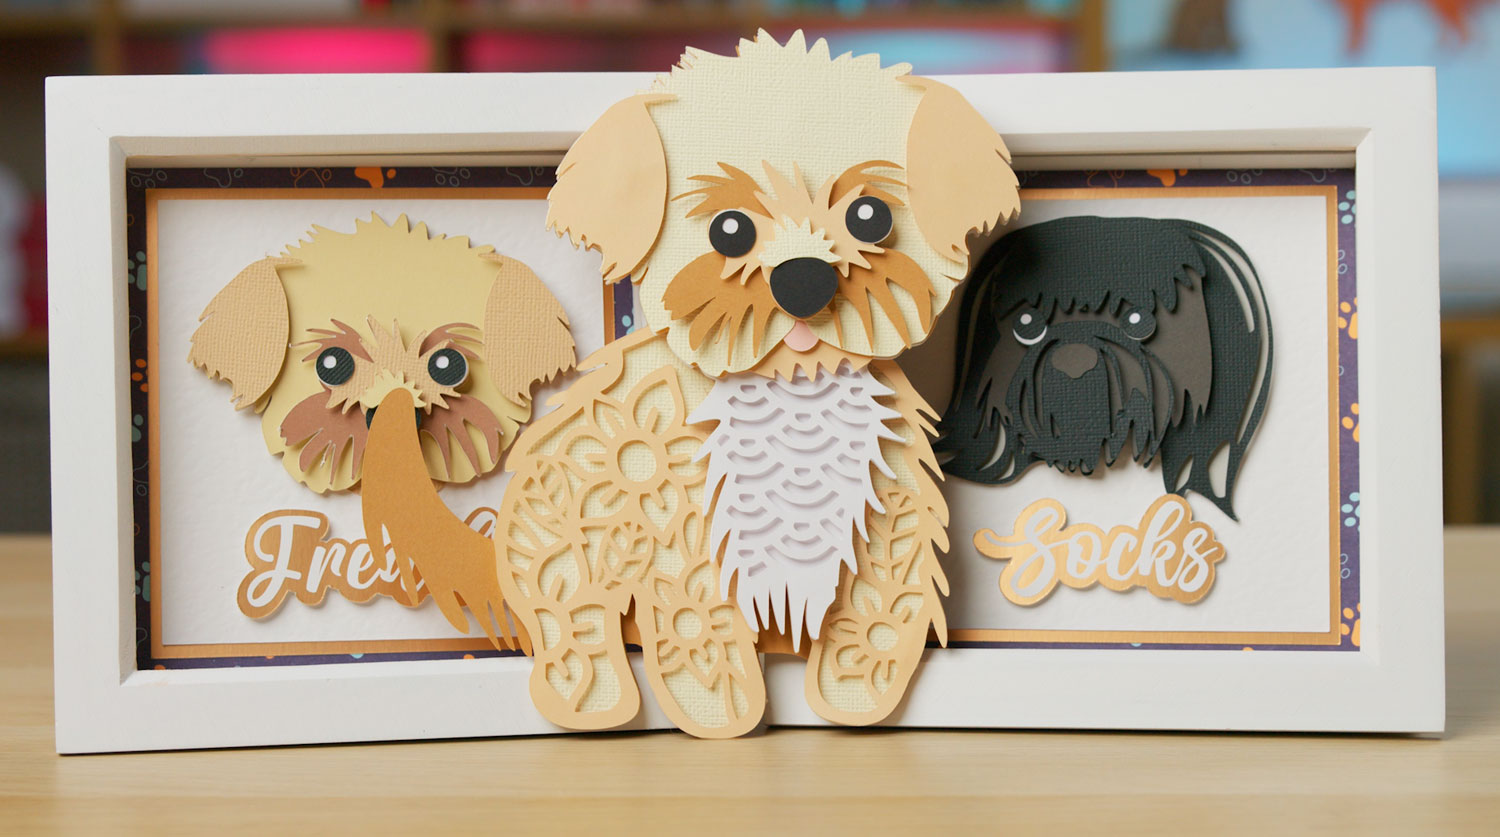
Personalized Mini Shadow Boxes of your Pet
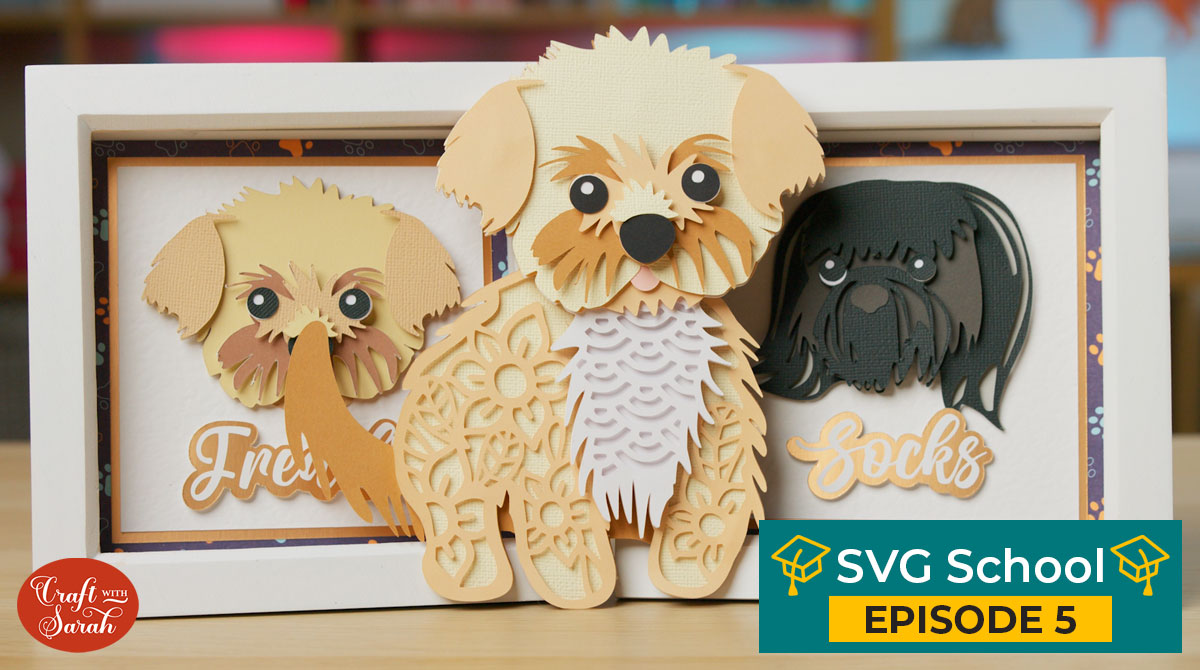
Make a gorgeous mini shadow box of your dog’s face with this tutorial on how to modify my layered dog/cat SVGs so that you only cut the head.
This technique is perfect if you are using a Cricut Joy as it’s much easier for the Joy to cut just the heads out than all the intricate body layers.
Likewise, it’s great for making mini shadow boxes as they fit the heads really well whereas it would be too difficult to fit the full body design into tiny frames.
See how to turn off the body layers to just cut the head, plus how to make personalized name tags using the Offset feature in Cricut Design Space.
[svg_school]
Please note that some of the links included in this article are affiliate links, which means that if you click through and make a purchase I may receive a commission (at no additional cost to you). You can read my full disclosure at the bottom of the page.
How to make a mini layered cardstock shadow box
Watch the video tutorial below. A full written tutorial with screenshots for each step is available further down this page.
Note: This tutorial was recorded using Design Space v6.7.201. Later versions of Design Space may look different to the video/screenshots shown on this page.
Video resources:
- Layered shih tzu SVG (Note – I updated the shih tzu design on 24th Aug 2021 so it now looks different to what you see in the video)
- Small fluffy dog SVG
- Cane Corso dog SVG
- 130+ dog SVGs & 20+ cat SVGs
- Download Design Space
- How to use layered SVG files (tutorial)
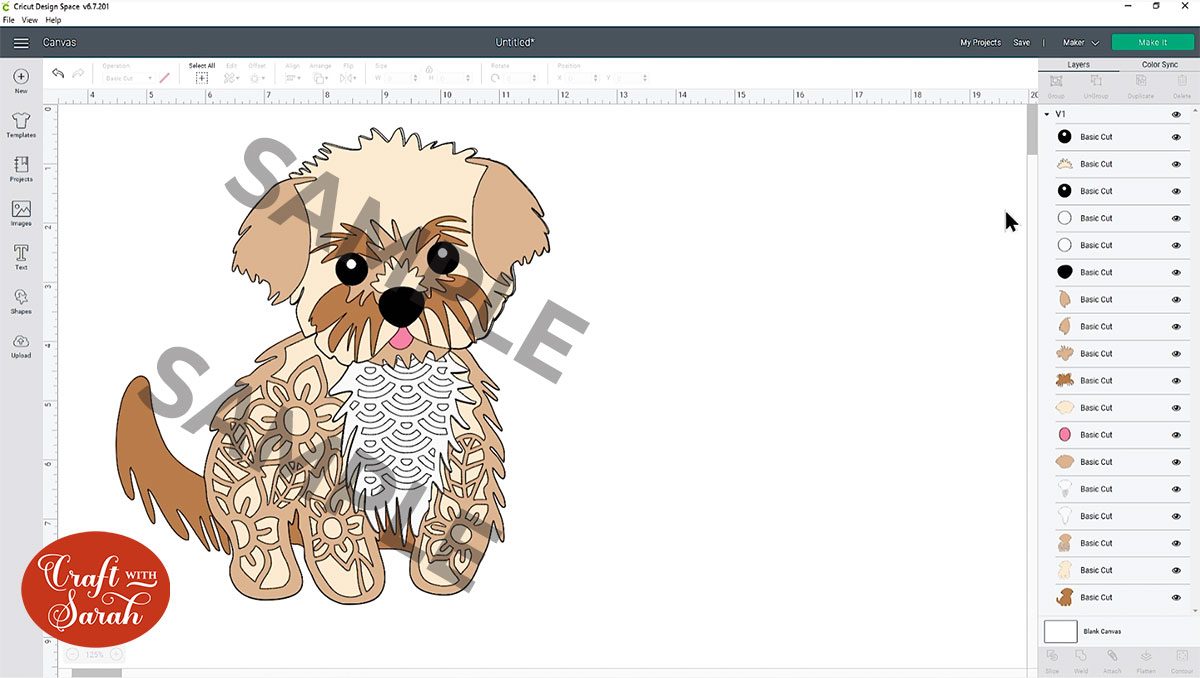
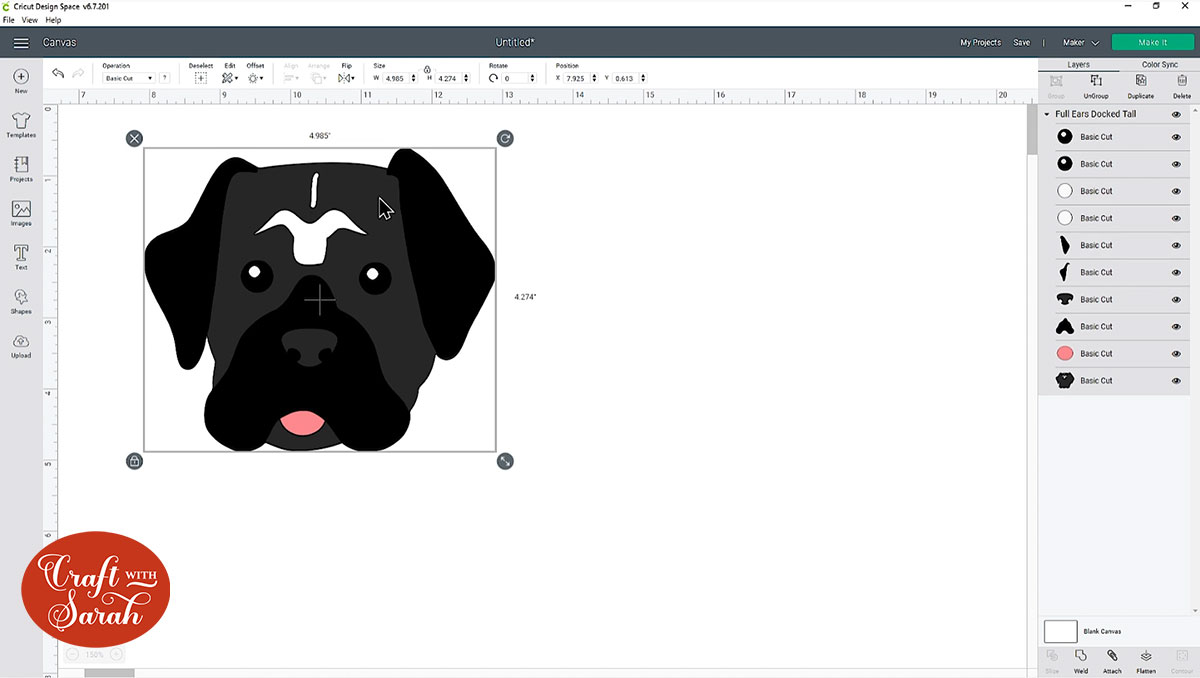
How to only cut the heads of my layered dog SVGs
Step 1) Upload the SVG to Cricut Design Space
To start, choose your favourite dog design from my shop and then upload it to Design Space.
Not sure how to do that? Check out this step-by-step guide to layered SVGs.
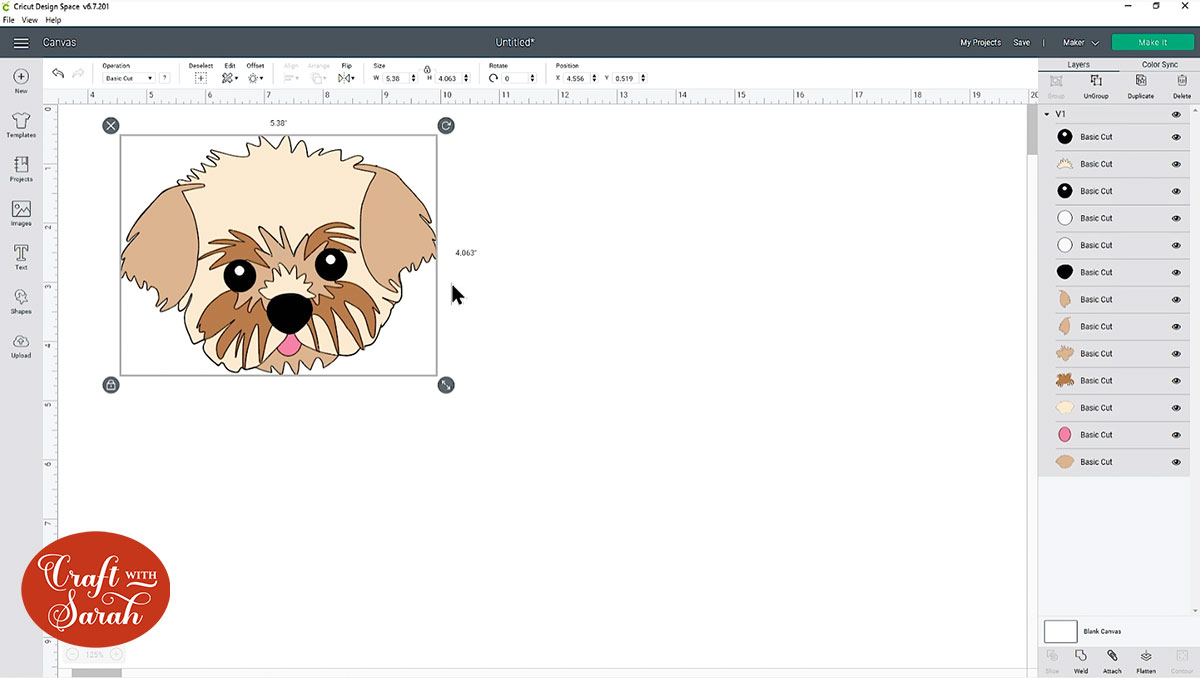
Step 2) Hide the body layers
Look down the layers panel and delete each of the body layers by clicking on them in the layers panel and then pressing the “delete” key on your keyboard.
This will leave you with just the head.
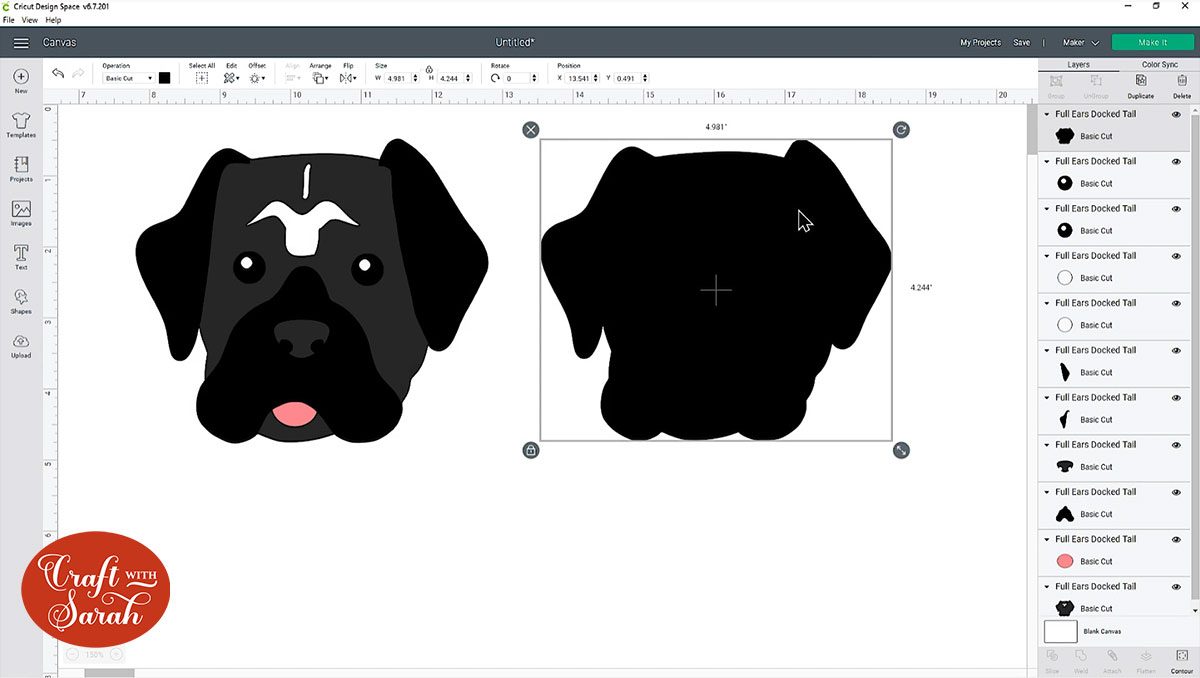
Sometimes, you might find that deleting the body layers leaves you with weird “empty spaces” in the head, such as in this Cane Corso SVG:
To fix this, click the design and then press “Ungroup” to separate out the layers.

Click the bottom layer (the largest one) and then press “Duplicate”.
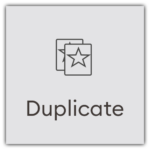
Change the colour of this new layer to match the design. For the Cane Corso I changed it to black instead of dark grey.
Next we need to fill in the gaps on this duplicate layer.
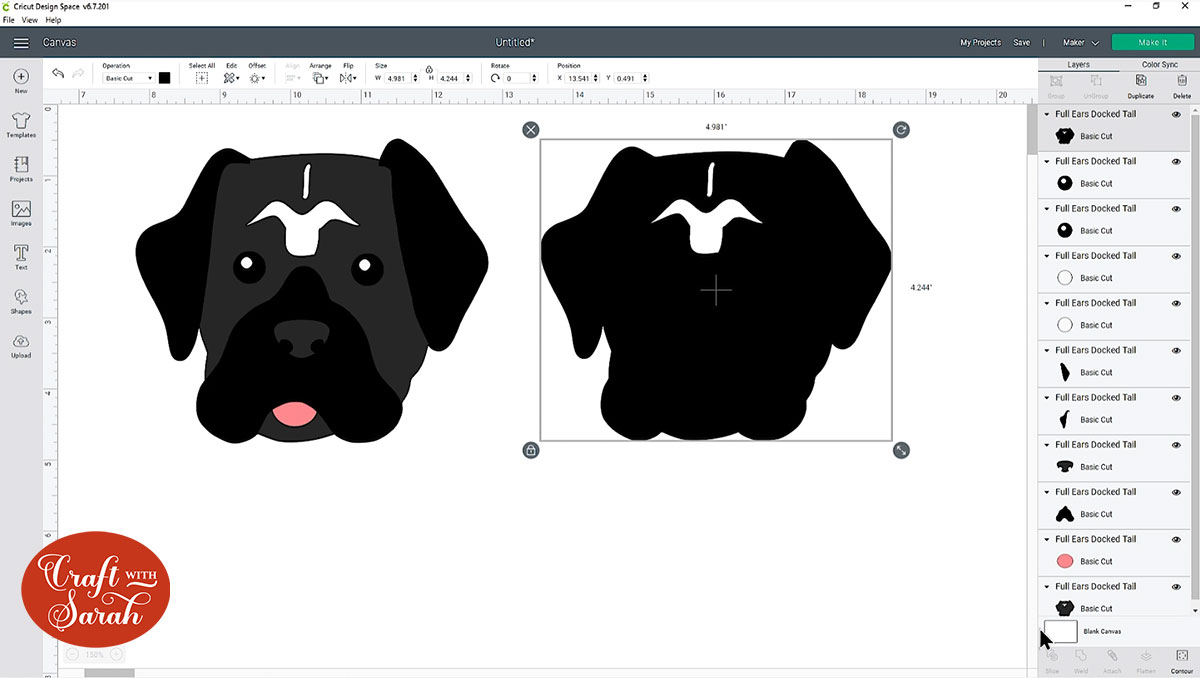
Make sure you have the new layer selected and then press “Contour”.

In the Contour window, click into the gaps in the head that you want to hide.
Close the Contour window and you’ll now have the gaps filled in!
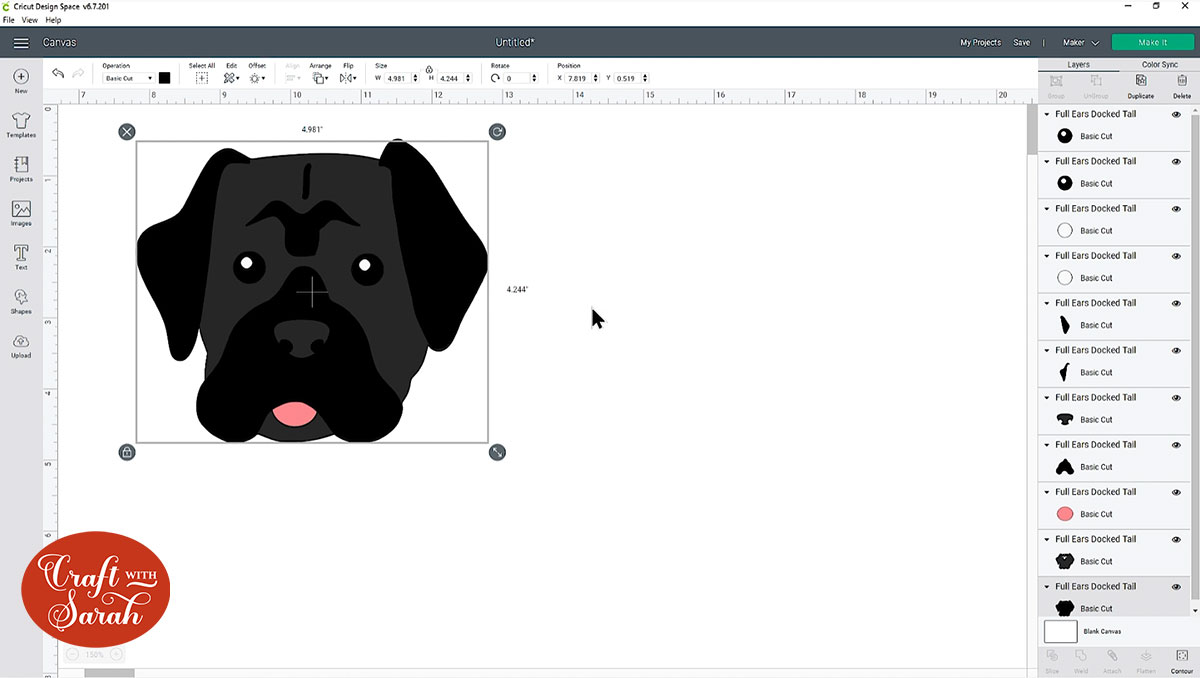
Make sure the new layer is at the bottom of the layers by clicking “Arrange” and then “Send to Back”.
Click-and-drag the layer so that it sits underneath all the others in the correct position.
This lets you check that you’ve filled in all the gaps and that you’re happy with the design.
Select all the head layers by dragging a box around them or by pressing “Select All”.

Click “Group” to group all your layers together again. Grouping means that you can resize all the layers in proportion with each other which makes it easier to resize the design, which we will do in a moment.
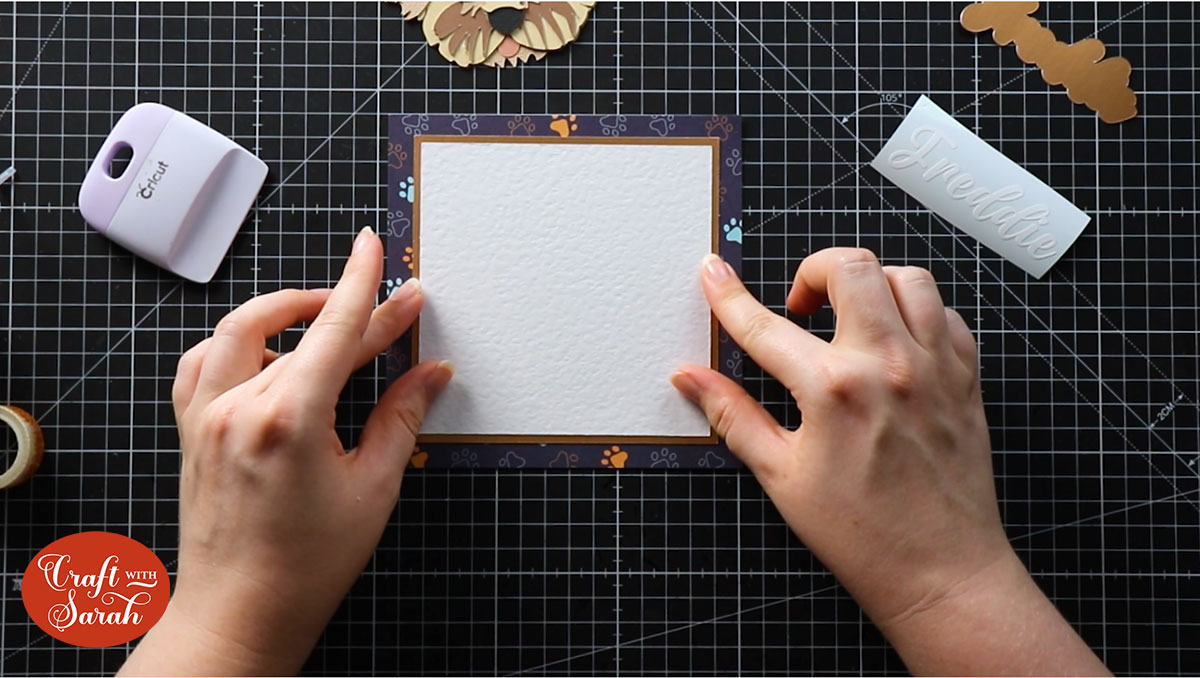
Step 3) Create the shadow box layers
Now that you have the separated out the head layers of the dog it’s time to design the shadow box background.
First, measure your shadow box. The easiest way to do this is by measuring from one outer side of the wooden spacer that sits inside your frame to the other side.
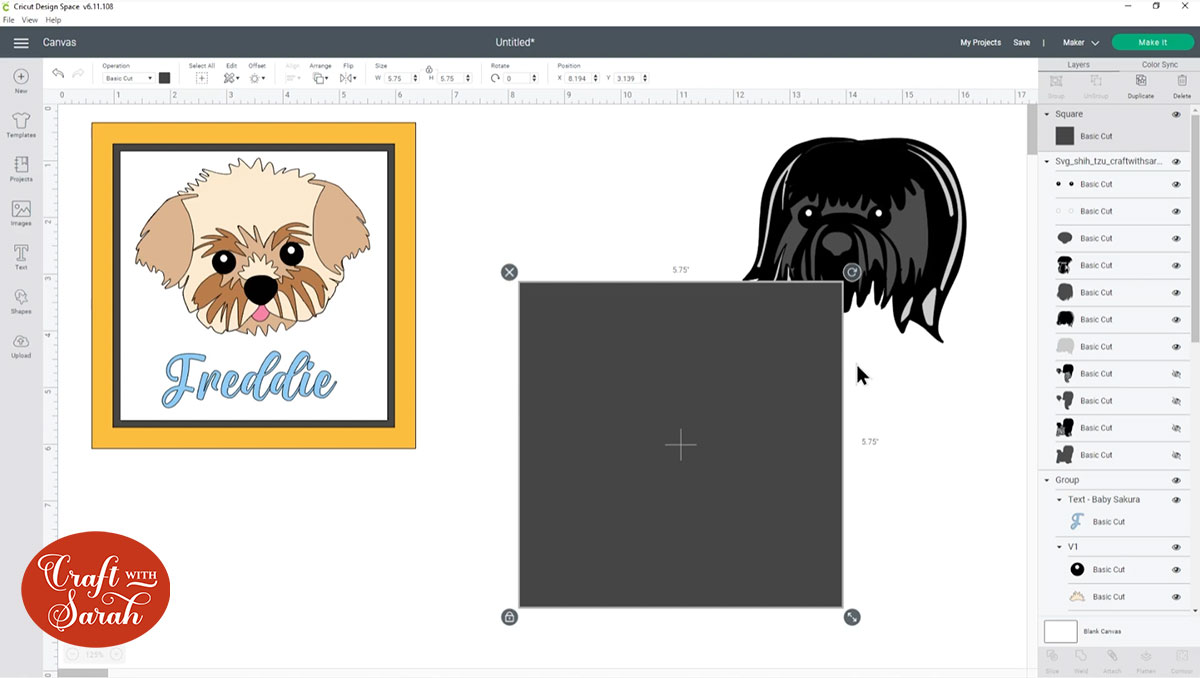
Use the “Shapes” tool in Design Space to draw a square and then resize it to match your frame measurements.
Mine is 5.75 x 5.75 inches.
If you want to layer up your background papers then create additional squares and size them as desired.
Check you’re happy with the sizes by selecting all the squares and clicking “Align” and “Align Center” to position them perfectly in the middle of each other.
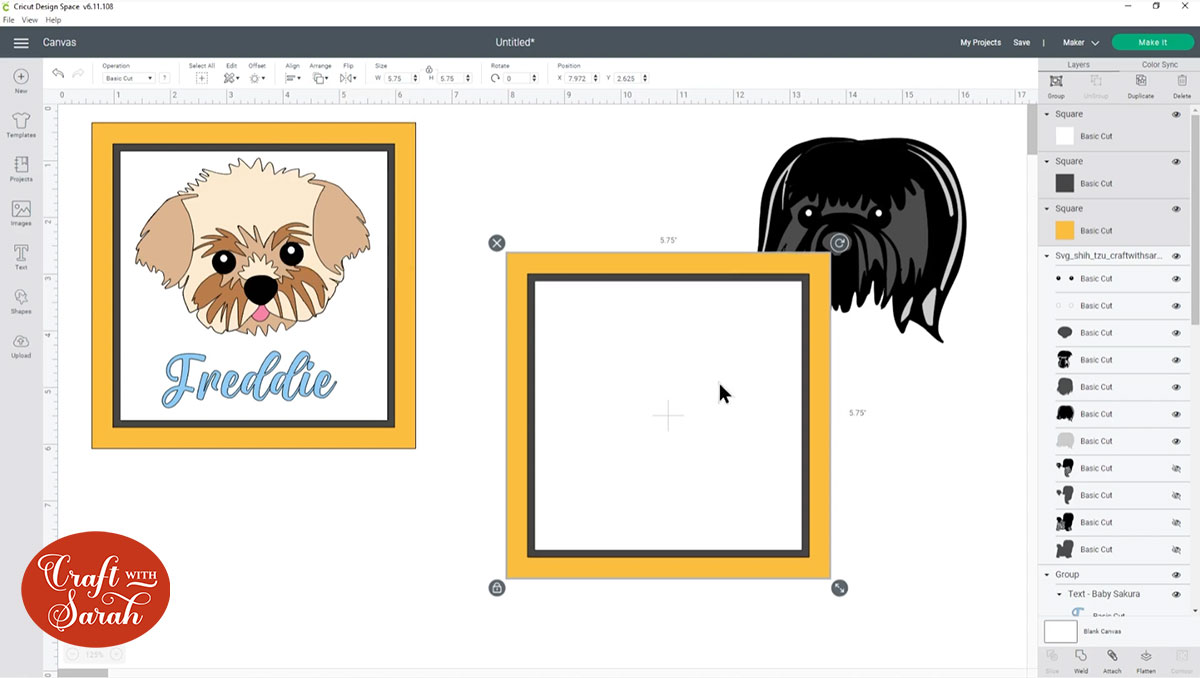
When you’re done with your squares, select all square layers and “Group” them together.
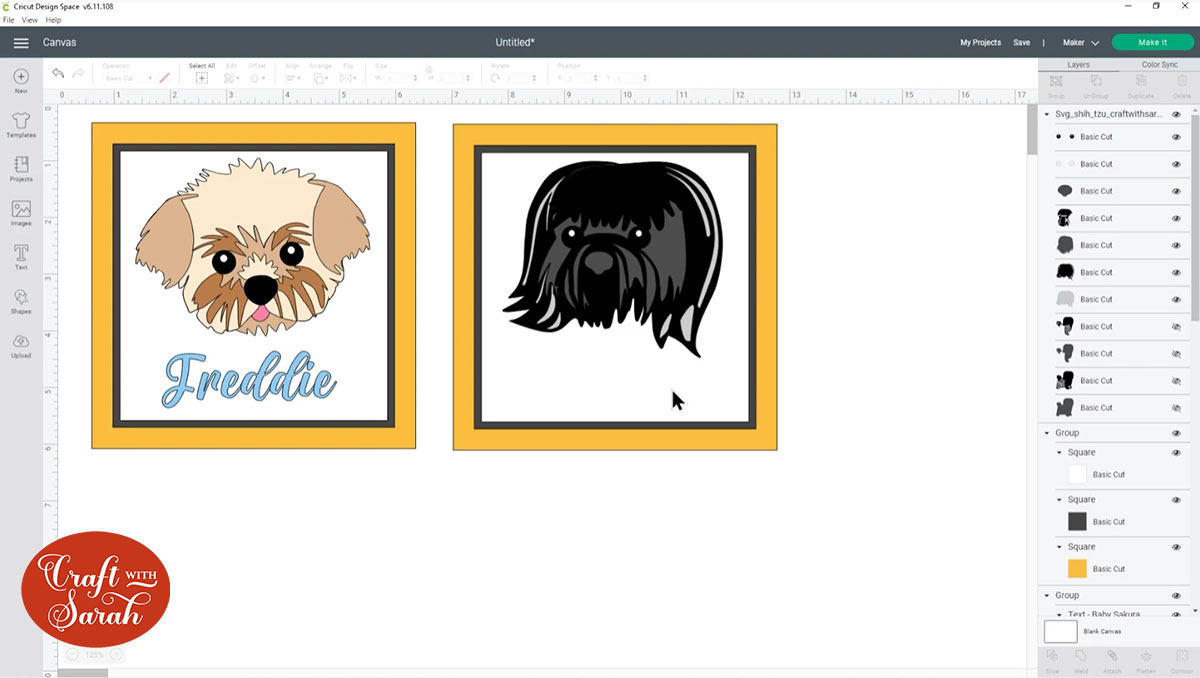
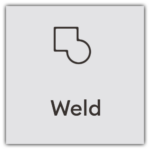
Step 4) Resize the dog head
At this point, your dog head might be appearing underneath the square layers.

If it is, click the dog head then click “Arrange” and “Send to Front” to move the dog head above the squares.
Resize the dog head until you are happy with how it’s looking inside your shadow box layers.
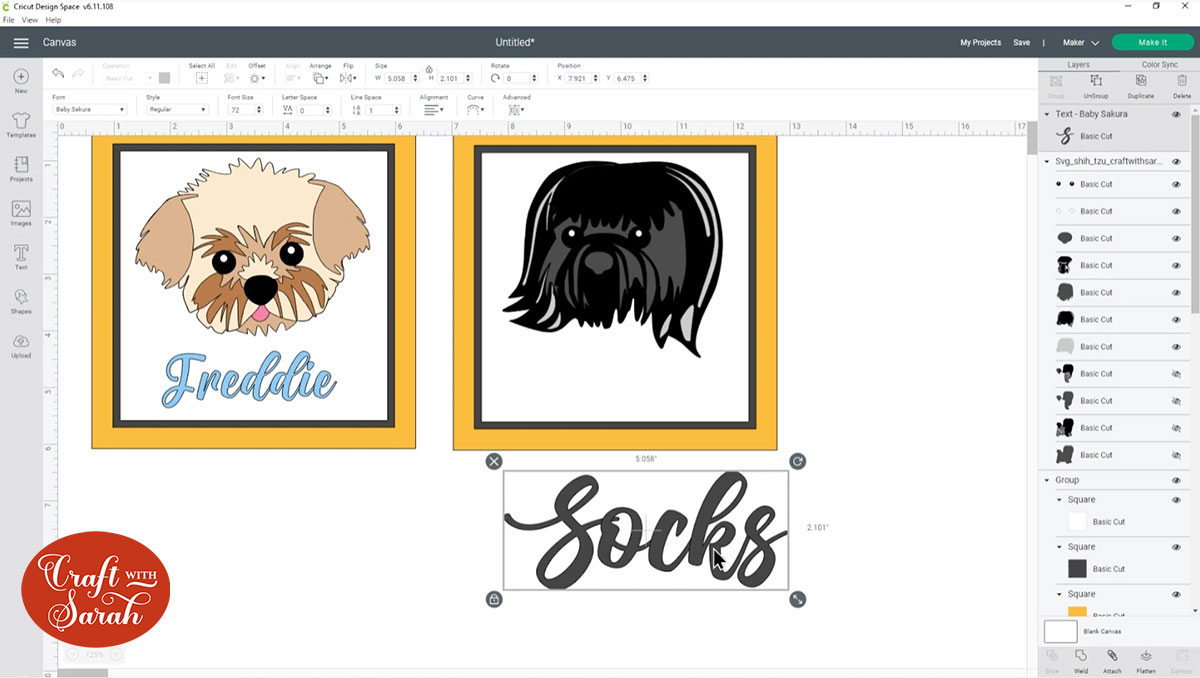
Step 5) Add your dog’s name
This step is optional but I think it’s a lovely “extra” detail to add your dog’s name to the bottom of the frame.
Click “Text” and type out the name of your dog.

Choose the font you want to use. The one I used is called “Baby Sakura“.
Note: In May 2020 Cricut added the “Kerning” Feature to Design Space which means the letters of script fonts now appear “joined up”. Even though you can see the lines between letters when you use a kerned font, it WILL still cut all joined-up as one, without the gaps in the letters.
Depending on the font you choose, you might want to re-position some of the letters. On my example I want to move the first “S” to the left so that the tail isn’t showing in the gap of the “o”.
To do this, click the word and then press “Ungroup” to separate out the letters into individual layers.
Click the letter you want to move and use the arrow keys on your keyboard to move it left/right.
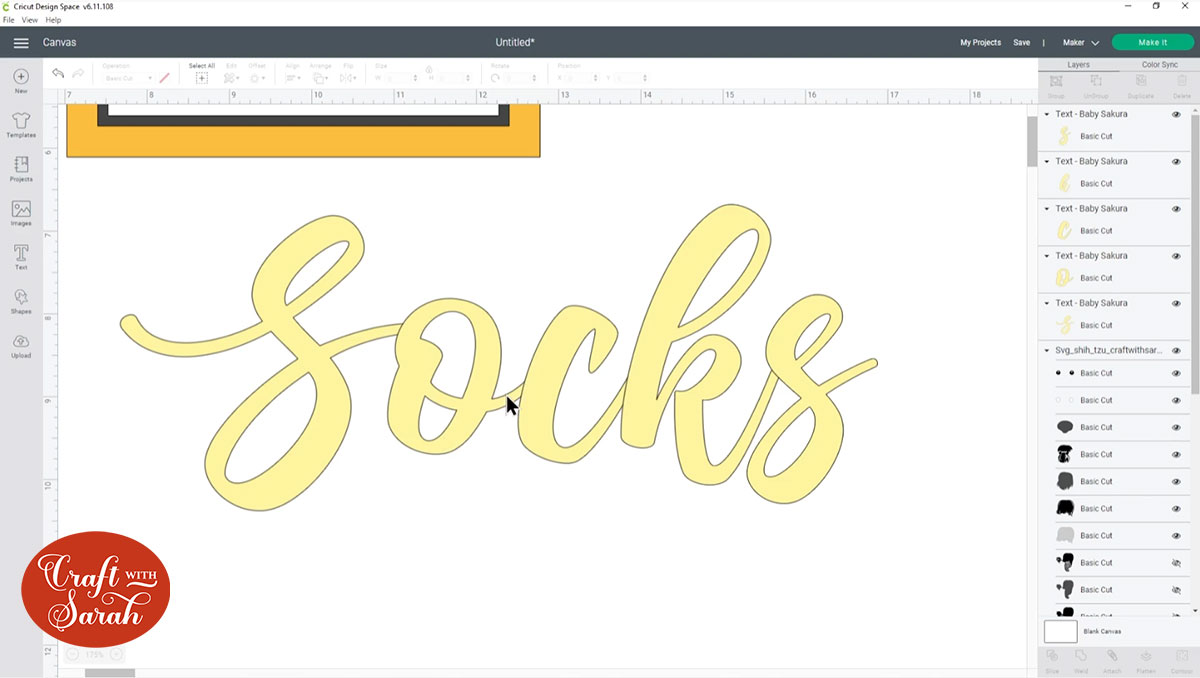
IMPORTANT! If you “Ungroup” the letter then you MUST select all the letters and “Weld” them before cutting to turn them back into one layer, otherwise each letter will cut separately.
This is how my word looks once the letters are Welded:
Resize the name and add it to the bottom of the frame to check you’re happy with how it will look.
I was originally going to stick the name of my dogs to the glass of the frame, but I changed my mind at this point 😀
Instead, I cut the names from vinyl but then cut an “Offset” layer of the name from gold card to stick the vinyl to. I felt that this filled in the space at the bottom of my frame better, and I prefer the look of cardstock inside a frame rather than vinyl on the glass.
To make an offset, click the name layer and then press “Offset”.
Move the slider to choose how big you want the offset to be and then press “Apply”.
Next, cut everything out using your Cricut machine.
Step 6) Assemble the background of the mini shadow box
Glue the layers of your shadow box background together.
My favourite glue to use on papercraft projects is Collall All Purpose Glue.
It’s SO good because it doesn’t “warp” or bend the cardstock like some glues do. You can use as much of it as you want and the card stays perfect – and it dries perfectly clear too!
To make it even easier to apply glue to layered card projects, I highly recommend getting some of these needle tip applicator bottles to put the glue into.
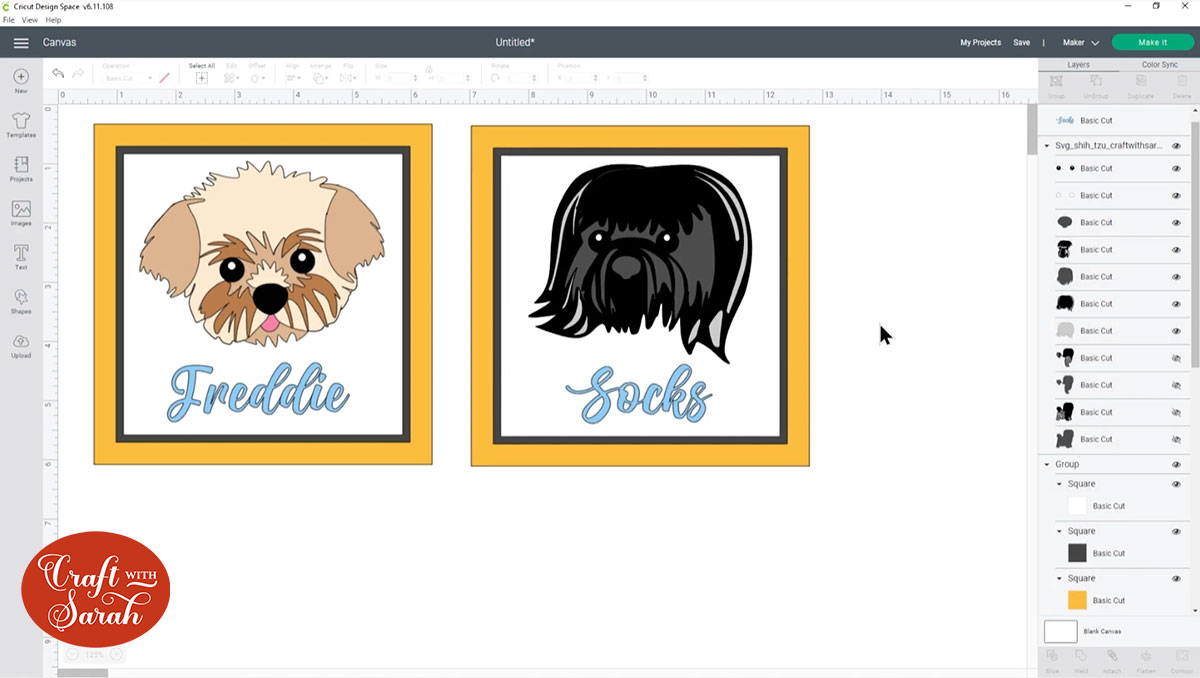
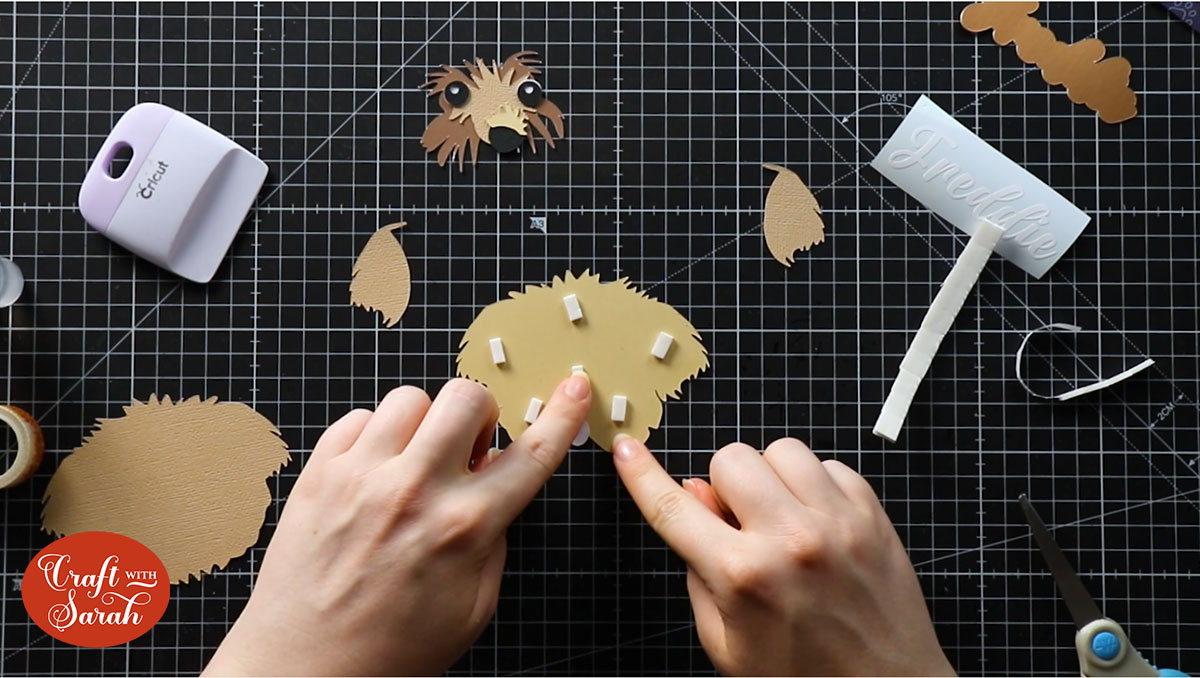
Step 7) Assemble the dog head & name layers
Stick the layers of the dog head together using foam pads and glue. Each of my layered SVGs comes with an Assembly Guide PDF so you know which layers to use foam for, and which to use glue for.
To transfer the vinyl name to the offset layer I used a piece of washi tape instead of transfer tape. I wasn’t sure if it would work, but it did!

Step 8) Put everything together
Glue the dog head to the background layers and glue or foam the name along the bottom.
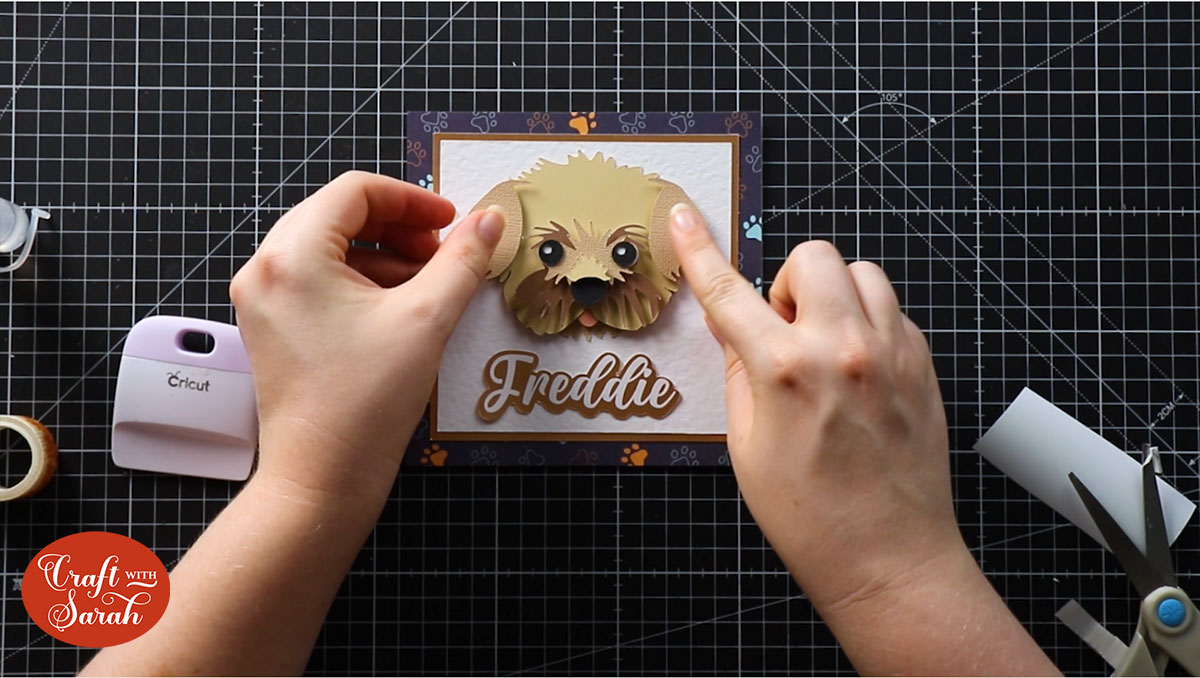
Put the design inside your frame, and that’s it – your pet mini shadow box is all finished!
I hope you enjoyed this tutorial on how to make a mini shadow box of your pet by only cutting the head of my layered dog or cat files.
Don’t forget, I have over 130 dog designs and 20 cats to choose from in my SVG shop.
If you can’t see the perfect design, you may be able to make it by combining two different SVGs or by changing the colours.
[svg_school]
Happy crafting,
Sarah x

