How to Switch the Heads of my Layered Dog & Cat SVGs 🐕
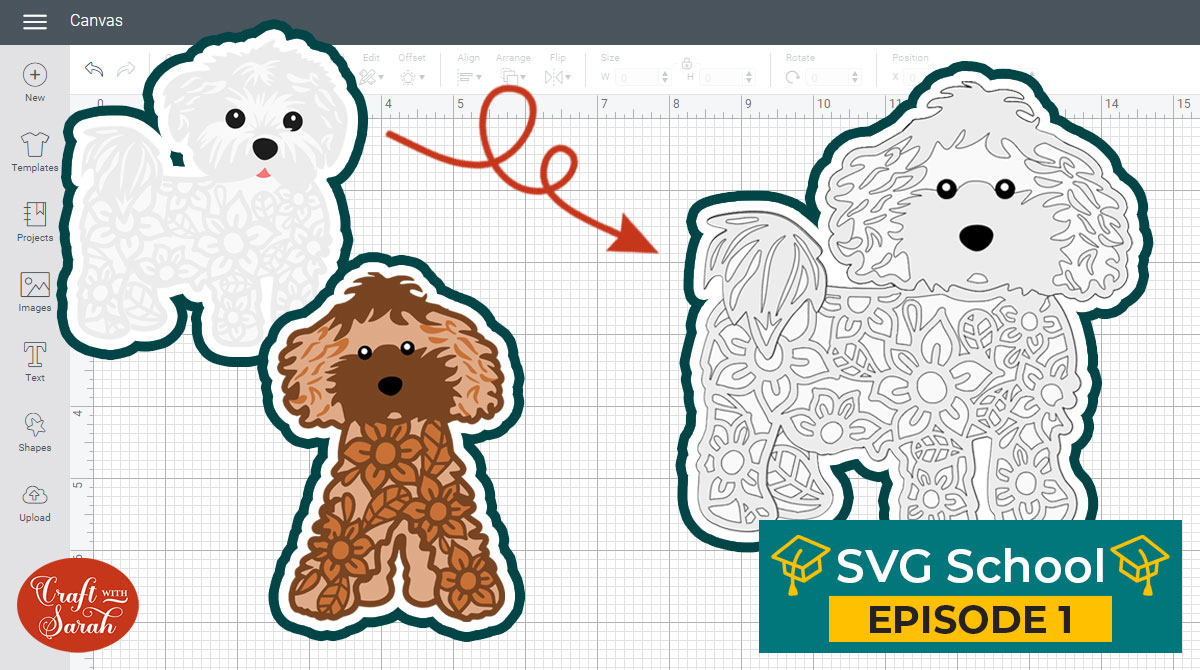
Want to make a Cricut craft of your dog or cat but can’t find the perfect SVG file? Here’s how to switch the heads of my layered dog & cat SVGs to make a custom cut file that matches your pet perfectly.
Use Design Space tools such as Slice and Weld to remove the head from one dog (eek!) and add on the head of another so that the size and position match up to create a new, realistic, beautiful design that you can cut with your Cricut machine.
[svg_school]
Please note that some of the links included in this article are affiliate links, which means that if you click through and make a purchase I may receive a commission (at no additional cost to you). You can read my full disclosure at the bottom of the page.
How to customize my layered dog SVG files
The steps below show to customize my layered SVG dog files to change the heads of the dogs. This can be helpful for making a bespoke design to better match your pet.
Note: This tutorial was recorded using Design Space v6.7.201. Later versions of Design Space may look different to the video/screenshots shown on this page.
Video resources:
- Layered Maltese SVG
- Layered Labradoodle SVG (Note – I updated the labradoodle design on 24th Aug 2021 so it now looks different to what you see in the video)
- 130+ dog SVGs & 20+ cat SVGs
- Download Design Space
- How to use layered SVG files (tutorial)
Step 1: Open the files in Design Space
Choose the two files you wish to combine in my SVG shop and then download and open them in Cricut Design Space.
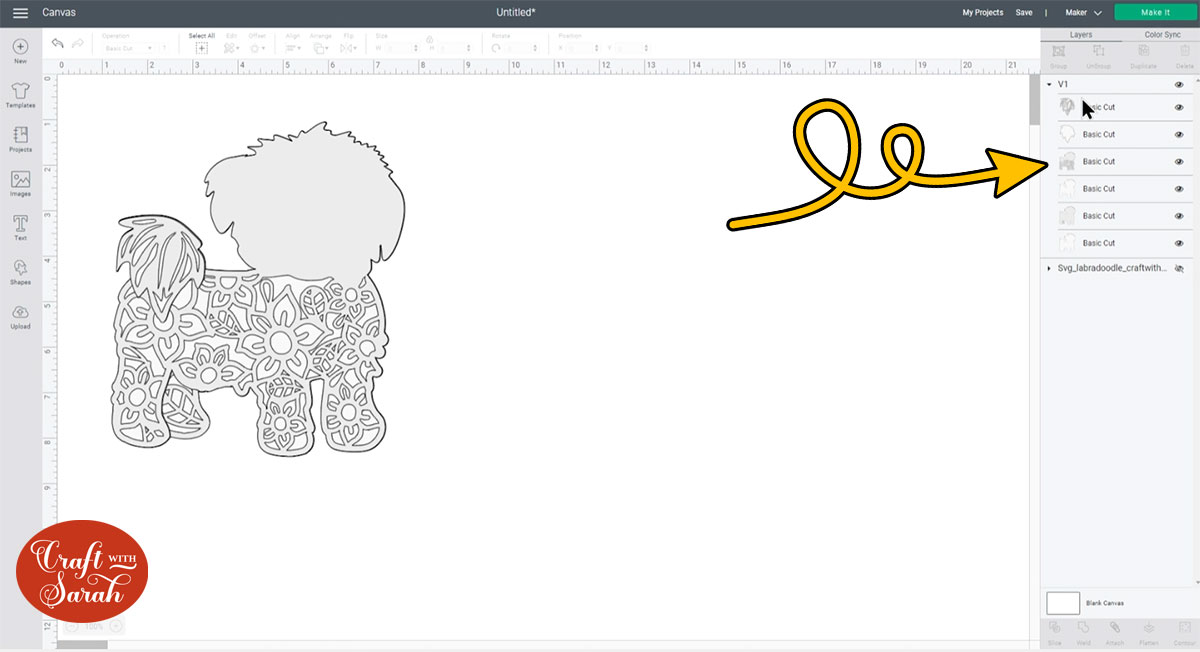
Step 2: Delete the head layers of the main dog
Select the dog which you want to use the body of.
Look down the layers panel on the right of your screen and delete all layers that are part of the head.
To delete a layer, click it in the layers panel and then press “delete” on your keyboard.
Keep any layers that are “joined” to the body parts.
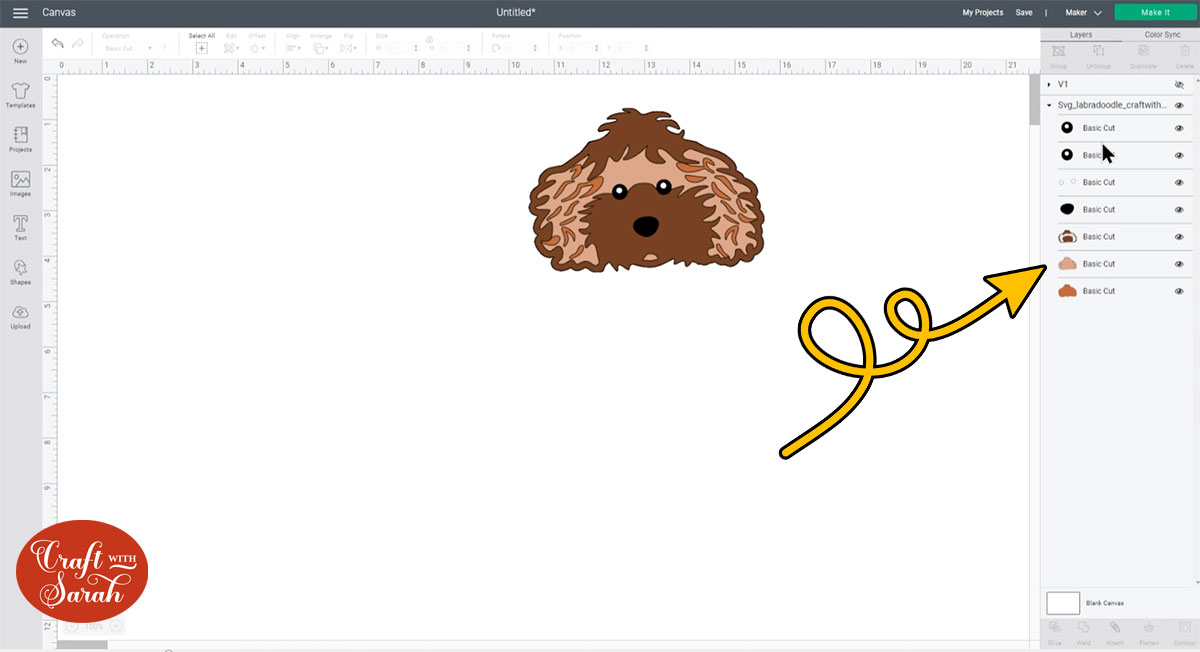
Step 3: Select head layers
Select the dog which you want to use the head of.
Delete all of the layers that have parts of the body attached so you are just left with the head.
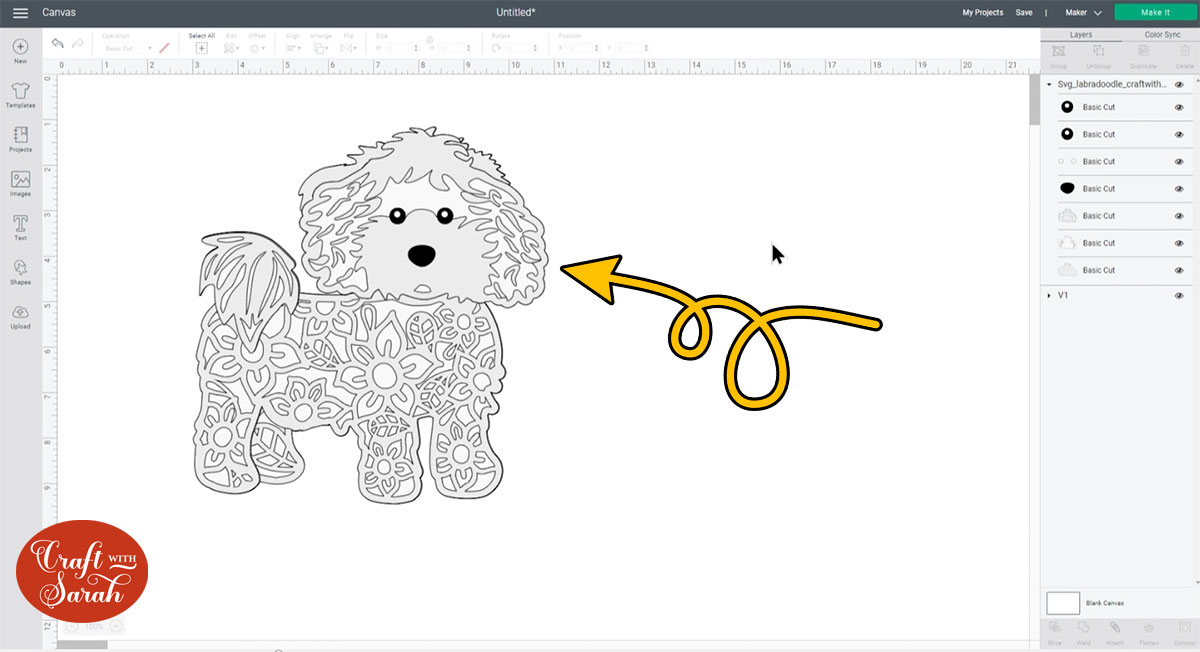
Step 4: Position the new head
Recolour the layers in the head to match the body (or recolour the body layers if those are the ones that need to change for your specific dog).
Drag the group that contains the head layers into position on the body.
You may need to resize and rotate to get the positioning looking correct.
TIP: If your head is appearing underneath the body, select the head group then click Arrange> Send to Front
Step 5: Cut the head off the original layers
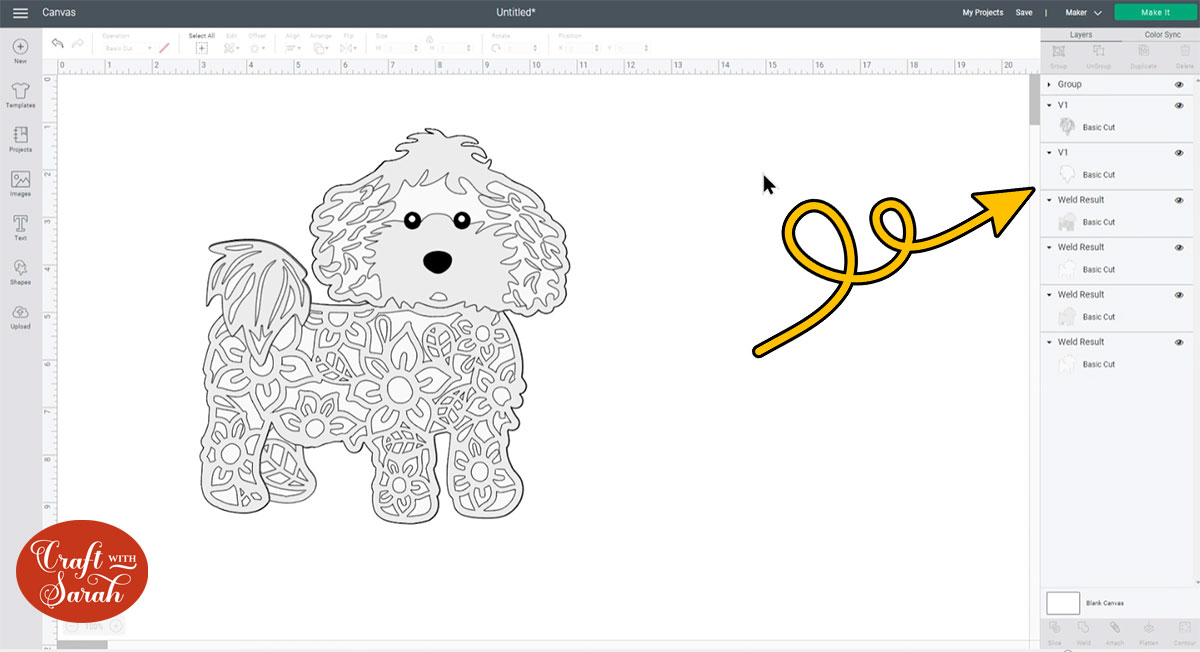
Click on your “body” layer and then press “Ungroup” to separate out all of the layers.

I’ve made the bottom layer of the body red to make it easier to see.
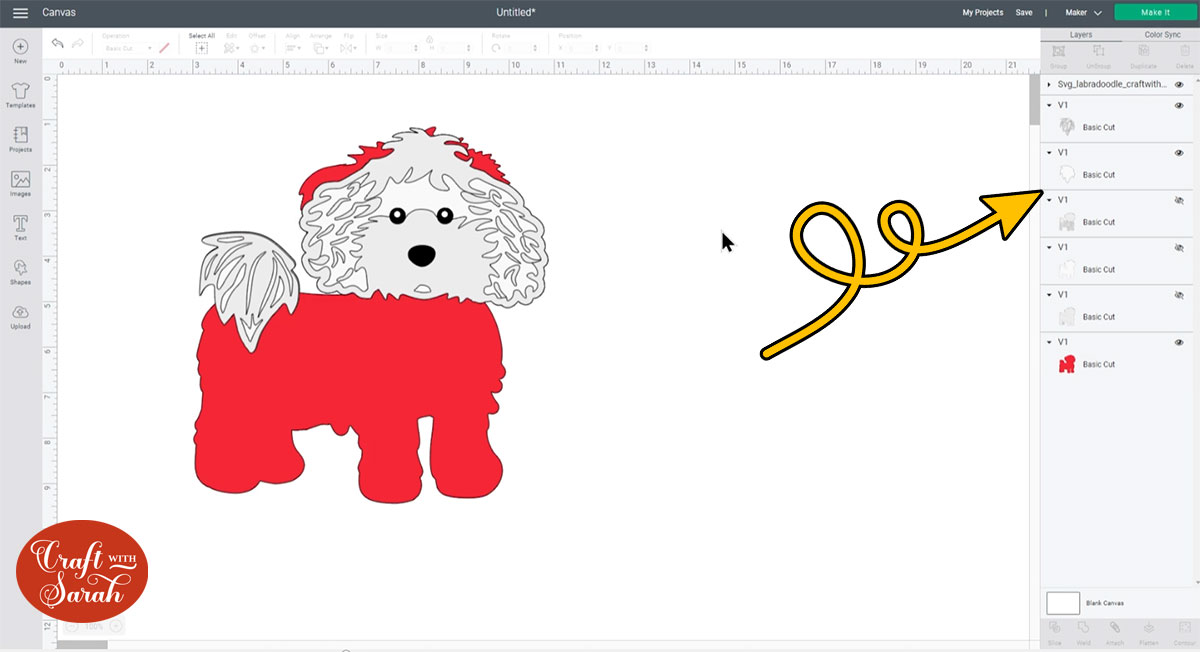
Insert some shapes and size them to cover all parts of the head that you need to remove.
When your shape(s) are covering all of the head section of the original dog graphic, select all the shape layers and click Weld to join them together.
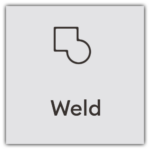
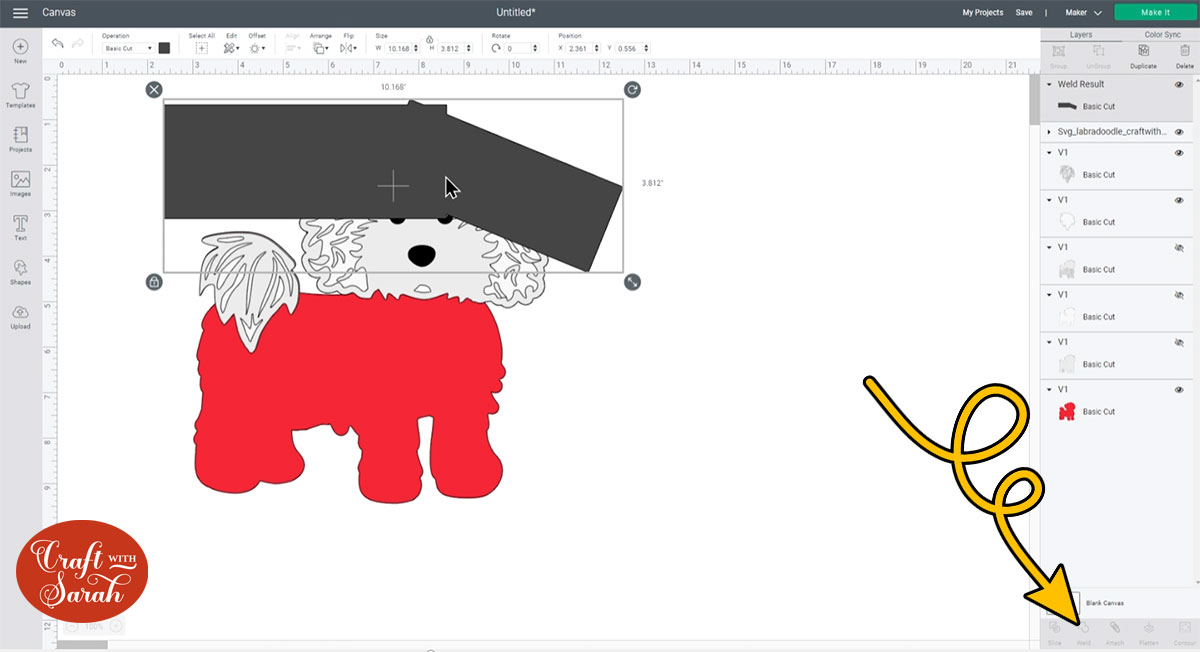
Duplicate the welded shapes so you have the same number of copies as you have of body layers of the dog.
Select one of the welded shapes AND one of the body layers and press “Slice”.
Delete the leftover pieces of the welded shapes and the top of the head that you have removed.
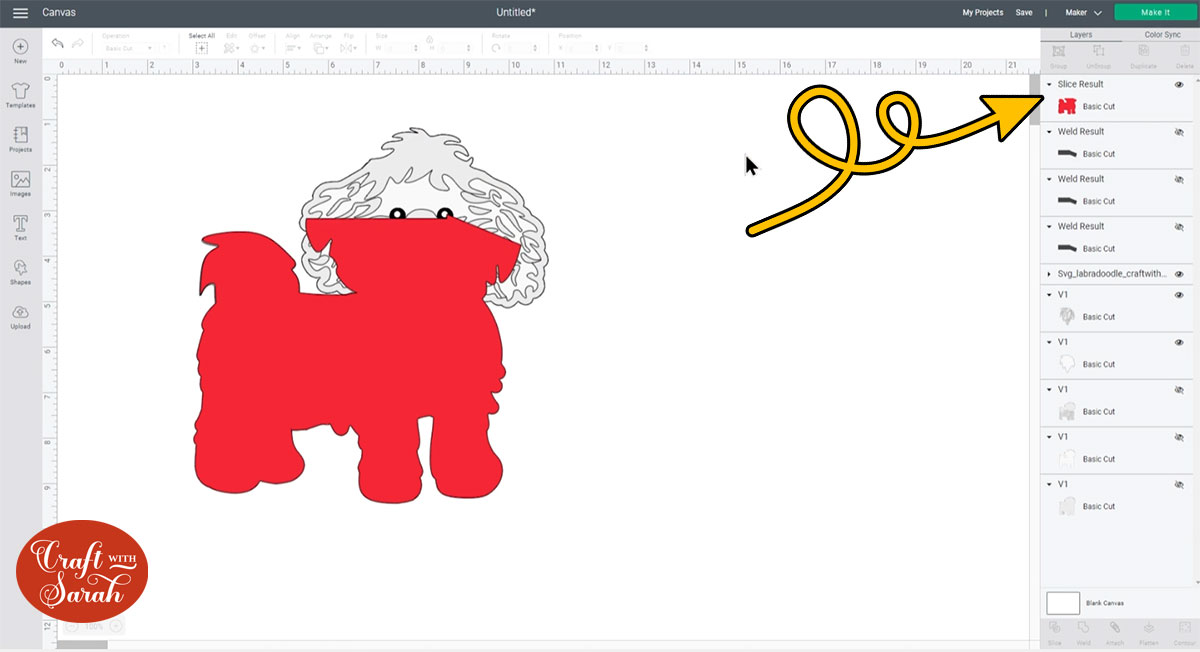
Repeat this step for all of the body layers.
Step 6: Prepare the layers for the new head
Re-colour all of the body layers so each one is a different bright colour. This will make it easier to complete the next steps.
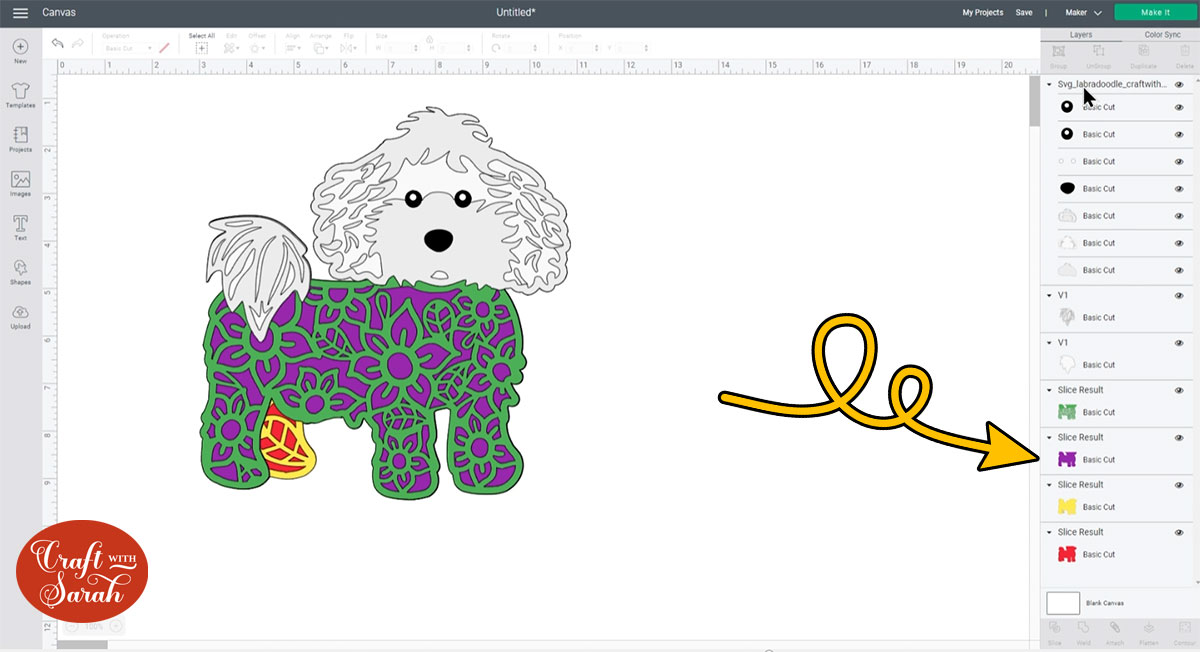
Step 7: Duplicate the new head
Duplicate the bottom layer of the new “head” group so that you have one per body layer.
Colour the new heads to match your body layers.
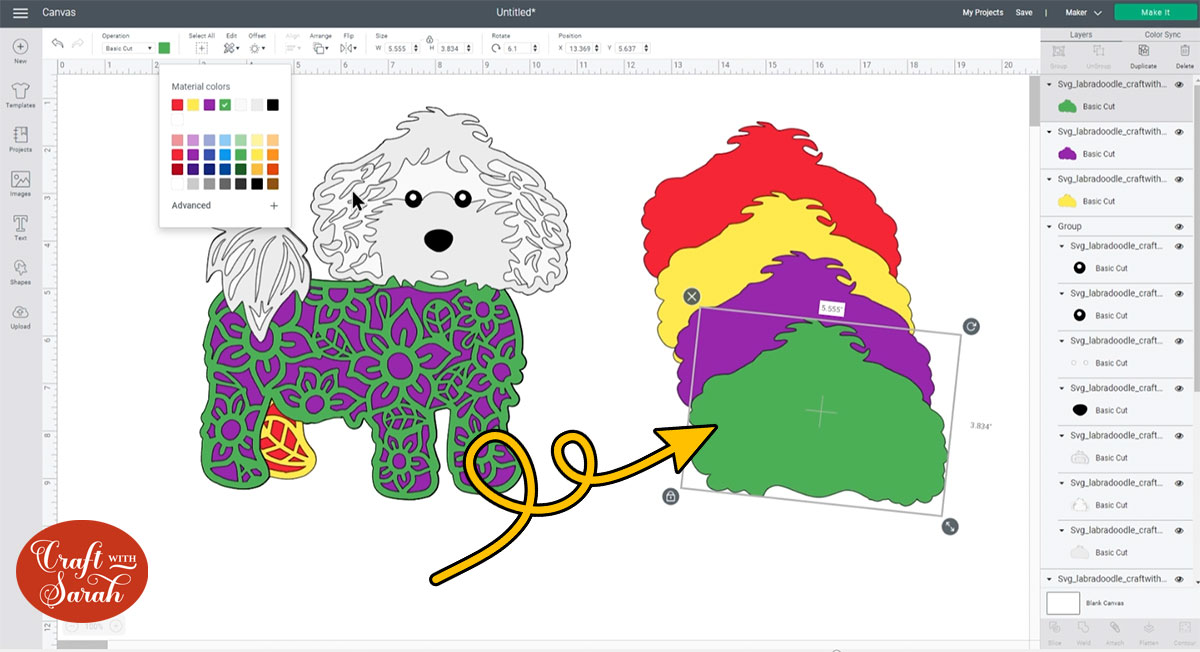
Select all the new head layers AND the head “group” and press Align > Center to position them one-on-top-of-the-other.
Drag back into position on the body.

Hide all the brightly coloured head and body layers by clicking the “eye” icon next to them in the layers panel. Keep the bottom layers showing.
Select the red body layer and the red head layer and Weld them together.

Repeat this for all the other brightly coloured head/body layers.
Step 8: Drag layers into correct position
The last step is to drag-and-drop the layers in the layers panel so that they are appearing in the correct order.
Finally, press “Select All” to select all the layers and then “Group” to group all the layers together.
This means you can now resize the design by dragging the resize corner when it’s selected, or by using the width/height boxes at the top of the screen, and all the layers will change size in proportion.
Don’t forget to save your Project when you’re done!
I hope you enjoyed this tutorial on how to switch the heads of my layered dog & cat SVG files.
Don’t forget, I have over 130 dog designs and 20 cats to choose from in my SVG shop.
I will be releasing additional tutorials in the next few weeks on how to further customize the designs to make them look even more like your beloved pet, as well as sharing ideas of craft projects to make with the layered files.
[svg_school]
Happy crafting,
Sarah x

