
Design Space Pattern Fill: How to use Digital Papers
Learn how to use digital papers in Design Space with two different methods: Pattern Fill and Slice.
Each method is quick and simple to do in Design Space and lets you add digital papers to your Projects without wasting any printer ink!
I love using digital papers in my craft projects as it often works out cheaper than purchasing pre-printed paper packs and there are hundreds of thousands of different designs to choose from online.
What are digital papers
Digital papers are graphics that have a pattern on them that you can print on your regular home printer.
The patterns are usually, not not always, a “repeating pattern”, also known as a seamless pattern, which means that you can “tile” it to cover more of your paper.
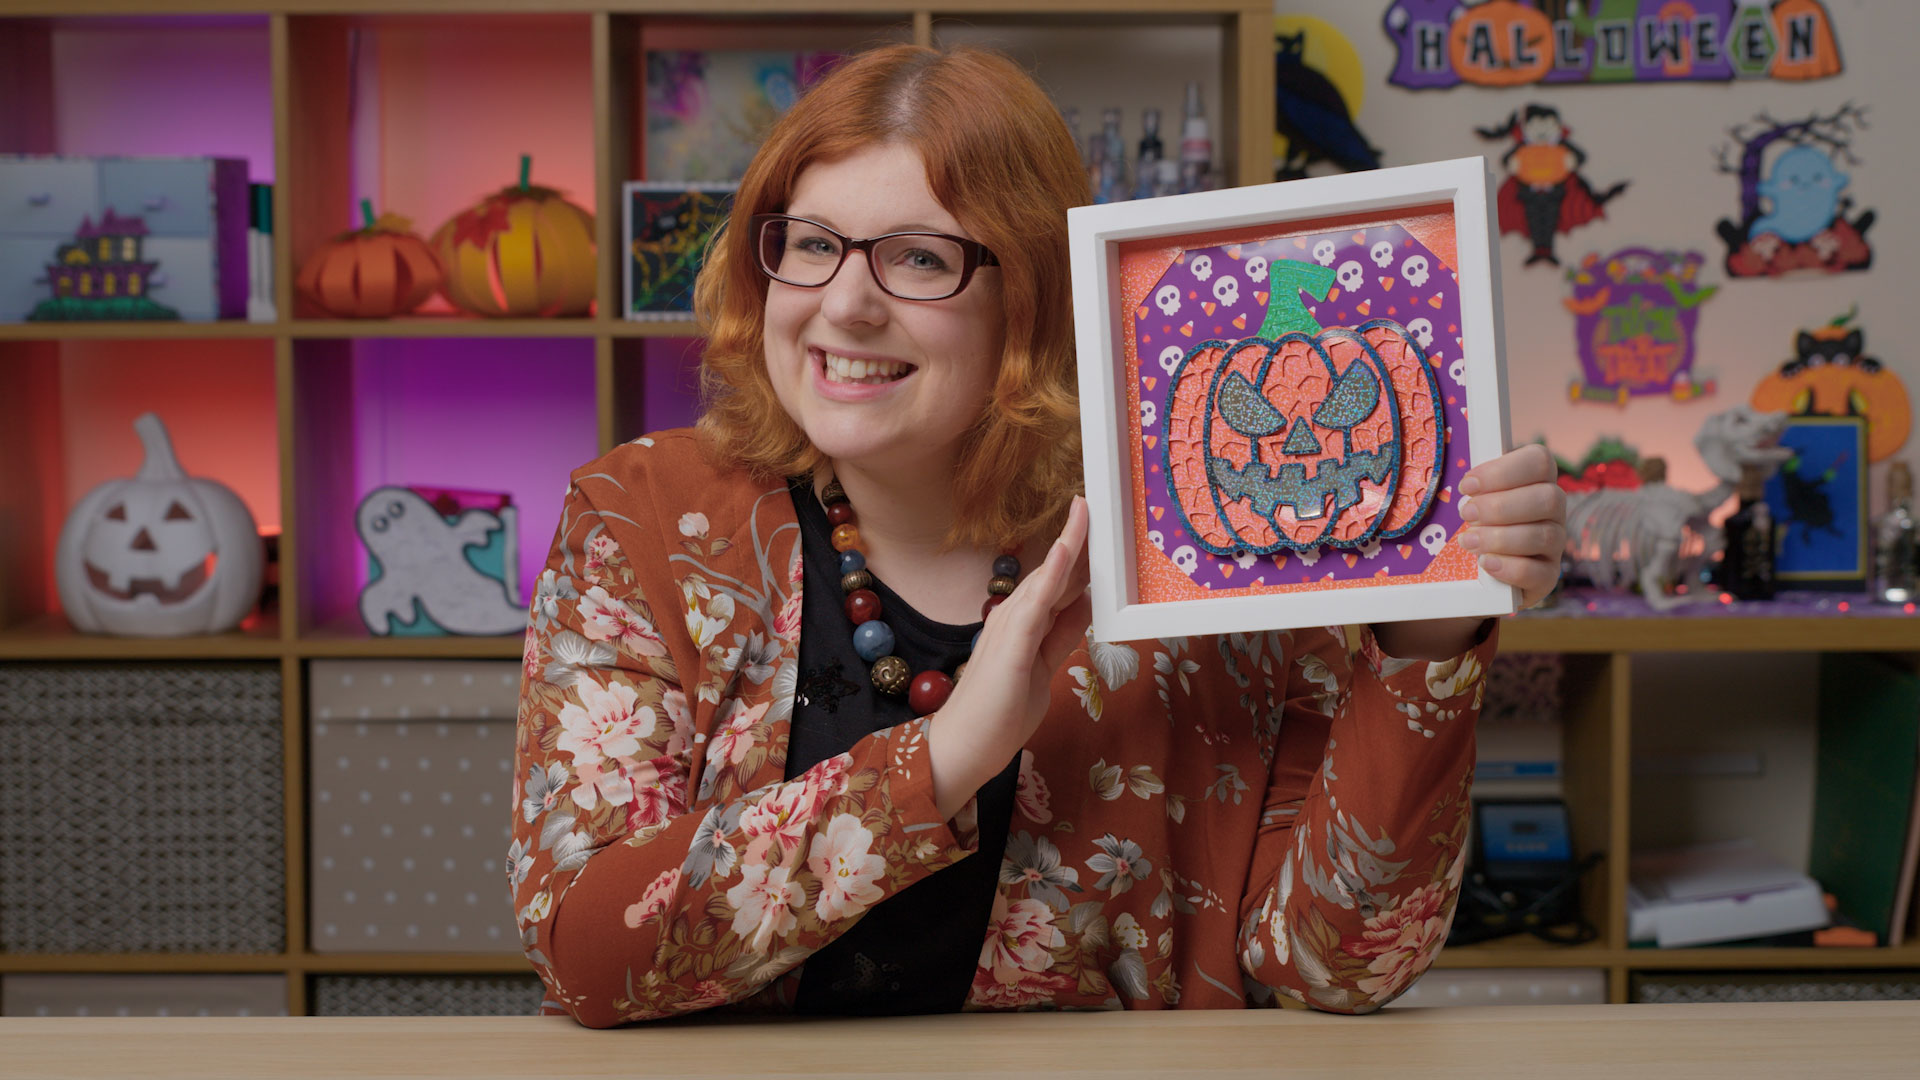
Here is an example of how I used digital paper for the background of a Halloween shadow box:
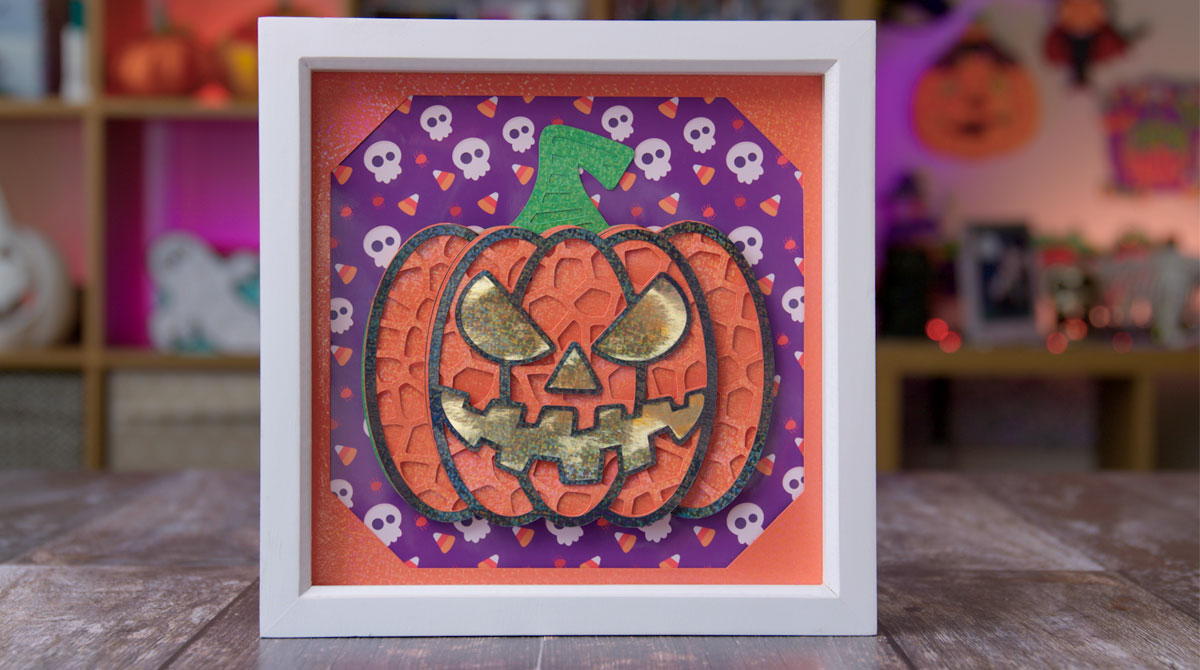
I printed the purple patterned design onto glossy photo paper and then trimmed it to the size of the frame.
As well as printing digital papers directly, you can also load them into Design Space and “crop” them into the exact shape you want to fill with the pattern. This saves printer ink and it means the Cricut can cut out the design for you using its print-and-cut feature.
Craft with printable background papers in Cricut Design Space
Here’s how to use printable background papers in Cricut Design Space. I’ll show you several different ways to load the papers into Design Space, and how to add them to your Cricut projects.
Note: The video was recorded using Design Space version 6.12.227. Later versions may look or function slightly differently.
Video resources:
- Pumpkin papers
- Sign up to Creative Fabrica for $1
- Print and cut tutorial
- Free jack-o-lantern layered SVG
Digital papers from Creative Fabrica
Step 1: Choose your digital papers
I’m using my FAVOURITE website to get digital papers from, which is CreativeFabrica.com.
They have hundreds of thousands of graphics, SVGs, digital papers, fonts and so much more to choose from.

The BEST thing is, they offer a monthly subscription where you can pay a small monthly fee to get unlimited download from their website! This is so beneficial as it means you can download all the graphics you want, for one small monthly price.
I’m happy to say that I have a special promotion available with Creative Fabrica where you can get your first month’s subscription for just $1!!
That’s right, just $1 to access 100,000s of digital file goodness!
If you’d rather not sign up to a recurring subscription though, that’s absolutely fine. All graphics can be purchased individually instead, for a small one-off cost.
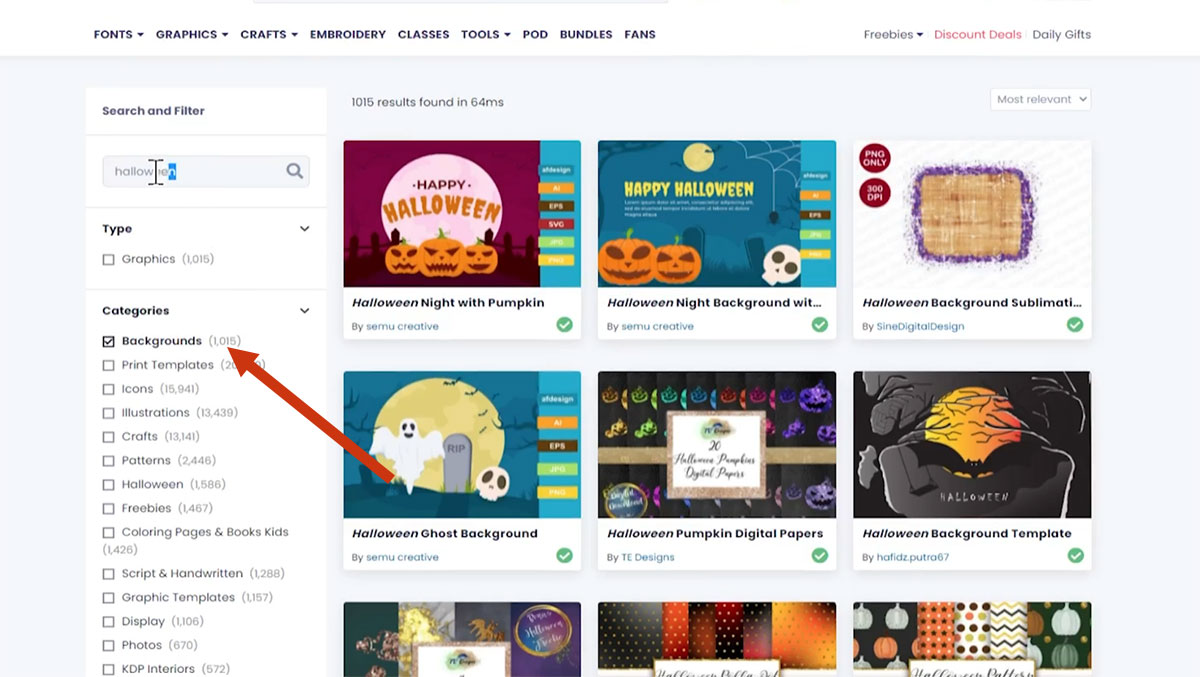
Head on over to Creative Fabrica and choose your Halloween graphics. Search for “digital paper”, “seamless pattern”, “scrapbook paper” or other similar terms to browse the different designs on offer.
To make it easier, you can filter by the “Backgrounds” category to only show background papers.
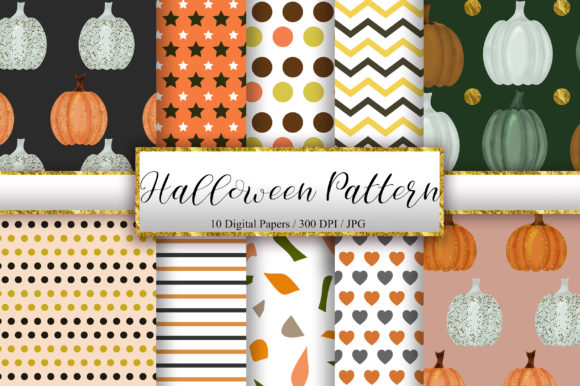
The set I chose is called “Halloween Seamless Pattern Digital Paper“.
Before you can use the graphics, you need to unzip the download folder that they comes in.
- How to unzip a folder on Windows computer
- How to unzip a folder on a Mac
- How to unzip a folder on an iPad/iPhone
- How to unzip a folder on an Android device
You can print the papers directly on your home printer just like you would print any other kind of file.

However, sometimes you might not want to print a whole sheet of paper, especially if you only need a small amount of the pattern for the project you’re working on.
Or, you might want to customize the size of the print on the pattern to better fit your design.
Let’s see how to do that in Cricut Design Space…
How to use digital papers in Design Space with Pattern Fill
The first method we’ll look at is the Pattern Fill.
This is the best method to choose if you want to customize the size of the pattern.
Step 1: Upload the patter as a Pattern Fill
Create a new Project in Cricut Design Space and click “Upload”.

Click the option which says “Upload Pattern” underneath the “Pattern Fill” heading.
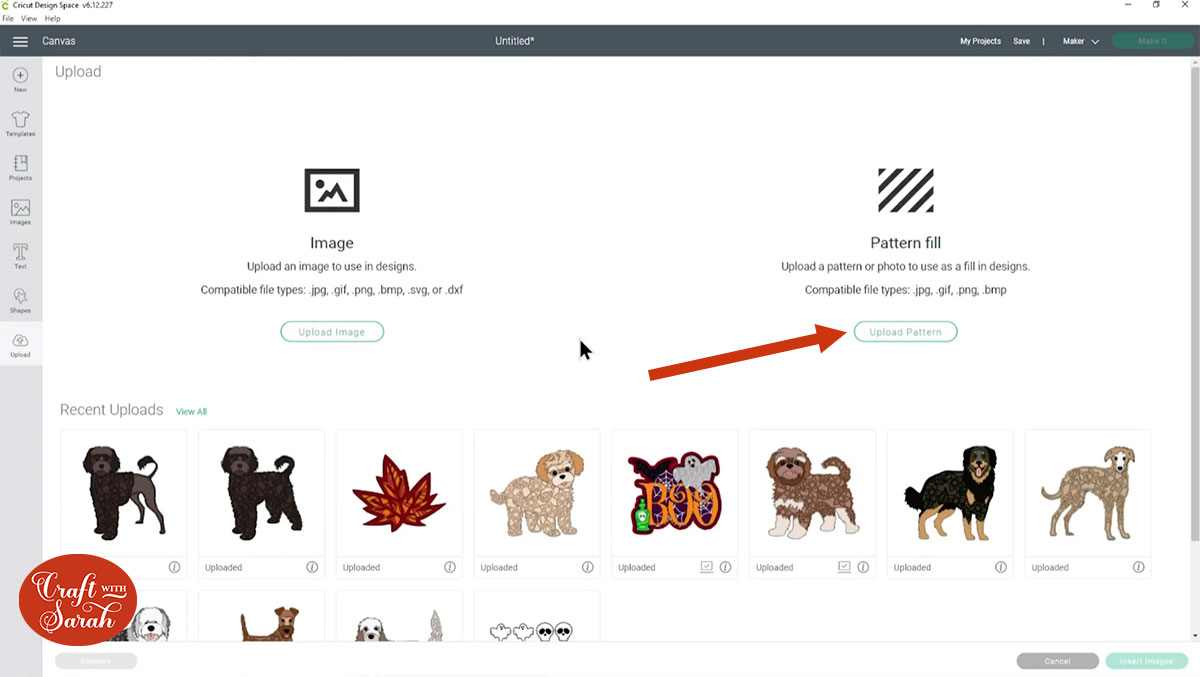
Find the pattern file on your computer and select it.
On the next screen, click “Upload”.

Step 2: Fill a shape with the pattern
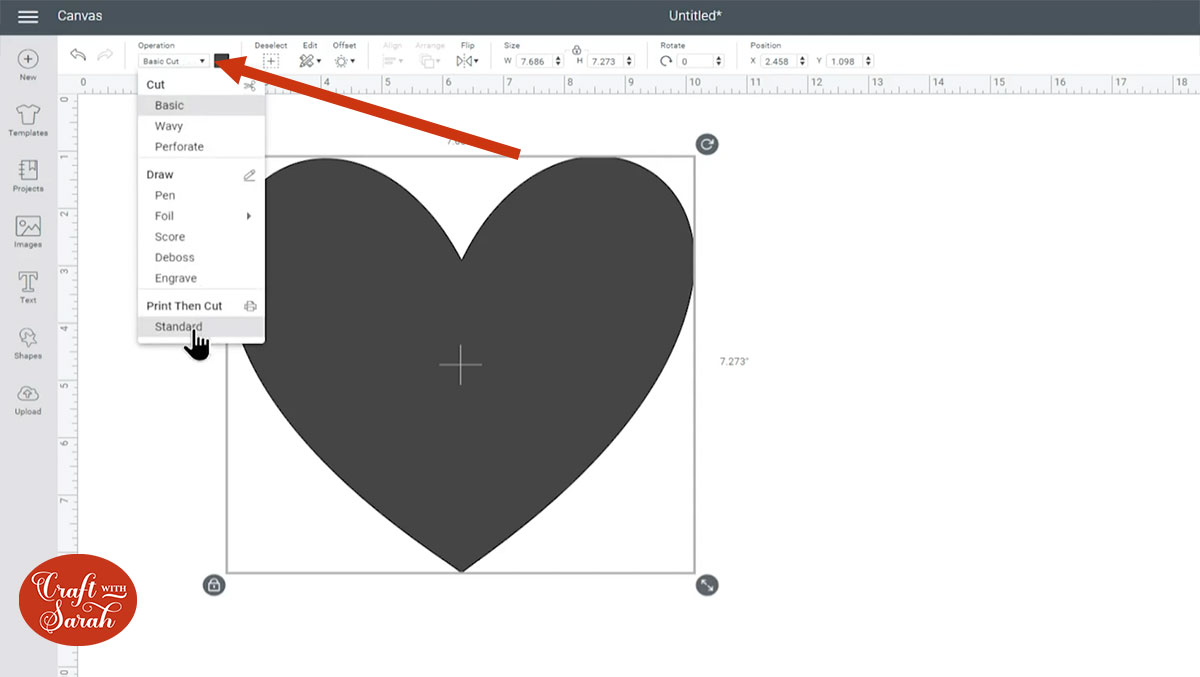
Go into “Shapes” and choose a shape to fill with the pattern.

Click the shape and then click into the dropdown at the top of the screen where it says “Basic Fill” and change that to “Print then Cut Standard”.
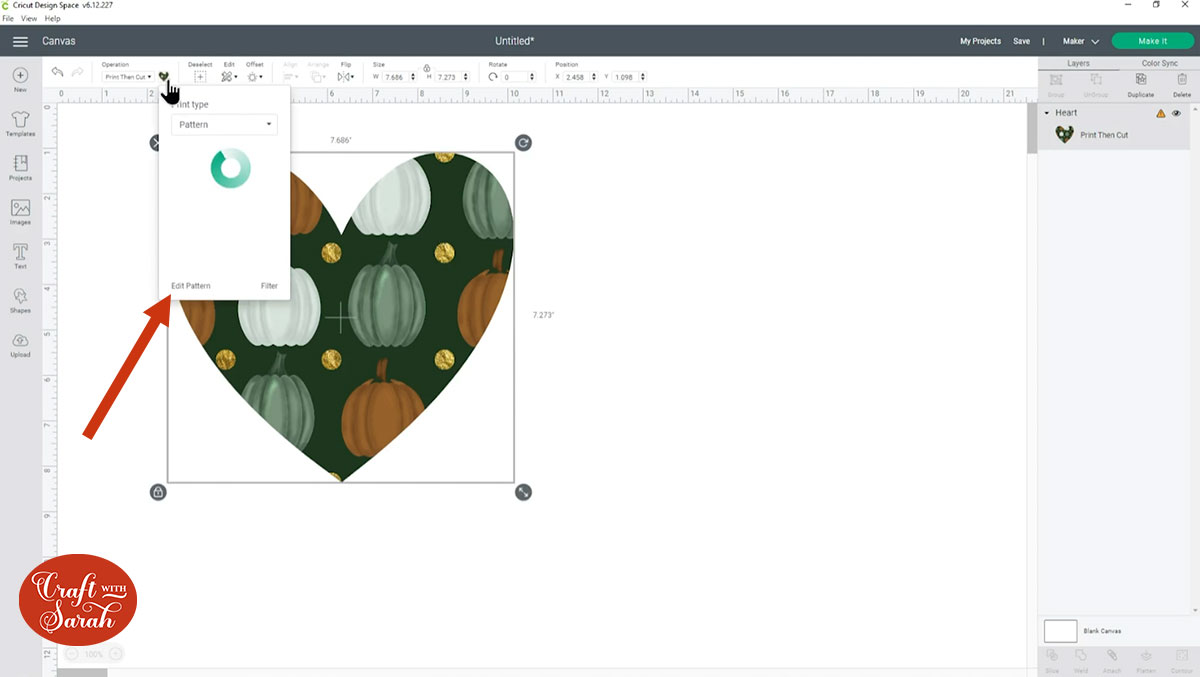
Click into the coloured rectangle to the right of that dropdown and then select “Pattern” under the “Print Type” option.
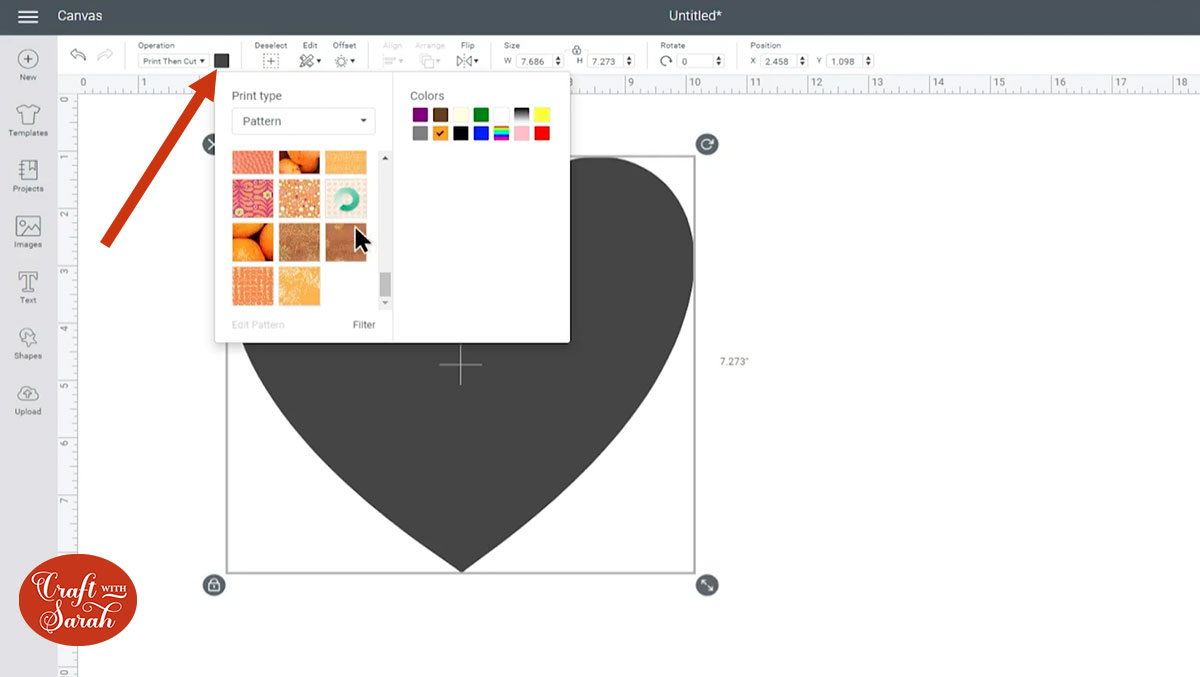
Find the pattern you just uploaded in the list (it may take a while – there are lots to look through!) and that will fill in the shape with the new pattern.
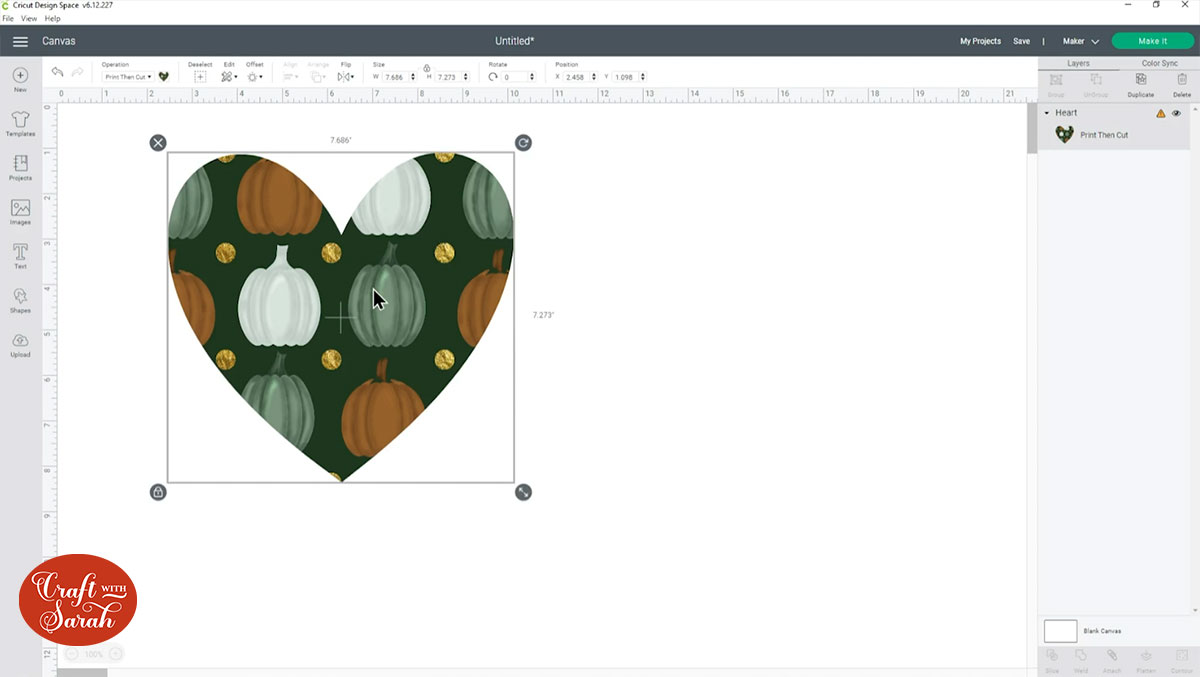
Step 3: Customize the pattern
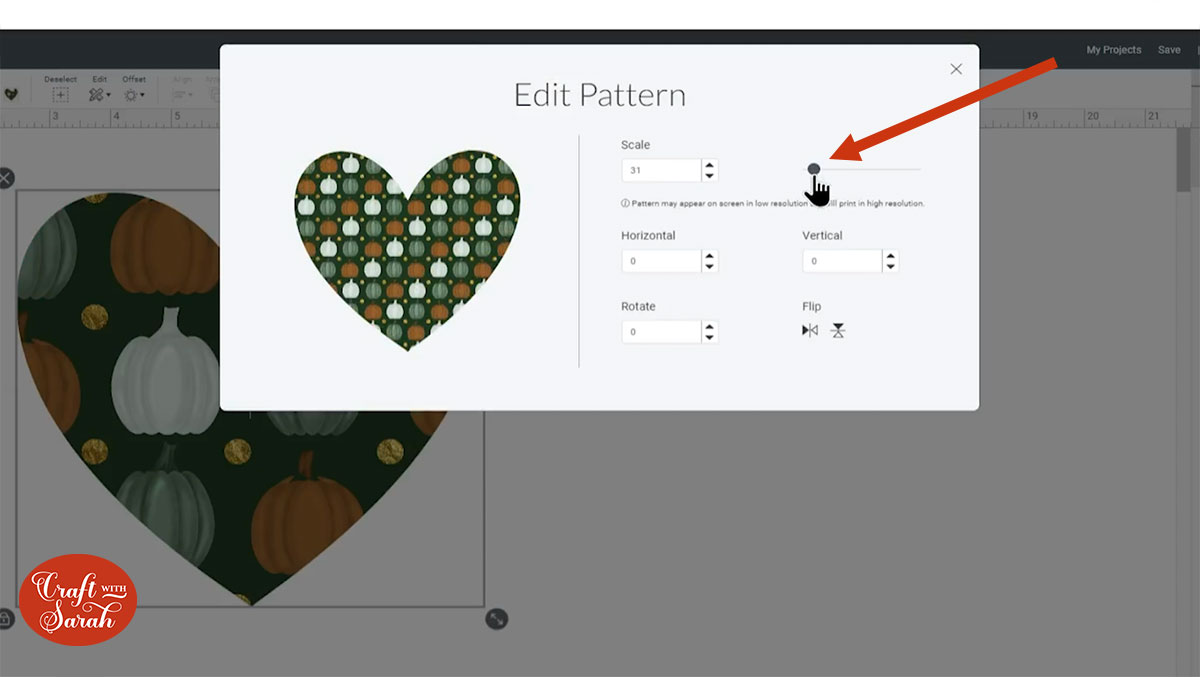
If you would like to change the pattern, click the shape and go back into the “Pattern” dropdown.
Click the “Edit Pattern” link.
This gives you lots of options to change the appearance of the digital paper within your shape.
My favourite tool to change is the “Scale”.
By dragging the slider to the left, it makes the pattern smaller which means you get more of the pictures inside your shape.
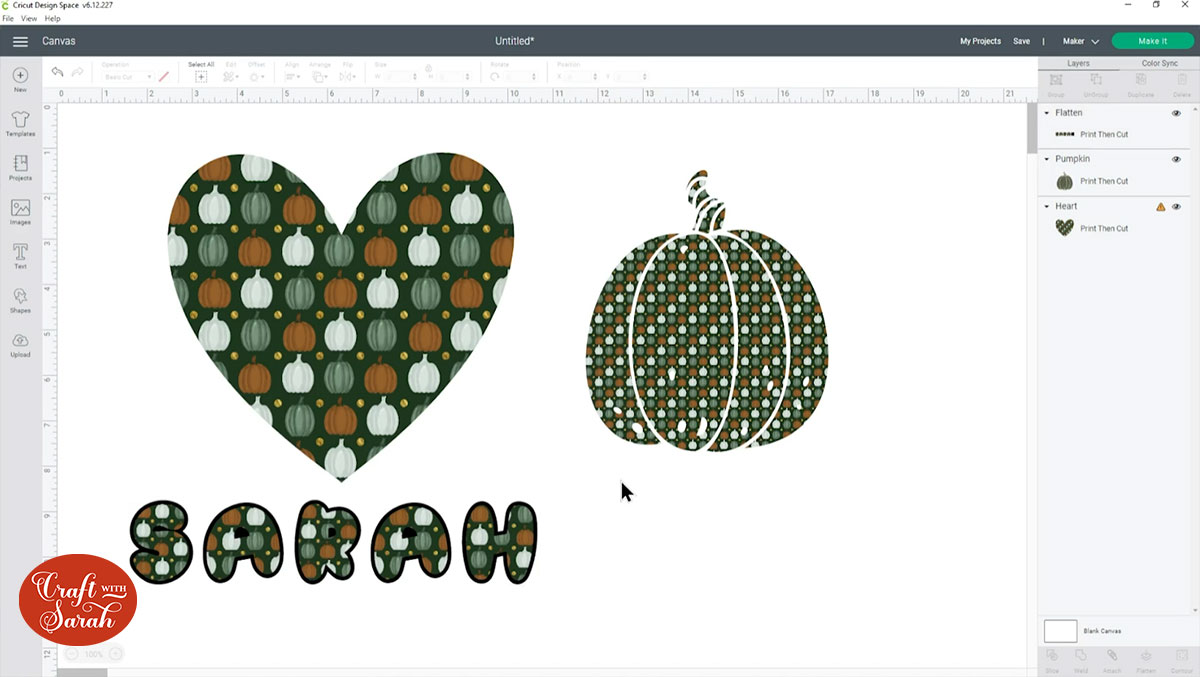
Step 4: Start experimenting with Pattern Fill!
Pattern fill is a very powerful feature of Design Space and it’s great fun to play with.
It’s not just limited to filling in shapes – you can use it to fill in images, SVGs and even text!
Here are some examples…
How to use digital papers in Design Space with Slice
Another way to use digital papers in Design Space is by cutting them into the correct shape using “Slice”.
This can be quicker than using the Pattern Fill and it often works better if your computer is getting a little bit old and slow.
However, you can’t change the scale of the pattern using Slice, so I prefer using Pattern Fill most of the time as it allows for greater customization.
Step 1: Upload the digital paper as an image
Click “Upload” and then “Upload image”.
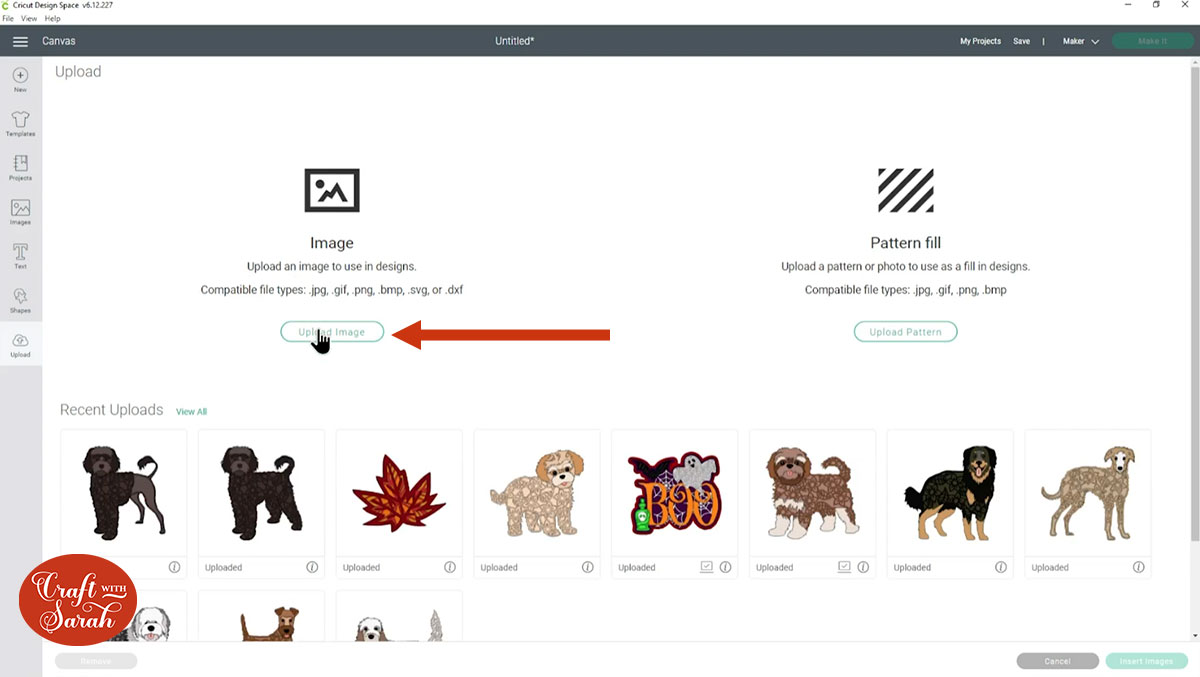
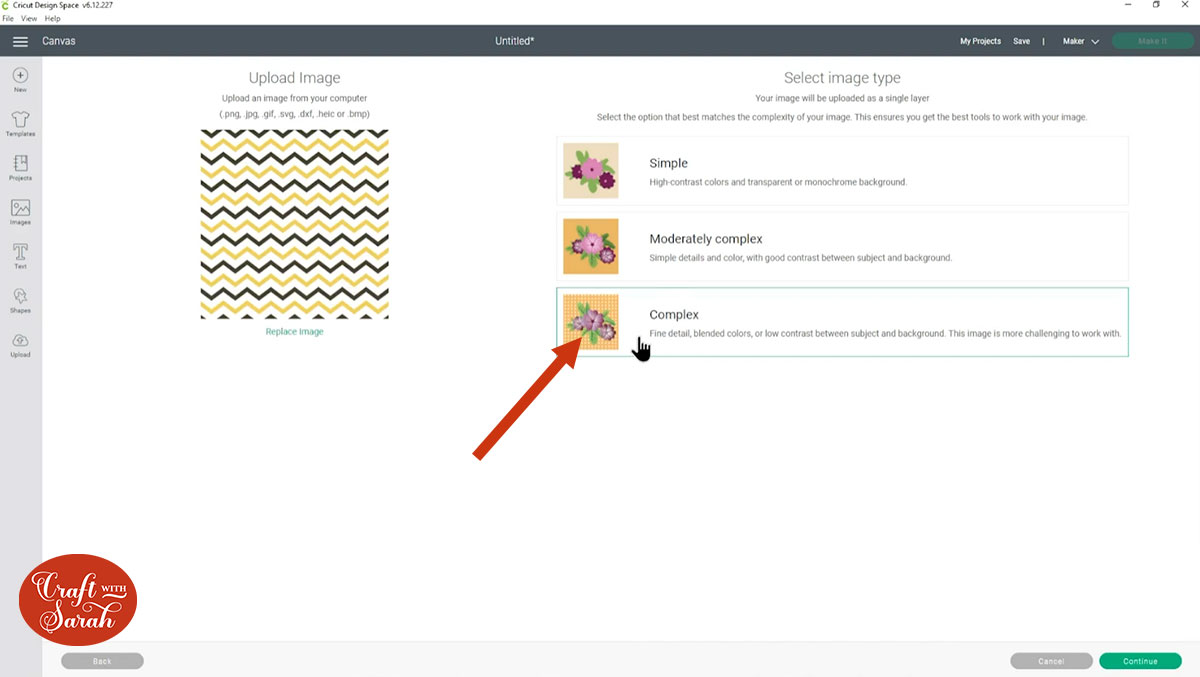
Find the digital paper file and upload it. Choose “complex” on the next screen.
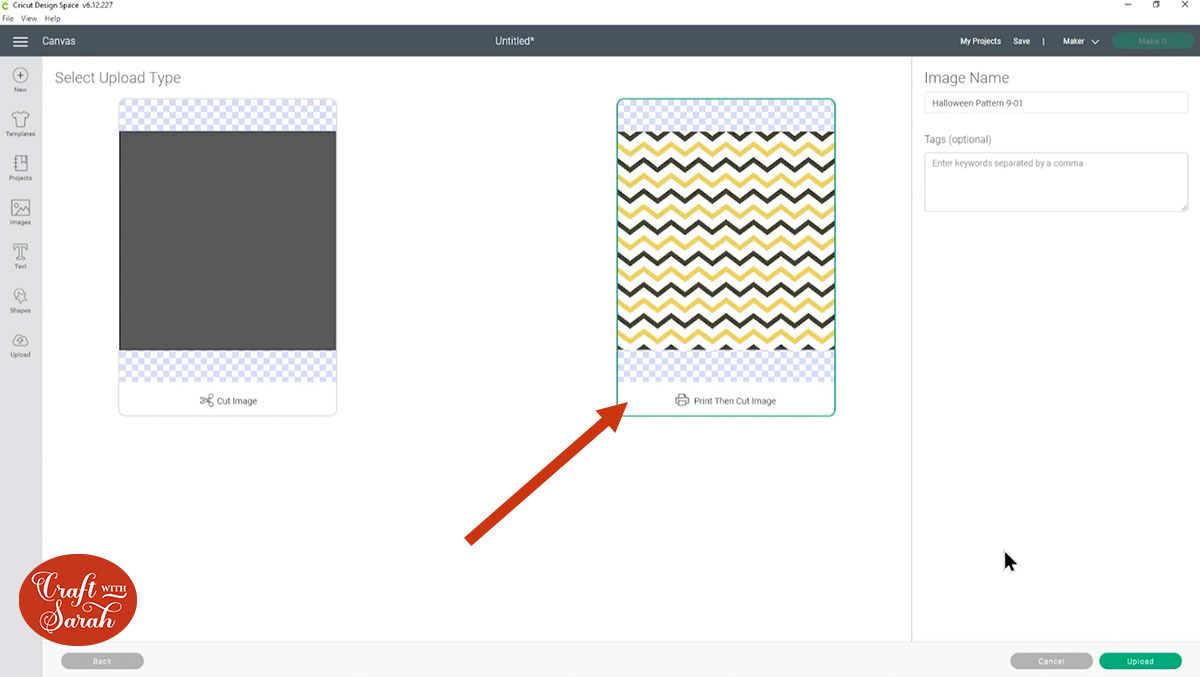
Save the digital paper as a “print then cut” image.
Click it in your “Recently uploaded images” and then insert it to your Project.
Step 2: Resize the digital paper
You might find that the digital paper loads in really, really big.
If that’s the case, change the size to something more manageable, for example 8 inches in width.

Step 3: Cut the digital paper into a shape
Insert a shape, image or SVG and position it over the pattern.
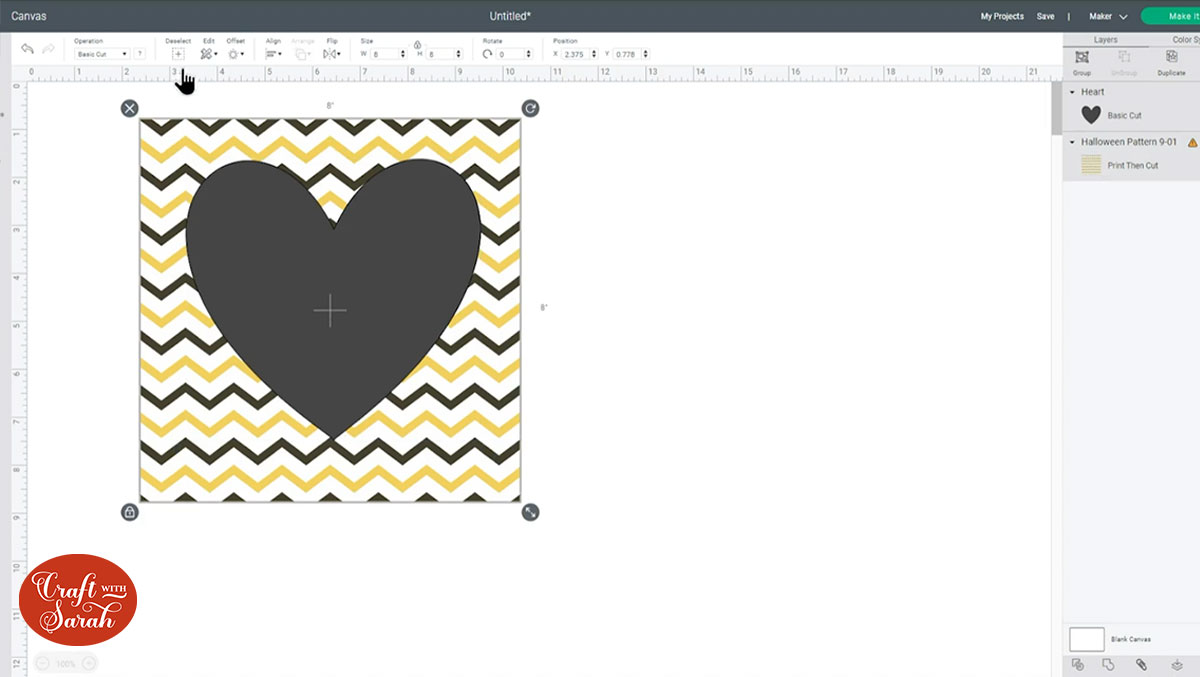
Press “Select All” to select both the shape and the digital paper.

Click “Slice” on the bottom-right of the screen to cut the shape out of the patterned paper – sort of like a cookie cutter or a die-cutter.
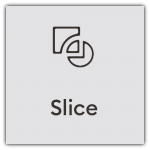
This gives you three “Slice Result” layers. I have moved them apart in the following image so you can see what they look like:
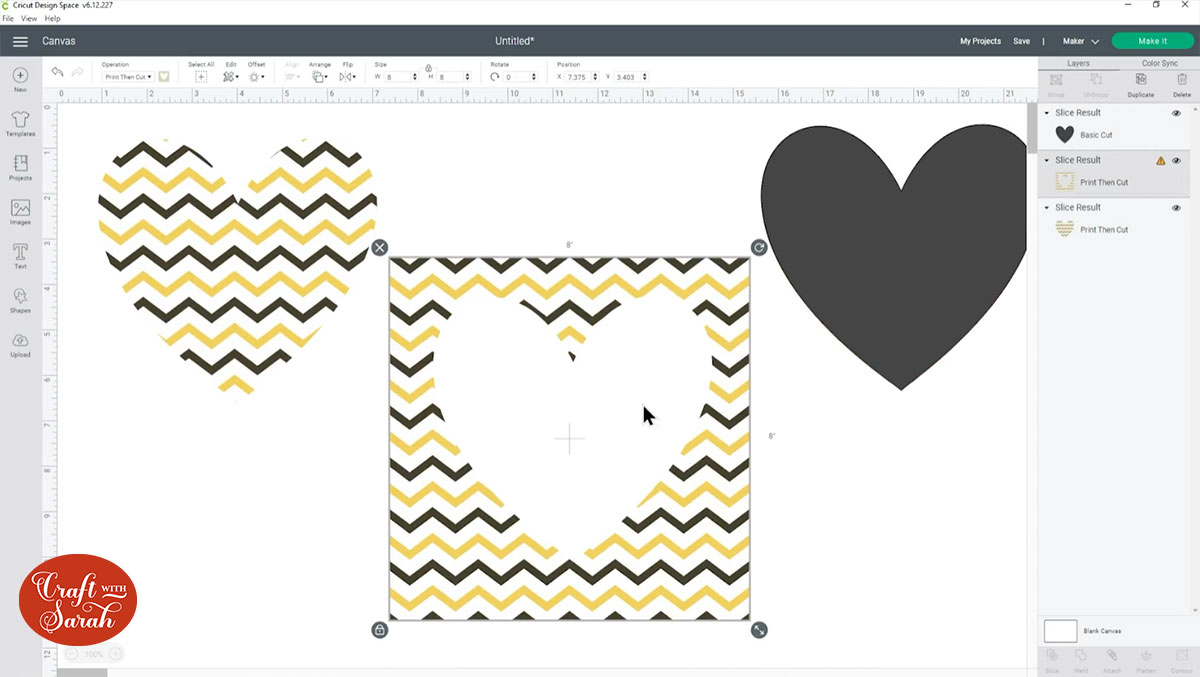
Delete the grey heart and the “offcut” of the digital paper and then you are left with your cutout paper in the shape of a heart!
Just like with Pattern Fill, you can use this same technique to slice the digital paper into the shape of SVGs, Cricut Access image and text.
I hope you enjoyed this tutorial on how to use the Slice and Pattern Fill features of Cricut Design Space to work with digital papers.
For more Halloween tutorials, be sure to join the Halloween Craft Countdown! I’m releasing 20 new Halloween crafts in 20 days, including several different Design Space tutorials.
Happy crafting,
Sarah x