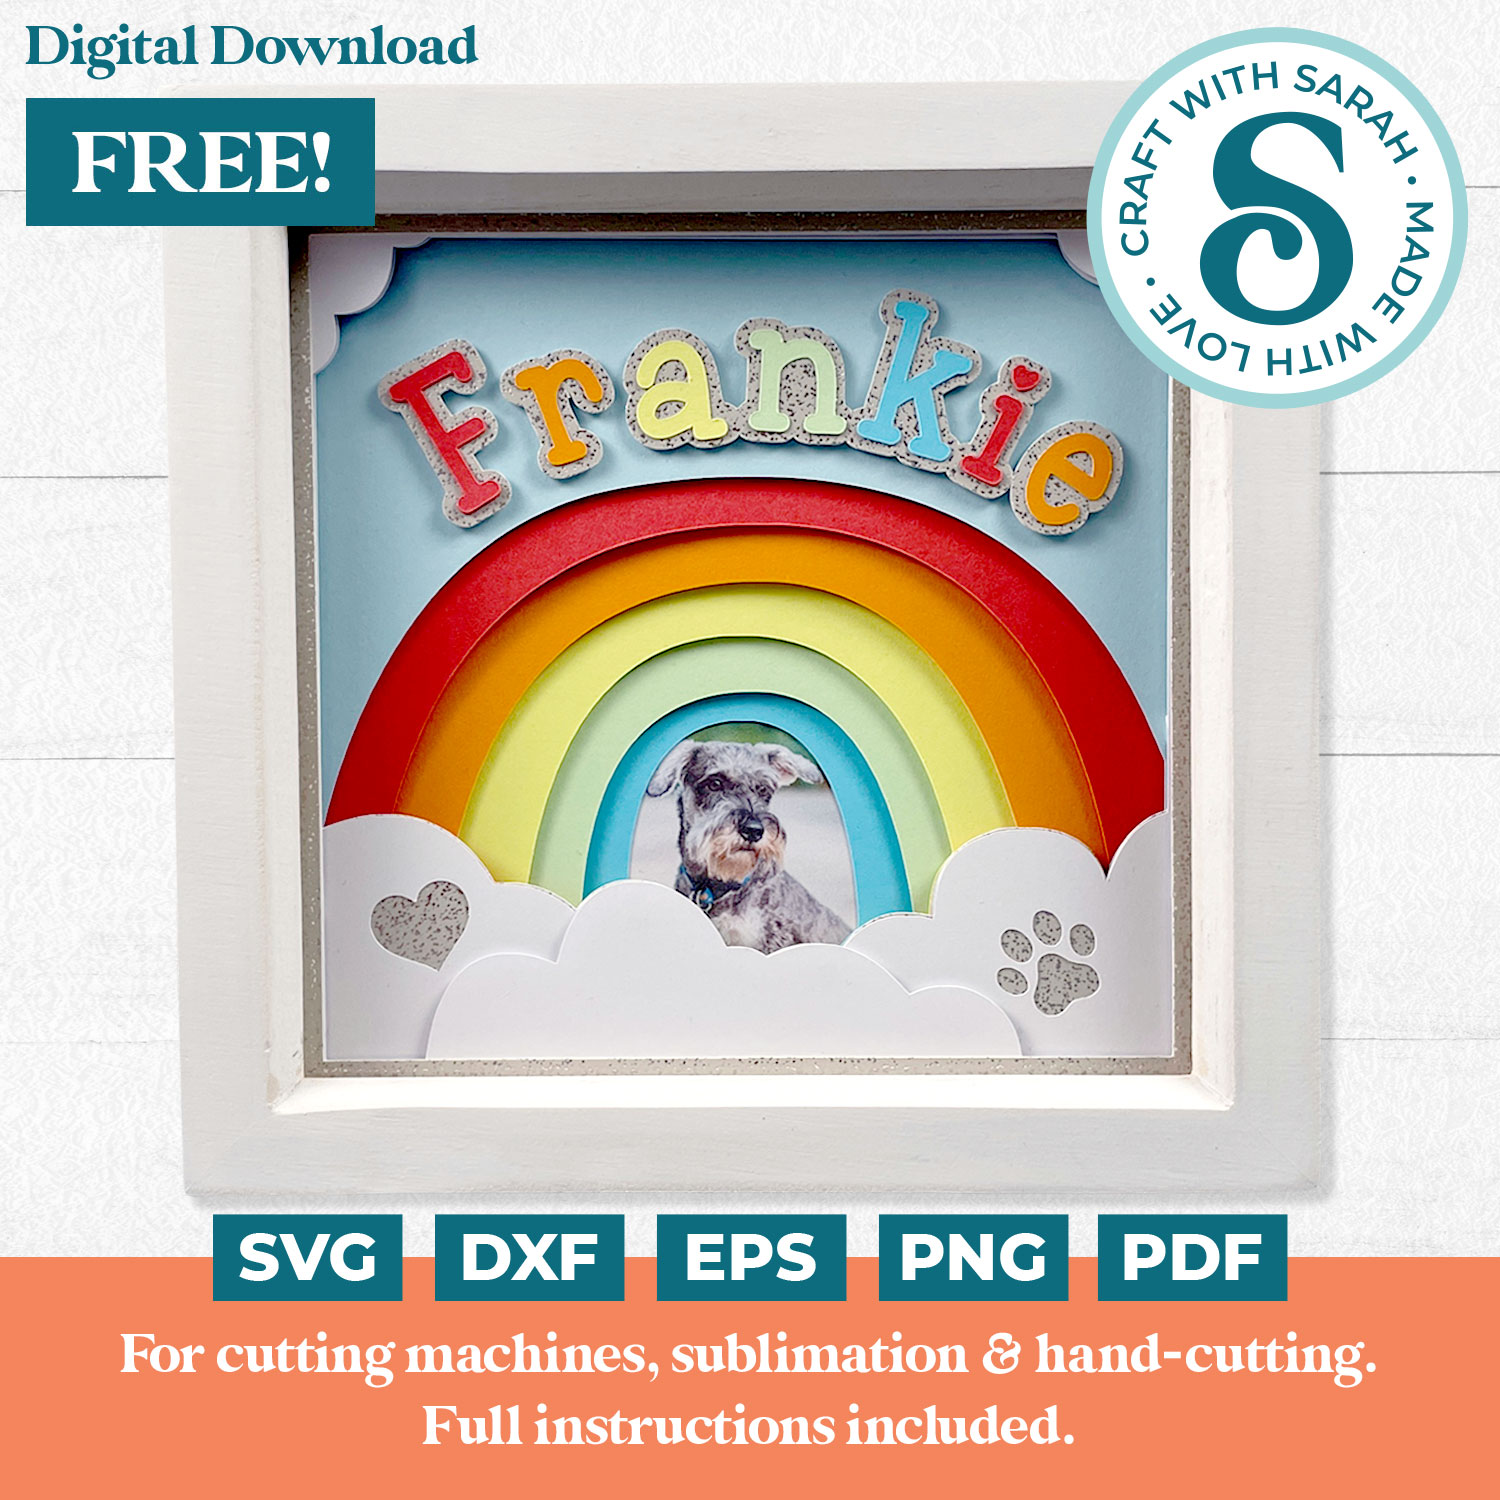
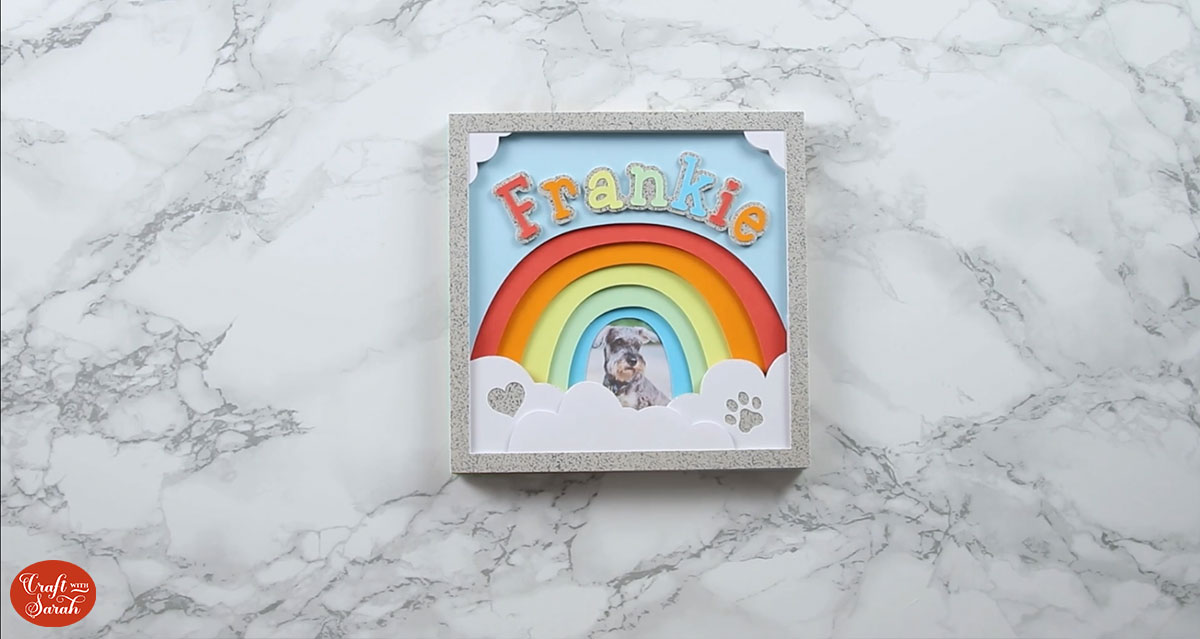
DIY Pet Memory Keepsake 🌈 Free Rainbow Bridge SVG
Make a DIY pet memory keepsake with this free rainbow bridge SVG. Craft a handmade pet remembrance shadow box which features a photo of your pet and is personalized with their name.
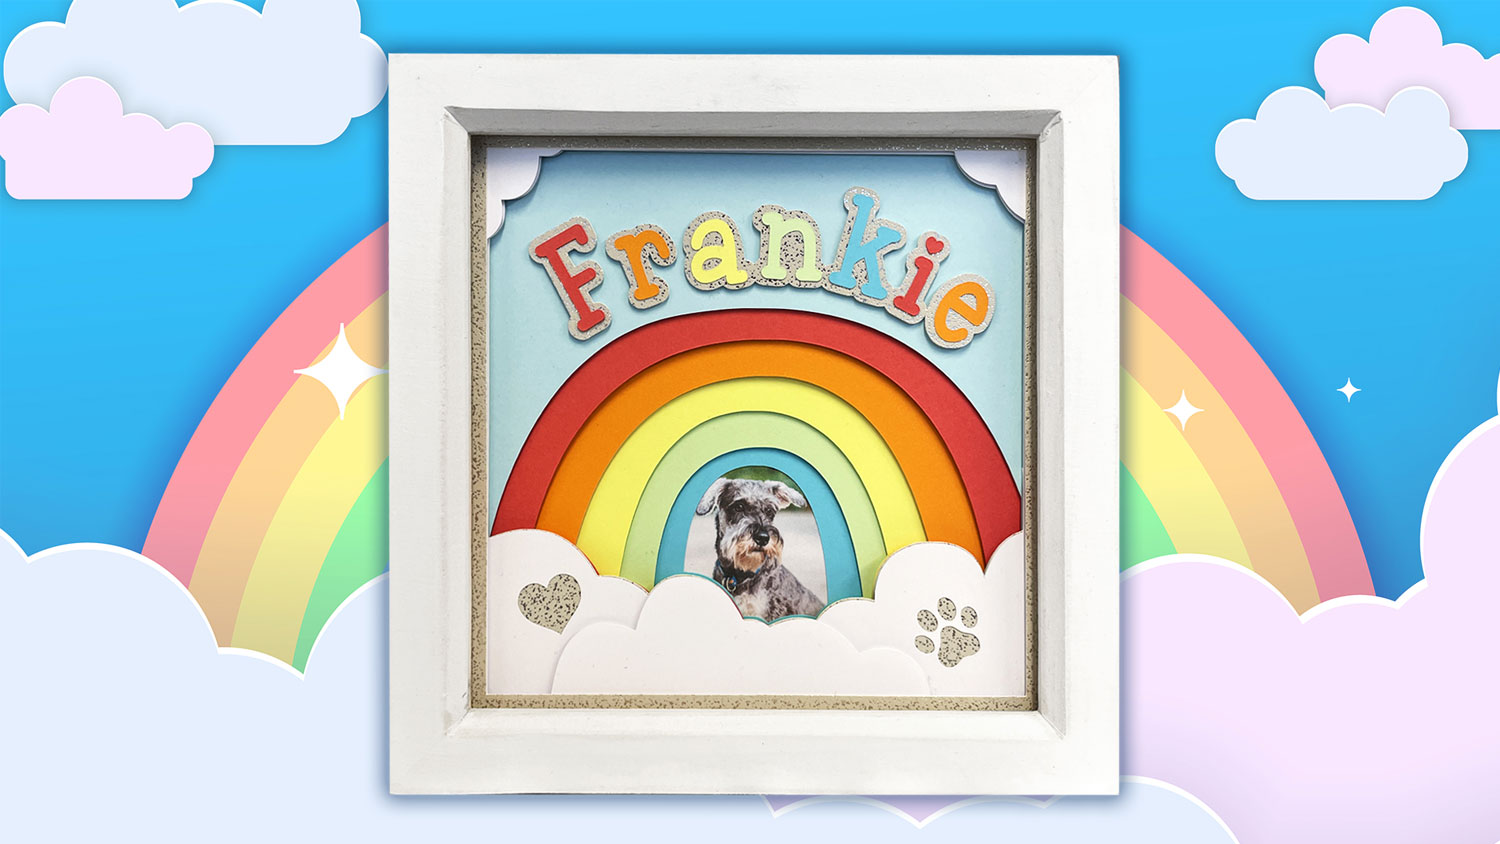
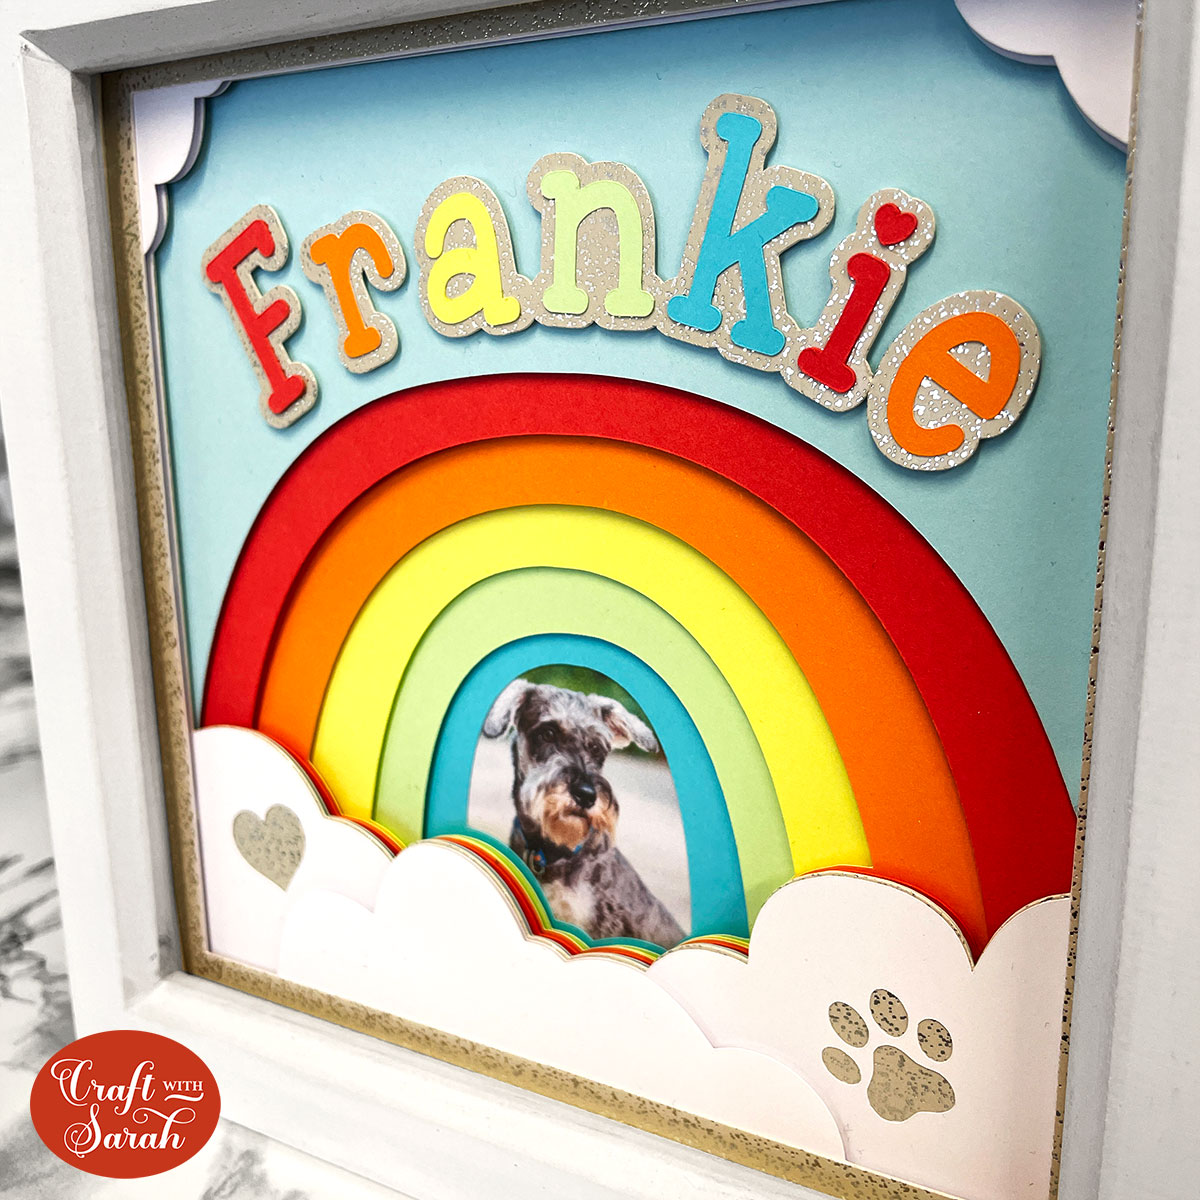
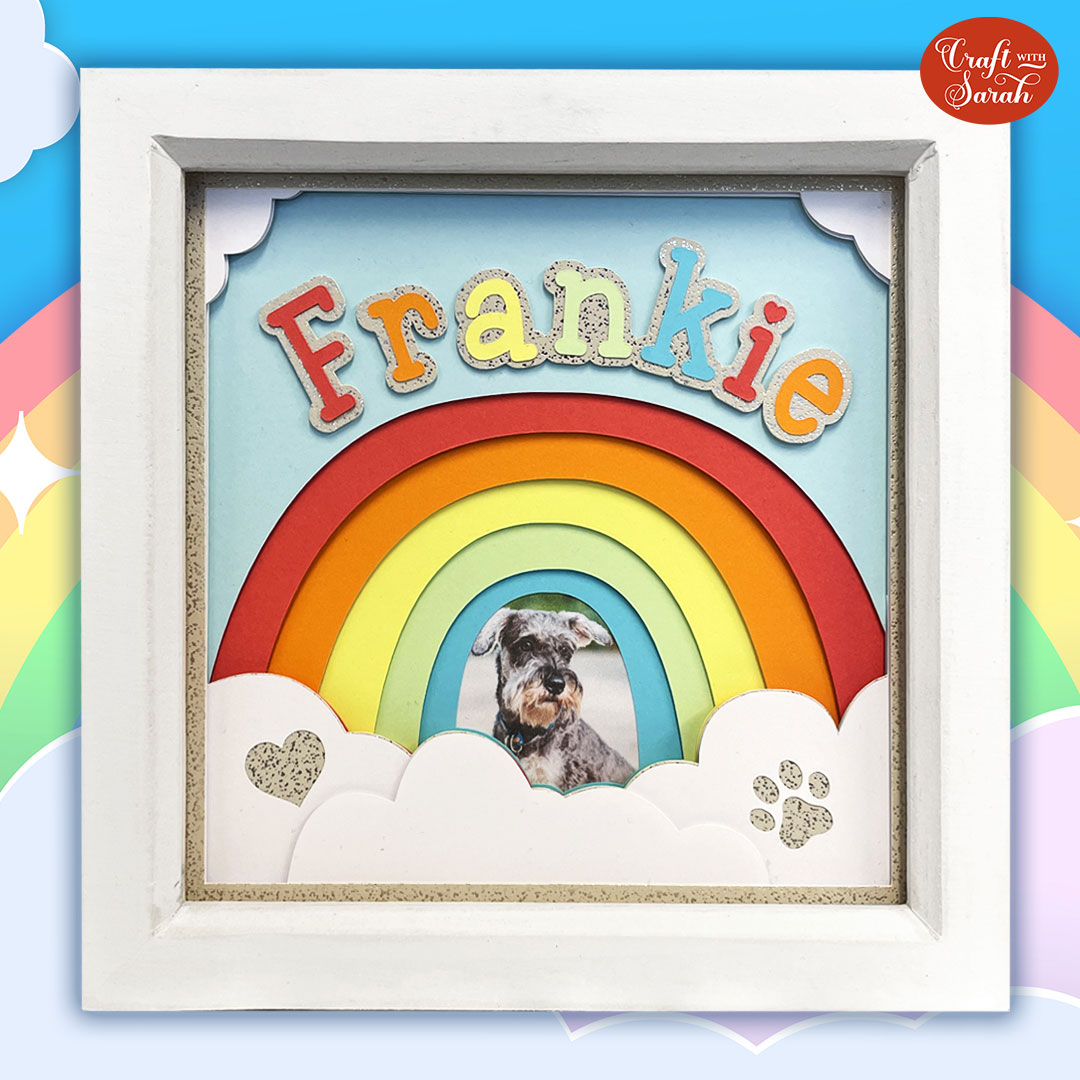
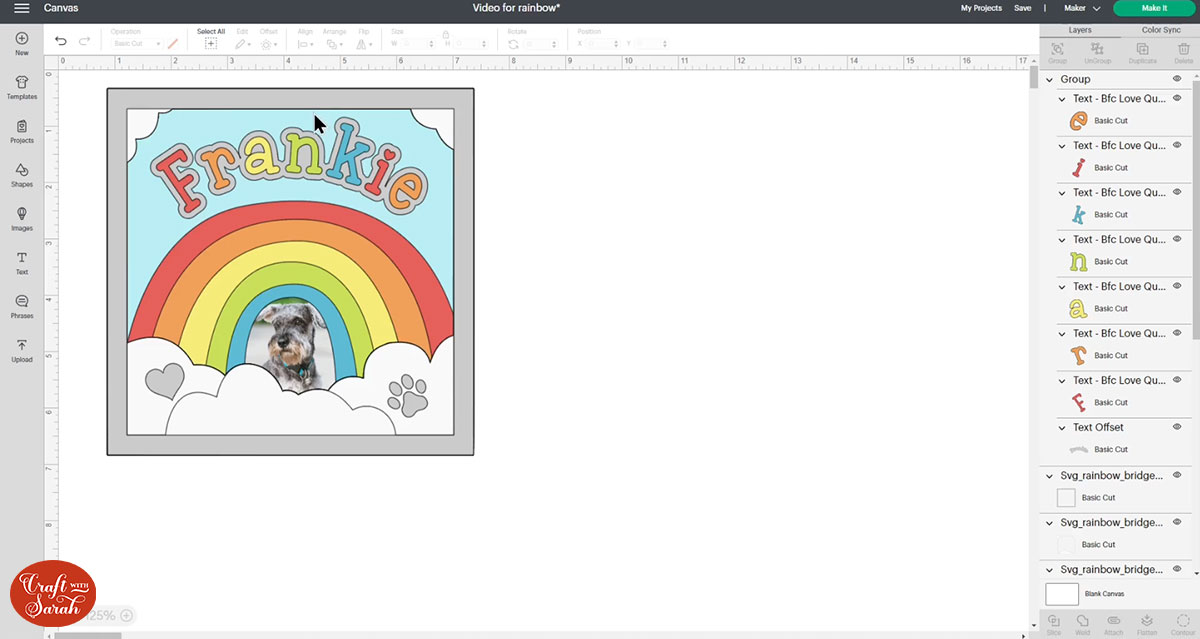
This tutorial is for making a remembrance project for a pet which has sadly passed over the rainbow bridge. The rainbow shadow box design has space in the middle for you to add a photograph of your pet as well as room at the top to add a name.
You could even add the dates of their birth and of their passing into the cloud at the bottom, or a favourite quote or saying.
Rainbow bridge shadow box materials
Here is a list of the materials that I used to make this project.
Please note that some of the links included in this article are affiliate links, which means that if you click through and make a purchase I may receive a commission (at no additional cost to you). You can read my full disclosure at the bottom of the page.
- Cricut Machine
- Light blue Cricut cutting mat
- Coloured card
- Collall All Purpose Glue
- Needle Tip Applicator Bottle
- 3D foam pads
- White shadow box frame
- Colour printer
- Glossy photo paper
Video tutorial for pet memory keepsake craft
Watch the video below to see how to modify the rainbow bridge SVG to add your pet’s details. Keep scrolling for a written tutorial.
This tutorial was filmed using Design Space version 7.6.172. Later versions may look slightly different.
How to make a pet memory keepsake shadow box
Step 1) Download the free file & unzip the downloaded folder
Download the Free Cutting File
Please login to your account to download this file.
TERMS OF USE:
You may sell finished, handmade physical craft items that you have made using this product but must not sell or share the digital files. Read full terms of use
Before you upload the SVG to Design Space, you need to unzip the download folder that they come in.
- How to unzip a folder on Windows computer
- How to unzip a folder on a Mac
- How to unzip a folder on an iPad/iPhone
- How to unzip a folder on an Android device
Step 2) Upload the SVG file into Design Space
Open up Cricut Design Space and upload the file called SVG_Rainbow_Bridge_CraftWithSarah.svg
This is how it should look after you have uploaded the file:
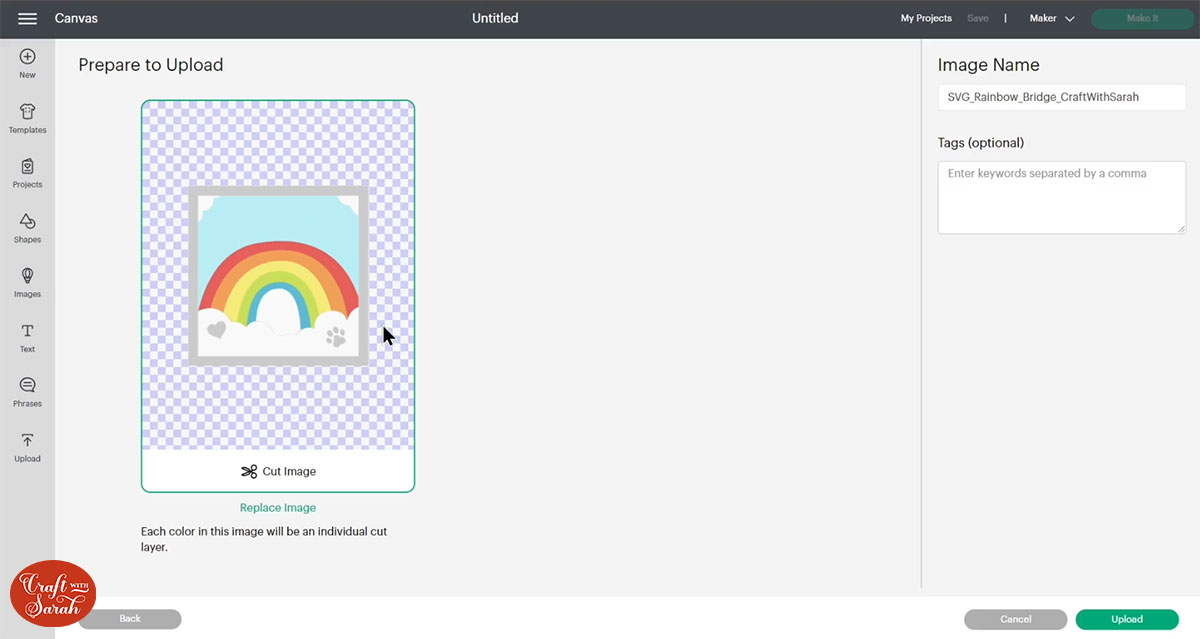
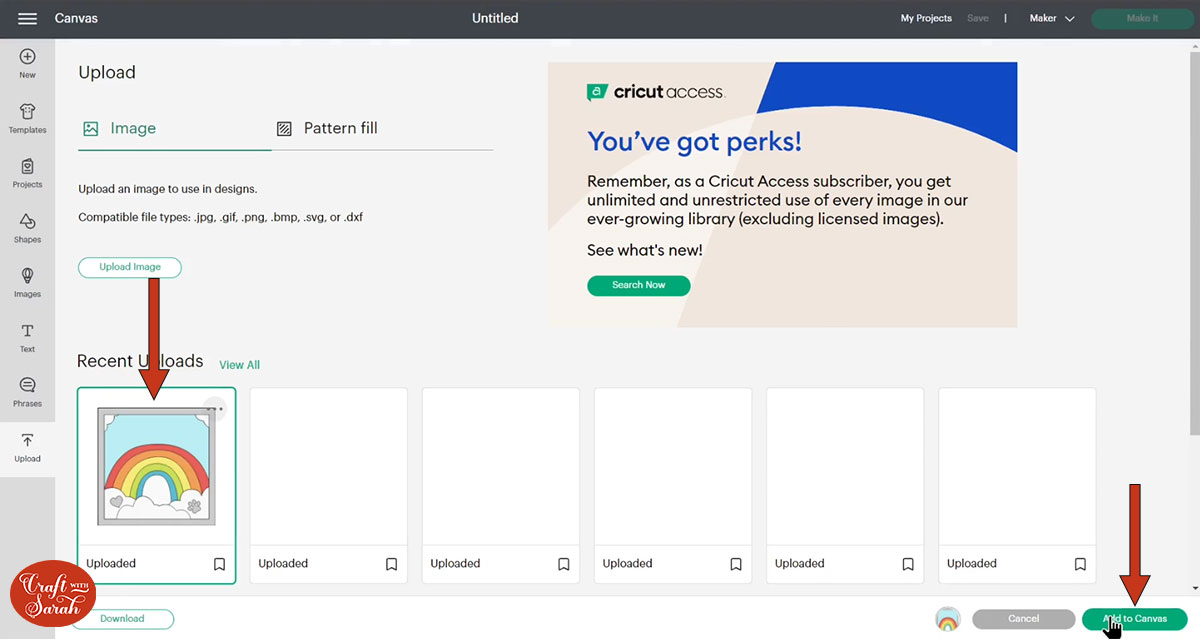
After uploading, the design will show in your “Recently Uploaded Images”. Click on it and then press “Add to Canvas” to put it onto your Project.
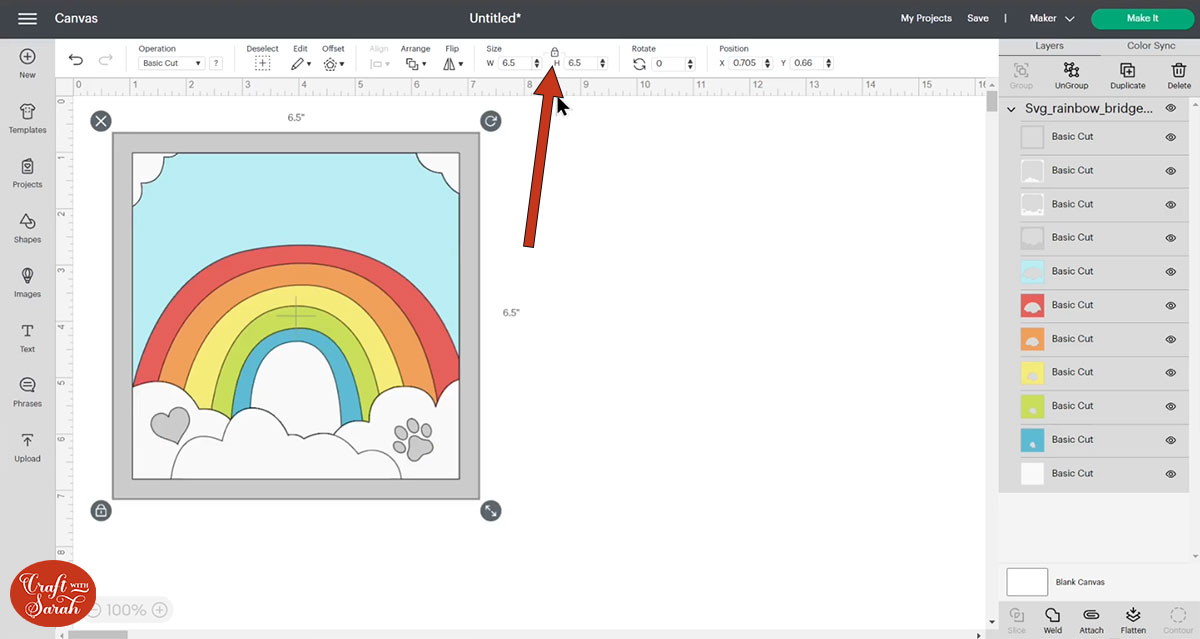
Step 3) Resize the design to fit your frame
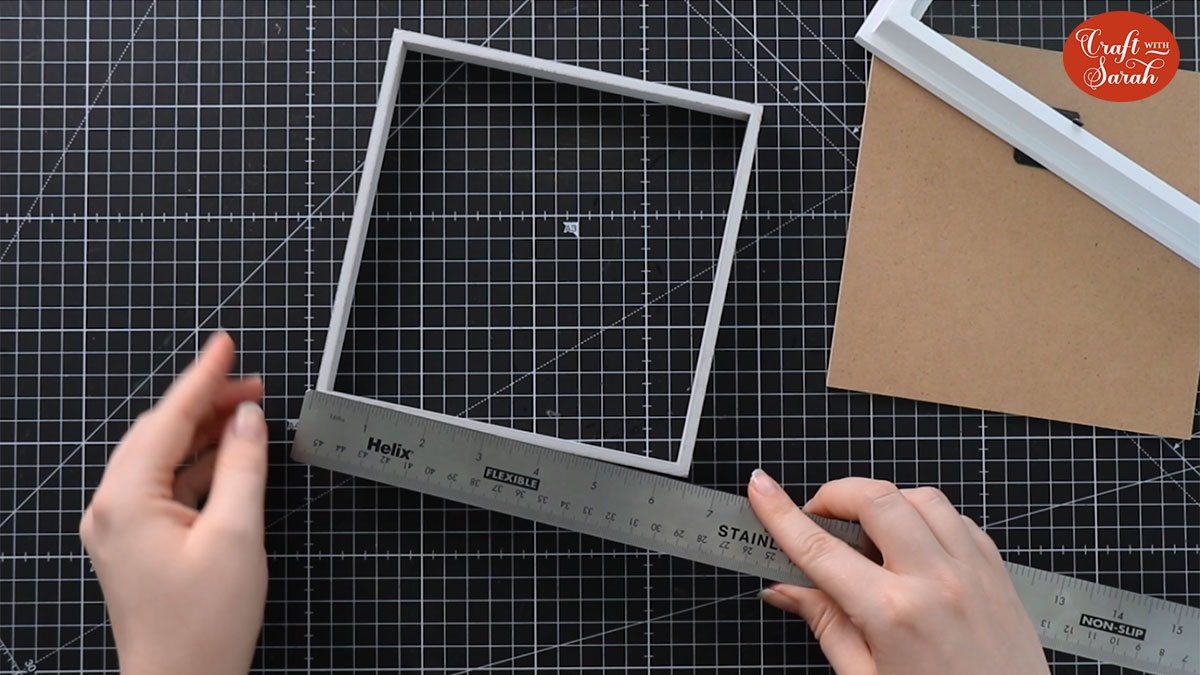
Open up your shadow box frame and measure the wooden spacer from one edge to the other.
This is how big you need to make the SVG in Design Space. Use the width/height boxes to change the size of your design to the same size as the shadow box.
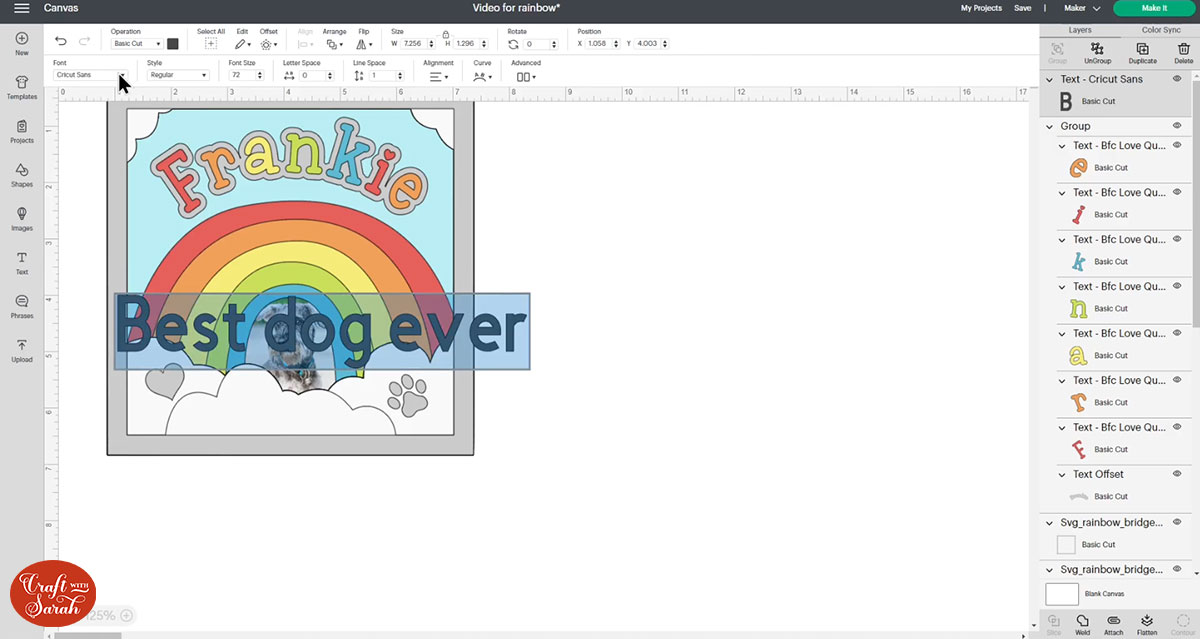
Step 4) Add your pet’s name
Go into the “Text” tool and type out you pet’s name.
Change the font to something which matches the rainbow bridge svg design. I used a Cricut Access font called BFC Love Quinn.
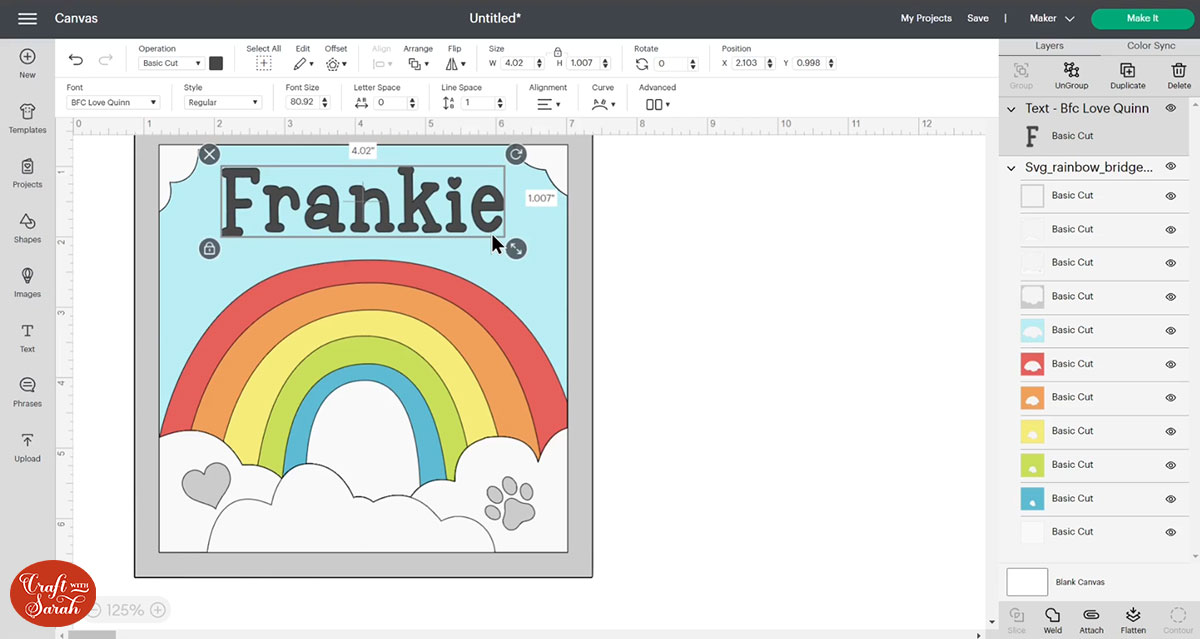
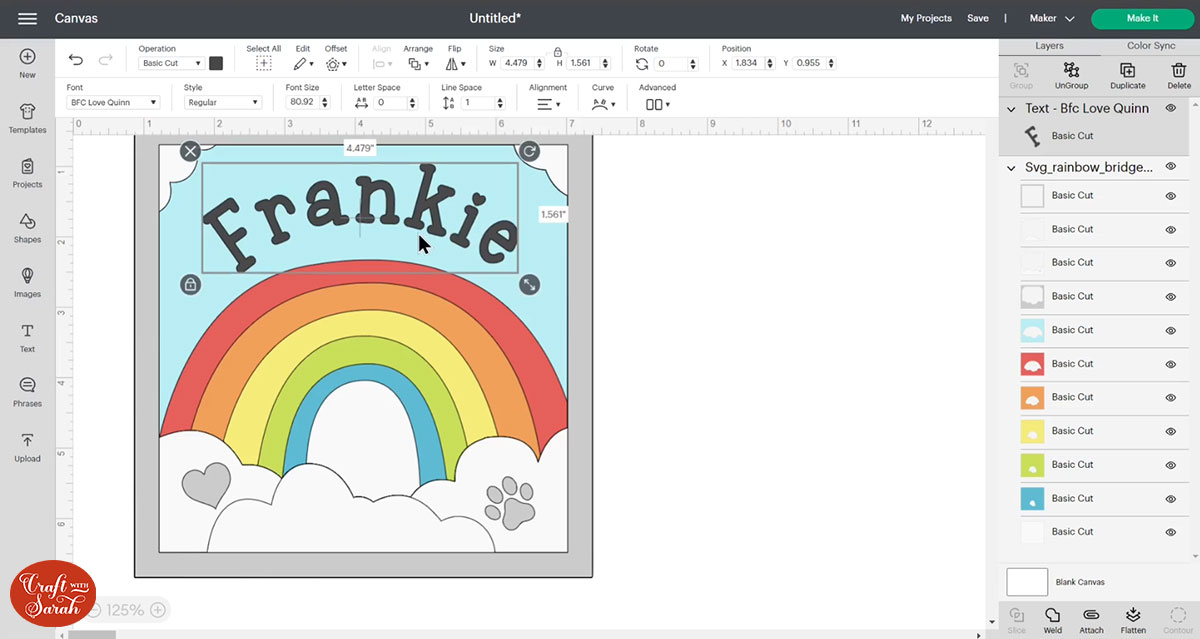
Use the “Curve” tool to curve the text around the top of the rainbow.
Note: The Curve button is not available on the mobile app version of Design Space.
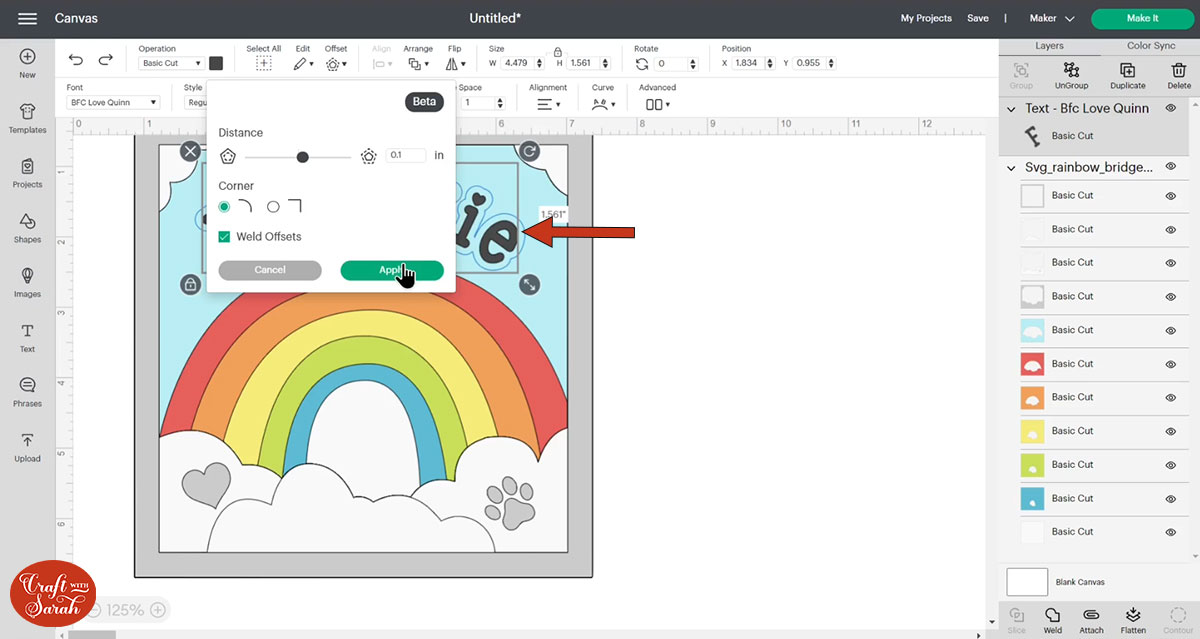
You could leave the text like this, but I thought it could do with a little something “extra” to help it stand out against the blue sky background and I also wanted to tie in the silver cardstock that I’d planned on using for the main outside frame into the middle of the design too.
Click “Offset” and give your text a thin offset.
I added an Offset of 0.1.
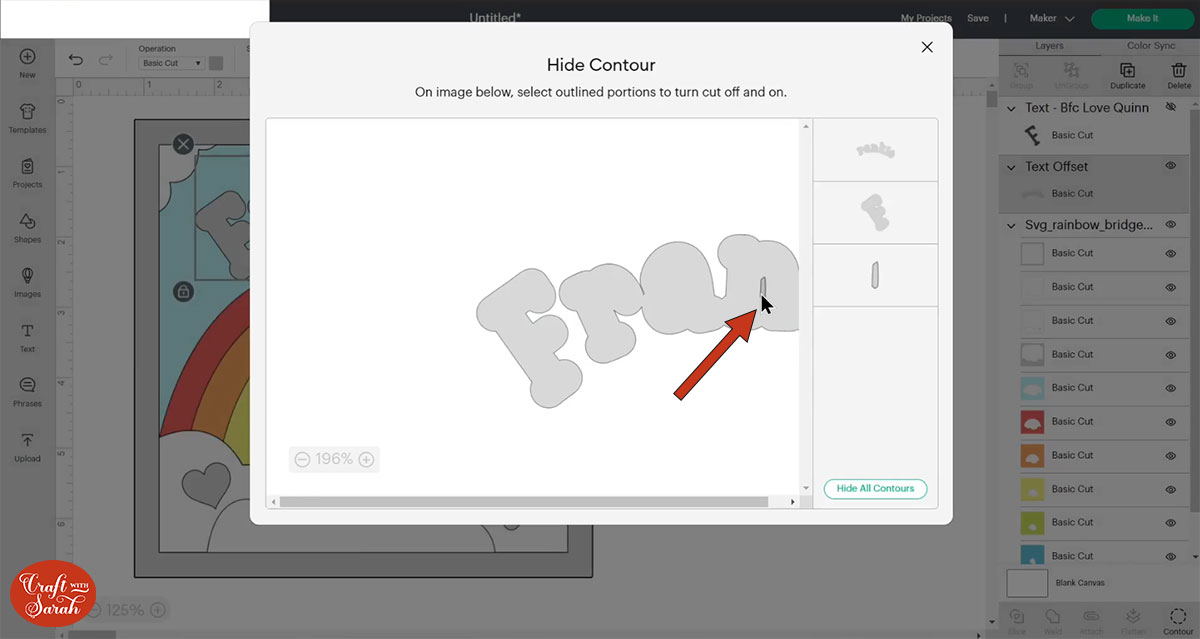
If there are any small cutouts in the middle of the letters that look a bit odd, use the Contour button to remove them.
Simply click into the little “gaps” in the middle and it will hide them so they won’t be cut.
Recolour the offset layer to match the outside frame layer.
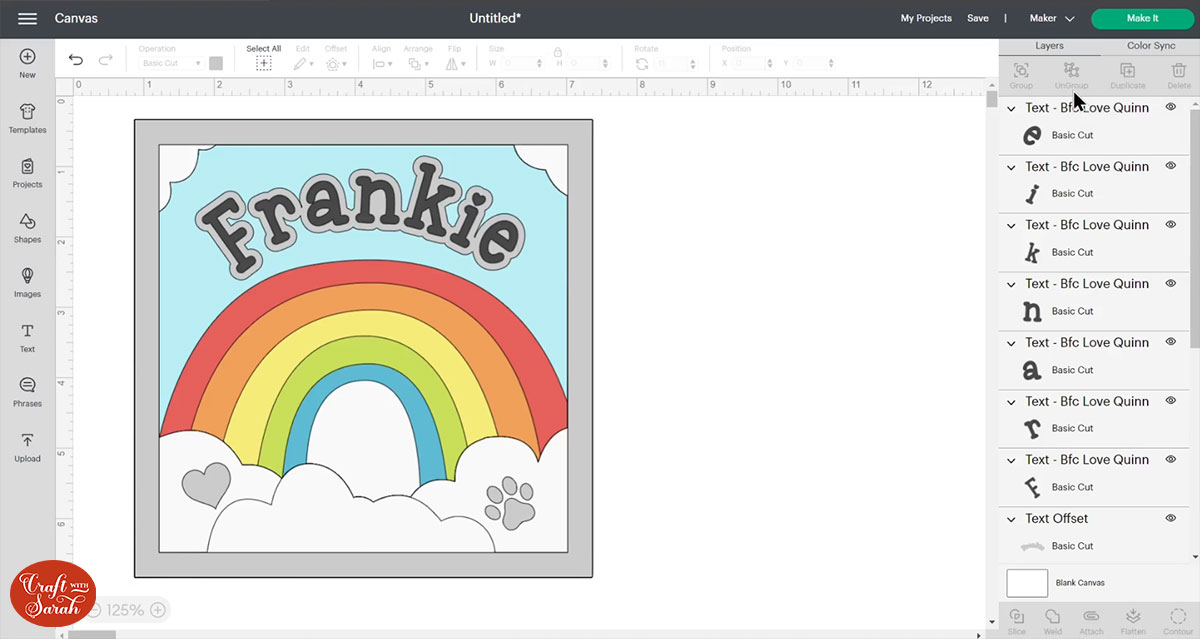
To recolour the name to rainbow colours, click the text layer and then press “UnGroup”.

This separates out all the letters onto their own individual layers which means you can colour each one separately.

When you’re happy with the colours, select all the text layers (including the Offset layer) and Group them together.
Now you can resize them all together if you want to change the size, and also to keep those layers nice and tidy in the layers panel to make the next steps easier.
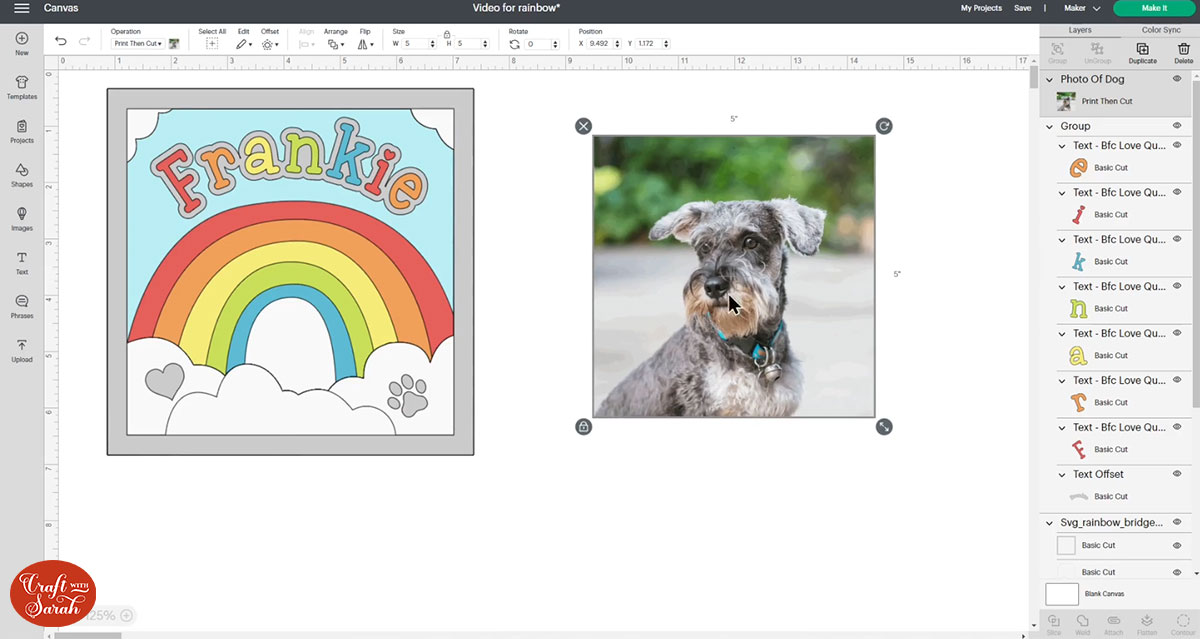
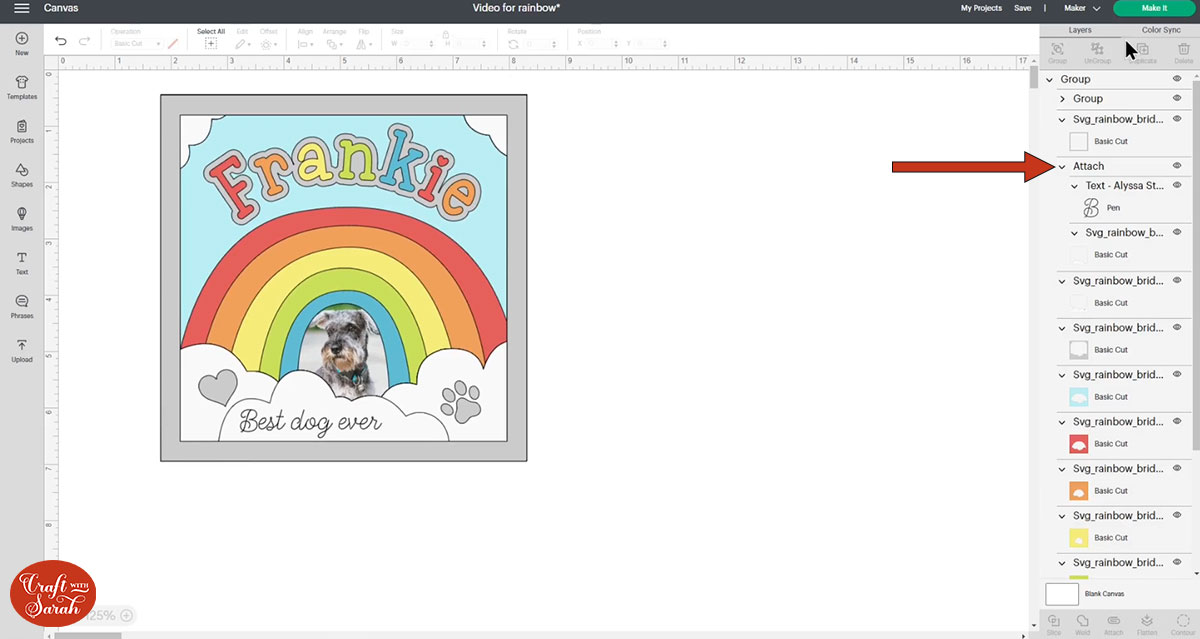
Step 5) Add your pet’s photo to middle of the rainbow
Click the rainbow image and then press “UnGroup”.
Click “Upload” and find your photo.
Your photo will be a “print then cut” image so the upload process looks a little bit different to how it did when we uploaded the rainbow bridge SVG at the start of this tutorial.
Choose “Complex” as the image type.
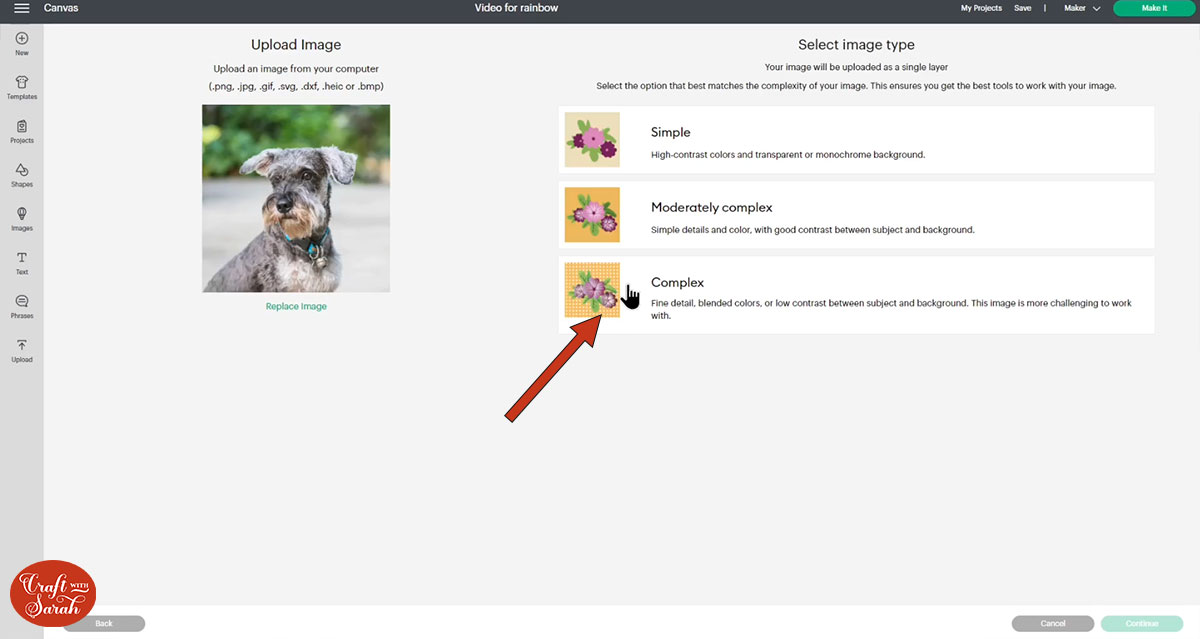
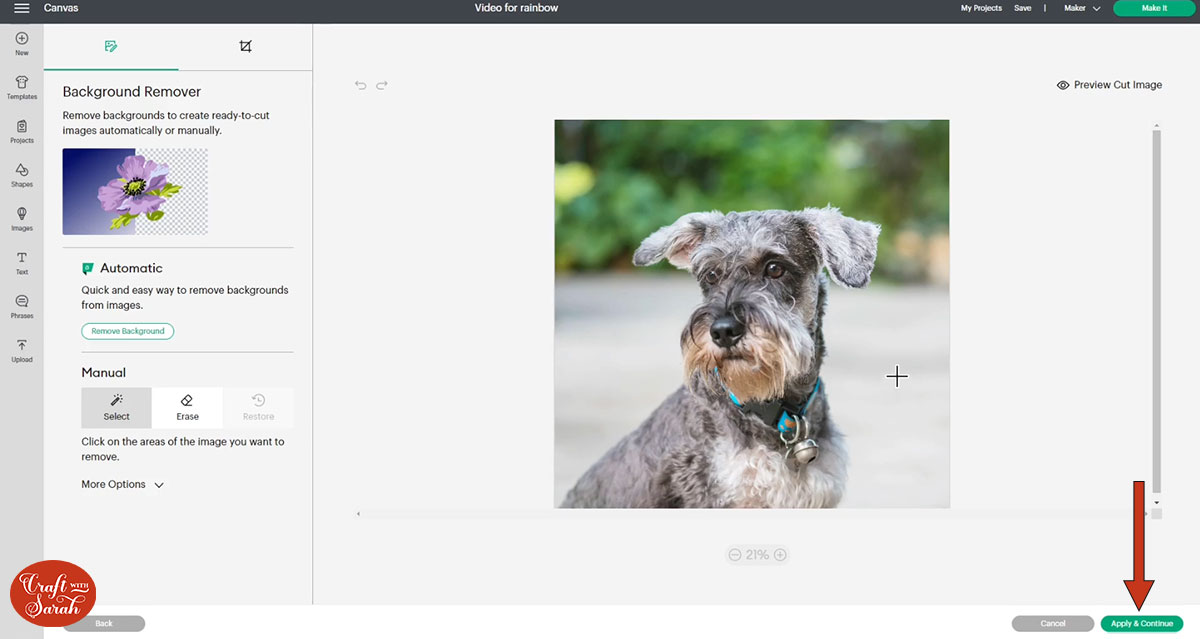
You don’t need to change anything on the next screen unless you want to remove the background from your photo. I like the green background on my photo so I’m going to keep it in.
Select the photo and add it onto your project.
Mine loaded in HUGE so I clicked it and resized it down to 5 inches in width to make it a bit easier to work with.
Hide the name/letter layers by clicking the little eye next to the group title in the layers panel.
Then, go down and hide all the layers of the shadow box until you get to the blue layer of the rainbow.
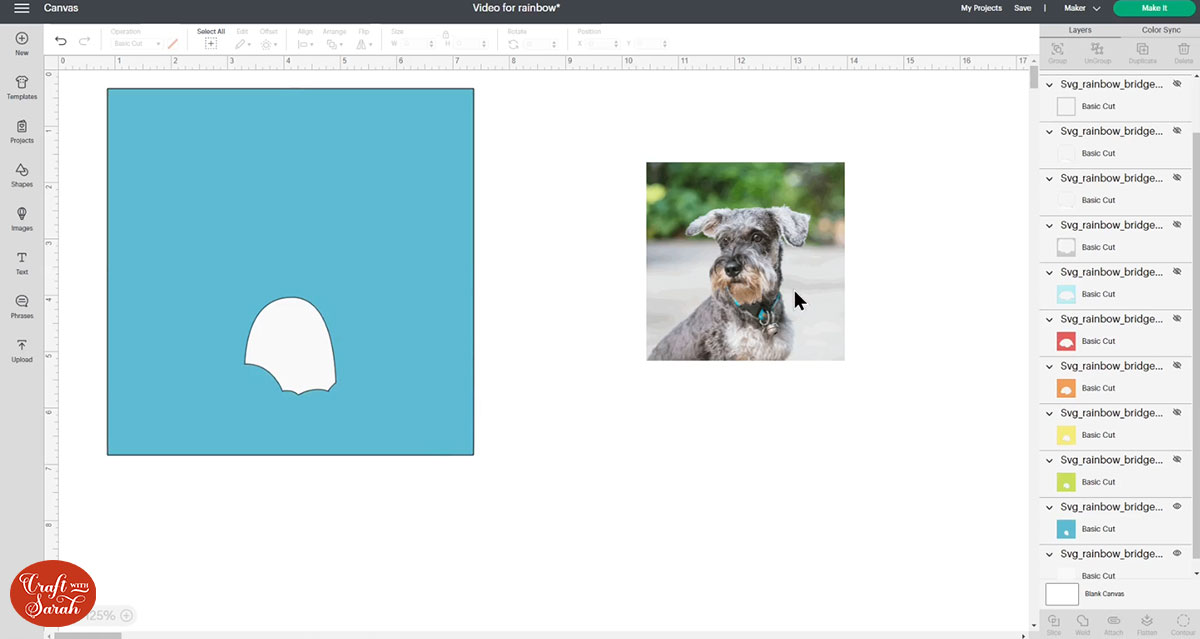
Click the photo and then press “Arrange” and “Send to back”.
Drag the photo up one layer so it’s above the last white square layer and below the blue rainbow layer.
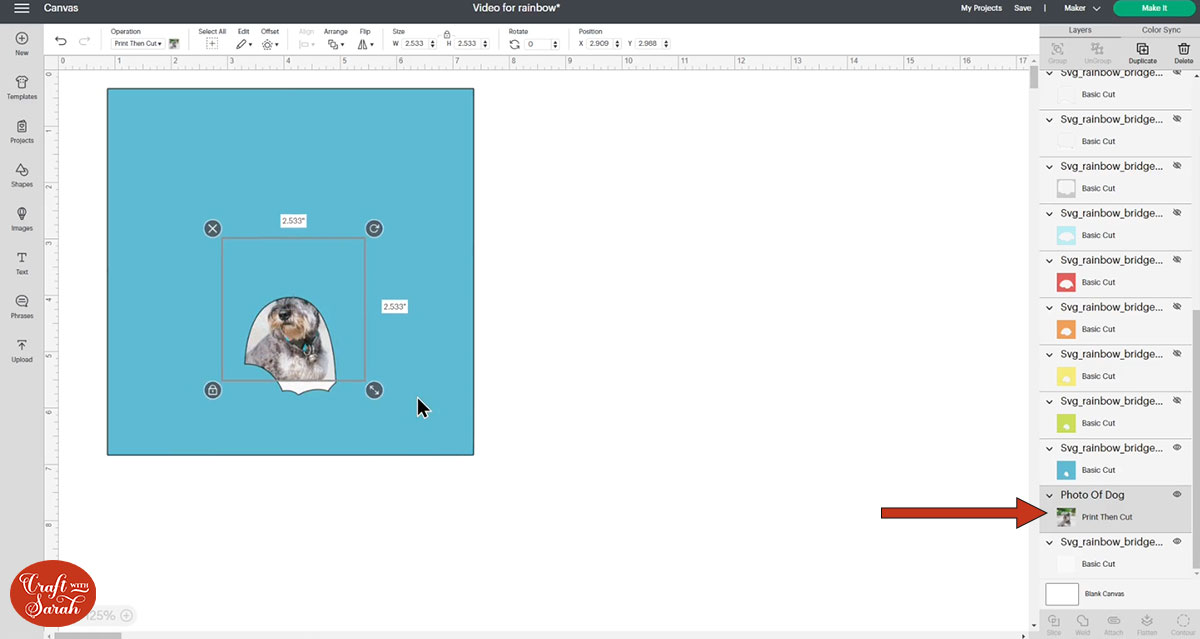
You can then resize and position it to fit inside the gap in the rainbow. Use your arrow keys to move the photo about because if you try and click it then it will select the blue layer instead of the photo and move that instead.
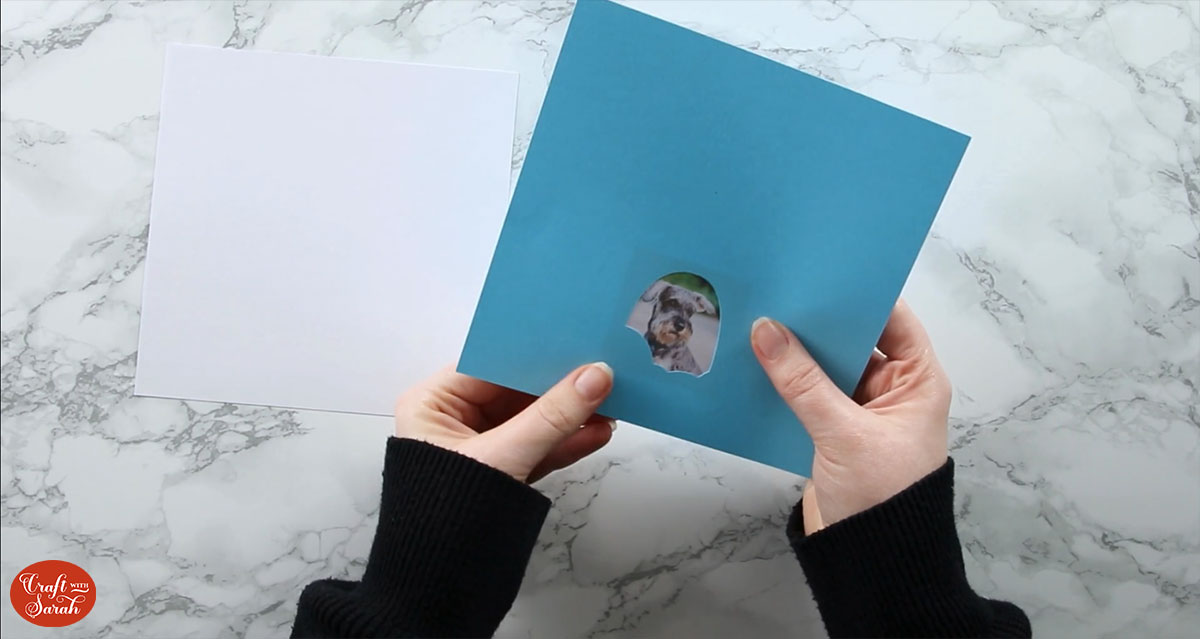
We are going to keep the photo in a square/rectangle shape. There is no need to cut it to fit exactly in the middle of the rainbow as we can just stick it behind the hole in the blue card.
Turn all the other layers back on when you’ve finished resizing the photo by clicking the eye next to each layer in the layers panel.
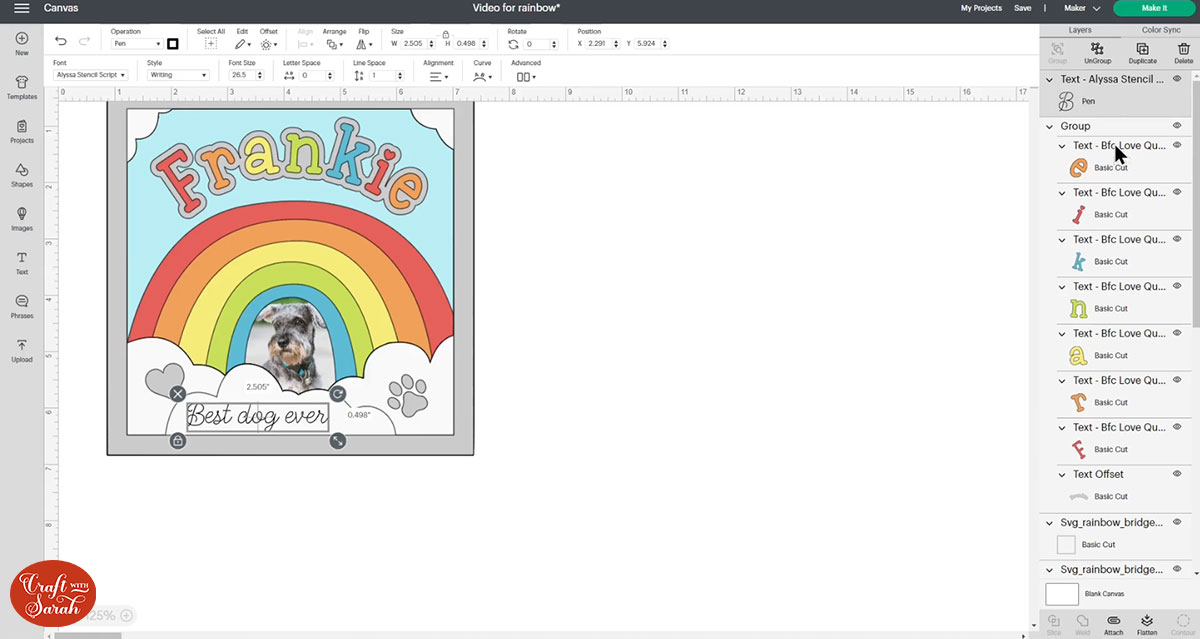
Step 6) Add “draw” features (optional)
If you want to, you can add some extra personalization to the frame by using a pen in your Cricut machine to write on the top cloud layer.
To do this, go into “Text” and type out your chosen wording.
In the font selection menu, use the “Filters” to select Writing fonts and then choose a font.

Resize the text to fit on the clouds.
Select the cloud layer and the drawing layer and press “Attach”.
This tells the Cricut to do the drawing on the clouds layer.
Attaching layers together moves them to the top of the layers panel.
Drag-and-drop them back down to where they are supposed to go.
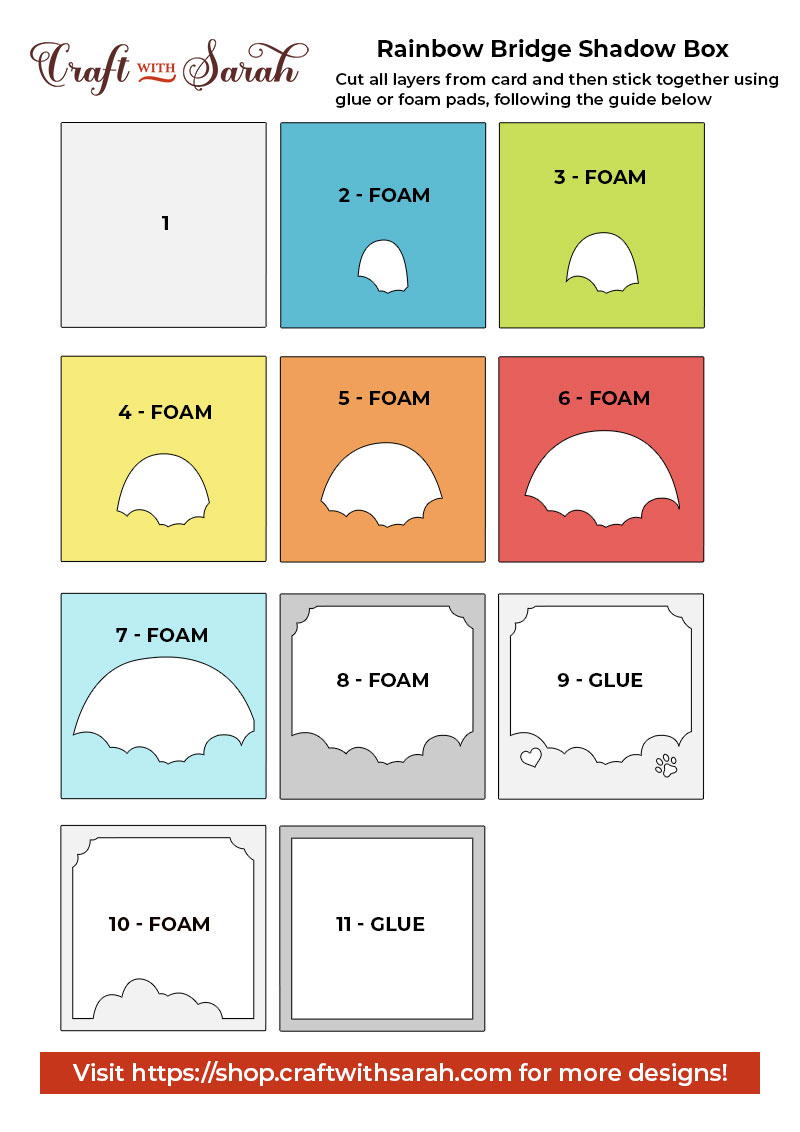
Step 7) Cut out the shadow box layers
Press “Select All” and then “Group” to group all your layers together.

Don’t forget to save your project!
Click “Make It” and follow the instructions on-screen to get everything cut out with your Cricut machine.
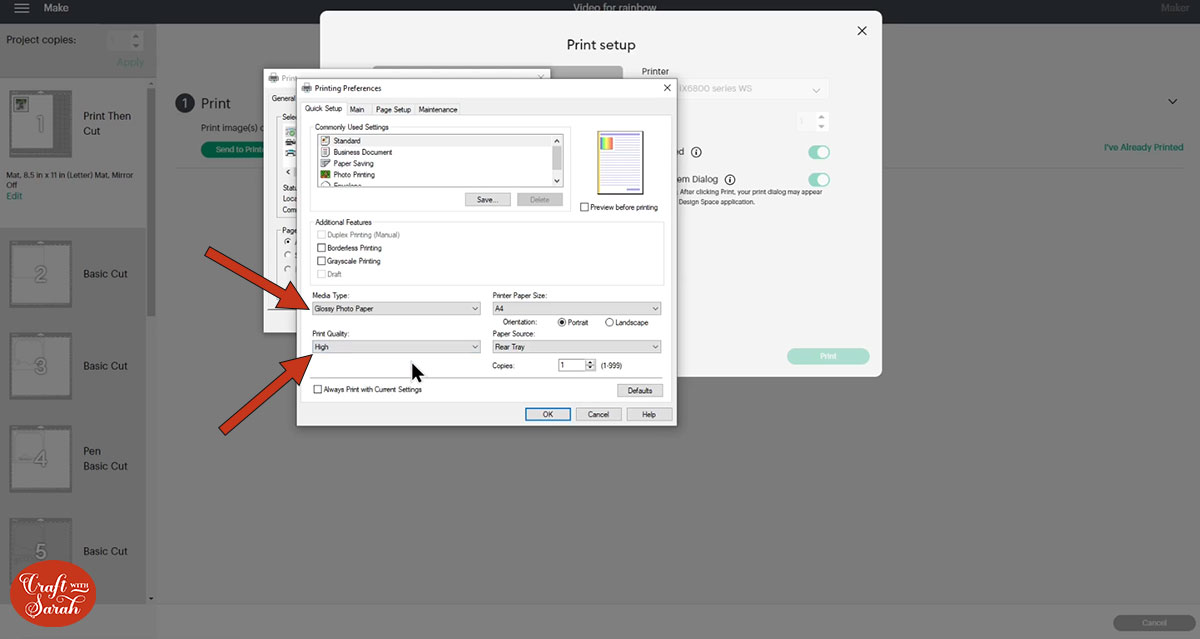
When you get to the photo layer, this is a print-then-cut so you need to print it on your home printer.
I suggest glossy photo paper or matte photo paper.
Turn the “Use System Dialog” option ON to open up your printer settings after you click “Print”.
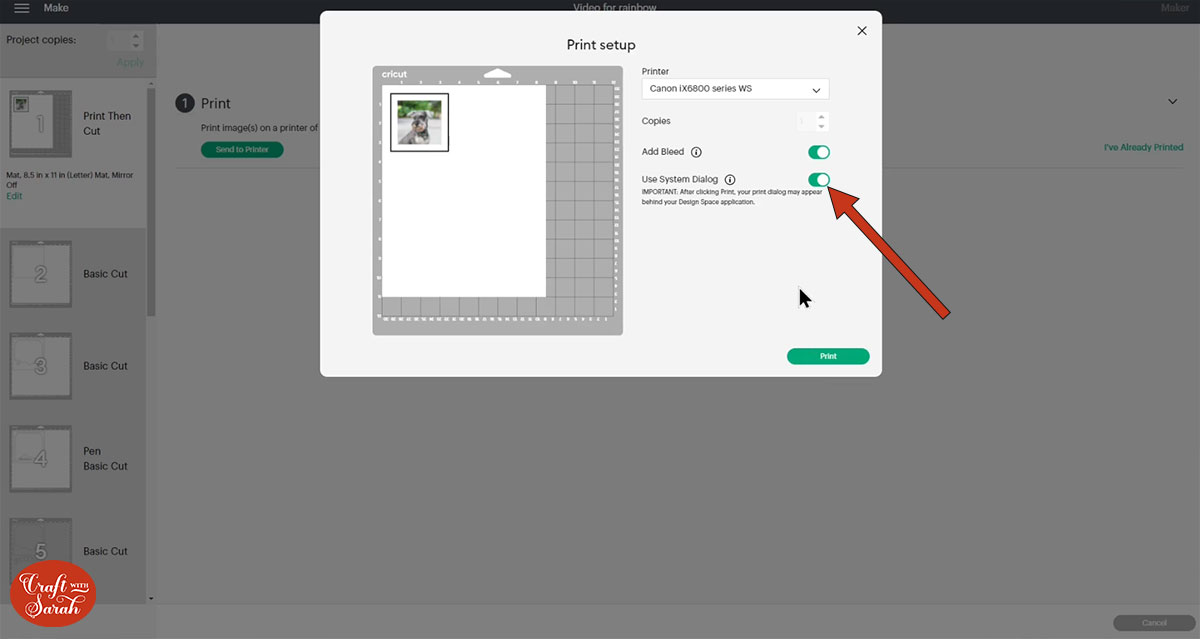
Choose the correct type of paper and switch your settings to the best quality.
New to print then cut? Find out how to print then cut with a Cricut.
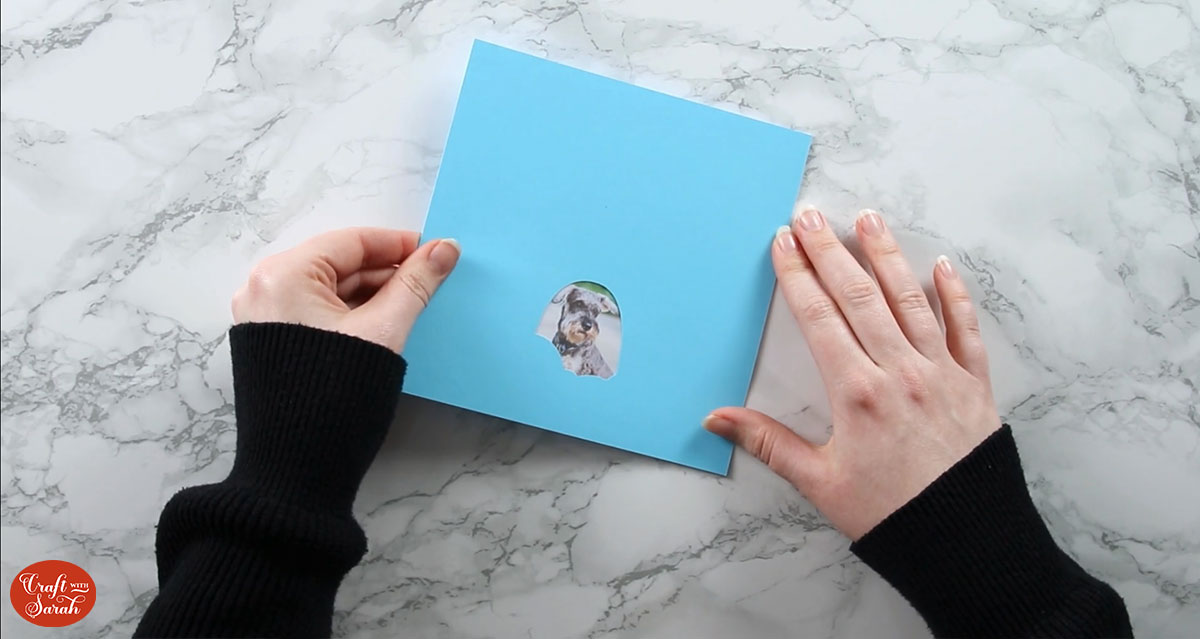
Step 8) Stick the rainbow layers together
Glue your photo to the back of the blue rainbow layer.
Use foam squares to stick the blue layer to the solid white square.
When adding the foam pads, make sure you add some in the middle of the pieces of card so it give stability to the middles. If you don’t add any foam pads in the middles then it can “sag” under the weight of the other layers which doesn’t look as good.
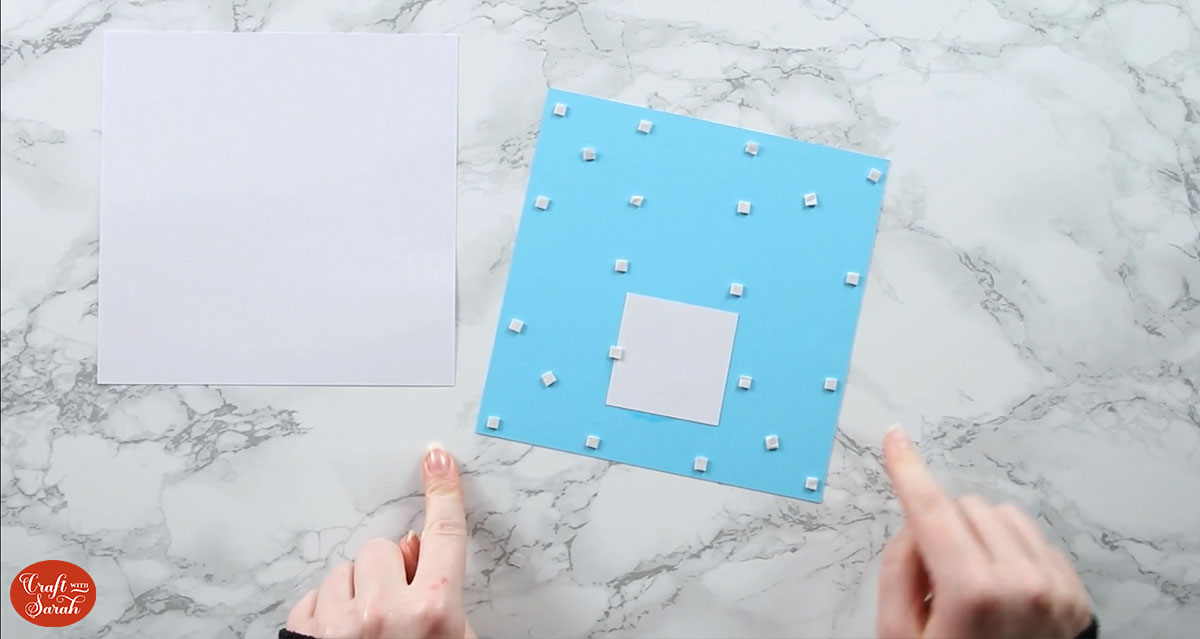
Gently position the blue layer above the white square and drop it down. This means you can check you are happy with the positioning before the foam pads get stuck too strongly together. That way, if you need to reposition the blue layer you can easily pick it up off of the white square and try again.
Repeat this step for all the layers of the rainbow and the silver layer of clouds.
NB: I didn’t do the “draw” text layer for the sample shadow box that I used for the photos below.
Use glue to stick the first white cloud layer on top of the silver layer.
Use foam squares again for the top clouds layer.
Glue the silver border to the top.
Step 9) Add your pet’s name
Glue the rainbow coloured layers to the offset layer below.
Use foam pads to stick the name onto the main design.
I recommend placing all the letter pieces onto the design before you start to stick them to make sure you get the positioning correct.
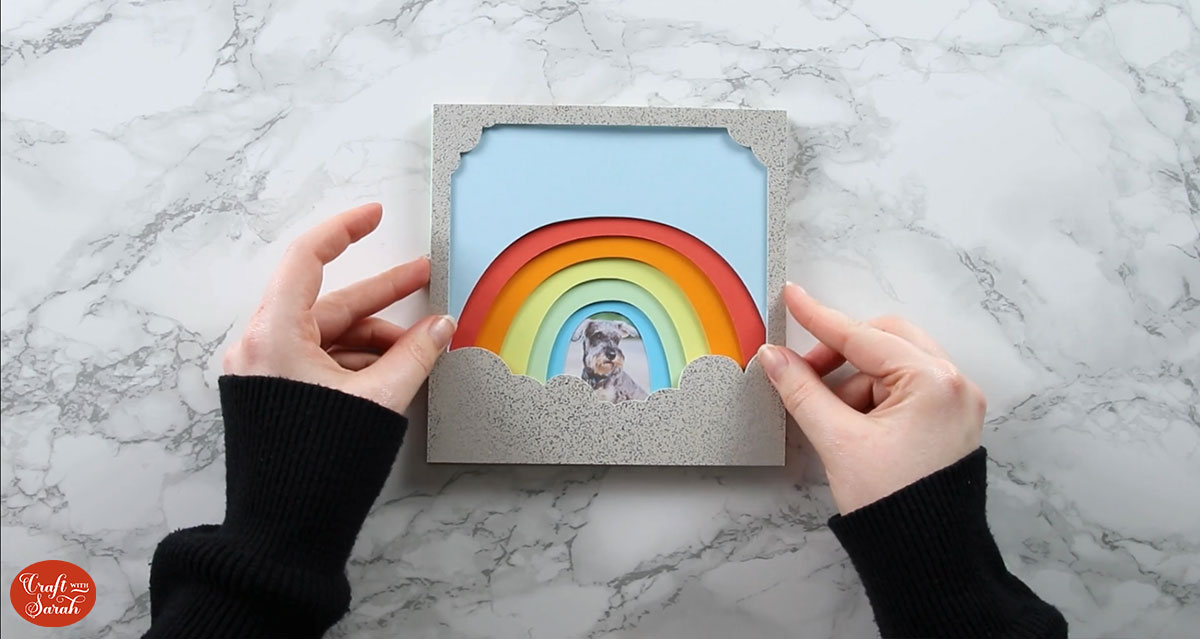
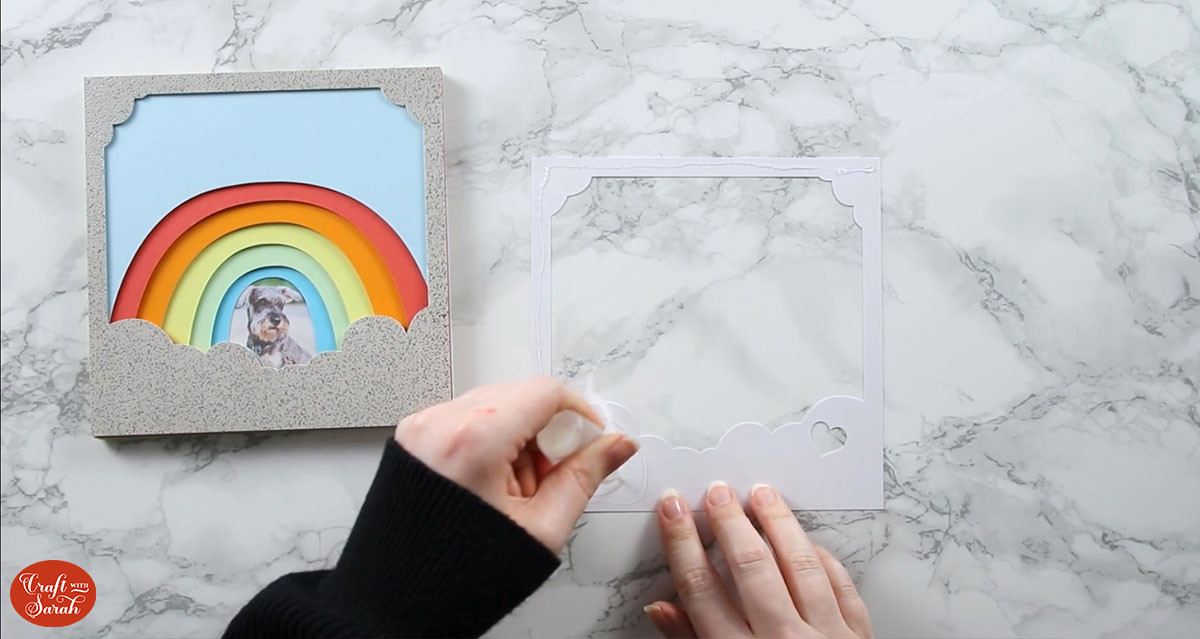
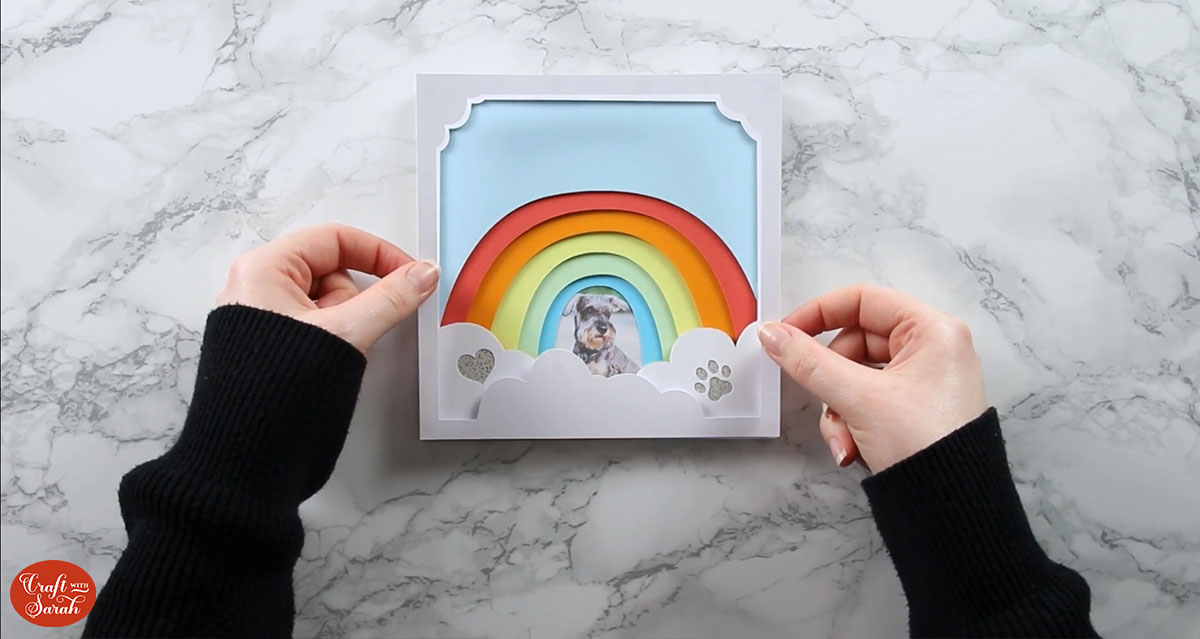
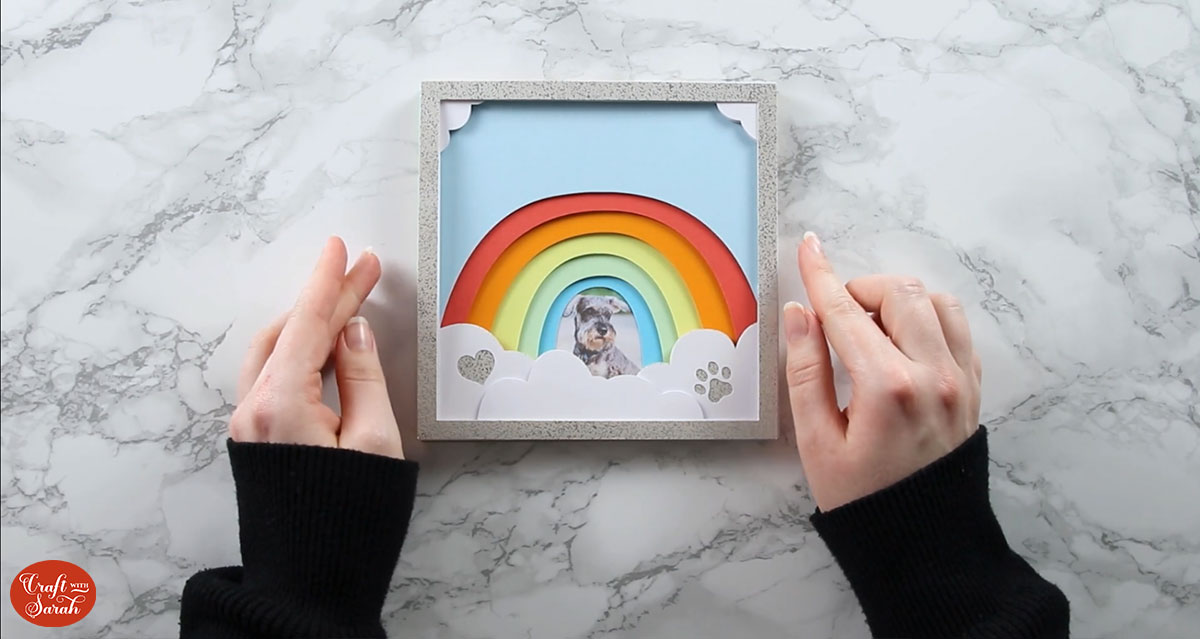
Step 10) Frame your rainbow bridge design
Once everything is stuck together, add the design into your frame.
The video at the top of this page contains three different ways of adding the design into the frame to get the best effect.
And that’s it – your DIY pet memory keepsake shadow box is finished!

Happy crafting,
Sarah x

