How to Make Layered Gnomes with your Cricut + FREE Gnome SVGs
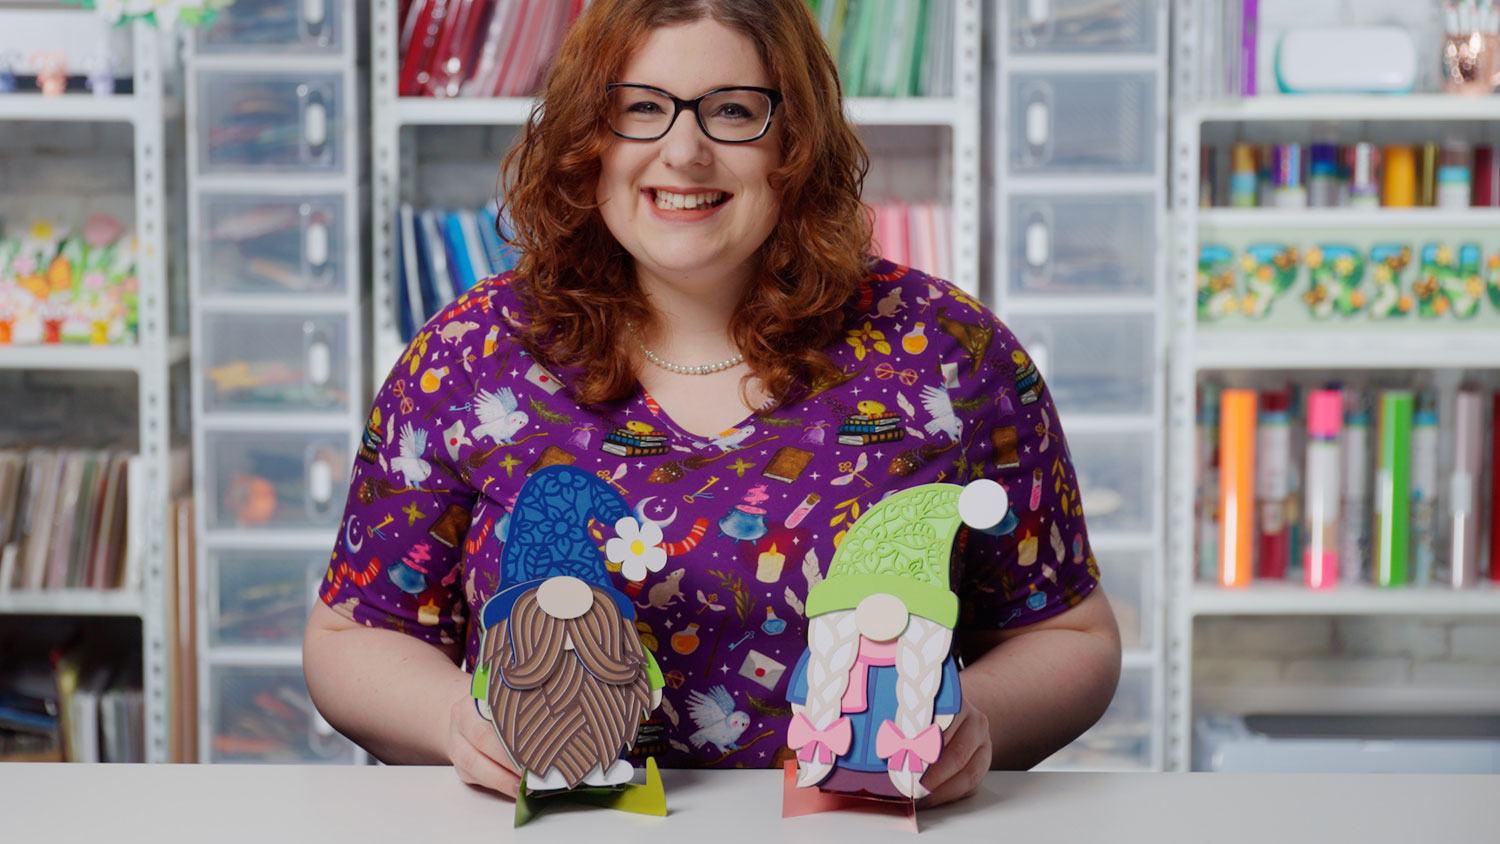
If you love Cricut crafting and have a fondness for GNOMES, you’ve come to the right place!
Gnomes are really popular in the crafting world at the moment, and it’s easy to see why – they are so adorable and come in a wide range of themes and designs.
Let’s get started…
How to make paper gnomes with a Cricut
This video shows the whole process of making layered cardstock gnomes.
Prefer to read rather than watch? Keep scrolling for a step-by-step written tutorial (with photos).
How to make layered gnome SVGs with a Cricut
Learn all there is to know about cutting and making layered cardstock gnomes on a Cricut in this step-by-step tutorial!
Materials List
Here is a list of the materials that I used to make this project.
Please note that some of the links included in this article are affiliate links, which means that if you click through and make a purchase I may receive a commission (at no additional cost to you). You can read my full disclosure at the bottom of the page.
- Cricut machine
- Light blue Cricut cutting mat
- Coloured Card
- Glue (I use Collall, but Bearly Art Glue is great too!)
- Needle Tip Applicator Bottle
- 3D foam pads
- Square shadow box to frame (optional)

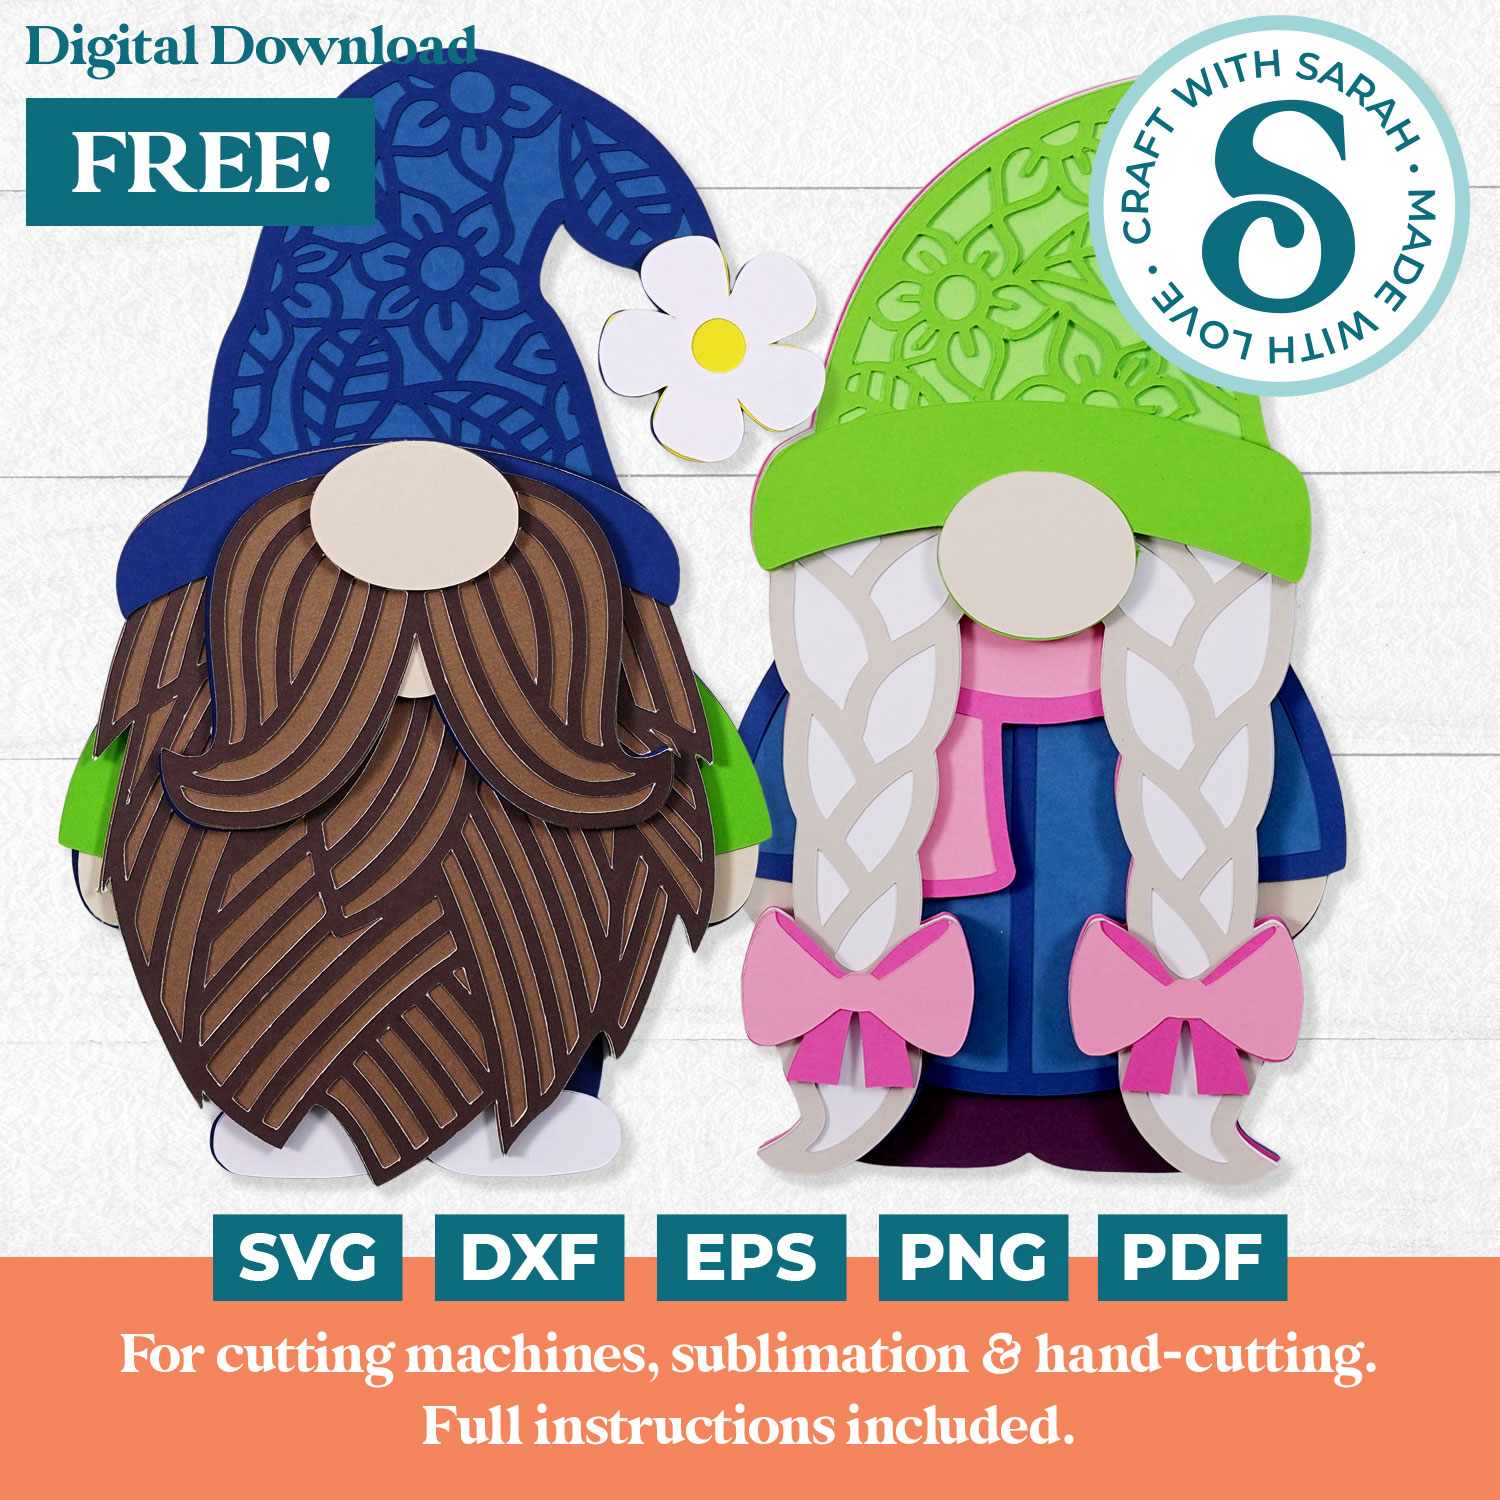
Step 1) Choose your Layered Gnome SVG
The very first thing you need to do is download your SVG. There are lots of gnome designs in my SVG shop that cover a wide variety of themes and occasions.
However, for this tutorial, I’m going to use the two free gnome designs that can be downloaded using the instructions in the box below.
Download the Free Cutting File
Please login to your account to download this file.
TERMS OF USE:
You may sell finished, handmade physical craft items that you have made using this product but must not sell or share the digital files. Read full terms of use
Step 2) Unzip the folder
All the files on my website come in zip folders.
A zip folder is a way for me to give you multiple files in one contained folder. Instead of having to download each file individually, you only have to click ‘download’ once and they’re all in that zip folder.
This works well for making the download process easier and quicker for you, but there is one little step you need to do before you can open these files in Cricut Design Space and that is to unzip the folder.
The instructions on how to unzip a folder will depend on the type of computer or device you are using. Click the links below to find out how to unzip folders on your particular setup:
- How to unzip folder on Windows computers
- How to unzip folders on Mac computers
- How to unzip folders on iPads/iPhones
- How to unzip folders on Android devices
Step 3) Upload the SVG to Cricut Design Space
Open up Design Space and open up a blank canvas by clicking ‘new project’.
Click ‘upload’ on the left-hand side of your screen.

When you click ‘upload image’ this will open a pop-up that will let you browse the files on your computer.
Make sure you find the unzipped folder that you have just created.
For Cricut Design Space, upload the file in the “01 Cricut Version” subfolder. The files start svg-01 in the filename.
This part is REALLY important, because the other files won’t load in Design Space.
Here is what Design Space should look like after you have selected the SVG file. It shows the image in the preview on the left and you can see all of the layers, but they’re all in the correct position.
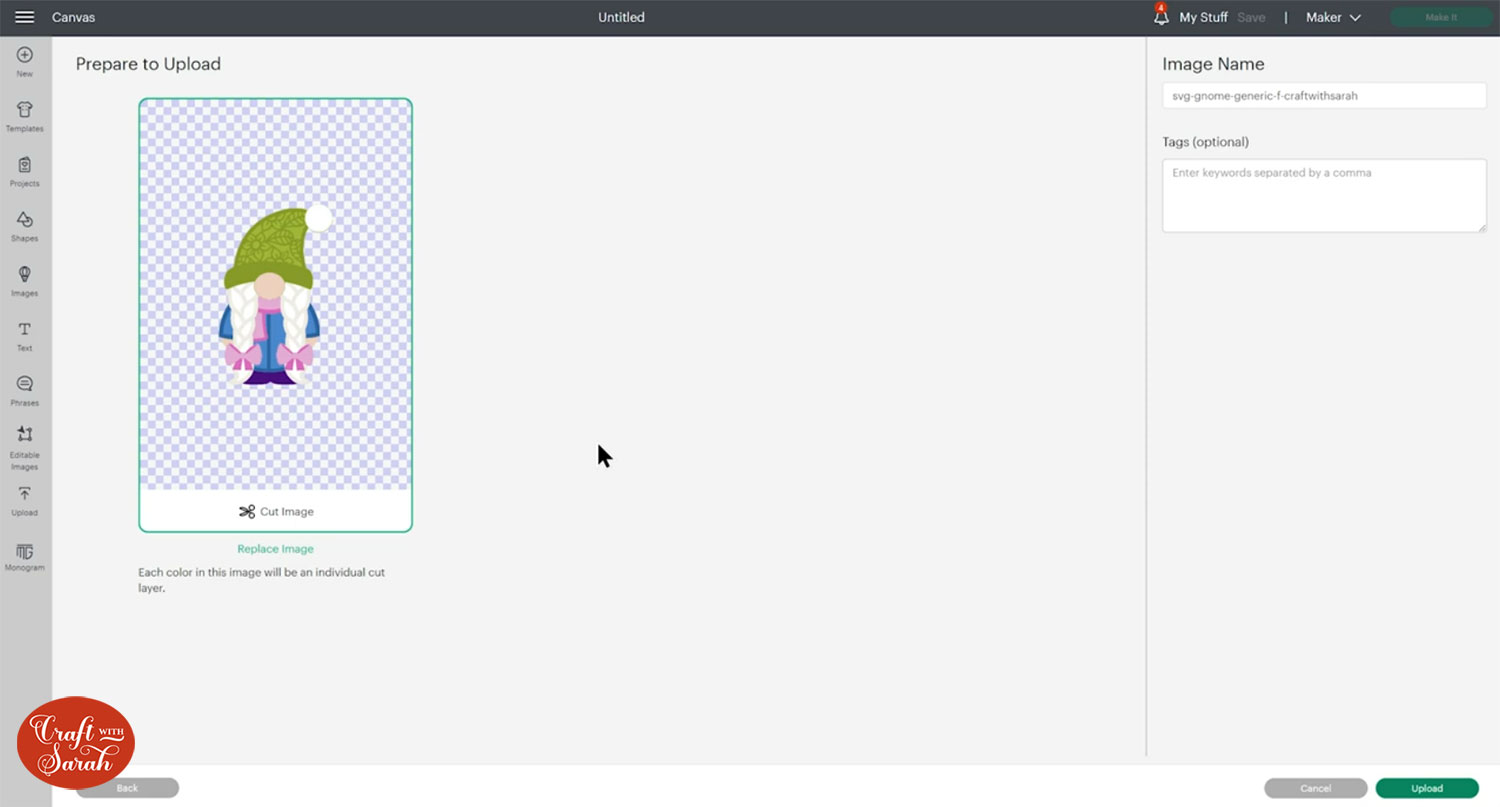
If after you’ve uploaded it you see all of the layers completely separate from one another, that means you’ve uploaded the wrong file. If yours has all the pieces in separate positions on the green, click ‘cancel’ and then start again and make sure you choose the SVG file, not the PNG or DXF.
After you have selected your SVG design, click “Upload” and it will appear in your Recently Uploaded Images.
Click the newly uploaded image and then click “Add to Canvas”.

This will insert the design into your project.
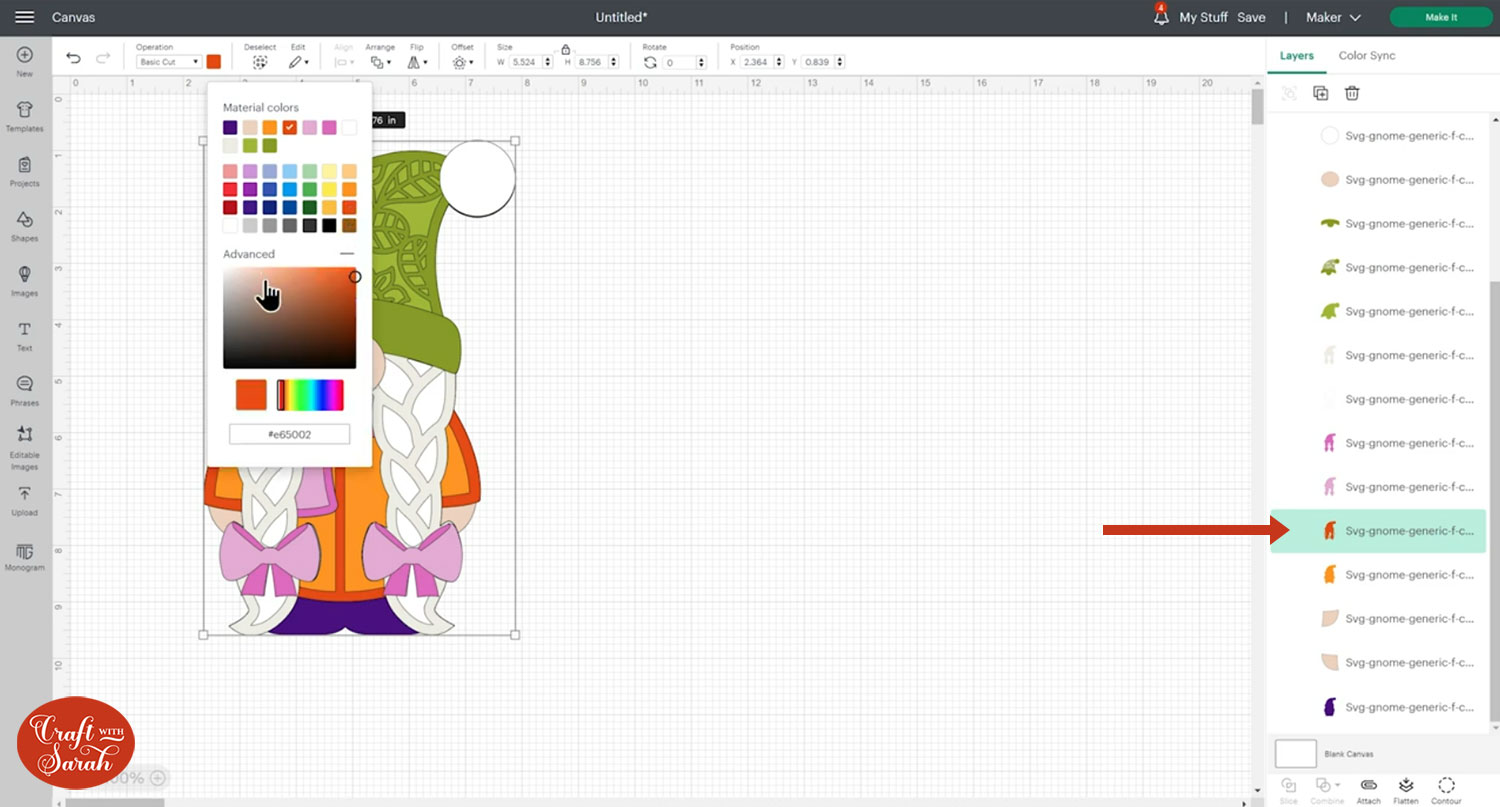
Step 4) Change the colours if desired
This step is optional, but if you want to cut the gnome in different colours then I recommend updating how it looks in Design Space before you cut it, to check you’re happy with the new colour scheme.
As an example, here’s how to change the gnome’s jacket to orange instead of blue.
Look down the layers panel and click the pale blue layer which makes up the main colour of her jacket.

You can tell that it is selected because it’s got the blue-green background colour around it.
Click into the colour box on the top bar and change the colour.
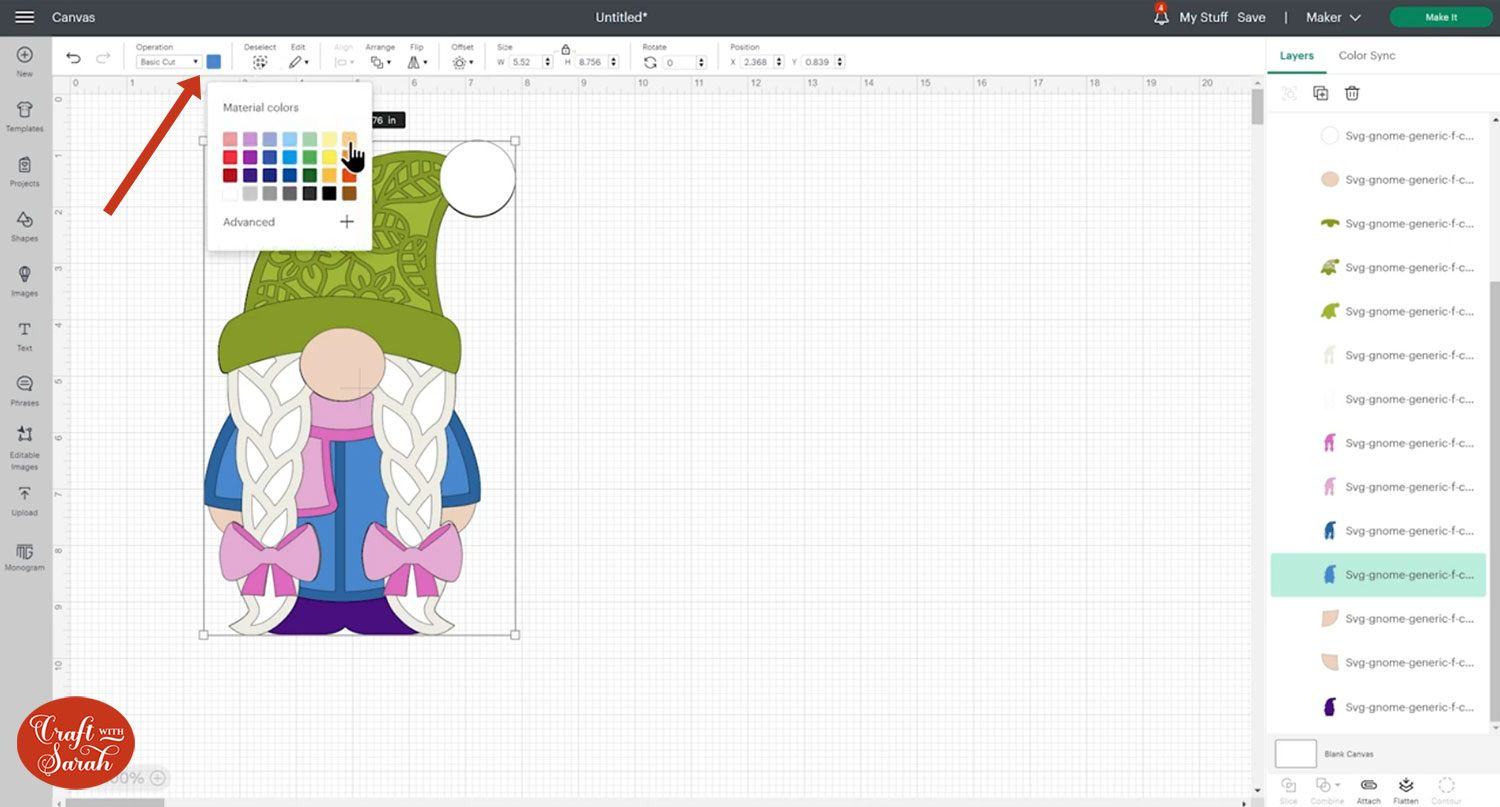
Choose the colour you want to change the layer to and click it.

Next, click the darker blue layer that makes up the outline of the jacket and change that to a slightly darker orange.
Click into the “Advanced” options in the colour box for more choice.
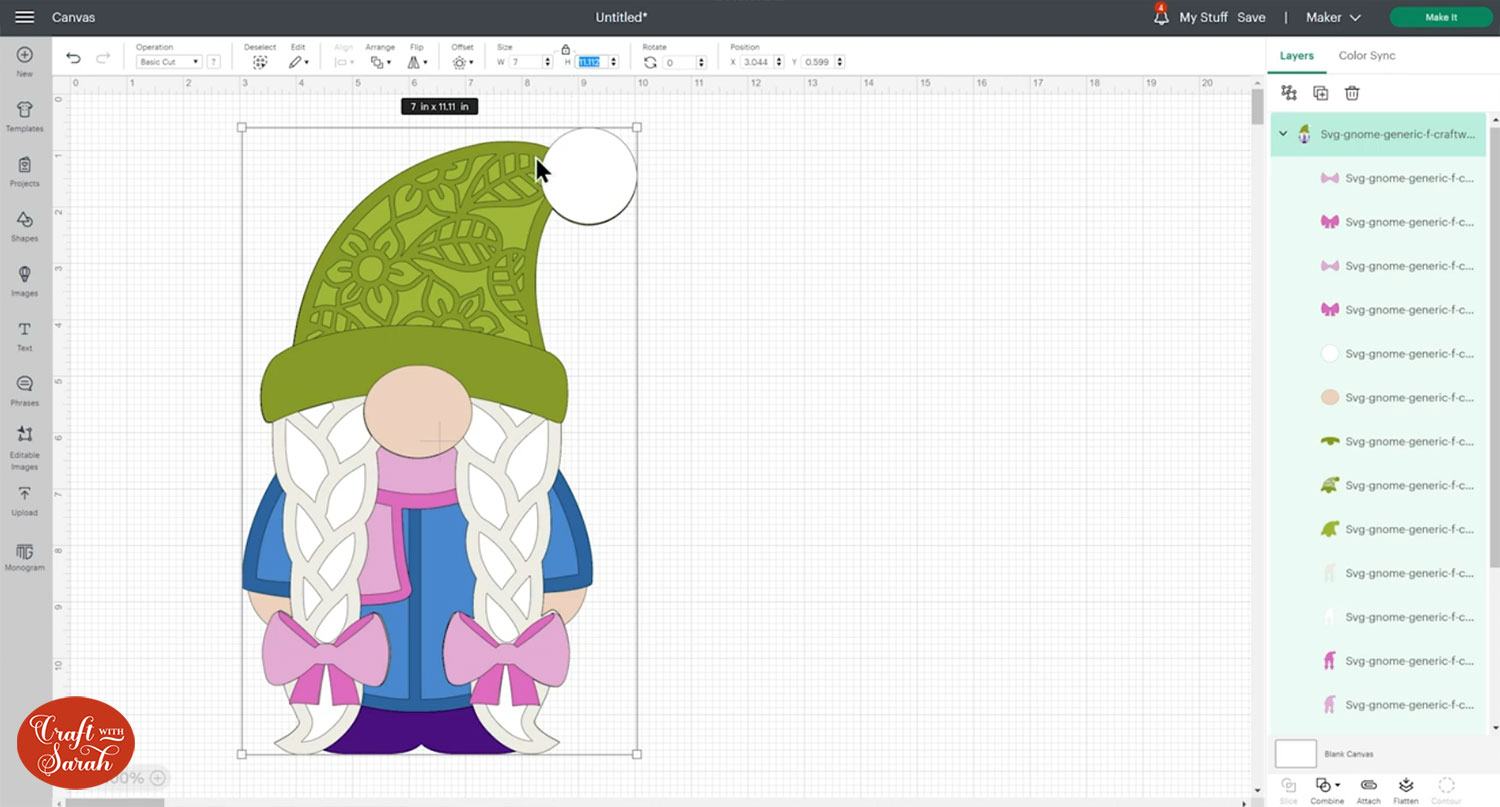
Step 5) Size the design
When you have the colours looking as you want them, it’s time to size the design.
To do this, click on the gnome and make sure the padlock icon between the width and height boxes at the top of the screen is closed.

If it’s open, click the padlock to close it. You might have to click it twice to get it to close – it’s a little bit buggy at the moment!
When the padlock is closed, it means that you only need to change EITHER the width OR the height and the other side will change in proportion.
For example, if I type “7” into the width box and press enter/return on my keyboard, the height automatically changes to 11.112 inches.
If you’re making your gnome to fit into a specific shadow box or frame, you’ll need to measure the frame first to make sure it will fit.
Here’s a video which shows how to do that as part of my “how to frame papercraft projects” tutorial.
I’m not going to frame my gnome, so I’ll make her quite large at 9 inches tall and 5.669 inches wide.
TIP: Use these free cardstock easel stand SVGs to display your layered projects without the need for a frame!
Step 6) Save your project
If you’ve made lots of changes to the gnome then I recommend saving your project at this point so that you don’t lose any of your changes.
Click “Save” on the top-right of the screen, give your project a name and then click the “Save” button.

Step 7) Cut the gnome on your Cricut
Now for the fun part! It’s time to start cutting!
Click “Make It” on the top-right of the screen.
This will split out all of the different colours onto separate mats.
Go down the list and change the paper size using the dropdowns to match the type of cardstock you are using.
I tend to use A4 paper as that’s what’s most easily available in the UK.

NOTE: You need to change the paper size for every colour individually.
To save space on your cardstock you can click and drag layers to move them about so that it just fills in the gaps a little bit better.

If you change the paper size to one that’s smaller, it might alter the number of mats that you need for that particular colour if not all of the shapes will fit on one page.
Sometimes you can trick Design Space into using less sheets of card by moving the shapes around on the mats.
If you think there is space on a mat to move some of the other shapes to, click the shape you want to move and then click the three little dots on the left.
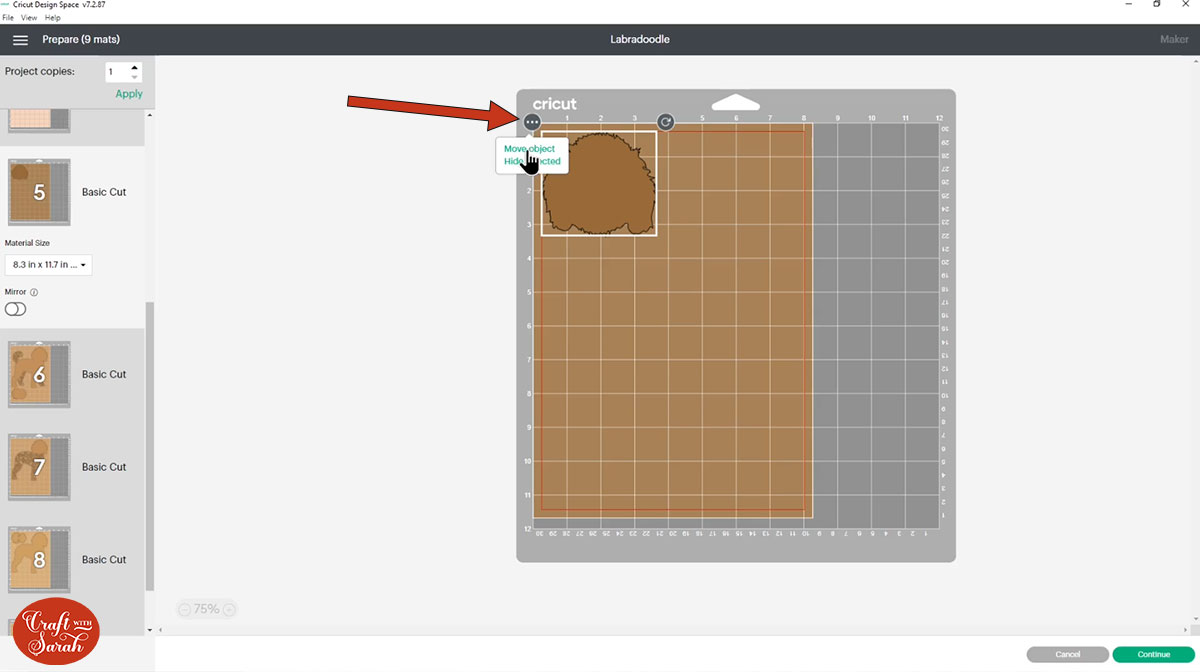
Click “Move object”. This opens a popup that shows all the mats.
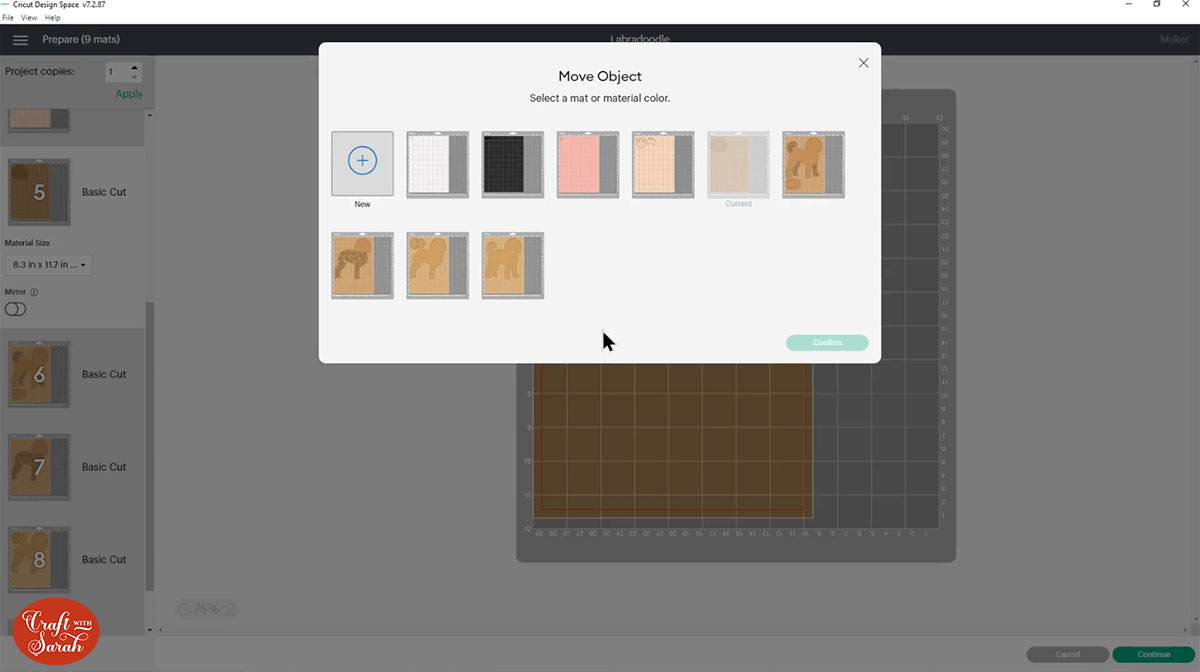
Click the mat that you want to move the shape to.
IMPORTANT – You MUST select a mat that’s the SAME COLOUR as the shape you are moving!!
This will move the shape, but it will probably be on top of the other shapes so we need to move it, otherwise it will cut wrong.
To move a shape around, click-and-drag it. Use the arrow button to rotate a shape around.
This is a great Cricut hack for using less materials when you’re cutting a layered SVG!
When you’re happy with the positioning, click “Continue” and then follow the on-screen instructions to out all the layers with your Cricut machine.
To see those steps in full, along with some tips on what materials to choose, watch the below video from around 13.09 onwards:
I get asked quite a lot what cardstock I use to make my layered cardstock projects. I tend to use 160 gsm card or thereabouts because it’s quite lightweight so it’s easy to cut with the Cricut. My favorite card to use is this set from Sizzix Surfacez.
Because it’s lightweight, it cuts well and having the linen effect pattern doesn’t affect how it cuts and these just work so well to give extra depth and dimension.
Top tip: To stop your card “curling” when you take it off the mat, instead of peeling the card off of the mat, turn the mat upside down and peel your mat away from the card. Use your hand to keep the card flat against your desk.
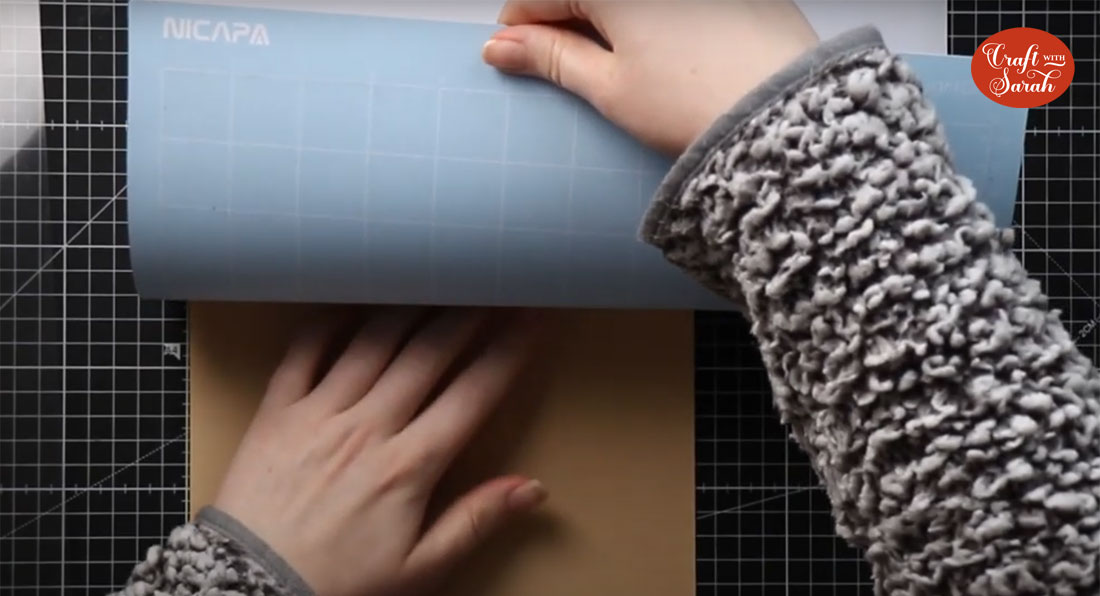
When you’re finished cutting, make sure you put the plastic cover back on your mat to protect it.
Step 8) Stick the layered gnome papercraft together
We’re going to stick all of these pieces of cardstock together using a combination of glue and 3D foam squares.
I live in the UK and the glue I like to buy is called Collall. It’s really good because it doesn’t bend or wrinkle the cardstock like some glues can do. Other glues that are more available in other countries are Bearly Arts Glue and Art Glitter Glue. It doesn’t actually have any glitter in it, it’s just a name.
I put my Collall glue into these needle-tip bottles from Amazon so I can easily get the glue into all the tiny pieces of the card.
The foam squares that I use are from Dot & Dab but any brand will do. I like these ones because they’re quite small which means again I can fit them where I need them to go. If yours are bigger then that’s okay, they’re really easy to cut smaller with just a regular pair of scissors.
I like to lay the pieces one on top the other to check I’ve got everything cut out right and from the correct colours before I start sticking it together.

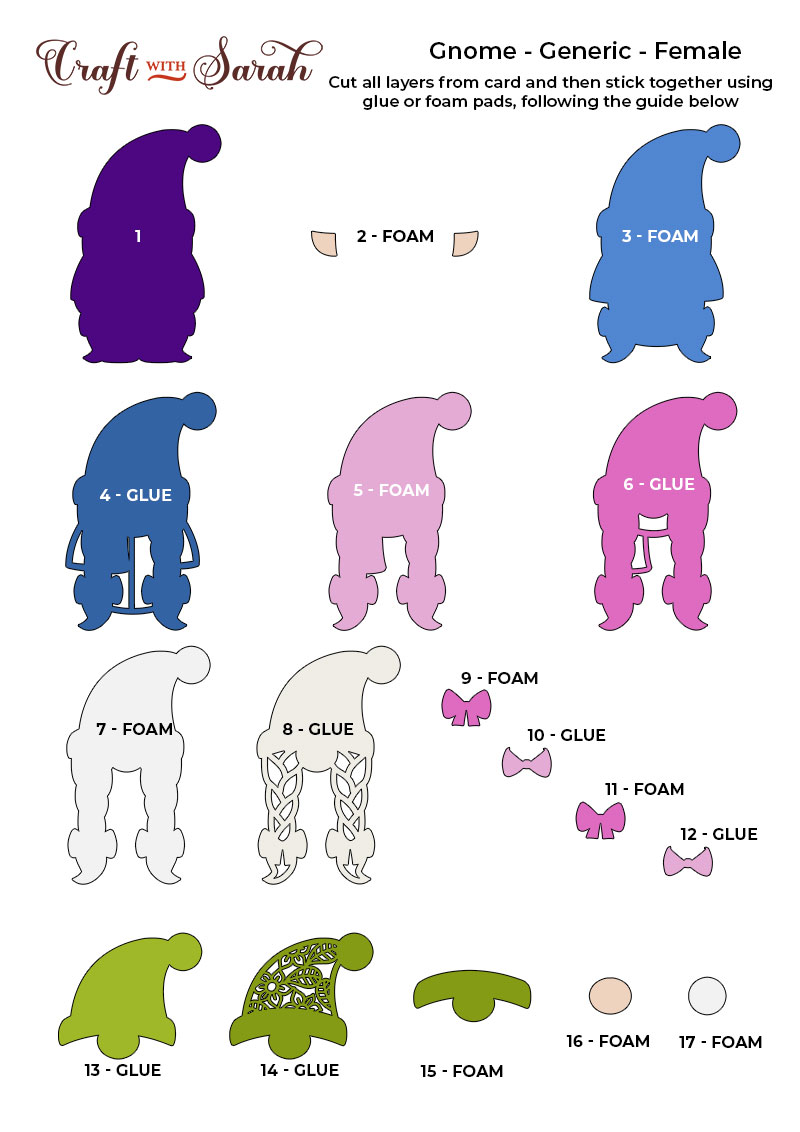
Use the assembly guide pdf which came in your purchase/download to see which layers to put on in which order and which ones to stick with foam, and which ones to stick with glue.
All of my layered SVGs come with a guide like this.
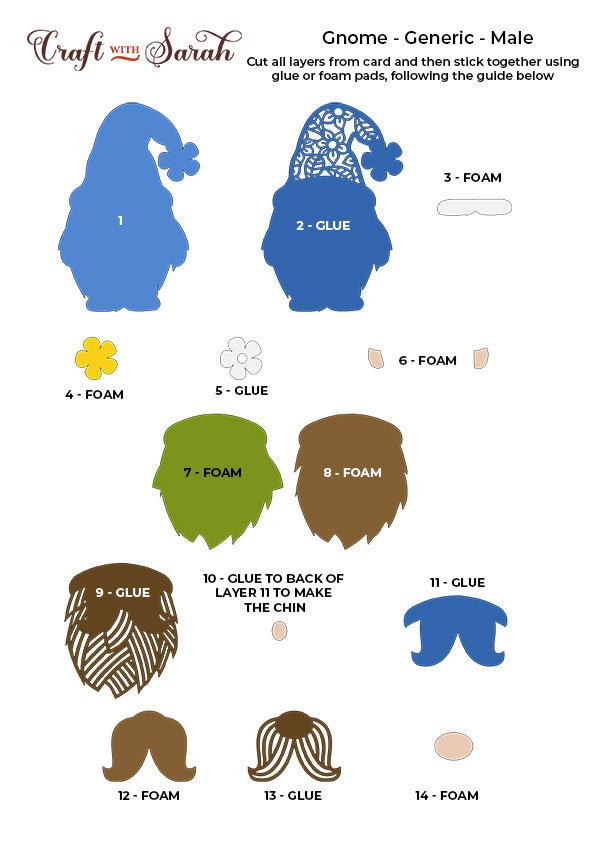
When making layered designs, we start from the bottom and work our way up so I need to move all of these layers out of the way apart from the very bottom two.
My bottom two for this design are the solid light blue to make up his hat, and the darker blue flower layer which goes on top to make up the detail.
From the assembly guide, I can see that this layer needs to be glued on.
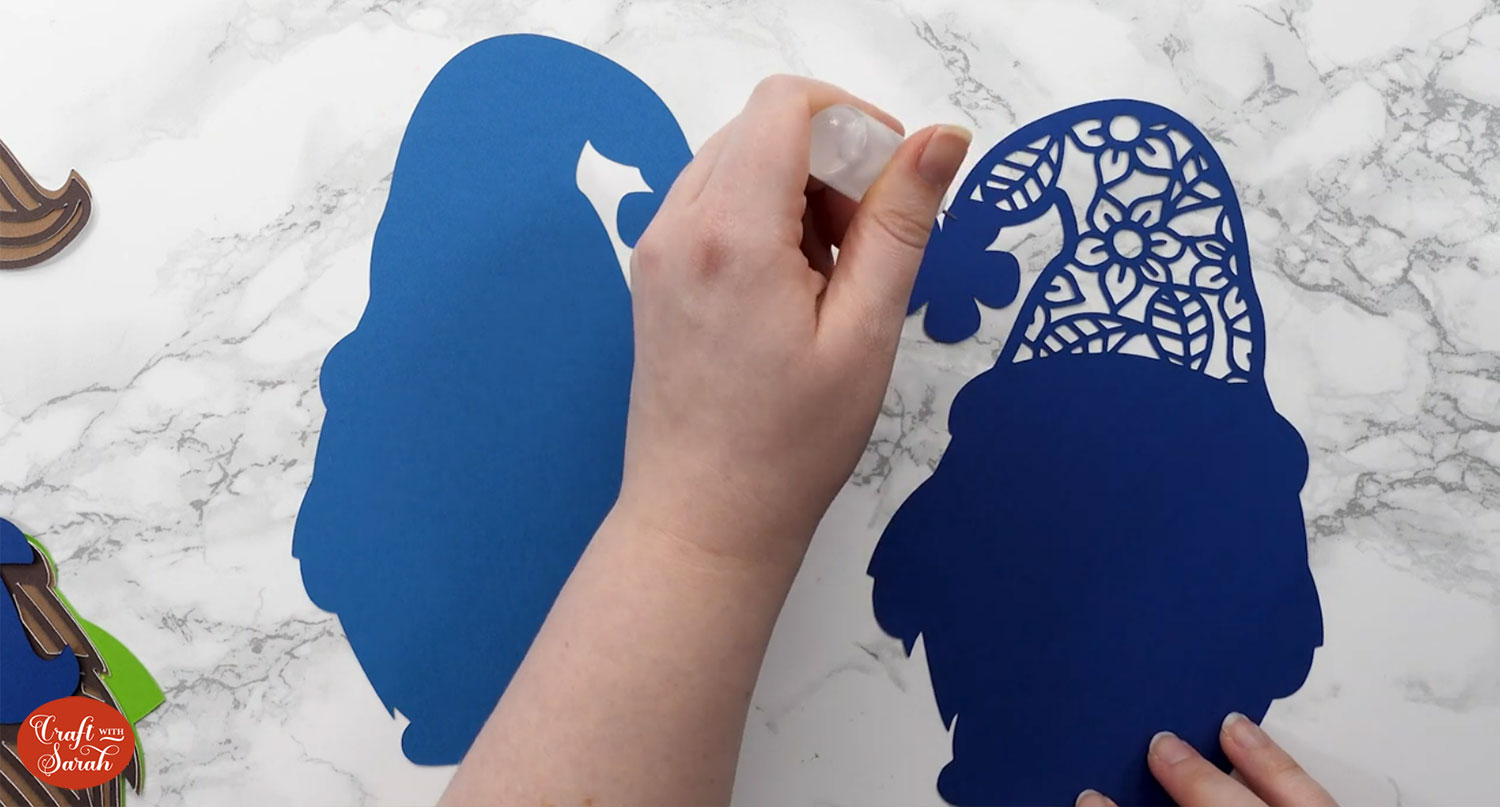
The nice thing about the glue is you do have a little bit of wiggle room to move it about a bit before the glue dries if you haven’t quite lined it up.
The next pieces are the hands and feet which are stuck on with foam squares to make them “pop” out from the hat layer.
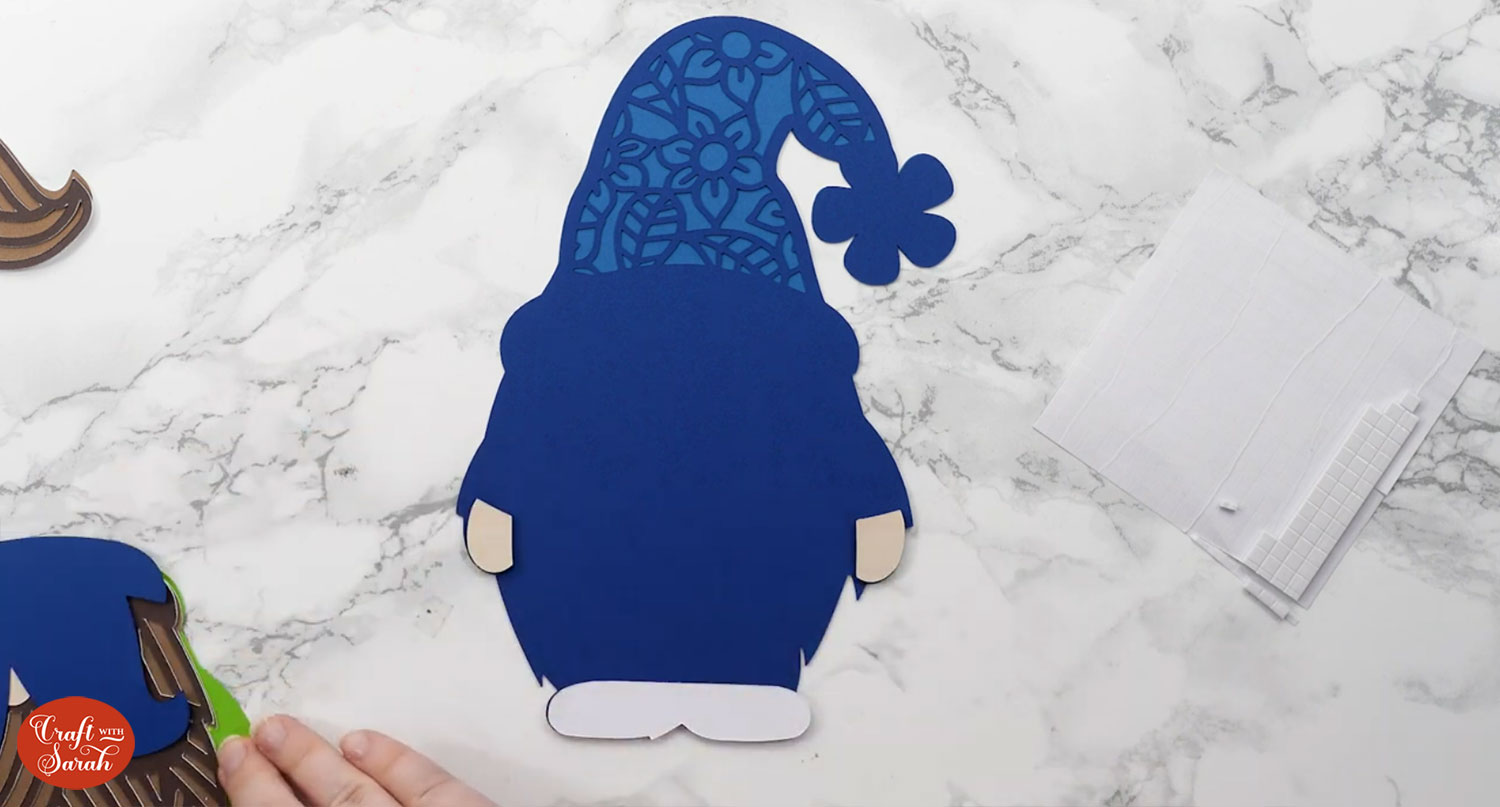
Next is the green piece to make up the body.
I need to be careful with the foam squares on this piece as it will overlap the hands and feet slightly, so I don’t want to add any foam on the bits that will overlap as otherwise it won’t sit flat on those areas.
Be sure to add foam squares in the middle of large pieces like this one to stop the card from sagging once you put all the other layers over the top. If you don’t put anything in the middle, then there’s nothing there to stabilize it and that can cause it to sag.
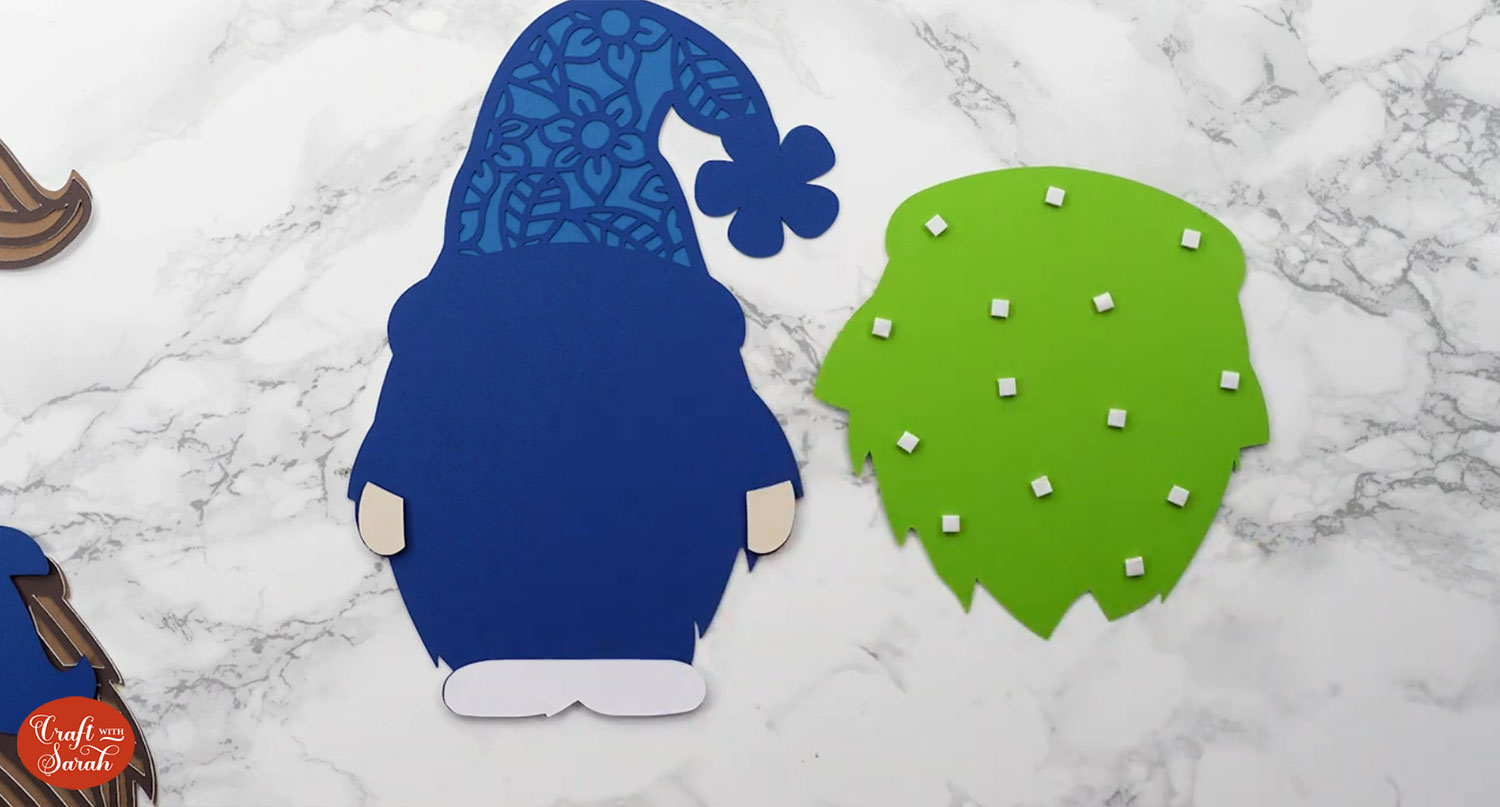
Keep sticking the layers together following the assembly guide until your gnome is all finished.

Be careful with small pieces such as as flowers and hands as they can be a little tricky to pick up… and they are easy to lose by mistake!
Then it’s time for the female gnome!! Follow the same process of glue and foam, as directed by the assembly guide.
Don’t they look adorable together?
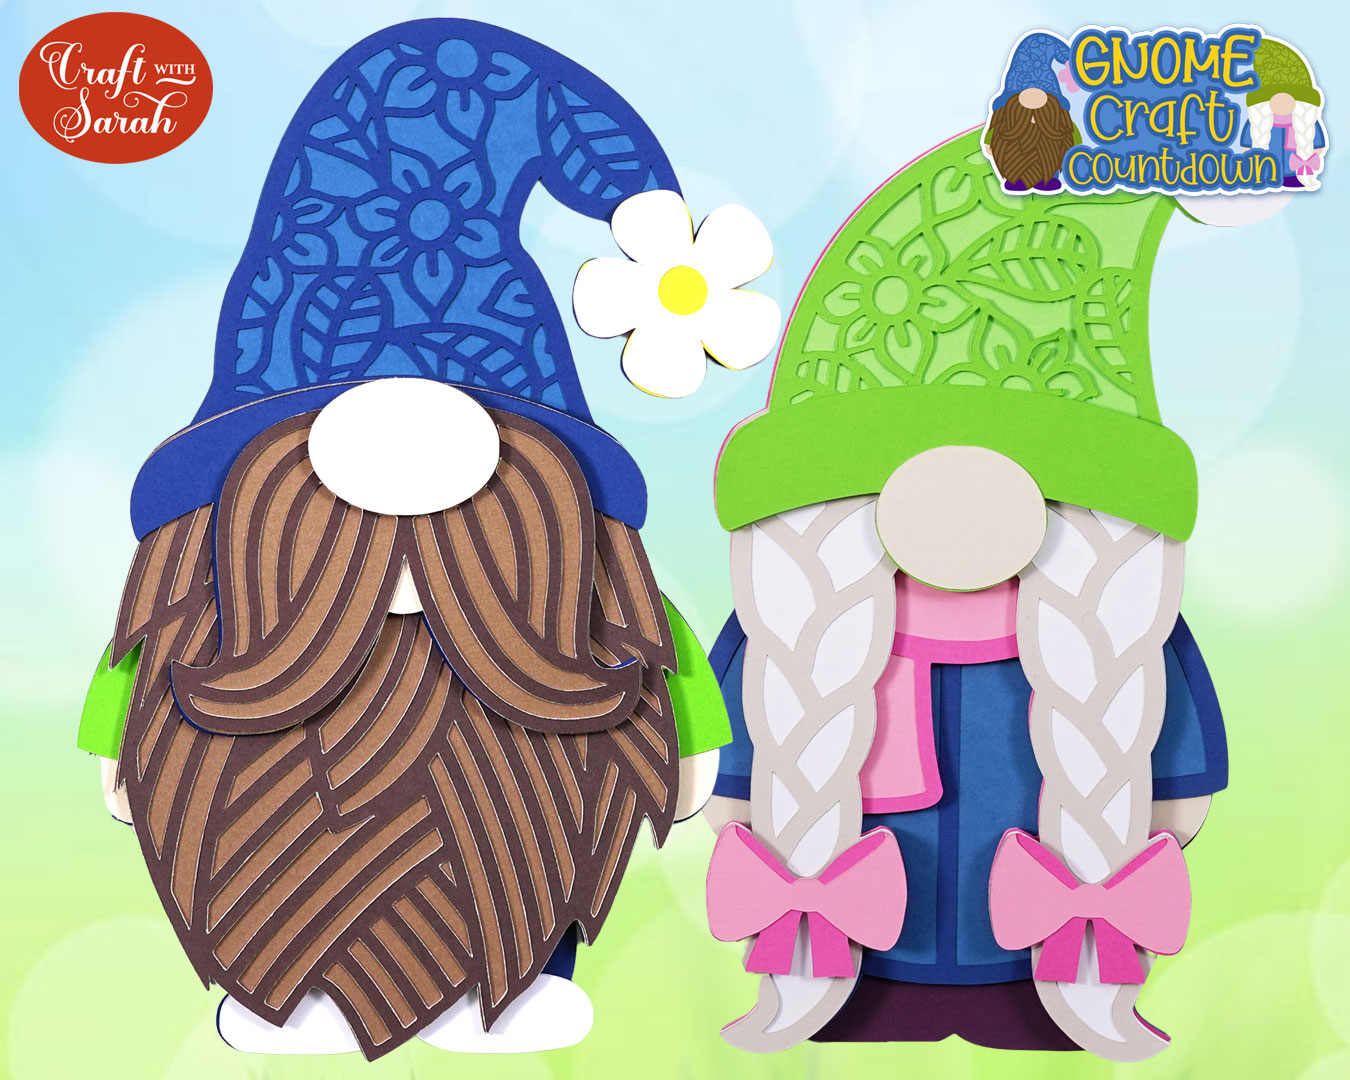
They are now ready to go into a shadow box frame, onto a greetings card, displayed on an easel stand, propped up on a shelf… or however else you wish to display them!
I hope you enjoyed this tutorial on how to make layered cardstock gnomes with your Cricut machine!
Happy crafting,
Sarah x

