Free Egg Holder SVGs 🐶 Cat & Dog Easter Egg Holders for Cricut
Display your Easter eggs in style with these fun cat & dog free egg holder SVGs.
Each design comes in two sizes so they can fit both Cadbury’s Creme Eggs and Kinder Eggs.
PLUS… find out how to customize the designs to make ANY dog or cat breed!
How to make Creme Egg holders for Easter
Here is a list of the materials that I used to make this project.
Please note that some of the links included in this article are affiliate links, which means that if you click through and make a purchase I may receive a commission (at no additional cost to you). You can read my full disclosure at the bottom of the page.
- Cricut Machine
- Light blue Cricut cutting mat
- Coloured Card (I used 160-240gsm weight of card)
- Collall All Purpose Glue
- Needle Tip Applicator Bottle
- 3D foam pads
- Double sided tape runner
- Kinder egg and/or Cadbury’s Creme egg
Note: You DO NOT need a scoring tool/wheel to make these egg holders.
Video tutorial for cat & dog Easter egg holders
Watch the video below to see how to make this craft project for Easter. Keep scrolling for a written tutorial.
This tutorial was filmed using Design Space version 7.5.174. Later versions may look slightly different.
Premade cat & dog Easter egg holders
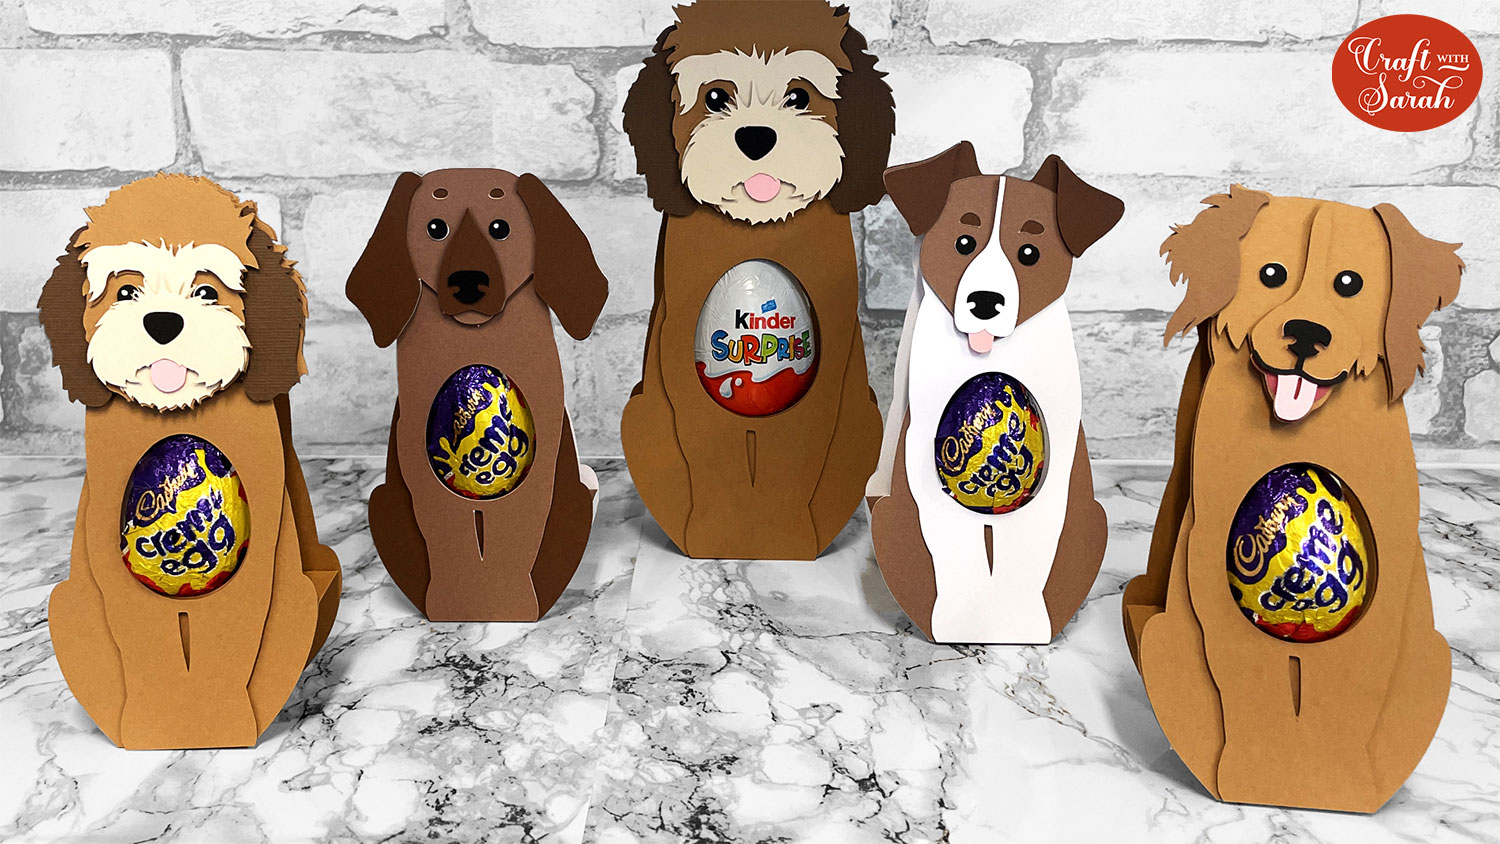
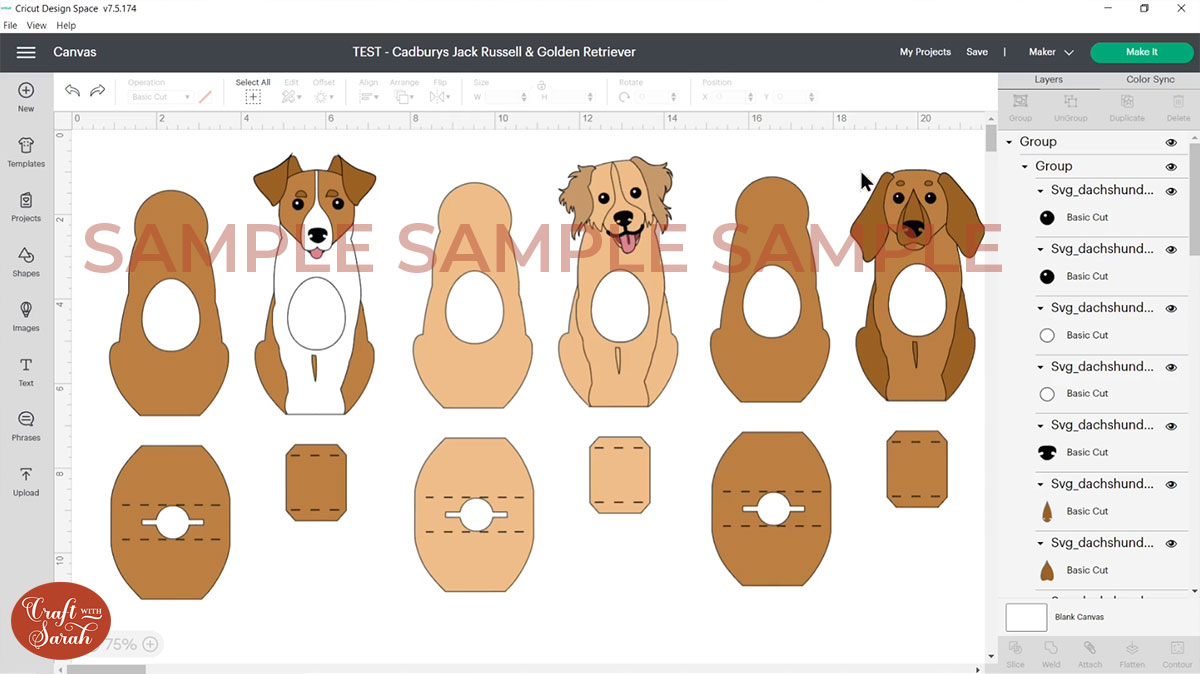
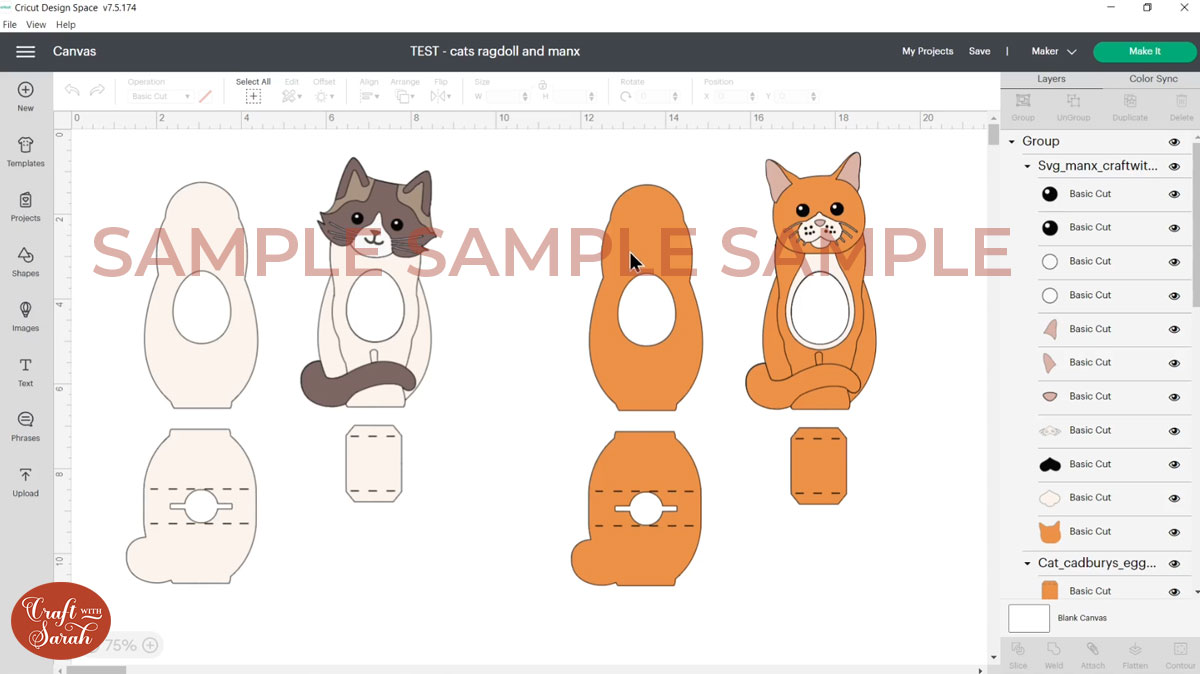
The first part of this tutorial is how to make the pre-designed cat and dog Easter egg holder SVGs which look like this:
Then afterwards I’ll show you how you can switch the head for any of my layered dog svgs or cat svgs.
There are over 200 different dog designs to choose from and over 20 cats so hopefully there’s something there which will help you to match your pet!
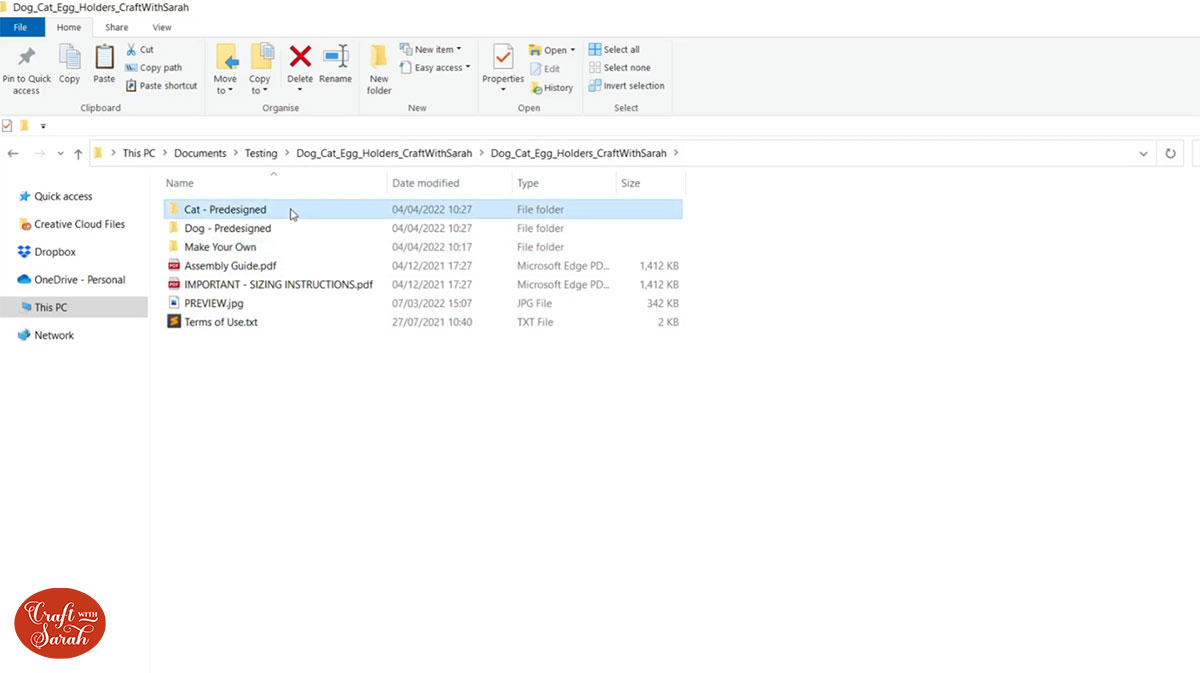
Step 1) Download the free files & unzip the downloaded folder
Download the Free Cutting File

Please login to your account to download this file.
TERMS OF USE:
You may sell finished, handmade physical craft items that you have made using this product but must not sell or share the digital files. Read full terms of use
Before you upload the SVGs to Design Space, you need to unzip the download folder that they come in.
- How to unzip a folder on Windows computer
- How to unzip a folder on a Mac
- How to unzip a folder on an iPad/iPhone
- How to unzip a folder on an Android device
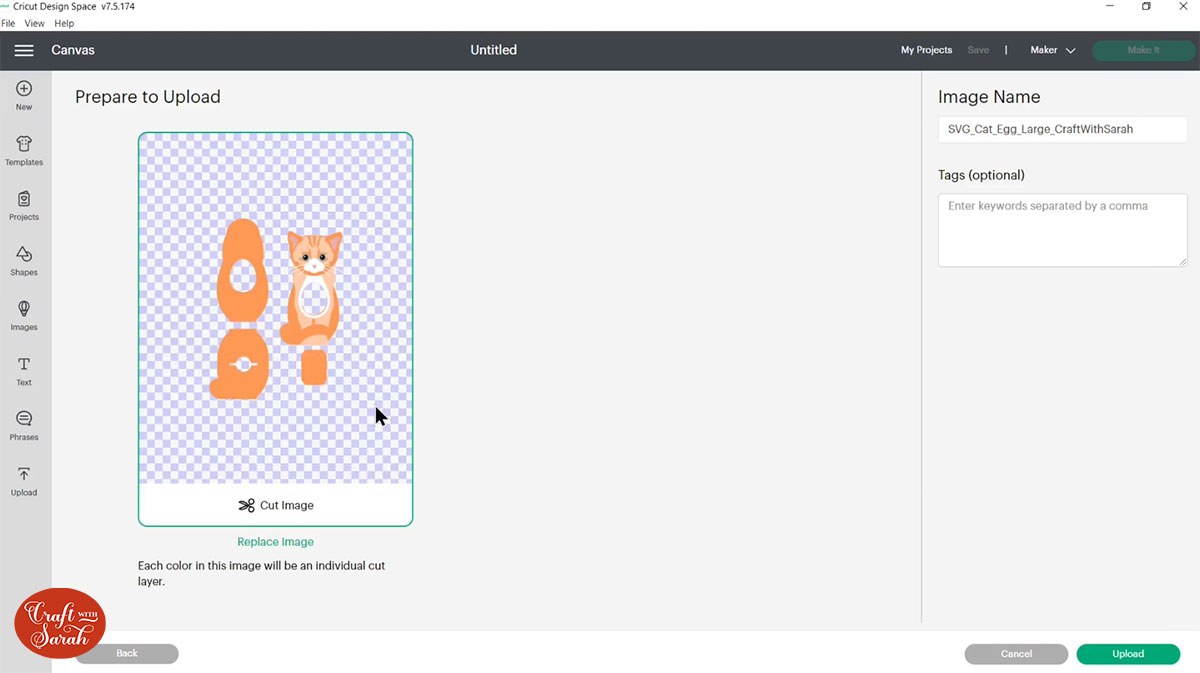
Step 2) Upload the SVG file into Design Space
Open up Cricut Design Space and choose the files you want to upload.
For the premade designs, there are two to choose from: a dog and a cat.
Make sure you upload the file which starts SVG_ in the filename!!
For this tutorial I am using the Kinder egg size of the cat SVG.
This is how it should look after you have uploaded the file:
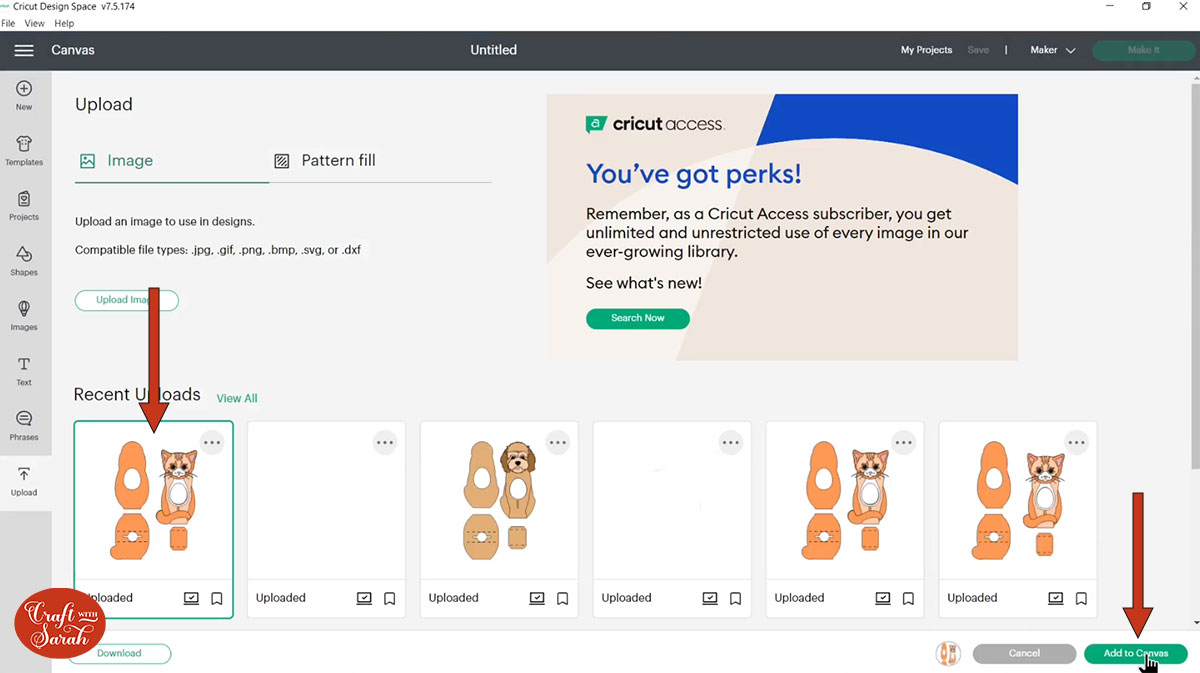
After uploading, the design will show in your “Recently Uploaded Images”. Click on it and then press “Add to Canvas” to put it onto your Project.
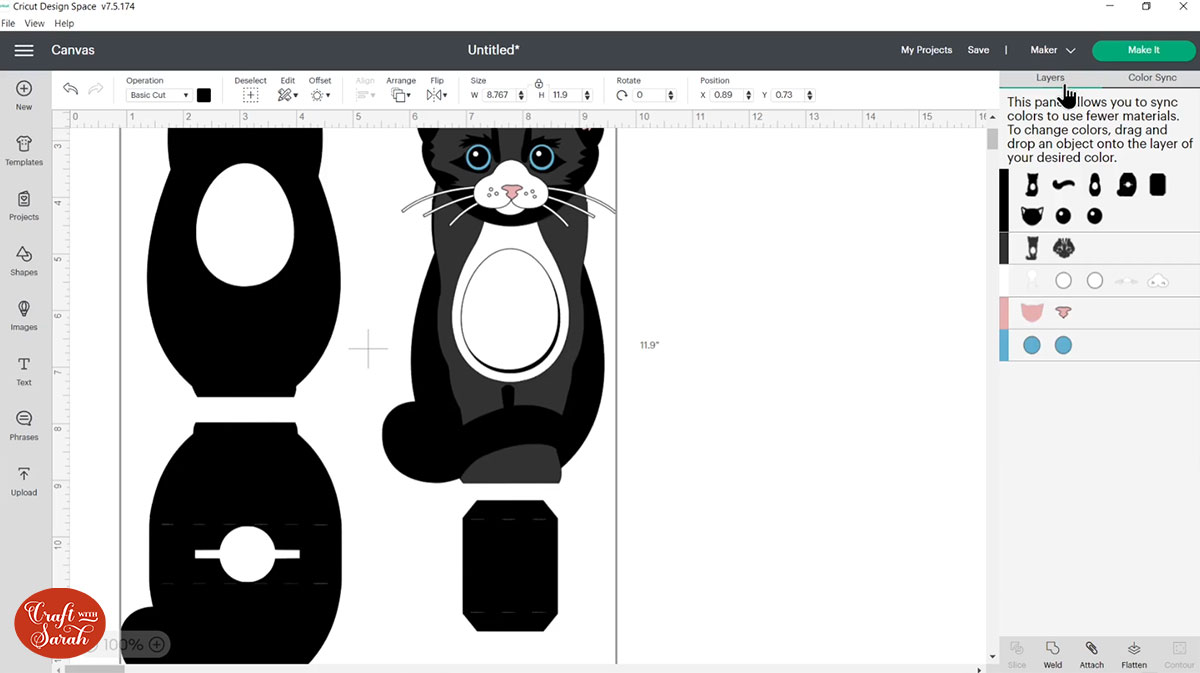
IMPORTANT – Click the design on your canvas and check that the size of the whole layer group matches the following. If it doesn’t then change it in Design Space to EXACTLY match the following:
- Premade cat – Kinder Egg (large) version – 8.767 inches wide, 11.9 inches tall
- Premade cat – Creme Egg (small) version – 7.418 inches wide, 9.451 inches tall
- Premade dog – Kinder Egg (large) version – 7.475 inches wide, 12.3 inches tall
- Premade dog – Creme Egg (small) version – 6.265 inches wide, 9.675 inches tall
Making the designs these sizes will ensure that your chocolate eggs will fit perfectly inside the holders when they are made.
Step 3) Recolour the design if required
You can cut these egg holders from any colour of card you like. I find it easiest to recolour the layers in Design Space first to get a good idea of how it will look when cut out from cardstock.
Watch the video near the top of this page to see how I recoloured the cat design from a ginger cat into a black-and-white cat.
Or, check out this tutorial on how to recolour layered SVGs in Cricut Design Space.
When you’re happy with how the egg holder is looking in Design Space, click “Make It” and follow the instructions on-screen to cut out all the layers.
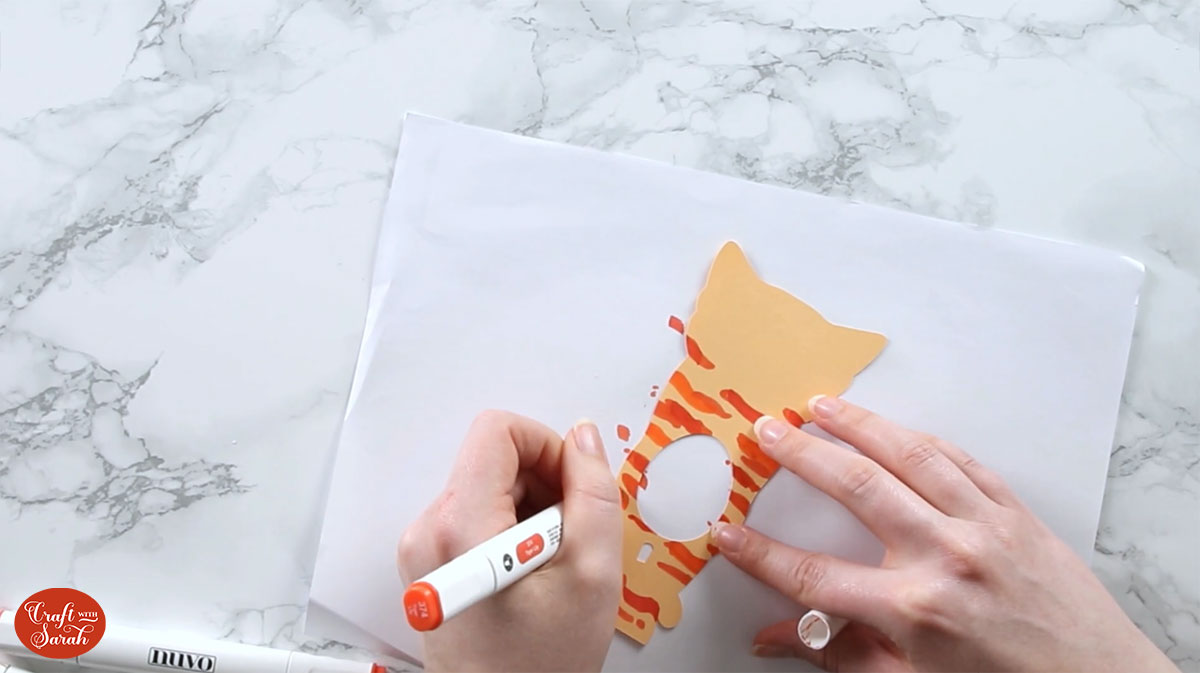
Step 4) Add extra details with pens
Alcohol markers, felt tips or even coloured pencils can be used to add extra details to the layers.
Step 5) Stick the front of the egg holder together
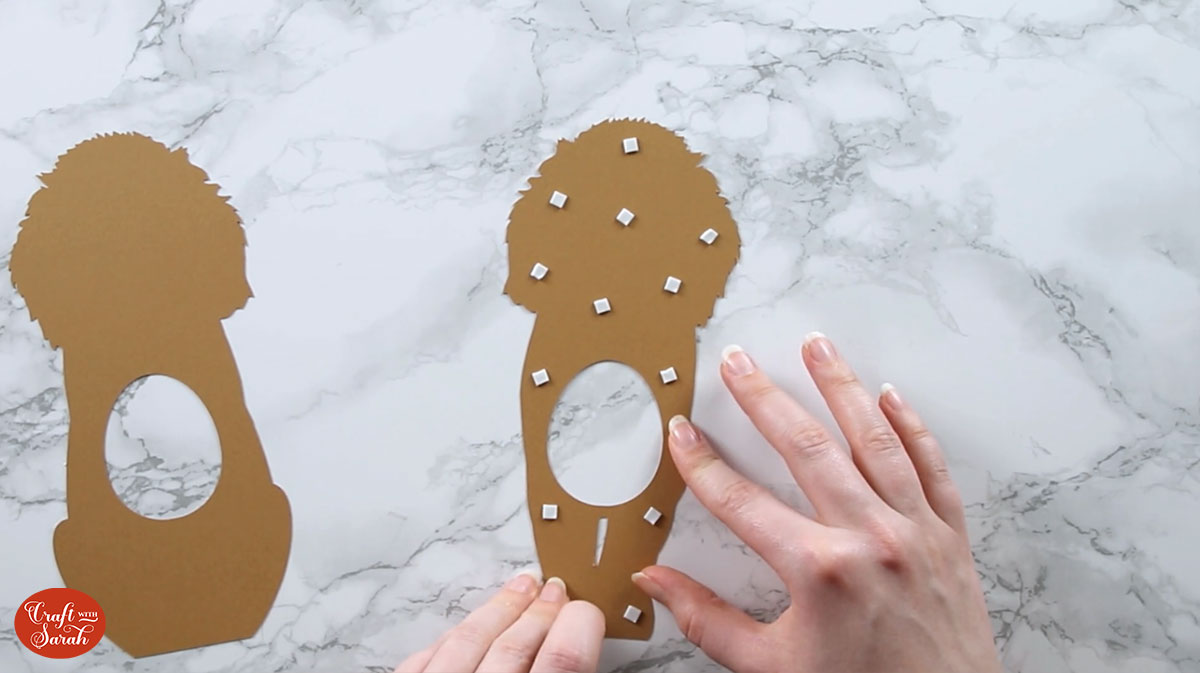
Use 3D foam pads and glue to stick the front of the egg holder together.
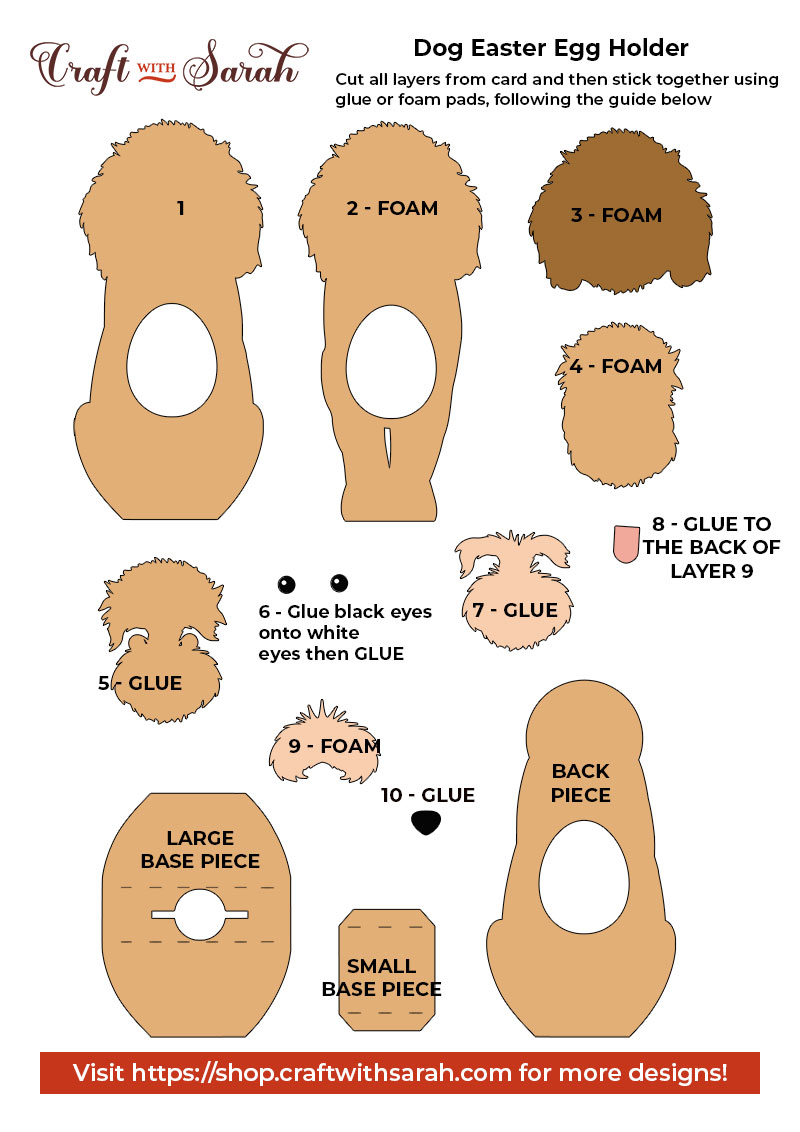
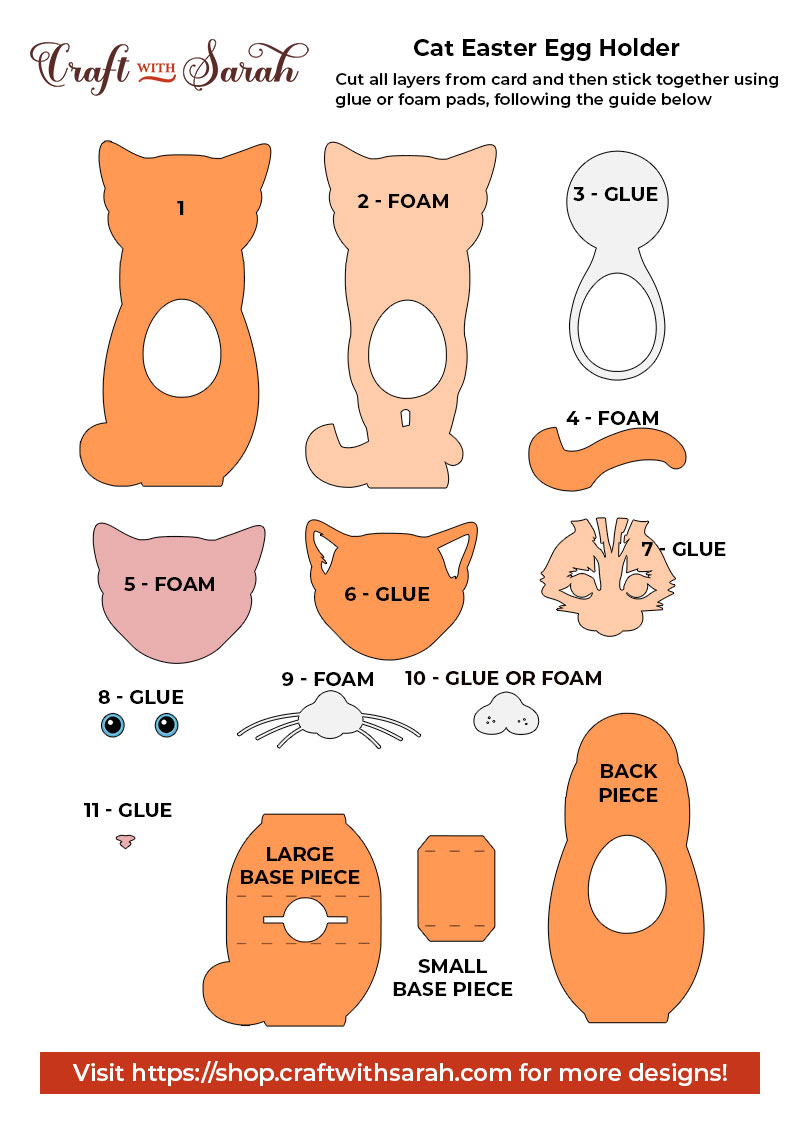
Use this guide to see the order to stick the layers together in. A high quality printable version of this assembly guide is included in the folder when you download this SVG.
My favourite glue to use on papercraft projects is Collall All Purpose Glue.
It’s SO good because it doesn’t “warp” or bend the cardstock like some glues do. You can use as much of it as you want and the card stays perfect – and it dries perfectly clear too!
To make it even easier to apply glue to layered card projects, I highly recommend getting some of these needle tip applicator bottles to put the glue into.
The nozzles are REALLY tiny which makes them perfect for putting glue in the pieces of cardstock that make up these egg holders.
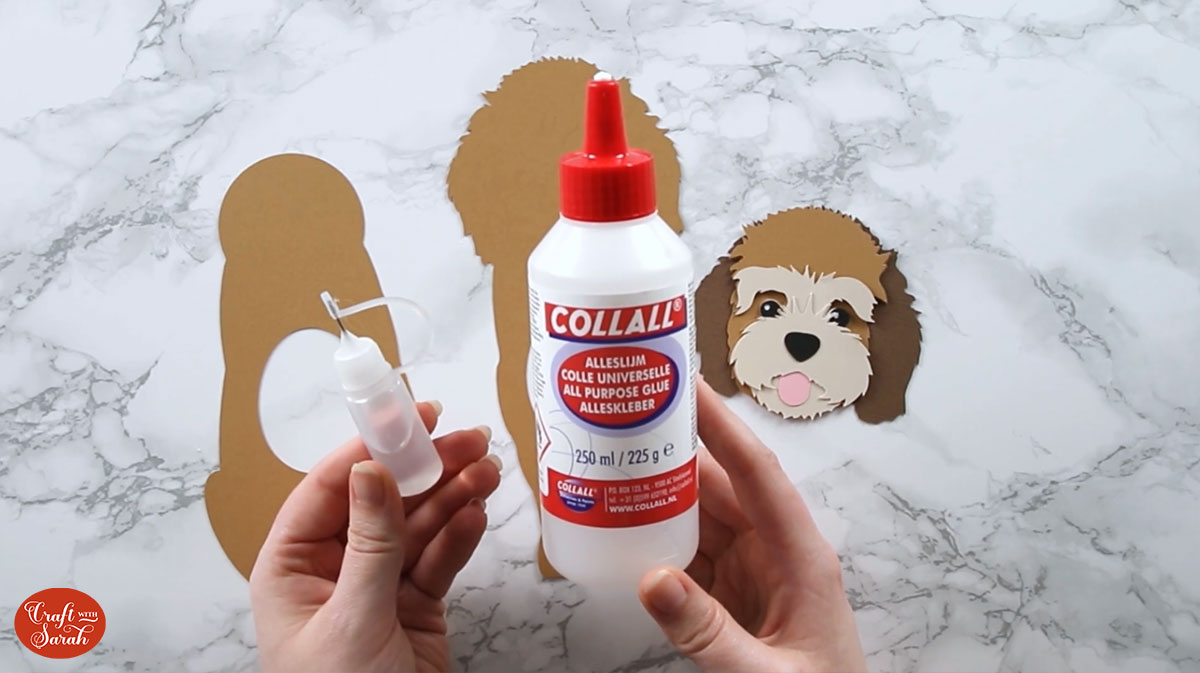
When adding the foam pads to the relevant layers, make sure you add some in the middle of the pieces of card so it give stability to the middles. If you don’t add any foam pads in the middles then it can “sag” under the weight of the other layers which doesn’t look as good.
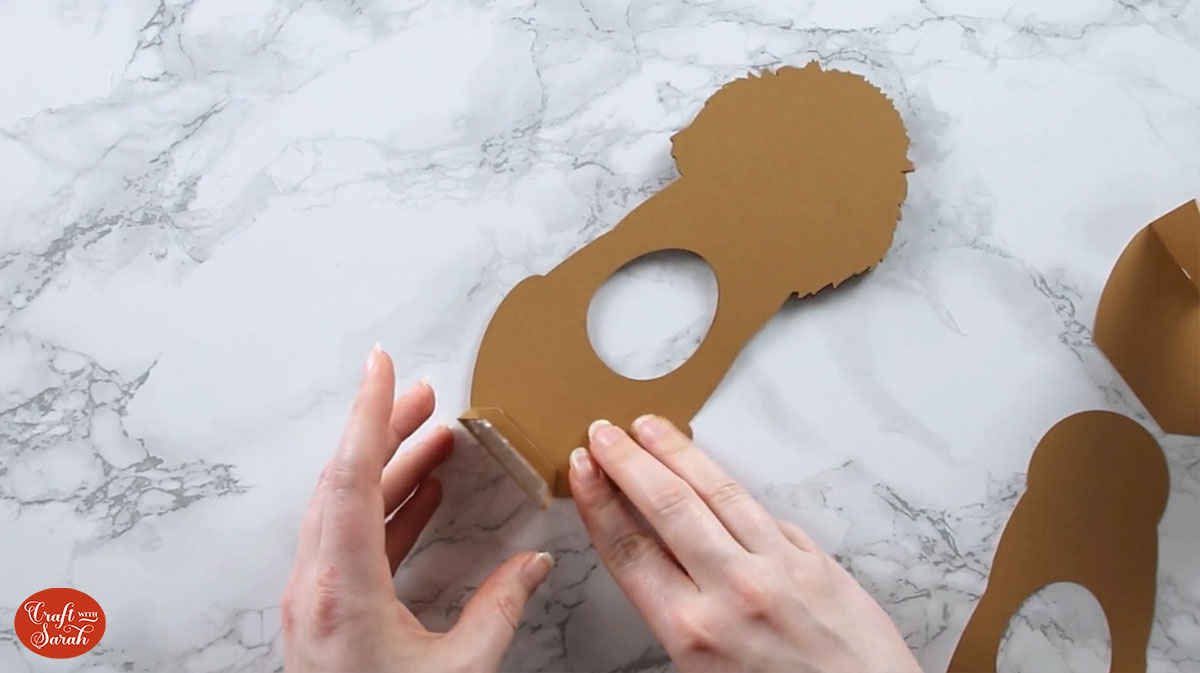
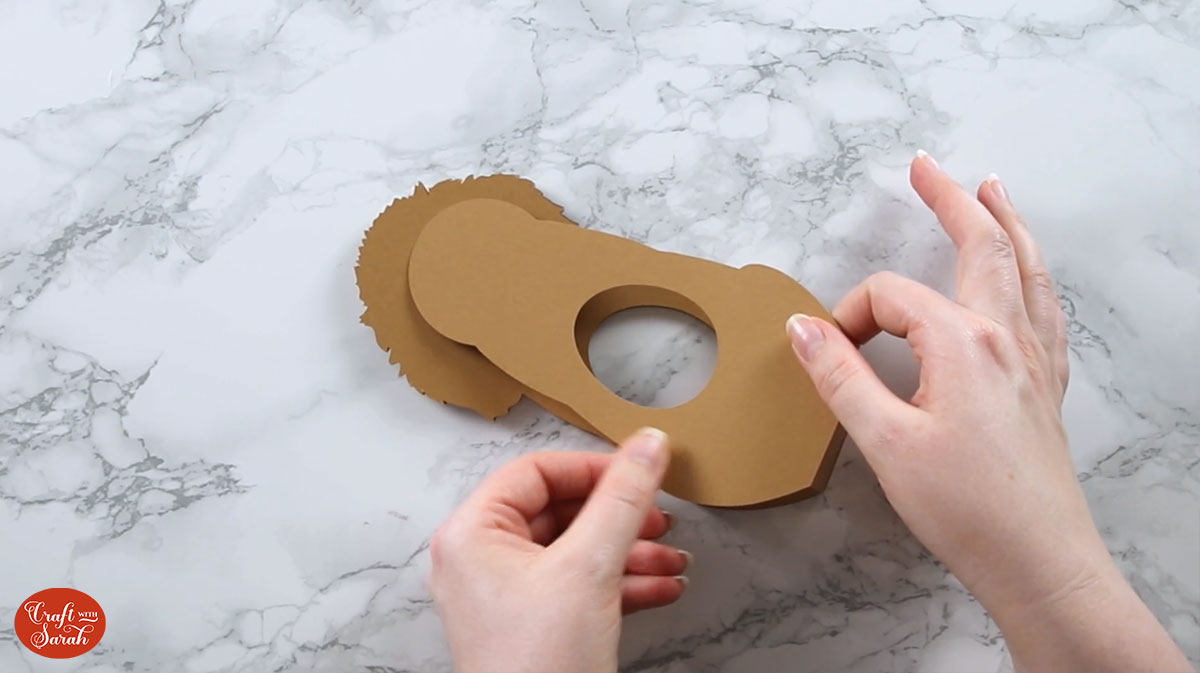
Step 6) Assemble the egg holder structure
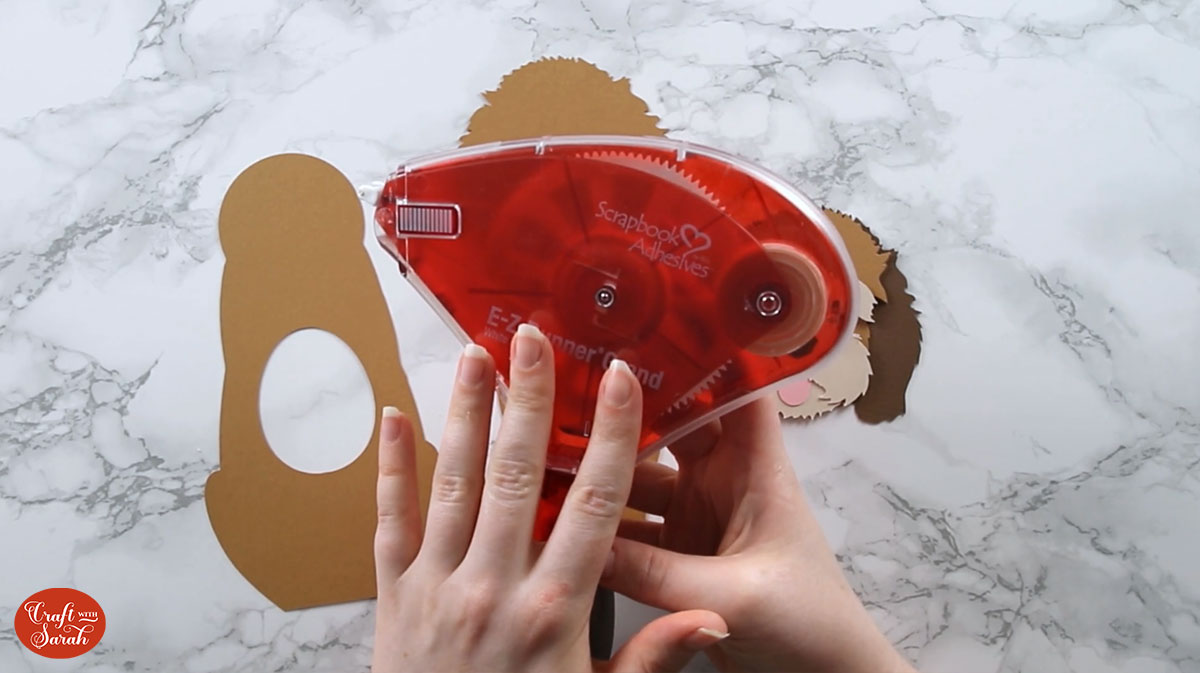
Double sided tape works best for putting the structure of the egg holders together as it means you don’t need to wait for it to dry. I’m using a tape runner from “Scrapbook Adhesives” which is one of my favourite craft tools!
The process for making this part of the designs is the same, whether you are making the premade dogs/cats or the “make your own” versions.
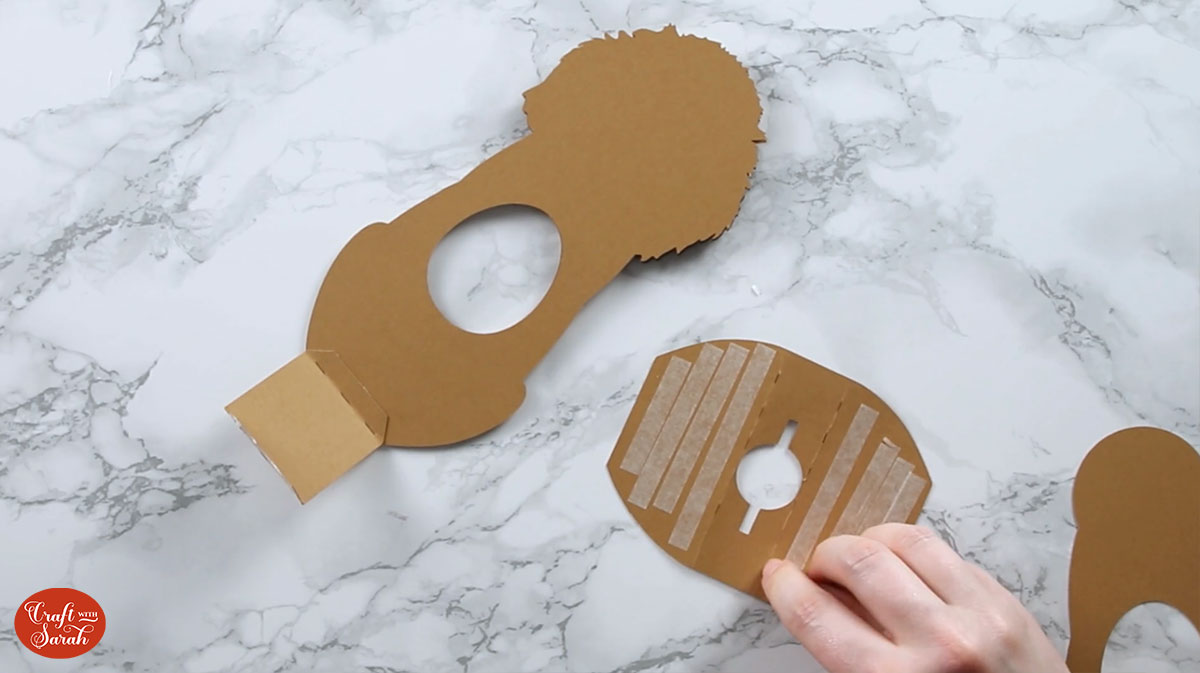
First, fold the tabs on the small base piece upwards.
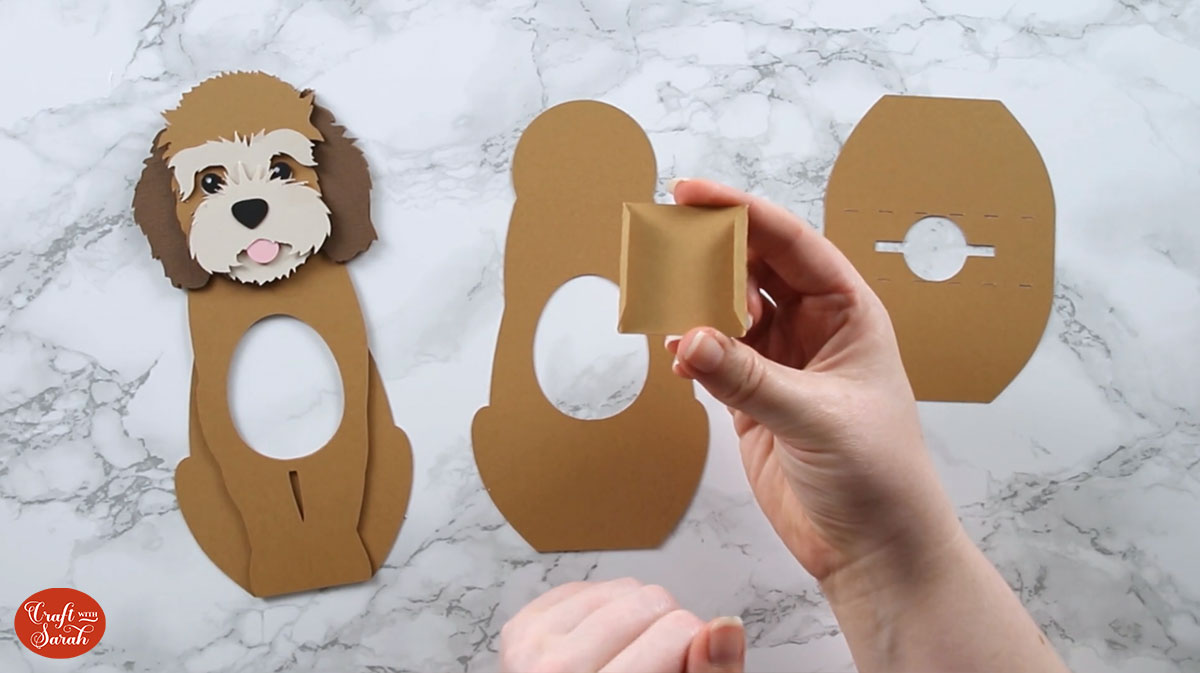
Next, fold the sides of the larger base piece. If you are using a cat design then make sure you fold the sides down so that the “tail” shape will match the reverse of your decorated “front” piece.
Add double-sided tape to the top of both tabs of the small base piece. Stick one tab to the bottom of the reverse side of your front piece (the one we decorated earlier).
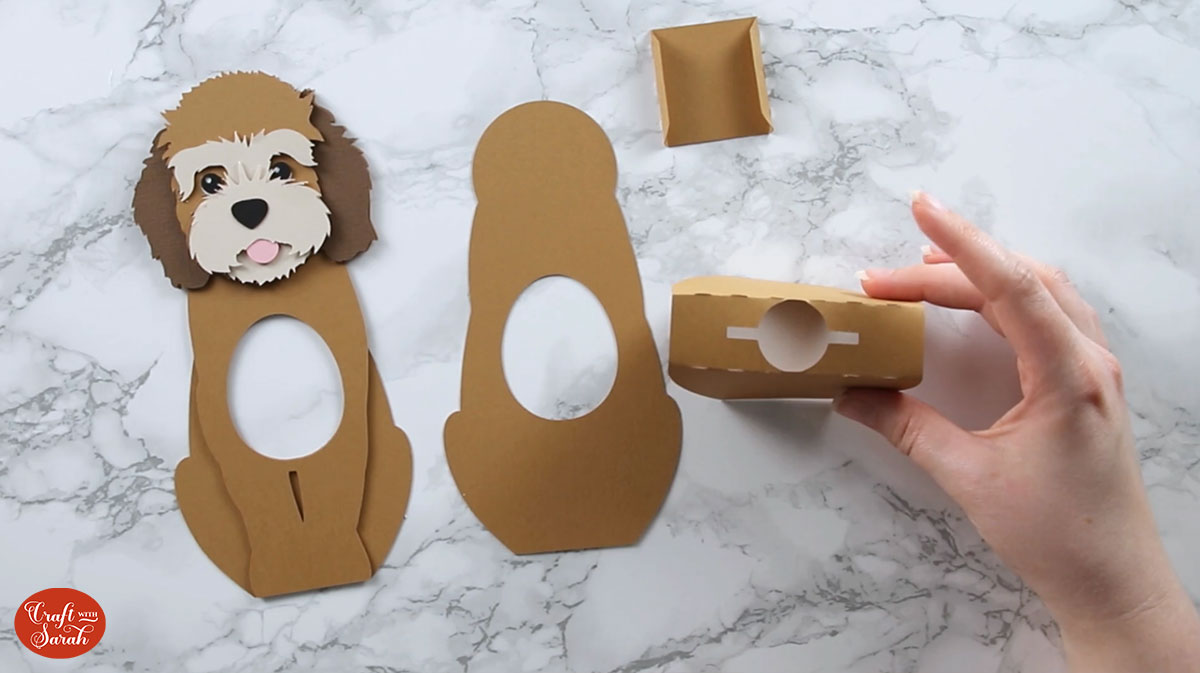
Add double-sided tape to both of the “flaps”/sides of the larger base piece.
Stick one side of the larger base piece to the reverse side of your front piece. It should completely cover the “flap” of the smaller base piece which you stuck in the previous step.
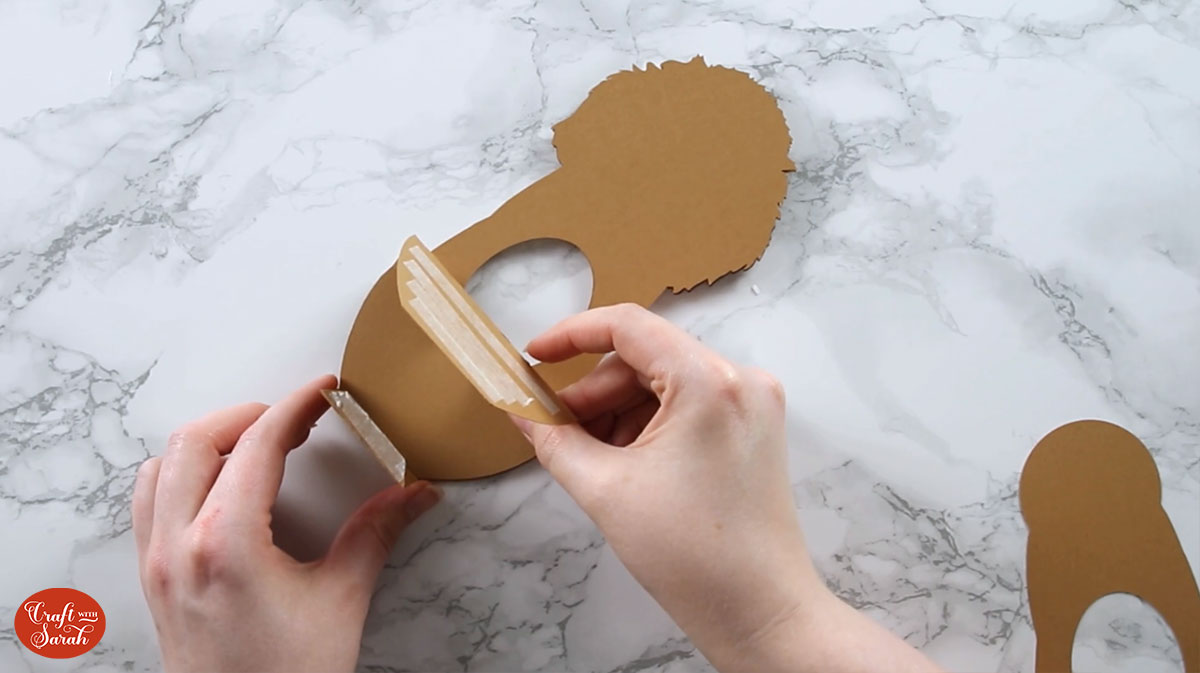
Stick the remaining tab of the smaller base piece to the reverse side (non-sticky side) of the larger base piece. The small base piece should be flat along the bottom as this is how the egg holder will stay stood up.
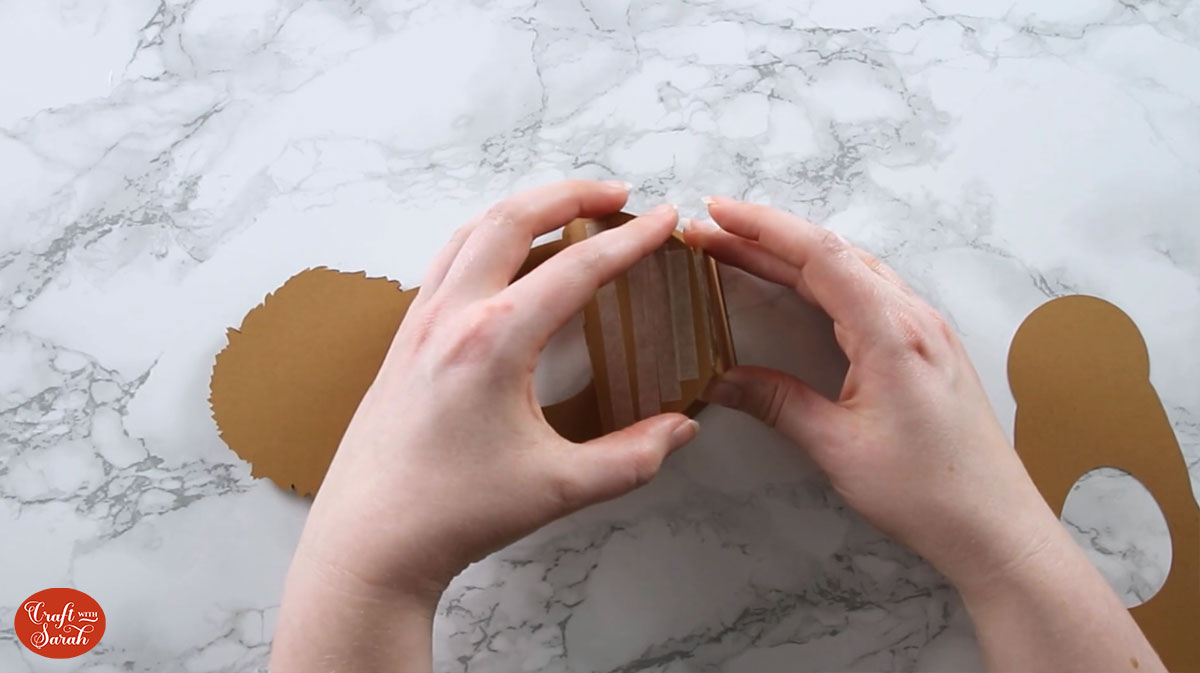
Stick the back piece onto the visible side of the larger base piece to finish.
If your egg holder doesn’t stand up, it probably means that the bottom isn’t quite flat. If you wiggle it about a bit, it should straighten up and then stand!
If you used glue, wait until it’s completely dry (ideally overnight) before adding the eggs in.
Otherwise, you can add the egg straight away.
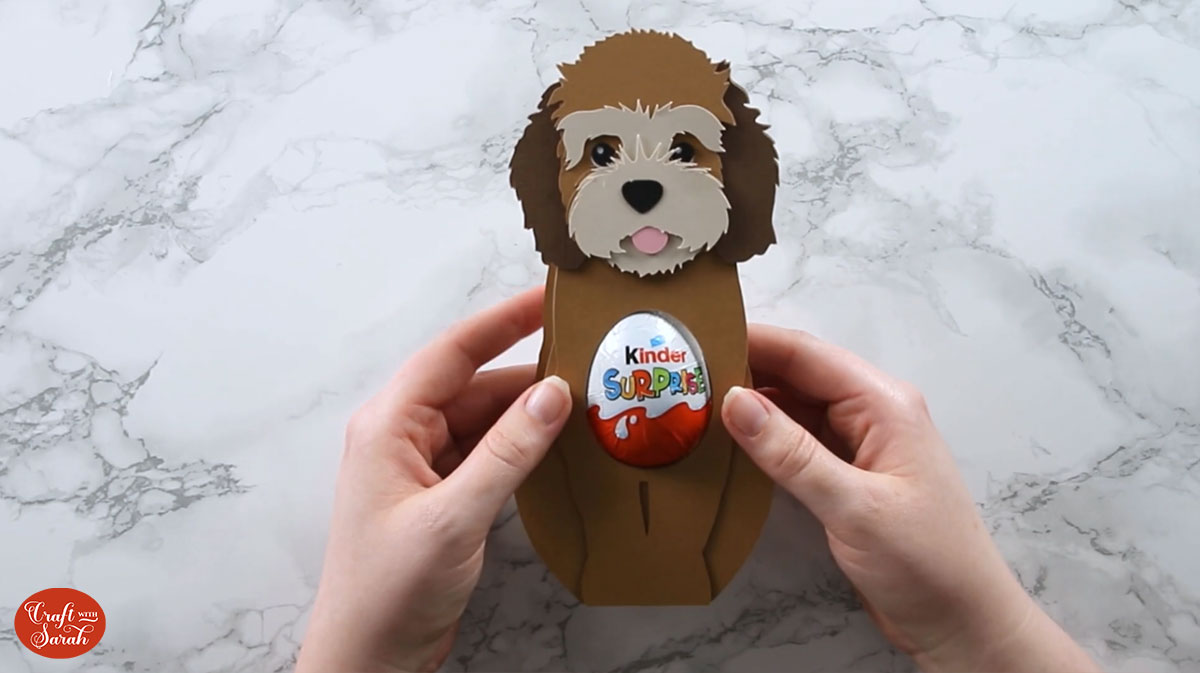
The egg holder will stand as-is and keep the egg held in, but to help secure the egg it’s best to stick the two pieces of the head together with a bit more double-sided tape, especially if you are giving this to someone as a gift.
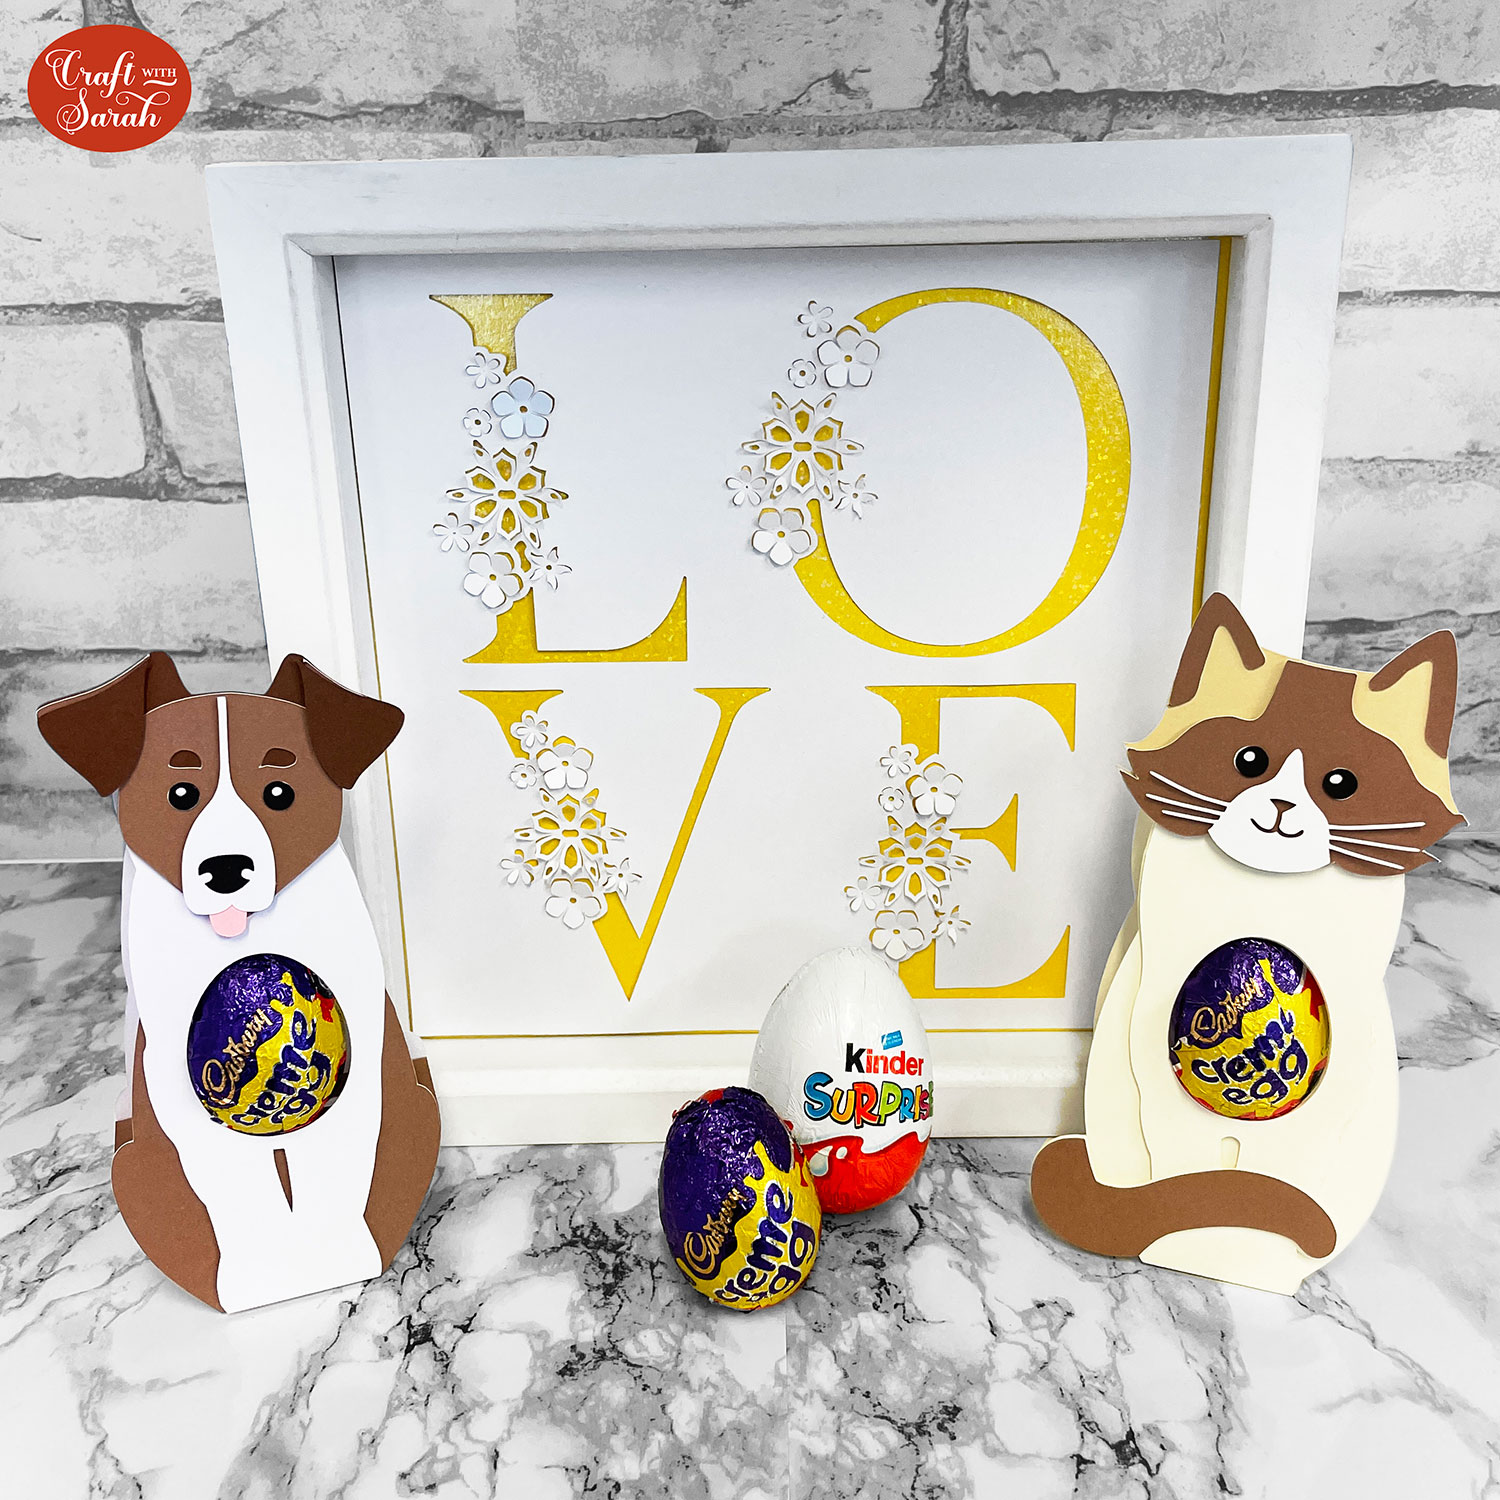
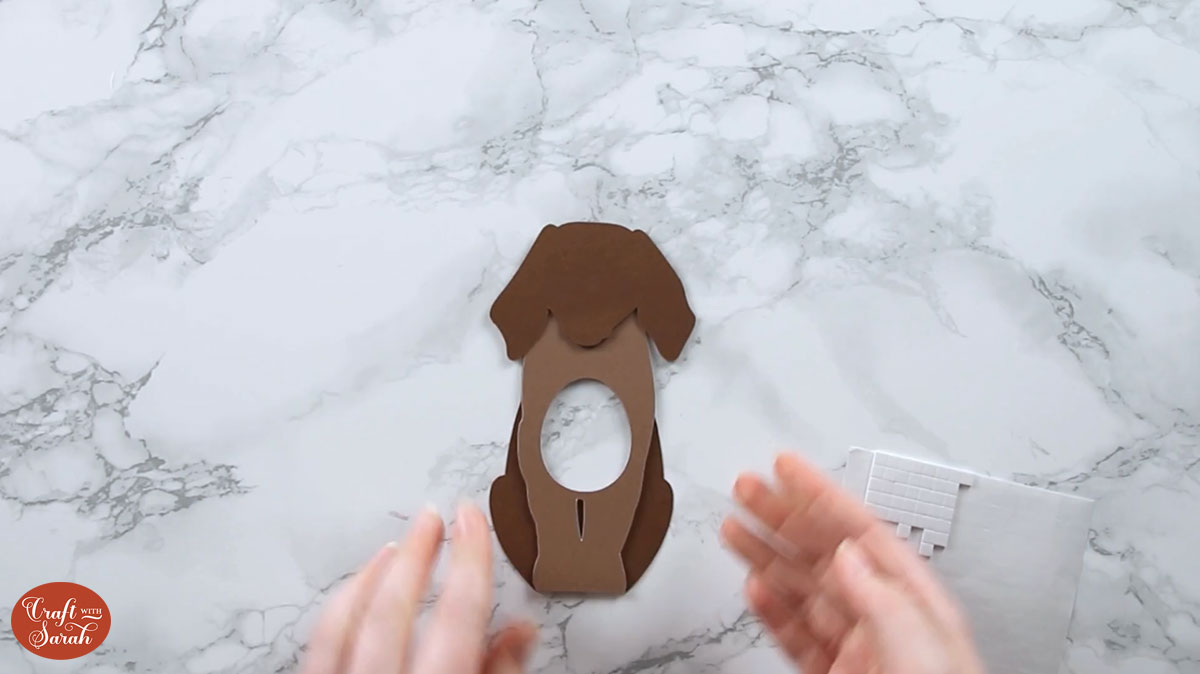
Here is what the free dog & cat Easter egg holders look like when finished, including both the Kinder Egg and Cadbury Creme Egg versions.
Design your own Easter Egg holder
Want to make a egg holder to match your pet, or perhaps one of your favourite cat or dog breed?
The download folder for these free egg holder SVGs includes a “make your own” version which can be combined with any animal face design you would like to use.
I recommend choosing of of these layered dog svgs or cat svgs.
Step 1) Load in the “make your own” egg holder and dog/cat
Upload your chosen designs into Cricut Design Space.
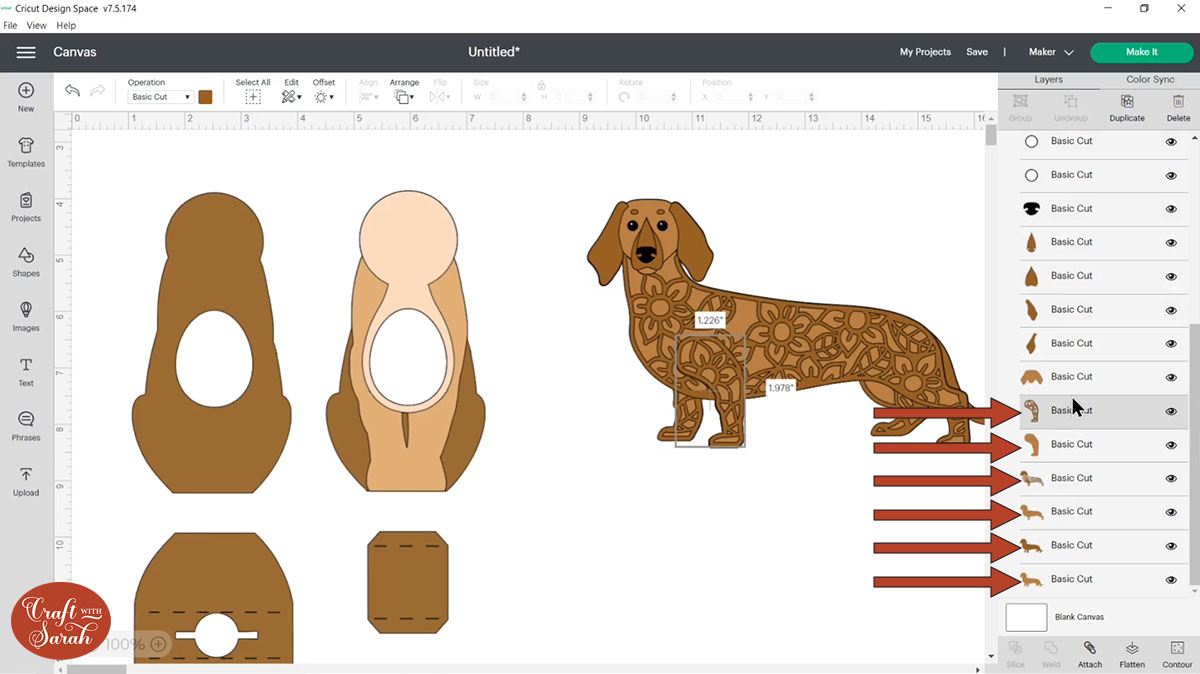
I’m using this layered dachshund SVG file and the Creme Egg dog version of the “make your own” egg holder file.
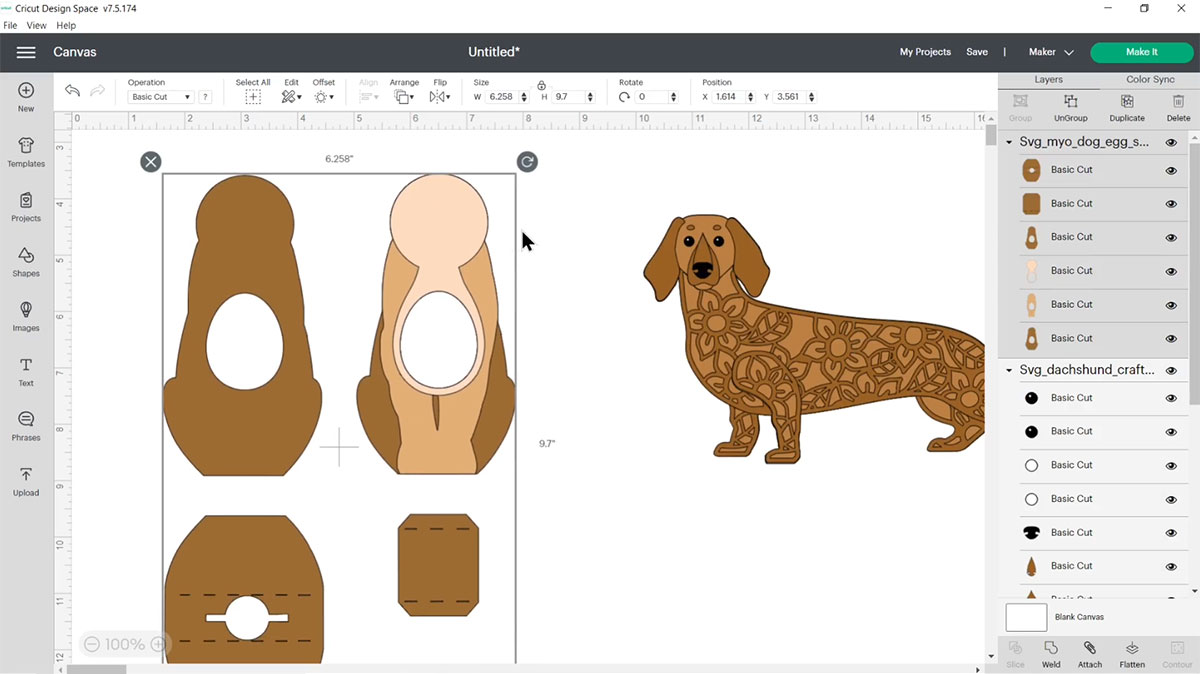
Check the size of the egg holder matches the below. If it doesn’t, change it in Design Space to match.
- Make your own cat – Kinder Egg (large) version – 8.614 inches wide, 11.991 inches tall
- Make your own cat – Creme Egg (small) version – 7.181 inches wide, 9.498 inches tall
- Make your own dog – Kinder Egg (large) version – 8.34 inches wide, 12.345 inches tall
- Make your own dog – Creme Egg (small) version – 6.258 inches wide, 9.7 inches tall
It’s really important for the rest of this tutorial that you never resize the egg holder pieces . Instead, we’re going to resize the dog or the cat itself so that it fits on this existing size of the egg holder.
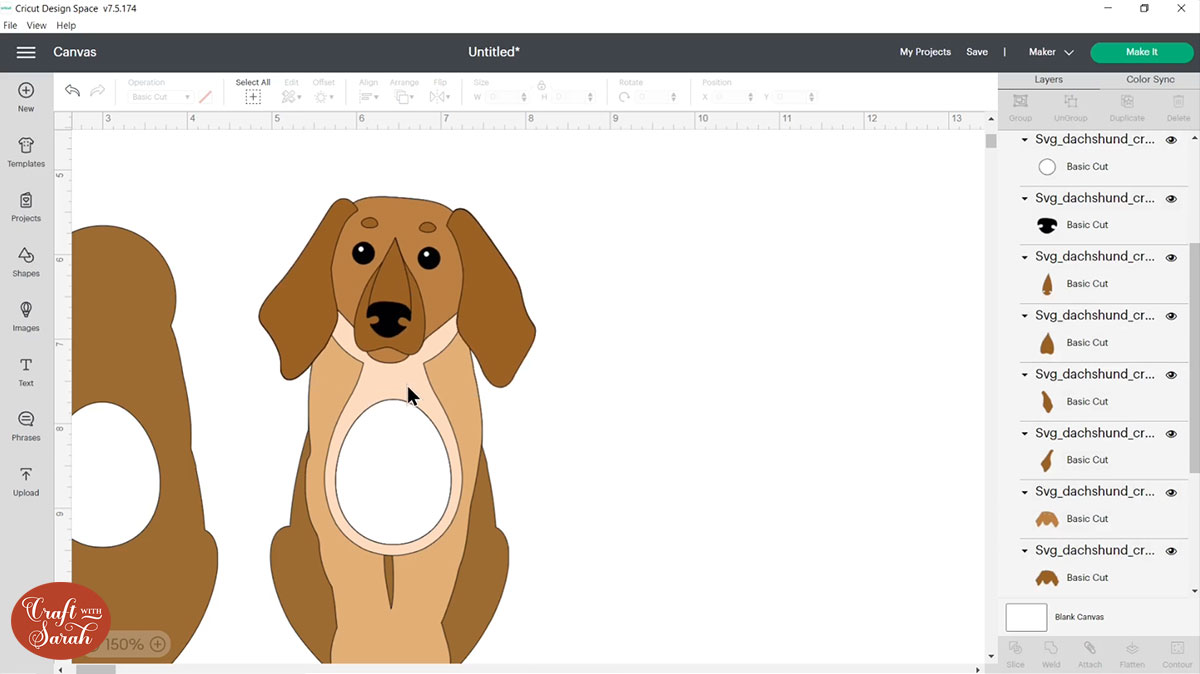
Step 2) Delete the body layers of the dog
Look in the layers panel to see the layers that make up the body of the dog/cat.
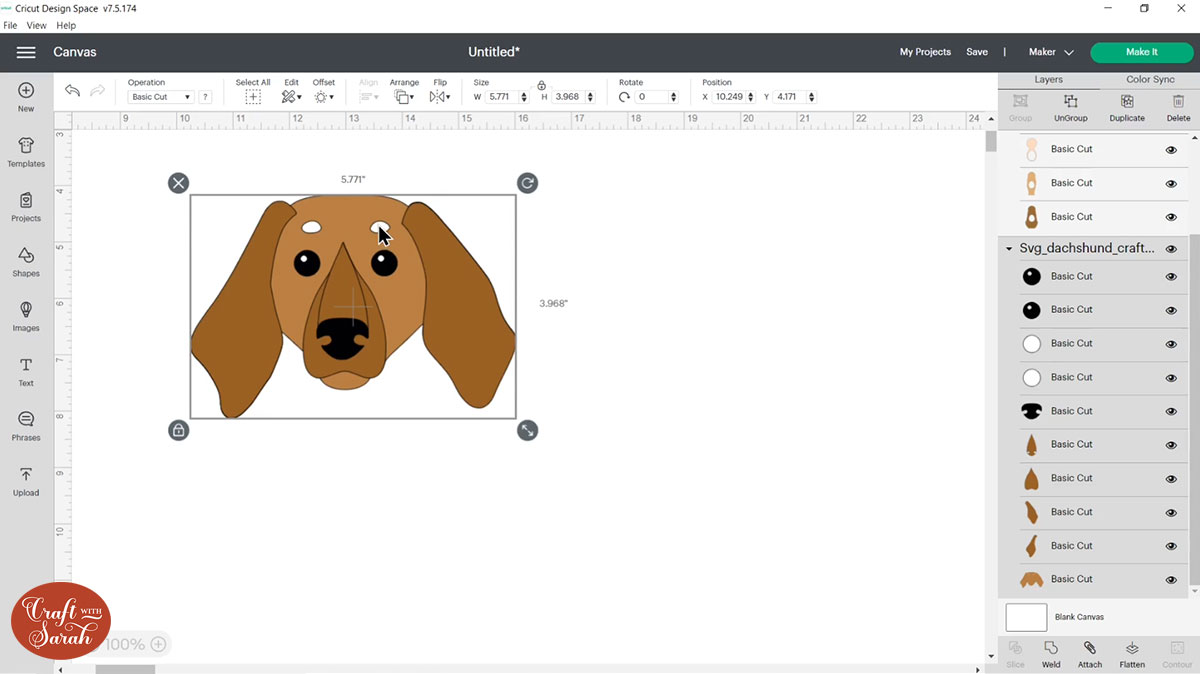
Click each body layer, one-at-a-time, then press Delete on your keyboard to remove them all so that you just have the head remaining.
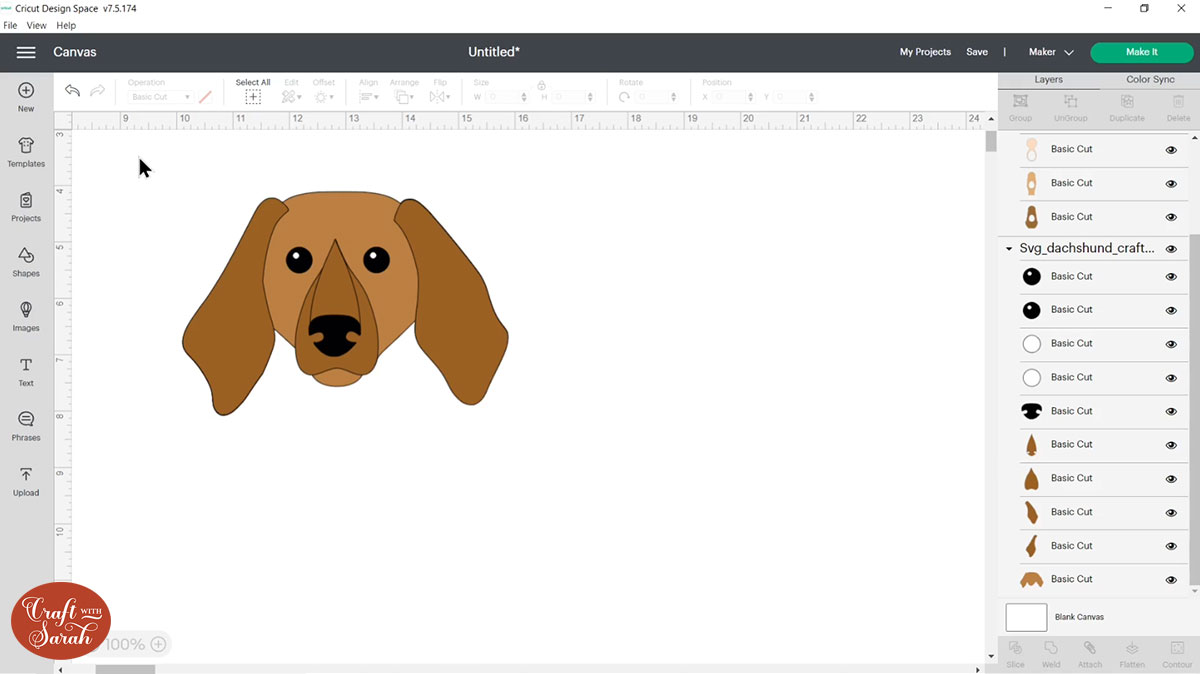
You’ll be left with just the head:
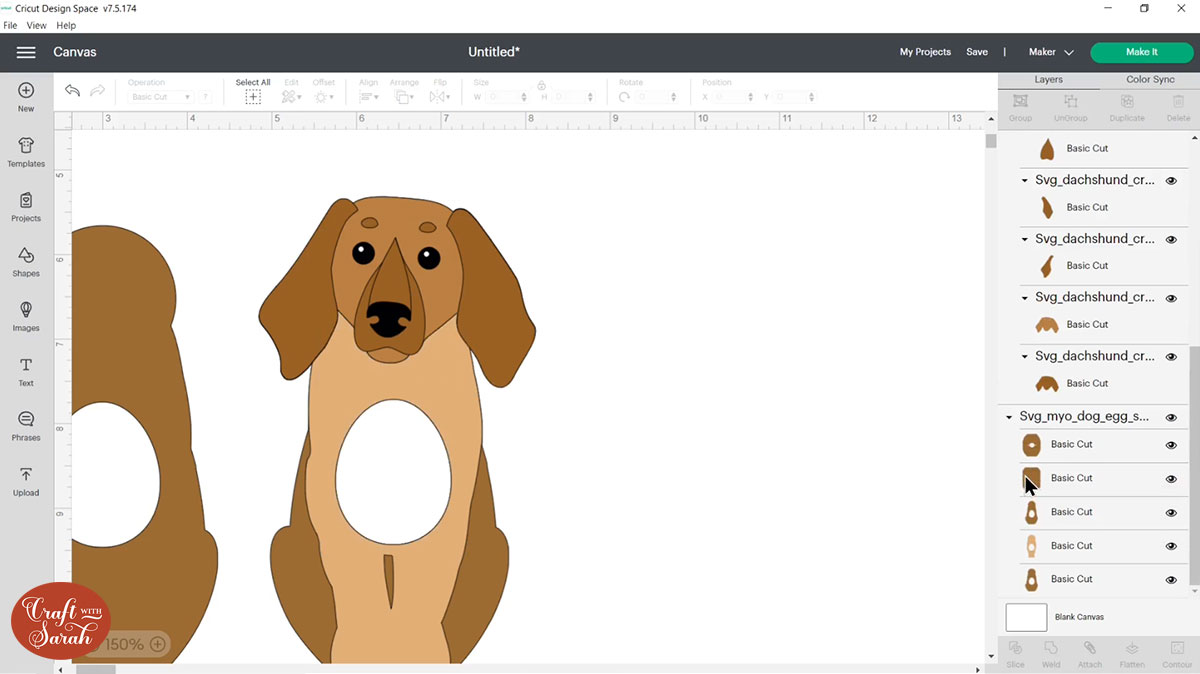
Step 3) Tweak the layers if necessary
For most of my dog and cat designs, you can skip this step.
However, for some designs, like this dachshund, you may find that there are some details in the head that no longer have any colour behind them so they are just showing as “empty space”.
This can happen for details such as eyebrows, face wrinkles, etc.
There are two different ways that you can fix this. The first is by clicking the head layer with the holes in it in the layers panel, then clicking “Contour”.

Press “hide all contours” then close the Contour popup window and that will fill them in so they’re now not there anymore.
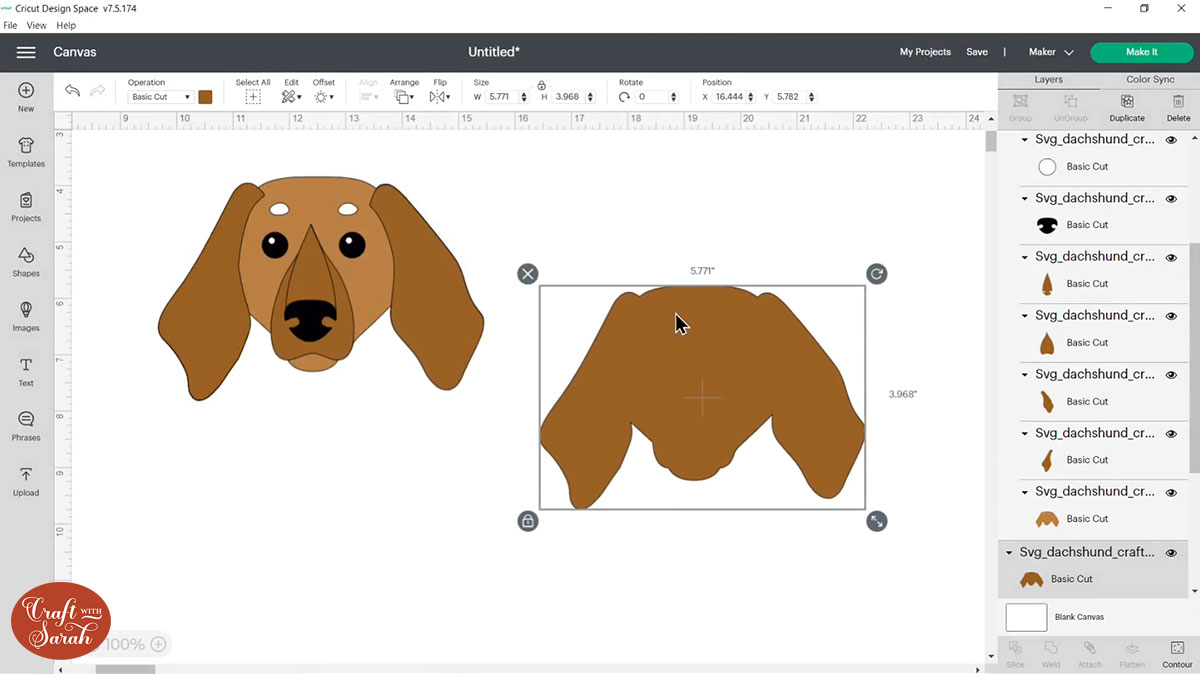
If you wanted to keep the details then it’s a few more steps. Select the head group and then click Ungroup in the layers panel to separate out the head layers.

Scroll down to find the very bottom one that we need to fix and press Duplicate.
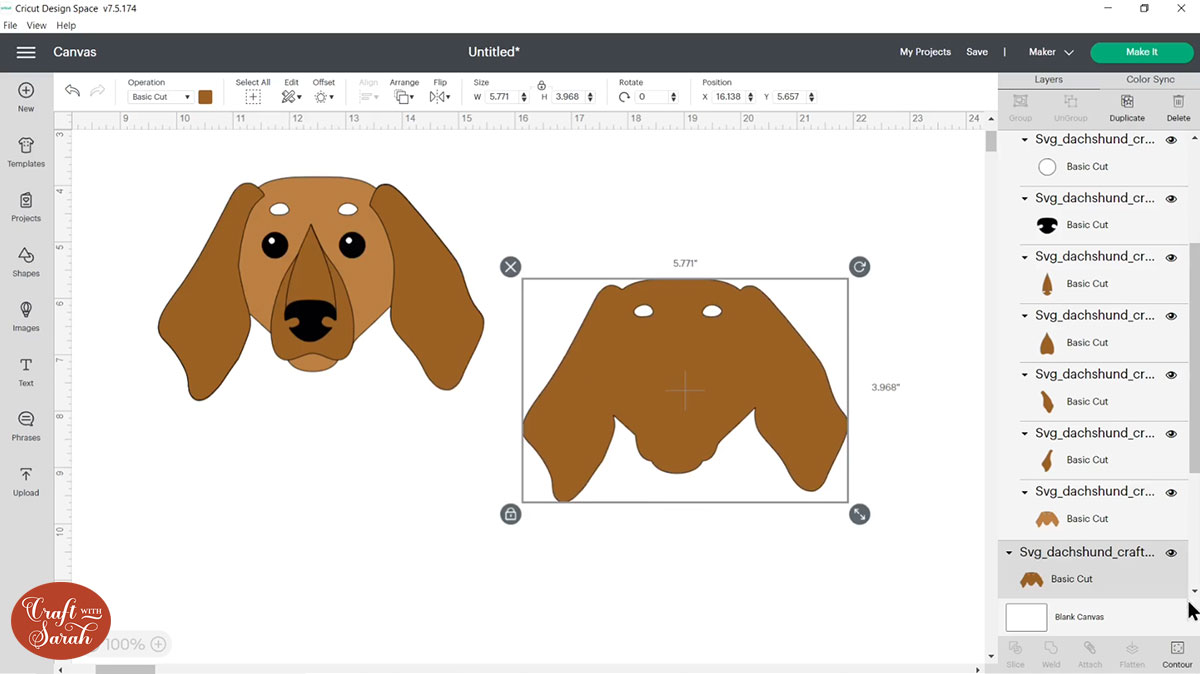
Move the duplicated layer over to one side, drag a box around your original head layers and Group them again by pressing Group so that we can keep all those layers together.
Change the colour of the duplicated layer, then click “Contour” and “hide all contours” to fill in the gaps.
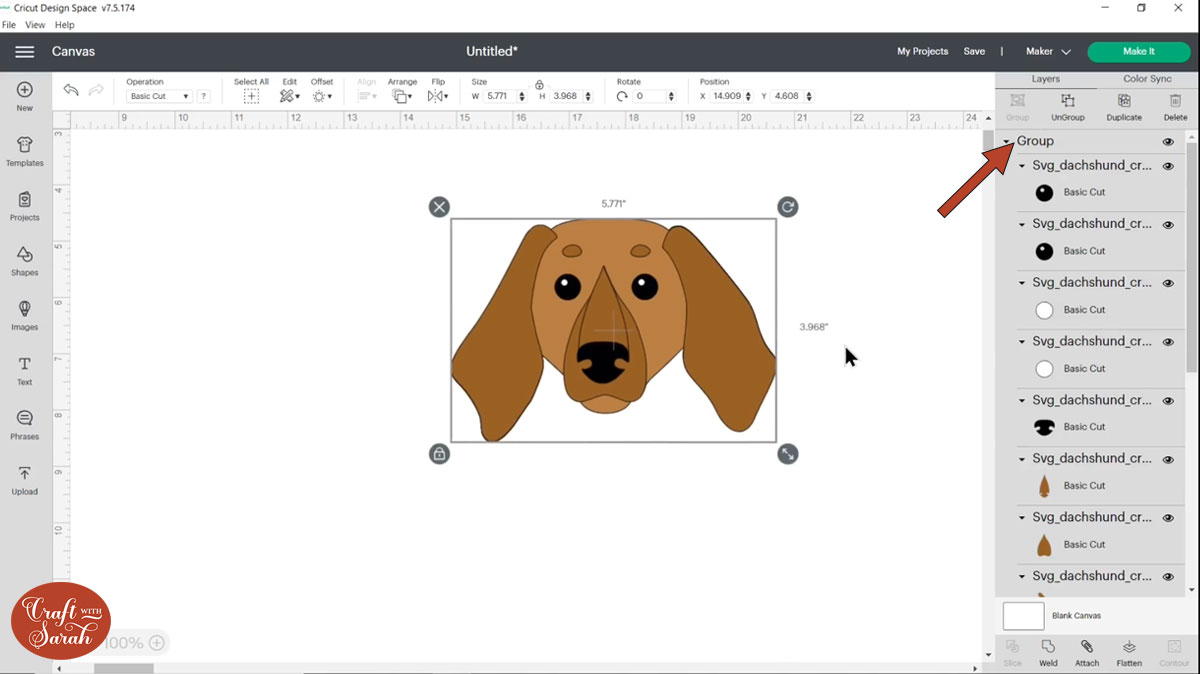
Now we need to put the two heads together so drag a box around both of them and go “Align” and “Center” to perfectly put the dog head with all the layers on top of the single layer that we just filled in.
Click on the main head group, click Ungroup to separate the layers again and then drag a box around them all again (including the filled in duplicate layer) and group them.
Step 4) Add the head onto the body
Now we’re ready to put the head onto the egg.
It can be easier to zoom in using the buttons on the bottom-left of the screen to see what you’re doing a little bit better.
Resize it and reposition the head Group until it looks right on the body.
DO NOT RESIZE THE EGG HOLDER LAYERS – Only resize the head.
Mine looks a little bit weird because i have the cream tummy piece. I don’t need that for this particular dog so i’m going to click that layer in the layers panel and press delete to get rid of it.
This is looking much more natural because we don’t have that line where it’s going thinner around the tummy.
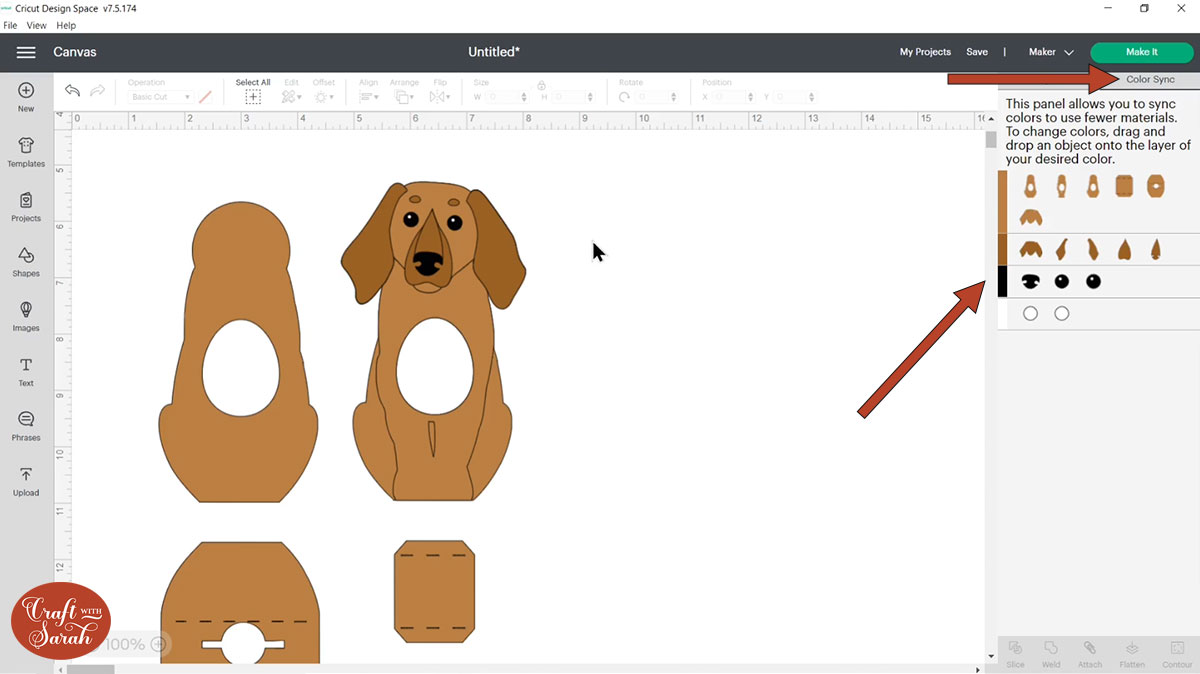
That’s looking good for the positioning, but the body is all the wrong color so we need to fix that.
Go to “Color Sync” at the top-right of the screen.
This splits everything out by color so now we can see that we need to change the body colors to match the rest of the dog. Drag-and-drop the layers around to match the colours of the head and body so that they are the same shades.
Don’t worry too much about getting the head position absolutely perfect in Design Space because when you cut it out it will be a separate piece anyway, but as long as you’re happy with the size that’s the important thing because obviously you can’t change that once you’ve cut it out.
Save your file at then click “Make It” and follow the on-screen instructions to cut out the design from cardstock.
Step 5) Stick the design together
The custom designs are stuck together very similarly to the premade cat and dog designs.
The only difference is how we attach the head.
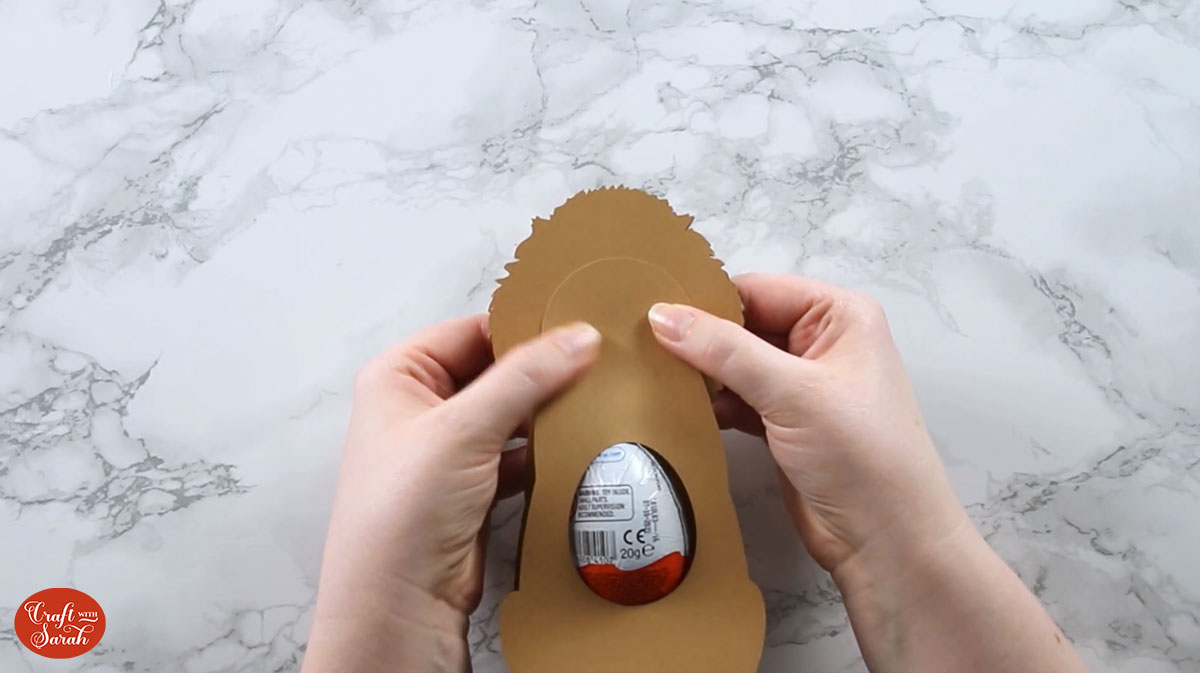
First, stick the first leg piece on, then add foam squares to the top “circle” piece of the egg holder.
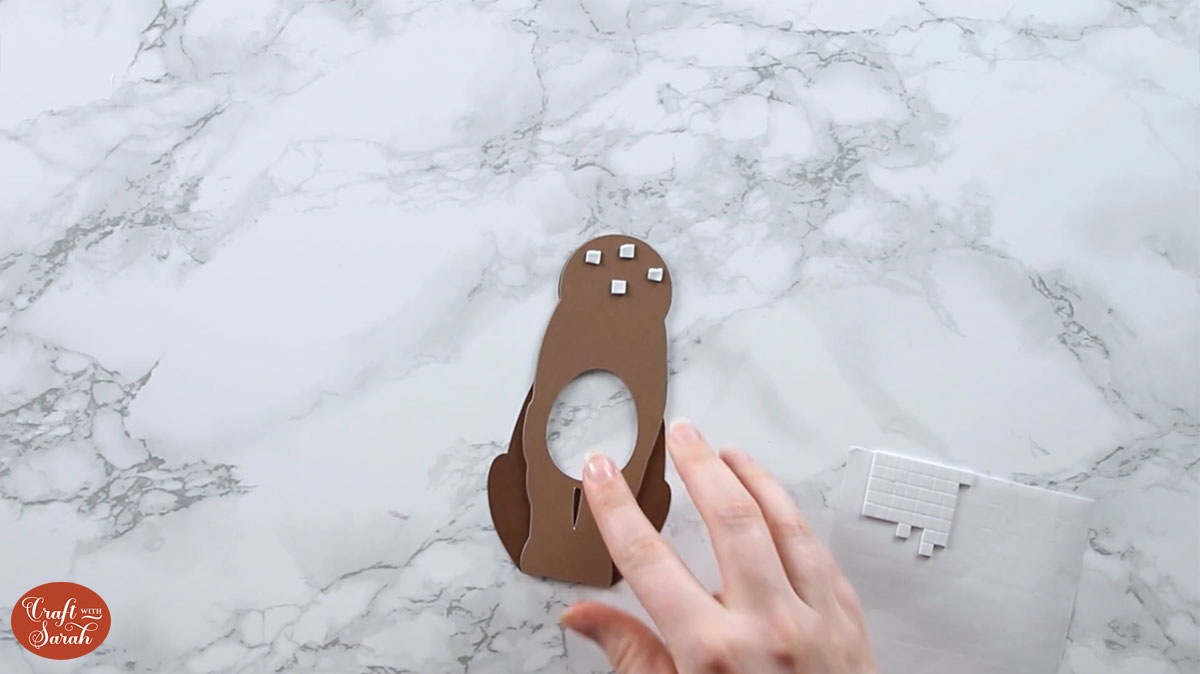
Stick on the bottom layer of the head, then continue in the same way as with the premade designs.
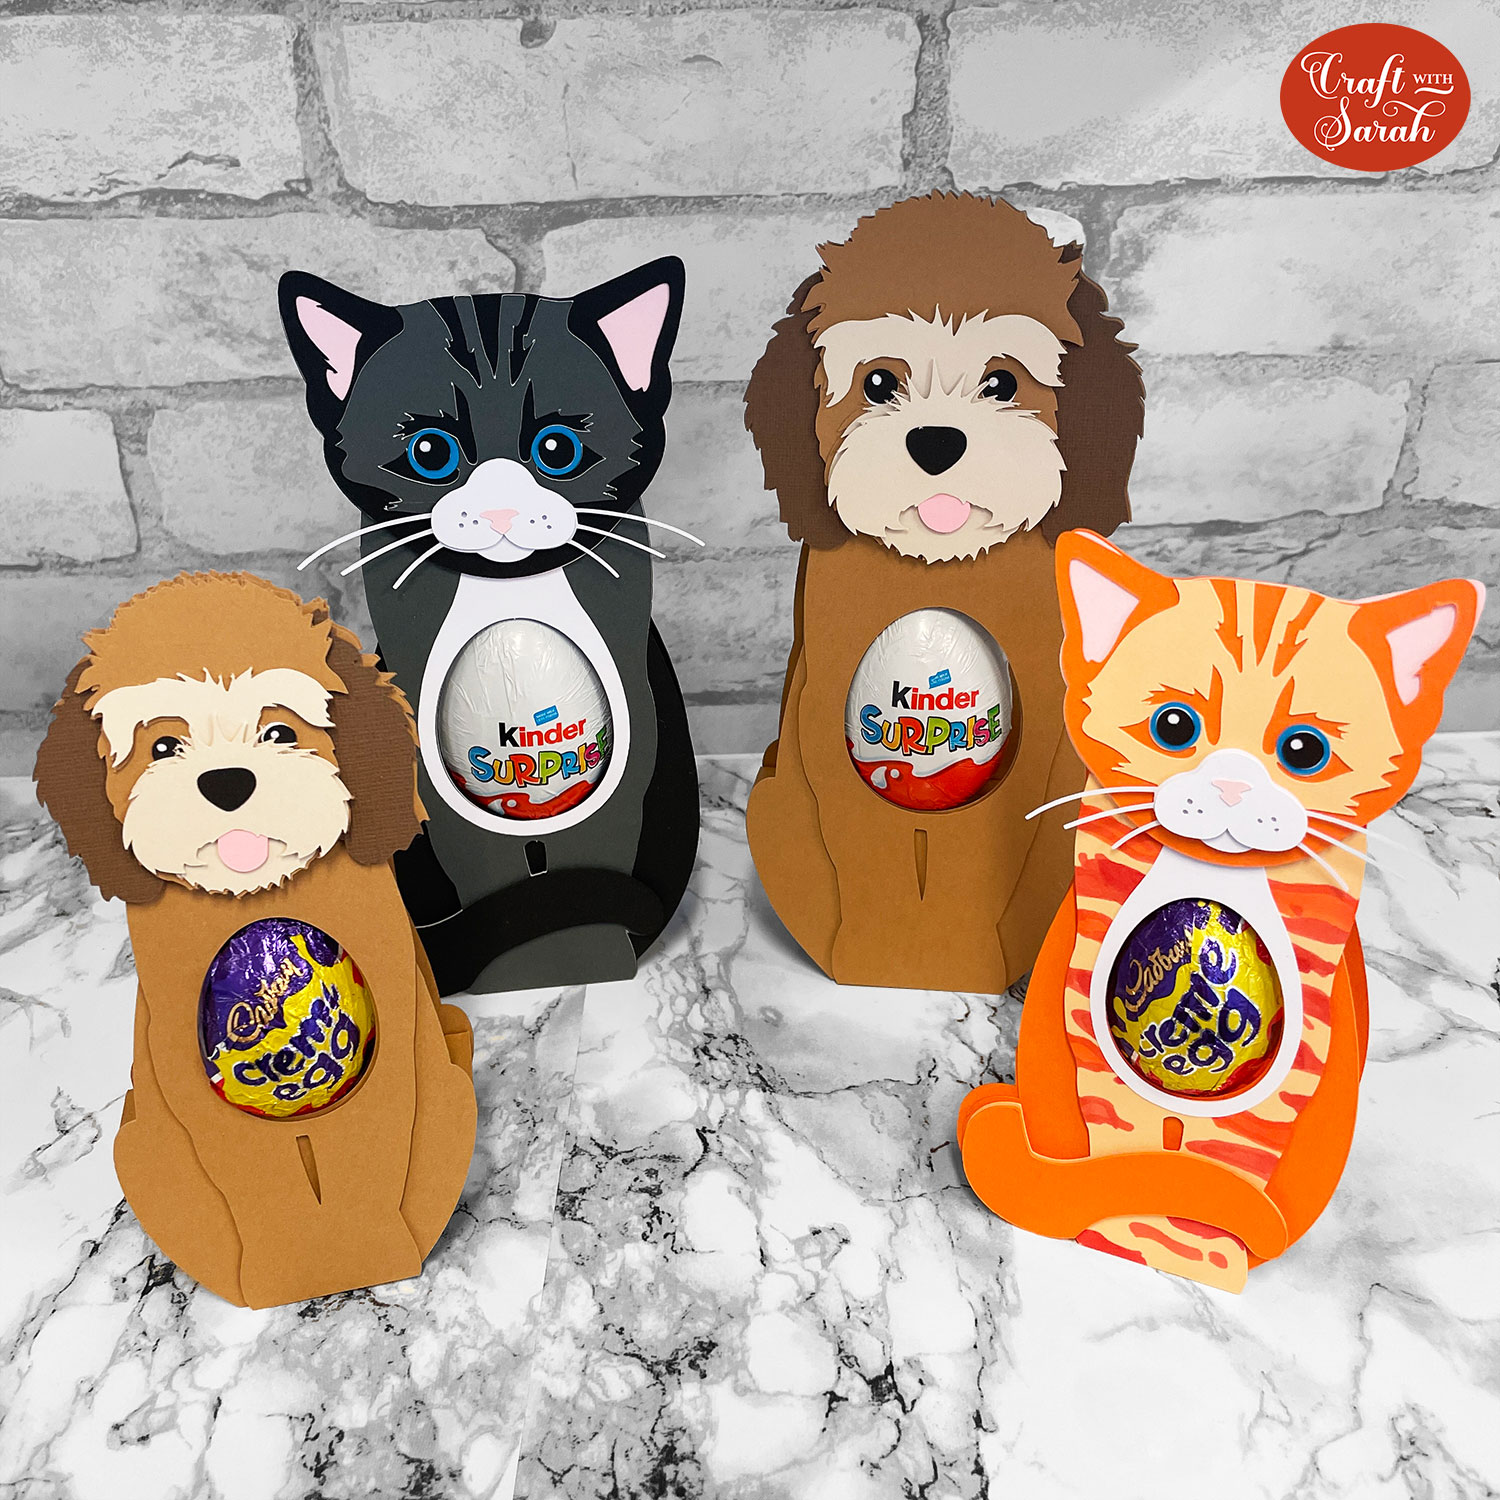
Here are a few other examples of how you can customize the dog egg holder:
And this is what they look like made up:

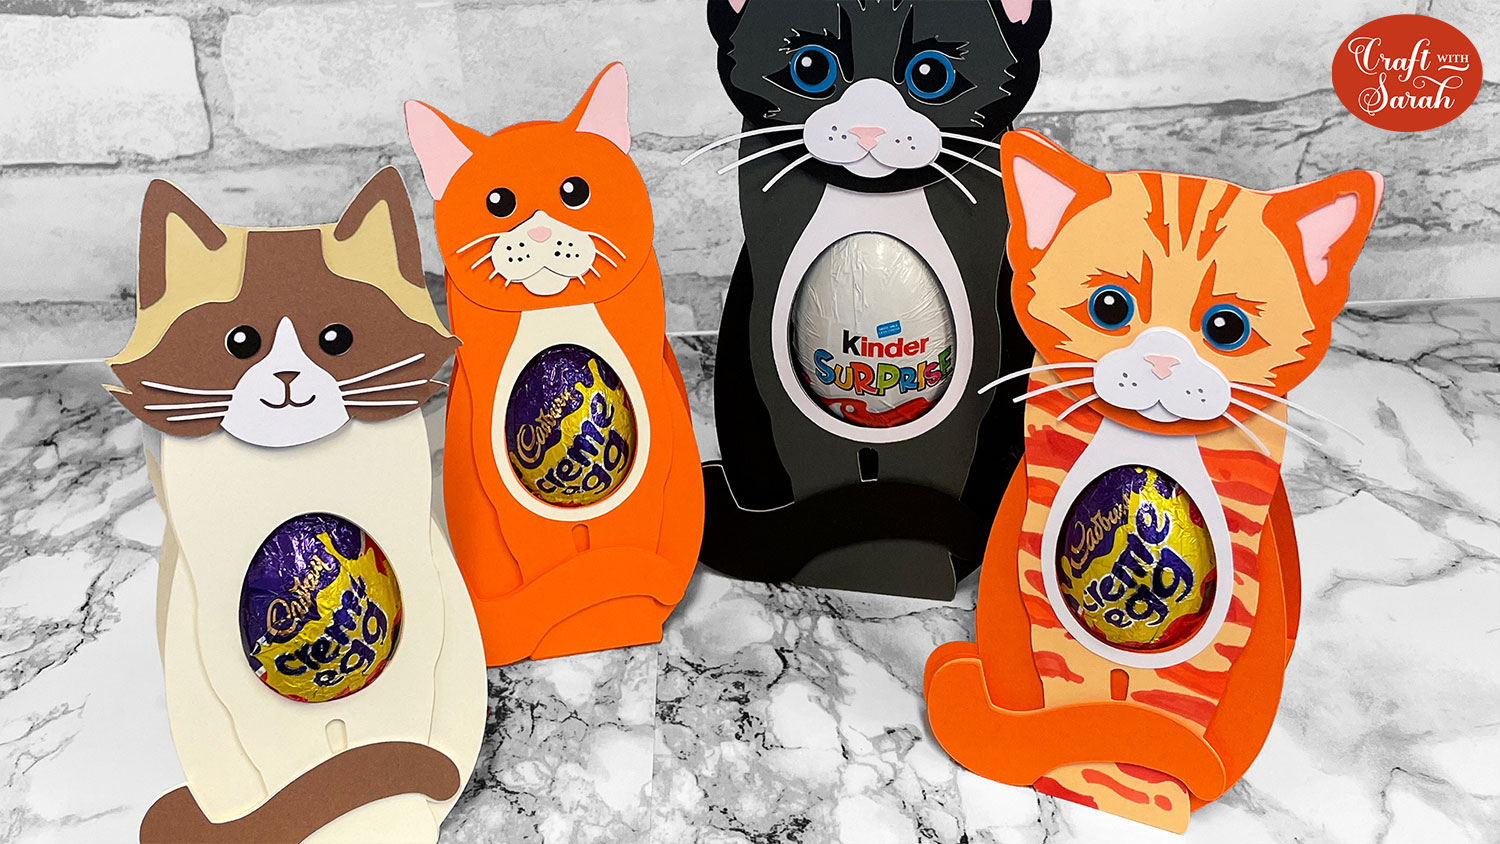
Here are a couple of other cat examples:
This is what they look like made up:
Easter Cricut papercraft projects
I hope that you enjoy these free egg holder cut files!
If you’d like to make even more Cricut crafts for Easter, here are some beautiful layered designs to choose from:
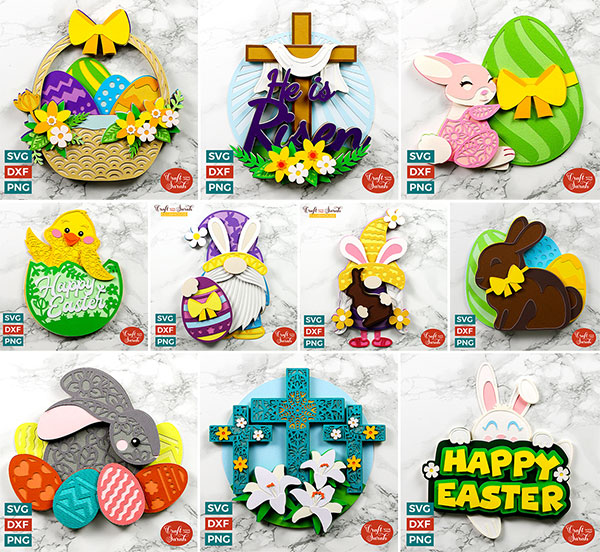
These designs are available in my SVG shop.
Love layered SVGs? Check out my other free layered SVG files
Happy crafting,
Sarah x

