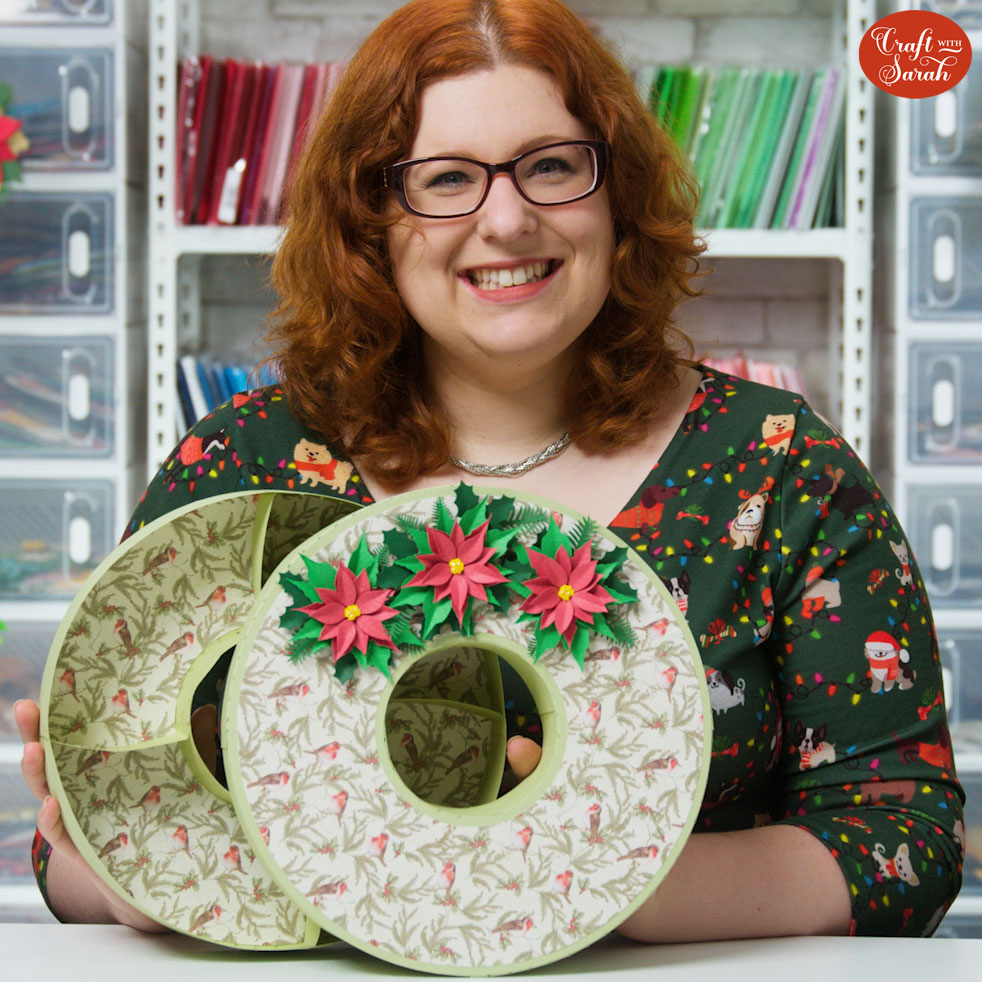
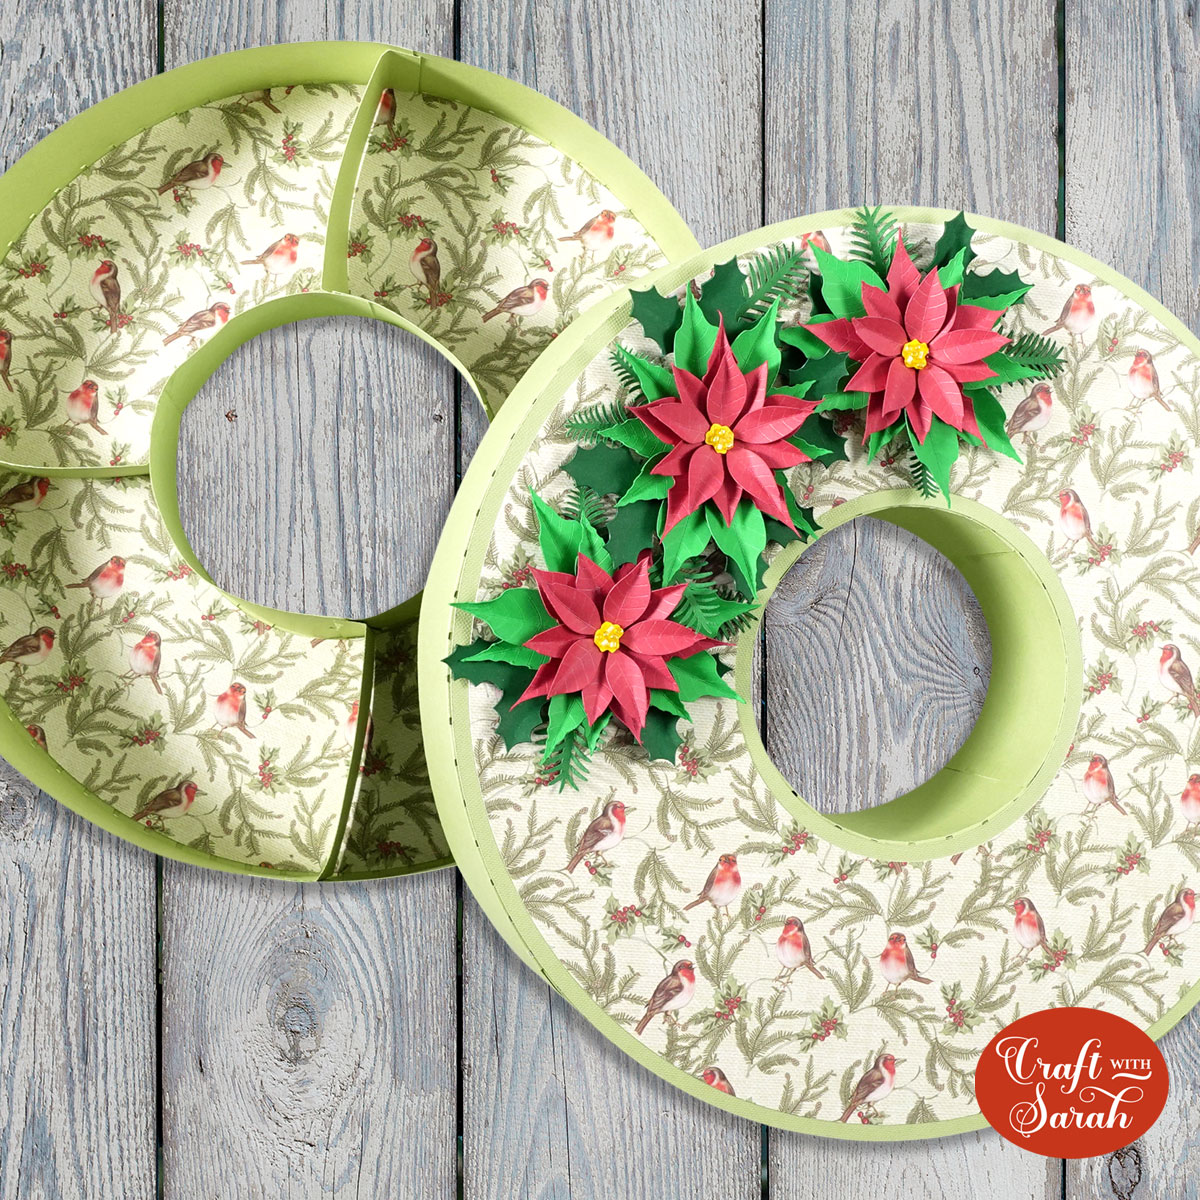
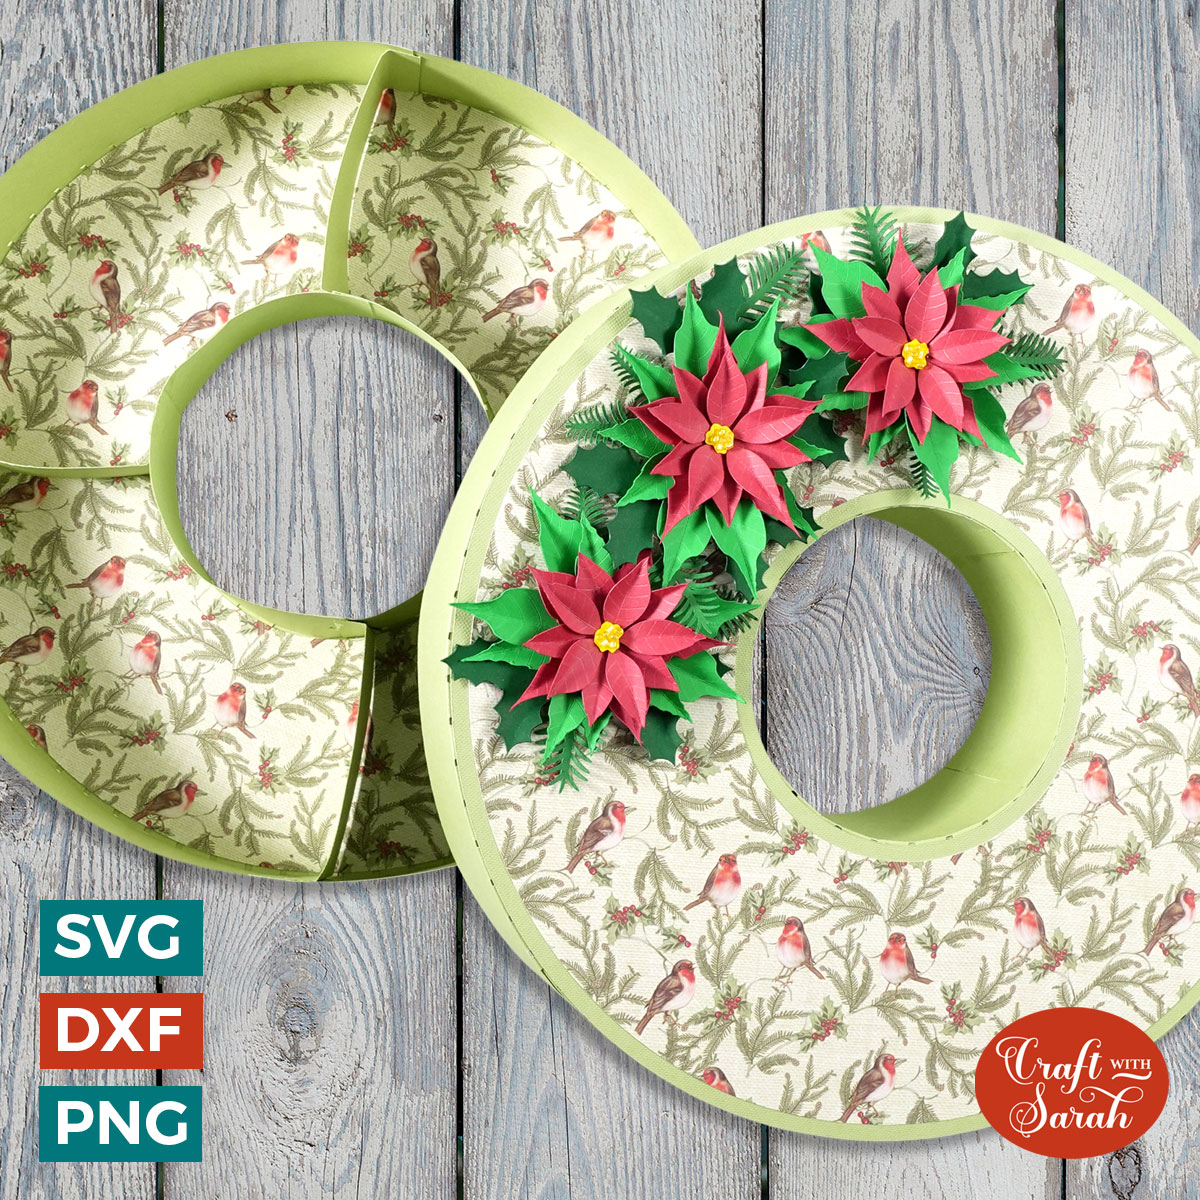
CCC Day 06 ❄️ Giant Papercraft Wreath Treat Box
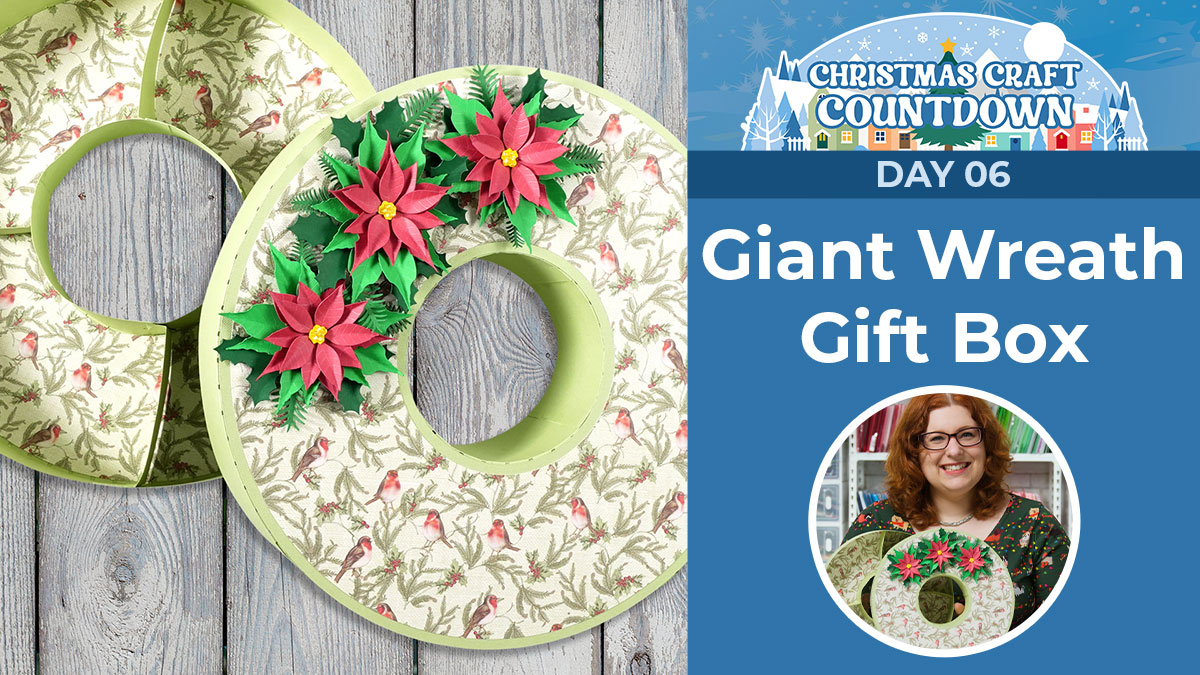
Make a gift box with a difference with this enormous wreath shaped papercraft.
The box comes with optional segments so that you can separate out the bottom into sections to add different treats into it.
Decorate the top with gorgeous paper poinsettia flowers for even more Christmas cheer!
This Project was part of the Christmas Craft Countdown 2022
Materials supply list
Here is a list of the materials that I used to make this project.
Please note that some of the links included in this article are affiliate links, which means that if you click through and make a purchase I may receive a commission (at no additional cost to you). You can read my full disclosure at the bottom of the page.
- Cricut machine
- Light blue Cricut cutting mat
- Cricut scoring wheel or scoring stylus
- Coloured Card for the poinsettias
- 6 sheets of green 12×12 inch card
- 2 sheets of 12×12 inch patterned paper
- Collall All Purpose Glue
- Needle Tip Applicator Bottle
- 3D foam pads
- Glue gun and glue sticks
- Gold or yellow seed beads (optional)
- Paperclips (optional but helpful for holding parts in place while the glue dries)
Video tutorial
Watch the video below to see how to make this project. Keep scrolling for a written tutorial.
Written tutorial (with photos!)
Here’s how to make your very own Christmas gift box using a Cricut machine!
Step 1) Download the cutting file(s) & unzip the downloaded folder
Purchase the File(s)
This cut file is available as part of the Instant Access Bundle.
Or, purchase this design individually here
Before you upload the SVG to Design Space, you need to unzip the download folder that it comes in.
- How to unzip a folder on Windows computer
- How to unzip a folder on a Mac
- How to unzip a folder on an iPad/iPhone
- How to unzip a folder on an Android device
Step 2) Upload the SVG file into Design Space
Open up Cricut Design Space and start a new Project.
Click “Upload” and then find your unzipped version of the downloaded files for this project.

Go into the “svg file” subfolder and select the file called svg-wreath-box-craftwithsarah.svg
This is how it should look after you have uploaded the file:
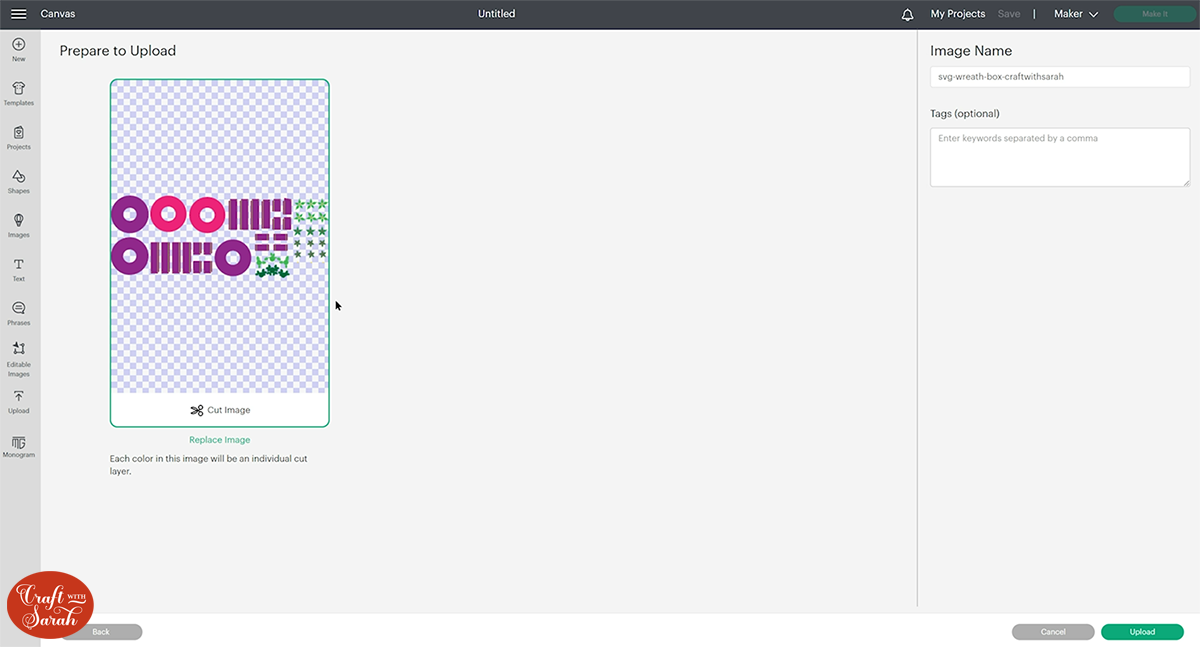
Make sure you upload the file which starts svg- in the filename!!
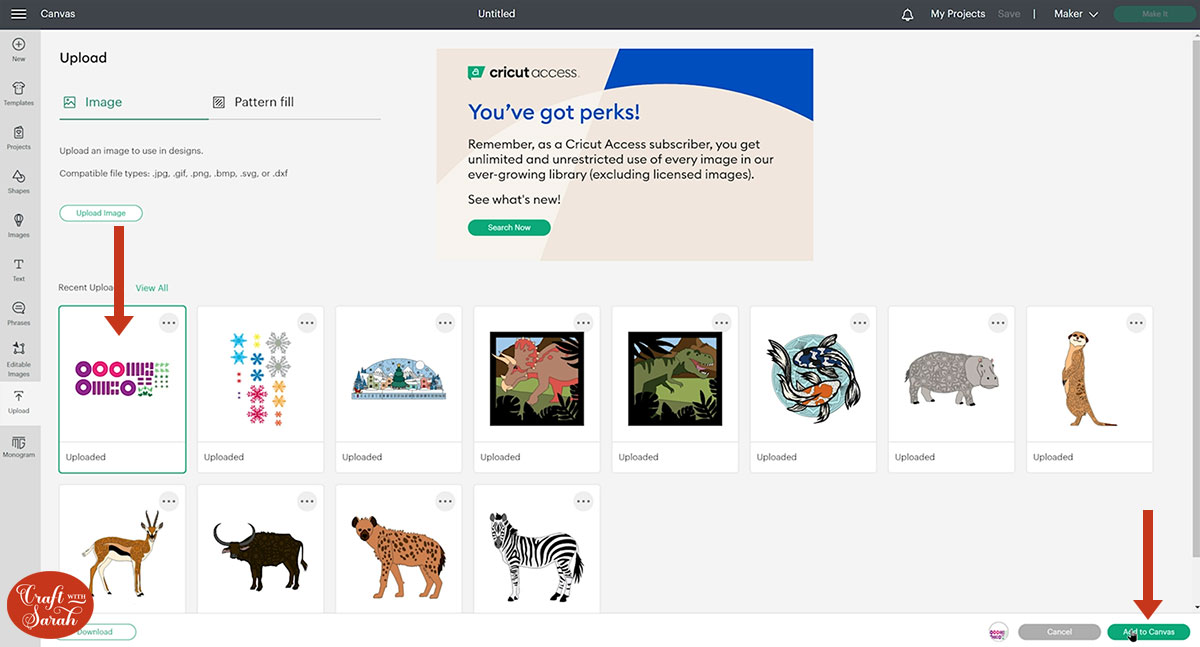
After uploading, the design will show in your “Recently Uploaded Images”.
Click on it and then press “Add to Canvas” to put it onto your Project.
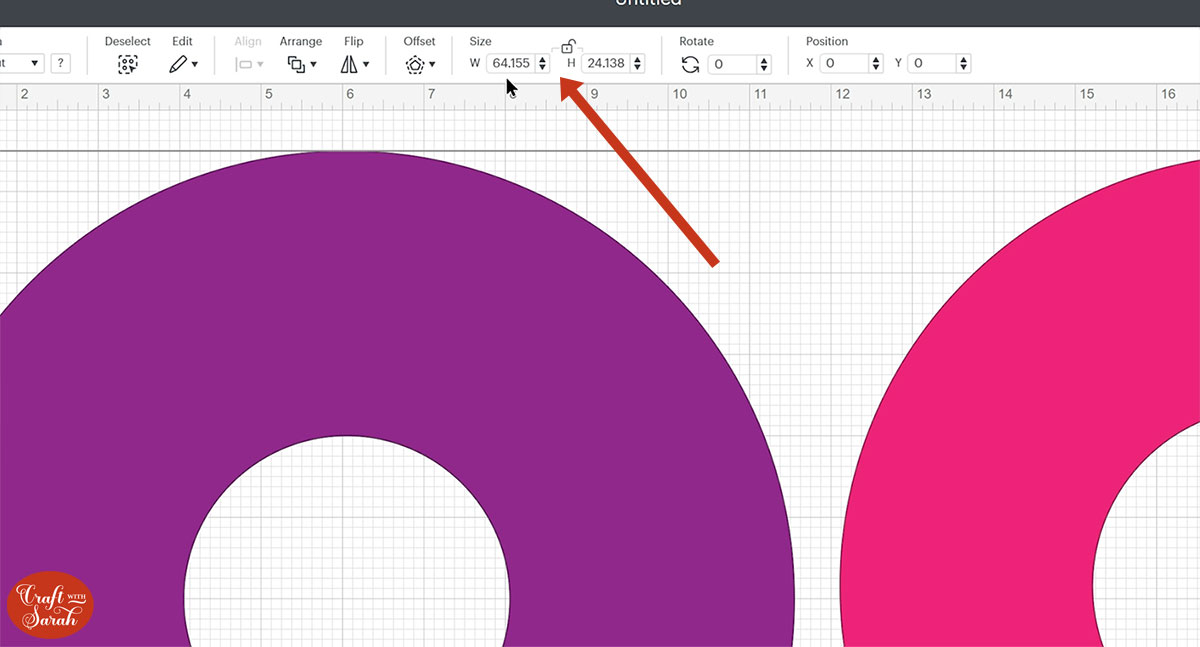
Check the design is 64.155 inches wide and 21.138 inches tall.
This makes a finished wreath box that’s approximately 11.5 inches wide.
If you’d like to make a smaller box, go into “Shapes” and choose a circle.

Make the circle the size that you want to cut the wreath box.
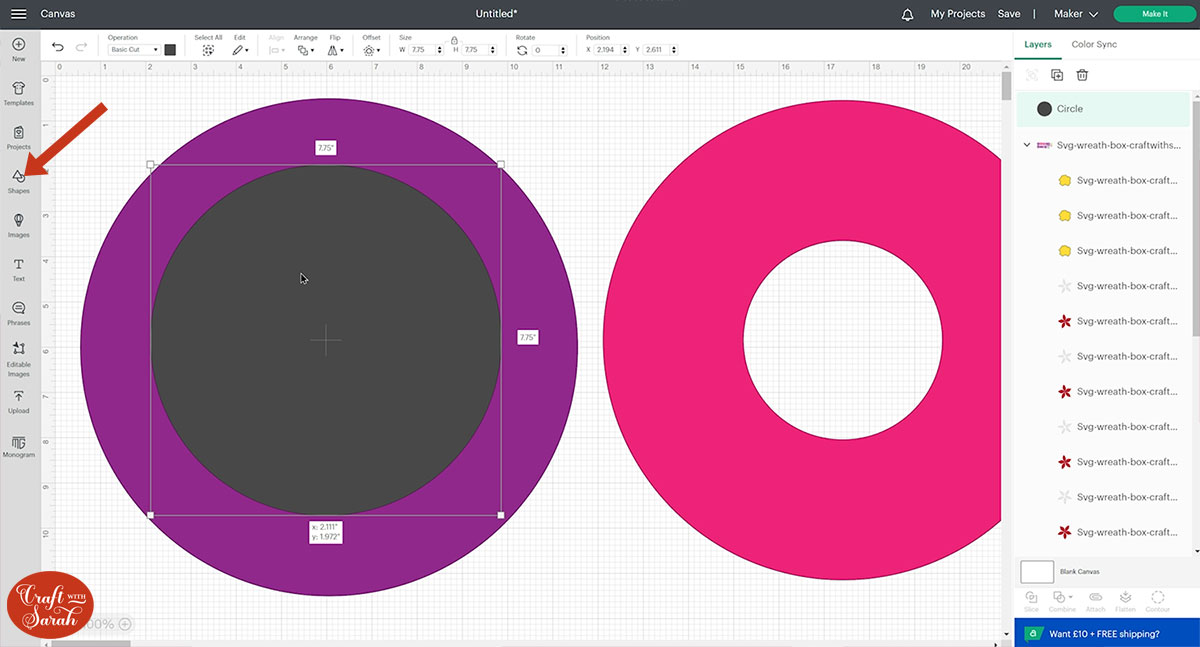
Draw the group of all the wreath box layers until the first purple circle is the same size as the one you just drew.
Then, delete the circle you drew so you just have the original group of wreath box layers remaining.
Step 3) Format the score lines
There are a few tasks that you must do in Design Space before cutting the wreath box.
We need to format all of the score lines and then “Attach” them to their relevant layers.
First, click on the design and press “Ungroup” to separate out the layers.

Look down the layers panel for the layers that appear as single lines (or you might not be able to see the picture next to the layer at all).
Click the first one that you find.
Press “Shift” on your mouse and select the next one. This allows you to select multiple layers at once.
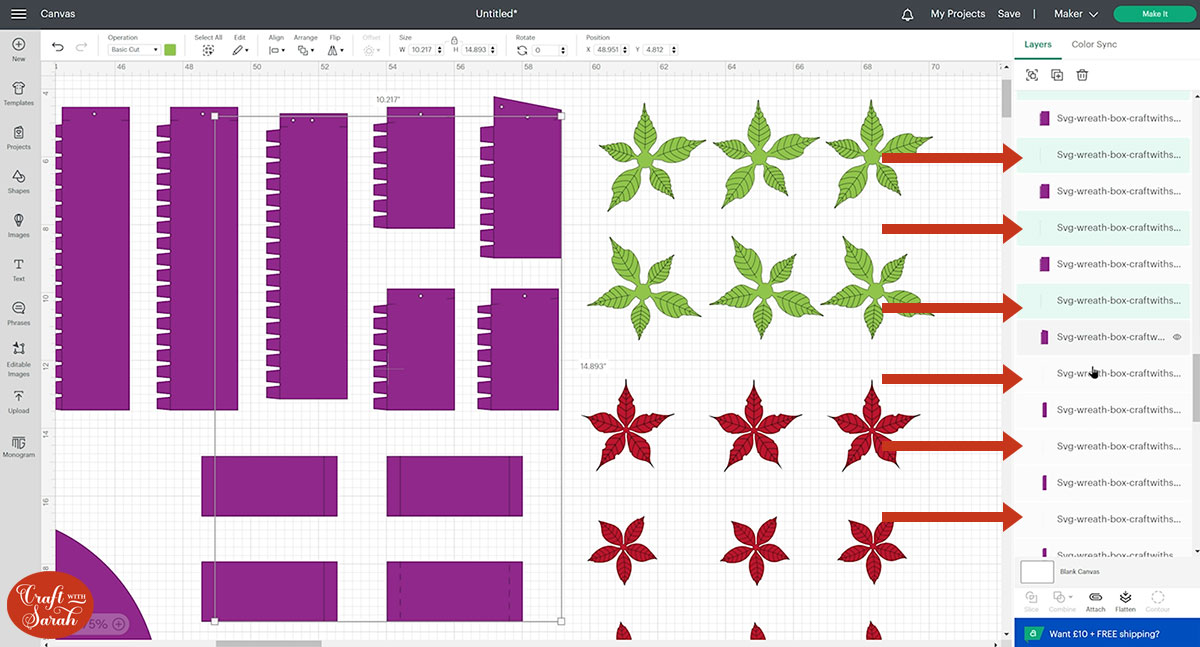
Keep going until all of them are selected.
Under the “Operations” dropdown, select “Score”. This will turn all the layers you have selected into Score lines.
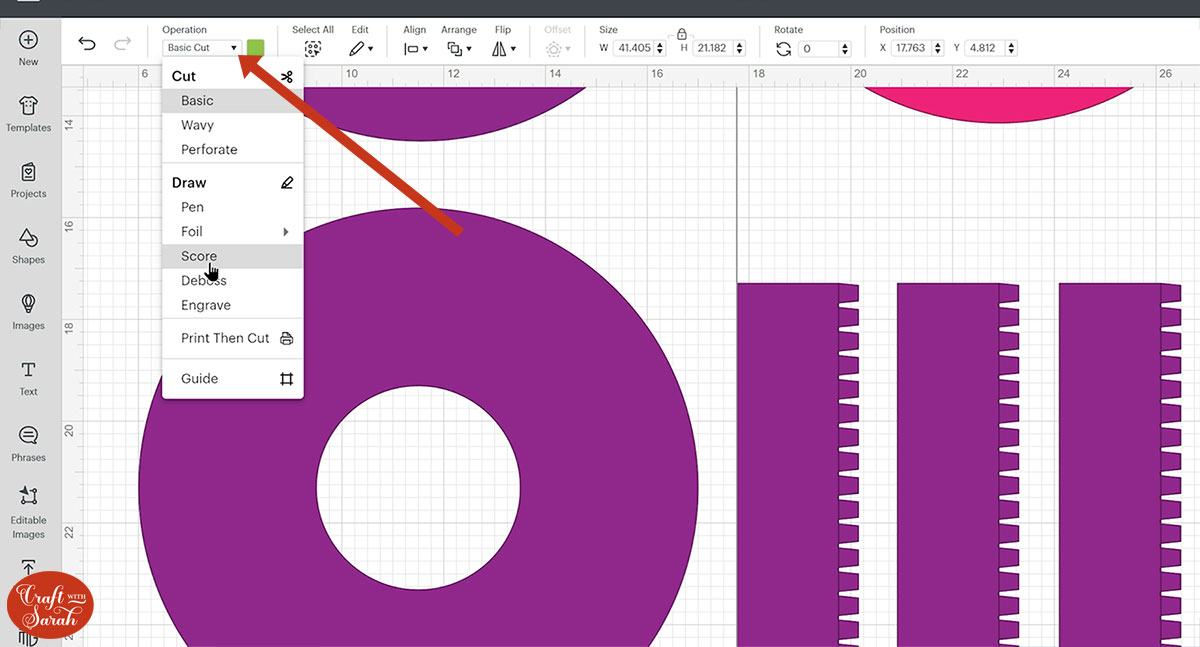
You know if it has worked because the lines turn from solid to dashed on the screen.
Now we need to “Attach” each piece.
Attach is what tells the Cricut that we want to do the score lines on the corresponding pieces.
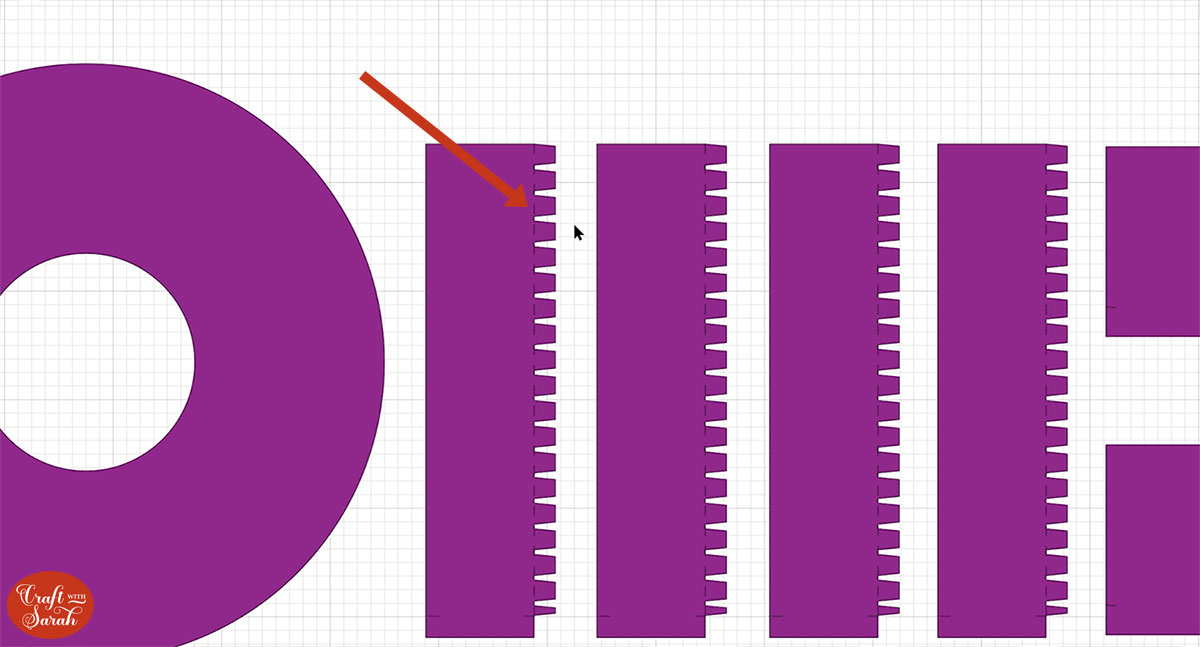
Drag a box that just touches one coloured layer and the score line that goes on top.

Press “Attach” to join them together.

Do this for all of the pieces that have score lines on them, including the flower petals and leaves. It does take a little while as there are lots to do!
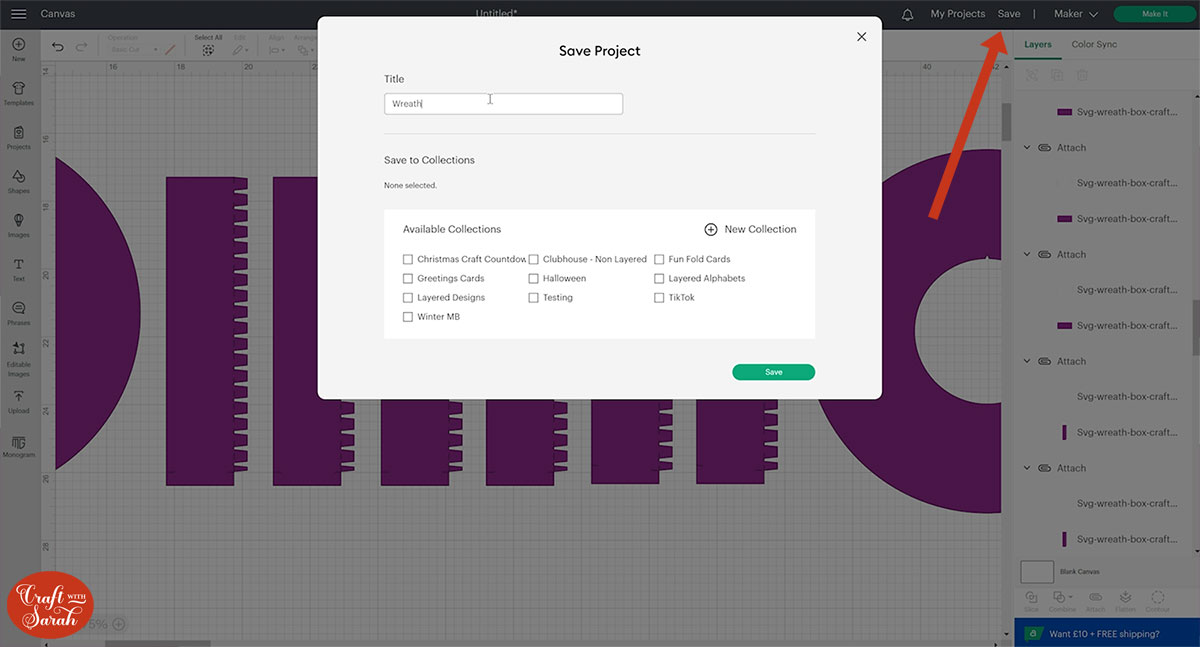
When finished, save your Project so that if you ever cut this again, you don’t have to repeat all the formatting!
Step 4) Cut out all the layers
When you’re happy with how the project is looking in Design Space, click “Make It” and follow the instructions on-screen to cut out all the layers.
This works best when your box colour (green) card is the SAME on both sides.
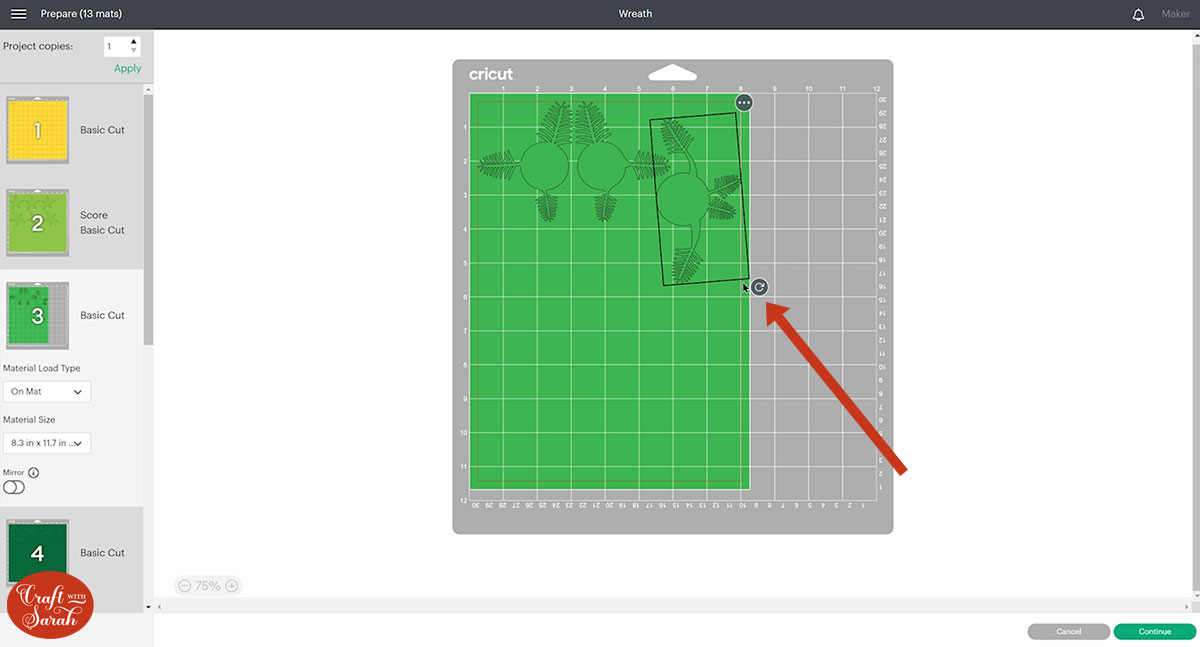
To change the paper size, go into the dropdowns over on the left side of the screen and choose the paper size that you want to use. You need to change it for every single colour.
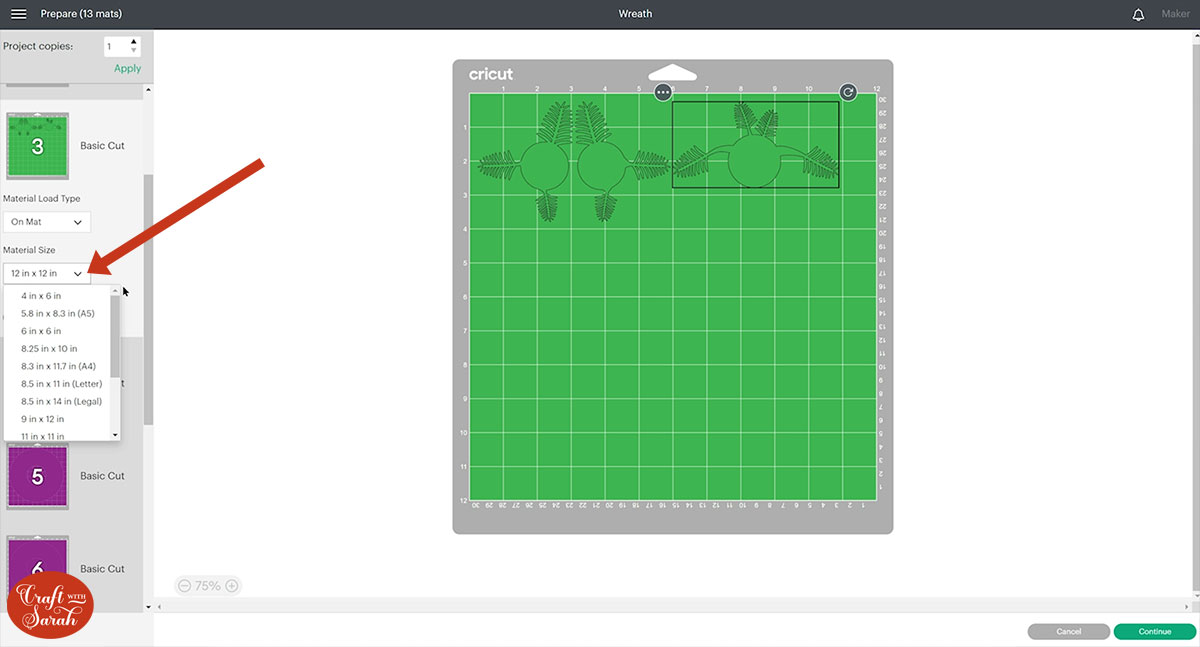
To save space on your cardstock, you can move things around by clicking and dragging. Make sure when you’re moving things about that nothing overlaps because otherwise, it won’t cut out properly.
TIP: New to cutting cardstock with a Cricut? Check out this in-depth tutorial which goes through every step of the process, including tips for getting the best quality cuts from your Cricut.
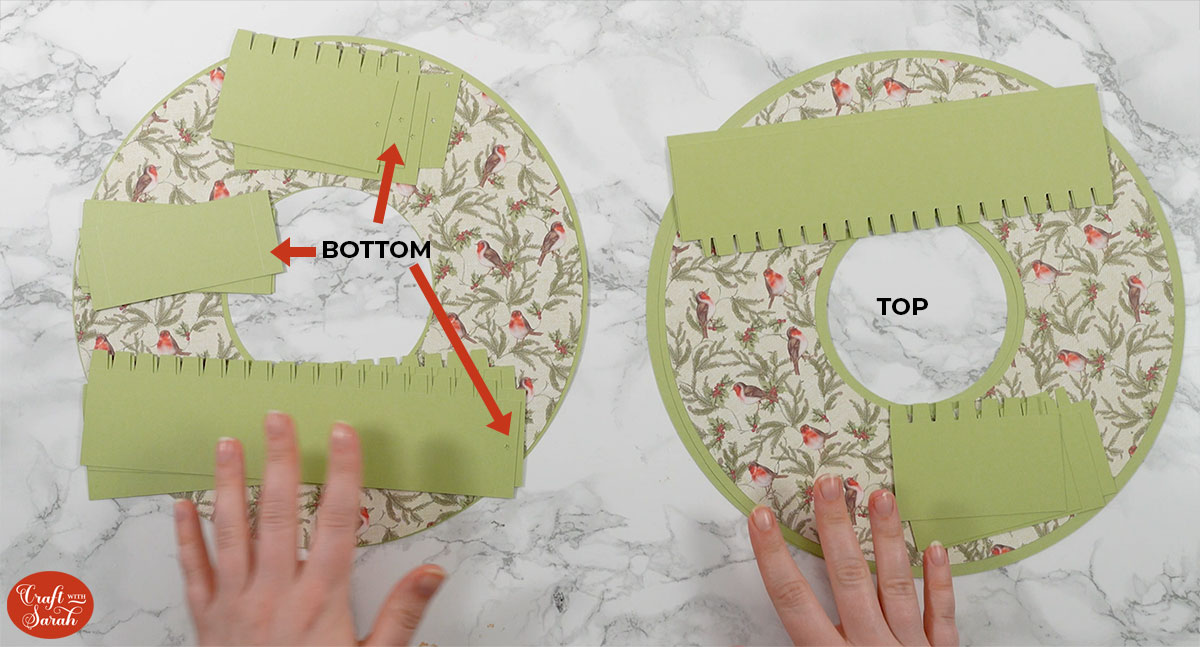
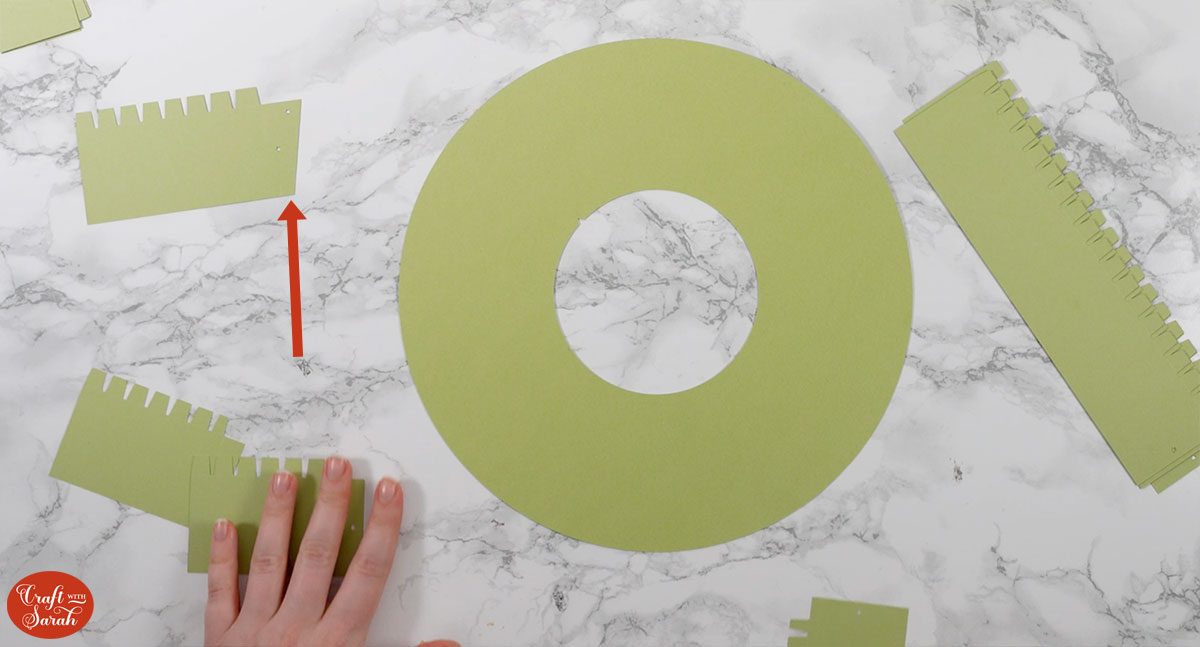
Step 5) Organise the cut pieces
Get your cut pieces in two piles: one for the top of the box and one for the bottom.
The smaller green circle (with the tiny triangle taken out of the middle) and the edge pieces with little star cutouts are for the BOTTOM of the box.
The larger circles and the edge pieces WITHOUT the star cutouts are for the TOP of the box.
The little rectangles are for the BOTTOM of the box (they are the dividers).
Step 6) Glue the top of the box together
The first part that we’ll be sticking together is the top (lid) of the box.
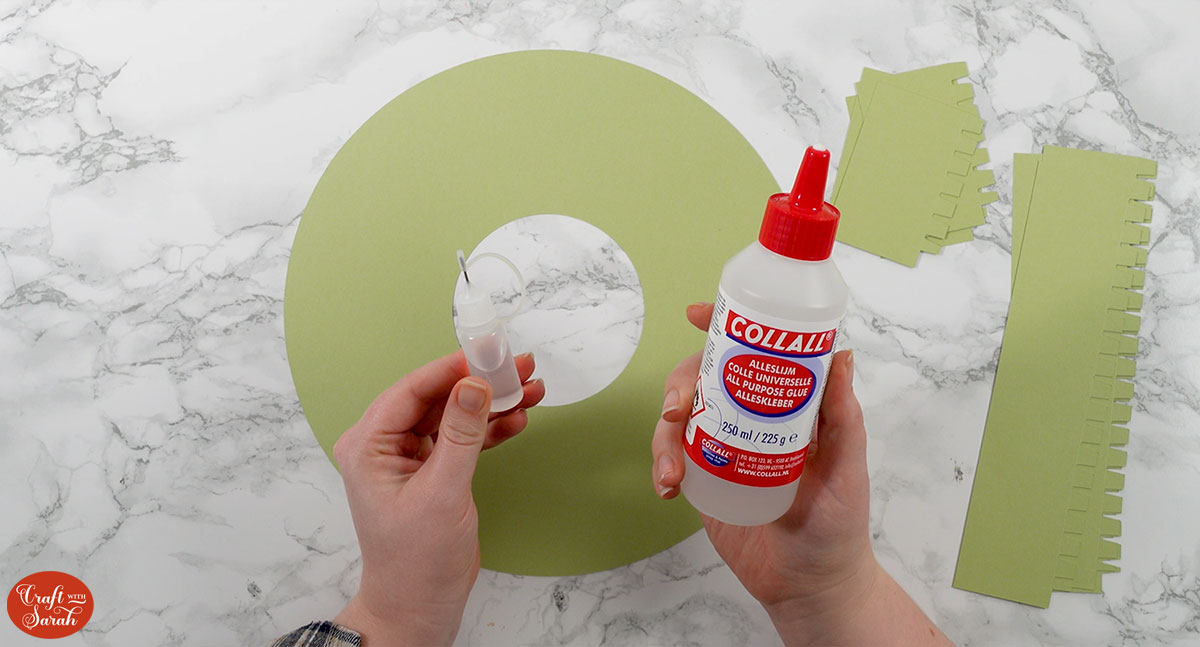
My favourite glue to use on papercraft projects is Collall All Purpose Glue.
It’s SO good because it doesn’t “warp” or bend the cardstock like some glues do. You can use as much of it as you want and the card stays perfect – and it dries perfectly clear too!
To make it even easier to apply glue to layered card projects, I highly recommend getting some of these needle tip applicator bottles to put the glue into.
The nozzles are REALLY tiny which makes them perfect for putting glue in the pieces of cardstock that make up this design.
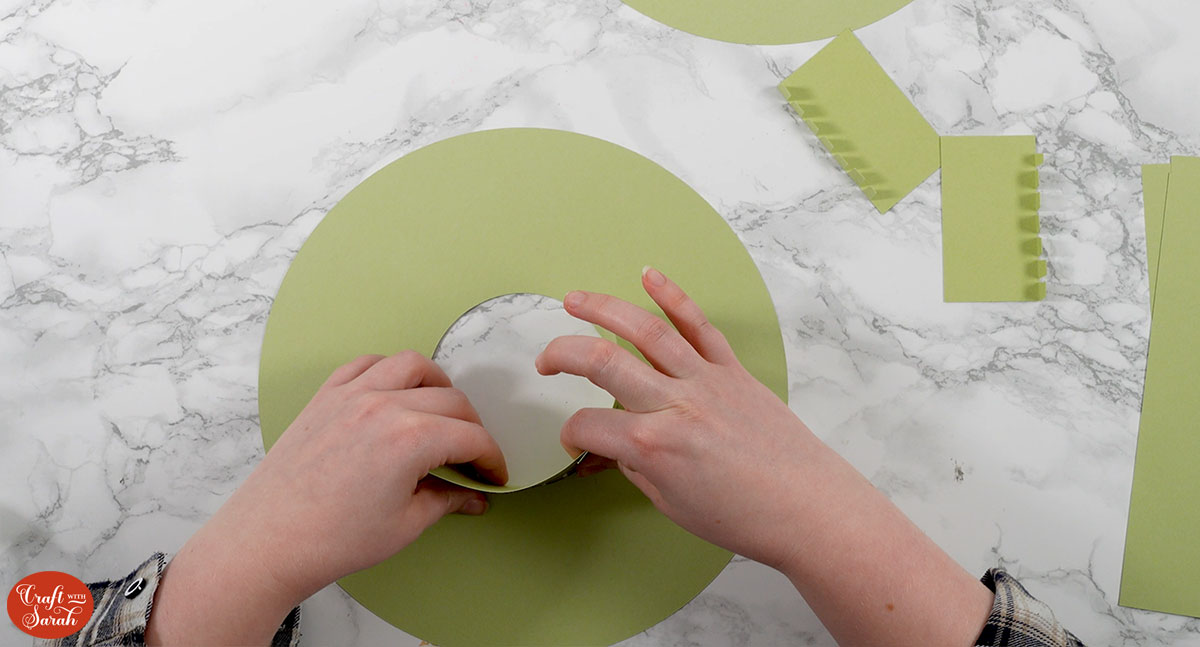
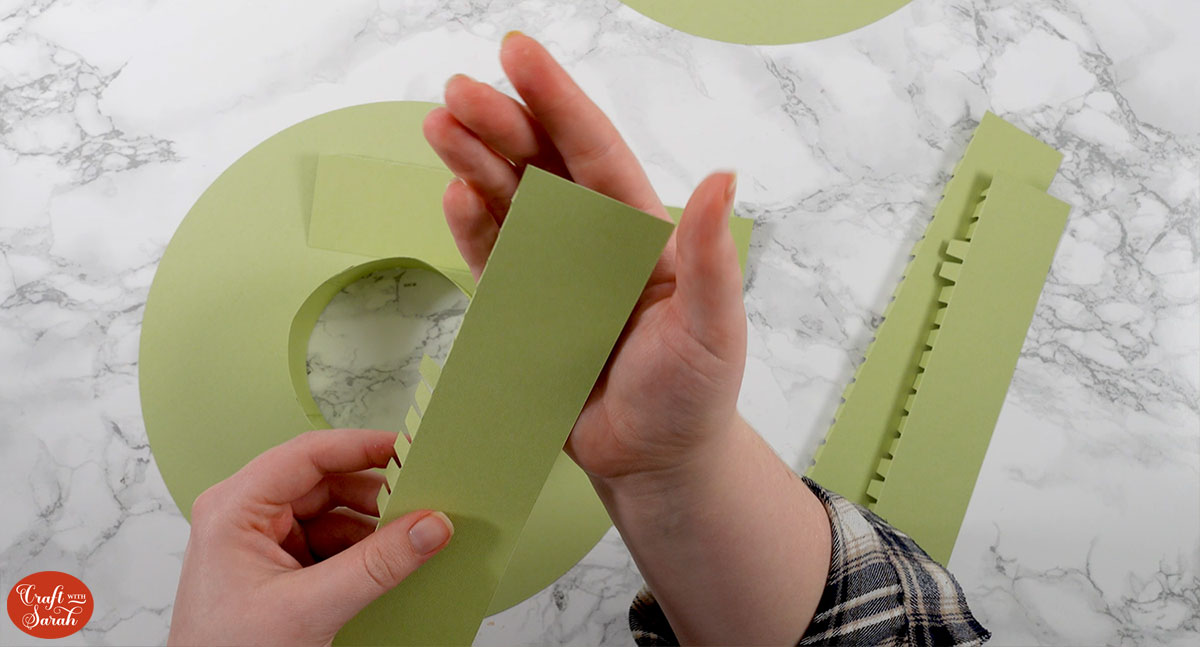
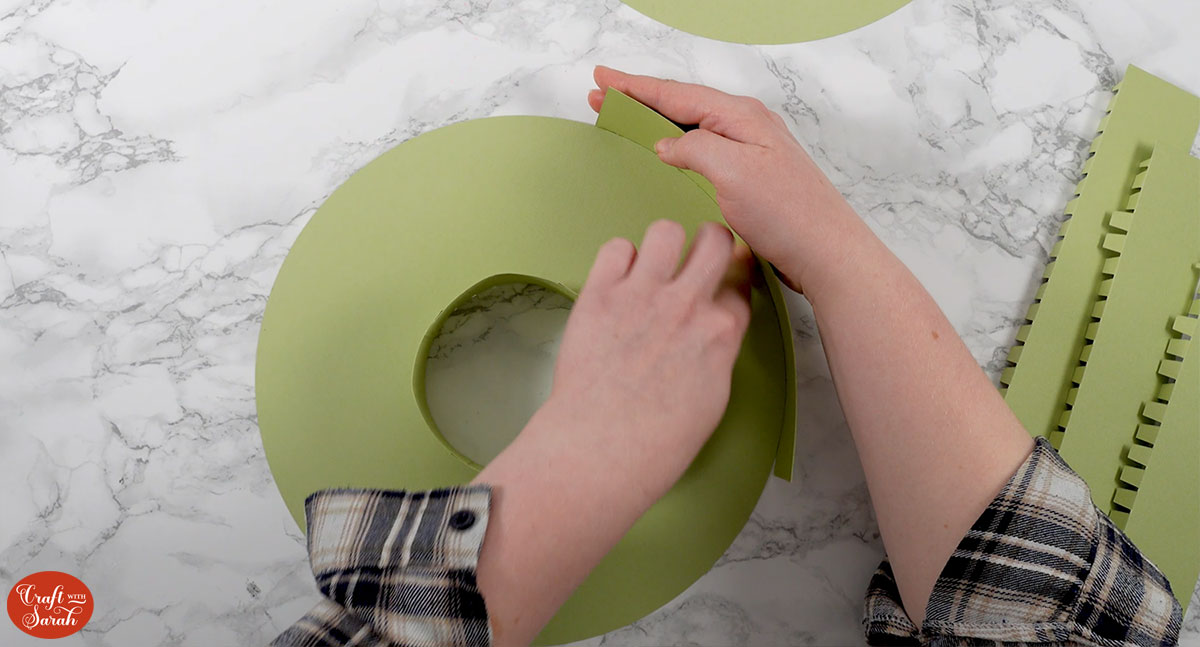
Select the smaller side pieces (remember, these are the ones WITHOUT the stars) and fold down the “crocodile teeth” tabs.
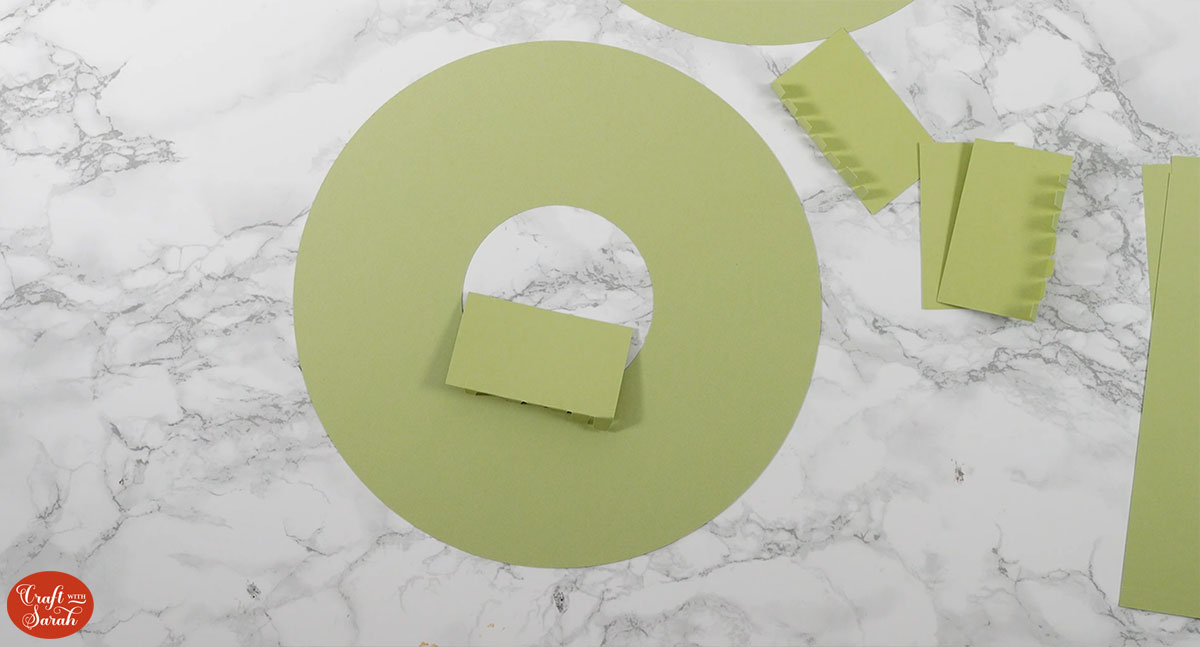
We’re going to be sticking these pieces so that the teeth tabs go on the top of the box. They will later be covered over by the other green circle so that they won’t be seen.
I found that the easiest way to do this was to add glue to the teeth tabs, feed them through the hole in the middle and then stick them like this:
It’s REALLY important to follow the curve of the circle EXACTLY, as close as you can, otherwise the lid may not fit over your box.
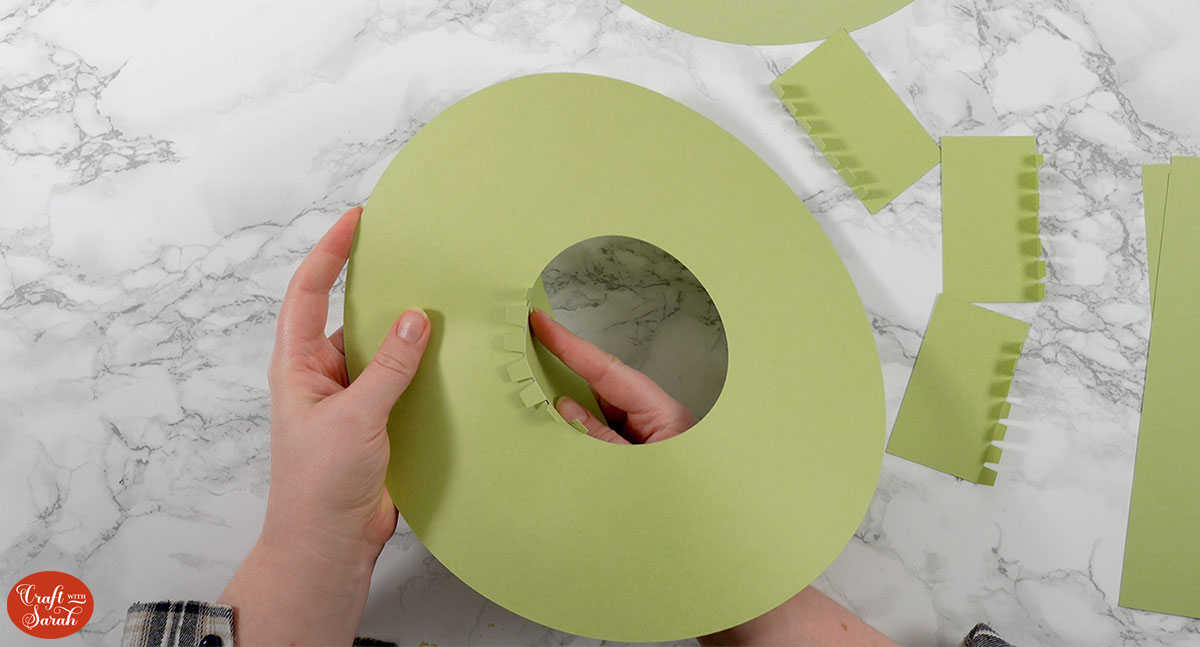
Add a little bit of glue down one side of the piece you have just stuck, and on the teeth tabs of the next piece.
Stick the next piece in to the middle. Hold the two side pieces together until the glue is dry. You could add a paperclip to hold it in place without having to use your fingers!
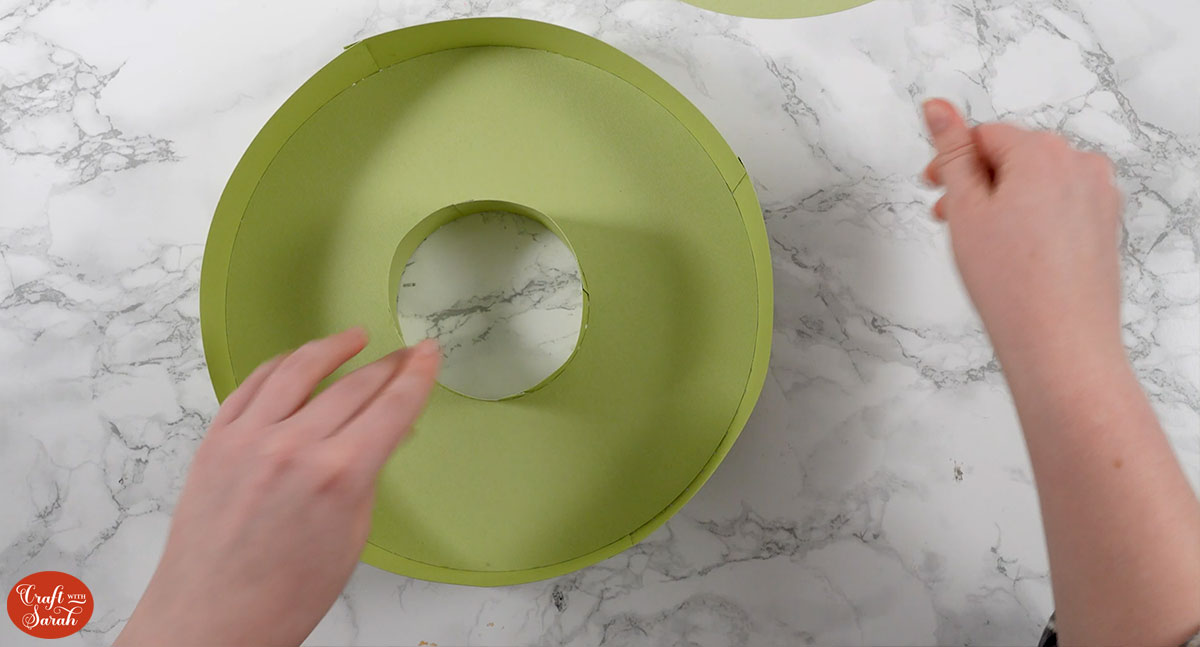
Repeat this until all four middle sides are glued into place.
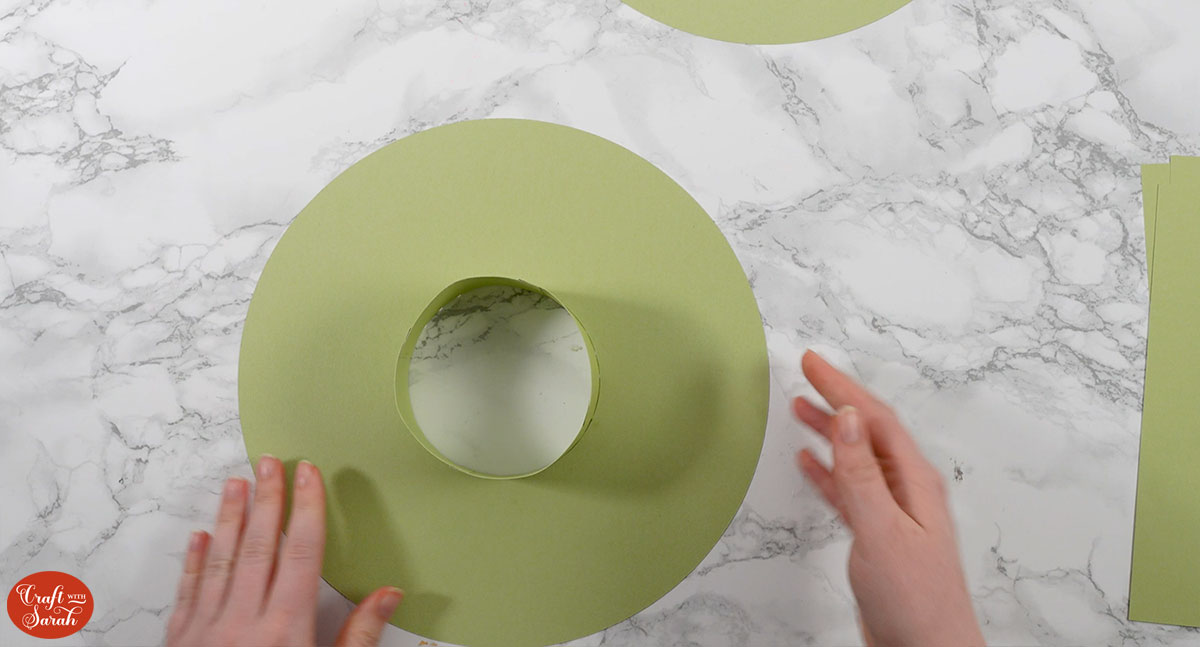
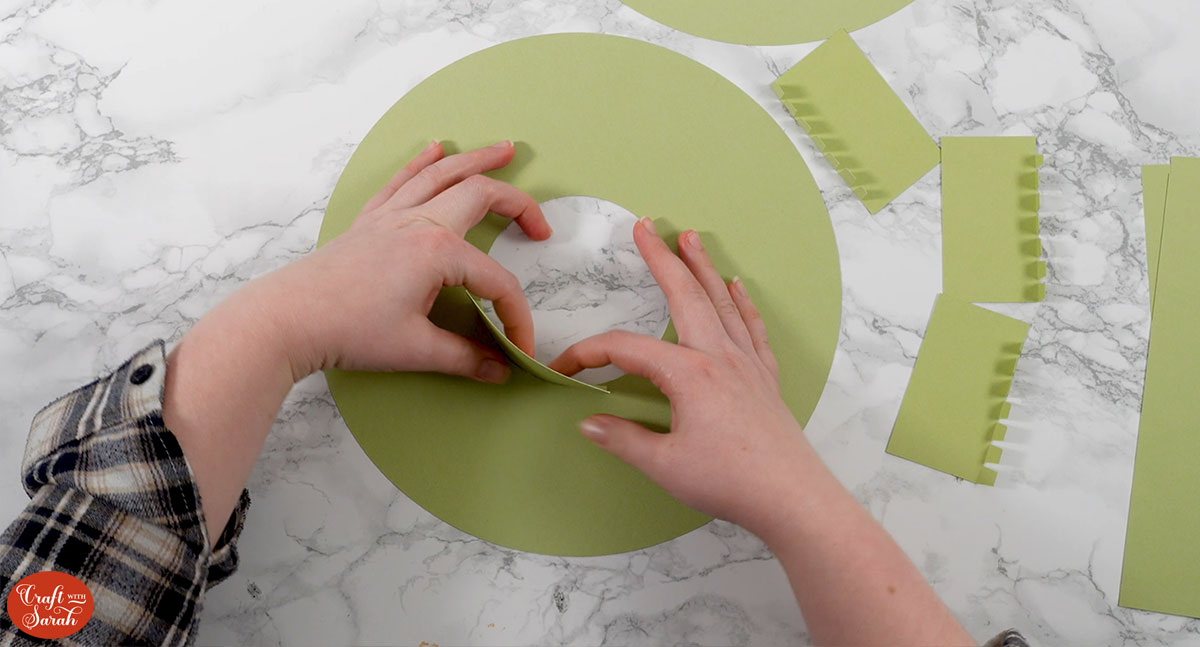
Here’s how it looks from the other side:
Next, fold down the crocodile teeth tabs on the four outside edges.
Do the same steps as we did in the middle.
Just like before, you MUST follow the curve of the circle EXACTLY, as close as you can, otherwise the lid may not fit over your box.
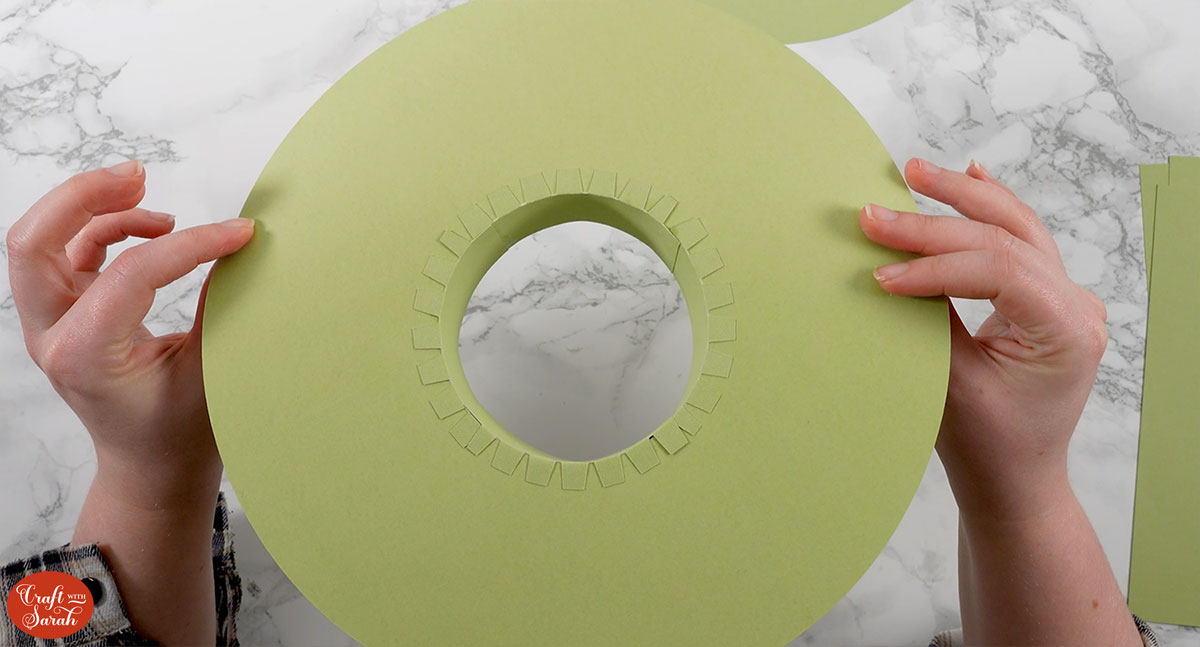
Keep going until all four sides are stuck.
Here’s how it looks from the top:
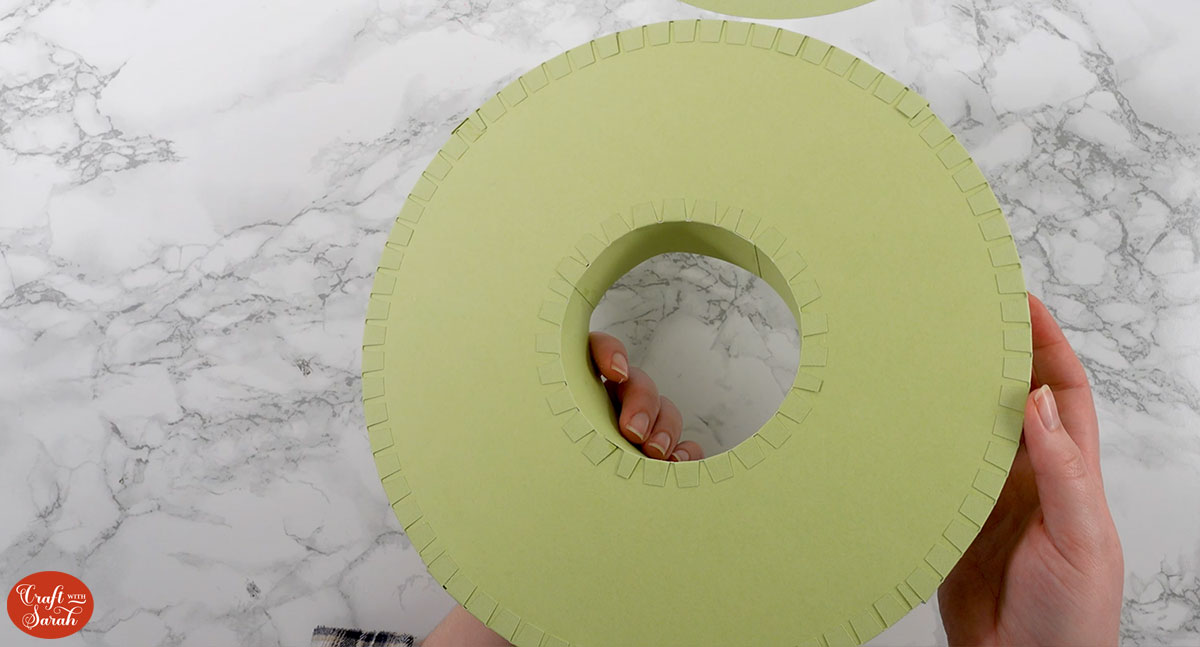
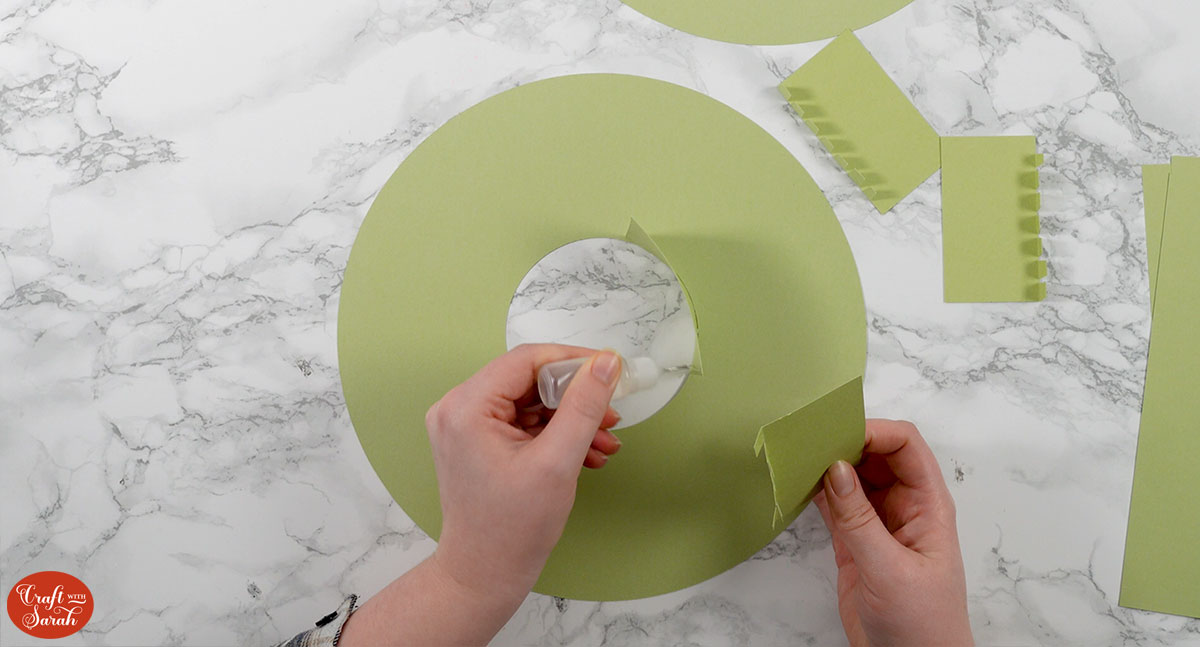
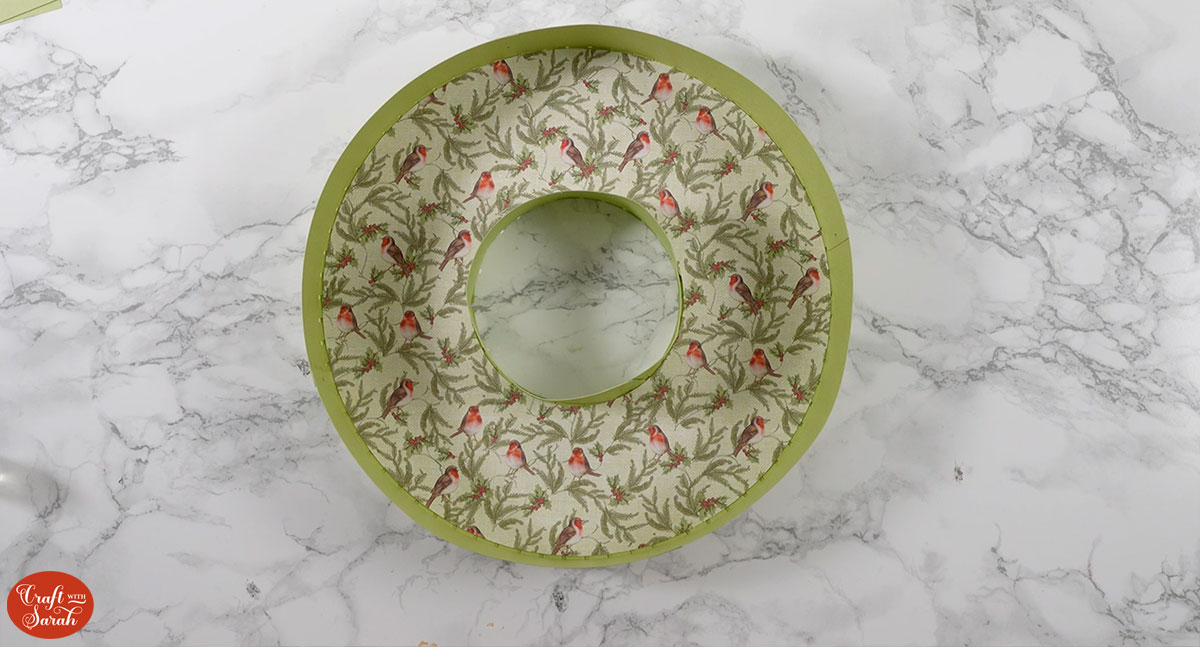
Glue the other large green circle to the top of the box, to cover all the crocodile teeth tabs.
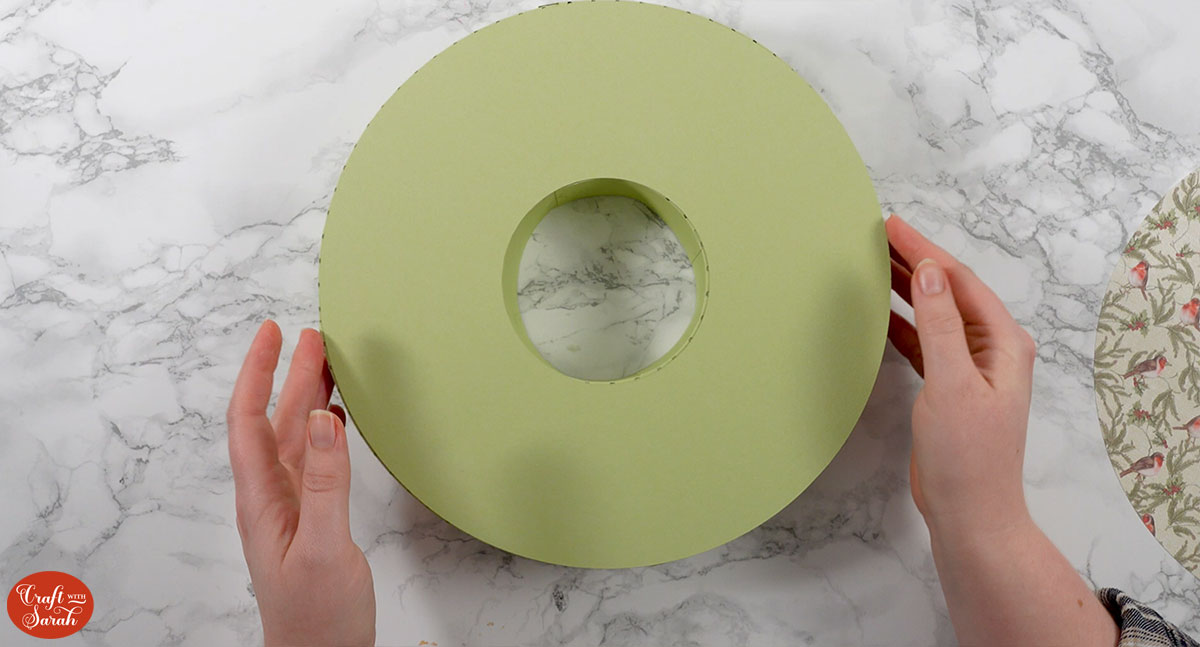
Glue the larger of the patterned scrapbook paper pieces on top of that.
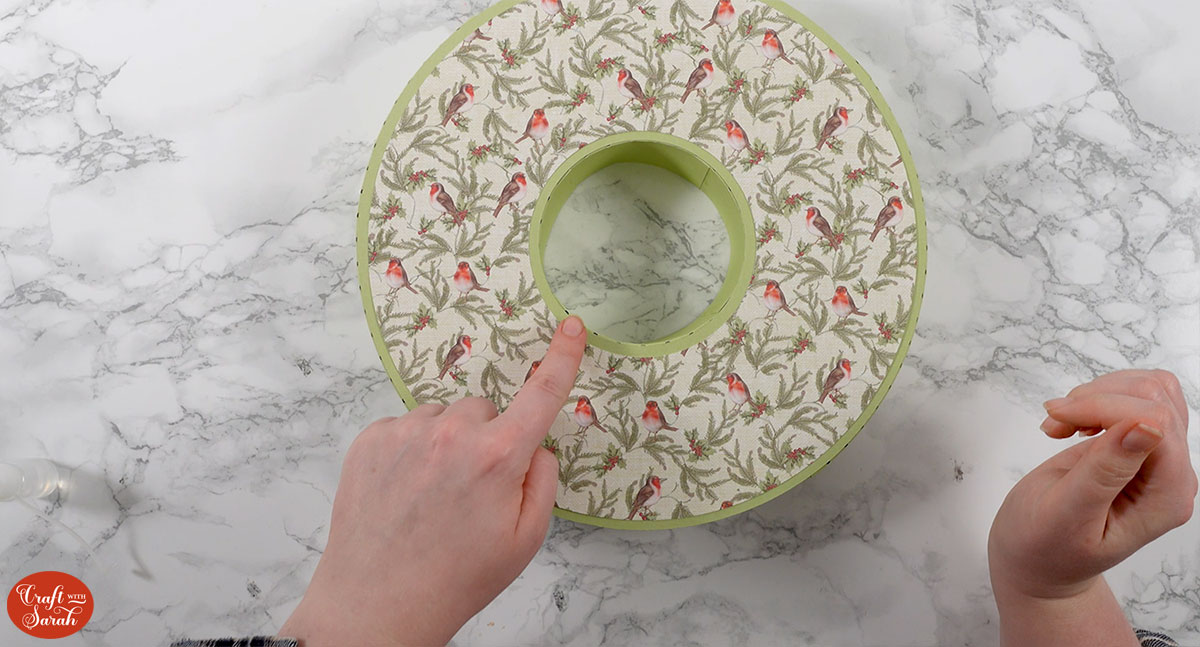
I will be added the poinsettia flowers to the top of the box at the end of this project, so for now let’s move on to assembly the base of the box!
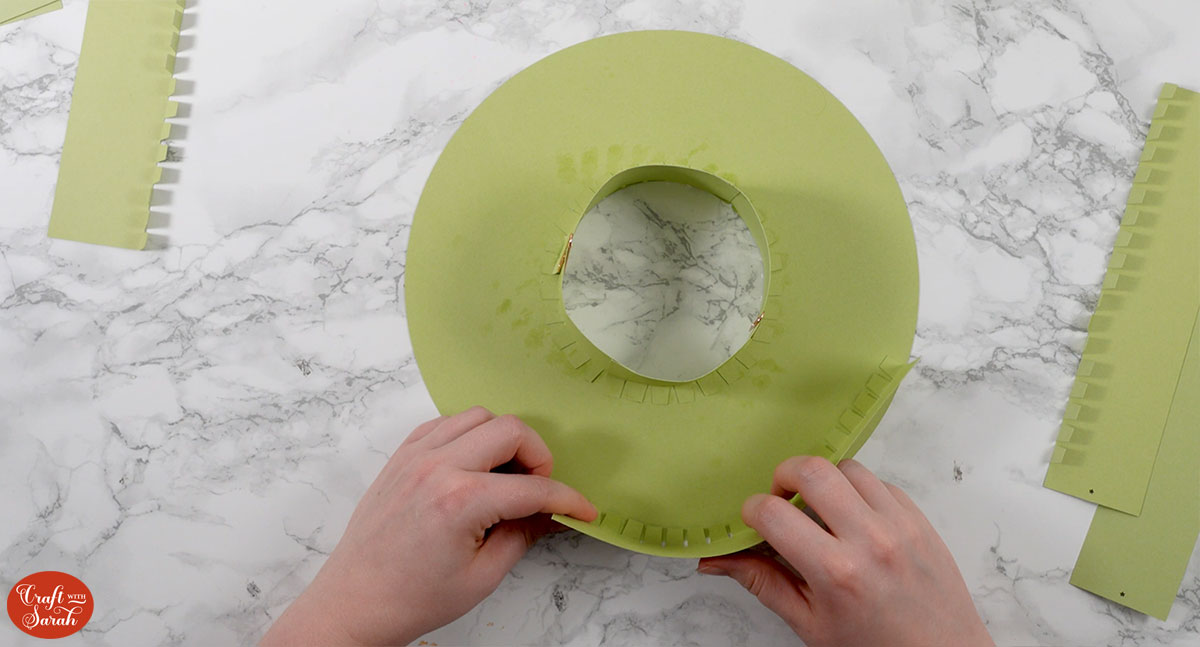
Step 7) Stick together the bottom section of the box
This goes together in a similar way to the top, except the tabs stick the other way around.
Again, we’ll start with the middle of the wreath.
For this part, one of the middle pieces looks different as it has a slanted edge on one side. This one needs to be stuck on last, so put it to one side for now.
Fold the teeth tabs down and then glue each piece along the middle circle cutout.
This time, instead of threading the teeth tabs to the underneath of the green circle, we need to stick them on top.

Follow the curve of the circle as closely and carefully as you possibly can!!
Stick all four pieces on. The final piece has a slant/angle on one of the sides to make it easier to stick.
Don’t worry if you get glue on the green circle as it will all be covered up with our patterned paper.
I used some paperclips to hold the edges in place as the glue was being troublesome at drying!!
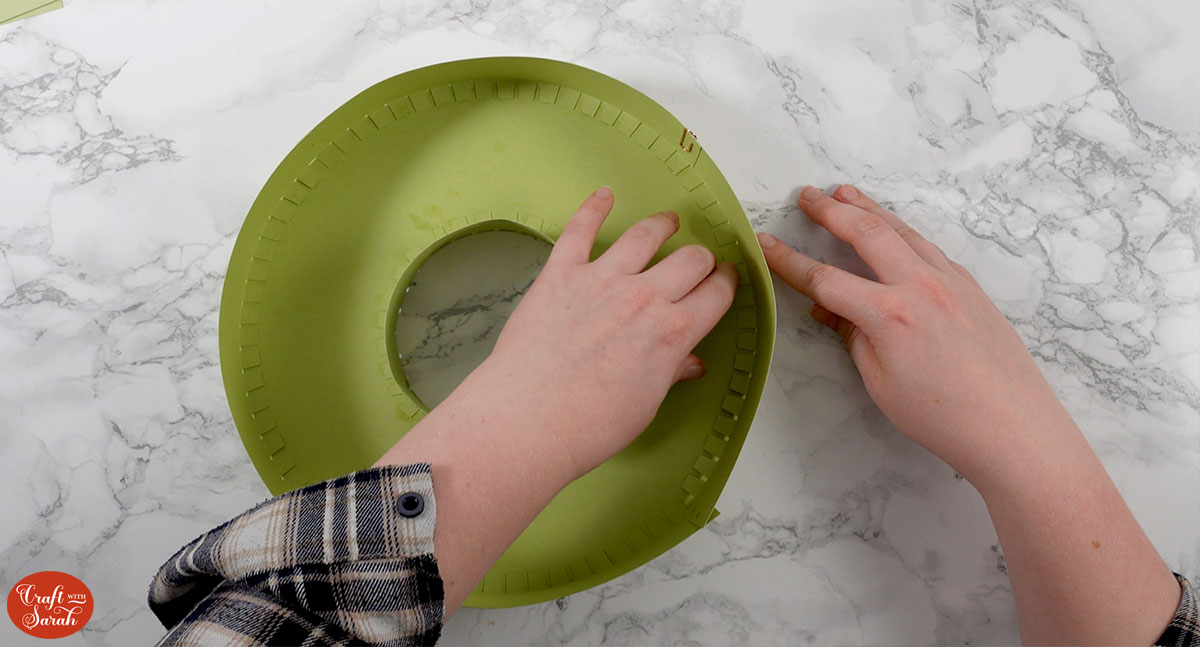
Repeat these steps for the outside of the circle.
Here’s how it looks with all four pieces stuck on:
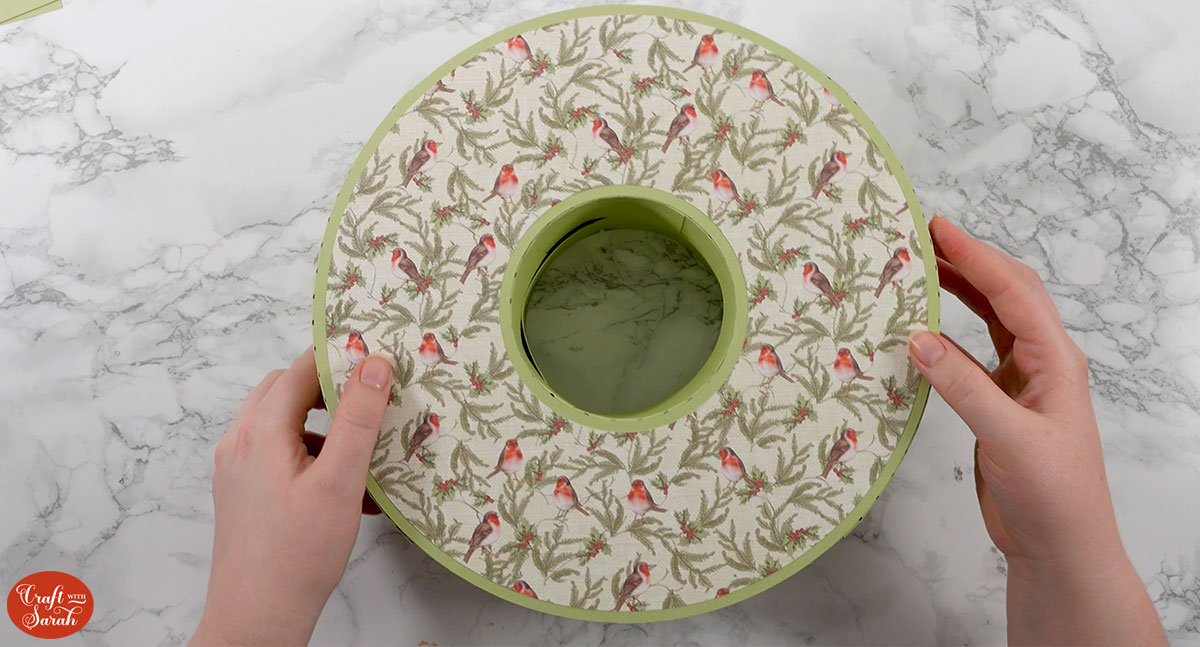
Glue the remaining piece of patterned paper into the bottom of the box.
Do a quick test to make sure the lid fits on your base!!!
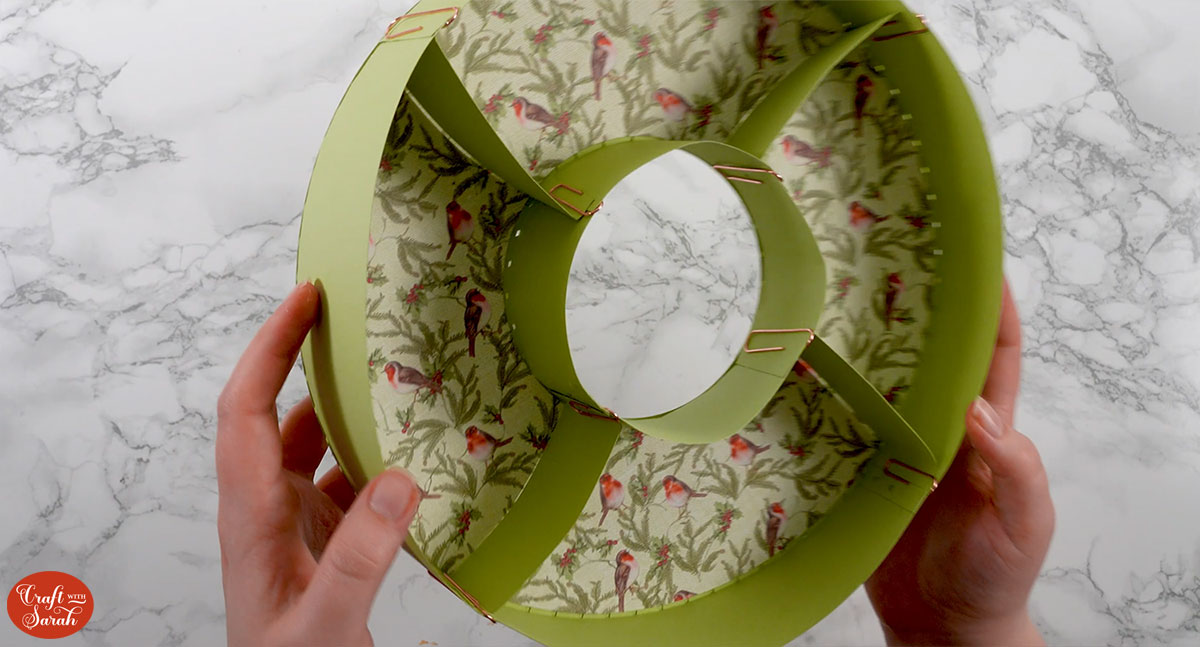
If you’re adding the inserts to the base of the box, now is the time to do it.
Fold the tabs on each end of the insert and glue them into the box.
These ideally do need some paperclips on them to hold them in place until the glue dries, as the curve of the box can cause them to “pop off” and fall away from the sides until the glue is fully dry.
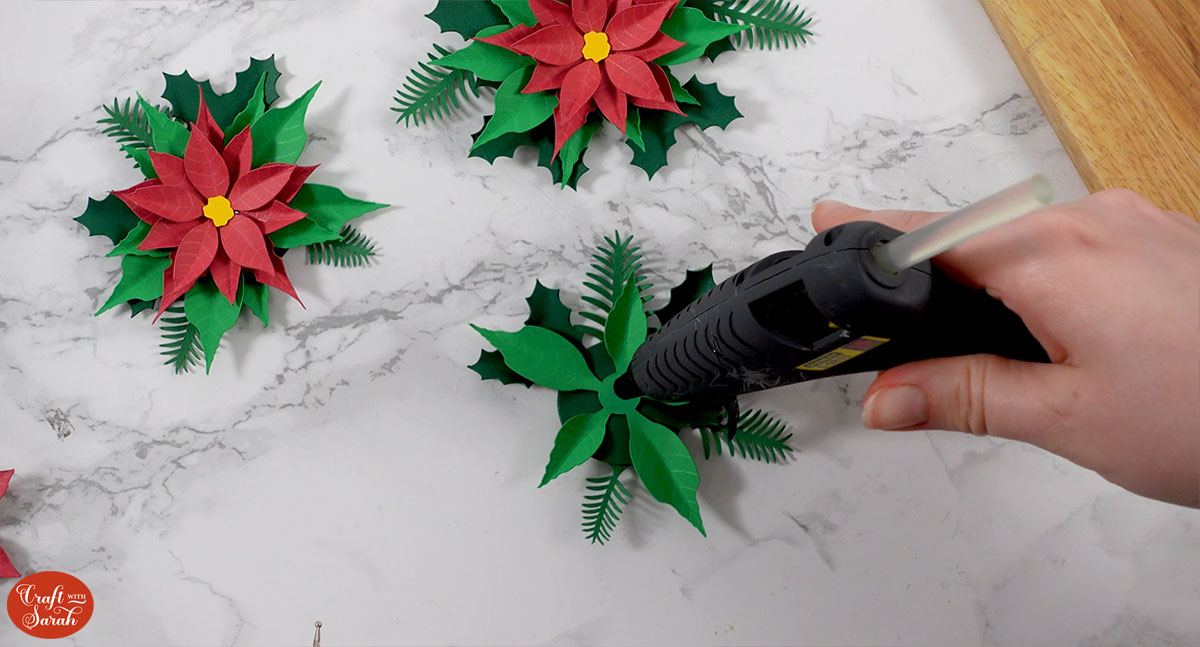
Step 8) Make the poinsettia flowers
Take the bottom leaf sections of each poinsettia and carefully bend them upwards to give the leaves some more “realism”.
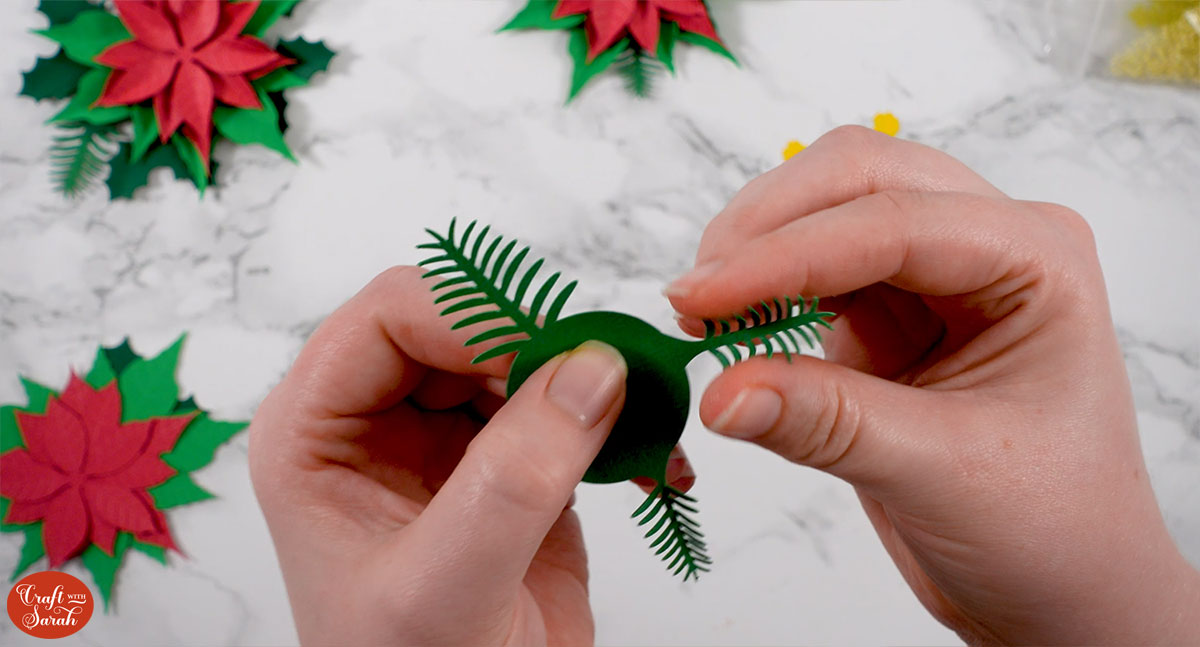
Do the same with all other green leaves and red petals.

Use a glue gun to stick the layers of the leaves and flowers together.
Try to alternate the leaves/petals so that they sit in the gaps of the layer underneath.
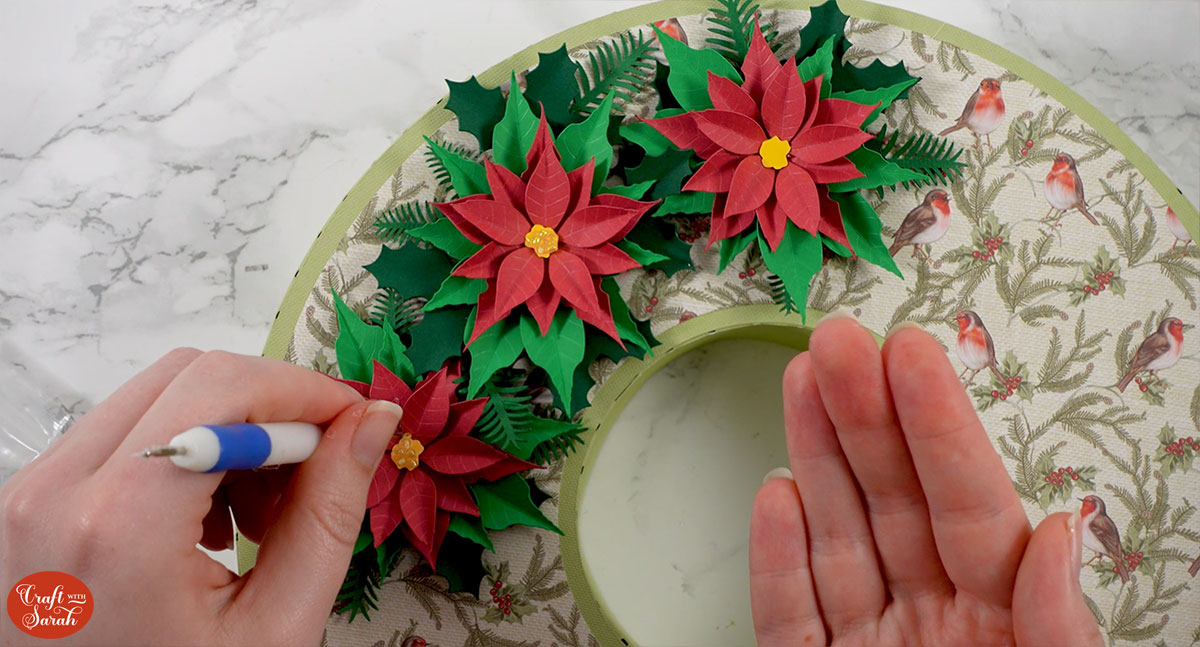
Glue gun the flowers to the top of the wreath box.

Add some Collall glue (or similar – NOT glue gun) to the yellow middles of the flowers.
Drop on some yellow or gold seed beads.
This makes the middles look more realistic and gives a lovely sparkle!
There you have it – your giant wreath shaped gift box is now finished!
I hope you enjoyed this tutorial on how to make a giant papercraft gift box with a Cricut machine.
This is one of the more advanced projects from this year’s Christmas Craft Countdown, but it’s one of my favourites because of how impressive it looks when finished.
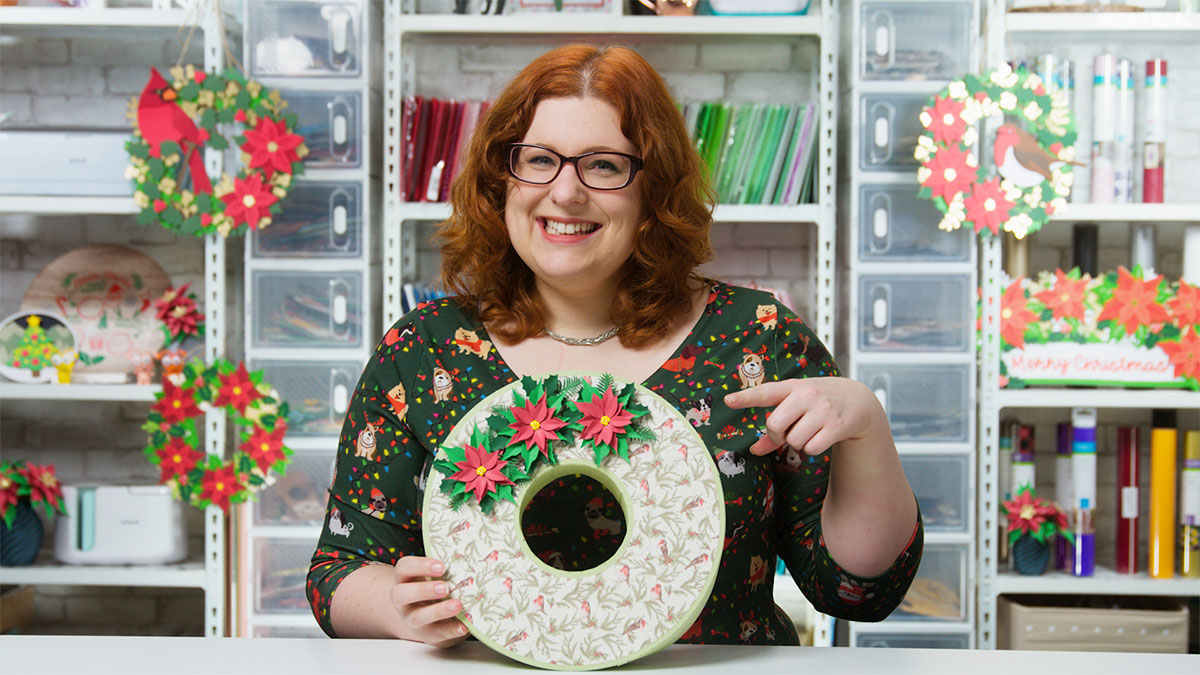
Now I just need to buy some sweets and chocolates to go inside, then that’s one of my Christmas presents all sorted!!
Happy crafting,
Sarah x

