CCC 2023 Day 19 ☃️ Popup Truck Greetings Card
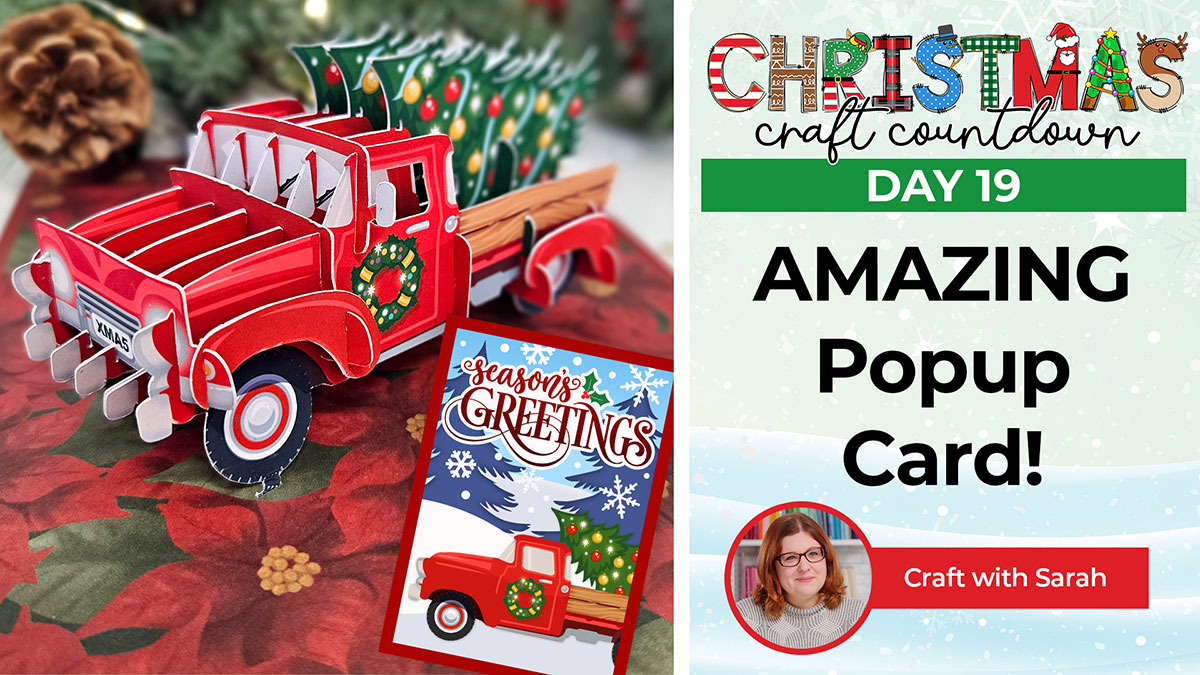
Make a Christmas popout card that really stands out!
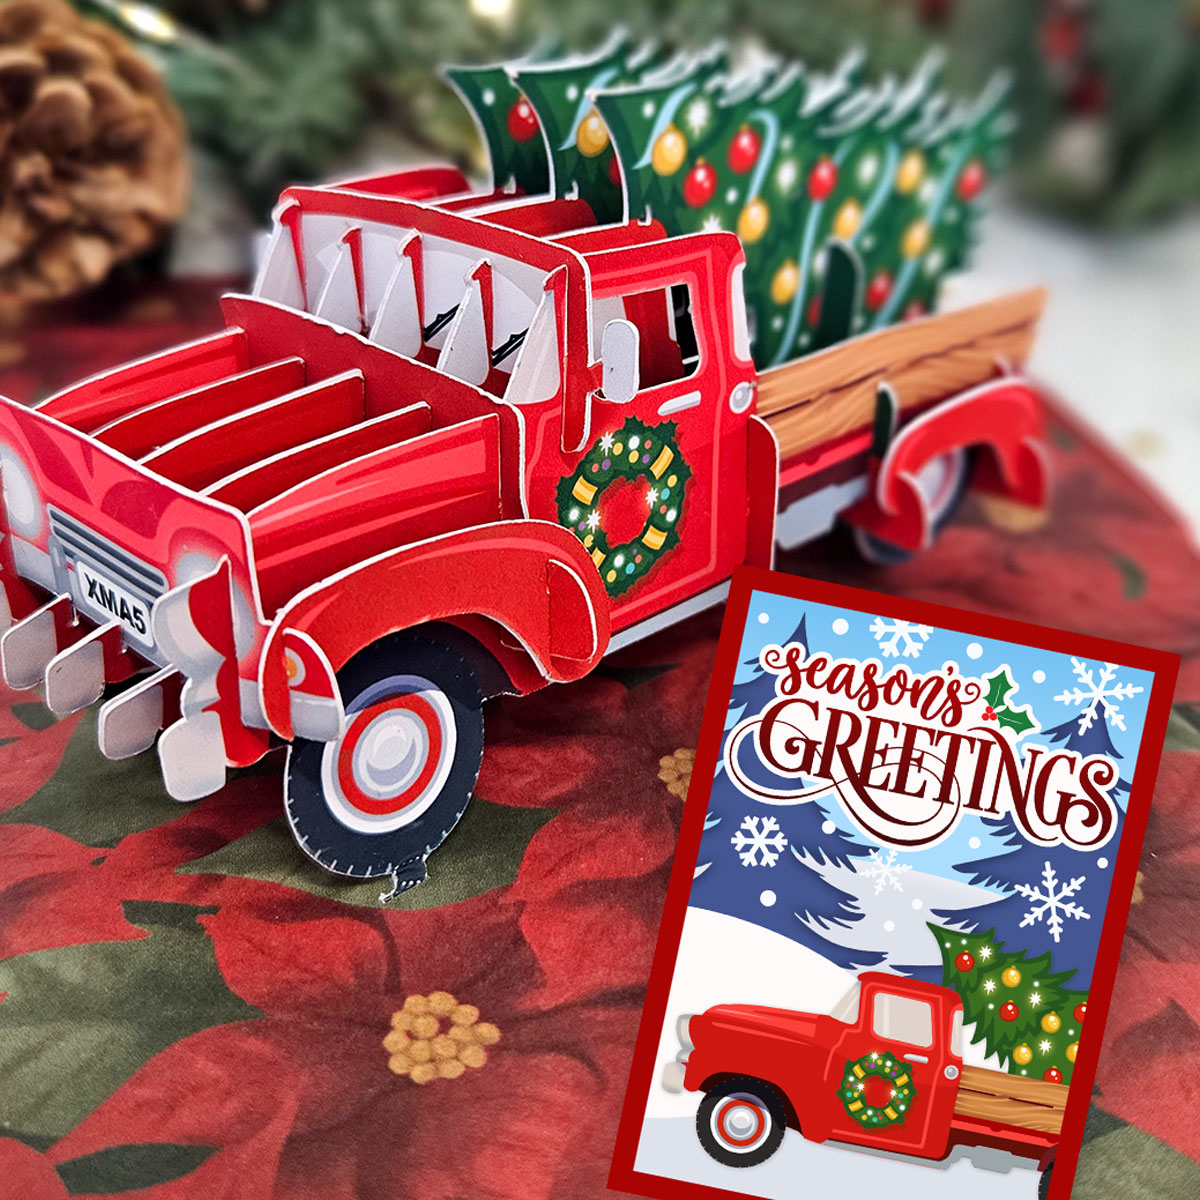
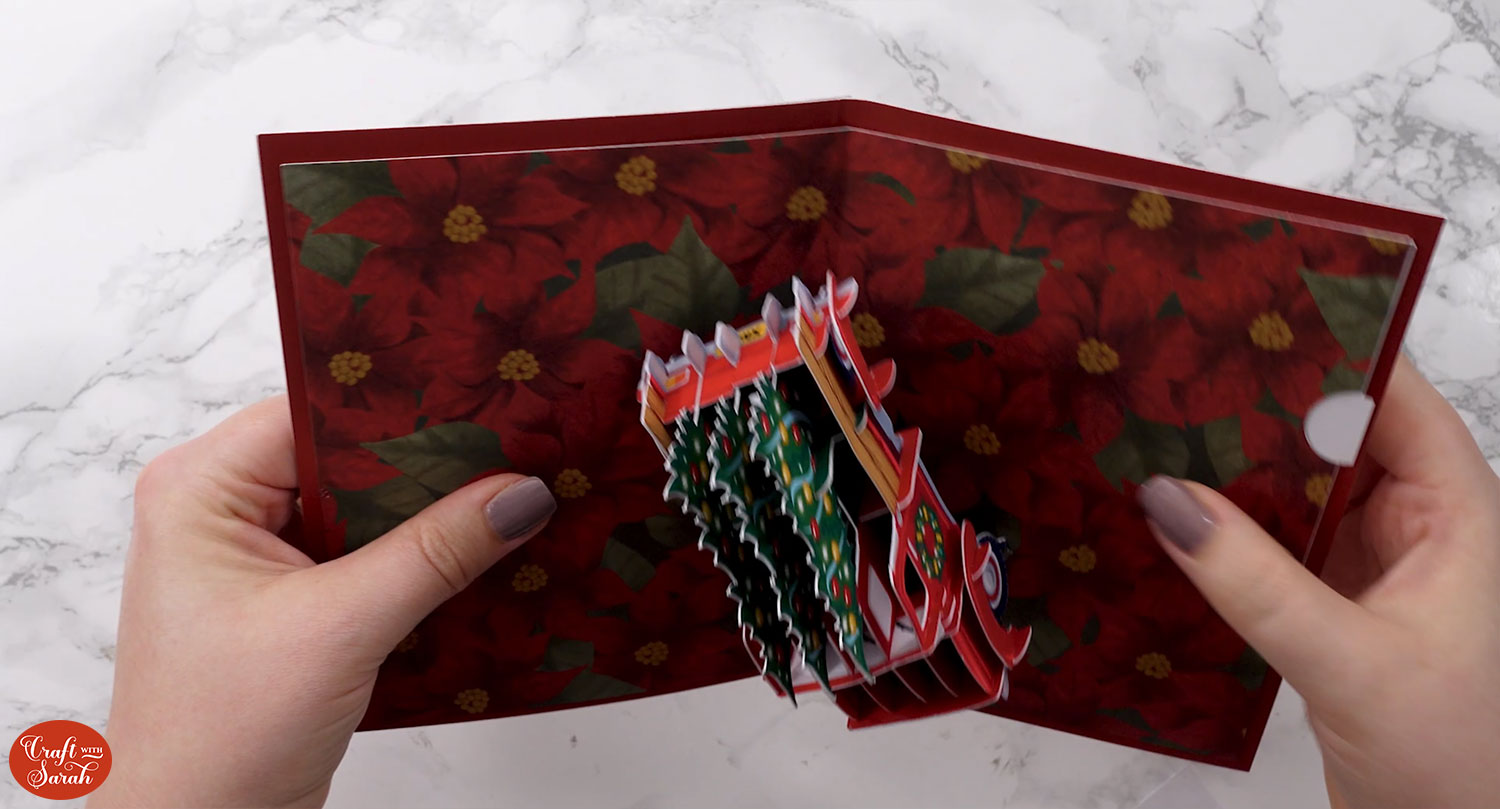
It’s Day 19 of the Christmas Craft Countdown and I have this impressive Christmas truck popout card to share with you.
Using Print then Cut, we will cut out all the different parts of the truck and slot it together to make an awesome pop up effect.
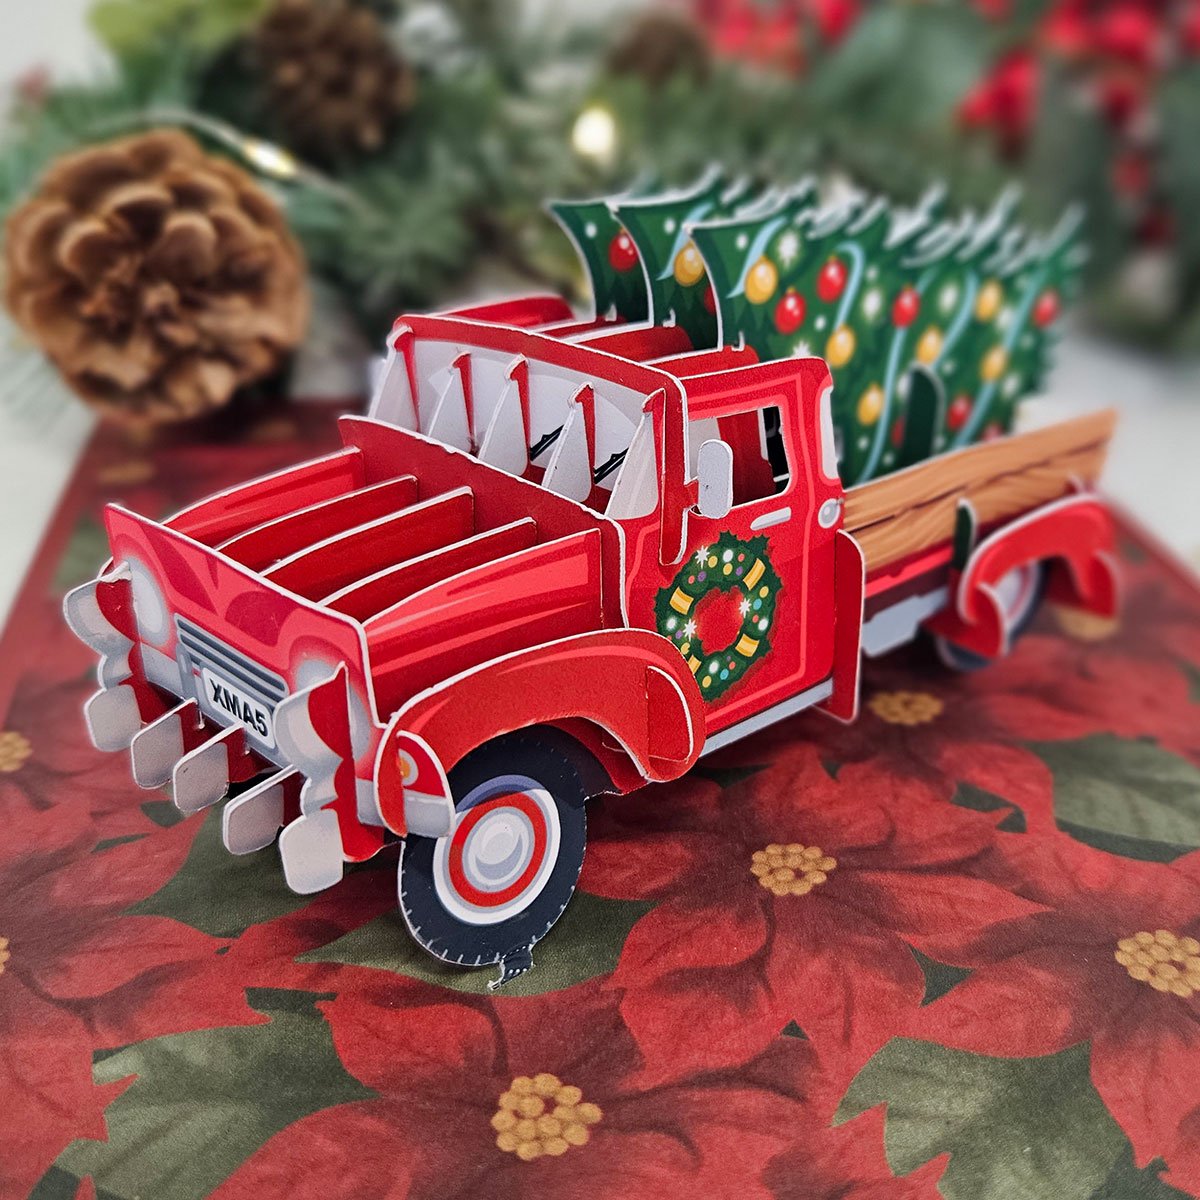
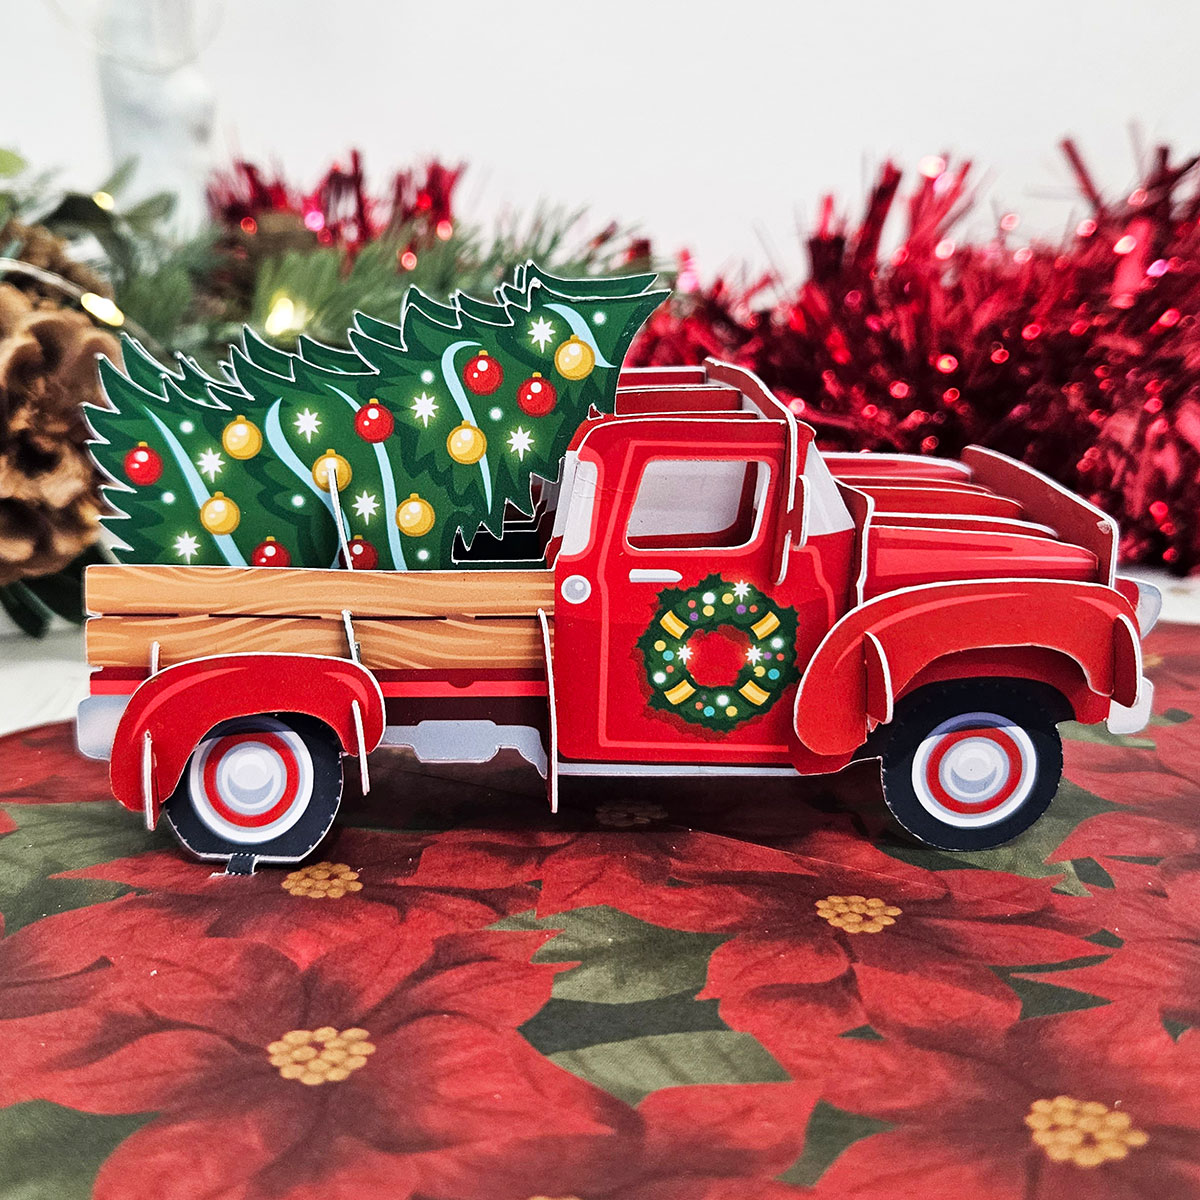
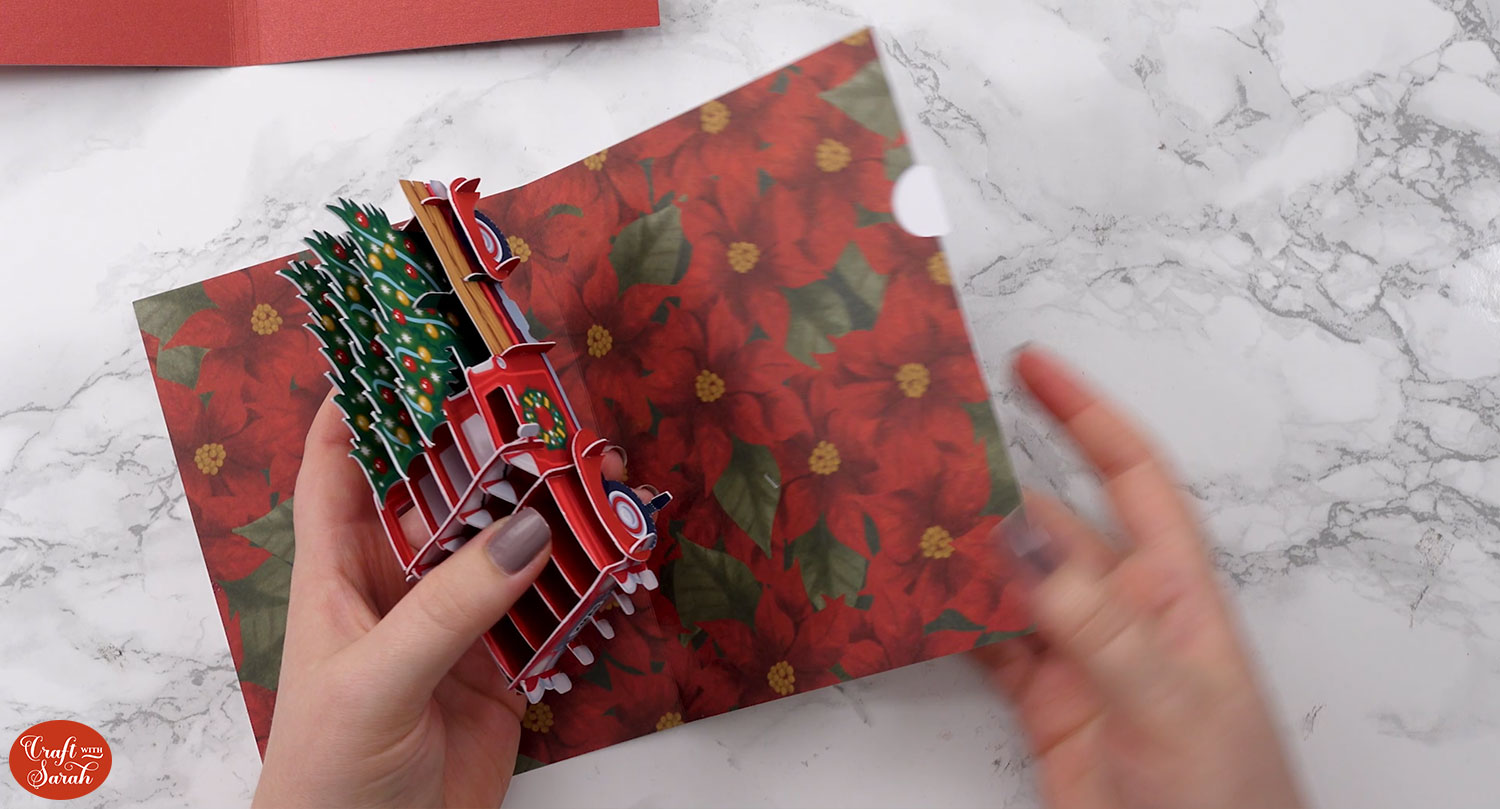
The truck lies flat inside the card, but opens up beautifully into its 3D shape to wow the receiver of your card.
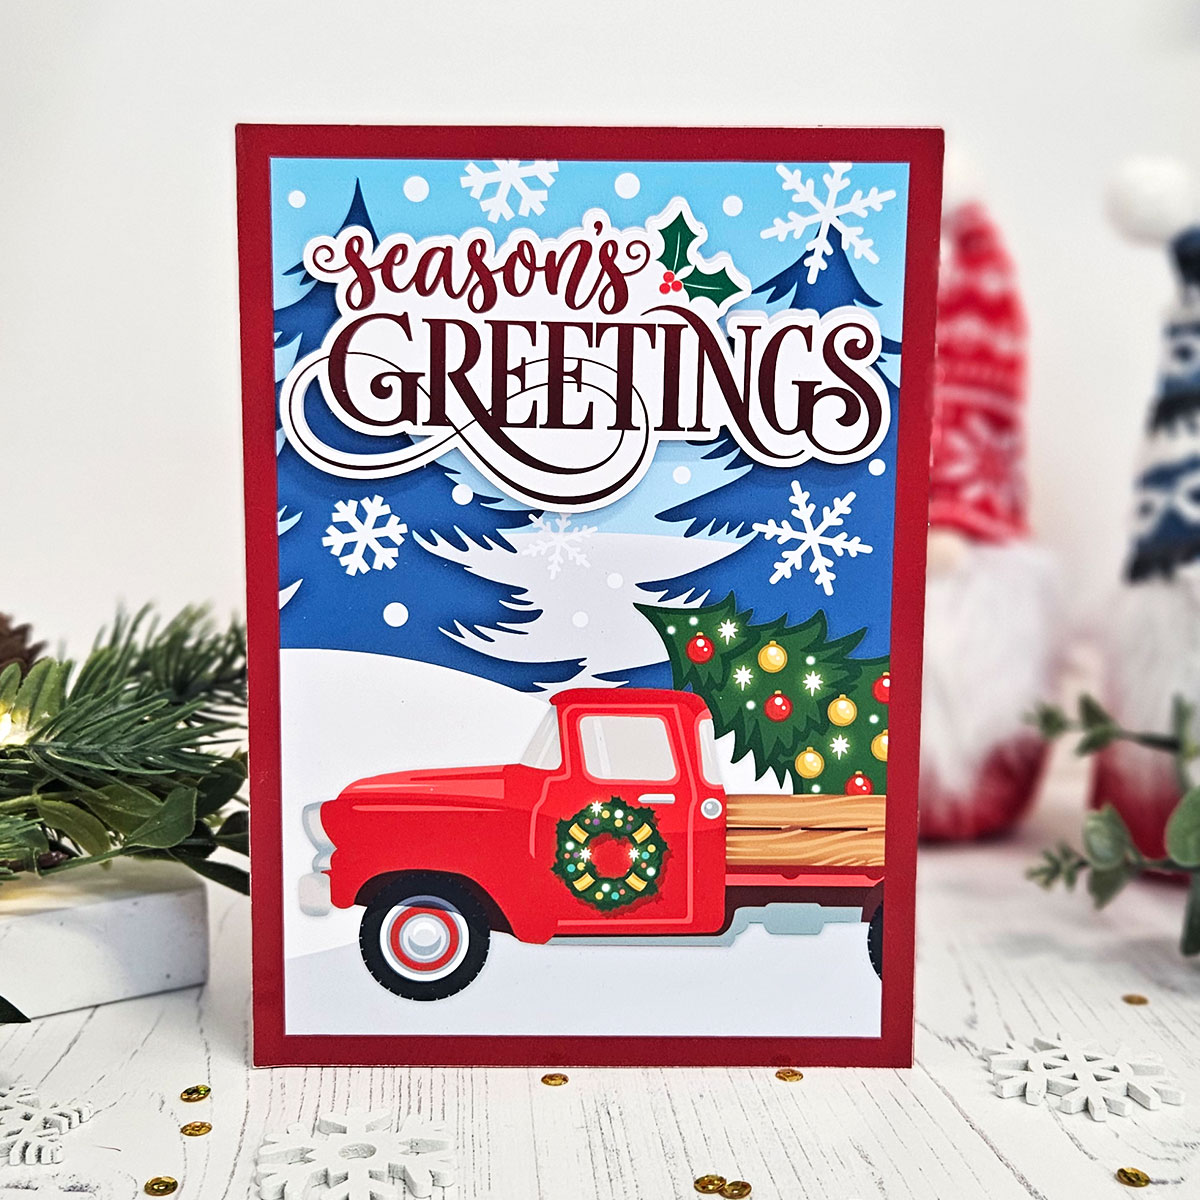
The front of the card is decorated with a matching printable design.
Look closely to see all the beautiful details on the truck which make it extra special. You can add a special message with the secret message panel hidden inside.
This Project was part of the Christmas Craft Countdown 2023
Materials supply list
Here is a list of the materials that are required to make this project.
Please note that some of the links included in this article are affiliate links, which means that if you click through and make a purchase I may receive a commission (at no additional cost to you). You can read my full disclosure at the bottom of the page.
- Cricut machine
- Light blue Cricut cutting mat
- Cricut scoring wheel or scoring stylus
- Colour printer
- Photo paper (48lb/180gsm matte effect works best)
- Glue
- 3D foam pads
- Red cardstock
- Patterned paper or card in a co-ordinating colour
- Sticky tape
This project is suitable for the following types of Cricut machine: Explore Air 2, Explore Air 3, Maker, Maker 3, Venture and Joy Xtra. It cannot be used with the original Cricut Joy machines as they do not have print then cut functionality.
Video tutorial for pop up Christmas card
This card would make such a lovely surprise for a loved one this Christmas.
Watch the video below to see how to make this popout truck card.
If you prefer to read rather than watch, keep scrolling!
Which type of photo paper is best for popout cards?
Before we get into the tutorial, I just want to share which type of photo paper worked best when designing this popout card. It involved a lot of trial and error!
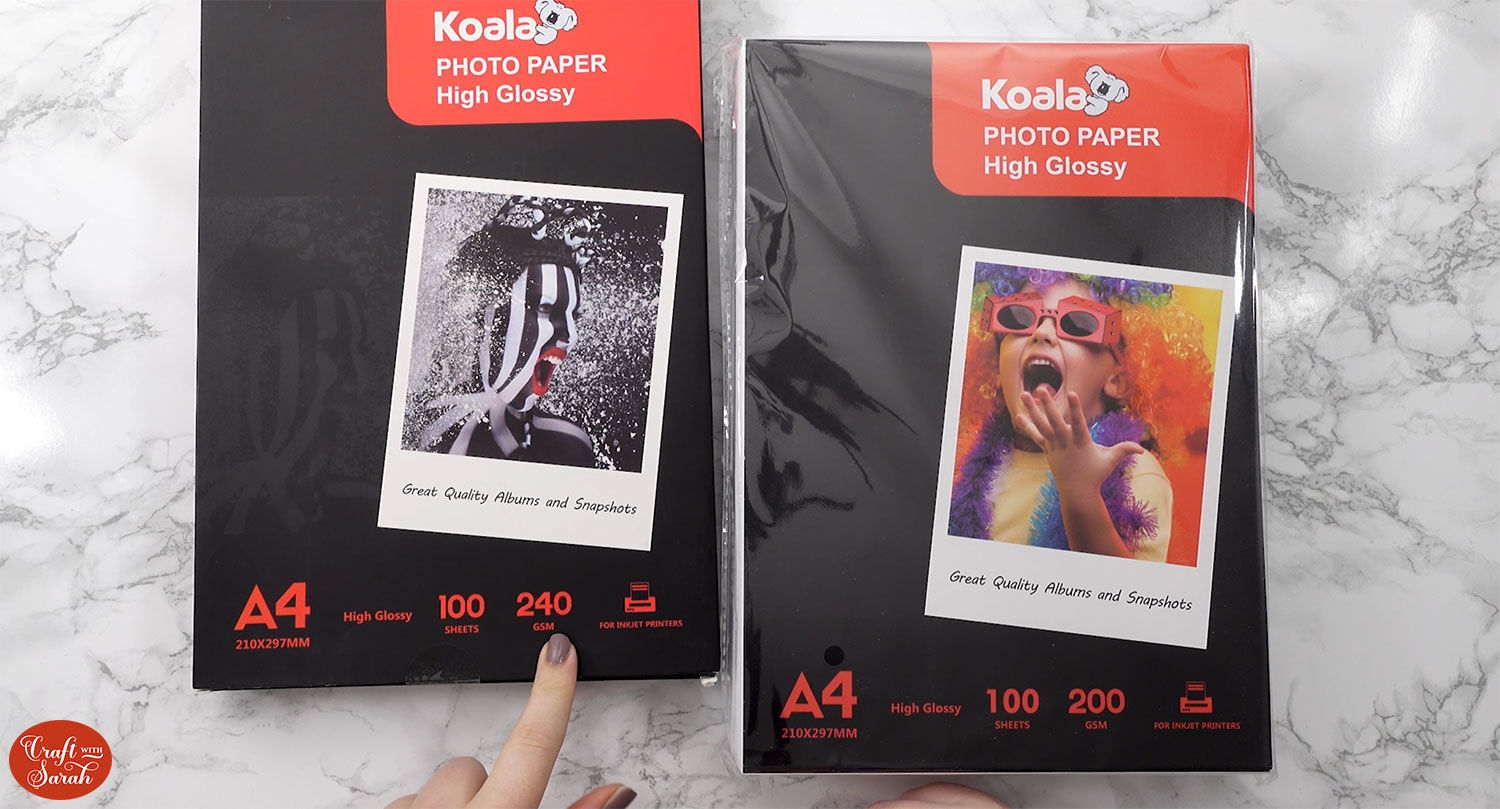
First I tried a glossy, 240 GSM photo paper which ended up being too thick and made it difficult when slotting the pieces together. It also meant that the card didn’t quite close flat as there was too much bulk inside.
Next, I tried a 200 GSM glossy photo paper which did work much better, but I found that I accidentally scratched off some of the printer ink when slotting the truck together, due to the glossy finish on the paper.
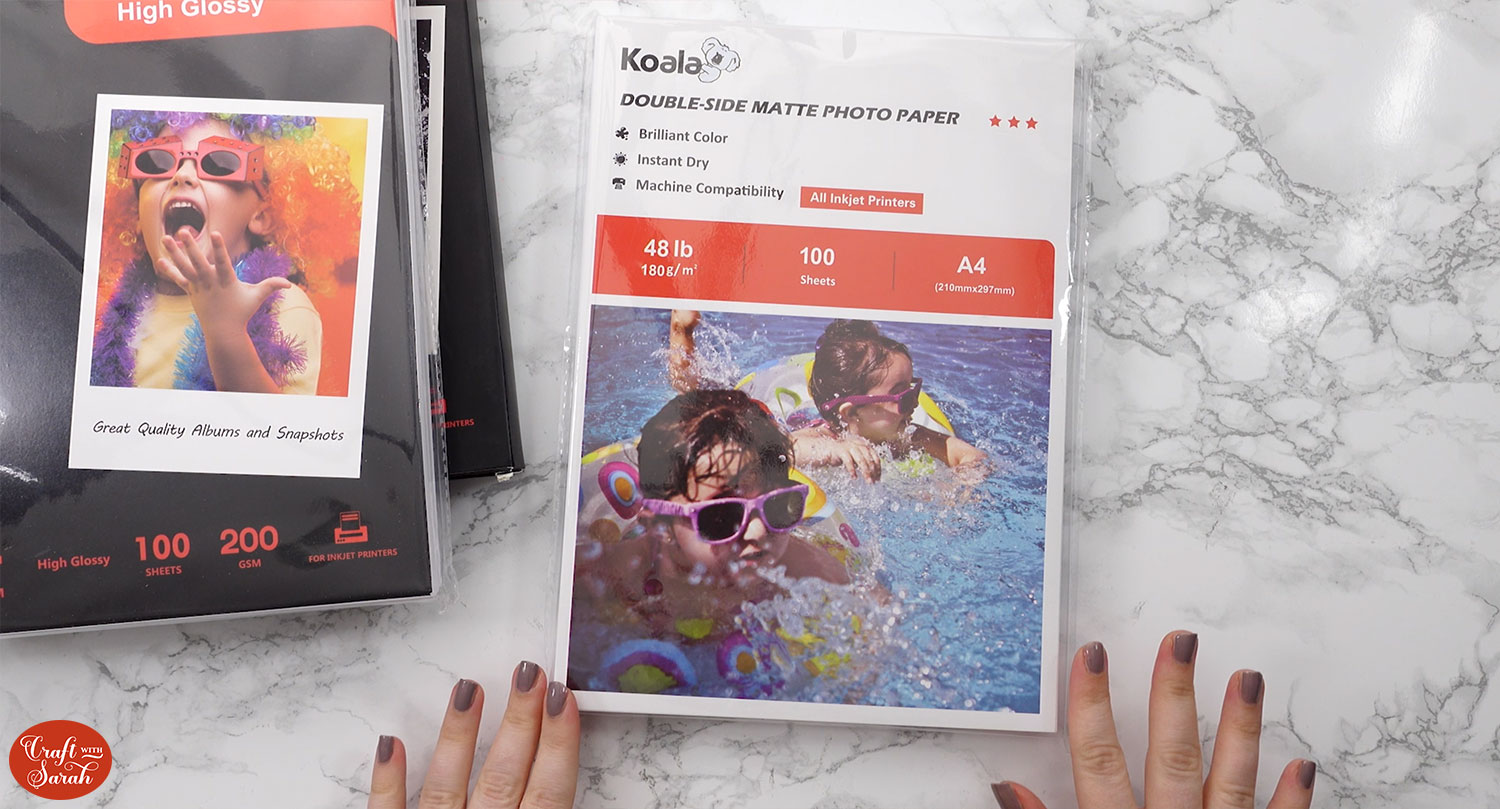
The best photo paper I found for making this truck card was even thinner at 180 GSM. It works best as it is lightweight so the card closes flat. It is a matte photo paper which stops the ink getting scratched off as the pieces are put together.
Cricut pop up card instructions
Here’s how to make your very own popup truck card with a Cricut machine.
Step 1) Download the file(s) & unzip the downloaded folder
Download the files using the box below.
Purchase the File(s)
This cut file is available as part of the Instant Access Bundle.
Or, purchase this design individually here
Before you upload the files to Design Space, you need to unzip the download folder that they come in.
Step 2) Upload the files into Design Space
Open up Cricut Design Space and start a new Project.
Click “Upload” and then find your unzipped version of the downloaded files for this project.

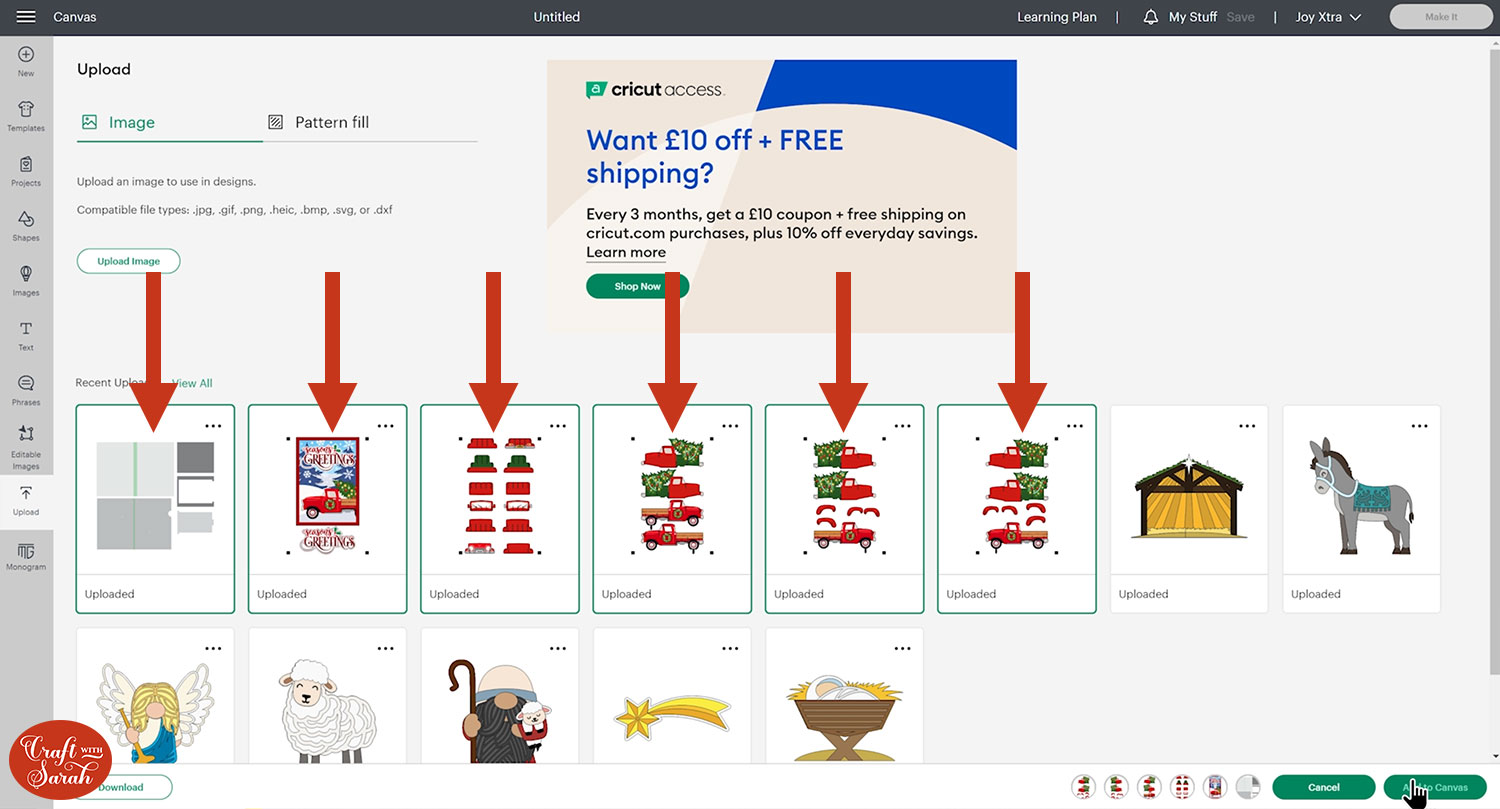
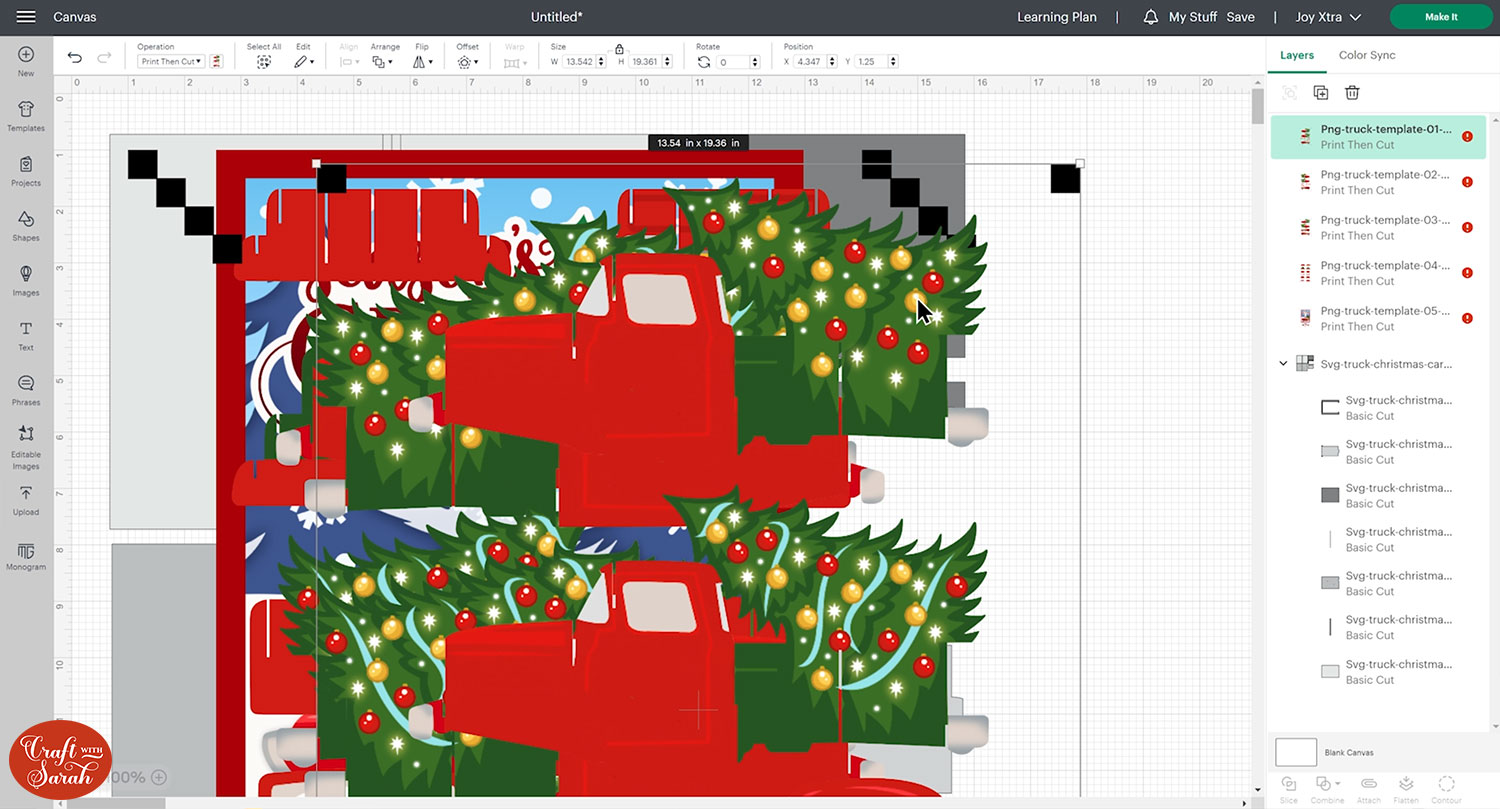
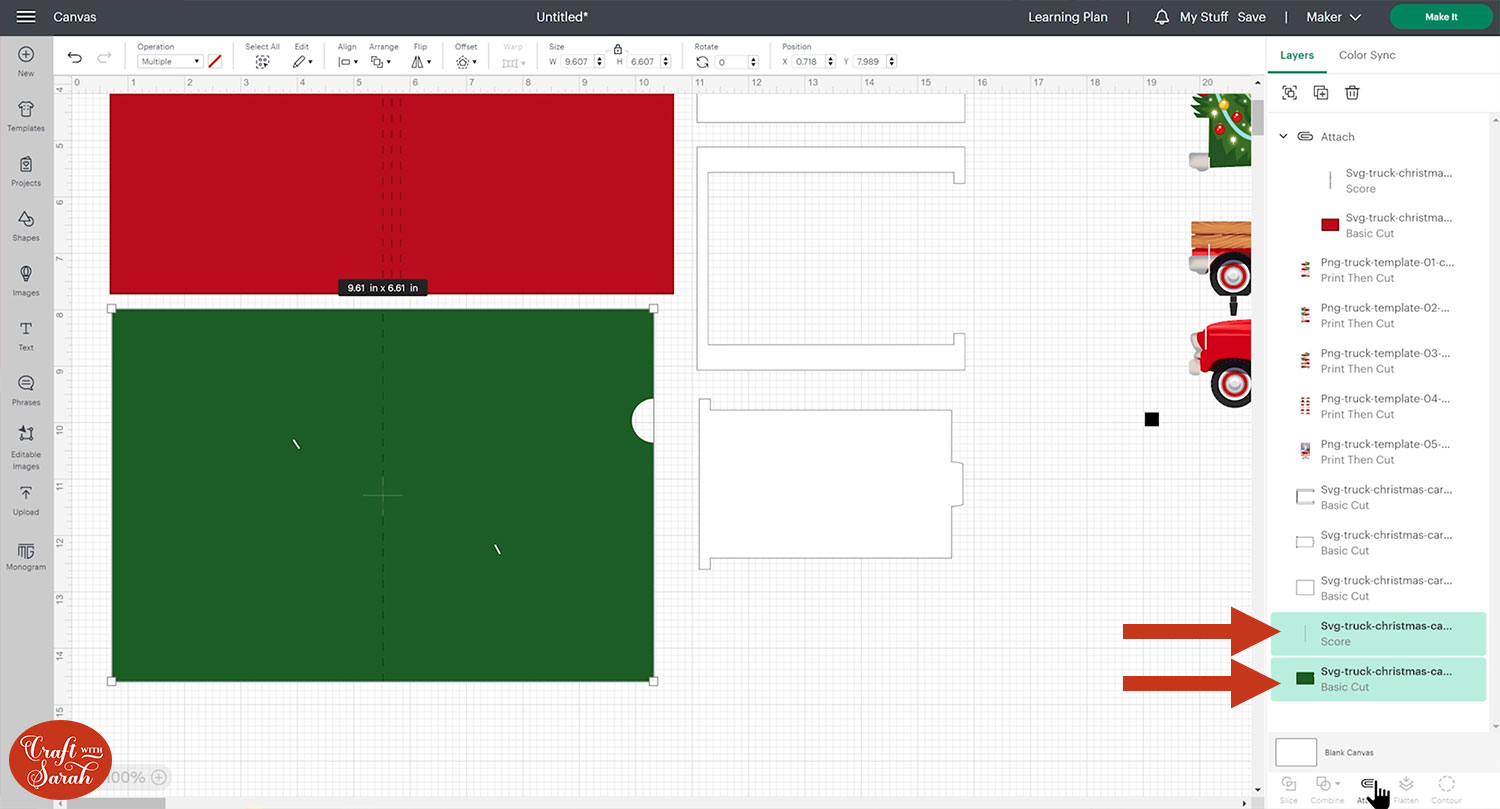
There are six different files that need uploading for this project.
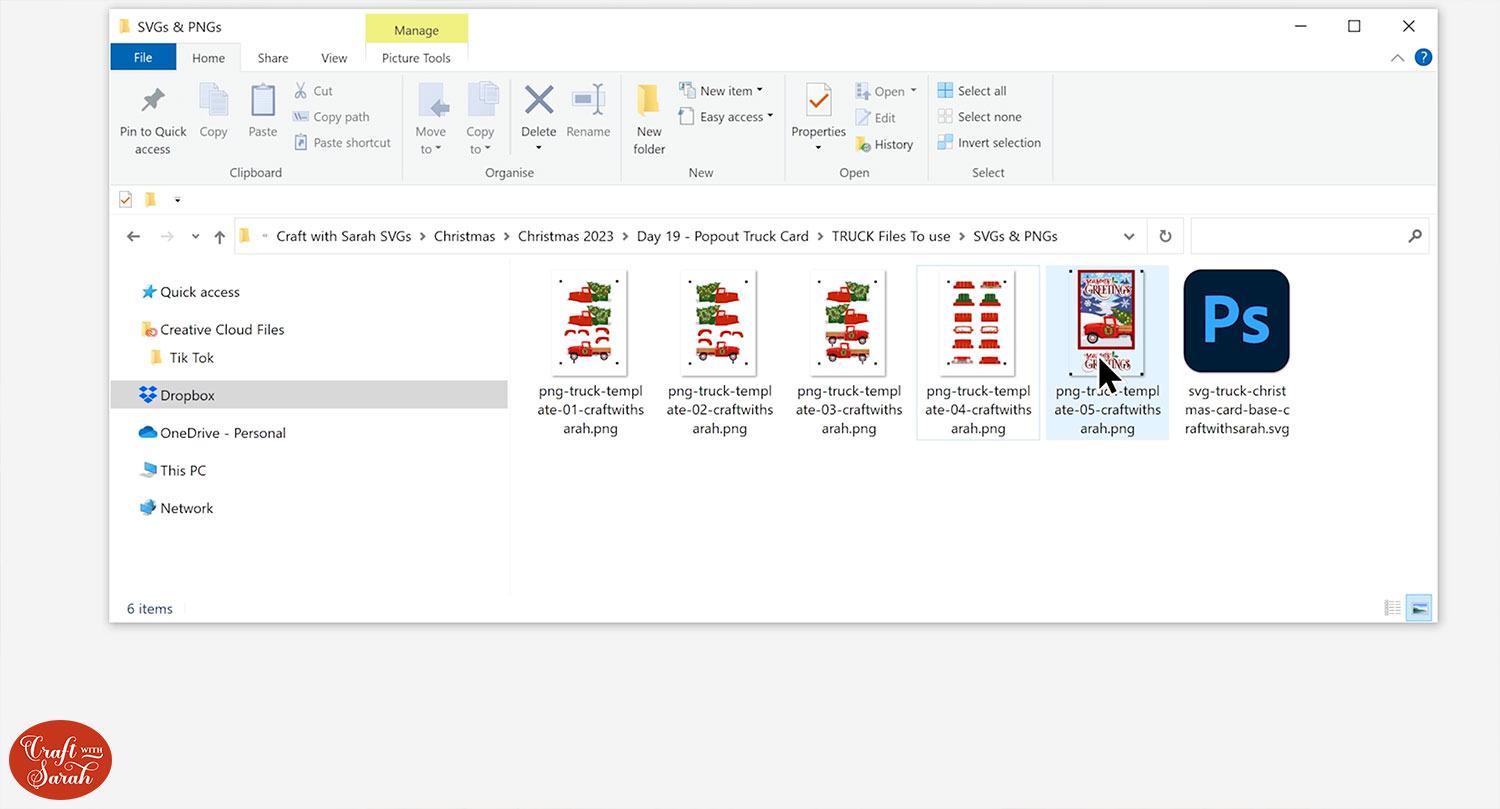
Five of them are PNG files for print then cut and one is a SVG file which is the base of the card.
The SVG file is uploaded in the usual way.
The PNG files need to be loaded in as follows.
Select one of the files and choose “Complex” as the image type.
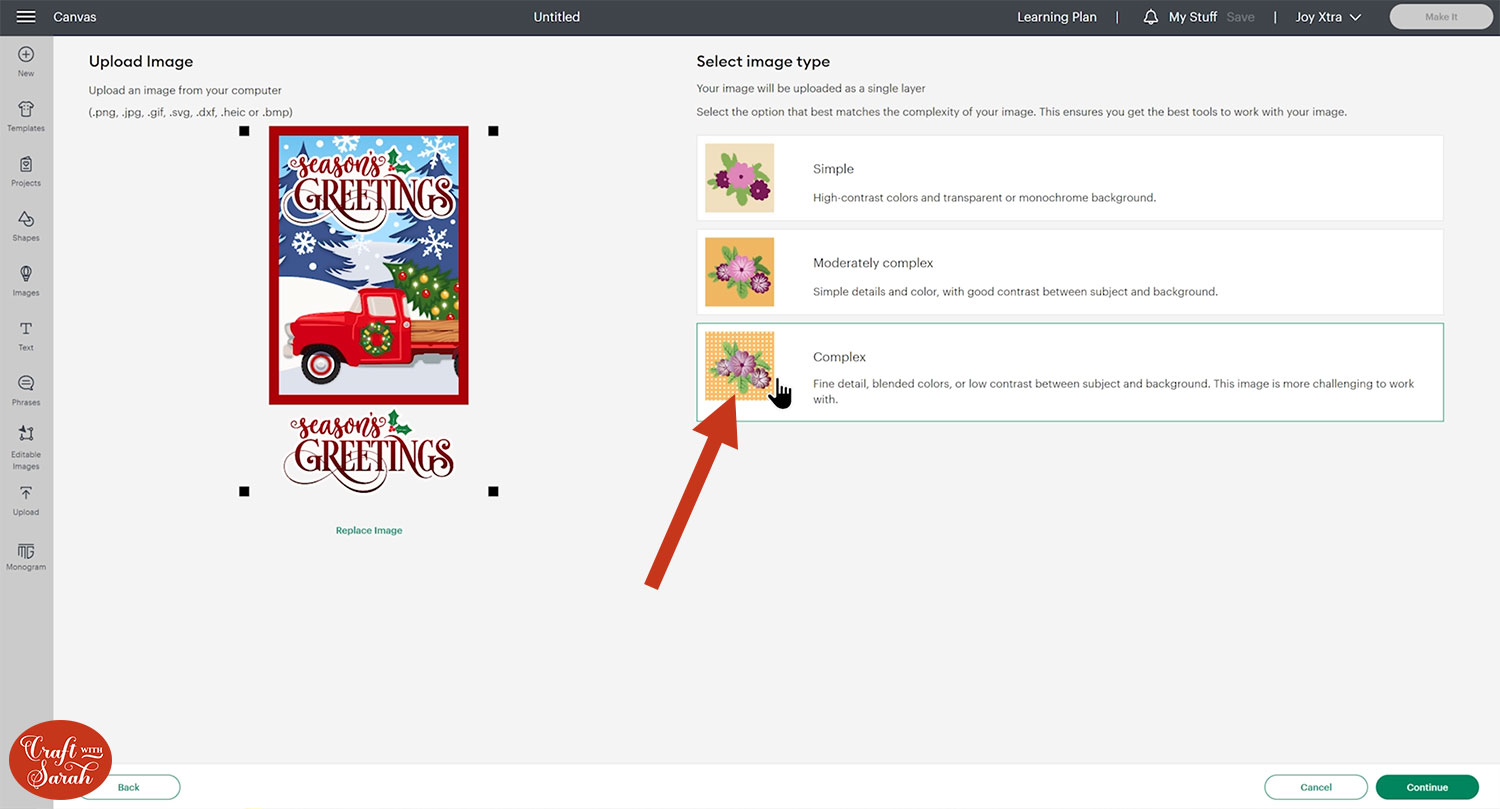
You don’t need to change anything on the next page; just click “Apply & Continue”.
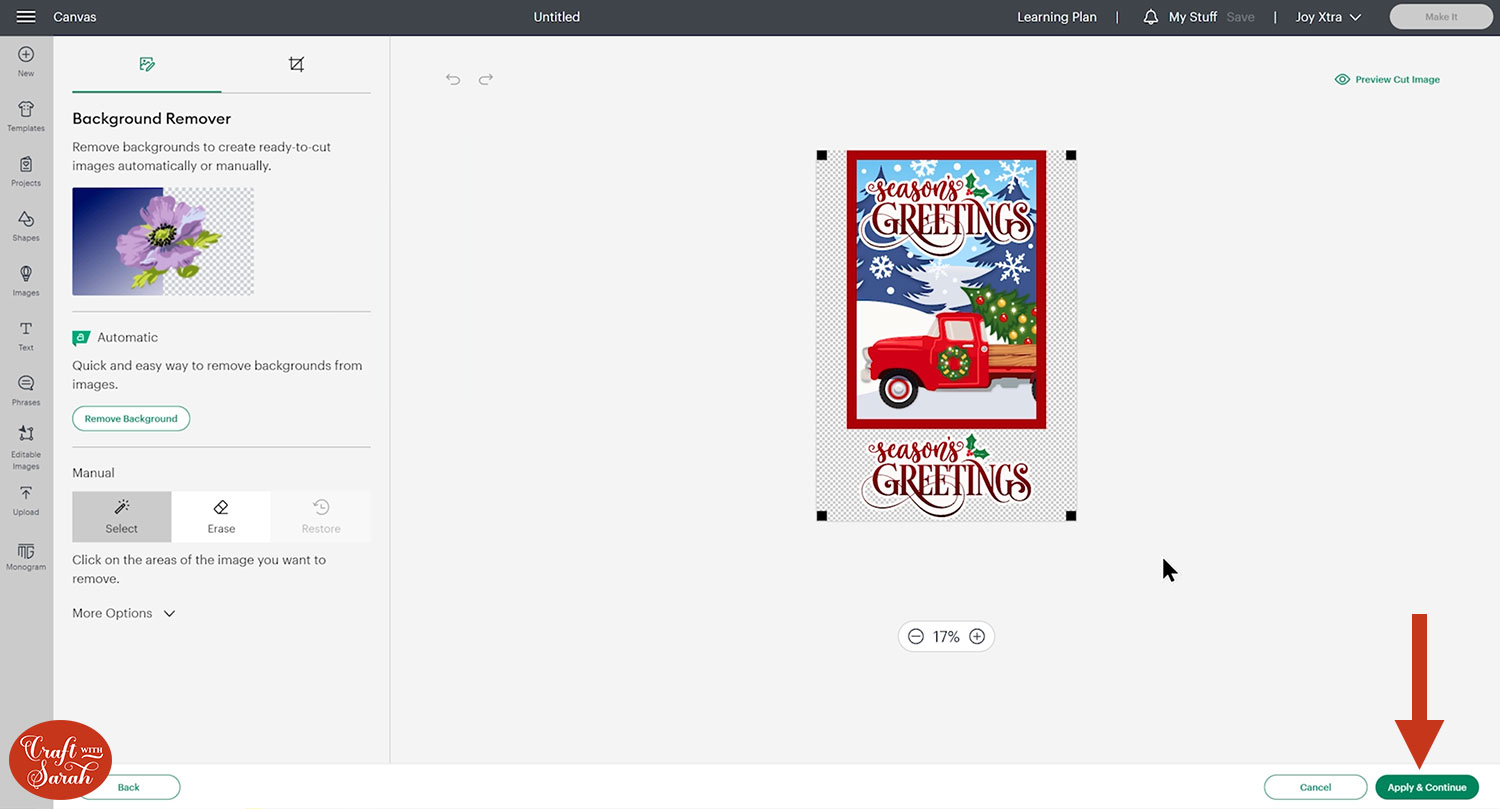
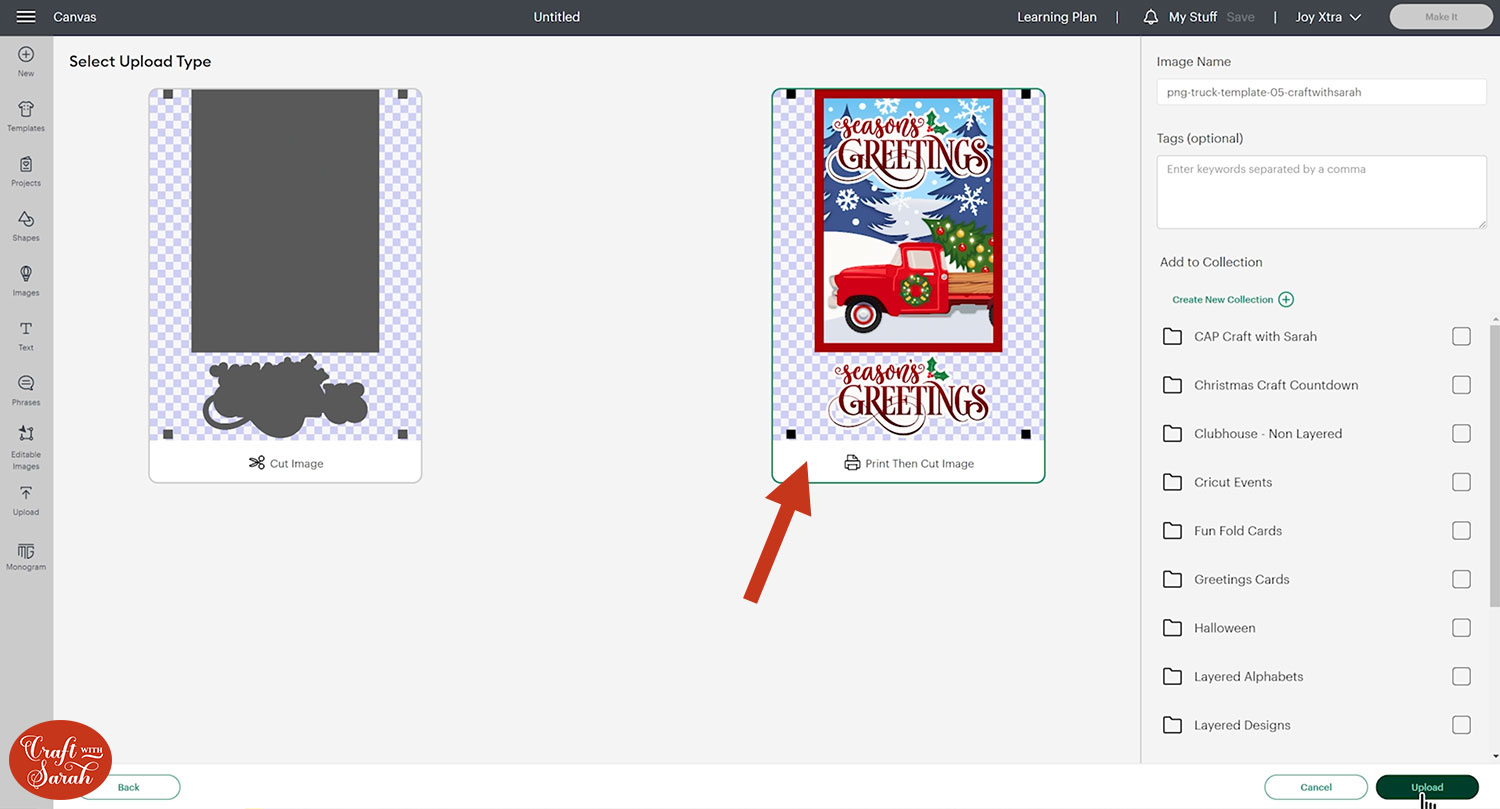
Choose “Print then Cut image” and save it.
After uploading, all six images will show in your “Recently Uploaded Images”.
Click on them and then press “Add to Canvas” to put them onto your Project.
Step 3) Size the print then Cut images in Design Space
The PNGs will load into Design Space too big and not at the correct size.
Click on the print then cut images one-by-one and resize them so that the width is 6.5 inches which should automatically change the height to 9.293. The black squares are what Design Space is using to resize the images.
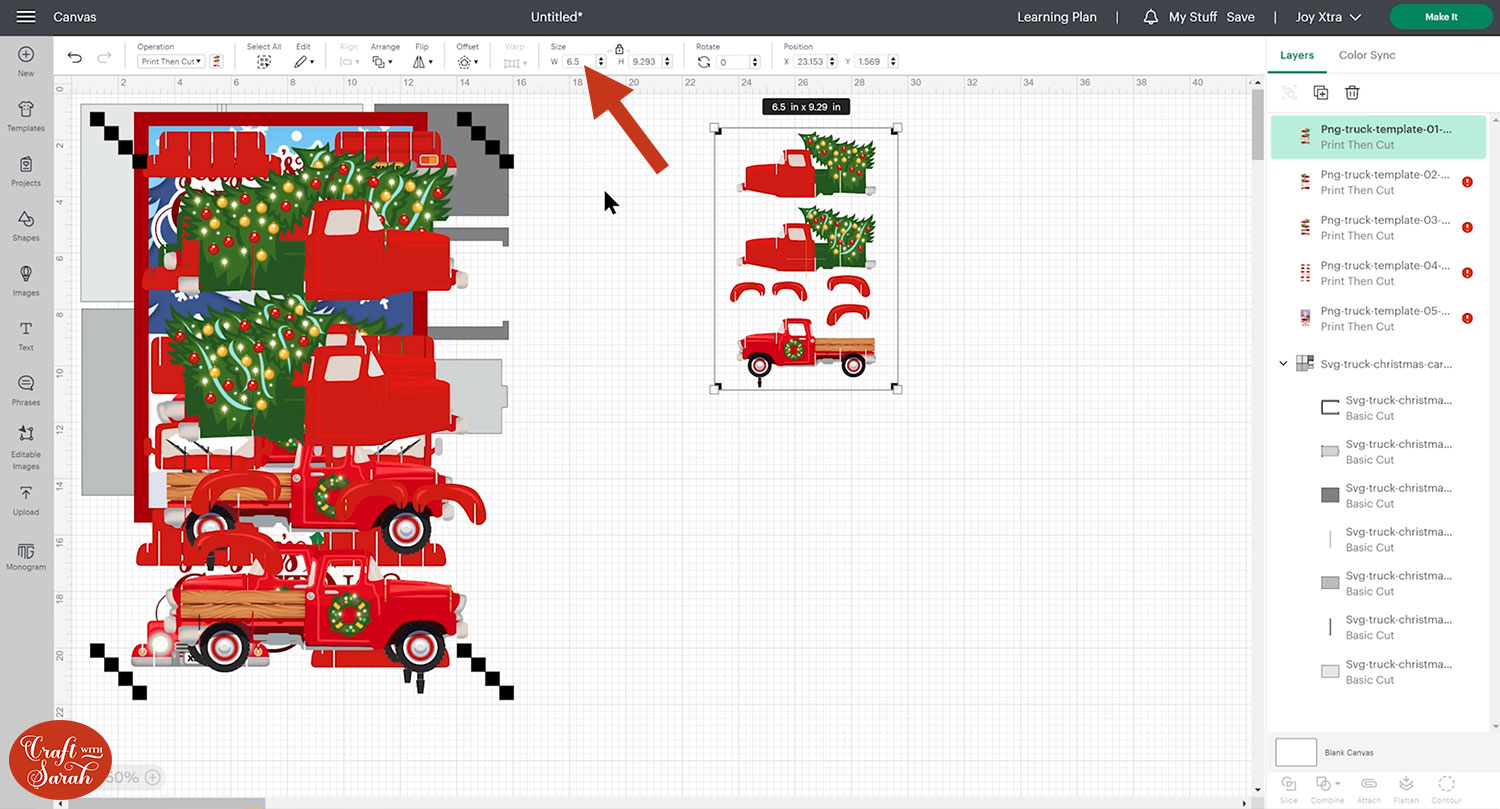
This is the size that you will need to make them all so repeat the process until all your Print then Cut images are the same size.
Your Print then Cut images are now the correct size to cut on either A4 and US letter paper.
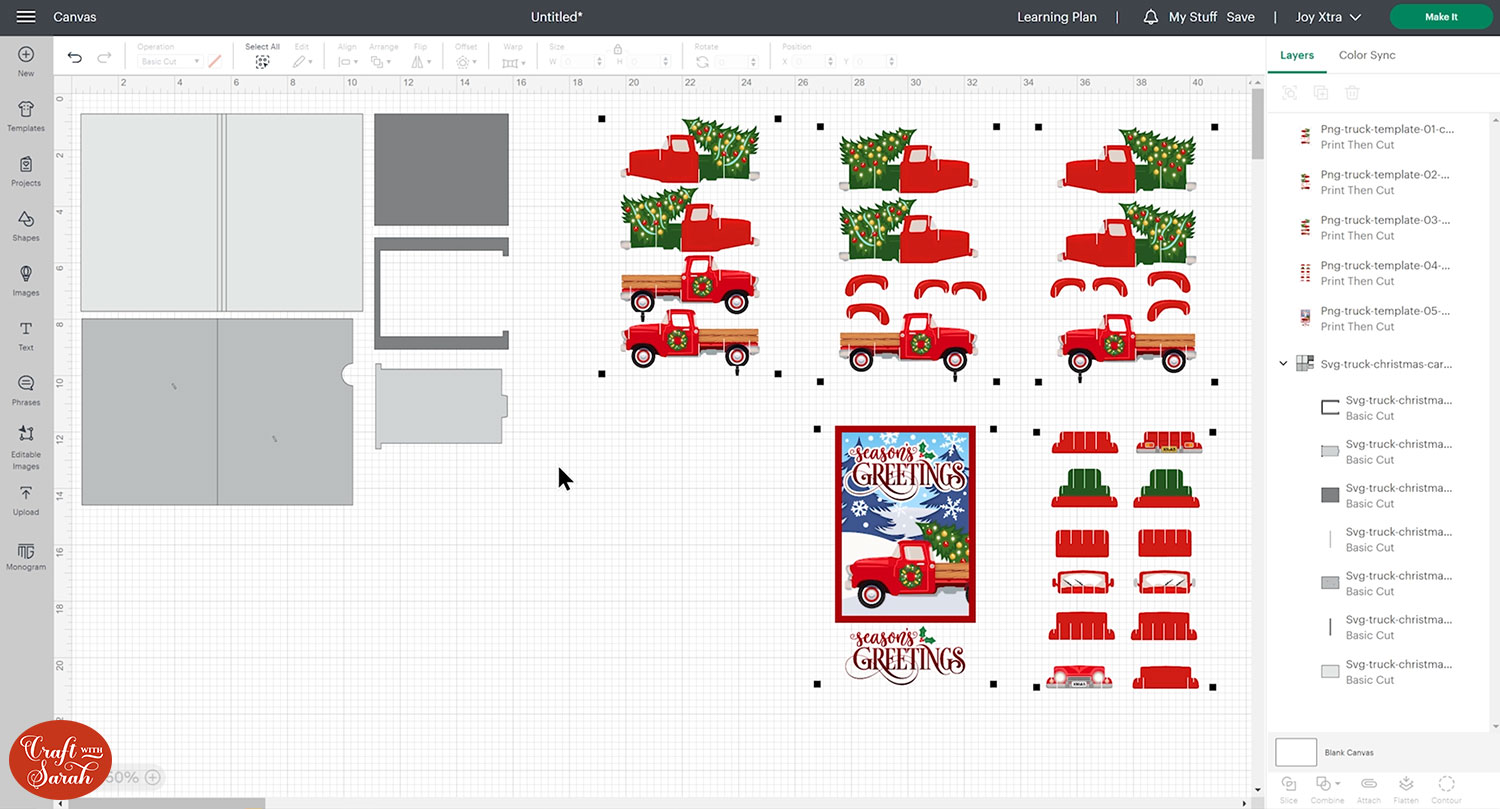
Step 4) Format the card in Design Space
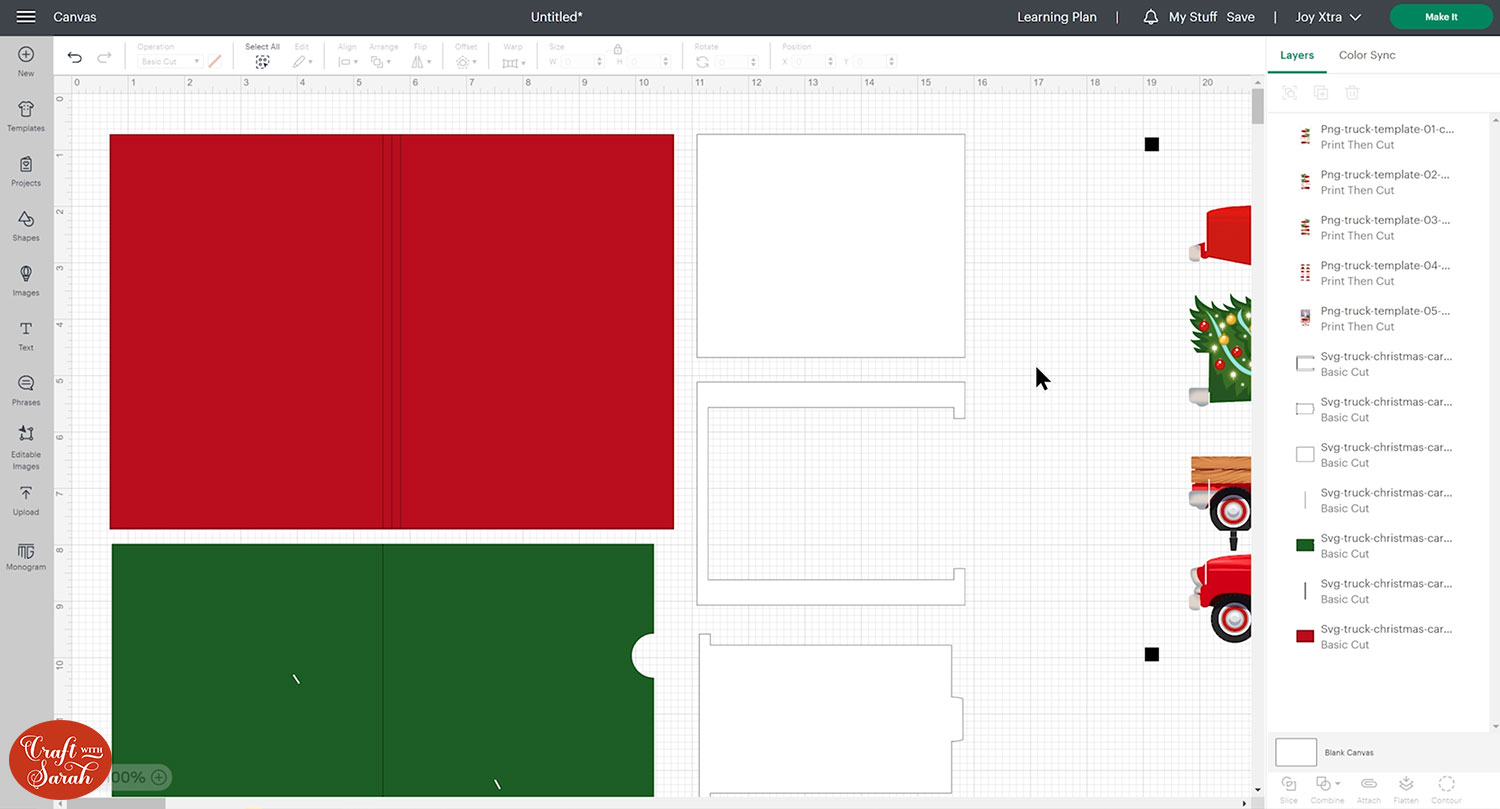
Looking at the card SVG design, the light grey piece is the front of your card.
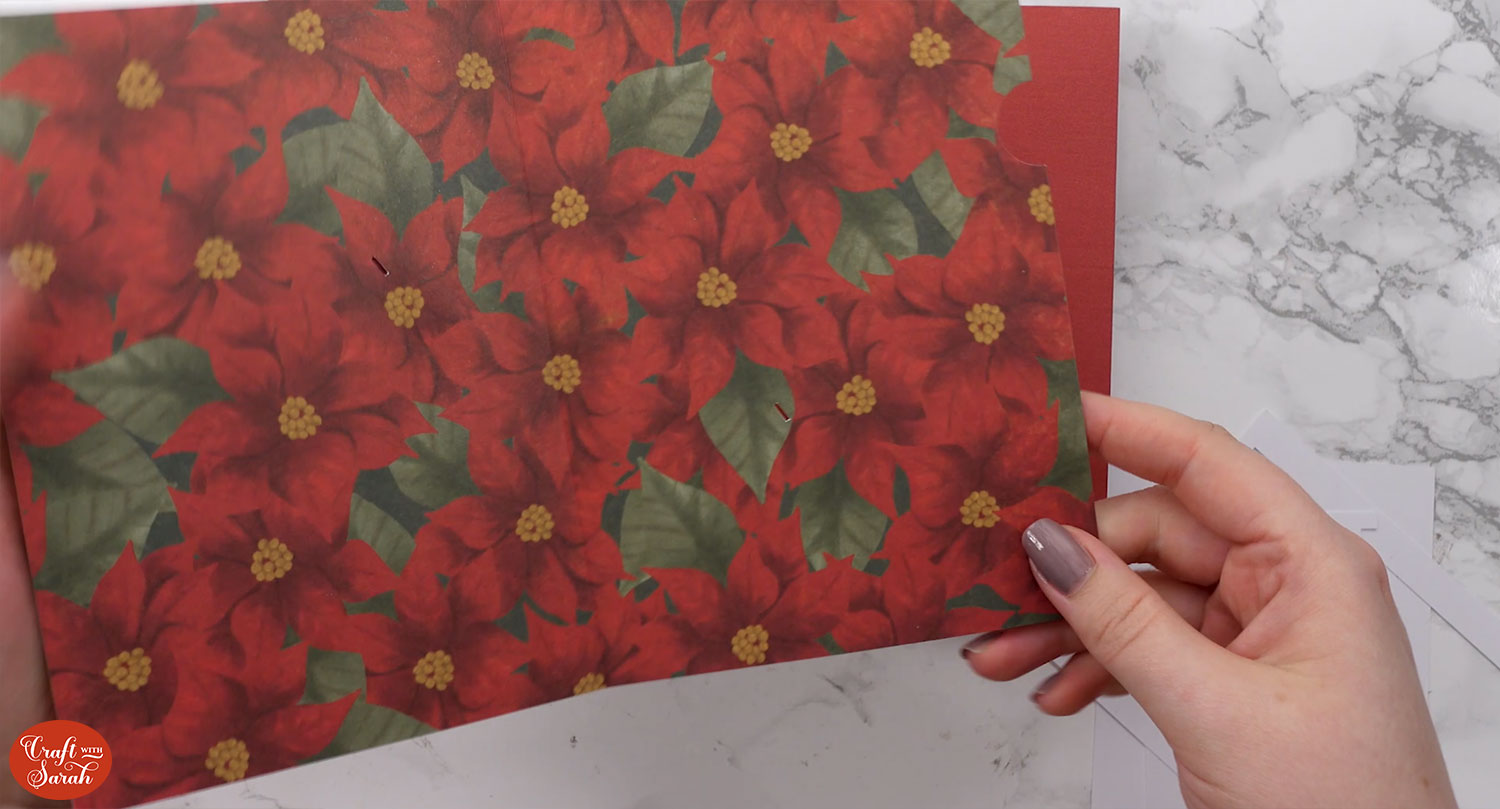
The piece below with the semicircle cut out will be cut from patterned paper or cardstock for the inside of the card.
The smaller 3 pieces make up the secret message panel.
Click the card and Ungroup the layers by pressing the Ungroup button at the top of the layers panel so that you can start playing around with the colours.
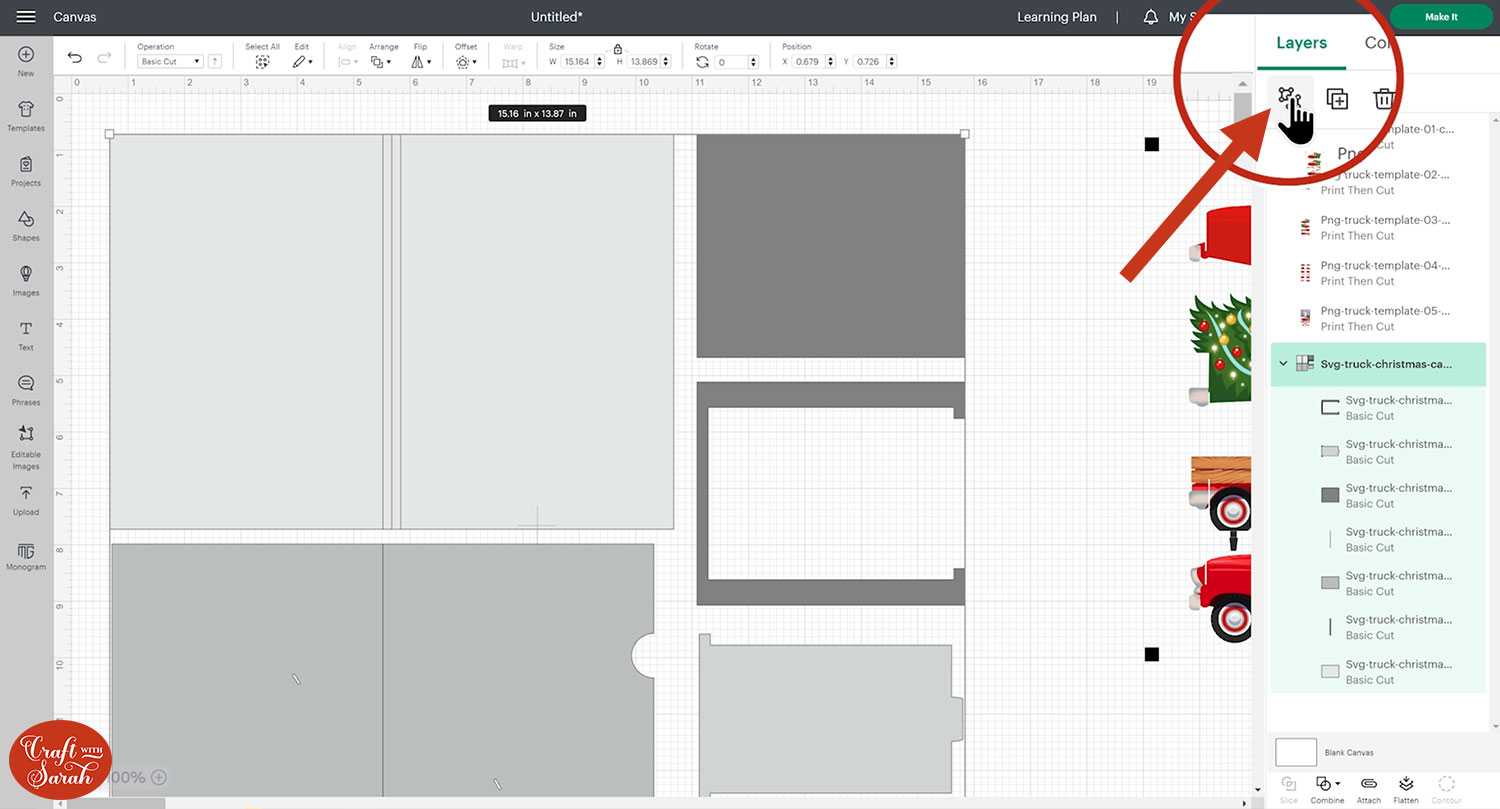
Change the colours to help you remember which piece is which. For example, I changed the inside piece to a green so that I would remember it needed to be cut from my patterned paper.
Change the colour of your outside card piece to match the cardstock you have in mind.
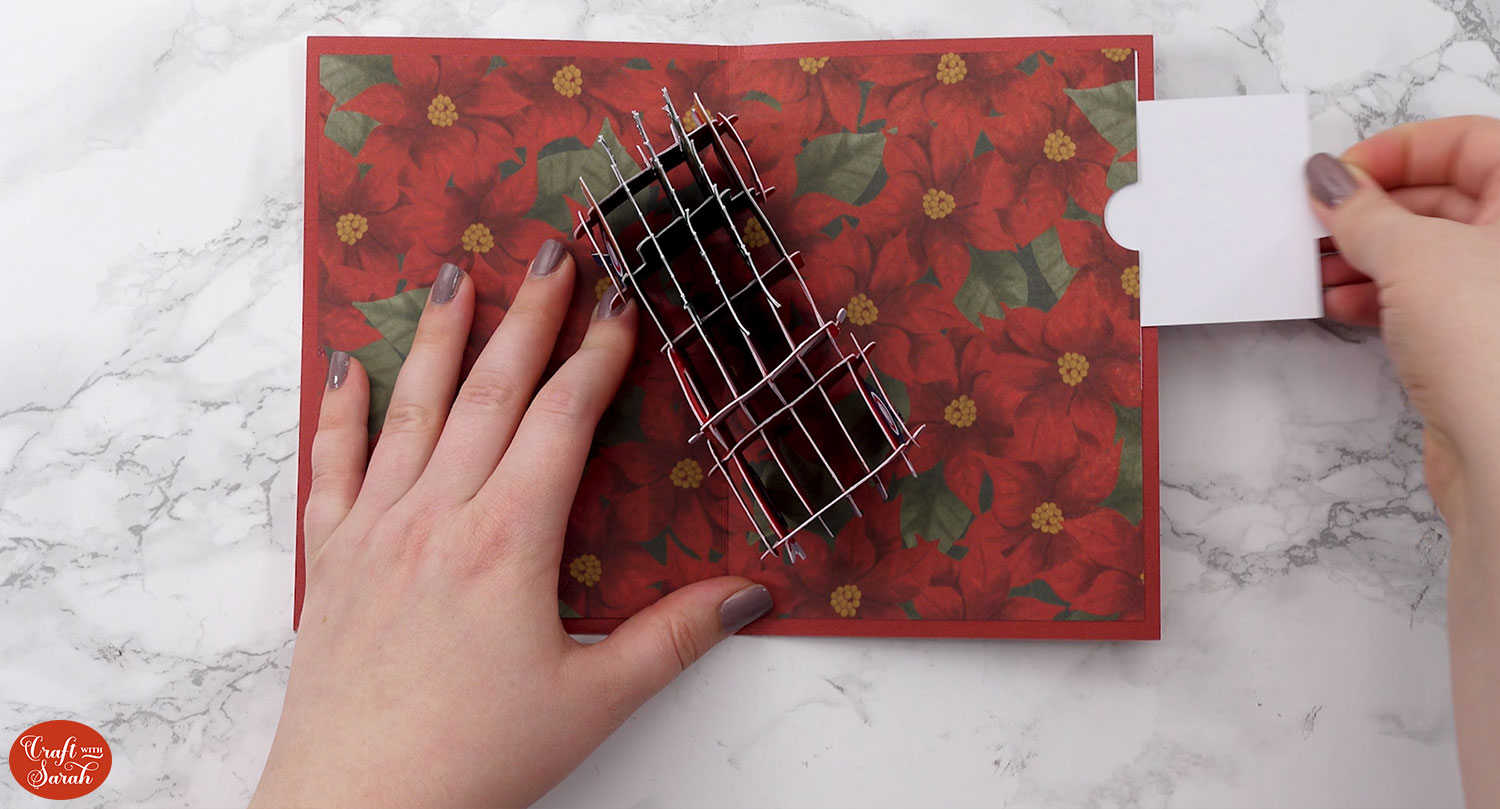
For the hidden message panel, the smaller bottom piece is the one you will write on. I cut mine from white so that the message will show up clearly.
The other two bits are what holds the message panel in place so they won’t be seen. You can cut these from whatever colour cardstock you want or have most of. It’s a great way to use up those scraps!
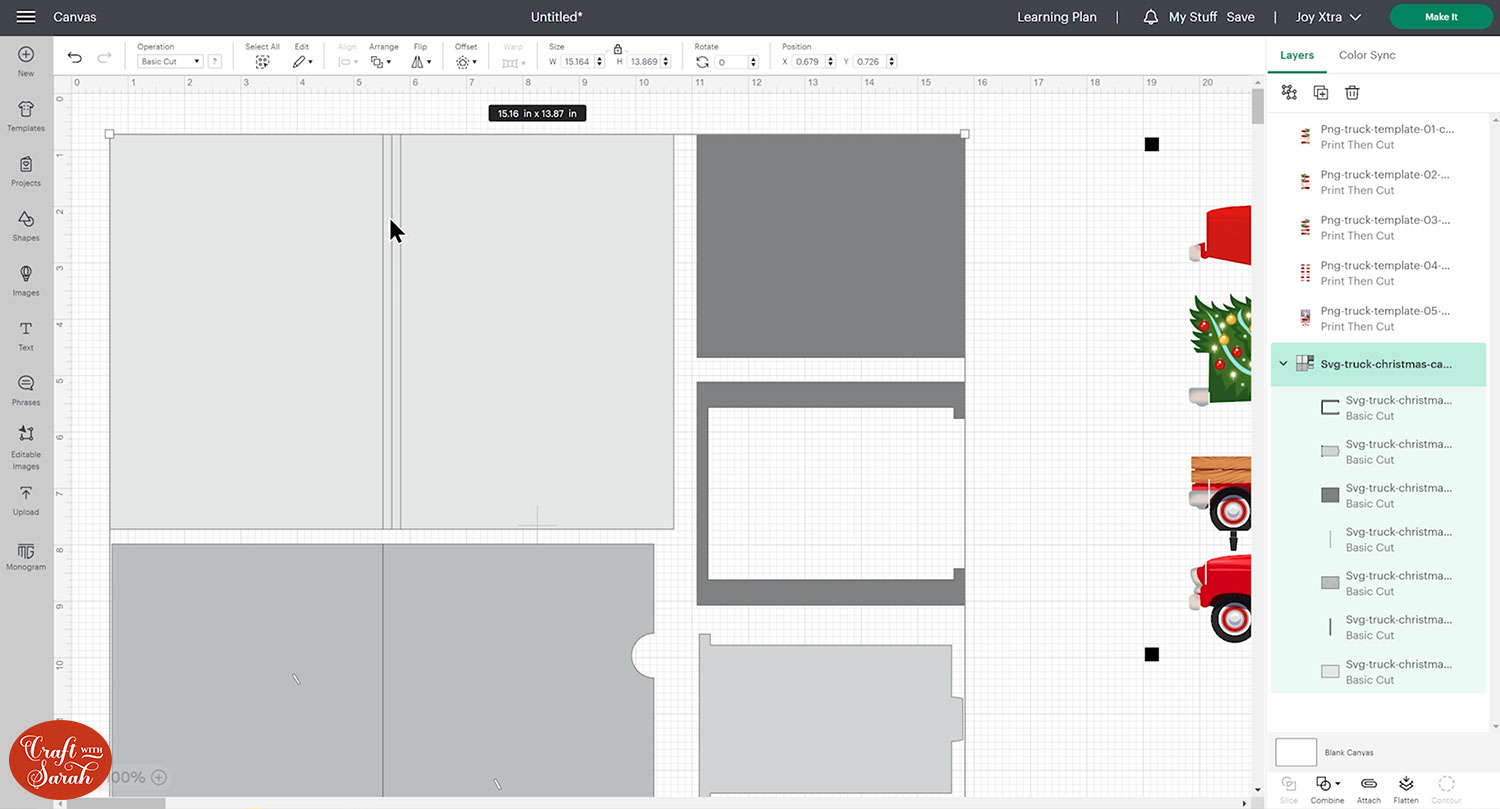
Look down the layers panel until you see a vertical line piece which sits above the greetings card base.
Click this layer and change it to a Score Line under the Operations dropdown.
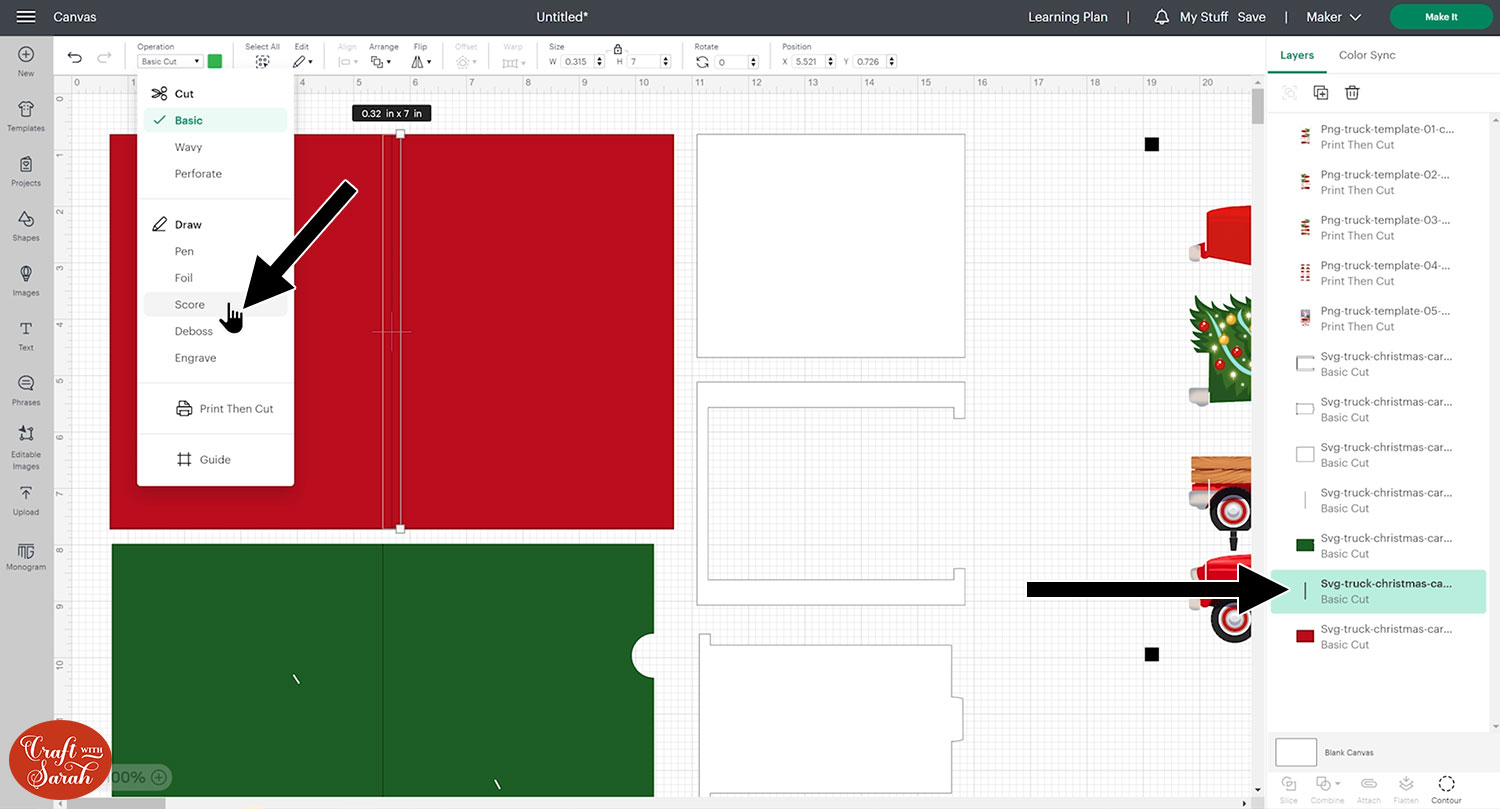
If you have the Cricut Joy Xtra and would still like to make this card without the scoring tool, you can set it to a foil line and use the foil tip to score for you. Unfortunately you won’t be able to make the card on the original Cricut Joy.
Select the score line and the card base layer underneath. Press Attach to tell the Cricut where we want it to do the score lines on the card.
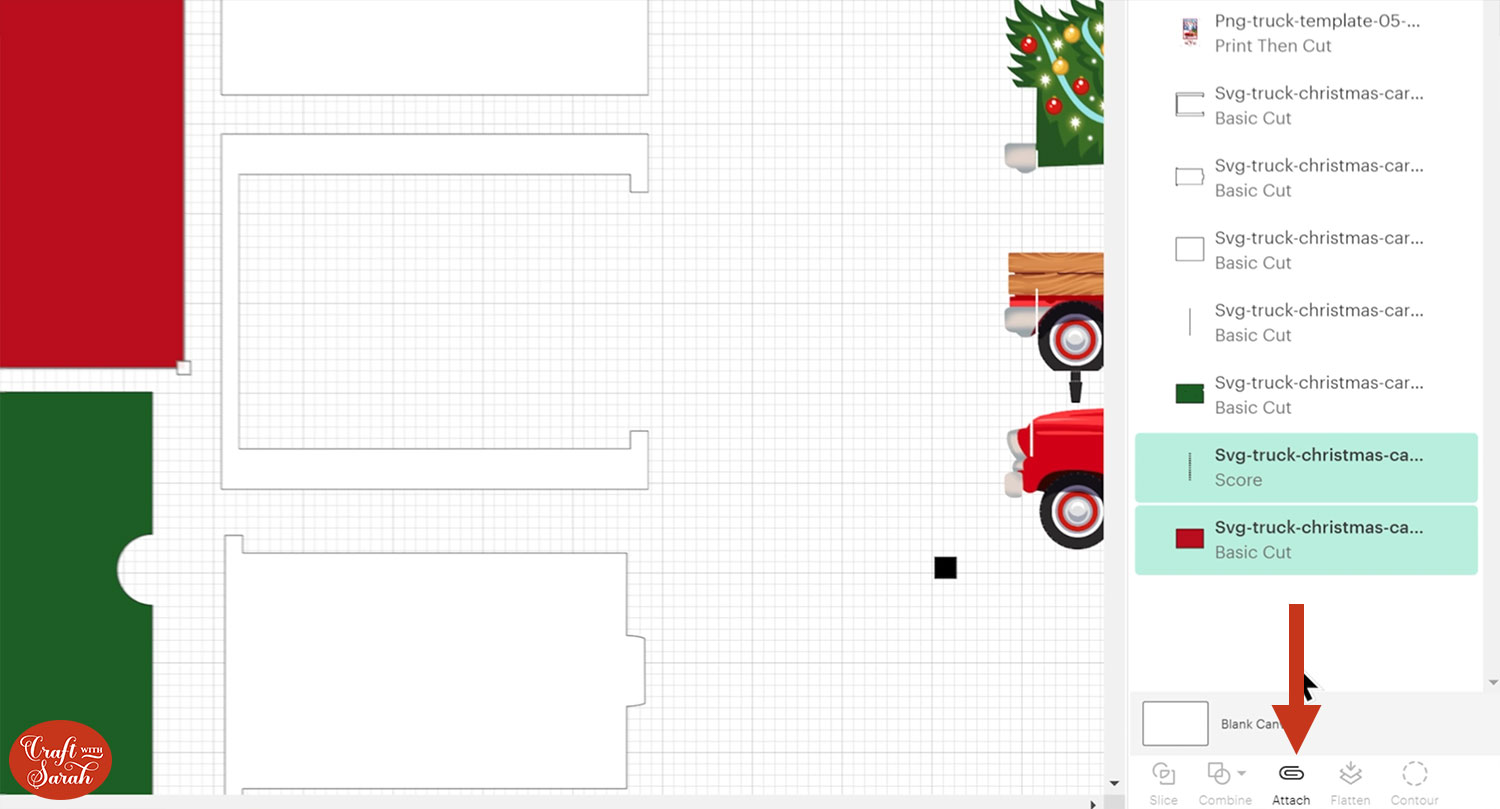
There is one more score line to format which you will see on the inner card piece. Change the line to score, select both layers and click Attach.
Save your project as everything is now formatted. Saving the project means that if you want to make this card again, it will be ready and waiting for you with all the formatting already completed.
When you’re ready, click “Make It” and get everything printed and cut out following the on-screen instructions.
Make sure “Bleed” and “Use System Dialog” are switched on. Use the system dialog to change your printer settings to the highest possibly quality.
If you are new to Print then Cut or if you would like a refresher, here is a tutorial on how to print then cut on a Cricut.
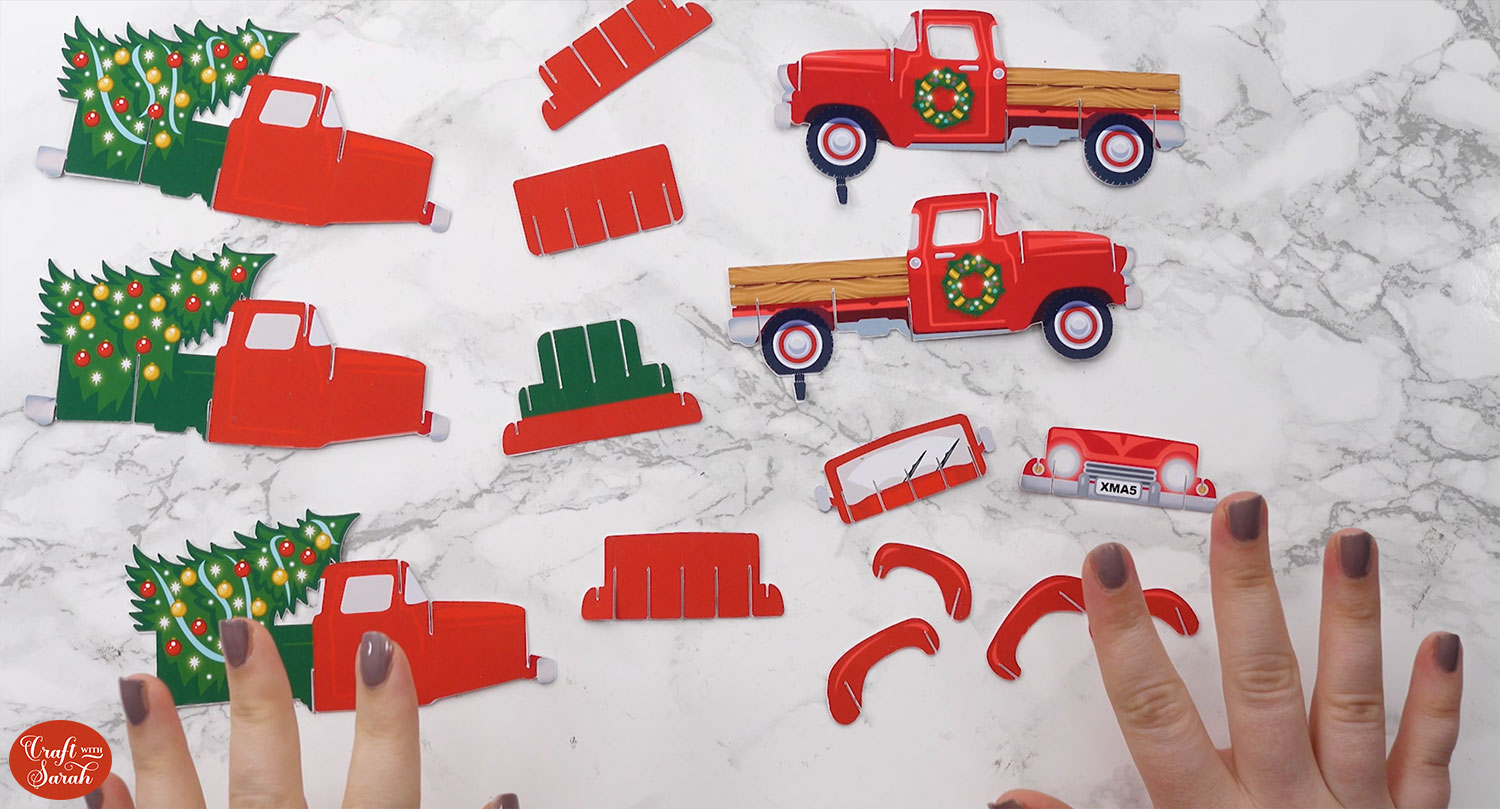
Step 5) Assemble the pop up truck
With all the pieces cut out, match up the truck shapes into pairs of the same size/shape. Glue them back-to-back so that the pieces become double sided and pretty on both sides.
To protect the edges as you slot the pieces together, use a tiny amount of glue (preferably a non solvent glue) and apply to the edges where the slots are and use your finger to gently rub the glue along the line.
Be careful not to get the glue onto the sides. This is an optional step but it will help your piece to stay firm as you place them together.

Allow all the pieces to dry thoroughly after doing this.
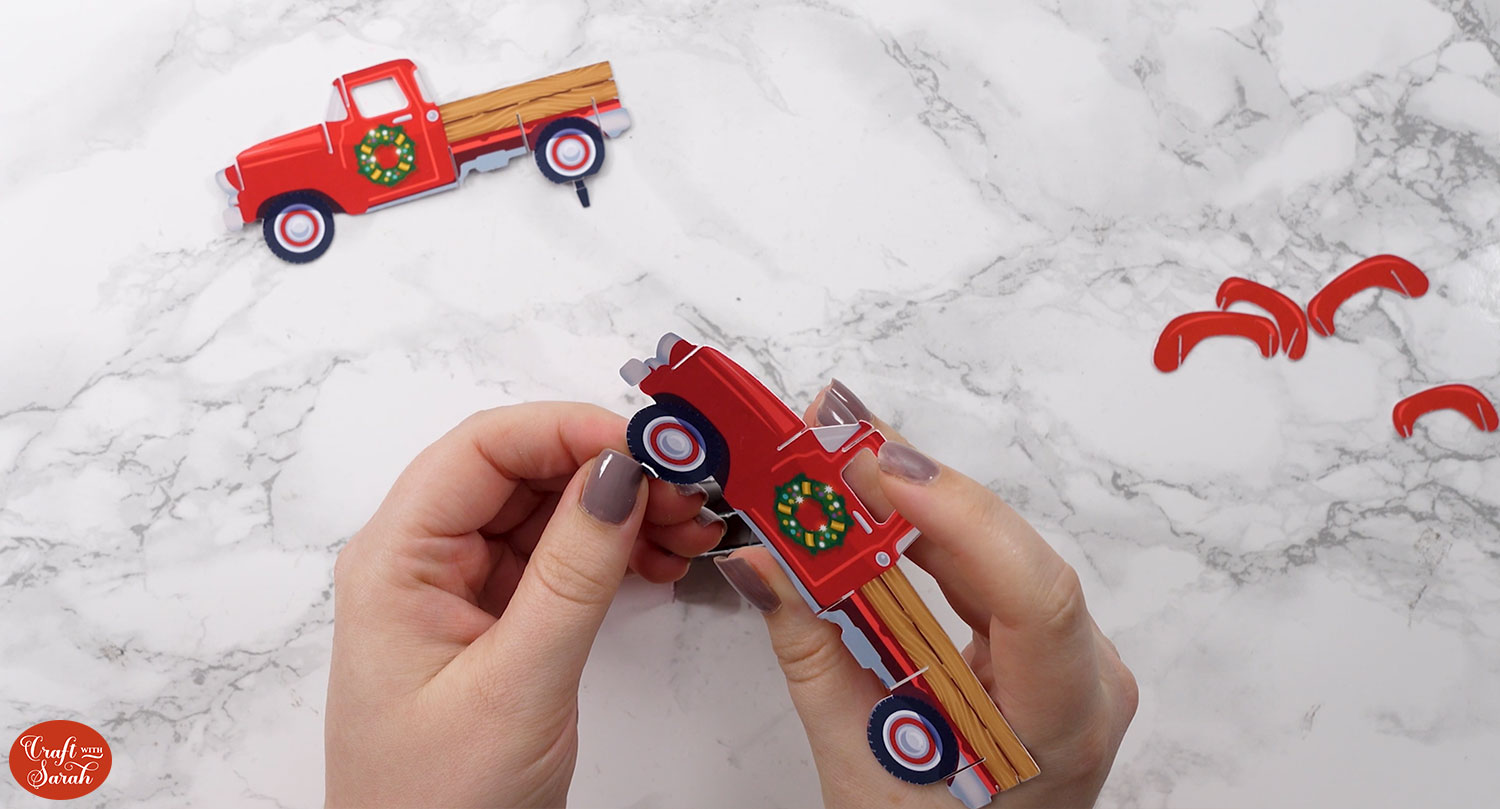
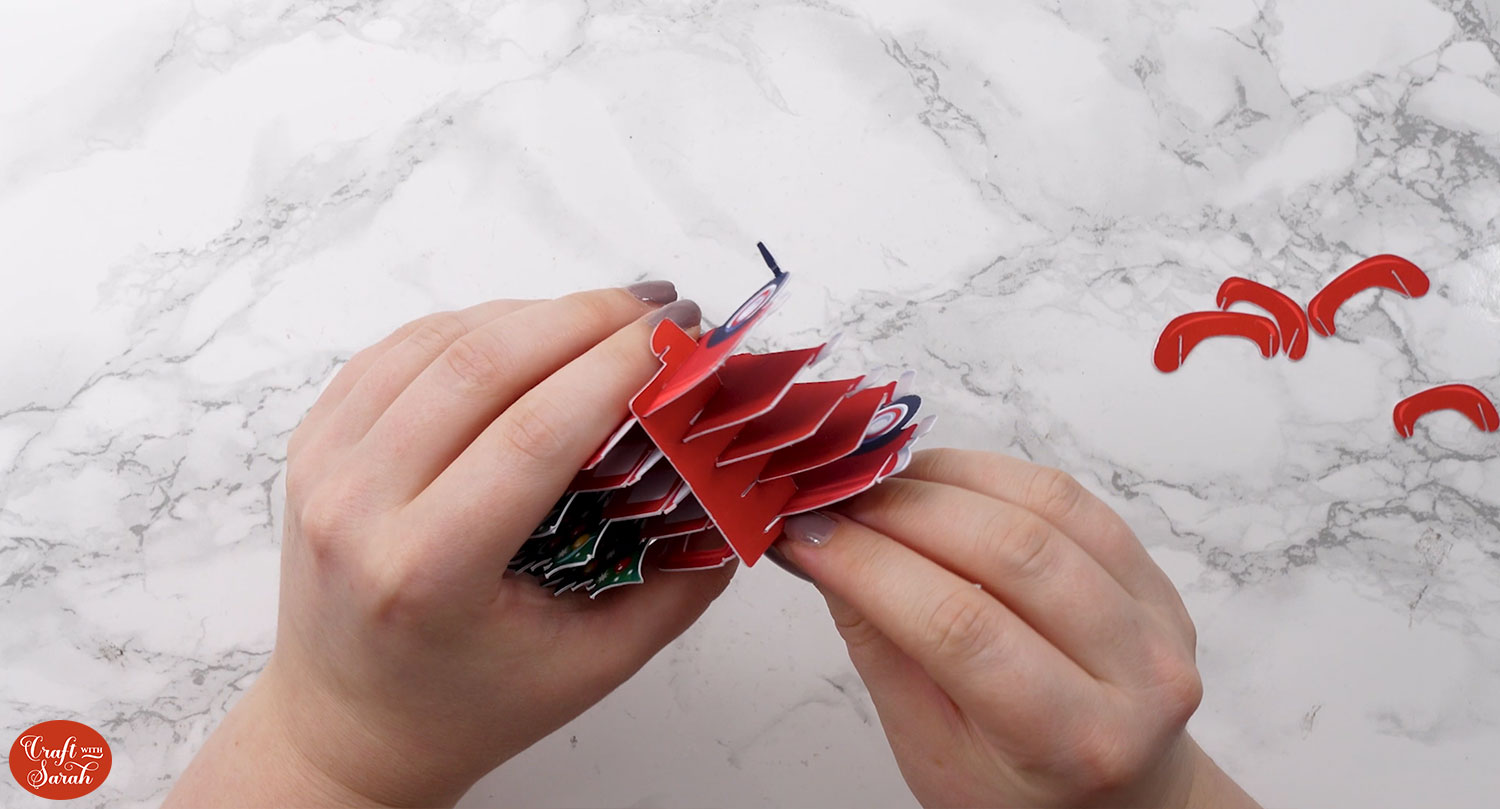
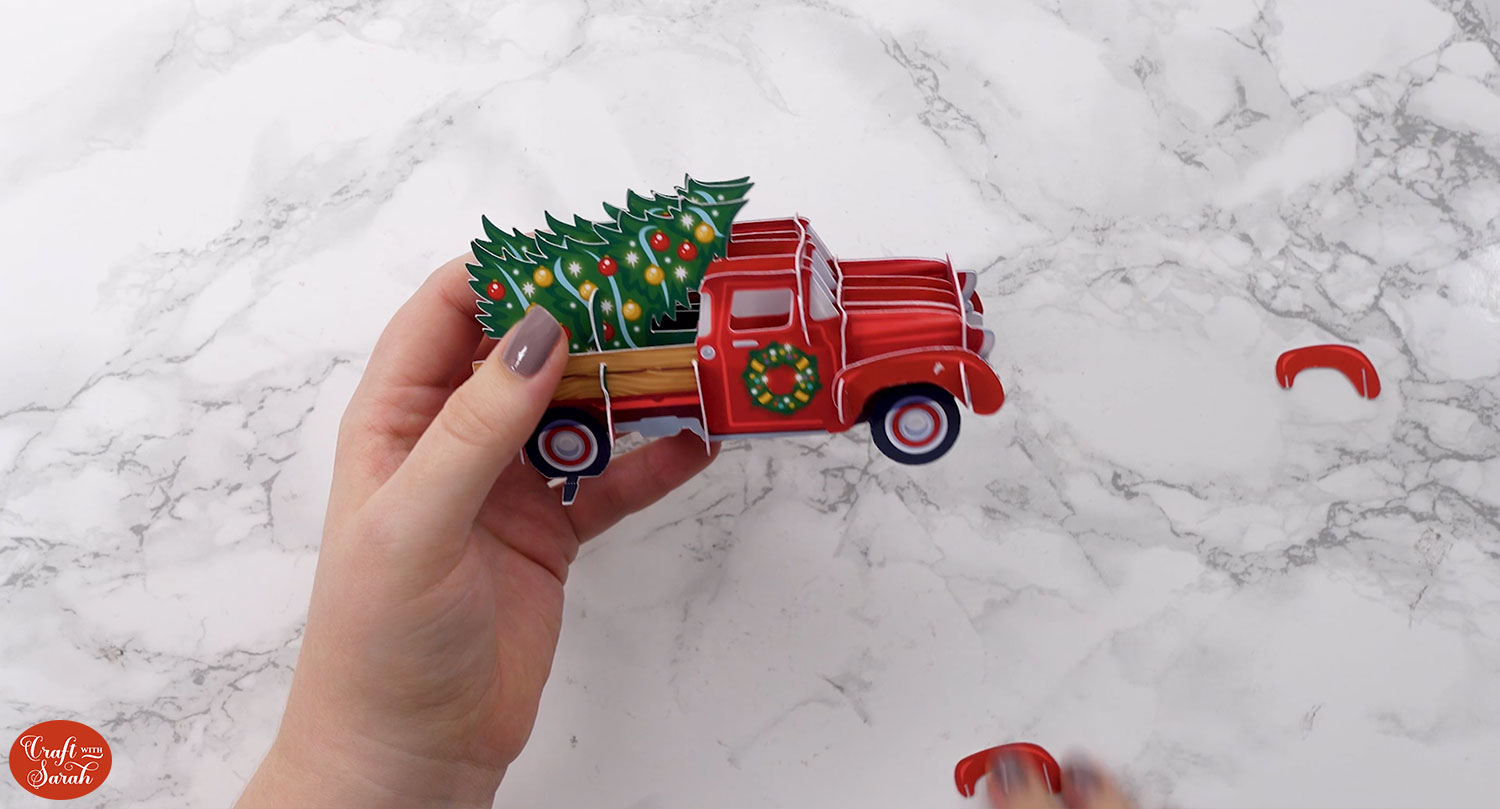
Now it’s time to put the truck together!
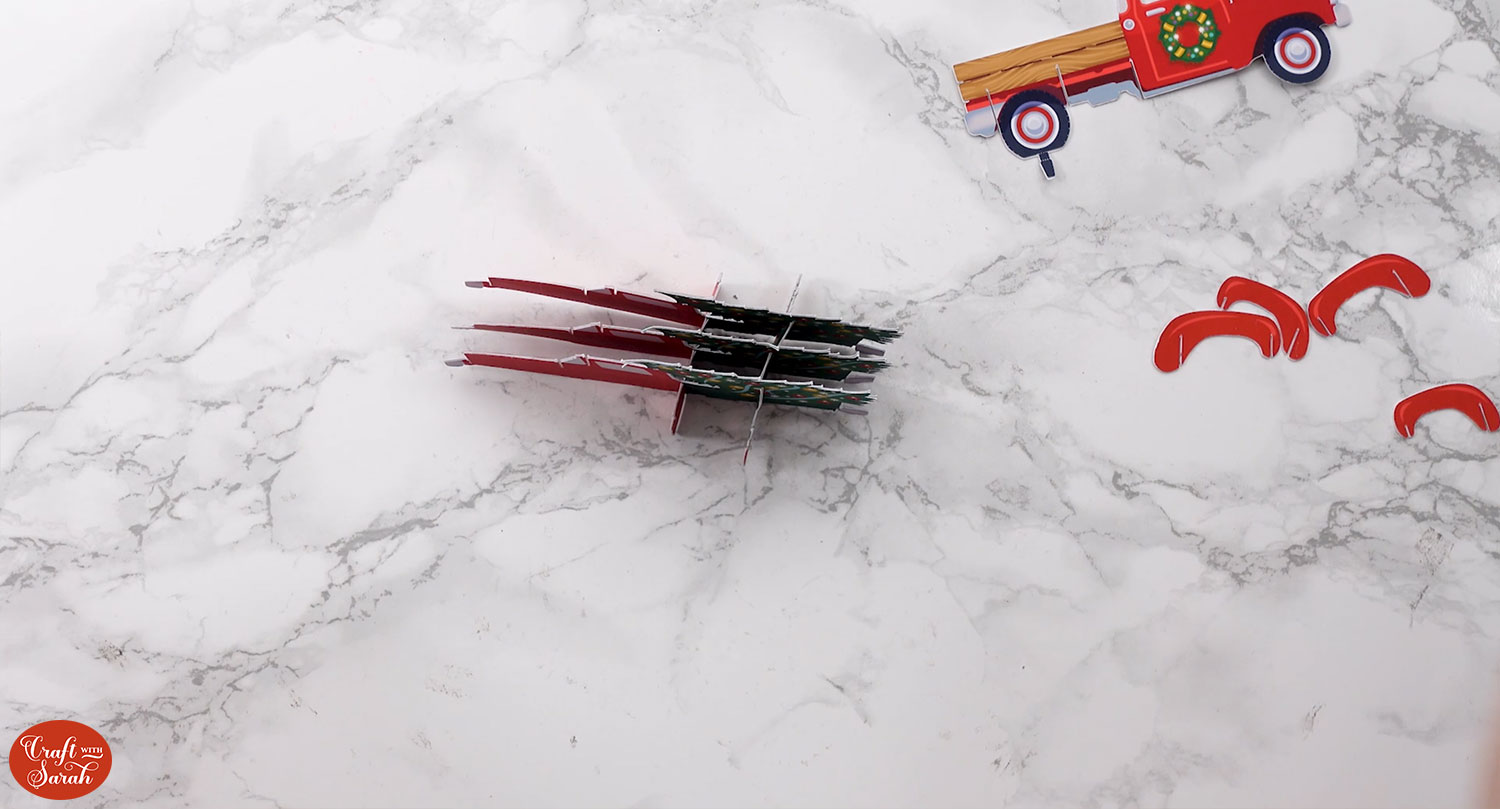
Start with one of the pieces which has the Christmas tree in the back. Take the green slotted piece and the red piece which doesn’t have any sort of flaps on the edge.
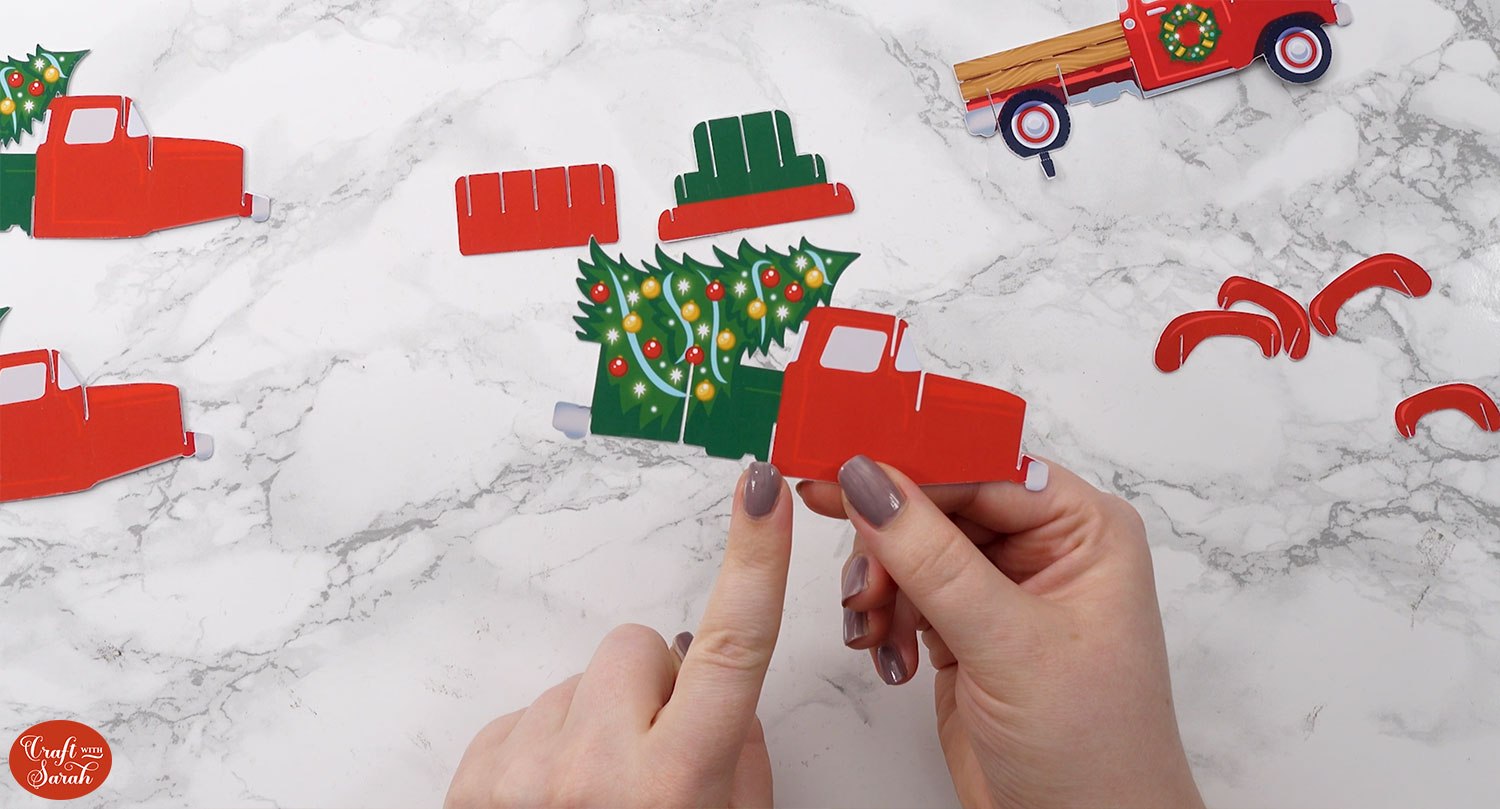
Take the tree piece and, using the bottom two slits, match the green slit with the green small piece. Slide it into the middle slit on the smaller green piece.
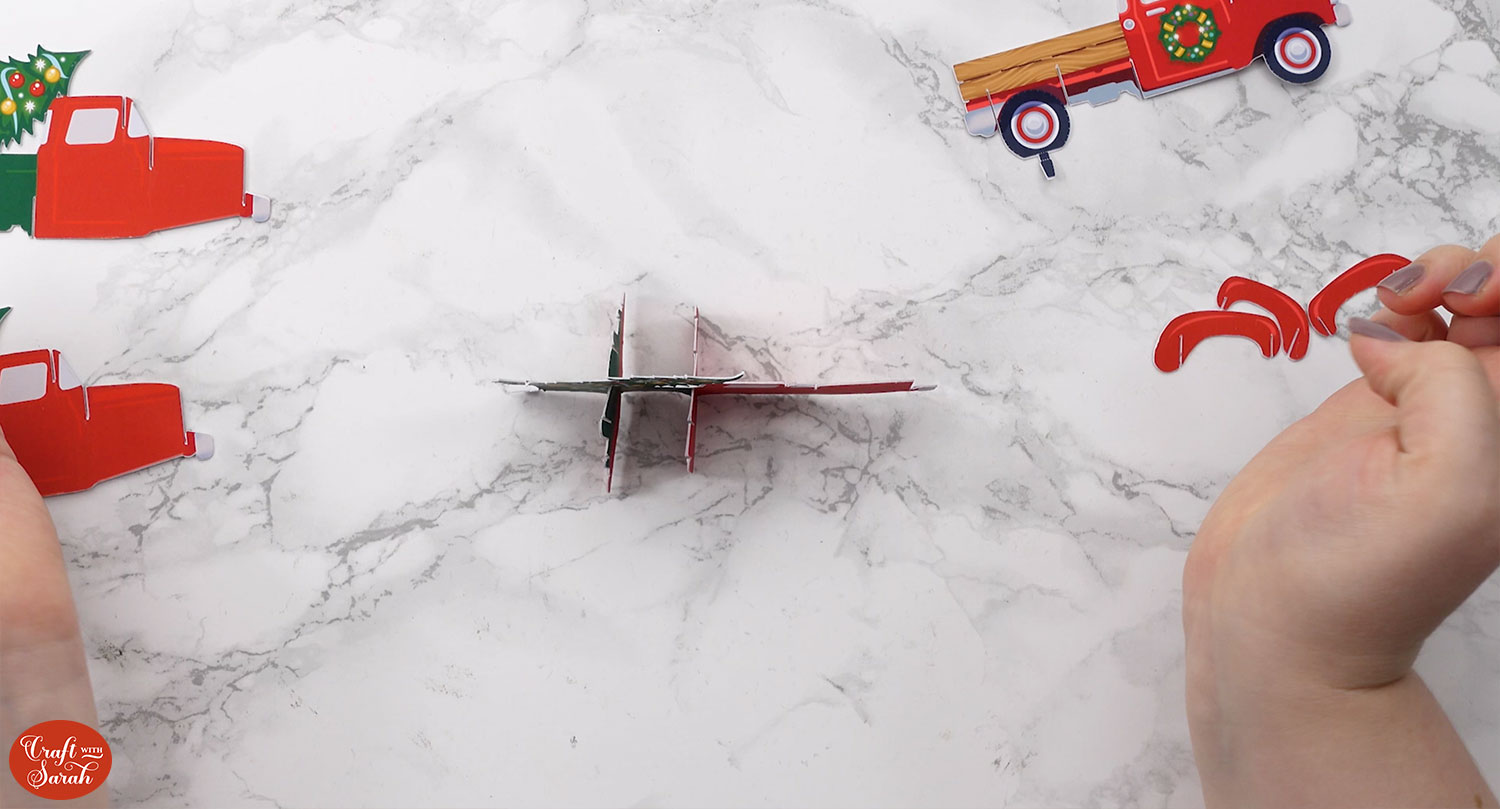
You may need to wiggle it about a bit but check that the two pieces make a perfect cross on the bottom. The two pieces should flush with each other.
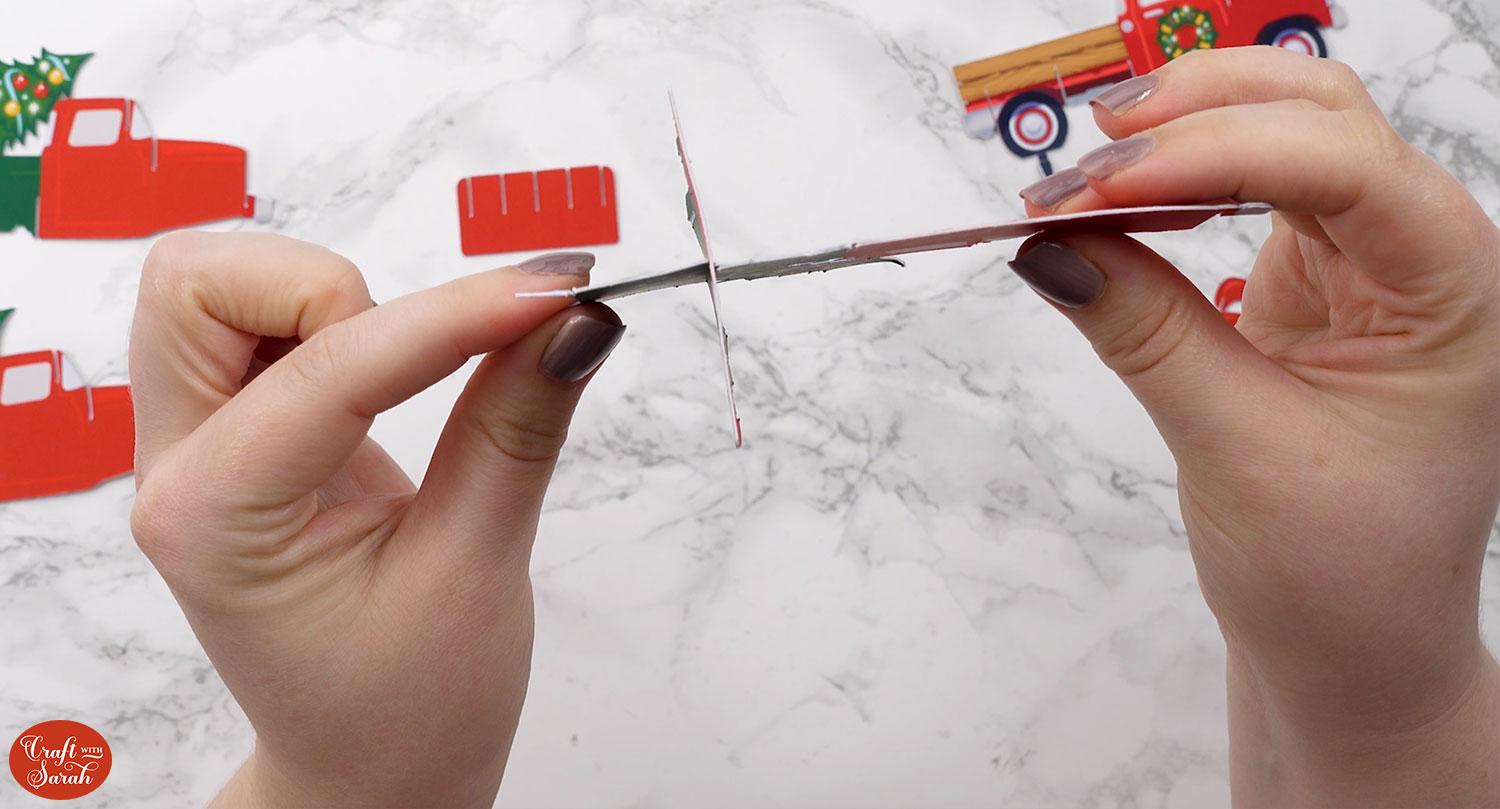
Slot the small red piece into the gap by the door of the truck.
Make sure to push it in all the way. The truck should be able to stand up by itself now.
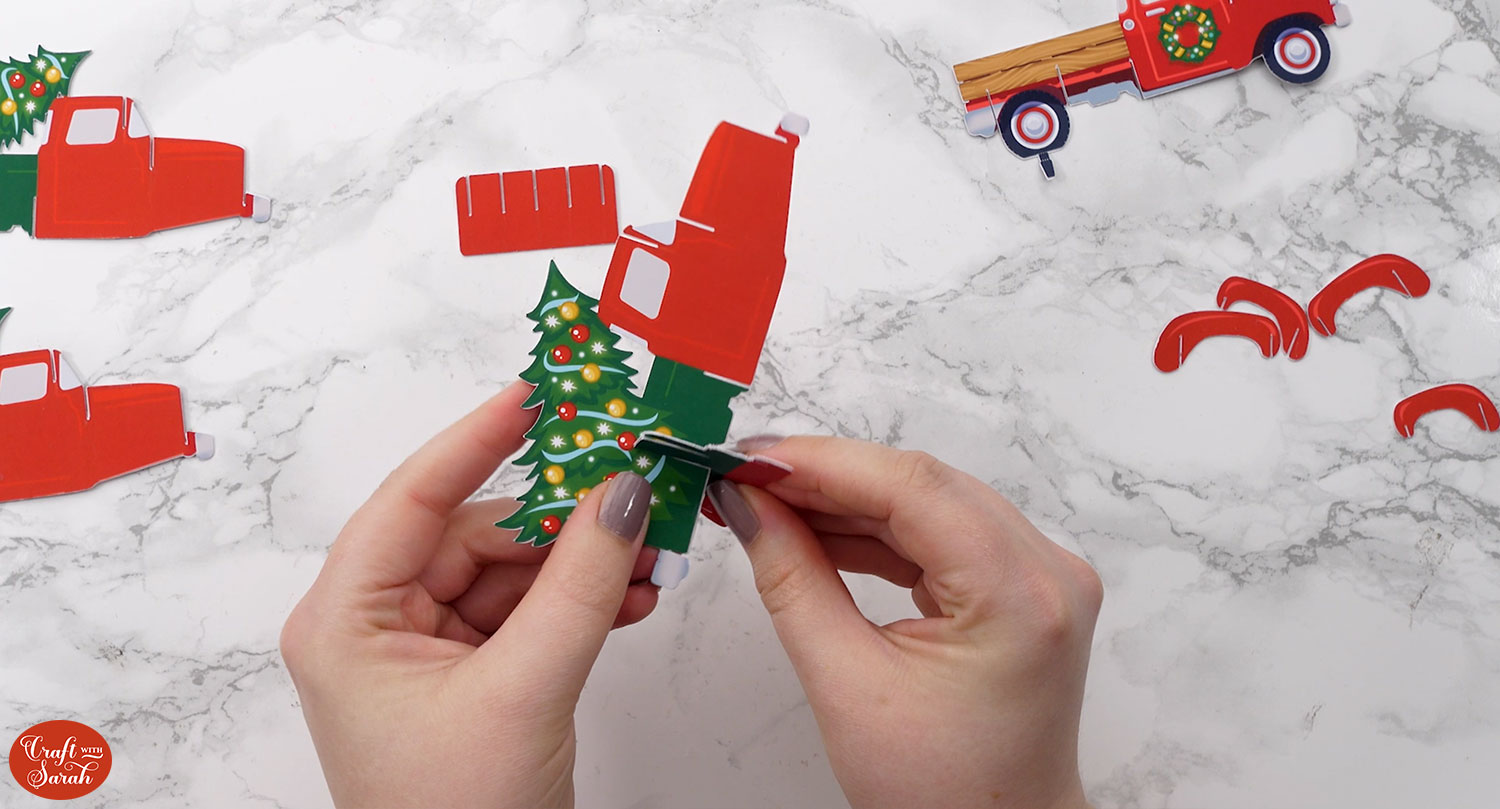
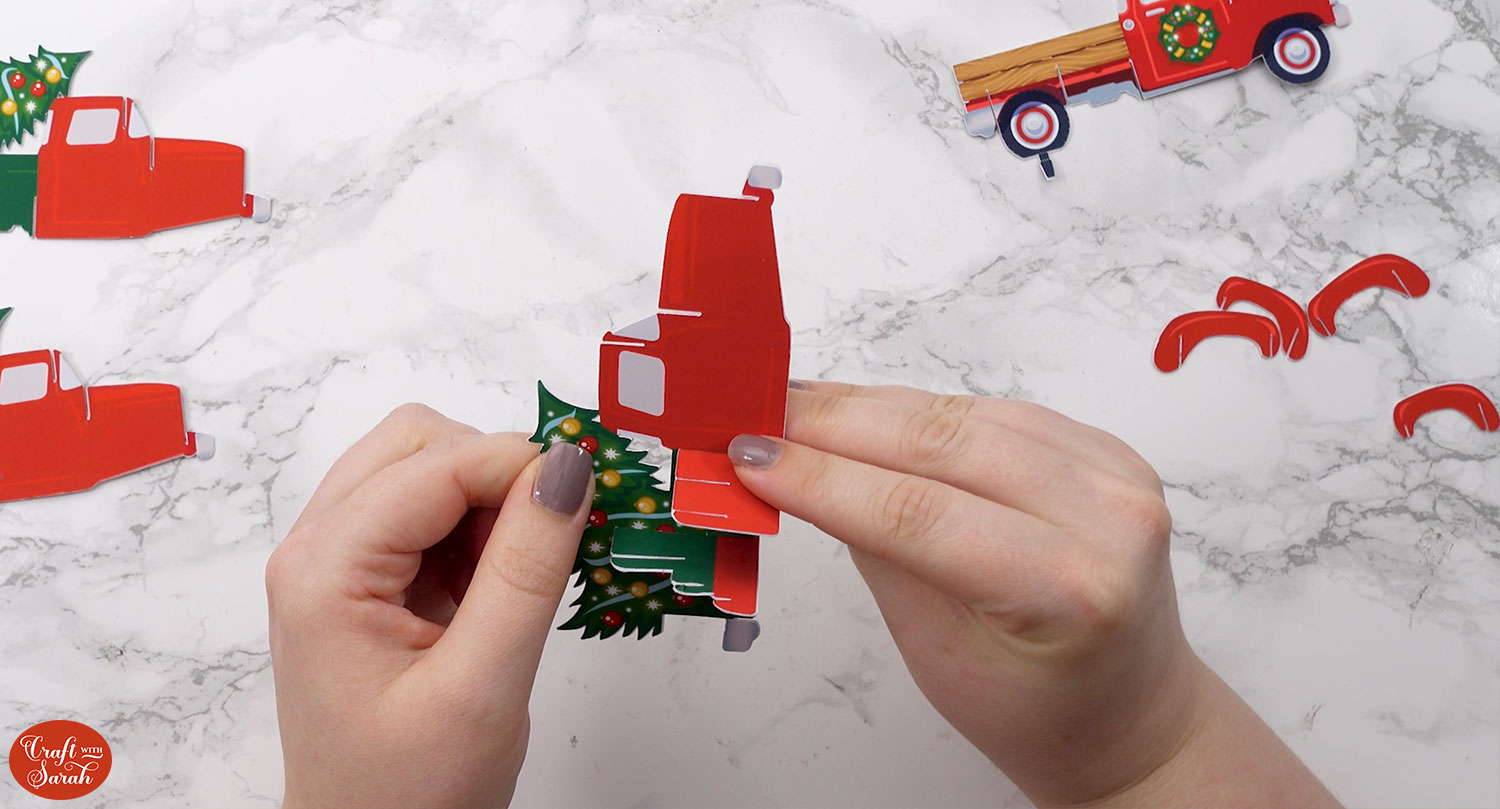
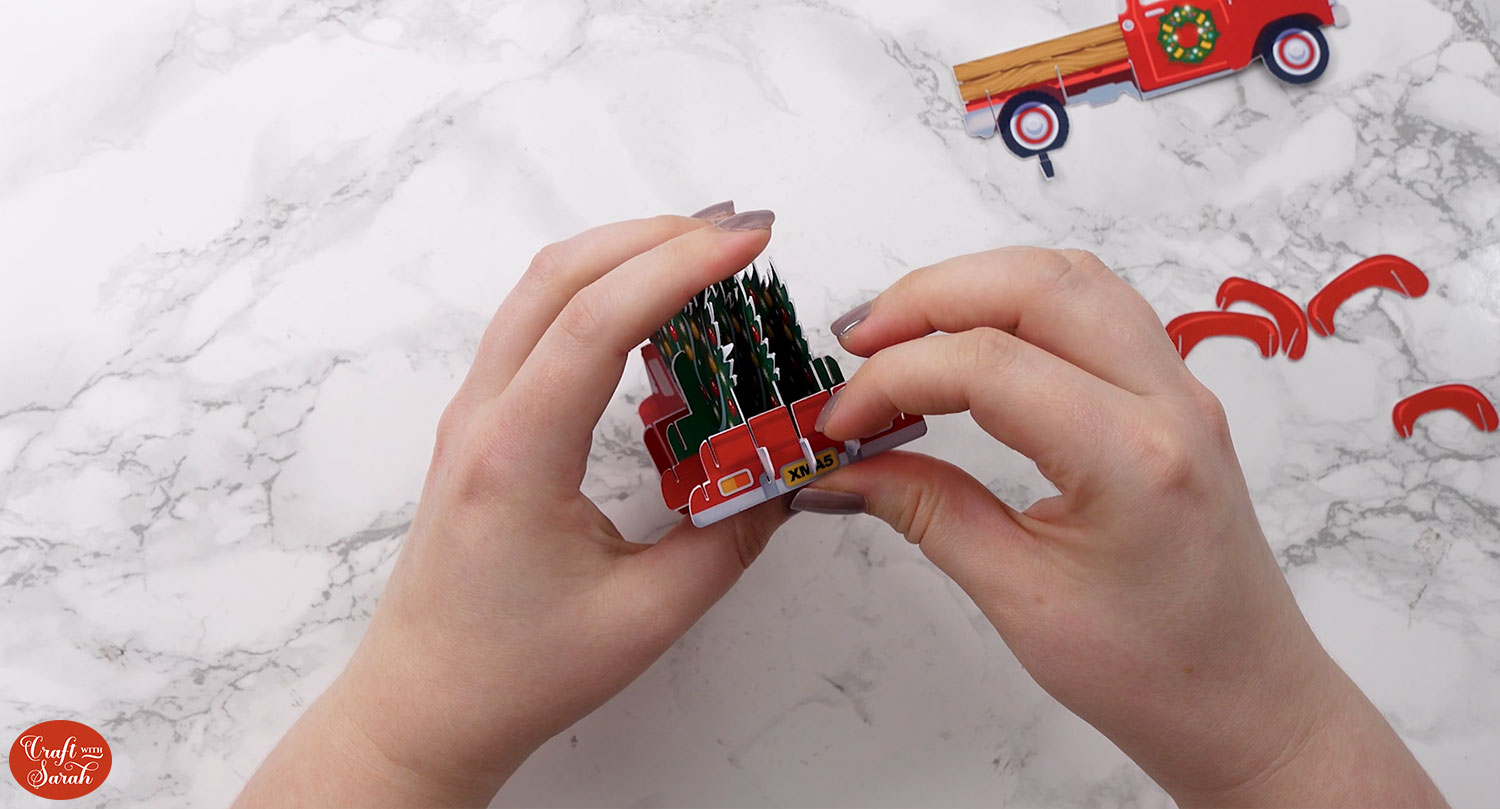
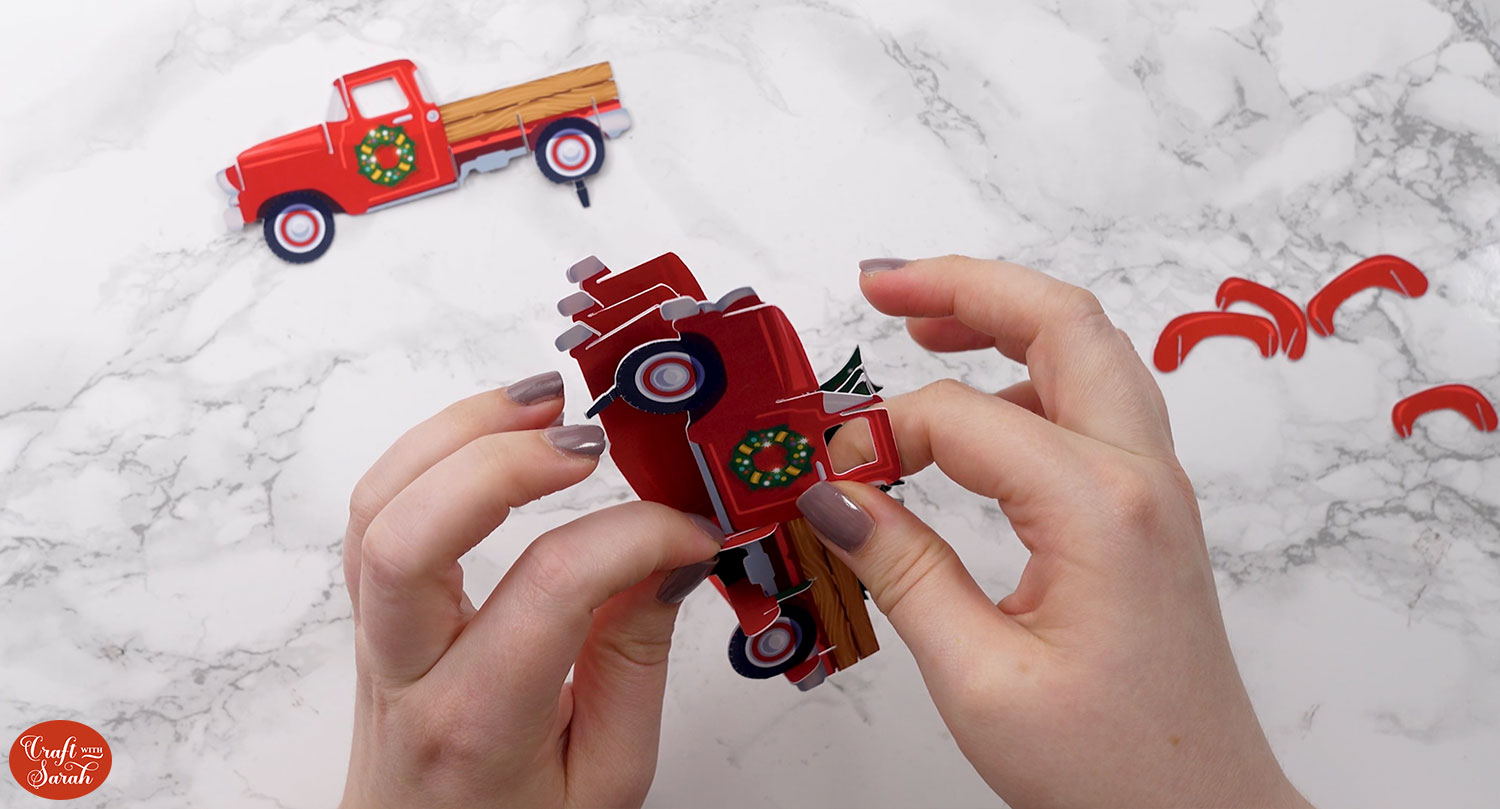
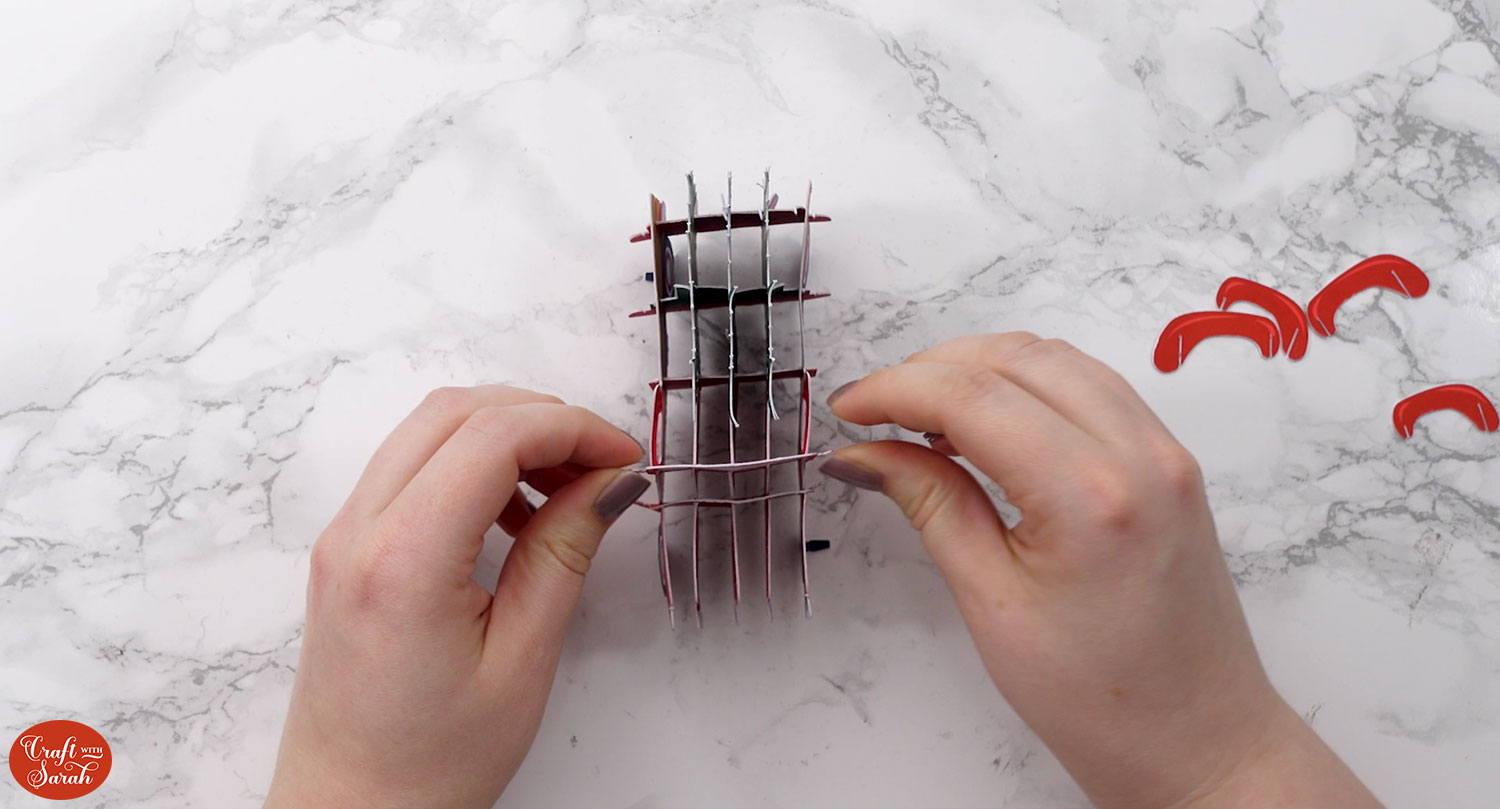
Next, take another Christmas tree piece and slot it into the corresponding slots on the middle slot pieces. Line up the slots and press them right down.
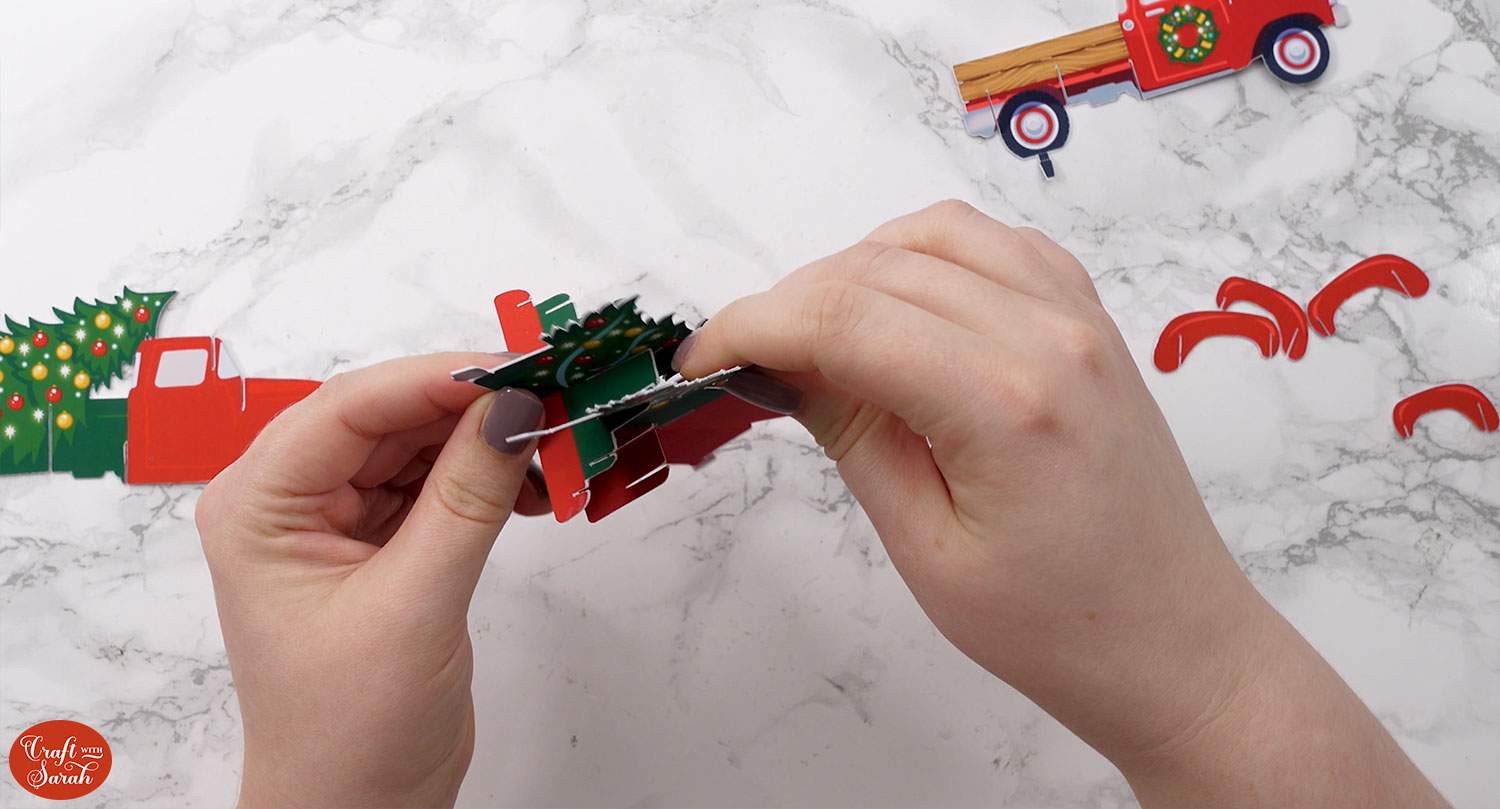
You may find that some pieces get out of position as you add new pieces. If that’s the case you may need to wiggle them around a bit but try to keep it all lined up as you go through.
Add the third Christmas tree piece to the corresponding slots on the opposite side to the piece you did previously.
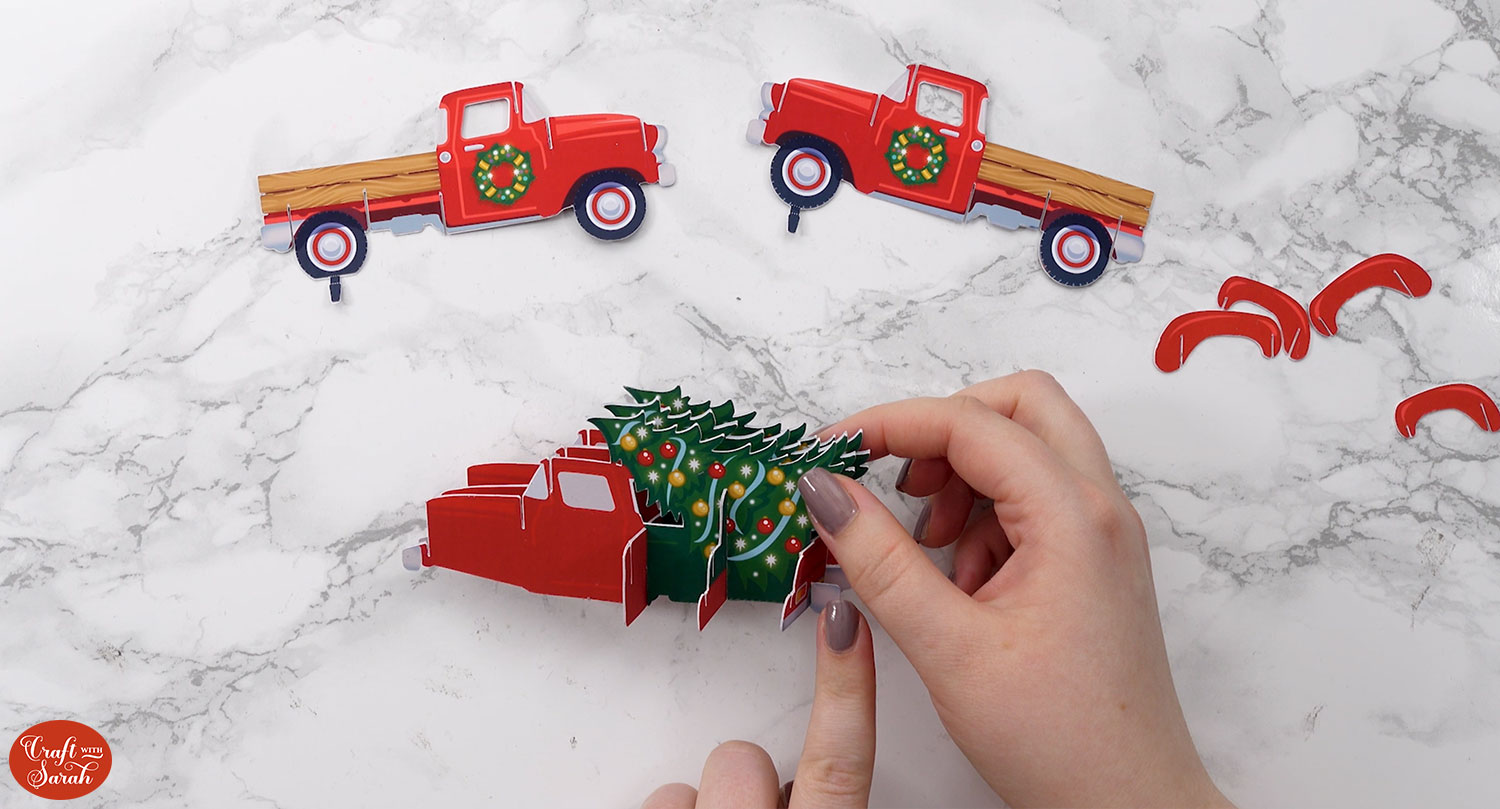
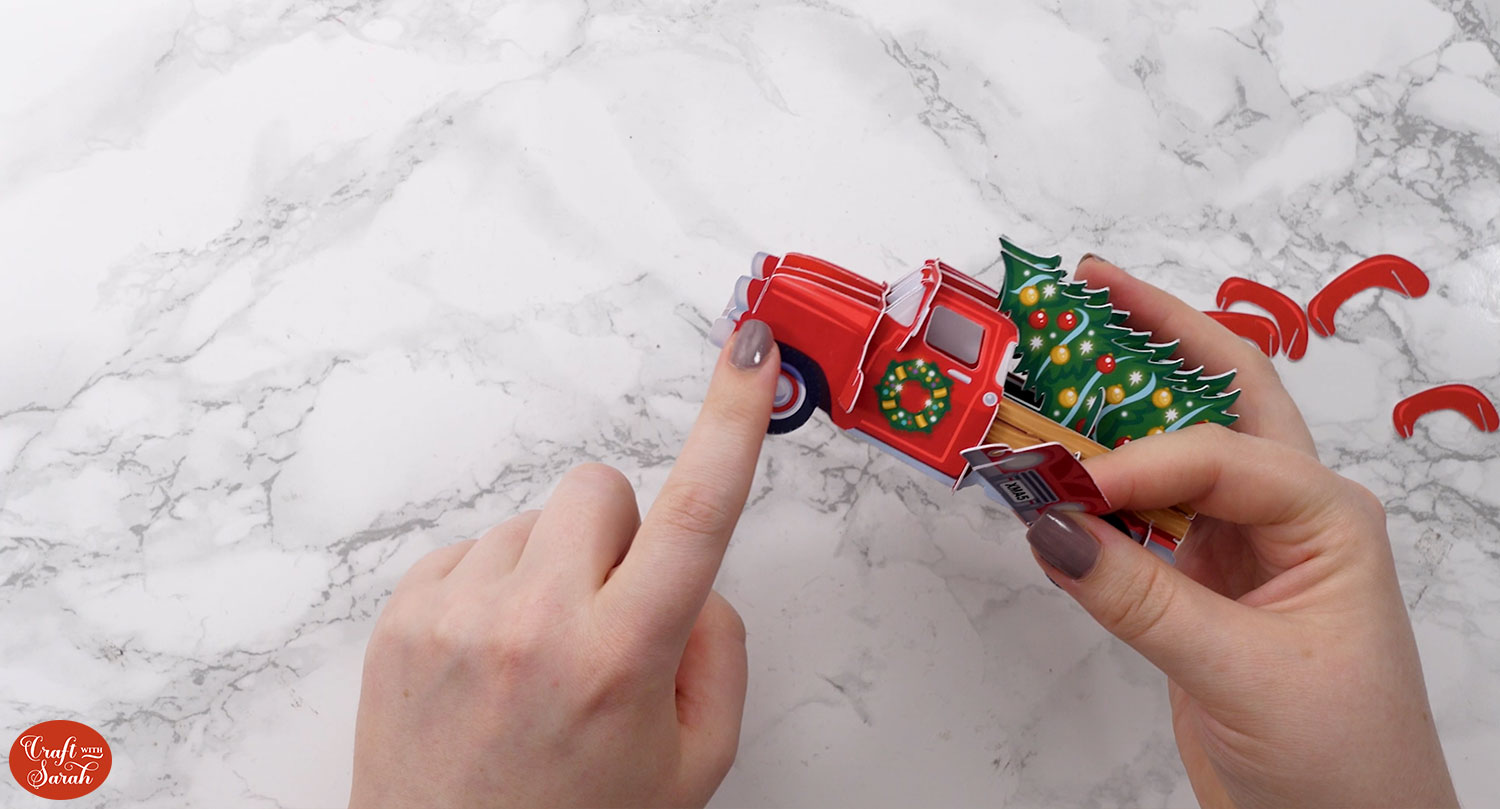
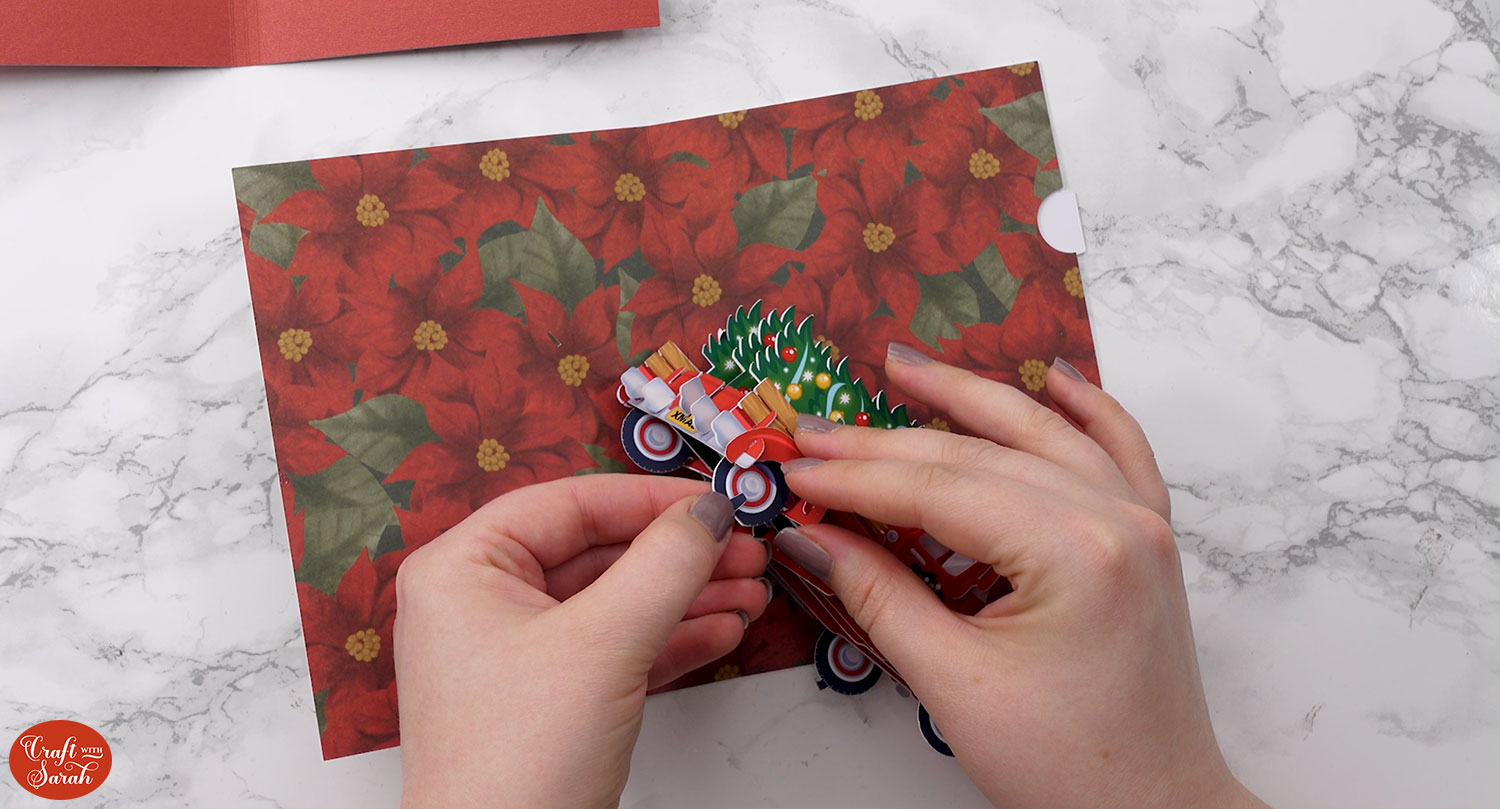
Find the piece for the back of the truck. Note that the license plate details are only on one side, so that side needs to be facing outwards. This piece slots into the back using the white slit sections.
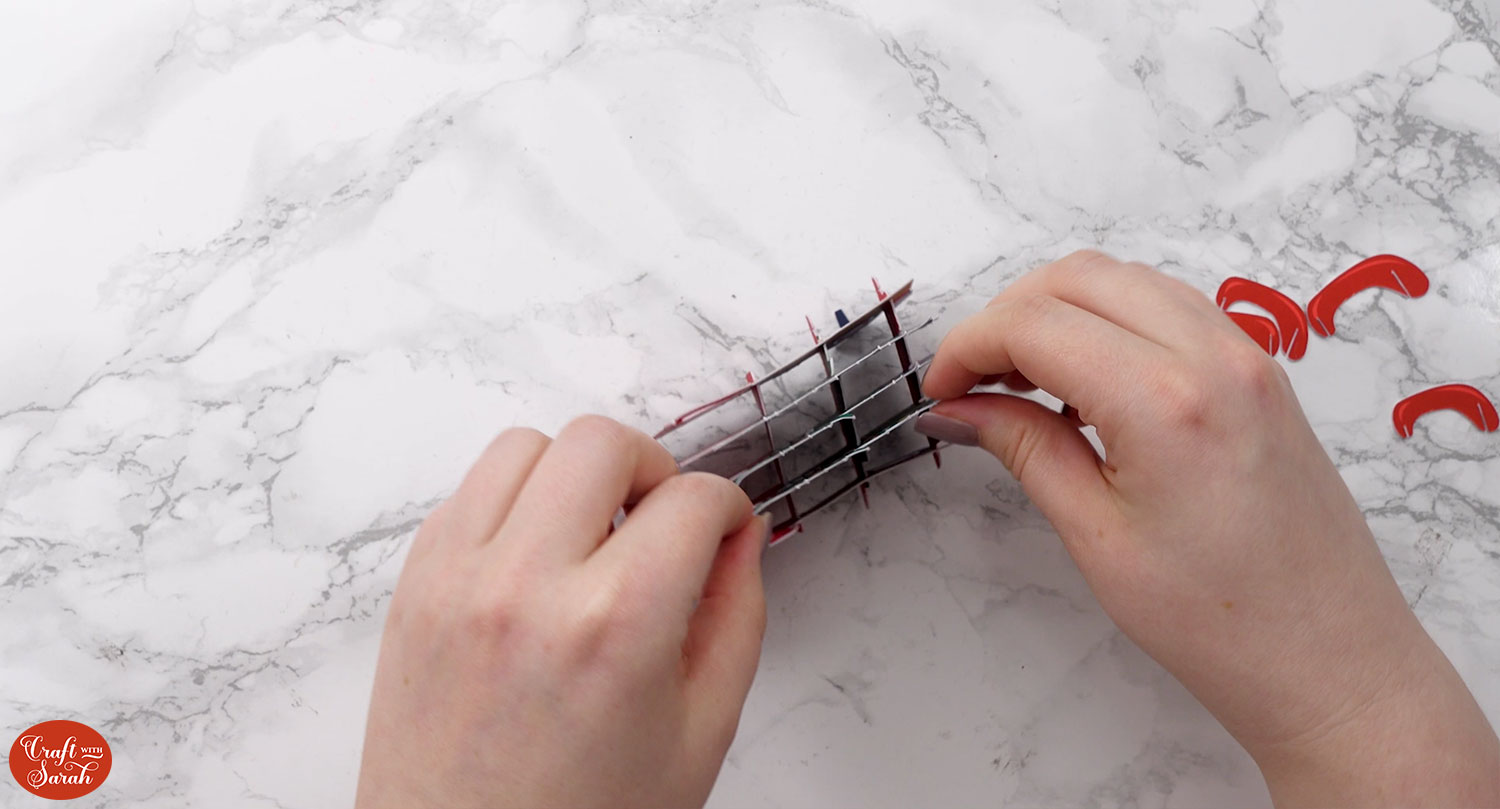
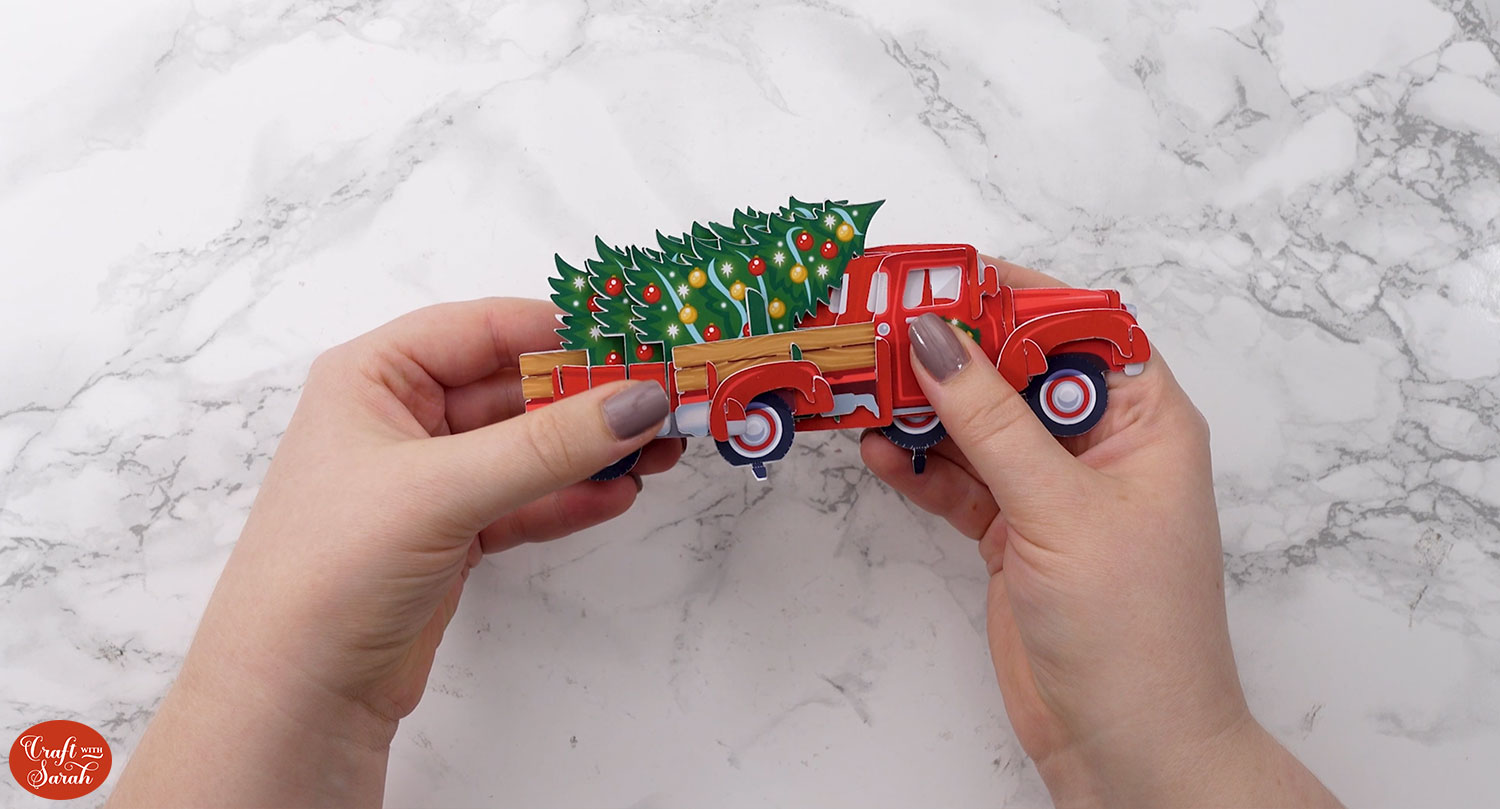
Next we will add the outer pieces of the truck. Although they look similar, there is a right and a wrong way round to place them, so pay special attention to this part!!
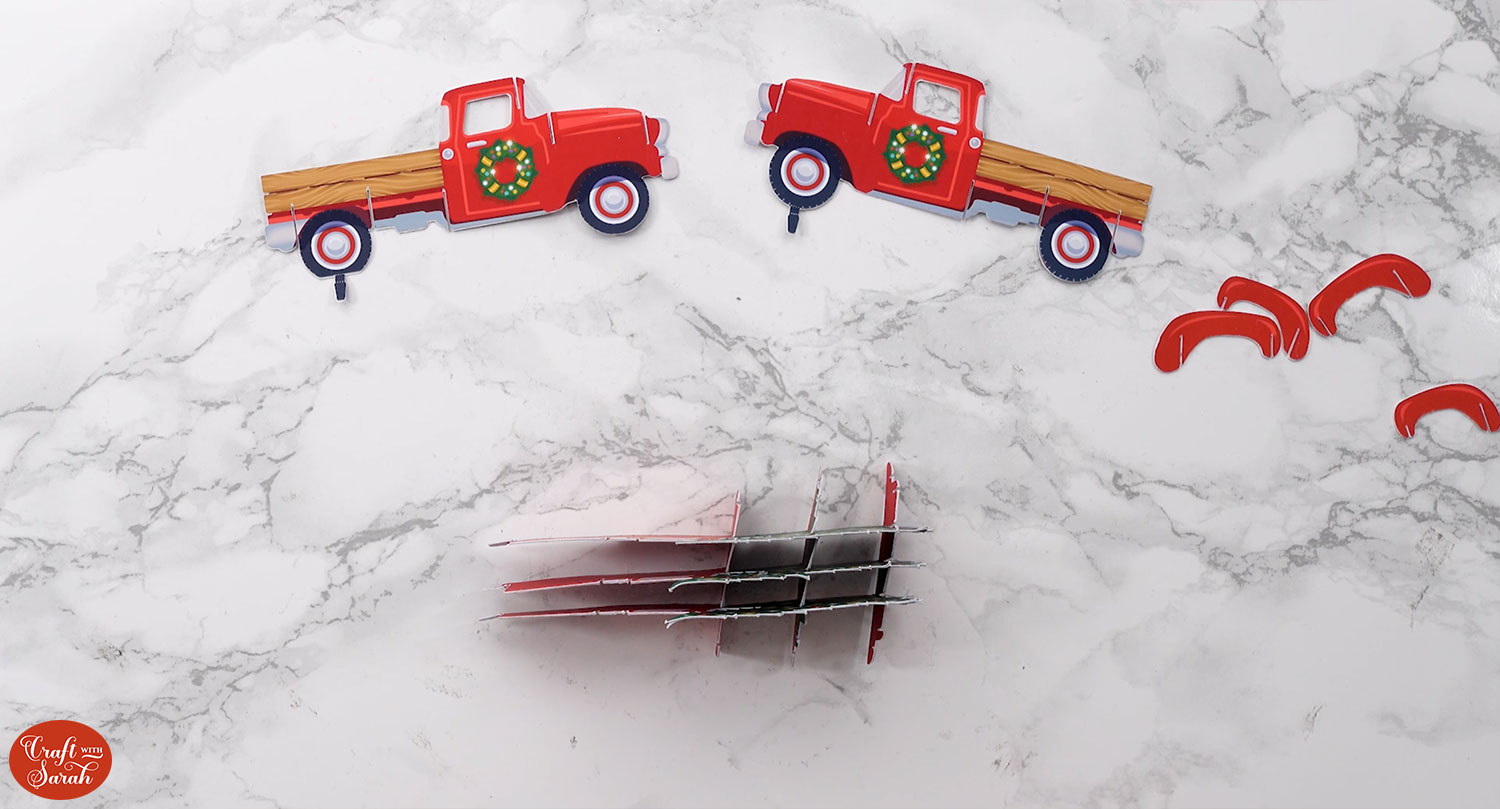
Position the truck that you’ve already made in front of you so that on the left you have the front of the truck and on the right you have the tree.
Fold the little tabs on the tires of the new truck pieces along the dotted line. Be VERY careful not to tear/rip the tabs off.
Take the piece which has the little tab on the front tire. This piece slots into the left side of the existing truck, assuming that it is facing with the truck pointing to the left and then tree on the right.
The truck piece with the tab on the back tire will be the one which slots in to the other side.
If you don’t get these round the right way, your card will not go together or fold.

When you look at your truck from above, all your trucks should appear level. If it doesn’t, wiggle the layers about to get them in place.
You will see some slits just below the windscreen of the truck. Place the red slit piece with little tabs on the edges into the corresponding slots below the windscreen.
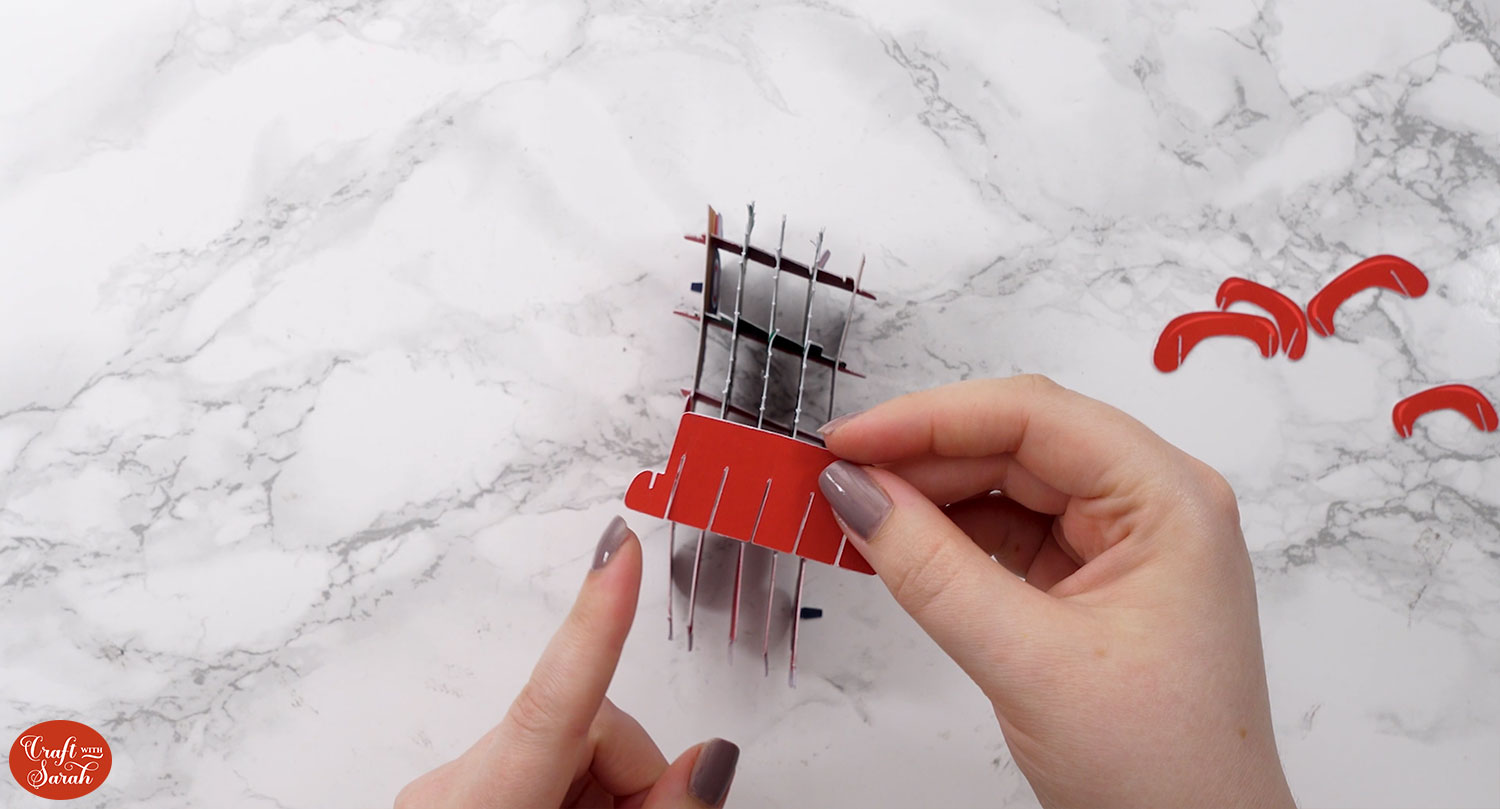
You may find that the other pieces want to come out of place as you do this, so be careful!
Take the windscreen piece and slot it into the slits behind the piece you previously placed.
Take the front licence plate piece, make sure it’s facing outwards so that you see the details and place it into the front slits.
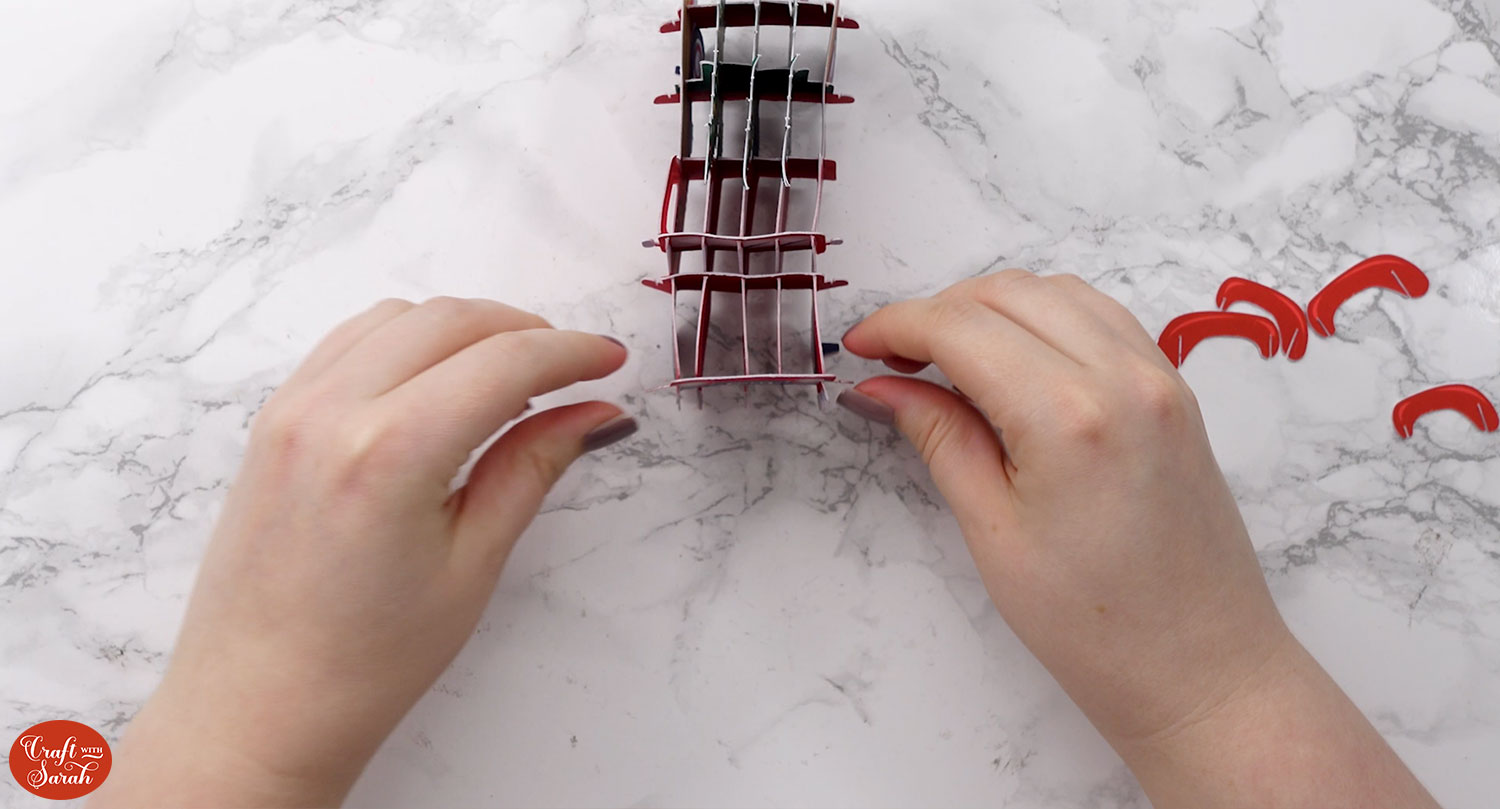
You are left with 4 bumper pieces which slot in next to the tires on the truck. The bigger 2 will be at the front and the smaller 2 at the back.
You want the thinner ends towards the front of the tire and the thicker at the back.
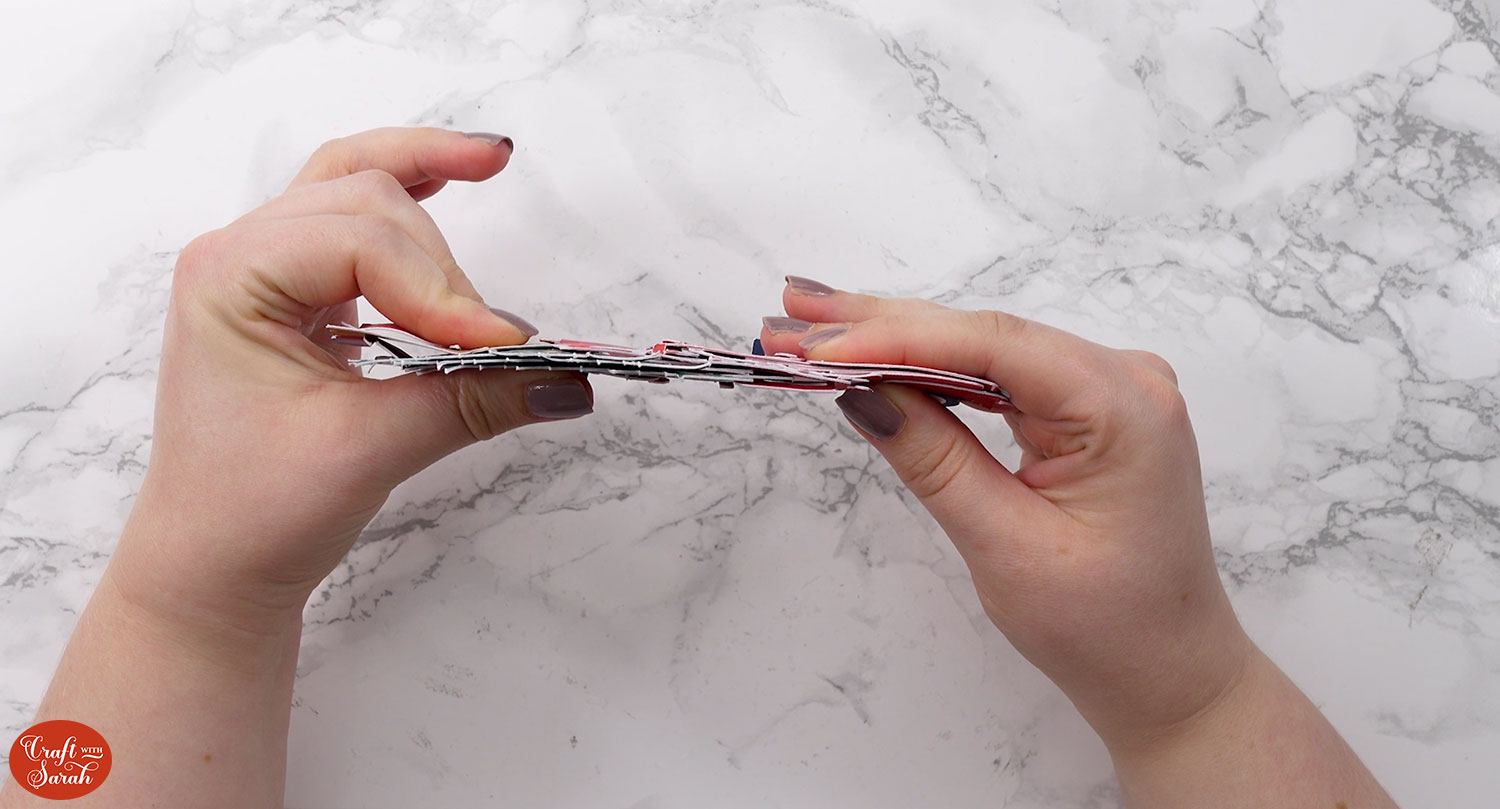
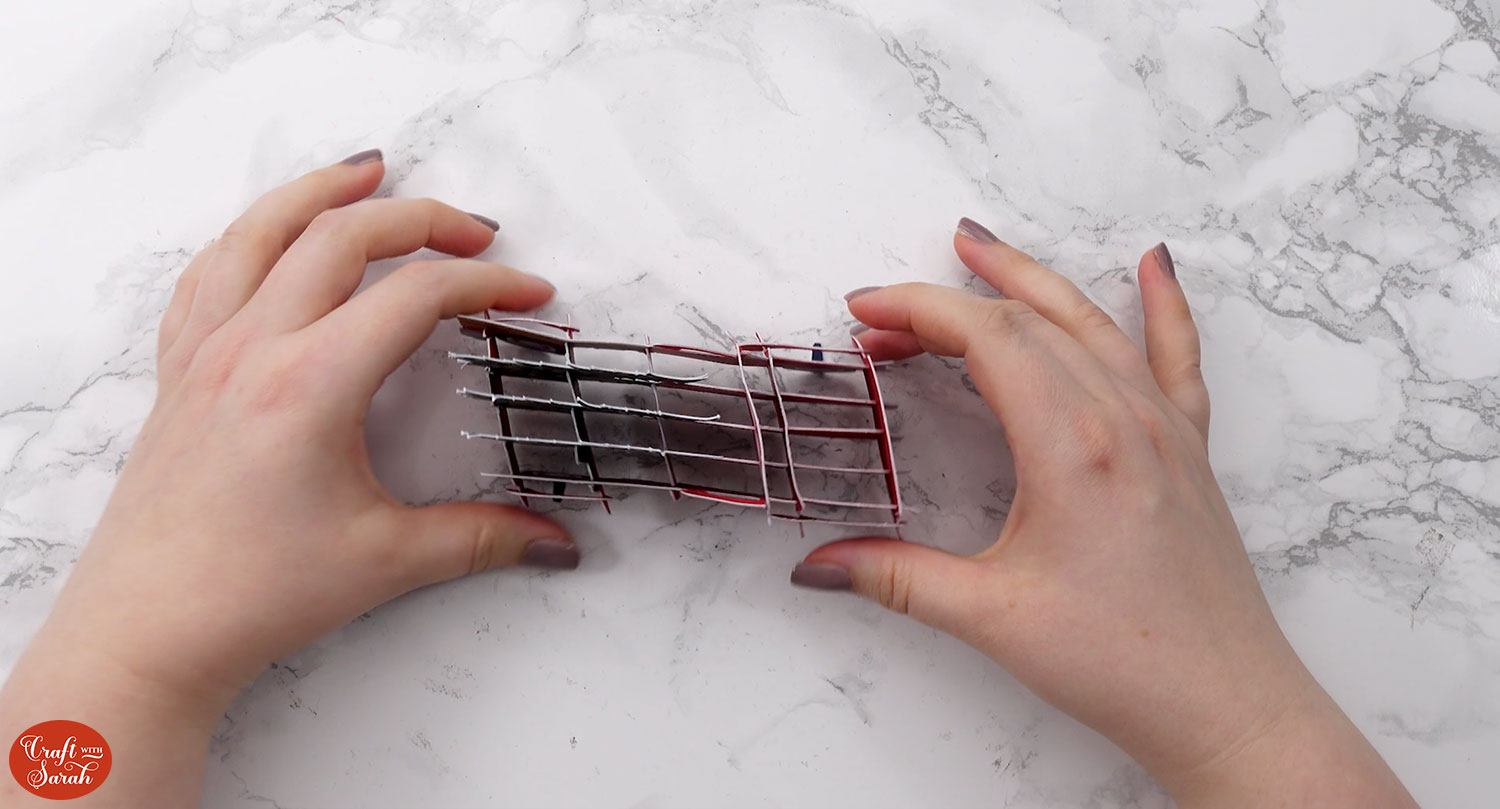
Gently fold the truck down to check it folds nice and flat. It should pop back up again.
Step 6) Make the greetings card
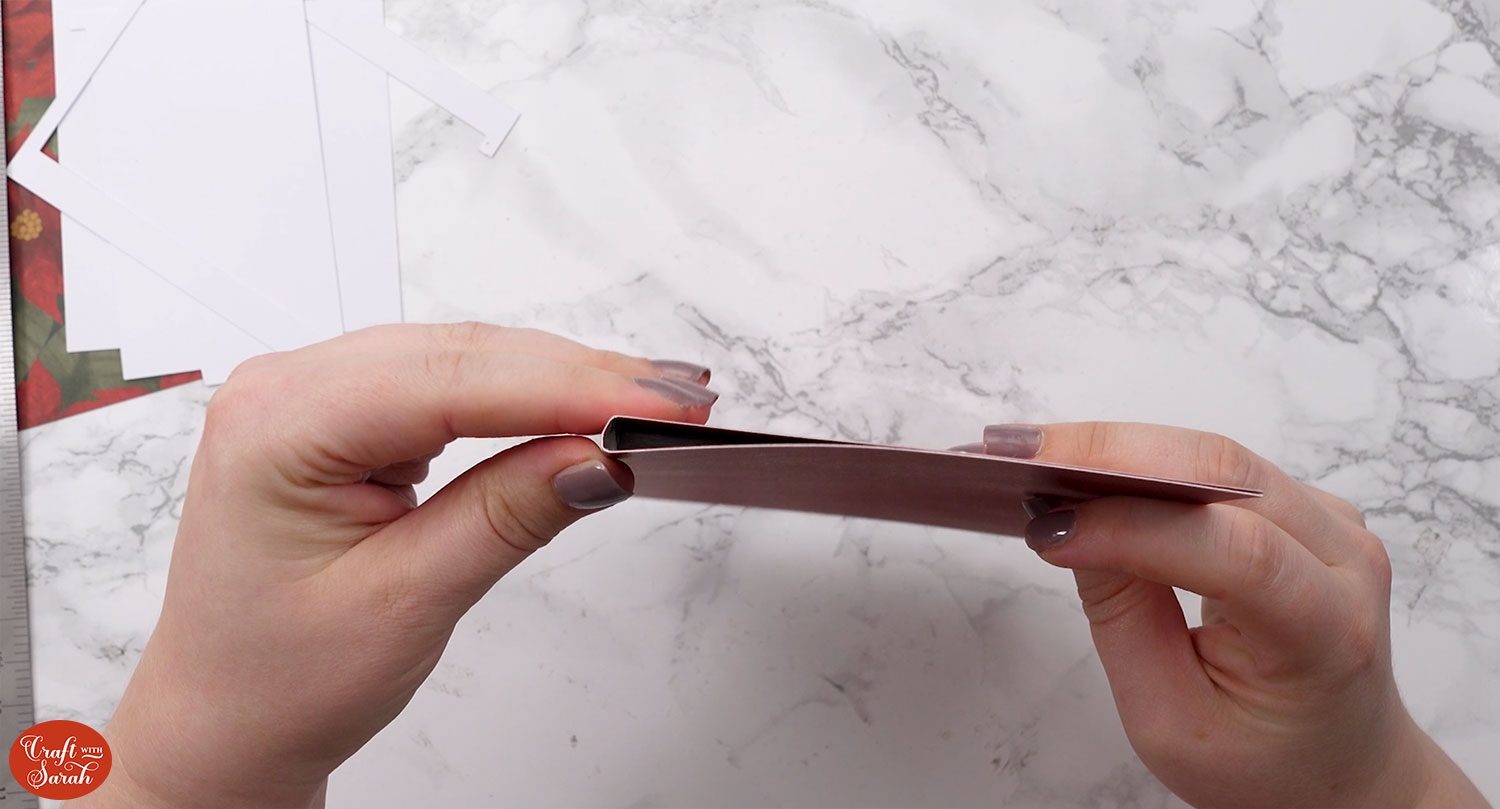
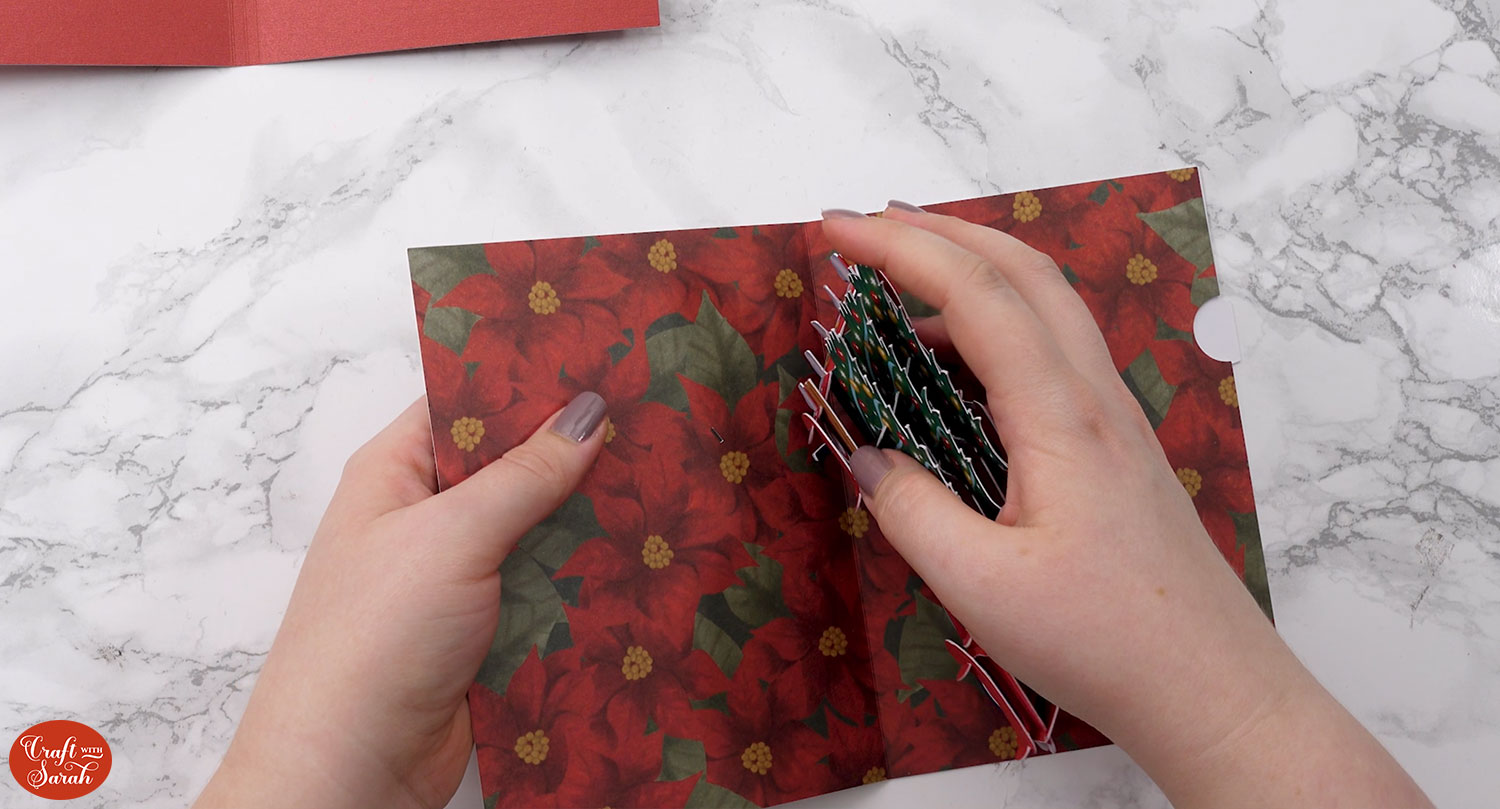
Take the base piece which has three score lines in the middle. Valley fold along the score lines using a ruler to help you get the lines exactly where they need to be.
You’ll end up with a folded card that has a little gap by the score lines when it’s closed.
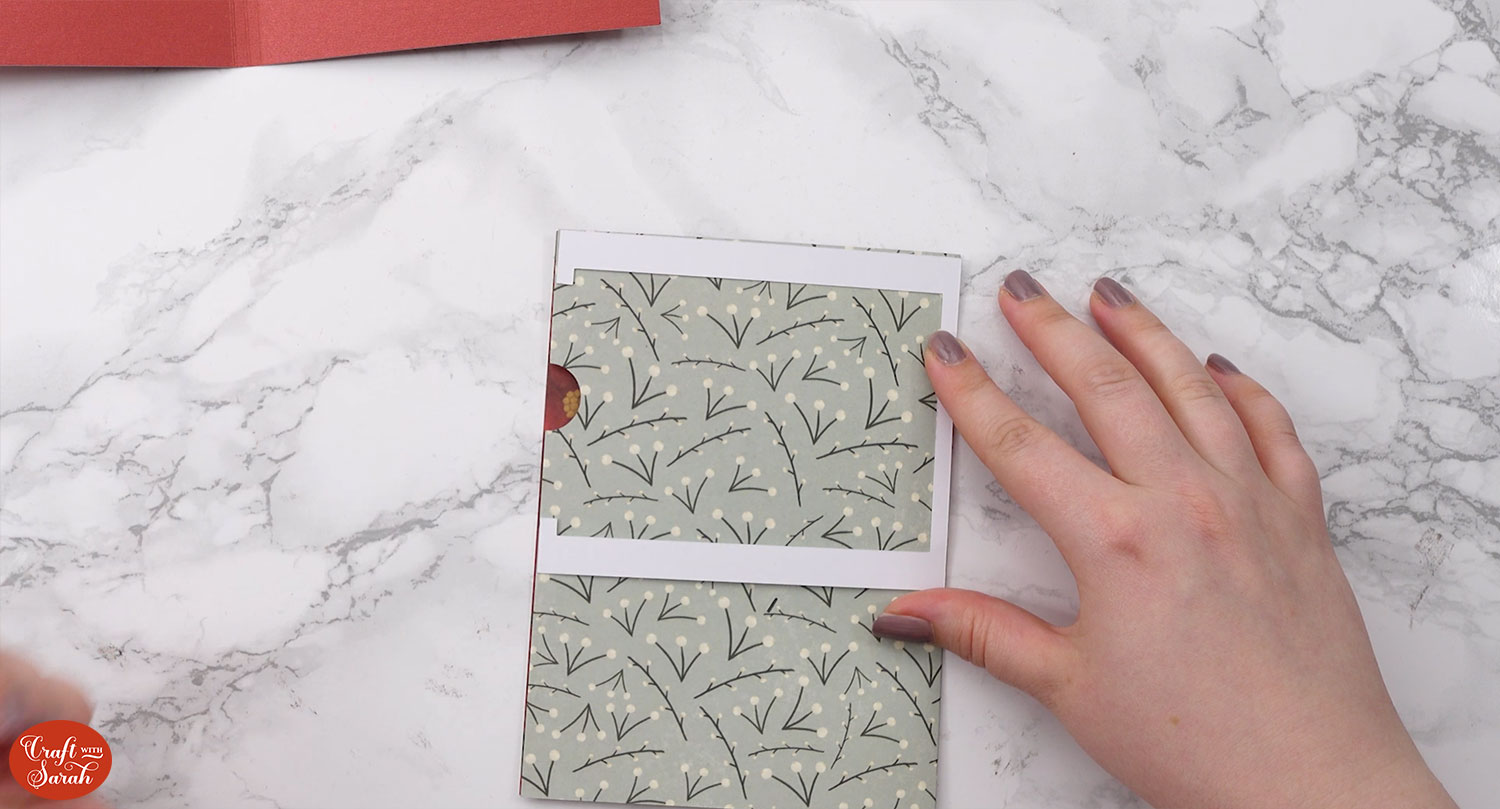
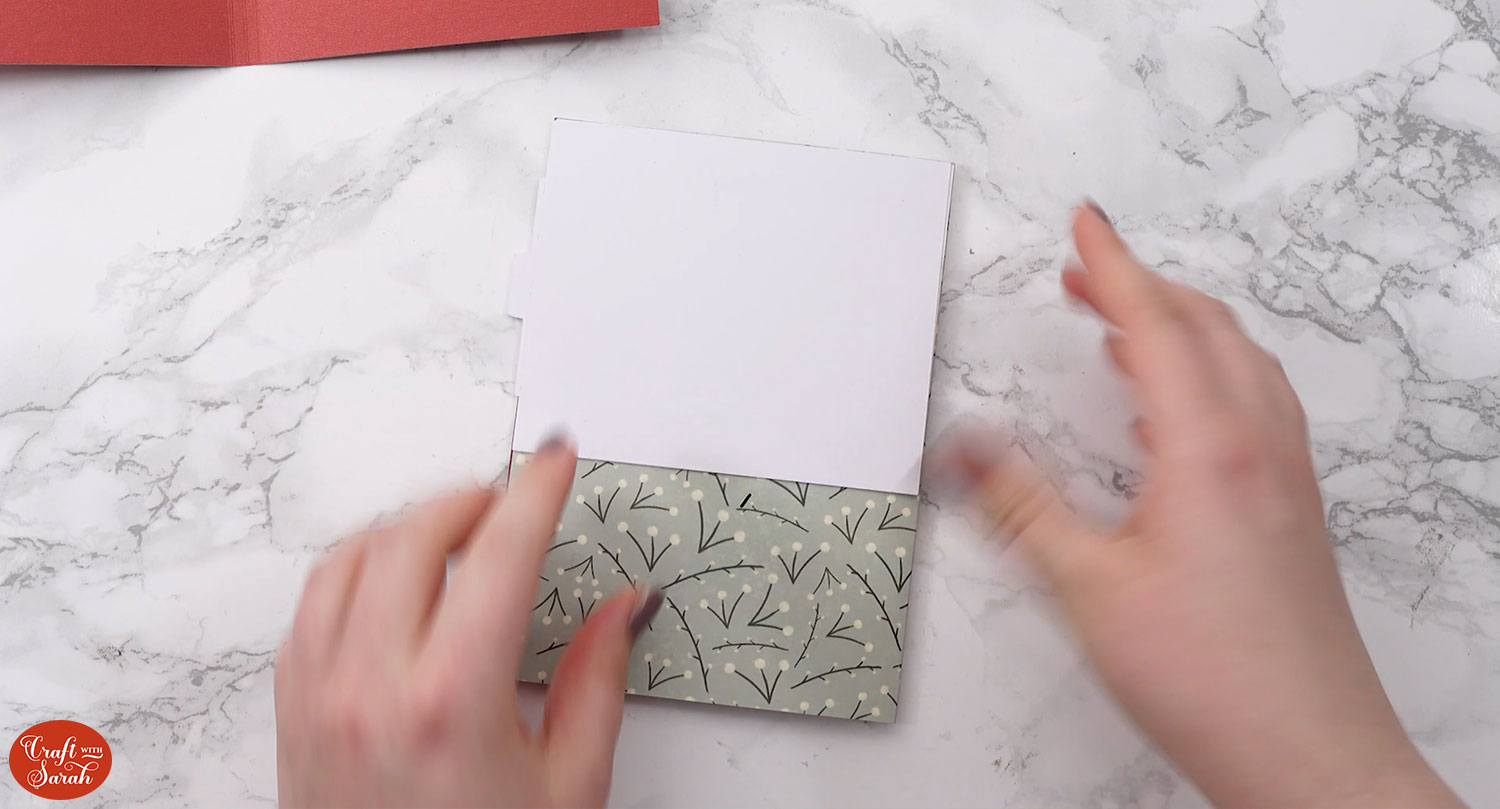
Fold along the single score line on your inside piece which will sit so that you have a small cutout on the top left side and a cutout on the bottom right side. The little tab will also be on the right.
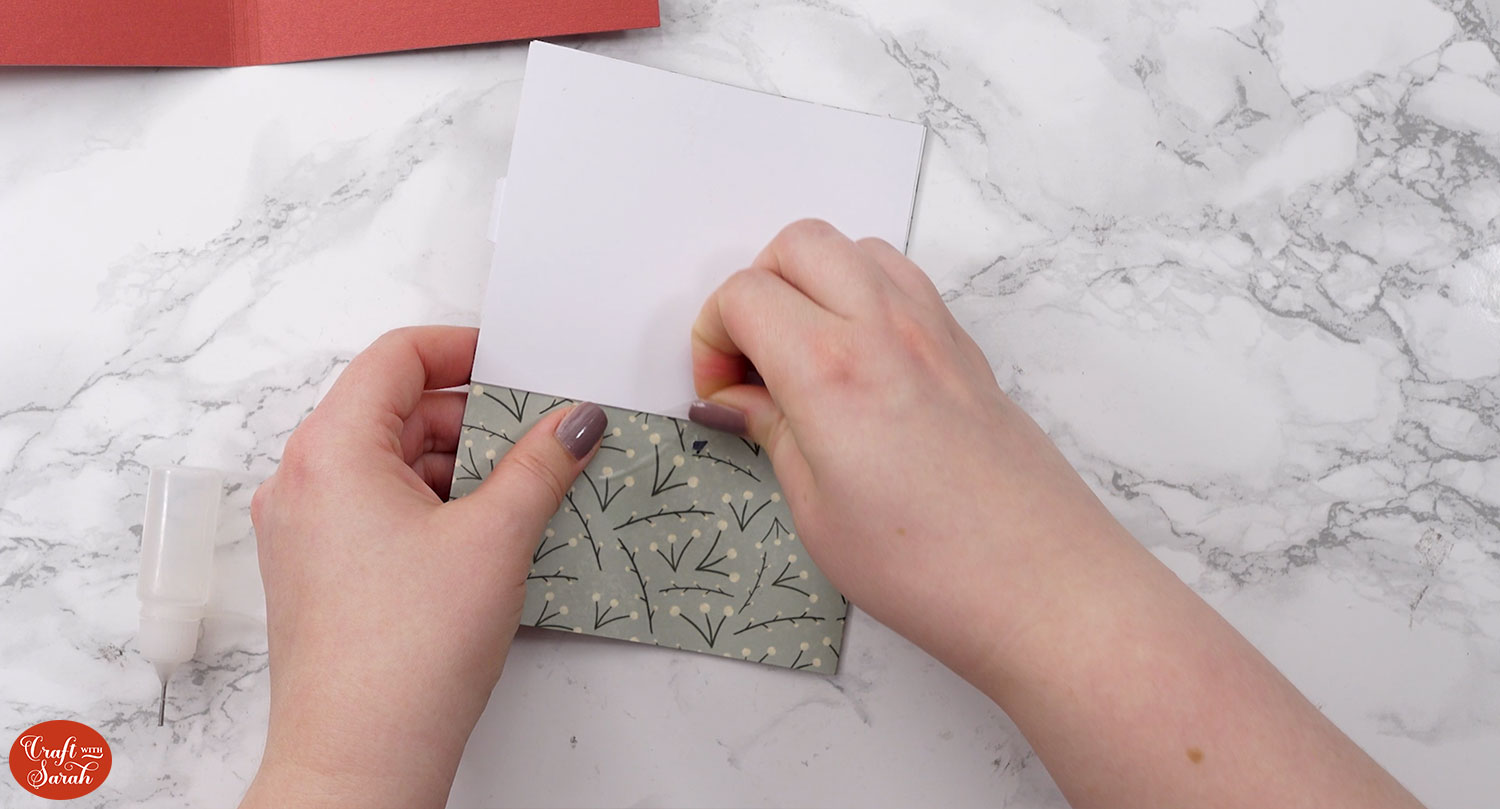
To make the hidden panel, turn over the patterned paper piece so that you are working on the back where the cut out tab is.
First, glue the edge piece which is cut out in the middle.
Place the panel piece in so that the tab pokes out the side. It will lock into place once the other piece has been glued on top due to the little tabs on the end of the panel piece.
You do not need to glue this piece as has to be able to be pulled out to reveal the message.
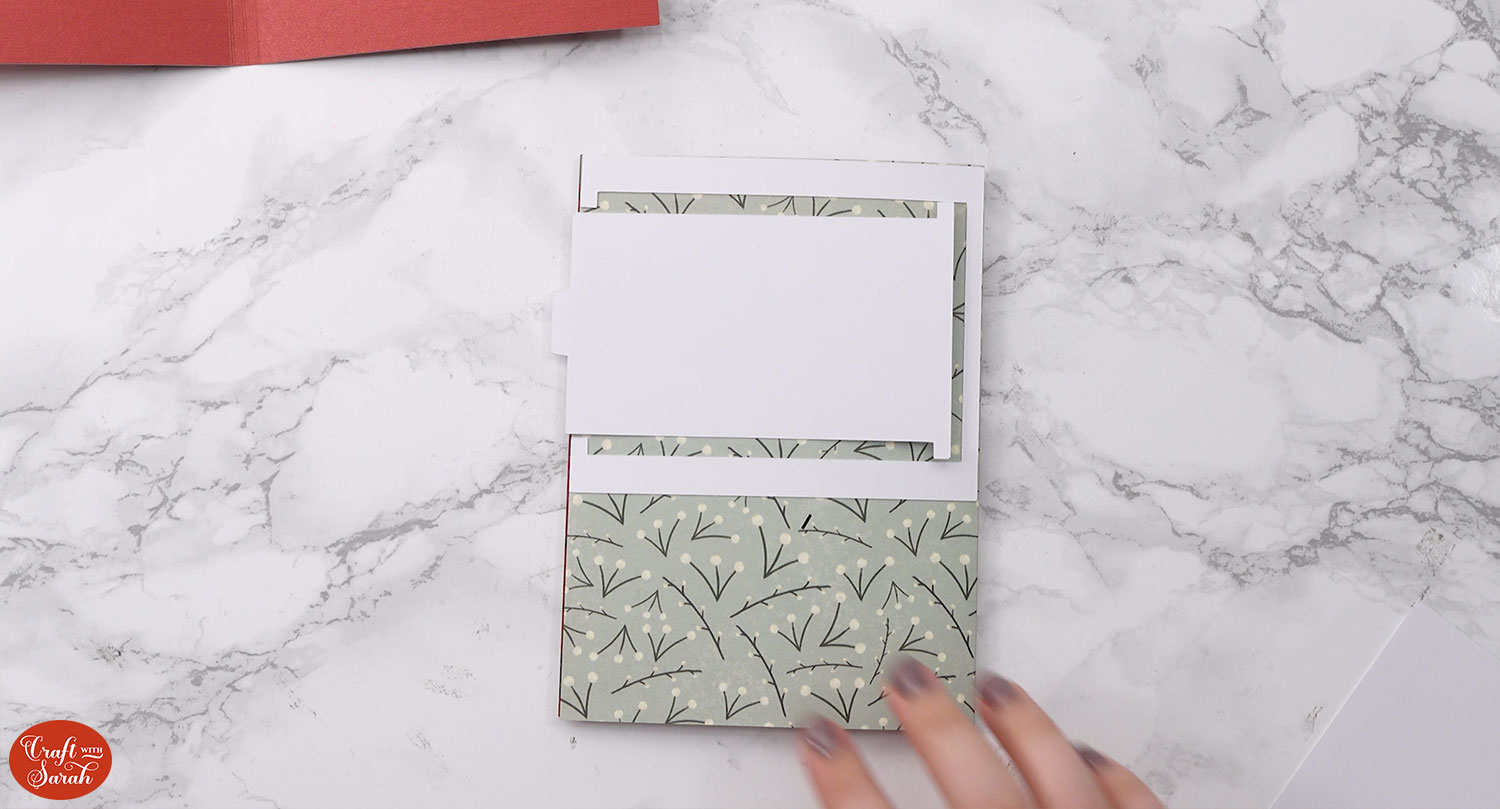
Glue the outside piece (do not put any glue on the pull out panel) and place the other rectangle on top.
Locate the tab on the front truck tire, fold the tab upwards along the line if you have not already done so.
Poke the tab through the hole on the right side of your card (the side with the pullout tab).
Poke the back tire tab through the hole on the left hand side.
Push the tabs through until you reach the folding line but no further. The tabs will pop out the back of the card. Place sticky tape over the top to secure them.
Make sure the tabs poke through all the way before you tape them.
Open and close the card a few times to check the popout mechanism. You may need to thread the tabs through a bit more if it isn’t working and re-tape them.
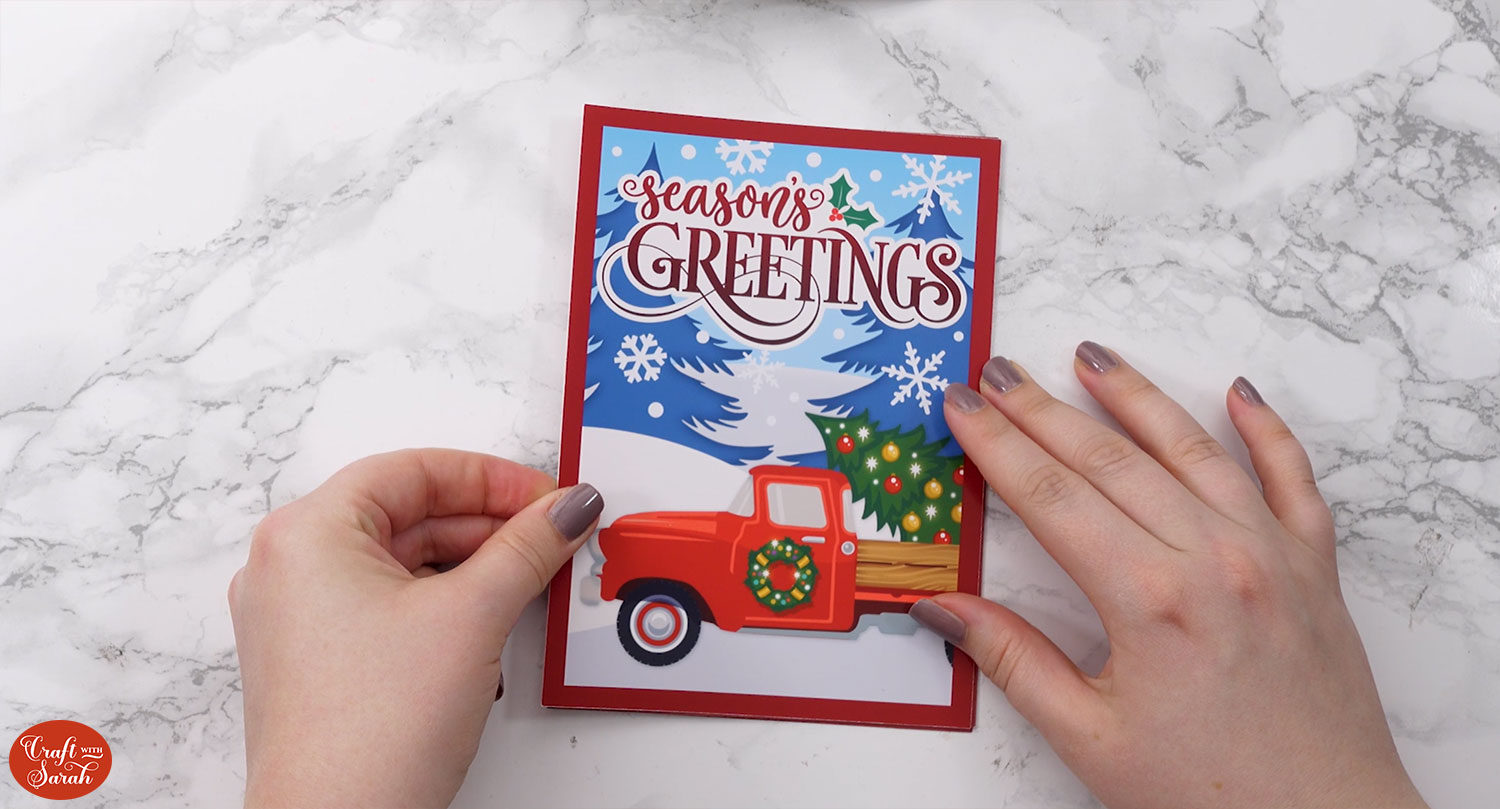
Stick the front Print then Cut image to the front of your card.
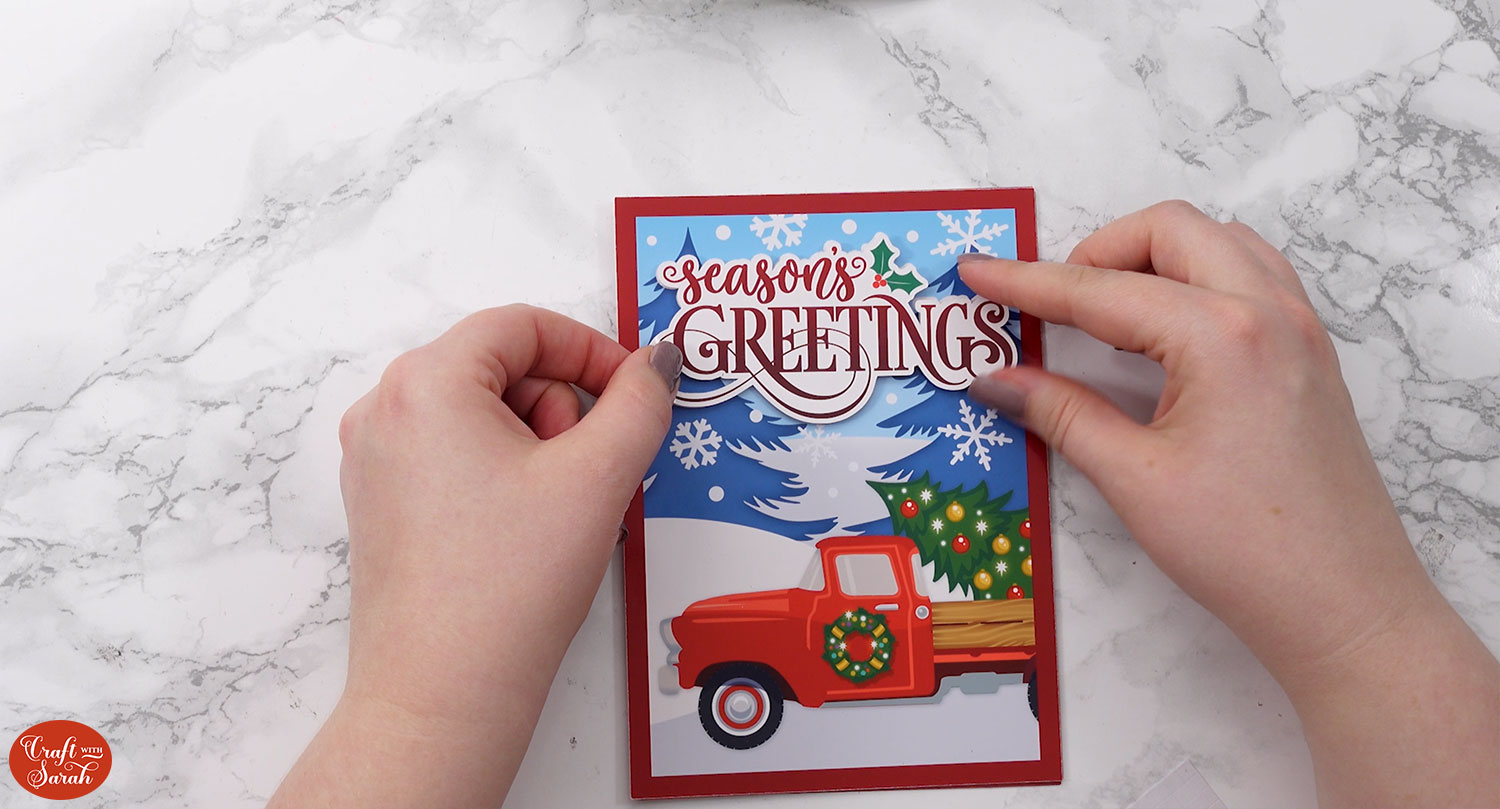
Use foam squares to stick the “Season’s Greetings” sentiment onto the front, lining it up exactly to the writing underneath.
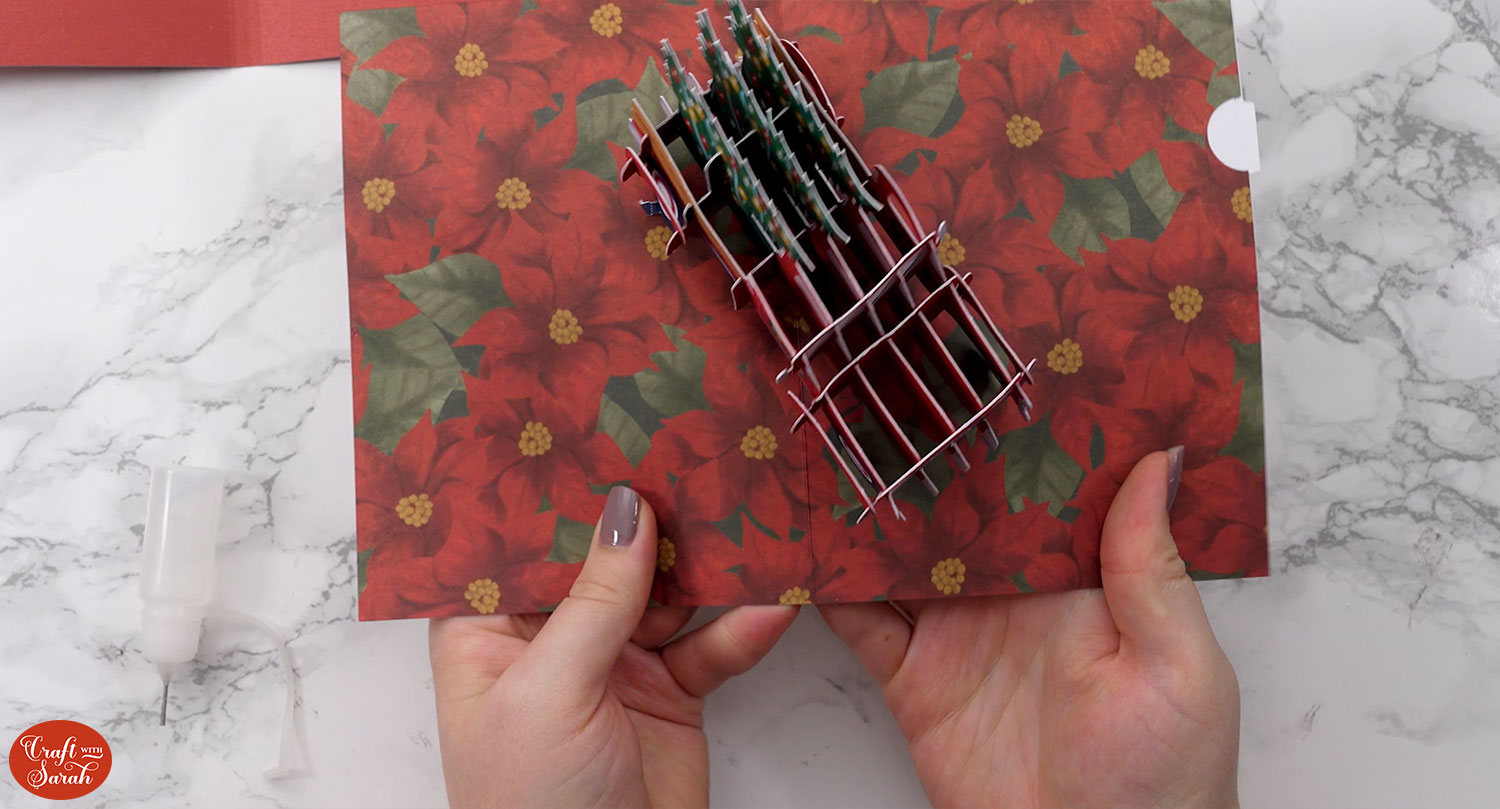
Open the card up and line up the inside piece ready for sticking. There will be a border around the edge; make sure it is equal all the way around.
The score line should match up with the middle of the three score lines on the outside card piece.
Glue along the back of the inside card on the right side. Don’t get too close to the score line with your glue as it will sit inside the V shape.
With the right side stuck down, glue the other side, taking care not to get too close to the score line again.
Check that the pull out mechanism works.
Amazing pop out cards to make for Christmas
Now your popout truck card is finished.
Just look at how the truck pops out as you open the card. It’s so fun!

I love how there are loads of different parts to this card which come together to make it so special.
Happy crafting,
Sarah x

