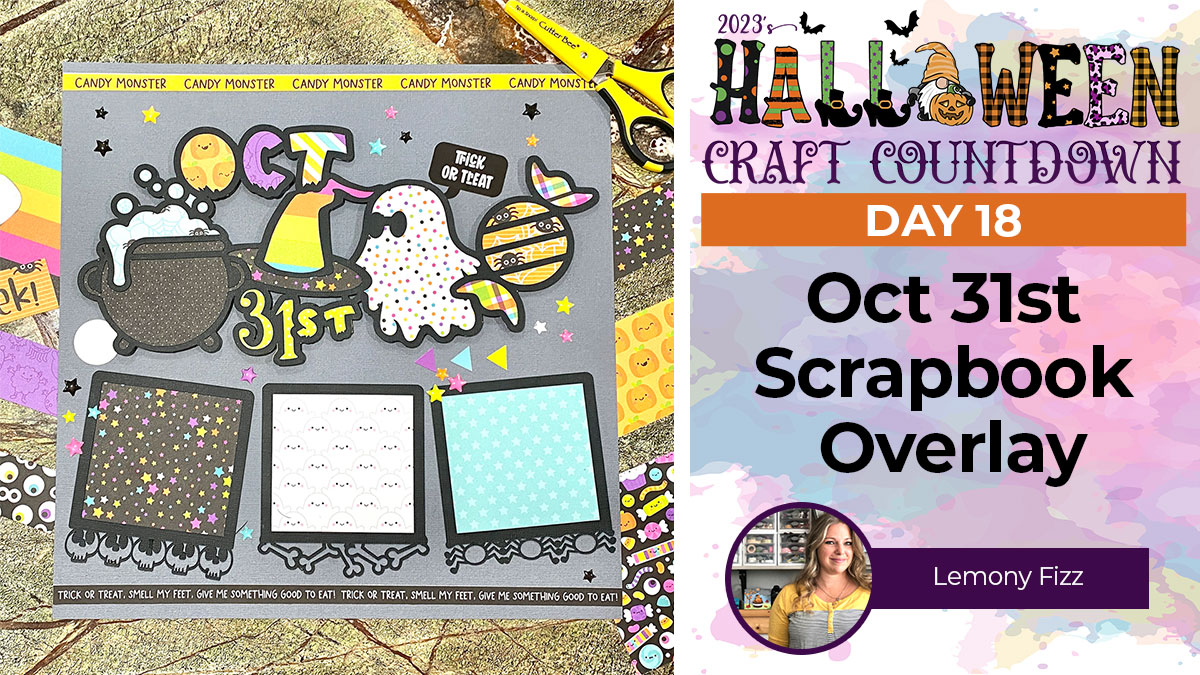
HCC 2023 Day 18 🦇 12×12 Halloween Scrapbook Layout
Got lots of patterned paper scraps? Here’s a great way to use them up!
It’s Day 18 of the Halloween Craft Countdown and today Rhoda from Lemony Fizz is sharing her beautifully detailed scrapbook page.
Gather your favourite Halloween patterned papers and keep reading to see how the page comes together.
This is a lovely Halloween project which can be personalised with your photos of the best Halloween memories.
This Project was part of the Halloween Craft Countdown 2023
Materials supply list
Here is a list of the materials that are required to make this project.
Please note that some of the links included in this article are affiliate links, which means that if you click through and make a purchase I may receive a commission (at no additional cost to you). You can read my full disclosure at the bottom of the page.
- Cricut Machine
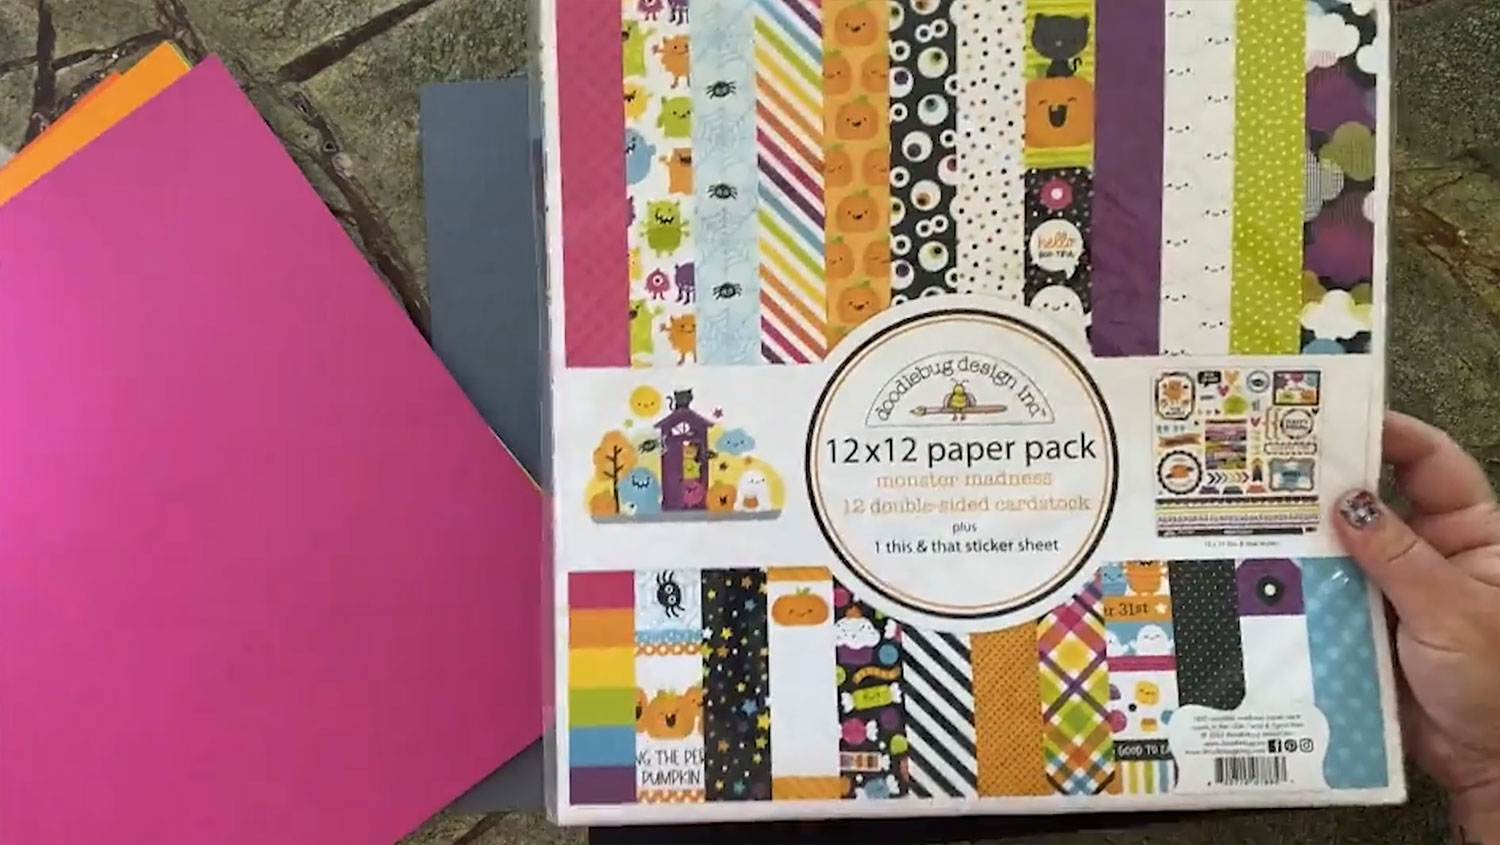
- Selection of pattern paper (Rhoda used Doodlebug Monster Madness)
- Cardstock
- Scissors/X-Acto Knife
- Embellishments
- Foam dots/squares
This project is suitable for the following types of Cricut machine: Explore Air 2, Explore Air 3, Maker, Maker 3, Venture
Video tutorial for Halloween scrapbook layout
Watch the video below to see how to make this Halloween scrapbook page with a Cricut.
If you prefer to read rather than watch, keep scrolling!
This project was created by Lemony Fizz
Rhoda has always loved to create things from paper. Colors make her world go round. With a minor in art education and a passion for sharing creative ideas with others, Rhoda designs SVG files for cards, scrapbook layouts, paper boxes, and mini albums to share with other paper lovers.
Scrapbook page tutorial
Making scrapbook pages with a Cricut is a wonderful way to organize your memories and preserve your favorite photographs for years to come.
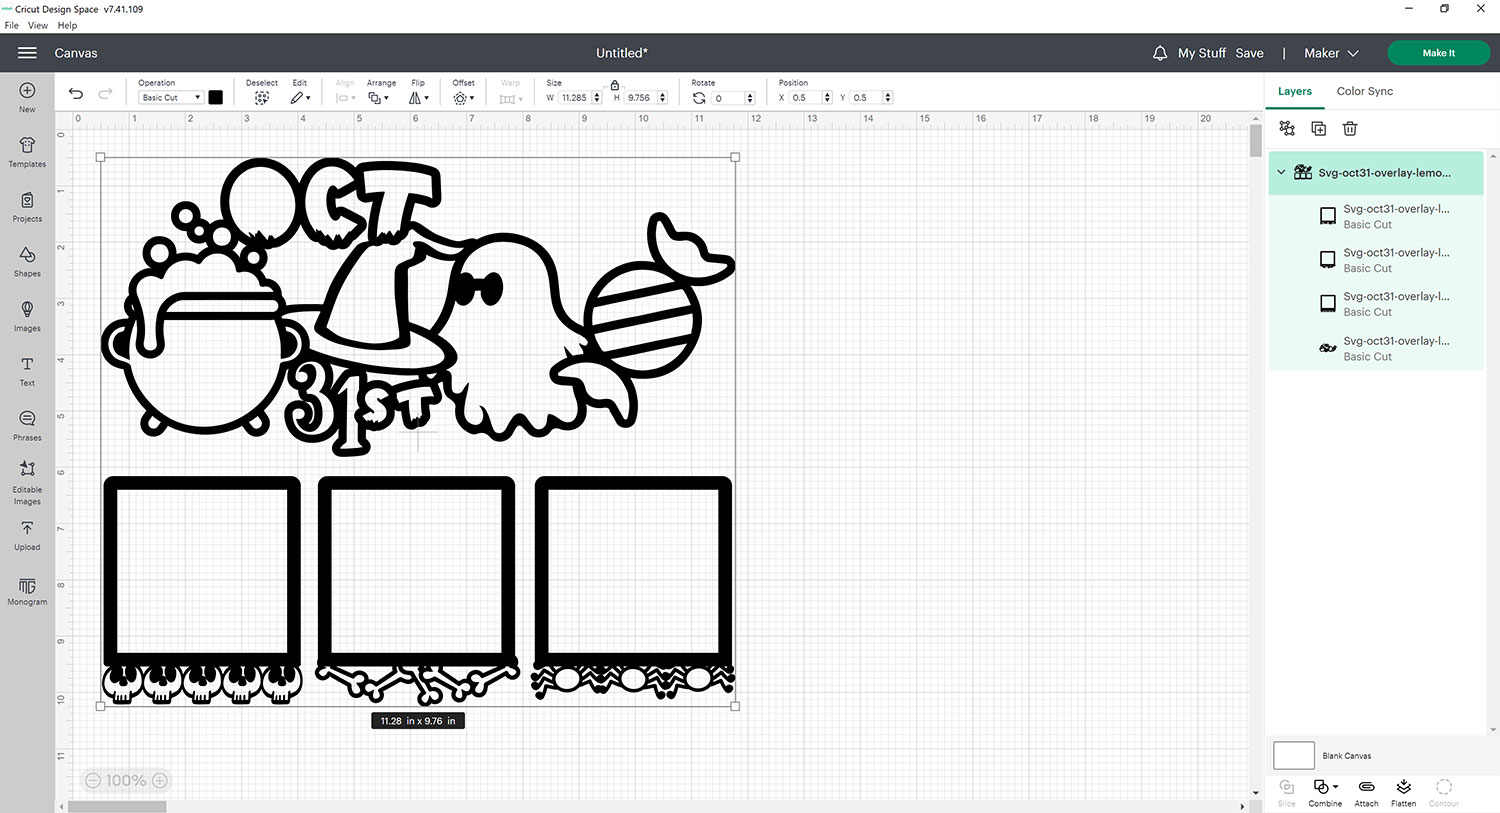
Step 1) Upload the SVG file into Design Space
Download the files using the box below.

Open up Design Space and start a new project.
Click “Upload” and find the unzipped version of the download folder.
Upload the file called svg-oct31-overlay-lemonyfizz.svg
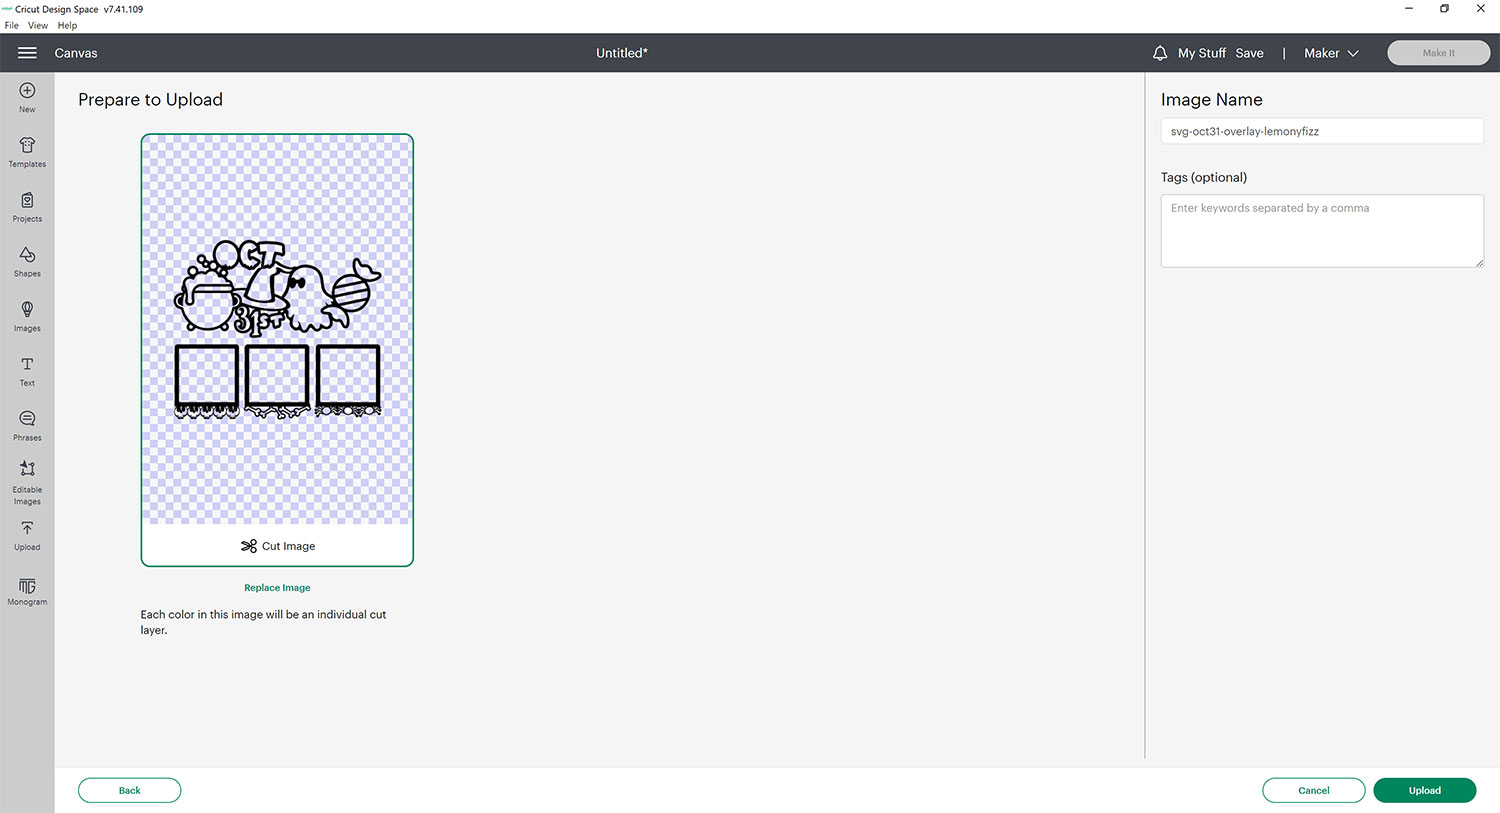
Click the design in your Recent Uploads and press “Add to Canvas”.
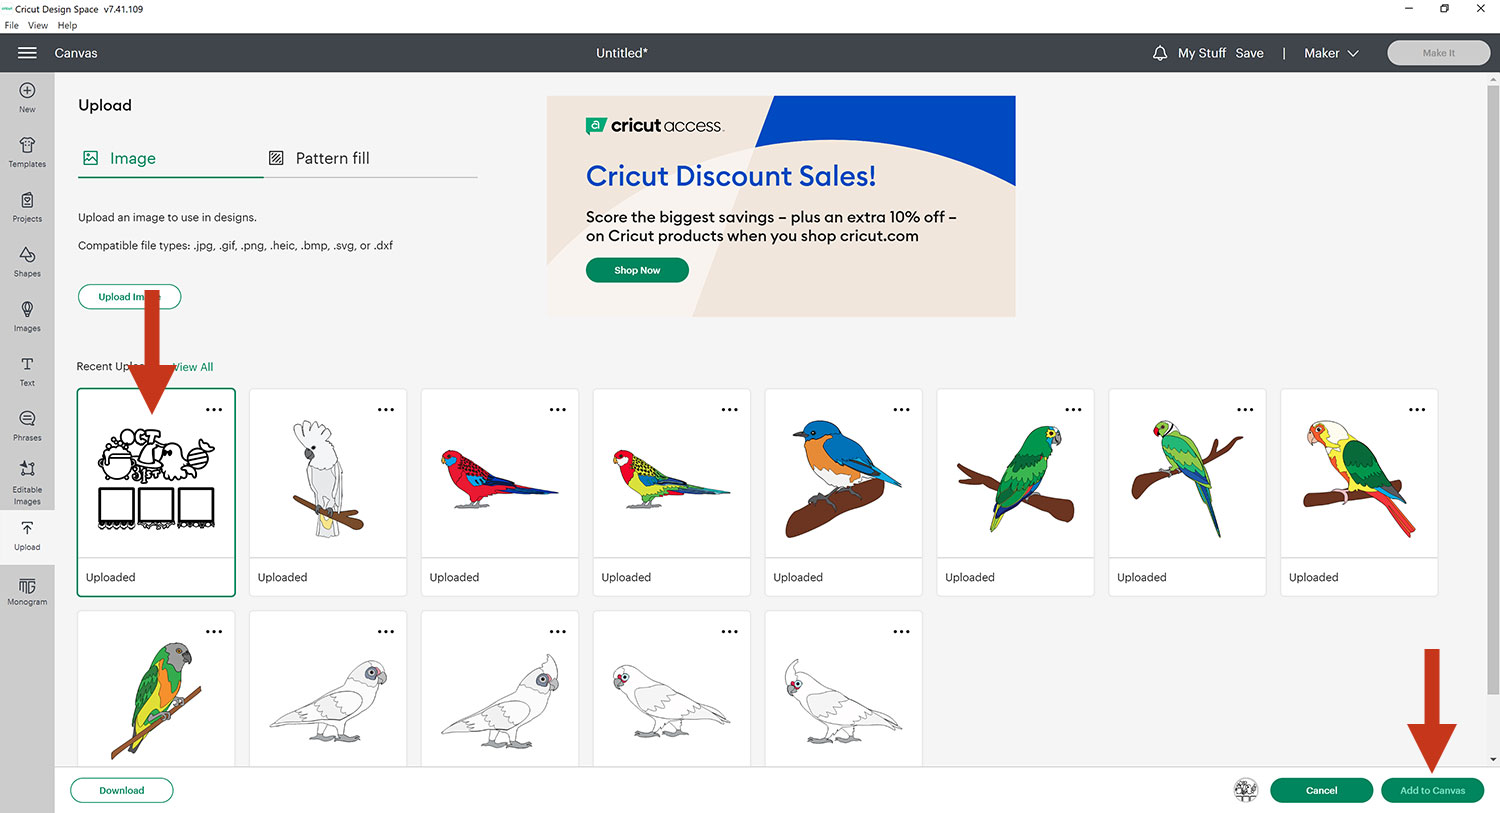
Here is what it looks like on your Canvas.
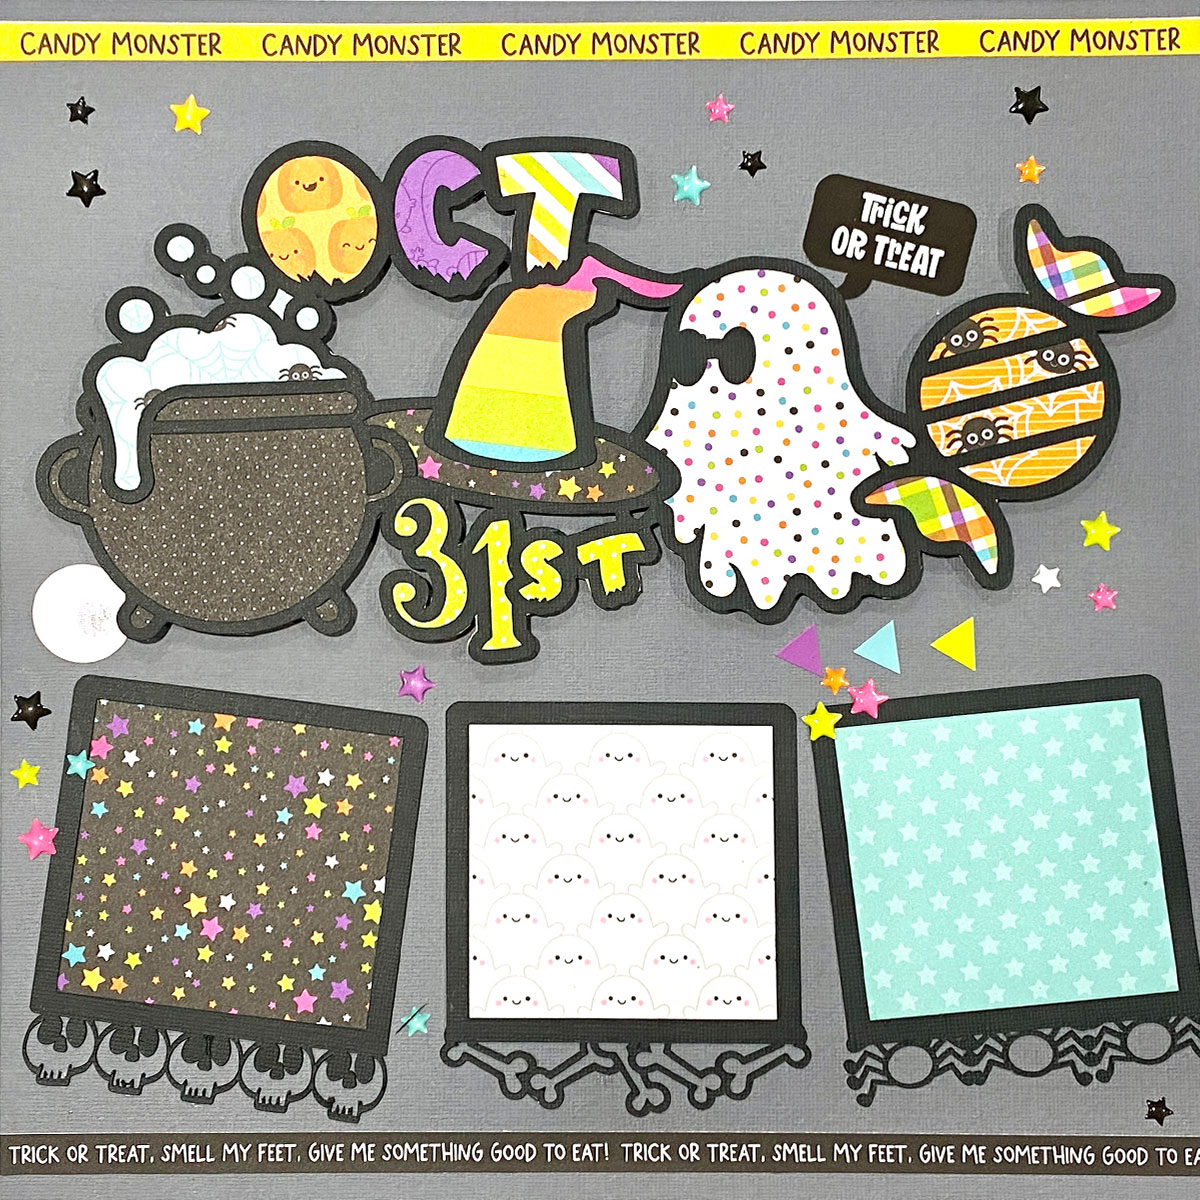
Rhoda has created this file so that it will cut a black outline for the scrapbook page, then all of the colours will be fussy-cut by hand to give you greater control over the types of patterned paper to add.
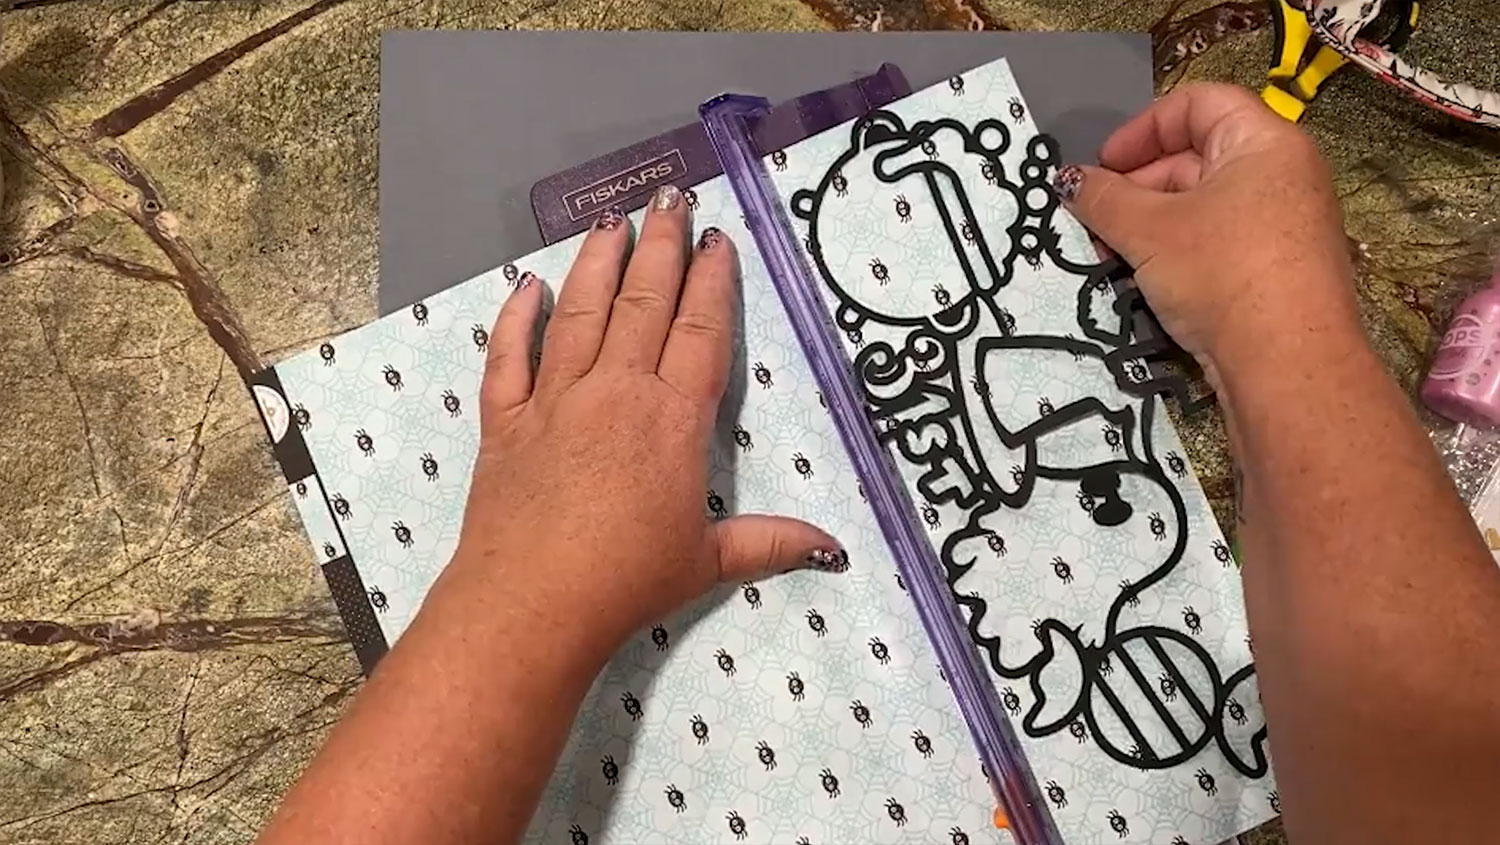
Step 2) Cut the scrapbook layout from cardstock
Click Make It and cut the design from black cardstock.
Your cut setting will depend on the type and thickness of cardstock you’re using, but Medium Cardstock or Heavy Cardstock should be sufficient.
Once your machine has finished the cut, don’t eject the mat but lift an edge of your cardstock to see if it has cut through. If it has, go ahead and eject the mat but if it hasn’t, don’t touch anything on screen but press the Go button again and it will repeat the cut in the exact same place.
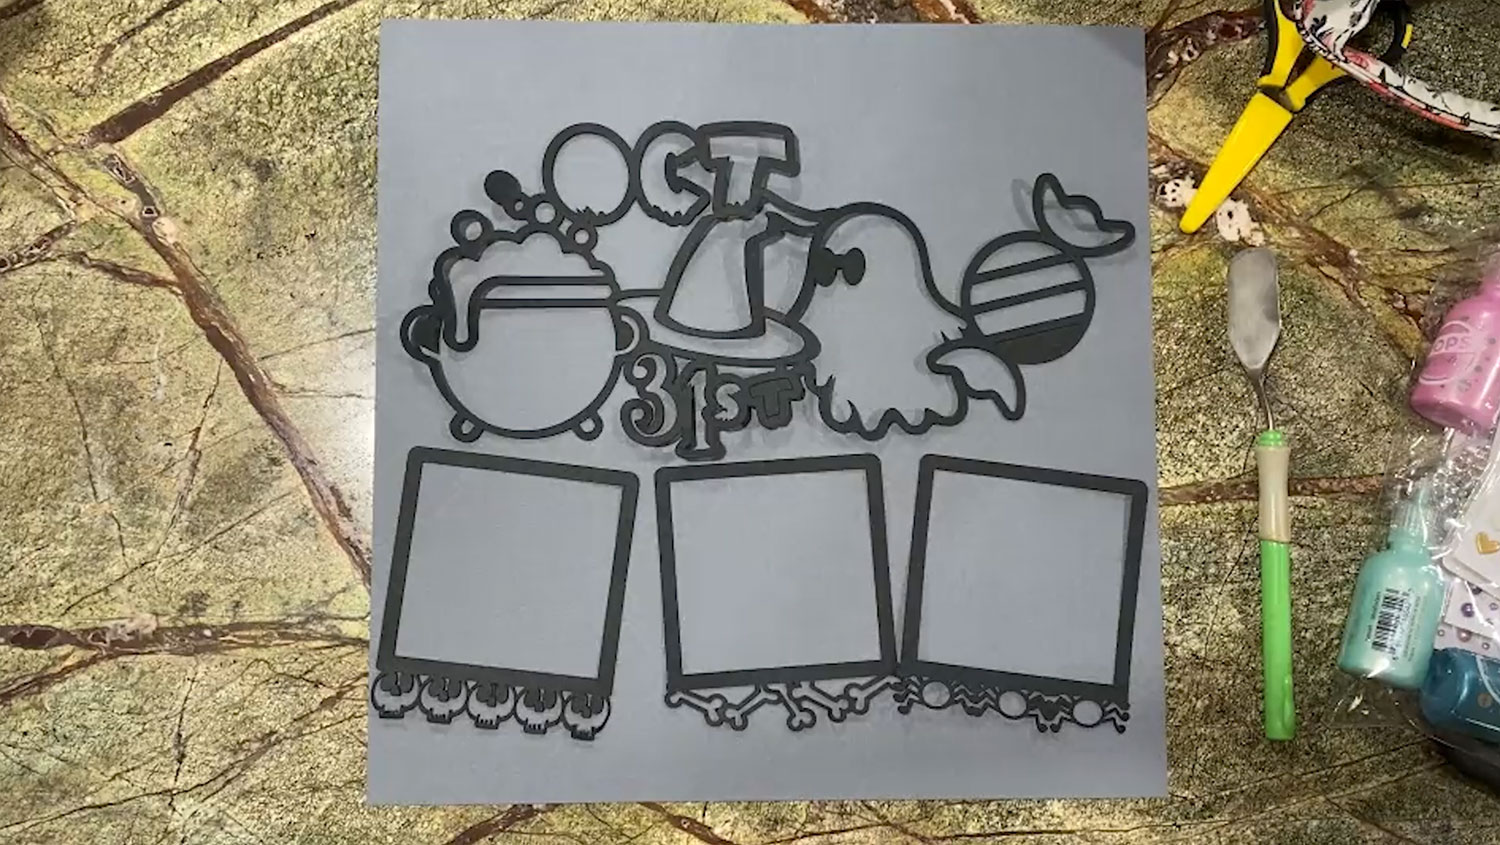
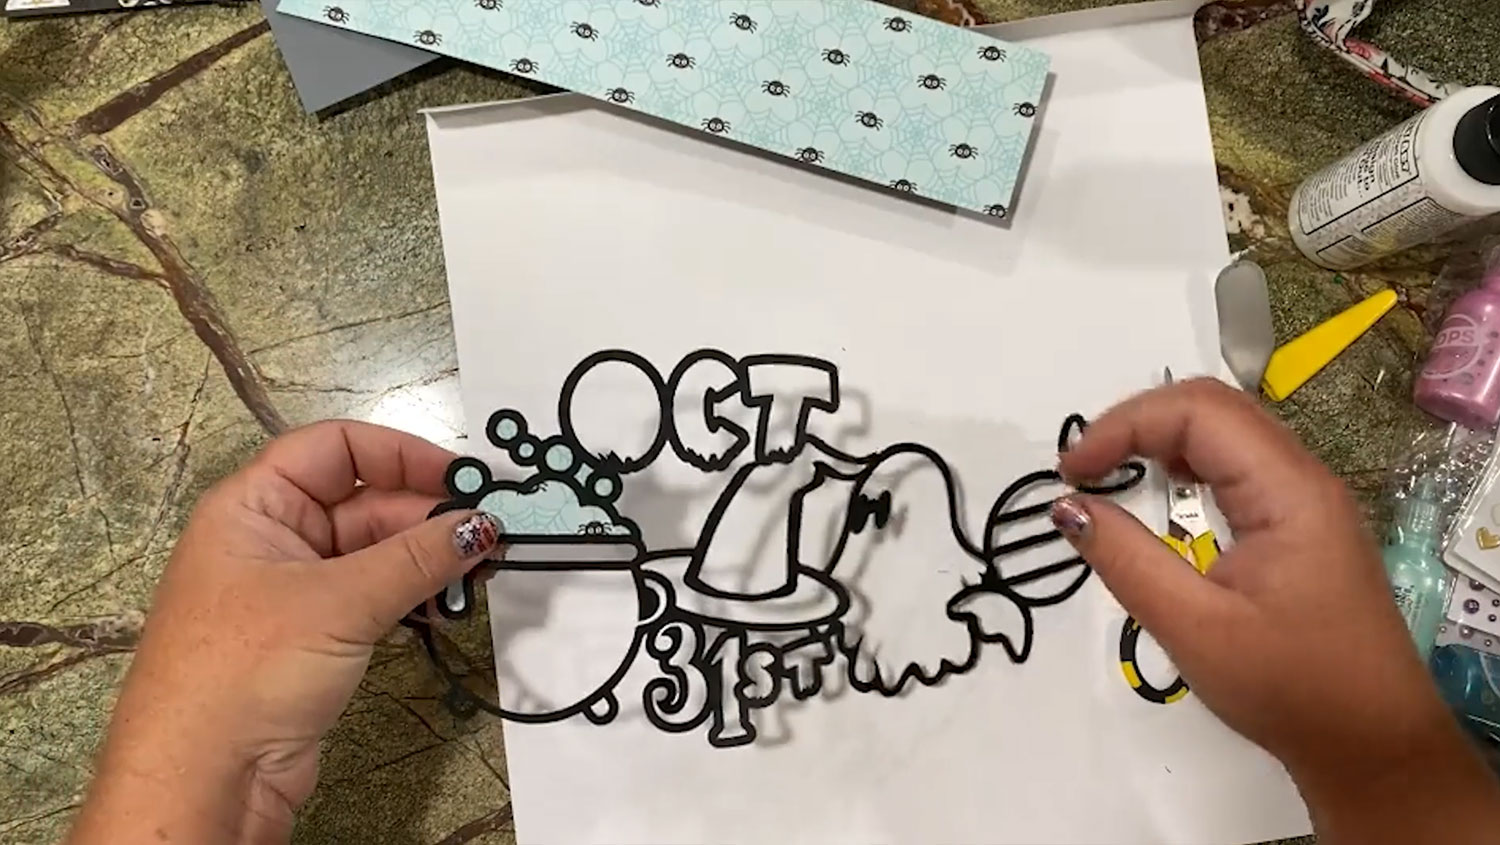
Carefully lift the design off the cutting mat. This will be the outline which we will fill with patterned paper for our scrapbook page.
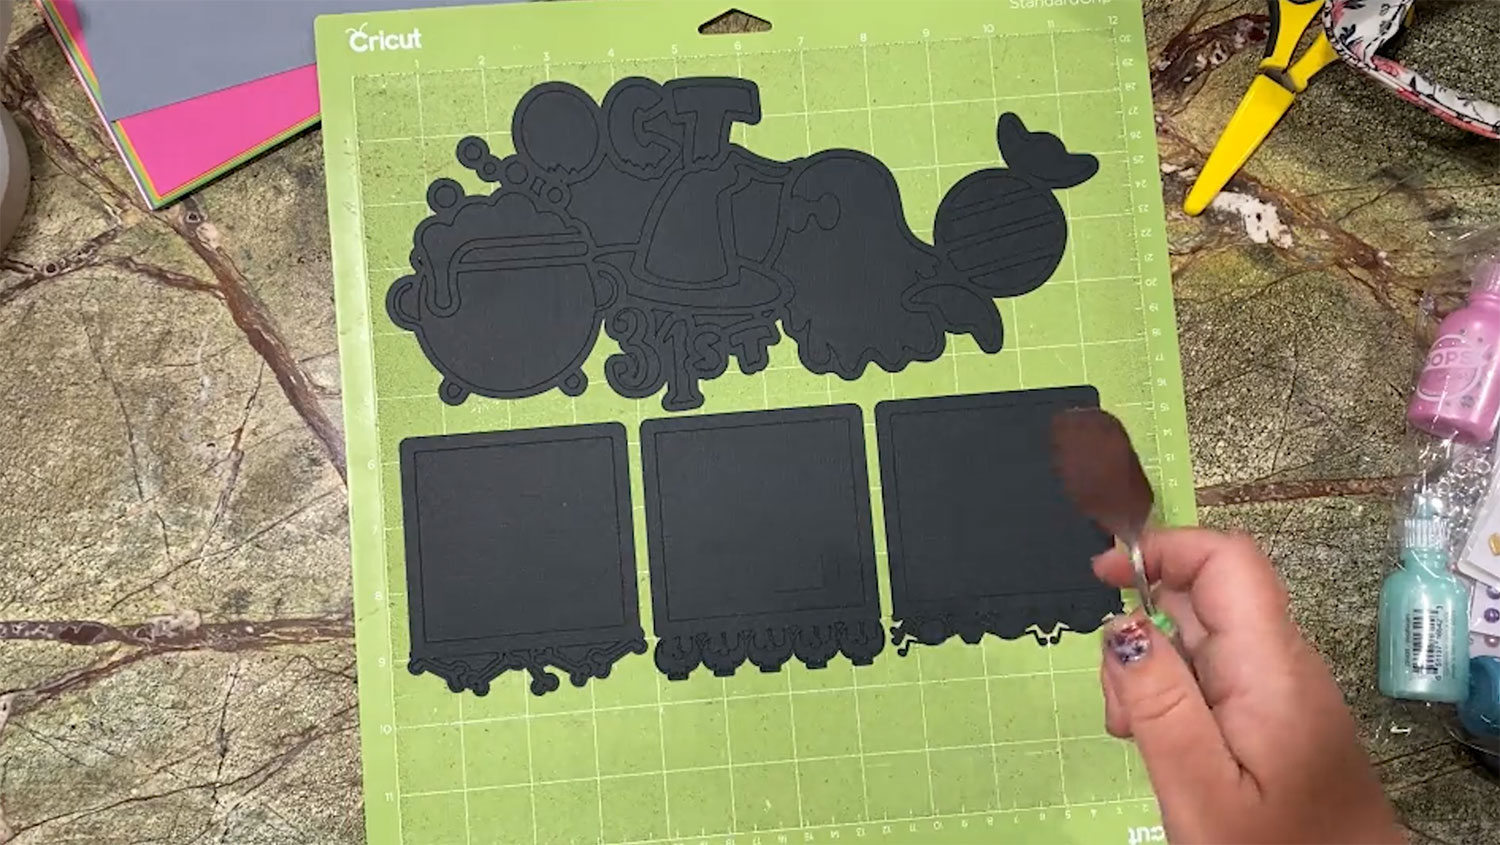
You will need to choose a 12×12 inch backing piece from your cardstock collection. Rhoda chose a dark grey.
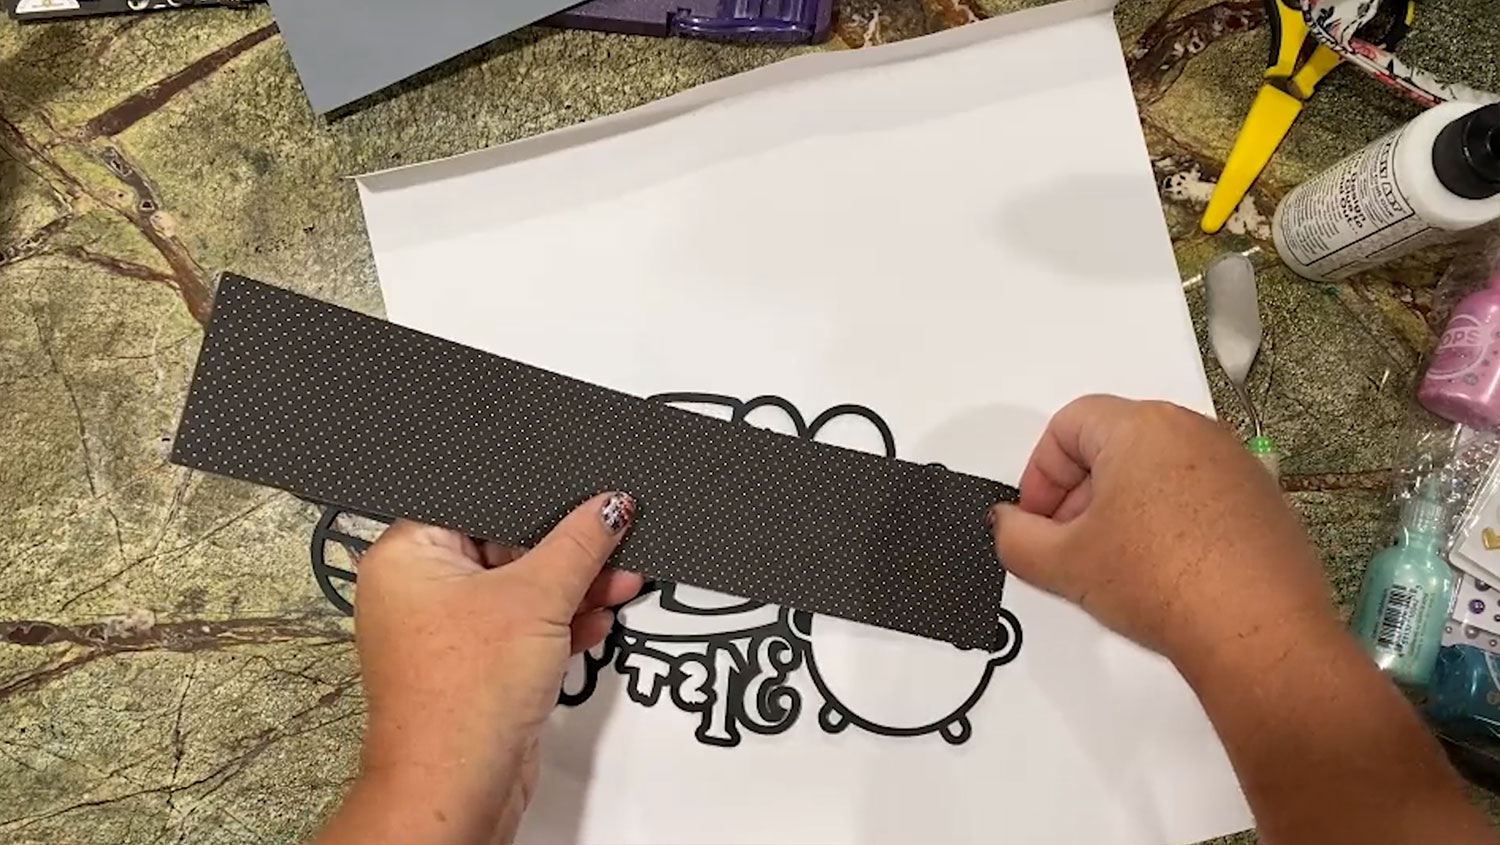
Step 3) Choose your patterned paper
Choose a selection of Halloween themed patterned papers, as well as some matching solid colours.
You can get the Doodlebug Monster Madness pack if you would like to follow closely along with Rhoda but you can use any patterned paper that you’d like.
Cut your patterned paper into chunks that will cover the section you wish to use it for.
Holding the paper behind certain parts of the outline may help you to decide what you want to put where. You can play around with the patterns and colours as you go or decide beforehand if you’d rather.
Step 4) Glue and cut your scrapbook paper
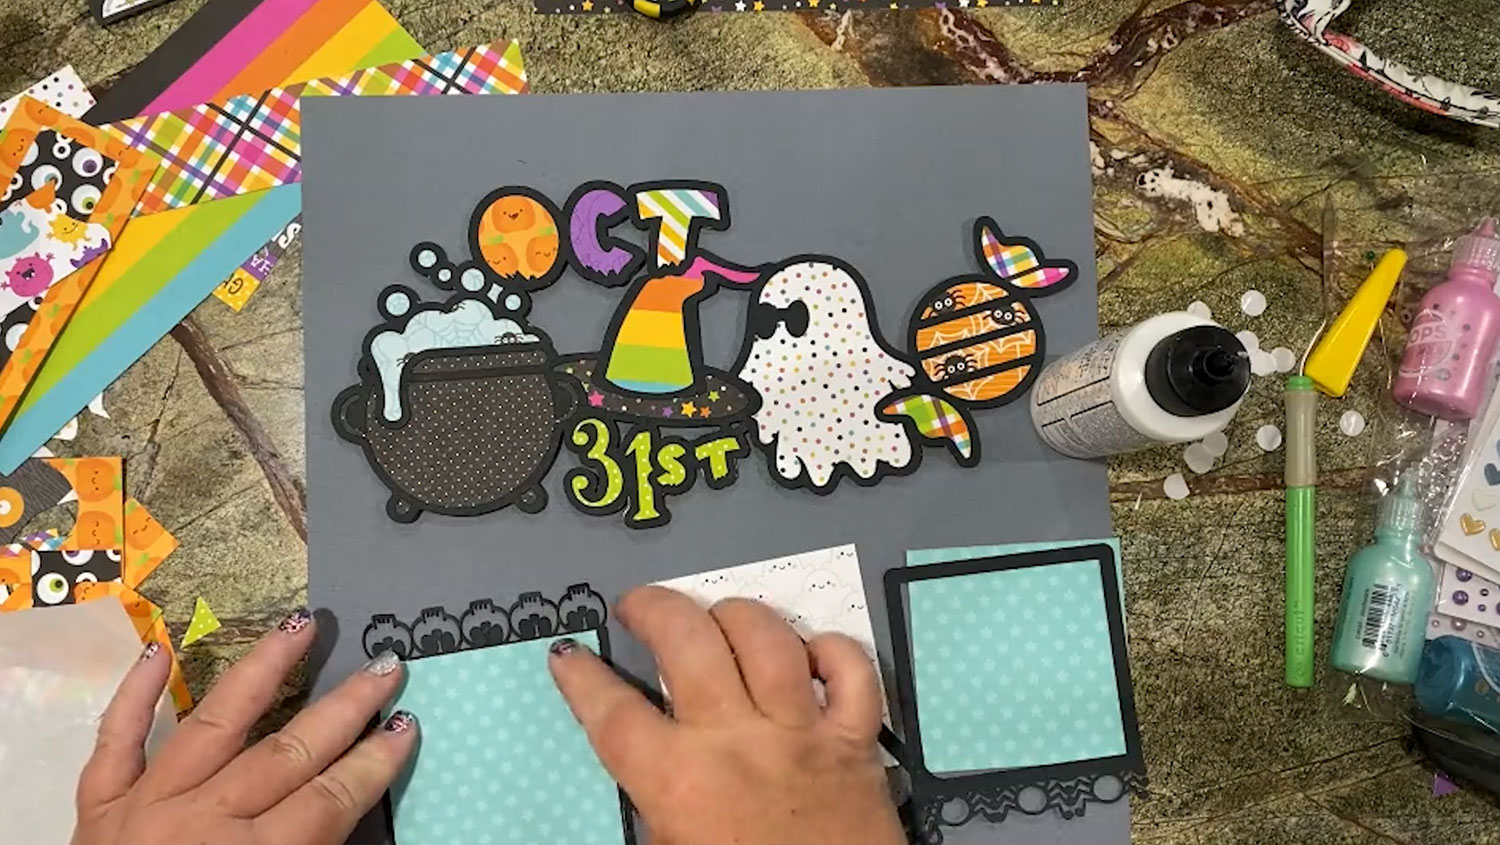
Glue the back of the outline that you want to begin with. Rhoda started with the bubbles pouring out from the cauldron.
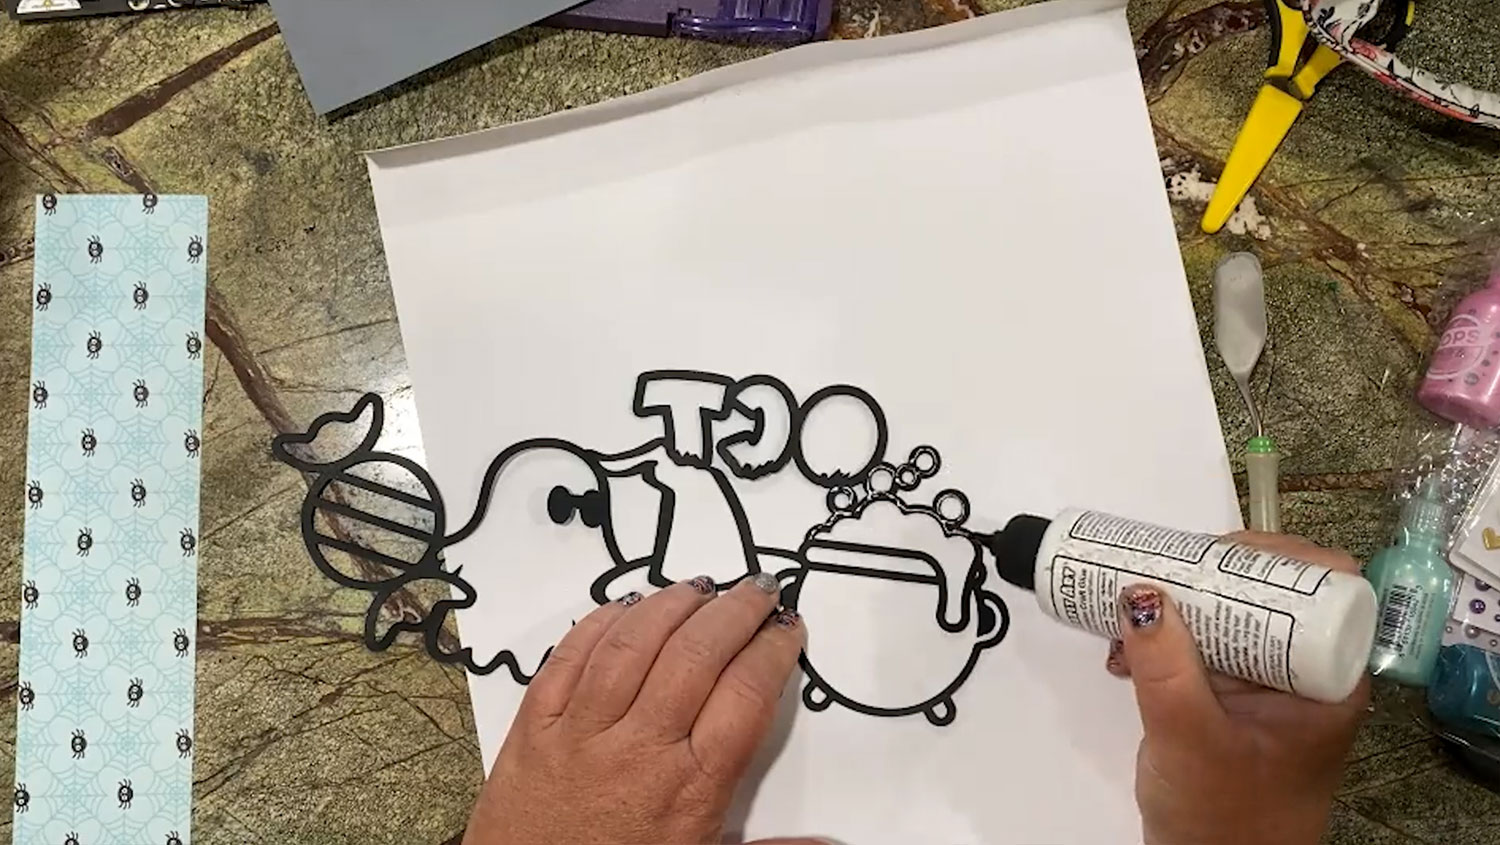
Place your pattern paper on top so that the back side will be facing you and the side you want to see will be touching the glue.
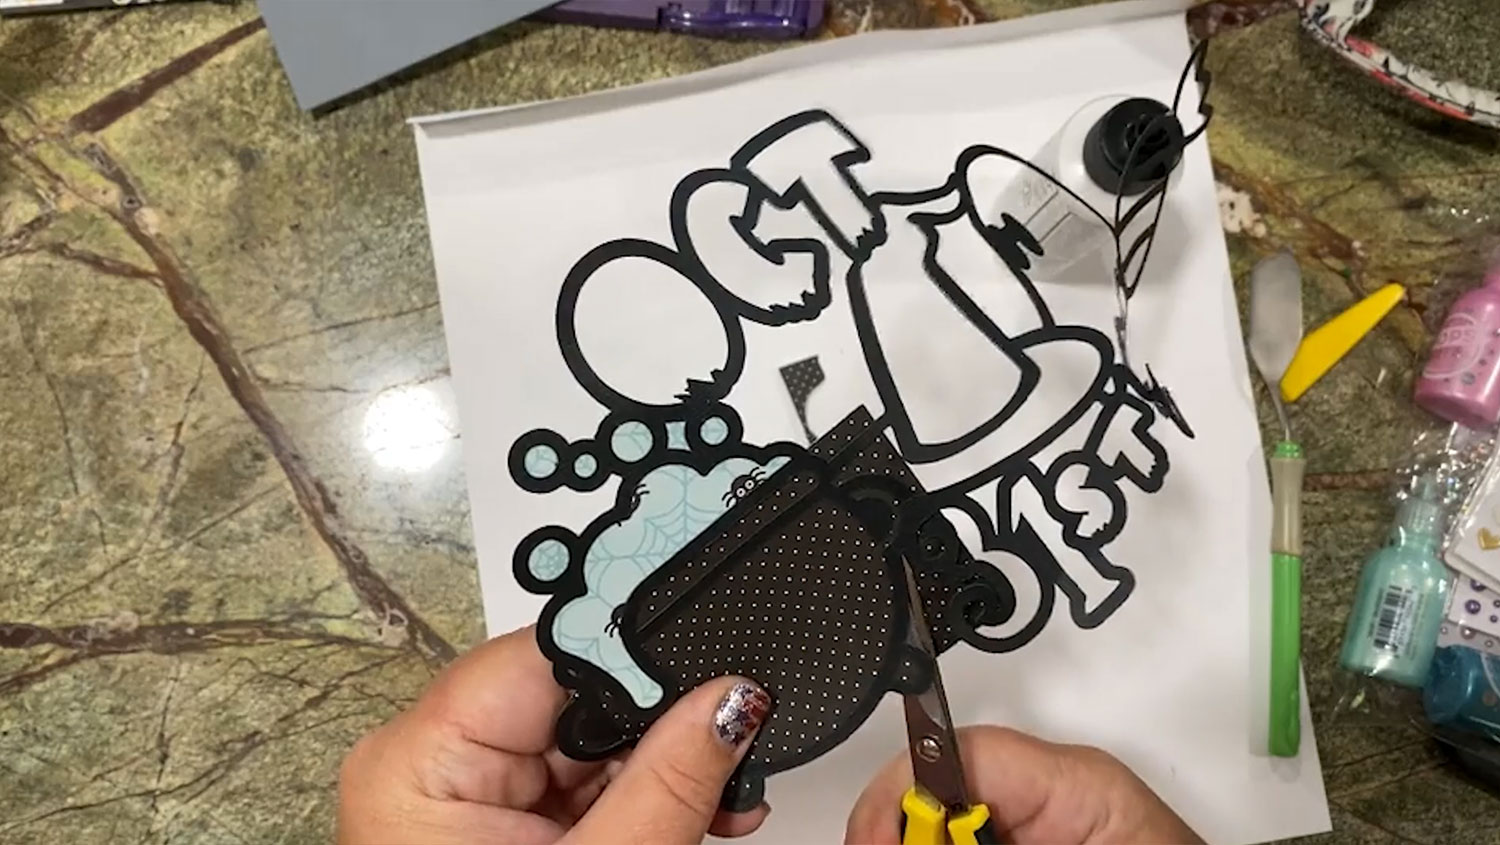
Use your scissors to cut around the paper, following the outline. You can snip and tuck some of your cardstock so that it doesn’t show outside of the outline.
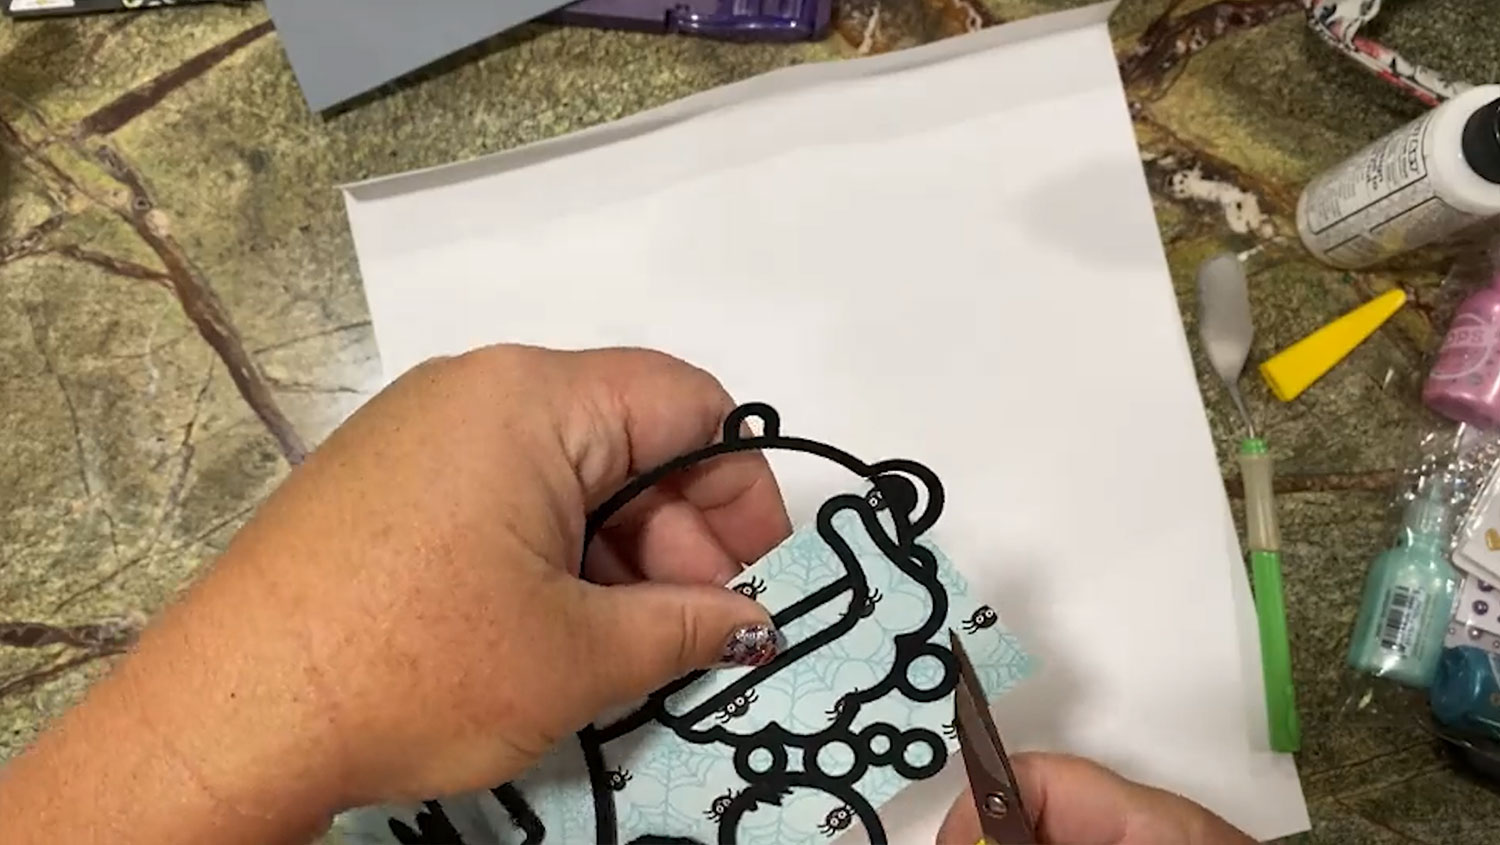
You can use a X-Acto Knife for this part if you’d rather.
Not a fan of fussy cutting? Get your Cricut to cut the shapes for you instead! Watch Rhoda’s video on this tutorial page to find out how to do that.
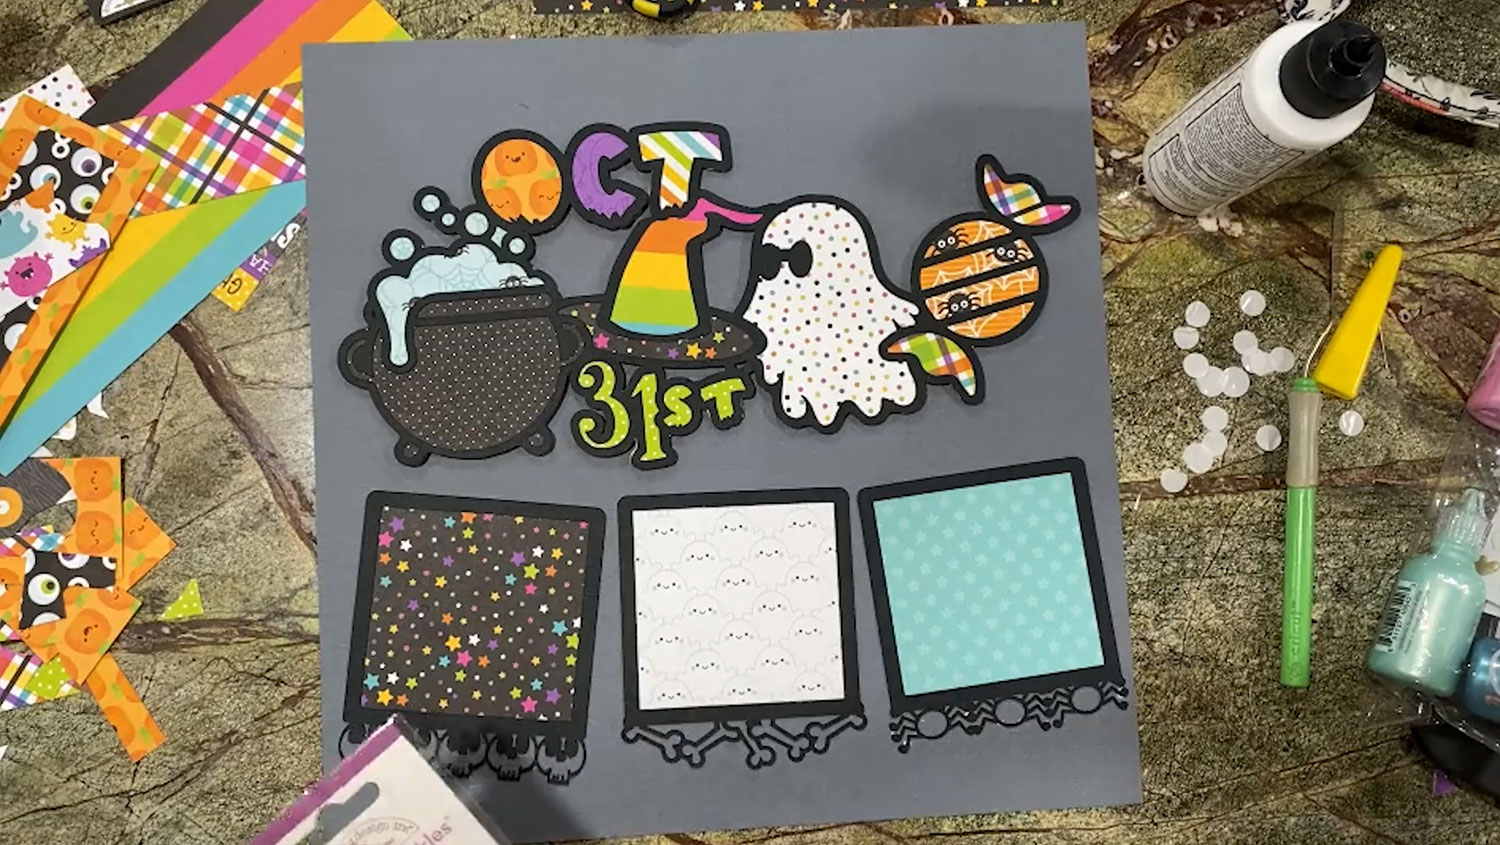
Continue to place different chunks of pattern paper over each of the different sections and cut around them until the outline is filled.
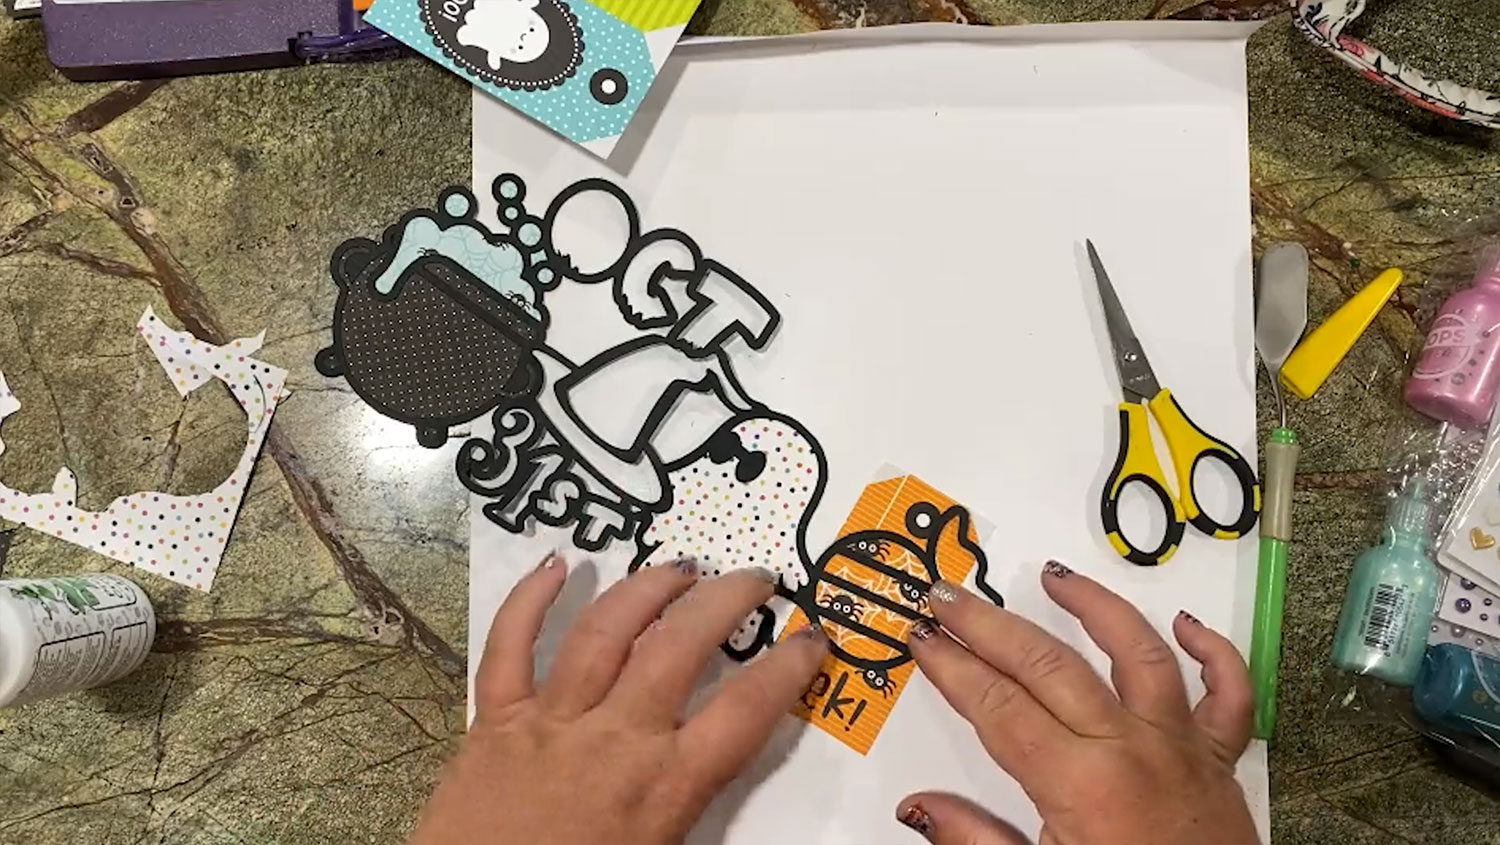
Once all the pictures are filled in, you then need to choose some pattern paper to stick behind the photo mounts. Once you have your photos added you may not see so much of the patterned paper, but it will add a lovely border and act as a placeholder in the meantime.
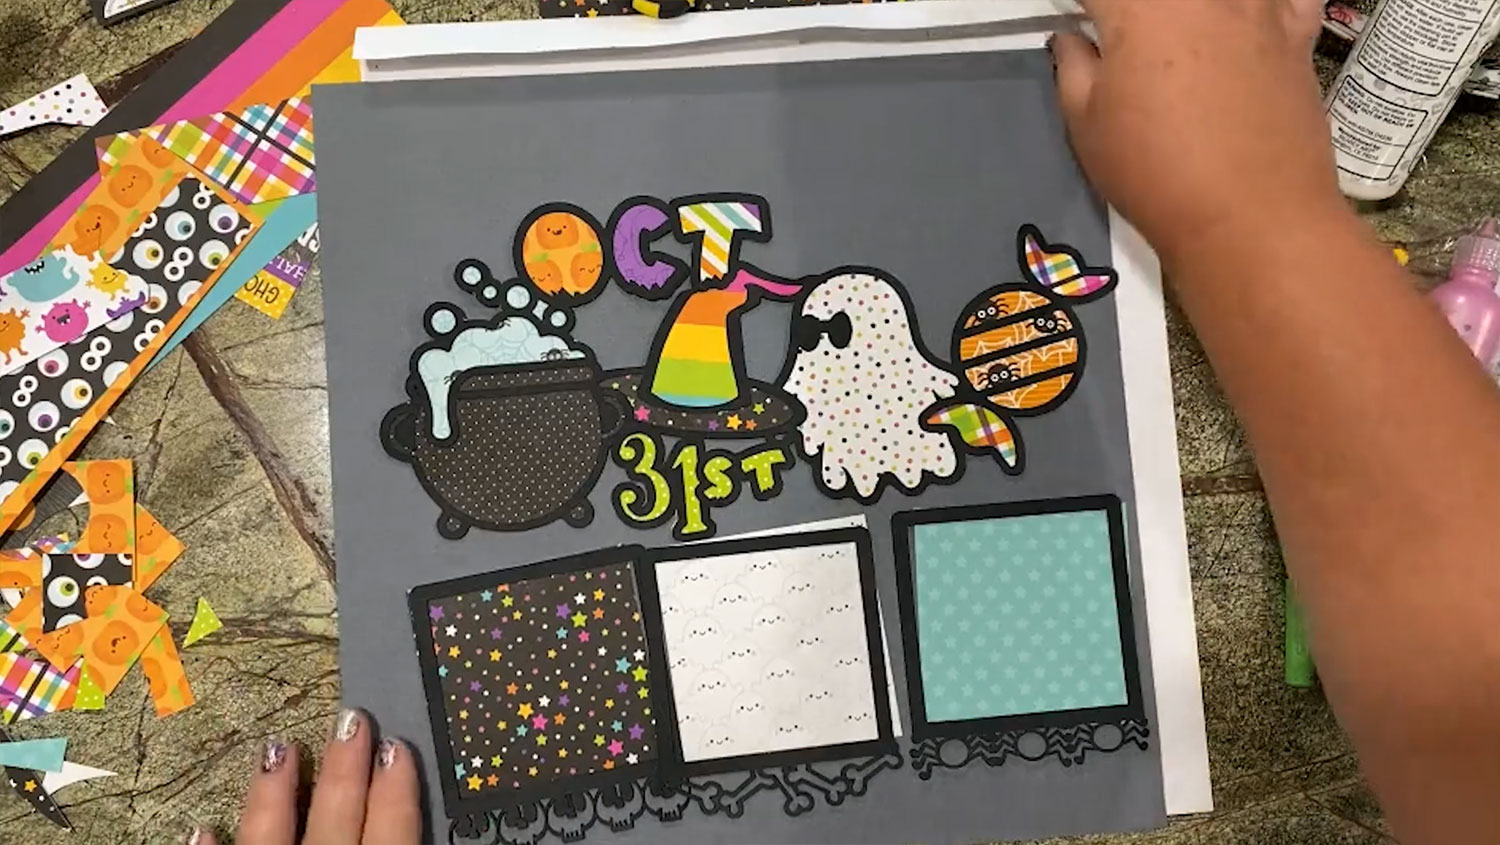
Step 4) Add the design to the backing page
Use foam squares or dots to the back of your main piece and place it on your backing cardstock piece.

The foam will add a lovely dimension to your scrapbook page.
You also need to stick your three photo mounts below the backing piece, and add your printed photos to the tops.
For privacy reasons, Rhoda hasn’t included photographs on her demo project, but you can easily see where they would go on the design.
Step 5) Embellish the scrapbook page
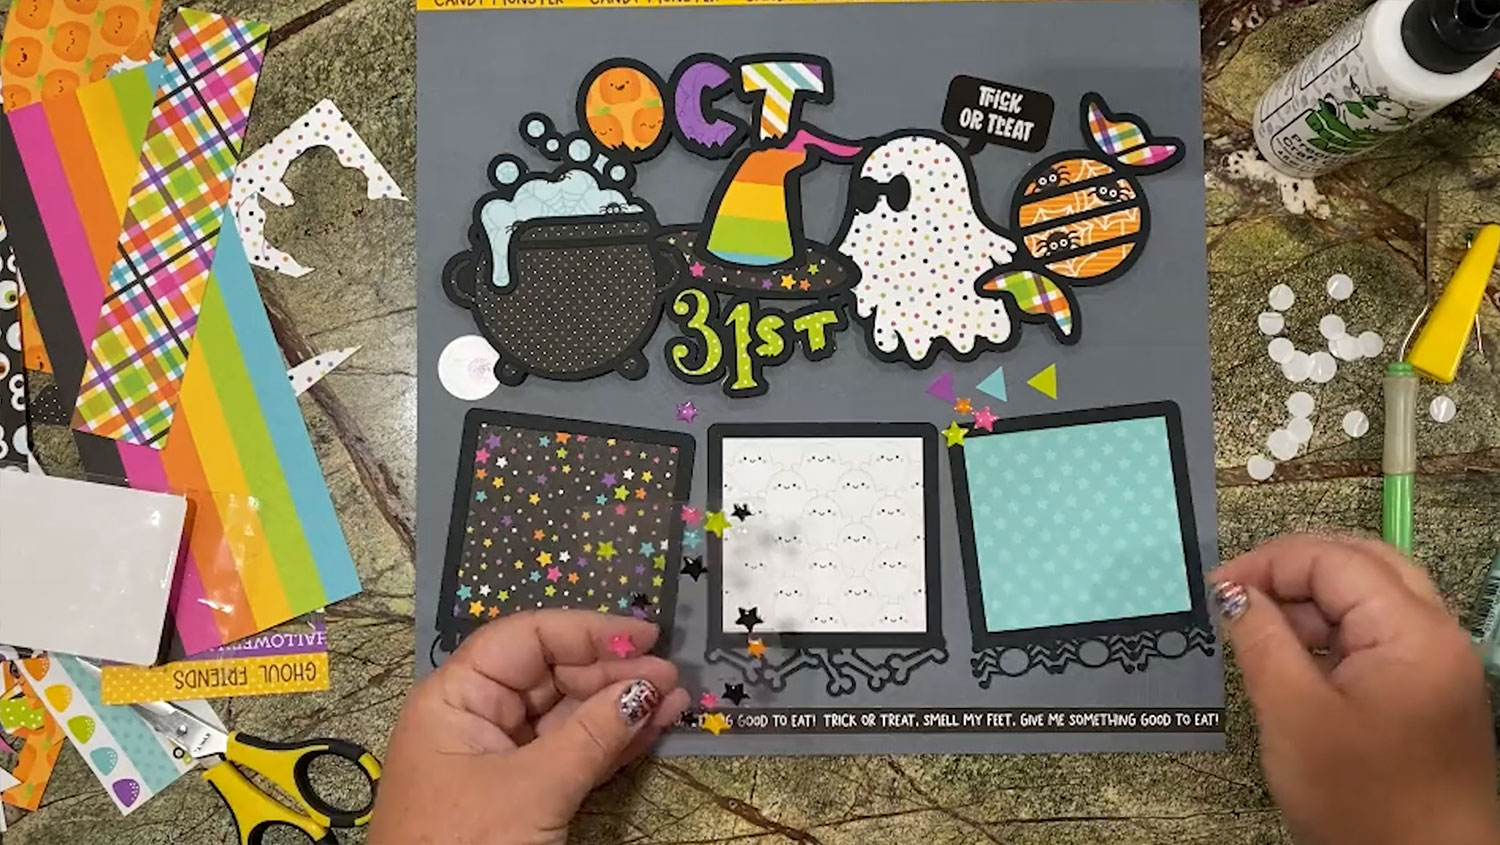
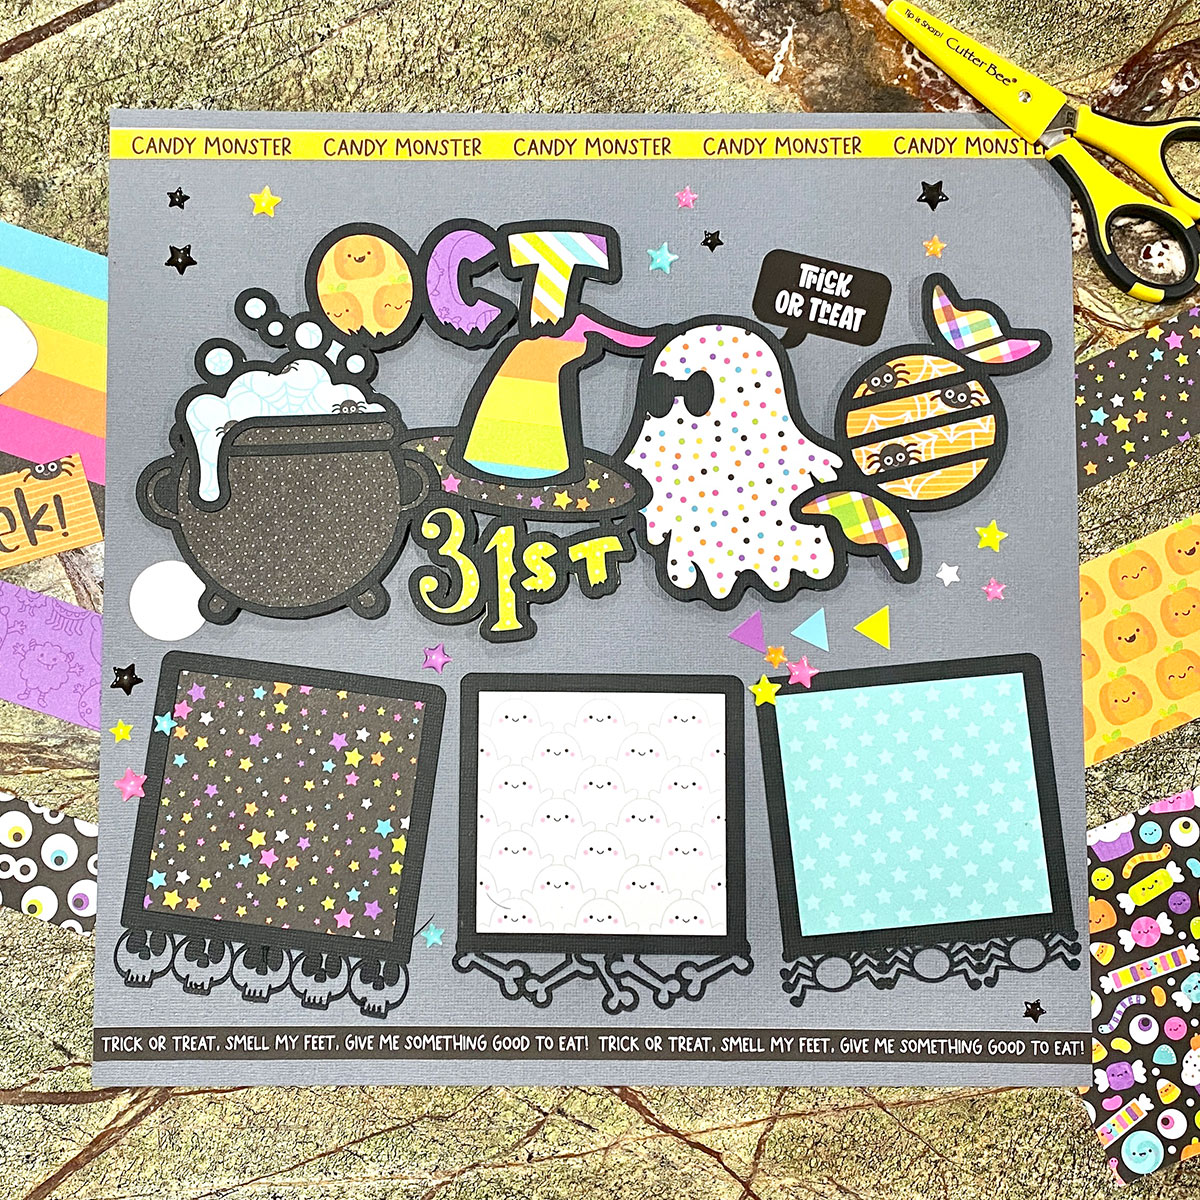
Grab your Halloween stickers, toppers and other decorations and embellish your scrapbook page.
Rhoda used stars, eyeballs, stars, shapes and a trick-or-treat speech bubble. You can use whatever you have in your stash.
If you don’t have any suitable decorations, you could use your Cricut to cut additional images for your page.
You can also use strips of your patterned paper along the top and bottom of the page. Rhoda used an orange “Candy Monster” strip and “Trick or Treat, Smell my Feet” strip.
And now your scrapbook page is finished!
Halloween scrapbook layout for Cricut
I hope you enjoyed this tutorial on how to make a Halloween scrapbook layout using a combination of Cricut cutting and fussy cutting by hand.
I love the combination of different patterns and colours. They tie in so nicely together and it will help to reduce your scrap pile, which is always good!
There’s something really fun about choosing the pattern paper as you go. I can’t wait to see your finished pages.
Happy crafting,
Sarah x

