CCC 2023 Day 12 ☃️ Photo Globe Surprise Explosion Box
Make your own explosion box to give to someone special this Christmas.
It’s Day 12 of the Christmas Craft Countdown and Emily Minor from MinorDIY is sharing this amazing explosion box with us.
She even shows how you can use your Cricut’s print then cut feature to personalise it with photos.

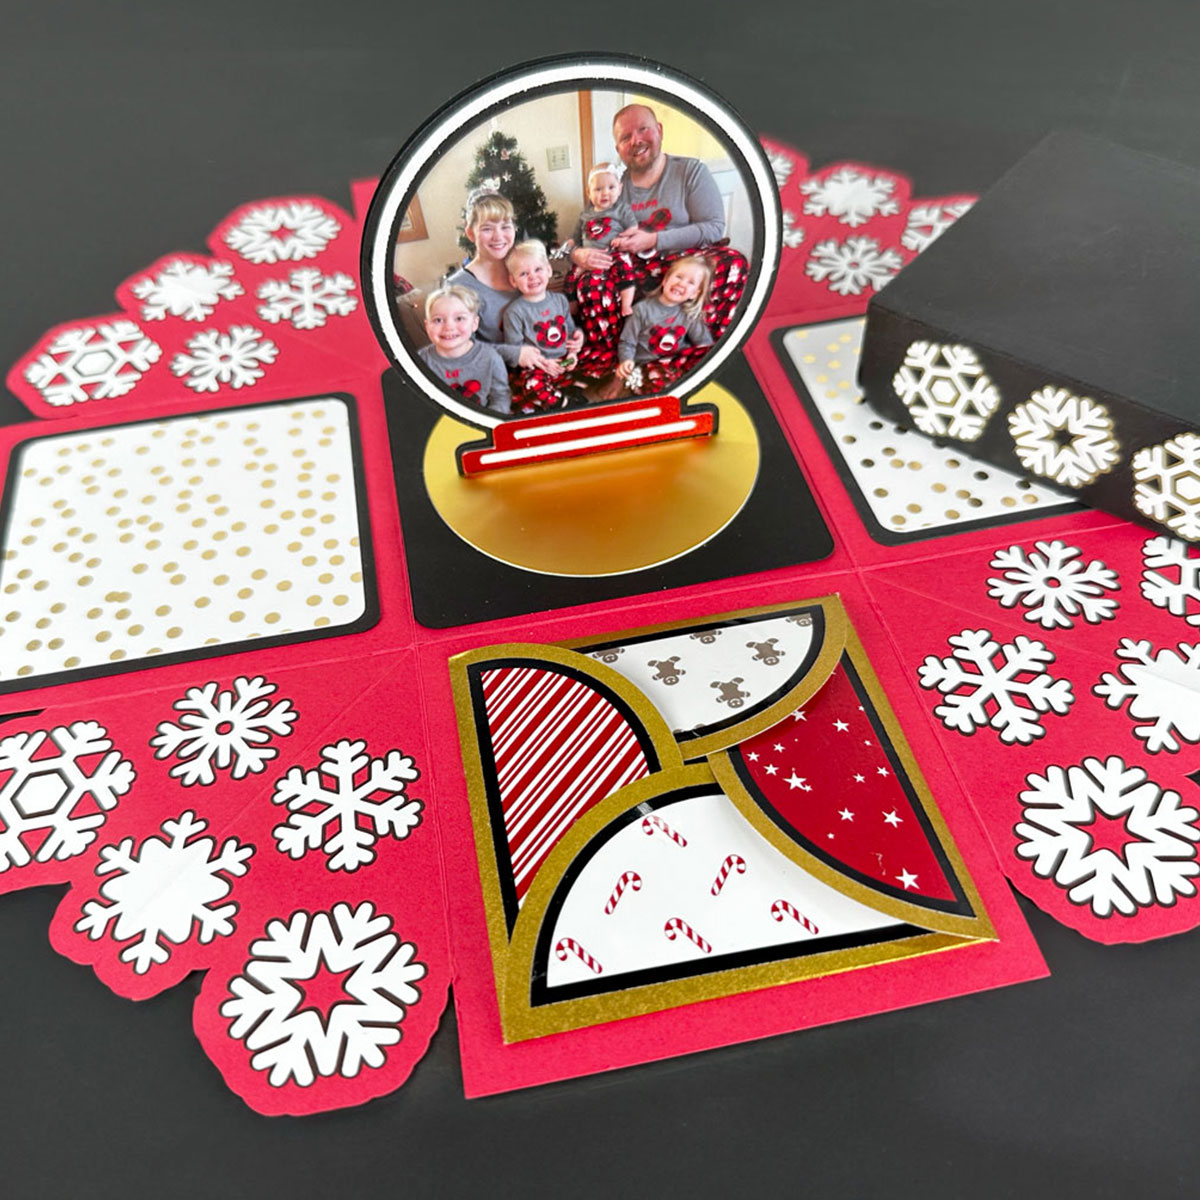
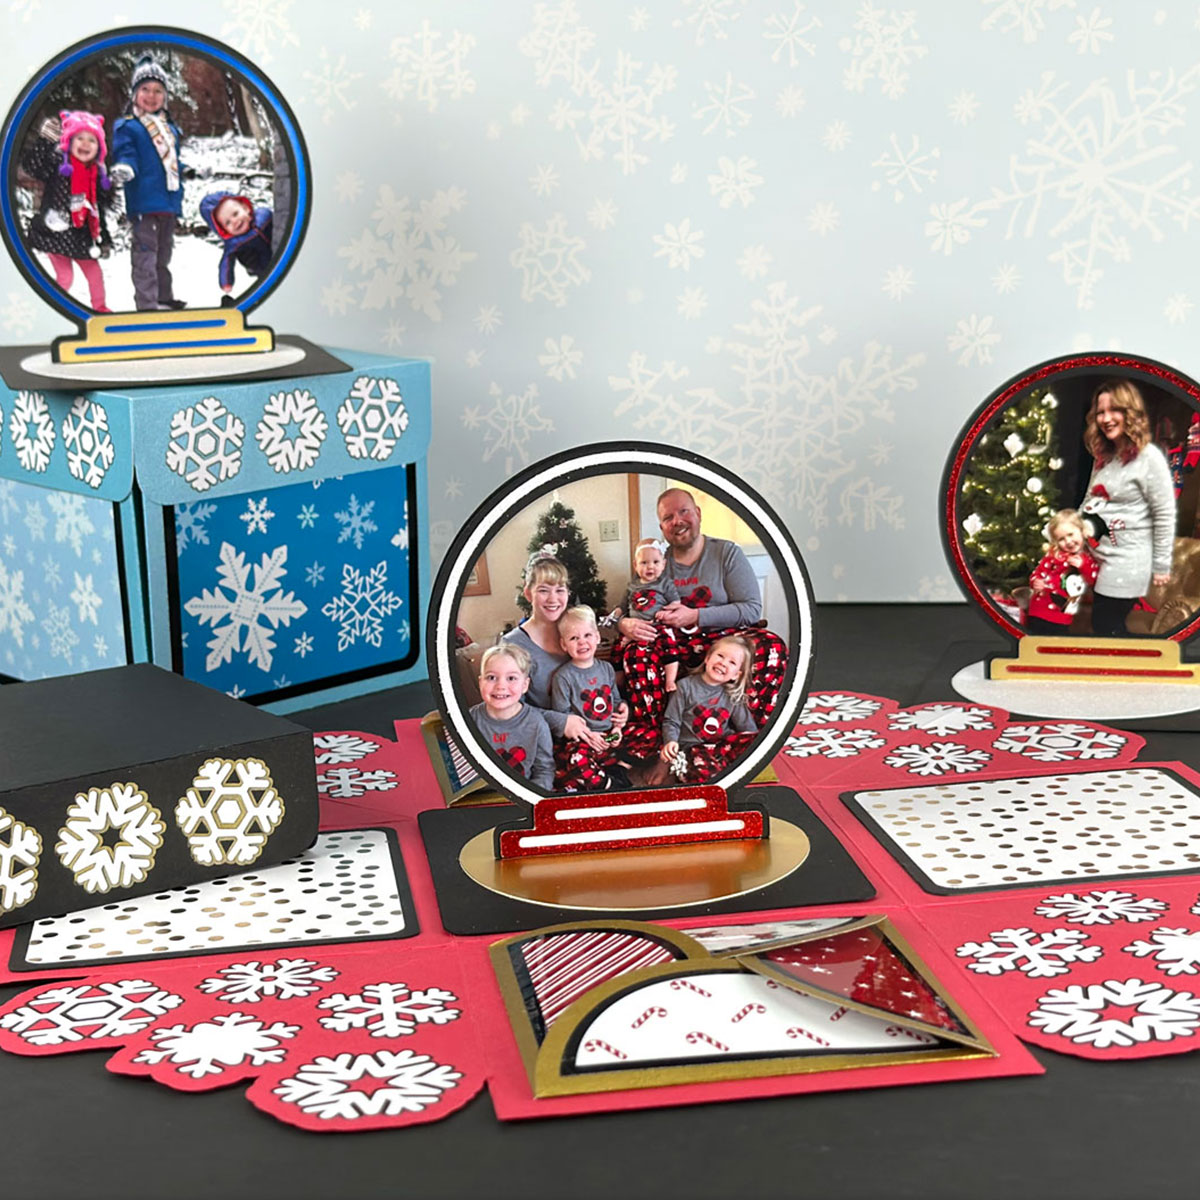
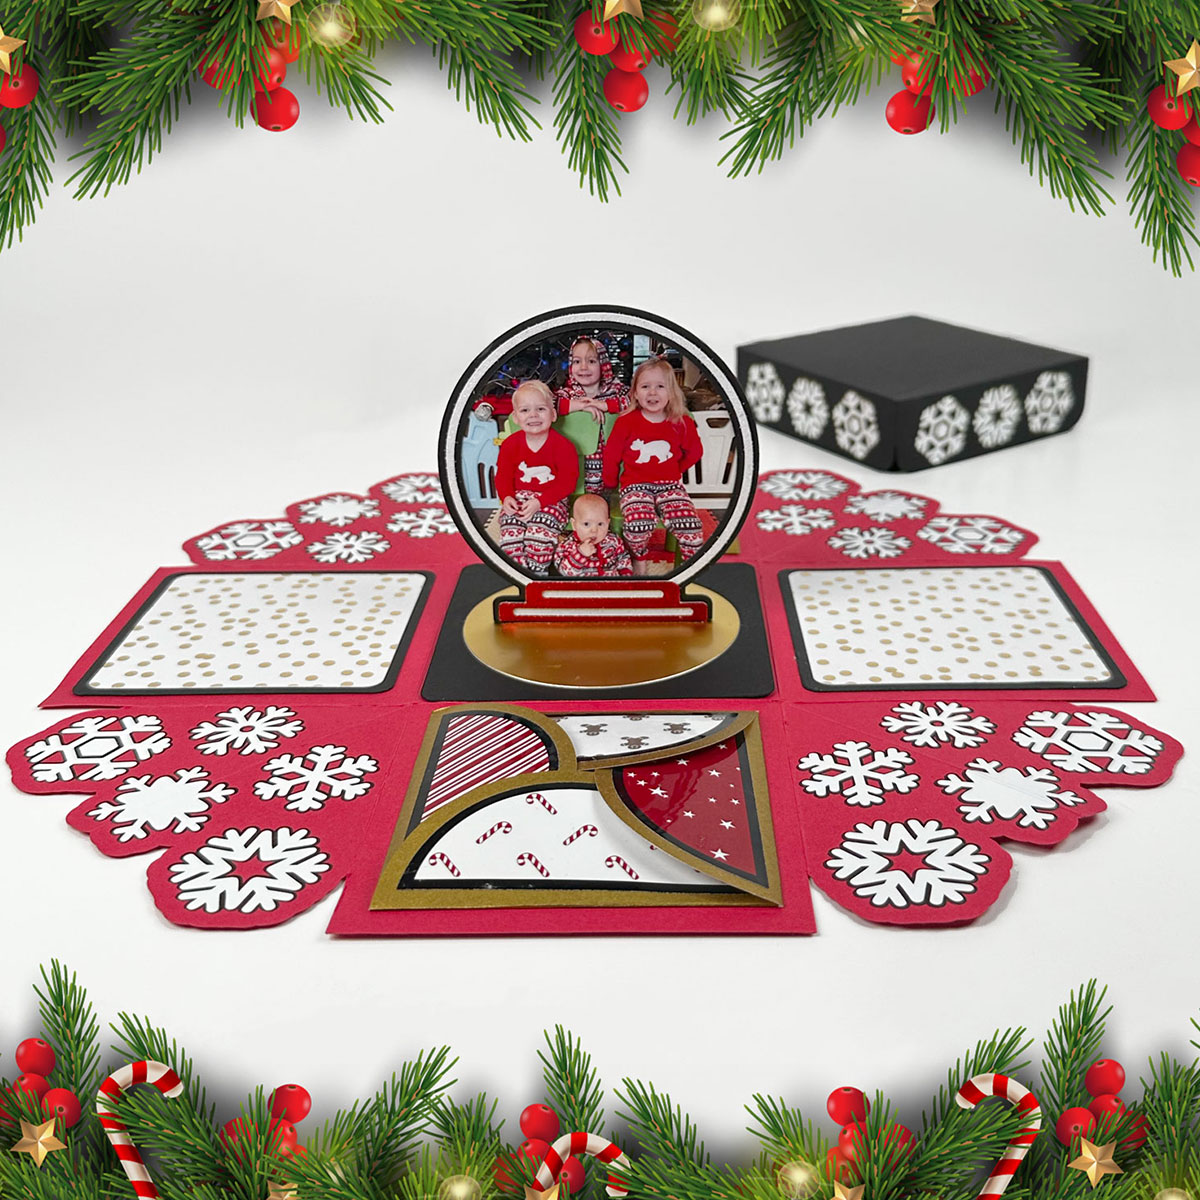
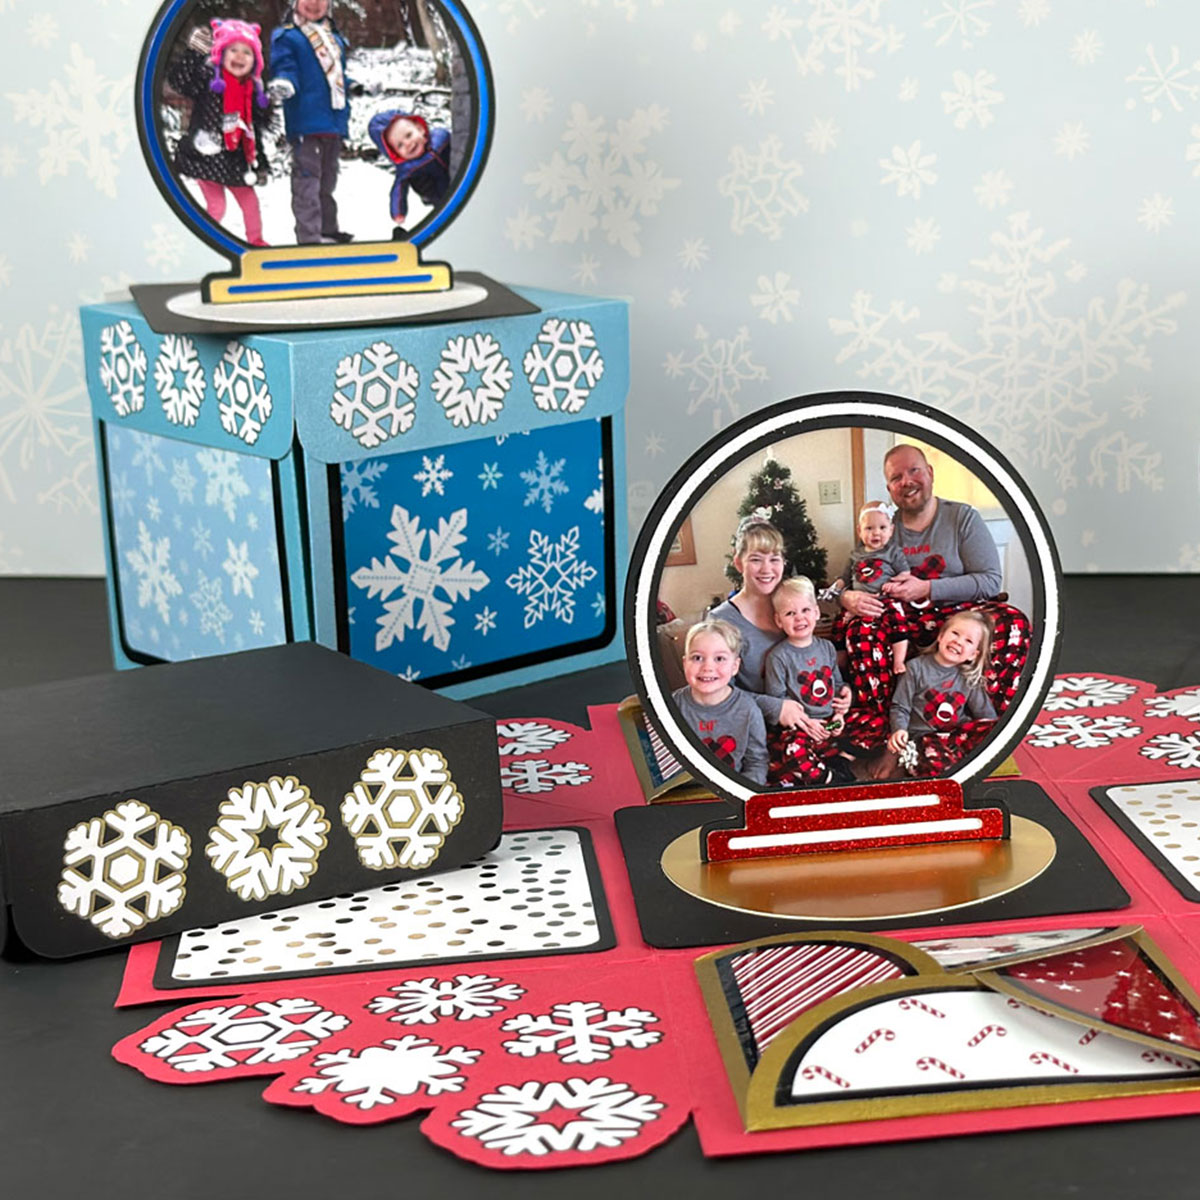
This exploding box project is SO clever. It looks like a normal gift box, but when the lid is lifted, the sides come out to reveal a snowglobe-shaped photograph inside.
Emily used a combination of print then cut images, cardstock, patterned paper and print then cut stickers.
Don’t worry if you’re new to explosion boxes, Emily will walk you through each step.
This Project was part of the Christmas Craft Countdown 2023
Materials supply list
Here is a list of the materials that Emily used to make this project.
Please note that some of the links included in this article are affiliate links, which means that if you click through and make a purchase I may receive a commission (at no additional cost to you). You can read my full disclosure at the bottom of the page.
- Cricut machine
- Light and standard grip cutting mats
- Colour printer
- Photo paper
- Cricut scoring wheel or scoring stylus
- Cricut pen (any colour)
- Sticker paper (optional)
- Glue
- Heat transfer vinyl
- Easypress mini
- Heat proof mat
- Brayer tool or bone folder
- Cardstock in various colours (12×12)
- Painters tape / masking tape / washi tape
- Clothes pegs to hold pieces in position while the glue dries
This project is suitable for the following types of Cricut machine: Explore Air 2, Explore Air 3, Maker, Maker 3 and Venture.
Video tutorial
I love how the receiver of the explosion box can use the snowglobe to put on display in their home afterwards.
Watch the video below to see how to make this snowglobe explosion box.
If you prefer to read rather than watch, keep scrolling!
This project was created by minorDIY
With a passion for crafting and a belief in its therapeutic benefits, Emily loves helping others create personalized photo gifts.
From fun pop-up cards and explosion boxes to supportive cards for difficult situations, Emily offers many projects for expressing emotions and connecting with loved ones.
Emily is dedicated to sharing her creations and experiences to bring joy and meaningful connections to other crafters.
Written tutorial (with photos!)
Here’s how to make your very own DIY exploding box using a Cricut machine!
Step 1) Download the cut files & unzip the downloaded folder
Download the files using the box below.
Before you upload the SVG files to Design Space, you need to unzip the download folder that they come in.
Step 2) Upload the cut files into Design Space
Open up Cricut Design Space and start a new Project.
Click “Upload” and then find your unzipped version of the downloaded files for this project.

There are three cut files required to make this project, but we are going to start with just one of them.
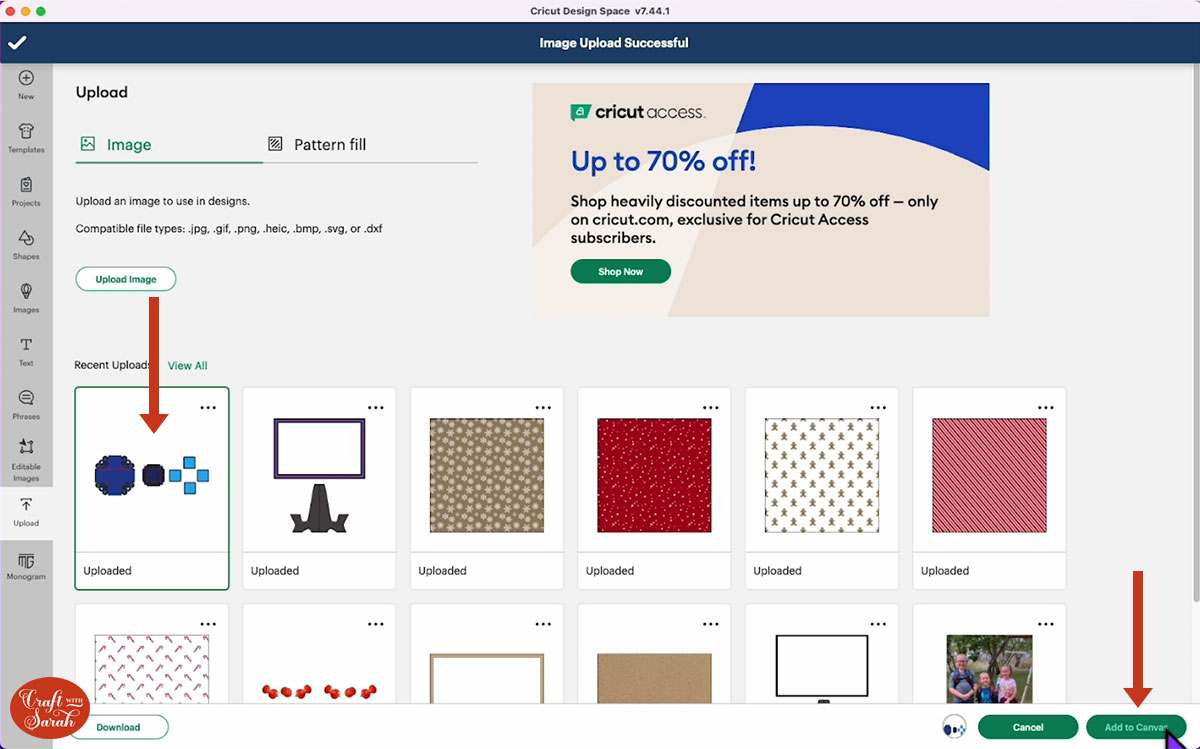
Upload the file called “CCC-Frosty-Surprise-Explosion-Box-Base-Lid_minorDIY.svg”
This is what it looks like:
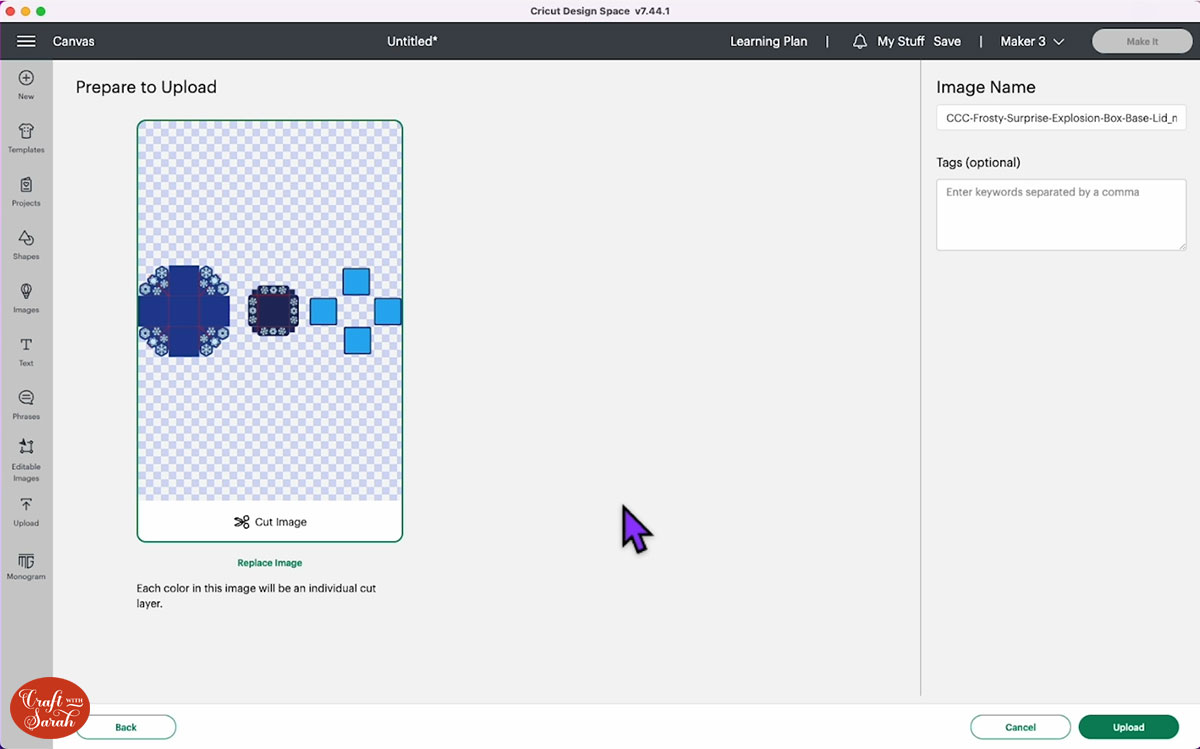
After uploading, the design will show in your “Recently Uploaded Images”.
Click on it and then press “Add to Canvas” to put it onto your Project.
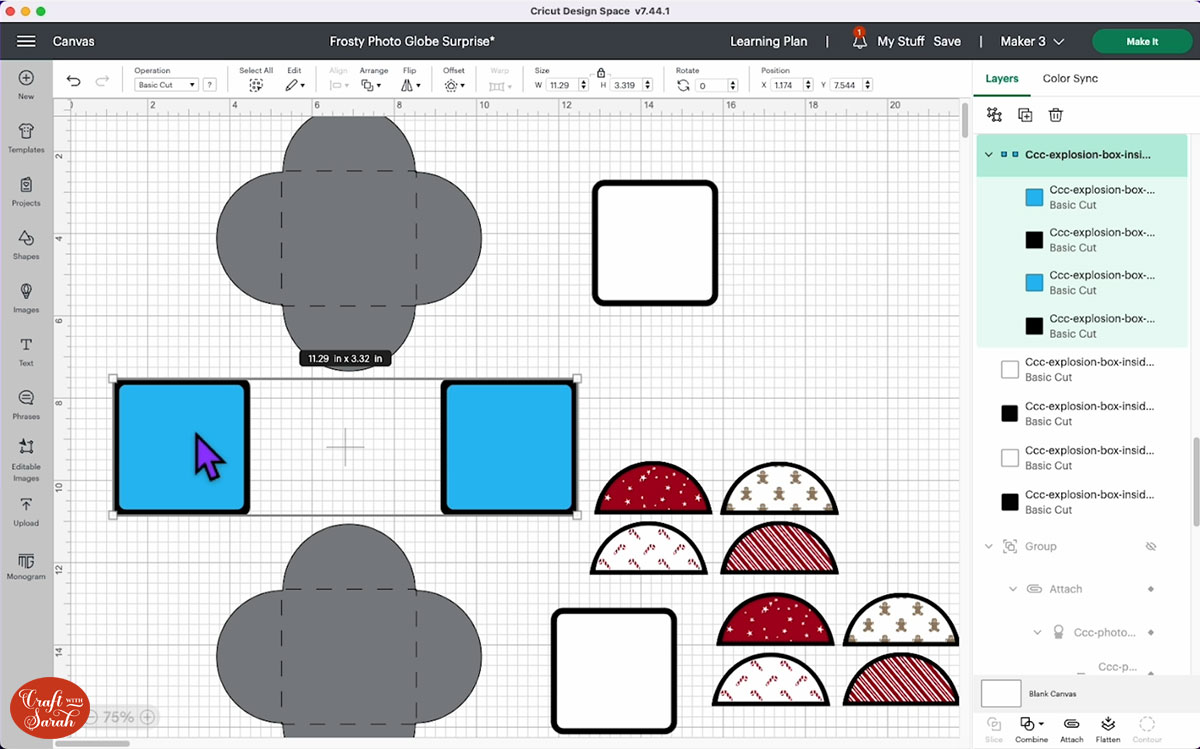
Step 3) Format the base and lid file
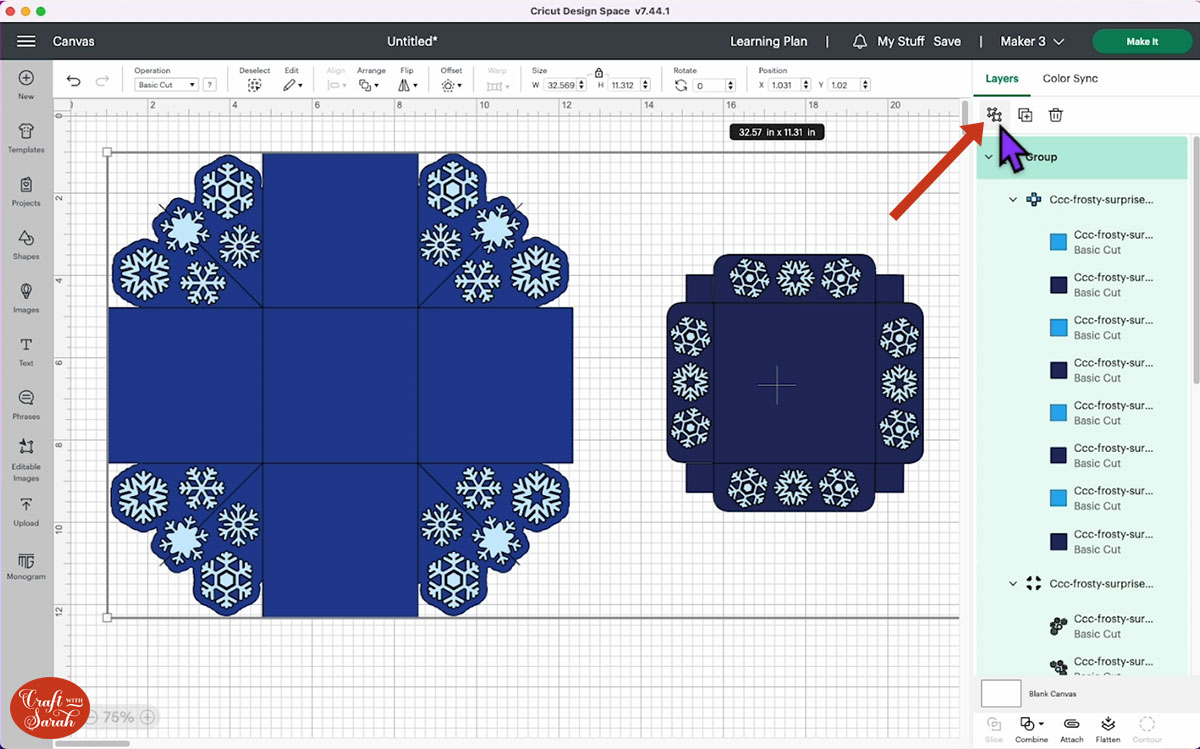
Click the design and then click the Ungroup button at the top of the layers panel to separate out the layers
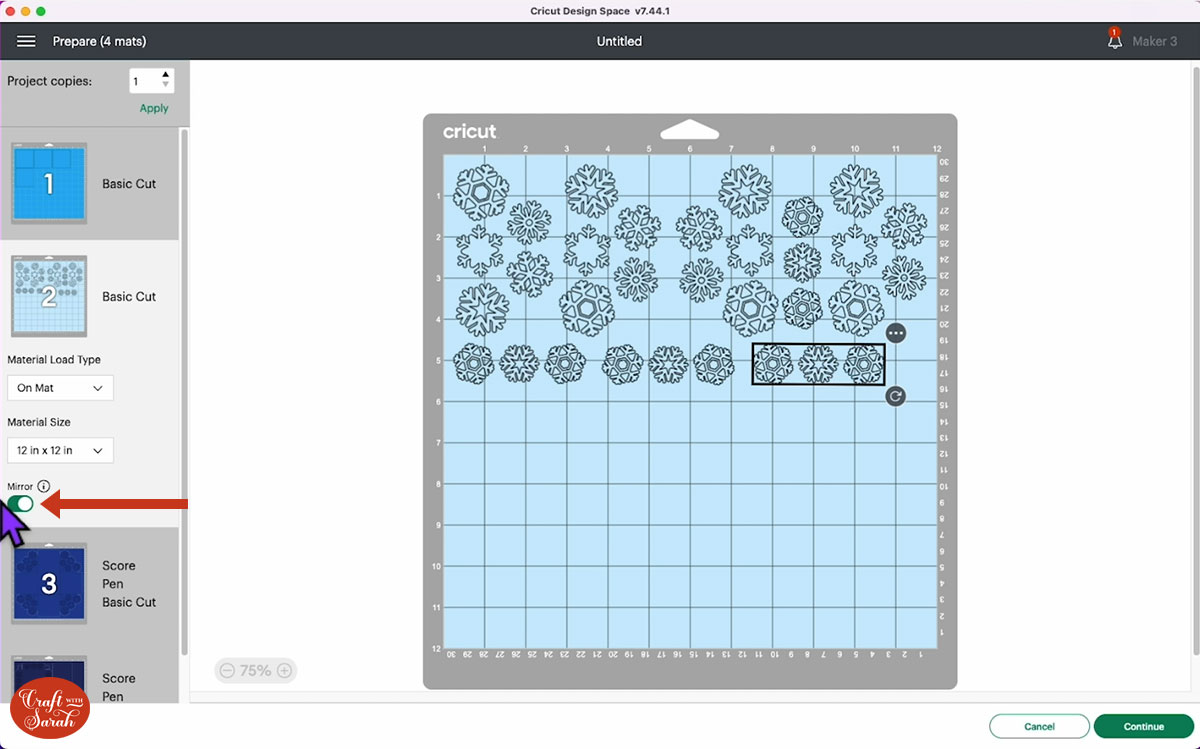
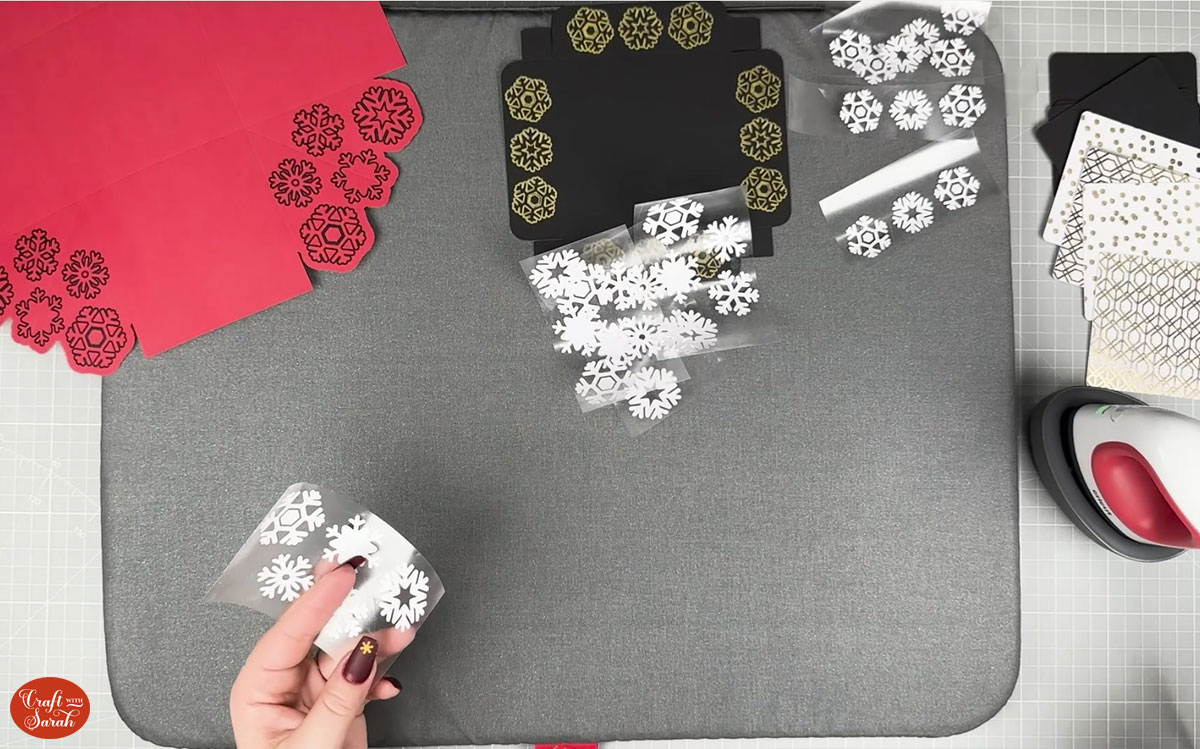
The light blue snowflakes will be cut using heat transfer vinyl as they are too fine to be cut from cardstock.
The base pieces will be cut using 12×12 cardstock.
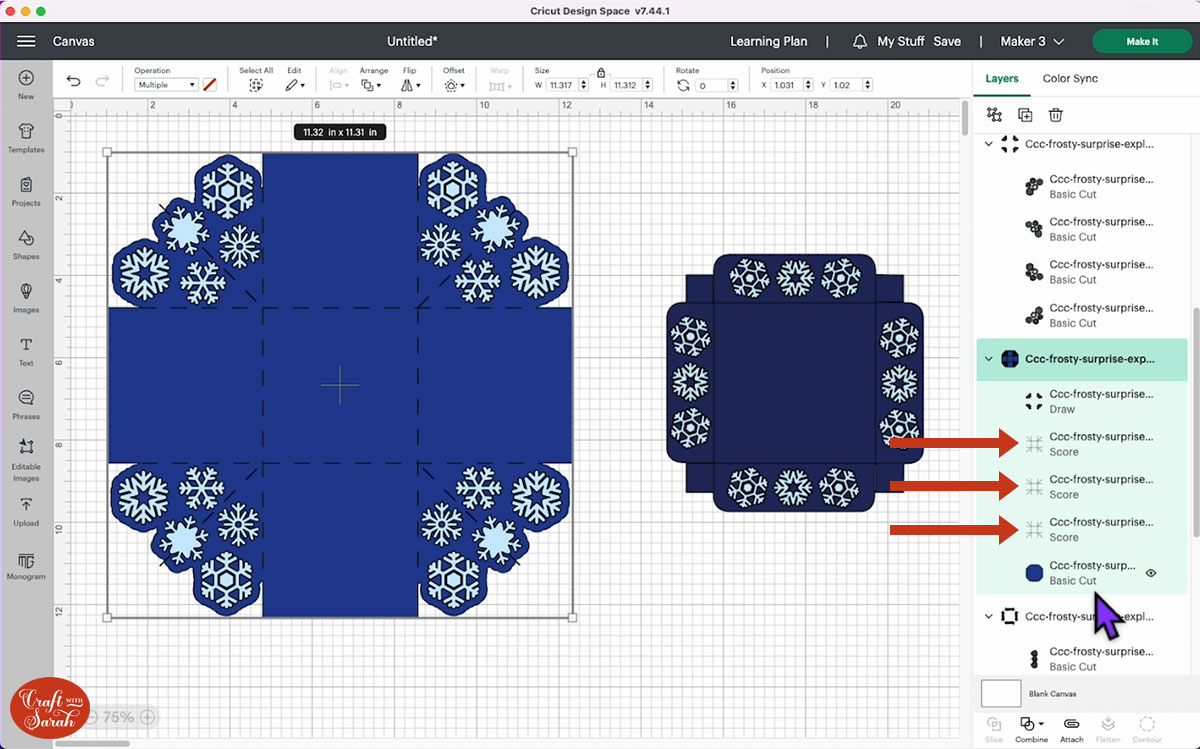
Click on the main base piece of the design. Look in the layers panel and you will see that the top layer in the group that looks like four little corners is currently set to a Basic Cut layer.
Click that layer to select it, then use the Operation dropdown to change it to a Draw/Pen layer. This will draw an outline to give our snowflakes a shadow.
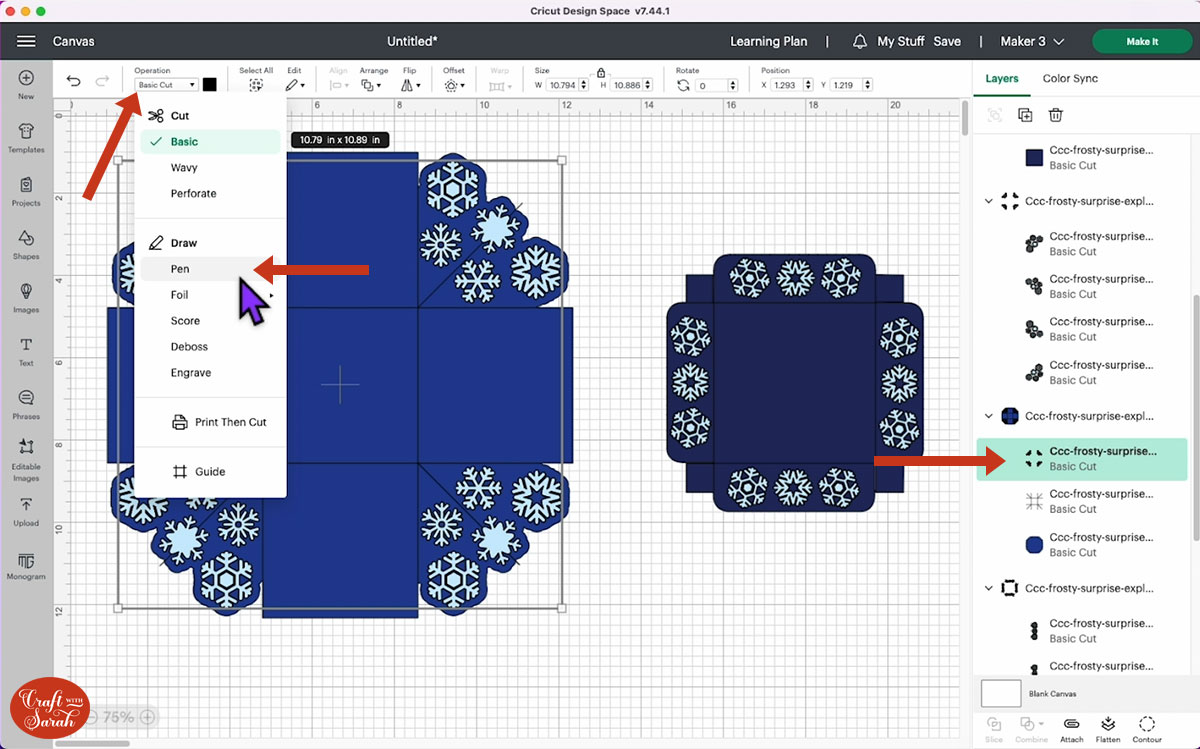
Click the layer below the one you have just changed. It looks like lots of single lines intersecting each other.
Change this layer to a Score layer in the Operations dropdown.
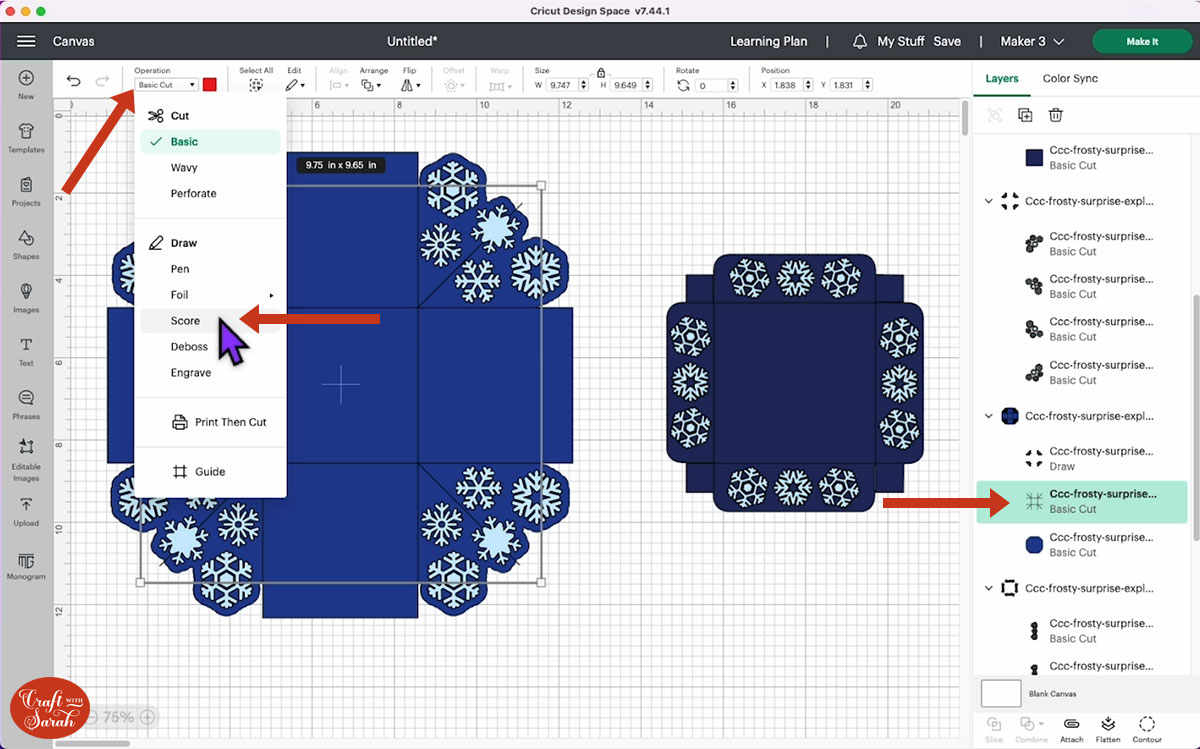
With the score layer highlighted, hold the ALT key on your keyboard and click on the design. This will duplicate the score lines layer in exactly the same place on your Canvas.
Repeat that step so that it’s duplicated twice.
This will give the piece a strong score which is helpful, as folding these lines precisely is the key to our box opening perfectly.
You will find the duplicated score layers at the top of the layers panel. Drag them down the panel and into their group.
The layers panel should now look like this:
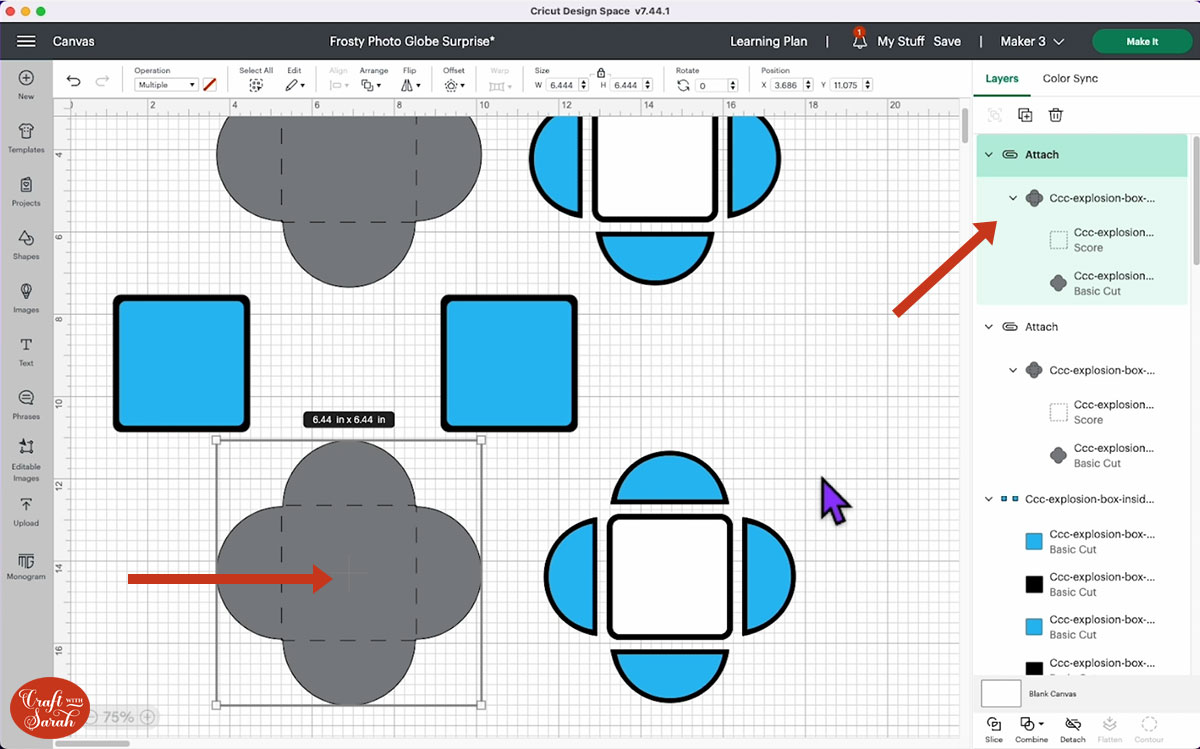
Select the sub-group that contains the layers you have just changed and click Attach so that the Cricut knows where the score and pen lines are going.
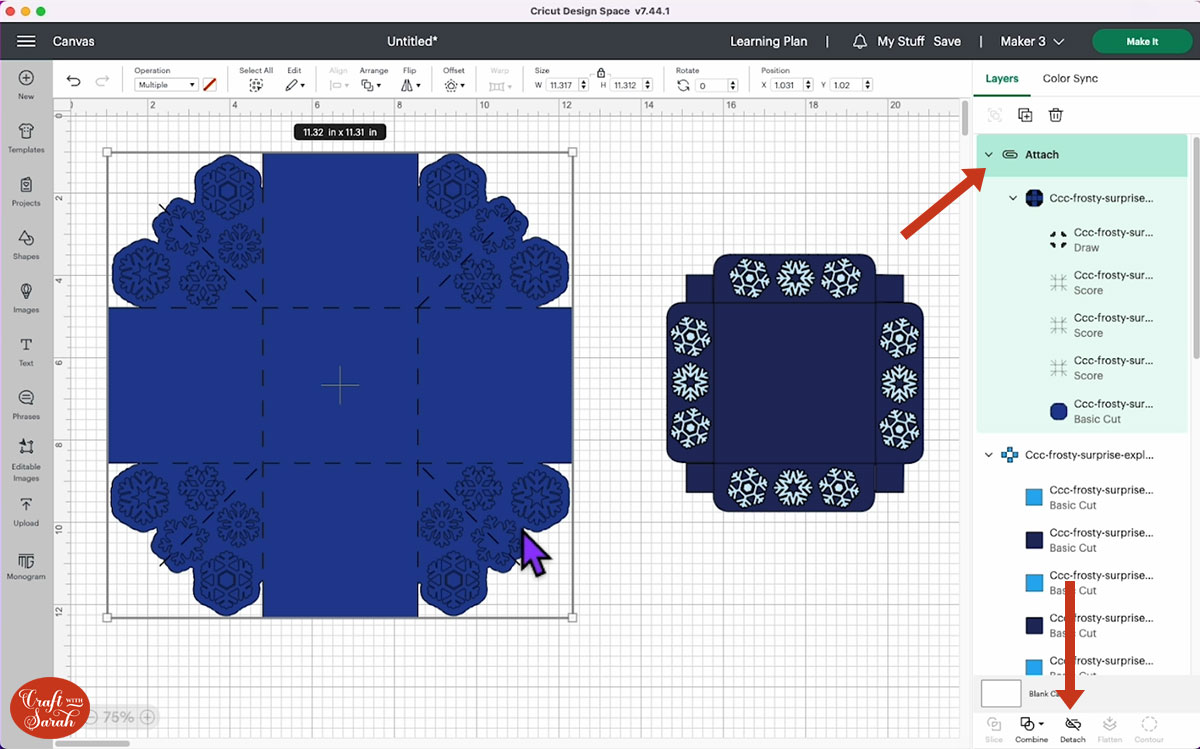
Don’t worry that your light-coloured snowflakes disappear after Attaching – it’s because the layers you have just attached have moved to the top of the layers panel.
Drag them down back underneath the light snowflakes.
You don’t need to worry about lining them up perfectly on the screen, as they will be cut from different materials.
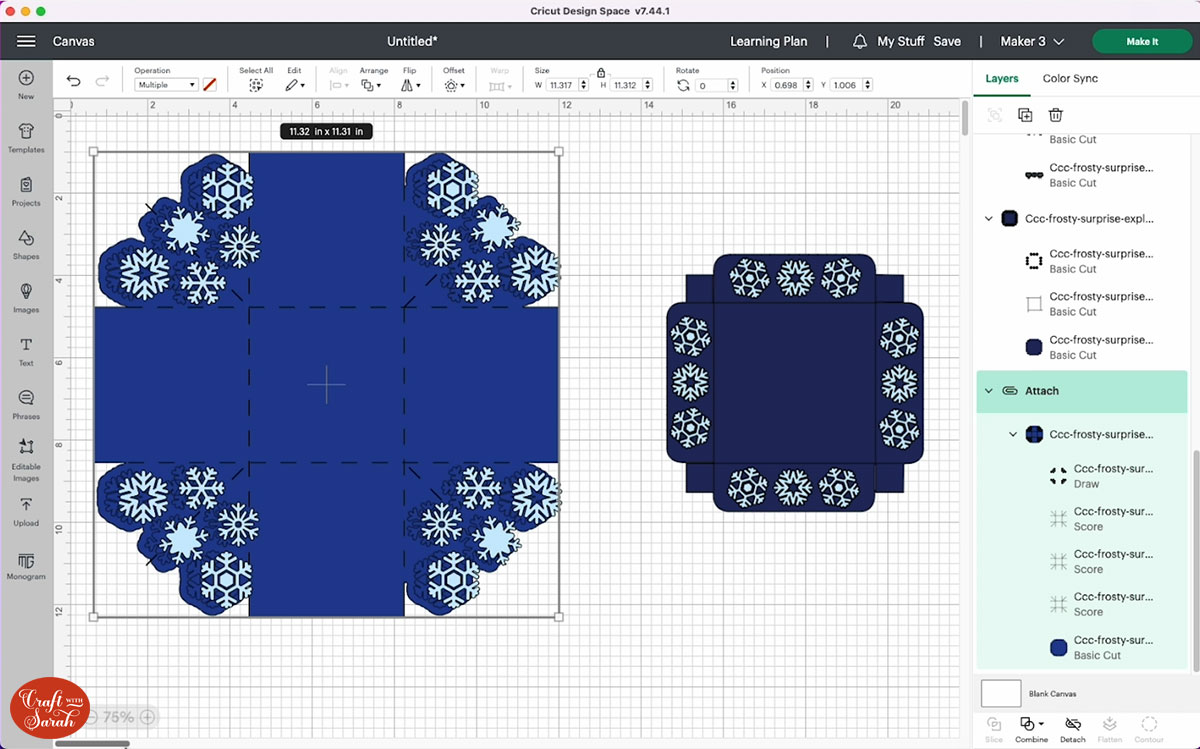
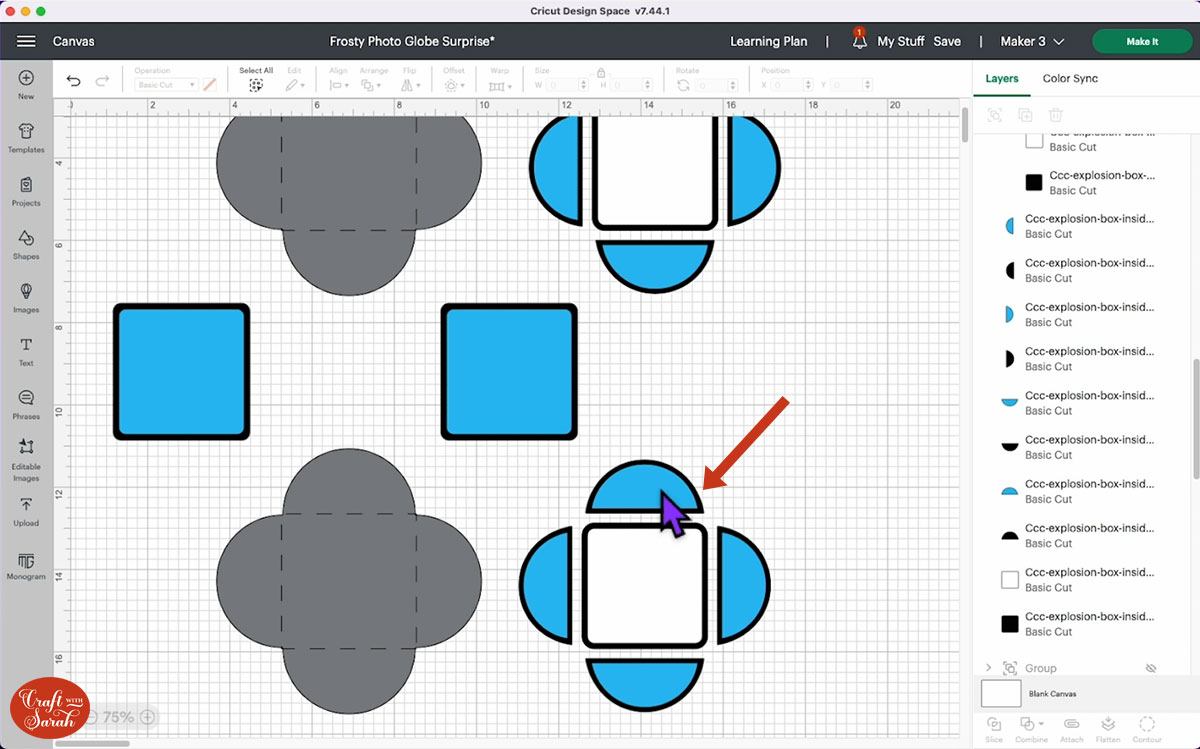
Click the lid section of the design.
Repeat the same steps we did for the base: turn the corner snowflakes to a pen layer, change the single-line layer to a score layer, duplicate the score line twice, add them into the same group and then Attach everything together.
Here’s how your screen should look after doing that:
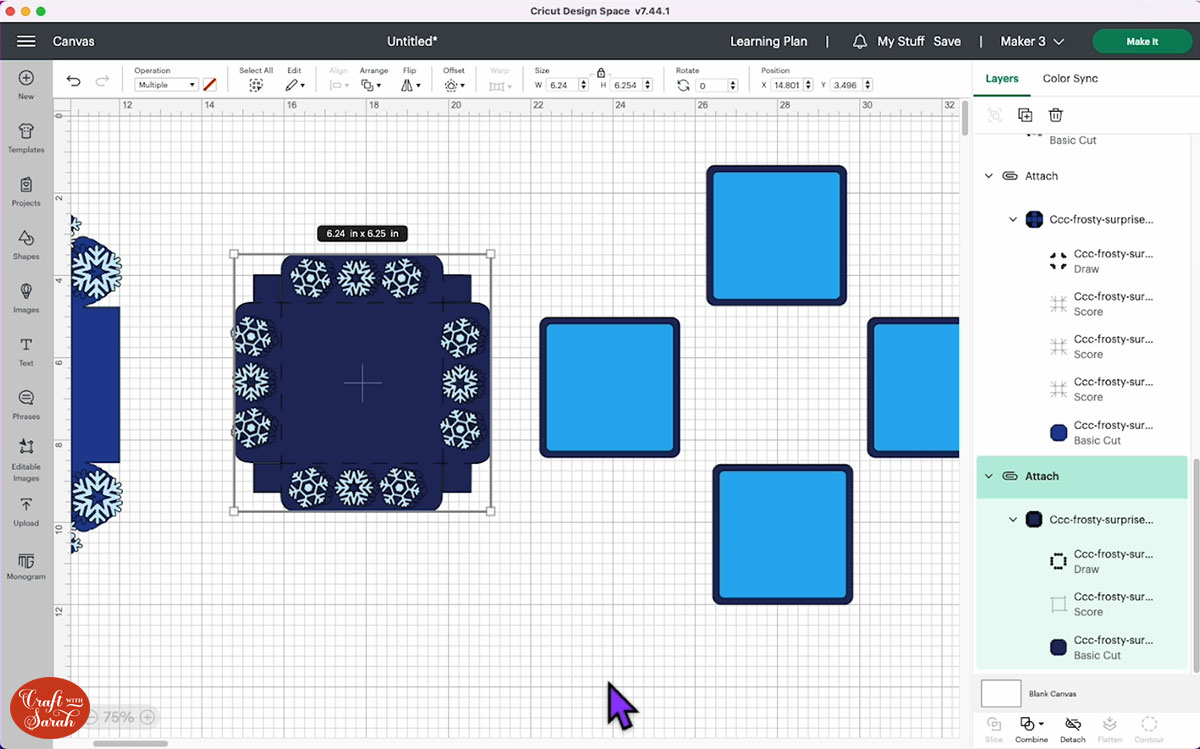
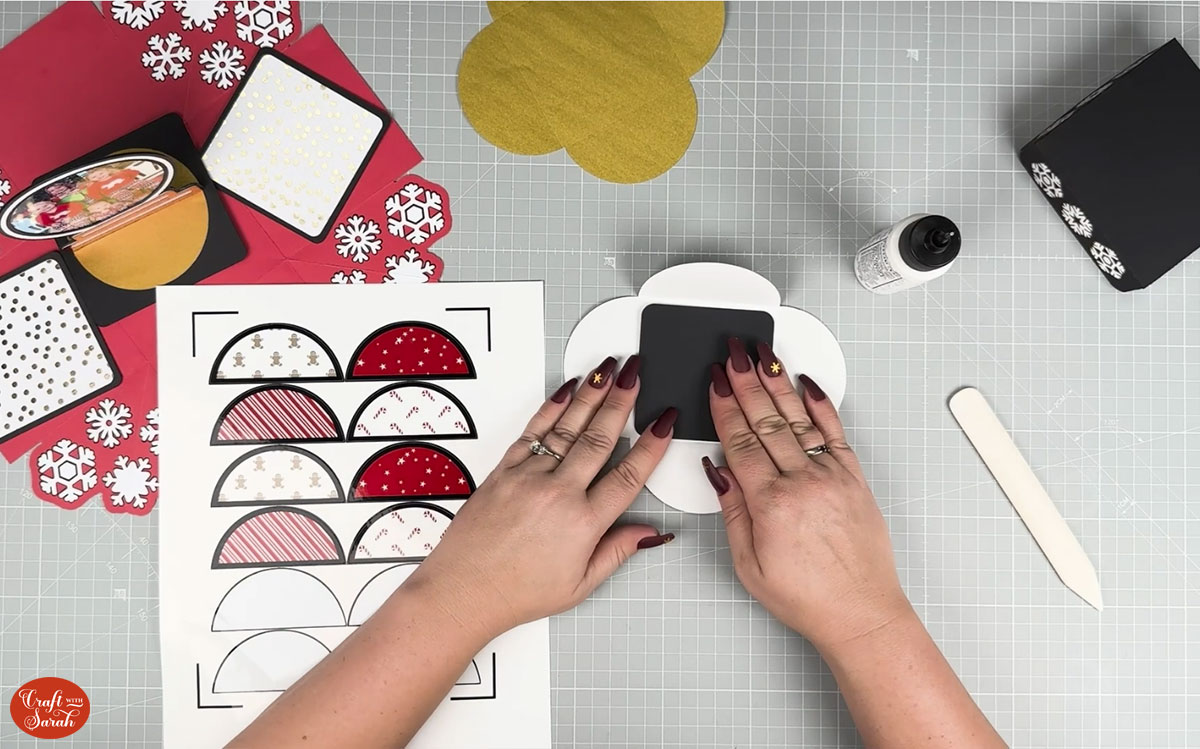
The squares that you have left over are the outside decoration. They can be left as they are. They look best with a decorative piece in the middle and a colour to make the border around the edge.
Emily used gold patterned paper for the squares and a black for the border squares.
A gold pen for the snowflake outlines on the lid of the box adds a lovely sparkle.
Click Make It to get everything cut out.
Don’t forget to mirror the snowflakes if cutting them from HTV!
Step 4) Weed the HTV snowflakes
There are a few things to watch out for when weeding the snowflakes as you don’t want to weed the wrong part of each snowflake.
Just take out the thin piece on the snowflakes pictured below.
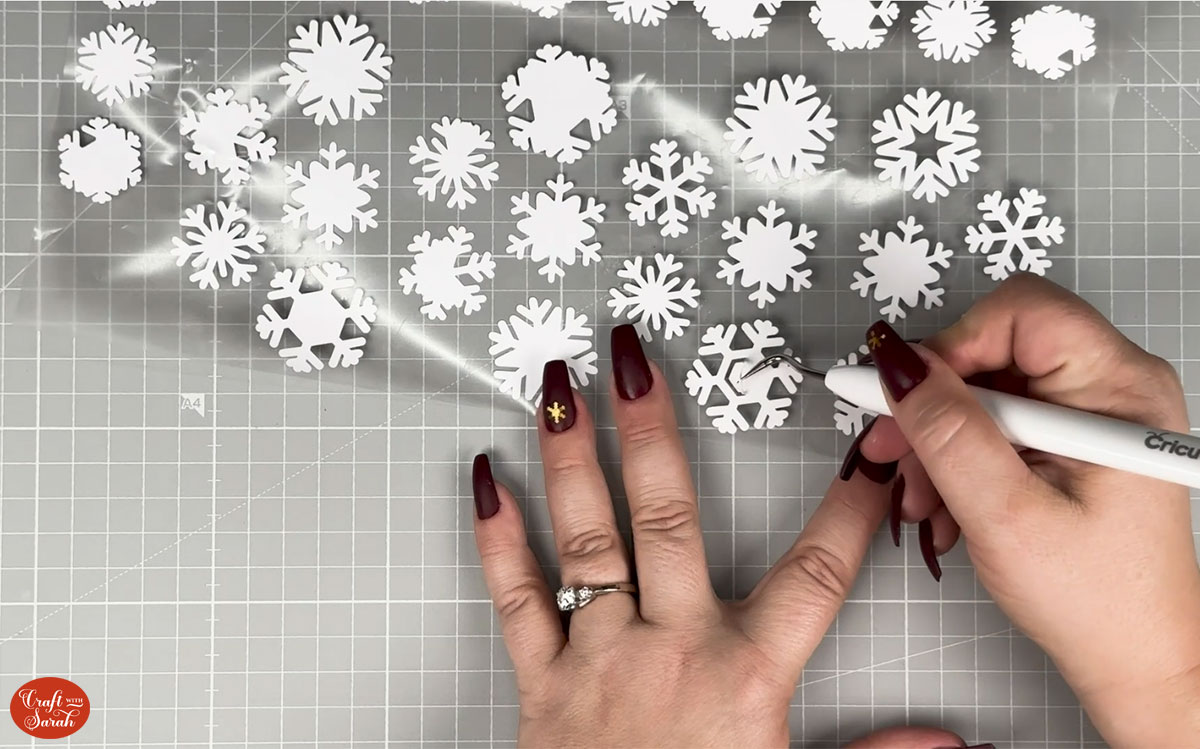
Take the center circles from the snowflakes pictured below.
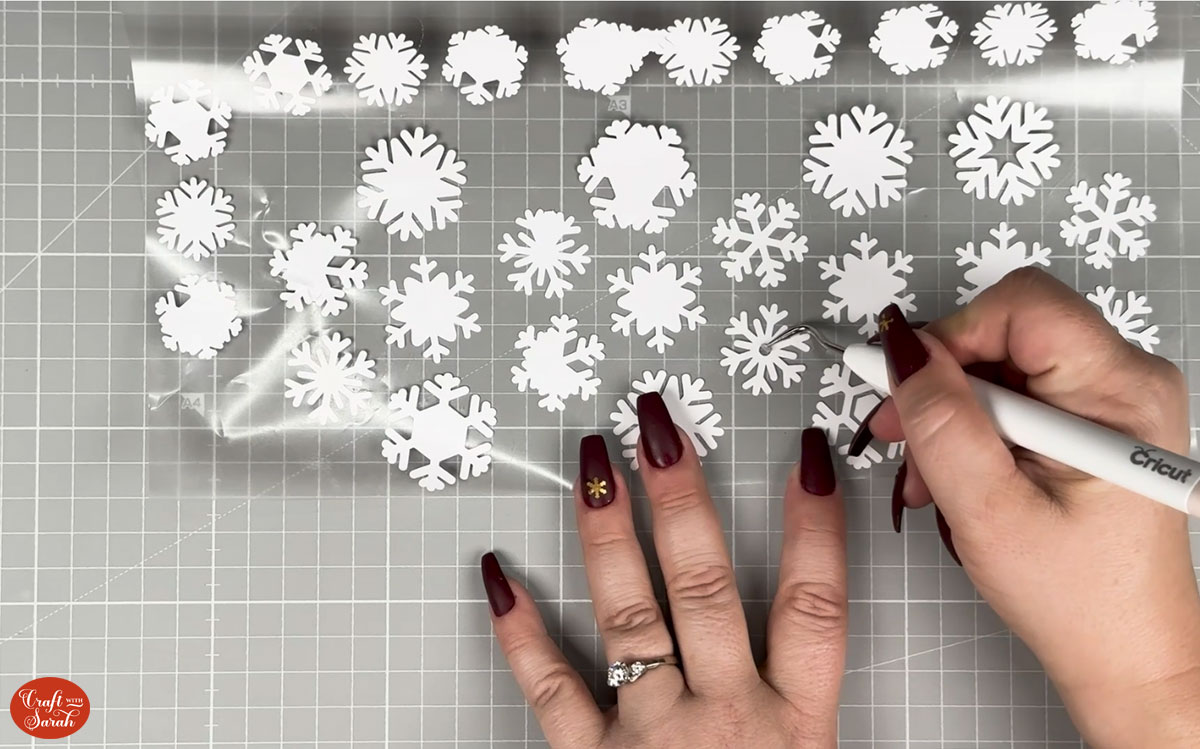
Take out the center stars from the snowflake pictured below.
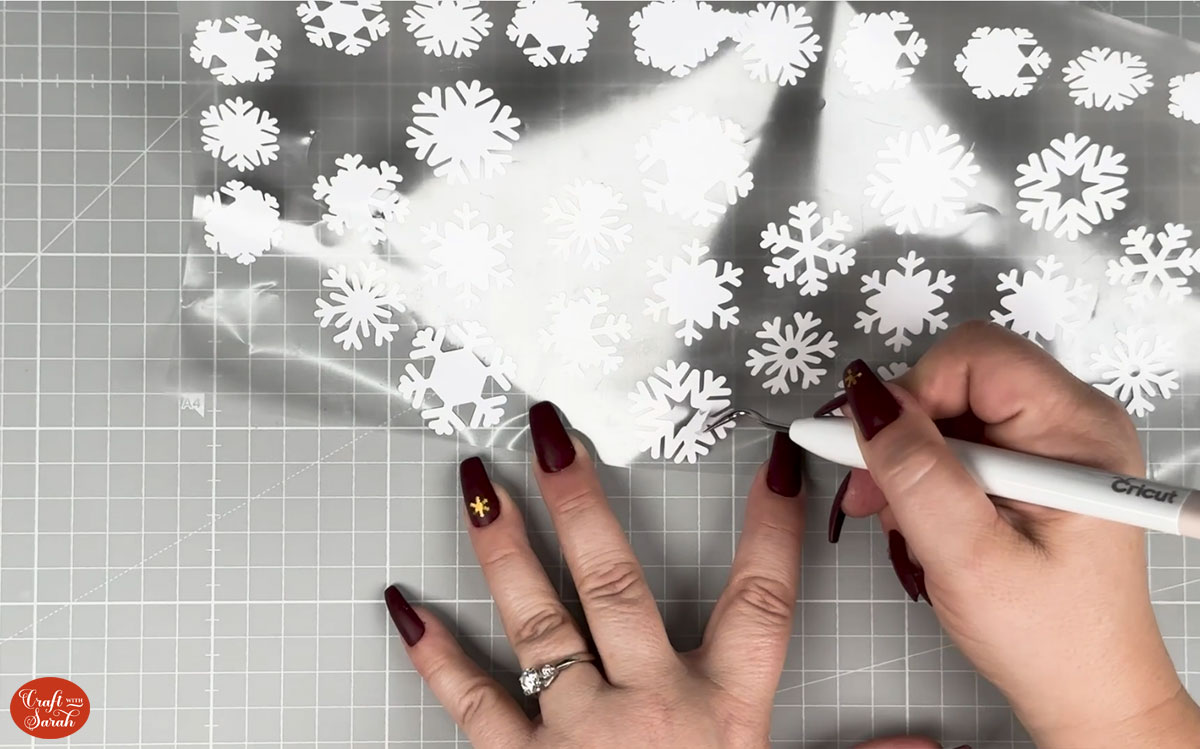
Use scissors to cut the carrier sheet on the snowflakes into sections, following the design on the explosion box.
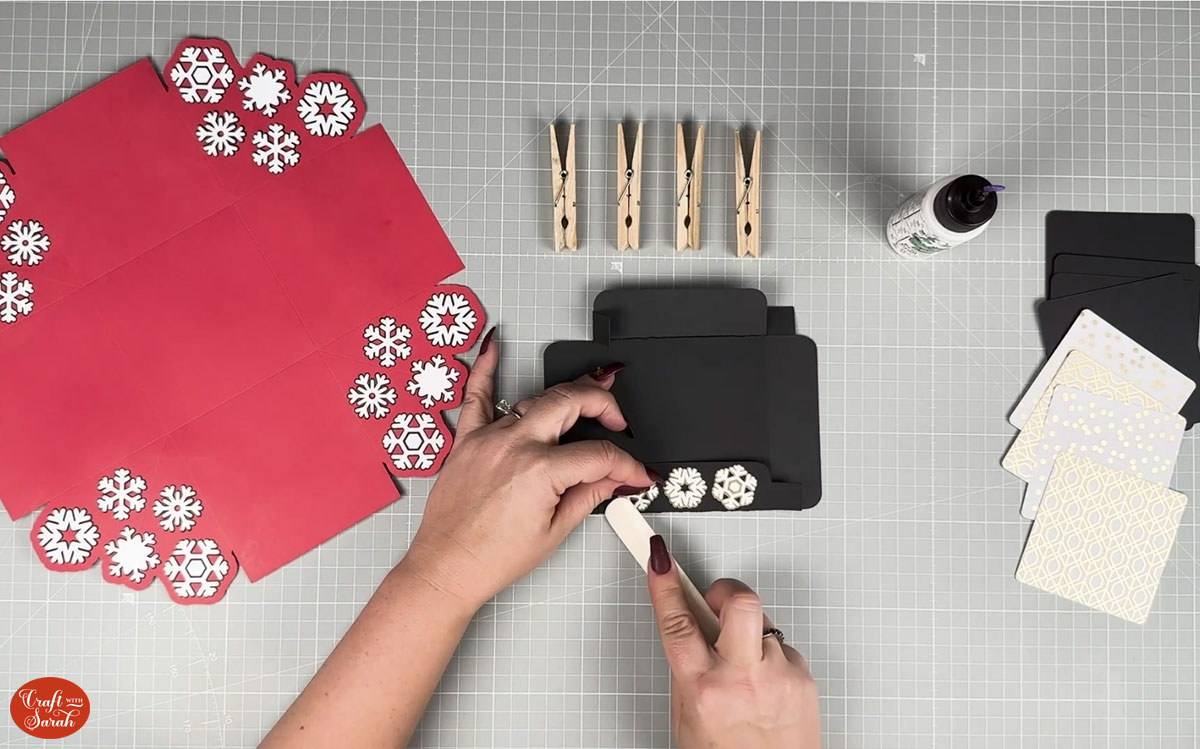
Step 5) Build the explosion box
Press the HTV snowflakes onto their matching outlines on the cardstock. The pen lines on the cardstock make the snowflakes really easy to line up!
Emily set her Easy Press Mini to a medium heat and pressed for 5 seconds.
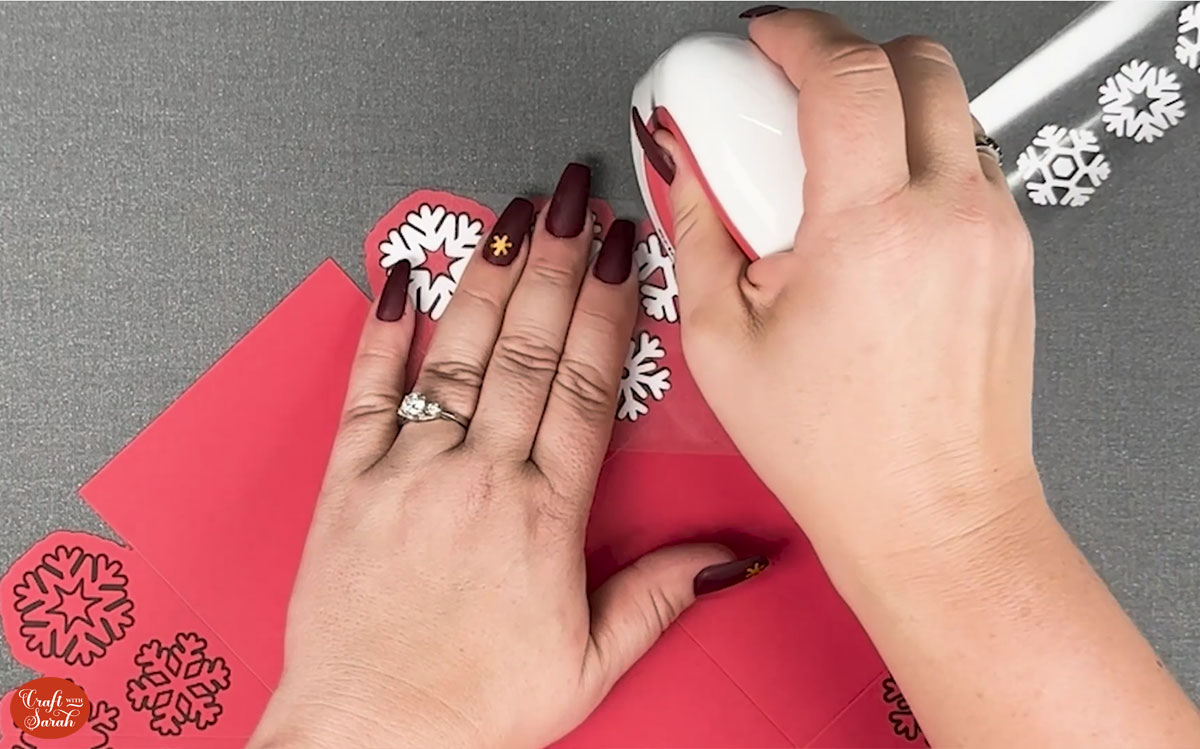
Wait a few seconds for it to cool down, then pull off the carrier sheet.
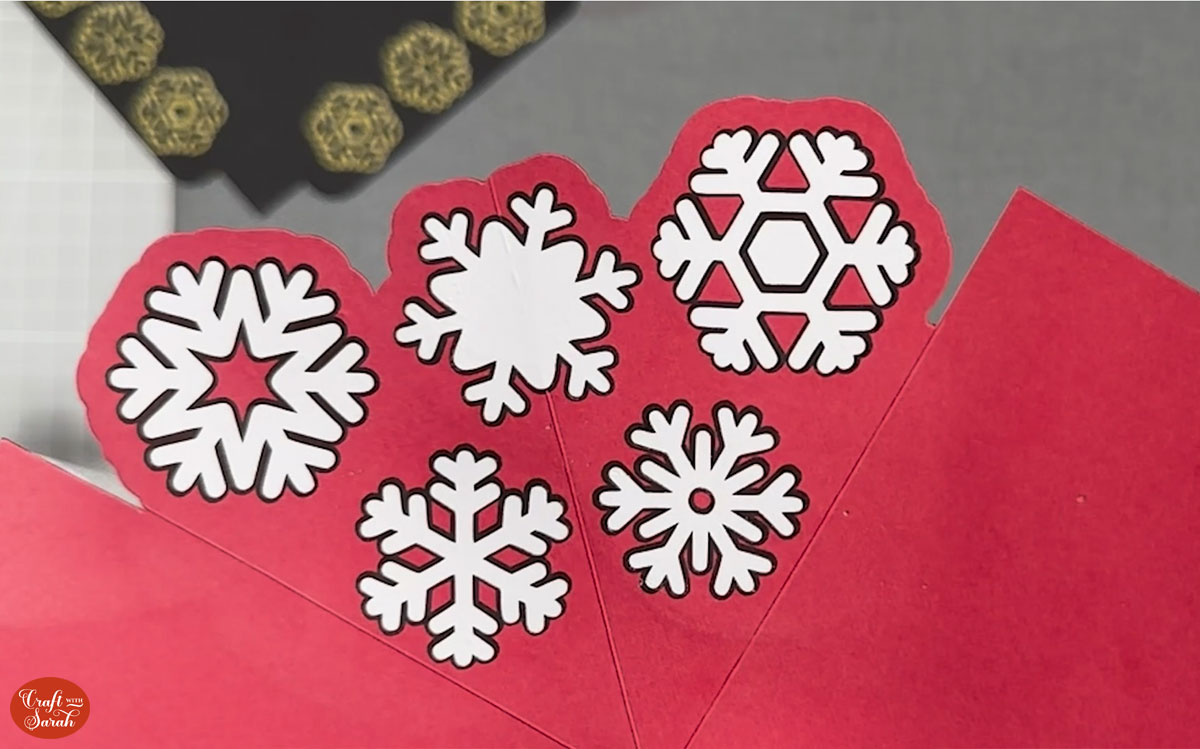
Repeat the same process for the lid.
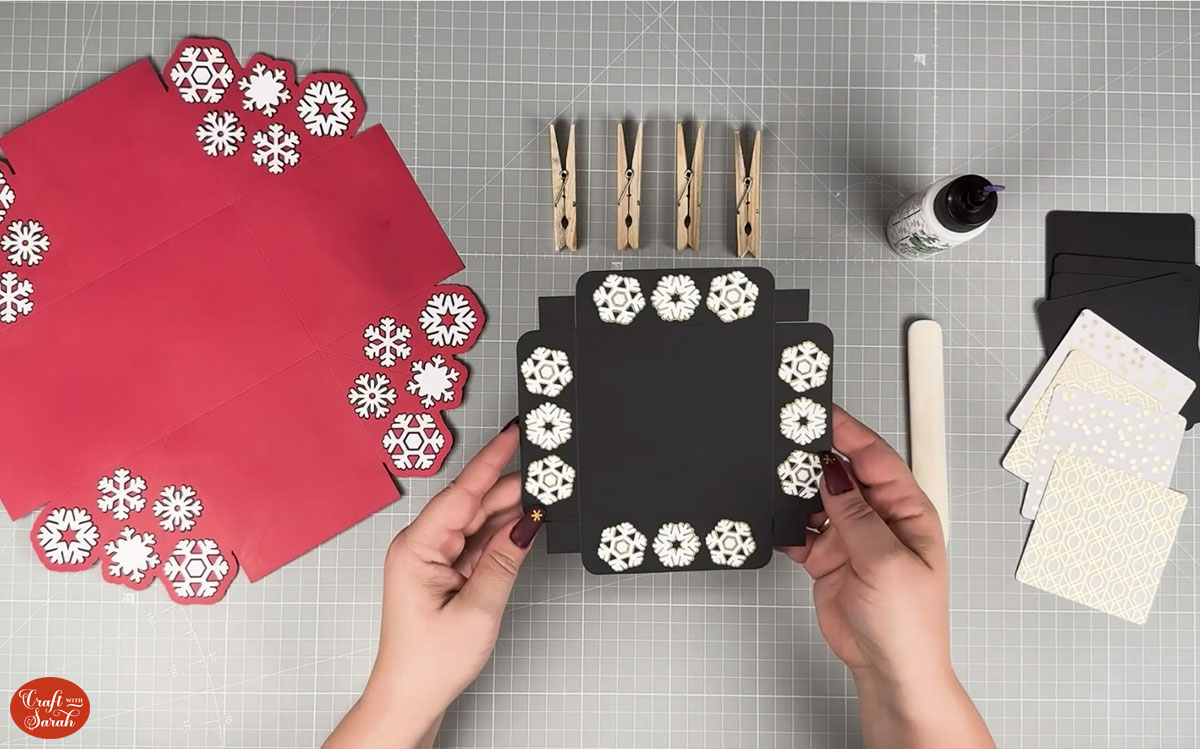
Fold and burnish along the score lines on the lid.
Put a dab of glue on each corner tab and stick it to the inside of the box lid.
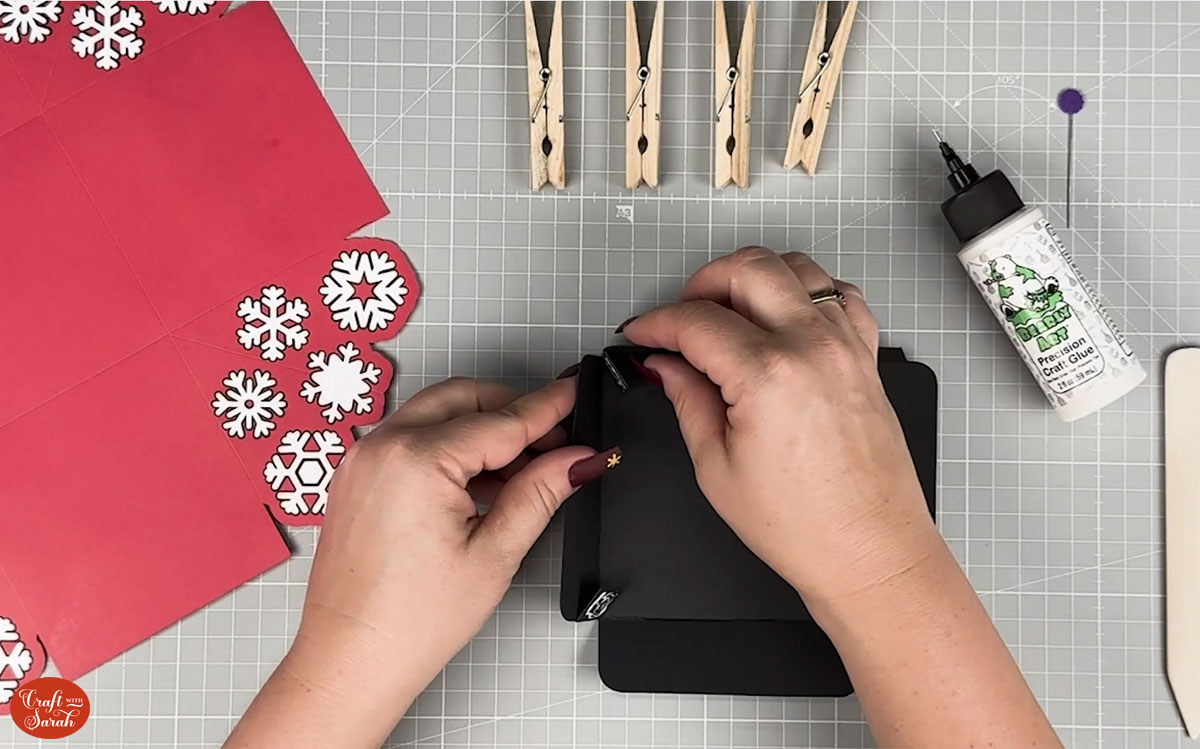
Clothes pegs are a great way to hold it together whilst it dries.
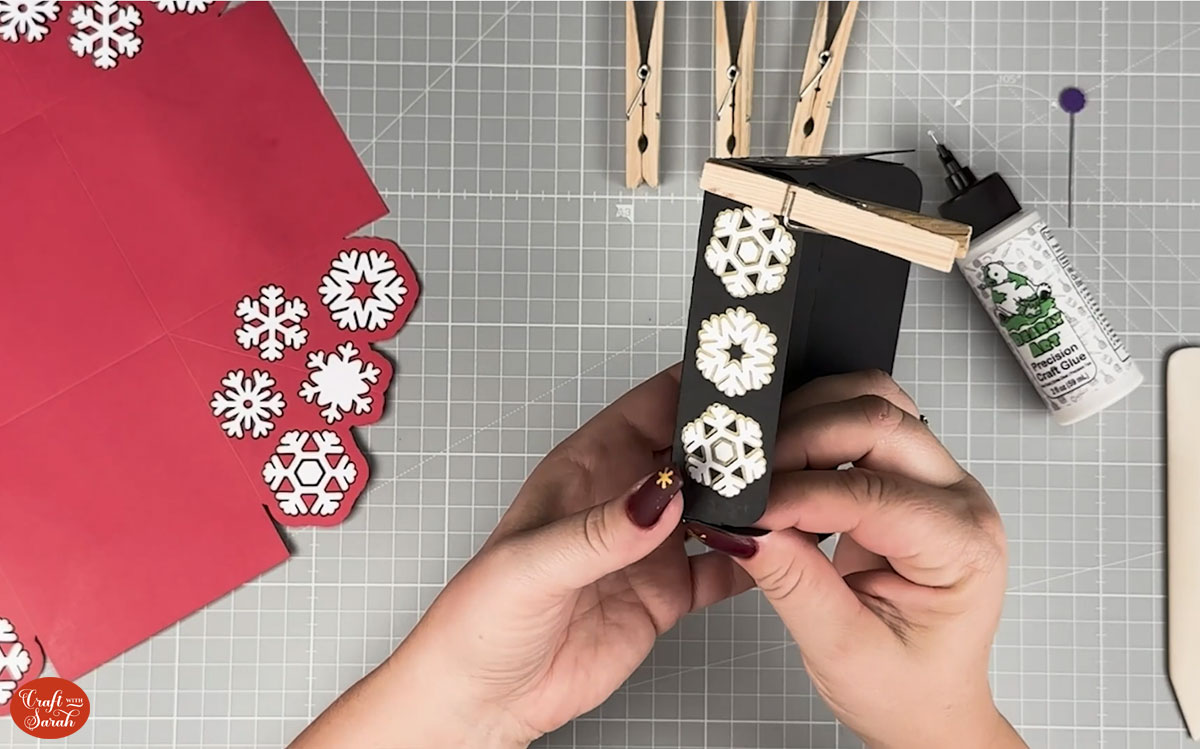
Leave the lid alone until the glue is completely dry.
In the meantime, let’s work on the main section of the explosion box.
Fold and burnish along the score lines on the main piece except for the corner score lines.
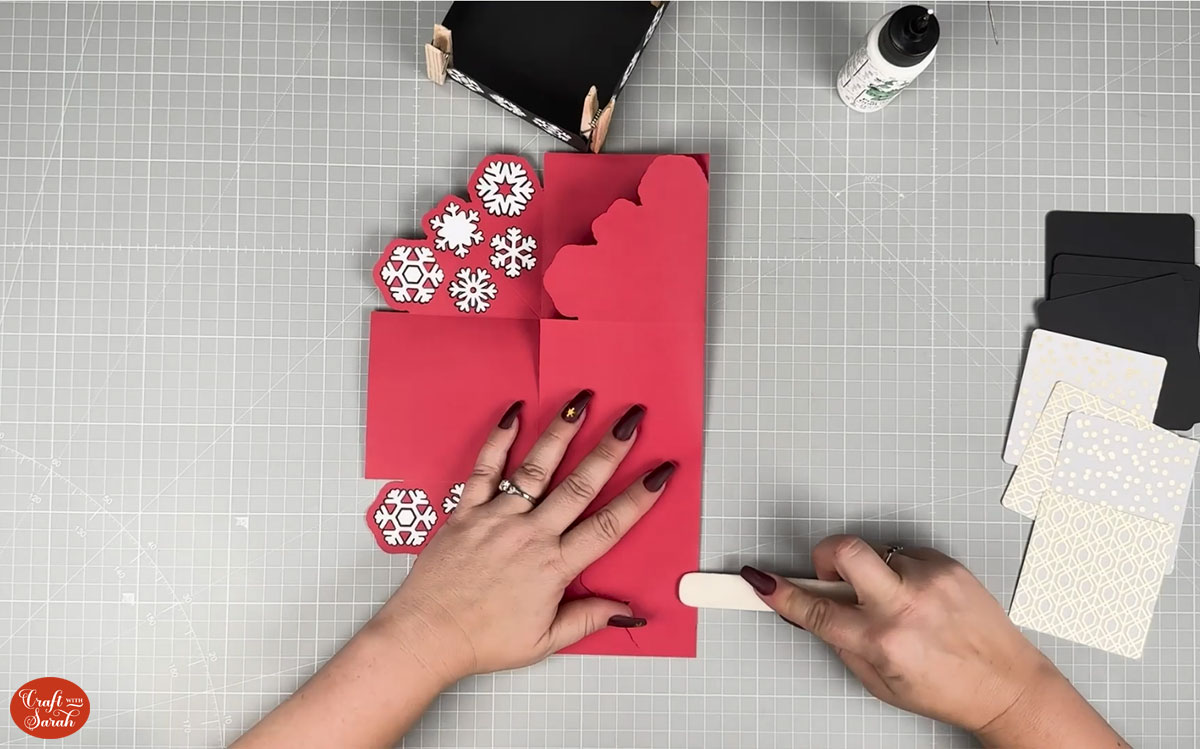
Flip it over and burnish again. You may have to do this a few times to weaken the cardstock so that your explosion box actually explodes.
Fold the corner pieces up and burnish once.
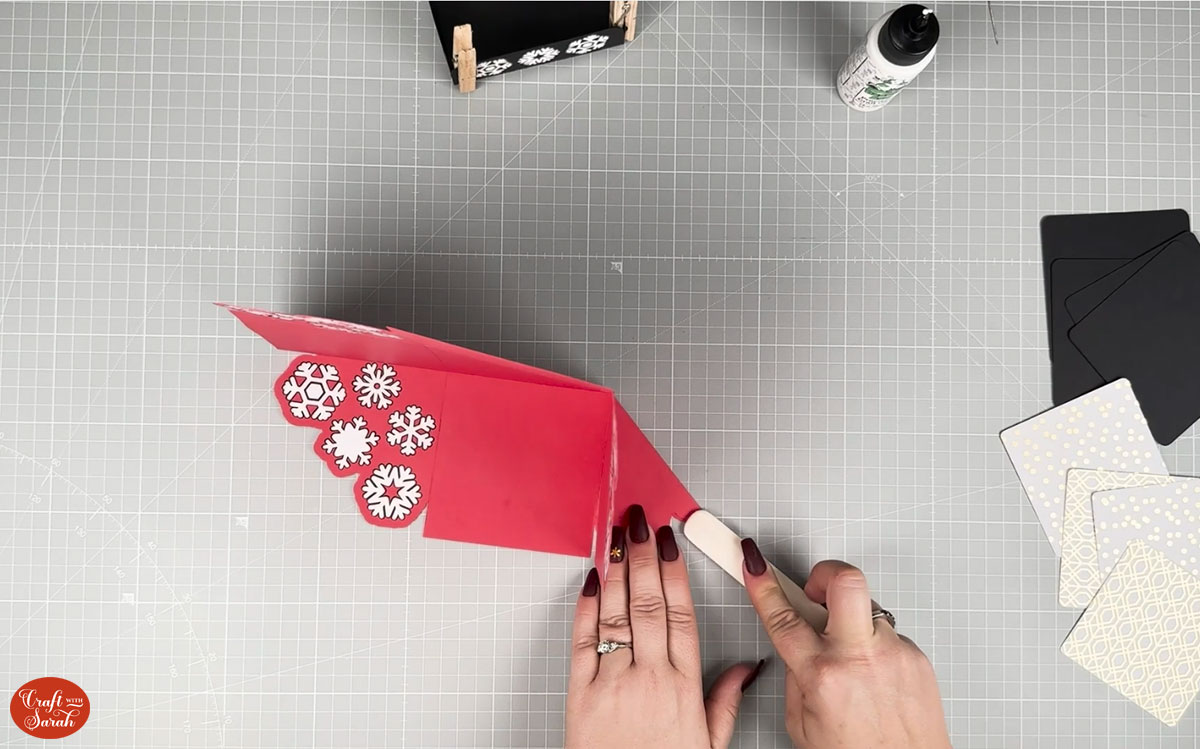
Flip over the box and glue on the decorative pieces to the outside of your box.
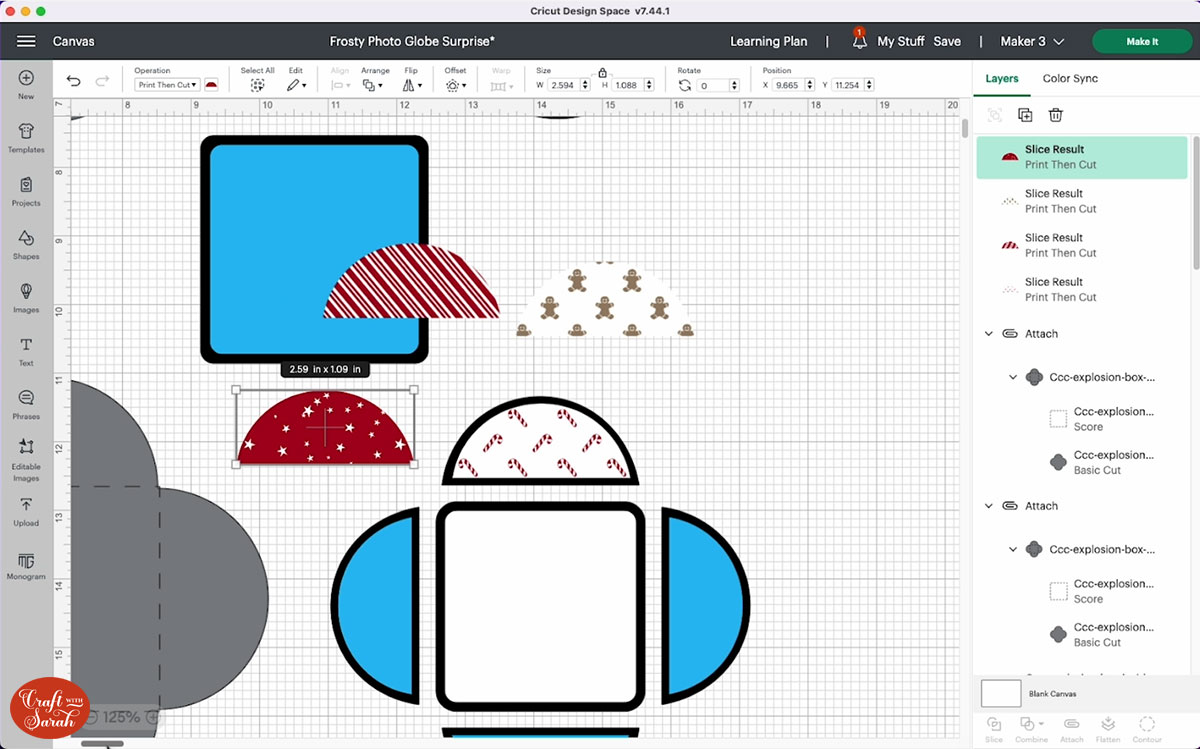
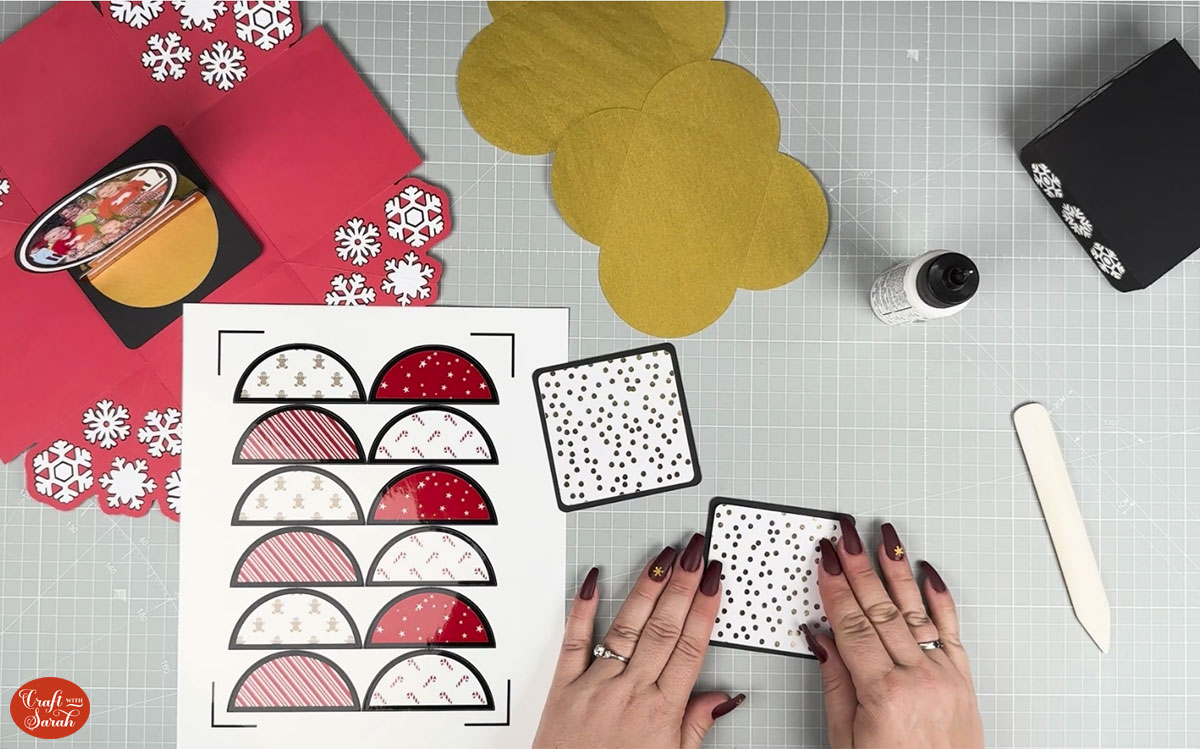
Step 6) Cut the snowglobe pieces
Go back into Design Space, group the pieces you already have cut out and hide them.
Upload the file from your download folder called “CCC-Explosion-Box-Globe_minorDIY.svg” and add it to your Canvas.
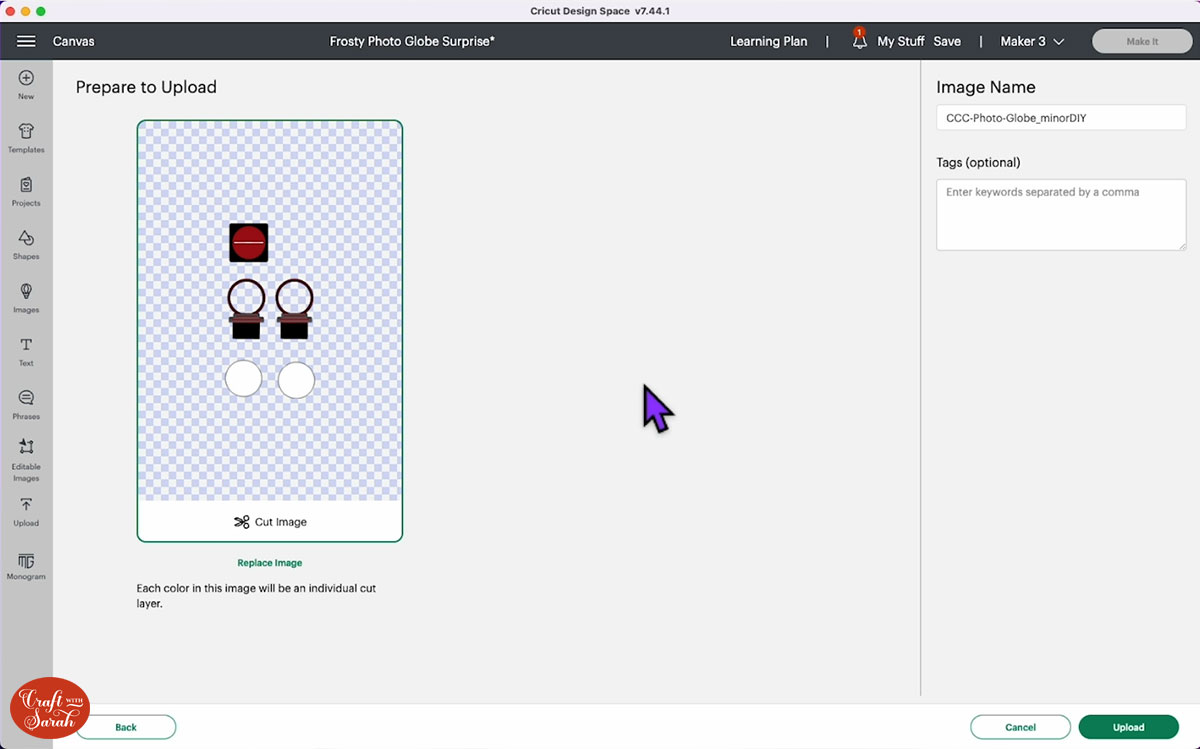
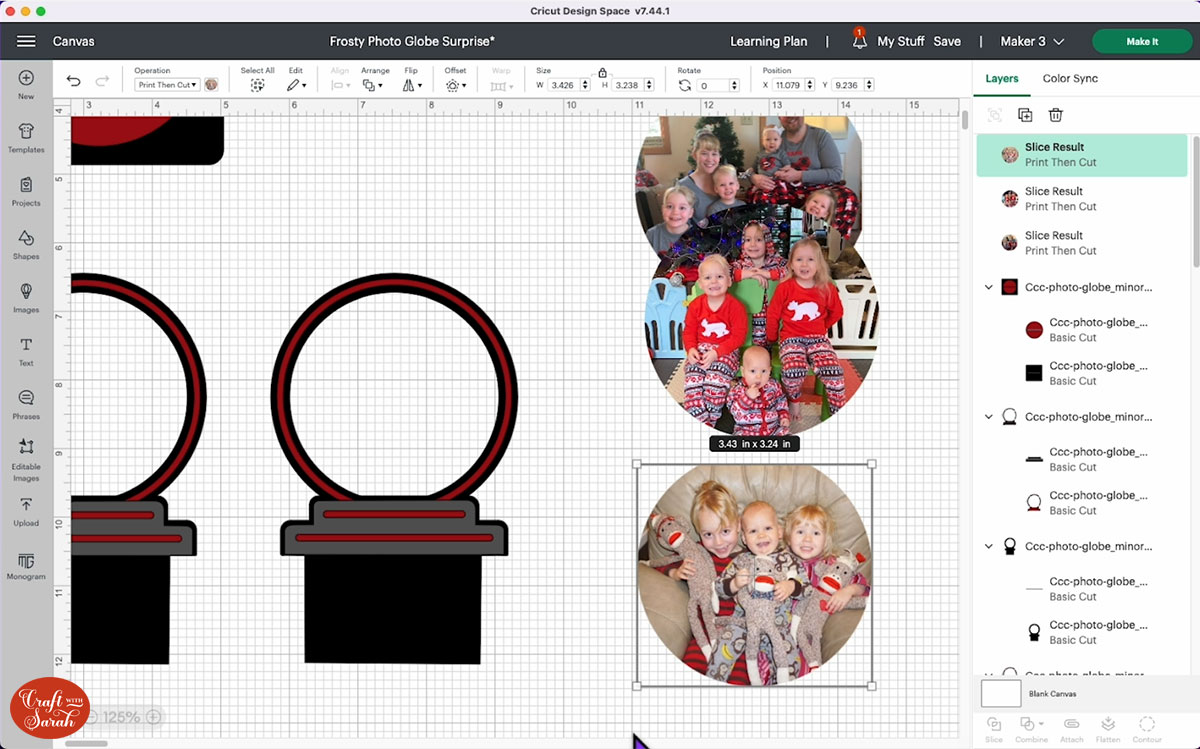
Ungroup the design. You will see that the circle shapes on the top of the black and red layers allow for you to add a photo.
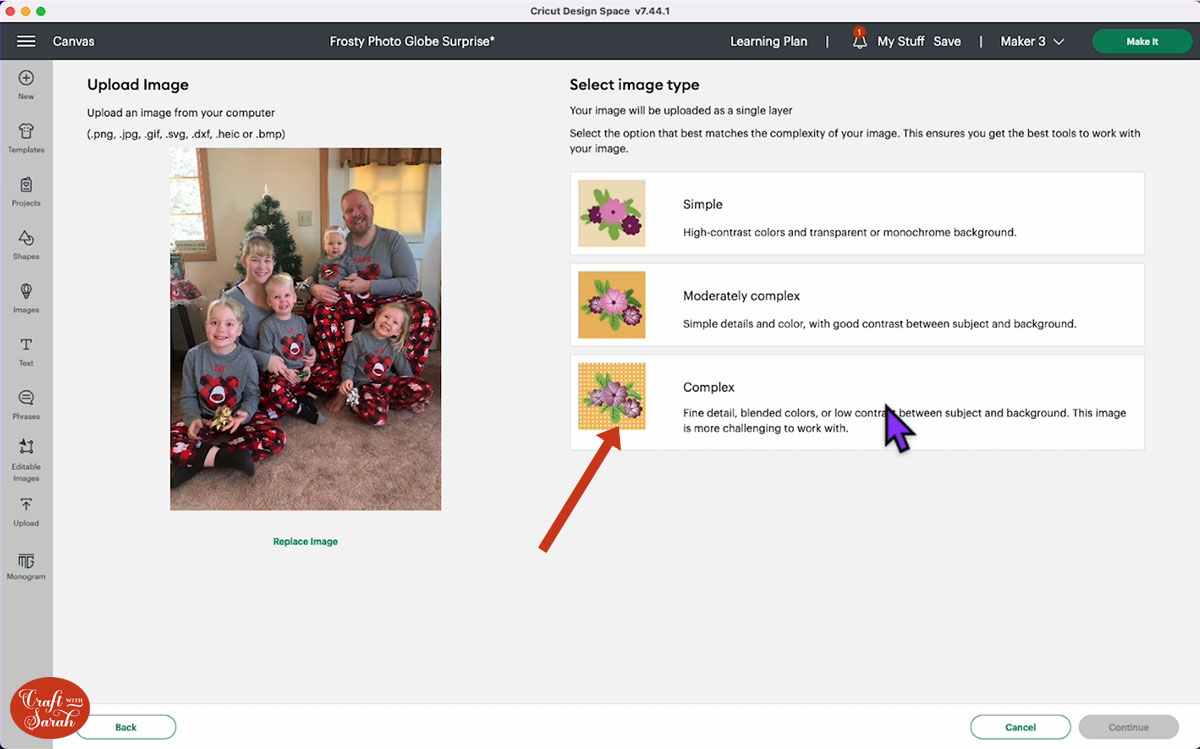
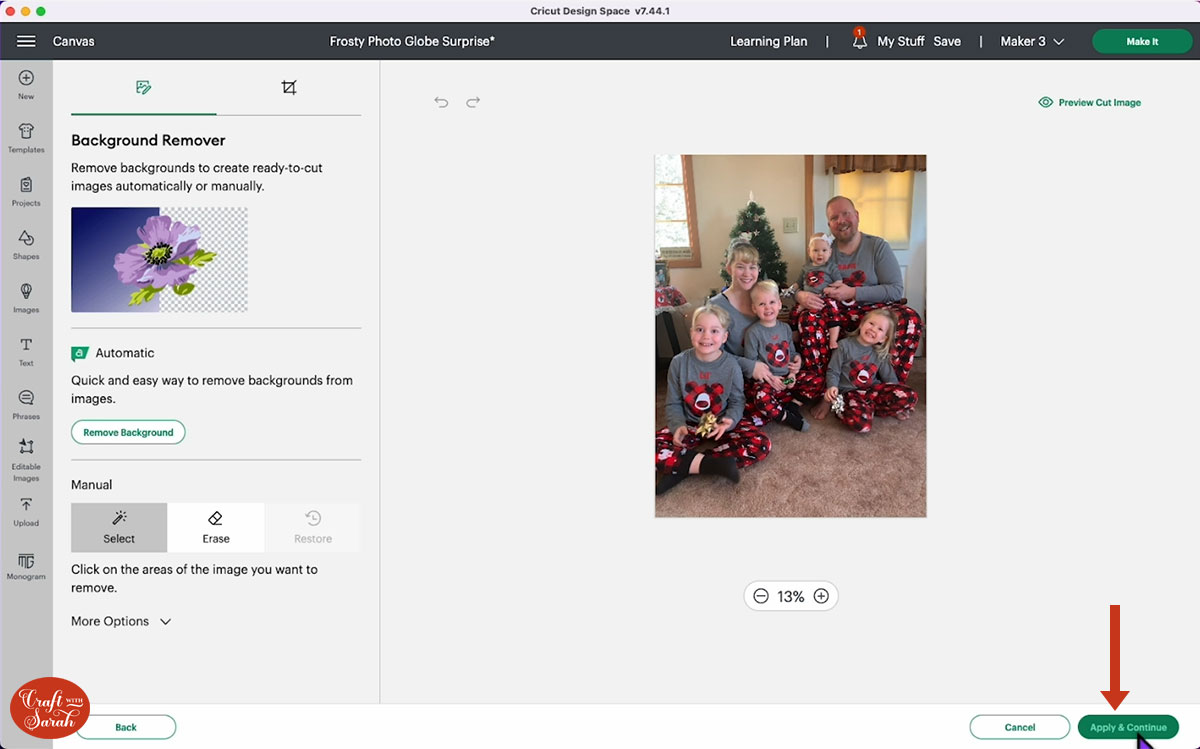
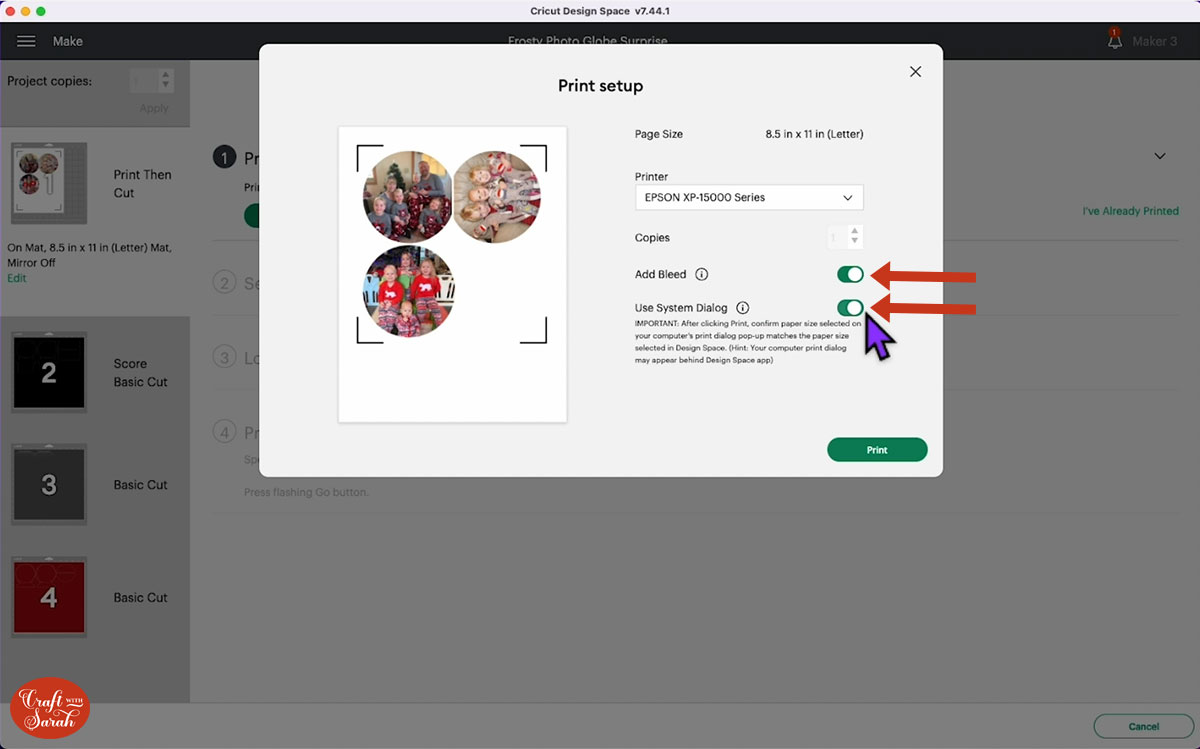
Choose a photo that you would like to use and upload it to Design Space. Choose “Complex” as the image type.
You don’t need to change anything on the next screen; just click Apply & Continue.
Save the photo as a print then cut image.
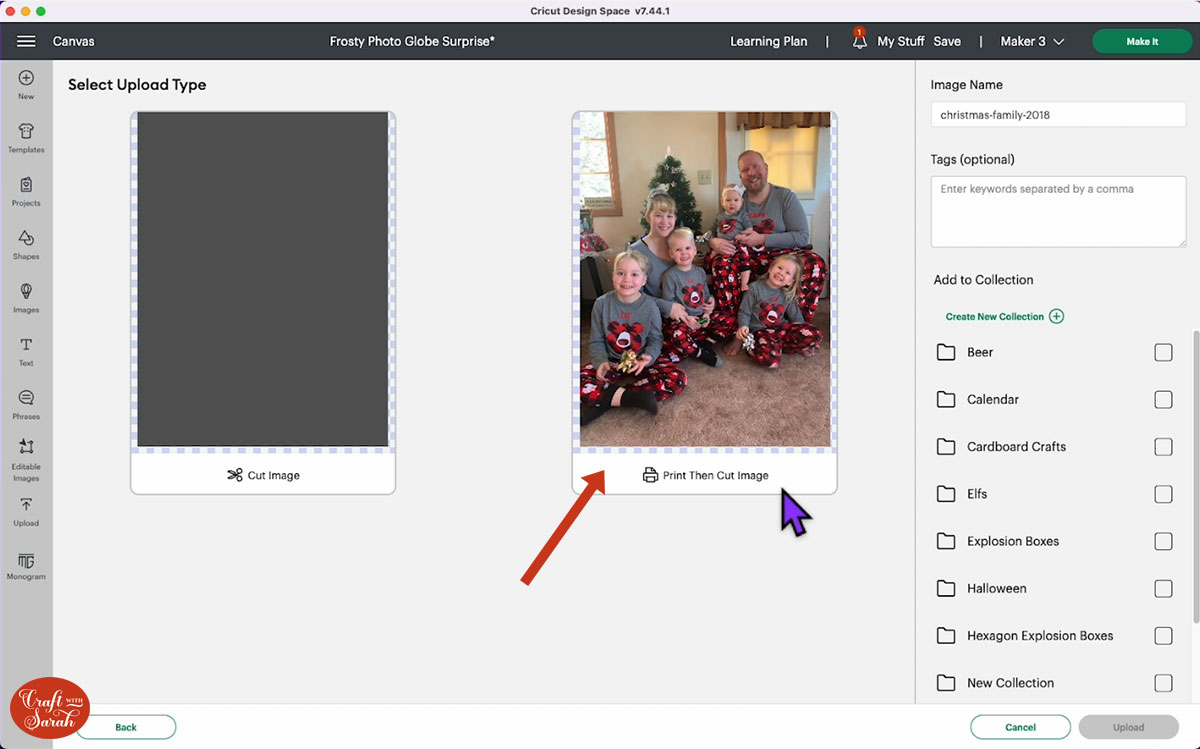
Add the image to your Canvas.
Send your image to the back and resize it, use the snowglobe outline as a guide.
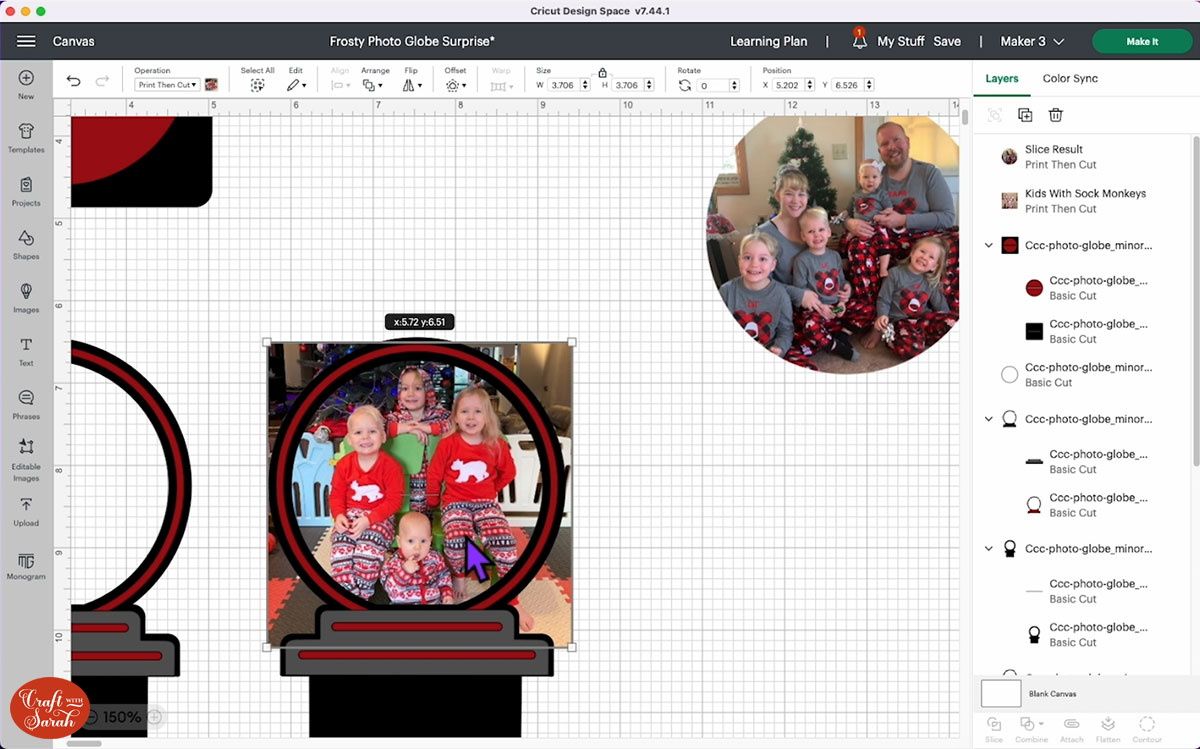
Take one of the plain circles and drag it over the image
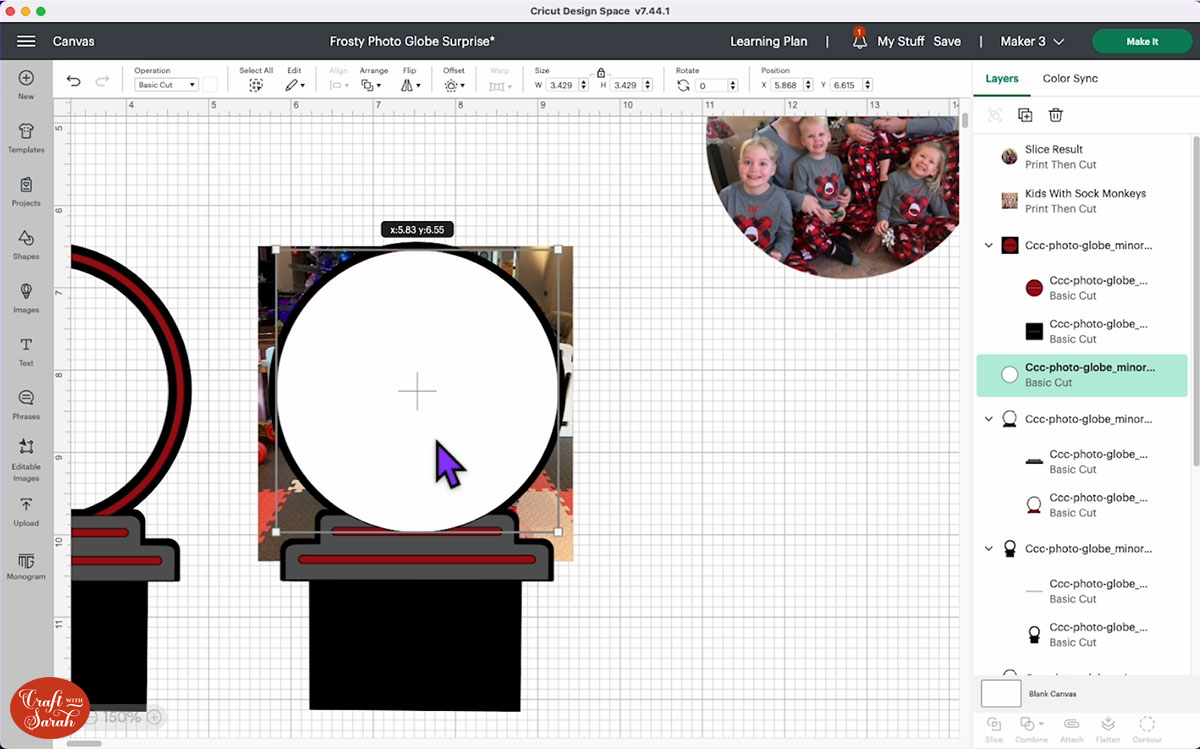
Select the plain circle and your photo and press “Slice”.
Delete the outside parts of the photos.
Emily used three photos in this tutorial, but you will only use two.
Now let’s look at the other pieces on the screen.
In the layers panel you will see a line layer in the snowglobe frames. Change the layer in the Operations to Score and Attach it to the corresponding piece.
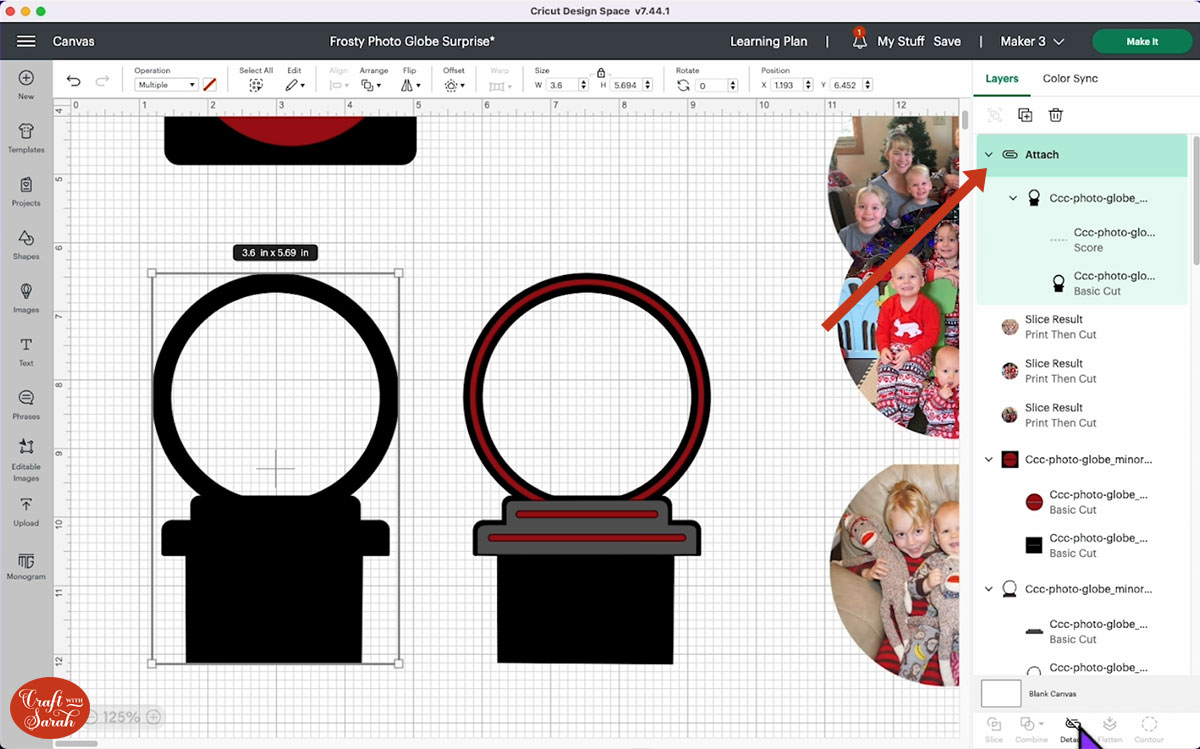
Repeat the process for the other frame.
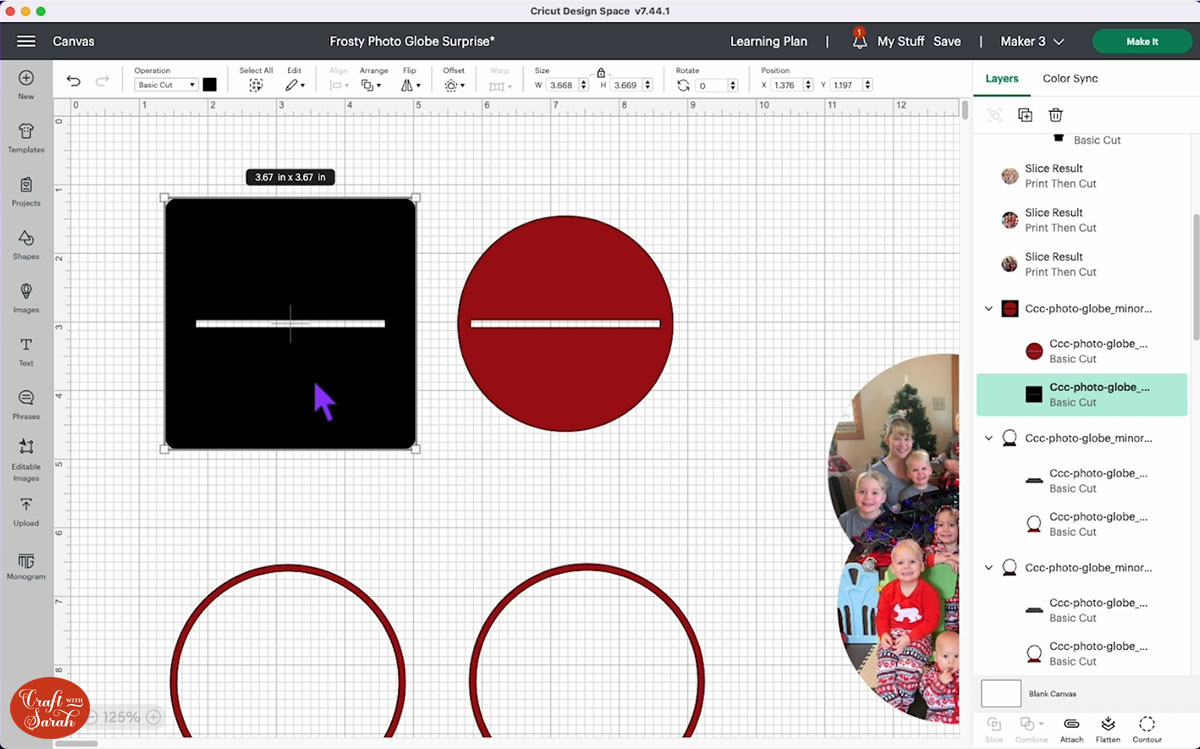
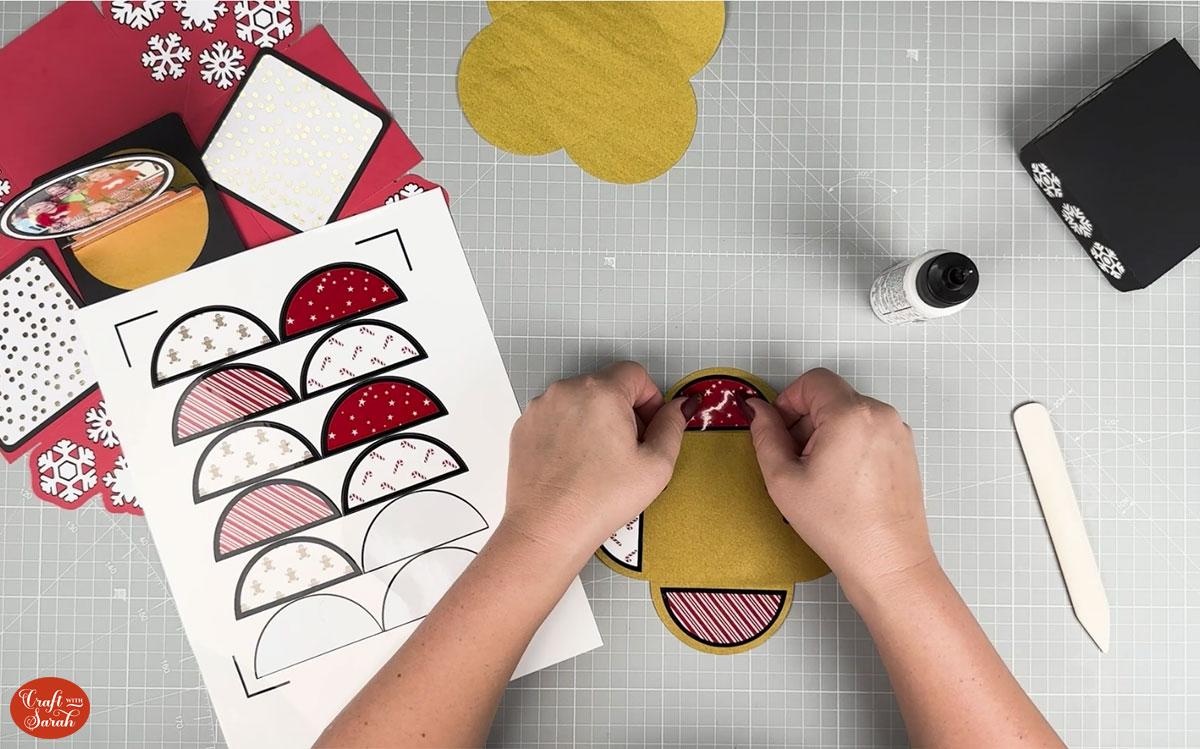
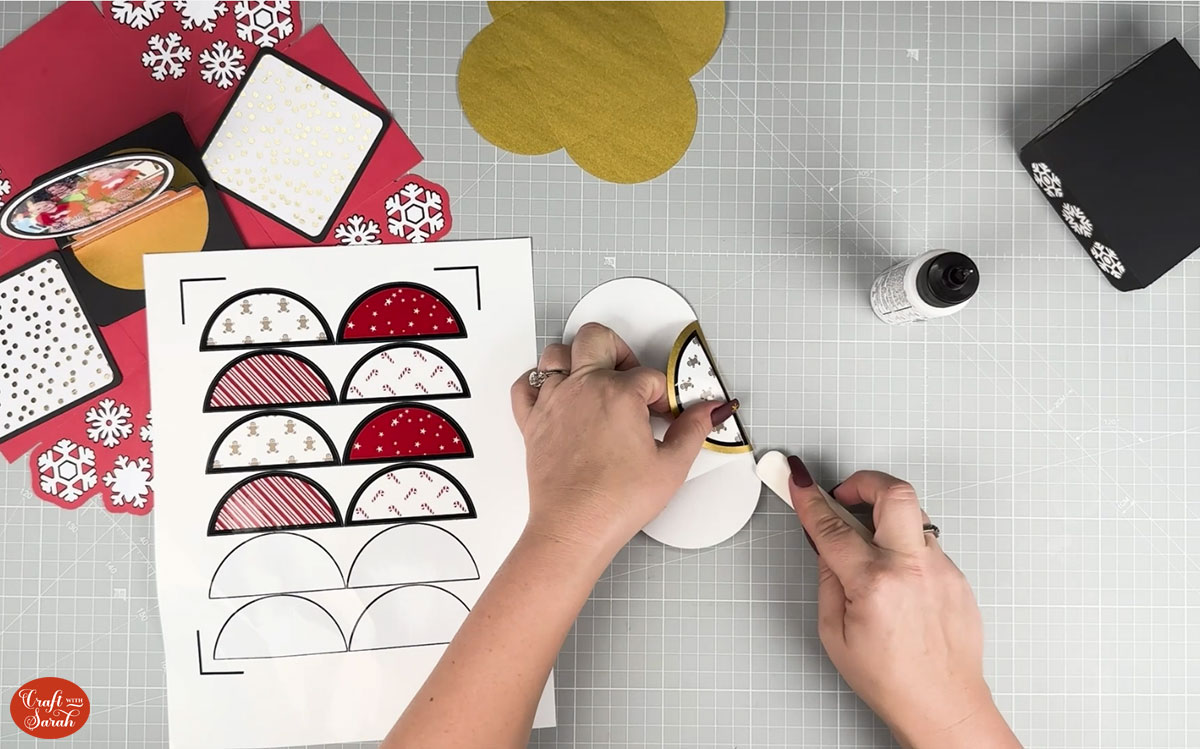
Emily cut the two black pieces from 110lb cardstock to make it nice and firm.
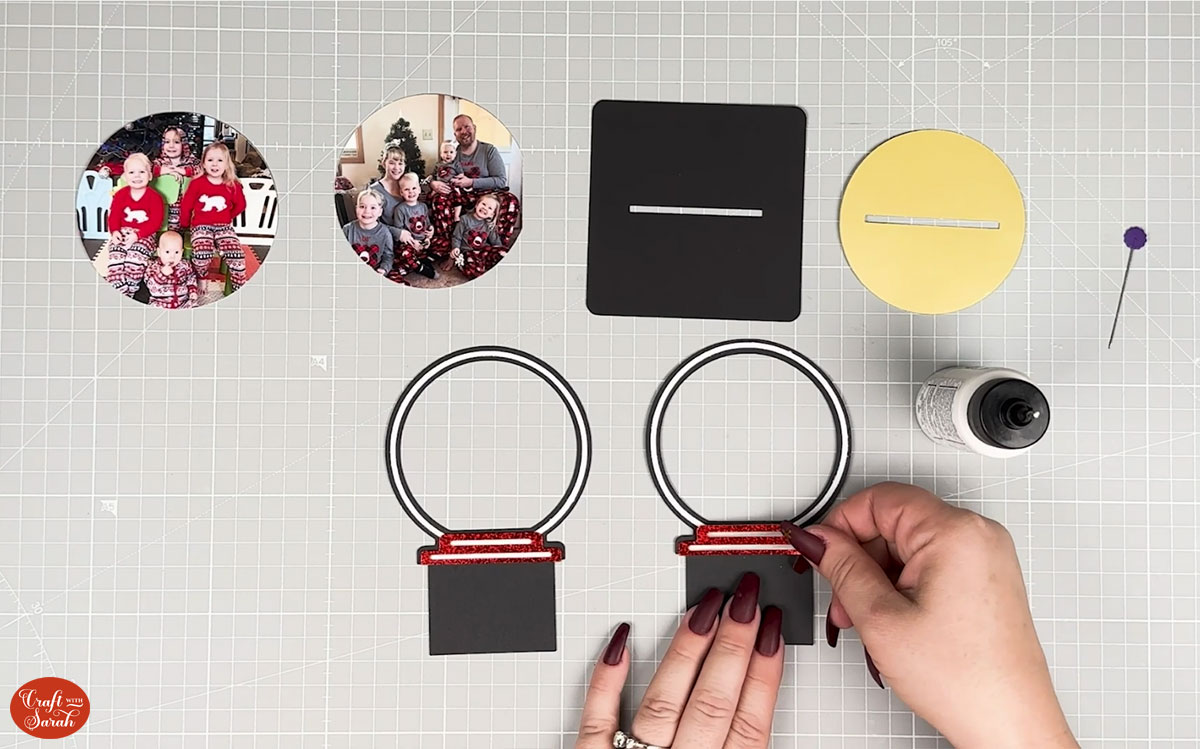
The thin red circles can be cut from whatever cardstock you want. The grey pieces below go on them for added decoration.
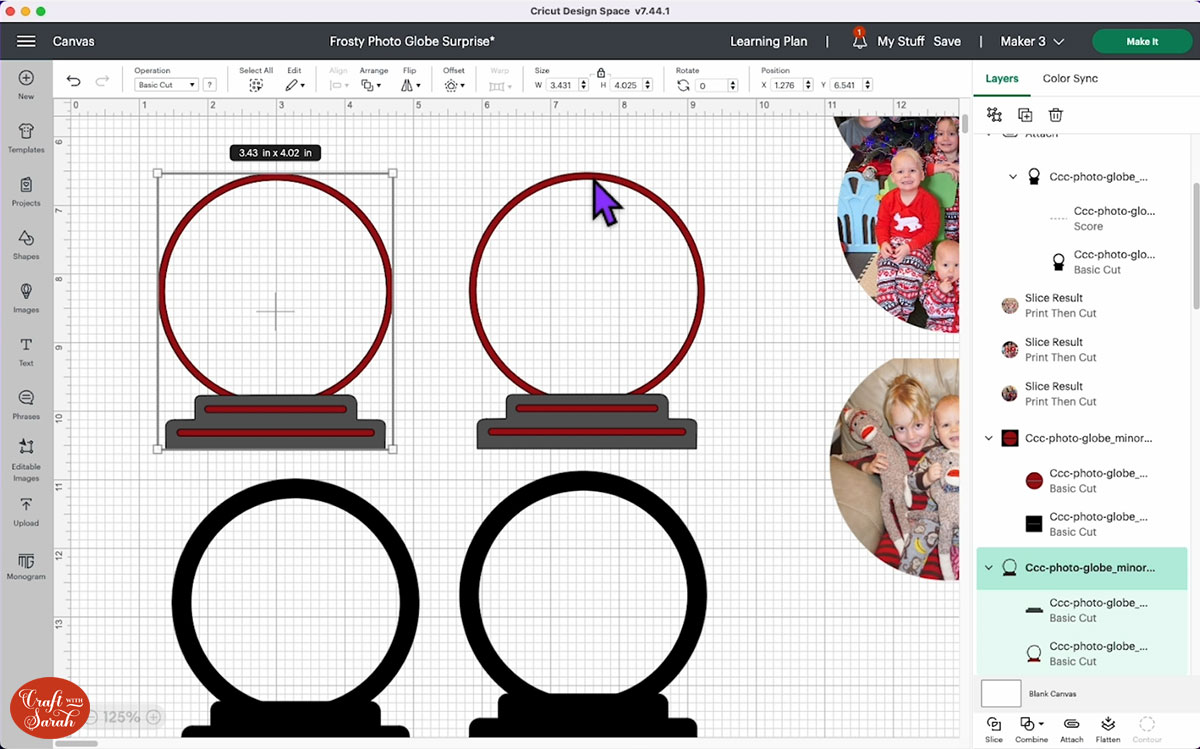
Emily also cut the bottom base piece from 110lb cardstock to help it stand up.
When using Print then Cut, make sure you add bleed and use the system dialogue so that you can use the ‘best’ quality setting for your printer.
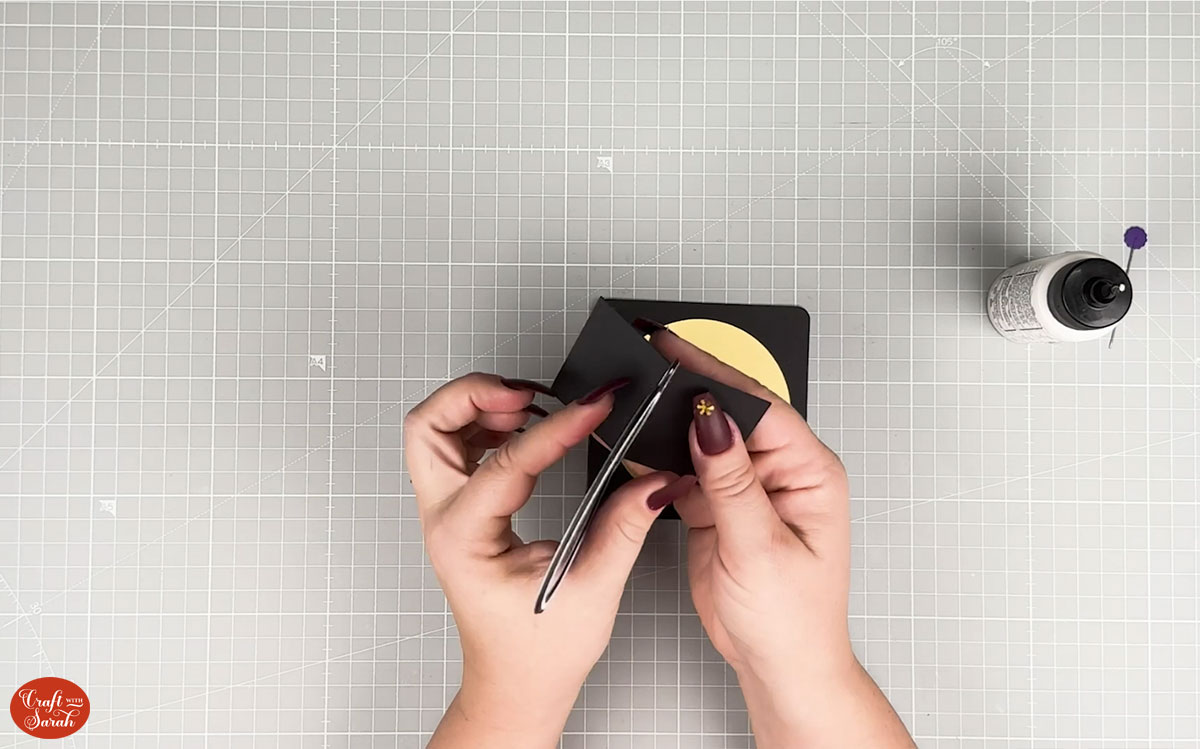
Step 7) Stick the snowglobe together
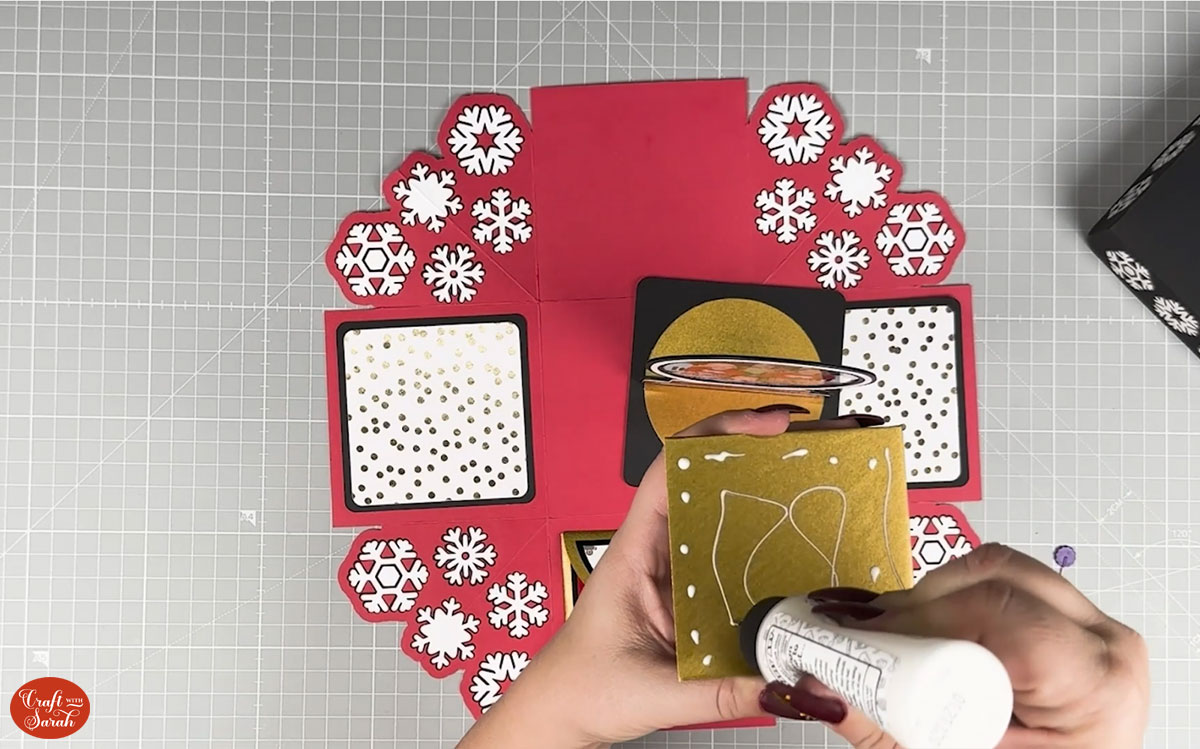
Dot little bits of glue on the decorative parts of the snowglobe and stick them to the snowglobe base.
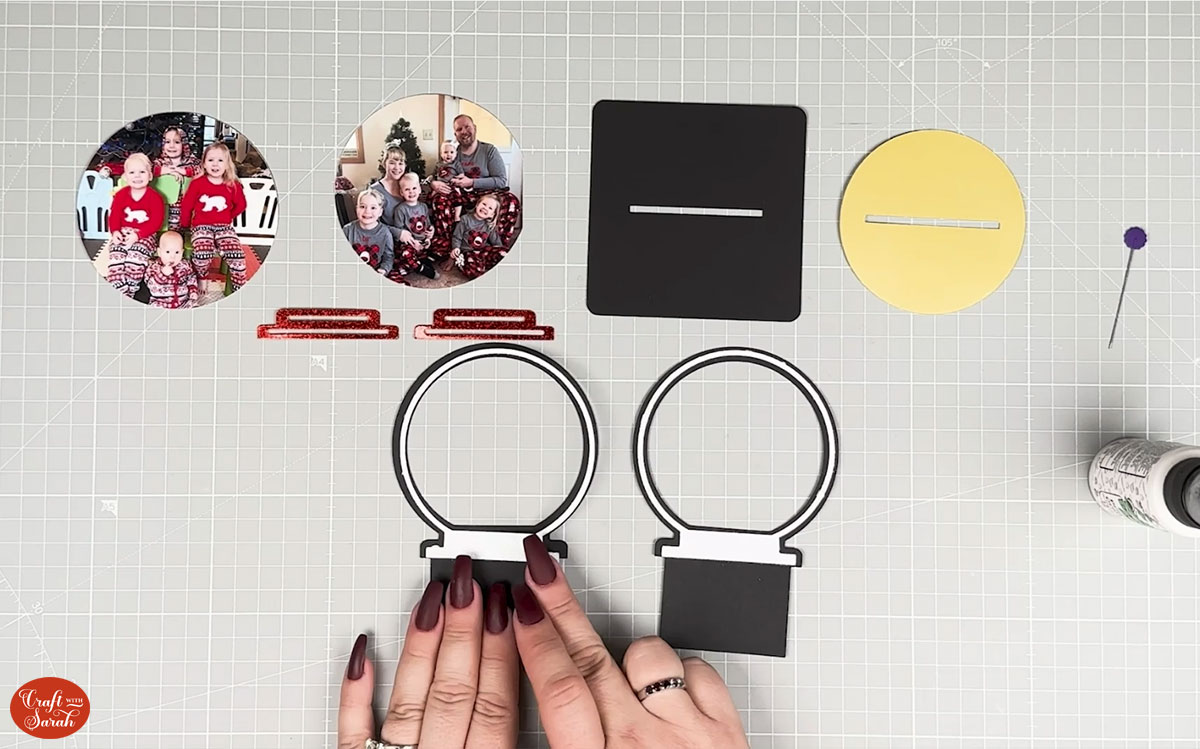
Glue the stand pieces onto the snowglobe.
Flip the snowglobe over and apply glue to the outside circle so that you can stick the photo on.
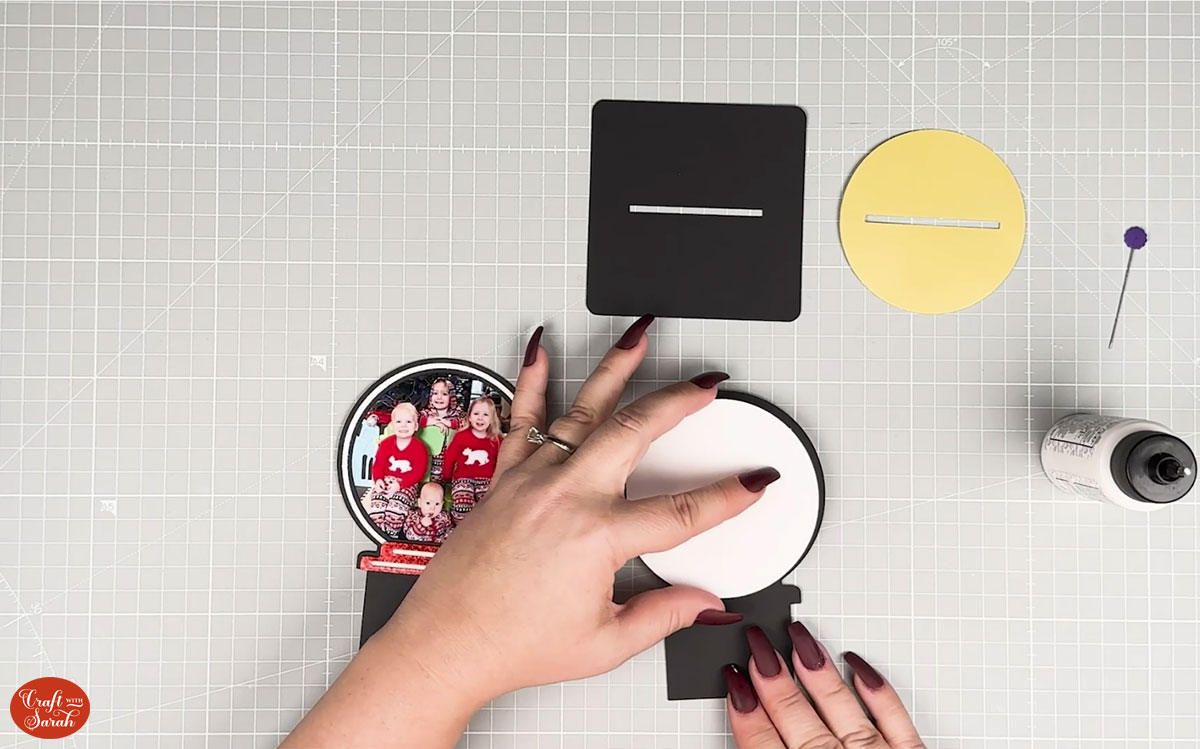
With both of your photos stuck to the snowglobe frames, glue the snowglobe pieces back to back but don’t glue the tab. You only want to glue to the base of the snowglobe.

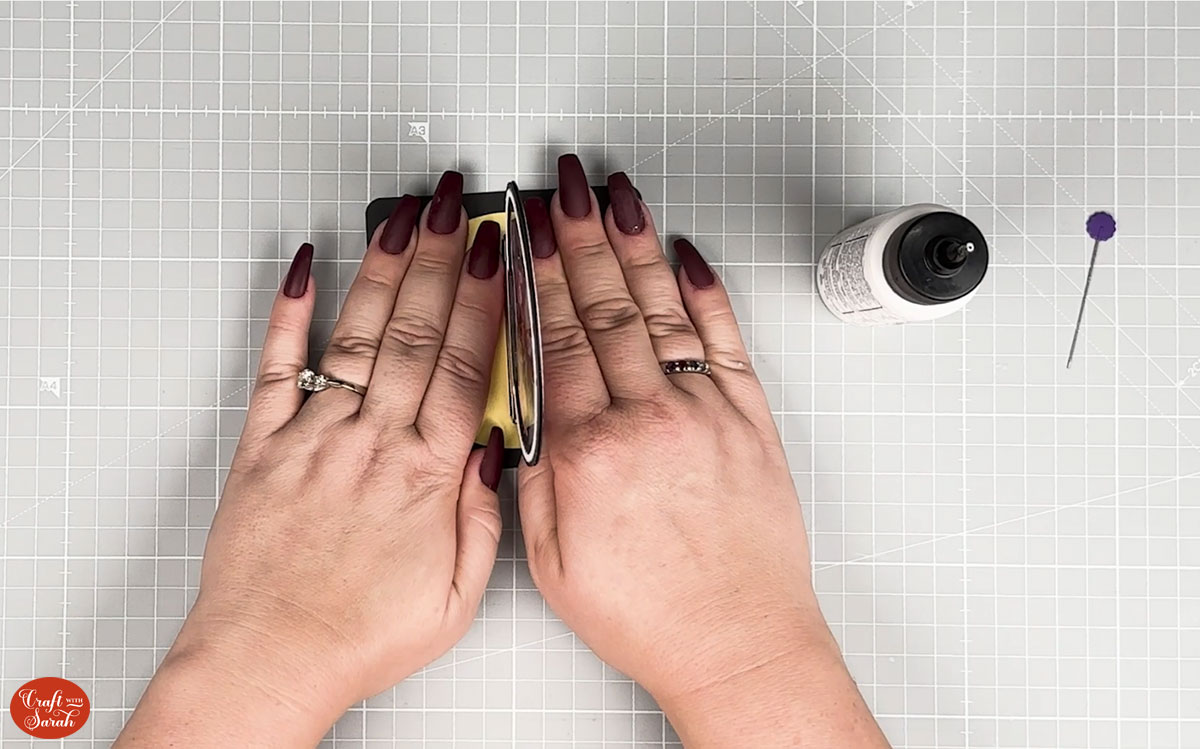
Glue the decorative circle to the black base.
Fold the bottom of the tabs up.
Post the tabs through the slit and glue them to the bottom of the base.

Hold it down on your surface to make sure it’s flat.
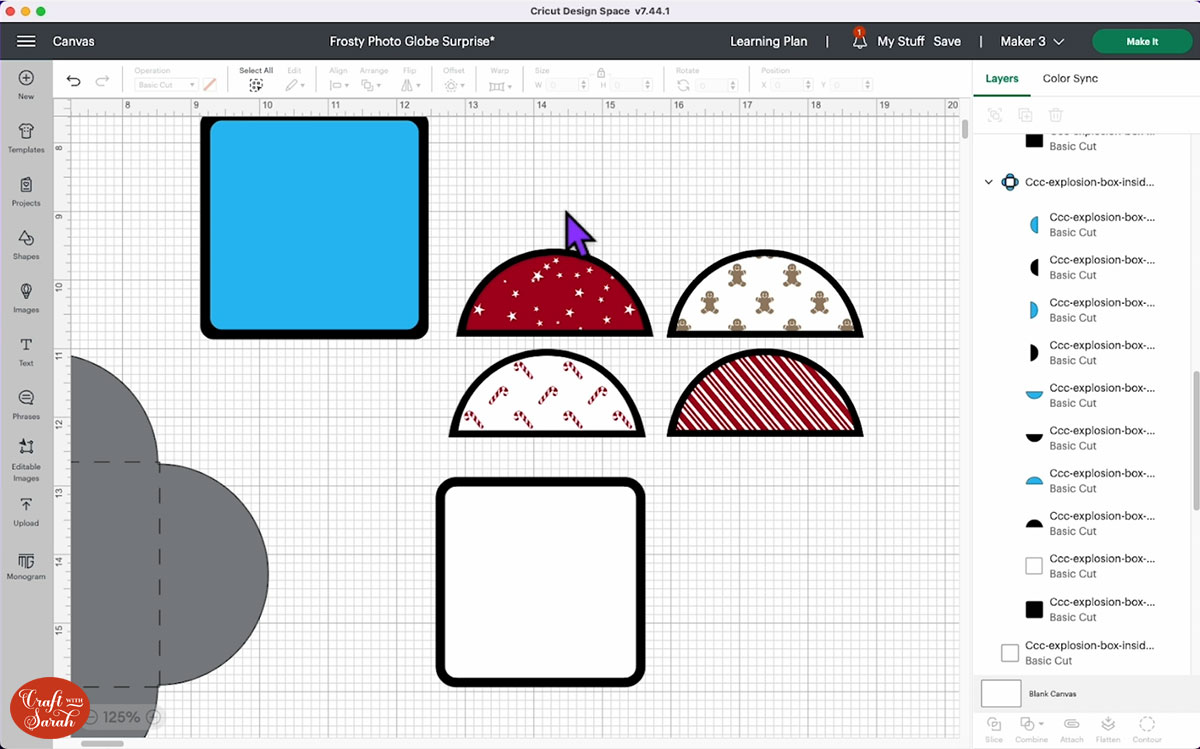
Step 8) Cut the inside decorations for the explosion box
Go back into Design Space. Group everything together and hide it.
Upload the final SVG (CCC-Explosion-Box-Inside-Deco_minorDIY.svg) and add it to the Canvas. This will be the inside decoration for the explosion box.
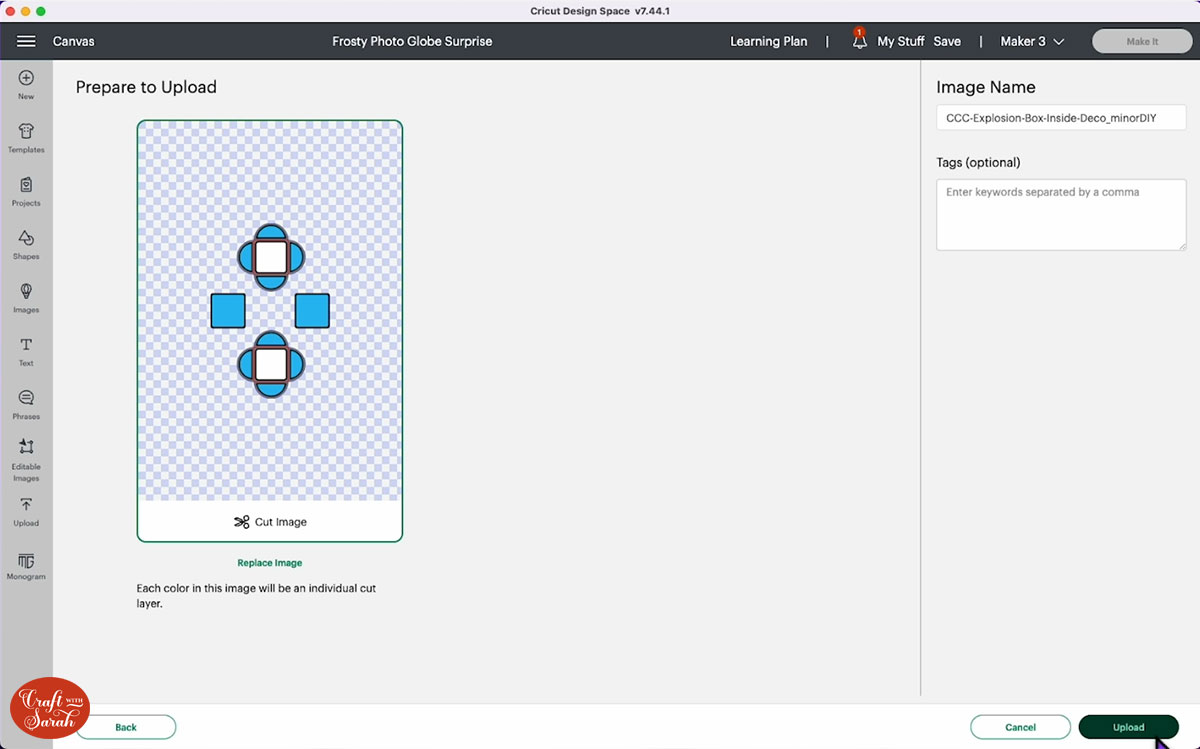
You will see a petal envelope and two squares for some decorative paper.
Ungroup the layers.
Select the bottom petal envelope piece and change the red, Basic Cut lines to Score.
Select the two pieces and click Attach.
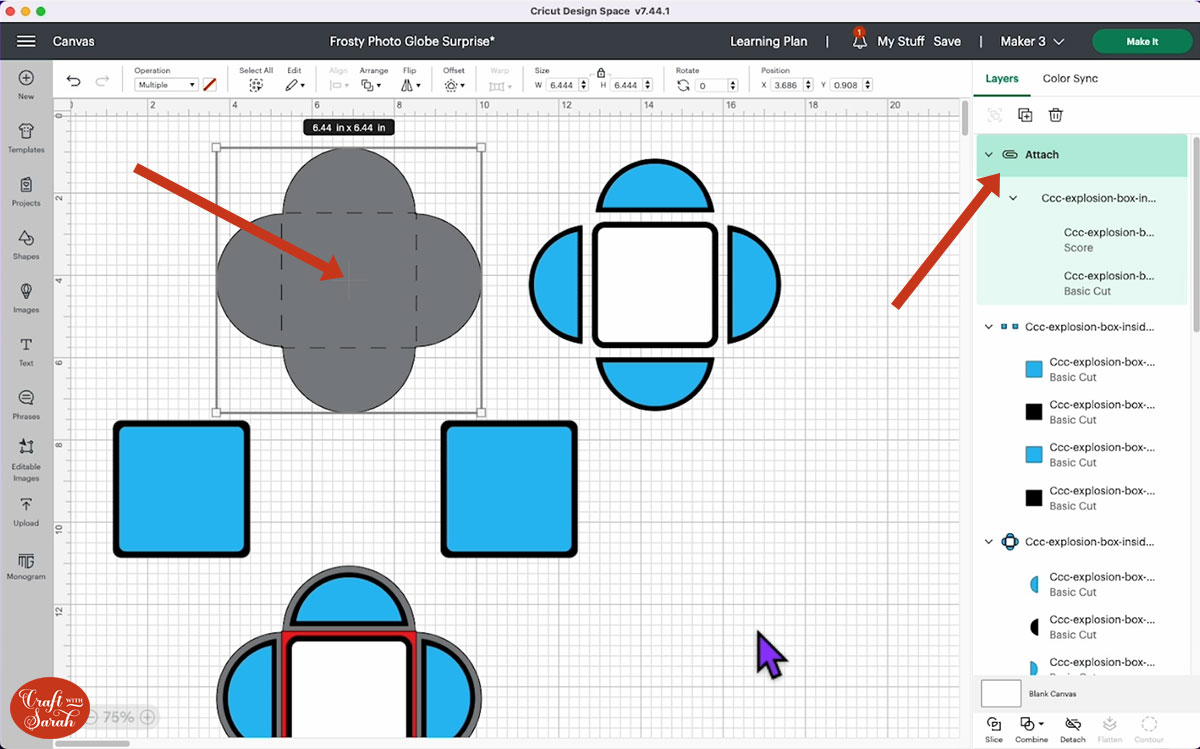
Do the same for the other petal envelope. They are now ready to be cut from paper or 65 lb cardstock.
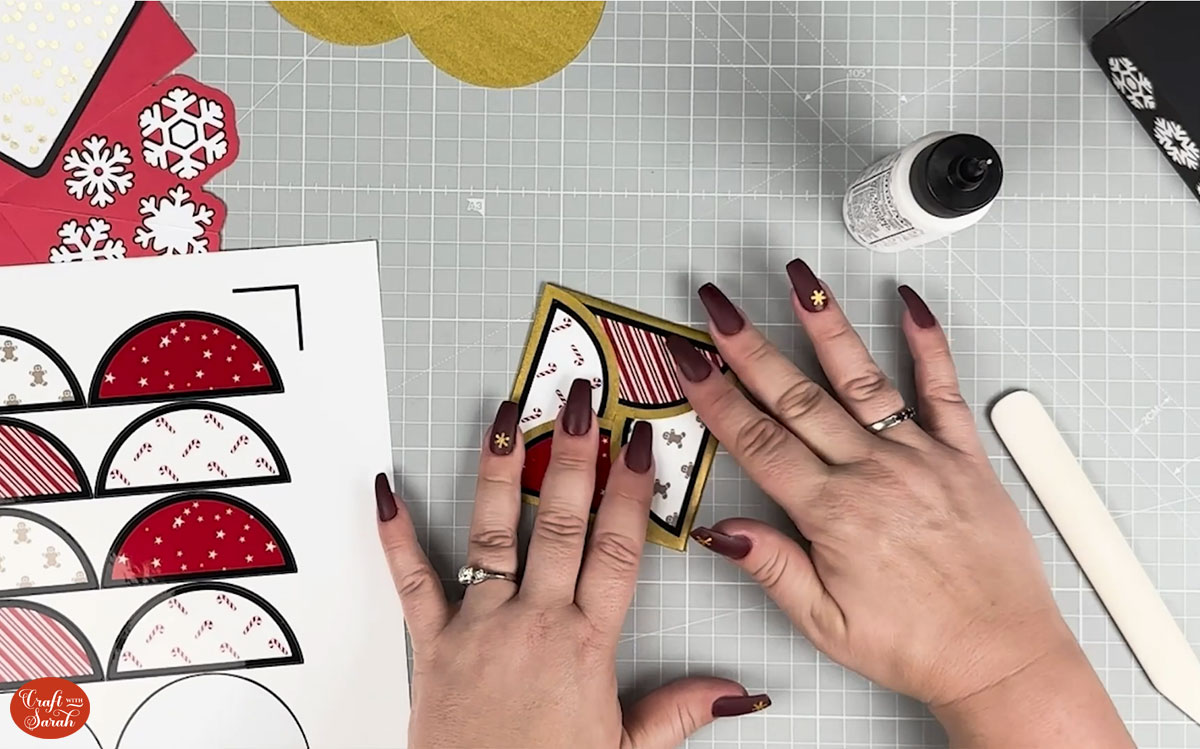
The petals can be cut from scrapbook paper. You will see a black border layer behind them; this is optional but it does add a beautiful effect.
Emily used Print then Cut to print a digital pattern onto her petal pieces by changing the inner petal piece to a guide and slicing it out of a pattern that she already had uploaded. She then aligned and flattened each of them.
Emily used sticker paper for these pieces so that she could easily stick them on.
You can do anything you like with the square piece of the envelope, it could be a photo, a Christmas greeting or some pretty patterned paper.
You will be left with two blue squares with a black border. Emily cut these from the same cardstock that she used for the outside.
Click “Make It” and get everything cut out.
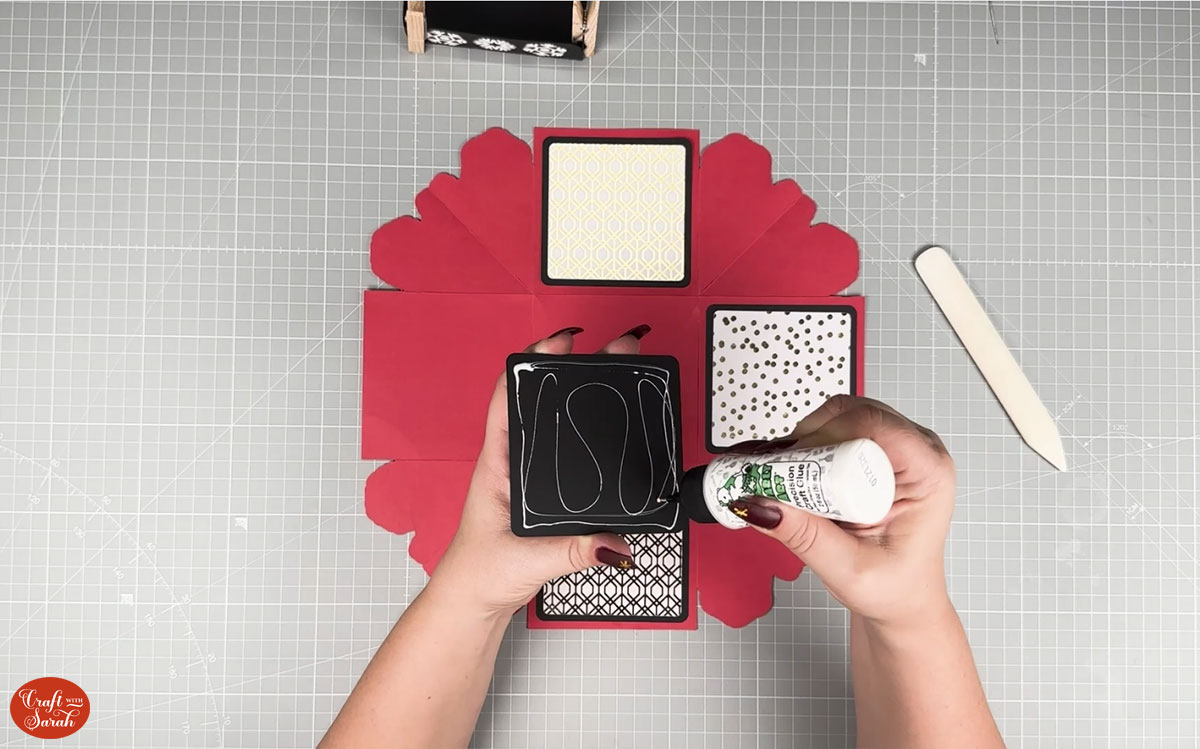
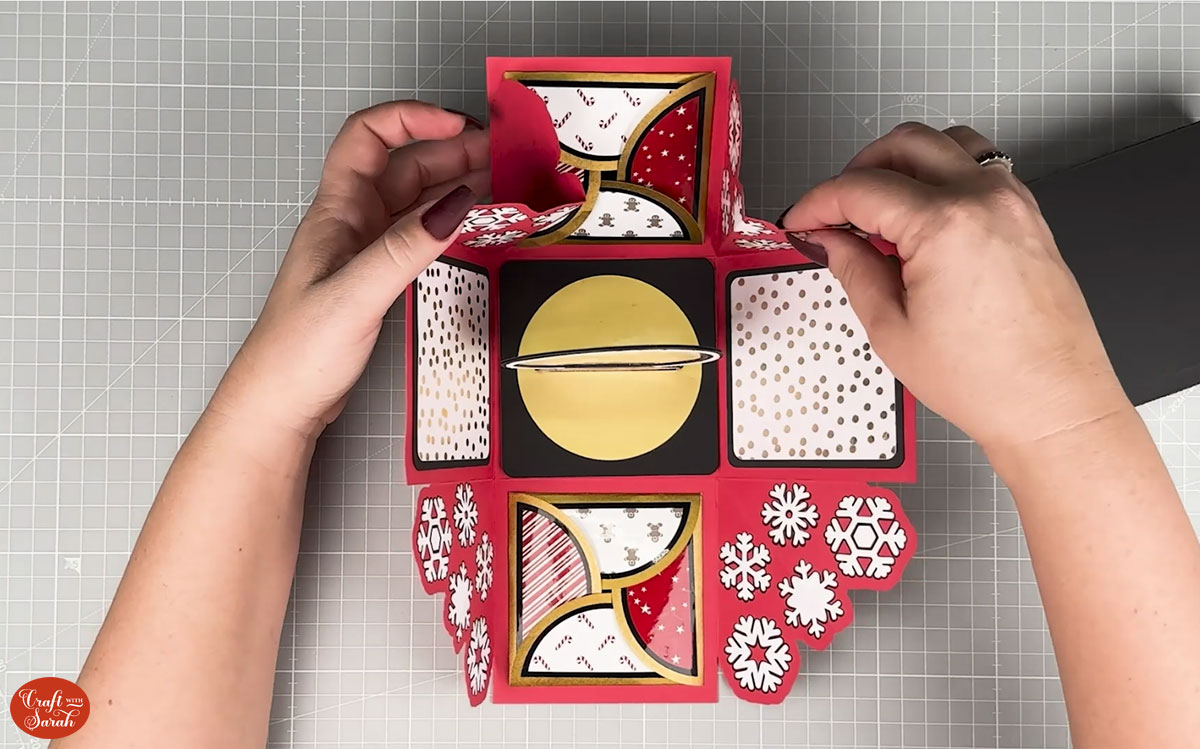
Step 9) Decorate the inside of the exploding box
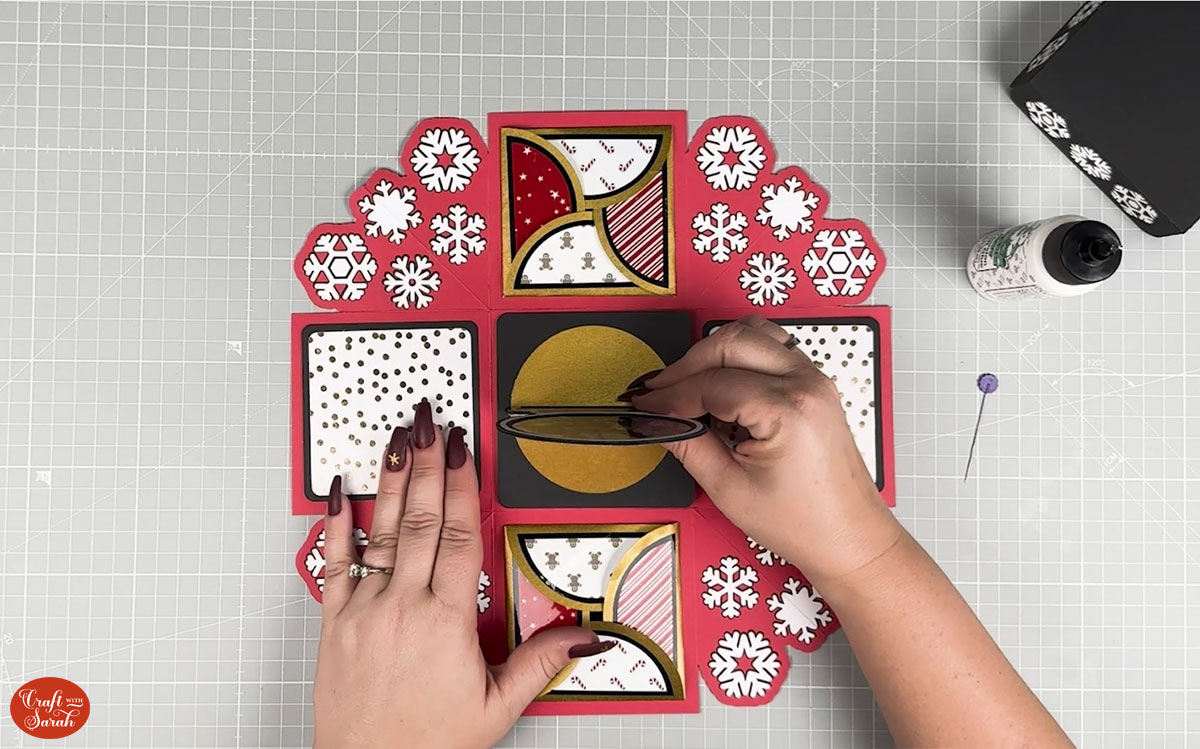
Glue each of the decorative pieces to their matching border pieces.
Stick the petals to the base.
Fold and burnish along the score lines.
Glue the center of the envelope whether it’s a photo or decorative paper.
To close the envelope, tuck each petal in over the previous petal.
Glue all the decorative pieces to the box piece you were working on earlier. The envelopes should be stuck opposite each other.
Leaving the snowglobe unstuck will allow the person who receives your gift to take it out and put it on display. You can use painters tape to secure the snowglobe so that it doesn’t wobble around.
Fold up the box by bending the corners inwards and pulling up the sides.
Add the lid onto the top. This will hold the sides of the box in place.
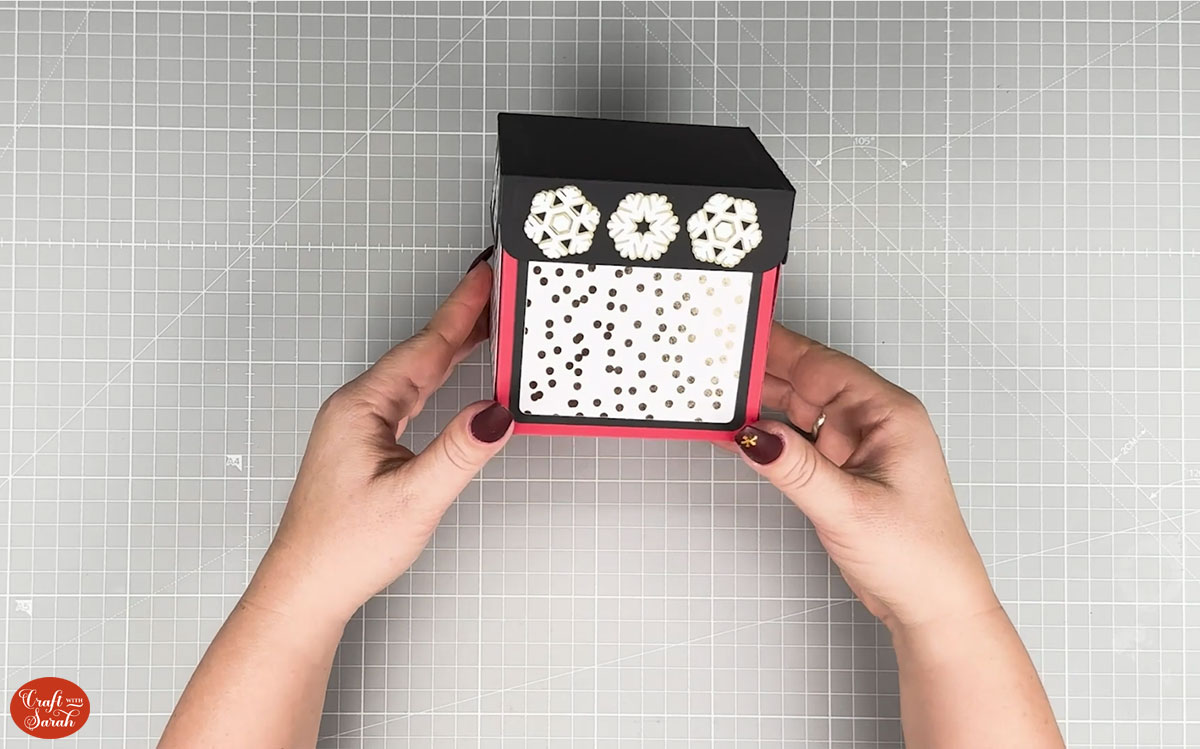
If you have burnished your score lines really well, the sides will pop out and lay flat when you take off the lid.
Create your own magnificent explosion box
This explosion box would be so exciting to receive, especially with a photo of a precious memory inside.
I love all the different ways you can use the decorative pieces. This project would be a great way to use up all your scraps.
Happy crafting,
Sarah x

