HCC 2023 Day 02 🦇 Haunted House with Porch
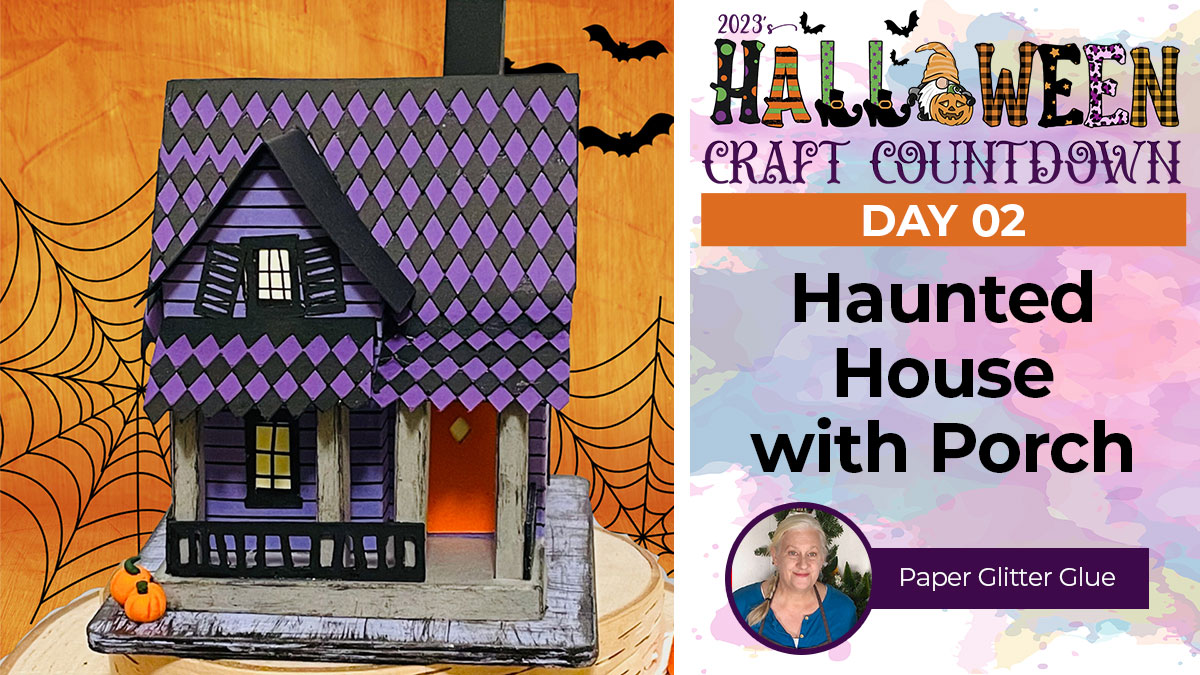
Make your own DIY haunted house out of cardstock to add to your Halloween decoration displays.
It’s Day 2 of the Halloween Craft Countdown and Lucy Foxworth from Paperglitterglue.com has created this Haunted House for you to get crafting.
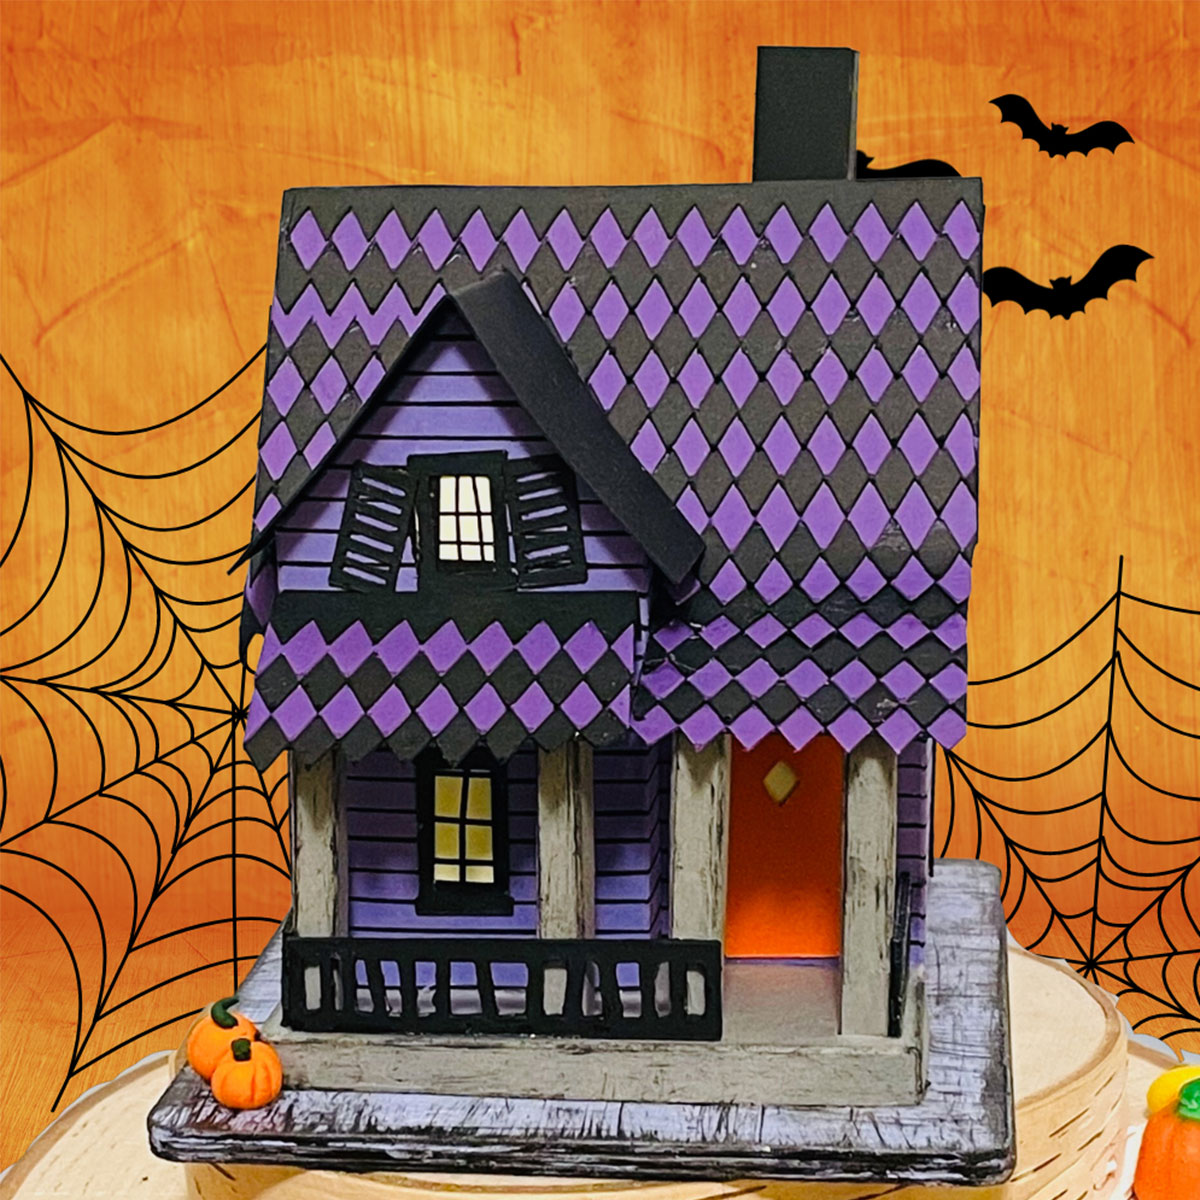
If you’ve been looking for something extra spooooky this Halloween, you’re going to love this Putz house!
Lucy takes us through all the steps to create this impressive 3D papercraft, plus extra customisation suggestions along the way for if you’d like to change things up.
This Project was part of the Halloween Craft Countdown 2023
Materials supply list
Here is a list of the materials that are required to make this project.
Please note that some of the links included in this article are affiliate links, which means that if you click through and make a purchase I may receive a commission (at no additional cost to you). You can read my full disclosure at the bottom of the page.
- Cricut machine
- Light blue Cricut cutting mat
- Cricut Scoring Wheel or Cricut Scoring Stylus
- Coloured Card (Lucy recommends 110lb cardstock)
- Glue
- Paint, pens or other mediums to decorate the pieces (optional)
This project is suitable for the following types of Cricut machine: Explore Air 2, Explore Air 3, Maker, Maker 3, Venture and Joy Xtra. It is too large to cut on the original Cricut Joy machines.
Video tutorial
Watch the video below to see how to make this project. Keep scrolling for a written tutorial.
This project was created by Paper Glitter Glue
Meet Lucy Foxworth, the paper architect behind the captivating tiny house designs at PaperGlitterGlue.com.
Often found covered in glue and cat hair and immersed in the details of her latest projects, Lucy is a crafting expert who loves sharing her knowledge so anyone can craft extraordinary creations.
Written tutorial (with photos!)
Here’s how to make your very own Halloween Haunted house using a Cricut machine!
Step 1) Size the design
Download the files using the box below.
Open Design Space and start a new project.
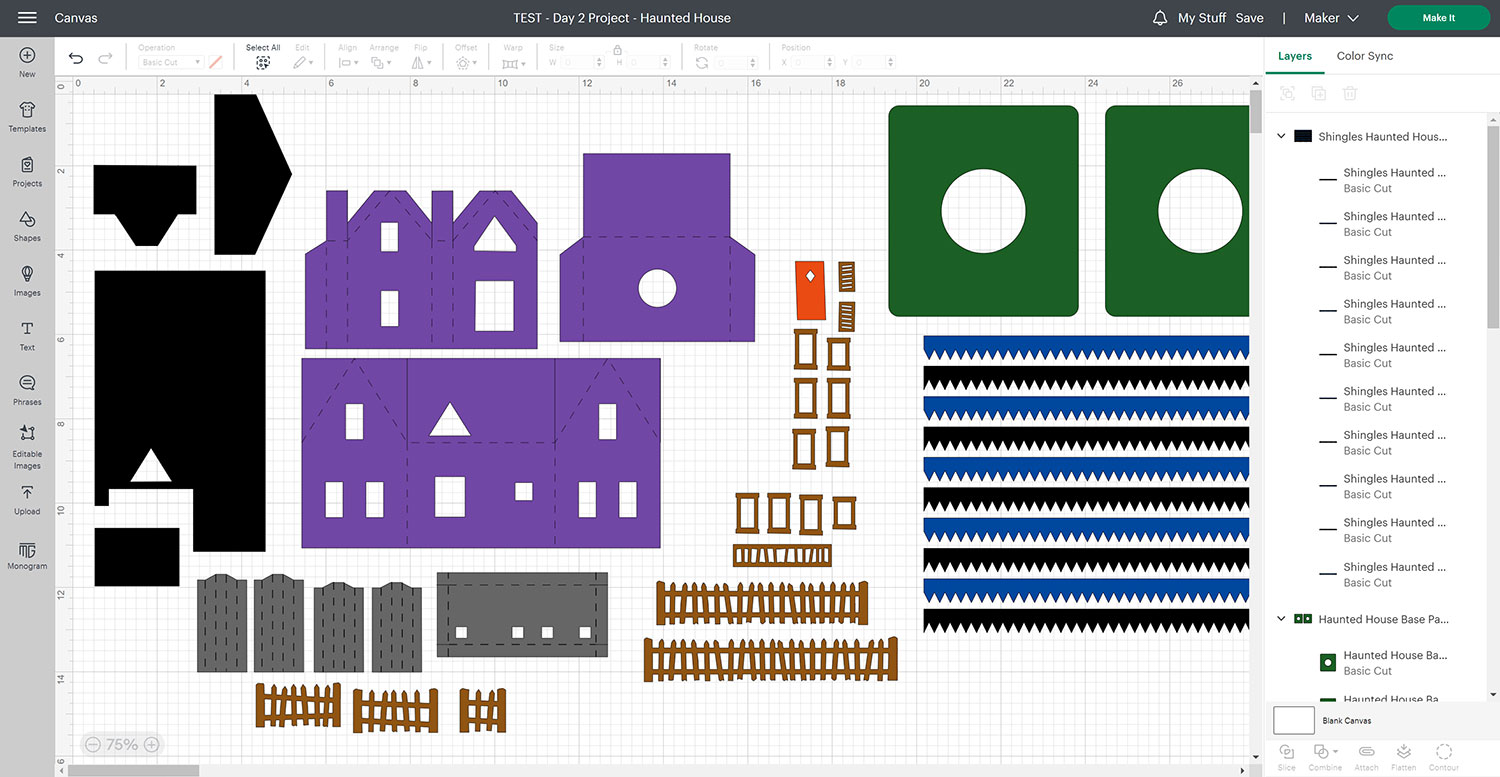
Unzip the download folder and upload the three files in the “SVG Files – for Cricut” folder into Cricut Design Space.
Add the file called “svg-haunted-house-paperglitterglue.svg” to your Canvas.
It may help you to reduce the canvas size (not the design) by zooming out using the toggle on the bottom left of your canvas.
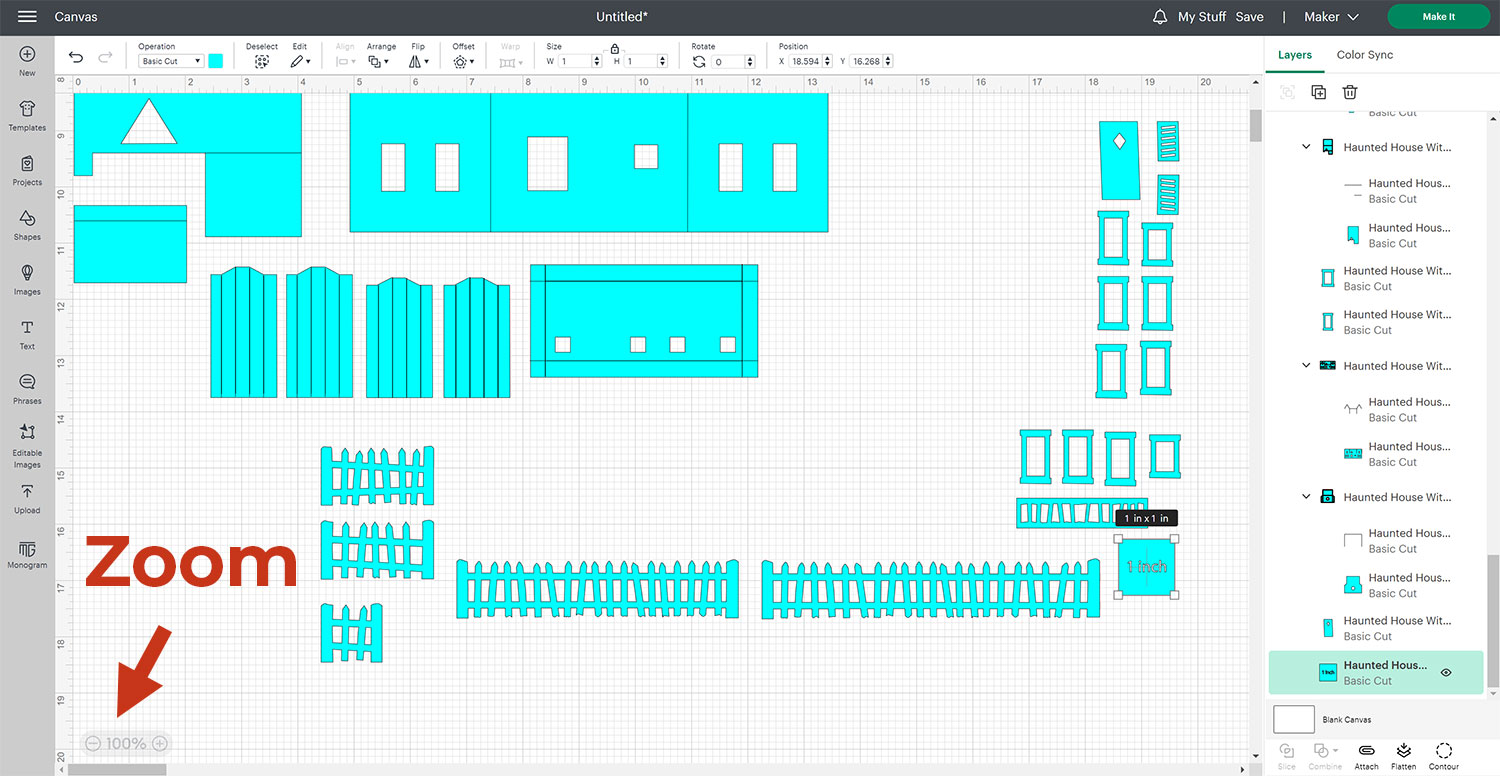
Check that the design has loaded in at the correct size by clicking Ungroup in the Layer’s panel and clicking on the 1-inch scale square on the bottom right of the design.
If it has loaded in at the correct size, this square should be 1×1 inches.
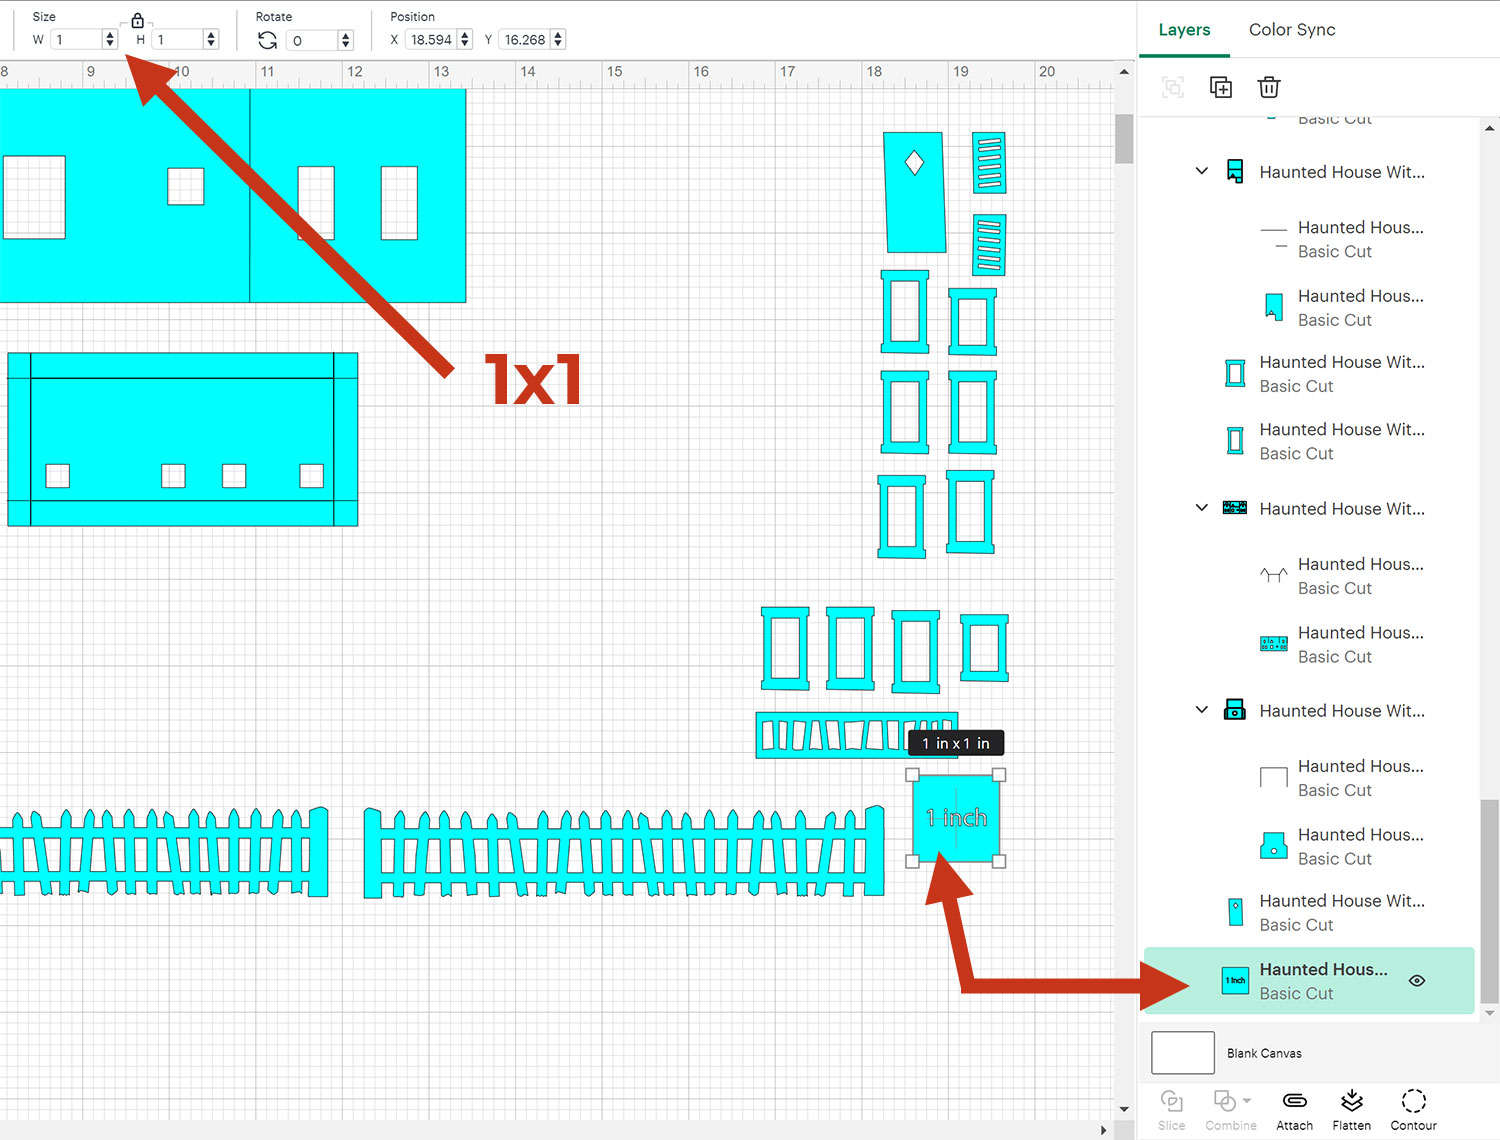
If it isn’t showing as 1×1 inches, here’s how to fix it:
- Re-group all the layers
- Create a Square and size it to 1×1 inches
- Resize the group of ALL the house layers until the scale square is the same size as your newly created square
- Check by Ungrouping everything and clicking the scale square to make sure it’s now 1×1 inches
The scale box (and additional square if you needed it) can then be deleted.
Next, add the file called “svg-house-base-paperglitterglue.svg” onto your same Design Space project and check the size.
The third file is optional. If you want to add a triangle shingle pattern to the roof, add “svg-roof-shingles-paperglitterglue.svg” to your project too and check the size. For a plainer roof design, you can miss this file out.
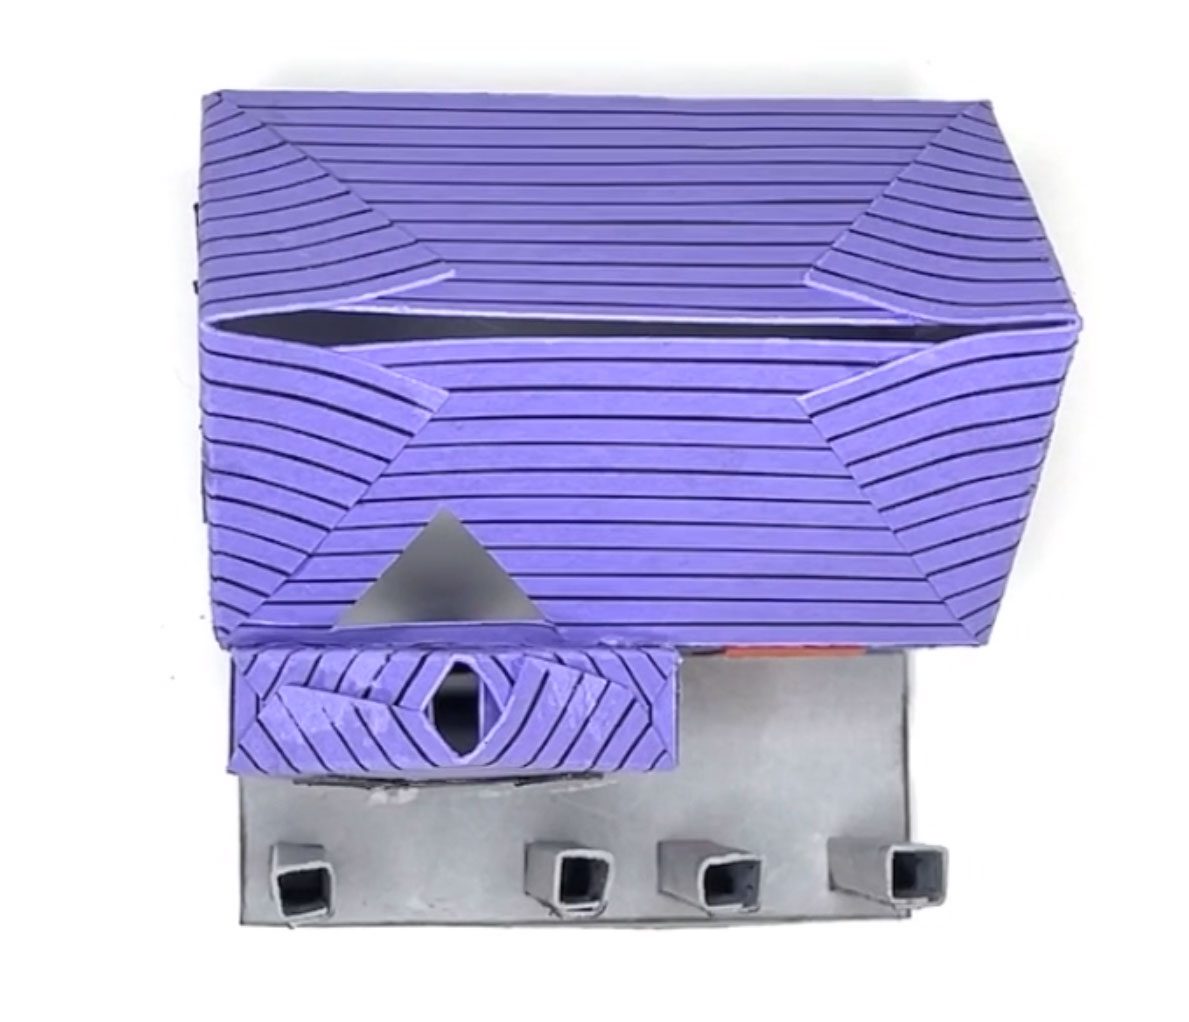
Step 2) Format the score lines
With each of the house pieces, look out for cut lines which will be separated from the turquoise piece when you look at the layers in the group.
The will show as a turquoise layer grouped with a layer on top that looks like single lines.
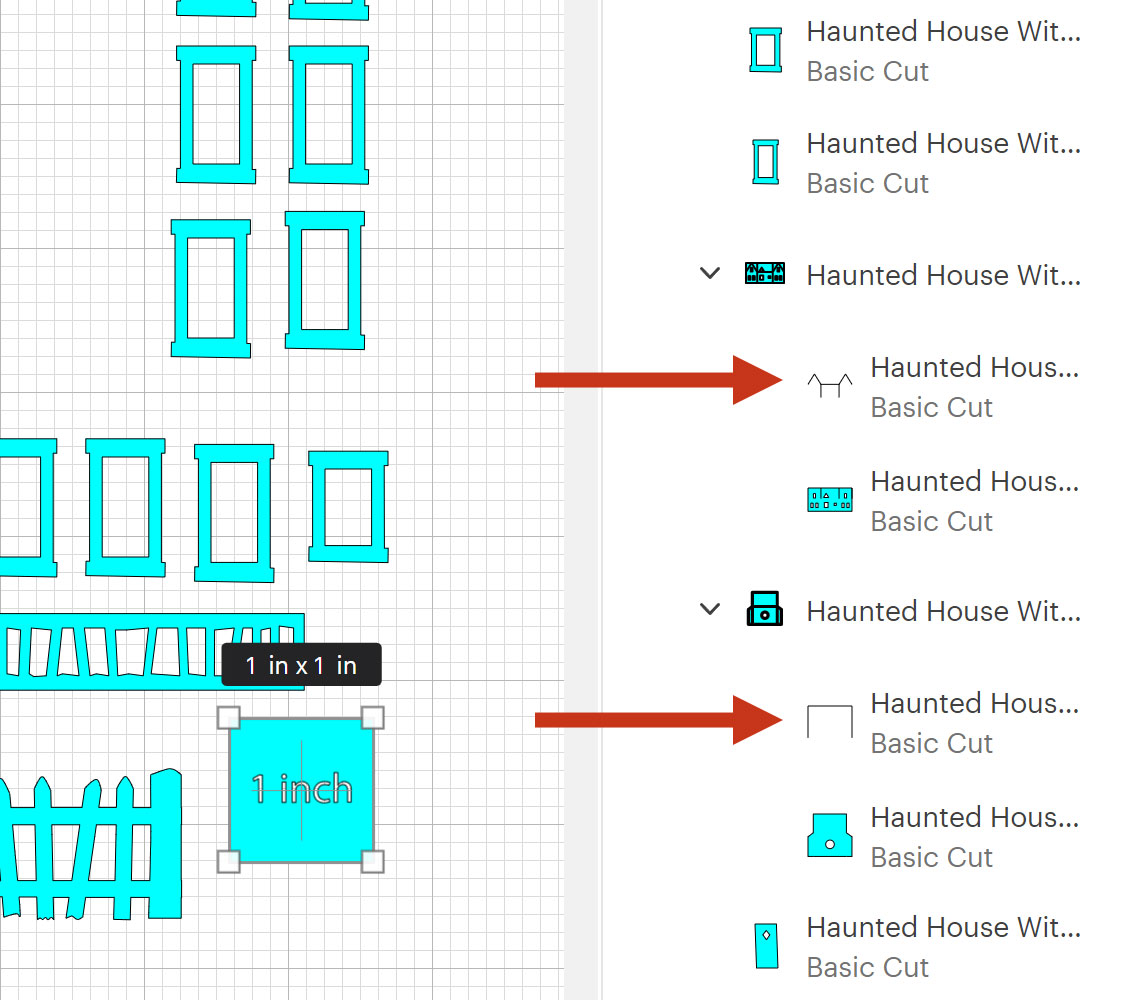
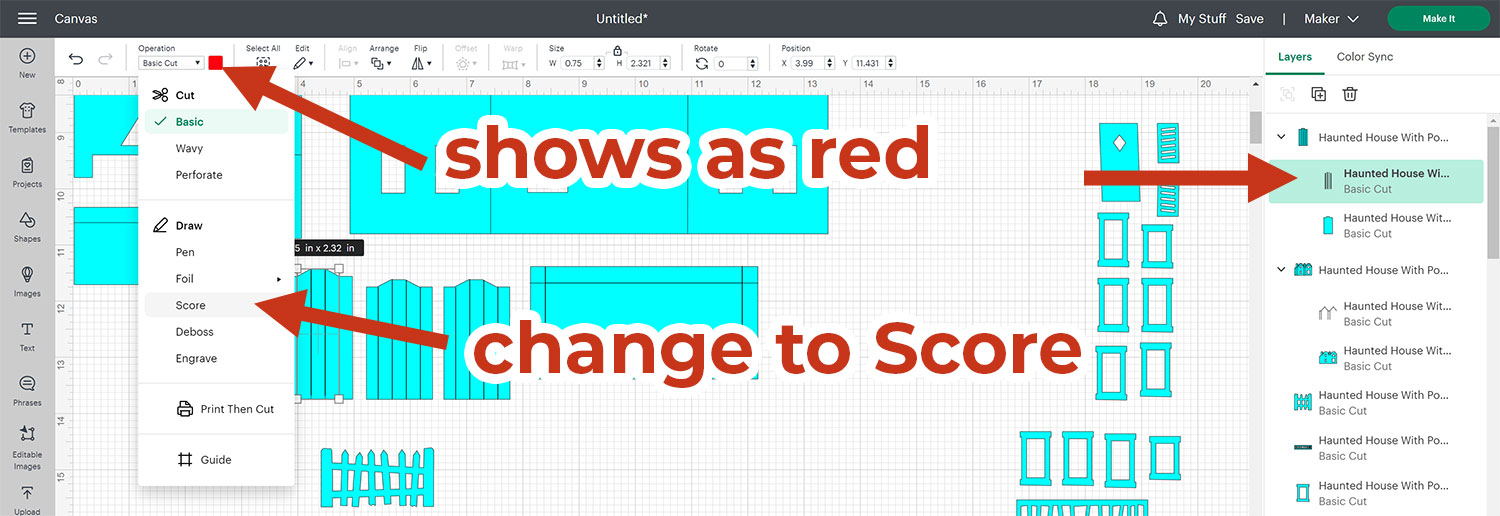
To be sure that the cut line is to be changed to a score line, check the colour box which will show as red, meaning it needs to be scored.
To change the cut lines to score, click the drop down in the Operation menu and select Score.
You can also change the colours of the matching “Cut” piece if desired, so that you can cut the house from different colours of cardstock.
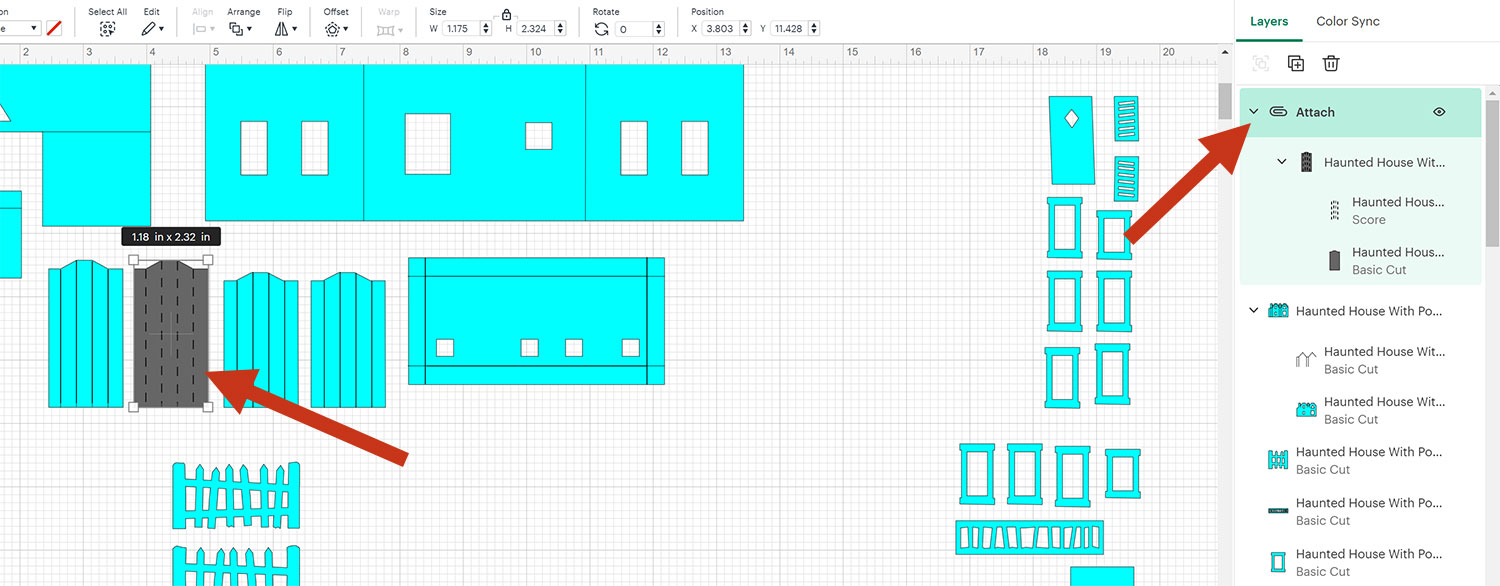
Select the Group containing the score line, usually consisting of one turquoise layer and one score layer, and press Attach.
Attach is what tells the Cricut to do the scoring on that particular piece of cardstock.
You will need to do this for each of the pieces.
Here’s how it might look with the layers changed to different colours:
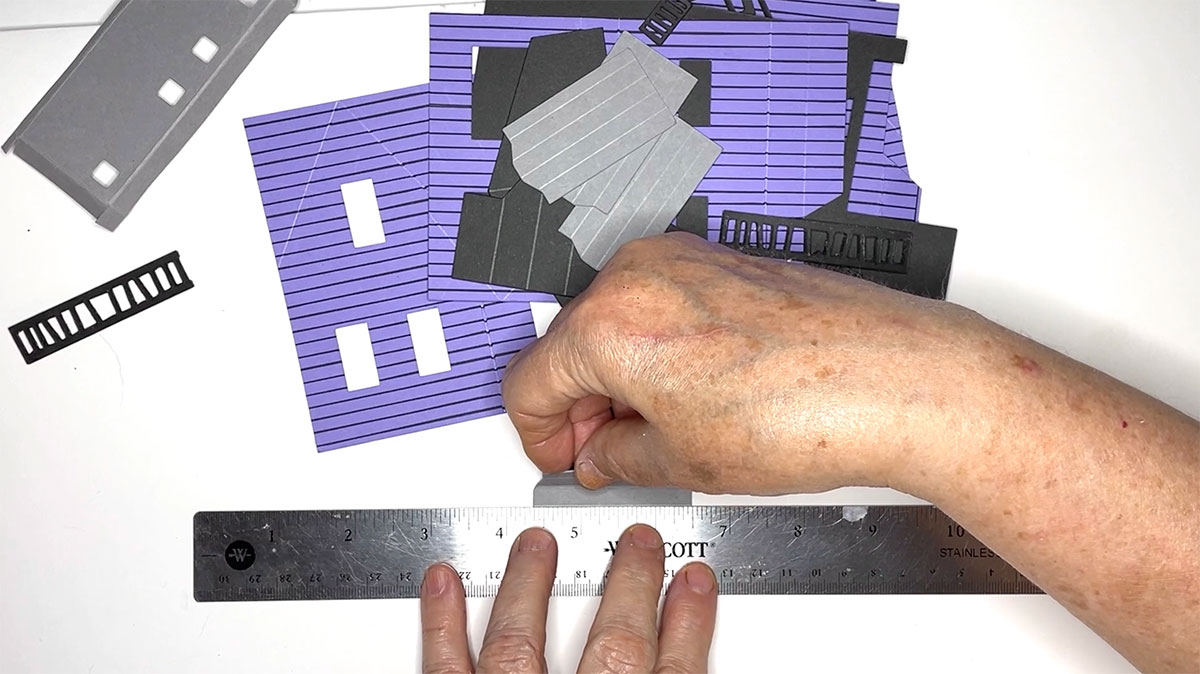
Step 3) Cut the Haunted House
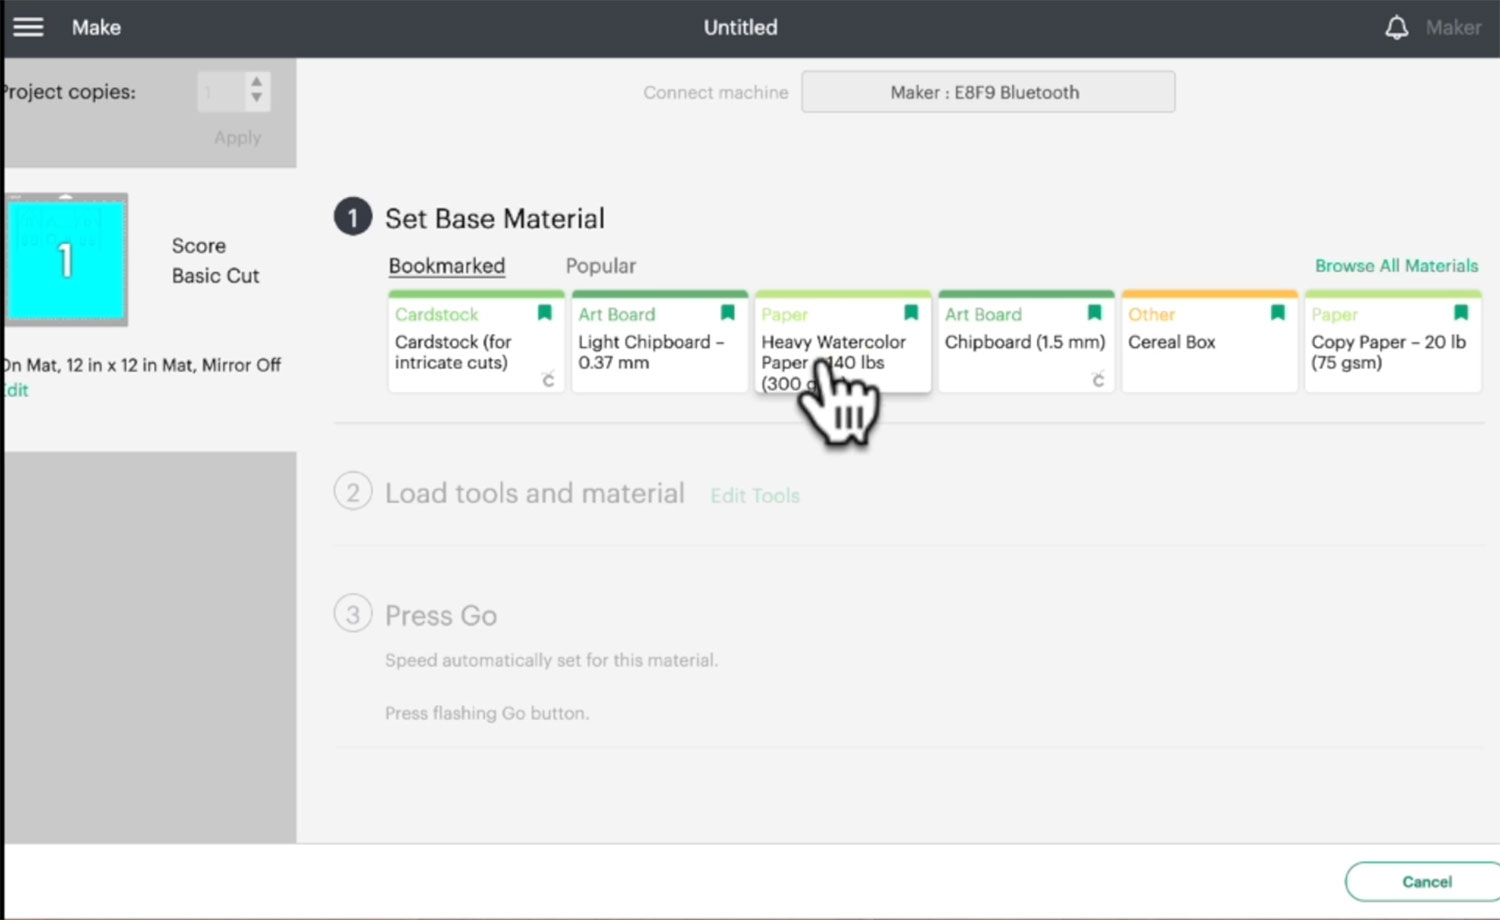
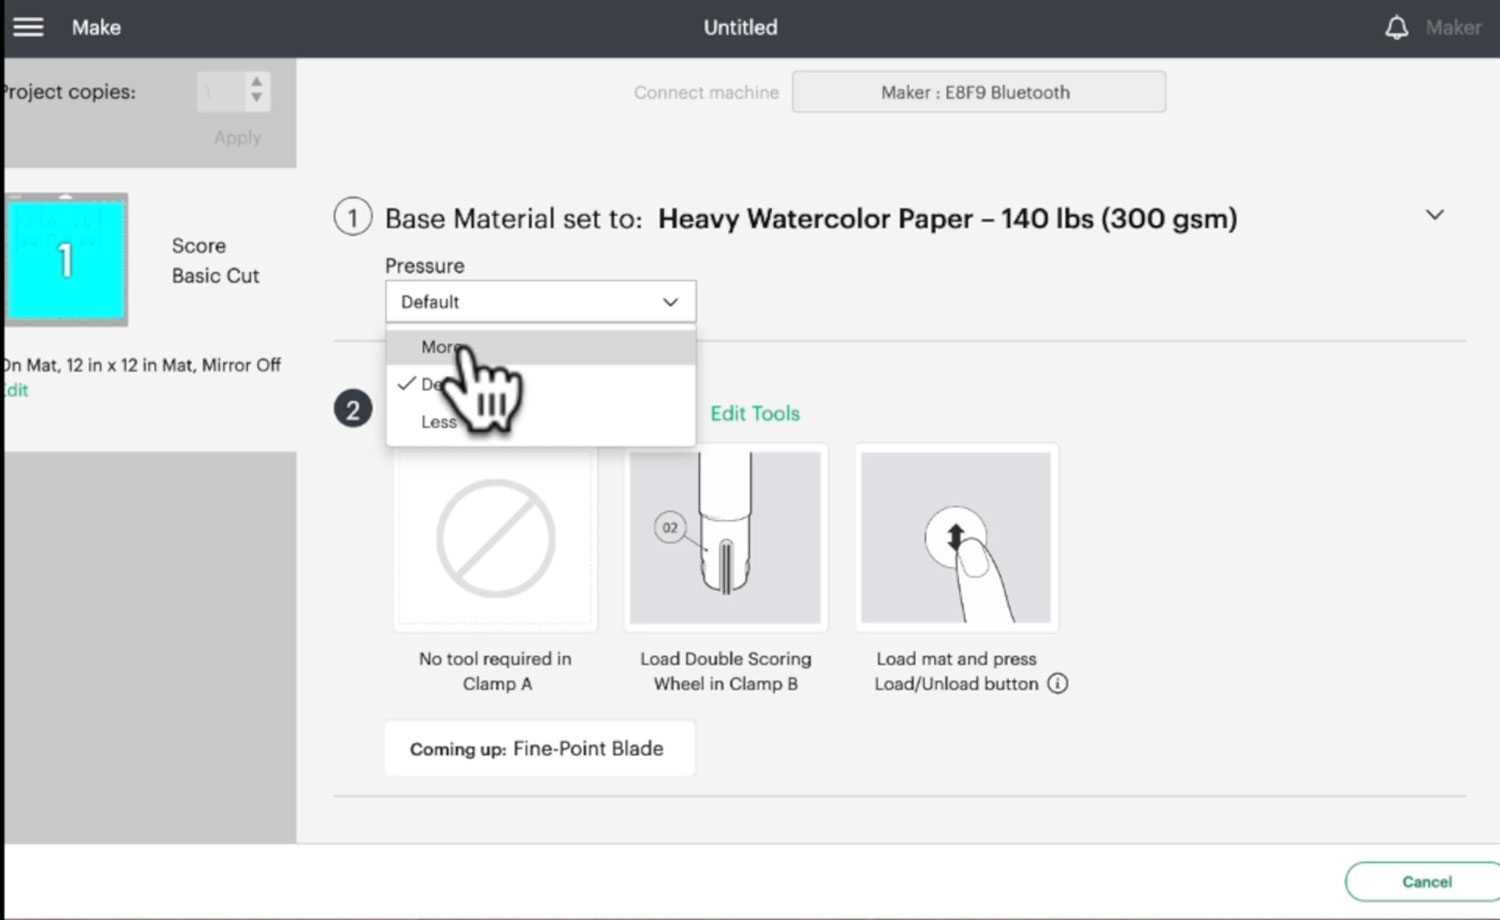
When using 110lb cardstock, Lucy recommends that you cut your cardstock using the Heavy Watercolor Paper setting. You can also try the heavy cardstock or Kraft Board settings.
Under the Pressure drop down, choose More
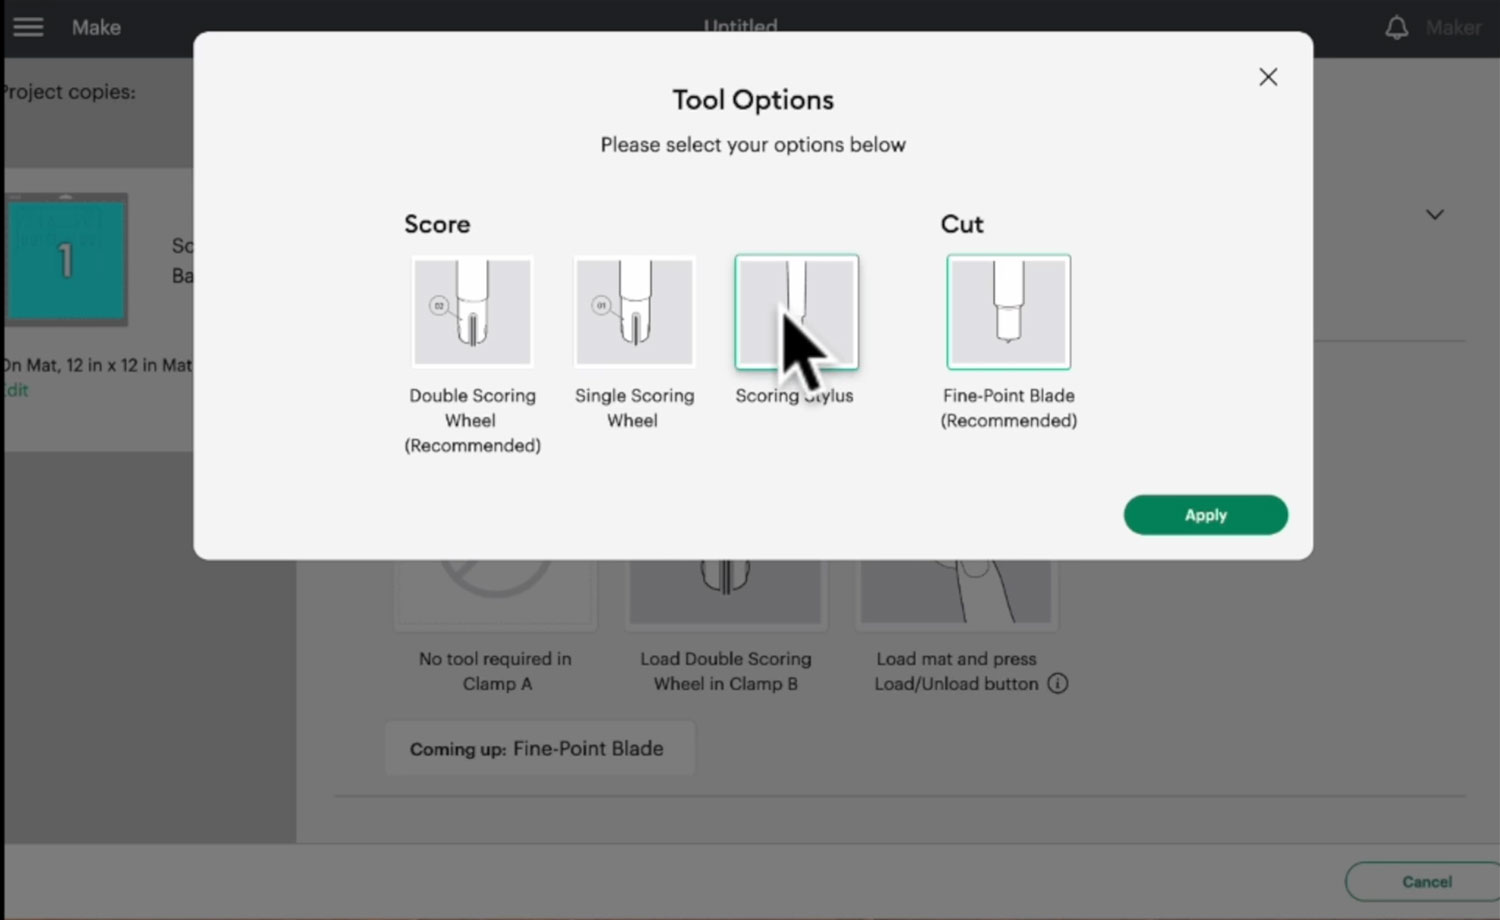
You will then need to select either the Scoring Wheel or Scoring Stylus depending on which tool you are planning to use.
I prefer the scoring stylus because it goes in the “pen” clamp in the Cricut machine so it can score and cut at the same time which is faster than using the scoring wheel.
When your first cut finishes, don’t eject the mat. Lift up the cardstock to see if it has cut. If it hasn’t, simply press the Go button again (without pressing anything else) and it will repeat the cut in exactly the same place.
Go ahead and cut out all the pieces.
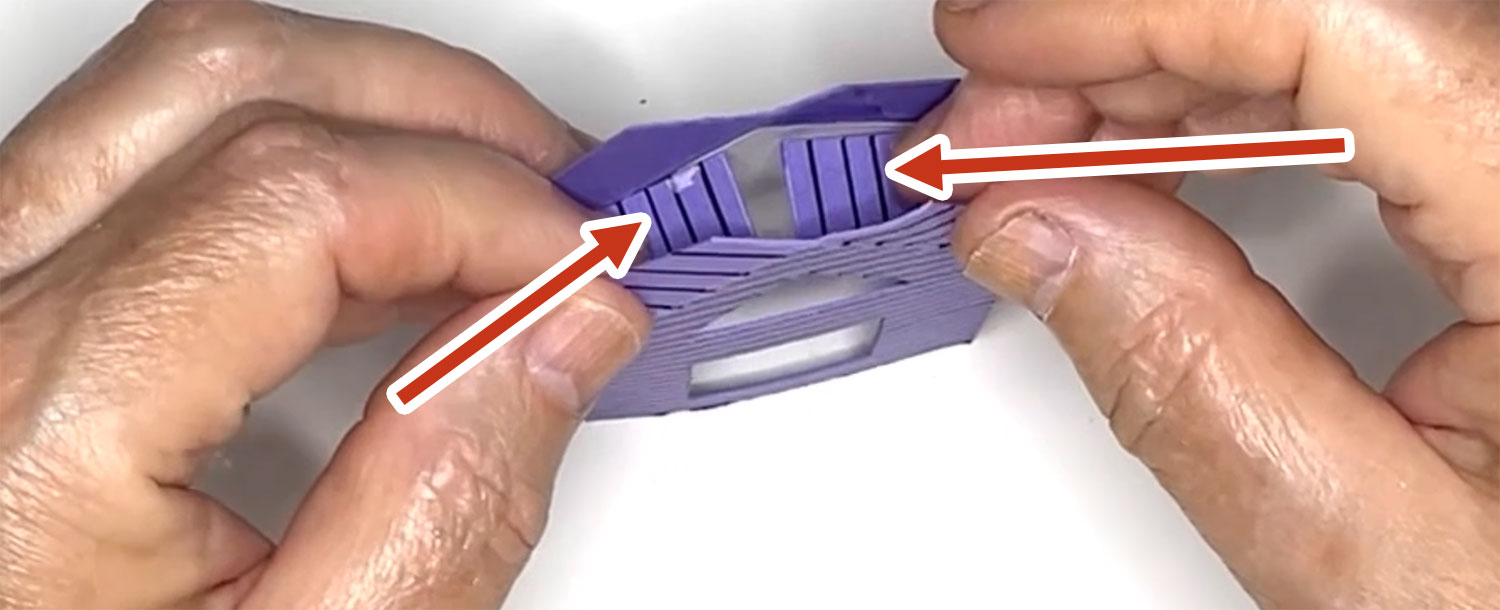
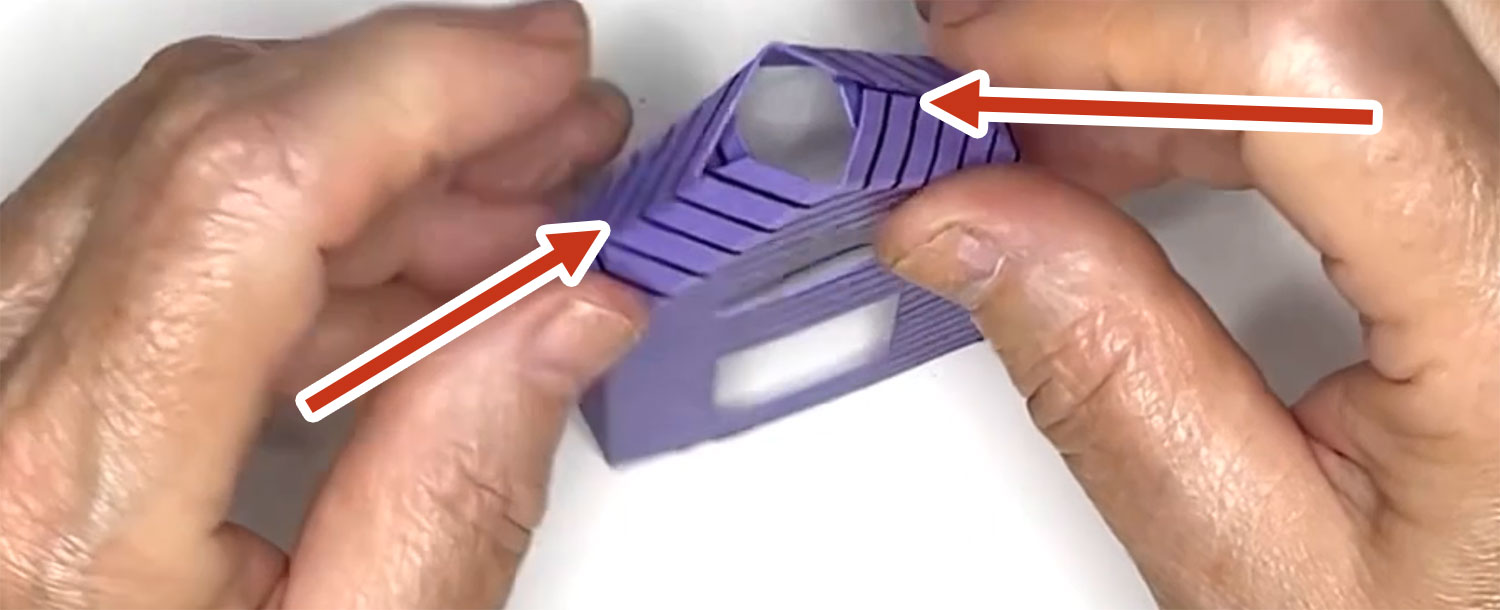
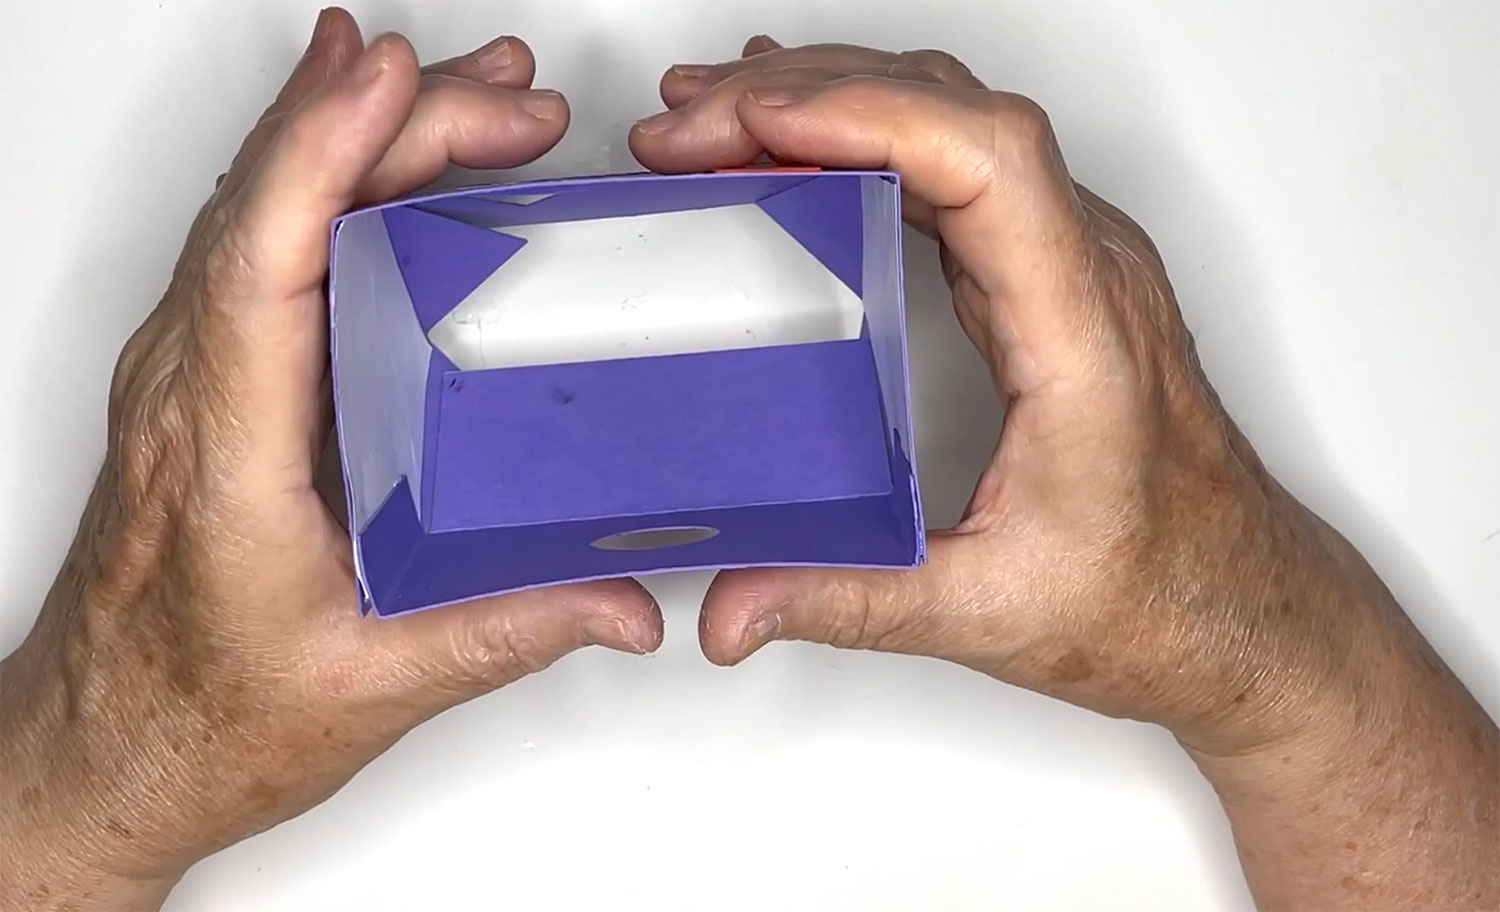
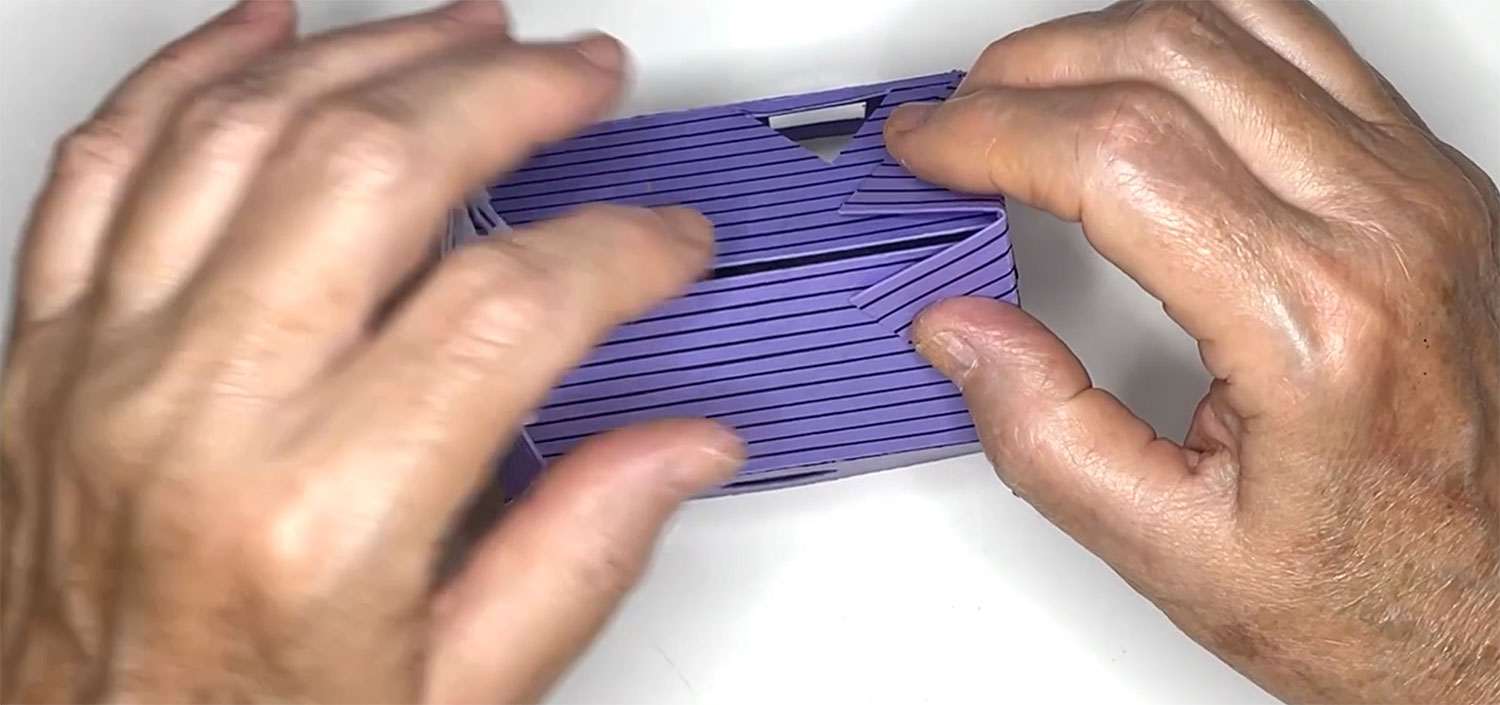
Step 4) Fold the score lines
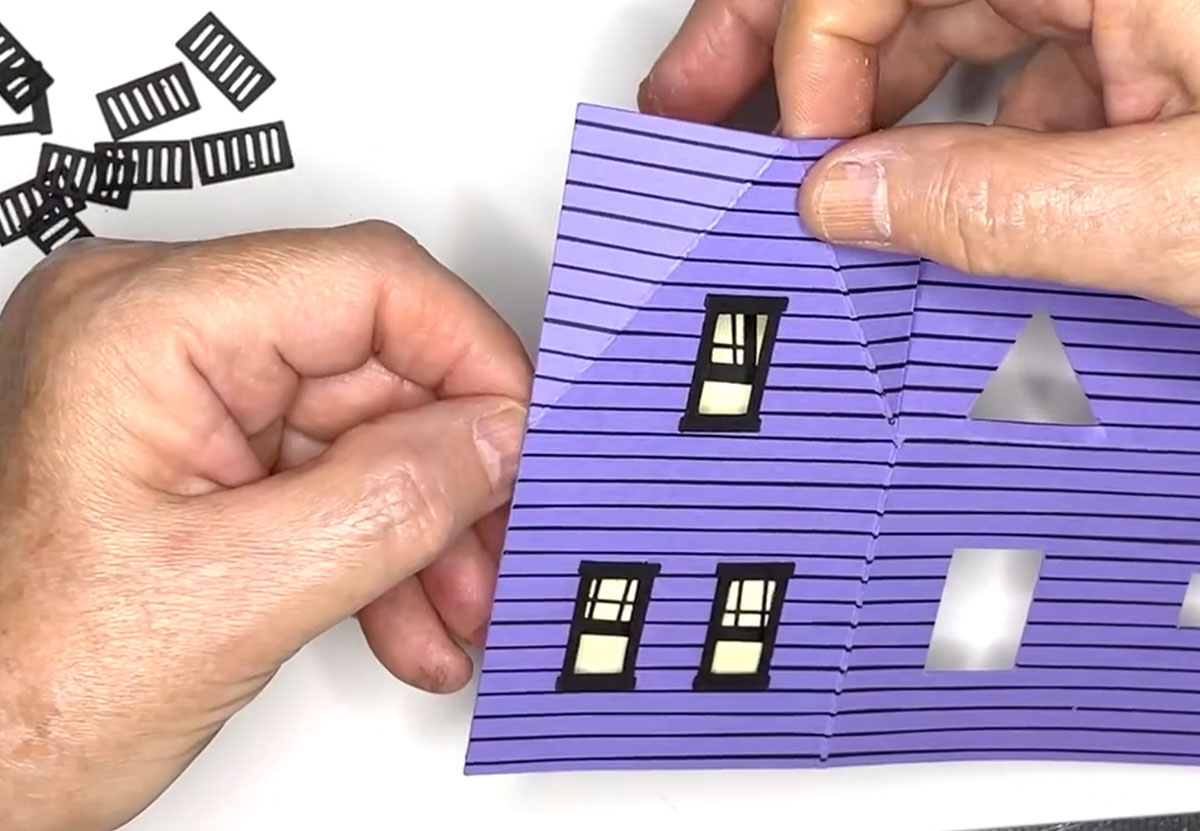
With all your pieces in front of you, fold along your score lines. Fold towards you first and then away.
You may want to use a ruler down the lines to help you fold.
Fold along all of the score lines in your pieces.
Folding the score lines should help to give an idea of how the pieces will be stuck together – but don’t worry, all those steps are covered further down this page.
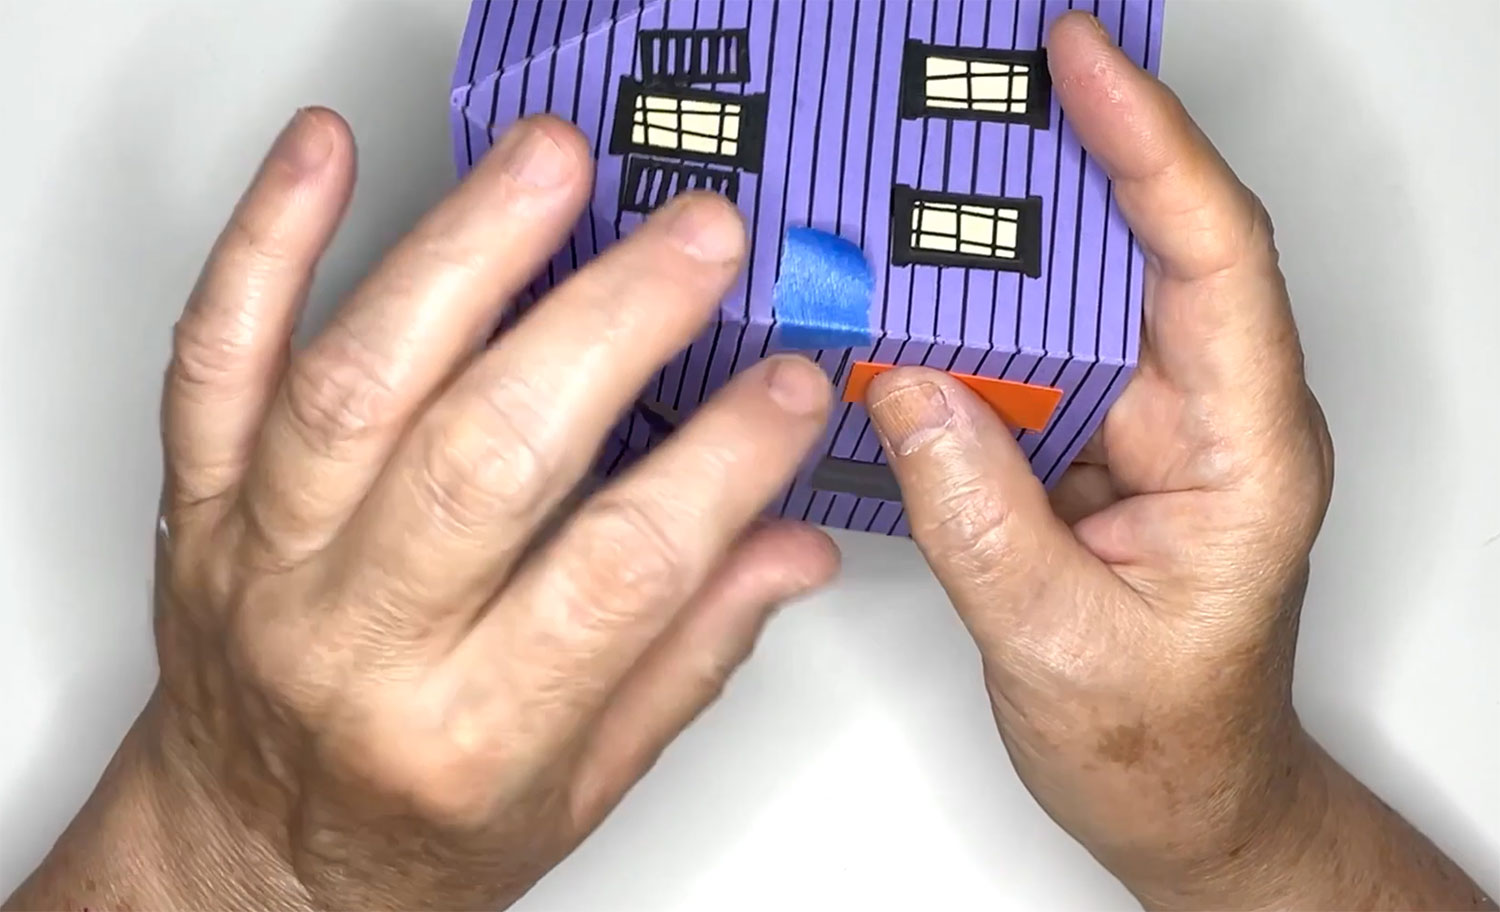
If you would like to add some extra touches to your haunted house, you can draw or paint on lines or other patterns.
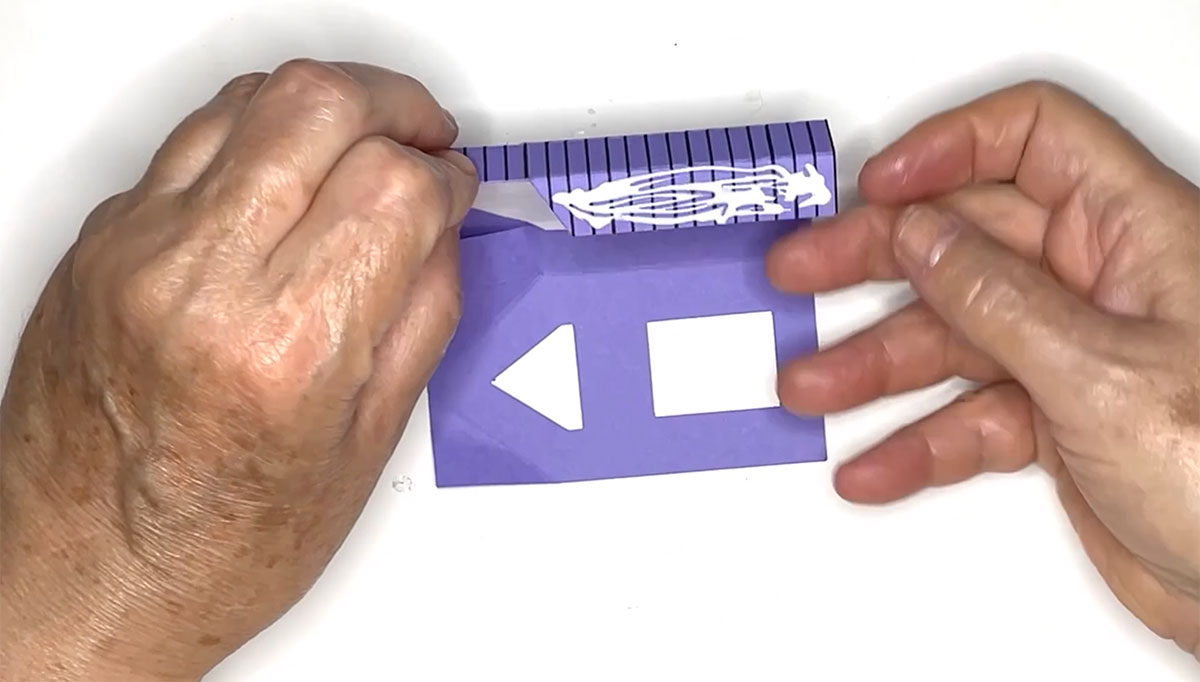
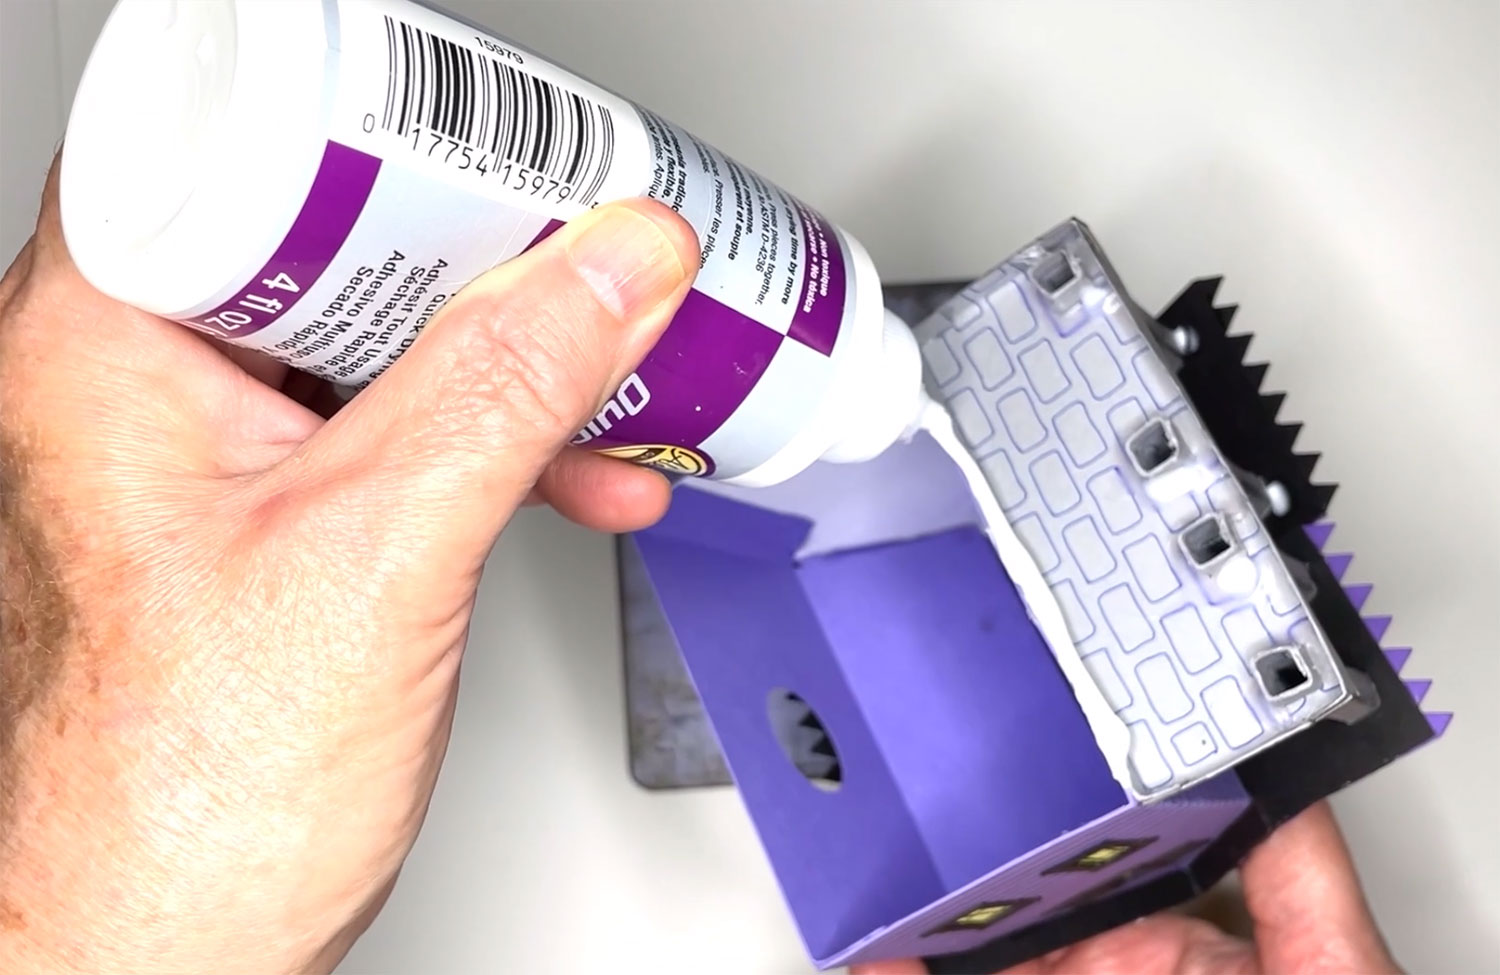
Step 5) Add the windows
Glue the window outlines to the outside of the window holes on your house.
Glue a shutter to each side of your rectangular windows.
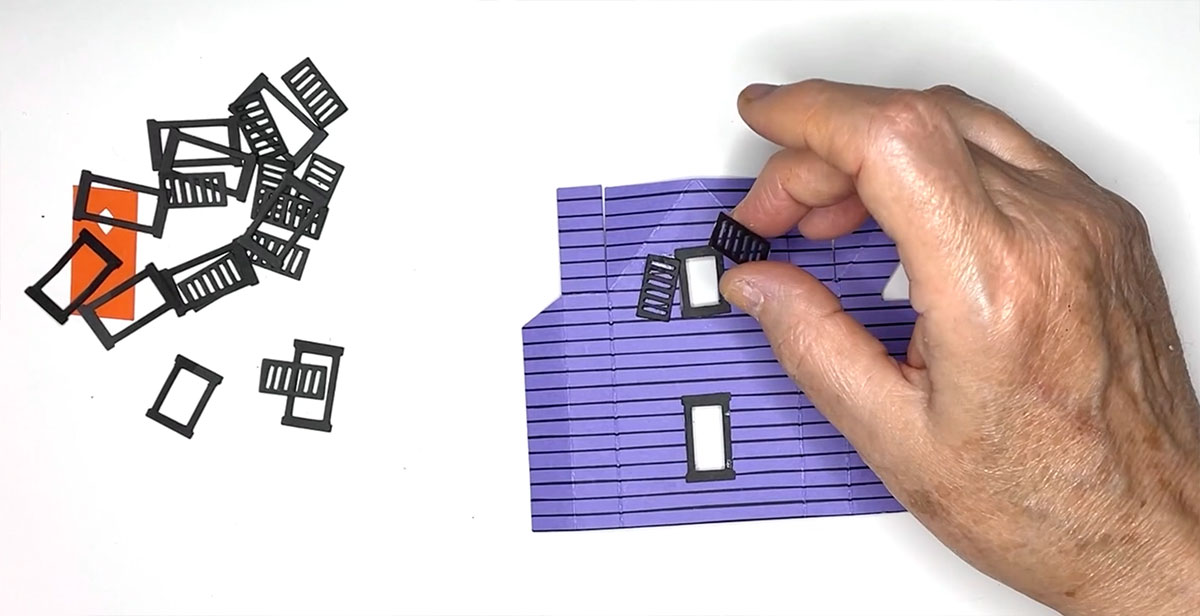
You can add extra details inside the windows to give a “glow” from the inside and to add some cute characters to the inside of the house too.
There is a printable sheet in the download folder, within the “PDF Files – for hand-cutting” folder. Look for the file called “Halloween windows to print PDF.pdf”
It looks like this:
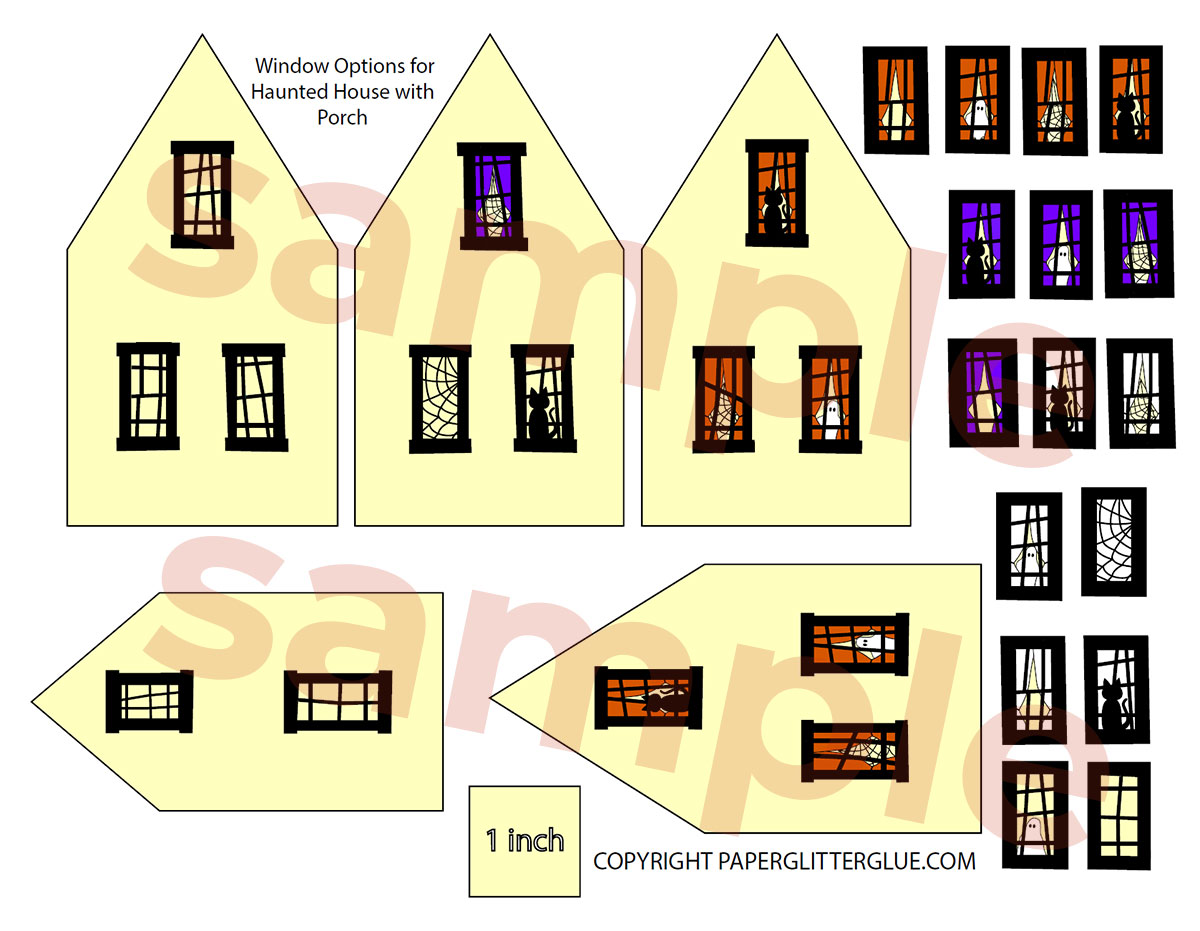
Print the sheet on regular copy paper/printer paper and cut out the details by hand.
Glue them behind the gaps in the windows.
Attach the little door to the front section of the house where you will see a small square.

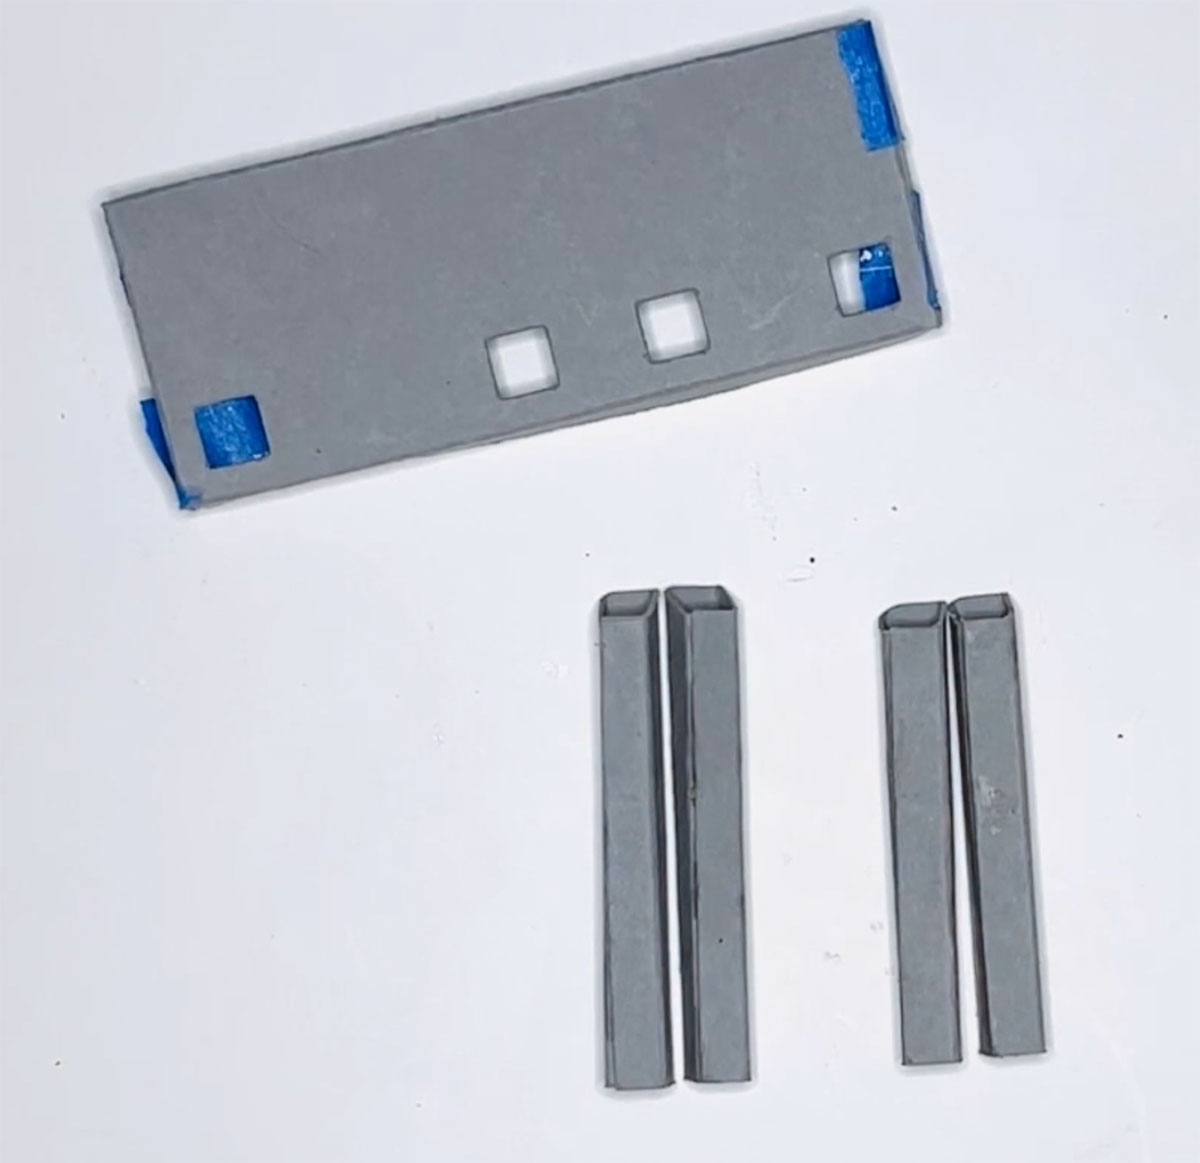
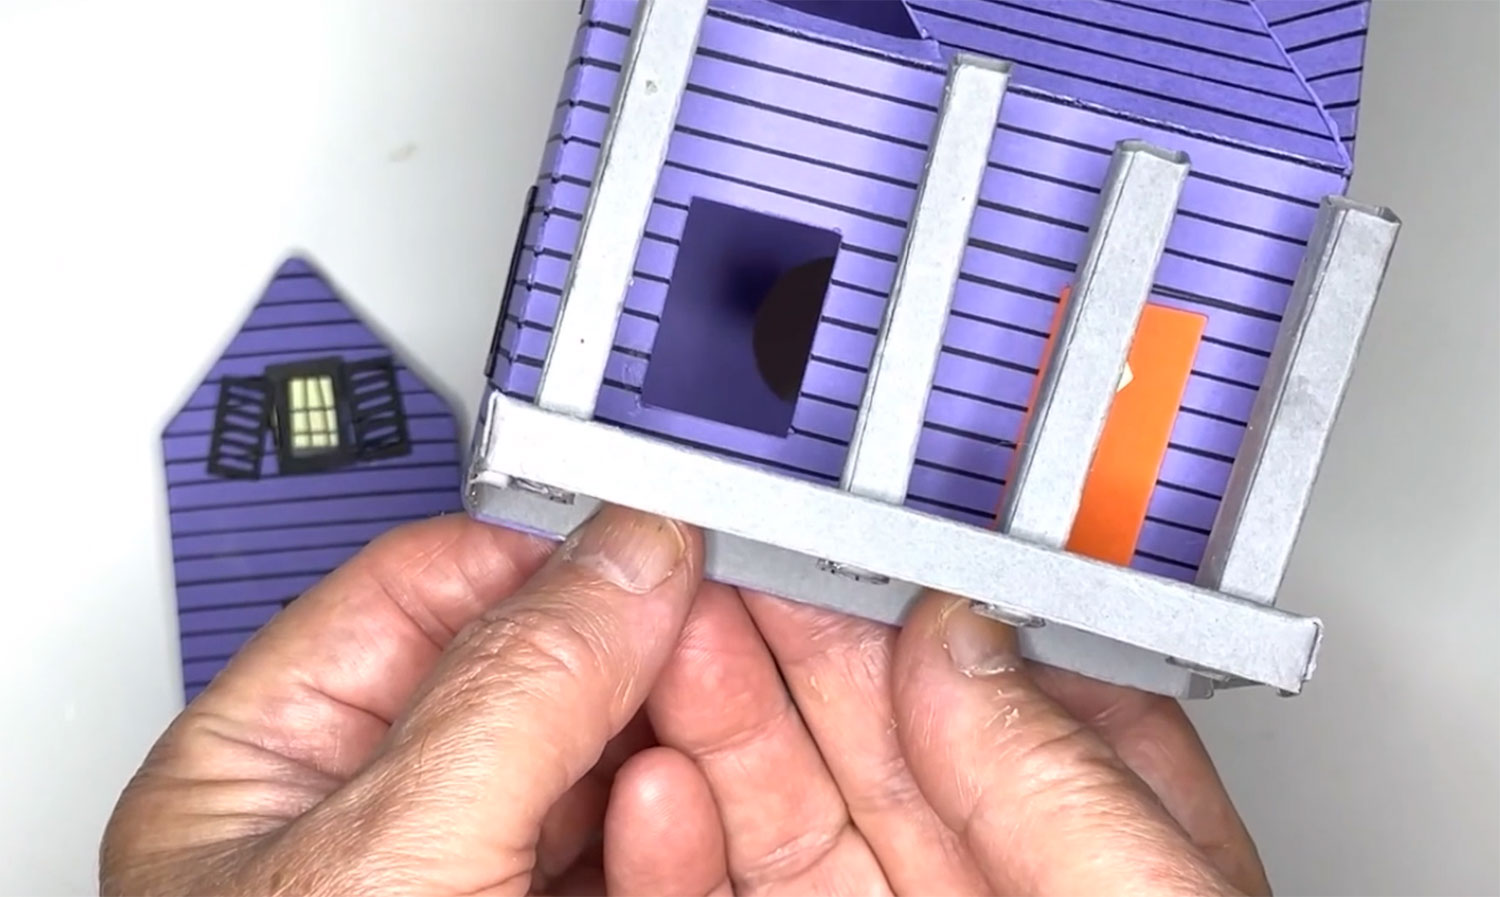
Step 6) Assemble the porch
The bottom section of the porch has four holes for the columns to go into.
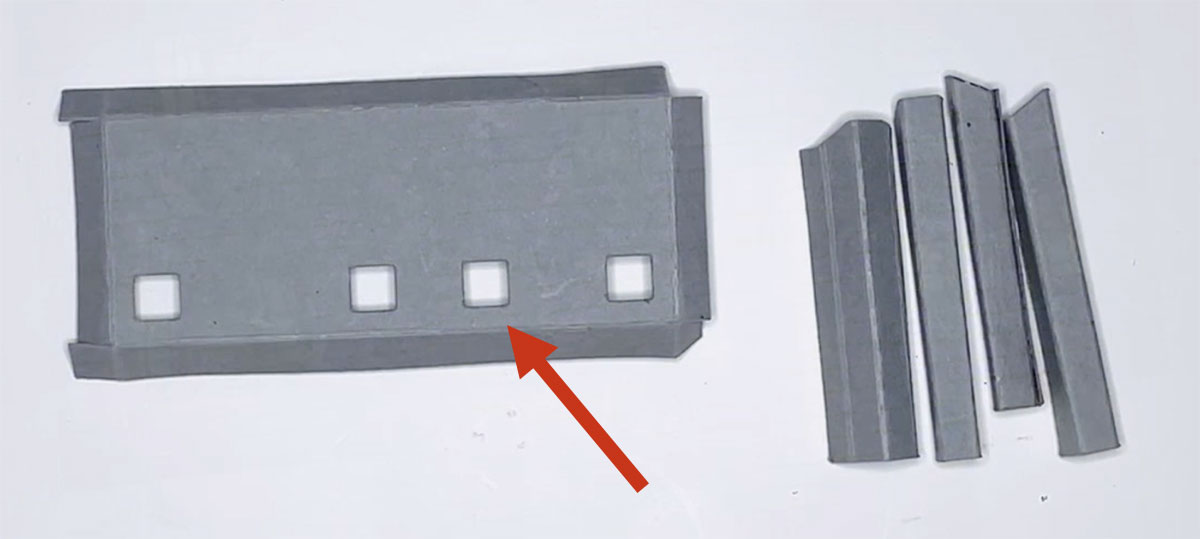
Glue the side tabs to the short sides on each end of your rectangular piece. You may need to add some painters tape or masking tape to help hold the sides together as the glue dries.
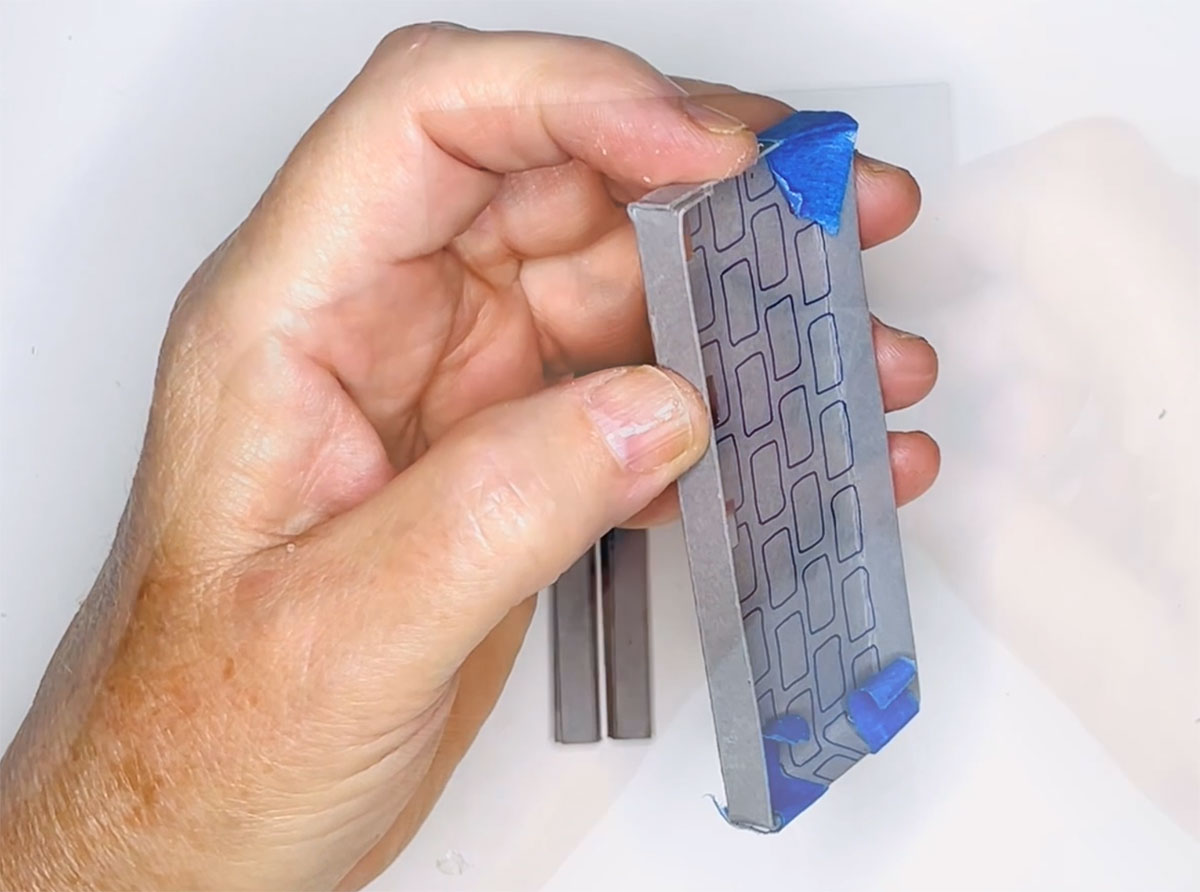
Glue your columns together by placing the narrower tab on the inside.
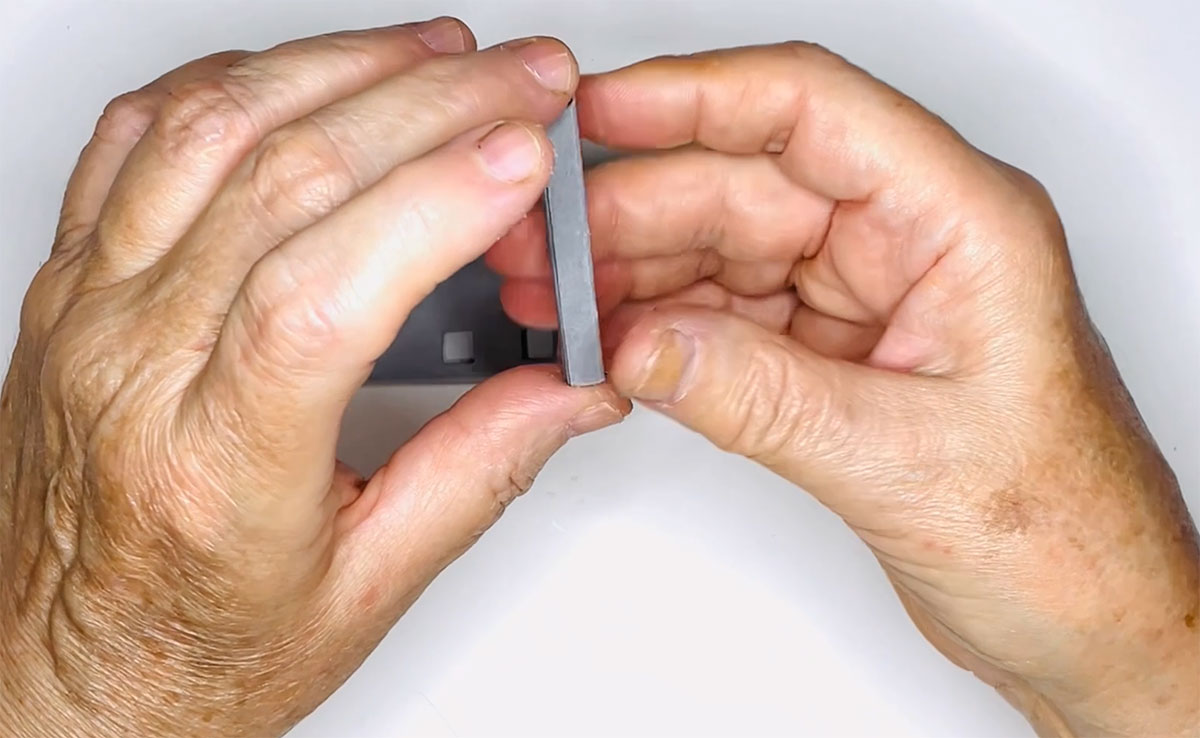
Note: the columns are in two sizes with the angled edges at the top (the angle goes at the back). The shorter ones go at the right side of the porch and the longer ones go with the front extension.
This is how the pieces should be looking at this point:
Put your columns in place by poking them through the holes.

Glue them in place on the underside of the bottom porch piece.
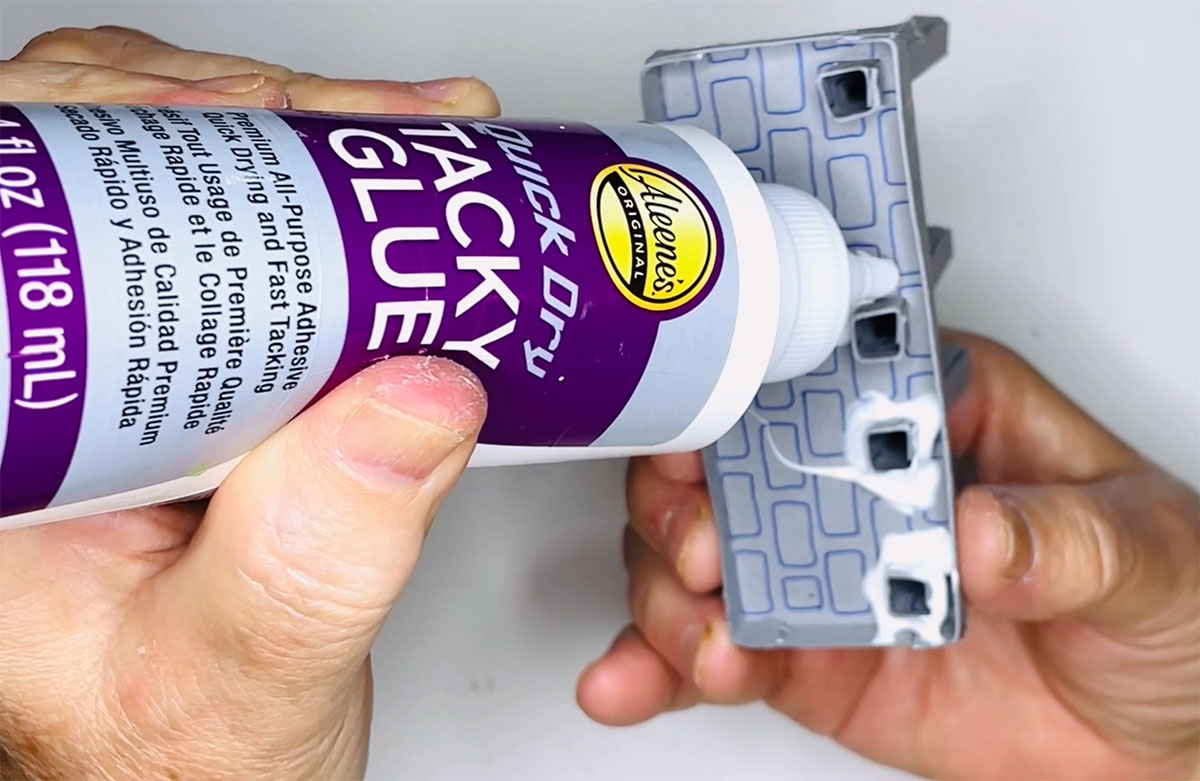
Make sure they are all standing straight and vertical.
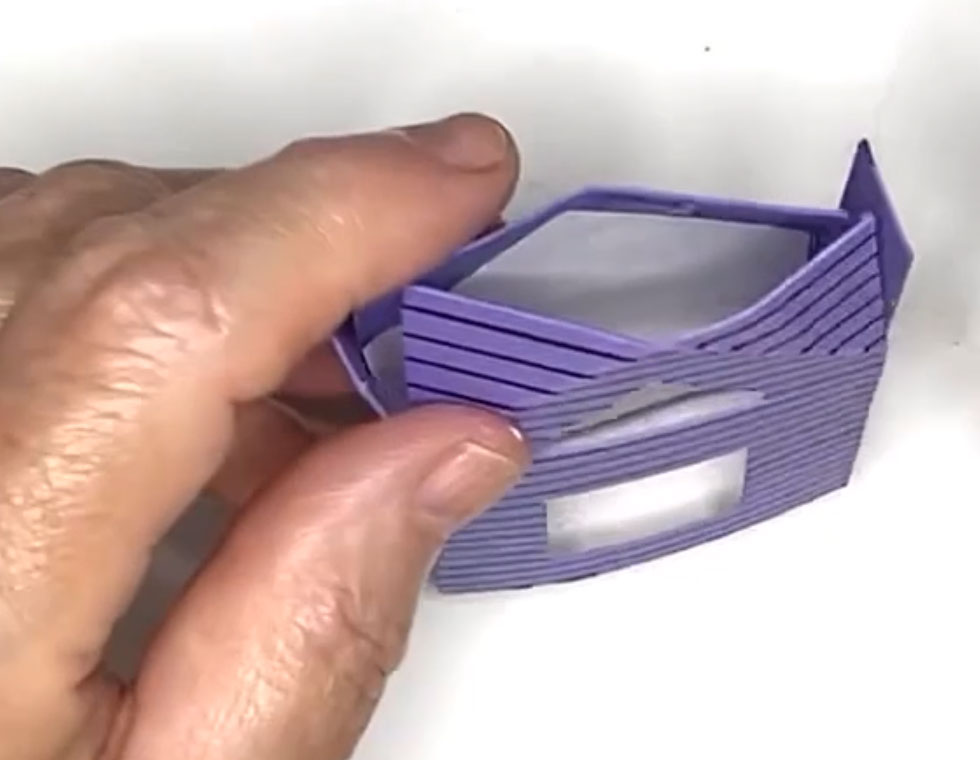
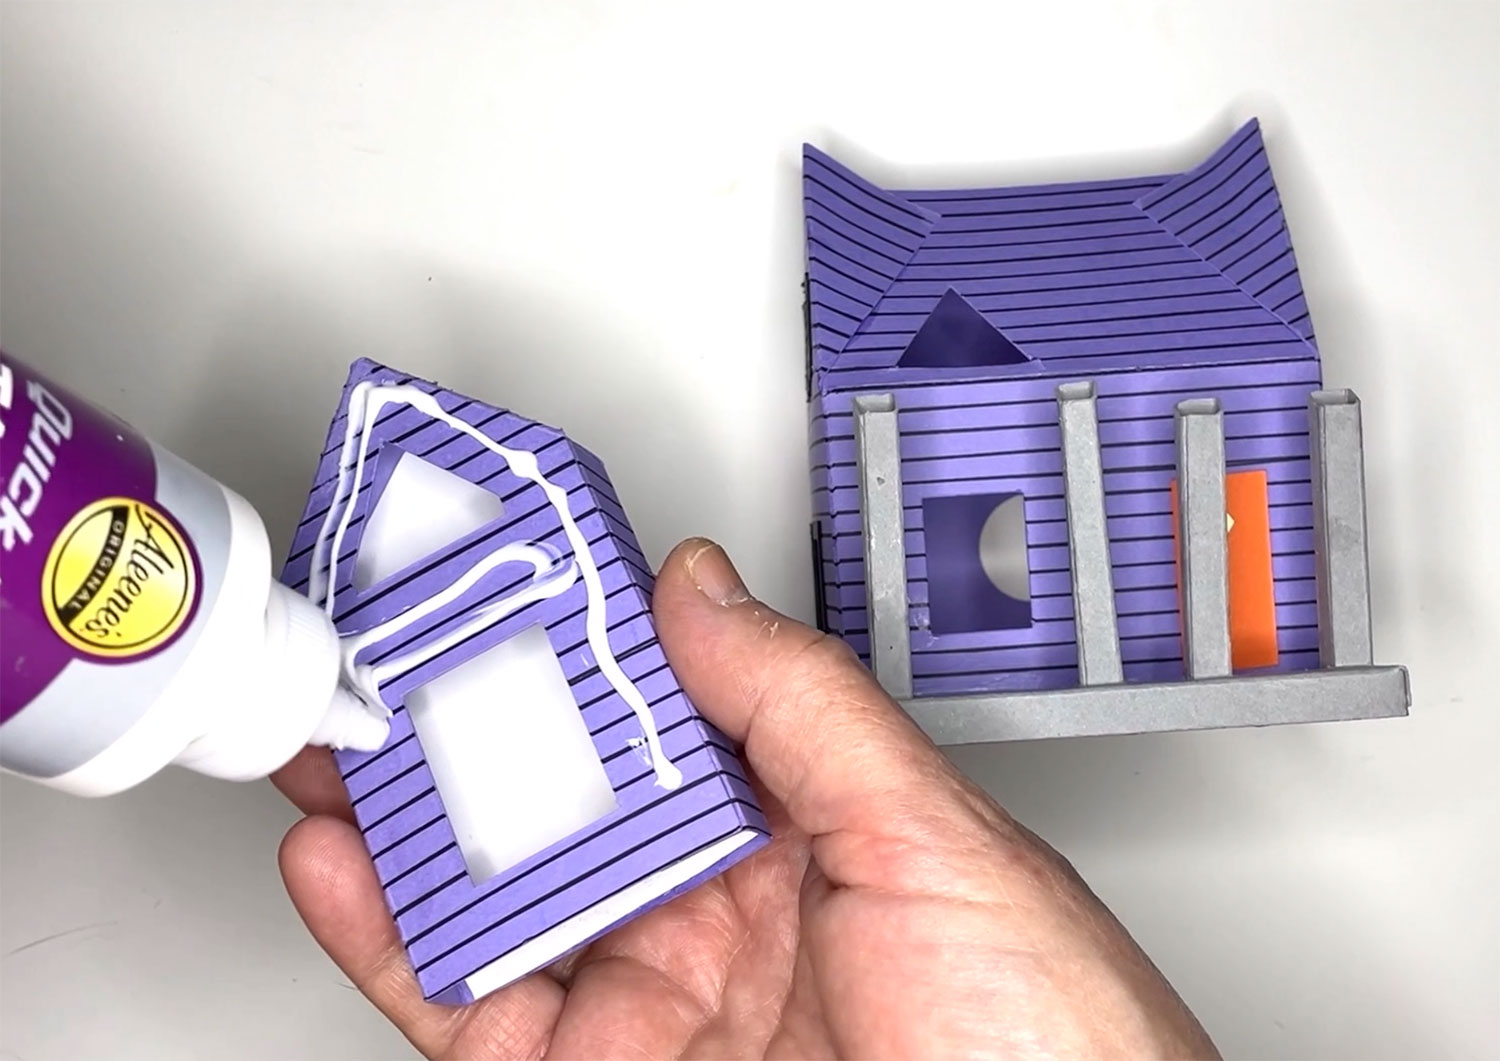
Step 7) Create the front extension
The smaller structural house piece will be the front extension. You will know this because it will make a complete rectangular shape on its own whereas the other house pieces will need two pieces to make up the house.
Apply the glue to the side tab of the front extension.
Glue together to form the front extension which should stand up by itself.
When moving on to the extension roof, make sure the two rectangular tabs are folded inwards for the triangular roof tabs to glue onto.
The triangular roof tabs will fold on top of one another (the bottom one will need to be glued to the top one).
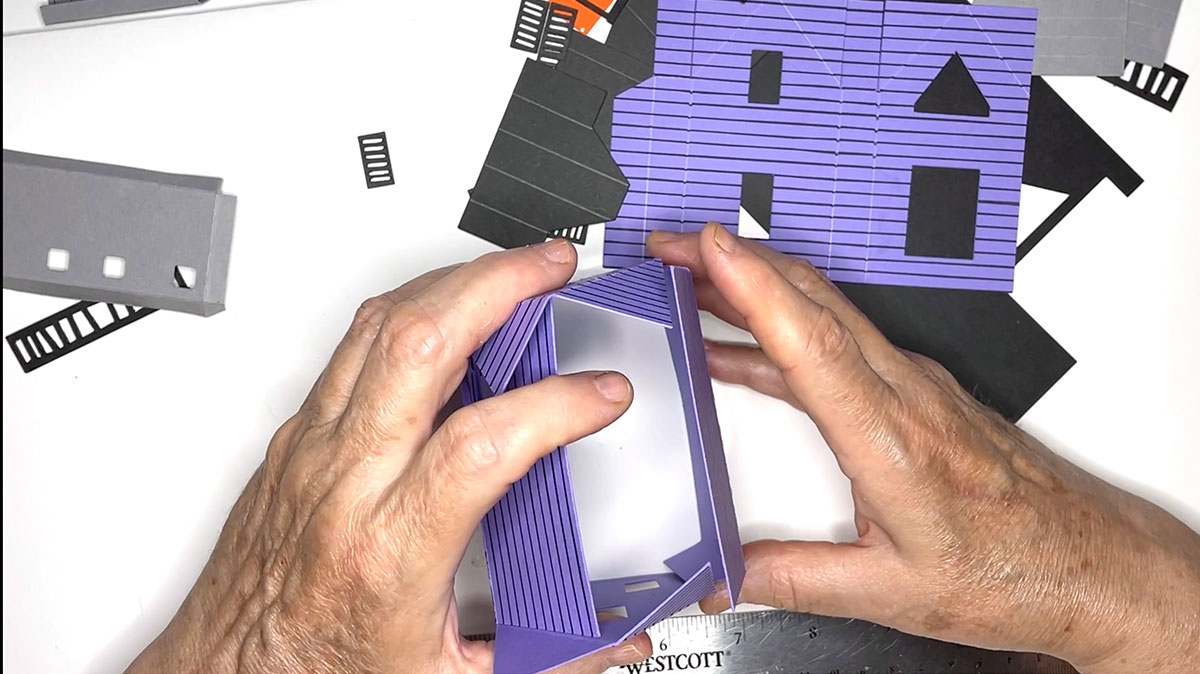
Step 8) Build the main house structure
Look out for the back piece which has a circle cut out of it. This piece and the front piece (with the door) will fix together to make the main house.
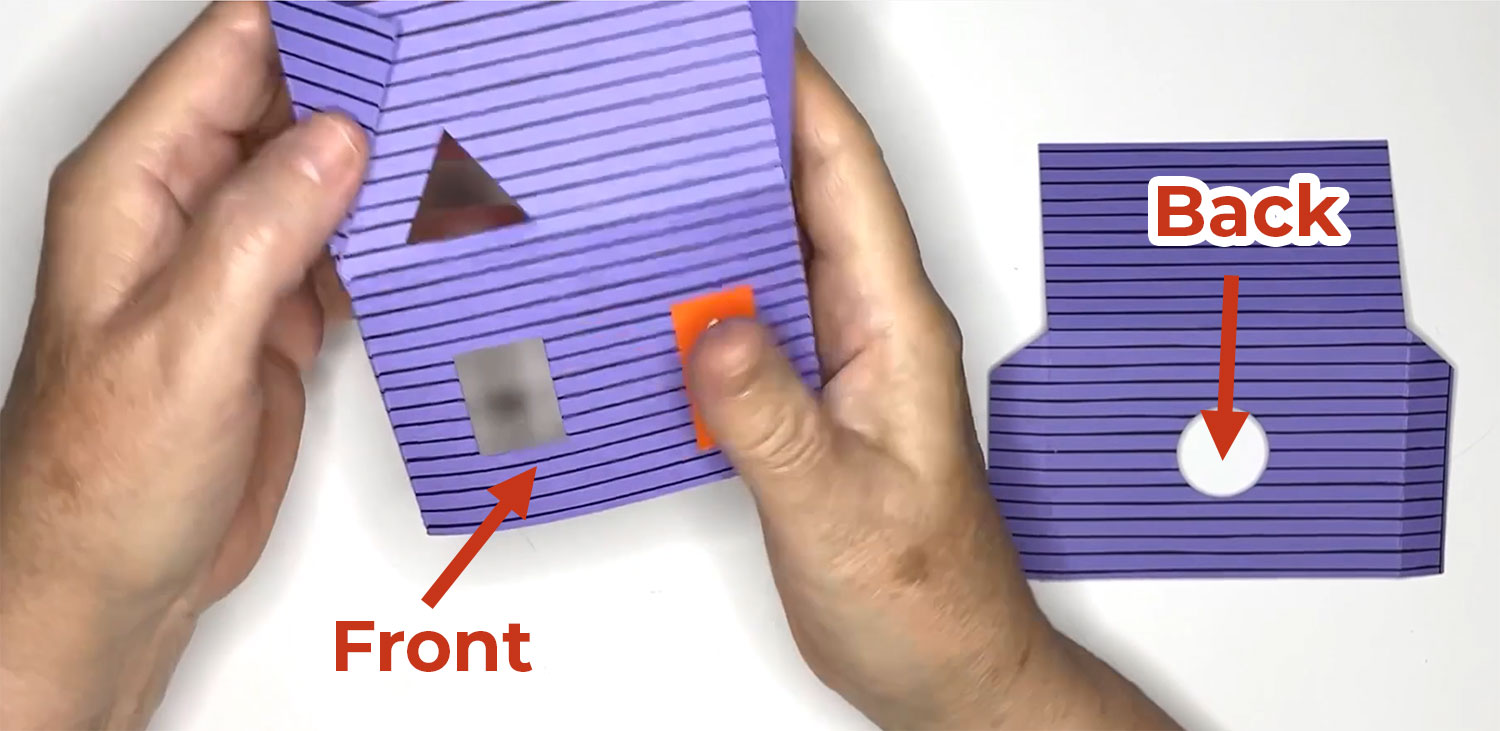
Apply glue to the tabs on the back piece and place inside the main house piece so that they fix together.

You may wish to add some painters tape or masking tape to hold it in place while the glue dries. Make sure the tape isn’t too sticky, otherwise it could damage the house.
Take care to line up the bottom sides so that they are equal, otherwise the house won’t stand up straight.
Glue the roof tabs to the flaps just like we did on the front extension.
Step 9) Attach the porch & front extension
Take the bottom of the porch and extension. Apply glue to the size furthest away from the columns and attach to the front.
You may want to use clips to hold it whilst it dries.
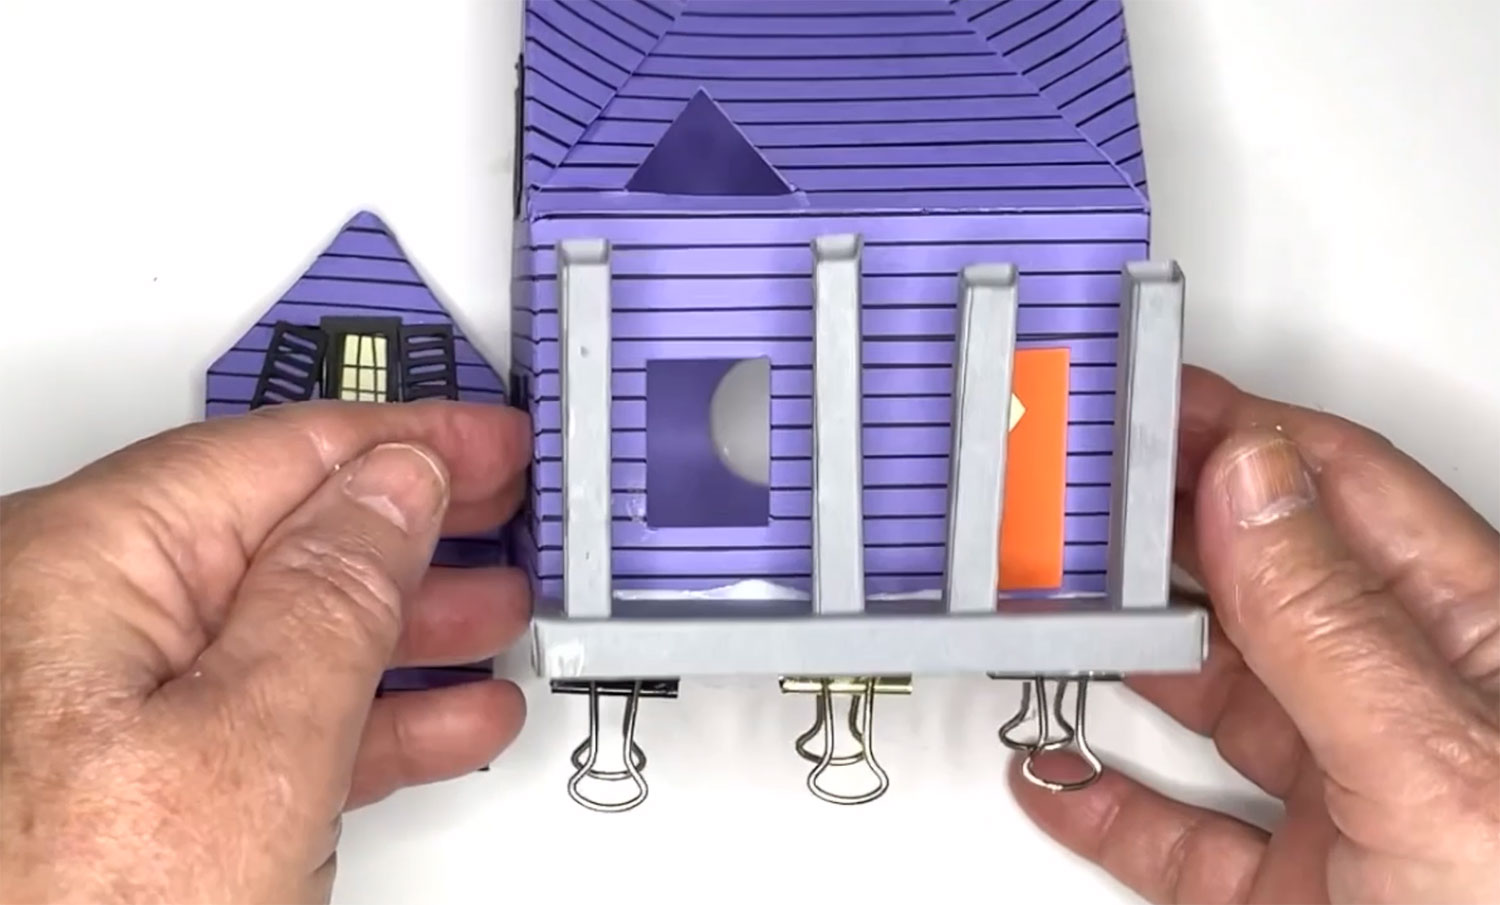
Take the front extension piece and add glue to the back and the bottom.
Slide the piece down so that it sits on top of the porch, matching the openings on the main structure and the extension.
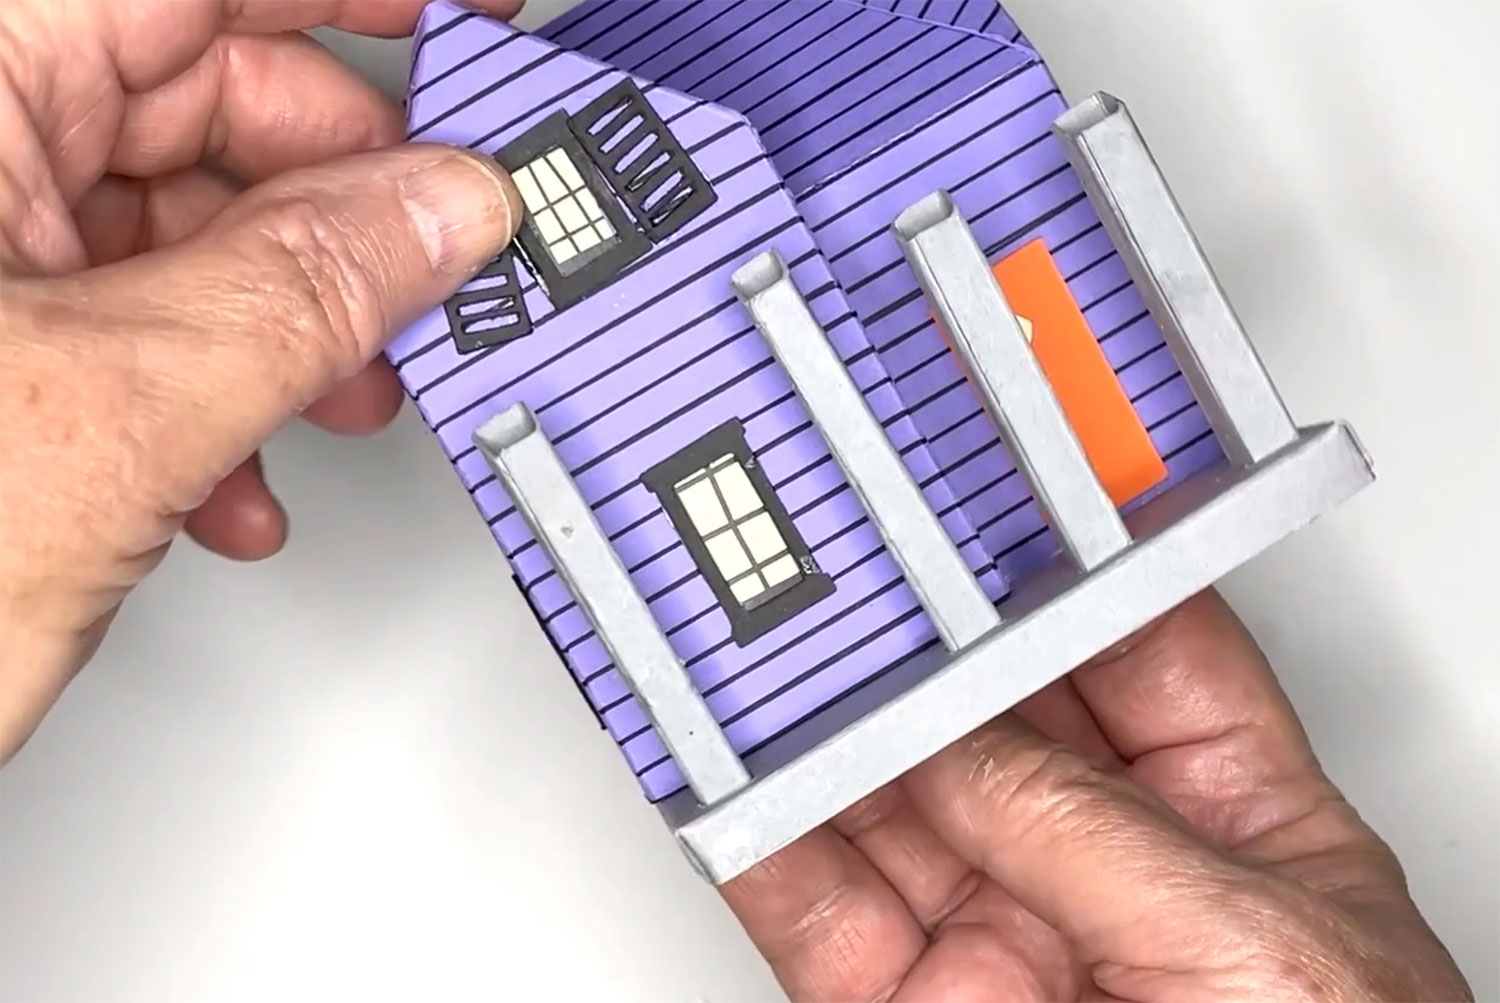
Glue the railings to the columns on the outside of the porch.
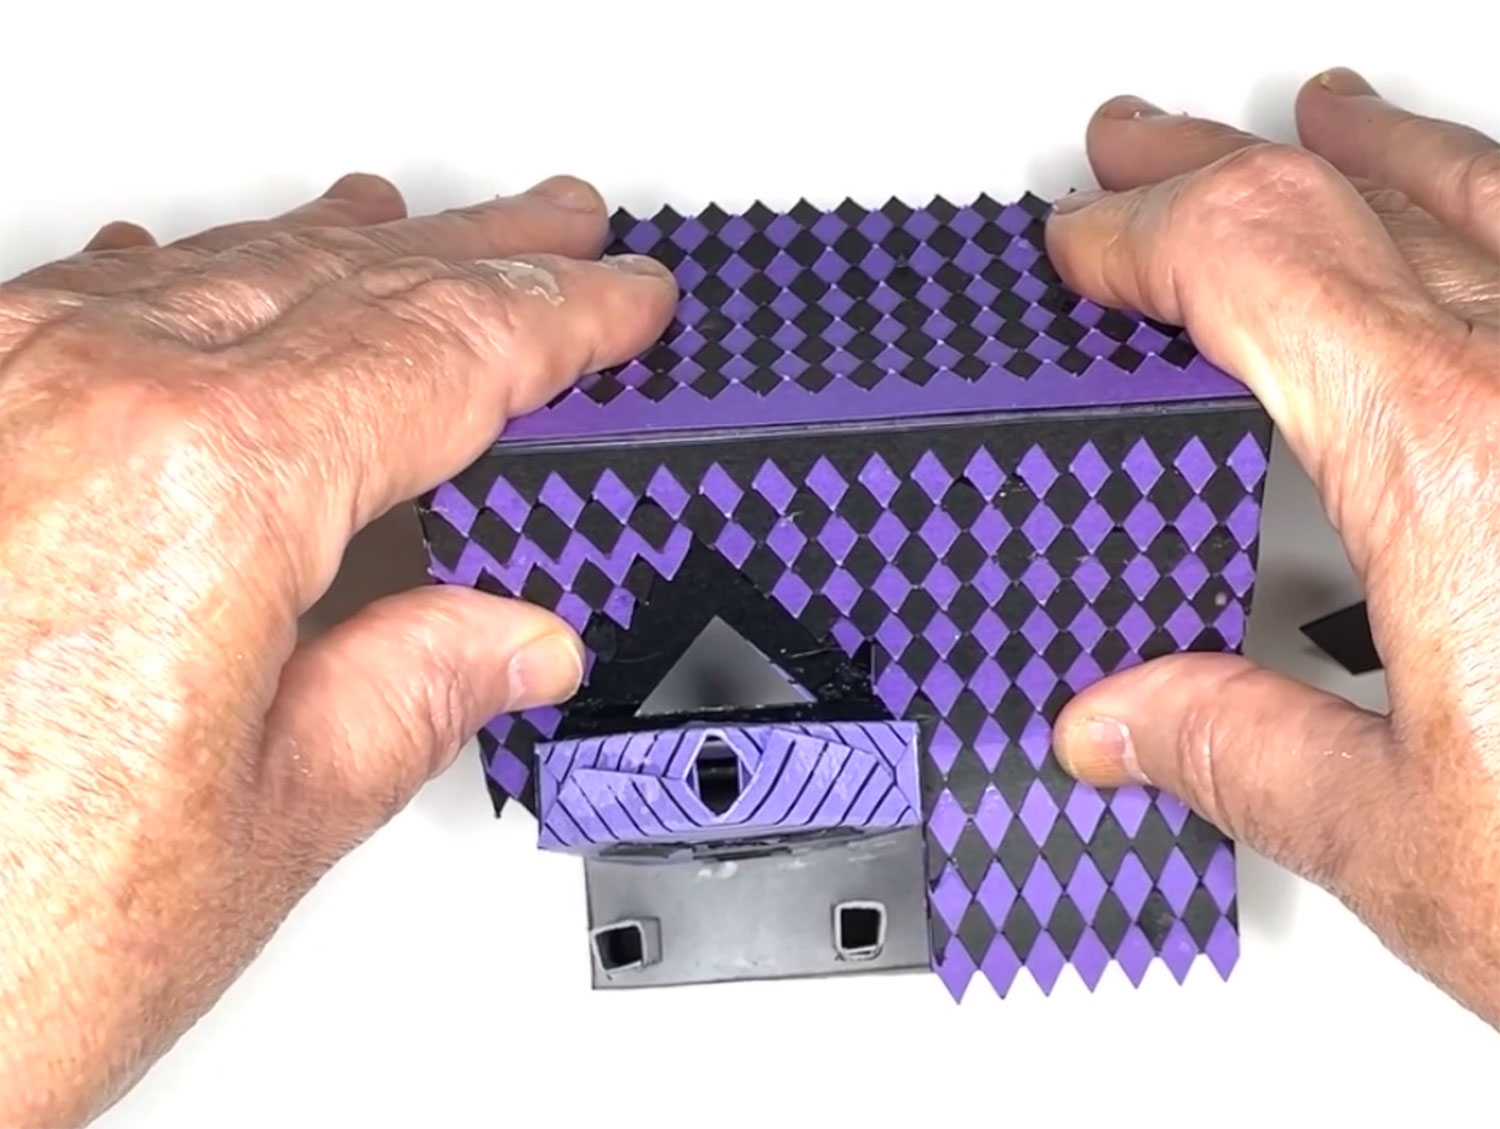
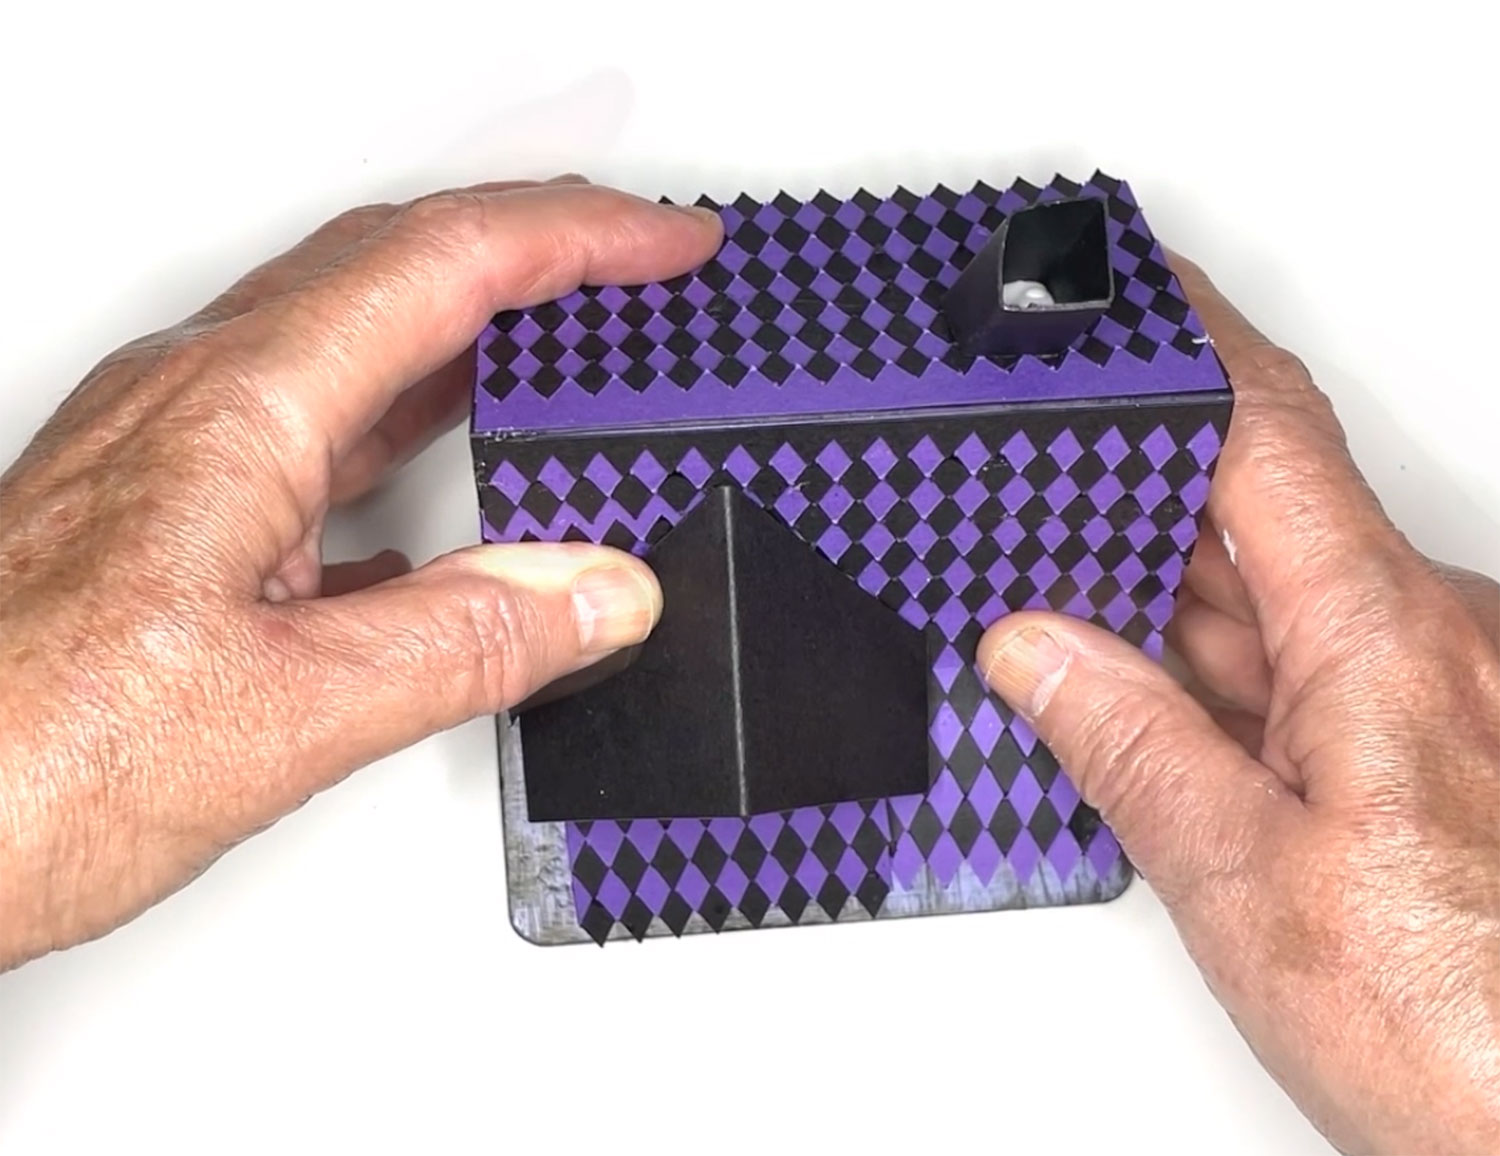
Step 10) Attaching the roof pieces
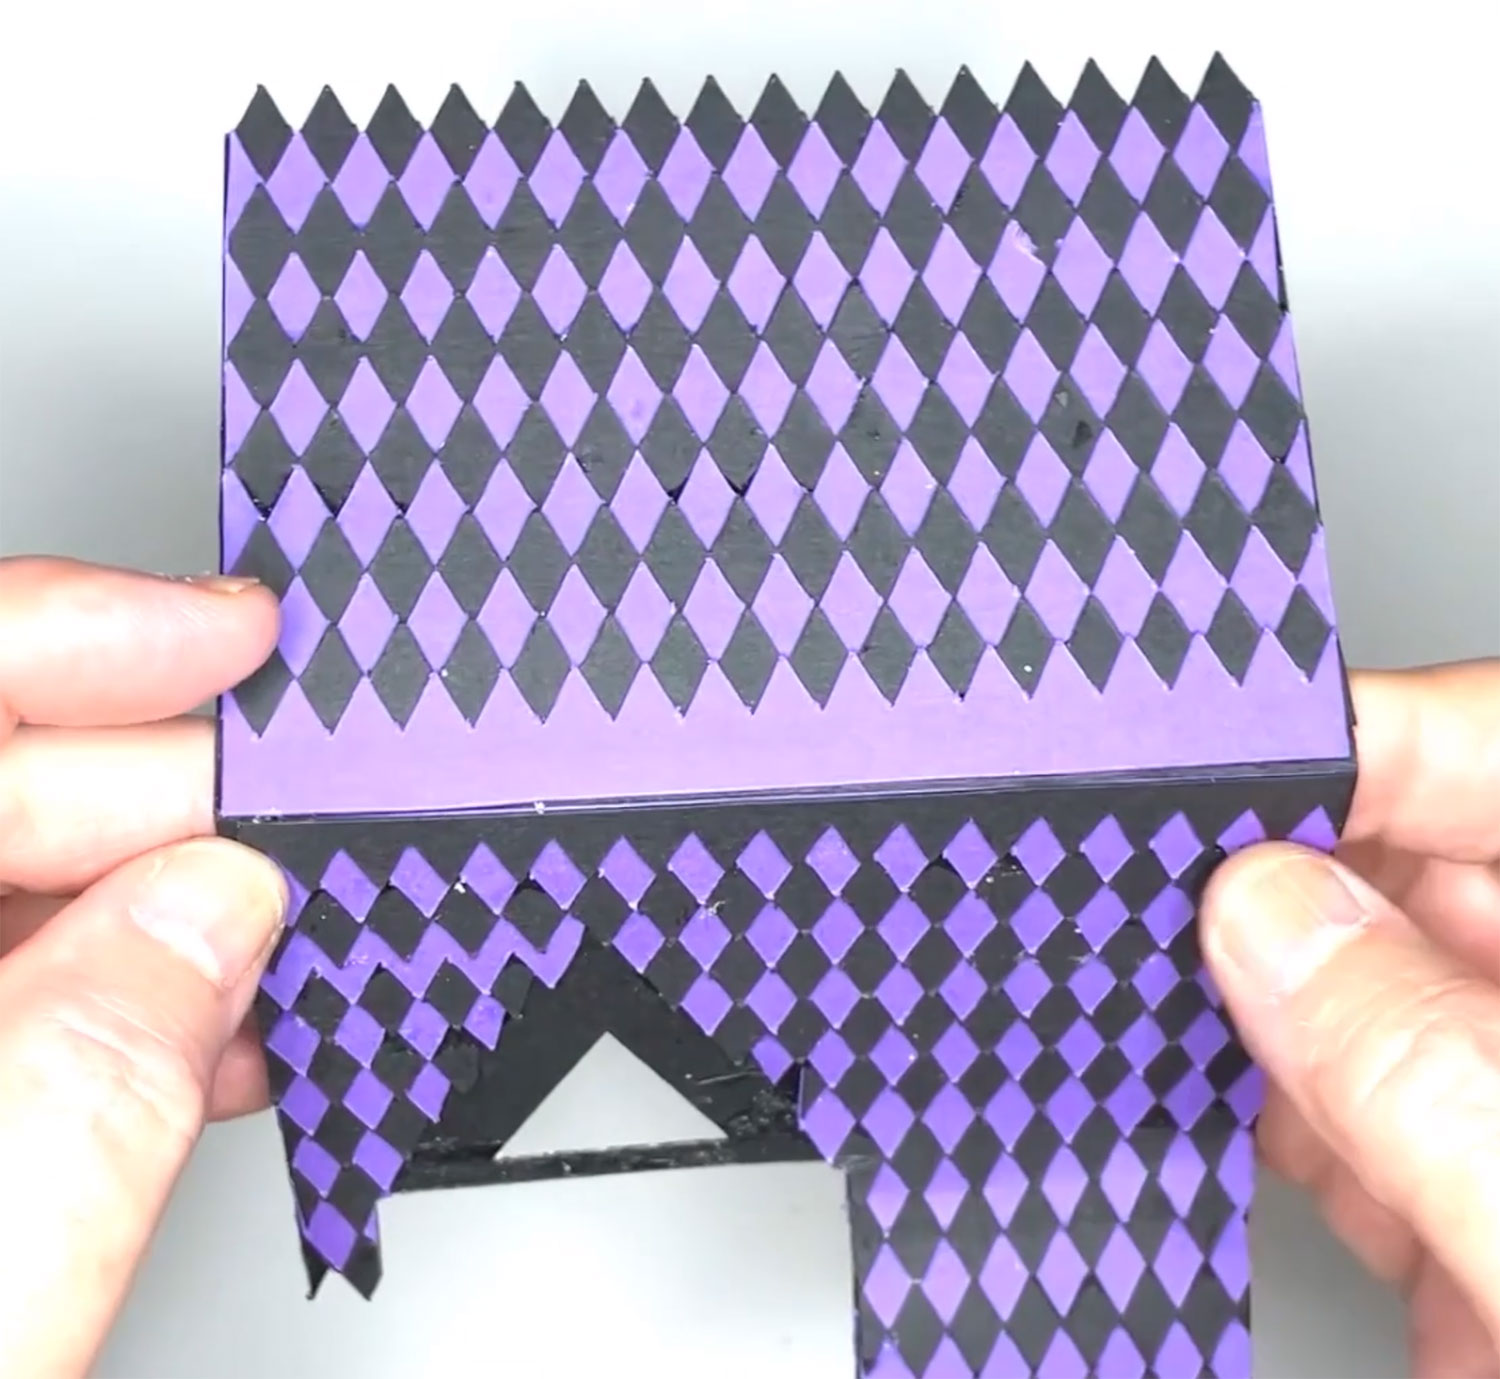
For the optional shingle roof, alternate the two colours of the strips to make diamond shapes. Stick them together, cut to size and glue to the roof piece.
Make sure you don’t cover the gaps in the roof.

It will end up looking something like this:
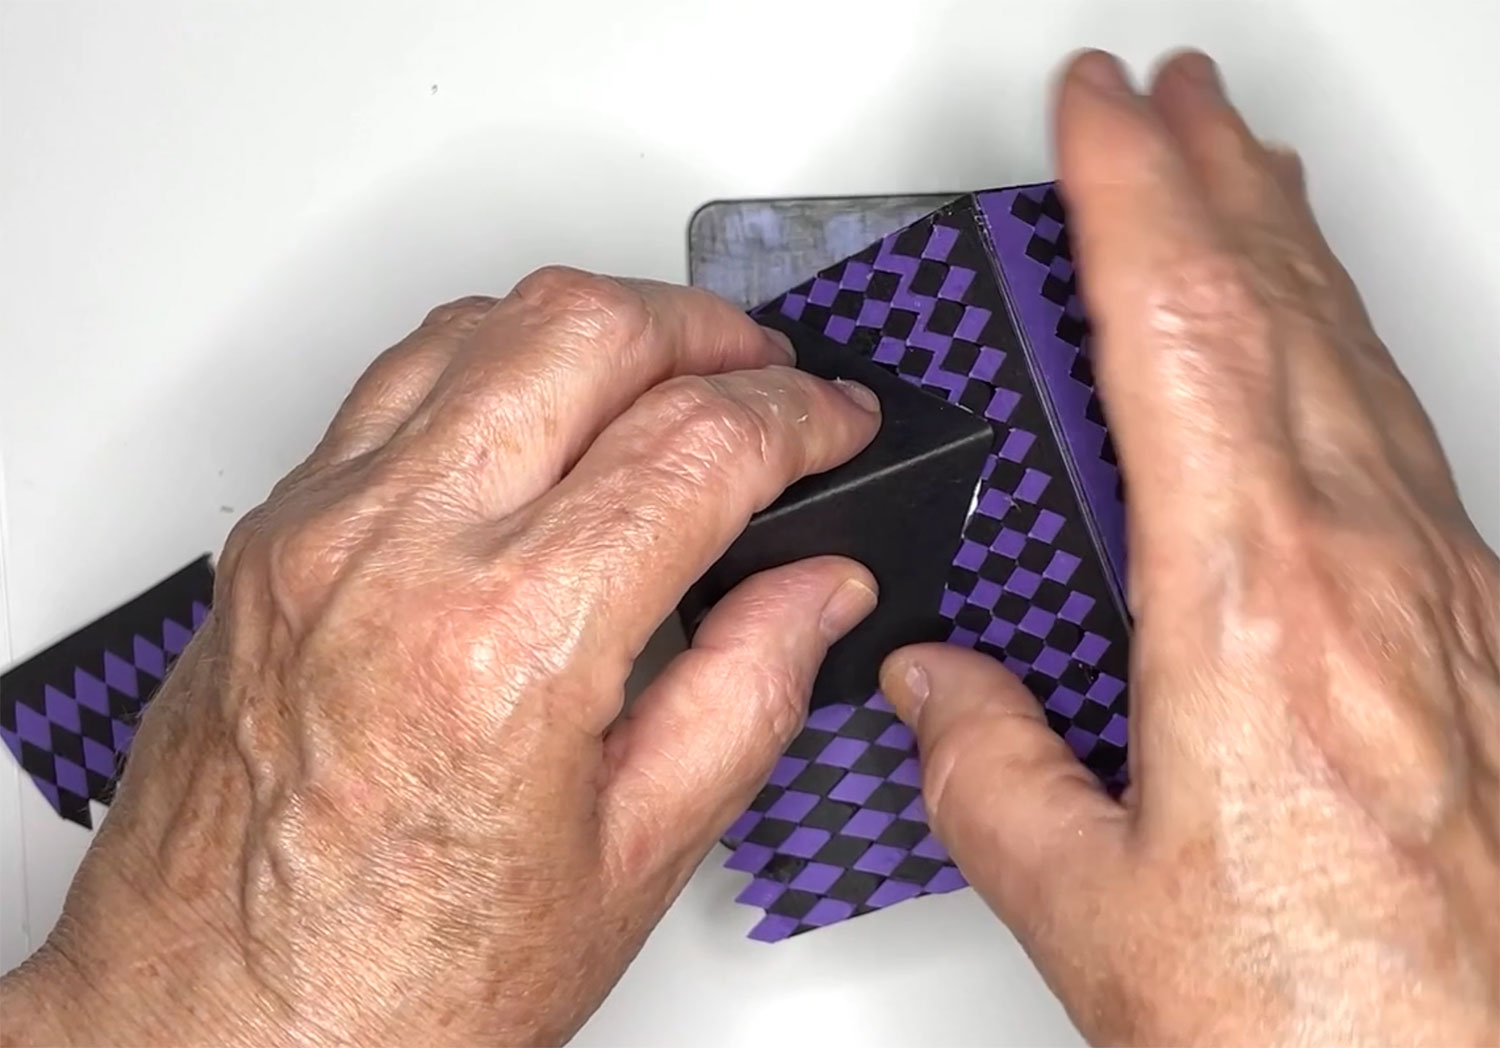
Make sure the tabs on top of the roof are folded and glued like this:
Glue your roof on top of the house structure. Take care to make sure you add glue to the edges as they will touch the roof the most.
Side it down in place and the overhang will be about ¼ inch on both sides.
Apply glue to the extension roof on the angled side which goes against the house.
Add the chimney piece into the top.
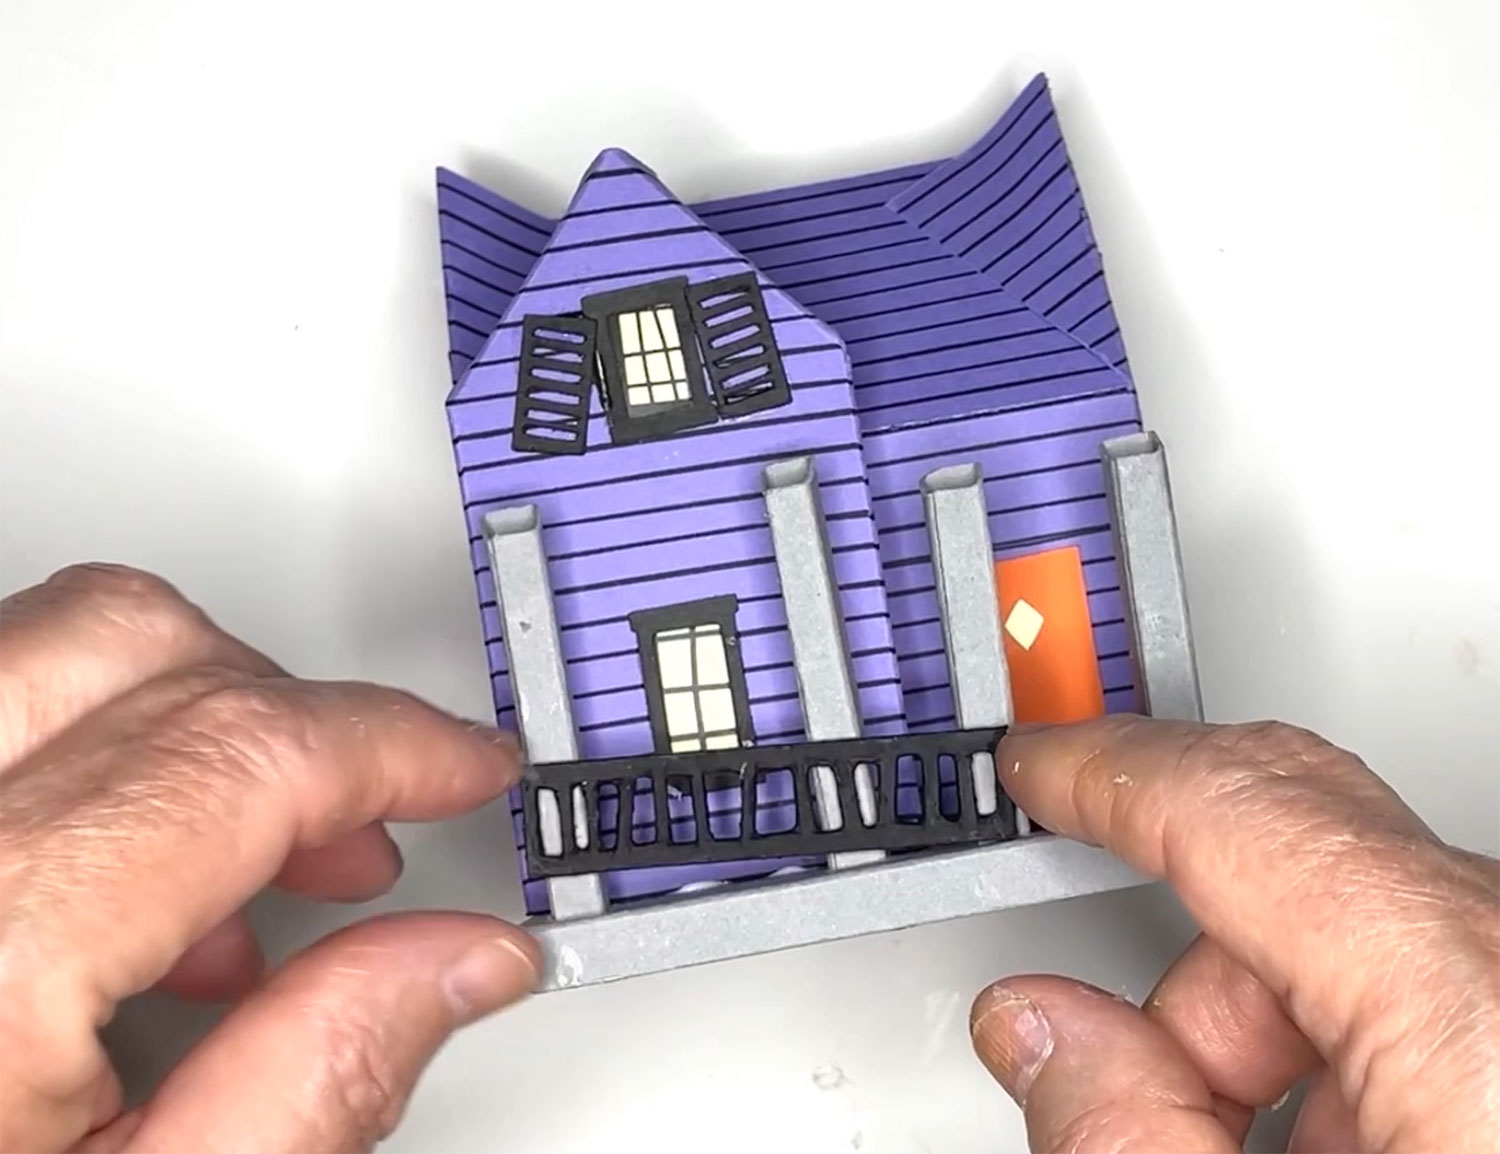
Attach the final porch piece by gluing the tab and the top of the two remaining columns. Secure just under the window.
Step 11) Mount the Haunted House on the base
Glue the two base pieces together to make a stronger bottom for the house to stand on.
Add glue to all the contact points on the bottom of the house.
Place the house centrally on the base.
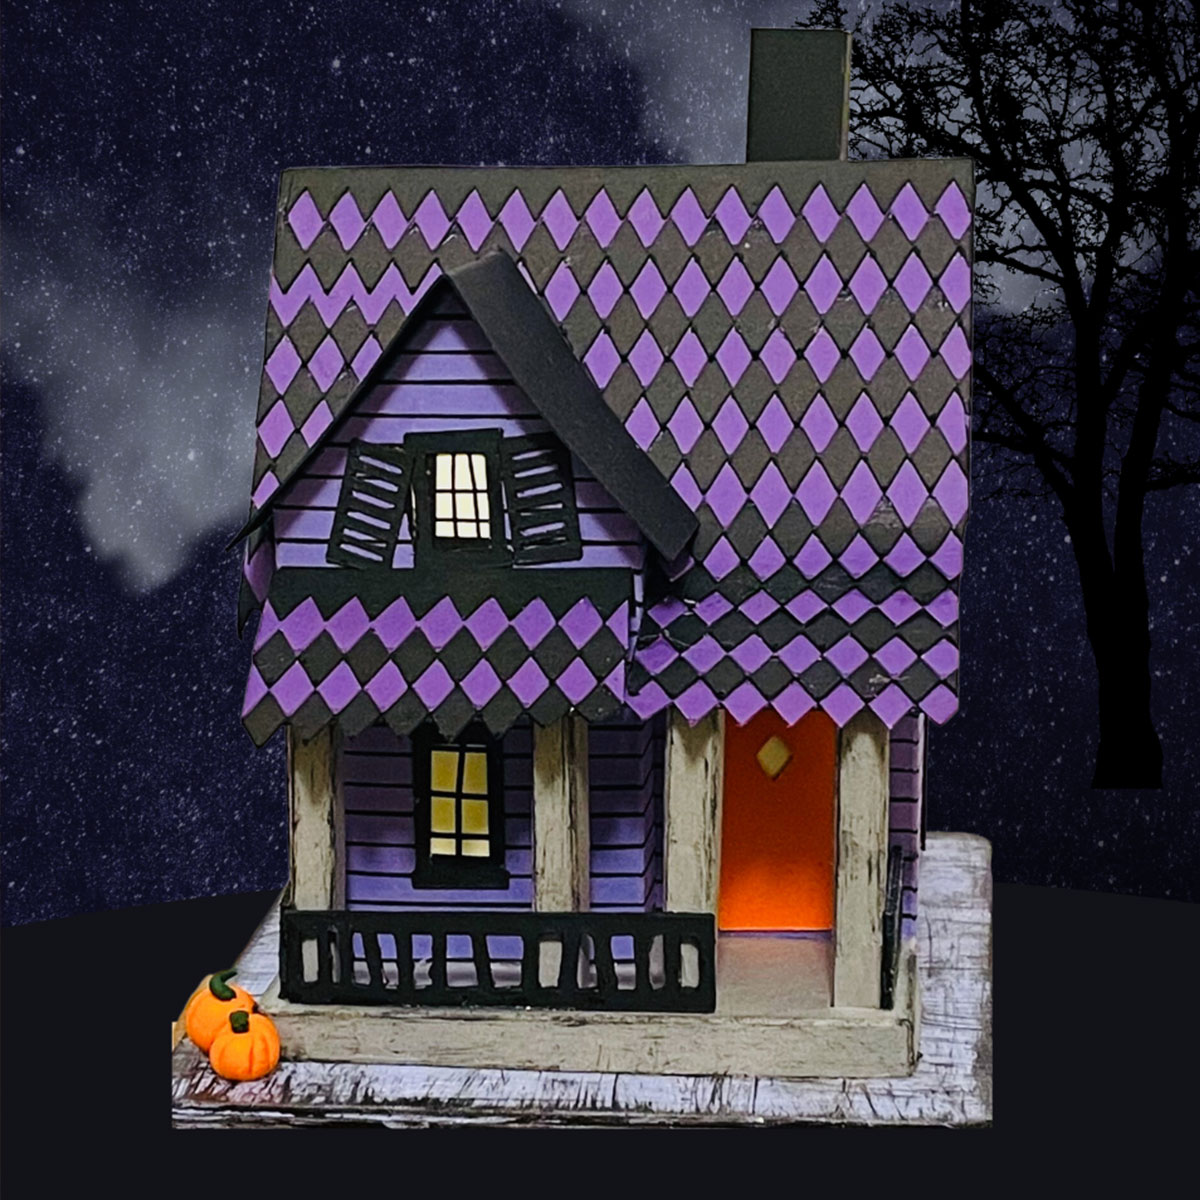
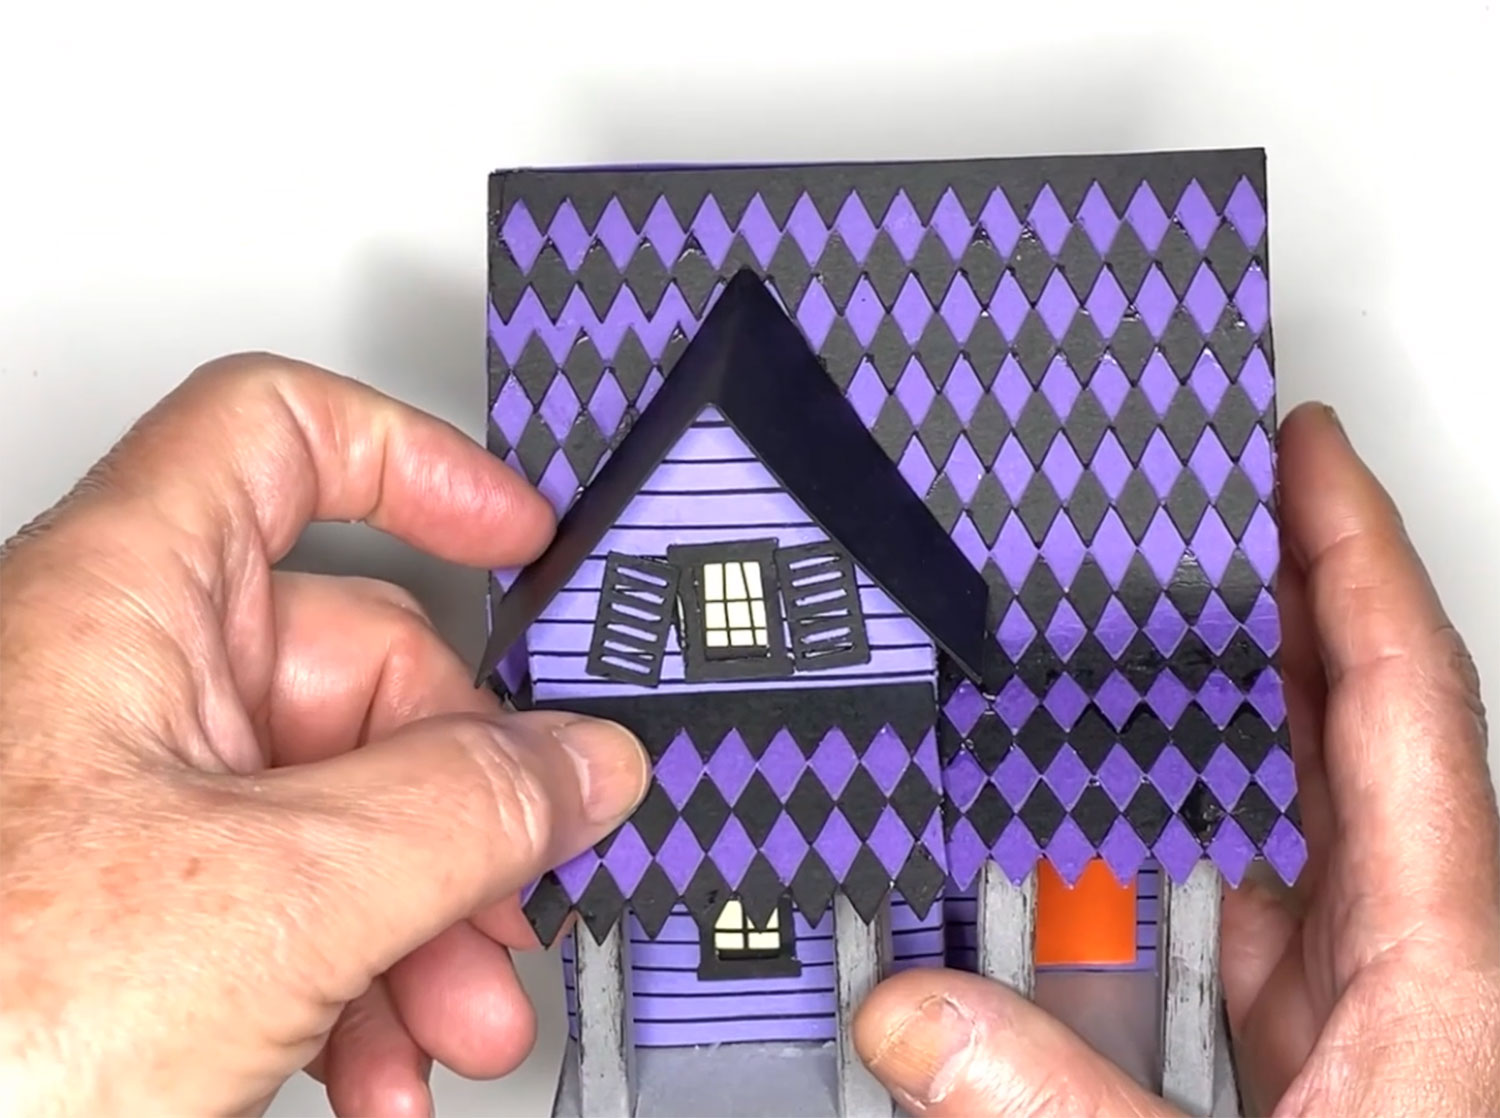
3D Haunted Mansion Putz House for Halloween
I hope you enjoyed following along with this Haunted House tutorial!
I love all the different ways that you can customise these so that they look extra spooky. I can’t wait to see what different colours and details you add to your Haunted House.

Happy crafting,
Sarah x

