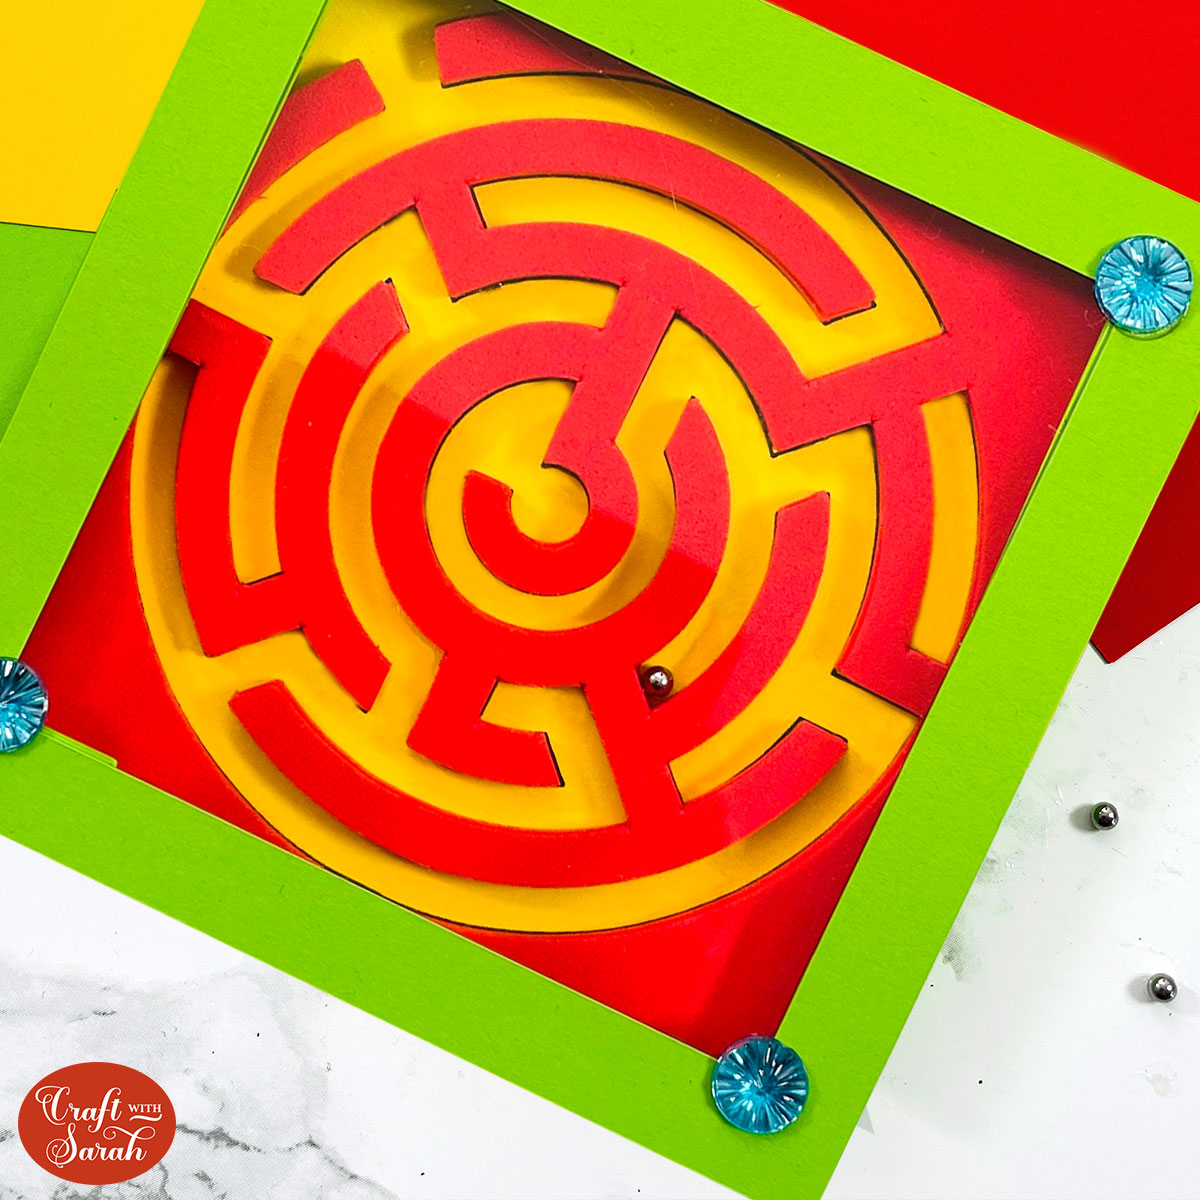
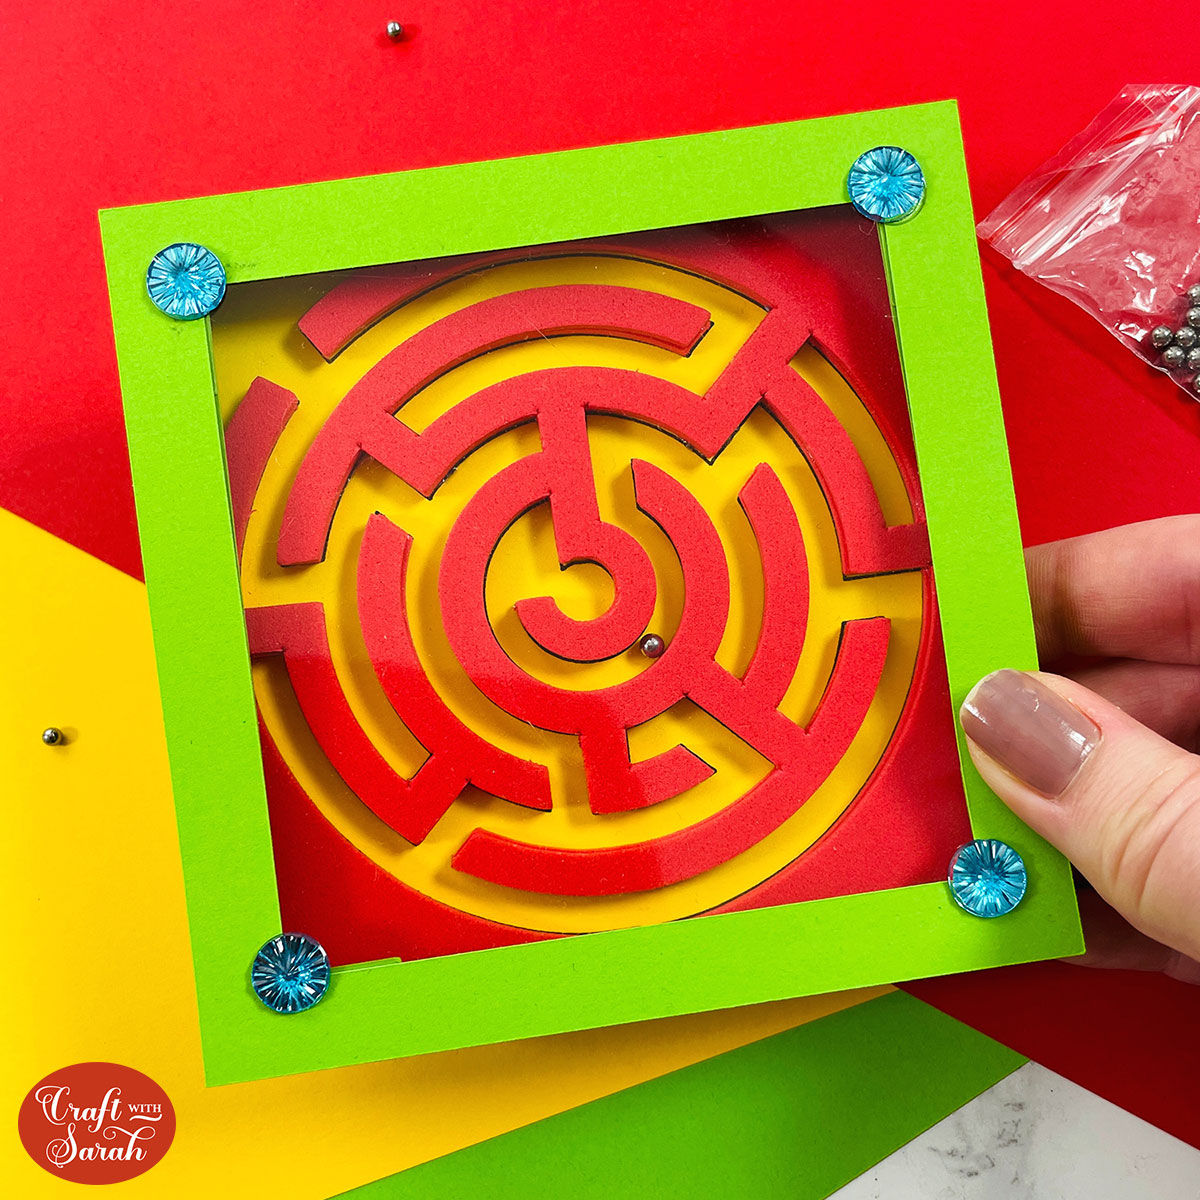
DIY Maze Puzzle Game 🤩 Make A Ball Bearing Maze Game
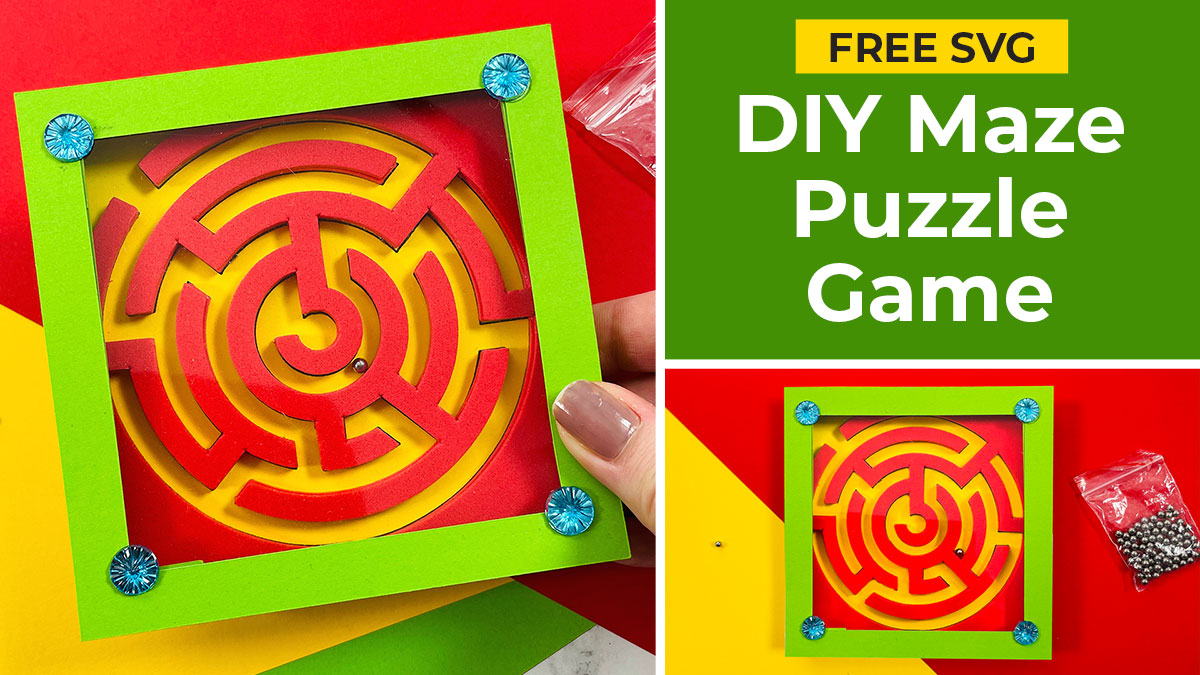
Make an interactive maze game with your Cricut machine, with craft foam and acetate to build the box around it.
These ball bearing maze games make lovely gifts, but only once you’ve had a play with them yourself…
I’m not very good at getting the ball bearing into the middle of the maze, but I’m getting better. Once I get started, I don’t want to put it down until I’ve managed to solve it!
This is a fun way to try out some new materials with your Cricut machine. We will be using craft foam and acetate along with cardstock and pens to create the structure of the maze game.
These would be great in party bags for older children. However, they are not recommended for young children due to the small parts.
The maze game is similar to the ball bearing game I released recently where there were three balls to get in the holes. You could make that one too, for a matching pair!
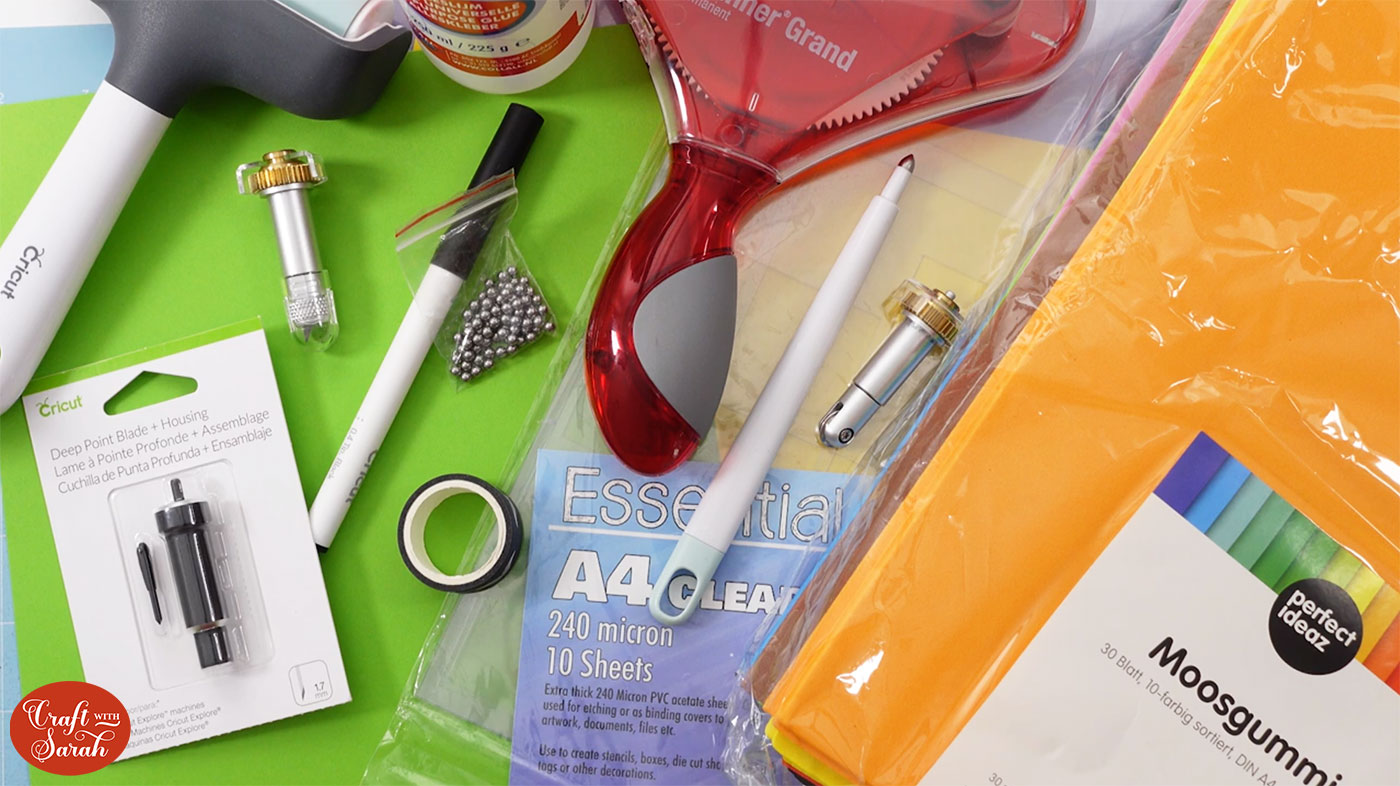
Materials supply list
Here is a list of the materials that are used to make this project.
Please note that some of the links included in this article are affiliate links, which means that if you click through and make a purchase I may receive a commission (at no additional cost to you). You can read my full disclosure at the bottom of the page.
- Cricut machine
- Light blue Cricut cutting mat
- Strong grip Cricut cutting mat
- Cricut scoring wheel or Scoring Stylus
- Coloured Card
- Collall All Purpose Glue or similar
- Needle Tip Applicator Bottle (optional)
- Double-sided tape
- Acetate
- Ball bearing (approx 3mm in size)
- Fun foam
- Cricut pen, ideally in a similar colour to your base cardstock
- Deep point blade or knife blade
- Washi tape, painters tape, masking tape or similar
- Sticky gemstones to decorate (optional)
This project is suitable for the following types of Cricut machine: Explore Air 2, Explore Air 3, Maker and Maker 3.
Video tutorial
Watch the video below to see how to make your own ball bearing maze game.
If you prefer to read rather than watch, keep scrolling!
DIY Maze Game Tutorial
Make maze puzzle games reminiscent of your childhood… but this time, from cardstock using your Cricut machine!
Step 1) Download the cutting file(s) & unzip the downloaded folder
Download the files using the box below.
Download the Free Cutting File
Please login to your account to download this file.
TERMS OF USE:
You may sell finished, handmade physical craft items that you have made using this product but must not sell or share the digital files. Read full terms of use
Before you upload the SVG to Design Space, you need to unzip the download folder that it comes in.
Step 2) Upload the SVG file and printable into Design Space
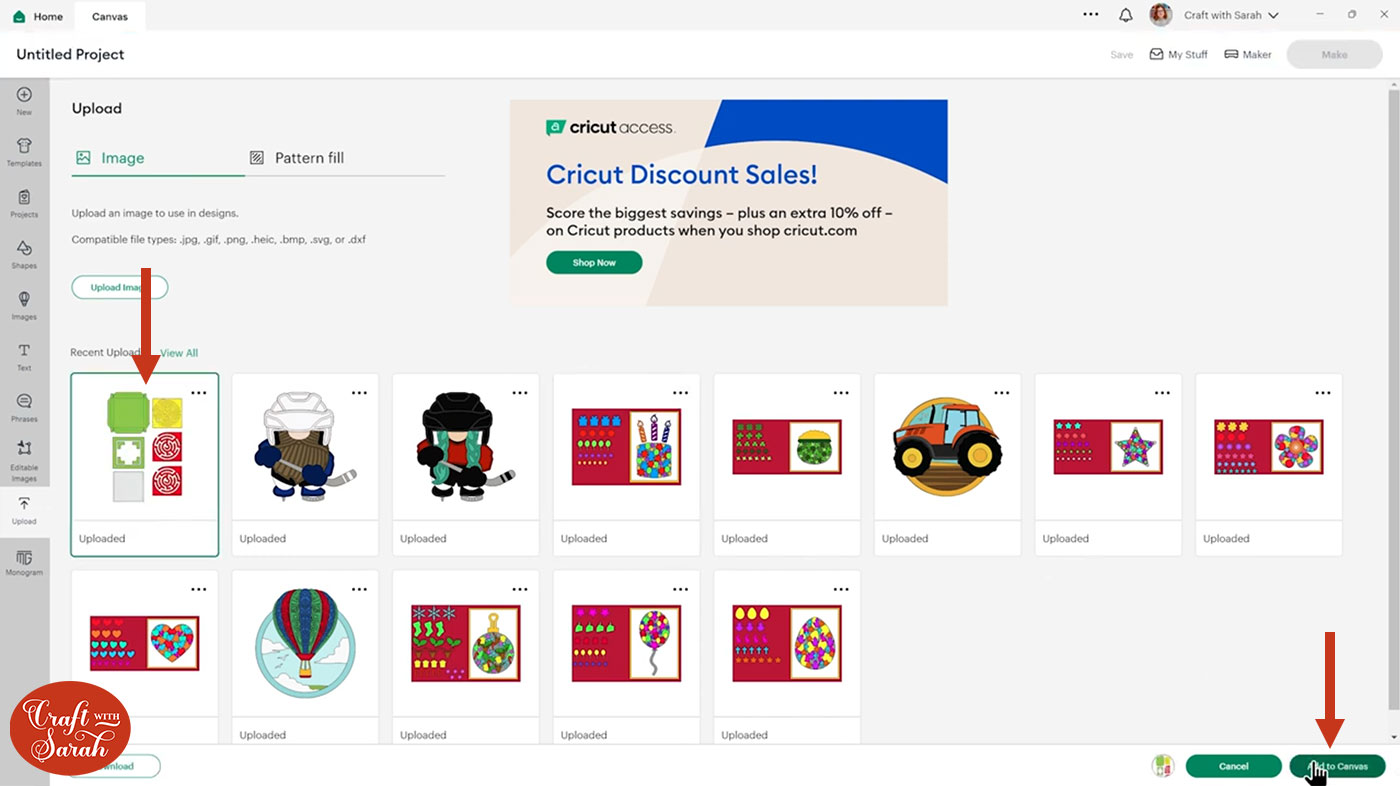
Open up Cricut Design Space and start a new Project.
Click “Upload” and then find your unzipped version of the downloaded files for this project.

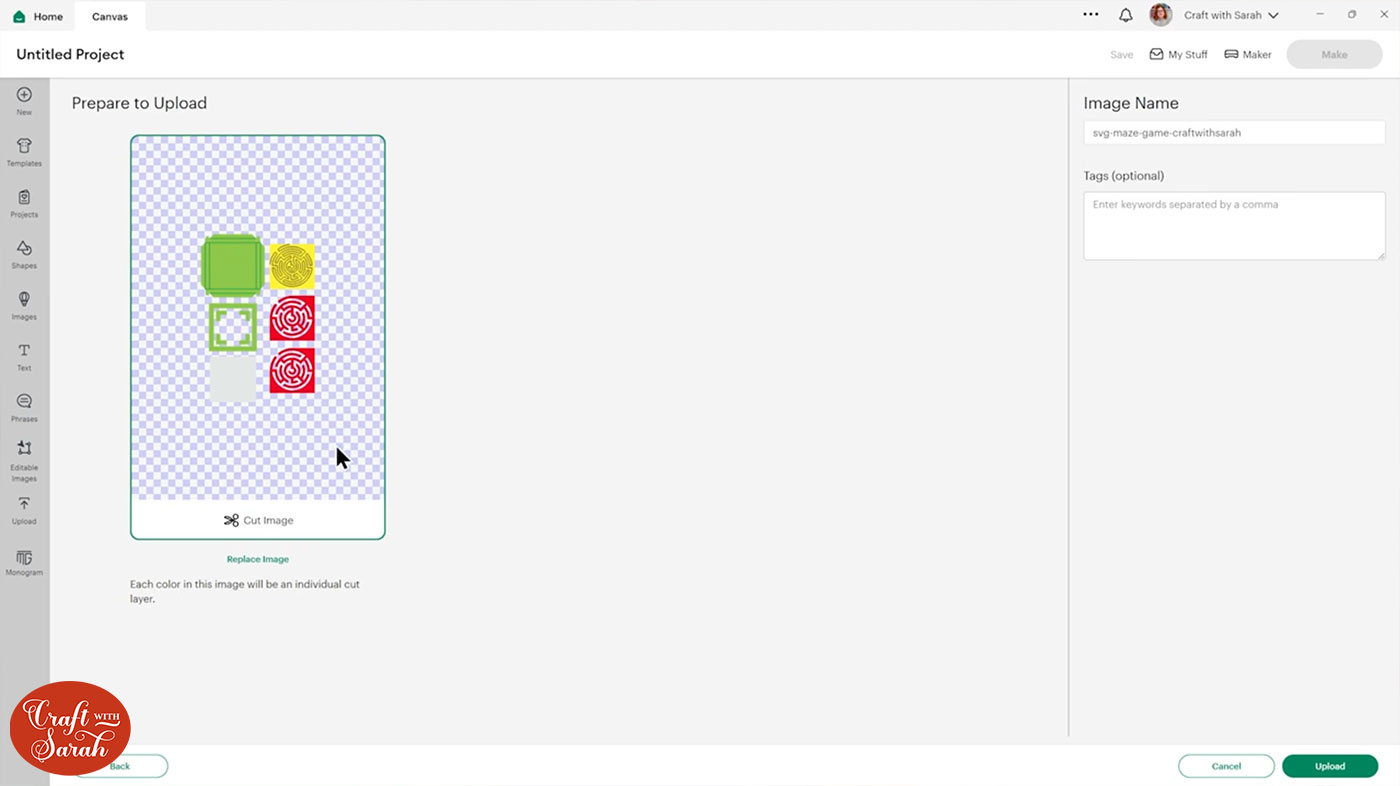
The file to upload for Cricut Design Space is the one called svg-maze-game-craftwithsarah.svg
Make sure you upload the file which starts svg- in the filename!!
This is how it should look after you have selected the file:
Click on it in your “Recent Uploads” and then press “Add to Canvas” to put it onto your Project.
It will load in at a suitable size to make. I don’t recommend making it any smaller as it will be really difficult for the ball bearings to get around the maze.
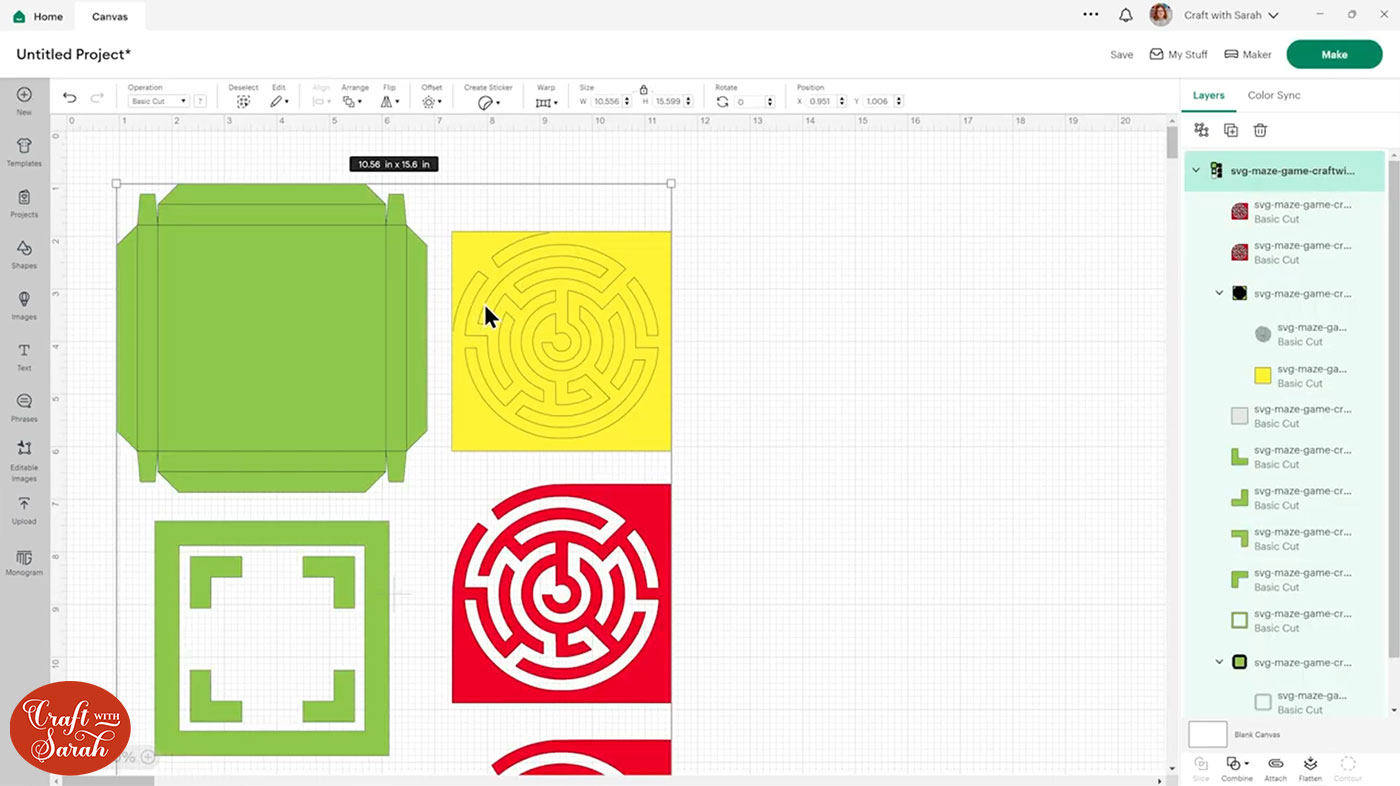
This is a nice size for ball bearings which are about 3mm big. If your ball bearings are bigger then you will need to make the maze larger to compensate.
If you are resizing it, make sure everything is selected and that the padlock icon at the top is closed.

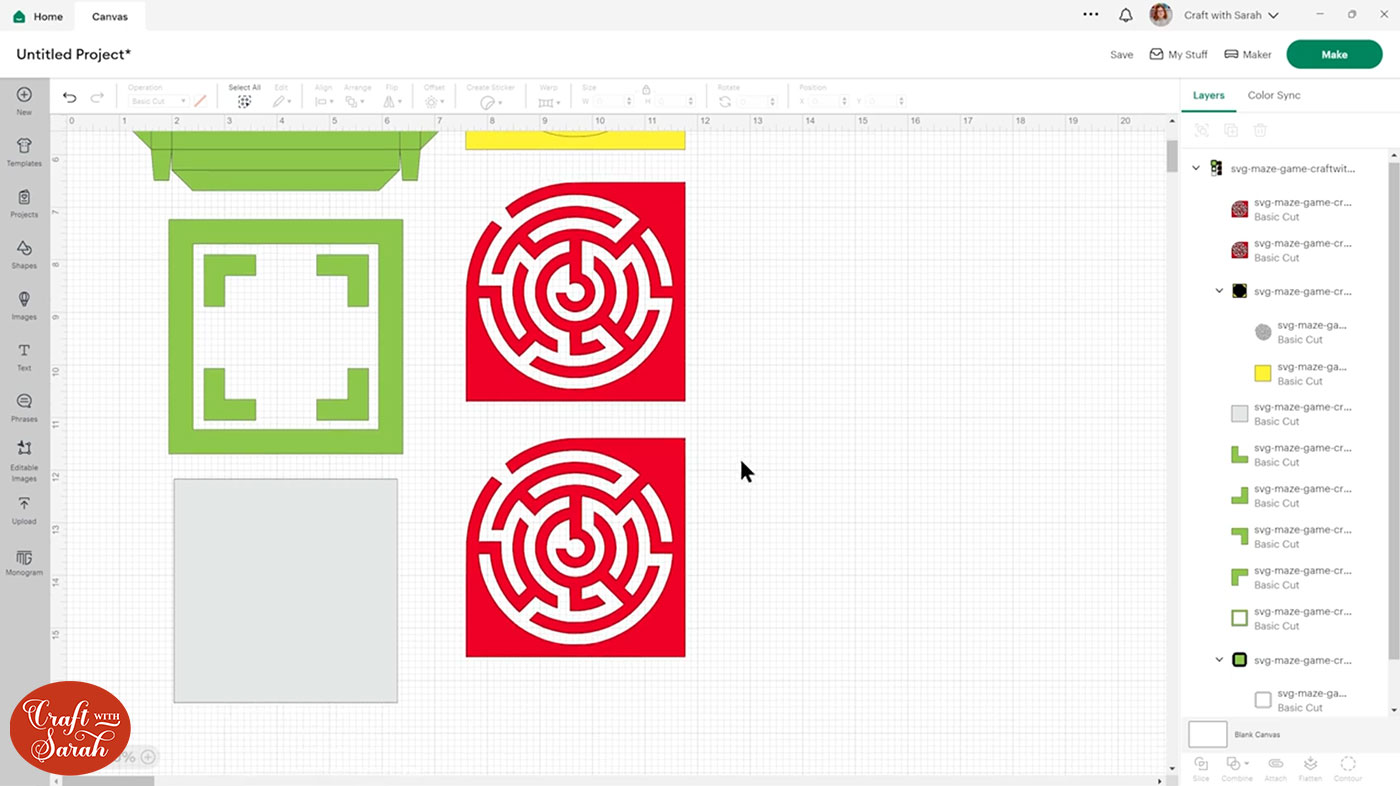
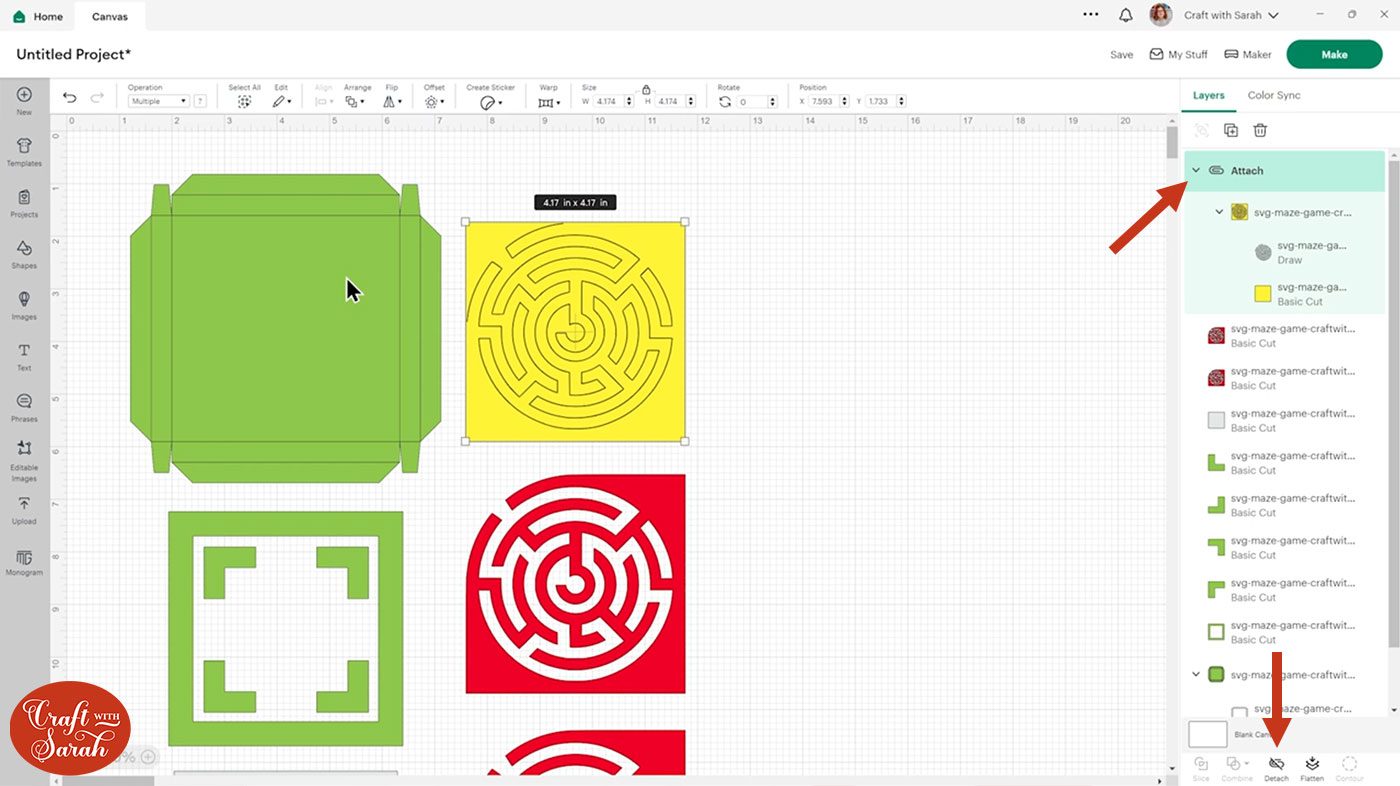
Before we start on formatting this design to make it suitable to cut, let’s go through the different parts that make it up.
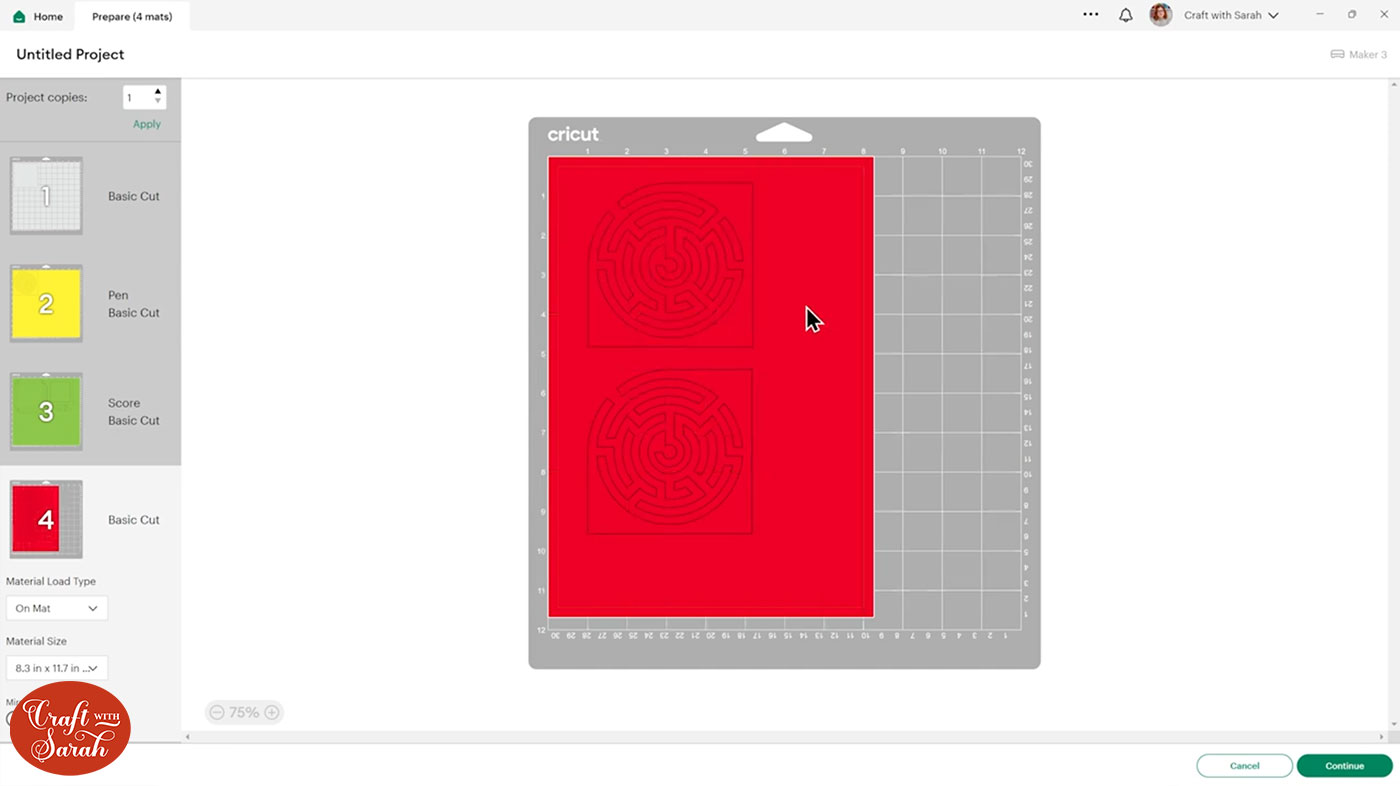
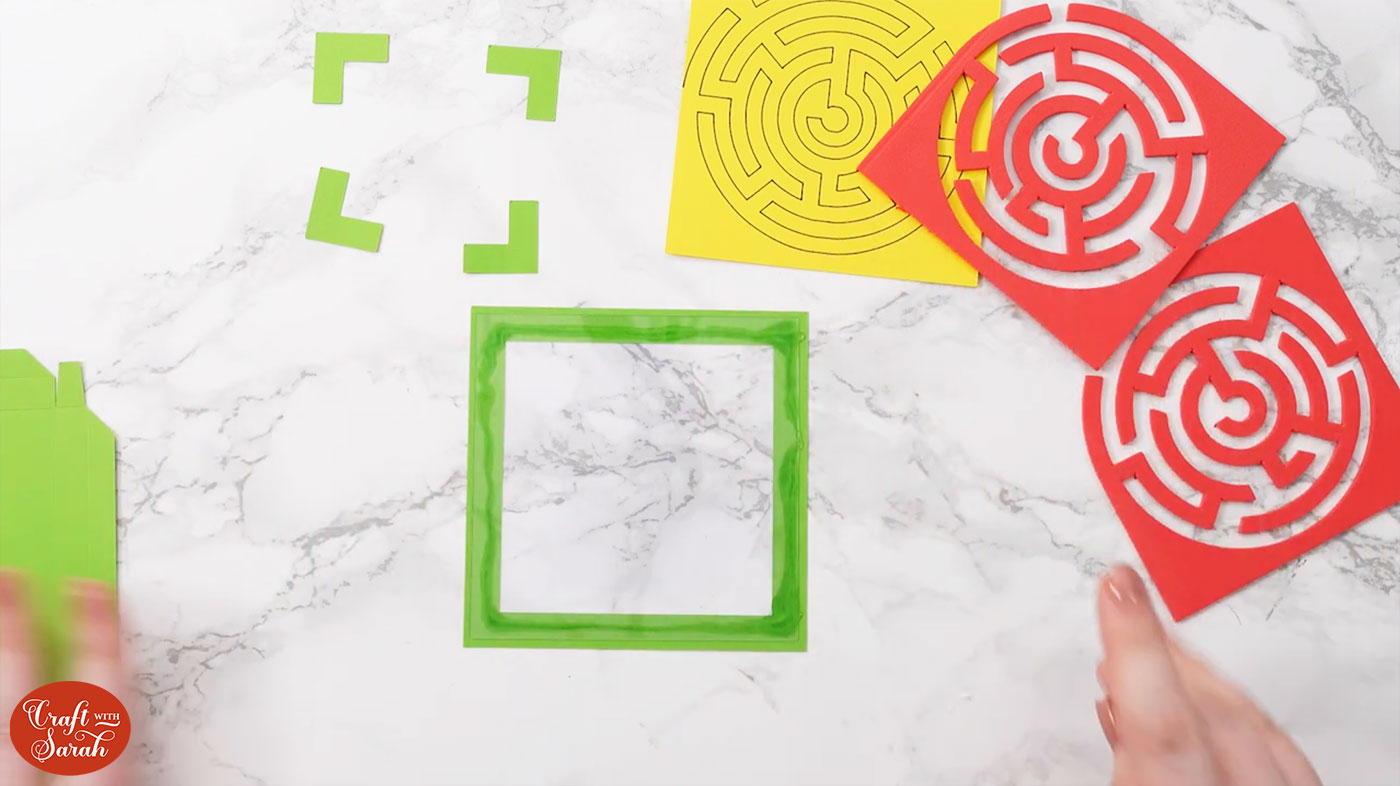
The green squares make up the top and bottom of the box. These will be cut from cardstock.
The yellow square with the maze outline will be a piece of cardstock which we will draw the maze onto using the Cricut pen.
The two red copies of the maze will be cut from fun foam. These layers will build up the walls of the maze to give it some dimension.
The grey square will be cut from acetate so that you can see through to the maze.
Step 3) Format the maze design
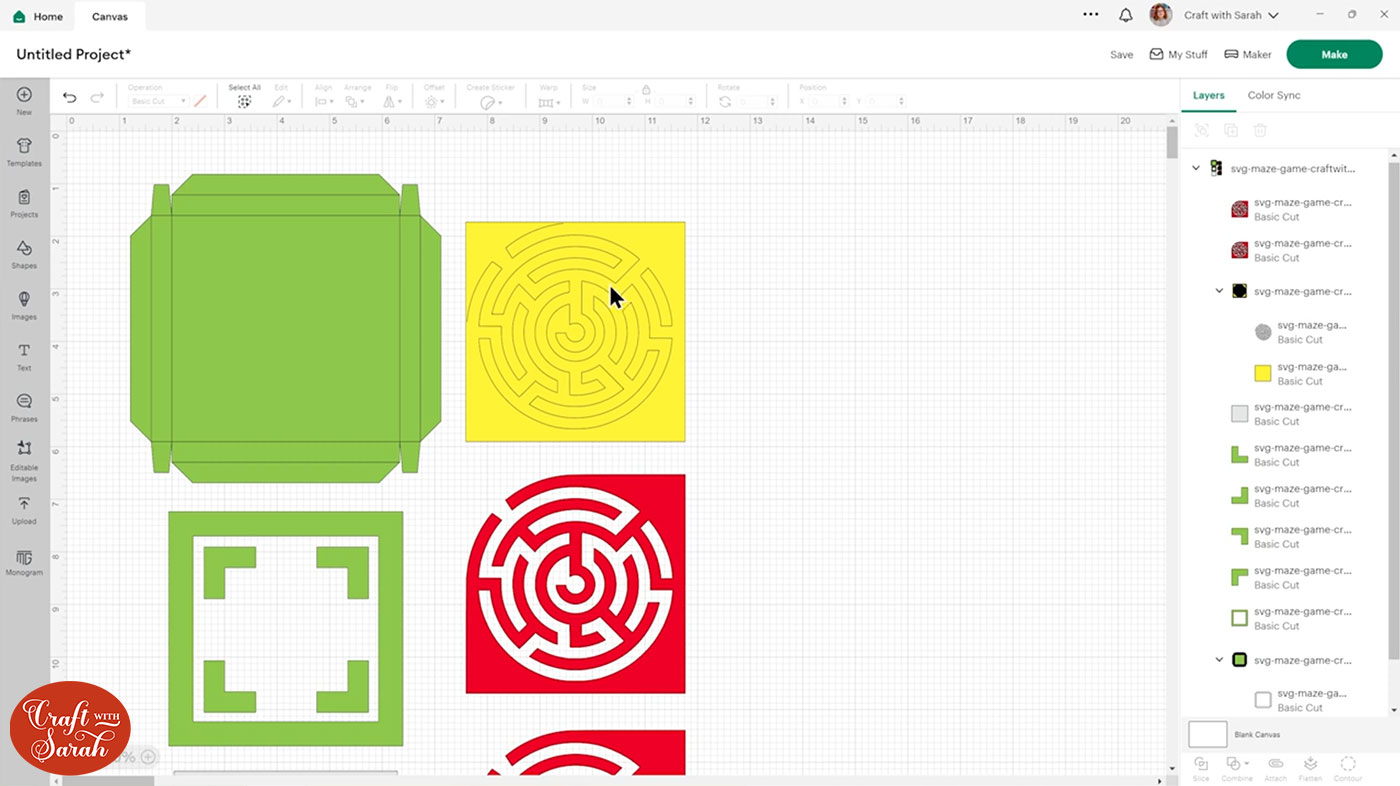
Ungroup the design to separate out all the layers.
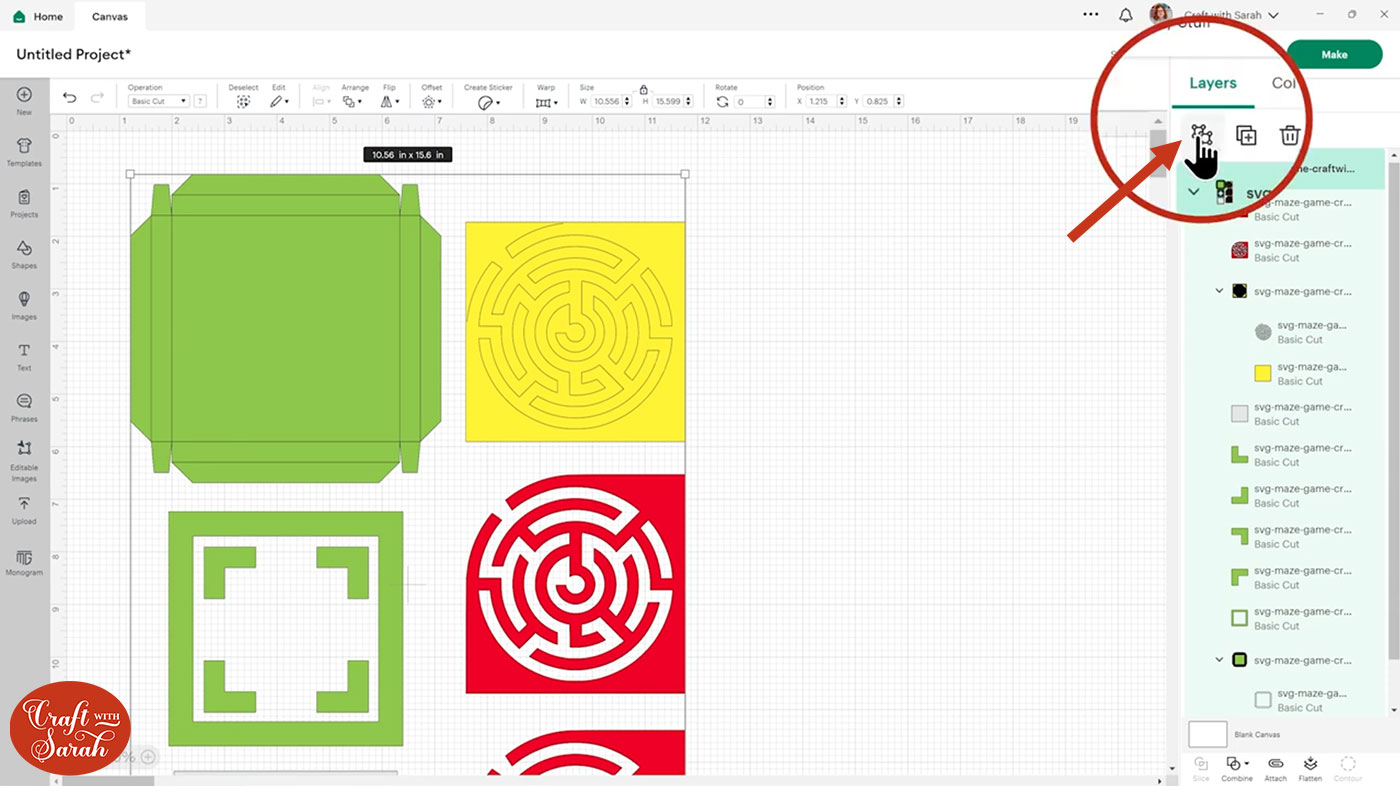
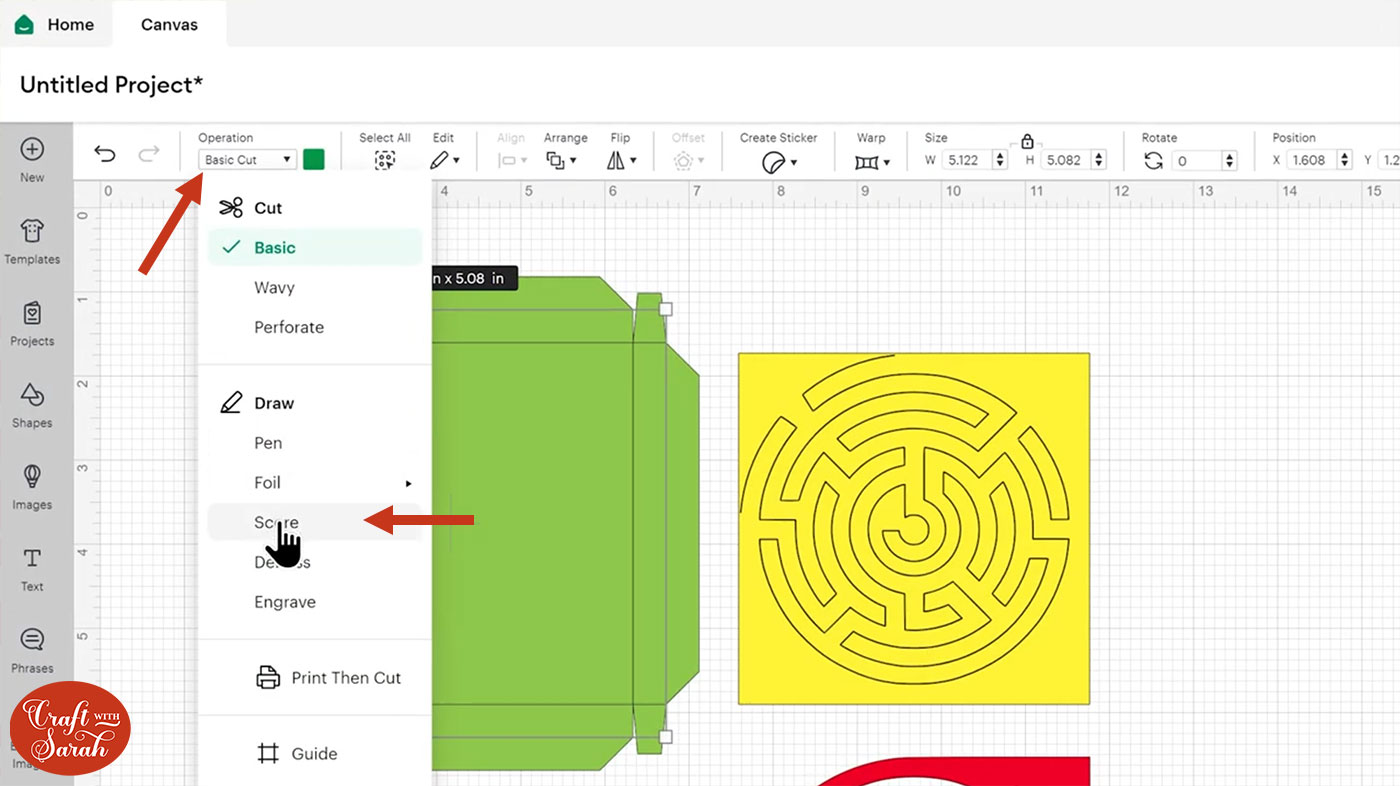
Look down the layers panel until you get to a black maze which is highlighted on the yellow square. Click this layer to select it.
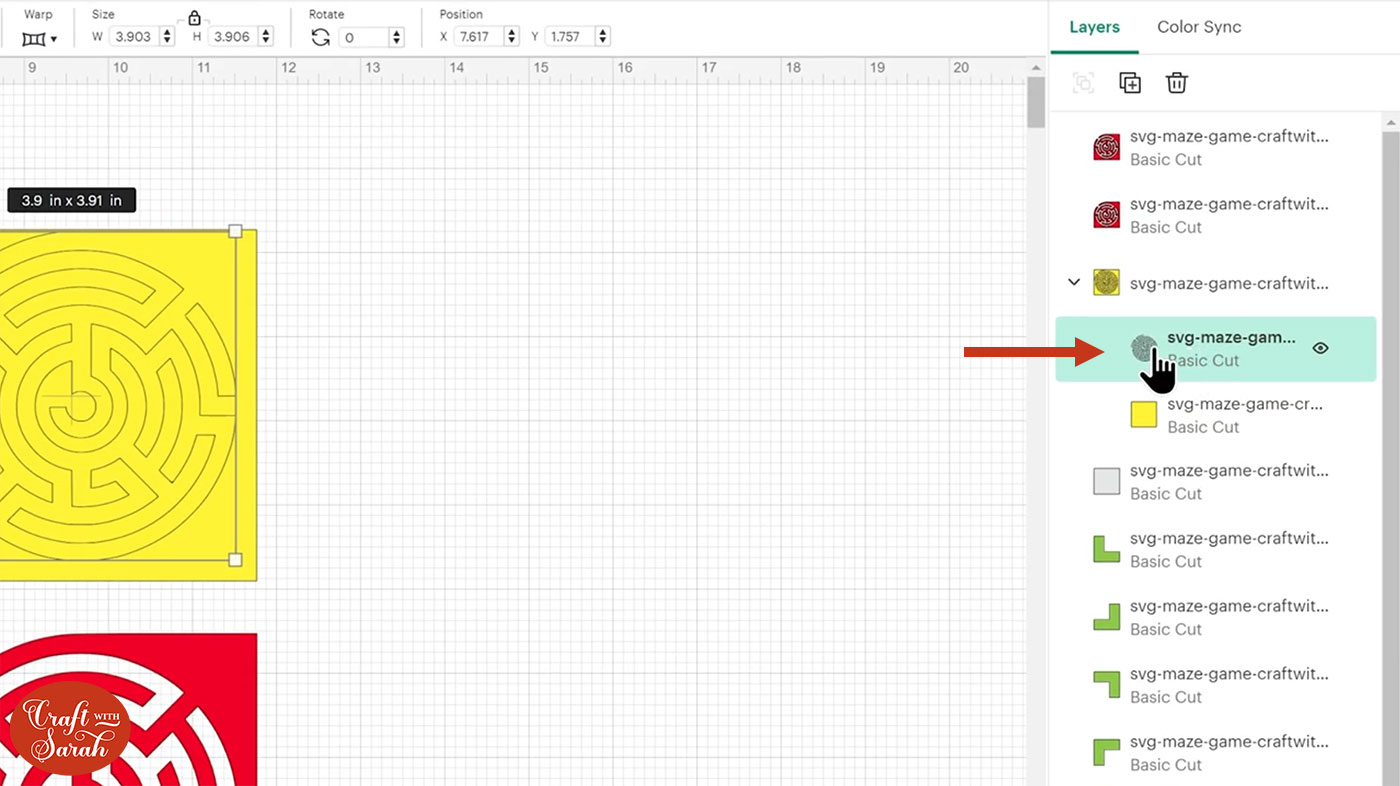
We need to change this to a draw layer so that we can use the Cricut pen. Click into the Operations dropdown and change it to Pen layer.
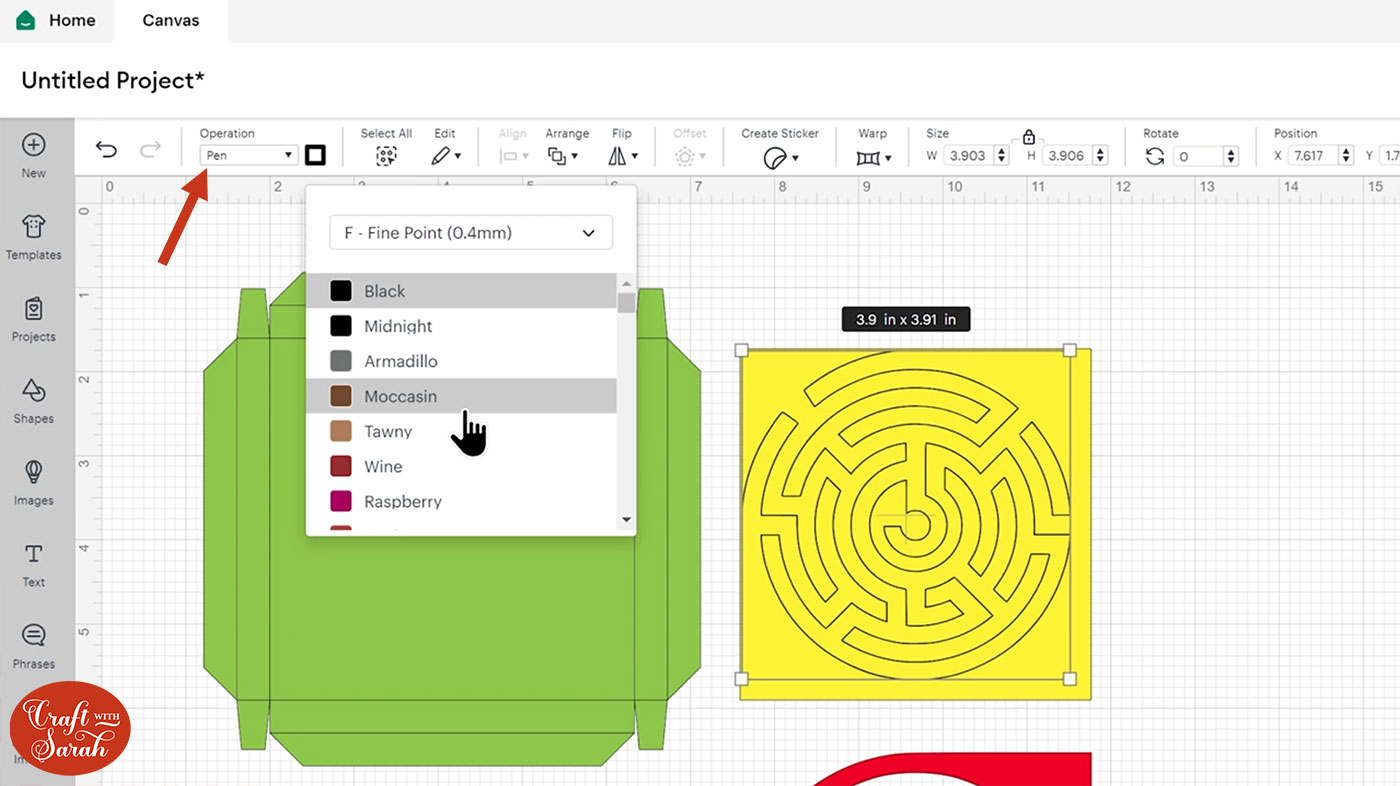
For this tutorial I used a black pen so that you can see exactly what I’m doing, but it’s best to use a similar colour to the cardstock you’re using so that it’s less visible.
Select the group that contains the Draw layer and the yellow square and then press the “Attach” button at the bottom of the layers panel. Attach is what tells the Cricut where we want it to draw.
Locate the green box layer in the layers panel. Click the black line layer in the Layers panel.
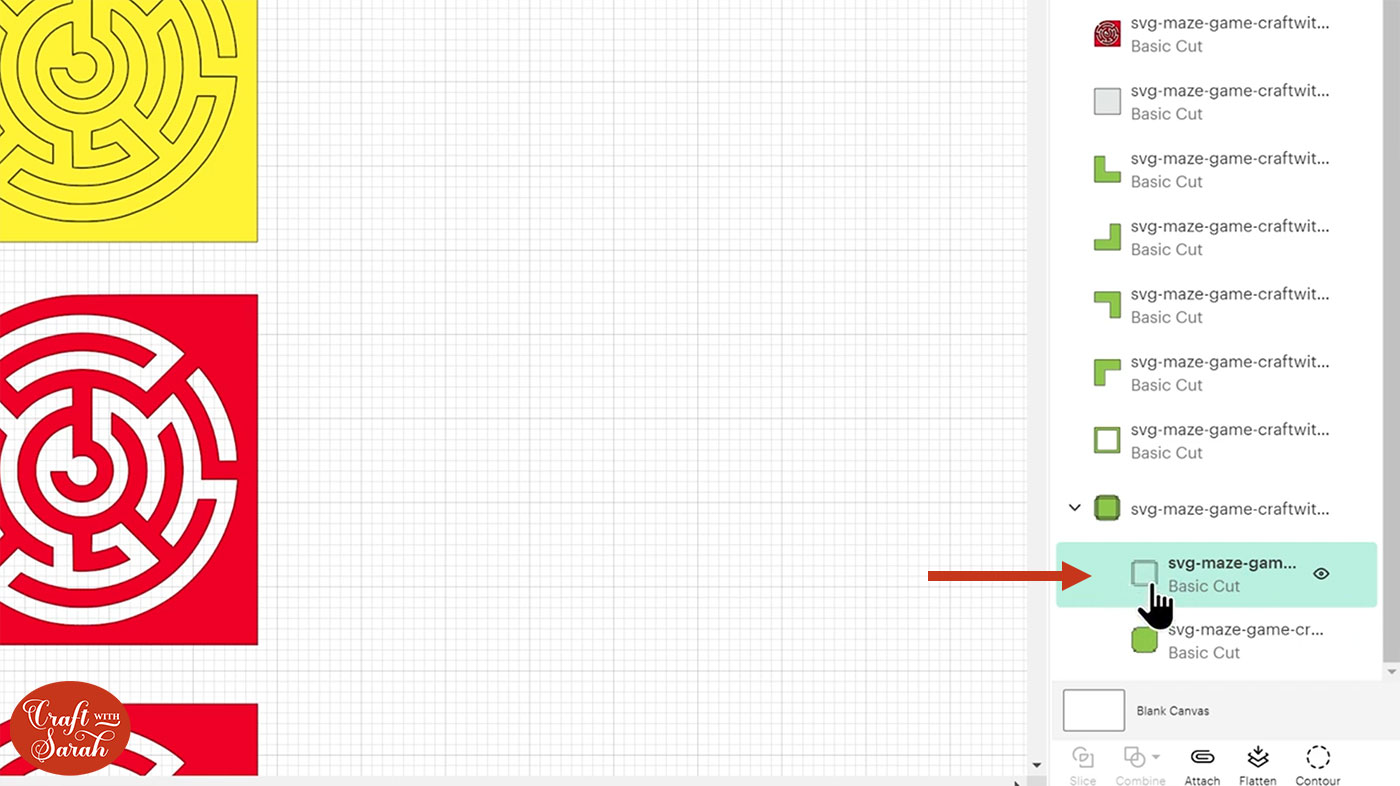
Change the Operation dropdown to Score.
Click the group that contains the new Score layer and the green piece underneath and press “Attach”.
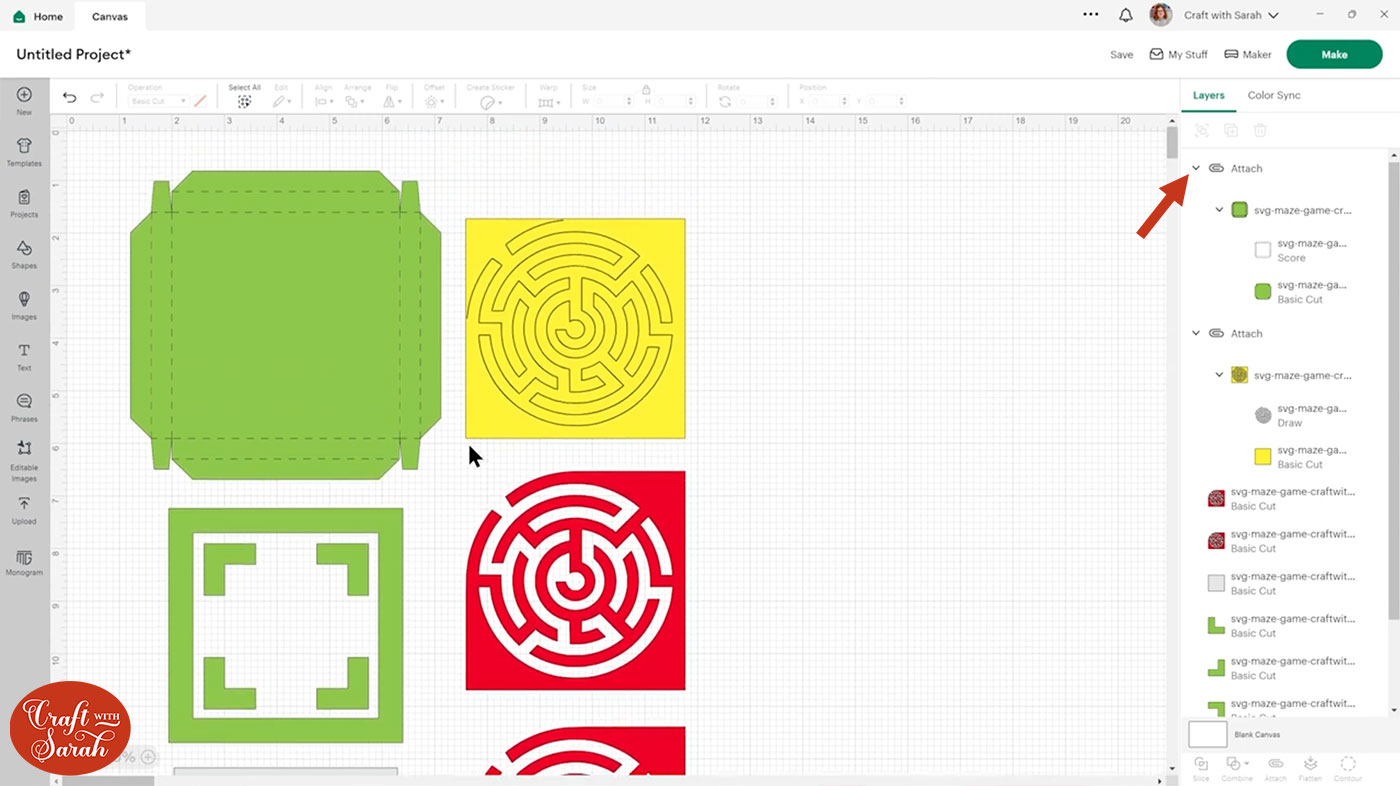
That is all the formatting done for this project.
You can change the colours using the colour box but do bear in mind that the two red maze layers need to be cut from craft foam so make sure they are a different colour to everything else.
Step 4) Cut out all the pieces of the maze game
Once you’re happy with how everything is looking, click Make to begin the cut process.
Follow the onscreen instructions to get all your pieces cut out.
The cardstock pieces will be straightforward but I will give some more guidance for cutting the craft foam and acetate.
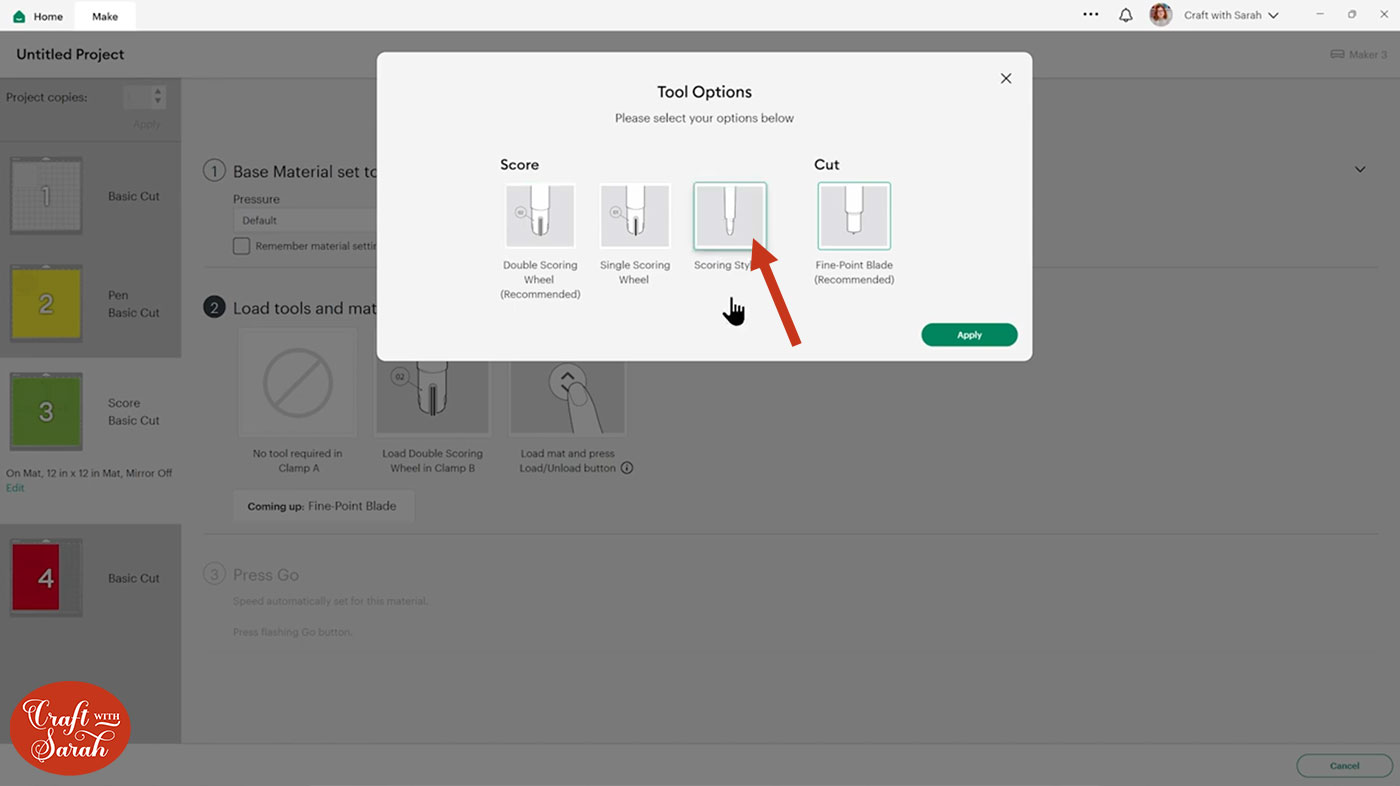
The box shape has scorelines so you will need to use the scoring wheel or stylus. It will automatically select the wheel but you can change it to the stylus by clicking Edit Tools.
TIP: New to cutting cardstock with a Cricut? Check out this in-depth tutorial which goes through every step of the process, including tips for getting the best quality cuts from your Cricut.
Craft foam cutting tips
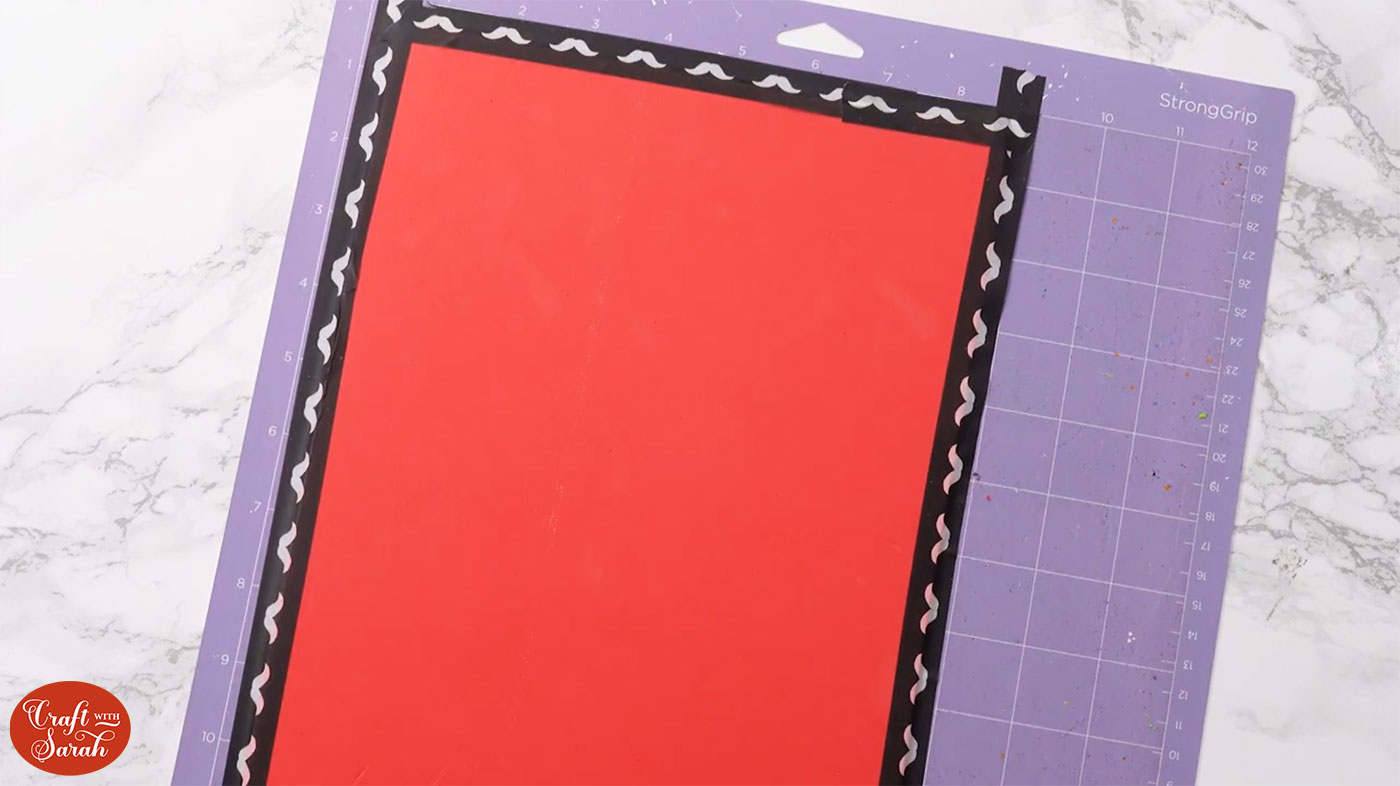
Click on your mat which has the craft foam cut outs on. Move the cuts away from the edges so that you can tape the foam down so that it doesn’t move when cutting.
As it is a thick material, it is best to use masking tape, washi tape or painters tape to secure the craft foam.
Use a brayer tool or a rolling pin to make sure the foam is properly stuck to the mat.
Use the “Craft foam” cut setting. Design Space will suggest the deep point blade by default, but I always have more luck with the knife blade.
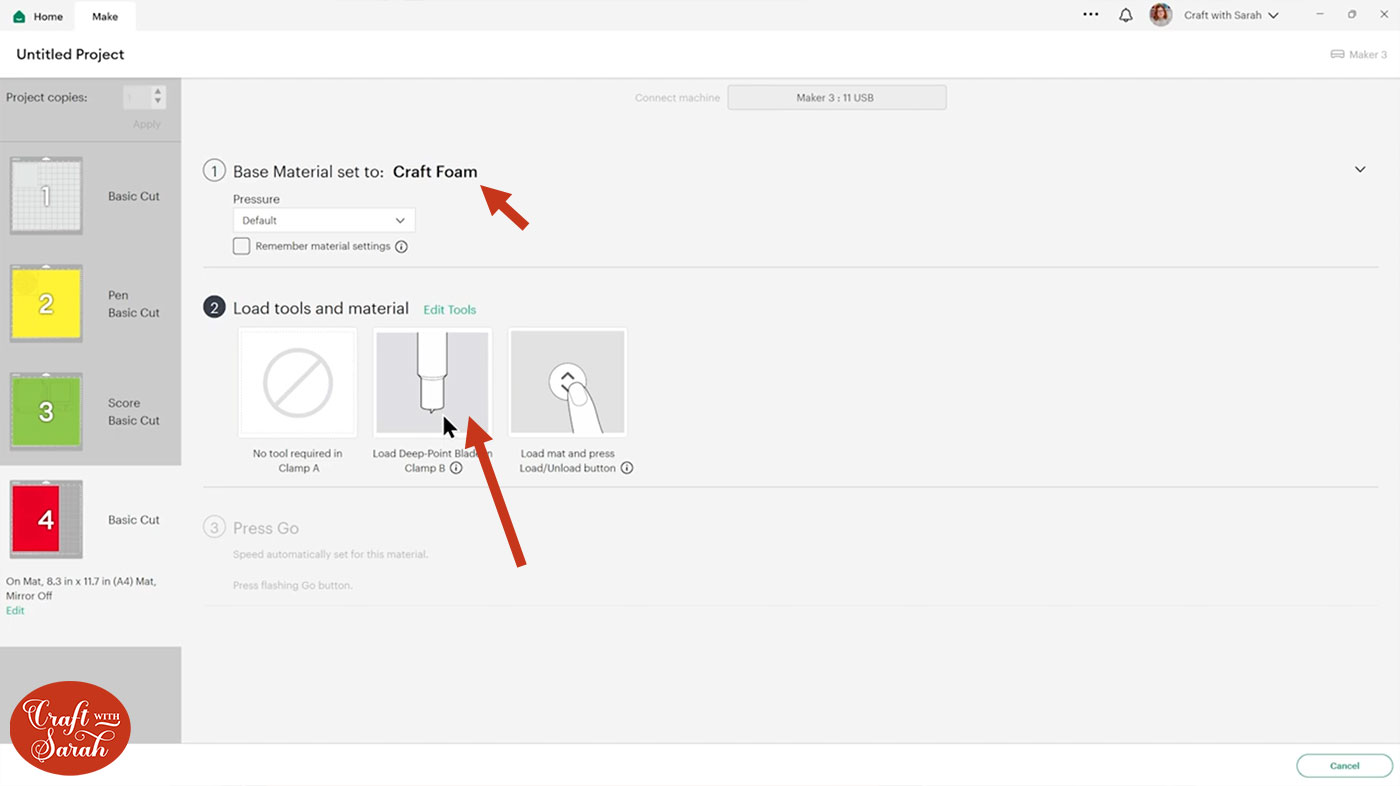
To switch, click the “Edit Tools” link shown in the image above and then select the Knife Blade.
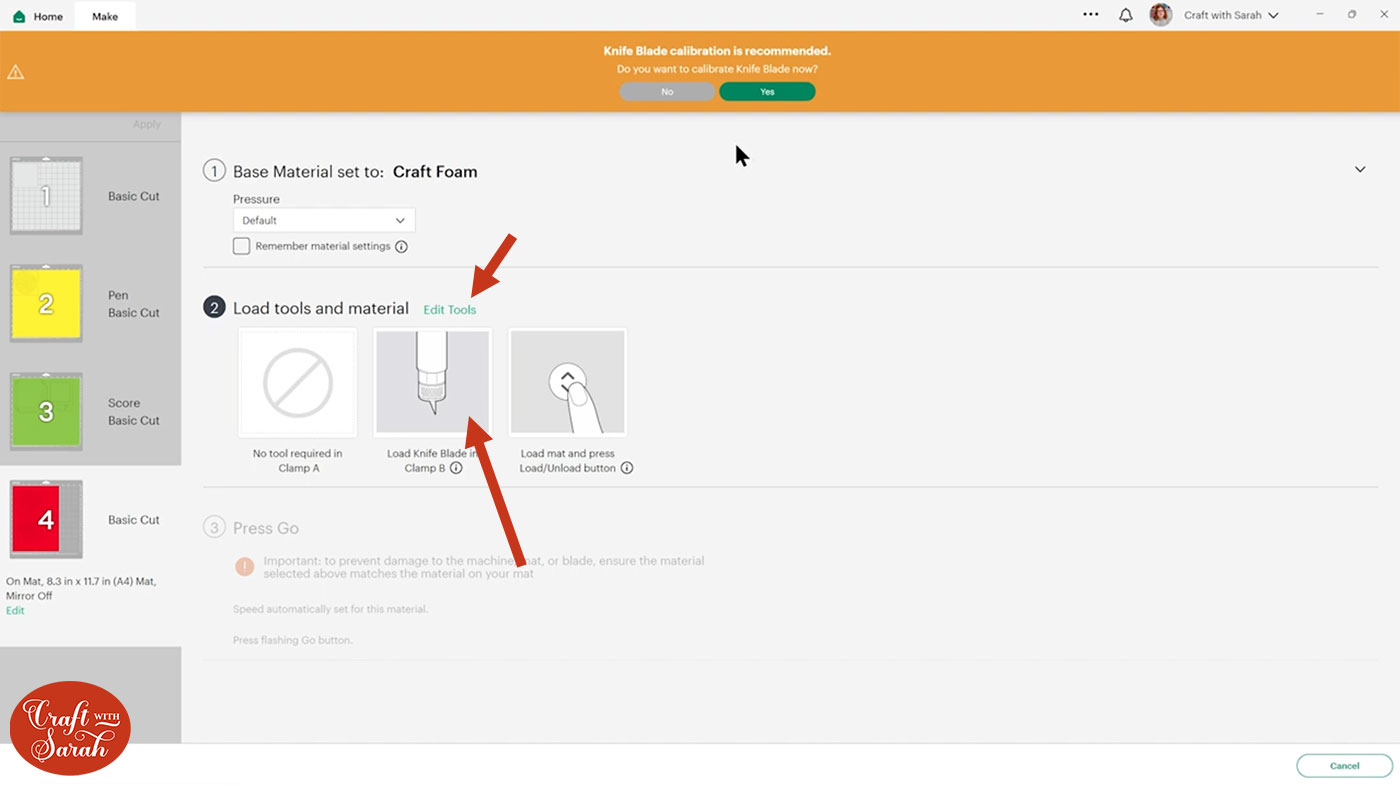
It may ask you to calibrate the knife blade. I have never done this and it still seems to cut fine, but if you are having issues with the machine not recognising the blade then try the calibration process to see if that helps.
Want some more tips? Check out this tutorial on cutting craft foam with a Cricut
Acetate cutting tips
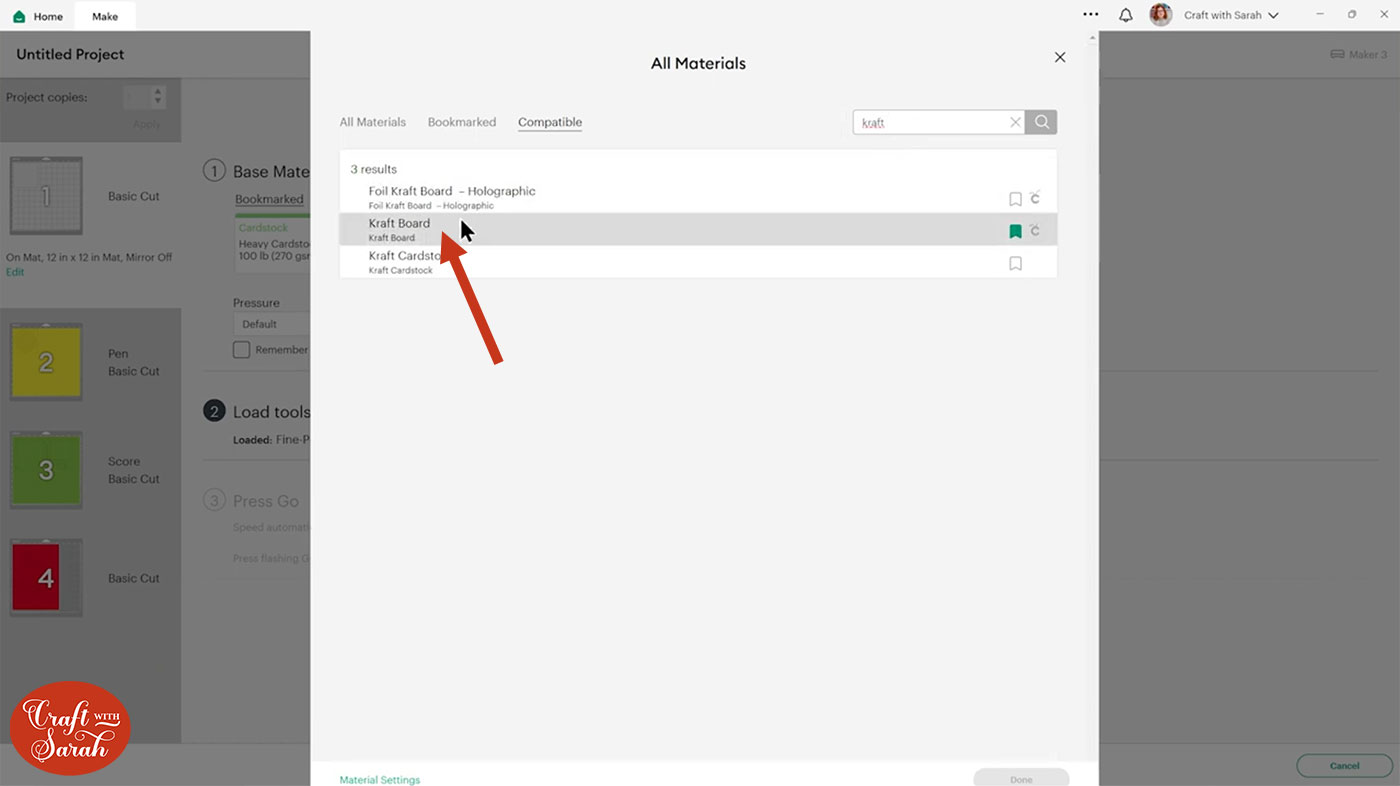
There is a cut setting specifically for acetate but I have never had success with this setting.
I use the Kraft Board setting which you can find by typing into the search box.
Kraft Board does two passes so it will cut the square twice in exactly the same place.
Step 5) Stick the maze together
Lay out all the pieces and select the square cardstock cut out.
Lay it upside down and glue the edges, making sure there are no gaps for the ball bearings to escape from later.
Stick the acetate onto the glue.
Place it aside to dry and in the meantime we will assemble the box.
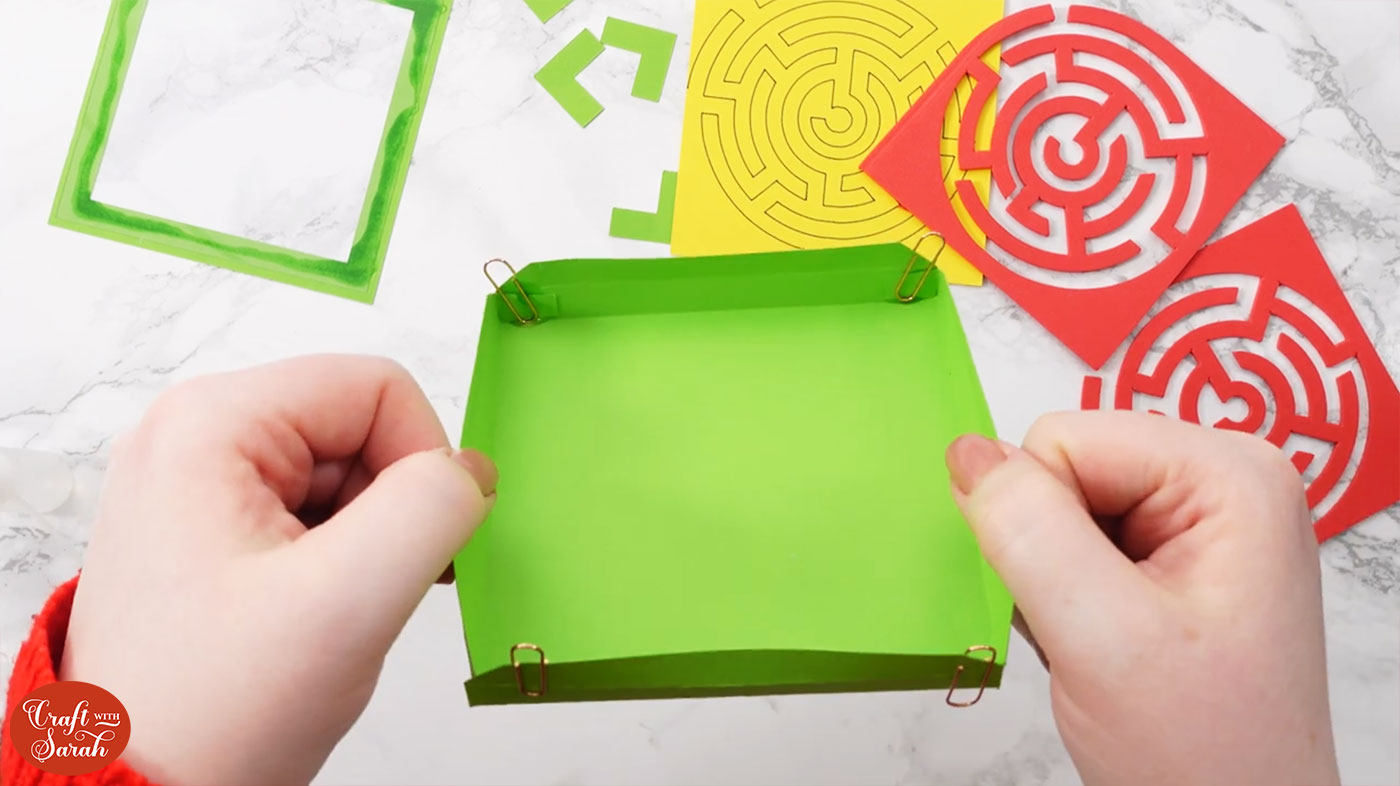
Take the bottom box piece with the score lines. Turn it upside down and fold all the score lines up towards you.
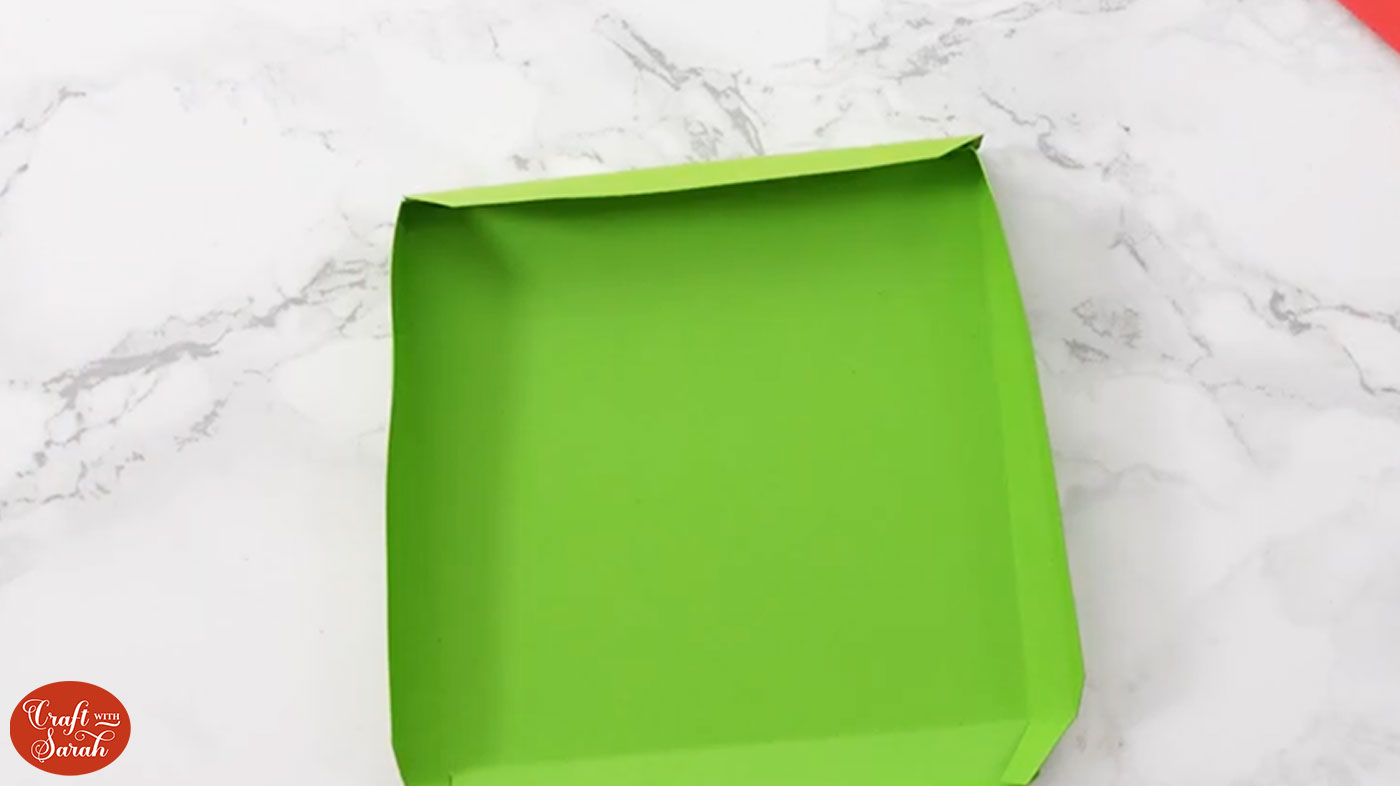
Glue the little triangle tabs to the corresponding section of the box next to them to give it shape. There are four in total.
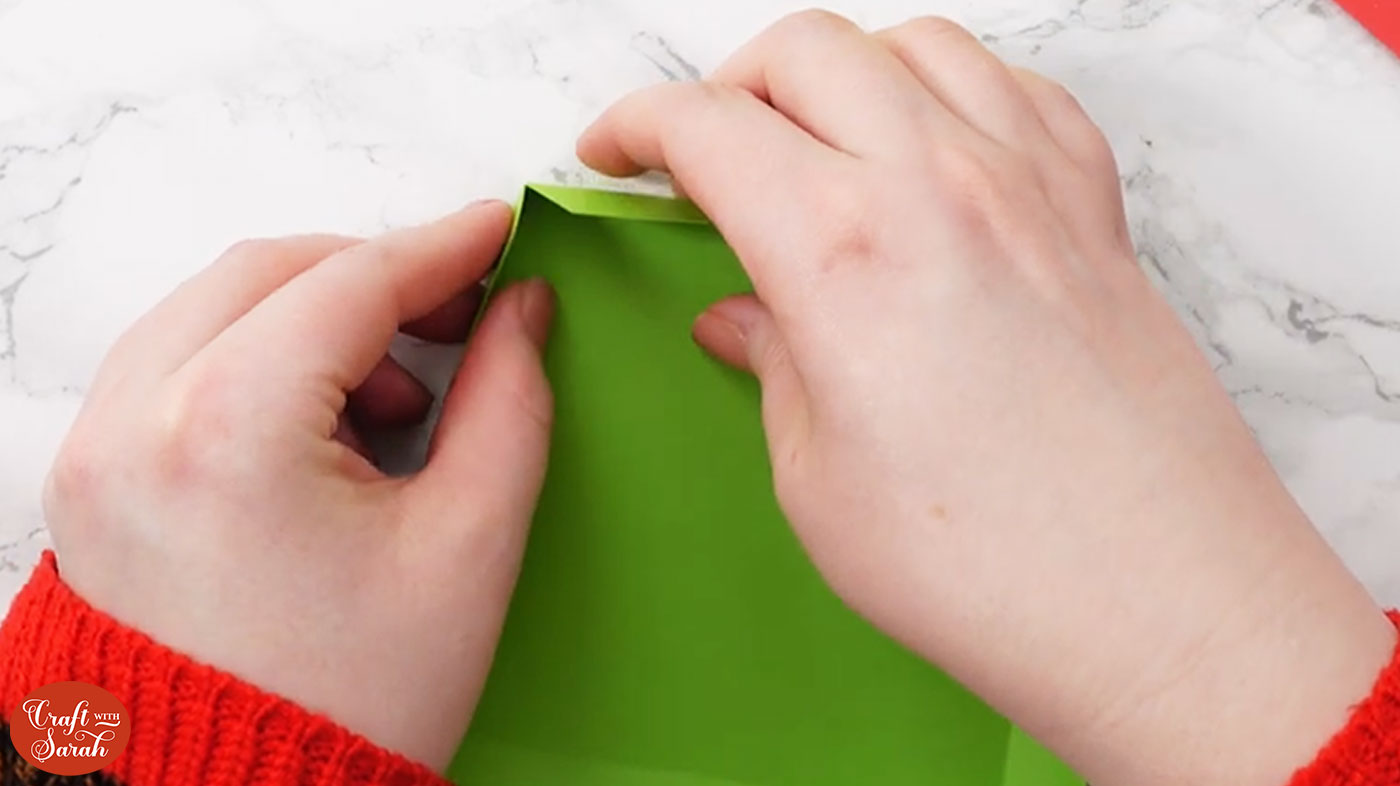
Allow it to dry. You can use paperclips to hold it together while the glue dries,
Take the square which has the maze drawn on. This will help when glueing the maze down as the foam can be quite bendy and hard to stick in exactly the right place.
Add glue directly to the maze on the cardstock. Make sure you are glueing the correct sections. You can follow the “C” shape in the middle to help you.
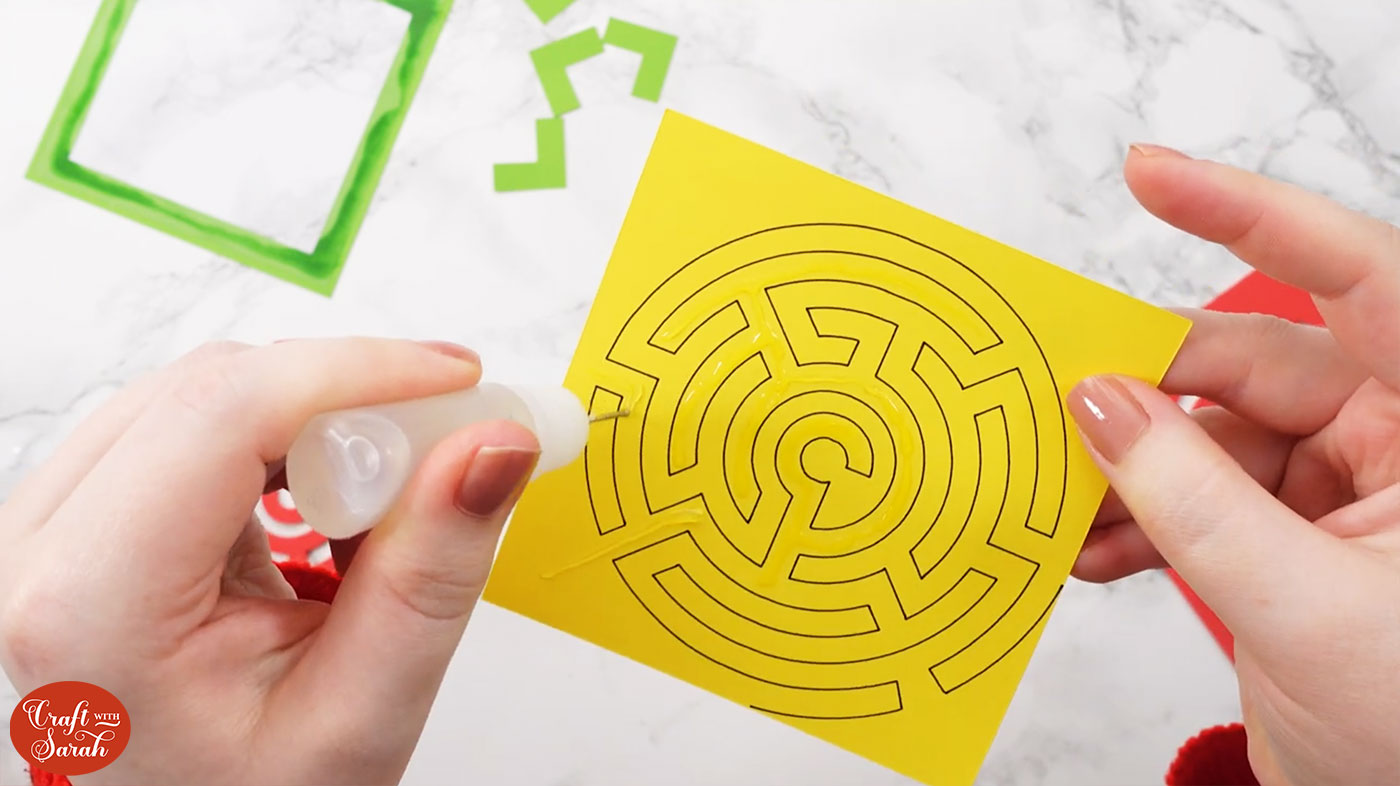
Be careful not to go right to the edges with your glue otherwise it will come out the sides when you put the foam on.
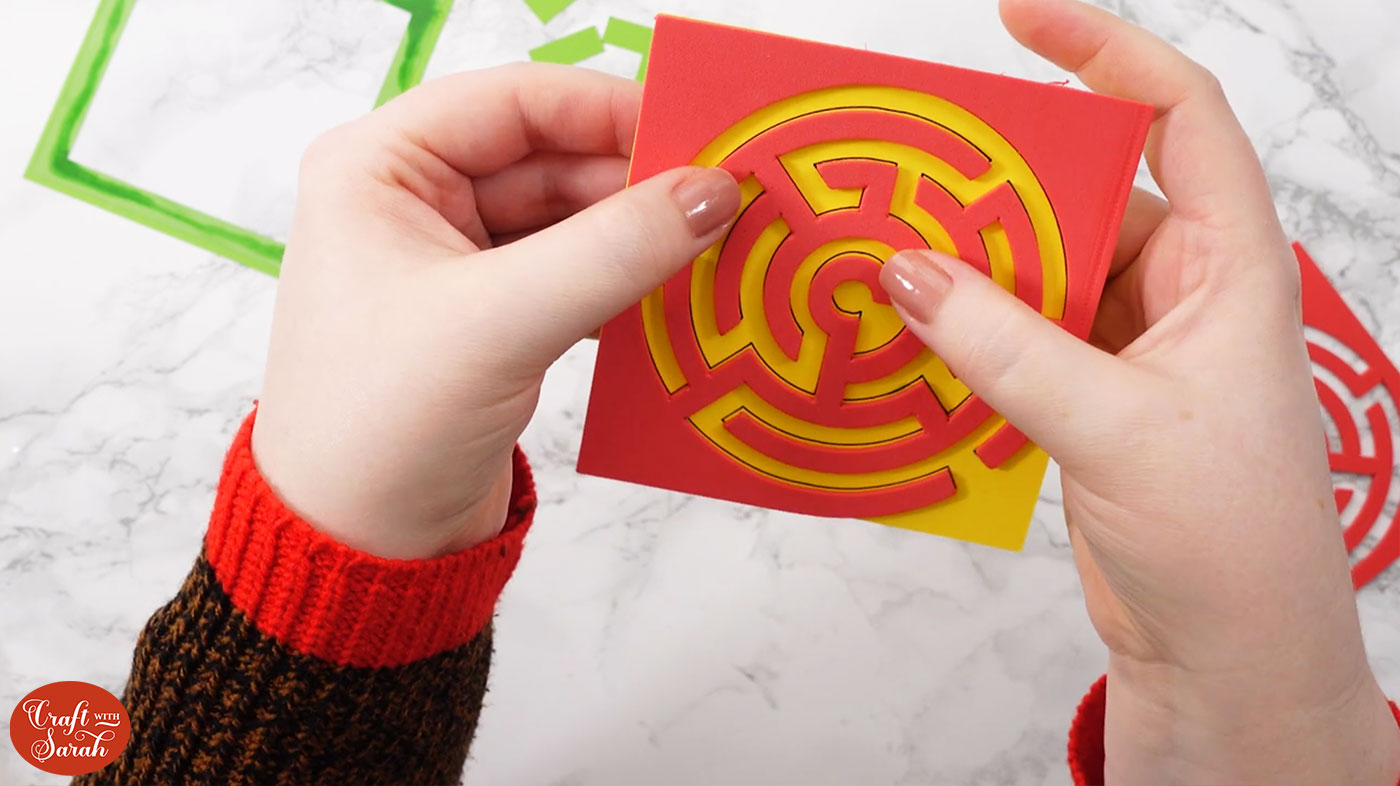
Pick up one of the foam layers and carefully drop it down on the maze drawing.
Use the lines as a guide when wiggling the pieces around and into place whilst the glue is wet. Make sure the foam is placed accurately on top of the draw lines so that the ball bearings will be able to fit through.
If you notice any of the glue has come out, use your finger or a weeding tool to remove the glue so that it doesn’t dry and prevent the ball bearing from moving.
Allow the first layer of foam to dry. Once dry, add a layer of glue to the top of it and place the second layer of craft foam on top.
Line up the maze again as accurately as possible to the one underneath whilst the glue is wet. It may help to pick it up and look from a different angle to help you check that it is aligned perfectly.
Don’t put the ball bearing in until the glue is completely dry. Otherwise, it might get stuck to any loose glue that is hanging about.
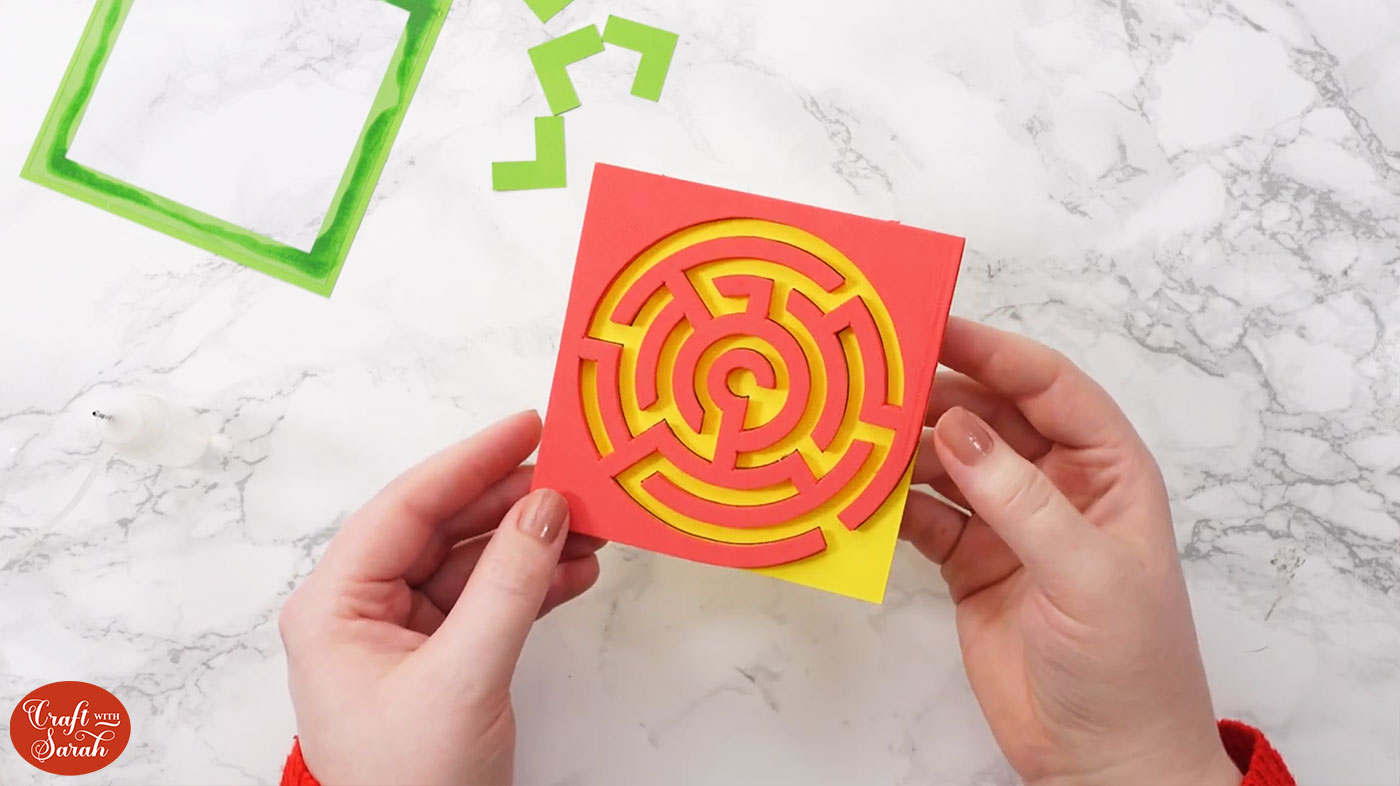
Add glue to the bottom of the maze and stick it inside the box. Make sure it’s flat and lines up with the square.
Add in a ball bearing and make sure it can move freely around the maze.
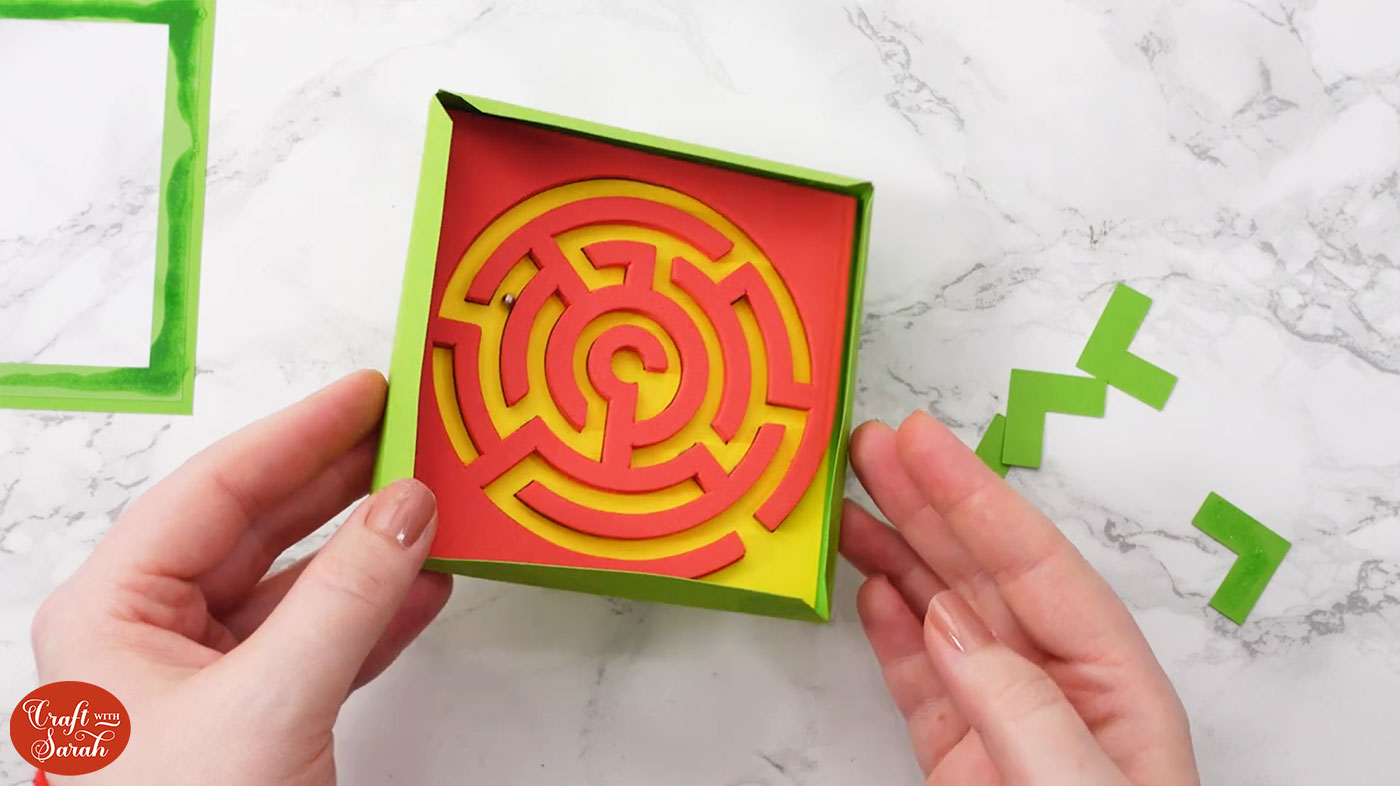
Stick the four corner pieces in the each corner of the box to join the sides together.
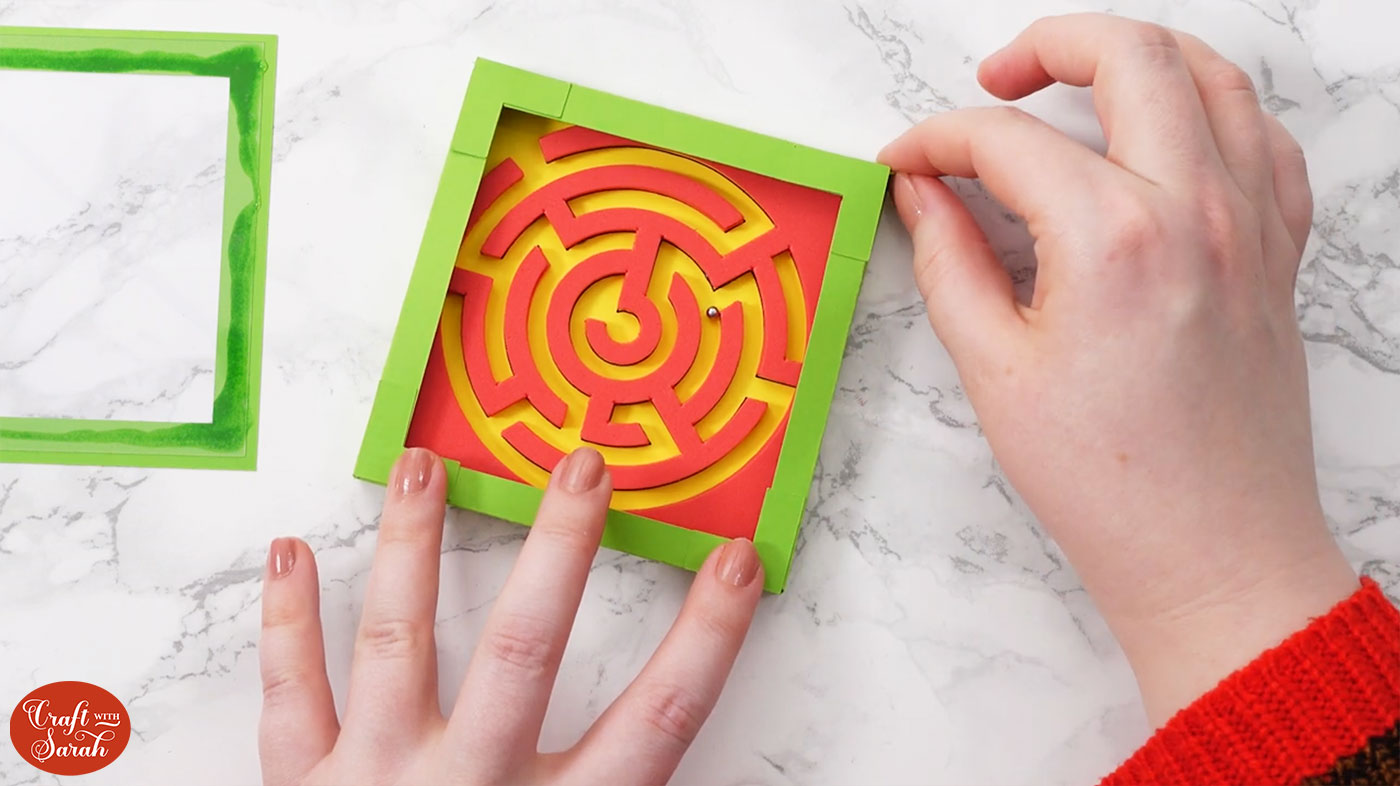
Finally, the window piece will go on top. Make sure there are no gaps when glueing the edges of the box.
I finished the maze game off by adding some sticky-back gemstones to hide where I had been a little bit messy with the glue – whoops!!
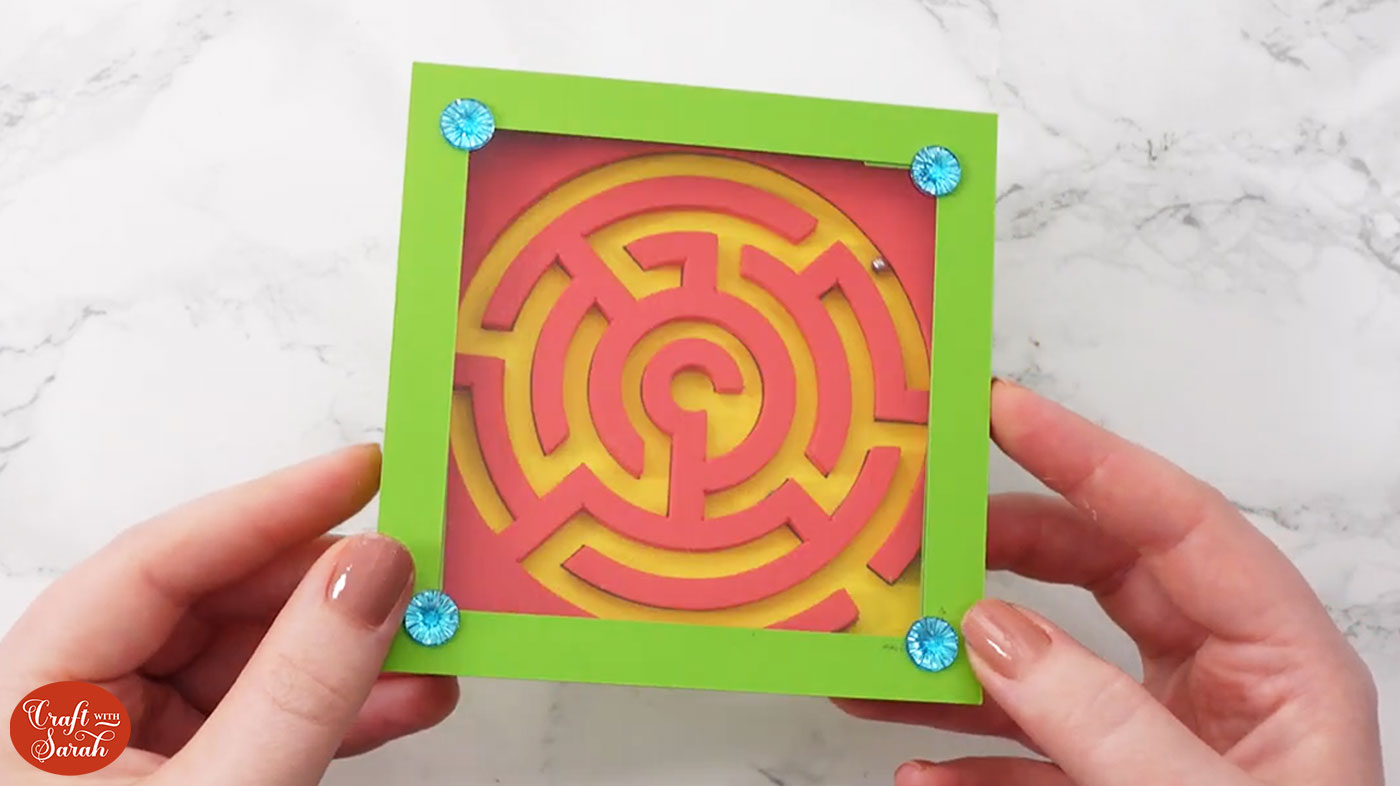
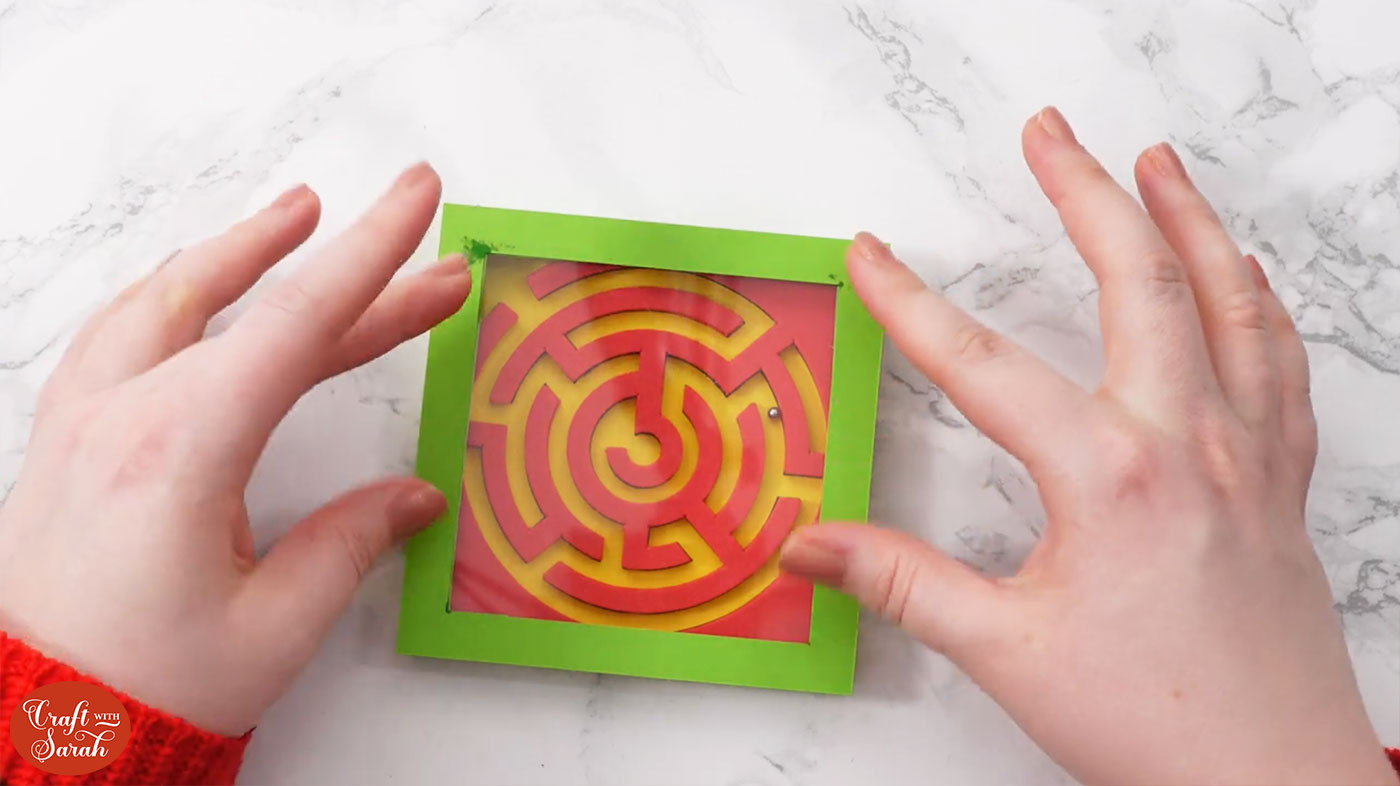
DIY retro maze game
Now your maze game is finished and ready to play with!
I love how fun this was to make. They would make such lovely gifts!
It was nice to do something a little bit different and to try out some new materials.

If you enjoyed making your own maze game then you might also enjoy this other ball bearing game that you can make with your Cricut machine.
Happy crafting,
Sarah x

