How to Make Layered Cardstock Crafts with a Cricut

Layered papercrafts are my favourite type of Cricut project because they are easy and fun to make, and the finished designs look incredibly detailed and professional.
Whether you’re making layered paper art for shadow boxes, greetings cards, scrapbook layouts or freestanding decorations, the process is exactly the same.
In this tutorial, I’ll show you how to cut and assemble one of my free layered gnome SVGs, but you can follow exactly the same steps for any of my layered SVG designs.
What you’ll need
To make a layered papercraft project, you’ll need a Cricut machine, a fine-point blade (the blade your machine comes with) and a cutting mat.
I generally recommend using a blue LightGrip mat for cardstock, although a green StandardGrip mat will also work.
If you’re using a brand-new StandardGrip mat, it can sometimes be so sticky that it becomes difficult to remove the cardstock without damaging it.
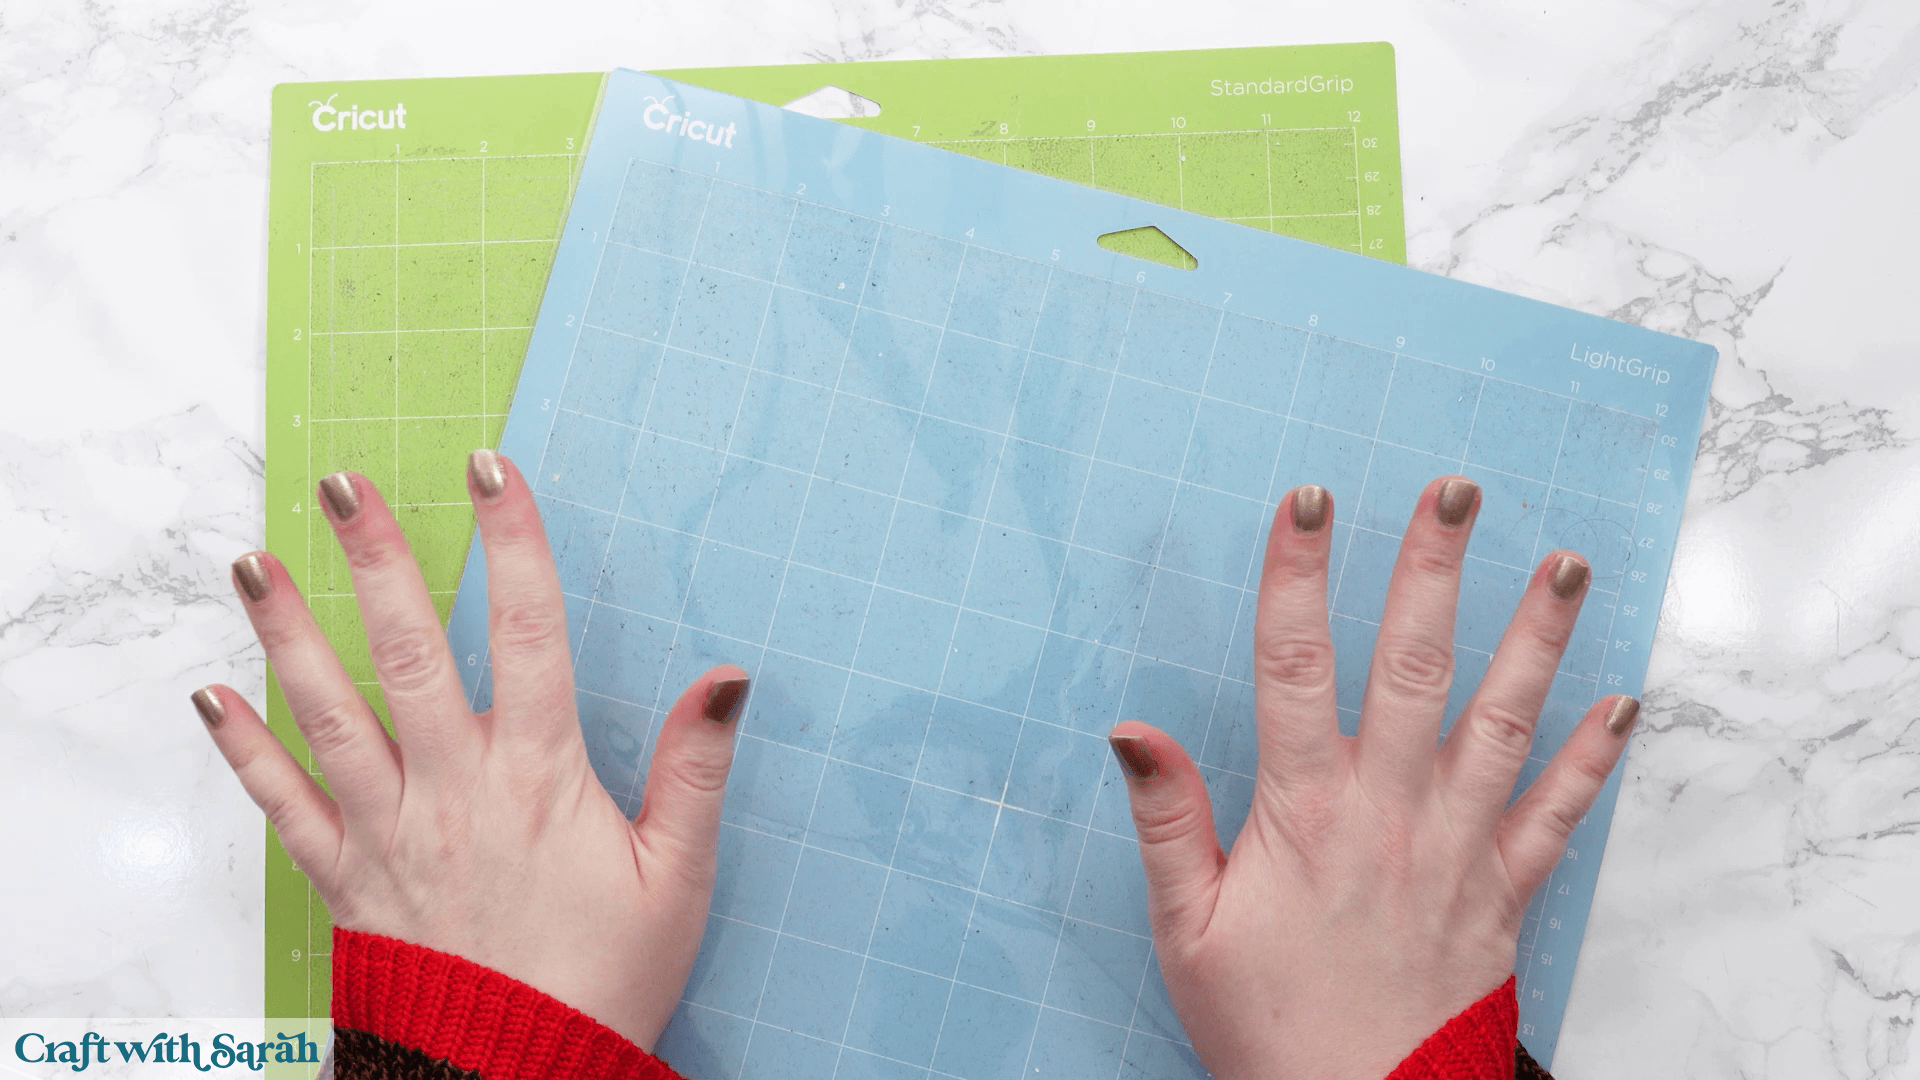
Older StandardGrip mats usually work much better for cardstock once they’ve lost a little of their stickiness.
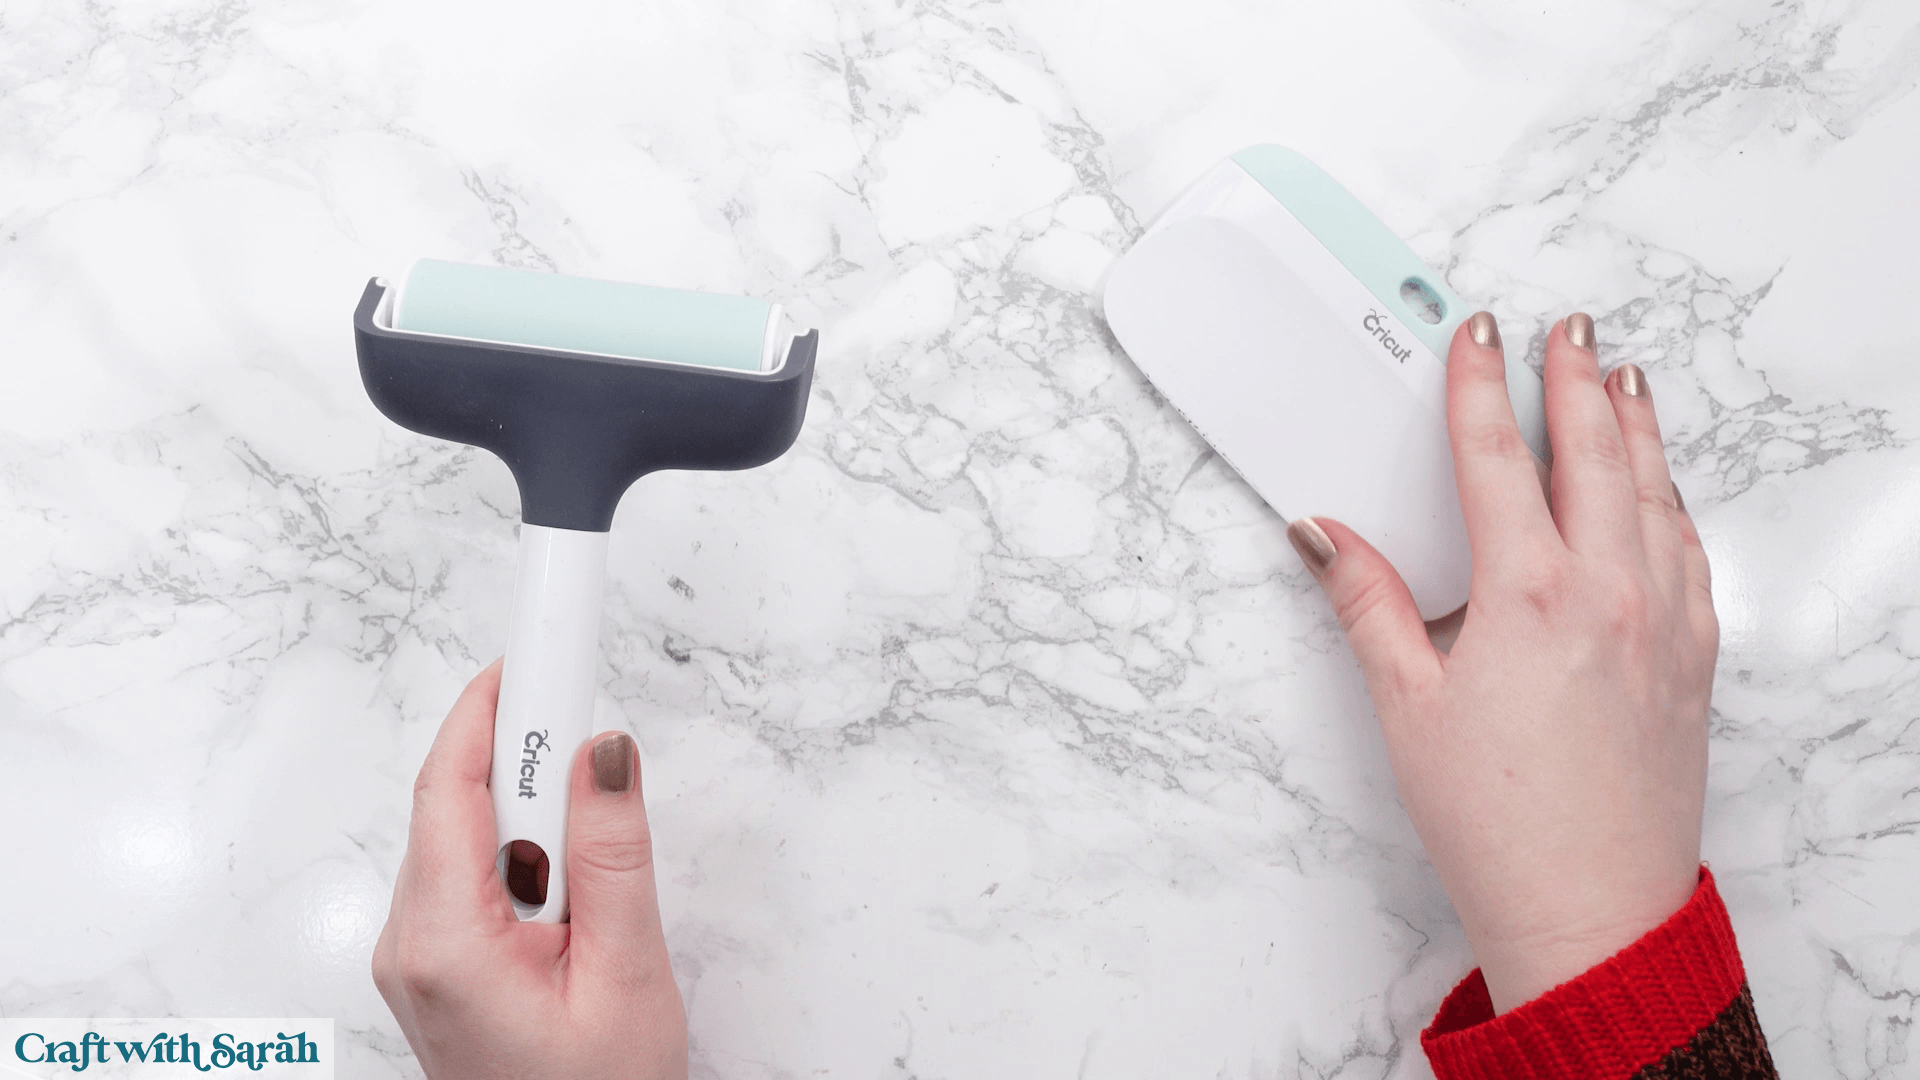
A brayer tool or scraper tool will be useful for making sure your card sticks properly to your mat. You could also use a rolling pin if you don’t have either of these tools at home.
You’ll also need cardstock in the colours for your chosen design. I usually use cardstock between 160 and 300 GSM, with around 200–225 GSM being my favourite weight.
That’s around 65-80lb.
Both smooth and textured cardstock work beautifully, and you can happily mix different finishes within the same project.
You don’t need to use new sheets of cardstock – if you have smaller pieces or scraps left over from another project, then you can use those.
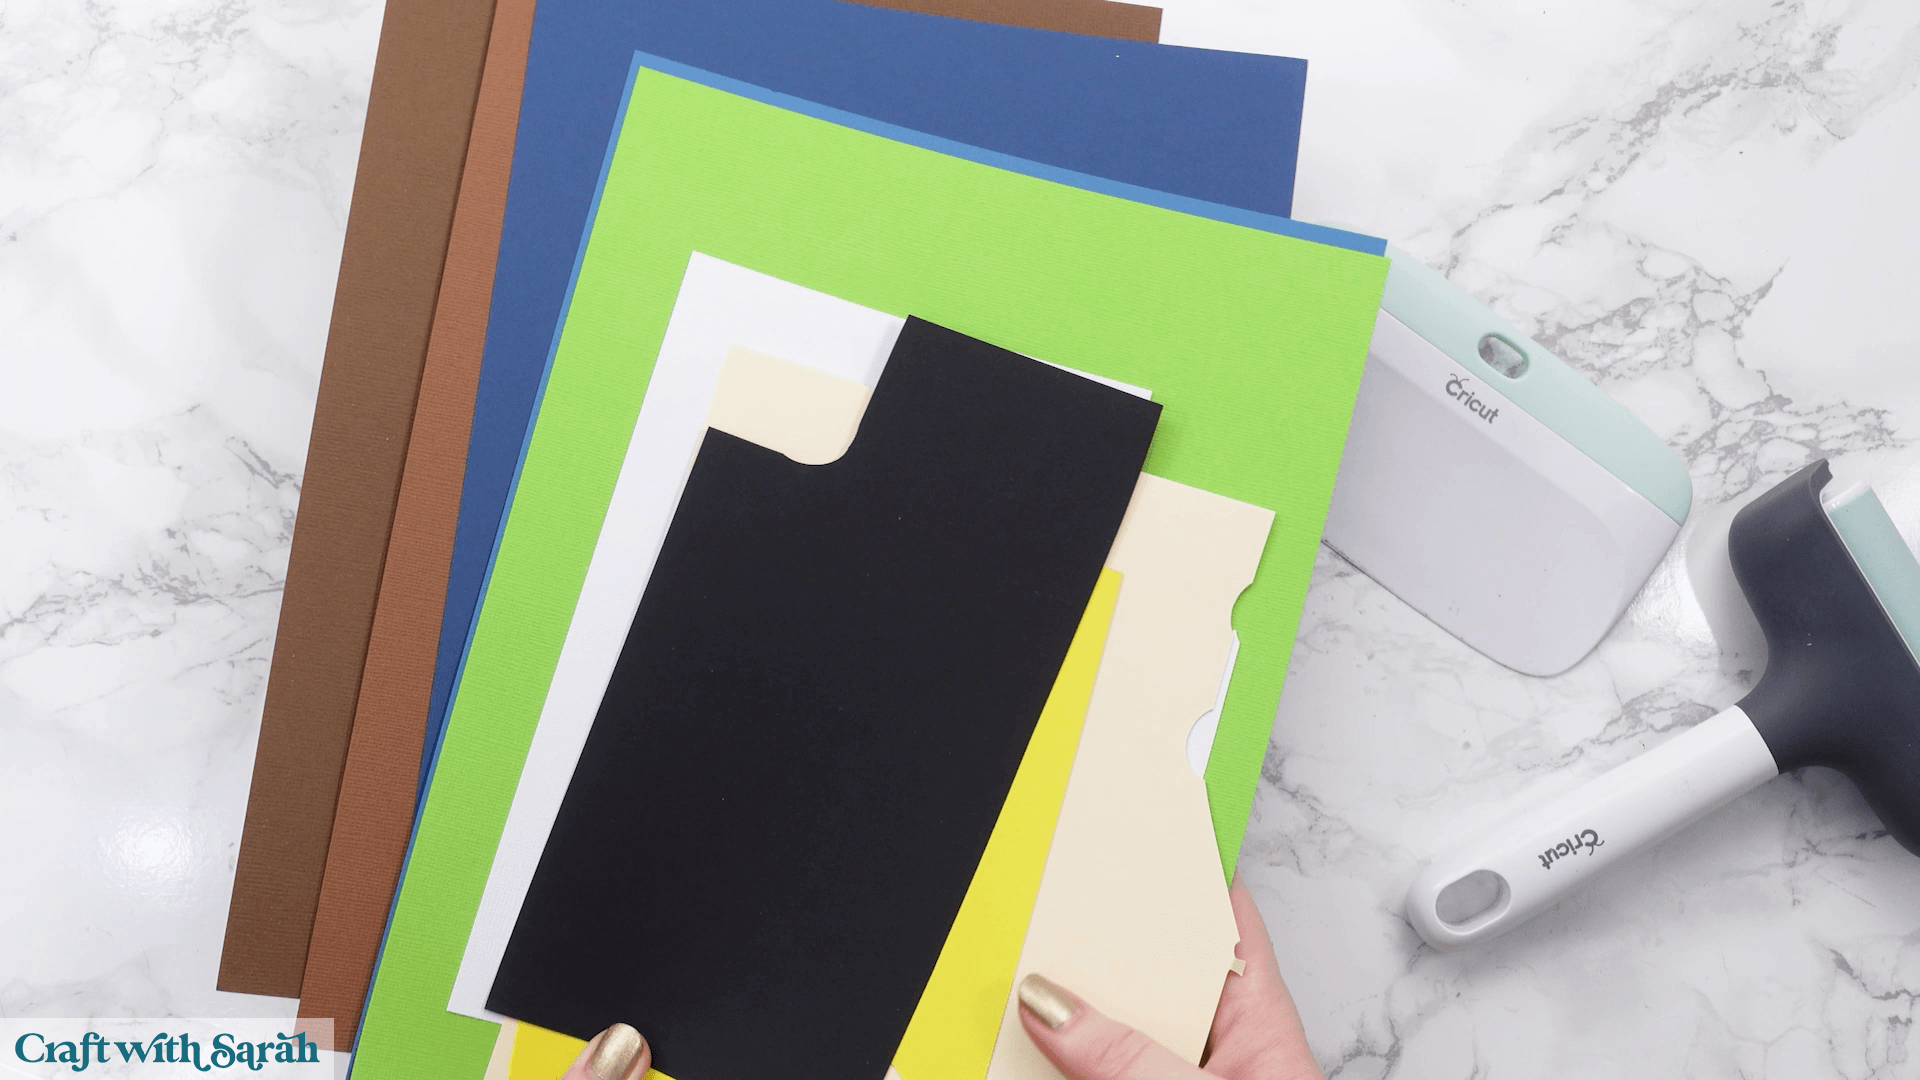
To assemble the layers, you’ll need a good-quality craft glue that won’t wrinkle your cardstock. My personal favourite is Bearly Art Glue because the fine needle tip makes it easy to apply glue to small, intricate areas. I also like Collall glue, although I recommend decanting it into a fine needle-tip applicator bottle for easier control.
The reason I like these two glue brands is that they don’t wrinkle or warp the cardstock like some other craft glues can do.
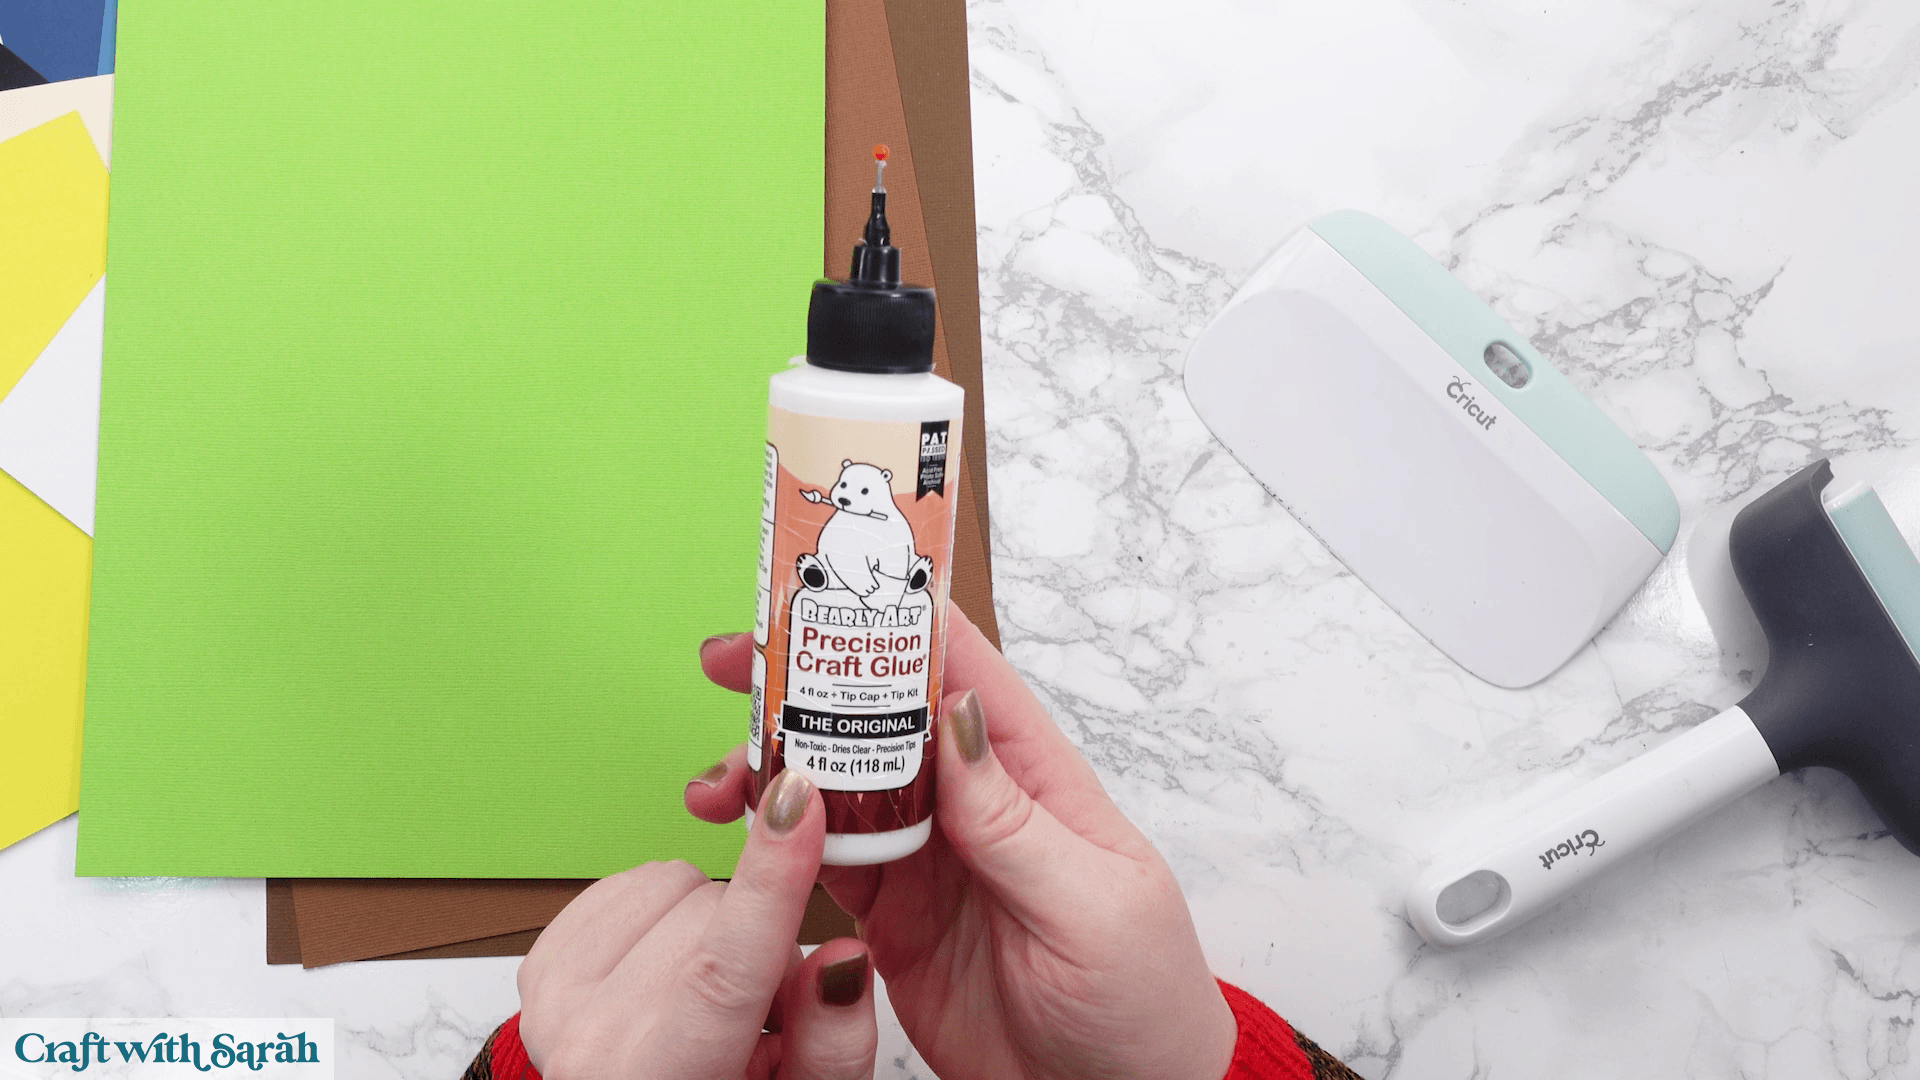
You’ll need some foam squares or foam pads to create dimension between the layers. I usually use 2mm foam squares, but any similar foam pads will work.
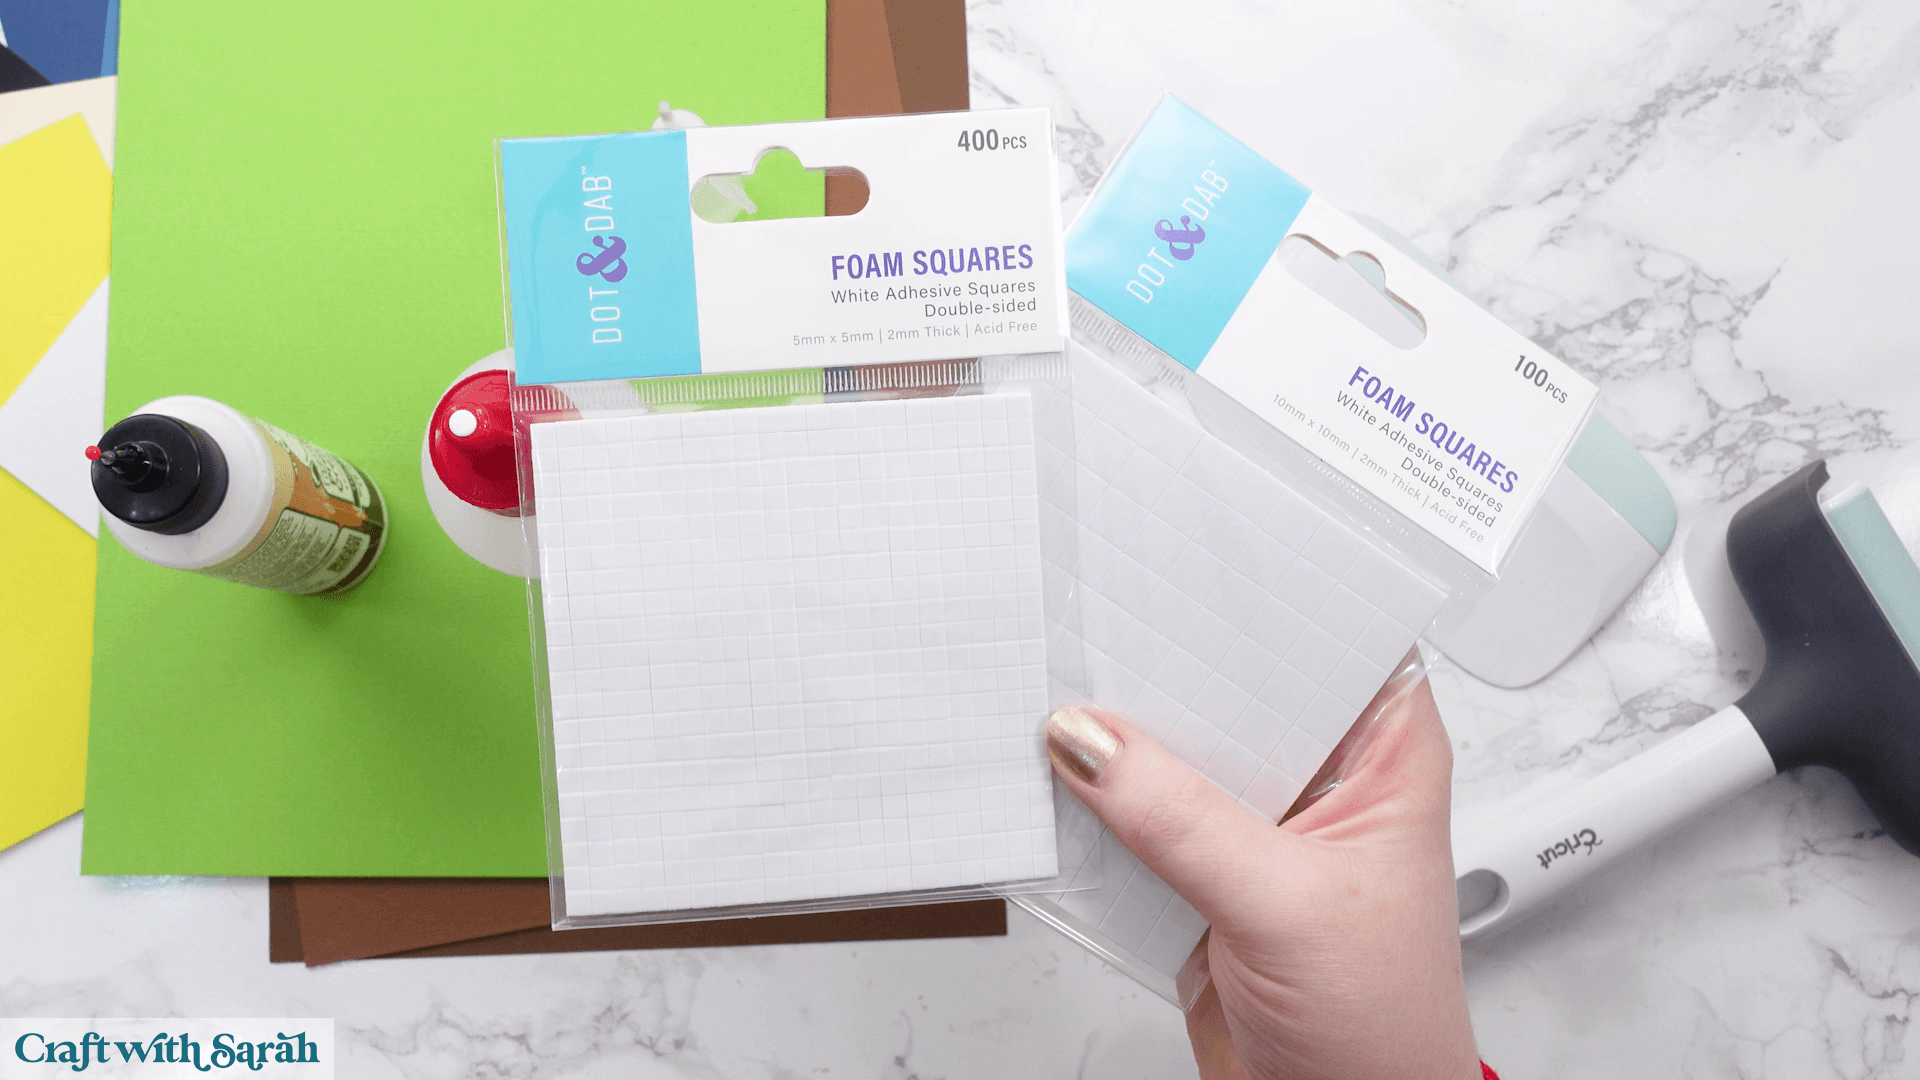
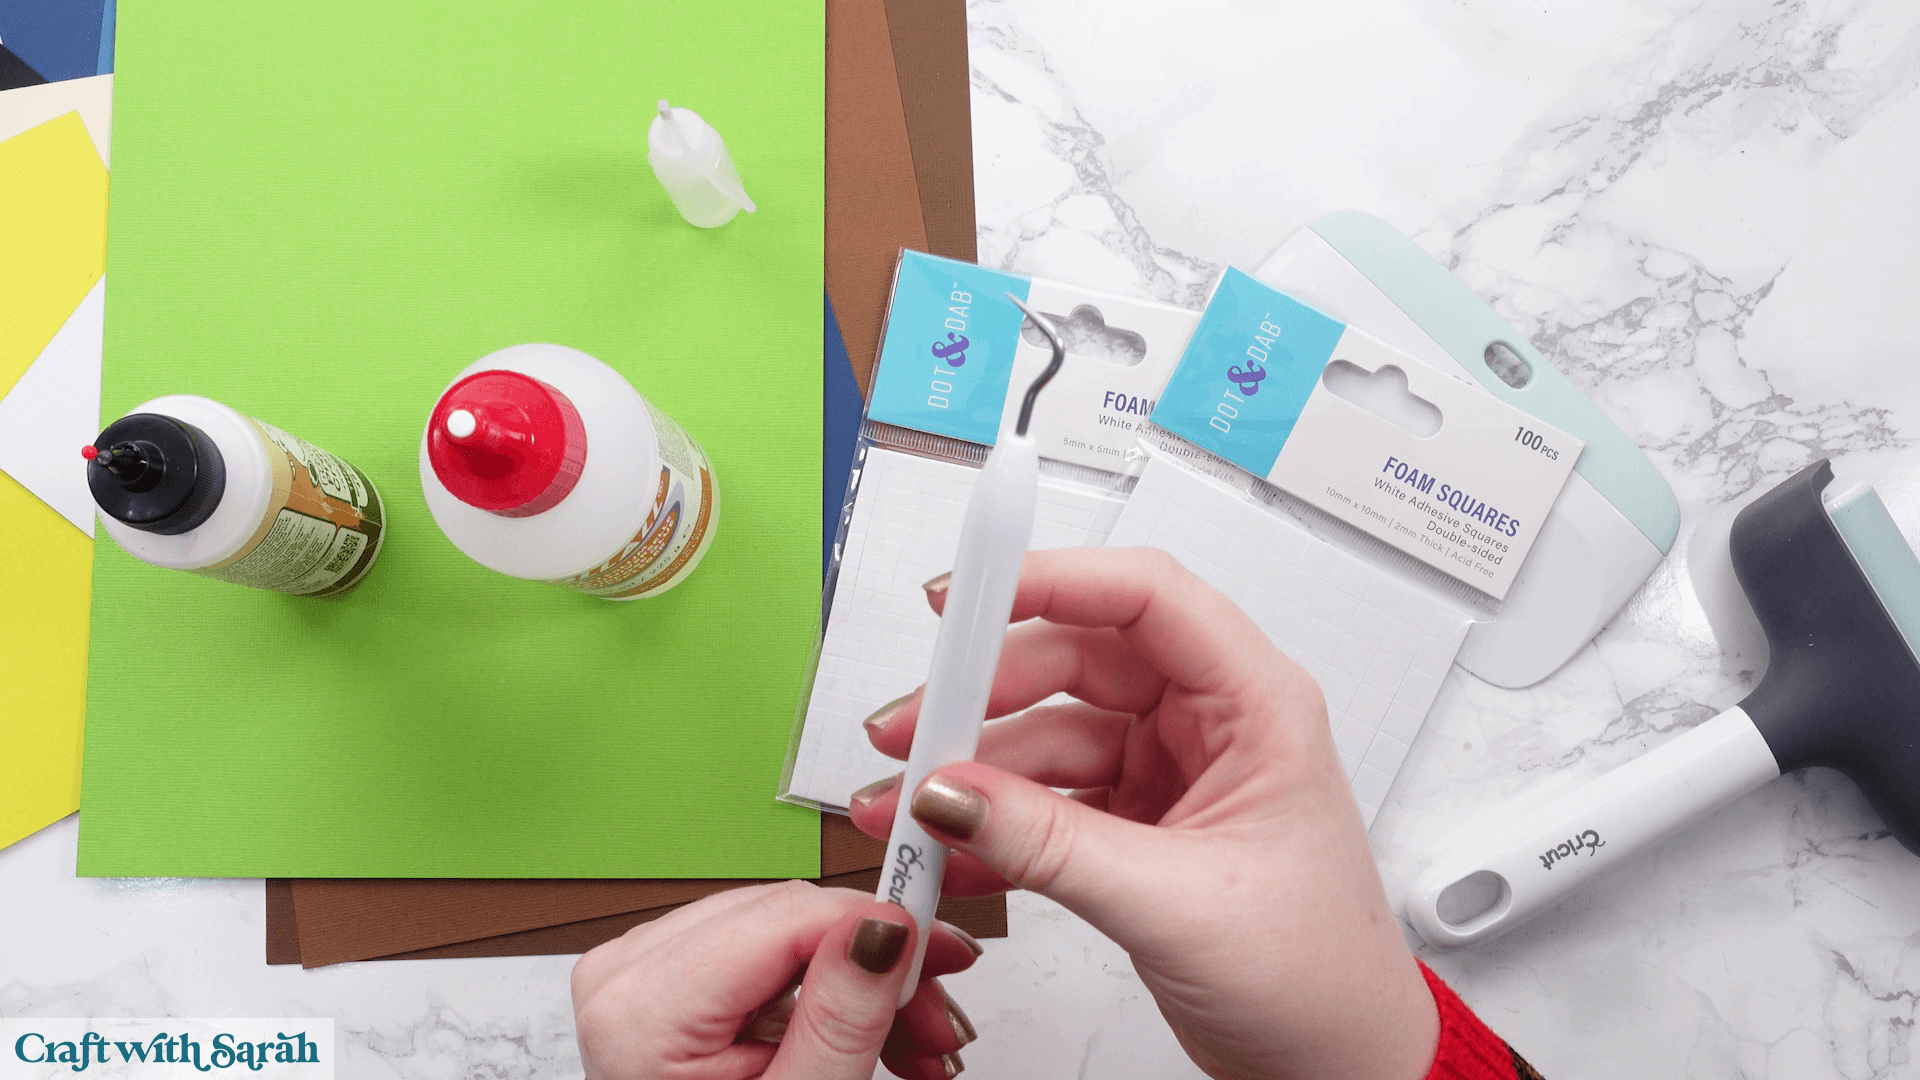
A weeding tool or pricking tool is optional, but it’s useful for removing tiny cut pieces or cleaning up any stray glue.
How to make layered paper art with a Cricut
Step 1) Download your chosen layered SVG
First, choose the layered SVG you’d like to make. Click here to view all my layered paper art designs.
You can browse all products, filter by themes or occasions, search for a particular design or look through the collection of free SVGs.
For this tutorial, I’m using this free male gnome design.
After downloading the file, you’ll need to unzip (extract) the download folder before you can use the files.
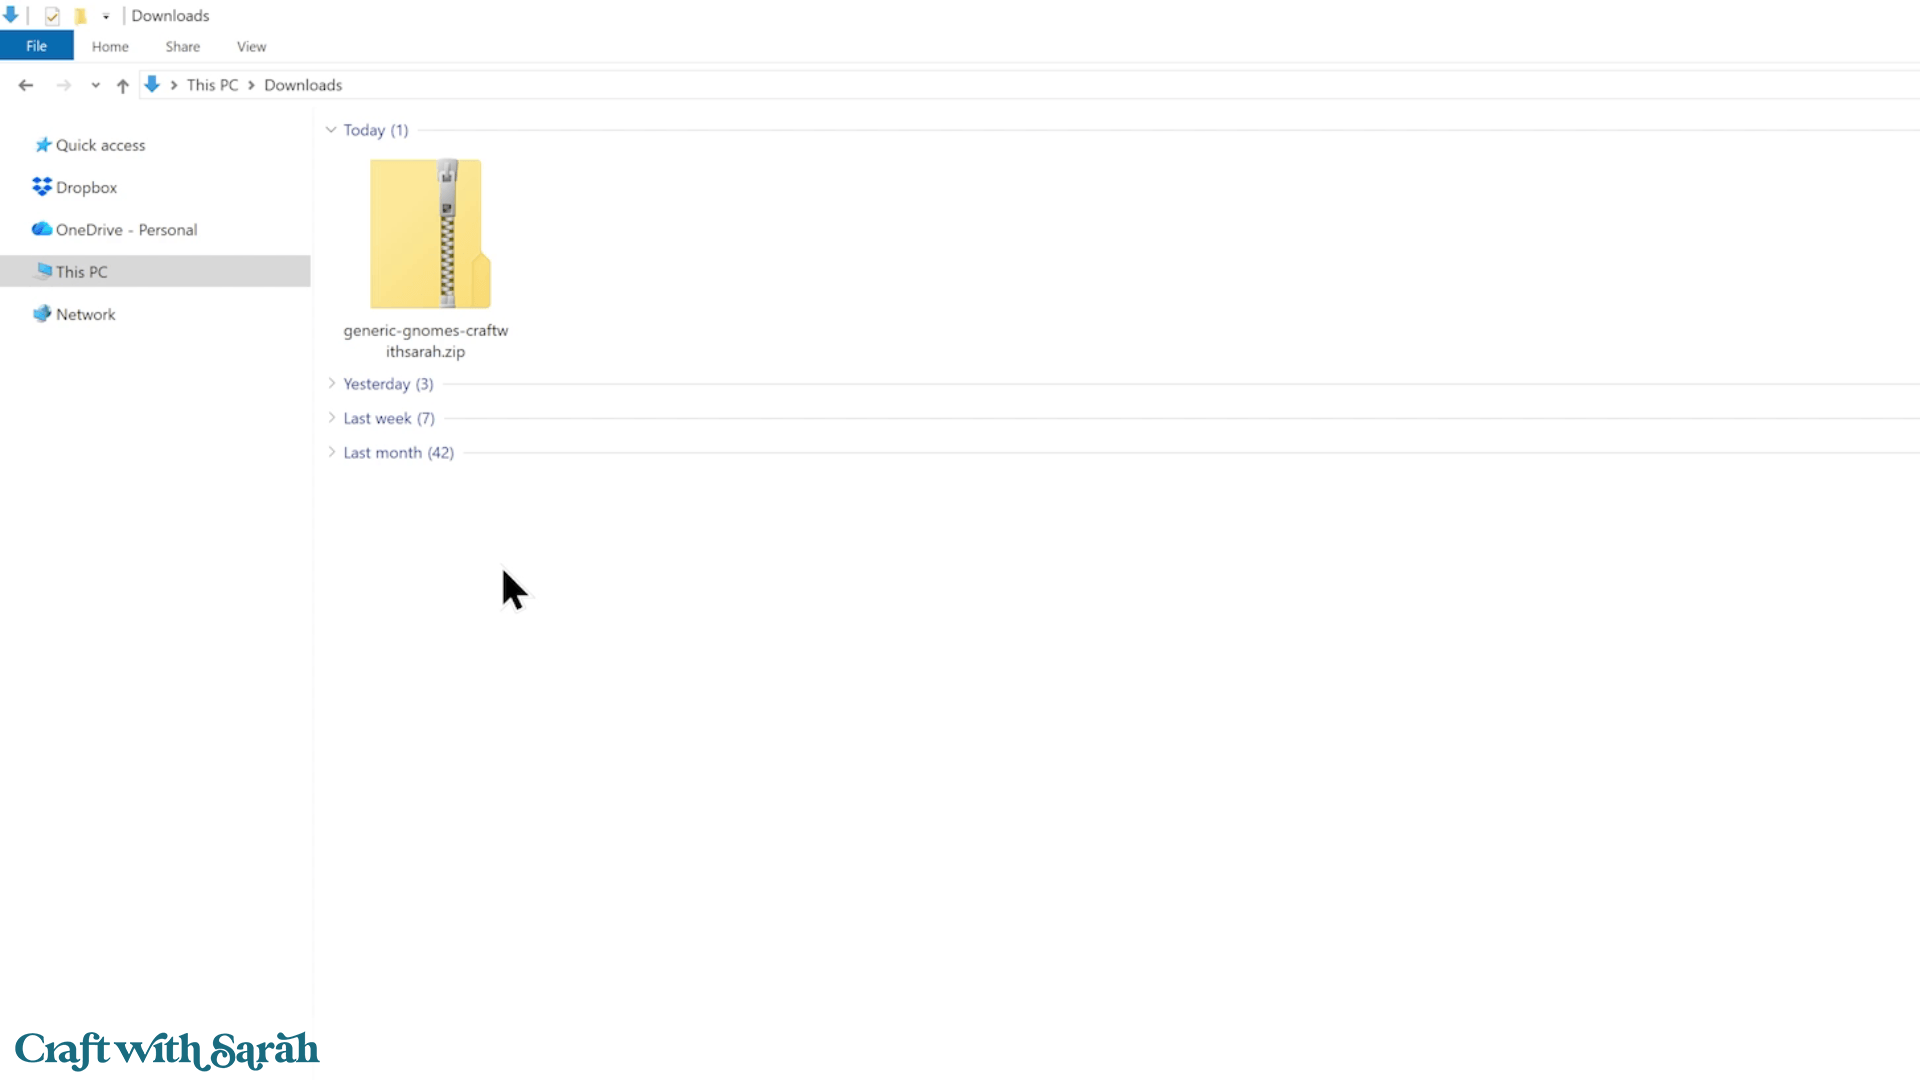
On Windows, simply right-click the ZIP folder, choose ‘Extract All’, select where you’d like to save it and click ‘Extract’.
Not sure how to unzip? Check out this separate tutorial for how to unzip folders on Windows, Mac, Android, iPad and iPhone.
Inside the extracted folder you’ll find several versions of the design for different cutting machines.
If you’re using a Cricut, open the ’01 Cricut Version’ folder.
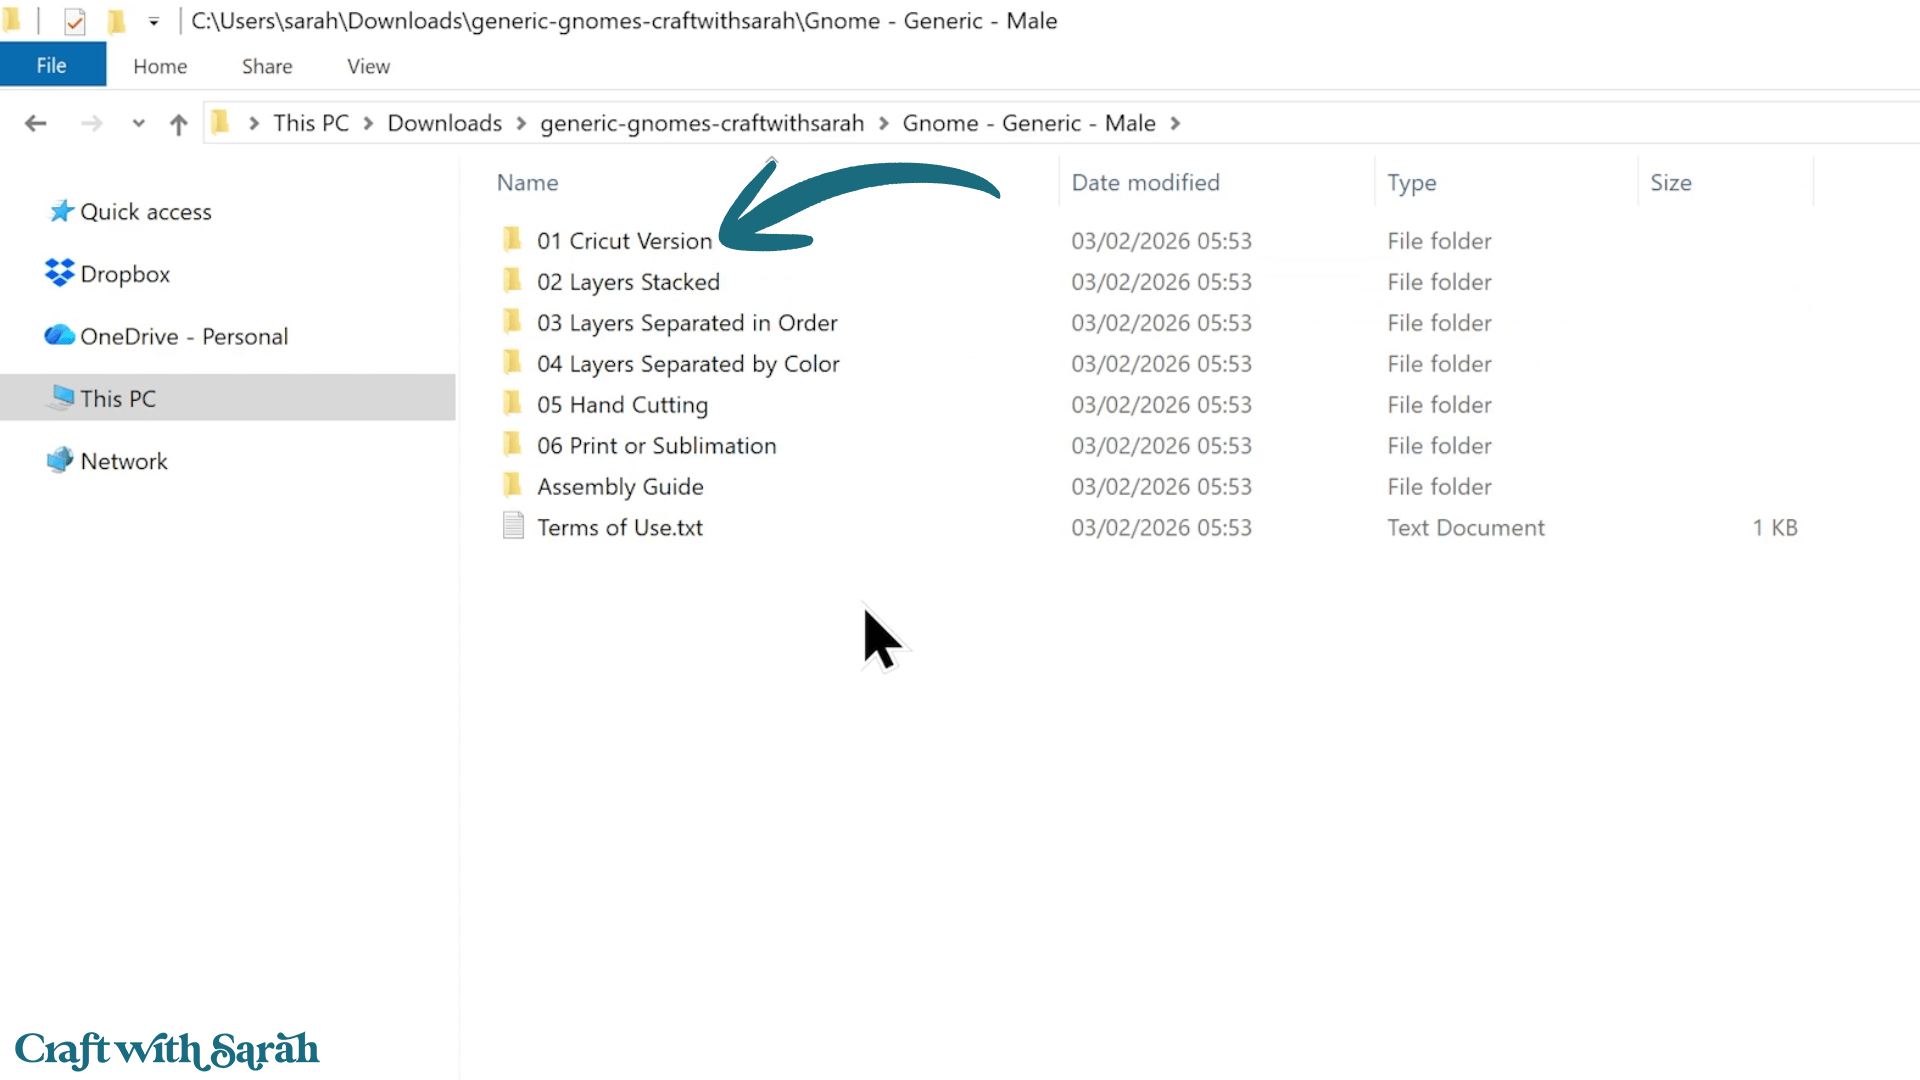
NOTE – if you are using one of my older designs that you may not see the ’01 Cricut Version’ folder. If that’s the case, the file you will need is the one that starts svg- or SVG_ in the filename.
You’ll also find an ‘Assembly Guide’ folder.
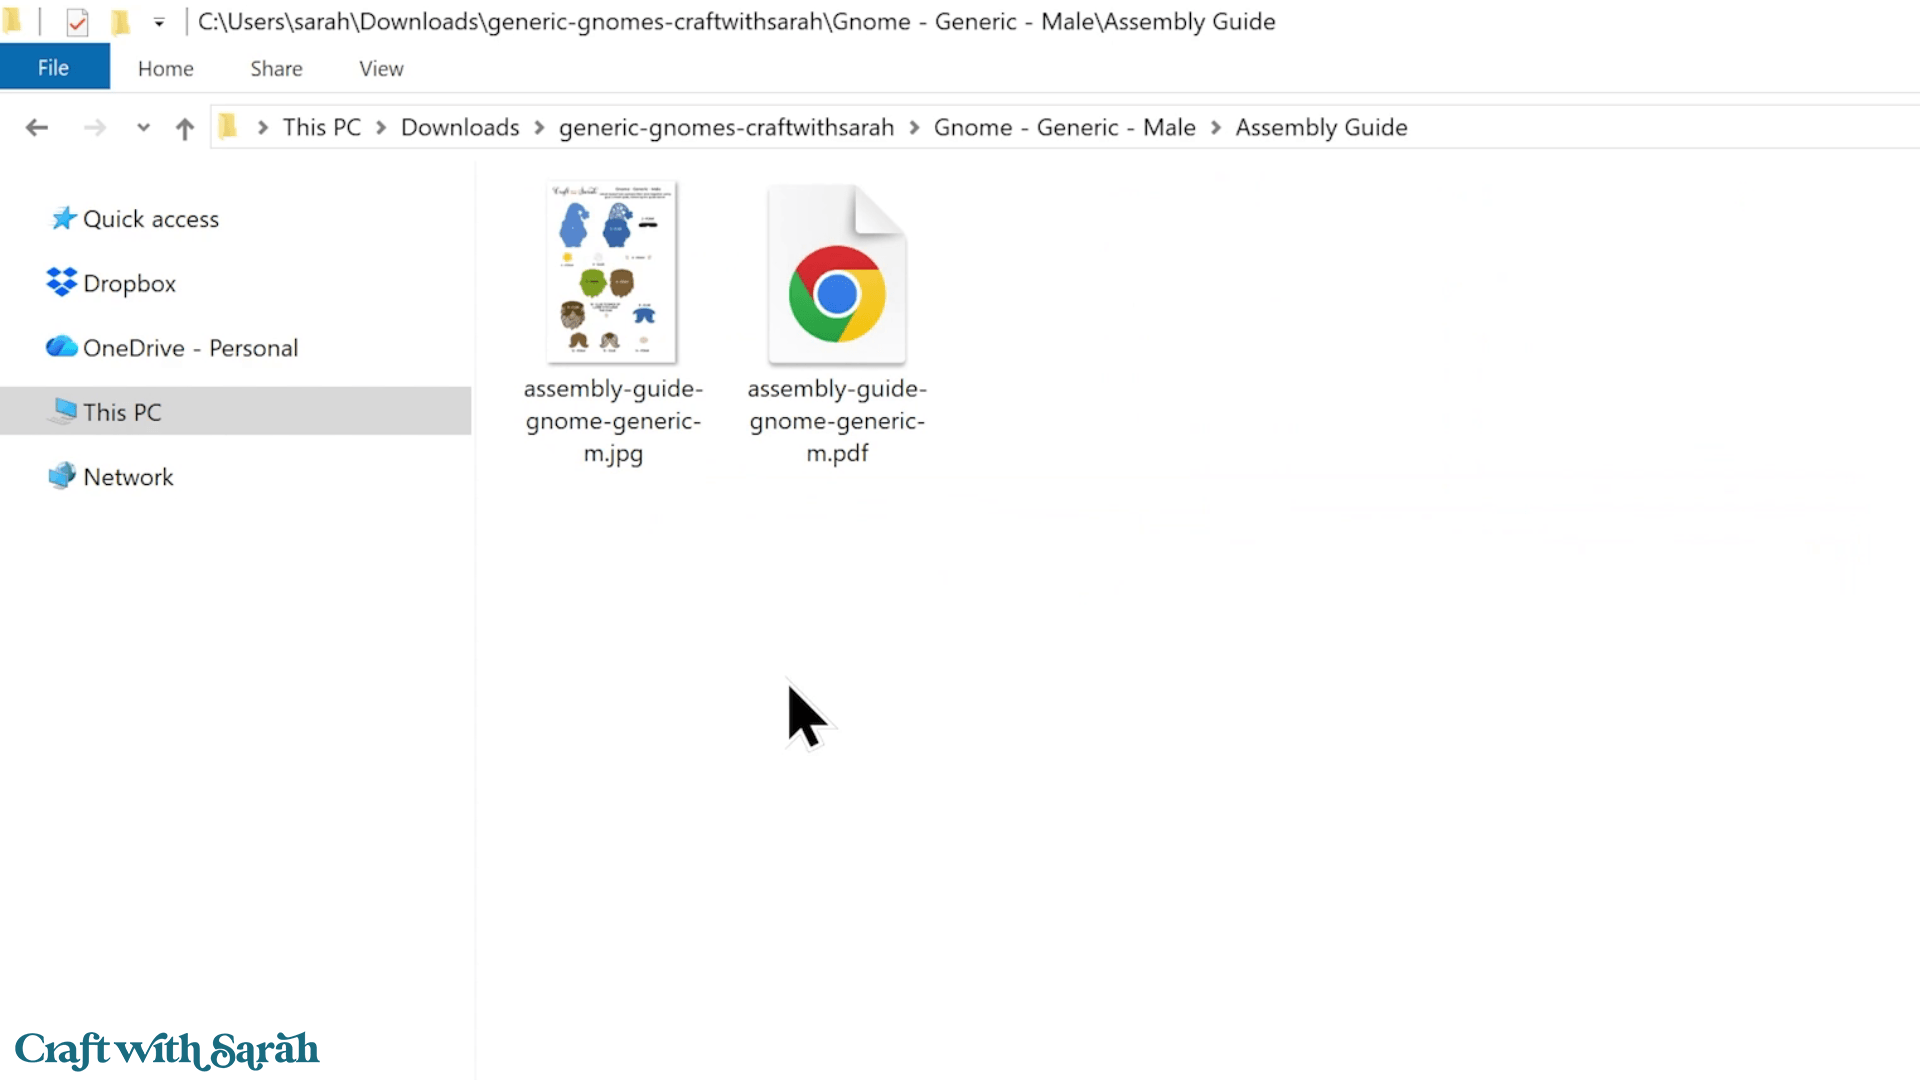
I highly recommend opening or printing the assembly guide before you begin.
It shows the order of every layer and tells you whether each piece should be attached with glue or foam squares.
Step 2) Upload the SVG into Cricut Design Space
Open Cricut Design Space and start a new project by choosing ‘New Project’ and then ‘Blank Canvas’.
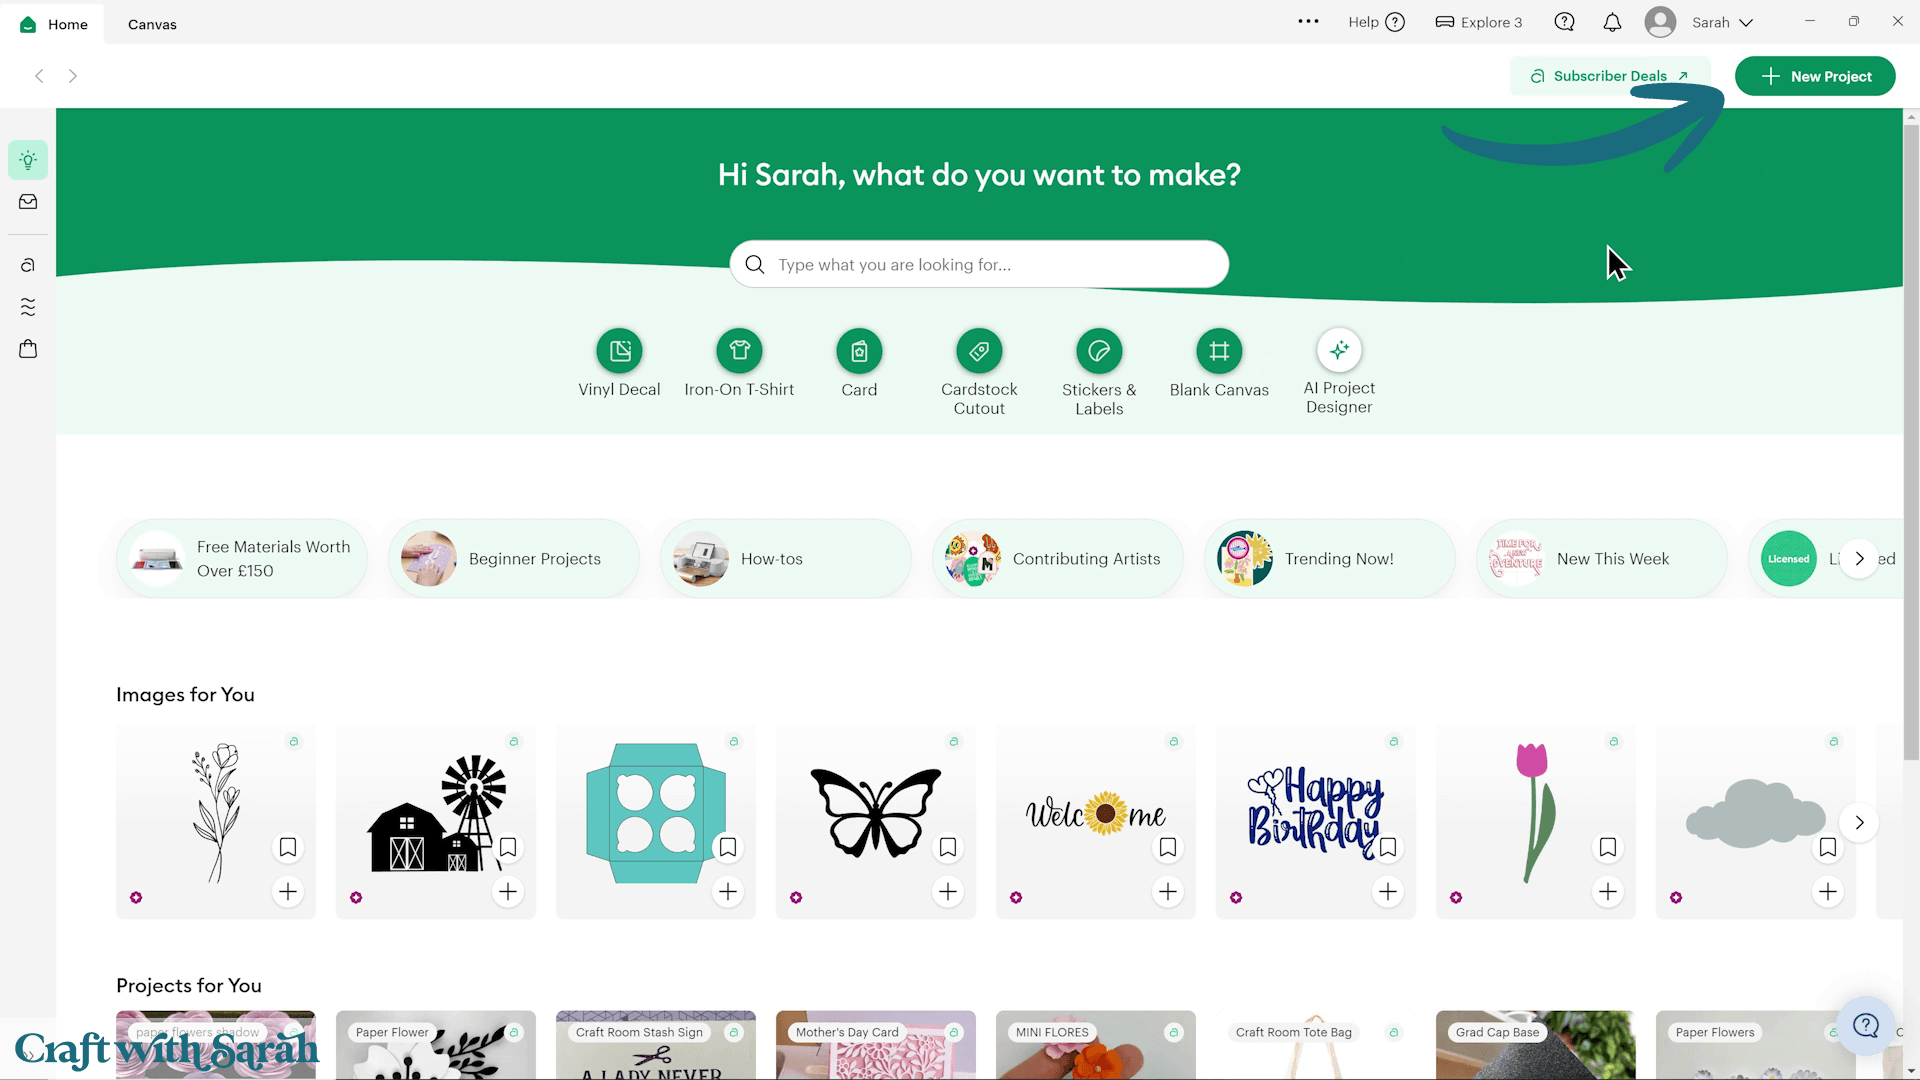
Click ‘Upload’, followed by ‘Upload Image’.
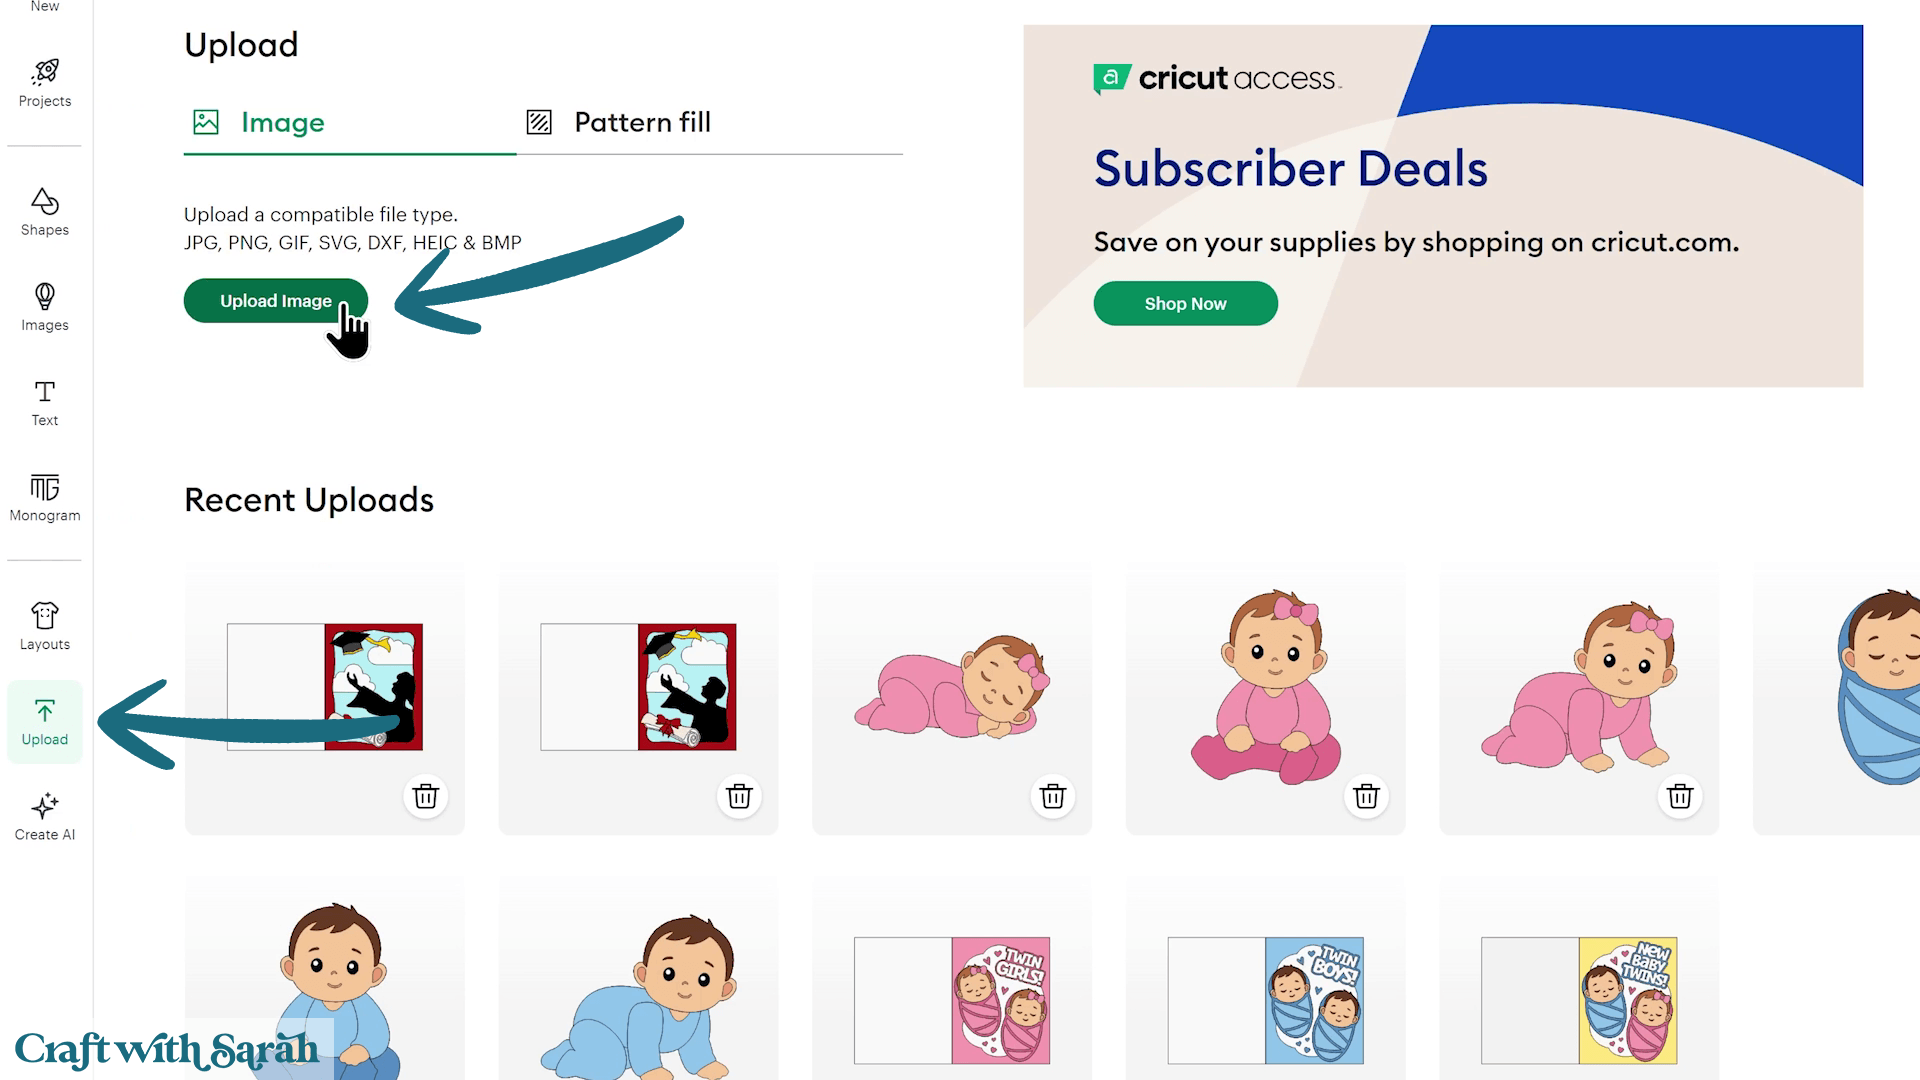
Browse to your extracted download folder and open the ’01 Cricut Version’ folder.
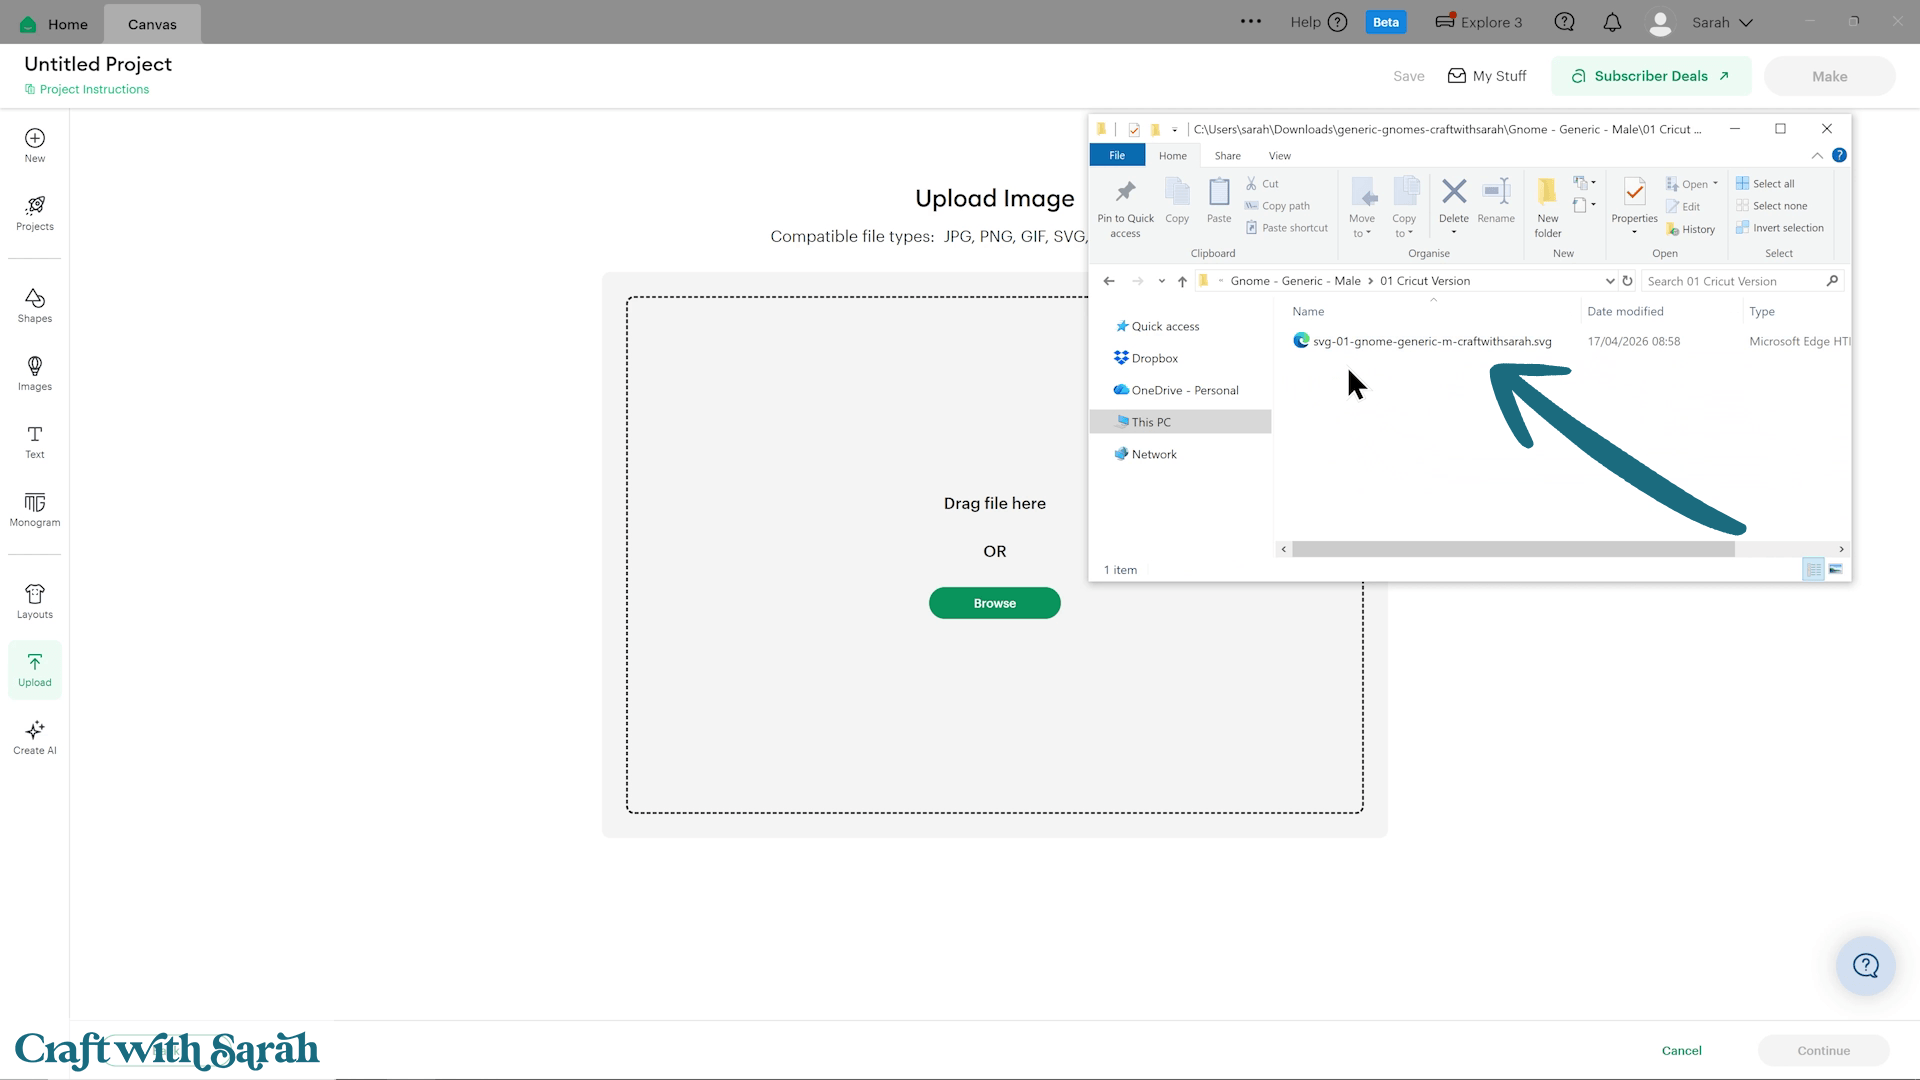
Choose the SVG file that starts svg-01 in the filename.
NOTE – if you are using one of my older designs that you may not see the ’01 Cricut Version’ folder. If that’s the case, the file you will need is the one that starts svg- or SVG_ in the filename.
Click ‘Continue’ and ‘Upload’.
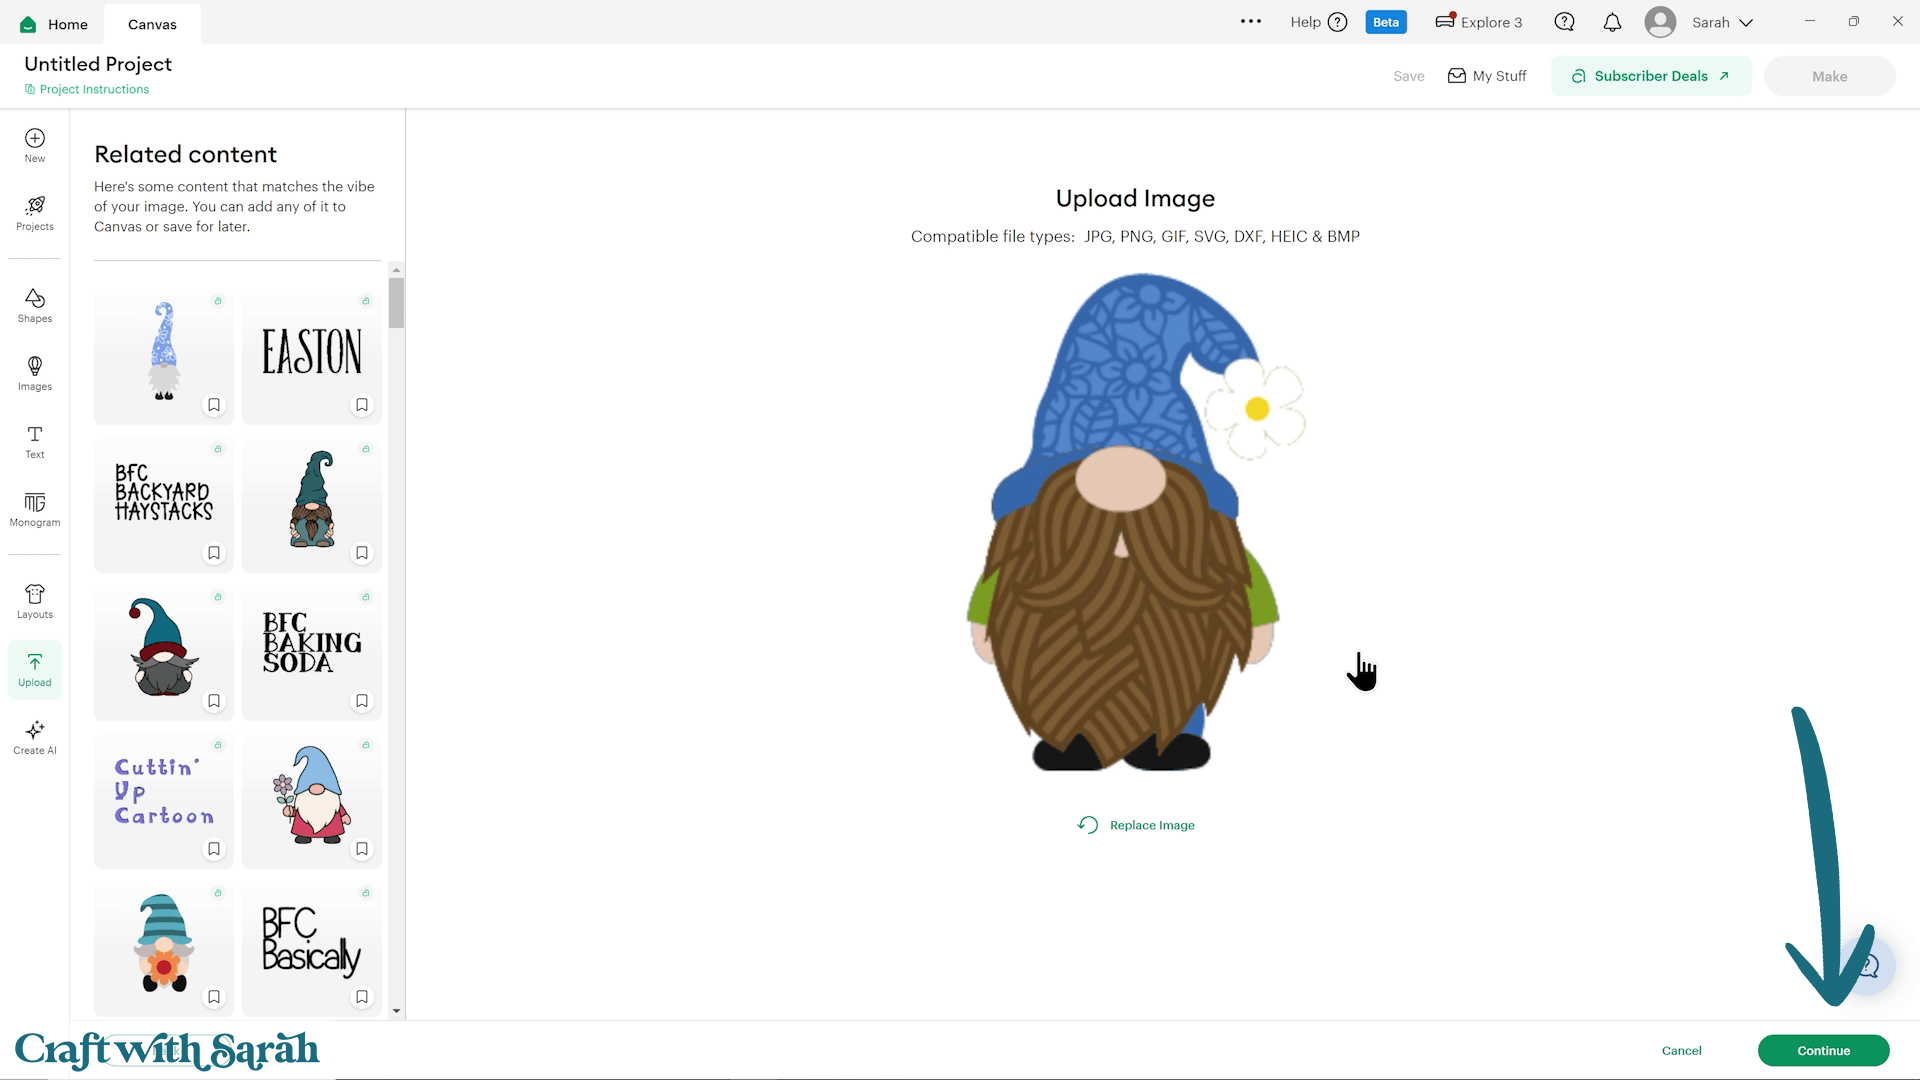
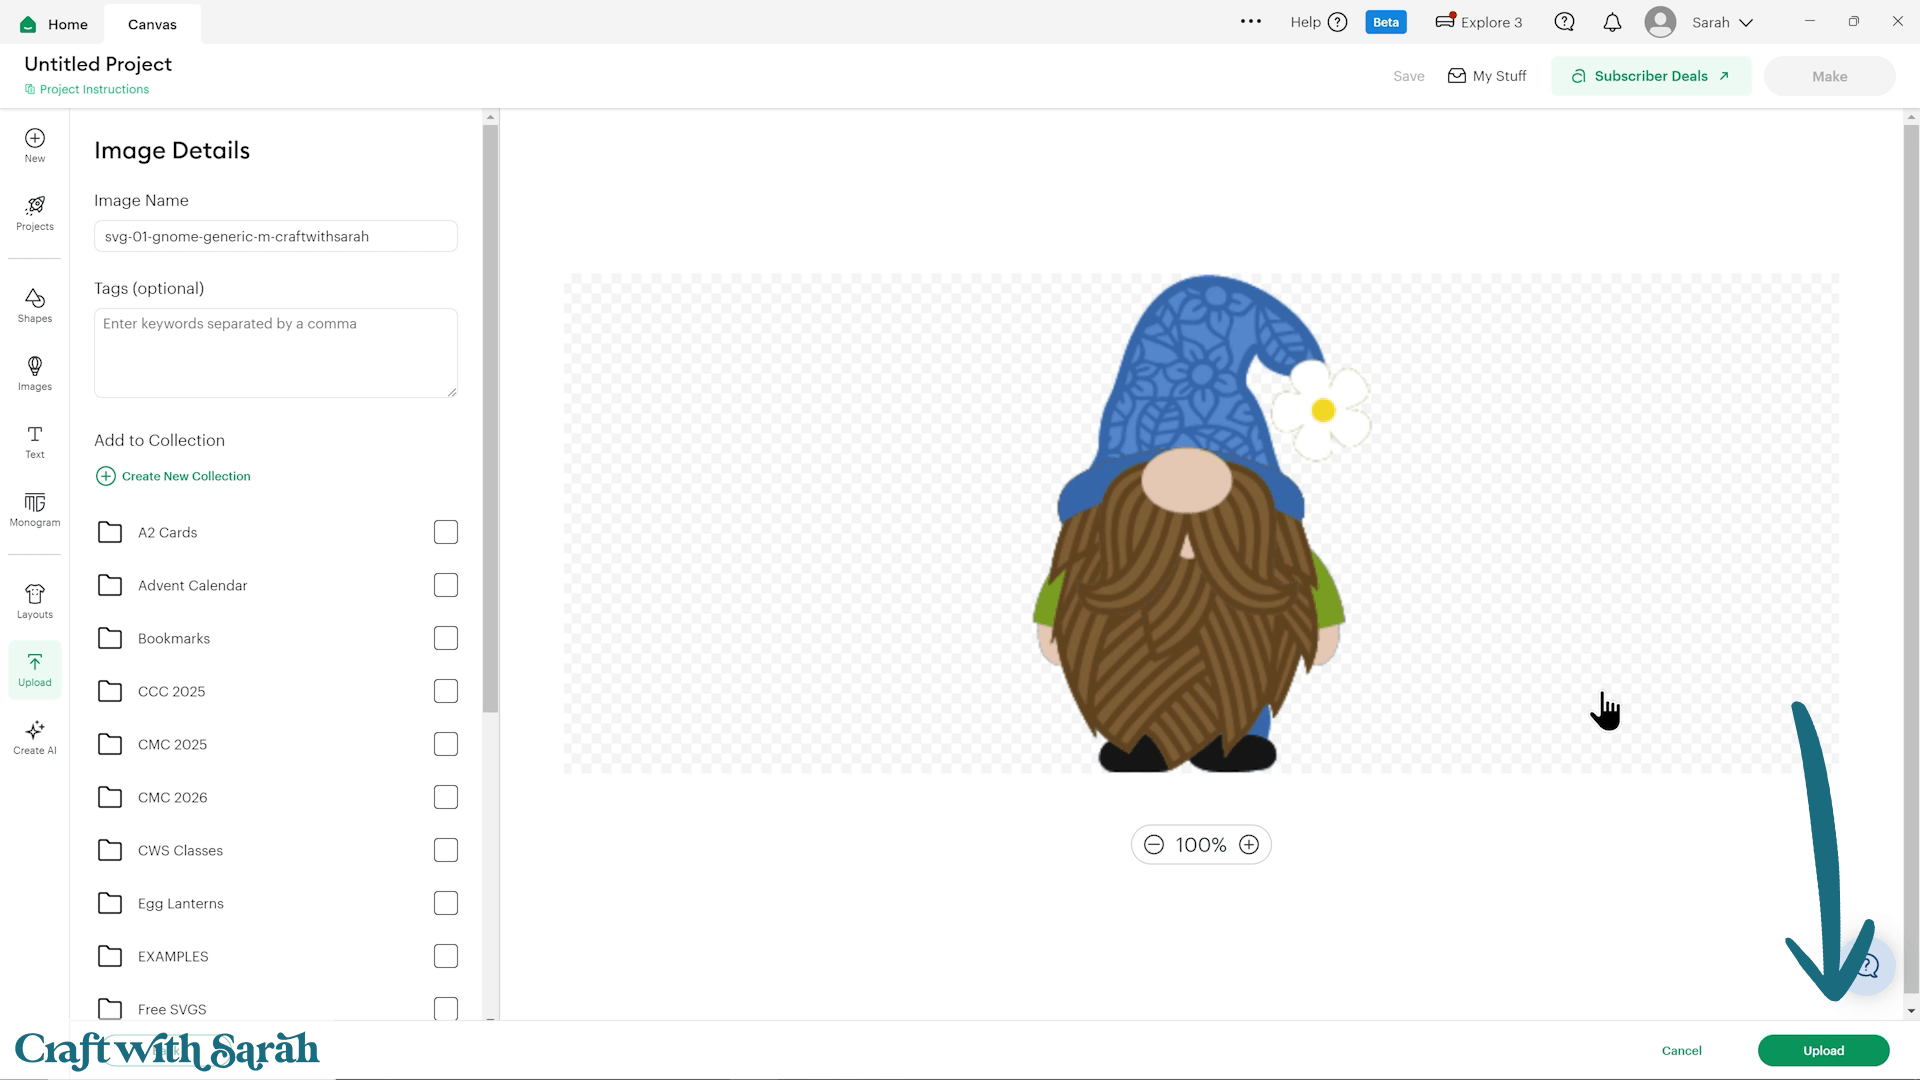
Once the design is inserted onto your Canvas, you can see all of the individual layers separated ready for cutting by opening up the layers panel on the right-side of the screen.
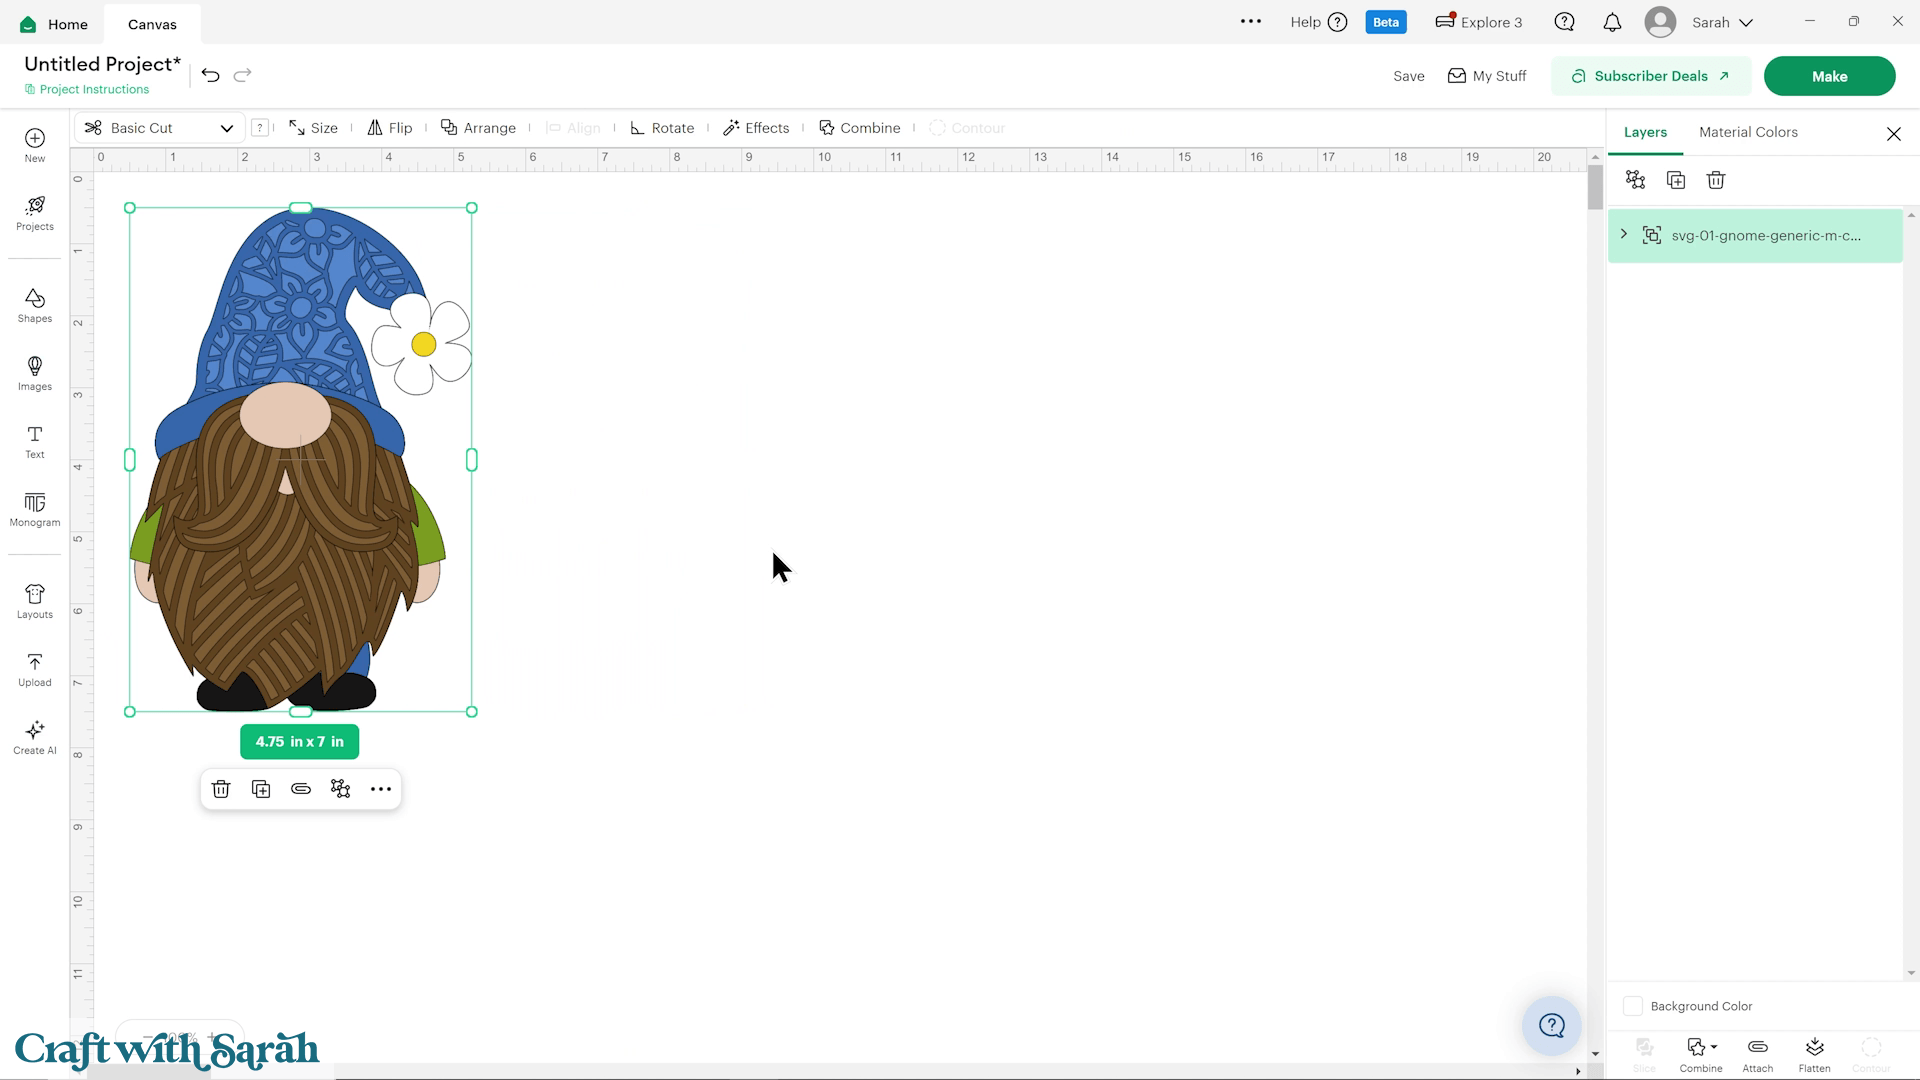
Still not sure how to upload? Check out this in-depth video tutorial on how to upload SVG files to Cricut Design Space.
Step 3) Customise your design
Now is the time to get creative!
If you’d like to make your design larger or smaller, click it and use the size controls.
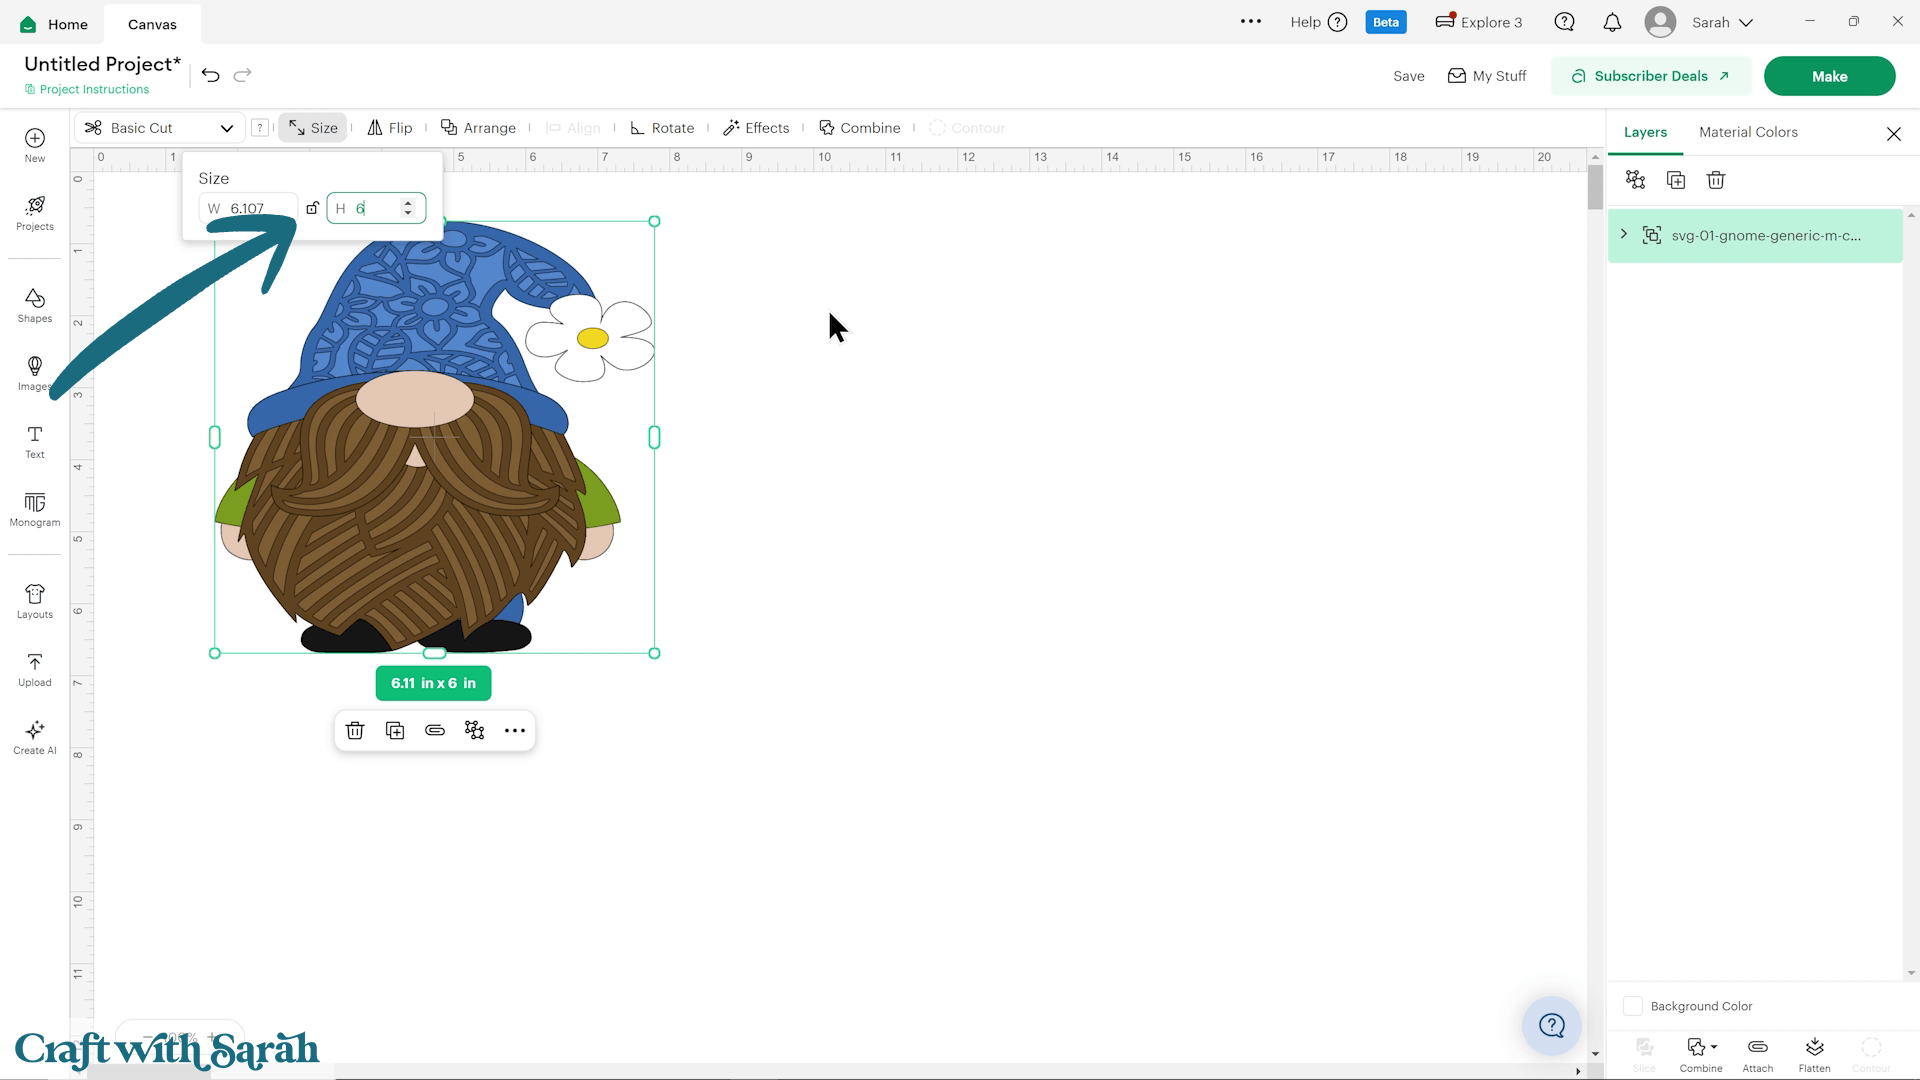
Make sure the padlock icon is locked before resizing so the proportions stay correct.
If your padlock is showing as open, click it to close it / lock it.
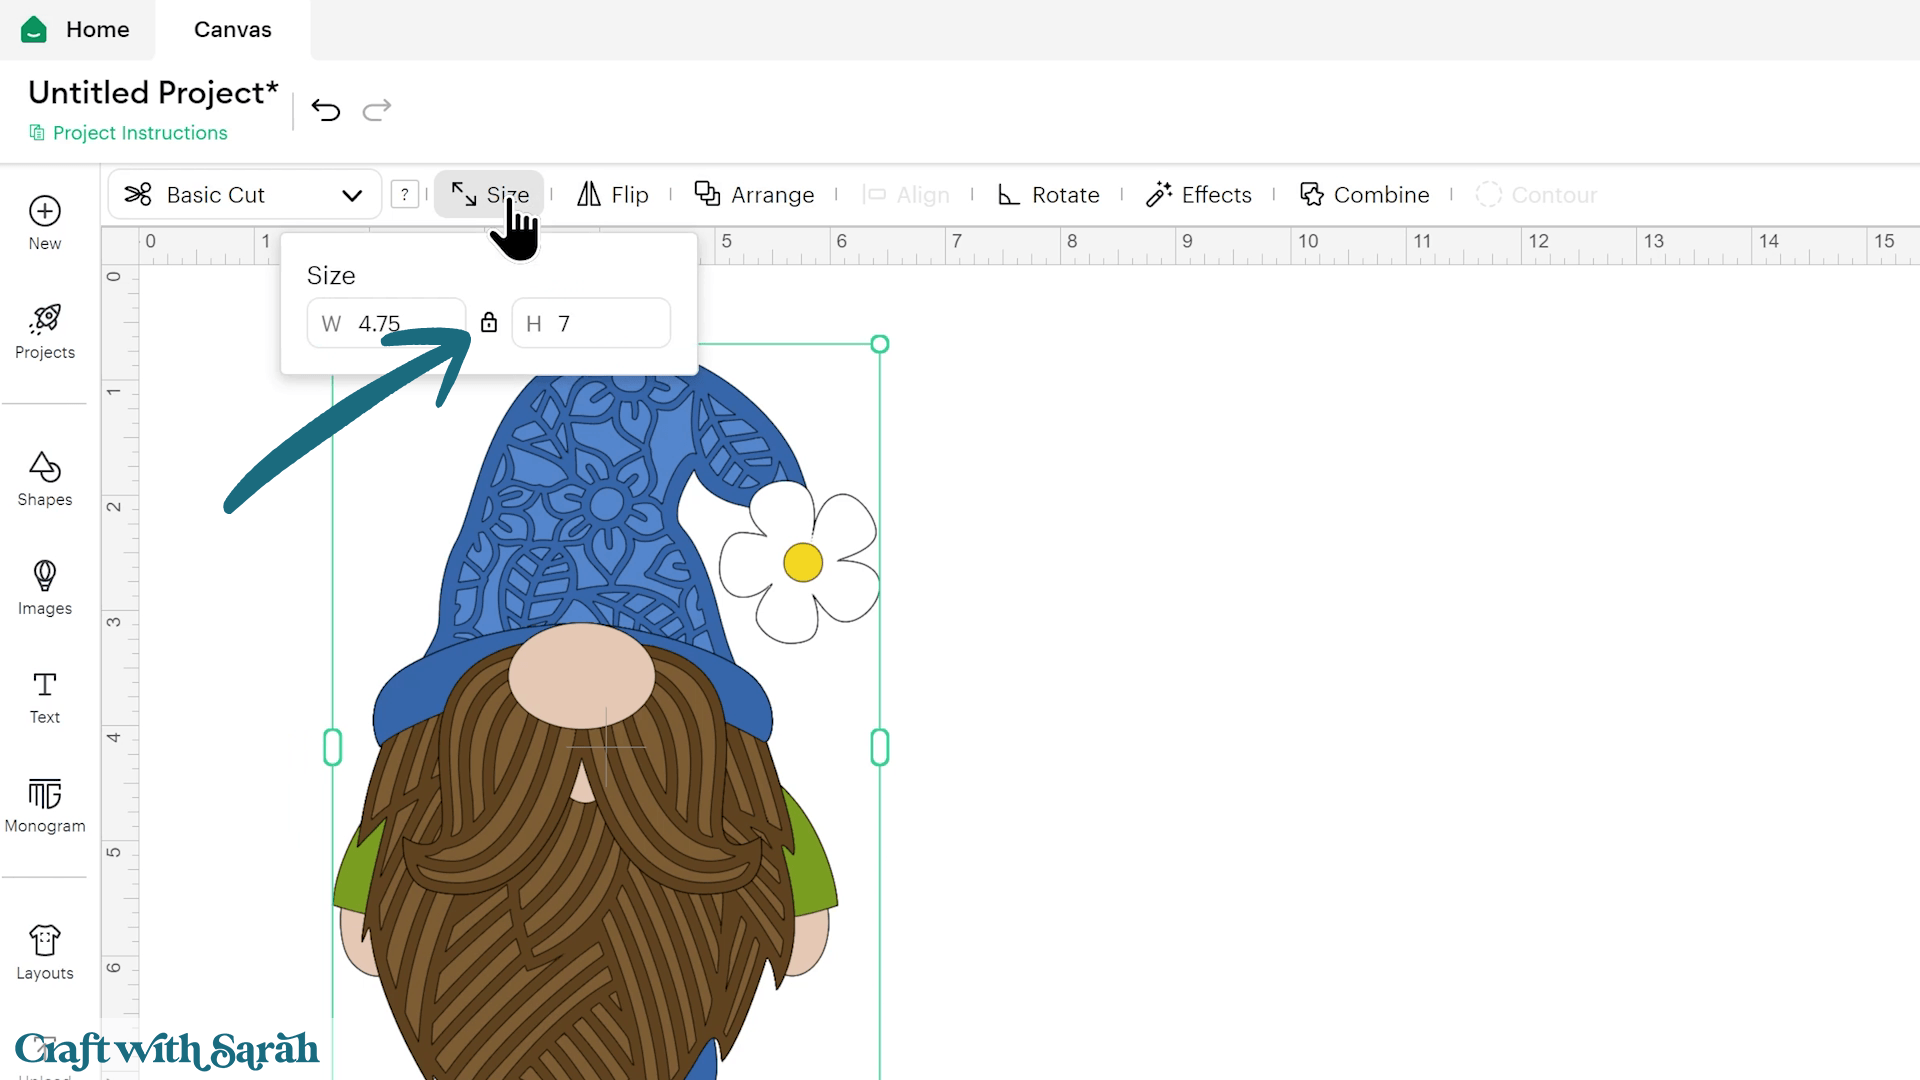
If you unlock the padlock, the design can become stretched or squashed.
You can change the colours of the design if you wish.
Open up the Layers panel by clicking the arrow.
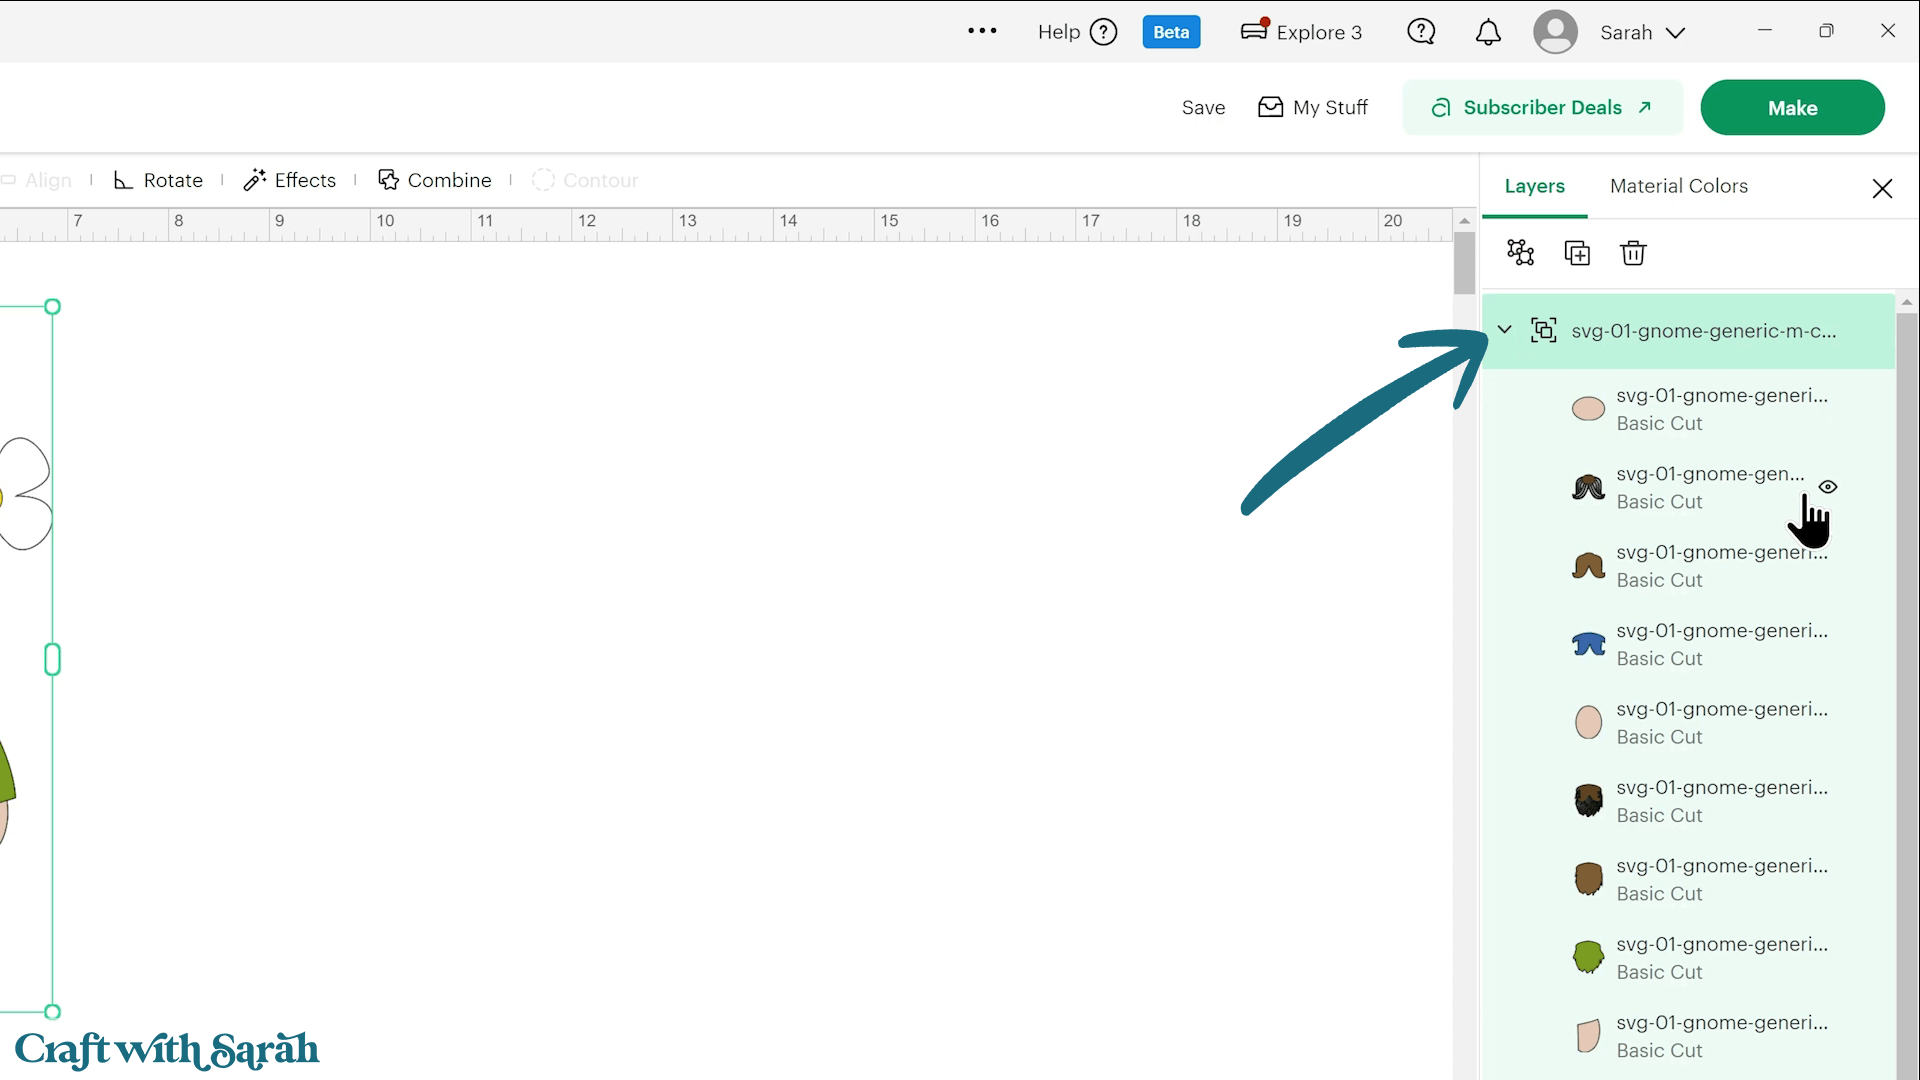
Select the layer you’d like to change and choose a new colour from the ‘Material Colours’ menu.
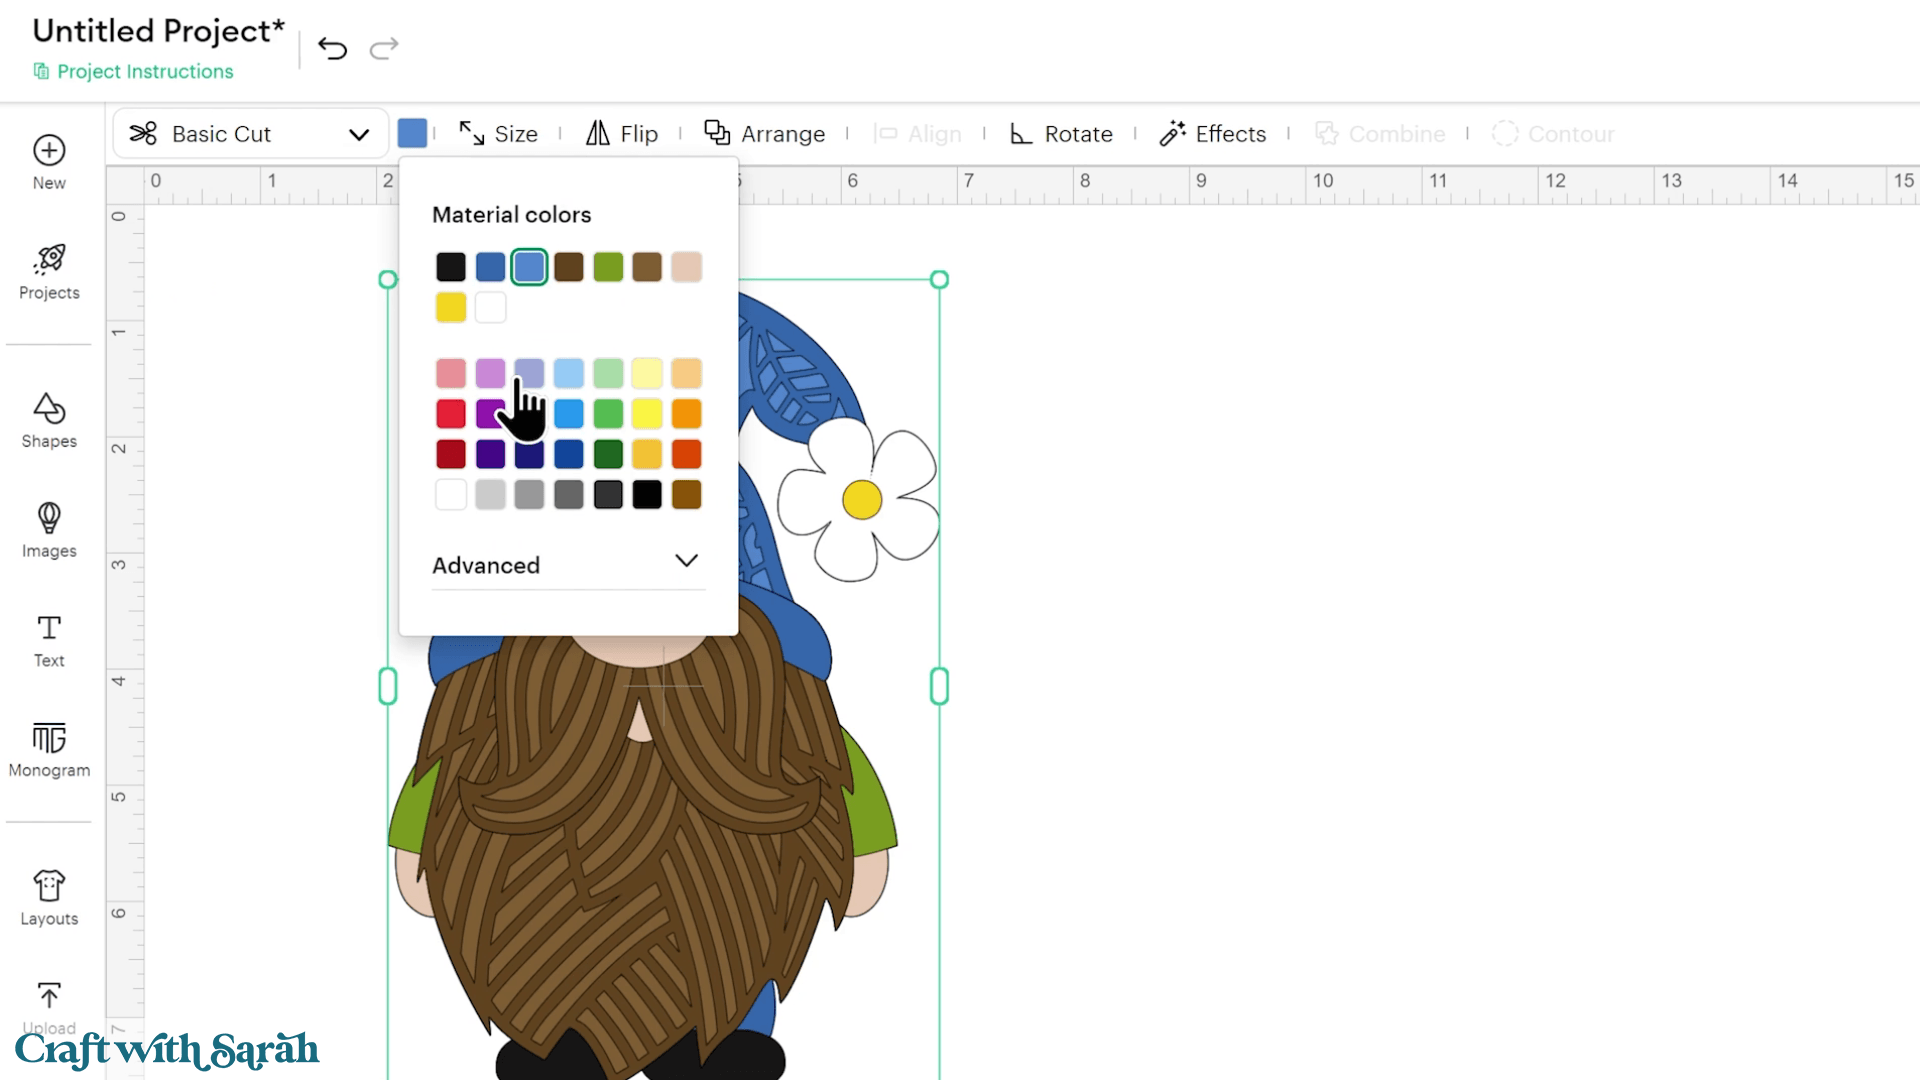
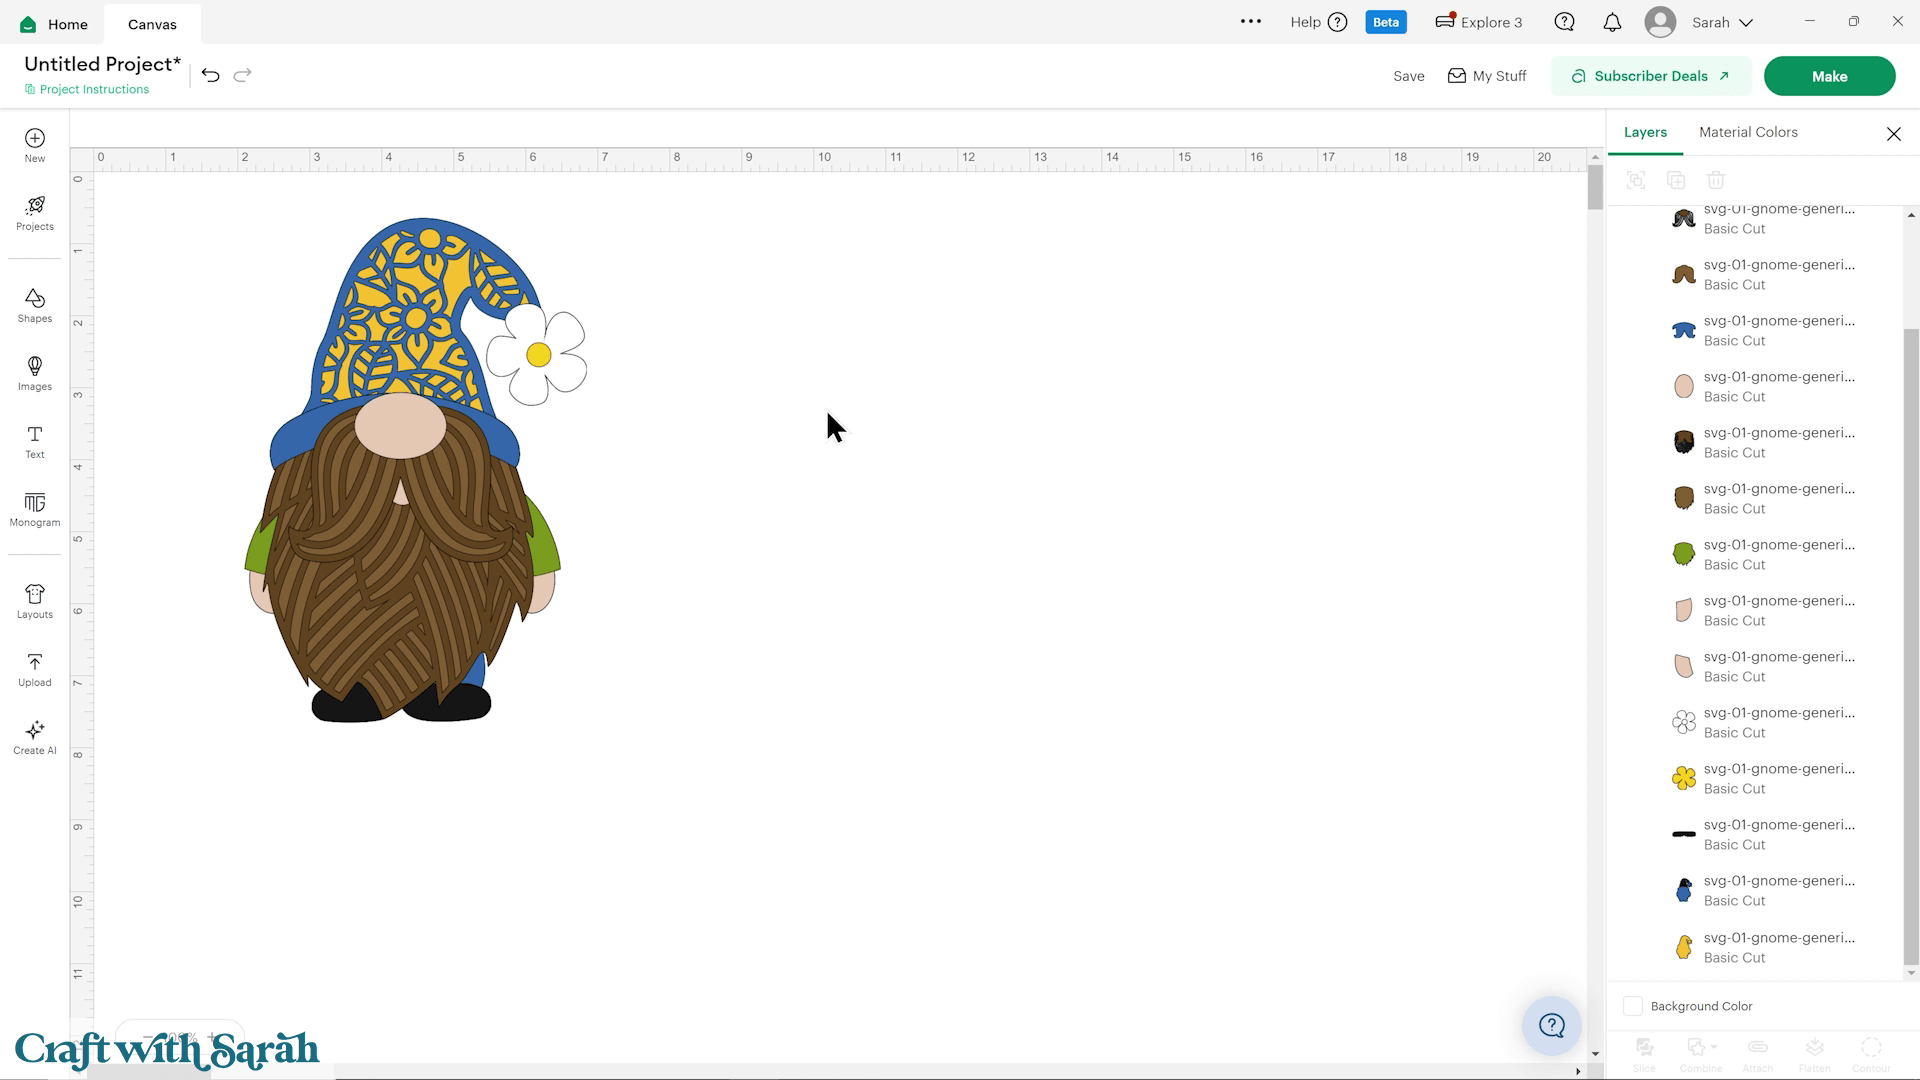
I recommend changing all of your colours before you start cutting as it’s then much easier to know which colour of cardstock to load onto your mat at which time.
For more information about customizing your Cricut projects, check out the following tutorials:
- How to recolour SVGs in Cricut Design Space
- How to modify SVGs for custom creations
- How to size SVG designs for fitting into a frame
Step 4) Prepare for cutting
When you’re happy with your design, connect your Cricut machine and click ‘Make’.
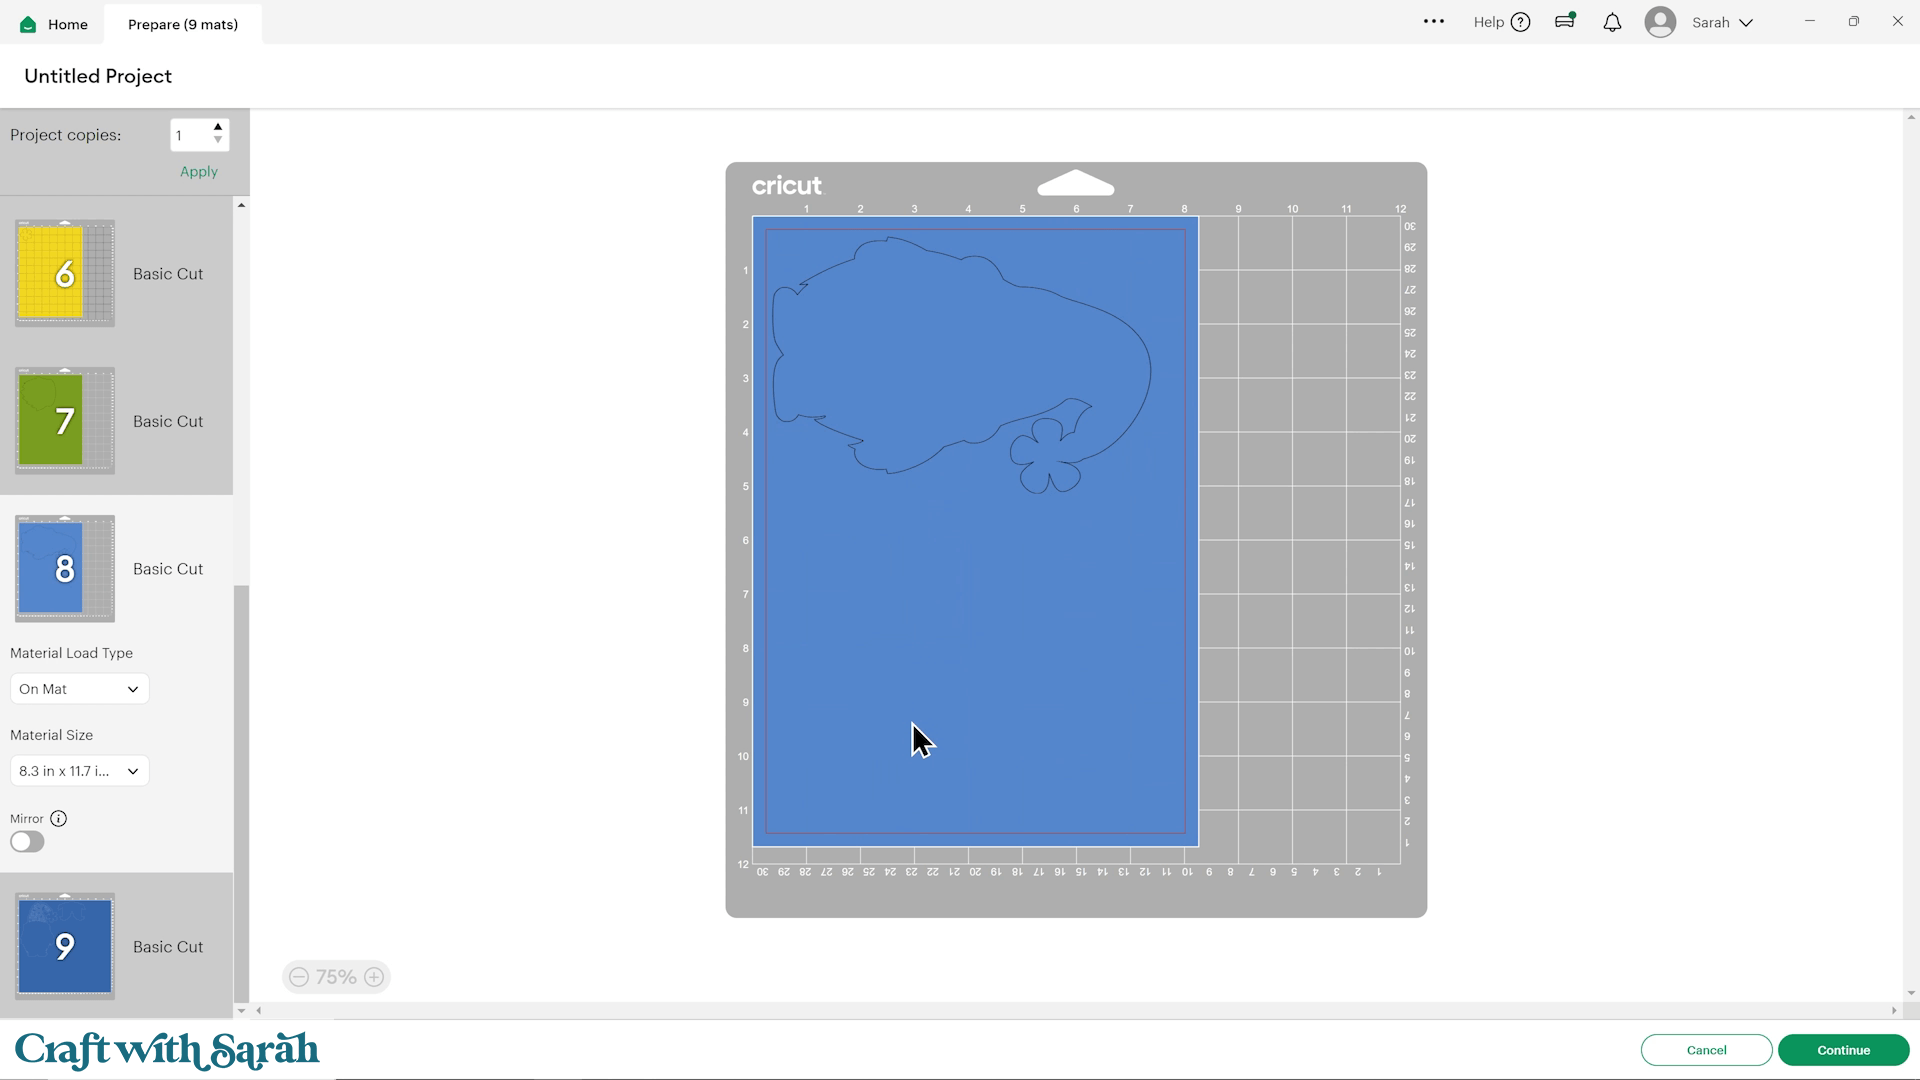
Design Space automatically separates each colour onto its own cutting mat.
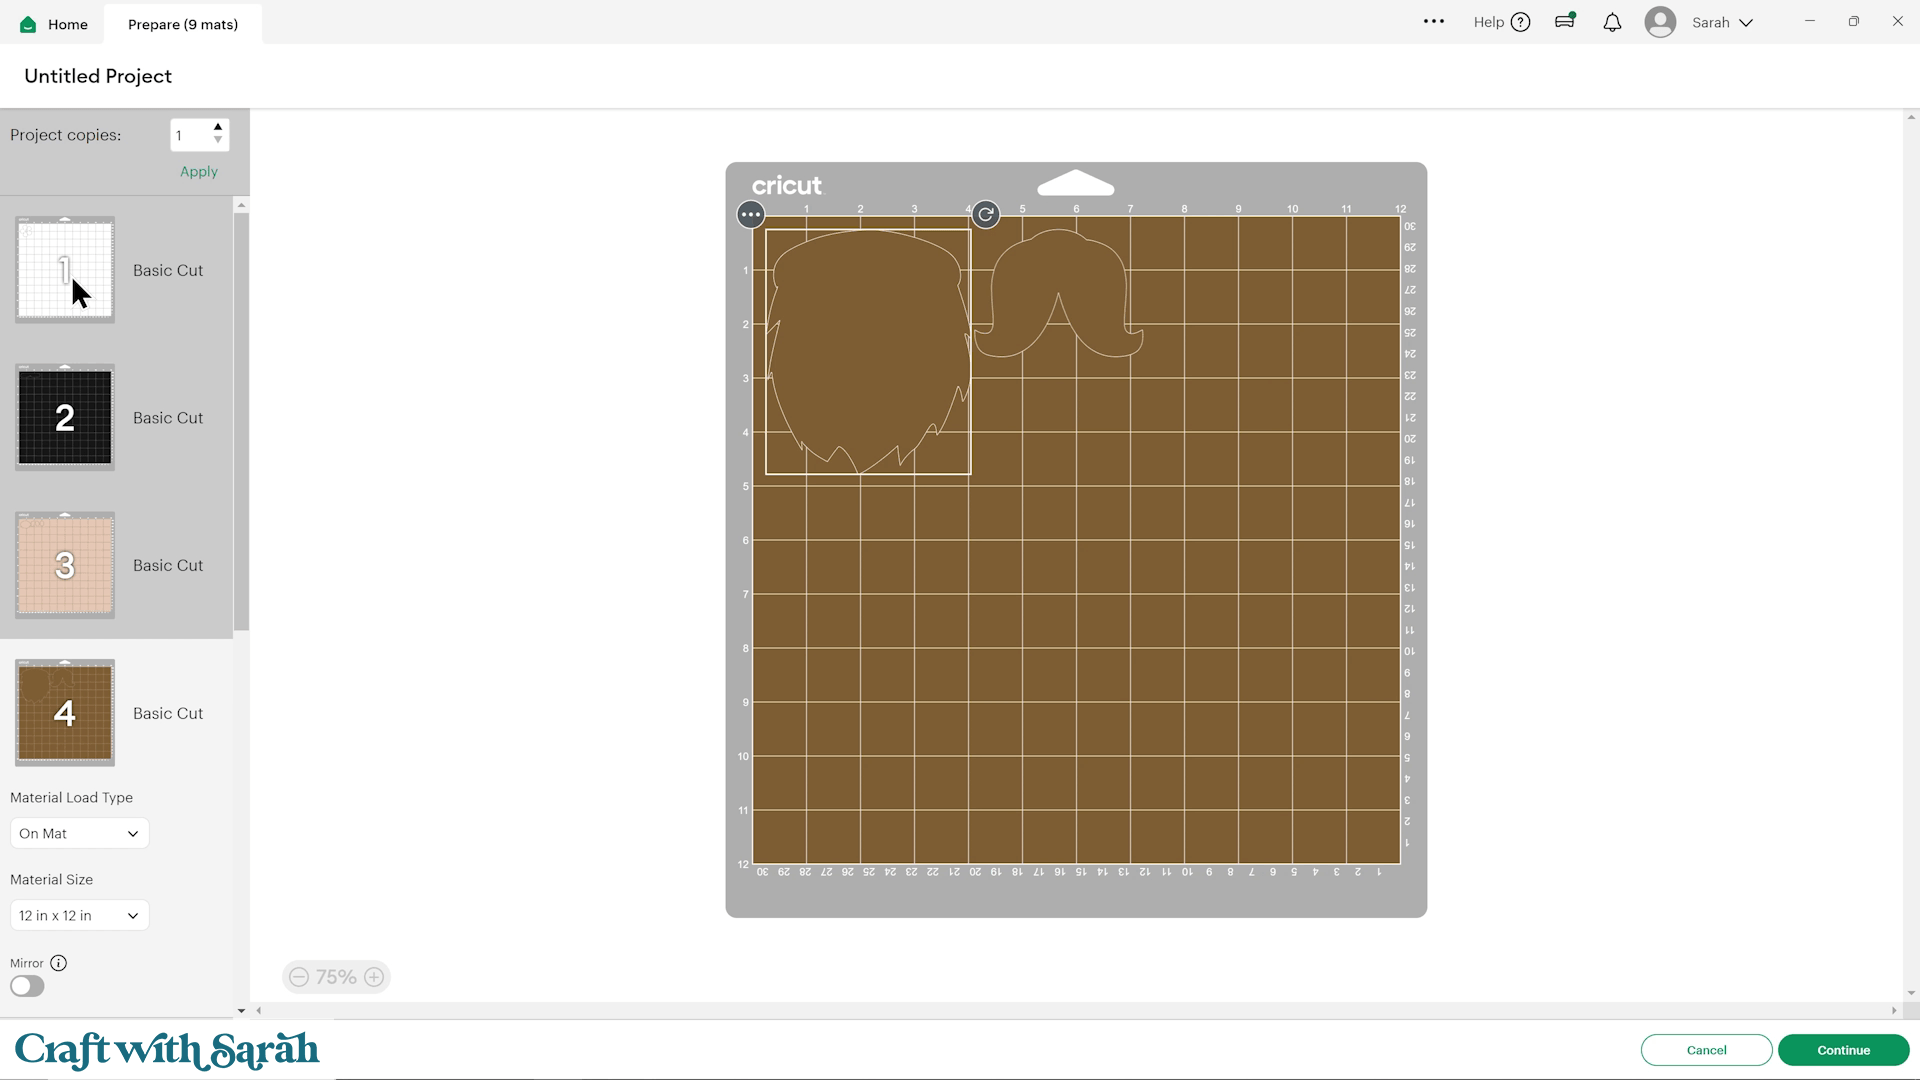
If there are too many shapes in one colour to fit on a single mat, additional mats will be automatically created in the same colour.
Check through all of the mats before you begin cutting so you know how many sheets of each colour you’ll need.
If you’re using cardstock scraps, you can move the pieces around on each mat to match the position of your scraps and reduce waste.
You can also rotate pieces to make better use of your cardstock, but make sure none of the shapes overlap. If they do, they won’t cut correctly.
Step 5) Cut all of the cardstock layers
Note – the steps below show how to cut cardstock on Cricut Explore and Maker models. You may find some of the below links more helpful if you have a different type of machine.
- Cutting Cardstock: Explore Air 2/3/4 and Maker/3/4 Version
- Cutting Cardstock: Joy Xtra Version
- Cutting Cardstock: Cricut Joy Version
Place the first colour of cardstock onto your cutting mat, lining it up with the top-left corner of the mat.
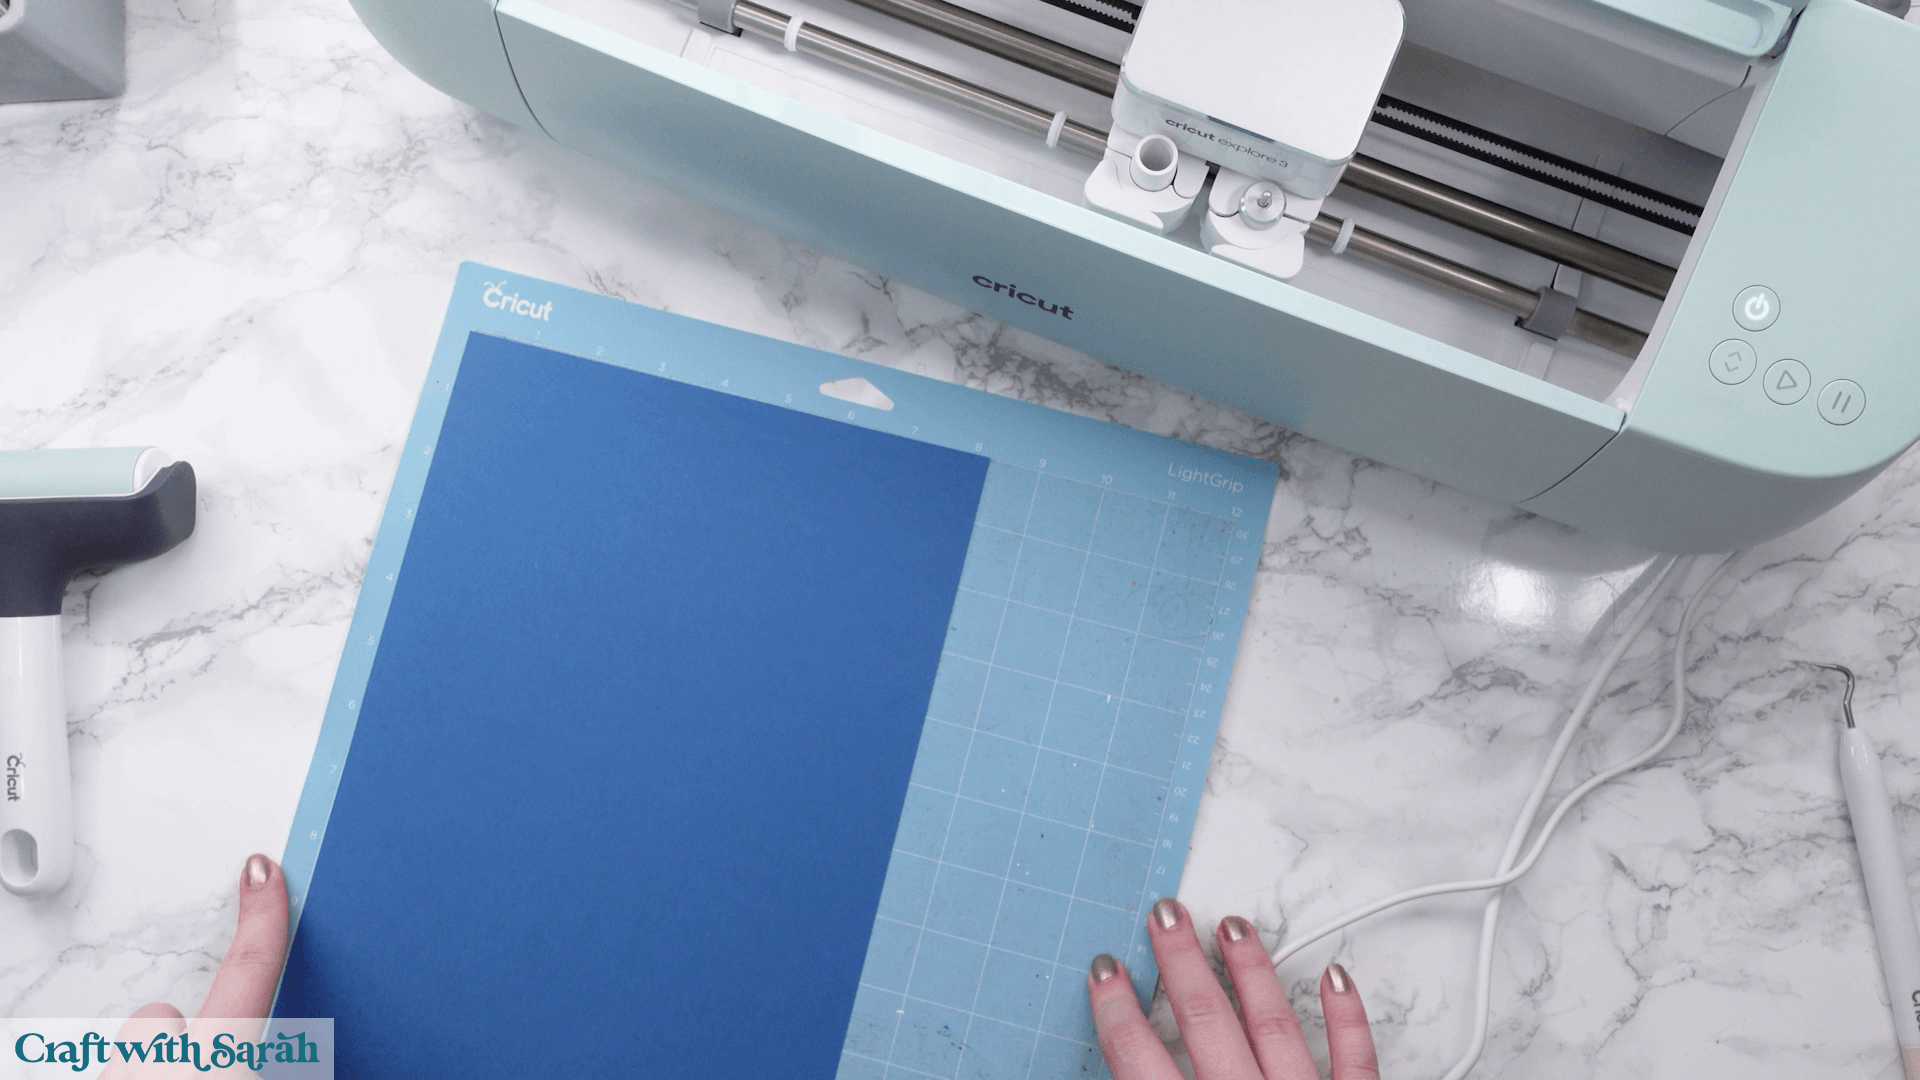
Press it down firmly using a brayer or scraper tool.
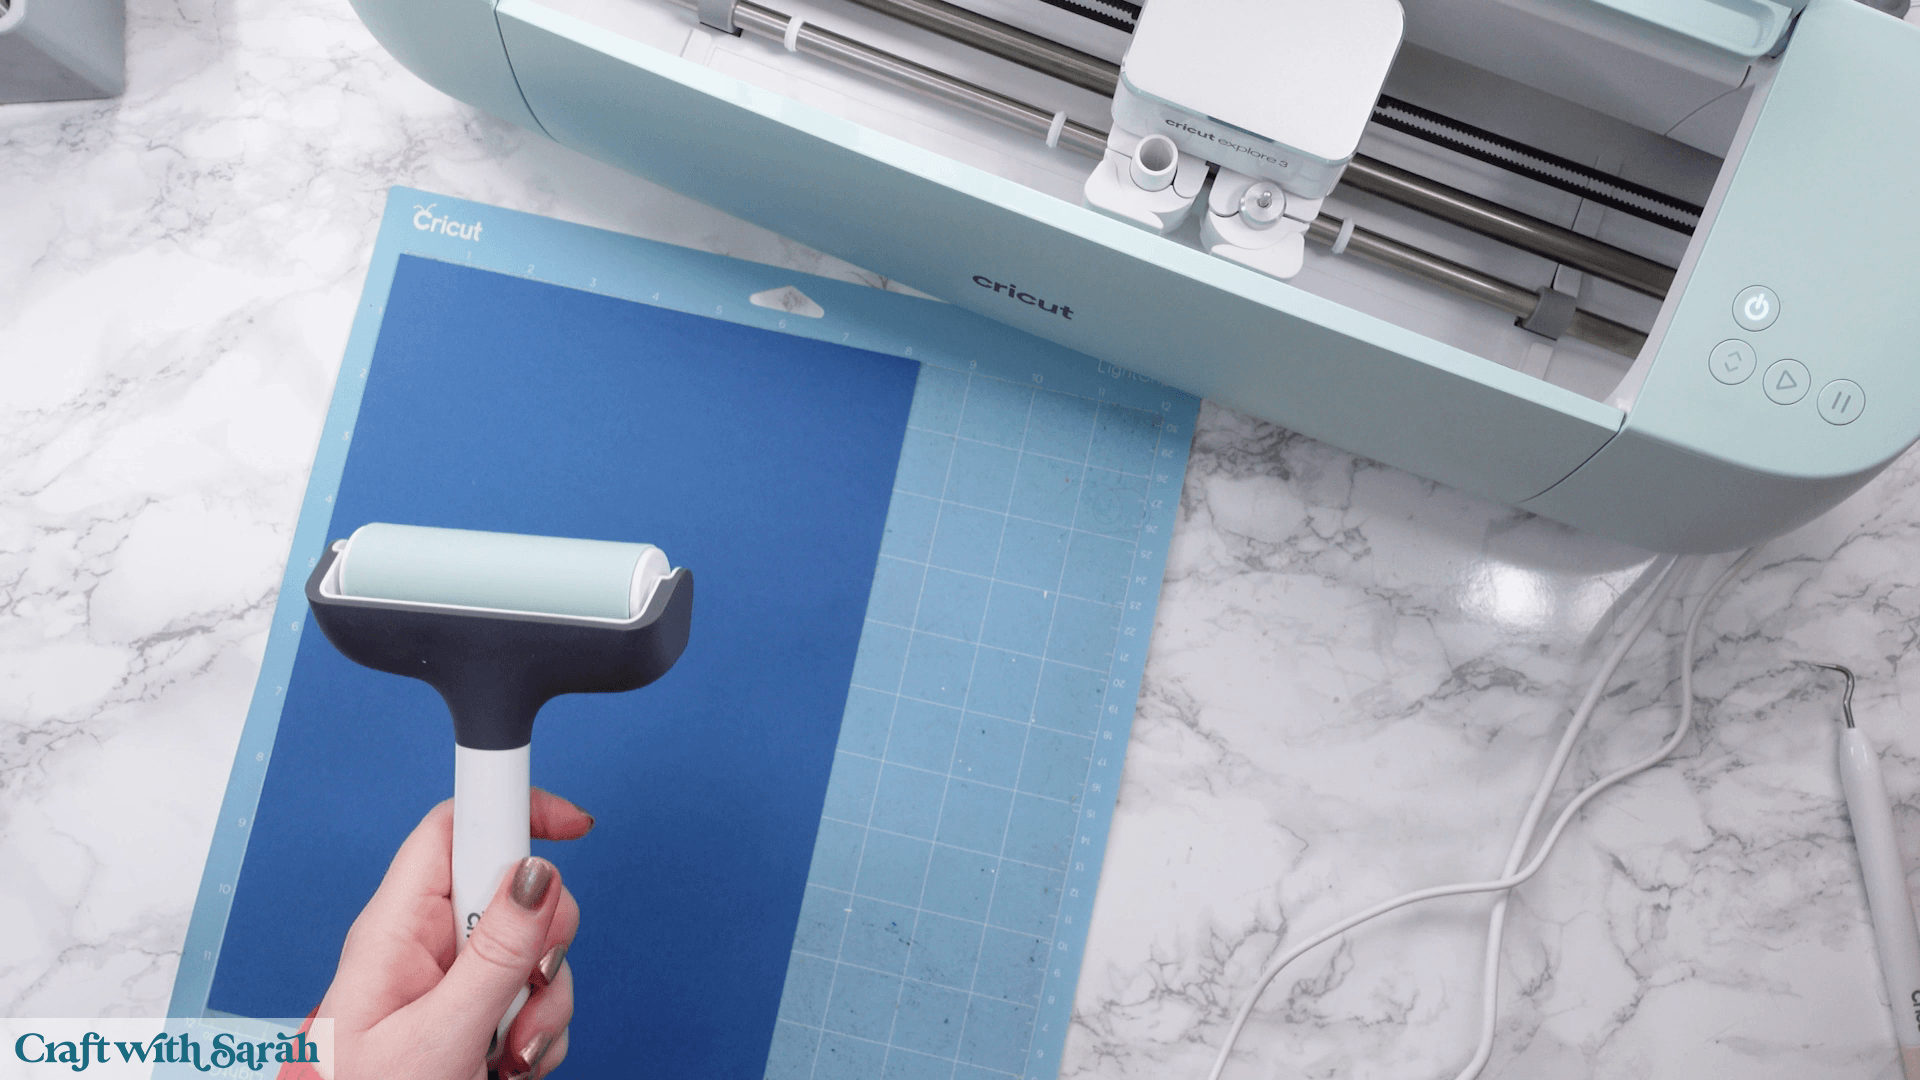
If you’re using an older mat that’s lost some of its stickiness, you can use masking tape or washi tape around the edges to help hold the cardstock in place. Just make sure the tape doesn’t extend beyond the edge of the mat.
In Design Space, choose the material that best matches your cardstock.
I usually use ‘Heavy Cardstock’, although lighter cardstock may cut better using one of the lighter material settings.
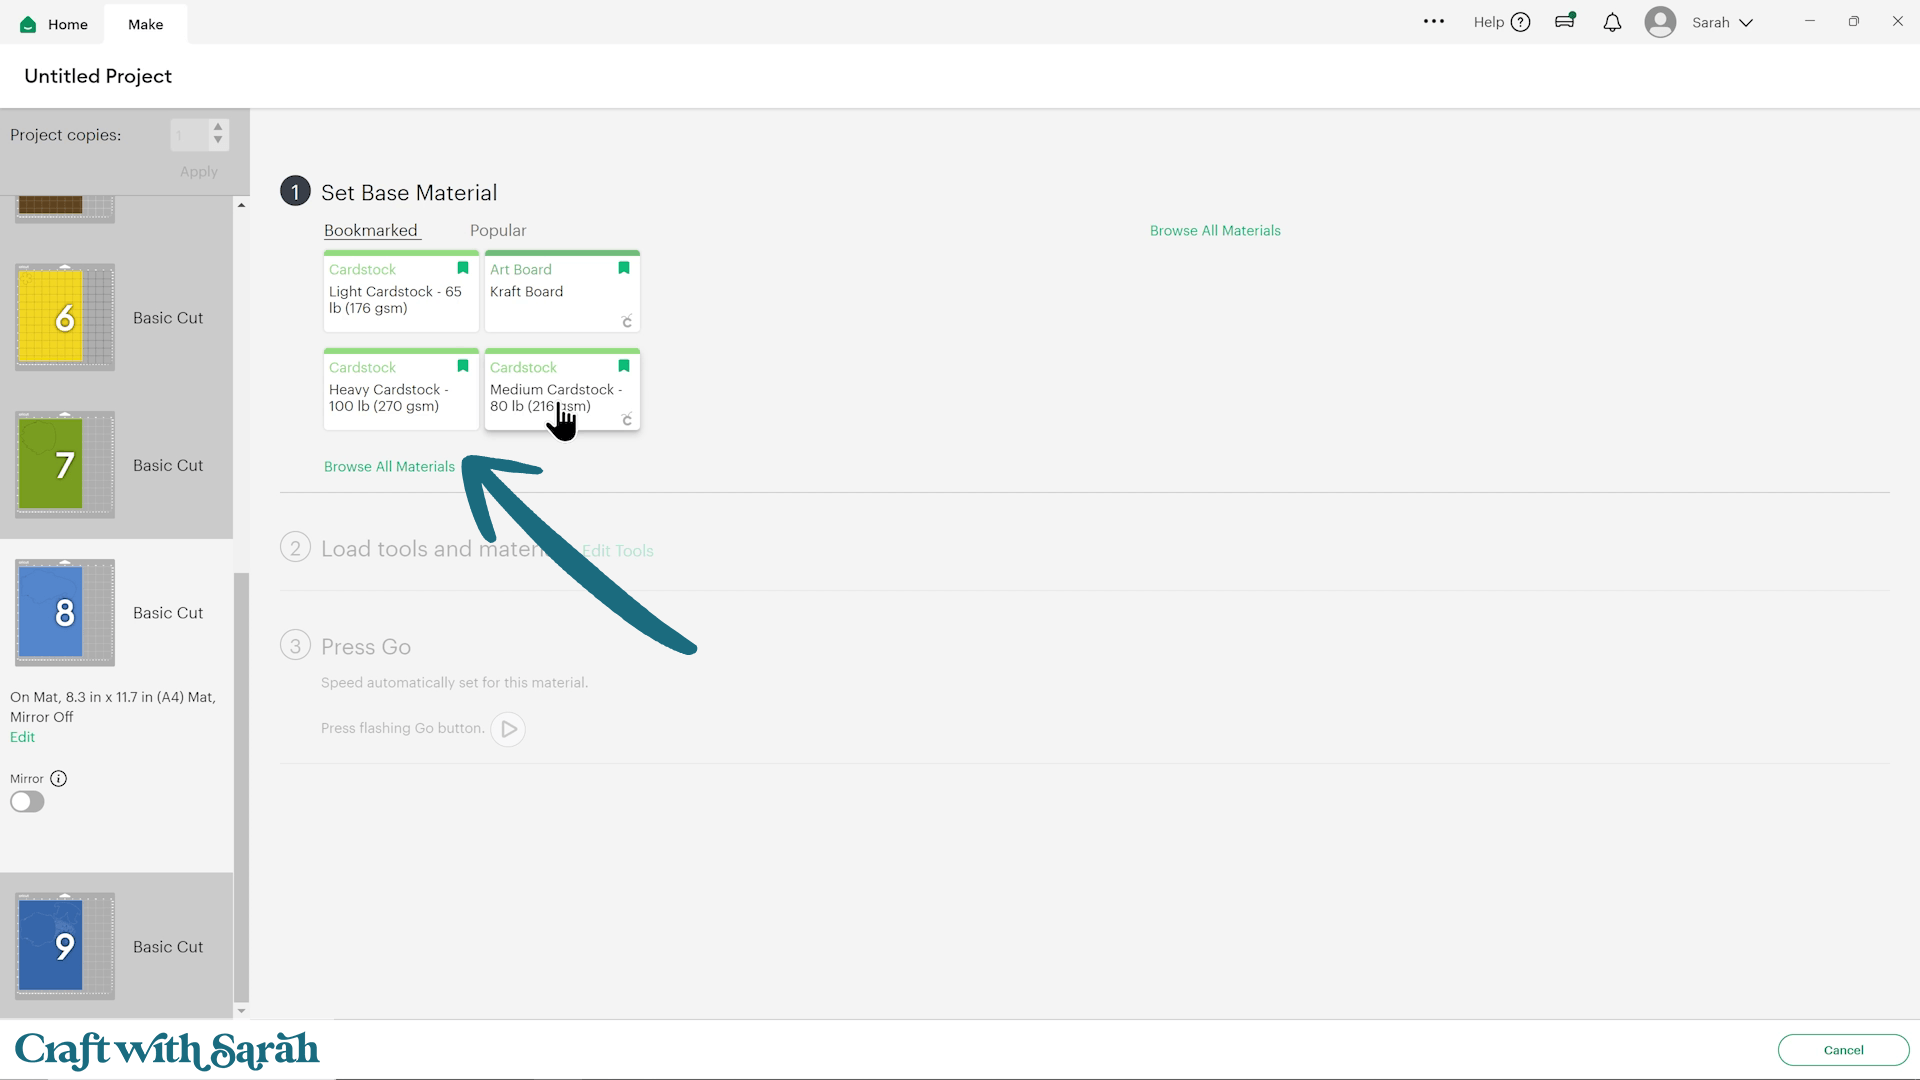
If you’re using particularly thick metallic or glitter cardstock, the ‘Kraft Board’ setting often gives excellent results. You can find more material options by clicking ‘Browse All Materials’.
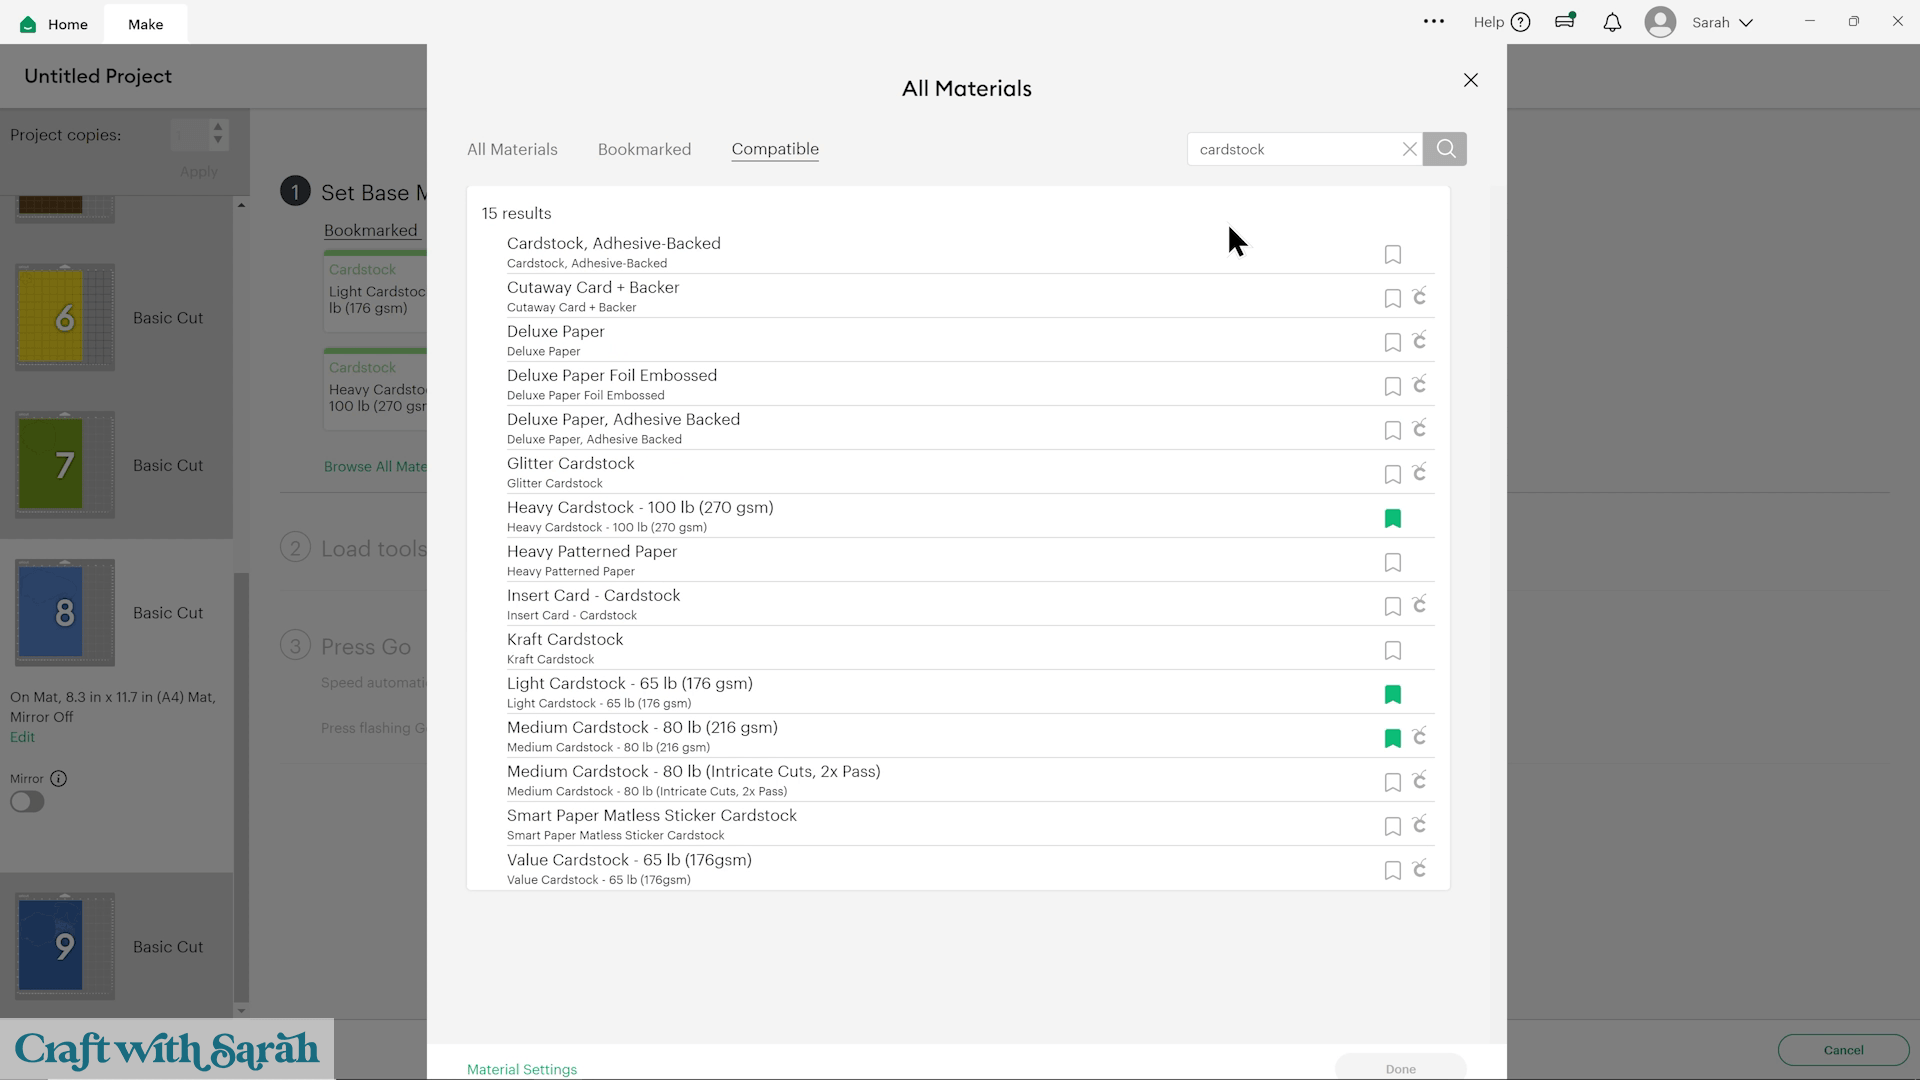
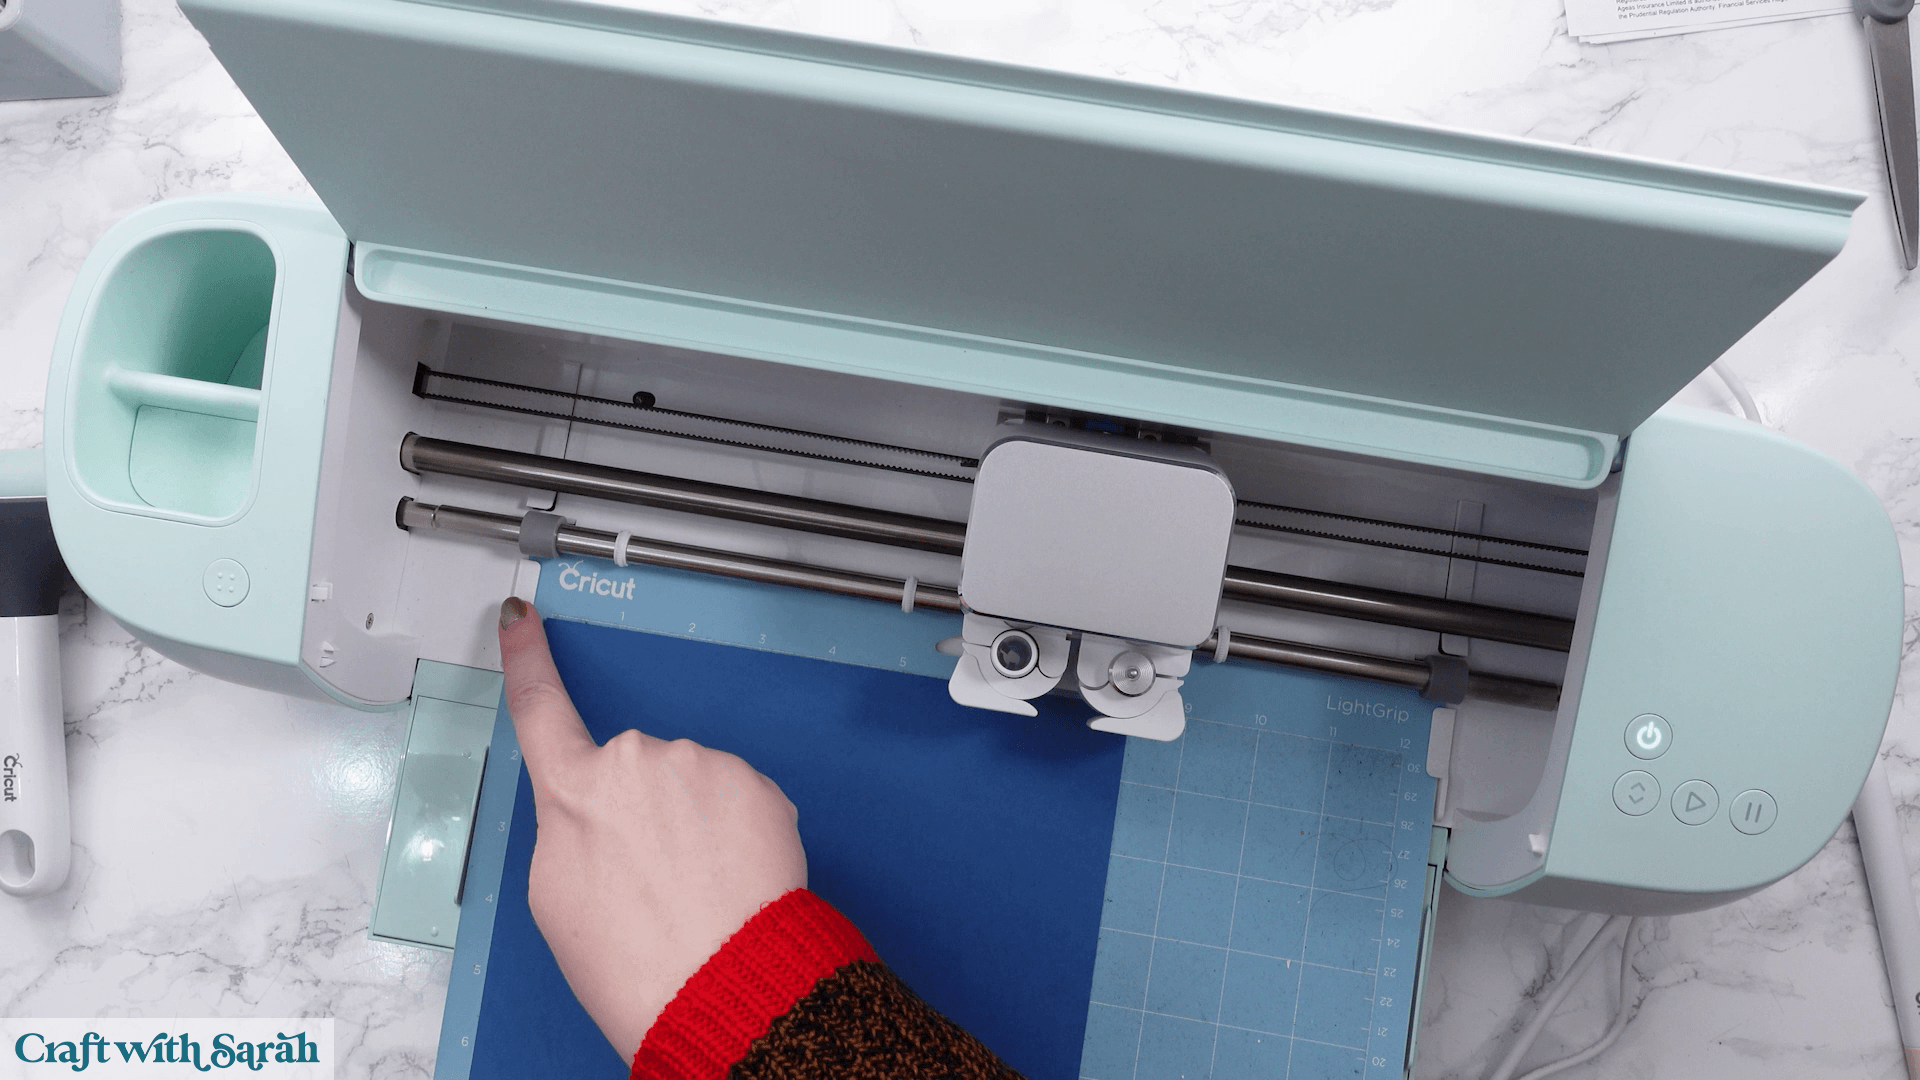
Load your mat into the Cricut by placing the mat under the rollers and pressing the load button.
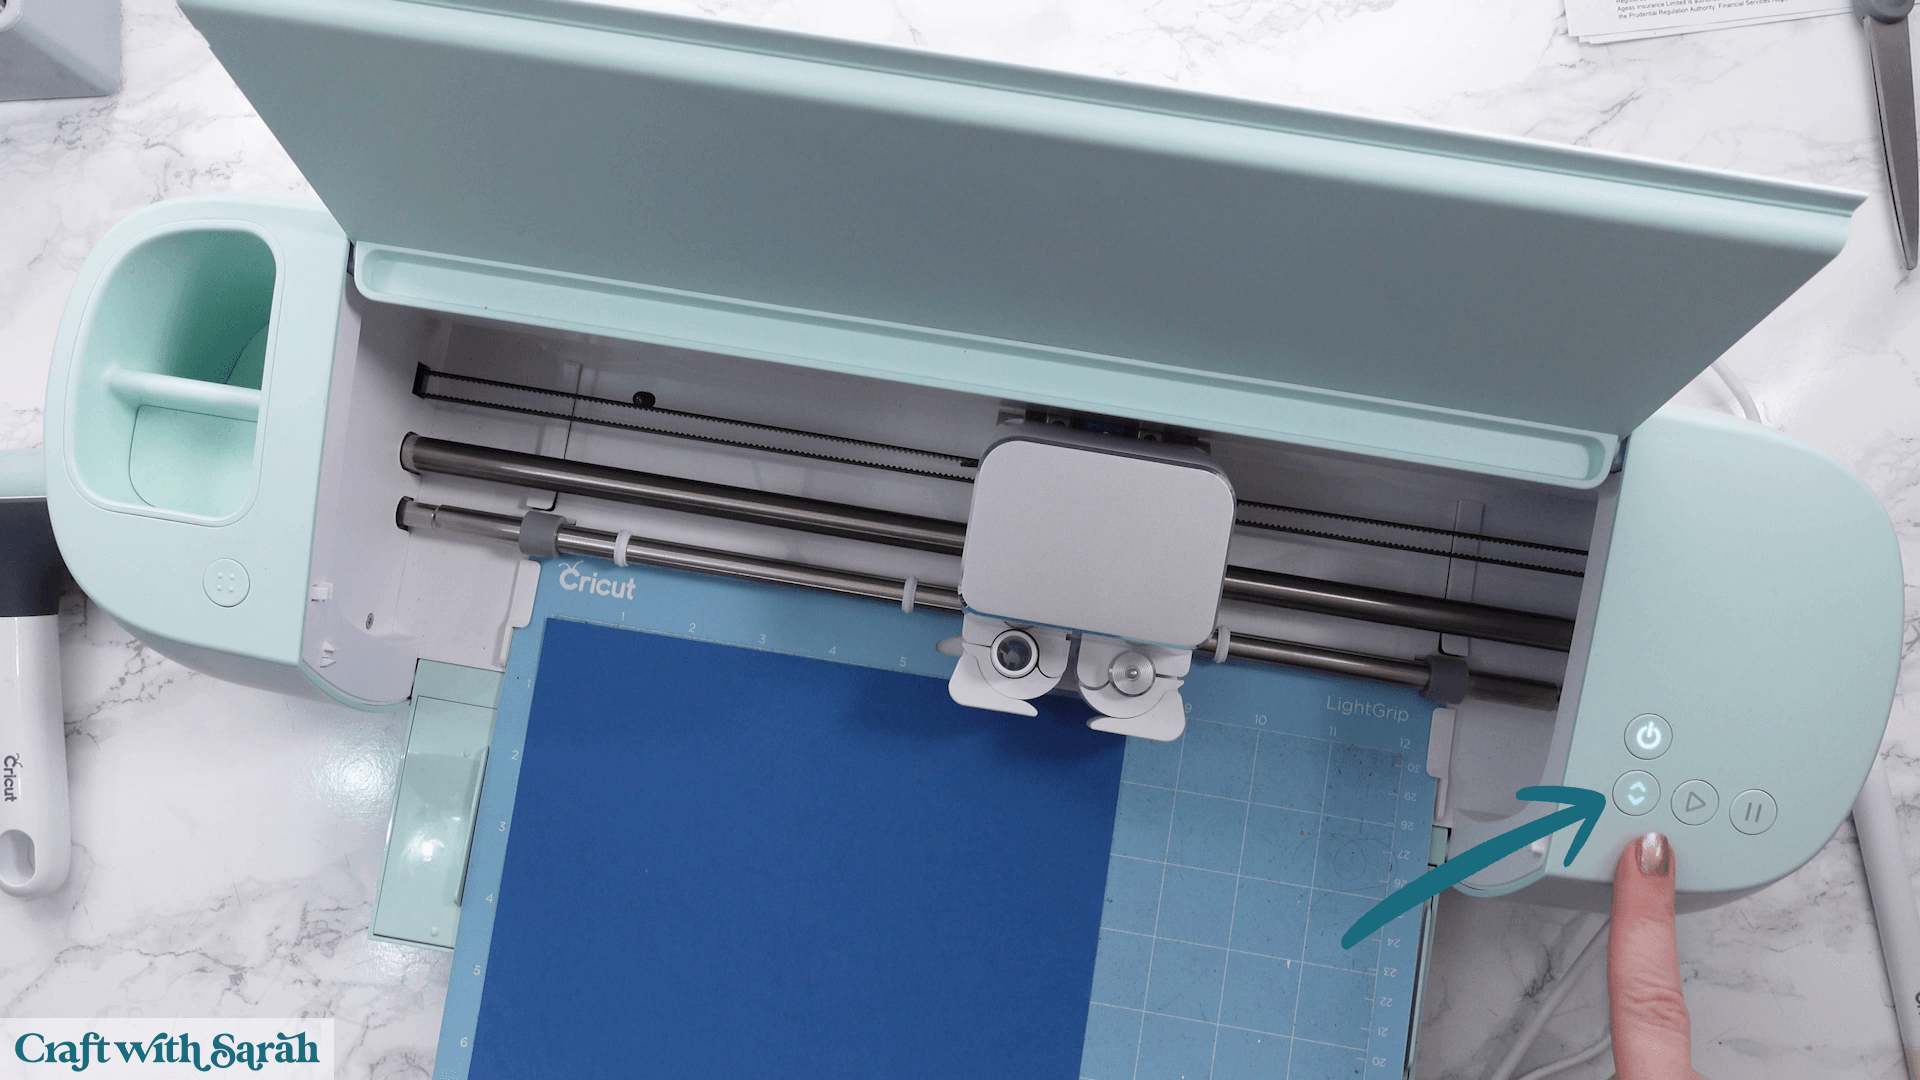
When the Cricut is ready, the “Go” button will flash. Press it to begin the cut.
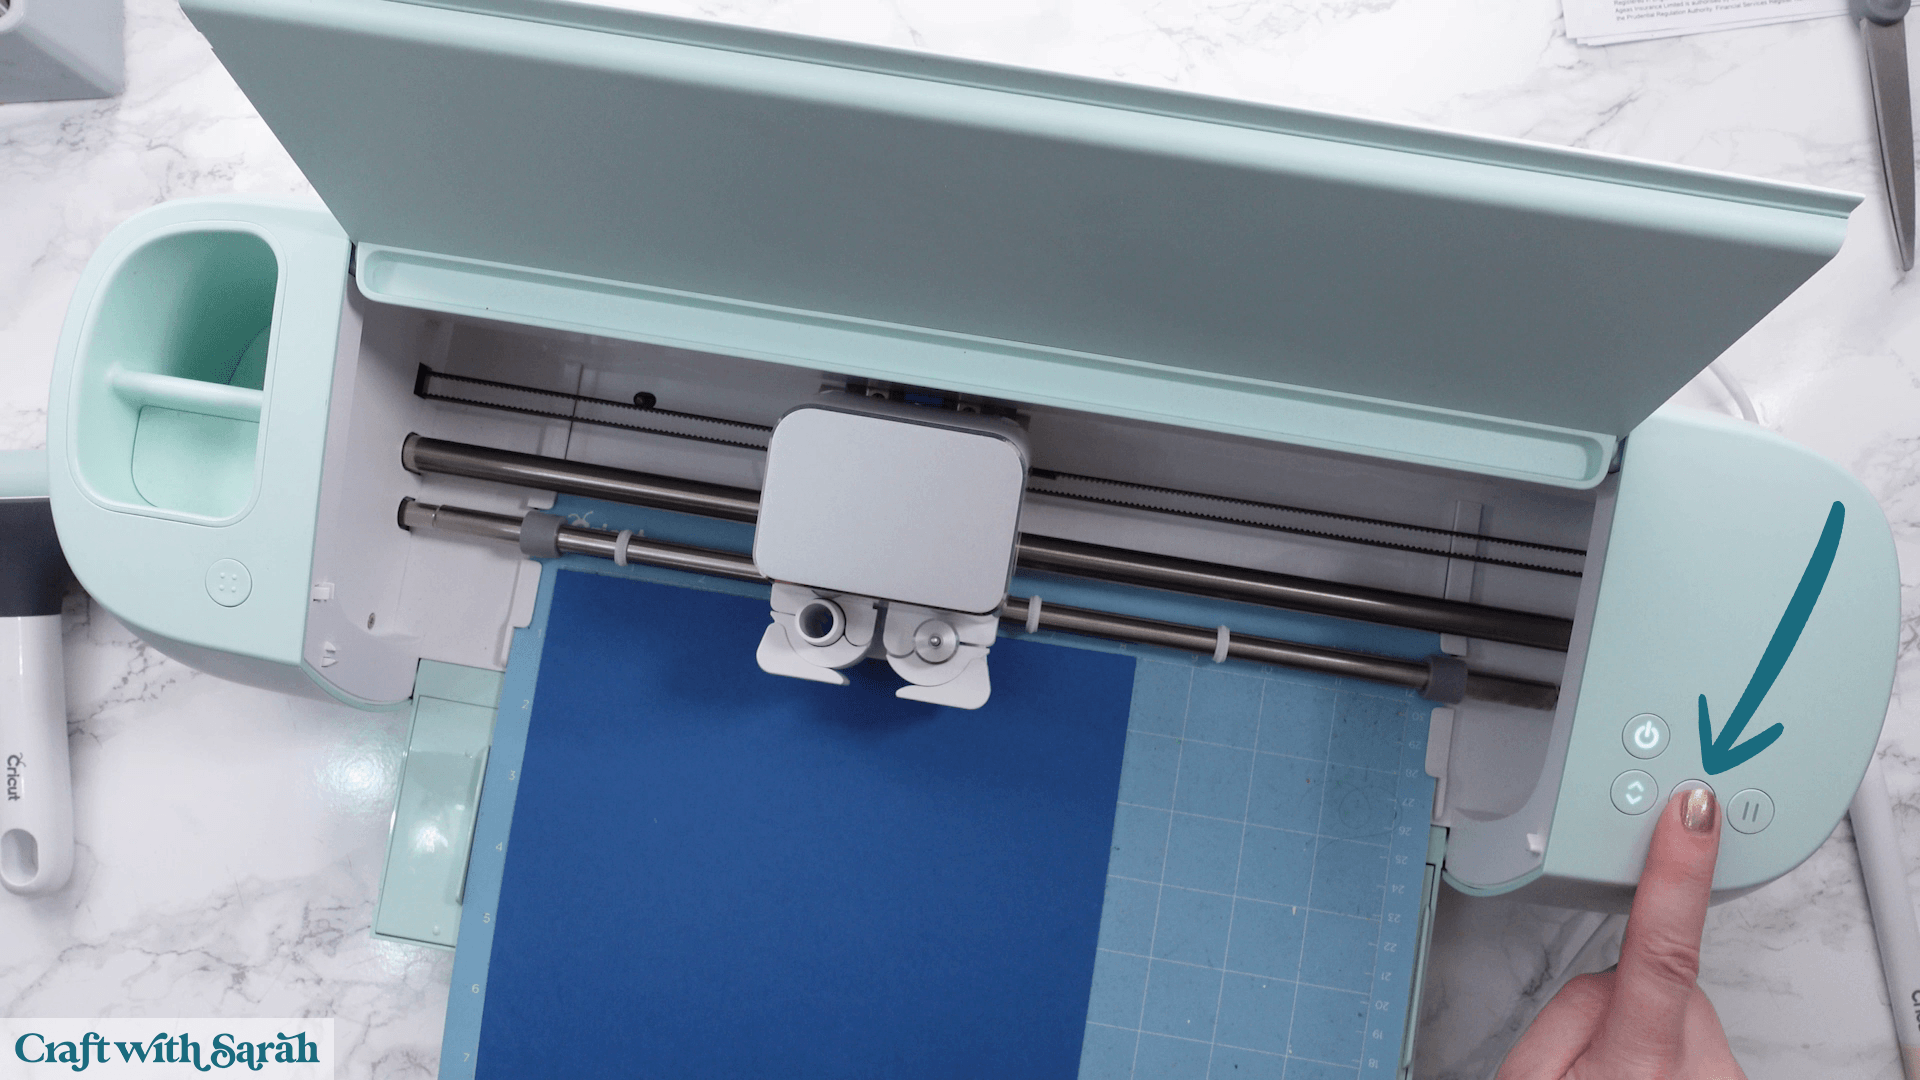
Once it’s finished, check that the cardstock has cut all the way through before unloading the mat. If necessary, you can repeat the cut before ejecting the mat. Press the “Load/Unload” button to eject the mat.
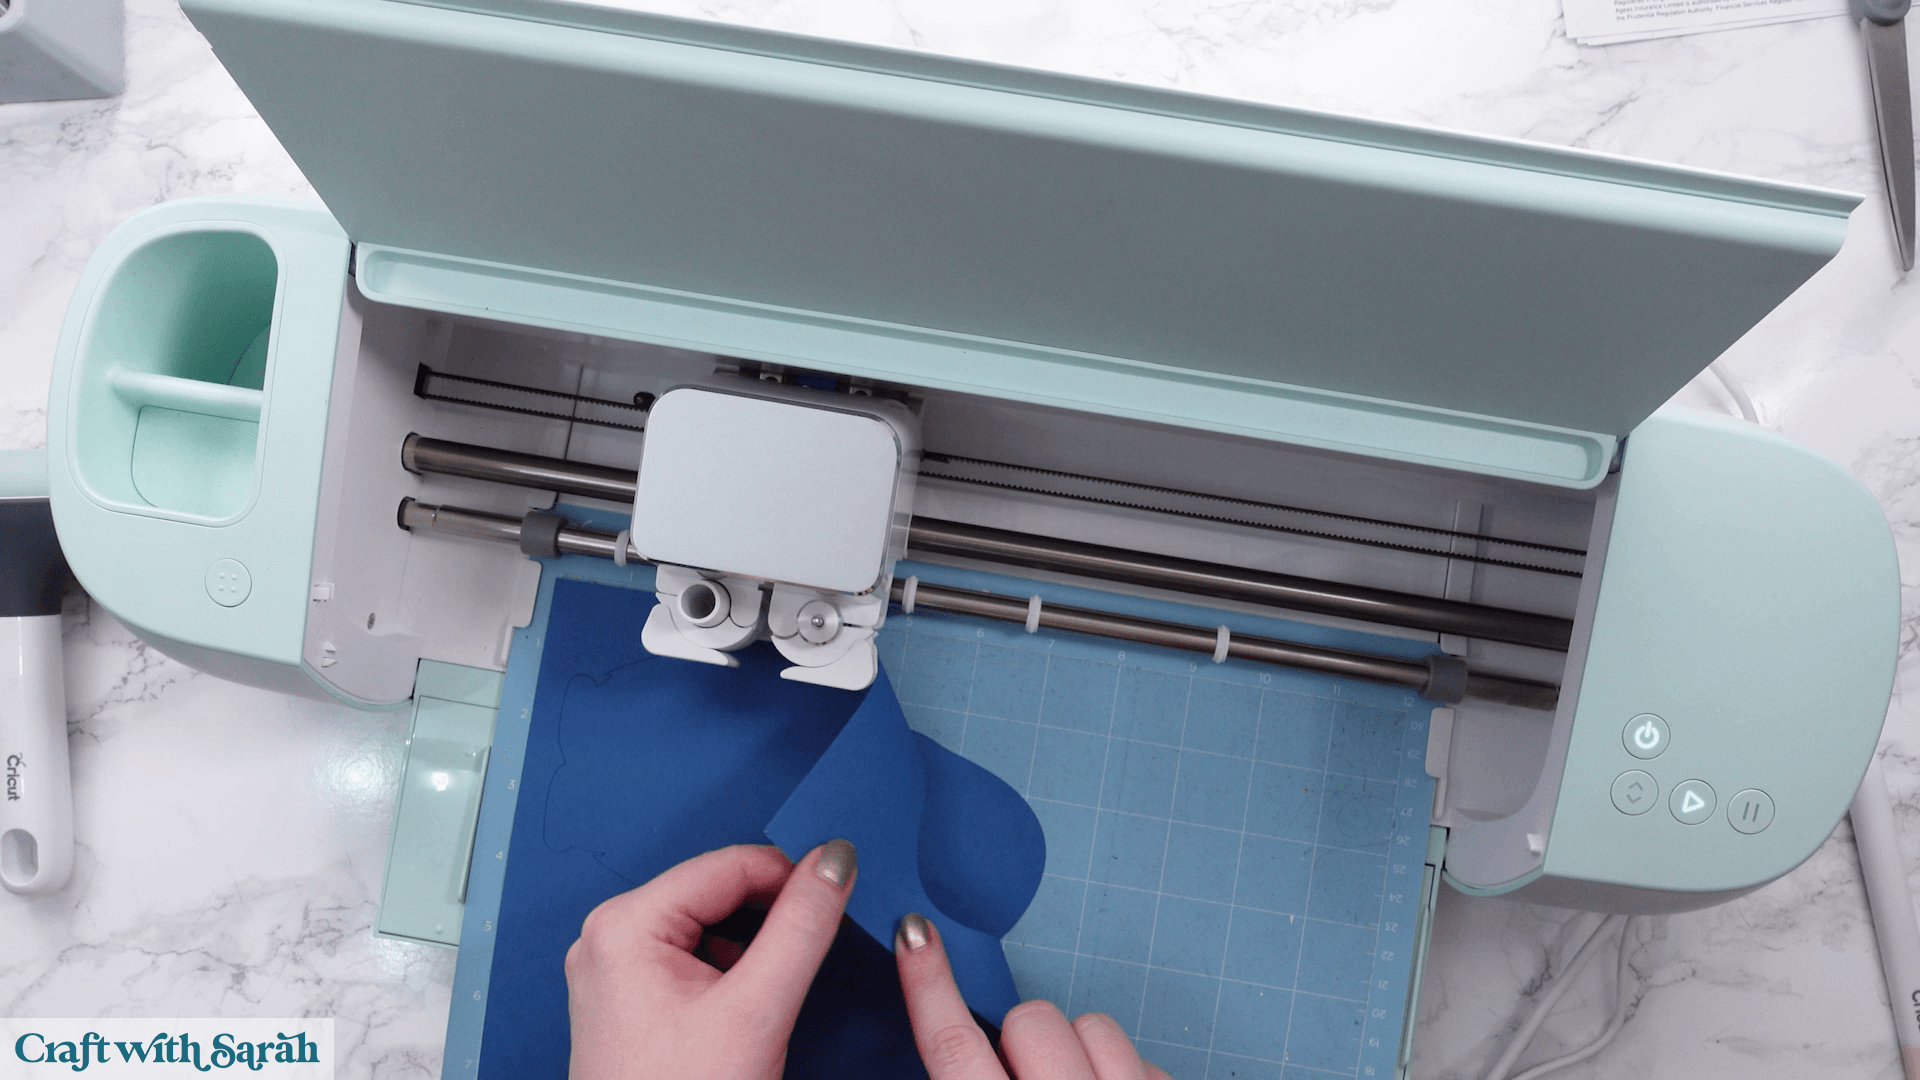
To remove your cardstock, turn the mat upside down and gently peel the mat away from the cardstock instead of pulling the cardstock off the mat. This helps prevent curling.
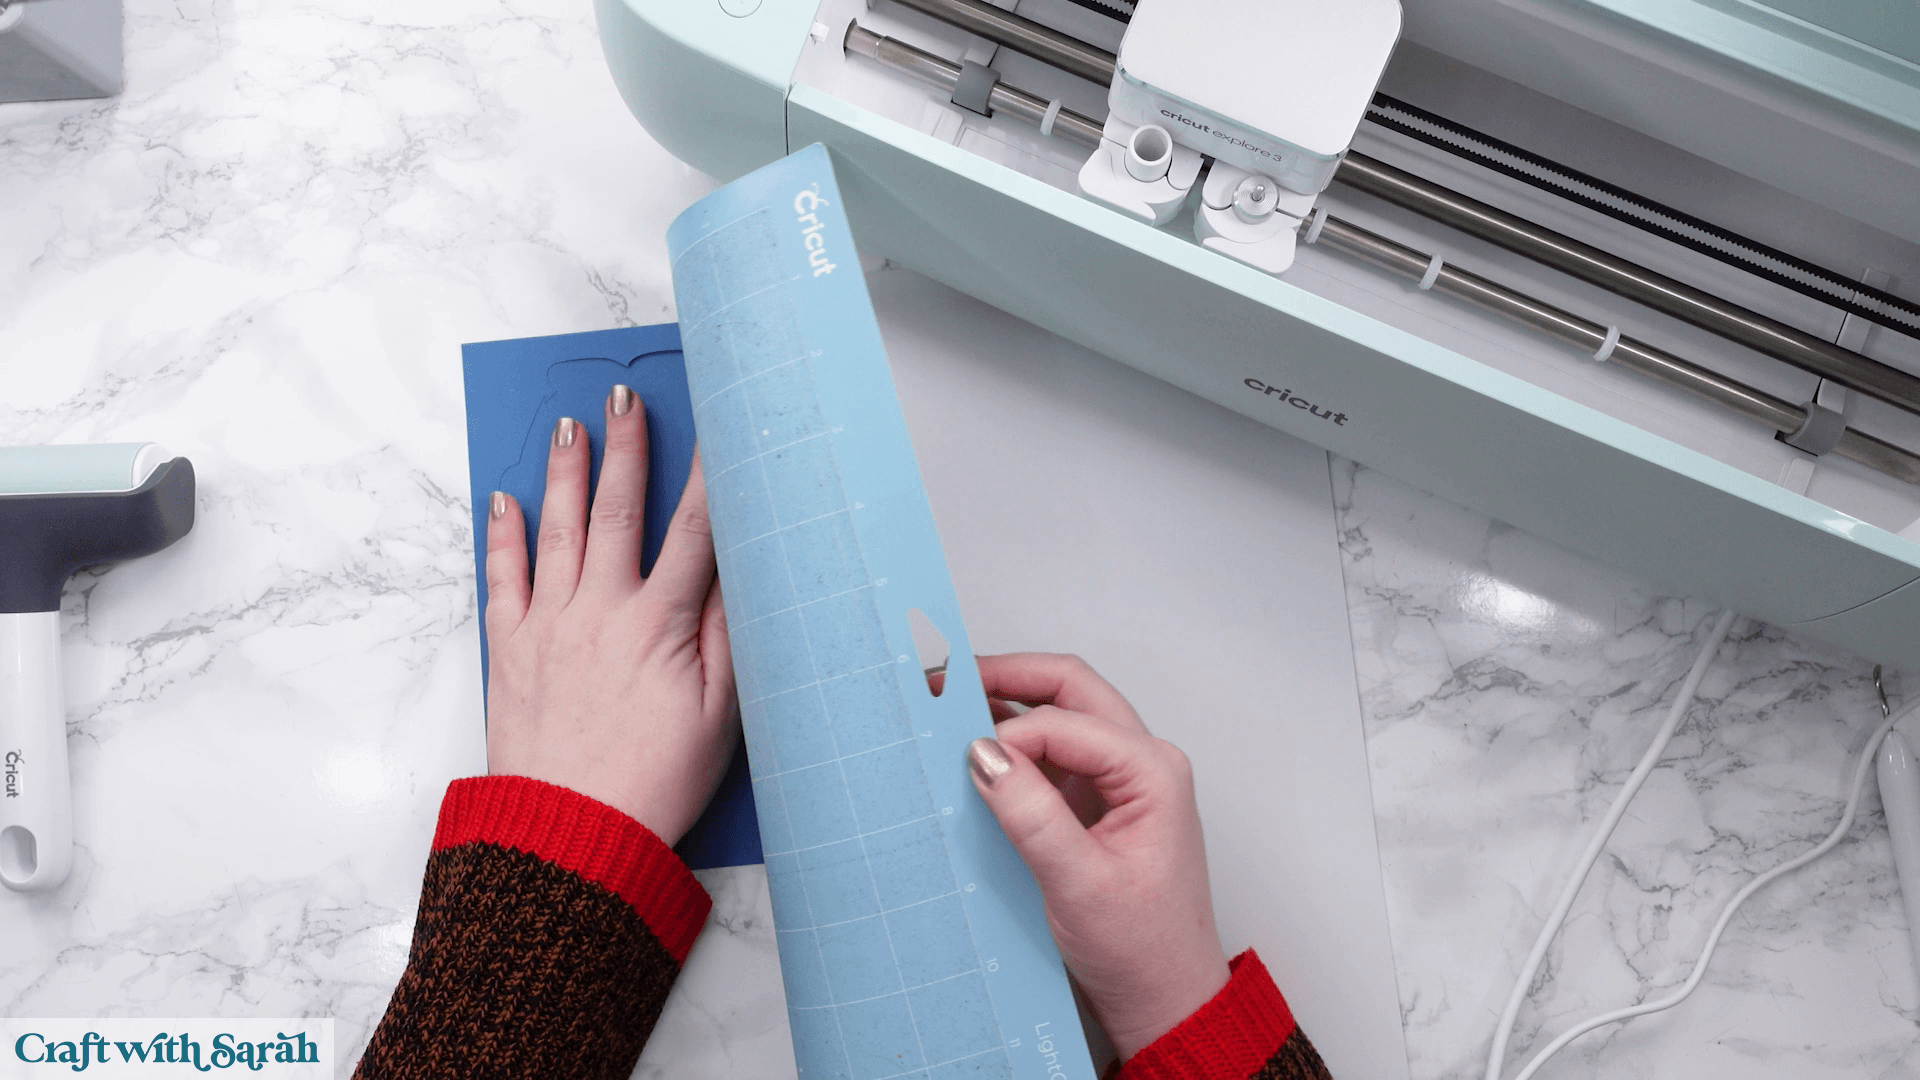
Continue cutting each colour until all of the layers are complete.
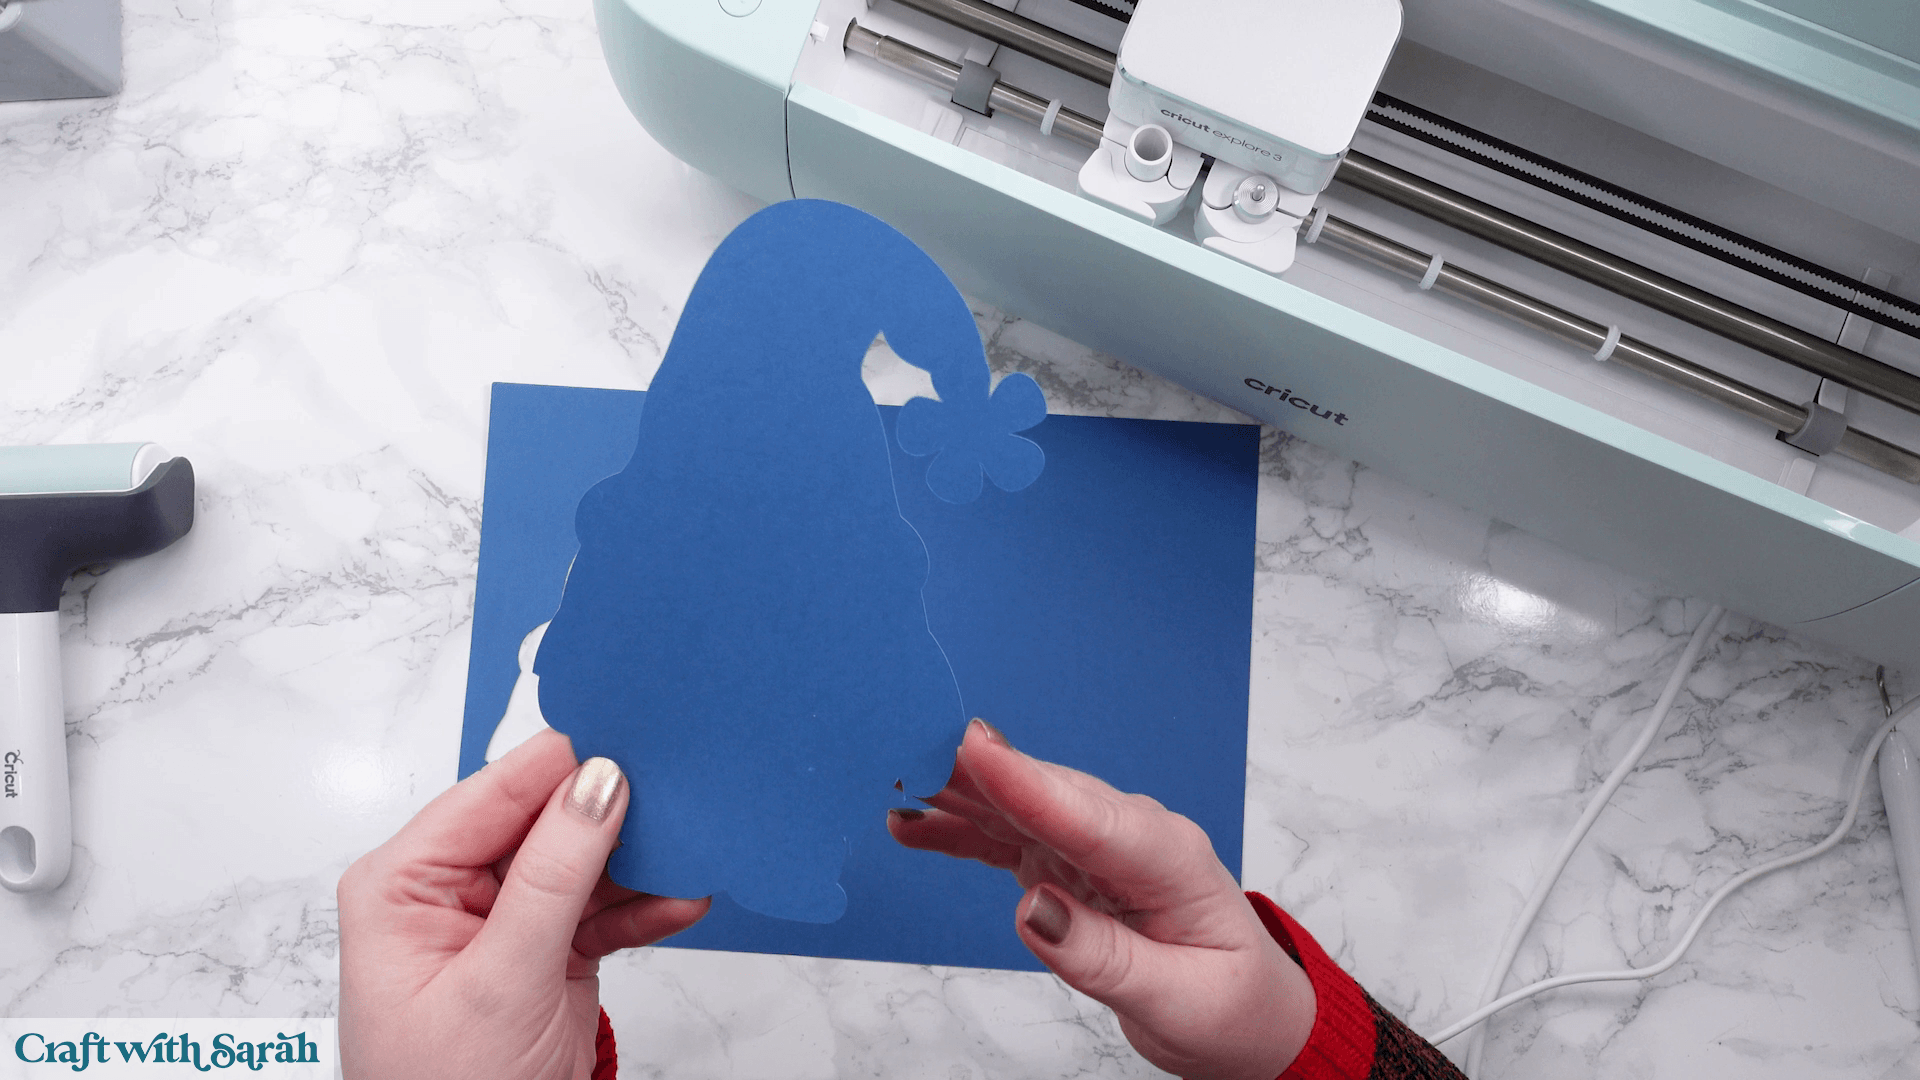
Step 6) Organise the pieces
Before reaching for the glue, arrange all of your cut pieces in the order shown on the assembly guide.
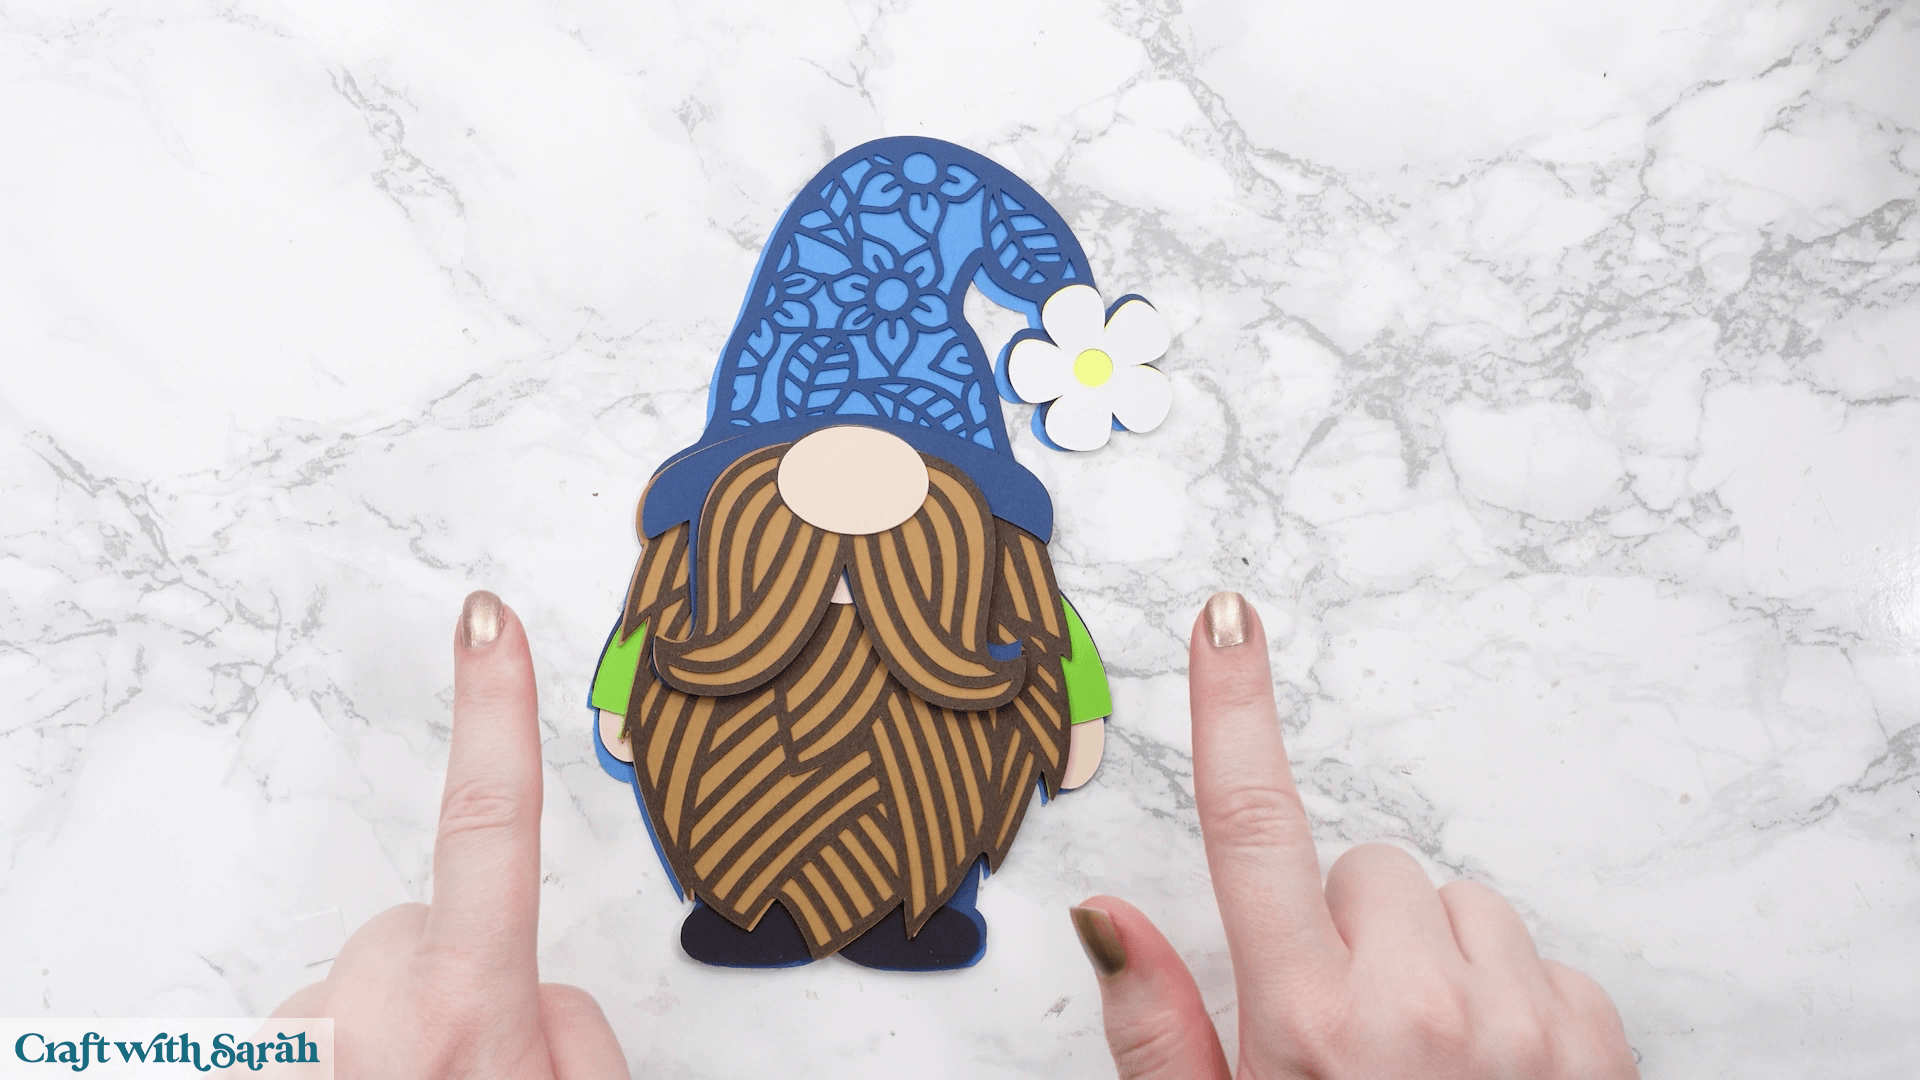
This is a great opportunity to make sure you’ve cut every piece and that you’re happy with your colour choices before you start assembling the design.
If there’s a colour you’d like to change, it’s much easier to recut it now than after you’ve started gluing everything together.
Step 7) Assemble your layered papercraft project
The exact steps to putting your papercraft design together will vary depending on which design you have chosen, but you can see the steps in the assembly guide included in the download folder.
The steps and photos below show the techniques for putting the pieces together.
Layered papercraft designs are assembled from the bottom upwards.
Start with the first two layers shown on the assembly guide.
Read the assembly guide to see if piece 2 is labelled GLUE or FOAM.
If it says GLUE, then glue it on top of piece 1.
If it says FOAM then use foam squares to attach it to the top of piece 2.
For my gnome, it says ‘2 – GLUE’.
Add glue to the back of the Piece 2 cardstock shape, then carefully line it up with Piece 1.
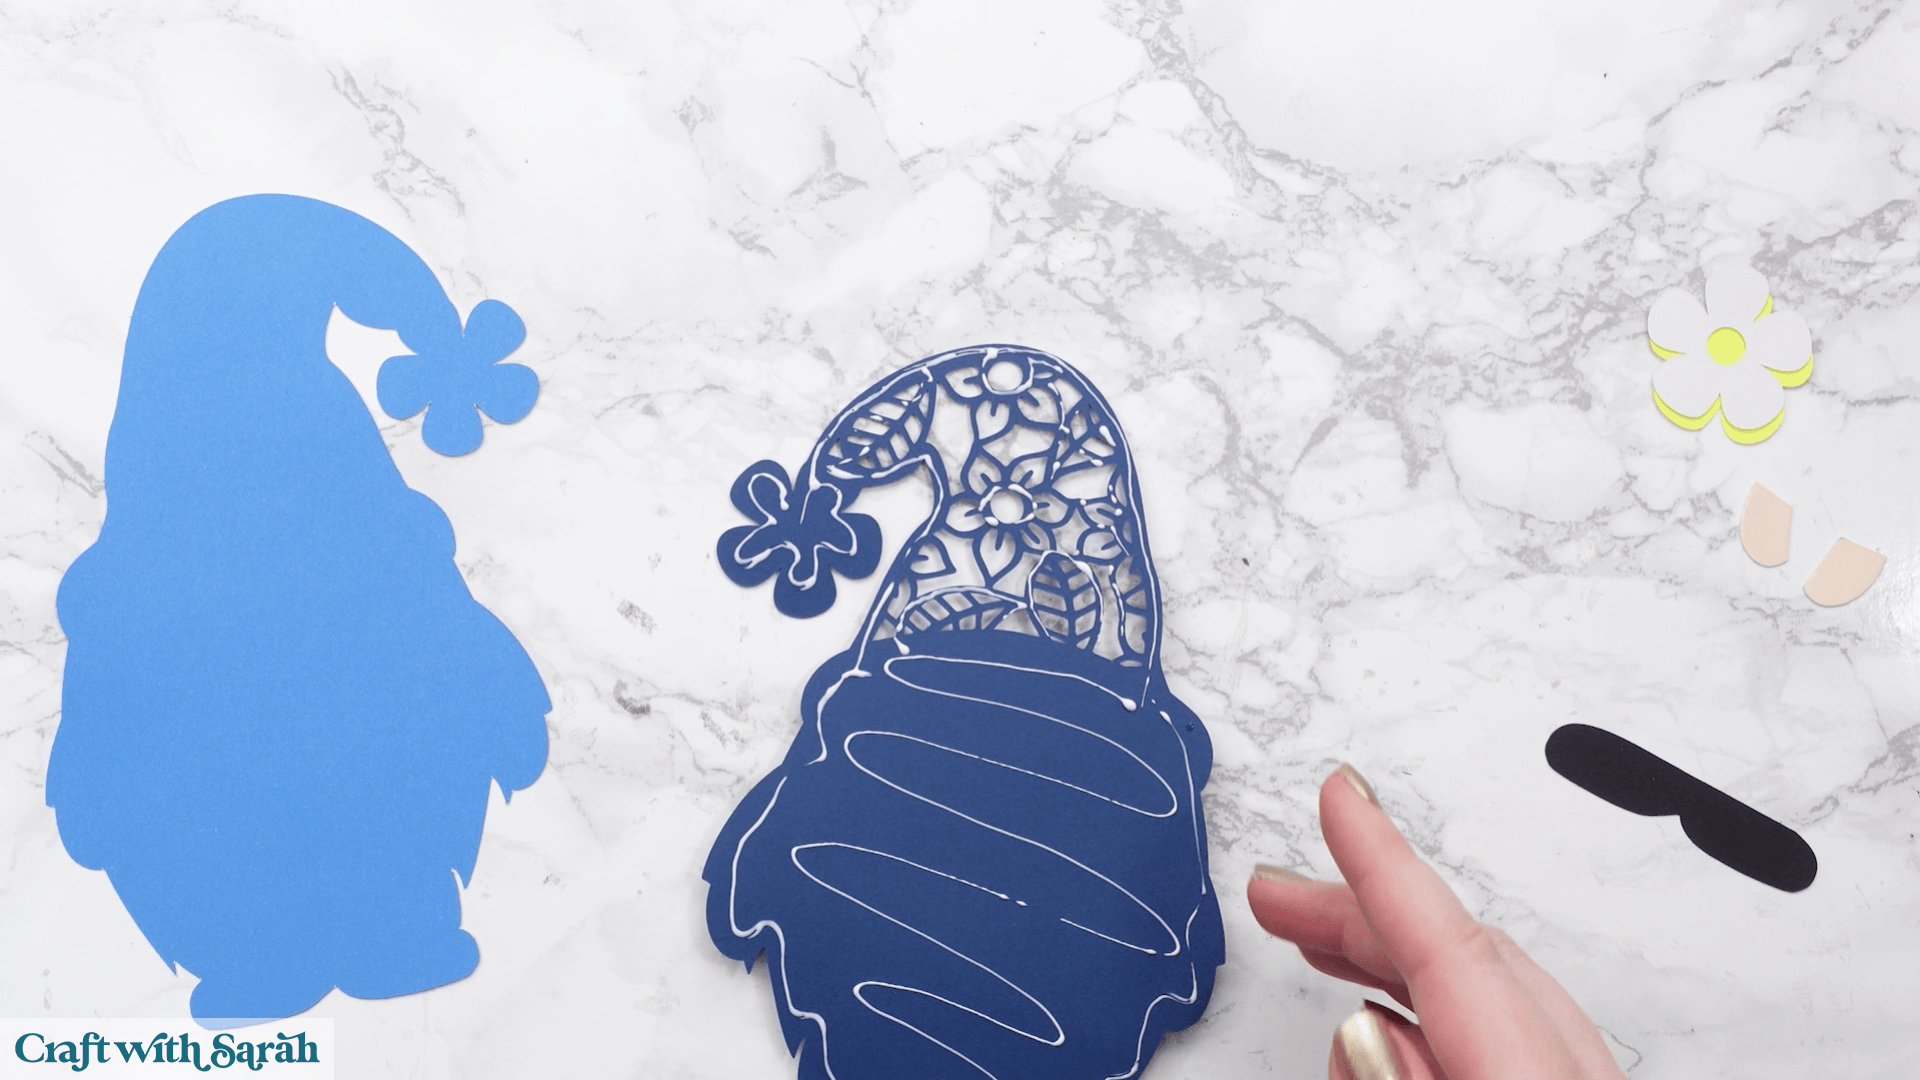
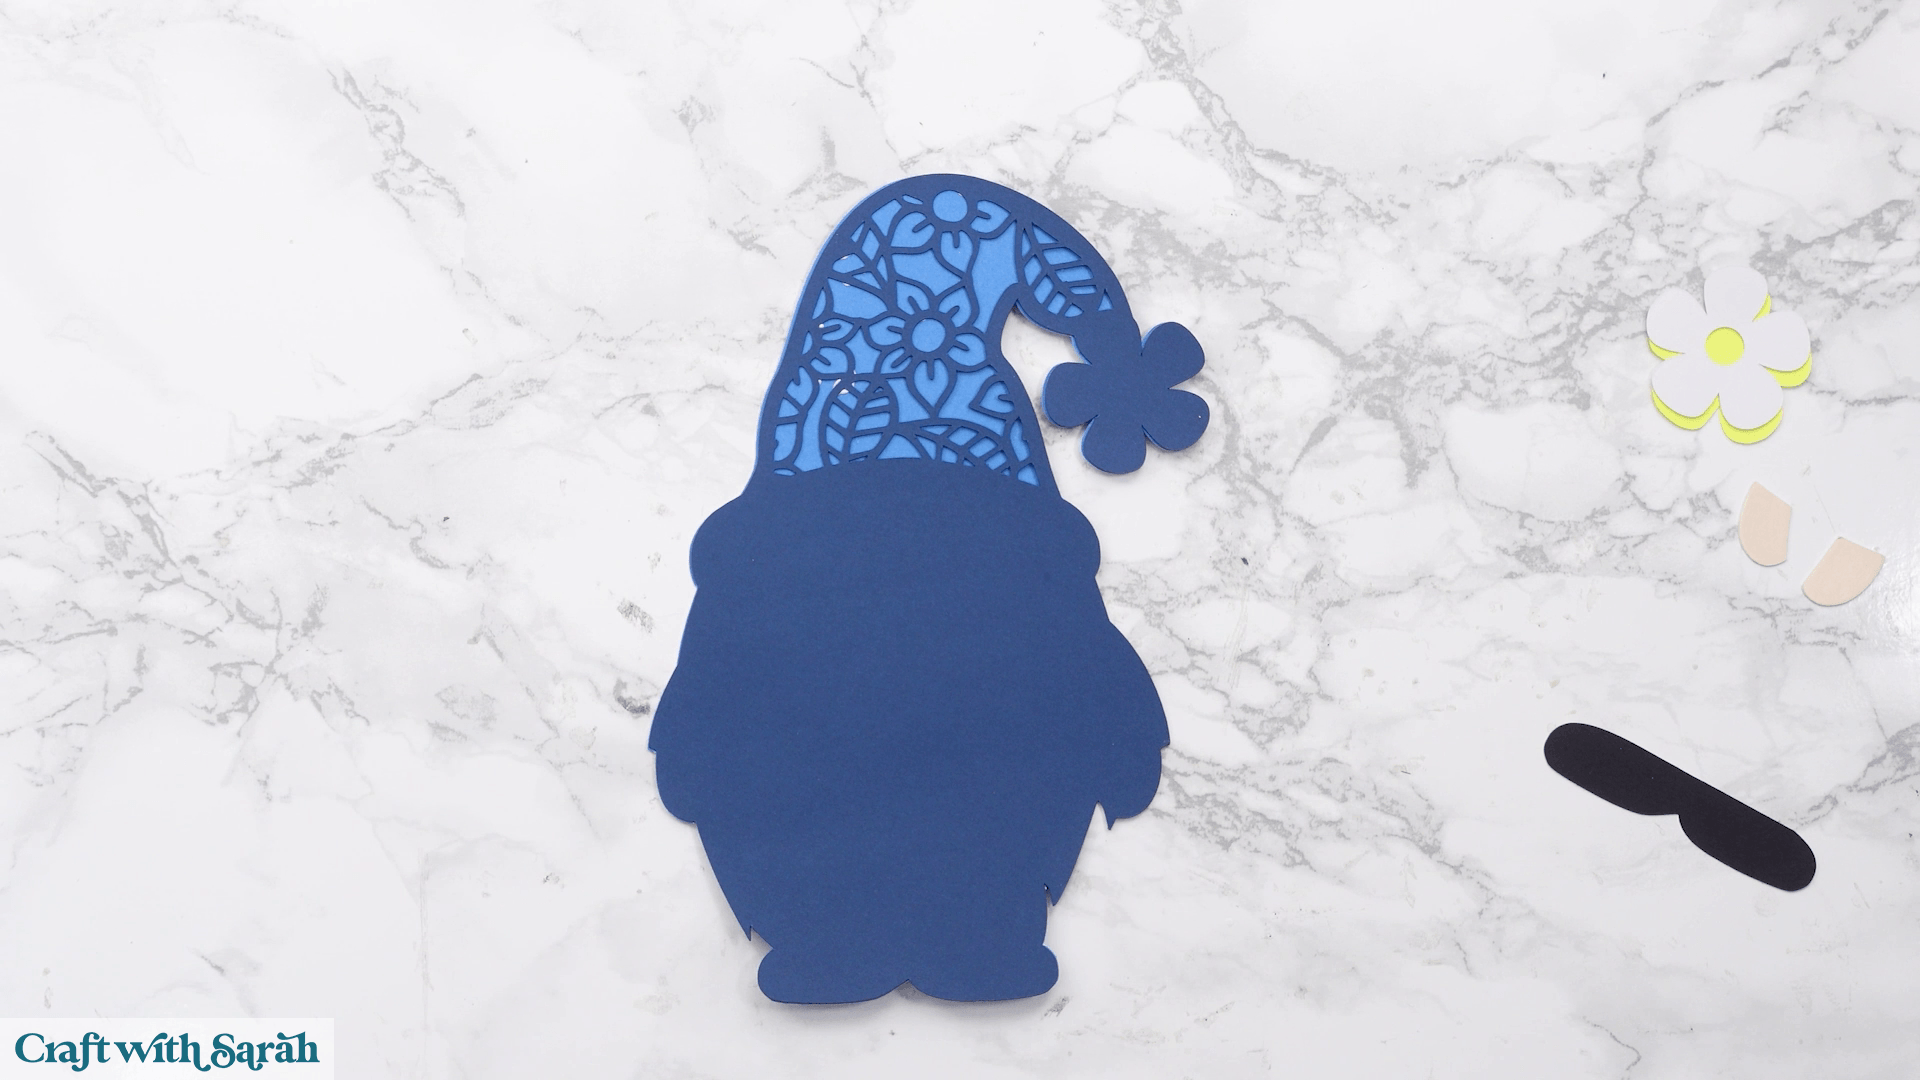
If a little glue squeezes out around the edges, don’t worry. Most craft glues dry clear, and any excess can usually be removed carefully with a weeding tool or your fingernail before it dries.
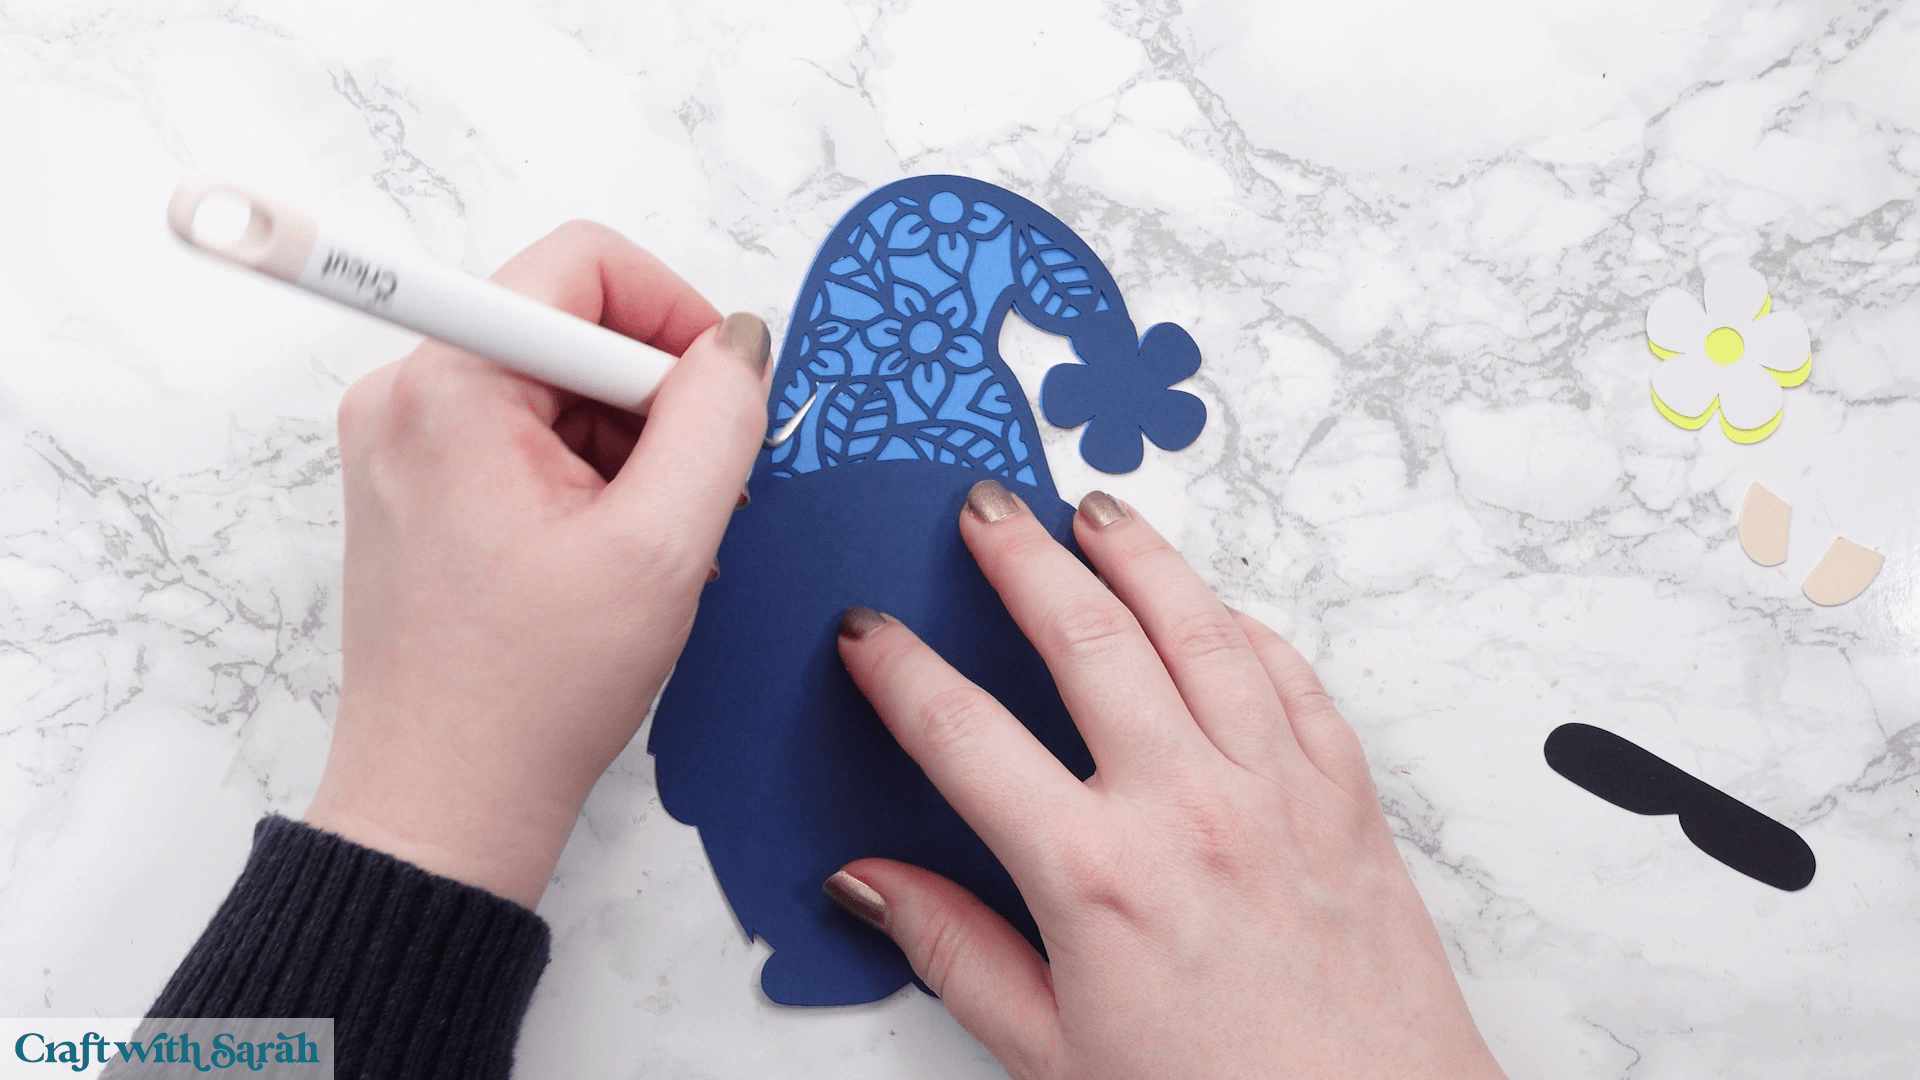
Continue following the assembly guide, using either glue or foam squares as indicated.
Foam squares create the depth that gives layered papercraft its distinctive 3D appearance.
For small pieces, you may only need one or two foam squares.
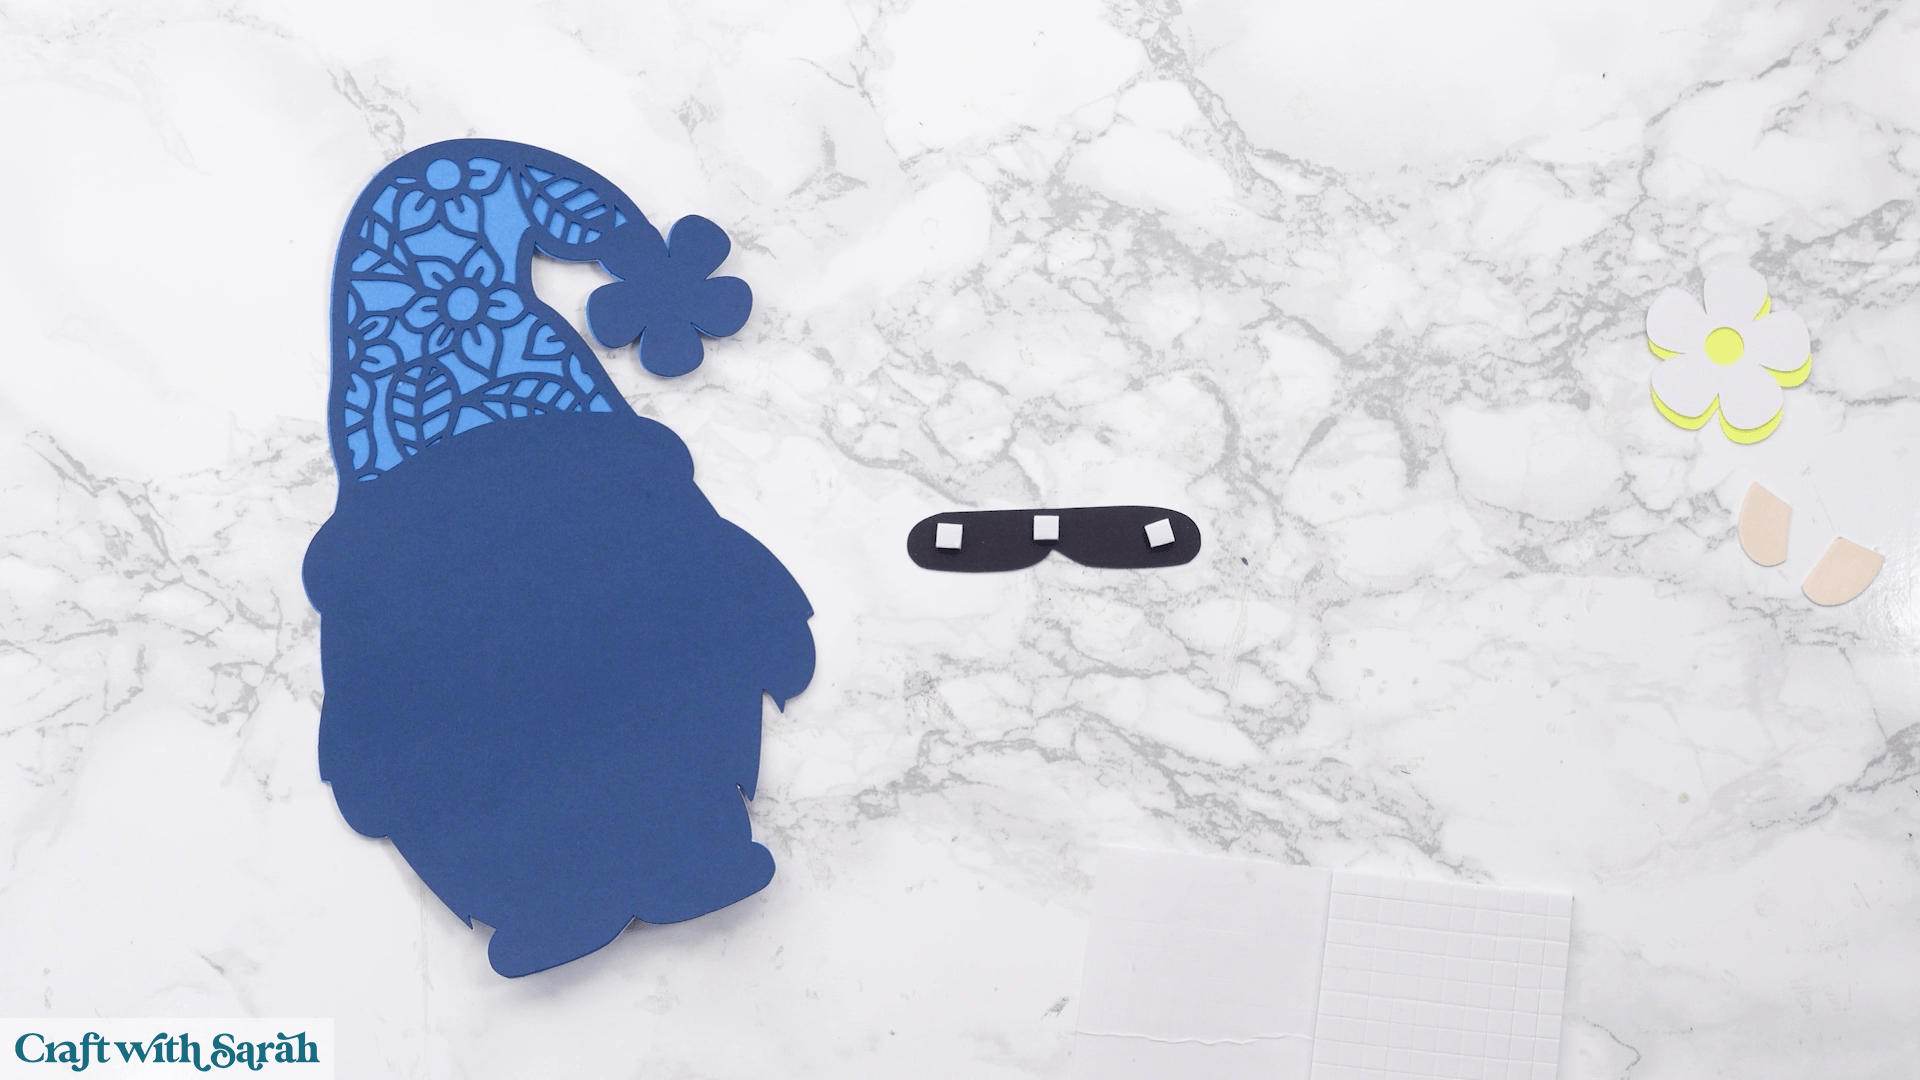
For larger layers, work around the outside edge first and then add extra foam squares through the middle.
This prevents larger layers from sagging once the rest of the design is added.
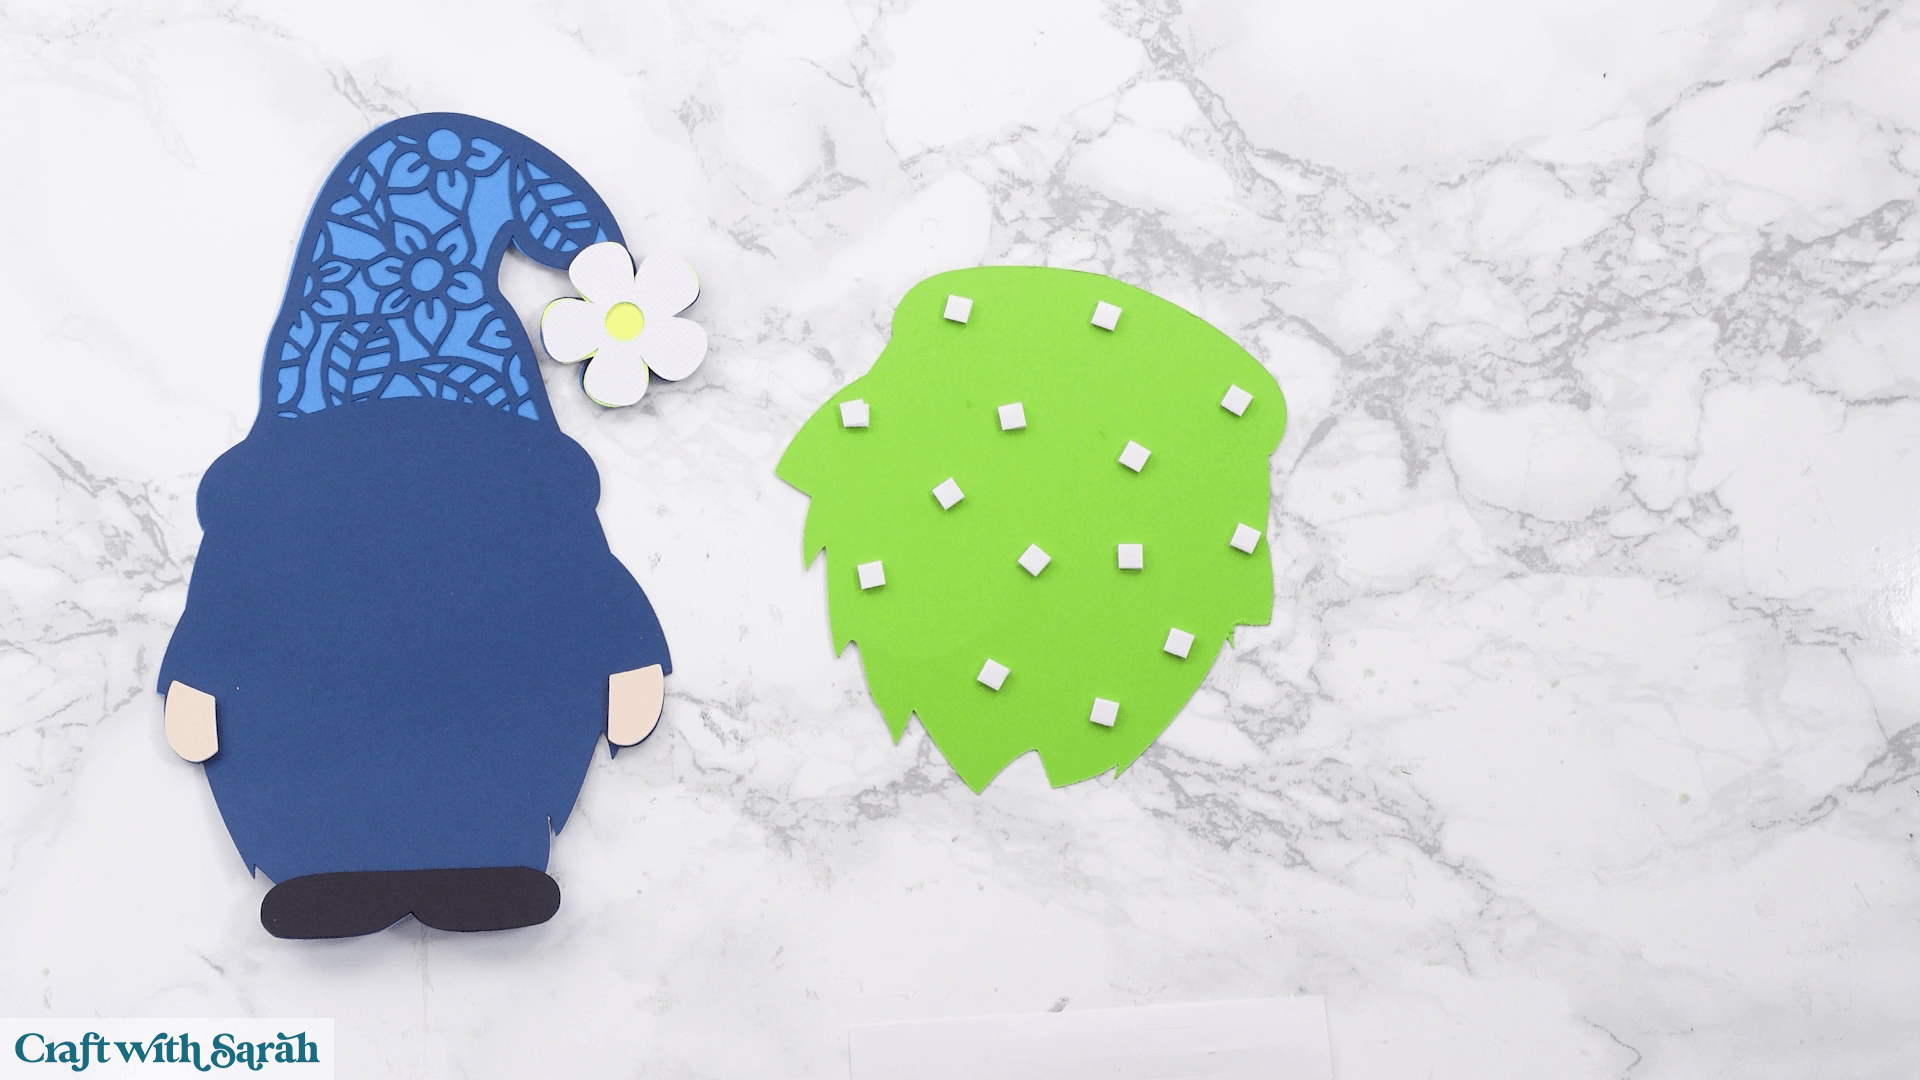
Place the layer gently onto the project first without pressing it down. That allows you to lift and reposition it if necessary before pressing firmly to secure the foam squares.
Occasionally, one foam layer overlaps another.
When this happens, don’t place foam squares underneath the overlapping section.
If you do, that part of the design will sit higher than everything else, leaving the finished project uneven.
Instead, only place foam squares where they’ll sit directly on the layer underneath.
Some assembly guides include instructions such as ‘Glue to back of 11’.
This is simply a way of making small pieces easier to position.
Turn the larger piece upside down, glue the smaller piece onto the back, then turn it over to check the position before the glue dries.
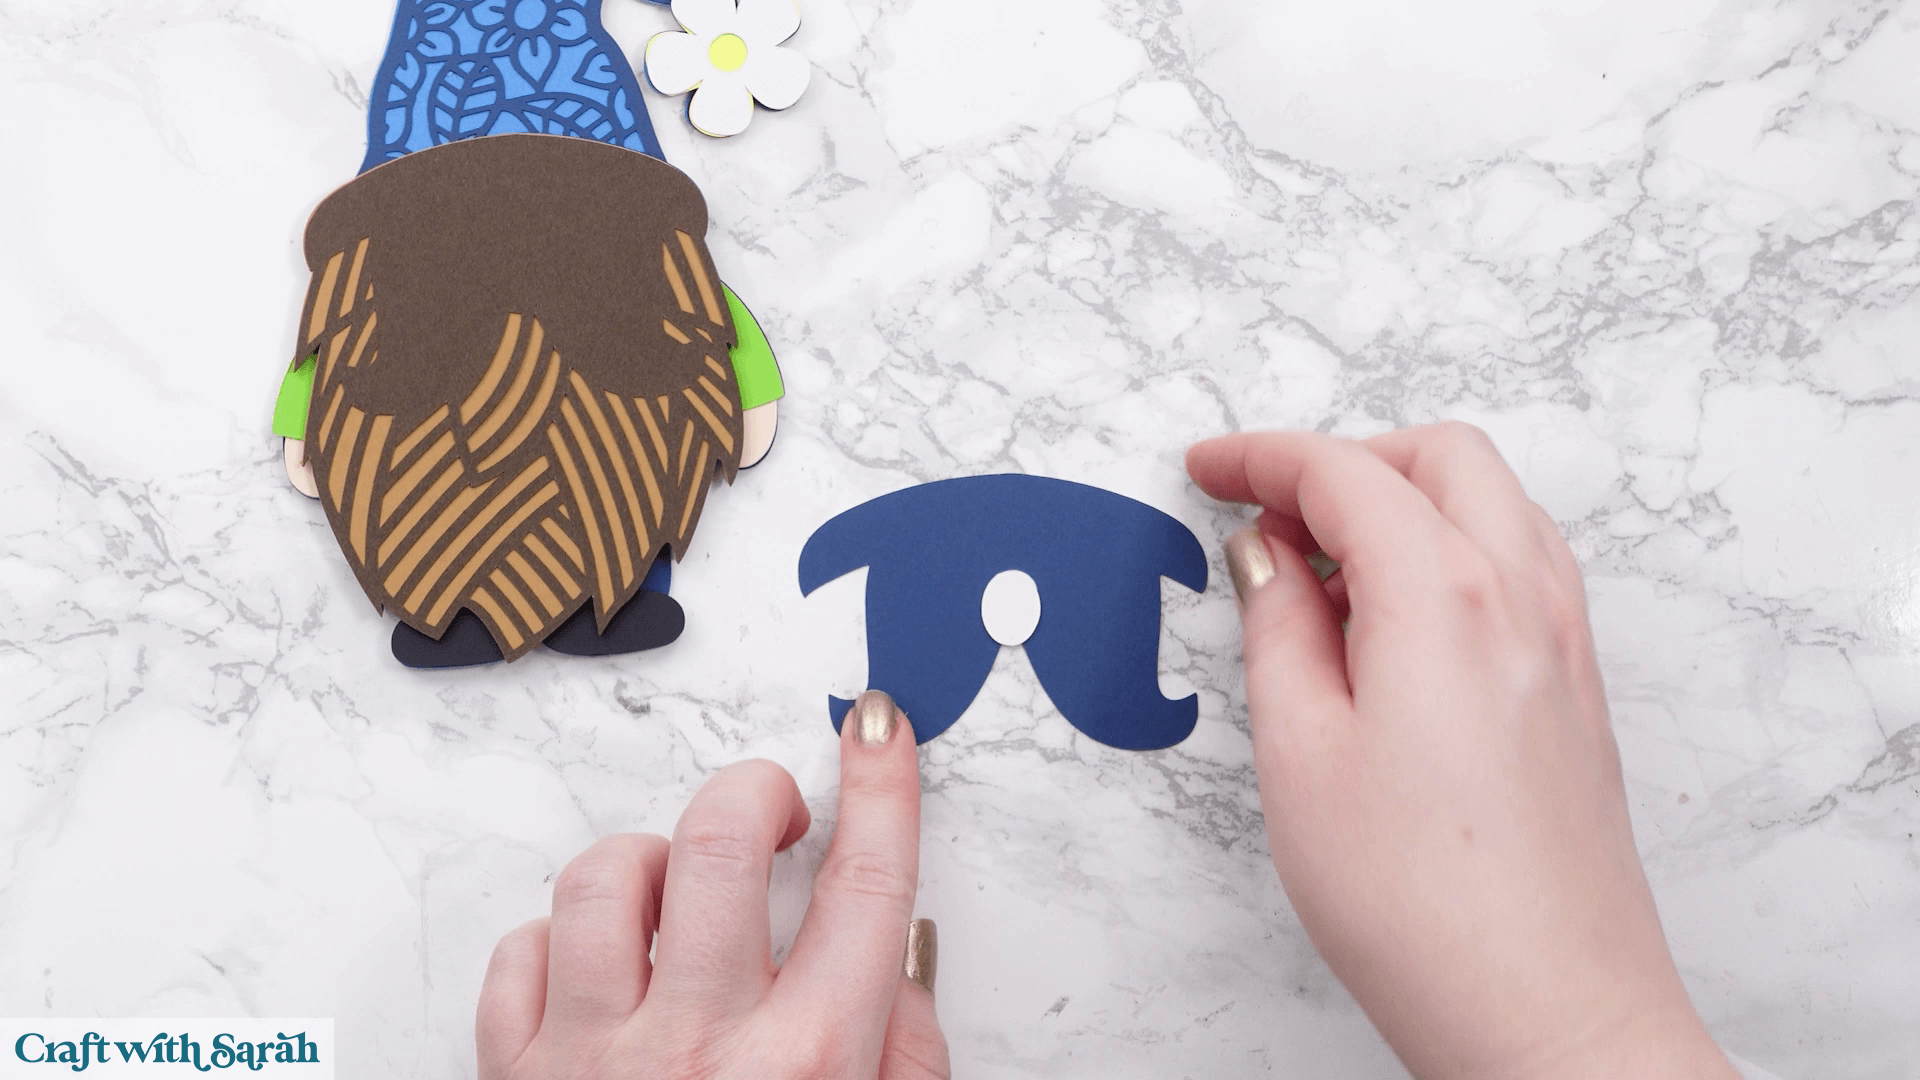
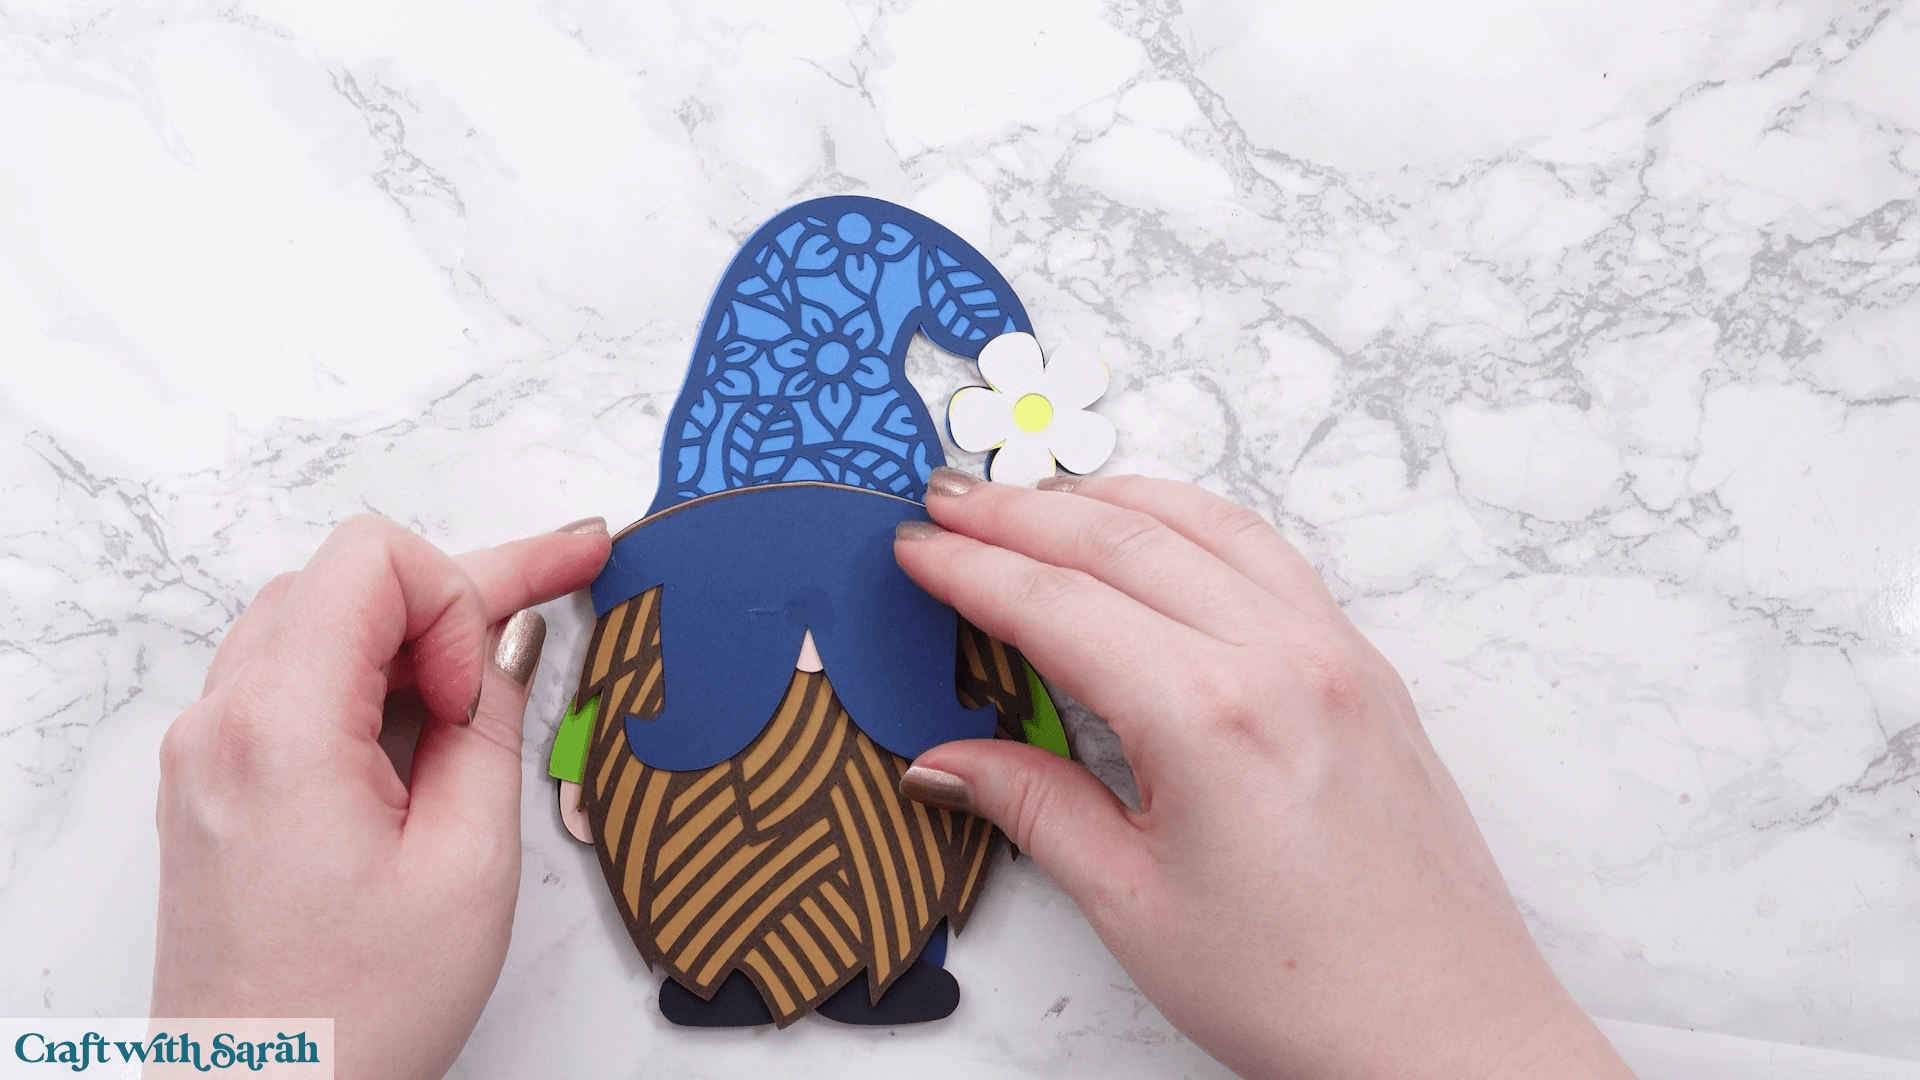
If you accidentally glue something the wrong way round, don’t panic!
Try to separate the pieces before the glue dries. If necessary, simply recut the piece and replace it. It happens to all of us!
Continue following the assembly guide until every layer has been stuck together.
Once complete, your layered papercraft project is ready to display.
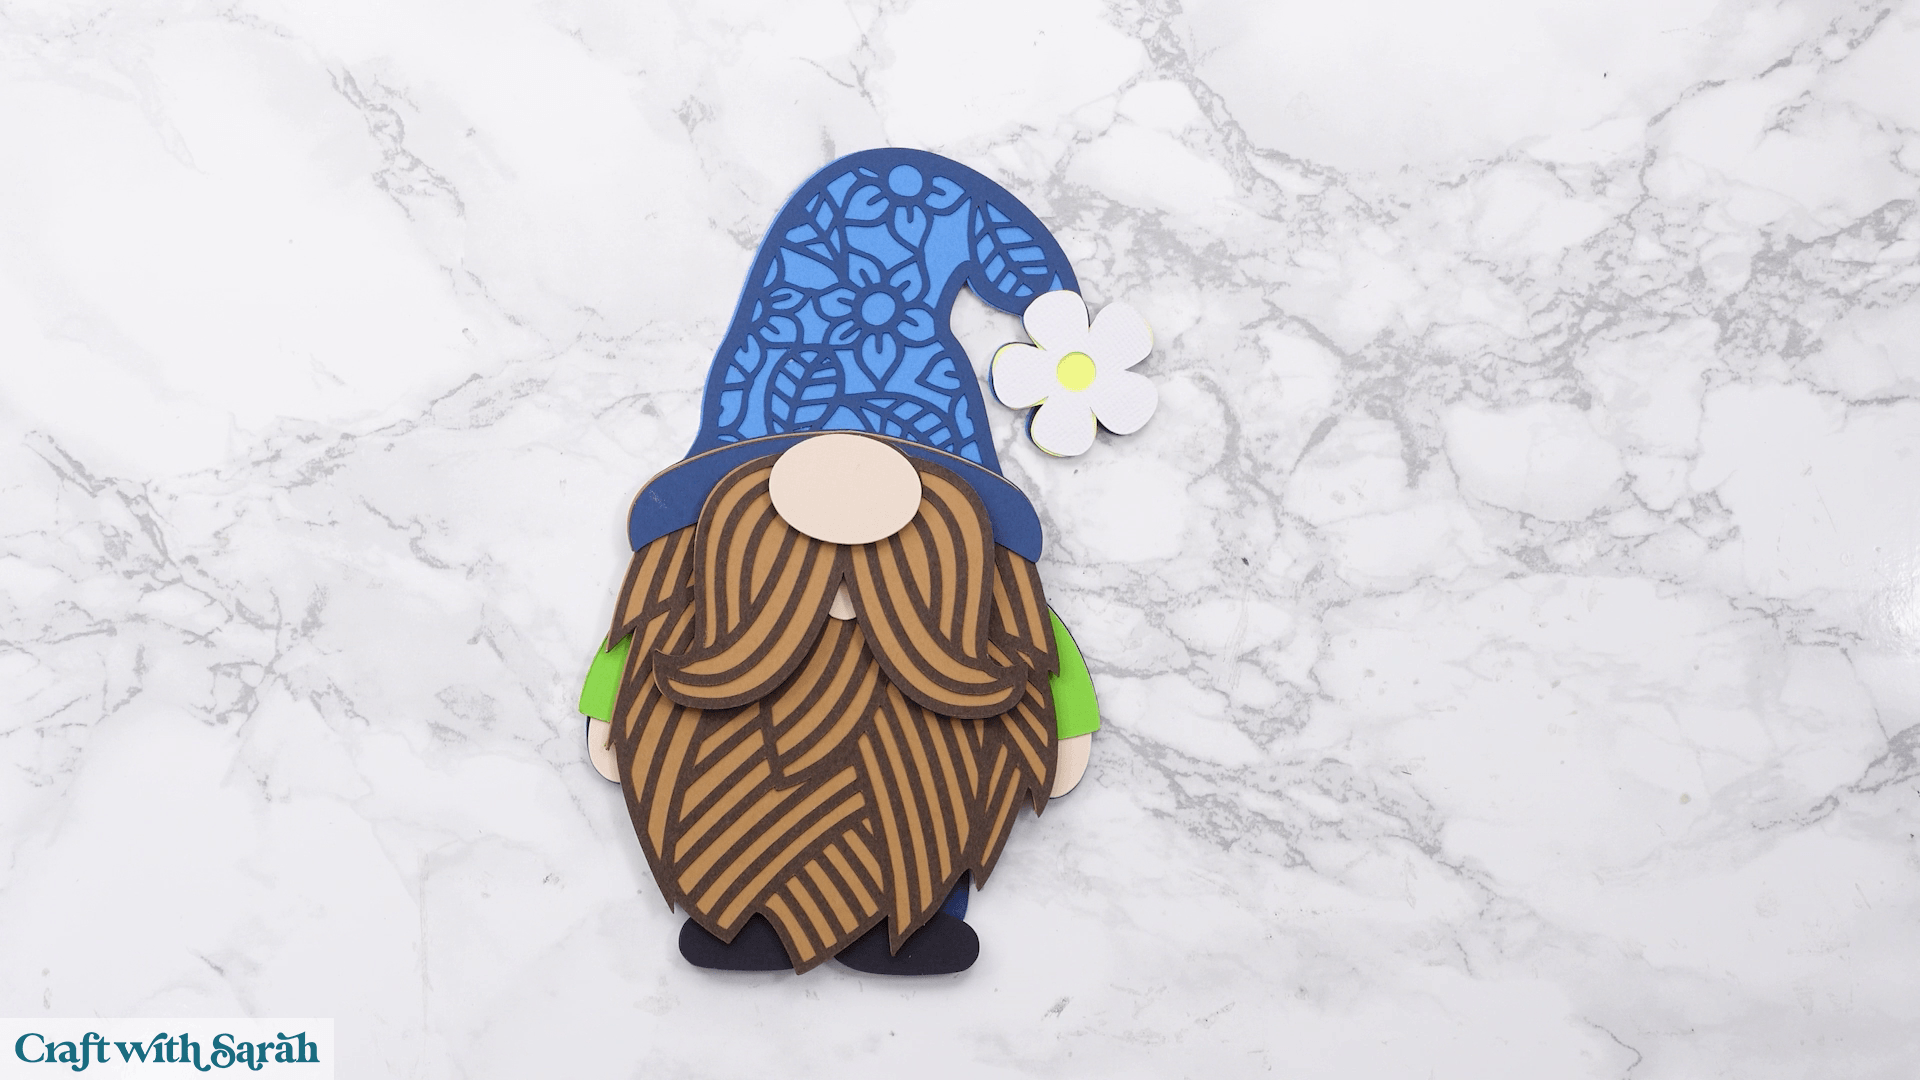
Your layered papercraft project is finished!
Congratulations, you’ve made your first layered papercraft project!
You could frame it in a shadow box, attach it to a greetings card, add it to a scrapbook page or use one of my free easel stands, or these simple wall hooks and backing stands to turn it into a freestanding decoration.
Once you’ve made one, you’ll find that all of my layered SVGs are assembled in exactly the same way, so each project becomes quicker and easier.
I hope this tutorial has helped you feel confident creating layered papercraft with your Cricut machine.
Before long, you’ll be making beautiful layered cards, shadow boxes, home décor and gifts with ease.
Happy crafting,
Sarah x
Frequently asked questions
What cardstock is best for layered papercrafts?
Most of my layered papercraft projects are made using cardstock between 160 and 300 GSM.
My personal preference is around 200–225 GSM because it’s widely available, cuts well and gives sturdy finished layers.
That’s the equivalent of around 65-80lb as my preference, but I use up to 110lb depending on the project.
You can use smooth or textured cardstock, and it’s perfectly fine to mix different finishes within the same project.
Should I use a LightGrip or StandardGrip mat for papercrafts?
I usually recommend a LightGrip mat for cardstock because it’s easier to remove the finished pieces without bending or tearing them.
A StandardGrip mat works too, but brand-new mats can sometimes be very sticky. Once they’ve been used a few times, they’re often much better for cardstock projects.
Why is my cardstock tearing when I cut it?
If your cardstock is tearing, first check that your blade is clean and sharp.
You could also try using a lighter material setting in Cricut Design Space, as the pressure may simply be too high for your particular cardstock.
It’s also important to make sure your cardstock is firmly stuck to the cutting mat before you start cutting, as lifting during the cut can also cause tearing.
Why won’t my small pieces cut out cleanly?
Very intricate designs sometimes leave tiny pieces behind after cutting.
A weeding tool or pricking tool is ideal for gently pushing out any remaining pieces.
If this happens regularly, it’s worth checking whether your blade needs cleaning or replacing.
What’s the best glue for layered cardstock?
I recommend using a glue that dries clear and doesn’t warp the cardstock.
Barely Art Glue is my favourite because the fine needle tip makes it easy to apply glue to intricate designs.
Collall All Purpose Glue is another excellent option, although I recommend transferring it into a fine-tip applicator bottle for easier control.
Do I have to use foam squares?
Not if you don’t want to! Foam squares create the beautiful layered 3D effect, but you can glue every layer flat if you prefer.
This can be especially useful if you’re making greetings cards and want to keep the finished design thin enough for standard postage.
Can I make these projects with a Cricut Joy?
Yes, many of my layered SVGs are designed to work with the Cricut Joy, Cricut Joy Xtra, Cricut Explore and Cricut Maker machines.
Can I make these projects with a Silhouette, ScanNCut or other type of machine?
Yes! When you download one of my SVGs, you’ll find separate folders containing versions for the different cutting machines, making it easy to choose the correct files for your machine.
Can I change the colours?
Absolutely! One of the best things about layered papercraft is that every design can be customised to suit your own style.
You can recolour the layers in Cricut Design Space before cutting, or simply choose different colours of cardstock when you assemble the project.
I always recommend deciding on your colour scheme before you start cutting so you know exactly which cardstock to load onto your mat.