Cut Layered SVG Files from WOOD with the xTool M1 Laser Cutter

Learn how to cut a layered SVG cut file from wood using the xTool M1 laser cutter.
In this xTool M1 tutorial, we’ll take a look at how to format and size SVG files from within the xTool software, how to choose which layers to cut to avoid the project getting too thick when cut from wood, and how to put it all together once it’s been cut. Let’s get started!

xTool very kindly sent me the M1 machine for free so that I could test it out and put it through its paces. All opinions and project ideas are my own.
Please note that some of the links included in this article are affiliate links, which means that if you click through and make a purchase I may receive a commission (at no additional cost to you). You can read my full disclosure at the bottom of the page.
Find out more about the xTool M1
Make layered wood projects on the xTool M1 laser cutter
Watch the video below to see how to format and cut layered SVG files on an xTool M1 laser cutter. Or, keep scrolling for a written tutorial.
Step 1) Choose a design to cut with the xTool M1
When choosing the SVG file to cut from wood, I wanted to choose one that was fairly simple in terms of the number of layers.
This is because it’s my first attempt at cutting a multilayered wood project, so I didn’t want to make things too difficult for myself!
Here is the design I’m going to make. This cut file is not yet released, but it will be available from 1st September 2023 for Craft Clubhouse members, and available to non-members from 1st October.
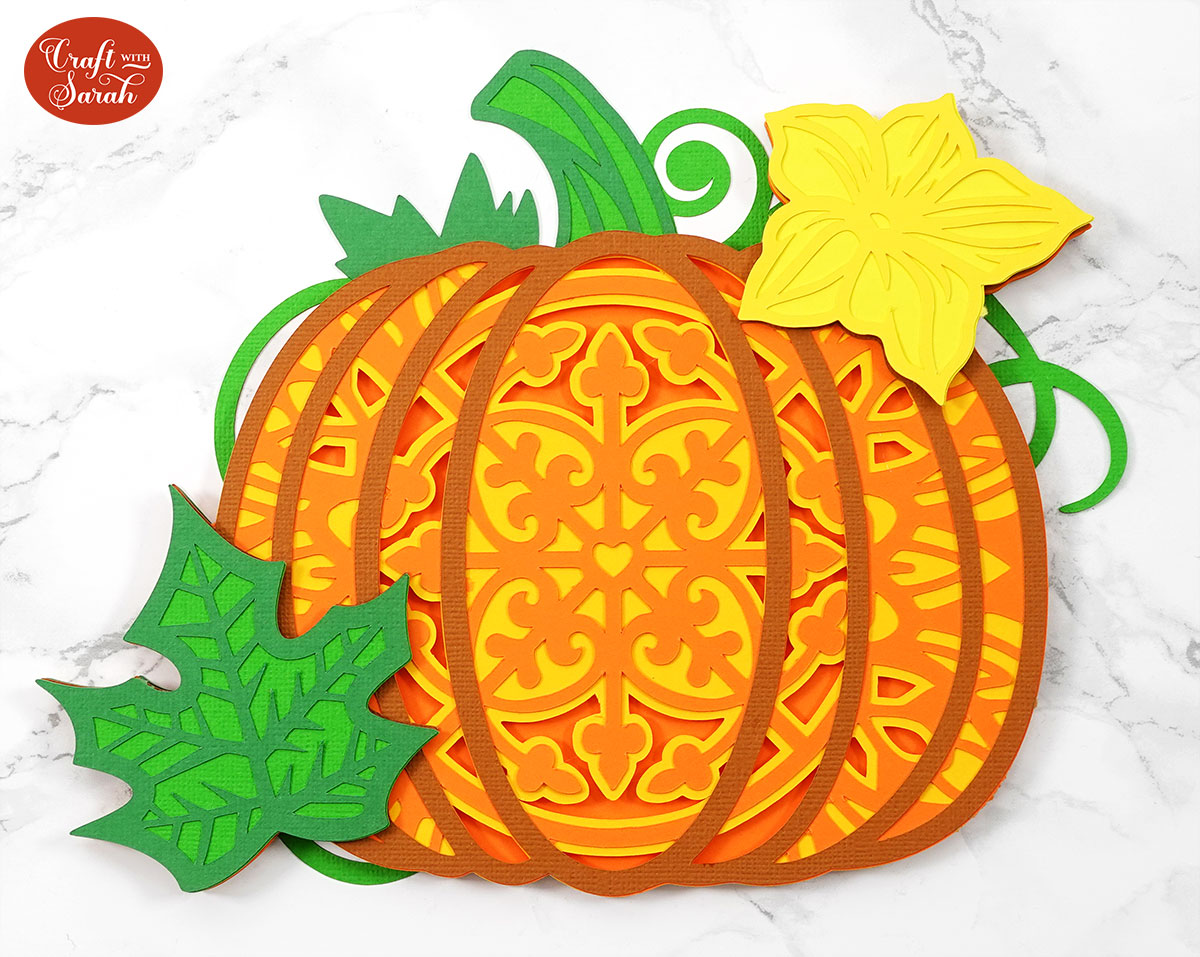
The pumpkin mandala cut file was designed to be cut with a Cricut Machine, but I’m going to modify it using the xTool Creative Space software so that I can cut it from layers of wood instead of the cardstock that I’d usually use with my Cricut.
Because all of the layers will be cut from the same colour of wood, I’m going to use the xTool’s engraving features to add some of the details so that they stand out.
Step 2) Prepare the machine and software
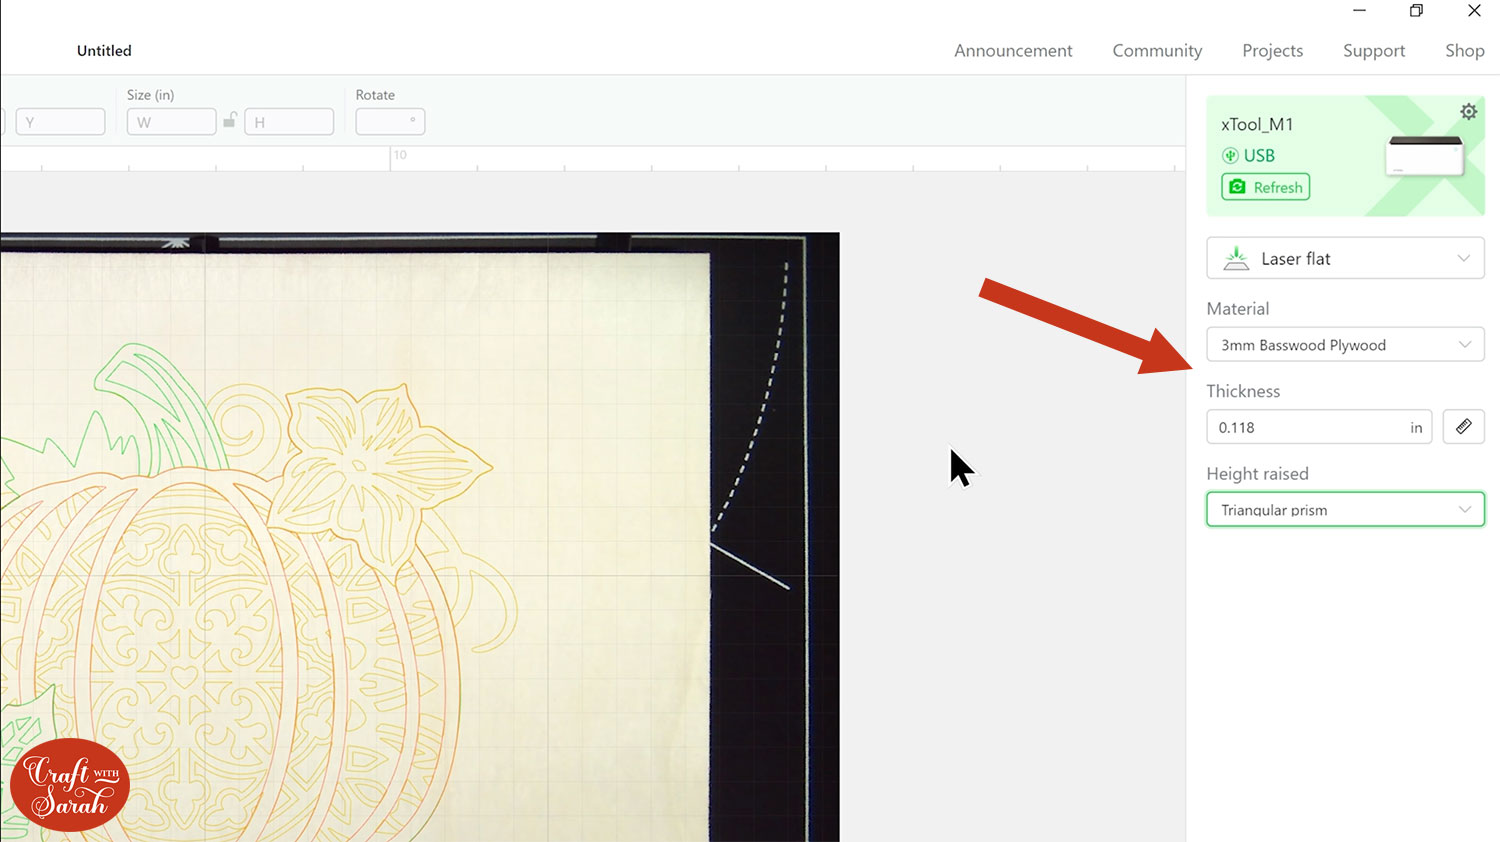
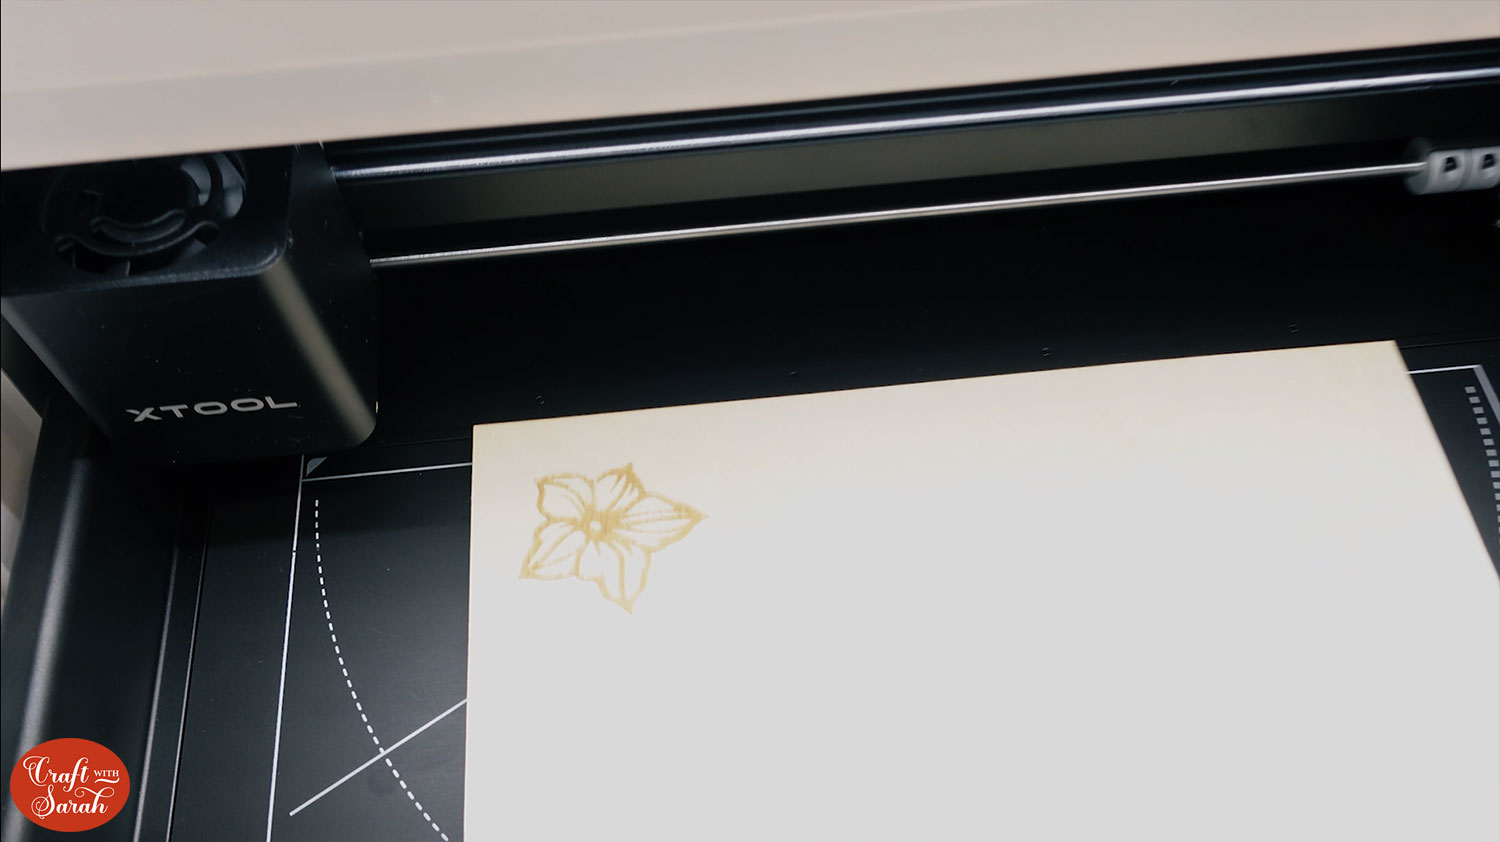
First, add your wood into the xTool M1 laser machine and place it on top of the triangle prisms that are included in the box.
The triangle prisms are made of metal and they raise the wood material up from the bottom of the laser cutter so that air can circulate around it better during the cut process. This helps to reduce charring on the edges of the wood.
The wood I am using was purchased from Amazon: Belle Vous 2mm Plywood Sheets.
Connect your xTool M1 machine to your computer and then set the material type and tell the software that you are using the prisms.
Step 3) Import the SVG file
Click File > Import and then locate the SVG file on your computer.
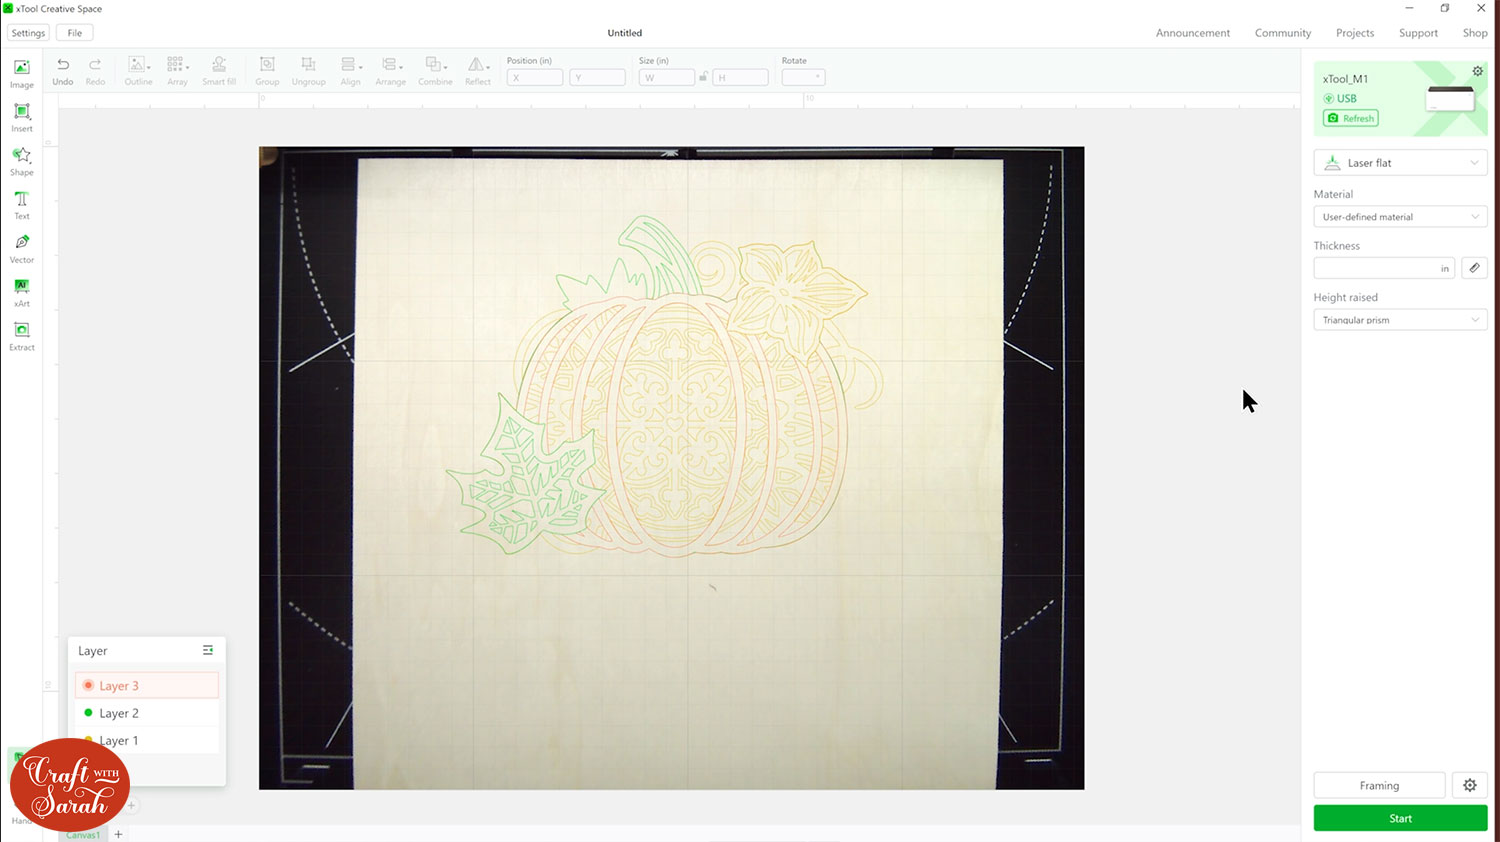
I find it easier to modify the designs by moving them underneath the photograph of the laser machine as the background is a bit lighter and less “busy”, so I can see the layers of the cut file better.
Before you change any of the layers, resize the design to the size you want to cut it at. I’ve changed mine to 7 inches wide. Make sure the padlock above the width and height boxes is closed, to keep everything in proportion when you resize.
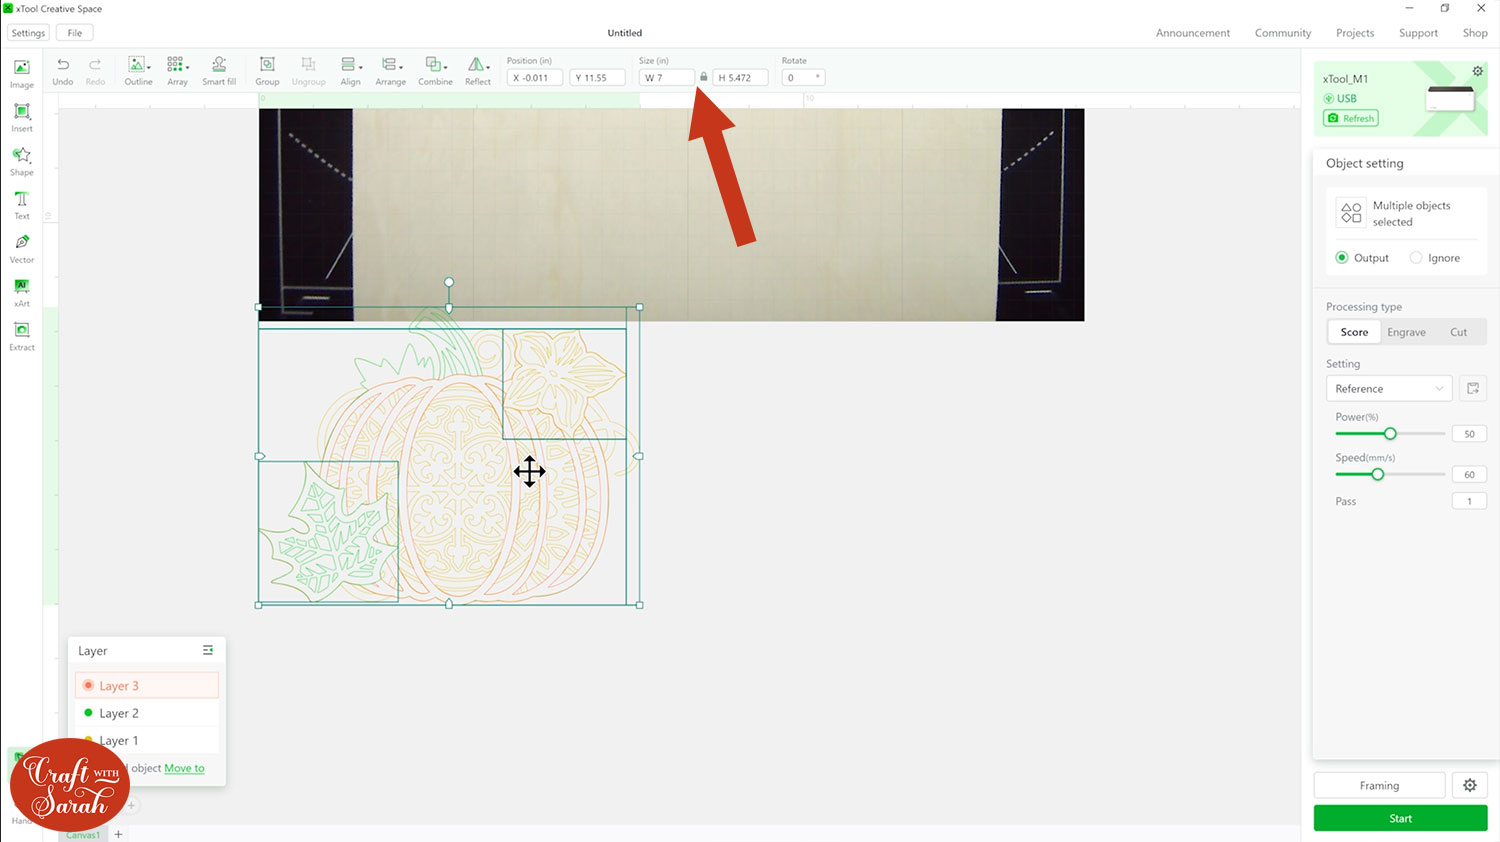
My layered SVGs are designed to be done from cardstock, so they have lots of layers in them. If I cut every single piece of the design from wood, it would end up really thick and heavy, and probably wouldn’t look great.
Most designs can be formatted with a few simple steps in the xTool Creative Space software to make them better suited to be cut from wood.
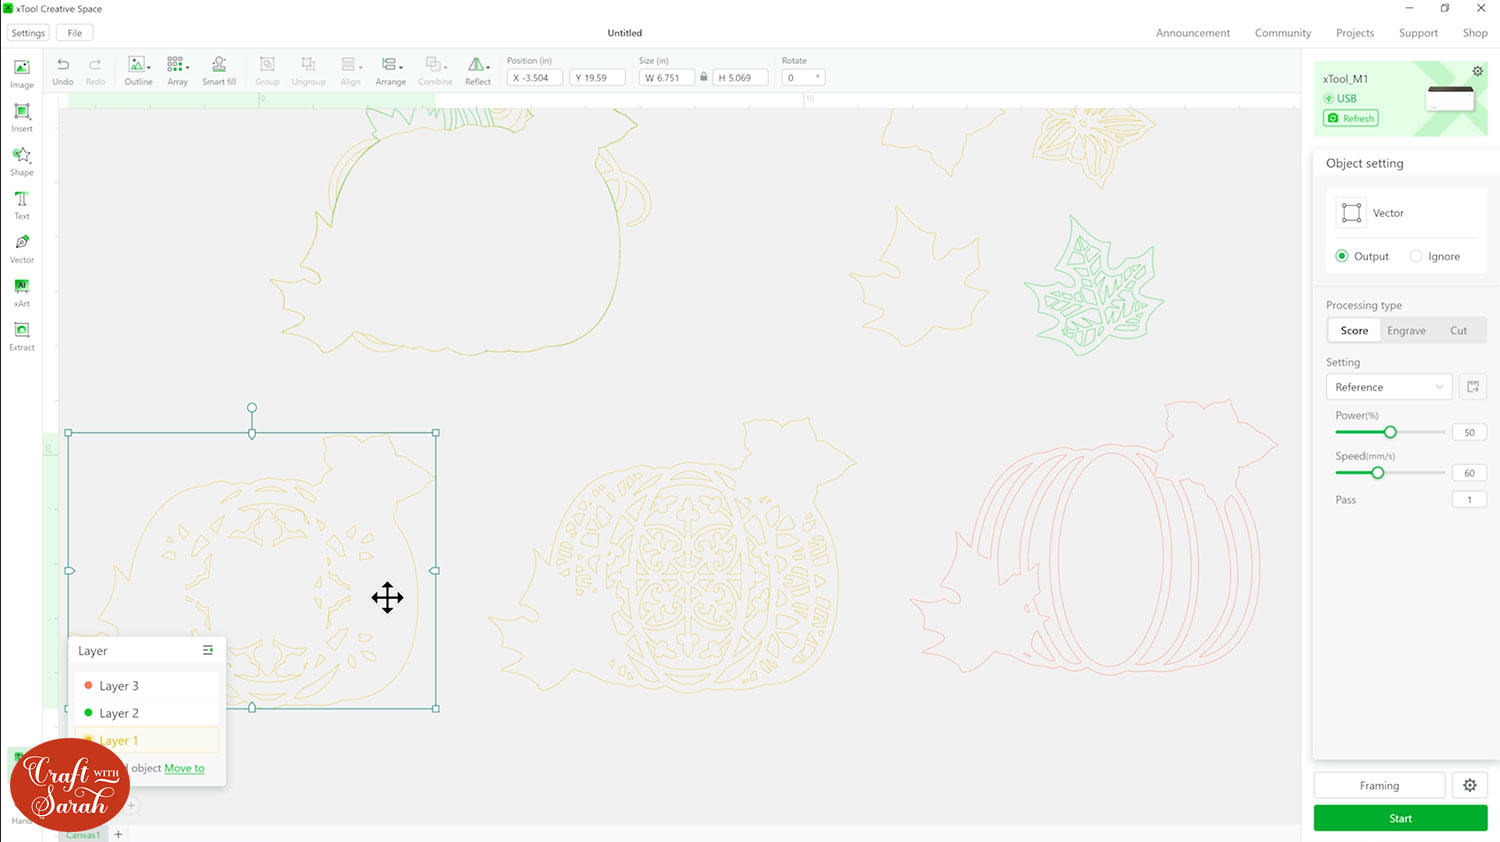
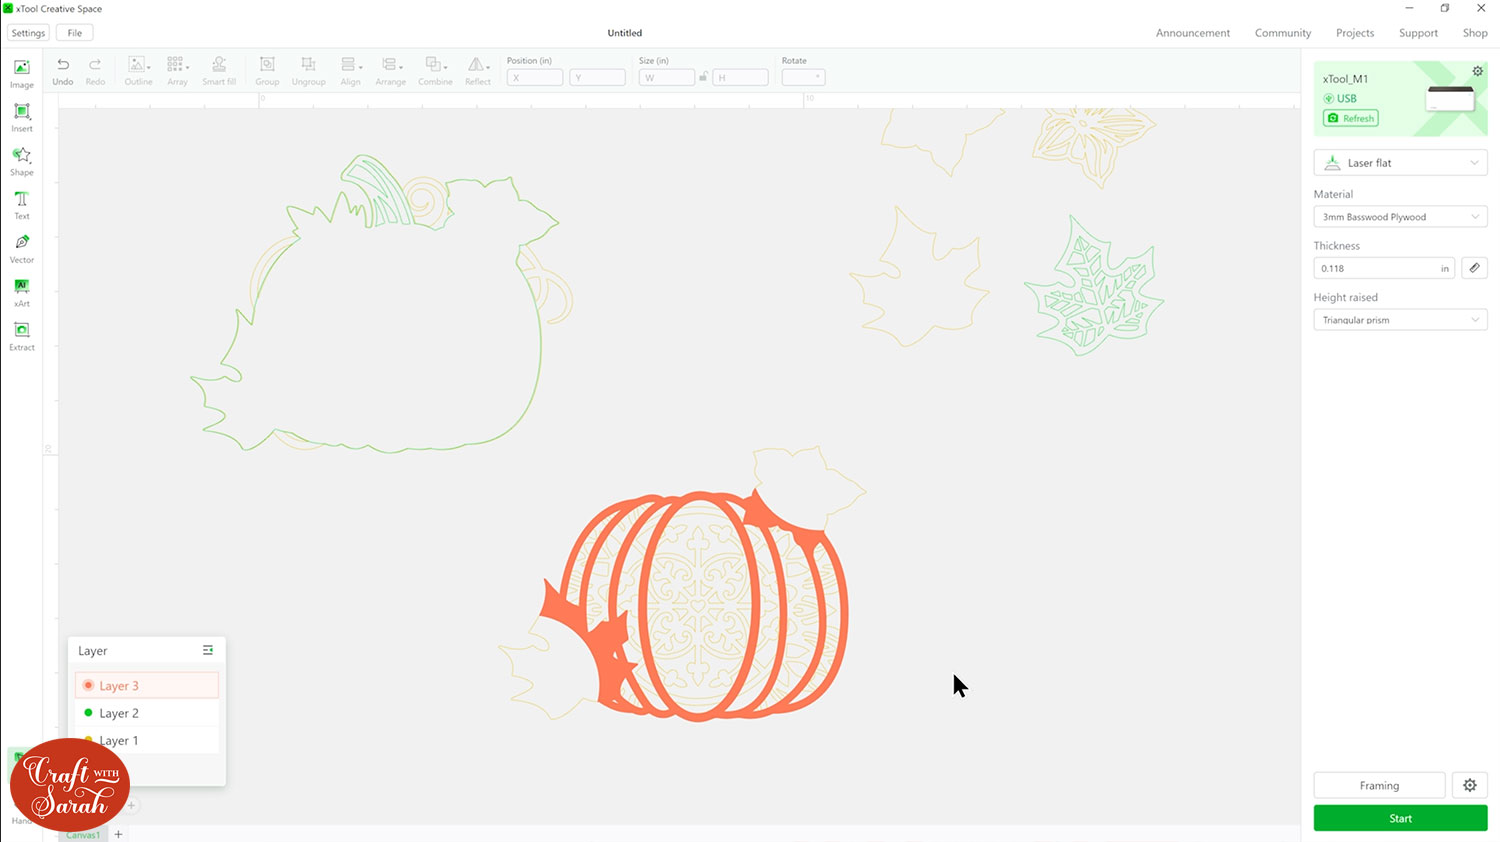
Step 4) Separate the layers of the cut file
Right-click on the design and Ungroup the layers.
Click-and-drag them so that they are all placed separately on the screen.
Step 5) Delete unnecessary layers
First, I’ll delete one of the mandala layers. Its purpose is purely for decoration to add an extra colour into the design when cut from cardstock, so it’s not needed in this instance.
I’ve also deleted the solid pumpkin piece because I want to have the gaps in the mandala pattern show through to the bottom layer.
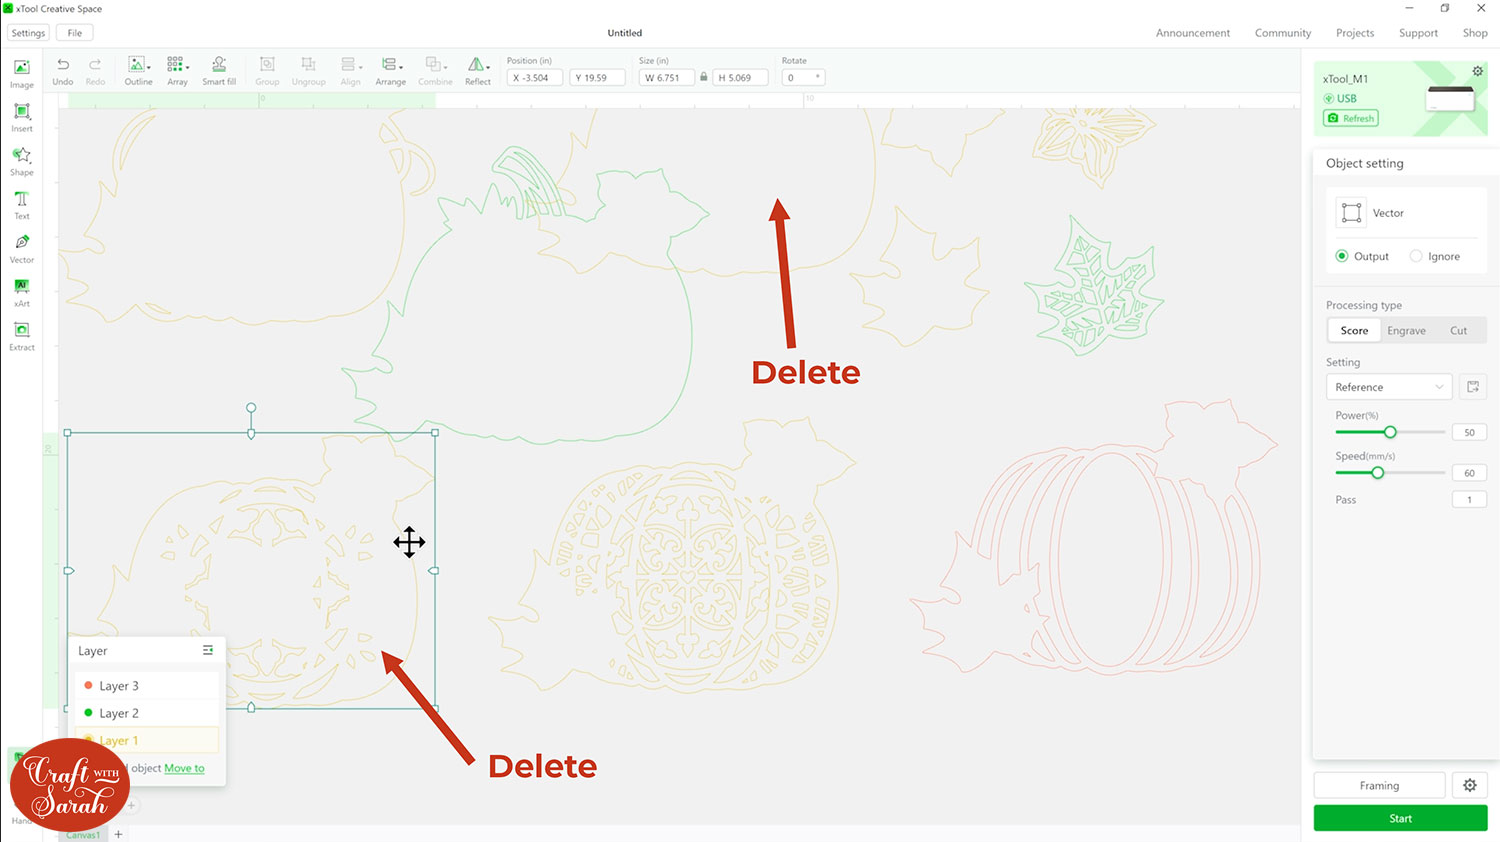
If you’re painting your project, you probably wouldn’t delete that solid layer, as it would mean that your orange pumpkin would show green leaves in the gaps. As I’m not painting my design, I’m happy to delete it.
Step 6) Add details with engraving
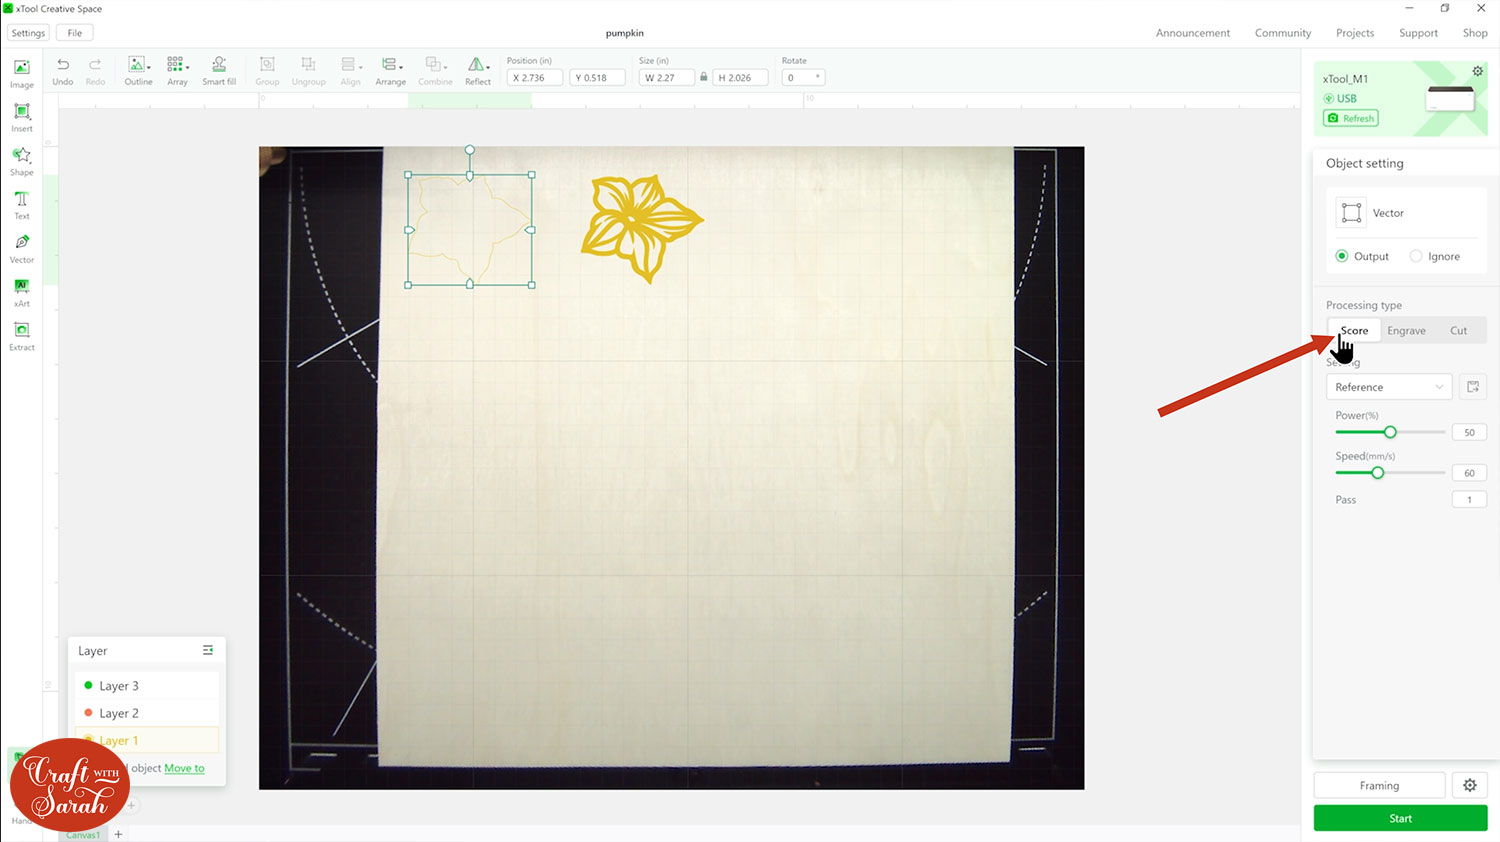
I want to engrave the outlines of the pumpkin onto the same piece of wood that the mandala pattern is cut from, to add extra detail onto that piece.
Click the layer and change it to “Engrave”.

However, at the moment this layer is not very well suited to engraving because of the silhouettes of the leaves and flower.
If I was to engrave this, it would take a very long time to engrave all of those areas, which would be a waste of time as it will get covered up by the separately cut flowers and leaves.
Luckily, there is a quick way to cut parts of a layer away so that they do not get engraved.
This is a great tip for speeding up your workflow!
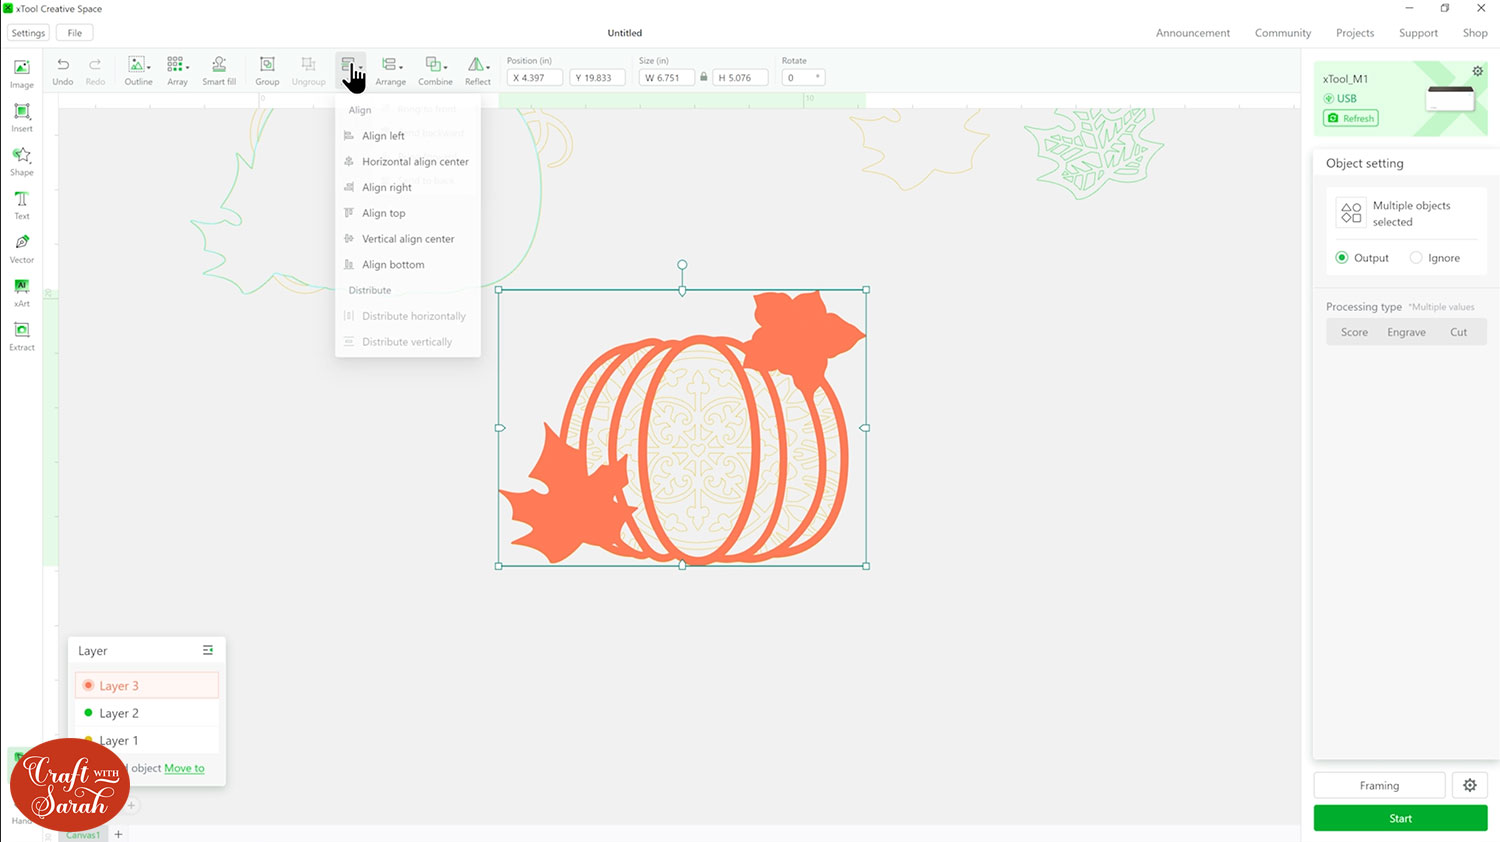
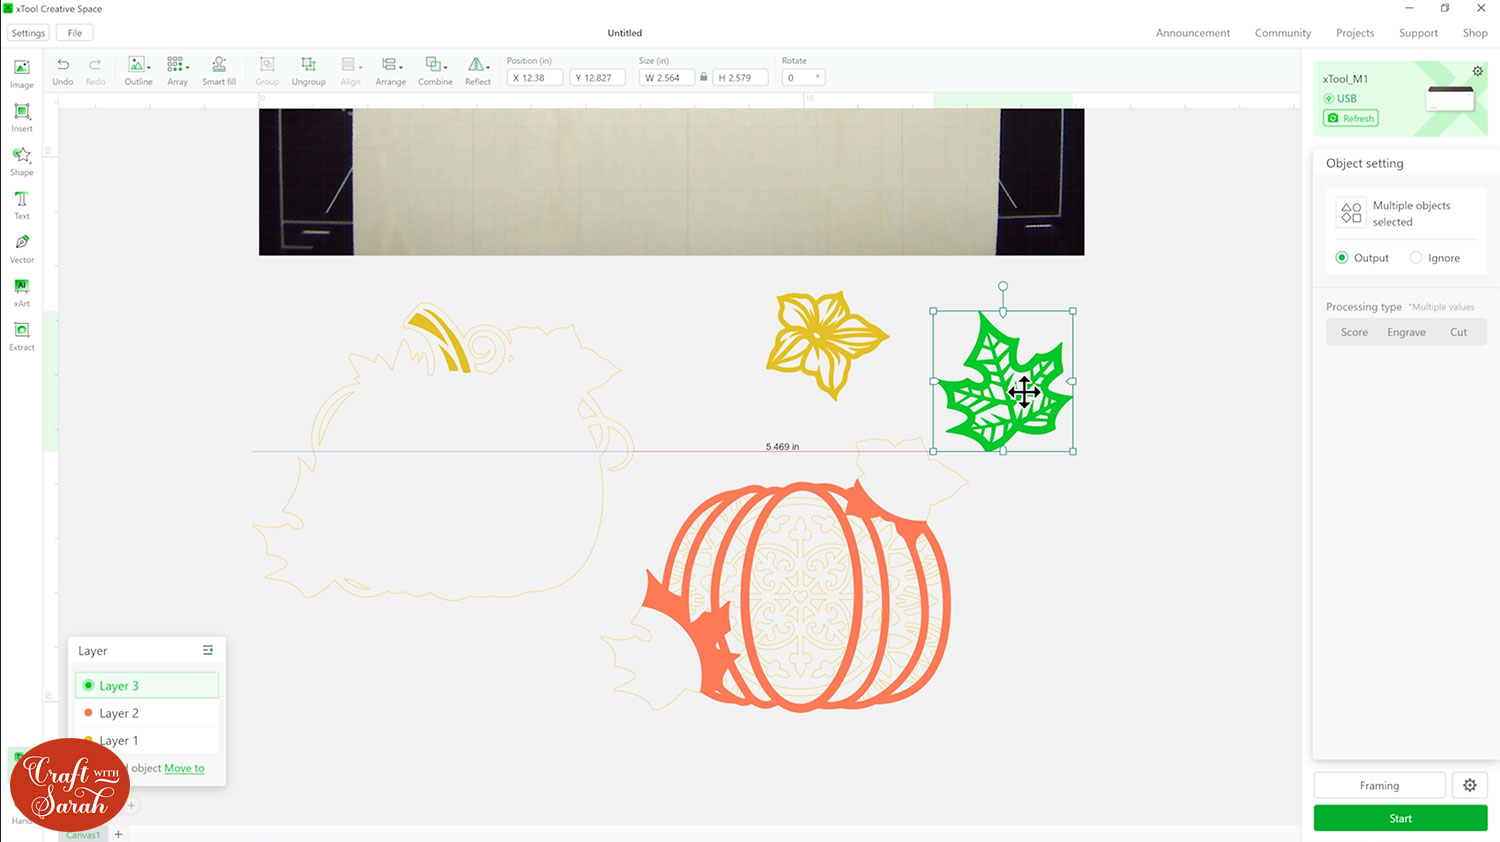
First, use the Align button to position the layer you want to crop on top of the layer that you will be engraving it on. It’s much easier to align it now, rather than waiting until after you have changed it.
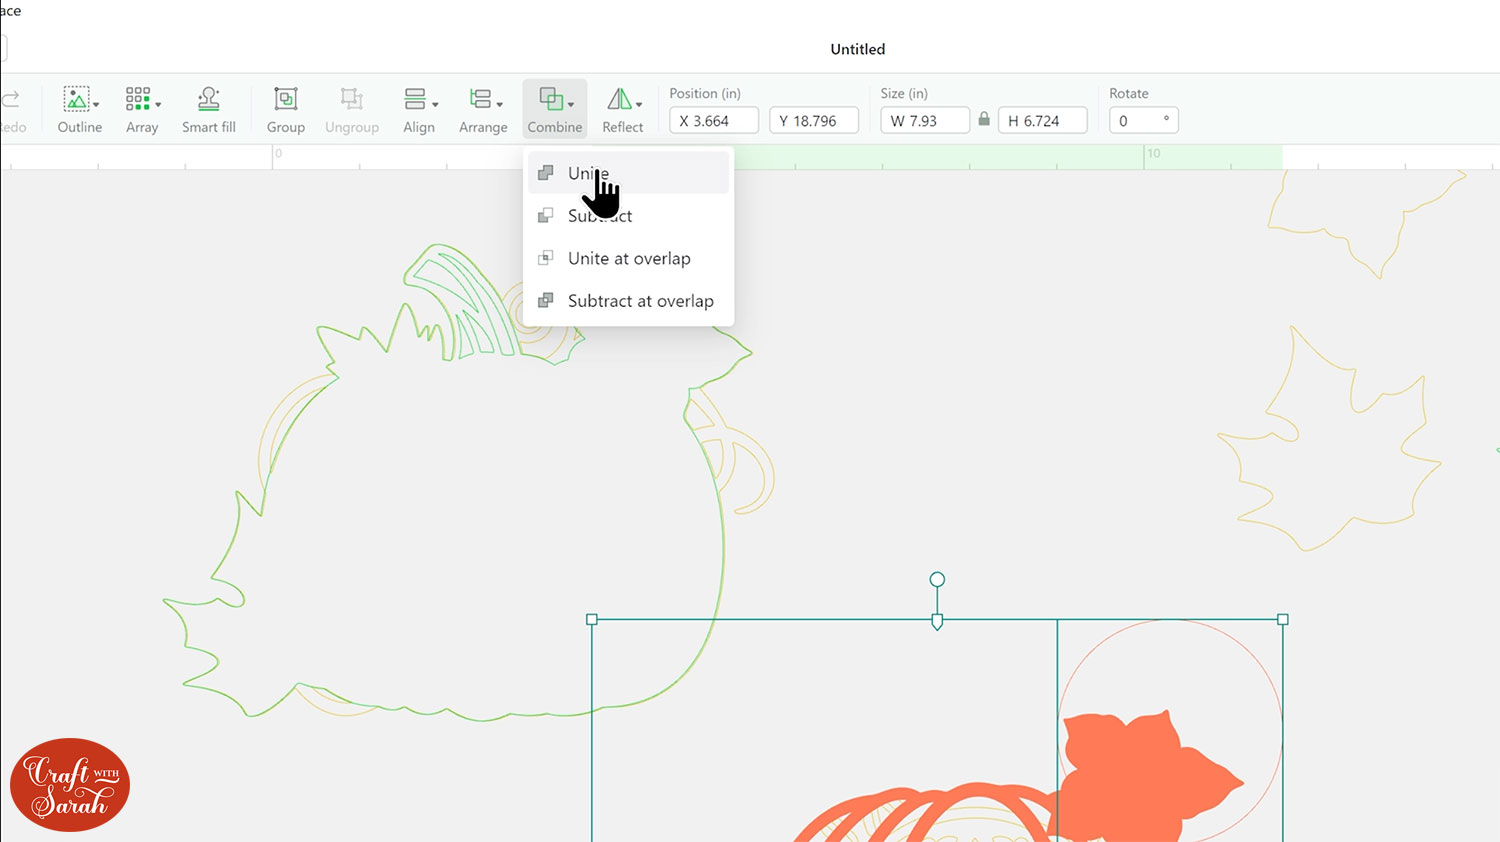
Create several circles (or other shapes) and place them over the layer that you want to modify.
Select all of the shapes and press Combine > Unite.
If you have a Cricut machine, you will probably be familiar with that terminology, as the same tools exist in Design Space.
Next, select your United shapes and the layer underneath and select Combine > Subtract.
That will remove the circle shapes from the layer underneath.
This will now engrave much faster as the xTool M1 will not have to fill in all the areas that we have just removed.
Select the engraved layer and the mandala layer underneath and Group them together so that when we come to cut the design we know that they will stay in the correct position with each other.
Continue formatting the layers until you have everything looking as you want it to be cut.
I changed the detail layers of the leaves and flowers to be engraved, then positioned them exactly on top of the solid layers underneath using the Align tool, so that the outlines will be cut but the details will be engraved on top.
For a detailed step-by-step view on how I formatted all of the different pieces, watch the video at the top of this page.
Step 7) Doing a test cut on the xTool M1
When cutting a new material for the first time on any kind of cutting machine, it’s always a good idea to do a test-cut first to make sure your settings are correct.
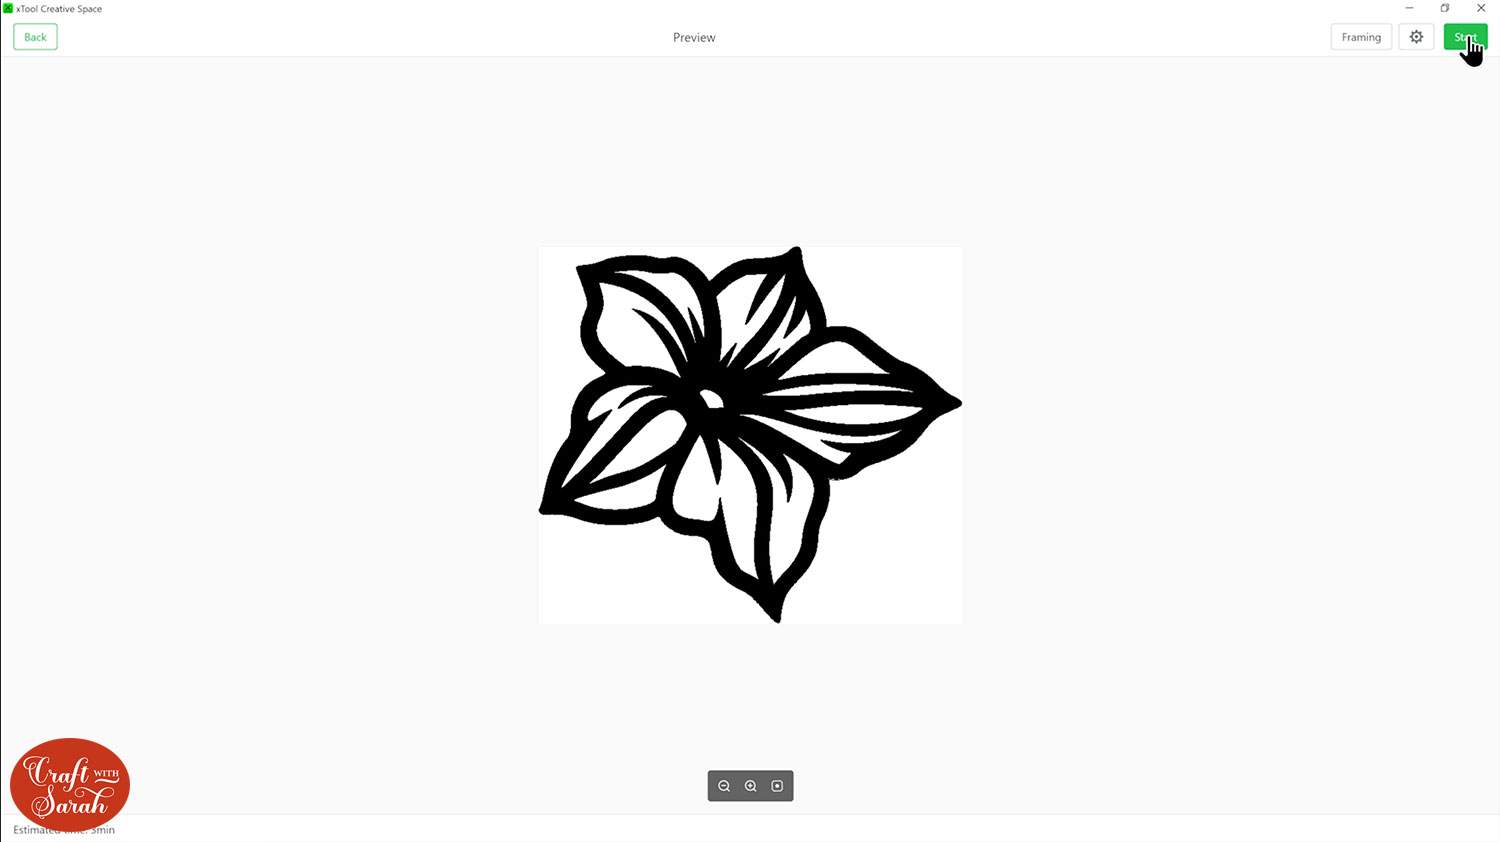
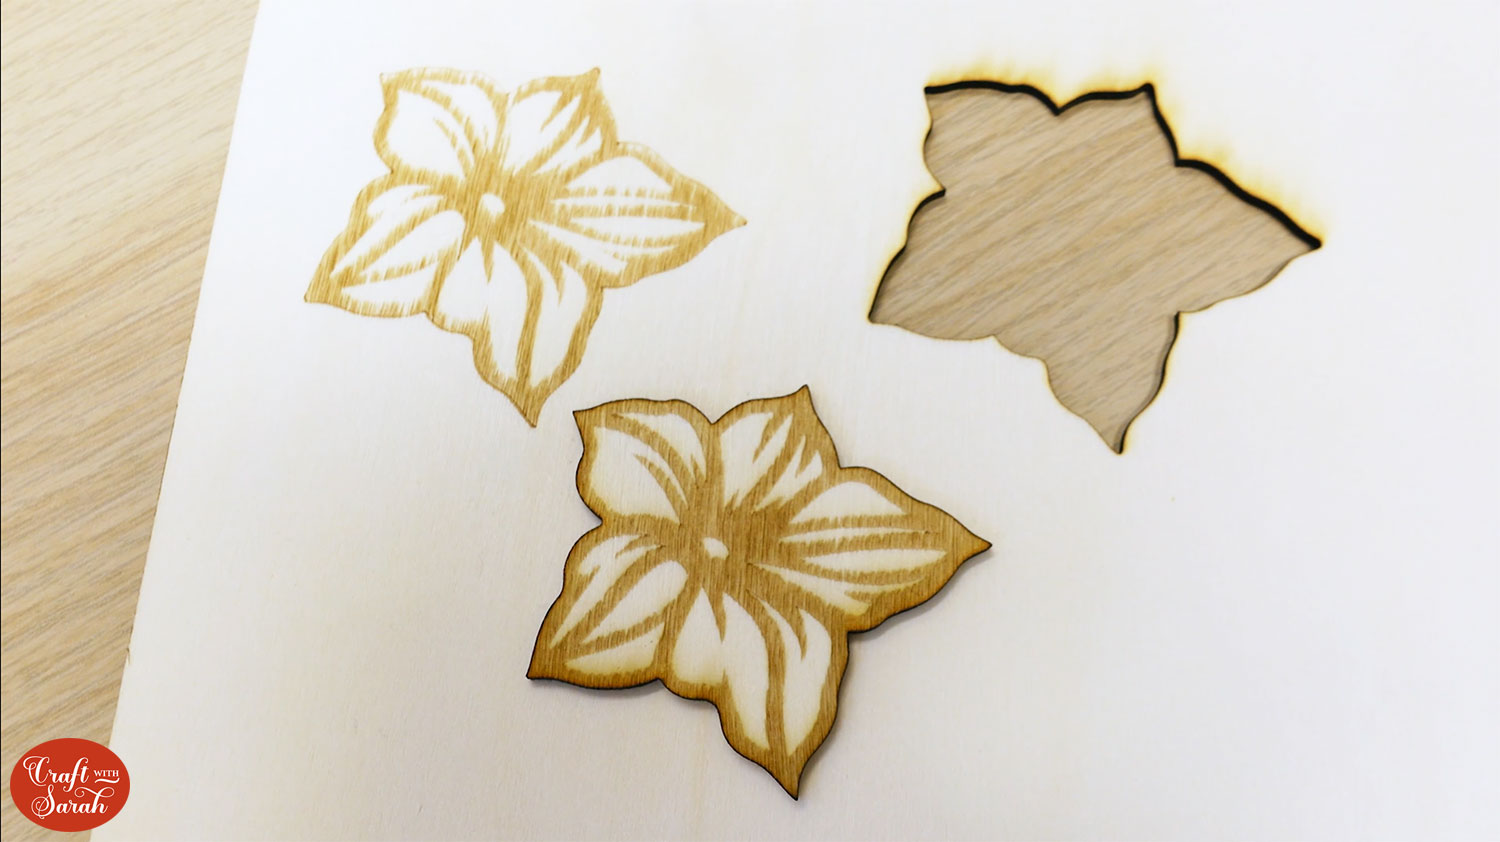
I’m going to cut and engrave the flower of my design for the rest.
Position your test piece onto your material and follow the Framing process.
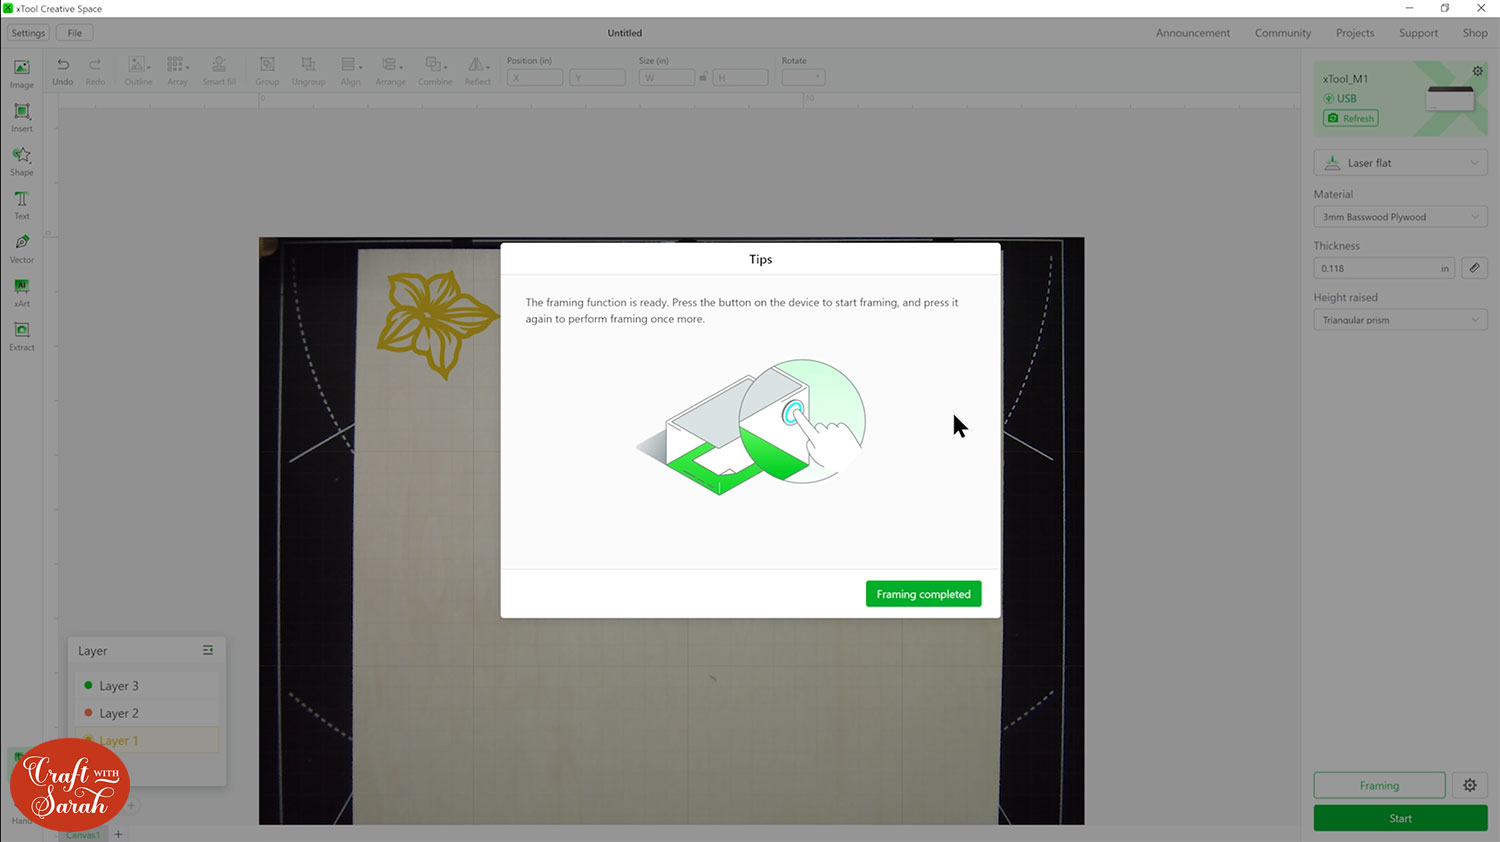
Click start and then it will show you a preview of what you’re about to make. I usually repeat the framing step on this page too. It only takes a few seconds.
It’s hard to show the laser machine in progress, but here’s a little shot of it doing the engraving.

When the machine finished the engraving, it was supposed to cut around the edge… but it didn’t!
As you can see, it has done the engraving beautifully, but the outline has not been cut.
This is why a test-cut is so important, as it helps to show up potential problems with the project.
In my case, this was completely my fault. When I looked back at the project, I noticed that instead of “Cut”, I had set the bottom layer of the flower to “Score”.
In fact, I’d done that for ALL the layers I had intended to be cut out – whoops!
I went through the project and corrected all the layers.
A test-cut also gives you a chance to inspect the cut or engrave settings to see if you are happy with how it’s looking.
I thought that my engraved areas could be done a bit darker, and some of the bits of wood weren’t engraved as deeply as others so it looked a little uneven.
To improve on this, change the lines per centimetre of the engraving settings. I upped mine to 120 lines per centimetre.
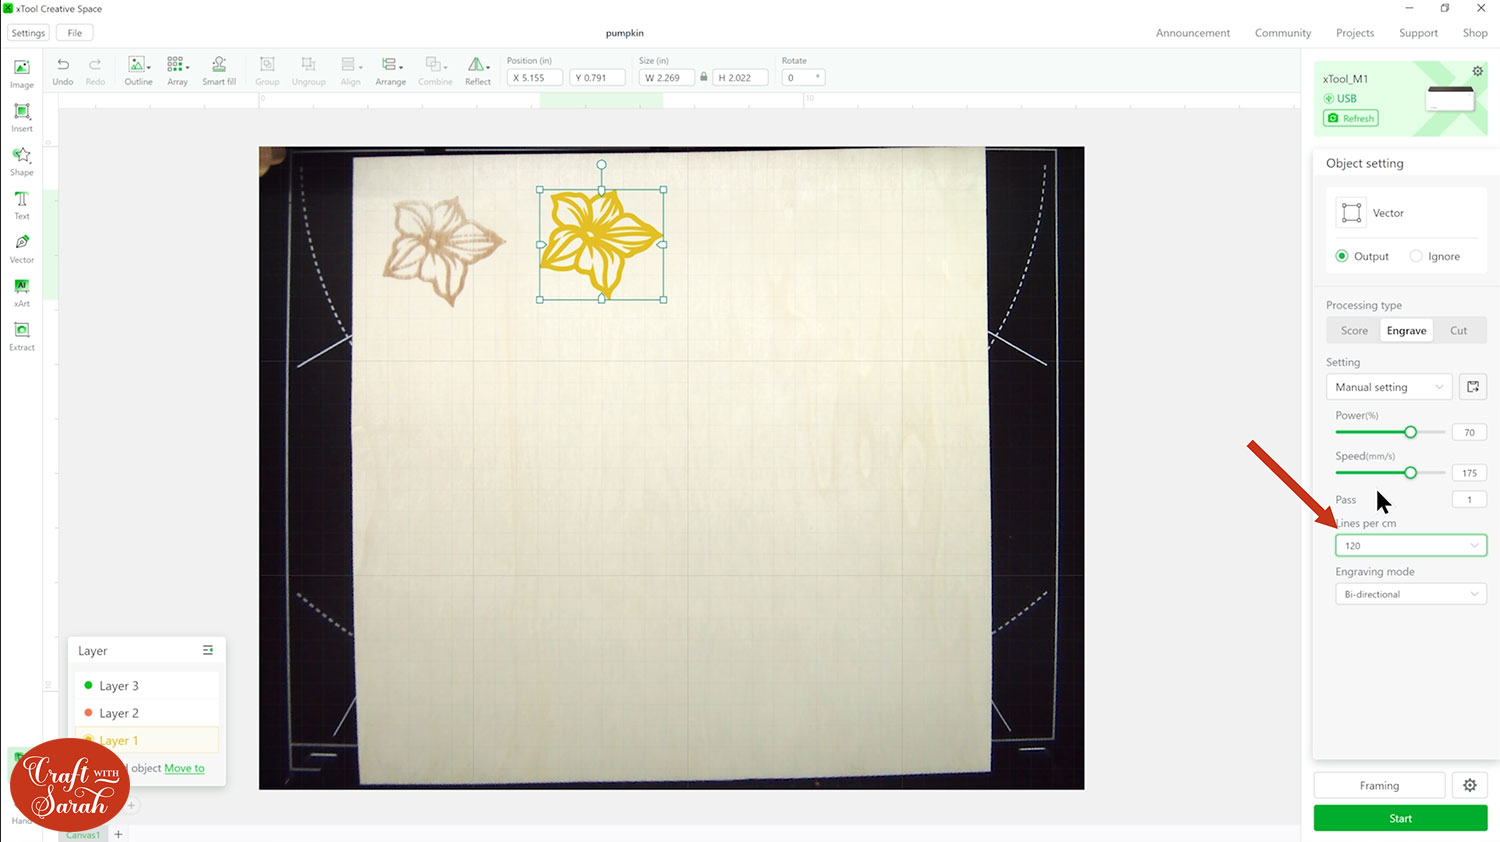
Here is how the flower looked after another test cut.
The engraving looks so much better with the lines per centimetre up to 120 instead of 100. You can see it doesn’t have any of these gaps and it’s a lovely darker colour.
Step 8) Cut your layered wood project
When you are happy with the test-cut, position the remaining layers on top of your material.
Here’s a little shot of the laser in action cutting out the beautiful mandala details on the pumpkin. It’s so detailed and precise on even these tiny lines.
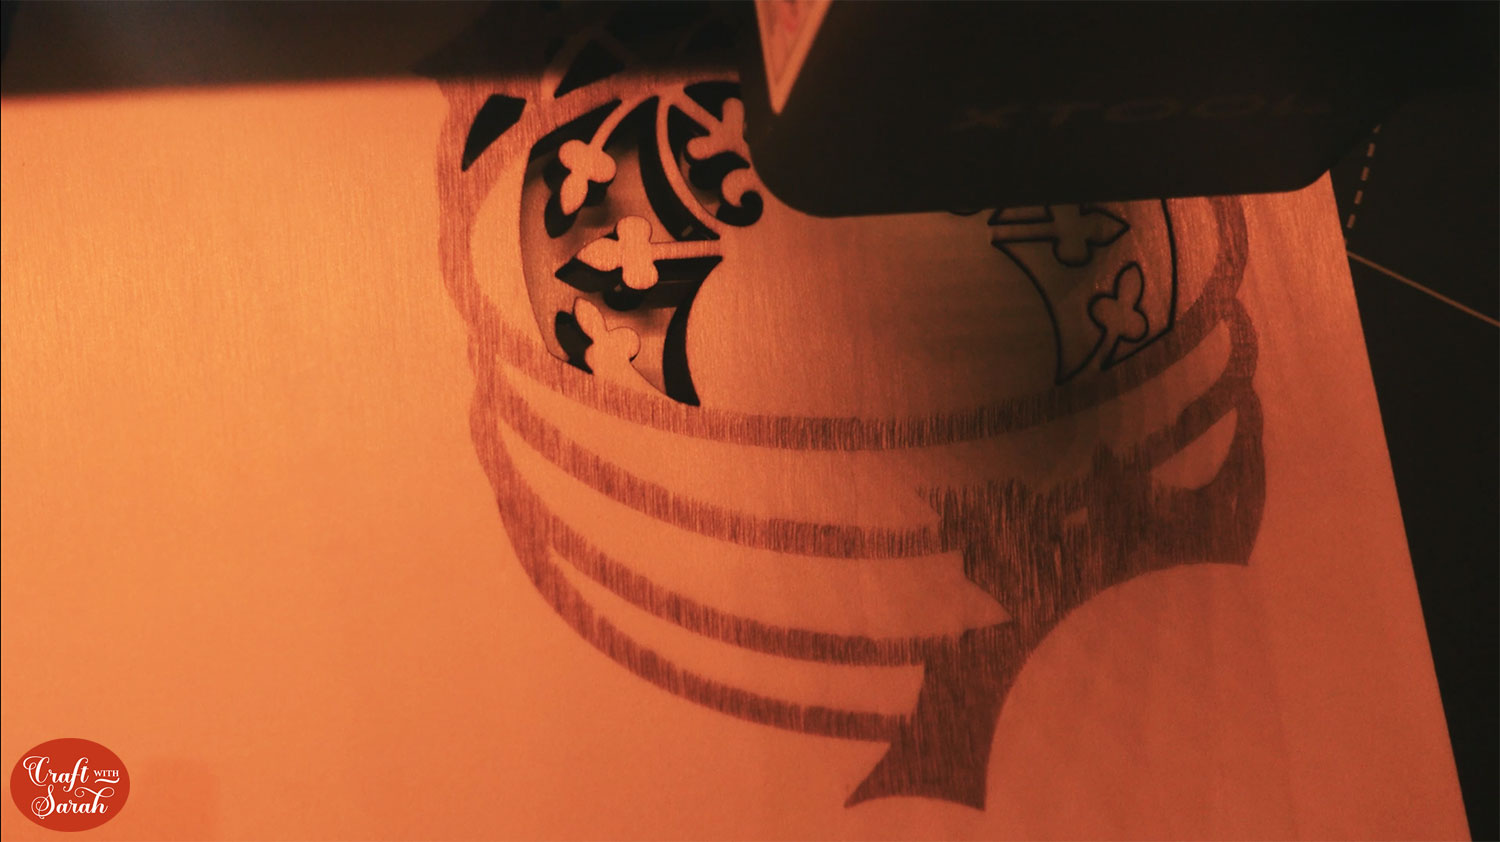
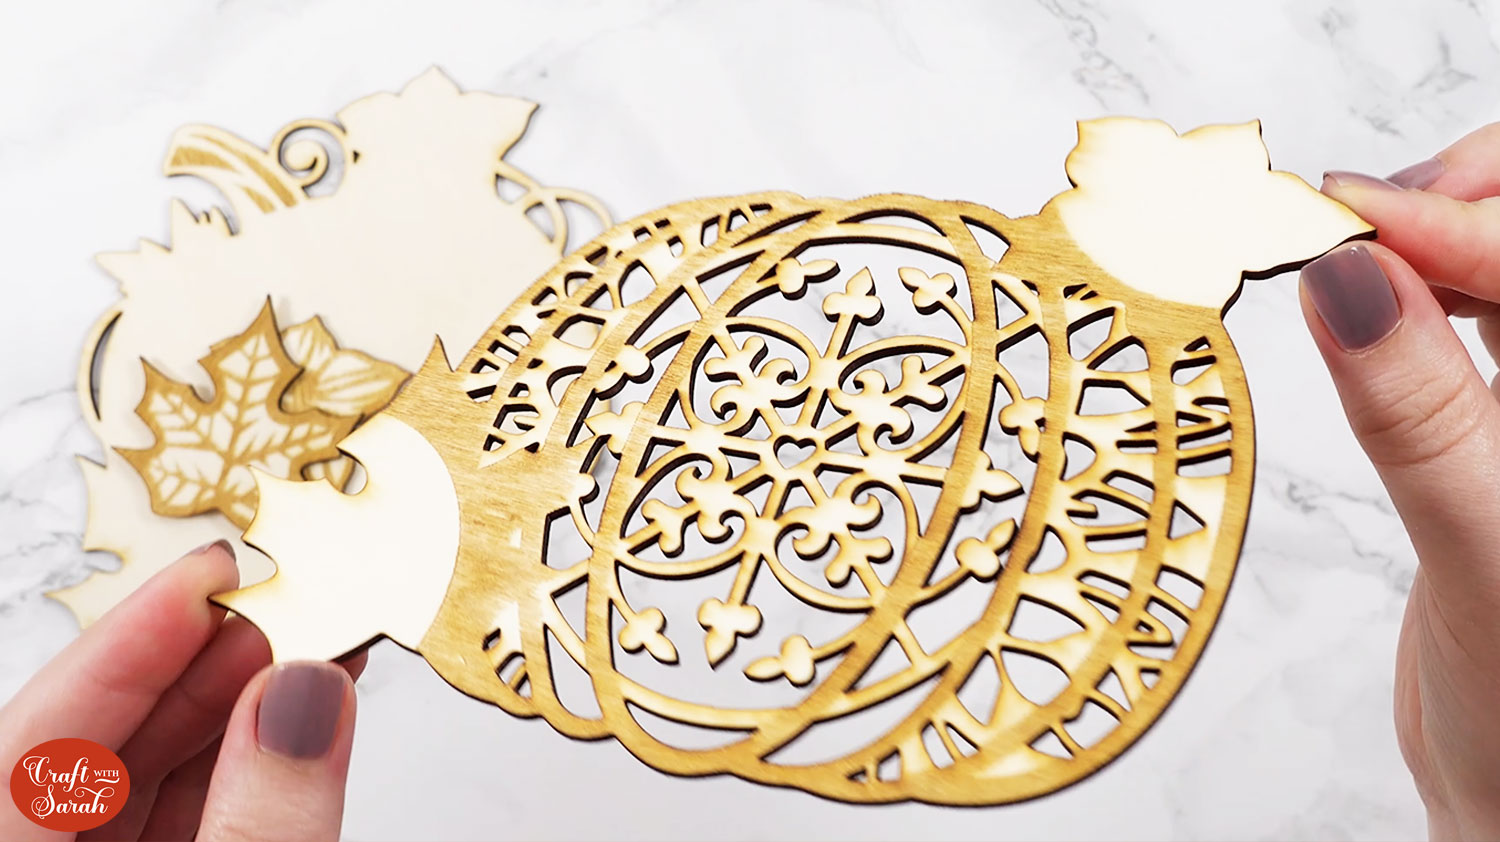
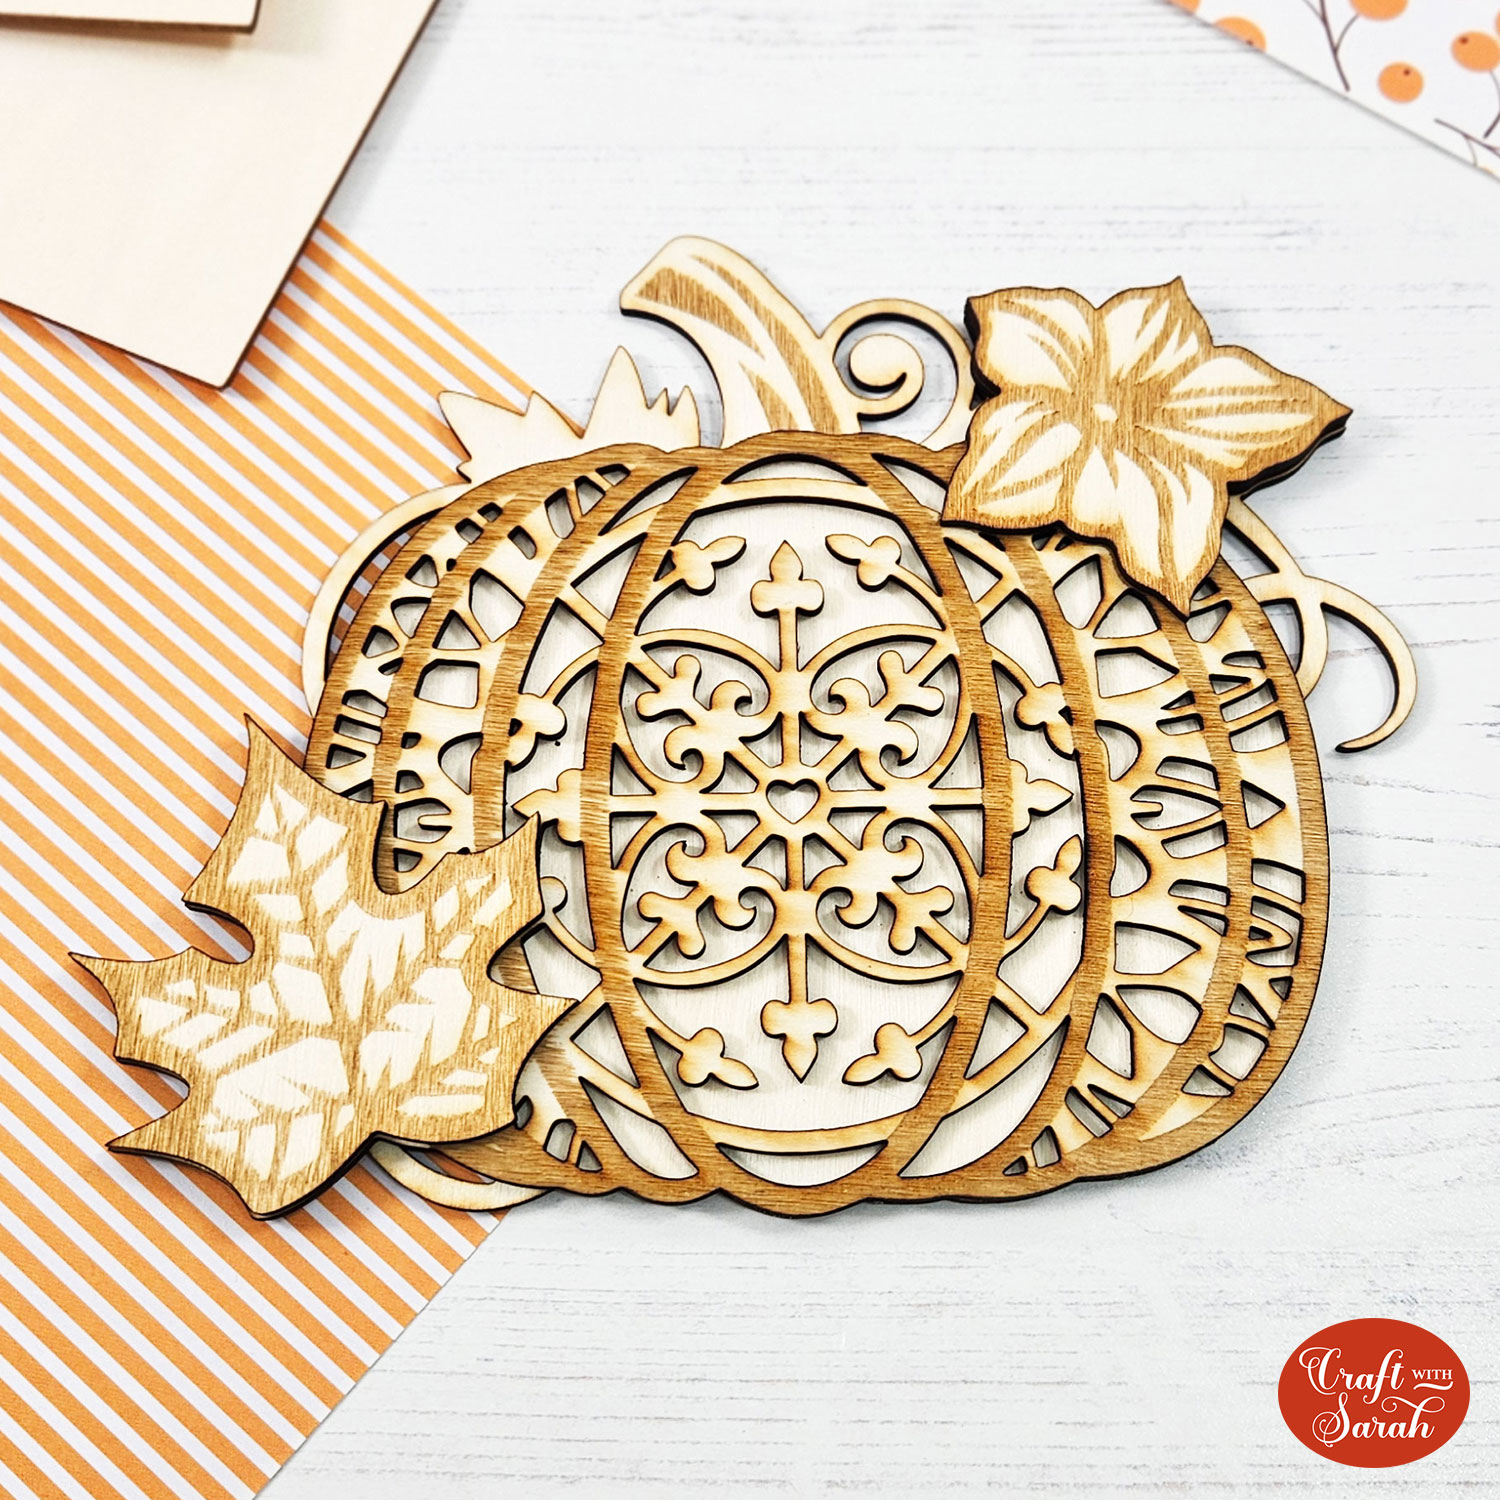
Here’s a closer look at the pieces now that they’re all done. In total, this took 54 minutes to cut and engrave on my xTool M1 laser cutter.
There’s a tiny bit of charring around the edges but actually hardly any at all. I don’t have the air assist tool in my xTool M1 which is an optional add-on you can buy that shoots a little bit of air around the laser to stop your projects from charring. If you do have the air assist, you will probably see even less charring.
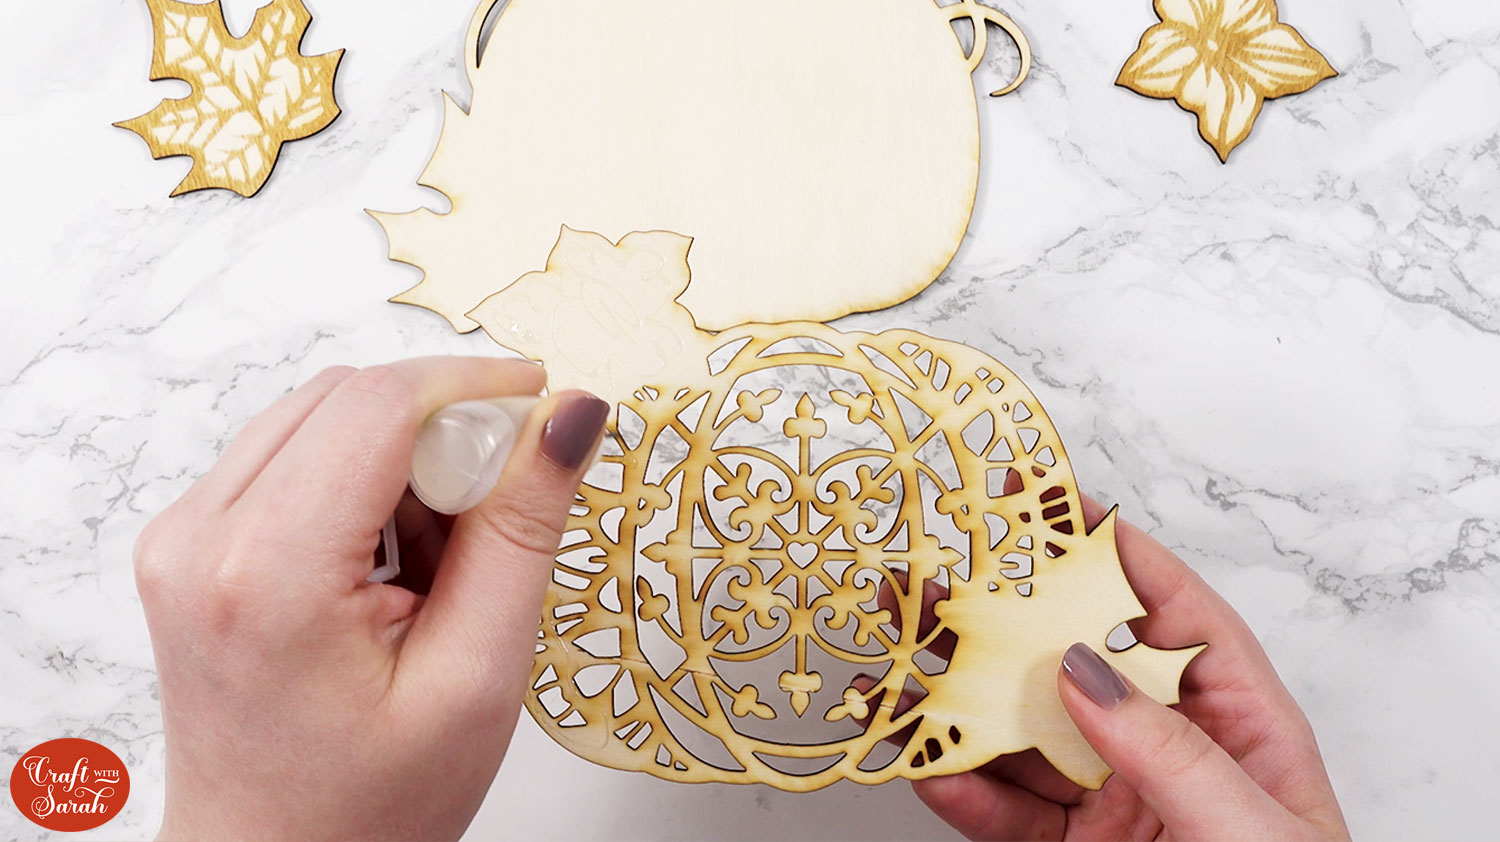
Step 9) Glue the pieces together
The final step is to glue the pieces of wood together.
I’m using my faithful Collall glue, as it said on the bottle that it was suitable for wood.
One all glued together, this is what I ended up with:
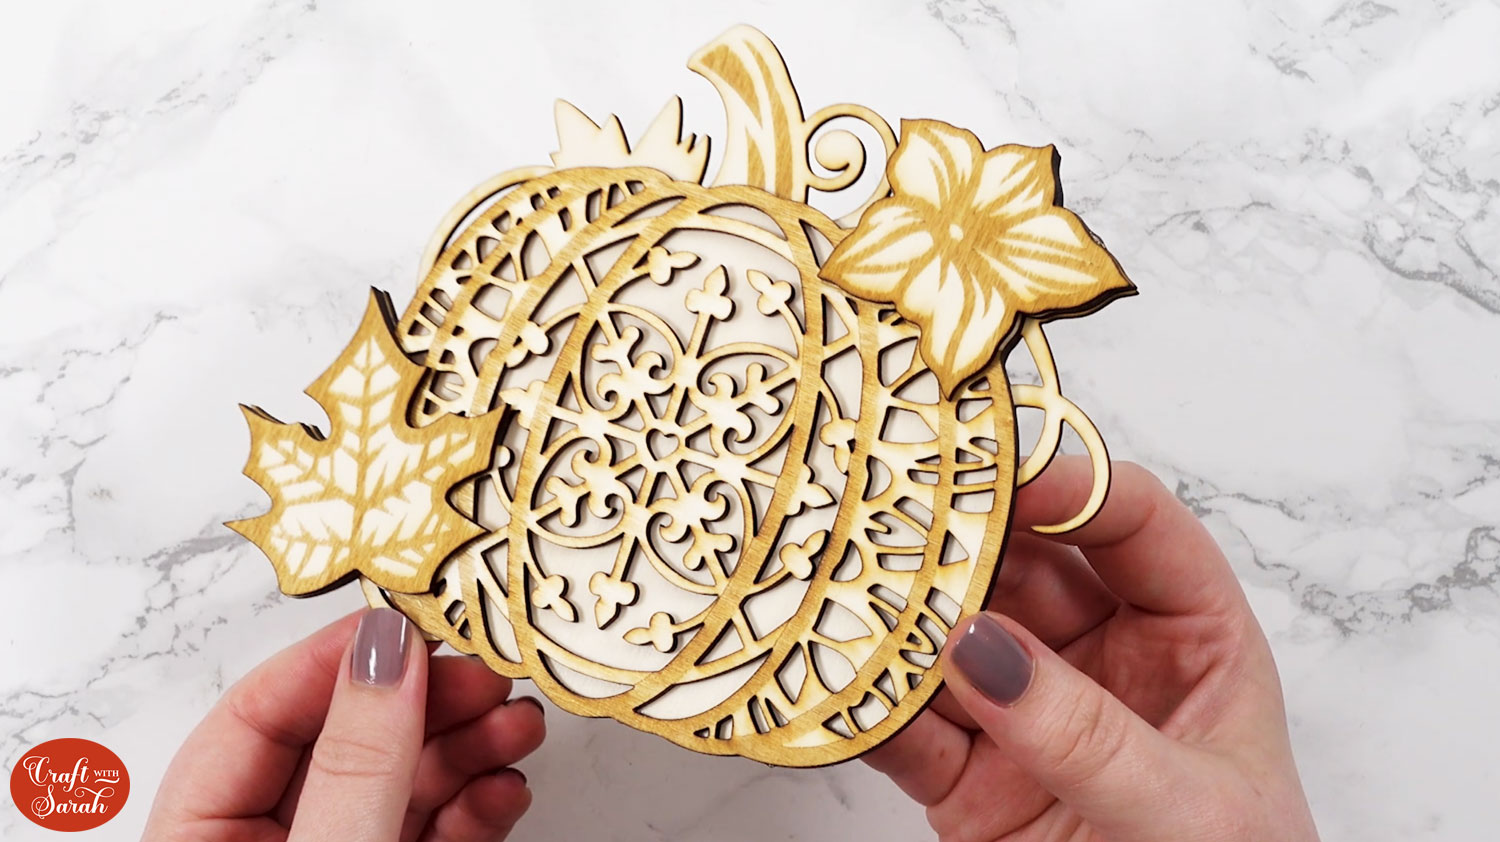
Look how effective that is with all of the shadowing and the engraved wood along with everything that’s cut out.
Final thoughts on layered wood projects with the xTool M1
This was my first time modifying a layered SVG file to work better on a laser cutter and I’m really happy with how the pumpkin turned out.
I like that it looks quite rustic; it adds to the Fall/autumn theme.
Equally, you could leave the engraving off and paint it and that would look great too.
The software was easy to use, and the machine cut and engraved beautifully. The only issue I had along the way was completely my own fault for using the wrong setting when I did the first test cut!
I love that I can use the same layered SVGs that I’ve been using for years on my Cricut Machine with the xTool M1 as well.
I hope you enjoyed this tutorial on how to cut a layered SVG from wood on an xTool M1 laser machine. I’ll be adding more xTool M1 tutorials soon.
Happy crafting,
Sarah x

