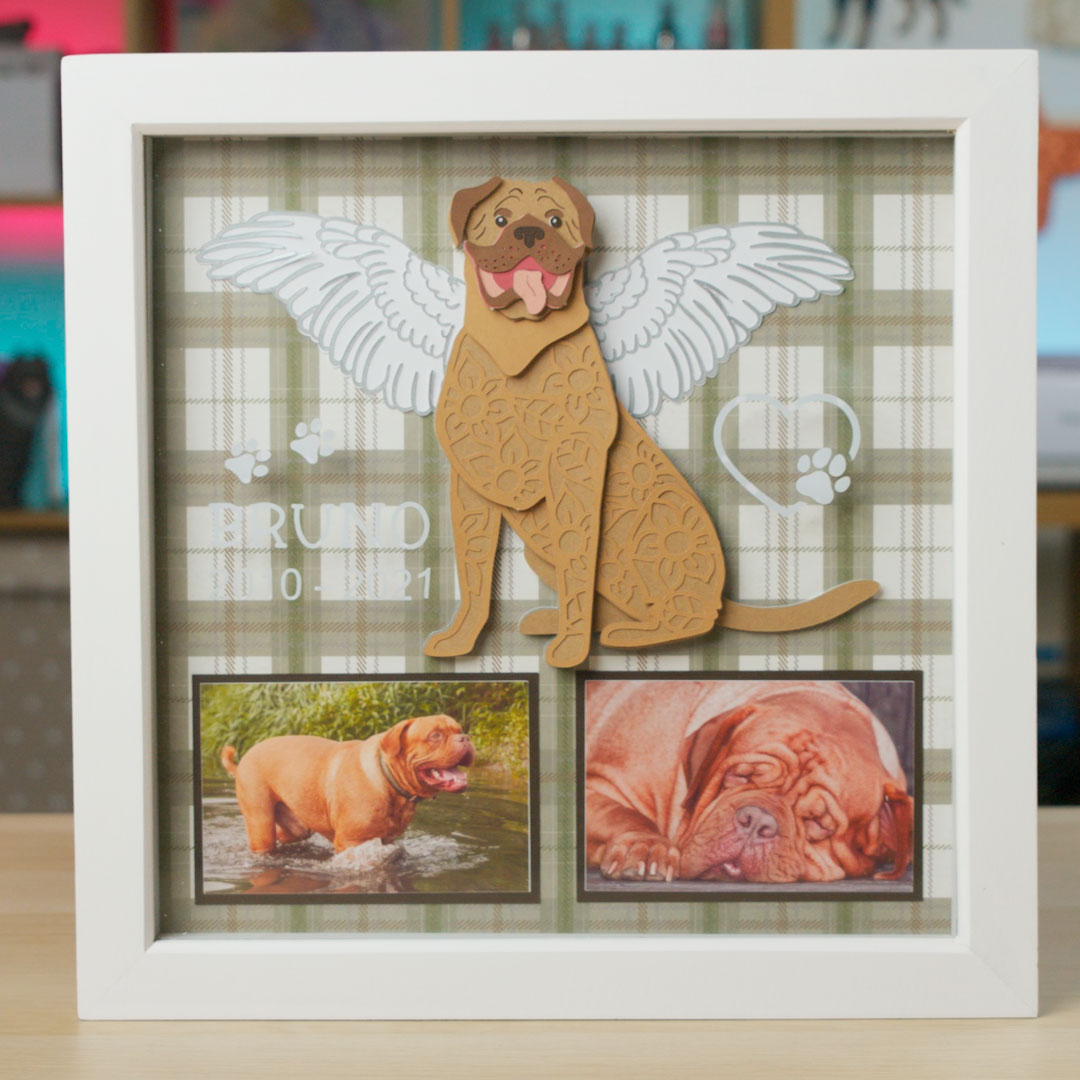
Design a Custom Pet Memory Frame for your Dog

A lovely way to commemorate a pet who has sadly passed over the Rainbow Bridge is with a memory frame that contains your favourite photos.
Here’s how to design a photo frame in Cricut Design Space, including adding vinyl details to the glass
This builds on my previous video which was how to add angel wings to layered dog and cat SVGs.
[svg_school]
Please note that some of the links included in this article are affiliate links, which means that if you click through and make a purchase I may receive a commission (at no additional cost to you). You can read my full disclosure at the bottom of the page.
How to make a pet memory frame with a Cricut
Watch the video tutorial below. A full written tutorial with screenshots for each step is available further down this page.
Note: This tutorial was recorded using Design Space v6.11.108. Later versions of Design Space may look different to the video/screenshots shown on this page.
Video resources:
- Dogue de Bordeaux SVG
- 150+ dog SVGs & 20+ cat SVGs
- Download Design Space
- How to use layered SVG files (tutorial)
How to design a Pet Memorial Frame
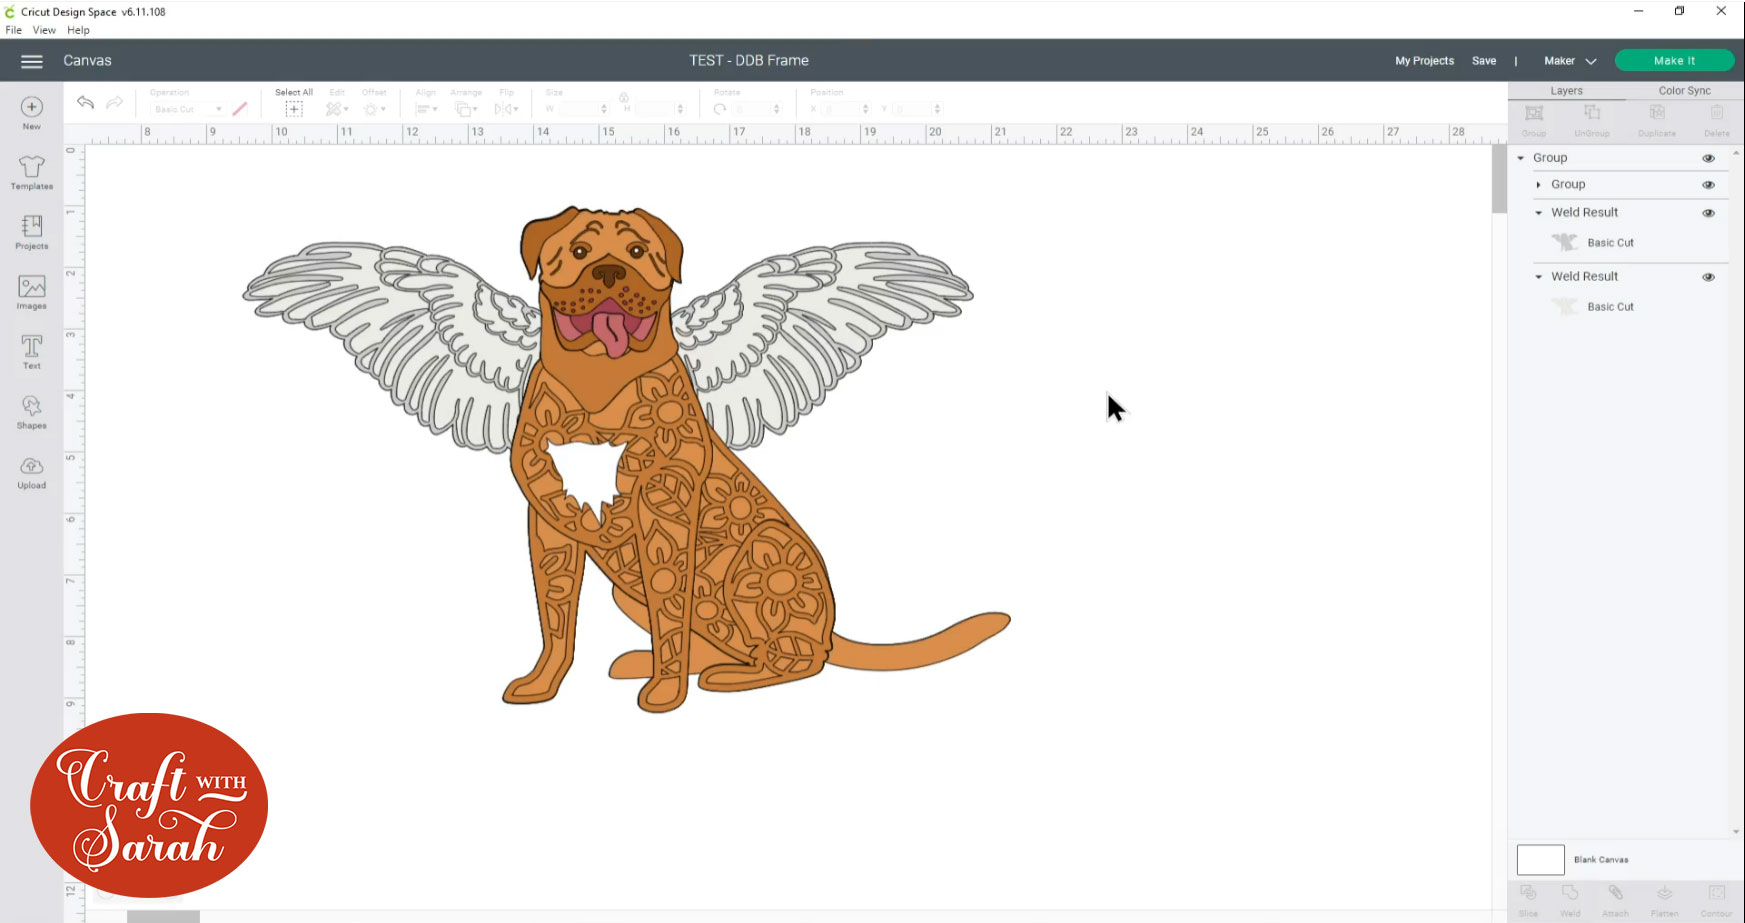
Step 1: Add angel wings to your chosen SVG
If you would like to have angel wings on your dog or cat SVG then complete that first.
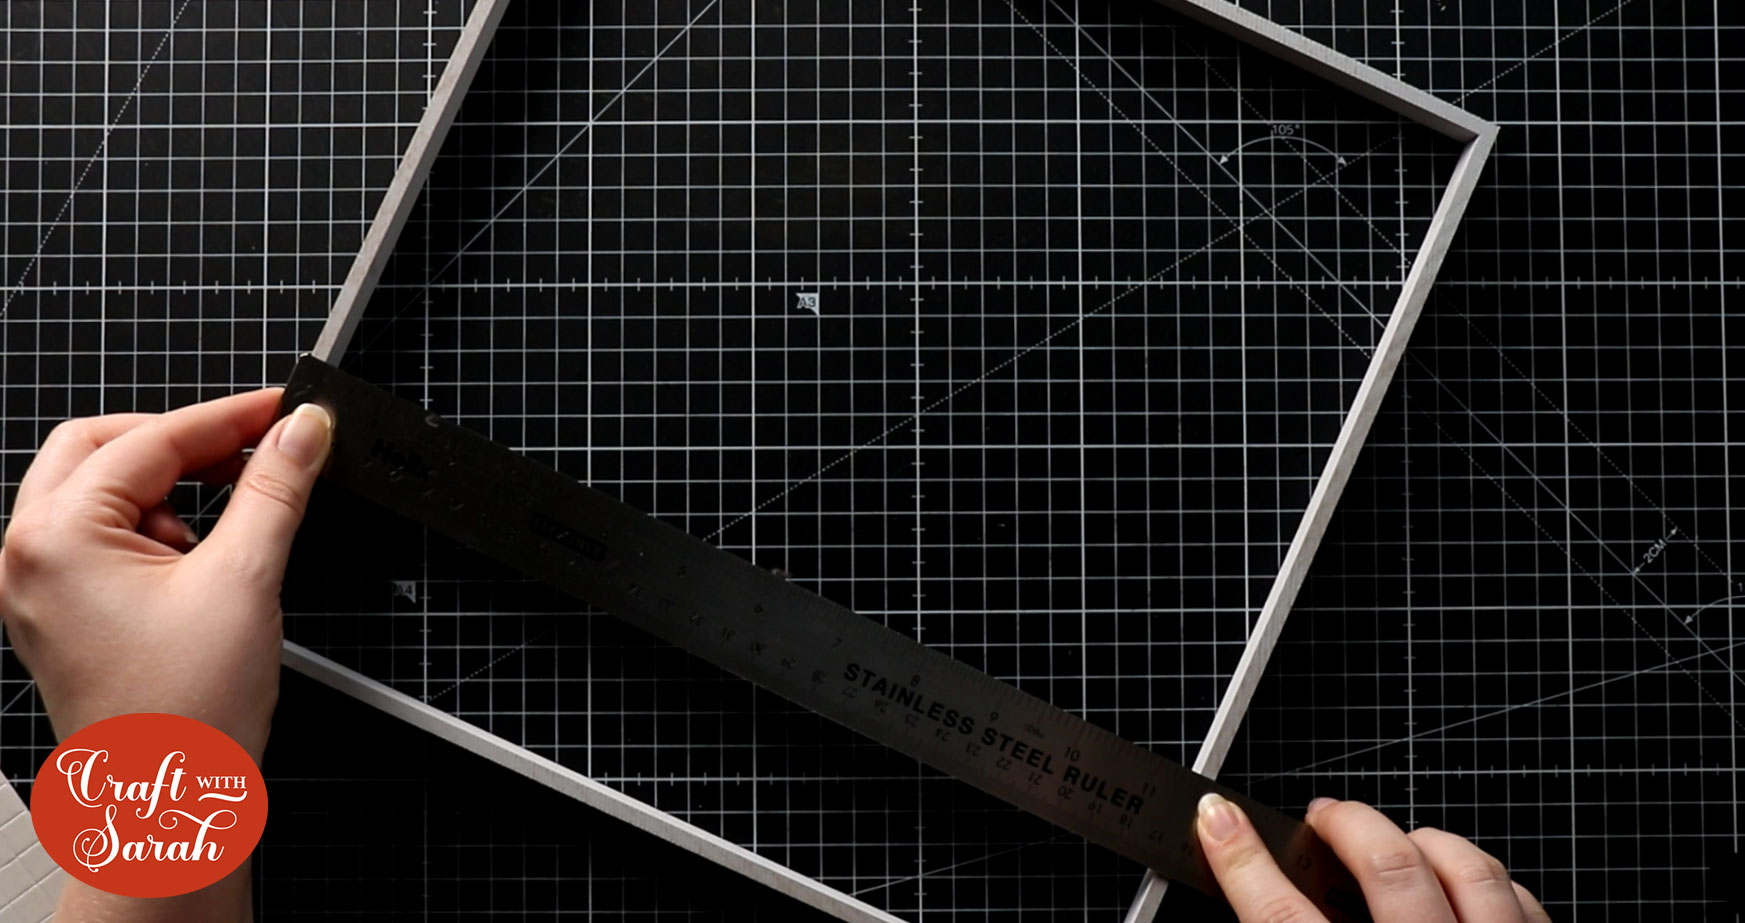
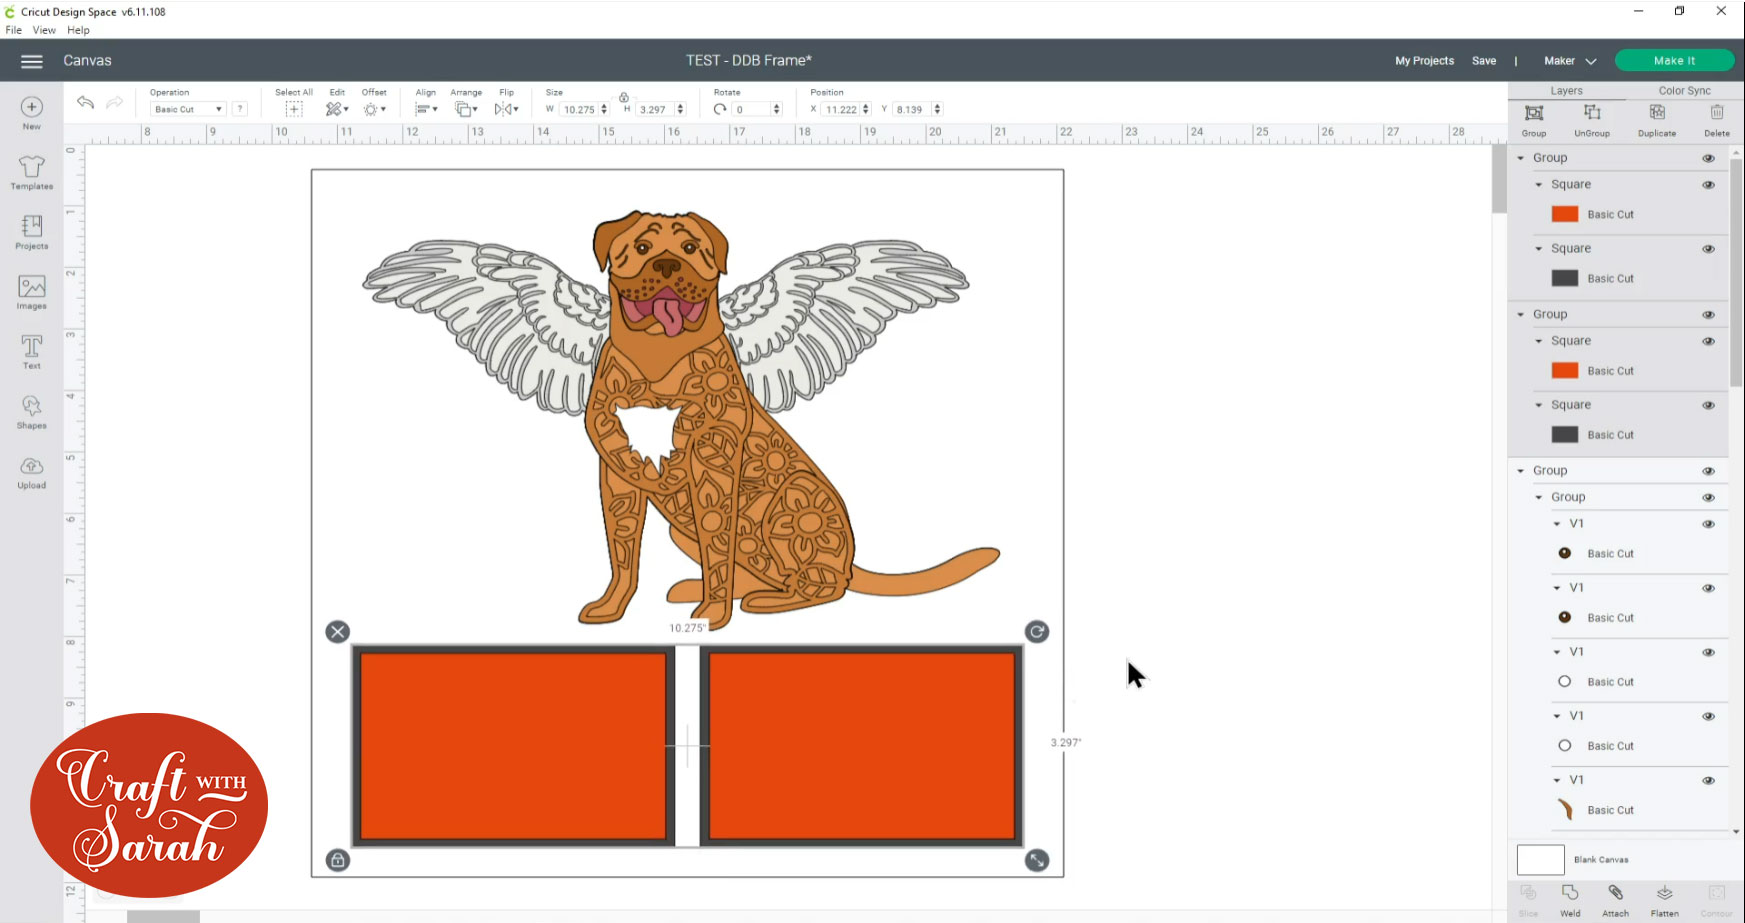
Step 2: Measure your frame
Measure your shadow box frame from one outer edge of the wooden spacer to the other.
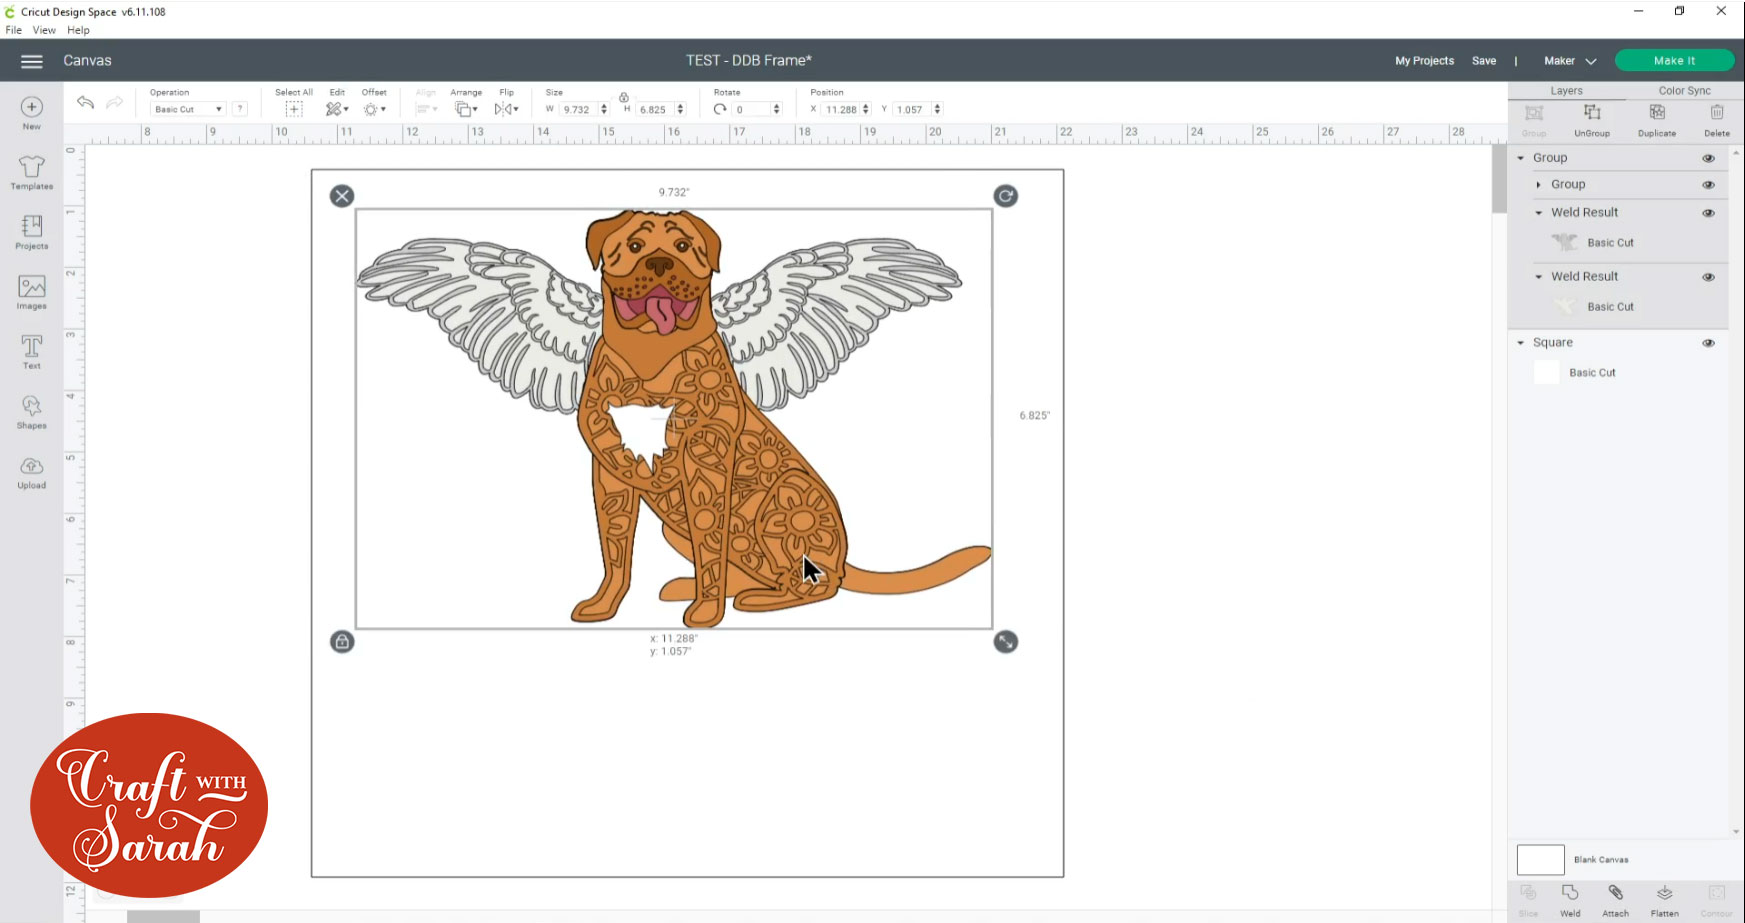
Draw a square in Design Space and make it the size of your spacer. It doesn’t matter if this is larger than the Cricut can cut – we are just using it for a guide, we won’t actually be cutting it out.
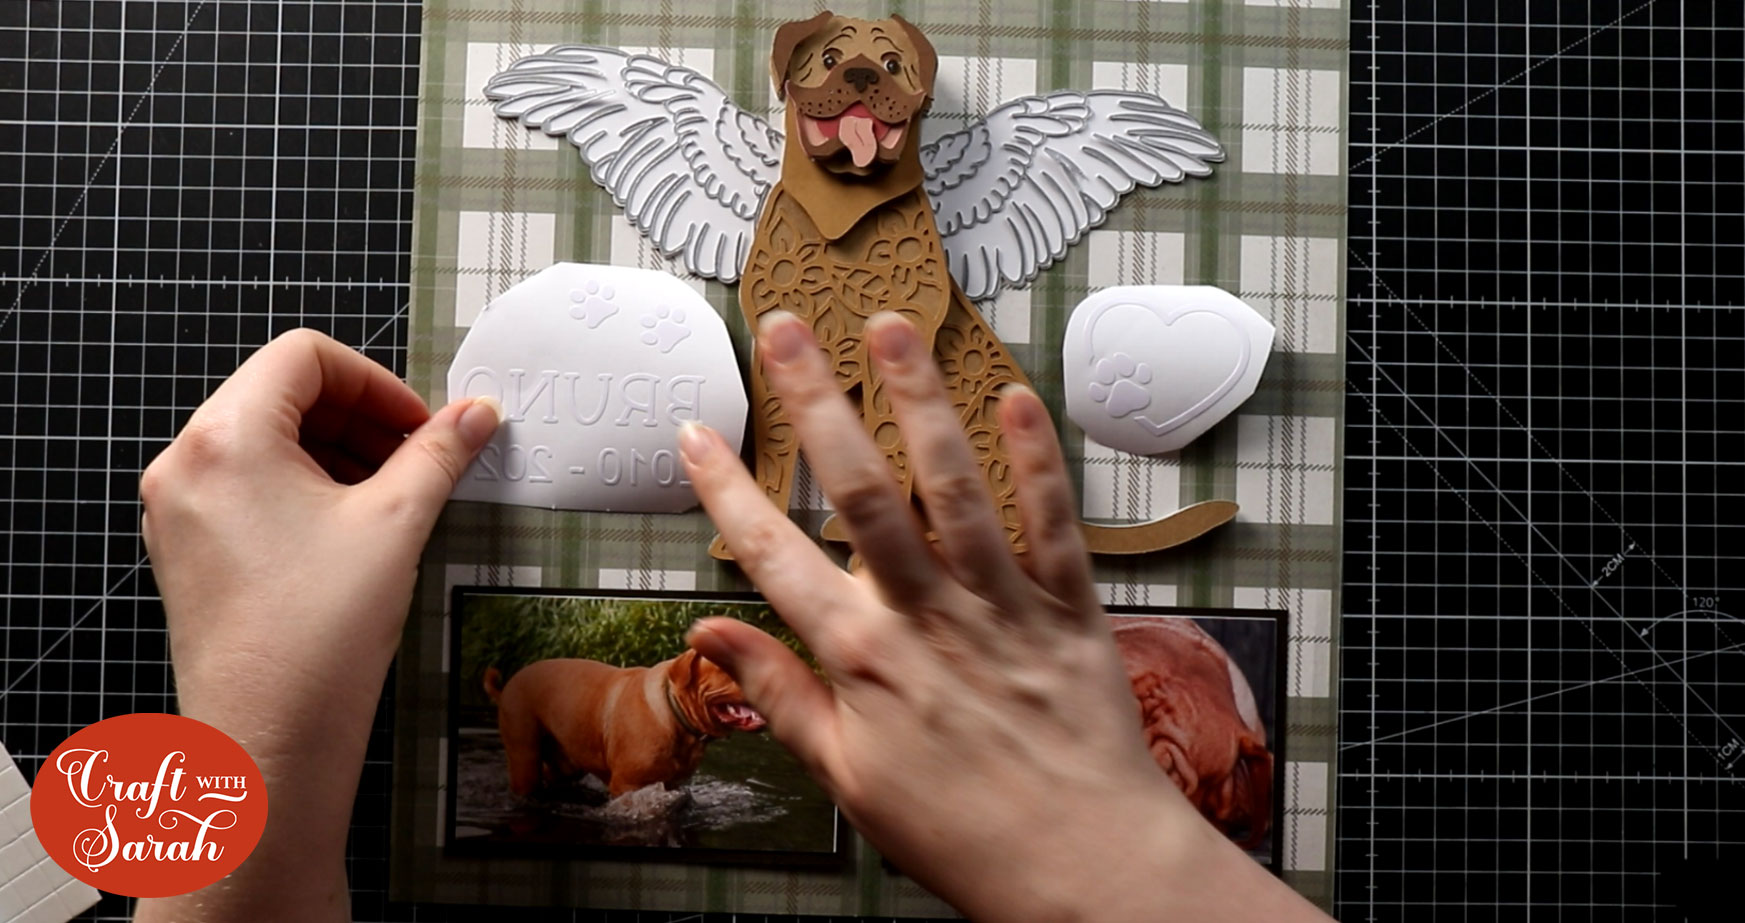
Position the pet design at the top of the square.
Step 3: Create the photo backgrounds
Insert another Square shape and use the width/height boxes to turn it into a rectangle.
I made is 4×6 inches first which is the size of a standard photo and then made it smaller in the same proportions to fit the frame.
Duplicate the rectangle and make it 0.25 inches smaller on both the width and height. This will give you a “mat” layer to surround the photo and create a border which will help it to stand out from the background of your frame.
Duplicate these two rectangles and move them to the other side of the frame.
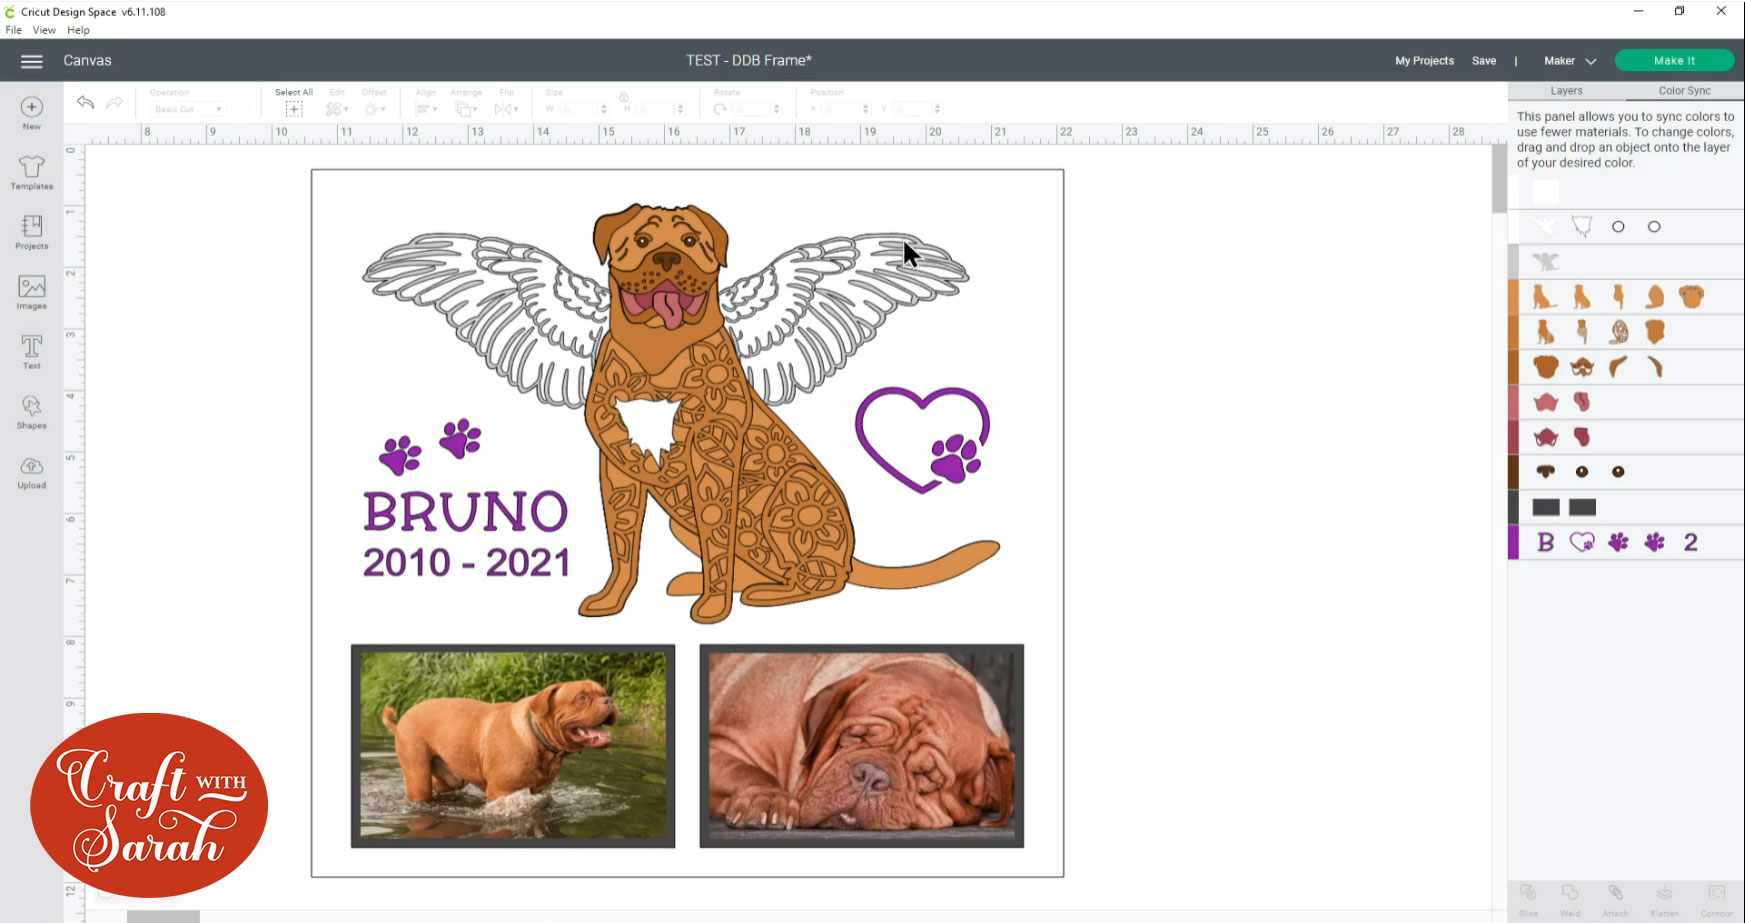
Step 4: Add the pet’s name
Use the Text tool to add your pet’s name. This will be cut from vinyl and stuck to the glass of the frame.
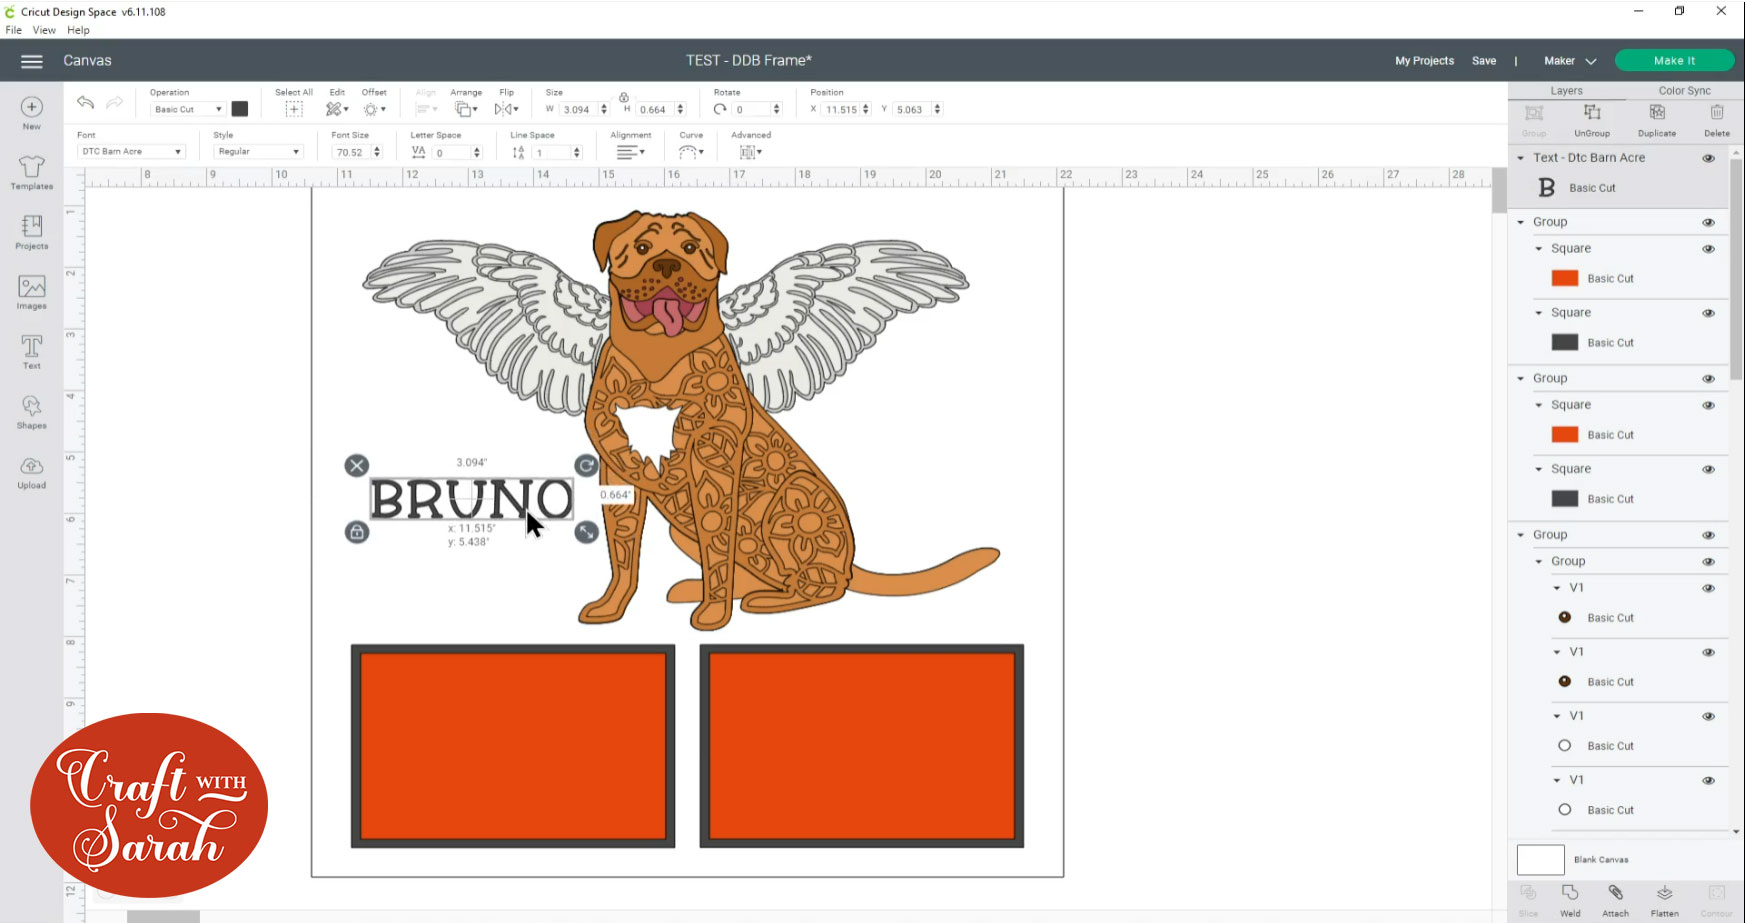
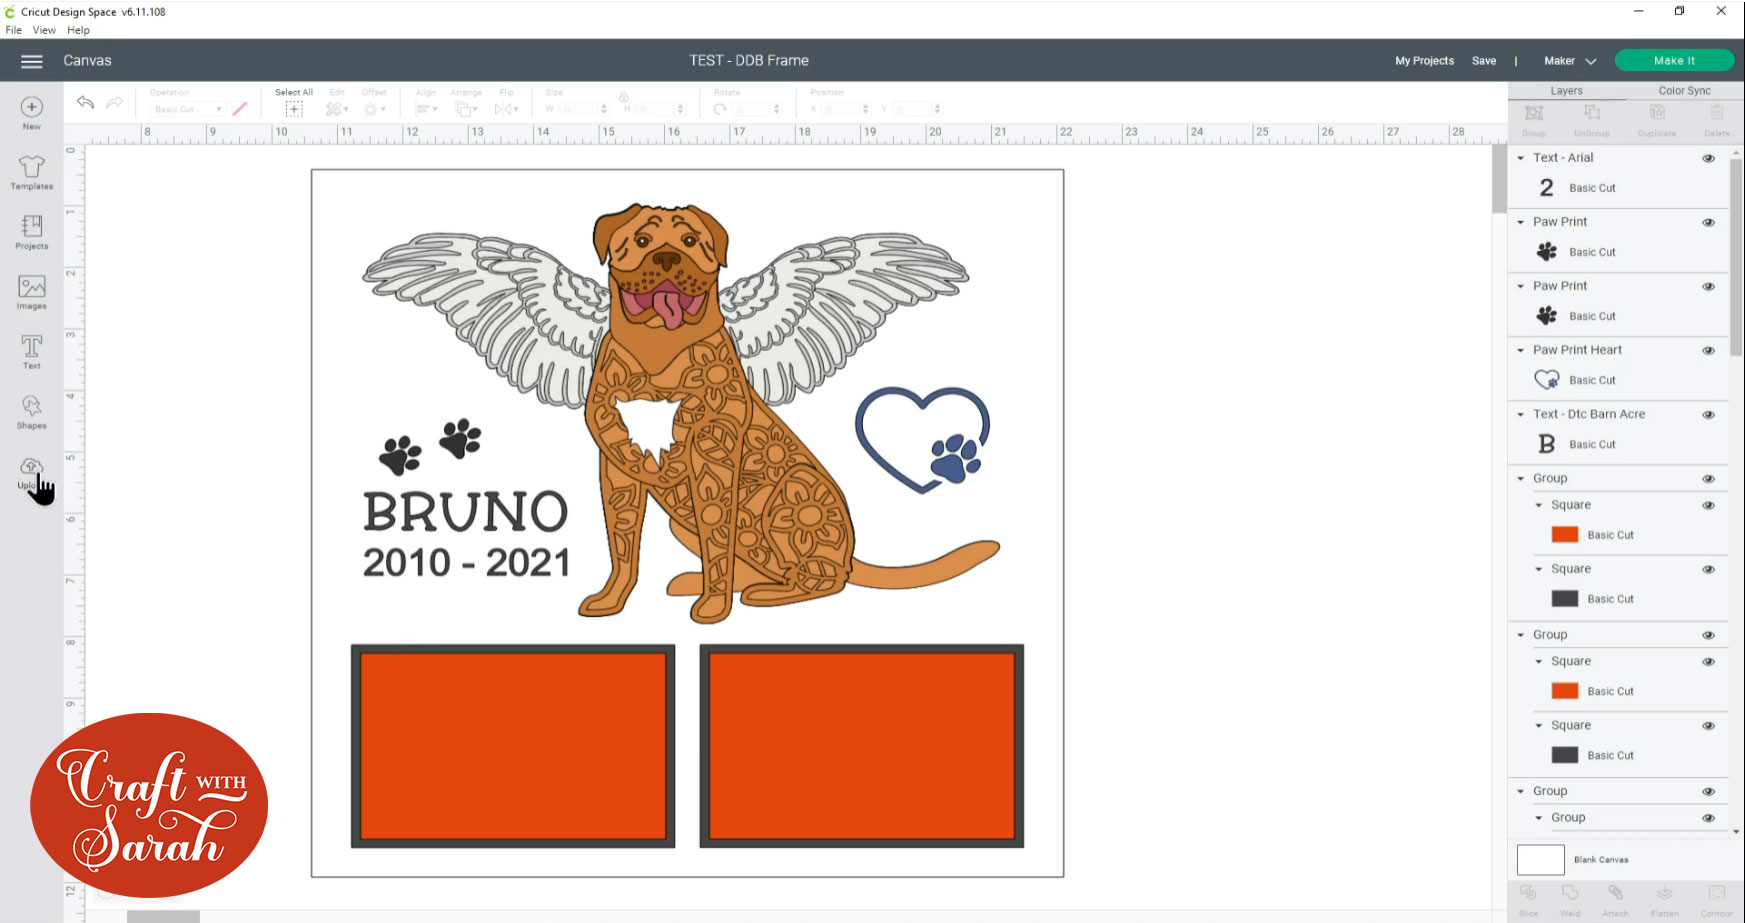
If you like, you can add additional details to the frame. Here is what mine ended up looking like:
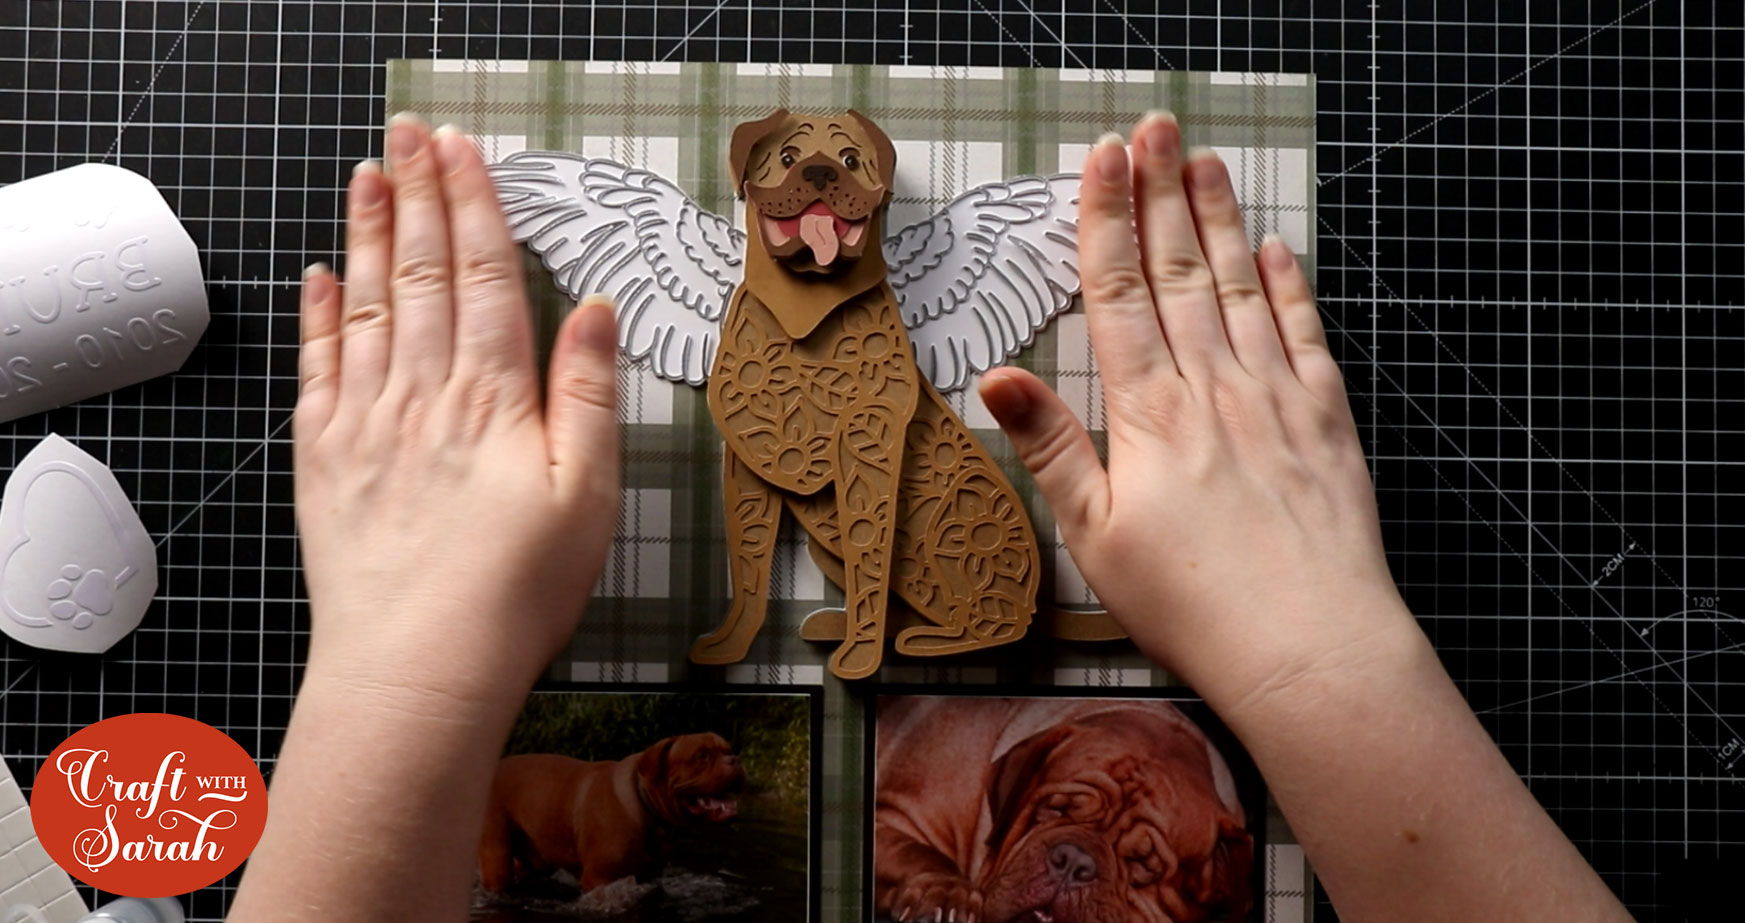
Step 5: Add the photographs
Click “Upload” and follow the steps to upload your first photograph.
Insert it on to the screen and then resize it so that it’s just bigger than the rectangles you made in Step 3.
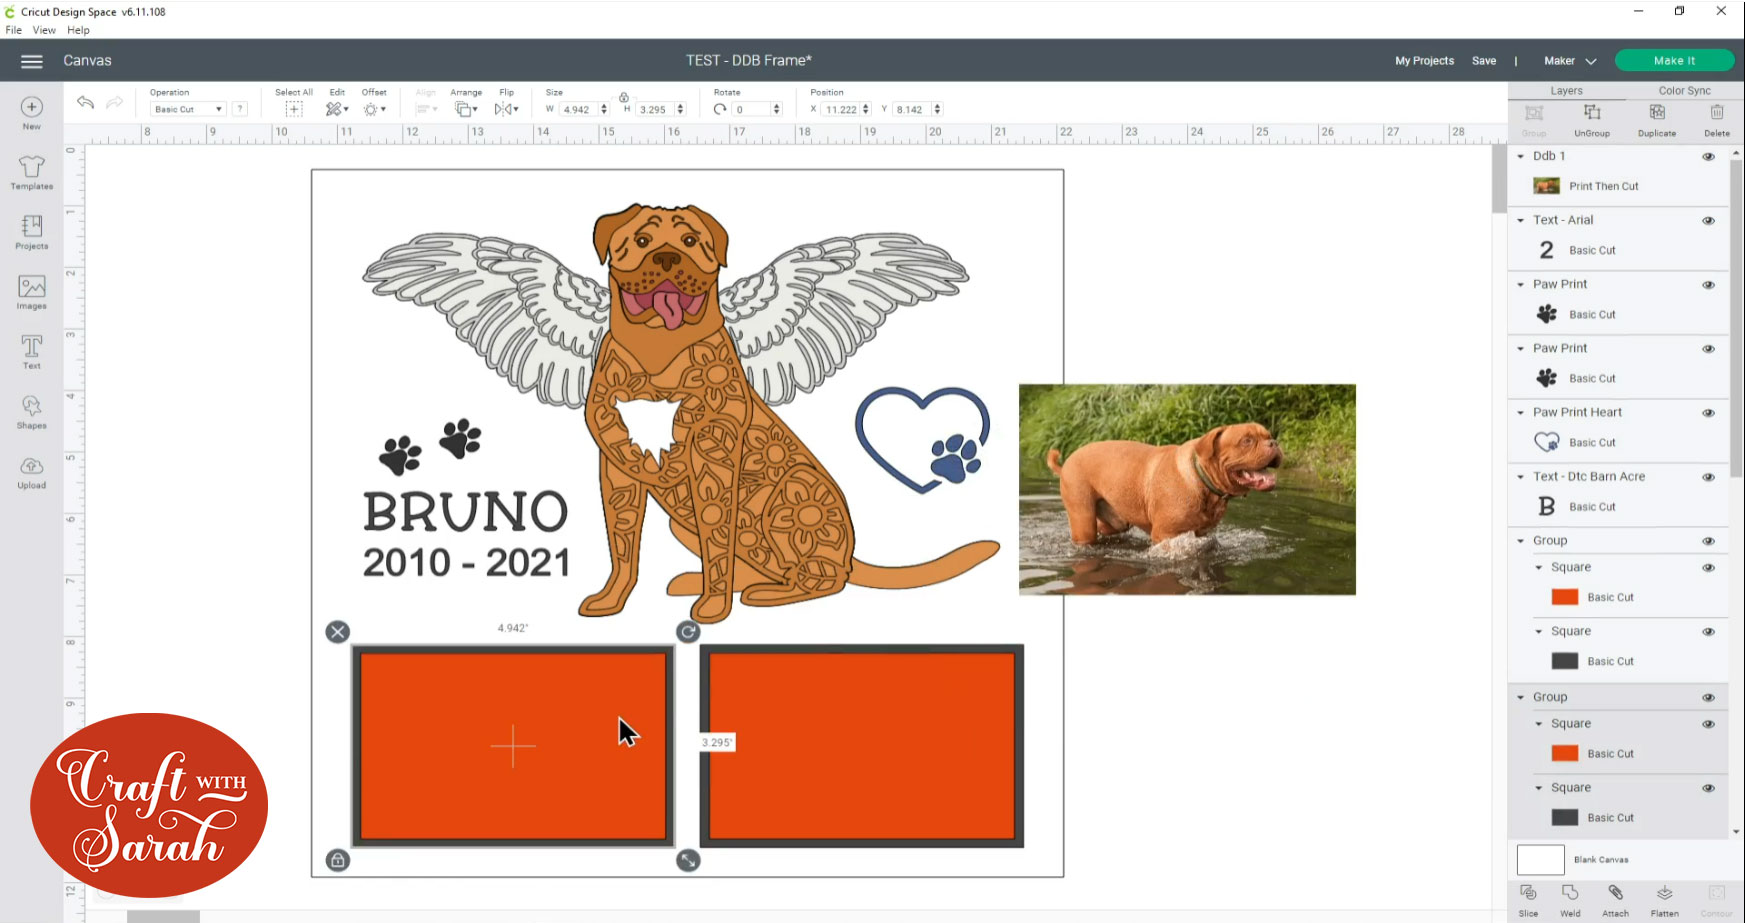
Move the rectangle on top of the photo. When you’re happy with the position, select the photo layer and the rectangle layer and press “Slice”.
This will crop the photo into the perfect rectangle shape.
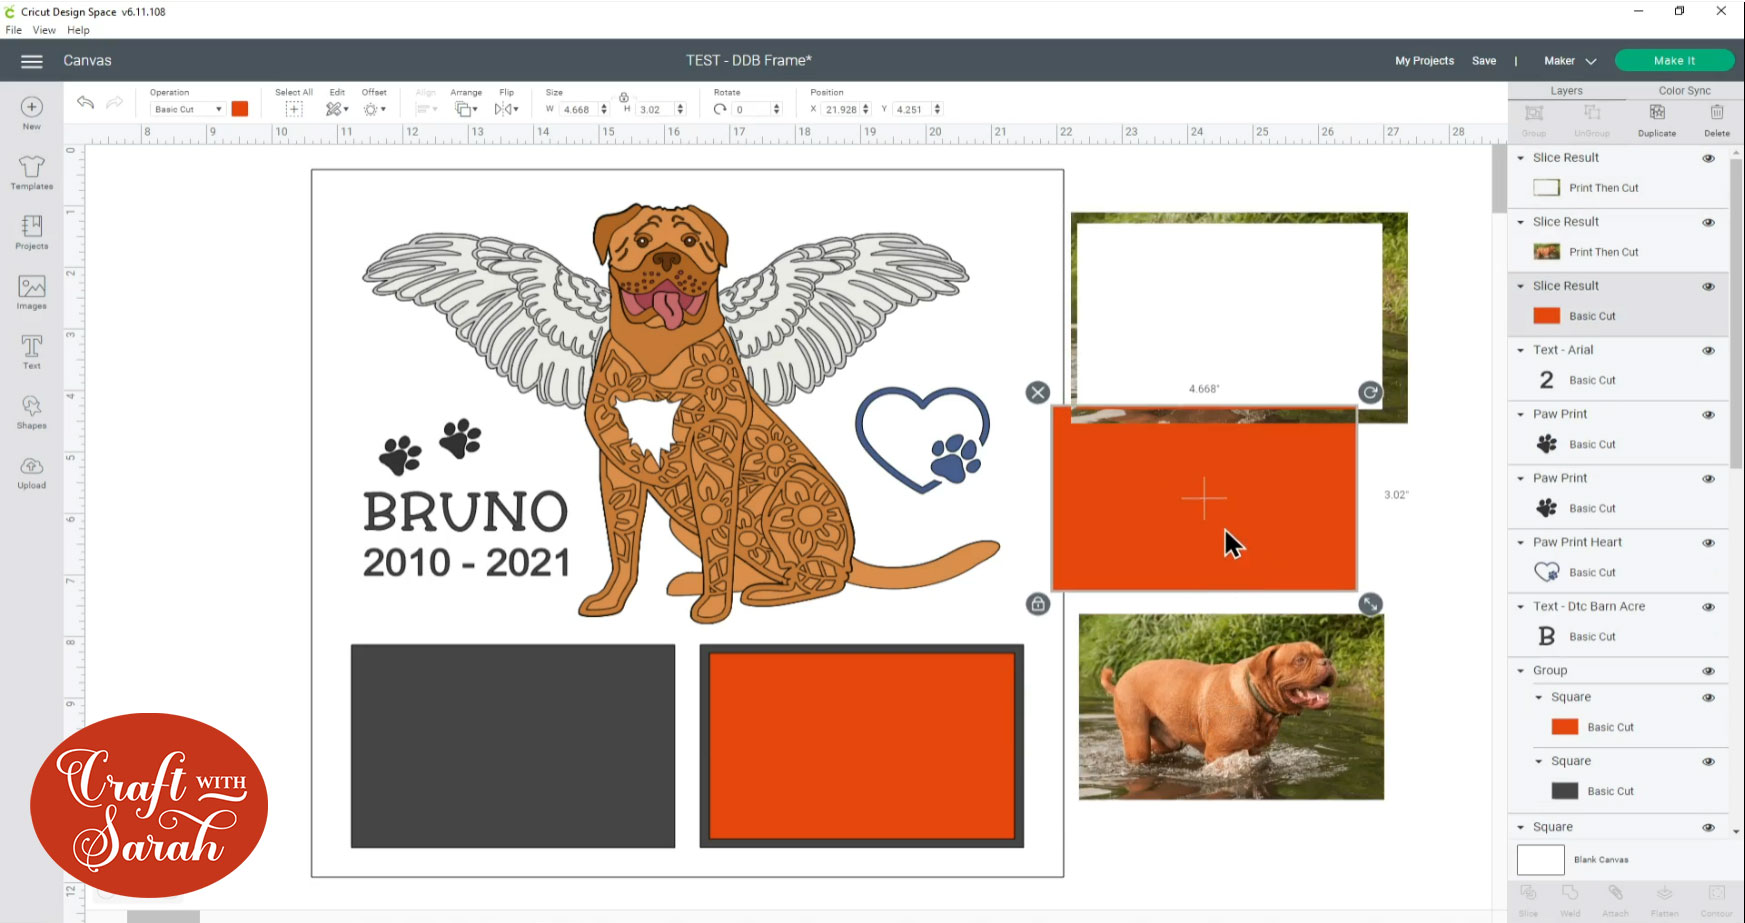
Delete the “Slice result” layers that are the original rectangle and the “excess” of the photo that’s left outside the rectangle and then move the photo back into position.
Do the same for the other photo.
Step 6: Cut out the layers
Save your design, if you haven’t already done so.
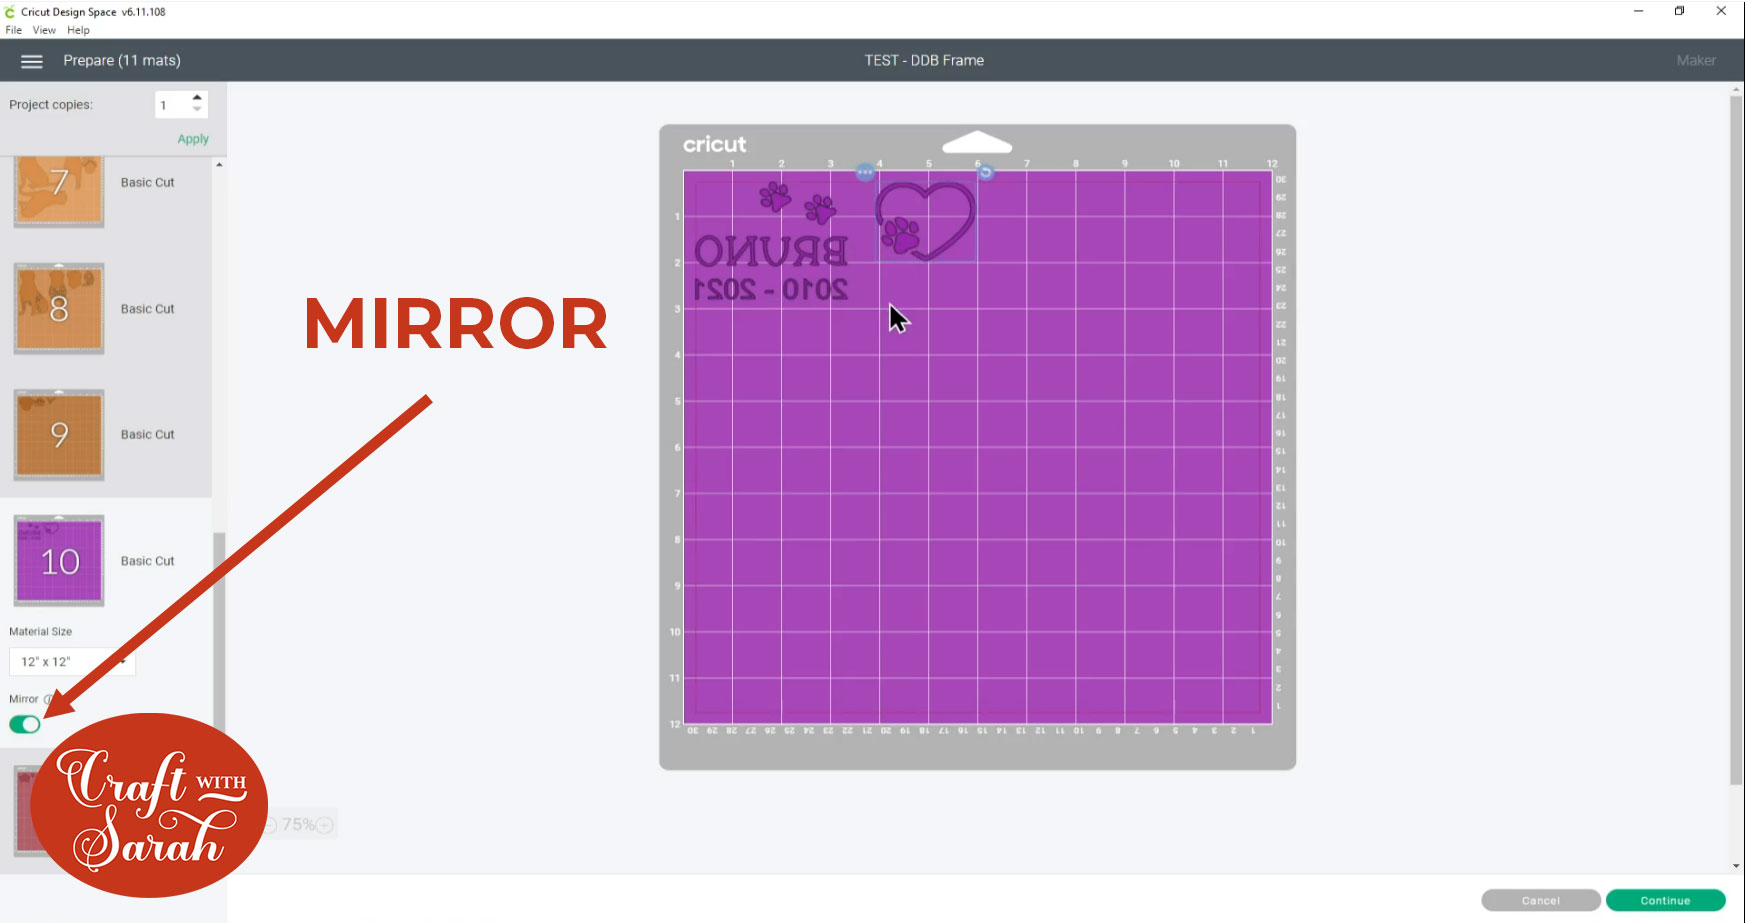
Click “Make it” to go to the cut screen.
If you are going to be sticking the adhesive vinyl to the INSIDE of the glass in your frame then you need to “Mirror” those parts.
If you are going to be sticking it to the OUTSIDE of the glass then you do NOT need to mirror.
Here is how my design looks mirrored:
Cut all the layers out from your chosen card and vinyl.
Step 7: Assembly the pet memory frame
Stick the layered pet file together first using the assembly guide PDF that was included in your purchase.
Not sure how to do that? Here’s a step-by-step guide to layered SVGs.
Position your completed pet and the other layers onto the base layer of the design. I’m using a 12×12 piece of scrapbook paper that I trimmed on my paper trimmer to fit inside the frame.
When you’re happy with the layout, stick everything together.
Step 8: Add the vinyl
If you are sticking the vinyl to the OUTSIDE of the frame then add your design into the frame, close it up and then turn it the correct way up so the glass is facing you and stick the vinyl to the glass.
If you’re sticking the vinyl to the INSIDE of the frame (like I did) then you need to be a bit more clever.
Place the glass over the design and mark where you want the vinyl to go with a whiteboard marker.
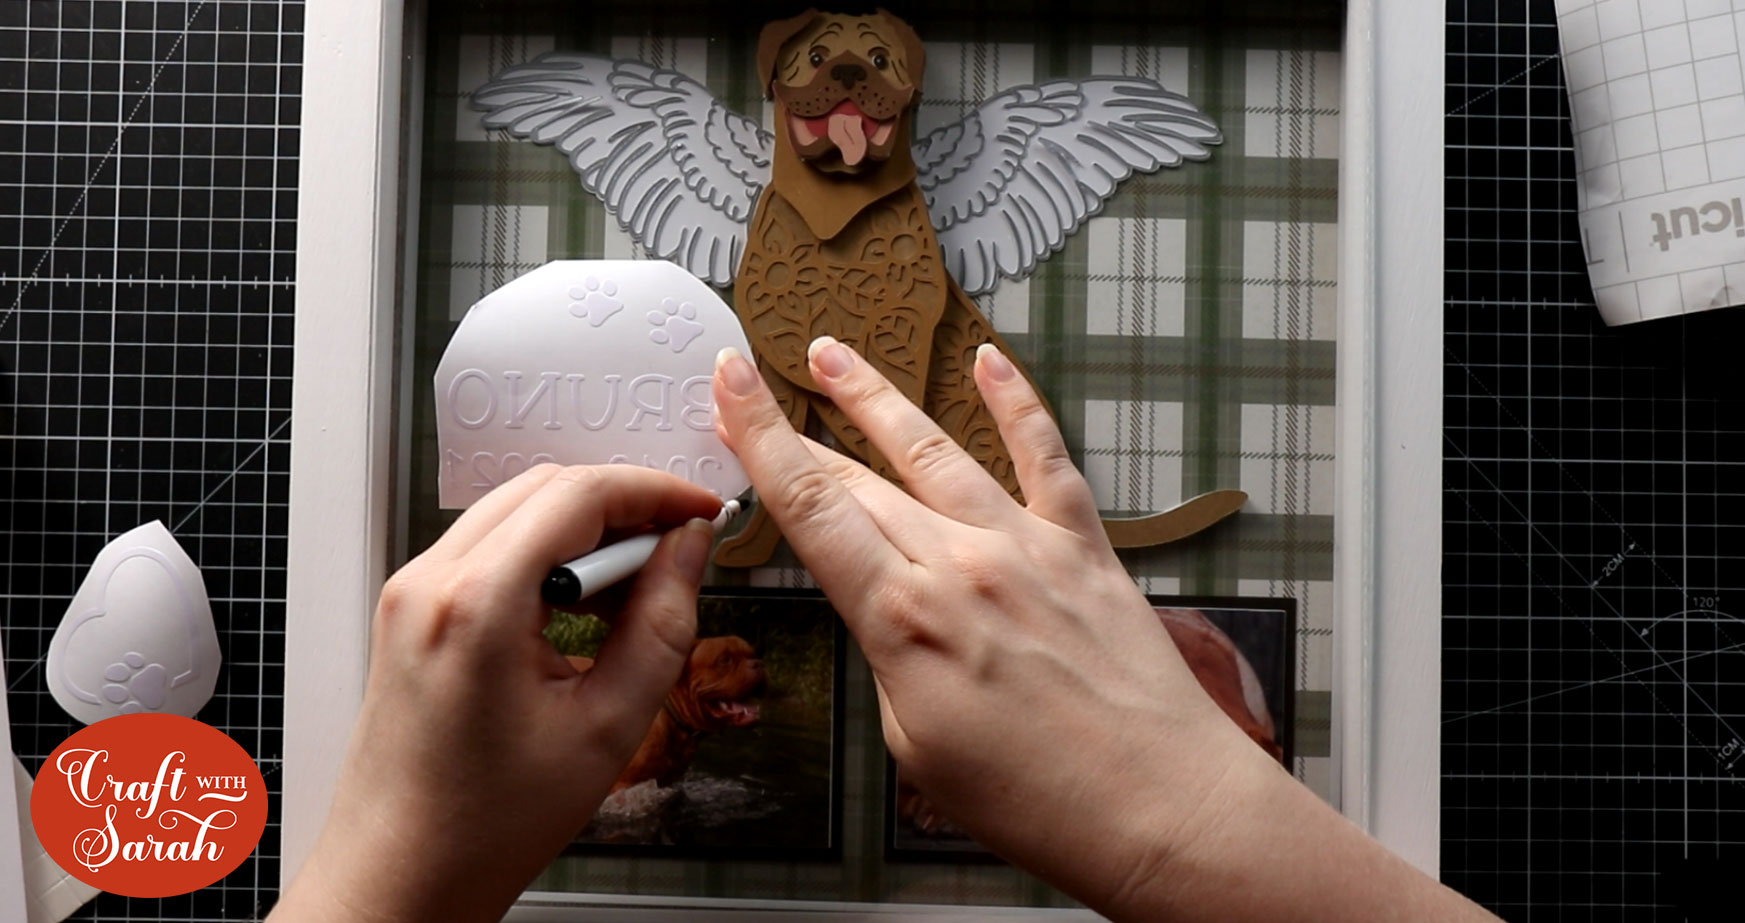
Turn the glass upside down and attach the vinyl, using your whiteboard pen lines as a guide.
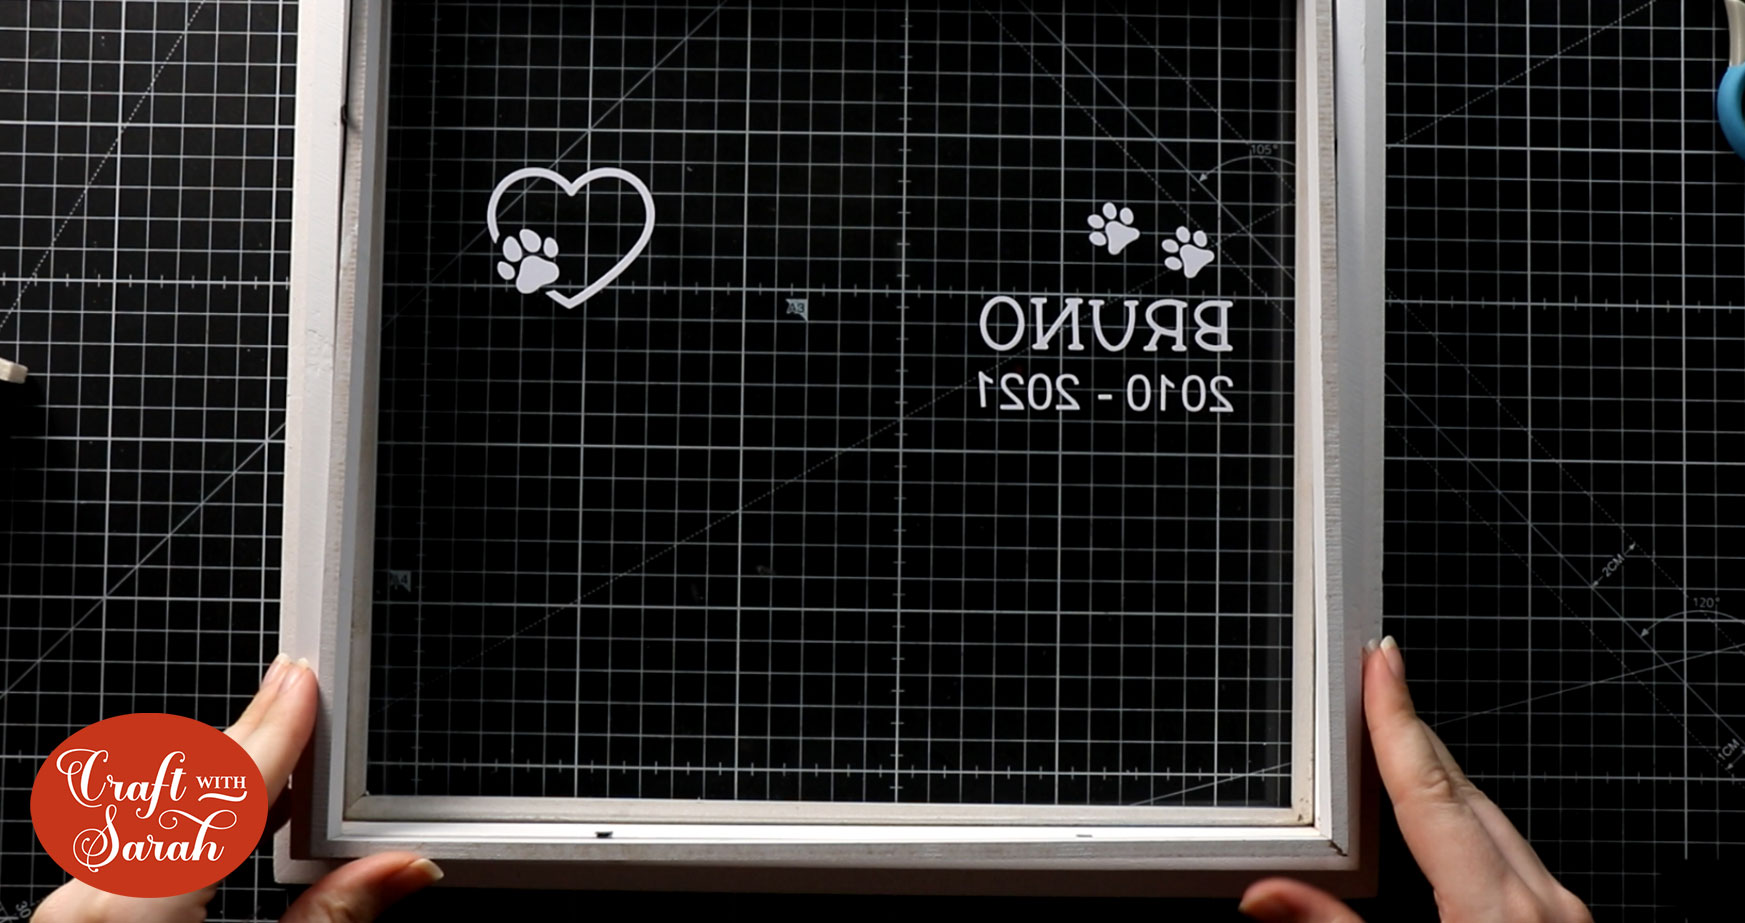
When done, turn the glass around and wipe off the pen marks.
Add the glass, spacer and design into the frame, close it up and that’s it – your pet memory frame is done!
I hope you enjoyed this tutorial on how to make a pet memory frame for your dog or cat.
Don’t forget, I have over 150 dog designs and 20 cats to choose from in my SVG shop.
If you can’t see the perfect design, you may be able to make it by combining two different SVGs or by changing the colours.
[svg_school]
Happy crafting,
Sarah x

