How to Design Layered Vinyl Projects in Cricut Design Space
Create your own layered vinyl projects in Cricut Design Space! Learn how to design layered vinyl projects and you’ll never be stuck for Cricut project ideas ever again!
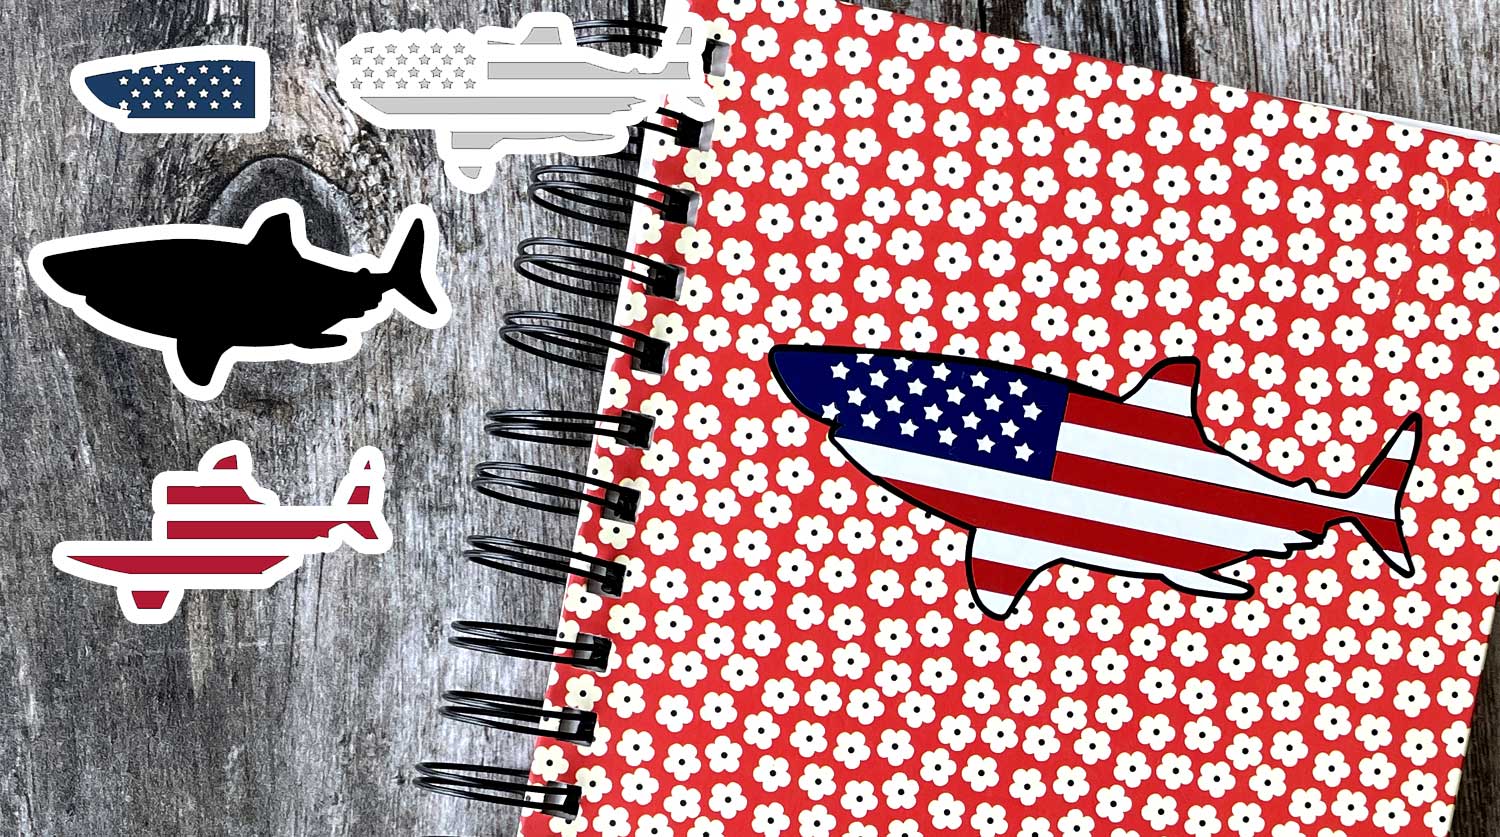
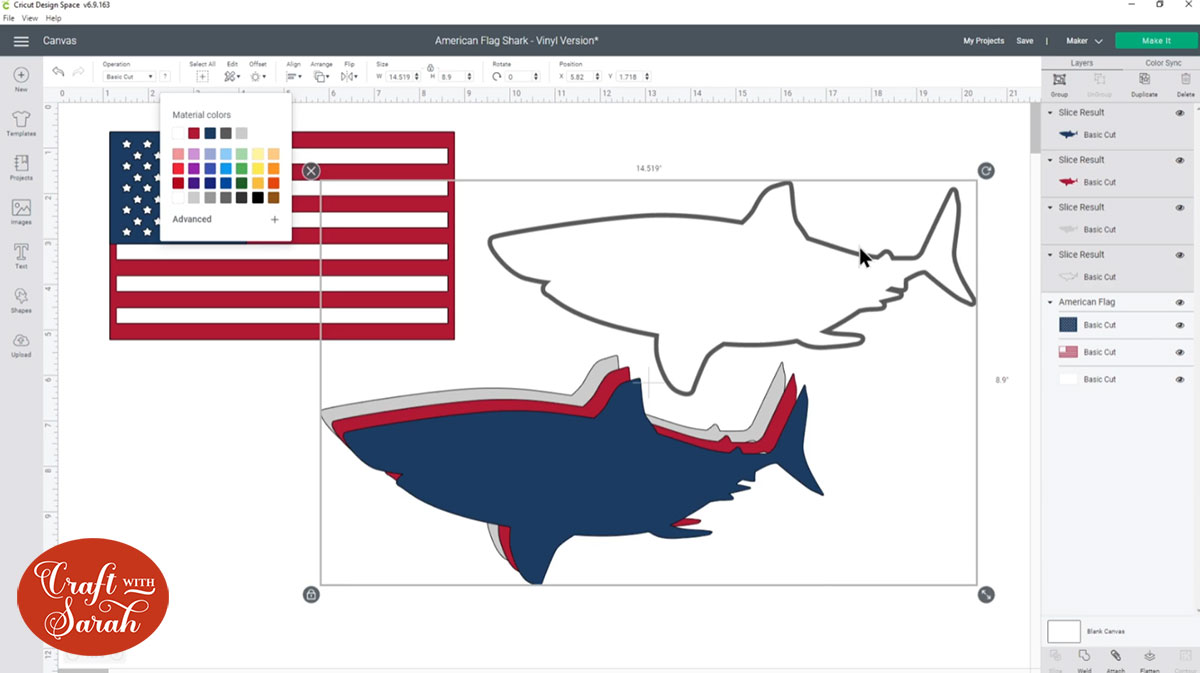
This tutorial is a request from somebody in my Cricut crafters Facebook group. They asked how you could put the shape of the American Flag with all the different colors inside the outline of a shark. I thought that was such a wonderfully random image combination that I just had to do it!
This is the second in a two-part series. The second part is how to make the SAME design but for a layered cardstock decal instead of vinyl.
The method changes based on whether you’re planning on cutting the design from vinyl or cardstock which is why I’ve made two separate videos.
Want to learn more about designing layered projects in Cricut Design Space? Click here for LOADS more project ideas and video tutorials!
Please note that some of the links included in this article are affiliate links, which means that if you click through and make a purchase I may receive a commission (at no additional cost to you). You can read my full disclosure at the bottom of the page.
How to design a layered vinyl Cricut project
Step 1: Choose your images
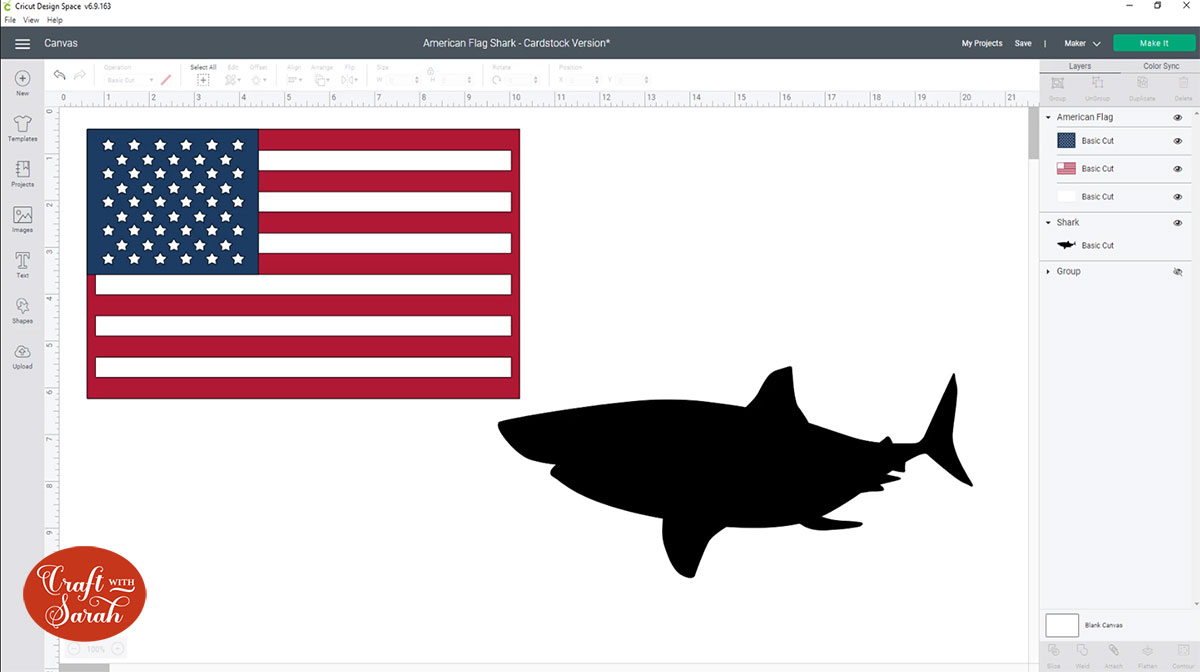
The Cricut Access images I chose for this tutorial are: American Flag #M2CCF4CC and Shark #M26C5E58D.
I chose this flag image as all the line are straight rather then “flying” in the wind which will make it easier when I’m creating the different layers.
Don’t have Cricut Access? No problem!
If you are looking for some quality free graphics to use as an alternative for this craft project, head over to Creative Fabrica’s Freebies. Creative Fabrica is my FAVOURITE place to find SVGs and graphics to use in craft projects.
To make a 4th of July inspired alternative you can download this Independence 4th of July Digital Papers for free, as well as all these cute SVGs from their exclusive free SVGs.
All files can be used with Cricut and Cricut Design Space!
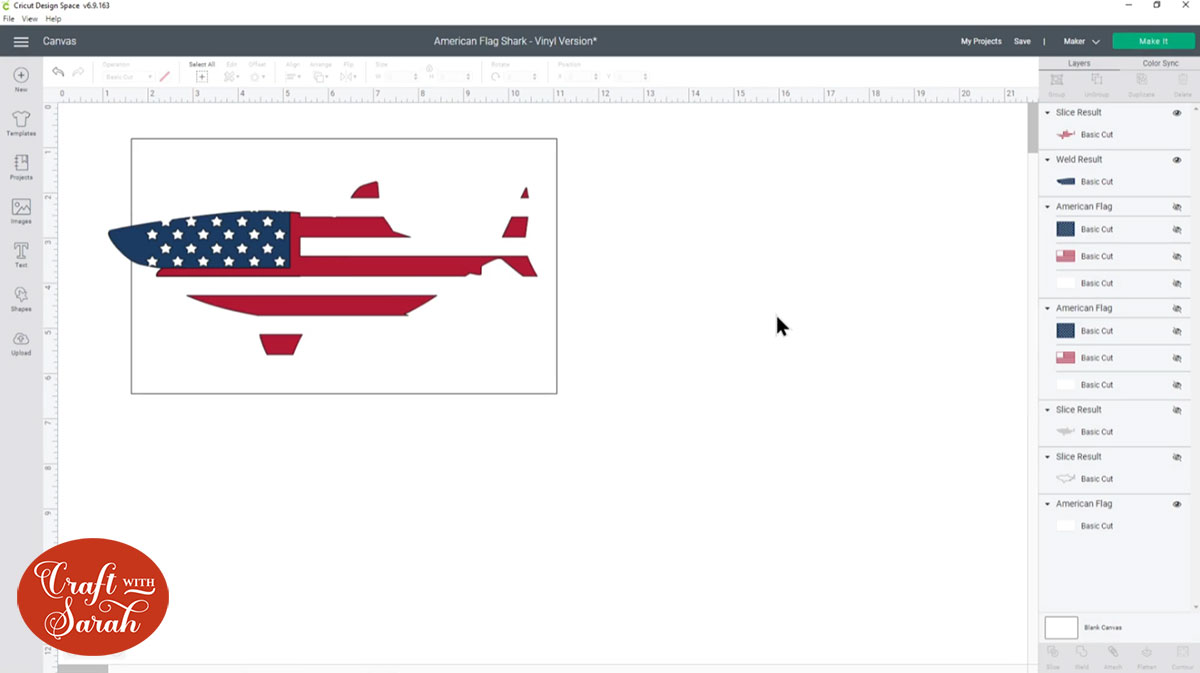
Step 2: Make an outline of your main image
At the moment the shark image is a silhouette. We need to give it an “outline” to make it easier to position things later on.
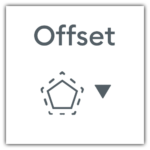
To do this, select the shark layer then click the “Offset” button.
Add a thin Offset of around 0.1.
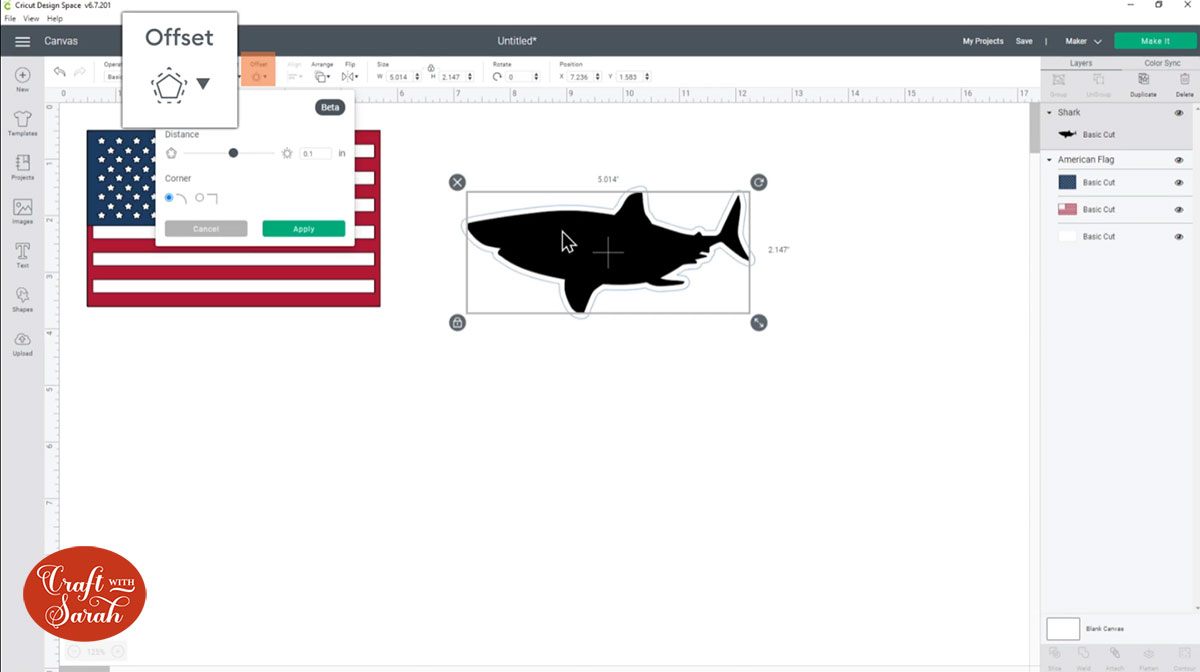
Select the original shark image AND the new offset layer and press “Slice”.
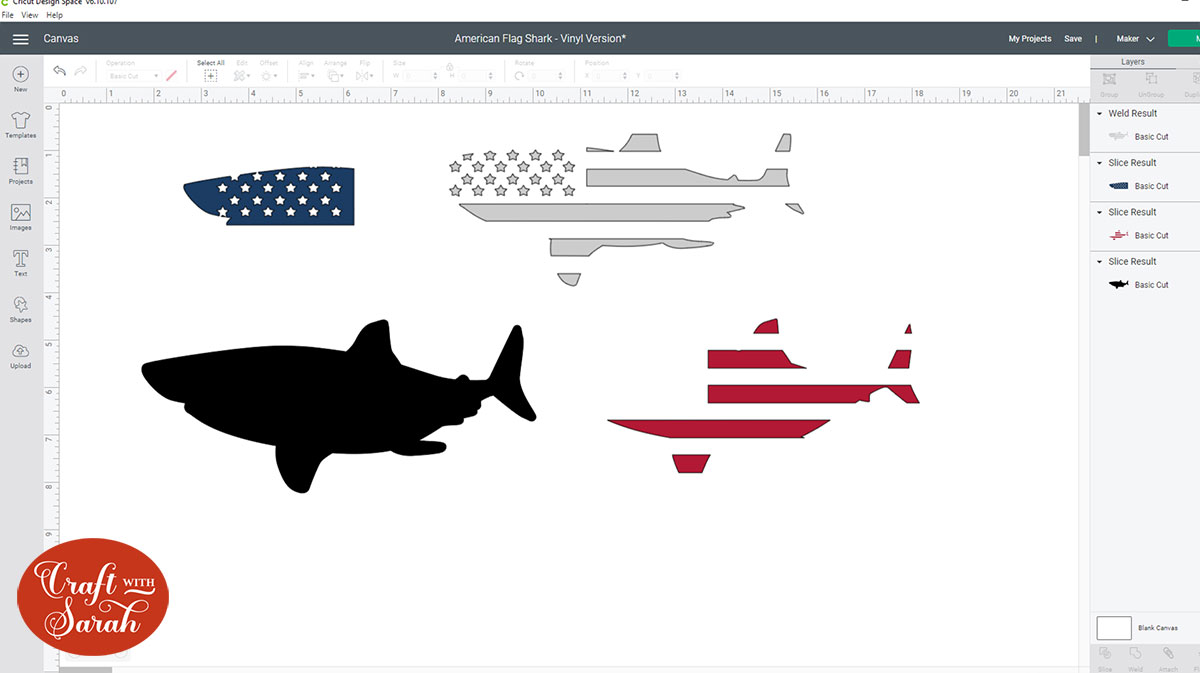
This will cut out the original shark from the offset layer to leave us with three separate layers.
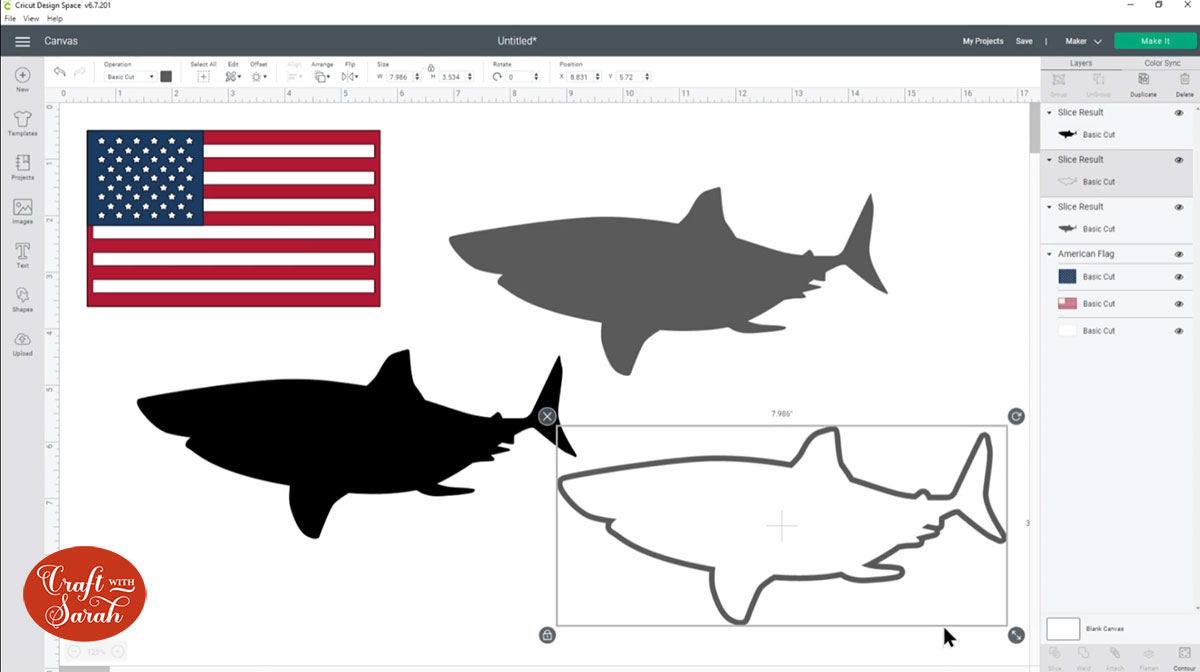
Delete one of the filled in layers so you are left with just the outline and one filled in layer. Make the filled in layer white (I used grey for the screenshots as it’s easier to see).
NOTE – In the screenshots below you will see I made some “duplicates” of the American Flag image when I was recording the tutorial video. I didn’t end up using them which is why I haven’t added that as a step here. Just ignore the extra flags in my layers panel!
Step 3: Duplicate the shark layers
Click on the filled in shark layer and duplicate it so you have the same amount of copies as the amount of colours you want to put in your design.
Select all of the shark layers and go to Align > Center to position them one-on-top of the other.
Select all the shark layers and press “Group”.
Grouping the layers means that you can move them all about and resize them and they’ll all move/resize at the same time.
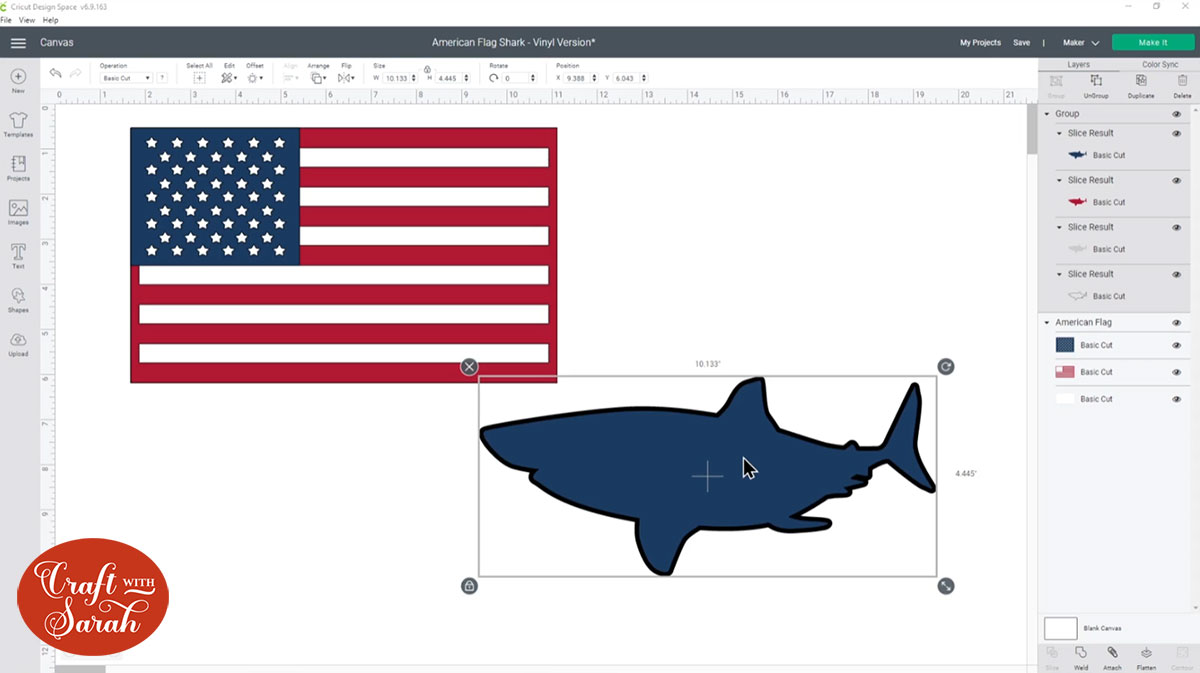
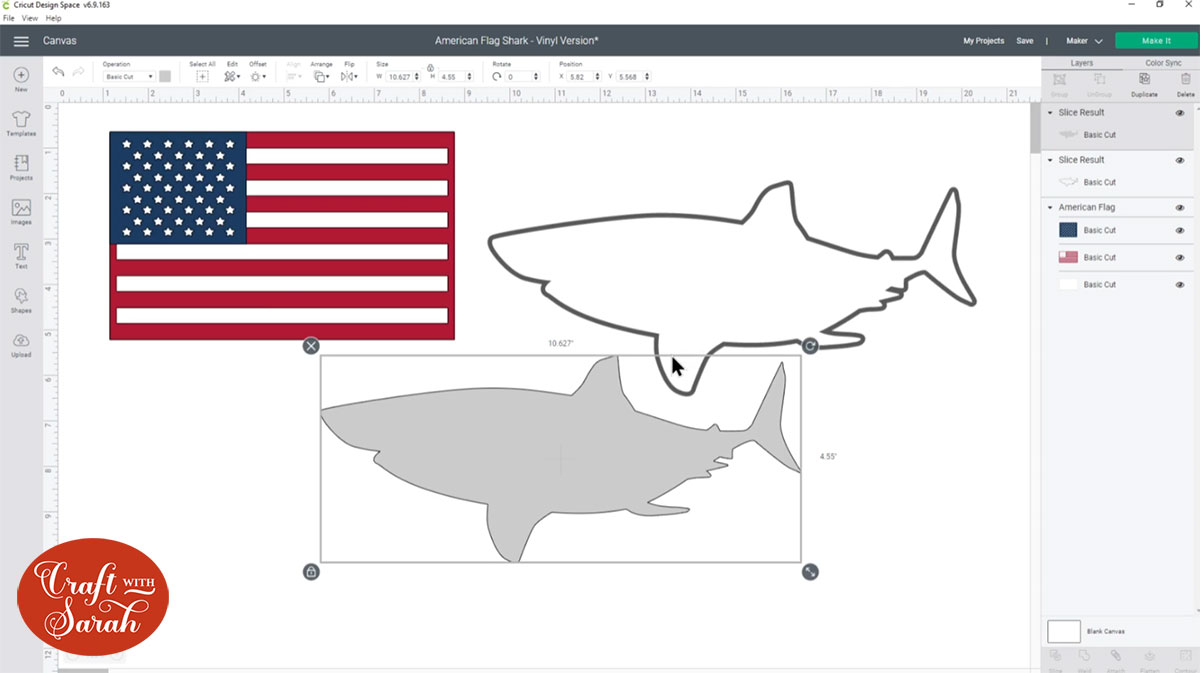
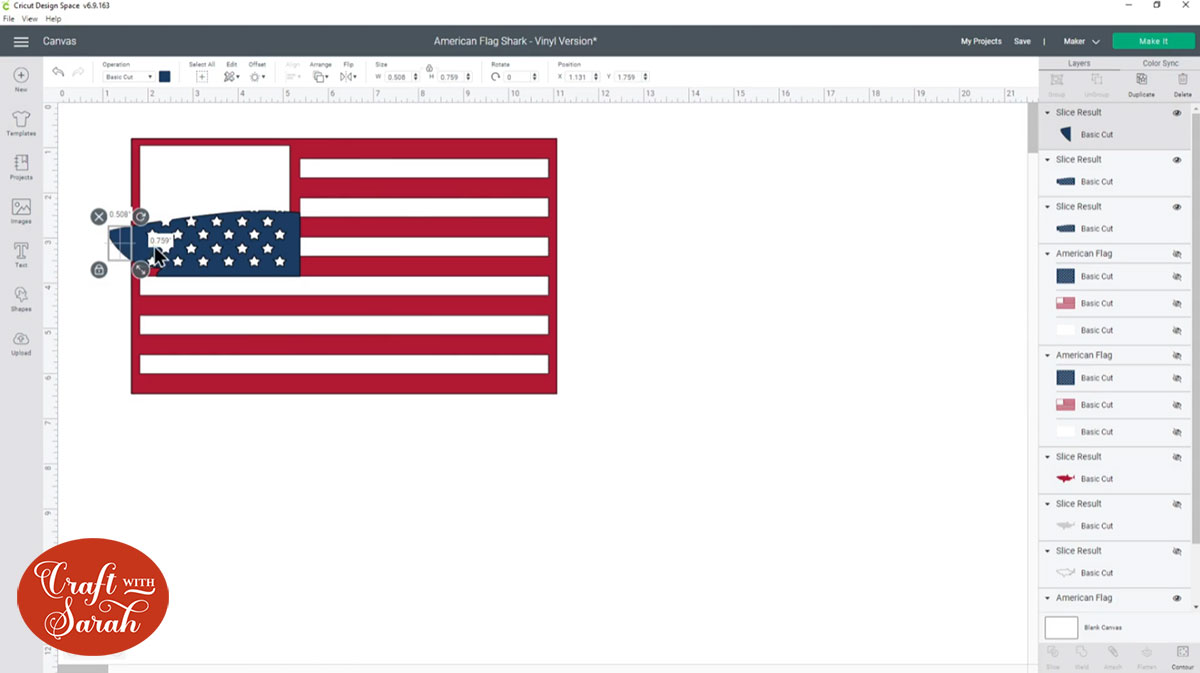
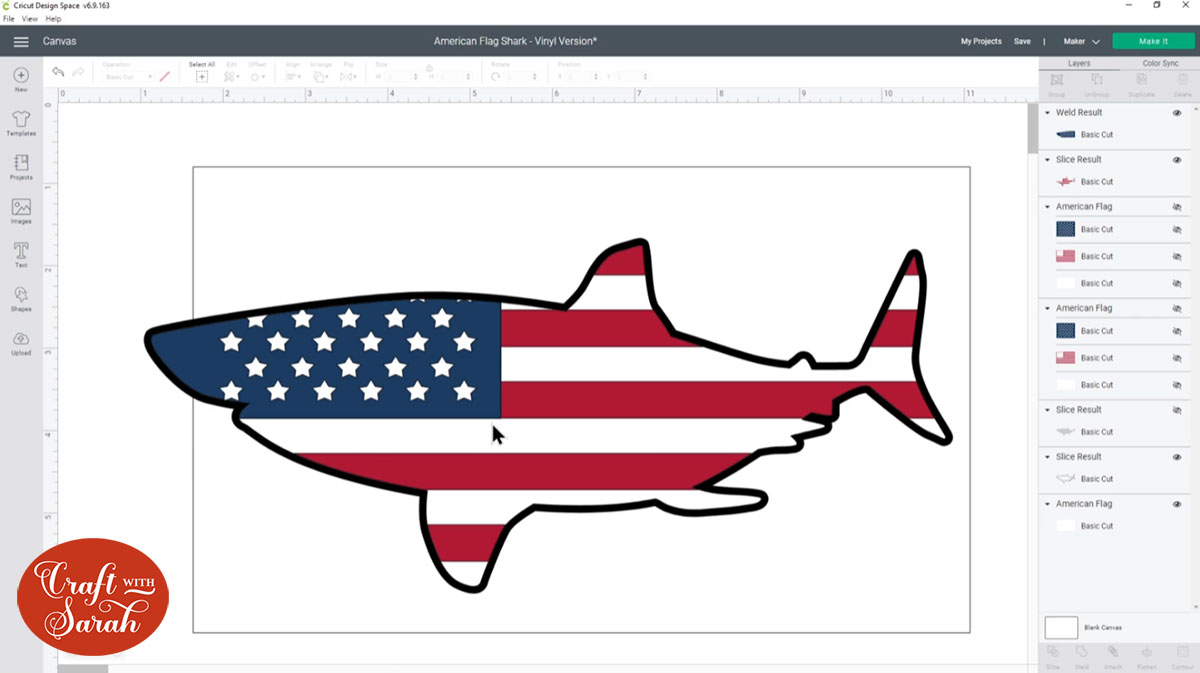
Step 4) Position the shark and flag
This is where you can see why we made the outline of the shark – it makes it SO much easier to get it lined up against the flag!
Hide all shark layers APART from the outline layer by clicking on the “eye” icon next to each layer in the layers panel.
Position the shark over the flag where you want the flag shapes to appear.
Step 5) Make the blue layer
This is where things start to get a bit different from the cardstock version of this tutorial.
When I’m making layered cardstock designs I like to start with the bottom layer and work upwards, but with layered vinyl designs I find it easier to start at the top and work down.
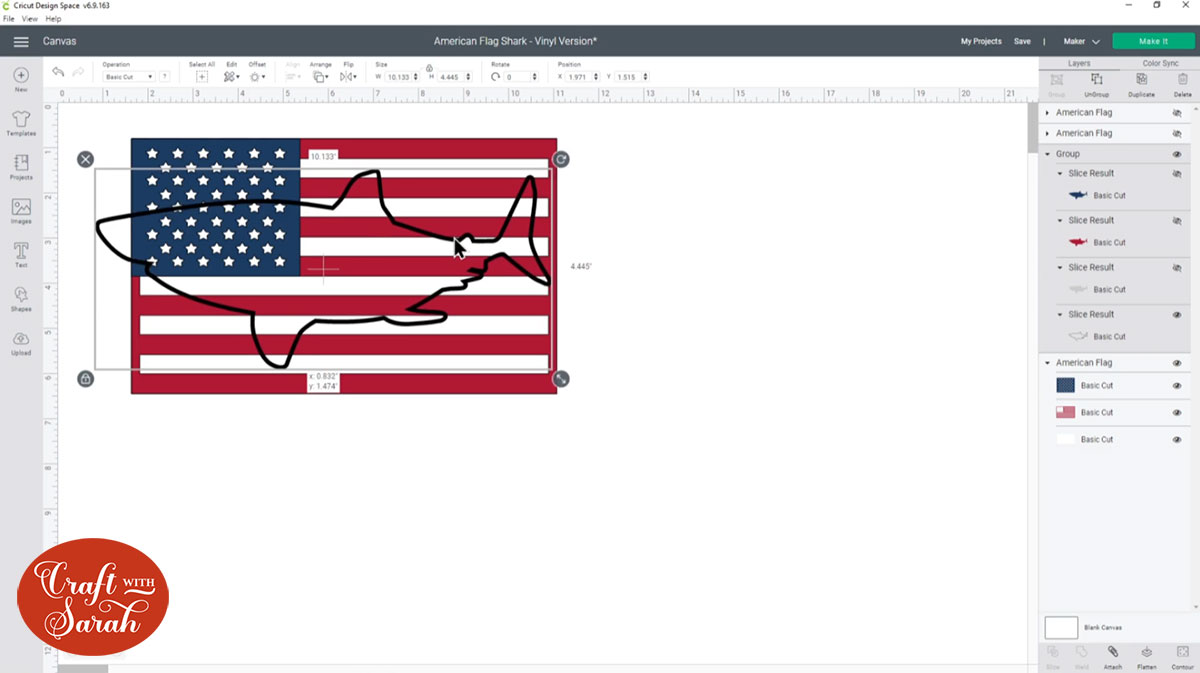
When you’re happy with the positioning, click the shark group and press “Ungroup” to separate out the layers.

Do the same for the flag group.
Turn on the blue shark layer by clicking the eye next to it in the layers panel. Turn OFF the black outline layer.

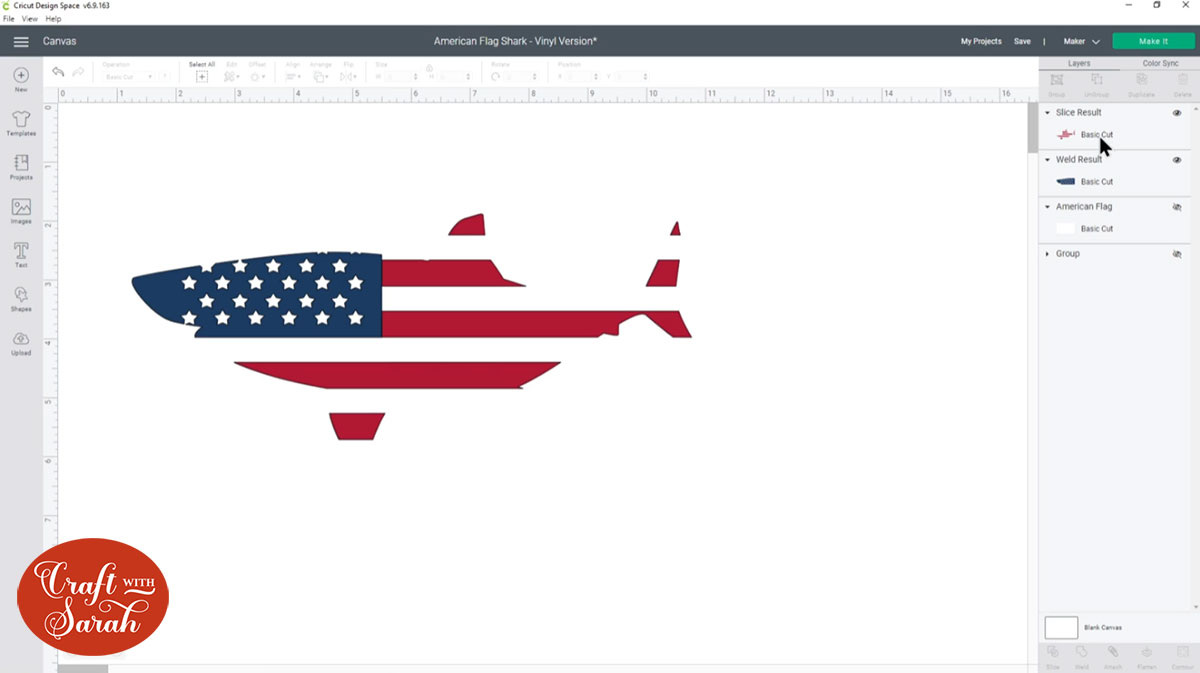
Select the blue flag layer and the blue shark layer and click “Slice”.
This will cut the two layers out of each other, leaving you with four “slice results” in the layers panel.
Delete two of the blue layers so you are just left with the two shown in the image below. Do NOT move the bigger layer away from the smaller layer – I just did this to make it easier for you to see the two layers that are left.
For the larger layer, we only want to keep the piece in the nose – not the body or stars. Click this layer and then click “Contour”.

Hide everything APART FROM the tiny piece of nose on the left.
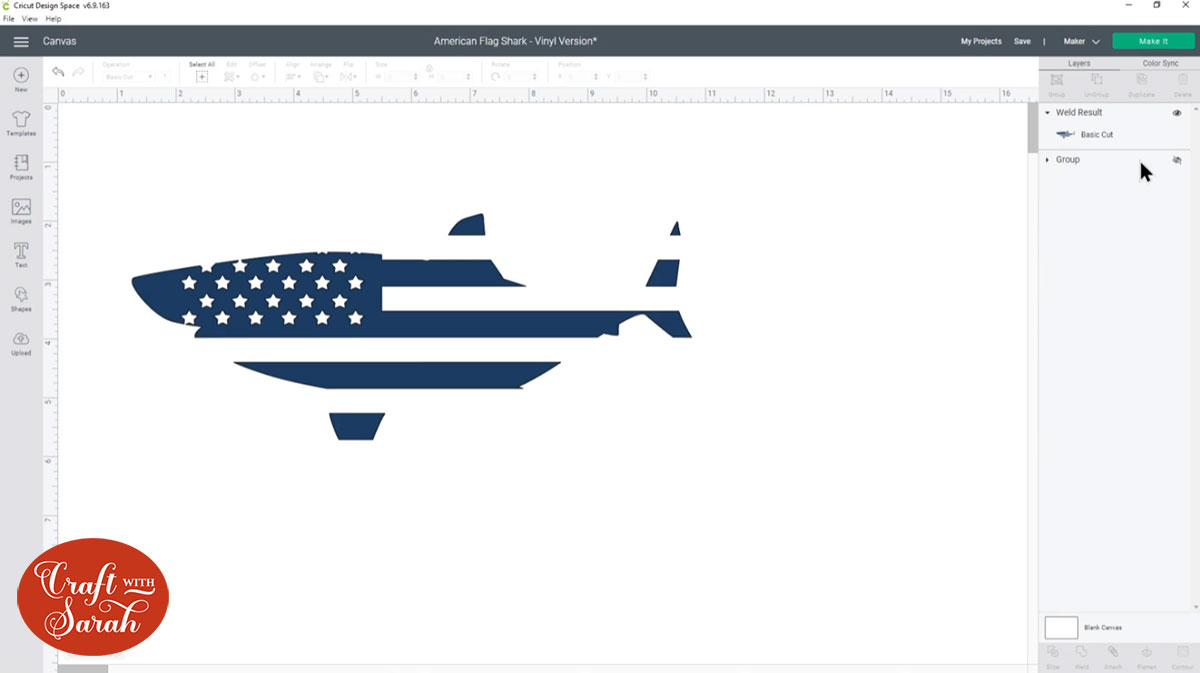
Select both blue layer then click “Weld”.
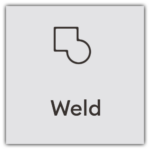
Weld merges layers together into one.
The blue layer is now finished!

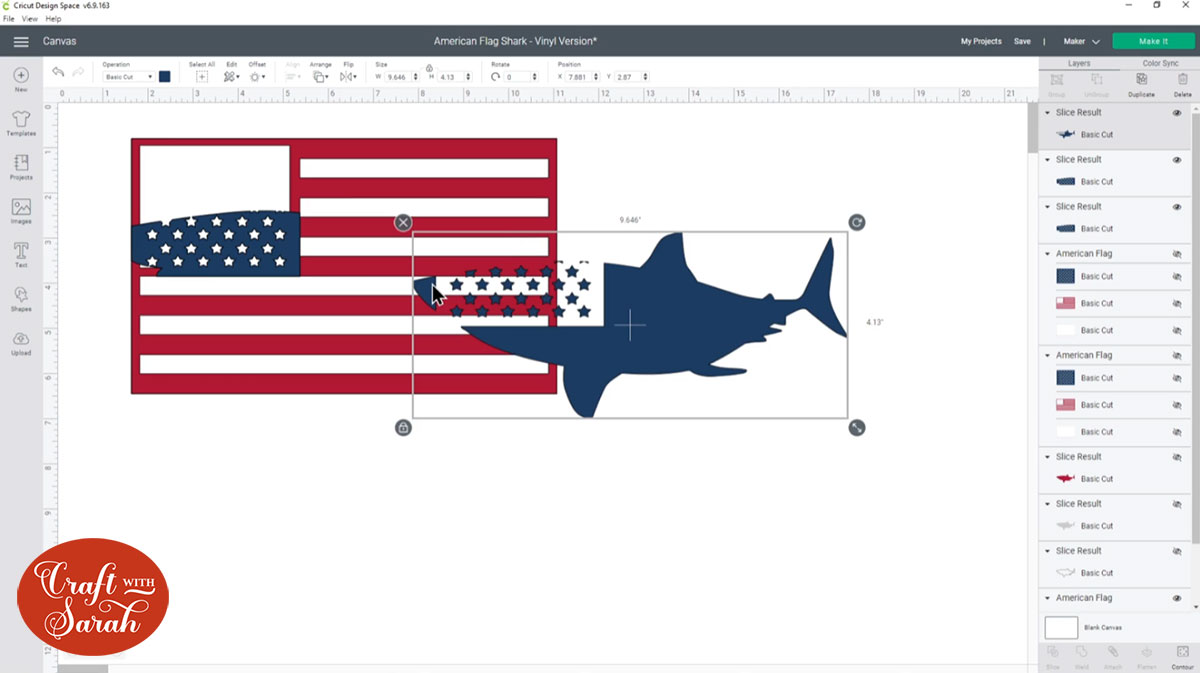
Step 6) Make the red layer
Hide the blue layer and turn on the red shark layer.

Select the red shark and red flag and click “Slice”.

Delete the slice result layers that are not needed so you end up with this:
Turn on the blue layer so we can see what we need to change.
We don’t want the red line in the shark’s nose, so click the red layer and Contour out that shape.
It looks a bit strange how there is a red box around the edge of the blue.
Move the blue layer to the top of the layers panel and we can see why it’s happening – it’s because of how the original flag layers were made in Cricut Access.
I don’t want these extra parts of red, even though they can’t be seen with the blue layer on top, because it will make the vinyl different heights when we try and stick the layers together so it will look lumpy.
Go into “Shapes” and choose a rectangle.

Resize the rectangle so it fits over the blue layer.
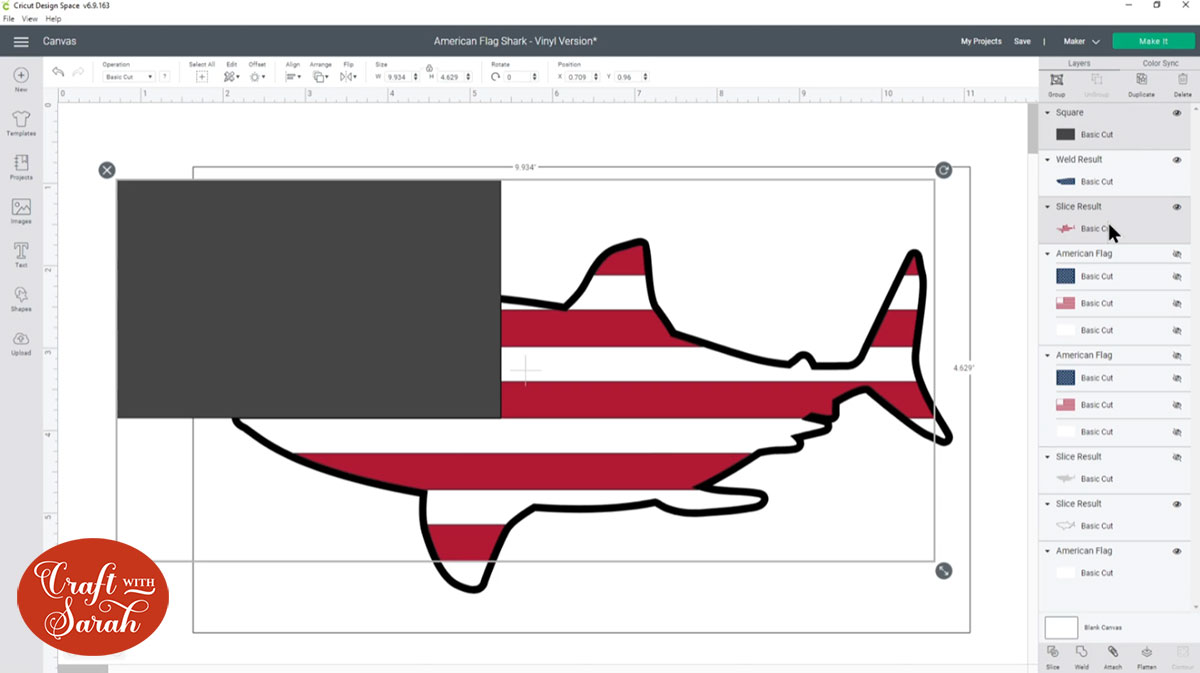
Select the red layer and the rectangle and press “Slice”.
Delete the parts we don’t need, to be left with this:

Now the red and blue layers will perfectly fit around each other, without any vinyl overlap.
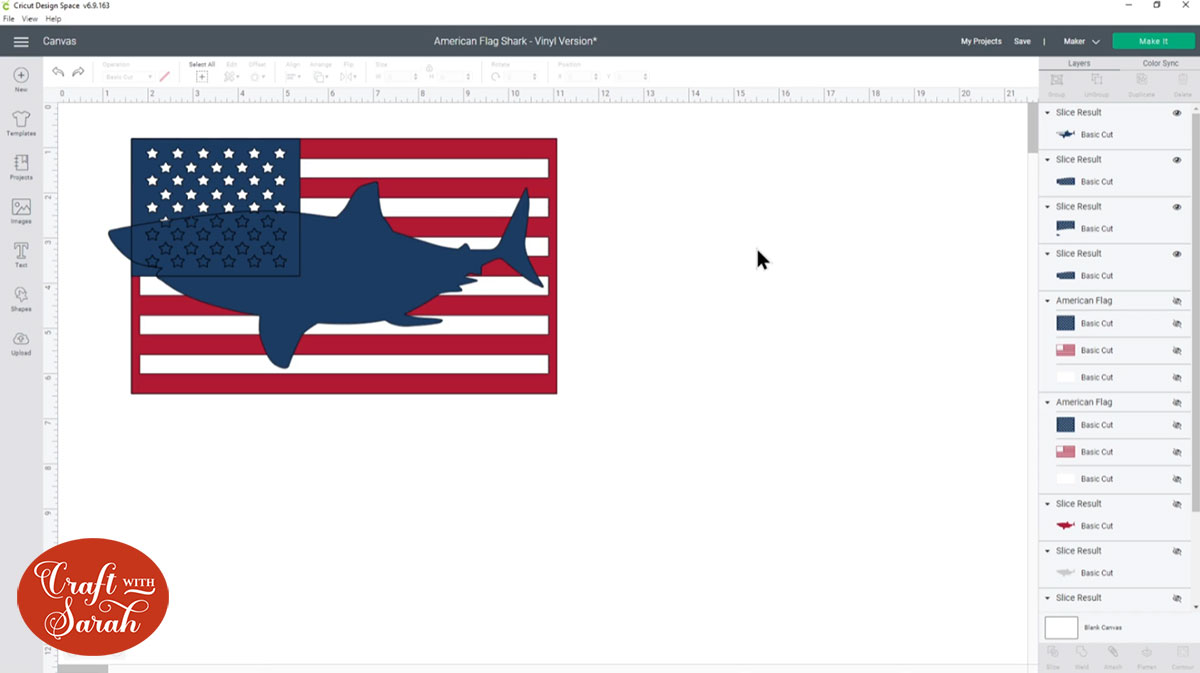
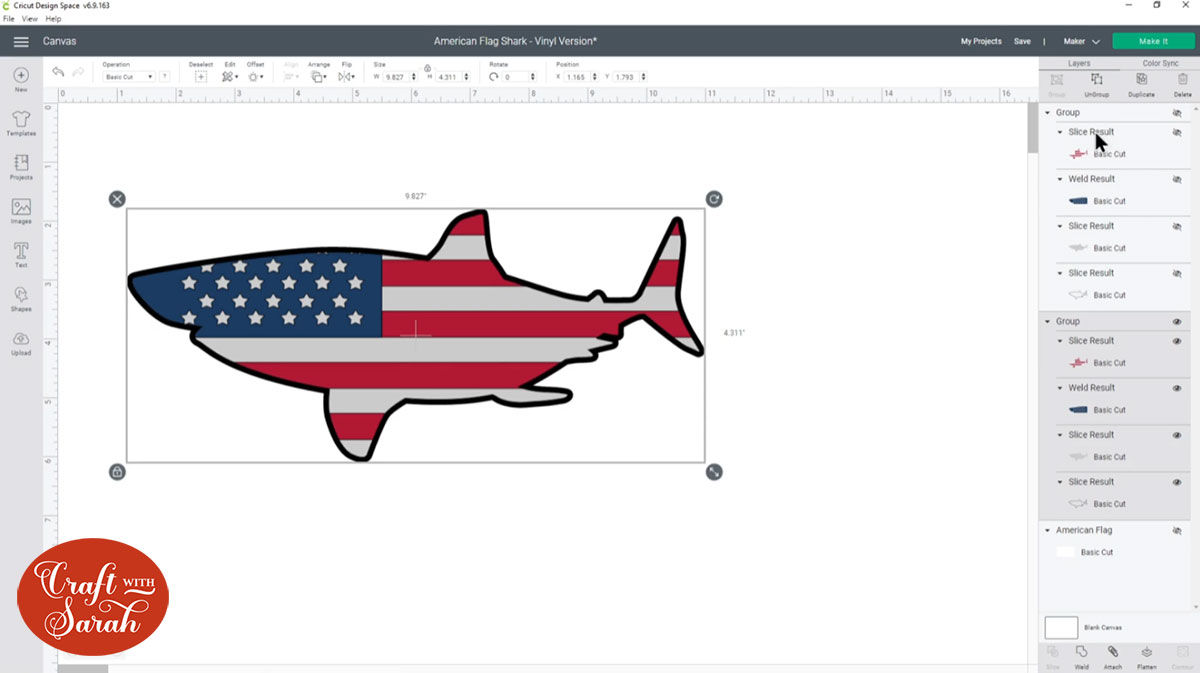
Step 7) Make the white layer
For the white layer, we want to slice out the shapes we’ve made from blue and red out of the white filled-in shark layer so that we are left with the negative space to complete the rest of the design.
If you are putting the design on a white t-shirt or other white surface then you may not need to make the white layer.
Delete the white layer from the flag – we don’t need it.
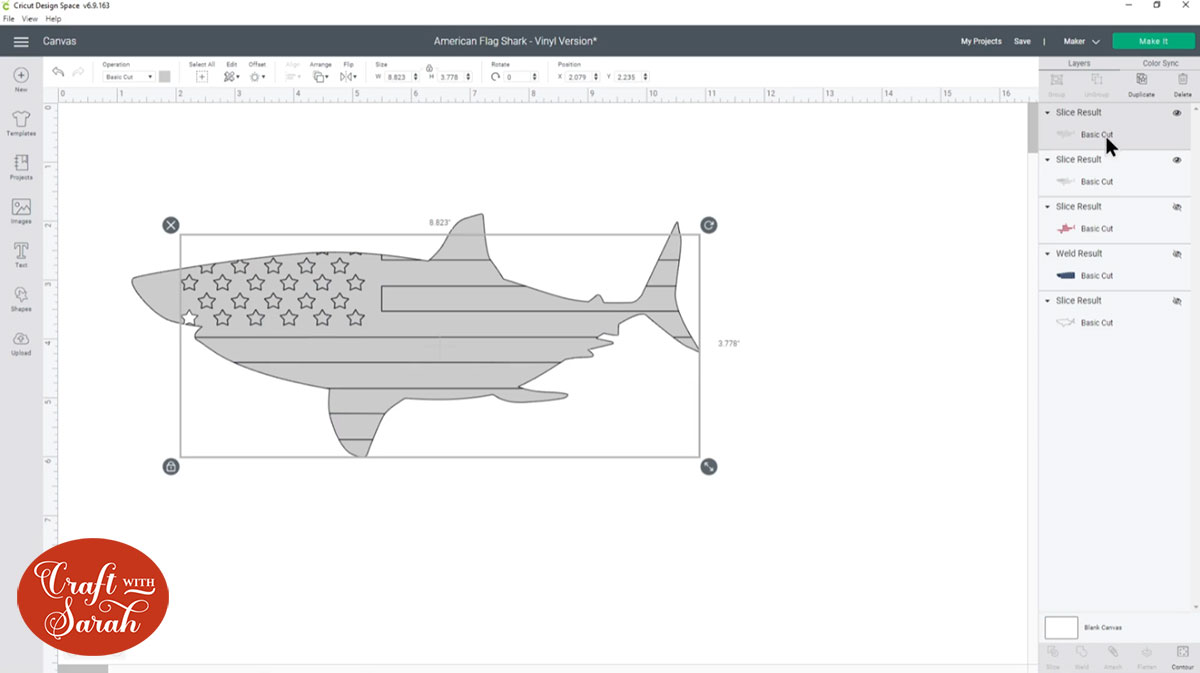
Turn on the black outline shark layer and then press “Select All” and group the layers.
Duplicate this group to make a copy.
Press “Select All” and then “Align” > “Center” to perfectly position the two sharks one-on-top of each other.
Click the “eye” icon in the layers panel next to the one of the shark groups to hide it.
For the group that’s still visible, click it and then press “Ungroup”.
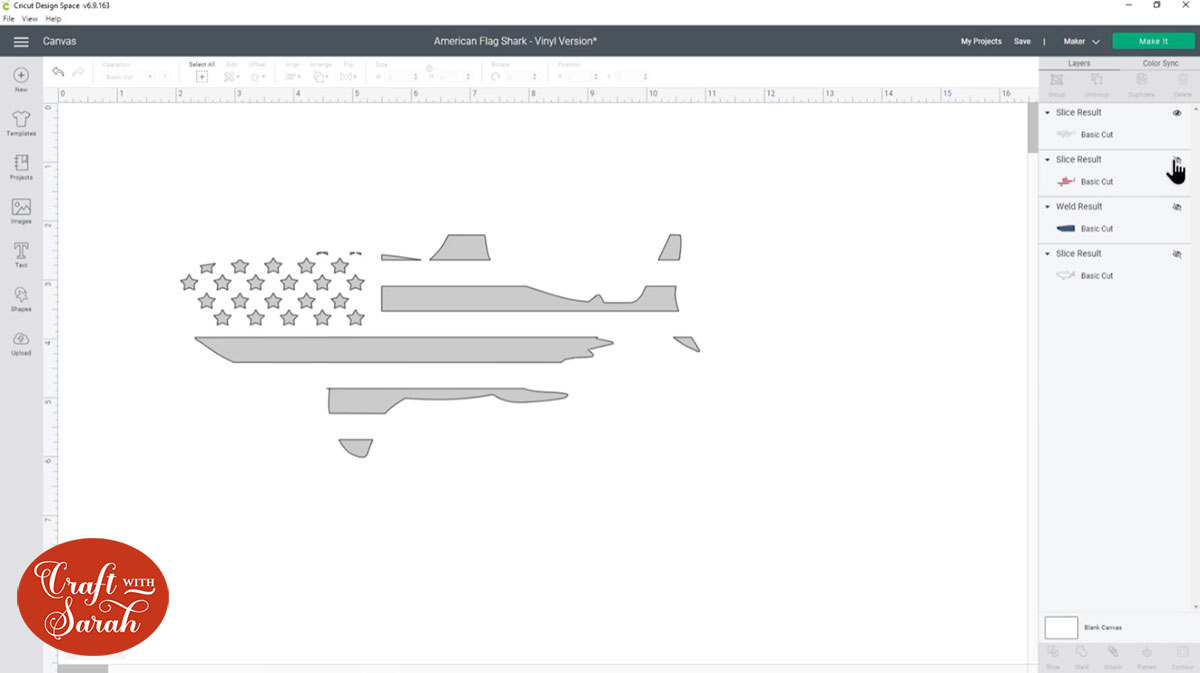
Delete the white layer and the black outline layer so that you’re just left with the red and blue.
Select both layers and Weld them together. This will join the two layers together and it will turn either red or blue. Mine went blue. It is easier at this point if you change this layer to a different colour that’s not in your design, e.g. yellow or green. Sadly. I forgot to do this in the video.
Turn the hidden shark group back on and Ungroup the layers.
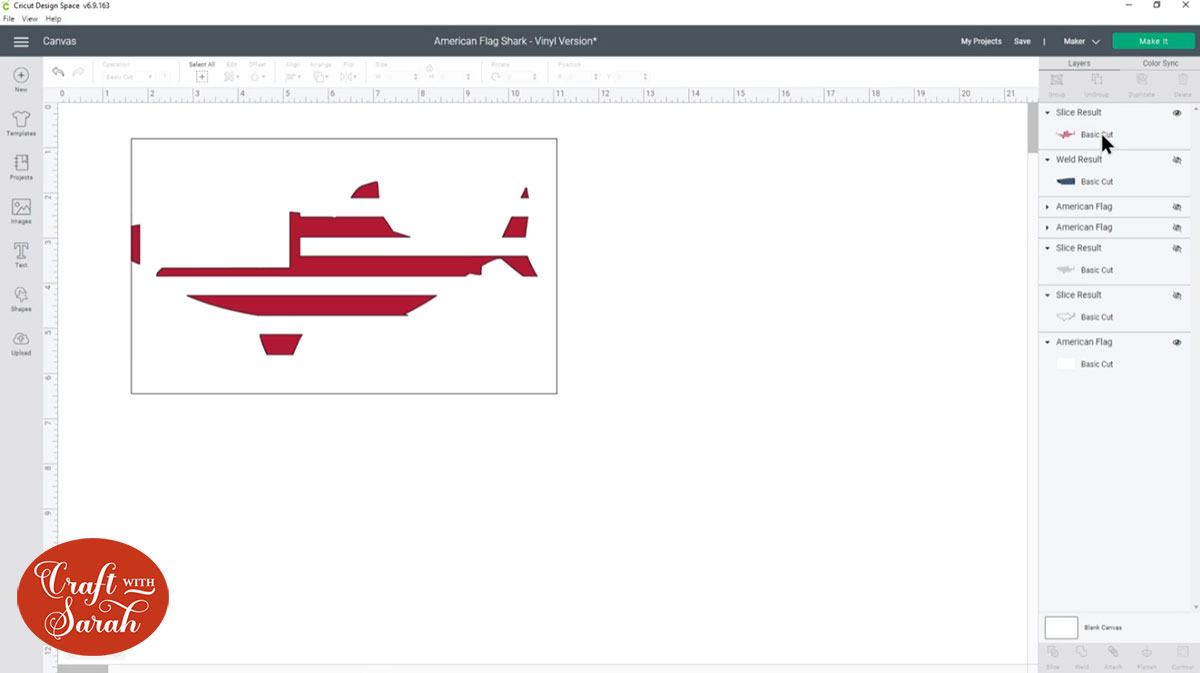
Select your newly welded layer AND the white filled-in shark layer and press “Slice”.
Delete the slice result layers you do NOT need, until you end up with this:
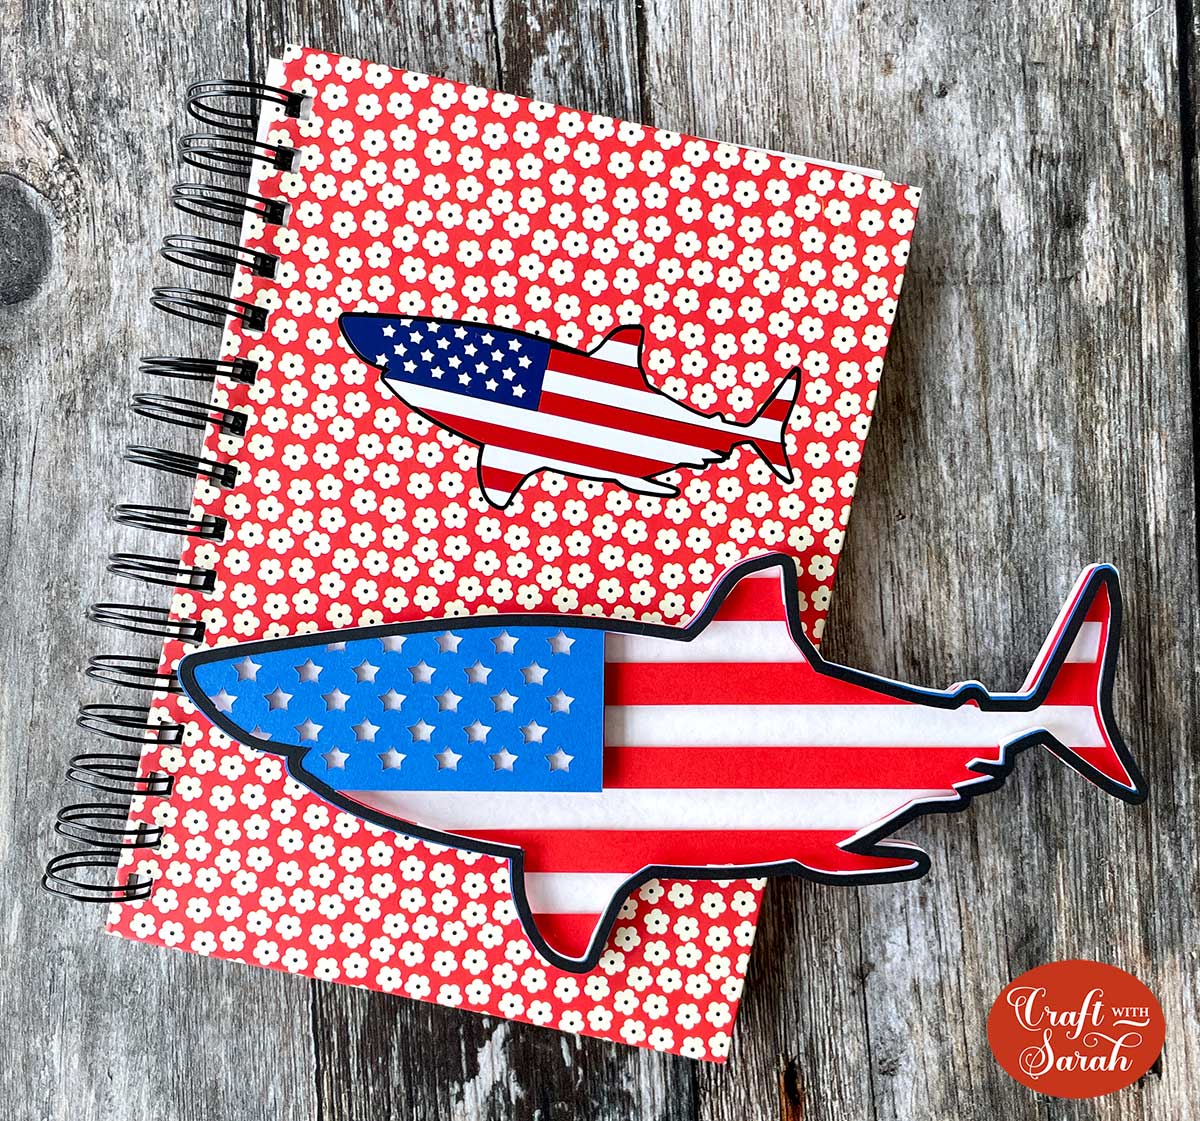
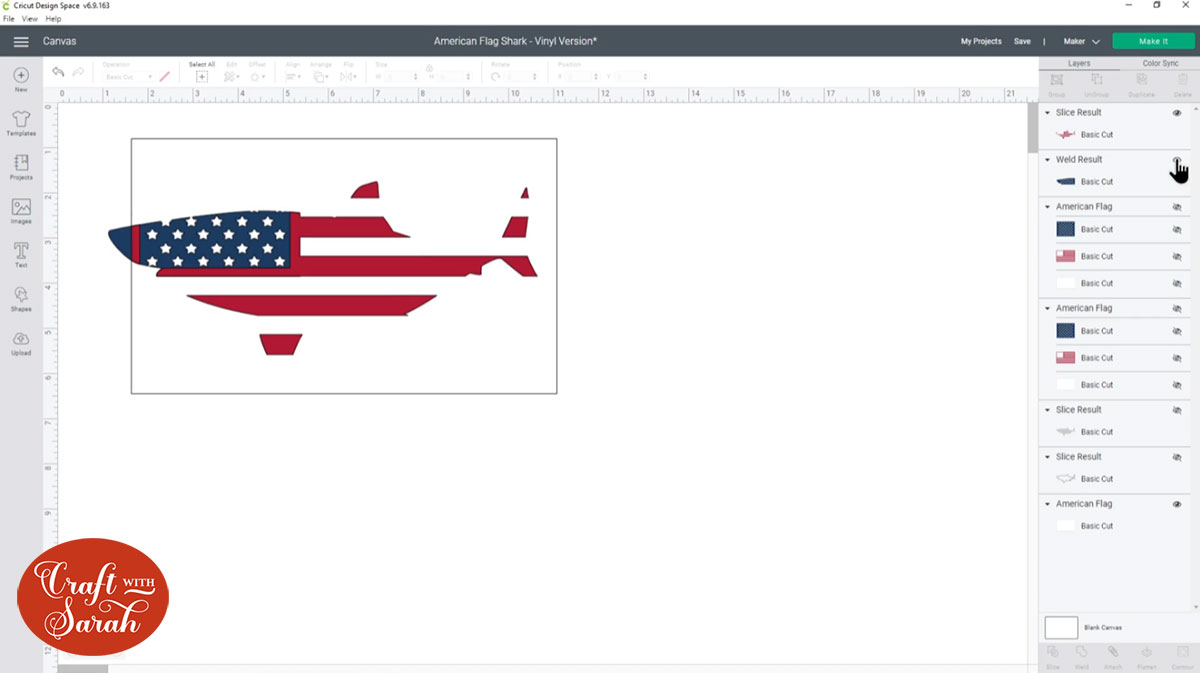
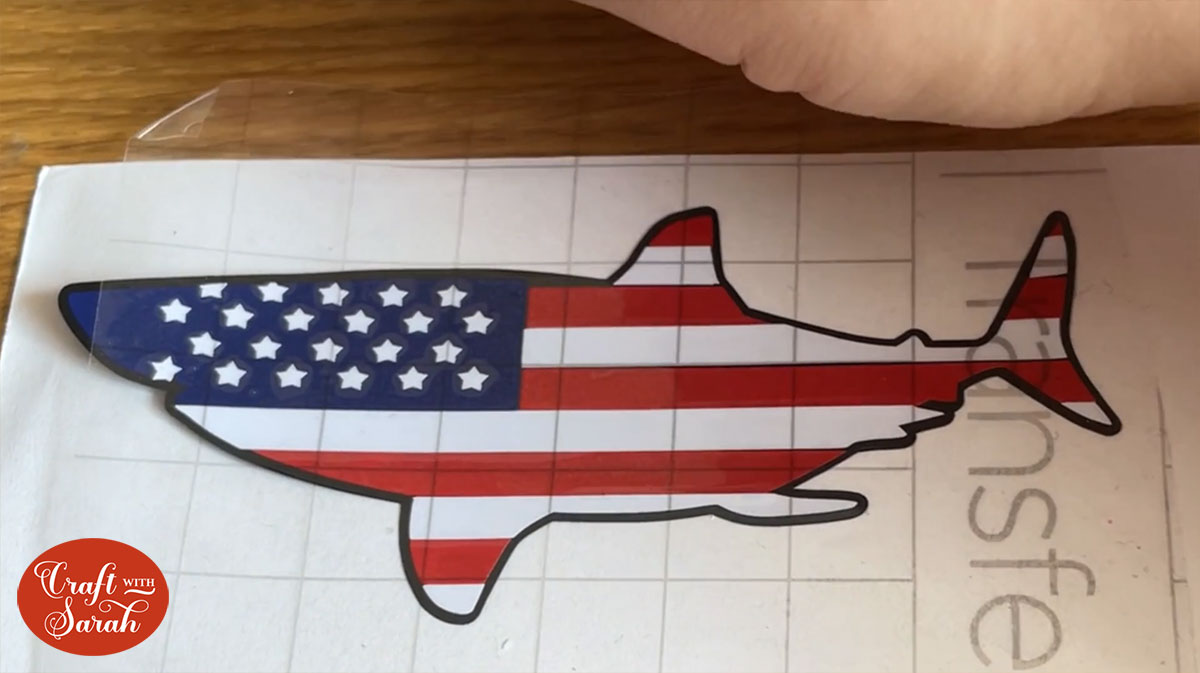
Step 7) Admire your finished vinyl decal design!
Turn on all the layers, and there you have it – your finished vinyl decal!

You can leave off the black outline if you prefer it to have a less defined outline.
Unfortunately I had a little trouble with some of my stars not being filled in with white. This is because they were overlapping the edge of the blue at the beginning.
To see how to fix this, watch the video at the top of this post from 17 minutes onwards.
Once that’s all sorted, here’s what your final layers look like.
I decided to fill in the black outline layer to turn that into a “base” for my vinyl to be built on.
Step 8) Cut the design
Press “Select All” and then “Align” > “Center” to make sure everything is positioned correctly, then Group your layers.
You can now resize it to however big you want to cut it.
Press “Make It” on the top right of the screen and follow the instructions to cut from adhesive or heat-transfer vinyl.
Don’t forget to check if you need to mirror the design before you cut it!
As I was cutting from permanent adhesive vinyl, I didn’t need to mirror it.
Step 9: Weed & layer the vinyl
After cutting, weed your vinyl by removing all the pieces that you don’t need.
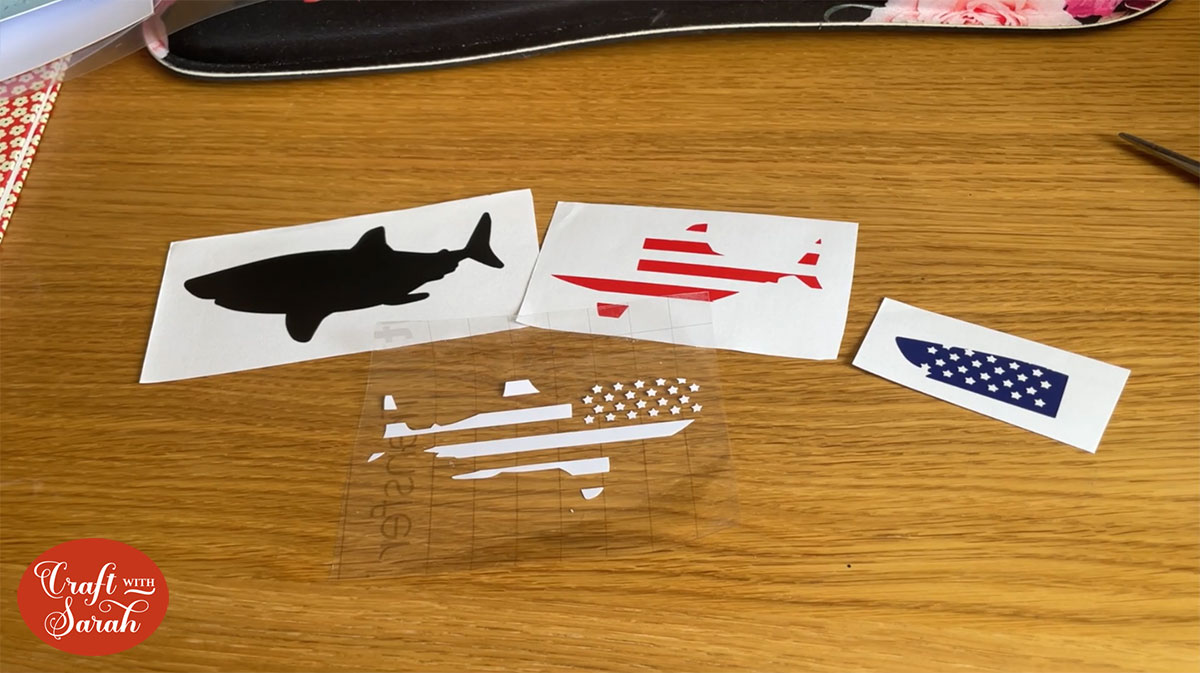
Use a piece of transfer tape to pick up all the different colours of vinyl so that they are perfectly aligned.
I did the white layer first, then the blue, then the red, then the black.
Finally, stick the vinyl onto whatever you are making!
I put mine onto the front of a red-and-white notebook.
More ideas for layered projects in Design Space
I hope you enjoyed this tutorial. It’s definitely a bit more on the “advanced” level when it comes to Design Space tutorials, but I hope I managed to explain it.
If you get stuck following the written instructions then I highly recommend watching the video from the top of this page as it will help show the steps a little clearer.
But what if you want to cut from cardstock, not vinyl?
As I mentioned at the beginning of this post, this is Part 2 of a 2-part series.
The first part is how to design multi-layer projects to be cut from cardstock instead of vinyl.
Click here for Part 1: Creating Cardstock Designs
Love making layered designs? Don’t miss this!
Do you spend aaaaages searching for the perfect layered cutting file? There HAS to be a better way, right?? 😫
Ditch the endless SVG searches and make your OWN layered projects that look EXACTLY how you want them to! 🥰
Lovely Layering is a collection of 11 video lessons on how to design your own layered projects in Cricut Design Space.
From turning flat images/SVGs into layered designs, to mastering shadow box design, mandala letters, adding shadows/outlines to text and even designing your own CLOCKS – the Cricut possibilities you’ll unleash by taking this training will be endless!
Happy crafting,
Sarah x

