How to Design Layered Cardstock Projects in Cricut Design Space
Ever wondered how to design your own layered projects in Cricut Design Space? Here’s a free tutorial on how to make your own layered cardstock projects, without ever leaving Design Space!
This tutorial is a request from somebody in my Cricut crafters Facebook group. They asked how you could put the shape of the American Flag with all the different colors inside the outline of a shark. I thought that was such a wonderfully random image combination that I just had to do it!
This is the first in a two-part series. The second part is how to make the SAME design but for a layered vinyl decal instead of cardstock.
The method changes based on whether you’re planning on cutting the design from vinyl or cardstock which is why I’ve made two separate videos.
Want to learn more about designing layered projects in Cricut Design Space? Click here for LOADS more project ideas and video tutorials!
How to design a layered cardstock Cricut project
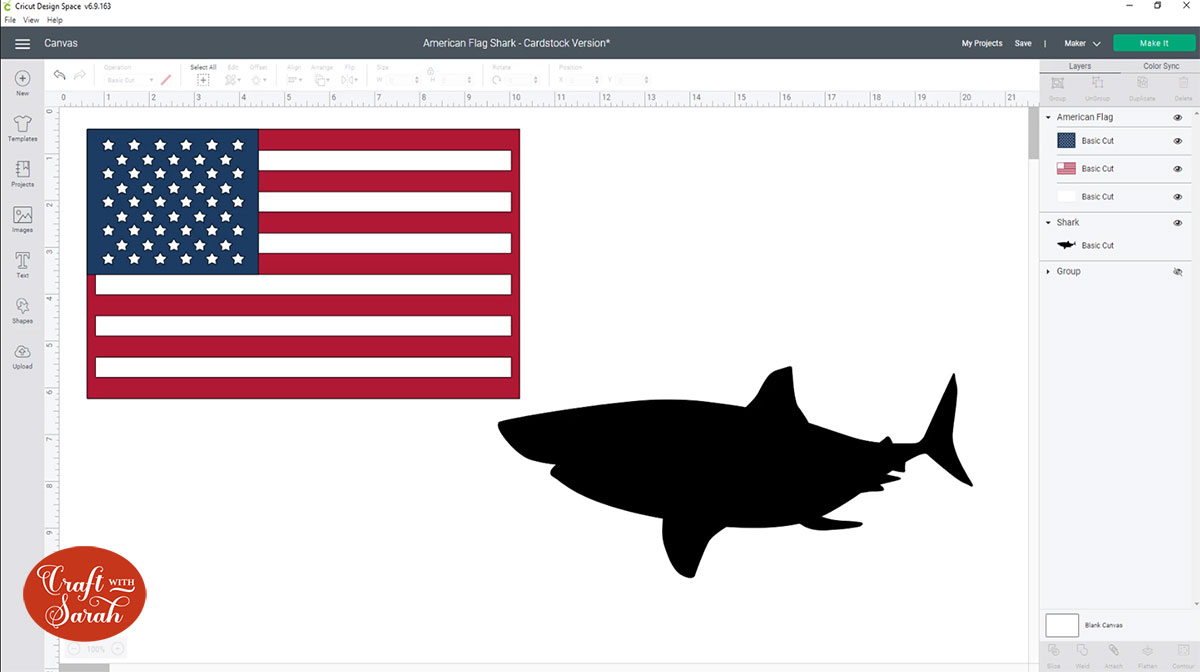
Step 1: Choose your images
The Cricut Access images I chose for this tutorial are: American Flag #M2CCF4CC and Shark #M26C5E58D.
I chose this flag image as all the line are straight rather then “flying” in the wind which will make it easier when I’m creating the different layers.
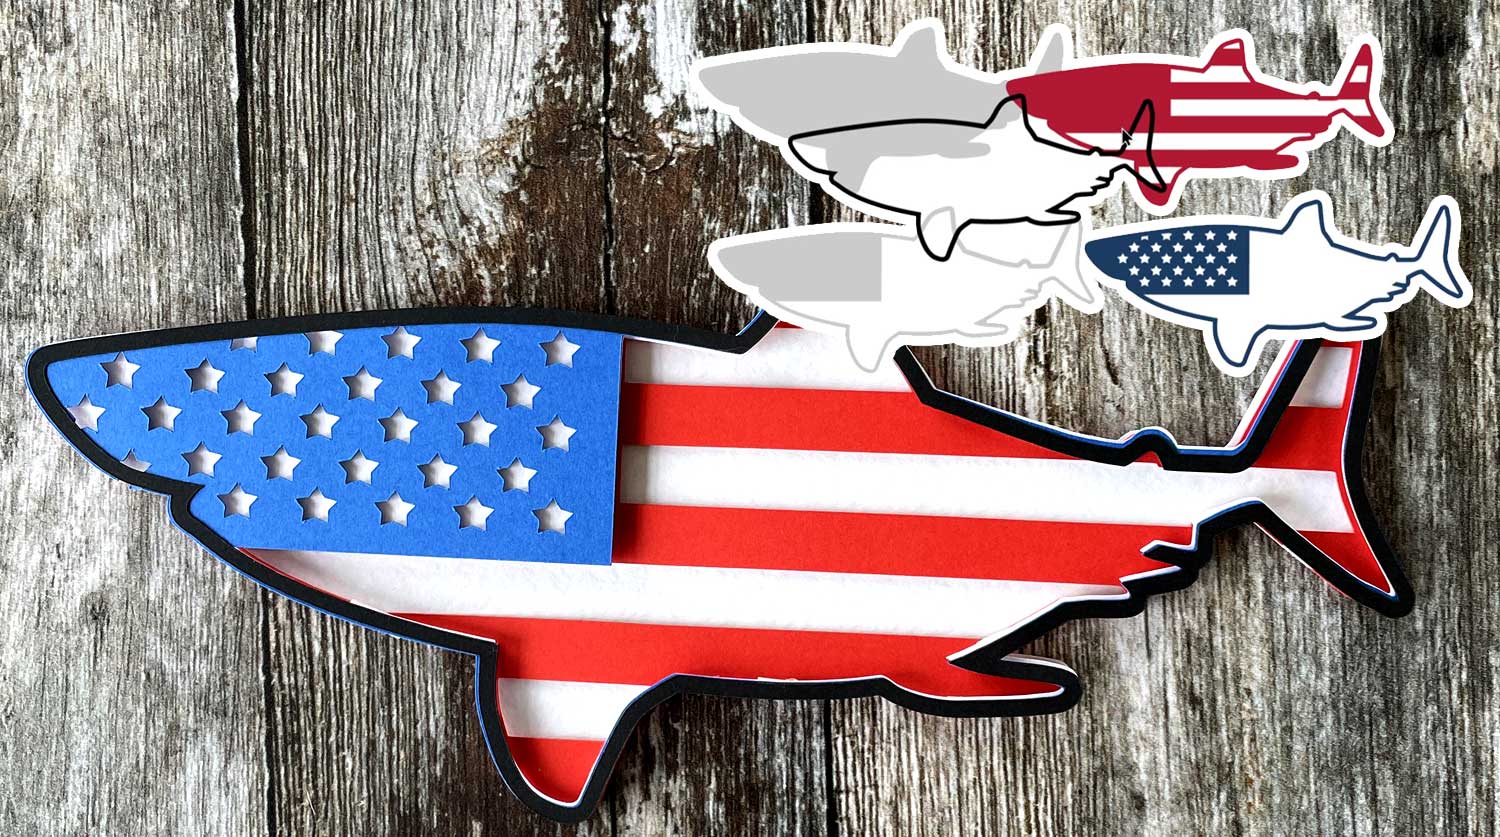
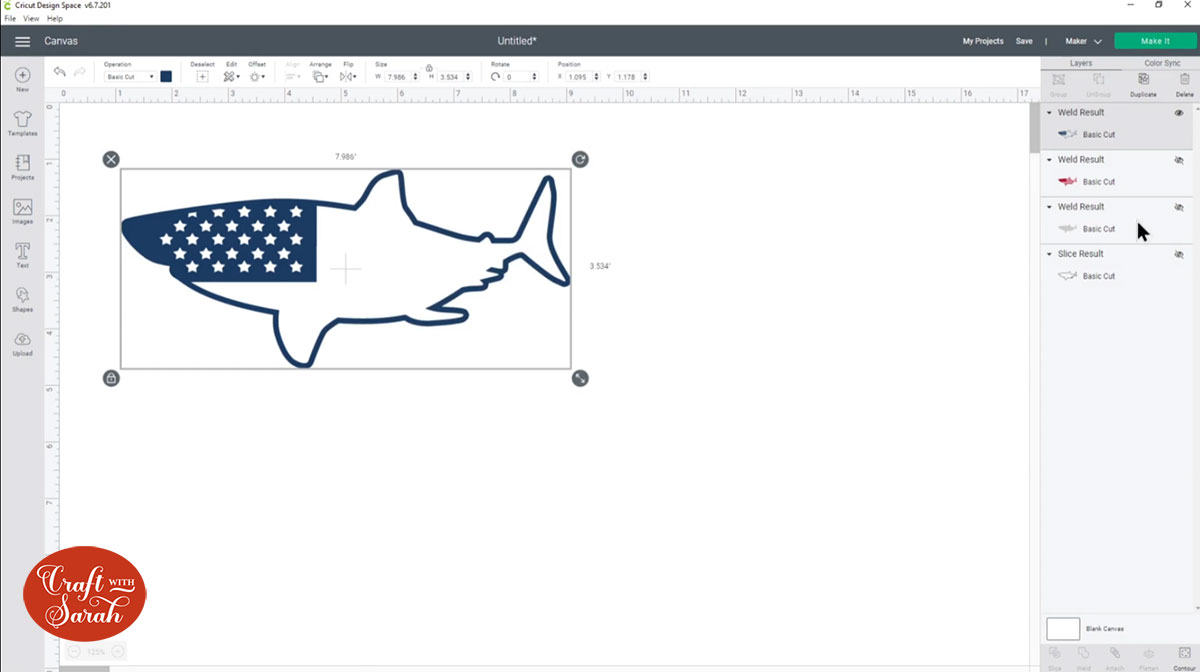
Step 2: Make an outline of your main image
At the moment the shark image is a silhouette. We need to turn it into an “outline” instead so that we can add the American Flag image inside of it.
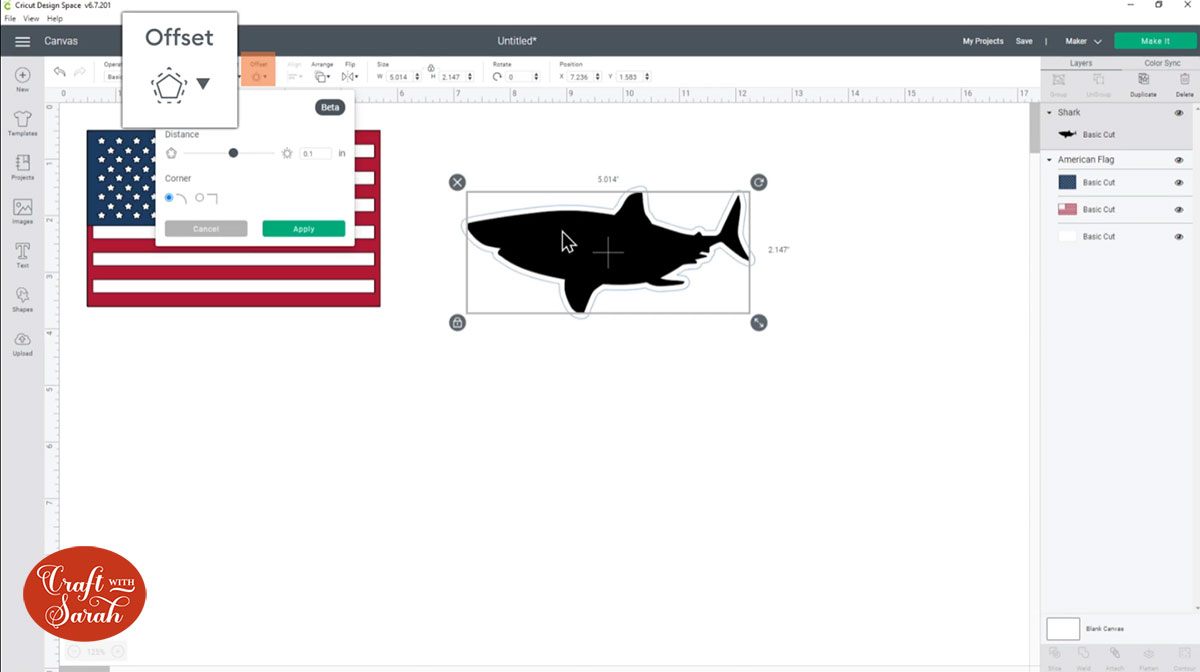
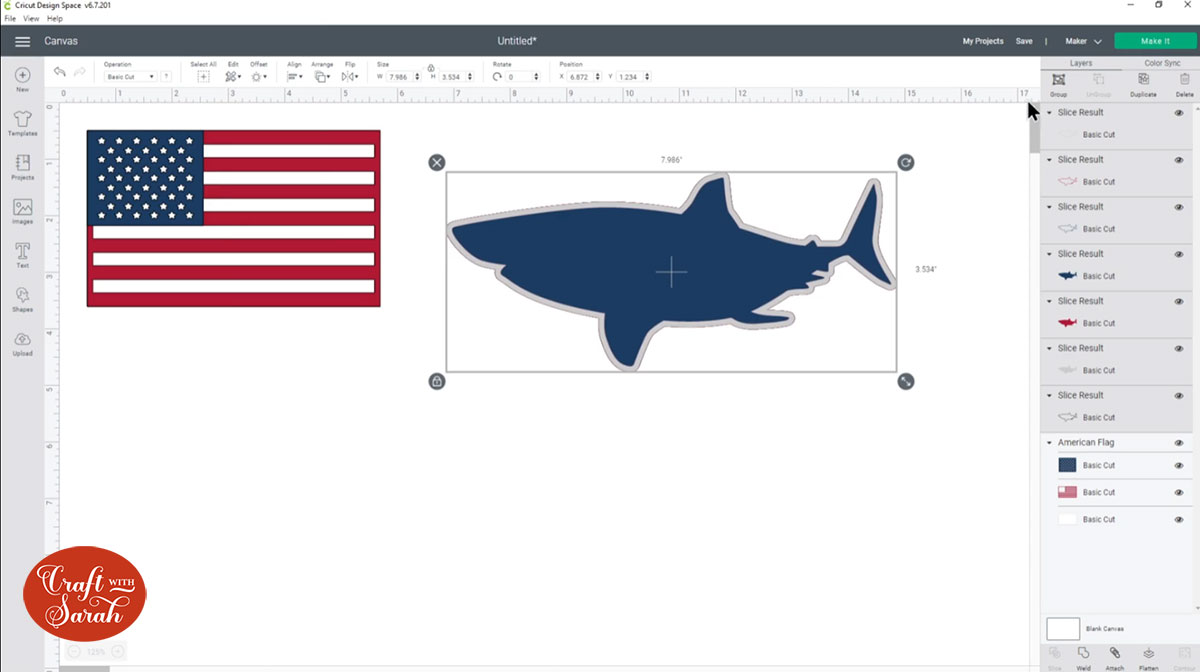
To do this, select the shark layer then click the “Offset” button.
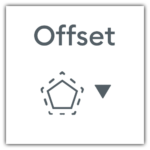
Add a thin Offset of around 0.1.
Select the original shark image AND the new offset layer and press “Slice”.
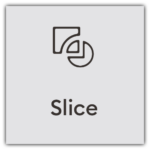
This will cut out the original shark from the offset layer to leave us with three separate layers.
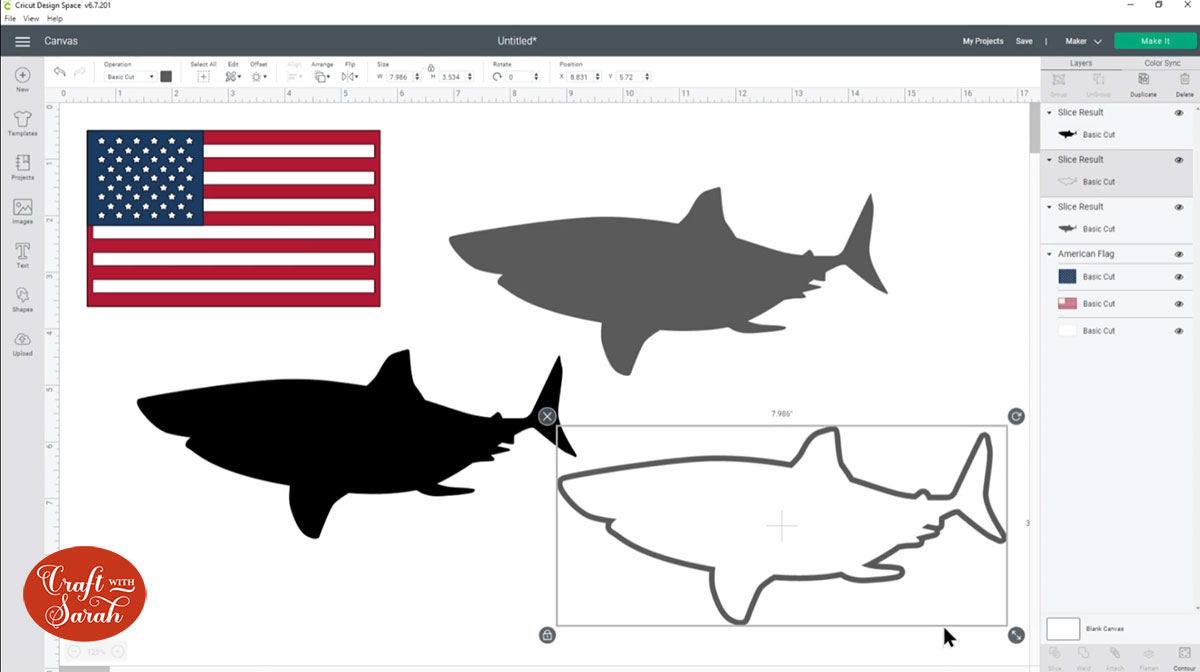
Delete the two “filled in” layers so you are just left with the outline of the shark.
Step 3: Create new “filled in” layers
This step might seem a bit off since we just deleted two “filled in” layers, but we now need to create some new ones.
The reason we deleted the two layers in Step 2 is because they were only the size of the INSIDE of the outline layer, but we need them to be the fill size including the width of the outline.
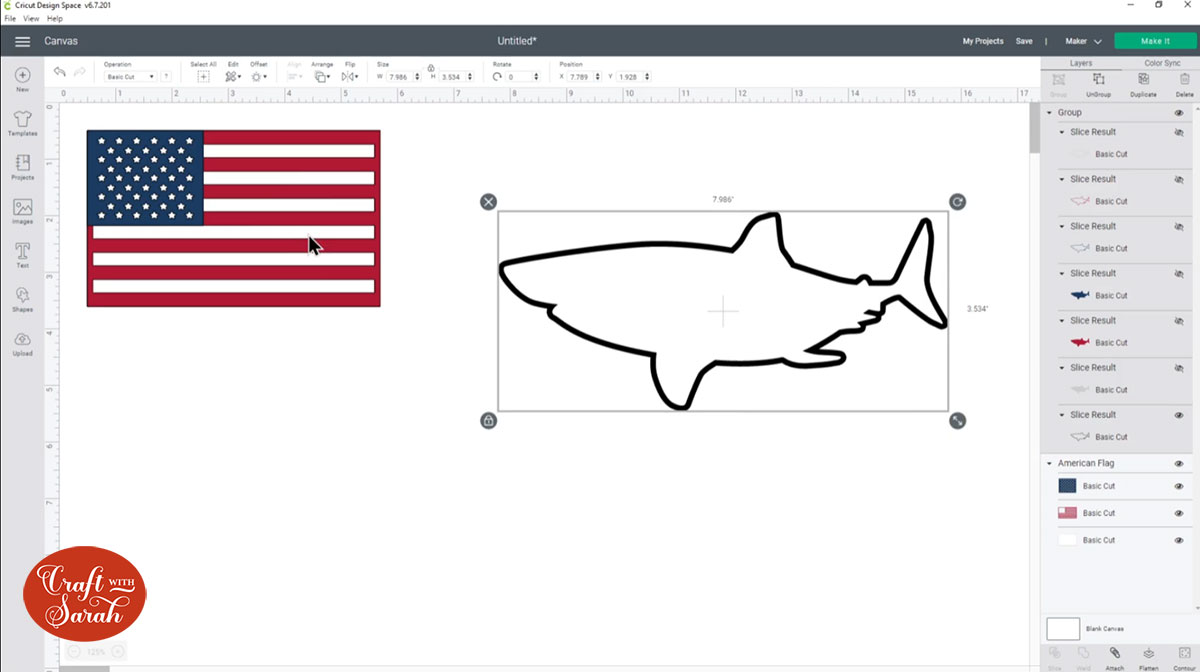
Click the outline shark layer and click “Duplicate” to make a copy.
Click on the duplicated layer, click “Contour”.

Click “hide all contours” in the popup box, then close out of the popup. Change the colour of the shark to white (I used a pale grey so it’s easier to see)
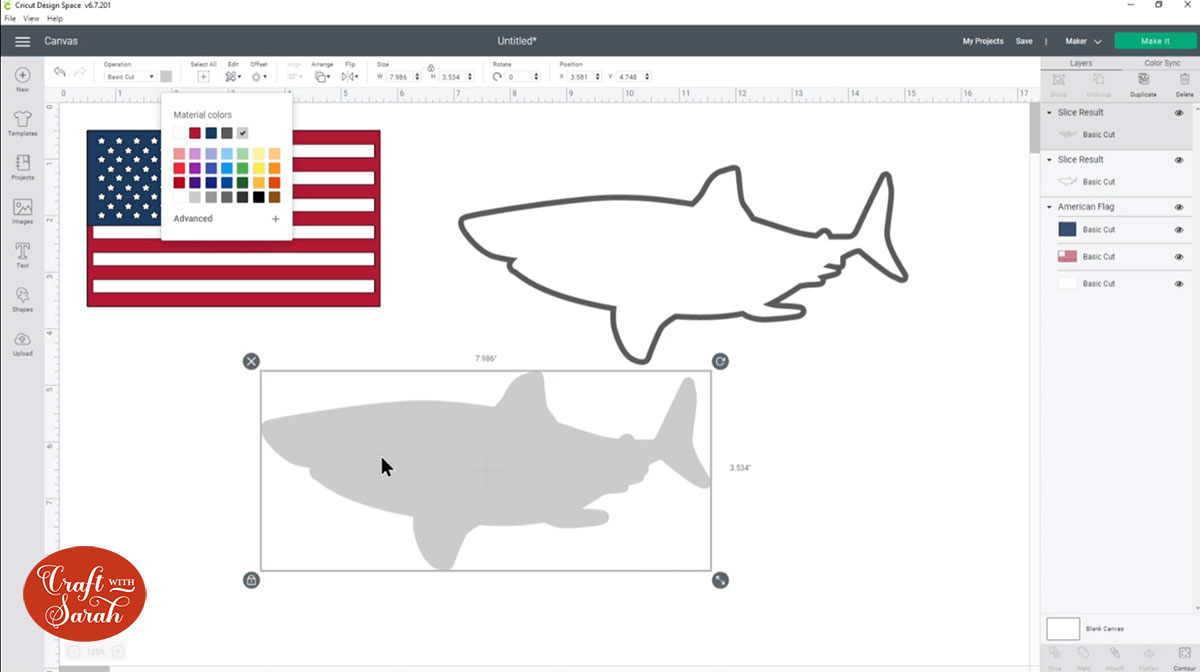
This has left us with a filled in shark that’s the exact same size as the outline layer.
We need one “filled in” layer for every colour that we’ll be using for the finished design.
Duplicate the layer until you have enough, then re-colour them to match your design.
Step 4: Duplicate the “outline” layer
Next we need do something similar but for the “outline” layer of the shark.
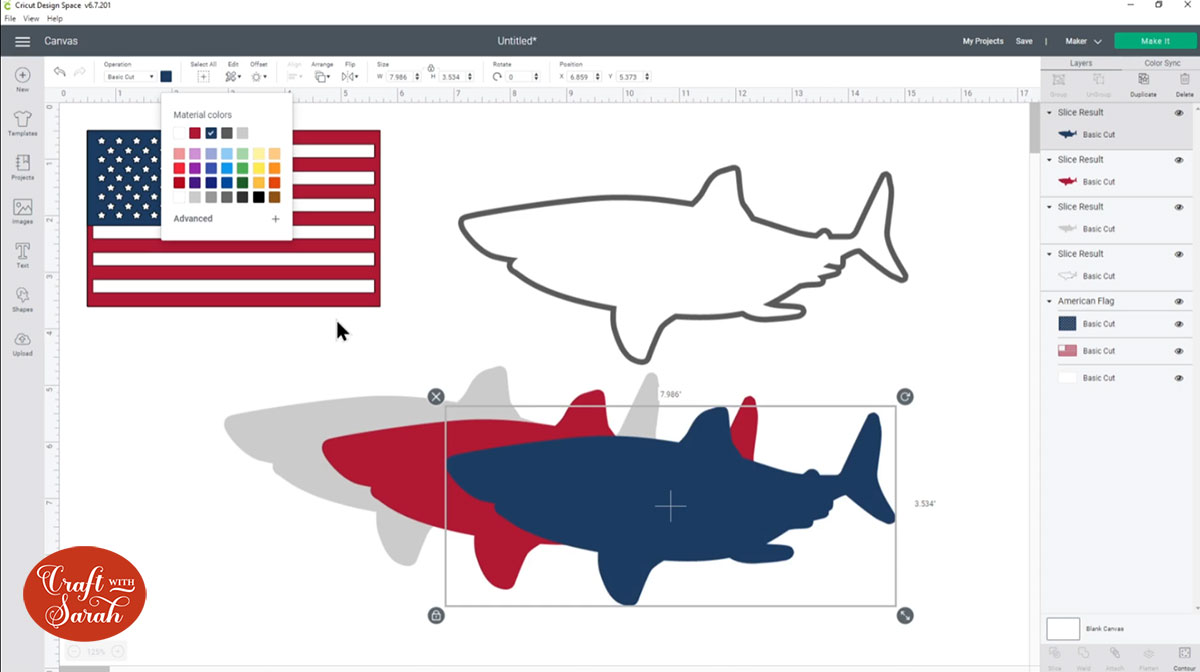
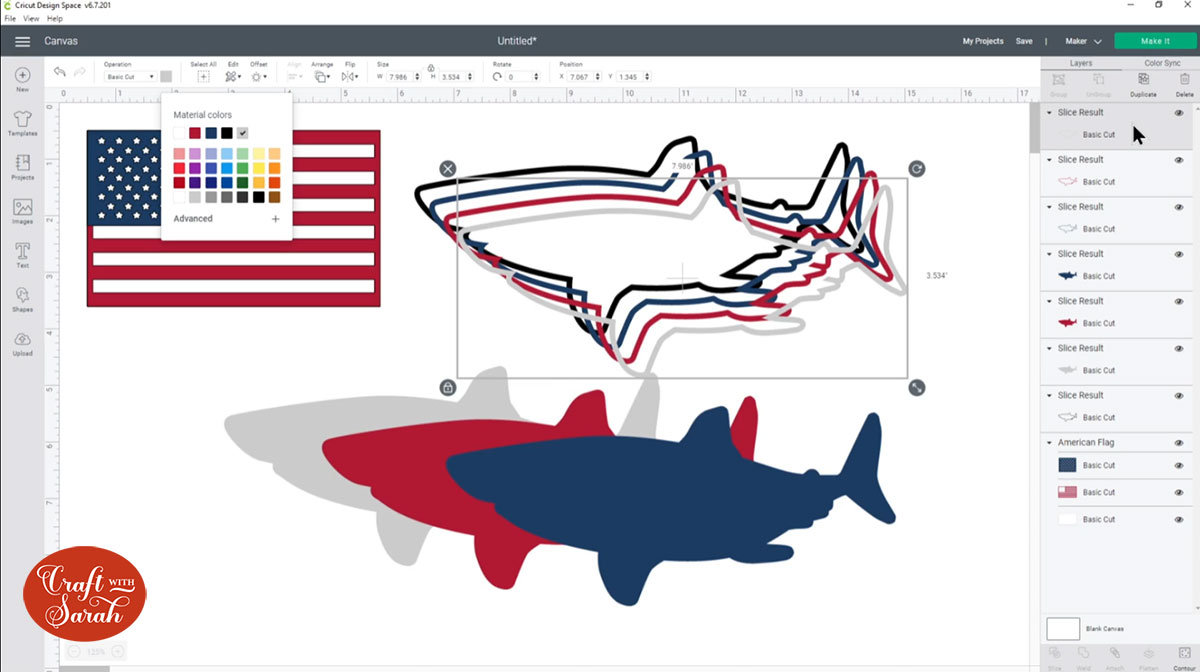
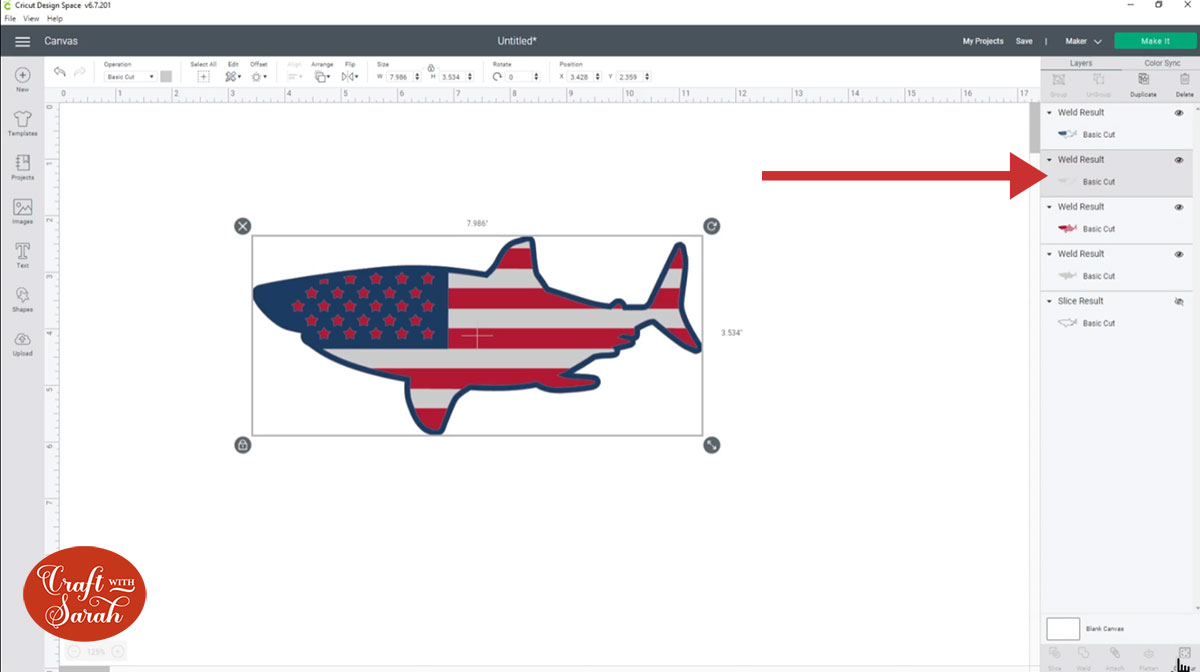
Make the outline layer that’s already on the screen a dark colour that won’t be used on any of the other layers of your design. I chose black.
Duplicate the outline several times so that you have as many outlines as you will have colours on your design.
In my case, that’s four: red, white, blue and the original black outline which will be my very top layer.
Step 5: Align the shark layers
Select all the shark layers, either by clicking-and-dragging a box around them on the main Canvas, or by clicking one of the layers in the Layers panel and then pressing Ctrl or Shift on your keyboard and click the rest of the shark layers.
Once they are all selected, click “Align” and then “Center”.
This puts all the shark layers perfectly on top of each other.
Click “Group” to group together all the shark layers.
Grouping layers means that they will now all move and resize at the same time.
Hide all the shark layers APART FROM the black outline layer.
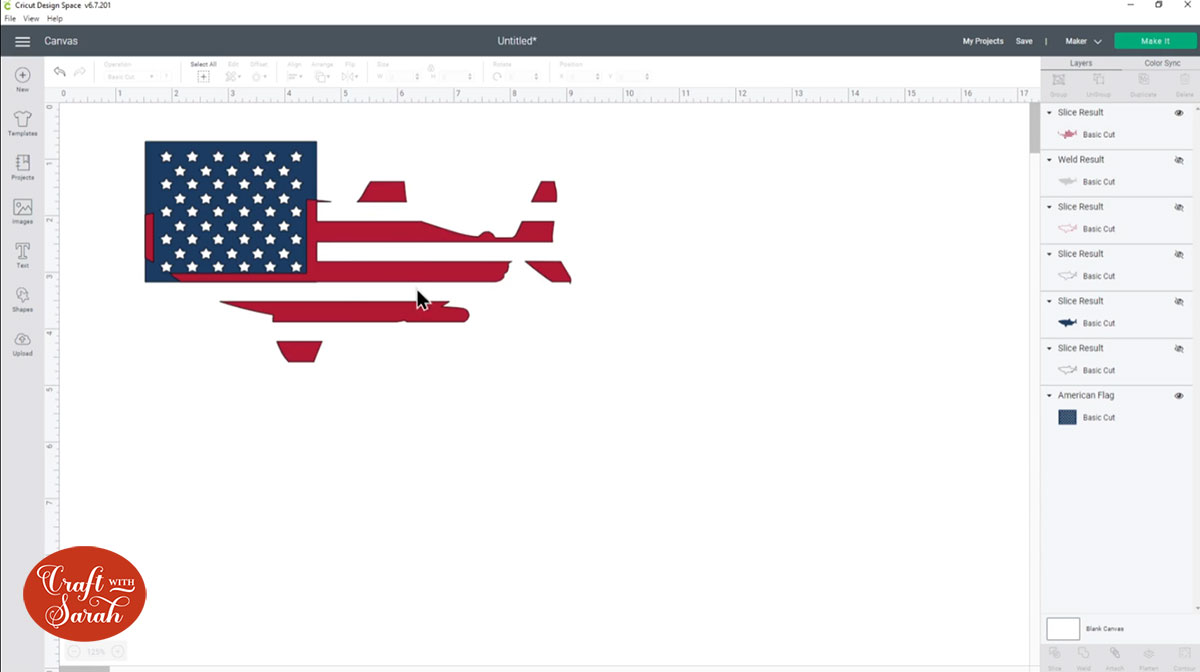
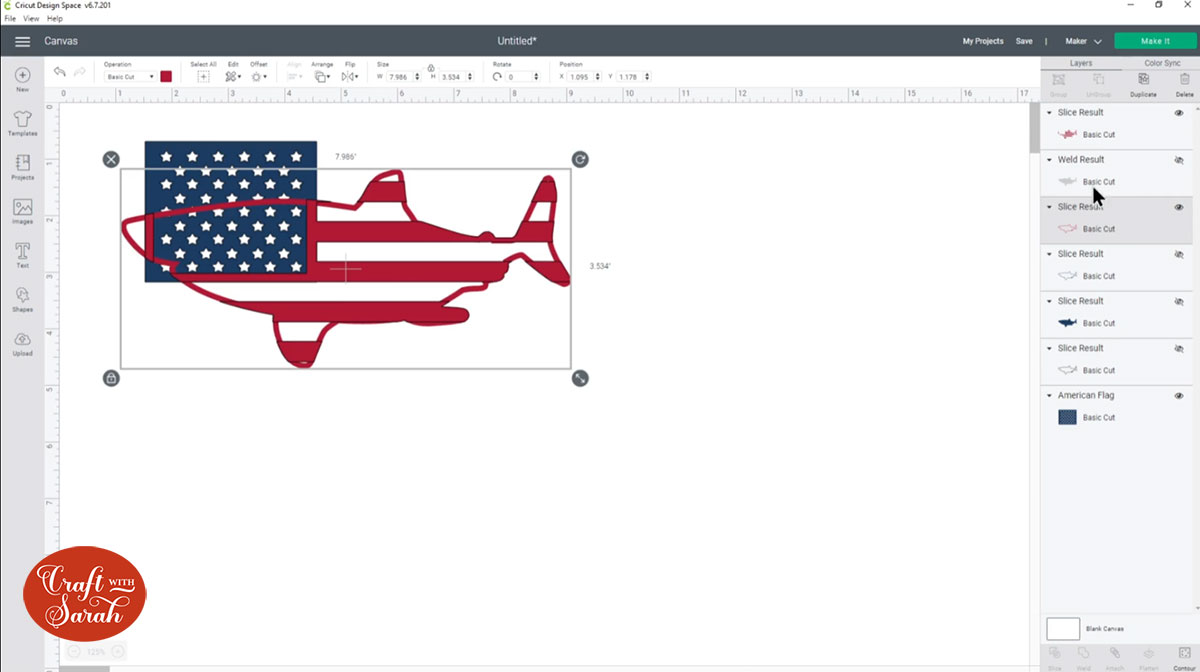
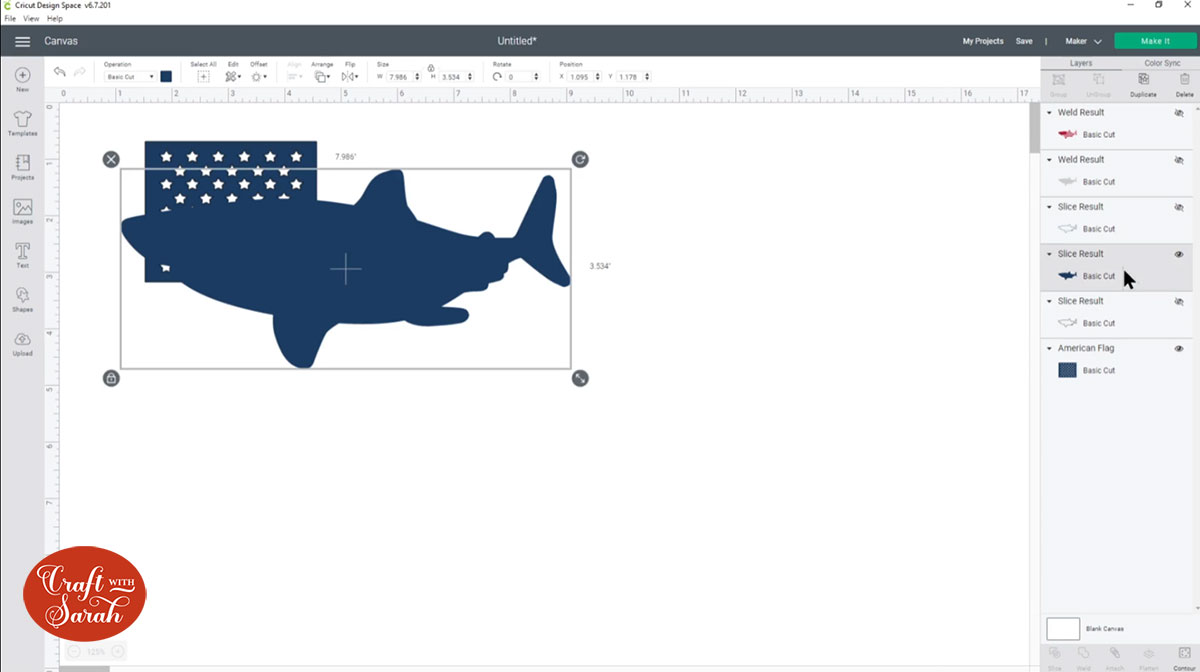
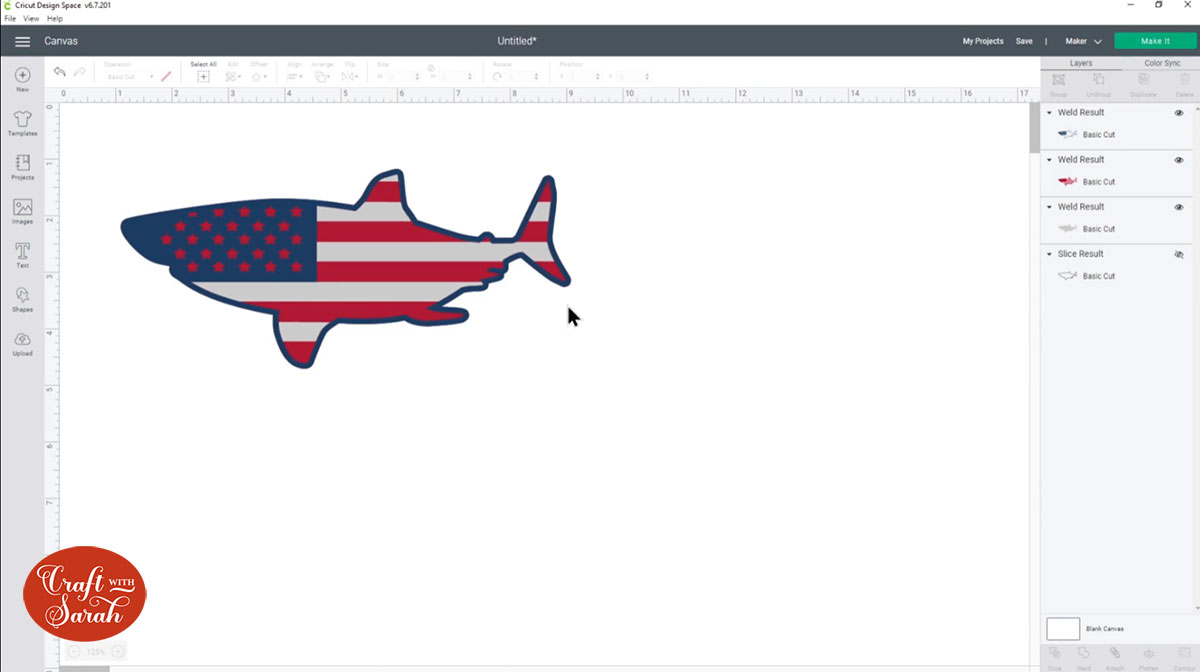
Step 6: Position over the flag image
Move the shark image over the flag image.
If the shark is appearing BENEATH the flag, click the shark group then click “Arrange” and then “Bring to front”.
Resize the flag and shark as appropriate until you are happy with the positioning.
I have a bit of empty space in the nose of the shark where it’s going slightly over the edge of the flag but that’s ok – I can fill it with blue later.
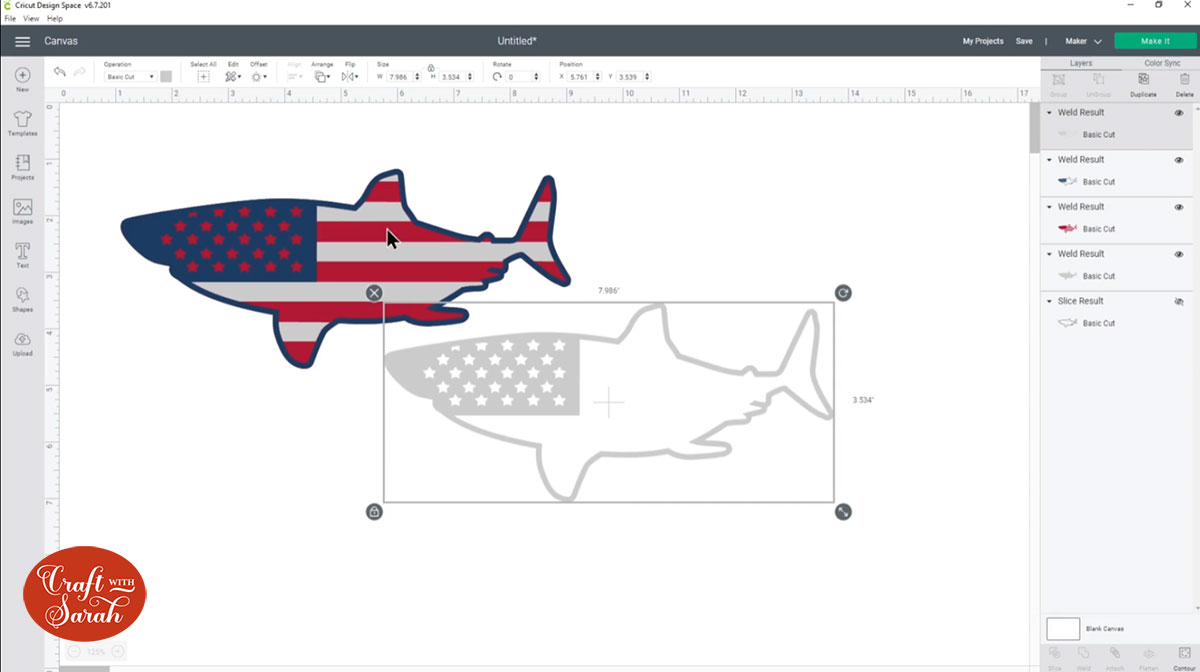
Step 7: Make the bottom layer (white)
It’s time to start making our layers!
Hide the black outline layer by pressing the eye next to it in the layers panel.
Click on the flag image and press “Ungroup” to separate out all the layers, then do the same for the shark group.

The bottom layer is easy because that’s all one colour and it will be the full size of the shark.
So, for this one – it’s super simple!
Just delete the white layers of the flag AND delete the white outline layer of the shark as we don’t need them.
Turn on the white shark layer by clicking the eye in the layers panel just to double-check it’s all looking as it should:

Hide the white shark layer again by pressing the eye icon.
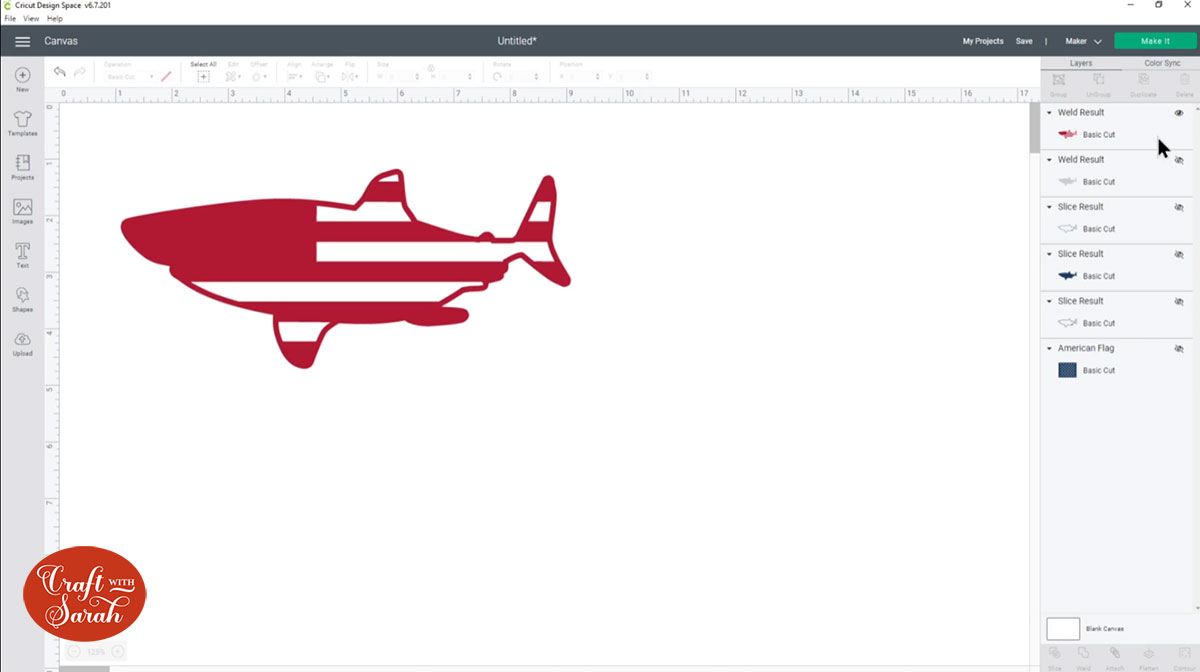
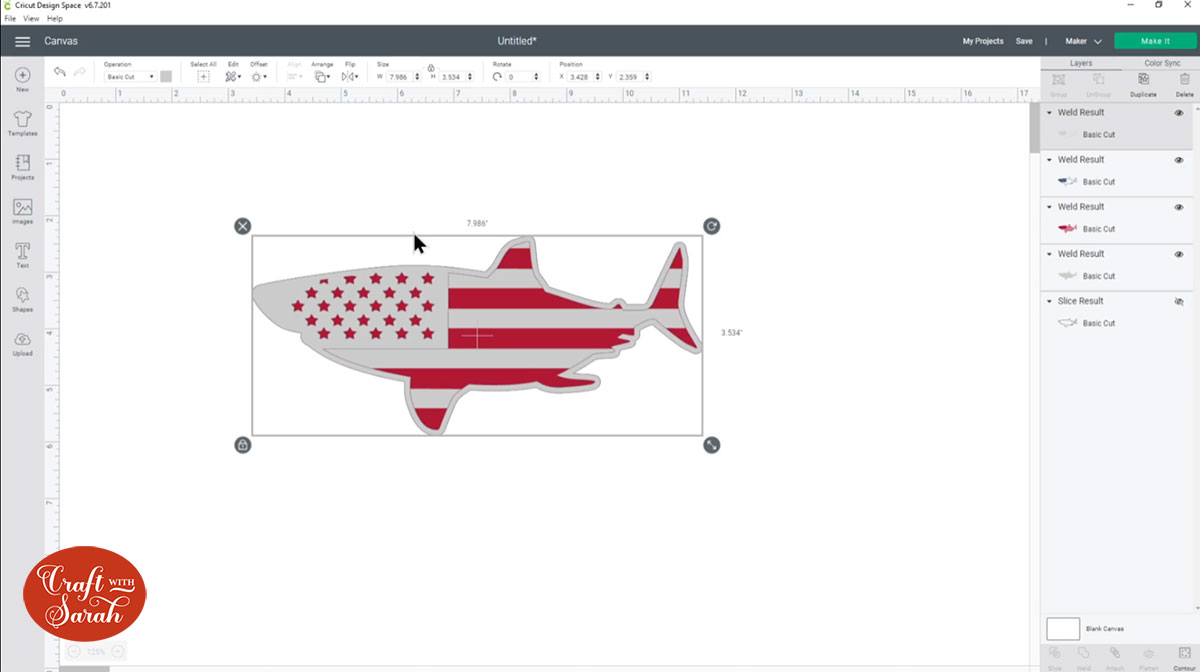
Step 8: Make the red layer
Click the eye icon in the layers panel next to the solid red shark.
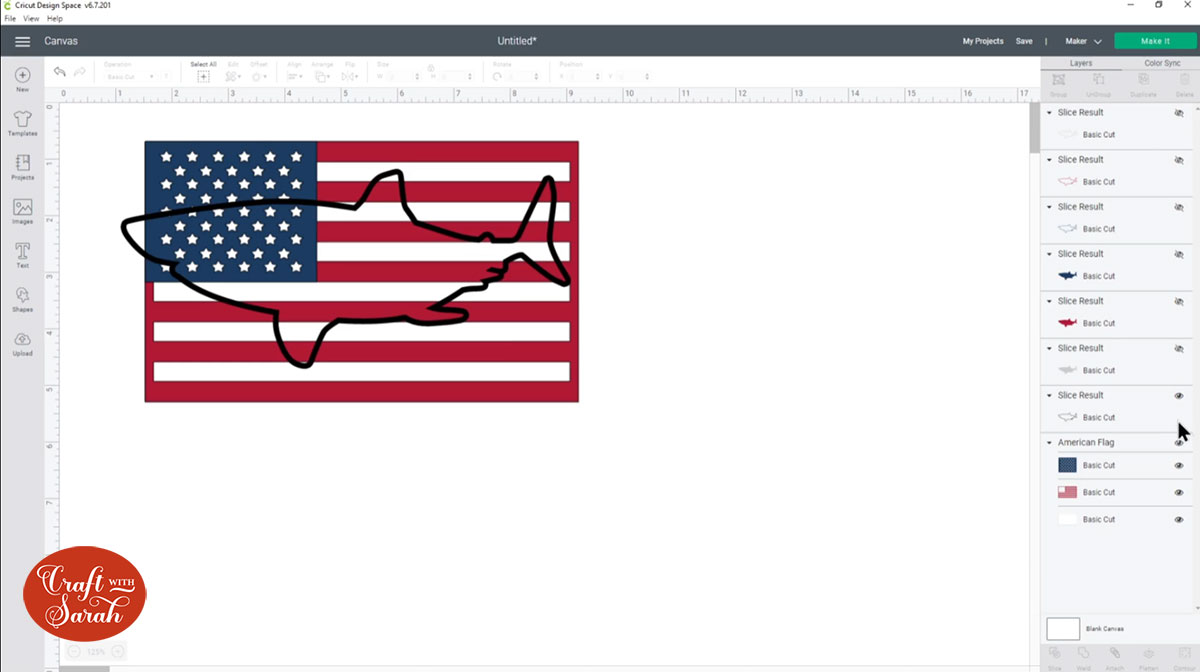
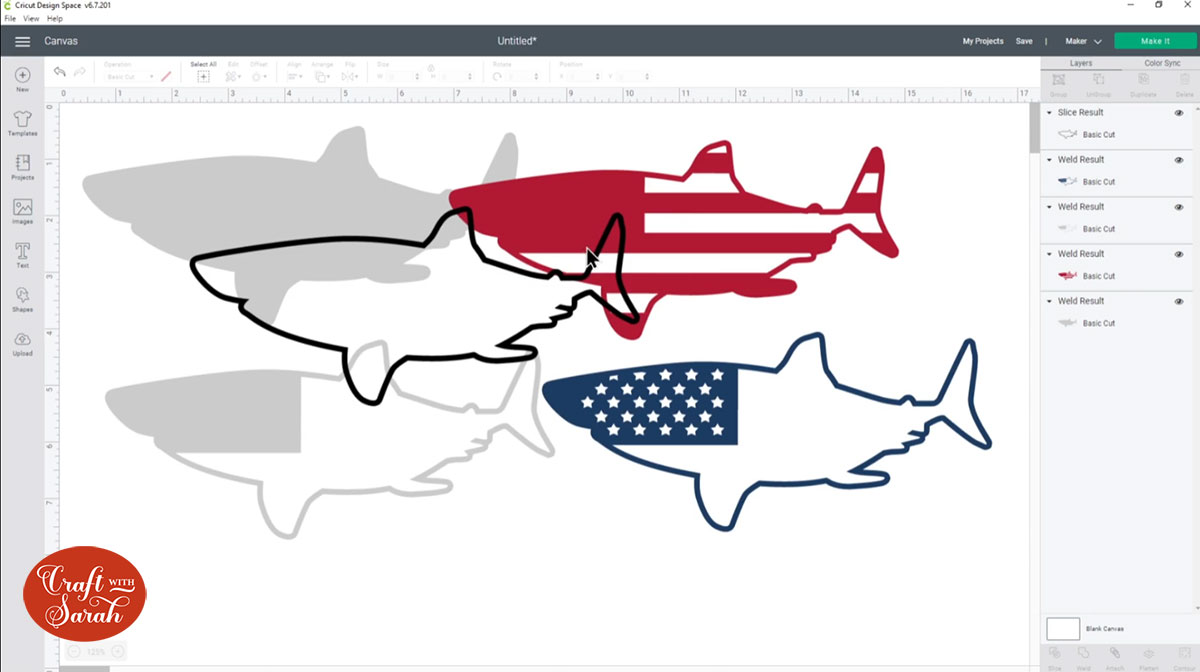
Select the solid red shark layer AND the red flag layer and click “Slice”.
This will cut the two layers out from each other, giving you four “slice result” layers.
Delete the original shark layers and the flag layer that shows all the shape outside of the shark so you are left with this:
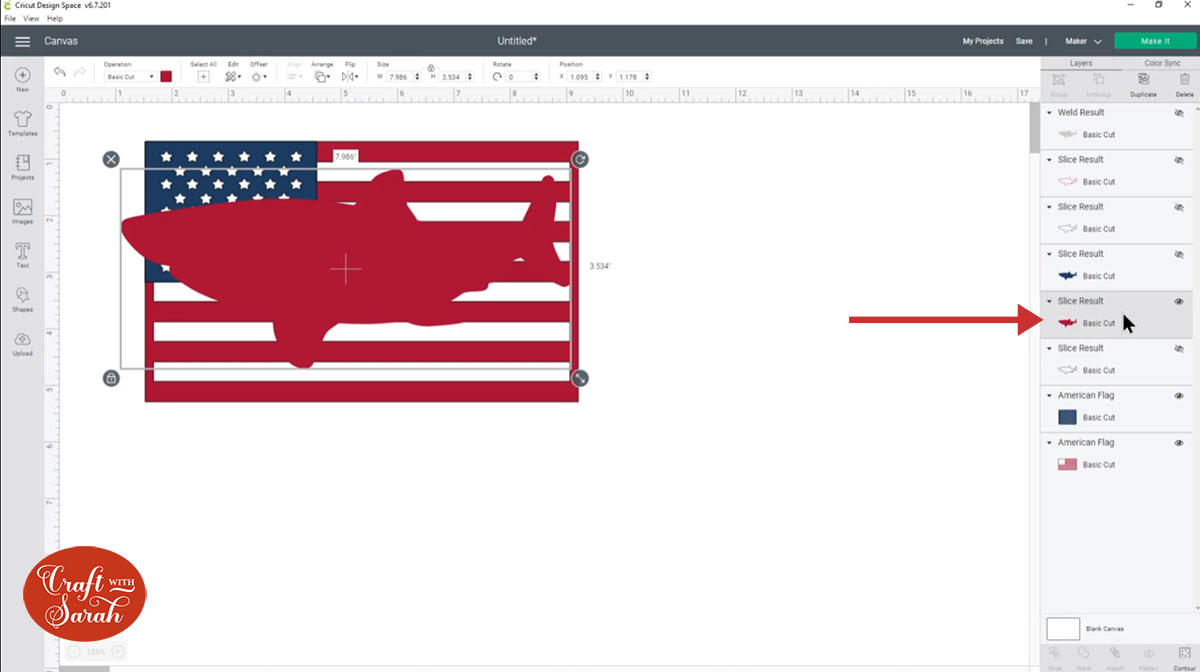
Turn on the red shark outline layer.
Select both the red layers and click “Weld”.
Weld “joins” multiple layers together, so now we are left with just one red layer.
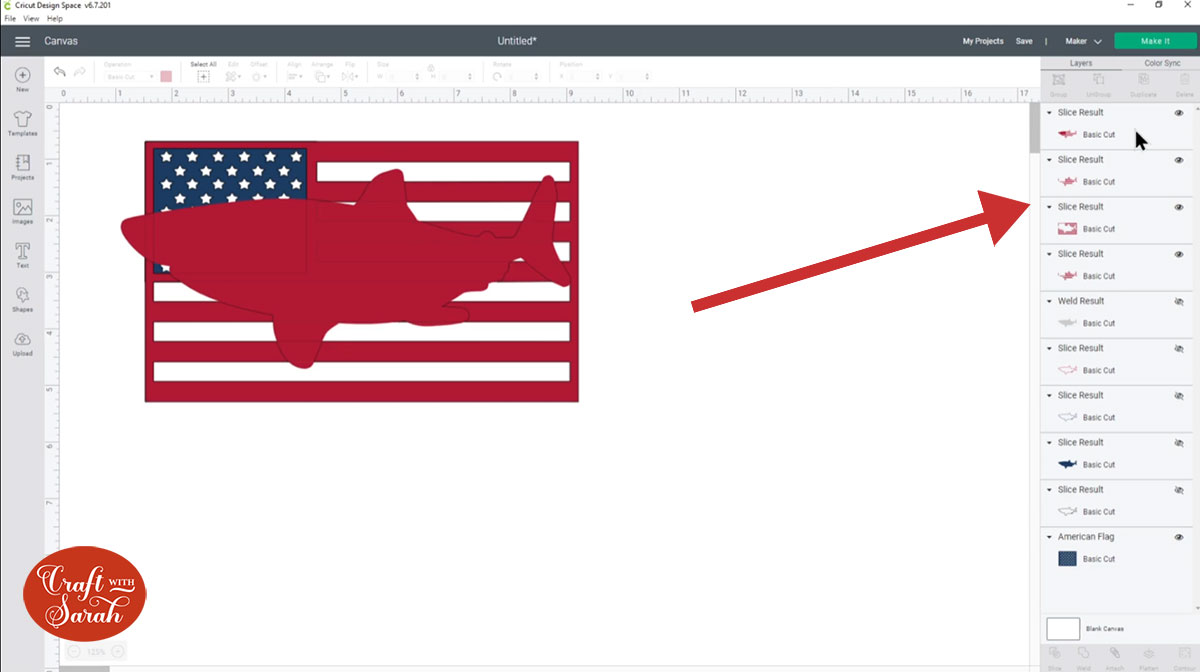
Hide the blue flag layer so it’s easier to see what you’re doing.
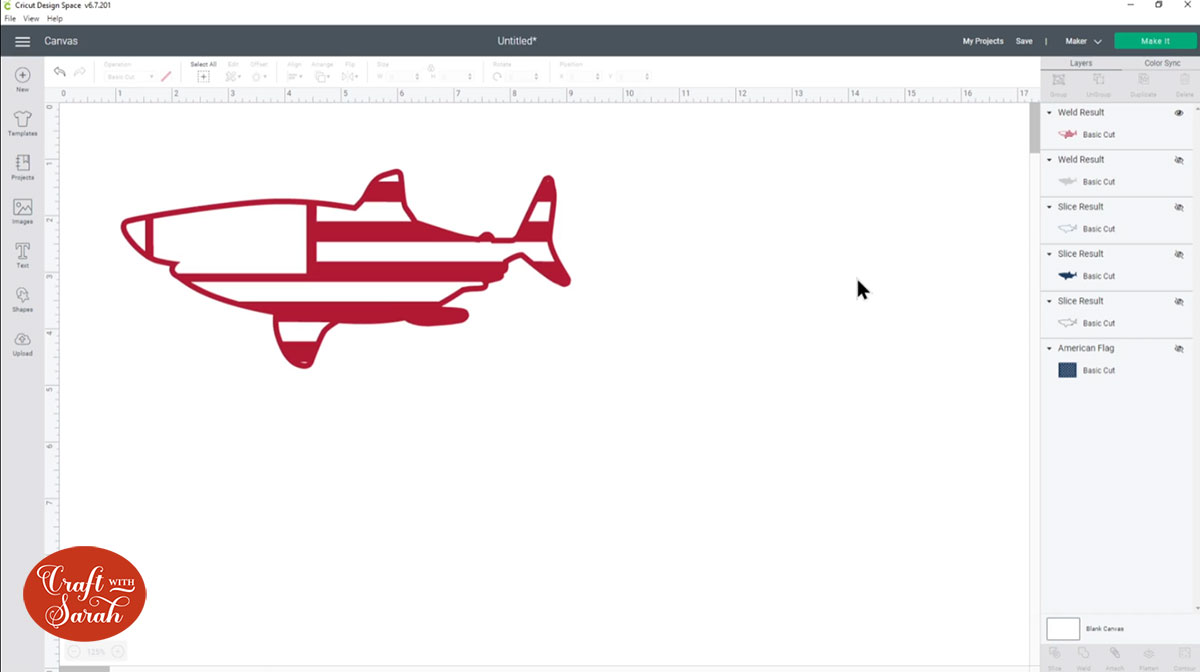
There are a couple of tiny little gaps in between the flag lines and the outline of the flag. These are so small that the Cricut would struggle to cut them out so they need to be filled in.
Click the red layer and then click “Contour”.
In the popup box, hide any tiny little gaps and also click the nose of the shark to fill that in, and the piece in the head that will be covered by the blue part of the flag.
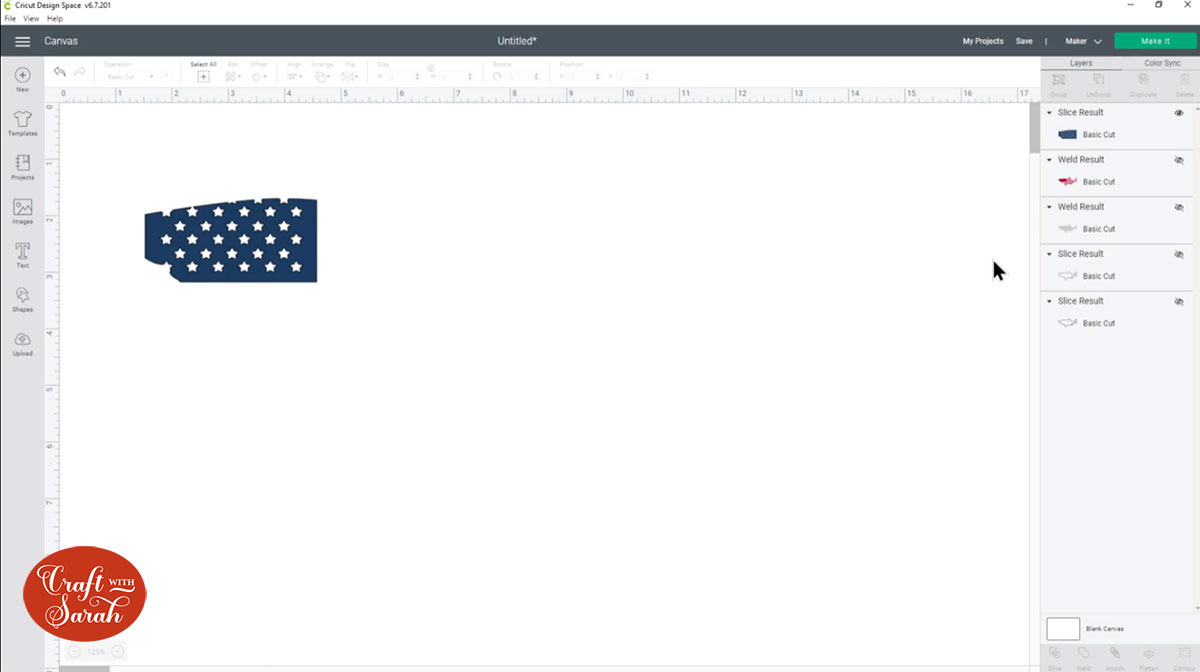
Step 9: Make the blue layer
Hide the red layer and turn on the solid blue shark and the blue flag layer.
Select both blue layers then click “Slice”.
After slicing, delete the original solid shark layer and the part of the flag that’s outside the shark shape.
You want to be left with just the part of the flag with the stars in it.
Turn on the blue shark outline layer.
Select both blue layers and click “Weld” to join them together.
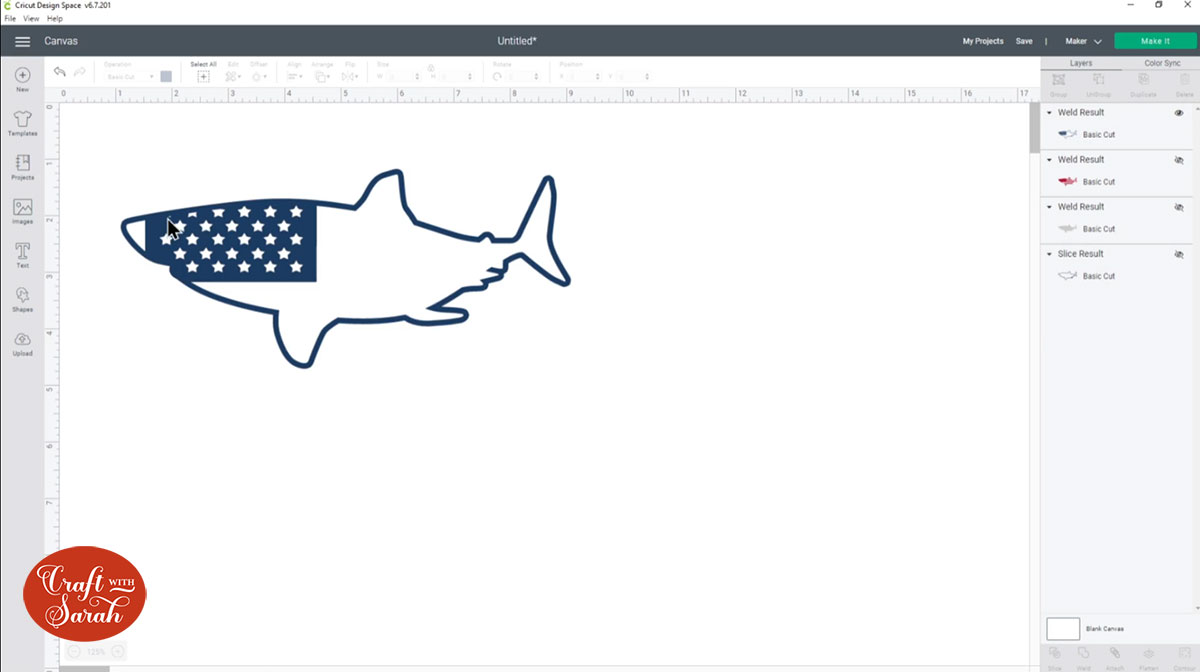
Click “Contour” and fill in the gap in the shark’s nose.
Step 10: Add another white layer
Now we have created all the layers that we initially planned.
Turn them all back on to see what we have so far.
Now we can see that we need another white layer to go on top of the red layer to fill in the stars with white instead of red.
Click on the blue layer and Duplicate it. Change the new layer to white.
Press “Select All” and then “Align” > “Center” to re-position everything.
In the layers panel, click-and-drag the position of this new white layer so that it sits on top of the red layer and underneath the blue one.
With your new layer selected, click “Contour”. Hide all the stars.

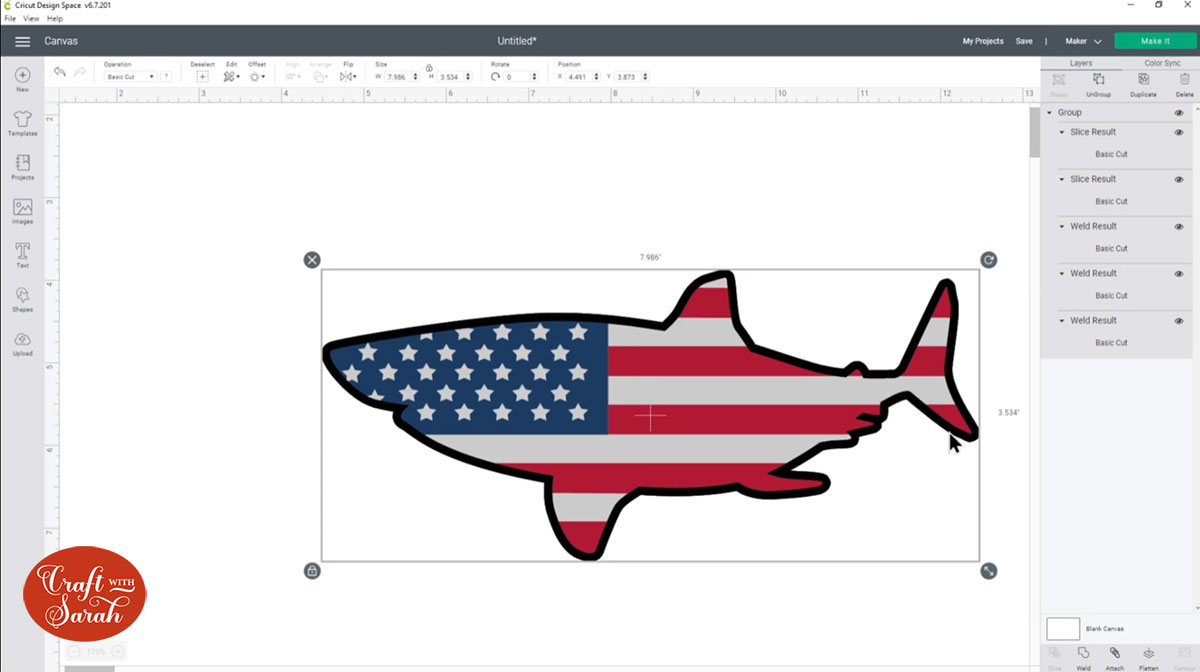
That’s our layers finished!! Here’s what it all looks like…
Step 11: Add more stars to the nose
This step is optional. You could choose to keep your shark as it currently looks and miss this step out.
I felt like the nose of the shark looked a bit “empty” with all the blue colour so I decided to add some more stars into it.
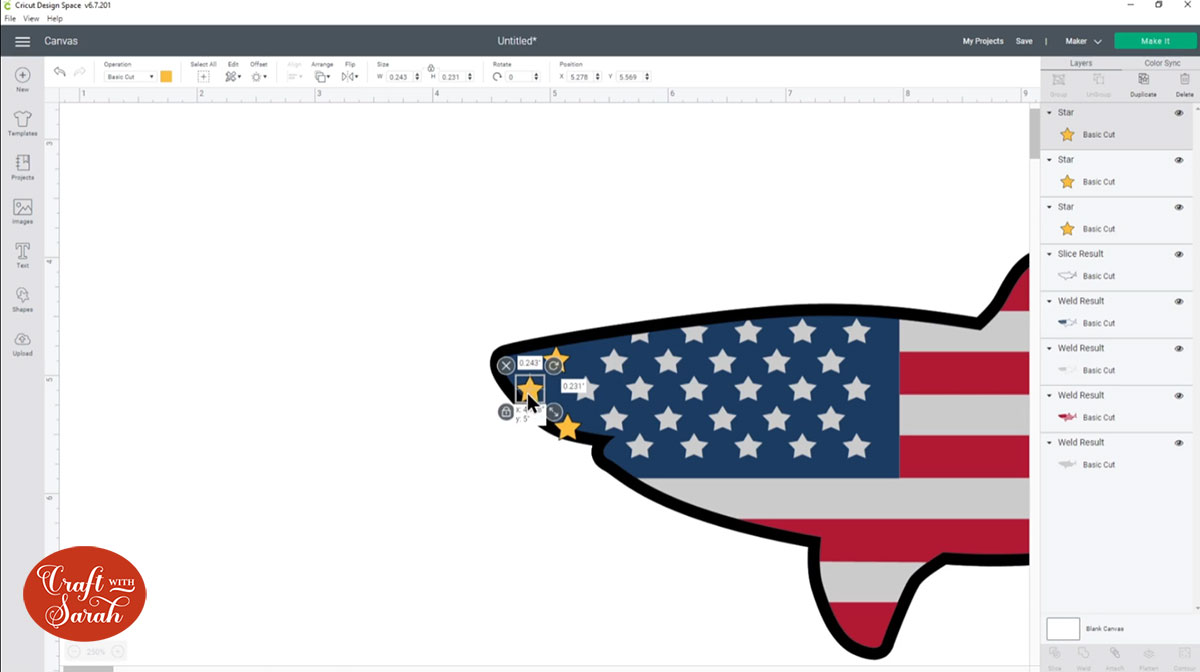
To do this, click “Shapes” and then choose a Star.

Make the star the same size as the stars in the shark’s nose and then position it where you want it to be cut out. Duplicate the star a few times so that they cover all the area you want to cut out.
Select all the star layers and “Weld” them together.
Click the welded star layer and the blue shark layer and press “Slice”.
Delete the individual stars so you are left with the original blue layer which now has the extra stars cut out of it.
Step 12: Cut the design
Your DIY layered cardstock design is now ready to cut – yay!
Press “Select All” and then “Group” so that all the layers can be resized to however big you want to cut them.
When you’re happy with the size, press “Make It” on the top-right of your screen and follow the steps to cut out the design from cardstock.
Step 13: Assemble the design
Use 3D foam pads to stick all the layers together.
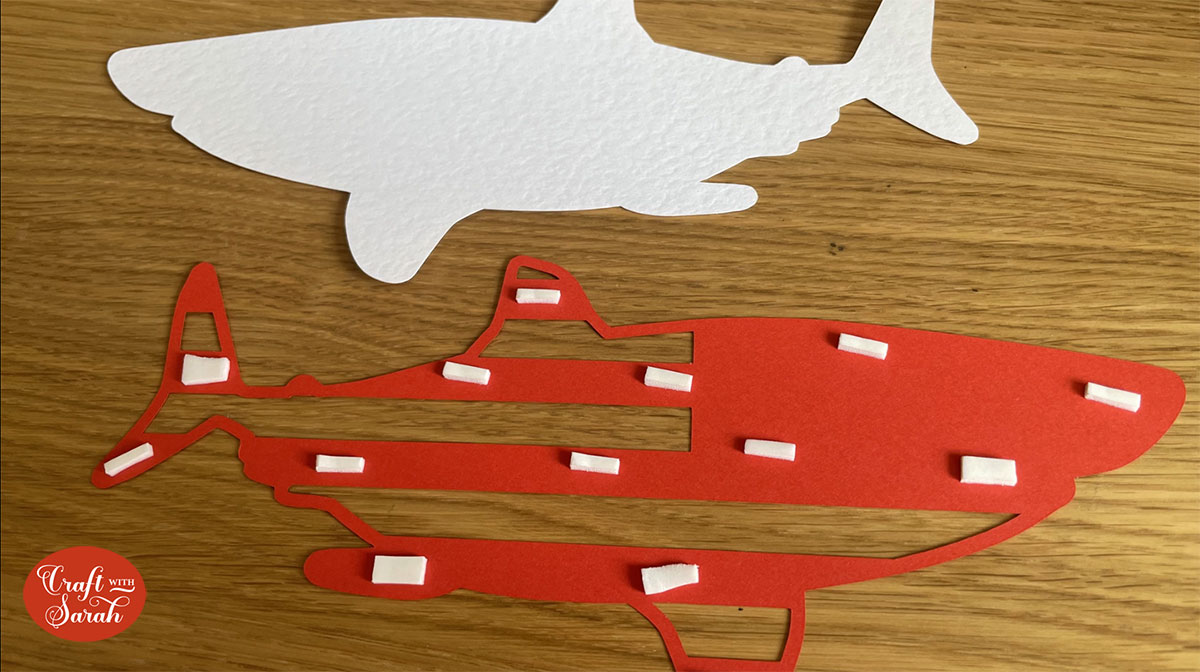
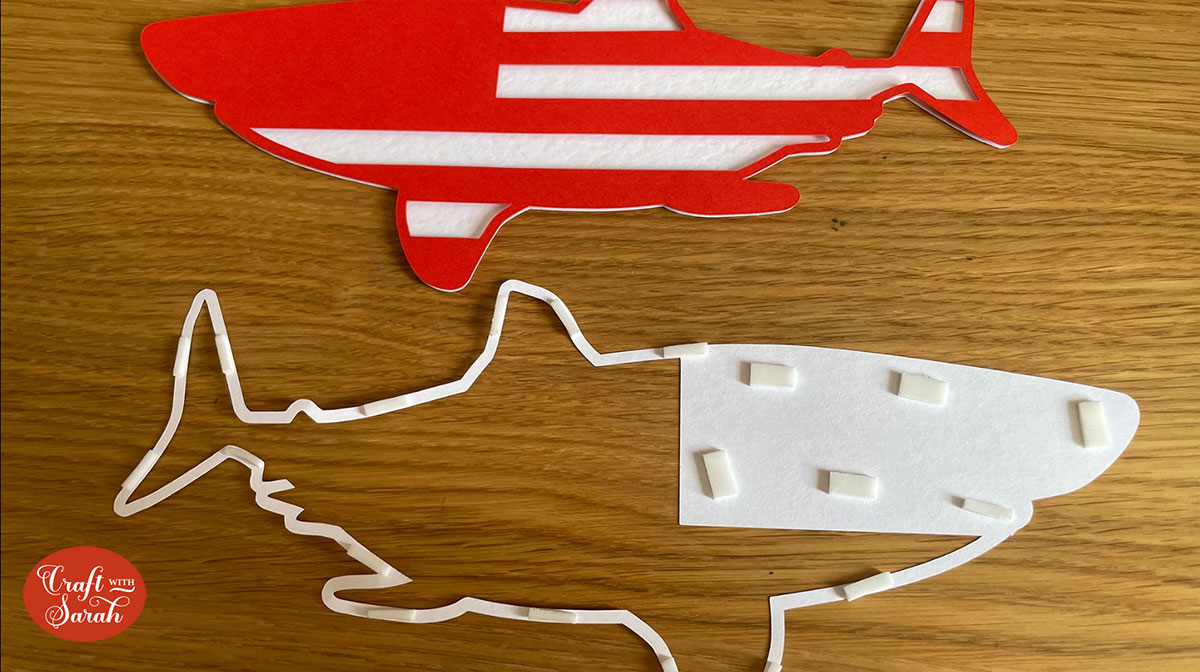
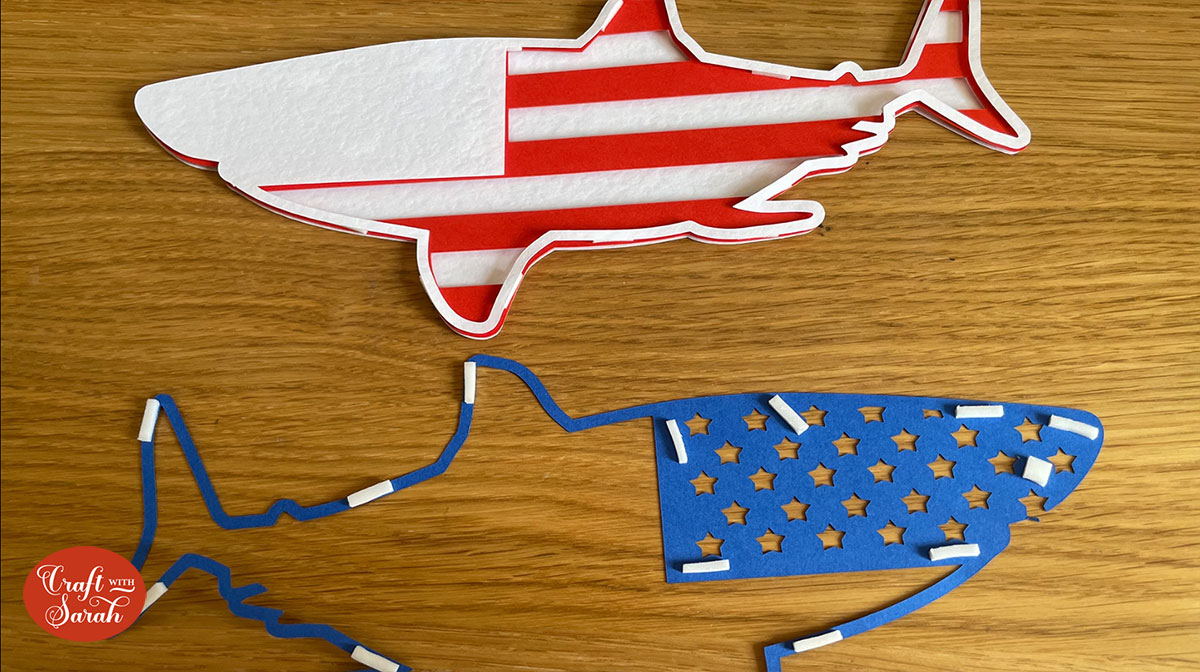
I used glue for the top layer as it was so thin.
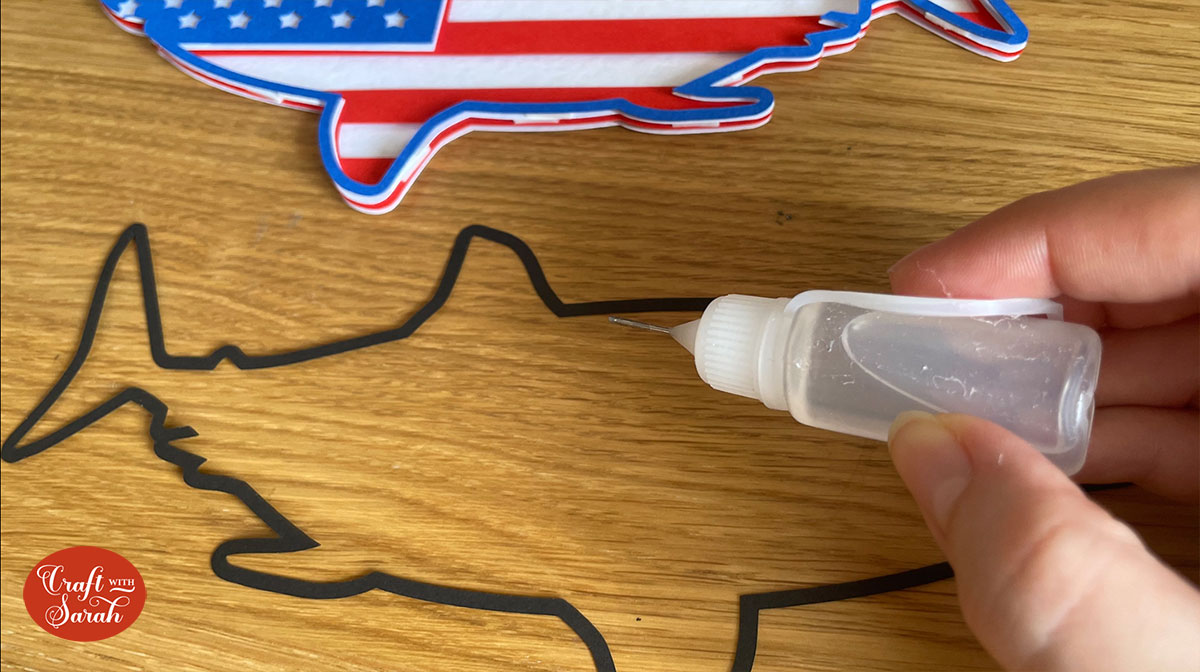
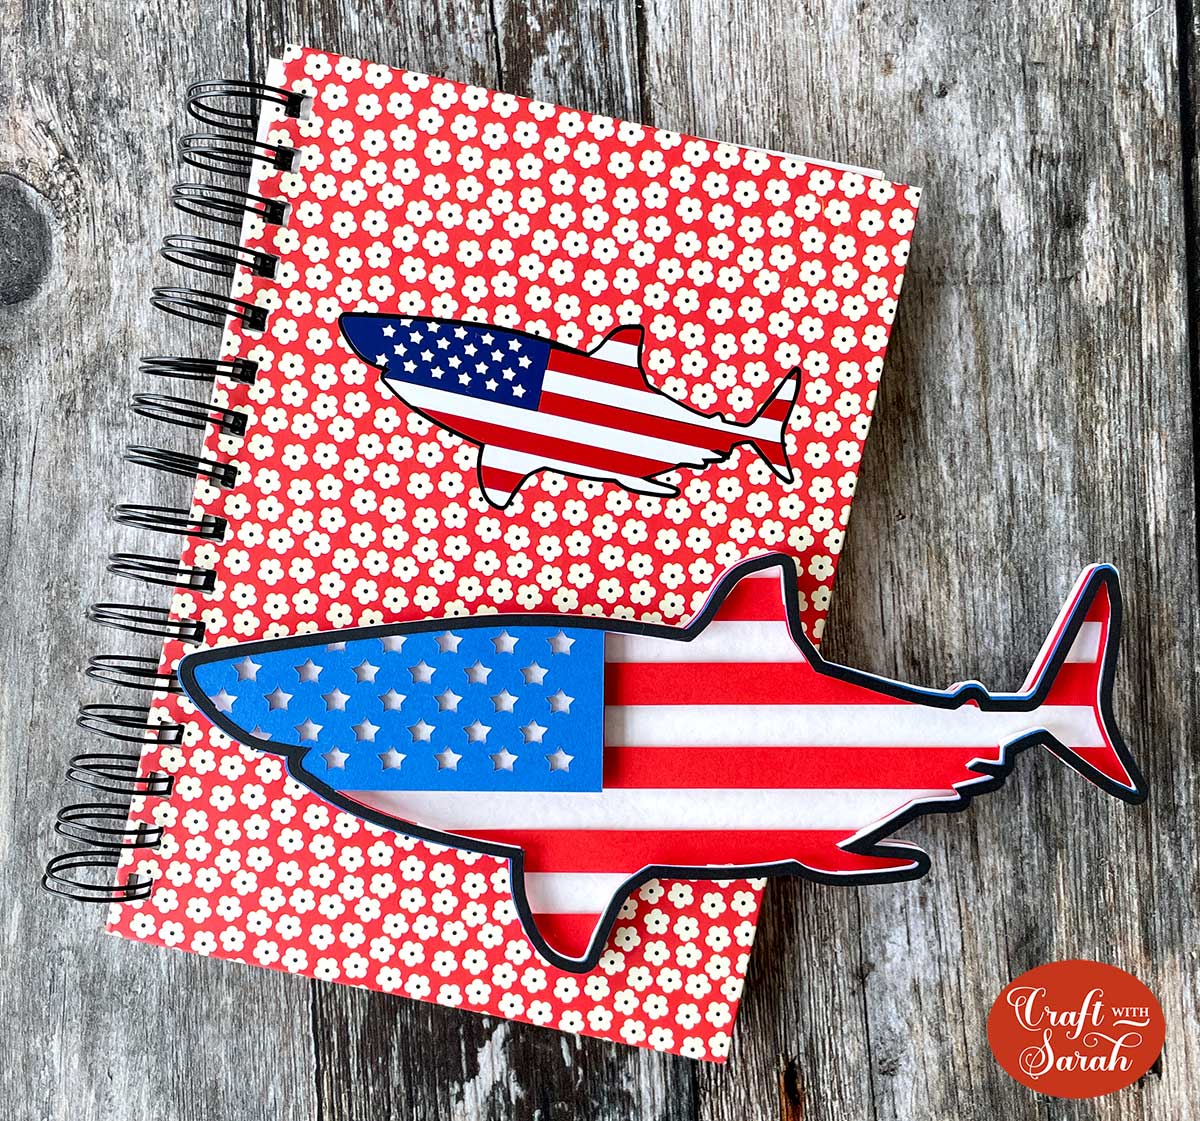
There you have it – your completely cardstock design all ready to be displayed!
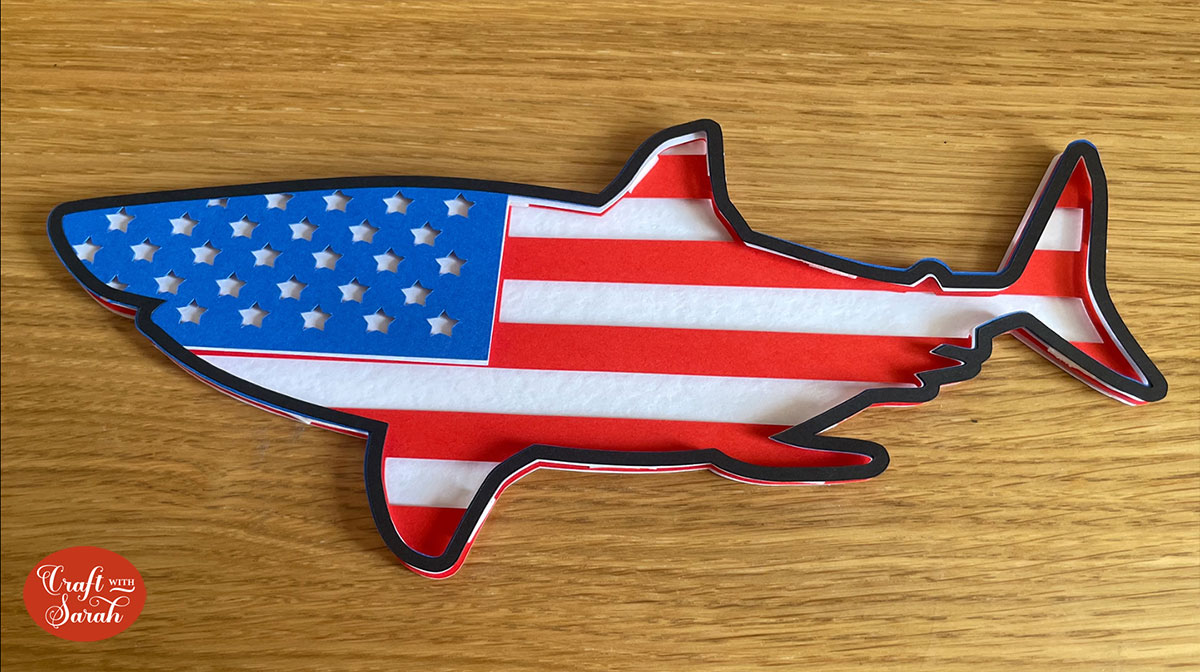
You could frame your finished design in a shadow box, put it on a greetings card – or even just stick it straight to the wall with some Blu-Tak!
More ideas for layered projects in Design Space
I hope you enjoyed this tutorial. It’s definitely a bit more on the “advanced” level when it comes to Design Space tutorials, but I hope I managed to explain it.
If you get stuck following the written instructions then I highly recommend watching the video from the top of this page as it will help show the steps a little clearer.
But what if you want to cut from vinyl, not cardstock?
As I mentioned at the beginning of this post, this is Part 1 of a 2-part series.
The second part is how to design multi-layer projects to be cut from vinyl instead of cardstock.
Click here for Part 2: Creating Vinyl Designs
Love making layered designs? Don’t miss this!
Do you spend aaaaages searching for the perfect layered cutting file? There HAS to be a better way, right?? 😫
Ditch the endless SVG searches and make your OWN layered projects that look EXACTLY how you want them to! 🥰
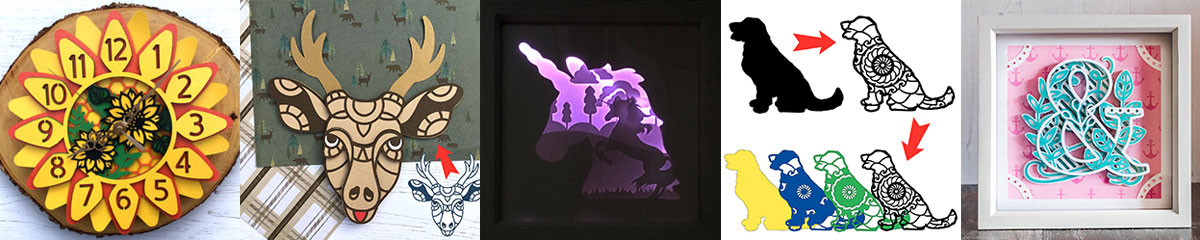
Lovely Layering is a collection of 11 video lessons on how to design your own layered projects in Cricut Design Space.
From turning flat images/SVGs into layered designs, to mastering shadow box design, mandala letters, adding shadows/outlines to text and even designing your own CLOCKS – the Cricut possibilities you’ll unleash by taking this training will be endless!
Happy crafting,
Sarah x

