How to Cut Cardstock with the Cricut Joy Xtra
Have you been wanting to make your first cardstock projects with your Cricut Joy Xtra, but felt unsure how to get started?
If the tech part has been holding you back, this step-by-step guide is here to help you every inch of the way!
In this tutorial, I’ll show you how to make a layered paper heart using a Cricut Joy Xtra, but the same techniques can be used for all cardstock projects.
This is a simple, beginner-friendly cardstock project to help you learn all the steps to cutting paper and card with your Cricut Joy Xtra.
I’ll show you:
- How to upload an SVG file into Cricut Design Space
- How to change colors and resize your design
- How to send a project to the Cricut Joy Xtra
- How to cut cardstock with a Cricut Joy Xtra
- How to know which colour to load into the machine at which time
- Tips for taking cardstock off a Cricut mat
- And, finally, how to stick the pieces together to finish your project
Let’s get started!
Note: This tutorial is for Cricut Joy Xtra machines. There are matching versions available that cover Cricut Joy machines, Cricut Explore/Maker machines, Silhouette machines and ScanNCut machines.

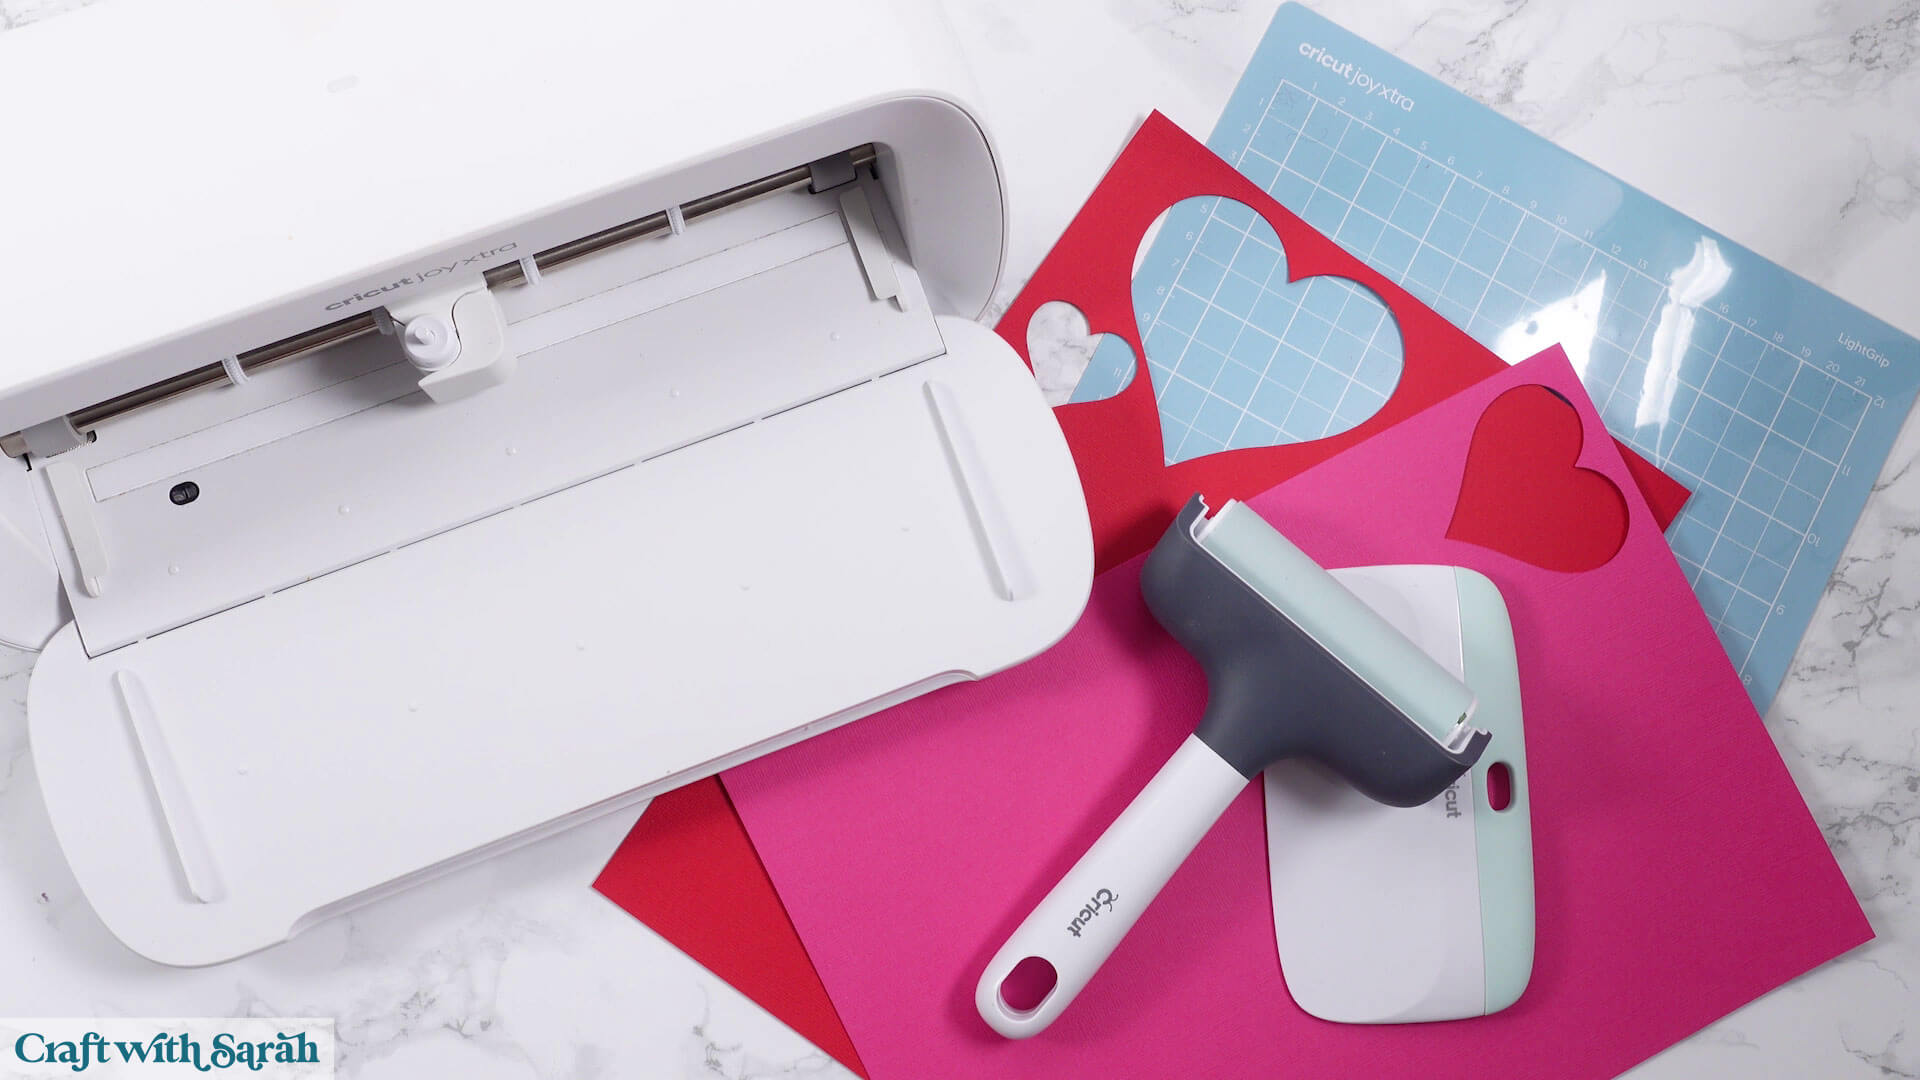
Supplies & materials
Here are the supplies and materials you’ll need to follow along with this tutorial:
- Cricut Joy machine
- Light Grip (blue) cutting mat or Standard Grip (green) cutting mat
- Scissors or a craft knife (to trim large cardstock to fit on your cutting mat)
- Cardstock in colors to match your project (any thickness)
- Scraper tool
- Craft glue (I like Bearly Art Glue, Collall and Nuvo Craft Glue)
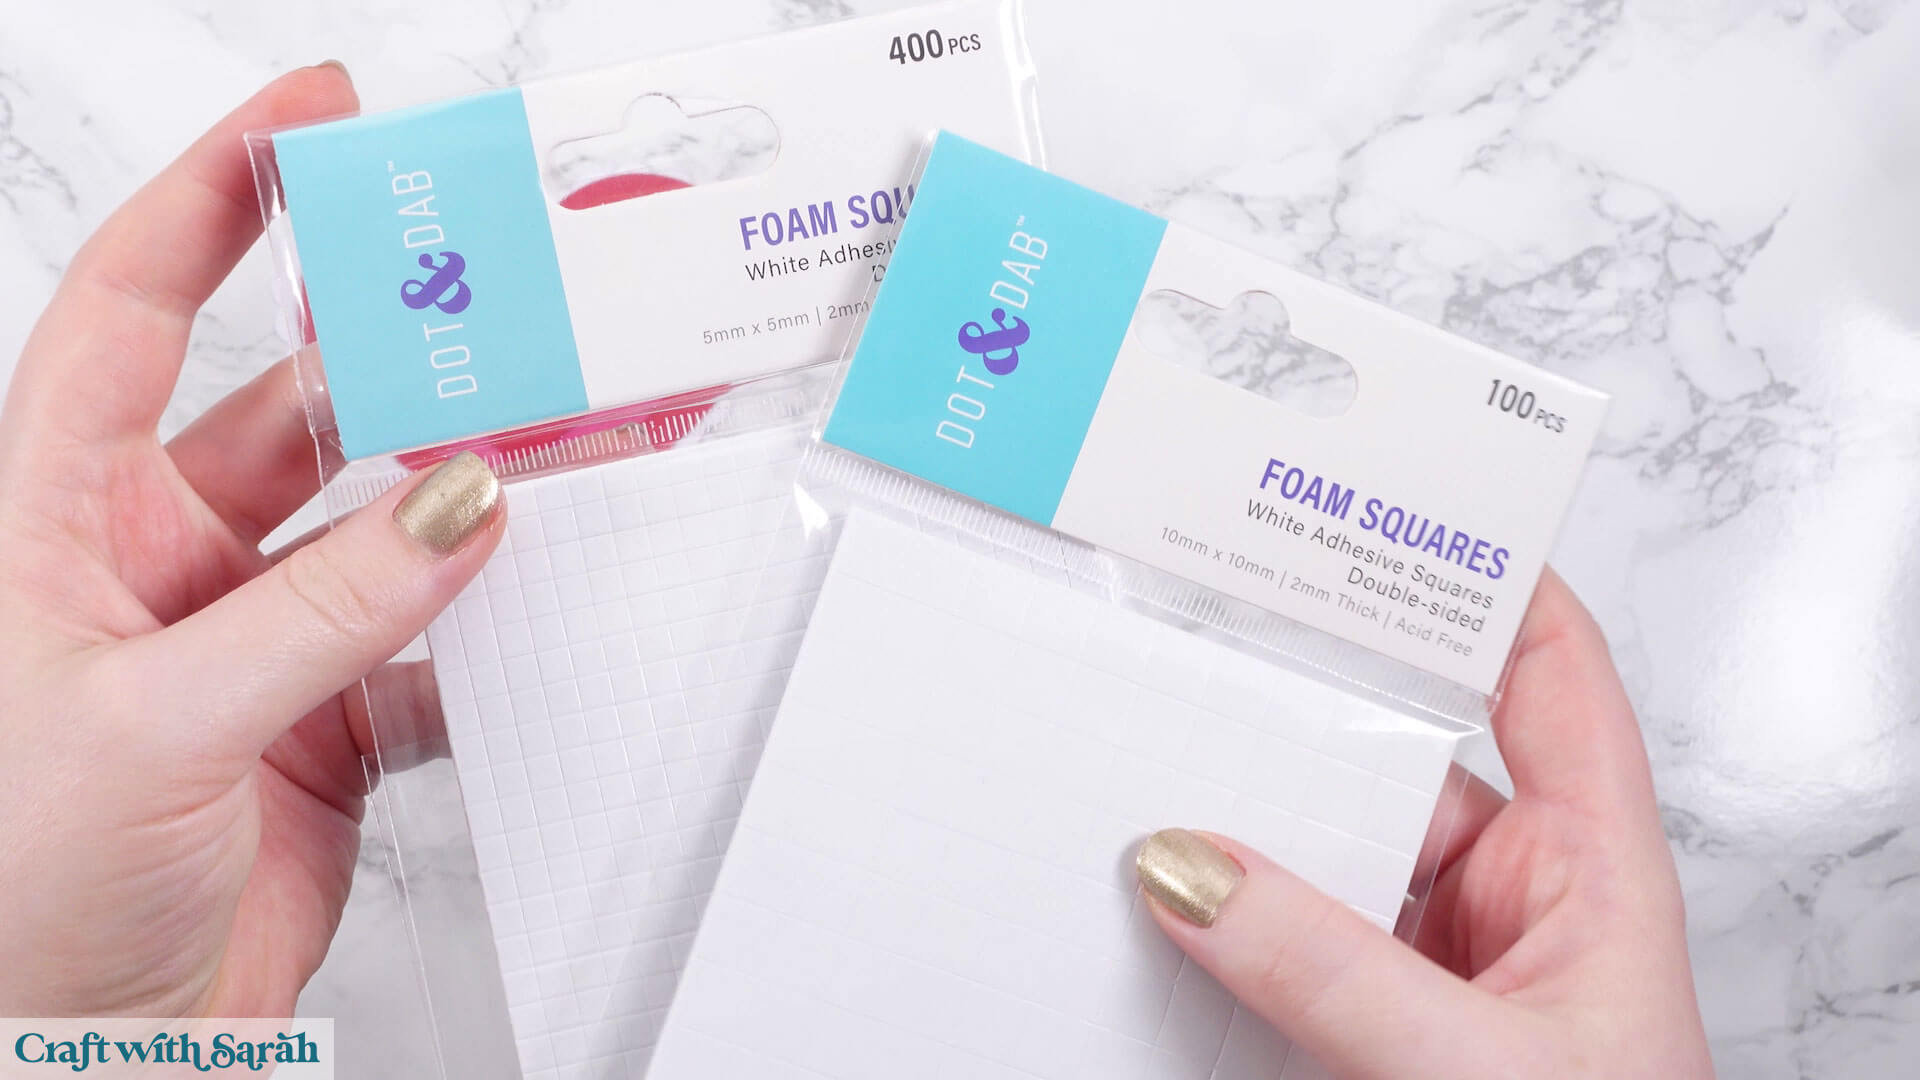
- Foam pads/squares, ideally 2mm thick
- Optional – Brayer tool, rolling pin, or scraper (to press the cardstock down securely on the cutting mat)
Cricut Joy Xtra video tutorial
Watch the video below to see how to cut cardstock with a Cricut Joy Xtra.
Scroll down for a written version of the video content.
Note: This video was recorded in May 2025. Cricut regularly releases updates and changes to the Design Space software, so your version may look a little different to mine.
Download the free heart design
Video timestamps:
- 00:00 – Introduction & Overview
- 01:15 – How to unzip folders
- 02:49 – Uploading SVG files to Cricut Design Space
- 06:02 – Recoloring the SVG
- 06:39 – Setting your machine type
- 06:57 – Resizing the SVG
- 07:29 – Saving the project
- 07:46 – Starting the cut process
- 09:46 – Material selection & cut settings
- 11:06 – Loading the Cricut mat
- 14:03 – Cutting cardstock with a Cricut
- 15:29 – The BEST way to take cardstock off a Cricut mat
- 16:30 – Changing cardstock color
- 19:21 – Sticking the pieces together
- 26:02 – Summary & Ending
Step 1) Download & unzip your SVG file
You can follow the same steps in this tutorial for any SVG file that you are making.
However, if you want to follow along exactly, download the free heart design.
When you download SVG files, you’ll probably find that they are contained within a zip folder.
This is a way for designers to send multiple files in one single download.
Before you can open the SVG files in Cricut Design Space, you’ll need to unzip the folder. This is also known as “extracting” the folder.
- On Windows: Right-click the ZIP folder and select “Extract All”.
- On Mac: Double-click the folder to unzip it.
Once unzipped, you’ll see all the different files within.
For “Craft with Sarah” designs, you’ll either see a folder structure like this:
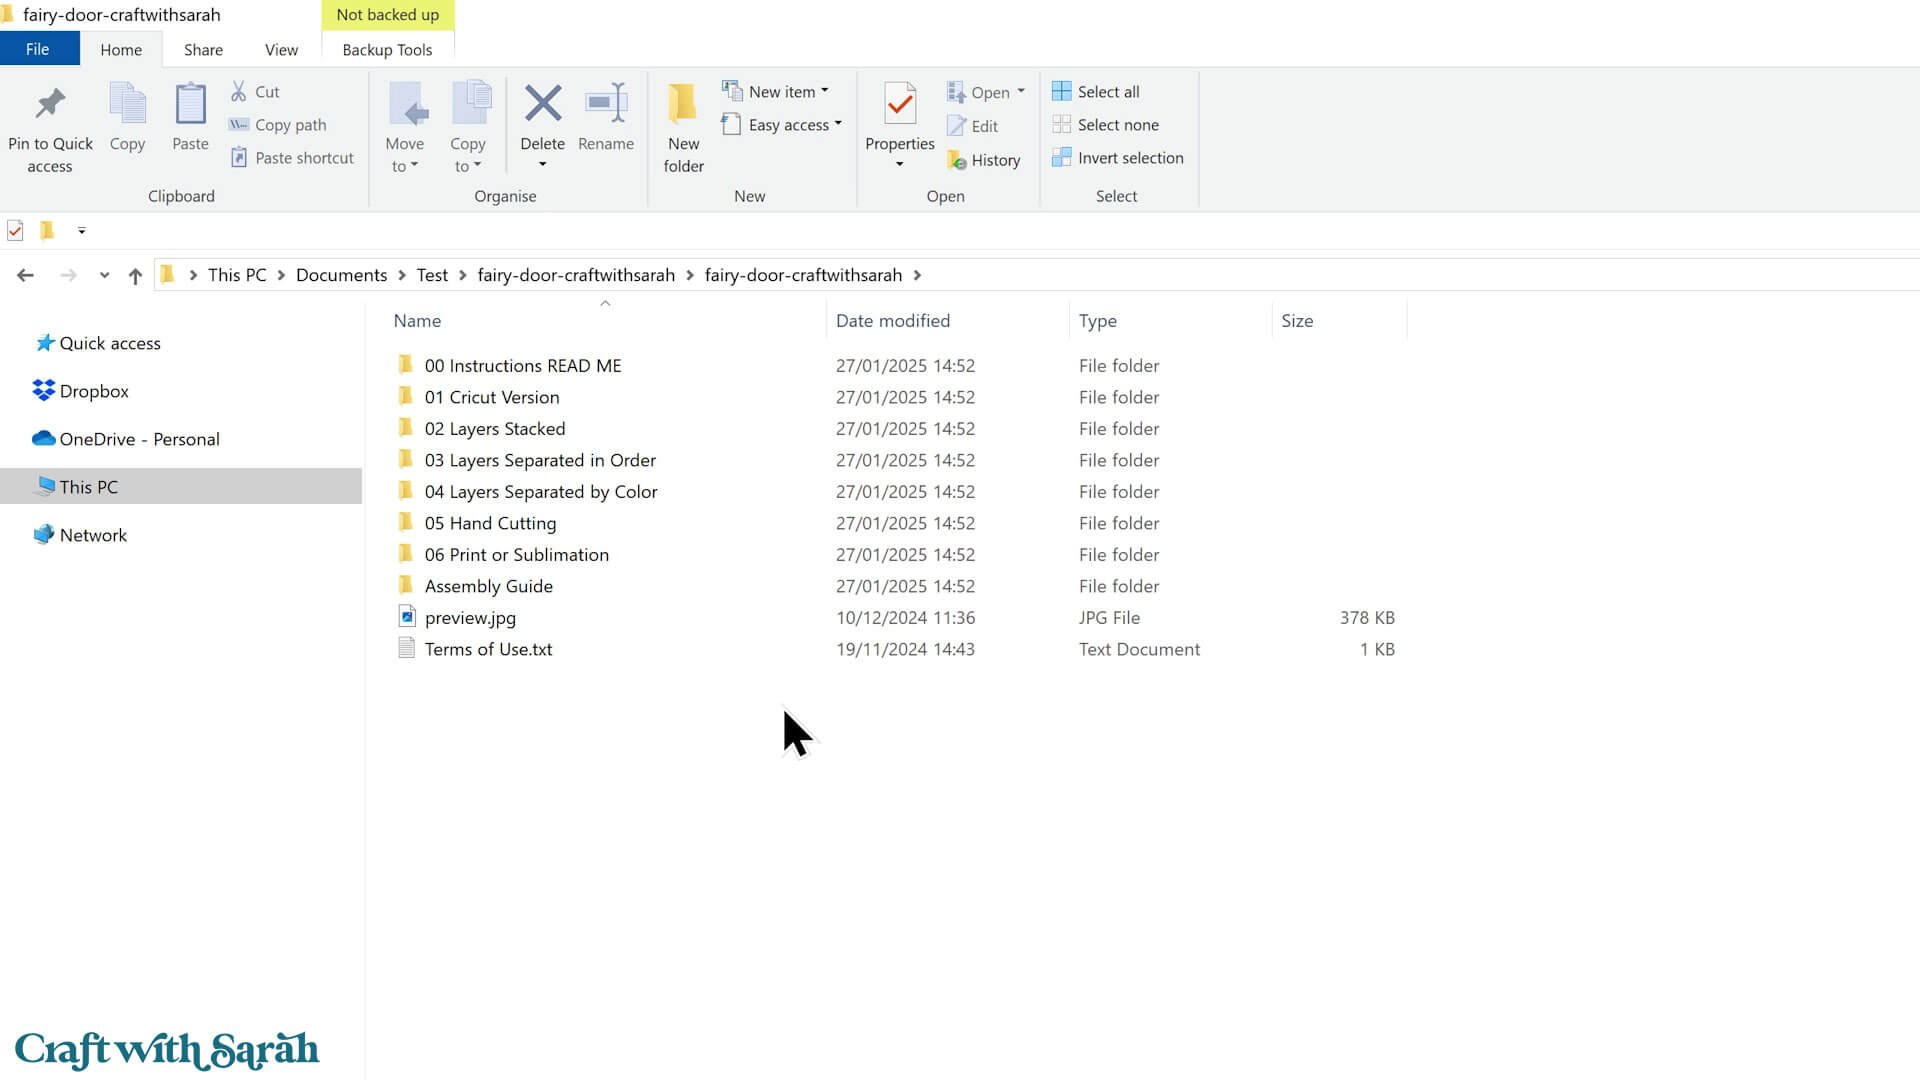
Or you’ll see all the files directly, like this:
Step 2) Upload the SVG into Cricut Design Space
Note: The images below were taken in May 2025. Cricut regularly releases updates and changes to the Design Space software, so your version may look a little different to mine.
Open Cricut Design Space and start a new “Blank Canvas” Project.
There are several ways to do that:
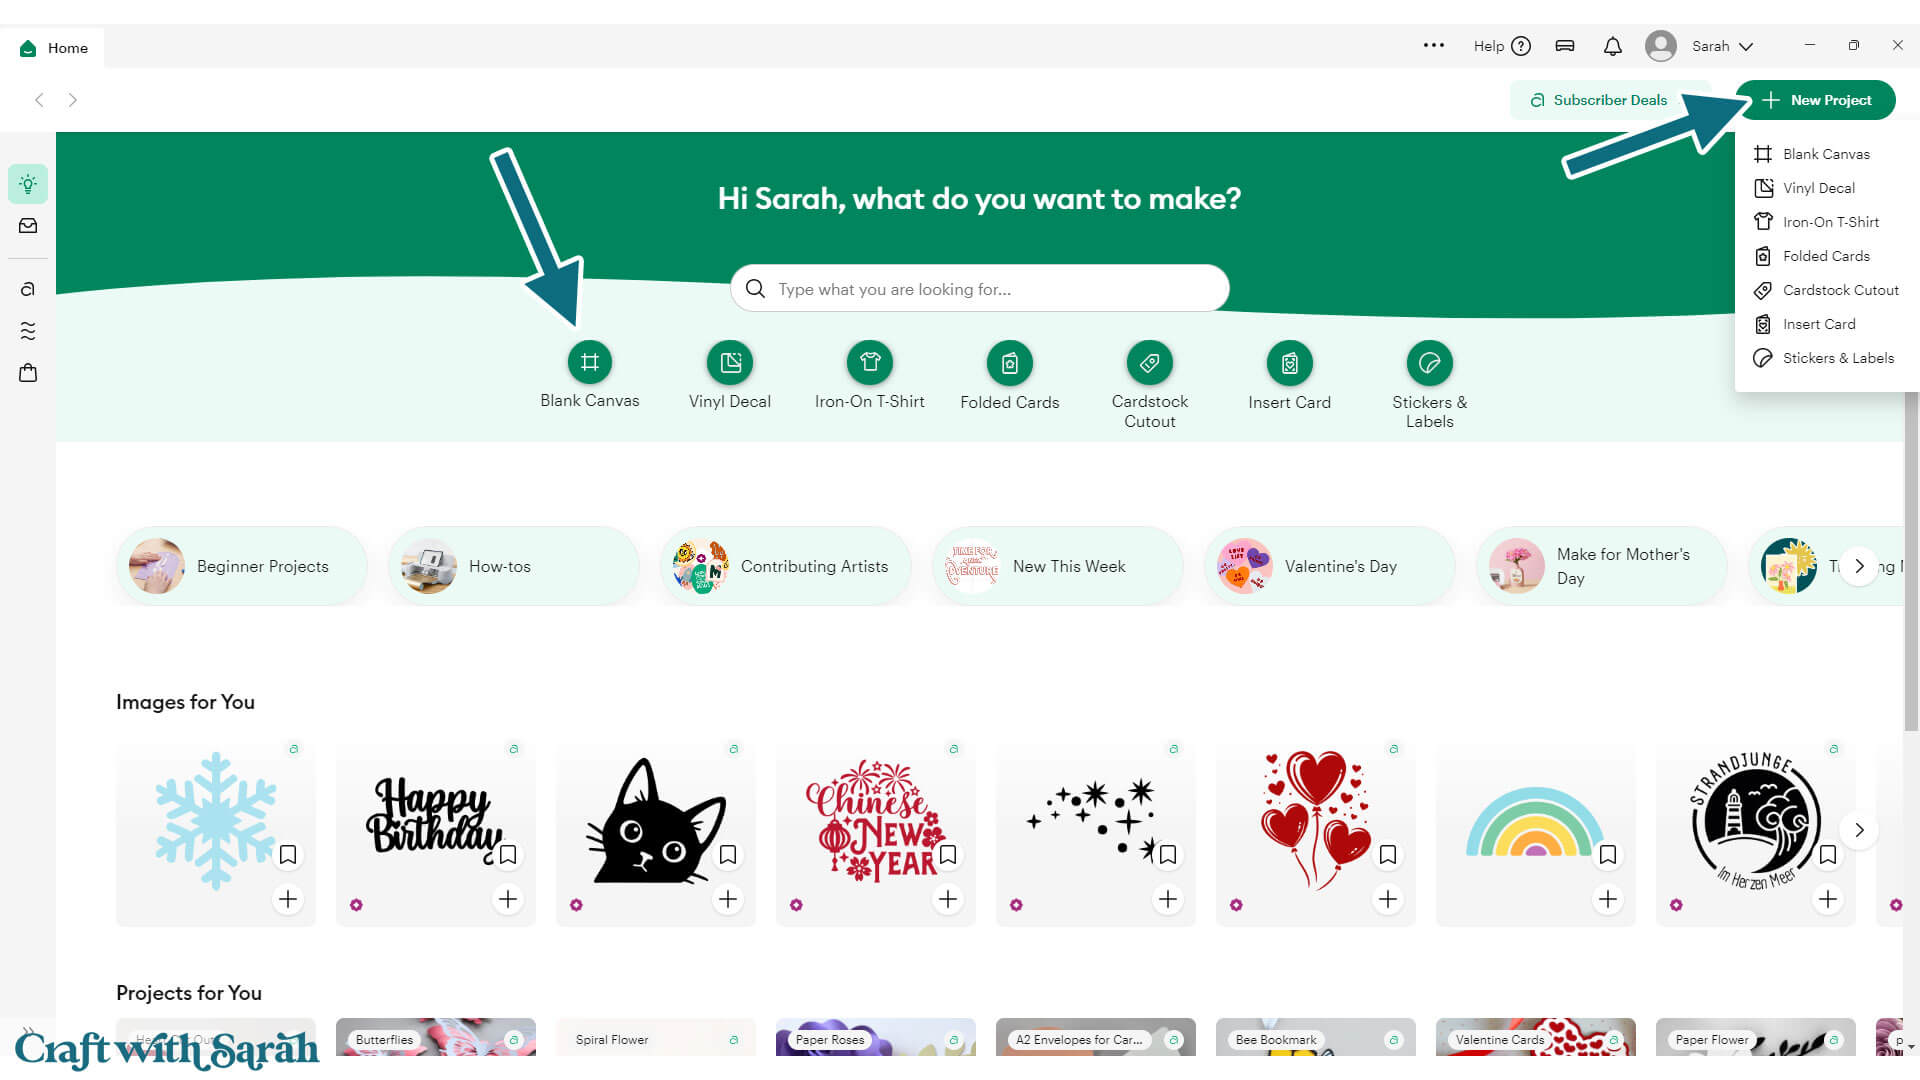
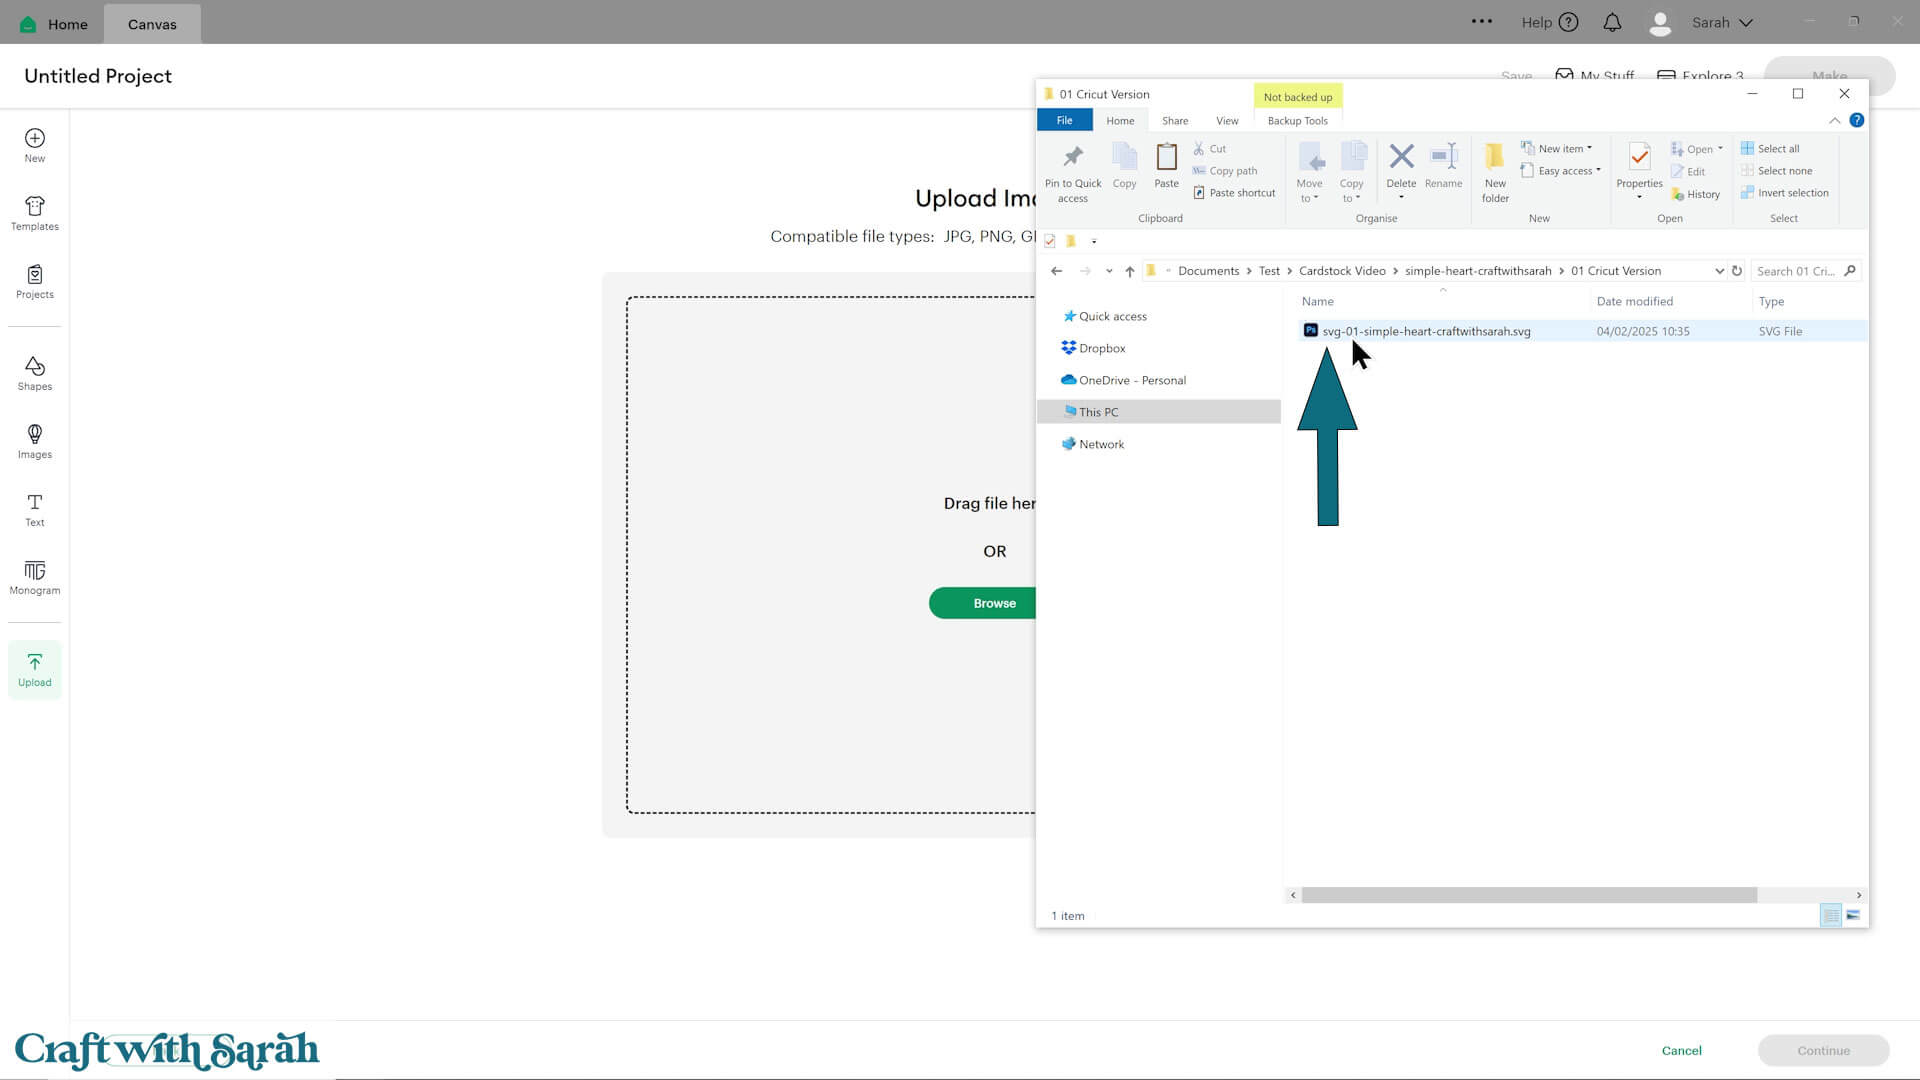
Click the “Upload” button on the left of the screen.
Then, click the green “Upload Image” button.
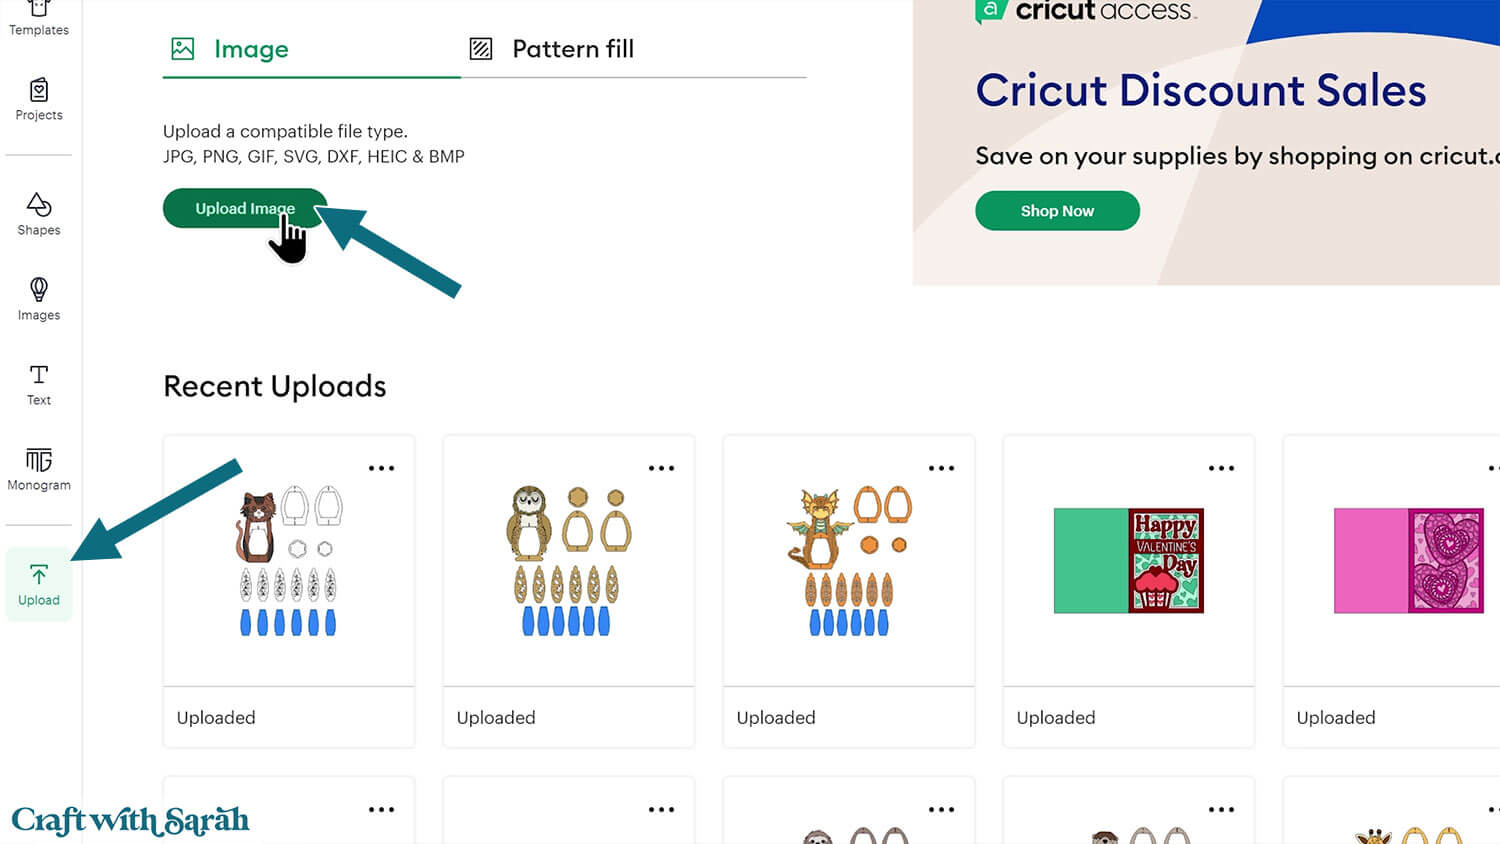
You can either drag-and-drop your SVG file onto the screen, or click the “Browse” button to find it on your computer.
Make sure you select the unzipped version of your download folder, otherwise you will see an error message when you try to upload.
If you are using a “Craft with Sarah” SVG, select the file within the “01 Cricut Version” folder that starts svg-01… in the filename.
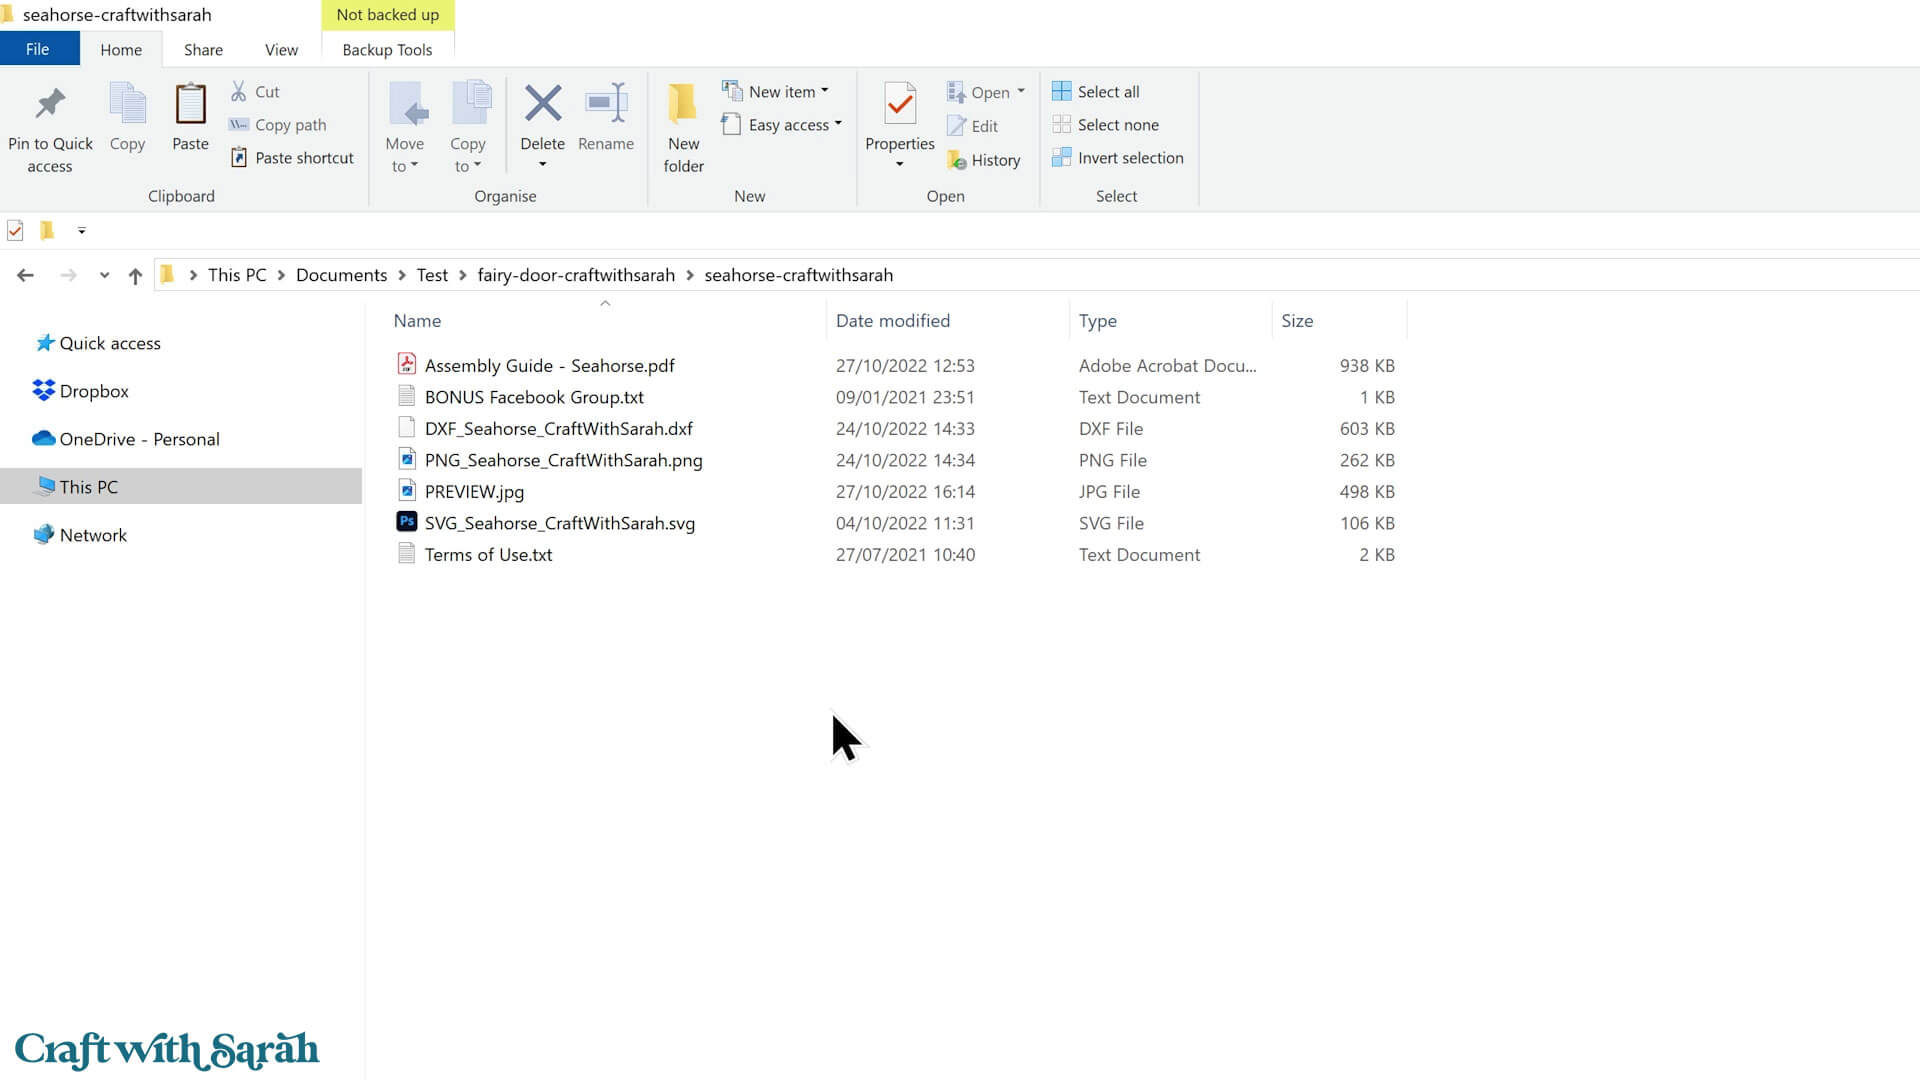
If you’re using one of our older designs then you might just see a few individual files instead of the folder structure mentioned above.
If that’s the case, select the file that starts svg-… or SVG_… in the filename.
After selecting the file, you’ll see a preview of the design. It looks like a completed picture at this stage but don’t worry – once it’s inserted onto your project it will automatically separate out into the different layers.
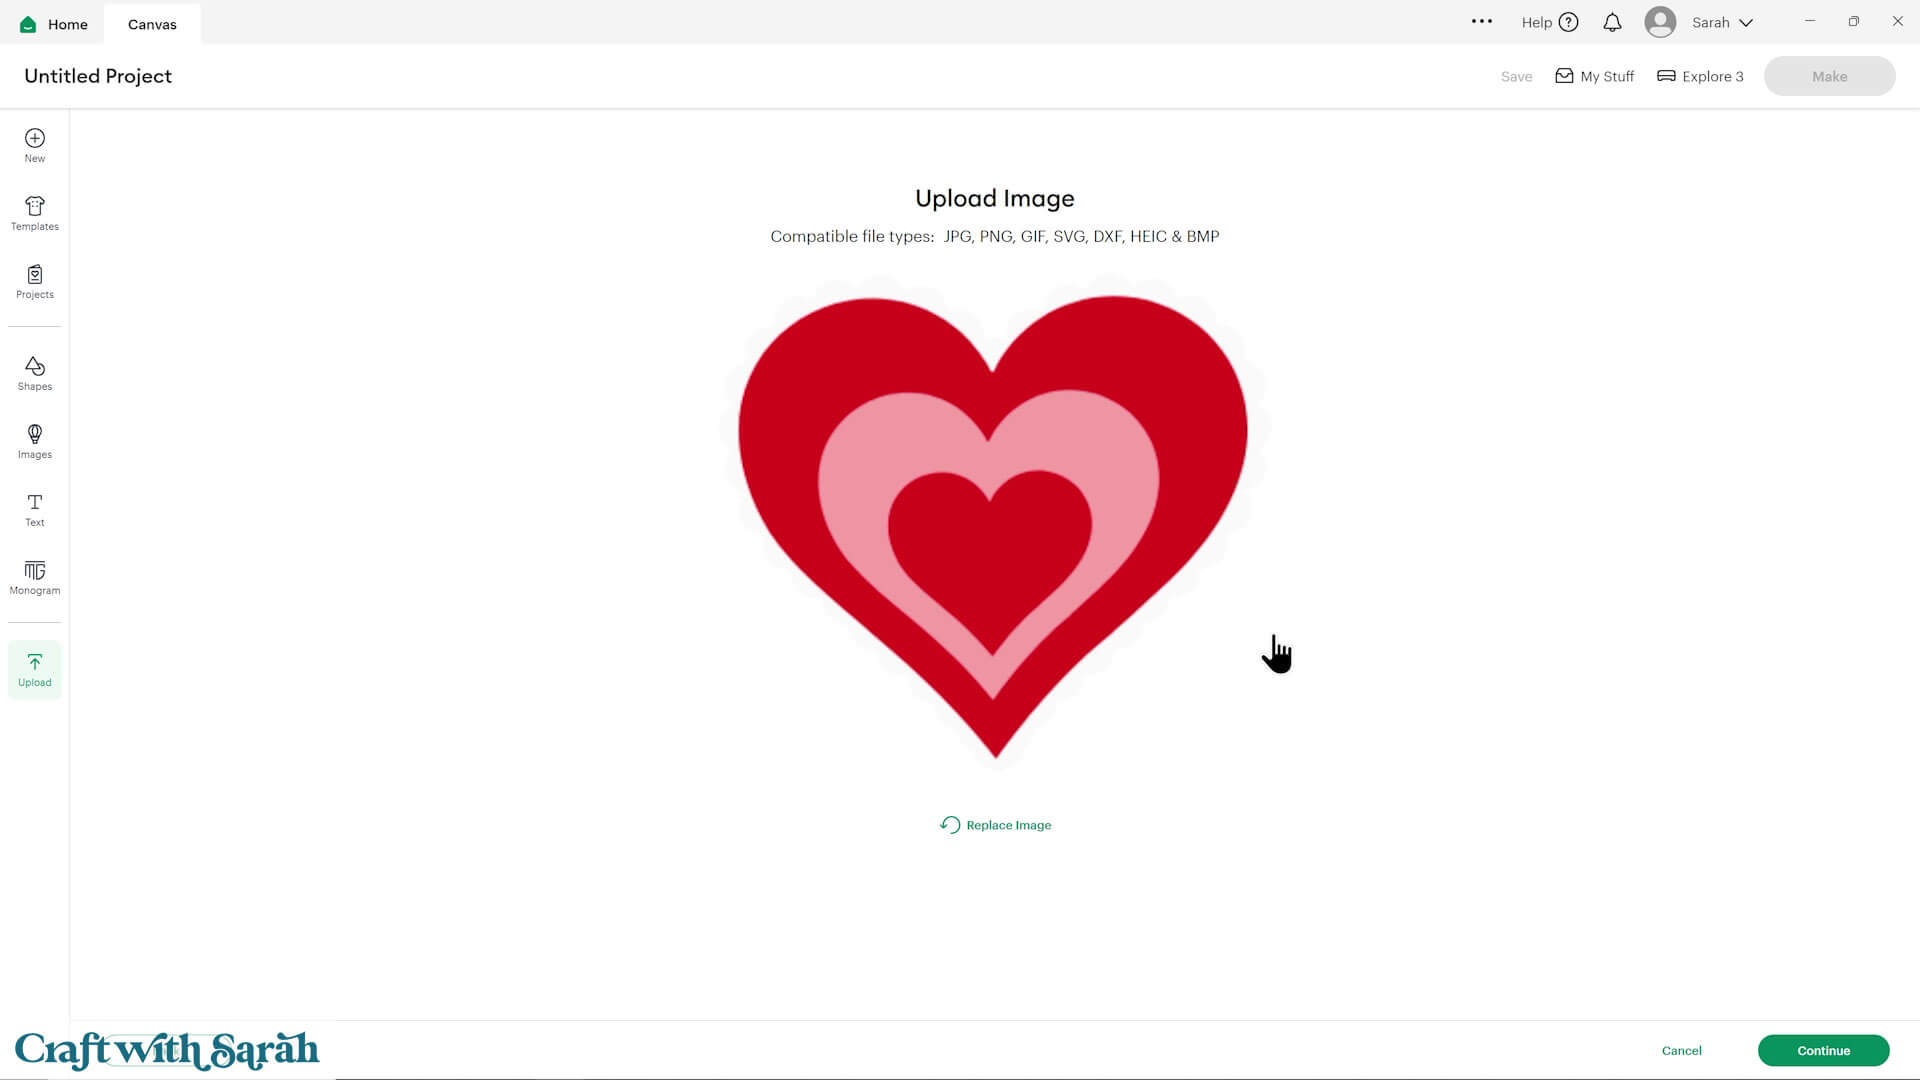
Click “Continue” to move to the next screen.
You don’t need to change anything on the next screen, just click “Upload”.
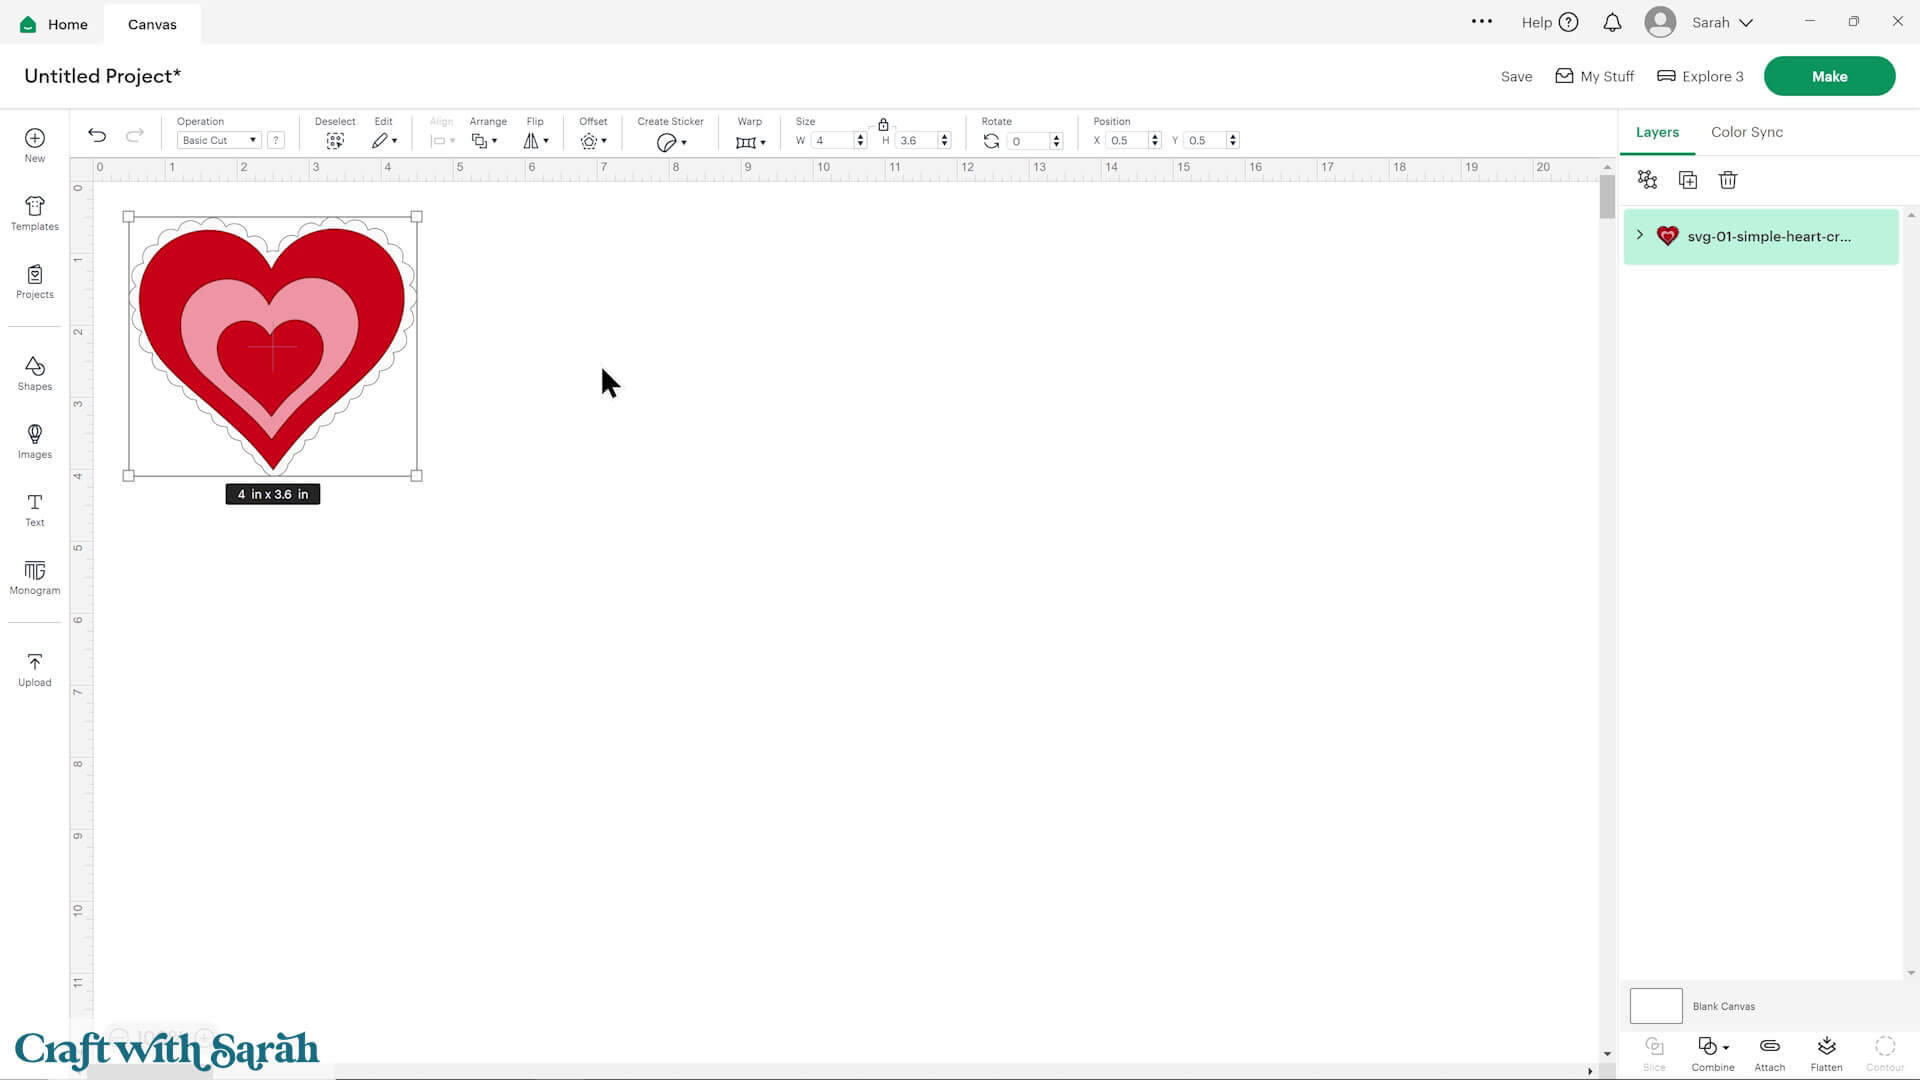
Your design will then appear on your canvas.
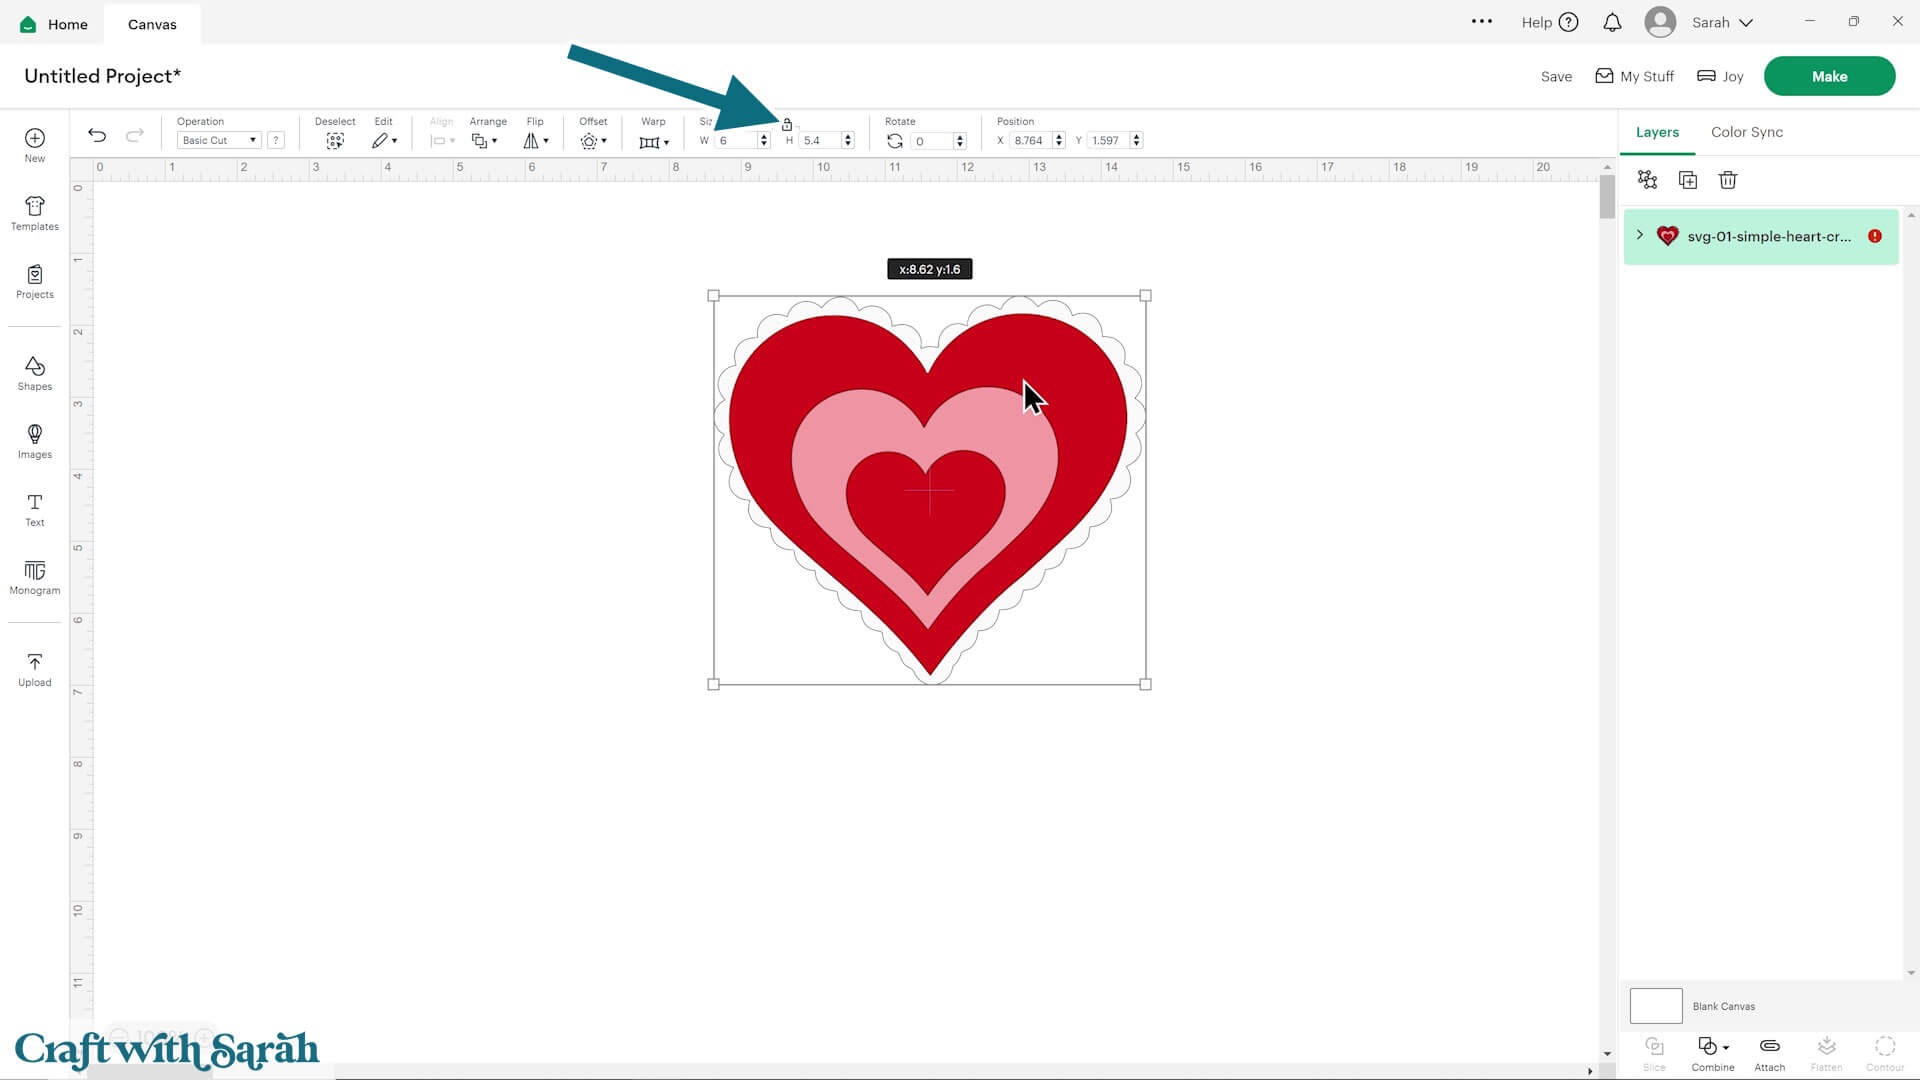
Step 3) Customize the design (optional)
Now is the time to customise your project to make it look exactly as you want to cut it out.
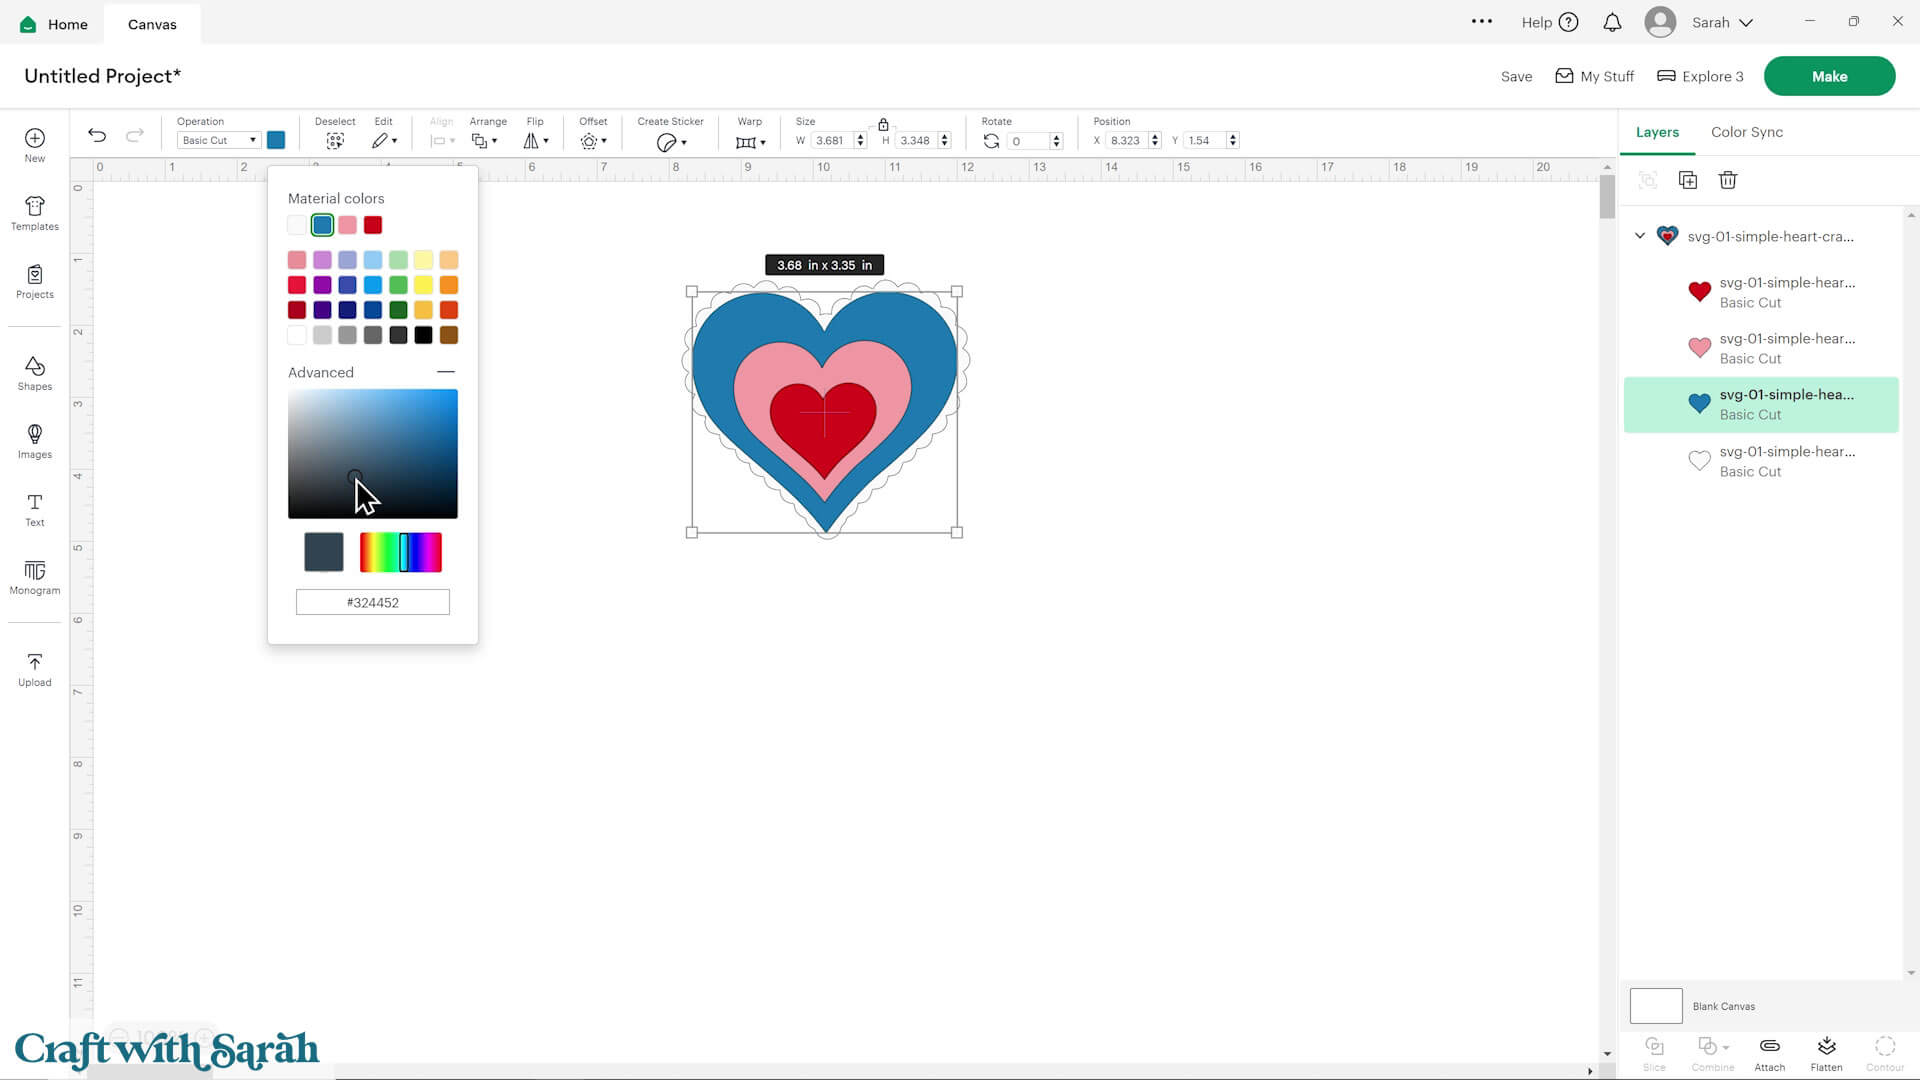
To change colors:
Click a layer in the Layers Panel, then pick a new color using the color box in the top left of the screen.
Want to know more? Check out this full-length tutorial on changing colors in Cricut Design Space.
To resize:
Click on the design and look for the width and height boxes along the top of the screen. Make sure the padlock icon is closed. If yours is open, click the padlock to close it.
Type your new width or height into the boxes.
Want to learn more about modifying SVGs? Check out this full-length tutorial on how to customize SVGs in Cricut Design Space.
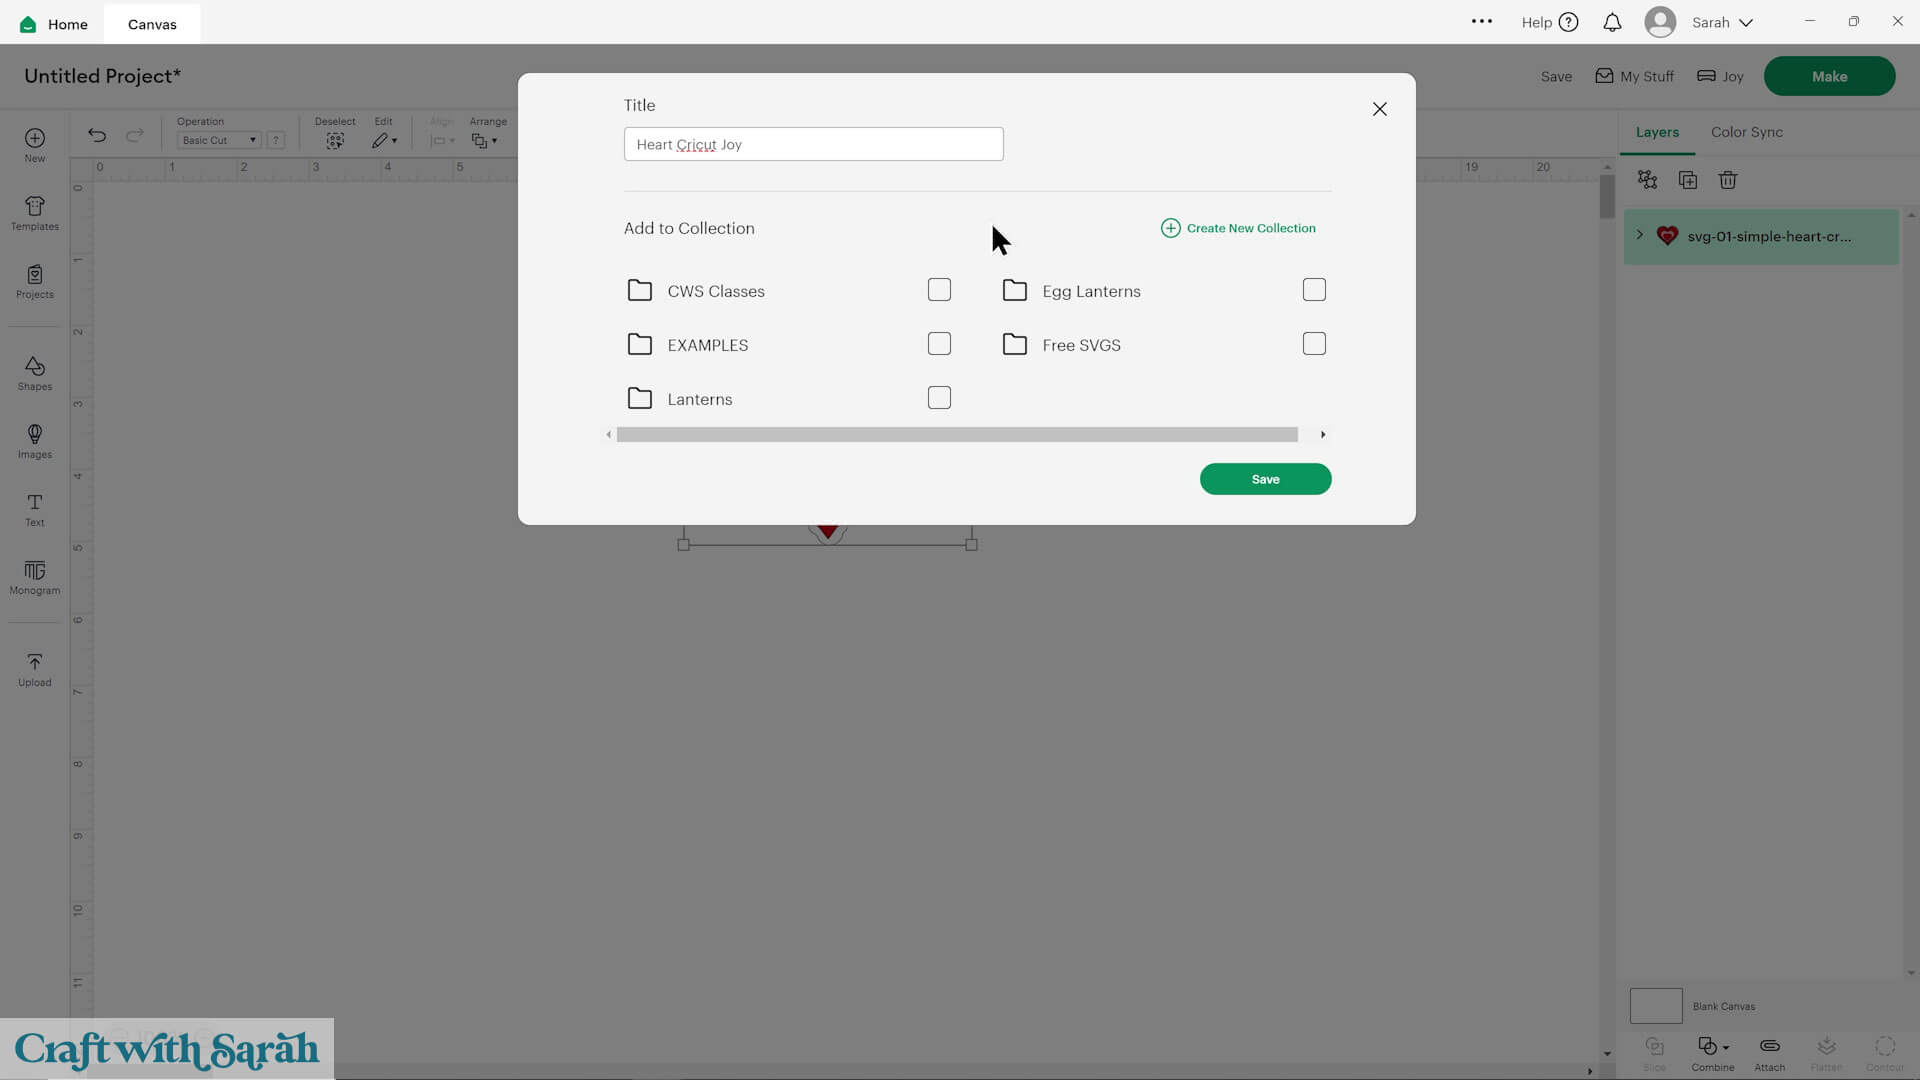
Step 4) Save your project
Before moving on, save your work:
Click “Save” on the top-right of the screen.
Give your project a name.
Optionally, add it to a collection (a folder for easier access later)
Step 5) Prepare to cut
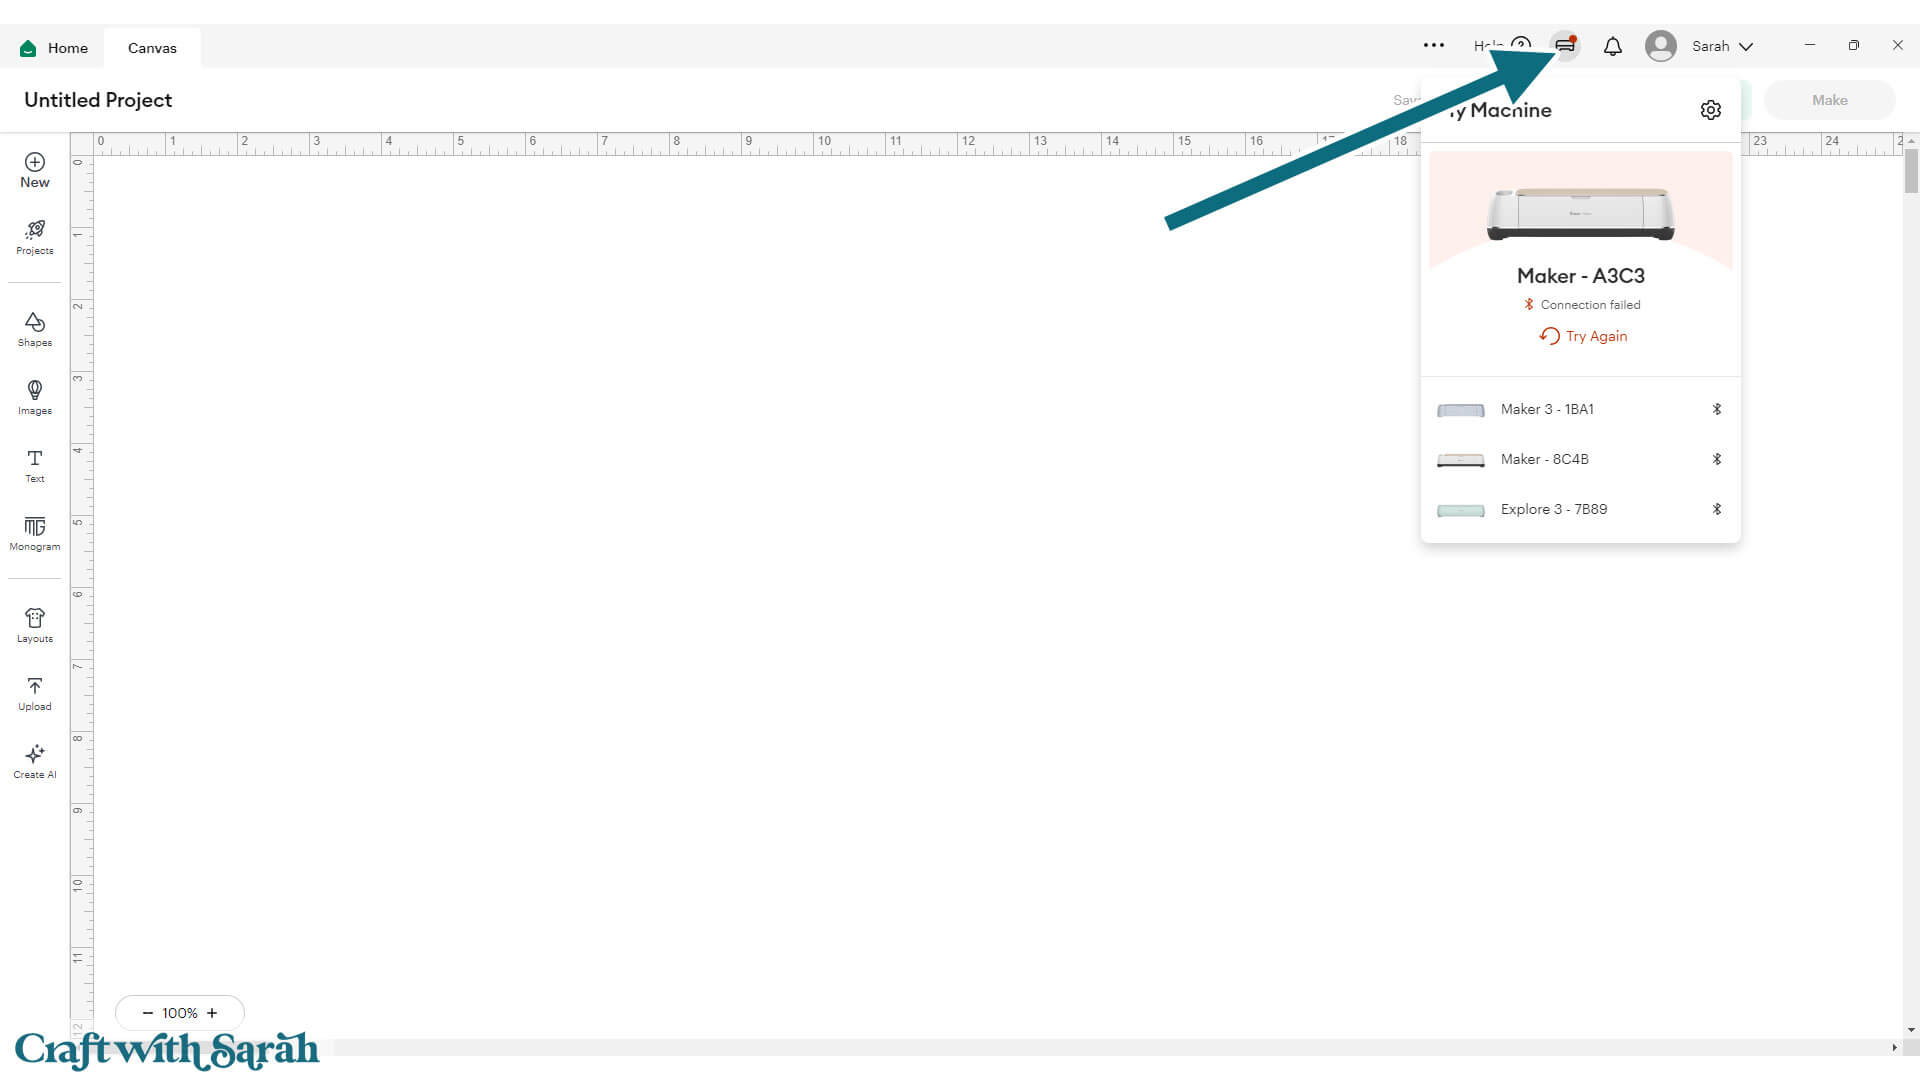
Plug your Cricut Joy Xtra in and make sure the power is on.
Connect to the machine using the connection icon along the top-right of your screen.
Look down the layers panel to make sure that you don’t see any sizing errors. These are shown as red exclamation marks. If your project is too large to cut with the Joy Xtra, resize it smaller, then re-save.
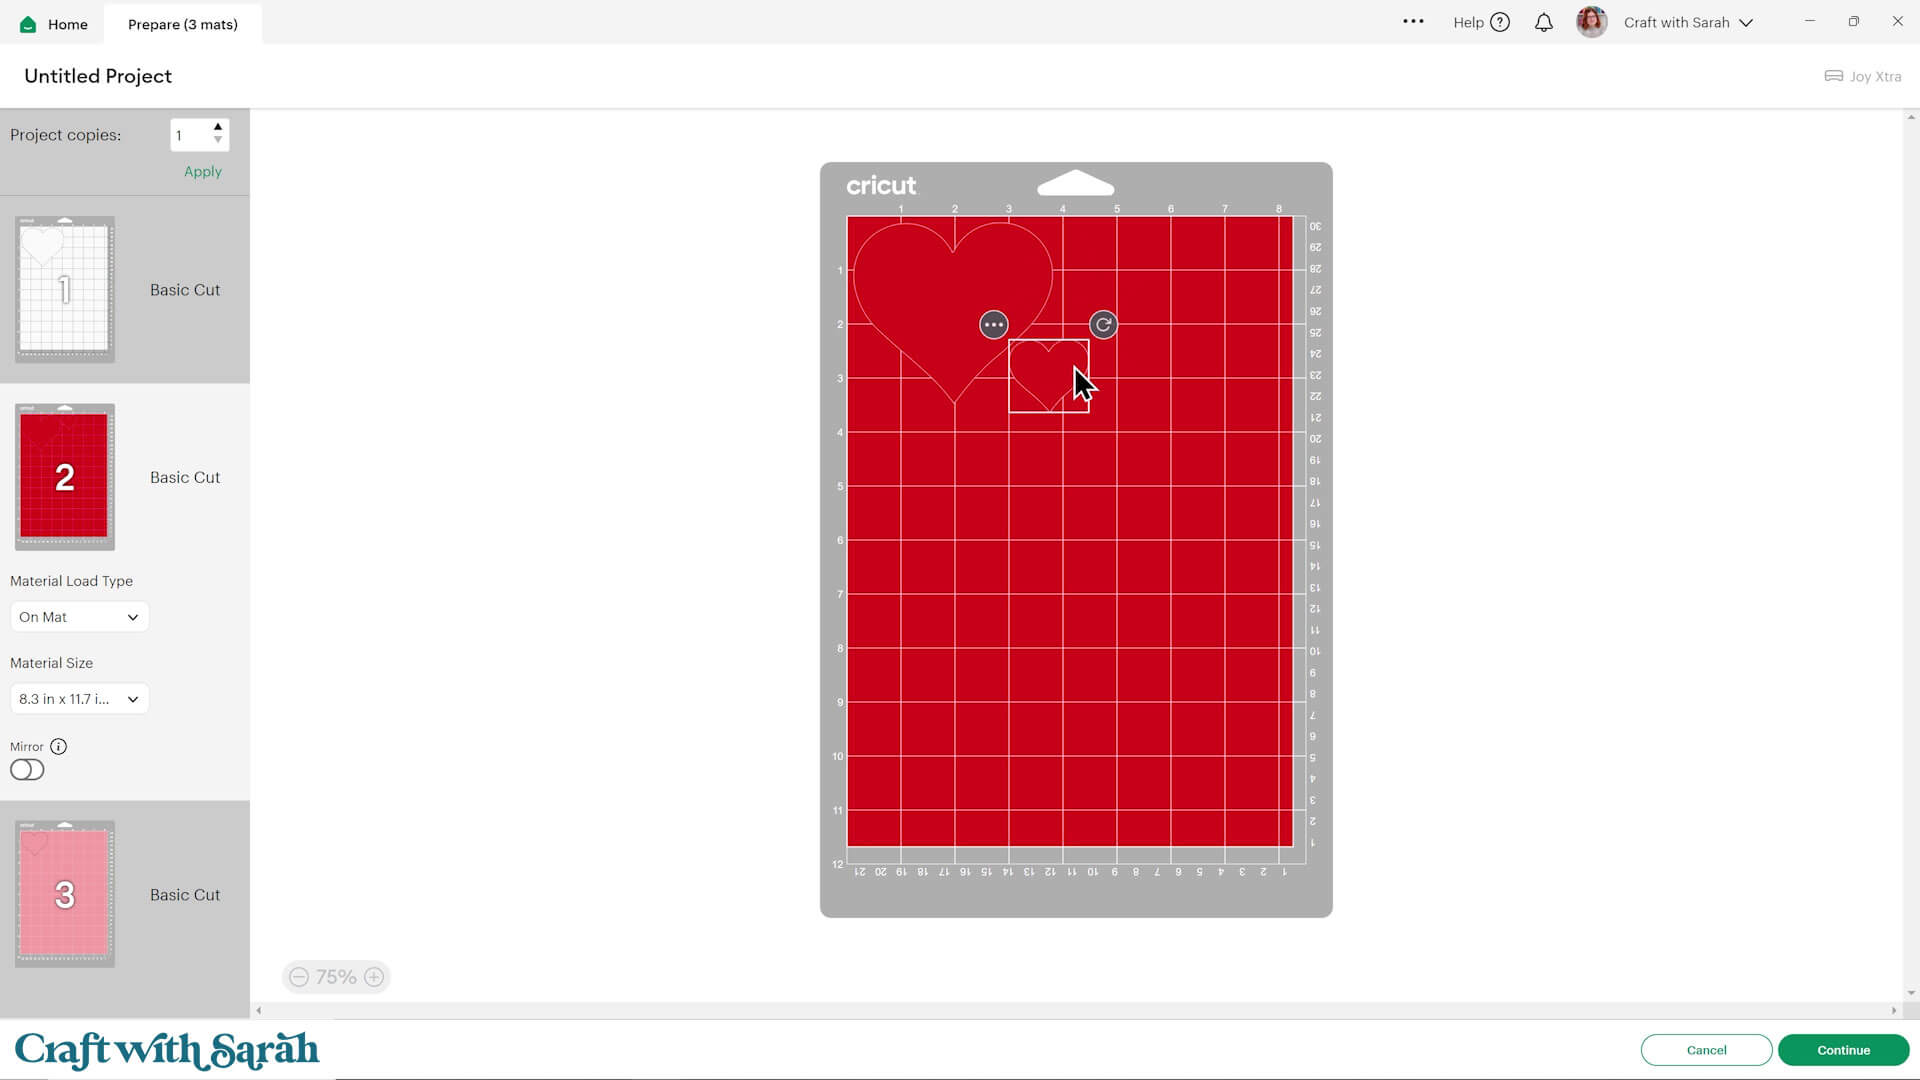
When you’re ready to cut the project, click the “Make” button on the top-right of your screen.
Design Space will automatically separate out all the pieces of your project into the individual colors.
Make sure your “Material Load Type” is set to “On Mat”.
Choose the mat size you’re using for your Cricut Joy Xtra.
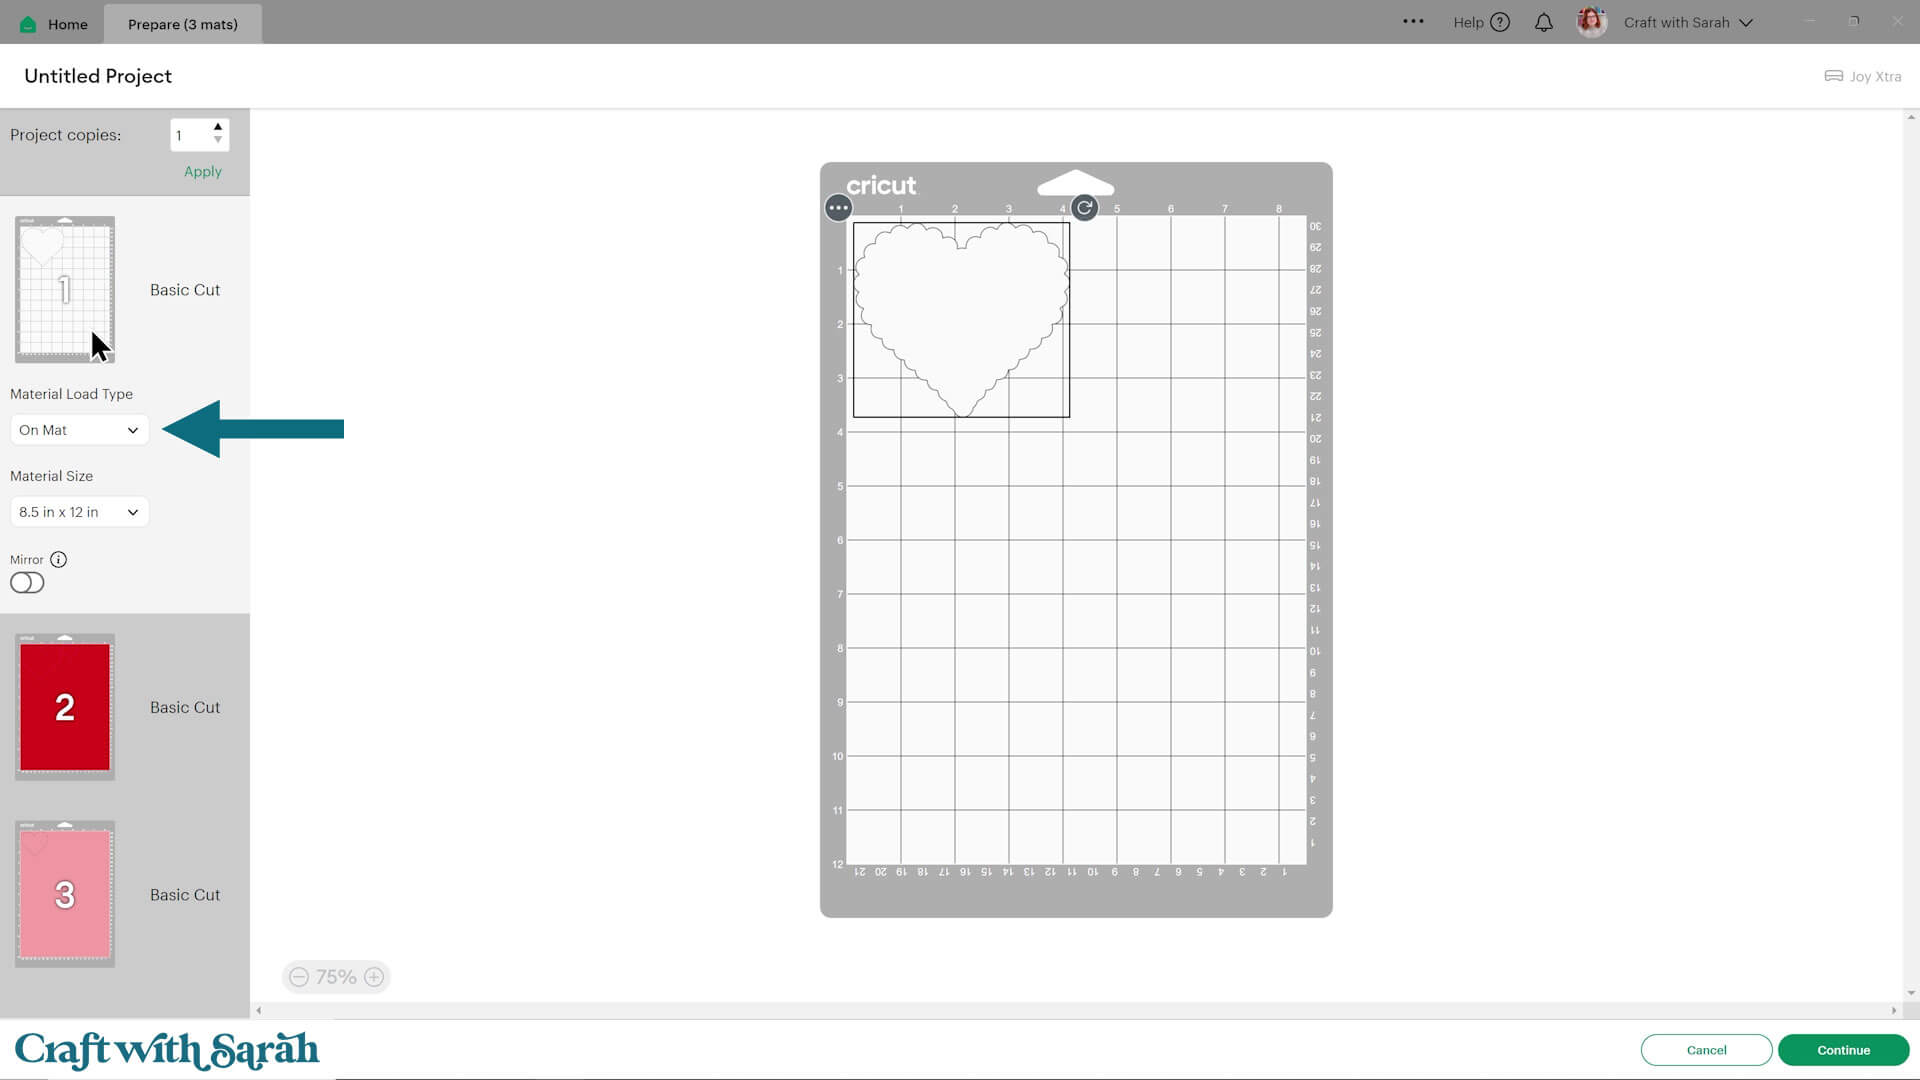
Choose the paper size that you will be using.

If needed, you can drag the shapes around to save space.
Make sure none of the pieces overlap with each other, as otherwise they will not cut correctly.
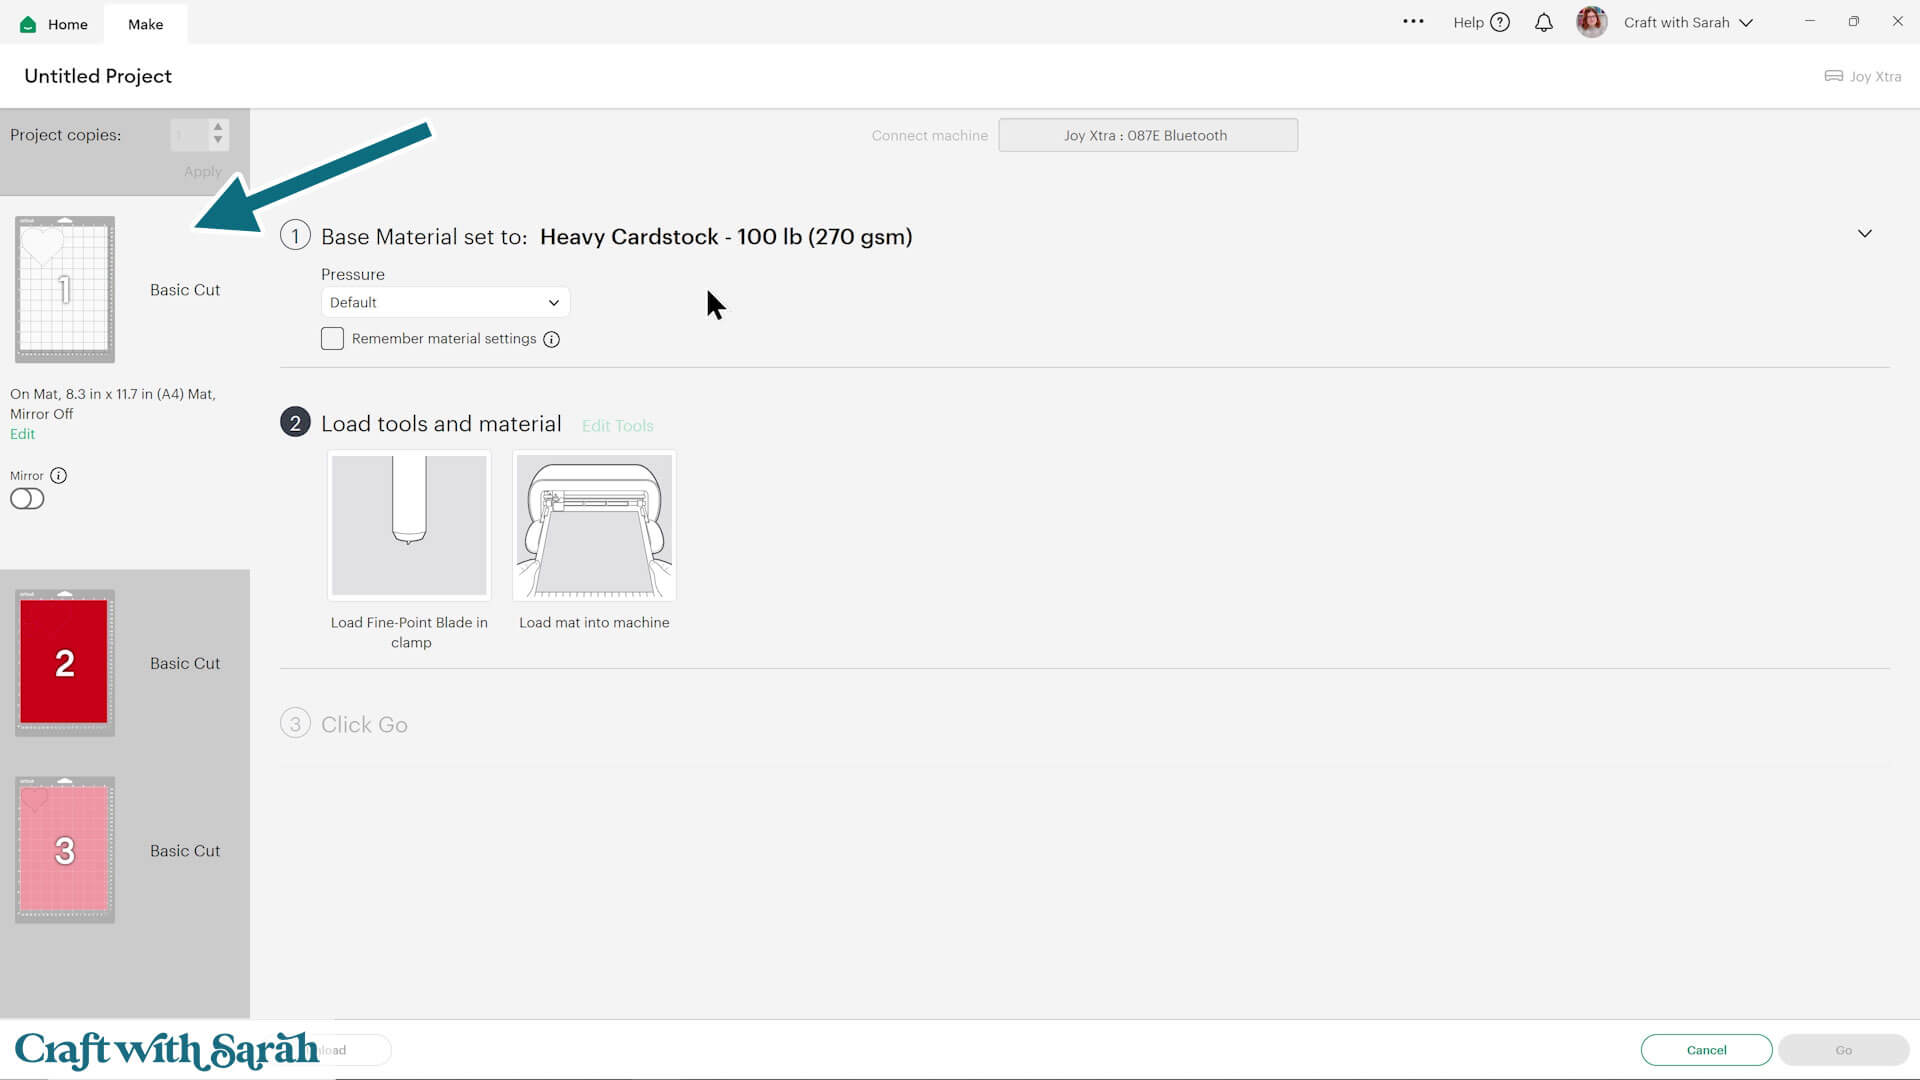
Step 6) Choose your material settings
Click to select “Mat 1” in the list down the left side of the page. This will be the first color to cut.
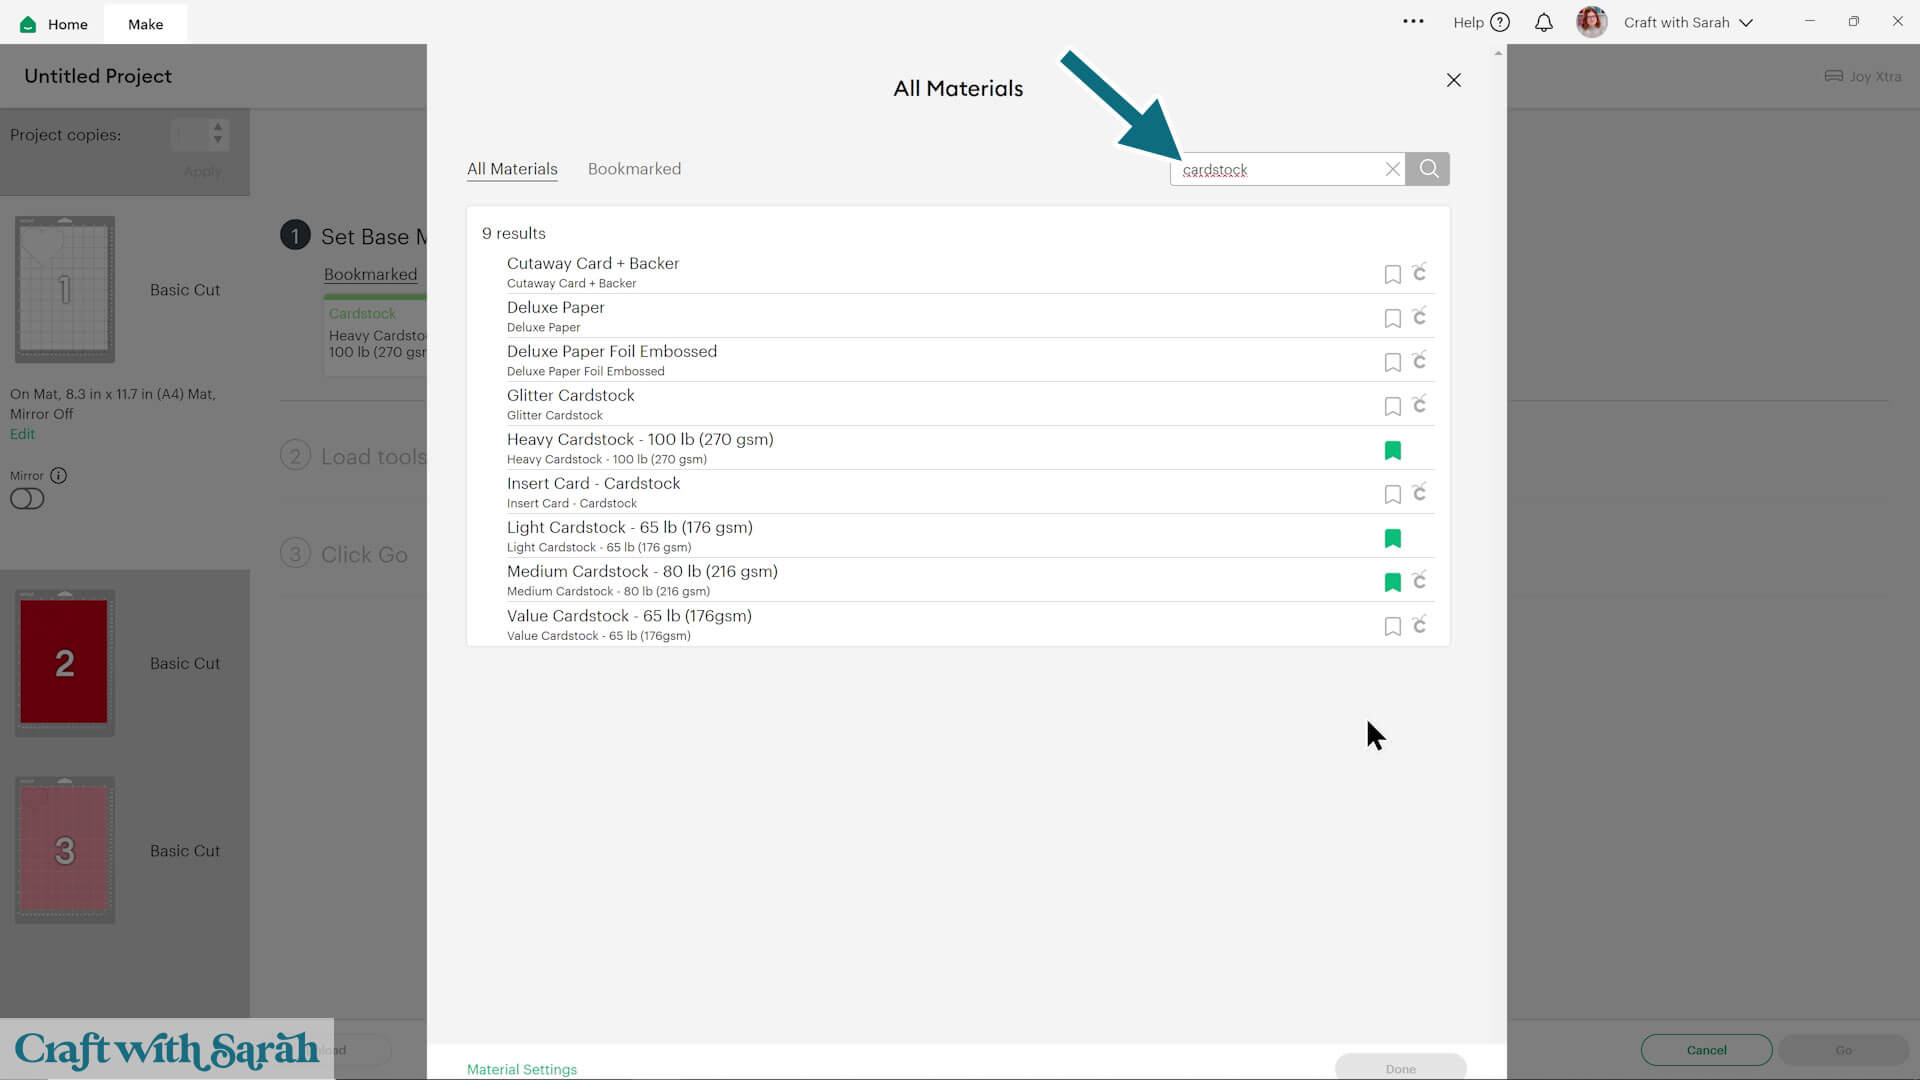
If you cannot see any cardstock settings, click “Browse All Materials”.
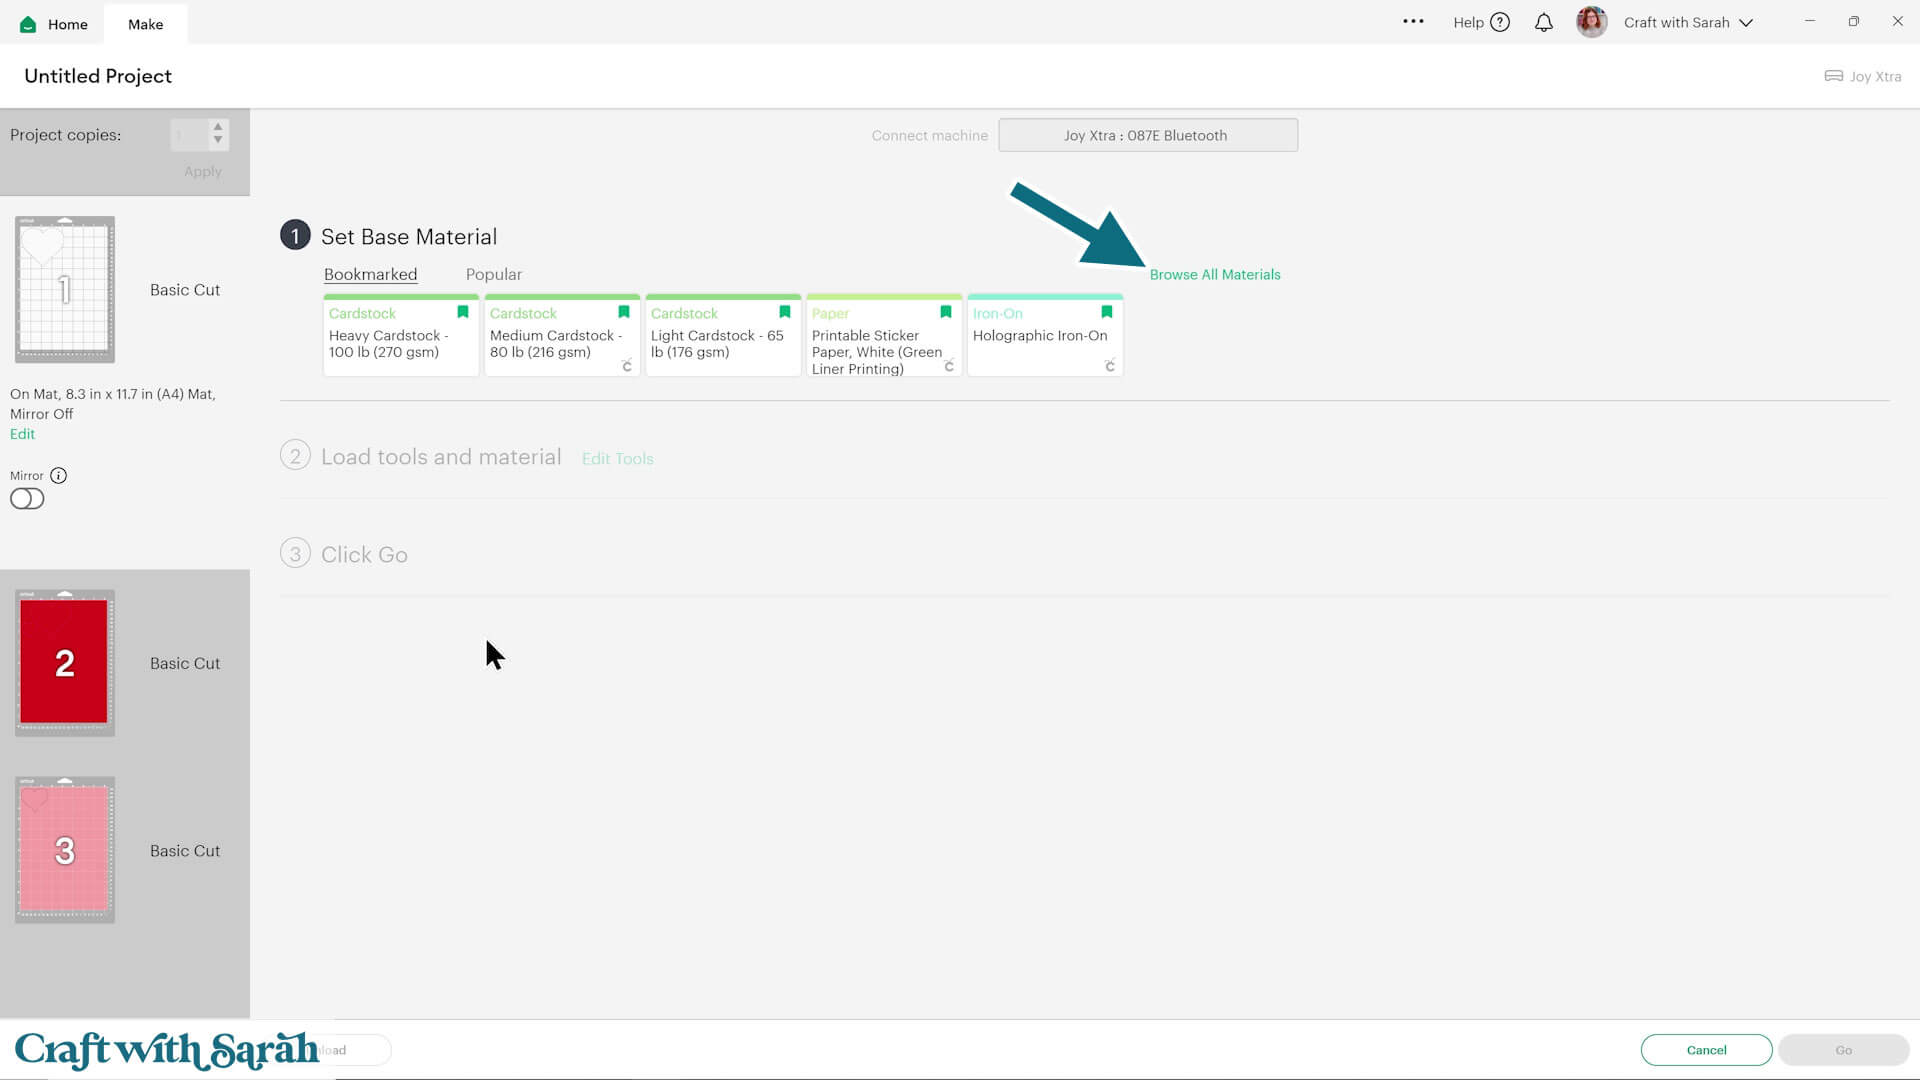
Type “Cardstock” into the search bar and pick the one that matches your paper best.
It might be a bit of trial and error before you find the material setting that works best for your particular machine.
I use the following settings most frequently:
- Light Cardstock (for thin card)
- Medium Cardstock
- Heavy Cardstock (I use this one the most)
- Kraft Board (for very thick card, glitter card, mirror card or holographic card)
💡 Tip: Click the little flag to bookmark your favorite settings so that you don’t have to search for them every time.
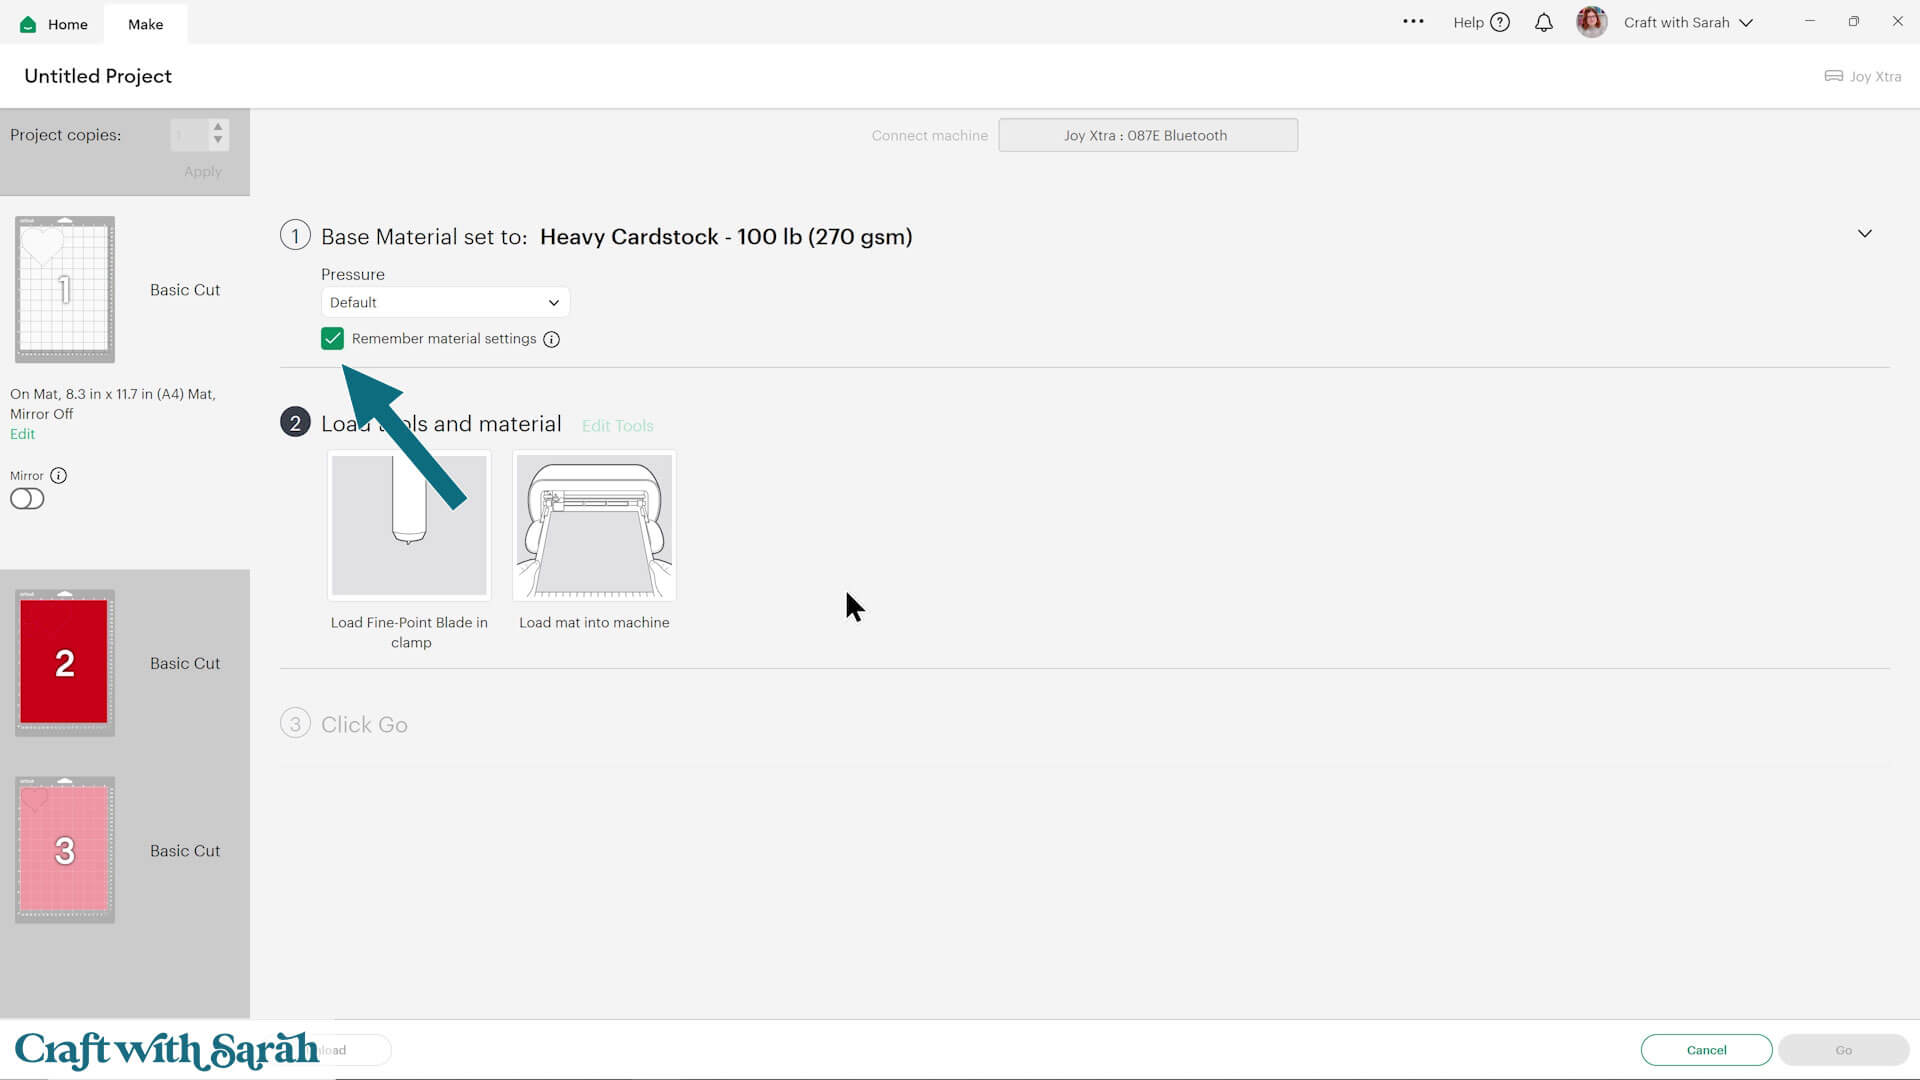
You can check “Remember Material Settings” so you don’t have to re-select the material type for each color in your project.
Step 7) Cut your project
Look at the screen in Design Space to see which color of cardstock to load.
You can click a particular color on the left-side of the screen to choose the color, or follow along in order.
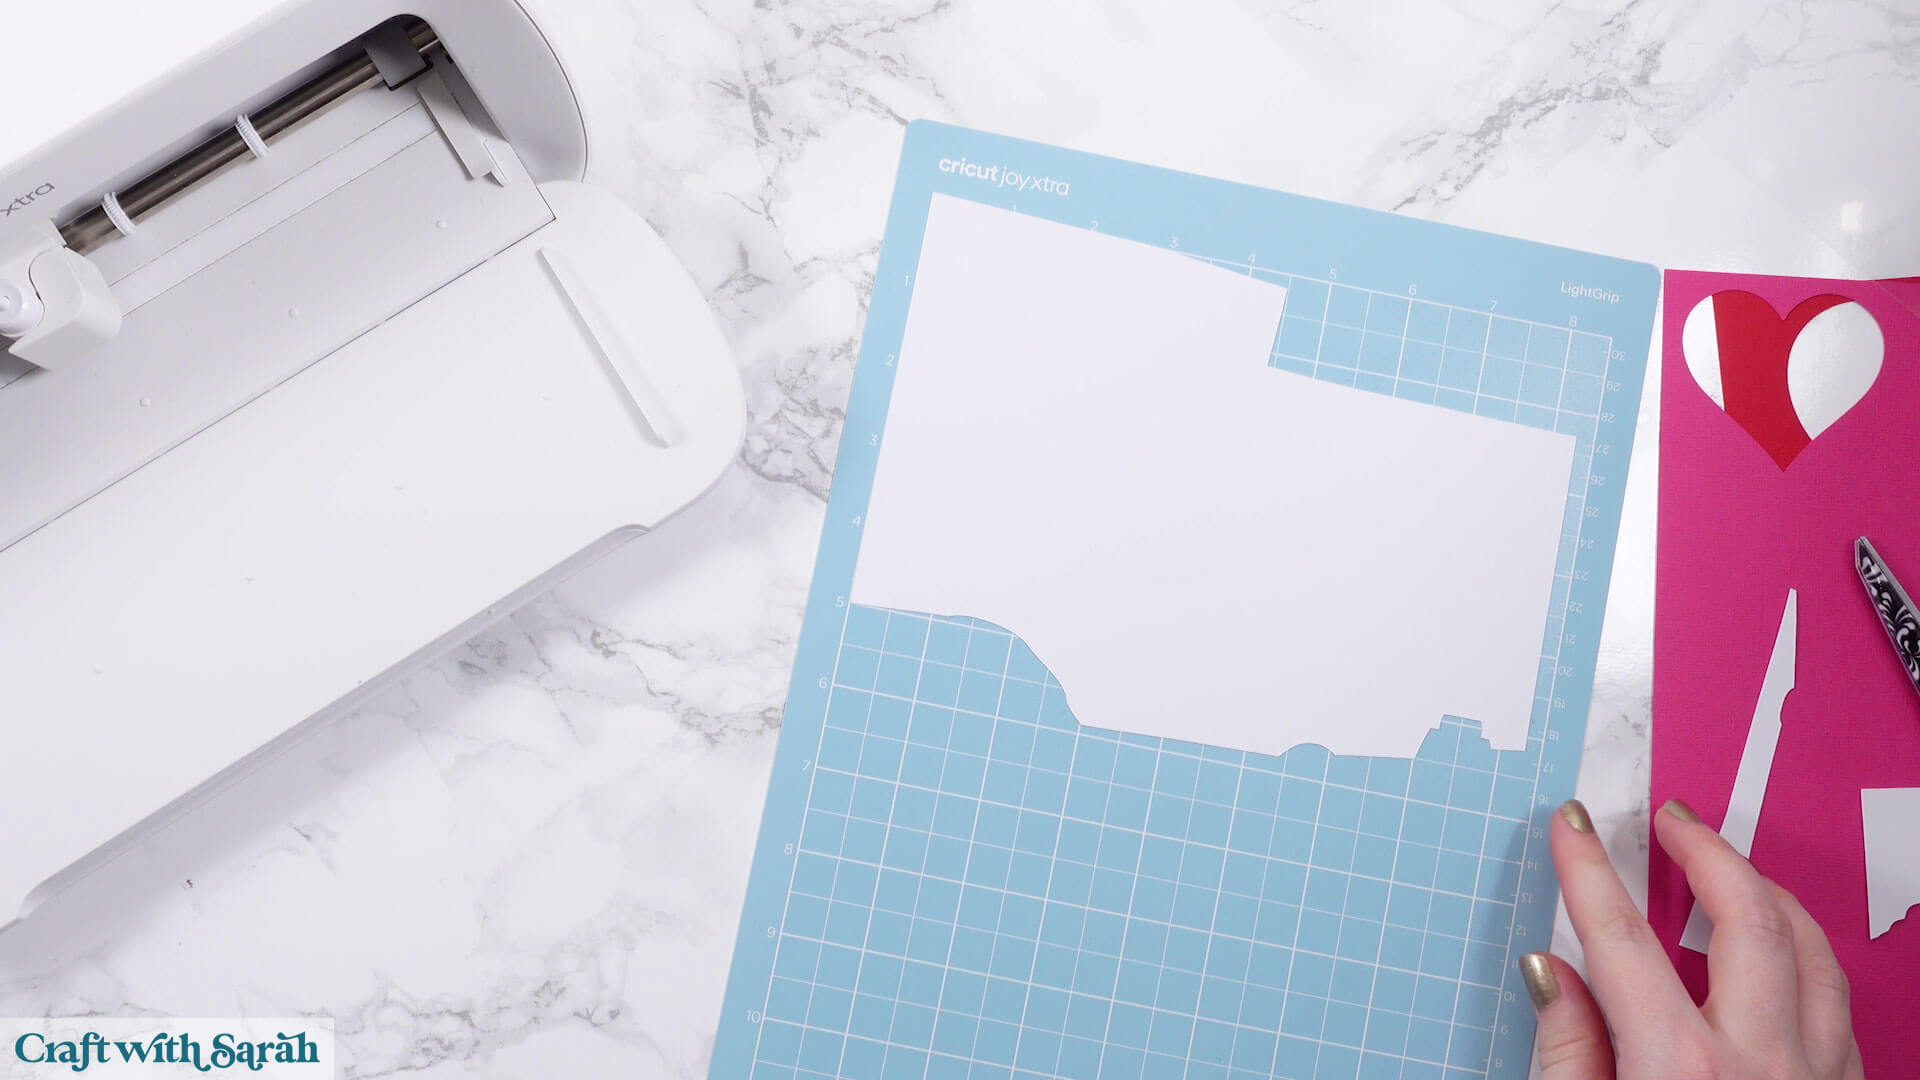
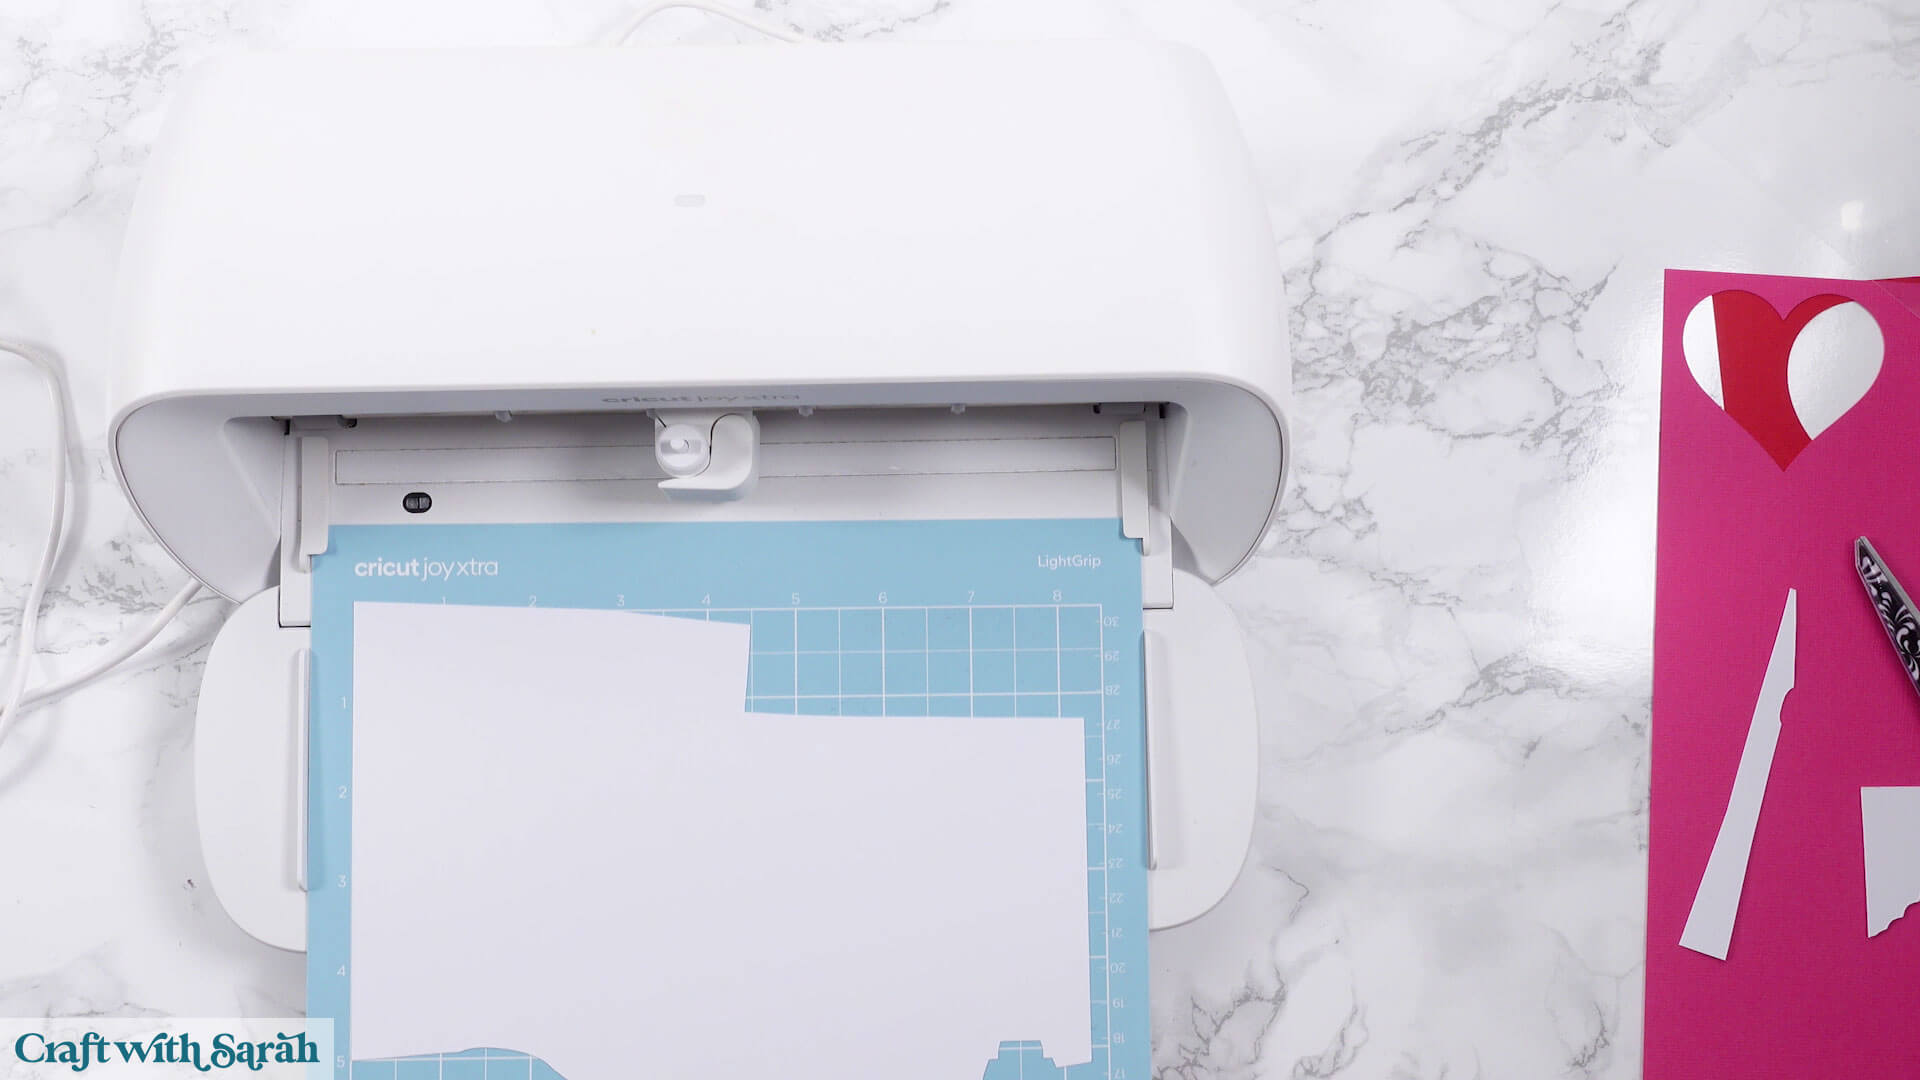
Remove the transparent protective sheet from the front of your cutting mat.
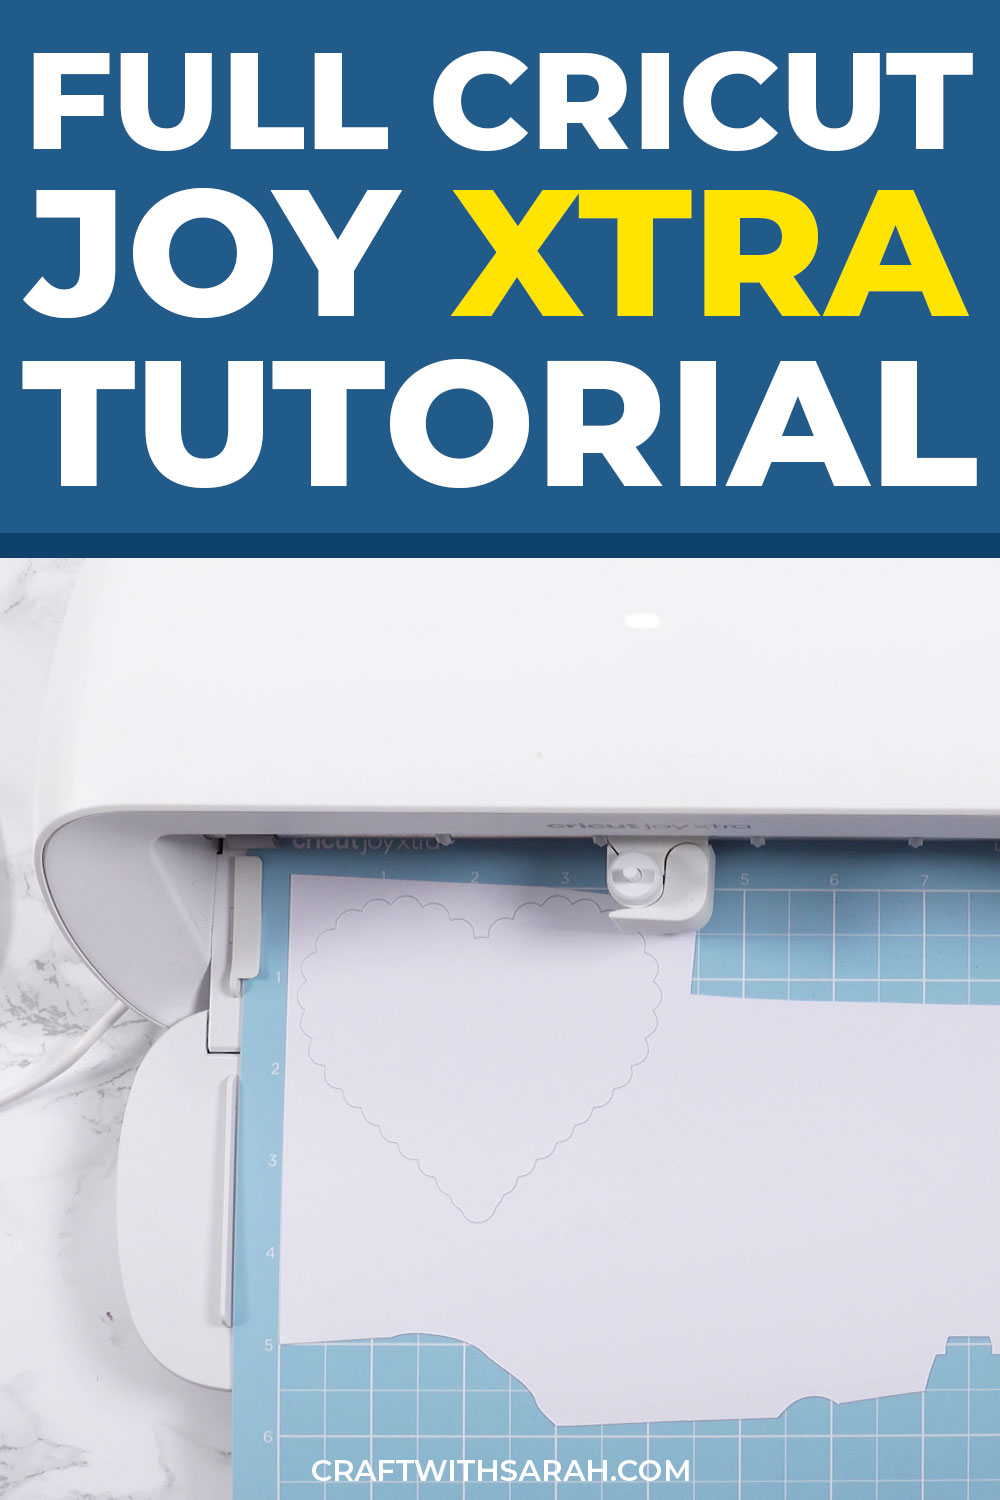
Line the cardstock along the white guidelines on the mat.
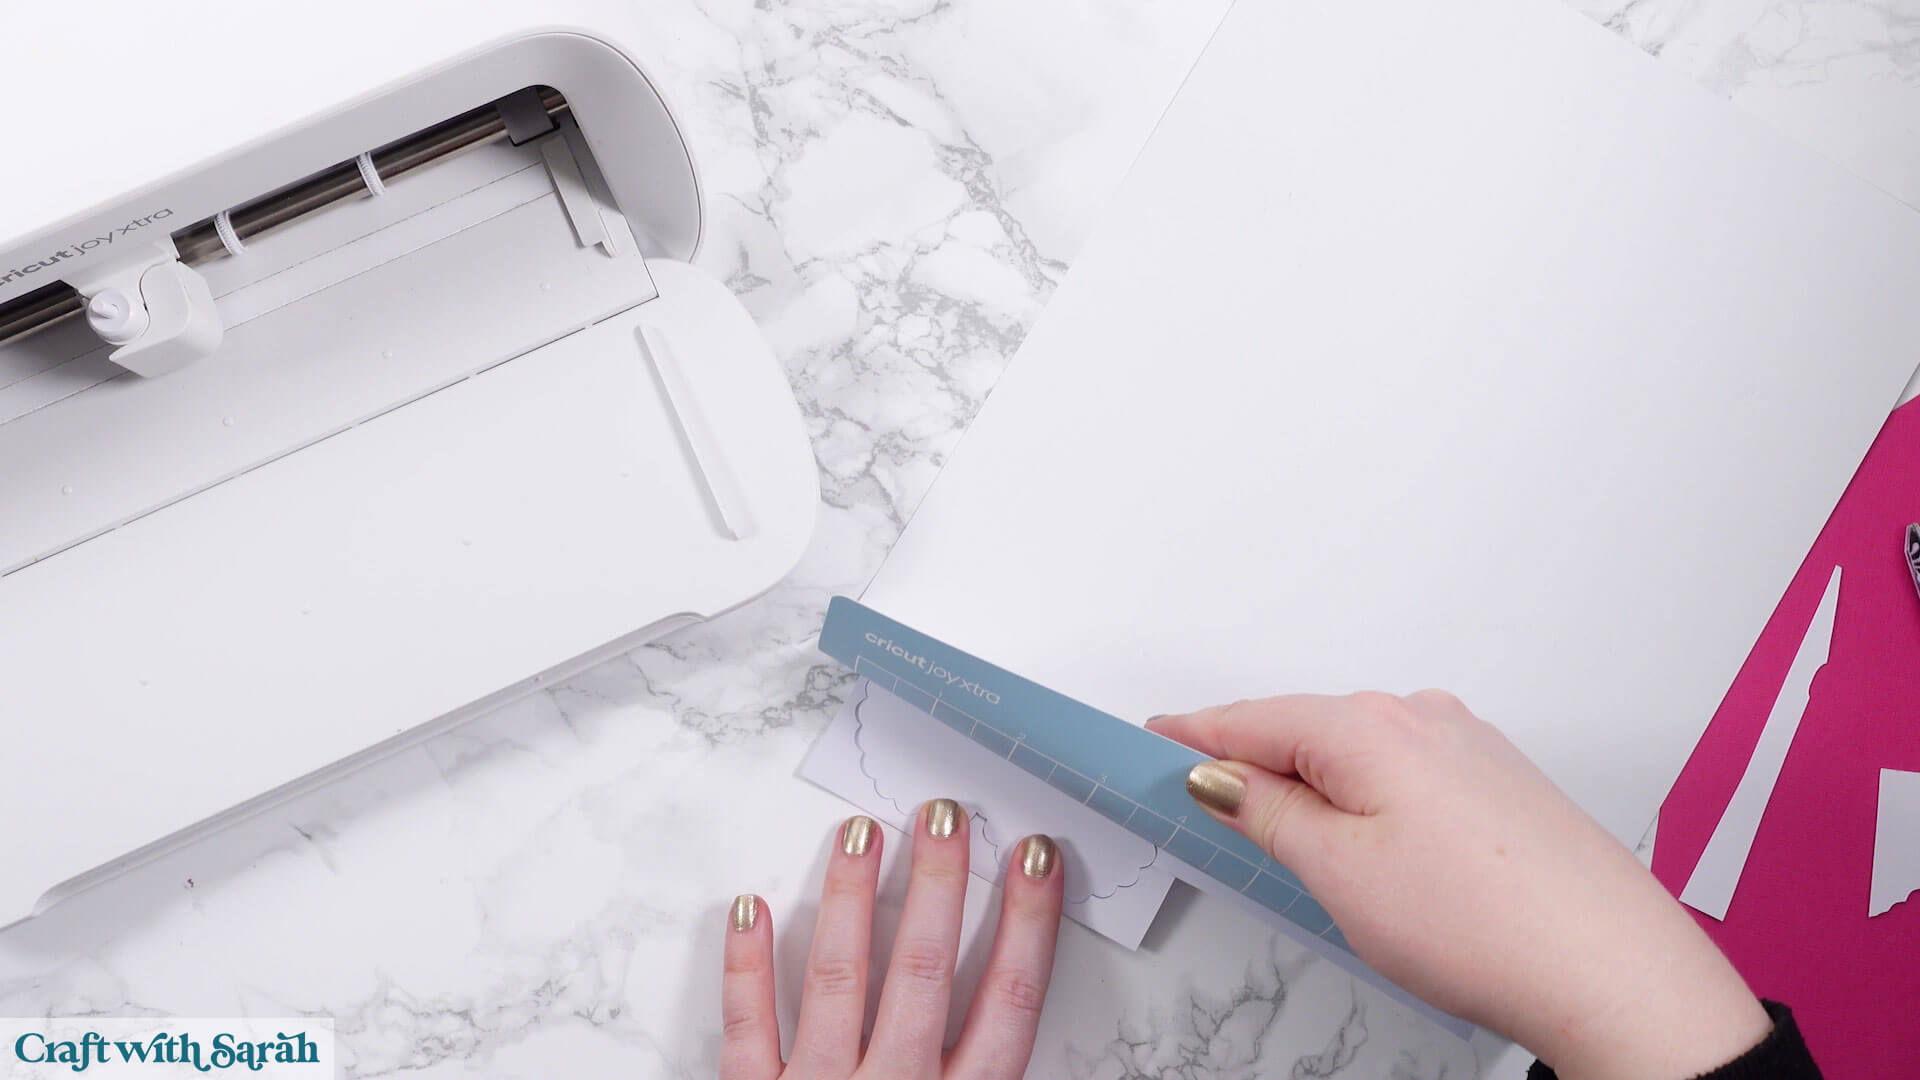
You may need to trim the card smaller to get it to fit on the mat.
Make sure no cardstock goes over the edges of the cutting mat, otherwise it will not fit into the machine.
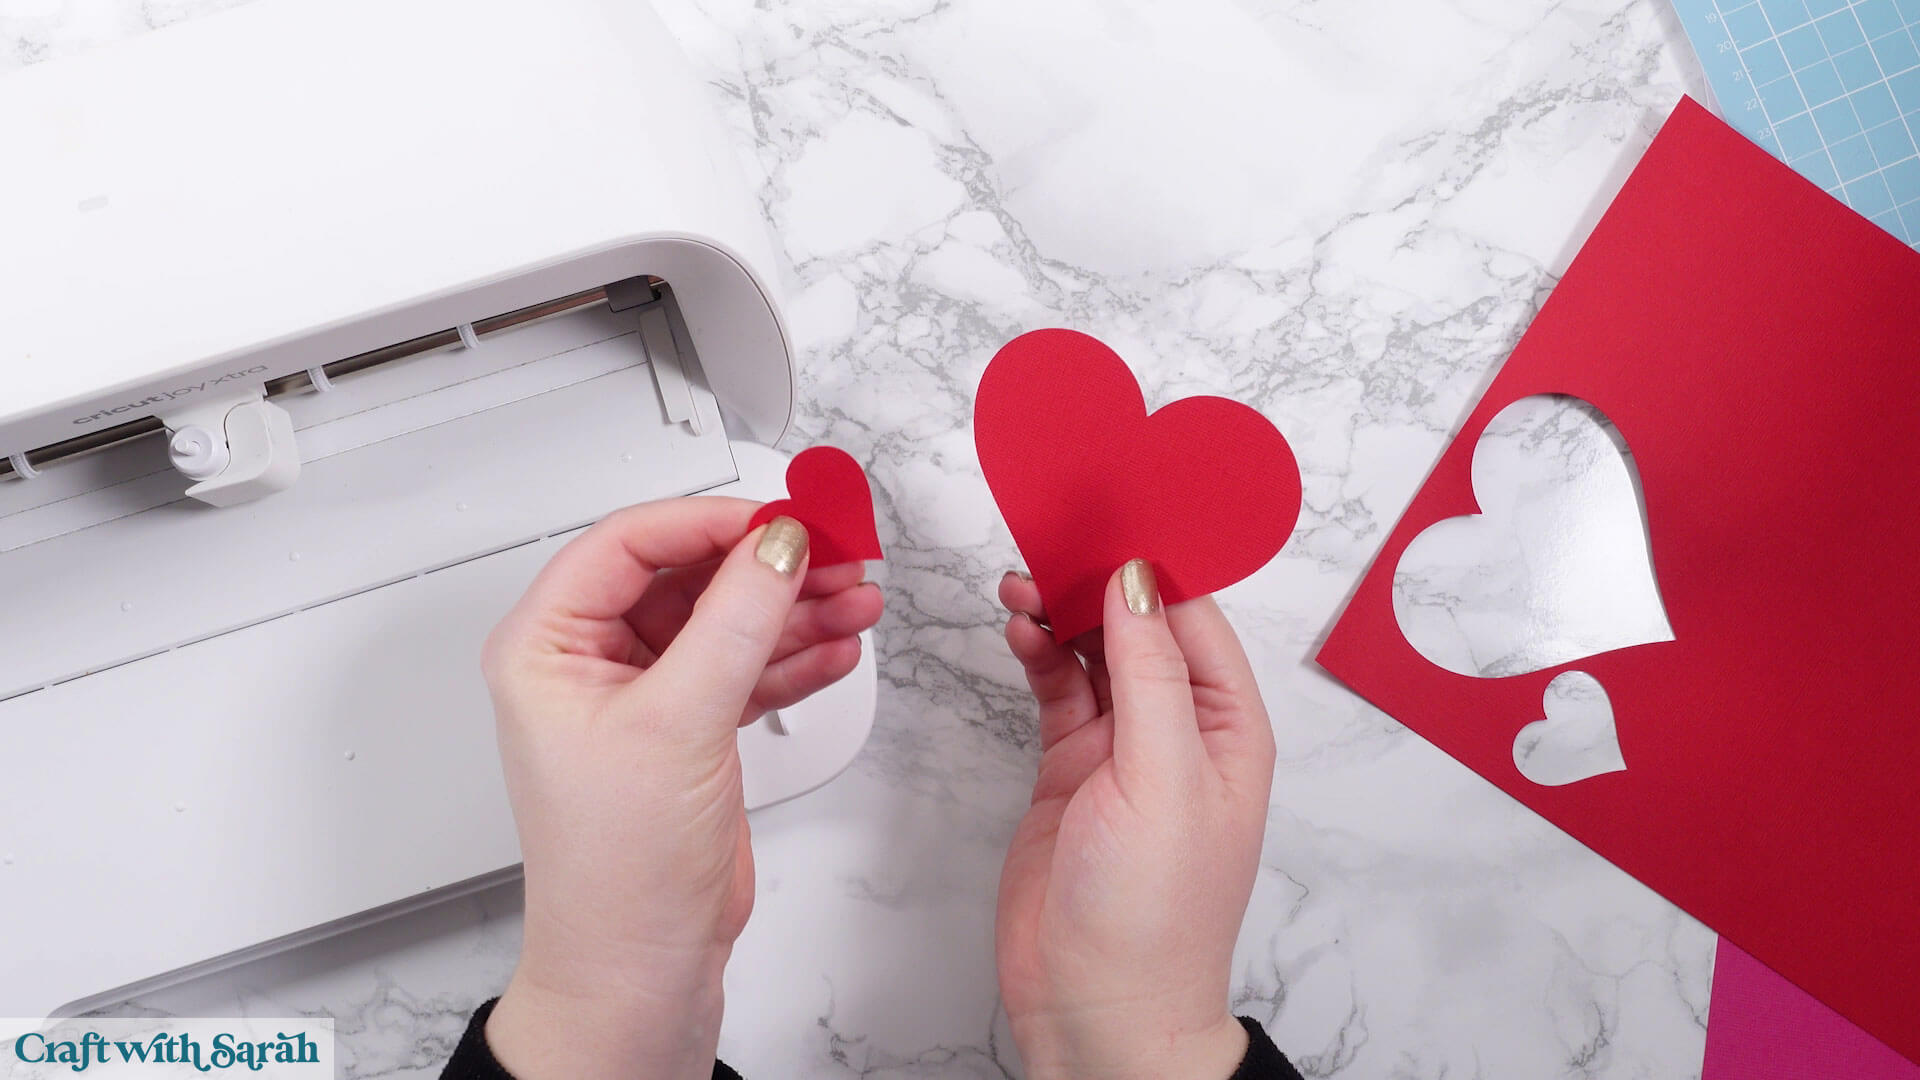
You can use card that’s previously been used, for example in my image I am using a scrap of white cardstock left over from another project.
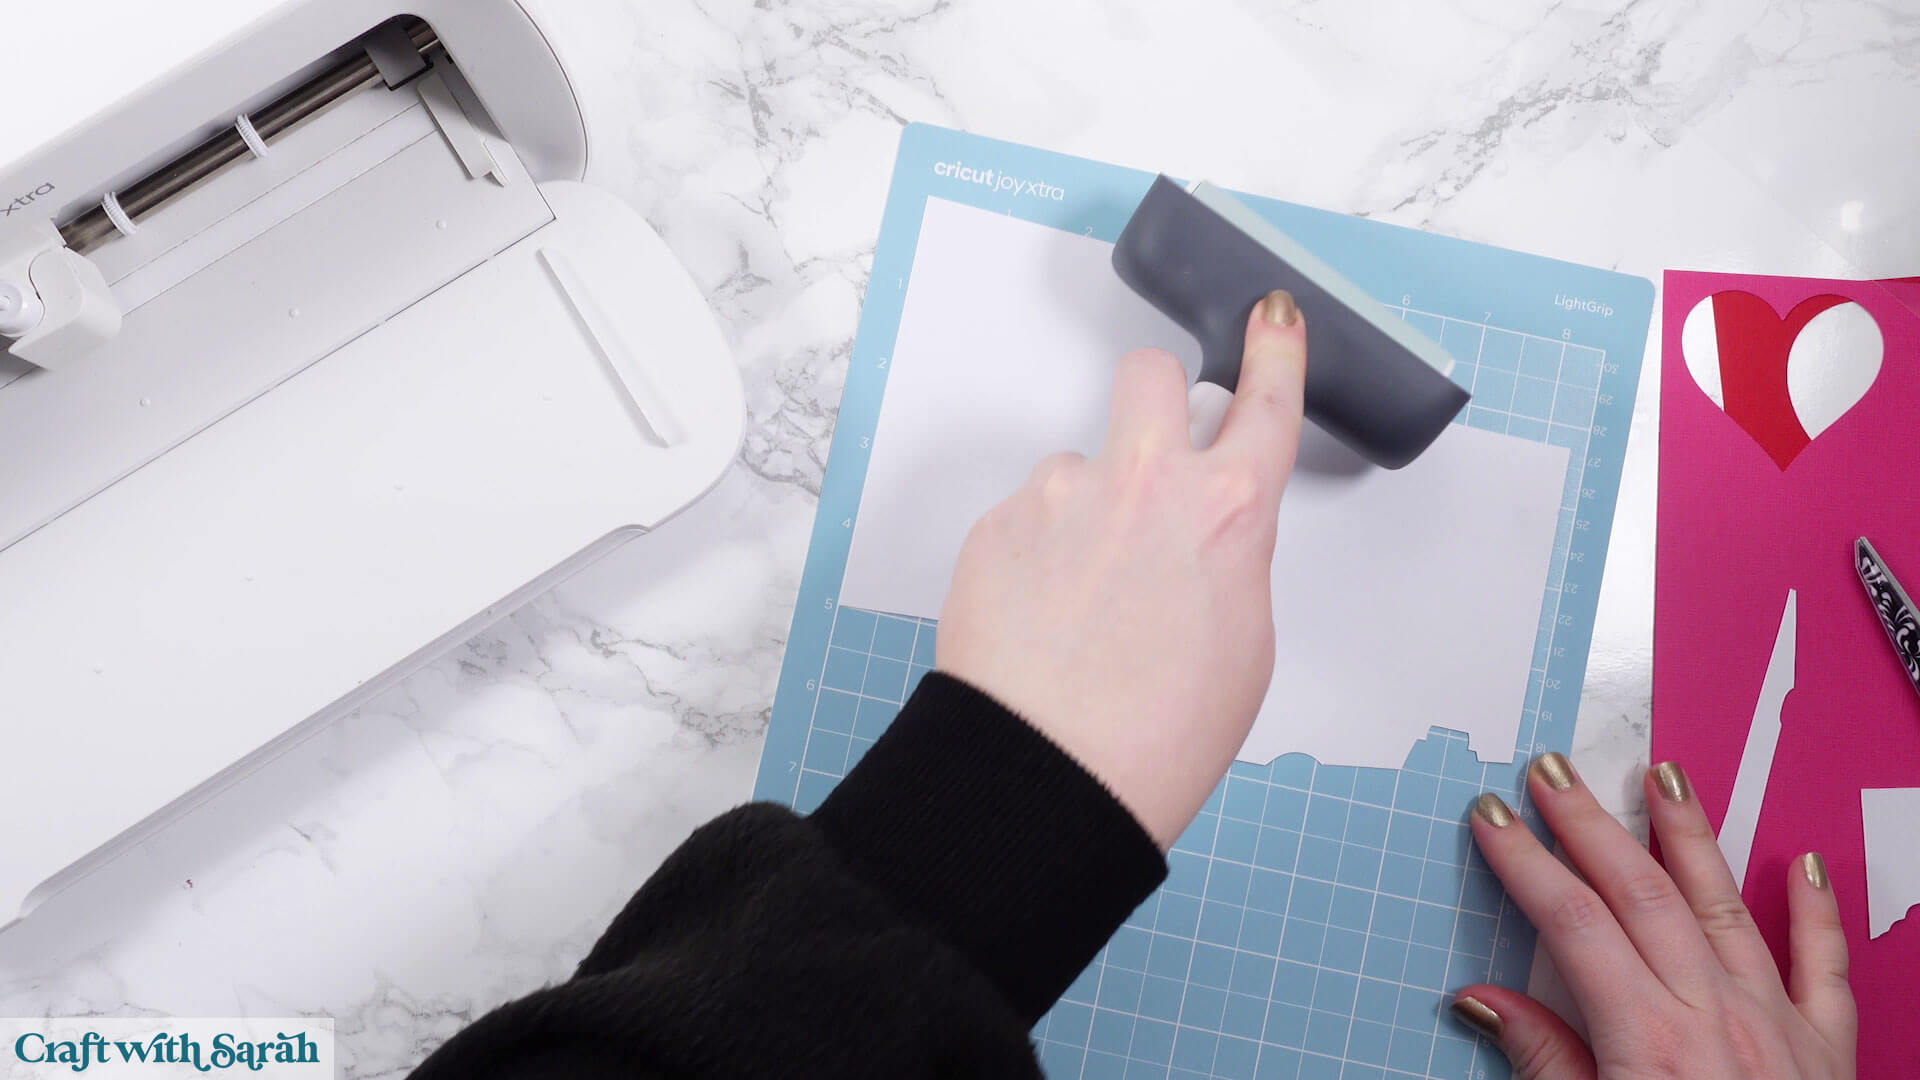
Use your brayer or scraper to press the cardstock down firmly on the cutting mat. If you don’t have one, press firmly all over the cardstock with your hands.
If your mat is losing its stickiness a bit, use washi tape or masking tape along the edges of the card to hold it securely in place. Make sure no tape goes outside the edges of the mat.
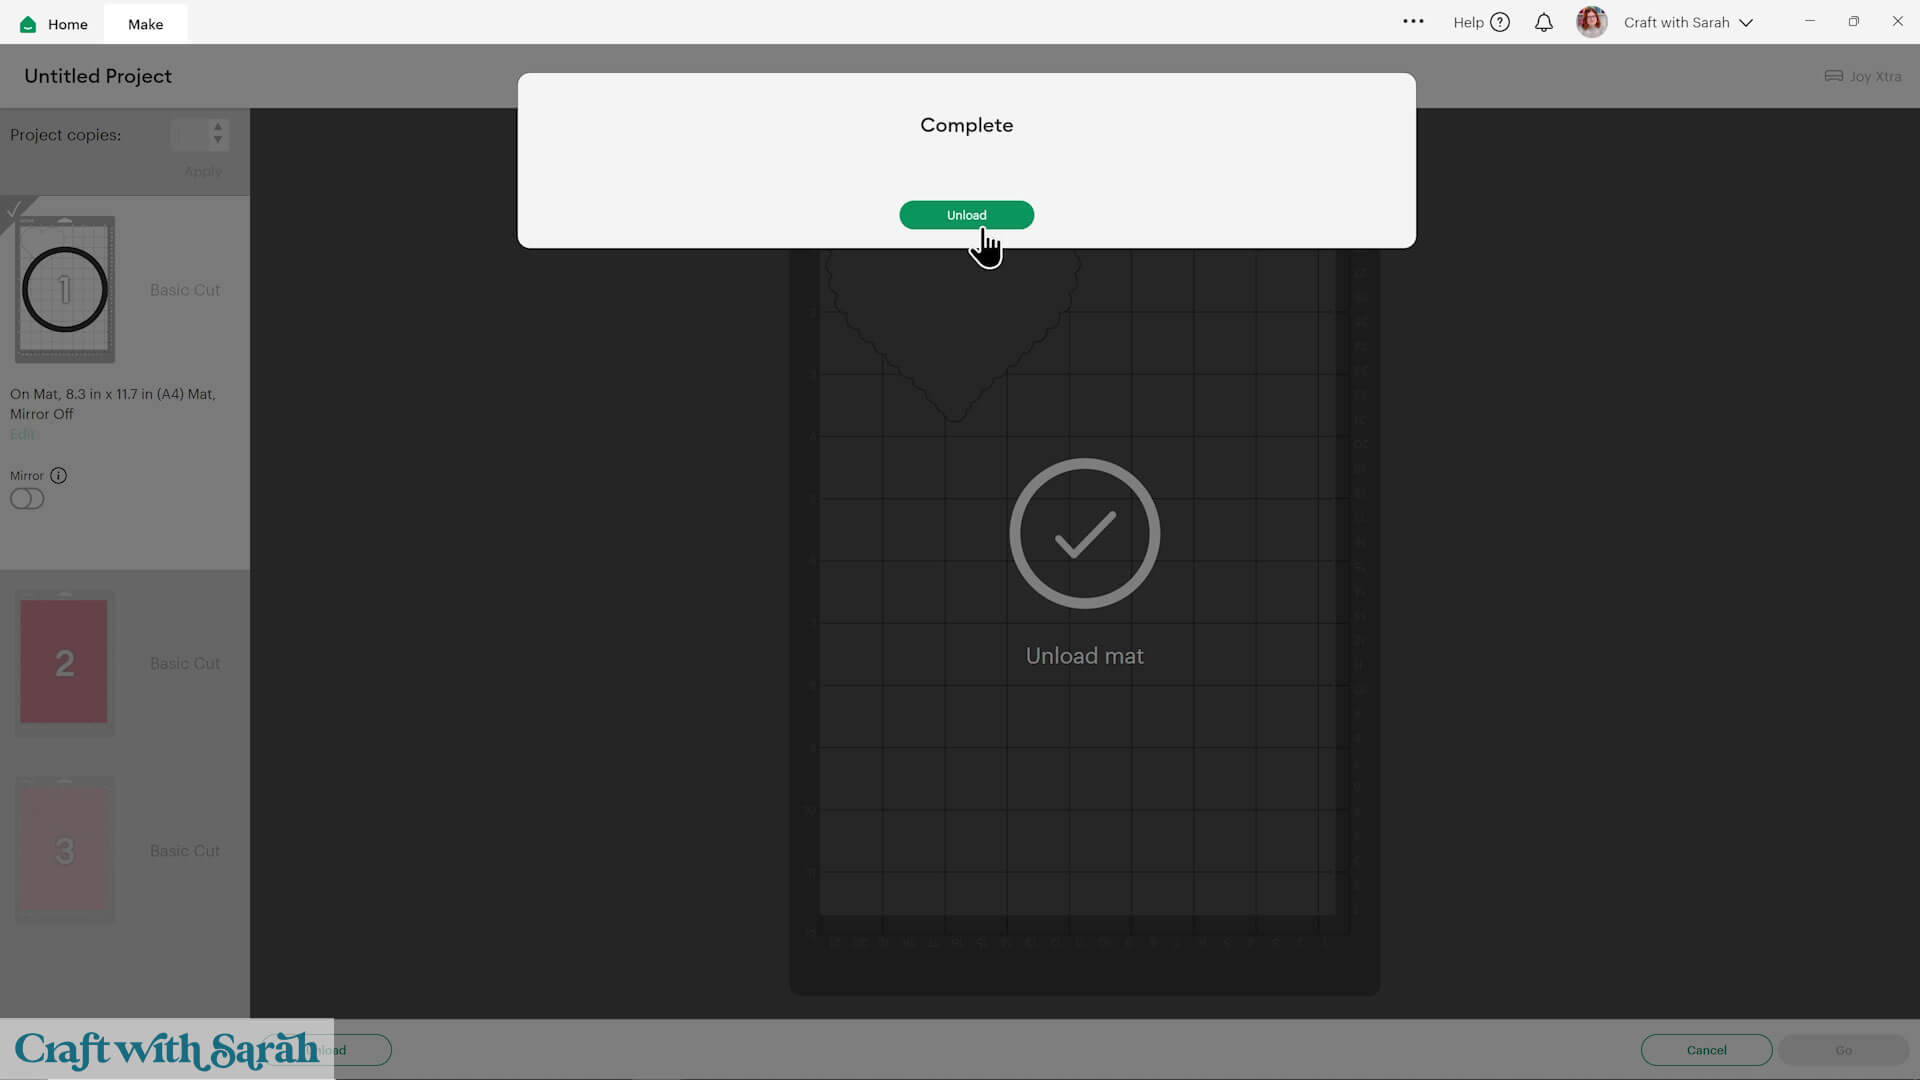
Look at your computer screen. You should see a message instructing you to load the mat.
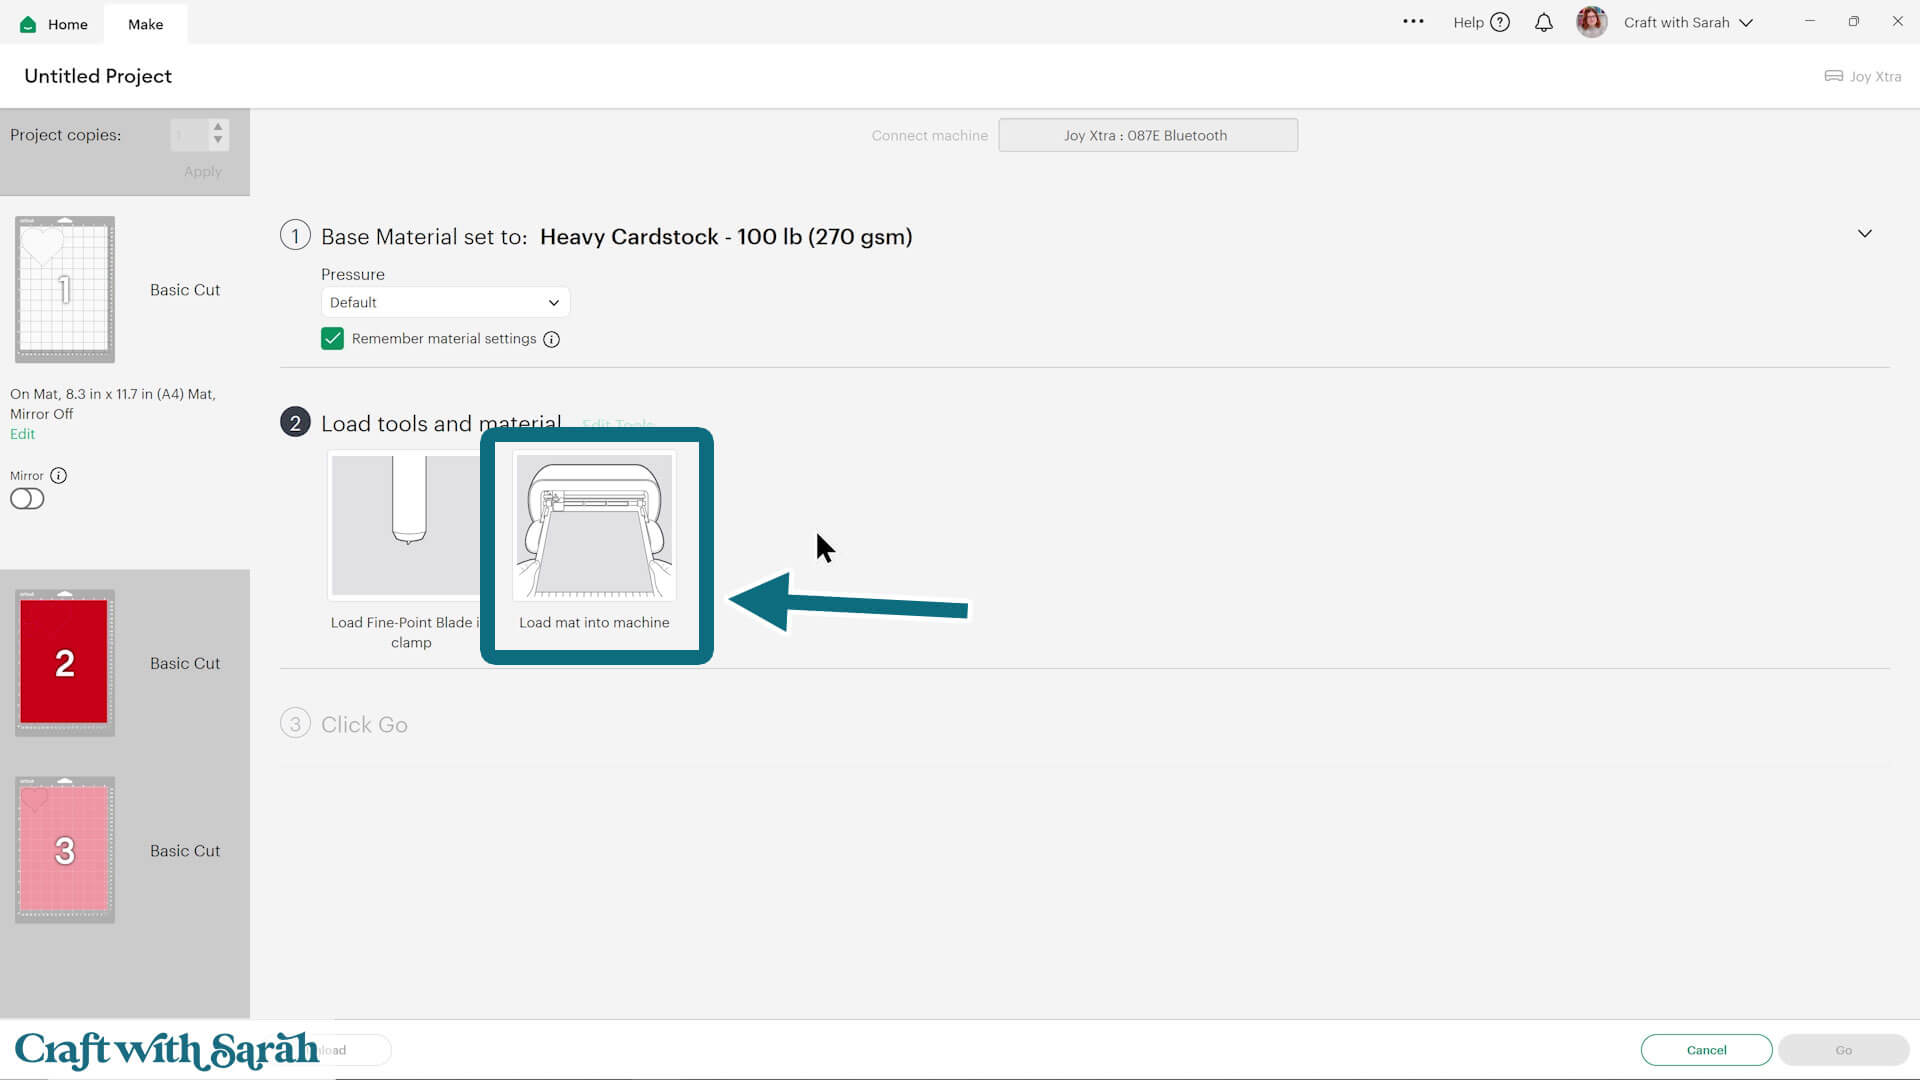
To load the mat into the machine, slide it under the two white plastic tabs on the front of the machine. Gently push it forward until the machine grabs it and pulls it in.
Once loaded, click the “Go” button in Design Space.
Your Cricut Joy Xtra will start cutting!
Don’t be alarmed if it cuts the same shape twice. If you have a heavier cut setting selected, it does a “double pass” to cut through better.
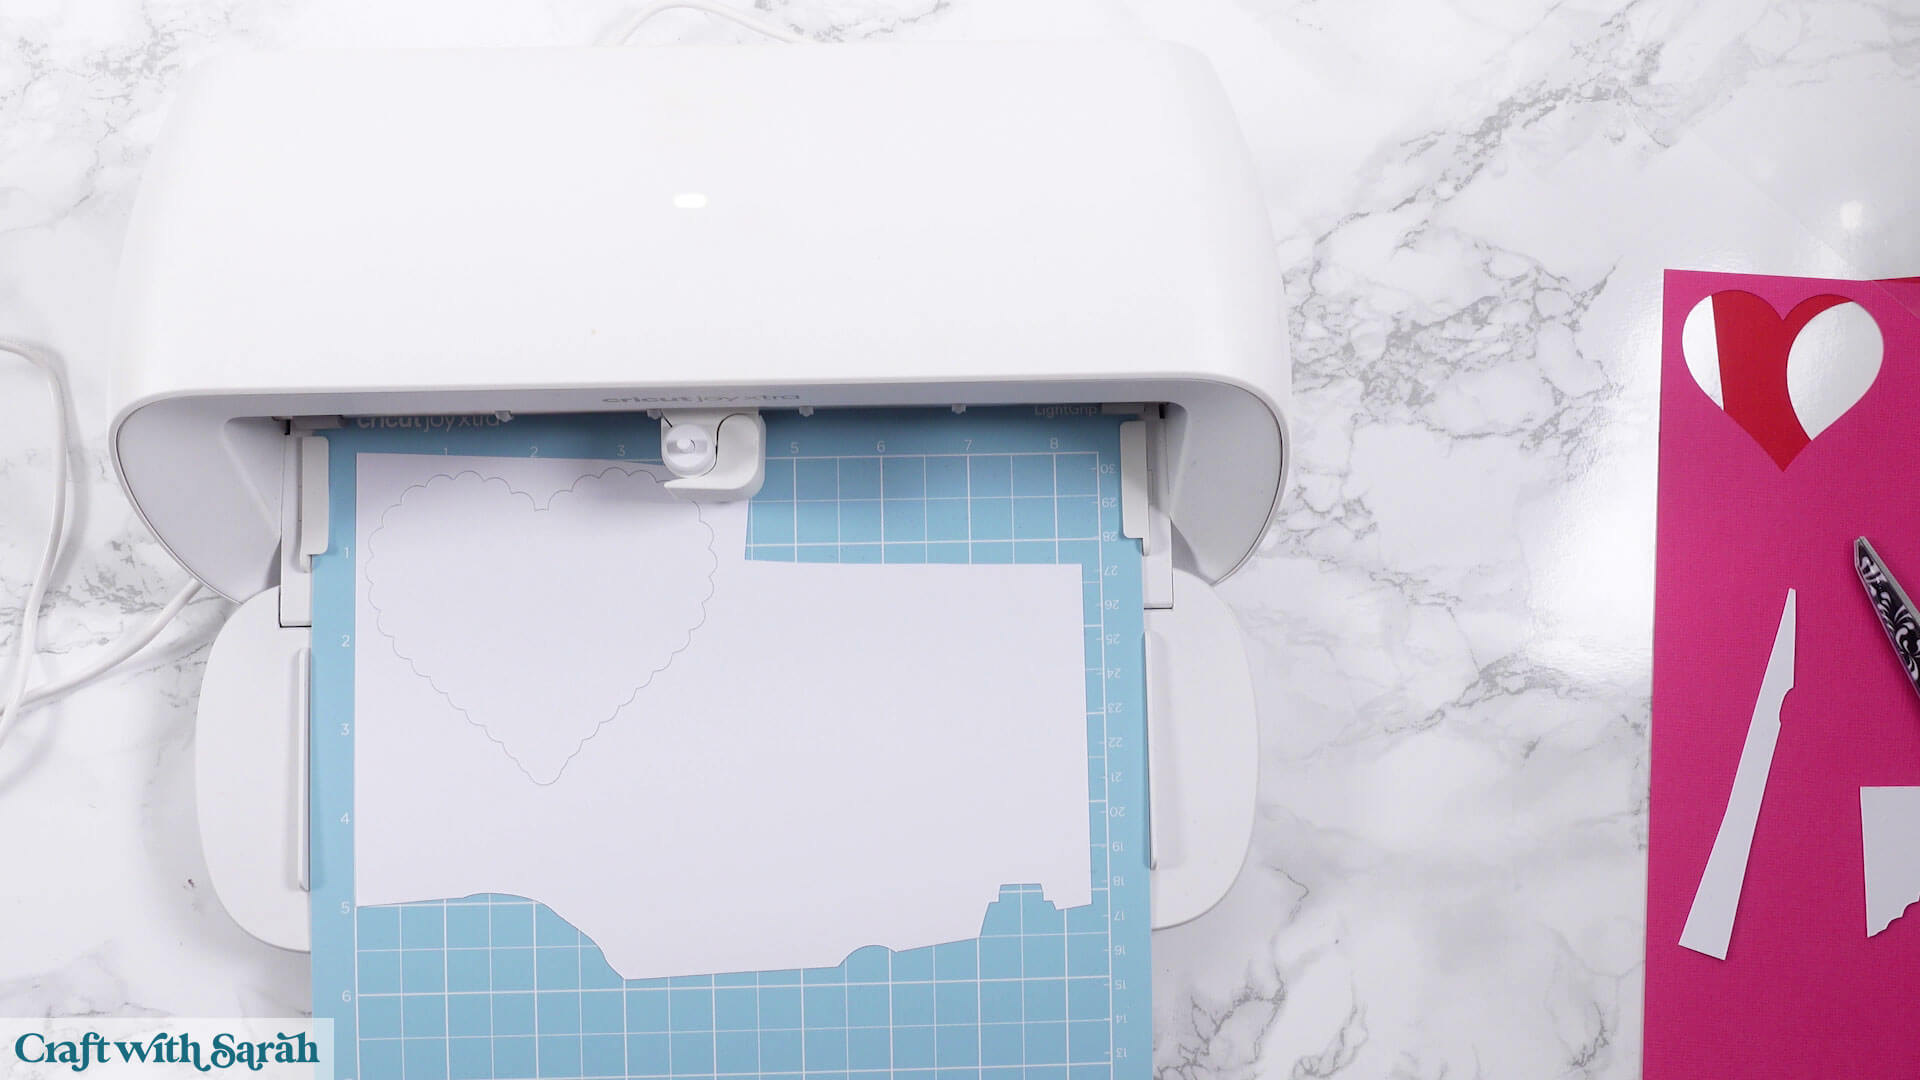
When it’s finished, click the “Unload” button on your computer and the mat will pop back out.
To take the card off the mat, turn the mat upside down and gently pull the mat away from the cardstock, using one hand to hold the card flat against your work surface.
This is better than trying to peel the card off directly, as that can cause it to roll/bend.
Be careful not to fold your mat, otherwise it might snap or crease.
Design Space will automatically move onto the next mat for your project.
Repeat this process until you have all the pieces of your project.
Step 8) Stick the project together
Time to put it all together!
If you’re using a “Craft with Sarah” cut file, look in your download folder for an “Assembly Guide”. This shows the order to stick the pieces together in, and whether to use glue or foam pads for each piece.
If you don’t have foam squares you can glue all the pieces together instead.
These are my favorite glue brands. I like them because they don’t bend/wrinkle the cardstock like some glues can do.
My overall favorite glue is Bearly Art Glue.
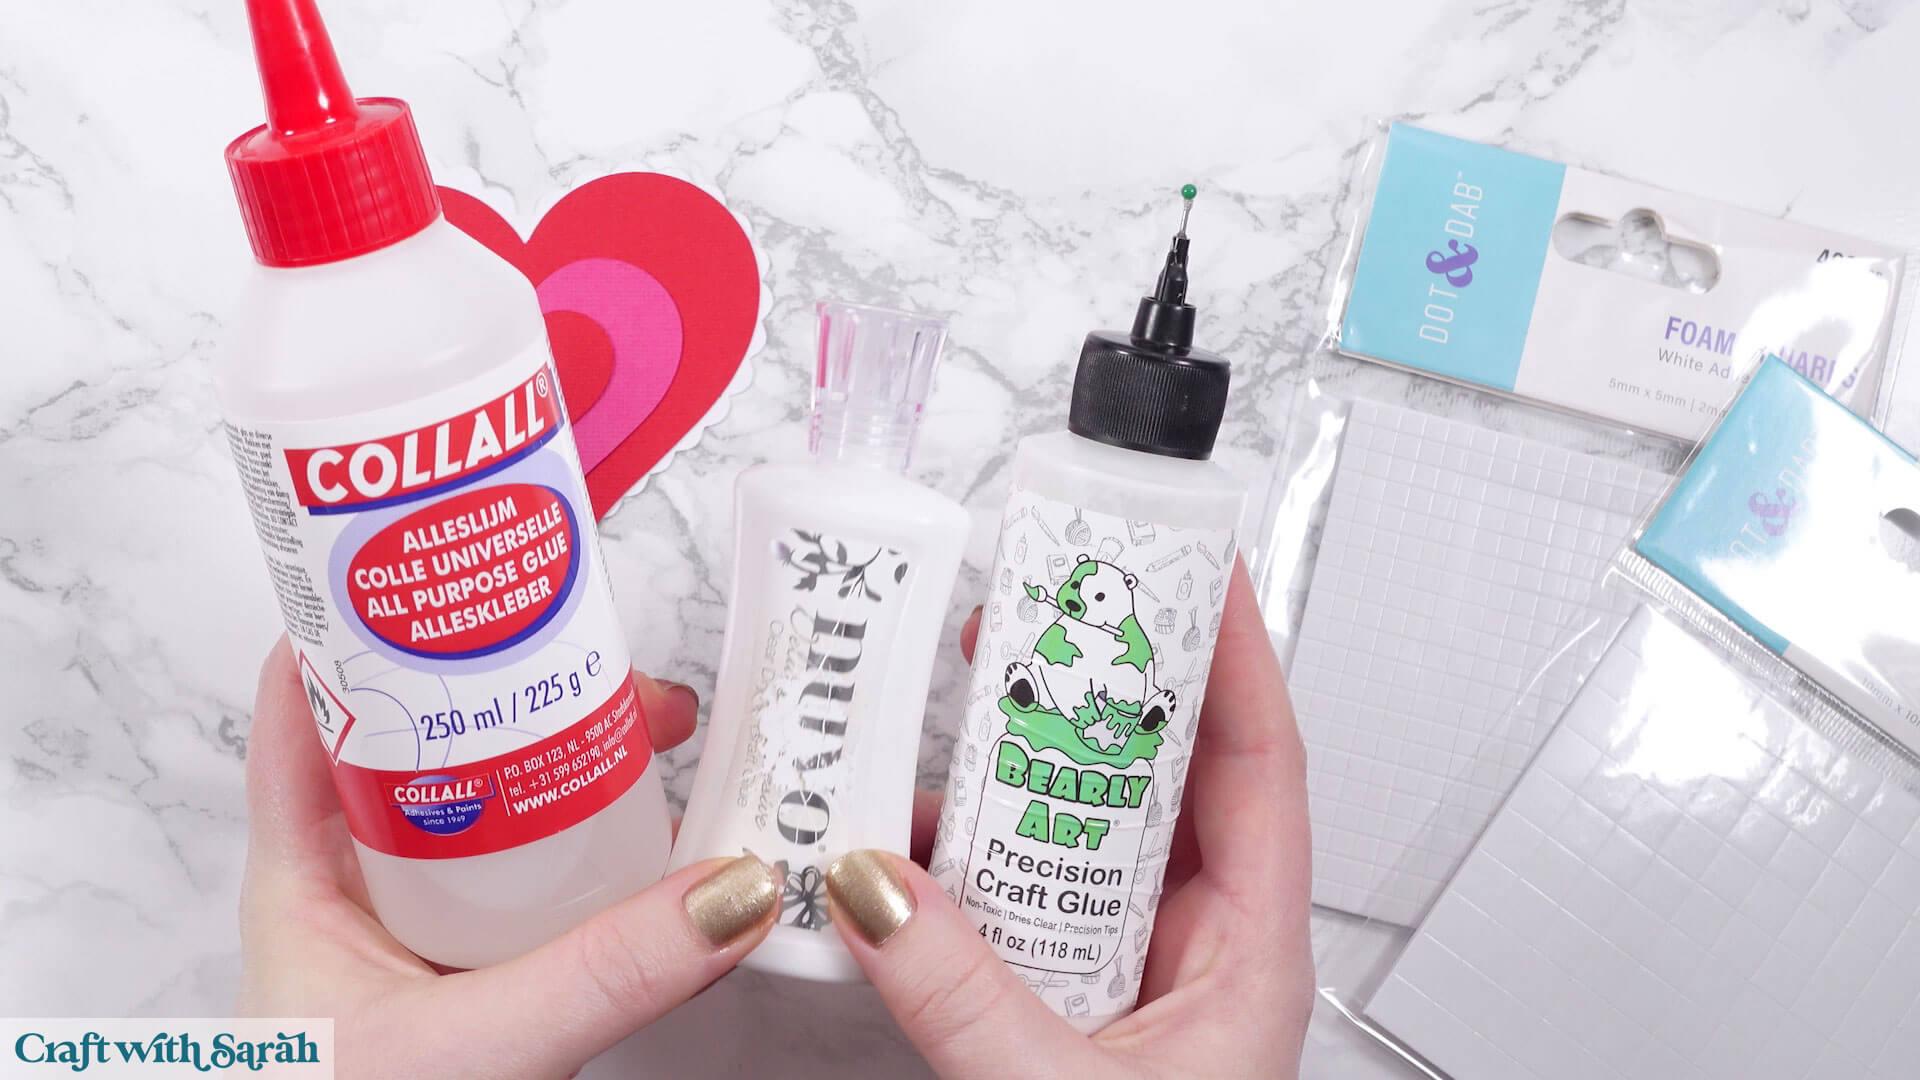
For foam squares, I like the Dot & Dab brand, but any will do. 2mm thick foam pads work best for these types of projects.
If your foam squares are too large to fit onto the cardstock then cut them smaller with scissors.
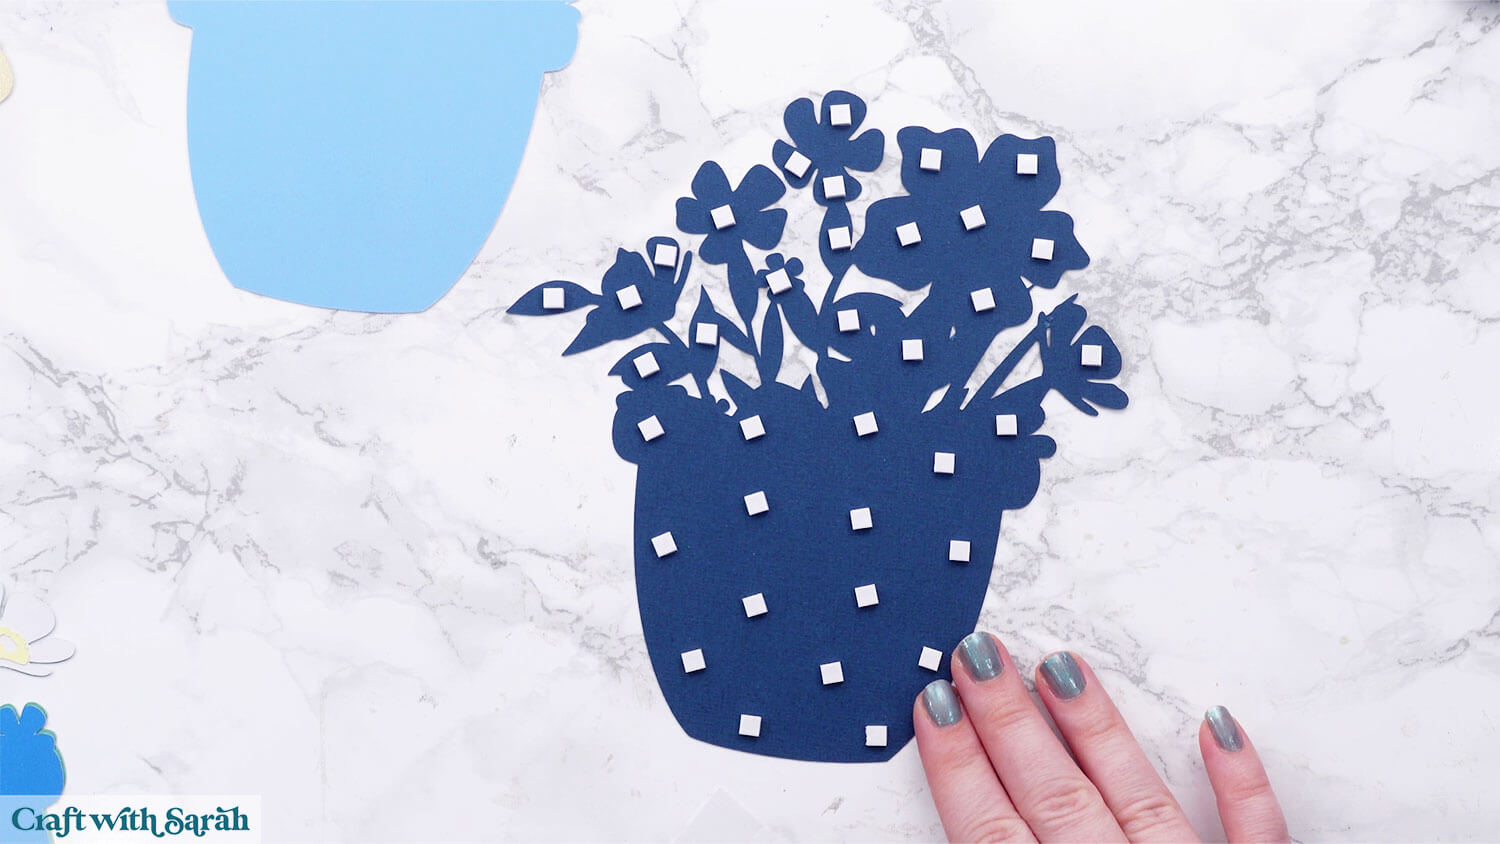
When putting your project together, start at the bottom with the largest layer and then work your way upwards, following the assembly guide.
When adding foam pads to larger pieces of cardstock, make sure you add some in the middle of the pieces of card so it gives stability across the whole piece.
If you don’t add any foam pads in the middles then it can dip/sag down under the weight of the other layers which doesn’t look as good.
Here’s an example of good foam square placement on a large piece of card:
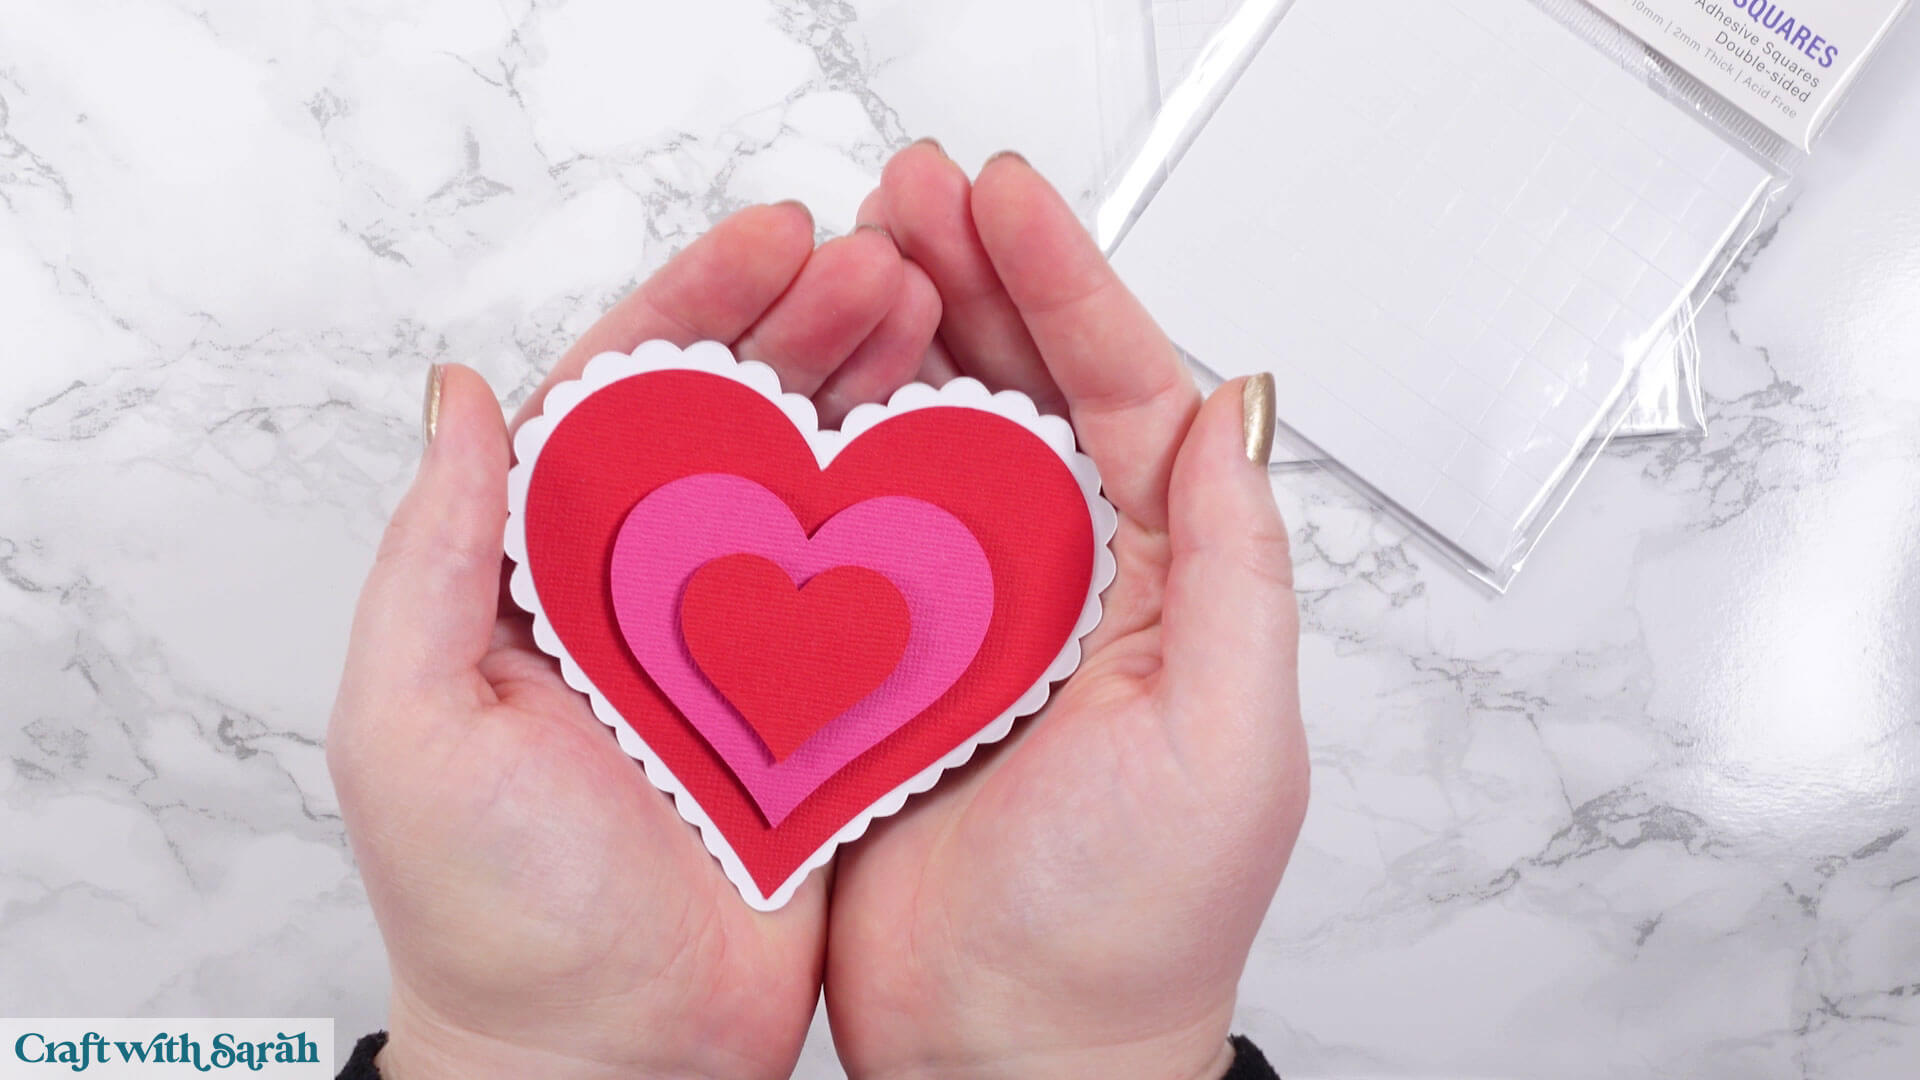
Once you have finished sticking all the pieces together, your project is ready to be framed, added to a greetings card or scrapbook page – or, however else you are planning on displaying it! 💕
🌟 Cricut Joy Xtra papercraft projects
You just learnt how to upload a SVG file to Design Space, customize your project, cut it out with your Cricut Joy Xtra, and stick the pieces together to make your very first papercraft.
You're now ready for all kinds of beautiful projects to make with your Cricut: layered designs, greeting cards, lanterns, shadow boxes, 3D projects, bookmarks and more!
Choose from over 200 free SVGs or visit my SVG shop for over 2,000 additional designs.
Or, learn even more about your Cricut machine with free Cricut machine help guides.
If you have any questions about the techniques shown in this tutorial, please get in touch.
Happy crafting,
Sarah